Transcripts
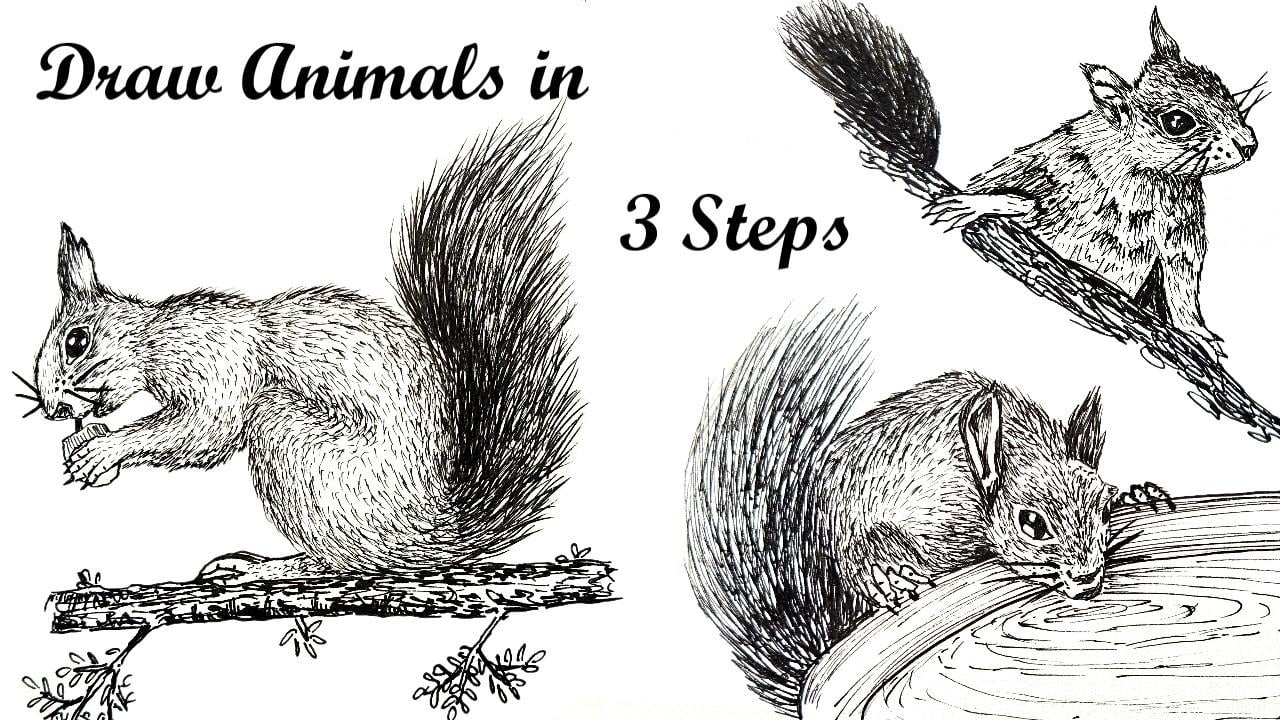
1. Introduction: Hello. My name is Menakhi. I'm an artist and
an illustrator. I love to draw and paint. I work on acrylics, watercolors and pen drawings. I welcome you all to my class. In this class, we will embark on a creative journey to discover the art of
drawing animals. To be specific, we will be concentrating on
drawing squirrel. We will explore various
techniques and styles to help you capture the beauty and essence of drawing animals
in your artwork. I have designed this
class for beginners, so we will start
with the basics. We will begin with simple
shapes and lines to warm up. Then I will show pictures of our subject animals squirrel and talk about their
distinctive features, since observation is
crucial for drawing. We will also discuss how to draw animals using
a reference photo. Then I will teach you
to draw the squirrel, breaking it down
into simple steps, demonstrating each
step on my sketchbook, like drawing the fur and encouraging students
to follow along. Whether you are a
budding artist or just curious about
the world of drawing, my drawing class is
the perfect place to ignite your passion and
unleash your creativity. If you think this
class is for you, let's meet in the next lesson.
2. Requirements: Let's take a look on the
requirements for the glass. Let's first talk
about the sketchbook. You can use absolutely
any sketchbook or paper of your choice. I love to use Strathmore
sketchbook for my pen drawings. The papers are very thick and
it has a beautiful texture. But as for my
drawing experience, I would say using a
better drawing paper doesn't make your
drawing better. So instead of investing
a lot on art supplies, you can just use a normal
sketchbook of your choice. Any drawing paper, more
than 100 GSN would be fine. You will need a pencil and an eraser to draw the
outline of the animals. Of course, you will
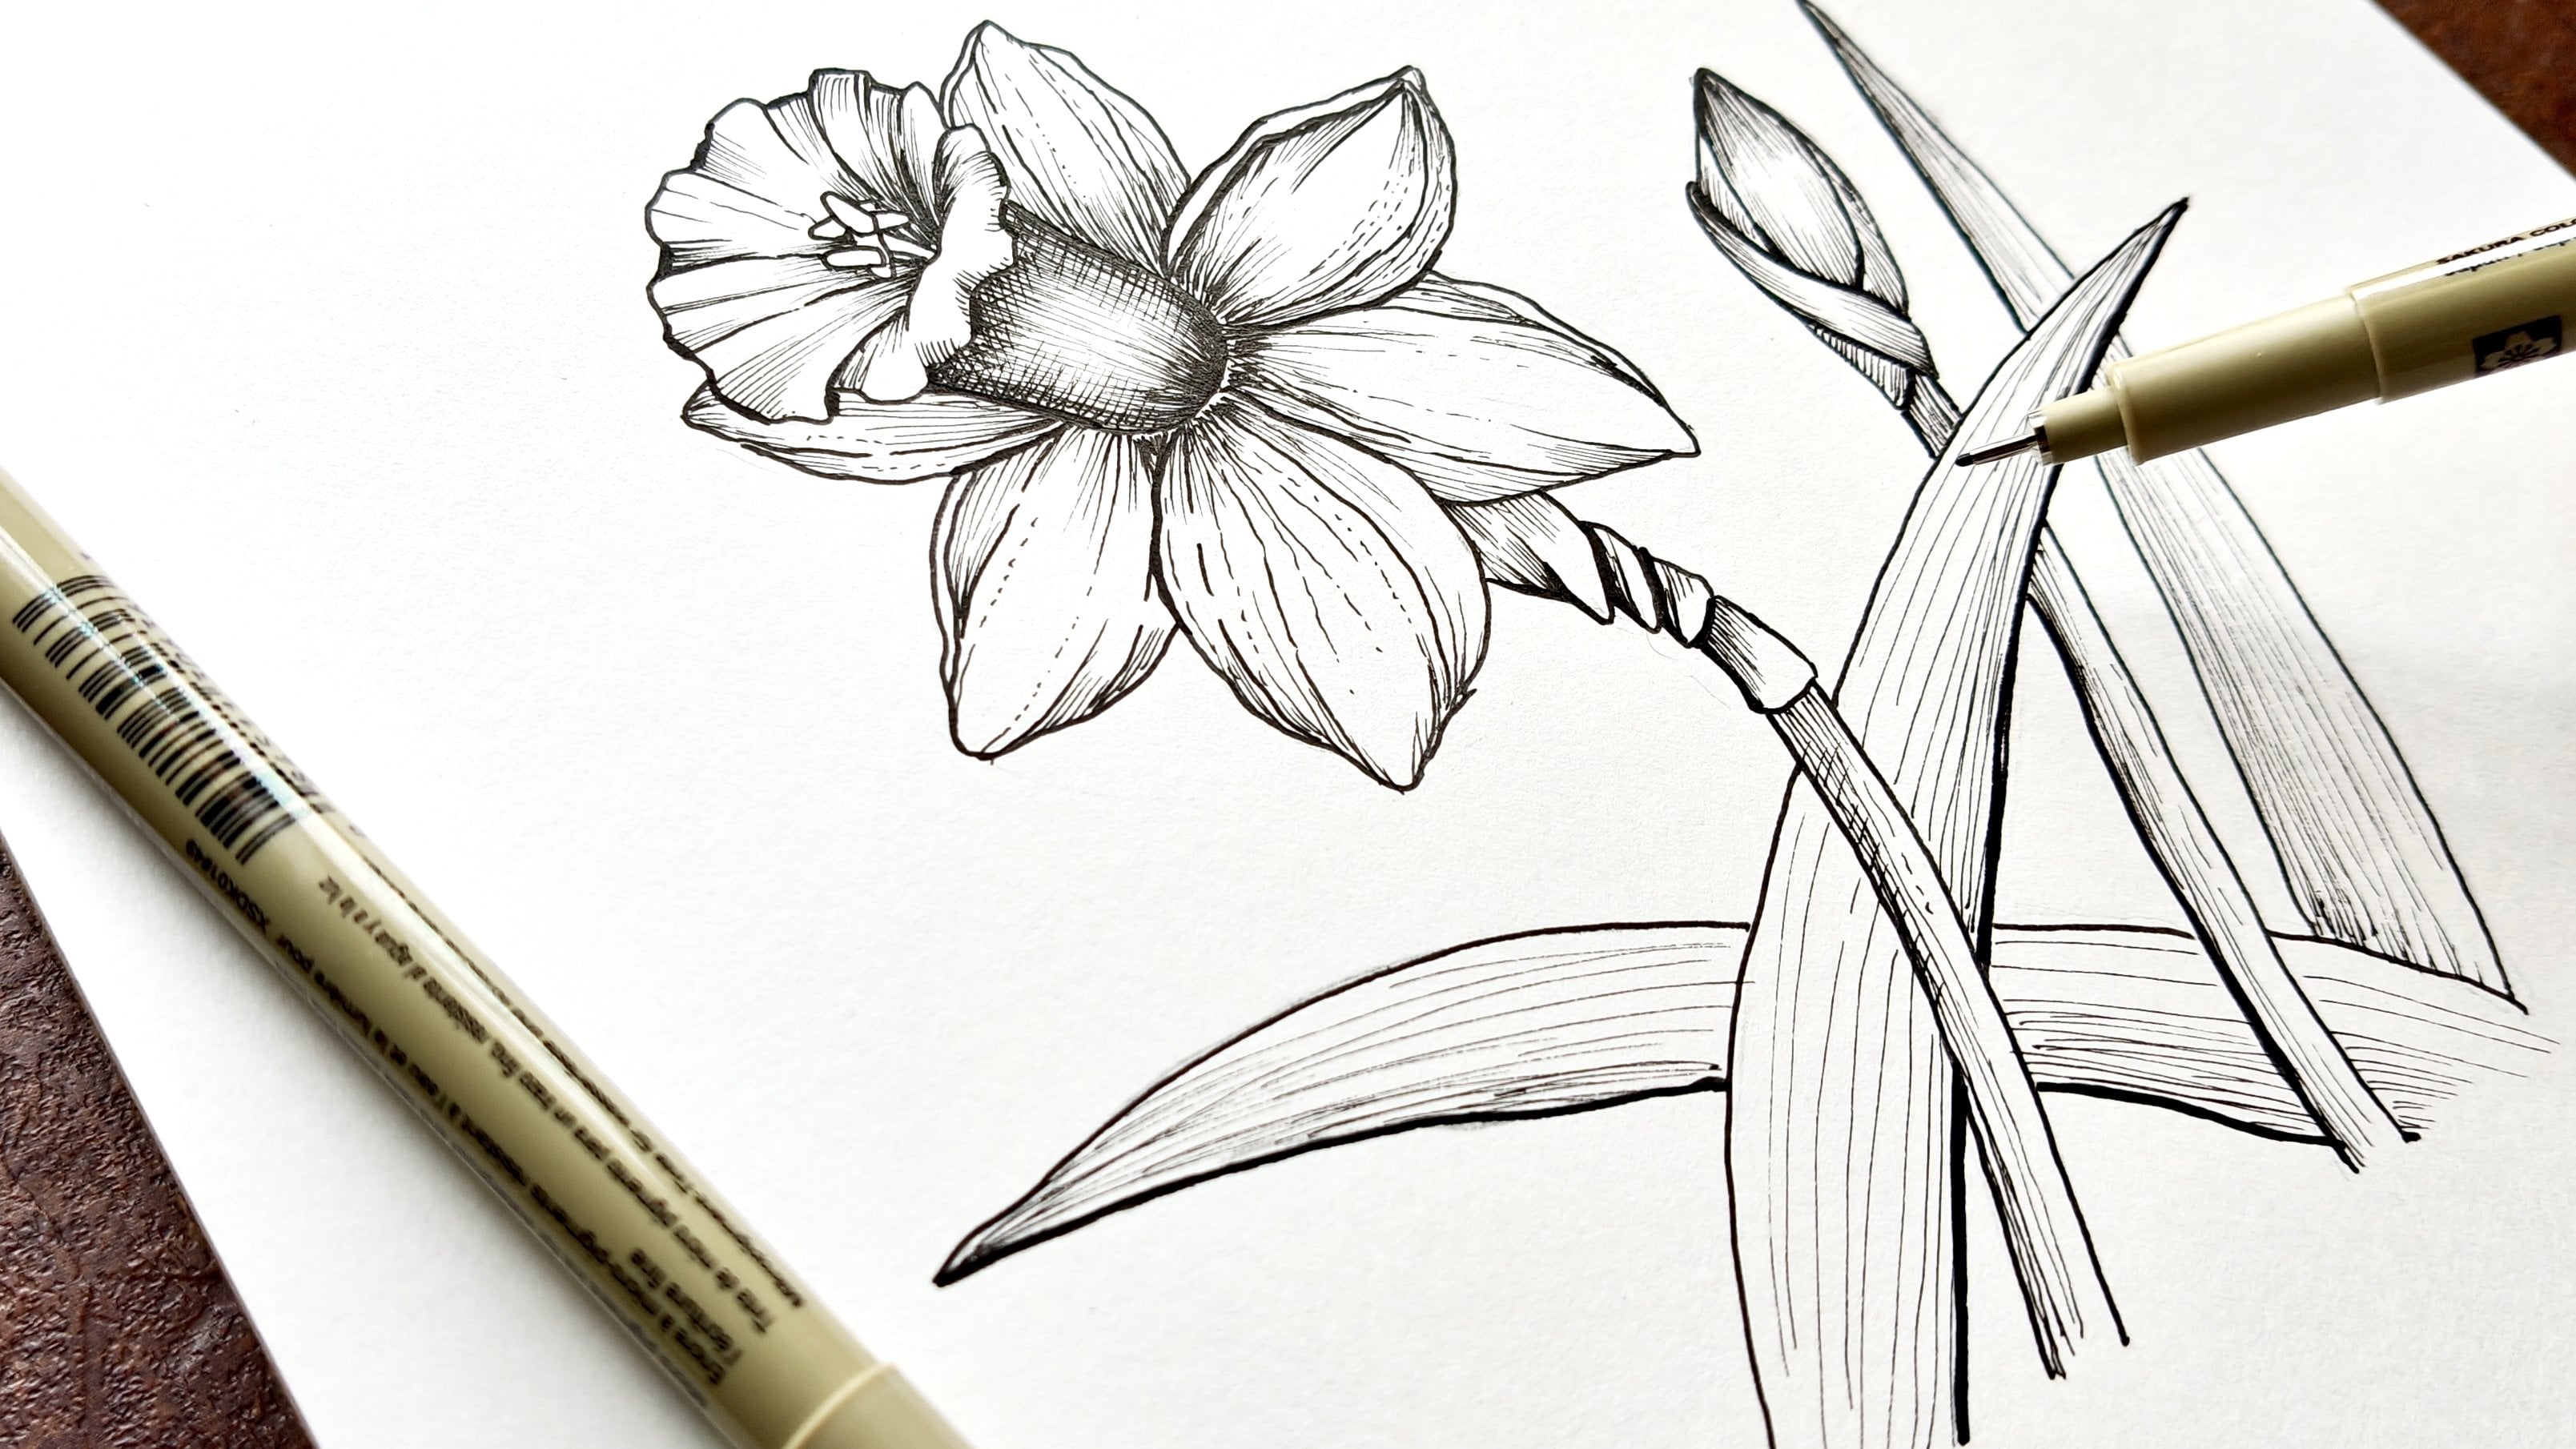
need drawing pens to draw the animals. So I'll be using pigma
micron from Sakura. Coming to the Pigma Microns, let's talk about the
different sizes of pens. You will need a smallest pen, oh five of pigma micron to make tiny details like the far. For this quill, I used oh five of pigma micron
to draw the far. The next size would be 01. This is slightly bigger
than the previous pen. The next size would be 02, which I would call as
a medium sized pen. So you can use either 01 or oh two to make the
highlights on the squirrel. The next size would be 05. This is somewhat a bigger pen. I use this pen to create
bolt marks on my drawing. For example, I used 05 to make the whiskers
on the squirrel. So that's all about
the materials, grab your supplies,
and let's get started.
3. Explore Animal Anatomy: Subject today we will be
concentrating on is a squirrel. Let's do a quick
observation on our subject. The small head of
the squirrel has two large eyes and
two large ears. They also have a tiny
nose and whiskers. Coming to the body, they have furry skin between the
front and the rare legs. They have the front legs and
the hind legs with claws, which are used for climbing. The tails are the most
attractive part of the squirrel. Their tails are super
fluffy and bushy, which I used to keep them
warm while sleeping. So that's all about the subject. Let's do the sketching
in the next lesson.
4. Warm Up: We are going to do a quick warm up before we start to
draw the squirrel. Take your sharpened pencil and a drawing paper and
start to draw circles. Warm up exercises before
drawing are crucial because it loosens your hand muscles and improves your hand
and eye coordination. I'm just making loose
circles on my paper. You can also make circles
of different sizes, maybe a smaller or a bigger one. Sit straight, keep
your hand loose, and draw the circles. Now you can make some
lines and drawing straight lines on the circle
up and down, up and down. Keep your hand loose. You can also make
horizontal lines, slanting lines, keeping your
hand loose, draw the lines. You can also practice
some curves. Doing warm up exercises leads to create more confident and
accurate lines and shapes. You can also try making
horizontal curves. Practice this and
from the next lesson, let's concentrate on
the squirrel drawing.
5. Step 1 - Drawing Animals using Shapes: I have attached the reference
photo below the video. You can download it because we are going to use
it for drawing. What I'm going to do now is
I'm just going to observe this squirrel and put it on
my paper using simple shapes. Starting from the head, I find the head to be somewhat
in a triangular shape. I'm drawing a small dent
for the nose and the mouth. I'm making a small line for the ears and the other
part of the head. I'm drawing a small
circle which are cornered on either
side for the eyes. Well, I'm not getting
into the details. I'm just putting the
shapes. That's it. I'm drawing a big ear which
is facing towards us. The other ear is behind, so it is not visible. I find the upper body to be somewhat in a rectangular shape, a rectangle with curves. Then I'm going to
draw the four legs. I'm making a couple
of curves for that. Just observe the photo and put on the paper
whatever you see. For the lower body, I'm going
to make a big oval shape. And a small curve on
the body for the legs. I'm drawing a couple of
big curves for the tail. As I said before, the
squirrel has fluffy tail for balancing and also
to keep them warm. The claws are not visible
in the reference, so it can just draw with me. I start by drawing
a couple of lines, a small curve on the
front for the claws.
6. Step 2 - Defining the Drawing: I'm now going to make the
drawing more defined. I make a small circle for
the eye of the squirm. I'm leaving some portion white and coloring the
rest for the eye. I'm just trying to
gather some details. As the year is turned, you can see a curve on the ear, so I'm trying to draw
the curve on my paper. Coming to the nose part, I'm making a dt for the nose. And then down comes the mouth for which
I'm drawing a curb. Then I define the
neck of the squirrel, a little bit of far in between the sections for the four legs, which is visible, I'm
drawing the digits, which are the fingers. I'm just making four
lines for that. Drawing the digits are quite
simple than you can imagine. You just draw the lines and
make it curved on the top. I'm going to draw
as if the squirrel is holding a nut or something. I just mist affirm
the other foreleg, which is behind, which
is on the other side. So it is quite simple. You just draw another line to
indicate the other foreleg. Finally, you can just get rid of the unwanted guidelines and make the drawing more refined. On the tail part, I'm erasing the lower section and I'm giving a small curve
on the bottom, as it is in the reference. From the next lesson,
let's start to shade the squidle part by part, starting from the head, then the upper body, for leg, hind leg, and the tail.
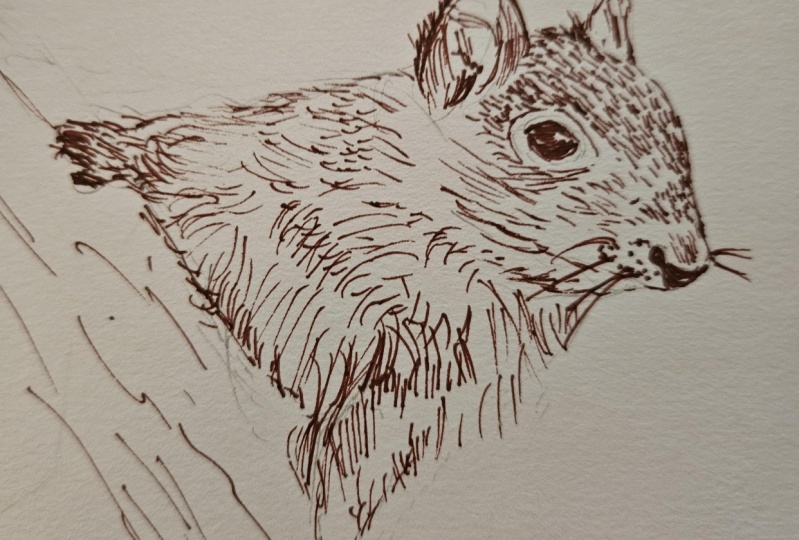
7. Shading the Head: To do the shading,
the first step is to observe the
direction of the hair. We are going to shade
the head first. So if you observe the head part, the direction of
the f is upwards. Keeping that in mind,
let's do the shading. I'm using an eraser to
lighten the sketch. I'm using my smallest pen
or 05 of pigma micron. It works great for
drawing head and f. I'm drawing the far along the direction we observed
in the reference. So how do I draw the
far by drawing loose, thin and small hair like
structures, you know, like a line or a curve along the direction
we saw in the reference. So I'm just drawing
these tiny little lines all along the outline. We're just concentrating
on the head section now. As you come down to the
nose and the mouth path, instead of making
hair like structures, as we did before, you
can make contours, you know, just like lines
instead of making fur. If you observe the reference, the direction of the fur is
changing on the neck part. So the direction of the line is also changed on the drawing. For the eyes, I first make the outline using my
same drawing pen. You can also use a bigger
sized pen if you want to. I'm drawing a circle inside, and I'm leaving a few section white and covering
the rest with black. Down the neck, the
squirrel has a lot of fur, so I'm drawing some bigger
hair like structures. I'm making few dots
for the whiskers. As you can see, a small section around the eyes highlighted
in the reference. So I'm trying to bring
that to my drawing. So how do I do that? I'm drawing small
hairs around the eye, and these tiny hairs around the eye go along the
direction of the eye itself. And on the ears
also, I'm drawing hairs which are facing upwards
as it is in the reference. Down the ears also,
I'm making some far So what I'm doing is I'm just observing the direction of the
hair section by section, and I'm trying to draw
that on my paper. This part of the year
has less shadows, so I'm drawing less lines to give a three dimensional
look for the drawing. I'm just drawing
more lines around the eyes to give
a realistic look. If you observe the reference, the fur on the body of the squirrel is long and
fluffy than the head part. But on the head of the squirrel, the hairs are tiny. So that's why we are drawing
small hairs on the head. I'm drawing some
more hair around the eyes to enhance the drawing. In the mouth part,
as you can see, it is a little bit dark. So I'm trying to do that on my paper by adding more lines. As we come down, you can see the direction of
the hair is getting changed, so slowly, I'm changing
the direction of the hair as I draw
down the head. I'm making the mouth part more darker by adding
more tiny lines. So just keep adding more lines if you want the drawing
to be more detailed. In the next lesson,
we will start to shade the upper body
of the squirrel.
8. Shading the Upper Body: When we observe the reference, the far is facing towards different direction
along the upper body. First, it is facing straight and slowly it is coming downwards. On the start, the f is smaller, and as you move
towards the center, the far is long and fluffy. So I'm starting by
drawing small hairs, and then I draw
somewhat bigger hairs. Between the head and the neck, I'm adding more hairs
for highlighting it to give a more three
dimensional look. I'm changing the
direction of the far as I move towards
the four legs. In the next lesson, we
will share the four legs.
9. Shading the Foreleg: On the fore legs,
also, the direction of the fur is changing. It is downwards and slowly
moving towards the side. So I first shade the outline. I start by drawing the hairs,
observing the reference. The hairs are facing downwards on the lower part
of the foreleg. So I'm drawing some lines
which are facing down. I'm changing to a closer
shot for a better view. I'm also filling the rest of
the upper body with lines. Then I'm using tus to draw
the digits on the foreleg. Contours are nothing but drawing the outline
using simple lines. So that's how you draw the
digits. Quite simple, right. Then I'm drawing some lines
to give a realistic look. Now I draw the nut, which the squirrel is holding. Again, I'm using ants
to draw the nut. I'm drawing more
lines in between the sections to give more realistic three
dimensional look. In the next section, we will share the lower body
of the squirrel.
10. Shading the Lower Body: As you can see, the
fur is changing its direction along the
leg of the squirrel. So by observing its direction, I'm drawing the hairs. Also, on the lower
body of the squirrel, the hairs are long, so I'm drawing longer
lines than before. As we did in the
previous lesson, I'm drawing more hairs
in between the sections. I'm drawing more lines between the upper body
and the lower body. I'm drawing more hairs
above the leg for contrast. You have to be a little bit careful while doing this because the hair is changing
its direction here a lot from
the left to right. And I start to fill the other areas of the
lower body as well. I start by drawing the
hairs on the outline. And Once you do the outline, fill the inside
with hair parsley. Coming to the legs,
I carefully observe the reference and draw the hair according
to the reference. At this point, you have
to be careful because the fur is going to change
its direction along the leg. You can always turn
your drawing book and make yourself comfortable. The process is quite
time consuming, but the result is going
to be super good. In real time, it took me around 1.5 hours to complete
the squirrel. You need patience
to draw this, but, you know, the result is
going to be super awesome. Follow the same steps in complete shading the
leg of the squirrel. Once you fill the lower body, let's add contrast
by adding more fur. But the question is, where do
we need to add more lines? On the top part of the leg and near the tail on the bottom, I'm going to add more
hair for contrast. Also, I'm going to add more
fur to the top part of the lower body over the outline. A, I'm adding more lines between the lower
body and upper body. I just keep adding more fur. On the bottom part,
near the tail, also, I'm adding more
lines for contrast. Also on the bottom, the lines are long, so
know that before you draw. In the next lesson, we will share the tail of the squirrel.
11. Shading the Long Bushy Tail: The fur on the squirrel's tail spreads over
all the directions. To draw the tail, I'm using a bigger pen 05 of pigma micron. One mistake I see
the beginners do is that they just draw
long curves, you know, for the entire tail, which is not required
because it looks artificial. So what you have to do
is that you just need to draw small lines
section by section, layer by layer, like
what I'm doing now. I take one layer at a
time, one draw at a time. I complete that and I
move to the next section. Coming to the direction
of these lines, the lines on the
center are straight, and the lines on the left
are towards the left, and the lines on the right
are towards the right. So this is how it is for the
lower section of the tail. Coming to the upper
section of the tail, the tail is curved
towards the right. So the lines are also
curved towards the right. I also draw a few strands on the other side for
a realistic look. Then as we did before, I'm taking section
by section and I'm completing the entire
white area with far. On the right side of the tail, the far is facing
towards the right. So I draw the strands which
are facing towards the right. You can add contrast after you fill the entire
white space with FA. So right now, I'm just concentrating to fill
the empty space. Now that we have filled
the empty space, I'm going to add
contrast by adding more hair or more fur to
the left side of the tail. I'm just adding more curved
lines towards the left. As you can see, we have created good contrast by darkening
the left side of the tail. In the next lesson, we
will do the hind legs and some background and
finish this drawing.
12. Shading the Hindlegs: For the legs, I'm using
three of pigma micron. I start by giving the outline. I'm using a thicker pen to give some thick strokes on the
bottom part of the squirrel. I just make some simple curves for the digits which
are on the other side. Then I add some
details to the clause. Then I'm switching on
to my smallest pen 005 and making small tiny
halac structures on the legs. I'm going to draw as if the squirrel is
standing on a branch. So for that, I'm drawing
a couple of lines. I'm also drawing a small
branch for the stem. Accurate straight lines
are not recommended for branches or stem because it
gives an artificial look. So what you had to do is you had to give some
ups and downs to the lines for a realistic
branch or a realistic stem. One tip I would give
for beginner artists is that you have to sketch
instead of drawing. Drawing is a more controlled
process than sketching. So you can make use of contours, ups and downs, some pens
for realistic look. For the stem, I thought of doing some shading so that the drawing
would be more realistic. What I'm doing is I'll just sketch some irregular
patterns on the stem for representing the
shadows and the highlights. This might look
somewhat difficult for beginner artists,
but I'm telling you, just make some
irregular patterns on the top part of the stem and the bottom part of
the stem to indicate the shadows and just leave the center part
of the stem as such. That's it. We are doing this shading to indicate
the light and the shadows. Once you're satisfied
with the shading, let's move on to draw some
leaves on the branches. So I'm just making
some small leaf like structures on the branches. The next lesson, we will do some final touches to the
drawing and complete it.
13. Final Touches: We are now going to
do some highlighting and finish this project. For this, you can grab
a medium sized pen. I'm using 02 of pigma micron. I am highlighting over the
outline of the squirrel. When you use a bigger sized pen, your drawing is going to pop up. So what I'm doing is
I'm making some fur, which is nothing but hair like structures along the outline of the squirrel and between the sections to
enhance the drawing. I'm also making
some highlights on the areas where the shadows
fall on the ford leg. I also make some highlights between the upper body
and the lower body. Just now while looking
at the drawing, I found out that I missed
a draw the other foreleg, which is on the other side. So I'm just making the
other fore leg as well. A if you want your drawing to
be more detailed, you can always add more fur. We are almost done. We're going to do the whiskers
and complete the drawing. For the whiskers, use the
biggest pen you have. I'm using 08 of pigma micron. I'm drawing few lines
for the whiskers, few lines on the other side, and few lines on the front. With this, we have completed
our basic squirrel drawing.
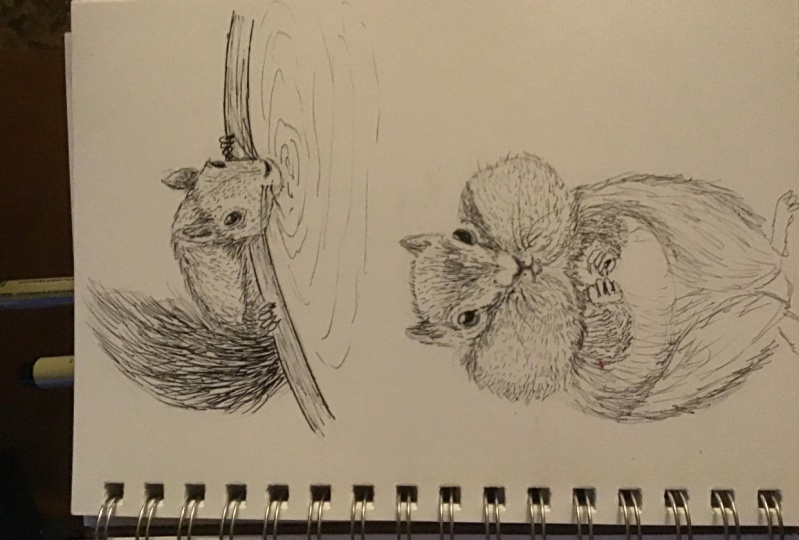
14. Class Project- Drawing a Squirrel Drinking water: Your class project is to observe the reference
and draw a squirrel. In this lesson, I'm going
to help you with that. We're not going to
get into the details, but I'm just going to give
a gist on how to do that. You can find the reference
photo below the video. You can either download
it or you can choose your own reference photo
and do your own drawing. As we did for the
previous drawing, I start by making
the basic sketch. I made a plus sign
for drawing the head for the placement of
the eyes and the nose. I'm drawing a few curves to indicate where the squirrel
is drinking water. It is a container or whatsoever
it is. I don't know. I make a small circle inside it for the
placement of the eye. The other eye of the squirrel
is not visible completely. So by carefully
observing the reference, I draw the other eye as well. You can leave some portion white and color the rest black. And I also make the nose, a small curve for the
nose and the mouth. Then I draw the ears
of the squirrel. For the year which
is on the front, you can see some texture
or whatever it is. And I also do the other year
which is on the other side, which is not fully visible. To draw the body
of the squirrel, you can try to grab
some information by observing the reference. Like this year is touching
the body of the squirrel, and the length of the body is somewhat more than the
length of the head. So keeping all these
points in my mind, I draw the body of the squirrel. I'm drawing the
four legs, as well. It is holding the pot where
it is drinking the water. For that, you can just make four cylindrical
shaped structures which are pointed on the edges. Finally, I draw the
long bushy tail which is on the other side. The drawing might look
complicated for beginners, but it just takes some
practice to get it right. At this point, you can get rid
of the unwanted guidelines and make the drawing ready
for the shading process. As we discussed in
the previous project, the head part of
the squirrel has tiny hairs when
compared to the body. So for the head,
I'm going to use very small lines
to do the shading. I'm shading the
nose part, as well. I draw the eyes. I make small curved
lines for the head, and I move on to draw the
years of the squirrel. Since this year is
on the other side, I thought of giving a lot
of shading for contrast. A little bit more shading on
the bottom part of the year. On the other year, I'm
shading on the center. Et's move on to do the shading on the
face of the squirrel. As we did on the
previous drawing, the golden rule for shading is that observing
the direction of the far. If you take a closer
look on the center part, the fur is facing upwards. And on the left, the fur is facing towards
the left and on the right, the fr is facing
towards the right. I'm doing some highlights as it is in the reference around the eye using smaller
hair like structures. As I come down the
head of the squiddl, I'm reducing the number
of hc structures drawn. Meanwhile, I'm drawing
lots of tiny lines around the eye for highlighting it as it is in the reference. Gradually, I move on to shade
the body of the squirrel. As always, I start drawing
the fur on the outline. Carefully you observe the
direction of the far on your reference and try to
produce it on the paper. You might think, Oh, my God, this looks very complicated.
I cannot do it. But I'm telling you
the drawing is very much simple than
you can imagine. We just observe the reference and we draw it on the paper. When I myself was
a beginner artist, I always wondered, Oh, my God, how these people draw these wonderful
kind of drawings, it's kind of impossible. But you know what, perfection
comes with practice. The first time drawing
may not look perfect, but when you draw
for the second time, it would be better
than the first time. And when you draw
for the third time, it would be better
than the second time. So it comes with practice. It is not like magic, you know? So what I would advise you is that don't be afraid
to take your pen. So, coming back to the drawing, I just observe the reference and draw the fur on the squidtle. I start by drawing the far
sparsely evenly distributed, and then I add more fur to the areas where I think
more fur is needed. You can always turn
your sketchbook and make yourselves comfortable. I add Mofi on the body
behind the head for shadows. On the other side of the body, I add some far for contrast. Some more highlights
near the outline. Now that we are
done with the body, let's move on to shade
the tail of the squirrel, which is the most fun
and interesting part. As we did in the
previous drawing, I'm going to take section by
section or layer by layer, and I'm going to draw the
tail part of the squirrel. You can always observe the reference for the
direction of these lines. First, I make far
on the outline of the tail and I fill
the inside later. Now we got one layer
of hair on the tail. I'm going to add
one more layer of fur above this to
make it attractive, as we did before, I'm
going row by row. I'm darkening the bottom
area of the tail. I'm making some highlights on the fore leg and
also on the years. I'm switching on to
my medium sized pen to do the highlights
on the squirrel. As we did in the
previous drawing, I'm adding highlights over
the outline and between the section and also on the areas where we
have a lot of shadows. A Now I'm switching on to the biggest pin I
have 08 of pigma micron. I'm drawing the pot where the
squirrels drinking water. I'm making some shading. I use 08 again to draw the
whiskers on the squirrel. For the whiskers, I'm drawing slightly curved lines which
are towards the other side. I'm making them somewhat
darker so that it is visible. I'm going to draw the water
and finish this drawing. For the water, I'm
drawing curved pattern. These are to represent
the ripples on the water. These circles are
going to be closer on the point where the
squirrel is drinking water, and these circles are spreaded
away on the other side. One more tip is that you need
not draw a complete circle. Broken lines would be fine. Finally, I'm going to
draw the other four leg, which is on the other side. So I'm using a bigger sized pen, and I directly throw
them on white paper.
15. Final Thoughts: As we wrap up our animal
drawing adventure, let's take a moment to
celebrate the creativity and effort each of you has put
into your artwork today. We have explored the
fascinating world of animals, learning about their
unique features while bringing them
to life on paper. Coming to your class project, your project is divided
into three sections. The first section is to practice the squirrel we
learned in the class. This makes you fundamentally
strong in drawing animals. The second part of
your project is to draw a squirrel using
a reference photo. In the class, I have
shared with you a lot of tips to draw animals
using reference photo. This will boost your confidence
and your drawing skills. There are thousands of photos available on the Internet.
You can make use of that. The final part of
your project is to share the artwork
you have drawn. I would love to see
your animal drawings. Also, I request all of you to share your
feedback on my class. It helps me create better
classes in the future. If you have any doubts in any part of the class,
feel free to ask me. I will get back to you
as soon as possible. Let's carry forward
the passion and inspiration from today's lesson into your future projects. And the next time,
happy drawing. Bye bye. Thanks a lot for
taking my class again.
 Meenakshi Muthuraman, Artist and Illustrator