Transcripts
1. Introduction: Hello. My name is Menashi. I welcome you all to my class. I'm an artist and
an illustrator. I love to draw and
paint flowers. I work on acrylics, watercolors and pen drawings. Today's class is all about drawing sunflowers in
different perspectives. This is a step by step class
designed for beginners. You need no prior
drawing experience. We will learn from scratch. We will start by
observing the flower to drawing in four
different perspectives. Then we will work on a project to draw a bunch of sunflowers. I will teach you to
add the details, and we will learn about the line drawings and shadings to bring the drawing to life. By using the techniques
we learn in this class, you can draw not
only the sunflowers, but also any flowers
of your choice. The objective of this
class is to make one confident to start
his or her journey with floral illustration. If you think this
class is for you, let's meet in the next lesson.
2. Requirements: Let's take a look
on the supplies you'll need for this class. Of course, you'll
need a drawing paper to draw the sunflowers. I'm using a drawing
paper from Strathmore. These papers are really thick
and I love to draw on them. They have a beautiful texture, and I prefer them
for my pen drawings. But it is a little bit
on the expensive side. If you are a beginner, I would suggest you to use a normal sketchbook
for your drawings. They also work great. I use them for my
practice exercises, but the paper you use is
completely up to you. You can absolutely use
any paper to draw. You will need a pencil and an eraser to do some
practice exercises. Then of course, you'll
need some drawing pens. I'm using pigma
micron from sakura. We will be using two pens
of different thickness. One, a medium sized pen, and the other will be a very
thin pen for finer details. This is 03 of pigma micron. Let me show you 05 of
pigma micron as well. It is a very thin pen, and I use them for
the finer details. Using pens of different
sizes creates depth to your drawing and
brings your drawing to life. I'll be using drawing
pens from sakura, but you can use any
brands of your choice. I'm going to make drawing these flowers very
simple for you, but let me tell you the
truth, it takes time. You need patience to
draw these flowers. Let's get started to
draw these sunflowers.
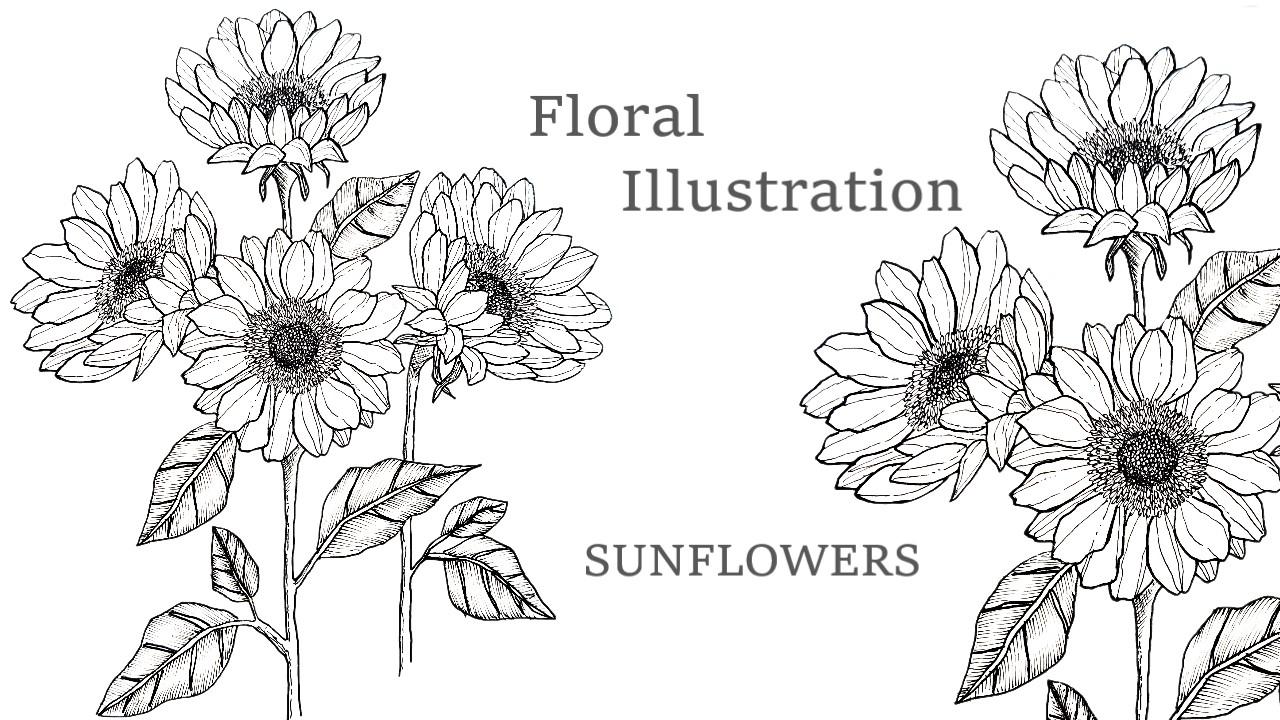
3. How to draw sunflowers - Frontal: Before learning to
draw the sunflower, let's first observe it. The center part of the
sunflower is called the seeds, and it has petals around
it and also the leaves. There is also something called the sepels which are
found behind the flower. If you observe a frontal flower, you can see two circular shapes. One goes around the seeds and
one goes around the petals. So what I'm going
to do is I'm going to draw these two
circles on my paper, and they will act as guidelines. You can use any circular
objects to draw the circles. We need one big circle
and one small circle. I'm using a normal
student grade pencil. If you observe the petals, the petals are oval in shape and some petals are front and
some petals are behind. They also vary in sizes. Some are small, some are large, some are behind, some are front. So I'm going to draw some
petals which are on the front, and I'm going to vary in sizes. Like, some are small
and some are wider. You can try drawing
petals of various sizes. It doesn't mean that you have to draw the petals over
the outer circle. We have drawn as a guide. Generally, the petals
which are on the front, they are shorter when compared to the petals which are behind. After you complete drawing the petals which
are on the front, you can draw the petals
which are behind. These are the
overlapping petals. As you can see, I'm just drawing the petals which are
behind the frontal petals. Some petals are completely behind and some are
partially behind. These petals are narrow on the center and they
are wider on its top. I've seen many beginners draw the top part of the
petals very sharp, but I strongly suggest
giving some ups and downs to the top part of the
petal for a natural look. The frontal flowers are
the most easiest to draw, so I strongly suggest
you to practice it a couple of times before moving
into perspective drawing. I will teach you to draw
the central part of the sunflowers in the
forthcoming lessons. So let's just concentrate
on the petals. In the coming lesson,
we will take a look on drawing sunflowers in
a perspective drawing.
4. How to draw Sunflowers - Towards the Sky: In this lesson, we
will learn to draw sunflowers which are
towards the sky. You can see the
face of the flower, but you cannot see it completely because it is towards the sky. So first, let's
observe the sunflower, observe the shape of the petals, observe the shape of the seeds. Instead of circular in shape as we did in the
previous lesson, it is now in oval shape, one oval for the center and
the other one for the petals. This is a horizontal oval. Again, I'm using my pencil
to draw two oval shapes. One large oval for the petals and one small
oval shape for the seeds. I'm drawing a half
oval shape instead of a complete oval for the
small one for the sees. As the flower is facing
towards the sky, only a portion of it is visible. The next step is to draw the petals which
are on the front. These petals are facing towards the sky coming to the
direction of the petals, the center petal is straight, and the petals which are
left are towards the left, and the petals which are
right are towards the right. As I move towards the sides, the direction of the petals
are towards the edges. The side petals fall over
the oval shape itself. I'm drawing a few more petals of the same direction above the
previously drawn petals. Drawing the side petals is more tricky when compared
to the other parts. All you can say is that
it comes in practice, and the more you
observe the flower, the better it looks
when you draw. After you complete
drawing the side petals, you can draw the petals
which are on the other side. As fitted in the
previous lesson, you first start by drawing the petals which
are on the front, and then you can draw the
petals which are behind. And the petals are more curved as you move
towards the sides. I complete the drawing
by adding a stain.
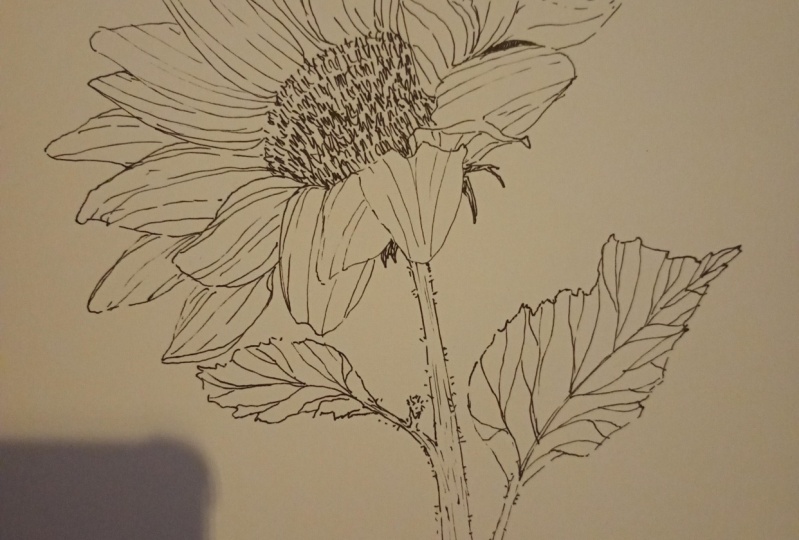
5. How to draw Sunflowers - Towards the Left: In this lesson, we will
learn to draw a sunflower, which is tilted
towards the left. As always, let's first
observe the sunflower. As you can see,
the entire flower is tilted towards the left. For your better understanding, I'm going to use the same flower that we drawn in the
previous lesson. I have just tilted
the entire flower towards the left,
ignore the stem. So that's what we're
going to do now. I start by drawing two ovals which are tilted
towards the left, one for the petals and
one for the seeds. I'm making a half oval
shape for the seeds because only half
of it is visible. I'm also drawing a curve for
the placement of the sepals, which goes down to the stem. So this will be the basic shapes for drawing the flower
at the side view. Let's now start to
draw the petals. To give a realistic
look for our drawing, I'm going to draw a
few petals which are folded and facing towards us. The shape of the folded petals are basically triangular shape. For the petals which are
facing towards the right, the triangles also face
towards the right. And for the petals which
are towards the left, the triangles also
face towards the left, which means I'm giving
a small tilt to the tip of the triangle towards the left or
towards the right. After you do this, let's draw some petals which
are on the front. These are just normal petals as we did in the
previous lessons. The center one is straight, and the petals which are towards the right are curved
towards the right, and the petals which are towards the left are curved
towards the left. You can also go back and
give some magisns if needed. The petals which
are on the sides, they fall towards the
direction of the whole shape. Then I draw a few petals
above the side petals. Same on the other side also. Let's do the petals
which are on the front, which are on the other side. This is the most simplest part. I start by making the
petals which are on the front and some
petals which are behind. As you move towards the sides, the petals are curved similarly to the petals
on the other side. You can define the stem and add some sepals towards the
top part of the stem. Sepals are tiny leaf like
structures. They are long. They are thin, and I'm doing the sepals over the
top part of the stem. With this, we are done
with the si view.
6. How to draw Sunflowers - Towards the Right: In this lesson, we will
learn to draw sunflower, which is tilted
towards the right. For this, I'm going to draw two oval shape which are
tilted towards the right, one for the petals and
one for the seeds. I think you'll now have a better idea of
what we are doing. In the previous lesson,
the entire flower was tilted towards the left. Now the entire flower is
tilted towards the right. You can always turn
your drawing paper and make yourself comfortable. You can always go back and
change the shape if needed. That's the convenience of
drawing with a pencil. I'm drawing a half oval shape, which is tilted towards the
right because only a portion of the seeds are visible and
not the entire oval shape. I'm making a small section below it for the placement
of the sepals, and I'm making a couple
of lines for the stem. As we did in the
previous lesson, I start by drawing
the folded petals. The folded petals are
triangular in shape, and they overlap
with each other. The shape of the triangle varies according to the
placement of the petals. If the petals are
towards the right, the dip of the triangles
face towards the right. And so for the other side, now I make some petals
which are on the front, As you move towards the sides, the petals are more curved. And for the petals
which are on the edges, they fall over the oval shape. Similarly, for the
other side as well, draws and petals about the side petals that
we have drawn before. Now that we have drawn
the side petals, let's draw the petals which
are on the other side. Start by drawing the petals
which are on the front, and then you can draw the
petals which are behind. As you move towards the sides, the direction of the
petals change accordingly. Likewise, do it on the
other side as well. If you have skipped
the previous lesson, I strongly suggest you take a look on the previous
lesson as well where I explained in detail
each and every step. After you do the petals, you can define the stem
and draw some sepals. With this, we are done with
a perspective drawing. In the next lesson,
we will draw a bunch of sunflowers in
different angles, and we will concentrate
in the shading part.
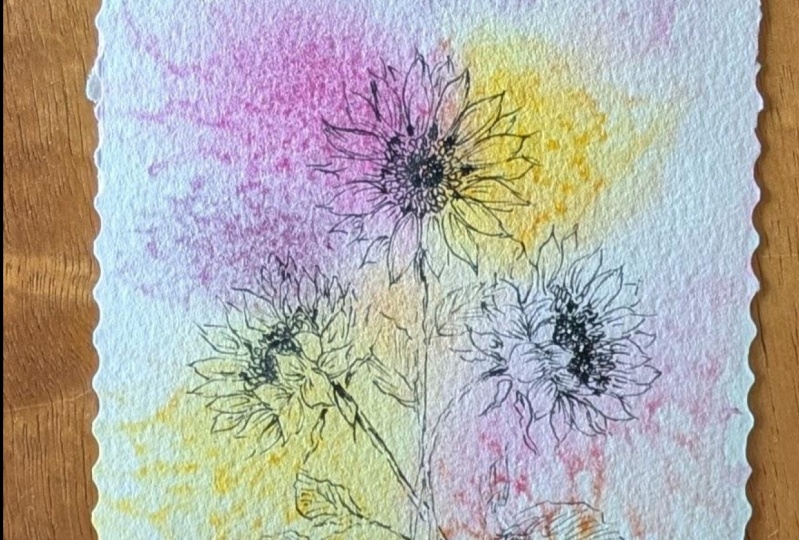
7. Project - Draw a Bunch of Sunflowers: Now that we have learned to draw sunflowers in different
perspectives, let's now try to draw
a bunch of sunflowers. We are just going to combine all the perspectives we learned
in the previous lessons. This will be the basic shapes
to draw the sunflowers. You can find a copy of
it below the video. You can either take
a printout of it or you can just sketch
it on your own. So I'm just drawing
four flowers, one, a frontal view, and one is filtered
towards the left, one is tilted towards the right, and one is facing
towards the sky. Follow the same steps as we
did in the previous lessons. So this will be your class
project to draw a bunch of sunflowers in different
angles and perspectives. You can always go back to the
previous lessons if needed, following the same steps, draw the petals for
all the flowers. I also draw the sepals for
the perspective flowers. For the frontal flower, you need not draw the sepals
because they are behind. A floral drawing is
incomplete without leaves, so I'm drawing few
leaves for the flowers. The leaves of the
sunflowers are very large. You can also make
some small leaves here and there for
a natural look. I'm drawing few leaves
which are behind also. So this will be the basic
sketch for your drawing. After you're done with
this, you can take your medium sized pigma micron. In my case, I'm using
three of pigma micron, and I'm just going
over the outline. One important point to note that do not pin your
circles and ovals, which are for the center part. I mean, for the sats, we will add more details to the center part in
the coming lesson, so you can just omit
that and pen the rest. Once you're done
with the pen workk, you can get rid of the unwanted pencil marks using an eraser. So here is the final result.
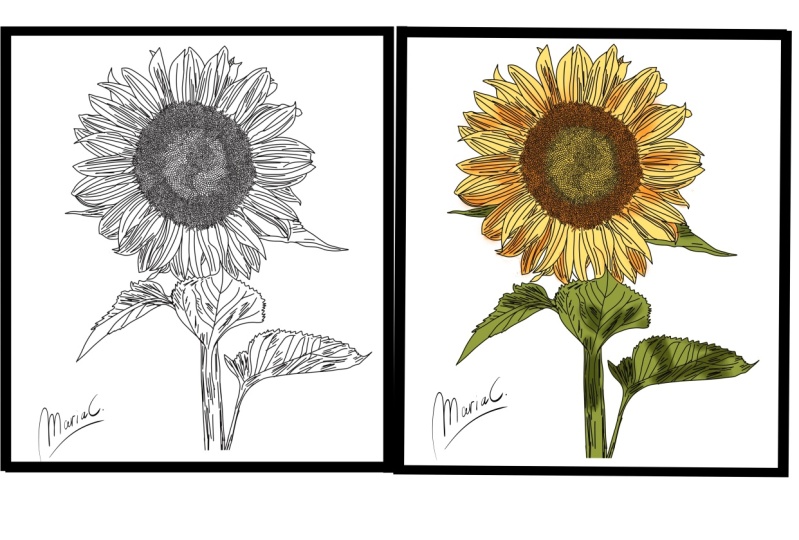
8. Drawing the Center of the Sunflowers - Part 1: The center of the sunflower
has basically two parts. The one which is on
the center is called the disc florets and which is outside is called
the ray florets. We will start by drawing the disc florets which
are on the inside. I'm using my smallest
pen 005 of pigma micron. What I'm doing is starting from the center point and drawing
tiny little circles. This is the most meditating
part in drawing flowers. You can just sit back
and enjoy the process. All the circles are
of the same sizes. I just fill the entire area with these tiny little circles. Once you're done with that, we are going to draw
the ray florets, and they are oval in shape. They are somewhat
elongated, oval in shape. Regarding the pen size, I'm using my same pen or
oh five of pigma micron. Take one row at a time and draw these old
shaped structures. Once you're done
with the first row, they'll do the same thing
for the next row also. These old shape, they need
not be similar to each other. One might be small and
one might be tall. So you can vary the sizes. You can vary the height and give some variation
for an astrom look. With this, we are done
drawing the ray florets also. But if you observe the drawing, there is something missing, which is nothing but the depth. So how to add depth? I use my same 05
of pigma micron, and I just do some
scribbling over the edges. This will create a beautiful three D effect to our drawing. I'm not creating any
particular pattern. I'm just scribbling
without any pattern. As you can see, the drawing
is now coming to life.
9. Drawing the Center of the Sunflower - Part 2: Et's now do the center for
the perspective flowers. I'm using Ooh five
of pigma micron, and I start to pen
my disc florets. I'm drawing tiny little circles
starting from the center. I'm making those
tiny little circles in a circular manner. Slowly as I move downwards
and draw the circle in an irregular pattern instead of drawing in a circular
manner as we did before. Once you're done with
the disc florets, let's now do the real florets. Undrawing some irregular
oval shaped patterns. So do this all over
the empty space. A Now I'm going to add some depth by doing some scribbling on the top
of the disc florets. Follow the same steps to draw the center for the rest
of the perspectives. Start by making tiny
little circles for the disc florets on the center and slowly moving outwards. Then I'm drawing oval shaped
structures for the florets. With this, we are
done with the center. In the next lesson, we will do some shading on the
petals of the sunflower.
10. Shading the Petals: In this lesson, we are
going to shade the petals. We will be using simple
lines to do the shading. These lines follow the
direction of the petals. These lines can be broken or they can also be
a complete line. If you take a look
at a real flower, you can observe small
folds on the petals. These lines that we
are drawing now, they are used to
represent that folds. Also, we use lines to repress in the shadows
on the petals. For example, for the
petals which are behind, they have a lot of shadows, so we can use a couple of lines to repress in the
shadows on those petals. This process is called hatching. So hatching is nothing but using lines to repress
in the shadows. Let's now try to
shade the flower, which is facing towards the sky. I'm using the same technique as we used in the frontal flower. I draw the lines which follow the direction
of the petals itself. And for the petals
which are behind, they have more shadows, so you can add some
more lines for that. You can always turn
the paper if needed. Try making yourself comfortable
and enjoy the process. This is totally relaxing
and meditating. For the petals which are folded, I'm drawing some curved
lines because they fall out. So the lines also,
they fall outwards. I'm giving some shading
for the setals as well. I'm just loading
those tiny leaves with a lot of lines so that they create contrast with
the petals and the setals. Follow the same steps to
shade the other two flowers. In the next listen, we will complete the drawing
by sheding the leaves. But
11. Shading the Leaves and Stem: Let us shade the leaves. I'm using a slightly
larger sized pen to draw the veins of the leaves. I'm using all three
of pigma micron. I'm using double lines to
draw the veins on the leaves. As I forgot to draw
the double lines, I go back to my previous leaves, and I make a double
lines for the veins. Once you're done
drawing the side wanes, let's now shade the leaves. So I'm using a smaller
penna 005 of pigma micron, and I start from the center
and I move outwards. I start by giving some pressure
when I draw the lines, and as I move outwards, I'm slowly taking my pen away from my paper so you
get a beautiful shade. Likewise, draw the lines
on the other side as well. These lines are very
close to each other. Now, what we're going to do is we are going to
draw lines again, but now we are
going to draw from the edges of the leaves
towards the center. Si lily on the
other side as well. This will create a beautiful three dimensional
effect for the leaves. The process is very simple, but the leave meal is going to elevate the look
of your drawing. Follow the same steps to
share the rest of the leaves. After you do the leaves, let's shade the stem
and finish the drawing. Again, I'm using my
05 of pigma micron, and I'm giving some small
lines on the tip of the stem. You can also add another set of parallel lines which intersect the previously drawn lines. This will create a darker
shade for contrast. And then I'm filling the
stem with broken lines and dots over one
edge of the stem. This is to indicate the shadows. The light is falling from
the opposite direction, so the shadows
fall on this part. Similarly, do the shading
for the other stem as well. Here we go. Our drawing
is now complete.
12. Conclusion: We have now come to
the end of this class. I hope you enjoy this class. I believe you are
now confident to start your journey with
Zora Administration. If you have any doubts in any part of the class,
do let me know. I will get back to you
as soon as possible. Also, please share your projects in the class project
section below. I would love to
see your flowers. You might be a beginner and your drawing may
not look perfect, but still share your projects. No one is born artist. Practice makes a man perfect. Also, please share your
feedback on my class. It helps me create better
classes in the future. I hope you enjoyed my class, and thank you so much
for taking my class. It really means a lot to me. Thank you. Bye bye.
Have a great day.
 Meenakshi Muthuraman, Artist and Illustrator