Transcripts
1. Introduction: Hello. My name is Minakhi. I welcome you all to my class. I'm an artist and
an illustrator. I love to draw and paint. I work on acrylics, watercolors and pen
and ink drawings. Today's class is
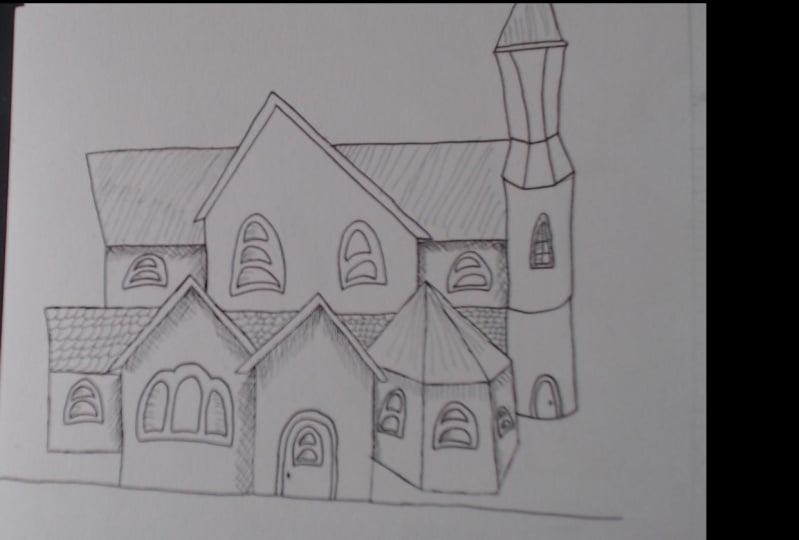
going to be about sketching buildings,
using drawing pens. Have you ever wanted
to draw buildings, but you're not able to because you're scared to take your pen, then this class is for you. I have designed this
class for beginners, so you'll be learning
right from the basics. We will be starting with
some practice exercises where we will learn to draw
buildings using basic shapes. Slowly, we will learn to draw realistic
buildings step by step. I will cover each
section in detail. We will learn in depth
on drawing windows, doors, balcony, and roofs. I will also teach you
how to add patterns to your building so
that your sketch will look more realistic. This is totally a fun class. If you think this
class is for you, let's meet in the next lesson.
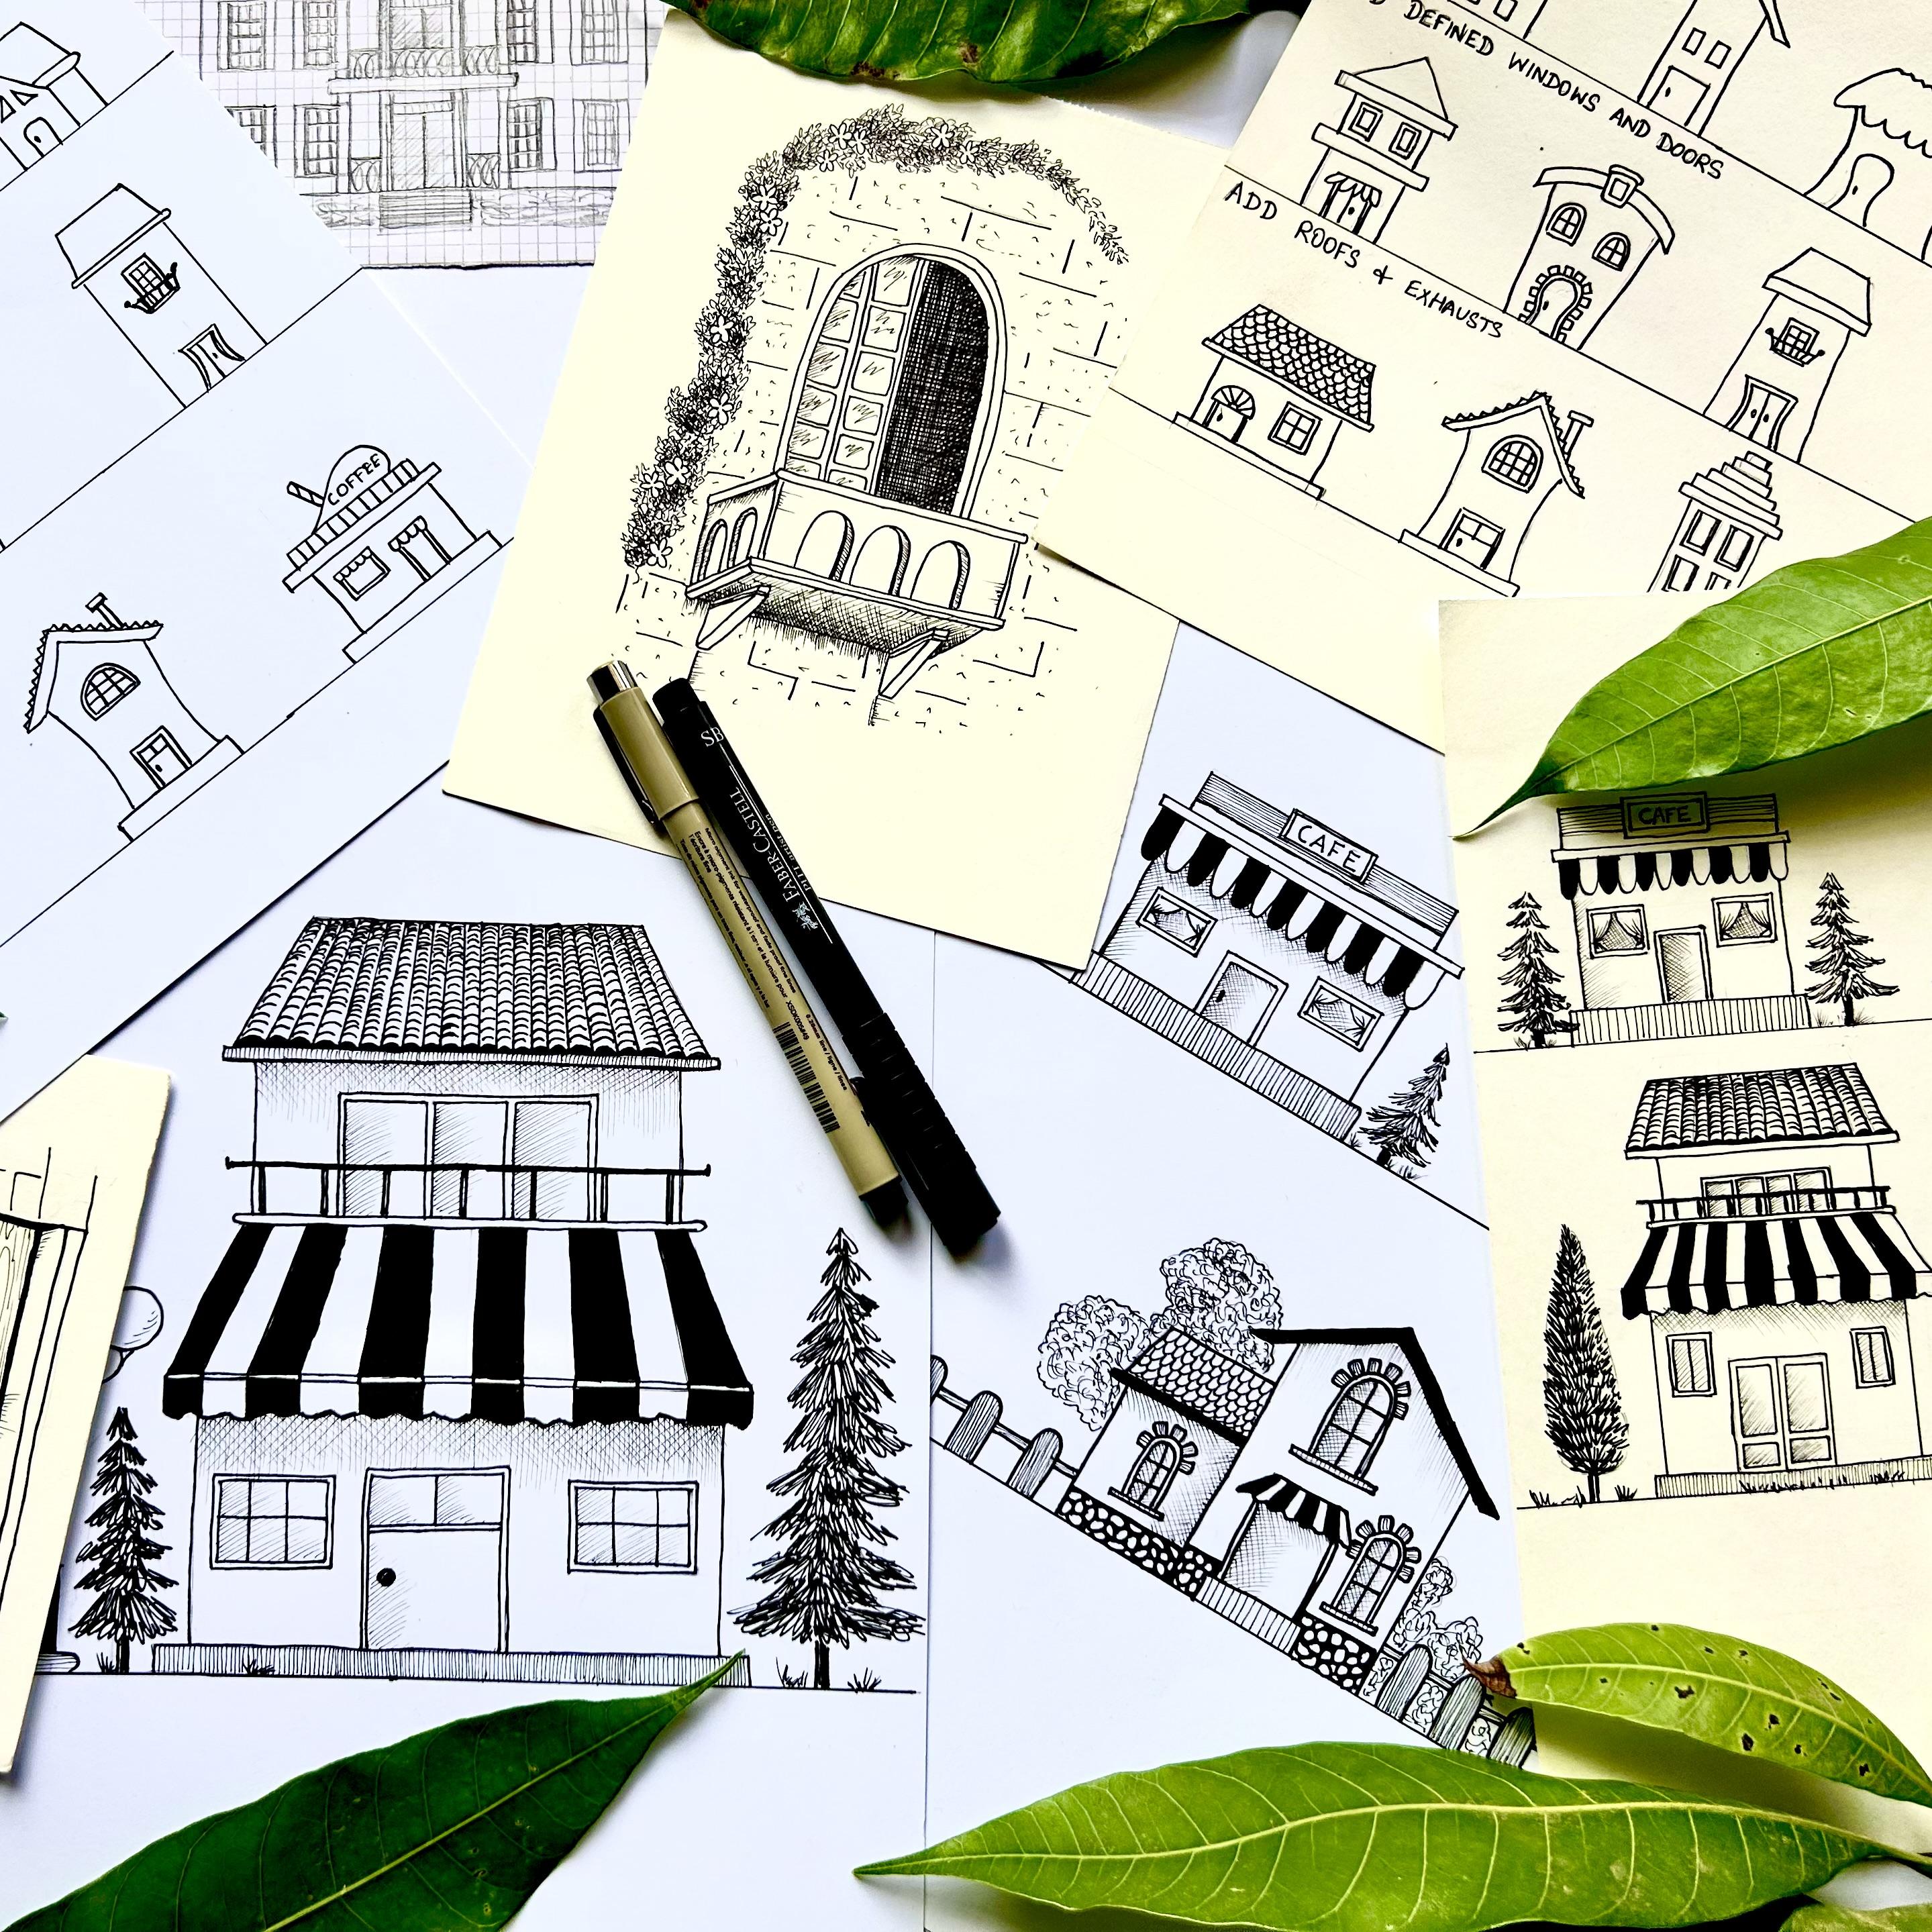
2. Materials Required: Let's now take a look on the materials required
for the class. You'll need a sketchbook
to practice some doodles. I love using my sketchbook for my floral illustration projects, and I also practice
on my sketchbook. Mine is a very normal 130 GSM
medium surface sketchbook. I use this for pencil and charcoal art and also
pen and ink sketches. I've also used ivory
sheets for these projects. I love using ivory
sheets because they are generally thick and
they are very smooth, but it is totally
up to your choice. You can use any paper. You'll need a pencil and an
eraser to draw some outlines, and you'll also need a scale to help you draw some lines
for the buildings. Don't be shy to use a scale if it makes
your drawing better. You'll need drawing
pens to do your sketch. I'll be using Faber castle and pigma micron for my drawing. You'll need various sizes. Here is for your
better understanding. You can see the difference
for different sizes of pens. You know, the size S and
Xs has much difference. The larger pens I
use for highlights, and the smaller
pens I used to make shadows and some minute details. Grab your supplies,
and let's get started to draw some
beautiful buildings.
3. Build your House using Shapes : In this lesson,
let's take a look on how to build a house
using basic shaves. Using a scale, I'm
drawing four lines. If you are a beginner, I suggest you use
your pencil first. This lesson is going
to be very simple, so you can use your pen
directly or you can just use your pencil first and then use your pen.
It is up to you. Instead of viewing a house
as a complex structure, I want you to break it
down into simple shapes. Now, let's try to be creative and use different shapes
to build a house. In this case, I'm drawing a rectangle for the
frame of the house, and I'm doing a triangle
on the top for the roof. Here I'm drawing a rectangle, again, a rectangle,
but this time, it's going to be like
a sleeping rectangle and on top of it, a roof. You can try to be creative and try using different shapes
in different designs, even though it might
not look realistic, like what I'm doing now. You know, it's like an
inverted cone shape for the frame of the house. Even though it's not realistic, I like to draw such
houses for my doodles. So this house is kind
of an elongated hut you can change the size, the width, the height, the designs, the shapes,
and create variations. We're just practicing.
Feel free to be creative. Here I'm going to
make a really cute, small, circular shaped hut. So this will be the basic
frame of the house. In the next lesson,
let's go one step further to create
realistic building.
4. Add Simple Windows and Doors: Et's try adding
some simple windows and doors for our house. I start by drawing a roof, and then the frame of the house. I'm drawing a semicircle for the door and four tiny
squares for the windows. You can try different
shapes to make your house. Right now I'm making
a rectangular shape, a standing rectangle for
the frame of the house, and I'm making an inverted
cone for the roof. Instead of making the
roof a triangular shape, I'm trying a double
line for the roof. For the door, I'm making
a standing rectangle. For the windows, I'm
trying it with triangles. Right now we are just doodling, so we need not try to
make it more realistic, so you can just play
with the shapes. You can try different shapes, different designs, and come
up with your own house. Here, I try to make a
heart shaped structure. So I draw the roof first with
a little curb on the sides and some zigzag
on the bottom and the top and a rectangle on the bottom for the
frame of the house. I make the door, and I give a carrom effect
for the windows. U. You can also try incorporating two
different structures for the same house like
what I'm doing now. You know, I first draw
a structure which is on the front with some
windows and a door, and then I'm drawing a
structure which is behind. So this is going to be
behind the front frame. I'm making the roof for it and the rectangular
frame for the house. In the next lesson, we'll
try to make our doodles a bit more realistic by adding some more details to the
windows and the doors.
5. Defined Windows and Doors : How to make defined
windows and doors? It's just by adding
double lines. Also, you can try incorporating various elements like you can add stones around the doors. You can add the sunshade, and also you can make
the doors even more dramatic by adding double lines, and you can make balcony instead of making
a simple window. So the sky is the limit. You can try different
methods and different elements to make your drawing even
more realistic. So come let's make
do this together. Don't be shy to use your scale. Whenever I make
building doodles, I like to use my scale, so I often use my scales for drawing houses
and buildings. I'm trying to draw a
two storey building, so I'm drawing a rectangle
to separate the two. Instead of using a simple
shape for the door, you can try different
elements like a sunshade, I'm making a simple semicircular pattern
for the sunshade, and then I make the door. And on the top, I make a
triangular shape for the roof. Below that, I'm
making a double line to connect the roof
to the building. Here I make two small windows,
square shaped windows. As you said before, doing double lines gives a more detailed look
for your buildings. So I'm just making double lines and a
center line with a knob. I thought of trying a
cartoonistic building, and for that, I'm making a
double curve for the roof. I thought of adding a small
structure on the center of the roof to make
it more dramatic. I'm making a somewhat a
conical rectangular shape with a double curve on the top with a small square shaped
structure within it. I'm using a scale to connect
the roof to the ground. Instead of making
a straight line, I'm making the
frame a little bit slanting to make it
more cartoonistic. You can also try making a curved door instead of
a square or rectangle. I'm adding stones around
the door, and for that, I'm making small tiny little
squares around the door. One tip here is you
can use a pencil to draw a guideline and go over the pen after that by adding small tiny
little squares. I'm making two
semicircular windows. So that's how you're going
to make fancy buildings like incorporating various
elements like sunshades, stones, et cetera, and
by using double lines. I get rid of the guideline
using an eraser. Let's try one more building. And for that, I'm making
a rectangle standing rectangle for the
frame of the building, a double line which connects the frame of the
building to the roof. I'm drawing two slanting
lines for the roof. Instead of drawing
a simple window, let's try to draw
a balcony here. And for that, I start
with a small window, and then I make little curves on the bottom line and a horizontal line which
connects all the curves. This line can be a little bit thicker to give dimension
to your drawing, and also I make a small
knob on either side. I'm making double lines
for the window as usual, and I make a cartoonistic
door on the bottom.
6. Add Exhausts and Patterns on the Roofs: In this lesson, we will try including exhaust
to our building, and also we will try adding
some designs on our roofs. I start by making a simple
frame for my house. And then I make a small
step on the bottom. And then I'm making a
rectangular frame for my house. For the door, I'm making
a semicircle on the top. I'm making some designs. And then I'm making some double vertical lines
on the bottom of the door. You can leave the door as it is, or you can make a line on
the center with a knob. I'm making a window
on the other side of the house a double line for the window with
some sections on it. Now comes the cool part. I'm going to make
patterns on the roof. This is going to be a
semicircular pattern. I'm just filling the roof
with a lot of semicircles. This part is totally meditating, so I love filling the
roofs with patterns. So this is going to
be our first house. Let's try another building. I start with a step on the bottom and a conical shape
on the top, for the roof. I make double lines
for the roof. I connect the lines. I'm using a curve to connect
the roof to the bottom. This gives a cartoon
effect to our doodle. And I make the door. I make double lines
for the door. And I also make few sections
on the door with a knob. Now I want to make a big window. This is going to be a
semicircular window. I make double lines
for it again, and I'm making a lot of
sections on the window. Few horizontal and
vertical lines which intersect each other. I'm making step like
patterns on the roof. This is because of the
view of the house. It is a front view on
which we are drawing. So because of that, we do this pattern. I'm also adding
an exhaust to it. A small rectangular shape, which connects to the roof. This time, let's
try to draw a cafe. As always, I start with a
small step on the bottom, and I'm making another
small rectangle on the top. I'm making a curved shape
pattern for the roof. This gives a more
dramatic effect. I also make a couple of
slanting lines on top. I want to give this pattern
because it is a cafe. I'm making a bigger
rectangle below the roof, which connects to the bottom. I would like to add a sunset for the door and a couple of
vertical lines for the door. On the side, I'm going to make
a window with a sunshade. Again, I'm going to
make a rectangle for the window
with double lines. You can leave it as it is, or you can add a screen to it, and I'm writing coffee
on top of the roof. I'm drawing a few standing
lines below the roof to just a pattern to give a more dramatic
effect to our building. So that's the next lesson, we will see some examples and make our building
even more bigger.
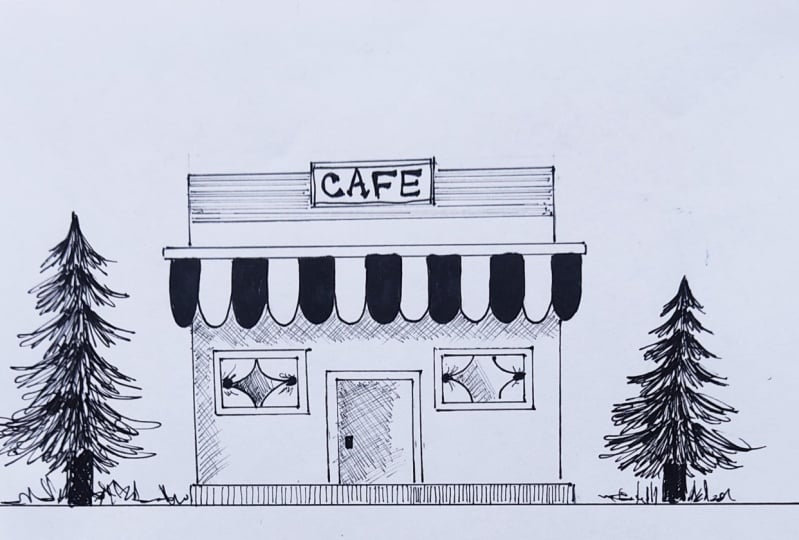
7. Let's Draw a Cafe: Using the techniques we learned
in the previous lessons, let's try to draw a cafe. This time, we are
going to try making the buildings a little
bit bigger than before. I start by drawing a
horizontal line for the step. I'm using a pencil to
draw because I can always go back and change
it if I don't like it. I make a double
line for the roof. I'm drawing a small
rectangle on the top of the building for a name
board called cafe. I make horizontal lines
on either side of the name board which connects the name board to the building. We're just done with the
top part of the building. Now, let's do the
frame of the building. I'm drawing a very
light horizontal line for the sunshade. I'm making cup
shaped patterns over the entire area
for the sunshade. These semicircles are all of same size and they are
parallel to each other. The guideline helps
us to maintain the same length for
all the semicircles. Now that we are done,
I'm going to connect the top to the bottom
using a couple of lines. And then I'm making
a rectangular door. I'm making double lines. A couple of windows
on either side. I use a scale to trace
out the location of my previous window so that
both the windows look similar. You can try different
styles for the windows. Like, you can draw the
windows as if it is open or you can add
screens to the windows, like what I'm doing now. I am making a couple of screens to the other window as well. I'm writing Cafe
to the name board. With this, we are
done with Outline. I'm going to pen this
using my 0.4 drawing pen. I'm just going over the
pencil marks using my pen. Let's now try to add some patterns and
shading to our drawing. I'm using my same drawing pen, and I'm making double
line for the name board. To make patterns, I
changed my drawing pen to a smaller size 05
of pigma micron, and I'm drawing some
horizontal lines all over the top
part of the cafe. I'm just filling the
entire top section with these horizontal lines. And on the bottom step, I'm making vertical lines. All these lines are
parallel to each other. They are evenly spaced. I enjoy making patterns to the buildings because it's
totally a meditative process. Also, it elevates the
view of the sketch. I'm using a black color brush
pin to fill the sunshade. You can fill alternative
semicircles. This will give a more realistic
look to our building. Also, when you fill a
space with black color, it elevates the look
of your sketch. I always like to fill some areas of my sketch
entirely black so that, you know, the entire
drawing looks elevated. You can also add some
elements outside the building so that your
drawing looks more realistic. In this case, I'm going to add two trees on either
side of the cafe, one tree which is very big
and one tree which is small. I'm using my medium sized
drawing pen to draw the trees. I'm drawing the leaves
over the guideline. I just make some leaf like structure over the outline
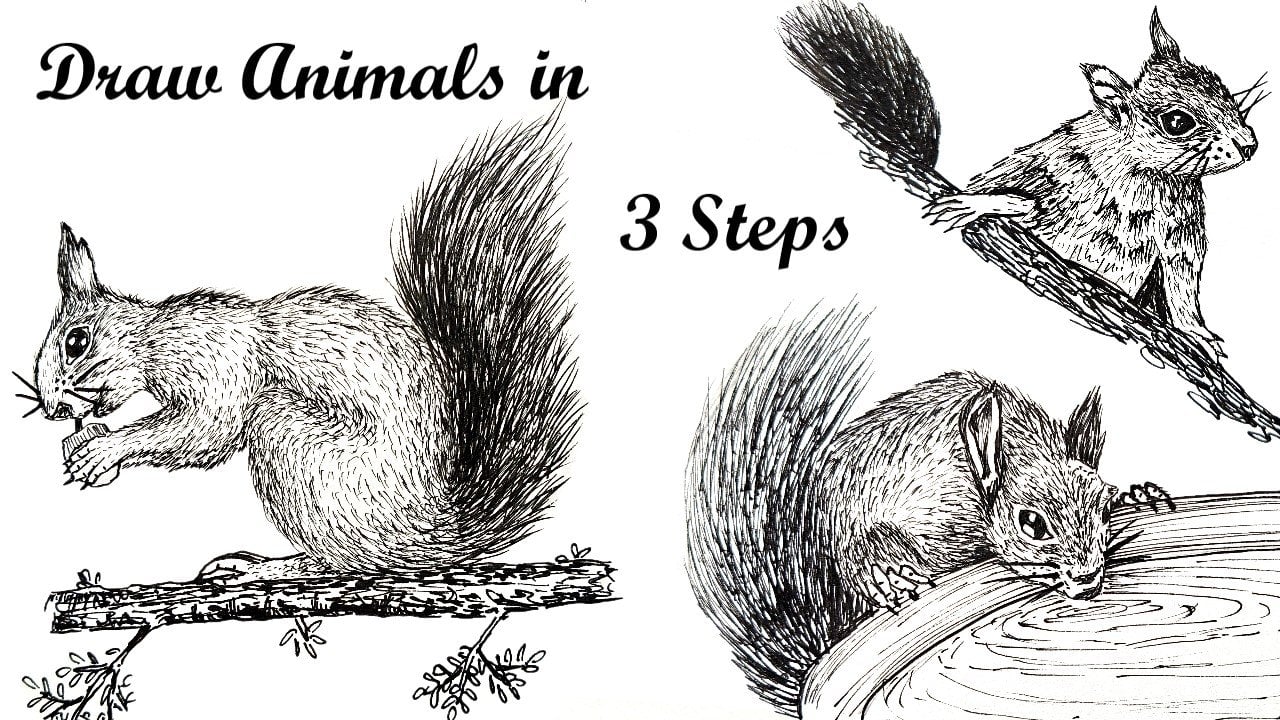
that I have drawn before. In case if you're interested
to learn how to draw trees, I suggest you to visit my previous class where I describe in detail
how to draw trees. Finally, I do the
stem for the tree. Similarly, I draw the other
tree starting from the top. I go over the guideline
using my pen. So it's going to be a lot of triangular shaped structures, starting from a tiny triangle to a white triangle
at the bottom. Tiny triangle at the top, to a white triangle
at the bottom. Finally, I do the stem. I also make some
crosses on the ground. Get rid of the unwanted
pencil marks using an eraser. For the shading part, I'm using my smallest pen 05
of Pigma Micron. I start by shading the door. I'm using a technique
called hatching where I draw tiny little
lines parallel to each other. I turn the paper and I
draw one more set of lines which are perpendicular to the previously drawn lines. I'm also using
hatching technique to one side of the building. So I'm just making some slanting lines on
one side of the building. Also in the windows, I'm trying to make
it a little bit darker by adding some shadows. So how do we make shadows by drawing lines which are
parallel to each other? In case if you want to make
a certain area even more darker to express deep shadows, you can make use of
a technique called cross hatching where you can draw one more set of lines which intersects the
previously drawn lines. Below the sunshade, there's
going to be a lot of shadows. And for that, I'm using this
cross hatching technique. I'm turning my paper and drawing another set of lines which intersects the
previously drawn lines. Our cafe is now ready. The next lesson, let's
try drawing a house.
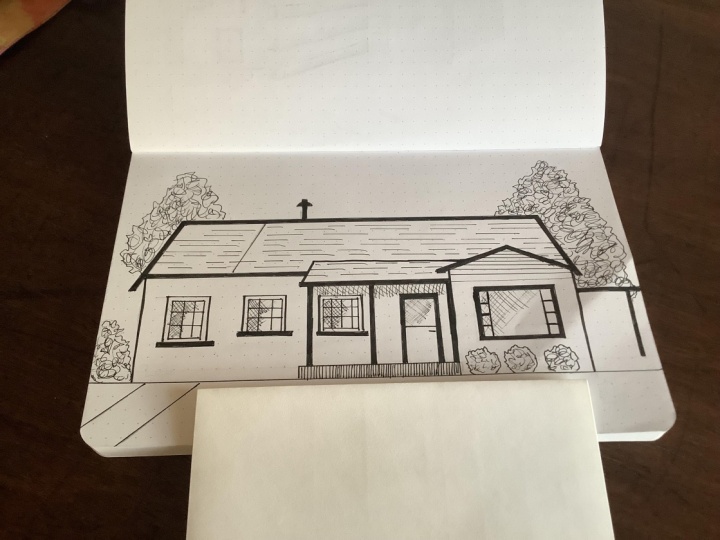
8. Let's draw a House- Part 1: Having learned the basics, let's try to dive into
a bigger project. This time, I'm planning
to draw a bigger house. I draw a line for the
frame of the house, and then I draw the
roof of the house. The roof is again in
a triangular shape, an irregular triangular shape. One side of the roof is
small than the other side. This is just to create
some variation. Now, we connect the
roof to the ground. I want this house to
have two sections, one on the front and one behind. So I'm drawing the part
which is behind now. So this is going to be
like a normal, you know, rectangular shape for the roof with a double line which
separates the frame to the roof. On the bottom, I'm
going to draw a step. Since this house is two section, the bottom step is going
to be much higher for the frontal section than the
portion which is behind. I'm going to make a
door with a sunshade. Maybe a small
sunshade this time. A couple of lines to connect
the sunset to the bottom. Below the door, I'm
going to draw a step. I'm making double
lines for the door. With this, a door is completed, and I'm drawing my windows. I would like to add a big
window for this house, so I'm making an elongated, semicircular shape with
a slab at the bottom. I want to cover around the top part of the
window with stones. So I'm drawing a simple
curve to act as a guideline, and I'm filling the top part
of the window with stones. You know, for stones,
I'm just drawing some tiny little square
shaped structures. I'm making the window
with double lines, and I'm dividing the window into many sections using vertical
and horizontal lines. I want to add another
window to the side, and this is going to be
exactly the same as the first one, an elongated semicircle. M. With the slab at the bottom, I'm making the window
with double lines, dividing it into many section using horizontal
and vertical lines, and I'm adding stones, which covers the top
part of the window. I'm making another window to
the portion which is behind, and it's also going
to be exactly the same as the previous
windows we drawn. Once you're done with
the basic outline, you can go back and
check if there is any changes needed
to the outline. We are done with a basic
sketch of the house. Let's do some extra elements
like fences and trees. To draw the fence, I'm drawing a very light horizontal line
to act as a guide. With that as a guide, I'm drawing an elongated
semicircular shaped structures on either side of the house. All these structures are
similar to each other, so you can always go back and change the size if
they are not similar. It should be of same length. It should be of same width. I finally connect all the
fences with horizontal lines. Maybe on the side, I'm going
to draw some bushes and trees to make the drawing
even more realistic. Our basic sketch is now done. In the next lesson, we
will pen this drawing.
9. Let's draw a House- Part 2: To pen my house, I'm using
my medium sized drawing pen. I just go over the
outline with my pen. Once you're done
with the outline, let's do the sunshade. I draw a few lines which
goes over the direction of the sunshade itself from
the left towards the right. And I colour
alternatively with black I get trade off the pens
and marks using an eraser. Then I use my smallest pin to do some patterns on my fence. I just draw vertical lines which are very closely spaced
with each other. This will give you that
wooden effect to the fence. This process is
completely meditating. As for me, I love
drawing patterns for my buildings rather than
drawing the building itself. You can also draw
some patterns on the horizontal lines which
connect the fence together. I'm going to draw some
pattern on the step as well. These are just standing lines evenly spaced with each other. I'm using a shading
technique to shade the door. So I'm drawing a set of lines which are
parallel to each other. And I turn my paper and I draw one more set of lines which intersects the
previously drawn lines. This technique is called
a cross hatching. Again, I do some patterns
on the slab of the windows, just tiny little lines. Then I'm going to do some patterns on the
bottom part of the house. For this, I'm using my big
sized pen of fiber castle, and I just draw some circles
all over the lower part. This will create a beautiful
texture to our building. These are some of my ideas. You can even try something
new of yourself, like you can draw some lines or can draw some curves,
it is up to you. As you can see, this pattern is lifting the whole sketch up. Once you're done
with the stones, let's do the roof of the house. For this, I'm using my
drawing pen of size 0.4, and I'm just making some slanted semicircular
shaped patterns all over the roof. O. For the other part of the roof, I'm just filling the entire
roof with black color. You can turn the paper whenever needed and just fill the
entire roof with black. I'm filling with
black here also. I'm changing my pen to 005, and I make some patterns
to the stones on the windows, small,
simple lines. I'm adding some shading
to the building which is behind because it's going
to have a lot of shadows. Also to the section
which is below the roof, they will have a lot of shadows, so I'm just making
some parallel lines. I'm drawing some straight lines below the other roof as well. I'm giving some shading
to the windows. With this, we're done
with our shading, and let's move on to the trees. I'm using my drawing
pen of size 01, and I'm making the trees. I just go over the outline. And the bushes down there. To make the leaves inside, I'm using a technique
called scribbling where I just scribble
the entire portion. Without any proper shapes like proper line
or proper curves, I just scribble the
entire portion. If you would like to learn
more about drawing trees, I suggest you go back to
one of my previous classes where I teach you about
drawing trees in more detail. I'll be teaching you
right from the basic, you know, so that you can master the skill
of drawing trees. So if you are interested,
you can always go back and check out
my previous class. I do some scribbling on
the bushes, as well. I use the same pen. I just
scribble all over the bushes. Here we go. We are
done with our house. It is more beautiful. It is more realistic or the patterns are
lifting up the drawing. In the next lesson, we will do one final project
for this class.
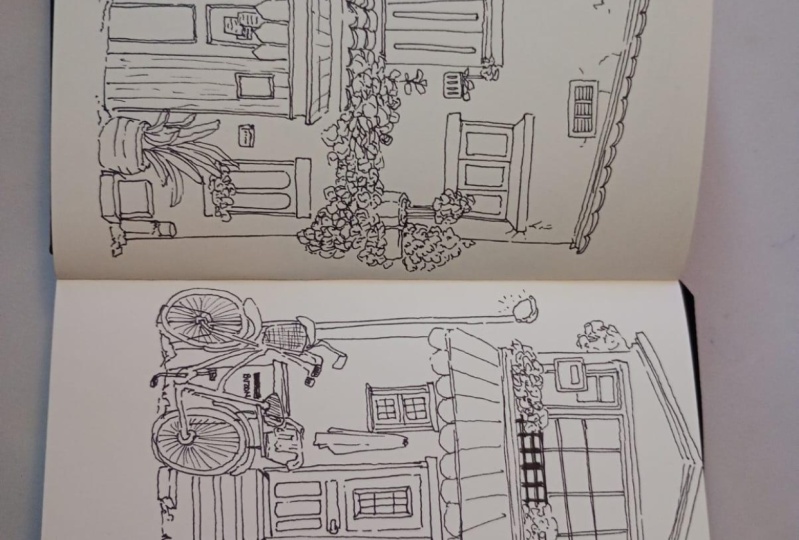
10. Let's draw a Shop-Part 1: I'm going to sketch a shop now. It can be a grocery
store or a supermarket. But the thing is, I'm just
going to draw a drill big. In my previous sketches, I started from the bottom, and I moved towards the top. But for this drawing,
I'm starting from the top and moving downwards. So I start with the roof. It's going to be a
two storey building, so I'm doing the top floor. I make the frame
for the top floor. Since we are using a pencil, we can always make changes. Then I draw a double line
in between the two floors. I'm going to make a big
balcony on the top floor, so I'm drawing a big rectangle. This rectangle is
for the windows. So I'm planning to make three windows,
three large windows. I'm just making three sections
on that one large window. I'm connecting all
the three windows. And I make the balcony. For that, I draw
a straight line. And I divide it
into many sections. With this, a top floor is done. Let's do the ground floor. So I'm drawing two
slanting lines on the sides and two horizontal
lines for the sunshade. You can always go back into
some adjustments if needed. I'm giving some zigzag
to the bottom line. I'm dividing the
sunshade using lines. As you draw the lines on the
right side of the sunshade, the lines are slanting
towards the right. And as you move
towards the center, the lines are more straight. And as you move
towards the left, the lines are slanting
towards the left. Extend the lines downwards. I'm drawing a couple of lines for the frame of the building. I'm making a step at the bottom. A then at last, I make the ground. Now let's do the doors
and the windows. I'm going to make this
door real simple, just a normal rectangle
with some sections on it, making a double line. And I'm making a few
sections on the door. I'm making a double line again. Now I do the windows. Again, I make a small
rectangle for the windows. I do double lines. I'm making a lot of sections on the windows using horizontal
and vertical lines. I'm going to make another window towards the other
side of the building. This window is similar to the previous one
we've drawn before. With this, we're done with the basic sketch
of the building. Let's do some external
elements as well. I'm planning to
add a street light and a couple of trees
to this drawing. For the street light, I
first draw a couple of straight lines and some
designs on either side of it with a big hue
on either side, and big bulb on either side. I want to make wider the bottom
part of the street light. I'm going to put a
small tree over here, a small pine tree. I just draw the basic sketch, the basic outline, and a
big tree on the other side. With this, our outline is done. I'm going to pen this using my medium sized drawing
pen of size 0.4. In the next lesson, we
will add some patterns and some beautiful
shading to our drawing.
11. Let's Draw a Shop- Part 2: Let's do some shading and add some patterns on our sketch. I'm using a larger sized pen to highlight the balcony rails. I'm using a double line so
that it is thick enough. Oh, so I'm adding a double
line to the sunshade. I I'm using a brush pen to fill the sunshade
with black colour. On the lower part also, I'm filling with black colour. I'm going to fill the sunshade alternatively with
black and white colors. The sunshade is now completed. Let's do the roof. Using my scale and
0.8 drawing pen, I'm drawing lines
all over the roof. So these lines, they
are going to change their direction according to
the direction of the roof. If the roof is
towards the right, the line is towards the right. On the left side of the roof, the lines are towards the left and on the center, the
lines are straight. To make the roof
look more realistic, what I'm going to
do is I'm going to add some patterns
on the roof. I start by drawing a
curve at the bottom, and I fill the curve
entirely with black color. Above that, I'm going to add more curves all over the room. As you move towards the top, these curves are very
close to each other. Let's try one more time. I first draw a curve, and I fill the curve
entirely with black color. Above that, I'm completely covering the entire
row with more curves. At the start, the space
between these curves are more, and as you move towards the
top, the space is less. It is very tightly
packed on the top. Follow the same pattern
for the entire roof. Drawing is such a
deep passion for me. When I draw, I get relieved
of my personal stress, and it's completely
meditative process. It just takes me
to another world, a completely new
meditative world. Let's do the street light. I first start with the outline. Using a brush pen, I'm filling the lower rectangular
section black color. I'm removing the
outline using an eraser so that it's
comfortable for me when I do the highlights
and the shading. I draw some straight lines on the bottom part of the house. These patterns, they are
completely up to you. You can try different
kinds of patterns. You know, you can
draw some curves. You can draw some, you
know, zigzag lines, and you can just try your own drawing skills
on these houses. A Let's give some shading
on the windows. I'm using a technique
called hatching and cross hatching
to do the shading. I'm just filling
the windows with pad lines of almost same size. Doing the same for all
the three windows. This is just to indicate the shadows which
falls on the windows. I'm using the same cross for
the lower two windows also. I'm just drawing these panel straight lines all
over the windows. I'm filling the top section below the roof with
some straight lines. This is just to cover
the empty space. So I'm just filling
with straight lines. I'm drawing some
horizontal lines on the street light also. Giving some very light
shading on the bulb. Just very minimal. I'm making it very minimal. Just fill all the empty space, all the white areas
with some patterns. That's all. Giving some
shading on the door also. I'm drawing a knob for the door and some very
minimal shading on the door. In order to add some
shading to any sketch, you should first observe it. In general, there's going to be a lot of shadows below the roof. So I'm going to add some
shadows below the roof. I'm just drawing
some straight line which falls downwards. You don't have to
strain your hands. You can always change
the position of your paper whenever
it is needed. Because while drawing
straight lines and while drawing curves, certain angle will be more
convenient than the other. A I'm doing some highlights using a bigger sized pen. I'm using the same
technique to add some shading to the lower
part of the sunshade. With this, our building
is now completed. As you can observe, we
have a lot of patterns, we have a lot of highlights, and the entire building
looks elevated using very simple patterns
and very simple sketch. In the next lesson,
we will talk about the class project and
wind up the class.
12. Class Project: We have now come to
the end of the class. I hope this class
was useful for you. I hope you now have the basic
idea of drawing buildings, and I hope you're confident enough to take your
pen and start to draw. If you are drawing
along with me, I encourage you to
share your projects. It might not be very big, no matter how small
your drawing is, I encourage you to share your projects on the
project section below. So your class project is to
sketch your own building. It might be a shop, it might be a grocery store, or it might be a cafe or it
might be a simple house. You can add some variations to the different elements of the building like
windows and doors. You can add some
patterns to the doors. Instead of drawing the
windows to be closed, you can draw as if
the windows are open. You can also try different
external elements like the elements
outside the building. Like you can include
a flower pot on the balcony and on the
front of the house, or you can also add
a street light, and you can add some trees, bushes, different
fences, so and so. If you have any doubts in
any part of the class, I encourage you to ask me. I will get back to you
as soon as possible. And you can also try
some of my other classes on floral illustration and
architectural buildings. Please share your
feedback for my class. It helps me create better
classes in the future. Thank you so much. Bye
bye. Have a nice day.
 Meenakshi Muthuraman, Artist and Illustrator