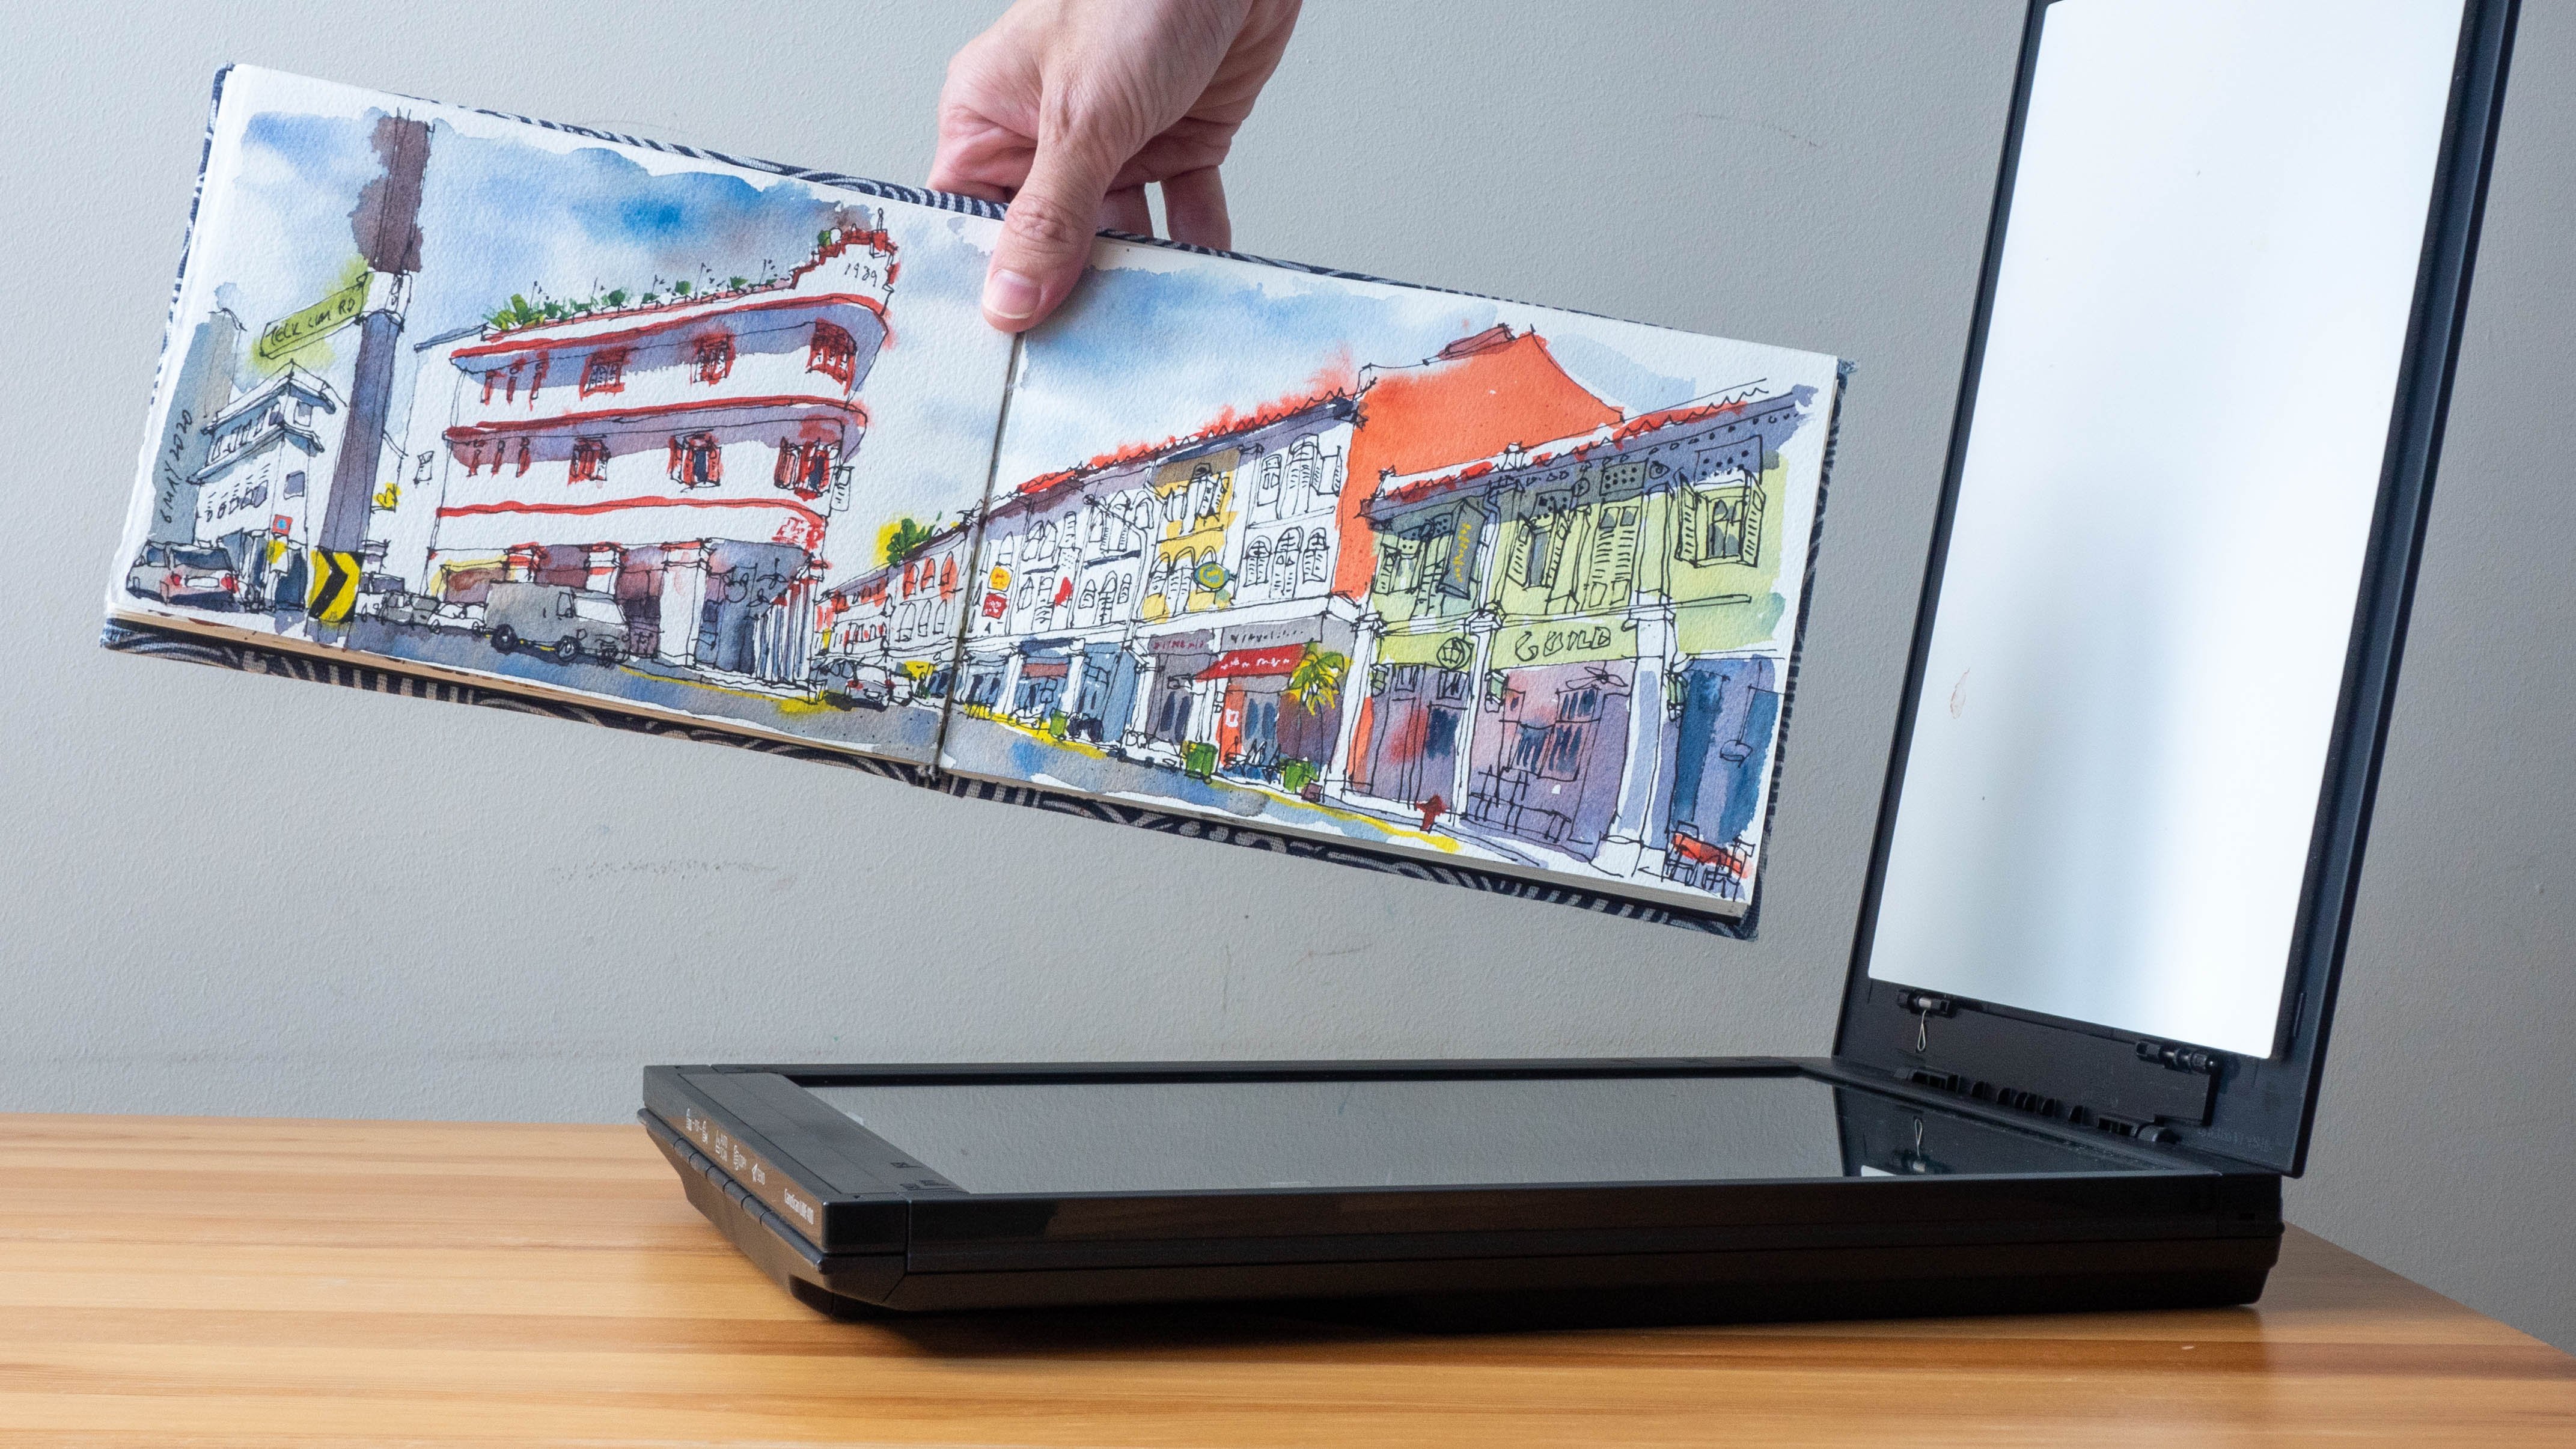
Transcripts
1. Intro: Hello, my name is T0 and
I'm a graphic designer, artist and urban sketcher. I make art with a
variety of tools, including traditional as
well as digital tools. In this course,
I'm gonna give you a quick introduction to how you can create digital hand-drawn
art with the concepts. Concepts is an app
that's available on the iPad, android, and Windows. If you happen to
be using the iPad, I recommend you check out
the ADA cost that I have, which is concepts on the iPad. In this course, I will
be using concepts on Android and on Windows. These are some of the artworks I have created over the years. I really love this app
because it's simple to use. And I loved a vector art style. I loved the flat coloring style. And there are also
many beautiful and wonderful texture
brushes as well. In this tutorial, we
are just going to be drawing something really simple just to get you familiarized with the
digital art workflow. This is gonna be a
very hands-on to Toro and I invite you to
draw along with me. But at the end of the course,
you should be familiar with the app and what
concepts is capable of. So let's get started.
2. Tools Needed: The tools you'll need
in order to follow along with this course
would be the app, tablet and a stylus, profitably and active stylus. To find the app you can hit to their website,
concepts dot APP, and on the website
there will be links to different app stores where you
can find an installed app. You can find an app from the
app installs from Apple, Microsoft, Google, and Samsung. After you have
installed the app, just open it and you
should be presented with this screen where direst nothing because there
is no artwork yet. Concepts is free to use. However, it's based on
the freemium model, which is to say that
certain tools and features are locked
behind a paywall. So now let's tap on
this probe button here. There are two ways to assess
all the tools and features. The first way is to pay
for a subscription model, which will give you team
collaboration features as well. And since we don't need that, we will just go with
one-time purchases. And the thing that
I highly recommend you to get would be
the essentials set. I cannot remember exactly
how much this is priced at. It's probably around
us tend to $15. So it's a onetime purchase and it's really worked on money. This will give you access to
the tab and whole selection, transform tools,
infinite layers. With the free version, you
only get up to five layers. So this infinitely yours
is very, very useful. And in this course
we will be using more than five layers. And you also get more fall
formats to export to, including PNG, which is
a lossless file format. Even if you do not buy
the essentials set, you can still follow along with the cost is just
that there will be some situations where you
will face limitations. For example, when I create
more than five layers, you won't be able to do so. You can only make use
of the five layers, starting with the
SNR shows set first and after you are more
familiar with the app, you can take a look at what other things
you may want to buy, such as they are brushes. I have actually
purchased almost all of their brushes because
they are so good. Other than the app, you will need a tablet
and a stylus for drawing. You can use a tablet that's
running on Android or iOS on Microsoft Windows. And it would be great if your tablet actually
supports and active stylus. And active stylus is append that can be
detected by the tablet. So this allows you
to rest your palm on the display while
you draw and write. This, we will not introduce
any stretch strokes. However, if you'll
tablet doesn't support and active stall this. When you read a
poem on a display, it's going to introduce
straight strokes, such as these strokes
that you see here. If your tablet does not
support an active stylus, you can draw with concepts. You just need to buy a rubber tip stylus or
a disk tips dollars. However, it is two
pens that I have here. They are not going
to be as accurate, compact to this active stylus, which also has tilt and
prejudice sensitivity support, and also comes with one
site button fall shortcuts.
3. What is Concepts: It is concepts. Concepts is essentially are vector illustration
at what is vector. You can think of a vector
as mathematical formula. So all the lines that you
see here, the colors, the shapes on this are based
on mathematical formulas. And the advantage
or vector art is you can zoom in
like all the way. And the artwork, we'll
retain the sharpness. Here you can see as I zoom
in all the way up the lines, osteo first shop for a really
nice and I really liked the flat coloring style of this IP compared to
non factor apps. When you zoom in other way, you will start to see
pixelation with the line art. This is one advantage
of vector art. You get to see like really
precise or very sharp lines, very beautiful, flat
coloring style. The file size for vector falls. First small. You can create a lot of artworks,
many artworks, and it will not use up that much storage
capacity on your device. Being able to create vector art is one of the main
features of this app. The other feature
that are really like is this ad has an
infinite canvas. This illustration
that I have here is actually off my neighborhood. And if I want to, I can continue to draw
on and on and on. Because there is no limit
to the size of this canvas. It's an infinite canvas. And when I want
to save the file, well, it's really safe, but if I want to export the
fall for sharing online, I can just zoom into
whatever portion that I want to take a screenshot
and share it online. Now, just because
this app uses vector, doesn't mean that you
cannot create textures. Actually, this app has very
good textured brushes. This is a growing
off my daughter. And for this drawing I used the pencil brush and
the pastel brush. And you can see the
lovely textures create that with the brushes. And again, this is Vector ops, so I can zoom in all the way and everything will be very
sharp, very detailed. This other the three main
features of concepts. It creates vector art. It has an infinite canvas
and it has a lovely texture. Brushes.
4. User Interface: Let me introduce you to the
user interface or concepts. This is how the UI
looks on Android. It's going to look rather
similar on Windows. This is the gallery page, and these are all
the artworks that I have created over the years. You can use your fingers
to zoom in and out to reduce or increase the
size of the thumbnails. There are the different projects or folders on a site here. And when you tap on
this plus button, you can create a drawing
or you can create a new project or folder. There are reason
that a plus button here for you to create a new drawing that's go into
this artwork to have a look. Here we have the gallery button. Once you press this button, it's going to go
back to the gallery. Sometimes I use that
button to save my fault. Files are saved automatically, but sometimes I
just want to make sure that it's really saved. So I press that
fall to go back to the gallery page
to see whether or not my fault is actually here. These are the tools
located on the wheel. You can assign up to IT tools, and this would include
the redo and undo button. For example, you can set
all the eight twos to become pens and just choose a different
color for each pen. You can enlarge the tool
just by zooming in. You can reduce it
by zooming out. You can move this
will around just by tapping and holding on the
will and just move it anymore. One, when you tap and hold, there will be another
pop-up box that appears. This will allow you to change the wheel into a toolbar which will appear on the
site of the tablet. In this case, I prefer to use the wheel to change the
toolbar back into a we'll just happened Hold
and drag it over to the circle icon and it will
turn back into her will. Other UI elements that are on display would be
the layers palette. Same thing you can tap
on the layers palette, tap and hold and move the
layers palette around. You can do a quick tap to
collapse the layers palette. There is the sorting mode here, which is either
manual or automatic. We have all these
different layers here for welcome that I have created. On this side. I have
seven layers here. And eyeball icon allows you to turn the visibility of
the layer on, all off. You can tap here to get into the layers options where you can select the
items on the layer. You can lock the layer,
duplicate the layer, clearly layer much delay or DHL, or you can change the
name of the layer. The slider here
allows you to adjust the transparency of the year. So I have line art on this
layer and when I reduce this to 0%, the line disappears. You can also do a quick
swipe on the Layers palette to reduce the amount of space taken up by
the Layers palette. Or if you wanted
to just tap on it to turn off the layers palette. The other UI element is
the precision palette. So under precision, you can choose to turn on or
turn off the grid. You can have snapping
or no snapping. And if you need
help drawing lines, you can choose to turn
on HDR arc order, guide the top right
corner of the display, you can see the amount
of Zoom, the rotation. This is the Import button, the Export button
and Settings button. You can reset the zoom to a 100% and the rotation to
0 degrees very easily, very quickly just by tapping on the Zoom or rotation
numbers here. So now it's at a 100% zoom. Let's take a look at the
settings under Workspace, you can change the paper
or the background, so you can choose between different textured
paper or you can choose a colored
background to draw on. I'm just going to
choose plain white. Here. You can choose to grid. You can adjust the odd
what size by default, this is set to infinity and
you can change the units. You can just leave all of
these at the PFAD values. Let's take a look
at stylus section. This is where you can adjust the pressure
sensitivity of the pen. If you are using an
active scholars that supports 2D and
pressure sensitivity, you can choose to enable or
disable tilde and pressure. The most important setting here is actually under
a finger action. By default, this
should be set to do. However, when we are drawing, we really want to
have palm rejection so that we can rest our palm on the display while we draw. Personally for me, I will
set it to Penn converse. The other very
useful functionality that you can choose
these select. Since my pen has a site button, I can assign that a shortcut
to the Cite button. In this case, I have pen Canvas, what a finger action. I'm going to choose, Select
Folder, Cite, button, think are actually
determines what's going to happen when you have your
finger on the display. So I have set it
to a pen converts. So when I use my finger
to touch the display, you can see it's set to pan the canvas to
move this around. Finger gestures are
still supported. I can zoom in and
out and rotate. For the Cite button I
have set it to select. So when I press
this button here, I can just draw a selection to select the items that
I want on my artwork. Next, let's look at the
settings under gestures. So I have all these settings
and enable so I can use my two fingers to zoom in
and out with snap to rotate. I can tap and hold. That's the amount of time
you need to tap and hold. It's not a shortcuts for
your finger actions. If you use two fingers
to tap on the display, It's going to undo. And if you use three fingers
to tap on a display, it's going to redo
and their results. So this four-fingered tap, you can look through the
different shortcuts and just assigned shortcut stood
a different finger actions. There aren't many settings
to go through, thankfully. And as you can see, the user
interface design of this app is very clear and simple
and minimal list. In the next lesson, I will show you how to
backup your artworks.
5. Backup Your Art: In this lesson, I want
to show you how you can backup your artworks
on concepts, the backup system is different on Android versus Windows OS. So let's start with the
Android version first. These are all the artworks
I have on the tablet and they are all
backed up online. But the backup system is
not turned on by default. So to turn on the backup system, just go into the gallery pitch and tap on the Settings button. The Android version of concepts users google
Drive to backup your fall. This means you will need to have a go drive in order to
back up your files. So you just have to
sign into your account and turn on backup
to Google Drive. Now, there is something very important here under
the instructions. Says that the app is going
to backup your fall. However, the backup doesn't sync your drawings
across devices. So what that instruction means is oil falls here are backed up. However, if you have another Android device and
other Android tablet or phone, or the artworks here
will not be sink to the other Android device. If you lose your tablet
or your tablet is damage. All these files are still
available on Google Drive. You can just import them
back into your new tablet. You can tell your artworks
are backed up when there is a little cloud icon just
below your artwork. Now let's talk about
how we can back up your artworks with
concepts on Windows. To back up your
files on Windows, you will have to rely on backup services or solutions that are available on Windows. Google Drive is one of them. Personally, I use
Microsoft OneDrive because it also backs
up my whole computer, not just a files with concepts. Same thing. Let's go into the
settings and have a look. So currently I am saving
all my concepts at works under OneDrive
folder directory. This is an online folder. So if I go to one
drives website, I will be able to assess
those files as well. If you are using Google Drive to backup your Windows computer, you can set the gallery
folder location to your Google Drive. The backup system on Windows is better compared to Android. With Android backup,
there is only backup. There is no thinking
across multiple devices. However, with
Windows when you use Google Drive or when you
use Microsoft OneDrive, there is backup and there is sinking of your artworks across multiple devices that are also using the same
backup system, regardless of whether
you are using concepts on Android
or on Windows, just make sure you set up your backup system before
you start drawing.
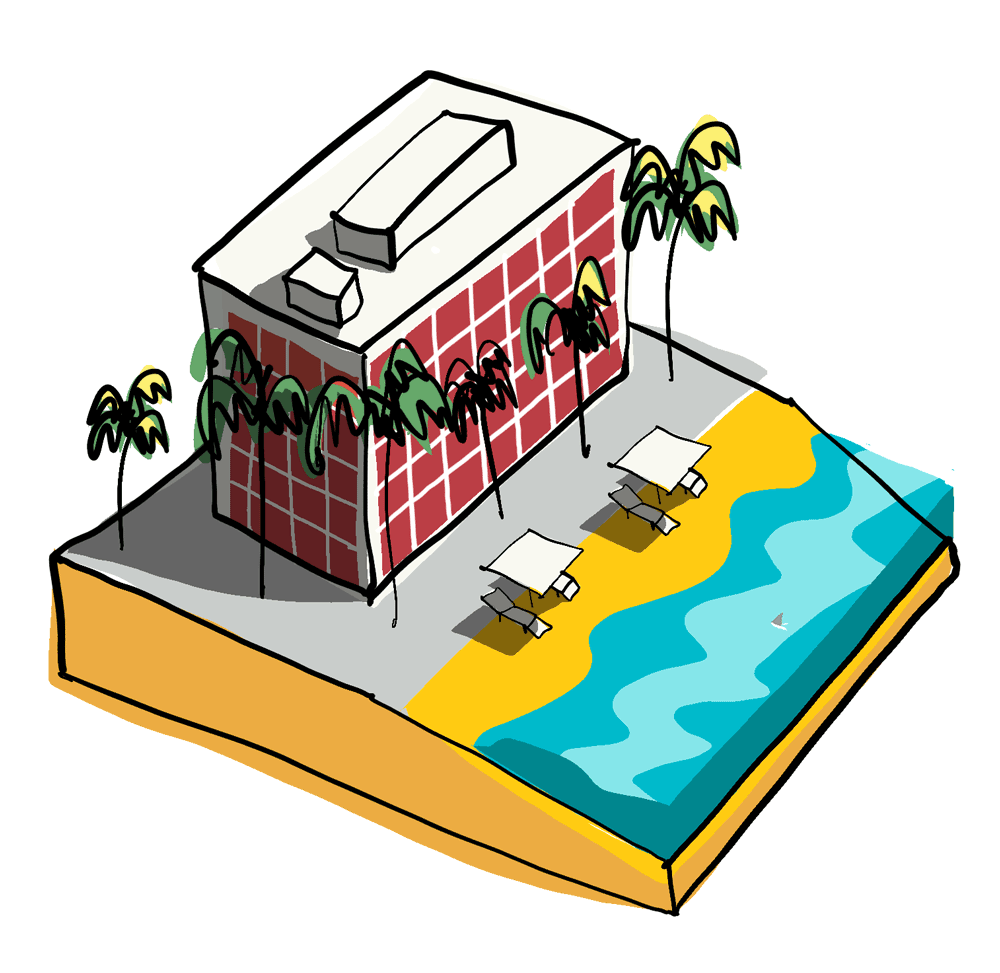
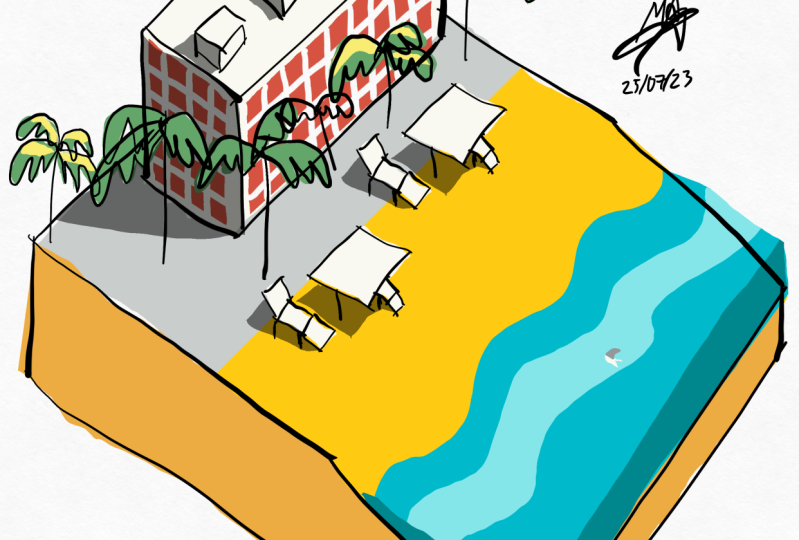
6. Let's Draw: Let's grow. Let's use the pen tool to draw
a rectangular block here, this will represent the hotel. That's move this slightly
up and draw the cutaway. We have a very simple drawing, a very geometric drawing. Just to get you started. Let's draw a palm trees. The palm trees are overlapping. The hotel behind we have
another palm tree here. Maybe a shot one here. Next, I'm going to color it. To color it, I'm going
to use the fill tool. Just tap on Monday or
Tuesday or choose Fill. If the setting is
set to automatic, which is the fought. Each time you select a tool, a layer will be created
for debt tools. So for example, when I
selected the few tool, a few layer was created. If I select the pencil tool, notice how the pencil
layer is selected. And if I select a few two again, the LEA will automatically
switch to the Field tool. And if I select the Pen tool, the layer will switch
to the pen tool. When I'm drawing with a pen, I'm drawing on the
penalty or if I'm using the feel drawing
on the fuel ear, this is quite convenient. And this is very important to know because sometimes when
you create a new layer, manually sorting, we'll
switch to manual. If this happens and
your select tool, you will not have the layer created
automatically for you. You have to switch back. Having a salting
set to automatic is very convenient and can really
speed up your workflow. Let's select a color, maybe this yellow
color for the beach. I'm using the fill tool. I'm going to just draw
a rectangle here. Now, one of the
downside of this app is it does not have
a field bucket tool. So if you want to fill an area, you have to draw the shape. Next, let's slow
that are darker, yellow color to draw
it across section. Now, if the fill tool is above
the pen tool, for example, if it looks like this, just drag it down
beneath the pen tool. Again, make sure to salting
is set to automatic. I want to extend a *****, maybe foot it up. So let me just create
another field to here. No, I have two shortcuts, one for this color and
one for this color. This will allow
you to switch very quickly between
different colors. For example, I'm using disk
green to color the leaves. And I have another green, maybe a yellow green color
some of the leaves as well. And I want to switch
back to this green. I can do so very easily. This sketch is coming along
quite nicely. Lattes. I have a gray wall
grown that's neutral. That's for all this pot here. And notice as I draw, it covers the leaves because I'm painting on
top of the leaves. One of the downsides of
this app is there is no way for you to quickly move this gray
beneath the leaves. So the mall tedious way
is to create a new layer. Like what I've just done. This layer is for
the for the ground, for the concrete
ground, just tap, move this layer beneath. Use the selection tool here. There is no selection tool, just tap on it and choose
the selection tool. Remember earlier you can go into this setting distalless here to set the selection
tool Cite button. I'm going to use
the selection tool to select this, ground, the concrete and drag it onto this layer which
has beneath now in the gray shape is
on its own layer. And notice the assaulting has switched from
automatic to manual. Now we have the gray
beneath the trees. Next, I want to color
the building with white. So I'm going to tap on this
color wheel here and select, let's not have
white, Let's have 0. Now when I am coloring it, I'm coloring it on the
layer with the gray shape. This is going to be on
top of the gray shape. Next, I wanted to change this to blue because I want to
maybe draw the windows. I'm going to draw
the windows here. And I'm going to draw
the windows here.
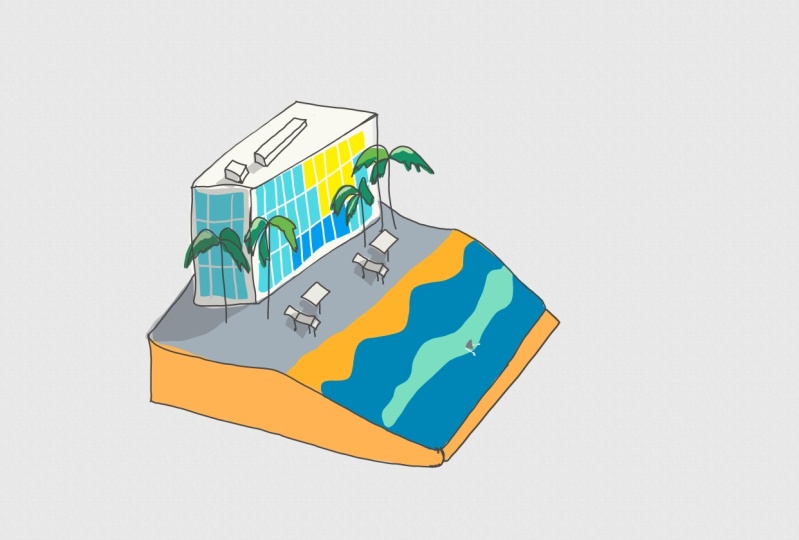
7. Erasing and Masking: Next, let's create
smaller windows and all this big
blue shape here, I will show you how to use the eraser and a
hot mosque tool. Let's select the hot mosque and select a weird
that you want, preferably one we've inlines. Let's just you find this
into smaller sections. It may look like I am drawing white lines or maybe I
am erasing the blue, but actually I'm applying
masking over the blue. Notice as I draw. I did not erase
the trees because the trees are on its
separate the year. Alright, so this was raised all created with
the hot Moscow T2. For the window here I will
be using the eraser tool. Let's use slice. Slice is the eraser too. I wanted to have this
at five points as well. That's urease slice. What happened there? It didn't work. If you find that you are you raising your line
art or auto colors, make sure to check that you are erasing onto correct layer. And options here is set
to the active layer, which means you are erasing on the active layer
to currently, instead of all the
layers that you raise. The difference between
the eraser tool and hot Moscow T2 is eraser tool. You are actually creating
separate shapes. You're slicing the shift
who create smaller shapes. Let's say I wanted to change the color of the windows here. And that's just
select the Windows. That's the selection tool. There are three options
for the selection tool. That was the color picker, the Lasso tool, and
the item picker. So make sure you
choose the Lasso tool and make sure you are selecting items on the current layer and change it to the
active layer here. If you find out
you are selecting the trees and also the line art, just make sure you are
when you're selecting on the active layer that's
selected windows here and change it to
a different color. Maybe let's change it to a rate. Notice what happened. I also selected the concrete on
the ground, so that's undo. Let's use two fingers to undo. Just tap. I need to lock the
concrete first, select a concrete
audit ground, lock it. Now select the Windows. Notice IF was selected. But I need to lock
the building as well. So lock this as well and select. These are some of the
downsides with concepts. There are all limited
selection twos. You really have to know
what you are working with. But all this will become second nature as you
get more practice, select the Windows and change
it to some other color. Let's change it to rate. To change all the windows, you have to select
all the windows because all these are different. Pots has changed this
to a rate as well. For this area here,
for the windows here, this was created with
the masking tool, which is to say that
this blue shape here is actually
still in one shape. If I select the blue shape here, notice how this is a big shape. It's not divided
into smaller shapes. So if I change the color here, I can change it very easily. Instead of selecting the windows one-by-one using the lasso tool.
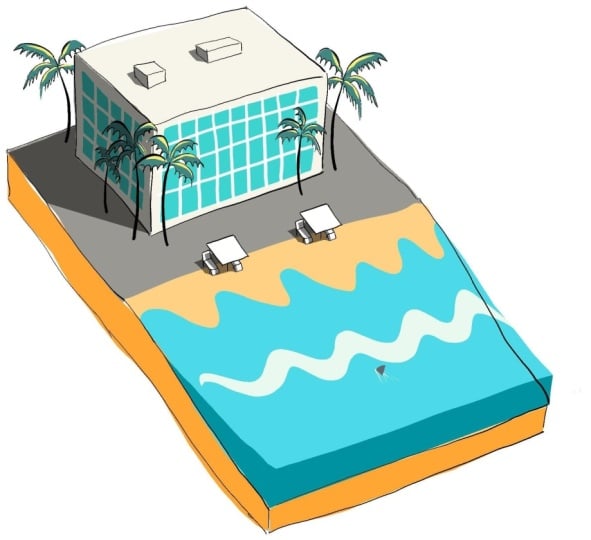
8. Digital Art Workflow: When it comes to the
digital workflow, there are many ways to
achieve the same result. Whether you want to use
the eraser on a hot mask will depend on which you prefer. Let's add more details
to the sketch. I'm going to choose the
pen tool again to draw something on top
of the building. Be cost of salting
is set to manual. I'm actually drawing on
the color, the year. So if I turn off
the color layer, this color layer, notice how
they line up disappear soul. Let me just undo this and set my salting
back to automatic. Now when I select the Pen tool, I will draw on the pen later. When I select the fill tool, I will draw on the fuel layer. Let's select the pen tool to
draw on the penalty year. Now I feel like I want to add some water on the beach slow. I select the field who
switch to a different color. And now I feel like I wanted
to draw more details, more line art on the top. So let's change the
pen tool again. I'm switched automatically
to depend too. So this is quite convenient. Using the automatic sorting
can be quite convenient. I was wanted to throw
some trees here. Now I'm going to switch
back to painting the water. So I use this FIO2. I want to maybe have
lighter water here. That's drawl, something darker just to
create the cross section. Okay, so we have some nice cross-section
going on for this area here, I want to use the slides to erase just to give it this
three-dimensional loop. Now let's go back to drawing by selecting the pen
tool and zoom in. Let's have some
chairs on the beach. I need to color this. Let's make this white. So I'm going to again
use the fuel tool. As mentioned, that there
is no field bucket, so I have to draw
all these shapes. Another limitation
of concepts is there is no multiply mode. So to add shadows, what I have to do is
create a new layer. I'm going to call
this layer Shadows. Not having the
multiply mode is quite unfortunate because the
multiply mode is pretty convenient to walk around
to create shadows is this. Choose the fill tool. Select black, set
the opacity to 50%, and just paint onto
shadow layers. So let's see how this looks. Let's have to sunlight
coming from this direction. Downside is at 2D shape. When you do that, you can see all these overlapping shapes. So if you want to draw
are very nice shadow, you have to draw it with
one continuous shape so that you won't have
any overlapping elements. It is look slightly better. That's erase some of the
shadows here because the leaves are lit by sunlight. So I have that you raise their selected I can just
raised his potty here. You have to erase a
continuous shape, for example, you cannot just erase in the middle
of the shadow. You have to erase from
outside into the shadow. This sketch is almost done. I just want to be at mall
chairs on the beach. I'm going to use the
selection tool to select mine OT for the chairs and it'll sort of
shadows and also the colors. Let's see what happens when I use the Lasso tool to select. Move this around. I'm only
selecting the shadow layer. So this means I have to set the lasso to
select all the layers. And let's see what
happens when I do that. Oops, I'm selecting
the line art, the shadows and also the beach. So I need to lock
the pitch down. Let's select Auto
things that you. Don't want to select and
lock it and try again. All right, so that's
smoothness around. Okay, so now I have to
correct things selected. Just tap on this
duplicate button here and move it around. Before I do that, maybe I wanted to
have the chairs on its own layer because
maybe I don't want to have chairs
at this pitch. So what I can do is I can create a new layer and drag this
selection onto that layer. Oh, actually when you select your items and
create a new layer, it's automatically pushed
onto that new layer. Now when you tap on the eyeball, you can see the
chair disappears. Another downside of
this app is there is no grouping functionality. Most specifically, there's
no grouping functionality for the Android and
Windows version of this. You do have to grouping
functionality with. The workaround to
group is to place all those elements into
its own separate layer. Now that I have the
chairs on its own layer, I want to duplicate this. I can use the lasso
tool, select the chairs. The other way to do
it is to just tap on this layer and use
the selection tool here, which will select all
the items on the layer, in which case there's only
this little item here. So it will just
select that duplicate and move this to
here and tap away. Now if you want to
do the same thing again and press tap on deselect, it will now select both items. So if you want to just select unshare now you have
to use the lasso tool. Next, I want to make this
beach small, dangerous. I'm going to draw a
shock in the water. So to do that, I'm going
to add a new layer. I'm going to select the fill to change the color to
it is gray color. I'm going to zoom in
here all the way. This is a vector app. You can zoom in all the way and everything will still
look very sharp. For a nice shot here. I just wanted to add the
fin of the shock that's at some white site. This looks quite nice. It looks very dangerous. Let's rename the
layer, call it shock. Now one quick way to
see you-all growing is to double-tap on
this Zoom button here. And it will go back to 100%. If you have your OT like
this, it's rotated. You can double-tap on the
rotation button here. And it will again
automatically rotate it to 0 degrees and tap here
and double-tap here. It will go back to 100% zoom. Next, I feel like maybe I
shoot at some sin here. I can just maybe just select the same
color as the earlier. Unfortunately, for the
Android version of concepts, there is no recently
used colors, so you have to remember the
color that you used earlier. So let me just draw
this part here. And maybe here as well, make sure you are coloring
on the correct layer. So I'm not coloring onto
correctly or I have to undo and go back to
the field later. Now I want to erase
this part here, so I've just selected the
eraser or the slice tool, and notice nothing happens. That's because the colors
were locked earlier. In order to erase
the lock layers, I have to ignore the lock. Just type on this option
here to ignore the lock. And now I can erase
the lobbed toddlers. Currently there is a mixture of locked and unlocked items. So if you want to
unlock everything, you have to select everything
and unlock to do that, just use the selection tool, select lasso, and make sure
to include locked layer. This will allow you to select everything including
locked layers. And type on this lock
button here to unlock. Now odd items on locked. This sketch is done. The last thing I want
to do is to create an empty layer right at the
top of all these leaders. Let's drag this all
the way to the top. I shall just name this blank. I do this to protect
all the layers beneath. So for example, if I open
this fall into future, I accidentally introduce
some straight strokes here. I can just go to
the topmost layer, select everything on the
topmost layer and delete them. So this is a protective layer to protect all the
elements beneath. Oh, I wasn't wanted to show
you the transform tool. Let's select this
pump tree here using the selection tool
and duplicate it. So that's moved as palm tree all the way
to the left side. And you can scale this down. If you use one of the four corners to
scale the pump tree, notice the scaling
is not proportional. So let's undo. To scale this proportionality, just use your fingers. Accidentally selected
something that's just SCOTUS slightly smaller, and move it into position.
9. Goodbye: We have come to the
end of the course. I hope you have
enjoyed the course. Before you go. I just want
to say a few more things. I highly recommend you check out all the brushes that
are available within concepts because each brush has its own characteristics
and style. And you can mix and match
different brushes to create your own style and to make your art look
more interesting. How far you want to take your
art really depends on you. In this course, we have just drawn something
really simple, but we've concepts,
you can actually draw them really detailed
illustrations. Finally, to live
this cause a review to help other students know whether or not this
course is helpful. Alright, thanks for
following along with me. See you in the next course. Bye.
 Teoh Yi Chie, Sketcher, watercolour lover