Transcripts
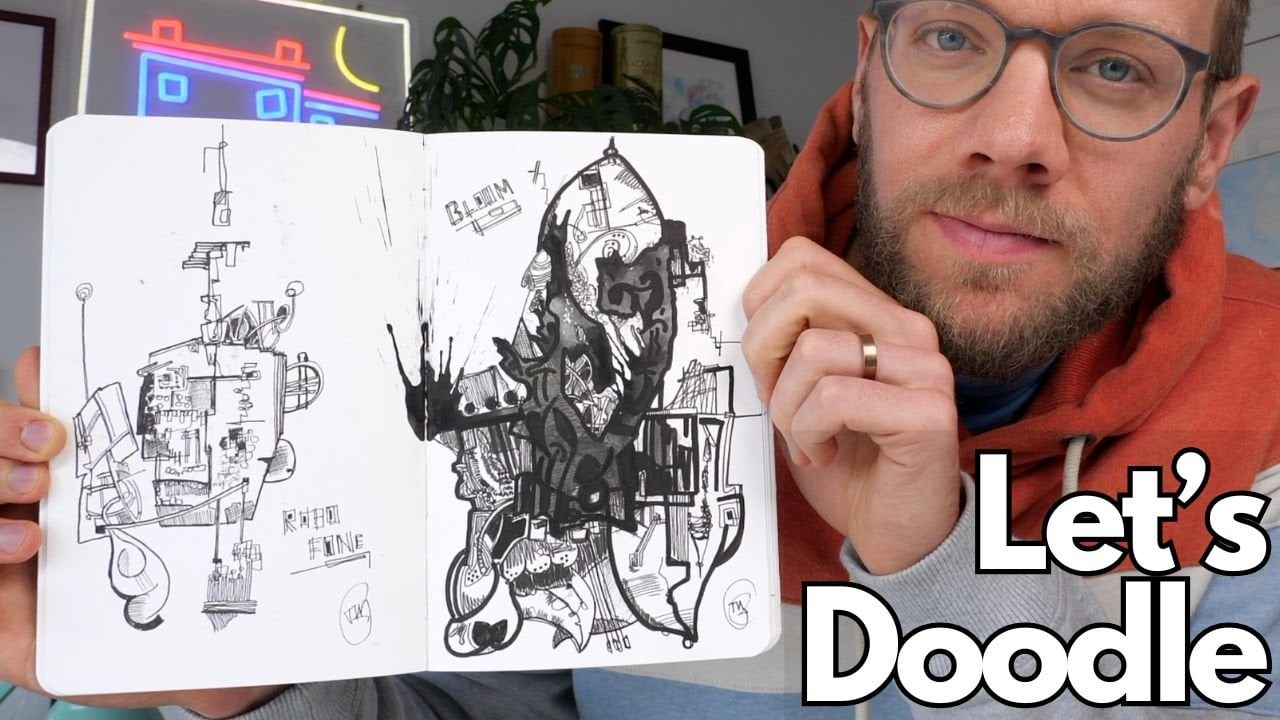
1. Introduction: Today, we are making a splash
and drawing what we see. The idea is simple, but the output, what you can produce from it, is
quite fantastic. We will be using some simple
color making materials. My favorite is watercolor. But you might also use alcohol markers or
watercolor pencils. Well, then use simple
techniques to find an outline, grab some details
and some textures. Finish it off with a
little bit of shadow. To create anything
from amazing beasts, fantastical landscapes or funky little
robots on your page. I'll take you through every
step of my creative process, as well as giving you ideas
and techniques to build on in your own time and create
more and different ideas. Beyond just creating
some really cool, really funky little
sketches today, these techniques will
actually teach you a lot of control of your contour,
creating interesting lines, developing shape and shadow, as well as layering of colors, vital techniques to take further into different
forms of art, illustration, and even fine art. My name is Toby, known as Toby Sketch Loos
across the Internet. And I love using
creative techniques like this to enjoy myself,
practice my art, improve my skills,
but also let loose, have a bit of fun and just let my creative ideas
unfold on the page. Now, without further
ado, let's get started. This is such a
delightfully simple way to explore our creative minds
to explore our materials. I can't wait to get stuck in to the endless possibilities.
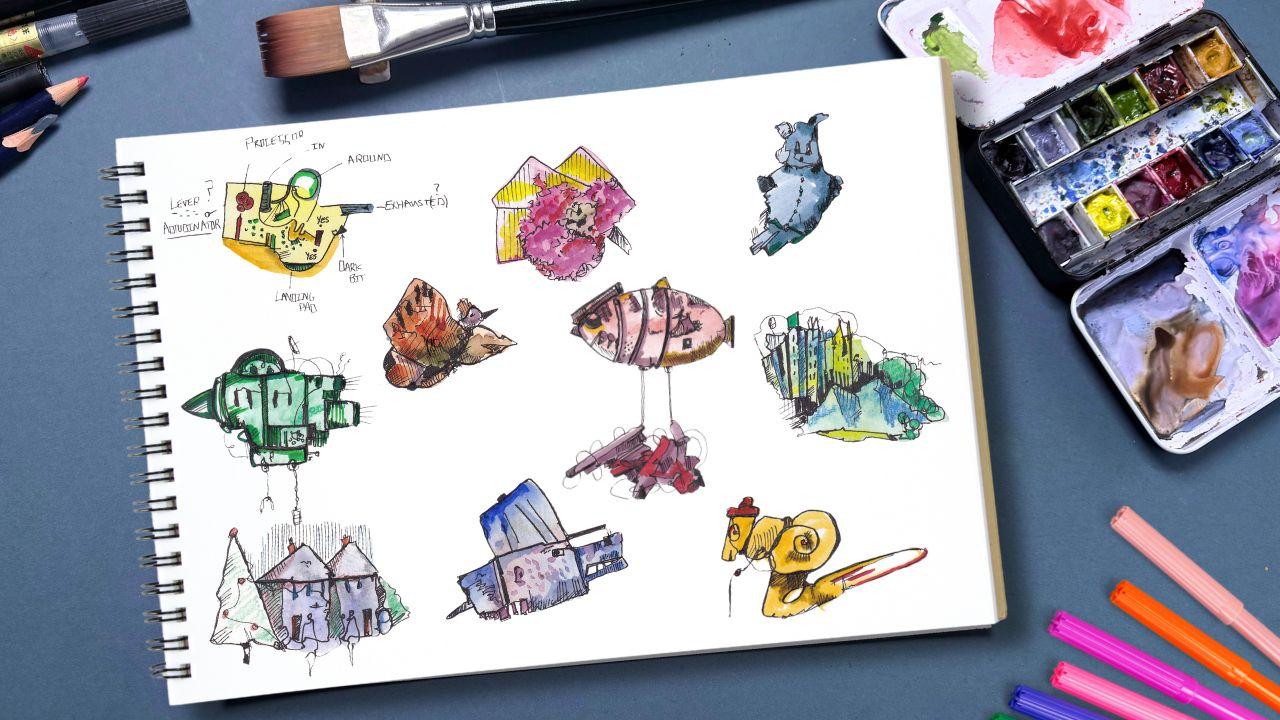
2. Project and supplies: Thanks for joining
me in this class. What I want to explain
in this short video are the supplies that
I personally am using, as well as ideas that
you might want to use. And then we'll also just
discuss the project, the aim of this class. So firstly, in
terms of supplies, I've got a sketchbook. So it's just a simple sketchbook with
watercolor paper in. This one's quite large.
It's 8 " by 10 ". I'm using watercolor
paper in this because I've got watercolors, which are going to
form my little splash a bit of color and
what colors are here. And really any set of watercolors would be
fantastic for this class. Other options do exist. So other options might be
using watercolor pencils or even using alcohol markers
or any kind of color where you can just quickly
make marks without too much intention to enable us to come
back with our pen. Now, for me, I'm using one of
the best options for this, which is a fine liner. Fine liners typically
are permanent, this one says waterproof, this one says archival ink. That means I'm
going to be able to pop some ink on and continue the process by applying a bit more color or
water on top later on. Other options, of course, might include a
fountain pen with some waterproof ink in or a
ballpoint or even a pencil. Anything where you can add simple marks will be plenty good enough. That's
what we're going to do. That is the project to create some splashes on the
page, draw some lines, and suddenly on the page
will emerge creatures or buildings or landscapes
or whatever your brain, your mind your creativity
comes up with.
3. Techniques: With this class,
most of the ideas the techniques are
quite intuitive, and we'll talk about
them as we move through the different
layers of the class, the different parts
of the process. I just wanted to
mention a couple of simple ideas which will be useful in applying ink textures, which I think is the most
scary part if there's a scary part of this class to producing
your finished works. So the first thing
I want to just show you is a simple
idea of hatching. Hatching can be linear. It can be cross
hatching and it can be more ovular circular
or curved hatching. We use different aspects of this in different
splashes today. But just remember,
creating gentle, simple linear marks can be a really effective way
of creating shadow, which can create a lot of
shape within our scene. For example, turning
two squares into a cube just because one of
them is hatched and in shadow. The next technique I just
wanted to mention is the idea of repetitive shapes and
linking those shapes. If we draw a series of squares, if we draw a series of circles, if we link them up
either by overlapping or by conjoining lines, then we end up with something which is
remarkably interesting. If we take that a
step further and we've actually applied
it to our splash, as we will do later, then actually these can
start to suggest details or features of a creature or
an object or landscape, whatever it happens to be. Finally, I just wanted
to mention the idea of very simple
textures to our lines. As we draw the contours
to our objects, the contours to our splashes, I'll be following
the watercolor, but also adding in
random touches, adding in little loops, making sure that line
wobbles and crumples. One of the things that I'll
do a lot is adding simple, strong vertical lines,
almost like hatching, but almost implying a
crease or a crevass or something built
into the body, the object that we are
creating from our splash. These are just
really simple ideas and a really simple overview, and we'll cover all of them in far more detail through
the rest of this class.
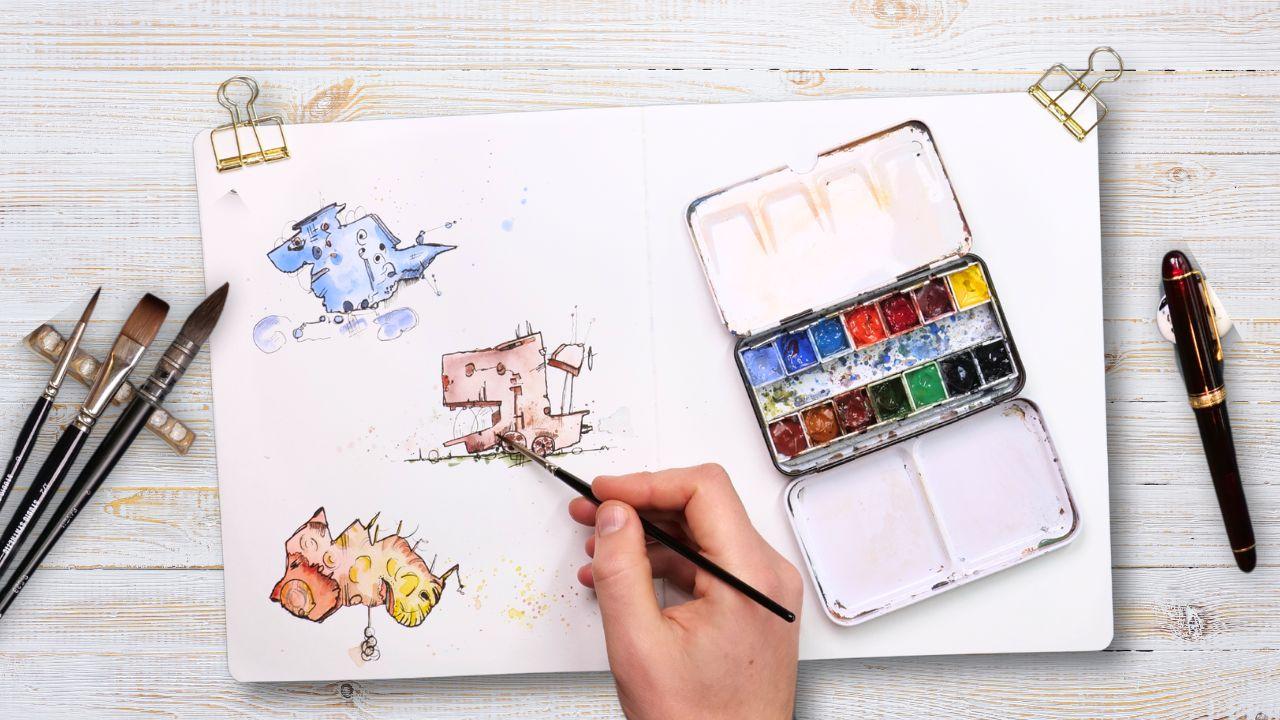
4. Making a splash: Now, the first step that we're going to take in our drop we see challenge is to
create some splashes. And here the idea is
create some splashes, some marks, without intention. I'm going to show you a few ways to do that with watercolor. But you can also
do the same thing with marker pens or with pencil. The idea without intention means do not focus on the shape. Do not focus on what's
happening on the page. Just great, quick, simple, blocky or flowing marks, taking a few seconds over it. And then move on. So, the ways that we could approach
this in watercolor. Include wet on dry and wet on wet watercolor
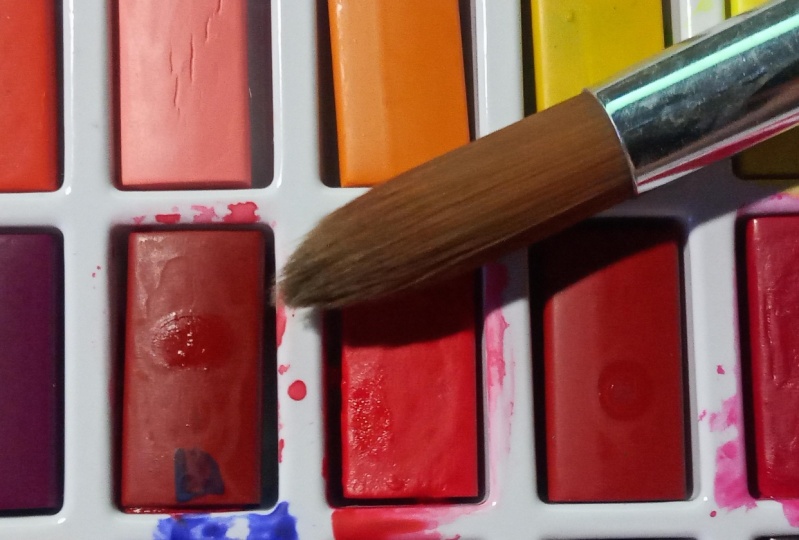
painting amongst, I'm sure, many others. The key is to have a nice
clean palette and a big brush. Here's my 1 " flat brush. Use plenty of water
to mix up your color, but also allow yourself to have a bit of fun just dipping in a bit of sort of pure
pigment into that splash. Notice, as I make my mark, I'm not really
painting anything. I'm just making a few
marks and then moving on. We'll do a different
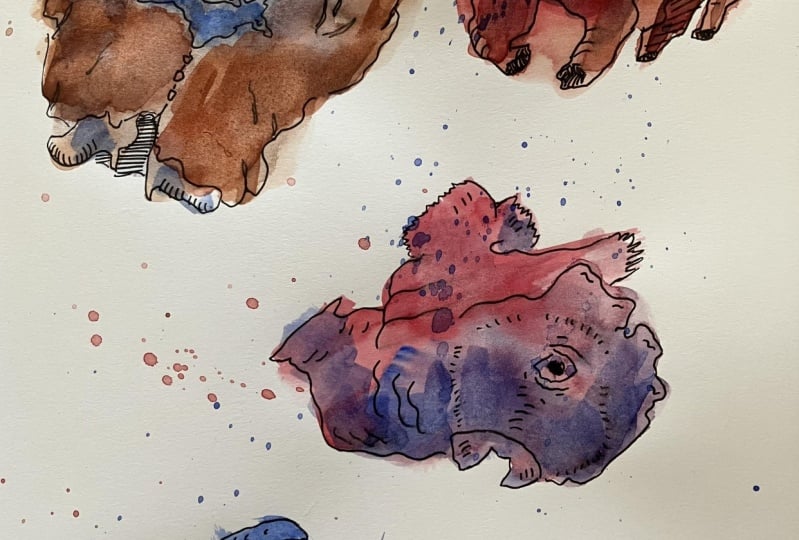
thing. That first was wet paint on a dry page. This is wet on wet wet
paint on a wet page. I'm dropping in some lunar earth and a little bit
of an Indian red. Now, these are
interesting colors because they're very granular. The pigments leave a
fascinating texture on the page, which
we'll see later. And the wet on wet process lets me push and move
the pigment around, pushing and moving the water. As this dries, it will leave something really
interesting on the page. But not least, I'll just
try the first, again, a bit of wet paint on dry paper. And now try adding
in another color. So with my red comes a
little bit of yellow, and I can make little spikes and funny little shapes
coming out of it, and perhaps they'll become
something perhaps they won't. We'll see. To fill up my page, why not do a few splashes? Using the same colours that
I've been using before. These splashes, again, might
just decorate our page, but they might be something our creativity can
latch onto as we go through the other stages of this fun and
creative process. Like that, leave
your page to dry, and we'll jump back
into the next lesson where we will discover the
outlines of our scene.
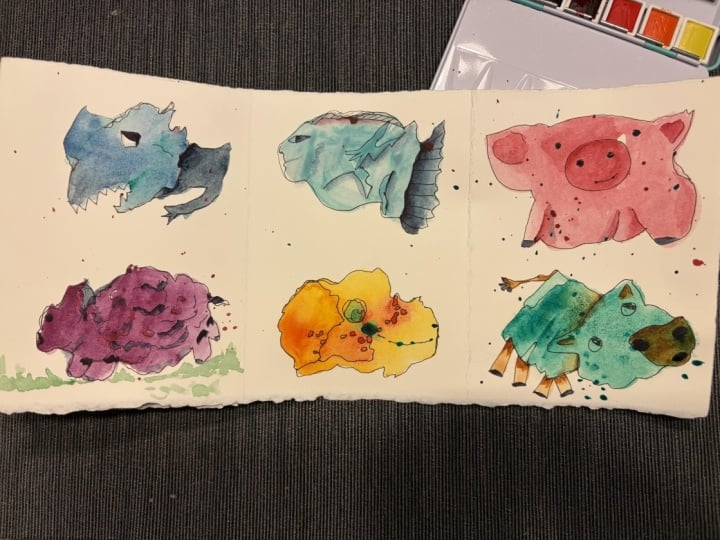
5. Contours: Time now to bring our
splashes to life. Our first ink marks are
going to go on the page. It's really important
you've left enough time for your page
to be completely dry. Otherwise, that ink
will spread and splurge in unexpected ways. With our dry page, we're going to very
slowly find the contour, the outline of our splash. It may not immediately become apparent what the splash is, or you may have so many ideas that it's hard to focus on one. That's why we go slowly,
we take our time, and we just allow the process to unfold
rather than trying to force a specific object or a specific idea
onto our page. Before we even start drawing, let's look at the splashes. You can see within and around the splashes,
there are lines. There are clear
granular textures in these funny colors
and even little blooms. Well, we've got these
speculating marks, the splashes. Everything is giving us an idea of an outline
that's a possibility. So just take a little
while to look at your own splashes and see
what lines you start to see. Had a good look, I'm
picking up my fine liner, and this is a 0.2
millimeter fine liner. In other words, a
very fine fine liner. And I'm going to slowly
go round this outline, finding the little edges, the little sort of bits and
bobs which come along with those edges and
inventing some of my own little cracks and
crevices I can elaborate on. I can add little linking lines between the outline and
some of my splashes. But I don't need to capture all of the splashes, some of them. As I'm doing this, I'm just letting my mind sort
of wander and start to imagine what it is that might
be appearing on my page. Not what's definitely there,
but what might be there. We might also take
this time when there's obvious internal lines, just to start bringing
those out, as well. And if you like something, if you think something's
working well, I really like, for example, how these connected splashes
splatters are working, then have another play
and extend that idea. Before moving on
to the next one. And here we have
something different, more angular, more square. So my first thought
is to start with more sort of strongly
geometric lines, replicating in my mind and
in my quality of line, hopefully, a little bit of what's happening
within the splash. And then we get down
to the bottom right, and it's actually
more soft and swirly. So I'll add little
swells in just think in terms of both the
outline that you're creating, but also the sense of the
outline that you feel. Here, there's a very
soft bit of water, which I'm just linking. You can't see it very
easily on the camera, but if you squint, you can probably make out some
of the textures there. And at the top, I like the
idea what's happened in that first splash is we
had kind of an eye emerge, and my brains decided I'm going to find an eye
in this one, as well. What can be fun, even
in abstract art is to find something which links
all of your ideas on a page. So with that in mind, perhaps what I'm starting to see as I draw around the kind of
internal edges of this splash, what I'm starting to
see is some kind of weird creatures emerging
from my splashes. And here we've
almost got a nose at the very left hand tip and maybe a tail or a body of
something off to the right. Now, these ideas don't have
to stick with me for the rest of fulfilling this
splash challenge. But it's a nice way to start
just opening up your mind. Allow these ideas to creep
in and see what happens. Before you know it, your
outline will be done. It's time to pop the pen down, take a little step back and take a short break before we jump into
the next lesson.
6. Details and textures: This is the stage where we add little textures with our pen, little marks and
suggestions of detail. And it's where
those initial ideas start to really take
shape on our page. Now, I said at the end, take a step back, take
a little break. And that doesn't need to
be a half hour break, but just a couple more minutes to look at what's
happening on the page because this is the point where ideas will
start to develop. Literally stepping back from
the page can help you see the bigger picture and see what might be an option
for the next stage. This is also likely to
be the longest stage. Let's see how I approach this by applying
different ideas, different marks to my splashes. Lots of possibilities now. And what I'm going to suggest
is just start where you see the biggest possibility.
You have the most ideas. So here, bear with it, but I see some kind of T
rex head with some wheels, and that is enough of a weird idea to start
moving forward with. So I'm going to use my pen. I'm going to reinforce
certain lines, and I'm going to apply simple, simple textures, little dots, blocking in areas,
circles, hatching. All of these are simple ideas. Other things which
will work well at this stage are little
connecting lines. These give it a steam
punk kind of feel. Those connecting lines
feel perhaps like wires connecting
something of a machine. So we end up with this monster, which is also a
bit of a machine. And from that, we can
then add antennas, satellite dishes,
simple small marks, which slowly, slowly
add something. We can also start thinking
here about light and dark. This bit of hatching and these black lines that
I'm adding perhaps give this funny object at the back of our T rex head a sense
of a free D shape. And within these things
which are perhaps wheels, we can start imagining spokes
and how to block in areas of that as well to create a more free D sense
of our object. And you can continue to
allow your mind to wander. Perhaps off the
back of our object, our robot, there's an exhaust. And when you're not
sure where to go, when you're not certain
what to add next, think about simple
things which work, simple light lines which might
give you clear direction. And perhaps you agree
that these simple little linear marks a little
bit like hatching, just start to add some
kind of character to our weird machine,
or weird animal. Other things which
will work include repetitive and linked up shapes. So I've got some circles
linked together, followed by some squares,
linked together, followed by more of my
simple repetitive lines. Try not to overdo things. It's better to dip
and dab around, do a little bit here,
a little bit there, than to suddenly add tons
of ink onto the page and be uncertain or find
your creativity blocked because
you've gone too far. Instead, again, I find myself back at these wheels, having
moved away from them, having added a few
more bits elsewhere, and with a little bit more to
say about them as a result. Your lines needn't be
confined within the shape, perhaps my exhaust needs a little cloud of smoke
or steam behind it. Perhaps my whole
funny robot tractor needs some ground
to be sat upon. So implying little grass
like textures underneath it is also really fun use of our simple ideas
for simple lines. Find yourself running
out of ideas, that's great. Just move on. We've got a few
splashes to play with, so we can jump, perhaps to this top splash. Now that we have this idea
of these robot animals, then I can make sure
the first thing I do is to bring out the important
concepts for that, blocking in a little bit of the eye to give it some shape, applying repetitive looping
marks to suggest maybe wires or other odd constructs attached to our robot animals. These are all simple things,
simple little techniques, simple little marks, which just create a little bit of fun. You can see the same ideas being used here as on my previous one, just with a little bit
of a different emphasis. Here I'm getting these
looping marks to criss cross over and
under one another, still using when I'm a little
uncertain of where to go, still using those
simple vertical marks. In this particular splash, I'm making use of contrast
much more readily. And when I say contrast, what I mean is using
these deep black areas, blocking in areas of the splash, just little pockets with black ink to create
something that feels a bit more dynamic. Don't forget that little step back is always really important. And you might find yourself just working out tiny
areas to touch up, tiny areas to add
little areas of texture to that you wouldn't have
noticed if you stayed stuck in. Other thing, don't
forget the outside of your splash is
also a place where you might find little
areas to pop your ink. Here, I want the idea of perhaps this is something
which is flying. Instead of previously being
on all those grassy textures, maybe these are little
puffs of smoke, maybe these are little puffs
of cloud that this object, this animal, this
robot is flying above. Not something we obviously
did with our last splash, but creating a firm outline and creating shadows
around and under the outline can also be a
really good way to just provide a bit more certainty to the ideas when you're
feeling confident. And by applying it
again, connecting, looping simple lines, keeping them really
light and gentle. Just add a clever
little touch of connectivity and
a real suggestion of complexity without it, really, actually being a very difficult
thing to do at all. So hopefully, you can
see from this clash we've created something
very different, but we've done all
the same ideas, simple repetitive shapes, simple bits of linear marks, simple bits of blocking
in contrast and hatching which can
only mean it's time to move on to
splash number three. And here, I'm starting with something the same
but different. We have those little
rod like connections, and we've been using looping
wires in other splashes. And here I thought,
why didn't we sort of abstract that idea a little bit and have these little wires flick off from
around those rods? Then proceed with the
same old typical ideas. Finding in this case,
we mentioned already, perhaps there's a no perhaps
blocking in that notes, making it a feature is
something useful to do, and that might help us
identify if this creature, this object has an eye
or not, like the others? Is that going to be
the unifying feature? We don't need to force it.
Let's find out and see. Now, the other thing
that we been doing with our gentle hatching marks and
all of previous splashes, is treating them as
fairly square objects. The marks have been quite rigid, quite up and down, quite vertical or horizontal. They haven't had a huge
amount of bend to them. And something I thought would be interesting to try out would be seeing if we could
make something more looping and more
flowing out of this. So you can see
already my marks have started creating a
bit more of a loop. We've got these funny little
balls hanging underneath. We've got this little fold, which has got loop
crossing over marks. And then my hatching here is all done with a little a
flick a little curve, trying to capture the idea of the contour of this
object, this creature, having a three D form which is more natural rather than
square rather than blocky. By giving our hatching
marks a little curve, it implies something
more spherical or soft or cloud like. That's the idea I'm
trying to get here. But it's still rooted
in the same concepts. You can see still applying a bit of contrast here and there. Moving around much
of the contour of this creature to give those
same looping contour marks. Then I thought, we've got this circle in the
middle of their face. I don't know what that is. I don't even know if
it's their face yet. But what if we
apply the same kind of funny contour marks in there? Maybe trying to create a vortex or something
along those lines. Who knows? There you go. Time, of course,
to add a simple I. As the ideas develop, you become more confident in
the direction you're taking, more confident in
what your object or your splash is
going to become. And you can start making
more certain additions. On top, back to my old
vertical bits of hatching, and that seems to me to fit that more angulated contour
that we have at the top. But then in the middle, going back to my nice
little swirly lines. And then it's time to
take a little step back again and wait
for the next step.
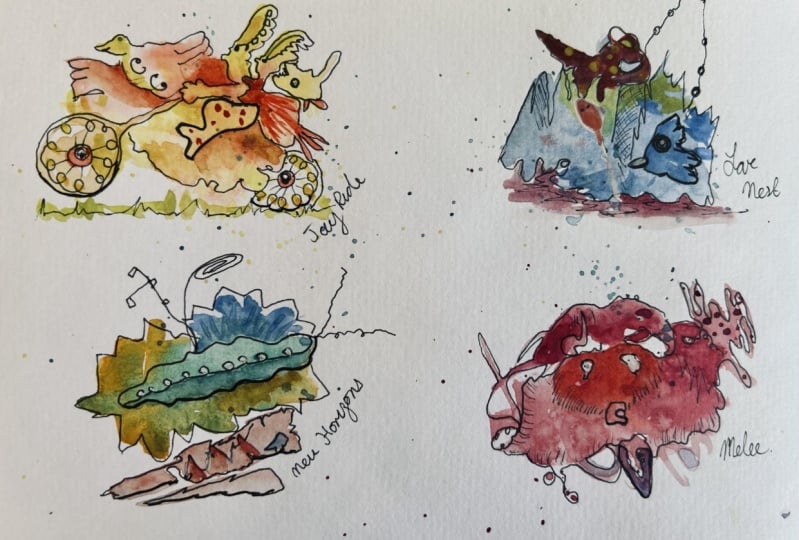
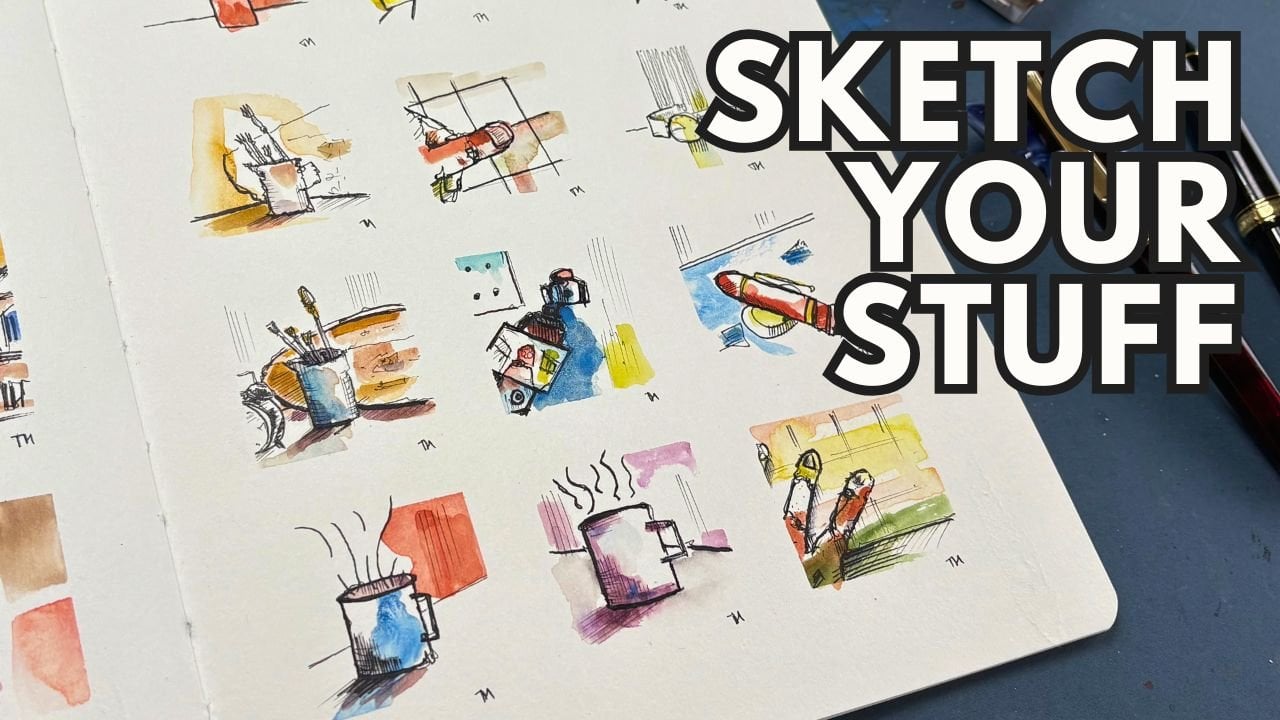
7. Layers of colour: Now it is time for a bit of color again so we
can grab our color, whether that's the same
colors we used before, and I love putting a bit of watercolor on top of watercolor. I think watercolor layering is one of the most
pleasing things to do. Or whether you want
to go mixed media, adding pencil on top of color, adding marker pen
on top of pencil. That's also a wonderful thing
to explore on this stage. The idea is to just add a few bolder touches to suggest shadow and
to suggest shape. So let's look at
that in practice and see what it is
we can achieve. The idea here isn't to do
our big unintentional marks. This time we're being quite intentional and quite limited. So I'm going to put my
colors nice and close, and I'm using a
much smaller brush a size six round
brush this time. And I'm using exactly the same colors to start
with at least. This is some cobalt blue. And you can see by layering that blue on the previous blue, we certainly but definitely
increase the value of it, we increase the darkness of it. Then I thought, I'll add in an extra color a little bit of lavender here to
give just a gentle, different feel to
the splash a gentle, different feel to the
layering of the colors, something a little
bit more complicated. Mostly, at least initially, mostly what I'm imagining
here are shadows. Where would the shadows be on our little object? Is its form. And this one feels
sort of spherical with maybe some hard angles. Maybe some of these other shapes overlap and have deep
shadows underneath them. But I'm just slowly going round, imagining little places
that I might pop shadow. If I want something much darker, then I can use a bit of indigo, a fairly neutral, deep blue. This, I can add in maybe
the darkest shadows, maybe in places where
actually it's not a shadow. It's just that this part of our machine or our
creature is black, and I'm using a
different watercolor now to bring that out instead of just using
lots and lots of ink. And we can be very gentle
and very subtle with the amount of color that we
use in these kinds of places. Well as trying to be
a bit controlled. A little bit of randomness
also goes a long way. And then reverting back
to control and actually filling in some of those marks we added outside of our splash, being able to do something
a bit different. Here, I thought about adding an extra bit of warmth in there. I wasn't sure where to go. And then I remembered the
mantra, keep it simple. Added a few little
bits of this gold in just a couple of places to
bring out something extra, a little punch of
a different color. And then we are on
to our next one. So again, repeating the same
idea, the same process, using the same colors initially
as my original splash. I can come in and
just add shadow. We even talked about
this little object behind our TRx mobile. Having a shadow on it. And now we can bring that out, not just with the hatching,
but also with the color. Some of these shapes,
these swirls can become deeper and darker all through
layering of the colors. And actually, the layering in these colors is more
obvious, isn't it? It feels much deeper, much darker than the layering that we achieved in the blue. And that's partly now because
I'm feeling a bit braver. So I'm going for a bit more
applying deeper pigment. It's also partly the quality
of the pigments I'm using. And the amount of vision that I have for what
this object is. This one, I think,
is the most simple. It's a big square thing. So I feel really
confident coming in and applying square marks. Just like before, adding a
bit of something different. This is a little bit
of organic vermillion, a nice sort of bold red that I added in just
a couple of places. Don't forget. In this robot, we have him mobilizing
along the ground. We talked about
these grassy marks, and we can really
bring those out and things like
the steam by using appropriate colors
or in the case of the steam or these little marks coming out of his mouth, just a gentle, subtle,
neutral touch. And working in a kind of semi logical and
semi just freeway, we can then jump back in with some darker marks in
our actual robot animal and apply those with
a bit more confidence now that we've been around and added marks
everywhere else. Coming back to that
lack of intention, applying some random
some splatters, especially splatters
in a different color to just make it come to
life in a different way. Before you guessed it. Moving on. So here we already
have two colors, don't we? We used initially a bit
of red, a bit of yellow, and as a result, we've got a color splash
splatter, which has reds, oranges, yellows, and of course, the black ink and it that
means we can have a lot of fun varying what we do
with our colors with a low risk of it
going really wrong. I'm also going to use here, just some other richer reds. This is a bit of
the Indian red I've just been using in our T rex, but using that to imply
some of these shadows. Notice how I'm applying
the darker colors at the top and bottom where
we've got that hatching. Because I wanted this to
feel like a cylindrical, fluffy, cloudy puffy shape. So by applying the darker colors at the edges with the hatching, hopefully, that's sort of giving giving that
idea of shadow, whilst letting these bold
yellows sit in the middle, nice and bright and happy and a few watercolor marks to bring out some of that swirling, that vortex, as I
called it at the time. And like in our first splash, we can adapt and introduce
some really dark touches. Or dot around, come back with
some really light touches. So ddle splashes really
filling up the page behind. Because here I just
felt there was a bit of lack of
symmetry in the page. This creature in particular, had too much going
on in the front, not enough in the back. So suddenly these splatters, that element of
randomness has become a major feature of our colors, perhaps a bit like
that steam coming from the TRx robot,
the TRx mobile. These splatters are
the stimulus from the propulsion that I don't even know what to call
this creature is using, but it's what it's
using to move around. And like so, with a few
more little gentle touches, my process is almost an ent. Like with anything
else sewing art, there's always extra things you can do, little
final touches. So I want to take
you to one more lesson where we will look at exactly what those little
special touches might be.
8. Little touches: So it is time for our
final duches and here is wearing going to apply
a little bit more ink just to bring out the character, bring out the boldness
of those lines. And just perhaps add
a few more details or keep it really simple as we've been trying to do
this whole time. So for this final stage, well, really anything goes. What I'm going to be
focusing on is using a bolder fine liner this time, instead of a 0.2 millimeter, a 0.5 millimeter fine liner. And we're going to be
encountering our contours again. So going around that outline gently to just make it
feel a little bit bolder. Whilst we're doing
this, we can also find areas to make darker. We can find little areas
to add extra detail to. Result or rather the
aim of doing this is to just make things punch off the page
a little bit more. By applying a little bit
of watercolor, again, on top of our lines, we might have covered
them up a bit. We might have made
them feel a little bit more pale and
less impactful. So these extra lines are sitting on the very top of
everything that's going on. You're doing this, you
might find extra details, little marks, little hatches, little loops that you
want to add again. And that's great. Try
not to overdo things. Try not to take
what's nice, simple, clever little sketch
and make it too busy, too workmanlike, and just no longer having
that absolute magic. You might also want to
apply a bit more color. You might want to do
some more splashes, more layering, a different
colors or mixed media. Again, I fully support those
experiments and those ideas. I just suggest keep it simple. Don't overdo things and let
the initial splash shine through so that you're keeping that authenticity to the creative randomness
of this approach. But equally,
experiment, take risks, have some fun and
make some decisions. Hopefully, you can
see all I'm doing with my pen is
really simple marks, making things a bit bolder in a few places, and making sure, at least trying my best
to make sure that I don't overdo it and I
don't overwork things. So continue with your
little splashes, create some fun on the page, and I'll see you in
the next lesson.
9. Final thoughts: Two Thank you so much for
watching and for taking part. What I'd love to hear
from you is how it went. Show me your project and give me a few sentences about the
ideas that came to you. What did your
splashes represent? And also, it's always
interesting to think about the challenges that we face because there's
always challenges. And this was by no
means easy for me, although I did enjoy myself, and I did enjoy,
for the most part, encountering and jumping
over those challenges. Also, if you enjoyed yourself, please do Le review
it means the world. I really helps spread the word if this class is
good enough to be spread. Can also find me elsewhere
on the Internet. Of course, have
loads of classes on Skillshare or with
the same positive. You can do it doodling and
having a bit of fun attitude. But you can also
find in depth ink and watercolor
sketching classes on Sketch Loos stock Code UK and subscribe to me on YouTube
without further ado, go out, create,
have a bit of fun, do some sketching, and I will
see you in the next one.
 Toby Haseler, Urban Sketcher, Continuous Lines