Transcripts
1. Coloring in Procreate: Hello, creative
friend. Welcome to a super fun class on
Coloring in Procreate. I am so excited to have you
here for a color along today. In this class,
we're going to dive into the magical world of digital coloring using the
app Procreate on our iPads. Whether you're a seasoned
digital artist or maybe you're just
getting started on your digital art journey, this class is perfect
for anyone who just wants to relax and have
some fun with color, texture, and some no pressure
art making techniques. We'll be exploring
various techniques and tricks within
the app Procreate. And the best part is,
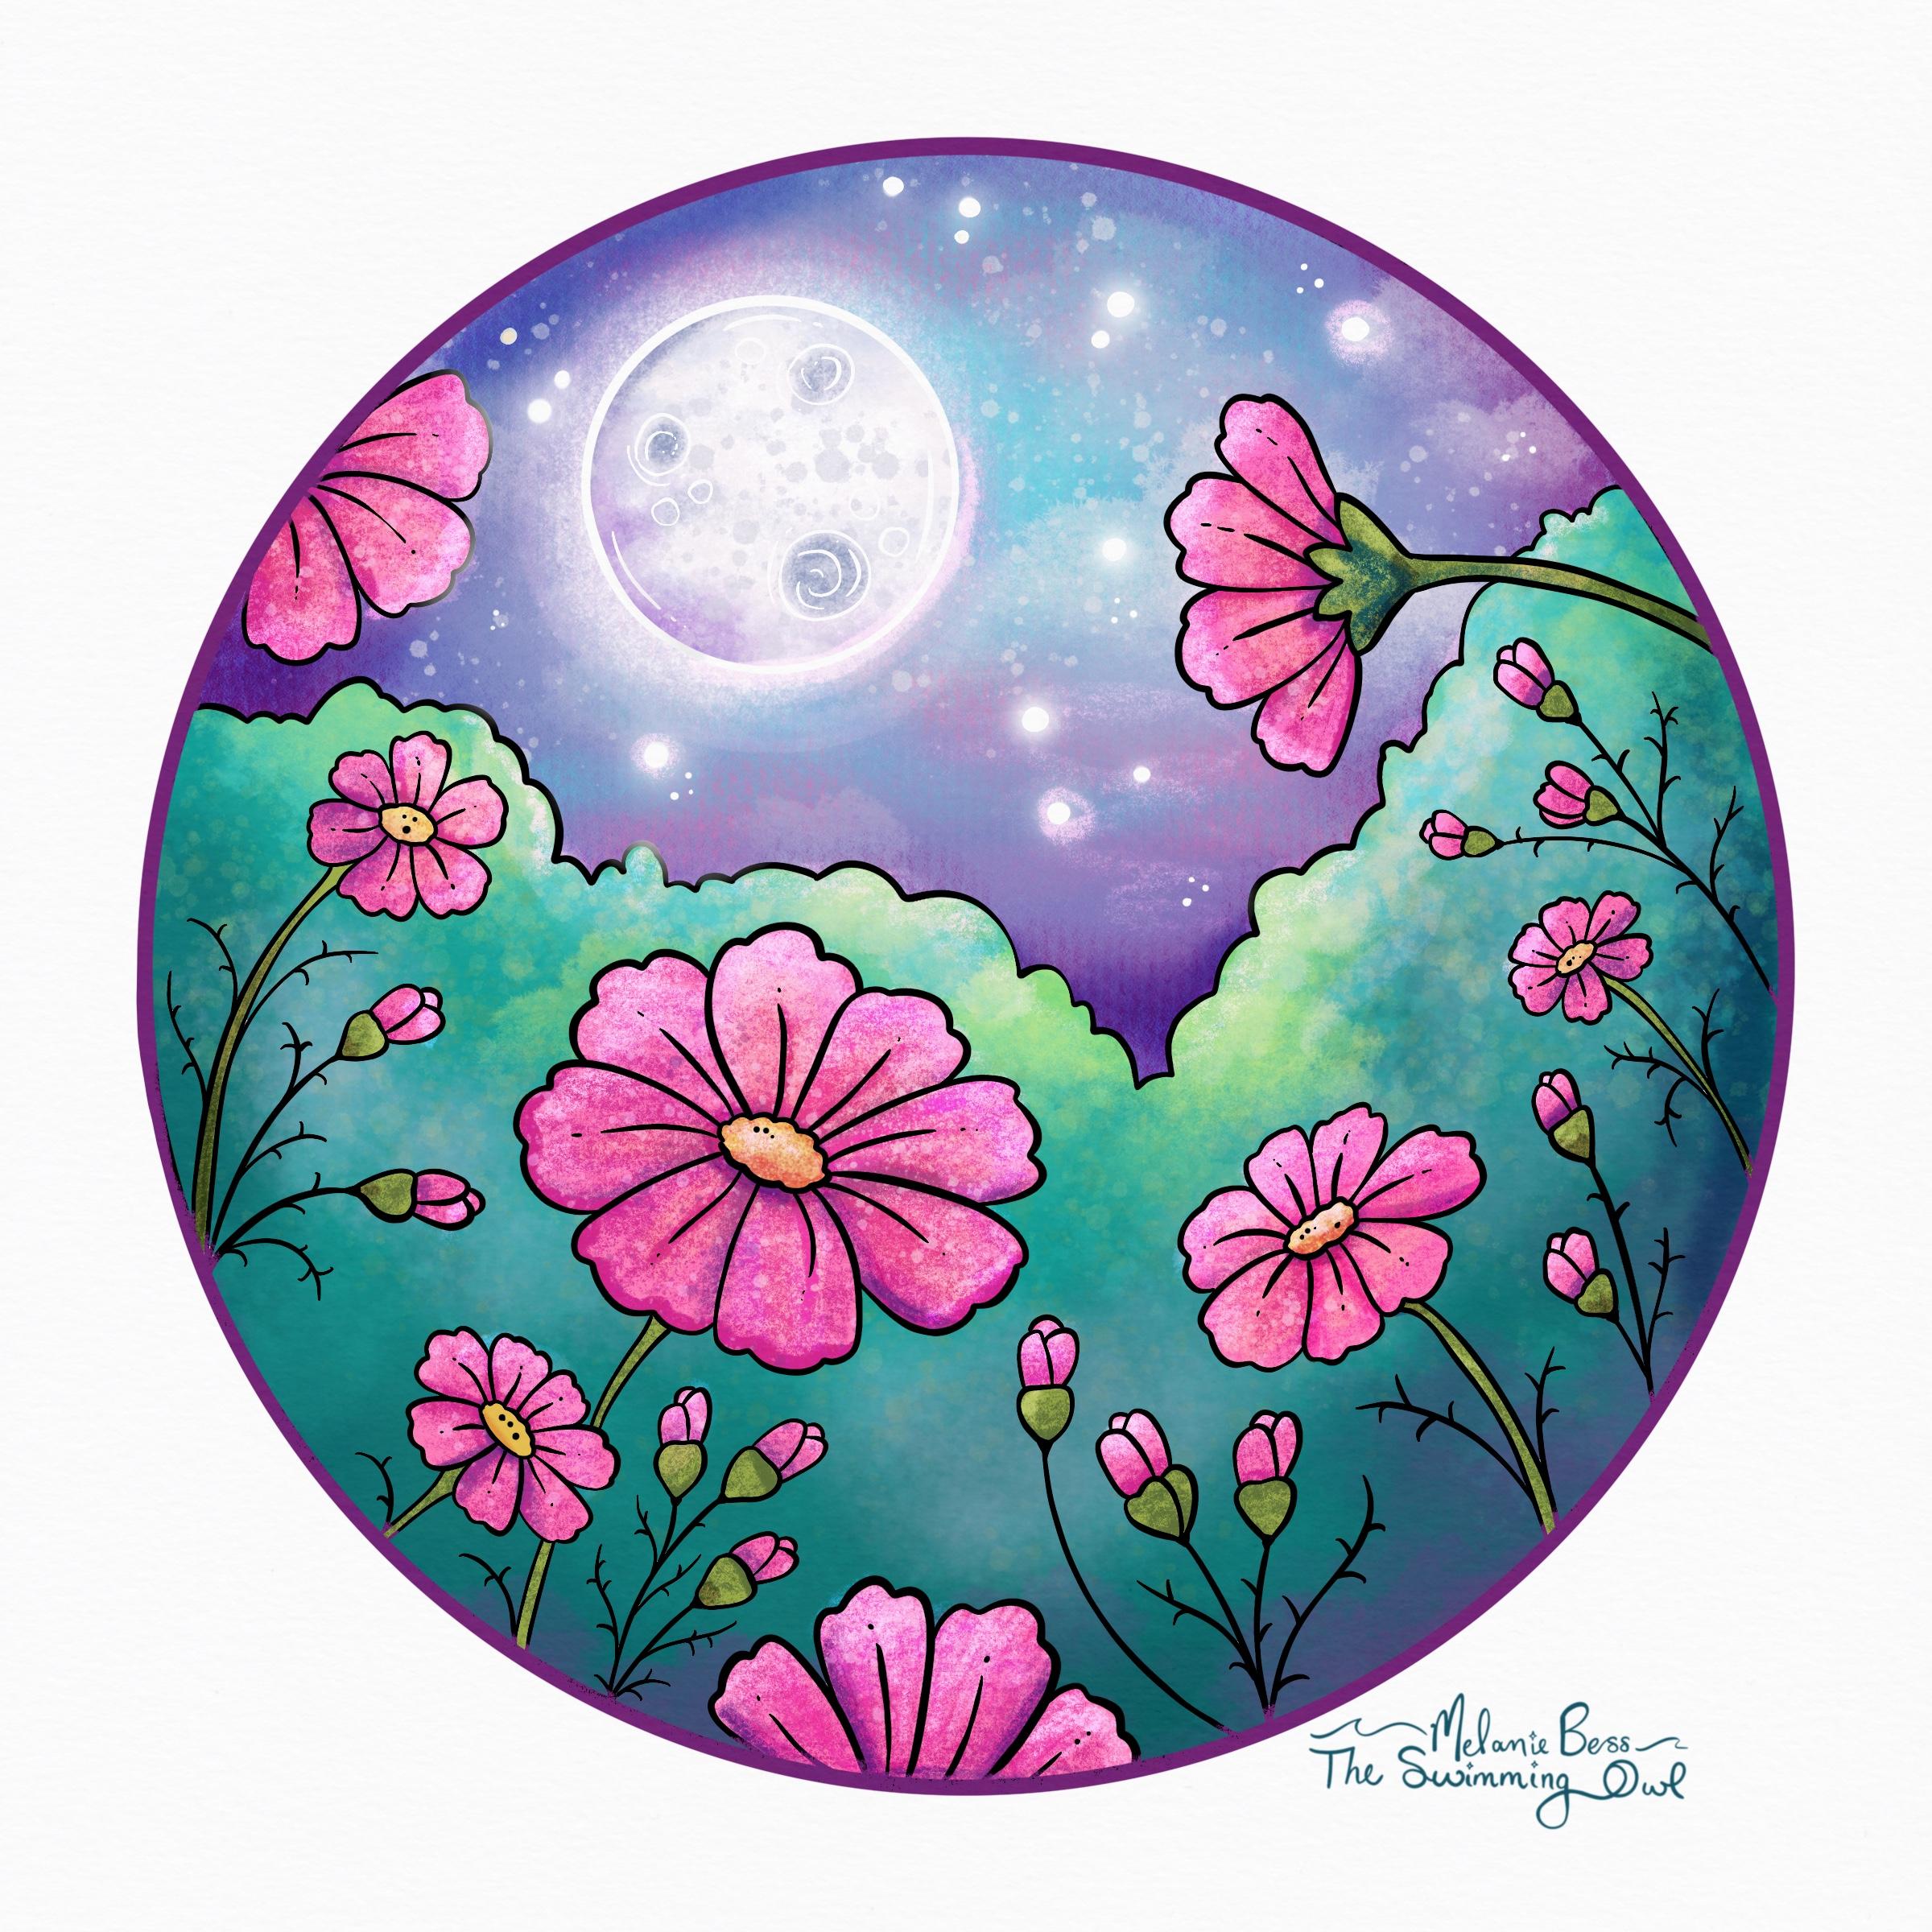
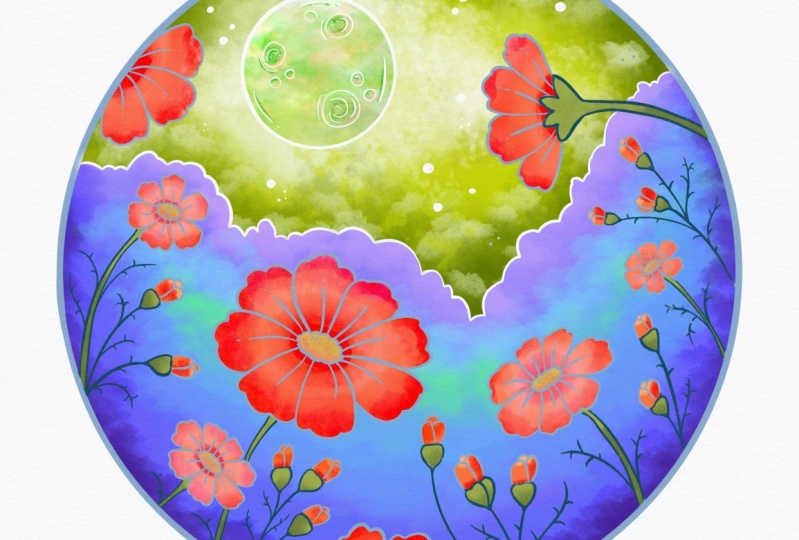
you'll walk away with a completed coloring page of a beautiful field of cosmo flowers in the
glowing moonlight. Now a little bit about me. My name's Melanie,
and I'm an artist who loves creating
cozy coloring books, whimsical picture books,
and colorful artwork for all of those cottage core souls and nature lovers out there. Fun backed. I actually taught a digital coloring
class as one of my very first
Skillshare classes, but I've learned so
much since then, and I'm thrilled to bring you this updated version
with new tips, tricks, and, of course,
fresh coloring pages. If you'd like to
learn more about my work or stay connected, you can visit my website, the swimmingowl.com, and you can also find
more videos from me, usually once every
other week on YouTube. But for the best updates, including exclusive offers
and more free coloring pages, make sure you join my
OL Post Club newsletter over on my website. And if you didn't know, you
can also follow me here on Skill Share by hitting
that green Follow button, and then you'll never miss an announcement about
a new class from me. Okay, so now that we've
gotten acquainted, let's grab our iPads
and our Apple pencils and let's dive in to
some digital coloring.
2. Your Project: In this class, you are
going to learn to color digitally on your iPad
in the Procreate app, and you are going to complete
an entire coloring page. You're going to take it from
a black and white piece of line art to a fully colored
magical wonderland. Coloring digitally
is such a fun way to increase the color and decrease
the stress in your life by putting a modern twist on this much loved creative hobby that we've all loved
since we were children. And it requires
very few materials, and you can do this anywhere
that you can take your iPad. Personally, I love
to color while watching a show or
listening to an audio book. It provides the perfect,
colorful escape. After you're done with
your coloring page, please share it with us in
the project's tab below. We all want to see how
your artwork turned out. Alright, let's dive into talking
about our supplies next.
3. Supplies + Downloads : The supplies for this class
obviously include your iPad, your Apple pencil, and you need the updated version
of Procreate. We'll be working on an
eight by eight inch canvas, and we'll be using
about 15 to 20 layers. You should be able to fit that on your iPad,
I would assume. This class does include
some downloads, which are a coloring page, a paper texture, a
Procreate Canvas file, a color palette,
and a brush set. The Procreate Canvas
file is really nifty because all you'll need
to do is import that file, and your page is going
to be completely set up, and it will be ready to
start coloring immediately. However, if you have
trouble downloading that Procreate Canvas
file for any reason, you will just download
the coloring page and the paper texture separately and put them into your
own setup file. For the downloadable
color palette, to add this to your
Procreate app, open any canvas and
hit the circle here, and then come to palettes
and hit the Plus button, and then wherever you've saved
your color palette file, you can open it from there. So you're probably going
to go new from file and find it in either
your downloads, your Dropbox file, wherever you might have saved your file, and it will
automatically pull in, and it's called Cosmic coloring. And then for the brush set, that set includes they're all
Native Procreate brushes, but I have made some
tweaks to some of them. So you don't have to
download this brush set if you are comfortable
with your favorite brushes, and you just want to use
your own favorites today. That is totally okay. However, if you want
to use the brush set that I've included today,
find that download, whether it's in your Dropbox
file again or on your iPad, tap on it, and it will import the brush set into
Procreate for you. All right. Now that we're
done talking about supplies, let's go set up our Canvas.
4. Let's Set Up Our Canvas: Alright, so let's
set up our Canvas. First, if you downloaded the Procreate Canvas
that I included, your setup is going
to be very easy. All you need to do is hit
Import in the top right corner, find your file wherever
you've saved it, tap on it, and it's
going to pull in. So this one right here, cosmomoon dot Procreate
is the Procreate file. And I pull this in,
and it's got all of the layers set up right here exactly how you need
them. Easy, Ps. However, if you're unable to get that Procreate file to
work for any reason, we can quickly go
through the steps of setting up your Canvas
from start to finish. And this will help
you down the road. If you ever download
a new coloring page, and you can then continue with this cozy hobby all on your own. Okay, so let's hit the
plus button to make a new Canvas and then hit the little Plus
button here again. And I'm going to be
working in inches, and I'm going to
do eight by eight, 300 DPI. Color profile. If you want to just
share this digitally, like social media, just
do Display P three. However, I'll just leave
mine on SRGB for now. If you'd like to have
a fun time lapse, you can make sure
that's turned on. And then I'm just going to
title this eight by eight. Okay, and hit Create.
Alright, now we need to go to the wrinch
and we need to add in our coloring page
and our paper texture. So go to insert a file
and locate wherever you've saved your coloring page. That's going to be right here. It's a PNG file, meaning it has a
transparent background. Make sure it's centered. So just move it around
with the arrow here, and I'll look for the gold crossbars that's in the center. And then if you'd like, you can also add the paper texture, which I really love doing. It makes it feel
a little bit more traditional and less digital. So go ahead and insert that
paper texture as well. Now this is going to
take a little bit of manipulating to get it to
work the way we want it to. So resize it to fill
the entire canvas. Then come to your layers, and you're going
to duplicate this. On this first one,
we're going to tap the N and put it
into multiply mode. On the second one,
we're going to tap the N and put it
into color burn. Now, to make sure that
the texture isn't all kind of doubled up in
the same space or place, I'm going to tap on
this second one here. I'm going to hit the
arrow tool here, and then I'm just going to flip horizontal and flip vertical. And that just changes up where the textures laying
in that paper. Next, if you want,
you could name these. You could just tap
it, hit rename, and call that paper.
Same for this one. And then I'm going to
turn down the opacity on the layer that's in multiply
mode just a little bit down to 65% because that one's the one
that we see the most visibly on
top of everything. Now, the next thing
we need to do is swipe on both layers, and we're going to group them. So if neither one of
them are selected, tap one in select another one, swipe on it, hit group, and that's going to
make a new group here of just those two layers. I'm going to rename
this to paper textures. And I'm going to lock this layer or this group so that I never accidentally
color on these. So to do that, make sure it's selected swipe to the
left and hit Lock. Now we will never accidentally color on our paper texture. We always want to keep
our paper textures at the very top of
everything we're doing. So keep those up here. Next,
this part's very important. Find your line art layer, and if you want to,
you can rename it. And we want to put this
layer into reference mode, which is going to
allow us to drop fill color into
the closed spaces. So tap on the little
thumbnail version over here and click reference. By putting your line art
into a reference mode, it's going to make
digital coloring so much more fun hand easy. Now, all other layers
when we work today, are going to stay
beneath both of these. So to make a new layer, hit the plus and drag it
beneath your coloring in art. You're coloring page
in art, excuse me. Now, all layers after this will continue to be underneath. Alright, let's jump
into the next video, and we're going to start
dropping some color in.
5. Color Drop Into Each Element : Okay. Are you ready to
start adding some color? Alright, the first thing
I want you to do just in case you skip to the
Canvas setup video is we need to double check that our line art is actually
set to a reference. So find your line
art layer and make sure it says reference
underneath it. If it isn't, tap the
thumbnail version of it here and turn it on. Next, I want you to remember
that all layers that we create today need
to stay underneath our paper texture and
our line art layer. So if you do not have a layer that says start coloring here, hit the plus and drag it to
wherever you need it to be. It probably jumped
above your line art, and you need to hold down
on it and pull it beneath. Now the next thing we
need to remember is that each section that we color today needs to go
on its own layer. So for this page, our sky
will be on one layer, our grassy background
will be on its own layer, the flowers on one
layer, and so on. This is going to allow us to add more color and texture
to those elements later by utilizing Alpha lock or alternatively,
a clipping mask. Come to your layers, and the
first thing we're going to do is put some
color into our sky. So I'm going to go
ahead and just delete out this extra one
that I just created, and I'm going to rename
where it says start coloring here to sky. All right. So once you have your
layer that says sky, the next thing we need to do is pick a color to drop fill. So I'm going to come
to where it says disc version here because
I like this view better. Another nifty little
trick that's kind of fun when you're
coloring a lot is you can actually pull
this whole color palette out away from
the panel up here. So you can just leave it right here next to your coloring page. So then to come back to the colors that I've set
in our color palette, I'm just going to click
on this little icon here, the Little Squares. Okay, so I'm just going to
pick a base color for my sky. I'm going to just go with this really bright blue for now, and we're going to
drop fill by dragging this color over and filling. Now, if any sections
didn't fill, then we can hit Continue
filling and tap those in. Or if you had this
problem happen, where you popped it
in, and it overflows. That means you have
a threshold problem, and that's very easy to fix. So two finger tap to
undo that and try again. But this time, don't
lift your pencil. So if this happened, you just want to drag back to
the left a little bit. And you want to go as far up as you can without overflowing. So 100% overflows, so I
want to come down to 99. And it works the
opposite way, as well. If you notice that
it's not quite filling in all of the pixels and
you have some white space, you want to pull
more to the right to fill up more of
that threshold. Okay, so if you want
to, you can try a few different colors
out on your sky. However, we will be changing
this a lot more later, so don't get too hung up on
a perfect color just yet. Okay, so I'm actually going
to move that over here. That feels a little bit
more natural to me. Remember, you can
customize this anyway you want to to make this experience better
and more fun for you. So the next thing we need
to do is make a new layer. So here's our sky layer, tap the plus, and I'm going to go ahead
and drag it below. So that way, when my
future layers get added, they're not going
to be anywhere near here. They're going
to start down here. And this is going
to be the grass. So I'm going to rename it. And same thing as last time, pick a base color, any of
these colors, drag it in. And I'm overflowing. I can see that it's
actually filling in some of my lines
here. So there we go. And here we actually have
some spaces that are, like, cut off from the main
space due to the line art. So we need to continue filling. So drag it into another space, and up here, hit
Continue filling. Did you see that little
menu pop up at the top? And you'll see now it says Color drop with a little checkmark. That means anywhere
that I tap now is going to fill with the
color that I'm using. So down here, I have another space that I need to make green, and I'm going to tap
into that space. Just go to kind of zoom in
and look around if there are any other grassy spaces that I'm missing, and
I don't think so. That looks pretty good. So I'm just going to tap
over on my layers, and that's going to close
out of the color drop fill, and we need another layer. So you can kind of see
this technique now. We're just going to fill in
all of our white spaces. Let's do the moon for this one. Rename moon. And I'm just gonna pick one of these light colors.
Drop that in. And I'm also going
to continue filling, and I'm gonna drop it into
these individual circles. There we go. Make a new layer. Let's do this one
as the flowers. And I'm just gonna choose kind of not the super vibrant
pinks, but this one here. I'm gonna choose
that and drop fill. So continue filling.
Tap that at the top, 'cause we have a lot of
spaces to fill here. Now, if you want, you could make different flowers,
different colors. Don't feel like
you have to do it exactly the way I'm doing it. Really feel free
to make this your own and add in your own flair. I'm gonna leave this part to be more of the kind
of green of the stem. Kind of like it's
holding the bud. And then I'm going to make
the center of the flowers on its own layer. Oops. And so what just happened
there is I started to color the line art I accidentally
tapped on the black line art, so I'm just going to two finger undo and
make sure I'm more careful to get inside the
area and not onto the lines. I really love pink
cosmo flowers. They're one of my
absolute favorites. So that's why I'm
going with pink. But cosmos come in many
different colors and varieties, so feel free to make these a color that makes
you happy cause after all, that's what this
project is about. It's about doing something creative for fun and happiness. By the way, I don't know
if you guys can see this, but after I had already made
this page and finished it, I realized that looks like a little face that's
very surprised. Kind of funny.
Can't unsee it now. Sorry if that bothers you. You can always go
into the line art and delete one of
those if it does. Okay, I think all of
my flowers are filled. So I'm gonna tap off of color
drop and color fill there. Next, I'm gonna make
the flower centers. And I'm gonna go with this yellow color.
Continue filling. And just this one
here with the face. And I think that's it. That
one doesn't need too much. Okay, we need one for the stems. In, I'm gonna go with one of these light greens
here. Continue filling. This is one tool that's
gotten so much better since my other
skill share class. And I just realized
I missed a center. I'll come back to it
in just a second. That's not a problem.
But the color drop fill has gotten a lot more intuitive. I'm very happy with the
changes they've made to that. Okay, my stems are good. I'm gonna come back
to my centers layer, the flower centers, choose my yellow again and hit
this one that I missed. There we go. Alright, the
last thing we need to do is just put a little bit
of color into our stars. You could actually leave them white or you could fill them. I'm gonna go ahead and
fill them just in case. Alright, rename to Stars. Ian, I'm just gonna choose kind of this light
yellow, I think. So I can actually see that I'm putting
something in there. You definitely will
have to zoom in for these stars to make sure
you don't hit the line art. Okay, I think we've
gotten them all. And if we've done this right, we should have seven layers here, seven different layers of color. One, two, three, four,
five, six, seven. Okay, so now that we have a nice flat base of
color on everything, we need to make this a lot
more fun and interesting. So let's head to the
next video to learn how to add texture and
more fun color.
6. Color The Sky + Grass: A Okay, we are ready to start adding
some fun texture and color, and we're going to start
with our two biggest areas. We're going to be
working on the sky and the grass in this
particular lesson. Okay, let's go back
to our layers, and we're going to
choose our sky layer. I want you to tap on the little
thumbnail version of it, and I want you to
select Alpha lock. By turning Alpha lock on, we're going to be able to
add more color and texture with our brushes to
this layer only, and the color and
texture isn't going to touch any other section, which is very nifty. So for the sky, I really
like to bounce between a couple different
textures and colors and just play until I get an
effect that I really like. So, let's start by choosing
one of our fun brushes. So come to your
coloring set brushes, and I'm going to start
with the cotton brush. And I'm going to choose a
darker blue color here. And I'm going to put this in
around the edges of my sky. And you may need to play
with size and opacity. So I'm going to make my
size a lot bigger here, and I'm going to start
softly brushing this in all around my edges. And sometimes it's fun
to do more of a tapping. You'll get more of a
strong look that way. I'm going to come to this
lighter color and do that a little bit more around the moon so that it's kind of glowing. I think I'm going
to go ahead and close this and come over here so that I can see the
color wheel a little bit more. I'm going to choose
the base blue that I started with and come down here. I'm going to go smaller. There you cannot mess this up. So just have fun with color
and texture right now. Okay, lastly, I'm
going to change up my brush to the
rainforest brush, and I'm going to
tap in some cloud like textures. So
come to our brush. It's good to the
rainforest brush. Back to my color palette and
maybe this really pale blue. And let's see. Probably need
to make it a little bigger. And sometimes with this brush, the placement's not
always perfect, and you might have
to undo it and just kind of re tap those in because it's very
randomized where this pops in. And so it may not always be right where you prefer it to be. And the harder you tap, the more severe or contrasting that
effect is going to be. Okay, so just continue playing until you are happy
with this sky. Okay, so I'm pretty
happy with this for now. And here comes one
of my best tips. If you're not super stoked
about the color just yet, let's turn up the brightness
and saturation on this layer and make it pop
just a little bit more. So make sure your sky
layer is still selected. Come over here to the magic wand and select the very
first option here, hue, saturation, and brightness. And here's where
I'm going to take these little sliders and I'm going to mess with
them just a little bit. I'm going to bump up the
saturation and the brightness, and you can even mess with
the hue a little bit. Maybe you went in one direction. That you didn't like originally, and you want to change
things up a bit, but I'm actually I
think I'm going to leave my hue where it was, and I'm just going to bump up the saturation and
the brightness to see what this looks like or to preview the change
before you commit to it. Tap anywhere around
on your screen here, and you're going to see
this little menu pop up. If we hold down on preview, it shows us what it
originally looked like. And if we let back up, that's what the change is
going to look like. So we can kind of decide, do I like that? Do I
not? What do I think? If you want to undo,
you can hit Undo, reset, cancel, or if
you like it, hit Apply. So I might bring this
down a little bit. Maybe I will go a
little bit more of a Towards the purple. Let's see again. Okay,
I'm gonna hit Apply. And then I'm just
going to tap on my brush to close
out of that menu. Alright, now that we have a
really pretty sky back there, let's tackle the grass. And remember, don't feel
rushed by me. Take your time. At any point, you
can pause the video, go back and rewatch parts. You don't have to be
moving as quickly as I am moving. Take your time. Alright, down to the
grass layer. Same thing. Let's turn on Alpha lock, tap on the thumbnail
and find Alpha lock. You'll know it's on, by the way, because you'll see this pattern behind the thumbnail version. Was down here, you see
it's just a solid gray. But up here we see these
checkmark patterns, so we know Alpha oc's
on on that layer. Okay, so with this grass, I'm gonna be keeping in
mind that the moonlight should be illuminating the tops of this grass a little bit more, and down here, it should
be a little bit darker. So I'm gonna go brighter
towards the top, for sure. And I'm going to go back
to my rainforest brush. And let's check out our colors. So let's start with the
deep darker color here. Again, feel free to
select any of the colors. You do not have to
do what I'm doing. And I'm gonna gently brush some of this in
around the bottom. And then I'm going to
make my brush smaller. And I need something
even darker. And now I need something
lighter towards the top. I think I just chose
the exact same color that's already on that layer. There we go. Again, I'm gonna mess with
the size of my brush, and I'm gonna tap some in now. I really like the texture
that it creates when I tap. I'm actually going
to put in some of this more yellowy green. It feels a little bit
intense to me right now, but I'm going to cover some
of it back up just a bit. Okay. I think I need a
little more contrast. Let's try a different brush. Maybe the cotton. I
think it's too small. Okay, and then right
here at the top, I'm going to select
my base green color and then come to the
color wheel and choose something a little bit
less saturated and brighter to go right
along the top edge here. Okay. And just
like with the sky, I'm going to make an adjustment
to the overall layer. So I'm on my grass. I'm going
to come to the magic wand, hue, saturation, and brightness
and same little tip. Let's give it a boost. And I'm gonna leave
that where it was. Okay, let's check that change. Think that looks pretty good. And apply and tap out. Okay, so I'm pretty
happy with this overall. If you are still needing
some time on yours, go ahead and pause here. And in the next video,
we're going to go and tackle the moon next.
I'll see you there.
7. Color The Moon: Okay, this next one's going
to be a nice quick one. We're going to add
a bit of color and texture to our moon. So come to our layers, find the moon and
hit Alpha lock. Next, you just want
to grab any of your textured brushes
and some light colors, and we want to just
kind of put in some shadows and
maybe some craters. We might add in kind
of, like, some purples. Maybe make that a
little bit darker. That's better. I
like the tapping. Like I said, I just think
that adds more texture. Maybe we'll go bright white and tap in a little bit of that. Oh, too much. Okay. And now I'm going to grab
the flick brush, and I'm going to come to maybe
kind of this color here. And those are a
little bit too harsh. So I'm gonna make them a little
larger, but the opacity, I'm going to bring that
way down and just kind of tap some of these in Okay, I brought it down a
little too much, I think. There we go. A little smaller. This, again, is
another random brush where they kind of go
wherever they feel like. So you might have
to retry this a few times to get a
look that you like. That looks better. Okay, so I think that moon actually
looks pretty good for now. If you wanted to,
you could come to a smaller brush like
the magic pencil, and you could choose
one of these colors, and you could kind
of draw inside these craters a little
bit if you'd like. And then you might be wondering, well, what about the stars? Are we going to do
something with those? We're gonna save those for later because
we're going to add some glow to them and
potentially even recolor the black lines a bit to make
the stars look even cooler. That's a special
effect for later. For now, let's head
to the next video where we're going to
work on the flowers.
8. Color The Flowers: Alright, let's get to
work on our hero element, which are all of our
beautiful cosmo flowers. Because these are such
an important part of the coloring page, this is where you're
probably gonna want to spend more time than we did
on the other elements. So I highly encourage you to experiment, try
different brushes, try different colors, and take your time on
these flower petals. I'm going to start
with the big one here in the center and figure out how I want to do them and
then work to the next ones. So come to our layers, find your flower petals, turn on alpha lock and
just begin experimenting. I'm going to start
with this brush here, thems pimsle I'm not
sure how you say that, but it's got a really
fun texture to it. Then I'm going to come
to my colors here, and I'm going to choose my
more saturated hot pink here. And I'm going to do
a small brush size. And here's where
it's gonna feel a little bit more like coloring. And I'm going to brush this
in over all of my petals. And I think I do like this
texture and this look so far. So I am going to go ahead
and do that very quickly onto all of the other flowers
just to get some texture. Okay. I'm gonna go even darker
now with a smaller brush. And I'm gonna focus this part on where I know it should
be a little darker. So kind of where,
like, petals might be overlapping underneath
the center of the flower. And I'm not pushing
down very hard. I'm just very lightly
brushing this texture in. Now, if you wanted to
get very experimental, but you weren't sure if you were going to like the effect, but you did like what you had
done so far on the layer, we could utilize
a clipping mask. So let me show you
after I finish this here what a clipping mask would look like and why you
might want to use that. So to make a clipping mask, make a new layer above the layer you're
going to be working on and tap in this empty gray
area and hit clipping mask. Now, whatever I make on
this layer will only show up on the flowers or the
flower petals, I should say. So let's say I wanted
to see what it might look like if I use
this dark purple, and I want to see if the watercolor brush
would look nice. So see how the clipping mask is keeping it only in the
flower petal area. But what's nice is by keeping it on its own layer on
this clipping mask layer, I can always go in and remove it and completely
delete everything I did without messing
up this texture I already started creating
on the original layer. So this is kind of like
an extra bit of security. If you want to get a little more experimental and
try something else that you're just not sure if it's gonna work the
way you're hoping. And so it gives you a way to
say, like, you know what? Maybe you did this on all
the flowers you backed out, and you're like, Yeah,
that was a bad decision. We can come in here and we can just delete that
clipping mask layer. So that's up to you if you'd
like to work in that way. I'm just going to keep
moving forward on the actual flower
petal layer and just building up more and more
textures and colors. And I'm okay with
kind of hitting undo every now and then
when trying something. So what I might actually do
is just go to my pencil here, which is kind of like
using a colored pencil, and I'm just going to start
brushing in more texture. In this manner. So this is
gonna make it feel a lot more like coloring from
when we were a kid. So as I'm working, I'm gonna
keep in mind that the areas closest to the sky and moon should be lighter
and more glowy. The areas below are gonna be darker and maybe more of
those like purple tones. One thing I love about this six B pencil
is you can use it more like direct and straight on
and get a harsher effect, or you can kind of
turn your pencil on its side and get
a softer effect, almost like you're putting your pencil on its side
if you were drawing with a pencil or colored pencil and using more of the
side of the lead, and it covers more area
and a more soft effect. I really like that
about the six B pencil. Another little tip I
want to give you is not to be afraid to play
with the smudge tool. So, for instance, check out this really harsh
line I just made. Maybe I like the color and
the placement and whatnot, but I want to soften
it just a little bit. So I'm going to
go ahead and hold down on the smudge tool, and that's going to choose
the same brush that I was just making my marks with
as my smudging tool. Smudge with current brush
is what that just said. And I'm going to make it
a little bit smaller, less opacity, and I can use that to sort of
soften the effect. While still keeping the
texture in placement. So that's something I encourage you to play with a little bit, because if we were coloring an actual piece of paper
with colored pencil, we would probably be
utilizing some blending. And that's what the Smudge tool allows us to do. It
allows us to blend. So I think I'm really liking this effect of just
using the 60 pencil. I'm gonna go ahead and just
get to work on finishing these up in a way that I like switching up my colors
just a little bit. So take your time
with this part. I'm gonna go ahead
and leave you with a little bit of music here, and I'll catch back
up with you when I'm ready to head to the
centers of the flowers. All right. Let's go
ahead and bounce to the centers of our flowers. I'm gonna turn on alpha lock. This shouldn't take too long. I'm going to choose
let's go with the charcoal brush and
the orangy color here, and I'm gonna darken in. I'm gonna turn up the opacity and make my brush
nice and small. I'm definitely
going to darken in around the bottoms of
these a little bit. Okay. And let's see. What if we go to
the flicks brush, and we make this a lot darker, make our brush nice and
small, and.in some texture. I think that looks
good. I need a little bit darker
of a color, though. I'm liking that effect. I'm just not sure
about the color. I don't mind the pink. So that's another way you can
use that flick brush. Kind of creates that little
seed like texture in there. Okay, let's go a little bit darker or maybe
even a dark purple. Maybe a little
bigger. There we go. That's interesting and fun. Again, don't be afraid to play. I didn't do this on my
original coloring page, but I'm doing it now. And we'll come back
to this yellow. I'll make it a
little bit brighter, almost like a little bit
of a highlight and pop those in there. Alright. An, at this point, don't forget you can
always go to either of those layers and make a small adjustment
if you need to. Maybe I'll make those
a little brighter. Alright. Now let's go ahead and do our stems really quick. I kind of forgot about them. Let's turn on Alpha lock. I'm gonna come back up here
to this brush starts with the P. Not even gonna keep
embarrassing myself by saying it. And that's too big. Just go to brush in
some quick texture. All right. And I'm going to try the watercolor magic brush, which has a little bit of, like, a changing tone in it. And I'm going to brush in some
darker colors underneath, and then something
a little brighter, more limey green on the top. All right. And I think that looks pretty good for
our flowers for now. We are now ready to head to a very exciting
part of the lesson, which is the blending modes. It's kind of like adding special effects to
the entire page now.
9. Turn On The Lights With Blending Modes: Blending modes are what I refer to as turning on the lights. They allow us to add some
magical looking light and shadows in a super easy way. So let's start with the shadows. First, we need to make
a brand new layer that's going to be above
all of our coloring layers, but still beneath those
two important top layers. So I'm going to click on my sky, which is the top coloring layer and hit the plus so that
the layer goes above it. We're going to set this
layer to color burn. So come to the end here
and come up to color burn. This is going to help us create a darker version of
the color beneath, but also taking into account the color that
we are painting with. I'm going to choose
a textured brush like the cotton or watercolor. I think I'll start with
the watercolor brush, and I'm going to use one
of the purply colors. You can experiment
with other colors and see what you like
best just remembering that whatever color you're
painting with is going to interact or play
with the color beneath. And I'm going to
just paint this into some areas where I know
should be more shadowy. And I may need to play
with the brush size, and I'm going to even
turn down the opacity, so I can sort of
build this effect up, and it's not going to do
a whole lot in one go. I can keep coming over an area to make it a little
bit more dramatic. I'm definitely gonna
hit the edges, and I like how this purple is creating more of
a bluish effect. But let's see what would
happen if I chose, like, a pink, for instance. It's a little more purply. What if I chose yellow? It goes more green. So you see how that
color really changes the effect of what you're actually going to do
here with the shadows. I like making purple
and bluish shadows, but you might like something
totally different. I also like really
dramatic effects. You might like yours
to be a little bit softer and more pastel. Okay, so just bounce
around the page, throwing in a bit of shadow wherever you feel
it really needs it. And then when you feel
like you've got enough, you can move on
to the next part. If you feel like it's getting
a little bit too harsh, you can always lower the opacity on that
entire layer as well. So click on the where it says CB right now for color burn, and you can push
this slider up and down to see if you want to soften that effect a little bit. You can also turn it
off and on to see, like, whoa, the lights, right? Like turning the lights on. Okay, so I'm going to
leave that for now, and I can always return to that layer to make things
a little bit darker. But for now, let's jump
over and add some light. Come to your layers,
make a new layer. In this one, we want to tap on the end and put
this into overlay. So come down to overlay. Now we're going to
make a lighter version of the colors that are beneath, but also taking into account the color that we
are actually painting with. So again, choose whichever of the textured
brushes you like. I'm going to maybe stick with the watercolor brush, I think. And I'm going to go with
one of the light pinks. And I'm going to
brush this in where I know the moonlight would
be hitting things. And I started to go outside the boundary of my flower there, and it looks a
little bit sloppy, so I can either undo or
I could also erase away, and I'm erasing with
the wrong brush here. I could also erase away where
that got out of control. So if you have a brush
that's harder to control, but you like the texture of
it, you can use the eraser. I'm gonna switch to
my cotton brush, and I'm going to brush in
along the tops of my grass. Now, another way you can
apply this effect is that you can apply it
to individual layers. So say I really liked
what was happening here, but I really only wanted
that effect on the grass. Then what I would do is I would come down to my grass layer, make a new layer above this, turn on the clipping mask, put this into overlay mode. And now I'm only going to paint this highlight
onto the grass. Gives you more control
and more options. So I'm gonna bounce back
up to my layer at the top, though, and continue painting
in a few more highlights. I'm gonna make a bit of
a glow around my mood. Alright, so using
that effect where we only put the overlay mode
above one certain area, I'm going to go to my sky, hit the plus to
make a new layer, put on the clipping mask, go to overlay mode. And this time, I'm
going to put in some very soft stars
in the background. I'm going to go to
the flick brush, and because this is in
clipping mask mode, I can just put in some soft
stars into just the sky. Again, play with the
size and opacity, make some larger also,
you can change the color. I liked the pink and how
that affects the color. I think that looks pretty good. So remember, you can do this
above any of these layers now if you want to do it with either the shadows or
more of the highlights, and you want to hit
a specific area, just make a layer above, put it into clipping mask, and you can isolate that section and add some more magical light. But I am ready to
move on and show you a game changing trick that I did not teach in
my first class, and that is how to
recolor the line art. So I'll see you in the
next video for that.
10. Recolor The Line Art: New step or new trick is something I didn't
teach in my other class, but it's such a game changer, especially if you want to
make your coloring pages look a little less
like a coloring page. Okay, we're going to
head to our layers, and we're going to
select our line art now. And let's turn on Alpha lock. So first, we need to
unlock the layer, slide to the left
and hit Unlock, and then turn on Alpha lock. Now we can actually
color over all of the black line art
and change the color. You can change all of
the color at once, or you can go in and isolate different things and
make them specific colors. Okay, so to do all of it
at once, choose any color. I'm going to choose
something close to white, kind of this very
pale lavender color. Then come back to the layer, and while Alpha lock is on, tap on it and hit Fill Layer. And look how cool that is. It just changed all of the black line art to
this pale lavender, and it looks really
dreamy and fun. And it immediately changes
the vibe of the entire thing. Okay, so I'm going to undo that. And alternatively, we
can go in and we can color smaller areas to
really customize it. So, for instance, I'm
going to do my stars. So I'm on my line art layer. I have Alpha lock on. I'm going to choose
the light pen along with this lavender color, and I'm going to carefully
color over Oops. See, I got too close
to this part here. I want to carefully color
over just my stars. You have to be
really careful with this brush when getting
towards the edge because this brush has this glow around the outside of it. So I'm just gonna make the
brush a little smaller. But this is just so cool. It's a very, very fun way to completely transform
your coloring page. We can do the same thing
now with the moon. And then you could choose the six B pencil
now if you wanted to recolor other parts
of the line art. So imagine you just wanted to color the outside
circle like purple. I could come in here now and I could just color the outside. Purple. Now, I'd have to be more careful when getting
close to Oops, and we don't want
to erase, actually, because that'll erase
away the entire line. We could also use
a clipping mask. You could also use
the selection tool. So what that would look
like is you would use this little ribbon tool here, and you would draw around
a section like this. And now I'll only be able to color inside that
section that I chose. So that's another
way you could do it. And then to tap
off of that, just click anywhere else
on a different tool. Alright, so that's
how you could color the outside or any
parts of the lines, you could make the flowers to
have actual pink linework. The grass could have green
linework. There you have it. That was a technique I
didn't show you before, and I think it completely changes the game and
changes your coloring page. So go for it. Color whatever
parts of the lines you like. In the next lesson, I'm going
to show you how you can actually recolor all
of your artwork.
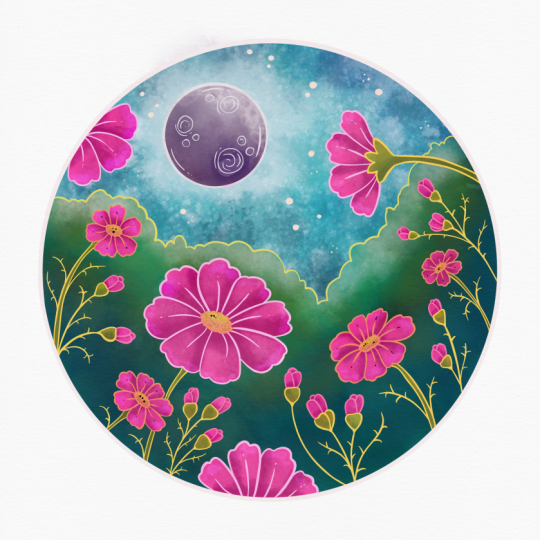
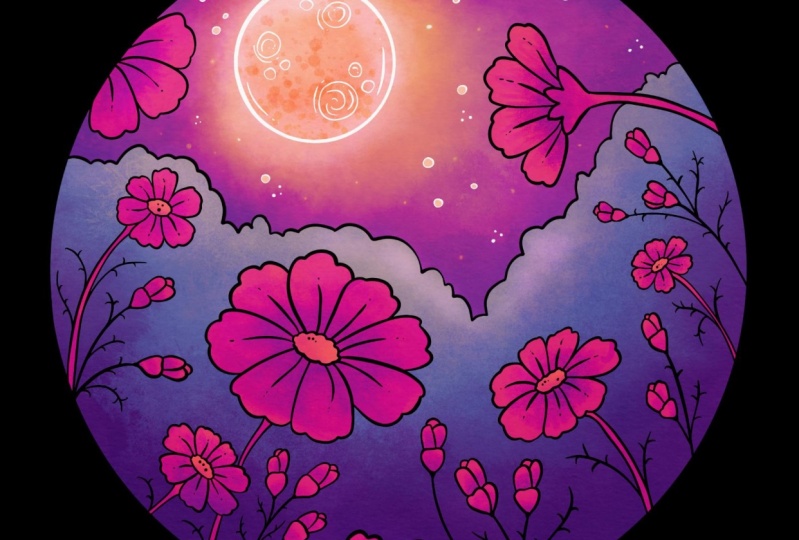
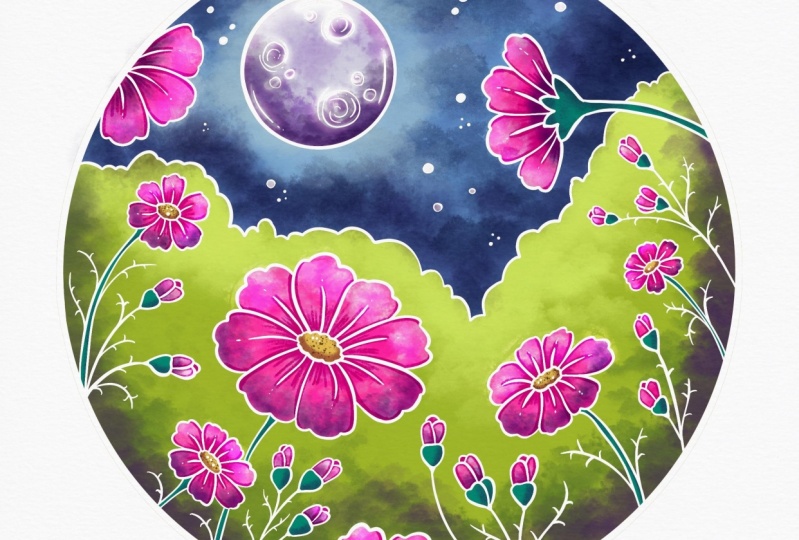
11. Recolor The Whole Coloring Page: Okay. Lastly, let's
learn how to change both individual sections
of our coloring page and then how to change
the whole thing to achieve different results. The first thing we need
to do is back out of our current canvas and duplicate
it at least two times. So I'm going to swipe
and hit Duplicate. And I'm going to do
it one more time. Duplicate. So open up either
one of your duplicates. Okay, let's select
just the grass and let's change the hue of it, which you saw earlier
how we do that. Select your grass layer, magic wand, hue,
saturation, and brightness. We can do it this way, and we can give an entirely
different effect. Or we can change it with a really fun thing
called a gradient map. So come back up to the magic
wand and hit gradient map. This is a super fun tool. You'll have all of
these different gradients saved down here, and you can also create your own by hitting the plus button. But go ahead and kind of just swipe through some of these. You can change the
intensity of it by sliding down this bar that you see at the
top here right now. It says 67%. I find
that somewhere 50-70 tends to give a
really good result. And you can just
change through here, and this is so fun
and addicting, and it immediately gives you a totally different
coloring page. I kind of like
these purply ones. So let's imagine I save that. So I'm just going to tap off
of here. I can preview it. I'll hit Apply. Oops, and it actually applied it
twice, but you know what? I'm not mad about it. It's
actually kind of pretty. And then you could do
that with the sky. You could do it
with the flowers. You can change as
many different areas as you want and tweak it
to your heart's content. Now, the other
alternative is we can change the entire page at once. So come back out
to your gallery, come over to your
other duplicate. And we need to flatten our layers in order to change
the entire thing at once. Now, you would not want
to do this on your original if you felt like you might want to
make changes later. So make sure this
is a duplicate. Come to your layers, and we're going to start
merging things together. If you have layers that
are clipping masks, you need to merge
those down first. So here I have a clipping
mask on top of my grass. So I'm going to tap on this
layer and hit Merge Down. I have another
clipping mask here. I can tell because
there's a little black arrow pointing down. I'm going to merge down and do that until all of the
clipping masks are done. I believe they are. Now I'm
going to take two fingers and I'm going to pinch
together my coloring layers, not the lighting layers yet, just the coloring layers. And now they're all merged. Now, you could actually just change this layer
without touching these, which sometimes is
going to be easier. Sometimes when you try to
merge down blending modes, things get a little weird. So I'm just going
to change the color on this layer here for now. As you already remember, we can just change to
saturation and brightness of the entire thing and you could create something
really fun in that way. I'm just going to
cancel that though, and let's go and play
with the more fun option, which were the gradient maps. Magic Wand, gradient map and feel free to
cycle between these. Remember you may need to
change the intensity of it. I usually come to
about 65 to start. I really like this blaze option. I love that. I'm going
to leave it like that. But remember, you have so many to choose from and you
can also make your own. That's just a really
fun way to make a completely
different alternative to your coloring page and
have a lot of fun with that. I'm sorry if that takes up
the entire rest of your day because you are obsessed with changing the color
over and over again. But I hope you had so much fun because I had a lot of fun
coloring with you today. I hope you will share your
page or pages with us down in the products tableau so we can see your
beautiful work.
12. Thank You + What Now : Thank you so much for joining me for a fun
coloring session. I hope you gain some new skills and confidence in your
digital art abilities, and I also hope
that you will share your finished coloring page with us in the projects tab below. If you like this class
and you haven't already, don't forget to hit
the follow button, so you get notified
about my next class, and please consider leaving a quick review in the
review tab below. Your review will let
me and other students know that this class was
fun and hopefully helpful. Let me know which part of
the class was your favorite. Okay, so here's where I'm
going to leave you for today. I really hope to see you in a future class and happy
art making until next time.
 Melanie Bess, Painting By The Light Of The Moon