Transcripts
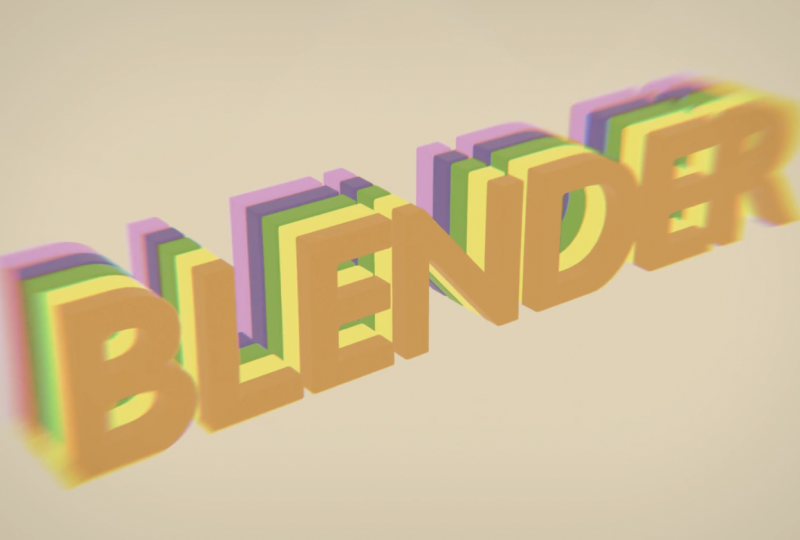
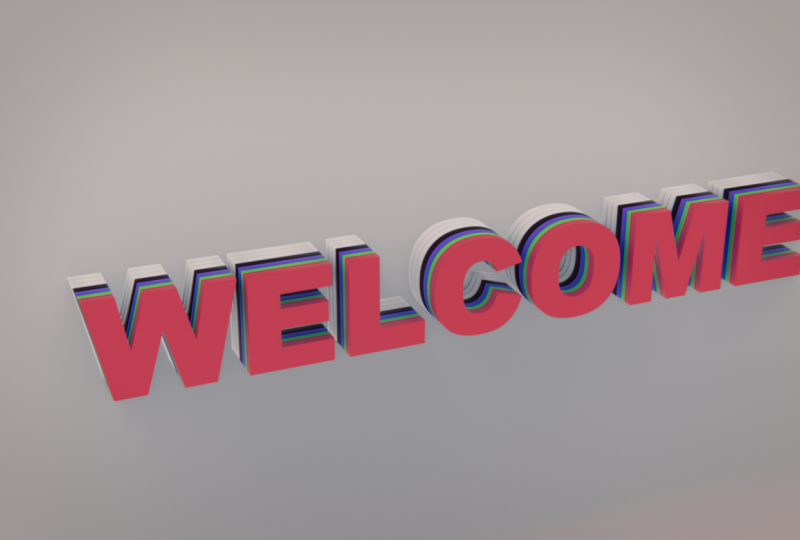
1. Trailer: Hello, in this mini course, you're going to
learn how to create this very nice clean
animation style in Blender. This is a simple project and the goal is to take
you step by step without overcomplicating
things on how you can go about
creating such an animation. We will set up the text, create the objects we
need for the reveal, animate everything, and then add a basic camera move to make
the shot feel more polished. We will finish then with
some lighting, color, and a bit of compositing so
the final result looks neat. And at the end, you
will have a clean, simple animation that you can customize for your own project. If you want a clear beginner
friendly walk through, this course is for
you, and we'll go from just a simple text to the
animation in no time. So yeah, let's jump in, and I can't wait to
see you in class.
2. Create the Text: Hello and welcome to
the first part of this text animation
series in Blender. In this lesson, we'll
start simple by creating the text and adjusting some key settings to
nail the look we want. So yeah, let's
jump into Blender. So hello and welcome
inside of Blender. This is a fresh Blender scene. I'm going to pick
General, and right away, I'm going to delete
both of these by hitting X and then delete. Let's go Shift A, and I'm
going to add my text layer. And to be able to
edit this text, all you need to do
is to just hit tab. Let's delete the text, and let's pick the word
we're going to animate. In my situation, I'm
going to type Blender, for example, and hit Tab
to exit the edit mode. The next thing I want to
change the look of this text. That's why I will go
to the text properties right here and right
away under font, you can pick whatever
font you want. In my situation, I'll go here. I'm going to pick
a nice font called Mont Montserrat Bold, open font. I will also rotate this
text by doing Rx 90. And for the geometry, I can extrude it a
little bit from here. So while you're holding shift to move in smaller increments, say we want it to be
something like 0.02, this will be good enough. And actually, I
might also consider adding some beveling
to this text, and that's what you can do
by going to the bevel depth and increase it
while also you're holding shift until
you get something, let's say, 0.002 and reduce
the resolution to three. And now the last thing
that we need to do is to duplicate this
text multiple times. But here's something
annoying about Blender. This text right now,
it is not a mesh. It is a text object, and that would impose a lot
of restrictions when trying to add certain modifiers
and all of example, if you have a text object
inside of Blender, sadly, you cannot even add
a Boolean modifier to it. That's a big problem because our entire animation is actually
based on using booleans, and that's why we
need to convert this text into an actual mesh. But now that will cause another
problem because later if you want to change the text or you find out that
you made a mistake, now you need to do
the whole thing from that's why what I always recommend is actually to always have different backups of
your different objects. That's why before I turn
this text into a mesh, which is a destructive process, that's why I will
select my text, hit Shift D to duplicate it, and hit the right mouse button to cancel any sort of movement. I will hit M to move it
to a new collection. Let's choose new collection, and I'm going to call
it, for example, Archive and create it. And also, I'm going
to disable it from the outliner because
I don't want to it. This is very useful because
even in the future, if I want to change anything, I can always go back to this archive collection and
change everything from here. And now we can go to this text. You can hit the right mouse
button and you will have an option for Convert to mesh. Just click on this. And right
now it is a regular mesh. And even if you hit the tab
to enter the edit mode, as you can see right
now, we're dealing with points and vertices
and faces and all. I know that the topology right
now is an absolute mass, but we don't need to
worry about this. But something that
for the life of me, I don't know why
is it happening. Right now, the stacks does
have a lot of points on top of each other or a lot of vertices that are basically
almost merged. They are too close to each other or even on
top of each other, and that tend to cause
a lot of problems. That's why while you are
in the editing mode, make sure to hit A to
select the entire mesh, and if you hit M to merge, you will have an option
here to merge by distance. Merge by distance is just a fancy way to tell
Blender that, Hey, Blender, if these two points
are to each other, based on a distance
that we specify, just join them and make them the same vertice or merge them. I will choose by distance,
and as you can see, Blender by default
will tell you that it removed 518 vertices. But also if you jump here
to the merge by distance, this is the distance that
is using which is 0.001. Actually, I don't know. This is tenth of 1 millimeter
or something. We didn't alter the shape
of the text by any means. We just removed vertices that we're sitting on
top of each other, and those will cause us a lot of problems further
down the line. So now, once you
are done with this, all you need to
do is to just hit Tab again to exit the edit mode, and we need to create
multiple copies of this text. That's what I will do by
going to the modifier stab. Let's add a modifier and
look for the array modifier, and I will choose array. I will put the X to zero, and I want to extrude them based on the Y axis or the Z axis. Let's try the Y and
this will move them up. You might be wondering,
why is it moving them up? That's not what's
supposed to happen. If you remember we
rotated this text 90 degrees and that will
cause the axis to flip. That's why we need
to set this to zero and actually do our operation
based on the y axis. Let's do it minus
minus one, let's say, and based on this, you will have something
looking like so, which I think is decent enough, but I want to leave a small gap between these, for example, by typing -1.1, and this will give you
the following result, which is exactly what we want. And as for the number of copies, I will make them,
let's say six copies. I think this will be
good or maybe seven. Okay, let's skip them at seven. And yeah, this is
basically it for how we will go about
creating our text. And in the next
video, we'll create the bullying object that we will use to create
our animation. And as usual, make sure
to save your file.
3. Create the Boolean Object: Hello and welcome
back. In this video, we're going to create
the Boolean object that we will use as
a mask for the text. Hello and welcome back. And in this video, as I said, we're going to create the
Boolean object that will act as a way to mask our text and create the desired
animation we want. So as you can see, we
need to create this sort of very smooth line with
a lot of ups and downs, this sine wave, let's call it, and later we'll use it as a. The first thing we're going
to do while I'm here, I need to create
the curve object that will look
something like so. I'm going to go Shift A, curve, and from here, I will choose
the option for By A curve. By default, it will be laying flat on the ground.
That's not what we want. That's why I will hit Rx 90 to also rotate it on the
X axis by 90 degrees, and let's hit Tab to jump
to the edit mode and maybe also type one from the number pad to jump to
the front projection view. Let's also enable the X ray mode to be able to see
everything clearly. And let's move this point
somewhere around here. Maybe you can even select the two handles and
hit S to scale them. A what I'm trying
to do is to create the wavy something like so. If you want to add other points, all you need to do is to
just hit E for extrude, same as regular modeling. And let's create something
that looks like so. Maybe you can even select
the whole structure, hit SX to scale it a
little bit on the x axis, J to move it here,
select this point again, E for extrude, something like so, I think
will do the job. We need to turn this
into an actual mesh. That's why I will exit the
edit mode by hitting tab. I will create a copy of this
and save it as an archive. Shift D to duplicate, M, to move it to a new collection, and let's choose archive. And for this BZA curve, right mouse button,
convert to mesh, and now if I hit
tab, as you can see, it is regular points as we want. A, to select everything. Let's hit seven to
jump to the top view, and I need to move this to sit perfectly in the gap
between the you remember, we left a very small gap between all the
different text elements, and that's where I will
be putting the line. So JY to move it on the Y axis, and let's say it will sit
somewhere in the middle. You don't have to be
very precise with this, make sure that it is not
intersecting any other text. Then just hit E for
extrude and Y to extrude it on the Y axis until you
put it something like so. Make sure to make it close or snug to the text as
much as possible without clipping
it because later also we'll be arraying
this multiple times. And actually, just to
make sure I'm safe later when I'm creating
the Boolean operation, I will also select
the upper line that's zoom in back again. And JY to make it
almost fit the text. It is like a bounding
box, let's say. And you will have something
looking like the following. Select everything by hitting A, JY to move it down and make sure it is not
clipping the text. And we're going to
extrude it upward. So hit E, and by default, it will be on the Z axis, if not just type Z, and let's move it
up just like so. Want also this upper
part to be a wavy line. I want it to be flat, and you can do that easily
by hitting S Z zero. That will set the scale
on the Z axis to zero, which will give
you this flat line and hit Enter to confirm. Let's hit tap to
exit the edit mode, and I'm going to hit F two
to rename this object, let's call it Boolean. The next thing we need
to a an array modifier to this, just like the text. But first of all, let me disable the X ray mode because
it is annoying. Let's go to the Boolean, add
modifier and look for array. For the number, I will pick six, same number as the text. And for the offset,
let's set the X to zero and set the Z to -1.1, which is the same exact
value we used for the text. Sorry, -1.1. And yeah, this is the result that
you must have right now. Whatever reason, actually,
I think we used seven. Let's pick the text. Yes,
we used seven. My bad. Anyway, right now,
we have this thing that looks like this with
the text sitting inside, and in the next
video, we'll create the bullying operation and
create the animation we want. So yeah, I'll see you there. And as usual, make sure
to save your file.
4. Create the Text Animation: Hello, and welcome back. In this video, we're
going to create the core animation that will
bring the animation to life. So yeah, let's
jump into Blender. And we'll come back
again inside of Blender, and right now we need to add the Boolean modifier and create
the animation, as I said. I always struggle when
it comes to knowing to which object should I be
adding the Boolean modifier? Should I add it to the text or should I add it
to the other object, the one that I will
use as a Boolean. The easiest way to think about this is to always ask yourself, what is the object that you
want to change the shape of? In my situation, I want to
change the shape of the text, and that's why you need to add the Boolean modifier
to the text. So let's select the text. Let's jump to the
modifiers tab and let's add another
modifier called Boolean. For the operator type, we're going to use an object
which is the Boolean. So let's pick here Boolean. And for the solver, most of the time I find
float is the best. Now, if I just disable
the X ray mode to see what's going on and
hit JZ to move this up, you will see that, Okay,
nothing is happening, but actually there is
something happening, but because when you add
the Boolean modifier, the other object
is still visible, so it is obscuring my view. That's why you will
always find yourself whenever you're adding
a Boolean modifier. You will jump to the
other object under object properties,
viewport display, change this from
display as textured to let's do bound just a fancy
way to tell Blender that, Hey, Blender, I
don't want you to show me the full object. Just show me the bounding
box of this object. And now, if I hit JZ
to move it upward, you will see the
following happening, and there is some
animation happening. But there is a small
issue. Normally, we should not be able to
see the text right now, but for whatever reason,
we're seeing it. Let's play a little bit with the array modifier right here. For the text, it was -1.1. Okay, we use the same value. So we're supposed to be safe, but I think we need
to change the value, exit the X ray mode, and let's play a
little bit with this. Okay, we're going
to use this value minus let's try minus one. No. Increase the
value a little bit to -0.08. This will do the job. Because our different
bullying objects were intersecting the text in multiple points, that
caused this issue. And now, if I select it and
do JY to move it upward, we're creating the animation that we want, as you can see. The last part of this animation
is to make sure that I don't want everything to
happen in the same amount. I want it to be like this, and that's actually very simple. All you need to do,
make sure you are selecting your bullying object and change the
offset on the Y axis until you get something like so. I will set it to 0.0 15, and this will give you
the following result. Now when I will
animate the position, if I go J Z, you will get something
looking like the following, which is exactly what I want. So now we can create
the animation. I will bring this up and I will do JZ to move
this downward, jump to the object properties, and all I need to do is to
animate the Z position. While you are on frame one, let's create a keyframe
for the z position. My animation will be,
let's say, 7 seconds long. So I will go to frame
seven multiply by 24. Since that's my frame rate, it is 168 and do JZ and move it upward until the full text is visible and create
another keyframe here. And now, if I hit play
to preview my animation, it will look just
like the following. And yeah, this is how you
can create this animation. And since I am already here, let's make sure that
my frame range is the same by setting this to 168. Okay, so this is it for how to create the Boolean animation, and I will see you in the
next one where we will create the camera animation and adjust the whole scene
setup. See you there.
5. Create the Camera Animation: Hello, and welcome back. In this video, we're going to finalize our shot, add a camera, and add some slight
movement to it to create a more dynamic
shot and basically have the shot ready for
rendering in the next video. Hello, welcome back
everyone inside of Blender. And the first thing
I'm going to do is to add a ground for the scene. All you need to do is just go Shift let's go mesh
and add a plane. And for the size of this
plane, let's make it, for example, 20 meters, something like so I
think will be good. And since also my text is not sitting in the
center of the scene, and I don't want to bother moving everything because
that might mess things up, I'm going to hit seven
to jump to the top view. Let's hit J and move it
somewhere close to this. I think this will be
good. And now we need to create the camera angle
we're going to use. To do that, I always actually like to add another
viewer from here. Let's hit T to hide the sidebar and also show tool settings. I'm going to hit zero from the number pad to jump
to the camera view, or you can do that by clicking
on this button right here. And from here, we need
to adjust our view. Let me toggle the
view navigation, which means that right now
I'm moving my actual camera, and let's just pick an
angle that we like. Something like so I
think would be good. Even move it slightly upward. Once that is done, I'm
going to also jump to the camera settings from here
and under viewport display, you will have this
option for Pass part, which is just a fancy way to make everything outside
the frame black. Let's sign all the
different overlays. So this is exactly my view. And actually, I think I'm
going to move the camera even slightly more to
something like so. And just to be safe, I'm
going to enable the Gizmos again for a second and
toggle off this option. So later if I move
this scene by mistake, I will not ruin this
camera position. Now I want to create a very
subtle camera animation. So I want the camera to
orbit around the text. There are multiple ways of
how you should go about this, but the easiest method by
far is by going Shift A, and let's add an empty object, and I'm going to
add a plain axis, and I need to pair in the
camera to this empty object. The easiest way to do this is
to just select the camera. And while you're holding Shift, just move it inside the empty. Let's rename this empty to
something camera controller. Now if I hit R Z to rotate
it, as you can see, I will be able to orbit around the position of
this empty object. I'm going to hit seven
to jump to the top view, and surprisingly, I
need to unparent it. So let's go here, shift, and move the
camera outside. You might be wondering
why Because I need to move this empty object to be sitting somewhere
in the middle. And if I do that
while it is parented, that will also move the
position of the camera, and that will ruin my angle. Don't want that to happen. So jump to the top view by hitting seven from
the number pad and let's hit J and move
it somewhere around here. I think this will be good. And then select the camera shift and move it inside the
camera controller. And now, if I select the
camera controller and hit RZ, I will be able to orbit around the text just like
the following, which is exactly what I want. I can even move the camera
slightly to the left RZ, Yes, this is looking neat. Go to frame number one, jump
to the object properties, and let's add a keyframe for
the rotation on the Z axis, and let's go to frame
168 and make this, for example, make it 30. No, that's too
much. Let's make it 15 and insert another keyframe, and let's preview this. And yeah, I'm
digging this result. I think it is looking good. So this is it for
this video, everyone, and I will see you in
the next one where we will start adding our
different materials.
6. Shading: Hello and welcome back. In this video, we will
add the colors and lighting that will shape the
shot for the final render. This part is always
fun because we can finally start to see
the scene come alive. So yeah, let's
jump into Blender. And we'll come back
inside of Blender, and let's start
adding our materials. First of all, let's jump
to the render settings. I'm going to use IV for my animation because
it is faster. And since it is more or
less a stylized animation, we can always go with IV. We're not looking to create
something that is very realistic that we will
use cycles for that. Next, also, let's
enable the rate racing, and for now, I will keep all the other settings
the way they are. Let's jump to the rendered mode. By default, you will
see the following. The first thing that
you will see is the different bullion
objects that we created because right now they are visible in the
rendered view. So it is important that also
you disable them from here and here so that they will not be visible and they will
not obscure my views. This is number one,
and now we can move on to creating
the actual material. Of all, we need to add some
lighting to our scene. There are plenty
of different ways of how you can go about this. You can add an area light,
you can add a sunlight. But in my situation,
I'm going to up to a very easy solution by changing this to
the shader editor, and let's jump to the
world properties. And instead of using
this dark gray color, I'm going to change this
to a brighter color, something almost white, maybe something like. So
I think will be good. Right now we can
move on to creating different colors for all the different
layers of the text. So let's change from world to object and make
sure to select your text object and create a new material that we're
going to call text. Now the question becomes, how are we supposed to create
different materials for or assign a different color to each one of these
different text layers, especially considering that all of these are the same object. So if I change right
now the color, that will be applied to all the different layers of the text. Well, there is actually
a very easy way to go about this,
and here's the logic right here, I'm going to add a node that is called geometry, which will give me some
information about geometry. And the first
socket is position. If I plug this to
the base color, this is the position right now. It is displaying it
in terms of vectors, red for X, green for Y, and blue for Z axis. I want to assign a different
color based on the Y axis, as you can see going like this, that means it will
be the Y axis. That's why you can
add a node called separate X Y and Z and plug
the Y to the base color, and you will have
a gradient that goes from black to white. So theoretically now, if
I add a color ramp node, put it in here and change
this from linear to constant. And especially if
you start playing a little bit with these
flags, as you can see, we'll be able to control
the position of all of these different colors that we will put inside
this color ramp. Here's an example. If I add
another flag and let's say I'm going to make it as purple, for example, and let's play
a little bit with the flags. As you can see, you
will be able to control the position
of each color. Let me disable the lock for a second to be able
to orbit the scene. As you can see, right now,
we're able to control the position of each color
using the color ramp. There is a slight issue, which is that everything is
crammed in this little space, so it will be very hard to add
the different colors here. It feels like all of
this is useless space. That's why the ideal way
of how you should go about this is to add a
multiply node before this. So let me move these here. Shift A, and let's add a math
multiply node, put it here. And I'm going to multiply it until this purple color will be sitting
perfectly in the middle. Something like let's say
four or maybe even 4.5, I think will do the job. Now I'm using the full ramp to add all the different colors, the process is very simple. All you need to do is to add more flags in
the color ramp, change the position of
the different flags, and that will allow you
to control the color of each part or each
layer of the text. For the first color
which is black, I'm going to assign
an orange color which hopefully will look
something similar to the color of the
logo of Blender. Let's say something like so. This can be very annoying
because you need to find some colors that
matches and all of that. But actually, it's the fun part because right now you can do some creative things instead of just thinking about how to
create a certain model. And that's how I
will go about this. I ended up going for the
shramp that goes from orange. I will start by having
an orange color. Then it goes to yellow, and then I will go basically
slightly into the purple, then white, and then
some shades of blue. So it is like going from worm old colors. Something
else I'm going to do. I think I will lower this
to something like four. I think this will
be better because I'm running out of space
in the color ramp, and I'm going to
add one last color, which is, let's say, it will be this cyan color. And now it is just a matter
of picking a better view, something like so and adjust all of these different
flags so that each color will be sitting
in one layer of text. The colors will
not bleeding from one text object or one
text layer to the other. So just play with
these flags until you get the desired look. And yeah this is looking
very, very clean. Let's hit zero from
the number pad again to jump to
the camera view, and you will have the
following result. For the roughness, I'm going
to bring it down to zero, and maybe you can even
make it a full metallic, but I think I prefer the look
of it being not metallic. Let's set play to
see the animation. This is how our animation
is looking right now. I really like this
light bleeding that is happening on the edges. That's very clean. Right now, you have the knowledge to adjust everything based
on what you want. So this is it for this video. And in the next one, I will
show you how you should set up everything to render
and how to render your scene. So I'll see you
there. And as usual, make sure to save your file. You don't want to lose
your work right now.
7. Finalizing the Scene and Rendering: And Hello and welcome
back to the final video. In this lesson,
we're going to build the compositing node setup
and render our shot. Okay, so Hello and welcome back again in Blender one last time. And in this one, we will add a compositing node tree to finalize the
look of our scene, and we will render everything. Let me jump back again
to the rendered view. And in the previous
versions of Blender, I remember that we had to render the full
scene and then bring it into the compositing to be able to see how the final
result will look like. But fortunately, right now, we can skip all of that and jump directly into
compositing and see exactly how the final
render will look like while you are still
in the three D viewport. Do that, let me change
this shader editor to the compositing and something
that is not so genius, I always say is that compositing is the operation that comes
once you finish rendering. And that's important
to understand because all of the operations that
we will be doing right now, they are operations that will happen on the image
once it is rendered. So while you are here, I'm going to create a new
compositing notary, same as the shader editor, and I'm going to leave the
name as compositing node. Let's say, for
example, I want to add some lens distortion
to the surrender. Shift A lens distortion.
Let's put it here. If you change the value, nothing will happen because we need to tell
Blender that, Hey, Blender, I want you to also
consider the compositor. It can either be disabled, which means Blender
will not show you the result after the
compositing process or camera, which will only
show you the result in the camera or always, which means that it will show you the result even when you are in the three VD Viewport navigating or
modeling or whatever. Know why you will use
always most of the time, and the thing that
makes the most sense is to always just use camera. And right now you
will be able to see the result of the compositor
in your camera view. So let's change the distortion to be something like -0.02. And for the dispersion, which is the chromatic aberration, that's 2.002 or maybe 0.02. You can also add some vignette and in the previous
versions of Blender, that used to be
very complicated, not very complicated, but it's a very elaborate node setup
that you need to create. But right now, all you need
to do is to just bring the vignette and
put it right here, and maybe you can even lower
the factor to something very subtle like 0.25
will do the job. And finally, I'm going
to do some split toning by adding this
split toning right here. This will give you
the following look. But for the factor
of the highlight, I will lower it way, way down until you get
something like so. You can increase the brightness until you get something
that looks like so. Of course, you can spend more time playing with all
of these different things, but I will leave it at this.
I think this is good enough. So once that is done, let's right now think about
how to render the scene. First of all, I'm going
to render using EV. I will keep all of
these the way they are. The only thing I might
change is actually motion blur because I want to add some motion
blur to my render. Output settings, since I'm
orbiting around this text, and that might be
a fast animation, I want to increase
this to 30 FPS. That will not change the
position of your keyframes, but will make the
animation slightly faster, which means it will be
smoother for the eye. And for the output, let's pick where we want to
save our animation. Let's say I will save it
in the Blender project, and I'm going to call
this text final. Except media type, whether you want to save it as
an image or a video. If you're doing some
high end work like a render for a client and you know you will need to do
a lot of compositing, you should be using
multi layer EXR. But in our situation,
we only want to render this video as a video, so you can post it on social media or use it in
your video or whatever. That's why I will
just choose video. For the color management, this is a fun part
because right here you can adjust a little bit the
final look of your result. If I jump right
here to the render, you will have the
same type called color man Color management
is just a fancy way. You can think about it
as a filter to show you different possible renders or possible different
looks for your render. This is part of a
bigger concept, which is the scene referred
color space and the display referred color space and how you should go from one
color space to another, which can get very complicated. I might make a course
about it at some point, but all you need to do
is that if you change the view from AGX
to one of these, these are just different ways of how you can see
your final render. For these sort of motion
graphic elements, I like to use CronospBR texture because it gives you slightly
more pump in the contrast, and I slightly more powerful, let's say, let's go
back to the output tab. And for the pixel density,
keep it the way it is. And under encoding
container Metro Saka, I will change this to
MP four or QuickTime. QuickTime will give
you the access to PRs, so that can be very useful. And actually, let's
render as a PRs video. Video Codec, change it to PRs, and let's choose four to two LT. That will be more than
enough for my work. And once that is done, let's go to File and Save your file. Let's also disable
the rendered view so it will not consume
any sort of memory, and then you go to render
and render animation. And all you need
to do right now is to wait for this
animation to render, and I will see you
on the other side. Okay, Blender just
finished rendering. And right now, if I go
to my File Explorer, I will have text
final animation, and let's play this yeah. And this is looking very cool. Thank you, everyone for
tuning into the scores. Other than that, I would really appreciate it if you leave a good review on the scores
that will really help. Other than that, I can't wait to see you in other
courses, please. Have a good day.
 Yassine Larayedh, VFX Artist