Transcripts
1. Welcome to Midjourney - The Future: Welcome to the future. Artificial intelligence
art, or a short AIR, is the next big thing. Discourse is an investment
into your future. Jump in early and set
yourself up for success. I can't explain how big this is. You type in something, anything and mid journey creates that any
style, any color, literally anything
that you can think of from creative work, too realistic photos, booze,
simply silly designs. This is all done in mid journey and I'm going to teach you how you can get started with it. Think of mid journey and AIR, like learning to
code 20 years ago. Invest time into it
and you're gonna get incredible benefits
down the road. Join me as I explain
everything for regular people who don't have any previous
experience whatsoever, I'm going to explain
everything step-by-step. Gonna have cheat sheets
that you can use, resources of all sorts so
you can get awesome results. Listen, I've been teaching
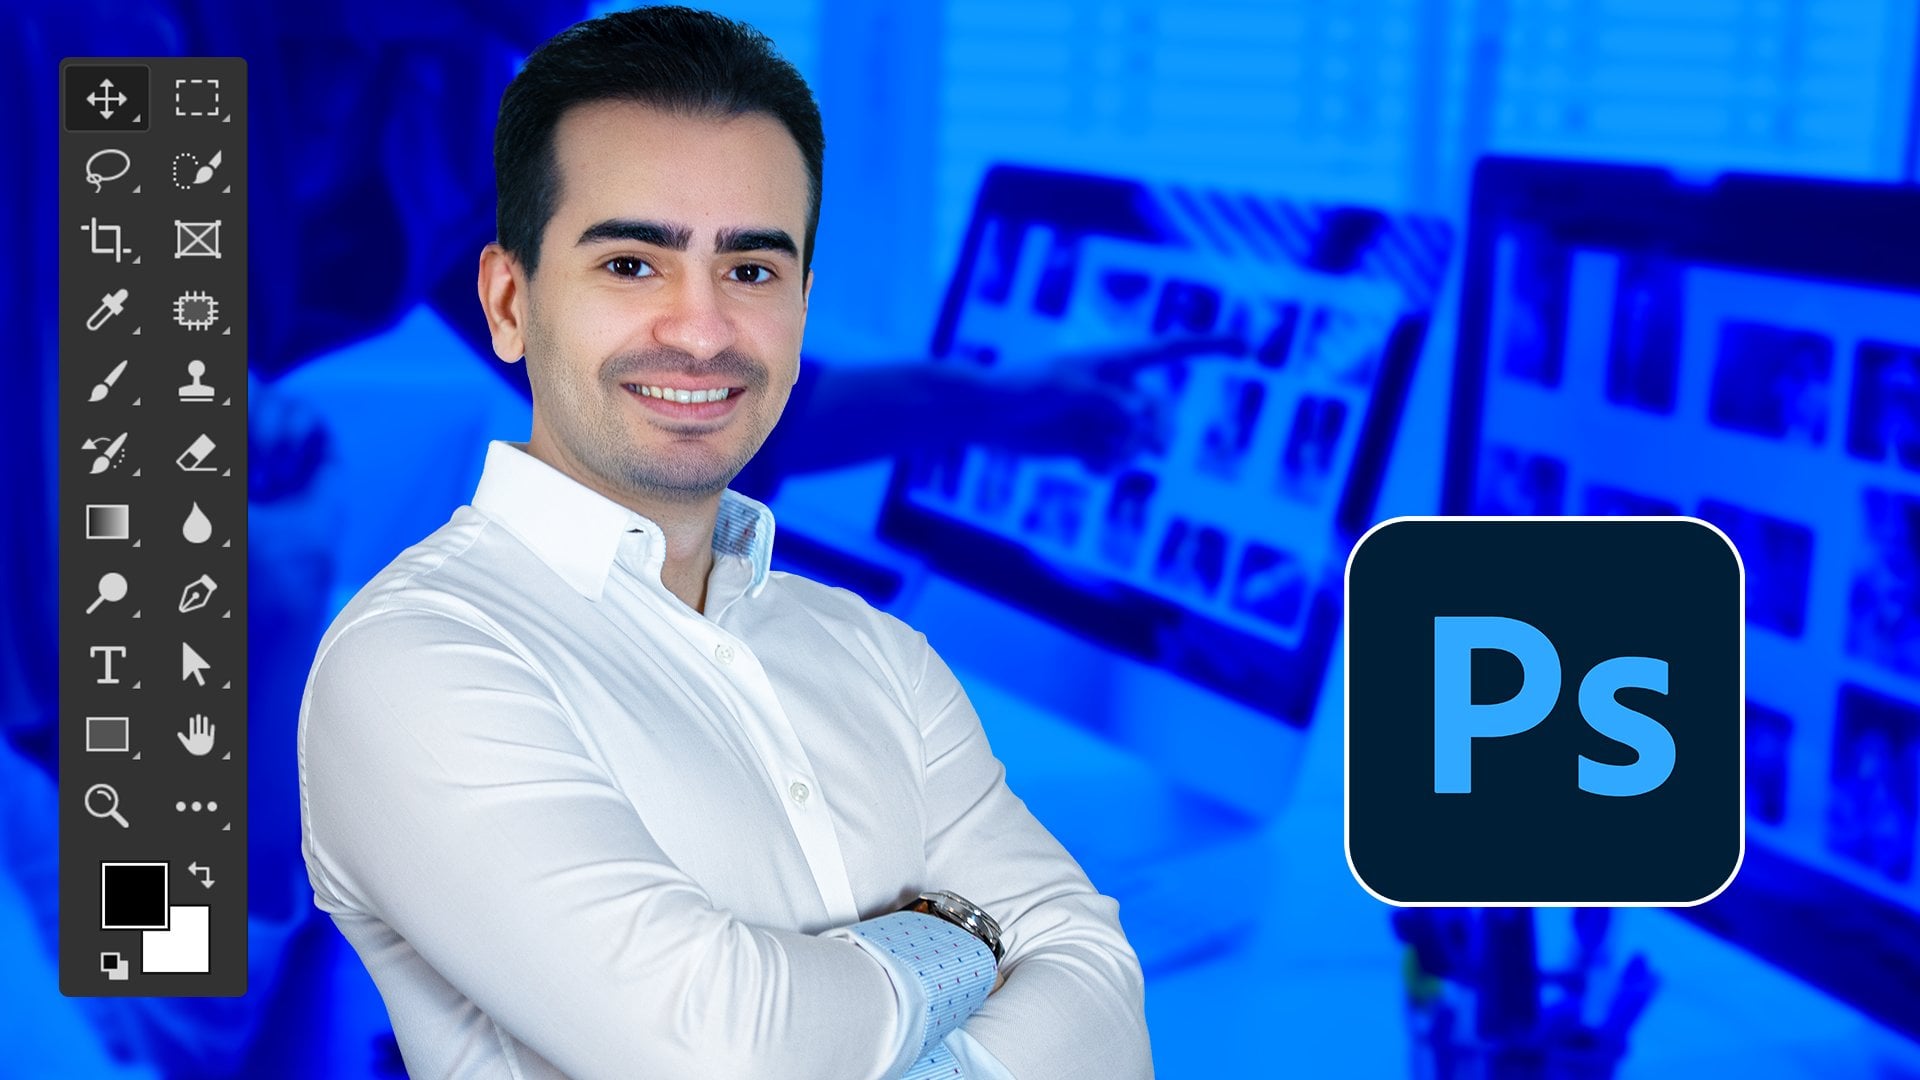
Photoshop for over ten years. Trust me, this is the next big thing and
you need this course. This is one of the best
ways to get ahead. This is the first
step into becoming an expert in
cutting-edge technology. Start today and your future self will thank you for
jumping in early. So let's get started
with my journey.
2. Use this approach with MidJourney: Welcome back. Mid journey is incredible. It's fantastic. You type something and it magically create
something awesome. You look at the showcase
and your jaw drops, even if you're not a
designer, even more. So if you are a designer and you jump in and you want to learn that you want to
learn mid journey, but chances are you're going
to find it frustrating. See you look at the gallery and what other people are doing, and then you compare
it to your results. And obviously you're
going to be disappointed. The beginning is 0. So for illustrating
the interface itself, it's challenging. The prompts are
difficult to learn. You have limited time and resources and mid journey
is eating them up. This is why you need
the right approach before we get into
all those details. So think of mid journey as an investment into your future. Don't assume that my journey as a finished product
that's going to deliver every single time? No, actually things are
quite crazy at the moment. Things are changing
week after week. This is a time where you get
used to it and you practice. This is like learning to code. 20 years ago, they went through all of these
difficult steps, all the ups and downs, all the frustration
learning phase. This is what's going on
right now with my journey, and that's how you
should approach it. See, I jumped into it
and I wanted an image of some ginger and a slice of lemon for the label of mine
for some lemonade, right? This is an actual
product of mine. Now, that should be
easy enough, right? Well, I spent hours
and hours and hours. If fried my brain, I got so frustrated
because it kept giving me silly results or blurry ones. And I did my best. I followed up guides, I watched tutorials and whatnot, but it's still messed up and
they ended up wasting hours. It would have been
much faster to use any classic resource
like Adobe Stock, Unsplash, free pack
or Envato elements. All the links are
attached, by the way, if you're looking for
the awesome results that you can immediately use, maybe this is not the right
approach using my journey. Now. Sure. Devolve cases where mid journey does give you
exactly what you want. But from my experience,
those are exceptions. If you're looking for
something very specific, you may not get it
and it's frustrating. So in conclusion, let's use
my journey so we can get the use of this
technology not to deliver something when
we have a deadline. Now, no matter what
updates come along, how they interface changes, how the technology improves, it's essential that we
understand that this is the future and we
want to be a part of it. So if you manage your expectations and realize
that this is going to be challenging and frustrating when you're looking for
something very specific. And Yolanda Clarke, then if
you realize it's going to be challenging and you're ready for the entire experience. We're going to be
much better said the mindset is actually one
of the most important things. So don't expect the world. Let's take it step-by-step with just learning how to walk. We're not going to sprint. First of all, we're going
to learn the basics. Let's continue.
3. Get started with Midjourney: Welcome back. Mid journey
works based on this scored, at least for the moment. So this means that
you first have to get up and running
with this gourd. If you already know how to use the program, please skip ahead. Okay, this gourd is a chat
program similar to Slack, skype or maybe even
Yahoo Messenger. This chord works
in your browser, in the BAB, but you can also install it as a
standalone program. And that's what I actually
recommend you use. It's a slightly
better experience. Signing up for this
chord is totally free, so I'll quickly go
through the steps. It's putting in your details. You're the email,
verifying your email. Nothing more complicated
than signing up for Gmail or any mainstream service. Now, while I work
in the background, you do have a step-by-step
guide attached to the lecture just in case you
need more help with that. And we can go
through the motions. So your email address,
your username, which isn't really all that important to be
honest, and so on. Okay, now what you need
to know about this gourd is that it works in
basically two ways. You can private message someone exactly like on Facebook
Messenger or Skype. So a one-to-one direct message or one-to-one conversation. And in that case, you're going to need to
know someone's username if you want to talk to someone. But most of the time
you're going to use this gourd in server mode, which basically means you're
going to enter a room, aka server with lots of
people and anyone can chat. Again, very similar
to Slack, e.g. by the way, this
gourd may show you some pop-ups asking you to buy stuff, upgrades and whatnot. There's no need for that, no need to pay for anything within this gourd and
it's totally empty. It's asking us to
add the friend, but we actually want to go
to the med journey server. Okay, remember, server
just means room chat room. We can click here and
if you hover over them, you can see it says, explore the public servers or
rooms, chat rooms. And once we're here, we can use the search bar and
simply type in mid journey. If you click on it,
you'll be brought to it. And this is why most
people get intimidated. It's overwhelming to be
honest, but no worries. It's actually quite simple. Up top, you should see this message that says
join mid journey. Click it, and you'll have to prove that you are
human most of the time. And once you do that, you're gonna get a
success message. You are now a member of
this server mid journey. Okay? Now, remember you
do have to verify your email address
and stuff like that. But let's say that you
can't manage to use the Search feature
from the left side of this chord to find the
mid journey server. Okay, no worries. You can do this as
an alternative. Go to your browser and
go to med journey.com. From here, click
on join the beta. And basically that's it. You're gonna be
taken to the server. And just so it's
easy to understand, let me join my server as well. I made this chat room
for all of my students. So we're gonna put in my
name here, Chris barren. And you're going to see my face. Click on it and
then you can join that totally free, of course. So let's do a small recap. So first of all, you
sign up for this chord, the free chatroom program. Then you search for the mid journey
server, aka chat room, by using this compass
icon in Discord or the by going to that
website, mid journey.com. Once you have here, this is how you can
use this chord. So every chat room you're a
B2B is going to show here. In this example we
have two servers. This is mine and you
can see my thumbnail. And you can see
this is the active one by checking out
this symbol here. And underneath you
have various channels that I created to keep
things organized. E.g. if you want to
talk about Photoshop, you can see we have a channel
specifically made for that, but I also teach Figma. Again, there's a channel
for that as well. If you want to see high,
There's introduce yourself. So these helped me keep
my chat room organized. Simply click on them to
switch from room to room. That's how you basically on-point to switch to
a different server. You're going to click here. Notice that here things that are different
from my server, we have rules
support, and so on. Now, the great thing about
it is that you don't actually need any of this
stuff with my journey. Go to any newbie room, and then you're going to
find the med journey bot. That's exactly how it's called. So you're gonna click on
it to send it any message, any character, and
just hit enter. And that's because we're going
to work in private mode. So this means we'll
have to pay for it. But trust me, this is
the only way to go. I'm sorry to say that the
free plan is super limited. It forces you to go to a chat room that's being
used by hundreds of people. And it's basically
a nasty experience, is so overwhelming,
it's so difficult. So that's why we're
going to go for the bait land to have a one-to-one
conversation right here. Okay. We haven't paid yet. But let's try to use my journey. So let's type in slash
and then imagine, then hit the spacebar. Prompt is going to show up and that's totally fine.
That's normal. Type in anything like car e.g. and hit Enter. And just like that,
you're going to see that you're
not allowed to do that because you haven't
paid. No worries. We're going to get
the 10-dollar plan. Click on this link. Mid journey.com slash account. Sometimes it may not take
you to your account. You may get this
screen, but no worries. Click on Sign-in,
wait for the second, and then you're gonna be
asked for some permissions. It's totally fine. Go ahead. It's all safe. Okay. After that's done, you're going to see my
journey.com slash account. This is the place
to be. On the left. Managed subscription is active. Switch to monthly billing. And by the 10-dollar the plan, if you have a VAT Code, you can't add it for
the initial Burgess. You can only add it afterwards. So yes, you will
have to pay VAT for the first month, hit subscribe. And once you put in your
credit card information, you can go back
to this chord and use the same command slash. Imagine then car. Wait awhile. And this is going to work. Check out the
step-by-step guide in the PDF that's attached
in case you need any help or do you
can also come to my Discord server
and ask for help, but please always, always
use the general channel. We don't have that
many students. There's not a lot going on, so it's quite easy to
use the public channels. Please don't private message me. Okay, let's continue.
4. This is how you get better at using Midjourney: Welcome back. I know that you
want to jump ahead and get to the part
where you can use mid journey Like a Pro and it spits out exactly what
you're looking for. But get that point, we need to establish
a few things. Number one, range anxiety. Now with given to
details later on. But right now you
should know there are three paid plans available
on mid journey.com. Please start out with a basic
plan that's $10 per month. You should have subscribed
in the previous lecture, then you'll probably going
to upgrade the $30 plan. And this should be
enough for most people. Now, you may not be
happy about paying, but as I said, this is an investment
into your future. For this course, you can
stay on the $10 plan, but later on you will
need the $30 plan. Now, trouble is you
have some limits. A certain number of
images per month, a certain number of hours. So this is where range
anxiety comes in, exactly like with electric cars. You're not sure that if
you're gonna make it now, sometimes it's
mostly in your head. You start to worry, am I wasting get, is this the right
command and mid journey? Should I do another
version and see when bullets are
scarce and precious, you begin to doubt yourself. You are no longer
in learning mode. You then anxiety mode. And I want you to know that's not the right
approach, right? This is not the
right in line set. So my advice is you fire away. And if you want to
be completely OK, go for the $30 land after
you finish this one, where you're going to
have unlimited bullets, so to speak, you can
fire the way non-stop. Now, there's a lot more to say, but I really wanted
to address this part. Please don't limit yourself. Don't watch the time or don't watch how your resources
are going down. Just work, explore, and
try to have fun with it. And that's the second point I want to establish
the second thing, explore the words possible. Now, most serious major
new users seem to agree that this is a tool
for creative people. It's not going to replace
designers altogether. It's a tool that can help you navigate difficult projects. Med journey helps
you find the style, a color scheme, a look of vibe. It's browsing for inspiration, but in a more guided fashion, you tell it what
you want and then made journey is going
to come up with ideas. So this is useful for
things like, I don't know, creating games, posters, animations, creating
rough drafts. It's not that mid journey will never ever give you
a finished result. It's more about having
the meeting with ten people and brainstorming, showing golf various concepts and getting closer
to a certain vision. In the past, skilled designers, the days and weeks to
come up with a style, a look of vibe. Then lots of people had a meeting and they
said, I don't know, maybe we need it in blue, maybe make it happier, maybe in a different
color scheme. And then scale
designers were upset. They went back to
the drawing board, they wrens, then they
repeated this process. It was low, it was expensive, it was frustrating, it
was time-consuming. Now with mid journey, you can accelerate all of that. The design of the shows concepts that he made and
maybe a few hours. The meeting is so
much shorter and the final concept is
approved much faster. So to sum this up, my journey is unlikely going
to replace all designers. It's likely going to
be a tool that can help designers become
more productive. And overall, it's going to speed up this creative process. So that's how you
should look at it.
5. Create your first images in midjourney: Welcome back. Let's create our first
images and mid journey. So let's start out
with the basics. First of all, you've
installed this gourd and you can always find
that in your task bar, even if you hit the X symbol is not actually going to close. It's just gonna get minimized. Next, we always want to use
the direct message feature so we won't get swamped by what's happening in
the public channels. Here, the main command is slash. Imagine. After you are going
to headspace, you're going to get prompt. This is how my journey works. A prompt is a command,
it's an instruction. And you can type in just about anything
that you can think of. E.g. let's use car. Once you've hit enter, your command is
going to generate. Sometimes it's going
to take a few seconds, other times it may
take a few minutes. You will also see a percentage
showing you your progress. When MIT journey is done, you're gonna get a notification, both the sound and the message. So you don't actually have to
sit around and wait for it. Okay, let's do another prompt. So slash, imagine red car. And after the while, you're
gonna get four more images. Now, before we continue, let's use this command
slash settings. Currently, these are
the available commands. What we want is the
latest version, and that's version five. At the moment, M J
stands for mid journey. We want the standard quality and the style
typically very high. The only other
option right now for this specific land that
10-dollar bland is remixed mode, which I encourage you to
enable more on that later on. Okay, back to other
image creation. So let's use slash. Imagine red car in
Paris with soft lights. Okay, So as you can see, we're adding a bit more
details with building it up. The more details, the
better the result. Though at one point it can
be counter-productive. More on that later, every time you create something, you are going to
get for the photos, you can click on the image
to get a better view. If that's not enough, you can use this tiny text here that says open in browser. And that actually
really helps a lot. And then this latest version, the quality is quite high. Now why for the photos? So you have options
to choose from. Now, these are numbered 123.4. So if you're super happy
with the bottom-left one, that's actually number three. Now, say that we want to use it. Now the problem in this gourd, you're going to hit U three. You can remember
you as up-sampling, which simply means make it
larger after a short while, you can see the result, open it in your browser
and save the photo. Now at this moment, the default size
is 1024 by 1024. I'm going to show you
how you can make it bigger to Photoshop later on. But up to recap, if you're happy with
the image, hit you, and it's number, if
you're not happy with it, hit V, which stands
for the variation e.g. let's hit V2, which means
we're going to have a variation of image
number two, this one. But rather than
having a red car, let's go for the blue car, e.g. we can also add various other details to get the photo that
we're looking for. And because we've
enabled re-mix mode, we get to do that. Now, if you've
disabled re-mix mode, mid journey is going
to randomly created different version without being able to type anything
differently. Now, unfortunately, remixing doesn't always give you the results
you're looking for. And it's really important
that you realize that from the start sometimes it's much better to
start from scratch. So just use slash. Imagine blue car in
Paris with soft lights. And it's much more likely that you're going to
get a better photo. Now, in short, this is the entire
approach in mid journey. That other few other
commands and choices. We're gonna go through
them step-by-step. And you're going to
have cheat sheets as PDFs that you can always
use to refresh your memory. But to recap, you can
always use slash imagine. Then you write what you want. Never think about
how many bullets you have left in your account. How many images
you can generate, your gonna run out, maybe in a week,
maybe in two weeks. So you're likely going
to have to upgrade. But it's a small price to
pay considering this is cutting-edge
technology and you're basically paying
for your education. I know it's not affordable
than dollars or $30 per month. But in a couple of months, you should be professional. You should be great
at it without being worried that your credits
and how much you have left. And with that, let's continue.
6. Show me your world through Midjourney: Welcome back. I want to see a piece
of your world and the best way of doing that
is to do mid journey. Here's what I want you to do. Use lash imagine and then write something like a regular
day in Bucharest, Romania, that's the capital
of Romania, My country. Now, the funny thing is that mid journey is showing a
lot of historic buildings, but tons of traffic. And those loads of
people sitting on the sidewalk having
coffee or whatever. That's not exactly accurate. Still, it's a nice way to see your own city through
a different lens. Now what I want you to focus on is a fairly simple prompt. Maybe do one the likes of a rainy day in
Bucharest, Romania. By the way, I'm speeding
things up through editing because obviously mid journey actually takes quite awhile. Okay? The results
are totally awesome. You will notice that
the cars aren't exactly realistic or that all signs of actually written
in gibberish, that's the current
state of my journey. It doesn't render
text correctly. Now, the overall
image is quite nice. So please do a few
prompts of your own city, then maybe do another
one of your country. And when you're happy, select
the version you like most. Hit U and then get the single
photo at a decent size. Please upload one
or two photos to the platform so I can see a piece of your city or country. To be fair, maid journey may
not be exactly accurate. The traffic isn't as bad as it's shown here
in this photo. And we don't really have that
many historic buildings. Nevertheless, it's a
great way to see how algorithms see your city. And here's how med journeys. He's Romania as a whole. Now, I was expecting some
stereotypes and her, well, that's exactly what I got. Loads of cows. It's easy to be unsalted. Booker S is actually a huge
IT Hub in Eastern Europe. We have loads of things
that were known for. We have glass buildings
all over the place. We have beautiful
new architecture. Now it's showing a
small village with animals may be
seen as insulting. But I would still pose
something like it. Some people see as
maybe medieval ICS, charming, relaxing a window into a different type of world. And we do have lots of
villages where people do live off the land and they do
have sheeps and cows. So that's cool. But let's do one final prompt. I'm gonna go with something
super vague romania pattern. We do have quite
a long history of having specific patterns
in our clothing. So this one does seem right. Now. This may seem
odd for some people, but these were the types
of patterns that were knitted by my grandma
when I was five or so. Okay, So that's a slice of
Romania and book arrest. Now it's your turn. Show me something that highlights your city
or the country. Keep the prompt super-simple. Have fun with it, and
don't be afraid of posting something that may not show you in the best possible light. Every city and country
has good and bad parts. Have fun with it. Thank you.
7. Discover better prompts: Welcome back. When you go to MIT journey.com
and you've logged in, you will find an
area called Explore. Or if you have not logged in, you're going to see a
button that says showcase. That's the same thing. Now, I have to say that
this has incredible stuff, gorgeous images that
make you feel alive. It shows you what's possible. Trouble is, most of your results are then
gonna be this sharp, at least not at the beginning. That's why I want
you to make sure you understand that this is
going to take some time. This will be
frustrating at times. When you compare your work, your results with these ones, you're gonna be
disappointed. No worries. This is part of the game, is like learning how to
swim or ride a bike. First of all, you're going
to swallow some water. You will scrape your
knees and elbows. It's fine. You're going to manage.
Don't worry about it. But the great thing about
this gallery is that you can see they're prompts if
you're logged in, of course. Now, this is going to feel a bit overwhelming because most of these prompts are crazy
long and highly detailed. Previously we said
red car and Paris. But these guys are writing many novels and
that's totally fine. You'll eventually get there. My advice is you look at these
as sources of inspiration. And if you scroll down, you can see other examples
that are somewhat similar. Let's take one of
these prompts and just copy paste it
and see what we get. This is quite important
because based on these borrowed prompts, let's not call them stolen. You can actually
take a shortcut. And as you can see, this is quite similar
to the original one. And more than that because
we're using re-mix mode, we can actually choose to
do a variation, say V3. So a variation of
the third photo, That's the bottom-left one, and maybe add or
remove a few things. And that's how we
can make it into our own original photo
without any moral questions. So to recap, if you
absolutely love something from this showcase and you
want your own version, simply copy paste the prompt. If it's too similar and you're
not comfortable with that, then use the V buttons
to make a variation. As a reminder, if you click on any V button and you don't
get this pop-up window, then that means that re-mix
mode is not turned on. Use slash settings. And you're going to
see re-mix mode. Click it. And that's gonna
give you the option to have that pop up that allows you
to add or remove stuff. One thing before we go, people liked the
cell guides that promised you to get
these types of results. My advice, stick
with this gallery and play with my journey
as much as you can. As long as Yolanda
ten or $30 plan, it's much better to
simply generate loads of images rather than
paying for the guides.
8. Use other people’s prompts: Welcome back. Let's try to use other
people's problems by using the showcase section
from mid journey.com. Remember you have
to be logged in. Now, there are two ways to work. You can copy the prompt or you can copy the entire command. And here's the difference. The prompt is just
a description, a series of words
without any parameters. While a full command also contains things like
the aspect ratio, the quality setting, the style, how close it should follow
the prompt and so on. So if you really want
a very similar result, you should copy the
full command like so. See before the weak base that we do have to be
aware of something. When we use slash settings, you might already have a suffix, meaning certain parameters
that you already set, like style, very high, mg, F5 and so on. But because you chose to copy the full command which
already has settings, you're going to need to
clear your existing suffix. Otherwise you're gonna
get something like V4 and V5 or the S 750, but also as 2.5D. And that's because you have
the entire command copied, but you also have a suffix. So please do the following. If you want to copy the full
command, use slash suffix. We can see a bit of
text right here, and we're going to hit
Enter to clear it. That's exactly what we want. Now we no longer have
any settings of our own, and that means that we can paste the full command that we copied. And there you go. This is all good. But I want to have fun with
it in a different way. This is how I actually
like to work. I'm going to change my settings
to what I prefer to use. And that's mg F5 and styled very high with remixed
mode turned on. Then I'm going to copy prompts. So just prompts,
Not full commands. I'm just going to browse
around and I'm going to look at what styles
catch my eye. I like to use Notepad and
base the prompts that I like. So simply go to the gallery and choose a few that
you like as well. I'm going to jump ahead. Now with these ones selected, you can replace the
main subject in every prompt with
whatever you want. E.g. right here that I'm going
to use maybe I don't know, a red car, but maybe a cat or a girl or whatever
you are looking for. Now, not all of these
prompts are going to work, but most of them
will do just fine. Now the results, again, they may be a mixed bag, but here's the point,
Here's the goal. As you generate 102050 of these, you're going to start
to understand that watercolor acrylic
dynamic composition seemed like a good choice. Those with just some
random examples, you make a note
that I don't know, macro photography seems to give you the result that
you're looking for. So that's the goal
to get used to certain words that typically
work for you to be fair. Some of these prompts
are quite repetitive. E.g. if you go for the
ultra high definition, for the k8k, ultra sharp, those are basically
the same thing. You may play around with
them and cut out a few. But yeah, that's the objective. Use other people's
prompts based on the showcase section
and then make a note of those few keywords
that you actually like. Be at photo realism, isometric, smoky
background or whatever. So have fun with it and put this showcase
section to good use. Again, I like to copy
just the prompt and not the entire command,
but you do you. Thank you.
9. The best shortcut for great results: Welcome back. I get the fact that you want incredible results
right from the start. So I'm going to
show you the best strategy right up front. Say that we want this
beautiful style, right? I have no idea how to
begin to describe it. What prompt I should use. I just saw it somewhere and
I have no prompt for it. Maybe this is from a blog, maybe a stock image gallery like Adobe stock may
be shut on stock. So then what's next? How can we replicate that? Well, we're going to use
this command slash describe. And then when you hit
the Spacebar key, you're going to have the
option to upload any photo. This is by far the
best shortcut and made journey that will
give you awesome results. Basically, this
tells mid journey. Hey, I have this photo. How do you see it? How would you describe it? And then measure knee
is going to give you four options for prompts. Now you can just click on any of them and then see the result. I like to click on
all of them because I don't have any range anxiety. And most often than not, the photos are going
to be quite similar. To be fair at the moment, there are a few bugs. Sometimes the upload
feature doesn't work. There are the upload
errors here and there, but I'm sure this is
just a temporary bug. Now, this is how you cut
coordinates so you don't have to memorize any
list of prompts, e.g. angular, isometric
diorama, and whatever. To be honest, even I don't know what some of those words mean. And here's another thing. Sometimes mid journey recognizes a style of an author, e.g. let's use I denote slash. Imagine a cat drawn
in Picasso's style. And then we'll see
what that gives us. So Picasso, picasso, I think. Anyway, wait a moment. And I think this is legit. But the question is, how many artists do you know? That's an issue. But with the described feature, you no longer have to do
all of that heavy lifting. So here's how I like to work, especially for my
social media posts. Go search for Adobe Stock. Simply type in your
browser, stock.adobe.com. If you just search
for the Adobe stock, it may actually tell
you the price of a share for the
actual Adobe company. Anyway, right, with here. Now I'm a designer and
say that I want to pose something beautiful,
something that's stunning. Basically that will grab
people's attention, right? Pretty basic stuff. Let's go with exactly
that designer. I think we should switch to
illustration mode though. One small note, you could potentially Bay and
get these images. You can use them. But you have to pay
a subscription. Trouble is if you check
out the pricing plan, especially the
month to month one, the payment schedule, well, you're going to see
it's quite expensive. It starts at €30 to be photos. Yeah. The put that into
perspective for 30 bucks. You're gonna get unlimited
photos in mid journey. So paying for this type of subscription is very,
very much expensive. So let's scratch
that and go back to the list of results and
download something, just about anything
that you like here. And now we can copy that
style to meet journey. It's really that easy. One thing to note is that mid journey doesn't
do well with text. Well not in this version anyway, so try to avoid using any bags. It's best that you remember that mid journey is a tool
in your arsenal, is not the only one. It's not the end-all, be-all. You should also use Photoshop or some other different program
to fine-tune your results, add text and really
make it your own. But with that, we now
know that slash describe is one of the best ways of
getting some awesome results. Just have a look and
you're going to see that this works wonders if you're looking
for similar sources of inspiration like Adobe stock, I'm going to have a PDF
with a few lengths, but for now, this is
my best shortcut. Let's continue.
10. Midjourney vs Dall-E 2 vs Stable Diffusion vs ...Midjourney vs: Welcome back. You may know that
my journey is not the only player in the
AI art game right now. And because we're human, we want the absolute best. We don't want to miss out. We want to pick the best team. Is the new iPhone better
or the new Samsung? Maybe huawei, is it
Mercedes or Lexis or BMW? Now, in this context, is it Dolly, stable
diffusion or Adobe firefly? And the list grows
every single month. Now my advice is this, please don't worry about it. Made journey is one of
the most popular ones. You can't really
go wrong with it. There's no absolute
best platform because it's way too
early to call it. If you think about
Figma versus Adobe XD, to programs that were built for the exact same purpose to design beautiful
websites and apps. They were head the head
for the number of years. But after the while, Figma simply shot past Adobe
XD, it grew exponentially. People love that
and this compounded into more and more
users content, tutorials, plugins and so on. It took a while, it
took a few years. At this stage, it's
way too early to CF stable diffusion may end up averaging over the
other competitors or if my journey is
going to keep it alone. Because at this point, there's no doubt
that at the moment, mid journey is the king. Everybody is using it. So I really wanted to take this moment and tell
you to not complicate things and don't approach
AIR with anxiety. Things are constantly going to change and we have to
be okay with that. Change is always scary
and uncomfortable. E.g. my journey was launched
on Discord and it was a bit of a pain
to get used to it right after you get
comfortable with that, boom, just like that, they're going to launch
their own website with a much
friendlier interface. So all those settings and commands that you learned, well, they're gonna be replaced
with a much better, more intuitive interface, easier to use overall,
a lot better. So let's have a
relaxed attitude. Stick with mid journey
for the moment. And if there's ever a
point where one competitor shoots up and lows mid
journey out of the water. I'm going to tell you about it. I'm keeping an eye on things. I have no horse in the game. I'm not betting on anyone. I'm here to learn alongside you and be on the
cutting-edge of BEC. Now, if I had to choose one, I would probably use
food for Adobe firefly. And that's because
there'll be Firefly is gonna get integrated
with Photoshop, maybe even Adobe Illustrator. The future seems bright, but again, I'm not
betting on anyone. I'm not betting on any program. I'm just observing and I'm learning and I'm
growing as a designer. And with that, let's continue.
11. This is how I’m using Midjourney to grow a business: Welcome back. At this point with having
some fun and mid journey. And it's all in the
name of learning. That's all fine and well. But what about more
practical uses? How can you use
it in a way where all that content
helps a business? Well, social media is key. When I browse around
on Instagram, e.g. I see a lot of basic
content, right? Nothing wrong with it, but it's not fantastic. It's not wow, you know. So this is what I've started doing one day out of the month, I plan out my entire content
for that specific business. I create loads of design
tips and then I use mid-year need to add some
type of striking image. Sometimes it's funny,
sometimes it's gorgeous. Fact there's, this will
help engagement quite a lot because versus all the
other basic content, this stands out. And I believe more
and more companies are going to look for
these types of images, this type of content. Now, while you could churn
out quite a lot of them with Chad GBD for the actual dip and then mid journey
for the visual part. You still have to
connect the dots. You still need a
good concept and you have to think
about what works well, you know, it's like a joke. We all know there's a
setup of some sorts, an introduction, and
then a punchline. But I'm making a joke is
actually quite tricky. It's difficult coming up
with something original. That's the issue. So this is why I
still believe that these tools made
journey and chat GBD. They need the human behind them, at least at this point. So that's one way
to go about that. You can create loads of content, then schedule it by
using some type of tool. I actually just change programs
from later.com to belly. I think that's how
you pronounce it. It's Australian Pali anyway, Valley is a bit cheaper, so I just switched
and basically I can schedule everything across
my entire social media. So that's how we can
help a company grow. Now, by the way, you may be a bit unfamiliar
with this program. This is Adobe XD, and for designs that are
going to remain onscreen, it's my go-to program is fast, it's lightweight, it's
super comfortable. Shirt. I love Figma as well
and Figma is free. I'm in Adobe XD. I can right-click any image
and edit it in Photoshop. The bad news is that the Adobe XD is then
bucks per month. Nevertheless, this is one way
of creating valuable comp. And now the second way is the workbook that you actually have attached to this course. This was also created in Adobe XD and it's based
on my journey as well. It breaks up the monotony of having to read a
whole bunch of bags. And here's another thing. I was actually planning on the printed workbook for one of my courses and
my native language. So something that's not
available internationally, but that one actually needs
to be done in Adobe InDesign, a special program that's meant
for print that projects. But a man from XD to InDesign. Indesign is slow as ****. It's a snail versus Adobe XD. You know, when you compare
the two, it's no contest. But yeah, coming back to it, my goal is to make a printed
book that looks awesome, that looks as well
as the digital one. So yeah, that's three ways in total to which I've
created value. You can think of mid
journey as a bit of cheese, good cheese that is added to some faster and it
becomes tastier, added to a sandwich,
maybe a burger. The same thing happens by
itself, just the cheese. It's not all that great. Sure, these images are lovely
to look at, just cheese. But when you include
these images in some type of contexts where
the content itself is actually valuable
and you give people a tip that they can
immediately use than Wow, that's a meal, that's the rise. Please let me know in
the comments section, what are the uses
you can think of? How you can help
companies from all over the world to
do mid journey. What situations you
can think of where adding a bit of spice
will help you out. Maybe PowerPoint
presentations for meetings may be pitch decks. I don't know, these are
just a few examples. Let me know what you can come up with and I'm gonna read them in the comments section
for now. Let's continue. Thank you so much.
12. 23 is this correctIs Midjourney ethically correct?: Welcome back. The genome that a lot of creative people
are quite upset at the existence of mid journey and similar AI tools. Here's why. First of all, we know
that chat GPT will very likely put a lot of
people out of their job, is going to cut back
on jobs dramatically. Rather than having ten
people do certain tasks, you can have only one or two. It's going to be really bad
in terms of employment. But see, that's not why MIT
journey is actually on fire. Actually, the music industry is one area through which we can
best understand WhatsApp. Here's the situation. Some people create
that Jay-Z songs, M&M versus Drake songs, all without their permission. They basically train the
model to all of their songs. And it managed to
generate that voice to a level where you couldn't
tell that was a robot. So basically brand
new jazzy songs without him having to sing. Now, that begs the
question, Is that okay? Is that morally correct? What about in terms of the law? Coming back to designing
the problem is clear as they met journey is showing us watermarks and
artists signatures because it's analyzing
their work and it's basically stealing get yes, stealing, get from Behance, from dribble from
all over the place. So is this right? No, I don t think so. It's borderline stealing. In some cases, it's
a clear of death. In other cases, it's maybe
at best a gray area. And here's why MIT
journey didn't ask any designers if they're okay
with the work being used. They just took it, be it from Behance Dribble art station, just about any other
design platform out there. It browse the Internet web and stole all that information. It's stolen. Now, these platforms like
mid journey or the Scraping, just about everything
that you can think of. They're analyzing everything, but they're not paying anyone. So as an end-user, you are happy with
a new Drake song or with a photo that looks like, I don't know, go coup
from Dragon Ball Z. But what about the artist, the creative team
behind that product? Every single artist
that you know, respect and love has
put in countless hours, years of sweat and
blood into their craft. And now anyone can recreate their style daily work
in the metal of minutes. It's not right. So why am I creating a
course on mid journey? If at best, this is a gray area because we
need to know our enemy. We need to see what's going
on and be a part of it. It will take quite
a lot of time until new laws are passed and
this thing gets settled. If we simply choose
to ignore my journey, if we act like it doesn't exist, it's going to hurt us
even more as designers that are millions of users
on my journey right now. And it's still very early days. While I would love to say, hey, let's all boy, call that. Let's not use my journey and
that's going to teach them. I think that's a battle
that's already lost. My guess is that the music industry is
going to heavily push for new laws and those laws will be applied to
the design world. You probably know
that if you upload any copyrighted song
on YouTube, e.g. is going to get flagged. And the method of minutes, maybe in the method of hours, or at most in a few days. These platforms have
algorithms that are so sophisticated that
you immediately get caught if you tried
to do something shady. So I guess that's what's going
to happen in the future. Now, let me tell
you the good news. Adobe Firefly is
right now in beta. This is a competitor
of my journey and there'll be seems
like a good actor. They will only analyze their
own stock photo library. And from what I understand
that the consent there that asking for
permission otherwise said, if you put your work
on the platform and you want to sell it
like a stock photo, you may be okay with algorithms analyzing yet
and letting people get a benefit as long as you're getting paid or
credited in some shape. For now, Adobe Firefly is
baking into every single image, some type of code
that says, Hey, this is generated, this is not 100 per cent
original work. Now I'm simplifying things, but yeah, that's the essence. Adobe fireflies seems to
be one of the good guys, but we'll have to wait and see. So let's sum this up. This is a Gold Rush. There are no laws right now. It's crazy as chaotic. It's also not right morally and possibly even
from a legal standpoint. But I would much rather use this information to get educated
and see what's going on. When Adobe Firefly
or mid journey launches a version
that's correct, legal, fair for all parties, then we can use it immediately. Again, it's best
to know our enemy. It's tricky, It's complicated. And lots of designers, very skilled designers are going to get ripped
off for months, maybe even a few years. It breaks my heart and
I feel their pain. But until solid laws
are put into place, we need to acknowledge
our enemy. We need to make sure
that we understand the future and where
things are headed. Only then we can make
adjustments and make clear demands in terms of
what's fair and what's not. Thank you.
13. 10x the size of any image: Welcome back. But most people the size of mid journeys photos maybe. Okay. The standard is 1024 by 1024. If you use mid journey for, you could potentially
use on up scalar that takes you up to 2048 by 2048. But I don't really
recommend that even so, that may not be enough. What specific cases, e.g. if you want to print something, that's not going to be enough. Now, there are some tools
on the web that promise you great results when you
want to enlarge something. Trouble is they cost quite a lot or the base on the
subscription service, or they simply don't
work that well. Let me give you one
example though. Pause. Gigapixel is one of the
most well-known ones, and right now it's $99 per year. And I haven't used it, but I do have to say that. I don't recommend that. Here's why. Now first of all, the three
is out of the questions. Free stuff doesn't wear it, right, especially for
enlarging photos. Now should you may get a
free trial here and there. It's probably only
going to give you a few images to test that. But if you're in it
for the long run, What's the solution and why don't I recommend
this or that? Well, it's actually
quite simple. Photoshop is a solution. Photoshop is in my book, one of the best investments. It's only $10 per month and it offers you a world
of options, e.g. you can Tenex your
images, maybe even more. And you're going to
get, besides that, a literal boatload
of other features. Now let me show you how
this enlarging works. We're just going
to focus on that. But again, developed so
many other features in Photoshop that $10 per month. It's nothing. Now, if you're not paying
for the Photoshop, what I'm about to tell
you isn't going to work. So I'm using the latest
Photoshop version at the moment and I'm going to
open an image width control. Oh, this image is
from my journey. Now I can quickly check the
size with this shortcut. And again, it's not
all bad grade than 24. Not a problem. Go to the top menu to filter. If this is grayed out, you may not have a subscription or you may need to do this. First convert for smart filters. Now, let's open up Neural
Filters from the same menu, a new section in Photoshop that's going to be
filled with AI, machine-learning, overall,
magical goodness. Gonna love this stuff again
for only ten bucks per month. Now from here, we're going
to look for the super zoom. This is what we want. Flip this switch to
enable it super zoom. Then simply click on this
icon here to enlarge yet, you can go for crazy
values like ten x. Though. I would suggest that you
keep it on the lower than. Keep in mind that the
higher the multiplier, the more the Photoshop
has the thing, you're going to see a bar at the bottom to show
you your progress. And after the while you're
gonna get the new file, before do we get wet? You're going to see some
of these options right here to enhance the photo, you can remove some of the inevitable noise
that's going to creep and you can sharpen
it a bit and so on. Again, this is one
of the best ways to enlarge your photo
by quite a lot. Now, in my everyday work, I like to keep the multiplier, set that for x. So that's 40, 96 by four D 96 more than enough
for most situations, even for printing stuff. Now, in previous
Photoshop versions, enlarging a photo
which is officially called upsampling
would give you blurry, soft edges, various artifacts. In short, it was a mess. Now with neural filters, the results are great. Now, if you look at it, it's not impeccable, right? It's not 100% perfect. Like this was made in
Adobe Illustrator, e.g. but yeah, overall,
it's solid stuff. By the way, always choose to show the result in
a new document. So this is the best way to Tenex your images
from mid journey. Use Photoshop, you Super Zoom
and you'll be good to go. This is why I don't recommend any other service like topos
or with any other platform. Good luck with it and have fun.
14. 11 Improve Midjourney photos: Welcome back. As I said at the
start of the course, made journey is not
the end-all, be-all. It's a tool that works well with other tools,
specifically Photoshop. Here I have this lovely image. Here's the prompt on screen in case you want
something similar. Now, this is quite alright, but it's not amazing. It's also quite small. 1024 by 1024, the standard
size from mid journey. Well, let's enlarge it three times by going to the
top menu to filter. From here, click on
Convert for Smart Filters. Now use the same menu and from here click on Neural Filters, like in the previous lecture. Next, we're going to flip this
switch called super zoom. By the way, please, please
don't work on a laptop. A desktop computer
with 224 inch displays running get to K If you
want an ideal setup. That's what I consider to be
the best possible scenario. If you're thinking about
buying a new laptop, a desktop computer provides much more value for money,
better performance. You can upgrade it. In short, it's a lot better. I know that some
people need mobility, but most of the time, you could actually benefit a lot more from a desktop computer. Anyway, back to it. We'll make this three
times as big and then we're going to open
it in a new document. Okay, now that we're here, let's use Control Z though, the fit that design
to the screen. Okay, now go to the same
main menu to filter, but this time around
choose Camera Raw Filter, this is going to
load up in a second. And now right here we have
a world of possibilities. First of all, we can click
on this button that says, although from the
top right side. And then Photoshop
will do its own thing. If you don't like it, you can click it again to reset. But actually this is quite
okay as a starting point. Next, I would love to
have a bit more texture. So I'm going to use this slider. I'm going to use
a generous value, a bit too much to be honest. But that way you can
really see what's going on to the
screen recording. We can zoom in and
move from side to side to really
see what's going on. We can add a lot more color by using this saturation
slider as well. Take your time with it. No right or wrong edits, as long as you don't exaggerate, you're gonna be good to go. There's a bunch of other
methods that we can apply, but I think I'm going to raise up the temperature so we can get that warm soft glow and ensure that's the
power of Photoshop. Well, Camera Raw to
be more specific, hit Okay, and have a
look at the result. And just to show you a glimpse
of the power of Photoshop, hit this icon that looks like the Yang Yang symbol that's at the bottom of
the Layers panel. Now from this place, choose this option called
hue and saturation. And now we can play
with this slider here, and this changes the
image quite a lot. Now, assuming that we're
happy and you have all done, you want to export
that, to do that, go to File and then Export, and then obviously finally, export, as my advice, choose PNG and now
you're good to go. Now, obviously this wasn't a
complete Photoshop tutorial. I actually have a
complete course on that. I'm an Adobe certified
instructor and an Adobe certified expert in Photoshop with a
diploma and everything. But yeah, a short, you can use the power
of Photoshop to really take your mid journey
photos to the next level. Not to mention the fact
that here you can add some text and really
make it stand out, plus a whole lot
of other things. Now my advice, invest in programs that have
a future interests. Me. Photoshop still has a
long, bright future. Mid journey will
continue to improve, sure, but so will fold or sharp. And mid journey was never meant to replace
for that workshop. As I said, these are two different worlds that
actually work well together. Peanut butter is totally fine. But then when you
add some jelly, you get a delicious sandwich. And that's Photoshop and mid journey together.
Have fun with it.
15. Get the right aspect ratio: Welcome back. Getting the right aspect
ratio is quite simple in mid journey and it's all a matter of adding
a special command. And that's double
hyphen AR space. And then something
like 16 by nine. Ar is short for aspect ratio. So let's say that we want the bold straightforward
though, right? Say a wallpaper for your phone. This means tall and thin. So nine by 16. The code for that would
be something like, imagine red sports car, a hyphen, hyphen AR, space bar. That's quite important
than nine by 16. Please be aware there's no space between
the hyphen and AR, but there is a space here. And just like that, the
photo is basically Awesome. So that's aspect
ratio by default, mid journey gives you a
one-to-one aspect ratio, which basically means
a square image. You can make it tall and thin, like I just mentioned here. What do you could
flip it and go for 16 by nine or three by two. Let's try that out. Keep in mind, I'm using
my journey file here that allows for absolutely
every single aspect ratio. The previous version only
allowed squared ones, three by 2.2 by three. So quite limited choices. But now with this one,
complete freedom. Now, here's something
beginner struggled with. Say that you love this blue car version to
the top right one, right? But you actually need
it for your phone. So a different aspect ratio. Well, now you know the command plus we have
remixed mode enabled. So this means that
if we click on v2, we're going to get this pop-up. And indeed here it is. And we can see our
commands is three by two. So we can simply replace
those numbers, right? We can simply go nine by 16. So portrait mode, tall and thin. But here's the thing. Re-mix doesn't actually work
well with aspect ratio. You saw that at the beginning
of the course as well. When we tried to make the
car from red to blue. Actually in this case, it will simply
distort the image, and this is clearly
not what we want. As you can see, this
is not acceptable. This is a reminder that we're not dealing
with any type of Superintelligence that
understands exactly what we want. This is a very capable
set of algorithms, but it's far from perfect. So what can you do if you want
a different aspect ratio? Well, the easiest way and what I recommend is to
start from scratch, start again with slash, imagine and put in
the same prompt. Or better yet, we know that we can use the describe command. So we're going to hit U two and then save that image
onto our computer. Then we're going to
use the describe command and upload it. Now you're gonna get a prompt. And because we're using gray
mixed mode, once again, you hit any of
these versions and you can modify the aspect ratio. Still. It may not give you
exactly the same style, but chances are you're
gonna be close. And most of the
time you're going to have to be happy with that. Again, mid journey
is not perfect. So that's why I mentioned
that the start, that this can be frustrating. You know what you want, you just need a small tweak, but that's small and it
takes ages to get well, as you go through the course and breakfasts more and more, you'll be able to get
better and better results. But for now, it's not
gonna be perfect. You will have to accept that. Let's take a quick break.
16. Create beautiful patterns: Welcome back. One of the best things
that you can do in mid journey that has loads of practical uses is to create patterns, seamless,
repeatable patterns. These are great for
the Etsy shops, for the shirts of all sorts, social media Bo's book
covers, you name it. The magic command is
double hyphen style. Let's try this out. Let's go with minimalistic
fruit outline pattern, and then we're going to add the thiol command,
just like that. Now, the great thing
about it is that you can really get creative and use various things
to get loads of results. Now, let's assume
that we like one of these guys, say number two. Okay, Now we're going to have
to download them, right? And as before, I think Photoshop is one of the
best tools for the job, is just one of the
many things it can do. Now, here's how
you can easily use this pattern in any design. Once you have the photos
saved on your computer, you have to open up Photoshop. It's quite important
that you don't have any projects open. Drag the image inside that
drag-and-drop or better yet, use Control 0, 0 for open, the next step is to go to
the main menu to edit. Okay, from here,
scroll all the way down until you see
Define Pattern. And really it's that simple. You're gonna get a pop-up and
this asks us for the name, but I'm just going to hit Okay. Now it's time to test
it out and to see if it's really seamless,
repeatable. Now to keep it simple, I'm going to start
a new project with control and any
settings will do. Next, I'm going to double-click this background layer
in the layers panel. You can see the lock
icon next to it. So that means that we
need to unlock it. Now get here though gay, and now we can
apply the pattern. This is how it goes
one super simple way, use this icon that says
fx from the bottom of the Layers panel from this new list, choose
Pattern Overlay. We're gonna get a
bunch of options here, but what we want
is quite simple. Select the last entry
from this window. The rest is set exactly
like you see here. 100% opacity, normal blending
mode, nothing special, but you could potentially change the angle in
case you want to rotate that that may work
well in certain cases. But yeah, really, it's that simple and indeed it's seamless. It looks great.
And we can use it absolutely everywhere
on any size. Now, let's go back to my
journey and create another one. Let's go with something
completely random. So colorful geometric
pattern, right? By the way, the word
pattern isn't mandatory, but it does help. Remember to add
the thiol command. And let's wait and
see what's up. Now, awesome patterns are
quite tricky to find, but with my journey, It's no longer an issue. Okay, This one seems lovely. Let's download it and go
through the motions once again. Remember, good the
file on your computer. Then launch Photoshop and use Control 0 to open the pattern. Then go to the top menu to edit. Go near the bottom and look for Define pattern here
that is L gate hit. Okay, and now we can use it. I'm going to make a new project. Once again, any
settings will do, but this time around, I'm going to confine the
pattern to a specific area. Get the rectangle tool, hotkey, you, you rectangle. It doesn't make a
whole lot of sense, but that's been the shortcut, That's been the hotkey for
the ages in Photoshop. Anyway, drag any random
shape, any rectangle. Finally, we can click on the fx button and then
apply a Pattern Overlay. And basically that's
how you do it. This is one of the
most powerful ways the user journey without
giving it away. If you don't want
people to know that you used an AI generator, this keeps you a secret safe
and you can find loads of celebrities making merge with
these types of patterns. Maybe add a bit of facts,
inspirational or whatever. And all of a sudden you are
creating something awesome, a clothing line or
whatever, a personal brand. Good luck with it and show
me you have patterns. I'd love to see some. Thank you.
17. Generate impressive anime art: Welcome back. Let's have
a look at our settings. So we're both on the same page. The default is version five at the time
of this recording, the best mode for realistic
photos and beautiful imagery. But what if you're looking
for the specific style will animate is actually
built into my journey. Simply switch to need G5, that's NIJ F5, the latest one at the
time of this recording. And you are going to be amazed. Let's write something like
a cute girl walking in the rain holding a teddy bear with a warm sunset
in the background. So this is fairly descriptive, but nothing too exaggerated. Now while this is being generated with the
nice Zhe setting, let's switch back
to MJ five years. You can actually do that. You don't have to let
the job finished. And we can run multiple operations at
once, three to be exact. So I'm just going to
paste the same prompt. Absolutely nothing has changed except we switched
from Nietzsche two mg, by the way, I'm not sure if you pronounce it Nietzsche
or something else. Sorry for that. Okay, Now the results are
incredibly different. You can see why this is
best used for animate. Of course, it's also a great
choice if you want to do fun animals stickers
that are lifelike. There are loads of other cases. I feel like this is one
of the best uses for the mid journey and for
the AIR in general. Now, I'm going to go on a bit of a personal brand that has
little to do with mid journey. So you may want to skip ahead. This is it. I'm not
big on animate. I watched Sailor Moon
when I was five or six. I grew up on Dragon Ball
Z, the dubbed version. I really appreciate
that Castlevania most recently or
the One Punch Man. But, uh, yeah, I'm 100
per cent of Rookie. I have little knowledge
of this world. But having said that, I've watched a few documentaries about what really goes on behind these enemies,
about these artists. And they really work
their hands off. They spend years
perfecting their craft, and only the best ones make
a decent living out of it. It's an incredible journey. This is where major
knee comes in. And these artists can focus more on the storytelling side. This is how true artists can
search for different style. So it looks to translate their thoughts and ideas
into something real. And I believe that this type
of art to generation will give us a better experience
through better content. Go even deeper. I'm tired of seeing the
same rebooted movies over and over just
for the money. Now, I'm hopeful that
truly creative people with original ideas can leverage
these new technologies, including mid journey, so
they can create stuff that would otherwise cost a
fortune. Yeah, nice. G5 is great for the enemy and hopefully you can put it to good use to make
something lovely. Especially like the
cute characters that I can create based on animals. But yeah, the sky is the limit. Your imagination
is the only limit. I really hope that
we can all enjoy better content by
using my journey.
18. Creating consistent characters: Welcome back. I wanted to address
something that I've struggled with for
quite awhile and you may be in the same
situation and that's giving the same person
to do multiple prompts. E.g. if you want to do a comic book or any
type of situation where there is a person
and you want to maintain that person's
space characteristics. Right? Now, I've followed
loads of guides and then I have
options out there too, which you can kind of keep the same person, but not really. So I want to take
this moment and say, if you're in love
with a specific face, it's quite unlikely
that you can generate loads of scenes with
the same person in it. This is why most people
tried to lower the quality. The face isn't really
all that recognizable. Basically, you
choose a style that omits details on purpose. Think about South Park, right? Stan and KaiA law, basically identical in
terms of their face. The only thing that changes is their head and
obviously that voice. Actually if you put
the same hat on butters and slap on some gloves, it's the same character. Now storytelling
doesn't actually need all of these
intricate details. But back to mid journey, the platform doesn't
have a memory, it doesn't remember things yet. Should that may
change in the future. But as of now, no matter
what techniques you apply, you won't be able to faithfully
have the same person with specific facial features
across multiple prompts. I thought I was doing
something wrong because some people
say it's doable, but in most cases, results
aren't replicable. You may get lucky
here and there. But as of now, there
is no sure-fire way of saving a character and reusing
it over and over again. Think about the
girl sitting down, then have herb in the rain
than have her in a city, than in a train and so on. It's really, really difficult
to have the same person. Again, it looks similar. Sure, but it's not going to
be the same person, so forth. Now, my advice is you
scratch that off. It's much better to
focus on the style itself rather than
specific traits. Let's continue.
19. How to use the Stylize command: Welcome back. In this current version
of my journey five, you can use stylize,
change your results. This is done by adding
a double hyphen S, then an empty space, then a number 0-1 thousand. Now when you read the official description
of this parameter, things, I've been
told that clear. So low values produce images that closely
match the prompt, but they're less artistic. And high values create images
that are very artistic, but they're less
connected to the prom. Now, let's see what that
means by way of examples. First of all, I'm
going to type in slash settings so we
can check what's up. We want to use MD5, but I also want to set
this style to medium, which right now clear
is the current suffix. Notice that right now
we only have v5 here, which means this will
automatically be added after every prompt. Now, if we choose
styled very high, then we're going to immediately
get S seven-fifths. Now, I want to be able to
manually control that. So it's essential that
we go for the med, which is short for medium. And if you go for the
load, that's actually 50. So that's not okay. But let's say that you can't
manage to clear this suffix. What now? No worries, there's a command for that. So typing slash suffix
and you're going to get this command prefer
suffix selected, but then we're going
to leave it empty. That's going to clear it. Now, how do we know
that's going to work? Well, it actually
says so right here, suffix will add
various parameters at the end of every prompt
to save us time. But if you don't want
any, just hit Enter, then you should get
a message saying suffix is now removed, right? So let's reset it to v5 and no style by way of style medium. Now, I have two prompts. The first one is a cute
girl walking in the rain holding a teddy bear with a warm sunset in the background. Okay, next I'm going
to add s z though, 10030051750 n 1,000. I won't make you wait. So here are the results. So zero should give us less artistic results that
match our description. Well, the pattern
that I see here is that the girl
is walking away. Better said We
don't see her face. The background is
also quite blurry. One-hundred brings in a bit
more richness to the results, but the background
is still blurry and the differences
are quite small. 300 is where we get
to see the face. We clearly see more details. We do have more details here. 500 is yet another
small improvement, but it is an improvement. Same thing with 750. But note this, the
girl is closer to us. Quite nice. And finally 1,000. Well, it's just better overall. Now, in this case 0-1 thousand, the results aren't
really night and day stylize isn't really
a grading system. The likes of four ATP 720
than ADP or whatever. You know, what a scorecard with 1,000 means in a while
it then out of ten, It's just a different way
to interpret the prompt. Now, let me show you
the second prompt, which is isometric
workspace of a designer, vibrant, colorful
computer desk person. Now, this is going to
help us a lot more. Now in this case, the z, S, z though, shows us a fairly
simple basic result. This is something most
people could design in Photoshop after
some basic training. And the bit of willpower, 100 brings in a lot more detail, but the colors are
still a bit too neon, light blue shout in your face. The shadows are quite crude. The sizing in one of
these photos is off. Overall not that great. By the way, notice these lines
here, that's a watermark. These lines are there to protect the photo from being stolen. This is a sign that mid
journey is still using stock photos as a
source of inspiration. And stock photos are not free. That's a bit tricky, maybe we'll discuss it later on. Moving on, 300 is
starting to look great. This is where you
should begin with. 300 is a solid starting point, especially this last one here. Now where as z though, maybe 10 min for
someone to make. This one would take a
couple of hours with an actual person to make it as 500 is a place where all fall options I've
actually super solid. And 750 is a marginal
improvement. But, um, yeah, by the way, those lines yet again, my grade, finally, 1000s seems to be a
small upgrade, them as 500. The results are very likely
what you're looking for. This command truly shines when
you start having my along prompts with loads of details and the platform isn't
giving you what you want. I typically keep my
stylized setting on 750 because I'm not
looking for literal stuff. I'm using my journey for the inspiration rather than a specific thing
that I have in mind.
20. Test models and other settings: Welcome back. We've seen em J5. We've seen Nietzsche
for the animated style. But what about
these other models? Mj test and energy test photo? Well, in short, these are temporary versions that are going to give you a
very different result. Let me run both of these with the previous prompt from above. As you recall, we were quite happy with anything
from 300 upwards. Now, the trouble with these test models is that
they're unpredictable. And even if you spend a lot
of time figuring them out, they may change, they may
get removed, and so on. More than that, they have
several limitations. The aspect ratio
is limited, e.g. it's either the square, one-to-one, three by
two, or two by three. So that means you
can't get wide photos. You can't get portrayed photos in the sense of having
them tall and thin. So it's not great. When you look at the results. These are vastly different
than the ones from MDG5 with different
style values of light. Now, do they look nice? Yeah, I think they're decent, but I don't really recommend
these tests models. And unless you just want
to have fun and you want to explore various
options and choices. As I said at the beginning, I'm approaching AIR as an
investment into my future. Learning how to use these
models is quite important, but we do need some
predictability. E.g. mg six is just
around the corner. But there's a very high
chance that most of what's available in MJ F5
will still apply. Now for the test models, from what I understand, that may not be the case. Another limiting factor
is the number of results. As you can see, we only
get to rather than four. And that's what the
stylized command, it ranges from 12, 52, 5,000. So my advice leave this at the
very end of your learning. I'm addressing it right
now because I'm sure they caught your
attention. Moving on. You may start to get range anxiety because that's something that
everybody goes through. If you've been working along
and generating images, your resources might
be going down. If you want to see how
much you have left, you can use slash info. And that's really going to help. And you're going
to see fast time remaining a certain number of
minutes and the percentage. Now, do we care? No, we shouldn't know. We don't care about with it. And that actually brings
us to relaxed mode. That's a setting here. When you get started, you're going to buy the smallest available back right now, then bucks that has a certain number of
resources included. They're all in fast mode. Meaning is going to generate your results in no time at all. But here's the thing. Being at the front of the line has certain costs involved. But here's the thing. If you're not in a hurry. So relaxed mode, you actually
get unlimited images. So once you burn through
all those fast hours, you can still work, but you're going to need
a bit more patients. And at this moment, I really do mean it's
just a bit more patients. It's not a night and day
difference in speed, but overall, it's noticeable. Now, to sum this up, if you don't want to
feel that range anxiety, you're going to have to pay
eventually for that $30 plan. Then you can switch
to relax mode. The basic $10 per month plan does not give you relaxed mode. You can't switch to relax. Most of this means that
you won't be able to get unlimited photos
for the basic land. Now, could you
potentially get more fast that was in the
$10 per month plan? Actually, yes, you could
raise some images and you might get some bonuses
a few hours here and there. But my advice is you
take the 10-dollar head, you use them all up
when that happens, 234 weeks, then upgrade to the $30 plan and then
go to relax mode. Here's the thing. After 23 months, you
should be proficient. You should be great at it. I'd rather not spend any
time on grinding away, getting small bonuses,
just pay the price. Okay, What about
the stealth mode? Well, this is available in the biggest gland at the
time of this recording, that 60 bucks per month. And that's mainly for
people who need privacy. Here's the thing. This may be great
for adult content. It may be sensitive content. It may be worked for a company that doesn't
know that you are using AI generators.
Here's the thing. Even though we are in
a private conversation in this gourd us with the bot. All your work is visible
on mid journey.com. So if you need to keep things
private for your work e.g. then you're going to
need this stealth mode. My advice, there is no
need for it unless you're working for the giant company
making loads of money. And in that case, 60 bucks won't matter anyway. But yeah, most people get
the 10-dollar of land, then eventually upgrade to the 31 and switch to relax mode, Unlimited Photos, and that's it. Now at the end of the day, I'm going to stick with the
latest mainstream model, MD5, and that's what I
suggest you do as well. Don't worry about
these other ones because they are temporary.
21. Change the quality setting: Welcome back. Let's talk about
the quality setting because it may
actually fool you. First of all, let's use the settings command
and come back to the T5 model and set the
stylized function to very high. Next, we'll use a
previous prompt just so we can do a
comparison if needed. Right now, quality
can be adjusted by adding cue from quality, and the standard is one. You can also do 0.5 or 0.25, but there's also two
times, so double quality. Now the question is, does the maximum quality always
give you better results? In short, for
realistic photos? Yes. Let me show you the
results of a series of prompts starting with
a quarter quality. So 0.25. The prompt is a cute
girl walking in the rain holding a teddy bear with a warm sunset in the background. These and now please note this, the empty spaces
quite important. So these aren't all that great. They generate super-fast, and that's the only
redeeming quality. If you can't really
afford the $30 land, using lower-quality will
save you some GPU hours. In short, 0.25 is obviously
four times faster to generate and it only consumes a quarter of your minutes
in terms of GPU Bauer, for realistic work, it's
really not that great. So let's move on to 0.5. So half quality, this
is quite decent. The results are
respectable, usable. You can see a watermark in the first image,
that's not great. The third one is
quite good, though. The teddy bear seems
to not have any legs, which is a bit weird
overall, quite okay though. The regular quality
standard stuff is lovely. In the image you can see how the rain is dripping
from her jacket. Her hair is quite wavy. It has quite a few
strands because it's wet. The teddy bear is also dripping. If you have a look at
the bottom left side, this is actually great stuff. The third and fourth
images of equally awesome. So this is what most people
expect in terms of quality. And when you compare it to
the 0.25 version, well, the difference is immense, but what about
twice the quality? Does that give us
sharp for K images? Actually, no, it's the
same resolution and the sharpness of the image has more to do with your prompt. Still, if we look at
the second image, the sun is shining in a way
where the bear is glowing, and that's quite nice. The road has loads of details. The fourth image also has a lot going on in terms of its vibe. Now, is it twice as nice? Is it worth consuming
your images? You have bullets twice as fast. I don't think so. It's maybe 20% better, maybe 30 per cent better. But most people use this
double quality as a crutch for using not so great prompts
to get better results, but they burn to do the GPU time to load data
available resources. So my advice is you stick
to the basic quality. So Q1, at least for
realistic photos, having said that lack
of detail is not really a problem if you
have a style warrants it. E.g. I'm going to use
the following prompt. Red car in the dark city with
neon lights, manga style. Now, keep in mind, I'm using mg. Not Nietzsche style is set to 750 and I'm going to
use half quality. The result is
actually quite okay. This works well. And countless other
situations where it may be okay to use half
quality, a quarter. I don't think so, but half sure. Watercolor images, whimsical
styles, kid friendly styles. Sure. Just look at the Simpsons, e.g. That's a super simple style
that most people love. I'm just so we're clear, I'm going to use the
same red car prompt set to one rather than 0.5. Let's compare these two
and see what we get. Now in Q1, you're going to note this a bit more sharpness, more detail in the reflections. But I'm put this in another way. If this was part of a story in the comic
book with whatever, Does this change in
quality really make a difference from
half to standard? I'm going to let you
be the judge of that. But now you know
that you can adjust your quality to this command. Just use q 0.51, or in rare situations,
two times, two.
22. Use chaos to get what you want: Welcome back. Let's learn
about the new parameter that can really help us get what
we want, and that's chaos. Chaos can be used by
adding a double hyphen, then an empty space, then a number 0-100. Now by default, this
is set to z though. Let me show you an example. I'm going to use the
following prompt in the latest version of mid journey with stylized
set to very high. So this is where I'm going
to use a beautiful beach with tropical trees
and blue water. Because chaos ranges 0-100. I'm going to go for the 150. And then now here's
how this works. If you use a very
low chaos value, you're gonna get just
about the same design, but with very slight changes. Notice the angle is
just about the same. We have a tree in
the top left side that sort of hanging low. We get the same bluish water in every one of these choices. In short, low chaos means you
really know what you want. Your prompt is very, very good. You have a very clear
idea about what you need. And basically you tell
mid journey, hey, please follow my
instructions closely. Now, jumping to chaos 100. So the maximum value, well, the results are quite
different, vastly different. The water is sometimes blue, sometimes green, sometimes
it's transparent. We get a hanging tree, but we do get multiple
trees as well. The images have different
approaches, the same prompt. This means that
it's best to start your exploration with
very high chaos values, then see what
you're looking for. Now the way down. If you don't like any of these
for the high chaos values, simply hit this button
to get more options. Now, remember, that's the
point of mid journey to explore various options and get your creative
juices flowing. Now, can you choose the first
option and be done with it? Yeah, sure, of course. But most of the time you want
to have a relaxed approach. You want to try things out. And after you get a better
idea of what you're doing, maybe after 345 versions, then you start refining it
based on those versions, you're going to get
closer and closer. But remember, you
can also download any image and use the
describe function, which should get you even
closer to your goal. But I repeat, as you
nailed the concept, use lower values or just
keep it to the default, which is z though, when
you're starting out, chaos 100 is probably best. I'm quite sure this
is going to become the new default chaos 100, but we'll see about that
anyway. Good luck with it.
23. Assign importance to words: Welcome back. Adding weight is
quite important, especially in very long prompts. Before we get deep into it, Let's start out slow with using the latest MJ model
with very high-quality. Now let's go with
a simple prompt, sunflower towards and with
using S seven-fifths. Now, as you would imagine, this is gonna give us the plant that gives us sunflower seeds. This is quite easy
to get, right? But what if we want
the flower in the sun? Of course, we could
potentially rewrite the prompt and use more appropriate language
exactly like I just said, it, a flower in the sun. Alright, but we could
potentially try this. We can assign the level of importance by using
a double colon. So I'm going to use
someone and flower for. Now while this is rendering, Let me explain the numbers. There isn't a range per se, though most people
use anywhere from minus five to plus five. And you can even do
have values like -0.5. Now, another thing, you can
use 1.4 like I did here, or you could use 150. And inorder example
1.4 means that the flower is four times
as important as the Sun. 150 is the same thing as 21, so double the importance. So it's all relative. It's a comparison between
the terms themselves. Looking at the result
is quite clear that the flower was the
star of the show. The Sun, little to none. Now let's flip this around and go for the sun
with a weight of five and a flower
with a weight of one. This doesn't always work, but I hope that you're
going to get the point in these situations is quite easy to understand how it works, how it attribute's importance. Well, emphasizing the sun
doesn't seem all that great, but it still follows
our instructions. Let's do this again
with cheesecake. First, the standard one. And then we're gonna
do a two-to-one wait. First of all, we're
going to favor the cheese and then we're
going to favor the cake. Now, the results are going
to be drastically different because mid journey
follows our weights. The standard prompt is a beautiful desert,
a cheesecake right? Now, when we emphasize
cheese, well, we get a lot of cheese
and just about no cake. And then when we focus
on the cake, well, basically it's a cake
made out of cheese. Weird stuff, but yeah, that's how it goes. Now, let's do something
a bit more complicated. Let's imagine a girl
running through a city being chased by
aliens in a spaceship. The girl has a weight of five. The city, nothing, the aliens, three, the spaceship to. So we're looking for the girl to be the
main star of the show. Hence, where it gets a
five, aliens are next, so they give it three, then the spaceship
only gets a boo. And finally the city
11 is the default. And the result is sort of okay. Now, as you add more
and more characters, mid journey has a harder time generating something that
you are looking for, especially when you
have several character. But for now, this is our result. But let's flip this. Let's go with a girl to
running through a city, nothing being
chased by aliens to v. And then in a spaceship five. Now the spaceship is gonna be
the main focus than aliens. Then finally, the girl. Keep in mind, there
is a potential for the girl to not show up because most of the time mid
journey does tend to value the first
words in the prompt. Okay, fast-forward and well, the city isn't
actually showing up. Maybe just a glimpse
here and there. And that's because it's being
assigned the default value. Because we requested
an emphasis on the spaceship that takes
up most of the design. Then the aliens, well, sort of, it's kind of tied
together with spaceship. I might have expected
something like real aliens as individuals, as characters, but
that didn't work out. Let's flip this one final time. Let's go with aliens five, spaceship to the girl too. This should give us some aliens. As you can see, this is how
you learn to use my journey. You experiment with
different commands, parameters, prompts, a new inch your way for
the web bit by bit, the more predictable
this is gonna be. And yes, this gets
us closer to aliens. But only just, of course we can always remix and try
out a few more times, add a few more details. But I'm happy to show you have wins and half fails as well. This is a big part
of my journey and even though I've spent loads of hours on several accounts, I still miss the mark
from time-to-time. And I prefer to show you
that not everything works. So this is word weight. Makes sure you triple check your spelling and always
check the spacing. Otherwise, it's
not going to work. Good luck with it.
24. Exclude words with this command: Welcome back. We've known about the word
weights and how it can help us prioritize certain
parts of the prompt. But what if you're constantly getting too much of something? The best approach would be
to rewrite the prompt, e.g. in the aliens prompt, we might replace that with
extra terrestrials or something like that because the spaceship is
also alien, right? So that may be a confusing
part for the mid journey. So rewriting may get
you a bit of outcome, but here's another
way to go about it, excluding certain concepts
by using the no command. No. Basically no is the same
thing as putting -0.5. So if you write the prompt, maybe feel the flowers
without anything else. Just the regular MJ five
classic engine and then S7 50, you're gonna get a bunch of
flowers, of course, right? But what if you don't want
the specific type of flowers? Well, to keep this
easy-to-follow, I'm going to use
no yellow weight the moment and you're
gonna get exactly that. Now please be aware that if you don't use the double hyphen, you'll actually get
a lot of yellow. Let me show you what
that would look like. So this is one of those things that really require
this practice. How you use these
commands when you leave an empty space and when you
don't, it's quite important. Always make sure you pay
close attention to that. If the result is
really unexpected, then you might have
missed something, a space or something. But yeah, the correct one
shows little to no yellow. You could revert
to using digits. Flowers could be five and
yellow might be minus five, just in case you really,
really hate yellow. This is quite an extreme
example because yellow is actually quite a common color
in the field of flowers. This is why I used it. Now, please be aware that
you can simply do minus five yellow because you
need to balance it out. You need the prompt that is
overall z though or positive. So that's why I use minus
five and then plus five. And indeed, this
gives us z though, yellow flowers, Absolutely none. Now how do we see
this no command? Well, I think you should
think about stereotypes, positive and negative ones. So if you think of
Animalia and Japan, I don't know, you might get
a lot of neon lights, right? If you think about barriers, you may get the Eiffel Tower. Now in certain situations, it's best to exclude the first
thing that comes to mind, the stereotype, especially if you're looking for
something that's original. Because think about that. Millions of people are
using this platform. You don't want to be cheesy. You don't want to
get something that everybody else is getting. E.g. unsplash.com is one of the most well-known sources
of totally free photos. No strings attached,
huge size, good-quality. Well, if you're looking for
the woman in red smiling, chances are, you're gonna get this result and you
may choose to use it. It really stands out. It's a nice photo, right? Well, most designers also
thought the same way. So I've seen this girl countless times in countless websites, from thick the medical to AI
to wherever it's overused, it just doesn't feel
special anymore. And when you are
the freelancing, clients usually want something
tailor made for them, customer, especially for them. So if you go for the
lowest hanging fruit, for the Eiffel Tower,
for broad stereotypes. Well, you may give
them angry client. You may want something
special for them. So that's why you can use no. Now to recap, you
can exclude words if you use double
hyphen, NO, NO. You can add multiple
ones as well. No Eiffel Tower, no river, nobody gets or whatever. Though I found that using multiple nodes sometimes
gives me strange results. So use it wisely. There's also something to be said about your expectations. If you use a prompt that says
mountains in the winter, you would naturally assume that there's gonna be some snow. Winter in snow go hand in hand. Well, if you simply use no snow, unfortunately because
those concepts are so well tied together, you're still gonna get some. Remember, no is the
same thing as -0.5. You want a realistic portrait, but then you say no
eyes or no mouth. And while mid journey
can create all sorts of monsters than things that
basically don't exist. You will be confusing
the platform if the main concept is clashing with the no command,
it doesn't make sense. You want the close-up
of a person, but then no phase, it doesn't make sense
or no mouth or nose. Now, in general, what I
like to do is I prefer to use weights by
using digits e.g. mountains five in the
winter, snow minus four. And that will totally
remove the snow. But will you be able to
tell that it's winter? Well, I don't think so. So let's do mountain
five in the winter for snow minus four. If you want to work smarter, you could say all of
them instead of winter. That should give you
a closer result. What you're looking for, It's all about your
vocabulary and how used to make Johnny
you actually are. Now, let's check out the result. And yes, this is clearly when
there is little to no snow, depending on how you
interpret these images. Notice the results
are quite different. But overall, if you
want to exclude words, I think it's best to use digits rather than using
the no command. Oh, but one very important
uses this note text. And that's because
mid journey has a very hard time rendering
texts correctly. In short, it's gibberish. So adding no text is
actually a great idea, especially if it's generating
stuff like, I don't know, a map or a library or
something like that, that will typically have words. So no text is actually
great for the rest of them. Probably using digits
may be a better choice. Okay, let's keep going.
25. Use your own photos: Welcome back. I wanted to show you
a technique through which you can really
have some fun. We're going to use
our own images to create some
interesting avatars. Keep in mind this
is what having fun, it's not really
aimed at creating a perfect replica of our face. So let me show you
how this works. First of all, you find a
nice image of yourself. I'm going to use this one. Then I'm going to drag it into this conversation with
the mid journey bought. This is quite important because the photo needs to be
somewhere on the web. Okay, now we can right-click it and we'll have a few options, but with only interested
in this one copy link. Basically we now have a URL
where this photo is hosted. Great. Next, the simplest
command is this. We're going to go for the slash. Imagine, then we're going
to paste that link. Now as a side note, you could also use
a Dropbox link that ends in a one,
not with a z though. Okay, next, we're going
to add a few words. I'm going to go
for random stuff. Let's use neon background,
modern, creative, colorful, and I'm going to run
it and two styles need G5. So Anime mode, then
the MDG5 model. I'm going to show
you the end results so we can save a bit of time. Now, the Nietzsche
version as well, it's really out there. As I said at the beginning
of this video, It's fun. It's playful. It's not really meant
to be taken seriously. Now, this animated style is really going to be
entertaining for those who appreciate this style
in terms of resemblance. Well, I can't really
say that I see when. Now going to the N j version, well, this is much
more realistic. It's something you
would expect to see in a Facebook announcement
regarding the multiverse. But this is quite usable. Plus is sort that looks
like me, sort of. Now can we take this
to a different level? Sure, we can use multiple
images to show my journey, how we really look. We can use a
different chaos level and a different stylized value. But for now, I just want to keep it simple and let you
have some fun with it. Please try it out for
yourself and post the result. Remember, drag an image of u, then copy the link. Use the imagine command, paste the link, then
add a few words. The main thing is you'd be relaxed with it and
enjoy the process. Now, are we wasting our resources from
the basic land now? Sure you could look
at it that way, but right now, it's a matter of getting used to the platform. So get to work and I hope to
see some of your own photos. Thank you.
26. Save a lot of time with this command: Welcome back. At one point, you are
going to have a style in mind and you may
want to follow it. You may want to apply
it several times. You might have seen
something that really looks nice in the
showcase section. And obviously that stood out then you want to
remember it, right? You maybe did some
tests and then you found something that
actually clicks. Awesome, right? So this may be
certain words like eight K, vibrant, creative. These are just random examples. The other hand, you may have
found a different style for a different project that includes keywords
like realistic, bouquet, portrayed,
pose, and so on. Well, here's the thing. You don't actually
have to remember them. That's right. You can actually create
some presets and then you can save them
into mid journey kills. Have this works. First of all, bipeds
slash prefer, you're gonna get a list, but we're looking for this one. Briefer options set. You could use your arrows
and tab and then there, but I'm going to
use my mouse so you can easily follow along and you can see where I'm
clicking. Immediately. You're going to see this option. Then plus one more, which isn't all that intuitive. It doesn't seem all that simple. But just a moment, Let's
stay here for a second. So above, you can
see that I have quite a few options that
I previously saved. Now, you won't have any
of these on your end, but no worries, I'm going
to show you what's what. So click here next to option, and this is where your
cursor should blank. I'm going to call this
one crest e.g. right. Now, you will see some type
of warning here that says, no options match your search. Another problem that's fine. We're creating a new one. Next, please click here
exactly above plus one more. That will change the
part that's above. And we're going to have
a single choice value. Awesome, that's good. Please click on it. And now this is where we
can save our command, e.g. let's say if I don't know, eight K vibrant and
then colorful, right? This is a basic example, but you can make this
list as long as you want. And you know what? I also want my designs
in portrait mode. So let's add the double hyphen
and then AR nine by 16. Make sure you check
those empty spaces. Okay, so let's backup. So we're saving a preset
that's called cress. And then when we use crest, my journey will automatically
add these terms right here. But also the parameters. Actually, let me change
the quality to 0.5. So that's double hyphen
Q than an empty space. Then 0.5, just
something get random, you can use whatever you want. Let's hit Enter and this
should be good to go. We can actually see
a success message. So we have all set. This is how we use it. Type slash imagine as usual, and then let's write
anything, the actual prompt. Let's go with something
super basic like, I don't know, a
cute cat in Paris. And then at the end of it, I'm going to add the
double hyphen, then Cress. Okay, hit Enter and we're
going to have to wait. Now, initially this is
going to show you Chris, V5 and 75th might default. But I'm going to start
generating the image. You're going to see
that Chris will be replaced with all the preset. That's eight K
vibrant, colorful, the aspect ratio and
the quality setting. So as you can imagine, this is fantastic
because after we've explored loads of
descriptions and parameters, we can simply say the best ones. And as you can see,
this works well. Okay, let's do it again. So type n slash prefer, and from this list, choose the one that
says options set. The first thing
that you have to do is name the name the preset. It's not a great idea to call them crests or just
some random words, you should choose
a descriptive name so you can actually remember it. E.g. realistic portrayed. By the way, please don't
use multiple words with an empty space because
you're gonna get an error, at least for now. If you really want
multiple words, use a hyphen between them. I'm going to keep it simple, so a single word. So let's go with portrayed. Then click Next
wet above plus one more from the top,
click on value. And now we can type in our custom description
and even parameters. I'm gonna go with,
again at random, realistic close-up
studio photography. Though again, you could make
it as long as you want. That's the actual value here. And then at the end, I'm gonna go with
wide aspect ratio. So that's gonna
be AR 16 by nine. Awesome. Now hit Enter and you're
going to have it saved. Okay, Now let's use it. Let's go with the slash. Imagine a cute girl
in London, e.g. and then before we hit Enter, we're going to use
double hyphen portrayed. We just save that. Now, remember initially it may look like it's not working, but at this portrayed
part will soon be replaced by our preset. You just need a bit of patients. And this is really going
to open up our schedule. You can have a style for the comic book that
you're working on, something realistic
for your work, and maybe something super cute to show off to some
kids in your family. You had something like that. And as you can see, the
realistic close-up shot is beautiful. It works well. One final time, please. Slash prefer option set. Let's call this one victory. We're going to
click on the value. And then we're going to put in, I don't know, her
glory, American flag. And then eight gave
for the example. And then we can also change the aspect ratio
to portrait mode. Maybe it's for the
wallpaper phone. So AR nine by 16. Okay. Enter and let's try it out
some Americana for us. So let's go with a slash. Imagine, let's go with
a car in New York. Then we'll add victory. I have no idea how this
is going to turn out, but hey, we're having fun. Okay, this is interesting. It's a bit unexpected, but yeah, it gets
the point across. This is how presets work. Try it out and let
me know what styles you saved up on
your end anywhere. 3-5 is best in my book, but remember, descriptive terms. Have fun with it.
27. Here’s how you adjust your presets: Welcome back. We've
seen that we can save some presets by using
slash prefer option set. And that's a great way to really save some time and not have to remember all those
specific words that give you a specific style. You may be excited about it, and you may end up with
quite a bit of a list. You might have, say too many. Now first of all, how can you see
what you've saved? Well, you can use
this command that's called prefer option list. So instead of set
with choosing list, and that actually makes
quite a lot of sense here of all my choices
and what they mean. Please be aware that when
you name your preset, you won't have to add the
double hyphen, just the name. You can see that here. These are very simple names like Victory portrayed,
press whatever. So no double hyphen.
That's something to note. Now again, the command
is prefer option list, list. That makes sense. Now, if you want to
remove some of them, Let's go ahead and do that. E.g. let's remove the
last one called Victory. Well, it's quite easy. Type n slash prefer options set. Then you're going to get
your list of choices. By the way, this is another way to check out your presets, though you will know
what they contain. But from here I'm
going to choose victory because that's
the one I want to remove. Now you may choose to
use tab and enter, but I'm going to stick with
my mouse clicks for now. Okay, we can't have
an empty value here. So that's not how you
actually delete that. Actually you can
try the head and there is going to give you an error if you remove the value part by using
backspace, just like that. Now you can hit Enter and
you're going to remove it. And that's basically how
you delete a preset. Let's do it again. So type n slash
prefer options set, and let's choose another
one from this list. Let's go with portrayed. And if you don't
want to mess about, don't click on value. Instead, just hit Enter. And just like that, you've
removed another preset. So it's actually quite easy. Let's do one more. But this time we're going
to edit one of them, e.g. Chris, we can see the
aspect ratio right here, but let's say that we
want to flip it, okay? So let's do it. Refer options set,
then choose Crest. And you'll notice that it doesn't show the
value of the preset, whether it contains,
but we do have it above by using the command
prefer option list. So I can copy this part and then I can paste it
down here inside value. Hit Enter, and now
we're good to go. We've flipped the aspect ratio. I've made the small change, but of course you can
edit the entire thing. So that's how you can use these presets to your advantage. Create a few of them and always keep your list nice and clean. Have fun with it.
28. What's next?: Welcome back. You got to the end
of the course, but we're not finished. First of all, I'm
gonna do my best to keep all the lectures updated. I'm going to add more
features as they roll out. But what I want
from you is to keep using my journey
and learning mode, not the finished deadlines, not to get very super
specific images that you have in your mind. No, please focus on
getting used to it. You are very familiar with
all the commands with chaos, word waste, quality, and so on. So you can begin to
predict what animate mode will give you versus
the regular mode. Remember, it's not about
making money right now. It's about being at
the front of the line. When companies are going to
start hiring for mid journey, having good on your
resume will count a lot being in so early on. So my advice is you think
medium to long term, that's what's going to
help you get ahead. Another friendly advice, please learn Photoshop,
Adobe Photoshop. And not because I have
a course on that, but it's because my journey and Photoshop work so well together. You can take your results from mid journey to the next level. That's why I think you
should invest your time and energy into future proof tools. Thank you for sticking
with me until the end of the course and please
write a review. I would really appreciate that. Thanks again. This is
Chris signing out.
 Chris Barin, Certified Photoshop Expert