Transcripts
1. Intro: You ever thought about
building a website? If so, the first language
you need to learn is HTML. Today we're going to
walk through everything you need to know to learn HTML. Hi, my name is Zoe. I'm a software engineer
and former professor who loves helping others
get started with coding. I've created tons of websites
and web apps using React, CSS, HTML, and more. Today, we'll be going over the
basics of HTML and how you can use them to build your
first or next website by building this website. We'll talk all about
how to use elements, paid structure,
attributes, and more. This course we'll start with the general overview of what HML, why it's used, and what
purpose it serves. Then we'll dive right
into our tutorial. The tutorial will be broken
up into three parts. First, we'll initialize
our new HTML project. Then we'll get it up and
running on our browser, and finally, we'll build out the structure
of our website. This course is for anyone
who's interested in building their own websites and learning
how to work with HTML. By the end of this course, you'll be able to do this all for yourself. Let's get started.
2. Class Project: Class project. The project
for this class will be to build a simple
website using only HTML. Throughout the lesson, we'll
cover which editor to use, how to structure your code, and how to see and update
your site as you work. For this class, it
will be essential to have access to a
computer that you can run Visual Studio code or another code editor
of your choice. You'll also want
to have a browser like Google Chrome
up and running, as we'll be using it to
display our webpage. I'll leave links to any
assets and resources you'll need in the project
and resources tab below.
3. What is HTML?: What is HTML? HTML or hypertext
markup language is the essential building block for everything you
see on the web. From buttons to links to larger sections,
everything involves HTML. If you've never seen what
it looks like before, you can actually see the HTML, but that's used to
build this webpage. If you right click
on the page and select the option that
says View page source, that will bring up all
the HTML for the page. And it works on any
page on the Internet. Try it out, which as
a markup language, allows us to display
everything we see on the web. HTML is made of elements, and these elements are the
building blocks of the web. Each element consists
of two parts, its tags and its content. Let's look at the
general structure of attack to understand
them better.
4. Tags: Tags. There are three types
of tags opening tags, closing tags, and
self closing tag. An opening tag starts with
a left angle bracket, followed by the
name of the element and then a right angle bracket. If the element has content
that goes between the tags, then it will contain
a closing tag, which is a tag of the same
structure as our opening tag, but with a forward slash after
the first angle bracket. If the element doesn't require closing tag because there is no content to go
between the tags, we'll refer to it as a
self closing tag and add in a forward slash just before that
right angle bracket. For most types of tags, there will be content
that lives in between the opening
and closing tags, but the content that
you choose to put there will depend on the type of
element you're working with.
5. Elements: Elements. There are dozens
of different elements that are used in HTML and each can
serve a different purpose. If we're interested in creating an element to display text, depending on what
type of text it is, we might reach for a
header or a paragraph tag. There are six different
levels of header tags, and you'll use them on your
page in a hierarchical order. We'll dive into headers a
bit more in our tutorial. Say we didn't need to specifically
display text, though, but we're looking more so to structure the
format of our HTML. In that case, we
want to take a look at elements such as
dividers or sections. These elements help
us separate one chunk of HTML from another and allow us to keep our
code organized and more easily work with
sling later down the line.
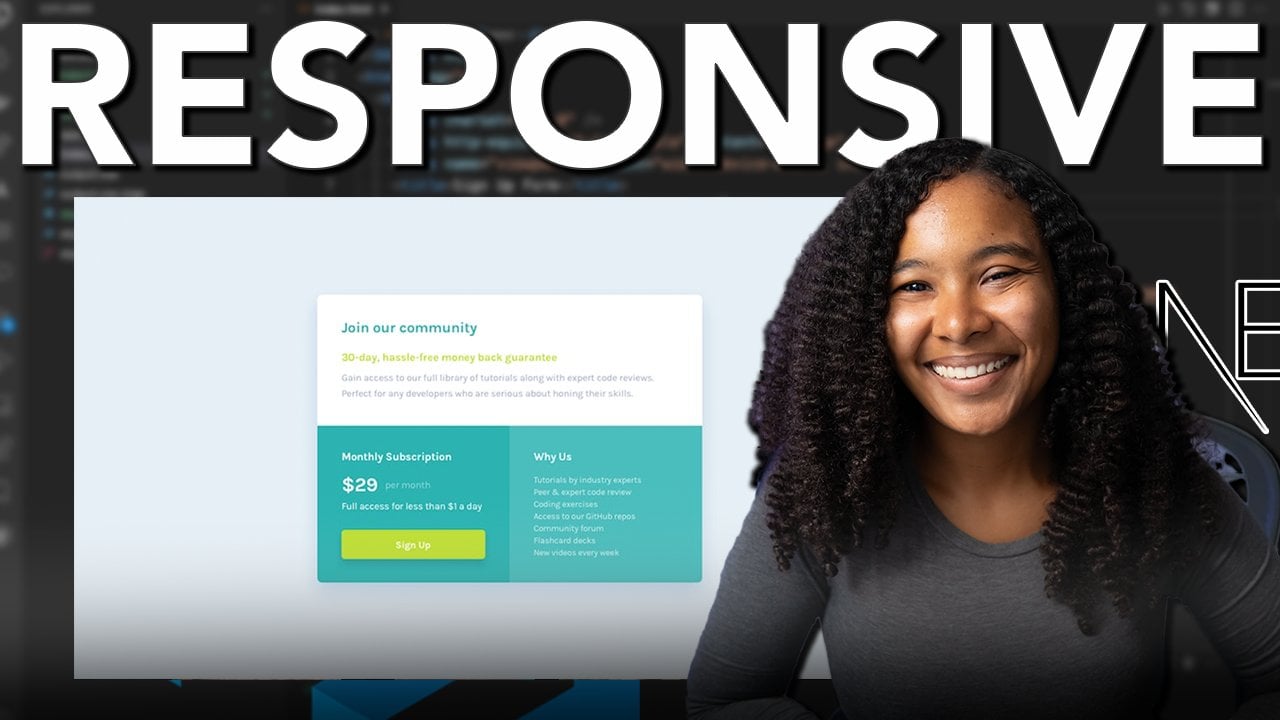
6. Tutorial: A so first things first, let's take a look at the project that we're
hoping to build. This is a design for the project that we're
looking to build. Basically, it's a simple
form with, you know, some styling in the background, some different sizes of the
headers and things like that. Alright, so first things first, you're going to
go to the link in the description
below and connect your account so that you can download all of these
starter files for free. Really, you just
need the images, but we can use the entire
starter kit to get us going. So, what we've been provided with here is a lot
of information. They've basically gone ahead and created a bunch
of files for us. I'm going to go ahead
and hide this file so that we can work
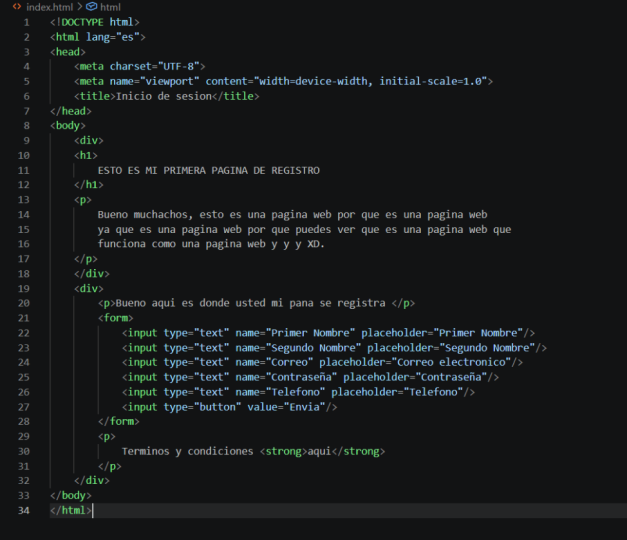
together to build it again. So what we want to do is create a new file and call that index dot HML,
just like they had it. That's just the
convention that folks use to write new HTML files. Awesome. So now we want to actually take our HTML
file and show it, we want to see the fruits
of our lava, right? We've created the file. We
want to see it on the web. So we're going to click down
here where it says, Go Live. Remember, we install Live
server in the last unit. Well, we're going to
start using it now. So in the bottom
right where it says, Go Live, you just want to
click that to run Live server. And it started. So it
started at port 5,500. If I mouse over one and I
go to Local post 5,500. I'm getting my webpage, but there's literally
nothing there. Now, why is this? It's because we haven't put anything
in the file yet. So, let's see if I say hello
hello world, and click Save. Still nothing. That's weird.
Why is that happening? Well, it's because HTML, as you might have glimpsed
at in the other file, has a very specific
folder structure that actually tells the computer that it properly
formatted HTML file. We can't just go ahead and
type text into our editor. We actually need to
format it properly. And you'll even see
VS Code is giving us a little live server is
giving us a little hint here. Like, Live reload
is not possible without a head or a
body tag, you know? Basically, it's
telling us, like, Hey, you're missing
pieces to this spot. So VS code has a really, really cool feature where if you type an exclamation mark, it will actually using Emmet, which is a built in
auto complete feature, it will actually
provide you with the whole doc type
for an HTML file. I encourage you to
use it because very rarely will you
actually have to type out Doc type HTML
in your actual job. So if you hit exclamation
point and Enter, it will take all of
that boilerplate and put it on the page for you. If we click Save, now we have
a bunch of proper elements. And let's take a look what
it. So the first one, it says doctype HTML. So that's basically
just telling us that the document is
of the HTML type. If you notice this right
underneath Doc type HTML, there's this HTML tag
that actually has a matching pair at the bottom Remember we talked about
HTML coming in pairs? Well, that is the opening
and the closing HTML tag. Now, one thing you need
to remember with HTML is that everything falls
within elements, right? And if you don't write something
within the HTML element, it doesn't exist on the page. So, as we're going
to start writing, let's make sure that
we write everything within this HTML element. Let's go down to the next level. Here we have a head, and
underneath the head, they seem to be on
the same level. We have body. So head and body. You can think about HTML
as if it was a human body. So the head is what contains
a lot of the information, you know, the behind the
scenes kind of knowledge. The body is what contains
the literal element. So, if we look at the head here, we'll see there's a couple of meta tags here,
which are basically, um metadata information
to basically tell the computer a little
bit more information about our HTML file. So it's telling you what
character set to use, content, the view port,
that kind of thing. These aren't parts that we
need to worry about right now. Then it also gives us a title. So we can actually give
our webpage a title. Let's call it signup form. Now, if we go over to
our browser and maybe we refresh the page, there's
still nothing there. But if you notice
on the top left, that thing that was
saying Local host 5,500 now says signup form. So by changing the title in
our HTML within our head, we are actually changing
the title of our page. Pretty cool, huh? Alright, so we kind of finished up
with a head for now. We'll come back to
this in later lessons, but for now, this is as
good as we need to get. Next, we're going to
talk about the body. Now, as I mentioned, the body is where all of
the elements live. So we want to make sure
that we're putting everything that we want
to see in the body, rather than starting
with just basic texts, because although we could
put hello world here, and save it and then go back
here, and it would show up. That's not really
semantically correct. HTML has a ton of different elements that you
can actually use for text, for images, for buttons as
we've talked about before. You want to make sure that
you're using the element, that is correct for the type of data that you're
going to be presenting. So because I'm
presenting some text, I'm going to probably
use a header tag. So the H one tag is the
highest of header tags. There should only be one H
one tag on your page because that basically tells us that this is what
the page is about. So as there's nothing
else on the page, I'm going to call it the
Hello World page for now. So I type in Hello World
between these H one tags, and let's take a
look, you'll see that it's already
formatted differently. That's because
headers, by default, have some built in stylings. They're bolded, they're larger. They have more
prominence on the page. If I was to go and create
this with, let's say, an H six tag, for
instance, and save it. You'd see how tiny the text
is, you can barely read it. So it's good to understand the importance and
the prominence of H one versus H two
versus H three all the way down to H six and
when you should use them. I personally don't use H six
tags very often because that just requires so many headings
before that to be used up. Let's take a look at our design. So as we can see here, it's this big image in
the background, and then we have learned to
code by watching others, see how experienced developers solve problems in real time. And then there's this form
on the right hand side. Okay, let's start building this. Alright, so learn to
code by watching others. I would guess that
that's probably the H one, so let's
type that in. And if we go over
here, look at that. It's already refreshed. Amazing. Alright. And let's see, see how experienced
developers solve problems. So this part right here, this see how experienced
developers solve, you might be thinking,
Well, should be using H two in age
three and age four? You don't actually want to
use a heading for this bit. This is something
that you would use a Ptag for or a paragraph tag. Paragraph tags are
for those larger, more general pieces of texts that you'll see on a webpage, you know, basically
paragraphs of text. So we'll use the
paragraph tag for this. Another really cool feature
about VS code is you can drag your tabs over to one side and then have them side by side, so you can kind
of just reference what's going on
in the other tab. So using a Ptag we'll say, S here Bing scripted
tutorials is great, but understanding how
developers think is invaluable. I agree. And you should
definitely reach out to your mentor to get
some of that one on one time. Alright. Awesome. So we have
our H one and our PTAC. Let's see how that's
looking. Perfect. Alright, cool. But then there's this other
section over here. There's like this, try
free for seven days, and then there's this,
like, form situation. And then this looks like
a button that you click. And then there's more
text under here. So how do we want
to structure it? We can kind of
understand that there are two sections here,
basically, right? There's a section on the left that is really just the text. It's like telling
us about the page. And then there's a section
on the right that is more about, like, what's
actually going on. So we can use either
the section element. Or we can use the div element, which it's more just
a generic divider. So what I'm going to do
is create two divs here, DIV one and DIV two. What I've done here is I've put all of this text into one div, and then I've created
the second div and I'm going to put all the form
information in there. This is just to give
them a good separation, and it'll make it easier when
we come back to silt later. So in this first
section up here, I'm going to create a P tag
and encapsulate that text. So we're going to say P. Now we have a form. This is the first time we're
dealing with forms. Let's talk about what a form is. A form is, you know, you've probably submitted a
bunch of forms online, even when you signed
up for Github, you're probably
submitting a form. What a form does is it takes
the different pieces of data that are submitted
or entered by the user, and then it sends it
to another location to be processed and dealt with. Maybe turned into a user, maybe, you know, you're sending in your Instacart
order for the day. Whatever it might be, forms
are used across the web, so it's really important to
know how to create them. So, to create a form, we're going to actually use
the element called form. And what that's going
to do is just give us a few extra special tools
that you come with forms. So within a form, you can have a couple
of different things. You can have an input. And the
great thing about a lot of these VS code extensions we've installed is that they
give you information here. So if you ever have
a question about what something is as
you're typing it, you can literally just click here where it says
MDN reference, and it will you can say open it. And then it will open it
in a new tab and you can read all about the form
input and the form element. I'll bring it over here
so you can see what I'm talking about.
So it's right here. Input form element, and
it will give you all of this information about the input within the form element, right? I'll tell you that it
has a type, it has IDs, it has a name, it's required, et cetera, et cetera, et cetera. So inputs a really great
place for us to start. So within HTML, you don't just have all of these
different elements. So if you go back up to the
top where it says HTML here, and we see Lang equals English. Lang is an attribute
specific to HTML, the language attribute, right? We can specify the language in HTML because it's sort of
like the overall element. Not every element will
have this feature, but really you wouldn't
need it if you set your overall
language is English. Just like that, all of these different elements have their own particular attributes. So input is one of those. Input has several different
types of attributes. So one is the type, right? You can specify what
type of input you have because there's
several different types of inputs you could. So a little hack that I
want to show you here. Alright, so when you type
in type and you hit Enter, it will give you all of
the different options you have for what type of
input it could be. So it could be a button,
a checkbox, a color. URL, there could be so
many different types of input that you could use. So you can start to see how
HML has a lot of flexibility, even though it is a fairly
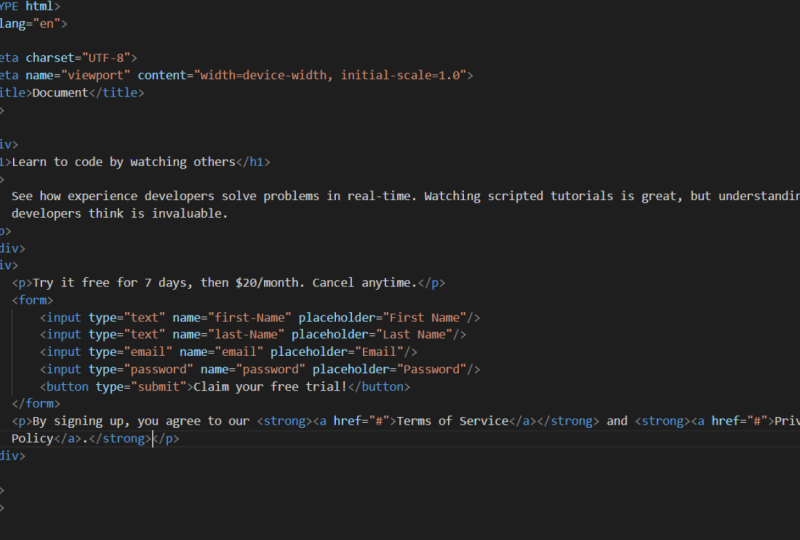
limited language to write in. We want this to be taking the first name of
what our users input. So we're going to
want it to be a text, so a type of text. And then another
attribute on input. And you can look it up
right here in the MDN docs another attribute is the is
it the name? Is the name? So you want the name of
whatever the input is. So whether it is is it the
first name of the person? Is it their last name?
Is it their age? What is that piece of information that
they are submitting? So if we go back over
here, we type in name, we would actually put first
and we could put first name. And that's how we know what piece of information
it is there. And then we close it off. Inputs are actually
self closing tags. So rather than having this slash input again,
we wouldn't do that. That's not proper syntax. Prettier will give us a little
error here saying, Hey, self, if there's nothing
in between your tags, they should close by themselves. So what a self closing tag is is if we take input
and we isolate it here, it's a tag that ends with
a slash and a bracket. So there's nothing that
goes in between it. The tag itself is the value. Another really cool feature
that you can use with input. Another cool attribute is
the placeholder attribute. So you can actually give
your user a prompt. You know when you ever
go in a form and you're not quite sure what you're
supposed to put in, you can actually
give it a prompt, like email address,
name, et cetera. So let's go ahead and give our first input attribute the
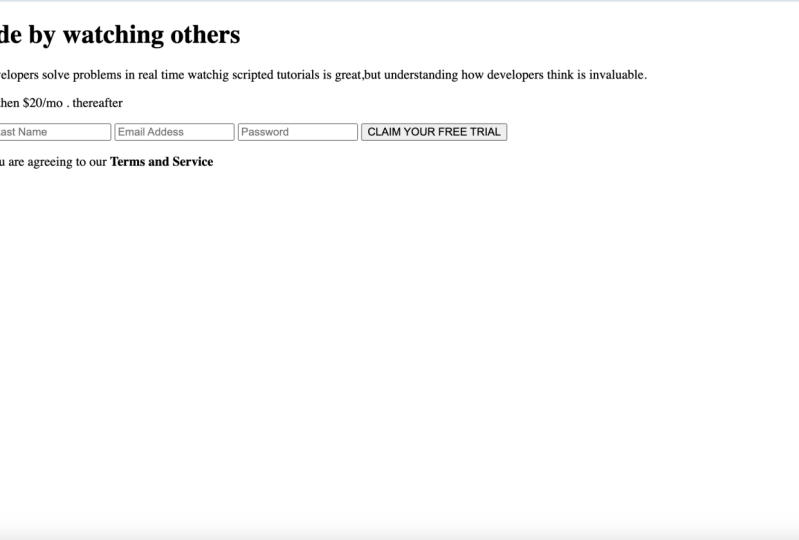
placeholder a first name. Cool. So now when we go back
over to our page, awesome. When you look here, this
is our little input box, and this is our first name box. You may notice something
interesting, though. All our code is
going straight down. Like, it's not just like
coming onto the side. That's because we haven't
put any styles in yet. We'll work on
styling this page in the next unit when
we talk about CSS. But for now, let's just try and get everything on the page
in a semantic manner. Alright, let's bang out the
next couple of inputs here. So we're going to
copy and paste and paste and paste a
bit of a hack there. And we're going to type in This is going to be
their last name. So we're going to change
the name to last name. So remember, these values that they submit are
going to be sent to, you know, a database
or a back end or, you know, we're going to
log in to the console. But we need to understand what
they're sending us, right? Because if we meet
somebody whose name is, like, George Steven, we won't know whether George
or Steven is the first name, unless we assign it
a particular key. So we've decided that
the first one's going to be first name and the next one's going to be last name. Placeholder for this
one, last name. And then the next
one looks like, Alright, we've got
our four inputs here. Again, they're
sitting side by side instead of stacked on
top of one another, but that's something we'll
fix in another lesson. And then underneath this, we need one more type of input. Remember earlier that we saw that input could be a button? Well, that's specifically
related to forms. So with forms, you want to make sure that when you
submit the form, all of that information that you submit with a form
gets sent with it. And we do this by creating
an input type of button, including that within the form. So we'll create one more
input, call it input, create it of the
type. Button Name. Let's change name to actually value and we'll claim your free
trial inside there. And it is still a
self closing tag. Alright. Okay, cool. So value claim your free trial. If we go here, boom, big button that says claim your
free trial. Awesome. We're flying through
this. Alright, I think the last thing we need
to add is this piece here. By clicking the button, you are agreeing to our
terms and services. Alright, so let's go ahead. That seems to be
outside of the form. Let's go ahead and
add it down here. Let's do a PTAg
and we'll put it. Now, something interesting
here is that both terms and services and try it free
for seven days are bolded, but we haven't bolded them yet. So what we could do is
actually use the strong tag. Now, we could do this
in CSS, as well, but there's some really
easy ways to do it in HTML. The strong tag basically just makes the text stronger or bold. So we'll just wrap the pieces of our text that we want to appear bolded with the strong tag. Let's put one here and try it free for seven
days. Let's put one here. Save that. And
boom, there we go. Try free for seven days is Bold, as well as terms and services. Awesome. I think we've gotten all of the
elements on the page. The last thing you'll want to do before we move on to CSS is to push our code to Github and get an initial recording
of what we're doing here. So, let's go ahead and open up a new instance
of the terminal. Alright, so this is in a
folder called project files. Let's make this a
Git repository. So we'll type in Git in it. And we're going to change the
branch to main and awesome. Alright, so we have our
Git and kit brands. And as you can see
here, all of these haven't been added yet
to our Git repository. So they're showing up
green and untracked. So what we can go ahead and do, and these are just the
designs and the images as well as the index and the instructions for
how to build this. But really we don't need to
track all of these things. All we really need
to do is to track our index dot HTML
file at the moment. When we add more CSS and images on work with
different things, we can start tracking those. But for now, all we need
is our index dot HTML. So we can do this and we can just call
this initial Commit. And we can commit it,
and there we go. Done. Alright, so now what
we want to do is link this to a
Github repository, because remember, we're
tracking all of our code on GitHub from the very first
day all the way to the end. So let's navigate
over to Github. And we'll go to your account, whatever your account name is, and we'll go ahead and we'll
create a new repository. So'll head over to
repositories, new repository. We are going to call
this sign up form. I hope it's available.
Yes, it is. Awesome. Alright, doesn't
need your description. We're gonna keep it public,
and we're just going to go ahead and create a repository, just like we did the last time. Awesome. Since we've
already created a we've already initialized
it as a Git repository, all we have to do is press
this copy button right here, and it's going to copy all of these nice lines of code that we don't need
to go and memorize. I will hop back over to VS code, paste it in our terminal, hit Enter, and there we
go. It's set up to track. So if we go back over to GitHub, refresh the page, just to
double check our work. Alright, we'll see that we have one index dot HTML file
committed 1 minute ago. We have one commit, and
it says, Initial commit. And the great thing about Github is you can actually click in and see all the information. So this is everything
we just typed in there. See our text boxes, our buttons, our form, our P tags, our dibs, our H one. We've got a lot of
things going on in this HTML file right now. So let's hop over and learn some CSS and add some
styling to this page.
 Zoë Davidson, Software Engineer & Cinematographer