Transcripts
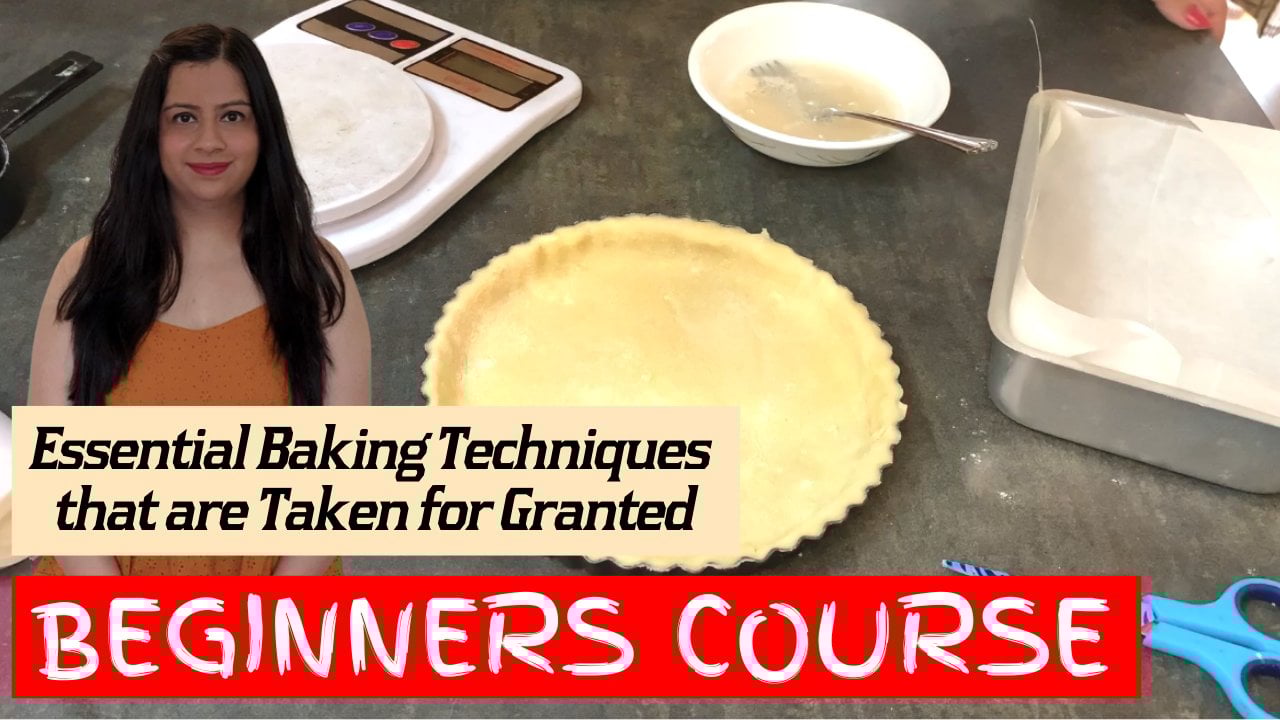
1. Introduction: Hello everyone. I'm
Savini Gauri. And I'll be your
baking and pastry mentor for this course. Before we get started, I wanted to brief
you a little about what we'll be doing
in this course. Basically, this course is
all about making rough puff dough, we've all heard of lamination
that is used to make puffs, croissants, and danishes and
a lot of stuff like that, but that's for the
professionals. But there's an
easy way for us to do it at home without any of the machinery and equipment used in professional bakeshops. That is what is
called rough puff dough. We will be making
rough puff dough right in our homes with zero equipment. We won't be using a stand mixer or dough sheeter or anything just us and our rolling pin and a few other easy tools
you'll find at home. In this course, we'll
be walking through the process of making
rough puff dough. Then after that, we'll be using that rough puff dough
to make five recipes, we'll be making
strawberry turnovers, will be making
French Palmiers. We'll be making twisted puffs. Pizza puffs and
an apple galette. The twisted puff is the best
recipe or of all of them because that is the recipe we'll be making out of our scraps. So not only will I be teaching you how to
make rough puff and use it and use it to make
it into brilliant dishes. But also how to use
the scraps that we have left from all
those beautiful dishes. So I hope you guys enjoy this course and if
there are any doubts, feel free to reach out to me. Thank you. Let's get started.
2. Preparing the Butter: Making Rough Puff Dough: Let's get started on the
puff dough, before we start, I want to make it very clear in the beginning that when it comes to making puff
dough, preparation is key. Preperation is the
most important part of nailing the puff dough. So I'm gonna take one chunk of 85 grams of butter,
put it on a plate, and just throw it in the freezer until it is nice and solid, but usually takes about
two hours at the minimum. Now, I have a plate in which I've got
some dry flour. I have another empty plate. I have a very sharp knife
that I'll be using. And I have taken another
chunk of 85 grams of butter. I will sprinkled some flour
on the cutting board. I have lots of
sprinkled some flour on the knife and on the button. Will start by cutting
the butter into slices. We want the slice
of butter to be about 1 fifth of a
centimeter thick. It's a rough
approximate measure, but basically we need ten
slices and we will start placing distance laces
on the Florida bleed. We wanted to let the bleed with one nice thin layer of
pieces of mothers places. Then to make the
second layer on top, we'll sprinkled some flour
on the border slices and then continue adding more
slices of butter on top. Once we're done with
slicing the bottom, we're just gonna put this
plate in the refrigerator for about ten to 15 minutes to ensure that the butter
is nice and cold. In the meanwhile, IT
admin workstation because cleanliness
and being very, very meticulous is important
while making BAFTA, it makes the process
easier for us. Let's just clear out
the work surface.
3. Preparing the Dough: Making Rough Puff Dough: Right now on my work surface here I have all
the things I need. I have an extra large bowl. Ensure that the bowl is way larger than you
think you need. And in case if you
are living in a place which is Julie heart or
your kitchen is humid, just throw all your tools
as well in the fridge. That way, it helps you
keep the temperature low and cool for a
longer period of time. Then I've taken agree
TO I have a spatula, I have some spawns
all my ingredients, and then I have a plastic strap. I have these things ready. Now let's get the ice
cold water out as well. So to begin, I'm going
to add 210 grams. That is one and
three-quarter cups of all-purpose flour
into the bowl. That I will add
one tablespoon of sugar and one teaspoon of salt. Using my silicon spatula, I'll mix these three
things properly until the sugar and
salt are equally, equally distributed
throughout the flower. Then I'll take the frozen
chunk of butter that I have, and I have lightly dip the
butter in the fly to coat it. The two have a thin
coating of flat on it. This coating of flour helps you ease up the
process of greeting. So we're also going to add some dry flat on a greater as well. Now, we'll start grading
the frozen butter. You have to be really
careful while creating it, because since it is frozen, sometimes your hands get
cold and you may get your hands on the graders will be really careful with that. If you're in the
middle of the process, the butter has started
to stick to your hands. Feel free to quote the chunk of frozen butter in dry flat. Again. Once you're done
grading the buttocks, gently start posting
the button flower. You don't want to press
down on the button. You don't want to
apply any pressure. You just gently want to toss
the flat and butter until all the strands of butter or evenly coated with flat dry fly. We will continue this process of tossing until we are
satisfied and feel like it is evenly coated in distributed
throughout the flower. Now, we'll take out
our butter slices, will be repeating the same thing with the butter slices as well. We will take out
all the slices of butter and start putting
them in the Florida. We don't want to apply any pressure or press
down on these slices. We just want to
place these slices ensure that they're not
stuck to each other. No, two slices are
stuck to each other. Just put all the
slices into the flood. Then start tossing them again. You don't want to press down, you don't want to
apply any pressure. You just want to toss them until all the slices of butter a
nicely covered in the flood. Make sure that as
you go you also keep your station clean,
your workspace clean. That ensures that you have, you can walk quick COVID stuff and make sure things
are very, very cool. Now that the slices
of butter are all evenly coated
with some dry flat, we're gonna start adding
the ice cold water. Don't or add all the
ice cold water at once. We have 60 MLF ice
cold water over here, and we're gonna add
it in increments. New start adding the water. Again, this is not
a regular dose, so you don't have to need it. All you have to do is take
your hand and bunch the door. You bunch it and leave it. You bunch it and leave it. You don't want to needed liquid will continue to add the water, the rest of the water slowly and continue the
bunching and needing process. You don't want to
apply pressure again, just bunch it and neat. Bunch it and leave it, bunch it and leave it. Then if you feel that the flood has started
looking like doing it, I started to look a little
hydrated. It's perfect. Once you're done
adding all the water, you will realize that it has started to resemble or do know, in case you feel
it's still looks. You can add another 15
to 20 mLs of water, ice cold water to it. But there are less chances
that you'll need more water. Once you see that the DOT has
started to come together, even if it has a few dry spots, that total rate, We'll stop
needing the flat over there. We'll stop moving
the door over there. We don't want to go
overboard because the longer you take to need or
handled the door, the button is going
to start melting and we don't want
the butter domain. Once we feel that it's coming together with some
dry bits here and there. We'll stop needing and
keep the bolus aid. Just drop off the
floor access though from your hands and
just put it aside. Now we're going to
clear out to Workspace and take the plastic tab. We're going to lay down
one layer of plastic wrap. Then we'll cut out
another piece of plastic wrap and keep the
second piece aside for normal. On the surface of the plant. First piece of plastic wrap will empty out all of our dough. We will just empty
out all the DOE, even the dry bits and
gently press it down. You don't want it to
become one piece. We'll do that later,
but just gently press down the dry
bits onto the door. Then place the second piece of plastic wrap on
top of the door. *** it up from all sales, make sure it is seeded
from all four sides. Now we have a packet of tow, this packet of dough, we will gently press it
down and try to make the corner shop so that it starts to resemble
a rectangle. It does not have to be
a perfect rectangle. It should just
resemble a rectangle. Make sure that you
keep this door on a flat surface to chill for 60 minutes
in the refrigerator.
4. Folding the Layers: Making Rough Puff Dough: So now that it's
been 60 minutes, I've cleared out my workspace
and Yoda have the dough. I've taken a bench knife I
will use to collect the dough. I've again kept ablate of dry flat and I've
taken a dull pain. You can either use adult
but not a rolling pin, whichever it is
available to you. I will unwrap the door
from the plastic wrap. And then before I take it
out of the plastic wrap, I will sprinkled some drive
flat on my workspace. On my station, I will
sprinkle the flower or tip. Whenever you're
sprinkling Florida, try not to sprinklers
from the top. When you sprinkle
it from the side and you kind of throw
it from the side. You will notice that that
throwing from the sale creates a nice and thin layers of giant flood that is evenly distributed on
your whole work surface. Now we're gonna
take that piece of dough and place it
on the flat surface. I will also sprinkled
some flat on top. Make sure the top
of your dough is also valid sprinkler with Dr. Clark and the QDOT making
a good puff though, is that before you
start rolling it, you will always hit it with your dowel pin
on your rolling pin. Start beating your door like literally start doing on your
dough with the rolling pin. You will notice that
since the dough is hard as it's been in
the fridge for so long. The butter has frozen up and if he will
roll it right now, nothing will happen to it. So we start by hitting the doll. We will hit the door for
about 30 to 40 times. And then we'll start ruling it. Start drooling your dough. And right now our aim is
to roll out the dough into a rectangle that is
of one is to three ratio. Now, vantage to three is a
roughly show that we have, we don't have a specific
measurement in mind, but we will try and
keep it to a one is to three ratio and vital,
we're gonna roll it. We will also use our
bench snakes to collect the door and give it a
nice rectangular shape. This way it helps
us control that the dual does not
get old floppy and drawn into a viewer
chip image to create a rectangle that is
of one is to three ratio. And then we'll continue to link. We're going to use
a rolling pin. When you roll it, you don't
want to make small rooms, you want to make
bigger, longer roles. And throughout the process, we will continue to use a bench knife to
collect the door. This vivid able to make
sure that the shape stays like a rectangular or at
least resembles a rectangle. We also have to make
sure that the door does not stick to
the work surface. So we will continue to lift the door and chillax the tube. If you feel at any
point that the door is starting to stick
to your work surface? Just gently sprint goods and
more dry flat over there. Again, we will
continue to roll it, delivered is about half
a centimeter thick, but we will also use a bench near to
continue to collect it. That way, we can continue to try to make a
rectangle out of it. Right now the edges
look really rough and rounded and viewer,
but that's all right. Once we reach the
desired thickness of about half a centimeter, we're going to use our bench
knife and make marks on it, dividing it into
three equal pieces. You just want to make marks. You don't want to
cut into the dude who just want to make marks. And then we will take the outer side and folded
towards the center. Similarly, we'll use
the adult of the state that we've marked folded
before ending it, like we would fold a little. Now we've made our first fold. This will count as our first
fold of creating layers. Now with the open side, which is also known as
the lip of the door, we will make sure that there's
on our right-hand side. We will stick to
this right-hand side throughout the process. We will sprinkled some
more dry flat on top and now vivo collected again, we want to make sure that
it resembled a rectangle. So as you notice, the lip is on my right. We have to remember
it is on the right. Now. Lock in these layers of door or do rocking the
layers of the buffer TO, we are gonna beat it again. You want to beat it
about 20 to 30 names. This ensures that the
layers kind of Stephen, and it is these layers
that is going to give it the leakiness in the end, again, I'm gonna collect it using a bench knife because I wanted
to assembling a rectangle. And then we will
start ruling it. While rolling the door. You will notice that
whenever you would rule, the edges of the
sides start to cough. To counter that we will
just draw out on the edges. We will continue to
roll this again and try to maintain a one
is to three ratio. We are trying to maintain
a one instruction ratio. We will again roll it until it is half a centimeter thick. We will continue to
take the help of our bench nave and collect the edges trying
to keep them meet. Vantage to three is the
ratio we're looking for with the Dolby half
a centimeter thick. We will also continue to relax the lower throughout
the process by gently lifting it at any point if
you feel it is sticking, you will just
sprinkled some more dry flat and continued or link. I feel that again, I've reached the one
is to three ratio. It is about half a
centimeter thick. Again, using my bench knife, I will roughly the waded into three equal parts formed in the outer sides on
towards the center piece. And again, the open side of the foreign debt is
also called the lip. I decided to keep it on my right-hand side so I will
place it back on Medicaid. See, you started assembling
a rectangle even more now. So this was our second Ford. Started reading it again, again Vb thing it to
lock in these layers. These layers will give our buff to the beautiful leakiness. I will be dead for
about 20 to 30 dimes, and then I will relax the door, collected back into
a rectangular shape using my bench knife. And then continued Olin. I will continue to roll it, GNG lacks it, roll
it and relax it, and also ensure that
there is plenty dry flat on the surface so that
it does not stick. I will continue to rule in
this process of relaxing it, rolling it, and
ensuring it does not stick, has to continue. Again, delete this reached a one is to three
ratio and the shape of a rectangle with being
half a centimeter thick. I can always use
my bench knife to collect it and keep the
edges kind of neat and tidy to ensure that it continues to
resemble a rectangle of vanish to three ratio. Once I'm satisfied
with the vanish to three ratio rectangle and think it is about half a
centimeter thick. I am going to make
my third fold. Again using a bench knife. I will make the markings, dividing it into
three equal pieces. Folding the outer
sides of the door towards the center piece
like I would fold a letter. Then again, the open
side of the fault, that is the lip I decided
on the right-hand side, so I will keep it on
my right-hand side. This was my third forward. Now, again, using a bench knife, I will be collected and make
it into a nice rectangle. I will sprinkle it
with some more drive flush on the surface
and on the top, and then mute it again
to lock in all layers. I will be about 20 to 30 times to ensure that the
layers are locked in. Then I will use my
bench knave as well to collect the edges and make sure that it
resembles a rectangle. Now, once I'm done building it, I'm going to take the plastic
wrap that had kept aside, do not throw it away. Really could reuse it as
many times as weekend. And now I'm gonna
tightly sealed it in the plastic wrap and make sure it's seated
from all edges. We don't want any
air getting it. We're gonna chill this
laminated buff TO for at least three to four
hours are up to 24 hours. I usually like to keep it
around six to eight hours, but you have to do it for at
least three to four hours to ensure that the layers get perfectly set where they are. And we get a nice buff
TO with flaky layers. Let's move on to the next lesson where we use this buff toe.
5. Rolling Dough: French Palmiers: So let's get started on
our palm ears short. We have our puff TO
that has been sitting in the refrigerator for
six to eight hours. So I'm gonna let it sit at room temperature
for five minutes. In the meanwhile, I
have your prep with me. A plate of dry of
flour or rolling pin, or a really sharp knife
and a bench nave. Let's make the cinnamon sugar
for which over here I have a quarter of a cup that is
50 grams of powdered sugar, to which I have learned one teaspoon of cinnamon
and a few pinches off. If you don't like sort,
you can omit that. And then we'll mix
these three things up really well until all
the salt and cinnamon is evenly distributed
throughout the sugar will not keep it to say it. I also have over
one tablespoon of milk at room temperature that will be brushing
on the palm years. But for now we'll keep
that aside as well. Let's get started on the door. First, we'll unwrap the
door of the plastic wrap. Please don't throw away this plastic wrap
will be reusing it. So keep it aside for now. We're gonna start by sprinkling some dry flat on
our work surface. Remember you don't
sprinkle from the top. We will sprinkle
it from this side. We'll sprinkle some dryer
flower on the surface, then something Dr. Florida
on the buff TO as well. Remember we decided in the last lesson
that we're going to keep the lip of the dough
on a right-hand side. So I have kept it on
my right-hand side. Now, we'll start
beating the door. Since the door has been sitting in the fridge for so long, it is really hard
to make it pliable. We will beat it about 20 to 30 times to make it a
little easier to work with. Now I will start
rolling the door. When we'll start
rolling the door, you will realize
that the sides of the node tend to
curve and it does not necessarily
resemble a rectangle. So to counter that, we're just gonna roll
out on the edges of 34 corners of the dome. That way, it helps
us balance out that COVID Joe and make it
resemble a rectangle. We will continue to rule
the door and we will also use a bench knife
again to maintain the shape in case you feel that it is still becoming curved even if you're
using the bench knife, Don't worry about it. We're gonna cut out the
edges and make it all neat. But for now, we will
continue to rule the door. We have to be really
quick with their dog because it has butter and we don't want to make the button. Because if it makes then
little start leaking and we won't get the layers
really, really quickly. Continue to roll the toe. But we will also continue
to relax the door and ensured that it does not
stick to a work surface. In case we feel it is
sticking to a work surface, we will apply some drive flash. This time our aim with the
DOT is to roll it until it is about 18 inches by eight inches are about 1
third of a centimeter thick. You'll notice that
normally DO has somebody only curved
edges but that's fine. We'll cut it. It's rough. Draft isn't the name. Again, will continue to relax the door throughout
the process and we'll sprinkle dryer
flower whenever we feel the need and
continue rolling. Once I feel satisfied, I will stop rolling. But until then, we will
try to roll it out evenly until we have an 18
inch by eight inch rectangle. I feel we've reached the 1 third
centimeter thickness. I'm going to stop rolling. Now using the sharp
knife that we're taken, we're gonna cut out
the rough edges. No viral carting. You have to ensure
that you do not jagged your knife
through the puff TO YOU have to place your
knife where you want to apply pressure
and lift an eighth. Apply pressure and lift an a. Do not dragged through the door. These pieces of scrap that we have from our puff TO
we're going to collect these and we're going to
use this in a bonus recipe that is at the end
of the whole course. That's the last
lesson of the course. If you feel you can't cut straight sides like
without using a ruler, without using any help. Feel free to use a ruler to
cut these straight sides. If you feel you can
do it freehand, that is fine as well. But remember, you will not jag
your 9th through the door. You will apply pressure and
lift the knife and cut again. We'll continue the
process until we have neat rectangle with us. And we will keep
the scraps aside. We will not throw
away these graphs. We have a beautiful recipe
at the end of the course. Now the plastic
wrapped, remember that allows you to keep aside, we're going to keep all
our scrap pieces in it and wrap it up really nicely and put it in the refrigerator until
we get to that lesson.
6. Assembling: French Palmiers: So here we have a rectangle. Now. We're going to take the mic and pastry brush that we have
prepped and keep it ready. We will relax our
dual VN last aim to ensure that it does
not stuck to the surface. Then we will take
a flat baking tray over here with us that I have learned with the silicon mat. You can always use
parchment paper as well, whatever is available to
you and keep that ready. Now, we will brush the surface of the buffer IO with the milk. In short, you evenly court the whole surface with the milk. Even the edges do not forget the edges and brush
it. Thanks asleep. Then we take our
cinnamon sugar and start sprinkling it
on the whole surface. Again, don't forget the edges. We want flavor on all
corners of the premier. Sprinkled sugar really nicely throughout the whole surface. Vile sprinkling also ensure that you sometimes pat down and make sure that the sugar is actually sticking to the
milk that we've put. We will leave, say, about two to three
teaspoons of sugar, the cinnamon sugar for later on. Now, using your bench nave, we will roughly mark those
center of the dough. This is like a rough marking. We don't want to cut
through the loop, we're just making a
marking for us to see. You can use a knife
as well to do that. Now, from one side, I am going to make a forward that is about one
centimeter thick. This fold will help me
roll the door easier. Now, where I've made the
one centimeter fold, I will start rolling on it. And I will continue
to roll this until I reach the center mark
in that we've made. Then I will press
down on their door to ensure that it is nice, at least stuck together and
there are no air pockets. We will repeat this
process on the other side. Again, I'll make a one centimeter thick
Greece or forward. And then roll on that fold. Again, we will press
down so that there are no excess air pockets and all the layers get
stuck to each other. Using both your hands, you will start pressing on
the door from all sides. We will keep it
sideways, press on it. We will keep it
straight, press on it, we'll keep it upside
down and press on it. This way the palm ear layers
get stuck together and there are no excess air
pockets in the whole rule. Now, we're going
to start cutting the palm years in charge. You have your baking tray ready. We will cut about a
centimeter thick bomb ears. You can always alter
the thickness. I liked them one
centimeter thick. And this is a rough I'm
not going to measure it. I'm just going to roughly
start cutting them. Take your piece of Palm yet and gently press it in
from both sides. So it starts to
resemble a heart. We will gently press
it in and start placing it on the prepped
baking tray we have. We will repeat this process
with all the pieces. We will cut it, we
will press it in from both sides and place
it on the baking tray. Ensure you please these
pieces about two inches apart because they tend to
spread when you pick them. This way, you will
repeat this with all the pieces and slice up all the doors until
you're completely done. Now, we will gently press
down on the bomb years. We have to be very
gentle with this press. We just want to make sure that the layers are stuck
together. That's it. We're not trained to make
it bigger or anything. Just press it down
enough to the desktop. Now remember the cinnamon
sugar, we'd get to say it. We're going to take
that cinnamon sugar and sprinkle it on all the pieces. Just a light sprinkling
on all the pieces. This helps get a better color
on the bombers done topic. We'll keep these palm
years in the refrigerator to chill for ten to 15 minutes. While these bombers
were chilling, I preheated my oven to
a 190 degrees Celsius. Now, I'll break these
bombers at 190 degrees for about 2222 minutes or until they have a nice
golden brown color on top. While the big, I'm going
to clear out my workspace.
7. Taking Palmiers out of the Oven: The bomb years or
out of the oven and they're beautifully
golden brown. They've expanded in size. They have a nice golden color, all the layers and
opened up perfectly. We're going to let them cool on the baking tray for
about ten minutes. Before we transfer
them onto a wire rack. Now we'll transfer
them on the wire rack and let them
cool completely. Transferring them on a wire rack ensures that they could
evenly from the top and the bottom so
that we don't have any soggy peanuts or
any moisture left. I'll transfer them
and then we'll taste them once
they're nice and cool. It's been awhile and
they're nice and cold and I'm going to
transfer them on a plate. I like to keep my palm years old stacked up one on
top of the other. Here they are ready to be eaten. I'm going to break a
piece for you to see. And you will see that
it is so nice and flaky and rough puff DO look so beautiful and all the
leakiness is coming apart, all the laser coming apart. Let's move on to
the next lesson.
8. Rolling Dough: Strawberry Turnovers: Let's get started on the
strawberry turnovers. Again, I have one
recipe of puff TO, that has been resting
in the refrigerator for about six to eight hours. I'm going to let it sit
at room temperature for about five minutes to make it more pliable and
easy to work with. As always, I have
everything prepped here. I have some drive flat on
a plate ready to be used. I have a rolling pin, I have a really sharp knife, and I have a bench nave. Then I have one to
two tablespoons of granulated sugar that will
be used to sprinkled. Then I have some
homemade strawberry jam in case you're interested in
the recipe, do let me know. You can also use any other jam or preserve of your choice. Then I have one egg at room temperature that
I'm gonna whisk up. Once it is whisked to this, I will add one tablespoon of milk at room temperature
and mix it up really well. This will be our egg wash for
the strawberry turnovers. For now. I will keep this to say it along with a pastry brush. Now let's get started
on the puff TO, Let's unwrap our puff TO take
it out of the plastic wrap. And again, do not throw
away this plastic wrap. We will be reusing it. So keep it aside for now. We'll start by
sprinkling the surface with some dry flat do not
sprinkler from the top. Sprinkle from the side gives
it a more even spread, as I had mentioned earlier. Then sprinkled some
more dr bar on top. As decided in the puff video, I am keeping the lip of
the dough on my enolate. Now, before we start
beating there, DO ensure that there is nothing
kept on your workspace or workstation that can fall off because of the vibration that
this meeting will create. Let's start beating the door. We will beat the door for about 20 to 30 times to make it more easy and
pliable to work with. And then we will
start rolling it. Will start rolling it. We will make long big rules. We will not go with
smaller roles, really go with big roles. You will notice
that the sides will start to create a curvature. So to counter this curvature, we're gonna roll out just
the corners of the dough so that we're able to maintain
a more rectangular shape. We will continue
rolling this dough and we will also ensure that it does not
stick to the work surface. So we will lift the
toe, relax the door, and if required, sprinkle mode dry flat on our work surface. We will continue rolling this
dough, relaxing it again. Then we lose a bench knife
to collect the edges and ensured that the edges
stay nice and sharp. We will roll it again with the same one is to three
ratio in my funnel. Constantly continue
to relax the dough. Now we will switch site and
start rolling the width. For the strawberry turnovers. The rough estimates that we have in mind is that
we want to roll out the store until it is 18
inches by nine inches. That is about 1 third of
a centimeter thick toe. Again, if the door
starts to have curved edges or does not
have nice sharp edges, don't worry, we're
going to cut it and make those nice sharp edges. For now, we will continue
to roll the toe. Again, big long rules to
ensure even rolling out. Continue to relax it
in the process as well and sprinkle more
dry flat if required, do not feel shy. We will continue rolling
it and relaxing it, rolling it and relaxing it. Once we're satisfied and feel like we've reached
the 18 inches by nine inches dimensions or have reached the 1 third
centimeter thickness, we will stop rolling. Use a ruler if you feel confused or if you're not sure
of the dimensions, feel free to use a ruler. Now, we will start cutting
the sides, the curved sides. Remember that we will not drag the knife
through the dough. We will apply pressure
and lift or knife. Then we'll pick up the knife, place it again, apply
pressure and lift the knife. Do not throw away these scraps. We will be using these scraps in the bonus recipe at the end. If you feel you can't
cut straight sides like without using a ruler
or without using any help. Feel free to use a ruler to
cut these straight sides. Or if you feel you
can do it freehand, that is fine as well. But remember, you will not
Jagger 9th through the door. You will apply pressure and
lift the knife and cut again. Now, once we have
a neat rectangle, we will take these scraps, placed them in the
plastic crap we'd kept aside and put them
in the refrigerator.
9. Assembling the Strawberry Turnovers: Now we have your rectangular
piece of dough with us. Using a knife, we will
make rough marks, dividing this
rectangle into half, and respectively dividing both
the halves into more hubs. So basically we have three marks that are dividing
the dough into force trips. When we make these rough market, they just help us have
estimates better. We haven't even sort
of piece of dough. We will now divide the nine inch side into
three equal pieces. So we will be making
poor rough marks. At any point. If you feel that
the marks are not correct, you can just drop over them
a little and do it again. But again, these
are rough marks if you are really finicky
and want to do it to the T user ruler and
make exact markings. By making these marks, we will now use them and
cut them into strips. This way we will
have 12 pieces of dough that will make 12
strawberry turnovers. We will now cut those markings and have 12 pieces with us. Cutting. We will again not
drag our knife through it. We will apply pressure, lifted up and apply
pressure again. We will not drag the knife. Once we're done cutting, we have over here prepped flat baking trip
with the silk pad on it. You can also use
parchment paper. We will remove these
pieces of dough that we've got that assembling the
strawberry turnovers. But first I will clear out
my workspace and remove the dry flat and all the things that are not required over here. And have the things
that are actually required that as the egg
wash in the strawberry jam. Now, I'm going to
take about one to 1.5 teaspoon of strawberry jam. And please sit in the
center of the turnover, folded over to
create a triangle. When you make this turnover, it is in the name, it is just a turnover. We will not stick
anything or apply a new pressure if the jam
leaks out from the sides, we will let that happen
because that is what gives it the name and the beautiful
taste of a nicely bit jam. We will continue to do
this with all the pieces and start placing them
on our line baking tray. Ensure that your pizzas are kept about an inch apart
from each other. So that in case they expand, they have space and they don't stick and make one big piece. Continue this process of putting the jam and
turning them over. With all the pieces are as many pieces as you can
fit on your baking tray. I'm left with one
piece over here, so I'll maybe use it later. Now, we will apply the egg
wash on all these pieces. Will apply a wash on just
the surface of these spaces. Nice thin layer of hogwash. Now we'll sprinkle
the granulated sugar on all the pieces. About eight to ten
granules are good puppies. And then using the sharp
knife that we have, we will create slit
marks on all the pieces, about two to three slit
marks on all the pieces. This makes it look
pretty when it peaks and in case there is
any excess moisture, it helps get rid of
that excess moisture. Now, we're going to take these strawberry turnovers
and bake them in a preheated oven at 200
degrees Celsius for about 20 minutes
or until they have a nice golden brown
crust on top.
10. Taking Strawberry Palmiers out of the Oven: So our turnovers are
out of the oven. We're going to let them sit on the baking tray for about ten minutes and
then transfer them on to work via turnovers. You'll notice how
nice and glossy look this gloss is because of the
egg wash that we'd apply it. Now we're gonna get them
ready to be served. We'll place these turnovers
on any drill play to Lake. And they're ready to
be served based best when they're slightly warm
and not completely cool. I like to solve them when
they're out of the oven. It's been like 1520 minutes since they've been
out of the oven and just going to
stack them up on a plate and there
already to be head. You will notice that it has
opened beautiful layers. The puff too has come out
really well and you have some nice leaky strawberry
jam on the sides. And it's nice and
crispy and golden on the outside and very
soft on the inside. I hope you enjoyed the recipe. Let's move on to
the next lesson.
11. Preparing Apples: Apple Puff Galette: Let's make our app
above, collect. For the Apple buff
collect over here I have 1 eighth cup of melted
and software and butter. Then I'm going to keep a Sade. I have the egg wash remaining from my strawberry turnovers. But if you want to
make a fresh egg wash, it is made of Vanek and one tablespoon of room
temperature on milk mixed up to get on that, I'll keep aside for now. Then to make a cinnamon sugar. I've taken 50 grams or quarter of a cup
of powdered sugar, to which I added 1 fourth teaspoon of
cinnamon powder that I'm going to mix up
really well until the settlement is evenly distributed
throughout the sugar. To this now I'll add
two to three pinches off salt and mix up
the salt as well. Then I'll keep the society. I also have a melon baller
and abetting knife Sydney. For the apples, you can
use a quarter as well. Let me get a plate
for the scraps, for the apples scraps. Here is the plate
for the app with scraps that I'll
keep aside for now. Now, let's get started
on the apple's. Usually you require two apples to make the Apple buff colored, but I like to keep
an extra handy in case there's
something wrong with the two apples that I have. First, I'm going to
cut the apple into half using the melon baller. I will take out the Seed
Center neatly from the Apple. Using a padding knife, I will cut off both the ends of the apple,
including the stem. This way I have to really need two pieces of apple ready to
be sliced for the bullet. We will start slicing
the gullet using a sharp knife
because they weren't nice cuts on the apple. I want the slices of apple to
be about three to four MM. We will do that for
the whole apple and start opening up the
slices and shortening. No, two slices are
stuck together. Now, I will take half an apple, slice it up the same way, about three to four places. But this time I will not
separate the slices. I'm going to keep
this whole chunk of apple slices together and
use it for the center. But for now, I'm going to
keep aside the whole chunk. I'm not gonna bore you with the video of me just getting apples. So let's just skip to the part where I'm done with the uploads. Here I have the apple
slices all separated and 1.5 of an apple sliced
up but kept together. The slices over the
junk over there. Now I'm going to
clear up my workspace to start working
on the puff toe.
12. Rolling Dough: Apple Puff Galette: The path DO again has to
sit on your work surface for about five minutes
because it's been in the fridge for about
six to eight hours and it's really hard to make it pliable and
easy to work with. We said let it sit on the work
surface for five minutes. As always here I
have prepared with me My Drive flat on a plate, my rolling pin, my sharp knife, and my bench knife. But an additional thing I have this team is around baking tin. This is a 12 inch round baking. Often I will use to cut
the circle piece of dough. But if you want to use a plate instead or
if you have anything else that is round and it's
about 12 inches in diameter. We're good. Now we'll open
the puff TO and again, do not throw away
the plastic wrap. We will be reusing it. To start using the puff
TO we will sprinkle, dry flat on a work surface. Remember, do not sprinkle the flower from the
top but from the side. As we've decided in
the buffet recipe, the lip side of our
dough is on our right. We will start
beating the door to lock in the layers
and make it more pliable and easier
to work with will beat at about 20 to 30 times. After that, we will start
rolling the puff TO again, the process remains the same. We will continue to relax it in insurer does not stick
on the work surface, so we'll add more flour, sprinkle more flat if required. This time. Aim is not to keep any ratio in mind when we're rolling
out the puff toe. We have to make sure
is that the puff DO is ruled out till it is about slightly bigger than the
baking pan I'm using to cut us the circle with
slightly bigger than that, but in case you don't want
to make around gullet, keep in mind that you can roll out the dough until
it is about half a centimeter thick that
where you can make a square or rectangular
gullet or any shape you lake. But I let my goal, let's round. I will roll it until it is slightly bigger
than my big Hinton. I will continue to use
the baking tin and check if the puff
do is big enough. I will keep the baking tin on top and check if
it's big enough. While you're rolling
out this dough. A good way to ensure that you've ruled out the door
evenly is if you run your hand on the whole surface
of the puff TO you can actually feel the bumps
as to where it is thicker and where it needs
to be ruled a little more. This way you don't have to
go on with the whole puff. You can just fill out the higher or the teacup
arts and just specifically rule them
to ensure that you have an evenly thick
buff to throughout. Now, my baking tin
fits on it perfectly, so I'll stop rolling. Now using my sharp knife, I will cut out the round again. I will not drag the knife. I will make cuts and lift the knife and
then place it again. I will not drag it. Again. We have these scraps that we will keep in
our plastic wrap, wrap them up really nicely, and put them in the refrigerator
for the bonus recipe.
13. Assembling the Apple Puff Galette: Now I have a three over here that is lined with
some silicon mat. You can also use parchment, paper, whatever works for you. Now, we will take this
round piece of dough and gently transfer it onto
the lined baking tray. Here we have our circular
path TO on the baking tray. Now, we will start folding about a centimeter of the edge
towards the inside, just about a centimeter. You don't have to be really specific with this measurement. Just estimated
Measurements wouldn't do. We will start folding it in. And we will repeat
this process for the whole edges of the whole
border of the puff piece. Again, if there's slight
overlapping it for doesn't look too straight,
that's completely alright, just repeat this
process of folding in about a centimeter
towards the inside. Now once you fold
it all the same, you will notice that there is a slight border or a ridge that we've
created on the edge. Now, take a fork, dip it in your egg wash and start creating marks
around the whole edge. When you create this smock. Push the folk down
and pull it back, push the fork down
and pull it back. Push up and pull it back. This helps you ensure that this ridge will not
open up while baking. We're in a way making it
stick to the surface. And continue this process of making the marks
by pushing it down and then pulling it back around the whole
border of the buff. Once you're done with
all the edges and all the whole board that is covered with these
beautiful marks. We will take some egg wash and start brushing
it on these edges. Whoops, I dropped
some on the center. I'm just going to use this
and pick it up from here only and brush the whole edges. My bad, Be careful. This is what you're
not supposed to do. Do not drop it in the center. In case you do, that's
completely fine. There's nothing wrong with it, but try not to then brush
all the edges generously. Now come in that but
slices that we'd made, we will start placing these apple slices along
with the border of the whole buff TO
all you have to do is take slices and slightly
overlap them like this. There's no rocket
science towards, it looks really
pretty uncomplicated, but in reality it is
a very easy process. We will continue placing these apple slices
around the whole bottom. Again, slight overlaps. In case you love apples, you can even make
a double layer or even placed the slices closer
than they are right now. But I would recommend
this thickness. It just looks pretty like this. And we will repeat this
for the whole circuit. Again, if you are
an upper-level, feel free to make two layers. Feel free to place the apple slices closer
than they are right now. You can overlap them even more and fit an even more apples. But I like these menu only. When you come to the end of it, you have to ensure that it
has to look picture perfect. So how do we make it
look picture perfect? All you have to do is slightly lift the first slice
the two are placed and slightly shoving
the last piece or slightly slide
in the last piece. This way it looks like one big perfect circle and you can't tell where you started. Now comes the slices
that we'd kept together. Take them on your palm and press them back like you
will open guards. Playing guards. See how this slightly open and not place that whole piece of
slightly open apple slices. Now press down on all the
apple slices so that this settling to the puff
dollars land they don't fall off when
the buffalo rises. Once it's all set. Now we'll use the melted
butter that we'd kept. We will lightly brushed the melted butter onto
all the apples laces. Don't need to be too
generous with it, but then enough that
it'll get a nice color. Once you're done brushing the
butter on the apple slices, we will put another
layer of egg wash on the border of the buffer TO
the ridge that we'd created. Just egg wash all the bottom. After that we'll
use cinnamon sugar. Eat meat. Just use your hand and pick up the cinnamon sugar as an start sprinkling
it on the apples. You can be really generous with the sprinkling because this is the only sugar other than the natural sweetness
of the apples will have in this glut, we've not added a lot of sugar in the door
or anywhere else. You can be generous. Now, this puff DO has to
sit in the refrigerator for about ten to 15 minutes for
it to cool down completely. Vile. The apple buff gullet was chilling in
the refrigerator. I have preheated my oven
to 200 degrees Celsius, and now I will bake it in the oven at 200
degrees Celsius for about 2222 minutes or until
there is a nice slide, golden brown color on
the whole surface.
14. Taking the Apple Puff Galette out of the Oven: It up above the letters
out of the oven. It looks beautiful. It has risen really nicely. We're going to let it sit
on the baking tray for about ten minutes because again, it has a lot of butter and
melted butter can really burn, so we don't want to do that, so we let it rest. Now, will not transfer it onto a wire rack like we did for the other recipes
we're going to get it prepped to solve
now because Apple, Google, it stays best
when they're warm. Here, I have taken cutting
board to serve it on. You can serve it on a plate or a plateau, whatever you like. Now comes the tricky part to
transfer all these things I like to keep a steel
spatula at hand. You can also use two large
knives and offset spatula, whatever thing works for you. I like to use this giant
spatula to transfer it. I will gently slide the spatula under the Collette and just transfer it onto
the cutting board. Now comes the slicing part. Again. The, Let's usually add
a little tricky to cut. The secret to cutting
a good collect is have a very sharp knife and as
we did for the buff TO, YOU never drag your knife
through these things. You have to just place
your knife at one place. Apply pressure, don't drag. That way. You get really nice
laces, need slices. That way you get
really needs places. Here it is a slice
of our delete, all beautiful with
a nice soft center based on the center and some beautiful puff layers
on the outside. I hope you enjoyed
the gullet recipe. Now let's move on
to the next lesson.
15. Preparing Toppings for Hand Puff Pizzas: So let's get started on
our hand buff pizza. For this again, I have
one recipe of puff TO that has been sitting in the refrigerator for
six to eight hours. So we're going to let it sit at room temperature for
about five minutes. In the meanwhile
here I have with me ten to 12 leaves
of fresh basal. You can use any of
the hub you lake. I have about half cup of tomato based homemade
pizza sauce. You can even use some best TO or metal or any other
source to lake. Then I have one tablespoon
of chili flakes, one tablespoon of seasoning. In case you don't
like these two, you can switch it with
whichever seasoning you lake. Then I have 1 third
cup of Hamburg. You can completely
skip the hamburger. You can keep the ham bits. You can replace
them with onions or olives or Alipay
news or mushrooms, whatever you lake, or even
bacon bits for that matter. But I'll use the Hamburg. Hamburg. Then I
have one block of fresh mozzarella that I will agree it I'm not going
to read the whole thing. I'm going to only grade
about 75 to 100 grams of it. This is like one hundred
fifty, two hundred gram block. You can also use any
other cheese you lake, maybe a ricotta of feta, a chatbot, some parmesan or skipped the Jesus
who don't like cheese. Now once I've graded it, I'm going to keep this
aside as well. Then. I clear my workstation,
clean it up, make sure there's no cheese
bits left behind and clean up my hands because I don't
want to spoil my buff toe.
16. Rolling Dough: Hand Puff Pizzas: Now that my hands are clean, I'm going to get started on the buffer TO over here I
have with me my rolling pin, my sharp knife and
my bench knife, and some dry flower. We'll start by
opening the buf two and taking it out of
the plastic wrap. Again, remember,
we're not gonna throw away this plastic wrap
will be reusing it. As agreed in the
buff dough recipe. We will be keeping the lip of the door now right-hand side. We'll start by sprinkling dryer
flat on our work surface. Remember sprinkling dryer
flower from the side. Then we'll sprinkle someone
top of the puff TO. Again. We'll start by
building the buff TO ensure there is nothing
kept on your surface there to fall off by the
vibration will start by beating the puff TO
about 20 to 30 times. To ensure that the dual becomes pliable and
easy to work with. We'll start by rolling
out the puff TO, again with a similar thing in mind that we had for our
strawberry turnovers. We want to reach
a point until it is 18 inches by nine inches, or about 1 third
centimeter thick. We're going to continue
to roll it and relax it throughout the process. If we feel that we need more
dry flat or they're flat, door is sticking, we will sprinkled some more dry Florida. But don't forget to relax your notes throughout
the process. Will continue to roll it, relax it, and apply enough. Dr. Floyd, if required. I feel we've reached
the desired size. Now using my sharp knife, I will clean up the edges. Remember, do not drag your
knife through the door. You want to apply
pressure and lifted, apply pressure and lifted. Keep these scraps or say
it and continue to cut the whole dog until you have gotten a nice and
neat rectangle. Once you're done with
cutting the scraps off, we'll take the plastic
rapid kept the sale, put all our scraps in it, wrap them up real nicely, and just put them
in the refrigerator for our bonus recipe.
17. Assembling the Hand Puff Pizzas: Now getting back to the puff TO now let's start
cutting up the buff TO, I will divide it into
about five strips. I'm not going to use
a ruler or anything. I'm just going to eyeball it. If you want precision, you can use a ruler and divided
into five equals ships, and then divide each strip
into two equal pieces. I don't mind if
they're equal or not. If you're finicky, use a ruler. I'm not going to use a ruler. I'll just eyeball it. Then I'm going to put
away all the slices and make room for
my baking, true? I am going to place
all the puff DO pieces on the baking tray. Try to make sure that the pieces of puffed or about one to 1.5 centimeters apart so that they have some
breathing room. I'm going to try and fit in all the pieces of
puffed on this. I don't want to put
in another batch. Now, we will start by
applying the pizza sauce. I'll apply about one to two teaspoons of pizza sauce
on each piece of dough. You can apply less or
more whatever you prefer. Now we'll spread the sauce. While spreading the source, you just have to be careful about one thing that
you'll do not want the sauce to leak to the sides or the layered
part of the dough. Because if the, if the
source leeks still there, that is going to hamper
the rising processor, the leakiness of the WTO. So I like to keep
it about half a centimeter away from
the edges of the photo. So that one, it does
not hamper with the raising and
the fluffiness of the dough and to
whoever eats it, your hands don't get dirty. To keep it neat and tidy. I like to keep it half a
centimeter away from the edges. Then in case you don't want
to make small puff pizzas, always remember you can make one giant puff pizza like
we did for the big gullet. I like hand pizzas that
easy and quick to solve. Once I've applied
all the sources, all the sauce, I'm gonna
start sprinkling the cheese. Again. These things are
also subjective. You can sprinkle
a lot of cheese, very little cheese, no cheese. It's all personal.
It's a choice. You have to decide how
much she's works for you. I like to sprinkle about
one to two tablespoons of cheese per puff. Then when I'm done with
sprinkling the cheese, I am going to take the Hamburg and put about six to eight
hamburger on every puff pizza. I'm repeating myself,
it's subjective. You can add more or less if you don't like Hamlet's
add mushrooms, onions, olives,
olive, good news, bacon bits, chicken
bits, whatever. Then I'm gonna take
the ergonomics and sprinkled some of
that on all the pieces. And repeat the same process
with the chili flakes. I'm going to sprinkle
some chili flakes on all the pieces. Now comes a slightly
complicated part. A lot of people like
to keep or put their basal leaves on the pizza once
it comes out of the oven. I like to put it in before
it goes into the oven. This way my basal gets nice and crispy and it has a
nice room art world. While if you put it at the end, I think you'll miss out on their beautiful smell of basal. I like to put it before
I became the pizzas. I'm going to place one
leaf on all the pizzas. This will go into
a preheated oven at 220 degrees Celsius for about 15 to 20 minutes to see if there have a nice
golden brown color and the cheeses nice and bubbly.
18. Taking Hand Puff Pizzas out of the Oven: Handcuff pizzas and out of the
oven, they look beautiful. Garden, nice, flaky
raised to them as well in the cheeses.
Nice and bump it up. I'm still going
to let it rest on the baking tray for
about five minutes because heart Jews
congenially burn your mouth and I don't want
that to happen to anybody. So we let it rest for
about five minutes. It's been about five minutes, are puffs are ready. I'm going to use a fork and
gently start taking off all the pieces from the J and transfer them onto a
plate already to be selfed. These make for a
great party snack because they're easy
to pick up handy, yet they're filling
and people do feel satisfied
after eating them. So as you can see, the layers have opened
up really well. It's very nice and
flaky are buff TO has some beautiful
laminated layers, making them soft and
crunchy at the same time. I really hope you enjoyed
this hand pizza recipe in case you have
any other recipe would like to see,
do let me know. In the meanwhile, let's
move on to the next lesson.
19. Bonus Recipe: Twisted Puffs: Now comes my favorite
recipes, rough puffed twists. This, I'm still going to use the same baking tray
I did for my pizzas. All you have to do is
layout all the scraps that you have on tour
trip because of I naught. And then just lay
out all the strips about one centimeter apart. We're going to take
all the rough scraps we have from all the
recipes we've done so far. Just lay them out flat. There's no science toward, there's no method
towards just randomly. Then over here I
have a tablespoon of Reaganomics that I'm going to sprinkle on all these places. Don't worry about it sticking because right now it feels like it's just sitting
on the surface. But when we bake it, it has enough butter on it that when the
butter gets released, all these beautiful ****** at reporting on top will
stick to it really nicely. Sprinkle the oregano
on all the pieces. Then here I have with
me some smoked paprika. You can completely
skip the paprika. You can add a spicier
spice if you want, you can add something milder. There's no specific
thing that I would say. There is no specific
recipe for this. You can add paprika, you can add dry actually powder. You can add ginger powder. If you like cheese, you
can add some parmesan. And then I have
some garlic powder. I'm going to sprinkle some
of the garlic powder. Again. There's no one thing or
one specific recipe. This is subjective. This is, you can literally add
whatever you like. Now I'm going to press
down one edge of the strip and start twisting
it from the other side. And then once I'm satisfied
with the twists I've gotten, I will press down
on both the ends. We'll repeat this process with all the pieces
big or small. You don't need to
cut the pieces, just the scrap the way it is. Just it on the tree like that. In case you want to completely skip the twisting part as well, you can do that as well. You'll just have straight
or looking puffs, but that is good too. Because at the end, when these go in the oven, they crisp up really
nicely and become a really nice snack in case you don't want
to go the saved reroute, you want to go the sweet root. You can also sprinkled
cinnamon sugar on this or just some sugar on this, some brown sugar or some
jaggedy whatever you like. I feel like squeezing
a few more pieces. So I'm just going to put
a few more strips and repeat the process with the
Oregon all the smoke papyri, the garlic with these
pieces as well. And now twist them. Once I'm done with
all these pieces, I'm going to bake them
in a preheated oven at 200 degrees for about 20 minutes or until they have a
dark golden brown color. We're looking for dark
Gordon Brown color. So they go into the oven now. Now the twisted puffs
or out of the oven, they have a nice dark
golden brown color and they look beautiful. I'm going to let them sit
on the baking tray for about ten minutes for them
to slightly cool down. Now that they've cooled down, I will transfer them onto a
plate and just stack them up. They're not the prettiest
looking snacks, but trust me, when you eat them, you will not regret it. They are perhaps
the tastiest recipe out of all that
I've done so far. I really hope you
enjoyed this recipe. It's a perfect way
to utilize crabs. Never value or of
puffs, scraps go waste. Now, it's crisp. See how crisp, beautiful. This brings us to the
end of the recipes. Now let's wrap it up.
20. Wrapping it Up: So this brings us to the end of this rough puff door adventure. I hope you guys enjoyed
all the recipes. We started out by
learning how to make these beautiful palm
ears are French hearts, or pigs, or elephant ears. There's so many names for it. I really hope you guys
enjoyed this recipe. We made the classic ones that are using cinnamon and sugar. You can always go seasonal. Like a lot of people
do pumpkin spice or a nice car minimum flavored one. You can actually play with the flavors as much
as you want there, nice and flaky and perhaps have a really long shelf life in comparison to all
other products. Then we learned
how to make these beautiful, shiny
strawberry turnovers. These strawberry turnovers
can be made with any jam, any preserve, any
other flavor you like. Again, you can have a mixed fruit jam or mango
jam, berry preserve. Anything. These recipes that I teach
you are very flexible and can be molded into anything you like as per your
personal preference. Then we moved onto our
apple puff gullet. Again. The apple puff collects
the side of it beautifully rows with the nice flaky layers
with a nice moist center. I really hope you guys
enjoyed this recipe as well. Again, this can be
edited as well. You can make it with pairs, you can make it with
some tangerine. You can make it with any
other fruits you lake. But Apple's again, a very
easy to handle fruit. I believe. I went to Apple route and taught you how to make
an apple buff collect. Then we learned how to
make hand puff pizzas. These handcuff pizzas are again, very easy and great for some place where you
want to solve them in parties or gatherings they
make for a great table snack. Or even if you're
just sitting on your own one day and you feel
like eating a pizza buffet. That's completely fine too. I love doing that. The highlight of it all I
think these twisted buffs, these vested puffs,
or perhaps an underrated recipe, I believe. Because usually when
we make anything else, we tend to throw away these scraps or we
don't really look at them as something
that can be made into something so
tasty and yummy. But these twisted puffs are that throughout the
course my aim was to make sure that you understood
and you were able to learn that rough puff is actually a very nice
and simple concept. We don't necessarily need to go the professional
lamination route. We can always go the
RAF pathway as well and how easy it is to
make a rough buff. It's all about good preparation, good tools, good technique. If you have any
questions, any doubts, any other queries
related to rough buffer all these recipes that I walked you through
in this course. Feel free to reach out
to me either here in the discussion section or on Instagram or on, through e-mail. Whatever method you want to use. Feel free to reach out. Feel free to tell me if there's anything else you would like
to learn in the next course, anything else you would
like for me to teach? I'll be more than happy to
accommodate all those things. I really hope you guys
had a good time and you were able to learn
something from this course. Thank you so much. See you next time.
 Savini Gauri, Serial Baker, Learning Pastry Chef