Transcripts
1. Class Introduction - How to create Mandalas: Hello and welcome to this class. I am very happy to see you here. My name is Beatriz Pascual, and I am a surface pattern designer and illustrator. Creating Mandalas is a super funny exercise. In this class, you will learn how to create Mandalas using Photoshop, that can be printed later or compiled in a coloring book. We will start learning the basics, just letting our hands and creativity flow. creating Mandalas, using random lines. You will learn shortcuts and how to apply different weights in the strokes to create variation in your designs. We will also try different symmetries, to design diverse Mandalas. Next, I will show you how to incorporate motifs and elements into your Mandalas designing with some kind of purpose. Then we will learn that we can incorporate motifs inspired by historical art styles to create unique Mandalas. Following the lessons, I will show you how to color in Photoshop our Mandalas and we will explore different options to create diverse results. After that, we will learn how to export our Mandalas to be printed. And finally, we will compile some of our Mandalas to design a coloring book using Adobe Illustrator. This class is especially indicated for you who are creative and want to create Mandalas with a different perspective and have a nice time whilst designing. Okay, let's get started.
2. Class Project: So the project for this class is to create a coloring book where you will include at least five of your favorite Mandalas that you have created. And I suggest two project options, to choose the one that you prefer. The first option is to create a coloring book where you will include one cover, including one of the Mandalas that you have colored previously using Photoshop; two Mandalas created with random lines, two Mandalas including motifs and one Mandala inspired by an historical art style that you prefer. And the second option is to create a coloring book with a specific theme where you will include five cohesive Mandalas and the cover with one of those Mandalas colored with Photoshop. So I can't wait to see your projects.
3. First Steps Creating Mandalas: Hi everyone. In this first lesson, I will show you how to create Mandalas in a random way. Just letting our hands flow and exploring our creativity. And we will study the different options that Photoshop offers. So first, we are going to create a new document and we are going to select the standard A4 size. I am going to select 300 pixel resolution and color CMYK, because our purpose is to be able to print our designs so we can create the document. Now, we are going to select a brush that we will use. And I like using the circular defined one, just a standard brush that comes with the program because the stroke will be uniform along the mandala. But obviously you can try different brushes to experiment how you feel with them. I am going to give the brush ten pixels size. Okay, so now we will create the first layer that is where we're going to draw. Then when we select our brush with a shortcut B, we will see the little butterfly on the top of the menu that will allow us to select a symmetry option among many different possibilities. For this first design, I am going to select the mandala symmetry. And I will use the maximum segments allowed, 10. And when we select the number of segments, the symmetry grid will appear. And we can scale it up or down according to our needs. In this case, I am going to scale it a bit, just selecting 120% as I show you here. And when we create mandalas, the standard way to do it is to start from the center and continue building to the outside. I will zoom it to see better my strokes. Yeah, let's select the black color better than the yellow I have here. And yeah, Also, let's keep the opacity to 100%. So as you can see, as soon as you start drawing, everything will be reflected in the rest of the segments. Photoshop has a useful tool here in the Options bar to smooth the strokes. You can try how it affects them by using different percentages. Let's test how it works. So the highest percentages will create smoother lines. and the lowest will give you a more handmade look. For the moment, I will keep these at 53 percent. And now I am going to start creating strokes, just letting my hand flow without following any purpose, rather than expressing my creativity. So let's see the process and how it goes. The eraser tool is as important as the brush tool. When we press the E in our keyboard, the eraser will be selected. So this is an important shortcut to keep in mind, just to be more efficient whilst, we design. Okay, and now I'm going to refine the edges of the strokes here. and zoom in and out constantly to check how the design is going. Yeah, this is very important as well. We have to save our document because it is very important to do it as soon as possible to avoid potential problems such as loosing our work. I will save it into this folder. For sure it is also a very good habit that from time to time, we save the document as we are drawing. Okay, so now we're going to start connecting the first level that we have created. Drawing a second level in our Mandala. Um, I think I am going to add some more lines in the center as I have room for it. Okay, now I'm going to speed up the process to complete this first exercise. Just remember, to let your hand flow and let your creativity show up. This is the starting point for you to find out your favorite moves or lines to express yourself. Now we can try a different symmetry. For example, these Mandala with four segments. Yeah, I'm going to speed up the process again. And we can try now in the third design, a symmetry with seven segments. Let's see how it goes. Okay, For the next design, I am going to select eight segments. We're going to try something different. I will use strokes with different weights. So you can see the nice effect on the design. Finally, for our last exercise, we are going to test the radial symmetry that will allow us to create very interesting designs. And in this case, I will use seven segments. And as in the previous exercise, I am going to alternate between different brushstrokes weights Okay, So this was our first task, just warming up and learning how the different symmetries work. You've seen diverse brushstroke weights and getting used to the main shortcuts B and E to draw and refine our lines. Now we're ready to move into the next lesson.
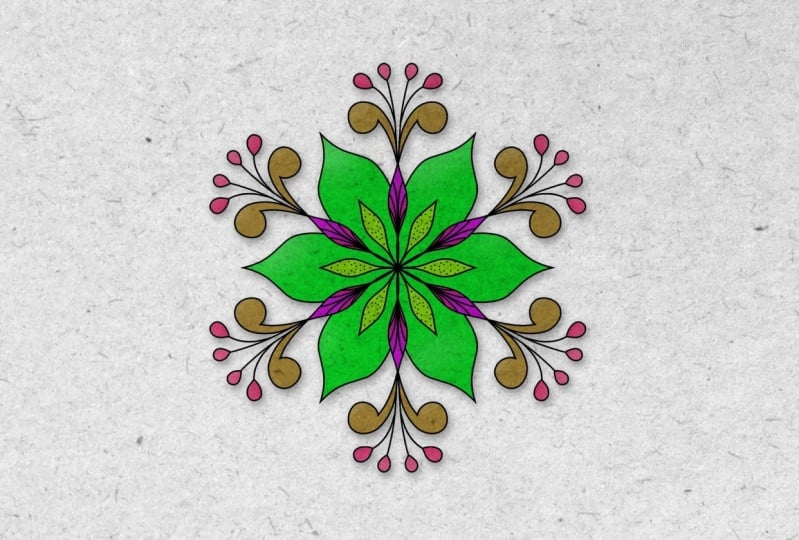
4. Including Motifs in our Mandalas: Hello again. In this lesson, we will learn how to include motifs in our Mandalas and designing with some kind of purpose, not just creating random lines as we did before. So in this document I am going to start with the Mandala symmetry of 10 segments. And as my intention is to draw a flower, instead of starting so close to the center, I am going to start drawing more or less in the middle of the grid. I'm going to draw a basic tulip. To create a straight line using the brush just click where you want the line to start and then hold down the Shift key to create a line. Now as I am building the design, I will be applying the same principles as before, refining edges with the eraser tool to create better ends. And then I am going to create random lines to build the design. And we can also change the stroke weight to create variation in the design. I am going to speed up the process. Obviously, as we go on, the design can be more or less complex. In this case, let's make a really complex one creating more levels and details. Okay, I think I am going to stop at this point. We can include in our mandalas, any kind of elements or motifs belonging to any subject that might inspire you. Be creative and bear in mind that the possibilities are endless. And I think it is a great idea if you can come up with something new and innovative. You can always use a sketch layer to draw your Mandalas when you are planning to create something more complex. to help you with the design. In this example, I am going to draw a Mandala where I will include some grape clusters. So I will use the sketching layer. Just reduce the opacity of your brush for this sketch. Okay, when you have finished with this sketch in a new layer, we can draw the final drawing. I am going to change the brush opacity again to 100. Now I just want to show you other examples that I have created using this method and adding some motifs to my designs. And as you can see, some designs are more complex than another, which is good, so we can have a variety of difficulty levels. Okay, so let's move now to the next lesson.
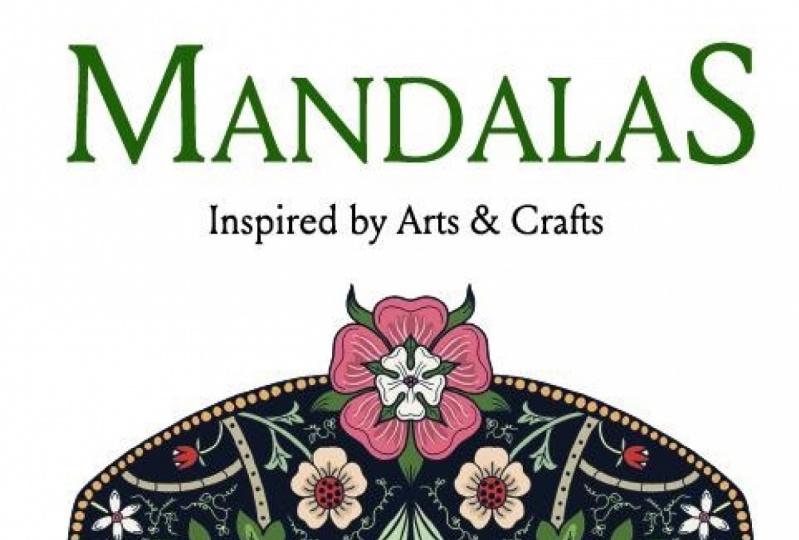
5. Historical Inspired Mandalas: I am a big fan of historical styles. And we can also create Mandalas inspired by them, such as Rococo, arts and crafts, art nouveau, or any kind of historical style that you are a fan of. Of course, we can find inspiration online to create our own motifs. For example, on Google or Pinterest, where we can make specific searches. You can just identify the main characteristics into a specific historic, a style that you want to evoke, to apply them later in your own motifs. And be brave and mix different styles to create something unique. As I said, use Google, Pinterest, libraries or museums, for example, to find your references as well. So you can sketch your motifs first on a piece of paper, take a photo, and then transfer to Photoshop using your phone. Or you can also scan them and place them in Photoshop. But I prefer to sketch them directly in the program as it saves me time. So for this exercise with sketches, we can use the vertical symmetry. Let's keep the opacity of our brush around 30 or 40%. And the smooth tool in a low number. I am going to sketch different types of simple motifs inspired by historical styles, such as arts and craft and art nouveau. that I really love and that I could use later, in my Mandalas. So start simple and as you get more experienced, you can design more complex motifs. Ideally, we should create a bunch of different versions for the same motif, so we can choose the one that we like the most. You can also create your own library with lots of different motifs that you can use several times in different designs. And now we can select one of these motif sketches with the lasso tool. Then press "Command + C" and in a new layer paste it with "Command V". We can scale it down a bit with Command + T. If you pull from the corner whilst you hold the function key, the sketch will scale proportionately. Let's place it in the center of the document at the top of the grid. And now in a new layer, we can draw over this sketch, our definitive motif. Now it's time to build the rest of the Mandala around this motif. Okay, in the next example, I am going to include a mix of motifs inspired by different historical art styles. and I'm going to draw them directly without the sketching. I am going to design leaves with scrolls, spirals, spikes, which are a very typical in the Rococo style, flowers inspired by the arts and crafts movement, and also art nouveau webbed leaves. Ok, I think now it is complete. Before we finish the lesson, I want to show you some other examples of Mandalas that I have created inspired by the arts and crafts movement. with roses, tulips, leaves with pointed edges and many small details. All right, I hope you got some ideas to create your own mandalas inspired by historic styles. And now we can move into the next lesson.
6. Colouring Mandalas Digitally with Photoshop: Hello again. In this lesson we are going to put some color in one of the Mandalas that we have created. And I think I am going to choose the one with the butterflies. So first of all, we deactivate the background as we only want to copy them Mandela in a new document. Then we go to selection, select all, and then we can press Shift + command + C to copy the selection. In a new document, size A4 I am going to copy the Mandala, and as you can see, I have copied it in a transparent way, in a new layer. We lock that layer and we save the document. Before coloring, we have to activate the same symmetry that was used to create this Mandala. And in this case it was Mandala symmetry of seven segments. We have to make sure that it is centered with our design. In case of need, we can go to the butterfly icon and select transform the symmetry to center it properly. Okay, I think it is centered. I'm going to select my brush, make sure that the opacity is 100%. I am not going to use the smooth tool now. So now we can start using colors or we can be more selective. using a determined color palette. You can download color palettes from Adobe color and use them later. As you can see, using them is very easy. Just click on the color that you want and it will be automatically displayed on the small window with the color selected. I have some color palettes already in my library that I am going to use here. And you can organize your color palettes into groups in your library to locate them easily. So now in a new layer, we can select a dark color and color the whole design. This color doesn't need to be seen later, but it is helpful to detect any uncolored sections in the design. We will use it as a sort of background color. As you can see, coloring mandalas is very funny and very quick. Everything colored in a segment will be replicated in the rest. Now we can turn down the opacity and in a new layer, we're going to start applying colors from the color palette that we have selected. We have to use different layers for every section that goes in a different color. This will allow us to change them easily later if we are not happy with them. So I will start with the palm leaves and then I will continue with the rest of motifs. As our palette has got only five colors. We can select in the color selector some variations from the colors of our palette to create darker or lighter new hues to use in the design. Or we can include some new ones that you think you could fit just fine, like this. Nice yellow I am going to use here. I think that I am going to use a lighter yellow. So I'll show you how to change the color in the current layer. So first, I select a new lighter yellow from the color selector. By pressing the key x, I moved the color from the foreground to the background small window. Now I click the little icon here that blocks the pixels in the layer. Now with "Command + Delete" the new color will be applied to the existing pixels in the layer. And after applying our colors in a flat way, we can start creating details to give the illustration more personality, like I am going to do now with the butterfly and the rest of the leaves. I like how the butterfly looks now. And I am going to speed up the rest of the process. I think I'm going to add some extra details here in the center to give it some more depth. Now we, this brush I am going to give the illustration a sort of 3D effect in some parts of it. If we detect some pixels out of the lines now it is a time to erase them, click on them, and its layer will be selected. Then with the eraser tool, we can delete them. And it is a good habit to constantly check your work to keep it clean and tidy. As a final touch, I am going to include a sort of highlight in the background, using a blurb brush and a new layer. And I think that with this the illustration is ready. Within this lesson, I also wanted to mention that we can use the gradient tool to color our Mandalas in a nice way. Before using this tool, we have to have colors already applied (in a flat way) in the layers. Justice I told you in the previous example. Then make sure to block the pixels in the layer by pressing the little square icon on top of the layers panel. When we select the gradient tool, we can grab one of the preset gradients that come with the program and just start playing with them. For that, select the layer where you want to have to gradient and apply it by clicking and dragging a line to define the directions size of the gradient. Using this tool is very funny and it is worth trying. Here I show you some examples. And now we're ready to move to the next lesson.
7. Creating Prints with Our Mandalas: Hello again. In this lesson I will teach you how to export your Mandalas so they can be printed perfectly. So if you remember, this is the Mandala with the butterflies that we colored earlier. And I think I am going to change the background color and use a creamy one. So I select the new color and pressing the X key, I send it to the background. Now in the layer of the background, I press Command Delete, and I change the color. Now I am going to flatten the image in a new document. To do so, first I go to the main menu and in selection, I click All. And with this, all the basic layers will be selected. Then I pressed Command Shift C to copy this selection. I create a new document size A4, color mode, CMYK and 300 DPI. And I copy my illustration with Command V. My Mandala will come up flatten in a new layer. Now I can go to File Export, Export As, and I can select PNG or JPEG to export it. I give the file a name and I save it properly in a folder. And we don't need to save the PSD file with the flattened image as we can only keep our master PSD where we can go back if we needed in the future.
8. Creating Coloring Books with our Mandalas: Now we are going to create a PDF coloring book in Adobe Illustrator. So in a new document, size, 21 centimeters by 29.7 centimeters, we include five artboards, as this is the number of Mandalas that the coloring book will have. But we can always add or delete more artboards later. Now we need to have ready and open our document with the Mandalas in Photoshop. And we simply click and grab the mandalas from Photoshop and hold them until we drop them in the Illustrator document. By default, they are dropped in the last active art board. So we will need to rearrange them to the rest of the art boards to create our coloring book. I am going to add a new art board to create the cover of the book. To create the cover, I can use the Mandala with the butterflies that I colored before. So from Photoshop in my master file, I deselect the background and having all selected, I press Command Shift C to copy everything visible. And in a new document, I paste it. I can just select the clipboard document and my Mandala will be copied and flattened in one unique layer. Now, as before, I click and grab and I hold it until I drop it in Illustrator. I already had the previous illustration created for another project that I am going to adapt for this one. So I copy and paste it in my coloring book document. I think I'm going to delete the background that I had and I am going to align everything with the align tools. And also I'm going to change this title. Now we can save this document as a PDF for printing. But now I'm realizing I haven't included the butterflies Mandala to color. So I add a new art board and I grab and drop from Photoshop again, as we did before. And I think that I can design a simple frame to include in the art boards. So I am going to create a rectangle with no fill. And I align it to the center of the artboard. And now I can select from the library a different type of border for my frame. And I think this one looks just fine. Now I only need to go to Object, Expand Appearance, and expand again. Finally, we the recoloring tool I can just change this purple color to black. Now, I am going to include a short text with the copyright info. Next, I select the frame and the text and I'm going to group everything together with Command G and copy and paste in the rest of the art boards. And I will use the align tool again so everything looks perfect. I think it's looking good. Finally, we have to expand the text in the document so it is not text anymore. Therefore, we can be sure that the PDF will always be readable even if the fonts I have included in this coloring book are not installed in the viewer's devices. Now we save these changes and I think that it is ready. And this is the final result. A nice coloring book, ready to be printed and colored. You can also create coloring books with a cohesive theme, as I have them here, gathering some of my designs that are inspired by the arts and crafts movement. I have just adapted the previous coloring book, changing the cover design and adding new Mandalas with this historical style inspiration. So as you can see, the possibilities are endless!
9. Bonus Lesson - Drawing Arts and Crafts Inspired Motifs : Hello again. In this lesson, I will show you some examples of motifs inspired by the arts and crafts that you can use as reference to incorporate in your Mandalas The arts and crafts, elements are drawn in a simplified and a stylish way. The elements are not meant to be a realistic copy of the real plants, flowers, leaves, or animals that we can see in Nature. Arts and Crafts had a strong influence from medieval art. So you can see as well, some influence of this in their motifs. So I have prepared a small selection of some common motifs that you could find represented in the arts and crafts style. Roses are very typical and we can find the traditional Tudor roses represented here, as well as lush roses with spiky petals. Carnations are also very common in Arts and Crafts. The petals also have that spiky or lobed end that it is so nice to see and to draw. Then we can see tulips. We can find simplified tulips or other more elaborated with more petals or even drawn in a completely creative way. Mixing spikes, lobed edges and spirals. We can also find small flowers where it is again applied the same principles of simplicity and stylization. You can find small flowers with pointed petals or lobed petals with simple decorations in the center as small grids or dots. For the leaves, it is very common to see acanthus leaves with a complex structure. Although here I have included a simplified version. Also they are leaves with pointy edges, and we can also find leaves with some kind of Rococo inspiration. So this is just a bunch of motifs to give you ideas of what you can draw and include in your designs. I am going to show you how to draw some of them and we can start with the leaf. So first we activate the vertical symmetry. And the principle is to draw the sketch first. And when we are pleased with this sketch, we trace the final motif in a different layer. You can activate the small icon with the circle and the pen on the top bar. To do better sketches, it is recommended to have the smooth selector in 0%. To draw these type of leaves, we can start drawing the skeleton of the structure. Just drawing the wire that will serve us as the initial point to build the body. I include the guiding lines where I want the lobes to be placed. And when I am happy with how the structure looks, I can start sketching the body. When I am happy with the sketch, again, reduce the opacity of this sketching layer and create a new layer where I will draw my definitive motif. For this, I select my brush with full opacity. I deselect this small icon with the circle and the pen at the top in the bar. And I will include some smoothness, so my tracing won't be very wavy. Now to draw the next leaves, I go back to my sketching layer and with the Lasso Tool, I can select the previous sketch and pressing Delete. I erase it. Now as I did before. I draw the wire where I will build the body of this type of simplified acanthus leaf. As this motif is a bit more complex, I can use another sketching layer over the first one. This way I can draw my strokes better without getting my sketch too messy. Once I am happy with the design in a new layer, I draw the final motif. And I can also draw the edges in different ways, such as this wavy type. I am also going to name each layer properly so I know what I have in each one of them. Next, let's draw this Tudor rose. We start drawing a circle with another smaller circle inside and a small circle in the middle. Tudor roses always have five petals, displayed in two levels. So I am going to draw the guiding lines for the outside petals and the guiding lines for the interior petals. Now in a new layer, I start sketching the biggest petals. And I can use my guides to draw the corners of these petals and then connect them easily. The interior petals are displayed in the middle of the biggest ones. So I can draw the corners again and connect them. In a new layer, I sketch the design for this one. And I am going to choose the type of petals with a concave form in the center. I can also add these eyes to connect them. And now for the big petals, I am going to use a convex form in the center. So I have a nice variation in the flower. We can add as well some texture lines in the design and Tudor roses have leaves between the petals so we can sketch them as well. And with the sketch complete in a new layer, we can draw the final motif. Try to mix the type of petals to create different versions of this rose that it is so nice to draw. Now we are going to draw this lush flower with petals in movement and bended in different positions, which gives the design a lot of rhythm. So for drawing this type of flower, we can just draw some guiding lines pointing to different directions for the petals. So we can draw some petals going up, down to the center or twisted. And you can always start drawing a few guiding lines to build the body of some petals. And add progressively more guiding lines in-between spaces available to draw new petals with different directions. Add some as spiky or lobbed edges
00:11:38.930 --> 00:11:41.825
to the petals to get the arts and crafts Look. When you are pleased with your sketch in a new layer, draw the final motif. This is the same rose but adding lobed edges. The tulips are very easy to draw. I will speed up the process so you can see how I draw them. And just remember to add variation to the edges of the petals to get different results. To finish the lesson, I will show you how you can use your library of motifs to create Mandalas inspired by the arts and crafts. So with the lasso tool, just select and copy the motif that you want to include in your mandala and in a new document paste it. Now reduce the opacity of the layer and in a new layer and start drawing your motif. Okay? And you can also combine different motifs using different layers to draw them. Then you can combine them. For that, Just select the layers that you want to merge and press Command E. Now you can color your Mandala and there you have a nice arts and crafts inspired Mandala.
10. The End and Thank You!: Okay, this was all, I hope you have enjoyed this class and I cannot wait to see your project in the gallery. Please share it with us so we can celebrate your beautiful coloring book. And if you have any further questions, just drop them in the comment section and I will reply as soon as possible. Okay. Thank you very much for your time and I hope to see you very soon.
 Beatriz Pascual, Pattern Designer & Entrepreneur