Transcripts
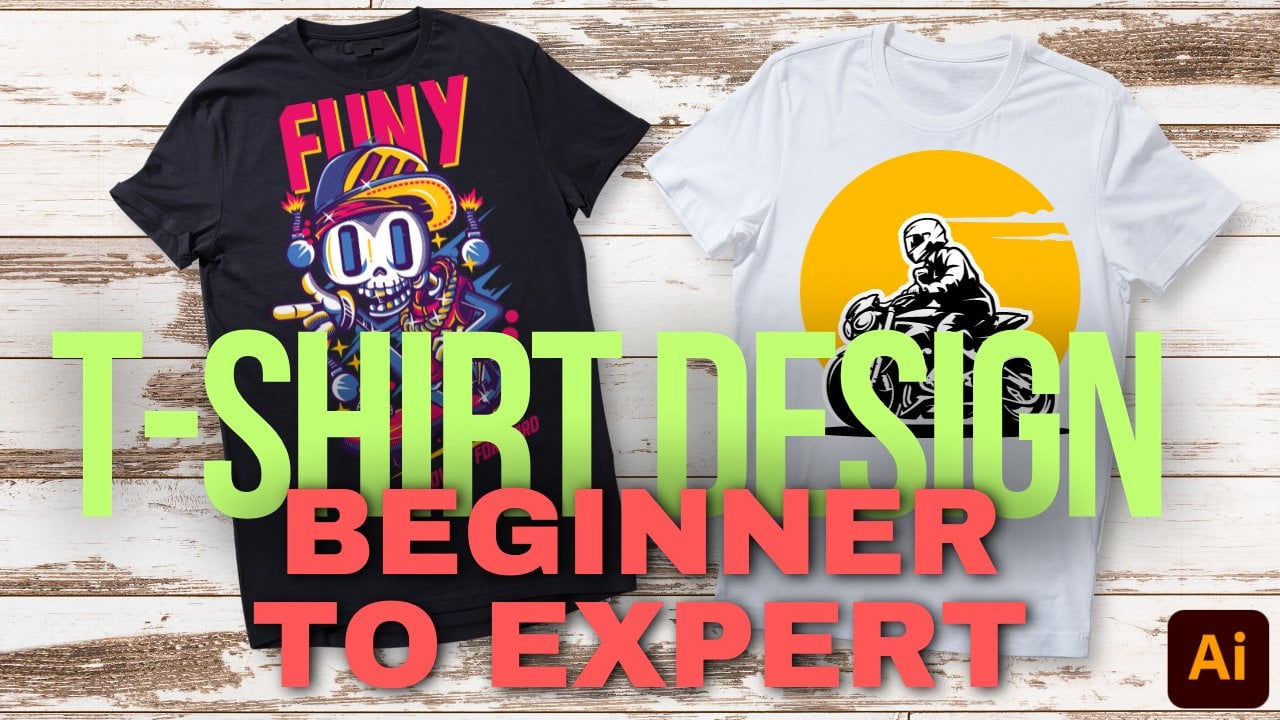
1. Introduction: Hello everyone. Welcome
to our class of T shirt designs for learning how to design different
types of shirt. If you're planning
to learn shirt designing from the beginning, then you are in the right place. Because we will
cover in this class from the basic to advanced. This is a beginner level class, so if you have no
previous experience, then you can join in this class. Let's take a look at what you
will learn from this class. Introduction to Basic
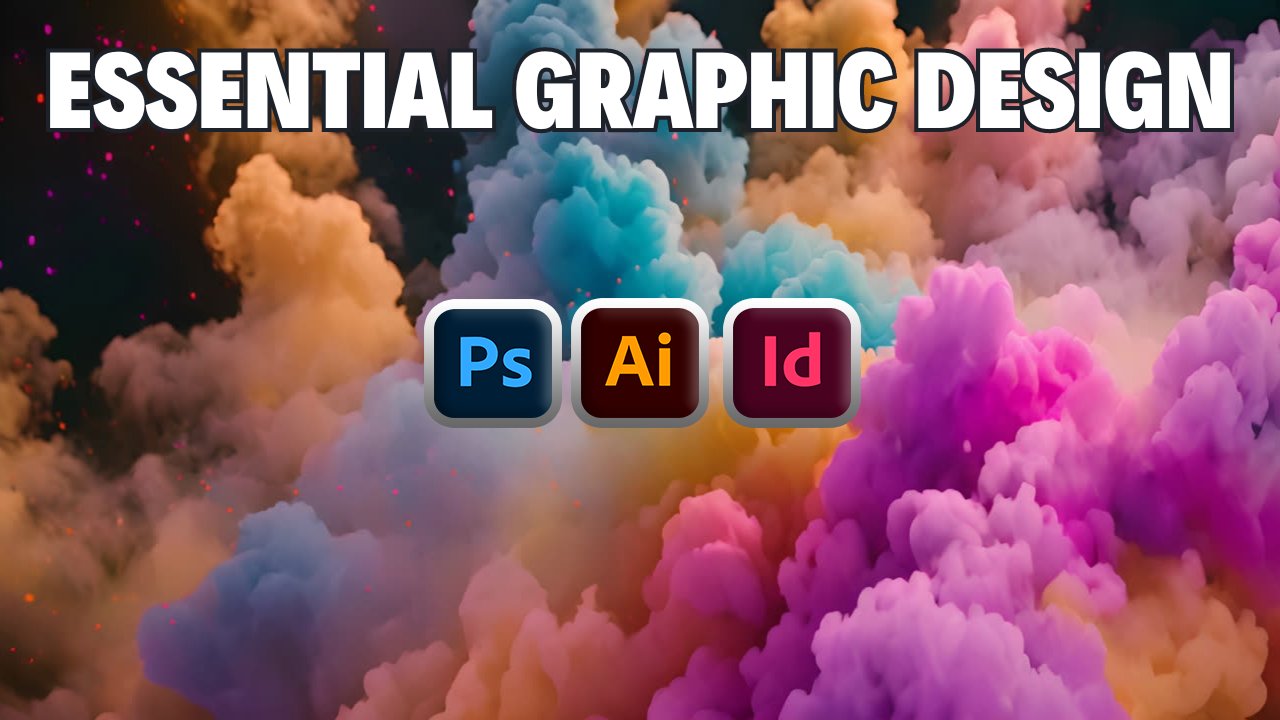
Shirt Designing, usage of Canva, Adobe Photoshop
and Adobe Illustrator. How to make shirt designs
using different softwares, design mock ups,
photo manipulation, graphic manipulation,
graphic extraction, exporting and importing
shirt designs and usage of different format of
graphics and elements. After completing this class, you will be able to create visually appealing
designs using Canva, Adobe Photoshop and
Adobe Illustrator. Implement various graphics and images to enhance shirt designs. Successfully create
designs using Canva, Adobe Photoshop and
Adobe Illustrator. Apply best practices for
designing and fill up the graphic designing
criterias and build a professional online portfolio
and showcase your work. This is a project based class. During learning you will
have class projects. So what you have learned, you'll be able to participate
in class projects, so you can practice
while you're learning. You will have supporting
resources in this class. It will be easier for you
to learn during learning. If you face any issue or
if you have any question, then feel free to ask me. I'm always there to help you. Let's start learning
shirt designing for making appealing
designs for your T shirt.
2. Camping t-shirt design with canva: Welcome to our first lesson
of Canva shirt design. In this lesson, we are going
to learn how we can make a camping shirt design
by using Canva. Without any further ado, let's just open up Canva
and see how we can make it. On my screen, you can see
that I have opened up Canva. Now one thing I will
suggest you to do is that either get a subscription so that you can use the
premium version of Canva. It allows you to
use vast amount of resources for every purpose, starting from your docs to
your videos, everything, okay? Also, you will be able to get access to a lot of facilities, functionality, and a lot. Now another thing is that you
have to stay connected to the Internet so that
you get functionality. Now one thing I'm going to
be doing first is that you can make your shirt design
on your presentation, but there are also something
like Instagram post flyers, the Instagram post, and
also Youtube thumbnails. You can basically make
it wherever you want. And there's also this
graph unlimited. It's basically up to you. And there is this also mug where you can also
make your designs. Now the first thing I'm
going to be doing is searching from over
here I'm going to do is type in T shirt and you
can type in design. Now when you hit on
T shirt design and you will basically see
that there are a lot of, let's say, templates
or resolutions which you will be able to use it for. Now what you can do is click on T shirt,
which is over here. But you can also open
it up on presentation. It also helps you to find out
those specific templates. Now one thing you're going to do is click on this over here. Click on Customize
this template. And now it will give you the exact resolution
of what you want. Now the exact resolution
is something like this. What I'm going to do is go out and this is
how it will work. And you will basically see this Create blank
option over here. Now click on Create Blank, and there you will see that
your page has been made. One thing is that
you will be able to use other resolutions too. But I prefer using this
because it just allows you to make it look a
lot more better. The resolution is like
perfect and you will be able to add more
pages if you want to. Also. Now, how will
you get the resources? Well, there are
going to be a couple of resources which you will find out in Canva if you want to get resources from your PC or
maybe a web browser. I'm going to suggest you
a couple of websites where you'll be able to
find those resources. Open up any of the web browser
which you have on your PC, just like this over here. Now what I'm going to be
doing is searching for the first one where you
can get your images. The first website
is going to be Pig Sales.com Hit on Enter,
and there you go. You have it. Well, all of these images which
are over here, there is also videos
which you can use and all of them
are royalty free. You can use them
whenever you want. Now the next one which we
have is going to be splash. You can search for splash, splash, hit on Enter, and there we go on
Unsplash.com This is also a royalty free site
where you can download your images from and use
it for various purposes. Now obviously there are also
a couple of sites such as free picks to get graphics
from and a lot of those. But as you know which
sites you can get your designs from,
that is basically it. You can download it
and directly upload it on Canva and use it
for various purposes. But as this is going
to be all on canvas, so I'm going to try to
use all the elements and all the resources that
Canva has to offer. Okay? Because in
this course I'm also going to be showing you how
you'll be able to design, you know, T shirts
or make T shirt designs on Photoshop
and also Illustrator. So for those purposes I will
be using resources directly from my PC and I will get those photos from
the web browser, also from my photos. Okay, so for this lesson as we are going to be making a
camping type of shirt design. So what are you
going to do first? Now you can use templates
if you want to. What we're going to do is make
two pages for two of them. One is going to be pre made and another one is going to
be started from scratch. So as you can see on template, I'm going to do Search
for Camp, Hit on Enter. And you can see that
there are a lot of type of camping type of designs which you can use
from over here. Now the first thing
I'm going to be doing is going to be
using any one of them. I'm going to use this, you can see this looks very subtle, very decent and also usable
for all purposes, right? You can use it as a logo, you can use it as the
camping T shirt design. And if you don't
want the background, you can just take the
text just like this and group them up and then use it directly on your
T shirt. Okay. How are you going to do
that? The first thing, as I already have
this over here. Now, you will also
find out Mako files, which you are going
to find out in Canva. You will also be able
to download that. The first thing I'm going
to be doing is going to be making a design from scratch, which is going to be a
camping type of design. Now, how will I do that? The first thing I'm
going to be doing is going to be
changing the color. I'm going to do is click
on this color option and I'm going to do is
use this color over here, which is going to
be a bit different. But this is also very smoothing
and also very smooth. Now I'm going to be doing is going on clicking on elements. Now from here I'm going to
do is just search for camp. Now as I've already
searched for camp, now you can use whichever photos or graphics you want to use. You can also apply in
videos and shapes. There are also shapes
which you can use. There's audio, there's
frames, there's charts. And you can see none
of them are available. So we have to use
photos or graphics. In graphics, I'm
going to do is search for something which will
look good from here. I'm going to do is maybe
use this one and this one. Okay, I'm going to do is click maybe, let's
start off with this. Let's start off with
this one, I guess. Or maybe let's just
put this over here. I'm going to put this and then I'm going to
use two of these. What I'm going to do
is take this over here, make it under duplicate. We're going to meet
needing a couple of these. Then what I'm going to
do is going to be find out for mountains,
if that's possible. This is also doable. And then I'm going to do is
maybe find out for mountains. Okay. You can see there are like a lot of mountains
and a lot of images. Which I can use from, I'm
going to do is use this. Okay. Let's, if I'm going
to need a couple of them I'm going to do
is use this also. This. Okay? We have a lot of elements
which are over here. I'm going to do keep
them over here. And I'm going to do is start aligning each and
every one of them. I'm going to do is first off
keep them to be shorter. Riga I'm going to do is delete them as I don't
need it right now. I'm going to do is also
use this like very small. Take it something a bit bigger. Okay? I'm going to do,
take this one below. I'm going to do is make
this over here first. Okay? As that is over
here, I'm going to do, take this one over here and this is going to be
the background, okay? I'm going to do take
this over here. There we go. Take
this over there. Take this at the top. I'm going to just
click on Layers. Bring forward. There we go. Now I'm going to
decrease the size two of this. There we go. I'm going to do is start
putting up a couple of photos or a couple of
trees, which I can find. There we go, I'm going
to make duplicates. I'm going to do is keep it over here and make a couple
of duplicates over here. Send, send backwards. There we go. This
is right over here, should be couple over here. Take this right click,
send it backwards. Send this backward again. There we go. I'm
going to send this backward to just click on layer, Send it backward. There we go. I'm going to just take
this to be a bit bigger. There we go. I'm going
to take it over here. Then I'm going to do is make a couple more
duplicates of these. I'm going to take this over here and make sure that
these are a bit smaller. Click on this layer option, send them back backward
again. There we go. We have a couple of elements
which I'll be able to use. I'm going to do is make a
couple more of these copies. What I'm going to do is
put these over here. There we go. Do you send backward click on layer
backward. There we go. All of them are quite
perfectly attached. Now as all of them
has been attached, I have the background and
I also have the caravan. And I'm going to be doing
is putting this up in such a way so that
it looks good. But one thing I'm going
to be doing is going to be taking this behind. The first thing I'm
going to be doing is removing this moon. I'm going to click on it. The image, you're going
to find out the new one, which you can see over here. Editing your image
removes the ability. Now the first thing I'm
going to be doing is last thing I'm going to
do is find out Edit, Image, search for effects. And I'm going to do is, okay, I'm going to do is go down
a bit and click on Apps. I'm going to do is click
on Discover Your Apps, and let's search for
magic. Okay, over here. Film and use, whichever
effect you want to use. Let's say you want film, you want watercolor,
you want other ones. It's all up to you,
whichever you want. But I'm going to do
is go off to click on over here and click
on Edit the Photo. Now when I click
on Edit the Photo, you can see all of these
effects which are over here. Now you will be able to use
whichever one you want, but if you have an
exact photo or if you import or upload any photo, you'll get more, let's say, more facility or
more functionality where you'll be able to use it. Now the first thing I'm going
to be doing is going to be removing or applying
whichever effect I want. You can use whichever
effect from over here. You can see it over
here, Micro polar. And also there are
also a couple of different colors. Person, okay? And it will basically see
that it will be connected. And you can see Blear fuzz tube, retro, and also a couple
more other effects which you'll be able to use. Now if you want to
use any one of these, what you can do is click on any one and
double click on it, so that you'll be able
to fix up what you want. Let's fix the row speed. I'm going to do let's, I'm not going to be
applying any one of those. I'm going to
do is keep this. And I'm going to
click on Position. Go off the layers I'm going to do is take all of
these at the bottom. There we go. We
have all of them. Now as I have it I'm going to do is first
off click on this. There we go. It
has been applied. What I'm going to
do is take this and I'm going to do is
first off rotate a bit. There we go. I'm going to
keep it right over here. I'm going to do is maybe search
for what elements I need. I need the fire, so I'm going to do is put up the
fire over here. Maybe I'm going to keep
it right over here. I'm going to do
apply in an effect. So I'm going to do
is try it over here. Click on Edit the Image. After you click on
Edit the image, you can apply what effect
you wanted to apply. I'm going to do use this, maybe apply color blind filter. Or you can use lies, pixelated, liquefy, all of those, whichever ones you want. Let's do, maybe use a bit of spin or maybe a bit of wobble. There we go. It also
looks quite good. Now, you can also apply in whatever type of effect you
want to apply over here. Now as I've applied
it over here, what I'm going to do is maybe
start off with a couple of elements and also
a couple of texts which I can use as
I already have it. First off, click on position because I don't like this
background over here. Going to do is delete it.
As I've deleted that. I'm going to do is find out
a couple more elements which I'm going to use
Search for Camp. Click on graphic, and then I'm going to do
is put this over here. I'm going to do is reduce
the size over here. Sma, keep it over here, camp. And then I'm going to do
is maybe find out maybe a seat or maybe
whatever there is. Well, do put this over here. There we go. I'm going
to put it over here. There we go. Looks
a lot more better. I'm going to do is
put in my elements. Okay. You can also put in different type of elements
such as this one. Also there are a couple of things which you'll
be able to apply. Sma, use this, put
it right over here. That I'm going to do is
click on Crop or flip sina, flip horizontally.
Keep it over here. Or maybe just delete
it, whichever one you feel like it's good. Now you can also use whichever
effect you want to use, Sma, maybe something like this. I'm going to just flip it up. Click on Flip Roizano. There we go. Rotate it a bit. There we go, we have
it. I'm going to do is put in a couple of texts
which I'm going to apply look on text and I'm going to do
a search for maybe camp now. There's also a lot of type of camping fonts which you
will be able to use. I'm going to do is
use this campground and I'm going to do is
increase the size in such a way so that I can see and how it
actually looks like. I'm let's put the text increase the size until it actually looks
good and is visible. There we go. Keep it at
the center. There we go. It is now at the center,
all Semana do is type in Camp Camp Britannia. You can see it over here. To do is put in a couple of other texts which will
actually go with it. If you want to apply
this curved type of text, you can also apply it. The first Sema is going to be using this over here at the top, Cambritania, I'm
going to do is put in a bit of different
type of text color. It will basically
look a lot more better now as I've seen. You can put this and I'm going
to put in a bit of effect. Maybe put in a bit of outline. In the outline I'm
going to do is put in black. There we go. I'm going to do is
put the text color to be a bit different. Maybe lets use
this Camp Brtania. There we go, Cam Britannia. That I'm going to
do, maybe some text. Now where this camp is, I'm going to put another text. I'm going to just delete it and I'm going to make sure to put another text over here That I'm going to do is
maybe reduce the size. I'm going to do
select on this and reduce the size
where it is located. Let's say I'm going to
do type in Brisbane, made change the color Ma is instead of this
effect I'm going to do is put in none or maybe a bit of shadow or modus use outline. But I'm going to do, instead
of outline put in black. And also the text
should be black. Okay? Or maybe
something like white. Okay, Brisbane. There we go. And you can use whichever
effect you want. Cambritania, Brisbane. And I'm going to
put this over here. And it can also change
the font of this. Okay? So I'm going to
do different ones. Let's, I'm going to do is
maybe use handwriting. Okay, so it just looks good. Brisbane. Cambertania, Brisbane. Okay. After I've applied that, I'm going to do is
maybe select on this and click on
the effect again. And fix the thickness. Here we go, Now it's
a lot more visible. I'm going to do is put in
a couple of other texts. So I'm going to do is
put the text over here. I'm going to do is maybe
use something like this. Okay? So I'm going to do
is click on text again. Campground I'm
going to do is put on effect and you'll
find out curved. So I'm going to do,
after I've put on curve, what I'm going to be
doing is going to be increasing the size up till 120. Hit on enter. Now
after I put in that, I'm going to do is make
sure to save that up. I'm going to do is increase
the size a bit more. What I'm going to
do is type in 160. Okay. Now as I've put in 160, I'm going to just
click it over here. That I'm going to do is
click on this over here. And make sure to maybe
put in some spacing. Letter spacing to be
something like this, okay? And then what I'm
going to be doing is going to be, first off, I'm going to change the
font into something like this because I
want it to be visible. Okay, now I'm using the
same font as this one. I'm going to click on Effect. And then I'm going to put
in a bit of outline to two. I want a bit of thickness
I'm going to do. First off, click on black. And I'm going to
change the font color to maybe to white or this color. Now I'm going to use this because I'm using the
same color over here, or this one over here. And there we go, I'm going to just put
it in the center. I'm going to do Center Align. I'm going to do is put
this one over here. Click on Position also, I'm going to click on Arrange
at the center. There we go. And I'm going to do the
same thing over here. Position at the center. Okay, this is already
at the center, so we don't have
to worry about it. Now what I'm going to
be doing is going to be clicking on this text and
what text you want to apply. What I'm going to do is put in, let's say what we got over here. I'm going to put in
a motto, Discover. Just cover the wild. Okay, I'm going to do select
on these over here. And then I'm going to do
is click on Spacing Again, Letter spacing to be a bit less, there we go, discover the wild. Then I can also do apply
something like that. Click on effect and
make it hollow. If you want hollow,
you can also do that. Now I'm going to do
is click on Effect. And there we go,
we have Outline. The outline I'm going
to do is make sure that this is black in color. I'm going to put
this the way it is. I'm going to click on May
I'm going to do is go off the effect again on the
outline where there is hollow. I'm going to do is
use hallow a bit. There's the hollow.
I'm going to do is outline I'm apply in black. Okay, black over here, and I don't want any text color. You can also make it white or also select any one
of these colors. Let's at'm, keep it just the way it is so
that it is a bit visible. Now, I can also do is reduce the size of this text
so that it looks good. And I'm going to
go off the effect again and go off the curve. And I'm going to make sure
to use something like this. All I'm going to do is click on position and keep
it center aligned. There we go, this
cover the wild. And then I'm going
to do is maybe put in TRD right over here. I'm going to put this over here. I'm going to do the
same thing over here. Mrk going to just
find this over here. There we go, Perfectly aligned, Make sure this is
perfectly aligned. The MRK freedom is expensive. There we go. I'm going to put in a couple of
these over here too. I'm going to make
copies of it and put it right over here. There we go. I'm going to make
another copy of this. This one too,
obviously I'm going to do is change the fonts on
each and every one of them. Don't worry, I'm going to do, make another copy and
put it right over here. I'm going to make sure that
this actually looks good and also goes with the color pattern of our ones from scratch. I'm going to just
click on this color over here and make sure to use, and also use this over here. I'm going to make sure
to use the same color. There we go, I'm first
I'm going to do, take this over here
and I'm going to do is make sure that all of them
are quite center aligned. Click on Position. There we go, I'm going to click on Position. Just take this over here. Just click on Position Center. This one also click
on Position Center. This is already center,
you can see it over here. I'm going to select on all
of them and I'm going to do group them up and
take it a bit above, there we go, as all of
them are over here. What I'm going to do is going to be taking this color over here, change it to this one. I'm going to go off to Effect Hollow and I'm going
to do is change the color. Maybe over here I'm
going to click on this. And there we go we
have the color. I'm going to do the
same thing over here, Change the color as I've changed the color of
each and every one of them. I'm going to do is
change the motto. I'm going to do is
covering the Ok. I'm going to select on this ungroup to click
on Position Center. There we go. There we go. Now what I'm going to
be doing is going to be either take these elements
a bit to the left side. There we go. Look on Position Select on this
and take it behind. Take this over here.
Position Center, Align, Enjoy, Enjoying, Nature. Just click on this, river.com. Position Sender over
here I'm going to do is maybe comfort, comfortable moments. Click on position
Center, aligned. And there we go, we
have our design. Now what you're
going to do is going to be saving all of these up. First off you're going
to do is group them up. Control, what you can do is take all of
these all together. Now after you've taken
all of these together, what you're going to do is
just save it up as PNG. I'm going to do is first
off click on Share, click on download, and
you're going to fix it. Save it as PNG. You can use
this whenever you want. Save it up on your PC
whenever you want. And you're going to
click on at a page. And then we're going
to mark it up, Search for T shirt mock up. And then you will basically
find out a lot of these. And you have the software over here on Canvas,
which is mock up. You're going to click on app. Now when you use the app, you will basically find
out a lot of these things. Now on apparel, you
will find it over here. Click on this over
here, and you will basically find out a
lot of mockup files, which is very simple and
very easy to access. Click any of the
files which you have. Let's use this photo over here is make sure to
increase the size. There we go, I do is going
to be inserting the image. Okay, I'm going to do is, first off you're going
to do is save it. Click on Share,
click on download. And you're going to do
is click on download. It will take a bit of a time
so that it will be saved up. The first thing you're going
to do is going to be you can see campground being saved. And sometimes it also is saved as a PNG and also in a zip file, you have to wait for a while. And if you don't want
that to be in a zip file, what you're going to do is
save only one page at a time. That it just save all of the, all of the details all at once. You can use it PNG or JPG. It's like totally up to you. Select wherever you
want to save it. And then what you're
going to do is click on this over here. And I'm going to just click
on Load upload files. And you can see it
over here. I have it. And I'm going to
just click on open. Now when I click on open, I'm going to do is take
this one over here. Okay, so I'm going to do
is click on this over here and make sure to put it up
over on this mockup file. Now you should just
have to wait for a bit until it has been mocked
up on your design. And you can see
when you zoom in, the file or the
design which you did on Canva has directly been
mocked up on a T shirt. Now you can use
whichever mock ups you want and hope you
understood everything about this lesson on how
you'll be able to make a camping type of T shirt
design by using Canva. Now let's move on
to our next lesson, where we are going to learn
about how we can make a street bird T shirt
design by using Canva and by using the same functionality of
Canva without any further ado. Let's just hop on
to our next lesson.
3. Streetwear t-shirt design part 1: Welcome to our another
lesson of T shirt design. In this lesson, we are going to be learning how we can make a streetwear T shirt design by using Canva Without
any further ado, let's just hop on the lesson by opening up Canva on our device. As you can see that I
have opened up Canva. Now the first thing
I'm going to be doing is obviously if you've
seen my previous lesson, you already know what to do. Just get to this bar over here. Then what you're
going to do is search for T shirt design. Then you will find out T shirt right over here, Click on it. Or you can go off
make a custom design, or let's say a custom print, which is going to be 14 into, let's say 14 into 18. You can just click
on it over here, and you can see 14 into 18. What you're going to do is first off go off and click on Custom. And click on 14. Height should be 18. Now what you're going
to do is instead of pixels, click on inches. Now you can see 14
into a semina juice. Click on 14 into 18. There we go, you
can see T Shirt. Click on Create New Design. And there you go. It
will basically be made. If you want to follow
the same method which I used in my first lesson, you can just click on
over here T Shirt, and then make up your own blank space so that you can make
up your own design. In this, in this lesson
we are going to learn about how we can make a
streetwear T shirt design. The first thing I'm going
to be doing is adding up two pages because in
most of our lessons, one is we use a template which is going
to be a pre built design. In the next page, we're going to be making
one from scratch. Obviously, when we make
something from scratch, it takes a bit of time because you are putting in
your own element, your own text, your own design, your own color, all of it into. But if you are making
a pre built design, or let's say a template
or using a template, it will already be made. You just have to, you know,
make it up on your own. So the first thing I
would suggest you to do is first off click on
any one of these pages. And then first you're
going to do is click on T Shirt Design. Now when you click
on T Shirt Design, now what I'm going to be needing is going to be a
streetwear design. You can see that there are a lot of designs which you can use. Now you can see
something over here which is like a
streetwear design. So I'm going to do is
click on it over here and I'm going to
do is control Z, because I'm going to
be needing the pre built on the first one. You can see it over here. And there you go.
You can see that this is how it will
look like, okay. You can see this is
very good looking. Now I'm going to be making
something similar to this, but obviously it's going
to be a bit different. Now what I'm going to
be doing is making up my own one over
here, but with a dog. So the first thing which
I'm going to be doing is I'm going to do is change this
shine into something else. Let's say instead of shine, I want it to say glow. Okay, I'm going to click on this over here. I'm going to do. First off as this is the
photo do is click on this and type and glow glow. The last one I'm
going to do is put it right over here,
center aligned. There we go. Perfect.
This is the first one. Now what I'm going to be
doing is going to be making in my own T shirt
design right over here. If not, I'm going to do is
make or make two of them. I'm going to be
doing, first off, I'm going to take a color. Now what color do I want? So I'm going to do is
first off go up to black. And then I'm going
to do is slide it a bit so that it looks
somewhat like this. A bit grayish, a bit blackish. That is what I need. Now you
have to go off to elements. Now, off here, what you're
going to search for Street, where design hit on Enter. And you can see all the graphics which are going to be over here. Now I'm going to
be using a doc to first things first
I'm going to do is click on this over here. Apply it on my second
page over here. There we go. Make sure
to align it perfectly. There we go. I'm going to
keep it at the center. If you can't keep
it at the center, what you're going to do
is click on the element. Click on position out,
center and middle. Now as I'm not going to be
using this on the middle, so I'm going to click on
position, not even at the top. I'm going to do, just
take it up to this level. Now after this level I'm
going to be doing is putting in a lot of elements or other elements which
I'm going to be using. First thing I'm going
to do is make sure that all of them are white in color. Now as in white, I'm going to do is take
it over here a bit down, and you can rotate it if you
feel like it's a bit tilted. But make sure this is
on zero degrees so that you can put in whatever
element you want to use. Now I'm going to take it a
bit down just a bit too much. Then I'm going to do is
put in my text on this. I'm going to go off the
text and I'm going to do search for something Neon. Now when you hit on Neon, you'll basically
see a lot of texts which are being used from here. What you can also do
is go off the font and find out the ones
which you want to use. Let's say this is also usable. You can see bright
yellow hollow sale text. But as we are starting
from squares, I'm going to do is
click on these fonts. And what you're going
to do is going to be clicking on at a textbox. And after that,
click on over here. And we're going
to do is find out something which will
look actually good. So I'm going to do is maybe find out something funky
or geometric. If not geometric, what we're
going to do is find out something funky or school
is going to be up to you. After that, we're going
to do apply and effect. First thing I'm going
to do is use graffiti. Okay, let's just use graffiti. I'm going to increase the size a bit more so it just looks good. We can see sprite graffiti. There we go. That
is what we need. Now, the text I'm going to do
is put in, let's say bless. Okay. I'm going to do
increase the size a lot more. Let's see
how it looks like. Okay. We're going
to increase and keep increasing
the size until it is the highest or until
it is totally visible. There we go, Blast. I'm going to keep
it at the center. There we go. Increase
it a bit more. There we go, blessed. Now I'm going to do is going
to be clicking on this and I'm going to do apply
in a bit of effect. I'm going to do is
maybe use Neon. Or let's say I'm going
to put in a bit of, let's say first thing
I'm going to do is maybe a bit of lift
instead of anything. I'm just going to a bit of lift. I'm going to change the color. I'm going to do, make it blue. Okay. I'm going to keep
it something like this. Okay? This looks very good. Okay. This color is good. Now I'm going to do is make
a couple of these copies. I'm going to keep it, or keep it going. There we go. Bless all of it. Then I'm going to
do, on these ones I'm going to do is use
a bit of hollow effect. I'm going to go off to hollow, there we go. Hollow effects. You can see this is
looking quite good. I'm going to do the same thing, hollow effect, on
the last one too. I'm going to put in
the hollow effect of this hollow and
not this color. I'm going to do is
make sure to use maybe black or either white. There we go. Do the same thing over on each and
every one of them hollow I'm going to do
is make sure to use whites to do the same
thing over here. White. There we go, blessed. Now what I'm going to be doing is going to be keeping it in such a way so that this
is actually visible. First thing I'm going to
do is go off the position, Take this color over here. I change this color into maybe
something a bit grayish. Let's see if this is visible. Okay, it's not that visible,
but you can see it. That is what we need, and this is also something what we need. The next thing what we're
going to do is going to be, let's say I'm going to do
is put in my elements. I'm going to do is first thing select on each and
every one of them. And I'm going to do
is go off to position and arrange and keep
it all of them center. I'm going to click on each and every one of them.
Click on this. Center. Position,
Position, center. And also the last one, I'm going to see if
this positioned center. Now as all of them
are center aligned, I'm going to do is
click on this one. Go off the effect,
then I'm going to do, just put in a bit of
shadow underneath. Okay, I'm going to
do, make sure to put the offset the direction
a bit over here. Make sure it's a bit blurred. The transparency
should be a bit less. There we go. And you can also apply in a
bit of echo to it. Okay, I'm going to
do is make sure to use a bit of this direction. Should be over here. There we go. I'm going to
put in a bit of outline. Two to do is make sure to
put less outline over here. There we go. Blast. Make sure to click
on this over here. And you can change the
color if you want to. You can see bless. You can also change whatever
color you want to use. Maybe the black
looks quite good. It's just more visible
when I use this. Now what I'm going to
be doing is going to putting in whatever
elements I want. I'm going to click on elements. Now what I'm going
to do is going to putting in whatever
I want over here. The first thing I'm
going to be using is going to be trying
to find a hand, but the next thing I'm going
to do is do this design. I'm going to do is first
off, take this over here. I'm going to do is take this
underneath, there we go. Make sure it is perfectly
aligned to this position. Make it white or this
color. Okay, There we go. We have that color,
because we want it to be visible over this position. Then I'm going to do is put
in a couple of elements, which is over here. There we go. Take this, I'm going to also change the color to be
the same. There we go. Make it over here to make
a couple of other copies. Make another one. There we go. I'm going to do as I
have three of these I'm going to do is
maybe rotate it a bit. There we go. We're just
following a couple of the same steps which we
see on the pre built team. I'm going to keep
it right over here. There we go, three of
them in three direction. That I'm going to do is going to putting in two of
these more elements. Over here, you can see most
of the time people use this. I'm going to also
use the same thing. I'm going to reduce
the size. There we go. I'm going to make sure that
this is of the same size. There we go, over here. I'm going to make
sure that this is of this color that go looks
a lot more better. I'm going to do also
put in a bit of effect. I'm going to click
on Edit the Image. I'm going to do either.
We can liquefy it, we can use this, okay? You can also use this maybe. And if it doesn't look good, what you're going to do is click on Edit, the Image again. And try using whichever one
you feel like is doable. So I'm going to do is
press on control Z so that we can undo the process. I'm going to click
on Edit the Image and use whichever one
you feel like is good. We can also use a bit of sliced so that it
looks like this. Then I'm going to
do is going to be finding in whatever
one you want. I can also cancel it and I can also apply whatever I want to. Okay? As I already have this, which is going to be this
global thing over here. I'm going to just reduce
the size a bit more. And I'm going to
put it over here. Okay? I'm going to
do the same thing. 21.2 and 1.1 We're going
to do the same thing. There we go, three of them over here. And then I'm going to do
is search for a line. I'm going to use
this line over here. I'm going to make sure that
this is a bit more slimmer. I'm going to do click on this, I'm going to do make it white, because we need a bit of white, even though there's like a
couple of the same colors. There we go, I'm going to
do is make sure to put in whatever details or
whatever I want inside of it. I'm going to do is take this over here and make
sure to keep it there. We can also use
different types of elements which I can put
just like it is over here. But I'm going to do is put
in my text on this side. And I'm going to do is put in
another element over there. It just looks good. I'm going to do this, this
also looks a lot more better. There we go, I'm going to do is click on this color
over here and make sure this is of the same
color and pattern. You can also use
whichever element you want to use as it has been done. The next thing I'm
going to be doing is searching for something, which I can put
it in the middle. Now what do I want to
put it in the middle? Let's just say I'm
going to do is find this looks really good. I'm going to do is make
sure to select on this. I'm going to do
keep it over here. Then I'm going to do is going
to be changing the color. I'm, I'm going to do is
use this or maybe this. What I'm going to do is
find something which will basically look really good. I'm going to do is maybe okay, first up, just like
I said I'm going to do is find a doc
I'm going to do. First up delete this. I'm
going to do is street. Where do it on enter I'm going
to do is find something. Okay, this looks also good. I can also use that, but I'm not going to be
using that right now. If you can't find it over here, I'm going to do is find a hand on Enter,
click on Graphics. Then I'm going to do is find something which has
two hands together. I'm going to do is search for maybe something so that we have two hands
at the same time, we will be able to get it'. Pray hit on Enter. There we go. Now we're
going to have it. I'm going to do is maybe this one I'm going
to use this one. Going to do is click on this. And I'm going to do is
keep it right over here. There we go. Now
as it is visible, I'm going to do is
change the color. I'm going to do,
use this, maybe, maybe, let's say which
one is actually visible. I'm going to do is make sure to make it visible on all sides. Let's see which one is visible. Okay, none of it is visible. So I'm going to click on Edits. I'm going to do is find out something which will
make it look visible, or we'll make it look glowing. Let's not use this right now. Let's find something a bit
more better I'm going to do is go down a bit more and find something which
will actually look good. We can use this, okay? This one is a bit better because it has more filled color to it. I'm going to do is
keep it over at the center. There we go. Center aligned, I'm going to do is change
the color of this. There we go, We have
a bit of color which can be changed or
which does look good. I'm going to do is click
on Edit the Image. We can also use Effects. I'm going to do is maybe
use whatever I want to do. Search for Effect,
let's say Globe. And if it's still
not over there, what you're going
to do is wait until you'll be able to
customize those. I'm going to do is click
on any of these texts. And I'm going to select
on this image too. If you want to upload any of your photo, you can
also upload it. Last I'm going to do
is maybe use this one. Okay, so when I
click on this one, I'm going to click
on Edit the Image. And I'm going to do
click on Check It Out. Now what I'm going to use
this I'm going to do is take it out and click
on Edit the Image. And you will basically see
that it will not be over there because it
doesn't support that. I'm going to click on
Smear. There we go. It is now a bit more visible, but we have to remove the background and
we cannot do that when we are using
resources from Canva. I'm going to do edit the image. I'm going to do Edit Photo. I'm going to do is
click on over here, we can use Background Remover. There we go now as it is
already turned into a photo, Now I'm going to do is
remove the background first after I've put on
the background remover. You can see now this is
how it will look like. Make sure to save that image first or turn
it into an image first, and then you'll be
able to use those. Now what I'm going to
be doing is going to be finding something
which will look a lot more better and something
which will be doable. So I'm going to
do is, first off, let's find something
which looks bluish. I'm going to do is maybe use
the first thing which I did, which is the first
one, Fresco maybe. Or maybe this one
over here which also looks blue. I'm
going to use this. What I'm going to be
doing is going to be clicking on Elements, and I want certain
parts to be above this. I'm going to click on
Position, Go off the Layers. And then I'm going to do,
is going to be clicking on this Blest at the
top, There we go, Bless all of them Over here, you can see it over here, that we have this top over here. And this one is also on the top. You can see that I have made myself a street
board design. That I'm going to do
is put in my text, which I did over here, put in a text box. Now let's go off to
this text over here. I'm going to do is o select
on this text over here. Instead I click on
something else. I'm going to do
press on control Z. I'm going to select on this text and I'm going to do take
it right over here. I'm going to make sure
this is totally visible. I'll have to change the color to white or else it
won't be visible. So I'm going to put in
your text over here. I'm going to do is make sure
you keep it over there. And I'm going to do is make
sure to keep it over here. There you go. You have
your Street Ward Design. Now what you're going to
do is just save it up on your PC and use it
for various purposes. I hope you guys understood
everything about this lesson in our part two. I'm going to be making
something with a dog over here, but you can see already how
we made this over here. So first thing I'm going to
be doing is that on this one, I'm going to add this
in part two of how you can make a different
type of streetwear design. This is going to be it for this first part of this lesson. Let's move on to our next part or the second part of
streetwear design, and let's move on to it.
4. Streetwear t-shirt design part 2: Welcome back to our part two of streetwear T shirt
design in Canva. You can see that in
our part one we did this and this is what we
followed now in the next one, which is going to be a
bit different instead of these texts and also following
this specific method. Now you can also search up
for something which you can use as an inspiration and
also follow the same methods. And I will be showing you how
you'll be able to do that. Just like I said
in the first part that I'm going to be
making one with the dog. Now obviously I'm going to do is make something
different over here. Now the first thing
I'm going to be doing is changing the color. Now I want something,
maybe brownish. So I'm going to do is first off, click on any one of those or
maybe something over here. I'm going to go off
on the RGB palette. What I'm going to be doing is selecting something a bit brown. What I'm going to do
is find something over here. There we go. Okay, this is
basically what I need. Now as this is what I
need I'm going to be doing is applying all of
the effects on this page. And what you're going to do is just select on this
page anywhere. Now I'm going to be doing is finding the right elements now as this is still a
street where what I'm going to be doing
is find something. Street, Street
where it On enter, go off the graphics. Now here I'm going
to do is first off find out what I'm
going to be putting inside over here I'm going to do is go down and find something, a keep going down. Okay. This also looks good and
this also looks quite good. Sma do is use this amina
is increase the size. This is going to be where
the photo of the dog is. I'm going to put my
text from here to here. Okay. So I'm going
to do is click on this again and I'm going
to do is make sure that, make sure that this is
a bit more lighter. There we go. Okay, this
looks a lot better. Now I'm going to
do is, first off, I'm going to do just put on
more elements if I want to. And I'm going to
change this color. Let's say something which
goes well with this. Okay, this also looks good.
This also looks good. It's going to be up
to you what type of sign you are making. Now I'm going to click on this and what I'm going to be
doing is as this is black, I'm going to put my
text white over here. Now what I'm going to
be doing is going to be searching for the dog
design, which I need. The first thing I'm
going to do is, as this is a street
board design, I'm going to search
for retro dog. Now on enter, it will
show me a couple of graphics which can be usable
in this type of design. Now the first thing I'm
going to be doing is searching for something
which looks good. I can use this, I
can also use this, and I'll maybe also use this. Let's try this out.
We can use this. This also looks quite good. I'm going to do is make
sure to use this over here. Here we go. Now the first thing I'm going
to be doing is going to be, let's try to put in a photo
frame so that it looks good. I'm going to do is
first off click on this photo frame over here I'm going to do is make
sure to increase the size. There we go. Now if this is not visible, you
don't have to worry. What you're going
to do is wait for a while until it appears up. Now I'm going to do is going
to be try to put it inside. So I'm going to do is first
off, take this underneath. Is going to be clicking
on this color over here. Now as this is over here, what I'm going to be doing is
placing it in such a way so that it covers up
that grid line. Now what I'm going to be
doing is let's say go off to position now I'm going to go off the layers and I'm going to just make sure this is underneath it. Now I'm going to
do is take this, add it into another page. Okay, I'm going to just click
on over here. There we go. I'm going to just increase
the size. Okay, there we go. As we have increased
the size of this, what I'm going to
do is going to be taking this over here. There we go. So this
is perfectly aligned. And at the center of the page I'm going to do is
click on Share. I'm going to do is
click on Download. And I'm going to
select the page, which is going to
be only page four. As I've selected page four, I'm going to click on
Done and save it as PNG. And hit on Download and select the filder where
you want to save it. And you can see this is
going to be over here. Not glow this time, it's going to be dog. Okay, Hit Enter, and
there we have it. And I'm going to
do is going to be click on Upload from over here. I'm going to click on Upload. Click on upload file,
and there we go. We have the doc PNG
and I'm going to do is upload it over here so that I can use it in my photo frame. Now you might think
that why am I doing it? It's because if you want to make your design a
lot more better, you have to put in a
bit more of effect. Okay, There's not going
to be any shortcut to it. Now you can see that. I can
put this inside over here. I'm going to keep it
under here. There we go. I'm going to do is
check if it is there. I'm going to click on Position. There we go. I'm going to
just click on it over here. I'm going to select on it, and then let's try to
put it over there. And if it cannot be doable, I'm going to do is try to
make sure and see how it is. Okay. Now you can see that
this has been applied. I'm going to do is
click on over here and you can also detest the
image if you want to. You can also click
on Crop and fix the part which parts you
basically need I'm going to do, make sure to resize it a bit. Okay, let's try to resize
it in such a way so that it can be usable. Let's click on Smart Crop
And looks great already, so I'm going to do, make
sure to keep it over here. Let's try maybe rotating
it a bit. There we go. I'm going to do, is going
to be clicking on Done. And then I'm going to
do is make sure to rotated in such a way
so that it looks good. Okay, this is looking good. I'm going to do is
make sure to use it underneath, there we go. Make sure to select
it like this, doable. Now I'm going to do is going to be clicking on transparency. And reducing the
transparency over here. Now I'm going to do is going
to be clicking on text. And I'm going to do
add a text box first. I'm going to do
increase the size so that it is a
bit more visible. I'm going to click on over here. And then I'm going
to do, make sure to keep it straight
up like this. I'm going to do, make sure
to click on litter space and also fix the line
spacing if you want to. You can also anchor
your text box. Before that I'm going to do is keep it on something like this. Then I'm going to do
go off the effect. You can also apply effect
which effect you want. But first things
first I'm going to do is put in my text over here. Okay? So I'm going to do is I'm going to do
search for a font. First I'm going to do is go off the textile or maybe go
off the font and then you're going to wait
for a while until the ones appear and the ones that you need from here I'm
going to do is find out one. What I'm going to do is
maybe find for something vintage or maybe let's
say black letter. Okay, let's try black letter because it's going
to be a lot better. I'm going to do is
to do, try this. I'm going to do is
type in let's kennel. Okay? I'm going to do
increase the size. Let's go and I'm going to
make sure this is big enough. Then I'm going to do
is make it horizontal. Let's say vertical, ka, Make sure to put it like this. There we go, we have
it, keep it over here. I'm going to do now
decrease the size. There we go, I going to do
is make sure to keep our, let's say change the color
of its. There we go. We can also change the color of this rack over here into white. Okay, it also looks quite good. I'm going to do is
make sure to use this. And I'm going to
click on Effects. And I'm going to put
in a bit of outline. It just looks a lot more better. Just make sure to keep it the
same height with this text. There we go. Just encourage
the size a bit more. Just click on Effects
and I'm going to change the color
into maybe let's, I'm going to do is
this looks good. I'm going to make sure to
put in another effect. I can also use slice. I can also use hollow, whichever one you
feel like looks good. I can also change it into
background if I want to. What I'm going to do
is obviously make sure to use outline
because it just looks a lot more better then how it does I'm going to do
is try to make it a bit more darker so that it is a bit more vivid or sharpened. Okay, now as I've
had my text and I'm going to do is now
search for the graphics, I'm going to do
search for Street. We enter and then I'm
going to do is, okay, I'm going to search it on
elements Street, wear, get on Enter and then
I'm going to do is maybe search for the
elements which I need. I'm going to click
on Graphics That, there we go I'm going to
do is put this over here. I'm going to do is make
sure to use this and I'm going to do rotate it
a bit, just like this. Then I'm going to do is
also keep it over here. I'm going to just edit the image and I can also remove it a bit. I'm going to do is maybe go down first I'm going to do search for something
which looks good on it. I first off click
on Check It Out. After I click on Check It Out, I'm going to use
this magic eraser so that I can remove the parts, which I don't need. I'm going to remove this part. I'm going to do is also remove this part because I don't
need that part either. I'm going to do
is do this thing, which I just said I'm going
to do is wait for it to be removed and I'm going to do
is make sure to remove this. Part two I'm going to do is
also make it a bit more like, let's say straight and
have like pointy corners. I'm going to do is,
let's try removing or making it a bit
more rounded corner. There we go. This
is what I need. I'm going to do is keep this
and I'm going to do is just apply how it is on the
photo or the design. I'm going to do is go back.
There we go, we have it. And I'm going to do is
go off the position, go off the layers
and I'm going to do, make sure to use it over the doc and I
can see it over here. I'm going to do, make sure to fix the transparency.
There we go. Now as you can see the
streetwear I'm going to do is make sure to put
it under the doc so, so that I can make
the transparency 100% Now let's see how it
looks like under the dog. Okay, It doesn't look that good, so I'm going to do is make sure to use it over. It's okay. I'm going to do to
keep it right over there just as I have it. What I'm going to
be doing is going to be clicking on
this rack over here. I'm going to reduce the transparency a bit
more. There we go. Now we can see it.
Then I'm going to do is put in the other elements
which I need underneath. Let's start with
this street were again and find out the
elements which I need. Now I'm going to do is put in a couple of things
underneath here. First I'm going to
do is put this, I'm going to put it
right over here. Let's just keep it
up to this level. Okay. I'm going to change
the color into white. There we go. We can also
keep it somewhat like this. Okay. Looks a lot more better. And I'm going to make sure
to put another duplicate over here. There we go. That I'm going to do is put in a couple more other elements. I'm going to put this over here. This is going to be
our background again. I'm going to take this and
keep it underneath it. I'm going to try this over here. Let's see how it looks like
if it doesn't look good, but we're going to
get that removed. Okay, it doesn't look that good. I'm going to do is lect on it and try the transparency of it. Fix it up and looking a lot more better if you want
to remove or make any changes to the graphics
to you can also edit the image and also change
how it looks like. We can slice it up a bit, let's try slicing it down
and check how it looks like. Then I'm going to do is put in a couple or more
other effects. Let's try positioning it. I'm going to do is
keep it underneath, there we go. Looks
a lot more better. So I'm going to keep
this how it looks like. And then I'm going to do
is going to be putting in a couple more other elements which is going down over here. Let's try using this
chain over here. I'm going to keep
this over here. I'm going to just
compress control Z there. I'm going to do. Make sure
to put this over here. This is going to be
the line I'm going to do is change the color
of how it looks like. There we go, we're
going to use white. And then I'm going to do
is going to be putting in a couple more
elements over here. Now I'm going to do is going to be finding these ones which I basically need to make this
look a lot more streetwear. I'm going to do is
keep it over here. There we go. And then
I'm going to do is this I'm going to do is
put this one over here. I'm going to do zoom in,
Let's keep this over here. And I'm going to do is put
another one over here. Make sure this is a bit
more smaller. There we go. Now as it is over here, what I'm going to
do is going to be, let's try removing
this one and applying this one control Z I'm going to do is make
sure to remove this, is make sure to keep
it somewhat like this. Okay. It just looks a lot
more better than that. One I'm going to do is make
sure to click on Position. And I'm going to do
keep it underneath the dog. There we go. We have it that I'm going to do is going to be
clicking on this and check it out if it
looks better over the dog. I'm going to do is, okay, this looks a lot more better
I'm going to do is fix the transparency I'm going to do is make sure to
keep it like this. Okay, a better that I'm going to do is going
to be putting in a couple more other let's say texts and whatever
we need over there. I'm going to do is
maybe click on any one of these and make
sure to use it over here. I'm going to do
is click on this. One I'm going to do
is change the color. I'm going to do
is click on this, and I'm going to
click on this color. And I'm going to do
is select on these. Okay. I'm going to
rotate it 90 degrees. Then I'm going to do is make
sure to increase the size. There we go, We have it. I'm going to do is going
to be putting in my text. I'm going to click on text. Then I'm going to do is maybe, let's say put another text box. Add another text, another
text box. There we go. I'm going to do is going to be clicking on this over here, making sure to put it over here. I'm going to do is
make sure to keep the texts on the same pattern. Just make sure to put more
over here. There we go. We have our texts I'm going to do is make sure to
select all of them. I'm going to do is increase
the size. There we go. We increase the size we have it. Then I'm going to do
is click on all of them and make sure
to keep them white. Okay, As I have all of it I'm going to do is now
change the color of it. You can see how this
actually looks like. Now you can see this
is looking a lot better than how it was
looking on that color. We can maybe applying another background and
check how it looks like. Let's try any of these, but in a different color. Let's try this. I'm going to do is change the color white. And then I'm going to do is make sure to click on position. I'm going to take
it at the bottom. Okay, not on the bottom. Okay, Let's just
keep it this way. I'm going to do, keep
reducing the transparency. There we go to do keep it over
here, just the way it is. I can also remove
it if I want to, but I don't like it that much, but you can change it
whenever you want to. Then you can apply
in more elements if you want to on this design. Now as I'm quite done, what I'm going to be
doing is going to be saving this and
try mocking it up. Okay, let's just remove this. I'm going to do is let's
click on Position. And I'm going to remove this
and it looks a lot more better I'm going to do
is just save it up. Let's click on Share,
click Download. And I'm going to do is click on the page I'm going to select on the last page only I'm going to do is try saving both of
them at the same time. I'm going to do, let's just
click on Done and Download. I'm going to save that one too, so that I can mock
up both of them. In this part of this lesson I'm going to do is as
it is being downloaded, I'm going to click on Share
again, click on download. I'm going to do, first off, save this as this is dog two. I'm going to save
it up over here. I'm going to go back. Click on download.
Click on Current page. I'm going to need
the second page now. Click download. Now you can see now this
is being downloaded, which is going to be not Globe. This is basically bless. Let's just try Globe. Click on Save Now as both
of them has been saved, and in our next page I'm
going to do is mock it up. So I'm going to go off to
apps and then I'm going to do is search for mock up. Okay, so there are like
mock up and edit photo, so you can also select
it from over there, but you will basically
also find it over here. So you can see over
here popular mock ups. Now I'm going to do is take
any one of these photos. First off, as this is a T
shirt design, you know, lesson or course I'm
going to do is take one T shirt or even take
a photo, which you want. Well, I'm going to do
is maybe use any one of these I'm going to
do is make sure to click on something like this. Okay, so let's just click on it. Okay, I'm going to do
increase the size. Increase the size. There we go. And I'm going to do
is click on Upload. And then I'm going
to do is click on Upload files. We have it. I'm going to put two of
them at the same time, and you can see two of
them being uploaded. That I'm going to do is apply it on two pages I'm going to do, make sure to copy this. I'm going to paste
it right over here. Let's check out the designs. First thing I'm going to do
is take this photo over here, then take a beautiful time. And I'm going to
take it over here. I'm going to do wait
until both of them are uploaded on this macro
file of T shirt. After it will be done, I'm going to give you a result. Now you can see the
results, how it looks like. Now you know how you'll be
able to make a T shirt design, which is going to be
streetwear design, and also mark it up on
any T shirt you want. Hope you learns everything in this lesson on part
one and part two. And if you have any question or if you are facing any problems, feel free to ask me anything. And I will help you and guide you through the whole process. Let's move on to our next
lesson of Canbell shirt design.
5. Anime t-shirt design: Welcome to our new
lesson of shirt design. In this lesson, we are going
to learn about how we can make an Anime shirt
design by using Canva. Without any further ado, let's just open up Canva and let's start selecting
our resolution. I have opened up Canva. Now the first thing
I'm going to be doing is searching for T shirt. Okay, T shirt. And then there we
go, 14 into 18. I'm going to do select on it, and then you can select on whichever template
you want to use. But from here the first
thing I'm going to be doing is searching for anime. Then I'm going to be, obviously, just like other lessons we're
going to be making two. Okay, let's say I'm
going to do anime T shirt design on
Enter. There we go. We have a couple of anime
shirt designs to use. What I'm going to be doing
is going to be making another one where I can
put in my own design. Let's, I'm going to do is use just any one of them and
we'll show you how it works on this one to do
use this or maybe just, okay, this is just very basic. Now, you can obviously
customize a lot of it. In this lesson I'm going
to be doing is making a lot of edits on
this specific design. Let's start off with
our back screen. Now I'm going to do is keep it wide because I'm
not going to be needing any background and I'm going to remove it anyways, even though if there
is any background, the first thing I'm
going to be doing is clicking on elements. And then I'm going to
do is search for anime. Hit on Enter, click on Graphics. Let's try searching for a
specific type of anime. Let's if there is Demon Slayer
hit on Enter, there we go. I'm going to click on CO. And you can see that
there are a lot of, a lot of them which
you can use from now. If you cannot find
the exact type of photo you want from Canva, you can obviously go on the
Internet and search for it. Okay. Now from here I'm going to do is maybe use one thing as a background and
then I'm going to do is the other elements
or let's say the photo, which I'm going to get from online or from my
web browser case. Let's do, the first
thing I'm going to do is use this as my background. I'm going to increase the size. There we go. And then
I'm going to do is, let's try searching for what
photo I'm going to be using. After which photo I'm
going to be using, I'm going to do
change the color. Let's go off to any web
browser. There we go. Now you can see that I have
opened my web browser. I'm going to do is
search for pig cells. Or maybe splash,
splash, hit on enter. I'm going to do go off to unsplash and then I'm going to do search for Demons Slater, let's search for
it and on Enter. And if I can't find it, I'm going to do is go
on for other downloads. Okay. You can also, there is another site
called Free Pick, which you can also
search your photos from. And then I'm going
to do is search for demons layer icons. Let's do search
for PNG on enter. Then I'm going to do is
use whichever one to use. Okay, let's going to do is from here I'm
going to use this photo, which I can see from
over here, P and G Arts. I'm going to select on it. And then as it opens up, I can increase the
size and then use it. But what I'm going to be doing
is going to be searching for ones which are going to be, let's say, wallpapers, your PC. And you can see these
are quite small because if you use them and
if you increase the size, obviously it's supposed to, the resolution is going
to get corrupted. I'm going to do is demon
slayer, PNG or PC. Now I'm going to do is hit
on Enter and there we go. We still have a couple
of them to use, so I'm going to do is fine on something which I
can use it on my PC. You can see this is
also quite good, so I'm going to do
is use this, okay? Okay, I'm going to do
is click on it and I'm going to do is click
Save Image As, and then I'm going
to do is going to PNG and save it up on my PC. Now as I have it saved on my PC, I'm going to go off
the Canva and then I'm going to do is change this
color into something else. First I'm going to
do is go off to Upload and click on upload file. And then I'm going
to do is use this. Click on Open, and there we go. We have opened up the file
as that has opened up. What I'm going to be
doing next is going to be clicking on it. There we go. We have placed in
the main character, which I'm going to be using. Now from here what I'm
going to be doing is also clicking on
the back of this. And that I'm going to
do is change its color to selecting any
one of these, okay? You can see this
looks good, okay? This one looks better. Okay, so I'm going
to be doing is using maybe either this or this, okay? Okay. Maybe this,
some maybe use this. Black looks very classic. Some do keep it at the center. And then I'm going to
do is also keep it at the center there you can see Now if I can find the center I'm
going to be doing is going to be putting in
a frame at the back. Let's try putting a frame at the back and then try using it. I'm going to go off to elements, and then I'm going to do is find out frames which are
going to be squared. So I'm going to
increase the size. There we go, I'm going to go off the position and
I'm going to make sure that this is underneath
it and I'm going to do is obviously make it in
such a way so that it just keeps up to this level. Then I'm going to do is
going to keep this over here. There we go. Now as we have it, what
I'm going to do is take this over here. Then I'm going to do is take
this at the top. Here we go. We have our background and we also have our main character. Now as I've put that I'm going
to be doing is applying in a couple of effects and let's see how it
actually looks like. If it doesn't look good, we're obviously not going
to be applying it. But obviously if you want to change or apply any
effect over here, you can try using the
filters which are over here. And there are also vivid
ones and also cool ones. Whichever one you want to use, you can see this is
how it will look like. But I'm going to
do is make sure to keep it subble and looking good. If you still see that it
doesn't look that good. I'm obviously keep it just
the way it's supposed to be. So after you're den applying, you can see this is
how it looks like. I'm going to do is
keep it this way. Okay, so it just looks better. I'm going to do is make sure to select on this back over here, and you can see over here,
the color has changed. The bit I'm going to
do, try selecting and trying out colors which are
going to be looking better. I'm going to do okay, this one I'm choose this one. You also see that this
also looks quite good. I'm going to do is I'm
just going to keep it however it was I'm
going to do is just click on the black ones. You can see it over here. There we go. Black is better. Now I'm going to do is
going to be applying in a couple more other effects now as it's going to be an
animate teacher design. So I'm going to do
is going to be, obviously we need a couple
of text effects, right? So I'm going to do
is make sure to keep it a bit to the bottom. There we go. As we've put that, I'm going to do is put in
a couple more elements, let's search for
demons later again. And then I need a
couple of graphics. I'm going to do is going to be clicking on this text over here. I'm going to do is going
to be keeping this in such a way so that
it looks a lot better. I'm going to do is rotate it. There we go. If it
doesn't look that good, I'm going to keep it
this way. There we go. Then I'm going to do
is obviously apply in a bit of effects to search for yellow or maybe
let's just try in green. Then I'm going to do is
go off to Edit Image, which you can see over here, this is an image is let's
click on Edit Image. And then I'm going to do Apply in a bit of effect over here. You can see this is
how it looks like. And then I'm going to do remove the background. You
can also use this. I'm going to do is going to be try searching for something
a bit more better. If this is not the one I'm going to do is
press on control Z. And I'm going to select on its, click on Edit
Image, click on CL. Then I'm going to do is
maybe use this over here. Or maybe this, let's say, okay, this looks better. I'm going to do is going
to be clicking on this, back over here, and Apply, or keep it just the way it is. Then I'm going to do is
remove the background. Okay, BG Remover, you
have it over here. Make sure to click on it
and wait for a bit until the BG remover is not graded
out. And then apply it. After you apply this BG remover, you'll basically
see the background, which is the black
part, will be removed. Okay, you can see it over here. Now you can see this is
not that visible yet, so I'm going to
keep it over here. Reduce control G. I'm going to do is
redo, undo the process. There we go, we
have it. Redo, I'm going to keep it
just the way it is. There we go, We have
that. I'm going to do. Let's try changing our color. Okay, let's try changing
the color of this page. Now, if it is black, obviously it's not going to be visible. I'm going to do is make sure
to keep it gray for a while. And if it doesn't
look good, obviously, we're going to
change it back into something which is going to be visible as we're going to be
putting it on a white shirt. We needed to be black. Okay, let's just keep it
this way for a while. And let's go off to text first. Now from our text, what
we're going to do is going to be putting in a
couple of text effects. So I'm going to do is put
in the name of this anime, that is going to
be Demon Slayer. And then I'm going to do is put the name of this character too. And then I'm also going to be applying a bit of
maybe Japanese text. So I'm going to click
on at a text box. And here on the textbox I'm going to click on
this over here. First I'm going to
use in Criticize in such a way so that I can see it. Okay? You can see that
this text isn't that bad, so I'm going to do is
type in Demon Slater. Okay? As I've put
in Demon Slater, what I'm going to do is going to be increasing the size in such a way so that it
just looks a lot better. Soma juice, keep
increasing the size. There we go. This is 137
and this is 96 sina juice. Increase the size two there. Again, I'm going to increase
this one a bit more. Then I'm going to do is
going to be keeping it in such a way so that
it just looks better. And I'm going to do
is line spacing. I'm going to do fix it to
keep it a lot more together. It just looks a lot
more better when it's together like this. Then I'm going to
do is going to be keeping it at the center. There we go. I'm going to do is going to be taking
this at the back. Let's try it now. You can also keep it at the
back or keep it over here. It's going to be
totally up to you. I'm going to do is going
to be taking this. Then I'm going to do
is click on the color, which is going to be black. But I'm going to do
add in the effects. Let's do apply in the hollow effect. You
can see it over here. Obviously, just like I said, I'm going to do apply
in a bit of thickness. You can see demos
as I've applied it. I'm going to do as this is done now I'm going to
do is put in the name. A bit of effect
I'm going to do is put it inside of this text to, I'm going to do is click on this again and click on Line Spacing. And make sure to
put in a bit of, let's say line spacing as I'm going to be putting in a
bit of text over here. Now I'm going to do is going
to be putting in a bit of Japanese effect
or Japanese text, which I'm going to be doing. I'm going to do is take
the other one over here. Let's try putting in the name of this main heater over here. So I'm going to click on this duplicate I'm going to do
is put it right over here. Obviously I'm going to do
is cut all of these off. Okay, I'm going to
select on all of them. The name of this
character is Tanjio. I'm going to do
Tanjio over here. Tanjioadoo, there we go. Keep it over here. Then I'm going to
do reduce the size so that I can put
it inside of it. There we go. And then I'm going to put in
a bit of effect. I'm going to obviously put
in outlines. There we go. Tion I'm going to do is going to be
clicking on this color, which I'm going to put
white. Here we go. Then I'm obviously apply the color of the text inside
to be a bit different. I'm, we can put in white
inside and black outside, which also looks
good in my opinion. I'm going to do is, let's
say I'm going to do is put in white inside
and black outside. I'm going to do is
click on effect. I'm going to click on
black outside there, Tan jio, do as we have it. Then I'm going to
do is going to be applying in a bit more
effect over here. I'm going to click
on at a text box. I'm going to go over here, I'm going to search for
Japanese hit on Enter. You can see a lot
of Japanese text has appeared up from here. I'm going to do slk on any one of them. You
can see it over here. Then I'm going to increase
the size so that I can see that the effects being applied
or the text being changed. Now, after the effects
will be changed, I'm going to be doing is if I cannot put the text
over on my keyboard, what I'm going to do
is go up to any of my web browser and search for the text and apply
directly over here. Okay, I'm going to do is going to be selecting
this over here. You can see it over here.
To text is over here. I'm going to take
this at the center. Now the first thing I'm
going to do is increase this text in such a way
so that I can see it. Obviously I'm going to do is keep it bigger so
that I can see it. Then I'm going to
do is going to be going off to my
web browser again. You can see it over here. I'm going to do search
for Google Translate. You can see it over here. I'm going to select
on Google Translate. I'm going to do,
so I'm going to do is type in Demon Slayer, and then I'm going to do
is change it over here. And let's change
it to the Japanese so that I can get
the Japanese text. I'm going to do is
select on this, I'm going to do control. Or you can also copy
directly from over here. Go off to Canva. Then I'm going to do is paste it
over here. There we go. I'm going to select on it, then I'm going to do
is increase the size. There we go. Then what I'm going to be doing is going
to be changing the color. I'm going to do is
change the color into, obviously, let's
say this one, okay. I'm going to do is
click on effect. I'm going to go off Outline. An outline I'm going to
do is going to be using, maybe I'm going to do
is use black outside. Click on over here.
Black outside. And the inside, I'm going to
put in this tangio color. Okay? I'm going to do, just
use this. There we go. Even if it doesn't
fit, I'm going to do is just click on this
color over here. And then I'm going to
just from over here. And then I'm going to put it at the center. Can
see it over here. Then is going to be clicking
on this effect over here. Okay, let's just click on
this and letter spacing to be a bit more. There we go. And then I'm going to select
on this spacing over here. Line spacing I'm going to
do is keep it like this. Maybe you can keep it
like this if you want to. I'm keep it just like this. Okay. I'm going to
take this a bit at the top as we have our top text and
then I'm going to do is putting in our bottom text. In our bottom text
I'm going to do is obviously the same thing. I'm going to go off
to my web browser, then do in Jo. It is going to be, there we go, I'm going to copy it. We have to Canva, I'm going to do is going
to be duplicating. Another one I'm going to do
is paste it, right over here. There we go. And
increase the size a lot. You can keep it a big,
it's totally fine. Because this is going to be the last bottom text
I'm going to do is going to be keeping
this over here center. I'm going to increase
the size of a bit more. Obviously I'm going to do is
go off the spacing again. Letter spacing, I'm going
to do, decrease it a bit so that it just
looks a bit better. I'm going to keep the
text a bit bigger. Spacing, I'm going
to do fix it a bit more and I'm going
to increase the size. Just click on this until I
feel like it looks better. I'm going to do is going to be clicking on the
effect this time. And then I'm going
to do is going to be clicking on this color to be the outline inside I'm going to do is
put in black there. Rico looks a lot more
better now as I have it. I'm going to do is going to be I'm going to
keep it over here. I'm going to do this. Okay. Let's just take this out. Okay? As I've taken this out, or I can also do control Z. There we go. I can also apply in a couple of
more effects over here, which will actually look good. I'm going to do is going
to be clicking on, we can use green, right? I'm going to do is maybe green. There we go. Now as
I've applied that, now let's go up to elements and let's find something
which I can use, even though most of the things which I needed for this
design has been completed. Now if I want to put
any other elements, I can apply it directly
from over here. Now let's just search for
maybe the words which I saw. Okay, so I'm going to
use this, there we go. I'm going to fix in
the transparency. And then I'm going
to do is click on position I'm take
it at the bottom. As we have it. I'm
going to click on Position and arrange and
obviously keep it at the center. Basically we have
all of it done. Hope you like the design. And then I'm going
to do is going to be mocking it up on my T shirt. First things first I'm going
to do is keep it white. There we go. Done. Then I'm going to do is going
to be clicking on each and every one of them. Control G grouped up. And then I'm going
to do is click on Share, click on Download. And then I'm going to do is going to be clicking
on the page. I'm not going to be
needing the first page. I'm going to click on
Transparent background. You can also keep it this way. And then I'm going
to do, is going to be clicking on page two only as I'm going to be needing
a transparent background. I'm going to click on
Done, click on Download, and you can see this
is being downloaded. You can also change the color of the page
whenever you want, but as I'm already using
transfer and background, the background will not
be downloaded with it. I'm going to keep
it over here safe. And then on our next page I'm going to do apply
in the mockups. I'm going to go
off to apps, apps. I'm going to find
out mock ups and then I'm going to do
is find it apparel. I'm going to do is click
on CL and then I'm going to do is use a T shirt or maybe any one
of these photos, which I use most of the time I'm going to do is use
this one over here. Okay. This time I'm
going to use this. Increase the size. There we go. And then I'm going to
increase the size of a bit more so that I can see
if it is visible or not. Okay, so insert the
photo I'm going to use. Also increase the size
of a bit more so that I can see the size over here. I'm go off to Upload. I'm going to click
on upload file. There we go. We have it.
I'm going to click on Open. As that is being
opened, I'm going to do take this one
over directly here. Click on at a page again, so that I can apply
in this effect. And I can also take
this over here. Okay, You can see
this is being loaded. Now in our next page I'm going to do is
going to be applying in another T shirt so that you can see a bit more clearly. I'm going to click maybe, Let's go off the mock
ups and then find out Hootie and can
see it over here. I'm going to just click on
this color and make it black. You can see it over here. The T shirt design
has been applied. You can see this is being
perfectly visible over here. And I'm going to take this, or maybe let's just find
something a bit more bigger so that it is
a bit more visible. Okay, I'm going to use
this. There we go. I'm going to do is apply
my effect over here. I'm going to do is wait until a loads up after this
has been applied. I'm going to show
you the results. You can see this is
how it will look. Hope you understood everything about this lesson on how you will be able to make
an Anime shirt design. This is very simple, you just
have to play with it, okay? And fiddle through every tools and elements you think
it goes with it. After you're done, just
make sure to save it up and apply directly
on your T shirt. Thank you for watching
this video til the end. Now let's move on to our next lesson of
Thirt Design in Canva.
6. Vintage t-shirt design: Welcome to our, another
lesson of T shirt design. In this lesson, we are going to be learning about
how we can make a vintage T shirt
design by using Canva without any further ado. Let's just hop on to the lesson by opening up Canva
on our device. As you can see that I
have opened up Canva. Now the first thing
I'm going to be doing is searching for T
Shirt over here. Also for this one, I'm
going to also use 14 to 18. So I'm going to
just click on this, make sure to put in 14, hide, should be 18. Create a design
that I'm going to do is wait until it
has appeared up now. As you can see that, I'm
going to first off search for vintage vintage T shirt design. Hit on enter. I'm
going to do wait for a while until the
results are over here. After the results
has been given. Okay, over here I'm going
to do use any one of those. You can see that I have
my results over here. Now I'm going to be
using any one of those. You can see that these all
designs look very vintage. And you can see on
most of them it's about looking a bit
funky, looking a bit old, and which is going to be
back how it looks like, not this one, but you
can see how this is. I'm going to be
making two designs. Okay, In this lesson I'm not going to be
using any template. So the first thing
I'm going to be doing is just keeping
one of them over here. And using how it
works, let's just, I'm going to do is on lead this one and
keep it over here. And I'm going to do
add two more pages. I'm going to do is
make two more designs. Now in vintage designs, you might see that most
of them are cutouts. I'm going to do is
use cut out designs, and obviously use text or
fonts which look old or retro. I'm going to do is first
off click on Elements. And I'm going to do is
search for vintage Vintage. Hit on Enter and
click on Graphics. Now you can see that
there are a lot of vintage type of
graphics to use from. You can also search for Retro. Now when you search for Retro, you can also see a couple of these designs which
are also very vintage. The first thing I'm
going to be doing is going to be using two photos, let's say use photos
of two person. Now I'm going to
do is retro guy it on enter and then you can see
that we have these photos. Now from here I'm going to use these two photos and
obviously make the design. Obviously you can see that
I have two of these photos, so I can also use different
ones if I want to. If I cannot find those
photos, I'm going to do, let's go off the photos and see if there's two of
the same person. If there is, I'm going to
do is use these photos. Okay. You can see two of
these photos, qui mats. I'm going to click
on Edit Photo. I'm going to just remove the
background of two of them. I'm going to make
them in such a way so that it just looks good. And I'm going to do is
Edit Photo, click on Crop. And then I'm going to
do is make sure to use this. You can see perfect. Then I'm going to
do, is going to be clicking on Done. There we go. Then I'm going to do is use
this to be the back photo. I'm going to do keep
it right over here. And then I'm going to just take another one of this photo. I'm going to just click on CL. And you can see this
is how it looks like. I'm going to do is maybe use this one. This one looks good. I'm going to click
on Edit, Photo, and then I'm going to click
on Background Remover. You can see Background
Remover is working. And then I'm going to do is crop out the parts
which I don't need. So I'm going to click on Crop. And then I'm going to do is
make sure to use it over here and there we
get click on Done. And you can see that I
have two of these photos. Okay? As I have two
of these photos, what I'm going to be
doing is going to be keeping the ones or the
parts which I need. Now you can see that even though there are two
of these photos, what I'm going to be doing is going to be clicking on this, click on Flip, and I'm going
to use horizontal flip. To this over here
now is going to be obviously making effect in such a way so that
these two look good. I'm going to just
group them up and then I'm going to do
is click on them. Are you can also edit the
photo however you want. Now I'm going to do
is make sure to use such design or let's say effect which it looks a
bit grainy and retro. So I'm going to click, I'm going to just
revert to old editor. You can also go off the
old editor and you can also use the new editor
is going to be up to you. I'm going to click
on Edit Image. You can see this is
how it looks like. I'm going to find out
the ones which I need. Let's go off the filters and let's find out something retro. I can also use gray
scale for one of them and also make it
look a lot more better. Well, I'm going to go and find something
which looks retro. Okay, you can see retro
over here to keep this. And I'm going to just click
on it and I'm going to reduce the trans like
intensity up till 31. I'm going to go back, go back, then I'm going to just
remove the background. After it will be removed. After the background
has been removed, what I'm going to be doing
is going to be doing the same thing on let's
say the other photo. As you can see it
has been applied. What I'm going to do is
click on its position, obviously keep it at the bottom. I'm going to use
First off Group and I'm going to take
it at the bottom. Now I'm going to do is apply the same filter
on this one edit. The image that I'm going to do is going to be clicking
on CL and find out Retro and make
sure to put it on somewhere around here. Okay, then I'm going to do
is go back and then add the background
remover so that I can remove the background as I'm
not going to be eating that. Now. After I've done that, what I'm going to
be doing is going to be click on both of them. And let's search for
some grainy filters, which I can apply on two of these images
at the same time. You can see both of
them has been applied. Now let's go back on. Let's click on any one of them, edit the image, and
click on Check Out. Now what I'm going to be doing, I'm going to do is find
out a couple of ones. You can see this is not
over here is going to be, you can use magic eraser or
expander if you want to, and you also have magic wrap. But as we already have this, I'm not going to be
applying any one of those. And I'm going to go back again. Revert to the old editor. Click on Image, Edit the Image, and then I'm going
to do is going to be finding in
something which will give me like a grain effect. You can see it over here.
I'm going to click on CL and there we already have it. We have our grainy filter. You can see it has been applied. Then I'm going to do is going
to be clicking on them. And I'm going to use
vertical pixels to be somewhere around here. Horizontal pixels somewhere
around over here. Or we can also find out a
grain, let's say sheets. I'm going to use press on Cancio and let's see if there is an grainy texture. You
can see it over here. So we can also apply
any one of these. Take this over here. I'm going to do apply
directly on the whole page. And then we can also apply, let's say, a whole filter over. Take all of this over here, let's take this
filter at the end. Before that I'm going
to be doing is applying the couple of effects which I'm basically going
to be needing. The first thing
I'm going to start off is going to
be with the text. Now the text plays
a very important, let's say, effect on
these type of designs. I'm going to do is start
off with a couple of text. Let's say from here I'm
going to click on Text. And then I'm going to do
Search for something Retro. If there is no retro,
let's try it out first. Retro, hit on Enter. And you can see that there
are a lot of retro stuff, a lot of retro text. From here I'm going to use this use increase the
size and make it 150. Hit on Enter, you can see
how it's going to be. Then use cut this off. And let's type in, let's say it's something out
of like a very retro '80s. Let's type in let's
say Detective. Detective Lo, let's type in for Kev. Detective. Kev I'm going
to do is put it over here that I'm going to do
is search for effects. Now as I've put in that, let's type in for maybe
splice go Detective Kev. I'm going to do is
fix the offsets. There we go. Just fix the direction over on the
left side maybe. There we go. I'm going to just put in
a bit of effect on its. I'm going to just fix the color. Let's say on the
color I'm going to do is select on any one of those. Okay, it looks a
lot more better. You can also apply in other
effects such as maybe red or any other effect
which you can put. I'm going to just make sure
to put this one over here. For now I'm going to
do is going to be clicking on this and I'm
going to increase the size. There we go, Detective Kev. Make sure to put it
centered over here. Detective Kev, I'm going to
be applying a lot more text. I'm going to click
on this again. I'm going to do is
Detective on watch. I'm going to just click on it. Over here that I'm
going to do is going to be reducing the size so that
it looks a lot more better. I'm not going to be applying
the effect on this one, so I'm going to just
click on Effect. I'm just going to be
using maybe an outline. I'm going to put an outline, just reduce the
thickness. There we go. Can also put in black outside. I'm going to, let's try black
outside and white inside. I'm going to keep it over
here. Just like this. Click on Effects, and
I'm going to increase the thickness because now
it cannot be visible. It is not visible basically. Then I'm going to do
is going to be putting in two more texts over here. I'm going to do is
maybe search for something like this over here or maybe
something different. Instead of that
I'm going to find another one which
will also look good. I'm going to do is,
let's say I'm going to use this type in 150. There we go. Let's just take this control X
and put it over here. There we go. Just
reduce the size. Click on Effects and
just put an outline. Make sure this is black
and the text is white. Just make sure that
this is visible. Okay, let us take this. Okay, let's just keep it
capital. There we go. I'm going to click on
Effects And increase the thickness of it so that
this is a bit more visible. Reduce the size of it more. Maybe. There we go. I'm going to do, is going to be clicking on this over here. I'm going to just
put this over here. Okay? We can also do something
like take it over a bit to this side and a bit
down over here. Keep it over here. I'm going to just
change it into one, let's say another time, just keep it over here. I'm going to select on
this spacing and I'm going to fix the line
spacing to be a lot less. There we go. Just take both
of them to the left side. Just take it at the center. Then I'm going to do is
going to be clicking on this one and changing the color. I'm going to do is select on
this, click on the color. And then I'm going to do
is maybe somewhere out of this another time. Then I'm going to do
is going to be keeping this a bit down over here. Something like this.
Okay? I'm going to keep it a bit above. There we go another time I'm going to do is
take this at the top. Then I'm going to do, put
another text over here. I'm going to do is
maybe take this duplicate and do make
sure it fits over here to keep both of them control all cut this off. I'm going to just make
sure to keep it on the right side so that
it's a bit more visible. Another time I'm going to
just take this over here. I'm going to put in
one text over here, up to this one I'm going
to do is going to be, let's say out of London. You just take this
text over here, just increase the size. Increase it. There we go. So as I've applied
that, I'm going to do, maybe make sure to
increase it a bit more. There we go, London
another time. Straight out of decrease the size and check it so that all of it fits on
this exact, this one. Okay. This box. There we go. We have it. Now I got to do is
click on Effects. And I'm going to do is put
in Outline. There we go. I'm going to click
on this over here. Make sure to put the
effect on outline to be black and
inside to be white. I'm going to make sure to keep it over here, straight
out at London. Just click on this text over here and make sure to
use another color. Going to maybe somewhere
around over here another time, straight out of London. There we go, You can see
this is how it will work. And I can also do something
else which is going to be, let's say I'm going to do
is click on this spacing. And I'm going to use
letter spacing to be somewhere like this. The juice reduce the
size of all of them. There we go, the juice. Click on it again.
Click on Spacing. There we go, is
done another time, straight out of London. There we go, Detective V. Watch I'm going to do is
select on this over here, and keep it somewhere like this. I'm going to do is
click on Elements, and I'm going to
search for Retro. I'm going to click on Graphics. And then I'm going
to do Apply in whatever effect I want to apply. Now let's go down and find for something which will look
basically good on it, not something too funky, but something which will
actually look good on it. Okay, if I can't
find it over here, we're going to search for vinyls and grains and all of those. And apply it directly
on this page so that it just looks
good and retro. You can also apply this, let's try, Okay,
this is too funky. I'm going to do is maybe
go down a bit more. If I can't find it, I'm going
to do is just search for retro vinyl. There we go. We have a lot of vinyls
which I can apply, but let's just Samin is
let's search for '80s mas. Go off to graphics, you
can see a lot of 80 stuff, a lot of graphics
which I can use, but let's just find out
maybe grains this time. If I cannot find it, even though if I don't want
to use a certain part, I can remove it, which
you've already seen. There is this magic remover
which you can use so that you will be able to
use it on various purposes. Now as I cannot find anything
I'm going to do is maybe just apply any one of these effects which
I basically like. It doesn't have to
be like total retro. You can also apply in a couple
of effect if you want to, but if you don't want
to, it's totally fine. I'm not going to be
using that because that is a whole different color. Let's just say I'm
going to do is maybe search for scraps. Now you can see a couple
of scraps which I can use. These are basically usable. I'm going to do is maybe
use this over here. I'm going to do take this
over here and apply it. There we go, Detective V, make sure to put
another duplicate. I do is rotate it. I'm going to do is make sure
to reduce the transparency. I'm going to do,
keep it over here. But I'm going to do is
going to be clicking on position and taking this at the bottom. There we go. Then I'm going to do is going to do the last thing
which is going to be grains head enter. Go off the graphics. Then I'm going to do is find
out the grainy texture. There we go, click on
transparency and reduce the transparency
however you like it. Then I'm going to
do is crop it up. I'm going to do this
position, this one. There we go. Click on Done. Here we go. We have
our retro design. Then I'm going to do is going to be clicking on all of them. Okay, let's click on this grain texture again
and then reduce it a bit more. There we go. As we have it, what
I'm going to be doing is going to be
clicking on all of them, grouping it up, and
then saving it. Control G. Our first
design is down. Let's move on to our simple
design next time I'm going to just start off with
something retro guy. Hit on Enter, click on Photos, and I'm going to do apply
in any one of those. What I'm going to do is, instead of this, let's try this. Okay, let's click on this photo. I'm going to do is at the image, click on Background Remover. And then I'm going
to do is going to be applying in a retro sunset, which is going to be
a bit of vintage. Which will look a
lot of vintage. Okay, so as you can see that I'm removing the
background and then I'm going to do is go off the
elements and then I'm going to do search for retro, head on Enter, go
off to graphics, and then we have a lot of
things which I can use. Then what I'm going
to be doing is going to be increasing
the size of this. If it's not good, I'm
going to just remove it. And then I'm going to be
clicking on this over here, which also looks very good. You can also make
it on your own. Now I'm going to do is going
to be applying in a photo, which I saw retro
retro head on Enter. Click on photos and find
something which will look good. With this I'm going to be doing is going to be applying
something good. I'm going to do is just apply the same type of text over here. After I've applied the text, that is basically
going to be done. I'm going to do is maybe, okay. Instead of that I'm going
to do is rock rock band. They don't enter,
you go to photos, maybe find someone, okay, some guy from over here. And then apply whichever
photo I want to apply. Let's go down and find
a specific person, Le Samad. Use this. There we go, as we have it. And I'm going to put
in a couple of texts. I'm going to go back, I'm going to find something
which will look good. Sma do go down and then
I'm going to do apply the same retro filter or let's say the vinyl
or the grain effect. After that it will
look a lot more. Better to do is a bit
of a maybe find out graffiti hit on enter
and then I'm going to do is wait until it shows me all the graffiti type of
fonts. Search for it again. I'm going to wait for a while. You can see this
is not over here, so I'm going to
just cut this off and click on at a text box. And then I'm going to do
search for graffiti over here. It on Enter. If
you can't find it, you will basically find
it in a section or a category I'm going
to be doing is, let's find our graffiti. You can also directly, we have vintage over here. You can also use this
vintage type of text. Whichever one you want to use, I'm going to do is maybe
use this and also this. At the same time, someone is click on this over here
and you can see it is already applied some type in 150 I'm going to do is
keep this over here. Then I'm going to put in
a bit of effect outline. You can see it over here. This is going to be
the text Rock of Ages, I'm going to just
click on maybe.
7. Class Project 1 - How to remove background of a photo in canva: Welcome to Class Project One. The name of the class
project is how to remove background of
a photo in Canva. I have attached in
a description and outcome in a description. We can see by using the
background remover tool in Canva, you can remove the background of almost every photo or text. It allows you to use the
specific subject of an image. Now one thing you have to
keep in mind that you must have a premium subscription
for this purpose. Now let's go off to the steps. In step one, we're
going to open up Canva. In step two, we're going
to open a presentation. In step three, we're going
to apply a photo from either from Canva or from PC. I'm going to show you both ways. In step four, we're
going to select the photo and click
on Edited Photo. In step five, click on BZ Remover and we're
going to wait. Then you can edit it
up if you want to. Now another thing
you have to keep in mind that if you are on an old editor and can't
find background remover, you have to switch to
the new editor and add background remover
to your interface. And then you'll be
able to use it in the outcome Learning how
to use background Remover. Rbg remover allows you
to use any subject of any image by removing the
background for multi purpose. Now we're going to
do is going to be opening up Canva and
follow our steps. We have opened up Canva. Now I'm going to do is
select on presentation. I'm going to do is go over here. Then I'm going to do is going
to be opening up a photo. I'm going to click on Upload. I'm going to just
click on Upload file. Now another thing is that I have attached in a resource file
with this whole course. You can use the resources
which I have over here. We have this class project too. And we also have this photo
which I'm going to be using. I'm going to click on the photo
over here. Click on Open. I'm going to upload
it up over here. And then I'm going to
go off the Elements. And I'm also going
to be searching for a man hit on Enter. I'm going to go off the
photos and I'm going to use another one
of these photos. I'm going to use two photos
on two different pages. I'm going to just click
on this over here. In the first page I'm going to do is use my uploaded photo. I'm going to do is
take this over here. There we go. And then I'm going to do is click
on this over here. Click on Edit Image, and you can see the
background remover over here, because I'm recently using it. This is the old, old editor. Now if you want to go
off the new editor, just click on Check it Out. And you can see
this is going to be our new editor from here. The first thing I'm
going to do is just click on BG remover. I'm going to wait for
a while. I'm going to go off over here too. Click on this photo edit. The photo, click on VG
Remover and we're going to wait for a while until the
ad like edit has been done. You can see removed
and also removed. Hope you learned everything
about this lesson. What you're going to do is after you're done
with all of this, make sure to take a
screenshot or maybe show us the PF and upload it on our project panel so that
we can see how you're progressing with work and
hope you learned everything. And thank you for
watching this video. In our next lesson,
just like I said, we're going to be using Adobe Illustrator for
our T shirt design. And we're going to
follow up a couple of stops and also we're
going to learn about it. Thank you for
watching this again.
8. Photo t-shirt design with adobe photoshop: Welcome to our new lesson of photo design T
shirt in Photoshop. In our previous
lessons, we used Canva. Now in this lesson,
we are going to be using Photoshop without
any further ado. Let's just hop on the lesson and open Photoshop on our device. On my screen, you can see that I have opened up
Adobe Photoshop. Now one thing you have
to keep in mind is that make sure to use
the newest version of Adobe Photoshop so that you get most functionality out of
it through every updates. Obviously, you will get
a lot of buck fixes. First thing we're
going to do is going to be clicking on New File. Now on New file, what
I'm gonna be doing is going to be clicking
on whatever size I need. Now you can see that
it has given me a size according to my resolution and I'm going to
be using it now. You can use CMYK RGB
color. That's up to you. But for now I'm going
to be using RGB color, and then I'm going
to do is use a bit. Now another thing
what I'm going to be doing is going to be
clicking on this over here. And make sure to use
black background. Now you can use whichever
color background you want, but I'm going to be using black color because
that is what I need. Now after I'm done
with everything, what I'm going to be
doing is clicking on, you can fix up the orientation and you can also
fix the iron board. Now what I'm going
to be doing is going to be clicking on Create. Now after I have created
this background, you can see that this
is how it looks like. Okay, Now another thing
you have to keep in mind is that first
thing I'm going to do is going to be going off. Last thing I'm
going to do is no. And I'm going to do is go off the windows and go
off the workspace. Now on workspace, make sure to use essential
defaults so that you get most functionality out of
it and you get like access to every tool Adobe
Photoshop has to offer. Now what I'm going to be doing is going to be clicking on File, and I'm going to
open up one file. So I'm going to do
is click on Open. Now with the lesson
or with the course, I have added in this resource
file where you will be able to use a lot of
resources which I've used. Now from here, what I'm going to do is going to be
finding out Grunge. You can see it over here. I'm going to click on
Grunge and click on Open. Now you can see that I will have my grunge background
open on my Artboard. Now, it's going to take a bit of time to open it up on my screen, and now you can see that I have this background over here. Now what I'm going
to be doing is going to be removing the white part. Now first first thing to
do is click on this over here and make sure to convert
it to normal layer first. Now as I have it
on normal layer, what I'm going to be
doing is going to be removing the white background, which I don't need. You can also remove the
background directly, which is also a new functionality
of Adobe Photoshop. Now you can background
and what is that? It will process up the photo and remove
the background for you. But if you do not have this removed background
option in your Photoshop, what you can do is click
on this file first, or click on the Layer, and
then go off to Effect. And then go off the Blending
option, which you can see, you can click on Effect and then click on Blending Option. Now from here, you can
see this over here called Current Layer and
Blend Mode is normal. Now click on this
arrow over here. Now double click on this part. Now you can see that the
background is now being removed while I drag it to
the left side over here. Now fix it up according
to your need, and you can also fix
the underlying layer according to your need. You can also fix up the
black parts if you want to. Now you can see that I
am keeping it somewhere around 193 because
that is perfect. So as it is done, I'm
going to press on. Okay. Now what I'm going to be doing next is that
changing this color. So for that reason I'm going to be doing is
clicking on Effects. And then what I'm
going to do is use the color overlay so that
I can make it white. So I'm going to click
on Color overlay and you will basically see
an RGB palette or, you know, this type of
interface will appear over up. Now you can fix, you
know, this opacity. First off, fix the
opacity in such a way so that it blends up
only on this part. And then what I'm going to
do is change the color. Now use whichever
color you want. For this lesson, I'm
going to be using white, so that I can make it white. Kama, press on. Oka'm,
going to press on, okay, and then fix
out this layer. There we go, we have it now. You can fix it up
according to your need. But first things first, before adding this white layer, what you're going to do is right click on it and then you're going to do is make sure
to rasterize the effect. Now you can see that I cannot
put rasters over here. Now if you want to rasterize and a specific effect,
right click on it. You can see this layer zero, and you can select
the specific subject. Now what you're
going to do is first off take this layer,
which you can see. I'm going to take this onto
my first page over here. There we go. And I'm going
to right click on it. And then you'll be able to convert it to a
smart object first. First off, convert it
to a smart object. Now you can see this
is how it looks like. And then right click
on it, and then you have to rasterize
the effect. Now you can also make
it into a clip art, but before that, just like
I said, rasterize later. Now when you
rasterize the effect, it will contain all
the resolution, which you can see over here, even when you extend
it or reduce the size. Now you can also customize
it according to your need. So I'm going to do is keep
it like this and press on. Okay. Because this
is the size I need. Now, after this has been added, what I'm going to be doing is removing this part because
I don't need it anymore. I'm going to press
on No, because I'm not going to
be saving it now. Next thing I'm going
to do is going to be clicking on
this over here. Go off the effect, Go
off the color overlay. And then I'm going to do is
change the color of this. Okay? And you will
basically see that only this color is now changing instead
of the background. So I'm going to do is
click on maybe white. There we go, we have
it. And press on. Okay, Now I'm going to do is make sure to fix the PCD too, so that I can see
how it actually is. Now you can see that I have
my background over here. Now if you want these
type of backgrounds, make sure to go over
to the Internet. You can see it over here. Now you can search
for ink roller. Okay, texture,
texture it on enter. And you'll basically see these type of images
will appear up, go off the images
and then you'll find out a lot of these images
which you can use. Then what you're going to do is going to be using a photo. I have also like, you know, downloaded a photo or use, which I'm going to be
using in this lesson. Now if you also want
those type of photos, you will be able to find it
online on specific websites. Now first thing I'm
going to do is click on File again and click on Open. Okay, Open. Now I'm going to do is make
sure to use this photo, which I'm going to be using, which is going to
be London Street. I'm going to press on open and you will basically
see that could not open because it is invalid
a Photoshop Okay document. So first thing I'm
going to do is click on open and then I'm going to
do is select the same file, click on open, you can see that the photo
has been applied. I'm going to do take
this photo for stuff, converting into a smart object or converting into
a normal layer. And then I'm going to apply
this photo over here and press on Control or press
on Alt to zoom out. And then you're going to
do is reduce the size of this so that we can use
it for all purpose. Now I'm going to
do zoom in again. There we go. I'm
going to do zoom out. I'm going to do is make sure to keep it and make sure to hold on the shift so that you get the exact size what you need. And then you're going to
do is try to keep it in such a way so that we can
use it on this background. Now one thing is
that we're going to use this photo on this, this layer, which is
the grunge background. Now if I want to apply
this effect on this one, what I'm going to be
doing is going to be clicking on this and
make sure to hover. Press on Control
or press on Alt. What I'm going to do is
first stop, delete this. You can see both of
them are over here. First thing I'm going to do is take this underneath, okay, And take this photo, which is over here,
to be over it. And then what you're
going to do next is you can hover
it if you want to. But another method is that
you can press on right click, You can see Create
Clipping Mask. Now press on Create
Clipping Mask. Now you can see this
is not visible. But how do you make it visible? As we already have
a color overlay, it's not visible,
so I'm going to do is click on this color overlay. And there you go. Our
photo is over here. So going to increase the size. We can see it over here. And then this is how
it will look like. So I'm going to just
click on this over here. I'm going to make sure to
keep it just the way it is. And this is basically, we have our elements and we're going to click
on both of them and control G. All we're going to do is make sure to use both
of them at the same time. We're going to merge the layers. And you can see our layers have been merged and this
is how it will look like. Then we're going to
do is going to be we can crop it up if I want to. You can also, you
know, customize it according to your need. Now as we have it, obviously we're going to
need to customize it, right? So the first thing
I'm going to be doing is going to
be clicking on, let's say we're going
to edit our text. So I'm going to click
on this text option, which is over here. Click on the text option and there we go, we have our text. So going to do is going
to be typing in over here and we can see
our text over here. So next thing I'm
going to do is find out whichever font I want to use for this specific lesson
or this specific design. Now what I'm going to do is
obviously I'm going to put in something like
London street and, or maybe London lifestyle. It's going to be
up to you. So I'm going to do is go down, let's find something
which is totally usable. I'm going to do is
go down a bit more. Let's see, I'm going to do is going to be if I can't
find it over here, I can also download funds from
the website or maybe from Adobe site so that
I can use it for various purposes and
also for my designs. Now from here I
feel like something like this is like good looking. So I'm going to do
is type in London. Creek. There we go. I'm going to click
on all of them. Control A, then I'm going to do is going to be
reducing the size. Came. Just click on this
over here and just put in 30 or maybe a click on
this text over here. I'm going to press on Control. You can see it over here. I'm going to select outside
control text on this. And we're going to
reduce the size. There we go. I just put
it right over here. You can see just how it is. And then I'm going
to do is going to be clicking on this text
over here again. And then I'm going to
do click on this text, which you can see over here. And then I'm going to
click on this text exactly whichever one I want. If you apply it in an extra one, you can obviously
try removing it whenever you want
to control this. Then I'm going to do is
going to be changing the color according to this one. Let's say this is
what I need press on. Okay, here we go. Then I'm going to be this, another text, which
we see over here. I'm going to do is delete this. Okay. I'm not going
to be needing this exact text which
I see over here. So I'm going to do is
going to be removing each and every text
which I see over here. After I'm done, I'm going
to press on this over here. What I'm going to be
doing is clicking on this text over here, Control and then delete. You can see it over here
that we do not need it. I'm going to do is keep it just the way it is I'm going to do is click on this text
over here, London Street. And then I'm going to do
is going to be putting in another text which is
going to be underneath it. I'm going to click
on Text over here, or maybe we can use that
exact one I'm going to do is press on control so that I
can drag from left to right. Then I'm going to be
increasing the size of it. And then I'm going to do
is click on this text, which you can see over here. Click on this text option. I'm going to click on Text. And then I'm going to do
is press on control Z. Then I'm going to put
in or edit the text, which I already have. Then after I'm done editing
the text over here, what I'm going to be doing is obviously customizing
a bit more. And at the end of the
lesson I'm going to be o, I'm going to customize the text. Or maybe let's say mocking up the exact
design on my T shirt. I'm going to click on this
over here, London Street. And then I'm going to do, is
going to be removing this. Let's see how it looks
like London streets. Let's say I'm going
to type in lifestyle, L, I, F, E, S, T, Y, L lifestyle. And then I'm going to
do is change the color. Make sure to use white this time or you can also use a
different type of font. If you want to just
click on this, then do use press on. Okay. And then I'm
going to do is going to be changing
how it looks like or changing a
different type of font if I want to, Sam, maybe this. Okay, there we go. We have it over here. Okay, I'm going
to do is going to be keeping this right over here. I'm going to press on
done and I'm going to remove this London
Text Lifestyle. And then I'm going
to do use this tool over here to select
different parts of it. What I can do is also select the parts which I need.
You can see it over here. Click on this tool over here. Move Tool, And then I'm
going to do is going to be pressing on control A or maybe keeping it at
the center so that I can actually keep
it however it is. You can see Center, there we go. Press on, okay, select
on outside, there we go. And then I'm going to
select on this again. As we're done with this, I'm
going to press on Control. And I'm going to click
on this over here. And obviously I'm also going to be putting it at the center. And then I'm going to click on later three, which is over here. And I'm also going
to be putting it at the center as possible. You can see the line over
here. There we go, we have it. And then I'm going to do
zoom out and then I'm going to do is apply a bit
of other effect. I'm going to click on File
again and I'm going to open up another one which is
going to be named Tape. I'm going to click on
tape, Press on open, and you can see it over here. What I can do is obviously
remove the background. You can also already see the background is
already removed. Even if it's not, what I can do is obviously remove
the background. However I want I'm going to
do is right click on it. You can see it over here as
this is already a photo, which you can see at an index. What I'm going to do is going
to be clicking on this and also I'm going to do is apply a bit of effect on this one. There we go. I'm going to
apply it right over here. You can see it will take a
bit of a time to process that photo and process that
tape graphic over here. You can also remove
it whenever you want. And even if it's not over here, what you can do is
obviously go back and try to apply it back again. I'm going to do is take
it on the first one, you can see it over
here and it's going to take a bit of a
time to be applied. Another thing what you
can do is click on file, and you can open a specific
object as a smart object, click on open a
smart object again, and find out the tape. And press on open. And there we go, we have it. Now what you can do is take this whole thing and remove the background if you want to. I'm going to click on the
background and you'll basically see the
time to process. Now another thing
what you can do is when you don't want to use it or don't want to use
remove background is that you can use
blending option, right? But another method is that using this brush
tool or select tool, first off click on this plus two and then select the part. There we go, it is done. I'm going to click on
this move tool, Zoom out. And then I'm going
to do is going to be taking this exact part, which you can see over here. And that is basically
what I need. So I'm going to do is
click on this part, and then I'm going
to do is remove the other parts which I need. Select the subject. Okay, we
will take a bit of a time. Select the part and remove the background
according to my need. And you can take this directly
to that specific page. And what you can do is go off the effect then blending option. And then what you're going to do is going to be clicking on Control and obviously remove
the other backgrounds. As you're done, press on okay. And then you can take this only and take it over
here. There we go. And then I'm going to
do hold on a shift and increase the size because
that is what I need. I'm going to press
on this over here. I'm going to do take this
over here and then hold onto the corners and rotate
it according to your need. I'm is going to be
pressing on control C, control V. Again, you can see that another
part has been done. Or you can also duplicate it. Just right click on it. I'm going to do,
press on okay first. And then you're going
to press on control C and control V. You can see
another one over here. I'm going to use rotate. This one too. You can also increase the
size if you want to. There we go. We
have it press on. Okay. Control V. There we
go. We have another one. Rotate it according to
your need. There we go. As that has been done,
I'm going to press on, I'm going to press on control C, control V again. There we go. We have the last one over
here, press on, okay. And we're done with
everything that I'm going to do is going to be
clicking on all of them. And you can see it over
here, all of the layers. Then what I'm going to
be doing is going to be clicking on this and
press on Control. You can see grouped up. Then what you can also do is
select all of them together. You can see it over
here. Right click on it and you can convert
it to a smart. There we go. Now we
have our design. Now the next thing I'm going
to be doing is going to be opening up our mock file. Now I'm going to press on
No and no over here, Okay? No. So first thing you're
going to do is if you do not have or if you want to use a different
type of mockup file, go off to a web browser, you can see it over here. And search for T
shirt mock up file. Hit on Enter, and
then you will find out free Pick.com Go over there and what you're going
to do is make sure to download a PSD file if
you want to use any one of those or else I'm
also going to be applying or giving
you markup file, which is already in
our resource file. You can also use it if you want to make sure to use a PSD file, because that is how
it will work better. If you want to
download any photos or use any resource on yourself, make sure to go off to Pills.com Excels.com It don't enter, and you can download whichever
photo you want to use. Okay? So you can use these. And I'm going to go off
to my Photoshop again. And then I'm going to
open up my PSD file. I'm going to click on Open. And then you'll have these
PSD files over here. And I'm going to do is going
to be clicking on this. And I'm going to wait
until it appears up. And as that has appeared up, what I'm going to do
is take this one and take it directly over here. I'm going to press on, okay? And you can see that my PSD
file, this is over here. And then I'm, it's going to be reducing the size
according to my need. Hold on the shift and apply
that design over here. And basically you are done. And if you still feel like it's not well fitted,
right click on it. And then what you're
going to do is obviously you have to
link it up over here. First off, you have
to convert it into a smart object and then
create it into clipping mask. Now as this is the
clipping mask, it will go out just like this. Then what you're
going to do next is go off to Effx again, go off to a blending option, and then find the
exact fit so that it actually looks good
on this exact box. Now you can fix up the opacity. Now if you don't want
to fix the opacity, just make sure to fix
it up just like this so that everything you can
see over here looks good. And you can see this
underlying layer, this current layer over here. You'll be able to
customize it too. And you can fix it into
whatever you want. You can see color burn. You can see linear burn. And basically it will give you the texture of this T shirt to and after it's
en, done, press on. Okay. And there you go. You have your T shirt design
mocked up on a T shirt. So hope you learn everything
about this lesson on how you'll be able to use a design, or let's say a
photo shirt design, by using Adobe Photoshop. So thank you for
watching this video. And now let's move on
to our next lesson, Photoshop, T Shirt design.
9. Rock band t-shirt design: Welcome back to another
lesson of T shirt design. In this lesson, we are going to be making a
design which is going to be a rock band shirt
design by using Photoshop. Without any further ado, let's just hop
onto the lesson by opening up Photoshop
on our device. You can see that I have
opened up Adobe Photoshop. So for this lesson
I'm going to be making a Rock Band
T shirt design. So for that reason I
have already, you know, applied or used a couple
of things or let's say I have already downloaded a
couple of resources now. You can also use those
resources whenever you want. And even if you want
something else, you can use it for
later purpose or, you know, you can also download
it from the web browser. So let's start off by
creating our new file. Let's, I'm going to click
on my new file and I'm going to be using the same
one which I have over here. And make sure to keep
the resolution 300 because this is not either
less or neither low. Okay? This is quite
a lot better, so I'm going to be
using 16 bit this time. Okay? And then I'm going
to do is obviously make sure to use a white background
so that I can see it. Now I'm going to
press on Create. And I'm going to
wait for a while until this has been done, and this is our previous one, so I'm going to press on Yes, and that has been saved. So the first thing I'm going
to be doing is going to be opening up the resources
from my resource file. Let's start off by
first off applying our square background where I'm going to be putting in
all of the details. First off, if you
want to make square, which you've seen over here, make sure the right
click on this part. And you can see this rectangle tool and that
I'm going to be doing is applying or making my
rectangle in this rectangle. All of the designs
are going to go in. So I'm going to do is
make sure to keep it somewhere like
this. There we go. And then I'm going to do
is going to be clicking on this move tool I'm
going to do is make sure to keep it at the
center. There we go. Next I'm going to do is
going to be applying a couple more of those
squares inside of it. I'm going to just click
on this over here. Make sure to click on the fill and use white. Not this one. Let's use black that I'm going to be
applying another layer. In this layer I'm going
to be doing is applying a couple more of
these triangles. There we go. This is one. Make sure to use white.
And then I'm going to do, is going to be clicking on this. Make sure to hold onto a and make a couple
of these copies. There we go. Then I'm going to do is going to be clicking on this copy over
here. There we go. Perfect. Make sure this
is perfectly aligned. Third one, make sure this is the same distance
and of the same height. There we go. Then I'm going to be doing is clicking
on each and every one of these. Click
on all of them. Right click. And then I'm going to be doing
is group them up. Control to press control. But then I'm going to increase the size and which is the middle I'm going to do is make sure to use a different color on this, but I'm going to
put that later on. Let's say on this group one, this is going to be inside back. Okay, let's say inside
back because this is the inside background
that I'm going to do is going to be applying
in another layer. Okay, in this layer I'm going to be doing is
putting in other effects. But first things first
I'm going to do is open up the images which
I'm going to be using. We have this drummer over here. I'm going to open that
up and I'm going to have over here I'm going
to click on file open. I'm going to do is
get the guitarist open and then I'm
going to do is use another one which is going to be the Singer tree for
the background. Open another one and I'm
going to do is fine. At the singer which
is over here open. Now I'm going to do
is select all of them one by one and apply
directly over here. But next thing next I'm going
to do is click on File. Okay. First thing I'm
going to do is going to be applying a different color
over here in side back. I'm going to do is make sure
to click on this over here. And that I'm going
to do is going to be keeping a different color. I'm going to select
on this tool over here and I'm going to do is going to be changing
a different color. I'm going to do use
a color overlay. When it opens up
I'm going to do is change the color of the
specific rectangle. So I'm going to do is
click on this over here. And make sure to
use maybe right. Okay, it looks quite good. Press on, okay, Press on. Okay, and then
you're good to go. What I'm going to
be doing is going to be applying the photos on each and every one of these
let's say rectangles. I First off, let's get
the drummer first to Now as I'm removing the back,
take a bit of the time. And after it has
taken a bit of time I'm going to do is taking
this directly over there. First thing I'm going
to do is take this, which you can see over here. And then I'm going
to do is going to be clicking on this and take it directly on this first
one. Press on Okay. And you can see this
is how it looks. I'm going to do reduce the size, obviously you hold on
a shift, there we go. Press control Z.
Hold on a shift, there we go, we have it. I'm going to do zoom in. I'm going to do is make
sure to put this over on. I'm going to press
control Z again. Make sure to hold it on a shift or it's going to be free sized. Then I'm going to do is going
to be right click on it. You can see it over here. Right click. Then you have
to rasterize the effect. First off, turn it into a
smart object convertiject. There we go. You can
see it over here. I'm going to just
take it over here. And then I'm going to just
take it around over here. You can see this is
how it looks like layer two. Right
click on it again. And then what we're
going to do is try to rasterize the effect. You can rasterize it
whenever you want to. You will basically
find it over here. Rasterize the layer. There we
go. It has been rasterized. I'm going to do is going
to be right clicking on it. You can see it over here. Click on Effects. Go off to, let's say, color overlay
or gradient overlay. It's going to be up to you
whichever one you want to use. And for that reason, I'm not
going to be using this one. I'm going to just
press on cancel. Instead of that, I'm going
to do use a color overlay. I'm going to use
color overlay and I'm going to do make it black. Okay? Now if it is black, it will
look a lot more better. I'm going to just click
on this over here, and I'm going to
just make it black. Press on. Okay, press
on. Okay, there we go. Looks a lot more
better. And then I'm going to do is
going to be increasing the size. There we go. I'm going to do is going to be clicking on this over here. And make sure to drag it
or put on all over here. And then I'm going to
use right click on it. And let's see I'm going to
do is create clipping mask. You can see this is
how it looks like. I'm going to remove
the color overlay. You can see this is
how it will look like. See, this is how it looks
like if it isn't visible. What you're going
to do is going to be clicking on control Z. I'm going to make sure
that all of them are visible. Control Z going to do is
layer two. Right click on it. I'm going to do is
release clipping mask. And then I'm going
to do, make sure this color is
perfectly over here. Okay, so I'll press on Done. Then I'm going to do is going to be as I'm done with the drum, I'm going to remove it. No, that I'm going to do is take another one. You
can see this over here. I'm I'm going to wait
until the bag moved. Then I'm going to be doing is putting it on the other one. Okay? It just works
a lot more better. And then I'm going
to do is going to keep it just the way it is. And then I'm going to do
right click on it and I'm going to do is convert
it into a smart object. But first thing we're
going to have to take it over on this title one. Then I'm going to
do is press on Yes. Then I'm going to
do zoom and hold on a shift and make sure
this is something like this over here does have look like Do
take it at the top. Do zoom in. There we go. I'm going to use
right click on it. We're going to first
off convert it into smart objects.
Right click on it. And then we're going
to use rasterize. The Lear, we're going to obviously apply in
the color overlay. I'm going to click on at
like style color overlay. Wait until it appears up
then what we're going to do is going to be obviously
changing the color into black. Press on. Okay, there we go. We're good to go do
reduce the size. Sure. Okay. First things
first I'm going to do is click on over
here, Color overlay. Click on this over here. And then I'm going
to make sure to put it something black,
just like this. Okay, I'm going to click
on this over here. That I'm going to do is
going to be clicking on the darkest one possible. There we go, Press on okay, and we are good to go. This is Reduce the size. There we go. Press on. Okay, we're done. I'm going to click on this other layer, which
we have over here. Click on Color Overlay
or click on Effects. Again, go to Color
Overlay and make sure to use a total black,
just like the other one. I'm going to just click
on this over here. I'm going to just make
sure to use all black. You can see this is the darkest one possible. This is dark. Press on, okay.
Okay, here we can. Then I'm going to just
obviously to increase the size. I'm going to use
right click on it. We can also crop
the specific layer. So I can go off to type Select and we can
find out other ones. You can see Select over here, and then we also have
image over here. We can also turn it into however we want I'm going to do is
click on this over here. And then I'm going to do
is going to be clicking on this one. There we go. We're done on, on the left one. And then I'm going
to do, is going to be clicking on the singer over here and then I'm
also in the background. And then I'm going to apply
the specific photo or the specific person on to
our first one titled One. There we go. I'm
going to paste it over here. It's on yes. And there we go, we have it. Then I'm going to do is going
to be holding on the shift. Make sure to hold on a shift
all the time. Do zoom in. First I'm going to do
is right click on it. I'm going to do is
convert it into a smart object. There we go. Right click on it. Size a Leer. I'm going to click on it again. Argo effects color overlay. Make sure to use black. After I use black, that I'm going to
do is going to be obviously applying in
a couple of effect. I'm going to just
click on over here. Make sure to use the darkest
one possible press on. Okay. Okay, Rico. Now we can also use
white on this one, but we're just going to keep it black just so that it matches
up with the other ones. There we go. Press on. Okay, here we have it. Now as we all have it, what we're going to do is
going to be clicking on, let's say I'm going
to do take this one. The other one which is
over here I'm going to do is make sure to increase
the size a bit more. I'm going to just
right click on it. Obviously we have
blending option, We can create clipping
mask if you want to. You can also increase the
graphics if you want to. I'm going to keep
it however it is. I'm going to click on
Create Clipping Mask. If it's not visible, we can just remove the effect to remove the color overlay
as it is over here. We can also do keep it
somewhere over here. Okay, so I'm going to do
is take it over here. We're going to do remove
or use it whenever we want or we can also
release the clipping mask. And what we're going to
do is going to be using this one underneath so that this is just a
bit more visible. Okay, I'm going to do is
click on this over here. I'm going to do is going to be right clicking on this one. Which I'm going to be, I'm going to click on this
and I'm going to do is take it under, there we go. We have it Looks a
lot more better. I'm going to keep
it however it is. As we have our design, what I'm going to be
doing is going to be clicking on
each and every one of them. Select all of them. There we go. All has been
selected. Not this one though. I'm going to select on this, I'm going to select one by one. Hold on the control layer four, rectangle inside layer
one, layer three. And the right click
on it. And we're going to convert a smart object. There we go. We
have it over here. We're going to do, keep it at
the center as we have this. What I'm going to be doing is going to be obviously applying in a couple of other
effects on the sides. There we go, we have it is going to be removing
the ones which we don't need. I'm going to do is
remove the ones. No, I'm obviously, there are a lot of effects
which I'm going to apply. The first thing which
I'm going to be applying is going to be these. We have these streetweregraphics which I'm going to be using. First off, let's start off
with this globe over here. You can see globe I'm going to do is also apply the other ones. I'm going to open
the other designs, you can see street bar graphics. We're going to also be using any one of those first things. First I'm going to do
is go over here and then I'm going to do is going
to be taking this globe. Okay. First off, let's just
take this globe over here. I'm going to do Apply It Person. Yes, you can see it over here. That I'm going to
do is going to be clicking on this
blending option. And click on Color Overlay. And then I'm going to
do is use white on it. Okay, so I'm going to
click on this over here and I'm going to do
use white person. Okay, We're good to go. And then I'm going
to just take it. In the middle. Let's, I'm going to do is use it over here. And then I'm going to
just right click on it. And then I'm going to do
is convert to object. You can see it over here. Now it looks a lot more better. Just make sure to
use it as a graphic. We can also use
it underneath it. Okay. We can also use
it underneath it. So I'm going to do is hold
on a shift control Z. Hold on a shift, just like that. We can keep it over
here if you want to, like totally underneath, reduce, increase the size. There we go. Keeping it at the center. I'm going to use right click on it and then I'm going
to use rasterize, the layer, there we go. And then underneath it, this is how it will look like. You can see this is
how it is looking. Like you can use it
whenever you want, but if you don't want to use it, you can obviously
use the smaller one. And keep it as a
logo or a design for this design,
keep it over here. I'm going to take
this at the top. There we go. Keep it over here. And also make sure to
use it in the line. Some is going to be making
a couple of copies of this control D hold again. I'm going to make sure to use this one select on all of them. I'm going to convert
it into smart objects. There we go, we
have it. I'm going to do is going to be
clicking on the other one, as we don't need the globe
anymore. Press on No. Then I'm going to do is
use any one of those. First, click on
any one of these. First off, I'm going to
convert to normal layer. I'm going to select
any specific parts. I'm going to do is going to
be clicking on Background. And then I'm going
to do selecting specific parts which I need. Let's sing to use this. If it doesn't work that bad, I'm going to do is
click on control Z. And then I'm going to do
is select a specific part. Which I need to do is going
to be using only this part. Which I need over
here some to be. Let's just click on this. Over here I'm going to do is make sure to
reduce the size. There we go, I'm going
to do is make sure to select on the ones I
need. There we go. Control C, Control V. I'm going to take it
over on this one. Yes, this is what I need. Hold on a shift. I'm going to keep it over here. I'm going to take
this color over here. I'm going to do is select
on this globe over here. And make sure to
reduce it just a bit. There we go. Press on, okay. I'm going to just click
on this one over here. I'm going to do zoom in. I'm going to do is make
more copies of it. First off I'm going to
do is change the color into red color overlay. I'm going to change it
on how better it looks. I'm going to use not white, we can also use
white if I want to, but for now I'm
going to be doing, going to be clicking on,
let's say, first off, let's just click on this over here and make
sure to use this. There we go. Press on, okay. Okay, there we go. We are done with this part. Control C control. Use
another one over here. Wing is going to be
keeping it just the way it is over on this part. This time I'm going to do
is click on Color Overlay. Click on Color
Overlay over here, which is going to be layer five. Then I'm going to do is going to be changing the color a bit. Let's, I'm going to do make
it a bit lighter person. Okay. And we're good to go. Okay, we're done on this part,
which is the bottom part. And then I'm going
to do is going to be applying the text on
this and these sides. First things first
I'm going to do is select on each and every one. You can see it over here. Layer three I'm going to do
is right click on it and I'm going to do convert
it into a smart object. First, there we go. We have our design done. Then I'm going to be obviously applying
the name of the band. Let's click on text. Horizontal click
on this over here. And then I'm going
to do is going to be changing how it looks like. Okay, let's say I'm going
to find something which actually looks good or will
look good with this photo. I'm going to use this, let's say Rock of ages. Then I'm going to change
the color, obviously. I'm going to change it
to maybe white person. Okay, To select on all of them. Control A, then I'm going
to change the color. Okay, we're good to go. I'm going to select
this move tool, then I'm going to paste
it at the center. Du increase the size. Let Samad 24. Okay, 24 is a bit too much. Sam is 19, maybe 20. Hit on Enter, let's
just type in 19. Okay, hit Enter. There
we go, we have it. Then I'm going to do also
apply a couple of other text. Click on Text option again. And then I'm going to do,
is going to be clicking on over here Rock. I'm going to click on this
and make sure to use a bit. Let's say 15 done. I'm going to click on this move tool I'm going
to do is rotate it. Control Z. I'm, let's try to rotate it 90 degrees. I'm going to do is click
on this text option again. And then I'm going
to do is hold on a shift and reduce the size. There we go. Click on this, move to, then I'm going
to click on this, not 17. Let's try 15. Let's try 13. There we go. Let's try 12. I'm going to do zoom in. Okay, let's keep ten and
see how it looks like ten. Here we go. Okay, it
looks a lot more better. So I'm going to be doing is
using ten on both sides. I do control C, control V, do put this
over on this side too ago aligned. And then I'm going
to do is going to be clicking on each and
every one of them. Also the rectangle because as
we're done with all of it, and then right click on this and convert it
into a smart object. Basically our design is done. Then I'm going to do is going
to be removing this part, which I don't need anymore. And then I'm going to do is
open up my PSDfile so that I can mock up it into
a T shirt design. I'm going to do is take
this black press on open. There we go. We have
it. I'm obviously remove this part because
I don't need it anymore. So I'm going to do
is take this design and paste it right
over here. Person. Yes, Person. Okay, and you can
see it over here. Hold on to Shift, keep it
over here. There we go. Right click on it. I'm going to use Create Clipping
Mask, there we go. And then I'm going
to do is go off to effects and go off
to blending option. And then I'm going to do is
obviously use linear burn because it just makes it look like it's basically
on a T shirt. I'm going to use linear burn,
you can see it over here. Then I'm going to do reduce
the transparency just a bit. And I'm going to fill
opacity just a bit. And also somewhat like this, we can also apply
whichever effect you want. There we go. Press on. Okay, there we go. We have our T shirt
and also our design. Hope you understood
everything about this lesson on how
you will be able to make a Rock Band T shirt
by using Adobe Photoshop. If you have any
questions about it, make sure to ask me and I will guide you through
the whole process. Let's move on to our next lesson of T shirt design in Adobe.
10. Combined images t-shirt design: Welcome to our another
lesson of T shirt design. In this lesson, we are
going to be combining images to make T shirt
design in Adobe Photoshop. Without any further ado, Let's just hop onto
the lesson by opening up Adobe Photoshop
on our device. From my screen,
you can see that I have opened up Adobe Photoshop. Now the first thing what
I'm going to be doing is obviously opening
up a new file. I'm going to click on this
new file option over here. And then I'm going to
do is make sure to use the same option over here, but I'm going to do is make sure to use a different
custom design over here. And make sure to click on
Resolution and keep it 300. And you can also use eight bit or 16 bit. That's
also up to you. First things first, I'm
going to click on Creates. I'm going to wait until
it has appeared up, and this is the
one which I need. The next thing what I'm going
to be doing is going to be, obviously, just like I said, we're going to be applying images or combining images
to make up a design. First things first
I'm going to do is click on File and
open up the images. First, click on Open,
and there we go. The first design, which I'm
going to be the first photo, is going to be this
one open. You can do. This is the photo I'm going to do is open
up the other ones, two at the same time. I'm going to do is go down. What I'm going to do is use
this and this and this. Hit on open. We have four
photos at the same time. We're going to be
using all of them. Now, where do you think
like I get them from? Obviously, these are from the same website, just
like I showed you, Pig Sales.com You can
also use unsplash if you are more familiar
to it and if you feel like you will be able
to get more resources, or if you cannot get the
resources from let's say pig sales, try using splash. That is also a very good site. Now the first thing I'm going to be doing is going
to be obviously making a rectangle or you know, let's say a space
or an area where I'm going to be
putting in my details. So first thing I'm
going to do is click on this rectangle
option over here. And then I'm going
to do is going to be making in my rectangle which is going to be over there we go. Increase the size of a bit more. This is the rectangle which every details are
going to go inside of it. And then I'm going to do
is fill it up with white. There we go, as we
already have white. What I'm going to be doing is later I'm going to change it, but let's just keep
it like this for now. As we have rectangle one, I'm going to do add
another layer in another layer I'm
going to do start putting in my details. Let's start off with this image which I'm
going to be using. First things first, I'm
going to run around. Now over this photo I'm going
to apply a lot of images. Okay, First things first I'm going to do is
click on Move tool. I'm going to do take this. First off, let's just convert
it into a smart object. If we can convert a smart object, you
can see it like this. And then I'm going to take
it over on this pattern. I'm going to do zoom out, hold on a shift, there we go, we have it zoom in. I'm going to be right
clicking on it. And that Mu is going
to be obviously rasterizing the
effect so that it doesn't lose any details that I do go after
rectangle over here. And that is going to
be keeping it somewhat a there we go, we are done. Then I'm going to do is
going to be right clicking on this and I'm going to
use Create clipping mask. I'm going to keep it over on the rectangle, not on the layer. I'm going to remove this layer. You can see this is
how it will look like. I'm going to use mask. You can see this is
how it will look. I'm going to take
this rectangle. I'm going to keep it at the center so that it
just looks a lot better. There we go, Increase the size maybe a bit
so that we can see it. This is how it will look
like. I'm going to press on. Okay. That I'm going
to do is going to be also applying the other photos which I'm
going to be using. I'm going to press on that I'm going to do is
go off to lightning, and we're going to use
this lightning over here. Now you can also go
off to select and select all whichever
part you want to use. First thing I'm going to do
is take it to a normal layer. First you can see that we
have our normal layer. And then I'm going to do is
take it directly over to our untitled page and
keep it over here. Zoom out, and then
I'm going to do hold on the shift and
make sure that this looks a lot more
better and I'm going to increase the size
a bit more. Zoom in. Then I'm going to
do is going to be right clicking on it and go off to effect
blending option. Then obviously I'm going to also create a clipping mask
on this rectangle. To first things
first I'm going to do is try seeing
how it looks like. You can see this is
how it will look like. I'm going to multiply color
burn, whichever one you want, basically lets maybe multiply
which looks really good, due fix the opacity. I'm going to press on, okay? And this is how it
will look like. Then I'm going to
just right click on it and create the clopping mask. And it is also on this
rectangle so that I can use it on like layers or
maybe various places. This is it Then I'm going to do is going to be clicking
on this over here. And you can also, let's say you can select
whichever part you want. You can use it for
various purposes. It can go off to images, and you can try trimming it up. And you can see this has
been trimmed out. Press on. Okay. And then I'm going
to do is going to be using only this part
which I need. This is it. And then I'm going
to do is going to be applying in a bit
of other effect. I'm going to do is, as we're done with
this lightning, let's try removing it. Press on. No, then let's
try a bit of these, These roots I'm going to do convert it into a normal layer. To convert to the normal layer. I'm going to take it on
this part. There we go. Then I'm going to do is going
to be taking it at the top. I'm going to do, first off
release the clipping mask. I'm going to do zoom out
and then I'm going to do, first off, keep it like this. And I'm going to do
take it over here. Then first off, let's just
see how just basically looks like I'm going to do is right click on it and create
the clipping mask. Can see this is how we look. But first things first
I'm going to do is click on Effects Blending option. And then I'm going
to do is reduce the transparency of this so that it just looks
a lot more better. Okay, I'm going to do
is click on Opacity. I'm going to keep it
under this layer. Okay? First things first I'm going to do is
press on Cancel. I'm going to take it at
the bottom, over here. Okay. And then I'm going to be keeping it
maybe at the top of this. Then we can also do is
click on, let's say Select. I'm going to do, first off
I'm going to click on this, or maybe click on Eraser. I'm going to select on the
parts which I want to remove. Let Sad is going to be
clicking on this size, which you can see over here. And the hardness, I want
it to be a bit lighter. Lemina maybe use the parts
which I'm going to be using. This is the part which I
basically need. There we go. As we have it I'm going
to do is click on this move tool and I'm
going to click on Effects. Click on Blending option, and then I'm going to
do is blend it up a bit so that it just
looks a lot more better. I'm going to be clicking
on this over here, multiply or darken. It's
going to be up to you. Let's just use this. Let's just first off fix the
transparency a bit. Maybe first I'm going
to do cancel this part, just person control
Z so that I can keep the obesity just how
it was previously, even if you don't
want to use it. Make sure to keep this control
person control Z again. There we go. Then I'm
going to take it. At the top of this photo I'm going to
do is click on Effects. Click on, let's say Blending option as we I'm going to do is fixing
the blending option I'm going to do is
fixing the opacity. Just a little bit. And then Mag is
going to be clicking on whatever effect
I want to use. What Mag is going to be using, maybe something like this, or maybe multiply it
somewhat like this. There we go, Press on Okay. Whichever effect
you want to apply, you're going to fix
the current layer, or maybe the underlying layer, which you can see over here. Let's not use that, but
let's just use this just a bit curse on. Okay, there we go. We have our design. We can also take it at the
bottom or at the top. It's like totally up to you. It just looks very
sick right now, I'm going to do zoom out now. Let's see how it looks
like if you don't like it, let's take the eraser. And I'm going to do
is just remove this. Part of the eye is going
to be removing this part. Just remove this so that only the eye looks like,
you know it's the eye. So I'm going to do is
just remove the parts, the ones which I don't need. There we go. There you
go. We're done on this. What I'm going to be doing next is going to be pressing on, okay, we're done on this one. Click on this smooth tool. Now just maybe apply this
hands over here too, because this just
looks a bit of empty. Remove the bound here
it is, being removed. Now what I'm going to
be doing is going to be obviously turn this into a smart objects that
we're going to take this over on this part,
you can see it. I'm going to keep it at the bottom so that it just
looks a lot more better. I'm going to be at the top. Let's see, I'm going to
take it somewhat like this. I'm going to rotate it, let's just keep it
how it was over here. I'm going to do
increase the size. I'm going to just click
on this tool over here. And then is going to
be clicking on, okay, remove this hand over here and keep the other part
I'm going to do, click on this one over here, or maybe at the top. Let's just keep it over here. And then I'm going to do, is going to be right
clicking on this. And I'm going to fix on Effects. Click on Effect over here. And then I'm going
to increase it. Okay, increase whatever it is. I'm going to go off
to blending option. For blending option, I'm going to fix the way it looks like. I'm going to do, going to be
click on Current Layer and I'm going to remove
a couple of parts. I'm going to use underlying
layer to be like this fixed. I'm going to do is
going to be fill pity I'm going to fix it up and I'm going to
do is make sure to use whichever effect
I want to use. What I'm going to do is maybe
use the back over here. Take the hands over
there at the back, we're done, and press on. Whichever effect you
want to apply, press on. Okay. And I'm going to do is going to be
clicking on this layer. Click on Effect, click
on Blending option. And then I'm going
to do is going to be making it look a
lot more better. Okay, I'm going to
do is go off to fill pit cheap it this way. Just fix out a bit of this part. Here we go. A bit of
highlights. Press on, okay. And then I'm going to do is click on the Lightning,
which is over here. Click on Effects. Go
off to Blending option, And then I'm also going to
be applying a bit more. Let's just see how much
we can apply to it. Just it's a bit more
visible over here. Maybe I'm going to just
keep it just like this, an underlying layer to be
over here, multiply it, fix in the transparency, fill asit to be a bit
somewhat like this. I'm going to do, maybe you can drop a shadow if you want to, but if you don't want
to just press on. Okay. And then I'm going to do, is going to be taking this
over here. There we go. As we're done, what I'm
going to be doing is obviously apply in the
text for this design. I'm going to do is first off, let's click on this text option. First, let's just say I'm
going to click on all of them. I'm going to click on Text over here and I'm going to do type in haunted dot click on this text over here and take it on this. Do is make sure to put a copy if it's in. Sure. Z, M juice,
adding another layer. Juice. Put in the text, Haunted. Click on this move tool, make more copies of this. There we go. I'm going to do is take this first
text over here. I'm going to select
on all of them. The first thing I'm going
to do is going to be keeping them on the left side. Let's align them over
on the left side. I'm going to do find
out where we're going to do is keep them on the left or let's
say at the center. There we go. We are done on
the first one, Let's see. Take this, I'm going
to select this text. I'm going to just make sure
to put in white, okay. As this is now at the
center. Person control Z. You're going to see the first
text which is over here. And then I'm going
to do is going to be keeping it just the way it is, control all of them. And then I'm going to select on this move tool and make sure
to keep it at the sender. We're done. And then I'm going
to select on all of these layers rectangle, I click on it. That I'm going to do is let's say convert to smart object. There we go, we are done. That I'm going to do is going
to be removing this part. No. Then I'm going to
do is click on File. I'm going to open up my PSD file and let's see how it looks like. I'm going to put it on a
white or black T shirt first. This time you can
see this is black. I'm going to take this
design and put it over here. Press on Ok. There we go. We have its Reduce the
size. Hold on a shift. Put it over here. Duce,
right click on its. I'm going to do is
create clipping mask. I do, right click on its
and we're going to do is go off to effect
blending option. Then what I'm going to
be doing is going to be obviously fixing it in such a way so that it just
looks a lot more better. Let's try linear burn
or darker color. It's all up to you whichever
effect you want to use. You can see screen, you
can see linear dodge. Just make sure to
fiddle through each and every one and use
whichever one you feel like it's looking good and it can obviously apply
in a lot more effect. You can see like luminosity, it just looks gray. And it can also keep it just
the way it is a person. Okay, now another thing
what you can do over here is that you can apply in a bit of effect. So go off to filter. What I'm going to do is click on others to filter gallery. I'm going to go off
to filter gallery and maybe apply a bit of
grains on this one. So this just looks a bit better. Do zoom out first. I'm zoom out a bit more. Now let's find out
where the grains are. So I'm going to do, let's
say I'm going to first off go to this tort or may be sketch sketch like this tort
to do maybe stylize texture. Okay, here we go. We have
our grain filter over here. I'm going to do is
fixing the intensity, maybe a bit less or
maybe a bit low. It's going to be up to you,
we can fix in the contrast. Can see this is the contrast
being reduced or increased. There we go, looks
a lot more better. Going to use intensity
to be a lot less. Also you can increase it. You can also use whichever
ones you feel like. You will see that it looks
just a lot more better. I'm going to use
grains over here and you can also fix what
type of grain you want. You can see soft clumped
there is enlarged, there is horizontal, and
there's also vertical, which you can use,
and also speckle. You can see. This also looks
quite good and artistic. You can use it if you want to. After you're done,
I actually like it. I'm going to press
on intensity and increase this a bit
and press on, okay. And you can see this is
how it will look like. I'm going to just take
this or remove this part. I take it over on this
design or this T shirt, and you can see this is
how it will look like. Press on. Okay,
keep it over here. Just remove this first. You can see this is
how it will look like. Okay. This will turn temporarily
into something else if I apply or keep it that way. Can see. Okay. So first thing I'm going to do is going to
be keeping it over here. And I'm going to do is increase this design or increase the
T shirt a bit more the size. Our first things first, mas turn this into a smart object, right click on its, convert it into a smart
object. There we go. Now we can apply the
effect however we want. Lets remove this, delete. We can apply this directly
over on this one. There we go. Press on, Okay, here we go. We have our design
hated at the top. There we go. Perfectly placed, click on it, Create
clipping mask. There we go. And
then we're going to also go off to Effects. And then fix in the
blending options so that it looks a
lot more better. That I'm going to do is
going to be clicking on, let's say we can use linear burn or whichever effect
you want to use. This color also looks a
lot better, this effect. And you can see this is
how it will look like. Then you can click on both of
them and merge it together. Hope you learned everything
about this lesson on how you will be able to use multiple images are
combined images together to make a T shirt
design and Adobe Photoshop. If you have any confusion of
which part or what I did, you know, if you
have any questions, feel free to ask me anything. And I will guide you through the whole process and
also help you to, you know, progress on
with these designs. Okay, so thank you for
watching this video again. And now let's move on to our next lesson where we
are going to learn about how we can make a Christmas T shirt design and
Adobe Photoshop.
11. Graffiti text t-shirt design: Welcome to an adolescent
of our course. In this lesson, we are going to learn about how we can make a graffiti text shirt design in Photoshop without
any further ado. Let's open up Adobe
Photoshop on our device. On the screen you can see that I have opened up Adobe Photoshop. Now the first thing
I'm going to be doing is I have applied, or let's say I have downloaded a couple of resources
which you can use in your work or when
you're learning this. Okay, I will be applying or giving that in
our resource file. So I'm going to do is
click on new file. I'm going to do is first off, make sure to open up a
new file, which I need. What I'm going to do is maybe somewhere around over here.
I'm going to use this. And then I'm going to
do is press on Create. Now I'm going to do is keep a default according to
my previous lessons, which is going to be 300
PPI and all of them. Now the first thing I'm going
to do is click on File. And I'm going to do
is click on Open. And then I'm going to open up the graffiti type of elements. Let's say this one I'm going to do is going
to be going down, let's say this one and this one. I'm going to go down a bit more. Hold onto control whenever
you're selecting it. This is basically
going to be it. Okay. Then I'm going to do is
press on open and all of them will be opened up
all at the same time. You can see 12345 and the first one is
just basically blank. Now the thing which
I'm going to do is I'm going to use a couple
of these elements, which you can see
from over here. Then I'm going to use
graffiti alphabets. You can see it over here,
then these elements or these texts, if
I want to use them. And then there we also
have the graffiti elements which I can use to make my graffiti look a
lot more better. I'm going to do is
let's say on my design, I want all of it on a specific, let's say paint or
graffiti type of effect. So I'm going to go off
to my web browser. You can see it over here. Then I'm do is going
to be searching for graffiti, paint texture. Hit on enter. Then I'm
going to go off to image. You can see this is
going to be my image. And I'm going to
do apply a couple of these effects
which I can see. I'm going to do is
download a couple of them. Whichever one I want, you can see this and
I can also use this. Select whichever you
can see over from here. What I'm going to do is find out something which
is a bit bigger, but obviously which
also looks good. So what I'm going to do is
use this, which I can use. I'm going to right click on it. Save Image that I'm going to do is going to be
saving it over here. There we go. Saved, I'm
going to do is cut this. And I'm going to open that up. Right now, I'm going
to click on File. I'm going to go down, and there we have it. So I'm going to click on this
file and then press open. Now after we have opened
up this exact texture, the thing I'm going to do is going to be right
clicking on its. First off, I'm going
to convert it into a normal layer so you can
see into a normal layer. And that I'm going to do
is remove the process. If you've seen my
previous lesson, you already know how to
remove the background. Either you can select on Remove Background or you
can just go off to Effects and then you know change it first things first I'm
going to do is going to be, let's say now what
I'm going to be doing is clicking on Effects
Blending option. And then I'm going to
do is remove this part. You can see it over here.
This is the effect that I need that I'm going to
do is press on, okay. I'm going to do is convert it into a smart object so that I can take it over to that
layer convert object. I'm going to take it
at the beginning. I'm going to do take this over here or will
Sema press on that. I'm is going to be increasing the size of the
way it looks like. You can see it over here. Then obviously I'm going to
do is going to be making a rectangle which is
going to be our outline. The first thing I'm going
to do is going to be clicking on this slover here. And then I'm going to
do is make the base, or let's say make
the background. This is going to
be our background. I'm going to do, make
sure to keep it this way. And then I'm going to
do is going to be using it to fill it up
and make it black. Instead of that I'm
going to try in white. You can see it over
here. This is how it looks like a move tool. I'm going to keep
it at the center. Okay, let's just
keep it this way. And then I'm going to
take this at the top, and you can see it over here. Then I'm going to
right click on it. Or you can right click
on this one and create a clipping mask
so that I can use it for various purposes
whenever I want. And also I'm going to
just reduce the size. I'm going to make sure
to keep it inside. As you can see that I have
this element over here. What I'm going to be
doing next is going to be keeping it as clipping mask. Then I'm going to do is
going to be going off. Okay, let's just first
remove this one. Press on. No. And then I'm going
to do is going to be clicking on the
parts which I need. The first thing which I
need is going to be a B. As I've already selected. I'm going to do is
going to be taking this on this first page. This page over here I'm going
to do is right click on it. And I'm going to do is click on, let's say convert
to smart object. Okay? You can see it here. Then I'm going to do is
going to be zooming out. And then I'm going
to do is hold on to shift and then I'm going
to do is zoom in again. You can see it over here. I'm going to do is go down. I'm going to do is click
over here. There we go. We, I'm going to go off to, let's say other
elements over here. I'm going to select
on the other part. I'm going to do, click on this plus select this part over here. There we go. So you can
see this is the B which I need. There we go. To do is remove these parts, which I do not need. Okay, this is the first
layer I'm going to do is select on this plus
again, there we go. We have it selected. I'm
going to select the parts to, you can see it from over here. I'm going to do is
click on these parts. If it is selected Holes
I'm going to do is press on control Z. Remove the first layer I'm going to do is
convert to normal Er. First I'm going to do is going to be clicking
on this plus again. And then I'm going to select
on B over here. There we go. We have it selected.
As I have it selected, I'm going to do is remove the parts which are in the middle. You can see it over here before. I'm going to click on
Plus again, there we go. I'm going to do is remove this. There we go. To
remove these parts to, here we go, we have it. Seven is going to be
pressing on control C and control V. Click
on this move too. And then I'm going to just
take this over on this one, you can see I'm going
to just press on. Yes, can see it over here. Or we can also take it over
on this one. Press on Yes. There we go. I'm going
to hold on to shift. Going to remove this part. Press on No, I'm going to do is going to be
clicking on Shift again. And then we're sizing it to do is going to be
clicking on Okay. And then I'm going to
click on this layer. I'm going to go off to
Graffiti Element again. I'm going to do is
select on R Delete. Click on this plus
tool over here. Here we go. I'm going to do is make sure to select this size over here. There we go. So here we go. We have
selected this part. As I've selected that part, I'm going to do is going
to be clicking on, let's say I'm going to do
is select on this move to, I can take it directly, or I can also keep it this way. I'm going to do on R, I'm going to hold on a
shift R, there we go. I'm going to keep this at
the top to hold on to O, which is over here. I'm also going to keep
that at the R. I'm like reduce the size BRO. Then I'm going to do is going to be clicking on
each one of these. I'm going to do is layer
one is this one I'm going to do is select
on this and I'm going to do is group them up. I'm going to do is control go. Then I'm going to do
is going to be R O and then I'm going to go off to a. You select on this one is
click on this sign over here. We're not going to
be needing that. Do is going to be
reducing the size. And click on plus. Go select Selected. This part has been selected. Two I'm going to do is click
on this part over here. Then I'm going to
do is going to be reducing the size a bit more. Clicking on Plus so that I can remove the part which is inside. Over here I'm going
to do is control. I'm going to do is take
this part on this untitled two, there we go. Then I'm going to do take in D. Click on this
plus sign over here, and I'm going to
select this part. I'm going to select
on this first, and then I'm going to select
this area. Select this part. And then I'm going to do press
on control C and control V. Click on this and I'm going
to do take it over here. I'm going to take this
six and layer five. Hold on a shift. Click on six, it is rotated a bit. There we go, broad. I'm going to select
on all of them. Right click I'm going to do is turn it into a smart object B. Then I'm going to do
is put in broad way. I'm going to do
is click on A and Y. I'm going to do is going to be clicking
on this plus again, I'm going to do select On, there we go, Selected. I'm going to do Reduce or remove a couple of parts
which I do not need. I'm going to do click
on these parts. You can see this is
now perfectly done. I'm going to click on
this minus over here. I'm going to select
on this part. There we go. I'm going to do is click on
this one over here. I'm going to press on
control C and control V. Do the same process until all
of our text has been done. Hold on a shift W, there we go. I'm going to do is A and then
Y I'm going to do is click on over here I'm going to do
is go off to alphabet again. I'm going to do is A. First off, let's just click on Y and select this one over here. You can see this is how to look like I'm going to do is
click on these parts. Here we go. Then I'm
going to click on Minus. And then I'm going to reduce the part which I do not need. You can see this is
done, control V, take it over to that part
over here, can see y. This is going to
be a bit bigger. I'm going to do is go
off to the last one which is going to be A. I'm
going to go at the top. I'm going to select
on this plus again, which is O plus. There we go. As we're done, I'm going to just
click on minus. And then I'm going to remove this part I'm going
to do is control C, control V, click on move tool and then
I'm going to do take it over on this part. There we go. I'm going
to click on four. I'm going to do is
right click on it. I'm going to convert it
into a smart object. I'm going to do is click on, over here, convert
smart objects. I'm going to click, or
let's say click on Effects. Let's go off and add in a bit of color overlay or maybe whatever
effect you want to apply. I'm going to do is go off
to color overlay first. And then I'm going
to do is fix in the opacity I'm going to do
is apply in a bit of red. 46 is perfect person. Okay, I'm going to do is
go off to blending option. First you can see this over here I'm going to do is make sure to apply and a bit of effect
over on this part. Let's, I'm going to do is
keep it however it is, okay. Let's just keep it this way. Do is make sure to
press on, okay, look like I'm going
to just click on it or go off to Effects first. And then after I put on
Effects, I'm going to do, start off applying in a
bit of color overlay. Because this just needs to
look a lot more better, right? To keep it this way,
I'm going to press on. Okay. I'm going to do is to the first one to
you can see this is the one person effects color overlay that I'm
going to use. Person. Okay. All is done that I'm going to do is apply or select
all of these parts. You can see over here 34.5 Click on it
and convert object. There we go. This has been done. I'm going to do is going to
be taking this at the bottom. Okay, let's just try
taking this at the bottom. Or you can also
keep it this way. And I can also see this one. I'm going to click on it
or go off the effect, I'm going to go off
the color overlay. Then I'm going to
do is going to be applying in a bit
of different color. I'm going to do is maybe used
somewhere around over here. Press on. Okay. Then I'm going to do is go
off the contour. You can see this is
how it looks like. This is change the color. You can see I'm going to do is make sure
to put in a bit of blue. Okay, percent, okay, broad. And then I'm going to do is do the same thing over on this one. Click on Effects I'm
going to do is click on Blending Option I'm going to do is obviously put in a
bit of gradient overlay. Or you can use
whichever one you want. Let's say I need a
bit of texture on this one I'm going to do
is fix the texture first. You can see this is
how it looks like. Now if the texture
doesn't look good, what I'm going to do is also fixing a bit of a
different type of texture. Let's say I want a bit
of this 12 over here. I'm going to do is make
sure to decrease it a bit, fix the opacity, and then check
whichever one looks good, this one looks really good. I'm going to click
on this over here. I'm going to do is
make sure to effect it up just like this
Broadway press on. Okay. Then I'm going to do, is going to be applying in whatever type of other
effects that I need to use. I'm going to press on. No, you can see
this has been done. I'm going to select
on both of them. Right click I'm going
to do is convert to smart objects. There we go. I'm going to go on
click on Effect. I'm going to do is click on Blending option if you want to. You can also apply
whatever type of effect I'm going to do
is drop a bit of shadow. Can see this is
how it looks like. Can see this is how it
is I'm going to do. Make sure to use it just
like this spread to be a bit more juice fix the size of bits and then I'm juice
is going to be clicking on the Opacity press on. Okay. And then we're good to go, we have our effect over here. I'm going to do right.
Click on this too. And I'm going to click on Create Clipping Mask so that
I cannot take this out of this is this rectangle is going to be increasing
the size a bit more. Can see our graffiti text
has been applied, press on. Then I'm going to do apply in
a bit of effect over here. First things first
I'm going to do is take one of these
elements over here. I'm going to select on this. And then I'm going to
do is use this part, this arrow over here, select on this arrow, which looks really good. Here we go. Then I'm going to
do is going to be clicking on control C and control V. Do is click on
this move tool, Do. Take it on untitled two. I'm going to do,
keep it this way, I'm going to do click on this. Then I'm going to
do is going to be clicking on Create,
Clipping Mask. I'm going to do take this
at the top, hold on a ship. This is rotated a bit more. Then I'm going to do is going to be right clicking on this. And then I'm going to do
is click on Effects first. First off, let's
rasterize the effect. If it just looks a
lot more better. Let's say object, right
click on this rasterize, the layer looks a
lot more better. I'm going to do is
going to be right click on this, click on Effects. Let's go off the
blending option and let's try a bit of effect. Devil Emboss if you want to, or maybe contour or let's say to add a bit off
texture if you want to. Let's maybe a bit of stroke. Let's say this
looks a lot better. Just click on stroke. Just fix the size I'm going to do is click
on this over here. Fix the size. There we go. Make sure to fix in the like I'm going to do is maybe
use this color over here. Press on. Okay. Or maybe let's
just use black. Press on. Okay. And then I'm going to do, is going to be used
whichever one you want. Let Sam is put in a
bit of outer glow. I'm going to press
on. Okay. There we go. We have it Broadway. Then I can also use another, Let Sam use another one I'm going to do is click
on this over here. And then I'm going
to do is apply this one. Okay, there we go. Control C and control V. Click on this move and then I'm going to
just take it on untitled. There we go on its
convert object, right click on its rasterize, the layer, right click and
then create clipping mask. I'm going to do is go off to effects on this one
blending option. Do the same thing on these
ones just like I did. I'm going to do is
take this over on this side and then I'm
going to do is going to be obviously putting
in a bit of let's say first one was stroke, you can see it over here. This is the one which I applied. You can see this
looks a lot better. I'm going to do, make
sure to put in black, just like that one. Not black. I'm going to do maybe
somewhere around over here. Press on okay. And
then I'm going to do is going to be outer
glow. Clicking on this. And then I'm going
to do is maybe apply and a bit of texture
if possible. Or let's say stroke
just like how it is, can see color overlay. Let's use a bit of this color. Let's say I'm going to
do is put this, okay. And then I'm going to
do, is going to be clicking on Color Overlay. Let's maybe use a bit of this. Okay, there we go. Press on okay, and we're done. And if it doesn't look
good over here, obviously, what you can do is take
it on the other side. There we go. Them do is going to be taking
this at the bottom. There we go. What I can also
do is take this at the top. I take it over here. There we go. Someone to do is going to be clicking
on each and every parts, which you can see over here. Can see group one,
layer seven, layer six. Click on it and I'm going
to do Smart Object. I'm going to press on control Z. If this disappears over here, I'm going to do is clicking
on this layer two, which you can see layer five. And then I'm going
to do convert to smarts and the Rico we have it. As we're almost done
with everything, you can also select whichever whichever element
you want to use. I'm going to do is use
only this one because I'm not going to be
using anything else. Then I'm going to do, let's
say I'm going to use this, select this part, there we go. Do press on control C, Control, Click on this move tool I'm
going to do is take it over here. Press on control Z. Hold on a shift I'm
going to do, right? I'm going to do
is clipping mask. There we go. I'm going to do is click on this
Effects over here. Color overlay. There we go. Apply a bit of stroke. Just press on cancel. Okay. I'm just going
to keep it this way. I'm going to just
click on both of them. Click and then I'm going
to do Smart Object says, I'm not going to be
needing any one of those. I'm going to just
remove these parts. I'm going to do,
just click on file, click on open and I'm going to do is open a black T shirt. I'm going to do, click
on this over here. I'm going to do is going to
be clicking on this part. I'm going to do
keep it over here. Press Do is keep
this one over here. Right click on its.
Then I'm going to do is going to be
Create clopping mask. And our design is done. Now one thing you can
also do is obviously right click on Effects. Click on, let's say
Blending option. And then you can also
remove the white parts. Keep it this way.
Press on, okay. You can keep it like this
is select on this one, this is how to look
like now if you want to use it on a white shirt,
let's press on No. Click on File Open, then I'm going to do is going
to be clicking on this one. Click on Open and I'm going to do is going
to be removing this part. Do take this design
directly over here. Keep this over here. Right click on its click
Concrete clipping mask. Do is obviously go off to
filters blending option. And you can try whichever
color you want to use. Lead use linear burn. And you can see this
looks a lot more better. Hope you understood
everything about this lesson on how
you'll be able to make a graffiti text shirt design by using Adobe Photoshop. If you don't understand
a specific part, please let us know and we will guide you through
the whole process. Thank you for watching
this video again. In our next lesson, we're
going to learn about how we can make a Christmas shirt design by using Adobe Photoshop.
12. Christmas t-shirt design: Welcome to our another
lesson of T shirt design. This is going to
be the last lesson of this Photoshop
teacher design. In this lesson, we
are going to learn about how we can make
a Christmas shirt design by using Adobe Photoshop
without any further ado, let's hop onto the lesson by
opening up Adobe Photoshop. On my screen, you can see that I have opened up Adobe Photoshop. Now the first thing I'm going
to do is click on new file. Instead of these I'm going to be doing is using print
size this time. And I'm going to do is find
out four and is RGB eight bit and keep the resolution 300 and also keep it orientation
on portrait. Then I'm going to do is going
to be clicking on Create. Do is wait until it opens
up and there we go. We have it now as this is going to be a
Christmas teacher design, the most of the detail
which I'm going to put is going to be text, Okay? But I also have attached in
a couple of resources which I'll be using in this lesson and you'll find it in
our resource file. So what I'm going to do
first is going to be opening up the resource files which I'm going to be using. I'm going to click on File, Click on Open, and there we go. So I'm going to
do is use both of these or let I'ma keep
three of them opened up. Now you can see that eight them will be opened up over here. And I'm going to use
elements out of everything. Okay. If I have any
other resources I'm going to do is
check out for a while. And as I don't
have anything, I'm going to press on Cancel. And this is all I need. Now let's start off the design by starting off our text now. As it is going to be a
Christmas T shirt design, obviously we're going to
need a couple of texts. So what we're going
to do is keep the background however it is. And I'm going to just
make up a new layer. In this new layer
I'm going to do is add up multiple texts. So first off, let's
click on Text. And I'm going to do
apply in my first text. Now as you can see this is
the text I'm going to do is make sure to keep it black
so that I can see it. And obviously I'm going to
use this move tool to keep it in between hold on
a shift and there go, obviously I'm going to
do is sure to copy it. I'm going to make sure you know, duplicate the same
text over time. I'm going to do is going to
be clicking on text again. I'm going to do is make sure to click on them and remove it. What's I'm going to do is type in have to do is click on He. Y is going to be
changing the funds, let's just take this then. I'm going to be using
whichever fund we want. I have some specific funds
which I most of the time use. Well, there is Edwardian
which I like using. So I'm going to do is go off to, you can see Edwardian. You can see it looks quite good for a Christmas
Christmas type of vibe is going to be
using this and I'm going to do is try to take it on
the right side. There we go. And then I'm going
to do is going to be selecting the fund
to be a bit bigger, 72 do is type in 100. Hit on there we go. Then I'm going to be
click on this text. Going to do is copy this exact. I'm going to do is going to
be clicking on this one. You can see it over here. I'm going to click on
Text now that C's to do. First off, let's remove
this from over here. Let's keep it over here. I'm going to, I'm going to do, just make another copy. If it's, I'm going to click on Text Happy, the semi type in
half of Very Mary. And then I'm going
to do, is going to be clicking on Okay. And then I'm going to do,
is going to be copying this exact text again. Click on texts
Christmas. There we go. We have all the texts. Then I'm going to
do, is going to be clicking on each
one of these texts. I'm going to do increase
the size a bit more. Let's type in 130. Here we go. 130 looks a lot better. I'm also going to be
clicking on each one of them and type in 130. We can see the other ones. Let's just take it a bit down so that it just
looks a lot more better. Let's make sure to keep it zero degrees so that it
just doesn't look bad. Go Christmas. Should be a bit down over here. Let's keep it 150. Just click on Mary. Click on very over here. I'm going to click on it. This is also going to be 150. I'm going to do check the last one which
we have over here. And I'm going to do keep 150. Let's say 160 is better go. We have all these texts that I'm going to do is
going to be clicking on each one of them and I'm
going to do is convert it. Or I'm going to do is first off, keep it this way so that I can edit each and
every one of them, but the thing I'm going to do is going to be keeping them. Okay, let's just keep it
this way and let's just add in our designs which I'm
going to be putting, I'm going to do is go off, let's say I'm going to do is
apply in a shape over here. So if I want to apply
in a shape I'm going to do is go over here and
then I'm going to do, is going to be clicking
on Custom Shape Tool. Now from Custom shape
tool I'm going to do is, let's say let's find leaf
or maybe whatever type of effect I want to use if
it is not over here. I can also use this line tool which I'm going to be using. What's I'm going to do
is click on line too. And then I'm going to do
is going to be clicking on whichever line I want. From here I'm going to do
is keep one line over here. What I'm going to do
is keep it straight. Hold on a shift. There we go. You can see the line I'm going to do is
click on line one. I'm going to do, Zoom
in and make sure to keep it like this. We're going to do the
same thing over here. Then I'm going to do is going to be keeping this at the bottom, okay, as we have it. It is underneath
this very then I'm, let's say if we add in a
bit of stroke on this one, it will also look good. I'm going to click on Effects. Let's go off to Blending option, and then I'm going to
do is click on Stroke. You can see stroke over
here. Do increase it. And I'm going to make
sure to use a bit of white so that it just
looks a lot more better. Maybe use red, it just
goes with Merry Christmas. Going to do is use
red press on, okay. And you can fix the
size if you want. You can make sure to
keep it like thin. It just looks better. You can see how it looks like. You can also fix in the position inside or maybe at the center. It will also look good.
Can also keep it out. Most of the time,
I'll just keep it center so that it just looks a lot more better For this one I'm going to do is
keep it at the center. You can see this is
how it looks like. And then I'm going to do is going to be keeping this black. And then on this one Christmas I'm going to do is apply green. Okay, so I'm going to
click on Christmas. Go off the effect, click on Blending option and then I'm
going to do click on Stroke and then I'm going to do go
off the stroke and then I'm going to do is make
sure to use green. Okay, there we go. This is the type of green
I want press on, okay? And keep it at the center. You can fix the opacity
if you want to. Let's just keep it
somewhere around 90 or 80. I'm going to do fix
in whatever I want, press on, Okay, and
then we're good to go. Then I'm going to do,
is going to be clicking on this line over here. And I'm going to just make
a couple of these copies. Okay, let's just
click on this Alt. And I'm going to make sure, like make copies on each
and every one of those. I'm going to just
hold on the shift. I'm going to just make
sure to keep it over here. Take this one over here. There we go. Do the same thing. Make another copy. Just keep it over here. There we go. Do increase
the size of bits. Do is make sure to increase this one then I'm going to
do is make the last copy of it over here
so that I can use it under the Christmas
if it doesn't look good. We can also change it
whenever we want to. But for this one,
let's just say I'm not going to be using
this at the bottom. I'm going to do is
keep it this way, have a very merry Christmas. You can see this is
how it will look like. One thing I'm going
to do is going to be keeping each and every one of them underneath
that look better. I'm going to do is
click on this line over here and keep all
of them at the bottom. And then I'm going to
do is click on Mary. And then I'm going
to do is click on Effects and go off
to Blending option. And I'm going to do is
use Stroke to be white. Okay, so I'm going to
do is click on Stroke. And then for this I'm going
to do click on White. And then I'm going to do, is going to be clicking on Okay. And make sure to
use full white so that it just looks better and
doesn't overlay anything. So I'm going to do
keep it this way. I'm going to do is
keep it outside so that it is a
bit more visible. I'm going to press on, okay. And you can see this is
how it will look like. This is basically it. Let's
just apply in also a stroke. Over here I'm going
to just click on and I'm going to do click
on Effects Blending option. And then I'm going to
do is click on Stroke. And you can see a
bit of maybe white. You can see over here.
This is how we look like. I'm going to press on, okay,
there we go, we have it. Then I'm going to do is
going to be applying in the elements whichever one we need for that one I'm going to do is go
off to this over here. I'm going to do around, you can see now removing the background and
this is what I need. I'm going to take this over here and then I'm going
to put it over here. First things first
I'm going to do is take this at the top. This is at the top. I'm going to do, let's just increase the size of this a bit, we don't need the
color right now. I'm going to do is make
sure to reduce it. And I'm going to
click on Layers. There we go. Then I'm going
to do is right click on it. First off, convert it into a smart object to just
take this at the top. I'm going to right click
on it and I'm going to do z effect. Then I'm going to do is going
to be increasing the size in such a way so that it
just looks a bit better. Do out first. There we go. We can also change
the effect if I want to. I'm going to do take this. Now at the bottom, I'm going
to also right click on it and I can take it at
the bottom directly. Take this over here. Have a merry Christmas
as we already have it. I'm not going to be
needing that anymore. I'm going to remove it. Let's go off to this one. I'm also going to be, after
I'm apply a couple of them, First things first, I'm going
to click on it, a juice, convert it into a smart object, and take it over here. There we go. Reduce the size. Do rotate it a bit. I'm going to do is
take it over here. I'm going to do is
take this a bit at the top that it just
looks on top of this. That's enough. I'm
going to do is make another copy of this over here. There we go. I'm also going
to be keeping this design, which you can see over
here, layer to copy. I'm going to keep it at the top, but I'm going to make sure
that it doesn't look bad. Okay, there we go. I'm going to hold on
a shift, we have it. Then I'm going to
do, is going to be applying in other
effects if I want to. Now from here I'm
going to select the parts which I
need for this one. I'm going to be using this tree. Or maybe this one. And this
one, and this one, okay? The first thing I'm going
to do is going to be clicking on this plus two. And then I'm going
to select the part which I need. There we go. You can see this
has been selected. Then I'm going to use control C, control V. I'm going to
select this part over here and take it over here.
I'm going to do zoom in. I'm going to do right click, convert it into smart object. Right click Storz the layer. I'm going to do
increase the size. I'm going to take it over here. There we go. Then I'm going
to do, go off the effects. Click on blending option. I'm going to do is fixing
the opacity. Fixing this. Let's see do first off, let's keep it over here. Let's just take it a bit, maybe let's just keep
it whole like this. And I'm going to do
apply in a bit of stroke on the stroke I'm going to do use
black instead of white. Press on, Okay, I'm going
to do is fixing the size. There we go, and press on. Okay, just click on this stroke over here and
make sure to put in black. Okay, just fix the sides. I'm going to fix
the opacity full. Okay, there we go. We have it. Then I'm going to
do, is going to be clicking on another one. I'm going to remove
layer one this time. Then this one I'm going to
be using is maybe something else I'm going to do is
take this star over here. I'm going to click the
star. There we go. Now as it has been selected, I'm going to press on control C, control V, so that
I can copy it. Instead of taking it, I'm
going to keep this over here. Right click convert
smart objects. Then I'm going to do is going to rasterize the layer to zoom in, increase the size, and I'm going to just take it at the top. There we go. I can also change
the effect if I want to, but if it looks good,
just like this, then I'm going to keep it just the way it is as we have it. What we're missing is
just a Christmas tree. The first thing I'm going to do is going to be
removing this one, as I'm not going to be
needing that anymore. And then I'm going to do is use a Christmas underneath it. I'm going to go off
to my web browser. From my web browser
I'm going to do search for a Christmas
tree doodle. You can see it over
here. I'm going to do or Christmas tree doodle. Hit on Enter, go off Images, and then I'm going
to do is find out something which will
actually look good. I'm going to do is going to be finding out the one I need. You can see there
are a couple of them which I can actually use, and actually it looks
good. From there. I'm going to do is
select any one of those. You can see this
one is also good. I can also use PNG images
so that it will be just looking a lot more
better according to my need. So I'm going to do is use this. This also looks very good, so I'm going to do is
right click on it. I'm going to do save image
Az and then I'm going to do is as this is web web photo, I'm not going to be using that. Instead of that,
let's just search for something which
looks a bit more Better I'm going to do is let's just take
any of these doodles. Okay? Png, right click on its. We can use any of
those directly. As I've downloaded my resource, what I'm going to do is
going to go off on file, click on open, and
then I'm going to do go down and find out trees. Click on open and I'm going to do like using any one
of these first things. First I'm going to do, let's say for now I'm going to do is remove the background, remove background and all the
white parts inside of it. You can see this is
how it will look like, because if I
selected one by one, it wouldn't be
selected perfectly. So the first thing I'm
going to do is going to be clicking on any one of these. And if it doesn't work for you, what you can always
do is use my step, which I do, is click
on any one of these, convert it into a normal later. Then I'm going to do is click
on Effects Blending option. And then what I do is
just remove the Y parts, okay. And there we go. We have it click on its Convert
to Objects. There we go. Do is going to be
selecting the parts or selecting the tree which Y need, which I need is going
to be selecting this tree over
here. There we go. Perfectly selected.
Then I'm going to use control C control
V. Click on this, Move to, I'm going to take
this over on untitled one. There we go, we have
it right click. I'm going to do is obviously
convert to smart object, right click, rasterize the layer and then I'm going to
do increase the size. The thing what I'm
going to do is going to be obviously keeping
this at the bottom. I'm going to do is going to
be changing the way it looks. I'm going to do
right click on it. I'm going to do, take
this at the bottom. You can see this is ha looks. There we go. I'm
going to click on Effects Blending option
and then I'm going to do is going to be fixing
the way it looks like filopsitue current
layer to be over here. Over here I'm going
to do is going to be, let's go off on texture. There we go, a bit of contour. If I want to apply it can also keep it
just the way it is. And then I'm going to
do, is going to be applying in a bit of shadow. Drop the shadow, there we go. Looks a lot more better. And then I'm going to
use press On. Okay. And there we go. All
of them is done. Then I'm going to do
next, is going to be keeping this over here. There we go. I'm going
to click on Background. And then I'm going to
select all of these parts. If I cannot, I'm going to
select all of them at once. There we go. Select on all of
these layers. Right click. And I'm going to do is convert
it into a smart object. Then I'm going to do is
remove the background. My background has been
removed. There we go. The background has been removed. And then I'm going
to do is going to be click on Subtract from Mask. Zoom in. You can also
press on control Z. For a while I can do is
click on layer five, can see this way, Merry Christmas, layer
three, layer four. Zoom out and click on it, convert it into a smart object. There we go. Zoom.
Click on Move Tool. If it is like this, then I'm going to do is going to be clicking on both of them. Click Convert a smart object. There we go, we have it. Then I'm going to
select on this part. Two, press on control Z. First, select all
of them together. I'm going to be missing
this part anymore. I click Convert to Smart
Objects. There we go. That I'm going to do
is going to be opening one of the T shirts open. What I'm going to do, apply
it on a white T shirt. Maybe I'm going to
do is first off, remove this I'm going to do is going to be removing these ones because I'm not going to
be needing that anymore. I'm also going to be
removing the tree. There we go. I'm going to
take it directly over here. Okay, do out. Click on it. I'm going to use Craig
Clipping Mask. There we go. We have our design C.
This is how it works. Hope you understood
everything about this lesson on how
you'll be able to make a Christmas shirt design
by using Adobe Photoshop. Let's move on to
our class project and in our next lessons
of T shirt design, we're going to be using
Adobe Illustrator. Stay with us and hope you
understood everything. If you have any questions, feel free to ask me and I will guide you through
the whole process. Thank you for watching
these videos again.
13. Class Project 2 - Remove background from any image in adobe photoshop: Welcome to our
class Project Two. Name of the class project is how to remove background from any image I have added in a description and
also an outcome. In our description, we can see that removing the background of an image is a very
important task in Photoshop. You can remove the background of any image by using Select, Remove Background
selection, brush or blending tool depending
on the image and needs. So let's see the couple of
steps which we need to follow. We're going to open up
the image called SRT or triple T from the
resource file in Photoshop. In step two, we're going to convert the images into layers, or let's say normal layers. In step three, use either select, Remove
Background selection, brush or blending tool so that we can remove
the background. In step four, after
removing the background, convert it into a smart object. And in step five, copy and paste the duplicate of the
subject in another file. Take a screenshot of
the clear file with the removed background and upload it in our project panel. And I will obviously
show you the steps too in the outcome is by learning
how to remove background, you can use any element in any image and using it
for various purposes. So without any further ado, let's hop on to Adobe
Photoshop and start our steps. You can see that
I have opened up Adobe Photoshop and I'm
going to open up the file called TTTNSRT from our
files or our resource file. I'm going to find
out TTTNSRTI'm. Going to click on this and then I'm going to
do is click on TTT. I'm going to click on Open. And then both of them will
be opened up on our file. Now I'm going to do
is use the steps and remove the background
for this type of images. What you can do is click
on Remove Background, or you can select the subject. It's up to you. For this one you cannot use blending option. Or you can use, let's say you can also
use Selection brush tool, but it will take a lot of time
for this type of subject. You can click on Select
Subject from here. Or you can go off to Select and click on the Subject over here. Or click on the
remove background. So I'm going to click here. And then I'm going
to do for a while, basically see the subject in
this photo will be selected. You can see this
is how it works. And then you'll be able to
remove it or make copies of it and then remove the
background whenever you want. Let's going to do is
press on control C, Control control V, and you can see a duplicate
has been made. Now you can see this
looks very professional. And when I want to remove the whole background so
I can do is wait for a while the background has
been removed and you can see this is how it looks as it does not look
that professional. I'm going to do is
press on control Z. And then I'm going to do
is going to be clicking on and then I'm going to
do is going to be on file. And then I'm going
to do copy this one over on that clear file. This is going to be the
copy I'm going to do. Just click on File,
click on New. And then I'm going to do,
is going to be clicking on four, press on Creates. And I'm going to do is
going to be copying this one on that four paper. There we go. Hold on a shift
so that it looks better. There we go. We
have our first one. Our SRT file is done and TTT, How are we going to remove
the background when you sell? It might not word because
there is no subject. But you can see this
is still being used, but it does not
look professional. Now if you want to know if you want to remove the background
on these type of surfaces, you obviously have to
use the blending tool. Now first things first convert
it into a normal layer. You can see by
following the steps. And then I'm going to
use Click on Effects. And then I'm going to just
click on Blending option. From blending option I'm
going to do is going to be using this current
layer, you know, slider. Click on this one right
side and then start off tracking it
on the left side. And you can see the white part, All of it has been removed. And then just press on. Okay. And there you go.
You have your file. Now the thing, what
I'm going to be doing next is following
the next layer, I'm going to just press on No, which is going to be converting
into a smart object. You can see now it
is a smart object. I'm going to take this over
on this layer, there we go. Hold on the Shift and
increase the style. I'm going to just click on
layer one, right click on it. And then I'm also going to be converting into a smart object. So we have two of
these smart objects and two of these
backgrounds removed. So hope you
understood everything about this class project. Now what you're going to
do is take a screenshot of it and make sure
to upload it on our project panel so
that we can see how you're progressing with work and how you can remove
the background. In our next lessons,
we're going to be using Adobe Illustrator to
make T shirt designs. I hope to see you
in my next lesson.
14. Biker t-shirt design with adobe illustrator: Welcome to a new
lesson of Sir Design. In this lesson, we
are going to learn about how we can
make a biker Sure. Design in Adobe Illustrator. Well, this video is
going to be quite long if it exceeds a limit. I'm going to be making
this video into two parts without
any further ado. Let's open up Adobe
Illustrator on our device. On my screen, you can see that I have opened up
Adobe Illustrator. Now the first thing I'm
going to do is going to be opening up the print file, or let's say the canvas or
the artboard, which I need. I'm going to click on more. Click on, let's say print. And I'm going to do
is make sure to click on four and press on Create. And it will make
my artboard here. Then what I'm going to be doing is going to
be starting off with the first detail or the first element, which
I'm going to make. Let's click on
this ellipse tool. Hold on to this. If you want
to hold on a shift, you can. It will make a perfect circle. But for this lesson, I do
not want a perfect circle. I'm going to select on this.
There we go, we have it. Then what I'm going to be doing is clicking on the same thing, Draw Inside, because I want
the detail to be inside. I'm going to click
on this over here. And then I'm going
to click on File. And then I'm going
to click on Place. Now from here, what I'm going to be using is going
to be mountains. I'm going to click on
this, press on Place. I'm going to do is paste it
over here in this Discover. I'm going to select
on this text over here I'm going to do
is change the color. I'm going to click on this. And then I'm going to do is
going to be keeping this one, if I cannot find it, what I'm going to be
doing is going to be clicking on this and then applying this
color on this text. Okay? So I'm going to do is
going to be clicking on this. Then I'm going to just click
on this text registration, which you can see over here. You can take this tool and
then I'm going to do is take this text over here,
the Rega Discover. Then I'm going to do is going
to be applying a bit of effect on this, under this text. Or I can take it a bit at
the bottom because I'm going to be applying this
text over here, Discover. Then I'm going to do is going to be using a couple of elements. I'm going to click on File Open. I will have stars over here. I'm going to click on Open. It will open up on this page. I'm going to press on, I'm
going to select this part, only only this star
I'm going to do. Take this on this first page. There we go. And
this is an AI file, so you don't have to worry
about selection in anything. Discover, I'm going to do make a couple of
copies of these. I'm going to make copies. There we go. There we go. I'm going to select
on all of them. There we go. Keep it
at the center aligned. Now this is the
part where it gets a bit of time consuming. We're going to be
doing is taking a photo and we're going
to remove the background. First thing I'm
going to do is take both of them and
then I'm going to do is keep it on the left
or center, align. Let's say this is centered, but I'm going to use press
on control Z. There we go. I'm going to keep
this at the center. So I'm going to do is
keep it on the center. Let's say center over here. Click on this. I'm going to
also keep it at the center. Do take this and also keep it
at the center. There we go. And I'm going to do
group all of them up. Group. And then I'm going
to keep it at the center. There we go. Looks a lot more better then I'm going to do
is to remove this, Cass. I'm not going to be
needing the stars anymore. For the next one
I'm going to do is open up the file called biker. I'm going to take this
one. Click on Open. Now there are a couple of things which we need to do on this. We're going to need to
cut out the whole thing, of this exact photo. Now it's going to
take a bit of time, but there's going to
be a couple of steps, so make sure to not
like skip any part. The first thing we're going
to do is going to be make another layer and lock
in the first layer, which is going to be
the default layer. In our second layer, we're
going to do select the parts. Now first off click
on this pen tool, which you can see over here. You can see, or you can also
see, delete anchor point. You can also use the
pen tool which is over here that I'm going
to do is going to be clicking on the
parts which we need. Let's go to click
on these parts, whichever ones we need. There we go. Now before selecting this, make sure to click
on this over here. And also make sure
to click on this. Make sure that they are no
and no color over there. Make sure to do that.
Do zoom out a bit. You have to do it until you get your exact desire that I'm going to do is
going to be keeping, I'm going to keep
continuing this until I get all of it done. After I'm done, what I'm
going to be doing is going to be masking that exact photo. Or masking this exact texture
and this whole photo, so that I can use only
this exact object. Now one thing you
have to keep in mind is that this
is not Photoshop. In my previous lessons, you've
seen that I have selected the photo very easily by
clicking on removed background. But as this is illustrated, it's also used for manipulating
a lot of graphics. It's going to take
a bit of a time for you to select up specific parts, which you can see
from over here. Something that's
going to do is do it fast so that I
can show to you how I will be able to remove the parts from this exact image. Or how I can make a mask
out of this exact photo. So I'm going to do is keep
continuing until I'm done. Okay, I'm going to do is going to be
keeping this however it is I'm going to
do is select on this part Control I'm going to do is make sure
this is a lot smaller. There we go, can see
this part which we need. And then I'm going
to do is going to be saving it as transparency. First I'm going
to click on File. I'm going to do is going
to be click on Saves. Or first off, let's
go off to Export so that we can use it
as the transparent one. Click on Export and
click on Export As. And then first
things first, what you're going to do is going to be clicking on
whatever one you need. Let's say B one. Okay, So I'm going to do is going to be click on Bicer one. Then you're going to
do is click on Okay. Now you can also use art
boards if you want to, but as I'm not going to
be needing the artboard, what I'm going to be doing
is just clicking on Export. It will allow you to see
another panel like this. Now, first things first,
what you're going to do is going to be JPEG options. Okay? Now I'm going to do is PNG I'm going to do
is click on File again. Click on Export, Export. And I'm going to do, click
on this and click on PNG. Click on Export, and then
you'll find this over here. Make sure to click
it on Transparent. Press on okay. Now you can see it will
be saved in just a while. After this is saved, what you can do is
obviously go off over here, click on File, click on Open, and you will basically
see this transparent one. Click on this open,
and here we go, you have it I'm going to do is take this directly over here. There we go. Do take
it down at the bottom. I'm going to be applying
it right over here. I'm going to take this, keep it over here. Select this, keep
it at the center. There we go. Do right. Click on it and then I'm
going to do is going to be arrange bring to front Discover. I'm going to select on this part and also keep it at the center. If it's still not at the center, what we're going to
do is going to be keeping this at the center. There we go, lower the
gear. We all have it. And then we can make it
the target if we want to. If it doesn't, we're going
to also keep it this way. But first things
first, I'm going to do increase the layer. First, let's go off the effect. And then we're going to do apply in whatever type of
effect you want to put. I'm going to go off
the effect gallery. You can see it over here. This is how it looks like and this is how it will look like. I'm going to press
on this and you can fix in whatever type of
effect you want to put. Increase it a bit more, keep it a bit less. There we go, Lower
the gear, press on. Okay, it will take effect in
just a moment. There we go. You can see this is
how it looks like. I'm going to click
on this text and then I'm going to
do is going to be apply a bit of stroke. I'm going to click on White. Here we go, two or maybe three. There we go, lower the gear. This looks a lot
more better then I'm going to do is going to be
clicking on this target. The first thing I'm going to do is to remove the other ones. Press on No, no. Then I'm going to do is
open the T shirt file, which is going to
be on our resource. Ai, which we going to do is
going to be click on Open. Click on Open and okay, as we have our T shirt, which is white, I'm going to
do, take the whole thing. Select on the selection tool, I'm going to take it directly
over here. Press on. Okay, there we go. We have it. It will take a bit of a time
to apply the grain effect. Zoom out. There we go. We can also apply the effect. However we want We're going
to do is click on this. We can also isolate the group. There we go, lo
right click on it. And you can also isolate
the group however you want. You can make a
release and you can also collect it for export. It's going to be up to you. This is how it will look like. If you want to keep this
effect on this layer, you have to isolate
this exact layer, which you can see over here. After isolating the whole layer, what you can do is obviously customize it for
various purposes. First things first, you can
have to select on this, unlock it first
you can see this, use preview bounds,
scale corners. And then you can
try a free sample. You can generate colors, recolor it if you want to. It's all up to you. And after when you are placing
it over here, make sure to save it
up, however it is. And then you'll
basically find out how it actually looks like
with the exact effect. You can also select on this over here without the T shirt. If you want to take
only the T shirt, which you can do, keep it
this way, select on this. Only you can see over here, what you're going to
do is click on Effect. Click on, let's
say texture grain. This is how it will look like. Consume in this is too much. I'm cancel it up. I'm going to do.
First off, deletes. First off, let's
group all of them. Group this is all grouped up and I'm going
to do is going to be saving this just the
way isolate the mask. You can also un, isolate
it if you want to, going to go back then when you apply it
directly over here. Then it will take a bit
of let's say, effect. Now if it still
doesn't put effect, then it means that we are using a different color
option over here, which is going to
be SRGB or CMYK. But as this is RGB, you can see this is CMYK, the effect is not being put. I'm going to group this up, click on Effects, and then let's try a bit of grain on it. Then it might look a bit better. Two is going to be clicking on this intensity, press on, Okay. You can see this, looks, it just gets disrupted
and doesn't look good. So we're going to
keep it this way. Hope you understood
everything about this lesson on how
you'll be able to make a biker design T shirt
in Adobe Illustrator. Hope you understood everything.
In our next lesson. We're going to make
a baseball T shirt design and hope to see
you in my next lesson.
15. Retro sunset t-shirt design: Welcome to another lesson
of T shirt designing. In this lesson, we
are going to be learning retro
sunset shirt design, but we're going to be using Adobe Illustrator
for this lesson. In our previous lessons,
we've used Canva, and then we used
Photoshop in this lesson. And in our next lessons, we're going to be using
Illustrator for shirt designing without
any further ado. Let's open up Adobe
Illustrator on our device. And let's see how we can make our
retrosunsetshirt design. So we have opened up Adobe
Illustrator on our screen. Now you can see that I am using the newest version of Adobe
Illustrator for this lesson. And I'm going to suggest you to obviously use the newest
version of Adobe Illustrator to because obviously
the new were ones are going to have a lot
of buck fixes and a lot of facilities and a lot of updates and tools which
you will be able to use. It will obviously make your
work a lot more easier. So just like I said, we're
going to be making a red show, sunset T shirt design. And obviously, I have added
in a couple of resources in our resource file
which is going to be given with this whole course. So make sure to use it if you want to and if
you don't want to. Obviously, in my
previous lessons I've shown you where you can
get your resources from, make sure to get those
resources from those sites because those are
basically royalty free, so you can use them
whenever you want. Now the first thing
I'm going to be doing is going to be clicking on New File And start off
with my first panel, or let's say my first canvas. So select whichever
one you want. And most of the
time, and when I try to make designs on
Adobe Illustrator, I try to use four
sizes or print large. Because it just helps me to
get those prints on maybe sometimes on paper or
maybe on T shirts. Whichever one I
want I'm going to be doing is going to be clicking on print large for this time. Make sure to fix the height. Fix the orientation I'm
going to do is keep it on portrait and then
fix raster effect. Make sure to select on medium. Most of the time I
keep it on medium. Neither low, neither high, because I want the
raster effect to be working well on my
device to be smooth. And also it just gives out a good type of print
raster effect. Okay, and after you're done, you can see there's
also default. Well, most of the time when I use like T shirt design,
I use overprint. But for this lesson
I'm going to be using Default and then you're done. If you want to
customize it more, you have more
settings over here. Make sure to customize it
according to your need. And then you are good to go. So I'm going to
press on Creates. And after I press on Create, you will basically
see that I will be able to see my
canvas on my screen. You can see now I have my
canvas over here and I'm going to be doing is customize
it according to my need. I'm going to cut this one off because I'm not going
to be needing that. And then I'm going to be
doing is going to be, let's say I'm going to make
up this design over here. And I kept it big so that
most of the time I keep my designs over on top or bottom so that it just
looks a lot more better. Now you already know how you will be able
to navigate route. You can use your scroll key, and if you want to
zoom in, in or out, you can hold onto Alt and zoom in or out. You can
see it like this. And if you hold
onto Alt R control, you'll be able to see that
you can go left or right. And if you hold shift,
you will be able to go up and down just like this. Okay, so the first thing I'm
going to be doing is going to be as this is a
retrosunset T shirt design, I obviously have my resources, so the first thing
I'm going to be doing is clicking on File. And in on file I'm
going to be doing is obviously applying
the resources I need. Now the first thing I'm
going to be doing is going to be clicking on Windows, click on Workspace,
and then I'm going to do is use Essential Classic. Now Essential classic, I
suggested to use it because you have almost all the
tools over here, so you can use them
whenever you want. So I'm going to do
is click on File, click on, let's say, open. And I'm going to do is
open up my resources. You already have The
resource I'm going to do is going to be use any of
these resources, AI resource. You can see it over here. Now from these resources, what I'm going to be
doing is going to be using this beach over here. Sunset trees, okay? I'm going to be using these two, okay? And none other. I'm going to click on Open
as these are JPG files. So I'm going to do
is wait until it opens up and I'm
going to do zoom out. There we go, I'm going to press on this and then I'm going to hold on a shift and
then size it down. So I'm going to do is
hold on a shift again. I'm going to do zoom in.
Then I'm going to do, is going to be holding
on shift again. And there we go. Here we go. Here we go, we have it over here. And I'm going to do
is keep it this way. And I'm going to do is
also take this beach. Sunset. If I want to use
it I'm going to do is hold on to shift to do, take this one over here. There we go. Then I'm first off, I'm going to make a circle and put that design inside of it. First thing I'm going
to do is going to be clicking on Rectangle. But here I'm going to
do is click on Ellipto. What you're going to
do is going to be holding on to shift so that you make this perfect
circle. There we go. Inside of this circle, I'm
going to be putting the image, now how do I put the
image inside of it? The first thing
I'm going to do is going to be clicking on Beach, which is over here. I'm going to do take this over here and then I'm going
to take it over here. I'm going to do,
just hold on a shift I'm going to do is
increase the size. There we go. I'm going
to do increase the size. There we go. And then I'm
going to do right click on it. And then I'm going to put it under okay, under this circle. Now how do I do that? First off we're going to do
is open up the layer option. Well, there is also another
method of how we can do that. First things first I'm
going to do is take this underneath, there we go, I'm going to do is click on this control and I'm going to do is going to create a new sub layer or
create a new layer. There we go I'm
going to do is put this inside this second layer. Okay, I'm going to do
is going to be taking this over to that layer. If I have to do that, let
me just remove this again. And in second layer I'm
going to do this over here. I'm going to do take
this over here. There we go. In our second
layer I'm going to do is put this photo I'm going to do increase the
size. There we go. I'm going to do is going
to be selecting this. And I'm going to do put
this right over here. Then I'm going to do, is
going to be clicking on it. And obviously I'm
going to do is put it in our circle over here. You can see when I click
on this over here, you can see only the
circle is available. I'm going to click
on it and then I'm going to do is make sure to use a different color so that
I can put it on this. Okay. First things first, I'm
going to do right click on this one I'm going
to do make it visible. I'm going to click on this. There we go, we have it. And then you can also see
when you go off the file, you can place embedded, okay, well if you
used Photoshop, you will be able to find out
this place embedded photo, but you cannot see it over here because this is a
total different thing. Now the first thing I'm going
to be doing is going to be clicking or opening
up any one of these, you know, let's say presets. Well, what presets are these? These are not like pre made, any filter added thing. Okay? These are basically like canvases which you can use. Now, I've already also added in a couple of
resource file which you will be able to use throughout the course
for your practice. Okay? So make sure to use it and if you
don't want to use it, obviously in my previous
lessons I've already shown you, which if you want to use any
resources outside of this, where to get those
resources from. So you can go through
those websites too. So the first thing I'm
going to be doing is, first off, let's
click on New File. Now when I press on
like click on New File, you can see this is
how it will look like. And then what you're
going to do is you can customize these. Now when I, most of the time you customize or
make T shirt design, what I basically do is go off to print and then select
any one of these. Okay, so for this
lesson I'm going to be doing is using a four
because that is what I need. You can fix in the orientation
according to your need, and then you can use or
select the color mode. So here we are using CMYK Color. Make sure to use
the raster effect. I'm going to keep it medium because this will
look a lot more better then there is
also the preview mode. Now how do you want it to look? If you want to use
default, that's also fine. And if you want
to use, you know, separate type of
preview modes which are picels like overprint,
you can use them too. So I'm going to be using
Default for this lessons. And you can also go off through more custom or more settings if you want to and
customize the bleed, the height, width, number of art boards which
you're going to use. And also preview
modes which are on the advanced points.
You can also use those. After you've done this, press on Creates and make
sure you will be able to see that we have our canvas or art
board on our screen. Now, just like I said, I have also a couple of
resources which I can use for this lesson and I'm going to use in these lessons. So let's start off
with the first steps. Okay, so as it's going to
be a retro sunset design, we're obviously
going to be needing a background where
I'm going to be putting in my main elements. The first thing I'm going
to do is going to be clicking on this
over here, Lipstol. Well, it might always look like this rectangle tool over here. From there I'm going to do,
just click on a Lipstol. I'm going to hold on a
shift, which is also a hack. Now I'm going to do is
hold on a shift and make a perfect circle
there, G, we have it. I'm going to select
on this path. And then I'm going to do
is keep it at the center. Now what am I going to do now? I'm going to be putting
all the elements inside of this circle. At the end, I'm going to
put my text over here, but that is going to
be a later thing. Okay, which we're going
to do almost at the end. The first thing I'm going
to be doing is going to be clicking on this over here, which is going to
be draw inside. We're going to shift mode. Now you can see this
is draw normal. So we're going to apply
all of the things outside and overlay each one. There's another feature
called Draw Behind, which you're going to
do is Draw Behind. Now the first thing
I'm going to do is going to be clicking on white. Make sure this is hit
or kept on white. And then I'm going to do is
switch on to draw inside. This is how it will look. Now we're going to put
in the first photo. To put in the first photo, I'm going to go off to File and then I'm going
to find out Place. Now, click on Place. Now you are going to
see this resource. I also like added a couple of resources and which I'm going to be using in these lessons. For this lesson I'm going to use is beach and sunset trees. First I'm going to do is open up the beach and you can see
this is how it looks like. I'm going to put it over here. There we go. Then I'm going to do is going
to be zoom out. And I'm going to customize it in such a way so that it just
looks a lot more better. Put it over here. There we go. This is a will look
like I'm going to do is zoom out a bit more. I'm going to put it
over here, okay? So as it is over here, what I'm going to be
doing next is going to be applying in more effect on this. Now, how do I do that? First off I'm going to do is
go off the effect, which you can see over here, and then you can
apply the effect. First off I'm going to do
is click on Effect Gallery, And then I'm going to do Edit
my Photo how it looks like. And I'm going to customize
it according to my need. I'm going to zoom out until
I get the whole photo. There we go. So I'm going to, first off, I'm going
to go off on Artistic. Or maybe, let's go off the stylize and select
whichever ones I need. Let's maybe add in a
bit of texture to it. First up I'm going to do
is try in Texturizer, and let's check how it
actually looks like. It's going to take a bit of
time to apply the effect. After the effect
has been applied, what we're going
to do is apply in more effect and let's
see how it looks like. We're going to wait
a bit. You can see now our texture
has been added. Now, I can also apply in scales. If I want to, I'm
going to do reduce it. We can reduce it
according to my need. We can fix it just like this. You can see the texture
is being added. I can also apply the relief which is going to be
looking like this. But as I'm not going to be using that much I'm
going to do keep it somewhere over here and this
is how it will look like. Now I can also remove the texture like this and
check how it looks like. Just keep it
somewhere over here. And I'm going to do also
apply in a bit of grains. I'm going to do
fixing the intensity. I'm going to do
fixing the contrast. There we go. This is
how it will look like, fixing the intensity a bit more. Basically, this is what I need that I'm going to do
is just going to press on. Okay, there we go. Perfect. I'm going to do, wait a bit until the grain has been
applied to these photos. It's going to take a bit of time to apply all the effects. Now you can see this
looks retro now. Now I can also apply in a
lot of effect if I want to. I can also convert it
into a smart object, and also I can apply in the texture as I've
already applied that. What I'm going to be doing
next is go off to layers. I'm going to do is
click on Layer. There we go, We have our
first layer and then I'm going to do is going to be
apply in the second layer. Now in the second layer
I'm going to be doing is using a couple of elements. Now if I want to
use these elements, what I'm going to be doing is going to be clicking on File. I'm going to be
clicking on Open. Now I'm going to do
is use Sunset trees. Now I'm going to do
is Apply the trees. Okay? Now how do I
apply the trees? First I'm going to
do is click on this. I'm going to do is make sure
this is small enough to do. Take it over first.
Here, there we go. I'm going to keep it over here. I'm going to just
click on Select. And then I'm going to select
on those trees if I want to. You can also use these tools, which are over here. Magic wand tool. You can
select them if you want to. You can also use this
paint brush tool There we have other tools, magic wand and other tools
which are available over here. Now from here I can use
the lasso tool so that I can select whichever
part I want to use. Then those parts will
be selected for. Now I'm going to do is going
to be click on these parts. Here we go. I'm going to do is going to be image
trace. Click on, okay. And then I'm going
to do is going to be clicking on something like this. This is how it will look
like, it doesn't matter. Next thing I'm going to
do is click on Select. And I'm going to do
is click on Object. And then I'm going to do
is going to be click on, let's say I want the object
to be clipping masks. Okay. Then I'm going to do
is going to be weights. And after it has been
applied I'm going to do is take it over on this photo. And if it still doesn't work, we can apply other resources which I also have
downloaded as trees. And those are basically
cut out file, so I will be able to use it. So I'm going to
open those up to, I'm going to click on File. I'm going to click on Open. And then I'm going
to do is going to be finding out trees, which is over here.
I can also use this. Click on Open, and then you can see this is how it'll look like I'm going to
do is press on. Okay, there we go.
We have our design. From here I'm going to do
is going to be clicking on Select Objects all on the same. Leer can see this is
how it looks like. Then I can also select out
specific parts if I want to. I can also apply
in effect, okay? If you want to apply
in a bit of effect, you can also apply that. And then we also have line
segments which I can apply. And also my brush tool, which I will be able to use, as you can see that I
have my photo over here. Now the first thing I'm
going to be doing is obviously we don't need the
other parts outside of it. But if I move it, the
whole thing moves right. So as this is a wide background,
which is going to be, you know, very less hassle, the first thing I'm
going to do is going to be clicking on Image Trace. Click on image trace,
do not show again. And press on. Okay. Then I'm going to do is make
all of it white. Now this is the thing I need, so I'm going to do is going
to be taking all of it over on this part. There we go. Now you can see that the
boundaries are being redefined. I'm going to do
is take this over here and that is what we need. Now how do I mask it up
onto the background? Now first things first, what you're going
to do is going to be clicking on Transparency. Now from Transparency,
click on Darken. Now when you click on Darken, you will basically see
the white parts will be removed because there is something already
in the background. Someone is going to be fixing
the part which I need. You can see now this
looks a lot more better. And then I can also
increase the size if I want to because this will
also look a lot more better. So there we go. I'm going
to do is keep it over here. And then we have two of
it at the same place. Now I'm going to do is
going to be selecting all of the parts you
can see over here. And then I'm going to do is
going to be group them up. Okay, this is what we need. And then I'm going to do is
going to be opening up layer. And there we go, we have two of the layers at the same time. Now on the first layer, what
I'm going to be doing is obviously we're going to
put in a bit of text, which will obviously
look a lot more better. Now I'm going to go
off the layer two, which you can see over here. This is the part you can see, this is the part which we need. I'm going to do is
going to be clicking on this, decreasing
or increasing. There we go, increase the size. There we go. On this one, what I'm going to be doing
is clicking on Effects. And obviously I'm going to do
is apply in a bit of grain. It just looks similar to the ones which
we find over there. When you see this
grain has been added, I'm going to do is press on. Okay, there we go. I'm going to do is
click on Transparency. Again, you can see grain has been like being
applied to it. You can see this is
how it will look. And then I'm going to do is going to be doing
the same thing. If it doesn't look, you
know, if it doesn't work. So gonna do is obviously
remove the grain or undo the process and
make sure how it works. You can see when we use darken and I'm going
to do Make mask. There we go. I'm going to
do is click on layers. You can see all of
those over here. If it doesn't work, what we're
going to do is just under the process and keep
it just the way it is. The next thing I'm going
to be doing is going to be obviously applying in my text. Now on the text option, we have this type on path tool. Click on this and then
we're going to do is find this round
corner over here. And then click on
this, press on. Okay, we're going to do, we must click on a non compound, non masking path to create
a path along a path. So the first thing,
if it does appear up, we're going to do is make
another circle over here. I'm going to do is going to
be making a circle which will look just the same. This is how it will look like. And then I'm going to do
is going to be keeping this or let's say I'm
going to undo the process. Undo, I'm going to do
decrease all of its. And I'm going to
make another layer. And then I'm going to
do, is going to be making this circle over here. I'm going to be clicking on
this and I'm going to do, just make sure this
is transparent. So I'm going to click on None. Then I'm going to do,
is going to be clicking on this text tool. I'm going to just
click on this path. And there we go,
we have our text. Then I'm going to
be applying my text in such a way it just
looks a lot better. What texts are we
going to be putting? Let's say I'm going to be Sam
to do is put something like sunset and sunset and lots of dreams. There we go, M is going to be clicking on this again and
then I'm going to put in, first off, let's
finish the text. I'm going to zoom in, Zoom out control Z control. Oh, I'm going to select all of it and I'm
going to do is going to make sure that it looks bigger, 72. You can see this is
how it looks like. Then I'm going to do
is going to be keeping this on this part, okay? We need to keep it this way, not something like this. The first thing I'm going
to be doing is going to be selecting on these parts. And then we're going
to need to rotate it. Now if you want to rotate
it per pres on control, you can see it over
here to press on. Okay, I'm going to
select this part. You can see layer three control Z. I'm going to do is obviously make sure that it
looks a lot more better here. I'm going to put
my text box again. I'm going to do is
increase the size of this. Then what I'm going to
be doing is going to be you have this rotation
option over here. This is the degree from here. Let's type in 110, hit on Enter. If it still doesn't work,
I'm going to do type in 15, hit on Enter. There we go. It is working
a lot more better. Let's say type in
13, hit on Enter. Okay, let's try 100. Okay, I'm going to
type in 100 over here. Okay, this is still not working. I'm going to do is type in 98. I'm going to do is type in 96, hit on Enter, okay, this is going to be a
lot less type in 88, hit on, there we go. Working a lot more better. Let's type in 84. There we go. It is
now totally perfect. Or let's type in 83. Totally perfect. Then
I'm going to do is going to be selecting the
text which is over here. And then I'm going
to do is going to be changing how the
font looks like. What Sam to do is going to be, what I'm going to do is go down, this is looking a lot
better, a lot of dreams. So this time I'm going to do is going to be fixing it
in a different way. I'm going to type in a lot less 120 R. Maybe 130, 130. Hit on enter. There we go. Sunset. And a lot of
dreams it is now perfect. Now I'm going to do is going
to be selecting on shift and keeping it in such a way so that it just
looks a lot more better. There we go. This
is now perfect. Then I'm going to
do is going to be clicking on all of these layers. Just click on layer one and
then I'm going to do Control. Or I can also select
on all of them. Click it just looks a
lot more better control G. Now what I'm going to be doing is going
to be saving it up and using it as a design. First I'm going to
click on New File, and then I'm going
to click on Export. I'm going to do Exports. And then I'm going to do is
going to be saving it up. I'm going to click on
wherever I want to save it. Person Export. And
it will be saved. And you can see this
is how it looks like. Person, okay. And there. And then what I can do
is going to be obviously apply or use this T
shirt on our design. On this T shirt, let's say I'm going to click
on, let's say File. You can see it over
here. I'm going to just click on File over here. Click on New, then
I'm going to be, instead of that, let's just
open up my teacher file, Let's send to open. And then we have
my Mako file on. This, can see over here, press on open, press on. Okay. 'just wait
until it is done. I'm going to take this design or take this part off if
it doesn't work like this, let's just remove this. I'm going to do is going
to be clicking on this. I'm going to go back and then I'm going to do is
going to be image trace. And I'm going to do is remove
this file over from here so that it just looks
a lot more better mask the image. There we go. And I'm going to do
is going to be click on inside over here. First off, let's just
isolate the mask. And then I'm going to open up that design which I have on AI resolution,
which you can see. And then I'm going
to do is going to be opening the one which I saved. Select the whole thing. What we're going to do
is going to be clicking on this option.
Click the target. Now when I click on this, you will basically see that
this will be isolated. Then you can drag it
out wherever you want. Then I'm going to
do is going to be opening up my T
shirt file again, which I'm going to be
using is black T shirt. There we go, I'm
going to press on. Okay. And as this opens up, I'm going to do is
take this directly on this isolated T
shirt, press on. Okay. And then you'll basically
see it will be applied. And then I'm going to
do is going to be hold on the shift, there we go. We have our design and I'm going to do is
going to be applying directly on the T shirt and making it look a
lot more better. It will make a lot of
progresses and a lot of a couple of loading screens
which you will be able to, obviously, you have to
wait a bit until it processes up the whole image
and then I'm going to do is going to be pasting
it right over here. You can see it is now working
and processing the photo. It will take a bit
of time to progress. Okay, the grains. And there we go. We have our design. There we go, we have our design
of retro sunset T shirt. Thank you for watching this
video up till the end. If you have any questions, feel free to ask me anything and I will guide you
through the whole process. In our next lesson,
we're going to be making a Biker T shirt design by
using Adobe Illustrator. Thank you for
watching this video and hope to see you
in my next lesson.
16. Baseball t-shirt design part 1: Welcome to our, a lesson
of T shirt design. In this lesson, we're going to learn about how we can make a baseball shirt design
in Adobe Illustrator. I have attached in a couple
of resources which I'm going to use for this lesson
without any further ado. Let's just hop on to the lesson by opening up Adobe Illustrator. The first thing which
I'm going to be doing is going to be opening
up the file where I'm going to be
putting in my data or putting in all
of the graphics. The first thing I'm going
to do is going to be clicking on any one
of these presets, but I use one most of
the time, which is four. I'm going to click on Create, and I'm going to wait
until it opens up. Make sure to keep the
raster effect on medium because it just works a lot
more smoother on my device. The first thing I'm going to be doing is going to be applying whatever type of
effect I want to use. Now for this lesson,
I'm going to be using a specific color palette
or color pattern two. The first thing I'm going
to do is going to be clicking on this square. Let's just, I'm going to
use press on control Z and I'm going to add in
a couple of layers. This is going to be
my left box on Enter. I'm going to do is
going to be clicking on this over here. This is going to be my design. This is going to be the height. I'm going to put in a
background on this, which is going to be,
let's say red or blue. From here. I'm going to
select in a specific color. Let's apply this. This is going to be it. And I'm going to click on Control. And I'm going to increase
the size. There we go. That I'm going to be
doing is going to be applying the effect
or apply the text. I'm going to click
on Text over here. There we go. We have our text. I'm going to do is make sure
to use a lot bigger texts. 72, I'm going to type
in, let's say baseball. There we go. And then I'm
going to find the font, which I need from here. I'm going to maybe use this.
I can use it basically. It looks good, but let's try finding something which will actually look a lot more better. It looks good on these. Okay, copper plate got bolt, but let's find out something
a bit more better. But obviously make
sure to keep it subble because that
is how it looks like. It just goes up with this text which I'm
using as baseball. So if I cannot find it, I'm
just going to go up and use the first one
which I selected. Let's se I'm going
to do is use this. Maybe I can use it because
it looks a lot more better. And I can also maybe
go down and use this, but let's just try something
like this. There we go. And then I'm going
to do is going to be increasing the space
of letters, Okay? I'm going to do is
going to be keeping it like this baseball, make sure to keep
it in such a way so that it just looks
a lot more better. Then I'm going to do is
going to be clicking on the selection control. I'm going to do is
rotate it and keep it 90 degrees, Keep it over here. I'm going to select this text
and then I'm going to do is type in let's say 100. There we go. I'm going to be keeping it 99. Let's go to control Z. Let's keep it 95 or
96. There we go. Perfect. Then I'm going to do is going to be
obviously increasing this text spacing so that it
just matches up like this. There we go, we have it. Then
from here I'm going to do, instead of regular, if there
is bold, we can use bold. But if there is nothing, no bold text, we're going
to keep it this way. For this lesson I'm
going to be doing is keeping this black
or maybe white. I'm going to do, just
keep it over here. And I'm going to just
click on this whole text. And then let's try white. There we go. We have baseball. Then the next thing which
we're going to put is, let's say instead of this text, I'm going to do is
find out something a bit more better and
a bit more retro. Something like this, maybe, or maybe, which is a bit
castellar or century. I'm going to find
something which just goes with varsity football
type of font, which has a bit of corners, which will look good. And I'm going to do is find them and use it whenever I can. I'm going to do is go down, there we go. It looks good. This also looks good, but we need something
a bit more fat, which will be bold. Let's try this then. Let's maybe. A different type of text here. Let's just decrease it until it matches up with this text. Just increase it a bit more. There we go. I'm
going to select on this text or select on this box, which we have over here. Do reduce the size. And I'm going to select
on this text over here, I'm going to do click on this
to keep it at the center. There we go. And then I'm going to do is
going to be applying in a bit of stroke
black baseball, looks a lot more better. And then I'm going
to do is going to be selecting both of them. Do group it up, I'm going
to keep it on this side. Then the next thing which I'm
going to be doing is we can also put in the different color palette which
I'm going to be using. Next thing I'm going
to do is going to be clicking on this box again. And then I'm going
to do is going to be Apply in another box, which is going to go underneath. Okay. This is basically it. I'm going to click
on this over here. This is going to be the box. And then I'm going to
click on this color. And let's use this. Then I'm going to go
off to transparency. And then I'm going
to do is reduce the transparency a bit. That it just looks a lot
more better on stroke. I'm going to do is make
sure to use no stroke so there is no outline from here. I'm going to be keeping
this like this. Then I'm going to
do is going to be putting in my text inside this. I'm going to select on
this box over here. I'm going to do is
going to be clicking on this Transparency. Go back. Then I'm going to
do is going to be, first off, let's
ungroup this a bit. Let's select on this, make
sure to use No stroke. No stroke. And then
I'm going to do, is going to be clicking
on Transparency. And I'm going to reduce it in such a way so that it just
looks a lot more better. Now as it is done. Here we go, baseball. Then I can apply in
effect if I want to. I'm going to just
click on it and group it up on this text, which I can see over here, which you can control,
you can see this. Then I'm going to
click on this text. I'm going to be
clicking on Pick. I'm going to make it this color. If not, I'm going to
click on this stroke. Click on this register. Click on this Picker tool, and there we go. We have it. I'm going to just
click on this text, and I'm going to make it white. Click this text, obviously I'm going to put
in a bit of color, which is going to be this one. There we go. I'm going to just make sure
to put it in black. Make sure to select
black over here. And stroke. Let's
just use this color. We have it. We can also
group this up first. Let's just take this out. I'm going to select
on this text, and I'm going to make sure
this is black enough. I'm going to select
this text over here. Transparency is going to be 100% I'm going to select
this text over here. There we go. I fix this and I'm going
to take this one again. The stroke is this One I'm
going to do is make sure to use white control Z, select on this,
there we go, Group. Then I'm going to put in whatever type of
text I want to put. We'll go to click
on Text over here. We'll type in Sports. Then I'm going to put in Team. Okay, and then for this
one I'm going to do is reduce this text size of the college. Select only this part
I'm going to do. Keep producing in
such a way so that it just fits up with this part. There we go. Select this part. I'm going to make sure it
just spreads out. There we go, Select
this whole thing, the Jews selects
control Z, Control Z, J fix in this part A, there we go. Adjust it and we have
it to control T. I'm going to do increase it, Just like this where we go, it works. And then I'm going
to do, is going to be making it white again. And then I'm going to
do click on this part. There we go. Then I'm going to
do select on all of these texts. Control A. Then I'm going to do is going
to be obviously apply in white and the
stroke to be black. Then I'm going to
do is obviously select all of it
and group it up. Here we go, Sports
team of the college. I'm going to click on File, click on Open, and then I'm
going to do Re over here. I'm going to do select
on this baseball, which we have over here. Now one thing we can do is
take AI files for this. One I'm going to do is
select on this open. You can see it over here. I'm going to do is select on this part I'm going
to do is first off click on layers
and not isolated. I'm going to do
back, there we go. The first thing I'm
going to do is going to be clicking on New Layer, because I'm going to
be needing just two of these elements,
this one and this one. I'm going to do is going
to be clicking on this. And then I'm going to
do click on this one over here and make sure
that there is no color. I'm going to click
on this pencil, I'm going to do O. I'm
going to select the parts, just like I did for
the previous lesson. I'm going to make
sure this is perfect. Let's just keep it this way. I'm going to do is make
sure to keep it like this. I'm going to keep it
like this. There we go. I'm going to select all of
these parts. There we go. Zoom out a bit. Do is get it over here. There we go, we are done. And I'm going to go
off to Layers again. Click on Layer. Then what I'm going to
be doing is going to be unlocking this and
taking this on this one. And I'm going to be click select an Object I'm going to do is click on Clipping
Mask and click on Make. There we go. I'm is going
to be selecting this part, which we have to do is
take the whole thing. I'm going to take it
over here. There we go. I'm going to do increase the size. There we go. I'm going to put
it just like this. Then what I'm going to do
is going to be putting in a bit of other elements
which is going to go down. The first thing I'm
going to do is going to be clicking on Erasor. I'm going to do is going to be keeping it in a different way. There we go. So here we have it. I'm going
to do is click on this. I'm going to be keeping
it just like this, but I'm going to do
is hold on a shift, I'm going to keep it
over here. There we go. I do is going to be removing
a couple of elements. We have it over here. I'm
going to click on this tool. We've got our design that I'm going to be putting in text, but this is going to
be it for this part. In the next part of this video, I'm going to be also
selecting the ball, which I'm going to be using as the background and then
putting it on this design. I hope to see you
in my next part of this baseball T shirt design.
17. Baseball t-shirt design part 2: Welcome back to part
two of baseball T shirt design in
Adobe Illustrator. Now you can see that
in my previous lesson, our previous part, I've added this photo or
added this image. Now in this part, what I'm going to
do is use or make the background and
finish the whole design. First things first
I'm going to do is fix the position of this. There we go, Keep
this over here. And I'm going to
go off over here. I'm going to press on control
Z. I'm going to do is make sure to click on this
control Z, control Z. Now I'm going to do is use this ball or mask up this
whole ball over here. I'm going to do is
remove all of its. Then I'm going to do is
apply the effect over here. Okay, someone is going
to be zooming in. And then I'm going
to do is going to be first off locking up the layer you can
see already locked. And then I'm going to be
starting to cut out the parts. I'm going to do,
start off cutting out the parts And it will take a
lot less time because that, that image was like a lot
bigger than this one. It took a bit of time, but this is quite small
and quite circly, it won't take that much long. I'm going to remove the
back parts if I can. Let's just try it out. I'm going to select
Select. Select. Obviously, make sure to finish it on the
anchor where you start it I'm going to do is
going to be unlock this part and I'm going
to take it underneath. And then I'm going to
select all objects. And I'm going to be making
the part, there we go. And I'm going to click on the selection tool and take
it directly over here. There we go, Do zoom out. I'm going to do is right
click and arrange it. Sent to back, there we go. I'm also going to be
fixing the transparency. This is basically
how it looks like you I'm going to do is select on anywhere
outside of this. Obviously you can see this just because of this transparency, this just looks a
lot more better. But if it wasn't, it
wouldn't look like this. Okay? Do is going to be using this and I'm going to
select on this part. Again, fixing the transparency. Make sure to keep, reduce
the transparency a bit. There we go. And you can use whichever effect
you want to apply. Multiply that we have
color burn there, we have color dodge. But all of them are
basically black, so it doesn't matter that much is going to be
keeping it just the way it is for this one I'm going to do click on this, I'm going to click on Effect. I'm going to be applying
in grain at the end. So we can go off over here. And this is what I want. Then I'm going to do is going
to be applying a bit of text at the end because it just needs to
look a lot more better. First thing I'm
going to do is going to be applying a bit of text over here and apply a bit
of text at the bottom. First thing I'm going to
do is going to be taking this a bit to this side. I'm going to do is
take it over here. I'm also going to be taking
this at the top. There we go. I want to put my text over here. First things first
I'm going to do is click on this text option, click on this text, and
then I'm going to do is going to be putting
in whatever type of text I want to use. Okay. The first text which I'm going to be applying
is going to be, let's say I'm going
to put a bit of college team and then I'm
going to do is going to be selecting this part I'm going
to do is go over here and then I'm going to do
is going to be making space until it just
looks a lot more better. I'm going to keep increasing it until it matches up with
this college over here. I'm going to type
in, let's say 400. Okay? We have to
increase it a bit more. I'm going to do is type in 500. Okay? I'm going to do now
increase it like this. We can also put
like 600 and also make sure to keep
it just the way, so that it just matches up. I'm going to click
on this control A, and then I'm going to do is
going to be reducing this. Okay I'm going to do is click on this Team over here
and do increase it. There we go, College Team. Then what I'm going to
be doing is going to be clicking on this over here. Then I'm going to do is
going to be apply in stroke, which is going to be this
red color over here, which is going to
be this one inside. I don't want any text, but I'm going to do is put
in this color over here. I'm going to select on this, I'm going to do rotate it. First off, let's select
the text control A I'm going to do is make sure
to increase the size a bit. Let's use 72. There we go. We can also
change the font if we want to, but what I'm going to
do is go down over here and find something which is
going to be a bit thick. I'm going to do is
go down and what I'm going to do is maybe
use this, okay? It doesn't look that bad.
So I'm going to do decrease this until it matches
up with this. I'm going to do is going to
be decreasing or increase it. Just like this I'm going to do is click
on this stroke and make sure to put
it a bit thicker. And then on this color fill I'm going to do is make sure to put in, let's say, none. Okay. I'm going to click on this tool selection tool that I'm going to do is going
to be keeping it like this. Hold on a shift. There we go. I'm going to select
this text over here. The whole thing control A. And then I'm going to do is, let's say I'm going to do
is going to be selecting a darker color so that it
just doesn't look bad. College team, it doesn't need to look like visible,
totally visible. I just need to put it over here so that there's this text. Someone is going to be clicking
on this text over here. And I'm going to put another
text box right here. And then I'm going to type in, let's say I'm going
to type in Olympus, Select this whole text on Enter. Let's say not even 100. Let's type in 70 hit on Enter. There we go, is still not
the same. 60 hit on Enter. Click on this text,
do decrease the size. Hold on a shift, we need to
put it somewhat like this, but we also need to decrease it. Let's say a type in
zero, hit on zero. We can also decrease,
there we go. Then we can obviously
reduce the text size. Increase it now.
Just enough. Okay. Basically, just
enough over here. And then I'm going to do is
going to be keeping it in such a way so it just matches
with the whole thing. There we go. And then I'm going to put in
the text over here. I'm going to click on Text
option Text over here, Olympus forever. Okay, for this one
I'm going to use a bit of cursive type of text. I'm going to do is
find another font. What I'm going to do is go down, I'm going to do is go down
until I find the one I need. I need a bit of like hand writing type of
text or handwritten. I'm going to do is, let's see, I'm going to do go up. If you can't find it over here, make sure to
download more fonts. Let's, I'm to click
on Find More. And I'm going to do
is going to be wait until the ones I
need appears up. From here, what you
can do is obviously click on Find More, remove It. When you click on Find More, you can just basically find
whichever one you want. Then what you're going
to do is just click on this option over here, and it will appear on
your phones over here. Right now I have this
one which I activated. You can see now after it's
activated will look like this. I'm going to do apply this. Then I'm going to do is going
to be reducing the size. This is what I'm
going to be needing. This is what I need.
I'm going to do is going to be
using a white fill. Now on the stroke I'm
going to put in black. I'm going to do
increase the size. There we go. I'm going
to keep it over here. Now if it doesn't look good, what I'm going to be doing
is going to be clicking on this one over here. Let's just click on this. And then I'm going
to be clicking on this icon or Picker Tool, which is going to be this one. Select on this, and then I'm going to do is going
to be clicking on Stroke. And make sure to use white or maybe black according
to your need. Now you can also use
whichever one you want. Let's say I'm going to do is
use block letter or swash. It's totally up to you. Now I can use this, it will
look a lot more better. And then I'm going to be
increasing the size just a bit. I'm going to click on this, I'm going to
increase the stroke. There we go. It looks
a lot more better. I'm going to keep the
transparency a lot higher. This is more visible
than that one. Then I'm going to
do is obviously click on the back one,
which is over here. Olympus I'm going to do is apply a stroke so that
this is divisible. There we go, we have it and this is going to be our design. And I'm going to do
is go off to layers, which you can see over here. And then I'm going to do
is, when you click on it, to all the designs over here, I'm going to select
on this design, which you can see over here. And then I'm going to do
is click on Any Different. What I'm going to
do is press on no, I'm going to open up
the T shirt mako file. Go off the resources T shirt. Okay, I'm going to
do is paste it on this T shirt I'm going
to do is also open up the y one or let's
say the black one. It's going to be
white written white. I'm going to do is
going to be opening this up and then I'm
going to do take it over on this panel person. Okay, there we go. We have it hit on Shift. Paste it right over here. There we go. This is going to be our design
on our T shirt. I'm going to do
the same thing on this black T shirt,
which is over here. Okay, Do is make sure to
reduce the size. There we go. Hold on a shift. So this is going to be the design
or your baseball T shirt. Okay, so hope you understood everything about this
lesson on how you'll be able to make a baseball
shirt design by using Adobe Illustrator and also
mock it up on a T shirt. Thank you for watching
this video till the end. And if you didn't
understand a part, and if you have any question, feel free to ask me and I will guide you through
the whole process. In my next lesson, I'm going to be showing
you how you can make an urban shirt design
by using Adobe Illustrator. Till then, stay safe.
18. Class project 3 - How to mask any object from an image: Welcome to our last
class project which is going to be class project
three of this whole course. Let's open up our doc
file and let's see the name of our class project which we are going to be doing. On my screen, you can see that the name of this
class project is how to mask any object from an image in Adobe Illustrator. Now I have attached
in a description and also an Alkm in our description. We can see that masking
to an illustrator is very vital to merge any object
or cut out any object, it plays a vital role. It allows you to
select any object, like a small smart art object in Photoshop to edit and use
it for various purposes. Let's go off to our steps. In our first step, we're going to open up the image called Leaf from the resource file
and Illustrator in step two, we're going to make a new layer. In step three, we're
going to lock up the default layer which
already has the photo. And I'm going to just make the other layer in
the new layer select the object you want to mask with the pencil around
its boundaries. In step five, we're
going to merse the lines and then unlock
the default layer. And drag the red square
to the default one. And a blue square will show
up on the default layer. In step six, we're
going to go to the Select panel
and click on All. In step seven, we're
going to go to Object panel and click
on Clipping Mask. And see in our outcome. By learning how to
mask object helps you use or edit a certain
part of an image. Or extract any object from an image without
any further ado. Let's open up our leaf file
from Adobe Illustrator. Or open up Adobe
Illustrator on our device. On my screen, you can
see that I have opened up Adobe Illustrator
I'm going to click on, and then is going to be
opening up AI resource. And then I'm going
to find out leaf. So I'm going to
open up this leaf. Now what I'm going to be doing
next is just like I said, I'm going to do is make
a different layer. First off, let's take it
a bit down over here. And then I'm going
to be doing is going to be making another layer. And then I'm going to lock up this layer. This
layer is locked. And then I'm going
to do is going to be selecting the parts
which I need. First things first,
let's lock it up first. And then in our next
layer I'm going to do start selecting our pen tool. And then I'm going to be selecting the parts
which I need from here. I'm going to start
off from here. And then another thing, what you have to keep in mind is that we have to make the
color into no color. Someone is going to
be click on this. There we go, perfect. As we're done. What I'm going
to be doing next is unlock this layer and go to drag
this square over to this one. There we go, we
have it. And then I'm going to do is going
to be clicking on Select. I'm going to click on All. Then I'm going to be doing is going to be click on Objects. I'm going to click on Clipping
Mask Make. There we go. We have our design
select on this tool. There we go. We have
it. There we go. We have our exact subject
or object from our photo. Now what you're going
to do next is going to be saving this up or taking a screenshot of this
and then uploading in our project panel so that we can see how you're
progressing with work. Hope you learned
everything about this lesson and hope you learned everything
in this course. If you still have any
question, feel free to ask me. And I will guide you through the whole process and
help you through, I hope, to see you
in my next course.
 Manuel Tudu, Web Design and Microsoft Office Expert