Transcripts
1. Introduction: Hello everyone.
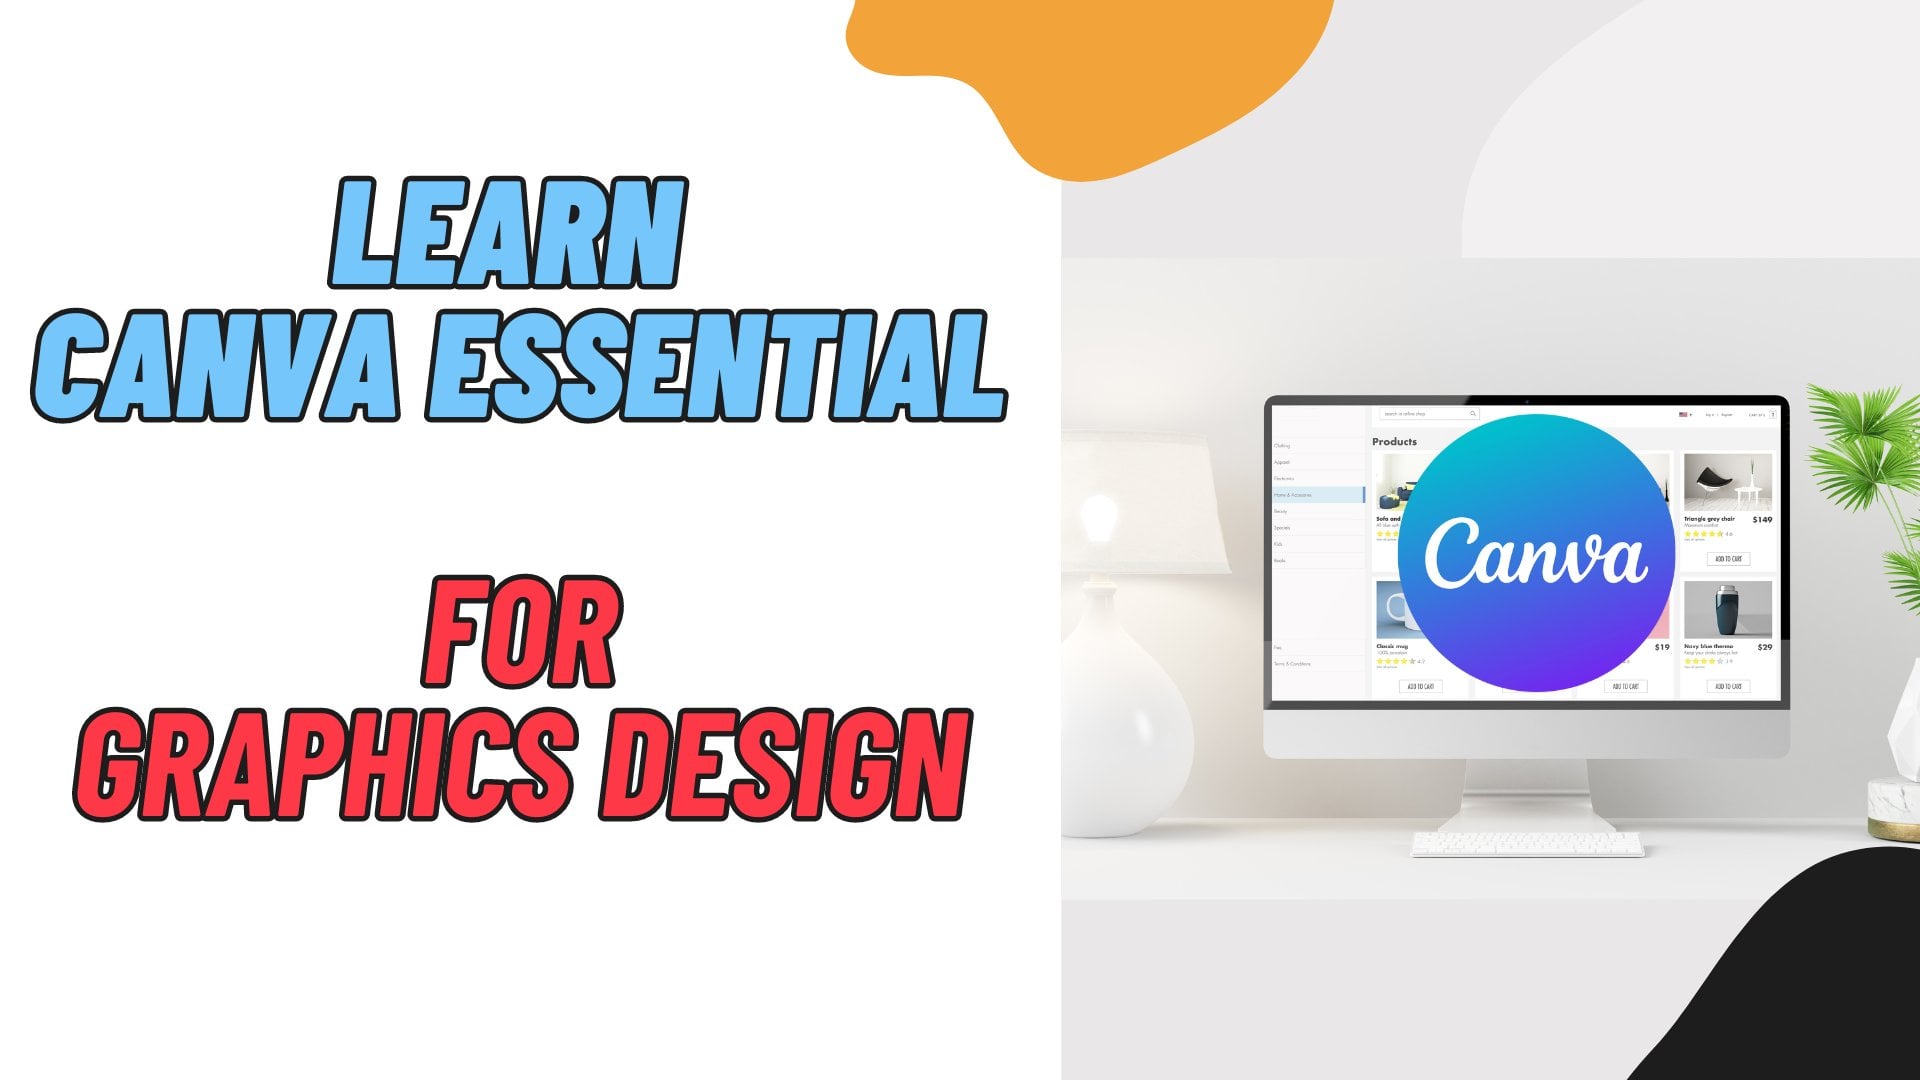
Welcome to a class of Canva for graphical contents. So if you are planning to learn graphic designing content
creation from the beginning, then you are in the right place. Because we will cover in this class from the
basic to advanced. This is a beginner level class. If you have no
previous experiences, then you can join in this class. Let's take a look at what we
will learn from this class. Introduction to Canva,
Account creation, making basic and
graphic designs. Making Instagram post designs. Making Facebook post and
cover photo designs. Making Google display ads banner best free
templates to use. Making e mail signature designs, customizing photos
and creation of fiber and linked in
thumbnails and cover photos. After completing this class, you will be able to create responsive and visually
appealing designs using Canva, Implement interactive
elements and animations to enhance
user engagement. Successfully create
designs using Canva, apply best practices for designing and fill
up the graphic, designing criterias, and build a professional online portfolio
to showcase your work. This is a project based class. During learning you will
have class project. So what you have learned, you will be able to
participate in class projects. You can do practice
while you're learning. You will have supporting
resources in this class. It will be easier for you
to learn during learning. If you face any issue or
if you have any question, then feel free to ask me. I'm always there for
you to help you. Let's start learning Canva for graphic designing,
content creation together.
2. Creating an account: Creating a Canva account. Now, there are two ways of how you can open up
your Canva account. Now, obviously, if you want to start working on your Canva, or let's say on Canva, you need to have an account. Now there are two account types, One is premium and one is free. But one thing is that
you will get a lot of facilities when you use
the premium version, okay. You're going to get
access to a lot of stuff which you cannot
while using free. If you want to use it for your career or maybe
some official purpose, then I'm obviously
going to suggest you can get a subscription and
use the premium version. Okay. Now, first thing you're going to do is either you can download Canva on your PC or you can go to
the web browser, which it's already going to do, and then search up for Canva.com first, and
then make your account. Now I'm going to do search
for Canva.com Okay, I'm going to hit on Enter, and you can see that an
interface like this will appear. Okay, now you can see there's Canva free Canva Pro
and Canva for Team. Now you can see this over here. If you already have an account, just click on login. But if you don't
have an account, just click on Sign for free. Now, there are other ways if you want to open up a Canva account. Now, one of the most
convenient type of method to open up a Canva account is by
using the Google account. Okay. I will show it to you, but if you want any other way, just click on
Continue with other. You can see that there's Apple, Facebook, Microsoft,
clever e mail. And you can also login
with your phone number. Use whichever one you want. You just have to
follow through it. But I'm also going to give you an idea of how you'll
be able to do that. Well, most people know how
to make an account nowadays. But if you are still confused or if you still
have any questions, I'm going to give you a
very simple tutorial or a very simple walk through
to make an account. Now I'm going to do is click
on Continue with Google. Now you can see it
is how it works. You can choose whichever
account you have over here. Now I'm going to do is
use whichever account. Or what you can
also do is go back. I'm going to go back again. I'm going to do is you
have this over here, sign up for free, and
continue with Google. Now the first thing
I'm going to do is going to be use another account. Now I'm not going
to use mine, okay? So I'm going to do is
create an account. What I'm going to be doing
is going to first off making up an account over here I'm
going to do is type in, let's say Jake, Paul. Okay. Click on Next
to fix all of these. Just I'm going to type in 2000, maybe gender mail
and press on next. Now I'm going to put
is Jake Paul, Edward. Gmail.com Let's say I'm going to do is use
your existing army. Jake Paul 56 Adgmail.com
Let's sima type in Jake. Paul 2947 Adergmail.com Let's see if it still
works. Okay, works. Just cut this off. Let's put a very simple password so
that we can get in fast. Let's Sima okay, we
done this, let's go. Okay, I have to put in a
better password. Let's say. Let's go. Here we go. Now I have to put
in my phone number. You can use whichever country's phone number
you want to use. Let's, I'm going to type
in mine the press on next. I'm going to wait
for a while until I get my verification code. After I get my
verification code, I'm going to do is just put
it up and then you will basically see that my account
has basically been made. But first thing I'm going to
do is going to be waiting. I'm going to type in code, let's say 04 UK next. Then I'm going to
skip this part. Next, I'm going to agree
to everything which I have in Google and see I'm
going to press on next again. Now, after your
account has been made, just select the account. And basically you
will see that it will open up an interface like this. Now ask you, what will you
be using Canva for now, if you have a large
company, or a student, or personal, small business, teacher, nonprofit or charity. Select whichever one you
want and then it will just basically find out the datas and also all the
resources for you. Now as I want to
use it for maybe teaching or maybe let's say personal use or
nonprofit charity. Up to you from here I'm going
to do is click on teaching. Because that is what I
will be doing for now. I'm going to do is click on
and hire or somewhere else. So I'm going to press on.
Continue. There you go. You have your account made. Now another thing, what you can also do is go off to Canva. First thing what you
can do is search for Canva.com Now after you search for Canva.com what you can
do is start your free trial. Maybe another thing what
you can do is download it on the software or download
the software on your PC. Now, I have already
downloaded the software, but if you do not
have a downloaded, what you can do is
click on Open the app. Now it will tell you if you have your software on your PC, but what you can also do
is click download Canva. Now after you can
download Canva, you'll basically see that there is the software over here. It is directly from Canva.com What you're going to
do is just click on this download or you can also go over here Canva.com
last download, and you can download
it for your Windows, Mac, or maybe even
for your phone. Okay. But if you want
to use your phone, just go off the Playstore or maybe App Store and then download it for
your own purpose. Now another thing you
have to keep in mind, it's for Windows ten and above. If you have a window
seven or eight, it might not work or it
might not function properly. Make sure that you have
a windows ten or later. Well, most of the
people nowadays in this time use a
Windows ten or more. Okay. Which is 11 or so. But I would suggest you
to use a ten or 11, which is going to be required. Okay. Now, after you are
done downloading Canva, what you can do is
just hit it up or start it up from your PC screen, or you can also click
on Open, the app. Now from here, the site
is trying to open canvas. Just click on Open. And you'll basically see this
is how it worked. Now one thing you have to do is also log in through the browser. What you're going to do is
click and log into browser. Now what you have to do the access so that you can
use it on the software too. I'm going to click
on. Yes, continue. Canva app, press on
open, and there we go. We have finished logging
in on our account. This is very simple to
make a Canva account. Now you might feel like it is getting a bit
confusing or so, but there are a
couple of methods. If you want to make
an account using your Facebook account,
it's also doable. If you want your phone number, you can also try that. Or maybe clever
and all of those, it's all up to you. You can also make up an account
just by using an e mail, which you have already have, and then just start using it. Okay, so hope you understood everything
about this lesson. And if you want to go
through any of the settings, or maybe any of let's
say your account or so, just go over here, find whichever one you want. You can see over here that
I'm using this account. And you can also see
Google and all of those. Okay. You can also
customize your Canva, how it looks, appearances, but I'm going to be keeping
that for later purpose. Up till now, I hope you
learned everything. In our next lesson,
we're going to learn about some basic
designs in Canva. Thank you for watching this
video up till the end. And now let's move on to our next lesson of
Canva, pros based.
3. Design basics: Basic designing in Canva. In this lesson, we are going to be using
a premium account, or an account with subscription, so that we can get
access to all of the resources which
we have in Canva. Let's start off opening
up our Canva software. Now, when you talk about
designs or the design basics, we have to learn about
the four key principles. The four key principles
are alignment, hierarchy, consistency, and
also balance in a design. These four things constitute
a very good looking design in wherever you want to use it or whenever you are
trying to make a design. Now what we're going to do
is going to be opening up any of this preset
and start using any, start making any designs. Now the first thing
we're going to do is going to be clicking
on any of them. Now let's start off with
maybe a presentation, but instead you can also use
a graph or maybe a logo, and for graphics mug, whichever one you want. From here, what I'm going
to do is start off by using any one of this presentation or maybe a blank presentation. Now when you're using
a blank presentation, you will basically see
something like this. But I'm going to go back over here and we can also
find something like maybe an Instagram post or
maybe a flyer up wall paper. Let's start off with
an Instagram post, even though we're not going to be making an Instagram post. But why we're using it
is because the panel, or let's say the canvas, which is the page over here, is quite small and very
good for graphic designing. Now we can also make it
for various purposes. Now the first thing I'm going to do is going
to be going off to elements because
that's the thing we need. Okay, so in our elements. So first thing we're
going to do is going to be searching
for maybe leaves. Well, I'm just going to
show you an example, okay? Now I'm going to
click on CL from here I'm going to do is
use any of these, okay? So let's sma do use
this over here. Now I'm going to play
with my elements. I'm going to do is
shorten it up over here. Let's to paste it over here. I'm going to do is make
another duplicate. I'm going to do is
take it over here. But first thing I'm going to do is going to be clucking on, maybe flip crop or rotate. I'm going to do flip
horizontally, flip vertically. And there we go. Okay,
we have two of these. Now what we're going
to do is going to be putting in other elements. Now let's say maybe text
or maybe some other stuff. Now the first thing I'm
going to do is going to be finding out same things
according to it, or maybe we can duplicate it. I'm going to put
this underneath. I'm going to take it
a bit to the side. What I'm going to do
is take this behind, which I have over there. I'm going to click on position. Now I'm going to
do take this one, or maybe this one
which is underneath. Okay, this is underneath. Okay. As this is under, I'm going
to do is click on Edit Image. Now I'm going to do is
go down and I'm going to do is turn it into maybe a black and white one so that it looks different O' maybe find liquefy. Okay, not liquefy.
I'm going to do is find a one which
looks different. Over here, you can see it's
a bit yellow over there. I'm going to do is maybe what we can do is
increase the size. Here we go. We have
increased the size. I'm going to do is
go off the position. Now I'm going to take
a duplicate of this. I'm going to do
is click on Flip. There we go. I put
this over here. See looks quite better, right? We can do the same
thing over here, but we're going to
keep that simple. Another thing you can do is
control, which is group. I'm going to do is
take this, remove it. I'm going to do is copy. The same thing I'm going
to do is control C, control V. You can see
this is how it works. I'm going to do is click
on maybe this over here. And you can flip it
up if you want to. That's totally up to you how you're going
to work with it. Click on the whole thing. Click on flip,
vertical, Horizontal. I'm going to press on control Z. First I'm going to select all
of them at the same time. Click on this. When you see
that this is grouped up, it cannot be flips like that. What you have to do is
do them individually. I'm going to click on Crop
maybe if you want to. Okay. But first thing
I'm going to do is flip and do the same
thing on behind. I'm going to flip. There
we go. It has been done. I'm going to take this
at the corner first. I'm going to take it
maybe right over here. Take it a bit over there
so it can be done. Okay? You can also
increase the size, just like this, but I'm going to keep it just the
way it is over here. Okay. Now, as we have our
elements on two sides, the first thing
I'm going to do is going to putting in maybe, let's say an image. Okay, ma, type a girl. Okay, hit on answer. We can use any animation,
it's totally fine. But we can also use a
photo if you want to. Here, when we already
have this searched, we can use this, maybe. Let's use this now. We're going to use hierarchy. Now, just like I said, we're going to need hierarchy, then we also need
alignment and consistency and balance at the same
time for this text. What we can see is
that it is basically a square type of just this page. We can do is take this over here and we can put
our text over here. Right? Which will
look quite good. First thing I'm going
to do is going to be type in my text. Now click on Text over here. I'm going to click on
Adding a Text Box. Now from here I'm going
to do is type in maybe, let's say type in December, December 1 or five. I'm going to do
change this first. All we're going to do
is change the color. The first thing
I'm going to do is take it right over here. I'm going to change the font. Use whichever font you want. I'm going to use one of these. Let's say I'm going to do is maybe use something
which is readable, not something which
cannot be read. Okay, let's try blooms. Okay, This looks really good. I'm going to do is
increase the size, or we can use it over
here, over here. December 1 to five are going
to be somewhere around, over here, aligned perfectly. December 1, 25. Now, what we're going to do is put in a couple more texts. Let's say T, T, R, L, let's put it over here. I'm going to do is
put another text box, grand opening. Okay? This is how it will work. First thing I'm going to do is going to be changing
how it looks like. If it doesn't look good, we can do is change
the color maybe, or maybe something like
this a bit different. Okay, let's just try a couple of colors and see how it works. Okay, we're going to start off with something around over here, but a bit darker. I'm going to try this maybe. Okay, First I'm going
to click on over here. I'm going to put it over here. I'm going to increase the size. Then I'm going to use
the Grand opening. Change the font if you want to. You can also change the color. Is totally up to you.
Put it the recon, also put it black. Okay, there we go. We have it. Or we can also put it like this. We can also keep
it just like that. If you want to, do you
have to decrease it like this or you can also take it
somewhere like this. And then you have to rotate it. Okay. If you want to rotate it, you have to click it and then
you have to fast effect. And you can also
keep it like this, line spacing, anchor text box
just the way you want it. Then you will be also able to
put a list if you want to. It's totally up to you how you going to work with it that there are also other options which
you will basically see, upper case, lower case, and all of them, okay? Use whichever one you want according to your need
and then there you go. You will basically have
a very simple design which also looks very good. Okay? December 1 to five. Beauty parlor, I'm going
to increase the size a bit more. Increase the size. Grand opening go, I'm going to change it to black. Looks a lot better, Right? Here we go. We have a
very simple design, which you can see over here. Now we're going to do is start
off with other things too. Now if you feel like this
is not working for you, I'm going to pre group
them up together. Then you're going
to do is put this in the middle, you
can see it like this. And then put maybe another
element over here, just like going to elements. And then I'm going to do search for, let's say aesthetics. Maybe a bit of flowers
or something more. You can put it over here. I'm going to do
use it over here. I'm going to do, first off, flip it horizontal. There we go. Looking quite better, right? Then I'm going to do is go down. I'm going to use this underneath it can look
a lot more better. Delete, let's try using this. I'm going to go off
to maybe position, and I'm going to drag
it at the bottom. See, let's a lot
more better, right? This is basically how it works. You have to combine all of them together so that you
can get this exact. I'm going to do also use
this, maybe over here. I'm going to take
this underneath, click on position, get
this at the bottom. And you can see this
is how it will work. You can see it like
this basically. So take over here, decrease the size.
This is how it works. It can apply whichever type of elements you want to put to use this like this.
And there you go. If you feel like this
is getting too much, then what you can all do is obviously remove them
whenever you want. Let's see if I don't like it, delete this because it
doesn't add up to it. You can see this
looks quite good. Now if it doesn't
match up, delete it. Find something else which
will look good on it. Let's say something
like maybe this, you can see how it looks like. Maybe I'm going to
put two of them. I'm going to
duplicate over here. See looks quite better, right? If you want to fill it up with something else, it's
totally up to you. The first thing you
have to keep in mind is about the elements or the
photo which you're using. You can see with this photo
there are flowers and all of those obviously try to use flowers and stuff so
that it will look good. Okay? I hope you understood
everything about this now let's try on
using another one. Okay? Let's, I'm going to do
is going to be adding another page as we're done
with one basic, okay? So just like I said, follow the four key principles which are going to be alignment, hierarchy, consistency,
and also the balance. Now let's move on
to our next one where we're going to
add up different stuff. Let's say we're going
to do is make it a very simple one.
Now, how to do it. Let's say you want
to do only text. Now the first thing
I'm going to do is going to be clicking on text. I'm going to do is
maybe, first off, let's just find something
which quantum looks good. Okay, I'm going to
do is use this. Shine, shine, shine is I'm going to do is change the
color so that I can see it. Now as I have the
shine, shine, shine, I'm going to do is take this and make it a
lot more bigger, just because we need only
the text, not anything else. Now, as I already
have this over here, now what I can do is put
a small text over here. Put in a text box, but
not this text, okay. Or not this font. I'm going to go back
to cooperate or carp use this as I
have this text box. I'm going to do is first off I'm going to do is decrease
the text size. We're going to follow
our principle. Now let's Samin use
copy control C. I'm going to go over here. Control V control, V control. Okay? Now ma do is first off we're going to put
four of these, okay? Let's say four lines, okay? Let's just say this is
a very simple text, stamina, decrease to size. Okay, there we go. We have our text over here. Now we can do is also put
another text over here. I'm going to do
is go down maybe. And I'm going to add
another text box. We're going to do is change it to whichever one
we used over here. Now we're going to
make it a bit bigger. Okay, it looks good. Now one thing again I'm going
to do is click on this, and I'm going to do
is change the color. Let's say we're going to
do something very vibrant, maybe something like yellow,
maybe something like this. You can see already the
difference, that color, whatever I'm using is
still quite popping up. I'm going to click on this
over here aligned well. I'm going to take
this over here. I'm going to make the tree, but I'm going to do
is select on control, increase the size for this one. Now as I've increased
the size for this one, what I can do is click
on this over here, increase it. Control A. I'm align it to be
on the right side. I'm going to do the same
thing over here, Control A. On the right side, I'm going to press on control A. I'm going to make it
bold. There we go. Control A. This one control A. I'm going to change it
maybe to white, right? The white is quite visible. Okay. If it is not, what we
can do is also click on this. And maybe something that white, well we're going to use white. Maybe something like
this, still not visible. Let's just say I'm going to
do is maybe use total black. Okay, let's keep it total black. I'm going to do is click
on this and I'm going to change the color to white. Okay, One should be white and
the others should be black. Looks quite good, right? We can use a bit of white
text over here at a text box. We're going to just
the paragraph, we're going to make
it white only. But at the same time
I'm going to do decrease the size over here. I'm going to make it
a lot more smaller. There we go. I'm
going to change it to white. There we
go, we have it. And then I'm going to do
maybe control C control V. C control V. We
have another one. I'm going to put this again, right over here looks
really good, right? Just basically,
you have to follow these four principles
to whatever. You have to make it
look a lot better. Now you can see it over here, that we have a bit of space I'm going to do, cut this off. You can see this
is how it looks. A very good looking one. Now we can also a simple ones, let's say I'm going
to do is going to be making a bit
different one, okay? Going to do is go on at page I'm going to do is change this
into something like this. Very simple. Now what I'm going to be doing is going
to be maybe a box. I'm going to do search
for a box, okay? Okay, Not over here. I'm
going to go off to elements. I'm going to search for borders. You can see it over here. Now from here I'm going to
do is maybe use this one. Obviously, I'm not
going to be using this one as it is to be. Okay. Let's just find something
a bit more thin, right? Let's just this one. Okay? Is this good? Okay. This is not going to do is
going to be rectangle border. Okay? We found it. There
we go, we have it. I'm going to click on this. Increase the size. There we go. Now first thing I'm going to do is going to be
clicking on this. We're not going to
use any border. We're going to click on this and I'm going to make it
somewhat like this. It just gives up the vibe,
right? Nothing else. What we're going to do is
click on this border again. Click on over here.
Go off over here. I'm going to do is
find a bit more darker so that we can
differentiate it. Right. You can see.
Now I'm going to be putting in my textbox. Textbox. Okay. First thing
I'm going to do, make a bigger one. Now, the first thing
I'm going to type over here is going to be Holiday, S, C, H, E, G, U, LE Holiday. I'm going to select on this increase that I'm
going to go over here. I'm going to go back
and let's to do is find something which looks of, let's say paragraph type. I'm going to do is use
whichever one I want to use. I'm going to do is
use this, okay? But I'm going to do is
use bold so that it looks different and also
better. Use this. Increase the size Holiday. Now as I have it, I'm not
going to use the same color. Going to do is go over here and use this because
this looks a lot better. All right. Holiday. Okay. I'm going to do is
put another text box. You can see over here here. What I'm going to
do is going to be typing in another thing, okay? I'll say Holiday she plans. There we go, bold. Okay. Holiday she plans. Now we can also add in
a couple more things. Let's say we're going to do
is put another text box, your paragraph text here. You can just keep it
just the way it is. I'm just going to keep
it here over here. Okay. Company name, maybe a
company name, Camina Juice. Put it right over
here. There we go. I'm going to just put
it another tick box and I'm going to just
put in the date, maybe December Amina juice. Make sure that this
is underneath well, let's say January 50. 26 over here. 12 pm. 03:00 A.M. M. Let's say where it is studiled, let's say City Mall. Okay. There we go. We have it. I'm going to select
on control A, make sure this is center,
increase the size. There we go, we have it. All right, just over here. Now you can also
make sure that this is all going to be
on the left side, maybe on this side. You can see over here,
all according to that. You can also keep
it right over here, which will also look quite good. But one thing is that
I'm keeping this over here is because I'm going to be putting in something over here. I'm going to go
off the elements. Now I'm going to do
is type in holiday. Now find out which ever
one you find over here. Now let's say as
this is a holiday, I'm going to do is put in
two Gingerbread mens over here, something over here. Duplicate it, and make sure to use a smaller
one over here. There we go. Looks quite good right now. If you still feel like
it's not working yet, what you can do is that you
can change the colors a bit. Not too much, but a bit. First thing I'm
going to do is going to be pressing on control A, and then I'm going to make
sure to use black on this one. You can see this is
how it will look like. Control A. Make
sure this is bold. It can be seen. Now what you can do is also
click on this one. Control A, make sure
this is black in color. You can see this
is how it works. First thing you going to do is going to be making sure that this is the small one,
this is the bigger one. Here we go. Looks a lot better, right? If you want to add more to it, it's totally up to you. What's mining to do is
put something a bit more sub, delete, delete. Put this duplicate, and take one over here, which is a bit bigger. Looks very sub and very decent. Hope you guys learned everything about this lesson by following four basic key principles
of designing in Canva. You can apply this in all sectors or all
categories if you want to, such as maybe graphic designing, which is going to
be our next lesson. But we're also going to
be using the same steps so that our same
principles so that we get a very good looking design on Canva see it looks
very subtle, decent. And also good hope you learned
everything in this lesson. Now let's move on
to our next lesson. Just like I said, we're
going to make a couple of basic graphic
designs in Canva.
4. Graphic design: Welcome to our, another
lesson of Canva. In this lesson we are going to learn about graphic design. In our previous lesson,
we learned about the designing basics of Canva. In this lesson, we are going
to design with graphics. Now you might think that
in our previous lesson, we've also used
elements and stuff, those are also graphics. While it is said, graphic
design is going to be a lot more different than
how it is on basic designs, But one thing is going
to stay the same. It's going to be the
four key principles. Okay, if you've seen
our previous lesson, you already know about
the four key principles. And we're also
going to be making more designs in this
lesson by using that key principles
which are going to be balance alignment
than hierarchy, okay? A couple of them are going
to be a bit different, but I'm going to show
you how you will be able to make up your design by
using the same methods. By using any of the designs or any of the details which
you find in Canva. Okay, I'm going to do is going to be showing
you how it works. First things first, I'm going
to show it to you again, which is going to be starting off with alignment hierarchy, consistency, and
also with balance. Now there are also
going to be a couple of other things which you're going to learn about in this lesson. Now you can see that I am
on my screen of Canva. Now there are going to be
different things over here, including the four
key principles. There's going to be scaling,
rhythm, portion, symmetry, emphasis, pattern,
then contrast, space, repetition,
movement, and wide space. And the other ones are
going to be the same, which are the four
key principles. Now the first thing we're
going to do is going to be making a design by
using the same method, but we're going to add
up the same things. Now the first thing we're
going to do is going to be starting off with our
Instagram post again, so that we get a small
space or a small page. Now as we have our small page, what we're going to do is going to do is go off to elements. Now I'm going to add only
two elements and I'm going to make this design just by
using that two elements only. But whatever I'm going
to do is going to be text and other edits. Okay, First things first I'm going to do is
search for Sun. Now as I already have the Sun, I'm going to click on this. This is going to
be the sun. Now I want ice cream. Hit on Enter. Click on CL. Now the first
thing I'm going to do is, let's say I'm going to be maybe this one or maybe
this one is totally up to you. The first things first I'm
going to do is just use this. Okay? Two of these
and nothing else. If I'm going to
need it later on, I'm going to put it later on. But for now I'm going to do
is only keep these tube. The first thing I'm
going to be doing is I'm going to use
decrease the size. There we go. And I'm going to do is
keep it right over here. Now the first things first
I'm going to click on this page and I'm going to
do is change the color. Now I'm going to do
maybe something like, okay, this looks not that bad. Okay, I'm going to
use this color. Okay? Now I'm going to do is select
whichever color I want, because this color
looks quite good. If it doesn't look that bad, I'm going to do maybe
change it a bit more. Okay? Looks a lot better. Now, the first thing
I'm going to be doing is going to be
changing out the color. Okay. I'm going to do is make double copies or triple copies. Now I'm going to do is
going to be rotating it, but one thing you
have to keep in mind is that the other two which are over is going
to go at the bottom. I'm going to do is
go off the layers. You can see this is the one I'm going to do. Take
this at the bottom. This is the one. I'm going
to take this at the bottom. There we go. We
have two of them. I'm going to keep it right over here now as I've used repetitive methods and
also aligned them well, we can keep it like
this if you want to, but there is going to be another method of how
you can do that too. I'm going to take this up over here and decrease the size. You can see it like
this. And the other one, I'm going to keep it over
here, decrease the size. Rotate it a bit. I'm keep
it right around over here. See, looks quite better, right? I'm going to do is
rotate it a bit more. And there we go. Then I'm going to change the color, obviously. I'm going to change
it over here. Put this I'm going to
do is instead of that, okay, I'm going to keep
it right like that. I'm going to do is change
this one over here. Maybe keep it to be
somewhat pinkish. Okay? Maybe something like this. It's going to be up to you
whichever one you want to use. If you don't want to
use any one of those, just make sure to use
whichever one you want. There we go. Or if
you want chocolate, you can also put
chocolate if you want to. There we go, we have them
and looks quite good enough. I'm going to do is put
this one over here. This is going to be
over here. There we go. Now make sure that this
is a bit above over here. This should be center of those. At the center of those. Okay, there we go. We have it. Now as we have it, I'm going to do is going to be
increasing the size of this a bit more. Here we go. I'm going to do is put in my
text boxes. Click on text. I'm going to do is put in the text box as I have
my text box over here. I'm going to do is make sure the upper text or the
heading is going to be big. I'm going to do is
going to be putting in, let's say ice cream, ice cream party this summer. Okay, let's just put
this summer first and then ice cream party control C. Let's take control X
control. There we go. I'm going to copy or
select all of them. I'm increase the size. There we go. Now, obviously
it doesn't look good, right? Obviously what we're going
to do is going to be selecting all of it
and change the font. Now I'm going to do is going
to be finding the font, whichever one I want. If you don't find
it from over here, we can just find out these over here to do is go
off the display, because as this is ice cream, everybody loves a funky look. I'm going to do, say this one. Let's try it out.
Okay, not that good. I'm going to do is, let's try, this doesn't look bad. I'm going to select
on all of them. Let's just try, maybe white. Okay, select on them. Try white. There we go. This
summer ice cream party. Okay, as we have it, I'm going to take it a
bit above over here. I'm going to do is going
to be selecting all of them and I'm going to
group them up together. Okay? This is not aligned. Let's
try to keep it at the center. There we go. It is now at the
center of the whole thing. Okay, This is still
out at the center. Make sure it is okay. A lot more better then. What we're going to do
is going to be putting in a bit of text
over here. Okay? Not too much, but very small. Whatever you want to control C. Okay. Select all of
them and make sure this is wide two at the same
time to decrease the size. There we go. Then you can also
change it, not ten, because obviously
this is not the one. But we can also use another one which we already have under it, ten summer, Change all, only one of them, so
change ten summers. Now what we're going
to do is going to be putting in the same
thing underneath. I'm going to do is going to
be clicking on at a text box. Now let's say this
is ten headline. What we're going to do
is not use the headline. We're going to do is
change it to ten summer, okay, Which we're
using right now. I'm going to do is find out
ten summer, there we go, ten summers now we're going to put in which
date it's open up. Let's say this is going
to be also January. January 5, 2024. Let's say five, three time. Let's just try
this. There we go. I'm going to do is
put this over here. I'm going to do is
select on all of them. Control a, obviously
decrease the size. Control a select on this text first and make sure
to change the color. You can see by
following those it looks and how good it does look. Now you can also
change the color or change the size
according to your need. If you want to introduce present
control Z, cancel it up. First group, increase the size. First, there we go. The size of the ice
cream has increased a lot center and this is
how it will look like, just like you saw that just by using two graphic elements of added or let's say
something else. Or made, let's say the photo
or the whole graphic design. Now let's just try out
something very basic. Now, how do you do that?
We're not going to be using the same color
over here, right? So the first thing we're
going to do is going to be a very sule, a very small element, but we're going to
use other elements without the graphic. Okay, it's going
to be the graphic, but not certain
substances or anything, but we're going to use
as just one photo. Let's just say one photo and others are
going to be shapes. And we're going to
use it maybe as a logo or maybe as a thumb nail, or maybe you can also use it for branding purposes.
It's all up to you. Now, how do you do
that? First thing I'm going to do is
go off to elements. Now for elements
I'm going to do is search for something.
Very basic. Search for dot, maybe square, Okay, let's just do it. Shapes, okay? I'm going to hit on doted
shapes. Click on CL. Now what do I actually
want? Let's see. I'm going to do is
maybe use this. Okay? I'm going to do is
use this, okay? The first thing
I'm going to do is soon to be selecting on this. I'm going to do is add, we can add a page
if you want to. What I'm going to
do is maybe keep it around over here.
Okay, there we go. Perfect. I'm going to make
another one right over here. Now as we have two of
them at the same time, I'm going to do is make
sure to use another one. This is going to
be a bit better. I'm going to do is
make sure that two of them are now
perfectly aligned. There we go now. As it is perfectly
aligned right now, what I'm going to be
doing is going to be, let's say, putting in my
element inside of this. One thing I'm going
to do is going to be keep my text in
such a way so that it looks good, somehow good. Now the first thing I'm
going to be doing is, let's say I'm going to
put one element inside. I'm going to do is use
the circle over here. There we go. At the center I'm going to do is maybe put in
something, aesthetic. Okay, I'm going to
searching for aesthetic. Now from here I'm going to use
only one element or one of this to use it as
the main subject. Now the first thing I'm
going to do is going to be finding in maybe
something like this. We can use that if you want to. We can use it as
something like a, o, a branding for
something like that. We can also use this show over here and also brand
it up just like this. We're going to use this
now as we have it, what I'm going to be
doing is going to be, I'm going to do, take
this circle over here. I'm going to duplicate it. Now the first thing I'm
going to do is going to be clicking on this
circle over here. I'm going to do is
select on the circle. I'm going to edit the image. Now I'm going to slice it up as I've sliced it up
first as it is torn. Now I'm going to
press Apply First, I'm going to be removing
a couple of parts. I'm going to click
on BG Remover. When I click on
Background Remover, after selecting that, you'll basically see that it is
how it will look like. You can also remove certain parts or you can also
keep it just the way it is. It's going to be up
to you. Now, I'm going to click on Position. And I'm going to
find out the circle to let that part, there we go, looks quite better
right now I'm going to do is you can use
other parts too, such as this one
underneath, if you want to. I'm going to go off to position obviously
underneath, there we go. Looks quite good. I'm going to find out or make
it a bit bigger. There we go. Now as we did that, what
I'm going to be doing is going to be now
putting in our text. Now how do I put in my text? The first thing I'm going to be doing is clicking on this. Click on the Color. I'm
going to select on this. And select on this, and find out the exact color for this so
that it actually looks good. I'm going to do the
same thing over here. I'm going to do is click
on this over here. Click on this over here, and find out the
color which you want. I'm going to do the
same thing over here, border style color, and find it to be
something like this. Or maybe a black
one does look good. I'm going to click
on Eyedropper, and I'm going to
change it to this one. Okay, To put in my text, I'm to click on Text over here. Click on at a text box. Now make sure to use whichever
Vont you want to use. Now let's, I'm going
to do is cut this off. Now I want something which
is going to be good, right? Minimal, maybe funky. Okay, we need something funky. I'm going to do is find
something which actually will look very good with this
whole thing as a branding. Going to do is cut
this one off too. Let's see, whatever there
is to offer we have, so okay, we're going
to go off with school, which is also quite
good looking. I'm going to do wait for
a while until it is done. After it is done, what
we're going to do is select any of the
texts we want to use. Maybe something else too. If you want to use maybe
any of the textiles, make sure that you have
this open and also you are connected
to the Internet so that you get
full functionality. I'm going to select
any one of them, let's say. I'm
going to try this. Okay. This also looks very good or we can also
use different ones. It's all up to you.
You can also use this. Are okay. Now even though we have this, we're going to apply
our effect later on. You have to go off the effects and you're going to
find out this curve, which you can use this
to curve up your text. Now one thing I'm going to
do is click on Curve first. As you can see it over here
I'm going to do is click on this curve meter and you can fix it up
however you want. Now first off, make sure
you have your text at a certain position so that it actually looks
good from your side. I'm going to do is find out
the ones over here like this. Your text is going
to be over here. Okay, This is going to
be your text over here, But I'm going to select on this, click on Effects First. And then you have to make sure that this is going to
be somewhat like this. And I'm going to put
this a bit over here. There we go. I'm going to do
is put in my text over here, let's say what can we put you say now? I'm going to put it another one, but this time we're going
to do is flip it up. We're going to do is make sure that this is
somewhat like this. Or we can do something
like, you know, what I'm going to do is try flipping it up again, like this. But what we're going
to do is going to be clicking on this over here. Okay? Something like this. See, it's a lot better, right? I'm going to do select
on this text over here. Okay. First off, let's
cut up the whole thing. Now, let's try it.
Discount to 30% now as we have it over here. There we go. You have its discount up to 30% looks very good, right as we have it. This is how it will look like. And you can also
rotate it a bit, discount up to 30% and this
is how it will look like. If you want to change the color, it's also going to be up to you whichever color
you want to use. Now from here, you can
also select on position. Maybe this one, you can see it over here and change the color. Maybe we can change it to black. Or maybe somewhat like this. We can, this one looks
a lot more better. We're going to do change
this color to over here. I'm going to click on,
I'm going to do this one. I'm going to do the same
thing over on this one. There we go. Which is a very minimalistic and also
looks quite good. You can put up a couple of names too. It's going to be up to you. Now let's try something
a bit more different. Okay, Now from here what
we're going to do is going to be something
a bit different. But one thing about this
is that we're going to be making something by
using a lot of elements. Now if you put a
lot of elements, you have to follow hierarchy. Now when you do hierarchy, it becomes a bit,
let's say complex. Okay? First thing I'm
going to do is going to be adding in a page. Now when you add in a page, you have to add in a
couple of elements. Now one thing is
that you have to either do repetitive
method or either you have to position them or align them in such a way
so that it looks good. Okay, now how to do that. First thing I'm going
to do on elements, I'm going to make
certain shapes. Okay, first off, let's just take this square over here,
increase the size. I'm going to do, make
myself a bottom. Let's. Okay, let's just
search for maybe boles. Let's sing to use photos now. Now as we have photos over here, I'm going to use this
instead of the square. Why don't we just
use a photo now. I'm going to put it right over here as we can see over here. Now you can use also
different ones up to you. It's going to be depending
on how you work with it. Okay, I'm going to find out, maybe if you find
an animation one, it's also a lot more
better then how it is. Okay, let's just rest up to you. If you want to use maybe a different one
such as these ones, you can also use them. Just click on any one of them
and there go, we have it. It also looks quite good, right? I'm going to keep it right
over here as we have it. Now, the first thing I'm going to do is going to be putting in certain shapes or
certain sections. Now I'm going to be
using the same method, but what we're going
to do is going to be duplicating them first. Now as I've duplicated them, make sure that
these are smaller. Now I'm going to do, first
off, I don't need it. I'm going to click on Elements. I'm going to go for
all Cut this off. Now I'm going to be
a certain sections for each and every elements. Now there's going
to be text part, there's going to be
the same elements, there's going to be
maybe more headings, and there's going to
be just white spaces. Okay? Which helps you up. Sometimes I'm going to search for shapes, they don't enter. I'm going to wait for a
while until it opens up. Now I'm going to do is
search for it again. Shapes. There we go. I'm going to click on
this shape over here. We can make certain
parts like this. Over here I'm going to do
is click on this again. And here I'm going
to do is make a we're just this or
something like this. There we go. Now there are three
of these parts where we can put
elements inside of it. The first thing
I'm going to do is going to be duplicating this. Here I'm going to do is
put this element over here to do is crop it out. There we go, Done, we have crop that part out. I'm going to do is also going to click on this again and I'm going to do is make sure
that this is over here. It should have this type
of texture over here. Looks quite good right now, even though we have these elements over here
and it still looks good, it's because we still
have wide spaces in it. Now, what are these wide spaces? Obviously, you're going to need some wide space when you
are working with any of Your elements or any of
the graphics which you're working on because it
just allows you to bread. Okay, now I'm going to
do is put on text here. I'm going to put this over here. I'm going to start off with adding our text or our headings. Now the first thing
I'm going to do is going to be removing these. I'm not going to
be needing this. I'm going to click
on at a text box. I'm going to do is go back,
not school, obviously. I'm going to do is
maybe find something geometric or maybe sports. Whichever one you
feel like is good. I'm going to try
paragraph or surf. Okay, I'm going to do
is try paragraph first. Here I'm going to do
is maybe use this. This looks quite good. First things first I'm
going to do is put this over here, okay? As I have it. I'm going
to do, first off, make sure that this is
all grouped up, control. First things first,
I'm going to do reduce the transparency K. There we go. Reduced transparency. I'm going to select control, Reduce the transparency.
There we go. Okay, First up, let's
say control Z, okay? And group first. I'm going to take this over here. I'm going to take
this and reduce the transparency so that
we can see the pebbles, we can like see the pebbles that they are now getting
like blended up. But we need the background. Your paragraph text
should be over here. I'm going to do is
make another one, keep it under here. And obviously it
should be smaller. Right? There we go. I'm going to mak another one, make sure that
this is over here. There we go, the size, make sure this is left
aligned. There we go. Text should be over here. I'm going to do is click
on Position Arrange to the left as we have it. Our text are over here. I'm going to do is
make sure to copy this over here and put
your text over here. If you want to use
white, it's up to you. You can also use bold
if you want to sing, to use bold over here and
also use bold over here, and also italic if you want to. What you can do is also
change the color to white. Now basically pops
up and you have this white space
so that you have some space to breed and
also looks quite clean. You can see that these are the three graphic designs
which we've made right now. Now just by following the four key elements or
the four key principles. And also let's say a couple
more steps which we followed. Hope you understood
everything about this lesson. I hope you also
understood about how you can follow through
the key elements, or the key principles
so that you can make your own
graphic designs, templates, banners,
and all of them. In our next lesson,
we're going to learn how we can make
an Instagram post.
5. Instagram post: Creating an Instagram
post on Canva. On my screen, you can see that I have opened up Instagram. Now what we're going
to do is going to be selecting on whichever
size we want to use. In Canva, there are all of them. Now, the first thing is that
when you open up Canva, you will basically
find out 23 of them which are also named
Instagram and stuff. The first thing you're
going to do is that are basically portrait and square. Another one is story. You don't have to
select the story, but select whichever
one you want. In our previous lessons, we've used portrait because
we needed a bigger height. Or let's say the height
to be bigger or longer. But now what we need is that
we need it to be square. Now how do I do that? Basically, you can see that there is Instagram Post square, which is 1080 into 1080
means that it is square. And there's another
one which is portrait, which is not 1080 into 1080. You can see this
is 10801350 p x. What we're going to do is
going to use the square one because it is a bit more
convenient than how it is. Now the first thing
we're going to do is going to apply
more pages to it. Because obviously when you post, you don't always post only
one photo right on your feet. You post like multiple photos. We're going to add
like four pages. You can see the pages are also
counted at the same time. The first thing we're
going to do is going to be changing the
color of the pages. I'm going to do is
click on this color. I'm going to do is choose
something which is going to be very light and also
looks quite good. This is page one,
can see how it is. Page four and page one, I'm going to select on
this color I'm going to do is find out something
a bit more lighter. Now I'm going to do is put
1.3 to be the same color, 2.4 to be a bit different. Now on this one I'm going to do is select of this color first. And then I'm going
to do is just make it lighter by lighter. This is what I need this, and four should be this color. Now, all of them are of the
same but two color palettes. Now the first thing
I'm going to do is going to be starting
off with elements. Now let's go off
to our first page where we are going to
put in our elements. Now in our elements,
what we're going to do is going to putting
in maybe circle. We can put in shapes, we can put in like, let's say, where you can put in images and all of those steps
at the same time. Now how do I do that? The first thing you have to keep one thing in mind is that make sure that you're
connected to Internet, okay? And make sure that you are
connected to your account. Now about the account is
that you can use either free or you can use either
premium. It's up to you. The first thing I'm
going to be doing is going to be clicking on one of the pages where I'm
going to be starting off my first element
or my first photo, which is going to
be as our covered. I'm going to click on Elements. I'm going to wait for
a while, refresh it. I'm going to start off
with the first one. Click on the first, then I'm going to do is start
off with maybe, let's say a circle
or maybe a square. I'm going to use rounded square, which is also quite perfect. We don't need to, I'm
going to use one of it I'm going to do is going to
be making one over here. You can see that we
also have our border. Which you can see over here I'm going to do is going
to be making it white. First, click on the color, There we go, we have white. Obviously what we're
going to do is going to be fixing our
transparency of it. Let's go now here you can see that this is
how it will look like. The first thing I'm going to
do is going to be putting in a lot less
transparency over here. I'm going to do is make sure
that this looks like this. There we go, I'm going to
do is put it at the center. There we go. As it is
now on our center, we can also put in a
triangle if you want to. The first thing
I'm going to do is going to be turning it in such a way so that it
looks something like this. I'm going to make sure
that it shrinks down. There we go, we have
it at our center. Now first thing I'm going to
do is going to be putting in our image boxes where you
can put in your images. I'm going to do is start off
with this over here, right? This is going to be
your image boxes. Now here you can put in
whichever image you want to use. Let's say I'm going to do
is search for something. Maybe he don't enter, You
can see it like this. Go off the photos, wait for
a while until it loads up. You can see now this is
how it will look like. And you can see I
have two. I'm going to do is remove one of them. Or you can also use
it whenever you want. I'm going to do is, first off, you're going to do is have
them edited if you want to or you can also put it right over here,
something like this. This is how it will
look like, okay? You can see that I have
two of these boxes where I can edit and also
use whenever I want. I'm going to go off to elements, and then on your elements, you'll be able to use whichever
element you want to use. Now as we already
have applied those, we can also apply the
same things over here. Or we can do is overlap each other so that it looks better. Right, Let's try this. Let's do the same thing
over here on the box. And there we go. We have
two images over here. Now I'm going to just
click on Position, click on Layers, and
take it underneath. I want this overlapping. If you want to extend
this up till here, it will also look good, right? I'm going to take
it right over here. And there we go,
it looks better. And this is going to be, it can apply whichever
photos you want to use. I'm going to do is
just take any one of these photos and apply
directly over here. I'm going to just
take it over here. And there we go. We have
two of these images. Now, we can also use different type of
images if you want to. Now, I'm just using
any one of them. Whichever I see,
just so that you have the idea about
how you can edit them. Now if you want to
use any elements, you can also go off
the graphics and apply whichever elements
you want to use. Let's say from here I'm going
to do is maybe use these. I'm going to do is, first
off I'm going to do, take this over here,
turn it around. This is how it will look like when I take
them in the corner. Going to do is
going to be turning this upside down perfectly. I'm going to do is make
sure this is tidied up. I'm going to select on more. You can also go off the
shapes if you want to. You can align it if you want to. You can just go
off to positions. Arrange. What's I'm
going to do is top. You can see, there
we go, we have it. I'm going to do is go to back. I'm take it at the corner
there. We have it. Duplicate it. What I'm going to do is going to
be clicking on this, and I'm going to do
is turn it okay. We're going to turn it, we're
going to just flip it up. Just click on this. If you find flip, you're
going to flip it up. But if you don't find flip, what you can do is also just
click on this over here, then just click on
this or click on this. And there we go, we
have flipped it up. I'm going to do is
click on this again. I'm going to do is two back. What you're going
to do is going to be clicking on this one over here I'm going to do is
change this transparency. Let's say I need it up to 82. And do the same thing over here. Click on this. Up to 82, 83 is also perfect. Now we are done with
our first page. As we are done with
our first page, now we are not
like totally done. We're going to put in
our text over here. I'm going to do is use
whichever text you want to use. What I'm going to do is use this baked fresh when
you click on it. Just wait for a
while and then you can see this is how
it will look like. Now there are a couple more of these stuff which you
can see over here. As you can see, this
is baked fresh. I'm going to do is take
this underneath control X. Mood is just fresh food. Neonode is either keep it at the center or maybe
right over here. See looks quite good, right? If you want, let's say strokes, you can also apply strokes, you just go off the effects. Click off left select on
this one, click on Effect. You're going to do
is apply an outline. And there we go, we have fresh. I'm going to select
on this effect again, and then I want a bit of echo. Okay. You can see the echoing. To put the offset a bit
more the direction. This is where I want my
direction to be of the offset. There we go, we
have it. And then I'm going to do is
maybe duplicate this. Group. First duplicate it. Put it right where it
is on the top one. Mina Do is put in
a bit of stroke I'm going to do is let's
go off the layers. You can see the bottom one. This is the top
one. On the top one I'm going to do is
go off to effects. Instead of that I'm going
to do is put in outline on the bottom one I'm
going to do is go to position on this one. I'm going to go off to effect. I'm going to put in echo. Do is put this like
this direction. Should be somewhere
around over here. I want the color to be a
bit darker so that it is more visible There we go. Now we have our first
slide, totally done. Now as our first slide is done, we can see fresh food
right over here. We can also put the whole
thing, copy the whole thing, group them up if you want
to hold on a shift control. There we go, we
have it. I'm going to put it right over here. Fresh food. And
then I'm going to do is put this over here. I'm going to put
another text box. Let's, I'm going to do is type in O. I'm going to change the size. I'm going to select on this and select whichever
fonte want to use. What I'm going to
do is use this. I'm going to wait
until it is applied. After it has been applied, I'm going to do is move
on to our next page. What I'm going to do is apply more content and also
apply a lot more. Okay. Then we're
going to also apply other photos and other elements. In our next pages, you can see the text
has been applied. Now this is how it
will look like. Now let's go off to
our next one where we are going to apply
changes to our next page. I'm going to do is go
off to the next page. I'm going to do is find out
the same thing over here. I'm going to take
this over here. Okay, let's just duplicate it. And take it over there.
Duplicate over here. This time I'm going
to do is going to be taking that color. Or maybe let's take
this over to this side. I'm going to do is
change the color of this one over here,
which is this one. I'm going to change
the transparency. 82 is perfect. Duplicate it. I'm going to take it right over here, 180 perfect. There we go. Totally perfect. I'm going to do is
going to be taking another element where I
can put in my photos. Do take it right over here. Okay. I'm going to be
using something like this. Make another duplicate. And I want landscapes this time. There we go. This is
how it will look like. Okay, I'm going to
do is use this. Almost done with this
design and you're going to do is just put
whichever text you want to use. I'm going to do is
select on this. I'm going to do is
maybe rotate it a bit and I'm going
to reduce the size. Beach, please. I'm going
to do is change the color, this into something
like maybe this. Okay. Not this color. I'm going to do is change
it to maybe this. For this one which is the beach. On this one I'm going to
do is maybe put. Okay. This one I'm going
to do is change it to a bit of yellowish purplish. Okay. A bit of yellow. Okay. Okay. This is
basically how it is. Just revert it, never mind. I'm going to keep it this way. I'm going to do is
go off the elements. I'm going to search for beach. After I hit beach, I'm going
to do is click on photos. I'm going to do is just
take any of these photos, which I have over
here and there we go. We have applied in the photos. You can also put in your
text if you want to. You can also put in where it is. Okay. Let's just say I'm going to put this text over here. I'm going to put
the other element which I have over here to be
somewhere around over here. I'm going to take this. I'm going to make
another duplicate. I'm going to make it
turn all the way around. There we go. We have zero. Then I'm going to do
is going to be taking this like this and I'm going to do is
go off the position. I'm going to take this
underneath it. There we go. We have it. This is going to be our second page I'm going to do is put in
a bit of aesthetics. Let's see what we can
find. Let's click on See. I'm maybe put in a bit of
a couple of lines maybe. Let's just select
this. There we go. If you want to remove it or
remove a couple of parts, it's totally up to you. It's just up to you how
you're going to work with it. This is our second page. On our next page, we're
going to go off over here. You can also take this
underneath if you want to also go off to
the third page, which is going to
be quite similar, but I'm going to put in
circle over here instead of how I used it
in the first one. There we go, Click on
this transparency, change the color white
as we have a white. There we go I'm going
to do is put in my photo box inside the circle. As I've put it inside
the circle I'm going to do is put a text over here. I'm going to do is
type in lodge photos. I'm going to do is maybe
find something good. I'm going to do is
put in a bit of text. I'm going to go to
text at a text box. Take it at the top.
Increase the size. This is how it's
supposed to look like. Induce increase the size. There we go. Inside the box, it should be somewhere
around 60 or 51. There we go, left the
lined cut this off to type in what Simona is Royal. December 23 I'm going to do is click on this first
text or both of the text. Click on this, Let's
try handwriting. I'm going to do is select
on something good. Okay. Let's just use
what we had on this one. It's Go hand. I'm going to use Go che
hand on this one too. Let's go. There we go, go he hand increase the size a bit
more. There we go. We can put in elements on
this side too if you want to. I'm going to do is, well, Sema is duplicate it and
take it to this page. I'm going to do is
change the color. Let's use something like
red on the last page. We're going to do is three
photos. Now how do I do that? Elements. All we're going to find out this photo keepers are the frames where
I can keep my photos. I'm dot select the frames
which I want to use. Now what I'm going to
be doing is going to be finding out the ones, the heights are very small. I'm going to find out
shapes over here. We can also use the basic
shape of square or rectangle. It's up to you. You can also trim it if you
want to from here. What I'm going to be doing as I'm using rounded corners most of the time,
let's just use this. I'm going to do is
make three of these. Take this over
here. There we go. Duplicate, duplicate.
There we go. We have three of these. Now
as I have three of these, what I'm going to be doing is going to be applying
more elements. Now let's apply a
bit of element over here as we already have it. To go back. Now Sam is prep, let's just try road, not this one. And don't enter. Let's try whichever
photos we find. And on the road
trip we're going to add all the photos over here. Then after adding
all of the photos, we're going to apply a bit of
elements which will make it look a lot more better and
a lot more professional. Because I'm quite satisfied with these ones which also
looks quite good. This one is very good. This one also as this one, very subtle on this one, we're only going to apply photos if we can or
if we have any space, we will apply a bit of elements. Now I'm going to do is use the photos and I'm going to
do, I'm going to apply this. I'm going to apply this and
also this. There we go. We have three of the photos. Now I'm going to
do is going to be apply a bit of
element over here. I'm going to do type
in aesthetics again. I'm going to do is
go off to graphics. I'm going to do is maybe apply
a bit of this over here. What I'm going to do is try if it can be changed or
something it is not, so I'm going to do is delete it. I'm going to go down,
I'm going to do is maybe find something which
goes very well with this. I'm going to do is maybe
find something good. Okay, this ones are nice
to do is rotate it. I'm going to do is click
on position backward. There we go. Over here I'm going to do is find
maybe something better. This is going to be October,
if possible, October. I'm going to apply
coffee control Z. That's not an element. I'm going to do is, let's
try using another one. Here we go, this and also this one over here. Also on the last one, for the third
photo, there we go. We have four of the pages
which is completely done. And this is basically
how you'll be able to make your Instagram
post by using Canva. Now one thing is that
you can make it up according to your desire and
however you want to make it. So it's like totally up to you. You can also use
this Spotify frame which you have over here
so that it looks better. And you can use
photos inside of it, so it just looks aesthetic. Hope you understood
everything about this lesson, and I hope to see you in my
next lesson where we are going to be learning
about how we can make a book or maybe, let's say we're
going to be making a logo design by using Canva.
6. Google display ads banner: Welcome back to our, another lesson of Canva. In this lesson, we are going to learn about how we can make a Google display ads banner
without any further ado. Let's just jump into the
lesson by opening up Canva. As you can see that I have
opened up Canva on my screen. Now the first thing you have
to keep one thing in mind is that it comes out
in a specific size. Okay? There are a couple of sizes and all of them
have different sizes. Let's say the resolution. Now the resolution which
we'll be using in this lesson is going to be the
20 into 100 pixels. Now what you're going to do
is click on Custom Sizes and search it over
here, 320 into 120. Okay. Click on
Create a New Design. And you'll basically
see that exactly that this panel or this
page will appear up. Now one thing is
that when you make a custom size or
user custom size, you will basically get these
rulers which will help you to align a lot of elements
inside that page. Now you'll also see a
couple of templates which you'll be able to use now, they are all categorized
in a certain way. Let's say if you want
something green, it will give you green
type of manners. And all of those categories are. So now you can use
whichever one you want. For this lesson, I'm going
to be searching for, let's say, maybe an e
commerce type of manner. Let's search for maybe clothing, or maybe fashion, or maybe
something like shoes. It's going to be up to
you going to make it. I'm going to do Do for shoes. Or let's say search
for sneakers. Let's see, sneakers.
Okay, we have it. We can also click on shoes and also find the
one which we need. You will basically
see that or let's say whatever type of categories
of templates you want to use. It will appear up if
you want this facility, you will not get it in offline. You have to stay
connected to the Internet so that you get this
facility. Okay. What we're going
to do is going to be clicking on any one of my desire after I've clicked it. Now you'll also see what color or what pattern it is using. Okay? You can see all of the
datas are already pre made. Now what we're going
to do is going to be just changing
how it looks like. Now how are we going
to do that as we already have this and when
you go off the elements, or maybe you go off the text, you will basically find
that exact type of color pattern being used or
color palette being used. Okay, so the first
thing I'm going to do is going to be
removing the photo, which I don't need and I'm
going to put my own photo. Now as I'm already on
elements I'm going to do is search for shoe on Enter. And you'll basically
see all the type of shoes you want to use. Now I'm going to do is maybe find something blue
if it goes with it. Or we can also use white. It's totally up to you,
so I'm going to do is fine for anything you
can use these animations, or drawings or graphics. You can also use photos. Okay, if you go off the
photos and you will find out the photos
which you want to use. And you can also see the
photo which is being used or which was
being used over here. Now you can select
whichever one you want. Let's say I'm going
to do is search for a specific type of shoe
which is a bit fashionable. And so that I can
change these text to, let's say I'm going to do is maybe use something like those. I'm, I'm going to do
is go down a bit. Let's give something, okay. Something maybe a bit different. I'm going to be doing is selecting any one
of these photos. Let's, I'm going to do, use
this as I've clicked on it, it has appeared over here. Going to do is reduce
the size. There we go. And I'm going to put
it right over here. What I'm going to
do is put it back, so I'm going to click on Position I'm going
to do is go off the layers and I'm going
to do is drag it down. I'm going to go all the
way down, right over here. Okay? You can also
put it a bit above. See I'm going to do is put
it right above this circle. It looks a lot
better right now as I've put this I'm going to do this is not going
to be the same thing. So I'm going to do change
each and every one of them. I'm going to close this
off. I'm going to, let's say comfort is
the new trend, okay. I'm going to do is reduce the size of the text so that
I can put it in one line. There we go. I'm going
to change the names to. What I'm going to
do is put River. I'm going to keep
it right over here. Select on this text, and
I'm going to make sure to use bold and put it
right over here. We can change whichever one you want or we can also remove them. Delete. Delete.
Delete. Okay. Now it looks a lot more clean, right? But I'm going to do is
go off the elements. I'm going to do is
search for sports. They don't enter. I'm going
to go off to graphics. Okay, As I've put
in on the graphics, I'm going to do is
going to be search for maybe soccer because it looks
a lot more better, right? I'm going to do is
find maybe not soccer. I'm going to do,
instead of that, let's just search for any
athletic type of image. I'm going to put this over here. Take it right over here. I'm going to put it right
over here. Click on position. Just take it at the bottom. Okay, I'm going to
change the color. There we go, We have it. I'm going to keep it right
over here, aligned perfectly. Now what I'm going
to be doing is going to be changing
this text if I want to, or I can keep it
just the way it is. Let's just try changing maybe. Okay, we're going to
do is best for sports, can't beat in tactile. Okay. That I'm going
to do is going to be, as all of this is done, we can also apply different type of elements or any graphics,
whichever one we want. You can also put like videos, photos, and all of those. Let's just say I'm going to
do is find any one of those. Something may be like this.
Take it right over here. We can use it cause person control Z so that
I can undo the process. I'm going to also do
take it at the bottom. I'm going to do is click
on Transparency first. We can also keep it like this, or we can also do is take it at the bottom. Let's just do that. Instead of changing
the transparency, take it at the bottom, right over here. There we go. We have it looks a
lot more better now. We can also change the color. I'm going to do is if I want to change the color of the
page, we can also do that. You can see it looks yellow. It also looks good.
And we just have to change how it looks
like from over here. We're going to do is
change thing over here. Click on this and put on white. There we go. See however
you want to change it. You can have to just change two of these elements
and also the page, and make it look good in
each and every color. You just have to match
it up. That's it. Then as we're all done, we can also save it up and
share it however you want to. You can also upload
it whenever you want. You can also send
it to a teacher and you can also
send it to anyone. You have this share option,
which you'll be able to share to Google Classroom
and also Microsoft Team. And also make a public view link and also present it
whenever you want to. Okay, hope you understood everything about
this lesson on how you'll be able to make this Google Ads banner
by using Canva. And it's all up to
your creativity. This is just the
basic method of how you'll be able to do
that if you want to align it a bit more better and make it a bit more
better however you want to. If you want to make
changes, you can do that. And you can also use the
ruler to align all of these. Okay, All these pages are all of the elements which
you have in the page. If you want to add
more, just click on a page and you will
basically have another one. You can make copies
if you want to. Thank you for
watching this video. Up till the end and
in our next lesson, we are going to
be learning about the best pre templates
Canva has to offer.
7. Free best templates: Welcome back to our, another lesson of
Canva Project based. In this lesson we
are going to learn about the best free
templates which you will be able to find in Canva without
any further ado. Let's open up Canva
on our device. As you can see that I have
opened up Canva on my PC. Now the first thing you have
to know is that when we say the best free type
of templates to use, there are basically
a lot of category of formats or presentations
which you'll be able to make. Such as, you can make
presentations, you can make videos, you can make Instagram post, and also make websites, web designs, and all of them. In this lesson,
just like I said, I'm going to be showing you
the best free templates which you will be able
to find in Canva. They're going to be for
presentation, then video editing. And the next one
or the last one is going to be Instagram
post templates. I'm going to be showing you like a ton or maybe not a ton. A couple of templates which
you will be able to find if you even don't have premium account or have
any subscriptions. Those are, let's say, quite professional
looking and very good. I'm going to be showing you each and every one
of them today. The first thing
I'm going to do is select on presentation. I'm going to do is fine
at presentation first. Now the first
template which I'll be using is going to
be green and blue. Ten geometric lines. Okay, Let me just search for it. Green and blue, ten,
let's just search for it. Ten geometric lines, you can see green and
blue, ten geometric lines. You can also add in finance
report. There we go. Now you can use whichever
one you want, okay? This one is the one basically
you can see that all of the pages are very well made
and the data is very clean. You can see how it looks like. These are basically
can be termed as professional or
the ones which we can which we find in
the premium account, you can use this,
this is very useful. This is also something
which I use so that I can actually say
that this is very good. Now the next one which I'm going to be showing
you is going to be a bit more
differently themed. Okay. The next one which I'm going to be showing you is
going to be somewhat dark. I'm going to do is type
in gray scale, bold, big text to gray
scale, big text. Hit on Enter, and you'll basically find it right over here and also right over here. These are the two ones
I'm going to click on. Over here, Click on Apply, all 30 pages, and there you go. You can see it how different and different the team basically is of this specific template. I'm going to do is
don't show again and replace all, all of them. As you can see, this
is how it look like. Now I'm going to do is
go after the next one after going through a
couple of previews. This is very
professional looking, you can use it
whenever you want. Now the next one which we
are going to use is going to be Out Illustrated
how vaccines work. That's the name of it you're going to do is search for it. Out illustrated how vaccines work and there we have it. Click on it and apply all 14, you can see you'll be able to
change it however you want. And this is also very professional to use and
also looks very subtle, decent, and obviously
which is also good. Now the next one which
we're going to show you is going to be gradient,
modern webinar. I'm going to go back again, I'm going to do search
for gradients webinar. There we have it. Now we're going to use this, obviously the first one
ingredient, modern webinar, okay? Apply all 15 of them and see
how good it actually is, The color to the data, to the effects, to the elements. All of them look very
professional looking and also very decent and subtle. Now the last one
which I'm going to be showing you is also going to be a bit different and let's
say just peaceful looking. So I'm going to go back and this one is going
to be Navy Blue simple. Let's search for
Navy Blue simple. And then you have to search
for professional Seals. Pitch Professional. Sales pitch, it don't enter. And there we go, we have it. At the first one,
you can see this looks really good and
also very modern. You can use them and
also the fonts and the text elements are
also very good looking. Now I'm going to be doing
is add another extra which you can use basically
that is also very subtle. I'm going to do search
for the next one. The next one is going
to be dark green and hand drawn human geography,
let's search for it. Green drawn human geography. He don't enter and
there we have it. You can apply all
of them and you can basically see how good
it actually looks. This is also somewhat
an animation. You can play it up
whenever you want. Let's just click on
it and there you get. Okay. You'll be able to apply more animations
if you want to. This is basically how
it will look like. Okay. Hope you understood
everything about this part. Remember the templates which
you'll be able to find, you can just search them
whenever you want to. Now, the next ones
which I'm going to be showing you
are going to be video templates which are also
very useful to use, Okay? Now the first one which
I'm going to be using, the first one is going to be, let's say, colorful
fashion Youtube intro. But the first thing I'm
going to do is cut off this tab and then I
have to open up videos. Okay, Video editing, Play with
video when I click on it. Now you'll also
have the same type of section for searching
video templates. So the first thing
I'm going to be searching for is going to be colorful fashion, Youtube intro. There you go. You have
it at the first one. You can use it
whenever you want. You can see how it looks like. You can also use this, use this and also use this
at the same time. All of them look very vibrant. So you can use it
whenever you want to. Now, this is the first one. Next one is going to be
our product launch video. Just click Remove it. I Launch Video. There you go. You have in our product video, you have this over here. Click on it, and you
have this over here. See, this looks very good. This is for a mobile and
doesn't look that bad either when you apply all
of these pages, okay? Apply all ten pages. When you play them up, you'll basically see that
this looks very good. We're going to wait
for a while until it has been applied
and all loaded up. After it loads up, you can see this is how it
will look like. You can see how this
is changing and also all the motions at once to do get it back and then apply it again so that
we can see the whole thing. You can see this
is how it works. We're going to check
the whole thing. See, that's basically it, but even though whatever it was, it was really decent and good. This is going to
be the next one. Now the next one which
we're going to know, which you have to keep in mind is going to be Brown video. Just remove it and search
for Brown video, Hit on her. And it's supposed to be
something like this. Click on it, apply the videos, and then you're good to go. You can just like press on play. First off, wait for a while
until all of it loads up. After it has loaded up, just what you're going
to do is play it up. Okay, wait for a while until it processes all the data
and all the video. You can see it as loaded up. I'm going to play it up now. You can see this is
how it will look like. There's going to be
a small transition or animation after
each and every one, even though if it's not, it's
going to be quite smooth. Okay, now I'm going to do go back and the next one is
going to be yellow video. I'm going to do is
remove it. Yellow video. And there we go, we have
it at the first one, you can see this is
how it will look like. This is how it is. If you don't like it, you can
use whichever one you want. All of them are by
the same producers. You can use it
however you want to. Now, I'm going to go back and
move on to the next video, which is going to be black. Can it gives you off a very
pop type of color On this, I personally used it. It's good. I'm going to
do is type in black. Can hit on Enter and you'll basically
find it on this one. Okay? This is the one. This is also the one
which I've used. There's going to be something, okay? Just this one, okay? This one and also this one looks very good and you can use
it whenever you want to. This is for streaming.
If you have any sports athletic type of streaming deck or whatever purpose, you
can also use this. And this is also very
modern looking okay. You can see how it looks like. See, you'll be able to use
whichever one you want. I'm going to go back and as
we're done with black scion, next one is going
to be black, red. I'm going to type in black, red. This is going to be this one. Okay? This is the
one which I used. Okay? Red, black, or black, Red. Use whichever one you
want after you apply it and add in your own
text of your own desire. Now, the next one
which I'm going to be doing is going
to be dirty white. Search for white on enter and it's supposed
to look like this. Okay? You can also use
this if you want to. This is going to be
the sport related. If you want to use
this, you can just apply it. This is dirty white. The one which I've used is this. It also looks quite
good, very simple. You can use it if you want
to, if you don't want to. There are obviously
other templates which you will be able to use. We're going to wait for a
while until it loads up. You can see this
has been applied. Now you can play. You can see
this is how it looks like. This is very simple.
You can use it too. Now, the last one
which we are going to use is going to
be charcoal slate. Someone do remove it. Charcoal slate. Hit on enter. Basically,
I'm Enter again. I'm going to go down. There. We have it. This is the one.
This is also slate. You can also use it. This also
comes in charcoal slates. It's up to you whichever
one you want to use, plate up and see
how it looks like. Okay. These are the
video templates which I use most of the time. And these are very helpful and all of them
are basically free. You can use them up
whenever you want. Now we're going to do search for Instagram
free best templates. So I'm going to do is
first off I'm going to open up an Instagram
square post. Our custom size I'm
going to do is Square. Now what we're going
to do is go after templates and you
can use these ones. Now the first one I'm going to do is search for
geometric leaders, metric leaders. It on enter. And there we go. We have
our geometric leaders. We all of them belong
to the same template, so you can use all of them
whenever you want to use. Now the next one, which we will learn about is going
to be a bit different, but I will also show you how it will look like on your screen. The name of the template is pink makeup
ttorioI'ing do is remove this make up, hit on Enter. If it's not working like that, what you have to do is wait for a while and also
try different ones. I'm going to do is make up enter and there we go. Sorry, Matt. This
is supposed to be pink make up editorial. As I'm done with this
pink make up editorial, we're going to move on
to something a bit more different and looks educative
at the same time now, okay, we can also use
educational type of templates, which you can do is search for them and use it
whenever you want. Now, the third set
of template which I use most often is
about self care. Or let's say also
a bit colorful. Now how are you going
to search for them? The keyword is retro
skin care stickers. Going to do is retro
skin care stickers. It'll enter and this is how it will look like. You
can use it too. It's also very basic subble
and also good looking. You can try using it
whenever you want. The next one which I'm
going to be showing is going to be a bit amber. Or not even amber. It's also very calm. You can use it to, the key word for this is going to
be productivity woman. I'm going to do is productivity
woman, hit on enter. This is how it will look like, very calm and you can also change it whenever you want to. Now the fifth number set of templates is going to
be Pastel block spa. Now I'm going to do is
search for pastel blob spa, hit on Enter, and this is the set and you can
use it whenever you want. And also quite subble looking
and also very good to use. Now the next one which
I'm going to do is going to increase the
engagement on your Instagram. Now it will also
look very good and also very calm and peaceful. Okay, the first thing
I'm going to do is going to be searching
the keyword. The keyword which
you need to do is search for golden boho. How are you going
to search for that? I'm going to do is
search in golden boho. Coach hit Enter,
and there you go. You have the set of templates
which you want to use. Now the next set of template is going to be a
bit more better, a bit childish, a
bit more colorful, but it's going to be
aesthetic at the same time. The key word for that is organic beauty sale I'm
going to do is search for organic TY sale. Hit on Enter. There you go. You have it now. The next one which I'm
going to be showing you is also going to
be quite aesthetic. The last one which
I'm going to show you is going to be
aesthetic wellness. Aesthetic wellness. It'll enter. There you go. You have it. You can use whichever
one you want. It's going to be up to you. Hope you learned
everything in this lesson about the best free
templates which you can use in Canva without even getting any subscription or
buying the premium of Canva. All of them are quite
professional, so you can use them, fiddle with them, and also
let me know how you liked it. If you have any question, please feel free to
ask me any of them. Now let's move on
to our next lesson of this whole project.
8. Linkedin cover photo: Welcome back to our
lesson of Canva. In this lesson, we are going
to learn about how we can make a linked in cover
photo by using Canva. So without any further ado, let's just open up
Canva on our PC. On my screen you can see
that I have opened up Canva. Now one thing you have
to keep in mind is that this linked in cover photo comes in a specific resolution, but you can use two
types of resolution. The specific resolution
which you will find out linked in
cover photos are. The page size in Canva is going to be 2000
into 600 pick cells, but you can also use
13, 60 into 350. Okay, that's also doable, but I'm going to
suggest you to use 2,600 because you will be able to use it in all platforms. And obviously it's going
to be high quality. And if you use lower, it's going to be lower quality. And when you go off
to a bigger screen, it might get like corrupted or maybe sometimes you break
up the resolution a bit. So the first thing we're
going to do is you can go through these
if you see it, if you see it, you will
be able to use it. But if you still cannot find it, obviously we have to go up
here and create a design. When we click on
Create A Design, what we're going to do
is search over here for link Linked in cover. When you hit on Linked in cover, you will see linked in article, cover image 2,600 big cells. You can also make a custom
size type in 2000 into 600. Now when you click on it, you will basically
see this is also the same as linked in cover,
article, cover image. You can use both of
them whenever you want. Now after you're done,
just make sure to click on Create a New Design. When you click
Create a New design, you will basically see
this is how it will look like on the left
side of this panel. You'll basically find
these templates. In this lesson, we
are going to be making two cover photos. One is going to be by using the templates and one is
going to be from scratch. The first one, what
we're going to do is going to be starting from a template so that you get
an idea of how it works, how the interface works, and also how you'll be able to customize it
whenever you want. You can also save time
by using templates. The first thing
we're going to do is going to be searching
for something. One template which I need. Now from here I'm going
to be needing something. Let's say tech based. I'm going to search
for something tech. Now when I hit on tech, you will basically see
that there are a lot of tech related templates
which you can use. From here, I will be using one over here, this
is something I like. I'm going to click
on this and you can see this is how it
will look like. I have elements
such as graphics. I have text, I have
almost everything. But from here what
I'm going to be doing is going to be
changing the color. I'm going to do is
make one yellow. I'm going to click on it, I'm going to make this, I'm going to change
the next color to be something like this. Or maybe, let's go
off for something white or brighter. Okay. Now as it is done, I'm going to change the color of this page, or exact page. Now I'm going to do
is use this color. Now if I use this color, I have to change a
couple of things, right? But if I use this color, I also have to change
a couple of things. I have to just go off
with the flow and go off with the color pattern
or how it basically is. What I'm going to
do is I'm going to settle down to this color. But when I settle
down this color, I will not be able
to use these colors. I'm going to do is change the color into something different. I'm going to click on it. I'm going to do is use red. The next one I'm going
to do is click on Red. But I'm going to do is
make sure this is a bit darker or maybe
a bit brighter. I'm going to do do the next one. I'm also going to select red, but I'm going to select
on this new color. I'm going to make
it a bit wider. Now, you can also fix the transparency if
you want to Rico, we have our transparency fixed. Now as it is done, what I can do is also
click on this exact image. Now I can animate
it whenever I want. What's I'm going to do
is instead of that, I want it to maybe neon, okay, Or maybe tumble. I'm going to do use graph, Bic, Arctic tonic, rigo. Use whichever one you want.
It is going to be up to you. Okay. This is totally perfect. Now what I'm going
to do is going to be changing a couple of
texts and also I'm going to add in a
couple of elements in the next one I'm going to do
is make one from scratch. The first thing
I'm going to do is going to be clicking on maybe this Warner I'm going to do is Broadway Broadway
Technology Service. The future is here, okay. We can just keep them however it is I'm going to do is
just add an element. I'm going to type in
Tech, hit on Enter. All I'm going to do is find something which will go
exactly well with it. I'm going to do
increase the size. I'm going to keep
it right over here. What I'm going to do is going
to be keeping this under. I'm going to click on
Position, click on back. And there we go. We have it. Now I'm going to do
is forward a bit. Now you can see this
is not above it, it still looks quite good. Right now I'm going
to do is find a couple more things or let's say'm add this on two corners. I'm going to do apply
this over here. I'm going to do is
fix the transparency. Maybe a bit we have
fix the transparency. I'm going to do is
click on Position. And I'm going to do
is send it back. Okay, now as it is over here, maybe we can also keep it
right around over here, all around like here. It's going to be up
to you, it's all about the alignment.
There we go. I'm going to do
reduce it a bit more. There we go, I'm going
to make a duplicate. Again, to fix the transparency. The total highest, make another,
keep it right over here. I'm going to click
on transparency. I'm going to fix it up and
reduce the transparency. Now it looks quite good, right? This is basically going to
be our first cover photo, or let's say our linked in
cover photo for our first one. Now if you want to use your own photo, you
can also do that. Just go out the photos
and I'm going to do search for human, Get on enter, got the photos and you can use whichever photo
you want to use. Let's say you can upload
your photos obviously. But as I'm not going
to be using that, I'm going to do is just
click on one of them. I'm going to do is
just delete it. And there you go. You will be able to apply your
own photo just like this as our template based
cover photo is done. Now what I'm going
to be doing is going to be making something
from scratch. I'm going to add a page. Now you can see I
have the same type of the page color
on the second one, but I'm not going
to be needing that. I'm going to make
sure to keep it on white so that I can
change it purpose. Now the first thing
I'm going to be doing is going to be going back. I'm going to do is remove
all these because as I will not be using any
of those templates, I'm going to be
starting from stretch. The first thing I'm
going to be doing is going to be starting off, let's say, a meditation
type of cover. I need it to be calm. Okay, The first thing I'm going to be doing is going
to be searching for, let's say we can use a photo. I'm going to be doing is
taking one of these photos. I'm going to do is take
it right over here. I can see this is how
it will look like. There we go. This is going
to be my page. Okay. So I'm going to do is
next one I'm going to crop it up because
I'm not going to be needing this whole thing I'm
going to do is just take it right over here. There we go. I'm going to do
is make sure that this is perfectly
aligned over here. Press on Done, and there
we go, we have it. Now what we're going
to do is going to be clicking on this
and I'm going to do reduce the transparency that this is as our background image. I'm going to do is
right click on it. I'm going to do Image as
Background. There we go. It has been turned into a
background and you will not be able to remove it now
as I already have it. Now the next thing I'm going to be doing is going
to be clicking on this again and reducing the
transparency a bit more. Now you can see the
transparency is a lot less. Now I'm going to do is
going to be making in my sections for where I will be able to put
in my elements. Now as I've put ocean
I'm going to do is search for ocean.
It don't enter. Now I'm going to do
is click on Graphics. Now in graphics, I will be able to find out
a lot of things. Now select whichever one you feel like it is
going to be good. I'm going to do is
use this, okay? This is going to be a very good, let's say logo type of things. I'm going to do is keep
it right over here. I'm going to add in my text. I'm going to click on Text, Add in a text box
and the name of our page is going to be Breeze. I'm going to do
increase the size. I'm going to change the color. We'll see if white is visible. We'll see it is totally visible. I'm going to do
is click on Bold. Increase the size breeze. Or let's just keep it
over here. There we go. We have this. Now
the first thing I'm going to be doing is
going to be going off the elements and find out a
couple more so that I can put it in my page. Which I will be doing is searching for a
couple of things. Now I will be taking, this is going to be our image. I'm putting my image
holder over here, this is where I'm going
to be putting it. There we go. Now what we're going to do is going to be putting
in a couple of elements over here or maybe a couple of
elements over here. First off, let's put
in a couple more text. I'm going to go down and find something
which will look good. This one I'm going to be
using maybe something. Okay? I have to use
something different. Okay? I can, this
one bird. Use this. What I'm going to be doing
is going to be taking this. What we're going to do is going to be putting
it over here. Now I'm going to cut this off. Relaxation on, there we go, there we go. Relaxation on tour, okay.
We don't need this. Another page then I'm going to do is going to be
relaxation on tour. I'm going to do cut this off, find comfort in best way possible. Now we can change whatever
you have over here. Well, Sem type in 2024 I'm
going to do is cut this off, say London Streets Park A 03:00 P.M. two 07:00 P.M. Okay, so we have this over here. We can also take it
down right over here. And we can also take
this over here. Take our breeze text
right over here. You can see this is also
how it will look like when we use this or we
can also use it on it. If it's not visible,
we can take this. I'm going to click on this. We can change the
border if you want to, but I'm not going to
be using any borders. Let's just keep
it however it is. Okay? We're going to
take this text over here and keep it right
round over here. I'm going to be putting one of the photos and I'm going to
put in a couple of elements. Okay, now the first
thing I'm going to be doing is going
to be making all of them on the right side do
the same thing over here. Doing is also clicking
on all of them and keeping them on the right side as we have
it all on the right side, you can put in a couple of emails and phone numbers
and all of those. Let's say I'm going to put
in a couple of text box, I'm going to do is X xx. There we go. You can put in
your phone number over here. I'm going to put in
another text box. That is going to be
the email at the rate, mail.com go. I'm going to put in
another text box, www.breeze.com There we go. We have three of our
important stuff over here, Contacts and all of those. And then I'm going to be
doing is putting in one of the photo I'm going to do
is go off the elements. I'm going to search for
maybe relaxation answer. Go off the photos I'm going
to do is find a human. Okay, I'm going to do
is search for human. I'm going to go
off the photos and then I'm going to do is
search one of the photos, which I basically need. Okay. I'm going to
do is use this. I'm going to do is take
it right over here. I'm going to do is
click on Position. I'm going to go
off the layers and take it under here. There we go. Now you have your linked
in cover photo all ready. Now what you can also do is click on both of these images. I'm going to do is
click on Position. Click on both of these,
make sure to group them up. Now as to have group up, I'm going to do is find out
a perfect location for them. There we go. Okay, now we got it. This is going to be
our linked in cover. If you want to
increase the size, you can also increase the
size whenever you want to. You can also save it as a template so that
you can use it for various purposes and
also for later purposes. Hope you learned everything in this lesson about
how you can make a linked article photo or maybe just your article or
your CV photo by using Canva. In our next lesson, we are going to learn
about how we can remove background in
Canva of specific photos.
9. Removing background from images: Welcome back to our
lesson of Canva. In this lesson, we are going to learn about how we can remove backgrounds from images
just by using Canva. After you open up Canva, what you're going to do
is going to be opening up the templates
or any of these, whatever you want to try. I'm going to start off
with maybe a presentation. I'm going to click on
Create A Presentation. And I will have my
page over here. Now I'm going to be making three pages with three
different photos. I'm also going to be showing you how you'll be able to do it and how you will be able to remove the background
by searching for it. Okay. So the first
thing I'm going to do is make three pages. Now in three pages
I'm going to apply in three photos and I'm going to
do is go off the elements. I'm going to do is let's
search off a couple of photos. Click on L. I'm going
to do is go down and find something very
simple to look at. Okay. I'm going to do is maybe go down and
if I can't find it, I'm going to do search for it. I'm going to do search
for ball, hit on Enter. And there we go, we
have the ball I'm going to do is maybe
click on this. There we go. We have
our first photo, which is on the third slide. Okay? So we have our first
photo on the third slide. On the second photo I'm going
to do is search for glass. Now in the glass
I'm going to do is search for another photo
with a background. Just click on this. There we go. We have our second photo
on our second slide. On the first slide, what we're going to do is upload my own photo from my desktop. Click on Upload. I'm going
to click on upload file. Now in this file, we can see over here that I have this
photo in our resource file. You can also use it
whenever you want to. I'm going to click on Open. It's going to upload
itself on the section. And then I'm going to do is take this photo right over
here onto this page. I'm just going to click on this. And there you can
see I have the photo ready now as I have
three photos ready. But I'm going to do is I need to remove the background now, how do I do that now? First thing you
have to do is I'm going to do is click
on this photo. After you click on
this photo or click on any of these photos over here,
you can see it over here. Now you'll find out Edit Image. Click on Edit Image. Now you'll find out
recently used BG remover. Okay? Now, this will not be available when you
just open up Canva. Okay, you have to find it now, how are you going
to find it now? There is the section you can see over here,
Search for Effects. Now in Effects, what
you're going to do is search for BG remover. Hit on Enter, and you'll
basically find it over here. And you can also click
on Check It Out. And you can see on
the effects section, you will find out BG remover. Now it is on the magic studio, and also on the new one. Now one thing is that
you cannot use it if you are using a free
canvas subscription. Okay, If you need to buy
a subscription or buy premium so that you can use
this background remover, Not just background the premium, you will get access to a lot of stuffs, almost everything, okay? Almost everything.
Now you also have a magic Azor. You
can also do that. You can also add BG remover. So I'm going to do remove the backgrounds of
each and every one. I'm going to click
on BG Remover. Now. It takes a bit
of time for it to process the photo and then
remove the background. You can see it has removed
the background very easily. Now let's try it
for the next one. I'm going to click
on this photo. Click on Edit Photo, and you can see BG
Remover over here. Click on BG Remover. Wait for a while,
and you can see the background of the
photo has been removed. Now let's try it
for the last one. Let's, I'm click on the
photo Edit Photo BG remover. And there we go. It didn't
even take that much time, it just removed the background. But if the photo is going
to be a bit complex, like it cannot detect
the background, there's a lot of details, it takes a bit of a time. So you just have to
stay connected to the Internet and also you
just have to stay patient. Okay. So that you can see how the background
is being removed. This is basically how you'll be able to remove
the background. Let's try it for another one. Let's just show to you
when there's complex data, okay, are complex
elements on the photo? I'm going to clot on
elements and I'll search for maybe human don't enter. What I'm going to do
is maybe use something a bit complex Sema to
do is maybe use this. Okay. Now I'm going to increase the size
first. There we go. Now you'll basically
see that it will also be selected very easily. I'm going to click
on BG Remover, and you can see
it has been done. Going to do is find
something a bit more complex where
there is a lot of data and sometimes
the BG remover doesn't even work and
there's a reason for it. Okay? Because it cannot detect all of the
elements or a lot of elements inside of it as it is not a photo editing software. Okay, I'm going to do
is click on Edit Photo, click on BG Remover. And I'm going to wait
for a while and you can see the selected data. The data has been selected.
Now what if you use? You know, couple of
them at the same time. Let's naming to do is
use the one where there are a couple of people
at the same time. Naming. Go up. Let's try this. I'm going
to just click on its, click on Edited Photo,
and click on BG Remover. I'm going to wait
for a while and you can see this has been done okay. Still it is now selecting
or remote background, removing the background
very easily. You can go and try through a
lot of stuffs and a lot of photos and try removing the background of
your own images. And also if you want to edit it more like this magic eraser, you can also erase
specific parts, specific elements
inside of a photo. And you just have
to wait for a while until it loads up process data. And you can also remove specific people from
the whole image tube. That is going to
be a magic eraser. Now, how do you do that? By this magic eraser. Will you do that?
Will you do that? I'm going to do is going
to be removing one photo. I'm going to do, go back, I'm going to delete this photo. I'm going to do is
maybe find this. Okay. Now as I've edited that, I'm going to do
try on edit photo. I'm going to do is try
to use magic erazor. Now when I use magic erasor, I'm going to do is remove
all of these parts. Try to select the parts. You can also brush
over the image. Okay, you're going
to wait for a while. After you wait for a
while, you'll basically see the part that was over here will be removed or the part that was brushed over
will be removed. But it just takes a bit
of time because you can, but you can see that this is not like completely
removed. Okay. This is going to be removed in such a way that if there
are specific parts, it's going to be
removed that way. How do you do that? Let
me just show it to you. Let me just show I
don't want this hand. Remove this part. Remove it. There we go now to just wait for a while
until it is all processed. Now you can see that the hand
over here has been removed. This is like very simple. Now, if you want to
remove specific parts from a specific image,
you can do that. But if you want to remove a
couple of different things, let's say something like this or maybe remove
the whole background, then I'm going to suggest
you to use BG remover. Now you can also use a
couple of other things. You can try it over here if
you want to grab any object. You can also do
that I'm going to do is click on magic wrap. Now the first thing
you have to do is select the specific part and then you will be able to
move it wherever you want. But one thing is
that it takes a bit of time to process up the data. Just stay patient for a while
until it selects the data, and then we'll be able to
move it wherever we want. You can see it has
been selected. Now I can change the position of this image wherever I want,
see something like this. You can also do it for
different subjects. And it's all up to you. Hope you understood
everything about this lesson on how you'll be able to remove the background of images either from Canva or either
from photos of your own. You can also try
different other stuff, such as removing
specific parts and also moving specific parts
from the specific image. So hope you understood
everything about this lesson. And now let's move on to our
next lesson of our course.
10. Facebook cover photo: Welcome back to
another lesson of making Facebook cover
photo by using Canva. Without any further ado, let's just open up
Canva on our PC. On my screen you can see
that I have opened up Canva. Now what is the first
thing you're going to do? The first thing
we're going to do is going to be opening up that specific page where I can edit my Facebook
cover photo. Now there are a couple of
things you have to keep. One thing in mind is that
you have to make one, okay? Now you might find out
cover photos over here, or maybe if you search
for recover photos, you might find it or might not. So what you can do is click
on Create a Design and search for Facebook cover. Okay? Now you can see this Facebook cover
photo is over here. Okay? But this is
not going to be the exact one as we need to be. And obviously,
Facebook cover photos nowadays are not
this big, right? So obviously now you
can see that you will have to make
it on your own, okay? Now, how do you do that? Now there are specific type
of, you know, resolution. Now, let's go off to any of our web browser and let's
search for something. Let's search for Facebook
cover photo resolution. Now hit Enter and their reg. Now there are different sizes for different types of pages. Now you can see there's also the Save zone which I'm
going to be making, and also the Save
zone over here, visible on mobile desktop. Now, are you going
to customize that? Now we have to combine 23, let's say pages to make our own. Now how do I do that? As you can see,
851 wide and 315. So it can go up to 320 into 312, to 380 into 360. Now let's just go off to Canva again and
start off our thing. Now the last one
which we're going to keep one thing in
mind is that we will have to make something such as 64360 pick cells so that
we can make our save zone. Now it is also showing us
our save zone right now. We're going to make
that right now. Let's open up
Canva. There we go. Now the first thing
you're going to do is click on Custom Size. Now in Custom Size, what you're going to do
is remove the one. Okay? This is my previous
width and height. Now on the width, first thing I'm going to be
doing is going to be the topmost or
the backest page. Now that page is going to be 820 into the height is going
to be first off 360. Okay. Hit on 360, Click Concrete, A New Design. Now when you click
on New Design, you will see this page. But this is the biggest one. This is the backest one, okay? But we're not going to
be needing it right now. Now as we have the page now, we're going to be
making our margins, also our save zones. Now to make our save zones, what I'm going to be
doing is going to be, first off, I'm going to
click on Home again. This is our save zone. This is where I
will be making it. I'm going to click on
Custom Size 820 into 312. Hit on Create a New Design. Now our design has
been made over here. Okay, so we have this 36312. Now the last one
which we are going to make out the safe side. Our save zone from left to
right is going to be 640 type in 640 into 360 cells. Hit on, create a new design. Now this is going
to be side to side. Now the next thing
what you're going to be doing is going
to be making boxes. Now how do you make boxes? But first thing I'm going to
do is click on this page, which is going to be
the backest page. You can see it over here. I'm going to click on this
size or click on the color. Now let's just make it something like this
color, or maybe this. Or maybe click on
something like this. And I'm going to make
something look very calm. Okay, now as this is going
to be our backest page, now we're going to put
in our save zones. Now for the save zones, what you're going to
do is go off elements. When we go off the elements, we're going to do is
find out the shape. Let's apply in this square. I'm going to do is
get it over here. I'm going to make a
full size of this page. Now I'm going to do the
same thing on this one. I'm going to do
is take elements, take a square I'm going to do is take it right
over on the corner. I'm going to make it
maybe this. Okay? Fill the whole page, and now it looks good. Now what I'm going to be doing
is going to be copying it. Okay, I'm going to copy this. I'm going to paste it right
over here. This is now paste. I'm going to keep it at
the center perfectly. You can see now it
is at the center. Now the next one I'm going to do is going to be copy this one to. Copy paste it right over
here, keep it at the center. Now you can see that this part I'm going to do
is take this one over here, click on its layer, bring to forward this part. And this part is going
to be our safe zone. Now how do that. First I'm
going to click on this, I'm going to do is first
off click on transparency. You see the part over
here, up to here, to here, That is going to
be our safe zone and that is where we are going to put in our elements.
Now how do I do that? First thing I'm going
to be doing is going to be this ruler and guide. Now how do you turn
on ruler and guide? So you have this option
over here called File. When you click on File, you'll have this view settings. Now in this you will find
out Show Rulers and guides, and you can also add
guides if you want to. You can also see that there is this shortcut key which
is going to be shift R, so that you can turn on
auto guides KR rulers. Now from here, as I already have my rulers and guides open, what I'm going to
be doing is going to be putting in that margin. Hold onto this over here. I'm going to take
it at the bottom. This line over here. Take another line and
put it right on this. We'll do the same thing
on this left side. Take it right over here. The last one is going
to be over here. There we go. Now as
I'm done with this, I'm going to do is cut the
other ones off as I don't need it anymore and we already
made our save zone. I'm going to do is
just delete them. There we go. This is basically
going to be our save zone and that is where we
are going to put in our data or whatever there is. Now you can also put
in a background, but it doesn't matter because
you're going to put in the background over on the whole page. Now,
how do you do that? You can use templates
if you want to, or you can also use just
a color if you want to. But we already got our margins so that we already
know the alignments. Now the first thing
I'm going to be doing is going to be
clicking on Design. Now, choose whatever
you want, okay? You can use a template
or maybe a design. Now you can also select any of the colors or palettes
if you want to use. Now the elements I'm
going to be doing is searching for
something on Enter. And there we go. Let's click on Peaceful. I'm going to do is click on CL. There we go. We have a whole
lot of things right now. You can apply
basically anything you want but you can also
use graphics to, if it's up to you for now
I'm going to be doing is searching for I'm going to
do is go off the photos. If you want to use
any of the photos you can apply it whenever
you want to. Well sea use this as this. Take it right over here.
I'm going to increase the size until I
fill the whole page. Or you can write, click on it and set Image as background. There we go. Now it
is totally perfect. I'm going to click
on Transparency And reduce the transparency
if you want to, or you can keep
it however it is. Now I'm going to do is
click on Elements again. I'm going to take another box. I'm going to take
it right over here. I'm going to increase the size, make sure that it
is white in color. And I'm going to do is
fix the transparency. See, there we go. It's now totally perfect. Now the thing I'm
going to be doing is going to be putting
in my elements. Now I'm going to do
is start in for now, as this is going to
be our cover photo, we don't need a lot of stuff. But we can put in a
couple of text over here. Let's say this is going
to be something relaxing. So I'm going to do
is go off the text. When I go off the
text, I'm going to do is put in something
from over here. But you can also put
in on your own by customizing it as I want
to save a lot of time. I'm putting on any
one of these, okay? As I have it over here, I'm going to put on steak. Now when I click on it, it will appear right up
on my screen over here. I just have to wait for a while and I can see it
has been opened. Now what I'm going to
be doing is going to be keeping it at a side, let's say going to do
is put it on this side, but make sure to put it
inside of the margin. Do not take it out
of the margin. I'm going to do is
customize this every night starting from 08:00 P.M. stake nights. Now, this one Boulevard Avenue, slot five. There we go, state night. Then I'm going to be
doing, is going to be putting in, let's say the photo. Now there are a couple of photos which you'll
be able to apply. Now let's search for
stake first. On stake. I'm going to see all, I'm going to use this, this looks really good. I'm going to do is click
on over here. There we go. We have a photo. Now as we have it over here, you can put it right
around over here. Now you can see this is
how it will look like. You can also apply in a couple
of photos if you want to. Let's say you want to apply
this now I'm going to keep it at the center
of the whole thing. Just keep it over here. I'm going to go off
the transparency and reduce the transparency up here. There we go. We have it. You can see how
good it actually looks. You can also use
photos if you want to. Let's make a couple
more starting from scratch and also let's
see how it works. Let's, I'm going to add page and you'll basically see that
we still have the margin. This time I'm going to be
doing for a photographer now how he wants to make it to do is going to be
clicking on the page. Now instead of that I'm
going to just search for photo or maybe. Let's just good pan
get any of the photos. Click on CO, I'm going to
do is make sure to put any one of those I'm going to use right click, just background. There we go I'm
going to do is click on transparency over here. Reduce this, okay? Now even though I reduced it, I'm going to do is make
sure to put a pink type of what I'm going to do is
go off the elements again. I make sure to put
this over here. I'm going to get off the colors. I'm going to find out pink. Now I'm going to do
increase the size. Now I'm going to do
fix the transparency. Up to here, there we go. It is now perfect as we have it. What I'm going to be doing is going to be putting in a lot of things I'm going to do is
put this graphics over here. I'm going to wait for a
while until it appears up. We're going to search for Japan. Okay, make sure to put on
Japan I'm going to do is obviously search for a lot of stuff I'm going to hit on all. And there we go, we
have a lot of elements. Now, I'm going to be doing
something, just like I said, someone who's a photographer I'm going to do is use any of these. I'm going to use this I'm
going to do is rotate it. There we go. I'm going to do is
click on Upload. I'm going to do apply
one of the photo. I'm going to click on
Upload files or less. I'm going to click on upload
file, and there we go. We have it. I'm going
to click on it open. I'm going to wait
until it opens up or upload after it
has been uploaded. To select on this, I'm going
to do is edit the photo. Click on BG Remover so that
I can remove the background. Now after I remove
the background, that is going to be, let's
say in our safe zone. Now you can see
this one is not on the safe zone because that
is going to be going out. Anyways, I'm going to
do is click on this. Just keep on over here. There we go. Okay. Now another thing
what I'm going to do is going to be
searching for elements. Now Japanese frames it
on enter. There we go. We have this Japanese frame
over here I'm going to do is put it right over here. Okay, select on this. There we go. I'm going to increase the size. Increase it in such a way so
that it covers up this part. I'm going to take it right
over here all maybe. Let's just try deleting it and putting it something
which will work. What I'm going to do
is put this over here. I'm going to just reduce
the size. There we go. I'm going to keep the
thing I'm going to do, apply this over at the top. I'm going to zoom in now we have to take it
over here. There we go. As it has been done, what I'm going to be doing is
going to be putting in other elements now as we are done with this or we can
also use this if we want to. Now I'm going to
do is take this, we're going to make
it super Japanese. I'm going to remove it. Instead of that, I can just
use directly this. Right. Delete. There we go. I'm going to select on this, the photo magic eraser I'm
going to do is first off, get back I'm going to do is make sure to use both of
them at the same time. Group them up. There we
go. As they're grouped up. Right now, I'm going to
select on the whole thing. I'm going to do edit
the photo magic razor. Okay. Now on this part I'm
going to do is go back, take it a bit down, there we go. As it is done, what
I'm going to be doing is going to be
applying in our text. I'm going to go off the text, I'm going to do
search for Japanese. There we go. We have to do is maybe search for this. Okay. Select on this
text professional, a graph, increase the size, additional
photographer induce. Make another duplicate that. I can use it under it. Call inquiries and photo. Reduce the size over till here. Select on all these. I'm going to reduce the
font to do is bold it up. If possible, control
a son boldbleI'm. Keep it just like this.
Then I'm going to do is going to be making it
another one to do. Go ifont. Take this, go ifont and then I'm
going to apply the mail. Then we're going to use
the contact number. Then all of those I'm
going to do is type Xx X equals a number. There we go. I'm going to do is
put another one, Du, right over here. Let's say at the rates Yahoo.com I'm going to duplicate
another one. Do is cut this off. Do saw Rti.com There we go. We have all of them
ready and we can also put in whatever you
want for your cover photo. You can also apply
different customs or elements if you want to. You can also do a lot of stuff. A lot of elements change. A lot of things to
do is Japanese. I'm going to hit
on Enter Graphics. And there are a lot of things
to put this over here. I'm going to do is
keep it at the center. There we go, I'm going to do
is click on position layers. Just take it at the bottom, not like totally bottom. I'm going to do is
click on transparency. Reduce the transparency.
There you go. Looking quite good. Go
off the elements again. I'm going to do is search for Japanese again and then I
want a couple of patterns. I'm going to go
off the graphics. Let's say I'm going to
do is maybe use these. Okay, this is quite good. I'm going to do is, okay,
we can also use this. What we're going to do is cover up the whole
page with this. I'm going to select
the whole thing. I'm going to keep it
right to the center to duplicate another
one right over here. Take it just like this. Now what I'm going to do is going to be clicking
on both of them. Control, What I'm going to
do is go off the position. I'm going to take it at
the bottom, over here. Okay, not under that. I'm going to do is
take it over here. I'm going to do is click on the transparency
I'm going to do is reduce it until it looks good. There we go. I hope you understood
everything about this lesson on how
you will be able to make Facebook cover photo by using Canva and how you will be able to
get the resolution. So let's move on to our next lesson where we
are going to be learning about how we will
be able to make a Facebook post design
by using Canva. Without any further ado, let's just jump onto
our next lesson.
11. Facebook post design: Welcome to another
video of Canva. In this lesson, we are
going to learn about how we can make a
Facebook post design. Or how we can design
a Facebook post on Canva without any further ado. Let's just open up Canva and
start setting up our page. You can see that I
have opened Canva. Now, what is the first thing
you're going to do now? You might think that there
is this Facebook post over here and there's going to be
Instagram Post mobile video, Instagram, Tiktok video,
Facebook cover and all of those. But one thing is that
you're going to search up directly and put up
the exact resolution. In my previous lessons, I've shown you how you
can make a linked in profile or let's say a
linked in cover photo. Then we have Facebook cover
photo and Instagram designs. We are also going to be using a specific type of resolution
for our Facebook post. Now there are going to be two methods of how
you can do that. When you open up Canva, if you are using the
latest version of Canva, you'll basically find out
Facebook post right over here which is 940 in the 788 pixels, which is like a portrait. You can also use that, but what I most of the time
use is that I go off to create a design and then I search for Facebook
post over here. And you can also use 800 at the same time when you
click on over here and search for Facebook
and then search for Post. Now when you search
for Facebook post, there are going
to be a couple of resolutions which you
will be able to use now. There's going to be a landscape, there's going to be portrait, and obviously there's
going to be square. I most of the time use landscape which is
going to be this 1940, not that this one, which is
1,200 into 630 peak cells. And I also use 1080 into 1080 which is
going to be square. And that is also
the same resolution as we get on Instagram. So the first thing I'm
going to be doing is going to be using both of
them at the same time. And show you how it works. Let's start off with this
Facebook post square. Okay, I'm going to click
on this just in a while. It will open up
that page for me or that exact size of resolution where I can
put in my own elements. Now I will be making two, okay, Which is going to be landscape, and another one is
going to be the square. What I'm going to be
doing is, first off, let's start off with this
one and start adding our own content,
our own elements. Now obviously you can
apply in your own styles, on your own, like templates. You can see a couple of them. When you just click on it, it
just directly gets applied. But I don't need
any one of those. Right, I'm going to do is
use whichever one you want. Let's say if you want
fashion, you have this. And there's obviously tons of categories of templates
which you'll be able to use. Now from here, what I'm
going to be doing is make one which is going to be from template and make one
directly from scratch. And I'm going to do
the same process on our landscapes too. I'm going to do is use this. This looks quite good. Let's say from here I'm going to do is change the content, change everything, and
also change the color. I'm going to do is change it to, let's say this one, okay? It looks pink. I'm going
to do is change the color. I'm going to select on this, I'm going to do is change it. Okay, Let's say this
one looks good. And also these ones, I'm
going to select all of them and it can change or
animated whenever you want to. I'm going to do is click
on it and I'm going to do change it to this color. Change this color to also I'm going to do is
change this color. Okay, there we go. We
have changed the color. No, I'm going to select
on this color two. I'm going to change it to this
obviously on the last one. Then I'm going to select on this and also change this color. If it's still not matching up, I'm going to find something different which will
go very well with it. You can see now this color
goes quite well with it. Now what I'm going
to be doing is going to be changing our photo. There is this photo holder. As I already have
the photo holder, I can upload whichever
type of photos I want. Now this is content writer. I want something different. Let's say food. Let's say 2047 Food Service. Okay, I'm going to be doing is putting in like
food or let's say maybe a restaurant
restaurant on enter. And there we go. We have its, I'm going to go get a couple
of photos which I can find. What I'm going to do is put this I'm going to do is
find right over here, There we go, 2047 Food Service. I can also use different type
of photos whenever I want. What I'm going to
do is maybe put something like this.
This looks better. There we go, 2047 food service
and also goes quite well. Now, I can also change the color according to the photo
which I have over here. You can see this is how we look like or maybe
something like this. To do is change the
colors of all of them and maybe turn it
into something like this. To change this color to to this I'm going to do is keep it just the
way it is over here. Maybe I'm going to do is change it to maybe a bit different. What I'm going to
do is maybe a bit yellowish over here or
maybe dark brown, brown. Okay, I'm going to do
use brown on these. Do take this and
I'm going to put on dark brown on this one, I'm going to use the brown. I'm going to put dark
brown over here. Just going to be over
here. On the next one, we can also apply in A and we can change
whatever we want over here. Okay, We can also change
the color over here. Let's say I'm going to
keep it dark brown. This is basically how you'll be able to customize
it according to your need and also make it look good according to how you want. Now the next one I'm
going to be doing is going to be
starting from scratch, as I'm going to be starting from scratch as we already know. A very simple method
I'm going to do is maybe follow a couple, okay? Now the first thing
I'm going to be doing is going to be
selecting the color. Now I'm going to do is maybe find for something
anywhere from over here. And I'm going to
make it very light, it looks calm, and
also very smooth. I'm going to be doing a click
on any one of these colors. Let's use this. This color is very smooth
and looks quite good. Okay, As I have my background, now I'm going to be
doing is putting in my own content.
Now how do I do that? First thing I'm
going to be doing is clicking on elements. From here. I'm going to do, I need some photo holders. I'm going to select
on this and I'm going to do is keep
it at the corner. Hold on a shift control Z. There we go. We have
a circle over here. I'm going to do is put in one of the photos I'm going to do is, let's say this is going to be
something related to spam. Hit on spa. I'm going to do
is go off the photos and find any one of the photos
which I need I'm going to do. This looks quite good and you can see this is
how it will look like. If you don't want
to use that, you can go off for something else. So maybe this also
looks quite good. Also a couple of different ones, so this maybe this one, okay? This is a lot
better. There we go, to change this color into
something different. So I'm going to do,
maybe go off for something like
this. There we go. Now we've made up our
background and also our photo. Now I'm going to
do as I have Spa. I'm going to put in a
couple of elements, Right, I'm going to do is
this is going to be our logo. I'm going to put this
logo right over maybe. Here, there we go. There we go. We have our logo just
like we have it over here to take it right
around This part. I'm going to put in
my text box first. I'm going to put in my text box. In our text box I'm
going to be doing is putting in my elements or let's say the name of our
spot, let's say relief. Relief. I'm going to
increase the size. I'm going to change
how it looks like. Okay, let's go off
finding something good. I'm going to do is go off for something mono
spaced our sports, whichever one you want, it's
going to be up to you now. Let's see if there's
anything good. We can use this if I
want to. There we go. We have relief. I'm going to select on this, I'm not
going to be using that. I'm going to go back and find something which
looks very soothing. I'm going to do is maybe go down and find something
which will look good. We can use Intro Rest, but I'm going to be doing
is fine for something maybe a bit more calligraphy or just handwritten and
something like that. Okay, we can use this,
this looks really good. There we go, we have relief I'm going to do is
increase the size. And there we go, relief we have in our elements over here. There we go, it
should be over here. Relief I'm going to do is put in a couple more
elements over here. I'm going to go
off the elements, I'm going to just find out
a couple of things which I can put or use it as an element. So the first thing I'm
going to be doing is going to be finding in
a couple of shapes. Okay, What I'm going
to do is use this. First I'm going to do
is increase the size. There we go. Okay. Center a line and there we go I'm going to
do is right click on its, go off the layers, send to back. I'm going to do is
reduce the transparency. There we go. You can reduce
it more if you want to. I'm going to do is add in a
couple of shapes over here. I'm going to do is just click on elements and then I'm
going to do is maybe put in a couple more shape
or whatever you want to. I'm going to do is go down
and find something flat. So I'm going to do is see, all I'm going to go down,
there we go, we have it. I'm going to do is put
this right over here. This is how going to look
like I'm going to do, take another one I'm going
to do is maybe rotate it, keep it 180. There we go. I'm going to keep it
right around over here. I'm going to just put in a couple of elements
I'm going to do take duplicate over here. We can also keep
another part over here. Maybe we can, or
maybe remove it. Glossus. Remove it. I'm
going to keep two of these I'm going to do
apply and maybe something, whatever element we get. Let's search for Spa again. Spa, go off for
something like this. I'm going to put it
right over here. I'm going to turn
this select on this. I'm going to do is
take the photo, which I have over here. I'm going to do is rotate
it obviously crop. I'm going to rotate
to this side. Click on Done. And there we go, just click on this part. There we go. We have it done. I'm going to take
the next one too. I'm going to take
this over here. I'm going to click on C. I'm going to put
another one over there. I'm going to do is maybe
put in something different. We have a couple of that
I'm going to maybe put, this I'm going to do instead of that
I'm going to be doing is maybe put
something different. Let's, I'm going to do is
put this one over here. Instead of that
double click on it. Rotate it and minimize the size so that you
can make it visible. First on done, and there you go. It is now totally done. Now we're going to do is put in whatever text we want to use, we're going to do
take it a bit above. Then I'm going to click on Text. And let's say click on a Text. I'm going to find
comfort in every moment. Select on this texts and
juce, increase the size. This. Select on all of this and I'm going to make sure this is all left aligned. Increase the size. There we go. I'm ju hit Enter. There we go. Control a bold select on
all of this text again, I ju change the font
so that it looks good. I'm use this, which is Angelina. I'm going to select on this two. I'm put in Angelina
J at the top. At the top, we're going
to find out Angelina. There we go, control. And then I'm jus put
in some blind spacing. After I've put in my
content in the text, I'm going to use control A. Let's try to right align, there we go, perfectly aligned, find comfort in every moment. Then you can put in all the
details however you want. Control C, control V. I'm
going to take it right over here like this. You can see it over
here. More details, you can put in
whatever you want. You can also put
in different type of elements over here, such as. You can put this over here. You can see it over here. And you can put in a
couple more other, okay, whatever you want. Right over here and there,
It's all up to you. We can also use this like this and this will
also look quite good. You can take it a bit At the bottom we're going to
do is take the last one. Control C control
is put this right over here is select
this control. C control, V control to first of I'm going to
make a duplicate. I'm going to just remove, and I'm going to just
paste it right over here. I'm going to change the color. I'm going to use this. And there we go. Our Facebook post has been done. And we can also increase the size of this
whenever we want to. You can also change
it whenever you want. Now you know how you'll be
able to make a Facebook post. Now I'm going to
do is cut this one off and I'm going to make sure to make another one to
start off with the landscape. Now I'm going to click on this and I'm going
to wait for a while. Opens up as this has opened up. Now what I'm going to be doing
is let's, I'm going to do, start off with any one of these templates and then
I'm going to do is just directly make my
from scratch post. I'm going to do is take any
one of those which I need I'm going to do is make
something related to food. Hit on Enter and there we go.
We have any one of those. I'm going to add a page. I'm going to start
something like this. Okay? This is going
to be food related. So I'm going to do is
go off the elements. And here I'm going to
do is search for food. Now I'm going to go off the graphics and then I'm going to do find something which
will be good looking. Now the first thing I'm
going to be doing is, first off I'm going
to do is make my page select a page color. Now what I'm going to do is, let's say I'm going
to do is maybe not blue this time I'm
going to do is use yellow or maybe
something like this. Okay, this looks quite good. I'm going to do is click
on this and I'm going to make sure that it looks good. I'm going to do is
rotated, there we go. Click on it and perfectly done I'm going
to do is crop it up. Edit Photo. I'm going to
just take it at this corner. Click on, there we
go, we have it. I'm going to click on it. I'm going to do,
I'm going to edit this photo again because
we need to crop the top. Okay, this is cropped
perfectly. Press on done. And there we go, we have
it. Then I'm going to do is going to putting in a
couple of other elements. Let's say I'm going
to do, use this, then I'm going to do is first off I'm going to do
is add this image. Let's removing the
background if it is doable. Okay, This is the doable one. I'm going to do is remove it. Let's try for something else. Okay, let's try this over here. There we go, Increase the size. I'm going to take
it right over here. I'm going to do is maybe
put a circle first. I'm going to do is
click on Elements. I'm going go down, I'm going to do is
find a photo holder, which will be quite good. Now from the photo holder
I will be using something, maybe quite like this. Okay, there we go. I'm going to put this
photo inside of it. If it is doable, If it can be, I'm going to do
take it over here. I'm going to take
this at the top. If this is not
doable, I'm going to do is right click on its layer. Bring forward, this is not doable. Going
to do is remove it. Let's just find
another photo for it. Food going to do is
go off the photos. Let's find maybe fast food or whatever it is, as
this is fast food, I'm going to search
for fast food. They don't enter. There we go, we have it to do. Use this, this has
been put over here. I'm going to do is take it, however it is I'm going to do is put in another
white shape. I'm going to do is
go off the elements. Take this over here. I'm going to set
this a bit backward. There we go. I'm going
to change it into white. To do, go off the position I'm going to do is
click on position. Go off the layers and I'm going to put it underneath here. I'm going to do change
the transparency. There we go, we have it I'm going to do is also change
this transparency a bit. This is totally perfect. There we go. I'm going to
do is put the names, okay? Take a couple of names
over here and you can use whatever you want
am to do is maybe, let's say I'm going to do is use this and also the name
control C control. I'm going to take it around over here and see how
this is look like. This is going to be like I'm select all of it
at the same time. I'm going to do is
select on them again. I'm going to take it at
the bottom. There we go. I'm going to do select on
this color and I'm going to do change it into
maybe a bit darker. There we go, change it to white. Change this color into red to then I'm going to do is going to be taking
this at this corner, Make sure to put in something
so that this is visible. I'm going to do is
go off the shapes, click on L. I'm going to do is maybe find something
which will look good. I do take this and
increase the size. Then I'm going to do
is click on Edit. I'm going to do is maybe
click on this and we can also change our fix it. Okay, I'm going to do is, let's say if it's not how it is I'm going to do is make
sure to use the other one. We can use this. There we go. I'm going to go
off to positions. I'm going to take it
under here. There we go. I'm going to select on this. I'm going to do is change the
color into a bit different, maybe something
like this or gray. There we go. Looking a
lot more better also. This is looking quite good, so I'm going to
make a duplicate. Put it right over
here. I'm going to get a duplicate of this also. Put it right around
over here. There we go. We can use these boxes
over here as we can duplicates this one
to be over here. What we're going to do
is going to be making a part where it's
going to look dark. I'm going to do is, let's
say I'm going to do, find out this part which
is going to look darker. I'm going to do is
make another part of this duplicate concede
this is the part. There we go. I'm
going to do is find out over here I'm going to
do is go off the colors. I'm going to select on this, I'm going to go a bit darker
and I'm going to go off the position I'm
going to do is drag it underneath it or over here. See, looking a lot
better, right? Looking a lot more professional. This is basically how
you'll be able to make your Facebook post on
landscape and also square. It's going to be
up to you and you can customize it
whenever you want to. Hope you learned everything
in this lesson of how you'll be able to make
Facebook post design. And you can also follow through
the steps so that you can make couple more and which is going to be
up to your creativity. Let's move on to our
next lesson and hope you understood everything
about this lesson.
12. Email signature design: Welcome back to our
lesson of Canva. In this lesson, we are
going to learn about how we can make an e
mail signature creation. Now those of you who don't know what an e mail
signature creation is, it basically is kind of like
an electronic signature. When you send an e mail, it will also be there so that it just proves that
it's you who's sending and it's
going to give them a PNG or a link
type of signature. Which you'll be able to use
in a couple of mail services. Okay, so without
any further ado, let's just hop on and
open up canvas so that we can start on creating
email signature. Now you can see that I
have opened up Canva on my screen now there are like a specific type of resolution when you are making
an E mail signature. The best size which
I'm going to be using, or I would suggest you to use, is going to be 600
into 200 pixels. Now you might go through these templates or
whatever there is, but you will basically not find out email signature and you can also search
it from over here. Now if you search
it from over here, email signature, you can see that this
is how it will work. E mail signature with the logo. Also find it over
here, which is 400. In 200, there is
400.200 But obviously, there's going to be two methods
we are going to be using and two different things which
we will be able to make. Now the first thing which
I'm going to be using is going to be clicking
on Create a Design First. Okay? You can also go up on Custom Size and also
make up your own size. Now the first size which I'm going to be
putting is going to be 600 and the height
should be 200. And this is the best size, okay, So you can see e mail header
and this is what we need. So I'm going to do is click
on Create a New Design. Now when I see that
this has been made, you will basically
see a couple of templates which you
will be able to use. But as this is a signature, now as this is a signature, this is going to be very
simple and this is going to be very specific of what we have
to put in the signature. Now how do we do
that? First off, what we're going to
do is need a logo. Now, I'm going to be
doing that later on, but we can also make it
directly from over here. You can search up for logo, which is going to be 500.500. But we're not going
to be needing that which just type in 50. Okay. We're just going
to do is click on Custom Size and type in 50. In 50 and that's the
best for the logo size. I'm going to do is wait until it has been created
and there we go. We're going to need is three
of them at the same time. We're going to put it later on. But let's get onto
our first one, which is going to be where it's going to be
containing all the data. Now the first thing I'm going
to be doing is going to be selecting the size
or fixing the margin. Now what you're going to do
is take this right over here. There we go. We're
going to do is put the same thing right
over here, not here. Just where it seems to be. Okay. We can do one
thing over here, which I'm going to
make another one. Custom size we're going to
do is type in 600 to 170. Okay. Just type in 170. Hit on, create a new
design. There we go. It is being created now
as it has been created, what we're going to
do is take this size. I'm going to do is
go off elements. I'm going to do take one
of the square boxes. I'm going to make sure that
this is filled up. Okay. As this is filled up,
what we're going to do is make a duplicate of this. I'm going to click
on a duplicate. I'm going to do is make
sure to copy this or to control take it directly over control V. It has
been placed over here. You can see now this is
totally quite perfect. Make sure that this is at
the center. There we go. I'm going to do is, first off, let's just remove these lines. Okay, We're not going to
be needing them right now. Let me just put it in the
center first and then we can put, align it perfectly. There we go, We have
put it perfectly. Then I'm going to
do the same thing by uploading or making. Another one I'm going
to do is cut this off. I'm going to put in custom size. Let's say I'm going to
put in 200 this time 200. But make sure to put in, let's say width should
be 55550 to 200. Now just hit on it and
wait until it is created. Then what we're going to
do is make sure to put another box inside of it so
we can make the safe zone. I'm going to do is take
this part over here and fix the whole thing
as this has been created. I'm going to do is make sure, let's just cut the whole
thing inside control x. I'm going to do is paste it. Control V, There we go. Now you can find it at
the center. There we go. Both sides quite
aligned perfectly. You can see this is
where we need it. I'm going to take
this right over here. Take another line over here. I'm going to do the same
thing over here. There we go. I'm going to put this over here. Make sure to follow the
sizes and after we're done, we're not going to
be needing them, but make sure to keep the logos. Okay, So I'm going
to do is remove these and there we
go, we have it. Okay. This is going
to be our safe zone. The first thing we're
going to do is going to be putting in our background. So the background
is I'm going to be choosing this, this
looks quite good, so I'm going to do is
make sure to put this, and there we go, we have it. And I'm going to do is
click on transparency and make sure to
keep it a bit low. Make sure to do that
because it just looks a lot more better when you
reduce the transparency. Because you don't want it to
be totally popped up and, you know, hide up your data. And we can also fix the
transparency later on. But make sure to keep it a bit low before
starting your work. Okay, now what we're going to do is going to be
putting in our e mail. Let's first off put in our logo or whatever
photo we have. I'm going to do is click on
Elements First and make sure to use a cover or let's
say a frame that is. I mean, that's just,
you have to do it. Okay. I'm going to put this
over here. There we go. I'm going to do
increase the size and make sure to align it
perfectly. There we go. There is going to be our
photo. I'm going to do. Take it a bit to the left side. Okay. Now I'm going to do is make sure to put this over here. I'm going to put one line, now I'm going to just
search for a line. Hit on Enter. There we go. We have our shape. I'm
going to select on this, make sure to rotate it up
perfectly, totally 90 degrees. There we go. I'm going
to do is make sure, obviously decrease the
size. There we go. Make sure that this is
still on 90 degrees. I'm going to do take all
of this. There we go. As we have it I'm going to do is make sure to fix this up. I'm going to select
on this over here. I'm going to do, make sure
to put in whatever we want. Let's just say I'm going
to keep it this way. I'm going to do, make sure
to use this straight. And you can also animate
it if you want to. You can fix the transparency. There we go. And I'm going
to do is click on Elements. And what is your job, right? What is your job and
what signature is this? Okay? Most of the time it's
like for business purpose. So make sure to select
your niche or gig. Whatever it is I'm going
to do is maybe, let's try. Okay, Let's, I'm an
entrepreneur I can do is type an entrepreneur. Okay. After I have
my entrepreneur, now I'm going to do is put in any of the logo
which I want to use, so you can use logos, you can use photos,
whichever one you want. Whichever looks good for you, I'm going to do is first off, I'm going to use a photo first, and then later I'm going to
do is make a logo first. Let's see which one looks good
if we want to use a photo, first off, take any of
your photo which you have. Let's, I'm going
to use this photo. I'm going to click
on Edit Photo. I'm going to just remove
the background so that it just looks
better on this. Okay, as I have it, I'm going to do take this right over here and there you go. We have this over here. And then I'm going
to be doing is obviously put in what he is. Okay, let's sing to do. Click on text at a text
box I'm going to do is type in General manager. Okay, let's say this guy
is the general manager. Or I'm going to do
this first stuff, let's just increase the size. This is going to be how
it's going to look like. Now what I'm going to do is change the font
so it looks good. Make sure not to use
any handwriting. Make sure to corporate, because it just looks better. Okay? Because it just
goes well with these. Okay. General Manager. Okay. This is going to
be under over here. First up, it's going to be
the name I'm going to do. Make sure to put another
duplicate over here. And I'm going to
do is make sure to select it and make sure
this is a bit bigger. I'm going to do is Gary Harold. Okay. I'm going to
do is put it on the left side aligned left. Gary Harold, general manager. I make sure to decrease
this over here. I'm going to do
is make sure that it aligns with the
photo over here. Okay, Gary Harold,
there we get perfect. Now as this has been done, now what we're going
to do is going to be obviously something else
which is going to be, let's say an e mail, let's say the context. Okay? So the contexts are going to be either the phone
number or maybe, you know, let's say a website or maybe the e mail
address and those. Okay, so to do that what we're going to do is just
start typing in all of those and also
we're going to be putting in different types
of, you know, logos. Now, how are you
going to do that? So the first thing I'm going to be doing is going to
be clicking on Elements. First, I'm going
to cut this off, I'm going to search in
for a call, hit on Enter. And the rig habits
I'm going to do is I'm going to search for contact, get on Enter, and
I'm just click on all the go habits I'm going to be doing is
use mail and phone numbers. I'm going to just click one of them, two of them. There we go. We have two of those
which are going to be very helpful
for me right now. I'm going to click on this, I'm going to click on Black. That is what I need right now. I'm going to do is make sure
to put in, let's say 31. 31. Perfect. I'm going to do
the same thing over here. 31. 31. There we
go, two of them. 31 I'm going to do is make
sure to remove one of them. And here we go. We habits. Next thing I'm going to
do is going to be putting in our placing it perfectly. There we go, there we go, two of them placed perfectly. I'm going to do is
make sure to make it a border weight to
be a bit thicker. Okay, Let's just say no border, lets keep it just the way it is. Border weight corners to be
rounded, just like this. Let's Sema type in one, let's say two, okay, 22, okay. Looks better. Maybe three. Hit on Enter. There we go. I'm going to do the
same thing over here. Click on this border
style corner three. There we go, both
looking quite perfect. And the same I'm
going to do is put in my text box over here in a
text box I'm going to do, phone number is
going to be X, X. I'm going to put in a couple of Xs because obviously you can put in your own number
whenever you want to. I'm going to put it
right over here. Or maybe at the
center, there we go. I'm going to do is
put in my E mail I'm going to do is
duplicate this. I'm going to do,
make sure to put it right over here. There we go. Five I'm going to do is type in, let's say Gary 44 add
rate, Gmail.com okay? As I've put it right over here, I'm going to do, make sure
to keep the spaces the same. One thing I'm going
to do is going to be putting this line over here too. I'm going to do, first
off select this line. I'm going to just
click on over here, make sure this is totally black. Okay, I'm going to do is obviously you can fix in the
transparency if you want to. I'm going to duplicate this. I'm going to do,
take this over here. I'm going to do is make sure
that this is 90 degrees, okay, 90 degrees all the time. I'm going to do is
keep this over here. I'm going to do is
make sure this is 90 degrees straight, okay? I'm going to make
sure rotate it again. Control only select one. Control Z. Control Z. I'm going to do is make sure that this does not
stick together. I'm going to do, make
sure to put in a bit of spaces because it
just gets sticky. I'm going to keep
this over here. I'm going to do is
take it over here. There we go. Go to make sure that this is 90
degrees. That's it. There we go, We have it. Basically, it is almost done. There we have it.
I'm going to do is make sure you can put it
on bold if you want to, and make sure this is not bold because it usually is not bold. Okay? It doesn't stay bold. You can also keep it a bit smaller if you
want to or larger. It's up to your wish
and up to your taste. Now, we can also use
logos or graphics. Contact entrepreneur. Entrepreneur. Let's try out a bit of graphics and
see how it looks like. To do is maybe this. If we use this, how
does it look like? You can also use it
whenever you want, but I'm going to keep
it however it is. Now after you're done,
what you can do is, first off, you have
to click on Safe. And you have to save it as PNG. I'm going to do is click on this over here
I'm going to do, first off more I'm going to do is first off you
have to save it up. Now to save it off, I'm
going to do safety folder. Now, which folder you want
to save it to your project. You can save it on your
project if you want to. You can also download it. First thing you have to
do is click download. Okay, I'm going
to click on this, Click on Download now, PNG 620. You can save Download settings, and you can click on
Just Download. Okay. It's going to take a bit
of a time and also show your pop up where it's going
to be saved in your folder. What we're going to do is
going to be just click Save. There we go. It is now safe. Now the next thing I'm
going to be doing is going to be putting
in the logos. To finish the logos, we're going to do search
for social media, we're going to need
just graphics. Okay, I'm going to do
is not over here bad. I'm going to do is
go off elements and search for social media. Head on Enter I'm going to
do is click on L. Okay, when you click on L, what you'll basically
see a lot of icons. But from here I'm
going to do is, let's say I'm going to
do search for Facebook. Is wait. Okay. There we
go. We have Facebook. I'm going to use
this or maybe this. Whichever one prefer you prefer. Okay. Make sure this is somewhat fixing our at
the middle. There we go. That's going to be 43. 43. I'm going to be putting
the same size on all of them. S this is Facebook
now I want Instagram. He don't just click on all put in my Instagram
over here. There we go. We have this Instagram on this one. This is
going to be 43. 43. There we go. Keep it at the center. There we go, 43, 43. I'm going to do take
or remove this one. The next one I'm going
to do is put in, let's say I'm going to
put in maybe linked in, Linked in, hit on Enter, click on CL, and find
the one which you want. Let's say I want this
one I'm going to do, just click on this. I'm make it 43. 43. There we go. Keep it at the center
and we have it saved. We have three of
it I'm going to do is make sure to use
it whenever I want. I'm going to do is clicking
on click on Download. I'm going to do is make sure
to save all three pages. It will just say in page 123, it will not say
Facebook, Instagram, or Linked in because it
is not saved in such way. So I'm going to do
is just click on download and I'm going to wait until all of
them are saved. Now I'm going to wait for a while and make sure to save it in PNG file and make sure to click on all
files and then save it. Now after you click on
all files and save it, it will be directly
saved on your PC. Now what you're going
to do is open up any of your Gmail account
or e mail account. Okay? So I'm going to go off to my web browser and open
up my Gmail account. So select any browser. Now I'm going to do is
first off search for Gmail.com Now as my
Gmail has opened up, I'm going to go
off the settings. Okay. Now what
you're going to do is just directly
See all settings. So when you click on
See All Settings, it's going to be
something like this. Now what you're going to
do is find out signature. So I'm going to do is go down and go down a bit more
and find out signature. So I'm going to do is go down and you can see signature
right over here. When you see signature,
what you're going to do is you have this
option over here, you can see No Signature. Click on Create New. Now I'm going to do is
type in Gary Herald. Okay. Press on. Now what you're
going to do is use any of it. Okay. I'm going to do
is make sure the edits. Now you can put in the image
which image you want to use. Click on Insert Image. Now an interface like
this will appear. Just click Upload. Click on select a file
from your device, then find out the folder
where you have it. I'm going to select
this, press on open. It's going to take
a bit of time to upload it after it
has been uploaded. What you're going to do is wait. You can see this is
how it will look like. See this is the signature. You can also apply
in a add in more, which is going to be our
links. Click on Upload. Again, select File
from your device. And if it's not here, you
have to unzip the file. First I'm going to click
on me. Just click on this. I'm going to use all
files and the coming to use untitled zip file
if it's not zip, so I'm going to zip it and
then upload all of them. I'm going to do as
it is unzipped, click on its title design, select all of them going
to use to one by one. There we go. Upload, Uploading. There we have it uploaded. And we're going to do is
obviously put in links. Okay, so I'm going to
do is click on link. There we go. Now I'm going to do is first off I'm going to do apply in more if you want
to. There we go, we have it. You're going to apply those
two at the same time, all at the same time, which
is going to be the signature. And there we have our
logos where a person, when they click on it, it
will take them directly over to that directed page. Now, how are you
going to do that? How will that
person be directed? Obviously, you have
to add in links. Just like I said, what
you're going to do is going to be clicking on
links now Te display. Okay. What text or do
you want them to see? Let's do type in Gary.
Now the web address. Let's, I'm going to do is type www.facebook.com Now this is just an example
I'm going to do is you can also try the e mail
address if you want to. I want the web address.
I'm going to press on. Okay? When someone clicks on it, you will
basically have it. Now what you're going
to do is going to be, as this has been done, you can also customize it
however you want to. You can also align it, also add numbers list. After you've done,
what you have to do is click on this and
select on Gary Harold, also Gary Harold's
reply forward use click on Insert Signature
before code a text in replies. Remove the these. After we've done just
press on Safe Changes. Now I'm going to be showing
you how it actually works when I click on Compost. And you can basically see
that I have this Facebook and also this text where if
someone clicks on it, it will just take them
directly over there. Basically, this is how it works. And if you don't want this text, what you have to do is basically
just click on Settings, see all settings, and go
off to your signature, which you have it over here. And make sure the
slide select are. Click on this over
here, press on Done. What you're going to do
is as this is the text, just click on this
text over here. And what you're going
to do is remove it. Okay? After you remove it, which you will basically see is that it will not take any space. You can also change the
size, small, medium, large. It's going to be up to
you. Small is good, and if you want original, you can also add an original. And you can also apply in the other icons which
you had over here. Let's say I want Instagram two. I'm going to wait
for a while until Instagram has been apploaded. After it has been upploaded. You can see the Instagram and as I already have Instagram, I'm going to do is
appload my linked into, Click on linked in, press
on open, and there we go. It is uploaded and all of them are there at the same time. You can obviously apply that icon and also link it
up whenever you want to. You just have to select on
it like this and click on it and put it up.
Or put up the link. Now you know how
you'll be able to make this signature and use
it for your own purpose. Hope you understood
everything about this lesson on how
you will be able to use or make E mail
signature design on Canva. Thank you for
watching this video. Let's move on to our
next lesson of Canva.
13. Fiver thumbnail creation part 1: Welcome to another
lesson of Canva. In this lesson, we are going
to learn about how we can make a fiber thumbnail
by using Canva. Now there's like a vast
amount of templates which you will be able to choose from and make it
directly by using Canva. But we're going to do is
make two thumbnails which are one is from scratch and the other one
is going to be pre made. But what we're going to do
is just change the data and also the photos without
any further ado. Let's just hop onto the
lesson by opening up Canva. Now the first thing I'm going to be doing is going
to be selecting a specific size for a specific type of
compnil which are posted, are used in Canva or
let's say in fiber. Now the exact resolution
for that is somewhere around 1,200 or 12, 80 into 375. Now if it's still not 375, it's somewhere around 600. Okay. So I'm going to be showing
you all the methods. Okay? You can use three, but I would suggest you to
use like 12, 80 in 769. Okay. That is a lot
more better because it's kind of like
the Youtube videos, but kind of a bit shorter. So what we're going
to do is going to be clicking on Custom Sizes. Now you can also click
on Create a Design, and Search for Fiber. Now you can see
there is no fiber. But we can also search it from over here and check
if it is there. You can see fiber gig image. And also for Tom Neil for fiber. Okay. You can use that
whenever you want. So the first thing
I'm going to be doing is clicking on Custom. Then from here I'm going
to do is type in 12, 80 which is the width. And it should be
somewhere around 769, And that is almost perfect, So I'm going to do is click
on Create a New Design. Now another thing is that if you feel like it's not
enough for you, what you're going to do
is going to be search on the website and
check if it works. Or let's say check
if it's the same. What you're going
to do is open up any web browser
which you have on your PC. You can
see it over here. I'm going to do is search for
fiber to nail resolution. Hit on Enter, and you can
see this is how it is, 12 80 into 769 and minimum
is going to be 712 into 430. Or you can also use 4,000 2416 pick cells
which is at 72 DPI. You can use whichever you want. Okay. And the image must be within five B,
which is megabytes. So we can use is 12 80 in 769. So you can see this is 769. If it's still not the same,
you can just check it over here and click on
Create a New Design. And when you just reduce
the size from over here, you will basically see
somewhat like this. Now from here I'm going
to click on Design, as we're going to be
making 21 from scratch. Okay, so I'm going to do is just change the name over here. And let's say this
is going to be pre made and the next one is going
to be, let's say scratch. Okay, So I'm going to type in scratch it on
enter. There we go. Now the first thing
I'm going to be doing is choosing
one thing, okay? First up, I'm going to do
plot one of the photo, which I will be using
in this lesson. I'm going to do is
click on App file.
14. Fiver thumbnail creation part 2: Now you can see that I
have uploaded the photo. You can see it over here. Now what I'm going to be
doing is make sure that the photo is related to
the fiber, whatever it is. Now let's say from this photo we can see that it might
be somewhere around tutorials for maybe
fashion designing or how you can fixture fit
in different methods. I'm going to do, first
off, delete the photo. I'm going to keep it on uploads because it just stays
uploaded over here, so you can use it for
various purposes. Now on the template I'm going to do is search for fashion. Okay, On Enter, and there
we go, we have fashions. Okay? Now all the things
are related to fashion. So the first thing
I'm going to be doing is going to be let Sam do find something where I can use only one photo at a time. So the first thing I'm going to be doing is going to be let. I'm going to click
on this maybe. Okay, this looks good now
as I already have it. I'm going to do is remove the
things which I don't need. So this is going to be
removed cranny fashion. So the first thing I'm going
to do is remove this photo. I'm going to do is go off, uploads select on
this photo over here. There we go. We have our photo, but I'm going to do is edit the photo and remove
the background. Now I'm going to
do is wait until the background has been
removed from the photo. Then after it has been removed, what we're going to do
is align it perfectly so that it looks very professional. You can see it over here. I'm going to do increase
the size of this. I'm going to do is
take it over here. I'm going to do is
click on Position. I'm going to go off the layers. I'm going to do
take it underneath. Okay, I'm going to
take it over here. Maybe it looks a lot better. There we go. It is looking
a lot more better. I'm going to do is
change the colors a bit. And also change maybe the
text and also the colors. Because I need it to
look somewhat like this. Okay, I want sule colors
instead of these. The first thing I'm going to do is going to be clicking on this text R box for
some, Let's color maybe. Okay, let's check this color. And also check the
color of the page. Okay, I'm not going to be
needing this color anymore. I'm going to do is
maybe change it into something like
this, a bit darker. Okay, there we go.
It has changed up. I'm going to do is
change this color too, because I'm not going
to be needing that. I'm going to do maybe something
like this or maybe this. Okay. It looks a lot more
better I'm going to do is change this color
over here of this box. I'm going to do is
change this color into something like this and
maybe a bit darker. There we go, I'm going to do is change this
color over here. I'm going to click on Effect. And I want the color something. Okay, let's just check
the color over here. Okay, now this color,
I want it black. I want the background
to be a bit different. So I'm going to do is
maybe change the color of this to maybe
something like this. There we go. I'm going to
do is check the color. Okay, totally works. Make sure you can also
keep it italic or both. It's up to you. And
you can also change. What I'm going to
do is use this. What I'm going to do is, okay, let's just go off to
textiles or font. I'm going to do is maybe find something which
looks a lot more better. I'm going to do is find out
something maybe like this. Okay, going to do is find out something similar to
this or maybe this. Let's go off back and
find out something funky. Okay, we can use
something Comic too. At the same time.
You can see Comic. We can use funky if
you want to do is maybe find something that
actually goes well with this. I take it over here. I'm going to do is
reduce the size of this text I'm going to do, take it over here, going
to do is also change it into something
funky over here. I'm going to do is this one I'm going to do is make sure to change it something like this. There we go. I want it to here. I'm going to do is
reduce the size of this text right over
here by the bat. I'm going to do is
obviously it align it. Basically I'm going
to do is first off, make sure to fix the spacing. I want letter
spacing a bit more. Okay, there we go. We have it. I'm going to do is make sure to
select on it again, I'm going to decrease
the size a bit more. There we go. I'm going
to reduce the size. Then I'm going to
do is first off select both of them
at the same time. I'm going to reduce the size. There we go, I'm going to do is select on this and make
sure this is a bit smaller. I'm going to press on
G and group them up. I'm going to take
it right over here. I'm going to do is
take this over here. I'm going to do is increase
the size just a bit. There we go. There we go. Trendy fashion. I'm going to do fix
the spacing a bit. Letter spacing, there
we go. As we have it. I'm going to select on this
text two and obviously use this tips and
inspiration. There we go. We have our, let's say this is going to be
our fiber thumbnail to do. Take it a bit above
so that we can put in tips to I'm going to do. First off, go off the text, I'm going to do at a
text box, at a list. Let's say how to design your, okay, let's say your closets. Learn how to not design,
sort your closets. Then let's say learn how, how to use, which color will
make your outfit. Then what Sam going to
do is put another one. Learn how to make your own fits, okay? So going to do is increase
the size of bits. Control Z fits. Take it to the left, take it to the left again. There we go. I'm going to do is obviously make it somewhere
around, over here. You increase the size
and then the size, or let's say change the font. I'm going to do
something like this. There we go, we have our thump. This is how it will look like. Now let's start
off from scratch. Obviously we had made
another page here. What we're going to do
is going to start off from scratch and which is
going to be very simple. Let's go off Elements. I'm going to do is click
on the shapes and I'm going to do is make something
very similar to that. What I'm going to do is
obviously take this, I'm going to use the same
photo I'm going to do. Okay, to do, put this over here I'm going to
do is duplicate it. I'm going to do is
change this color. Go over here, make
something like this. Do is make another one I'm going to do is change
the color a bit more. Make sure to put it
like this. There we go. I'm going to do is obviously
take this around over here. There we go. We have three
of them stacked over here. I'm going to do is control all
of them are now over here. And increase the size. There we go. Looks a
lot more better I'm going to do is go
off to uploads. And I'm going to do,
instead of that, let me just take this over here. Okay? I'm going to
do is just make another duplicate
versus duplicate. I'm going to do, take
another copy of this. There we go. We're going to
be making this on this side. There we go. This is
where it's going to be. Let's just take it a bit more to this side so that we have a bit of space where
we can put in our text. Let's just am going to
do is take it, okay, let's take it over to
this side. There we go. Now what I'm going
to be doing is going to be putting
in a couple of elements I'm going to do is
instead of that, let me just Fashion, hit on inter,
get onto graphics. And then I'm going to do
is put in a couple of elements just so that it
looks good like this. Okay, after I'm done with that, I'm going to do is put in the same type of things
which we have over here. Let me just get this
copy over here. Okay? It's going to be the same. I'm going to do keep
this over here. You can obviously try to make your bullets or whatever it is to look a lot
more better, okay? If you try to make
your own ones, okay, then what you're going to do is you have to make sure that
you're connected to Internet. What we're going to do is
going to be taking any of these elements which
we have over here. What I'm going to be doing
is going to be finding up something which basically
looks better on, or how it will look on this one, on this photo, on this page. I'm going to do is
going to be taking this I'm going to do
is change the size. I'm going to do make a
couple of copies of it. Let me just something like
a background or a pattern. Okay, over here,
make duplicates. What we're going to be doing
is that we're going to do is these underneath so
you don't have to worry. Duplicate. And there we go. And
what I'm going to do is going to be
clicking on Position I'm going to do is layers. I'm going to do select
on all of them control. And I'm going to do is first off reduce the transparency control. Okay, Increase the
transparency First, I'm going to select on
this one, to this one, go off the position, let's just take it underneath
first control. There we go. I'm going to do is first off, take it underneath this photo. There we go. That I'm going to do is going to be fixing the transparency. There we go, we have it. Now as we have it, what we're
going to do is going to be obviously putting in
whatever we need over here. Now I'm going to
do is take this, which we see over here. Tips and inspiration.
We can also make it. Don't worry, I'm going
to do is first off click on this and
make my own one. What I'm going to do is
take this over here. This is like this over here. Let's just take it over here. I'm going to put in my text box certified, increase the size. Well, I'm going to do is put on maybe something like this. Make it bold. Over here, bold. And obviously color to be red. Obviously we need
to change the font. Maybe this one. There we go, certified. Then I'm going to do is click on this and add in a border. You can see the border.
The border is going to be basically yellowish
or maybe a bit gold. Okay, I'm going to do
is click on this over here and I'm going to do is
find something a bit better. I'm going to do is either
take it over on this side. We can also try something
like this. Okay. It looks a lot more
better certified. Then I'm going to do is take it underneath and then
I'm going to do is put in another element
so that I can put in that I'm going to do
is put this over here, take it a bit like this
and I'm going to do is change the color of
this into maybe this. I'm to take this certified, I'm going to also take
this color to be the same. This one I'm going to
do is put in tips and inspiration Control C control V. What I'm going to
do is just put in the text box at the text box. Control V, tips and inspiration. Increase the size. I'm going
to do is take it over here, increase the size a bit more. There we go. Make
sure to put bold. And then I'm going to
do is use this font. And I'm going to do
is change the color to red. There we go. We have two thumbnails
for our fiber gig, okay? This is going to be very simple. Then you can make
your own ones and you can see both of them
are quite good. It all depends up
to your creativity, how you're going to
want to make it. I just hope you understood
everything about this lesson. And the rest is like
totally up to you. Because it depends on
how you want to make it. I hope you just
follow these steps. And if you have any question, then feel free to
ask me anything. Let's move on to our class
projects of this course.
15. Class Project 1 - How to use slice effect on a photo: Class project one. The name of the class project is how to use slice
effect on a photo. Now I've added in a description
and also an outcome. Now the first step is
going to be open up Canva. In step two, we're going
to open up presentation. In step three, we're
going to apply a photo either from Canva
or from your PC. In step four, we're
going to apply the photo on the page and
click on Edit Photo. In the last step we're
going to do is find the slice effect and
apply it on our photo. Then what you're going to do is after following our steps, you're going to make sure to save it up and also upload it on our project panel
so that we can see it and check how you're
progressing with your work. I've also added in a description
and also an outcome. Let's just hop onto Canva
and start doing our steps. As we've opened up Canva, we're going to start off
with the presentation. That is going to
be our first step and also our second one. Now after I've applied, after I've clicked on a page, now I'm going to do is
upload a photo either from my PC or either from Canva. You can do either way. Let's just say I'm
going to do is search for a couple of photos. That's what I need.
So I'm going to do is just go off the
photos, click on. What's to do is maybe use any one of the
photos which I need. So all I'm going to do is
search for maybe ball. Okay? Hit on ball and there
we go, we have our balls. Okay? So from here I'm going to do is select any
one of these balls. And I'm going to do
is just use this. Okay? So as I have my
photo of this volleyball, I'm going to do is
apply the effect. Now how do I do that?
Click on the photo. The next step is
editing the photo. And there you go, you
have this over here. And you'll basically find
out other stuff too. So if what you're going to do is just click on this
effect over here. And then what you
can do is click on mock ups and also use up that you know
that slice effect on this specific photo. You can also go off
Edit in effect. Now just like you've
seen when you click on this photo and
click on Edit photo, there is no slice effect. Now how do you find
the slice effect? Basically, this is the
new editor of Canva and you will basically not find out slice effect over here. If you want to go back
to the older version or the older variant of editing
photo, you have to use this. Click here and click
on Revert Old Editor. When you click on Old Editor, now it's going to
be our old editor. And there you have
it, the slice effect. Click on Slice
effect and you'll be able to slice up the
photo however you want. And after you're
done, just press on. Okay. And you can also customize it. Just
double click on it. And you'll be able to
apply in slices offsets, then also the position.
So it's all up to you. And after you're done, just
make sure to save it up, download it as PNG, and upload it on our project
panel so that we can see and review what you've done and how
you've progressed. So thank you for watching
this video till the end, and let's move on to our
next class project of Canva.
16. Class Project 2 - How to apply the smoke through text animation: Class project two. The name of the class
project is how to apply the smoke true
text animation in Canva. I've added in a
description and outcome. But let's just go
off to the steps and what we have to
follow in step one, we're going to do is open
up Canva in step two, we're going to open a
presentation in step three. In any text in step four, make a copy of that text and apply hollow effect
on the upper text. In step five, get a smoke effect video and
remove the background. In step six, keep
the smoke animation under the hollow text which is going to be above the text, which is solid Outcome is that learning how to
apply the smoke through text animation and
Canva allows you to make an immersive and
stunning type of animation. And videos to use for
various purposes. Without any further ado, let's just hop on a Canva
and show you how it's done. After you're done
with this, make sure to save it up and
also upload it on our project panel so that we can review what you've done
and how you've progressed. And if you didn't
understand the parts, feel free to ask me anything and I will guide you
through the whole process. As you can see that I
have opened up Canva. Now I'm going to open
up a presentation. After opening up a presentation, I'm going to do apply
any one of these texts. So I'm going to do is let's go off something which
is already made. What I'm going to
do is use this. I already have it. I'm going
to do is select the color, which is going to be black. Okay, there we go. I'm going to do increase
the size a bit more. Then I'm going to do
is keep it centered. And then I'm going to do is
make another copy of it. On the top one I'm
going to do is apply the effect which
is going to be hollow. I'm going to do align it to. After I've aligned it, I'm going to do is go off the
elements and I'm going to search for smoke, hit enter. I'm going to go off
the videos now. Let's see which one we can use now to do is maybe use
this if I want to or maybe use this Sma do is find something which is
going from the left to the right, Okay? We can also use
this if I want to. This is doable. I'm going to do is increase
the size of this. I'm going to increase it
up to it is full over here I'm going to do
is click on this edit. The video I'm going
to do is remove our, the background remover
after it is done, what I'm going to be doing is
just play the thing there. You can see it is
still over here. What I'm going to do is going
to be clicking on Position. I'm going to do is
stop this video. Take this at the front. And I'm going to do
is click on Position. Go off the layers, and
this is going to be in between this and under
this hollow text. I'm going to do
play it up and you can see the smoke is
getting through the text. Hope you understood
everything about this lesson and everything
about this class project. Make sure to do it and then
save it up and upload it to a project panel so that
we can see our review and hope you understood
everything about this course. Or if you still have any
question or any problems, feel free to ask
me and I will help you and guide you through
the whole process. Till then, see you in my next course where we
will learn a lot more.
 Manuel Tudu, Web Design and Microsoft Office Expert