Transcripts
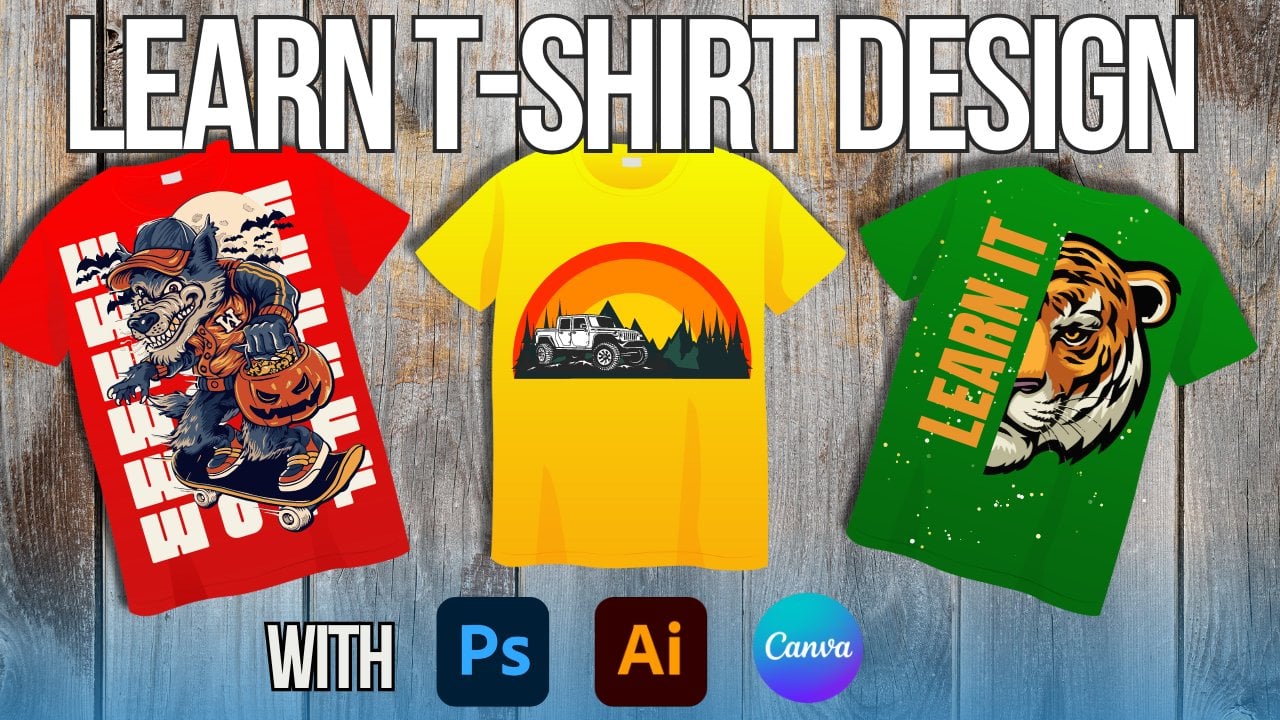
1. Intro of Tshirt Design: Hello everyone. Welcome to our class of Adobe
Illustrator, Sir Design. If you are planning to learn T shirt designing
from the beginning, then you are in the right place. Because we will cover in this class from the
basic to advanced. This is a beginner level class. If you have no
previous experience, then you can join in this class. Let's look what you will
learn from this class. One, introduction,
Adobe Illustrator. Two, Workspace and interface. Three, basic tools to use Adobe Illustrator to
make sure designs. Four, how you can
start designing from the basic advanced
in making tissue design. Five, how you can customize fonts and elements in
Adobe Illustrator. Six, how to add in photos
and AI objects in the panel. Seven, how to customize objects, turning objects into
outline for editing. Eight, How to mock
up designs on shed. Nine, how to mask objects. Ten, making desired
shapes and editing them. 11, Gradients and color. 12, How to make several
types of T shirt designs. After completing this class, you'll be able to do make
your own shirt design. Get more comfortable using the work space of
Adobe Illustrator. Able to grab a good
knowledge of making shapes and objects
and editing them. And the last is customizing
elements to your own desire. Because you will be a lot familiar using the workspace and also a bad idea of how you'll be able to make
some shirt designs. This is a project based class. During learning, you'll have class projects,
what you learned. You will be able to
participate in class projects, so you can practice
while you are learning. You will have supporting
resources in this class, so it will be easier for you
to learn while learning. If you face any issue or
if you have any questions, then feel free to ask me. I am always there to help you. Let's start learning Adobe Illustrator teacher
designs together.
2. Interface: Welcome to our first lesson on Adobe Illustrator interface. Now the first thing
you're going to do is going to be opening
up Adobe Illustrator. Now you have to keep, one thing in mind
is that whenever you're using any
software from Adobe, or let's say Adobe Illustrator, make sure that you're using
the newest version of it. As you can see that I am
using Adobe Illustrator 2023. Okay, From here, what you will get or what
the advantage you will get is that it gets a lot of buck fixes with each updates. And there are going to be a
lot of tools or let's say the newest tools which even if you don't have in
the previous ones, you will get those functionality
in the newer ones. Make sure to use the
newest version of Adobe Illustrator
whenever you're using it. Now let's learn about the
interface without, let's say, before going into
our first lesson of our first teacher design. Okay, the first thing when
you see when you open up Adobe Illustrator is let's start off with the
left side panel. We have new file open home. Learn your file share
with you and then delete it and also reasons and sort it up according
to your desire. In our home, you will get
this interface from our home. You can even select
whichever type of template you want to use. These are not just, let's say, ready made templates
or anything. These templates are basically the size of your panel or let's say the screen or the canvas which you
will be working on. Then you can select anyone from over here
according to your desire. You can also see the pick cells. These are also like resolutions. Then we have more presets
you can select on it. Then you can go to Save Mobile, whichever type of template you want to use or
document you want to use, and then select it
according to your desire. You can also see that there are pre built teams which
you'll be able to apply whenever you want to just click on any one of
them. Press on Preview. If you want to
preview them, okay, you can see modern design
travel and navigation icon set. We're going to use
them later on, okay? But if you want to use any of the templates, you can use it. But if you see
that you don't get your desired or expected size, you can just slot on here, over here, and then just
type in your own data. Let's say I'm going
to cut this off. And instead of points, what I'm going to do is
going to be clicking on, let's say pick cells from here. What I'm going to do
is going to be typing in 1920 in height. What I'm going to do
is going to be typing in, let's say 1080. Okay, You can type
it like that, 1080. Then select your orientation. Select the number of art boards you want to use
for your project. And then fix out the bleeds of top and bottom, left and right. That's totally up to you. Then you can select the
color mode if you want to, but I'm going to
suggest you to use the default one
which is MIC color, because RGB is going to
contain only three of it. That's totally up to you
And select the effect. I'm going to suggest
you to use medium or high because it's the
higher the Rester effect, the better the
quality of your photo or the design which you
will be working on. And then select the default, or let's say the preview mode, which type of preview you want. If you're using oversized
or overprinted pick cells or let's say documents, then I'm going to suggest
you to use overprint. But if you're using
pick cells over here, then pick cells
will obviously give you a good type of preview
of your own project. Then on the more settings
you'll be able to customize it more
according to your desire. After you've done just press on Create and then
you're good to go. Let's say before that I'm
going to do click on Learn. When you click on Learn,
you will get a lot of tutorials and you can get a
tour of Adobe Illustrator. Okay, that's like
totally up to you. Another advantage, or let's
say another tip of using Adobe Illustrator is that always stay connected
to the Internet. Also, make sure to stay
connected with your account. Okay? As you can
see from over here that I'm connected
to my account. And then you have your files. If you are connected
to the Internet and you have any files
in your Cloud, then it will show up over here. You have no cloud documents
as I don't have anyone. Okay. Even when you're offline, you'll be able to access them and work on it according
to your desire. But as this is my new
account, so I'm not using it. And make sure to stay
subscribed to any of your, let's say, the plans you
have on Adobe Illustrator. Make sure to use those then
you have shared with you if any person shares
any document or you are sharing any
document with someone else, those will be visible over here. And then in the last
we have deleted, this works like a trash
bin from your devices. Okay, let's say a recycle bin. Even if you delete anything, it gets stored over here, if you want to delete
it completely. You have to delete it
from over here too. If you want to
restore it, obviously you have this restore
point for you. And that is also a functionality Adobe Illustrator offers and the newer versions of
Adobe Illustrator. Now, you can also open
up specific projects from clicking on Open and
then opening up anything. It will open up
this pop up window which you'll be able to select any file which you have on
your PC from any drive. And then you can open it up directly on Adobe Illustrator. Then we have RDs ribbons. Before that I'm going
to click on new file. Let's just create it. If you want to make
a new document, just click on Create and
then you're good to go. Let's cut this off. Now, the first thing we
have to learn about, or let's say about
the interface, is going to be the ribbons
urbonsile edit object. Then we're going to
learn about type select effect and
window and help. These are the ribbons
which are going to help you to find
a lot of tools. As in file, we have all
about the basic needs. Let's say new version
history, export, import, edit, invite the
edit. You'll get it. How you can edit your stuffs, our projects, our work
in your documents. An object, you'll be able to do anything with
specific objects or elements that you your documents and we have a type in our type, you're going to get a lot of type of elements which
you'll be able to work with. Let's say change case size, guilds, then we have
funds and all of those. Then in select,
you'll be able to select any object in effect, you'll be able to see that there are a lot of type of
effect which you'll be able to apply in
any element basically. And then we have view of how
you'll be able to view it. And then you can go
through other tools too. Okay? You can go through
them whenever you want. But as this is not about the essentials of
Adobllustrator, but about the shirt design. So we're just going
to learn about the interface and then we're
going to go into our lessons about how we can be able to create or customize shirt
designs in a window. You'll be able to see
a lot type of windows according to your
desire and how you can customize your window
in adobtrator. But the first thing I'm
going to suggest you when you open up adobustrator, first off, go to window, find out work space, and then click on
Essential Classic, and then you will get more
tools in your window. Okay, we're almost quite ready. On the left side,
we have a couple of these tools what we're
going to use in our lesson. Let's say we have
a couple of tools, let's just know about the
names selection tool. Then we have Direct
Selection tool. Then we have magic
wand, lacto pen to. Then we have Curvature
text or type two. Then we have line segment two. Then we have rectangle two. When you right click on any of these that have
these corners, you will see that there
are a couple other tools to then we have eraser, then we have sharper
shaper basically. Then paintbrush rotate to and then scale and
a lot of them. Okay, On the right side we have properties and libraries and a lot of other tools too. Now you know about a couple of the basic interface
about Adobillustrator. Hope you understood
everything in this lesson. And basically this
is very simple, so you can also fiddle with Adobe Illustrator a bit so that you can get
through a lot of tools. Okay, let's move on to our first lesson of
customizing our T shirt.
3. Customizing fonts for tshirt design: Welcome back to another
lesson of Adobe Illustrator. In this lesson, we are
going to learn about customizing bonds to
make T shirt designs. Okay. Without any further ado, let's just hop on the lesson by opening up Adobe Illustrator. As you can see that I have
opened up Adobe Illustrator. Now the first thing I'm
going to do is going to be opening up a new preset. Let's click on four, which I most of the time
use in this lesson. Now as this lesson is
about customizing fonts, there are a couple
of different things, or a couple of
different methods, how you'll be able
to customize fonts. But I'm going to be showing
you a specific method, or let's say I'm going to create my own design in this lesson. First off, you're going to start off with this text option. And the text option,
click on text, you will be able to
see it over here. Let's select the text again. And I'm going to do type in
my text and select on it. And use whichever font you want, but I'll be using
this Futurama three. Select on it, and then you'll basically see that
there are three types. One is light, bold and expanded. I'm going to use
this, Expand it. Okay. I'm going to cut this off. Let's, let's use one text. Let's say I'm going to
type in exceptional. Okay, we have exceptional. Now, how are we going to make this look a
lot more better? First thing I'm going
to do is going to be clicking on each and every one. Then I'm going to
turn them into, let's say we're basically make this thing into an outline. I'm going to press
on this select on the text control shift. And then you will basically
see that they will turn into outlines throw shift and now you can see as they
have turned into outlines. Now what I'm going
to do is going to be clicking on this and then you will be able to make or make changes on
each and every one. Hold on a shift. Do
you have this anchor? Let's say I'm going to do
is make this up over here. You can see this has been added, going to do the same
thing over here. Horizon control Z to do
the same thing over here. Anchored it up, let's say this is basically
how I want it to be. Then I'm going to go over
shear and do the same thing. It looks a lot more better. I'm going to do is take
this one over shear, hold on the shift, and customize it
according to your desire. And if you want to make
changes like this, make rounded corners, then you can fix it up
according to your desire, whichever one you want
to change, basically. Let's see, I'm going
to change this. Okay, works. We're going to do the
same thing over here. We're going to copy the
same thing on this one. Double click on an anchor
to make it like that. Do the same thing on this one. Okay, there you go. You have it. I'm going to go off to the sides to see which
one looks better. Okay? This doesn't
look that bad now. Well, we're going to make
a couple more changes. I'm going to do it
with the C over here. I'm going to do the same
thing on over here works. I'm going to go off to the right side and
find out this one. This one also needs something
to be changed a bit. Works now as this
looks a lot better. Now what I'm going
to do is going to be finding out whichever
one I need to change. Basically. Let's say I'm
going to do is make this to be a bit more oval
or like circular. I'm going to do the same thing
with A. A isn't that bad. What I'm going to
do is take this one and make this to
be a bit longer, just a bit basically. Okay. It doesn't look that bad. Now, after we have all
of this all together, I'm going to do is
make sure to use our rectangular tool
select on this. I'm going to change the color, whichever one we basically want. I'm going to use grayish. Now what I'm going to do is going to be clicking
on this tool again, so that I can make
some rounded corners. Select on this and I'm
going to go off Object, I'm going to send backwards. I can see that basically how it will
look like, hold on to A. You basically get the center of it, control Z. I'm going to keep it on
just like this, okay? It doesn't look that bad. After you're done, just select on it, group it up together, and then you're good to go, basically how you'll
be able to do that. Now you can also select on
whichever one you want. Let's say if you want
to fix the text, select on the color or
whichever one you want, okay? Then you can also go to
some color options, okay, from Adobe, or maybe online, and select whichever
color you want to use. Let's say from here, let's
use a color palette. I'm going to click on this, on the fill of this rectangle, I'm going to use, let's
say a bit darker. And I'm going to select on this, I'm going to get
behind all this. This is basically how
it will look like. Group them up together. Select on your mockup file. Let's, I'm going to open
up one of the mockup file, which I have here.
You can see it. I'm going to select on
this black click on. Okay. And I'm just going to do is take it
up right over here, press on Ok. Then you can see this is
how it will look like. There we go. I can make the same, or maybe different on different texts
or whichever font you're making are using. That's totally up to you, hope you understood
everything about this lesson. Now let's move on
to our next lesson of Adobe Illustrator
T shirt design.
4. Summer tshirt design: Welcome to our first
lesson of shirt design, where we are going
to try and make up a summer shirt design
without any further ado. Let's just hop on
Adobe Illustrator and start working on it. As we've opened up, let's say our first lesson and opened up Adobe Illustrator. Now the first thing
we're going to do is going to be making up a preset. Say I can start off with
this, this is not that bad. I'm going to press on Create. When you have this window, make sure that you have
this Adobe Illustrator or essential Classic turned on so that you get like
a lot of tools. The first thing I'm going
to do is going to be making this page black. Now the first step
we're going to do to change out the color of this page is going to be
going on Document set Up. Now how are you going
to change the color? I'm going to click on File first and then find
out Document set up. Click on that. You're going to fix out the grid colors
whichever one you want. Let's say keep it on light. Make sure to simulate
colored paper and discard white
overprint Output. Select on this, click
on, press on Okay. And press on Okay again. And then wait for a bit
until the color is rendered. You can see now the color is
being rendered over here. We're going to wait for a while until it takes the whole thing. Okay. I can see all of the thing is black
at the same time. Now what we're going to do
is going to be starting, let's say, edits, okay? To make up our own
T shirt design. Now I'm going to
right click on it and start off with this Ellpsu. Because I want, let's
say I want the logo inside of a circle and
then mark it up later on. Now what I'm going
to do is going to be pressing, you
can see the center. And if you want to
keep it at the center, press on Alt, you
can see the center. And from here, press on shift and then make
up your circle. Okay? What basically happens
if you don't use all the center is
that you can make up your circle from
wherever you want. When you press shift, it's not going to be
like a perfect circle. You can make up an oval to, but when you press on shift, it will just directly be a perfect sized
circle all the time. Let's start off with
going through the center. Press on all shift and then
I'm going to make my circle. Can see this is basically
how it will look like. You can see this is basically the center I'm going
to do is press on Z. I'm going to
keep it at there, then make up my circle. The circle looks good enough. The first thing
I'm going to do is going to be clicking
on the Select Tool. I'm going to press on Control C, and then press on Control
to Paste in front. And then I'm going
to do is going to be having another one over here. You can see, okay, basically what I'm going to
do is going to be keeping it somewhere around
over here, weights. I'm going to press on
control Z and then take one. Just like this. You don't
have to worry about it. Because when you press on Alt, it will tell you which one
is basically the center. This is basically the center. But yeah, press on control. I'm going to do keep it
somewhere around over here. Or you can also
click on this and then align it wherever you want. You can see the center. This is basically
the vertical, align. Let's keep it over here. You can click on, okay, first of, press on
both of the things. Select on this vertical
and center, Okay. Select on both of them,
then Align, Center. Okay. Vertical. And
then you're good to go, but you can also do it
manually whenever you want. Okay. You can see the center. I'm going to get
this at the center, then I'm going to get
this at the center. Now. Looks a lot more
better, I guess. Okay. You can see both of these. I'm going to press on shift. This is basically the Intersect. Now the next thing I'm
going to do is going to be, let's say using this as only we're going to
get the outer ring. And how are we going to do that? To get the outer ring,
what we're going to do is take this color
and make it black. First I'm going to do
is take this and fill this color up with
the tool of coloring. Okay? I'm going
to select on this and select the color black. Okay, If you can't do that, what you're going to do
is go off the Properties, select the paint tool, which you have is to find
the fill and click on Black. Then you see that we
have this black center. And make sure that the color or the stroke we also
have isn't the same. Okay? Make sure that it's white or black according
to your desire. Now the next thing
what you're going to do is going to be start intersecting or grouping both of them up so that it
looks a lot more better. Now what we're going
to do is going to be doing the same thing
which I said to you, okay, now I'm going
to select both of it. Or first off, align it
according to your desire. And after you're
done with aligning, then group them together
so that you get a better, like a better look to it. Now what you will do is, first off click on this. Let's say I'm going to
click on Properties. And then we're
going to find out, let's say we're going
to find out Pathfinder. Okay? First off select
on both of them, and then you have this
path finder option. Now what does this
path finder option do if you can't find
this path finder option? You can also go to Windows. Here in Windows, you
will basically find all of the tools Adobe
Illustrator have to offer. Make sure the path finder, which you have already open over here I'm going to
do is take it here, which looks a lot more better. Okay, now what I'm going to do is going to be mixing
them both together. Which you will find
out at the center, which is minus focus. Now you can see that this is click to minus focus. I'm
going to click on it. And then you basically have
both of it altogether. You can see now this
is basically a hollow. Now, it's a lot like those merging tools
which helps you to merge both of them together and then basically get
the outer ring, or maybe just the outer part
which is visible as white. You can also do that. This
is basically how it is. Now the next thing
we're going to learn, the next thing we're going
to do is going to be taking in any specific, let's say, let's say icon or
maybe any photo or any edit, which you want to do in Adobe Illustrator and
put this in a center. The first thing
we're going to do is open up our resource file. And you don't have
to worry about that, because I'm going to
be putting all of those resource files or any project or any document
in our resource file. You can find it, are downloaded
from our description. Now I'm going to open up. First off click on Open and then I'm going to do is
find out my decks top. And then I'm going to find out Job Illustrator and Resource
File. There we have it. I'm going to click on this. Now the first thing I'm
going to do is going to be finding out any of that
called Surfing Logos. I can select on
Surfing logos and therefore I have it now. I'll be able to use
whichever I want as this is the summer one I can use because is all about the
beaches and all of those. Okay. Whichever one you prefer, you can download
whenever you want to. I'm going to use this. This
looks a lot more better. First thing is that
you can see that this is a bit different. I'm going to do is first off
then select all of this. Instead of I'm going to press on control Z control. To group them together can
basically see how it works. Select on this, drag
it down over here, hold on a shift,
therefore you have it. I'm going to do is keep
it something like this. But I'm going to do is
control B R control. I'm going to press on control Z. So it looks like this
but I'm going to do is take it behind. Okay? You don't have
to worry about that. I'm going to take it
behind. Later on, press on shift again. And then I'm going to do strike
it just like this, okay? As I already have it. Now, the first thing
I'm going to do is going to be clicking on objects. You can see over here, that's all about
the object, okay. Now what you're going to
do is going to be arrange. It can see you will find out range I'm going
to bring backward. Click on the specific one. Click on object again, click on red backward. You can see now this is on the backward side of the circle. Now it looks a lot more better
than how it basically is. You can use other photos to. That's like totally up to you. Then you can also customize your own logo or whatever
you want to put inside of, let's say your logo or any design which
you're trying to make. Now we're going to make another ellipsole to
get another lining so that we basically get
another text circled around. Instead of being flat, you can also use flat ones, but that's like
totally up to you. But I prefer using, let's say, a circular text. The first thing I'm going
to do is going to be making another ellipso here. What I'm going to do is
going to be finding out, let's say press on Alts. Okay, we're going to
find out the anchor. And then I'm going to do is make up a circle. Just like this. Press on control Z. I'm going to find
out our circle. Say we already have it. And I'm going to click on this. Okay, Select on this and
make sure that there is, let's say on strokes,
we're going to put in a color, let's say red. That is what we need right now. I'm going to do,
increase the size just a bit so that it is more visible. Now we already have,
let's say outline. But the first thing I'm going
to do is click on Phil. Then I'm going to click
on only like this. Make sure this is center
aligned at the same time. Okay, it looks a
lot more better. Click on it, you can just
click on this and vertical, now we have it basically, which is now center
aligned perfectly. The next thing I'm going to
do is going to be putting in my text however I
want it to look like. Okay, now if we want
to put in our text, what we're going to do is
going to be clicking on our anchor and
putting in our text. Basically, when
you click on this, you can see the path
when you press on at, you will basically find the
anchor right over here. At this point, that is
going to be the center. Now what we're going to do
is going to be clicking on this text tool and we're
going to find our anchor. When you find out your anchor, just click on this and
there you go. You have it. You can see the text
is now circular. This is basically how it works. I'm going to do is cut all
of this off basically, and then put in your own text. Let's say I love the beach. Now as you can see that
when I click on it. And then I'm going to
put in center a line. But you will see
that basically it will turn down at the bottom. But first I'm going to do
is going to be clicking on it and fixing
whichever font you want. I'm going, I'm going to go
on searching for a lot of, find out the one which I want. I'm going to click on this. I love the beach, let's say. I'm going to go
through a couple more. Okay, this looks really good. The next thing I'm going to
do is going to be keeping our text in such a way
so that I can rotate it. Okay? So the first
thing when you want to rotate it
is first of select the path and then you will be able to use
the Rotate tool. But before that
I'm going to do is fix out the size of this. Let's say I'm going to
click on our text option, then I'm going to do
is increase the size. Let's say if you want
to fix the size, I'm going to click on this. Now I'm going to do
is first off click on this Best path, Select Tool. There you go. We
have our path I'm going to do is rotate it. When you click on rotate, you'll basically
find this option. From this option
you're going to do is make sure to keep
it in such a way. Let's say 180 or maybe 90.
That's like totally up to you. What I'm going to do is type
in 180 and press on okay, 180, then you'll basically
see that this is at the top. Now as you can still see that the text is at the
top of this text, but I want it at the center. First I'm going to do is
increase the size of a bit more and then you're going
to do is go on to type. And then here on the
type you'll find this option of type on a path. Okay, I'm going to click on
this edit or type first up, I'm going to go off to type select on the specific
one and click on Type. And then type on a Path
Type on path option here. From type on path option, you're going to find
out this option over here which is called
a line to path. And then fix out center, okay? A line to path. Fix out center, and
click on, Okay. Now you can see that this
is now at the center. Select on it and fix out your
specific size of the text. See, I love the beach. Looks a lot better. Okay. Now, even though we
have done our top part, it still looks a lot empty. Right? We're going to put
another text and a bit more. Okay. At the bottom Two I'm
going to do is go back select on this and select the specific text over
here, which we have. I'm going to do is
increase the size a bit more. Los a better. Now what I'm going to do
is going to be clicking on this control C and Control. As you can see over here, I'm going to be clicking
on this person control Z. Select the control C
control can see verse here. Now I'm going to do is
rotated back again at zero. Hit on, okay, you
can see control. I'm going to click on this text. Let's just try removing it or let's just keep
it control C and control F I'm going to
do is rotate it, okay. Let's just keep it 180. What I'm going to do is now I'm going to take off this one, which you see over here. Instead of the one
which I have over here at the bottom of the top. I'm going to do is click on
this rotate tool back again. I'm going to do this,
time is going to be flip. If I want to do that, I'm going
to have to click on Type. And then select on
this Type on Path. Click on Path option. Now I have to flip this over. Now you can see this is
basically how it will look like. I'm going to do is going to
be taking this at the center. I'm going to do is
click on over here and click on this line center. As until all of them are
good, This one is 67. This, let's say also 67. Now as both of them
are quite done, what I'm going to
do is going to be increasing the size a bit more. Let's, I'm going to
keep it that much. Do is keep it in such a way. Let's say 68 is like
a good one, okay? 68 is a good one. Now, even though it
looks a lot more empty, what I'm going to do is going
to be clicking on this. Let's say I want
this specific one. Control Z. I'm going to
control to ungroup them, first, objects and group. I'm going to be clicking
on the specific one. I'm going to click on object aligned and arrange.
I can do that too. That's like totally up to me what I'm going to do with it. But first off, you can select any specific object
from over here. I'm going to click on object again and I'm going
to do ungroup them. I'm going to select
the specific one. Right now I'm going
to do is click on object again and ungroup it. Okay, looks a lot more better. We can also keep it
just the way it was. That's like totally up to you how you're
going to work with it. Basically you have it. Now I'm going to click on
this tool again. And let's say I'm
going to make some start tool over here. It looks a lot more better. I'm going to click
on this and add in black, Cancel it up. Click on the Select tool
and then keep it to be, I'm going to keep it
aligned vertically. I already have it.
I'm going to do. Take the same one, press on all ten shifts. There we go. We already have it now You can take up the
whole thing I'm going to do is s basically
the whole thing. Then tuls you to group them up together, including the text. Group them together, you can see then we
have our T shirt, then we can put it
on our T shirt. I'm going to click on file I'm
going to do is open it up. Open another one.
Let's open, then. We have our T shirt mock up. Whichever T shirt
you want to put it on to put it on black, you can see black PSD. We already have it.
You can take that. Open it up if you want to. Let's click on Open. Click on this isolated black.
I'm going to click on that. Then we already have
this T shirt over here. We can put it up on this one. Okay? If you want to
put this on this one, you can put it up, but
that's totally up to you. What I'm going to
do is going to be using another AI file. Now, I'm going to
take this whole thing over to isolated black T shirt. I'm going to do is mock it up. Now first stuff you can do, one thing is that
right click on it. Then what you're going to do is, let's say I'm going to click on Library's properties and then rasterize it according
to your desire. Okay? And then you can mock
it up directly over here. Instead of dragging
it like this, I'm going to do take it up and then put it
on your T shirt. You can do it like
this. Okay, that's totally up to you how you're
going to work with it. Well, let's go off to layers. Okay, Acid export, you can
do it like this over here. From here you can also find out this layer option
or click on it. You can use this
create new sub layer. And all of it I'm going
to do is click on this. You can add it up
according to your desire. You can also release masking option and all of those clipping mask you
can clip up the mask. I'm going to do take up
and create clipping mask. You can also do that. That's
like totally up to you, but now this has been
put on your T shirt. Okay, hope you understood
everything about this lesson. Let's move on to
our next lesson, where we are going to be making another T shirt design by
using Adobe Illustrator.
5. Sports tshirt design: Welcome back to our next
lesson of Adobe Illustrator. In this lesson, we
are going to learn about sports shirt design. Well, you might
think that there are a couple of different
sports shirt design, but this is going
to be quite basic. It's just we're going to
put in our make ourselves a logo and then we're going
to put it on a T shirt. Then we're going to see
how it basically looks like without any further ado, let's just hop in lesson by
opening up adobe shatter. From here, you can see that I have opened up adobe shader. From here, we click
on Presets and then just open up anyone
whichever one I want. Make sure to use
your layers because that is quite important to use. Okay, The first thing I'm
going to do is going to be either making it black
or either making it white. First I'm going to
keep it to be white. And then I'm going to start
off using my ellipsu. Click on this and I'm going
to make two ellipsu slick. Click on the pat, click on Alt, and then
make our hit on Shift. Now select on both of them, and I'm going to click on this. Now you can see this is
basically how it will look like. Click on both of them. Click on any of the path, and then make sure they are perfectly aligned
at the intersects. I can see all of them
looks quite good. Now, I'm going to
do is group them up together if you
want to, basically. But if you don't
want to, you can obviously use any part,
whichever one you want. Let's say I'm going
to do is take our group of them up if
you want to basically. But from here I'm
going to do use this Shape Builder
tool which I'll be able to use and I'm going
to do is click on this, select on this part basically. Well, first off you have
to select the whole thing. Then you're going to
select this part. First I'm going to
select on this, I'm going to click
on the select too. And double click on it. And take this part just which I want. I'm
going to click on it. And then I'm going
to delete this. We're going to use
just this one, Okay? Now it looks like
a shield, right? So I'm going to click on it and hold on Shift and
increase the size of it. Now first thing
I'm going to do is going to be clicking on this. And then I'm going
to fix the stroke. Let's say I'm going
to keep it to be two. Now we have our size and it
looks a lot better, right? You can rasterize
it if you want to. You can join group whatever
you want to basically. But I'm going to keep
it just the way it is. And then I'm going to do
is use up another logo. Now I'm going to open
up a couple of things. Let's say I'm going to do is open up and this is the T shirt. I'm going to click
on Resource File and then I'm going to find out, let's say Console Skulls or whichever one you prefer or
you can use sports logo. I'm going to open this sport
logo up so that I can use it for different purposes. And click on this
activate the fonts. I'm going to close
it. I don't need it. I'm going to keep it basically. I have it over here.
You can see all of them are different in size and color. But what I'm going to do is
going to be using just this, which is going to be
like a shield basically. Now here, the next thing
I'm going to do is going to be clicking on any of these. Okay? Whichever one I prefer, I'm going to go
right click on it. I'm going to use this one. Right click, ungroup it. I'm going to take this ball it, make sure that it
is at the center. Looks a lot more
better. Okay, let's just use it somewhere
around over here. Make sure it is big enough. Now as I have a basic
structure of it, I'm going to do is click on it. I'm going to do is shorten
it up just a bit more. I'm going to use it. Okay,
this place looks good enough. I'm going to do is
click on my text. Let's, I'm going to
click on this one first, then I'm going to fill it
up with a specific color. Okay, I'm going
to do is find out the specific tool and
then find out this one. Click on Phil. All
right. Click on it. If you want to use, let's say if you want to use Gradient, just click on over here, select on this Picker tool, which you will basically
have over here. Say I'm going to
Eyedropper tool. And you can see this
is basically how it will look like, Okay, now it looks a lot more better, but instead of that, I want to use something a bit
more different. I'm going to click
on the specific one. From here I'm going to do is take this color.
Okay? This color. So I'm going to do is
click on, over here. I'm going to do is
click select on Phil. Click on Gradients. I'm going to click on Pick Tool, and then I'm going to
select this, basically. Now what I'm going
to do is going to be clicking on these ones. I'm going to click
Select, click on Phil. I'm going to drag
the whole thing over here so that it looks
a lot more better. Okay, I can just change
the color whenever I want. Click on Tool,
eyedropper, basically. Now this looks a lot better. I'm going to click
on the Select Tool and then I'm going
to do is remove it. I'm going to do is change
out the gradients. I'm going to do is
click on Strokes. Let's, I'm going to use this and then increase the stroke. I'm going to do is
click on Strokes again. Click on this. I'm going to do is make it a
bit more darker. Therefore we have
it. Okay. I'm sure I don't need this anymore, so I'm going to keep it
somewhere around over here. Now, if you want to use the
wings, you can also do that. You can just select
or ungroup it first. Okay, I have it. Take
this one over here, and there you go. Okay, I picked the wrong one. Take it right around over here. I'm going to press on Control. I'm going to press on this and make sure it
looks big enough. I click on it. And then
I'm going to arrange it. Send back. Okay, let's, instead of that
I'm going to do is Alt. Click on over here. I'm going to do
is click on Type. You can select On
Path if you want to, but I'm going to do
is just rotate it. We can rotate it
according to your desire to keep it, okay. Instead of keeping that like
that I'm going to do is going to be rotating it in
a whole different level. So I have to turn that
to be the opposite. To do that, I'll
have this option. Okay, so that I can just use the specific
one which I already had select on the tool. I'm sure that looks
a lot more better. Right click, click on
Range, Send to back. First thing I'm
going to do is going to be clicking on this. Okay, perfect. I have to
make this a bit more. S, okay, looks a
lot more better. Shorten it up a bit
more, and there you go. I'm going to select
the whole thing, group them up together, because I'll be needing them. Okay. Now I'm going to do is going to be
putting it my text. Okay, I'm going to
select on this text, let's say soccer. So. I'm going to do is
change the text. Let's say select
whichever text you want. That I'm going to do is going to be selecting one
which looks a lot more better like that to this. Okay, let's look for a couple of other
fonts which we have. I'm going to go down, okay, this looks not that bad. I'm going to do is click on it. Okay. As we're quite done. Okay, Now I'm going to do, is going to be
clicking on this text. I'm going to do is going
to be keeping the font. Okay, I'm going to keep on this. And strokes should be black. Strokes black. And
put the to be white. Now let's say I'm going to
put in a couple of the fire, which we have over here.
I'm going to use that. Let's say I'm going to
pick a couple of those. I'm going to use these decals, I'm going to click on
it and ungroup them. I'm going to use this decal
wherever I basically want. There we go, we have it. I'm going to select the
whole thing control. Then I'm going to do is as
we have our logo ready, you can also put it up in
a circle if you want to. Then I'm going to just click
on this, make another one. Let's say first off, let's get our T shirt Moko file open, T shirt mock up wherever
you want to get it. Let's say this time
I'm going to use a white T shirt first on, Okay, And then, there
you go. You have it. I'm going to take this whole
thing and paste it around over here. Control Z. Hold on the shift, there you go. You have it, okay. We press on control Z. When you're pasting that up, let's say I'm going to
take it up over here. I'm going to do is the convert
this RGB working space. Okay? I'm going to do, you
have to change the RGB? Okay. If you have
the better one, then you can see
this is how it will look like, the better one. You can see when you keep
it up just like this, it will just congest the space. That is why it looks like that. You need a small
font, delete it. But if you basically have
the smaller font over here, let's, I'm going to click
on the specific one. I'm going to click on
this object and group it. You can see over here, What we're going to do
over here is going to be selecting the font to
be a bit less thicker. Now let's try it out,
group them together. And other words, let's
just try pasting it. Can see at least the font
looks a lot better over here. You just have to fix
the fonts a bit. And make sure to fix
your resolution before applying anything to
your T shirt mock up. Because it depends
on the resolution. Because now you can see that the strokes are basically
getting congested, okay? They're just getting thicker. And we can see the details, the text to be a bit more. They can also do
it from over here. You can click on and you
can fix the strokes. Let's say no stroke can see now it looks
a lot more better. Click on the texts. I press on control Z. As I have the box over here, I'm going to do is going
to be keeping no strokes. Now you can see
there's basically no strokes I'm going to do. I can see this looks
a lot more better, even though this
looks like this. I'm going to click
Keep on one font, but it's still a bit too thick. A lot more better, right? So now you know how
you'll be able to create a sports T shirt with the
logo you make on your own. But if you want to use any
of these logos over here, you can just click them
on and then just take it to any T shirt and mock it
up according to your desire. Okay, so hope you understood
everything in this lesson. Now let's move on to our next lesson of customizing
our next T shirt design.
6. Gaming tshirt design: Welcome back to our third lesson of Adobe Illustrator
shirt design. In this lesson, we are going to be making a gaming shirt design. Well, there are a lot of
gaming shirt designs. But here in this lesson, I'm going to be explaining about a couple of
things which you can do while you're making
a gaming shirt design. And Adobe Illustrator
gaming shirt designs can be a bit complex
and sometimes as it is, like a jersey, sometimes
very tough to do. But I'm just going to give you a couple of ideas which can help you to make your T shirt
look a lot more better. Let's just open up
Adobe Illustrator. Now let's do the same thing
by opening up our own preset. I'm going to click
on, let's say, Create. That's totally fine. Now the first thing I'm going to do is going to be opening up a couple of things
including our T shirt. First things first I'm
going to do is click on File, click on Open, go onto our resource file
and find out console game, T shirt pattern, then Skulls. First I'm going to
click on console or maybe open all of them
up at the same time. Click on open. Three of them will be opened
at the same time. You can see our T shirt
pattern is over here. Deletes Then see a couple of parts of this pattern
which I'll be using later on. I'm going to do is going
to be keeping it delete. It controls you to
undo the process. Let's just keep it
the way it is now. The first thing I'm going
to do is going to be clicking on this open page. I'm going to do, first off, close it off, We'll skip this. The last one is
Skulls over here, which we are also going to use. The last one, we're
going to open up our mockup file from T shirt mock up whichever
one you want to use. Let's say I'm going to use
the black one this time. Okay, you can use
this if you want to. What I'm going to do is going
to be clicking on File. Open this up instead, find out the black T shirt. I show the preview
if you want to. And then flatten
layers to single or convert layers to object. Okay, therefore we have it. Okay. Now let's go onto our first one which
you're going to need, my bad, not this one. Click on this one
where we are going to edit in our own stuff. Now, whichever one
you want to use, that's like totally up to you. Let's, I'm going to
use just this one. Okay? First I'm going to do
is ungroup the whole thing. Click on object, ungroup
the whole thing. So that I can use
the specific ones, whichever one I prefer. So I'm going to use this, I'm going to use this as
the pattern, okay? I'm going to use one of these. Right click, ungroup, this up, introduce click on objects and ungroup again. Do
the same thing. Objects plow, this is group, Take this over here. Which I'm going to take the
ones which I basically need. Okay? So this is
the isolated, okay. I'm going to remove
this, I don't need it. Okay, we already have one. Now what we're going to do is
going to be clicking on No. Okay, as we're quite done Now the first thing about a gain T shirt is
all about the pattern. So we're going to first stop, put the pattern over here. First things first I'm going
to do is right click on it. You can crop it up
if you want to, or you can take this
up on another page. Okay? The first
thing I'm going to do is going to be in
decreasing the size. Okay? We have our
T shirt over here. Now the first thing I'm
going to do is going to be taking this pattern. You can see the dark sheet I'm going to do is rasterize the effect over here
on this T shirt. Okay, Now if you want
to rasterize it, there are a couple of
different methods. It's a right click on it. Let's say I'm going to
click on this and make sure I'm going to click
on File. You can open up. I'm going to do is Export
Selection can click Select. First off, you have to rasterize the effect so that
you can put that up over here directly on
the specific T shirt. You want to do that I'm
going to do is right click and create clipping mask. First off, select the
specific T shirt. Click it up over here. Delete it. Now from here what I'm going to do
is going to be click on it. Then I'm going to do is going
to be clicking on Layers, which you already
have over here. Select on a specific file, then I'm going to
make pixel perfect. Then let's try using
our rasterize and then clipping mask over here so that I can put that up
directly on our T shirt. I'm going to do is release
right click on it. Let's make another layer for it so that I can put
that up directly. I'm going to delete this first. Use layer two over here. Now you might find out that
this is a bit complex, but the first thing
is that you have to rasterize the effect now before. And there's a lot of other things about
layering and stuff. The first thing
I'm going to do is going to be clicking on this T shirt and make sure that you don't
have no background. If you do have any background, you can use this
pencil or let's say at anchor and all of those
tools to remove the parts. And then starting on with it, make sure to use
this file because this is going to be
a lot more easier. Now, the first thing
I'm going to do is going to be clicking on layers. I have already another layer, but if you don't
have another layer, you can see this is layer two. I'm going to delete it and
keep on just layer one. Okay, here in layer one,
I have this T shirt. S I'm going to do
is name this image. Okay, now I'm going to do is make another layer which
is going to be layer two, which is going to be underneath. Now from layer two, what I'm going to do first up, I'm going to keep it like this. I'm going to set this first. I'm going to mask it up. Now this is masked up. Okay, now the first
thing I'm going to do is going to be clicking
our Copying this. Click on File I'm going
to do is Copy first. So click on Edit and Copy, and click out the
Transparency option, and click on this and
paste it right in place. Paste in place. You can see this is how it
will look like. You can see over here, CD is 100% this is
basically white, so it cannot be seen. I'm going to click
on Layers first. You can see layer two
over here, Transparency. I'm going to click
on this option. First off click on Clip. You can see this is basically
how it will look like. And I'm going to do is
increase this stroke to 4% that it looks better and looks the way
it needs to look like. I'm going to click on this, can remove the stroke
if you want to, but this is basically
how it will look like. Okay, then you can clip it up, but if it's still not working, then what you can do is
obviously delete it. You can see this is the effect. Then the first
thing you're going to do is going to be zooming in and I'm going to do
rasterize this effect first. Okay? I'm going to do this first. I'll do the same thing, find the anchor, and start
doing the same thing again. I'm going to keep this up
until all of this is done. Okay. Now looks a
lot more better. We're almost at the end. You'll see it is almost done. The, now, the first thing after doing this is going to be you're
going to click on it. After clicking okay, now we're
going to make a path out. If it click on it, make sure this is on layer two. Okay, make sure it
is on layer two, which we are basically doing. Okay, If it's not on layer two, you're going to
copy the same path. Click on layers, you can
see the path over here. And make sure this
is black in color. If it is not working that way, just select on any other color. Fix out the transparency. Sing to click on this. We can see now I have clipped it up according to my desire. Now after I've clipped it up, now the first thing
you're going to do is going to be doing a couple of other things which
you need to do with this. That's just quite perfect. Now what I'm going
to do is going to be clicking on another layer. We can change color right now
according to my own desire. Okay, now the first
thing let me try is using a fill on
our second layer. Click on this layer and
you can see a past. Well, we're going to basically
need another one which we use in our first one
which is not over here. We're going to keep it
underneath basically, this is the part control
z, let's just remove it. This is basically the path, so this is the first
and the second control z. I'm going to paste
it just the way it is. Flick on transparency. You can see this is the first. Clip it up, make sure both
of them are clipped up. Well, it's not going to work. Now I'm going to do is paste. After you past both
of them in place, you're going to select
the second layer, which is where your
path basically is, what is going to be this one. Okay, This is the one
which you basically need. Now here I'm going to
click on layer two, our isolation mode,
which you basically have not going to keep it
isolated most of the time. Click on another layer, you can see this is
basically isolated. You can see this is
now how it looks like. I'm going to press on control. This is the masked up part. You can see the path over here. I'm going to click on the path and then I'm going to do
select any of the color, whichever one I want. Let's say I'm going
to, first off, let's just put on a stroke. See where the stroke ends up. Can see basically this
is where it is, right? Click on it and I'm going
to do is try resizing it white or maybe transparent. Okay, make sure this is
transparent or white. Whichever one you prefer
I'm going to do take this transparent one and
create clipping mask pre. Okay, the selection contained rester object which will be restorized but not added
to the clipping mask. I'm going to do take it
right above, over here. Opcd is 100% I'm going to do is click on the fill and make sure we only have this. I'm going to take this part out, click out Transparency, then there we are. Good to go. That I'm
going to do is going to be clicking on this
option over here. Taking this up over here. But make sure to put it on the second mask you
can see now we can only see the effect instead
of the whole thing. All right, I'm going to click on this and I'm going to click
on it a couple of times. You can invert the
mask if you want to. You can clip it up, you can
see how it will look like. I'm going to put in
90 or maybe 10% Okay, I'm just going to put in
100% I'll just keep it. 100 is basically how
it will look like. Click on the fill, make sure
there's more color on it. You can put whichever
color you want. There you go, You have it. I'm going to remove
this part. Let's see. I'm going to keep it
just the way it is. Now what you're
going to do is going to be using your logos. Whichever one you want, say I'm going to do is use
this skull, which I used. I'm also going to paste
it right over here. Instead of that, what I'm
going to do first is going to be taking a making
a group first. Both of it a group control. I have to select the
whole thing together. I have to press on control A, except for this one over
here. And delete it up. I'm going to group them up. Lock select on layers. Okay, we have it as we have
it now I'm going to do, want to be taking this
one control C control. Let's see. I'm going to do
make another layer over here. You can see you can make
mask if you want to. That's like totally up to you. But I'm going to do is
keep it just the way it was that I'm going to
do is paste in front. You can see it over here. I'm going to do is
take this part, fill it up with black. I want the stroke
to be a bit higher. The stroke is going to
be higher over here. Fix out the opacity in, Click on this and then
put in the layer over here. Okay, I locked in this
instead of that one. Select on this one. Let's say first off I'm going to do is save this up first. Later on, let's try
working on this one again. No, click on no. I'm going to do is,
first of save this one, click, save, save
on your computer. Well, let's say I'm going to
do is type in gaming save. Okay, we're good to go. I'm going to do is
open up another one. Open up the same one which
we have gaming over here. Then we have it basically. Then we're going to
be using this one. Only I'm going to do is open the other ones open
resource file. What we're going to do is
going to be clicking on Skulls and then console
both of them together. Then we're going to be using it, we're going to group them. Objects, group on them
again, object group. Then I'm going to select
the specific part control. I'm going to take
this over gaming. I can see how it will look like. You can still see this looks like this because
it is being rested. But first I'm going to do is
select on the specific one. Use this whenever I
want or however I want. I'm going to use this part. I'm going to click on this, I'm going to copy this whole thing. Basically. I'm going to take
it right above, over here. There you go. I have it. Can
see it's totally visible. Can see over here. I'm going to do is reduce the strokes a bit
so that it is not that you can see
how it will look like all has been
restored and all of it. There you go, I
have it over here. Now if I want to use these
ones too, I'm going to use, first off, plug on objects and ungroup it
according to my desire. Okay? You have to ungroup them. Let's say I'm going
to use just this one and take it over here. I'm going to delete this
because I don't need it. I'm going to hold on a shift
and then reduce the size. There you go. I can put in your name or put whatever you
basically want over here. Let's say I'm going to put
in a couple of texts here. I'm going to type
in Team Lawrence. Let's say put in
TRD C. It's good to go click on it and fix our
use whichever font wants. I'm going to use something
cool which looks a lot better. Let's say V Bull is good. Select on it, pick out the size, taming this text that I'm
going to select on fill. Then use whichever color
you basically want. Let's say from here I'm
going to click on Fill. Click on Gradient. From, I'm click on
this Picker tool. Then from here I'm going
to select this text. Or maybe this one
looks a lot better. Cancel it up and paste it
wherever you want it to be. Let's just use white because
it's not that visible. Use whichever one you want. Now you know how you can make up a basic gaming T shirt
according to your desire. You can also remove it or add whatever you want
to your T shirt. Hope you understood
everything about this lesson. Now let's move on
to our next lesson, where we are going
to learn about a different custom T shirt
design and Adobe Illustrator.
7. Grafitti tshirt design: Welcome back to our lesson
of Adobe Illustrator. In this lesson, we
will be learning about how we can make a
graffiti shirt design. Well, all of the resources, or all of the
things or elements, or even decals which I'll be using will be given
in our resource file. You don't have to
worry about it. If you want to use them, you can download it directly
from the resource file, which we have with this course
without any further ado. Let's just hop on the lesson by starting opening
Adobe Illustrator. As you can see, that have
opened up Adobe Illustrator. Now click on more presets and
use whichever one you want. If you want to use it
for mobile web prints, that's like totally up to you. But I most of the time
try using on a four because that helps me to print it out later
on if I needed. Now the next things I'm going to do is going to be opening it up. I can see from our
resource file, I will select all
the graffiti files. From here I'm going to find out, let's say I'm going
to do first up, I'm going to click on this. Let's say I'm going
to find out graffiti. Okay? All of these, I'm
going to need them. I'm going to click on all
of these graffiti stuffs which I have downloaded. You can see that
there are a couple of things which I'll
be able to use. You can see I have
different alphabets. I have different logos which
I can use such as decals. And then we have spray decals. Also, you don't have to
worry about anything. The last one, we have a couple of texts which we'll
be able to use to all of them will be given
in our resource files, so you don't have to
worry about it either. All of them are vector files, so you don't have to
worry about losing any, let's say the resolution. Let's just start off now
from the first thing. What I will be needing
is going to be a canvas. If you want to use a
canvas, that's up to you. But I can use a canvas, but also at the same time, I don't like using it that much. The first thing I'm going
to do is going to be keeping or using
in our alphabets, let's say, what am I going
to type the things I'm going to be using or
typing it up, let's say. What I'm going to do is I'm
going to select on red R. I'm going to do is take
A. I'm going to use, okay, I'm going to
use these first. Make sure that they are
perfectly placed in, then take the other ones, whichever one you want. Lets say I'm going to take or I'm going to click
the other one. Let's say I'm going
to use these. Okay? So I'm going to do is position them according
to my desire. Now I think what you can do is also turn them into outlines so that you
can use it later on. What I'm going to do is keep
them just the way they are. I'm going to be keeping
them just the way it is. Increase the size a bit. Increase the size
whenever you need. Okay. We have our text. The next thing we're, let's say I'm going to do is increase the size a bit more
on the bottom one. Because this needs to look a
bit bigger than the first, the upper case letters. Now as we're done
with alphabets, the next thing I'm
going to do is take these. I'm
going to use that. I'm going to use this
too at the same time. Okay, we have it now. We're going to use
a couple of logos. Also, you can use spray decals. Now the first thing I'm going to do is going to be taking in whichever one you want or whichever type of
method you want to use. Let's say I'm going to
make something like this. Or you can also take
the specific parts which you have over here. You can take it, paste it, wherever you basically want. But you can also make them
according to your desire, wherever you want them to be. Someone click on them. Click on Phil, I'm
going to do click on this Picker tool and then I'm going to use this
select on this color, make them to be like this for us on cancel. You can see now this is
how it will look like. But I'm not going to keep
this to be like this. Okay? It is invisible. I
guess black is better. I'm going to press on
so that I can keep it black or white
maybe. Okay, not white. Okay, We'll just keep
it like this for a while and then later
on we can change it up. If you want to change
any specific ones, just double click on it and then paste it wherever you want. I'm going to keep it
right over there. I'm going to do this over here. I'm going to make a couple
more copies of this. This looks good to make
another one over sheer, but a bit smaller. Okay, better now as we have it. Now the next thing, okay, let's just add in
a bit of stroke on these non black,
obviously white, so that it's visible 0.25 works, okay? So we are basically
done on the layer, now it's a bit more visible. Okay, Now the next
thing I'm going to do is going to be
using a bit of decals, which I'll be able to
use it from over here. We can use logos too
if you want to let, I'm going to take
this, first thing I'm going to do is
decrease the size. I'm going to select on it. And let's see why
is it not visible. Because I'm going
to go over here on Logos because it's
white basically. So I'm going to do is
change the color to black. Change it to black. Control Z. I'm going to do is keep this to be white. Okay, let's just use a
bit of black over here. On this one I'm going to do
is make this to be white. I'm going to use
white over here also. White over here. Let's just try taking
this up over here. Okay? It doesn't look that good. I need to do is keep
it just the way it is. Okay? This doesn't look bad. Okay, let's just
ungroup them first. Now what I'm going
to do is going to be keeping our selecting on this, select on objects
and ungroup them. I'm going to click on
Objects and Group. Instead of this being like this, I'm going to do is
add the stroke to be a bit smaller in the field. To be white, tell us, just go up a bit. I'm going to press on control Z. I'm going to do is reduce the size of bits and then try
pasting it right over here. I'm going to take this,
reduce the stroke reduce, and try pasting it over here. A shorter works, I have to take this
part and let's say stroke should be a bit, but the field should be white. Okay, Now the other one
which we have over here, the stroke, well I'm going to keep it like this and I'm going to do is
fix the stroke. Two PT and there we go. We have it selected. We have the other
ones which we have over here is this pat. Exactly. We have to
reduce the stroke a bit. Fix out the fill.
Okay, let's time this. Just adding black. Okay, we have to reduce the stroke size
and make it black. I'm going to just click on them. Select on these, and let's
try keeping it over you. Then I'm going to
select the whole thing. I select on this, keep the stroke to be black. Just keep the stroke black. I'm going to take
this and make sure the stroke is a
bit more thinner. There you go. Group
them up together. There you go, we have it. There you go. Click on roughly spray decals. And if you want to use this, I'm going to take it up down
over here. Do paste it. I'm going to do rotate, But the thing I'm going
to do is going to be making it okay. Click on this, click on Black, And there you go I'm going
to do is click on Object, Arrange, send to
back, there you go. We basically have it select
on all of this control. Group them together. Open up the mock file. Let's see, I'm going to use white T shirt this
time. Press on. Okay, I'm going to go over here and take it to the isolated
white T shirt. Press on. Okay, I'm going to select on this and paste it
right over here. Okay, so this is basically
how it will look like. I'm going to select
on the specific one. What I'm going to do over here is that I'm
going to do is reduce the stroke size a bit more. I can see it's a
bit more visible. Okay, I'll get to go. This is basically how
it will look like. Okay, so hope you understood everything about this
lesson on how you'll be able to make a graffiti T shirt design on Adobe Illustrator. Now let's move on
to our next lesson of Adobe Illustrator
Teacher Design.
8. Japanese tshirt design: Welcome to another lesson of our course of Adobe
Illustrator T shirt design. In this lesson, we are going to design a Japanese based design. We know that Japanese are
really popular on pop culture. We're going to give
you a couple of ideas of how you can make up those type of T shirt by
using Adobe Illustrator. Without any further ado, let's just hop into the lesson by opening up Adobe Illustrator. As you can see that I have
opened up Adobe Illustrator. Now the first thing I'm
going to do is going to be opening up a new preset. I'm going to click on Create, make sure the rest
reffect is high. Now I'm going to do is make up this box
because I'll be needing it just putting in my own
content inside this box. Make sure to use the layers. I'm going to add
in another layer. Let's say this layer is going
to contain the next data, or let's say the next
element inside of it. Now what I'm going
to do is going to be clicking on let's say stroke. I'm going to do is
increase the stroke a bit. Looks a lot more better. I'm going to click
on this next layer. Can see this is
the bottom layer. Okay, I'm going to
keep it like this. This is the second layer which I'm going
to be working on. The second layer, what I'm going to do is
going to be putting in my elements, the element. What I'm going to do
first is click on this box, click on File. And then I'm going
to do is let's say export or import something. But first off here what I'm
going to do is going to be opening up some photos. What I have in my resource file I'm going to do is Shrine Gate. I, I'm going to take this whole thing or can
take the specific ones too. That's like totally up to you. I'm going to do take the
whole thing altogether, because this looks a lot better. Taking all of it together,
select the whole thing. Person control. Now all
of them are groups. Take it and paste it
around over here. But one thing I'm going
to do is going to be creating clipping mask. I'm going to do instead
of this over here, I'm going to be
putting this, okay, I'm going to use
this as a template. I'm going to put this
in our second layer. Create a clipping mask control. Okay? I'm just going
to keep it the way I want to use it, okay? You can see transparency
and all of those that I can put anything
inside any object, you can rasterize it. You can also use text
wrap or clipping mask. You can do clipping mask. Click on this, click on objects. And Clipping mask over here can see this is basically
how it will look like. I'm going to unlock this. Click on, okay, let's
say I'm going to do is keep it in such a way so
that I can use just this one. Okay, let's just use this. The rest is underneath I'm
going to do is taking on layer two or let's say the other data that
we have over here. Or what I can do is delete the whole thing and I can
only take these parts. That's totally up to you. Which, whichever one you're
going to work up with, I'm going to do is T.
I'm going to take this one and paste it
right over here. Okay, I have this go over there. Instead of that, I'm not going to take the flares
because I don't need it. I'm going to take
this one over here. I'm going to do keep it in such a way so
that it goes back. I'm going to do a line, I'm going to arrange
it, send backwards. You can see this
is the second one. And I'm going to put, the
last one I'm going to do is go over to the last one
and then select this one. At the end I'm going to
do is do the same thing. Click on objects
and send backwards. I'm going to do the same
thing again, send backwards. Again, send backward. Now it looks a lot more better. Now, the thing I'm going to
do is going to be putting in a couple of texts and a
couple of things over here. I'm, let's say, first off, make sure it looks
a bit more better. Okay, we're good to go. Maybe I'm going to
do keep it there. It's more visible, now
it's more visible. Now what I'm going to do
is going to be clicking our opening up another
file for my resource file, which we have as you know, we have Japanese mask. You can use whichever
one you want. But here, from here, what I'm going to do is use
cherry blossom. And then we also
have another one, Okay, Tokyo AI, we're
going to use that. At the end I'm going to do is open up this cherry
blossom AI file. You can use whichever file
you want to use from here, because there are a lot of
things which you can use. Let's okay to use this
one, the whole thing. I'm going to take it directly
to Untitled one over here. As you can see that it will be pasted right above over here. It will take a bit of a time
to render all of the data, but first thing I'm going to do is going to be flipping it in such a way so that it
looks a lot more better. Press on control Z. I'm going to do the
same thing, Control. We can also go on
Edit, Red, Paste. Okay, what I'm going
to do is going to be rotating it, okay. I'm going to do is find
out one D and then we're good to go now we have
it in 180 degree. I'm going to hold on a
shift and I'm going to do is strike it
around over here. So it looks a lot
more better, right? Take it right around over here. Okay, perfect. I'm going to do is take a couple more
details so that I can use it. Okay. We can also use just that. What we're going to do is
find out this specific one. Or maybe find out
something which we can use as a background. Okay, we can use this or maybe just remove the
whole thing from here. I'm going to take this
two out of the thing and I'm going to do is just
use this specific one. I'm not going to
need that. I'm going to take it right around
over here and paste it. Just the way I want it to. I'm going to do is put it in such a way so
that it looks good. I'm going to click on
Object, click on Range, and send it back. Not that back. So I'm going to do is click on Objects and I'm
going to click on an bring forward C now
looks a lot more better. I'm going to do is going to
be clicking on this path and then try to make
it look a bit better. According to our lines over here can see just the way
it is I'm going to do, it looks a lot more better. I'm going to find out the
intersect on over here, can see the way it looks. Okay. We are basically
good to go over here, which looks a lot more better. Now the last thing
we're going to put is going to be
something else. Let's say I'm going to
do is reduce the size of this bit, Okay. Now it looks a lot more better. Now the last thing I'm
going to put is going to be our Tokyo file. So I'm going to open
up, I'm going to click on this file called Tokyo. And this will take a bit
of a time to open up. And there you go,
You have it and I'm going to do
is press on this, whichever one I need. I'm going to take this over here and paste it according
to my desire. Hold on a shift so that
you get a perfect. You go, you have it. Now if you want to
put in more details, let's say I'm going to go
off the cherry blossom, then from here I'm
going to take this 12. I'm going to do
take this over here so that I can use it
over on the side. I'm going to take it up, I'm
going to use it over here. Let's say I'm going
to make it 180. Okay? Which I can use
most of the time. I'm going to use, okay? This is not going to be 180. Instead it's going
to be 90 degrees. Now we have it in 90 degrees. I'm going to do is take it up. I'm going to put it in such
a way so that it looks good. I'm going to shift and
make it a bit smaller. Better. A lot better. I'm just keeping it over here. Or maybe we can rotate a bit in such a way so that
it looks like this. Okay? Looks a lot more better. We can drag it a bit down. There you go. You have it. I'm going to do,
take the whole thing and put it up in a T shirt. I'm going to copy
select the whole thing. Person control G, which
we have it over here. You can rasterize
it if you want to, but I don't prefer
StorizingI'ming to click on Object and I'm
going to do is Group. Okay. Or you can restaize. If you restaize it, make
sure that price on. Okay. And basically,
there you go. You have it sturized. Well, we'll take
a bit of a time. Now as we are done, I'm going to do is open up our T shirt file or mockup file. I'm going to do is remove this. Also remove this because I don't won't be
needing them anymore. I'm going to click on File. I'm going to click on open mock up or T shirt mockup file. Click on open and then I'm
going to do is open both of them that I can show it
to you on both of them. Press on, okay, press on. Okay. And then I'm
going to do is take it directly over here. Once. Show you how it works. Okay, paste it up
according to your desire. And wherever you want, I'm going to press on Shift
and then decrease the size so that it fits in the T shirt or on the T shirt wherever
you'd like it to be. There you go, you
have it. I'm going to do take it up around over here. See it looks a lot more better. Align it according
to your desire, wherever you see it. And then just paste it. Now you're good to go now, this is how you
basically make up a Japanese type of
T shirt designs. You can also take up the
design and take it directly to this isolated white T
shirt and paste it. And if you want to change
anything from your design, you can just paste it over
here to do, take it up. Now what I'm going to do is
going to be clicking on this. Let's click on
Background over here, which you basically see. What I'm going to
do is going to be clicking on Untitled here. I'm going to do remove this
Background, which I have. I'm going to try to remove it because if you don't like it, you can just remove
it whenever you want. I'm going to click on that. You can just drag it out. It will basically be
dragged out. Okay. But if it's still not working, what you're going to do
is first off ungroup it. Click on Object and click, let's say I want to remove
it, Just drag it out. Not this one, but I'm going
to take this one out. Okay, I'm going to
drag that one out. Can see how it looks like.
I'm going to do remove it. And you can also remove this
outer layer if you want to. I'm going to do take
the whole thing and then group them up together. Click on this back option. From the back option, you
will find out that you can take it directly to another tab. As you can see that
this has been done. What I'm going to do is
going to be taking this over on this isolated
white T shirt front. I'm going to do is just
drop it over there. Take it over there
and just drop it. Just let go of your left mouse key and then
you're good to go. You will see this
interface, press on. Okay. And then what I'm
going to do next is just just align it
according to my desire. Press on the shift, and then you will find out
that it will look like this. Just shorten it out a bit
and then you're got to go, you can see that it
has been shortened to. What I'm going to do next
is just going to press Paste it up On this
one over here, you can see that this
looks a lot more better than how it
was with that shirt. You can see this is
how it will look like. Hope you understood
everything about this lesson on Adobe
Illustrator T shirt design. How we can design
a Japanese T shirt or Japanese design on a T shirt. Let's move on to our next
lesson on Adobe Illustrator.
9. Typography tshirt design: Welcome to and on the lesson of our Adobe Illustrator
T shirt design course. In this lesson, we are
going to learn about how we can make a
topography shirt design. Well, I'm going to
give you an idea, but if you want to make
or add more edits to it, that's totally up to you
how going to work with it. Without any further ado, let's just hop onto the lesson where we are going
to learn about how we can make a
topography shirt design by using
Adobe Illustrator. You can see that
we have opened up Adobe Illustrator and I'm going
to click on more presets. Let's, I'm going to
use letter this time, or maybe just a four. That's totally up to you. So I'm going to use this
and press on Create. Now, the first thing
we're going to do in this lesson is going to be making up my own canvas or
making up my own space. To do that, I'm going to
click on this option tool. I'm going to make
my own place over here so that I can
put my edits in this. Okay, I'm going to click on this and make it black in color. Now as I have it, I'm
going to click on Layers. And I'm going to do is
add in another layer. Now the first layer is
going to be locked, so I'm going to be
putting all my edits on the second layer. Now the second layer,
we're going to put in our first thing, which is going to be
our own topography. To put in my own topography, I'm going to click on Text and I'm going to do is
adding my text. Now the first thing I'm
going to do is type in HOPE I'm going to cut this off, HOPE I'm going to click on this. And then I'm going to do
is increase the size a lot more so that it is visible. Now the first thing
I'm going to do is, let's make it like this,
or maybe this one. I'm going to select any of
the fonts which I want. I'm going to use this
for this lesson. Click on this and I'm going to do is
increase the size a bit more in such a way so that I can a couple more of
these texts at the same time. Let's better. I'm going
to click on this. Let's see if there
are other text or any other font
which we will be able to use. This isn't bad. Either we can use this, Bradley Hand, or we
can also use this. That's totally up to you, whichever one you're
going to use. Okay? I'm going to go
through a couple of them to see which
one looks better. This one isn't that bad. Okay, This looks good too. Okay, We're going
to use this one. This one looks
good. We look good. I'm going to do, is going to be reducing the size just a bit. I'm going to change the color. This doesn't look that good. I'm I'm going to use this one. Okay. Okay. Yeah, perfect. I'm going to select
on this tools and then I'm going to make
a couple more of these. I'm going to use four. I'm going to take
this a bit above to use the last one
right around here, J. Now we have all of our texts. Now the first thing I'm
going to do is going to be selecting on each
and every one of them. Then what I'm going
to do is group them. Control. Now all of them are groups going to press On Undo. I'm going to select on them
Control as they are grouped. What I'm going to do, let's
make some edits on it. First things first I'm going
to do is take on the text. I'm going to select on
any of these texts, which I see over here. You can change the
bond if you want to, but I'm going to do keep it just the way it is because
I like it this way. Now I'm going to do is
click on Select on this, first on the text. Then you're going to find out a couple of tools
which you will find. We're going to let's say two, which you'll be able
to see over here. Two I'm going to do is okay. We contains text, can be converted to
outlines before, okay. If you want to convert
it to first off, click on them or click on them, and then we have to
convert it into outlines. First off, click on this, we're going to
create trim marks. If you want to, you
can also rasterize it. Now the first thing
you're going to do to create outlines is that select the whole text
person control shift, and at the same time, basically you will see that
they will turn into outlines. Now we're going to use
the Wp tool, let's say. I'm going to use it just
the way I want it to. A lot more better. Can see this is how it will
look like, okay? Can put in whichever
content you want to put. I'm going to click on
this or I click on it. Let's say I'm going to do
simplify the brush size. Show brush size, press on, okay? I can increase the
size if I want to, but I'm going to
keep it just the way it is because it
doesn't look that bad. Okay, now we're good
to go select on this. Okay, now what I'm
going to do is going to be putting in my
content over here. I'm going to do is going
to be clicking on File. And then I'm going to
open up the skull. Okay, I'm going to
do is click on this, whichever one we used, a skulls over here, as you can see over from here. Click on Skulls.
I'm going to do is click on them and
press on our object. Ungroup them from here. I'm going to use this one. I'm going to click
on Object again, ungroup them, and
then select Control. Take it around over here. As you can see that this is
not the color which I want. What I can do is change the
color according to my desire. But you have to use
the Path Finder tool. First off, click on
this Pathfinder tool and then you will
find out this Marge, Then click on Phil
and use white. You can see white marks. Okay? But what about the
colors? Which I see? Whichever one I need to use, that what I'm going to do
is going to be pressing on, let's say control Z, which I'll be needing over here. I'm going to select the stroke. Okay, First off, let's
select the stroke Color. I'm going to click on Merge
or maybe trim or Full. Whichever one you prefer. But I just prefer keeping it
the way it before it was. Select on Color option, whichever color you want to use, I'm going to use this
fill to be white. This fill to be white too. I'm going to zoom in and find out the ones
which I need to fill. After you're done, just click on this and then
we're good to go. But from here what I'm going to do is going
to be clicking on the specific circle over here. I'm going to keep
it totally black. I'm going to do is
keep it at the top. So I'm going to do
is click on objects. I'm going to click on a line, basically how it will look like. I'm going to do the same
thing to all of it. I'm going to click on objects and go to Arrange
Bring to front. There you go. You have it. You can keep it the way it is. I prefer using it. Okay, let's just use this. Okay. Person control z. I'm going to do keep it
just the way it was. I'm going to take it back to. Okay. Instead of that,
let's just take this one. Let's just press take the whole thing. I'm
going to remove it. I'm going to select
the ones which needs to be on the front. Select on, Phil, Color it up. I want this fill to be
this Phil to be black too. There are a couple of
details under there. So I'm going to do is press on controls and try seeing what
this basically looks like. Let's just try putting
the whole thing. If it basically works okay, we just need to fix the path
and fix out the strokes. Fix the strokes on
each and every one. White. There you
go. There you go. You have it now it's more visible. The other one, I'm going to
do the same thing over here. Select on the path,
select on them. Can see how it will look like. I'm going to take the
whole thing altogether. I'm going to take the stroke
and put it to be white. Let's just try the
other ones too. At the same time, we're going to select all of them individually. There you go, White. Click on white. I'm going to take all
of them over here too. Select the pads, and when
you select the pats, you will basically
see the red line. So make sure to select
them and select on Stroke, and click on White. There you go, you're good to go. Click on Stroke and Vola. Select on this, click on it, and turn it into white. There you go. You have it now as we
already have our details, we can use it whenever we want, but it's like totally up to
you going to work with it. Let me just show to you
how you can use it now. We already have, oh, I'm going to click on Phil. And you can use whichever
color you want. Let's say if I
want white, I can, I can click on this, put on white or black
according to my desire. Let's say I'm going to use
white because it looks a lot more vivid than having
nothing basically. Here we go, we already have it. Now if you want to put
more details to it, that's totally up to you. I'm going to click on the skull, which is over here. Click on the Slayer. I'm going to do is take this on. If you want to take this out, what you can do is take this
and group them together. I need this path to. Okay, perfect control G. Okay? All of them are
grouped together. I'm going to take this out
and put these back on. All right. Take it up, and here we go, according to your size. Wherever you want,
you can put it up. There you go, you have it. Now if you want to
put in more details. Let's say we're going to open up a couple of other things. Let's say I'm going
to click on Open, and we're going to use a couple
of these cherry blossoms. Okay, just for looking
good. Click on. Okay. From here we're going to take a couple
of these elements. I'm going to select
on this tool, remove it, deletes, Let's
say we're going to use this. I'm going to take it out and drop it right over here,
so that I can use it. I'm going to click on
cherry blossom again. I'm going to take these two. Lastly, let's just use
this maybe a bit more. Okay, now as we're done, what we're going to
do is going to be using these flowers altogether, let's say try putting them all
together if it looks good. If it doesn't,
it's totally fine. Select the whole thing and
then group them together. Press on Alts. I'm going to get another copy of the same thing and I'm
going to do up it control. I'm going to do rotate
it, okay. My bad. This is going to be
looking upside down. I'm going to be taking a couple more of
these flowers over here and keeping
it just like this. Okay? I'm going to
press on control. It was looking a lot better,
just the way it was. I'm going to take
it down over here. Okay. Let's use
the other flowers over on different sides. Okay, my bad. I'm going
to click on this again. Okay. I'm going to use this up. Delete. Okay, there we go. Then I'm going to do is
going to be using up a text. Another text. Okay? So I'm going to do is first
off, right click. Click on ellipse tool.
Fix on our center, which you can see over here a shift make up
your ellipse tool. Okay, from here I'm going
to make no fill over here. Then what we're going to do
is going to be finding out the anchor points
so that I can put in my text on the path like on this text we found our anchor. Okay, click on this and find out the anchor I'm
going to do zoom in. Click on this text, not over, I'm going to use it on my tool
which I'm going to use. Let's just make it over
a Shear Sun control. Flick on, Phil Flick on nothing. And I'm going to just put in my text sun control z, select on this circle first and there you go. I'm going
to type in hope is needed. Select on this and reduce
the size, how much you need. Select on the whole
thing. There you go. You have it select on the text, select on Stroke,
keep it on white. What I'm going to do is
going to be clicking on this and click on Type, Type, Type on Path option, pluck on center. Okay? And there you go. Place it up. Not here, obviously not here. Okay. There we have it. Then you can align it according
to your desire. Let's, I'm going to put it up. Okay, middle. There you go. I'm going to put it
on the sender two. Now what I'm going
to do is going to be clicking on this,
clicking on Phil. Let's say instead
of this, I'm going to put in a bit of white. Okay, The white,
Isn't that visible? Click on the stroke.
Click on black, and make sure the
stroke is visible. Okay, there you go. Can put it up like this, make sure it looks
visible, okay? If it's not visible, then change the color
according to your desire. Can see, now it looks
a lot more better. You can also fix the
transparency a bit. Let's say I'm going
to put in 90, type in 50 R, maybe 70, okay? It doesn't look that bad. Let's put in 80, okay? Not that bad. After you're done,
what you're going to do is just take the whole thing, group up the whole thing, Sal G and see this
has been made. Then find out the T shirt where you want to paste it over. No. Click on file, click on open, mock
up. T shirt mock up. Let's say black or white,
Whichever one you want. Let's say I'm going to type, click on both of them, try to open them up. Okay? Okay. And then
I'm going to take this design pat on the
black shirt first. Okay. I'm going to do is reduce the size and pasted. Can see this as being
pasted over a shear. There you go. I can see the specific text
is not that visible. I'm going to click
on this. I have to remove this. There you go. I can see we have our
topography type of T shirt. I'm going to use the
same thing on this. Now you can see this is
how it will look like. But instead of this, you're
going to have to change the color a bit of
the white ones. That's the basic thing. But you can just select
on the specific text. You can see over
here, select on this, select on the strokes, then there you go,
you have it now it is black in color and
a lot more visible. Hope you understood
everything about this lesson. This is how you basically make a typography type
of shirt design. And you can also make it up according to however you want. Let's move on to
our next lesson, where we're going to learn
about how we can make a camping type of shirt
design and Adobe Illustrator.
10. Camp tshirt design: Welcome back to our another
lesson of Adobe Illustrator. In this lesson we
are going to be making a camp teacher design. Well, we're going to go
through a lot of steps. Well all of them are
quite basic and very simple to do without
any further ado. Let's just hop on Adobe
Illustrator and start our lesson. If you don't
understand any part, please let us know and we will guide you through
the whole process. Open up Adobe Illustrator and I'm going to
press on Create. First thing we're going to do is going to be opening up a, let's say, a lot of templates or a lot
of files which we have, we're going to derive it from. I'm going to do is,
you can see from over here I'm going to do is
select whichever one I want. I'm going to need this, and I'm going to
need this one to, I'm going to need this. This. Okay, then we're
good to go press on open. We're going to open all
four of them altogether. We're going to wait a bit
to do is close up the font. I'm going to do is use
whichever one I want. The first thing I'm
going to do is going to be our making up a triangle so that I can get exactly where
I want it to be. Okay, there we're good to go cancel clog on the fill
I'm going to do is make it black cancel select on the
tool and then we have it. Then I'm going to
do, start putting in my items over here. Now the first thing I'm
going to do is going to be clogging on layer and
then I'm going to do add another
layer and lock the first one so that nothing
is done on the first one. Now the next thing I'm
going to do is going to be putting in my items. Now the first thing
we're going to do is let's say I'm going to wait, close it up and use
whichever one I want. See a couple of mountains
we can get from. You can see we have also this one which you'll
be able to use. Let's just use a couple
of them altogether. Click on this right
click and arrange it. Send backwards. Right click on it to
arrange send to back. It's a lot better. Then I'm going to do
is take this, okay, I'm going to press on
objects and ungroup them. Select on this object
again and ungroup. Select on both of them. Objects and ma select
on the specific ones. I'm going to take
it to untitled one. This is basically how
it will look like. What I'm going to do is change the fill and keep
them to be white. If it's visible, okay, it is quite visible. Okay, I'm going to use this
as just a mounting photo. Then we're going
to do is keep it, let's try keeping
it at the center. Looks a lot more
better. I'm going to put in a couple of strokes. Strokes look better, okay? Now it is looking a
lot more better then. If you want to use a
couple of logos and stuff, you can have it over here. I'm going to do is going
to be using this one. Which take this. I'm going to drop
it right over here. I'm going to select on
Phil, click on whites. There you go. You can
basically have it, I'm going to select on them. We have it. If you
want to put in a bit of color, we can do that. We can put in yellow or
whichever color we want. Okay. Why? It is looking better. Now what I'm going
to do is going to be maybe if you want to use camps
or whichever one you want, you can put that where we're going to use this at the end. Okay. We're going
to use a couple of decals too, at the end. Then you can also use Tens. That's like totally up to
you whichever one you want. Let's say I'm going
to use this one. Only click on objects
and ungroup them. I'm going to click on Shifts. We need a couple of other elements too if
you want to use it. Let's, I'm going to
click on Home first. I'm going to click, let's say I'm going to go to more preset. I'm going to go off to
more art and illustration. From here you can find
out something about trees so that you
can use it later on. A more templates. Go over there and then download
whichever one you want. You have a couple of logos
which you'll be able to use. Let's type in Tree, click on Go. This will basically search up any tree type of
templates for you online. And you can see that
it is already online. But as I don't
need it right now, I'm just going to close it off. But if you want any of it okay. You can just click on anyone. Let's, I'm going
to click on this. You can download
free with trial. You can do that. Okay. Or if you want to totally download it, you can use it to. I'm
going to cut this off. I'm going to use another file which I have on
my resource file. I'm going to open this up, which we already have over here. Go back, click on Open. I'm going to open
up the tree one. You can see that I
have it over here. Now let's use this. Okay, let's just remove
this for a while, press on Alts I'm going to do is make this a bit
bigger than the other one. Okay. We're going
to take this to keep holding on Alt. There you go. We have now the next one we're going to do is going
to be putting in our text, right click on it. Use the ellipse tool now, instead of having total circle, we're going to use
this. Click on Phil. Make sure that there's no color because we're just going
to use it for our text. I'm going to click on Texts. Then we're going to
find out our anchor. Cut this off, click on Phil. Use white. Let's say I'm going to type in, let's explore. Let's explore the
world. Flick on it. Then you have to keep
it at the center, even though you can see
that it will go down. Over here you have this rotation tool which
we're going to do. Double click on it
and put in 180 on. Okay. And then you'll basically see that it
will be at the top. Select the tool,
double click on it, then increase the size. Let's say I'm going to do is increase the size,
just like this. Okay, we got it. I'm going to change the font, whichever one you want. Let's use this. Looks good. Right. I'm going to
select on this text. Now I'm going to do
is go off the type, select on type of pat, then I'm going to
select on center. Okay, we are good to go, Let's explore the world. They can also change the
color if you want to. Let's say from here I'm going
to select on this color. Okay? It's not that visible. So
I'm going to select on this, select on Phil, select on whichever color
you basically want. Doesn't look that bad, does it? I'm going to do is keep
it just the way it is. Now what I'm going to do
is going to be putting up a couple more elements
inside this it now. First things first I'm going
to do is click on Camp Text or maybe logos which
I have camp logos. Now from our camp logos, what we're going to
do is going to be keeping our selecting a couple more things
which we have over here. Okay. From here you can use either this or
this, maybe this. From here I'm going
to do is just click on the specific one. I'm going to do. Select
on this and delete. Select on this, put in a text, let's say Journey. Select on this text, select the fill to be
white. Select on it. I'm going to do is press
on Alt to zoom in. It looks better. I'm going
to group them up, Control G. We're also going to
increase the size. We're going to select on this
and take it up over here. Okay, we're good to go a bit to the left. There you go. Now what we're going to do
is going to be putting in a bit more elements
on this, okay? Click on Logos. If you don't want
anything, just skip it. It's totally fine. Let's
see, I'm going to use this. Click on the Keep it Black. Rotate. Okay. I'm going to do is go to Camp Logos again or
maybe Camp Text. And we're going to use
this bag over here. Take this one over
here and I'm going to do take this and
hold on a shift. Increase the size a bit. Use it on both sides, basically. There you go. You have it now I'm going to put in my extra
text over here. Click on Phil. Click on White
and Stroke to be block. Do the same thing. Click on White. Then
we're going to fix the stroke to be
block. There you go. Now I'm going to put in
my extra text over here. Okay, so in our extra text,
we're going to put in, let's say, let's
explore the world. Change A Emits. Click on text. Let's just click on
this, select A text, not the whole thing. Control Z, change. I'm going to cut this off. Okay, I'm going to cut this off and I'm going
to click on this. First I'm going to do is
increase the size a bit. Then first I'm going
to do is going to be changing the fill color. I'm going to use this, I'm, let's say this one is going to be a bit
shorter. It's fine. We're going to put our
strokes to be black. Our pace and discover I'm going to do is change the size
to be a lot bigger. This needs to be over
here. I'm going to do. Select on this text, select on this, not that bad. Select on this,
again click on fill. Black stroke, white. Select on the fill. Let's sing to use this one. Let's Sima, Click on
something else or maybe select another
color, Okay, Let's change the fill first, okay? It's not that bad right now. I'm going to do is, let's
say as we're done with this, we can put in a couple more
details if you want to. I'm going to put in a couple of lines which will look
a lot more better. I'm going to click on this line, so I'm going to hold on shifts and make
this click on hold on the Alts and do the same thing. Okay, It doesn't need
that much control for perfect control. Hold on the shift
and there you go, Go out of layer chain. There you go. We have itch now, after all is done, I'm going to remove them up, whichever one we don't need. Cut these off. Cut
these off too. And I'm going to do is select
the whole thing together, person control G. This is basically how
it will look like. I'm going to open
up the Mac files. I'm going to click
on both of them. Click on Open, okay. Okay. And then I'm
going to do is just it. Directly on this person. Okay, zoom out, pull on the
shift and then paste it. Select on them. Select on the ones which you need
to fix out the stroke. Okay, never mind. No stroke over here. I need to use the stroke
on maybe the white one. Okay, so this is done
on the black one. Let's okay. Never mind. We have to change a
bit of these texts. Okay, Font or stroke to. There we go, we have it. Let's more better right now. Let's use it on this one. White T shirt, press on. Okay, hold on the shift. There you go. You have it now. Let's change
the strokes a bit on this. We have to keep a bit of it. Let's say 0.25 or maybe
I have to select this. I'm set, I'm going to keep it to be
0.5 okay? Looks perfect. 0.5 looks good, right? This one I have to use a black stroke and
fill to be white. Now it is a bit more visible, right click on this
out and there you go. You have it. There you go. Now
you know how that you will be able to
make a travel T shirt. Okay, this is not that black, so I'm going to
remove this first. There you go. You have both of the T shirts. You can make it just like this. Okay, hope you understood
everything about this lesson on how you will
be able to make travel, let's say a cam shirt design
by using Adobe Illustrator. I hope to see you
in my next lesson.
11. Retro sunset tshirt design: Welcome back to our lesson
of Adobe Tissue Design. In this lesson, we will be
making our retro sunset tissue design according to my need or according to my creativity, without any further ado. Let's just hop on the
lesson by turning on Adobe Illustrator as we've
opened up Adobe Illustrator. Now let's open up
any of the preset, whichever one you want, make sure the rest
effect is high, okay, so that you get really good quality edits or
whatever you're working on. Now, we're going to
start off by using our ellipse and make
out our retro sunset. Okay, I'm going to click
on our ellipse now. Hold onto Alt and Shift. And then we're going to make an exact sized circle,
whichever one we need. Now the first thing you're
going to do is click on it and make sure to
use any of the fill. Okay, Instead of that, I'm
also going to be okay. First I'm going to
do is click on File. Click on Open. It will take me to
the resource file. I'm going to use this palette which I have in
my resource file. What I'm going to
do is going to be taking this right over here and use this color
palette, which I have. Now. I'm going to click on this, click on this tool, and select
whichever color you want. I'm going to click
select on this, and press on Control. And press on Control. Now we
already have another one. Now you will see basically
that there's another circle, but what you're going
to do is press on Alt and then shift
so that you get an exact size circle from the exact place you are
trying to make it from. Okay, you can see control. I'm going to press on a shift and then get your
exact size. There you go. Then I'm going to change
this color into this one. I'm going to click
on this select on Control C Control.
There we go. We have another one, Shift
and Alt at the same time. There you go. We
have another one. Click on this Picker tool again, select on this, there you go. We have another one. Select on the tool Control C control. And I'm going to do is make
another one. There you go. I'm going to click on this
again and there you go. We have our sunset. Let's say I'm going to
do is make another one, another circle, so I'll
be needing another one. It's totally fine.
I'm going to do is just increase
this a bit more. We're going to select on
this control C control. There you go. We have it. The last one, let's
say I'm going to use a different color from
the color pattern. Let's see if this works. Are maybe a bit lighter. What goes good with this? Okay. Never mind. That
doesn't look that good. Okay, white is good.
I'm going to keep it on white. There we go. As I don't need it anymore,
I'm going to remove it. Now what we're going
to do is going to be using our making in our rainbow. To do that, I'm going to right click and make a rectangle tool. Hold on to Alt and shift. Okay, just Alt, select on this and make sure to
put it at the Intersect. You can see the Intersect. You
can put it down over here, but also keep it on the center. If you want to, let's
say we have it on the center I'm going to do
is hold on a Shift and M, this will give you
the select tool which you have over here. We're going to do is
select all of it. And remove it basically. But before removing it, we have to select
a specific part, which we have to do. That is I'm going to
do, have to first off select the whole
thing altogether. Now you can see that
it is like this. Now press on shift M. Then what you're going
to do is hold on to Alt, which is going to remove the
parts which you don't need. There we go, we have our rainbow
or whatever you call it. Now after you're done with this, what you're going to
do is going to be, let's say, grouping
them up together. But if you don't want
to use this color, then you can change the
color, that's totally fine. But as I want to group them together now they are grouped. Okay. The next thing we're going to do is going to
be using in our text. Okay? To use in our text, I'm going to click
on Text option. Now, put in whatever
text you want. Let's say for this
I'm going to be okay. Let's, I'm going to type in red. I'm going to select on this. I'm going to select
on the size first. And then select
whichever font you want. Okay? You can see regular
and all of those, but from here we'll be selecting on whichever
text we want. If you don't want to use these, you can obviously
go to find more and use whichever font you want. But make sure to
use your Internet or stay connected
to the Internet and also so that you are stay
connected to your account. Okay. From here you can also
get whichever one you want. Let's say I want to
use this if you want to suck and all of those. From here I'm going
to do is going to be using in something that looks a bit retro to find that I'm going to do is let's
say I'm going to go down. Okay, let's just stay on the
ones which I have over here. I'm going to use
this. Okay, Select on this and obviously increase the size from here. What I'm going to do is
going to be select on. What I'm going to do
is select on this, click on Phil that I'm going to do is click on
this Picker tool and then use this Select Phil. Okay, we're going
to use this again. Works better. There
you go, we have it. The next thing we're going
to do is going to be, let's say we're going
to put in another text. Now that you use
that another text, we're going to put
in another one. I'm going to click on
this text option now. I'm going to click on this, let's say I'm going to
type in Laboratory. Okay, I'm going to select on this whole thing and I'm going to use whichever font I want. Let's say I'm going
to use Bajaras. We can use whichever
one we want. Let's totally up to you. Whichever one I'm
going to go down and find the one which
I basically need. I need something to
look a lot more better. What I'm going to do is
going to be something. Okay? I'm going to click on Find More and then
search for this. I'm going to look for them. Let's try searching for
the ones which you need. Okay, I'm going
to go down, okay, this one looks good, but I'm going to need something a bit cursive and looks
a lot more better. Let's just for this, I'm going to search
for something. Okay, it's not here. Let's
just try using these. Okay? Maybe select on this
and select anything cursive over here I'm going to do
is find anything cursive. Let's just use this
abstract groove. I'm going to do is
select on this, increase the size that
I get a preview first. Then from here what I'm
going to do is going to be selecting on the regular
or whichever one I want. You can see over here. Let's try seeing
whichever one we have. Okay, this is the same. I'm going to do is click on
this. Zoom in on or out. That's totally up to you. Now what I'm going
to do is going to be clicking on this text. Let's say I'm going to
click on another one. I'm going to use
this select on this, and you can see that
this is on Extrude. You can also use. That's
totally up to you. First thing I'm going
to do is going to be clicking on these texts. Whichever one I want,
see this and this. You can use whatever one that's elect totally up to
you. I'm going to use. This looks a lot more better. The last one I'm going to do
is going to be using, okay. Let's see how this looks like. Or this one or this one. This one looks good. That
I'm going to do is keep on, okay. Looks better. Okay? Instead of
this, let's just use now as we already have it. What we're going to
do is going to be making it a bit different. Go to objects, and then
you're going to find out, let's say we're going to
warp it up. Which is called. Envelope distort. Okay? You can see it over here. Envelope distort
and make with Warp. Instead of this, what you're
going to do is click on Arc and then find out rise. Maybe from there you'll be able, as you can see from here I'm going to do
is fix up the blend. You can see it looks a lot
more better. Press on, okay. If you got your exact results, then you can rotate it up exactly according
to your desire. I'm going to do
increase the size. This is basically
how it will look like now as we
have it over here, what we're going to do is
going to be clicking on this. There you go, click on this and place it up
according to your desire, wherever you want
it to look like. Then what you're going
to do is going to be clicking on brushes. Clicking on brush, you
can see paint brush, And then select whichever
brush you want to use. Let's say from here I
want to use this type of brush, brush on, okay? And then select on
the brush control Z. Then let's see, I'm going
to do is select on black. You can use this
brush if you want to, but if you want to use, let's just cut this off. If you want to use any
elements, you can also do that. That's totally up
to you to do that. What you're going
to do is going to be using one of the elements. So I'm going to open up
those retro texture, click on open, then you'll find a retro texture.
You can see over here. Let's say we have this first one which you can see cancel. I'm going to click on cancel, select on the text. Whichever one we need, you can see from over here. Now the first thing we're
going to do is going to be taking this texture
on the first one. To do that I'm going
to do is let's say first off we're going to
take our make another layer. Click on layers. I'm
going to log this up. Now the first thing
I'm going to do is going to be clicking
on all of its. Okay. Now what I'm going
to do is going to be taking all of these
direct, it's all to, you know, take this up over here now just paste it up
all appropriate layers. You can see that this
has been applied. Now as this has been applied, what you're going
to do is going to be clicking on transparency. Okay, As you found out, this one I'm going to
do is take this up, paste it in just the
way I wanted to be. You can see that I have
pasted it over here. Now after you're done, what
you're going to do is going to be clicking on
the second one, obviously the second one. And click on Transparency, which is over here. I guess when you click on Transparency that
the first thing you're going to do is going
to be pasting it on mask. Okay, I'm going to click
Mask Can See over here. We're going to make
mask over here. But first thing you
can see that we don't have anything over here, so I'm going to do is
cut this off and paste it on this exact text. As this is not made, I'm going to click on Delete, because I won't be needing it unless I have this over here. I'm going to click
on Layers again. I'm going to remove this layer because I
won't be needing it. I'm not going to lock
this up this time because I'll be pasting the whole
thing directly over here. Object on this background, I'm going to drop it up. This is basically how
it will look like. You can see over here. I'm going to click on this. I'm going to remove it. Remove this transparency. Instead of that, I'm going
to click all of this. Okay, I'm going to
keep it on over here. This is going to be the
Create Mask option. Okay, I'm going
to click on Mask. We can see over here we also, we're also going to need
the text at the same time. So I'm going to click
on control Z because we will have to
group them together. Now you can see this is
how it will look like. We have the text, okay? We need the text too
at the same time. Can see this is how
it will look like. And I'm going to do
is press on controls. I'm going to click on this, make the mask. Just
going to remove it. Okay, I'm going to go back on the first layer and then
select the whole thing, control G. Okay, all of them are grouped
and make the mask. Now I'm going to put
in this over here. I'm going to take this
right on top of this. Instead of this I'm going
to do is double click to create pacity Flick on the one, whichever one you
need flick on clip. Okay, I'm going to do is now we're going to group
them up to all together. First off, take all of this, group them together if
you want to control G. And then take this
back over here again. The first thing you're going to do is going to be clicking on them and select the
whole thing altogether. Find out the one which
part you basically need. I'm going to take this
one right over here, and this will basically
look a lot more better. Now, first thing you're
going to do is going to be selecting the whole
thing altogether. You can see everything
is selected. Click on Make Mask. Then you will see that
there is this clip option. And you can see the
clip I'm going to do. Unclip it. And there you go. Basically you will have
it like this, okay. Then fix out your transparency
however you want. Let's say you're going to fix the transparency a bit less. And there you go, you're
going to have it just like this if you want to do it, okay. But if you want to just keep it just the way it is,
just keep it like this. And there you go, you have
select the whole thing, group them together, Control G, and then find out your mock up. I'm going to click on File, Click on Open, click
on T shirt mock up. I'm going to click on
black isolated T shirt. You can use that, but this is just the photos I'm going
to click on Open again. I'm going to find out
isolated black T shirt. Click on, okay, we can do
the same thing over here. What you're going to do is
going to be clicking on this. Take it up right over here, Press on, okay, and
then fix out the size. What I'm going to do is hold on a shift and take it up
right over sheared. I'm going to click on
this, paste it up. What you can do is like
select the whole thing together and then
go to transparency, make mask, and
then just clip it. You can see this is
basically how it will look like when you clip it
up directly on this. Okay, but that doesn't matter. You can invert the
mask if you want to. That's totally up to you
how going to work with it. This is basically how
it will look like. But as I don't want this
gradient or without stroke, I'm going to click on this. And there you go, you
have your T shirt. But if you don't
want to mask it up, you can just keep it the
way it is and it will have the best color to your T shirt. You can see over
here. There you go. Hope you understood everything about this lesson on how you will be able to make a
retro sunset T shirt. Let's move on to our next
lesson of Adobe Illustrator.
12. Retro text tshirt design: Welcome back to an Adolescon
of Adobe Illustrator. In this lesson, we are going to learn about how we can make a retro text T shirt design
by using Adobe Illustrator. Well, this lesson is going
to be a bit lengthy. And also it's going
to be a bit complex. But it's quite easy if
you follow each steps, as this is going to be a long video without
any further ado. Let's just hop onto the
lesson of Adobe Illustrator. As you can see that I have
opened up Adobe Illustrator. I'm going to click
on more presets and just start off
with this one. And I'm going to
start editing it now. The first thing I'm
going to do is going to be adding in my text. If I want to add in my text, first thing I'm going to do is going to be clicking on text. It's, I'm going to type in, Summer is banging on the door. Now I'm going to do is make
three lines out of it. Summer is banging on the door. Now I'm going to select the whole thing to
increase the size. Now first thing I'm going to do is going to be clicking on control A and make sure that they are
aligned at the center. I'm going to do is banging, find out this over here. I'm going to select
on all of them together and change
out the fonts. I'm going to use this, okay? When I use this, I'm going to take this up right over here. Now what I'm going to do is
going to be clicking on this and make sure that they
are perfectly aligned. Now I'm going to
press on Control, and you will basically
see these lines. I'm going to take this
up right over here, so that I can get
the specific line where I basically want it on. Okay, now I'm going
to get two of these. I'm going to click on them. I'm going to do is decrease
the font size so that it is according to the line
which I have over here. I'm going to hit on this, decrease the size a bit control. Okay. If it doesn't
work like this, I'm going to do
take on this text. Okay? I'm going to
click on this guide, which I have over here. And I'm going to do
remove this text, deletes, add in another one. Okay, is banging,
Click on this text and on make sure that it is now perfectly aligned according to this guide we have over here. So it looks a lot more better. Okay, we have it on our
line which we need it. I'm going to keep it
up right over here. I'm going to start off
with this left side, left line, our center aligned. That's like totally up to you,
are going to work with it. Can enter. I'm going to
remove this one to delete. I'm going to start off with
another text on the door. Click on this text and align it wherever you
basically want it to be. Increase the text size, Increase it a bit more.
It's totally fine. You can later on change it. Okay. There you go. We have it. Keep it perfectly aligned so that all of them
are all together. After they did this,
press on control. All of them are together now. Now as all of them are
together, but if they were not, you could have used the end and the size to fix out the size, but make sure that they
are perfectly even. Just looks a lot more better
than being nonsymmetricalow. The first thing
I'm going to do is going to be changing
in the colors. If you want to do that, you obviously need a color palette. Okay, I'm going to do is get in a color palette
from my resource file. Now you can also do, another thing is that
there is an online website where it contains a lot of
color palettes called coolers. You can also go over to cooler so that you can
get your color from here. I'll be using these colors. Okay. What I can do over here
is that I'm going to use these hex codes
to basically take those hex codes and then
use it on my project. So I'm going to click on them. Now, the first thing I'm
going to do is going to be selecting
on specific ones. First, I'm going
to click on this. Now first things first, I'm
going to press on Cancel, and then I'm going to go off to my web browser. I'm
going to copy this. Okay? You can see color
copy to clipboard, and I'm going to use
that specific color. Now from here I'm going
to do is get out and then I'm going to select
on the specific text. Let's say I'm going
to select on this, I'm going to click on Fill. And then over here I'm
going to do is put in my exact color V,
Press on, okay. And then you'll see it
will look like this. I'm going to use the
same thing over here. Press on it. Okay. I'm going to do the same thing over here. Click on the text. Okay. Then we're good to go. Okay. Let's use another one. Click on this text. There we go. Now we're going to
use the other ones. Okay. So you don't have
to worry about it now. I'm going to continue the
process on all of them. I'm going to select on these, let's go to select
on the other ones. Let's select on, let's
say M. I'm going to go off to my web browser and
I'm going to use this color. I'm going to click on a B again and click on them.
And you got a Paste. Do press on. Okay. I'm going to do the same thing
over Shear. Okay? Okay, I'm going to click
on them. There you go. You have to continue doing it until all of them
are quite done. This is basically 1234. I'm going to go off to
my web browser again, and then I'm going to copy this. I'm going to select the ones
which I'm going to need. I'm going to use these, I'm going to paste it. Okay, there we go. We are
going to go over here too. I'm going to go off
to my web browser and select this one. Click on them, paste it up. Wherever you want to put it on, click on this color. There you go. Now we have
a couple less over here. I'm going to go
through my web browser and select the last one. Okay, it's like on the color, Paste it up. And I'm going to go off
to my web browser and put these purples over there. I'm going to take this baby
pink. Okay, there we go. We're going to go, we can see that we have it
right over here. Now we're going to
do is going to be putting in strokes on
each and every one. But first off, we have to open
up our appearance section. What we're going to do is find out our appearance section. You can see it over here, we have our appearance
and all of that. I'm going to click on this appearance from
the appearance section. We're going to add
in our for that. We're also going to
be needing a section to color where we
are going to put in, let's say our shadow color. First things first, I'm going to click on this
appearance section, which you'll be able to see
or our appearance panel. First thing you're going
to go is go to View. You can see it over here. And you can also go to type
our edit and put up your own. Okay, I'm going
to do is go down, I'm going to find out this. Find out, I'm going
to go over there. What I'm going to do is going
to be clicking on this, and then you will find out
this appearance option. Click on this and you're
going to add in a new stroke. You can see it over here. As you can see, the stroke
over here I'm going to do is take it down over
here and paste it up. Or maybe take it or
use it right over here I'm going to do is drag it so that I
can see a bit more. Okay, now the next thing you're going to do
is going to be, after you add in your stroke, you're going to put it
down at the bottom. You can see it over here. I'm going to take this
down right at the bottom. You can see over here. Now what you're going
to do is going to be clicking on this stroke, which you basically
see over here, and make sure that it's okay. Whichever one you want,
I'm going to use four, then I'm going to use the
color to be a bit different. After you select on this and
then click on this panel or section where you'll be
able to get the hex code from. From here, you'll be able to use whichever color you want. But let's say I'm going
to use either this or maybe something that
makes it look better. Okay? This one looks
a lot more better. I'm going to keep it
just the way it is. As I'm done on this one, which we already have, you can see, make sure this
is under, okay, over here. You can drag it at
the bottom too. That's like totally up to you. Okay, Now I'm going
to do is keep the strokes as we are
almost done with it. Now you're going to do is click on Effect or something, okay? And you will find out
this tort or transform. Now after you click on
this tort and transform, you will find out that there are a couple of things
you want to use. You can use whichever one
you preferably you want. So let's say I'm going
to click on transform. And when you click on transform, you will basically find out
this looking like this. Then what you're going
to do is going to be clicking on this horizontal. Now you'll basically
find it to be like this. But what I'm going
to do is going to be selecting on this font, or let's say the
stroke size, okay? First off, you have
to select the stroke. And then you are
going to be doing it. I'm going to click on
the Strokes option, keep it on the strokes and
then start on transforming it. Because if you do
it on the opacity, it's going to start
working on the opacity. I'm going to click on
Effect and then find out this tort and
find out transform. And then you'll be
basically be able to fix it minus one or
let's say minus two. Minus two. You can keep it like
this if you want to, but that's totally up to you. That's according to your desire. But I would rather try
keeping it on one apply new effect I'm going to
do is cancel control, keep it on strokes
and I'm going to do is find out one on
each and every one of it. I'm going to cut
this off. One, do the same thing over
here and then hit on. Okay. You can see this
looks a lot more better. It looks a bit more three
D right now as we have it. You can now change it
according to your desire. I'll make sure to
keep an extra layer for it so that you can use
it for a later purpose. I'm going to do is
first off zoom out. I'm going to do is keep
one out of this panel. Let's select on this and
then increase the size. You can see over here, we don't need the guide anymore, so I'm going to do is
click on the guide and delete it if you want to. But that's like
totally up to you, are going to work with it. Okay, now the next thing you're going to
do is warp it up. Now click on this object, okay, Then I'm going to click
on this specific one which I already have over here. I'm going to click
on Objects and then envelope distort and make warp cannot be the selected contains object
which cannot be distorted. What you're going
to do is press on control and then make
layers out of it. I'm going to click on this. Then what you're going
to do is going to be make it into a text one, or let's press on
Control shift and O. I can see that all of
them are now together. You're going to do
is make it warp. You can do it over here, Go over to envelope
distort, make. You can see this is still an
object but you can also use this Warp tool which we
have on over here on, let's say we're going
to find out the Sp two. We're going to go through
each and every one of them. Let's say we have
this swirl two, or twirl two, whichever
one you want. I'm going to use twirl two. Press on control Z. I'm going to use the Swarp two. I'm going to zoom out. Or zoom in too much. Okay, I'm going to do is
get it up over till here. Okay? Looks good enough. I'm
going to click on them again and press on
Control Shift and O. Now, it looks a lot more better. I'm going to select on each
and every one of them. Now, as we are quite done
with editing a lot of it now, you can also use
whichever one you want, but I'm going to
keep it just the way it is. Not that bad. I'm going to keep it just the way it is and I'm
going to press on control. Now as it is done can also change this up
according to your desire. According to my desire. Now what I'm going
to do is going to be making a couple of stuffs. Let's say we're
going to be making a couple of shapes which
I'll be able to use. That I'm going to do
is click on this. I'm going to find
this out over here. You also have that
outside of over here. I'm going to do is going to be clicking on this ellipse tool. I'm going to do is make out
a circle, just like this. Instead of this I'm going to
do is instead of strokes, I'm not going to be
using strokes anymore, I'm going to be using the fill. Let's say I'm going
to go over here, find out, just like this, to be over here. Now what I'm going to do is going to find
out another one. I'm going to press on Zoom. I'm going to do rotate it
up later on if you want to. Basically, I'm going to
click on this color option. I'm going to press
on Alts of this and I'm going to do make
out a couple of them. Control Z, I'm going to
click on the specific one. I'm going to make
a couple of these. Okay? Now as we
have a lot of it, I'm going to press on
this just like this. Keep it on over here. I'm going to do the same thing. Find out the intersect
on each and every one. I'm going to find
out the one over here, this is the center. I'm going to get
it just like this. And the last one over here, I'm going to keep
it at the center. Then I'm going to do is
take it up just like this at the center. There you go. It looks
a lot more better now. That's like totally up to you. I going to work with it center, There you go. It doesn't look that bad. I'm going to remove
this select on it, then I'm going to
do merge it up. Maybe use all of them together. I'm going to press on
Control, Merge all of them. If you want to control G, make it into a shape. Now what I'm going
to do is going to be making a circle inside. I'm going to click on
this and paste in with the white color select on this, select the tool, and then
put it right at the Alt. There you go. There
you go. We have it. I'm going to take this one, which we have over here. I'm going to change the
color into something pretty, let's say. Not that bright. I'm going to do is zoom out. First, select on the
color which we have. Or maybe select on this color. I'm going to go off on this. And then I'm going to select
on this, click on Fill. Find out the Hex code,
CMYK Gray scale. I'm going to create new
scratch watch name. You can also use whichever
hex codes you want. That's like totally up to you. But from here I'm going to do is find out the one,
whichever one I need. I'm going to click on this and paste up the code. Press on. Okay, there you go. We're all good to go.
Change out the stroke. We don't need no stroke. Click on it. And if you want
to change out the stroke, what you have to do is
basically select on it, flick on the stroke color. What we're going to
do is basically find out the one which is
totally dark brown. You can see it over here. This is basically how
it will look like. I'm going to do is, first
off I'm going to remove it. Flick on the stroke. Remove it, This is basically
how it will look like. Okay. I'm going to do is
take a couple more of them. I'm going to group
them up together, Control, then we
have a couple of it. I'm going to do is use
these wherever I want. Basically I'm going
to do is let, keep it up over here. We're going to make a
couple of other shapes too. Later on I'm going to do is make a couple
of these copies. I'm going to change the
color into a bit yellowish. To do the same thing, I'm going to use a bit of sky blue over here
instead of strokes. Let's not use strokes. Flick on Phil, not
the whole thing. Flick on this and there you go, Flick on Phil on the color. And there you go, you have it. We have a couple of different colored flowers
and use it over here. There you go, you have it. I'm going to paste the
other ones over here too. Well, let's see, I'm going
to get these over here. That's like totally up to you. I going to work with
it. Make a couple of these over here. Now we have our flowers. The next thing we're
going to do is going to be putting in our stars. Our sprinkles. Okay? You can
put in stars if you want to. That's like totally up to you. What you have to do is click Star Tool and then hold
on a Shift and Alt. Then if you want to round it up, you can make the
rounded corners. If you want to, you can
have to offset the path. Basically, you can
direct the tool, Let's say I'm going
to select on this, I'm going to fix out the edge. You can see the
anchor over here. Now I'm going to
fix our click on this direct tool and make sure that all of
them are around it. You can see that
they're around it. Now you can see this
looks a lot more better. Now what I'm going
to do is going to be clicking on this fill and then use whichever
color I basically want. Press on Control. Press on. Okay, not the strokes,
but the fill. I'm going to remove the stroke. You can see how it looks like. Click on the Selection tool, Zoom in bold on the shift. And we're going to make a
couple of these copies. Press on control D, so that it continues on. I'm going to press
on A, make copies. Let's make a couple of them. Okay, there we go. We
have a couple of it. Now I'm going to do is going
to be using another one. Let's say I'm going to write, click on it and make some El. Instead of that
I'm going to do is make a couple of these. I'm going to select
on this tool, I'm going to select on these, then I'm going to do
is take both of them, press on Alts, Flick on this. What you're going to do is
going to be finding out. Let's say I'm going to do is click on all of them
and click on Phil. And then remove the strokes. You can see how it looks like, but from here what I'm
trying to make is going to be control Z O. I'm going to do, take
this up over here. I'm going to select on this. There you go. You have it. I'm going to select on all of its that I'm going to do is put another one which is going to
be underneath it. There you go. We have select on all
of its control shift. M basically I'm going
to press on Alts. I'm going to do is remove
the ones which I don't need. There you go. We have
our other shape. Now what I'm going
to do with this one is going to be a bit different. This one I'm going to be
using a different color. Let's say from here I'll be selecting yellowish
less yellowish, not that yellowish looks better. I'm going to make a
couple of these copies. Ten Z. I'll make a couple
of these copies over here. There you go. Now what I'm going to do is going
to be clicking on them. Selecting on the fill.
Selecting on the color, which I basically used. I'm gonna fix it up. I'm gonna fix all of them, wherever they need
to be. There you go. And put in the stars
wherever you want. I'm going to delete this. I'm going to do is make
just this color to be blue. Fix on this and then put in the other ones
wherever I want it to be. Delete. Basically I
won't be needing them. What I'm going to
be doing is just copying them wherever
I want them to be. There you go. We have most of
the things which I need it. This is basically it. I'm
going to copy the whole thing. Control, all of them
are now grouped. I'm going to click on open. I'm going to click on
the one T shirt mock up. And then I'm going to do is find out whichever one I want. Open it up, press on. Okay, I'm going to
do is take this on. Directly over there, past it. Okay, I'm going to do is select on this. There you go. We already have it. If you
want to use any other effects, just click on open. Then we have a couple of
vinyls, retro texture one. I'm going to open this up
and see which one it is. I'm going to find
out the one Okay, I'm going to do is out, let's say I'm going
to drag this out. As this is dragged out,
I'm going to do is drag it right over on that layer. Then what I'm going
to do is going to be taking this over there. Then I'm going to do is
just make up the mask. Basically, I'm going to take
the whole thing altogether. There I go, I have it. Then I'm going to do is paste
it right on top. I'm going to select
the whole thing. Click on Transparency,
make mask, okay? And then remove this clip. There you go. You have it. You can see this is
how it will look like when you zoom in. Okay, fix out the
transparency if you want to. You can darken it
up if you want to. You can see this is
how it will look like. Put in darkened. There you go. Then you can take the
whole thing back on that. Let's say we're going to put
that in the black T shirt. We're not going to
need it anymore, so I'm going to
flick on this file. Flick open, flick
on T shirt, black. Open it up and paste
it up right over here. First on, okay, then I'm going to do wait
until that is applied, Then hold on a shift,
reduce the size. You can do the same
thing by mocking it up right over here. Take this. There you go. We have our retro summer, our text wa v design. Hope you understood
everything about this lesson. All the resources will be
given in our resource file. Hope you learned
everything and hope you follow all the steps
without skipping anything. If you didn't understand a part, please let us know and we will guide you through
the whole process.
13. Musical tshirt design: Welcome to Adobe
Illustrator. Sure Design. In this lesson, we are
going to be learning about how we can make a band, or a musician, or an icons Sure. Design by using
Adobe Illustrator. First off, let's
just start off by using our opening up
Adobe Illustrator. Now let's start off opening
our Adobe Illustrator. We're going to click on
any of the preset we want. Let's click on a four. Make sure your raster
effect is high, and I'm going to pick
on picked cells. Okay, so this is a bit better. If you want to change anything over here, you're good to go. I'm going to press on Create. After we're done creating, you will see this
paper over here. And now I'm going to do
is going to be opening up the files which
I basically need. This is going to be
very simple lesson, but I'm going to do is click
on File, click on Open, And then I'm going to search
for something, let's say, which is going to
name okay, musician. I'm going to search for
it. Let's search for it. Let's say I'm going
to go through it and there we go, we have it. I'm going to open up this one first musician and there we go, we have our exact result. I'm going to click
on the tool and I'm going to do is use
this specific, okay, I'm going to take
this up over here. I'm going to use the
Sky. I'm going to do is take the other ones to, let's say, instead of
taking the single one, let's just take the whole thing. Select, select, select, and
select all at the same time. Keep it up right over here. And group it up so
that we don't have to lose any of the progress
or the positioning. There we go, We have it now. We're going to do
some edits on it. If you want to change the
color, you get to go. You can also change anything. Basically, we can overlap it, we can change the color. I'm going to select on
any of the color we want. You can do that from over here. And then fix the
strokes if you want to. That's like totally up to you.
I'm going to work with it. I'm going to do is keep it just the way it is at the beginning. This is going to be how
it's going to look like. Now let's say what we're going
to do is I'm going to be clicking or making a couple
of circles around it. Now if you want to do
that, I'm going to click on this Ellpsol, which we have over here. I'm going to select on Shift
and then make up a circle. There we go, We have it,
we don't need it that big. I'm going to reduce the size. I'm going to click on Phil. And nothing basically,
but I'm going to increase the strokes
for one T over here, which is what I'm going to need. I'm going to reduce
it a bit more. Okay, Perfect. Increase the strokes
of the tree. Select on control C and control. Keep it just like
this. We're going to make a couple of them. C, control, control C and control F again. There you go. Control
C and Control. Do the same thing
over and over again until you get your
specific results. Control C, control, do our continue the same
thing over and over again until you get
your exact results. Basically, there you
go, you have it. I'm going to do is take the
whole thing altogether. I'm going to do
is group them up. I'm going to take this tool and then drag it right over there. Okay, there you go. We have it, place it
according to your desire. After you're done, what
you're going to do is going to be taking
it at the back. Okay, click on objects, a line, arrange, send to back. You can see now it
is at the back. Even though it is at the back, What I'm going to
do is going to be taking out the specific one. Okay, First thing I'm going to do is going to be
clicking on this. Let's say this is the part from where I don't want
it to be visible. So I'm going to do is cut off this part because I'm not
going to be needing it. Or I can also keep it the
way it looks like this. Okay, That's like
totally up to you. But I'm going to do
is cut off this part. So I'm going to click
on this rectangle tool. I'm going to do is
make up one over here. And then I'm going to do is select on both of
these elements. Shift M and then
hold onto Alt up, sell this part, select on it, and then I'm going to do
paste it up right on this, Okay, this is how
it will look like. There you go. You have it. If you want to make
more of these, I can increase the size a bit. Let's say. I'm going to
have to do it again. I'm going to make a
couple more of these, can see how it looks like. I'm going to press on shift, increase the size
according to your desire. Now, continue the
same thing until you get your exact results. Okay, but make sure to
hold on the shift and Alt at the same time that you get it just the
way you want it to be. Because if you don't, it's going to get out
of the Intersect at the center and it will
not be Even make sure to hold on shift and
Alt shift for getting your perfect circle
and get at the center. This is how it will look like. If you don't like it,
just get it out of here. And then cut off
the circle again. Or make sure or select
on the specific one. Control. C control. Control C control. And get your exact results. Now get this rectangle
again, hold on. Or select on both
of its shift alt, and then delete the parts
which you don't want. There you go. You have
it select on this, group them up together, Control, and then paste it
wherever you want it to be. Hold on to Alt or just
paste it wherever you want. There you go. We have it. Now, if you want to put in your text, you can do that too. But here I want to
put in a cassette. I'm going to click on file and
open up the cassette file. I'm going to click on
or find that cassette. Let's see where it is. See we got this cassette. I'm going to close it off. I'm going to take the
whole thing on over here. I'm going to keep it
just the way it is and I'm going to decrease the size. Keep this just the way it is. Going to keep it like this. Shouldn't be white,
should be a bit blackish. And I'm going to do reduce
the stroke a bit more. And there you go, we have it. I'm going to do is put
in my text ride over. It may wherever we want. Let's say I'm going to do
is rotate the specific one. Let's say I'm going to put
in my text right over here, but before that I'm going to do select on my specific font. Whichever one I'll be using, find out the one which
you'll be using. Let's say I'm going to do is go down and find the one
which you want to use. Let's go and find out
on this one is usable, but I'm going to go
for something a bit more goes with the
band type of text. I'm going to go down and
find something usable. If you can't find it in fonts, just go to find more and stay connected to the
Internet so that you get your exact result or
maybe like a results are a lot more fonts than you can
find over here I can use, this is not that bad, but I'm going to do
is go down a bit. Let's say I'm going to search
or use something which, okay, this isn't bad, I'm
going to use this one. I'm going to keep
it on downloads. It will be downloaded. Z, Cool control, Z. Click on it and find out the one which
had the exact exact font. Or maybe instead of that, we can use something
a bit different. Okay, from here I'm
going to be selecting something else which
will look good too. It doesn't look that bad. Let's say I'm going to be using
this one, Maybe this one. Okay? I'm just going to. Okay, let's say I'm going
to use this one, okay? Now, instead of extrude, I'm going to click on regular. I'm going to click
on all of its. Cut this off, Let's
say world Music. They select on the whole thing. Let's say I'm going
to do is keep it to be the next line.
Select on both of it. I'm going to keep
it at the center and I'm going to do
using Christo fonts. I'm going to keep it just like this control select
on this text, both of it basically. And then you can change out whichever color you want to use. Let's say from here I'll be using this color, okay? I'm going to click on this, take out the appearance, character style,
paragraph style, okay? Control Z. Chairman,
select on this color, find out what color it is, and then use that specific
color for my text. First off, let's just
select on this text, whichever ones we want to use. Okay, this one is
perfect. Let's use for D. Okay, Nothing for D, Y. We're going to get
this for D capital. We're going to use
this for this, we're going to use this, we're going to find
something like this. Okay? Works a lot
more better, right? Well, we don't have
anything on W, I guess. Okay, Now we are going to go, I'm going to click
on, outside of this, we got World Music Day. Increase the size,
select on the stroke, click on whites, increase
the stroke size. There you go. You
basically have it. This is basically
how we look like. Now group all of them together, Control G. I'm going to click on any of the T shirt
file which we have. Let's say we're going to
put it on a black shirt. Press on, okay, If I want
to put it on a black shirt, then the first
thing we have to do is going to be clicking on this, changing the stroke to white. And I'm going to do right click control G. Take it up
on an isolated T shirt, press on, okay, hold on a shift and paste it wherever
you want it to be. Paste it up right over here, and see this is basically
how it will look like. I'm going to click on
the specific texts, reduce the size of the
exact font which we have. I want to fix out the weight. The weight is really slim, even though it's looking
just the way it is. This is going to
be just like this. There you go. Now I'm
going to select on the specific one and also fix
out the stroke over here. There you go. This is
how it will look like. Let's try it on a white shirt. I'm going to click on
this, Press on, no, I'm going to open up the white
T shirt. Press on. Okay. But this time we have to change
that specific into black. Again, click on black. Select on the specific
text, then stroke. So be black, Bill,
should be white. I'm going to select the
whole thing, my T shirt. To paste it up, press on. Okay, hold on a shift
and reduce the size. And there you go. You have it. Let's increase the size a bit. There you go. You have it. Now select the ones and
fix out the strokes. Okay. You can fix out the
strokes on these ones too. Select on this, also fix out
the stroke. Click on Fill. Click it to be black, which is now visible. Looks a lot more better. Okay, let me do put it in such a way so
that it looks better. If you want to
obviously mask it up, just click on both of its. And you can see this one looks just the way
it needs to be. Select on the text. You can fix out the
strokes over here too. You can see this is
more visible, right? It's a lot more better. We can do the same
thing over here. Do the same thing
by selecting on it. Flick on Black. There you go. We have our musical based
band type of T shirt, whichever one you want. Hope you understood
everything about this lesson and hope to see you
in my next lesson. And if you didn't
understand a part, please let us know and we will guide you through
the whole process.
14. Class Project 1 - Making a rainbow design: Welcome to our class project one of Adobe Illustrator
T shirt design. The name of this class project is Making a Rainbow design. Well, I have attached
in a description and also an outcome in
our description. We'll be using the Ellipso and
Shape Builder tool to make our rainbow and
the color palette to later mark it
up on a T shirt. We're going to go
through the steps. Step one, we're going to
open up Adobe Illustrator. In step two, we're
going to open up an four preset so that
I can use it later on. In step three, we're going
to use the ellipse to make seven step circles
over one another. In step four, we're going to use the Shape Builder tool to remove the parts
which we don't need. And we're also going
to get the help of the rectangular tool, the end. We're going to group
all of it together and mark it up on
our T shirt file, which you are also going to
get in our resource files. The outcome is about learning how to make
a desired shape. It's like cutting the
bottom part of the rainbow. To get the exact shape we want, we can use the same steps
and the same method to get whichever shape
are the exact type of shapes of our
desired results. Whenever we are working on Adobe Illustrator
without any further ado, let's just hop onto
Adobe Illustrator. Now what I'm going to do is going to be clicking
on the four. I'm going to click on
this and there, Rico. I'm going to press on Create. I'm going to start off by
clicking on our ellipso, make sure you are
using the center. First off I'm going to do is get the anchor hold on a shift, we're going to get one. I'm going to select on this and find out the
center, basically. I'm going to click on it
and align it perfectly. I'm going to click on it.
Control C Control. There we go. We have another one
click. There we go. We have one ventral C control. Then I'm going to do is put into ventral C control shift or have three Tro control F four. Tro C control five. And there we go six. I'm going to hit on its, increase the size just a
bit on each and every one do the same thing, ventral control. There you go. We have 12345678. Okay. We're just
going to need 7, 121-234-5678, Okay. We're
going to delete this. I'm going to hold
on to Shift and Alt and then make
it a bit smaller. Okay, now we're going to use
the rectangular tool so that we basically get
over to the center. There you go, I'm going to
click Select all of it. Click on Shift M, which is going to be
our Shape Builder tool, and press on Alt, which
is going to be a minus. Select the ones which you
don't need. There we go. We have our rainbow control. Now we're going to
use the color palette from an online website. I'll be using the color
palette from online. I'm going to click on
the ones which we need. First off I'm going
to do is group. I'm going to do is
press on Control. I'm going to redo it. I'm not going to
just group it up, I'm going to select on all of its objects and then this
is basically ungrouped. First off I'm going to do is going to be clicking on this. Okay. I'm going to go
off online and I'm going to take this as I don't
have the specific color. I'm going to select
on the Paste. Okay, I'm going to
click on the next one. I'm going to click
on this basically and go off on line, Select this. Past it, right over here. Okay, I'm going to
select the next one. Go off to the website, I'm going to click on
over here. Paste it up. Okay, I'm going to
select the other one. Go off on line,
select the next one. Click on this color palette. We'll have two more to go. Okay, we are done with this. I'm going to click on this. Okay, with two more
to go, click on it. Okay? And the last one, we're going to get
it from over here. Okay, now we're done with this. Now what we're going
to do is going to be grouping them up together. I'm going to press
on Control as they are now grouped looks
a lot more better. Now, the last thing
we have to do is just open up our mockup file. I'm going to go off
the T shirt mock up. Let's, I'm going to get
it on. Black, press on. Okay, click on this and take
it up directly over here. Okay, hold on a
shift. There you go. You have your own T
shirt. Rainbow T shirt. Okay, I'm going to
click on both of them. If you want to mock it up, make mask, you can see it. You can clip it up. And this is basically
how it will look like. But as this has no color, what you have to do is make up the color to look a bit better. You have to fix out the stroke, you have to fix out the fill, and also fix out
the transparency. But if you don't want to
clip, you can just remove it. If you want to delete it, I'm going to do is
press on control Z and keep it just the
way it was before. Okay, there you go. You have your T shirt
and your own design. Hope you understood
everything in this lesson. And let's move on
to our next class, project of Adobe
Illustrator T shirt design.
15. Class Project 2 - Making a street wear design: Welcome back to our course of Adobe Illustrator
T shirt design. This is going to be
class project two. The name of this class
project is making a T shirt or which is going
to be a streetwear design. We have our description
and outcome, but I'd like to skip that and go off to our steps.
You can read it on. Later on in the step one, we're going to open
up Adobe Illustrator. And the next step, we're going
to open up an four preset, because four presets
are quite good and you can also later on print
it up if you want to. Then step three is
going to be open up the AI files named g
gods or get gods two, which are going to be in
the resource file section. And then you're going to use
the shapes you want to use. Select the file,
select the AI files, and group it if you want to. And then customize it, which is going to
be the last step. And group it up for mock up
without any further ado. Let's just hop onto
a Job Illustrator. Here I'm going to do
is click on Presets, and I'm going to click on
a four press on Create. I'm going to click on File, and then click on Open. Go to Resource File, and
I'm going to find out. Greek Gods, Okay? Greek Gods to. I
have two of them. I'm going to open
both of them up, press on control, okay? And then open both of
them so that both of them are opened open.
And there you go. Basically we have all of them. And use whichever one you
want. I'm going to use this. Okay? I'm going to use
a couple other ones. Let's I'm going to use this 12. That's totally up to you which
one you're going to use. You have these ones.
Two. That's totally up to you whichever
one you want to use. Now, after you got
your specific one, the next thing you're
going to do is putting it up in such a way you
can put up the fill. But first off, you have
to find out these tools. Okay, You can see that
there are a couple of these tools which will basically give you a different
type of result. But you can put in
your different fill, click on white or black. You can see this is
how it will look like. But as I don't want
that, I'm going to keep it just the way it is. Okay? I'm going
to click on that. I'm going to keep just this one because this is the
one that I need. Or I can use a specific
full structure. That's totally up to you. If I don't want to
use that, I can. Okay, I'm just going to use this specific one and
put it up over here. Now as I have it right now, what I'm going to do next
is going to be clicking on it can change in the
color if you want to, Let's say I'm going to
use a punk type of color, which I have over here. Or put in a bit of gradients. That's totally up to me, which I going to use. I'm going to click on this, I'm going to click on Stroke, and then click on
something more, punk. Okay, I have it now. As I have it, what I'm going to do is going to be clicking on my Text option,
Clicking on Text. But as I don't need this font, I'm going to be using this she. I'm going to click on it, the same on color, which I'm using from over here. I'm going to click on it. Instead of fill,
I'm going to put in strokes of let's say whites. Okay? I'm going
to click on this. I'm going to put in nothing. That is what I basically need. Okay. Increase the tech size. The same thing over
here. Remove this film. Put in your stroke. Let's say the stroke
is going to be white. This one is basically three. I'm going to put the
same thing over here. The change in whatever you want, but if you want to
put in more edits, you can select the
ones which you need. Then after all, you just open
up any of the mock up file. I'm going to click on T shirt, black T shirt S. I'm going to click on
this control C. Okay, My bet control Z. I'm
going to click on it. I'm going to select this one. Okay, I'm going to use
white over here. No stroke. Just put white select
on this tool control. Okay, there you go. Slick on the specific
texts. Select this one. There you go. You have your own
T shirt design, which is also like a street. If you want to fix out this one on the one I'm going
to select on this. And then I'm going to fix
out the transparency. That's totally up to you. Let's type in 90. I can use whichever
transparency you want so that it looks
a lot more better. Hope you understood
everything about this lesson. And this is going to be
the end of this course of Adobe Illustrator
T shirt design. If you didn't understand a part, please let us know and we will guide you through
the whole process. Thank you for staying with us up till the end of this course.
 Manuel Tudu, Web Design and Microsoft Office Expert