Transcripts
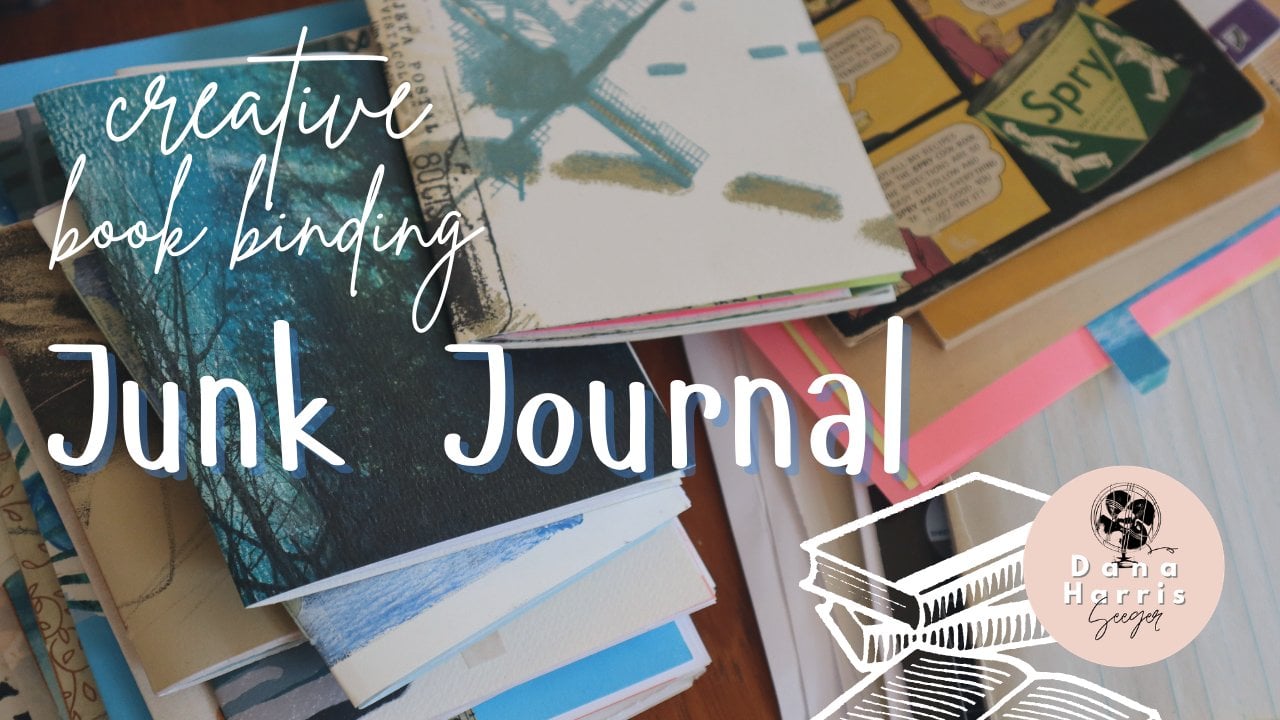
1. Case Binding Intro video: Hi, I'm Dana Harris Seeger. Welcome to case
bound sketchbook. In this course, I am going
to show you how to create your very own blank sketchbook or journal using the
case binding method. Case binding is really cool because it looks like
a traditional book. It's got pages. We're going to use
blank sketchbook paper. That's really good for drawing or writing in your journal. We're going to use a hard cover. We're going to decorate it, cover it with decorative paper. We'll even show you how
to do a different spine. This one uses book cloth
to accet your book. This is going to be a really comprehensive
bookbinding course. You don't need any
prior knowledge or experience in bookbinding. It's going to be really fun. My goal is that you have a finished book by the
end of this course.
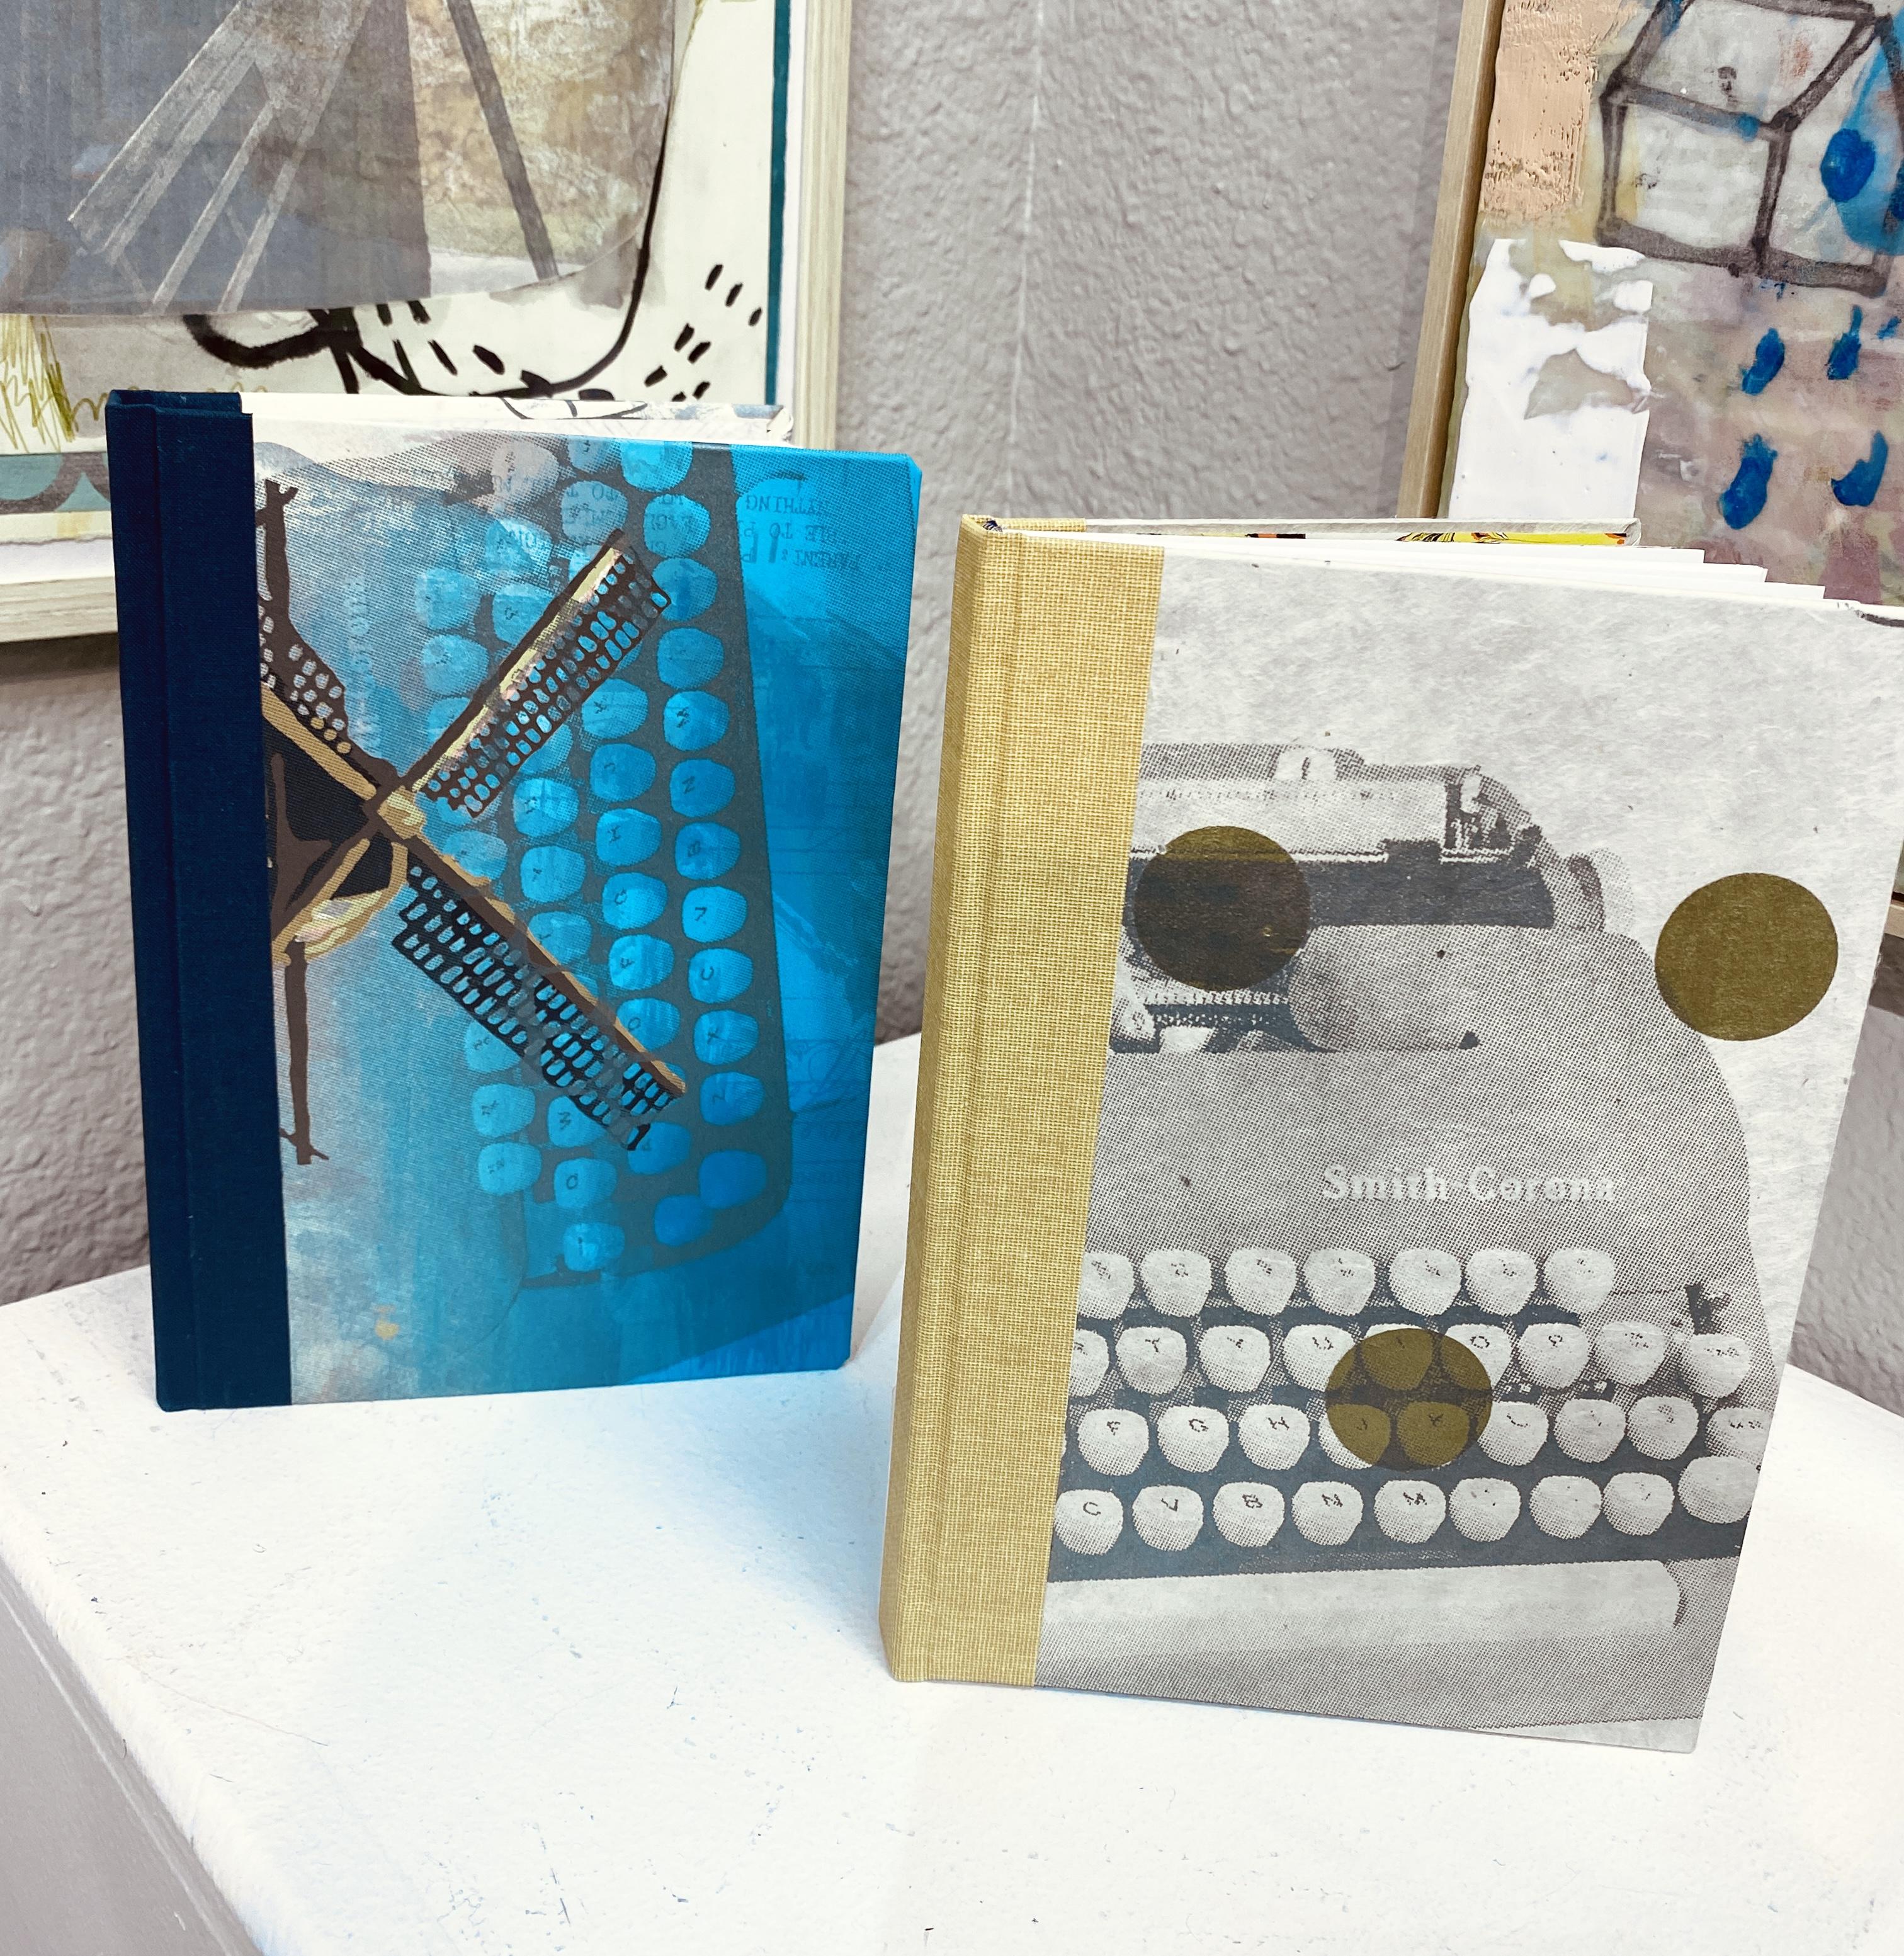
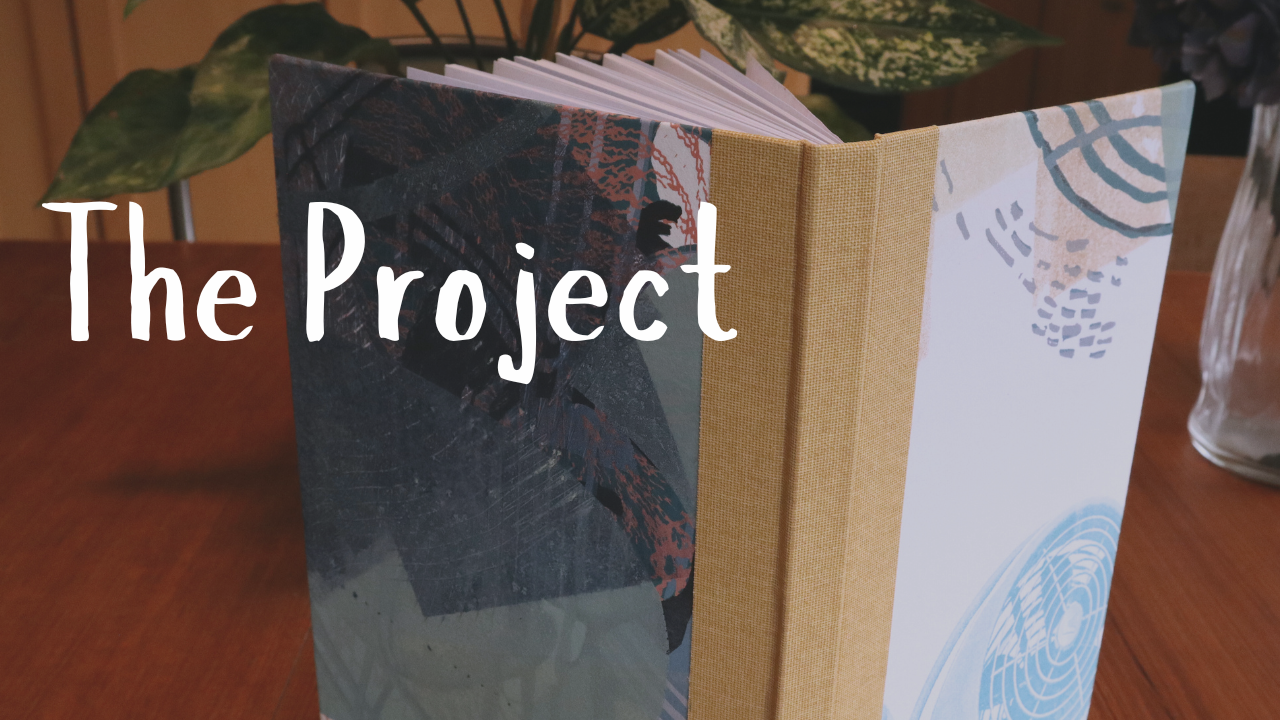
2. The Project: The project for this course
is a case bound sketchbook. It's going to be hardcover. It's going to have
blank pages which you can decorate during
or after the class, and it's going to be covered in paper or book cloth
of your choice. This book is 6 " by 9 ", but you can make your book as
large or small as you want. The concepts are the same,
it's going to be up to.
3. Case binding Materials: The material that we're
going to use for book binding today are paper. This is nice drawing paper, pretty thick, 90 pound. And this is bookboard
or Davy board. This is what we're
going to use for our covers of our
book and the spine. Is this just an old piece
of cardboard that I use for punching my holes and you'll
see that in a minute. Because when you
stitch the signatures, the papers together, it's
easier to pre punch. That helps. To actually do the punching, we use an L or a scribe,
has a pointy end. Some of them taper a lot more, but this is one that's
really easy to poke through. This is just cotton twill
tape that you can get at the fabric store and
we're going to use this to help keep the signatures
all bound together. Also mall or super, which is also going to
be on the binding of the spine to keep all those pages stitched and glued together
along the spine. In order to stitch, we
need something thread. This is waxed linen thread.
It's really durable. It's not super duper thick, but it's thick enough
that it's not going to break with all the
pulling and tugging, opening and closing
the book is doing. To stitch, I have an assortment of large chenille
needles which are sharp, but they have a large eye. That's really helpful for
sewing the pages together. Scissors are always helpful for cutting tapes or
cutting the mole. Bone folder, you'll use a lot. You'll use it to
smooth out the creases to fold the book covers when we cover
this with some paper. A utility knife is good
for cutting the bookboard. I'm also working on the self healing mat
because when you cut, you don't want to cut onto
a surface that you like. Self healing mats
are really good for cutting bookboard or if you need to cut
your paper down. A decorative thing that you can use that
traditional books have, but it's not required
as a headband and this is just a little
piece that you cut and put at the top of your book block just
right here when it's finished and it just gives it a nice finished and
decorative look. I'll show how to do that. Then we can talk about covers
after we stitch and glue, the book block
signatures to get.
4. Folding Pages: First, I'm going to fold all
my pages into groups of six. When you just fold, if
you have just one page that's folded like this, this is just one folded page. That's called a folio. A folio is just one folded page. Then when you have
a group of folios, in this case, there's
six folded pages. That's called a signature. And we're going to be sewing the signatures together and then sewing each of the six
signatures in one book block. Let's go. When I'm
folding the pages, I group two, three,
four, five, six. I'm grouping six pages together. Six folios are going to
make up one signature. I tap it and squeeze
it so that it's even. I lay it flat and then
fold it away from me. I line up the edges, I press with my fingers, and then I take my thumbs
and crease that fold. Then this is where your
bone folder comes in handy. You can take the edge
of your bone folder, which isn't really made of bone, but it used to be and
crease it like that. Now it's a nice tight crease. I can keep making
signatures that way until I have whether I'm making a stack of books
or just one book, I will create all the signatures first and then we
sew them together. As I'm folding here, I'm going to be talking about how I arrived
at this paper size. I wanted to make my
book a pretty easy size and that turned out to
be 6 " by 9 " because paper, the standard drawing
paper comes nine by 12. When I fold it in half, that equals 6 " by 9 ". I purchased pre cut 12 by
nine inch drawing paper, and now I'm folding it in half because each of these
groups of pages that get stitched together need to be folded and you stitch in that spine or that
little groove. If you wanted to make your
book a little bit smaller, you could cut the paper in
half to six by nine and then your book would be 4.5 by six. It's up to you, but you are
constrained a little bit by paper size and the
materials that you have. I also got book board from the store and I
could cut that down. I think it comes in
sheets of either 18 by 24 or 32 or 30 by 40. I think MAP board
comes in that size. But if you find a
bookboard that suits you or a crescent board or illustration board
that you want to use, by all means, use the
size that you have. So here I am gathering groups of six sheets and if I were
to fold one of those in half, that would be a folio. I as I'm folding a group of them together,
that's a signature. Now I'm using the bone folder to crease the spine
of those so that they lay nice and flat
and my book doesn't bubble up because you really
want it to be nice and flat. So I just keep
doing this as many times as I need to
to make my book as thick as I want it depends it's up to you how
thick you want it, how many signatures you want. If you want a thin sketchbook, something that's lightweight,
you can use less. I'm using six groups of six
5. Marking holes for case binding: I'm starting out by
marking where I am going to punch my holes in a template. This template is the
same size as my paper, although it doesn't have to be, just has to be as tall
as my signatures. Then I lay it on top of
each group of signatures. I want to put something
underneath before I punch, however, like the piece
of cardboard scrap. Okay. Then I'm going to take my all and punch holes
through the dot, the mark in the template and all the way through
the signatures. I've made a template. It's just the same
size piece of paper. I've got some holes, dots drawn, and those dots align with where I want to punch
my holes for stitching. The first one is first and
last top and bottom are always a half an inch half an inch from the top and half an
inch from the bottom. That way we can take the needle in and then also pull it out. Then these holes, there's six more holes because
of the height. I'm working on a
12 by nine piece of paper folded in
half is six by nine. Because of the
dimensions of my tape, the thread is going to get
stitched over the tape. I need to make the holes
wide enough so that they'll trap the tape
actually on the outside. One thing I didn't
mention is binder clips. I love these binder
clips or you can use those big bulldog
clips for keeping your paper from misaliging
and sliding out. These are really helpful.
I use at least two, but you can have
more if you want. And once we have
our holes measured, I found the center of my paper, and then I just made the first set of holes equidistant from that
center point out, and then another set of
holes down on the bottom, equidistant from each other. I want those to be spread out. I don't want them
to be too close together because I
want the stability. So this one is, let's see. From the bottom, it's 1.5 "
and two and a quarter inches. Then that one's a half
an inch or thereabouts. This one is about four
and eight, and then five. And seven and seven and three eighths and then a half an inch. That's roughly the dimensions. But as long as they're equal, these are equal distant
from each other and these are half an inch
from the top and bottom.
6. Punching Holes: Three. Then I'm going to punch the holes right
in the middle of the fold. I'm keeping that
right in the fold. It's my all. I'm going to
punch through all the layers. The reason I use a template
is because that way, I can take the template
off and put it on the next signature, and
they're all the same. All the holes will align. When I go to sew, it's not going to be
hard to find the holes. One thing I will say is
sometimes it doesn't always punch exactly through the
spine and that's okay. If you can't set the
hole on the backside, then sometimes what I'll
do is I'll just wiggle the through a little bit more
because when you punch it, it's not going to
go totally through. Wiggling it a little bit
will enlarge the hole. That will help when the needle has to go
in through the spine. I'm just going to keep punching.
7. Stitching the Signatures: All the holes are punched
and they're all lining up, and now we're going to
stitch it all together. Each signature is going to
get stitched one at a time, and then the signatures
will get linked together. And we will use our tapes, cut some cloth tape that will help keep them
together and attach to the book, and then also our mole, which will get glued onto just the spine once the
signatures are all sewn together. The first thing I
want to do is cut the tapes and I try to make them about an inch to an inch
and a half over the spine. Then when you wrap it around, same thing about an
inch and a half. They'll get trimmed later, but that'll help you keep
them secure while you sew. I'm going to cut
three, same size. No. It's in the box. It's just blue
painters tape. Thanks. Again, longer is a little bit better because you'll
get trimmed later. This is just that
cotton twill tape. I'm going to take
the first signature. I'm lining the tapes up
with these two holes. Remember when we
did our punching, we had one on the end
and then a group of two, a group of two and
a group of two. That is where the
tapes are going to go. You're going to lay them
on the first signature. Then I take some blue tape. Blue tape is nice or frog
tape because its pulls off, but it doesn't leave a residue. So make sure whatever tape you use doesn't pull the paper. Now we're going to
take our linen thread. You can buy just regular linen and wax it with a
little bees wax. Cake by taking the thread, pre wax thread and
just running it through the wax like
that a couple of times. And that helps just
make it a little bit stickier so it stays
put when you so, but also more durable. You're going to multiply the length of your signature by how many signatures you have. If I've got six signatures, one, two, three,
four, five, six, then I'm going to
take the length or the height of my
book because it has to go across that back
and forth six times. One, two, three, four, five, six, I'm going to add a few more inches so that I
can have a tail for tying on and and then take
one of my needles. These are chenil needles
which have a big eye, but they're really pointy. They're good for stabbing. If
you have tapestry needles, that'll work too, but they're
not always as pointy. They're dull. I like
the pointy ones. Because just in case
you didn't poke all the way through or your
holes big enough, the needle will help
stab it through. Then you thread your
needle and I double it over just with a couple maybe a foot of a
tail like that. Then I use these binder clips to keep the pages from
moving around while I so And you can put
them wherever it's comfortable on one on each end, but you just want to
keep the signatures, the half together. You just open it up so
that it's totally open, you can start at either end, but you're going to start
from the outside and go in. This is the outside of the book. This is the spine. This is going to be one of
the end sheets, and this is the inside. I'm going to start
over here and poke it in If you turn it over, you can see it's coming through. You're going to pull it through and you're not going
to go all the way. You're not going to pull
it all the way through. You're going to leave three or 4 ". Then you're going to stitch. Using a running stitch, you're going to go in in in each of the holes
on the outside, you'll see that
each of the tapes, you'll go over the
tape, this linen cloth. Get yourself situated and you
start sewing. Poking it in. And make sure you're not making a big
knot on this end. I'm going to catch the
tape when I go back down. I'm going to pull it through, pulling it through the bottom. Making sure that the tape
is caught and we'll be adjusting these as we go along, don't worry too much if
they're a little bit loose then back out. And in I sure the tape is caught. Oh and and then one more time in one more. At this point, you've
got one signature sewn. I take this end and this end
and give just a little tug. You won't tug too much
or you could risk cutting your paper to the holes. Then the next step is going to be to add another signature. And To do that, we're going to fold this one
in half, just like this. I'm going to take the binder clip sandwich this signature, and then we're going to take
just right off the top, slide it under so that
the tapes flop over. Make sure it's lined up. If you've accidentally
flipped it, it might not line up, just flip it back and make
sure that lines up. Then we're going to
open this one up. Going to grab it and clip
half of the next signature, and then the whole
one that we just dip. That's the way I like to do it. Like that. Making
sure that the spines are aligned. All right. Then we're going to do
the exact same thing. In this next signature.
You've already got the thread on the outside, so you're going to
go in the outside. This is a little joining stitch and you can see underneath. Let me poke it. Back up. Give a little tightness. This is where the wax
comes in handy because it will help that stick
and not slide around. Then you're going
to go back down, making sure that this tape
again is under the thread. Let me go. And if your threads getting, you know, if it's starting
to get shorter and shorter, just give a little pull
and that'll lengthen the I'll give more
working thread and less doubled over thread. Okay At this point, we have two signatures
sewn together. One is joined at the bottom, and then the one at the top,
when you come back out, you'll see that there's
this tail here. What we're going to do to join the signatures
together and make sure that it all stays
together at the top is we're going to
tie a square knot. We're going to take our end, a little tail and our working thread and give a little bit
of a tug to each of them. Then we're going to
tie a square knot, so we're going to go
over under and gently tighten and then we're going
to go under under and over. Just do the opposite of
whatever you did before. And that's it. Then
we can trim the tail. We'll cut your working thread. Trim this tail like that. Then we can carry on by
adding the next signature. That's how you join
number one and two, and then I'll show
you how you join the rest of them till the end. We're going to clamp
kettle stitch. Grab another signature,
slide it under. Sure. Fine as lined. Open it up. Punch punch now going to go back that way. Same thing. If it's not going through,
you might have to adjust your needle because sometimes when you punch you
punch at an angle. I found that helps. If it's too loose, you can always go back and
pull slide your needle under and give a little tug tighten. Okay, so now come
out of this side. We're going to tug to
tighten those guys. Then where this stitch
this top stitch is a loop? We're going to take
our working thread, slide it under that
stitch from the inside out going out along the top
of the spine and then pull. Then that forms a
little kettle stitch, which is just a little loop that keeps these two
signatures together. Now we can fold it. You see when you tighten it, then they can't move
around like that. That's how we do
the rest of them. Again, give him a little tug. Kettle stitch
handing your mouth, can fold it if it's easier, but inside to out
underneath that. Stitch that. Then we'll do the rest of
the signatures and I'll show you how to do the next step.
8. Finishing the book block: Now that we're at
the last stitch, I'm going to pull
out the needle, tighten, then right
here where we would normally do a kettle stitch, we are going to do that. But we're going to
add one more step, which is to loop the needle
back through and make a knot. Make sure it's squeezed tight and then do
that one more time. I'm going to go back
under the loop. And then through for a knot. You're going to
knot it two times, basically just like
you did at the head, and now you've tied it all off. Then we can trim just
like we did before, put our needle away, and
we're done with stitching. I'm going to keep
the book clamped. This is the text block. I'm going to pull the tapes tight and then I'm going to put another blue tape here because that will help as we glue the spine to keep it
as tight as possible. The next step is to
get our glue out, and then we're just
going to glue the spine. We're going to spread
a lot of glue in here. The mole will help to hold that glue in so it
doesn't ooze everywhere, and we're going to avoid
getting glue on the edge. We're just going to try
to get out on this. So blue tape. Pull pull and tape. Pull tight and tape. Pull tight and tape. Now it's all nice
and cinched in, which is what the
tapes are good for. At this point, I get
a piece of scratch. Paper with gluing on. Then the binder clips are also nice at this
point because they'll act like a little stand. However you want to do it or you can wedge it
in between something, but I like to make it so that the spine
stands up like this. Then we're going to get our glue out and a nice glue brush, which is just a
hogs hair brush or you can use a chip
brush doesn't matter. I'm just using Elmer's glue, which is a white PVA glue. You can easily mix this with water if you
want to thin it out, but I don't for this purpose. We can also at this point, if you so desire, we can cut head bands, which these go at the
top and bottom of the text block and
they look really nice. They just keep everything
looking clean and tidy. What we do if we want to make those is we just cut the piece, the width of the spine
for the head and foot. We put gues on after the mal. You can buy this stuff from
the moko making supplies. It's also handy
sometimes if you want to put if you want to squeeze another uh
what do you call it? Binder clip at either end because that keeps the
mall from feathering up. You can do both or you
can do just one end, probably just do one end. Then we're going
to take our glue. I use a generous amount of glue, lots of glue, you're going
to get it just on the spine. We really want to push
it in there. More glue. Smushing it down in there and you'll see
that the mole will start to absorb it and the glue, you won't see the holes of
that cheese cloth anymore. That's what we want. We really want the
glue to get in there. The nice thing
about the PVA glue is it dries really flexible. Even as you open and
close your finished book, it won't crack and snap apart. I like these stiff brushes
because you can really push the glo down in the cracks. I get a generous amount
just along with spine. It's going to seep into the
signatures just a little bit, which is what you want
because you don't want to see the separations
of the pages. So once we've got
the mole in there, put a little bit more glue
at the head and foot. Put our header tape with
this decorative side down, and you can see that you want it to stick
up just a little bit. That's the head band. You can see the glue oozing out too. You don't need to
add any more glue. I just stick it right on there. To the next one. But where'd you go? Make sure it looks good. So it's not where
I wanting to go. So I'm going to add
just a little bit more. G to this one. But I don't
want to do on the sides. I just want to do on the spine. Then you just let it
dry and often I'll take this binder clip and
just squeeze the middle, which tends to be
the part that has the most trouble
staying together. And then set your little book up to dry for 20
minutes to an hour. Then meanwhile, we'll do the covers and we'll
put the book together.
9. Cutting Covers: Three So here I am finding
the grain of the board, and then I cut the height
perpendicular to the grain. I'm cutting against
the grain right now and I'm cutting the height, which is the nine inch length. I'm going to be
cutting the six inch, the width in a minute
along with the spine. But right now I'm just
using a box cutter, a straight edge to keep
my lines straight. I just take my time
and I'm patient. It takes me a couple of slices
to get through the board. But now I'm cutting the six inch measurement
with the grain. I always want the
grain of the paper and the bookboard
to be vertical. That as it bends,
if it warps at all, it's warping in the direction
of the way that you're holding it and reading
it and it doesn't try to force itself
against that spine. I'm measuring again,
the second cover, which is 6 " because
my book is six by nine and I actually give
a little bit more, it's six and an
eighth and the top is so now you can see that it's going with the
grain as I'm bending it, it folds more easily that way. So I give a little bit of
excess about an eighth of an inch so that
the spine or sorry, the covers stick out just a
little bit over the pages, and the pages don't stick
out over the spine. Here I am cutting the spine, which is the thickness, the width exactly
of our book Block.
10. Covering the Case: I sheets covered. Spine. Here I am tracing
around the cover board, leaving about an
inch around the top, right, and bottom
onto the cover paper. Then if you notice I draw a
line right along the spine. That's because these
covers are going to have a separate spine and the spine is going to be cut out of a bookcloth in a solid color. I like the way that
looks as an accent, but you don't have to do that. If your paper is wide enough, you can cover the entire front, back cover, and spine
in the same paper. I like to leave about an inch around the cover size so
that you'll see that we fold the paper over the
cover and we want to have some borders to make
it easier to glue. Now I'm working on the spine. I have pre cut a
piece of bookcloth. It is sort of an
olive green color. And I'm making sure
that it is, again, about an inch around the whole piece so that
the glue will adhere well. Now I am working
on the end sheets. These need to be the same
size as your signatures. In my case, they are 12 by
nine and I need two of them, one on each end. You don't have to do this part. You could use the first
and last folio of your book block as
your end sheets too. That makes it a little simpler, a little less complicated, but not quite as fancy. Now it's time to
glue the covers. I've got the front and
back here all cut out, laid out on newsprint
because I'm going to be putting glue on it and I want to protect my work surface. Anything like newspaper,
news print is a good idea. The best way to do
it is to apply glue your white PVA glue to
the bookbard itself. That way, when you
hear the paper, sometimes it's harder to get
the glue because it's moist. Sometimes it absorbs
into the paper, especially if you're using a handmade paper or a thin paper. I always put the glue on
the bookboard itself. You can see the spreading it pretty thickly over
the whole board. I'm using a stiff chip brush or hogshairbush you can use
because it holds a lot of glue. And I'm spreading it
to the very edges, and then I'm going
to turn the board over and place it onto my paper. Having your bone folder
handies really helpful because you will be smoothing out the paper
using the bone folder. Here I'm just doing
it with my hand so that the glue will stick. You can see that I put
because I'm doing a spine, a different spine,
there's no bone folder. I'm going to place
the paper along that edge, the spine edge. Here I am going with
the bone folders edge, scraping all the excess glue, making sure there's
no air bubbles. I'm trying to crease the paper because this is rather thick
reads BFK printmaking paper. I'm trying to crease
the edges around the bookboard because I will be wrapping
the paper around. I'm going to do the same
thing to the other one. Now, after I've got
the car paper glued, I am creasing the corners
because I'm going to be folding up the corners so you can see how I
folded in the corners, which makes a nice clean edge
and it doesn't look messy, it looks really clean and it also keeps everything
neat and tidy. Glue is not squeezing out and you don't have
a big bulky corner. This is the best way I
found to do corners. If you have a really
big thick paper, then precreasing with the bone folder
is a really good idea. I'm going to be again
using newsprint as a buffer between my work
surface and the glue. It's really nice to have a bunch of newsprint newspaper
phone book pages. You can see how much I move
and take away the paper, I'll glue and then I'll move the newsprint so that I
don't get glue on my paper. If you can help it, you
really don't want glue on your book other than where you are trying to glue it the cover page to
the cover board. So as much as you can try to protect that is a
really good idea. I'm pressing down with my
fingers and the bone folder, emphasizing those
creases as well. I will do every corner
just like this. Then I'll move on to the spine. Also using a wet wipe
or paper towel rack to clean your bone
folder in between. Each part will also help keep the glue from getting
your book cover dirty, which can happen,
especially if you're using white paper and
you're using a lot of glue. Baby wipes or paper
towels, handy, and lots of newsprint or
wax paper is a good idea. Here I am now gluing the
rest of the cover page. After you have
your corner glued, the nice thing about
this PVA glue is that it dries really fast generally. I'm putting glue on
the rest of the edges, and then I'm going to fold
them up and glue them, press them onto my board with my fingers and then
with my golden folder. And you want to keep creasing. You don't really want big
thick areas or big bubbles. Bone folders are really good for that because they
just really get in there. You can see I'm using
edge to really crease it. Like I said before, this
is really thick paper. If you're using anything that's, nice and a little bit thinner, you might want to be a little
bit more careful just with your creasing because you could rip it if the glue is wet. Sometimes those thinner papers, they can they can tear if they get saturated
with the water based glue. Again, paper towels to
clean everything up, and I'm going to do this with the remaining two
sides of this cover, and then the other two or
three sides of the back cover. Term The last step is going to be to
glue the spine onto the spine paper and then attach the
spine to the covers. Not that. And then
put the book block, which is now dry in
the whole cover case. First step I'm going to do
using one of our sheets here is to put glue on the paper and
then stick this down. This I love using scrap paper, magazines, phone book pages, things as gluing pens. It's good to have a lot of these before you get started
because otherwise, then you can just remove
them and you're not getting your nice book and
everything all glued. After I put glue on here, There's minimal time when
you can move this around. Get it right when you want
it, right where you want it. Often I will make little marks. The distance between
the spine and the covers should be at
least two thicknesses. Even maybe a little bit more. But that way, your
book has room to flex. And It doesn't pinch.
Get really tight. No, put that upside down. Then just like we did before, a bone folder, smooth it out. And then I'll often
take the folder and crease against the spine. That's the hinge part.
Something like that. There's any little glue bits, you can use a smaller brush. Any parts that need
a little extra glue. Small brush. Take your towel. Smooth it in. Before it dries, in two. Hold it up, just like
we did with the covers. Crease Crease There we go.
11. Attaching the block: Three these are end sheets. You don't have to
use end sheets. These are going to go like this. I can be decorative. You
don't have to do that. You could just use the
first and last page of our text block right here. Now it's nice and dry. We're going to peel
it peel it away. Remember this is the mall then we're going
to carefully peel our tape off to release
or cotton tapes. Now we can trim those. Scissors are not very good. The same height as the mall. Same on the other side. Okay. Now it's time to put
the book block in our case. I position it on the spine and then these are going to get
glued to the covers, and then the end sheets
get attached like that. You don't have to
glue the whole page. I usually just put glue
right at the very edge and then you'll notice it'll
just stick up like that. We'll start over here. But it's heaven here and
here and here and here. Then you just start
putting some glue. Try not to get it on the page. It's probably the trickiest
part of the whole. You can get it along
the seam just a little bit because that's
where the end sheets glue in. But this will help hold
book block to the cover. If you didn't have an end sheet, you would just put glue
over the whole thing and stick the first and last
page down as an end sheet, which I've done lots of times. It's not quite as fancy. Over the whole sheet like this. It'll dry clear, even if you
get it past the end sheet, it's not that big of a deal. I like gluing the covers
rather than the paper because the covers are heavier, thicker so they won't warp or tear like paper
might with all the glue. Is water based glue, so warp thinner papers
like the end sheets. In put a little bit right here. You don't have to
glue the spine in. In fact, you don't want
to glue the spine in. You just want to
create the hinge. Now that I have glue, I'm going to carefully
lay my end paper. He smooth it out. Then I can grab my bone folder, and kind of crease it in there. And then read from the center
out from the inside out. The idea is that it will
glue just like that. Then if there's any extra
glue that we didn't cover, what I do is take a
piece of wax paper, put it in between the end sheet and the cover and the end
sheet and the book block. Then that's how you'll
press it to dry because otherwise it won't uh it won't. Like what? And it might stick. It's an hour under
the next side. Same exact procedure. We're just going to keep
this part together, put glue all around here. Then at the end we'll
press it all together. And then when I press it, I make sure that
everything is aligned. Spines sides. I put wrap some
more this around, and then I press so that the spine is kind of
sticking out and you just want to press it something
heavy probably for a couple of days to ensure that the glue is totally dry and your hook is not
going to warp on you. And that's it.
12. Thank You: Thank you so much for joining me along this case
finding journey. I hope that this has helped you make your first case
bound sketchbook, and I can't wait to
see the results in the project postings.
Thanks so much.
 Dana Seeger, Artist, printmaker, educator