Transcripts
1. Junk Journal Intro: Hi, I'm Dana Harris Seeger. Welcome to this class
on junk journaling. Today we will be making at least one junk journal because it's really
hard to make just one. They're addictive. I'll show
you how to make the covers, fill it with all
kinds of cool papers, bind it using a pamphlet stitch and then you can start using it.
2. Class Project: In this class, we are going
to be creating junk journals. Junk journals are really cool
because you recycle paper, you use what you have, you
use what's around the house, and they're really
easy to get started. They're really simple.
They also don't take a lot of expensive equipment
or anything like that. I like them because
they break the ice. If you are afraid of a blank page or you
have sketchbooks, but you're afraid to use them and ruin them
because they're so nice, junk journals are really awesome because they're already junkies, it takes the stress and the scariness out of
sketchbooking or journaling. Today we're going to be making
at least one junk journal, but they are addictive, so I'm sure you will not
be making just one. I hope you join me today in this class on junk journaling.
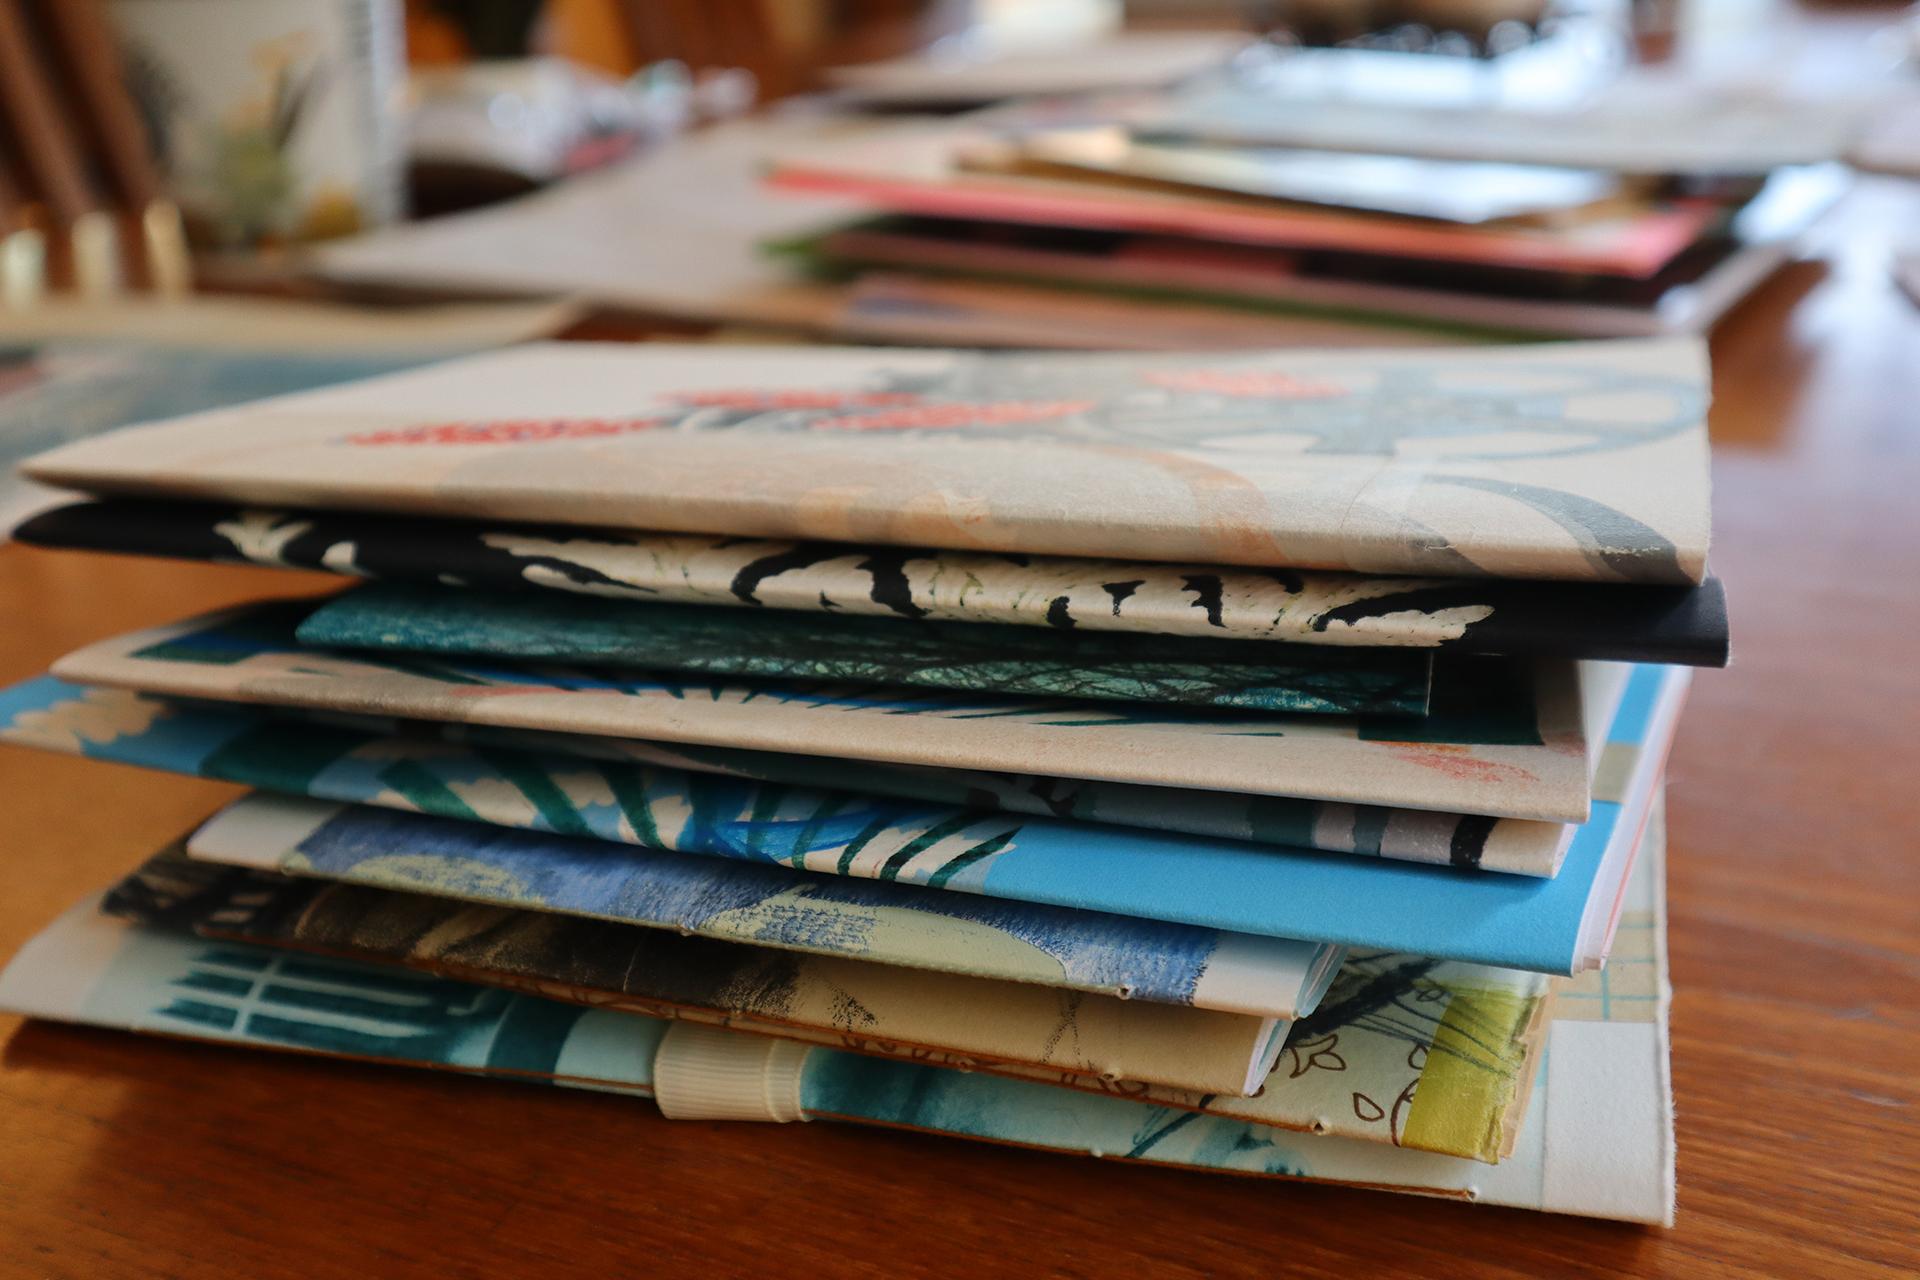
3. Papers: In this video, we're
going to talk about materials that you need to
create your junk journal. First, we need covers, and the cover paper
should be sturdy. What I usually use is
either watercolor paper. This is a watercolor
paper that's been printed on using jelly print
and laser printer. These are just straight up
jelly prints that I created on this Bristol paper
or heavy cardstock. So it should be
pretty stiff because it's going to be covering
and protecting your journal. This is, again, just
watercolor paper or if you have printmaking
paper like waves or arches, this one I've even got a
print on print and collage. I think I'm going to use
this for one of our covers. I like this process and using up the
materials that I have. You can see that
I've cut this out of a larger piece of paper
and when I make prints, I don't really think about
how they're going to end up. I just go with the flow
and combine things. I often end up with
leftover pieces that I'm not going to frame
or use in a print and cutting them down
to make covers for junk journals is one way
that I use up my scraps. Then we've also got
the interior paper. I don't just use drawing paper, although I do sometimes put in some just straight up.
Let's see if I've got one. This is just blank sketchbook
paper or drawing paper, and I like to save music pages. I've got just regular sort of construction paper
or colored paper. This one hasn't been bound yet, interspersed with this one, a fine rice paper. You can use pretty much
any type of paper, dictionary pages, old pages that you've
already written on, but you don't really need
anymore. This is printed. The interior pages though should be a little bit thinner
than the cover. You don't want the
paper to be too stiff. But that being said if
you wanted to do a lot of watercolor or mix
media in your journal, then you might want to opt for some heavier weight card stock or lighter weight
watercolor paper. I've got maps here
that I use, geez, all kinds of stuff
that you find from the Goodwill or
the antique store. If they're already folded, then you can just cut
or tear out the folios. This is just folded in half. And so I get that. These are just folded
in half and you can actually just
carefully take it out of the staple and reuse the page just like it
is already folded. These are fun. Don't worry if they already
have stuff on it. They're already decorated
because I'll show you how to either cover that up or you can use acrylic paint in all
kinds of other ways, collage to add to your journal
to make it uniquely you. If you're planning to make a
book that's about this size, which is a six by nine, then you want either 8.5 by 11 size or nine by 12 because
when you fold that in half, then it becomes the right size. It becomes the six by nine. We can always cut them down. One of the tools I'll show
you is a paper cutter. But it's okay if you have pages that are a little
bit smaller because they'll get bound in and
that adds to the fun aspect of the junkiness of the journal because not
everything is the same. If you're not, even
if your pages are a little bit off, we
can work with that.
4. Junk journal materials: Okay, over here, I've
got some more materials. One thing that I
really, really like is having a self healing mat. You can get these from the art store or from
the fabric store. You use them a lot for
quilting or cutting fabric, but they're really
nice for using um, the razor blade or exacto knife because they won't hurt
your table surface. We'll also be using this punch, which is an all for poking holes in the cover
and the pages. It's nice to have
something that won't go through to your table when you're poking holes
in something. Having a self healing mat or some table protector or table that you just
don't care about a nice junky wood table or piece of plywood that goes over your surface,
that's really handy. I use this ruler, which is a quilting ruler, but you can use any ruler for measuring out my page
sizes or my cover sizes. I've got a range of cover sizes and once you get started,
you'll use what you have. So books will end up small and some books will end
up a little bigger. That's okay. We can cut
pages down either with the exacto knife
with our scissors. Or with a paper cutter. This one's cool because
it just slides. You put the paper in and
you slice it like that, and it's nicer for
things like tissues or lighter weight papers because some chopping or
exactoblade cutters, they crumbled the
paper, crunch it up. I don't like that.
But this paper cutter is really nice and it's
not that expensive. This one I think is
made by fiscars. Bone folders really nice for creasing pages,
creasing the cover. You will need some type of
thread to bind your book with. I prefer this pearl
cotton embroidery thread. Doesn't have to be waxed
because you're really not going through the
book that many times. The pamphlet stitch is
very simple to master. It comes in a couple of
different thicknesses. This one's a little bit thicker. You could use traditional
embroidery thread. The only problem
is it's stranded, there's lots of strands that
can untwist. There we go. This one's nice because
it's already twisted, as you're pulling it
through the book, it stop going to
untwist. A needle. A needle is very handy
for threading your thread and dragging it through the spin. We'll
need one of those. Optional but recommended as
some type of binder clip or spring clip or
anything that will clip your pages together as you're binding so they
don't shift around on you. We already covered scissors, very handy for cutting
paper, trimming, and then if also optional is something ribbon that you can use to tie your
journal together. Sometimes they can get thick, especially when you
start filling them in. And if you don't particularly
like that or you have a book that has a foldover flap and you want to
keep it together, then I like using these
decorative ribbons. Is hem tape, brick rack, or just simple like
grow green ribbon. Again, use what you have. Maybe you have some
string or some yarn, use that that's optional also. Those are the basics
and basic materials and now we can get started
making our journal.
5. Cover: Okay, now we're going
to talk about covers. When I'm making my covers, I can make them a couple
of different ways. This one has sort of
a wrap around flap. It's got all the
pages bound inside and then this part is a little
bit longer in the back. I just folded it over and to
keep it from moving around, I attached a ribbon
using a sewing machine, and that way I can just wrap it wrap it around
and tuck it in, or you can make
two and tie them. But planning this
out ahead of time and seeing where to put your if you want
a longer piece of paper or if you want to
attach a ribbon or something, that is about the
only planning that I do when I'm thinking
about covers. This cover has a
print that's been collaged and I usually
do that before I bind it altogether because
it's easier to do all that. If I'm going to stitch
anything to it, then I'll do that
before I bind it altogether. You can do that. You can collage on your cover.
This one's pretty small. It's just a jelly print, but it's stiffer than
the interior pages, so it has a little
more structure. This one also has a
wrap around flap. This one I was going to do.
It's got a cool window. It's from a Kleenex box, but it's stiff car for. So in the spirit of
using what you have, you know, look around,
see what you've got. See what's laying around. You could cover paper
over that or whatever. But it will be easy
to punch through and nice and stiff to use
for one of my covers. All right. Now we're ready to create this cover and I'll
show you just how I cut it. The paper shape is weird. It's not how I want
to make my book. I like it when the
books are rectangular. But it's nice and long, so I could either use
this part down here and make a squashier book, but make it long, or I could make a book
that's more tall and narrow. It's just up to you.
I've got some pages. I have pages that
I want to put in the book of a specific size, then I can fold those in half. Then I can see about
how big maximum my books got to be
to cover that up. Then I can position
it where I want it. Maybe I want to see
more of the fan. Although when it's folded,
that'll be on the back. That's okay or I could focus on this leaf part or I could
make the fan upside down. It's a job journal, so it
doesn't really matter. It's just up to you. I just
put it right in the middle. I think for this one, I want to about
this collage part. As soon as I'm done arranging
ranging where I want it, then I'm going to take a
pencil, mark around it, or you could use a ruler and then I'm going to
use either my scissors, paper cutter, this
one doesn't work quite so well on
the stiff paper. If I don't have a
pair of scissors, I can use my self healing mat and my razor blade
and ruler and slice, which is probably
what I'm going to do for this so I get
nice clean edges. It looks like I
have a little bit of space for a wrap around too, which I'll probably do. If I'm going to wrap it around, I want to make it a little bit wider than it's ultimately going to be the flap
will fold over. I'm going to just lightly outline where the
book is going to be. You can make it a little
bit larger than the page, just so it covers
it all completely or you can just make it exactly and some of the
pages might stick out, it's job journal, so it
doesn't really matter. I'm going to take it over
to my self healing mat and use a razor blade and a ruler to trim the book size, the cover page to size. Okay, now we're at our self healing mat
and I've got the ruler. I can see my faint line. I'm going to line up the
ruler so that it matches. One thing I really
like about this quilting ruler is
that it see through, but it's also a grid. You line it up with the
self healing mat too. And then I'm just going
to press down as I glide the ruler as I glide the
razor blade along the ruler. If it's a nice new blade, you don't have to
do it 1 million times and you get
a nice clean cut. I just rotate it around. Again, I want to
make sure that I'm cutting on the mat
and I'm not cutting on I'm not going to end up
cutting on my table surface. You can go slow and if you're pushing too hard and it's still not
going through, just go over it a
couple of times. I'm leaving this edge. And line wasn't very straight. If you use a pencil,
then you can erase your line if you see. You
don't want to see it. It didn't quite go through
to push a little harder. Then, of course, you
got to save your scraps because you can use this in
your journal or as collage, save your scraps now
we have our cover. I'm not going to fold
it just yet until I know how the flap
is going to go. But if it didn't have a flap, I'd just fold it in half and
that'd be my journal cover.
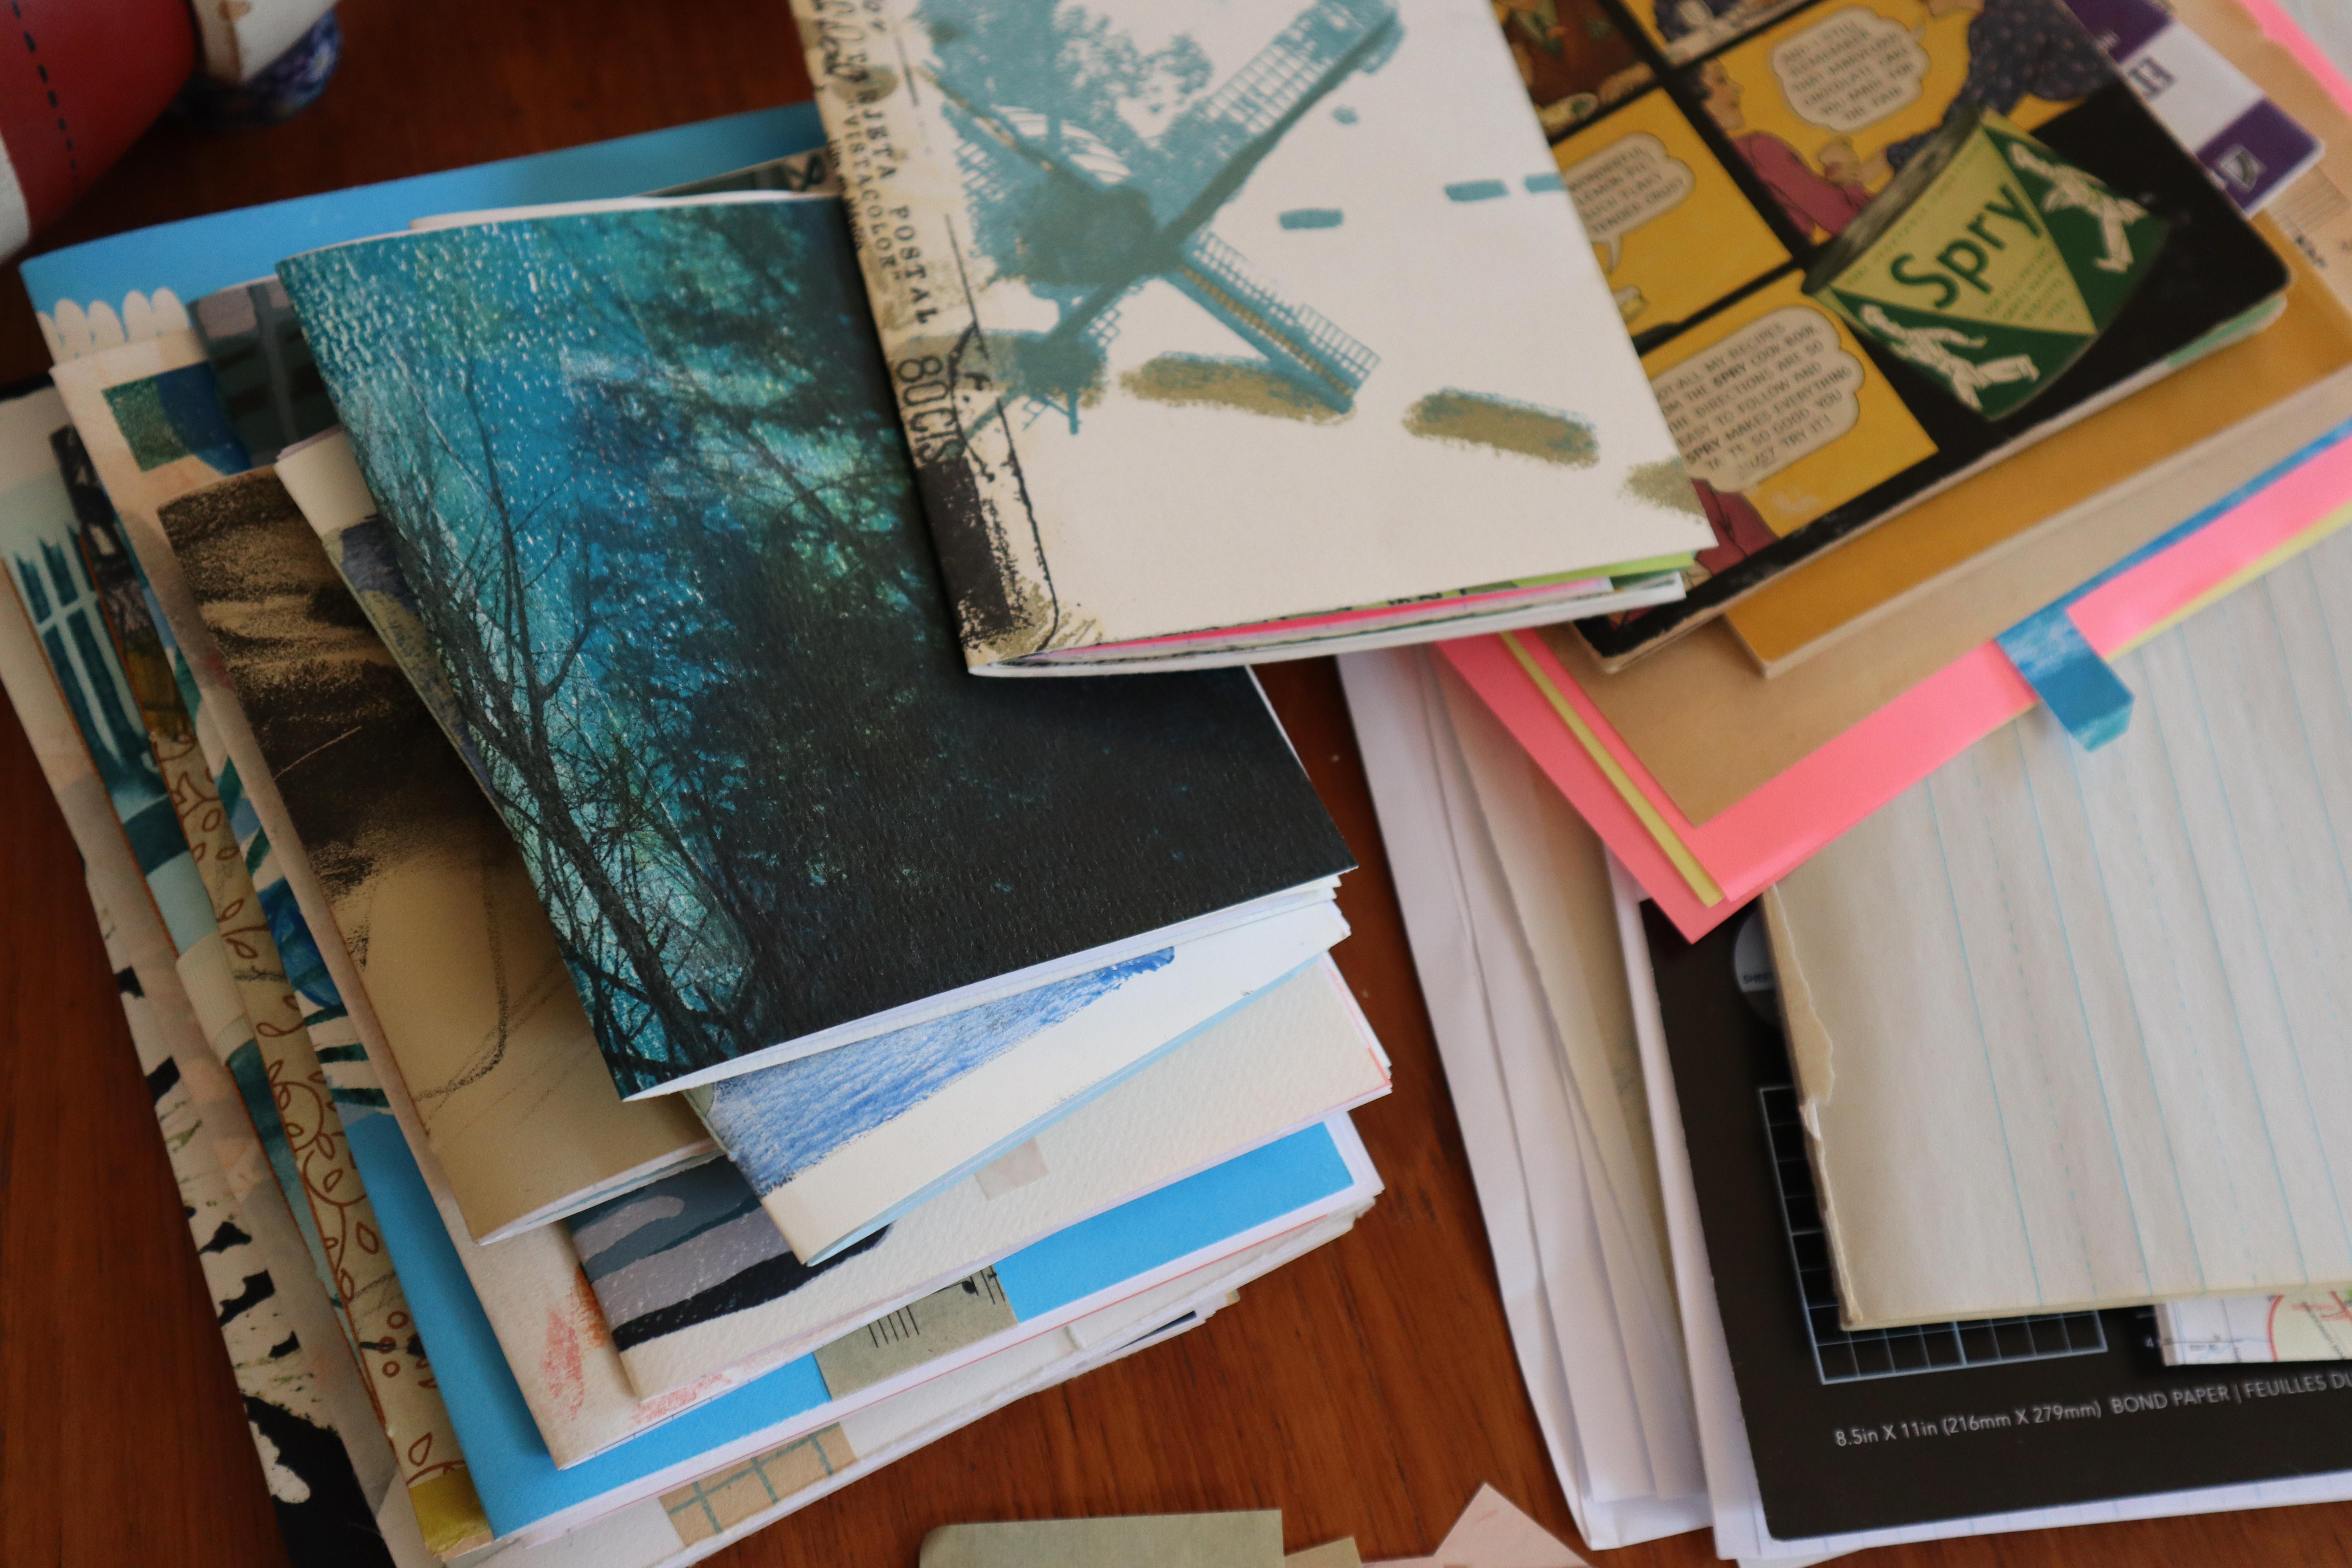
6. Interior Pages: Now that we have our covers, whatever dimension
we want them to be, we're going to work on
our interior pages. This, I folded to get an idea of how big this
book was going to be. Now, I fold that later, but now I can see that it's not going to be any taller
than this piece of paper, and if it's wider, then it's going to stick
out the side of my book. I don't want that. So I'm
going to find papers that are either smaller than this or I can cut them down
using my paper cutter. One other fun thing I like to do because it's
a junk journal is use stuff that I was normally going to throw
away like this envelope. If I fold it in half, I cut the little top part off, then I can find it into
my journal and I've got two little pockets
instant pockets that I can use to store
things in my journal. Envelopes business
envelopes also make fun a little pockets. You can keep this
or you can cut it off the window lets
you see things. So you don't disregard anything. If it's paper and you
can bind with it, you can use it in your journal. I might use this one for the
larger journal because I could stick it in like that and then it becomes part
of the binding. And a little pocket. Anything that you have though, you want to fold in half
because what we're trying to do is create what are
called folios, a single piece of paper
that's folded in half, it's called a folio, and
that's what gets bound using the thread
stitch into our book. If there are multiple folios
all bunched together, that's called a signature. What we're doing is we're
creating one large signature with multiple junky havea. I usually don't think about too much what
is going to go in it. I just start cutting. If it's got something
like a flap like that, then I'll want to cut it off. Again, as long as when
I fold it in half, it fits in my book,
we're good to go. You might want to
organize or group your interior pages by
size just in case you're making two different
size journals. But again, they
can all fit within the largest size,
it's up to you. I'm just going to start
taking some pages and trimming them down. Let's see if this one means
Your paper is thin enough, you don't need a bone folder, but if it's it's getting
thick and unmanageable, you can use the bone
folder to help crease. Now, if I stick this next to it, it's going to stick
out a little bit. I'm going to just trim that. I also have let's see.
Good for collage. I also have some drawing paper, just plain drawing paper that
I can cut and stitch in. This will give me
just a couple of blank interior pages in case I want to do some drawing
or anything like that. I just want to check the size
and it looks a little big, so I'll cut that down too. This one I'm using
to measure because I know that my pink
is the same size, so I'm going to line it up and slide it
under the paper cutter and just keep it so
that when I slice it, it's the same dimensions. Then as you go along, if you've got a lot
of paper to cut, you don't have to fold
it after you cut. You can just stack them up
and then fold it all later. That's usually what
I end up doing a assembly line type of deal. So some of your pages might
be let's see, but an example. Some of your pages might
be longer than your book. I was going to make, let's
say, this little book. I'm going to fold it in half
by lining up the corners. I'm going to keep my
fingers on the top part. It's simmered down. Then as best I can
crease with my thumb. It's like a holding
and a creasing action. Then as soon as it's folded, you can get a better crease
on it with the bone folder. Some of my pages like this one, if I want to add this
one might be longer. Just like what we
did with our cover, if we want to make
a folded Okay. I've cut this is 5 ". I want the height
to stay the same, so it fits nicely inside. But what if I folded it like that. Then I have this flap. I could fold the flap in
or I could fold the flap over. You could fold it in. Now I bind just this part, but I've got a little
foldout section of one of my pages
that I can have little secret notes or just
added extra drawing page, and that gets bound
in just like that. Then as your journal,
you can unfold it. That's another fun
thing to do if your pages are big enough or
you're making a small book.
7. Decorating pages: While we are making
our interior pages, we might want ones have stacked a little bit of stuff
together, but it's plain. What if I took one or two of the interior pages and
pre decorated them? I'll have so you can do
this on blank paper, a blank side, or you can
do it on something that's already decorated and it makes it look a
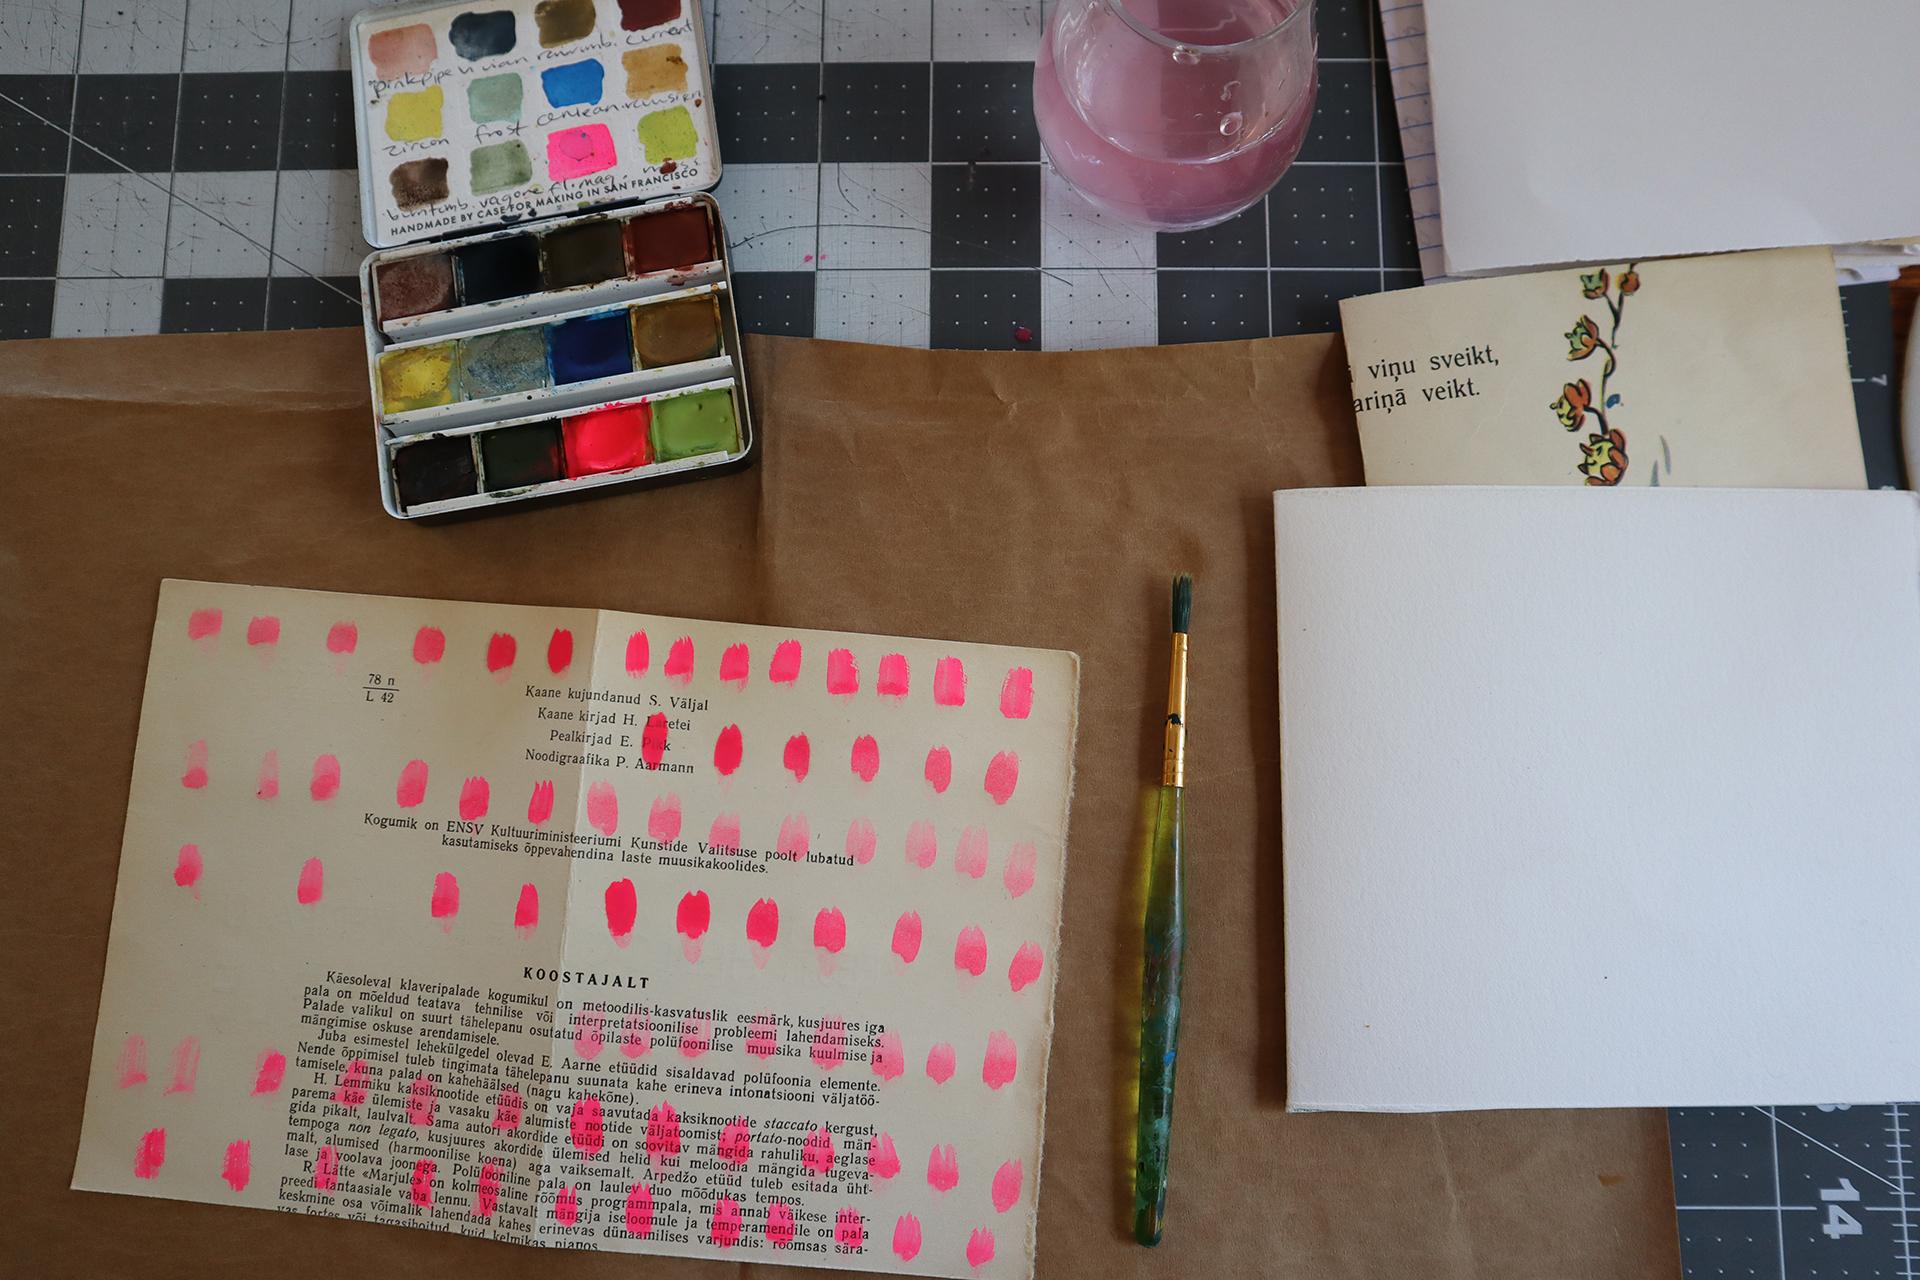
little bit different. Let's try these
three little papers, and I'm going to just start
by using watercolor set, this one's handmade by a case for making
from San Francisco. I just got a little brush. I'm just going to
make some marks. You can make lines, you can make the hot pink. You can make dots or dashes
or whatever suits your fancy, but something to add a
little whimsy to your page. You can do it on both sides. Mix it up. But that also breaks up
the tension and helps you not be so precious with
the pages and the journal. Let's do a couple more. We'll do maybe some
lines on the next one. This one. This one's already
got something on it. Let's do this side. I want to use maybe this
umber cover. Some wines. With watercolor
varying your amount of water gives you a lighter or darker or more intense
or a tinted version. You'll also notice that you'll also notice
that I protected my work surface with
piece of brown paper, just scrap paper that
I had laying around. And that's because I
didn't want to get even the water color is water soluble and you can clean it
up really easily with water. I didn't want to have to worry about that too much and I can
run my paint off my page. You can see the
less water I add, the more intense
the pigment gets. But more water I add the softer, more lighter. Pigment. Blank ones. Let's do one more inside here. Blue. Really cool blue. If you're working with a theme, like a color theme, then you can choose a
palette of colors. But for right now, I'm
just going with the flow. I'm picking colors that
I like on this palette. You have to be straight to chrome Because
you're using papers, what we call ephemera, which are papers that are
not really meant to last, they are not archival
or acid free like some. This one's specifically
made for art. But papers like this
children's music book or this kids lined school paper. Some of those won't
hold the water as well. You might notice that
it bleeds through. You can experiment with
different papers and different media and
instead of watercolor, maybe use markers
on a thinner, uh, ephemeral paper that's
going to discolor and you can see this one tears really easily because it's
just an old dictionary. Um, so it's kind of
yellowed around the edges. I mean, that adds a nice
patina to your book. But think about how
you're going to be using it and what you do want to save and how
you want it to end up looking before you
start adding media. My advice is to experiment. Again, if the water
just disintegrates the paper or makes
it look weird, then maybe try some
markers or some, uh, some other acrylic paint or something that doesn't have as much of the water in it. Then we're going to let this dry before we bind it into our book. If you want to get
interesting textures or add any more designs, you can use paper
towel to kind of blot. That helps it to dry, but it also gives a
different texture. If you're not afraid
to just play around, you can can be messy
and use all kinds of different methods for
decorating your pages. This is what we're doing before
we bind it in just to add a little bit of variety. But we can also definitely decorate our pages
after we bind them.
8. Binding: Now we're going to
punch our holes, and for this, you can use a template or you
can just wing it. If you want to use a template, then I would suggest
using a piece of paper that is as
tall as your book. Doesn't have to be as wide because we're just going
to mark the spine. If you want to take
a piece of paper, and then fold it in
half so that it's the same height as your spine. Then you can use a ruler and a pencil and draw a little dot. Let's see. I've
got my ruler here. I want to make them a mark
at the middle, very middle. Then at least if
your book is small, we're just going
to do three holes. I like to keep my
top and bottom holes about half an inch from the top of the book and a
half an inch from the bottom. If you have a taller book, then you can do five holes. After you do the
half inch top and bottom and the half
the center hole, then you can just do one
equidistant from the middle. So this is looks
like 8.5 8.5 tall. We're going to make a mark. Here's the half inch. My pencil work. Then one here. Because that's a half
inch from here to here. Then we're going
to do, we've got a half inch and if
you need your ruler, you can get the ruler out
half inch from the bottom, and then the center of 8.5 is going to be
four and a quarter, one, two, three,
four, and a quarter. That's the center. Folding it lightly, increasing it will also give
you the center. Remember, this is a template, so it doesn't have
to be perfect. Piece of paper doesn't
have to be perfect. The hole should be.
Then equidistant from this hole to this
hole. About right there. That way, now you have
your whole guide. Whatever book you have,
that's 8.5 " tall, this will be your
guide for punching your holes through your
whole book and signature. I'm going to reposition my book. I'm going to lay this
in the little *****. Line it up as best I can. If you have additional
binder clips, you can clip your
template to your book, but just make sure again
that your V, your valley, your ditch is all in the same all laying in
the same ditch. Otherwise, you'll
end up with holes that go weird directions. Again, I'm doing this
on my self healing mat. You can use a stiff dense
piece of cardboard, back up a sketchbook
works really well, or a pad of paper. You can use old foam books, but now I'm just going to
punch through all the holes. If I have to, I angle my book
and wiggle wiggle the all. This is a little hole punch through so it gets
to the other side. And then I'm going
to do my next one, punch and wiggle, pokes through. Ideally, you want it to poke through right along
that mountain fold. Wiggle wiggle, wiggle. Poke wiggle, wiggle, wiggle. Be careful. This
is really sharp, so don't put your
finger to brace it where the hole is or
you'll end up poking. There you go. If your all
is like mine where it's the same thickness
all the way down, then you don't have to
worry about how far you go, but some s get thicker the
farther they go to the handle, you just have to be careful you don't make your hole too big. Set my template aside, and now we have holes
and we're ready to sew. Because this has a
five hole pamphlet, I'm going to use my thread
here, my pearl cotton. I'm using my pearl cotton. Thread, Broidery floss.
I'm going to measure, about 2.5 or a length that's 2.5 or three
times the height of my book. Then I'm going to cut. I don't want it to be too short
or I won't have enough to go back and forth along
the spine of the book. If it's too long, that's okay because you can
always just reuse it. You've got plenty here
for a smaller book. I'm going to thread my needle, which is probably the hardest
part of this whole thing. There's our needle threaded. If your needle is too
fat, if it's too thick, then you'll end up making
too big of a hole again. Going to use it singly, but I'm doubling it up just at the end because I
might need some extra. For this method, you can
start from the inside of your book or you can
start from the outside. If you start from the outside, whichever end you start with, you'll see a little tail
because we tie it off. If you like that
idea or you want to maybe put some decorative
beads on the end, then start on the outside. But I'm going to
start on the inside and start on my center hole. Because I've pre punched, it makes it really
easy to poke it in. I'm going to pull it through,
but I'm going to leave about a three to four
inch tail on the inside. Then I'm going to poke it in. It doesn't matter which one, but just the next hole, you're going to go
in from the spine. To the inside and I hold the tail with my thumb
so that as I pull it, it doesn't fly out. Then I'm going to
go to the side one. I'm weaving doing this running
stitch the inside out. Then I'm going to go
back down that hole. I go back in the hole I
just came out of last and make sure that it comes out that hole. About the dogs. I'm pulling it a
little bit tight as I go and you'll be
able to tighten it later. But now that I've gotten two on the outside and
one wrap on the inside, I'm not going to go
back into this hole. I'm going to skip
over that hole and go into the next one right here. Then I'm going to go
from the outside to end, just like I did originally
at the beginning. Oops. There we go. Give a little tug, you don't want to tug too
much or you'll end up tearing your paper back out. A little talk. Now, this whole interior part is completely sewn and I've got
one more little jump to do. I'm going to go back down
where I started in the center. I'm going to pull on that. I'm going to pull this guy through and now the
backside is done. Make sure there's no
real loose pieces. Then for this part, I want each of the
threads that are coming out the middle. I want them on opposite
sides of this middle thread because I'm going to tie a
knot, just a square knot. I'm going to go once and
then I'm going to do it one more time. Just like that. I trim it and that will secure
about a half an inch trim. Now it's secured, it's knotted. Put this somewhere safe. It's now knotted, holding
all the threads together, and we take this out. You'll see that it's
all bound together. Decorative pages, a
little pocket envelope. That's all there is to it. Again, if you had that
coming out the back, you could keep it long and put some beads on it or
whatever to make it fancy. I could wrap a ribbon around it, but that is essentially
your finished kernel. The next section, I'll just
have a little bonus where we decorate the pages and maybe
add some embellishments.
9. 3 hole pamphlet: Okay. Say you have
a smaller book and you want to only use a
three hole pamphlet stitch. You do the same thing
you did before where we clamp our pages. Like I said, before you can do one side or you
can do both sides. It's so small, I can
just hold it in my hand. I've got my needle threaded with this cool amber
colored thread. I'm going to punch three holes,
one right in the middle. Bunch of the. One about
half an inch from the end, and then another one
about half an inch from the other end. Again, you could make
a template for this, but it's so small, you
can just eyeball it. Then I'm going to go in
from the inside out. Hold it with finger. Because there's
only three holes, I'm going to go back
in one of the sides. I'm going to skip the middle
and go out the other side, and then we go back
in the middle, back down the middle so I come out on the inside,
give a little tug, of my needle and then
make sure that they're both on the opposite sides of this middle Bread. Tie down. One more knot. Awkward if it's too short. If you have enough thread, leave the longer tail. Tying. It then just trim it. There you have it. The
three hole pamphlet. Nice and neat on the outside.
10. Embellishing: Now that we have our junk
journal all bound. So cute. A couple more things I wanted to share how to decorate it. On the inside, if you've got pages maybe that have
things already on them, either writing or painting, you can use papers that are not written on blank pages or see. Stuff that's a little
bit less busy. Although this group of pages is a lot more
busy than what? Let's choose this one. Maybe I want just a little
area to write or draw picture so I can take
some washi tape. This is really fun decorative
tape and I could just tape in a little a little piece. Doesn't have to be in the
center. Just put that on there. I could leave it flapped or I could do one more
on the bottom. But that will give
me a little bit of blank space to
do some writing. You can do that all
over the place. You can do a couple
on a bigger piece. However you want to do that, you can use markers or, again, the watercolor paint now to decorate your
pages after the fact. I also use papers, maybe some leftover paper that I had from the cut off part that I can collage in and you can
use a water based glue. I find that if you want to work quickly through
your journal and make a lot of additions without having to
wait for it to dry, then just a regular glue
stick works really well. It usually holds well enough. If you're having
trouble, maybe it's old, maybe it's a cheapy version. This washable school
glue might not be the best if you want a
super permanent bond. Here I stitched it,
stitched it down, put a little piece
of tape on it. Then when you're all done,
you just take your ribbon. Tie it up. Make a nice
little bow, and you're done.
11. Thank You: Well, that's it. Thanks for taking this junk
journaling class. I hope you had a lot of fun, got some inspiration and join me on my next
Skillshare class.
 Dana Seeger, Artist, printmaker, educator