Transcripts
1. Introduction: Hi everyone, welcome. My name is Kathy. This will be my
first blend across. And today we're going to create a beautiful studio
slash office space. And we're going to learn a
handful of useful skills. The simple fact is that
blender is the future of 3D design and it is a
completely free software. This course is geared towards intermediaries and
advanced students. However, if you are
a beginner students and you would still like to
take part in this course. I believe you can,
because I've adjusted the course material
and you'll be able to learn the basic
techniques of how to create simple objects. I'm not just an experienced
greedy designer, but I'm also an experience
former web designer. I used to design websites
for clients all the time. So more information
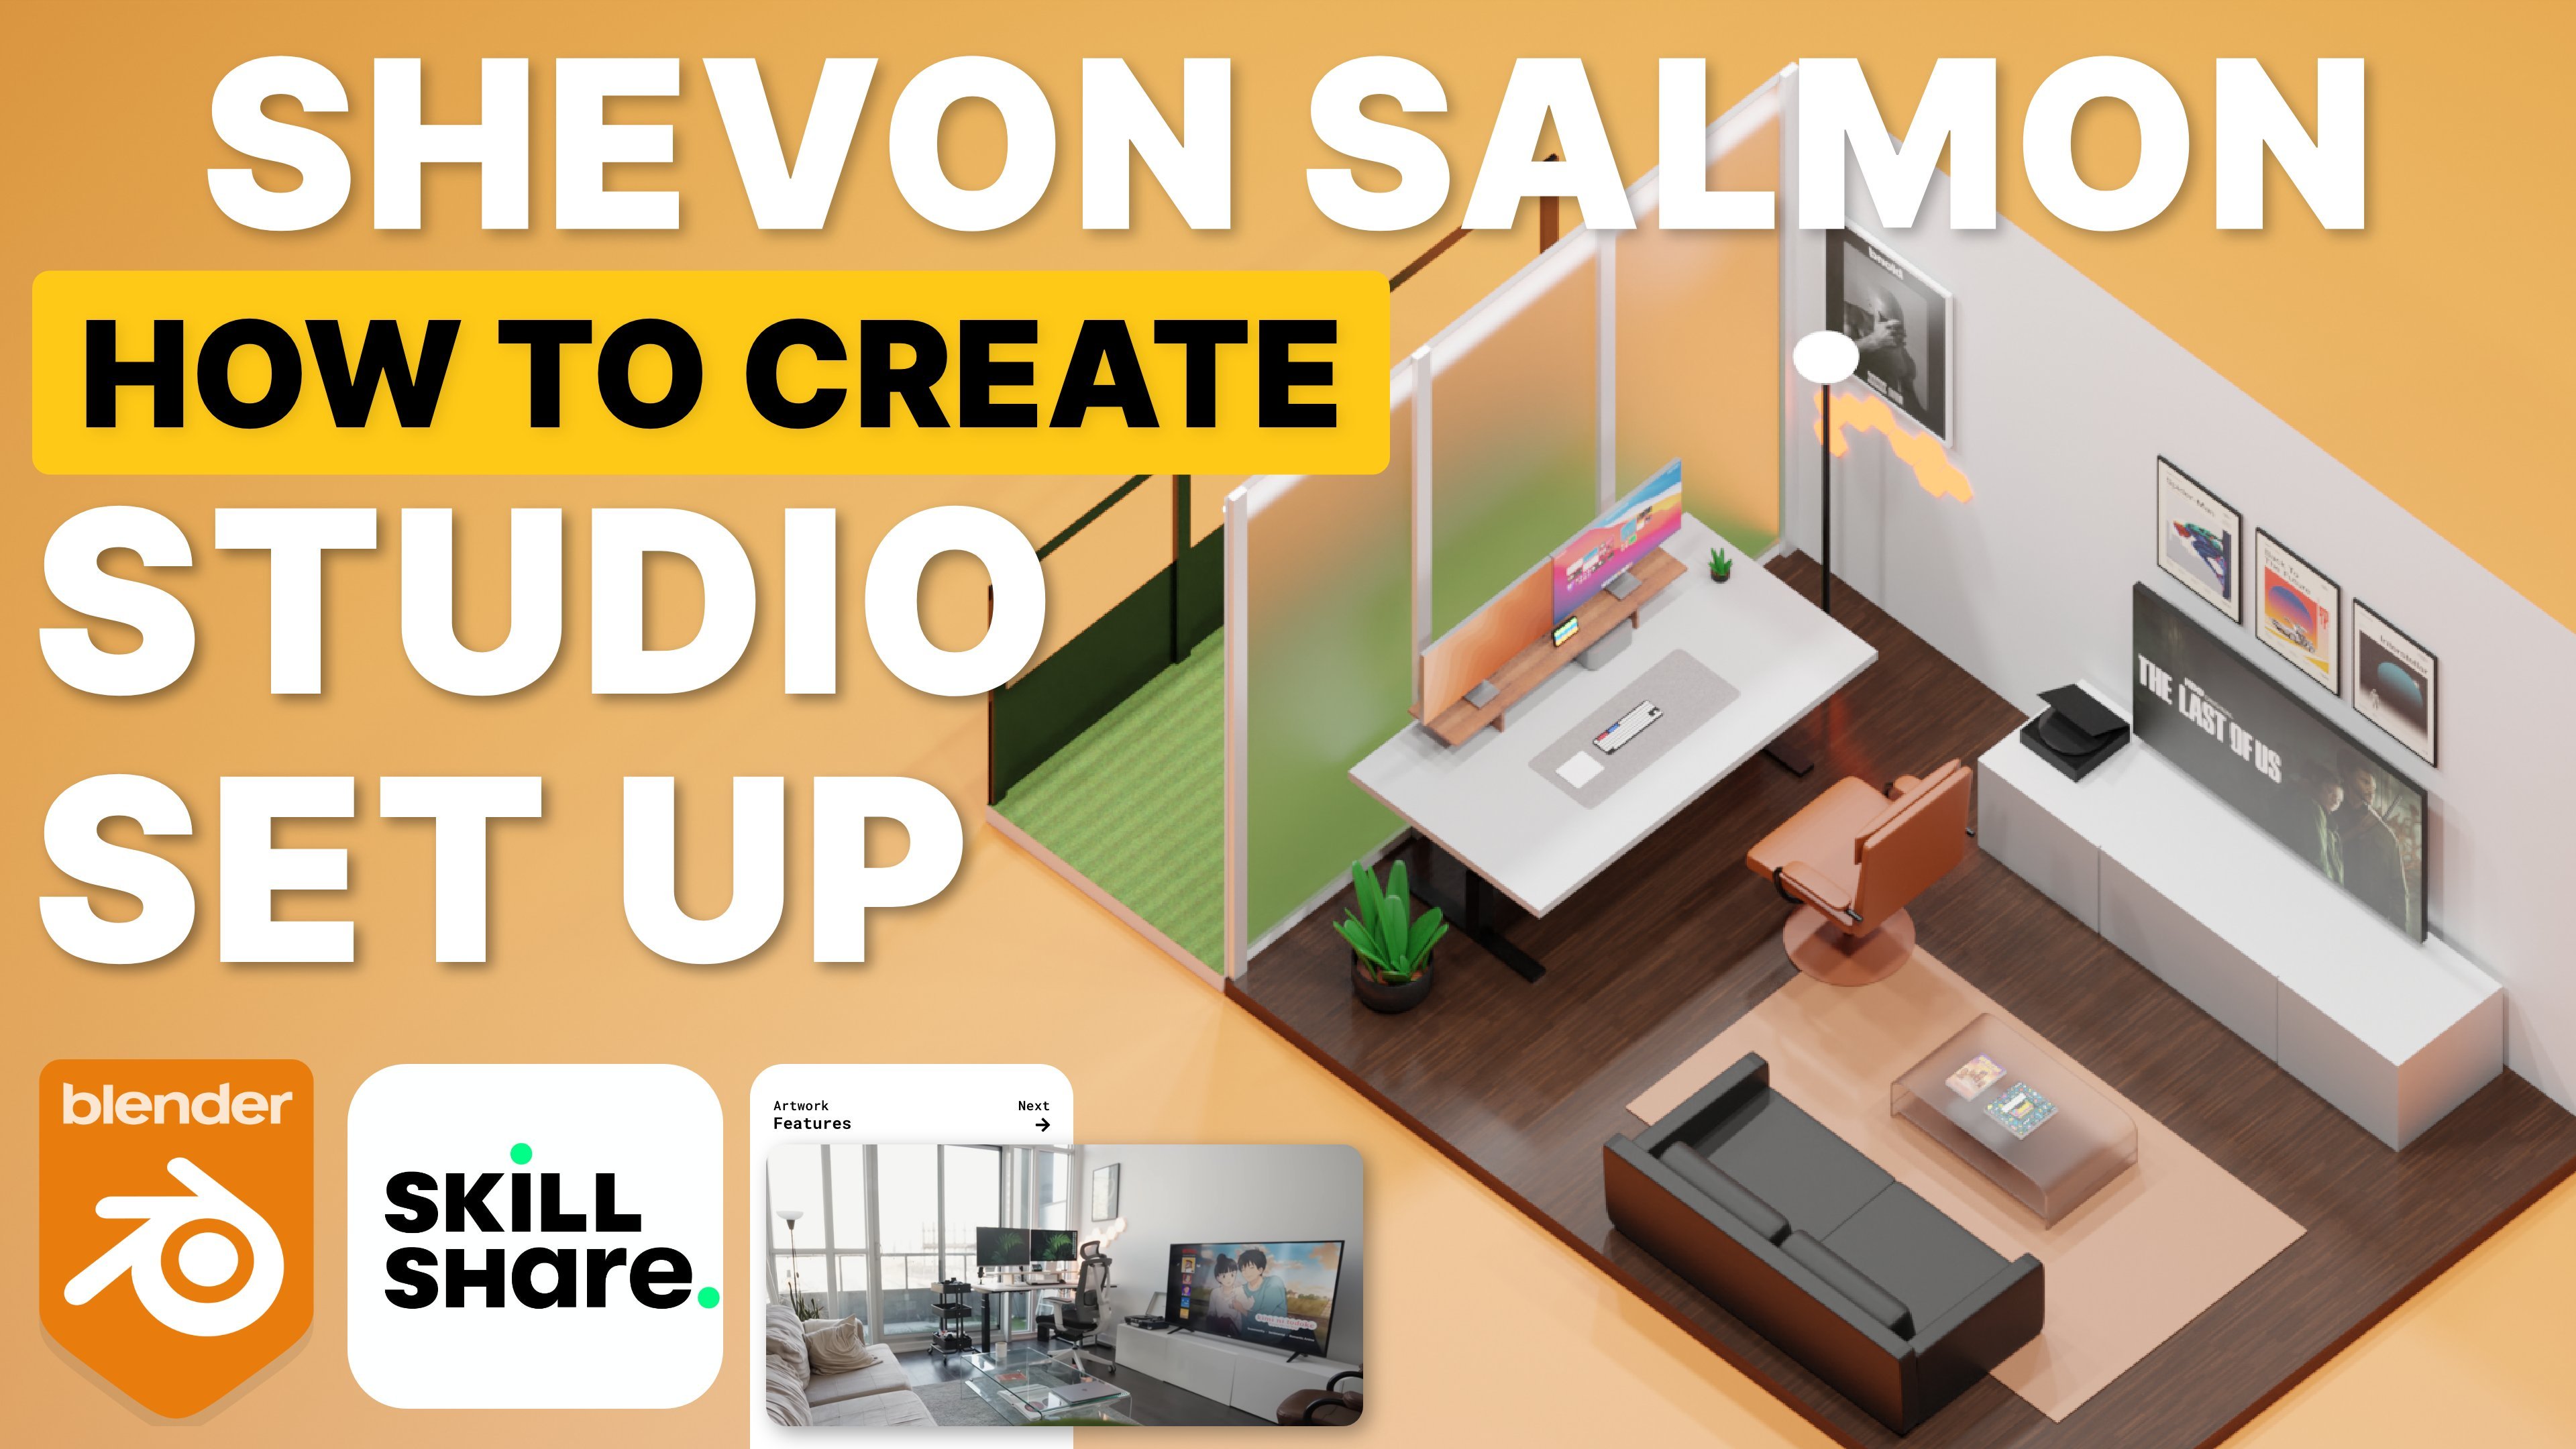
on the project. There'll be, we'll create
this as a studio space, like a YouTuber studio space. In fact, I took direct
inspiration from a YouTuber and I think this
is a great way to start. What will you learn in
this course and what can you expect from this course? The amazing thing
about this course is that I try my best to show you that you can take
simple design elements, simpler design
tricks, and you can actually turn it into
something really amazing. I want to show you how
simplistic blender can be if you think
about it that way, it is actually a very
simple software. If you think about
it that way in this class is
specifically for that, you will learn about lighting. You will learn how to
set up an ISO cam. You will learn how to
design chairs, plants. Most importantly for
a lot of people, this they trendy topic is
using material in Blender. I will show you how to download Blender kits and use
their free materials. And it's been really fun. You can experiment,
you can create almost anything your
imagination can think of. And that's what's really amazing
with this free software. And that's the
point. I want you to experiment as much as you can, change as much as you'd like. And just open your mind to a broader perspective
with 3D design. And because it's a
beautiful thing, now I'm guessing that
you've probably seen some of these designs on Instagram, on Twitter, and they've
been trendy lately. People design in 3D spaces, 3D office, 3D studios and rooms. It's really amazing.
And this course is directly for that purpose. So it won't just teach you the basic and
intermediary skills. We will teach you how to
duplicate your bedroom design if you'd like in Blender
in a 3D free software. Now that's it for
the introduction. Let's get the course started
and I hope you enjoy.
2. Blender Kit: Everyone, welcome to
my 3D room course. This course will be
geared and specified mostly for intermediary
to students. You can also be a
beginner student and still follow along
with this course. I will try to make this course
as simplistic as possible, just to make it really simple
to follow for everyone. So beginners and perhaps intermediaries as well can
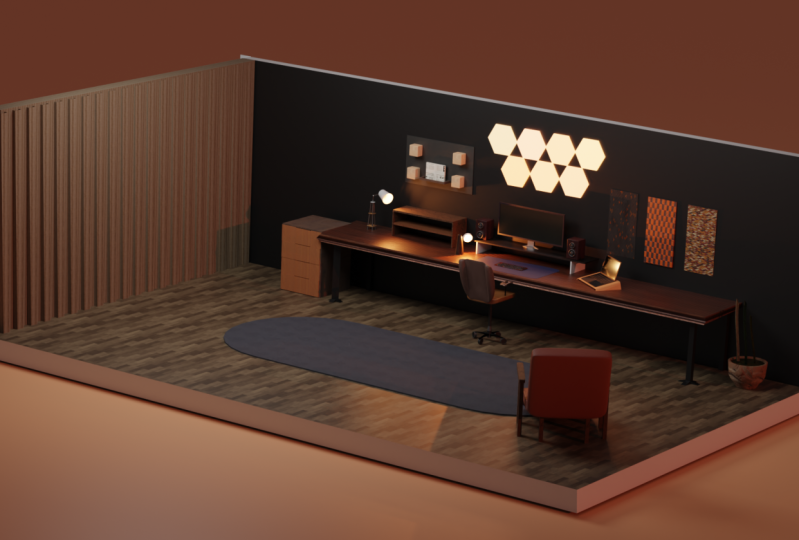
both enjoy this course. Now naturally to begin with, I'd like to show you an example. So this is a space
that are designed and we will be designing
something quite similar. But I just wanted
to show you this rendered out full and are usually split my screens up once I start rendering
out everything. Hi everyone. The first
thing we would like to do is to download blender. We need the core software
is torpedoed on Google. This is the official
site for Blender. They've got plenty
of material and they also have their own
courses that they provide. What you'd like to do is go
to the download section, download Blender for
your specific machine. If you're on Apple silicon, you can download the
latest version of Blender if you're on
Windows or Linux, you can also download
their version of Blender. But if you've already
got Blender installed, you don't really have to worry. The next thing that
we like to do is to download Blender
isometric camera. That's the ISO
camera from GitHub. This piece of software code
is created by Jason Carter. Very handy, very useful
piece of software. Get this installed as an add-on
in your blender software. Additionally, we would also
like to download Blender kit. This is quite essential
if you'd like to add specific materials
to your design. There are a host
of free materials, all from Blender kit. And essentially once you
download this application, you get it installed on
your blender software. It's basically
essentially an add-on. From there on, you can use whatever material
you'd like to create, whatever beautiful
environment you need. This is not essential, but I do recommend it. Everything that I recommend
downloaded in this video, it is quite useful and it does make your life
easier in Blender. So it's good to take the
time just to download these. Then we're ready to get started.
3. Studio Desk Space : So what we wanna do
is that we'd like to start a new file and
click on general, that will get you a cube will
also get you a few lights. Most people recommend that
you keep the cube so you can design whatever you'd
like from that one cube. I understand the philosophy, but for beginners
and intermediaries, it might not be ready for that. So what you can do just
can click your mouse, highlight everything, and simply press Delete
to get rid of fat. You can also click Control
S to save this menu. So you'd like to save your
documents as much as possible. This is so that you don't
lose track of your documents. So go ahead and name your
document and save it. So this is Blender. I hope you are familiar with
the interface of course. So we obviously
would like to start with is the base of operation. I tend to start with a plane. You can click S to scale
up this plane of course. But you can also click
on your number pad to give it a specific number. So we might want it to be ten. So let's try once more. Let's go for five. So I'd say five is just
about right for now. Keep in mind as well that this office space that
we are designing, it is somewhat narrow. So we do want to scale this
once again and press Y. We can actually scale
this on the y-axis. I decided we're going
to scale it to 1.3. That seemed about right for now. We can always change this
depending on how it goes. Next up we do want to extrude, so we're going to press tab. Now when you edit mode,
this actually gives you more control to extend
these features even more. You can do a wild range
of design options, create pyramids,
all sorts of stuff. But that's just to give
you an idea of what you can do in edit mode. And what we simple
wanna do is that we just want to scale it
alert a bit up how much you can see
it's very narrow and we want to keep it like that now because we also want
to create optional walls. Well, we can do, we can press Control R and that will
get us these options. We can actually press to scroll button to bring up
more of these options. But for now we only want one. Then you're going to
click Yes and bring this down towards the edge
right over there. Because we want to create
a wall right there. You can see as it's
perhaps not narrow enough. So what we can actually
do is that we can press G and bring it down even more to get that in our effects
that we really want. Now we'll press three to
get our face selector. Once we've got our
face selected, we can actually
extrude this wall, bring that up just a
little bit, not too high. In fact, we can probably
bring it up but just a bit higher just to make
sure we got our proportion. So that's the first wall. We also want to
wall on the left. We've got another line, make it as narrow as possible. Then go to three phase
selector for this war. And we want to extrude
this up as well. Next up we do want to
create a background. Of course, we're
going to tab out, go back to Object Model Shift a. And this will bring us stop
with a host of options. From this option panel, we can do multiple things. Let's start with a plane and
let's see what I can create. So we want to create a wall. We want to take
this and we want to rotate this on the x-axis. We want to rotate it 90 degrees. We want to bring this
back to the wall. But of course sometimes
this does happen. Sometimes it goes
outside your boundaries. And what you need to
do is just to click G and a y-axis and bring
it forward just a bit. Craig g, x, bring this up. Now we want to size this up, press S x and narrow this down. And I think it needs
a little bit more narrow and narrow
it down a bit more, and that's probably pretty good. Now we want to extend this
extended right there and center it as much as possible because this is
all part of our wall. Once again, we want
to go into edit mode, but as you can see, the object
is still out of my view. So we really want to
bring this forward. But it's important that we do establish this because this is something that happens all the time and people get confused. Finally, it's forward. We want to get close right now. It's pretty skinny. So what you wanna
do is that you want to extrude it forward. We're creating sort of a wooden background,
a wooden wall. We want to bring it
closer to the wall. So it seems like it's
attach, press G x, bring it down to the left, bring it pretty
close to the wall. So right there it's pretty close and it's extruded through
the ground a little bit, but I think that's fine for now. We're gonna go to the toolbox modifiers panel on the right. You can add so many
different modifiers, including the array modifier.
This is pretty good. Look at this thing that
I will do with this. Now. We can create this wool
function in there. You have it part
of our first wall. But of course, if this is not too are like and we can
always change this. But I think the gaps between
the wood is actually, it's actually pretty good. So here's what you
wanna do. You wanna duplicate this by pressing Shift D. Bring this
across on the x-axis. You want them to be pretty
close to each other. Because now what we're gonna do, we're going to press S x. We're going to bring this
down and we want to lower it. Essentially. This is all part of our design
process, of course. So this, That's part
of our wall as well. We want to go back
to the original. We would like to duplicate
this once again. Of course, bring it along on
the x-axis and look at that, that lines up almost perfectly
with the rest of our wall. That was actually first try and it's actually
looking pretty good. Now remember to click Control S to save our document because this is where it Justin keeps his company logo,
the feature logo. That's where we'd like our logo. Next, we can obviously
start on the desk. Once again, we want a
plain x true this plane, just a little bit
extruded on the y-axis. And of course we want to
bring this up a little bit. If we press seven, this will actually bring
us a top-down view. And now we can actually
adjust this into the corner to get this
exactly where it needs to be. We also want to raise it. So you press G zed to
bring the desk up. Of course, press tap to edit mode and extrude a little bit. Now in this office space, I think he does have two desks. So we go back to object mode and we're going to want to
duplicate this essentially. Now the question is, is
it, is it long enough? It's probably not. So let's extend
this a little bit on the y-axis once again, and then duplicate and bring
this across on your y-axis. There we go. That's, that's, that's,
that's almost perfect. So this is going
pretty well so far. Something of course
that these desk gov, they do have legs. So naturally, we'd
like to create some legs, Go to shift a. And actually what
we want right now is a cube, believe it or not, we want to bring this cube down, use an S and go to
a top-down view, bringing the cube across
right there under the desk. Essentially, we're going to
create our first desk leg. Now it's actually pretty narrow, so we can actually bring
this leg down using the y-axis is of course,
it will go into edit mode. We can actually go to
the face view and we can Dennis extrude
the leg right there. If you click, if
you select a unit, you can actually narrow
it by using S y. Now we're on the
y-axis right there. As you can see, I've
added another cuts to the floor right there.
So that's pretty good. Now we can actually extrude
these legs naturally. We wouldn't want to
extrude too much, but we do want to extrude
on the back as well. But once we get to this point, we can actually then
bring these legs down, narrow them sort of like that. Once you've extruded the legs, we can actually
click number two. We can actually bring these
legs down just like that. Once again, to the other side. Add a loop cut right there. And of course, bring these legs, the face of these legs
down right there. Now we can actually
click wireframe to get a view like this, just in case we want
to do anything more. So now that we divided
another loop cut, we can actually extend this
to the left, right there, because we're using the S and Y actual to extend it like that, so it just looks
somewhat better. So now of course we
do have one leg. That's for our first desk. Once again, we can actually
use an array modifier, used a y-axis on the right to bring that down
to the left side. On the factor x, we
want to click zero. That brings our leg back. It brings it onto
exact same axle. Now we want to go
to a top-down view to get a proportions view. And we want to adjust the
y-axis until it lines up. We're until it
looks somewhat more accurate and I'd say that
looks about perfect. So now that we've got the
base of our operation, we can actually
duplicate these legs, press the y-axis and bring
them across, of course. But if you want, you can go for a top-down view and
there you have it. We can actually get a much more accurate view and just adjust the legs and to get them to
look proper, proper, nice. So there we go. Our legs are adjusted on
our desk, are looking good. Next up on our desk, we've got a few things including our monitor
we will wanna do. We wanna get a plane. Once again, we want to adjust this plane using
the x and y-axis. Just like this, we
want to use the wax. Those, get them as
wide as possible. I'd say I'd say
that's about right. We want to raise this just
a little bit, not too much. This is where your
monitor will be. And you know the drill,
we go to Edit mode and we extrude just a
little bit right there. Next up, this next up our panel holder actually has a couple of legs
attached to the desk. We're going to
quickly create that using the same mechanism. Or we can just duplicate
this click right? And then we can just
rotate this on our x-axis. Then you want to
press S and Z and bring this down
just about there, G and Z and bring
it down even more. And there you have it. We want to get the
proportions right, of course. So bring this down just a
little bit right over there. And once again, we're going
to use the modifies tab. Array modifier is gonna
be the same thing. Array modifier in your factors. In the factor x, we want
to click zero once again. And the fact is Ed, we
can then adjust this, bring it down until the
proportions look about correct. Around 55 for me. It could be a different
number for you, but a soul or right, if you've got this far, this is pretty impressive. If you've gotten this far. We want to continue modeling
AutoDesk as this is a really important place for the information of
this entire office. Naturally, we'd like
to get our monitor. So what we'll do is
create another plane, rotate this plane
immediately on the y-axis 90 degrees and rise it on the zed axle just
above the desk. Now if you press number
three on your keypad, it brings you to your side view. And the z-axis, we can
now adjust the smarter use S and a y-axis adjusted
a little bit more. So it obviously looks
like a monitor. Lower it just a little bit. And actually it's very skinny. So we go to Edit mode
and we just extrude the monitor to the back just
a little bit light that. We press G x and we just bring our monitor back
just a little bit like that. We just want to bring it back. So it actually looks
like a monitor and it's attached to the
back right there. Naturally would like Carmelites
her to have a handle. So once again, we're
just going to duplicate this and rotate it on the axles 90 degrees, rotate it once again, but this time on the x-axis, 90 degrees adjusted use. And there we go, bring it down. This will be our monitor
handled, believe it or not. Sometimes this is our
simple blender can be it's just a matter of duplicates
in some of these edges. And it just adjusted at
the back using the G, using G to move it
around z, y axis. To move a back-and-forth, we want to go into the
Edit mode and we want to create some additional loop
cuts, go the face select. So right there using number
three and extrude it forward. Like I said, do not worry
about the back of it so much. But what I quickly did was just create a handle to
attach to the monitor. But it's not essential because what we're
working on today is just visual representation
of our entire office. Once again, Save, remember
to click Shift S to save, save as often as you can. You really don't want
to lose your work. Now that's our first
step done right there. We've actually got a
couple of bookshelf. So what we wanna do next, click on our debt, click on our monitor holder, click chef, and actually
bring that to your wall. So we're going to adjust the
height using the x-axis. We're going to bring it to
the wall using the x-axis. And of course it does
look a little bit long, so we want to adjust
it using the y-axis. Once again, we want
to adjust everything. There we go, bring
it down a little bit because we obviously don't
want it to be too big. So what I'm doing is
adjusting everything, adjusting the size,
use and y and x-axis. So there we go.
Essentially, that's our first shelf right there, that's our shelf unit. We want to create a duplicate. We want to bring this
up using the actual, There we go, another
bookshelf right there. We want to create
a couple of books, so we're going to
use the same panel, duplicate it, rotate it using
the x axis by 90 degrees. Rotate it once
again using desert X0 by 90 degrees,
bring down the size, of course to a book
size and just adjust it on top of your
bookshelf right there. Now if we zoom in there you go. It's pretty straight,
but if you want to adjust it a little bit more, you can actually
where we want it to lay down against
the wall so we can actually adjust it
a little bit more using the wax or just bring
it forward like that. You can use your
mouse up and down, bring it forward, bring
it back to the wall. And there you go. A saline and up from there on
it's a matter of duplicates in using the
y-axis right there. Next book right there. Duplicate once again using wax or another book right there. All three books, you
can duplicate them now. Duplicate, bring it
up using zed axle. Now you've got them
on top of each other. So what can we do next? Well, we can simply just bring them forward just a little bit. And we can have these books laying on top of each
other, essentially. Bring it forward
just a little bit. And there we have it just by adjusting them a
little bit like that. But we can actually
bring them across just to bring them
into the middle, just a little bit right there. Now we do have some
speakers as well. So what we can do is just
shift a less, get a cube, shrink this cubed down
using s, adjusted, using the y-axis, of course, and bring it across
on our monitor. Adjusted backwards
just a little bit. I want to shrink it
a little bit more. We don't want it. It's a little bit
narrow actually. There you go. Just adjusted upwards using
the z axis right there. We're just adjusting
it and yeah, just now run it essentially. Now you can actually see
that it's very sharp. So naturally we probably
want to Basil this. Now if you click shift,
you go to edit mode. You can actually
click Control B and basil our shape into whatever, whatever shape that
we really wanted to. It's pretty amazing
from here on out. They can get pretty wild. But without bezel, we just want to Basland
just a little bit. So right there I'll
probably just use five segments right there. You can actually go
to modifies tab and add a bezel specifically. So now if we go back
to normal mode and we actually add shade smooth, it actually looks alright. It actually looks
alright. Now keep in mind this is our speaker. So we're gonna get a cylinder and then we have a cylinder, want to shrink this
cylinder down. And of course we
want to rotate this on the y-axis just like that. We wanted to bring this
back just a little bit. Of course, once we've
got our cylinder, what we wanna do is go to the modifies tab at a bezel
modifier that we can do. We can just bezel
this in segments. If we go to Edit Mode, then we can just insert this
quite simple. From there on. We can insert this
again and just extrude a little
bit right there. And from that
object right there, this will be part
of our speaker. Bring it back a
little bit of course. But now we can just
shade smooth this. There we go. Looks pretty smooth.
From there on. We can simply just duplicate
this, bring it above, and obviously just shrink
it just a little bit and bring it forward
essentially. But in this case it's a lot
of duplication right there, ladies and gents, we do
have a little speaker. I don't want my speaker to be in the front so much so we can
actually bring it backwards. Just bring it back into the
foreground just a little bit. And then what we wanna do,
we wanna duplicate this on the other side,
right over there. Click save, of course, and there we have a
couple of speakers. Next up, of course would
obviously lighter create our decimate, create a plane. We can actually add a couple
of loop cuts to this plane, just to the edges right there. Next up we'd like to
bezel or edges of course, once everything is bezel, we can actually
select a and extrude, but we'd really like to
extrude on the tiniest amount. Really want to be very subtle
when it comes to extrude. And right there, so there we go. We got our first decimate, not our secondary desk. We do actually have a
monitor holder as well, so I'll duplicate this and
we actually want to bring this across right
there on the y axis, line it up so it does
look in proportion.
4. Office Objects: Next up, we do want to
create a laptop holder. So this will be
quite interesting. So when she can see I've
actually added a plane and I'm just going to narrow
this down just a little bit, narrow it down on
the x-axis as well. Keep narrowing it
down on the x-axis. We'll get into a good place, of course, that we want to
rise it up a little bit. There we go. So now it's risen off the
ground and I was just using the z axis right there. We want to go into edit mode. Then we want to go to number
two and select the edges. We want to extrude the
edges right there. Then we want to press S and open up these edges
just like that. There it is. That's, I'd
say that's pretty good. Select all and shrink it
down a little bit more. We don't want it to be too big. But I'd say that proportion
is pretty good right there. We can actually press
on these little pins, select these pins using
Shift, select both of them. And then we can
actually arise that up just a little bit like that. Once again, select
number to select both Penzias and shift
actually both, both edges. And then we can just bezel
this edge sort of flight that, that's gonna be kind
of a laptop part. Stan, I'm gonna
do it again just, just just to get the
proportions right. But we don't want
it to be Too much. I'd say that's about right, select all and bring
it down under y-axis. Once again, I don't
want it to be, I want it to be too much. Bring it down on the
x-axis once again. Now we're going to
press on these two pens at the back right there. And what we simply want to do is just extrude those a little bit. Press on the front ones, select both of them. And we want to bring
those n Actually, now that we've got this. So there we go, we add
a solidify modifier. This solidify modifier
basically gives it a body. There you go. You can't
get, gives it a body. And then it's up
to us to basically extend this to however
much we would like. There we go, That's pretty good. Even thickness, I'd like that. Even thickness is
always important. So that we kind of have a laptop monitor right now that's actually
going pretty well, but just simple shapes like that can really make
a big difference. Once again, say we don't want
to lose this information. And I didn't notice
that there was another book on the desk. We can actually just duplicate this just as we did before. This we will turn into another
book, bring it onto desk. And we really just
want to shrink this down using the
y-axis right there. Bring it down under
desk that actually looks like a VCR player. So perhaps just extended a
little bit more on the right. But there we, there we are. We have another
book right there. So this is just a star. This is simply just modelling
everything and it's just getting everything
to look within place. Now what I've actually
gone and done is just extend the boundaries
of the office. So essentially I've simply just extend the wall on the left and then I just select all
of the desk space and I just move that move that
all forward essentially. Well, this gives me as the
ability to fit something into this corner and we actually do need to put something there. So that's Shift.
Right-click select this space right there. This is where we'll
put our next cube. Because we actually
need to build a cabinet or just to draw unit like an Alex Drew
unit from like from ikea. A lot of us do. We do have these
Ikea desks units. So that's what we're designing next because it's gonna be a little bit like
this, of course. Go into edit mode of course. And now we have the face, go to three select Face and
we do want to click on P, separate this face, tap out and click on
the face specifically. Now we can actually
adjust this face. So what we're gonna do,
we're going to create our first draw unit. We shrink it down using
the x-axis right there. And let's bring it to the top. Of course. Now what the rest of the
draw unit we can actually had a solidify modifier, a solo fire, and
bring that joy unit. And just a little
bit, there we go. So it's actually looking
pretty good already. Bring this down just a
little bit right there. We want to bring it
forward using the x-axis. Now if we tap in, we can actually just extrude sort of back just a little bit. Now before we
extrude, we actually need to add a few loop cuts. So if we add a couple of
luke cuts right there, Click one, click these
two pins right there. Let's add a couple more
loop cuts. Actually. Let's add one loop
cut right there. And we'll add another
loop cut right there. So now click these inner
pins right there, click G. And now we can actually
bring this down somewhat. Select the outer pins because actually don't like to wear they're looking at right there. So press S and bring
it across like that. Now we press a Select
All and just extrude. Just like that. Now that we've got
this, what we can actually do is
basil, all of this, select those inner pins, select those outer pins
and bezel, right there. There we go. So I'm just going to
bezel that a little bit. Bezel this one as well. Vessel the inner pins as well. So there we go. This is all dazzled. And now we've got a little cabinet right
there. So here's what we do. We bring this back into the drawer right there
instead of joule unit. Now I do want to create
a barrier because I don't want any light to
affect the inner side. But this isn't something
you can worry about. This isn't something you
need to worry about. Just watch and see what I do. I select the back
panel right there. Duplicate this panel. I'll click right. And then I want to
separate this panel. I want to tab out and click
this panel and just bring it forward using the x
axis right there. This is just a light doesn't
affect the innermost cabin. And we can actually
shrink this down a little bit so it's really
not affected at all. There'll be goes
just so light and shadow doesn't really affected. Now from there on,
we can actually just duplicate the cabin draw, bring this down
just a little bit. And now we bring
the final one down. And the final one is always important to be a
little bit longer. This is a classic
alex draw situation. Or at least we can
make the final two a little bit
longer actually, so we can bring the
secondary one down as well and just slot
in place there. We have it. We do have a lot
of filing cabinet right there and I've got to say, it looks pretty **** cute. Now on top we do
have a light units, so we're just going to
design that light unit right now. Click on top. Well, you'd like to add
your items anywhere on top, get a circle and
move it up using the zed axles, bring
it down a little bit. Of course. I want to
bring it down even more. When it's haben and F
to fill this space, then we can extrude
this, this post. So now that we
have one of those, just move it towards the corner. And actually what I
want to do is just to duplicate this in a few steps. We just want to make
a quick square, duplicate once again,
and move that down. Just move it down on the y-axis. Now we've got four
of those pillars. So now we have our four pillars would actually want to do with my four pillars is
just to move it along. So now I can just rotate, rotate this in whatever
direction I want. But I'm actually going to do, I'm going to manually
rotate this. This isn't essential,
but I'm going to rotate it just around, around there to the
center a little bit. Same thing with this
one, double R to rotate and rotate
it to the center. This is a little bit
difficult sometimes. But if you'd like
to get control, you can move your mouse away from the object, double-click. And it's actually gives you
a little bit more control in order to rotate it properly. So now we've got, we've got two done same thing over there. It does not have to be
perfect, of course. Just keep, just
keep that in mind. Of course, it's really
difficult to get this perfect. I don't personally think
I am getting it perfect, but in a sense, we just want to
rotate a little bit. So now this is something
closer to what we want. Once again, we do want
to create another plane, shrink the plane down using S, and bring the plane up. There we go. Now this is not exactly how, now this is not exactly
how the setup is, but what I can do sometimes
is just improvising. And I'll always advise
you to improvise, especially when you're doing a project for the first time, you probably get stuck at, probably gets a
little bit difficult. And it's always good to improvise because improvisation can teach
you some new stuff. So we're gonna go
into, into control. So we're gonna go into
edit mode, of course, collect number one, and let's
just Basil these corners. So this is not how he has it. I think this makes
for a better design. Select all and just
extrude it a little bit. Now that I've got that made, I can actually just
duplicate that, bring it above and shrink it down just a little
bit, just right there. Go to the top of course. And just, and just
work on making everything as
symmetrical as possible. It's starting to look
a bit darker tripod. But, but now we can actually just create one last
cylinder right on top, bring this down because
obviously this is going to be where our lamp goes. Just do that right there, extend and bring it
up a little bit. Starting to look a
lot like a tripod. Now once again, we're going
to click, once again, we do want another cylinder,
get another cylinder, bring it down, but
not too much because this ladies and
chances are lamb. So of course we don't
want to bottom. So edit mode, face, select, and delete face. There we go. And it's the same thing
with your face select and delete face. Remember to click Save
as well, Control S, select all of that, and press S to bring it down. Control S to save. And essentially
what we have is a little lamp right, right there. Go back to object mode. There we go. Now we can actually
just shade smooth and it looks pretty perfect. Actually. We're going to
add a light in there. We're going to make it very
transparent of course, but this is still part
of the modeling stage. Now what I did
notice on the desk says that there is a laptop. So we're going to create
a quick load a laptop. Once again, we'd get another, another plane, bring
it down a little bit. This is a little
MacBook actually. So, so of course it doesn't, it doesn't need to be big. Of course, they say
about a 14 inch MacBook, so bring it down a
little bit right there. I'd say that's about ideal. Go into edit mode, of course, click number one,
and there we go. We can actually just
as little corners, nice and simple press all, bring this up a little bit. Actually these new
MacBooks there, they're a little bit thick. Which I actually quite like. Now what we can actually
do is duplicate this face. Click right there, bring it up the tiniest amount using
the z axis right there. And I really mean
the tiniest amount. Once again, we want to
extrude a little bit, but this is the top of
the far off our laptops, so we don't want
it to be too much. Then we want to zoom
right in bezel. Once again, we just want to
bezel the top right there. Take a look from the side view. This is our little laptop and the new MacBooks to the bottom. There, there, there basil. Just a little bit. This can get confusing, especially if you're a beginner, especially if you're
new to it all. But there we go. We just basil from the bottom. Once again, this is
not too much bezel, but it is, it is a
little bit bizarre. So we just want to keep the
curvature looking good. That right there is a
little map bulk, of course. That's our little MacBook. So we bring this back because he does have is locked up
underneath like that, that right there,
ladies and gents is a linear map book,
basil than all. But if it looks a
little bit too flat, we can actually just bring
it out just a little bit, just, just stretch
it out using s z. And we can just stretch
it out just a little bit, maybe a little bit more. We can shade smooth to
get our finishing touch, but Shade Smooth does change the look a little bit
too much for my liking. So right now it's a
low bezel design, a low poly designer
some would say, and that's actually okay. Next up we want to create our hexagon light
work on the wall. This is, this is quite
synonymous with a lot of setup. So we get a cylinder, of course, we want to rotate
this cylinder on the y-axis, 90 degrees. So of course we want
to create a cylinder. Of course, we go into, in order to make
this an hexagon, we must, must bring it down. So this is an exergonic
sits vertices. So there we go. So now we
can actually just rotate this on the y-axis, 90 degrees, use S and then use X to
bring this down quiet a bit. Looking from the face sign, we can actually just bring down the size quite a
lot, just like that. Take it across above the
monitor on the left. Because from here it
just works in grids. It just works three in grids. There's just three and grids
and all I'm doing is just, it's just duplicating and
duplicate once again. Now this is what we have. It's actually a pretty
cool design if you look at that from,
from that perspective. But I don't think this was the initial idea
from the YouTuber, but this is what I,
this is what I see. This is what I've
come up with in a space of a few seconds. There we go. I know that x is
gone. Light works. So this will be a light panel just extruding from the wall. It looks pretty good Now from the other side of
the wall, of course, we do have a few
other panels along with another light
unit on the left. Now to continue
modelling all of this, there's a lot of modeling and
it's typically what it is. Next, we want to
create a right panel. And the panel on the
right is simply just, it's just, it's just
glass panels, Mosley. But to be honest, we will probably
leave this until, until, it's probably gonna
be the last thing to do. Obviously, we'll be
working with wooden floor, but on the floor there
will also be a little rug. So let's click on the
floor right there. Let's go to a plane. And let's scale this up just
a little bit. There we go. That's actually pretty perfect. Scale is on the y-axis. Once again, there's a little rug that just didn't actually
has enough space. So that's looking pretty
good so far we want to extrude this by the
tiniest amount, truly, by the tiniest amount. Just extrude it by
the tiniest amount. There we go. Now, of course,
it's not, it's not completely leveled on the floor. So if we go to quantum
view object selector, we want to press G and
bring it down to the floor, bring it down to ground level. So basically on this corner, we actually have two panels. So we just like to shift
a click on a plane, rotate this plane on
our wax or 90 degrees. We want to bring it across
just like that on the y-axis, we want to scale it
down just a little bit, bring it across along
the y-axis as well. And then we just want
to duplicate this, bring it across on the y-axis. These will be two different
colors, I do believe. And next up we just
want to extrude this by the smallest margins. So this one would actually
like to duplicate this panel, bring it forward
just a little bit. And obviously we'd like to shrink this down just a
little bit like that. Bring this across
on the left and use Sx to scale this out
and bring it back just a little bit on
this corner There's also some glass object
just hanging off. So we want to create a cube
in this section right there, and then we just want
to bring this out. So this will actually
be pretty interesting. There we go. It's
everything selected. We literally just
vessel they send, bring this out a little bit, duplicate this, add one
on top of the other. Duplicate once again. With all three duplicate, bring it across on the
y-axis over there. Now on this, well,
we just want to create an additional bookshelf. So once again, we can
actually just go to cube, shrink this down essentially, extended on the y-axis
are used as that axle. Bring it down just like that. And of course bring
it in using the, using the x-axis and the book
will actually be inside. It will be like tucked away. So tab in Face Select and we
want to separate this face. Then we'd like to
delete this face. Now with this, we can actually
go to the modifies tab. Add solidify modifier. There we go. We've got a
little bit of thickness. Will everything keep in mind
that this is also bezels, so we add a'd bezel
modifier as well. Right thereafter our
solidify modifier, we just we just save
that right there. Now, like I said, we do
have a book insights, so duplicate this
book on the desk, bring it up, bring it across. We want to rotate this as well. Let's rotate this 90 degrees on the y-axis and bring it
backwards on the x-axis. Now this book is much bigger. Keep that in mind. Bring it forward just a little
bit so that it is visible. Extend this book on the y-axis will shrink it a little
bit on the Xanax rules, of course, so it can
actually fit properly. We're going across
on the y-axis, of course, shrink it
a little bit down. I'd actually like to shrink
it a little bit more it down. And there we go. This is starting to look a
little bit more like the book that we do
on the setup wall. And of course just rotate this towards the back
just a little bit. So essentially it's kind of lean and on the
backend save right there. Next up on the left,
we actually do have a little lamp before we
can create our Lambda. Let's just create
our little souvenir that we do have in
a setup as well. There's a little souvenir
and a left shift, right-click anywhere
you'd like or write their shift a lot. Another cube, Let's
shrink this cubed down. Now we're going to
shrink it down. On the x-axis is actually bring it up just
a little bit right there. Duplicate. And of course, bring
this across and extend. Of course, once again,
bring this across. Now if we go into edit mode, now we can actually just
add some loop cuts. So this is just for a
little souvenir device that we do have on the desk. Now we can actually
create a light. There is a light on
the left, right there. Once again, shift a for a
cylinder, ladies and gents. Now once we got our cylinder, we actually need to bring to the number of vertices upwards. Let's get it around 34. Now we can actually
adjust the size of sets cylinder and bring it down to proportion
just a little bit. Bring it up out of the
desk because right now it is inside the desk
a little bit too much. Shrink this down a little bit. Let's go into tab. Now we can actually move this upwards just a
little bit like that. We can actually
shrink this down at somewhat level and bezel
the top right there. So actually it
looks pretty good. Now once again, we
actually want to bezel the bottom right
there. There we go. I'd say that looks
pretty **** good too. This is all part of our handle. We can actually shade
smooth right there. We're going to additional
cylinder right here. Or what we can do,
we can actually just duplicate this click rate and just rotate this on
the x-axis 90 degrees. Bring it up just a little
bit, and of course, shrink it down, shrink it down, especially on the,
on the y-axis. There we go. That's starting
to take a much better shape, rotated a little
bit right there. Click right there on
that ladder knob. Now we're going to
add a cylinder. Once again, what I'd like
to do is just rotate this. Once again rotates a little bit right there, bring it across. Because this is our light unit. Bring this down just a
little bit, of course. So now we can actually go into edit mode and let's
work some magic. So we want another
loop cut right there. Now everything on this side,
all of these vertices, I actually like to
delete these vertices. We go looking good
alt Z and come out of the X-ray mode 34 phase. And let's separate this
phase because we're going to want this to be
a little bit transparent. And let's go back to
the rest of our light. Vacuum is actually
completely off. Let's go into edit mode.
Let's go to two and let's Alt Shift and
fill that area. And then we can use, we can, we can Bears
let down right there. Now what all of this
we can then just add a solidify modifier and we don't want to
fill it too much, but that's, that's about
perfect right there. And then we can just rotate
this just a little bit. Bring this up a little bit. There we go. We have our lovely
little light units, believe it or not,
that's, that's our little lump right there. Now in the actual setup, it's actually a
little bit bigger. So we can actually just extend this a little
bit if we'd like, and bring it down
just a little bit, maybe extend a little bit more. There we go.
5. MacBook & Plants: This light panel, the, our hexagon, remember to, remember to save control S, to save our excellent panel, we can actually just make
this a little bit bigger. Do be careful not to click, not to click the actual,
the actual wall. But we just wanted to, x is going to be somewhat
bigger, somewhat bolder. That's to be honest, the
majority of our setup, I've noticed that this
a little bit small, so we can actually just
extend this on the y-axis. Just a little bit. We can actually duplicate
the laptop, bring it down, and we can actually
just set the laptop right on top to
press on our keypad. Number one, we can actually just adjust
this from the side, rotate this as well using the
y-axis right about there. Now we can compare our laptops down to the size of our laptops. So we're actually
expanding our laptop Stan. So it doesn't really
look too ridiculous. Now we can actually
go into a laptop. Stan, select these vertices, edges right there, select
as much as possible. So there we've got the top
of the laptop basically. Now we can actually rotate
the display, just like that. We can actually rotate the
display using the y-axis. Kind of like that. We can actually bring this up on the z-axis and bring it back, of course, on the x-axis. Bring it up once
again on the z-axis. So there it is. Our laptop is kind
of kind of design. So next up we have to design
our chair, of course, now we do need a little keypad to be honest, just a little one. So we're gonna go ahead and
we are going to click plane. We're going to add a
plane right there. We're going to extend
this on the y-axis. So it's just a little
keypad to be honest. So from there on we
can go into object. We can actually just bezel this down just a little
bit, not too much. So we can actually just extrude
this just a little bit, not too much, of course, exit once against
to object mode. And now we can actually
just add our keys. So if we add another plane, take this plane
just a little bit, bring it there to the edge. This will be one
of our first keys. So we just extrude
our key, essentially. Just have it on top
just like that. Duplicate. Bring this over and just x and just expand it a little bit on
the y-axis once again, at both in day you are bring this down a
little bit of course. Now with this number pad, then we can actually
just do an array. We can separate them just there, zero for factor X
and four-factor way. We just extended a little
bit until it looks good. 1.3 seems to look perfect. Now we can have as
many as we'd like. There we have our first key
is duplicate once again and bring this down
on the second layer. Take it across onto the rights, of course, Sorry, onto the left. Now with this top-left key, duplicate, bring it down. Well actually let's bring
across on the right. Then we can bring it down the x-axis to line it up
with the rest underneath. The next key is
an important one. We bring this down on
the x-axis once again. Now with this key, this
is that Enter key. So we want to, we want to set up
a grid like that. And then of course, width, the width to what, the four pins at the
bottom right there. Then we can just
extrude this to create an essentially a Enter key. Go back to object mode. Of course, click on
all the top keys, duplicate, and we'll bring
this down on the x-axis. And essentially what
we'll do with this one, we'll simply just
change the amount, the amount of keys
that are there, and just bring it across
just a little bit, bring it down a bit more
so that it does line up. Then with this key, of course, we want to expand it a little
bit more on the y-axis, of course, number one
at the top layers just simply click on any one
of them. Duplicate. And let's bring this
down on the x-axis. Once again, bring it
across on the y-axis. Now because this will
be farther away, it doesn't actually need
to be that perfect. Once again, duplicate
this key above there. We can actually bring the
size of this key down. Typically it's a little bit, it's a little bit
smaller than the rest. Duplicate the top layer and
bring it down on the y-axis. Now with our Enter key, as
you can see right there, it is a little bit
too much protruded. So let's click on it once again and let's bring it upwards. There we go. Save once again, remember
to keep saving your work. We don't want to lose the brilliant work we've
been doing thus far. Now right there on the right, that needs to be
slightly longer key. So I'm going to
duplicate this one, bring it across an extent
that on the y-axis, of course, duplicate
this key on the left. This group of key, I should say, bring it down, of course, bring it across onto the left. And we're going to reduce
this number quite a bit. So we can actually create
spacebar, duplicate this key, bring this down on the X
brand across on the y, and then duplicate once again. And this will essentially
be our spacebar. Duplicate these three
keys on the left. Let's bring them
across. On the y-axis, we reduce that
number right there, duplicate once again and
bring it across to the left. And let's just reduce
this number to zero, reduce the count to one, or you can just get rid of that. Now, we don't really
need that for this key, but for your keys
for up and down, we need to duplicate
this key on the right. And essentially with this key, with this one, we are
going to separate it. So we want to create some
loop cuts right about there. We want to create basically
two sets of loop cuts. And we want to separate
this from the rest. So it looks a little bit
separated but not quite enough. So let's just, let's just reduce it a
little bit, press Sx, shrink it a little bit
and bring it down, of course, to line
it up once again, same thing or the one above JSX, shrink it a little bit and
bring it up a little bit. There we have our little keys. This is like a little
little MacBook. Yeah, this is sort of
like just a little, a little MacBook keyboard. Say yes, now, those are the
essential keys with this, we do have some leftover space, so we can just reduce
this somewhat. Bring it up a little bit. And there we have a
little, a little keyboard. And we've actually saved
that little keyboard now. So there we go, little keyboard. Now with these keys, say we
want to reuse these keys. We can actually
just select them as many as we can while
click and shift, because we're going to duplicate these keys to use on a MacBook. So now we can actually
just duplicate these key. So obviously I'm zoomed out and I'm simply just
going to duplicate and bring all of this
down right around there. But of course that does look
a little bit ridiculous. So we want to click G, raise it up a little bit and center it on my Mac
book a little bit. But of course we want to bring
it up a little bit more. It's on a MacBook kids. It's typically a
bit, a bit higher and a little bit bigger. Now we can actually just
rotate this on the y-axis. So it's actually quite fun. And there you have it. The keys are kind of in place. If we press one odd number pad, we can even we can straighten it a little
bit more, bring it down. Of course, I'd actually
doesn't look too bad. I'm guessing. I'm hoping. Yeah, I'd say that doesn't look too bad because like I said, the smaller details are not
really a big problem because, because it's gonna be in the foreground, it's gonna
be in the background. So that's good. What we've accomplished so far, we're getting really close to finishing up on our
material design. Next up, what we have to
do is essentially say yes, if you've gotten this
far really and truly, you've accomplished
a lot and thank you for watching the
video this long. This is actually a
huge accomplishment. This is a little room, this is a few little interest
in things that we've created and we've used basic shapes to create these. And it will get a little
bit more complicated. So now we're going to
create our plant pot. So right now we can
just go ahead shift a and click on Add
single vertices. Once we have that,
we go into tab, we click number one
to click on vertices, and we can extrude
along the y-axis. Then we can extrude
along the sides and extrude on the z axis upward. Now that we have less
voters, see right there, we can actually bring this backwards to the corner where
we want our plan to be. And then we can just add screw. There we go. We add screw. And this is what we get. Next we can add a
solidify modifier, so we can add
subdivision modifier. And that can be done by
clicking control one. And there we go. We've
got a nice little pot. We can actually bring
this down a little bit. If we don't want it
to look too much, can actually bring it up, bring down the proportions, of course, bring it across. And I'd say that
looks just around. Alright, so now we've got our screw modifier,
solidify modifier. And if we zoom in, we can actually edit this more to get a more lovely looking,
looking pot. There we go. That
looks about right. Well, we're probably
going to want to cover for our pot right there. If we go on top view, we select on the inner side, we go to Shift a and
we click a circle. Now with the circle, we want to bring the circle
upwards into the pot. This is gonna be
basically are dirt. Then we simply just
go into edit mode. We fill this circle
back out of edit mode. And there you have it. That's the first part. Now what's our
vertices selected? We can actually go
into X-Ray mode. We go into edit mode as well. Now we can do Control R. We can actually just add
some vertices to get a more, a more ideal shape
that we'd like. And there we go. That was nice and lovely. Let's click out of x-ray. There we go. We still got our part. And now it looks
somewhat better. We go up, we can actually
get it out of the ground. We don't want it to be
underground too much. What we can actually do, go back into edit mode. We can actually bring this, bring these two vertices
upwards just a little bit, and we back out, back
out into object mode. And we will actually, will actually have it
being a little bit, a little bit flatter. Next to create our
plant, we will add. The curve, and with this
curve we will add a path. This is our, our path. Let's bring it
down a little bit. Let's select the curve. Let's go to the curved section, and let's go to geometry. And if we go to bezel,
we can actually affect the depth of this
curve right there. Next to this, we actually
want to add a circle as well. From the curved section. There we go. We have a circle. Let's bring that down. And what this object, we can actually
select the circle, the bezel circle,
and there we go. We'll actually get
a more ideal shape. So this is the shape
we will start to get. Once we start to edit
these two right there, we can bring it backwards, bring it almost any
shape you want, but we want something like that. Now with the top bezel,
we can actually just shrink this down
just a little bit. We go back out into edit mode. So it all depends on how
big the bezels circle is that will determine
how big your plant is. Now let's continue to edit
now this middle part, we can actually scale
this down as well. You can see how that, how that will affect the
bezel. Now let's go into Edit. Now these two points,
control chef. We can actually dissolve
vertices just like that and we can keep the
rest of our object. Now from this side, we can actually shape, shaped us down, press Alt S and we can actually shape
this down just like that. And as you can see, it's
starting to look like a plant. Now with this entire thing, we actually want
to fill capsules. So this entire shape
will be filled. There you go. The bottom is filled, top is filled, everything is filled. Now we can actually shape
it up a little bit, go back into edit mode. And with the bottom-right there, we can actually scale
this down a little bit, Alt S, to scale that down a
little bit with the top one, alt S, we can actually make
this a little bit bigger. There you go. So it will
start to take shape. Additionally, we can also shape this around
just like that. We can bring the shape outwards. We can bring it down
a little bit more. Now if we select
these two rider, we can actually subdivide and get another one right there. Click on this one. We can affect the
shape even more and this is the overall shape
that we end up with. So now we can actually
raise this up, rotate. So we want to rotate
on the y-axis, rotated about 90 degrees. Bring this over here
and bring it up. There we go. We can rotate a bit
more light that we can duplicate,
bring this across. We can actually shrink
this or make it bigger. It's up to us if we go
from top-down view, this actually works
a lot, a lot better. We can actually adjust
this a lot more. Now in terms of the design, we can just move this to
the background G plus y, move it to the
background around there. And from here we can
just fill out our space. Right now we're gonna do
a face snap onto into the rest of the object to
the ground essentially. So we click on face
aligned rotation to target project
individual elements. And there we are. So let's go to filling out the
rest of our space. Duplicate once again. Rotate a little
bit on the x-axis, shows duplicate once again, and rotate on the x-axis. We can actually make this
wider by pressing Sx. Make this a little bit wider,
duplicate, once again, duplicate once again,
bring this around, rotate on the x-axis. Duplicate once again,
bring this around, rotate on the x-axis. So essentially what I'm doing is duplicating these ones and
rotate and M on the Z-axis, just rotate them
all on the z-axis. And that way we can just fill in the space, duplicate once again, rotate on the z-axis and
take this over here. And from here on out
it's a matter of just x expand and everything. Making some of these, some of these smaller, if they need to be smaller. And if we go to a top-down view, we can actually get
a bit more off. We can actually select all
of them, duplicate them, all right-click and just, just just go down, just, just press S to reduce the size. And then we can just move
these around even, even more. Once again, I'm using, I'm rotating and I'm using, I'm using the x-axis to rotate everything to just
get it to fit. And we're putting all of
these in different sizes as well to make sure that
it looks, it looks okay. So now of course we
can actually make some of these extremely tall. You can actually bring
these up a little bit more. We can actually
bring some of these, some of these down from
the, from the foreground. Brings some of these down, naturally, bring
them down even more. And perhaps on other
one, we want it to be, to be taller as well. We just want to give them
a bit more personality, bring them down a bit more. Everything looks
different and that looks quite good. It
is a lot as well. So understand if you
want to delete that one, can always delete that one. Probably, probably
delete this one as well, just to give it a bit
more of a personality, we can rotate this even more. So essentially. So essentially they don't, they don't have to
be all the same. Rotate these of course, I do like them
being there we go. Rotate these as
much as possible. Rotate this a bit backwards, bring it down, rotate. There you go. I'd
say that looks like.
6. Desk Chairs: First we're going
to want to play again just around there. Let's actually bring this
down in front of our desk. Bring this one back
just a little bit, and let's narrow it somewhat. And let's duplicate,
bring it back. And obviously let's rotate, rotate and on the y-axis because this is your
seat and area basically. And let's bring it up. So from the top-down
view right here, we can get a proper
view of everything. Let's go into edit mode and
let's add some loop cuts. About two loop cuts will do. And for the first two loop cuts, let's just expand this using the y-axis and secondary ones. And we're going to expand
this a little bit as well. Now we're going to
add an additional two loops cuts as well. And with a two middle ones, we're going to expand this as
well, bring this outwards. This will be our seat and area. Now with these two loop cuts, we're actually going to
bring these upwards. But let's take a look at
our chair once again, and let's narrow it somewhat. And same thing with
the other part. The top part. That's just an
arrow that as well. Perhaps not that much, but let's get it a bit narrow and let's actually
bring them backwards. So this, this will give us
more space to do our work. We're going to want
to add some loop cuts to this one as well. I'd say about three loop
cuts right there and an additional two loop
cuts right there. And let's bring
this back actually. Now we can actually widen this. We can actually widen decide. So let's just widen them individually just a
little bit this way. I'd say I'd say about 0.1. Why didn't it that way? And it's the same
thing over here. We're going to widen it 0.1. Actually it's the opposite way. So naught to 0.1. Additionally, we actually
want to bring these forward. So we're gonna bring
these forward on the axle just a little bit. Then we're going to bring these these two corners inwards. So we're going to
select all of them, press on the axle and
actually bring them forward. And with these two corner ones, we can actually bring
these downwards. So xoxo, we can widen the
two middle ones right now. And with the utmost middle one, we can actually extrude
that one on the z-axis. And it's a similar thing. We can just bring this forward. There we go, looking
a little bit better. Now with the back
axis right there, we can actually
bring this outwards. Now we can go back to
our chair actually, and we can just start to
lower the front actually. So we can lower it
sort of like that. Now right where we are, we can continue to create our chair. We're going to add a cylinder. And this is to help
to create the leg of the chair at our cylinder
down there. Good, too big. So let's reduce the
size and let's reduce, Let's increase the height. And if I go into edit mode, just the top vertices, we would like to extrude this
upward, just a little bit. Size it down, extrude
at once again, extrude it once
again and size that down and extrude all
the way to the top. Right there we have
a little chair leg, but it might look a little bit too big so we can always reduce the size and just make
it a little bit longer. That's about right,
to be honest. Now if we go back
into edit mode, will be able to create
some legs right now. So face selects in order to select some of the
faces right there. Actually, what we need to
do is to add a loop cut before we select our faces, then we're free to
select those faces. And we can start extruding that. So once we've got that extruded, don't need it to be too low. We can start lowering that just a little bit,
starting to look good. We can start to use the y-axis to bring
the shape towards, bring the shape
together a bit more. There you go. And then we can simply just move this around actually
until it looks centered. Then we can lower at G plus zed and lowered almost
onto the floor. So it just looks
very professional. Remember to save your
work by the way, by pressing Control S. Now all of these vertices, we want to select all
of them right there. We can actually
separate right there. And once it's separated, we can move it upward just
a little bit if we want, where we can keep
it, where it is. We're going to bring the leg
up just a little bit more. Go back to the original
exit out of x-ray mode. And obviously we want
to close the loop. We just suppress F to
close the loop There. It is. Much better
by the looks of it. And what we're gonna do is
add a cylinder right now, let's add another cylinder. There we go. This will be a little
wheel essentially. Let's rotate that on
the x-axis, 90 degrees. Let's decrease the
size on the y-axis. So there we go. So we got Lakonishok
going on right now. And we can actually rotate
this once again because we're going to want it to be just around there, just underneath. Now with regards to this, if we want to give this
a bit more detail, we can we can actually
add a couple of luke cuts and then we can just raise it up
that much further. And this part, we can actually
raise this up as well, raise the middle part. There you have it. It looks a bit more
that more professional. Once again, let's
save that work. Now we can actually reduce the height of this just a little bit so we can get the
proportions looking even better. Let's click on
everything and let's get the wheel out of the ground. Once again, reduce the
size just a little bit. There you have, it
looks somewhat better. And now we've got, we've
got to deal with this. So now we can
actually tap in Face, Select, select some of
the faces right there. Actually, I want to de-select
the rest of the face. Selected too much,
too much of the face. So just to, just to
top part actually, yeah, that's not too bad. So what we can actually
do is duplicate this separate tab out and we can then expand
just a little bit. So now if we tap it once again, click on vertices selector
and select the edge vertices. We can actually edit this to
look pretty cool right now. And because we've
got all of that, we select all with a
and we just extrude. If we click Alt E, we can
actually go to extrude along, extrude faces along normal. There we go. It's almost like adding
a solidify modifier. So that's actually pretty smart. Now we can bring this
down a little bit more. Maybe reduce the wheel size a little bit reduced the
size of this as well. And that's about perfect. So now with this part, we can actually just increase
the size just a little bit, but we want to tap in
and with these basil, want to select the
bezels and we want to, want to bezel
these, these edges. However, we'd like to go
to vertices selector. There we go. So we can actually bezel this a lot better
as you can see, it gives us a pretty cool look. Its bezel this a bit more, and that's actually not too bad. Now if we go to Face Select, which actually go down in
size and bring us inwards. Select, go down in size, bring this inwards, and we
can actually expand it. If we don't really
like the look, we can just expand
it a little bit. And basically that's
the first part done. We can finish this up
by Shade smooth in. However, doesn't look so
good while it's shaded mode. So we can probably keep
it low polyphenols. So just keep it like that
and it looks pretty good. It looks like a
skateboard wheel. But we're getting
there. Now let's click on the top
part of the chair. Go to vertices
selector and expand this middle part
where we want to expand it outwards like that. And it's the same thing with
these two bottom vertices. We really wanted to
expand outwards. So next up, what we're gonna
do, we're gonna select these faces right over there. We'll select these
faces as well. And what we want to do
is separate these faces. Then if we tab in on
the left specifically, we will delete these faces. What we're gonna do, we're
gonna use a mirror modifier. If we go to a Modifier tab, we click on numerous. We get a mirror modifier. There we go. That's your mirror modifier working. They're quite lovely. And what we're gonna
do, we're gonna do the exact same thing with here. We are going to
separate this part. We're gonna come over
here and we're going to delete these faces. Once we go back over there, we can use the same
mirroring effect. Turn off x, turned on Y, and we've got our mirror
effect work in lovely. Now we can actually look
at our wheel, my wheel. Now if we add a bezel
modifier to our wheel, you can see how it makes
things look different, but it actually
gives a principle that gives it boundaries. So now it's the same
thing when I add bezel modifier to the top
part of the role right there. Just giving it more boundaries. But we can shade smooth
out part as well. But in order to shade
smooth this part, we need to add another
bezel to this part as well, just to give it some
additional boundaries, then we can shape smooth. Now with all the fears. And we compare, we compare it
all of this to the object. So there we go. It is now
apparent to the object, not at its parent to the object. We can select all of this
and we can just duplicate, and it's a matter of rotating. So 70 degrees right there. So let's do that. While we can see duplicate, we can rotate on the z-axis. Duplicate, rotate on
the z-axis, 80 degrees. Duplicate once again, rotate on the z-axis and
duplicate once again, rotate on our z-axis 80 degrees. Duplicate once again, rotate
on our Xanax is 80 degrees. So now we can actually save, remember to save your document. So very important, we
don't want to lose track of our document
to let those, those objects right there
for your C scenario. Select them once again. We want Alt E extrude
along normals. So individually we can
just bring these forward, bring these forward
a little bit, and there you have,
it looks much better. We've got the base of
our chair right there. So now we can just do
so now we can tap out and control to there you
have it individually. This is where it gets
really interesting. We can start separating
these edges by leukotrienes. So if I look up there, I can bring these outwards. We can add another loop card. Somewhere around there. We can go to Face Select, select these faces right there. Once we've got those selected, we can delete vertices. See what it does. Now from here, we can actually
add a mirror modifier, click on Y, and we've got our mirror modifier right there. Now we can bring, we
can do another loop cut on the right
side or left side. And we can bring this in
just a little bit more, can actually bring this loop cut out to the edge right there. Can bring this loop cuts in
the back right there as well. And we can add another
loop cut to the front. And obviously we want
the rest of the seat to look somewhat similar as well. So there you have it adds some additional loop cuts and
bring them out like that. Now, that's starting to
look a little bit better. Now of course we can click
on Shade Smooth as well. Smooth all of the solid. And that looks quite lovely. We can make it a blurred
a bit if we'd like. And we can just slightly tilted forward using the
y-axis right there. But to tilt it for we just
need to be very subtle. It doesn't need to be tilted
too much to be honest. Now is the same thing
with this part. Will select all of those. And of course, we're
going to extrude. So we extracted to the back. And it's the same
thing right here. This part needs to needs
to clip on over there. There we go. We're just bringing
these together, led by Little Albert
bringing these together. And little by little like that actually looks pretty lovely. So from there on we can actually control the press Control E. And we get this doesn't
look so good at first. But once we go inside, then we can loop cut it. Once again, bring
this over here, add this to the middle,
and then we want to Face Select all of this. Well, the edge, just
that edge right there, not there, but just,
just the edge. We want to delete these vertices is the same thing
that we did before. We're going to add
another mirror modifier, de-select axe and select Y. On the right-hand side, you can actually add some more, some more loop cuts
depending on how we want our seat and area to be. Bring down the bottom
just over there. And maybe another another
loop cut at the top. Now right there, this is
where it will be very fun. So we'll be able to
loop cut over here, bring it together.
Nice and lovely. Loop cut over here. Now we can actually
bring this outwards. We can bring a loop
cut right there, bring this up towards us. We can bring this across. We want this to look
really good right there. We don't want that to
be too much, of course. Now with all of this,
we can actually just select it, select it all, bring it forward just a little bit with
the seat and areas while we can actually just just just bring this
down just a little bit, just to make it look
a little bit smaller. We don't want this
to look too long, but that essentially
is a little chair. Now we also want
to add a little, a little cushion at
the top right there. So we just hover. So we just hover at the
top right there, and we want to add a square. But we bring this square
down naturally, of course, and we just expand it on the sides and we just
press Control two. And we can actually bring
it up a little bit more. So we are going to edit this
and add some loop cuts. Let's start with the
front. Of course. We're going to add
some loop cuts on the undersides and
maybe some loop cuts towards the top so that we can, from there on, we can just bring it downwards a little bit. We have a little headrest, a little cushion right there. Now we go to create
a hand naturally. So now we're going to add
a plane right about there. And we're going to bring
this plane back to our chair because that's rightfully where
it's supposed to be. But sometimes that happens. So from where we are naturally, we just get to adjust
this by little. And then we can just bring
this spring this upwards essentially so that
right there will be a little handle
to start with. And from there on top we can create another, another plane. So from there on we can create a little handle just like that. So those are the basic shapes. We're going to turn them into something even more amazing. So from this shape, we can
actually go inwards and we can add some
additional loop cuts. We can add some additional
loop cuts right about there. Just adding displaying
just a little bit more. Now with these two,
we can actually just rise it just a little
bit, just gradually. Not too much of course, actually with the,
with the back, we're going to want to
lower this a little bit, but then we can press a to
select it all of course, and we just extrude. Then we can actually, we can actually rotate
this somewhat gradually. Plus RY rotates on the y-axis just a little
bit, not too much. And we're going to press
number two to bring this backwards just a
little bit right there. We want it to look real
nice and ergonomic. Basil this if we'd like, we can actually bezel both
corners if we'd like. So if we tap out, we press
Control to there you have it, something a little
bit more nice tab. And now we can get
to really play around with this and
model this too, I liken. So control are once again
to add some loop cuts. Feel free to experiment
like if you, if you don't like the
way I'm doing things, you can always change it
yourself and, and experiment. I promote experimentation
seriously. It is quite essential. Nowadays. We can repress
everything, of course a, to select everything
Alt E, of course, to extrude and press
excrete among normals, extrude it just like that. Once we've talked about we
get to press Control two. And there we go,
a little handle. So naturally what are we
going to do with this? And we tab in edit mode. And now we get to use
some more loop cuts to experiment once again
with this functionality. Add some loop cuts along
the, along the edges. Of course, you remember the
press Control S to save. And let's add some more new
cuts along these edges. There we go, looking
quite good actually. So I do hope you've
enjoyed this so far. It's actually been
really educational. You can even make it
a little bit more, a little bit more amazing. Like I said, always experiment, always try things
out for yourself. See what you can create. If I add a loop cut right there, I get to Face Select this part. So now with both of this, I can go to shade smooth, Shade Smooth, that
both are Shade Smooth. Control to save and
bring this back just a little bit so it's a bit more, it's a
bit more inward. Let's bring this down
using the z-axis, and let's bring this in as well. There we go. Now with all of
this, we're going to add a mirror modifier. Of course, there we go, add a mirror modifier, de-select x, and select Why. There we go. If you, if you do the mirror object and select the opposite
side of your object, you can see how easy
that is to mirror. I tip it doesn't always do it correctly on its first attempt. I click mirror object. I look for whatever I would
like to mirror to this, this left cushion
right over there. And magic, It's mirrored. We just created a seat in
a decent amount of time. Select all of them. Actually continued to
select everything. Select as much as
you can include in your missions and your arm rest. We can finally move
this upwards towards our desk and then we can
actually rotate this as well. So there you have it. We do have a chair now and
we've got our office space. Now there was a
secondary cushion that I've considered
created in this corner. And we can perhaps
just do it right now. So if we do a cube right there, we actually get to
bring this down, bring this up and
bring this inward. What we can do, we can actually create a little,
a little cushion. Well, to be honest, it
is a secondary seats, so that's what we
can do actually. So if I do Control two, we're going to the modifier
and it's the same thing. We're just using a bunch of loop cuts to get this
to the way we'd like. So you can see
where we're adding quite a few loop cuts
almost all over the place. So now we can just
do this little by little and little bits of mirror modifiers
all around the place. Then we can shade
smooth actually. So now it looks kind
of like a cushion. So now we can duplicate, bring this upwards and rotate. And then we can just bring this, brings us backwards, actually, bring this down a little bit. And of course, So now of course, because it's it is a
wooden, wooden surface. We've got to create some some additional like we've got to create the legs
and stuff like that. So it's gonna get interesting. So once again, we're using cubes and we're going to
view this from top-down. What we'll do, we'll move
this along just over there and we will bring it
downward a little bit. And we will extrude, just extrude it as
much as possible, just to extrude as
much as possible. But I think naturally
we'd like this to be perhaps somewhat more narrow. So we're going to bring
down the narrowness, just bring it, bring it down. And what we can
do, we can create an immediate duplicate
on the opposite side. And then we can
duplicate this once again, bring this one upwards, bring it upwards a bit more, and just bring it backwards. So you can see what
I'm doing is just simply just copy and paste in a lot of these
to bring them together. It's actually quite easy. And I think this is one part where you don't necessarily
have to do this. But if you feel like
you don't want to do this part and you definitely
do not have to do this. This is just to basically make the space look a
little bit better, just give it that
touch and finish. We're going to bring the size
of this down just a bit. We're going to bring this
backwards just right there. Just like a, a support system. There we have it. So that can be a little
cushion right there. But naturally we do want
the top part to be, to look a little bit
more like a hand. But obviously we want this
top part to be somewhere that people can actually
rest their hand on. So we want to expand it out a little bit
more and move it down. Just want to delete
the opposite side and duplicate the more updated side. And as well during this across, for sure, bring this across. So now if we control, if we hit Control
two, we get this. If we go into edit, will be able to do
a host of things. With this modeling feature. So there you have
it that I think that looks a little bit better, actually, surprisingly, that
looks a little bit better. So once again, let's
just delete this side. Actually before we do
that, let's do the rest. Let's try and see what
we can accomplish if we use the loop
cuts to experiment. And this was all improvised, like I didn't fully
plan to do this at all. So it is, it is kinda improvise, but
it's the same principle. I'm just clicking Control
to go into edit mode using a loop cut as much as I
can to turn this into, into surfaces that will look a bit more like a wooden surface. Let's save our work so far. We wouldn't like to lose this stuff control to
go into X-Ray mode, I just press Option Z
to go into X-Ray mode. And let's add some loop cuts
into this corner as well. And what I'd like
to do is just to move this down a little bit. Now this part, same thing, control to enter edit
mode, Control R. And we're just going
to bring this up quite a bit, bring this down. And now we've got this interest in looking kind of station, almost almost been bullish. Now I'm not sure if
it all makes sense. I probably go into this one, try what I was doing previously. Just bring these
bring these forward. Probably not too much. Actually. Probably not too much. So yeah, let's just bring them
forward just a little bit. That doesn't look
too bad actually, that looks pretty good. Let's save that work. And let's do the same
thing with the rear. So it's the same principle. One straight up right there
and another one right there. So I think, I think it
will only make sense if we did if we did
this to all of them. So it just makes more sense and it doesn't
have to be a perfect square. In fact, the rough
ER, it looks is probably the better
because we do want to give it that that natural
natural like a natural feeling. Yeah, look at that. We give it that natural feeling. And it looks pretty good, so much more improved
compared to this part. So let's delete all of that. Let's delete this as well. Essentially, we're just going
to copy and paste all of it and add it to the other side. Let's press shift
D and duplicate, and we take it over
to the next slide. Let's view it from the top
so we can get a proper view. We don't want we don't
want to mess this up, especially given that it looks, looks great so far. Will this over
here just a little bit, move this underneath. Just a little bit. We don't want it to be too much. Of course. Maybe move it back out
just a little bit just to keep that neat and organized. To make this look
even more natural, we can actually rotate this
just a little bit using the, the x-axis, just
rotate it right there. So now that's how
a lot of chairs. So what we can
actually do is to add a cushion right there. So we're going to add
a cushion just so it doesn't look too ridiculous. We don't want it to
look too ridiculous. They will look a
little bit ridiculous, but let's try to minimize
that as much as possible. Let's bring this down,
Let's bring this outward and essentially control, control, control tool tab in. And then we just, we just bring this out, bring this out as much as
we can and just select all. Actually, let's select all. And from there on we can, we can actually just
rotate this on the y-axis, rotates it, I'd say about
110 degrees actually, maybe, maybe 100.2020
degrees rotated. Bring it backwards a little bit, and then shade smooth. Let's shade smooth everything. You know what these handles? Well, we can actually do is
rotate them on the z-axis. So just that little
bit outwards. So it connects to the
back of the chair. But it actually gives
it that realistic look. Now at Justin's office image. The way how is office is set up. We want to rotate this
chair just a little bit so it mirrors is office
as much as possible. And if we join everything, I just click Control J and
then we rotate everything. We can actually bring it
downwards closer to the plant, rotate it ever so much more, bring it a little bit backwards. And right there,
ladies and gents, we have a little
a little cushion. So there we go. Nice
little office space. So I selected all of those. And what I'm gonna do is just to move this up a little bit more. So it's, it's in our image.
7. Lighting Set Up: Now, at the top right here, he does have a logo
in his office. So we can add a plane, rotate on the x-axis 90 degrees
and just increase this. We can lower it just
a little bit and continue to increase
it ever so much. Increased the boundaries
on the x-axis as well. And center it as
much as possible. So we can actually tap in and
just extrude ever so much, Not too much, but we just
want to extrude a little bit. I would say that's
majority of our model. Pretty much finished
right there. And it's been, it's been quite, quite good so far. Next, we're just going to
add a lot of material. Now the next stage FAR design is obviously to mod loudest design. So we actually want
to come up here to the left-hand corner. And we would like to
split the display. There we go. So we can
actually split the display. And to essentially why we'd
like to do this is to keep an eye on the render
of the display. And on the other hand, we can just keep an
eye on the modelling. Naturally, we do model in cycle. Well, at least I
do with the GPU. Of course, we would like to
de-noise for our viewport. So that right there
is the first idea of what our model will look like. This is being rendered in
cycle with de-noising. I choose to use de-noise and
because it just helps a lot. So underneath our
floor we will like a plane because we will
also set up our camera. So let's do a plane. Let's expand our plane
as much as we can. Actually, I'd say for now, perhaps around 60 for our plane. And let's lower the
plane a little bit because we want to keep everything in place
that looks pretty good. Let's save this, right? So naturally we want to
start modeling this. But before we can
do that as well, we need some light, so
let's add some lights. Let's click on Shift a. And this menu we've got light. Let's add some area light. Let's start with one
main area light. We will add our lights
in grids as well. So we're going to put one
area light right there. Let's raise it up a little bit. We will also put an additional
area light to duplicate. We'll put an area
light right there, duplicate once
again, and we will draw another area
light right there. These two area lights,
duplicate them. And let's put an area light
at the back down there. So we've got six area
lights right there. Now on the right side, if we go to our light and
this is where we will be able to adjust it for the first one, we want to go with, say, 1,000. Now this will be a dark, calm environment majority of the time because the
background of the studios, It's a Black Studio. Speaking of which, let's
go into edit mode. Let's click on our main project on the background
and everything. Let's go into edit mode. Let's do face select
clip number three. And let's separate
this wall right there. Now, one wall that's
now one panel that's really important
to separate is the floor. That's that's that's
almost crucial. I would say separate liver like that or we can
probably separate this part as well
just in case we want to we want to do something different with,
with both of them. So that's a good start.
Let's save this.
8. Add Materials: A lot of this will be black. So also don't forget, material design is
really important. So we are going to use something that's
called Blender kits. I've actually downloaded
this from the Internet. And essentially what it
allows you to do is to gather almost any material that you
would like to use there. I say almost any materials. So I'd like to use leather
for a lot of this, a lot like the chair. Obviously, we've
got a wooden floor, we've got wooden desk. So yeah, it's gonna be fun. So if you want to quickly
save your project and download Blender kit
from the Internet. It's like a quick add-on
and you just install it. You simply go to preference. Then you go to install add-on, go to your download and click on the downloaded file
and install it. Once it's installed,
you need to turn it on, just click, click on the arrow, and it will be turned on. And you'll be able to
basically search for almost whatever material
you would like. We can perhaps start
with the chair in fact. So something that I
just realized what a chair actually
grouped all of this. So I'll kinda messed
up right there, but we do have the emergency chair that
we can use if we want to. So that's good. But if we type in brown leather, We'll probably get some brown leather material that we can use on this chair with the rest of the house
or if it doesn't, there's also another
material while there's a bunch of
material that I just want to try them all. Actually, I quite like
the yellow material. That yellow material is. It's pretty good. It's like now the flow, I will do this floor with brown. So we created a new
color, pretty simple. Just click on the plus
button and this will, we will call this
brown one, brown wire. It'll be like a pretty cool, pretty cool brown color. For now, it will probably
look a little bit orange, but that's not the,
that's not the idea. Now the wall over here, the wall is a wooden
brown like wood brown. Let's get close up
to it and see what, see what it looks like. That's interesting, but I do think it's a little bit darker. Now this one is
dark will not work. So that's what
we're working with. We will try a few different
a few different colors. Like these are these two panels right there, two
different colors. And this is an
even darker color, but I don't I don't
think this is the color we're going for props for now. We will just do what would procedural for the
two on the left. And towards the end
we will see how that, how that turns out for
the background and everything like for the
main base we're gonna do. We're gonna put that
in black as well. I believe that's all black
for this background. For the the main background. It's the same thing,
wore black for now. The reason I've separated
them as the light will function differently
on the color, depending on the
color of the wall, dependent on the
amount of light. And now you see the desk, those are definitely not. Those are our light brown some
light brown kind of desk. That looks a little bit better, to be honest, that looks
a little bit better. We can perhaps work
with that for now. All of this, it should
be wooden as well. Same thing over over this side. This is all wooden as well. And with a laptop
stand that's also wouldn't know what this object
it's like, it's like red. So let's put red one, maybe a little bit
darker. That's okay. And this object, I do believe
it's supposed to be white, so we just put white one. So that's the white by default. So we can actually keep
it like that over here. We do have the handle. Let's put black too, because this type of
black is metallic. It's a, it's a metal object. Black too. And the
cool thing about blenders that once
you have one color, you've, you've
created one color, you can assign it
certain material. So with this one,
like I said, it's, it's quite metallic
and the roughness, we'd like the roughness
to be not too high, but not certainly not
too, not too low. And it's actually pretty good. So in this, we will actually like to
create a lot of light. So we select where we
would like to go Shift a, go to the light
section and we would like to create a
little point light, actually, let's create
a little spotlight. That's better. A
little spotlight, maybe 1,000 in there. We'll see what happens. But also, this does have a rather big effect on the
rest of the information. So I'm not sure how
well that works. So let's try an Array light, see if the array light
works somewhat better. So now we're just
painting the legs black as well because the
legs are black indeed, not a light units at the top. They're actually really nice. So we're going to call
that wall, wall lights. We're going to have
multiple of these and they're sort of emissions. So if we go to the right,
we click on surfaces, we click on emissions. This is pretty
important actually. This panel, we can actually do whatever we'd
like to be honest. We're just going to call it E M. This is VM2 and it's all
emission, emissions panels. But essentially whatever
color we would like, we can actually, we can actually do this part of the tutorial. You yourself can
actually improvise and just create
whatever you'd like. Actually, I'm just gonna
do the rest of these, just follow my instructions, create a new material,
go to emissions. And in fact, even if you
don't want emissions, you can also do that as well. But the point of this, the
point of this exercise is essentially to
do as you'd like. So that's what we'll
work with for now. But of course, this
is something that can always be
changed pretty much. Now the black panel, I'd actually like to create
a new material called a black wall too. Because I'd like this
to be as specific as possible because
this wall is not very is not very metallic, but it's not very soft either. So we have to be a bit more specific with this
kind of design. Here we want this light
to be a specific light, so we want to give it a
cool light and effect. We don't want it to be
too boring essentially. So we're actually going to go into rotate this
just a little bit, and we're going to shift this upwards just,
just a fraction. For now. That is okay. I think for now that
is actually okay. I'm not sure about the light. We can always we can always change your
light to something, something more like
this that could look amazing under the
right circumstances. So naturally we do have a
wooden floors to want to get a pretty good
wood floor replica. And I have an idea of something that could work potentially. I've found that it's best
to use Wood Park cats. That's the material I'm
going for on the ground. It took me a really
long time to decide, but I've decided that now that is the better
material to use, can also use this same
material in other places. And I think it could be
quite useful to be honest. For the ground, we
do need a gray mat, so it's time to look for
a gray, Matt, light gray. I'd say I've actually
managed to found a dirty gray fabric
and believe it or not, that's the one that looks
the best right now. I don't particularly like it, but it will, it will
probably have to do for now. Now we've got our
desk mat, of course. So ideally we want this to be
like a soft kind of black. It is a black bear
smarter and we want it to be a
little bit leathery. The Mac Book, of course we
would like a silver color. So what I'm doing is just
making these colors silver. So since it's already white, all you need to do is just
turn it to gray a little bit. You got to turn up that
dot, dot, dot metallic. Now this can also, can also be silver, so we can also put this as, as the same silver. But for the, so we're
actually going to do is work with a black keyboard that just works much simpler right now, we're gonna give our
MacBooks sort of like a darker gray,
like a space gray. And it's the same
thing to do with the other MacBook over here. We can give this one
a space gray as well. Actually, we just gotta give it the same silver,
just choose silver. Now in regards to the display, what we actually
want to do is insert this display and then
the inner display. We separate it because we would like to put something
else on that display. But actually I'd like
to smack book to be a little bit darker. So what we can do, we can create a new material and
just call it dark silver and just go quite dark and just make kits
make an extremely, extremely metallic and obviously probably turn the roughness
up just a little bit. Now with the monitor
arm right there, this should be silver as well. So actually we just
got to type in silver. We get silver up and
it's the same silver. There we go. The monitor right here. It's supposed to be the
exact same thing actually. So we can actually
do is duplicate this monitor and the
back of the monitor. We will use that. We will actually do
silver or maybe, maybe even dark black. And with this part, we just got to separate
that part right there, go back out into object mode. This part, we de-select that because we are going
to put a specific, specific image on that part. So it's looking good. Now, speakers, they
are black as well. So if we go with black one, that's actually pretty good. Now this it needs to be, it needs to be Roberta. So we'll go with
black three because that's a bit more rubber, that's a bit softer. It's it's a soft black. And that's exactly
what I need right now. Now, what the chair
it can actually be a lot of the chair and dean has literally it's
literally just leather. So we do want it to be, to be soft black
because it's mirrored. We just gotta go over
it and literally just, just select the color that
we're going for with the, with the leg of the chair that can actually be the silver. So we can actually
do something a bit different with
the individual legs. On the other hand,
we can actually work with dark, dark silver. This can actually
work. There we go. Dark silver for everything. I am a little bit worried
about the chair because it looks so glossy. So I'm probably going to have to change that material
if we go with black one for the wheels is actually really,
really metallic. So that works pretty good. So yes, this material will
definitely give this another, another type of black. Let's get a new black, and
let's name this black six. This one is a little bit soft, but not certainly not too soft. In fact, with this chair, we can technically give it
whatever color we would like. So essentially will
turn the roughness up. So it's not as glossy because even though
we'd like leather, we wanted to ideally
be a soft materials. So the rest of these we can
just change to black six. Like if you look at that,
it's really taken on a fabric type of look. And because this is a
decimal that we can actually give it that
black six as well. Because like I said, it's taken on a fabric type of look where we can
just go with black one. Black one actually looks
pretty good despite the fact that it's
supposed to be metallic. Sometimes we got to work
with what looks best. Now it's actually
looking pretty good. Now, we want to put up our logo. How do we put up images? Would actually like
to go to shader tab and obviously create a
new material right there. So what we can do, we can
add an image texture. If we go to add, let's
go to the texture. We can add an image texture. Specifically linked
this to the main color. And now I've already
downloaded the logo, so we just need to
attach it to our file. And there it is, the logo is n. So that's the logo
in the studio space and it's starting to
look good actually. So I've got a bunch of different materials that I need to add, including books,
including books. Before we can go to books, we actually have
a secondary lamp that we need to, we need to add. So click on the
first lamp, click D, and use Y to bring it down to the, to
the right-hand corner. I want to rotate that
using the x-axis. We can rotate that. We
can rotate on y as well. And then we can bring
it up into the, into the actual lamp. If we go to a top-down view, then we can actually just, just situate it
perfectly like that. So now we do have
material and now we can, we can perhaps even create new, new material with
this secondary lamb. We do want it to be
very specific material, beacon off, specific material. We want a lot of this, a lot of this lamp
to be, to be gray. So if I click on dark, dark silver can actually change a lot of
this information. A darker color. Well, we
can just work with silver. Let's see how silver tends to look where
this information, I think it actually looks
better with dark black. So this is also what
I mean when I say, it's literally experimental, lots of experimenting
to see what, what suits you best. Everyone at the end of today
will like something else. So it's, it's literally a
matter of just changing colors. Now with this lamp
material right here, I think we probably
will have to work with glass or glossy. So let's go for a
glass material. And this is what we get. We get a hue. What kind
of light material? And of course, the light source. We would like to
bring this upward and obviously rotated
a little bit more. Now we can actually turn
this into a disk so we can try to make it a
little bit more accurate. We can actually bring
this down if we'd like, and bring down to light as well. So that could work
actually if we went with a point light, this point light could
work a bit, a bit better. So there we have our logo and it's slowly coming together. And let's not forget
our, our draw unit. So what we can actually do
is go with, go with black. Black works well
with so many things. And this right here, it
works exceptionally well. Actually. Let's not forget our
cushion right there. Let's save our document. We don't want to lose anything. Let's not forget our cushion. We choose black six-foot
cushion as well. It gives it a really nice touch. For one, we went with
the perfect lights and now with the display, with this display, it's the
same thing I did previously. I will basically go
to shade in new, and then I will add
a texture image. And what does texture image? We will use the wallpaper
that I downloaded earlier. It's like an app for wallpaper. And as you can see
under display, it might be rotated, but there's a way
we can fix that. So yes, there we go. Under display, it is rotated. But if we do this, it could fix our problem. That's just using
rotate and using the y-axis to re-adjust, using the x-axis to
readjust once more. So we just need to adjust a
little bit. So there we are. We're just adjusting the screen. Now. You might have noticed, I've
got it upside and down. So we select all
of this once more. And basically we gotta rotate the entire thing
around that way. And this way we just save. And yeah, that
looks much better. Now with the rest
of the display, this does need to be black, so we just got to set this to black one I should
think because. This is a little bit metallic, so that works pretty good for
that specific background. While looking at our, look at our space,
it looks amazing. Looks absolutely amazing. We still got two different
material on the wall. And that's because
I haven't fully decided what to do in that area. Time to do our books, let's work across the
area little by little. Then we can do our plant. So for first book, create new material and
it's the same thing, texture and image
texture link the color to the base color and what
shall have first book B, well could be anything, but we will just work
from top to bottom. So new science, that
will be our first book. And I think it looks, it
looks pretty accurate. That's good. So it's the same thing
with everything else. We're just gonna do
the same thing we've done with everything else. So what I would
advise you to do is basically to get some images
that you'd like to use. But I will, I will leave
a link to these images. So you can actually
download this material and you can use them
for your own work. A lot of these images are
actually took them directly from Justin's
experience, his setup. He actually uses
some of these some of these book covers. And
I thought, You know what? I'd like, I'd like
to put up some of those because they
actually look pretty good. So try to work with everything, try to make it as
realistic as possible. Now because we're using
this specific one, we kind of need to,
need to adjust it. So I click a to select all, then we can just adjust it sort of like that. So
that looks much better. Look at the magic
ladies and gents. That was very simple. And we created some
books simply by adding a few materials here and there and just experiment. And honestly that's
the best way to learn. Now we will work on
the seventh book. Actually, what can I say? We've got a lot of
books, but it is really nice the way our books at a really cool effect to almost any experience
that you're trying to have. We can actually add new
science right there. That doesn't work too well and I don't really want
to readjust it. So New York City right there, once again, doesn't
work too well. But you know what? Let's just go with new science
and we are going to go into UV editor and
just readjust it. Now it looks like I just need
to rotate it to the left. So what we got right there, we just need to rotate it like this and just adjust
everything using the y-axis. Adjust these corners
to fit one another, using the x-axis, adjusting these corners
to fit one another. And the question
is, does that work? Well now it's upside down. Now it's upside down, so less. Let's turn that around. We got to turn it upside down. And that looks much better. We've got our book. Now we do have another
book on the wall. Let's not forget this one. This one is a big book, so it's the same
thing over again. And which book Can we
use for this display? I have no idea. Maybe wired. Maybe we use wired
for this display. Yeah, maybe we use wired. I know we're using
it over again, but these these Wired
magazine's are pretty cool. So if we rotate, this hopefully
should fix the problem, similar problem that
I had previously. And I'm just using
the y-axis and the x-axis to try and
fix this problem. There we go, Wired
Magazine on our wall. How lucky are we to question is, does not look good because
it's starting to look better. I'm starting to
dislike this wall. So if we wait a minute, just take a look at
the wall and let's try to think to us of
which one looks better. And I personally think the
ones on the left look better. They're a little bit darker, which gives it that much
more interest in tone. So this was what procedural. So let's get out what
procedural sense that we are. Click on wood procedural. It's all looking the same. I almost forgot
we got our plant. We have to do our plant. I think I will leave the I will leave the chair as
it is with that material. That yellow material
does look pretty good. I don't really know why, but it does look pretty good. It just cannot be
denied at this point. So with this material,
we really want this material to be green, but this will be an
interesting green because not just any
green is going to, we'll work with this material. So we really want
to make it a little bit darker than it is right now. Quite a lot darker actually. So even that little bit better. And of course we would like
to lower the roughness. That's essential. We would like to
lower the roughness. Roughness is lowered. And obviously, I would
like I would like everything to be a little
bit, a little bit darker. We really don't want
this to be too. We want it to be a little bit darker because we want to
keep that natural tone. So if anything,
make it less green. So we're going to work with
what we've got right now. And now we just got, got
to select all of these and can get rid of this one doesn't really make
any sense at the moment. We can move this one over here. We can probably move this one. Perhaps move this one down here. So once again, all of them needs to be, needs to be green. But when you edit one, it does affect all. Now sometimes it is, it is a, it is good to
have multiple green. So I think I'll create a
secondary green color just to have a few different variants with the material for the bowl. That's fine, but we
actually want to make the inner material or
brown dirt material. So let's just call
it brown dirt. It'd be like a darker and
darker kind of brown. Let's make it a little
bit, little bit darker. Now I think about the final
part that we really have to do is these things on our wall. So right here, this
will be brown as well. So let's call this, let's call
this one just, just brown. We'll just go at Brown for now. And I think the first color is probably, is probably perfect. Wow, that's doesn't
always happen, but I welcome it
when it does happen. Let's zoom in a little bit. Yeah, that's not too bad. And in terms of these
things, well, for one, the display, we have to
have that MacBook display. Let's go to the shader. Select our MacBook display. Click New Material,
click texture. Image is link the color
to the base color. And maybe we'll just put
feature, feature right there. Maybe we'll just put feature. So we decided we're
just going to use this one right here. And we will ideally just
rotate all of this. Click on our display. And we would just like to, like to rotate all
of this information. So I think let's rotate
it to the right. Let's expand the boundaries and let's shrink it a
little bit like that. But now it's upside down. So we need to do that again. But we need to spend this part
around kind of like this. And, and yeah, there we go. That's, so let's
create a new material. And this material, we
want this material to be a little bit soft. It's a white material, but I'm not so sure our
interest in this look, maybe if we make it metallic will probably
look a little bit better. So that's, that's
definitely not white. Let's call this black seven. We just want some different, some different
colors right there. And we already have a red, so we can probably use that
once again with this one. We can probably just, can
probably just go with yellow. So feel free to experiment
with the original. There were, there
were all white. Now let's go into edit mode
and let's get rid of the top, or at least let's insert
it and extrude like that. That's, that's pretty
good actually. Same thing with these ones. Edit mode. By the way, remember
to save face select, let's go to the top, insert and we go down. So similar thing
with these ones. So we go to the top, once again, insert and we lower this. So now that does look better. I'd say that does
look much better, but yeah, working with
different colors, just trying something different. It doesn't have to be
exactly like the original. It can be a little
bit different. Now with these ones, this
is almost supposed to be, supposed to be glass. So the background right there
is supposed to be white. However, this is supposed to
be, supposed to be black. So let's make that black. That actually looks alright. And with these top lines, they're actually
supposed to be glass. So what we can actually
do, we can actually just make it a metallic silver. So what we'll do is
we'll insert this just like the other
ones on the right. And all of these, I want to make a silver ish
color or lease dark silver. And maybe, maybe we should
go with dark silver, but dark silver isn't
working too well. We need a new silver,
maybe silver to. So obviously, we need this to be somewhat metallic
and under roughness, we need to increase
the roughness. That does look much better. I'd say that was silver
to create a new material. So this is just the process,
it's creating materials. And if I think this
material is a bit too dark, I can always just, just change the color
just a little bit. So we've adjusted the roughness and the material and
the metallic materials. So want it to be to keep that
metallic look, of course, now written on the wall, Justin does actually have
something written on the wall, so we want to add some texts. So here we go. We can actually add
some texts right there. Now that we've added texts, let's, let's let's
bring it out there. We wanted to be on the wall, so we want to rotate on
the x-axis, 90 degrees. We want to rotate on the z-axis. I'm 90 degrees as well. Then we want to, we want to raise the
height a little bit. And we want to bring this one to bring it towards
the back just a little bit. And if we go into, into font, will be able to change the, would be able to change
the weight of the font. So we'll be able
to change a lot of things from this area. There we go. We can change
the weight of the font. Now, what Justin has
has written down, I'll just copy this and
you can actually read from what I've copied
and type it up yourself. So let's go into edit mode. Let's click on All caps
and rewrite feature HQ. That's exactly what
Justin has written down. So we are just gonna
go with that for now, okay, and that's, that's
looking even better. So now the size we do need to lower the size
just around there, go back into object
mode and move it along. And then we just
bring this spring, this back using the x-axis. We just bring this
back a little bit. So there it is,
written on the wall. We can actually increase
the depth of this, of the written information. We can we can do a lot of stuff, but we don't want to
mess with it Too much. I'd say the background. I do think we can
make the background a little bit darker. I don't know how dark we
can make the background, but I think that's a little bit darker and I think
that's quite lovely. So now we get to add our camera. And this is, this has
been quite incredible. So notice that add our camera. I've downloaded this, this
thing called ISO chem. You can just type
it in on Google. It's on a GitHub account. I will try to leave a link to the hub account so you can
download your true ice Occam. So if we click on True ISO cam, this is what will get a true
ISO camera perspective. And now from this
camera's perspective, we have to find a way to, we have to find a way to widen this camera so we can actually bring the camera outwards
and adjusted that way. Then we can bring the
camera up by pressing G, bring the camera upwards, we can actually bring
the camera over. So the right, a little
bit, a little bit more. And still the we can bring the camera out
a little bit more. So yeah, this, this
does look pretty good. Now with the rest
of the lightened, we need to work on this as well. Sometimes I turn
up my light into 5,000 in this case is probably
not absolutely necessary, but we do need to get the best
light and we can possibly, I'd say around 2000 for
most of the light in here would be would
be pretty good. It is good to have the back
being somewhat darker. This is brown one, and this is what we have
so far for brown one. But I'm going to get a
different color to try out. And I'll let you know
that exact color code. So you can possibly try to color code if
you'd like as well. So this is what we've done. We've created a new
material named a goal to, and this is the, this is the code, this is the XCode, the edX code. Copy this code if you'd like to use it specifically
if you'd like. But essentially you can
use whatever you'd like. Now in this tutorial, I'm going to make it
a little bit darker, a little bit more golden. By the way, if you'd like
to render your image, you just gotta go to the
rendering image tab, choose the source of your
render if it's EV or cycle. I tend to use Cycle, choose your render threshold. I tend to choose
something around 7,000 because I like it to be really nice
for thin, crispy. So once you've chosen
your threshold, the longer the threshold is, the better, the
better to render. We'll look, the
more HDL will look. So I tend to choose a
really long threshold, and then we just go
to the render tab at the top and we choose
to render image. And essentially it will
render the camera path. You've chosen your
specific camera angle, and that is where it
will choose to render. Thank you for watching today subscribe and I will see
you in our next video. Remember to leave a
light, leave a comment, follow, and I'll see
you in our next video.
9. Outro: So congratulations for making it to the end of this course. I really hope you've
enjoyed this course. I really hope you've learned. I really hope it's exceeded
your expectations. If you have any questions, any concerns and
you need any help, please leave a comment
and remember now, feel free to export
your document, share your image,
share your work, the project you've created. In the resources
and projects below. This will be a good
way for you to get some really good
feedback from me, from the other students. It will be good that way. And of course, if
you enjoyed and if you like this course, please leave a review and let us know any improvements
that we need to make. Any concerns, any constructive
criticism of off-course. It's welcome. So thank you for watching congrats for
making it to the end. I do intend on making
a lot more courses, and I will see you
in the next one. Thank you.
 Kitai / Polygon Arcade, Creator, Designer & Animation