Transcripts
1. Promo Vid V2: Hello, my name is Eddie Harding, and I'm a professional three D modeler and three D artist, working in the Sup jot
industry now for 11 years. In this course, I
will show you how to create your own architectural
visualizations. I'm going to show
you how to model it and texture it and set up your own lighting and make your own amazing
renders and animations. And I'm going to show you
how to do all of this using the super powerful and completely free
software of Blender. I want to show you that making your own renders really
isn't that difficult. I'm going to teach
you how to simplify the process and show you
what you need to know to get started and not what you don't so that you can
quickly learn how to create your own amazing projects to impress potential
clients in the future. In the first few lectures, I'm going to show you
the basics of Blender. We're going to take
things nice and slow so you never feel
rushed or left behind. And we'll learn how
to move and scale, and then we'll finish off by creating our own
basic looking house. Then we will input our reference images
that are included in the course and learn how to scale them and move
them into position, lock them, and configure them
so that they can be seen from one side and that
they're semi translucent. After that, we'll start
building our walls, using our reference
images guides to make sure everything's
done to the right size and the right scale. I'm going to show you
how to use some of the more basic functions such as the loop tool and the extrude
tool and the bridging tool. I'm going to show you
how to model walls as efficiently as
possible to save you time going forward and to keep the modeling
measures simple as we can. Then we will start
modeling our sofa. It is included in
the assets pack, which is part of the course. So if you want to
skip it, you can, but it is a great chance to learn to make
upholster surfaces. We'll start by importing a
person into our scene so that we can make sure that we build our sofa to the
correct proportions. We will use the
sculpting tool to make folds and wrinkles and
bumps in our surfaces and learn how to apply gravity to an object to make it fall onto other surfaces to make super realistic
pillows and cushions. Finally, I'll show you
the most efficient way to make piping on seams or fabrics to further make your cushions and upholstery
look even better. Next, we will learn
how to apply textures, using the free texture maps
included with the course. I'll show you how to UV map. I'll show you how to
scale textures and apply extra details to the edges
to add to the realism. Then I will show you how to
light your scene and organize your lights to make them as
easy to adjust as possible. After that, I will
show you how to import assets into your
scenes such as trees and furniture and fittings
to make your house look as welcoming and as
realistic as possible. So why not join me on this
beginner intermediate course? When you finish it, you have
all the skills you need to go forward and make your
own amazing projects. Thanks for watching,
and who knows? Maybe I'll see you in
lecture one. Bye bye, Feno.
2. Lecture 1 Introduction: Hello. And welcome to
VectureO on this beginners course on architectural
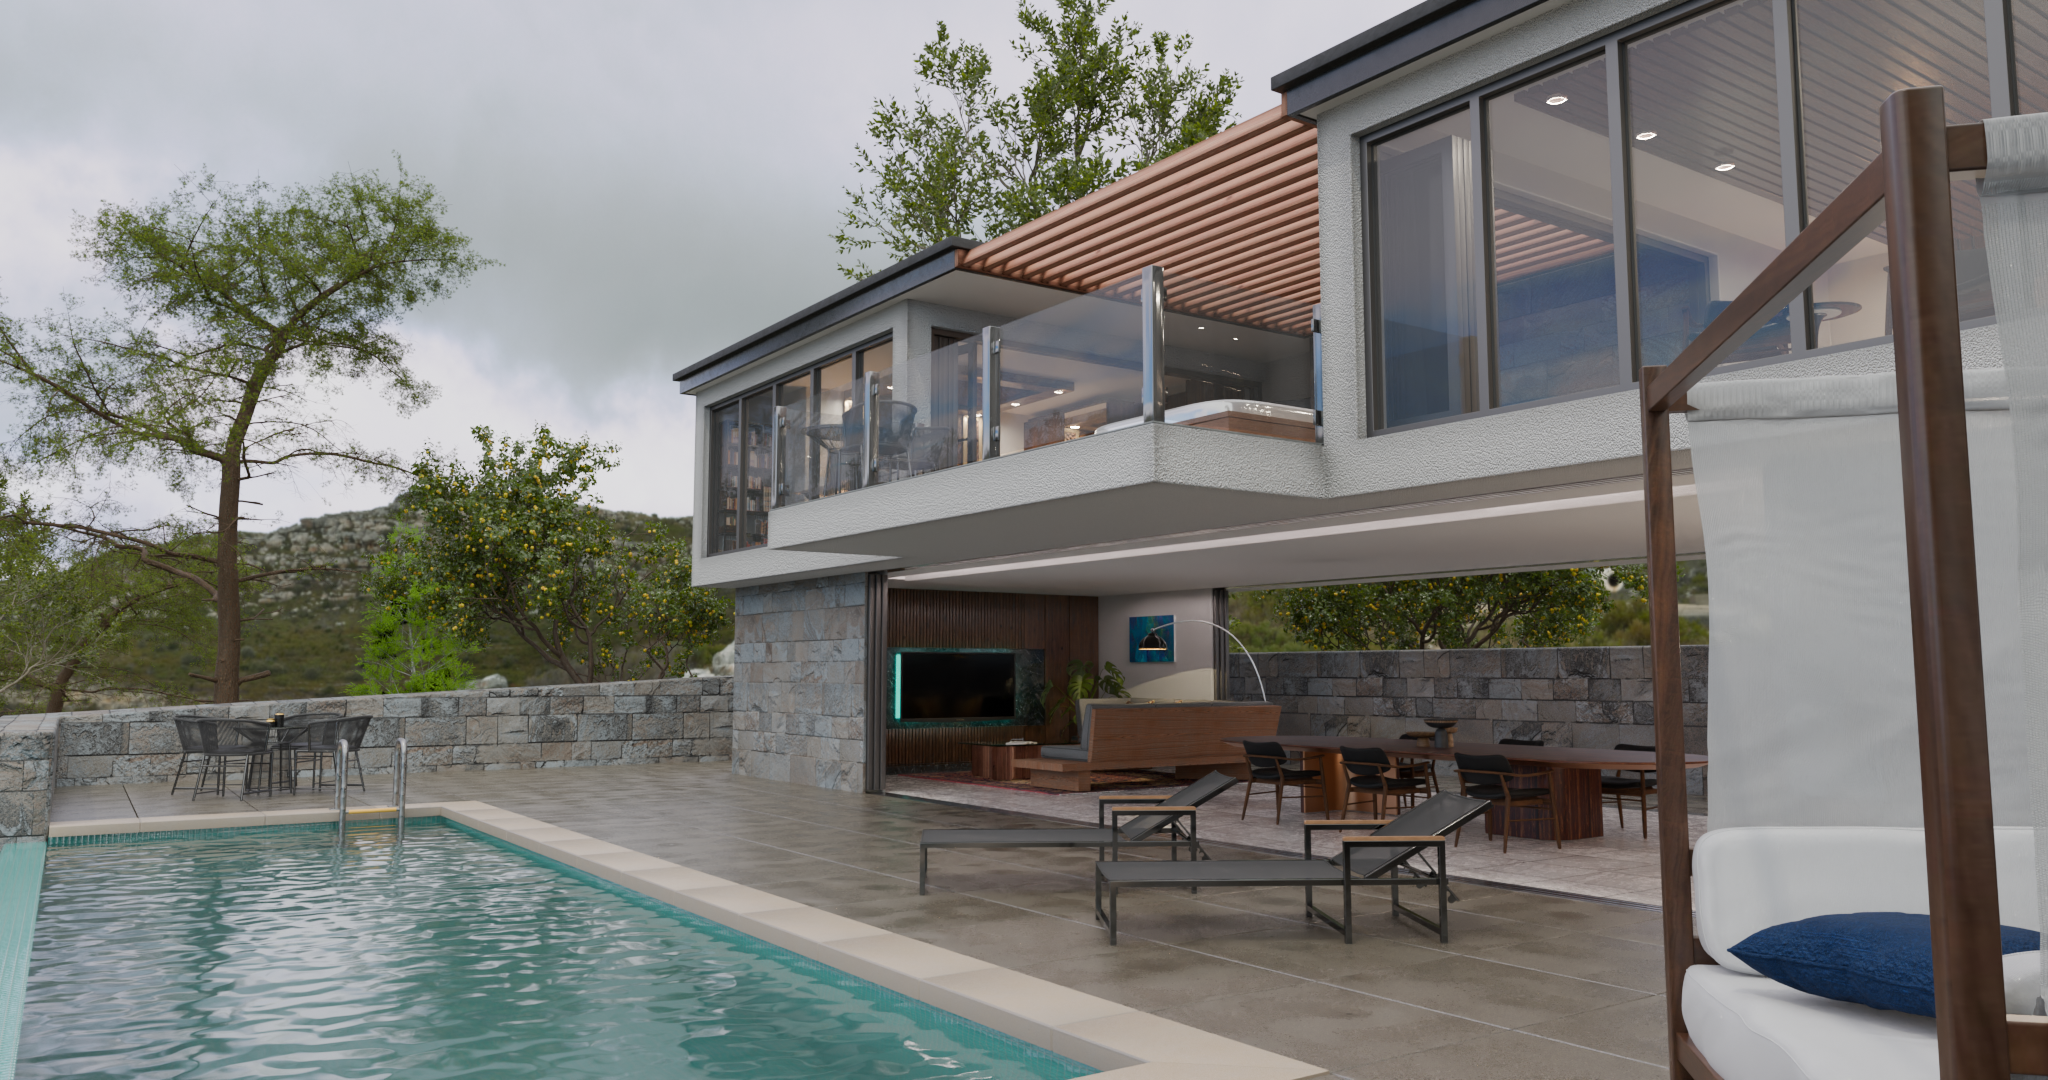
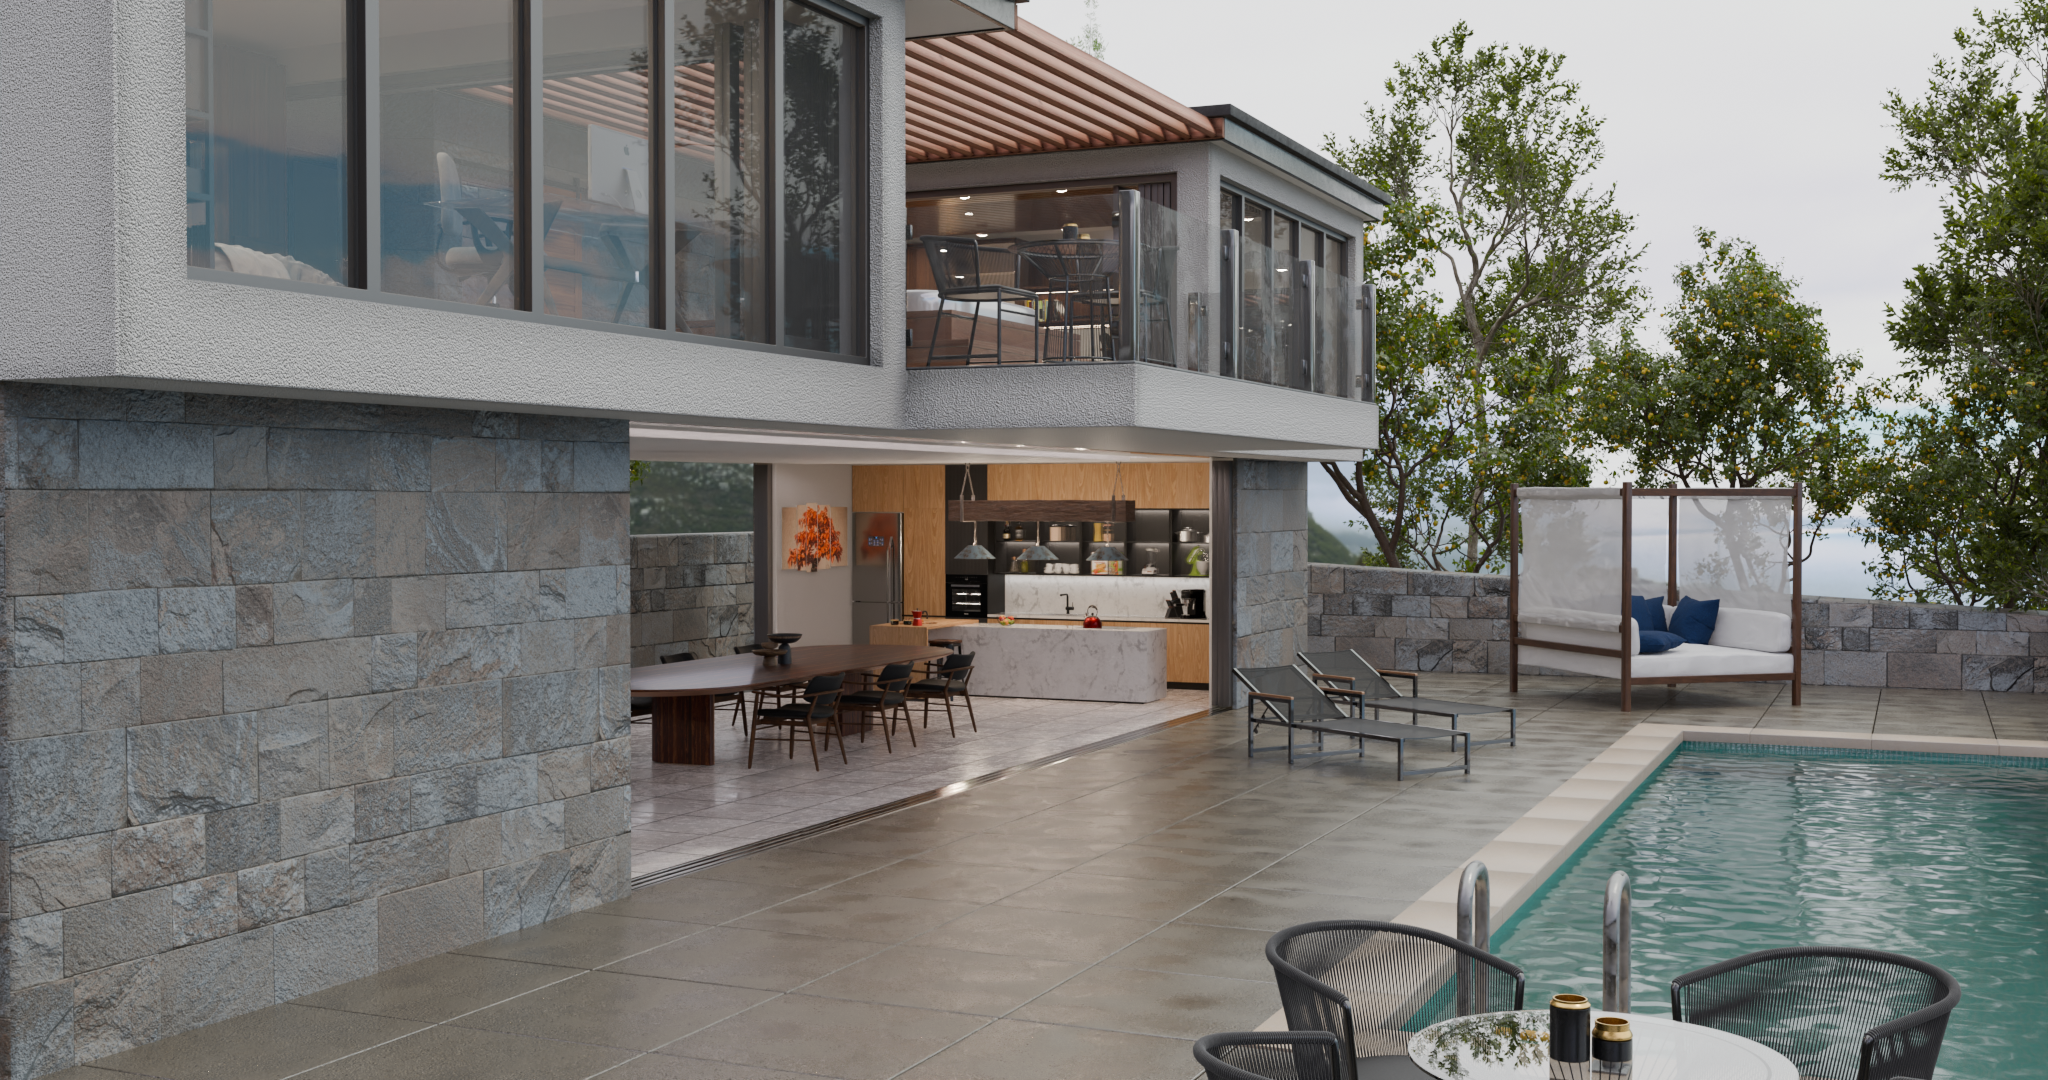
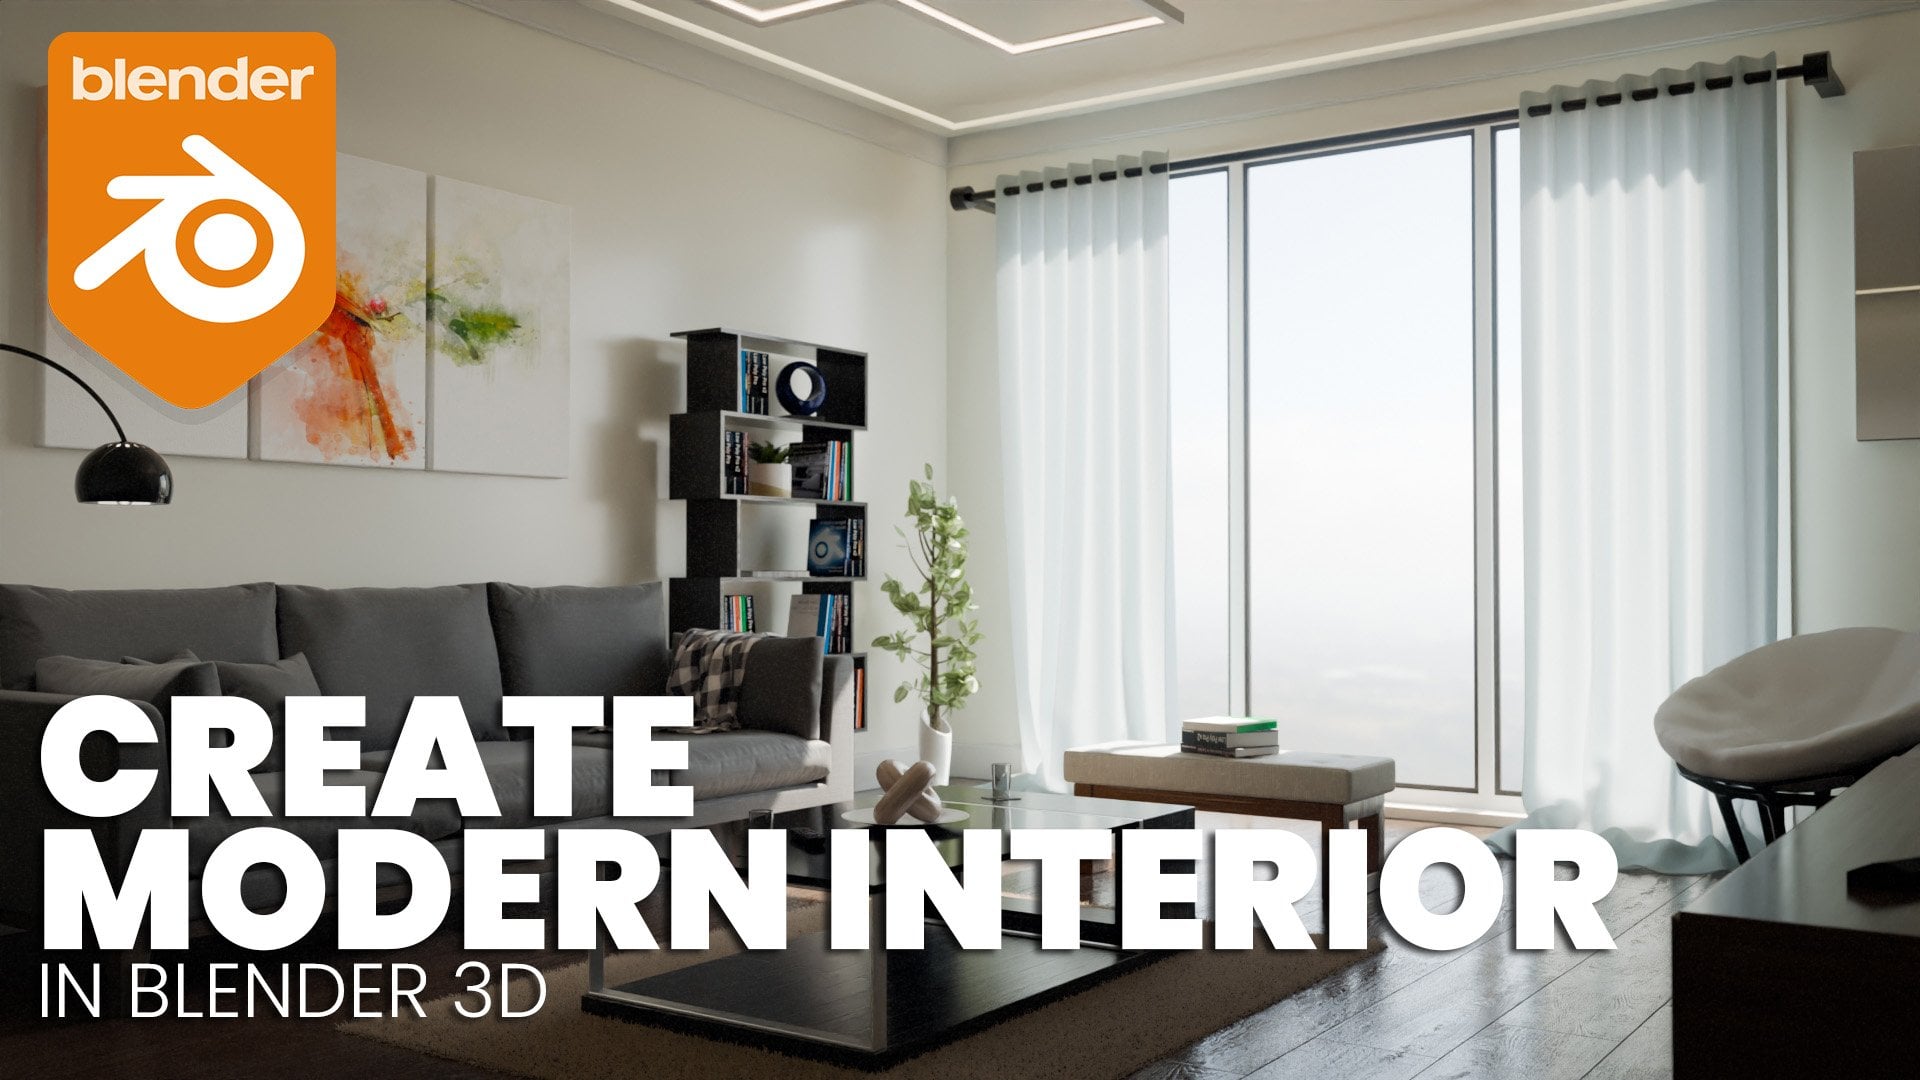
visualization and interior design. So at the end of this course, this is what you're
going to have. Or you're gonna have
something similar to this. It might be that you
decide to sort of take it your own way and do things
a little bit different. And I hope you do. I
encourage you to do so. But at the end of the
course, you should have something looking like
this, if not better, and it's my job to guide you through this process and get
you all the way to the end. If for any reason you're struggling with any
elements of the course, then please don't
hesitate to contact me, and I'll do everything I can to help you through and figure out
what the problem might be. It's in my interests to
make sure that you enjoy this course and you get
everything that you hope from it. So please don't
hesitate to contact me. And thank you, by the way, thank you for purchasing this course, and I really hope that you
enjoy it. I think you will. And I'm sure that you'll
get a lot from it. Okay, so the reason
for Lecture one, basically, is just
an introduction. And just to show you
what's included with the course and sort of give you an idea of what
you're gonna do with it. So this is what the end result will
look like, as you know. So what I need to do now is show you what you
have to do with this. So the first thing
I want to do is show you the reference images. So included in the course on the lecture where we start to import them are the
reference images. I'll go ahead and
bring those in. So we have three reference
images that we will import into our scene and
scale up to the correct size. We have some dimensions on
these as well to help us scale to the correct size
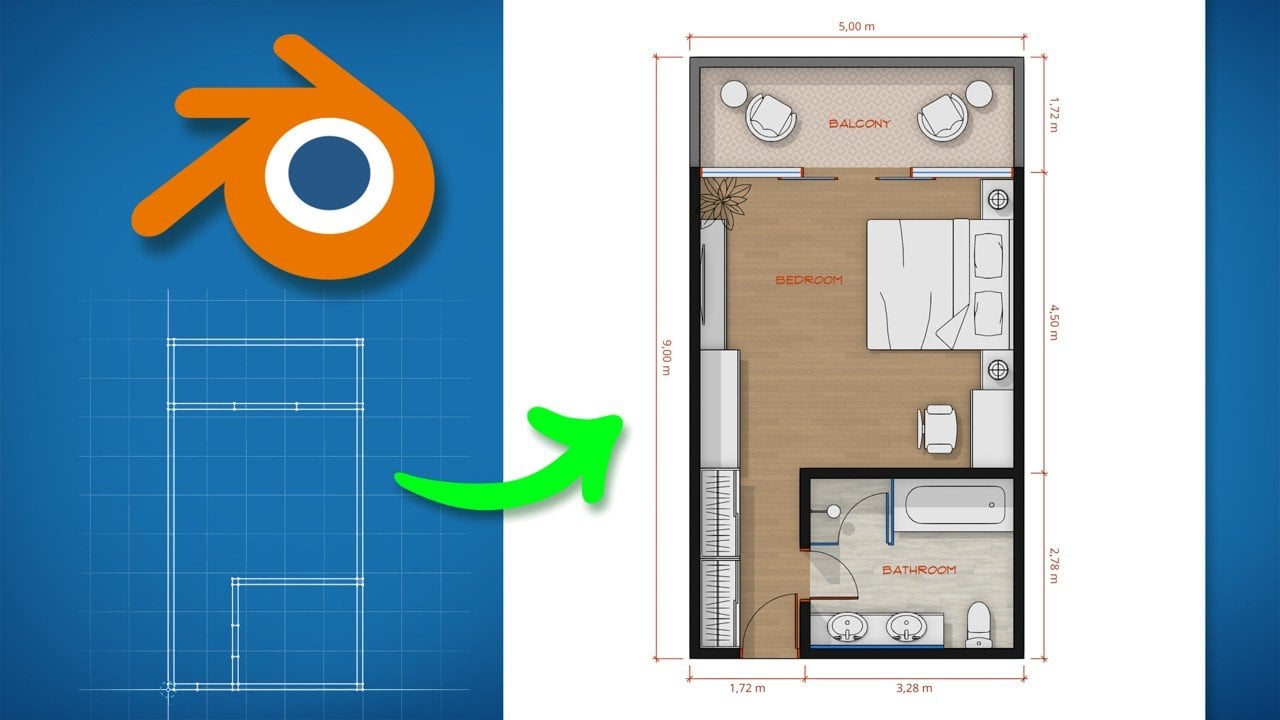
and use as a quick check. So this is the first floor
plan view, as you can see. So we have bedroom
one, as we'll call it, and bedroom two and a
stairway and a bathroom and the outline of the pool and the outline of the
property boundary wall. And we also have
the front elevation showing us the overall
heights of the property and, again, the boundary
walls, et cetera. And we have one more, which is the plan view of the ground
floor, showing us, again, the actual property walls and
a few pieces of furniture, the outline of the kitchen, and the property boundary wall
and the pool outline again. So these reference images
are included in the course, and they're attached to the
lecture where we start to import these into our blender. The other thing,
two things which are included in this course, let me just bring this
file in for a moment. Our texture sets, let me
just make the view slightly better is our texture
sets and our assets back. So if I go ahead and
click on the texture set. So this is actually attached
to this lecture right now, so you can go ahead and use
this whenever you want. And these are textures
I've created, and they're yours now, as well. So you can use them
in this course and anything else going forward
that you want to use them. So let's just click on one, and I'll click on
Stone and Tiles. And within this one, we have
floor tiles and marble, polished concrete, pool edge
tiles, and rough concrete. So if I go ahead
and click on one, maybe I'll click on
this floor tiles one. And within this, we have
what's known as a texture set. So a complete texture, as you see in blender, applied to a component or an object is made up
of a texture set. And a texture set is
made up of texture maps. So within this texture set, we have four texture maps. We have the base color,
as you can see here. We have the displacement, the
normals, and the roughness. All of those make
up the texture set. And you'll find
that in common with all the other textures that
I've included in this course. Some might actually
have five texture maps. Maybe there might be a
metallic or an Alpha, but they will all have
a set of texture maps. And the other thing
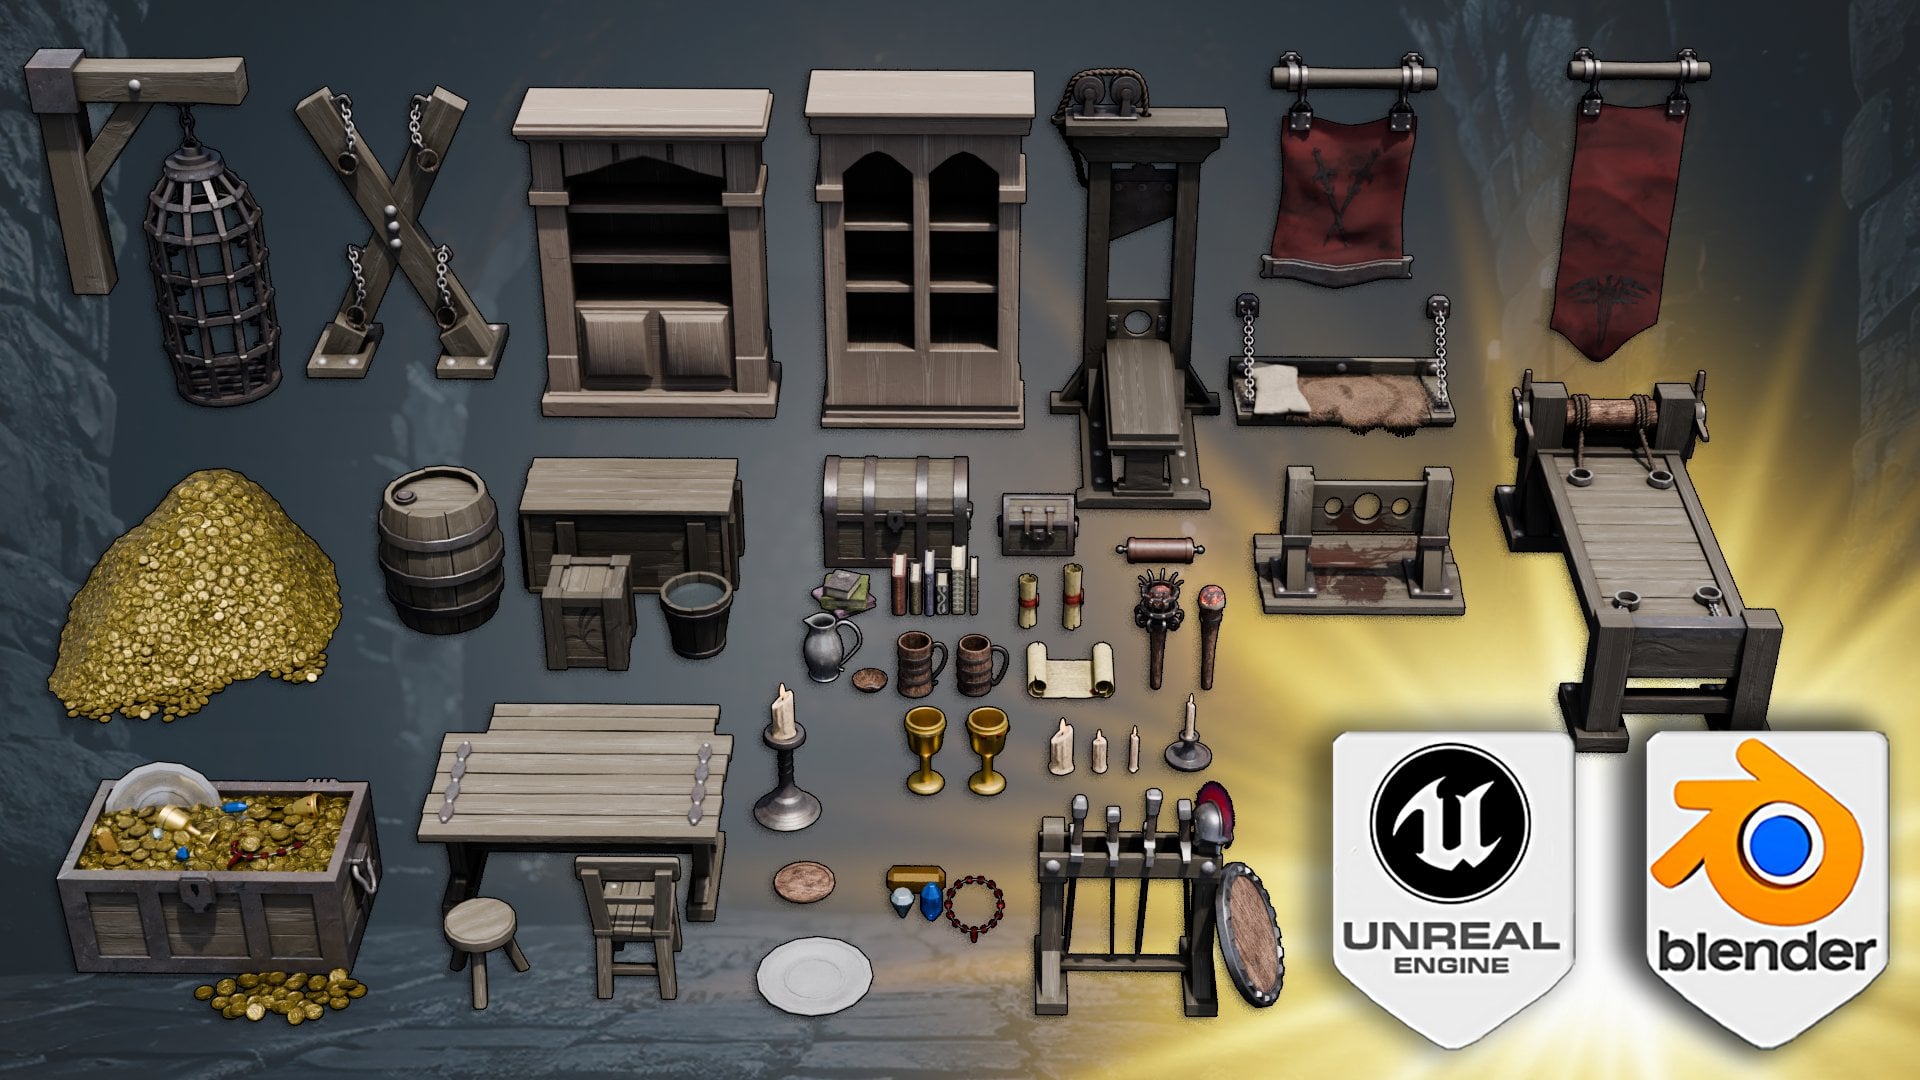
that is included in the course is the assets pack, which, again, is
completely yours now. You can use it wherever you want in any projects
that you're on. So I'll go ahead
and click on that. So here's a video
of the assets pack, which is attached
to this course, and we have a sofa
and a headboard, and we have a hot
tub and a day bed and a lamp set and a floor lamp. And all that, again, is absolutely included
in this course, and you can use it
wherever you want. Looking at the actual sofa, which is kind of gone again now, we will come back
round to just a sec. But the sofa element is included in the
actual asset pack. But I also cover in the course how to make
this because I think it is an important element of the course to learn how
to do soft furnishings. So we'll learn how to create these pillows and we'll
learn how to create sort of piping details on upholstery
and timber and how to create wrinkles and
soft edges on items. So even though it's included, if you wish to sort
of fly past it, I also show you
how to make this. So, yeah, that's pretty Oh, actually, there's one more
thing I want to show you. I'm going to bring this in. And this is called
My Mood Board. I can't share these images with you because of copyright
rules and regulations. So I can advise you to create your own mood
board for this course. Even though the inspiration
is here in our blender scene, it's a good exercise to go ahead and create your
own inspirations. So you can see here that I've dragged and dropped
images into this. And some of these images, you can actually see that I've used inspiration in this one. So that the software I used to create my moodboard
is called PureRef. And you can go ahead
and download that. It's absolutely free. And once you download
it, you can go ahead and start dragging
images in and just laying out a nice mood board some inspiration as
you model your house. So I use Pinterest quite
a lot because I find that full of nice
images and nice ideas. And you can just literally
just dragon drop with Pinterest directly into PRF. So this is something I wanted to show you. It's
completely optional. You don't have to do this, but some of these images
you can see that I do use or are inspiration for the house that we're
going to build. This one here is kind of the
keystone image that I used. I did reduce the height. I find this a little
bit top heavy, so I reduced that within hours. But, yeah, you can
see the inspiration. Go ahead and drag
this out away again, Yeah, you can see the
inspiration from that photo. Okay, so in the next lecture, let's start learning
about blender. Alright, thanks very much. And I'll see you in the
next one. Bye bye, Fino.
3. Lecture 2 User Interface Basics: O Hello, and welcome to Lecture two of our
architectural animation course. And here we are. This is blender. This
is what it looks like. And maybe you're looking at this user interface and thinking, Wow, what does all
this stuff do? And it's quite scary and a
little bit intimidating? Don't panic. Together,
we're going to learn this, and it's going to
be a lot of fun. And if you complete
this course at the end, you will have developed and learned a whole
new set of skills, which is just well, it's limitless with potential. And blender is a brilliant
piece of software. Sometimes I just can't
believe it's free. Search on YouTube,
maybe you can find some amazing animations from very skilled people
using blender. I suggest one called Charge. Maybe watch that.
It's just amazing. I don't think I can
show you on U Dim because of copyright laws, but yeah, go and
check that one out. So, let's get on with this. When you open blender for
the first time or you open a new project, this is
what you're going to see. In the center here, you have what's known as
the splash screen. So you have some
previous projects there. So if it's the first
time, then you won't have any of these and you have
some basic settings. I don't really use it. So just click anywhere else,
and it'll disappear. You're also every time
you open a new project, you're going to get these
three items on the screen. So you're going to get a camera, a light, and a cube. And what blends done is it
set up for you a basic scene. This whole thing together, everything that
you see is called the UI or the user interface. And that's a generic term used for almost all
modeling software. So I don't want to go into too much detail or too
much depth about what all these settings and functions
and buttons and tabs are because I think the best way for you to learn
this is to just do. So we'll pick all this
up as we start modeling. We're going to start modeling
at quite a slow pace. I'm going to go into a
lot of detail and try and explain absolutely
everything that I do. So don't think that I'm
going to go tearing off and you're needing to stop and start stop and start to keep up. We're going to start
at a nice slow pace. And as we progress
through the lectures, we will slowly pick up the pace. So, the first thing I want to do really is just change
the appearance of this UI a little bit just
to suit my preferences. What I find is I find that
the standard settings, everything is a little too small and makes it a slight
strain on the eyes, especially if you're looking at this screen all day,
which is what I do. So I'm going to go over here to edit and go down to the
bottom to preferences. And on the interface here, in the displayed Pat tab,
I'm going to change this. I'm going to use this arrow here to ramp this up to about 1:20. That's my personal preference. Now everything is
nice and clear, a decent size, no longer
a strain on the eye. That's pretty much what I want. You can tweak this to suit
you exactly how you like it. So don't think you
have to be 120. You can do whatever you want. Then you adhere to system. And within this tab, the cycles render devices, I'm going to make sure
that my GPU is selected. So I'm going to make
sure there's a tick in this box next to my GPU. In this case, it already is. You want to make sure that it's not the
other way around and you just have your CPU
highlighted or selected. You want to make it so
you're sure it's your GP. You can have both of
them if you want. I don't find a huge advantage
to it, but you may, but that's my personal
preference to have just this one selected. These are settings, which are dedicated to the
type of GPU that you have, so I'm using it invidio, so I use Qa setting or
I could use optics. If you're using a
different type of GPU, then maybe you want to
Google it and find out which one is best
suited to your GPU. The other thing I
want to do here is on undo steps in the
memory and limits is just slide across and up
that to the maximum, 256. And that's it. We're down in here, so I'm going
to close that. The next thing I
want to do is go to the bottom to hear
what's known as the status bar and right click there and turn on
scene statistics. This will show us the amount
of faces on this cube. I'll just list them for us, the amount of vertices within this cube and the amount
of tries within this cube. And there we go.
So we'll do that. And then the last thing I
want to do here and this one, if this one isn't visible, you can hit N on your keyboard to bring it in if
it's not visible. So here with clips Start, I want to add an extra zero to the right of
the decimal point. So I'm going to put
it right there, add an extra zero there. That's it. And what that's going to allow us to do is
when we zoom in on the item, it's going to make
sure that we can see that item for longer
before we clip inside it. I find sometimes a bit frustrating that as
I get close to it, it suddenly vanishes, and
I see inside the item. So that's what that's for. And now happy with
the interface. That is pretty much
how I like it to be. And so what I'm going
to do is go to a file, and I'm going to go to defaults, and I'm going to
save startup file. So I'm going to click on
that and save startup file. Now, every time I open blender, my preferences will be saved, and it'll start up with
my preferences in mind. Okay. What else? What's next? I want to show you this
tab on the left hand side. Incidentally, sometimes
if that vanishes, just press T, and
it'll bring it back. This is actually
known as the tab bar. I just at this
stage, want to show you two things on the tab bar, which is this one and this one. This one here is called
the selection box. So if I hold down the left mouse button
and drag my mouse, I can create a selection
box around that cube. There we go. Now that
cube is selected. So I'm going to deselect by
clicking somewhere else. And let's try that again. So hold down the left
mouse button and drag across a square
around an item, and let go, and that
item will be selected. There we go. So that is the selection box, and
that's its purpose. This one here is the move tools. I'm going to select that
pretty much I leave this tab with this
move tool selected. So if I select this cube no, we will see this thing here, which is called the Gizmo. Pretty much all three D
software has a variation of the Gizmo and it's a really important
tool within blender. And you can see on that
there's three arrows, a blue one, a red
one, and a green one. And you can also see these lines running through
the scene as well. These lines are called the ax the red line is
known as the X axis, and this allows us
to move our cube or any object that we've
got from left to right. So we can move it from left
to right in the X axis. The green axis is
known as the Y axis, and that allows us to move our object forward to backwards. And the z axis or the blue axis allows us to
move our object up or down. If we move within an axis, we are moving solely
within that orientation. We're not going slightly
sideways or slightly up. We're going exactly backwards. We're going exactly left, exactly right, exactly
up, exactly down. We'll also use this tool to rotate and we'll
use it to scale. And learning the axis, learning which
axis is which one. So the red being the
X, the Y being the Y, the z being green being the Y, the blue being the Z is quite important for a lot of different
reasons within blender. And you'll see that
as we go through. So that is the gizmo and that's the basic
functions of it. The next thing I want
to show you is how we display within this.
This is our viewport. So the screen we're actually
seeing displaying our items, we describe as the viewport. The whole thing, the
whole entire everything is the user interface, but within this section
is our viewport. So these tabs here on this corner control how we
display within our viewport. So here we have our
wireframe display. Here we have our solid display. This one is our material
preview display, and this one is our
full rendered display. If I go ahead and click
on the wireframe now, this is a very
useful display mode. It allows us to see more of the geometry in one
time and allows us to select a certain corner of the geometry whilst being
in different angles. So let's say that
far corner there. If I wanted to select that, but I wanted to display
it from this angle, I would use the
wireframe display. If I wanted to select maybe this corner and this
corner at the same time, again, I could use the
wireframe display. So this year is
our solid display, and this is the
most common display we will use in our viewport. And this is our kind of standard display
within our viewport. Here we have our material
preview display. So this will display our textures and our
colors on our object, but in a more basic setting, it won't display in
its absolute best, but in a lighter setting. And finally, we have a
full rendered version. So in our full rendered version, it will show us exactly
or not exactly, but it will show us
what our finished model is going to look like. So a full rendered display is quite demanding on your GPU, because it's doing something
called real time rendering. So every time I move my objects, it's reapplying my textures
to those surfaces. When we get to a stage that we've kind of finished
modeling our house, we'll use the rendered
mode quite a lot to view our surfaces and to add lighting and shaders
and start looking at HDRIs. And it's at that stage that we'll start using
our rendered view. Next thing I want
to show you here is called the outliner. So this lists all the items that we have here
in the viewport. So right now, we have our cube, as you can see, we
can select the cube, and it highlights
within the outliner, or we can do that the
opposite way around. We can select here, and it'll highlight the option
within the viewport. So we also have the camera
and we have the light. So you can see it
selected those. We also have this little eyeball next to each of these items, so we can make that
object vanish within the viewport if we just want to see something else more clearly. So bring those. There we
go. That's our outliner. As our model develops, and we get more and
more components, this list will get
longer and longer. So we'll need to apply a
bit of discipline to this. We'll have to rename
all these items. So if we get more and
more, make sure we got the wheels named
as the wheels, the fenders named as the
fenders, et cetera, et cetera. And then we'll also create sub files so that we can
again, find items easier. Here we have what's known
as the properties tab. So here on the properties tab, if I select this item to
make it work properly, we have all these
little tabs here, and we'll be using a lot
of these different tabs. So we have here this
is the modifiers tab. We have the particles tab, we have the materials tab, et cetera, we have
the rendering tab. So we will adjust our
properties in this area here. The final thing I want
to show you is here is the item or the
transform tab. So if I click on this item here, it will tell us the basic
information about this item. It's going to tell
us the location, and it's going to take that location from the zero
point within the viewpoint. And the zero point
from the viewpoint is where all our axes, our z axis, our X axis, and our Y axis cross. That's known as the zero point or the world origin is
another term for that. We also have the rotation. We have the scale, and
we have the dimensions. We can adjust the size
of this item here, we can adjust its location here, and we can rotate or we can scale it all from
here if we want to. And that's it for Lecture one, guys. Thanks very much. And I'll see in the next one.
4. Lecture 3 Moving: Hello, and welcome
now to Lecture three. In this lecture,
we're going to talk about how we view our component, how we can move
around in blender, how we can pan around the item, how we can zoom in and out, and how we can look
at item directly from the top or directly from the side or directly
from the front. We're also going to
look at how we can actually move the
component itself, how, in this case, we can move that cube left, right, up down. We touched on it in
the last lecture, but now we're going to look
at it in a bit more detail. So let's start with
how we're going to navigate ourselves within the viewpoint, how
we're going to do this. So the easiest way, which I'm
sure you've kind of already figured out is by pressing
the middle mouse wheel, you can rotate the object. You can sort of fly
around the object. The object is actually
staying in the same position, and it's us which is
moving around it. You can look underneath it.
We can look on top of it. We can do everything
just by pressing the middle mouse wheel. We can do the same thing here. We can actually just click on this XX TSA and just rotate. I never do that. I must
admit. I've never used that. I've never found it very handy, but it is there if it's
something you like. The next thing I want to show
you is zooming in and out, so you can scroll
with your mouse wheel and you'll zoom in and out. It's a little bit incremental. It's a little bit
jumpy, as you can see, but that's the quickest
way to zoom in and out. Now, if you hold down
control and hold down the middle mouse wheel and then just push the
mouse forward, you can zoom in with a little smoother and a
little more control. There we go. So I'm
now going to press the shift button and
the middle mouse button and just pull the
whole thing over. So I'm a bit more center. Now I'll hold the middle mouse, we'll rotate it. That's it. And then I'm going
to press Control, hold down the middle
mouse button, and push the mouse forward
to zoom in with control. There we go. That's a bit more
refined way of zooming in. And that's how we
basically navigate. So, yeah, we can press shift, hold down the middle mouse
wheel, and we can grab. We can hold down the middle mouse wheel and
we can rotate the object. Scroll in or press control, press the middle mouse wheel
and push the mouse forward. And that's how we basically
can move around an object. Now you can see that I'm not rotating nicely
around that cube. I'm off to the side of it. So if I select the cube, press the decimal
point on the numpad, it'll re center for me. And now when I press down
the middle mouse wheel, I'm rotating nicely to. There we go. Next
thing we want to do, just to make it a little
bit easier to understand which angle we are on the
object because a cube, we can't see what's
up or down, really. There's no clear way
of understanding it. So I'm actually going
to click on the item, and I'm just going to press
Delete on the keyboard. There we go. And that's gone. The cube has gone. We might bring it back
later, but for now. So I'm now going
to press Shift A. And I'm going to go to mesh, and I'm going to
go down to monkey. I'm going to bring monkey in. There we go, there's monkey. Money Monkey is the
symbol of blender, and she's actually called Susan. I don't know who
named her Susan, but that's the name
of the monkey. It's a little bit faceted, so a little bit low poly. So just to make it
look a little bit better, go to select the item. Gonna right click, and I'm
going to shade Auto smooth. There we go. That's just
smooth it out a bit for us. Okay. So what I want to do now is show you how
to view the item from what's known as the
orthographic view. The orthographic view just means that we're going to view
it exactly from the front, exactly from the side, and exactly from the top, and then exactly
from the bottom, which is really important
when we're using photographs as a reference
when we're modeling, which we will be doing that. So it's something we
need to understand. So if I press seven
on the numpad, I can view Susan
directly from above, looking directly down on it. That's called the plan view. It's an orthographic view. We're looking
exactly down on it, staring right down the Z axis. If I press Control and seven, I can view it right from
the bottom looking up. If I hit one, I'm now
viewing it from the Y axis. So I'm looking right
down the Y axis, so I'm viewing it
directly from the front. If I hit Control one, I'm going to view it
directly from the back. I'm still looking
down the Y axis, but I'm the opposite
way of the Y axis. Orthographic view from the back. If I hit three,
I'm viewing Susan from the right on the x axis. If I hit Control three, I'm viewing Susan from the left. On the x axis. This is the way that we
move orthographically, how we rotate around an
item orthographically, so we can view it
directly from the top, the left, the right, the
bottom, et cetera, et cetera. So that's a cool one to know. If you've got a notepad to hand, it might be worth you actually writing
some of these downs. I don't know about
you, but I find it easy to remember stuff if
I actually write it down. And also, you'll
have a reference. So if you can't quite
remember something, then you can just
refer to your notes on how did I move to
view it from the top, the left, the right, et cetera. So yeah, there we go.
We've learned how to view the item in
many different ways. We've learned how to rotate,
et cetera, et cetera. So now we want to know how
do we move this monkey? How do we move, Susan? So we've touched on the one way, which is using the Gizmo. So, again, if I hover
over this blue arrow, the Z axis, I can
move up like this, moving just in the Z axis. If I press escape, I will cancel that command. And now we can do the
same thing in the axes, so I'll just hover
over this red arrow, and then I'll just move just
in the Xaxis. There we go. And I'll press Escape
to cancel the command. So that's one way of
moving using the Gizmo. The other way of moving is using the transform bar here,
as we've talked about, so we could move here in the X, move over
there like that. Now I can just press Escape and come back,
cancel the command. Same thing as moving the Z. There we go and press Escape
to cancel the command. The final way of moving is to move using the G button to
grab it and to move it. This way, we don't
have to actually hover over the item
when we're moving. So when the scene
becomes more detailed, it's something that
we'll be using. So if I highlight the item
simply by clicking on it, and now I'm going to
press G on the keyboard. And I'm going to press X, and you can see how the X
axis is actually highlighted. That's confirming that we're
going to move in X axis. And now I can simply
just move the mouse, and you can see us moving. And then the transform
bar is telling us how much we're moving. There you go. I'm going to press escape
to cancel that command. So I could do the
same in the Z axis, so I'm going to press G and Z. And now I'm just going
to move the mouse to move up and the Z axis. As you can see, the
cursor doesn't have to be anywhere near the actual component that
we've selected now. So it's a really
handy way of moving. G to press Escape to cancel. I'm going to do it
one more time, of course, in the Y axis. So G, the green axis,
which is the Y axis, go to press Y, and it's
highlighted the Y axis, and now I can just move it. And this time, I'm going to
left click and keep it there. Now, if I wanted to
return to the zero, after I finished
the command, yes, I could go here and I
could type in zero. Another way of doing it is
just going back one command. So to do that, I can
press Control Z. And that's taking us back. That one command that's
canceled off or just gone back one command. So Control Z. And that's how we move
around in blender. That's how we move a component
using the Gizmo or G, Z or GX or GY or
using the transform. Okay, thanks very much, and I'll see you in
the next lecture.
5. Lecture 4 Subdivision Modifier: Hello, and welcome
now to Lecture four. We're going to talk
about something called the subdivision
surface modifier. And this is a really important
tool within blender, and it's used generally in almost all mesh based
modeling softwares. So whether it be three DS
Max or Maya or blender, they all have a subdivision
surface modifier or a variation of that. What the subdivision surface
modifier actually does is it increases the complexity of
the mesh of the component. So we have to sort of
figure out how to use that without making the
mesh of our item too much. And I'll show you that and
show you how we do it. So let's left click anywhere to get rid
of the splash screen. And then let's hold
down the left button, drag a selection
square over the light, and press delete,
and do the same with the camera
and press delete. So we've just got the cube left. So now let's actually
select the cube, and let's just pull
it to one side. Using the Gizmo, we hovered over the little arrow there
and we left clicked, and then we grabbed it,
and we pulled it over. Let's actually add a monkey now. So let's press Shift A
and mesh, and the monkey. There we go. And the
monkeys come in. Let's reselect the monkey. And now let's press Shift D.
And let's press X because we want to move the copy
we've just created using Shift D on the X axis. So we'll do that. There we go. Et's do that again. So we've still got that
monkey highlighted. Let's press Shift D, and it's gone white to symbolize that the copy has been made. Let's press the X button to
move the copy in the X axis, and then let's just
slide the mouse over. We've got three copies of
the monkey. Here we go. So I'm going to press
down the shift button and the middle mouse button and just grab the whole thing and bring it over to sort
of center ourselves. Okay. So let's select the cube. And it's a cube, isn't it? It's a very simple structure. It's got eight sides. I'm sorry, it's got six sides, and it's got eight corners. Let's press the tab button now. What that's done it's put us into what's known
as the edit mode. And whenever we do any modeling, chances are we're going
to be in the edit mode. In this mode, we can
actually move the sides, we can add sides. We can do pretty much everything
within the edit mode. We can do some basic things in the mode we were in before, which was object mode. We can scale and we can rotate. But anything beyond that, we will do here
in the edit mode. At the moment, if you look
at these three items here, we have this one here, which is the vertex selection. The vertex or the vertices, if it's the plural, is the junction points
between the edges. So it's these little dots. So we have this edge, this edge, and this edge, the three edges, they're
joining in the middle, and at that point,
we get a vertices. This one here is edge selection, so let's press that, and
then we can select an edge. There we go. I'm just left clicking on an
edge to select it. And then finally,
I'll go to this one. And this one, this
is face selection. So now I'll left click on
that and I can select a face. There we go. I'll go back to this
one to vertices, and all I really want
to demonstrate is the simplicity of the
mesh on that cube. It's as simple as it
can get right now. So let's hit the tab
button to go out of Edit mode back
into object mode. Let's select the item
again, the cube. Let's go over here
to the spanner, which is the modifiers. Let's add a modifier, and we will add a
generate modifier and we will add
subdivision surface. You can see what that's done. It's actually taken that cube and turned it into a
very basic sphere. We could actually here we could go over to this levels viewport, and we could just click that up and we could make it
an even nicer sphere. And what we could
do then is right click on the item
with it selected, and we could go to
shade Auto smooth and we could smooth
out even more. So that is what the subdivision
surface modifier does is it takes all the edges and smooths them out
as much as possible. But we need to learn how to control that because obviously we need to figure
out how we can use that tool to model accurately
to what we want to build. So to do that, what we're actually going to
do is first of all, turn on this one on
cage. So select that. And then hit the tab
button on the keyboard. First of all, select the cube, then hit the tab button
on the keyboard, and you can see we've
got this mesh again. So how can we turn this into
rather than being a sphere, a cube, but with softened
edges, with rounded edges. So let's go here so
we can select edges. Let's select this edge here
and then press Control R. And that's put a
set of extra edges in a loop of edges on
that cube or sphere, as we can see it right now. Just press the
leftmost button once, and that's applied to our cube. And you can see straightaway
what that's done by adding some extra
framework to it, it's restricted the amount of movement for the subdivision
surface modifier. It's put some extra
framework there, and the subdivision
surface modifier has to listen to that and adjust the way the curves
are being added. Let's actually just move
the mouse up and take that curve closer to the top
and then select that there. Let's select this edge
here, press Control R, and then hit the left
mouse button once, and then bring the mouse down. So that do it anywhere around about there and
left click again, move away from the
object and left click again to
deselect that item. And there you go. You
can see what we've done. So let's do that again. So
let's select this edge now. Press Control R, and let's add an extra ring of edges
there. So left click. And I'm going to move that
over there like that. There we go. And going
to select this edge. Gonna press Control
R. Left click once, and then move the mouse over. There we go. And I'm
going to drop that just there like that. Cool. Let's hit the tab key
to go out of Edit mode. And you can see what's happened. So we have a cube now
with some softened edges. Let's go ahead and apply that. So hit that button there
and press the apply button. So we're going to apply the
subdivision surface modifier. There we go. And that's soften the
edges slightly more. So you can see now how
we can actually use the subdivision
surface modifier to our advantage to
soften all the edges, create new shapes, but still have some say on what
actually happens. So let's see what we
can do with Susan now using the subdivision
surface modifier. So first of all,
with this first one, you can see that this
is really faceted. It's really jagged
edged and quite crude. And this is what
we call low poly. So if we go ahead and select
it and then hit the tab key, we can see what mesh has been
used to build this monkey. So let's go up here
to the vertices. Vertices selection
one, press that, and you can see the vertices that we have within the monkey. It's quite basic, low poly. The more edges and the more vertices and
the more faces we have, the more complex the model gets. And the more complex
the model gets, the harder the
computer has got to work to be able to model it. And then also to render it when we start applying textures. And we have to
keep that in mind, because as we build our
scene and our environment, if we make the mesh too complex, we're going to get
to a point where your computer or blender just
can't handle it anymore. It'll just get too complex. So we always have to keep the mesh as simple
as we can whilst also keeping the model itself looking as realistic
as possible. So it's a balancing
act between keeping the mesh low but also keeping
the model looking good. So what can we do?
Let's hit the tab key again to go out of Edit
mode back into object mode. And select Susan, right, click click on
Shade Auto Smooth. Then you can either come down here to this little tab here, which says shade auto smooth
or you can go over to the modifiers tab here and adjust the angle
at this point. I'm just going to go
ahead and adjust this over now to just find that nice smoothing
point by adjusting the angle of the
shade auto smooth. And I'll just keep on going
with that until I find that kind of sweet spot when
everything's looking nice. I think I'll leave that
about there at about 74. So the shade auto smooth does not actually
affect the mesh. We've not increased the
complexity of the mesh at all. It's purely Blenders
little visual trick. It's just lying to us a
little bit about the surface. It's visually improved it, but it's not increased the
complexity of the mesh. So that is a good way of
actually just improving our model without increasing
the complexity of the mesh. So let's apply the subdivision
surface modifier to this. So I'll go there. We'll
just select on the item. So left, click on the monkey. Go over to here,
click on the spanner. Add modifiers,
generate modifiers, subdivision surface modifiers, and we will keep that
at its absolute basic. So we'll just keep that at one. So we'll leave that like that. Actually, let's apply it. So let's apply that subdivision surface
modifier, and there we go. But then let's also add
the shade auto smooth. So you can see straightaway the improvement
between the models. So we have a standard model with just the shade auto smooth. Now for this one, we've applied the most basic level of
subdivision surface modifier, and let's see what
can do with this one. So let's click on this one, and let's add the modifier, generate subdivision
surface modifier, and let's click this to the top. There we go. And
then let's apply that So let's hold down the left button and pull a selection window over
all three monkeys. Let's hit the tab key
to go into Edit mode. And there we go. It took a minute
because now we've got some differences
in the mesh. We've actually loaded
our computer up quite well now with
quite a lot of polies. So at this one. This
is the first one, which is the low poly version. You can see that our
mesh is really simple. Our vertices are as
minimal as possible. We're actually keeping
a reasonable shape. And we've applied
the auto smooth to that to improve the
looks of our model, but we've not increased the amount of vertices
or faces or edges. So here, we've applied the subdivision surface modifier at its most minimal level. And then we've applied
the auto smooth, and you can see straightaway how much nicer this one looks, but you can also
see that there is an increased amount of
vertices, faces, and edges. Here we've maxed out the
subdivision surface modifier, and it just appears
black. It's not black. It's just that it's so
dense with the vertices, edges and faces that
it appears black. But if we zoom in, there you go. That is a lot of vertices. So that's my point
that you cannot just just max everything out on
subdivision surface modifiers. It will eventually just crash your computer
or crash blender. Because if you think about this house we're going to build, we need to constantly consider the complexity of the mesh. So all the time, we have to consider the mesh that
we're building and the complexity of the mesh and keep the items looking
as good as possible, but at the same time, keep
the mesh as low as possible. So low poly. Keep the vertices
as a minimal level, keep the faces and the edges, at the least we can do whilst keeping our actual
modeling looking good. So that is the subdivision
surface modifier. I'm gonna delete this
one straightaway and let my computer breathe. Thanks very much.
And I'll see you in the next lecture.
Bye bye, Fino.
6. Lecture 4: Hello, and welcome
now to Lecture four. We're going to talk
about something called the subdivision
surface modifier. And this is a really important
tool within blender, and it's used generally in almost all mesh based
modeling softwares. So whether it be three DS
Max or Maya or blender, they all have a subdivision
surface modifier or a variation of that. What the subdivision surface
modifier actually does is it increases the complexity of
the mesh of the component. So we have to sort of
figure out how to use that without making the
mesh of our item too much. And I'll show you that and
show you how we do it. So let's left click anywhere to get rid
of the splash screen. And then let's hold
down the left button, drag a selection
square over the light, and press delete,
and do the same with the camera
and press delete. So we've just got the cube left. So now let's actually
select the cube, and let's just pull
it to one side. Using the Gizmo, we hovered over the little arrow there
and we left clicked, and then we grabbed it,
and we pulled it over. Let's actually add a monkey now. So let's press Shift A
and mesh, and the monkey. There we go. And the
monkeys come in. Let's reselect the monkey. And now let's press Shift D.
And let's press X because we want to move the copy
we've just created using Shift D on the X axis. So we'll do that. There we go. Et's do that again. So we've still got that
monkey highlighted. Let's press Shift D, and it's gone white to symbolize that the copy has been made. Let's press the X button to
move the copy in the X axis, and then let's just
slide the mouse over. We've got three copies of
the monkey. Here we go. So I'm going to press
down the shift button and the middle mouse button and just grab the whole thing and bring it over to sort
of center ourselves. Okay. So let's select the cube. And it's a cube, isn't it? It's a very simple structure. It's got eight sides. I'm sorry, it's got six sides, and it's got eight corners. Let's press the tab button now. What that's done it's put us into what's known
as the edit mode. And whenever we do any modeling, chances are we're going
to be in the edit mode. In this mode, we can
actually move the sides. We can add sides. We can do pretty much everything
within the edit mode. We can do some basic things in the mode we were in before, which was object mode. We can scale and we can rotate. But anything beyond that, we will do here
in the edit mode. At the moment, if you look
at these three items here, we have this one here, which is the vertex selection. The vertex or the vertices, if it's the plural, is the junction points
between the edges. So it's these little dots. So we have this edge, this edge, and this edge, the three edges, they're
joining in the middle, and at that point,
we get a vertices. This one here is edge selection, so let's press that, and
then we can select an edge. There we go. I'm just left clicking
on an edge to select it. And then finally,
I'll go to this one. And this one, this
is face selection. So now I'll left click on
that and I can select a face. There we go. I'll go back to this
one to vertices, and all I really want
to demonstrate is the simplicity of the
mesh on that cube. It's as simple as it
can get right now. So let's hit the tab
button to go out of Edit mode back
into object mode. Let's select the item
again, the cube. Let's go over here
to the spanner, which is the modifiers. Let's add a modifier, and we will add a
generate modifier and we will add
subdivision surface. You can see what that's done. It's actually taken that cube and turned it into a
very basic sphere. We could actually here we could go over to this levels viewport, and we could just click that up and we could make it
an even nicer sphere. And what we could
do then is right click on the item
with it selected, and we could go to
shade Auto smooth and we could smooth
out even more. So that is what the subdivision
surface modifier does is it takes all the edges and smooths them out
as much as possible. But we need to learn how to control that because obviously we need to figure
out how we can use that tool to model accurately
to what we want to build. So to do that, what we're actually going to
do is first of all, turn on this one on
cage. So select that. And then hit the tab
button on the keyboard. First of all, select the cube, then hit the tab button
on the keyboard, and you can see we've
got this mesh again. So how can we turn this into
rather than being a sphere, a cube, but with softened
edges, with rounded edges. So let's go here so
we can select edges. Let's select this edge here
and then press Control R. And that's put a
set of extra edges in a loop of edges on
that cube or sphere, as we can see it right now. Just press the
leftmost button once, and that's applied to our cube. And you can see straightaway
what that's done by adding some extra
framework to it, it's restricted the amount of movement for the subdivision
surface modifier. It's put some extra
framework there, and the subdivision
surface modifier has to listen to that and adjust the way the curves
are being added. Let's actually just move
the mouse up and take that curve closer to the top
and then select that there. Let's select this edge
here, press Control R, and then hit the left
mouse button once, and then bring the mouse down. So that do it anywhere around about there and
left click again, move away from the
object and left click again to
deselect that item. And there you go. You
can see what we've done. So let's do that again. So
let's select this edge now. Press Control R, and let's add an extra ring of edges
there. So left click. And I'm going to move that
over there like that. There we go. And going
to select this edge. Gonna press Control
R. Left click once, and then move the mouse over. There we go. And I'm
going to drop that just there like that. Cool. Let's hit the tab key
to go out of Edit mode. And you can see what's happened. So we have a cube now
with some softened edges. Let's go ahead and apply that. So hit that button there
and press the apply button. So we're going to apply the
subdivision surface modifier. There we go. And that's soften the
edges slightly more. So you can see now how
we can actually use the subdivision
surface modifier to our advantage to
soften all the edges, create new shapes, but still have some say on what
actually happens. So let's see what we
can do with Susan now using the subdivision
surface modifier. So first of all,
with this first one, you can see that this
is really faceted. It's really jagged
edged and quite crude. And this is what
we call low poly. So if we go ahead and select
it and then hit the tab key, we can see what mesh has been
used to build this monkey. So let's go up here
to the vertices. Vertice selection
one, press that, and you can see the vertices that we have within the monkey. It's quite basic, low poly. The more edges and the more vertices and
the more faces we have, the more complex the model gets. And the more complex
the model gets, the harder the
computer has got to work to be able to model it. And then also to render it when we start applying textures. And we have to
keep that in mind, because as we build our
scene our environment, if we make the mesh too complex, we're going to get
to a point where your computer or blender just
can't handle it anymore. It'll just get too complex. So we always have to keep the mesh as simple
as we can whilst also keeping the model itself looking as realistic
as possible. So it's a balancing
act between keeping the mesh low but also keeping
the model looking good. So what can we do?
Let's hit the tab key again to go out of Edit
mode back into object mode. And select Susan, right, click click on
Shade Auto Smooth. Then you can either come down here to this little tab here, which says shade auto smooth
or you can go over to the modifiers tab here and adjust the angle
at this point. I'm just going to go
ahead and adjust this over now to just find that nice smoothing
point by adjusting the angle of the
shade auto smooth. And I'll just keep on going
with that until I find that kind of sweet spot when
everything's looking nice. I think I'll leave that
about there at about 74. So the shade auto smooth does not actually
affect the mesh. We've not increased the
complexity of the mesh at all. It's purely Blenders
little visual trick. It's just lying to us a
little bit about the surface. It's visually improved it, but it's not increased the
complexity of the mesh. So that is a good way of
actually just improving our model without increasing
the complexity of the mesh. So let's apply the subdivision
surface modifier to this. So I'll go there. We'll
just select on the item. So left, click on the monkey. Go over to here,
click on the spanner. Add modifiers,
generate modifiers, subdivision surface modifiers, and we will keep that
at its absolute basic. So we'll just keep that at one. So we'll leave that like that. Actually, let's apply it. So let's apply that subdivision surface
modifier, and there we go. But then let's also add
the shade auto smooth. So you can see straightaway the improvement
between the models. So we have a standard model with just the shade auto smooth. Now for this one, we've applied the most basic level of
subdivision surface modifier, and let's see what
can do with this one. So let's click on this one, and let's add modifier, generate subdivision
surface modifier, and let's click this to the top. There we go. And
then let's apply that So let's hold down the left button and pull a selection window over
all three monkeys. Let's hit the tab key
to go into Edit mode. And there we go. It took a minute
because now we've got some differences
in the mesh. We've actually loaded
our computer up quite well now with
quite a lot of polies. So at this one. This
is the first one, which is the low poly version. You can see that our
mesh is really simple. Our vertices are as
minimal as possible. We're actually keeping
a reasonable shape. And we've applied
the auto smooth to that to improve the
looks of our model, but we've not increased the amount of vertices
or faces or edges. So here, we've applied the subdivision surface modifier at its most minimal level, and then we've applied
the auto smooth, and you can see straightaway how much nicer this one looks, but you can also
see that there is an increased amount of
vertices, faces, and edges. Here we've maxed out the
subdivision surface modifier, and it just appears black. It's not black.
It's just that it's so dense with the vertices, edges and faces that
it appears black. But if we zoom in, there you go. That is a lot of vertices. So that's my point
that you cannot just just max everything out on
subdivision surface modifiers. It will eventually just crash your computer
or crash blender. Because if you think about this house we're going to build, we need to constantly consider the complexity of the mesh. So all the time, we have to consider the mesh that
we're building and the complexity of the mesh and keep the items looking
as good as possible, but at the same time, keep
the mesh as low as possible. So low poly, keep the
vertices as a minimal level, keep the faces and the edges, at the least we can do whilst keeping our actual
modeling looking good. So that is the subdivision
surface modifier. I'm gonna delete this
one straightaway and let my computer breathe. Thanks very much.
And I'll see you in the next lecture.
Bye bye, Fino.
7. Lecture 5 basic Modelling: Hello, and welcome
now to Lecture five. And let's have a
first go at modeling. Let's see if we can
model something together, something very basic. Let's see if we can
do a sort of a cabin, a sort of pioneer cabin. Let's see what we
can do with that. So first of all, just click anywhere to remove
the splash screen. And we have the camera
and we have the light. And let's go ahead
and delete those. So we just grab a selection box around the item by holding
down the left mouse button. Pull over selection, and
then just press X or delete. There we go. So now we
just have the cube. So you've got hopefully
this view up here. And if you haven't, press N
on the keyboard to get it. There we go. And then go
ahead here and click on item. So we want to look at this cube. Now, let's actually set the
proportions of this house. So I'm going to make
it in the Y axis. I'm going to make it 10 meters. I'm gonna press Enter, and there it is 10 meters. And then in the X
axis, the red line, I'm going to make it
half. It's Y axis. So I'm going to make
it five and enter. And I'm going to make it in height 3 meters and click ter. So right now, the house
isn't at ground level. It's a half and half. So let's press one on the
numb pad of your keyboard. Come over here to the tab and go to move selection.
There we go. And now just pull it up on the Z axis until it's level
with the top like that. There we go. And there we go. We have our basic size for
our log cabin. Okay, let's have a look here. So it is in the X axis, which is the red line,
it's 5 meters wide. In the Y axis, the green line, it's 10 meters wide. And in the height in the
z axis, it's 3 meters. I'm happy with that. But
the scale is out now. So the scale should
still read one, one, and one since we
haven't scaled the item. We've just changed the
dimensions. So let's fix that. So if you hold down
Control and press A, you'll get this apply box up and come on down to rotation and
scale and click on that. Before I do want to explain. So the rotation, actually, when we look at it
is zero, zero, zero. So the rotation is correct. But I always just as a
standard thing to do, always click on Rotation scale. In case there is an issue with the scale in the future of
different items we work with, it's instantly corrected too. So rotation and
scale, there we go. Alright, what to do now? Let's go ahead next and
put some height to this. So the first thing I'll do
is I'll tap into Edit mode. I'll hit tab on the keyboard. And right now you can see
we've got vertices selected. So I want edge selection. So I can come up here and I
can click on this like this. But I'm going to start using the keyboard for my shortcuts. So I'm simply going to
press two on the keyboard, and now we have Ed selection. If I press one, we
get vert C selection, two for Ed selection, and three for face selection. You can see it
changing up there as I press one, two, and three. I want two, so I'll go there. I'm going to select
this edge here, but hold shift so I can select more than one edge
and select this one. I'm now going to right click and I'm going to
press on subdivide. And that's simply divided
that face into two halves. It's divided these
edges into two, so it's divided the face into I can now select that
edge there in the middle. Come over here, make
sure we're in move, and just pull that up. And I can actually press one on the keyboard to see it from the exact orthographic view of the side and carry on pulling
that up in the Z axis. I kind of want my ridge
of my roof to be offset. So I'm going to pull
it over in the X axis now to get kind of
an offset ridge. There we go. And that's kind of our very basic
log cabin shape. The next thing I want
to do is actually grab a copy of this. So I'm actually going to
just grab this face here. So I'll press three
on the keyboard, grab this face, hold down
Shift and grab this one. And now I'm going to press I'm going to make a copy of this. So to do that, I'm
going to press Shift D. And now I'm going to press Z, and I'm going to pull that
copy up in the Z axis. And there it is moving
straight up in the Z axis. Now I want to take
that and separate it from the model of the walls. So that's still selected,
I'm going to press P, and I'm going to separate by selection because we have
these items selected. So I'm going to press
separate by selection. There we go. I'm now going to
hit the tab button. To tap out of Edit mode
back into object mode. And now we have two cubes. We have this one and this one, and you can see here in the outline this
one and this one. So let's go ahead and name that. So here, this is I'm going
to call this the walls. I'm going to come up
here to this cube because that's the one
that's selected here, so it's selected there.
And double click on it. And I'm going to call it
the walls. There we go. Whoops. Walls. That's got it. And now we're going
to collect this one here and I'm gonna
double click on it, delete that and
call it the roof. There we go. So now the
outliner is ordered for us. We have the walls and
the roof. There we go. Let's have a look at the roof. And the scales are correct and the rotations collect,
so we're happy there. So let's go ahead and
give it some overhangs. So the first thing
I'm going to do is scale it in the Y axis. I'm going to press S. Now if
I scale just by doing that, it scales the whole roof. And I don't want to
do that. I'm going to press escape to
sup that command. Gonna press S again. And this time, I'm
just going to press Y. So it just scales in the Y axis to give it overhangs
on the side. That's cool. That's
what we want. Now I want to make it overhang
on the front and the back. A lot more on the front
because I want to create like a stoop
on this house. So let's tap into Edit mode
with that, so I'll select it. I'll hit the tab button. I'll press two so it can
go into edge selection. And I'll grab this edge here. Now, the gizmo is not
lined up with the surface. So if I go ahead and
pull out in the X axis, it's changing the
angle of the roof, so it's not going to
match up with the walls. We don't want that.
So I'm just gonna press escape to
cancel that command. And I'm going to
come up here now to this one, transform,
transformation orientation. I'm going to hit the drop down, and I'm going to
click on normals. And now the gizmo lines up with the surfaces
of this roof. With that done, I'm
going to pull that out to create our stoop on the
front of our property. I'm going to do the
same with this one now, pull that out to create a
little overhang on the. And here on transformation, I'm going to go
back with Global so that now the gizmo lines
up again with the X, Y, and Z axis. Okay, let's actually know. Change the angle of the stoop where it
meets the roof point. So how do we do that?
If we do it now, it's going to change
that whole roof pitch, and we don't want that. So I'm going to press escape. G to select this edge here. Go to whole shift
and select this one. I'm going to right
click and I'm going to subdiv I'm going to go ahead to the transformation
again and go to normals and go ahead
and pull that down. Whoops, grab this one its own and pull that down until
it's level with the wall. Maybe change the angle to see where that is,
and that's good. So I'll grab this one here now. And I'm going to go back here to transformation to
Global and just go ahead and pull that up to change the angle
of the roof that. Okay, that's good.
That's what we want. Let's tap devoted mode, and the scale slightly out. So let's press Control A and apply the
rotation and scale. And now we're going to add our first modifier to this
roof or to this first thing. So let's go over
here to the spanner Add, modify, generate, and we'll come down here to
solidify and click on that. And that's added a small amount
of thickness to our roof. I'm actually just going to hover over this until we get
this horizontal arrow and just drag this in the negative until we get a
bit of roof thickness. So I've got 0.13, and I'll make sure
that even thickness is applied. There we go. I'm happy with that. So I'm
going to go ahead up here, hit this drop down and apply. There we go. I'm going to press three on the numpad now to
get us an orthographic view. Actually, I'm going to press one to see this from
the opposite side. There we go. Gonna grab my roof, and I'm going to pull it down until it's making
contact with the walls. And there we go.
That's looking good. So now let's go ahead and put some doors
and windows in this. So to do that, really, we need
to create some extra mesh. So that's our next step. Let's tap into Edi
mode with the walls. Let's select this edge here, hold down shift and
grab this edge. And now let's create
an extra edge there. So we can either subdivide, but in this case,
we're not going to. We're going to press Control R, and that gives us a
nice edge between them. And now we'll go ahead and
take that up like this. Let's actually view this in the orthographic view,
so I'll press one. I'll press three. And now let's
grab this edge again now. Hold shift and grab this one. And now let's press Control R. And I'm going to scroll the mouse wheel once to get an extra line
in there like that. And there we go. Let's
have a look at that. Let's grab this
line here and take this one down quite
a ways like this. Something like that. Let's grab this line and take this down. And there we go. Maybe let's take this one up a little bit. Something like that. Let's grab the bottom edge
here of our house. And now let's press
Control R again. Take the cursor
closer. There we go. And now just bring that over until it's on the
corner here like this. Let's do that again. So I'll
press Control R and drag that over until we've got about a door's width,
something like that. And now let's do it
a little quicker. So let's press Control R. Bring the cursor close
so you see the loop. Before you left click, scroll the mousewheel
once to get two loops, and now left click and just position those
something like that. There we go. That's good. So now let's go ahead and create our stoop
on our property. Let's press three on the
keyboard so we can select faces. It's changed to
faces just there. Now, I could actually just hole shift and move along
selecting these. But it's not too bad. We've only got a few faces, but let's do this. Let me show you an easy way
of doing this for future. I'll select that first edge. Now I'll hold down Control, go on to the last edge. I don't want to select,
grab that and it'll select obviously the first
edge and the last edge, but all the other
edges in between. Now I want to pull that out. But I can't just pull it out. If I do that, it's going
to do weird things because that face is still
connected to the other faces. Gonna press escape so it
pops back to where it is. I need to extrude
it in that X axis. So I'll press E,
and now just bring that out to create the
stoop to our property. That's good. That's
what we want. Okay, now let's
look at our door. So I'm going to grab
this edge just here. I'm going to right click and I'm going to dissolve that edge, which means we're
going to delete it, but we're not going to delete
the structure around it. If I just go ahead and delete
that, we have a hole there. That's not what we
want. We don't want a hole. I wanted to keep that. So I'm gonna press Control
Z to go back one move. You didn't need to
do that, by the way. So I'm going to grab
that edge again, go to right click and
I'm going to dissolve that edge so that we
keep that face in. I'm now going to
press three so we can select faces, grab that face. I'm going to press E and just take that back a
little bit like this. There we go. Now I need
to have a door frame. So to do that, I'm going
to press I to inset that face and just move my mouse a little bit till
I get something like that. And now I'm going to press E
and take that. There we go. And now I'm going to press I again to inset a second time. Take that in just a
tiny bit like that. And now I'm going to extrude it again but this time back out. And there we go. Now
we've got a bit of a door detail Okay, now let's work on the window. So let's grab this
face like this and let's press E and just
take that back like this. And now let's press
I and inset this. And now let's press E
and just take that. And there we go. There's
our window in place. Okay, I think we just need some posts now on the front
edge, and I think we're done. So let's now, actually, just press Shift A. And let's introduce a mesh, and let's introduce a
cube. There's our cube. It's way too big, but let's bring it forward on the X axis. And now let's hit S
and scale this down. Bring it up on the z axis. And then let's press three on the numpad to get the
orthographic view. I'm sorry, let's
press one. And let's bring that out like this. I'm going to hold down shift, press the mouse button, the scroll button and sort
of move ourselves over. And maybe bring it forward. I think I'm happy with the
scale, so there we go. Okay, the next thing
I want to do is actually just take
that top face up. So I'm going to hit
the tab key so edit. I'm going to select
that top face and just go ahead and pull that up until it's in our roof. There we go. That's
that. That looks good. Okay, the only thing we
want to do different maybe is just bevel these edges. But I want to just check
that the scales correct. I'm going to tap
out of edit mode, and the scales out in this case. So I'm going to press Control A and apply rotation and scale, and now the scales are correct. Go to grab this item,
hit the tab key. Go to press two on the keyboard and now
select these edges. So I'll hold shift
and select one, two, three, and of
course, number four, and I'll zoom in a little. And now with those selectors, I'm going to bevel those edges. So I could come over here
and actually click on Bevel. But I'm going to use a shortcut. I'm going to press Control B. And that little lines popped up there to say that
we're going to bevel, and I'm just going to
gently just move the mouse now until we get
something like that. Now, it's more
hamford than bevels, so that's not
really what I want. So to get more of a bevel look, I'm going to move the mouse
wheel a couple of times. There we go. And that's just added some extra edges to those bevels just to
add a bit more detail. Not going to do too many because we're adding more
complexity to the mesh, but that looks good
just like that. If you just left click once this little box comes up here, I'll click on this and out here's the properties
of that bevel. So at this stage
now, if I wanted to, I could increase these segments, and you can see
there on the model, you can see the
complexity increasing in that bevel and actually just going to put
that back on three. And if I wanted to, I could change the width of the bevel, really make that a round post, or I can take that back. Oops. Get there in a minute. There we go. That's fine. And there we go. That's the bevel done.
I'll tap out of di mode by hitting the tab key,
and I'll look at that. And I can prove
that a little bit further by clicking on it, and then right click and shade Auto smooth. And there we go. Okay, let's press one. I'm sorry. Let's press
three on the numpad. Grab this and take this over. Now, to the edge like this. And now let's press Shift D. And now let's move our
copy on the y axis. I'll hit Y, which now we can see that extra
line pop up under Y, and I'll bring that over, and I'll just guestimate it. I'll use the grid
pattern that we can see to estimate
what I'm doing. There we go. So I've got
middle of this cube here. And I'll press Shift D and
Y and bring another copy over to let's say
the middle of one. And I'll press shifty and Y, and bring another one over
to the middle of this one. And shifty and Y, and bring another one over. And actually, I
think I'm going to just distribute these by ice. I'll pull this over like this, grab this one and
pull this over. And this one until
we get something looking And there we go.
I'm happy with those. So we could now, if
we wanted to maybe just put a horizontal
rail in there. That's one last
little thing to do. So let's grab this one here, let's press Shift D, and we'll press Y, and we'll pull that one
out into the middle. Now let's look
where the gizmo is. And the Gizmo is right on
the bottom edge of this. So if I rotate it,
it will work for me, but it won't be the best. So what I can actually
do is right click and I can set the origin
to the geometry. And now the gizmo is recentered to the
middle of that object. And we can see where
the X axis is, and that's how I want to rotate. So now let's rotate it. So I'll hit R, and I'll press X because I want it
to rotate in the X axis. And I'm just going to type
nine and zero and hit Enter. And it's a little long, so let's just scale it down and just the Y axis, the green. So I'll press S and Y and
just bring that down. And there we go. Let's press three so we can see that nicely. Let's grab this and press Shift D and Y and bring
a copy over like this and press Shift D and Y and bring a copy
over here like this. Let's increase the
scale on this one, and we'll press S and Y and just increase the
scale. And there we go. There's our log cabin, and that's looking absolutely fine. Okay, so now we sort of
we know how to model. Basically, we're nearly ready to start doing our main
project properly. So in our next lecture,
we're just going to do some few more little
tweaks to blender, just setting it up
exactly how we want it, and then we're going
to start modeling. Okay, thanks very much. And I'll see you in
the next lecture. Bye bye for now.
8. Lecture 6 Blender Preparation: Hello, and welcome
now to Lecture six. And in this lecture, I want to do the last
kind of setups of blender so that we're ready
to start modeling our house. But before we start
that, there's something I forgot to show you, which is how to save your model. So let's just show
you that so that you can save your model from
the previous lecture. Come over here to file, and come on down to Save As. And I've already
saved this once, but I'll just do a new save. So I have it in my Eudi
course, take two blender. But you can here just
enter any file you want so that you have a
location for it to be saved in. And then down here, go
ahead and name your save, and then just click Save
As. And there we go. So here, why not? I'll
just do a second one. So I'll call this House two. There we go, and go
ahead and save that. So now it's saved.
And there we go. You've saved your first
model on blender. Okay, so let's carry on with
the rest of the lecture. So I'm going to go
ahead and close this. And I just quickly made
this little thing, which is nothing really, but it has a purpose in
what I want to show you. And what I want to show you is a different way of
navigating within Blender, and it's called
Blenders walk fly mode. And it's really good
for navigating sort of houses or anything well, exactly what
we're going to do. We're going to do
a house with two storeys and different rooms, and it can be quite
difficult to move around it. So we can actually walk around
the house quite nicely. We can use the walk
fly mode to do that. So what I'm going
to do is actually just make sure that
I'm directly over this little little model
as I'm doing this. So what I'm going to do is
press the shift Tilda key. And if you don't know
which the Tilda key is, it's the one directly
above your tab key. So if I press the shift and the Tilda key together,
and there we go. I'm in the walk fly mode. And you can see at the
bottom of your screen now, there's all the
different functions being shown there
to make life easy. But I'll show you
the basic ones. And now you can move around just as if you're
playing a PC game, a game on your PC. So if I press W, I
can move forward. If I press A, I can move left. D, I can move right, and
S, I can move backwards. If I press Q, I can move down. If I press E, I can move up, but I can also rotate my
mouse to help me move easier. And there we go. I'm doing it. But this is flying. What I want to do is walk. So if I hit the tab key now, Blender will apply gravity, and now we're stuck
to the floor. So if I press W now, we'll move up these
ramps. There we go. We're going up these ramps, just as if we're going up a staircase in the house
we're about to make. I'll even drop off here
now, and there we go. We're back. So that's
really handy way of being able to move around our model as we make it
in blender. There we go. Okay, I'll press Escape to get out of the walkfly
mode, and there we go. The next thing I want to do is put some add
ons into blender. So add ons are
little applications which can be added onto
blender to improve it. So if we come up here to
edit, I'll click on that, and I'll cling them down
here to preferences and select add ons
here in this left tab. And here, let's find the
node wrangler add on, which is right there
and enable that. So I'll just put a
tick in the box, and that one's enabled. I'll close this,
and there we go. So now the node wrangler
add on is applied. And what that does is it makes
it much quicker and much simpler to be able to apply textures and materials
to our model, and I'll show you
how much easier that makes it later on
in the tutorial. The next thing we need to do is apply another add on
called Blender kit, which we are going to use a lot, and it's absolutely brilliant. So what I'm going to do is
drag my browser over to the middle screen and
then expand that. And this is Blender
kit's homepage. And what Blender kit is
is a free asset library, which has been set up to work
seamlessly with Blender. It is solely for Blender, and it's the easiest way to import high quality
assets into blender. If I go over to the
subscribe here, It can be absolutely free. And this is what I
use the free version. And you can see here
there are nearly 13.5 thousand models
that we can import into our blender
scene over 14,000 materials and
around 1,800 HDRIs. So that's a huge free library of high quality assets that
we can put into our model. Because if we took the time to model absolutely everything
that's in our house, it's going to take a
lot longer to do that. So professional
architectural visualizers, they actually import a lot of assets into their models and we do exactly
the same thing. And you can see here that Blender gee is free
to subscribe to, and 85% of the subscription
fee goes to asset creators. So it goes to people that work with Blender
creating the assets. So it's absolutely brilliant. Also contribute heavily
to Blender itself, giving money to
Blender so the blender can continue to be
a free software. So it is absolutely good. So I'll show you how to go
ahead and download the add on. If you click on this
Download Blender kit, roll right here, I go up here
and download Blender kit. And it's saved to my downloads. There it is. It's gone in. So now I'll just
go ahead and drag my browser out of the way
and put that to one side. Come up here to
edit, and I'll go to preferences and
add ons we're in. And I'll come on
over to this side, and I'll just hit this dropdown, and I'll click on
Install from Disc I'll make sure I go
to my downloads, and there it is my
Blender kid download. So I'll click on that
and Install from Disk. And there is BlendqitOline
Asset Library. So I'll go ahead and close this. And now we have this
new tab on the top, which is Blend kit. So if I type
something into here, I'll type in Share. Click Enter. It's bringing up a whole load of chairs that we can bring in
to our new model. And some of these are paid for. They have the pad lock there, and some of them are free. We want to be able to
set up our browser or our blender kit browser so that we can find
the free ones first. So I'll go over to
this filter here, hit this dropdown and click
on Free First. There we go. And now it's going to show
us our free chairs first. So now all I need to do
is just grab a chair. I can click on it if I want to. And there it is.
It's in our model. I can left click on it, and
I can get information on it, and then I can also rate this asset so that the creator of this asset
can get some ratings. And there we go. I can actually go over to material preview. Click on that, and we could
see what this looks like. There we go. Now we have blender kit installed
into a blender, and we have the node
wrangular asset, and I've showed you how to use the walk fly mode
within blender. So there's just one more thing that I want to show you now, and that is I want to bring in an extra function on
our outliner here. So if we go over to this filter and hit the drop down here. And if you come
over to this little arrow and click on this, this is going to
allow us to be able to lock things within our viewport in our outliner.
So here, what's this? This is the plane.
And as you can see, I can move this plane. Now, if I actually just click on this arrow that we've just
brought in on this plane, now I can no longer
select this plane. I can no longer accidentally
move it around. So that is absolutely brilliant, so that when we are
creating our house, once we've built our walls or built our floors or
built our roofs, I can't accidentally grab it and move it and not realize
that I've done that. So that's why I brought
that in like that. Now, absolutely, everything
is set that we wanted. Okay, in the next lecture, let's go ahead and start
modeling our house. Thanks very much. Bye bye, Fino.
9. Lecture 7 Importing Reference Images Ref 2: Hello, and welcome
now to Lecture seven. And in this lecture, let's go ahead and start
modeling our house. Let's make a start on this. So the first thing we actually
need to do is bring in our reference images
to make sure that we have the correct
dimensions on this house. We have something to reference
from and to scale from. And to do that, you'll see
that attached to this lecture, you have a resource pack. And in that resource pack, there are the images you need. So you can go ahead and
open that file and go ahead and download and save
to wherever you want to. So let's go ahead
and make a start. So I'll click anywhere to get
rid of our splash screen. And I'm going to make a
selection box by holding down the left mouse button and just select everything
and delete. So we've got absolutely
empty screen, and we start building from here. This is my favorite bit. I love this because everything starts from an empty screen. I find that so cool
that when we finish, we've got this amazing
looking house, photo realistic, but it all starts from an empty
screen. Love that. Sorry, I'm digressing a bit. I'll go back to
what we're doing. So the first thing I
actually want to do is go ahead up to the outliner
and click on Collection. And I want to make a new file, so I'll hit the plus
sign there on the file. I'll double click
on this. And I'm going to rename this
reference Images. There we go, and just click off. And make sure that it's in blue, that you actually
have that selected. And now as we import our images, they'll drop straight
into that file. So now that they've done that, let's go ahead and bring
in our first image. So I'll press Shift A.
I'll come down to Image, and I'll click on reference, and I'll find where
my images are. And how slight references. And I'm just going
to bring in the ground floor one to begin with and add empty image. And there we go. That's perfect. So it's brought it in on
a bit of a funky angle, so I'll just deal
with it quickly. So I'll press N. And
here on the rotation, I'll just make that zero, enter, and zero, enter,
and zero, Enter. And that's brought in
now. Absolutely fine. But that scale is not correct. As you can see, we have some
dimensions on this plan. But this plan is
currently not a scale. It's not one to one, and that's what I
need this plan to be one to one. So we
can deal with that. So what I'm going to do
now is bring in a cube, and I'm going to make that cube 6.75 meters by 19.85 meters. And then we'll scale the plan up until it's the same
size as our cube. And then we know that
that's absolutely correct. So let's do that first. Actually, before we do that, let's go ahead and name
this. So I'll name this. Call this ground floor
plan. There we go. And now let's go ahead
and bring in a cube, so I'll press Shift
A and mesh and cube. And we don't need to
be in solid mode now. We can go ahead and make
this wireframe for a while. But rather than going all the way up here and
clicking on this, I'm going to show you
a shortcut for that. So I'm just going to press Z on the keyboard and click on
Wireframe. There we go. So I'll press seven to see this seven on the numpad to see
this in the orthographic view. And now let's go ahead
and scale this up. So first of all, let's work in the X axis on the red line here. So here on the dimensions,
the X is right there. It's currently 2 meters, and we need to make it 19.85. So I'll delete the
two, and I'll make 19.85 enter. And there we go. That's the correct
length of the house, the actual one to one
length of the house. So now we need to make
it 6.75 in the Y. So let's do that. 6.75
enter. And that's it. That cube is now the
correct size of our house. So I'll press seven
again and then pad to get us in the
orthographic view. I'll select our plan. And
I'll just hit S for scale, and I'll bring this
up. There we go. So what you can see
here, this outer shape, that's the sort of
the garden wall, the main border wall
of the whole garden. This rectangular
here is the pool, and this is our wall outline. So this is the thing that needs to be the same
size as this cube. And then we need to line
up with the cube, as well. So I'll hit S and I'll
scale it up a bit more. I'll make sure that
the move is selected, and I'll bring it
over on the X axis. And actually, that's
really good already. I'll bring it down on
the Y. And there we go. That's good. That's
actually perfect. That's great. So now, really, we need to know the
height of this cube, and it's not shown on this plan, so we need to bring
in another plan. So what I'll do is
I'll press Chef A, and I'll bring in an image and I'll bring in
reference image, and I'll bring in front
elevation and click Add Empty. And there it is. And I'll
make sure on the rotations, the X is in the zero, the Y is in the zero, and the z. I'll make that into zero,
as well, there we go. Now I need to rotate it
so it's standing up. So to do that, I'm
going to press R and X to rotate
it on the X axis, and I'll type 90 Enter. There we go. So now that's rotated 90 degrees
in the X axis. Obviously the scales out. So I guess that's
the next thing we need to do is we can go
ahead and scale that. So I'll press one on a num pad to make sure that
we see that orthographically, and I'll go ahead and press S and scale that
up. I'll do it more. Until I need this line here and this line here to
line up with our cube. So I'll bring that up, bring this over maybe scale it down a little bit
more, and there we go. And what we can
take note of now is the height of this ground floor, which is 3 meters and 40. So that's what I
want to do next. I want to go ahead
and make our cube 3 meters and 40 in the Z axis. So I've selected the
cube, and here in the Z, I will press 3.04, Enter. And now that cube is
the correct height. What I'm going to
do is press one again on a numpad to see
this from the front, and I'm going to prune
the cube up until it's level with our X axis, the red line because that's our ground
level, and there we go. So that cube is now
absolutely accurate. And we can double
check that, actually. What I'm going to
do is go ahead and hide these images for a minute. So I'll grab this image, and let's go ahead and
name this one first. So I'll call this
front elevation. Plan. There we go. And now that I've done that,
I'll go ahead and hide it. And I'll go ahead and
hide this one as well. So we just have the
cube for a moment. And now I'm going to show
you the measure tool, which is it's a little bit
tricky to get the hang off, but once you do,
it's really good. So I'll click on
the Measure tool, which is right here on the tab. And I'll go ahead and
just hold down Control, and then I'll press
the left mouse button. Which has made it
snap to that corner, and then I'll hold
onto the control and then snap to this one. And that is correct. I
remember that from memory, 6.75 is the correct
width to that cube. So that's absolutely perfect.
We can do that again. So I'll go ahead
and just hold down the left mouse button,
create a line, create a measurement,
hold control now, and snap it to this corner. I can actually just grab
this corner again now, hold control and
snap it to that one. 19.85, that's correct, as well. And I'll do the same
thing one last time. I'll hold down shift, grab sorry I'll just press
down the left mouse button. I'll hold down Control
and snap to that corner. And it's 11 meters because it hasn't snapped to
that bottom corner. It's doing weird things,
so I'll grab it. I'll hold down control,
and I'll snap it to there. And that's 3 meters and 40. So that's absolutely perfect. They can be a little
bit tricky to delete, but if you just hover over
the line and then left click and then press X for
delete and press X again. Do the same and do the
same. There we go. And I'll go over back
to the move tool, and we're absolutely happy that that cube is
the correct size. Let's go ahead and bring back
our ground floor plan now, and we're happy that that's
in the correct position. No more to be done to that one. But I do want to play around
with how the image looks. So I'll come down here to data, and I'm going to
click on opacity. I'm going to turn that on. And I'm going to
bring this down, which is going to make
our image translucent. Oh, we're in the front plan. I apologize. I want this
one, which I've locked. I want the front elevation. I want the ground floor plan. Sorry. And now
let's turn that on. And now let's bring this down. To about half like
that. There we go. The other thing I want
to do is I want to make sure that it's not
visible from the underside, so that it's not so I can see it from this side,
but not this side. So here on the side
elevation there, go ahead and click on front. And now it's visible from
this side, which we do need, but it's not visible
from this side, so we can see through
it from the back face. There we go. That's perfect. With that done, I'm going to actually click this
little arrow here in the outliner on the
ground floor plan so that we can't
accidentally grab that plan. That plan is now. Okay, so
let's grab this one now, and we'll press one to
see it from the front. And let's see what we need
to do with this plan. So I see I need to take it up. So I'll go ahead and
do that. And that's actually working
out really nice. I need to scale it down
slightly in the X. So I'll press S and X. And yes, brewing the
That's perfect, there. Whoops, slipped. There we go. That's
absolutely fine. So let's go ahead
and make this one translucent now, so
I'll select this one. And let's bring the
opacity down on this one, as I was doing a minute
ago, accidentally. Let's do it right this time. So I'll bring it
down about halfway. And now I don't want to
see it from this side. I just want to see
it from this side. But actually, yes, so let's go ahead and press
front on that as well. So now we can see
it from this side, but not from this side.
Now let's press seven. And let's go ahead
and bring this image back until it lines up with the back of
the plan like this. There we go. That's perfect. And now that we've done
that, let's go ahead and hit the little arrow
on that to hide that one, too, to lock that one, as well. Okay, now that we've
done those two, let's go ahead and
just hide those. So I'll just press the
little eyeballs on those. And actually, we can
name this cube, as well. So I'll go ahead
and click on this. And I'll call this
reference cube or just reference cube
Ref cube, there we go. That's a name. Let's go over to reference image here in the outline
and click on that. And let's press Shift A and bring in a final
reference image. And that is first floor, so I'll click on
that and add image. And there we go. And let's
sort out the rotations. So we'll press zero Enter, zero Enter, and zero Enter. There we go. So let's press
seven to see that from above. And to scale this one now, we can actually scale this one
off our ground floor plan, so I'll click on that one just to make that visible again. And let's go ahead and
press S and scale this up. And let's press S and
scale it up a little more. And what we basically
need to do now is line up this garden wall
with each other. And then when that's done, these scales are correct. So I'll bring this
forward like this. And just bring it over
on the X slightly. And it's already pretty
close, actually. We'll scale it up a tiny bit. Maybe bring it
down a little bit. And there we go. Let's take
that up in the Z axis. And that's absolutely perfect. So I'll just press one so we can see that from the
front view now, and I'll make sure
that this plan is just sitting on top of
our cube because this is the start of the first
floor. There we go. That's absolutely
perfect. And yes, the first floor is
slightly larger than the ground floor, but
that's intentional. That's the way the house
is supposed to be built. And with that done now, let's
go ahead and fix that one. So let's come on
over to the opacity and with the plan selected, of course, just bring
this down to around half. And on this side
here, click front, so we can't see it from the
underside. And there we go. And let's name this
one, of course. So I'll click on it, and I'll call this
first floor. Okay. Plan. And there we go. And let's go ahead
and lock that. And that's reference images
all in. There we go. Sorted. So let's go ahead and
save our progress so far. So let's go with a
file and save us. And you can go ahead and save it wherever you want in
whichever file you want. And I'm gonna call this House. Whoops. I'm just
going to call it one. There we go. And
go ahead and save. So in the next lecture, what I think we'll do is I think we will start building
our ground floor walls. We'll start putting those in. Okay, thanks very much. And I'll see you in the next
lecture. Bye bye, Feno.
10. Lecture 7 Importing Reference Images: Hello, and welcome
now to Lecture seven. And in this lecture, let's go ahead and start
modeling our house. Let's make a start on this. So the first thing
we actually need to do is bring in our
reference images to make sure that we have the correct dimensions
on this house. We have something to reference
from and to scale from. And to do that, as you'll
see on the Eudomi page, you'll see there on
the course contents, you'll see that attached
to this lecture, you have a resource pack. And in that resource pack, there are the images you need. So you can go ahead and
open that file and go ahead and download and save
to wherever you want to. So let's go ahead
and make a start. So I'll click anywhere to get
rid of our splash screen. And I'm going to make a
selection box by holding down the left mouse button and just select everything
and delete. So we've got absolutely
empty screen, and we start building from here. This is my favorite bit. I love this because everything starts from an empty screen. I find that so cool
that when we finish, we've got this amazing
looking house, photo realistic, but it all starts from an empty
screen. Love that. Sorry, I'm digressing a bit. I'll go back to
what we're doing. So the first thing I
actually want to do is go ahead up to the outliner
and click on Collection. And I want to make a new file, so I'll hit the plus
sign there on the file. I'll double click
on this. And I'm going to rename this
reference Images. There we go, and just click off. And make sure that it's in blue, that you actually
have that selected. And now as we import our images, they'll drop straight
into that file. So now that they've done that, let's go ahead and bring
in our first image. So I'll press Shift A.
I'll come down to Image, and I'll click on reference, and I'll find where
my images are. And how it references. And I'm just going
to bring in the ground floor one to begin with and add empty image. And there we go. That's perfect. So it's brought it in on
a bit of a funky angle, so I'll just deal
with it quickly. So I'll press N. And
here on the rotation, I'll just make that zero, Enter, and zero, enter,
and zero, Enter. And that's brought in
now. Absolutely fine. But that scale is not correct. As you can see, we have some
dimensions on this plan. But this plan is
currently not a scale. It's not one to one, and that's what I
need this plan to be one to one. So we
can deal with that. So what I'm going to do
now is bring in a cube, and I'm going to make that cube 6.75 meters by 19.85 meters. And then we'll scale the plan up until it's the same
size as our cube. And then we know that
that's absolutely correct. So let's do that first. Actually, before we do that, let's go ahead and name
this. So I'll name this. Call this ground floor
plan. There we go. And now let's go ahead
and bring in a cube, so I'll press Shift
A and mesh and cube. And we don't need to
be in solid mode now. We can go ahead and make
this wireframe for a while. But rather than going all the way up here and
clicking on this, I'm going to show you
a shortcut for that. So I'm just going to press Z on the keyboard and click on
Wireframe. There we go. So I'll press seven to see this seven on the numpad to see
this in the orthographic view. And now let's go ahead
and scale this up. So first of all, let's work in the X axis on the red line here. So here on the dimensions,
the X is right there. It's currently 2 meters, and we need to make it 19.85. So I'll delete the
two, and I'll make 19.85 enter. And there we go. That's the correct
length of the house, the actual one to one
length of the house. So now we need to make
it 6.75 in the Y. So let's do that. 6.75
enter. And that's it. That cube is now the
correct size of our house. So I'll press seven again and the numpad to get us in
the orthographic view. I'll select our plan, and
I'll just hit S for scale, and I'll bring this
up. There we go. So what you can see
here, this outer shape, that's the sort of
the garden wall, the main border wall
of the whole garden. This rectangular
here is the pool, and this is our wall outline. So this is the thing that needs to be the same
size as this cube. And then we need to line it
up with the cube, as well. So I'll hit S and I'll
scale it up a bit more. I'll make sure that
the move is selected, and I'll bring it
over on the X axis. And actually, that's really good already. I'll bring
it down on the Y. And there we go. That's good. That's actually
perfect. That's great. So now, really, we need to
know the height of this cube, and it's not shown on this plan, so we need to bring
in another plan. So what I'll do is
I'll press Chef A, and I'll bring in an image and I'll bring in
reference image, and I'll bring in front
elevation and click Add Empty. And there it is. And I'll
make sure on the rotations, the X is in the zero, the Y is in the zero, and the z. I'll make that in the zero,
as well, there we go. Now I need to rotate it
so it's standing up. So to do that, I'm
going to press R and X to rotate
it on the X axis, and I'll type 90 Enter. There we go. So now that's rotated 90 degrees
in the X axis. Obviously the scales out. So I guess that's
the next thing we need to do is we can go
ahead and scale that. So I'll press one on a num pad to make sure that
we see that orthographically, and I'll go ahead and press S and scale that
up. I'll do it more. Until I need this line
here and this line here to line up with our
cube. So I'll bring that up. Bring this over maybe scale it down a little bit
more, and there we go. And what we can
take note of now is the height of this ground floor, which is 3 meters and 40. So that's what I
want to do next. I want to go ahead
and make our cube 3 meters and 40 in the Z axis. So I've selected the
cube, and here in the Z, I will press 3.04, Enter. And now that cube is
the correct height. What I'm going to
do is press one again on a numpad to see
this from the front, and I'm going to pring
the cube up until it's level with our X axis, the red line because that's our ground
level, and there we go. So that cube is now
absolutely accurate. And we can double
check that, actually. What I'm going to
do is go ahead and hide these images for a minute. So I'll grab this image, and let's go ahead and
name this one first. So I'll call this
front elevation. Plan. There we go. And now that I've done that,
I'll go ahead and hide it. And I'll go ahead and
hide this one as well. So we just have the
cube for a moment. And now I'm going to show
you the measure tool, which is it's a little bit
tricky to get the hang off, but once you do,
it's really good. So I'll click on
the Measure tool, which is right here on the tab. And I'll go ahead and
just hold down Control, and then I'll press
the left mouse button. Which has made it
snap to that corner, and then I'll hold
onto the control and then snap to this one. And that is correct. I
remember that from memory, 6.75 is the correct
width to that cube. So that's absolutely perfect.
We can do that again. So I'll go ahead
and just hold down the left mouse button,
create a line, create a measurement,
hold control now, and snap it to this corner. I can actually just grab
this corner again now, hold control, and
snap it to that one. 19.85, that's correct, as well. And I'll do the same
thing one last time. I'll hold down shift, grab alright, I'll just press
down the left mouse button. I'll hold down Control
and snap to that corner. And it's 11 meters cause it hasn't snapped to
that bottom corner. It's doing weird things,
so I'll grab it. I'll hold down Control,
and I'll snap it to there. And that's 3 meters and 40. So that's absolutely perfect. They can be a little
bit tricky to delete, but if you just hover over
the line and then left click and then press X for
delete and press X again. Do the same and do the
same. There we go. And I'll go over back
to the move tool, and we're absolutely happy that that cube is
the correct size. Let's go ahead and bring back
our ground floor plan now, and we're happy that that's
in the correct position. No more to be done to that one. But I do want to play around
with how the image looks. So I'll come down
to here to data, and I'm going to
click on opacity. I'm going to turn that on. And I'm going to
bring this down, which is going to make
our image translucent. Oh, we're in the front
plan. I apologize. I want this one,
which I've locked. Front elevation. I want
the ground floor plan. Sorry. And let's turn that on. And now let's bring this down to about half like
that. There we go. And the other thing I
want to do is I want to make sure that it's not
visible from the underside, so that it's not so I can see it from this side,
but not this side. So here on the side
elevation there, go ahead and click on front. And now it's visible from
this side, which we do need, but it's not visible
from this side, so we can see through it from the back face. There
we go. That's perfect. With that done, I'm going to actually collect this
little arrow here in the outliner on the
ground floor plan so that we can't
accidentally grab that plan. That plan is now locked. Okay, so let's
grab this one now, and we'll press one to
see it from the front. And let's see what we need
to do with this plan. So I see I need to tick it up. So I'll go
ahead and do that. And that's actually
working out really nice. I need to scale it down
slightly in the X, so I'll press S and X. And yes, bring the
That's perfect, there. Whoops. Slipped. There we
go. That's absolutely fine. So let's go ahead
and make this one translucent now, so
I'll select this one. And let's bring the
opacity down on this one, as I was doing a minute
ago, accidentally. Let's do it right this time. So I'll bring it
down about halfway. And now I don't want to
see it from this side. I just want to see
it from this side. But actually, yes, so let's go ahead and press
front on that as well. So now we can see
it from this side, but not from this side. Now let's press seven. And
let's go ahead and bring this image back until it lines up with the back
of the plan like this. There we go. That's perfect. And now that we've done
that, let's go ahead and hit the little arrow
on that to hide that one, too, to lock that one as well. Okay, now that we've
done those two, let's go ahead and
just hide those. So I'll just press the
little eyeballs on those. And actually, we can
name this cube, as well. So I'll go ahead
and click on this. And I'll call this
reference cube or just reference reef
cube there we go. That's a name let's go over to reference image here in the outline
and click on that. And let's press Shift A and bring in a final
reference image. And that is first flow, so I'll click on
that and add image. And there we go. And let's
sort out the rotations. So we'll press zero, Enter. Zero, Enter, and zero
Enter. There we go. So let's press seven to
see that from above. And to scale this one now, we can actually scale this one
off our ground floor plan. So I'll click on that one just to make that visible again. And let's go ahead and
press S and scale this up. And let's press S and
scale it up a little more. And what we basically
need to do now is line up this garden wall
with each other. And then when that's done, these scales are correct. So I'll bring this
forward like this. And just bring it over
on the X slightly. And it's already pretty
close, actually. We'll scale it up a tiny bit. Maybe bring it
down a little bit. And there we go. Let's take
that up in the Z axis. And that's absolutely perfect. So I'll just press one so we can see that from the
front view now, and I'll make sure
that this plan is just sitting on top of
our cube because this is the start of the first
floor. There we go. That's absolutely
perfect. And yes, the first floor is
slightly larger than the ground floor, but
that's intentional. That's the way the house
is supposed to be built. With that done now, let's
go ahead and fix that one. So let's come on
over to the opacity and with the plan selected, of course, just bring
this down to around half. And on this side
here, click front, so we can't see it from the
underside. And there we go. And let's name this
one, of course. So I'll click on it, and
I'll call this first floor. But Plan. And there we go. And let's
go ahead and lock that. And that's reference
images all in. There we go. Sorted. So let's go ahead and save
our progress so far. So let's go with a
file and save us. And you can go ahead and save it wherever you want in
whichever file you want. And I'm gonna call
this House. Whoops. I'm just going to call it one. There we go. And
go ahead and save. So in the next lecture, what I think we'll do is I think we will start building
our ground floor walls. We'll start putting those in. Okay, thanks very much. And I'll see you in the next
lecture. Bye bye, Feno.
11. Lecture 8 Ground Floor Walls: Hello, and welcome
now to Lecture eight. And in this lecture,
let's go ahead and start building our
ground floor walls. Let's get those into position. I think that'd be a
really good start. So I think the first thing I
want to do is go ahead and hide our front elevation,
so I'll hide that. And I want to hide
our first floor. So I'll hide that as
well. Well, there we go. So we've just got
the ground floor. And actually, now we can go ahead and hide our
reference cube. There we go. So we just
have our ground floor plan. Now, this is just my preference, but I find this grid a
little bit distracting. So I'm going to go over
here to Viewport overlays. There we go. And I'll turn
off floor. There we go. And then for now,
we'll hide that grid. Okay, so what do we do next? Let's create a new file. So I'll click on here to
collection at the top. And I'll click on
this new file button, and I will name
this ground floor. Walls. There we go. And that's it. That's
our ground floor walls. Oh, I'm sorry. Hold on, hold on. I'm just going to rename that. And I'm just gonna call
that ground floor. There we go. So I'll
call that ground floor, and now I'm going to
create a subfolder. So with this still selected, I'm going to hit this
little icon again. And in this one,
I'm going to call this ground floor walls. Let's keep this nice and
organized. That's fine. So now with that
actually selected, I'm going to press seven on the numpad to get us into
the orthographic view. And I'll go back up
to Viewport overlays, and I'll turn off grid, as well. There we go. And now I'm going
to press Shift A and mesh. And let's go ahead
and bring in a cube. And as you see, because we had the ground floor wall selected, the cube has come
in in that file. So with that done? Let's
just grab the arrow here on the red arrow and bring this over until it's over this
wall just like this. Okay, I'm going to zoom in, and I'm going to press down shift, hold down shift, grab the middle mouse wheel and
drag the whole thing over. I'll just send that a
little bit more by eye. And I'm going to scale
it down in the X axis, so I'll press X and X and
just bring that down, scaling it down in the X axis. There we go. That's perfect. I'll zoom in a little
bit and center that. And that's good. So now I could scale it up
in the Y axis in the green axis until it flushes with this wall here and this
wall here, so I'll do that. I'll press S and Y and
just go ahead and scale that. There we go. That's cool. Let's zoom in on the bottom, so I'll scroll in, press
down the chef button, and press the middle
mouse wheel and just bring the plan down and then have a
look at that there. And maybe I'll just grab
that and take it up. So I'm going to press G and Y and then just take this
up a little bit like this. There we go. We'll go to the top and see
what we need to do, and maybe we just
need to increase the size of this
a little bit now. So I'll press the tab key, and I'll make sure we have vertices selected,
which I have. I'll grab these vertices here. Make sure that we're
in the move mode, grab these one here now, and just bring them
up a little bit. And that's absolutely
perfect. There we go. That's good. So I'll tap out
of Edit mode for a minute. I just hit the tab key again. And I'm going to press
one on the num pad to get us an orthographic
view of it from the front, and I'm going to take it up in the X axis until it's lining
up with our ground plane. I'll press G, and then Z, and go ahead and bring
it down a little bit. And there we go. That's perfect. So is our height correct? I guess that's the next
thing we need to do. So let's go over to
our reference images to our front elevation, and we'll go and turn
that back on again. And let's tap into heading mode. So I'll hit the tab key. And I want to grab
this whole top face, so I could either click here on the face or I could press
three on our keyboard. So I'll go ahead
and press three. I'll grab this face here
because it's wireframe, Blender actually to show us a little dot to represent
the face, so I'll grab that. And I'll press one on a numb pad to get us the orthographic
view of the front, and I'll go ahead and
take that up until it lines up where the top. And as you can see, we're sort of over the line a
little bit there, but I won't really worry. We're not drafts people. We're not creating
technical plans. We're creating a rendering, we're creating a
visualization of the house. So we're lucky enough
that we don't have to be absolutely
millimeter perfect. And for us, for the
work that we do, that's absolutely
fine. So there we go. That is our wall to
the correct size. I'll go ahead and hide this
front elevation again, and just have the
ground floor plan on. Okay, so what I
want to do now is create some loops in this. But now I think I need
to go to a solid mode, so I'll press Z, and
I'll click on solid. So we have that
wall in solid now. So what I can do now is
press two on the keyboard, so we can select edges. Or you can come up here
and click on this a little bit, grab this edge here. And I'm going to
press Control R, and then I'm going to just click on this loop and then bring it over until it lines
up with our wall. Now, we can't tell
properly from this angle. Is that lined up with that? The only way to
actually know is in an orthographic view. So
that's what I'm gonna do. I'm going to press seven on our numpad to see this in
the orthographic view. Scroll in a little bit, and
then just grab it and bring it down until it lines
up. There we go. Now we can do the same
on the other side, so I'll grab the top edge again, or any edge on this side. So, that one on the bottom, and press Control R and then bring that over
close to that wall. I'll press seven again to get the orthographic
view from the top. I'll go ahead and bring that until it's level with the wall. And that's absolutely fine. There Okay. That's cool. So now we need to be
able to select faces. So I'm going to press
three on our keyboard, or you could use this thing
here, that little box there. I'll select this face here. I'll hold down shift so I can make more
than one selection, and I'll grab that face there. And now that I've got
both of those selected, I'm going to press seven on the numpad to get us to
that orthographic view, and I'm going to extrude that out until it's level
with that wall there. So I'll just press E and then just pull
away with a mouse. Just pull those over until
they're flesh with a wall. There we go. That's
all I need to do. That's absolutely perfect. So we've talked about
this before about keeping the mesh as simple
as possible when we talked about subdivision
surface modifiers. And as we go ahead and
model, we'll do the same. We'll just keep the mesh as low poly as possible and
as simple as we can. So with that in mind,
I'm going to delete. Actually, I'm going to just
lose some of these walls, these edges here, dissolve them is the word
I'm trying to search for. So I'm going to press two
so we can select edges. Gonna grab this one, Hold shift, and grab this one, grab
this one and this one. This one, this one, and now
the same on the other side. So this one, this one, this one, this one,
this one, and this one. Once you've got all
those selected, right click, come
all the way down to the bottom to dissolve edges. And click on that.
And there we go. Now we have the simplest
shape possible, the minimum amount of faces that we can use.
And that's perfect. So I'll tap out of Edit mode with that and
take a look at it. Maybe it's time to sort
of correct our scales. So let's press Control A, and then click on
rotation and scale. And there we go. That's zero
out scales back up again. So now I want to press seven on the numpad to get us the
orthographic view again. And rather than remake it
for this opposite side, I'm just going to
click on this one. And I'm going to press Shift D and then I'm going to press X, and I'm going to
bring this over in the X axis to this side. Now that I've done that, I'm
gonna press R for rotate. And I'm gonna press 180, Enter. So we've rotated
there 180 degrees. And I'll just pull it
over in the X axis. Let's see what that
looks like. There we go. I'll just bring that over
until it's over the top of the wall. That's perfect. We know now as well that that's exactly the same width
as this one over here. So the only thing that remains
to do now really is to go ahead and take
these faces back. So I'll tap into Edit
mode with this one. I'll hit the tab key. I'll press three
on the keyboard, so we can select faces. I'll grab this face here. I'll hold shift and grab
this second face here. And now we need to go to
the orthographic view, so I'll press seven
on the numpad. And now I'll go ahead and
take that back in the X. And I'll zoom in a
little bit on that. So I'm holding down
Shift and pressing the middle mouse wheel to
reposition the screen, and I'll press G and X and just take this back until
I'm happy, and there we go. So that's our walls.
That's perfect. Let's check the scale on this and the rotation's
out so we could go ahead and press Control A and fix the rotation in the
scale. And there we go. So that's our walls done. Our ground floor walls
are now complete. So in the next lecture, what I want to go
ahead and do is start creating our doors
for the frontier, and they're like, what
they call pocket doors. So the doors actually
slide into the walls. So we're going to create the
apertures here in the walls, the holes in these walls for the doors to be
able to slide into. And then if we've
got any time left, I'll start making our doors. There we go. So
we've made a start. Our walls now our ground floor
walls, they're in place. So let's go ahead and
make a quick save. So to do that,
rather than come up here to file and do all that, you can just press Control S, and Blender will make
a quick save on that. Okay, so that's it
for this lecture, and I'll go ahead and
see you in the next one. Thanks very much. Bye bye now.
12. Lecture 9 Pockets In Doors: Hello, and welcome
now to Lecture nine. And in this lecture,
let's go ahead and start work on our main doors, our sort of big huge sliding
doors here on the front. But I think before we do that, I forgot to name
these two components. So let's do that first. So
I'll click on this one. And it's highlighted here
in the outline for us, so I'll double click
on this. Delete that. And I'll call this
right ground for wall. There we go. Yup, so
spell floor wrong. Get rid of that. Put
that in. Do it do? There we go. And let's do
the same with this one. There we go. So that's
named our two walls, keeping our outliner always
as organized as we can. So with that done, the
next thing to do is create our pockets and our walls
for our doors to sit into. So let's go ahead and do that. There's two ways we could do. We can either use
the extrude tool and extrude a pocket back. But I want to take
this opportunity to show you another tool. I want to show you a modifier called the Boolean modifier. So we'll go ahead and use
that to create these pockets. So with that mind, let's press seven on the numpad to get
us the orthographic view. And let's press
Shift D. I'm sorry. Let's press Shift Day, getting ahead of myself. And then to mesh, and
then let's go to Cube. Let's bring this cube down in the Y axis until it's kind of
level with this wall here. Let's scale that down
in the Y axis now, so press S and Y and
then bring that down. And now let's make that
bigot in the X axis. He'll press S and X, and just scale that up and do it some more SX and just scale that up to
something like that. Let's go ahead now and just centralize that
as much as we can. We get it. We'll
zoom in on this. And now let's go ahead and scale it up some
more on the Y. I'll press S and Y and
just scale this up. And again, S and Y and
see what we've got. Now let's press G for grab and Y again and bring that into
the middle of that wall. Let's scale it
down a little bit, so I'll press S and just scale the whole
thing down a little bit. Okay, that's good. And now just scale it up again in the
X. I'll press S and X, and just scale it
up a little bit more again. There we go. Let's take a look at
this from the front. Pull this up a little bit, and let's scale
it in just the z. So I'll press S and Z and
go ahead and scale this up. And then bring it so that
it protrudes through the top of the wall like
that. They, that's good. Let's press seven on the numpad to see
this from above and make sure that it's reasonably
centered on this wall. Maybe I'll bring it
down just a little bit. So I'll press G and Y and just bring it
down a little bit. That's it. That's all I want. And now let's make
a copy of this. So let's press Shift D and Y
and bring that up like this. Maybe just use the cursor now or use the gumball
just to bring this up. There we go. Let's have a
look at it on this one, and it doesn't look
quite scented. So we'll press G and Y
and just bring that down a little bit and just eye it for about center,
and that looks about right. Okay, so now we have
these two cubes. So we're going to use these to boolean cut our main walls. And often we call these cutters, and that's what I'm going
to call these cutters. So let's select this wall now here and let's look at
the scale. It's all good. If it's not correct, it's
quite important that we do. And actually, let's
check these ones, too. This one's out. So
press Control A, and apply rotation in scale. Grab this one now
and press Control A, and apply rotation in scale. Well, right, let's
check the last one, this one here, and
that one's good. So all those four items, the scale is correct. I'm going to select this
main wall here now. I'm going to go to the spanner here and I'm going to
click on Add modifier, slide down to generate
and click on Boolean. So within this boule and make sure the difference is selected, and then come on
over to this object, use this eyedropper,
click on that. Come on over to here and click on this cutter
that we've just made. And we saw that
it changed there. We saw that there's
a new outline, but just check that that
boolean actually worked, select this one for a minute.
Come on over to here. It's highlighted that cubers and just turn that
off for a minute. And we can see now that we have a cutout shape in that wall, and that's
just what we want. That's just exactly
what we want. So with that in
mind, we'll actually highlight that again
so we can see it, select this, and we'll go
ahead and apply this modifier. So I'll hit this drop down
here and click on Apply. There we go. Select the
wall a second time. Add modifier, generate boolean, make sure difference is on. Come down to object, grab
this little dropper, and just drop it on
this panel like this. I saw this time that
the shape changed, meaning that that
boolean has worked. So I'll go ahead and apply. There we go. I'll do
the same this side now. So I'll grab the wall
like this, add modifier, generate boolean, grab the little dropper,
just select this one. Again, maybe we check it.
Let's have a quick look. Oops wrong one. Grab this one. And there we go. That's
go ahead applied. So I'll turn that back on, select this, and
apply that modifier. There we go. Did I apply
the modifier in this one? Let's have a quick look? I did. Okay, let's do this
one last time. So I'll grab the
wall, add modifier, generate and boolean. Grab the little dropper
and select this one. And there we go. I saw
that it actually changed, so I'll go ahead and apply that. Okay, that's it.
We've got our pockets cut out on our doors, and
that's just what we want. We've no more use for
these cutters anymore, so I'll go ahead and
delete those. There we go. Okay, the next thing
we want to do is apply some bevels
to these walls. And we're going to use the
bevel tool quite a lot because you model stuff, very little has an
absolutely 90 degree edge. You might see that maybe in engineering or
something like that, but in modeling houses or
modeling furniture or cars, almost everything, you
always apply a bevel to an edge because also it makes things look so much
better as well. If you have a perfectly
90 degree corner, when you apply
textures to these, it just doesn't look natural. So we're going to apply
bevels to our edges. So let's go ahead and do that. So select the piece and make sure you're in
edded mode. I already was. And press two on
your numpad Grab maybe just these outside edges now to hold shift and
select the second one. So we get both these
edges and just pan around so you can
see over it like this. And now press Control B and just drag your mouse a little bit
to create that beveled edge. So you can roll your mouse wheel to reduce
or increase your vertices. I'm going to make sure
it's about there. That looks about right to
me. And with that done, I'll just left click once. Now we can come
down to the bevel here and then just click
on this drop down. And this is going
to give us more control of this bevel now. So if we wanted to, we could go ahead and increase the
width of this bevel. I'll leave it where
it was at about six or we could actually increase
or reduce the segments. So four actually is
looking good for me. And with that done, I'll go ahead and just left click off. So now we have the bevels
to do on this edge. I'll make these
slightly smaller. I'll grab this one and this
one, this one, this one. Oh, Chef carry on, this one, this one, at
this one at this one. And I'll just get in
the right position so I can see the bevel. And I'll press Control B. And again, I'll just
drag the mouse over. Until I get something like
that, I'm happy with that. And then looking at the
bevel, so I'll see. I'm happy to leave that just
where it is. There we go. We'll tap out of Edit
mode with this one, and then maybe one
last thing to do is to apply a shade auto smooth. So with the objects selected, right click and go ahead
and shade auto smooth. And there we go.
It's just flatten those walls off a
little bit more. Okay, let's go over
to the other wall and just repeat that process. So I'll select the wall,
hit the tab heed to tap into Edit mode.
Grab this edge here. Hold shift, grab this one, and go ahead and
press Control B, drag the mouse a little bit
until you get a similar edge. And that is about
the same, I think, so I'm happy with
that. And there we go. I'll just left click. So
I'll select these edges now. Holding down the shift.
One, two, three, four. Come down here and
do the same thing. Six, seven, eight.
That's all of them. Position ourselves
and then press Control B and drag the mouse until you
get a similar edge. And I think I'll
reduce that just to. And yeah, I think
I'm happy with that just like that. There we go. I'll left click and that's done. So I'll tap out of
Edded mode with that and then we'll whilst
it's still selected, right click and shade auto
smooth. And there we go. So that's our pockets
done for our doors. So in the next lecture, we'll go ahead and make our doors and then position them exactly
where we want them. Okay, thanks very much. I'll see you in the next
lecture. Bye bye for now.
13. Lecture 10 The Doors: Hello, and welcome
now to Lecture ten. Yeah, let's go ahead
in this lecture, let's create our doors. Our actual pocket doors, that'll be recessed inside these pockets or
recesses in the walls. So let's go ahead and do
that. It's quite easy. Let's press. Well, actually,
let's first of all, make sure that we have selected ground floor walls so that the doors when
we create them now, just drop into this file. So let's go ahead now and
press Shift E and mesh, and let's bring in a cube. Let's press seven on the numpad to get us
that orthographic view. Let's bring this over, bring it closer to the walls, so we've got a visual reference as to what size to make it. And I'll hold down
shift and press the middle mousewheel and drag over and just re center myself
scrolling the mouse wheel. And then I'll press S, and I'll just scale the
whole thing down. And we're gonna have
to just eye this up on size until we think
it's about right. Let's scale this up in the
X. I'll press S and X. A bit more Sx. There we go. Maybe
that's too long. I'll press Sx and bring that
down to something like that. And it's too wide, so I'll press SY that looks about right. So we're not going to make
these the full width of what the door would be because
they're not gonna be seen ever. They're just going to be
sitting here in the pocket. So we don't really need to
worry too much about details, it'll only be the last sort of this area here which
will ever be seen. So we'll scale it
down a little bit more in the Ys per S Y. And see how that looks. I'll bring it over
to, like, about here. I may need to do this again, but I'm just going to duplicate just to make sure that we
have about the right width. But actually, before I do that, I'm going to name this cube. So because it's selected here, it's selected the outliner, so I'll double click on it, and then I'll call this ground four doors or door. There we go. And now that I've done
that, I'll press Shift D and Y and bring a copy
across like this. I'll do it one more time, shifty and Y and bring a copy
across like this. And I think the first
door is too wide. So let me just see
reposition these slightly. And yes. So I'll
delete that one, and I'll delete this one. I'll grab this one. And I'll scale it down just a
bit more on the Y. I'll press S and Y, and just scale this down a little bit more to
about that, maybe. Reposition. Now I'll press Shift and Y and
bring a copy over. And I'll press Shift
D and Y and bring a copy over and see what this looks like
when we position them. And yeah, that's better. That looks better, I
think. We could even go a little bit wider
on that first one. I think I'll do that.
So I'll hole shift, and I'll grab both of these, and I'll press delete. I'll take this one. I'll just scale it up again in the wide. I'll press S and Y, and scale it up a little bit more to something like
that, maybe reposition it. And there we go. I'll
pan round on this now. And I'll press one on the numpad to get the
orthographic view. And let's get this the right
size now in the vertical. So I'll drag this up on the
Z axis to about the middle, and I'll press S and Z to
scale this up in the z. And again, S and
Z and scale this up. That's about right. And I'll just reposition
this, just centralize this. There we go. That looks good. Okay, so I want to
show you a new trick. I want to show you how
to isolate an object. So I have the object actually
isolated, so that's fine. And I'm just going
to hit the forward slash key on the numpad, and that will
isolate the object. Incidentally, it might not
be a bad idea for you to start writing down some of these shortcuts,
these commands. I can just you have a
little written reference as to which shortcuts to
use for which things. And I've always found that a good way of learning
new software. But that's completely
up to you, of course. Okay, now that we've
got the door isolated, next thing I want to do
is create the bevel. So we've done that
before. We've selected all edges, and it's okay. But that's more
usable, actually, if you're not going to
select all the edges, if you just want to
select some of the edges, but in this case, I'm happy
to select all the edges. So I'm going to use the
bevel modifier to do this. So let's select the object and look at the scale,
and that's out. So I'll press Control A. And apply the
rotation and scale. While it's still selected,
I'll click on Ab modifier. Go down to generate, and we will use the bevel
modifier. There we go. So it's bevelled every edge. And that's the quicker way of
doing things when you well, when you're going
to bevel all edges. So let's look at
the controls here, and obviously that's far too
big a bevel for our doors. So what I'm going
to do is just add two zeros to the right
of the decimal point. So I'll click just there.
Two zeros and enter. And let's see what we got. That's more like it, but I think I want a
slightly bigger bevel, so I'm gonna turn that one into let's try a five,
see what that looks like. Yeah, that's about what I want. Let's add more segments to this. What's three look
like? Let's see. That looks pretty good to me. I'll right click and
I'll shade Auto smooth. And, yeah, that's perfect. I'll go ahead and apply
this bevel. There we go. We've got our bevel done now. Let's press seven on the numpad to get us the orthographic
view of the top. And let's hit the
forward slash key on the numpad to bring
everything back. Press seven again. And let's go ahead and duplicate
these objects again now. So I'll press Shift D and Y, bring a copy across. And I'll press Shift D and Y and bring a copy across.
That looks great. That's what I wanted. I don't want these doors to appear like they're all
in the same position. So I'm going to grab this one that we've got
selected anyway and bring this one forward
like this to about there. Then I'll grab the middle one, and I'll bring that
to a middle position. It looks kind of like that,
and that's what I want. That looks good. I'll
press seven again. And now I want to bring a copy now over to the opposite side. So let's select all
three at the same time. So a hold shift and click
on all three of them. Now let's press shifty
and press X to move in the X axis and
bring those over to the opposite side and wrap those there. Let's
have a look at them. And that's fine. I'm
happy with that. So now I want to
hold down Shift and select the three over here now. And let's bring a duplicate now over to the opposite side. So I'll press shifty and Y and bring a copy
across now to this side. Let's zoom in on that. And I can't see the gizmo. So what I'm gonna
do is press G and Y and bring these up
into position like this. And that looks good to
me. I'm happy with that. So now you can see here
in the outline Outliner, we've created 12 doors. So the outline has
grown quite a lot, quite substantially
now with this, which I mean, if we're just
creating a small file, and we're doing a small project, that's not the end of the world. But obviously, this
is going to get quite a large project
with a lot of components, doors, floors, furniture, you name it, it's
going to be there. So we need to control the
size of our outliner and also keep our file small and consider the easiest
way of doing things. So what I'm actually
going to do is join all of these doors into
one object in blender. So rather than having 12 doors, the outliner will
just have one door. And we'll still have 12
doors here in the viewport, but they'll just be joined
into one item in blender, so that when we go ahead
and tap into Edit mode, we'll edit all of
them in one go. So when we apply
textures to these doors, it'll become a lot easier, and we'll keep the files
smaller by doing this, and we'll simplify the outliner. So the easiest way to do
it in this case is to select all these objects
in the outliner. So let's do that. We
know where they are. Here's the first one,
so I'll click on this, and I'll scroll down to the 11th one, which
is right there. I'll hold down Shift and
click on the 11th one, and that's selected all of them. With that done, I'll
go ahead now and press ControlJ and join all
those up into one item. And now you can see we
have ground floor door. So we just have those 12
doors have become one. So if I select on one, I select all of them. So there we go. That
simplified the whole thing. Okay, so that's our doors done, and I think they look just fine. So what we'll do in the next lecture is
we'll create, like, a track at the base, and eventually we'll
put it on the ceiling, as well for the doors to run on. Alright, thanks very much. And I'll see you in the next
lecture. Bye bye for now.
14. Lecture 11 Door Tracks: Hello, and welcome now to Lecture What are
we on Lecture 11. And let's have a go at doing the actual track
here on the floor, which the doors would run
upon when they're closing. So let's go ahead and do that. Again, it's really quite easy. It's not difficult
at all. So we'll press seven on the numpad to get us in the
orthographic view. And let's go over
to the outliner and make sure the ground
floor walls is selected to make sure
our new component drops right in that file. And now let's press Shift A,
and we'll go over to mesh. And this time, let's
bring in a plane. And we'll bring this over. And let's locate this
close to the doors again, so we get that visual
reference as to how big. And let's take
ourself over there, and let's just centralize
this to the middle door. Let's scale this down in the Y. I'll press S and Y
and bring this down. And yeah, I think that's about right where that
is, just like that. And I think the next
thing I want to do is I'll go back to seven. Let's have a look at the
scale. Let's fix that. So I'll press Control A. And let's apply the
rotation and scale. And let's press Tab key
to tap into Edi mode. Make sure edge is
selected, which I have. So if you haven't
either click on it there or press two
on your keyboard. And just come over here, click on this edge here, and now press Control R to get a loop. There
we go. There it is. If your loop doesn't appear, just bring your cursor closer to the object,
and it should appear. I think I want this
time, I want six. So I'm going to roll the mouse wheel until
I see six loops, three, four, five,
and six, there we go. And I'll click the left
button, and there we go. Okay, you do get this
opportunity when you've clicked off
to adjust this. But as soon as you click on something else, this
goes, remember? So again, now, if I wanted to, I could go ahead and
add some extra loops, but six is what I
wanted, so that's fine. Okay, so now I'm
just going to select these first two loops,
this one and this one. And I'm going to draw
them closer together. So I'm going to press S and
Y to scale them down in the Y axis until I get
something like that. And I'm going to
repeat this process through the other two,
so I'll grab this one. Hold shift, grab this one, and press S and Y
and bring those together and make sure they're center to the door or
appear center and do it one last time with these
ones, and press SNY. Centralize those.
And there we go. That's cool. So now
that we've done that, I'll tap out of Edit mode and
check the scale still good. And I'm going to
isolate that object. So with it's selected,
I'm going to hit the forward slash key and
Impad and there we go. And I'll hit tab and I'll
tap back into Edit mode. I'm going to press three on the keyboard to
select faces now. And I'm going to select these
three narrow little groups. And I'll just get a bit more of an angle so
I can see it from here. And I'll press E and take
that down in the Z axis, too. I don't know. Something like that.
There we go. That's fine. And with that done, we don't need these little faces here, so I'm going to delete those.
So I'll grab this one. I'll hold Shift, I'll grab
this one and this one, and I'll right click and
I'll delete those faces. I'll go ahead and do the
same on this opposite side. Grab this one. Hold Shift, grab this one and this one, right click and
delete those faces. I'll press two on my
keyboard to select edges, grab this edge, hold
Shift, grab this edge, and I'm going to bring those
down with an extrusion. So I'll press E, Z, and bring those down.
Maybe something oh. Okay, so now we want to
apply some bevels to this. So I'll just grab
maybe this edge and this edge, this edge, this edge, this one, this one, this one, and this one, and this last one, as well. And last one. There we go. With those selected,
I'll press Control B, and I'll put a slight
bevel on those. Whoa, that's a bit
much. That's fine. And I'll just scroll
the mouse wheel once. Maybe twice, and there we go. I'm happy with that. Now let's do the same with
these outer ones. So I'll grab this one now, and hold shift and
grab this one. And I'll press Control B and
bevel that edge, as well. And I'll scum my mouse
wheel back because I just want one
facet on that one. So it looks something like that. That's what I wanted. So that's two, actually, two segments. And I'll go ahead and click
on that, and there we go. That's cool. So I just want to blunten
those edges a little bit, so I'll grab this one, hold shift, and grab this one. And I'll do the same here now. I'll grab this one and this one, and I'll press Control B
and bevel those as well. I'll scroll a mouse wheel. Make sure your bevels
aren't overlapping like that because that's
going to create some big problems
with your surfaces. So again, just make sure
they're not overlapping, and that's exactly what I want just like
that. There we go. I'll tap out of demode,
take a look at this, and I'll press I'll right click, and I'll shade Auto
smooth. And there we go. That's looking kid. I'll press seven to bring everything back. Sorry, I'll press the
forward slashk numpad to bring everything back, and then I'll press seven to
go to the orthographic view. I can pull that
over in the X axis. To about there like that. And now, obviously,
we just need to stretch that until it's
meeting the other side. So we can either scale it or we can tap into Edit
mode, which I think I'll do. So I'll hit the tab key, and I'll press one on the keyboard to go into
vertice selection. But also press S and go into wireframe mode to make sure we select all the vertices. I'll grab all of these
here and just bring this over until it's in the right position on
the opposite side. That's it. We can tap a Ata mode and press SD and go
back to solid mode. We could press seven on the numpad to get the
orthographic view, and we can press Shift D and Y and bring that over now to
the opposite side as well. Let's zoom in on this. And let's put that in
position as we want it, as well, which is about
like that. There we go. So let's do one last thing. Let's have a look
at our outliner. So obviously, we've
got two new items. We've got plane one and
plane two, and that the. So let's name plane one. And we'll call this door track. There we go. And let's select and let's select
the door track one. And then once we got
both of those selected, let's press Control J and
join those into one as well, just to keep our outline neat and keep our file size small. Okay, so that's our
door tracks done, and that's our number
11 lecture finished. So in the next lecture, let's go ahead and build
this perimeter wall. Let's build this up
so we can start to get a feel for the
actual grounds, as well. Okay, thanks very much. I'll see you in
the next lecture. Bye bye for now.
15. Lecture 12 Boundary Wall: Hello, and welcome
now to Lecture 12. And let's go ahead now and build our boundary wall
around our house. So we get a sense now
of the true scale of the whole project and
how it actually feels. So, this isn't too hard. This is pretty easy. So let's press seven on a numpad to get the
orthographic plan view. And let's press Shift A, and let's bring in a cube. Bring this back on the y axis. And let's work in
wireframe on this one. So let's press S and
go into wireframe. Let's tap into Editod. So hit tab with it selected and press one on your keyboard
so you can select vertices. Let's grab these
tap vertices here, and let's bring those
down until they're flush with the wall and
do the same here. And let's go ahead and grab these ones now and take
these back like this. Grab these ones and take these ones back
as well, like this. Alright, that's
cool. Let's a start. Let's press two now on the keyboard so we
can select edges. Grab one of these long edges
here, press Control R, and bring this loop over until you're level with the
return of the wall. There you go, just like that. Let's do the same thing again. So press Control R and bring this loop over until
we're level with the return. Alright, let's pan
down on this now. Let's press three on our
keyboard so we can select faces. Click on this little dot, and hold Shift and click
on this little dot. Let's press seven again now on our numpad to get our
orthographic view back. And let's press E for Extrude
and bring those down again, until they're level with
the edge of the wall. There we go. That's cool.
That's what we want. All right. So now let's make sure we're in
edge selection, so I'll press two
on our keyboard. Grab this edge here like
this and press Control R and bring this loop down again till it's
level with the return. There we go. Do the same with this
one, press Control R, and go ahead and bring this down until it's level
with the return. Cool. All right, let's press three
so we can select faces, grab this face here,
press seven again, and the extrude that
until it's level with the pool and do the same
on the opposite side. E and extrude that as well. Okay, let's look at the height. So we could actually get the height if we wanted to
from the front elevation. But I think I'm just
going to visually just determine what
height I want. So I'll just grab this
face here, hold shift, and grab this one, and hold
shift and grab this one. And I'm going to pull this up. I want the retaining wall to be higher behind the house than
the front of the house. So I'll just put that
about there like that. And I think the front ones, I'm going to take those
down just a little bit. There we go. And deselect
the back ones. Whoops. And now I'm going to select
these front ones here. This one and this one, and maybe this one and this one. And do we want to
adjust the front? Actually, after selecting those, I think I've changed my mind. I think I'll just leave those
exactly where they are. Yeah, we'll leave those alone. Okay, let's press two now
so we can select edges. And let's go ahead
and select this edge, and then this one and this
one and this one here. And let's do the same here now, so we'll select
this one, this one, this one, and this one. Do the same again.
And one last time. And with those selected,
right click and delete. Oh, sorry, dissolve those
edges. Not delete, dissolve. Okay, we can work in solid now, so I'll press SED and
go back to solid mode. We can take a look at that
and see what it looks like. And yeah, I think
I'm happy with that. So now we can go ahead and do something with a bottom face. I want to bring this
down even further. So let's grab the bottom face. I'll press three
on the keyboard, so we select faces,
grab this face here. And I want to show you
a neat little trick. Instead of going around selecting
all those bottom faces, come up here to select, select similar and
select coplanar. So it's selected all faces on exactly the same
plane as that one. And let's just pull
that down in the Z axis to give us a slightly
taller wall on the outside. And there we go. That's cool. Maybe even more than
that, it doesn't hurt at all. There
we go. That's good. And now that we've
done that, I actually just want to delete those faces. So I'll select that face again, and we'll go select select
similar and coplanaRClick, and delete faces, in this case. That way we can reduce again, we can simplify the mesh and
reduce the amount of faces. Okay, so let's tap out
of Edding mode now. I guess the only thing
that remains to do is go ahead and apply
a bevel to this. So that's easy enough.
Let's look at the scale. And the scale's correct 'cause we haven't scaled anything. We've just modeled this.
We've just extruded, so scale's still accurate. Let's go ahead to
the modifiers, now. So add modify, generate, and bevel, and's zoom in a little bit and
see what we've got, and that's too much. So on the amount here, I'm going to add a disc more point. Maybe just one this
case and see what we got, and that's not enough. So maybe we'll go for
a five there again. And is that too much? Maybe that's too
much. Maybe I'll go for four, seeing how that looks. And yeah, that's better.
And I'll add maybe two more segments to that.
And yeah, that's what I want. So I'll go ahead and apply that and let's go ahead
and do a shade oro smooth. And there we go. That's cool. So all that remains really is to name
that. So let's do that. And we'll call boundary wall. Well, you can call it
wherever you want. I'll call it boundary Wall. There we go. Ah, that's that. That was a nice, easy lecture. Okay, and the next one, let's
just carry on with this. Let's go ahead and build our swimming pool and
put that in place next. Okay, thanks very much. And I'll see you in the next
lecture. Belie for now.
16. Lecture 13 Pool Part 1: Hello, and welcome
now to Lecture 13. And in this one, let's
start building our pool, and we'll just see how far
we get with this lecture. So first of all,
let's go ahead and press seven to get us in
orthographic view of the plan. And press Shift
and mesh and cube. And let's bring that
down a little bit to sort of the middle
of the pool area. And let's scale that up. And something like that.
Let's have a look. Oh, actually, I want to come to this edge with this
so scale this down a little bit and bring this over like this and maybe
scale up a little bit more. Yep, I think that's
pretty much what I want. So I'll scale it
up in the X axis. I'll press X and just bring
this again, to the boundary. What it kind of level
with these walls. So I'll just shift that
over a little bit. And yeah, that works
for me. That's fine. Let's see what this looks
like more from the front now. Let's press one on
the numpad to get us that orthographic view of the
front and bring this down. In fact, let's press and go
to wireframe for a minute. Let's bring this down to just below ground
level in this case. Kind of go to about
there like that. I think that's pretty
much what I want. And let's have a
look at the depth. Let's tap into Edit mode, grab this bottom
face here and maybe bring this up to what looks like about the right
depth for a swimming pool. Maybe something like that
would be about right. Maybe a little bit less. And that looks right to me. Let's get this top face, click on this one, and let's right click and
delete that face. We don't need that anymore. And I think now let's press two on our keyboard
so we can select faces, and maybe we can grab
this top face here. Let's press seven. And let's
press E for extrude and Y and bring this
over slightly to about halfway across
the wall like that. And now let's press E
again and Z and bring this down now to create that infinity drop that you
see on some swimming pools. There we go. That's cool. That's what we want. Let's tap out of Edmode with
that for a minute. And now let's press Z and go to solid and just
see what we've got. And I think that's looking
pretty good overall. I think what I want to
show you is my preference, and this is
completely up to you. I'm going to use
something called CAP. So if I come on over
here to the top here, click on this and
click on MCCAP, sorry, and click on this one. And now click on the color. I can change my color. So I'm going to change. This is my personal preference. You can go wherever
you can go for, like, quite a a sort of shiny
surface like that, but I don't think
that's looking great. Or you could go for, like, a light brown, like
a coffee colour, which is okay, actually. That's not bad at all, but my personal preference
is this one. So this is what I generally
model in this sort of clay red color. This is my preference.
So from now on, I'm going to do this, but
that's completely up to you. You don't have to
follow me with that. Whichever visually
works best for you. Okay. Now we've done that.
Let's actually just grab this item here and hit the forward slash key on
the numpad to isolate it. And I'm not going to put
a bevel on all surfaces, but I just want
to put a bevel on these two little edges here. So let's fix the scale, so press Control A and apply
rotation in the scale. Now let's tap into Edit mode. Let's just grab this edge. Hold shift, and grab this edge. Come in a little bit, maybe, and press Control B and just see if we can bevel those
edges just a little bit. That's enough, I would say. I'll add one more segment, and there we go. That's
all I want to do. I'll tap out of Edit
mode with that one, and that's our pull
pretty much done. So we could name it
in the outliner, so I'll double click on
it and call it the pool. There we go. Whoops,
caps are on. Turn those off, and
pool, there we go. Okay, let's bring
everything back. So I have the forward
slash key on the numb pad, and let's have a look at
that and see what we got. And yeah, that's looking fine. Okay, the next thing I
want to do is work on, like an edging tile to go around that top
edge of the pool. So I think we'll do that next. So let's press seven to get
the orthographic view and press Shift A and mesh and cube. Let's bring that cube into play, drag that over like this. And let's press and go
into wire frame on it. And let's press S and scale this down to maybe
something like this. I'm going to bring this
back a little bit. I want it to overhang
the pool a bit, but not too much. And I would say
that's about right. Let's go ahead and scale
this up in the X now, so I'll press SX
and bring this out. Until it kind of lines
up level with the edge. And maybe we'll just
go a little bit more. Maybe we talk about there for a moment. We'll
leave it like that. And now that we've done that,
let's go ahead and name it. So we'll go pull edge. There we go. And now
that we've done that, let's press Shift D and Y and
bring a copy out like this. Now let's rotate that, so I'll press R, 90, Enter. And let's bring this over on the X axis until we've kind of got that
where it wants to be. It's not looking too bad. Maybe we'll just take it over a little bit
on the X. I'll press G and X and just shift it
this way a little bit more. There we go. And now
let's take it down on the y axis until it's
flush with this. I'll press G and Y, and just bring it down
until it's level like this. Okay, that's cool. That's
kind of what I want. So the next thing I
want to do is make a copy and bring that to
this other side down. So I'll press shifty and X, and just bring a copy over. And for now, just drop
it on the other side. We probably won't use this one. I just need to get a length
for this back piece. So now we'll just press G and X and just bring this over until we're happy
with the location. All right, that's
cool. Let's tap on the longer piece now, and let's tap into
Edit mode using tab and press one on the
keyboard to select vertices. And let's bring these
vertices until they're in line with the one we've just positioned,
something like that. And let's do the same now
on this opposite side. That's cool? That's what I want. Okay, let's tap out of Edo Mode with that
one for a minute. And now, this one, I'm going to go ahead and delete that one, and we're just going
to work this one. So now let's tap into
Eta mode with this one, grab these vertices
here and pull this up. Until we're kind of level
with our boundary walls. Something like that should
be just about right. Okay, now that we've
done that, whoops. Let's press two so
we can select edges, grab this edge here, and press Control R, and roll the mouse wheel
to divide this surface up. IT I'll go maybe two more and maybe just move those
back just a little bit. To something like that,
that should be good. I'll tap out of Edit
mode with that one. And I'll grab this one now and tap into Edi
mode with this one. Maybe grab this edge here. And press Control A, and we'll do the same thing. We'll just scroll a mouse wheel to divide this with loops. I think maybe one more. And I think I'm happy with that. Cool. That's good. Okay, so let's tap out of
Edit mode with that one. And let's go back
into solid mode, so let's press S
and go solid and let's have a look at
the height of these. And maybe we grab
both of these now, and we press one on the numpad. And let's press Z again, actually, sorry, I
go into wire frame. And let's bring those down to pretty much ground level now. That's cool. That's
what we want. And let's tap into
Edit mode with both of those and press three
so we can select faces. And I'll just select
just this one, and then we'll go over to
select and select similar. And let's select Cplaner. And now let's press one
again on a numpad to get that orthographic
view of the front and now bring that up to get a thickness for
these edge tiles. And I think about that
should be good. That's cool. So now we have them at the right height and
the right thickness. Okay, so now we need to start applying some bevels to these. Let's tap out of Edit mode
for just a minute, actually. And let's just select maybe
just this longest one here and let's hit the forward slash key on
the num pad to isolate it. And maybe now we're
working solid for a while, so I'll press the Ed
and go over to solid. Let's hit the tab key
to tap into Edit mode. And what shall we do? Okay, yeah, we've got this
bottom edge here selected, so that's what I want
to do, actually. So I'll just do it again
to help you do the same. So I'll select this one, and
I'm going to hold control, go to the other end
and select this one. And that's selected all of them. Then I'm going to
right click and I'm going to delete those faces. There we go. So the next thing I want to do is select all
of these edges here. So I'll select this edge. Sorry, I'll press two so I can select edges, grab this one. Now I'm going to actually
go over to select, select similar and
select the same length. So it's selected
all those edges, and that's what we want. Maybe I'll hold down Shift
and just deselect this one. And maybe I'll do the same here. Just hold shift and
deselect this one. And I think actually
I'll deselect this one and deselect this one. Yeah, that's what I want. We can do the same
now here on the side. I'll grab this one and
go over to select, select similar and length. Maybe we'll hold
shift and deselect these and we'll do the
same on the other side. There we go. That's
done what I want. All right, with that done,
let's zoom in a little bit, get ourselves a bit closer. And we'll just hit the tab
key to tap out for a minute. Check the scale, and it's out. So I'll press Control A and
apply rotation and scale. It's taped back into Edimode using the tab key, and
they're still selected. And now let's press Control B and just create a slight
bevel on that edge. Maybe about that much. And we just want to
have three segments. I'm sorry, two segments. That's all I want
to see just there like that. And that's cool. So the next thing I
want to do is select that inner that inner loop. So we'll hold Alt and just
grab that one like that. And I'll hold Shift and
Alt and grab this one. This will be a
little bit tedious because we need to go
all the way along. So and this one. This one. I'll stop talking for a minute
and I'll just carry on. Are we nearing the end yet? Hopefully, it'll take us
by surprise in a minute. Are we go just keep going and E, that's the last
one. That's cool. Okay, now that we've done that, Let's have a look at what
we're working in here. Let's go up here and
go from global to local and make sure here that
we're in individual origin. And once we've done that, let's
hit S and scale those in. And that's what I want.
That's looking good. Now we can go ahead and actually just maybe grab that top edge only and do the same
with the rest of them. And maybe I press G and Z and maybe just take
those down a little bit. And that's cool.
That's what I want. So the last thing you
want to do is just select this edge here and goes the other end and hold on to Control and select
that top edge like that. And should we do the
same with the bottom? No, I think I'll leave that. So once we've got
those, let's press Control B and bevel
that edge, as well. Maybe scroll a mouse
wheel once on that. And, yeah, that's cool. That's
exactly what I want to do. Okay, let's tap out
of Edit mode on that. And yeah, that's
looking really good. Let's do a shade auto smooth
and see if that helps. And, yeah, that's exactly
the effect I want. Okay, let's the forward slash key and bring
everything back. And there, that's looking good. So I think we'll leave this
lecture at this stage now. And the next lecture, we'll just do these little
returns the same way, putting these little joints in these edging tiles on
these little returns. And then maybe after
that, we'll start looking at putting
some paving slabs down over the rest of the
pulls the area at the outside. Okay, thanks very much. I'll see you in the next
lecture. Bye bye for now.
17. Lecture 14 Pool Part 2: Hello, and welcome
now to Lecture 14. And in this lecture, let's go ahead now and finish
our swimming pool. I think that'd be a
good thing to do. So I don't think we need our
ground floor plan for now, so I'm gonna go ahead and hide that just here in the outliner, and then I'll compress
our reference images. I think what I'm
going to do is rather than use this piece here now, I'm going to make duplicates
of this long piece here because we already have
all our nice grooves in it. So let's utilize this. So I'll just go ahead
and delete this one. And I'm going to
make a copy of this, so I'll press Shift D and Y and bring a
copy over like this. And let's go ahead and put our orientations back to Global. And here as well on
our pivot points, let's put that back to median. And now that we've done
that, let's go ahead and rotate that on the Z axis, so I'll press Z nine, zero. E. And let's bring this over as well now and
line it up at the end. Let's press seven
on an umpad so we can see this orthographically
from the top. And let's go ahead
and bring this down. And let's take a minute
now to line this up. So I'll press GNX and
just take this over. And now I'll press G and Y and bring it down.
There we go. That's cool. Okay, so we've got a
duplicate of that edge, and that's saved
us a lot of work, but obviously, it's too long. So what I want to do now is put an extra control loop just here so that we can delete all the material
this side of it. So let's do that next. So let's grab it and
let's tap into Edit mode. And maybe let's go into
orthographic view from the top, so I'll press seven
on the numpad. And make sure you're an edge
selection, grab an edge, press controller,
bring a loop in, and then bring this loop down, so it's pretty much
flush with the wall. There we go.
Something like that. Let's press and go into wireframe and press three on the keyboard so
we can select faces. And then I'll just select
all these faces here. Let's zoom in and see what
else we need to select. Whoops. Let's select
all of these, as well. Whoops, not going well here. Give me a second. Let's
grab all of these again. And these. And if we got all
we need, I think that's it. So I'll press X, and I'll
delete faces. And there we go. That's where. Okay, so the next thing I want
to do is just create a face on the end here.
So let's do that. So if I press one, we
can select vertices. I'll grab this vertice, hold shift, grab this one, right click and new edge ace from vertices.
Let's click on that. And that's created a new edge
there on the base for us. Let's press two so we
can select edges now, and I'll hold down Control, and I'll select
this one as well. And now it'll hold
Shift and just grab this last one. There we go. So with all the edges selected, I'll press F, and
that will fill that. So it'll put an extra
face on the end there. Cool, that's that done. Let's press now and go back to solid mode and
see where we go. Okay, so next thing we want
to do is sort this out here. So what I want to do is put an angled cut
here on the back edge. We could go straight
if we wanted to. But I think I'm just
going to go angle. I think it'll just look better. So let's do that next. So what I'm going to do first is press seven and get an
orthographic view from the top. And I'm going to press Shift A. And I'm going to
bring in a plane, and I'll bring this
plane over like this. Now, I'll rotate
it in the Y axis. I'll press y90, Enter. And then I'll bring this
over now to this side. Let's get a bit
closer to the action. Let's bring this down. Until its origin is on
the corner just there. And then with that done,
let's press R and rotate it until it's lining up with this
internal corner just here. And that looks good to me.
Okay, so we're going to use the Boolean cutter now to try and cut an angle in
this piece here. So let's do that. Let's
grab this piece here. Actually, let's just
have a look at this, and let's clean up the rotation. So let's press Control A and
apply rotation and scale. And now let's select this piece, add modifier,
generate and boolean. Make sure that you're
in difference here, and then grab the dropper
and click on this. And there again, that's cut that through exactly
where we want it. So I'll go ahead and All right. Cool. So now we need to do
the same with this one. So let's grab this
piece here now, check the scales.
Let's correct those. We'll press Control A and
apply rotation in scale. Add a modifier and use
the Boolean modifier, grab the dropper, and
click on this one. And we have a problem. It's actually deleted
the wrong side for us. There's a reason
why it's done that. And it's this cutter
that we've got here. The normals on this
cutter are facing the wrong way. So
what are normals? So what I like to think
of normals as is, if you think of a cereal box. Now, on the outside
of the cereal box, you've got all the nice, glossy writing telling you to
buy it and how nice it is. And on the inside, it's
just gray cardboard. We have the grey cardboard facing the wrong way
to make this cut. So, blenders listening
to which way this panel is and cutting
in that direction. So how we can check this
if we come up here, click on this little drop down and click on Face orientation. And this normal is correct
because it's blue. And if you look at
everything else, you can see that our
normals are good so far. But this one here is wrong. It always had to be wrong
for one side or the other, so it's correct for this side, but not for this side.
So we need to correct. So what we can do is grab it, tap into Edit mode with it, come up to mesh, come down
to normals and flipper. And there we go. So now that's automatically cut
that panel for us. We come back to this panel now, and we'll tap out of edimde,
come back to this one, and now that boolean has
worked correctly for us, so we'll go ahead
and apply that. There we go. Let's get out of this normals indicator
face orientation setting. And let's work on the other one. So because now we
have a face on this, the opposite side of this
is open. We have one face. So we can't just
bring a duplicate a duplicate over and flip it anymore because
it'll be incorrect. So we actually need
to mirror this piece. So I need to show
you how to mirror. So what we need to do is
bring the pivot point for this object to the center
of the swimming pool. And the pivot point right
now is way over here, so that's not right for
us. So let's work on this. So I'll do first is
grab the object, right click and set its origin to the
geometry. And there we go. So we brought the pivot point back to the center
of the object. But that's not
technically where we want it. Still not right. We want the origin,
the pivot point of this object to be dead
center of the swimming pool. So we can do that, too. So
let's grab the swimming pool. And let's press shifts. And cursor to the selected. So we've brought the cursor now to the middle of
the swimming pool. So now let's bring
the pivot point of this object to the cursor. So grab the object, right click, set the origin to the three
D cursor. There we go. So let's make our duplicate, so I'll grab the object. We'll press shifty. It's turned white to tell
us there's two of it. Let's right click twice, and let's mirror in the X axis. And yeah, that's
worked. There we go. That's cool. So we
brought a copy over here now, and that's
looking good. Okay, so the only thing
that remains for us to do now is to go ahead and
put a cut on this one. So let's do that. So let's
grab our cutting plane, and let's press seven. And let's press S and
get a wire right. Bring this over now
to the opposite side. And let's go ahead
and rotate that. Oh, let's actually put it
in the right position, so I'll bring this closer
to the edge like this. And I'll press R, and
I'll rotate this round. And let's take a look at
that. And let's press R. Bring it back a little bit. And yeah, that's looking good. Let's press Z and
go back to solid. Let's grab this one, add
modifier, generate and boolean. And then let's grab our
dropper and click on this. And that's worked so I'll
go ahead and apply that. There we go, we can
delete this object, and maybe we just do a
little tidying up on this. So maybe I'll grab
this one then, and I'll tap into Edi mode. And I'll press one for
vertice selection. And I'll go ahead and grab maybe just these vertices here. I'll press seven and maybe
just pull that over like. And that's looking
good. That's looking fine. Let's have a look here. And yeah, that's looking good. Okay, so let's check these ones, make sure they're
named, and they are. So we could actually join these three together then,
so let's do that. Let's grab maybe this one,
this one, and this one, and we'll press ControlJ and
join those into one object. And we can actually
rename this object too. We don't need the OT anymore, so we'll delete that little
bit, and there we go. And there are different
color just here. So I think what we have
is a normals issue. So let's see if we can
just check on that. Let's tap into Edit mode. And let's go ahead up here
and do face orientation. And yeah, that's incorrect. So let's press A.
Let's go over to mesh, normals and recalculate outside. And there we go. That's
sorted that out for us. Okay, let's tap out of Edit
mode, and there we go. We'll just turn off the
face orientation again. And that's it. That's done. So in the next
lecture, let's start looking at creating
a ground, well, some external
ground, some paving, I guess, around the swimming
pool and around the house. Okay, thanks very much. I'll see you in the next
one. Bye bye for now.
18. Lecture 15 Paving Slabs: Hello, and welcome
now to Lecture 15. And in this lecture, yeah, let's see if we can do
these paving slabs on the outside here around the
pool and around the house. It may take more
than one lecture. We'll just see how we do. We're not gonna rush it. So, where's to make
a start with this? Let's start by putting the cursor back at
the world origins. And if you remember rightly, the world oranges
origins oranges. The world origins
is exactly where all the axes meet
right in the center. And so let's start
by doing that. So we'll press Shift S and
cursor to world origin. And there we go. Soother cursors smack back there again.
And that's what I want. Okay, let's press
seven on the numpad to get us back in the
orthographic view above. Let's press Shift A, and let's bring in a cube. And let's bring this
down like this. And let's take this over to the edge of the swimming pool. And I'm actually going
to use our edging from our swimming
pool to indicate the size of our slabs, as well. So I'll go ahead and press
S now and scale these down, and I'll take it over,
and I'll hit S again. And now bring this into
position just like this. And I'll scale it down
a little bit more, and maybe position this. Maybe scale it up now. Maybe take it back a little bit. Maybe scale it up
a tiny bit more. I think that's pretty good. It's gonna maybe take a little bit of playing
around with this. But I think that's pretty good. I'll take it up a little bit
just to put a slight gap between the edging
and the paving slab. Okay, let's press seven. Let's press one on the number
bad get us that front view. Maybe let's press s
and go to wireframe or grab this box here
and now take this down. So that it's maybe down a little bit lower than the
edging to the swimming pool, and that is a little bit lower. So I think that's right. Let's go ahead and tap
into Edit mode now, so I'll hit the tab key. Let's press three, so
we can select faces. I'll grab this face now. I'll press one again on the numpad to get
us that front view, and now bring this up to
about paving slab thickness. Something like that,
I'd say. There we go. That's good. And now, with that face also selected, I'm just going to press X, and I'm going to
delete that face just again to reduce the
amount of mesh we're using. Okay, I'm going to
grab the top face now. And with that selected,
I'm going to press two on the numpad so that we
convert to edge selection. But now, also, these edges are all selected,
which is what I want. And I may need to check the
scale before we bevel this. So I'll tap out of Edit mode, press Control A, and apply rotation in the scale, and that's
corrected that. Let's hit the tab key. And with that done,
let's bevel this edge. So let's press Control B and just apply a slide bevel
to this edge like that. And I'll put segments at two. There we go. Let's go
back to solid mode now, and just check that
that looks good. Let's press seven to see
this orthographically, and see if there's anything
we want to change. So let's tap out of
edit mode on this one. And maybe just take it down
just a tiny bit in the Y, there we go, just to reduce
that gap a little bit, maybe a tiny bit more. And there we go. That's good. Okay, let's name this. So I'll name this paving slab. There we go. And the
next thing I need to do is actually apply a new modifier we've not
used before to this. So with the items selected, let's add modifier and
go down to generate. And this time, we're going
to use the array modifier. Now, the array modifier
duplicates the amount of items in the
necessary direction. So at the moment,
it's duplicating the X axis in the red axis. And you can see
it's actually shown two now because
the count is two. And here is simulating the gap that we have
in between them. Let's zoom in on
these a little bit. And they're basically touching
each other, so it's one. It's exactly duplicated
it's own space once. So I want to create a
slight gap between these. So I think here in the X factor, I'm going to add an extra zero, then an extra five and click
Enter and see what we get. And that's created
a slide gap for us. And let's just see
how that works. So what I'll do now in the count is I'll
just increase this. Until we get to the other
end and see what we've got. I think I need to
increase that gap. So we'll do that. Let's
try increasing that gap to 1.009 instead of five and
see what that looks like. And yeah, that's pretty good. I mean, gaps here aren't quite lining up. But
that's not too bad. Maybe I could go 85
instead of nine. Enter. And yeah, I mean, I
think that's close enough. I think that's absolutely
fine. We'll go with that. So I'll apply that
now. And that's the array modifier we're using. Okay, so let's use the
array modifier again now, but this time in the Y axis to fill up the gap to the door. So we select the item, add, modify,
generate, and array. And of course, in the X, we
don't want it to do this. We don't want it to
send the equal number again over on this side. So let's turn X into zero. Enter. And in the Y, let's make this one and enter. And you can see what
it's done there. Now it's duplicated
that number for us. So let's see if we can apply
that same number again. So we'll go 1095 Enter. And that's given
us the equal gap now as well in the Y axis. So all that remains
to do is increase the count and see how that
works out up to the house. Let's see how that
looks in relation to the door track that we've fitted and see that looks nice. And it does. That actually looks really good. That
height is perfect. So that done? I'm going to
go ahead and apply that. Okay, so that's a fair portion of the paving slabs
already done. So now we need to sort of
carry on in this direction. But this is one lump now. The array modifiers,
turn this into one lump. And that's pretty
good, but we need a spare paving slab now so we
can start working this way. So let's get one from this. Let's tap into Edit mode. And let's press three
so we can select faces. Well, grab this face here. Anyone will do, really. And I want to show you a new trick. So I want to expand on this selection of
this paving slab. So I'll hold down Control and then start tapping
plus on the numpad. And you can see there that it's expanding on the selection. I can carry in plastering, but it won't go any
further because it's reached the boundaries
of that component, so we've selected all the
faces now of that component. So with that done? I'm
actually going to press Shift D and X and bring a copy. But I want to separate that copy from these ones
because at the moment, that's still a part of this group, and I
don't want it to be. So to do that, I'm going
to press P for separate, and then I'm going to
separate by selection. And now that I've
separated that out, it's created here in the
outliner, a different one. We have paving slab
and paving slab a one. Let's tap out of Edit mode. And this one here is
paving slab a one, and this one is paving slab. So now this is a separate item. And I think what I'll
do is I'll just make a duplicate this again so
we don't have to do that. But the origins is way over
here, so that's not right. So let's right click and set the origins to the geometry
to bring that over. And now let's press Shift D and X and bring another
copy out of the way. Over here. Okay, now what? I think what I'll do
next is let's bring a paving slab up here to this corner, level
with this one. So let's press seven to
see this from above. And then we'll bring this up. It doesn't matter
it's under the house. No one will ever
see that. And we'll just eye this up at this corner. Let's zoom in on that,
see how it looks. And then we take it up on the Y, so I'll press G and
Y and bring this up. And yeah, that looks good to me. Okay, so now that we have
that paving slab in position, let's go ahead and apply
another array modifier to that. Let's click on the
item. Add modifier, generate, and array. And I don't want to
go in the X just now. I want to come down
here on the Y. So let's delete the X. So I'll just put
a zero in there. And here on the Y, let's just click in the
negative to bring this down. Let's have a look at that and we still need to do
a little bit more. So I'm actually going to add a zero and put a five
and Clic enter. And maybe we make that a
nine. See how that looks. Enter. And maybe we
make that a ten. So I'll dilate that and add a ten and click
Enter. Ah, that doesn't work. Okay, let's try that again. Let's make that a 995, click Enter. And there we go. I think that's close
enough for us. Okay, so with that done, now, let's carry on just
adding to the count. And we'll bring that always the bottom and see how it fits. And yeah, that works
out just fine. And again, I'm not
worried about it going into this wall here
cause we'll never read that. Okay, so with that done,
let's apply that now. And let's apply straight
away another array modifier. Let's press seven on the numpad to get us
that orthographic view. Let's grab this one, add
modifier, generate and array. And let's just go ahead now
and have a look at this gap, and maybe we just add a zero to the end of that zero and a five and clack Enter
and see how that looks. And maybe we just add turn
that into a nine and enter. And, yeah, that's good. I
think that's just fine. So let's go ahead and increase
the count on that now. Until we come to the end. And yeah, that looks fine. That's absolutely what we want. Okay, so let's apply that
modifier, as well, now. And let's go ahead and duplicate this now to
the opposite side. So again, we need to
put the pivot point for this one here in the
origins in the middle. So let's right click and let's set the origin
to the three D cursor. And with that done, we can
grab the object, press E, right click twice, and go
ahead mirror in the Yaxis. Ah, the Yaxis is
wrong in this case. So here in this tab, just click on X and
then delete the Y, and that's put in the
right place for us. Okay, so we just need
to close that up a little bit by the
lock in. That's fine. So let's go ahead and set the origins now back
to the geometry, and let's just bring
that over slightly. Let's zoom in a little
bit on that gap. And let's press G and X and bring that in just a little bit more to about
that. I think that's fine. Alright, so what to do now? I think the next
thing I'm going to do rather than using a
ray modifier again, is I'm actually
gonna make a copy of this one and bring it over. So I'm going to select
this object like this. Gonna press Shift D and Y and bring a copy
over now to the back. Let's focus on this
area for a minute, making this gap look
good and we'll press G and Y and then bring this down until the
gap looks about right. And that looks good to me
like that. Okay, so now what? Let's actually tap into
Eddy mode with this one. And let's make sure
we got face selected and I have. I'll grab this face. I'll hold shift
and grab this one, this one, this one.
These ones here. And I think, in this case, actually, I'll take this
one and this one as well. And with that done, I'm going to expand on that selection. So I'll hold down
Control and press Plus until we've got all the
faces of those paving slabs, and now I'll press X,
and I'll delete faces. And that's fine. We can just see them there like that,
but that's fine. You'll never see that when we've got this staircase in place. So the next thing to do
is to select this face, this face, this face,
and then this face. Let's press seven
again on the numpad. Let's hit actually, let's just press Control plus and make sure we've got all
our selection on those. Press seven again. And now bring these down until we have these
in the right position. And that will be
something like that. There we go. Okay. That's cool. That's what we want. So the
next thing I need to do is actually to make a duplicate of these two here. So I'll do that. I'll select this
face and this face. And let's hit Control plus
to select all those faces. I'll press seven again to get
us the orthographic view, and I'll press Shift D and X and bring us a
copy out like this. Let's check our gaps, make
sure they're reasonable. And they're a little big, so I'll just bring the back
a little bit like this. And let's grab these ones again. Control plus on those. And let's press P, and let's
separate by selection. Okay, let's tap out of
edit mode with that. Let's grab these ones now. And let's go ahead and do
another array modifier. So we'll add modifier,
generate and array. And let's go the
opposite way in the X. So I click this until these come over
in the opposite way. And I'll see what
that looks like. And it looks like I need
to add maybe an extra zero here and a five click Enter and see what that looks like,
and that's too much. So let's turn that five
into a three click Enter. And let's turn that three into a two and see what you look like. And let's try one.
And, yeah, that's. So with that done, we
just increase our count here and see where we get
to now on this side here. And there we get that's done. So we could grab this one here, and we could press Shift and X and bring a copy over now to the opposite
side here like. It doesn't quite
line up just here, but that's a corner that
I'll never be seen, so I'm not overly worried. And we can actually just
line these up here now, so we'll press G and X and just bring
this over like this. And let's tap into
Edit mode now and just delete these
couple of paving slabs. So we'll grab this
one, hold shift, and grab this one,
this one, this one, and we'll expand on the
selection on those, and then we'll press X, and
we'll delete those faces. Okay, so let's tap of
Edit mode with that, let's just see what
we've got here. And as you can see,
we've got a lot of paving slab groups
here in the outliner. So let's see if we can join all these together all into one. So let's grab them. And
that's all of them. And with all those selected, Oh, let's deselect the
boundary wall. We don't want that. And
with all those selected, let's press ControlJ and join them all into
one like that. And we could go ahead
and rename this. So let's just well, let's just lose that 006. The rest is just fine. And this paving slab here, we don't need this
now, so we'll delete. And as you can see, this area here is a completely
different color. So again, that's
a normals issue, so let's sort that out. Let's grab it and let's go ahead and have a look at
our face orientation. You can see the issue there. Let's tap into Edit
mode with this. More press A four. Come up here to mesh and normals and recalculate
outside. And there we go. That's sorted that out. Let's
go back into object mode, and let's go ahead and turn off our face orientation.
And there we go. There's our paving
slabs in place, yep, they're looking
really good. Quite a long
lecture, I'll admit, but yeah, we've made some
really good progress. Okay, thanks very much. Time for a well break, and I'll see you the
next one. Bye bye now.
19. Lecture 16 StairCase: Hello, and welcome
now to Lecture 16. And in this lecture, let's have a go at making the staircase. Let's see if what we
can do with that one. Okay, so let's make a start. So first of all, let's press seven on the numpad to get us in
the orthographic view. And let's turn on
our images again or just turn on for now
ground floor plan. Let's just turn that on
and see what we've got. Okay, so there's our staircase. So let's just make a
cube straightaway, so let's press Shift A and mesh, and let's make a cube. Let's take the cube over. And let's go into wireframe. So I'll press and wireframe. Let's scale this cube down, now, until it fits in the Maybe
scale it up a little bit. There we go. That's what I want. So now that I've
done that, I will take that back right
into the corner. And let's see what that
looks like from the front. So I'll press one on the numpad. And we'll see where that is. And let's take the base of
the cube up to floor level. So that is just there like that. And now we need to establish
the height of this. So to do that, let's bring
in the front elevation plan. And we kind of need
to make the top of this cube level with the finished floor
of the first floor. So let's tap into Edit
mode with this cube. We'll grab this top face
and then I'll press one again to get us that
orthographic front view. And let's just pull this up now. Until it's level with the finished floor
of the first floor. Which is there, just like that. Okay, so we've established the height now of our staircase. And the next thing I want to do is put some loops in this. To be honest, I've
previously worked out how many loops we need
to do this, and it's 15. So I'll press two
on the keyboard, grab this etch, and
then press Controller. I'll just roll the mouse a
couple of times on the wheel. Then I'll left click once, and I'll left click again. Now we've got our little tab open here so we can
make some adjustments. And here, I'll just take
this up to 15. There we go. That's what we need. Now
that we've done that, this bottom loop straightaway, I'm going to dissolve that. I just wanted that one in there to get the
correct spacing. So now that we've got that, I'll press two so I can select edges. I'll hold Alt and grab this one. I'll right click and
I'll dissolve that edge. There we go. That's cool. Okay. So now what? Let's maybe go back to solid
mode for a minute. Let's tap out of Edit mode, and let's maybe fix the scale. So I'll press Control A and
apply rotation and scale. And maybe let's isolate
this object for a moment. So I'm going to hit the forward
slash key on the numpad. And now let's tap back
into Edit mode with this. And we don't need
much of this anymore. I don't need a lot
of these faces. I'll press three on the
keyboard, grab this one. I'll hold on to control and
select down here like this. And then I'm going to
right click and I'm going to delete those faces.
I'll do the same here. Right click and
delete those faces, and I'll do the same here. Right click and
delete those faces. And we don't need
the bottom either. There we go. So we've
just got this left. That's all we've got
left of that cube. Okay, let's bring
everything back, so I'll hit the forward
slash key again. And let's go into wireframe. So we'll press set and
go into wireframe. I'll grab this face here. I'll press seven on the numpad. And I'm going to go
ahead and extrude that now all the way to
this wall over here. So I'll press E and
bring this over like this until it's touching
the opposite wall. Now, the tab has appeared here, and in this, I want to click on Dissolve orthagonal edges. And there we go. That's done. Okay, let's do that again. So I'll just grab
this one here now, and I'll press seven, and I'll press E, and I'll bring this over until it's level with that
step there like that. And now we just keep on
repeating the process, remembering each
time to click on Dissolve orthagonal
edges. There we go. So let's do the next
one. Grab this one, press seven, and press E and
bring this over like this. Click there and Dissolve
orthagonal edges. Keep on repeating the process
all the way to the top. Remembering, of course, to just click on Dissolve
OthagonalE dges. Okay, so let's carry
on doing this. So I'll press seven
and I'll press E, and just keep on bringing these over and dissolve orthagonage. Okay, so what this sort of sort of zig zag line here means in the plan it's
called a break of scale. And what that's
telling us is that this staircase
actually continues. But the information in
the plan stops there, but the staircase continues. So what it would have
actually done is gone up onto the first floor, which is why it's not seen on
this ground for elevation. So we're just going
to make a kind of a few assumptions
on this, no. So we'll grab this
next one here, no, and we'll press seven,
and I'll press E, and I'll just bring
that sort of make a guess at about there and
go ahead and dissolve. And we'll go again. We'll press E and bring this forward
to something like this, I think, and dissolve
orthogonal edge. Okay, so there's our
sort of start of our staircase. And let's
take a look at it. So let's press and
go over to solid. And that's looking pretty good. Pretty happy with that. Let's tap out of Edit
mode for a moment. And let's go ahead and isolate
it and see what we've got. Okay, so the next
thing I need to do is just create an
extra step just here. So let's see if we can do that. So I'll tap into
Edit mode again. And I'm going to go ahead and just grab this edge here now, I'll press two on the keyboard, grab an edge like this and press Control R and get a
loop going through like this. And now I'm going to
actually just grab this edge here
like this and I'll press Control R and
just bring a loop over to about there like that. Okay, I'll press three on the keyboard so we can
select faces again. I'll grab this face like this. I'll press seven, and
then I'll press E and just bring this
out like this. And there we go. That's our
staircase, almost complete. So what we could do is go
ahead and put some bevels on these edges just to
soften these angles. So let's do that next. So we'll press two so
we can select edges. And we'll just grab these edges. This one, this one. Well, all the way up
the stairs, really. All the way to the top. And I'll zoom in so I can just
inspect my bevel, and I'll press Control B, and I'll just apply
a little bevel. And that's kind of all
I want is about that. I'll roll the mouse
wheel once to get an extra segment in
there, maybe twice. There we go. That's
that. That's done. Let's tap out of Ator mode. And yeah, that's looking
good. I'm pleased with that. Yep, that's looking good,
all the way to the base. Let's bring everything back now. So I'll hit the forward
slash key on the numpad. And there's our
staircase in position. Okay, so there's one
more thing we could do. We can actually build this wall which goes in
front of the staircase. So let's do that quick. So let's grab this wall here. Let's tap into di mode. Make sure we've got
edge selection, grab this edge and
press Control R, and put a loop on
this like this. Bring this kind of
over in position, and now press seven
and go ahead and now take this over until it's kind of flush
with the staircase, maybe even sort of living in
the space of the staircase, just a tiny bit like that. There we go. Now let's
repeat that process. Let's grab that
edge now and press Control R and take
this one over. And now let's press seven again. And now let's take
this one over until it's in line with
the wall. Like that. There we go. And with that done, let's press three so
we can select faces. Let's grab this face here. And now let's press seven
again and let's press E and extrude this out until it
touches the staircase. Like that. And let's see
what that looks like. And that is exactly what I want. Maybe I'll just bring that forward just
a little bit more. So I'll press G and then Y and just bring that forward just
a little bit more, and there we go. That's
exactly what I need. So what I'll do is just put
a slide bevel on that edge. I'll grab this edge
here, hold shift, and grab this edge,
zoom in a little bit. Maybe we'll see it from the top. Maybe that's a better
place to see it. And now let's press Control B and just try beveling
those edges. Maybe something like
that'll be fine. And that's good. There we go. That's that wall created, too. Okay, so that's great.
We're starting to make some really
nice progress now. So in the next lecture, let's start building the first floor. Let's start looking
at putting the floor in and creating some
structure on the first floor. Okay, thanks very much. And I'll see you in the next
lecture. Bye bye, Fino.
20. Lecture 17 First Floor Walls Part 1: Hello, and welcome
now to Lecture 17. And let's see if we can make
a start on the first floor. Let's see what we
can do with this. This may take a
couple of lectures, but again, we won't rush it. We'll just take
it nice and slow. So we don't need to see for now, the ground floor view. So let's turn that off. And I don't think we need to see the front
elevation straight away, so I'll turn that off as well. And let's bring on
first floor plan. Okay, so I think for a minute, as well, I'm going to
hide the ground floor. So I'll go ahead
and hide that, too. So we just have the
first floor plan showing. And that's the point. Let's create a new sub file
for this first floor now. So let's go over to collection. And let's add a file. And there it is. Let's
double click on it. And let's call this first floor. There we go. And let's go ahead and high or sort of compress the
reference images and the ground floor for a moment and just have the
first floor selected. With that done, let's press seven to get the
orthographic view. And let's press Shift
A and mesh and cube. And let's go ahead
and name this cube. And we'll just call
this first floor wall. There we go. That's
cool. With that done? Let's go ahead and scale
this up. And hill. Let's actually go
into wireframe. And let's tap into
Edit mode with it and press one for
vertice selection. Grab these vertices and
take these to the edge. And I think I'm just
going to let these just fly over the edge
just a little bit, maybe something like that. And now let's do the
same on this side. Just bring them over like this, and that's a little too much. So I'll take this
back until it's just flying over
just a little bit. Let's have a look
at the backside. So I'll select these backside vertices now and see
where they're at. And they're actually
really good. So I'll leave those alone, and let's have a
look at the front, and those are a little
too far forward. So I'll grab those. And I'll press, G, and Y, and just take them
back a little bit like this. There we go. That's cool. So that's kind of now the footprint
of our first floor. So let's go ahead now and have a look at
reference images again. And let's bring in
front elevation. Let's press one on the numpad so we can see this in
the orthographic view. And let's bring back for a
moment the ground floor, too, because I want to see where the ground
floor wall ends. So now I'll grab
these lower vertices, and I'll bring these up. And now let's roll in, get
a bit closer to the view. And see where we're at. And I'm going to press G Z, and just bring these down until it's touching the
ground floor wall. There we go. Let's grab the upper
set of vertices now. Oh, yeah, we'll just grab those. And let's take those down till we get those level now
with the staircase. Zoom in a little
bit and more press. G and Z, and just
bring those down. Let's get even closer so we
can have a good look at this. Press, G and Z, and just bring those down. Until it's flush
with this staircase. There we go. That's
what we want. And that's sort of
the actual size now of our first floor. Okay, now, what
shall we do next? Let's tap out of Edit mode for a minute, inspect the scale. And that's wrong. So
let's press Control A, and apply rotation and scale. And let's go back to
solid for a minute, just so we can see
what we're doing. And what do we need and
what don't we need? Okay, we don't need this
front elevation plant, so we'll hide that. And we don't need
the ground floor again now, so we'll hide that. And I just need just
these two items. That's actually
about it for now. Let's press seven so we can see this in the
orthographic view. And let's go ahead and
go into wireframe again. And let's start applying some
control loops to our wall. Let's grab the wall
now and we'll tap into Edibode and we'll press two on the keyboard so
we can select edges, and we'll grab an
edge here maybe. And we'll press Control R. And we're going to bring a loop flush with the back wall here. Let's have a look
what we're doing. Take that back a little bit
more. And yeah, that's good. Let's do the same now
on the front here. Let's do that. So we'll
grab this one here, and we'll press Control R, and we'll bring a
loop across here, on the front like this until it's level with these
columns that we have. So we'll bring this
back like this. And yeah, that's
what we want just. Okay, so let's do one now
for this internal wall here. So I'll grab this edge here,
we'll press controller, and we'll bring a loop
over now until it's flush with that interior
face of the external wall. Just like that. There we go. Let's do the same
now on the opposite side. So we'll grab this one,
and we'll press Control R, and we'll bring this edge over. Try that again. Grab this edge here, and
we'll press Control R, and we'll bring this
one over like this. Again, let's zoom in and just
pull that into position, exactly. That's it.
That's what we want. Okay, now let's
continue with this. We shall we go next? Let's have a go at doing a wall or a set of loops
for this wall here. So I'll grab this
one here again, and I'll press Control, and I'll bring a loop over. But that. Let's have a
look that's zoom in. And that's fine. And
let's do that again now. So we'll press Control R, and we'll bring a
loop over like this. Take it a bit further,
and there we go. Okay, let's do the
same for this one, so we'll grab this edge here, and we'll press Control R, and we'll go ahead and
bring this back like this. And we'll do the same here. Control R, and bring a
loop back like this here. Cool. We'll just keep on working these until we've got all
these walls covered. So I'll press control up. Bring this one back like this. And grab another one
here and press control, and bring this one back,
as well, like this. Maybe bring over a bit more.
There we go. That's cool. Where else do we need to go? Um, maybe one here now
to catch this wall. Do we need to do that? I don't. Yes, we do, 'cause we need an edge
there. We do, indeed. I'll grab this one,
press control, and bring this one
over like this. And maybe bring this now level with that
one. There we go. And we'll do the same here. Press control and bring
this one over, as well. And make that level with
that column, as well. That's it. And do the
same for this one. So grab here, we'll
press Control R, and we'll bring this
one over like this. And do the same
again. Control and bring this one over like this. Cool. And now we're going to do this wall here,
this bathroom wall. So I'll grab this one,
and we'll press control. And we'll bring this
over like this. And I'll see where
that's landed. Maybe over a bit
more. There we go. And we'll do the same again. Control. Bring this over. There we go. And this should be the last one, last two, and one more here. And last one. Control. Ah, and bring this one now over
to here like this. Alright. That took
a few minutes, but you'll see the impact of this in just a few minutes
when we extrude this. Okay, so what's next? I think the next thing I want to do is press three,
so we select faces. I'm going to select one of
these faces on the underside. Gonna go over to select, select similar and coplana. Once I've got all those faces, I'm just going to hit
H just to hide them at this stage so that we don't accidentally select them when we're selecting the top faces. Now let's press seven again. And let's start
selecting all the walls. So this may take a few minutes, so bear with me and
then just follow along. So we'll grab this
one, this one, this one, this one, this one, follow along
and see what I do. Takes a bit of thinking to which ones you need and
which ones you don't, but take your time. Okay, we need these
little pillars, so I'll just select
that on its own. And we need this pillar here. And do we need anything else? Is that all of them? I'm
just taking a sec just to see. And I think
that's all of them. I think that's all we
need. So that's cool. So let's just roll that
forward like that. And let's press one. And with that done, let's just
press E and extrude those up in the Z axis like that. And that's cool. There we go. Impressive is that? In one hit, we've got all our walls built. Let's press S and go back to solid and see how that looks. And admittedly, we still
need to cut our doors out, but that's really cool. And the thing is,
by doing this now, this entire first floor is just one component with
absolutely minimal mesh. And we'll take a few minutes in the next lecture to
sort of just tidy up some of the unnecessary edges that we don't
need anymore, just dissolving those as we go, just to keep this
edge this mesh, excuse me, this mesh
as simple as possible. So I think there's
just a few more things that I want to do before
we call this lecture done. So let's just grab one more. Oh, before we do that, let's bring back the
front elevation. Then select a face just on the top here
that we just extruded. Go over to select again. Select similar and coplanar. Let's press one, and let's bring that to where we need it to be, which is just level with
the roof line like that. Does it want to be anymore?
Let's just zoom it a little bit and maybe take it up
just a tiny bit more, two, About like that. Okay, so what's next? So I think we'll go
over to wire frame. So let's press and
go to wire frame. And let's press two
soy select edges. And let's select an
outer edge, maybe. And we'll press one on the numpad to get the
orthographic view. And let's press Control R. And now let's bring
this entire loop up till it's level with
the top of the windows. And that's fine
with me like that. And now let's do the same
with this pillar here? Let's press one. Let's press Control up
and just bring this up, as well, until it's
in the same position. There we go. That's cool. Okay, so now let's do
the same on this side. Let's grab this edge
here and press one. And let's press Control up. And let's bring this loop up until it's level
with the window, like that. There we go. And now let's grab this pillar. Let's press one again on the numpad to get the
orthographic view. And let's press
Controller and bring this one up as well till
it's level with the window. There we go. That's cool. So now let's go back
to solid modes. I'll press Z and
go back to solid. And I'm going to show
you a new trick. I'm going to grab
faces this time, so I'll press three on the keyboard so we
can select faces, grab this one, hold
shift, and grab this one. And we those two faces selected? Right click and bridge faces. And that's just created
an instant column, you can see over there, an
instant structure over there. Let's do the same again here. Grab this one, hold shift, and grab this one, right
click and bridge faces. And we'll continue this. So we'll grab this one. Hold shift and grab this one, right click and bridge faces, and add the last
one, this one here, this one here, right
click and bridge faces. And there we go. That's
our entire first floor, walls all completed. That was really you can see how easy it is sometimes
to model and blend it. It really doesn't need
to be that complex. Alright, thanks very much. And I'll see you in the next
lecture. Bye bye for now.
21. Lecture 18 First Floor Wall Part 2: Hello, and welcome
now to Lecture 18. And let's carry on
with our first floor. Let's see what we can do just to refine this a little bit more. So I think the first
thing I want to do is let's go ahead and
hide our ground floor. So let's turn that off php so we just
have the first floor. And let's tap into Edit mode with that and see
what we've got. And if you remember,
in the last lecture, we hid this bottom surface. So let's go ahead
and bring that back. So to do that, I'll press ltHe and that will bring
back all surfaces. And now with that back,
I'm actually going to go ahead and delete,
believe it or not. So I'm gonna press three
on the numpawGrab a face. Come over to select
and select similar. And coplana. I'll press delete and delete
all faces. There we go. Okay, so next, I just need
to just remove as many of these unnecessary
curves now as possible. So let's go ahead and
start doing that. So I'll press two and grab this one and just go around there grabbing
unnecessary edges. And then once you've got
a nice amount selected, right click and dissolve edges. And then we've cleaned
up that face down a lot. So let's go ahead
and do the back now. So this is a big one, so this
might take a few minutes. Okay, so now I've selected the back. I'm going
to do the same thing. I'm going to right click and
I'm going to dissolve edges. And then we go, That's
clean that up as well. So I'm going to pause the
video and continue this, and then you guys
can do the same. Just go ahead and dissolve all edges which are being used. And then let's meet back here
when we're all done. Okay. I'll see you in a few minutes. Okay. Hi and welcome back. And it's looking a
lot lot better now. We've cleaned up the mesh. Everything's nice
and super simple, and that's the way
it should look. There are a few edges here that Blender just won't
permit me to dissolve, and I'm not gonna worry about
these little bits here. It's really not an issue at all. Okay, so what else
do we need to do? I need to sort of put a
surface here and actually close this up next because this is essentially the ceiling
for our ground floor, so let's do that next. So let's make sure
an edge selection and grab these edges. Here we go, just
grab all of those and then just press
F to fill that. And now we have this
enclosed, so that's good. Okay, the next thing I
want to do is, well, let me just show you on
the first floor plan. We have a balcony here.
We need to put this in. But I think what I'm actually
going to do with this put this balcony just flush
with these columns here. I don't think this one
needs to be doing this. I don't see any point in that. So yeah, I'm going
to put it just flush with the column there. So I'll hide this first
floor plan again. And I'll select this
edge here like this. I'll right click
and I'll subdivide. And I'm going to put two
cuts in it. There we go. So we haven't seen those yet, but if I press one
so we can select vertices, we can see those now. So I'm going to select
this one over here. And I'm going to press one on the number pad to get
the orthographic view. And I'm going to bring
that over till it's in line with the one
above it just there on the column. Yeah,
that's what I want. That's fine. And then I'll
do the same with this one. I'll just grab this vertice here and bring it over so it
lines up with the column. Okay, there we go. Now I'll
grab this vertices here, hold shift, and grab this one. I'll right click
and I'll connect vertex Path. There
we go. That's done. And then I'll do the same here, grab this one, hold shift, grab this one, right click
and connect Vertex path. I'll press three on the keyboard now so we can select faces. Grab this face that
we've just created, and I'll press E,
and I'll extrude this out. Just like that. I guess we need to know how
far it needs to project. So I'm going to go
ahead now and bring in the first floor plan again
and I'll press seven, and I'll just bring this forward until it lines up with
the edge like that. There we go. That's cool.
That's exactly what I want. So I guess now I can
actually go ahead and press two and just
grab this edge here, hold shift, and grab
this edge here, and we can right
click and we can dissolve those edges
that are not needed. And there we go.
That's looking good. So in the next lecture,
what we'll do is we'll cut the hole here for the staircase. We'll do that and
then we'll start applying some bevels to
some of these edges. All right, thanks very much. And I'll see you in the next
lecture. Bye bye for now.
22. Lecture 19 First Floor Walls Part 3: Hello, and welcome
now to Lecture 19. And in this lecture,
let's cut out the first floor for our staircase and make
sure that it looks good. And now and then
let's also apply some bevels to these edges. Alright, so how are
we going to do this? I think for now, we don't
need for this plan. So let's go ahead and turn off the first floor plan or hide it. And let's bring back
the ground floor. Let's bring that back. And I don't need all of it. All I really need is the upper
floor and the staircase. And with those two
items selected, I'll hit the forward
slash key on the numpad. There we go. So
now what do we do? So I think the next
thing I need to do is for a moment,
let's press seven. And let's go into wire frame so that we can see everything. And now let's press Shift
eight, mesh, and cube. And let's bring this
cube into position. And let's go ahead
and scale that down. And I want to make it absolutely
flush with these walls. So this here is the staircase, and we're not too worried
about that right now, but I am wanting to line
it up with these walls. So I'll bring it
forward also till it's level with the
corner of these walls. And I'm going to just pull
that forward a bit more. And I think now to do this, I'm going to tap into
edit mode with it. And I'll press three to make sure I'm in
surface selection. And I'll start maybe
with this one here. And I'm gonna pour that
level with the wall here. I'm going to take a moment to
make sure I am really nice and close to it as
close as I can get, which is about there, I think, maybe even a bit more. Okay, I think that's
good. And I'll do the same now with the other
side. I'll grab this one. And I'll pull that into the wall and really take my time to make sure that it lines
up nicely with the ball. There we go,
something like that. And I'll do the same with
this one. I'll grab this. And I'll take my time to
check that's lining up, so I'll press G&Y and bring that forward until that's
level with the wall. There we go. Okay, I'll press Z, and just check that
in solid mode now. We can't even see it yet. Where's that cube? It's there. Let's take that up.
Let's tap out of edit mode and take the
whole cube up like that. And let's see what
that looks like. And it's looking pretty well, it's looking really good.
I think that's good. So the next thing I'm going
to do is tap into Edit mode again with this cube, and maybe grab this face here. Opera seven again. And now that we've checked it, let's go back to wireframe. And now let's prowl this face over until it's level
now with the wall, which is just it gets
a little confusing, I must have been with all these, but I'm pretty sure
that's the wall there. I'm not sure that one's correct. I think that's too far over. Let me press seven again. And let me press Gx and just take that over to I think
actually it's this one. I think that's
better. Pretty sure that's the line
we've been after. And GMX, take it
back a little bit. And it's worth taking
a few minutes to just make sure this is
where you want it to be. Let's have a look at it in
this line. And there we go. Okay, I think that's it. So I'll press SD and I'll
go back to solid mode. And I think that
block is now correct. So let's see if
I'm right or not. So what I'm gonna do
now is tap out of demo, and I'll grab our
first floor walls, add modifier,
generate and boolean. I'll grab our dropper and I'll tap onto the block we've
just been working with. Now, I saw those lines change, which tells me that
boolean has worked. So I'll go ahead and apply that. And then I'll grab
our cutting block, and I'll go ahead and delete it. There we go. And let's see what
that looks like. And that's looking
pretty good, actually. So the next thing I
want to do is play around with the top
of the staircase. So now I'll tap tap into
Edit mode on the staircase, and I'll press seven to get
us in the orthographic view. And I'm going to press one
so we can select vertices, and I'll grab these
vertices here, and I'll pull those back. And I'm just going to take
them forward until they just touch the finished floor level. There we go. That's cool. And then after we've done that, I'm going to press set, and I'm going to go into wireframe. And I'm going to grab
these vertices here and just maybe now just take
them over a little bit more, just take those back to
the wall, and there we go. Alright, so let's press now
and see what that looks like. And let's bring everything back. So let's hit the
forward slash keel in the numpad and see
what that looks like. And the upstairs looks great, but the downstairs, there's a few tweaks that we need to do. So let's tap into Edy moode
now with the ground floor. So I'll grab this one and
tap back into Edy mode. Press three, so we select faces, and maybe grab this face
here, and I'll press seven. And I'm going to
take that wall over. Maybe I'll press. Got a wire. And also, just take this
wall over till it's kind of level with the
other one. There we go. I think that's it. It's
kind of tricky thing to do this, but
we're getting there. Okay, let's go
back to solid mode again and see what we can see. And yeah, that's
looking fantastic. Yeah, that's looking good. So we could check the other side now. So if I go down the
stairs and zoom in. I just want to see it
from this angle now. And it looks like I
just need to bring this wall in a little
bit, just a bit. So I'll select this
one. And I'll need to select this corner,
as well, this bevel. And with that done,
I'll press seven, and I'll go into wire frame. And I'm just gonna take that I think it's this way I need to take it
just a little bit, too. Or is it here? There's where I need to take it
just there like that. That's it. Perfect. Okay, let's
take a look at that, now. And let's go back
into solid mode and see what that looks like. Yeah, that's absolutely fine,
now. I'm happy with those. Okay, so that's
our staircase cut through, and that's
looking good. I think the only
thing I don't like is I'd like to
bring this forward. This is called the
bulkhead on the staircase. And I'm not happy with
the position of it, so I think I'm going
to change that. So let's tap out of ded mode with the down
floor or the ground floor, let's tap into Headed mode
with the top floor now, select this face
and now this face. And let's press
seven on the numpad. And now let's just bring this over until it's level
with the first step. Okay, there we go. And I know we've got now this area here, which is essentially nothing, but I didn't want to take
this wall over as well, because this is where
the bed will go. The headboard of the
bed will be here, and I didn't want
to lose this wall. So I've left that
where it is and created a sort of dead area
here, but that's okay. I can live with
that. That's right. Alright, so that's our
staircase cut in now, and I think that's
absolutely fine. So the next thing I
want to do is have a look at the bevels
on these faces. So let's tap into Edit mode on this top floor, on
the first floor. And I don't want to
use the bevel modifier because I don't want
to bevel every edge. I just want to decide which
edges in this case to bevel. So let's press two so
we can select edges. And let's select the edges
that we want to bevel. So I'm gonna bevel this one
and this one and this one. This one and this one,
there's gonna be quite a few, so I'll have to
take a few minutes to select all of these. And this one and this one. I don't think I'm gonna bevel
any of the edges between the floor and the walls a lot
of time we'll have, like, a skirting board, so
we won't need to, so I'll grab that one and
this one and this one. And this one. And I won't grab any of
the top edges because I think the roof and the ceiling
will be covering those. But I'll grab those
and this one, this one, this one, this one, that
one, and that one. And this one and this
one and this one, those and this one, and those. One. And that one and that one, and one that one. This corner, let's do. And let's do this one, as well. I'm not going to
worry about the back because we'll never
see the back of this. We're not going to be
focusing on the back. Let's grab this
corner and this one. This one here, and let's have this one and this
one and this one. That one and this one and
this one. And this one. Is that all we need? Ah, maybe a few in the bathroom.
Not many, though. So this wall is gonna
be timber clad, and so I'll just do this one here and this one
here, and this one. And we can do this corner
here and this corner here. And we can do this corner
here and this corner. And I think Whoops. I think that's all we need. Just taking a moment
now just to check. We could do this
edge here, actually, just because it might be
Bzival from the inside. And is that all we need? Are we happy? Maybe
this one as well here. And this one? And I think that's all of them. I think that's all
we need. So let's zoom in on those so we can
inspect what we're doing. Sorry, my computer's just
frozen for a second. Okay, we're zooming in. There we go. And I'll
deselect this ed. We done with that one? And now we're nice and close to
that corner to inspect it. Let's press Control
B and apply a bevel. And I'm going to go for
something like that. Now I'll roll the mouse wheel to I think that like that. I think that's
about what I want. And I've got four segments, and that's the kind of
bevel that I want to apply. And I wanted to select I wanted to do all
the bevels in one go to make sure that we have a consistent bevel everywhere. And there we go. That's done. That's our bevels in place
and our staircase cut. Okay, it was a little slow this lecture in the
way we had to do things. We just had to really
take our time and set our blocks to make sure
everything looks nice, but I think that the
results are worth it. Let's bring everything back. So we'll hit the forward
slash scale and pad. And we've got a
staircase in place now. I'll just hit the decimal
point to re center. And we can just see
what we've got. Okay, this is looking good, and we have our staircase, as. Well, I think everything's
looking great. Okay, so that's it.
That's this lecture. So in the next lecture, what we'll start doing
and start building our windows here on the
front on the upper floor. Okay, thanks very much. And I'll see you in the next
lecture. Bye bye for now.
23. Lecture 20 First Floor Windows: Hello. And now,
welcome to Lecture 20. And in this lecture, let's
go ahead and see if we can make our windows here in the
front of the first floor. But before we do that, I
want to start organizing our outline a little
bit because we're going to quickly get a lot
of items in here. So we need to try and make sure that it's easy to
find things in here. Let's turn on the ground floor, and let's open that up. And you can see
we're starting to develop quite a few
items in there. So I think what I
want to do is create a sub file for all the exterior items
on the ground floor. So let's do that. So let's
click on the ground floor, and then let's add a sub file. And there it is.
And I'll name this. And I'll call this
outside. There we go. And now I'm just going
to grab the paving and the pool edging
and the pool, and also the boundary walls. And when I've got all those
items selected, I'll press M, and I'll go down to collections, and I'll go to ground floor
and I'll click on outside. And now all those items
have been allocated to this outside sub file
within ground floor. That's started to organize
that a bit for us. Okay, I'll compress that and I'll compress the ground floor, and I'm going to turn off the ground floor after
doing all that work on it. Let's do that. Let's hide that. I don't think I need this
plan anymore for now, so I'll turn off
ground floor plan, and I'm going to turn on front elevation plan,
and there we go. I also want to start adding
some sub files to this to our first floor walls
or our first floor file. So I'll grab the main file here, and I'll add a sub file to this. I'll add another sub file, so I'll click it again
and click on this. There we go. So it's
these two here, first floor one and
first floor two. So I'll click on the
first floor one, and I'll double click
until I can rename it. I will call this bedroom one. There we go. And I'll call this
one bedroom two. And actually, why don't we go a bit further
while we're here? So let's also click on first floor again
and do that again. Let's call this bathroom. And let's call this Veranda. So let's click on
it one more time, add folder and click on this. And how do you spell Veranda? Is that right? I don't know. Let's just if it's
not spelt right, let's just keep it
between us, okay? Okay, right or wrong. That's what I've
called my veranda. Okay, so what now? Let's start work on a
window and this one. I think that's the
next thing to do. So let's press one to get us the orthographic
view on the front. That's one on the numpad. And let's get a wireframe view. So let's press and
got a wire frame. Let's bring in a plane. So let's press Shift
A and mesh and plane. And let's rotate that
plane on the X axis. So x90 enter. Let's bring this up
and bring this over. Et's bring it down a little bit, and let's scale it up sort S and just scale
this up a little bit. And I think now let's
just tap into Edit mode. Press one so we can
select vertices. I'll grab these ones here. Bring these over until this fits nicely into this hole that
we've got for the windows. That's something like
that. Let's grab this one, too. Bring this over. And let's do the same now
with the base and the top. On the top, as well. Take that up. There we go. That's cool. Okay, so let's tap
out of Edit mode. And let's press seven so
we see this from the top. And now let's bring
this forward so it's sitting where
it needs to be, which is about there, I'd say. Um, it doesn't seem
to meet that corner, so I'll tap back into edit mode, grab this one here and maybe just bring
this over that last little bit to And
that looks better. Okay. So now what, let's go back into solid mode and see what that looks like. And yeah, it's looking good. So let's tap out of Edit mode, grab this on its own and hit the forward slash key on
the numpad to isolate it. And let's press one so we
see this from the front. Ah, I did want to keep
the plan at the back. So I'm going to unisolate. And this front elevation
plan, I'm going to turn on. So I'm going to
turn it on so that we can do things with it
so I can select it again, grab that, then grab this one, the two together, and then hit the forward slash
key to isolate. Let's press one so we get
that orthographic view. And now straightaway, let's lock that front elevation again so I can't accidentally move it. All right. Let's press Z
and go back into Wireframe. And The next thing I want to do now is divide this window so that we have these
verticals in it. Let's grab it and let's
tap into Eddy mode. Let's press two so
we select the edges, and I'll grab this top edge, and I'll press ControlR, put a loop in, and
then I'll roll the mouse wheel until I have
these verticals like that. And that's fine. That's just what I want. I think I'm going to trust
Blender to center them. I won't look at the plan behind, try and center to that. I'll just trust Blender that it's centered them
absolutely perfectly, and it will have.
And there we go. All right. Let's go
back to solid mode now. Ah, there's my window there. And I think now I can go ahead and turn off this rear view. I don't need that anymore, so I'll go and hide that.
So we've just got this. And the next thing I want
to do is be on Slack faces. I'll press three
on the keyboard. I'll grab this one, whole shift, grab this one, this one,
this one, and this one. I want to inset this now, so I'm gonna press I and now
just insert those slightly. Like that. That's what I want. But I wanted that to have separated
at these points. So if I come down here
to individual and click on that, it'll
do that for me. And there we go. That's done. An issue I do have, though, is these center verticals are twice the width to
these outside ones. So I think I'm just gonna
adjust that by hand and by eye. So I'll press one, so we
see that from the front. And I'll press two so
we can select edges, and I'll grab this edge, hold
shift, and grab this edge. And I'm going to press S and
X and just bring those in until it looks about the same
width as this one, roughly. So I'll grab this
one and this one, and I'll press S and
X and do the same. That's better. Do the same
with this one. S and X. And last two. S X, and bring those in too. All right. Cool. That's good. Whoops. Okay, so now let's press three so
we can select faces. And let's grab let's
press A for all. And now let's extrude
that in the Y axis. I'll press E and Y and go ahead and take that back to get some thickness
to this like that. Now I'm going to
grab these faces, one, two, three, four, and five. And I'll extrude
those in as well. So I'll press E and Y and take those in to something like that. And I'll grab the faces
on the back. This one. Well, all of those main faces, which will be the
glass in the end. And I'll press E, then Y and take those in. If I go too far, then it'll turn that
color to say that I've gone within the limits
of the other extrusion. So I'll just bring
it back a little bit to set the
thickness of the glass. And there we go. That's cool. So there's our basic
main window frame, and I think that looks fine. But I can take this a
little bit further. Let's tap out of Edit mode for a moment and take a look at this and let's hit
the forward slash key to bring back the frame. And how we're going to
make things look really realistic is to have
details on them. And if you look at
any window, really, there is a seal between
the glass and the frame. So I think the next step
is to create that seal, which will be like a
black rubber material when we start applying textures. But I think that's quite
important detail to put in. So let's do that next. Let's grab it and
isolate it again. And what shall we do next? Let's grab this,
and let's name it. So we'll name it window. And let's put this
into bedroom one. So I'll just pick it up and drag it over into bedroom one. There we go. And now let's
tap into Eddy mode with it. And I want to select. So let's grab these edges here, so I'll grab this one and this one and this
one and this one. Once I've got those edges, I'm going to press shifty and wide to bring them out nice and straight from the
window like that. Okay, so I'm not going to separate those from the
window just for now, so I'll press P and separate by selection.
And there we go. Let's tap out of Edit mode and see what we've got here now. And the first thing
I want to do now is convert this to a curve. So I'll right click and
I'll convert to a curve, but Blender won't let me. Show you a neat little trick. So with this selected, I'll come over to here
and I'll rename it. And what shall we call it? Well, let's call it
what it's going to be. Let's call it window seal. There we go. Window seal. And now that I've renamed it, Blender will now
let me convert it. So I'll grab it again, right click and convert to a curve. This allows me to do
things with this, and it's really cool
what allow me to do. So I'm actually in
the right file. I'm in data right now, object data properties, so
click on this one. And I'll just close these. So first of all, within
geometry, expand that. And in bevel here, just make us depth on the bevel. So that first one, let's
see what that does. That's kind of cool already.
That's what I really want. Is that too big? So you
can see what it's done. It's actually where
that curve was. It's created a tube, and it's followed the
path of the curve. And it's a nice, easy way. I should explain
myself there rather than just piling past. And that's what it's done. So this bevel here on
object properties, allows us to convert
a curve into a shape. Let's increase the resolution. To about seven, I'd say. And there's also extrude here. So I'm going to actually
click on Extrude and just make that a
little bit oval in shape. And now let's grab it and let's right click and set the
origin to the geometry. Let's press seven,
and let's take this back until it's
within the window. Let's press S and go back
to wireframe for a moment. And let's bring that to the center of the
window like that. And that looks too much. So I think on the extrude here, I'm going to add an extra zero click Enter and see
what that looks like. And I think that's
going to look better. Let's go back to solid mode now and see what
that looks like. And it's looking
pretty good, actually. I think I might just increase
the extrude from a one, two or two and see
what that looks like. That looks slightly better. Yep, we've got a
nice rubber seal now either side of that glass, and that's going to
look really good. I'm pleased with that. Okay, so now that
we're happy with that, let's select the item. Let's right click again and
convert it back to a mesh. And there we go. That's cool. That's a super quick way of creating a seal on that glass. Let's press one to get
us that front view, and then let's grab that seal, and maybe we'll go
back to wire frame. And now let's go ahead
and press Shift D. And let's press X and bring a copy over now
to this window like this. And let's go ahead and just
scale that slightly in the X. So I'll press S and X and just make that
slightly bigger like that. Okay, let's grab this one now. And let's press Shift D and X and bring a
copy over again. And let's see what that looks. Maybe scale this
down slightly in X. So S and X. There we go. Sort of center
that. That's fine. And we'll go again. So shift D and X and
bring a copy over again. And let's have a look at that
one, and that one's better. One last time, we'll press Shift D and X and bring
this over as well. And I'd say this one's too big. So I think we'll scale
this down in the X, so S and X and bring this
down just a bit like that. Bring it to the center. And
there we go. That's cool. Okay, let's go
back to solid mode and have a look at this
and see how it all looks. And yeah, that's looking good. Okay, the next thing I want
to do, actually, I think, is I want to try and apply
a bevel there to this. So let's see if we can do that. So let's click on let's click on modifiers and Add modifier
and generate and bevel. Let's tap out of Edit mode for. Oh, actually, we're
okay. Let's go ahead and fix the scale on this. So let's press Control A, and fix rotation and scale. And let's reduce our bevel. So let's actually add a
zero here and click Enter. And I think I'm going
to do that again. So I'll add another
zero. And click Enter. And then I'll turn
that one into a five. Click Enter. And yeah, that works out just
fine. Maybe a four. Maybe make that four glgena. And let's turn our
segments to three. And there we go. I
think that's fine. That looks good.
So with that done, let's go ahead and
apply that bevel. And that looks really good. So I think the final
thing I want to do now is join those rubber seals
into the main window group. So if I select
these rubber seals, one down to four, and now select the window. With all those items selected, let's press ControlJ and join
them back into the window. So now we have simply one item again, and that's what we want. Okay, let's press forward slash
to bring everything back. And let's bring a copy over
to the opposite side now. So let's press one to get us the orthographic
view of the front. And let's grab this window, and let's press Shift D and X and bring a copy
across like this. Bring it to about the middle. And obviously we'll need to
scale this up a little bit. We'll press S and X and just increase the
width of this window a bit. Maybe bring it back
over a little bit, press S and X and just increase the size
a little bit more. Okay, there we go. There's
our two windows in place. I think they're looking, really good. I'm pleased with those. Okay. Thanks very much. I'll see you in the next lecture.
Bye bye, Fina.
24. Lecture 21 Bi Folding Doors: Hello, and welcome
now to Lecture 21. And yeah, let's make a start on making bifolding doors
here in our bedrooms. I did notice here, though, that this window that I made
a copy of from this one, I need to send that
over to bedroom two. So I'm just gonna grab it here, Windows 001, and just dragon drop into the bedroom two file. There we go. Alright,
now what to do? I think I have to make sure that when we create
this door again, we make sure it goes
into bedroom one, so I'll click on
bedroom one like that. And then I'll press Shift
A and mesh and cube. And let's bring
this up like this. And let's press seven to go
into the orthographic view. And let's go ahead and
go into wireframe now, let's it S straightaway and
scale this down till we get a sort of frame size,
something like this. Maybe scale it up
slightly in the X. So S and X, bring this up like this and scale it down the Y. So SY, bring it down. I think that's pretty good. I'll take this over now until it's kind of
sitting where I want it, which is something like this. There we go. That's
good. And now let's go ahead and scale
it up in the Z axis. So I'll grab it and I'll
press SZ and just expand on this and go again some Z
and just pull this up. Like that. Alright, let's press three on the numpad to get us in the orthographic view, and then let's tap into
Edit mode with it. And I'll press one
on the keyboard to get me the vertea selection. And let's just drag these vertices down now to
where we want them. And I don't want them
on the finished floor. I'm going to stop them
a little bit above. And the reason for that
will become clear later. We'll leave it at that. And on the top here, let's do the same. Let's pull these up
now until they are flush with the top no caps. There we go. That's what
I want. That's cool. Okay, the next thing I
want to do is I'll press two on the keyboard so
I can select edges, grab an edge like this,
and I'll press Control R. I'll roll the mouse wheel once to get two loops like that. Now I'll go ahead and
scale them up in the Z, so I'll press S and Z, and just pull those up
until I, Is that too much? Not enough. I think
that's about right. I think that's good. Now
that I've done that, I'll tap out of edit
mode for a minute. And I'll grab this,
and I'll press Shift D and Y and bring a copy across
now to the opposite side. To make sure it's in
the right position, I'll press three on the numpad. I've got to admit
that's confused me. I'll press I'll
press Control three and see if that makes more
sense. And it doesn't. What's going on? Oh, I see it now. It's
just here like this. We were seeing we were seeing information from this side,
which was confusing me. Let's just stay in the
perspective view for a moment. And we'll get this
over. Maybe Opres seven. Maybe that helps. That helps now to bring
that in position. That's what I should have
done in the first place. There we go. And that's good. Let's grab both of these now. Let's press Control J to join them together
into one again. And now let's tap
into Edit mode. Let's press three so
we can select faces, grab this face
here on the front. And let's grab this face here. And let's right click
and let's bridge faces. And there we go. Let's
do the same down here. Now, grab this one and this one. Right click and Bridge faces. Okay, let's go
back to solid mode now and see how we're looking, see what it looks like, and
I think it's looking okay. Tell you what I'll do now
is let's just isolate it. So I'll hit the
forward slash key on the numpad and see if I'm happy. And I think these verticals
are a little too wide. I'm seeing that now. So I want to do
something with that. So I'll tap into Edit mode, and I'll grab this face here, and I'll just take that
back a little bit. To get that more like it, that looks slightly
better now, I think. And I'll do the
same with this one, take that back a little bit. They're just looking
too thick a profile. There we go. That's better. Okay, now that we've done that, let's select this face here
and I'll hole control, and I'll select this
bottom face here, and I'll select all the
faces in that loop. And now I'll do the same here. I'll hole control and grab this one and just grab
these last couple. There we go. I'll right click and I'll
delete those faces. We don't need those
faces anymore. And now let's select edges, I'll press two, and let's just
grab some of these edges. I don't know if we'll
be able to dissolve all these surplus edges,
but we'll give it a ghost. Let's grab those ones, right click and dissolve edges. And yeah, we can do those.
And we'll just see. We may not be able to dissolve
all of them. We'll see. Let's grab those four, though, right click and dissolve
edges. And that's right. And these ones, as well, right click and dissolve edges. And it's left is too there. It wants us to keep
those, so we'll do that. And we'll grab this
one and this one, right click and dissolve edges. And I wonder if we can do
these too. I'm not sure. Let's right click and try. And Blender wants us to hold on to those edges,
so we'll do that. Okay, so now what
do we want to do? I want to put some more
details on this, I think. I want to put some
sort of grooves in place for the doors
to be able to run on. So I think we'll do that next. Let's grab this one here, and let's press
Control R and put a loop in roll the mouse
wheel once to get, like an extra loop in there. So we've got like
that. Let's hold Alt and grab that whole thing. I'll shift and Alt
and grab this one. I didn't need to deselect it, really. I'm not sure what I did. And let's scale
that down in the X. We'll press S and X and just
bring those closer together. Let's do that again. And bit
more again. There we go. Yeah, I think that's
good just like that. And now that we've done that, I think the next thing I
want to do is grab a face. So I'll press three and
grab this face here now, and I'm going to press E for Extrude and take that
down in the Z axis. There we go. That's
cool. Let's have a look at that this way and
see what that looks like. And yeah, that's looking good. Let's do the same
on the top here. We'll grab maybe this face here. And more press E for extrude and take that up in
the z axis like that. Okay, so now that
we've done that, let's grab this one here, now, this middle
one here like this. And this time, I'm gonna extrude outwards or into the
middle of the frame. I'll press E and Y and just bring this out
a little bit like this. And now on this
point on this tab, I'm going to click on Dissolve orthagonal Edge and there we go. And let's do the same on
the opposite side here now. So let's grab this face here. And let's press E
and bring this out. And now let's dissolve orthagonal edge. There
we go. That's cool. Okay, let's tap out
of Edding mode, and the scale is all
right. Let's do that. So Control A, apply rotation and scale, and
that's looking good. Let's see if we can
apply a bevel to this now and see how it looks. I'll zoom in so I can
see what's gonna happen. And let's add modify it. We'll grab it first. Add modify, generate and bevel. And the bevel doesn't want
to work, surprisingly. I thought he would, but no. So let's see if we turn
off geometry clamping. Clamp overlay. Let's
turn that off. And, of course, all turns
to a mess, but that's okay. Let's add two zeros to the
right of the desal point. Click Enter and see what we. And I'm not sure where
the issue is there, to be honest with the bevel. It could be in this corner
here that it's not happy, but it's so minimal that I'm
not gonna worry about it. So here in the segments, let's turn that into two, and I think that's just fine. So let's go ahead and
apply that bevel. And let's go ahead
and do a shade oro smooth on it and
see what we get. And there we go.
That's our frame done. Let's grab it and find it, and there it is,
it's called cube. So let's call it
bifolding doors. There we go. Let's hit the forward slash key to bring everything back and see
what a frame looks like. And yeah, I think that's
looking just fine. So while we're here, we can
actually make a copy of this, drag it over to the
opposite side here, and we're going to need to do a little bit of work on
it, but let's do that. Let's grab this now. And let's press Shift D and X and bring a copy over now
to over here like this. Let's press seven on the mumpad to get us
that orthographic view. Let's go into wire frame. Let's right click and
let's set the origins to the geometry and now
bring this over again, till we're middle
of that column. Let's tap into Edit
mode with this one. And let's press one so
we can select vertices. Let's grab all the
vertices on this side here and pull them over
now until they're fitting. There we go. That's
what we want. Okay, let's go back to solid
mode and see what we've got. And yeah, that's
fitting just fine. So there's our frames in place now for our
bifolding doors, and I think they've
worked out well. We could actually name this one, so let's have a look at
this and where it is. It's currently in bedroom one, and we don't want that desk, so let's put it into bedroom two. So let's grab it and
just drag and drop into bedroom two,
and there we go. Okay, so that's the
end of this lecture. And in the next lecture, let's start work on
the actual doors, which I'll be running in
this track and sort of concertining to a flat and
then coming out again. Okay, thanks very much. And I'll see you in the next
lecture. Bye bye for now.
25. Lecture 22 Bifolding Doors Part 2: Hello, and welcome
now to Lecture 22. And let's carry on with
our folding doors, and let's start making
actual doors to go inside the frame. Yeah,
let's give this a go. So let's grab the frame itself. I think that's all we
need. So let's hit the Forward slash key on the
numpad to isolate the frame. And next thing to do
is perhaps shift A. And let's bring in a plane. Let's press one, so we see
this from the front and then rotate this bring this
plane up on the Z axis. And now let's rotate
it on the X axis. So RX 90t. Let's get this the right
size to begin with. So let's bring it to the
middle of the door like this, and that's far too wide. So let's scale that
down in the X, SX bring that down
to about that size, and then bring it over to
about this point like this. Let's go into wireframe. And let's go ahead
and scale this up now in the z axis only. So S S, bring this up. Let's bring it down
on the s axis. Maybe let's tap into
edit mode now and grab the top vertices and take this up until
it's just a little bit below the top of the
door frame like that. Let's do the same
with the bottom. Let's bring the
bottom vertices down it's just above the top of
the base of the dor frame. And we get that's kind
of what I'm after. Let's grab these vertices now, and, am I happy
with the position? Actually, I think I am. I think I'll leave those
just where they are. Okay, so let's tap
out of Edit mode now and have a
look at our frame, and I think that's fine. So the next thing to do is
let's go into solid mode. Okay, so let's click
on the item and look at the scale on the rotation,
and they're both out, so let's press Control A and apply rotation and scale,
and that's fix that. So let's tap into
Edit mode with that. And let's select the face. And let's inset. So let's press I
and inset a frame. Oh, I'd say something like something like
that should be good. And now that we've done
that, Let's press A for all. And let's go ahead
and extrude that. So we'll press E and
extrude this out nicely to get some thickness
to this frame like that. And that's cool. Now, let's grab this center
panel on its own. And now let's press
E and take that back in like this. There we go. And let's make sure that dissolve orthagonal edge is
on like that. There we go. Let's grab this other
one, and let's press E and take that in as well, and make sure that dissolve orthagonal edge is
on. And there we go. It's really easy to
create our door. It's almost as simple as that. Obviously, this is the
glass in the middle, and this is the outside frame. So the next thing we
need to do is create that rubber seal to go around, but I don't think I will. I think I'm just going
to make a copy of our existing one and then
make it fit this. So let's bring everything
back for a moment. And let's tap into Edit
mode with our window here. Let's tap into Edit
mode with this. And let's select one
face of our rubber seal. And with one face selected, hold down Control
and keep pressing plus until all faces
have been selected. Once we've done
that, let's press Shift D and Y and bring a copy. I'll bring it
forward for a moment in the air in the clear
where I can see it, and then I'll press P, and I'll separate by
selection. There we go. Let's tap out of Edit mode, grab this here now
and just rename this, and I'll call this seal so
we know roughly where it is. Whoops, my caps were on.
Let's do that again. Click Enter. There we go. Okay, so let's grab this now and take this
over to the door. The origins is over here, so let's reset the
origins to the geometry. That's better. And then
take this over to the door. And now let's isolate
these two items again, so we'll take the door
and the door seal, and let's hit the Forward Slash. Let's grab the seal on its own, let's tap into edit
mode with that. Make sure vertice
selection is on. And now let's scale this
and fit it to the door. So I'll grab these
top seals like this, and I'll bring those down
on the z axis like this. Until they're about half
and half. There we go. And I'll do the same
with the bottom. I'll grab these bottom vertices. And just take those
up until they're about half and half.
There we go. That's cool. Let's grab this side, you know, let's press G and
X and take those over again until they're about half and half. Let's
have a look at that. Move in a bit closer. And again, I'll press G and X.
I'll kind of line it up with this angular curve here as well, so
that looks good. And let's see what it
looks like at the top. And that's worked out nice. Let's just do the
same on this one, now. Grab these ones. We'll take them over just
with a gizmo, get them close. Zoom in a little. And actually, that was really not too bad. But I'll press G and X and just bring those out
a bit more like that. There we go. That's cool. Okay, let's tap out of
Edit mode with that. And let's take that over so
it sits within the door. And let's go back into solid
mode and see what we've got. And maybe I need to
reduce the thickness of my glass or I can increase
the scale of my seal. What shall we do? Maybe I'll increase the width of my seal. So I'll press S and
Y and just do that. Bring that out a little bit
more in size. There we go. That's. Take this over a little bit more
now in the Y axis. And we'll get this
right in a minute. So I'll press G and Y and just bring it over
a little bit more. Until we got equal amounts
showing either side, maybe a tiny bit more. G and Y, bring it over. There we go. That's cool. Okay, that's what I wanted. So that door is nearly finished, believe it or not, so I just
want to apply a bevel to it, so I'll grab the door and let's modify it and
generate and bevel. And of course, that's too much. So I'll add two zeros to
the right of the decimal. Enter and see what that looks like. And that's not enough. So let's put that
at about three, and we'll see how that does. There we go. Is that too much? I'm gonna say that's too much. I'm gonna take that
to a two. And enter, and I'll increase the
segments two or three. Oops. And there we
go. That's cool. So I'll actually go ahead
and apply that modifier now, and we can do a shade oro
smooth on this as well, and see how it all looks. And yeah, I'd say
that's absolutely fine. Let's join our door
seal now to our door. So I'll select the seal
first, then the door, and then I'll press
Control J and join the two together. There we go. That's cool. Let's bring everything back for a minute
and see how we're looking. And let's go ahead and take
that back in the Y axis like this to kind of
where it wants to be, which I'd say is about there. Maybe even back a
little bit more. I'd say that's about right. And I think the next
thing we actually need to do is now
bring in a handle. So again, I'll just isolate this panel now that we
have that in position. So I'll hit the
forward slash key pad. And I think it's
time to bring in our first item from Blender kit. Let's see what we can find. So I'm going to tap
on this panel here. And actually, before I do that, I'll make sure that I'm
in bedroom one file. And I'll come down to the Blender kit tab
right here. Click on this. And here in input settings, sure that we reduce the
Max resolution quite low. I'll go down to 512, 512. We're going to import
a lot of items. The majority of the furniture in the kitchen is going to
come from Blender kit, so we need to control
our file sizes. So we'll keep that quite low. If you've got a super
powerful computer, you can take that a bit
higher if you want. I would leave it at 5:12 for
now and see how you cope. Okay, now that we've done
that, let's press seven. So we get this in the
orthographic view. Let's click on here. And I'm going to click
for Door handle. And click into and see what you get. Now, we're
getting some come up. That's good. Okay, what have we got we've
got one like this, a sort of stainless
steel handle. And again, it's your preference. You can kind of right
click on it and you can get a little bit of information how big the file sizes are. This is quite important
that we do this. Make sure that
we're not importing anything really too big. And, of course, when
you import an item, go ahead and leave a review. All these people
are working really hard to make these
assets for us, so let's leave ratings for them. I don't think I'll go
for that one, though, having said that, I'm gonna
see what else we've got. What's this one? I
think I like that one. I'm gonna left click on
that one and bring it in. Maybe I should have just checked the size on that
and see what it is, 3 megabytes. That's
absolutely fine. That's nothing too bad at all. Okay, let's take a
look at this item, this handle that we've got here. I'll just collect
the whole thing, and I'll hit the desk
and we'll point to the numpad to center on it. And this thing here
is called an empty. And Blender calls it an empty because it contains
no information. It has no faces. It has no vertices or edges. It's just an empty
piece of information. It's an empty thing. It's just an empty piece of geometry. So why do we have it? We have it to be able to
control these assets. Because these components here, you can see these broken
lines which show us actually. These components are
parented to this empty, and that's the purpose
of this empty. So what parenting actually
means is that if I go ahead and rotate this D so I'll rotate it on the
Z axis. I'll press Z. You can see that I'm rotating
all the other components. So that's basically
what parenting is. This is the parent, and these items are the
children or the child. So if I move the parent, the children will
follow the item. That's why it's
called parenting. If I move the child, it won't move the parent. But if I move the parent, it will move the child. And it's a really handy
thing to do to be able to control multiple
objects from one point. So I'll use this straightaway. So let's go ahead and
rotate that in the X axis. So we'll press RX 90, enter, and we'll be parenting
a bit as we go ourselves. Let's press seven and go to the orthographic view and then
take it over to the door. And zoom in a little. And let's rotate that. So let's rotate that
press 180, Enter. And now let's take that over and put that on the
edge of the door. Something like that. I
bring it back a little bit. And let's have a look
at that. I don't think it's right in the z
axis, and it's not. It needs to go up. So
we'll do that next. Let's take this
up in the z axis. And let's press Control
one so we can see it. That was Control
one the manpower. And just visually just
check the height. Okay, so now we've got
the handling position. I think in this state,
I'm actually going to delete this empty, but I can't just delete it because These handle is
actually parented to it, so I need to deal with that. So I'm going to grab
the handle itself. So let's find it. Black
door handle. There it is. Let's grab it. And there's got to be more to it than
that. Let's actually do this. Let's grab all these items. And with that done, I'm going
to actually right click. And I'm going to
go down to parent, and I'm going to clear
and keep transformations. And let's do that.
Now I can actually take the parent item here
and I can just delete it. And we've kept the items in
the position that we needed. With that done, I can actually just select all these items now, so I'll select the handle, and I'll go all the way
down to the bottom, which is this one here. Holding down Shift,
I'll select those, and I'll press Control J, and I'll join them
into one item, so make life easier. So we just have one
item there now. Okay, so now that
we've done that, we need to make a copy
of this handle set, and we need to mirror it to the opposite side
of the door here. So let's do that
next. So do that. Grab the door, tap
into Edi mode, and grab this top
edge here and press shifts and cursor
to the selected. There we go. We can tap
out of Edit mode now. Grab the door, and we can
right click and we can set the origin to the three
D cursor, and there we go. Now we can grab the handle
set and we can press Shift D. Right click twice,
and mirror in. I think it's the X axis. Let's do that. And it wasn't. Let's try the Y, and let's turn off the
X, and there we go. That's the handle set in
the correct position. And that's cool. Alright, so I think we'll leave this
lecture just there. And the next lecture, let's create duplicates of the doors, and let's position them in the correct angles all the way along so it looks
really realistic. And then we'll make
a duplicate set and put them on the
other side as well. Okay, thanks very much. And I'll see you in the next
lecture. Bye bye for now.
26. Lecture 23 Bi Folding Doors Part 3: Hello, and welcome
now to Lecture 23. And yeah, let's continue with our folding doors and see if we can finish them
in this lecture. So the first thing
I notice is I think the handles should actually
be on this side of the door. I think I've got that
wrong. Apologies for that, but we'll soon fix them. So let's grab the door here. And let's press Shift and
bring cursor to the selected. There we go. So we've brought the cursor to the
center of this door. Then let's grab these handles. And let's right click and set the origins to the three
D C. So there we go. Now we can grab the door and
we can grab the handles, and we can go ahead
and rotate those. So let's press z180, Enter, and there we go. That's brought the door around
the way I think I want it. The next thing I want to do is effect the pivot
point of this door. If I currently rotate it, it's going to rotate
from its center point. And from now on, I don't
want it to do that. I want to rotate
from this end here. So let's do that next. I'll grab this door. And
I'll tap into Edit mode. Make sure you got Ed selection, grab this edge here and press shifts and cursor to the
selected. And there we go. Now we can tap out of Edit mode. Grab the door,
right click and set the origin to the
three D cursor. Now when we rotate that door, it's going to rotate
from that point. Okay, so the next
thing to do is go ahead and set the origin
of these handles, as well. To the three D cursor,
select both of them, right click and set the origin to the three D
cursor. There we go. Let's grab this door now, and let's press seven
to see it from above. And let's just rotate it
ever so slightly like this. I don't want the doors
to be completely flat. I want them to have some sort of rotation to explain
what they do. Now that we've done that,
let's go ahead and press Shift D and Y and bring a
copy over like this. And now let's rotate
that maybe bring it over a bit more and rotate it again and bring it over
a little bit more. So G and Y. Bring it over and
rotate it again until we get these ends
here, sort of meeting up. So I'll bring that down
a little bit more. Hopefully, this will
be the ones, rotate. And there we go. And
I'll bring those to the kind of just touching. Just touching like that.
Now that I've done that, I actually delete these handles. I don't want them on this door. And now I'll grab this door
and I'll press Shift D and Y and make another copy again and bring
it out like this. Let's go into wire frame so we can see what we're
doing and now rotate this one until it's
nearly at 90 degrees. Maybe a little bit
off, but not much. There we go. Let's press shifty. And why bring another
copy down again. And now let's rotate that one until it's
touching this door. I'll bring this in a little bit. And there we go. That's cool. Maybe in actually just
a little bit more. Maybe I'll rotate a tiny bit, bring it in a little bit more. And let's make
another copy again. So we'll press Shift D and Y. Bring a copy out like this. And rotate that
one a little bit. Something like that.
I'll bring it over, so it's touching the door at
this end now. There we go. And now let's grab maybe this
door here and I'll press Shift D and Y and bring
a copy out like this. There we go. Let's see what this looks like and see
what we've got. Let's go back into solid mode now and see what all
this looks like. And, yeah, I think that's
looking really good. I mean, if we wanted to, we could bring some of these panels further out and put some more angles on them. But I think that kind of
suggests what's going on. So I'll grab all the
doors like this. And I'll just take them over a little bit more on the way. So they're close to
this rail like that. And yeah, that's looking good. And we have one, two,
three, four, five, six. I think that would
be about right. If they were closing up, they would cover that distance. Okay, so our doors
looking really good now, and I think the next
thing we need to do is go ahead and make duplicates of all these doors here and put them on the
opposite side there. So I think the first
thing I want to do is go ahead and join
these doors together. So I'll grab the first
one, then all the others. And there they are
there. And I'll press Control J and join them
all into one like that. That's good. So now let's
go ahead and name that. So I'll just name that
bi folding doors. I just put two on that because it's kind of the same
description as the one above. And now that we've done that, let's go ahead and
bring everything back. So I'll hit the forward
slash key on the numpad. And what shall we do next? So we're going to mirror these doors onto
this side as well. So to do that, we need to change the origins
of these doors. Let's grab this frame here
and then this frame here. And with that done, let's press Shift S and cursor
to the selected. So the cursor will come in dead center of these two doors. And with that done, let's
grab this one here, right click and
set the origin to the three dcursor
and there we go. And let's do the same with
these doors now, as well. So we'll grab these and we'll right click and
we'll set origin to the three Dcursor and we'll also do the same
with the handles. There we go. Right click and set the origin to the three dcursor. There we go. That's cool.
Okay, once we've done that, we're going to make
a duplicate copy of these and mirror them over
to the opposite side. And to do that,
we normally press Shift D. But in this case, I don't want to do that. I'm going to press Alt D. And
there's a very good reason for doing that because when you use Alt D
instead of Shift D, the two components share
the same information. So when I apply textures
to these doors, the same textures will be
applied to these doors. So it's going to
save us a lot of time in applying
glass textures and wood textures to these
doors because it'll automatically do it on
the opposite one as well. And also, if we it will also
help reduce the file size, too, keeping our file size
as small as possible. So that said, let's grab
these doors and the handles. And with all those selected, let's press Old D.
Et's try that again. Press Alt. And I'm going
to right click twice. And I'm going to go
ahead and mirror in the Y axis. Let's
see what happens. And that was actually wrong. So let's try the X axis. And now let's cancel the Y axis, and that's put the doors in
exactly the right place. There we go, That's cool. Let's see if we can
find these doors, and there they are
folding doors, too. Let's drag this down into bedroom two and put that
right there like that. And there's this one, as well. Yeah, that's okay, actually.
We are our handles? Do we have two sets of
handles in this case? Let's find this handle
here, and there it is. So let's bring that handle
down into bedroom two. And let's find this
other handle here now. And let's bring that into
bedroom two, as well. And there we go. That's cool. And I think what I'll
do here in bedroom two and bedroom one is
I'm going to create, like, a subgroup for all the bifolding door
parts. So let's do that. So I'll start with bedroom one. Let's grab this and let's
create a subfolder. And let's call this
bifolding door. Yeah, let's put
bifolding do. Parts. There we go. And let's go ahead and grab this
one and put it in there, and this one and
put it in there. And the keyhole,
let's grab this as well and put it in
there. And there we go. We've reduced that one as well, and just kept that
down to a minimum. So that's just simply
simplified that. Let's do the same bedroom, too. Let's grab it and let's create a subfile and let's name it. We'll call this bifolding
door parts as well. I'll call it two,
bifolding door parts two. And now I'll grab these items. And I'll go ahead
and drag them into that subfolder. And there we go. That's cool. Let's helped things out a little bit, though. Okay, so that's it for
the folding doors, and they're looking really good. So in the next lecture, let's go ahead and start putting our polished concrete floors down in our bedrooms
and on our veranda. Okay, thanks very much. And I'll see you in the next
lecture. Bye bye for now.
27. Lecture 24 Floors: Hello, and welcome
now to Lecture 24. And in this lecture, let's do our polished concrete floors in our bedrooms and
here on the veranda. So let's start with bedroom one. So let's click on bedroom one. And now let's press
Shift A and mesh. And let's bring in a plane. There we go. Let's press seven so we see it orthographically. And let's go into
wireframe mode, and we'll pull it over like
this and just take it back to the wall see where it's at. Take it back a little bit more. There we go. And I'll tap into Edit mode with that press
one for vertice selection. We can grab these vertices here and take them over
a little bit more, maybe to about there like that. And then we can grab these
ones and take it back. And we can grab these ones
here and take it. There we go. Okay, so let's extrude that. Let's press three so
we can select faces, grab this face here, or press E, and just take that down. A little bit like
that. There we go. That's the first one. So now we can actually
extrude those bevel, those edges, so we can
grab this edge here. I'll grab this one,
too, in this case, because we're going to
make a uplica of this one. And now that we've got
those edges selected, let's sort of zoom in a bit, and let's press Control B and apply a bevel
to those edges. And I'll apply
something like that with What's that three segments. And that's just what I want. Okay, I'll tap how mated
mode with this one and take a look at that and
that looks pretty good. So I'll press seven. And I'll press Shift D and
Y and bring that copy over. You may be wondering why now I'm not using Old
D so that I can apply the same materials
to these surfaces. And the reason being because I don't want these surfaces
to be exactly the same. So if I use the Old D, then I'd have exactly the
same surface on each one, and I get something
that's called tiling, which is when you get a
repeat surface on each one. So by making them
separate components, that means I can
play around with the texture on each surface and make each one
slightly individual. So I'll pull that in that
little bit more now. There. That's good.
And I'll press seven. And I'll press Shift and Y. Maybe just bring this
one over here like this. And I think I'll tap
into this one again now. And I'll press one for
vertice selection. Grab these vertices here, and maybe just take this over a little bit
more like this. I'll tap out of edit
mode with this one, grab this one, and tap in. And I grab these vertices
here, take this one back. And now let's go ahead and
take these ones to the window. There we go, just like that. Okay, so let's tap out of Ed mode with this and
see what we've got. And what these sort of
grooves in this will represent is when you get these
polished concrete floors, you usually get what they call an expansion joined
between them. So that's what we're
showing in this instance is the sort of expansion
joined between the floors. I might take this
over a tiny bit more to something like that. That's good. And there we go. Okay, so let's join these
into one components. I'll grab all three of those.
And we've got all three. There they are there,
press control, J. And join them into one. And
let's go ahead and name that. And I'll call that floor
one. And there we go. Okay, so that's that one done. Let's compress bedroom one. Let's click on bedroom two
now. Let's press seven. And let's press Shift
A and mesh and plane. And let's kind of
repeat this process. I'll bring this over like this. Bring it into the corner. I'll tap into Edit mode with it. I'll grab these vertices
here and pull these over. And now grab these vertices
and pull these over as well. There we go,
something like that. Okay, let's press three, and let's grab the surface, and let's press E and extrude that down to get
some thickness in it. And now let's press two.
Grab this edge here. Hold shift, and grab
this edge, as well, zoom in a little bit, and press Control B and
bevel those edges. To get something like that. I'm happy with that.
Alright, let's press seven. Let's tap out of to
mid with this one. And now let's press Shift D and Y and bring a copy over now. Let's bunch it up
to the other one. And I'll just go into
perspective you to see how close they are with each other, and that's
kind of what I want. And I'll press seven again. And I'll grab this one, and I'll press shifty. And why? And I'll bring a third one
over now to something like. I'll tap into Edit mode, press one, so I can
select vertices, grab these vertices here
and take these back until they're touching the window or even a little bit
inside the window. I'll grab the N vertices here, now, and I'll take this over, so it's inside the wall
like that. And there we go. I think that's that
one done. Let's zoom in on this and see how these surfaces look,
and that looks fine. Okay, let's grab these
three panels here now. And let's press Control J
and join them together. And let's call this floor two. There we go. And now
let's press one on the numpad and then go
ahead and bring this floor down until it's touching
the finished floor. Here we go. That's in place. Okay, so that's bedroom two
done, and that's sorted. So let's compress
bedroom two file. Let's click on Veranda.
Let's press seven. And let's press Shift
A mesh and plane. And now let's bring
this plane over like this until it's kind
of living under most if not all of the bathroom wall to something
like that, I'd say. And now let's tap into Edi mode grab these vertices
here and take these over like this. There we go. And then we'll grab these
who C two and take these over as well until they're
touching the bifolding. Okay, that's good.
Let's press two. Or actually, before we
go ahead and press two, let's just tap out of
Edit mode with this one, and let's press Shifty and Y and bring a
copy out like this. There we go. Now,
let's grab this one, tap into Edit mode
with this one. Let's grab this edge here and press Control R to
bring a loop in. And now bring that loop up
to that corner like this. Let's press one so we
can select vertices. Grab these two vertices
here now and press E and extrude this
out in the Y axis. I'll hit Y and just bring this forward until it's kind
of level with the wall. There we go. That's complete. Okay, so now what? Let's tap out of Edi bud with this one. Let's grab this one now. And let's zoom in a little bit. Let's press G and Y and just
bring this in like this. Let's grab both surfaces now, and let's hit the tab key
to go into Edit mode. Let's grab these
two top surfaces. I'll press three and
then grab this surface. Whole shift, grab this surface. And this one and this one. Oh, actually, I could
just press A for all. And now let's go ahead
and extrude these. I'll press E and just bring these down to form
a slight extrusion. Something like
that will be fine. Okay, I'm going to grab just
maybe a couple of edges. I'm gonna grab this
one whole shift, grab this one and this one. This one. Whoops.
Let's try that again. So I'll grab this
one and this one and this one and this one. And with those selected, I'll press Control B and go
ahead and befle those edges. That's a bit too
much, so I'll zoom that out a little
bit, reduce that. And I'd say that's more like it. Maybe even one less than that. Okay, so let's tap out of Eddimde with those two now
and see what we've got. And let's press seven. And maybe just take that
up a little bit more, so it's close to the
other one. There we go. And maybe now, let's tap back into Edit
mode with this one. And let's press seven,
and let's press one, grab these vertices here and just bring this
back a little bit more. Two, maybe something like that. Okay, let's tap out of
Ed mode with this one. Okay, so now that
we've done that, let's bring in our last plane. I let's make our last plane. So let's press Shift Day. And let's bring in a plane. Let's bring it
forward like this. And let's make it touch
the other surface. Just this one here. That's
it. Something like that. And now, straightaway,
let's tap into Edi mode and press one so we can
select edges or vertices. Bring this one forward. Until it's kind of just
touching there like that. Let's grab these two now
and bring these over. Until that's just on
the window like this. And let's do the same
on the other side, grab these ones,
bring these over. Until that's just touching
the window as well. There we go. That's good.
Okay, let's press two. Grab this edge here. And let's press Control R, and let's bring a loop
forward like this. There we go. That's cool.
Now that we've done that, let's grab this edge here like
this and press E and X and bring this back until it's just shy of the
edge of the veranda. Now grab this other one here, right click and dissolve that let's do the
same on this side. Let's grab this edge here. And let's press E and X and
then bring this one back. Let's grab this one now, right click and dissolve
that edge. All right. That's cool. Let's go back to a solid mode
for a while now. And let's select these faces. I'll grab this one and whole
shift and grab this one. And I'm going to press E and just take down
a slight extrusion. I like this. There we go. Let's press two, so we can grab edges, grab this edge here, whole shift and grab this one
and this one and this one. And with those three
edges selected, let's press Control B to bevel, and let's just bevel
that edge slightly. Until we get
something like that. That's Okay, so let's tap out
of Aiding mode with that. Let's grab all three
of these floors. Let's press one so
that you see that they're all in the same height. And it looks like this one is actually a little bit higher. So actually, I'll just grab
this one here on its own, no, this one, and press one again and maybe go to wireframe mode. Maybe I'll just bring
this down in the z axis until it's level at the top,
like that. There we go. Let's go back into
solid mode now then. Let's go ahead and grab
all three of these floors, and let's press
Control J and join them all together.
Let's press one. Then let's bring this down
until it's sitting on the floor. There we go. That's cool. That's
exactly what I want. Yep, that's bottom. Let's
just have a look at this, and it's still called
plain, so let's name it. And we'll call this floor three. And there we go. That's done. Okay, so there's all polished concrete floors in position. And I think with
the next lecture, let's start putting
in some doors, which one will be here, and one will be here
for the bathroom. Okay, thanks very much. And I'll see you in the next
lecture. Bye bye for now.
28. Lecture 25 Other Doors: Hello, and welcome
now to Lecture 25. And in this one,
yeah, let's start putting some single doors, one here for the bathroom, and then one here
for the hallway. So let's see if we can
do something with that. So let's go ahead and have
a look in Blender kit. But before I do that, just
come over to these filters. Click on this one, and
turn on free first. There we go. And now let's click on this and
just type in doors. And clcano. And let's
see what we get. And we got some
nice looking doors, but they don't really these ones don't suit what we're doing. This is too old. This is more like a completely interior door. That one's quite nice. I think that one would probably
suit what we're doing. Oh, that's a little
too gold and black, and that one's okay. Obviously not, no, no, no. And they go on and
on, so you can kind of search through and
see what you like. But I think I'm
going to go back and choose this sort
of this door here. So I'll left click on it and bring it into the
model, and there we go. I think I'm just gonna
bring it forward for a moment on it's empty, just to sort of
have a look at it and see what it looks like and make sure
it's what we want. I would say that's the right
orientation, so that's good. Let's press one and then
grab the door empty here. Oops, I'll just grow
it, there we go. No. We'll Find it in a minute. There it is. And I'll press one. And now I'll bring this down and just drop this on the finished
floor level like this. There we go just like that. I'll take it over on the X axis. And we will put it. Sort of this is where I'm
thinking something like that. Okay, now that I've done that,
I think the next thing I'm going to do is bring in a cube. So I'll press Shift
A and mesh and cube. I'm going to bring this
over the door like this. And I'm going to go
ahead and scale it down the X. I'll press S and X, bring this down like this. Maybe scale it down a tiny
bit more on the X. SX, bring it down a tiny bit more. To something like
that. Centralize that. And I'll bring this
down on the z axis, and now scale it up on the z so as said and go ahead and take this And just place
that s. Okay, so now we have the cube, the size that we want it. Well, I wouldn't call
it a cube anymore, but now that we have this
item that we want it, I want to just pull
it back a little bit, and I'll look at the
scale, and it's out. So I'll press Control A, and apply the
rotation and scale, and now I'll pull it back
into the wall like this. Okay, so now, let's go ahead
and cut the wall with this. So let's grab the wall. Let's add modifier, generate, and we'll use a
boolean modifier. Grab the little drop a tool
and click on this like this. Let's see if that worked to. We'll find this item. It's here in veranda and
just hide it for a moment. And yeah, that
cutter has worked. I won't apply that
cutter for a moment. I'll just leave it
just like that in case we need to expand that. And then I'll grab the
dough and I'll go ahead and bring the whole door back in the white axis like this. Maybe I'll press seven
to see this from above. And I'll go ahead and
take this back in the white axis like
this. Perfect. That's what I want.
Let's have a look at it on the other side
and see how it looks. And yeah, that's
looking fine to me. That's kind of what
I'm looking for. Okay, the next thing I want
to do is just have a look at this door like this and see
where its pivot point is. And it's right there
in the corner, so we could actually
just press Az and just open the door
slightly like this. Just sort of leading
then into the hallway. I'm not going to
open it all the way. Just want to put a little bit of something there. There we go. So that's our door. So
let's find this door. And it's here in the veranda, so I'll compress this file here, and this is probably where
it should be, actually. And I think I'm happy with that. I think
I'm done with that. Okay, so now we're
happy with that one. Let's think about doing
the bathroom door next. And because we're gonna have really quite a
large hot tub here, I don't think we're
gonna have a lot of space for a traditional
hinge door. So I'm thinking
about using, like, a sliding door for this one. So let's see what we can do. So, let's type here
and Blender here. Let's type sliding
and see what we get. And we've got a
sliding door there. I'm going to right click on that and see
what it looks like. That's the kind of thing. That's the kind of thing.
But that one's a bit nicer. I think I'd prefer that
one bit more traditional, a bit more what I'm looking for. Or there's that
one there as well. Let's right click on that one, see what the file size is. It's 25 megabytes.
What's this one? Whoops. Let's just see what the file size is.
It's 7 megabytes. I accidentally downloaded it, but I'm happy with
that 7 megabytes, so I'm going to go
ahead and use that. So I'll grab it empty, and I'll press one and bring
the door down like this. And I'll take it over. And I'm going to close this
so we don't need that now, and bring the door over a
little bit more like this, maybe just bring it
down a little bit on the z axis until it looks
something like that. So I think I'm going
to use the cube that I cut this one to cut
this door, as well. So what I need to do first
is go ahead and apply this boolean modifier before
I move that cube over. So I'll do that. Let's
go ahead and apply this. And let's turn
this cube back on. Well, grab it and take
it over like this. Let's press one, so
we see this from the front again and
see what's happening. Maybe bring this over
something like this. Yeah, I think that's fine. That's exactly what
we're looking for now. So with that done, let's apply modifier to the walls again. So I'll pick up the walls, add modify, generate,
and boolean. Grab the dropper, and just
click on this like this. We could hide this
cube again for a minute and just check
that's actually worked, and it has, so that's good. And then we'll grab the
empty for this door and go ahead and take this door back
into position like this. And we'll take this back
a little bit more maybe. And that's what I'm looking for. That's absolutely fine.
And that's our door done. So let's just check where it is, and it's right there,
and that's good for me. And this cube here, let's just grab this wall, and let's go ahead and apply this modifier for this boolean
for this bathroom cutout. And let's go ahead
and apply it, then. And then the cube, we
can bring that back, and we can go ahead
and delete that. And that's Okay, I think there's one more
thing I want to do, and that's to apply a
bevel to this edge here. And it looks like the cube
that we used to cut out for this doors just taken a little cut out
of the floor, as well. But it's really not the
end of the world we've got some wooden boarding for the
flooring in the bathroom, so that'll cover that just fine. Okay, let's tap
into Edi mode with this and maybe grab
this edge here. Hold shift, grab this
one and this one, this one, and this one. That should be
plenty. Let's zoom in a little so we can see it. And let's press Control B. And we'll just apply a slight bevel to
that edge like that. Maybe increase our
segments to maybe four, and there we go. That's done. Let's tap out of Edit mode
and see what we think. And yeah, that's
looking good now. Okay, so that is pretty much
us done for these two doors. I think they're
looking fine. So let's check what these look
like in the outliner. And we have wooden sliding door. Let's turn that off and turn it on, and
that's just there. And there's the main
door. And they're both in place, and
they're looking fine. Okay, so on the next lecture, let's start looking at putting
a roof on our first floor. Alright, thanks very much. And I'll see you in the
next one. Bye bye for now.
29. Lecture 26 The Roof: Okay. Hello, and welcome
now to Lecture 26. And let's see what we can do with the roof in this lecture. Let's see if we can
put a roof on this. So make sure that first floor is selected so that the roof
drops into this group. And let's press Shift
e and mesh and plane. Press one on the keyboard to get the orthographic
view of the front, and then let's bring this up until it's a little bit
above the roof for now. We can always lower it
down when we're ready. Let's press seven to get the orthographic
view of the top, grab this plane that
we've just made, and bring it all
over to the center. And now let's press
S and scale it up. Let's go into wire frame. And let's scale it up
a little bit more. And let's do the
rest with edit mode. So let's tap into edit mode and press one so we
can select edges. We'll grab these edges
first and bring them past the edge of the walls
to get a roof overhang. And this is too much here, so we'll grab this
one, and we'll bring this back a
little bit like this. And I'll grab this
one and this one now, and I'll deselect this one. And I'll bring this forward as well to create a roof overhang. And there we go. That's cool. Grab this one here and this one, and bring this one forward. Until it's level with the inside face of
the bathroom wall. Something like
that. That's good. Let's press two so we can
select the edges now, grab this edge like this. And let's press Controller and roll the mousewheel
once to get two loops and then bring them back until
they're about there like that. Now just grab this one on its own and bring
this one further back until it's just in front of
this bathroom wall here. By what would be, I think, in the real world,
about 15 centimeters. That's what I want just there. Okay, once we've done that, let's tap out of Edo mode. And let's go back to solid mode for a moment and see
what we've built. And I think next thing to do
is to make a copy of this. So I'm going to press shifty and X and bring a copy over now to the opposite
side like this. Once we've done that,
I'll press seven, and I'll go back into
wire frame mode, and I'll tap into Eda
mode with this one. Let's press one so we can
get some vertices selected. We'll grab these vertices
here and take it back until we have an
overhang on the roof. Something like that. And these two will still be parallel. This back one will
still be parallel. So let's just grab these
ones now and just pull them forward a little
bit like this. Okay, let's go back into
solid mode for a moment, and let's tap out of EDA mode. And let's fix the
scales on these. So I'll press Control A and
apply rotation and scale, and I'll check the scale on
this one, and this one's out. So Control A, and apply
rotation and scale. Did I fix the scale
in this one? I did. It's all good. Okay, so let's grab both these
items together, now. And there they are,
plain and plain h one. And let's press Control, J,
and make them one thing. I think we should name this now, so let's double click on it. And just call it the roof. That'll be fine. And click
Enter. And my caps were on. Sorry, folks. Let
me try that again. Problem solved. That didn't happen. That's just between us. Okay, so now that
we've done that, let's tap back into
Edit mode for a moment, and let's press three
so we can select faces. Press A so we can select all. And now let's extrude in the Z. So let's press E and
Z, and take this up. And let's take a bit of time now to establish I'm not sure that was actually in
the Z. I'm gonna press Control Z to go
back on that move, and I'm just gonna
press that again. So E and just bring that up in the Z
access. That's better. Hopefully, you didn't do
that what I did then. But if you did, just press
Control Z and redo the move. Am I happy with that
thickness of roof? Do I want a little bit more? I think I'll go a tiny bit
more. I think that's about. Okay, so with that done now, want to select this face here, whole shift, and
grab this face here, and then right click and go
ahead and bridge those faces. And there we go. That's cool. Let's tap out of Edo mode now for a moment,
and let's grab this. Hit the forward slash key on the numpad to
isolate the object, and then tap back
into Edy moode. Let's press two so we
can select edges and grab this edge, and this edge, this edge, and this edge, and then right click and
dissolve those edges. There we go. That's
cool. Let's see if we can dissolve these ones. I'm not sure if we
can or we can't. Let's just try. And
yeah, the lettuce. That's good. And
let's do the same here and right click and
dissolve those edges. And then these ones as well. Right click and dissolve edges. All right. So now what? I think the next thing I need
to do is to work on the underside or
the inside face. So I'll press Control seven to get us the view
of the underside of this. And I'm going to press three,
so we can select faces, and I'll grab this
face like this, and I'll press I and inset. Until I get something like that. And now I'll press I
and I'll inset again. Until I get something like that. So I got two sets
of insets on those. Once I've done
that, I'm going to select that complete outer set. So I'll grab this
one, and I'll hold down Control, and
I'll come over here. Oops, that didn't work.
Let's try that again. Ah, sometimes it
doesn't want to work. Okay, let's press Control and just grab these going
all the way around. We'll have this
one and this one. Grab this complete out
of set and then we get, I'll roll this over so I can see it from
maybe this point. And now I'll press E and Z and take this up to
something like this. And I'm going to dissolve orthagonal edges.
And there we go. That's good. Yeah,
that's what I wanted. Okay, so let's repeat
that process now. Let's grab these faces. And once we've
selected all of those, let's get a sort of a
zoom in on this as well. And now let's press E and
just bring a copy of this or just bring this face down
just a little bit like that. And that's cool. That's
the effect I'm after. And this is looking
good. So I think the next thing you want to do is tap out of Edit mode on this. Let's check the scale and
the scales still good. And let's see if we can
create a bevel on this. So I'll zoom on
this corner here. And now that we've zoomed in, let's go ahead and add modifier
and generate and bevel, and let's see what we've got. Let's increase the segments to around about three segments, and maybe even four. Let's zoom in a little bit
and see what it looks like. And I think that's looking good. I'll go ahead and
apply that bevel. And let's do a shade oro smooth
on this. And there we go. There's our roof all done. So let's go ahead and
bring everything back now. So I'll hit the forward
slash kill and numpad, and let's press one to get
us that view from the front. And let's go ahead
and bring this roof down now until it's in
the right position. And there we go. So there's
our roof in position. I think that's looking good.
So in the next lecture, let's see if we can
tackle this handrail, which goes around the
edge of the veranda. Okay, thanks very much. And I'll see you in
the next lecture. Bye bye for now.
30. Lecture 27 handrails Part 1: Hello, and welcome
now to Lecture 27. And I just brought everything back for a moment
just to see how we're doing, and I think it's
looking really good. We're making really fast
progress with this. So, yeah, that's good to see. So for now, let's hide our ground floor. We
don't need that again. And actually, we don't
need much for a moment. Cause what we're going
to do now, sorry, is we're going to do the
handrails around this balcony. They should said that
rather than just starting. So let's grab the floor, and then let's grab the walls, and let's isolate those. I think that's all we need for a moment. And with that done? I think the next thing we
could do is just click on the Veranda file here, and let's make a sub box. And there it is,
what's it called? It's Veranda three. Let's double click on it. And let's rename that handrails. Let's rename it handrails. That will be good. There we go. Okay, now we've done that. Let's bring in a cube. So let's press Shift
A, mesh, and cube. Let's press seven. And
let's bring this forward. Now straightaway, let's go
ahead and scale this down. So I'll hit S and scale this down a lot
to something like this. Maybe bring it forward.
Now we've done that. Let's press one on the num pad to get us to the orthographic view of the front, and let's go ahead
and bring this up. Now let's scale it up in the Z, so we'll press S and Z and
start bringing this up. S and z again, and we'll just look at the
height of our post. What we could do is
we could bring back our first floor reference images to see what the
height of that is. Where is that first front
elevation plan there it is. Let's bring that back. Oh, we're going to have to bring everything back into view, let's hit the forward slash key, and we'll press one again. We need to go into wireframe, so I'll press set and
go into wireframe. And let's see what the
height of those posts were. And it's a little bit high. I'm going to tap into
Edi mode with those. I'm going to press one so
I can select vertices. Just grab these vertices
and bring these up like this. That's cool. Now I'm going to tap out
of Edit mode with those, and I'm going to
press S for scale, but I don't want to scale
it down on the height now. So I'm going to press Shift Z to eliminate the Z axis scaling. And now I'm just
going to scale it down in just the X and the Y. And then that's kind
of similar looking at it to the posts
we've got here. Okay, now we've done
that, I can go ahead and hide our front
elevation plan again. We don't need that. And
let's go back to solid mode. And we've got a post like
that. And there it is. Let's see if we can find it.
It is in the handrail file. So we could rename this. What shall we name this?
We'll call it posts. Oops. Click Enter. There we go. And I'll press seven, and I'm going to
bring this over until it's on the tight to
the side like this. Bring it close to the edge this way and bring it
forward a bit this way, as well. And that's cool. Now that we've done
that, let's just grab just the walls
again and the post, of course, and the floor
and let's is slide. So we've just got those items. Alright, so the next
thing I want to do is put some loops
in this, I think. So let's do that next. Let's let's have a look at it. The scales out, so
let's fix that. So we'll press Control A and
apply rotation and scale. And now let's go ahead
and tap into Edit mode. Press two so we can
select just edges, grab an edge like this, and press Control and go ahead and add
four loops to this. There we go. Maybe bring those loops up to
something like this, and now hold alt and
select this loop and bring this one up to
about here like this. Deselect that. Hold
and grab this one, hold shift and Alt
and grab this one, and now bring these down. Deselect that, and now hold
alt and grab this one, and maybe bring this
one down as well. Until it looks about the same
spacing as the one above, which I would say is
something like that. Once you've done that, grab
this top loop here now, this top edge and
press Control R, put two edges on that like this. And now scale that down
in the Y S and Y and just reduce the width
between those loops to maybe something like that. And we can do the
same this way now. So we'll grab this edge
here and press Control R, and we'll scroll the mouse wheel once to get two loops on there, and then we'll scale
it down in the X axis. And there we go. Alright,
so now we've done that, we can tap out of Edit
mode for a moment. The next thing to do is apply
an array modifier to these. So let's grab it and check the scales are
still good, of course. Add, modify,
generate, and array. And it's arraying in
the right direction. It's arraying in X, and we can see that it's just duplicate that number to two. So let's increase that code, I think to four. I think I want four posts
across this front edge, and then let's increase
this X factor. Actually got five, so I'm
gonna reduce that to four. There we go. And I'll carry
on just sliding this across. I know you just need to scroll
around to see where that's going and carry on
scrolling that. Whoops. And what's that? 19.1. Let's take off that one, so it's just 19 and see
what that looks like. And I'll go 19,
maybe 0.05 enter. See what that looks like, and
maybe make that 055 enter. And I think that's good. I think that's
exactly what I want. Okay, so with that now done, let's go ahead and apply that
modifier. And there we go. Okay, so let's tap into
Edit mode again with these. And I think the next
thing I need to do is to select faces,
so I'll press three. And I'm going to
grab this face here, whole shift and grab this one, come on over to this side here. And I'll grab this one. Hold
shift and grab this one. There we go. We got those
four tabs like that. And with those selected,
I'm going to press E and Y, and I'm going to press 0.07
Enter, and there we go. That's brought that
out 7 centimeters. Okay, so now that
I've done that, I'm going to grab this one, hold shift and grab this one. And I'm going to grab this
one. Whoops, not that one. I'm going to deselect
that one, this one here, and then this one. And, of course, this
one here and this one. And with those selected, I'm going to press E and X, bring those out by 0.07, Enter. Okay. Now, of course, we need to go in the
opposite directions. I'll grab these ones here. So this one here, and this one. And this one here,
this one here. This one and this one. Is there any more?
Or is that it? I think that's it. So
are those selected. I'm going to press E and X. Bring these out by 0.07, and then press minus Enter. There we go. Okay, so
those are looking good. So the next thing I need to do, I think, is apply
a bevel to these. So I'll tap out of Edit mode. And let's zoom in on these
so we can see what we get. Okay, the next thing we
want to do to these is, let's just check the
scale, and that's good. So let's add modify and
generate and bevel. And not much is happening. So there must be an issue with the geometry
here for bevels, but I'm just going to check
what this looks like. So I'm going to go
to geometry here, and I'm going to turn
off clamp overlay, and obviously, that's
just one crazy things. Let's add two zeros to the right of the decimal point
and see what we get. I don't see much wrong
with these bevels, really. That's looking okay. And
that's looking fine. I think I'm going to go
ahead and run with this. I want to increase
that, though, if I can, so I'm gonna turn that one
there into maybe a four. See what that looks
like and increase my segments to maybe a four, as well. There we go. And see if I've got any
issues with these bevels. Is there any strange
looking geometry which just doesn't work at all? I don't see any real issues. Have a look at the corner. Maybe that's got some problems. And it all looks good to me.
Try reducing this to three. I think I'm going to go
ahead and accept that. So I'm going to go ahead and
apply that bevel modifier. Gonna go ahead and do a shade oro smooth on these,
and there we go. They're done. And
they look good. Okay, so in the next lecture, what we'll do is we'll create our glass panels
between these posts, and then we'll just
make some copies of these outside posts here and just put them here so that we can have got
something for the glass to end to at this point. Okay, thanks very much. And I'll see you in the
next lecture. Bye bye, Fen.
31. Lecture 28 Hand Rails Part 2: Hello, and welcome now to
Lecture What are we on? We're on Lecture 28. And in this lecture,
let's carry on with our glass railing
or a hand railing, I'm sorry, on the
veranda just here. So, let's grab our posts. Let's grab our floor
and our walls, and let's hit the forward
slash killer to isolate those. And the next thing I
need to do is I need to put some posts sort of ending here in the
corner so that we've got some glass safety
rails here, too. So let's grab the
actual handrails, and let's tap into Eddy mode. And let's make sure we
have face selection. I'll grab any face on there, and I'll hold down
Control and hold down plast until we've
selected all faces. Once I've done
that, I'm going to go ahead and spin
around on this. And I'm going to
press shifty and Y. Make a copy and bring it out until it's
kind of level with the front edge of this column.
Okay, once I've done that. I'm actually going to
rotate this on the Z axis. So I'm going to press z90, and I'm going to
hit the minus key because it's rotated
the wrong way. Enter, and there we go. That's done. Okay, I'm going to do the same now on
this opposite side over here. So I'll grab this one here, so I'll just grab the top
edge here or any edge, really, it doesn't
matter, and hold down Control on plus and
just select all of it. And we'll press Shift
D and Y and bring a copy out Let's rotate that, so I'll press A Z,
nine, zero, Enter. And now bring it back, as well, until it's kind of level with this column. Bring
it back some more. Incidentally, if you
ever find with Blender, that it feels like it's all
running very slow like this now and nothing doesn't
seem to be working fast. It's like the whole
thing's running slow. Just press Shift B and then snap a selection window
around what you want. So I'm just going to hold
down the left mouse button and just grab a window
over that post, and I'll re center and everything will be
responsive again. Okay, so now that
we've done that, and we're happy, let's just bring this over a tiny bit more. Two, are there like
that, and that's fine. Alright, with that done now. I'm going to grab this
face here like this, and I'm gonna hold down Control
and press Plus until I've selected all the faces within
that square in the base. So within that framework there, I've got all those faces. Then I'll press X, and
I'll delete those faces. Let's do the same down here on this base one here because we don't need these little tabs
here, so I'll grab this one, hold down Control and plus plus until we've got all
those faces like that, press X and delete those faces. Now I'll select edges
by pressing two. I'll grab this one, whole shift, and I'll grab whats. I
didn't want that one. I'll grab this one, whole shift, and grab this one, this one, and this one, and
now I'll just tap F, and that will fill
that hole for me. Let's do the same up here. So I'll grab this one,
this one, this one, this one, and I'll just
tap F. There we go. Let's work on the other side, So let's zoom in on
this. There we go. And it's starting
to go slow like what I was talking about, but I can get away with it here. So I'm going to press three
so I can select faces. Hole can down control, press plus until we've selected
all those faces, and I'll press X, and
I'll delete faces. Once you've done that,
let's grab those edges. That one there, whole shift, grab this one and this
one and this one, and type F. There we go. Let's do the bottom one. So I'll press three, grab that face. Hold in control and
press Plus until I've selected all
those edges faces, press X and delete faces. Press two, and then
grab this face, this edge, this edge, this edge. Wrong one. Go too fast. This one, this one,
this one, and this one. And no type F. And there
we go. That's the posts. Absolutely done. Let's tap out of Edit mode on
those, and there we go. Okay, so the next
thing I need to do is start looking at glass and putting glass panels in
these. So we can do that. Let's make sure that we have the handrail file here selected. And now let's press Shift
A and mesh and plane. Let's bring that plane
up on the z axis, and let's rotate that
now on the X axis. So x90, enter. And let's go ahead and
bring that forward until it sits kind
of where we want it. It doesn't matter
exactly right now. And now let's press one and the numpad to get us
the orthographic view. And let's go ahead
and position this. Something like. I'm
going to put it about there like that. I think that works.
Once I've got it, I'm going to tap
into Edit mode and press one for vertice selection. Grab these top vertices here, and I'll bring them
down till they kind of flush with the
top of the posts. I'll grab these two
vertices here now, and I'll bring those
out a little bit, and I'll do the same here, and I'll bring those
out an equal amount. There we go. So that's the
size of our glass panel. That's done. Let's press
three so we can select faces. And let's grab this face
here and we'll press E and Y and just bring this out to get an extrusion.
And there we go. That's done. Okay, well, tap out a vote mode with that. We'll actually make sure that we're happy with the
position of that. Oh, I am. I think that's fine. So let's look at the scale
and the rotations out. So I'll press Control A. And apply rotation scale. Once we've done that, let's go ahead and
make a bevel on this. So let's add modifier and generate and bevel,
and there we go. So let's put two
zeros to the right of the decimal point.
And see what we get. And let's make that one, a three and see how that looks. And let's increase
our segments to maybe a four. And that
looks good to me. Okay, I'll go ahead
and apply that. And I'll do a shade
auto smooth, as well. Alright, so there's
our glass panel. Let's press one so we get
the orthographic view. That's one on the numpad. And now let's press Shift E and X and bring a
copy across to here. And now let's do the
same for the other side. So I'll press Shift D and X and bring a
copy across to here. There we go. And now what
I'll do is I'll press seven, and I'll press Shift D and Y and bring a copy
out like this. And now I'll rotate it on the z, so I'll press R and
Z, nine, zero, enter. We'll take this over. And we'll take this back in the iron till it feels like it's
in the right position, pull it back slightly until we just center
it on the post. Maybe take it this
way a tiny bit. And that looks good. Now, I'll tap into Edit mode with this. And I'll press I'll press and go into
wireframe. I'm sorry. And I'll get these
vertices here, and I'll pull these back. Sorry, I will brain
freeze for a minute then. Just absolute brain freeze. Nothing was going on upstairs.
Then I'm okay again now. I'm back with this. Okay,
so we're done there, so I'll press d again, and I'll go back to solid. There we go. And I'll
tap out of Eddy mode. And the next thing I want to do is just make a copy and
bring it over this side. So I'll press Shift and X and bring a copy
over to here now. And I'll pull this
over a little bit. And I just need to bring this column over a little
bit for some reason, but that's okay. We can do that. So I'll tap out this one now, and I'll grab the posts, and I'll tap into
Edi mode with those. I'll grab a face on
this one and hold down Control and press Plus
till it's all selected. Zoom in a little. And now just reposition this post until
it's correct for us. There we are. That's cool. Let's tap out of
Edit mode with this. And it does look like this
glass here needs adjusting, so we'll tap into Edi
mode with this one, and maybe we'll just go
into wireframe again. And now let's just press one so we can select vertices and we'll just grab
these vertices here, and now we'll pull this back until it's in the
correct position. There we go. That's cool. Does that mean the other
one the other side is in the wrong position?
No, that one's okay. Oh, I think that post is slightly further
back than this one. That's the issue that we had. So what I could do actually is just correct
my problem there, so I'll tap head of Edime
and I'll grab this one now. And I'll tap into
Edi mode with that, and I'll press three. Grab that face in the middle. Hold it control and press Plus. And I'll just zoom out a little bit so I can get a reference
for the other side, and maybe just pull
this back just a tiny bit. That looks about right. We'll tap out of Edit
mode with this one. Grab the pan again. And now let's just grab the vertices on this and
now just pull this over. And there we go.
That's correct, no. Okay. So let's go back to solid mode and
see what we've done, and we can tap out of Edit mode, and it's all there
now. We're happy. And the next thing
we should do is maybe just join all
of these together. So there's the planes, which are the glass,
so let's grab them. And once we got
those all selected, let's press Control J
to join them into one, and let's call that glass. And there we go, that's done. We can actually
compress our handrails now the handrails are completed. Alright, let's hit the forward slash key to bring
everything back. And I'd say everything's
looking really good now. So in the next lecture, what
we're going to do is we're going to do this sort
of roof structure which sits in the middle. It doesn't really have
a lot of purpose. They adding a little bit
of shade during the day. But the main reason that
I've put it in there is to actually create some nice
dynamic shadows in this area, just to put some nice
shadowing detail around. Okay, there's one more
thing that I want to do, which is not really anything
to do with modeling. What I want to do is
create a new save. So we already have
obviously one save. We've been saving as I've
been saving as house one. And sometimes it's nice
to have a sequence of saves so that if for any reason, you decide that you want
to change something, if you have a set of saves at different levels of
progress through the job, you can always go back
to a previous save. Another reason if
for any reason, you absolutely lose a file, you haven't lost everything. You've just lost the progress that you had since
the last save. Still not happy, but at least you haven't
lost everything. That's something I've learned through professional modeling. Day job is, do more
than one type of save. So I'll do that here. I'll come up to here and I'll press File, and I'll click Savas. And here, I'm just going to hit the plus sign and turn this to House
two, and there we go. Once you've done that, go
ahead and press Save As. Okay, so I think that's
it for this lecture, and I'll see you in the
next one. Bye bye now.
32. Lecture 29 Middle Roof: Hello, and welcome
now to Lecture 29. And in this lecture, let's have a go at
doing this sort of roof structure in the middle. I'm not sure what
you call it exactly, but let's see if we
can do this next. So let's just click on the first floor file like this so it goes
in the right place. And Alex's just grab our roof
and isolate it on its own. And now let's press Shift
A and mesh and cube. And let's bring this
cube up like this. And let's press one so we see it from the
orthographic view. And let's just bring this up
and kind of center it a bit. Alright, let's scale
it down on the z, so let's press S and Z and
bring this down like this. Let's scale it down a bit
more in the set S and Z, maybe take it up a little
bit. And there we go. I think that's
about what I want. Let's scale this up in the X. Now, let's press S and X. Put this in position like this. And let's have a look
here what we've got. Maybe let's take this over
in the X. I'll press G and X and take it over to
something like that. And now let's maybe tap
into edit mode with it. And let's press and
go into wire frame. Let's grab the vertices here, and let's take these over until it's kind of level
with this face, as well. And that's cool.
That's what I want. Alright, let's go back into
solid mode for a while. And let's tap out of edit mode, and now take this back until it's sort of touching
this bit here. And there we go. That's good. Now that we've done that,
let's tap back into Edit mode again and press three
so we can select faces, grab this face here,
and take this over. And let's get an angle on
this so we can see what we're working with
thickness wise, and carry on taking this back
until it looks like that, and I think that's fine. Okay, let's tap out of
Edit mode with that. And let's look at this scale, and it's definitely not right. So let's press Control A. And apply rotation in the scale. Once we've done that,
let's zoom into a little bit so we can see
what we're working with here. And let's add modifier,
generate, and bevel. Okay, let's add two zeros to the right of
the decimal point. And let's turn that one
into three and click Enter. Let's increase our segments
to three, and there we go. I won't go ahead and apply
that bevel modifier just yet. I'm going to leave that active. Let's just zoom in, see
what it looks like. And I'm going to use the Shift
B function to just grab it again because my
computer is kind of Blender is kind of going a
bit slow, so there we go. And just see what we've got. And yep, that's what I
want. That's just right. Okay, so now that I've got that, the next thing I'm
going to do is just make a duplicate of it. So I'll press Shift D and Y, bring a copy out like this. I'll maybe set the origin
back to the geometry now. And I'll rotate
it on the Z axis, so I'll press z90, Enter. I'm going to press seven on the numpad to get us
the orthographic view, and I'm going to
go into Y frame, and I'll take this
back until it's kind of touching that
panel on the roof. That should be about
there like that. And now let's go ahead
and take that back. So press G and Y and bring that back until it's flush with
the other one we made. Whoops. Which is about there. Okay, so let's tap into
Edit mode with this one. And let's select vertices. Let's grab these
vertices here now, and we'll go ahead
and bring those forward until they kind of
flush with this frontage, which is about there
like that. Okay. Let's go back into
solid mode for a minute and just eye
up what we're doing. And yep, that's looking
good. That's what I want. Okay, I'll tap out of
Edit mode with this. That board is now
sitting on this, which in the UK building terms, this is called the facia. But I'm sure all over the world, you have different
names for this. But in the UK,
this is the facia. So let's make a copy of this and we'll chuck
it to the other side. So let's press Shifty and X
and bring this one over like. And let's press seven again. And we'll press
and we'll press Z, and we'll go into wire fry, and we'll pull this one over. Until it's flush with
this facia here. And there we go. So
we've got those sort of framing boards in now,
so that's a good start. Let's go back to solid mode. And I'll grab this one here now, and I'll make another
copy of this. I'll press Shift D and Y, and I'll bring this
over like this. How are you? That's
cool. All right. The next thing I'm gonna
do, I think, is let's set the origins of
this to the geometry. And now let's rotate this slightly in the X.
I'll press R and X and bring this over
like There we go. That's cool. Make sure that here in the transforms
that you're in global, that's quite important
for this next move. And grab this piece here
and press Shift D and Y. Bring this copy over.
Before you actually set it, just type 0.275 Enter. Now, with that done? I want
to repeat that exactly. So to do that, I'm
going to press shifta. And that Blender will just
repeat my last command. And I'm going to keep
doing that until we go right over to the other side. And maybe that'll work out. Let's see if that
number will work out. It looks like it's going to. And yet, that works
really nice for. Okay, so there's kind of our
roof in place. That's done. So what we could do now is maybe just grab that first one and move all the way down here
in the outliner to cube 23, whole shift and select. So we've got all those
roof pieces selected. And let's go ahead and press Control J to join
those together. And where is it? Let's find it. There it is. And what
shall we call this? We can call this What? Middle roof. Let's call it back. Middle roof. There we go. You can
call whatever you want. It's all good. But that's
going to be my phrase for it. Now that we've done that, I
think we're good now to go ahead and apply this
bevel modifier, so we can apply this,
and there we go. That's our sort of middle
roof structure done. Okay, let's hit the
forward slash and bring everything back
and see how that looks. And yeah, I'm pleased with that. So when we start applying
some lighting to this, that should cast
some nice sort of shadow details down into this middle veranda.
And that's cool. Okay, thanks very much. And I'll see you in the next
lecture. Bye bye for now.
33. Lecture 30 Skirting Board: Hello, and welcome
now to Lecture 30. And in this lecture,
let's have a go at putting a trim board between
the floor and the wall. In the UK, we call
it a skirting, but I'm sure again, there's different terms
for it wherever you go. Okay, so well,
let's first of all, let's hide the roof, and let's hide our middle
roof. Let's hide that, too. And we'll just close the ground floor for
now. We'll hide that. And let's go ahead
and make a start. So I think I'll click on
bedroom one like this. And this is bedroom one,
actually, isn't it? We'll do this one first.
And with that Dan I'll press Shift A and mesh and cube. I'll bring that cube
up in the zer axis. And I'll scale this
down considerably, so I'll hit S and
just bring this down. And I'll press one so we can see it in the
orthographic view. And I'll get an idea
of the size of this. And I'll hit S, and I'll just scale it down
a little bit more. And I'd say that's about
right in the Z axis. So let's look at it
now in the Y axis. And let's scale it down the Y. So S and Y and bring
this down until we get something like this.
There we go. That's cool. Once you've done that, let's scale this up in the X. So we'll sorry,
we'll press S and X, and go ahead and scale this up to give us
something like this. Let's fix the scale on it, so let's press Control A and
apply rotation and scale. And let's add a bevel
modifier to this. And let's put our two zeros to the right at
the decimal point. And let's increase that one, two, a four. Let's see
what that looks like. Increase our segments to three, and there we go. I
think that's right. Again, I'm not going to
apply this bevel for now. I'm just going to leave it open. Now we've done that,
let's press seven. And let's go ahead and take this over to this room and then take it until
it's to the back wall. And, yeah, that's
where I want it. Let's find this. It is in
bedroom one. There it is. Bedroom one, and
there it is cube one. So we can call this Well, you
can call itever you want. I'm gonna call it skirting Lord. And there we go. Now, I'll press one so we can see
this from the front. And I'll bring this down
until we're at ground level. I think for now, I'm gonna hide the window. We don't
need that either. And let's bring this
down until it's touching the floor, which is Alright. Maybe I'm going to tap into
Edit mode with this now, and I'll press set and
I'll go into wireframe. I'll press seven to go
into the orthographic, and I'll go ahead and take this back until it's into the wall. Or just touching
the wall, maybe. There we go.
Something like that. Let's do the same
with the other side. Let's grab this and
take this over. And there we go. That's good. All right, I'll tap out
of Edit mode with that, and I'll press Shift D and
Y and bring that forward. Now I'll press R
and rotate it 90. I'll take this back like this. Maybe zoom in a little bit
more so I can see what I'm doing and go ahead and take that back
the last little bit. And now I'll press G and Y
and take it over some more. There you. That's good. So this now let's
tap into Edit mode. Grab the vertices and take that all the way into the corner. I guess we don't know
where the window is, so I guess I need to
bring the window back. And let's carry on bringing this over now until it's kind of touching the window
frame. There we go. Something like that. Okay, so let's tap out of Edit
mode with that one, and I'll grab this
one again now. And I'll go ahead again,
press Shift E and Y, ring a copy forward, and I'll hit and
rotate it 90, Enter. And now I'll go ahead and
bring it over like this. Grab it and press G and Y and take it into
position like this. I'll tap into Edi mode
with this one now. I'll grab the vertices, and I'll take that back. Kind of need to find out where
the edge of the room is, and it's there, so I'll bring
that forward like this. Actually, I might bring that
forward some more here. I think I have a
slight change of plan. I'll bring that forward to that. I'll press two so I
can grab some edges. I'll grab an edge there. I'll press Control,
and I'll bring a loop in and bring that
loop to there like that. And I'll hold shift
and grab the end here, and I bring the
whole thing back. Until it's kind of
level with the wall. I might go a little
bit further back than that, something like this. And now I'll hold hot,
grab this one again now, and maybe just
bring this forward. And yeah, I'd say
that's about right. Maybe back a little bit. That's about right.
Maybe grab this one now, bring this one forward,
a tiny bit. There we go. And now I'll press three,
and we can grab this face here and I'll press E and
X and take this back like. And there we go. That's done. Let's tap out of Edo
Mote with this now. Let's press and go back to
solid and see how that looks. And yeah, that's looking fine. We could actually just maybe take this back to the
wall a little bit more. So I'll press G and X and just touch the back into
the wall a little bit more. And there we go. That's fine. No. So I see a
little issue there. We need to take that floor
over a little bit more. So we need to deal with
that sooner or later. Just taking that flow into that sort of
reveal just there. In fact, we could
deal with that now. Let's grab this floor, tap into Adi mode, press one, so we can select vertices. Grab these vertices here,
these vertices here. And whereas those other
vertices? Can we see them? They must be there. Let's
press SED, actually, go into wire frame, make sure we got all
of them. There we go. Those. And now let's
just press E and X and just bring those forward until that's covered up that gap. There
we go. That's good. Let's press S and go
back to solid mode. And let's tap out of
Add mode with those. We have a color issue there, which I'm going to say
is probably the normals, have flipped on that one, but we'll figure that out later. We'll correct all the
normals in one go. Okay, so I think that's it. We have got a
little corner here, but it's so concealed by the door that I'm not
gonna worry about it. Okay, so now that's done, and we have our
skirting done in there. We could actually just
grab one piece first, and we could press shifty and Y and bring this
over like this, and we could take it
through to the other room. Now that we have that last piece of skirting which just one here, we can drag it into
bedroom two here in the outliner, and there we go. Now we can grab these
skirtings here, this one, and this
one and this one. And we could press Control J
and join them all into one. And there we go. Okay, so let's close bedroom one because that's the skirting
finished in there. And let's go over
to bedroom two, and let's open our file
here for this one. And there's our skirting
board now copied in here. So let's put it
to this back wall here. So I'll press seven. And I'll grab the
skirting board, and I'll just take
it back like this. And let's take that
over now to the door. So I'll grab it on the X axis and run this through
a leaf like this. Zoom in a little
bit, so we can take a look at it, and
that's fine there. Let's press seven again. And let's make sure it is
actually against the wall, and I think it is. We can take it back a
tiny bit more, maybe. We need to just
correct this here, so tap into Edy mode, we'll grab all the
vertices there and take it back like this
until it's inside the wall. And there we go. That's fine. Okay, let's tap out of
Edi moode with this one. And let's go ahead and press Shift D and Y and bring another
copy forward like this. And let's rotate that
on the Cal axis. We'll press Z, 90, enter, and let's press seven, and let's take this over until it's
touching this wall here. That's good. Okay, let's
take it this way now. So we'll press G and Y and take the skirting
back like this. There we go. And now let's go ahead and take this back
to where it needs to be. So let's tap into Edit mode, and let's grab all the vertices here and let's take them back. And let's try and figure
out where that should stop. And I would say about there like that. And now
I'll press two. We can grab this
edge here and press Control and bring this
loop over like this. Let's zoom in on this. Take it over a little bit more
to something like that. And now we can press three
so we could select faces. We could grab this face here, and we could press E and X
and take this over like this. And there we go. That's cool. All right, let's tap out of
Edit mode with this one, and let's see what
that looks like. And that looks fine to me. So I'm just going to grab
this last piece note. So I'll grab this one
here, and I'll press Shift and Y and bring
this over like this. Rotate it in the Z, so
I'll press rz90, enter. And now let's go ahead and
scale it down in the Y, so we'll press S and Y
and just shorten this. And now we can press
seven and we can take this back into this
little corner here. We can press E, go
into wireframe. We select the item,
and we can tap into Edit mode and press
one vert Z selection, grab these here and bring this to the right
length like that. And we'll do the
same this side now. We'll just grab this
here and take this into the window. Just like that. That's it. Alright, let's see
what this looks like now. Tap out of Edit mode
and see what we've got. And there we go. That's done. That's our skirtings
done in there. So what we could do now is go ahead and join
these all together. Grab all three and
press Control J, and join them into one. And there we go. That's
our skirting's completed. Okay, so in the next lecture, I think we're going
to start work on our bathroom because
the bathroom is mostly clad in wooden
boards in cedar in this case. Okay, thanks very much. And I'll see you in the next
lecture. Bye bye, Fino.
34. Lecture 31 Bathroom Timber Cladding: Hello, and welcome
now to Lecture 31. And in this lecture, let's
have a go at the bathroom. Let's have a go at the timber cladding on the floor and on
the walls in the bathroom. And for the first time,
I'm going to sort of have a look at the mood board that I showed you
in Lecture one, just to show you what I'm
planning for the bathroom. So I'm going to drag this over. And, of course, I'm sorry, I can't share this
with you because of the sort of the legal
issues with sharing photos, but there's nothing stopping
you sort of making up your own mood board
using pure ref. Let's zoom zoom in
on this image here. And this is how I'm
basing my bathroom. So it's going to look
kind of like this. I'm going to have a huge
skylight on the one side, making it feel almost like
it's outside bathroom. And then timber cladding and then a mirror
in the background, which should give the feeling of a little bit of infinity, a little bit of just
going on and on. So let's see what we
can do with that. But I think before I do that, I'm actually going
to have a look at the normals because
I think there's quite a few things with
incorrect normals right now. We've got some strange
colors going on. The floor looks a little dark. And we have this patch here that we got in the last lecture, and I think even the windows
look a little bit dark. So what I'm going to
do is press A for all. I'm going to tap into Edit
mode with everything. I'm going to press A
again to grab everything, and I'm going to
go over to mesh. G to go over to normals. And I'm going to go
recalculate outside. Okay, I'll tap back
out of Edit mode, and that's already
looking better. So we could actually come
up here to this one, hit the drop down here and
click on Face orientation. And now absolutely everything is blue, which is what we want. If we could still see some reds, then we'd still have
some normals incorrect, but that seems to have
fixed everything. Okay, let's go back and
turn off face orientation, and there we go.
We're ready to go. Okay, so let's lay some
boards in the bathroom. I think the first
thing I want to do is reposition the cursor. So what I'm going to do is tap into Edit mode with
the wall selected. Press three so we
can select faces. I'll grab this face
and now this face, and I'll press shifts and cursor to the
selected. There we go. I'll tap out of edit mode now, and there's the cursor just. Okay, so let's make sure
that we're in bathroom now. So I'll compress bedroom two, and I'll click on bathroom. And now with that done,
I'm gonna press Shift A, and I'm going to
bring in a cube. Alright, let's press seven so
we can see this from above. Let's go into wireframe mode. And let's go ahead
and scale this down. With that done?
Let's recalculate. So we'll press Control A, and let's apply rotation and
scale to zero those again. And here in the Y, let's
make this 0.095 enter. And there we go. That's good. Okay, with that done,
let's go ahead now, and let's tap into
Edit mode with this. Let's grab this bottom face
and bring this up like this. So we get a thickness
on these boards, something like that, I'd say. And now let's grab
this end here. Let's press seven to
see this from above. And let's bring the edge of
this board right to the wall. Let's get a bit closer so
we can see where that is, and just drop that just like that. Let's grab the other end. And let's take that over
to this wall as well. Once you've done that, tap out of Edit mode, and let's go back to solid
so we can see it. Okay, the scale, that's out, so let's press Control A, and let's apply
rotation and scale. And now let's go ahead
and add a modifier. Let's add the bevel modifier. And let's add two zeros to the right of
the decimal point. And let's make that one
into two and click Enter. And I think I think I
will leave this sharp, little bevel detail on
there just as it is. So I'm gonna actually
leave that as one segment. But I'll leave this bevel
modifier on there as well. Alright now
we've done that. Let's press one so we can
see this from the front. And let's press Z and go into wireframe and let's take
this down to the floor. And this time, we're
not going to set it on our polished
concrete floor. We're going to take
it down to finish the actual original
floor height, which is about there like that. So that this board is flush. Let me just go back
to solid now so that this board ends up
flush with our floor. So we'll take this
over like this. Maybe just take
this back now until it's touching this
polished concrete floor. And there we go. Maybe we could just take it
a little bit more. So I'll press G and Y and
just sneak this back, that last little bit
to something like that. Okay, that's good. That's what we want. So
now that we've done that, we could either array this across or we could
actually just copy. But I think in this case, I'm going to go ahead and array. But before I do that, I'm just going to steal
a copy of it. So I'll press shifty and Y, and just bring a copy out over here like this, just on its own. Now, let's grab our board, and let's add modifier,
generate, and array. Okay, so on the array, we don't want this in the X. I'll go ahead and
press zero on that. And in the Y, let's
start adding. Let's start bringing this
across and inspect our gap. Zoom in on this so we
can see what we've got, and maybe I'll bring
this back a little bit. I think that's actually
absolutely perfect. The boards just
touching like that. So we have that groove
appearing there in the middle. So
with that done? Let's go ahead and
increase our numbers on this to bring this across
to the other side. And there we go. That's
it. That's done. Okay, so we're done,
so I think I'll go ahead and apply
that modifier. And there we go. So there's a sort of timber
floor in position. So what we need to do
now is start thinking about sending these
up the wall as well. So let's make a
copy of this one. So pus shift and Y and
bring a copy over. And now let's lift
this up slightly. And now, let's rotate
that on the XX, I'll press rx90 and t now we'll go ahead
and take that over. Let's press seven so we
can see this from above. Whoops. Let's go ahead and take that over
now to the wall. Like this. That's what I want. Let's tap into
Edit mode with it. Let's press one so we
can select vertices. And let's go into
wire fright mode. Grab these vertices
here and bring these back until they're level
with the door opening. Maybe a tiny bit
forward, but not much, maybe just that much forward
of the door opening. Okay, let's go back
into solid mode now. Let's see what we've got.
Let's type out of edit mode. Let's go ahead and take that up. And now let's take a look at it, maybe take it down a little
bit. Am I happy with that? I think I'm happy with
that, just like that. Okay, now I've done
that. Let's look at the rotation and the
scale, and it's out. So let's press Control A and apply rotation in scale and
then let's add and modifier. So add modify, generate, and let's add the
array modifier. And let's cancel the X. We know we don't want
that. And in the z, whoops, still up that. Don't want that.
I'll click into. There we go. And let's increase
the z, and there we go. Let's bring that up and get an idea where we
want that to be. Sort of position as we want it, and let's bring it down in the set until they're touching, and that's absolutely perfect. So let's increase
our numbers on that until we're kind of level
with the top of the door. And we're getting
to that stage now. Sometimes it's going to
be tricky to see what you're doing when you're working in these confined spaces, but we'll do our best. So let's increase this until we're running to the
top of the door. I think that's about as
good as it's going to get. So I could, in the spacing, I can actually put
this at 01.001 enter. And that's done something,
but has it done enough? I don't think so, so I'm
just going to turn that one into a five and click Enter
and see how that looks. And we're sort of going
the right way with this. So I'll turn that into
a six and click Enter. Am I happy without having that much space
between the boards? Yeah, I think I'm happy
with that. So there we go. We're done with that one.
We can actually just bring the whole thing
up just a tiny bit. So let's press G and Z
and just bring it up. So I'll press G, and just bring this up a tiny bit
to about there like that. Okay, so with that done now, we need to make a copy of this, bring it to the other side, and then edit the length. So with the array modifier, still active on this one, go ahead and press shifty and X and bring a
copy over like this. Let's go ahead and tap into
edit mode on this one, and make sure you got
vertice selection on. And let's work in
wireframe mode. So because we have
the array on it, we only need to sort of edit
the original wooden strip. We don't need to
edit all of them. So now I'll just pull this bottom one over and
the rest will follow. Let's zoom in on
this and try and figure out if we've got
it in the right position. Maybe we bring this
slightly over, and there we go. That's it. So let's grab the other
end of the board now and bring this back until it's
flush with the floorboards. There we go. That's cool.
That's what we want. Okay, so let's go back to solid mode now and
see what we've got. And now let's tap
out of Edit mode. I think for now, I'm just
going to go ahead and leave that array modifier
on those boards. Okay, so I think the
next thing I need to do is make another
copy of this board. So I'll press shifty and Y. Bring a copy over a little bit, bring it up in the z, and
now rotate it in the X axis. I'll press RX 90, Enter. And now let's go ahead
and take that over. And I think the next thing
I'm going to do is I'm going to press Control one to get us the orthographic
view of the back of the house and go into
wireframe mode now. And now let's go
ahead and bring this up and then position
this where we want it. So I'm going to bring
it down, so I'll press GNZ and I'm going to put
it about there like that. There we go. So now let's apply the array
modifier to this one. So we'll add modifier
and generate an array, and let's cancel the
X straight away. And in the z, let's
just slide this up. Oh, I see what our issue is. We actually need to fix
our rotation on this. So let's press Control A, and apply rotation and scale. And now, in the,
let's slide this up. There we go. And I
think I'm going to make this 1.09 and enter. And we'll see what
that looks like, maybe a little bit less. I'll make it 1.05 and enter. And let's see what
that's gonna look like. Okay, so let's increase
the count on this now. Let's press Control one
again to get us that nice square view of the back so we can see where
we're going to. And let's see if this
is going to work. And I think I'm going
to leave it just there. We've got this gap
here, but remember, we've got the boards running
along the ceiling now, so I think that'll
work out just nice. Okay, so I think I'll go ahead in this case
and apply that one. We're done with this
one, and there we go. So the next thing you
need to do is bring in the final board, which
is this one here. So I'll grab this one,
and I'll bring it up, and I'll press Control
one to see this from the rear and position this just above the last board.
Something like this. I'm not worried about
this little gap here between the top of the board here and the top of the wall because when
the ceilings on, you'll never see that gap, so I'm not worried about that. Once you've done that, let's
go back to solid mode. And let's see what
we've got here. Oh, of course, we need
to bring that over now, so let's press seven, and let's grab the board
and take it over now. And just bring this
over like this. And now let's go ahead and apply our array
modifier to this. So add modifier and
generate and array. So let's cancel the X again. And let's move this
over in the Y. So we'll move this just to one. There we go. And then we'll
just increase our count. And try and figure
out how much we want to be having a skylight. Maybe take this to maybe 15. And I think that look maybe 14. There we go. I think that's just what I want,
just like that. And we can go ahead now. Let's have a look inside,
see what this looks like. See what this gap is
like, that's good. Yeah, that's the
timber effect that I was looking for
in the bathroom. So I'll go ahead and
apply that modifier. And I'll apply the array
modifier on this panel. And this one we have done. And what about this
little one here. Apply this array
modifier, as well. And the floor, the
floor is done. Okay, let's take this
one and this one, and let's grab this
little one here as well. And with those three selected, let's press Control J
and join those together. And let's call that wall clad. Whoops. There we go. What's this one here? Let's
see what this one is. So that's the ceiling, so we
can call a ceiling cladding, and we can call this one
here ceiling cladding. And we have got here flooring. And there we go. So
that's our starting. So we've started nicely
now, in the bathroom. Okay, so I think that's good
enough for this lecture. So in the next
lecture, let's put a mirror on this wall here. And then let's start building our bed frame in
bedroom one here. Okay, thanks very much. And I'll see you in the
next lecture. Bye bye for.
35. Lecture 32 Bedroom 1 Head Board: Hello, and welcome
now to Lecture 32. And in this lecture, let's put
a mirror in this bathroom, which is quite an easy job. And then let's start building all the headboard and so
ceiling feature panels for the bed here,
in the bedroom one. But first things first, I've
got a little confession. When I brought the
ceiling back in, which I'll do now,
let's have a look. Let's find our
ceiling. Here it is. And I go into the bathroom. These boards that we've put here don't line up
with the ceiling. Completely my fault, so we need to just add some
extra boards to this. So let's tap into Edit
mode with this one here. Let's make sure we've got three selected so we
can select faces. Grab this board here
and press Control plus until all faces on
that board are selected. Then let's press seven to go
in the orthographic view, press and go into Y frame. And now let's go ahead and press Shift and Y and bring
a copy over like this. To about there. And when you've
got that in place, press Shift R and Shift R again. And that should be
enough in total. Let's go and have a
look underneath now. And yeah, that's worked out. And there we go. So that's done. Let's have a look inside,
how that looks now. And yeah, that's
better. That's sort of covering up the edge of the ceiling, which
is what we wanted. Okay, so let's bring the
cursor to this wall now. So let's grab the walls, and let's tap into Eddy mode. And let's select this wall here. And let's press shifts and cursor to the selected.
And there we go. Then tap out of Edo
mode with this. Okay, so now we've done
that. Let's press Shift A, and let's bring in a plane. And let's rotate
that on the y axis. I'll press I Y, 90, enter. And let's tap straight
into Edit mode with this. And let's make sure we
got edge selection on. Let's grab this
top edge here now. I'm gonna take this up until it's just on the
ceiling like this. Let's grab the bottom
one and take this down until it's just to the floor level and do the
same with the other two sides. So grab this one
here, take this over. And grab this one as well, and go ahead and take
this over. All right. Let's press three now. So we can select faces,
grab this face here. Let's press E and X and go ahead and extrude
this out slightly like this. There we go. That's cool. That's what we want.
Once we've done that, let's tap out of Eddy mode. And let's name this. And let's call this the mirror. And once you've done that, let's check the scales, and
the rotation's out. So let's press Control A and
apply rotation and scale. And let's add a bevel
modifier to this. And let's have a look
at that bevel modifier. And I'd say I'll
leave that alone. I've got a slight
bevel on that edge. Maybe it's too much.
Let's increase this. Let's put an extra zero to the right to
the decimal point. Click Enter. And let's
go for another one. And let's turn this
one into a three. And there we go.
That's kind of good. And I'll just so this is what I call a shamford edge mirror. So I'm going to leave this at one segment so
that it looks like the edge has just been taken that sharp cutting edge off
it and put a hamfor on it. And that will do for me. So
I'll go ahead and apply that. Okay, so that's our
mirror in our bathroom. That's easy, and we've fixed
the issue with the ceiling. Okay, so let's leave
the bathroom alone now. Let's take the
roof away for now. Let's hide the roof again. And let's compress
the bathroom file, and let's click on bedroom
one and expand it. Okay, so now we'll work on
sort of the roof sorry, the framework that we
have behind the bed. And it's also like a ceiling
panel which comes across. So let's see if we
can work on that. So the first thing
I need to do is put a block in at the
right size to be able to use us just simply as a reference as
we build our headboard. So let's press Shift
A ash and cube. And then that's coming
on the bedroom one. That's what we want, and we'll
bring this over like this. And I'll press seven to get this in the orthographic view. And I'll just centralize this in the room as best as I can. That looks pretty
good like that. Okay, so dimension
wise, in the X, I want this to be 3.8 meters. So I'll delete
that. And I'll call it 3.8. And click Enter. And there we go. So that is the actual size
of our headboard, and it's nothing else but
a reference for that. Okay, so we could scale
this down the Y. I'll press S and Y and then just scale this down and then
bring this over like There, yeah, that's done. So we can actually maybe
reduce it in the z as well. So press S and Z and just
bring this down so that we don't see much of
it just enough to give us a clue how big
this is going to be. So we can hide our window. I don't think we
need to see that in our bedroom right
now, so hide that. And there we go.
So the next thing I'll do is I'll bring
in another cube, so I'll press Shift
A and mesh and cube. And this time, let's
bring this over. And let's scale this down. So I'll hit S and
scale this right down. So maybe we actually adjust
the dimensions in this. So in the X axis, let's make this 0.1
enter, and there we go. That's the kind of
width that I want, which is 10 centimeters. And in the Y, let's make this 0.02 enter, which would be 2 centimeters? And that's the kind of thing. Oh, do you want to
make it bigger? Let's make it bigger
in the Y axis. I'm sorry. Let's make
this 0.05 enter. And am I happy with that? Yeah, I think I'm
happy with that. That's the kind of
size that I want. So once I've done that, let's go ahead and scale
this up in the z. So I'll press S and Z and just go ahead
and bring this up. And let's do it again. So it has some Z and just bring this up. Let's press one so
we can see this in the orthographic
elevation and now bring this over until it's level with the edge of
our cube like this. There we go. Let's tap
into edit mode with this. And let's press one, so
we can select vertices. Let's go the wire frame, grab these bottom vertices, and then bring this
down to just on top of the skirting at the top here, let's take it up to
the ceiling height, which should be around
about here like this. There we go. And that's the kind of size
of our framework. Okay, let's tap out
of Edit mode for a moment and go ahead
and take this back. Let's press seven so we
see this from above, and now take this
back to the wall. Maybe just leave
a very small gap, maybe something like
this. And there we go. That's done. Let's have
a look at the scales, and let's adjust that, so
let's press Control A, and apply rotation and scale. And now let's press one again to get the orthographic view, and let's tap back
into Edit mode. And let's press two so we can
select edges, grab an edge, and press Control R. We'll
bring this up in the Z axis. Until we've got it, something like
that. There we go. Once we've done that, press
three, grab that face there. And let's go ahead and Well,
let's press seven first. And so we can see how far
we're going with this. And now let's press E and Y and extrude
this on the Y axis to I think about level with the edge
of our folding doors, something like something
actually a bit further, maybe pure guestimate,
about like that. Okay, so that's done. Let's go back to solid mode
now so we can see it. Yeah, I'm happy with
that. That's fine. So let's see if we can remove some of this extra
meshes Operas two, and let's see if we can get this one and this
one and this one. And this one and this one. Let's see if we can
dissolve these, so I'll right click and see if we can dissolve those edges. And there we go. That's cool. Okay, let's tap out
of it mode now, and let's apply a bevel to
this and see if it works. And, of course, let's
go ahead and add two zeros to the right
of the decimal point. And let's straight away, let's turn the one into a
five and see how that looks. And is that too much? I
think that's too much. I'm gonna take that to a four. Atlanta. And on the segments, let's take that to a four. And I think that's pretty good
now. I'm happy with that. But again, I'm going
to go ahead and leave that Actifon Okay, so now
that we've done that. Let's press one so get the
orthographic view again. And let's grab a piece, and let's just name this. So we'll call this headboard.
Let's call it headboard. There we go. And let's go ahead and add array
modifier to this. And it's actually working out. X is working out right for us. And let's increase the gap between these, let's grab this, and let's make this 1.2 and click Enter and
see how that looks. And yeah, I think
that's what I want. Maybe 1.2 or maybe even 1.3. Let's try 1.3 and click Enter. And yeah, I think
that's about right. So once we've done
that, let's press one again to get that
nice orthographic view, and let's just
increase the code. And take these now
all the way to the opposite side.
See where that lands. And I'm going to take that
back one or shall I instead? No, excuse my indecisiveness. I will leave that, like that. We could actually
just take this over a little bit until we're kind of central
with our cube again, and I think I'm happy with that like that. And there we go. So that is our sealing detail for our bedroom in
our main bedroom. We can go ahead and delete
this reference cube. Now, we're done with that. And there we go. That's it. D. Alright, so that's
it for this lecture. And in the next lecture,
what we'll do is we'll start working on the
headboard now in bedroom T. Okay, thanks very much. And I'll see you in the next
lecture. Bye bye, Fine.
36. Lecture 33 Bedroom 2 Head Board Part 1: Mm. Hello, and welcome
now to Lecture 33. And in this one, let's
have a go at doing the headboard now
in bedroom two. I think we'll probably spread
this over two lectures. It's slightly more involved
in this headboard, but there's nothing
we can't handle. I think the first
thing to do is, let's go ahead and apply the modifiers on
this headboard here. So when you apply modifiers, as a general rule, always
apply from the bottom up. So apply the ray first, and then let's apply the bevel. And there we go.
That's that one. So in bedroom one, we could actually bring back
the window now, and let's compress
bedroom one file. And let's click on bedroom
two and open this one. Again, we could hide the window. We don't need that for
now, and there we go. Alright, so let's make a start. So I think the first
thing we might as well do is bring
the cursor over. So I'll tap on the walls,
tap into Edit mode. Press three so we can select
faces, grab this face here, and press Shifts, and
bring cursor to selected. And there we go.
We can tap out of Edit mode, and there we go. There's the cursor
out in the right. So let's make a start. So this the headboard
is about 2.6 meters, maybe even a bit more about
2.2 0.7 meters, I think. We'll make the headboard.
Something around there. So let's see what we can do. So let's start off
by bringing a cube. So press Shift A and mesh
and cube, and there we go. So let's work it straightaway
in the dimension. So let's work it first
of all, on the Y. Let's make it 2.7 meters. 2.7 enter, and there we go. That's correct. Now, we could work the other two
dimensions as well. So in the Z, we could make this
let's make this 0.15. So 0.15 whoops that's 1.6, 1.5 enter, and there we go. And in the X axis, let's make this 0.35. 0.35 enter. And there we go. That's our sort of main or, that's the start of
what we're doing. Yeah, that looks good
as a size for these. So the next thing I'm going
to go ahead and do is, let's go ahead and
put a bevel on this. Let's check the
scale, and it's out. So let's press Control A and
apply rotation and scale. And now let's go ahead
and put a bevel on this. So generate and bevel. And let's do the whole two zeros to the right of
the decimal point. Click Enter, and let's
turn the one into a five and see how it
looks and click Enter. And, yeah, I think that's okay. We'll increase our segments to about a four, and there we go. Let's leave this bevel modifier
active for now on this, and let's see what's next. Alright, let's take this up to the ceiling and see how we look. So I'll take that over
maybe a little bit. Maybe just take it back in the X until it's just up
to the ceiling like this. I'll press seven to
see this from above and make sure we're reasonably
centered in the room. And yeah, I'm happy
where it is right there. Okay, so now we've done that. Let's make a duplicate
of this one. So I'll press Shift D and
then X and bring out a copy. I'll rotate this copy on the Z, so I'll press z90, Enter. And I'll press seven to
see this from above. I'll bring it out on the X until it's sort of level
with this like here. And I'll bring it out on the
Y until it's level here, too. That's it. And once I've done that,
I'll press Shift D and Y and bring a
copy out like this. Bring it out a
little bit further, and there we go. That's good. Okay. So the next thing
to do is grab this block, and I'm going to tap
into Edit mode with it. And I'll press and I'll
go into wire frame, and I'll press I'll
just grab this, this face here, and I'll
just take this back. Zoom in a little bit, and just stop when it's snug up to
the other one, like this. There. That's cool. I'll do that
on the other side as well. And I'll bring this back until it's snug up to the other one. There we go. That's cool. So I'll tap
out of Edit mode with this, and then I'll press Shift E X and bring a copy over now
to the opposite side like. Okay, that's cool. So let's see what we've got
now a solid mode, so I'll press and go
back to solid mode. And I'm going to grab all
four of these pieces. So I'll this one, this
one, and this one, and now I'll press Shift S, and I'll go cursor
to the selected. Now that I've done
that, I'll press seven to get the
orthographic view, and I'll press Shift A, and I'll go for plane. And I'm just going to scale that plane down
just a little bit. So I'll press S and just
scale this in like. Until we get maybe
something like that. I think that's just fine. Okay, so we could tap into
Edit mode with this one, now. Make sure we got face selected, and let's extrude that up in X. In the Z, I'm sorry. So let's press E and Z, and then just bring this up like this until we get a little
bit of thickness in this. There we go, and tap out of Edit mode and
take it down just a tiny bit. Okay, there we go. So let's look at
the scale on this, and it's out a little bit. So let's press Control A, and apply rotation and scale. And now let's apply
a bevel to this. And let's have a
look at what we got. So let's add our two zeros. And let's try the
five. Let's see if we can just put a
five there and see how it looks. And there we go. I'm happy with
that. I'll increase the segments to
maybe just a two. In this case, I'll
go ahead and apply this. All right. That's cool. That's done. We could do a shade or smooth on this,
and there we go. Okay, so next thing we
can do is actually go ahead and apply or let's
join these together first. I'll grab all four of
these and we'll press Control J and join
those into one block. And then we'll also go ahead
and apply the bevel to this. There we go. All right. So now that you've
done that. Let's do a shade auto smooth on
this. Oh, there we go. That's that one done. I think, actually, I'll just bring
this one forward a little. It's not quite so
level with the others. So I'll tap into
Edit mode with it and grab a face on this,
hit Control and plus. Now let's press seven
to see it from above. And I'll just bring it out
a smidge on the X axis. So I'll press G and then X and just bring this
out, and that's better. That's what I want.
Okay, let's tap out of Edit mode on
that, and we're nine. Okay, and I think that's all we need to do
for one lecture. If I tried to do all of this in just one lecture,
it'd be really long. So I'm going to break this
into two nice short lectures. All right. Thanks very much. And I'll see you in the
next one. Bye bye for now.
37. Lecture 34 Bedroom 2 Head Board: Okay. Hello, and welcome
now to Lecture 34. And let's just pick up
where we left off with this bedroom two headboard. So I think the first thing I'm going to do is tap into
Edit mode on the walls. So I'll hit the tab key, and I'll press three on the keyboard so we
can select faces. Grab this face
here, press shifts, and cursor to the selected. Okay, let's tab out about
Edit mode with that. And with that done, let's
press Shift A and mesh, and let's go ahead
and bring in a cube. Let's scale this down
in the X. I'll press S and X and just flatten
this out quite a bit. Bring this out a
little bit like this. And let's go ahead and scale
it down a little bit more. So I'll press SX scale this
down to something like this, maybe. That should be good. Alright, I'll press
seven like this, and I'll go into wireframe mode, and I'll tap into
Edit mode with that. And I'll press one for
vertice selection. And I'll go ahead and grab
these vertices here and just pull those over to
something like that. So not all the way
to the edge of the frame we made in the
last lecture, but close. And here, I'm going to grab these ones and do
the same thing. I'll pull these over until they're kind of there like that. That looks about right to me. Alright, so now what? Let's grab these
top vertices here, and let's press one
so we see this on the orthographic view
and go ahead and bring those up to
something like that. And let's grab the bottom ones, and we'll pull those down
to something like that. Okay, so let's tap out of
edit mode with that and then bring the whole thing
back a little like this. To about there like. All right, so the next
thing I'm going to do is, let's go ahead and set the origin back to the
geometry like that. And now let's press shifts, and let's bring the
cursor to the selected. And with that done,
let's press Shift A, and let's bring in another
cube. Let's scale it down. We'll just hit S and scale it
all the way down like this. And we could press seven to see this from the
orthographic view, and maybe we'll actually
enter these properly. So I'll fix the scale, so I'll press Control A and
apply rotation and scale. And in the Y axis, let's make this um, 0.075. 0.075, Enter. And in the X axis, let's make it 0.010
0.01 and click Enter. And that's not enough. I
think I need more than that. So I'll make this
about five, I think. Let's delete that one and
click five and click Enter. And we'll see what
that looks like. Okay, so I think that's
it for that way. Let's tap into Eddy
mode with that now. And let's press one so we
see this from this angle. Let's grab these vertices
here and now pull those up until we are where
do we want to be? I think it's I think it's about there
should be about right. And we'll grab these ones here, and we'll pull these down now until they're
just off the floor. Something like
here, I'd say Okay, so let's tap out of
Edit mode with that. And let's press three, so we see this from the side. And let's go ahead now
and pull that over until that's sort
of level with this. Actually, I need to
take this up higher. It needs to go up here. So I'll tap into Edit mode, grab these ones, and bring these up until
it's there like that. That's better. I'll tap
out of Edit mode with that now and take that right
to the edge like this. Let's see what that's
like at the bottom, and see if I got that right. And I did, that's better. So let's press Shift D now, and let's press Y, and let's bring a
copy over now to the opposite side like this and just bring that over to I'm going to say about
there like that. Once we've done that,
let's make a copy, so I'll press Shift D again and Y and bring that over like this. I'm going to rotate
this on the X axis. So x90, enter, and I'll bring this to
the middle here like this, to the middle of that cursor. I'll now scale it down the Y, so I'll press S and Y
and just bring this in something like that, and now take it up like this. Let's zoom in on this and go
ahead and take that up some more until it's about
there like that. Okay, so let's tap into
Edit mode with this one, and we'll grab these first
vertices here and we'll take those over until it's level with the vertical
piece one we just made. There we go. And we'll do
the same with this side, too, grab these ones, and take them over until
it's sort of level or flush with the verticals
we just made a minute ago. There we go. That's done. Once we've done that, let's
grab these vertices here and take these over until they're sort of level with the
internal edge. There we go. And we'll do the same with
these other ones here, grab these ones and take these over until they're level
with this other edge. And that's what we
want. That's cool. Let's tap our di
mode with that one, and we'll grab this
one, hold shift, and grab this one. And now let's tap
back into Edit mode. And we can grab this
one here, hold shift, and grab this one, and
now take both those down. Until we've got this
angular joint here. You can take those
up a little bit. And that's about what we
want. That's fine no. Okay, let's tap out of Edded mode with that
and grab this one now. Let's press Shift and Z and bring a copy down
a little bit like this. And now let's rotate that, so let's press x180, Enter, and now bring this
one down to the bottom, no. Until we are level with the two vertical pieces
again. Is that about right? It looks like we want to take
it over a tiny bit to about here and bring it
down a tiny bit. And let's see if that's
working, and it is. So let's grab this one now, and we'll grab this
other vertical one, and we can tap into
da mode with those. We could grab these vertices and no these vertices
and take those up. And now let's bring
them down a little bit until they're
looking about right. So I'm gonna press G and Z. And I bring these down. It says something like that. And I'm just gonna
adjust these by hand, so I'll just grab this one
and just tweak this one in. There we go, bring it in, bring it in until we're looking good. There we go. That's good. And we'll do the same
this other one, too. We'll just grab this one and just bring it down a little bit, bring it over a little
bit. And there we go. That's good. Okay, so let's
tap the edit mode with that. Let's go back to solid mode and see what we've got.
And sorry, whoops. It looks like my mistake. It looks like I've built
the entire structure inside the wall here.
Sorry about that, folks. Let's sort this out.
So I'll press set, and I'll go to wireframe. And let's press seven, and let's grab this
entire thing like this. Whoops. Let's just grab
these items here, sorry. So we'll grab these ones. And let's bring those
forward out of the wall. Whoops, sorry about that, folks. As press said, let's go back into solid mode,
and there we go. That's that's looking good. So what we could do now is
maybe just grab these items, this one, this one, this one, this one, and the last one here. And let's hit the
forward slash king and numpad to isolate those items. Okay, let's just
individually check the scales on these,
and this one's out, so press Control A, and apply rotation and scale,
and let's just repeat that. Around the bottom one as well. Okay. So now let's grab these four items
here. There we go. And let's press Control J
and join them together. And now let's go ahead and
add a bevel modifier to this. And, of course,
that's a little much. So let's add our 20. And let's see what
that looks like. Yeah, I think I'm
happy with that. I don't think I'll go anymore. I think I'll increase my
segments to maybe three, and I'll do a shade
oro smooth, as well. And yeah, I'm more
than happy with that. That looks great. So
I'll go ahead and apply that bevel modifier,
and there we go. That's done. Okay, so with
that done, let's head back. Let's hit the forward slash
key to bring everything back. And let's grab
that center panel. And let's grab this one. And let's press Control J
and join them both together. And let's grab those and bring a copy over
to the opposite side. So I'll press Shift D and Y and bring a
copy over like this. I'll press seven to
see this from above, and I'll just scoot
this over until it's level with the outside edge of the
stuff we made before. And there we go, that's done. Okay, so that's a headboard
finished for this room, too. So there's quite
a few items here. So I think what
I'm going to do is create a sub file in
here in bedroom two. So I'll select bedroom two. I'll hit the file,
and there we go. And here it's bedroom
2.2, so I'll grab this. I'll delete that heading and
I'll call it the headboard. There we go. And then
I'll grab these items. I'll grab this and then the
plane there in the middle, and I'll grab this one
and then this one. And then I'll press M, and I'll click on
collection and go to first floor and
then go to bedroom two and then go to
headboard, and there we go. So that's dropped
all those items into this subfolder here. I'll compress that, and
I'll compress bedroom two. And there we go. So that's the headboard
finished in bedroom two. We can actually bring
back whatever's missing. So we can click on the middle roof and open
that up and then this one. And that's open
bedroom two and bring back the window
open bedroom one. And I've already turned
the window under this one. So I'll compress bedroom one, compress bedroom two, and compress the first
floor, and there we go. So our outliners
still looking super neat when everything's
compressed, minimal amount. Alright, so we could turn
on the ground floor. And that's it, I think for
modeling on the first floor, I think we're already on the first floor for
all our textures. But I think before we do that, let's carry on now with the ground floor in
the next lecture. So in this one, we
need to apply a floor, and we need to make this feature wall
with a TV, et cetera, on this wall, and we need to do a little bit
on this side, as well. Okay, thanks very much. I'll see you in the next
lecture. Bye bye for now.
38. Lecture 35 T,V Wall Part 1: Hello, and welcome now to
What lecture are we on? Lecture 35. And in this lecture, let's
start our feature TV wall, which goes just here. So let me actually just bring in my Pure F board so
you can see it again. Drag it on over from
my other screen. And I'm sort of using this
is my inspiration here. This is vaguely what
I'm going to do. I'm gonna skip the fire here, this alcove, but the rest is going to be vaguely
what we're going to do. Alright, let's push
this to one side again. We don't need that. And let's make a start.
So first things first, we don't need the first floor, so let's go and hide that. So we just have
the ground floor. And we don't even need
all of the ground. Oh, we do because we're going
to put a floor in first. I'm getting ahead of myself.
We do need a floor in. So let's go ahead and open
the ground floor file. And I think I want to create
a separate file in here now, because ground floor walls
isn't comprehensive enough. So I'm going to click on the ground floor file
and hit subfolder. There it is there.
I'll click on it, and I'm just going to
call this interior. There we go, and click into. But for now, I'm just going to click on ground floor walls. So the first thing we're going to do is go
ahead and bring the cursor back to here
where all the axes cross. And this is called,
I did say, I think, at the foot in Lecture
two or Lecture three, but just to remind you, it's
called the world origin. So let's bring it back to there, so I'll press Shift S and cursor back to world
origin. There we go. Now that I've done
that, I'll press seven and I'll press Shift A, and let's bring in a plane. Okay, let's just tap straight
into edit mode with this. And let's press two so
we can select edges. Let's grab this edge
here and pull this over until it's slightly
under the wall. Do the same with
this one, pull this over until it's slightly
under the wall, and just repeat this process. Pull this over, and
this one as well, of course. There we go. So we can tap out of
Edit mode with this, and let's have a look at it and see if we're happy
enough with the height. I'll just zoom in a little bit. And I'm just looking
really what it's doing in relation to this
track for the doors. And I think I'm absolutely
happy with that. So let's just select it
again and let's name it. And let's call it the
floor. There we go. Alright, so I'm going to compress the ground
floor walls file. And then we're just
going to click on the interior file there. Okay, so now let's go ahead and bring the cursor over here. So let's grab this wall here. Well, actually,
let's hide some of this stuff because
all we really need at this stage is the
walls and the floor. And I think that's about it. So for those two selected, I'll hit the forward slash k and the lamp pad to go and
herd and isolate them. And now let's tap into Eddy
mode with these walls. And let's press three so we can select faces,
grab this face here, and press Shifts and cursor
to the selected. There we go. Let's tap out of edit
mode with a wool. We're done with
that now. And let's work on creating the sort
of vertical strips first. So let's press Shift
A and mesh and cube. Let's press seven to
see this from above. And let's go ahead and scale
that down significantly. So we'll hit S and just bring this down to
something like that. I'll bring it right now
to the edge of the wool. And just bring it flush with
the edge of the wall and, of course, forward until it's flush with
the wall, as well. And let's have a look at
that and see maybe I'll, first of all, scale
it in the Z to get a better idea of
the proportion of this. And I'll do that again and
Z, and just bring this up. And I think it's too big. So I'll press seven again. And I'll scale this
down in the Y, so I'll press S Y and just
bring this down like this, now to maybe
something like that, and then bring that over again. And let's scale it down
slightly in the X S and X, bring this down like this, and now touch it to the wall again. And let's have a look
at that, see if we're happy with the sort of
proportions of that one. And I think I'm
going to tap into Edit mode with it and grab this face here now and
take this back a little bit and do this rather than repositioning it
each time we scale. Let's grab this one now, and let's take this
one back a little bit. And that, I think, is more
like what I'm thinking. I might even take this face back a little bit more,
and there we go. I'll grab this top face now, and I'll bring this
until it's kind of flush with the top of the wall. I just press three, so I see this from this angle
orthographically. And now just bring this up
until it's just just under. The wall edge, there
we go like that. Now, let's grab this one here. Then I'll press three again, and I'll take this up until we kind of have the
right kind of spacing, which is, I'll bring it
over again for a minute, and you can kind of see it's about two thirds here to
about a third of the bottom. But I think I'll
make mine a little more equal top and
bottom on these. So let's take that back and I'll take this up a little bit more. To maybe something like that, I'd Alright, so I'll tap
out of Edit mode with this, and I'll fix the scale
because that's got to be out. Let's press Control A, and
apply rotation and scale. And then let's right
click on it as well and set the origin to the
geometry. There we go. Okay, so now let's apply
a bevel modifier to this. Generate and bevel.
And, of course, let's put our standard two zeros to the right of
the decimal point. And let's turn our one
straightaway into a four and see how that looks. Is that too much? Am I
thinking that's too much? Yes, I'll turn that four
into a three and enter, and let's increase our
segments to about four. And yeah, I think that's good. I think that's what
I like. I'll do a shade auto smooth on this. There we go. But I'll leave this bevel modifier
active for now. Okay, now we've done
that, let's just add a modifier
again straightaway. So add modifier,
generate and array. Okay, so we don't really
want this to array in the X, so we will turn that to a
zero. And so there we go. In the Y, let's go
ahead and scoot that over and see what we get. I'll press three again
on the numpad to get us that orthographic view so we can see what's happening here, zoom in a little bit, take that Y up to about
maybe, let's see. So 1.3, I'd say,
looks good to me. I think I'll leave that at 1.3. And now I'll go ahead and increase the count,
bring this across. Two, I would say about there.
Yeah, I'd say about there. Looks good for me. Okay,
now I've done that. I'm gonna leave this
bevel modifier active. And I'm gonna press shifty
and Z and bring a copy down. And I'll press three again to get it in the
orthographic view, and I'll go ahead and carry
on bringing those down, too, I'd say about there like that. I'll tap into Edimode,
grab that face there, press three again, and
now bring those down. And this is the big benefit still keeping the ray modifier active is if I change the first, all the others will follow. So I'll bring this down
like this to get us the size of the marble
panel which we'll go there. And I think that's good now. Okay, I'll tap out of
edit mode with that and check the scale and everything on that,
and that's okay. So I think the next
thing I'm going to do is look at putting our
first panel in there. So let's do that next. So let's press Shift
A and mesh and cube. And let's press seven, and let's scale this down and
bring this over like this. To kind of get our gap right. So something like that, I'd say. And now let's scale
it down in the X. So SX maybe bring this
forward like this, scale it down a tiny bit
more in the X of s x. And there we go.
That's about right. Okay, so let's press
three and then I'm pad to get us in
the orthographic view, and then let's go
ahead and take this up to the top like this. And there we go. That's good. So let's tap into
Edit mode with this. Let's press set to
go into wireframe, grab the bottom
edge here now and go ahead and bring
this over like this. And there we go. That's good. Maybe I'll just reduce
the width of this panel. So I'm gonna bring this
over a little bit like this. Yeah, that's good to me. So with that done? I'll go ahead and tap out of veto mode, and I'll go back
to solid, as well. And I'll fix the scale on this. So Control A, and apply
rotation and scale. And let's go ahead and add that bevel modifier
to this, as well. Two zeros. A two maybe, a two on this and increase our segments to
two, and there we go. And again, I think
I'll just leave that bevel modifier active Fino. Okay, so I think if I push on this lecture is going to be too long for just one lecture. So we'll split this into two. So in the next lecture,
we'll carry on placing our panels across here, put a base here at the bottom, and put our marble
backing panel in as well. Alright. Thanks very much. I'll see you in the next
one. Bye bye, Fine.
39. Lecture 36 T,V Wall Part 2: Hello, and welcome back. No to Lecture 36. And yeah, let's carry on
with our TV feature wall. So let's grab this block here, let's press three
again in the numpad. Let's press shifty and Zed
and bring that copy down, and just bring it so
it's kind of level with the top edge with the top edge of the
other little strips. And there we go. Alright,
let's tap into Edi mode. And let's press three. Sorry I didn't tap into Edit mode.
Let me try that again. There we go. And
let's press three, and let's take this up again until it's kind
of level with the bottom. And, yeah, that's
it there like that. Alright. So let's tap out
of Edit mode again now. And let's grab this top one. And let's press Shift and Y. Bring a copy over like this. And let's have a look at our gaping compared to the others. I'll take it back a
tiny bit like this. And now let's tap in let's
go into wireframe mode. And now, let's tap into
Edit mode with this. And let's grab this one and bring this down now
to the bottom edge. This one is a full panel. And there we go. That's cool. And I'm gonna increase the
width on this panel slightly to about maybe a bit more, maybe about there,
like that. That's it. Tap out of Edo mode, and I grab this panel again now, and press Shift D and Y and
bring a copy over like this. And let's inspect the gap, make sure that it's kind
of even like the others. It's too wide at the moment, so I'll bring it back this way. Let's tap into Edit mode with
it, grab this edge here. And now pull this back to leave a slight gap to the
wall. Like that. There we go. That's cool. Okay, so let's go back into solid mode now to see
what we've created. And I think that's fine. We have the bevels
on everything. We do, indeed, and there we go. That's cool. Okay, so the
next thing we need to do is create a big marble
panel, which goes here. So let's do that next. So again, it's just a cube, so let's press Shifte
and mesh and cube. Let's press seven, go into
the orthographic view. And let's scale this down
in the X. I'll press SX and bring this down
to something like that. Let's make sure
it's flashed with the back edge of those
others like this. And I think I'm going
to scale it down a bit more in the
X. I'll press SX, bring it down a bit more
to something like this. And now take it
back to the that. All right, so let's tap into
Edit mode with this, maybe. And let's press three to go
into the orthographic view. And let's go into wire frame, grab this edge here now
and bring this down until it's kind of almost
touching those vertical strips, and let's do something
similar on the bottom here. Take this up, zoom in a bit, and now bring this down
like this. That's good. And I'll grab it here
and take it back to level with this
one like this. And I'll just press
G and Y and take it a bit more. There we go. And now let's grab the other
one and take that back until it's flush with
the edge of the wall. Something like that
should be good. Okay, let's go back
into solid mode on that and let's tap
out of Edit mode. Let's look at the
scale, and it's out. So let's press Control A and
apply rotation and scale. And well, let's go ahead
and add our excuse me. Let's try that again.
Let's go ahead and add our bevel
modifier to this. There we go, and add
two zeros as normal. And turn our one into I'll
keep this edge quite sharp, so I'll go for a two and click Enter and then put maybe
three segments on there, and there we go.
That's what I want. Okay, so that wasn't so hard. So the next thing I want
to do is put a capping on this one here just to
clean this wall up. And then also just to
put a base in as well. But I think I'm going to bring everything back
now so that I can see when I put this capping on how it's going to look
against the steps. So let's hit the
forward slash key to bring those items back. Okay, I'm going to
press Shift B and just snap onto this area because it's running a bit
slow, there we go. And let's go ahead and
bring another item. So I'll press Shift
A and mesh and cube. And I'll press seven, and I'll bring that cube to
the end like this. And I think I'll just tap into Edit mode with it straight away, and I'll go into
wire right mode. And I'll grab this
edge like this, and I'll bring this
over like this. And put it right on the
edge of the wall like that. And here, as well, let's
bring this over to give us our final thickness for
our kind of capping piece of marble,
something like that. And I grab this one,
take this back, and I'll have it a little
bit proud of the TV wall, maybe something like this. And, of course,
this one, as well, let's take this over.
There we go like that. Okay, so let's grab
this edge now, press three and take this up. And let's grab the
bottom one now. Bring this down,
set it on the step. And let's see what
that looks like. Let's go back to solid mode. And let's see what
we have. And yeah, I think that's exactly
what I wanted. So let's go ahead and
put our bevel on this, now, so I'll tap out of di mode. And the scale is correct. So let's add our bevel
modifier to this. Two zeros. And turn that one into a two and turn our segments
into maybe three. And there we go. That's done. And in this case, I think I'll go ahead and apply that one. Okay, so now that
we've done that, we need to bring in
next a baseboard, so we can do that next. So let's press shift, eh, and mesh and cube. But when I mean a baseboard, I don't know if that's
the right term, but I'm going to put
like a base in it here to go just for
everything to sit on. And eventually, I'll put, like, a plant here in the corner
that all sit on it as well. So let's bring this down. Let's press three, and let's press the head
and go into wire frame, and just make sure this
is sitting on the floor. There we go, something
like that. Oh, it's tappened at Edit mode with this. Grab the top face here, bring this down until it's
just under the strips of wood. Oh, yeah, like that.
We'll grab this end here, and we'll take this
over like this. And we'll grab the other end, and we'll take that
over, as well. And let's see this from above, so I'll press seven and
see what that's doing. Of course, this is a bit crazy right now,
but we'll sort out. We'll grab it here
and bring this over. Take it back a tiny bit to about there and grab the front edge
now, and take this over. And I'm going to make it go to about there like
that, I'd say. I think that's about right. Okay, yeah, that works for me. So let's press it head and
go back into solid mode. And let's tap out of
Edo mode with this, and let's add the
modifier on this. Add our bevel modifier and put our two zeros on and enter, and let's turn the one into a three and see
what that looks like. And that looks good, but let's turn our segments
into a three as well. I'll go ahead and
apply that bevel on this one. And there we go. So that's our TV wall complete. And let's take a look what we've got here with our modifiers. So let's apply our
modifiers on this. Apply from the bottom. So I'll leave the
smoothing modifier on because that's
not really anything. So let's apply our ray modifier, so apply that and let's apply our bevel
modifier. There we go. Let's do the same with this one, apply our ray modifier and apply our bevel modifier.
And there we go. Let's take these two items, and let's Control J and
join them into one. And I think here in interior,
I'm going to click on this. And I'm going to make
another sub folder for this. And I'm going to
call this TV wall. There we go. And this cube 04, I'm going to call
this vertical strip. There we go. And then
we got these panels. So let's apply these
modifiers on these panels. And this one here as well. And let's take all these
panels, and let's join those. So I'll press Control J
and join those into one. And now let's go ahead
and call those panels. There we go. So now we
have the marble here. So let's apply the
bevel on that. And we'll call this marble back panel. There we go. And what's this one? Let's see. So I'll call this marble base, marble base. There we go. And now we just have this here, so I'll call that
the marble capping. There we go. That's. Okay, so
let's take all these items. So one, I'll whole shift and go all the way through
to panels. There we go. And I'll just drag them into the TV wall,
and there we go. So then we can
compress the TV wall, and the outliner is
looking quite neat again. Okay, so that's our
TV wall complete. So on our next lecture, let's start work on our sofa, which is something I'm
looking forward to doing with you because I can show you how to do cushions and put wrinkles in and all
that kind of stuff. It's gonna be very cool.
Okay, thanks very much. And I'll see you in the next
lecture. Bye bye for now.
40. Lecture 37 Sofa Part 1: Hello, and welcome
to Lecture 37. And in this one, let's have
a go at starting our sofa. Let's see what we
can do with this. So I think the first
thing I need to do is bring back our
reference images, so I'll turn those on
and open that file. And I don't need the
first floor plan, and I don't need the
front elevation. I just need Oh, let's turn off this reference cube. We
don't need that either. So that's all I kind of need. I think I need to
hide my floor here. So on the ground floor, let's open the
ground floor walls, and let's hide the floor. So now we have a
visual reference as to the size of our sofa. It won't look exactly like this, but it'll look kind of similar. Alright, so I think the
next thing I want to do is I want to bring in, like, a low poly model
of a man to put here. So we've got a reference as to the size and scale of the
sofa, so I'm going to do that. So we'll use Blender kit, so I'll type into
this low poly man. Oh, low polywoman whenever
you want, Rule. Click Enter. Let's see what we can find. And let's right
click on this and just make sure it's a
reasonably low file, and it's 2 megabytes.
That's fine. So I'll go ahead and left
click and bring that in. There we go. It's in. So I'll just grab this and
bring it over. And then I'm going to press
one to make sure that we're exactly in the
orthographic view and bring that down to
the floor like this. There we go. That's good. And I think all I really need now
is this reference image, but I can't select it. So the ground floor plan, I'm going to click on this
so it can be selected, and then I'm going to select the ground floor plan
and this low polyman. And with those two
items selected, I'll hit the forward slash key. Just to isolate
those two objects. That's all we really need now. Okay, so we're good to go there. I'm just going to hit
this little cross to close that Blender kit window. We don't need that now.
And let's see what we can. So on the ground floor, let's just select this. And let's compress this
ground floor walls bit. And let's compress the interior. But select the interior
and let's hit a sub file. Let's open this again. I
shouldn't compressed that. On interior, too, let's call
this sofa. There we go. And we'll keep that selected so that we can add
objects to it. Alright, so we kind
of need to just make sure that the scale
is right on this guy. So let's bring in a cube, so I'll press Shift A, and mesh and cube. Let's press one and bring the cube down
to the ground level. And bring him over like this. And on the height here
in the z, let's make it. So the average height for
a man is about 1.8 meters. So let's do that. And
then we'll bring that down to the ground plane again
and see what we can see. So he's a little bit short, so we'll scale him
up a tiny bit. So that's There we go.
That's about right. Okay, we can delete this cube now and we can make
a start on our sofa. Okay, so I kind of kept
that cube, actually, but never mind, so
I'll press seven, and I'll press Shift
A and mesh and cube. And the cube is coming
there on the sofa. And I'm gonna call
their sofa base. There we go. And I'm going to go ahead and
bring that over like this. And I'm going to go straight
into wireframe mode, and I'm going to
tap into Edit mode. I'll grab this at here and bring this to about here like this and grab the back and
bring that to A here, something like that, I think. Okay, so let's press one so we can see this from
your orthographic view. Grab the top now and
bring this down. Until we get that kind
of thickness, I think, can be quite a chunky
wooden sofa this. Okay, I'll tap out of edit
mode, and I'll grab this guy, and I'll bring him over so he's closer to the sofa for a minute. Because I want to set the seat
base level with the knee. So I'm going to go
ahead and I'll set the origins of this
to the geometry, and now bring this down. So the top edge of this
is level with the knee. And that's about right something Okay, I'll
take him away again. We don't need him for a while. And I'm gonna go ahead now, and I'll just grab the item, and I'll press seven again. And I'll press shifty and X and bring a copy
over like this. And with that done,
I'll just press Shift R to repeat
that operation. And that size was
actually perfect. So I just wanted to duplicate
those for a moment just to make sure that my guest size for that board was correct, and it's actually
worked out really well. So I'll delete those
now for a minute now that I know this
block is the right size, and I'll grab it and I'll
tap back into Edit mode. I'll grab this here and I'll
take this over like this. And I'll grab the front here, and I'll take this over. But I'm going to
differ a little bit from the image you
can see beneath. I'm going to actually
take it a little bit further over like this. Okay, so let's go back
to solid mode now. And I think the next
thing I want to do is add a bevel
to these edges. So I'll tap out of Edit mode, and I'll look at the scale on the rotation, and
they're still fine. So I'll add modifier,
generate, and bevel. I'm just going to go for it, and I'm going to say this
needs to be zero, 03. So I'll go zero, 03, and click Enter, and
I'll see what we got. And yeah, I'd say
that's about right. So I'll increase the segments now to three, and there we go. Okay, with that done,
I'll press seven. And I'm going to go
ahead and press Shift D. And X and bring this
copy over like this. And I will put it right next
to it, something like that. And with that done,
I'm going to press Shift to repeat my last
action, and there we go. So there's our three
boards there for the base. And with those done now, I'm going to actually
join those together, so I'll grab this one and
this one and this one, and I'll press Control
J to join them into. All right. So now let's press seven to get that
orthographic view again. So let's grab this now, and let's press Shift D and X and bring this
over a little bit. And now let's press r90, Enter. Let's take this back until it's flash on the
back edge like this. And now let's take it over on the X until it meets up with
the other one like this. And let's take a look at
these and see what we got. And I'll press G&X
and just bring them over until they're touching,
which is just like that. Okay, so I can actually tap
into Edit mode with this now, press Z, and get a wire frame, grab these faces here on
this edge and just bring this back now until it's
kind of where we want it, which I'd say is
about there like. Okay, so there we have
our seat base done. Let's press and go back to solid mode and see what we
got and see if we're happy. And, yeah, that's what I want. Okay, we could join these
two together so we can press Control J and join those into
one seat base. There we go. Okay, so let's make a
start on the sofa back. We definitely won't
be able to do everything in this
sofa in one lecture. I think it's probably
going to take three or four lectures to do the sofa. But we'll we'll do
a few more minutes. So let's select the item, and let's press Shift S and
bring cursor to the selected, just to get the cursor
kind of where we want it. Let's press Shift A, and let's bring in a cube. So we could press one on the numpad to get us
to that front view, and then we could press
S and scale this down. Bring it over, bring
it up a little bit, and maybe scale that down. Well, a bit more. I want it
to be a little bit thinner, less thick than the
thickness of the base, so I'll hit S, and
I'll scale this down. I would say to
something like that. Let's just have a look. No, maybe a little
bit less again. Hit S, scale down. Tiny bit more again.
That's all it as. And yeah, that's about right. I
think I'm happy with that. Now that's done, I'll tap
into Edit mode with this, and I'll press set and
go into wire frame. And I'm going to
grab this top edge here and I'm going to
take it up like this. And I'll grab the bottom edge, and I'll take it over like this. And there we go. So let's tap out
of Edit mode with this and grab this guy
and bring him over again to kind of compare him to the back of the sofa.
Is that about right? I would maybe just go
a little bit higher, tiny bit higher to about there, and I think that's happy. Okay, I'll tap out Vedam mode with that, and I'm
happy with that. But now I'm going to set the origin back to the geometry,
so it's in the middle, and I'm going to press R and just rotate this back
a little bit more like this to get the angle
of the back of the sofa, and now I'll take it back
again to about Okay, let's tap into Edit mode
again with this now. And let's press one so
we can select vertices. And we'll grab these
vertices like this. And I'm going to go here in
the transformation to local. And now I'll pull this down
on the z axis like this. And I'll do the same here
until it's meeting at the same sort of angle
as the sofa base. Those angles are the same,
and that's what I want. Okay, I'll tap out of
Edi mode with this, and let's press seven and see
what we've got there now. And let's press S and Y
and scale it up in the Y. So S Y, and scale it up.
And let's do that again. So S and Y and go ahead
and scale this up. In fact, let's just
tap into Edi mode, and let's do this properly. Let's grab this here
like this and pull this back until
it's about there. And this slide, I'm actually
going to fly past the sofa, so I'm going to go
to about the oh. There we go. That's in position. Let's go back to solid mode
so we can see what we've got, and see if we're happy. I'll tap out of Edit mode
and just make sure that that sofa back is about
the right height, and I think I'm happy with that. Okay, now that that's done, I'll grab this item, and I'll go ahead and turn the transform properties
back to Global, and I'll press shifty and X and bring a copy
forward like this. And I'll go ahead and
rotate that in the Z axis. So I'll press Z, 90, enter. Okay, I'll take this
back in the Y axis. And now I'll take it over
in the X axis like this. And see what we've got. So I think I need to take
it forward a little bit, though things may
change, but I'll take it forward a
tiny bit like that. And I'll do one last thing. I'll do one more for here. So I'll grab maybe this one, and I'll press Shift D and X, and I'll bring a
copy over again. And then I'll rotate this one or maybe actually I'll
set the origin again, set the origin to the geometry, and then I'll rotate
that on the Z 180. So z180, enter. And now I'll go ahead and take that back in the
X axis like this. To something like that. And
now let's slide this over on the y axis until it's just a back a little
bit from the seed base. That's about right for
me. Something like that. Okay, so I think we'll leave
it there for this lecture, and we'll pick it up again in
the next one when we start cutting all these panels so that they make nice
joints in the corner. Alright, thanks very much. And I'll see you in the next
lecture. Bye bye for now.
41. Lecture 38 Sofa Part 2: Hello, and welcome
now to Lecture 38. And yeah, let's carry
on with doing a sofa. So the next thing I
want to do is split these panels at this joint here to form a nice neat
joint going down the corner. So let's press Shift day. And let's bring in a plane. Let's rotate that on the y axis, so I'll press, I'll
press y90 enter. I'll go ahead and bring
this over like this. And I'll press seven to
see this from above. Then I'll pull this
over like this. I'll bring it to the middle of this joint, and I'll rotate it. I just line it up with this
joint as best as we can. Zoom in a bit and
see what we got. Bring it down a little bit, and rotate it a tiny
bit And there we go. Let's see what that
looks like now. And it's a little bit
off on that corner, which is not really what I want. It's not hugely off,
but it's a little bit. So I think it's this
one then that I need to take over a little
bit. I'll do that. I'll just bump this over
just a tiny bit like this. There we go. And let's go ahead and
look at this again now. Maybe just take this
over now in the X. And let's see what that
looks like here now. Okay, let's do a
bit more on this, so I'll grab this again and
now just pull this back a little bit. There we go. And now let's do the same here. Just pull this over in the X. And there we go. That's cool. Let's see what that looks like. And I'm happy with that now. That's close enough that
you won't see that. Okay, once we've done that,
let's check this plane, and we can fix the
rotation on it. So let's press Control A and
apply rotation and scale. Let's select this
piece here now, and the rotation and
the scale is out. So let's press Control A. And apply rotation and scale. Okay, now that we've
done that, and we still have it selected, let's go to modifiers. Add modifier, generate, and
let's add a Boolean modifier. Grab the little eyedropper
and click it on the plane. And there we go.
That's work for us. And yeah, I think that's good. I'm going to go ahead
and apply that. There we go. That's cool. Now let's select this
one. Let's check it. It's out, let's press Control A and apply
rotation and scale, and let's apply the
Boolean modifier again. And it's not going to work, but I'll do it just to show you. I'm going to grab that little drop her,
and I'll hit the plane. And this is what's happened. It's deleted the
wrong side for us. What that basically means is that this plane
that we have here, currently, the normals are the wrong way round
for cutting that. They always had to be wrong way round for one of these two. We had a 50 50, so it worked for this one, didn't
work for this one. If we flipped it, it wouldn't have worked for this one, but it would have
worked for this one. So we always had
to deal with this. So what I'll do now is
I'll select this plane, and I'm going to go over here
now and click on this one, and I'm going to click
on face orientation, and this is showing the
blue means that this is the correct side
of the normals. The red is the back
side of the normals. As you can see, it worked this way because blue is
facing this one. So now we need to flip this. So we can select it,
go into Edit mode, and then press A
for all and go over to mesh and click on
normals and flip. And there we go. And now
it's actually worked. I'm going to go ahead and turn this off because I
find it distracting. And we can have a look at this, and yeah, all is looking good. So let's grab this one now. Let's tap out of Edi mode, grab this one and go ahead and apply this boolean.
And there we go. Okay, so let's drag this over
now on the Xaxis like this. Let's go ahead and
rotate that on the z. So I'll press R and Z. I just
bring this round like this. Let's see what we've got here. Maybe we rotate this again on Z, so I'll press R z and just try and line this
up as best as we can. And I'll pull it on the Y. And I think I'll go into Y
frame mode for a moment, and I'll press seven, and let's see what we can see. And I think I'll
rotate it again, so I'll press R and
rotate it to about there. And I need it to line up with these two intersecting
points here. So I'll pull it back a little
bit now. And there we go. That looks pretty good to me. Okay, so let's press and
go back to solid mode. And let's see if that's looking
good, and I think it is. So let's grab this
piece here and add modifier,
generate, and boolean. And let's get the little dropper and select the plane like this. And the orientation
is wrong on that, so let's go ahead now and
just flip the normals. So I'll select the plane, tap into Edit mode,
press A for O, go over to mesh, normals
and flip. And there we go. That's work now. So I'll
select this panel now. And I'll go ahead and apply that Boolean modifier.
Okay, that's done. So now we're just
on to the last one. But we know we need to flip
this, let's flip this first. Let's tap into Ed
mode, press A for all, and mesh, normals and
flip. There we go. We'll tap out of
Edimde with this, grab this one, and let's
fix the scale on this. Press Control A, and
apply rotation and scale and modify and
generate and boolean. Grab the little dropper
and select the plane. And there we go. That's done. So I'll go ahead and apply that. Okay, we can delete this
now. We're done with this. And we can have a look at our handiwork and see what we've got. And that's
looking fantastic. That's a really nice
looking corner. So now we've done
that, let's grab each one of these and apply
a bevel modifier to it. So add modifier,
generate, and bevel. And let's do the
whole two zeros. And I'll turn the one into
three and click Enter. And let's increase our
segments to three. And there we go. That's done. So I'll just go ahead
and apply that now. I don't see a reason to
keep these active now. And I'll go ahead and do
the same with this one now. So I'll add modifier
and generate and bevel, and we will go for 003. And we will increase
the segments to three and go ahead and
apply it and there we go. And I like this detail. This is going to add some
real realism to this. The fact that we have
a slight bevel here, it's going to really
highlight the fact that these are separate
boards, so I like this. So let's do the
last one here now. So tap on it, check the scale. It's all good. Add modifier,
generate and bevel, and we will go for 003. And click Enter and increase our segments to three and
apply that. There we go. Okay, let's select all
three of these now. And let's press Control J
and join them together. Okay, so we can select this again now, and
we can name this. And we'll call it Sofa Back. And there we go. So we have
sofa back and sofa base. Okay, the last
thing we want to do now is just put
some legs on this. So let's go ahead
and do that next. So I'm just going to press
Chef A and mesh and cube. And I'll press one. And I'm just going to
tap into edit mode with it straight away and press and go into wireframe and press
three so we can select faces. Grab this face and take
it down like this, until it's nice and neat on
the underside of the sofa. And I'll do the same
at the bottom now. Take this here, back
up to our floor. And let's grab this one now
and bring this one over like this and grab this one here
and bring it over like this. Let's press three now to see this in the other
orthographic view. And let's go ahead and grab this edge and take
this back like this and grab this edge and just take this one
back a little bit. So I'm kind of looking
at this edge here, and this edge here is a
reference now. And there we go. So let's go back
into solid mode, now, and check that that's looking good, and
I'm pleased with that. So I'll tap out of Edit mode, and the scale and rotation
is still correct. So let's go ahead and add
our modifier to this. Bevel modifier, and
two zeros and a three. And there we go. And segments
will take up to three. Okay, so with that done, let's press one again. And let's go ahead and press shifty and X and bring
a copy over like this. To, I would say about
about there like that. No, I'm going to go for the
middle of this one here. So this is the board coming
towards us on the Y axis, so I'm going to go
for the middle of that. Once I've done that. I'll press seven and I'll look at it from the
orthographic view, and I'm going to
right click and set the origin to the geometry
to re center that. And I'm going to press
and rotate it like this. So I'm going to put this one
on a slight angle like this. I'll take our transformations to local and I'll poly
back in the Y. And there we go. That's
kind of what I want. Okay, so with that done, I'm going to grab
another one now. So I'll grab this one here, and I'll press seven again, and I'll press shifty and
X, bring it over like this. And we'll rotate that
in the ZT I'll press z90 I'll right click on it, and I'll set the origin of the
geometry just to reset it, and I'll bring this
over like this and just put this in position
on the end just like this. Maybe over a little bit further
at about there like that. Okay, so I think
three legs will be enough because everything
is very solid in this. And I guess that's it. So let's grab all
three of these now. And let's press Control
J and join them. And let's name this. I'll call this the
feet. And there we go. Okay, so I think that's the hard surface modeling
section of our sofa completed. In the next lecture,
it's going to get fun because we're going to start now doing something completely new. We're gonna start
doing soft surfaces. So we're going to
do our upholstery, our plows and our cushions, and I'm going to show you
some really cool tricks in Blender to apply that. Okay, thanks very much. And I'll see you in the next
lecture. Bye bye, Fino.
42. Lecture 39 Sofa Part 3: Hello, and welcome
now to Lecture 39. And in this one,
yeah, let's make a start on our soft
surface modeling now on all our pillows and cushions that'll
be on this sofa. And like I said, this
is a really fun state. This is when things
get really creative and Blender can really
show what it can do. So yeah, let's make a start. To begin with, how we start, is going to appear like any other thing
we've done really. So we'll just start with a cube. So we'll press Shift
and mesh and cube. And we'll bring
this in like this. And let's press seven to get
us in the orthographic view. And let's go ahead
and scale that down. Bring it into position
a bit, take it back. And let's scale it
down a bit more. So I'll let S and
scale this down. And I kind of want
the front edge of this cube to be
overhanging the base. Not that much,
though. So I'll let s and scale it down a bit more. Take that in like this
and maybe a bit more. Take it back. And yeah,
that's kind of what I want. So I'll take this
back like this now. And with that done, I'm going to press shifty at X, and I'm going to bring
a copy over now to the corner and see
how that fits there. And that looks good to
me. I'm liking that. So now I'll actually
make another copy, so I'll press shifty and Y
and bring a copy across. I'm making all
these copies right now just to get everything scaled and see what size we want these seat cushions
at. And there we go. So let's see what we can
do here in the middle. So I'll grab another copy, shifty and Y, bring this over. And it's a little big this time. So I'm going to scale
it down in the Y, I'll press S Y, and go ahead and scale this down until you have
a very small gap, something like that, I think. Okay, so let's press shifty and X and bring
this over a little bit. And let's rotate that, so
I'll press R, 90, Enter. And I'll take this back now. And I'll centralize that again. And I'll scale this
down in the Y, I'll press S and Y and
just bring this down again until it's got
a tiny little gap, either side, maybe a tiny
bit more on the scaling, so SY, bring it down a tiny bit. And I think that's about
right. I'm happy with that. Okay, so what we know is now. Obviously, they are two big slot on the hype, but
that doesn't worry. We have three blocks the same. This one, this one, and
this one are the same. So in this case, I'm going
to delete two of those. So I'm going to
maybe keep this one, and I'll delete this one, and I'll delete this one. These two are different, so I'll keep hold of those. Okay, so now that
we've done that, let's actually just
grab all three of these and let's
tap into edit mode. And let's select
the faces on top. And let's go and pull those down until we get a kind
of seat base height. And I'm going to say
something like that. Let's do the same on the bottom. Now, grab this one,
this one, and this one, and let's pull those up
until they're kind of sitting on the timber sofa
base on the wooden sofa base. There we go. That's cool. So, am I happy? Is that good enough Is that thick enough for my seat bases? Well, I like to go
a tiny bit thicker. I think I'll go a tiny
bit thicker, are these? I'll grab these and take
them up just a tiny bit. And there we go. That's cool. Okay, so with that done, we can actually
isolate these now. So let's tap out of di mode. And let's just grab
these three cushions. And let's hit the
forward slash key, which is gonna bring everything back for a minute,
but that's okay. And there we go. It's
brought everything back. And that sofa looks good, actually, isn't it?
I'm liking that. Anyway, sorry, I'm
getting distracted. So let's hit the forward
slash key again, isolate those three cubes. Alright, so now
we're going to start doing something that I talked
about a long time ago, actually, and what
lecture was it? It was I'm just looking. Lecture four, the subdivision
surface modifier. We talked about that,
and since then, we've not actually used it, but it is an important
modifier within Blender. So I'm pleased that
we're going to use this and get a chance
to learn with it. So yeah, let's do this. Let's grab these three blocks, and let's correct
the scale on them. So I'll press Control A and
apply rotation and scale, and let's do the
same on the others. And this one, too, can control A and apply rotation at scale. Okay, so I think the next thing I want to do is grab
this one and this one, and I'll just hide
those for a minute. So we're just dealing
with this first one. And I'll go ahead and tap
into Edit mode with this. And I'm going to press two
so we can select edges. And I'm going to
grab this edge here. I'm going to press Control out, and I'm just going to put
one loop on it in the middle just like that's all
I need to do for now. Once I've done that, I'll
tap out of edit mode. I'll select the object. I'll come over to our
modifiers, add modifier, generate and subdivision
surface modifier. Let's click on that. And it
does crazy things to it. Just like it did in
Lecture four when it turned the cube
into a sphere. It's kind of done
the same thing here. So I'm going to
max us up on this. So I'm going to hit this four
times and see what we get. And for a minute, I'm going
to turn off optimal display, and I'm going to
go into Edit mode. And I'm going to turn on cage, and we can see the sort of
mesh that we're creating. And believe it or not,
it's actually going to get more dense than this. And through the whole process
of modeling the house, this is exactly
what we've avoided. But for upholstery, it's
just a necessary el. You need more mesh to do
nice looking upholstery. So we just have to sort
of just deal with this. Okay, so I'll turn
on optimal display, so we don't need to see
all that mesh for now. And the first thing
I'm going to do is grab this edge here and I'm going to press Control R. Get three loops,
and there we go. I'll just grab those like that. And now I'm going to hold Alt, and I'll grab this
one like this. Now I'll hold shift Alt and
grab this loop like this. And I'm going to scale those up in the X. I'll press S and X, which I'll just take those a bit closer to the
edge like that. Alright, so I'll grab
this one here now. I'll press Control.
Roll the mouse wheel twice to get three loops
and put those in place. And again, I'm going to hold down Alt and
select this loop. I hold Shift and Alt
now and grab this loop. And now let's scale
those up in the Y. So I'll press S and Y and take those closer to the
edge like this. And there we go.
That's looking good. And I think that's all
we really need to do. Let's turn off optimal display now and see what our
mesh looks like. Let's turn off optimal
display for a moment. And yeah, actually,
I'm going to. I'm going to put one in there,
so I'll press Control up, and I'll put a loop
in there like that. And I'll grab this one
now and press Control up, put a loop in there like that. And I'll do the same
on this axis now. But this one here, Control R.
Put this one in like this. And I'll grab this one here and press Controller and put
one in here like this. Okay, let's turn
off optimal display again and see what that's done. And that's just
made the mesh here on the top surface a
bit more dense again, which is what I was
just trying to get. It does seem crazy, seeing
the mesh this dense, and it feels a little bit against what we've
learned so far, but it's just what
we need to do. Okay, so I'll tap out
of Edit mode with this, and I'll go ahead and apply
this modifier. There we go. So let's bring back the
other two cubes now, and let's select this one
here and we'll hide this one. And let's repeat this process, or select this object. I'll tap into di mode, actually, let's hide this one again.
So let's hide this. And let's grab this one
and tap into di mode. Grab the edge here
and press controller and put a loop in like this. Okay, I'll tap out of Edo mode, and we'll add modifier and generate and subdivision
surface modifier. And we're going to
take this up to four, and we're going to turn cage, and we're going to
tap into Edit mode. So I'm going to grab
this edge here now. I'm going to press Control R, and I'm going to roll
the mousewheel this time 44 times. I think that was it. And I'm going to press
S and Y and just scale these out closer to the edge like this. There we go. So I'll grab this one now
and I'll press Control R, and I'll roll the mouse
wheel, one, two, three, and four and click
enter. There we go. And I'll scale this time a
little bit, as well in the X. So I'll press S and
X and just bring those closer to the edge. Like this. Okay, so let's
have a look at this now. So let's turn off
Optimal display and have a look at the mesh. And, yep, that's what I'm
looking for, believe it or not. So let's tap out of
any mode with this, and let's go ahead and apply
this mesh, and there we go. Okay, so let's bring back the other two cushions and see what we haven't
done, which is this one. And let's go ahead and
hide the other one. So I'll grab this
one and this one, and I'll go ahead
and hide those two. So we just have this.
The scale's okay, so let's tap into Eda mode. Grab the edge here, press
controller, put the loop. And let's tap out of Edit mode. And let's go ahead and add our subdivision
surface modifier. Let's turn on the cage, and let's tap into Edi mode. And let's grab this edge here
and press Control R. And let's put four loops
in. I click Enter. And let's scale those
up in the X axis, so SX and just pull those out closer
to the edge like this. Oh, let's increase
our level view put to four. There we go. Let's grab this edge
here and press Control, and let's scroll
this up to four as well. And click Enter. There we go. Let's also
scale those up and the Y, I'll press S and Y and increase those to
something like that. Okay, let's turn off
optimal display, and yep, that's what we need. So let's tap out of a mode with this and
go ahead and apply it. Okay, let's bring
back the other two now and just check
we've got them all. And I think the
next thing I want to do is tap into Edit
mode with all three. And let's make sure we can select faces this time,
so I'll press three. I'm going to try and
select a face about middle of the underside
of the seat pad. Once I've done that,
I'll hold down Control and start pressing
plus to expand that selection until I get
that close to the edge, but not actually the edge. I would say something like
that is what I'm after. Once I've got all of
those, I'm going to right click and I'm
going to delete those faces just to
reduce unnecessary mesh, just to help it a little bit. And let's repeat that process. Find one about in the middle and hit Control plus and
expand that selection, get close to the edge with it, and right click and dissolve
and delete those faces. I'm sorry. Do it one more time. Bring that close
to the edge like this and right click
and delete those faces. Okay, let's tap out of
Edit mode with those, and there we go. That's us. We've
made a good start. So in the next lecture,
we'll start using proportional editing
tools and then also sculpting tools to get some
really cool shapes on these. Alright, thanks very much. And I'll see you in
the next lecture. Bye bye for now.
43. Lecture 40 Sofa Part 4: Hello, and welcome
now to Lecture 40. And yeah, let's start making our upholstered seat bases
look more like upholstery. And this is going to be fun. This is going to be really fun. So, the first thing I want to do is just grab all three items, and let's tap into Edit mode. And let's make sure that
vertices are selected. And now come over
here to this one, which is called proportional
editing and turn this on. And make sure when you
hit this drop down that smooth selection is on. So these are sharper
selections of the same tool, but we're going to start
with a smooth Now, for a minute, don't
follow along. I just want to show you what this proportional editing
tool is all about. So I'm just going to grab a vertice somewhere
here in the middle. And I'm going to
press G. I do that, I get this circle appearing. Now, what proportional
editing does is it selects a group of vertices as close as possible to the vertice
that I've selected. And by increasing or
decreasing this ring, it reduces or increases the
amount of vertices selected. So if I pull this all
the way in like this, and now just pull up, we're using the mouse, I get this effect because I've
got a small area selected, and I reduce the
size of that ring by simply scrolling
my mouse wheel. So I'll press Control
Z, and I'll go back, and I'll show you
the exact opposite. So I'll press G again, and now I'll scroll
the mouse wheel back to increase this selection. And now I'll go ahead and
just pull this area up, increasing this as I go. And you can see there the
exact opposite reaction. Because I increase
the selection window, well, almost to its extent, I get this completely
different effect. So this is what
proportional editing does. It allows me to select a
lot more vertices in one go and pull or push those. So let's press control Z, and then let's do this together. So I'll leave that
vertice selected there, and I'll hit G again. And obviously, I'm
going to scroll the mouse wheel and
bring this forward. And I just want to
kind of just bring the seat down in the
middle a little bit. So now that I've got selected, I'll just pull that
down like this. And I'll do the same
here at the back. I'll press G and
just pull this down. I'll do the same at the front, as well. I'll just grab it here. Press G. I'll scroll this
mouse wheel and a bit more, and now just pull this down. I want to do it quite subtle, because it's very easy to
get carried away using proportional editing and the sculpting tool,
which we'll use next. So I'll do the same here now. I'll press G, and I'll
scroll up a little bit, just increase this, and now
go ahead and pull that down. And I'll do the same
at the back here. Press G, and just pull this
area down a little bit, and do the same here
at the front, press G, and just pull this area down.
And there we go. That's it. That's all I really want
to do is just sort of give the impression that these
seats have been sat on a bit, there's a bit of a depression
in the middle of each one. Give the impression
there's a depression. Okay, let's finish off
with this one, now, so I'll press G and scroll the mousewheel up a bit and pull this down like this. Do the same at the back here and do the same slightly less, but a bit at the front. And there we go. That's it. That's all I really want to do. So let's tap out of
Edit mode with those. And let's start with
this one right here. So I'll select this one. And I'm going to
go I'm gonna right click and I'm going to
go shade Auto smooth. And I'm going to increase the
angle up now to about 45. Maybe even 50. I'll
put it at about 50. A roundabout. There we
go. Nothing too accurate. And let's grab this. And
over here in object, let's go all the
way down to sculpt. Now, the first, these are your brushes here
that we can use. And if I right click, I can increase the
radius of the brush, the size of the brush, and I can reduce the strength. And I can put a little bit of auto smooth on there as well. So I'll put a little bit of auto smooth on
there with you. And the first brush that
I want to use is called the inflight brush,
which is here. So I'll grab this brush. And I'm just going
to work the brush. I'm going to increase the radius a little bit more to
about there like that. I'm going to work the brush
around the edge of the seat. To kind of just
round off that edge and give the impression that there's some
upholstery foam in there. And you can see what we're
doing there straightaway. And we'll just do
this along here, too, so that we do actually
close these up a bit. I think what I'll
actually do is I'm going to tap out of
Edit mode for a moment. I'll go back to object mode. And I'm going to
go grab these two, and I'm going to press H
and hide them. There we go. And I'll grab this one again and let's go back
into sculpt mode. Let's carry on with
the inflate tool and just bring it around the
side of here as well, just so that we close
these cushions up a bit. And there we go. That's what I want.
Okay, I'm also going to use this same tool
now on the back here. So I'm going to bring this around the back
of the cushion. Jazz to sort of
create a bit more of a divot in the middle. There we go. And, yeah,
that's looking good. That's the kind of
thing that I want. Jazz graduate this in
a little bit more. Just using the
inflate tool to just pick up the edges of
the cushion like this. And, yeah, that's cool.
That's what I want. So the next brush I'm going
to use is the crease brush, so here it is here, so
I'll click this one. And I'm happy with the strength, and I'm happy with the radius. And I'm just going to
apply some creases on these corners to sort
of make it look again, more upholstery
like, I'm going to right click and I'm going
to reduce my radius. Quite a small radius
and then go again. And just put some creases in the corners off these seat beds. And then you can
easily go too far. So I'm going to try and hold back a little bit to make sure I don't go too far
with these brushes. And again, here now, I've
put a few more in here like this and maybe some from
the corner like this. This is looking good
and maybe a few more. And see what we've got going on. And maybe a few more here. And just roll the
seat around to get some reflection and
see what's going on. Maybe put some of this corner. And now we could just try increasing the
strength a little bit, and just so we've got some irregular kind
of divots and pulls. There we go. And that's starting to look more
like upholstery, something a lot more random. Okay, so the next
thing I want to use is the grab tool here. So, here it is the grab tool. And I'm just going to start pulling this around
a little bit. And I'm going to right click and I'm going to increase my radius. And I'm just going to
pull the chair down, the seat cushing down a
little bit just to sort of suggest that there's something that it's
just irregular, that there's nothing too uniform about this. And there we go. That's kind of what I want.
Do a bit more there, maybe, and just pull this up
a little bit here, maybe tuck that over
a little bit there. And yeah, there's
no hard and fast. I just encourage you
to play around with the sculpt tools and get the
effect that you want to see. So maybe I'll tuck this
in a little bit here. But the thing I will say to you is it's
easy to go too far. But if you do, don't sweat it. Just press that Control Z button repeatedly until you get
it back to where you like. Okay, so I want to show
you another button, which is this one
here, another brush, which is the smooth one. I don't think I
need it too much, but I just want to show
you what it does now. It's going to smooth out the sculpting that I've
done a little bit, just to try and soften some
of those effects if needed. So I could reduce
the strength and go again and just try and smooth out some of these
effects. And there we go. So the next brush I want to
show you, I really like it. Again, easy to go
too far with it, but it is the coolest
of all the brushes. And it's here. It's
called the cloth brush. So I'll select that. And
I'll look at the strength, and I'm going to right click,
reduce the strength a bit. And I tend to use a figure of eight movement with
a cloth brush, and I'll show you what it's
going to do for me now. Look at that. So I can swirl this
round and figure it out and get this really
cool cloth look. Okay, I'm going a
bit far now, I know, but I just want to show you
really what it's capable of. So look at this. By sort of creating a figure
of eight shape, I can get a really cool
looking upholstery or cloth, there we go. So obviously, that's
far too much, but how much fun is that? Look what we've created.
Blender is a super cool thing. It's really powerful. It's amazing that it's free. Okay, let me just control Z, 'cause I've gone far too far. And I'll go back a bit. And I'll try that again, and I'll rein myself in.
So I'll click right. I'll right click, and
I'll reduce the strength, and I'll reduce the radius. And I'm going to
work the cornice, and I'm going to do
sort of a figure of eight I find works well. Kind of a very subtle figure of eight to get
something like that. And that's more
than enough, maybe. So I'll do the same here, and I'm actually going to reduce my strength and reduce my radius some more and
go over this corner. Cool. Is this too much? Is might even be too much. I'm gonna hit the Controlse
and go back again. And I'm going to
try this again now. So I'm gonna reduce
my strength again, and I try this. And there we go. That's kind of the
effect that I'm after. Just something subtle
going on on the corners. And, yeah, that's cool. So
I'm gonna increase my radius, and I'm gonna increase
my autosmooth. I bring a bit of autosmooth in and now just apply
that to the top, as well. There we go, do the same here. And there we go.
Is this too much? So I'm going to use
the smooth tool again, and I'm gonna reduce the strength and just touch
this around a little bit, just to try and soften
the effects that I've put in. There we go. And, just play
around with Blender. I mean, play around with
the scope of tools. It's an awesome set of
tools within Blender. It's really fun. And just
see what effect you can get. So I'm kind of liking
what I've got there now. I don't want it too
wrinkled, you know, I tried to do quite a nice sofa, so it could be that
that's even too much. So maybe I'll soften this
off even a bit more. Maybe increase my radius a bit more and just soften this up. And there we go. I think
I'm happy with that now. Just bit more on the front, and there we go.
That's cool mode. Sorry, I'll tap on sculpt mode, and I'll press Altag and
bring the other two back. There we go. And we can kind of see the difference
now between the two. And I think I'm
really liking that. I think that's a nice effect. Let's apply a shade
or smooth to it, and then let's go
into sculpt mode. There we go. In fact, I'll just
go back into object. And I'll grab this
one and this one, and I'll press H and hide them, and then I'll go back
into sculpt mode, select the item, and that's
it back into sculpt mode. There we go. So I'll start with the inflate brush.
It's right there. And I'm going to right click
and I'm going to reduce the radius and
reduce the strength, and then run that brush
along the edges like this on the front edge as well. And there we go. That's cool. So I'll run this now along
the top edge now as well. Maybe increase our radius and create sort of a rise
there on the edges like that. Maybe reduce my radius a
little bit, and there we go. And that's looking good. I think I'm pleased with that now. Okay, so now let's go ahead
and grab our crease brush. And let's reduce our radius. Leave the strength
about where it is, and now just start applying
some creases to this. And that's too much.
I'll press Control Z. Take that back and reduce my strength and reduce
my radius, that will you. And I'll try that again. Put one there and put
one here like this. Put one here like this
and do one here as well. And maybe one right
across the middle. And now let's put a couple
of creases in the top here. And we'll do some more now
on this side, as well. And maybe one so
sneaking through. And let's see what
that looks like, and maybe this one
as well, snaking through a little bit.
And there we go. Now that we've done
that, let's grab our grab tool and let's just increase our
radius a little bit, and let's turn on
some auto smooth. And let's try just pulling
this corner down a little bit. I'll increase my
radius a bit more. And there we go,
Let's try this now. And this is just going to
just grab the material and just sort of manipulate
it a little bit. Just pull it around and make it a little less
regular. That would be good. Could do the same on the top, create some little
divots here and there. There we go. Something to just take the
regularity out of it. Okay, I think that's
looking good. Maybe I'll just pull this
one down rather than up. Maybe they don't
all need to go up, so maybe in some areas
they can go down. There we go. And
that's looking good. So now let's grab
our cloth brush again and let's see
what we've got. Let's right click and reduce
our radius considerably. And let's go ahead and apply a little bit of
this to our corner here. See how that looks. That's looking good
and do the same here. Kind of like a figure of eight, but very loose figure eight
pattern seems to work for me. And there we go,
that's looking good. Maybe that's too much. But I'll smooth
that in a minute. So now I'm going to
increase my radius. And maybe I'll increase
my auto smooth, and now I'll try here. And there we go. That's cool. And then put one
in here as well. And, yeah, that's
looking really cool. So I might just try the
smooth tool a little bit, and just try softening some
of these effects up a bit. Maybe just a tiny bit here, and a tiny bit here. Maybe this one here
in the middle. And there we go. I'm really liking the way that
one's looking. So we increase the
angle of our smooth and our auto smooth
here to maybe a 50. And see what we've got. And there we go. I'm going to leave that one
just like that. So I'll go here back
into object mode. And yeah, that's
looking really cool. So let's press Old
age and bring them back and compare it to the
other one, see what we've got. It's a little more wrinkly than the other one,
but that's okay. That's fine. It would
suggest that maybe this one's been sat in
more than this one. Okay, so let's go to the last
one now, and let's do this. So the first thing
we're gonna do is right click and
shade auto smooth, and then turn the
angle up to about 50. A. Now, let's go ahead and
hide the other two. So I'll grab this
one of this, so I'll hit H to hide them. Let's grab this one, and let's go into sculpt
mode. There we go. So let's start with the inflate
brush around the edges. So let's find the flaate
brush, and there it is. And let's look at the
strength and the radius, and I think I'll turn the radius down slightly
and then run it along the front to get the effect that I'm wanting
and along the sides as well. I increase the radius and then run this along
the top, as well, sort of create that
sort of feeling that the seat pad has been
sat on, and there we go. That's looking good. So
now I'll grab the crystal, where is here, and let's look at the
strength and the radius. E's right click, turn on
Autosmooth and bring that up. And let's reduce the
radius quite considerably. And let's try that now. Maybe reduce the radius
some more and try that. And just put some greases in. There we go. There's that side. Maybe a few through the middle. I'll reduce the radius even
more, and there we go. Increase the radius a bit. I think it went too small. There we go. And that's cool. And maybe just a few on the top. And a few on this side, too. Try increase my radius, try increasing my strength, and just put a few more
in, and there we go. So I could grab this
grab tool and I can right click and
increase my radius slightly and turn
up my auto smooth. And maybe just grab
areas now and just put some rises and dvts just
locally on the surface. Increase my radius and
carry on doing that, pulling up and dropping
down to get something cool. There we go. That's cool. So let's go over to our
cloth brush now, then. And let's see what
we're gonna do. Let's right click,
bring our radius down, take our strength up a tiny bit, and let's apply this to the corner and see
what effect we get. There we go. That's cool. Let's do the same here to get the effect that
we're looking for. And maybe a couple on the top now. A couple more this side. And that's too much. I'm
gonna hit the controze. Take some of that away. That's pretty much all of it away, actually, but that's okay. And let's try that again. So I'm gonna reduce the radius, and I'm gonna try that again. That's better. And
now some on the top. I'm going to use the smooth tool now to soften that effect. Increase my radius. Maybe there. And there we go. I think
I'm happy with that, so I'm gonna go back
into object mode. I'm going to go ahead and
press Aldag. And there we go. So there we have our first
upholstered surfaces looking really,
rather good, I think. So on the next lecture, what
we'll do is we're going to put a piping detail
on the edge of these, as well, just to
finish those off. Okay, thanks very much. And I'll see you in the next
lecture. Bye bye for now.
44. Lecture 41 Sofa Part 5: Hello, and welcome
now to Lecture 41. And let's just pick this
up where we left it, doing our upholstered
seat bases. So we have our upholstery now
looking really quite nice. I like what we've got
here, but I do want to put a piping detail on these seat bases just to add a little bit more realism again. So, let's show you
how to do that. So let's grab this first one here and let's tap into
Edit mode with it. And let's press two on the
keybod so we can select edges. And I want to select an edge
that about that height. So yeah, about that. So I'll hold so I can select a complete loop and select
that loop just like that. Yeah, that's a nice height.
I'm going to go with that. Once I've selected that,
I'm going to press shifty and I'm going to press Z, and I'm just going to pull
that copy up like this. All right. I'm going
to press P now, and I'm going to
separate by selection to separate away from the
actual other component. Okay, let's tap out of edit mode now, and let's grab this. And let's right click
and convert to a curve. Okay, come down to this one here to data and click on this. And on the bevel here,
let's increase this. So that's too much. So let's put an extra
zero to the right of the decimal point and enter. And let's increase
that one to something like a three and
see how that looks. That's looking better, but I think it's still
a little small, so I'll increase
that three to five and see how that looks. And, yeah, I would
say that's about. Once you've done that, increase the resolution to about an
eight, and there we go. So right click on it and
convert it back to a mesh, and then right click on it
again and shade auto smooth. And then right click on again and set the rig in
to the geometry. Now, let's go ahead
and pull this down until it's
back where it was, and just have a look
at it and see if it's actually sitting
in the right place and see that it looks good. And I like that just where
it is. Yeah, it looks good. So I'm going to do the same
now for the bottom edge here. So I'm going to tap
into Etiode again. And I'm going to hold Alt, and I'm going to select a loop, and I'll select it about the I'll press shifty and
Z and bring it up. And I'll press B, and I'll
separate by selection. Okay, I'll tap out
of Edo mode now, and I'll select it again. Right click, and I'll
convert to a curve. Let's go down to
the bevel settings, and let's put that where
it was on the other one. So I'll add an extra zero to the right of
the decimal point, and I'll turn the one
into what was it? A five. Let's go for that. And let's increase
the resolution to eight. And there we go. So now we've got some
right clicking to do, so let's select the
object and right click and convert to a mesh and right click again and
shade auto smooth and right click again and set
the origin to the geometry. Let's pull that down into position and see
where it wants to be. And let's have a look at it there and see
what it looks like. And I'm pleased with that. So once I've done that, what I'm going to do is join all
three of these together. So I'll grab maybe
the two pipings and then the seat last, and I'll press Control J
to join those into one. And there we go. So that is that upholstered seat base
now all finished. So let's go ahead now
and repeat that process. So I'll grab maybe this one
here. Tap into Edit mode. I'm going to hold Alt
and select a loop, and I'm going to select
maybe this one here. And I'm going to press Shift
and Z and pull this up. I'm going to press P and
separate by selection, and then tap out of Edit mode. Okay, I'm going to click
on it and right click and I'm going to
convert to a curve. Once I've done that, I'll
increase my depth to zero, add an extra zero to the
right of the decimal point, and change our one
into a five and click Enter and increase
our resolution to eight. And then let's right click
and convert to a mesh, right click and shade or smooth, and then right click and set
the org in to the geometry. Now let's pull that
down into position. And see where it wants to be. I think down a little
further than that, I don't think that's
quite right yet. So I'll pull that down
a little bit more. And I'd say that's about
right now. That's good. Is it right? Let's
have a look here. Maybe even a little bit more. And, yeah, that's
looking good to me. So let's repeat that process
again with the bottom, so I'll tap into Edi mode, and I'll select a loop so hold Alt and select maybe
this one here like this. And I'll press Shift D and Z
and pull this up like this. I'll press P and
separate by selection. Tap out of Edit mode, select it. Right click, and I will
convert to a curve. Here, I'm going to increase the depth and add an extra
zero to the right at the decimal point and turn the one into a five
and click enter. Let's increase our
resolution to eight, and then let's right
click again and convert to a mesh,
right click again, and shade auto smooth, right click again, and set
the origin to the geometry. Let's pull that down into position and see where
it looks about right. Let's inspect it
just where it is. Maybe I'll pull that
down a tiny bit more. And I think I'm
happy with it there. So once you're happy with
it, select the two pipings, then select the Cat
and press Control J, and join them into one. Okay, so let's do the last one. Let's grab this one. And let's tap into Eddy mode. And let's select the
loops or hold alt, maybe grab this one here. Is that right? It
looks about the same. And press Shift E and
Z. Bring this up. Press B, separate by selection, tap out of Edd mode. Right click on it again
and convert to a curve. Incidentally, if it won't
convert to a curve, just come on over
to the outliner and rename it as anything else. Just literally rename it as the word anything.
That'll be fine. You just need to reword it, and then it will convert to a curve if it's
giving you problem. Sometimes it just won't let you. And if you do that, then that
should resolve that issue. Okay, back to where were we? Where were we? Okay,
let's increase this. Let's increase our depth, add a zero to the right
of the decimal point, turn our one into a five. Click Enter, increase
our resolution to eight. And let's right click
and convert to a mesh, right click and shade
Auto smooth and right click and set the
Origin to the geometry. Let's pull that down and
see where it looks best. And I would say that wants
to go down a little bit more. I'd say
that's about right. Yeah, that looks good
to me. And let's do the same now with
the bottom one. So let's tap into
Edit mode with again. And let's choose loop here. So I'll hold on to
Walt and select one maybe about. Is that good? Right there? Yeah, that's good. So I'll press Shift D
and Z and take this up. And I'll press P, and I'll
separate by selection. I'll tap out of Edit mode. Right click the object, and I will convert to a curve. Okay, one last time. Let's increase our resolution. And there we go. Let's right click and convert it to a mesh, right click and
shade Auto smooth, right click and set the
origin to the geometry. Pull that down into position and see what it all looks like.
And that looks good to me. So I'll grab this piping and the other piping
and the seat base, and I'll press Control J and join them all
together. And there we go. That's cool. Okay, so I'm going to hit the
forward slash key on the numpad to bring
everything back. And we've got more than I
want here. I must admit. So we've got the
reference images. Let's turn those off. And there we go. So there's
our sofa in position. Okay, so the next thing
we're going to do is make copies of this one and then
fill in the remaining gaps. So let's press seven so
we see it from above. This is the one I want
to make copies of, so I'll grab this one here, and I'll press Alt
D and X and bring a copy over like this and
drop this into position. Like this. And now I'm
going to press Alt D again. Remember, not shift,
but Alt D so that when we start applying
textures to these, then the texture
will automatically be applied to all its copies. So I'll press Alt D and Y and bring this
copy over to here. Maybe rotate this one
in the Z. I'll press r90. And there were you. Okay, let's take a look at
that and see how it looks. And yeah, that's
looking really good. Yeah, I'm pleased with that. So in the next lecture, what we're going to
start doing next is start making our
upholstered back panels, which will lean against
the sofa back here, which is almost
identical process to doing our upholstered bases. So we should whiz through
quite nicely now. We're well practiced at it. Okay, thanks very much. I'll see you in the next
one. Bye bye for now.
45. Lecture 42 Sofa Part 6: Hello, and welcome
now to Lecture 42. And let's carry
on with our sofa, which by the way, I
think is looking great. I'm really pleased with
the way this is looking. So let's carry on. So let's grab our cushions and the sofa and the base
to the sofa and the legs. And let's hit the forward
slash key to isolate those. So we just got a sofa again. And let's create our
back cushions next. So I think I'll just select
this cushion in the corner and I'll press Shift S and
curse it to the selected. There we go. I'll turn our
transform properties back to global just because
that's easier to work in. Okay, so let's press Shift A. Mesh, let's bring in a cube. Let's just it S and scale
it down straight away. And let's press one to go
in the orthographic view, and then maybe bring
that up in the axis. Let's scale that down the X or press SX and just bring
this down like this. And now let's take Maybe let's scale it up slightly
in the head, so S said. I just want it sort of slightly higher than
the back of the sofa. Take it down a little bit, scale it up a bit more. And I would say
that's about right. Okay, so I'll press R, and I'll rotate that to line up with the back of the sofa and now
bring this back like this. Gonna scale it up a
tiny bit more in Z, but I'll take our transform
properties back to local, and I'll press S
and Z and just take this up a little bit more
to something like that. Alright. So obviously, this
is too narrow right now, so let's press S and Y and scale this up in
the Y axis like this. And for now, I'll put it
about there like that. Okay, so the next
thing I want to do is tap into edit
mode with this and just grab this edge here now and just
bring this forward. Whoops. Let's turn off
proportional editing. And now let's just bring
this forward like this to make it sort of thicker
at the base than the tub. And there we go. To about that, like
that. That's fine. And let's also put a
loop on this right now. So press Control, and we'll put a loop like this, there
we go, like that. Okay, so let's tap
out of edit mode, and let's fix the scale on that. So press Control A and
apply rotation and scale. And let's take transform
back to Global, and let's make some
duplicates of this object. So I'll press shifty and Y and bring a copy
over like this. And I'll do one
more. So I'll grab. Actually, I won't. I'll
leave it just No, I will. Sorry for my indecisiveness. I'll grab this one
here, and I'll press Shift D and X and bring
a copy out like this. And I'll rotate that on the z. So Z, nine, zero, enter, and go ahead and
take that back, as well. Until we've got
that in position, too. Okay, there we go. So we've got three
copies of this now, and that's what I want. So I think what I'm gonna do for a minute
is grab this one. I'll hit H and hide it. And I'll tap into Edit
mode with this one. And I'll grab this edge here. Well, both sides. And I'll pull that over
in the Y like this. Oh, that's not all I want. I want that one, as
well. That's it. Now I'll pull that over
in the Y axis like this. And I'll go right till
it touches the sofa, because when we apply the
subdivision surface modifier, this one's gonna
shrink a little. So I'll press three now
so I can select faces, and I'll grab maybe
this face here. I'll shift and grab this one. I'll maybe take this
back a little like this. And there we go. Okay,
now we've done that, I'll tap out of edit
mode with that one, and I'll press lth and
bring back the other one. And I'm going to tap into
header mode with this one now. And I'm going to
press this ahead so I can kind of see
through the other one. And I'm going to grab I'll
press two so I can grab edges, and I'll grab this edge here, whole shift, and
grab this one here. And I'm going to
kind of take those back on the X axis like this. And I'll do the same
with the top ones. Now I'll grab this one
and just these ones, this one and this one, no. And I'll bring this back
on the X axis, as well. Until it looks
something like that. There we go. That's what I want. So, the other thing I can
do is I can press three, and I can grab this face, I'll shift and grab this one
and level those up as well. Or just take them back a
little bit to about there. So the subdivision surface
mid will shrink it a little. So I'll leave it a
little oversize for now. Okay, so let's go back to
solid mode, and there we go. That's what I want. So I'll tap avata
mode with those, and there's our two
corner cushions. And now we can take this one, and we can just scale this
down in the Y until it fits. So press S and Y, and bring this down and just drop it in position,
something like this. Maybe scale it up slightly, so S and Y, and just bring it until it's
just touching the other one, there we go,
something like that. Okay, so which else we
have this one here. So I'll grab this
one, and I'll press shifty and Y bring
this copyed like this. And we could scale it
up slightly on the Y, so I'll press S and Y and
go ahead and scale this up. Maybe bring it over slightly and maybe tap int
Eda mode with it. And let's grab these two faces. Bring those over slightly, and there we Let's tap out
Veda mode with this one, and let's grab it
and press Shift D and X and bring a
copy over like this. So we could rotate
that in the Z, so we'll press z90, Enter. And we could press seven
to see this from above, and now take this
back like this. Until it lines up
with the other one, maybe scale it down in the X, so X, maybe bring it over, and we see what we get. And I'd say that's
pretty good, actually. So we could bring it
back a little bit, so it lines up with the other
cushion and there we go. So let's press Shift D again, and let's bring press X, bring a copy over like this. And let's tap into Ed
mode with this one. And let's grab these faces
here and just bring those over until they're kind of touching the vertical
board of the sofa, the back rest of the sofa. To about there like that. And now let's press two for
edges. Grab this edge here. Hole shift, grab this one. And let's go ahead
and bring those over now to something like that. Okay, so let's tap out of
Eddy mode with that one. And now let's grab this one. And let's press Shift D for the last time and press
Y and bring a copy over. Let's rotate that in the Z, so we'll press Z, 90, enter. And let's press one on
the numpad to get us the orthographic view and
go ahead and take this back And we'll see what that looks like. That's cool to me. So we could actually what
could we do with this? We could take this
over now in the Y axis until it's kind of level with the cushion on the
bottom there like that. And now let's tap into
Eda mode with it. And let's press three
so we can select faces. Grab this face here. Hold
shift and grab this one. And let's go ahead
and take that over. Like that. And press two. Grab
this edge here. Whole shift, grab this one. And go ahead and
pull these over as well to something like that. Okay, let's tap out of
Edit mode with that. And so there's our back
cushions in position. And okay, they're not looking
very upholstery like now, but in the next lecture, we'll continue doing
what we did with the seat bases with
the backs as well, just to use the sculpt tools and the proportional
editing tools as well. Okay, thanks very much. And I'll see you in the next
lecture. Bye bye, fina.
46. Lecture 43 Sofa Part 7: Hello, and welcome
now to Lecture 43. And let's, let's carry on doing our upholstered
sofa backs. So let's make a start maybe with this one right
here in the corner. So I think the first thing
I'll do is hide this one. So I'll select this one, and I'll just press
H to hide it. And I'll actually grab this one, too, and I'll press
and I'll hide that. Okay, so let's look at this one and look
at the scale first, and the scale is correct. So let's tap into
Edit mode with. Okay, so let's look at
this one and click on it, and the scale is correct. So let's go to modifiers, add modifier, generate, and this subdivision
surface modifier. Let's turn the
levels up to four. And let's turn on cage. And there we go. So let's tap into Edit mode
with this one. And let's select this edge here, and we'll press Control R, and we'll put in four loops. Click and click again. And now, before you deselect, let's scale those up in the Y. So SMY and just pull those
out closer to the edge, too. I'd say something like that. Let's do the same this way, no. Let's press Control R
and put in four loops. There we go. And I think I'm going to leave
those exactly where they are. I quite like those like that. But I'm going to add
an extra loop here. So I'm gonna press Control R and put a loop in
this way like this, and I'll do the same here. I'll press Control r. And put
a loop in here like this. So there's our sofa back, and I think that's
absolutely fine. So I'll actually click Optimal display so that we can see what mesh
we've really got here. And yeah, I mean, it's quite dense as we
expected it would be, but we kind of need all these vertice points to be able to sculpt to these edges. So I'll leave that
exactly as it is, and I'll go ahead and apply it. So I can just tap out of
Edit mode to do that. And there we go. And we can do a shade oro smooth
on it as well. All right, so that's
our first cushion done. So let's do some more. So I'll press ld H now to
bring back those other two. And what I'll do is I'll
select this one whole shift, and select this one, and
I'll press H and hide those. And I'll go ahead and
check the scale on this, and the rotation is out, so I'll press Control A.
I apply rotation scale, and I'll add our
modifier generate and subdivision
surface modifier. I'll take our levels up to four, and I'll turn on cage, and I'll right click and
I'll shade or smooth. Okay, so let's tap into
Edi mode with this, and let's grab this edge here. Press controlR and put four
loops on, and there we go. So I'll scale those up in the X, I'll press gas X and just bring those closer to the
edge like this. And now I'll grab
this edge here, and I'll press controller, and I'll put four
loops in this way. And there we go. I
won't move those. I'll leave those
exactly where they are. So, also, I'll put
a loop in here, so I'll press controller, and put that one in like
that, and put one here, too, ControlR and put that
one in like that. Okay, so once we've done that, let's tap out of Edit mode, and let's inspect
what we've done. I'm happy with that. So
I'll go ahead and apply it. Okay, so let's bring back
our other stuff. Okay. So I'll press Altag
and there we go. So I think at this stage, you should know well
what we're doing, applying these subdivision
surface modifiers to these and putting
the loops on. So what I'm going to do
is leave you to it to continue to do this process
for these other one, two, three, four, five
cushions, exactly the same way. Nothing changes. Just
remember to apply any rotation and scale as
you go, and you'll be fine. So I'll see you back in a minute when we've
got all these with the subdivision surface modifier applied and looking more
like these first two. Okay, so we're back
together again, and hopefully your sofa
backs are looking like this, sort of rounded off using the subdivision
surface modifier and applying the control loops as I showed you
with the first two. In fact, I'm sure you've got
them looking just like this. Alright, so what's next? Let's grab this back here, and let's press H and hide that. And let's grab all these
backs that we've just made. Oops. One, two, three, four, let's grab them
like this. That's it. It says, all of those. And let's tap into Edit mode with those. And let's make sure
we've got face selected. Okay, so I'm going to
select a face about here, in this case, and I'll hold
down Control and press Plus. Expand my selection until
I've got something like that. It looks pretty good. And then I'll press X,
and I'll delete faces. And there we go. There's
the first one done. So I'll do the same
thing with this one now. I'll grab one around here, press Control and plus, and expand on our selection. To something like that. And I'll press X and
I'll delete faces. And just continue to do this to remove these
unnecessary faces. And I'll press X and I'll delete faces, and
let's do this one. X and delete faces. I can do this one as well. Maybe about there. Try that. And I'll press X, and
I'll delete those faces. Do one here. Press X, delete faces, and the last one. So I'll come over a little
bit here on this one, I definitely don't want to
delete anything on this face. So I'll press Control. And plus, I'll expand
that selection, and I'll play it on the
safe with that one. I'll leave that around
there, and I'll press X, and I'll delete faces. And there we go. So
that's that done. So I'll tap out of
any mode with that. Okay, so now that
we've done that, let's bring the back back. So I'll press late,
and I'll bring that back in and see
what we've got and just make sure that those holes
we've made in the back of these cushions are covered by
the back panel of the sofa. And yeah, it's all looking good. I can just see it there, but I'm not worried about that. That's fine. Okay, so let's tap into edit mode with
these sofa backs again. So I'll hold down
Shift and select all, and I'll tap into Edit mode. And I'll press one so we
can a vertice selection, and we can see some
real density there. And I'm going to go to
proportional editing right here. So I'm going to grab one
about that I'm going to hit G. And I'm going to scroll the mouse wheel just
to increase the selection. And I'm just going to pull that down ever so slightly
in the middle. Just so there's a slight sag in the back of that cushion,
and there we go. And then maybe as well, just grab this one
here and press G, maybe scroll this in
a little bit now and just pull this back a
little bit like that, just to get a slight sort
of curve in this back. Maybe you want here too. Hit G and pull
this back as well. See what that looks like.
And yeah, that's fine. So I'll continue to do
this with these others. I'll hit G, scroll this up, and now pull this back just to get a slight
sag in the top. And there we go. That's good. And I'll do the
same with this one. I'll press G and just
bring this down slightly. There we go. Do the
same with this one, press G, bring this down, maybe increase the mouse wheel. And that's looking good.
Do the same with this one. Press G, bring that down. There we go. Grab this one here, and press G, and bring
this one down as well. Then the last one. And
bring that down, as well. And you can take a few
minutes just to sort of grab any faces that
you want, really, and maybe just scroll
that in a little bit, just take that in a little
bit, do the same here, too. Just to create a little
bit of indent in the face of the cushion. There we go. There we go. And let's go for this one now and our Blender
is slowed down for me. So I'm gonna press
Shift B and just do a selection window to recenter
Blender and there we go. So now I'll grab this one here, and I'll press G, and I'll
bring this in, as well. There we go. And continue this. I'll press G. Bring this in. One here, maybe, press
G. Bring that in, and there we go. That's that. Okay, so I'll tap
out of Edit mode now and see what
we've got there. And, yeah, that's
starting to look. It wasn't so straight
on that top edge, and that's what I
wanted to achieve. Okay, so in the next lecture, let's start sculpting
our cushions, putting all these wrinkles and all these imperfections
in the surfaces of these. Alright. Thanks very much. And I'll see you in the next
lecture. Bye bye for now.
47. Lecture 44 Sofa Part 8: Hello and welcome
now to Lecture 44. And in this lecture, let's
use the sculpt mode to make the seat backs look more upholstered. So
let's give this a shot. So let's grab this
first one here and let's make sure we got a
shade oro smooth on it. We could increase the
angle to about 50. A roundabout doesn't
have to be accurate. And once we've done
that, let's go ahead and drop into sculpt mode. So the first brush
I'm going to use is the inflate brush,
so let's grab that. Let's right click and look at the Let's turn the
auto smooth up a bit. I think I'll leave the radius maybe up at a little
bit, and there we go. So I'm going to run
it along the top edge of the polstered
surface like that, and now also down the side. It's a sort of balloon just to puff out this
edge a little bit. And again, I'll just add some little dimples
to it a little bit, as well, just to make it
a little more irregular. Now I'm going to do
the same thing on the face inflating this a
little bit. There we go. And maybe on this
bottom edge, too. There we go. That's
looking good. Once we've done
that, I think I'm going to use the crease brush, so I'll go over to this one here and I'll click on this one. Right click. Let's keep the
auto smooth quite high. And I'll reduce the
pinch a little bit. And let's try it. We can
always change our mind. So I'm going to sort of go
from this way over like this. And I'll leave that, but that's probably not what I
want to continue with. So I'll right click and
I'll reduce the radius, maybe even a bit more, and maybe even reduce the
strength a little bit. And let's try that. And
yeah, that's more like it. So I'll put a couple just on a surface like
this. There we go. And I'll also lead these around the edge into the actual panel. On the face, there
we go. That's good. Put another one
here. There we go. A third one here at the base. Maybe just make sure they're sort of going into each other. There we go. And here, too, make sure that sort of follows
through. And that's cool. And we'll do the same
on the top edge here. We'll just kind of put
a few imperfections in. And there we go. I
think that's fine. I'll put a couple in on the back just leading
this way a bit, maybe one more down here. And there we go. That's plenty. Okay, so now let's use the great cloth brush
here it is here. And I'll keep the auto
smooth quite high indeed. And I'll keep the radius
and strength where they are for now, and
let's have a play. Maybe I'll increase I'll
just press a Control Z, and I'll right click and
increase the radius a bit. And let's try that again. Maybe one down here, too. And maybe one here. And let's see what we got. Also, now I'll apply some
to the surface here. And maybe one here,
too. And here, too. Whoa, that's a bit
much, isn't it? Or shall I leave it?
Maybe that's good to have something quite dramatic. I think I'll leave
that one there like that to the realism. And that's too much. I'll press control zi. Just bring that back,
and I'll reduce the radius a bit
and try that again. Maybe on a stop edge,
maybe one here, too. Maybe one here. And here, too. Okay, so I'm going to use
the smoothing tool now, just to soften some
of these effects. Let's see what my strengths
are, and that's okay. So now I'll just
use this just to soften some of these
wrinkles a little bit. Maybe here, just take
some of these out. Maybe that's a little dramatic. And up here soften some of this. Maybe here too. I hit too. And I think I'm going to
try the inflate to here, just pulling this corner, rounding that off
a little bit more. Just to soften this up. There we go. Just to put a bit of form back
into this corner. And there we go, it's
quite dramatic that one, but I think I quite like it. So I'm going to maybe I'll just try softening this
area off a bit here. There we go. Maybe that one. And, yeah, I'm going to
leave that just like that. So I'm going to go back to
object mode with this one. Yeah, I'm happy with that one. You say, the sculpt mode
is really quite creative. You just need to play around with these settings
and these brushes and try and get an eek which suits you. But I'm
pleased with that one. Okay, so I'm going to grab
this one now, but in fact, I'm just going to maybe
select this one first and maybe this one and
press H and hide those. And I'll grab this one and make sure there's a
shade oro smooth on it. Increase the angle up to
about 50 approximately. And then let's go ahead and go into sculp
mode, what are they? So the inflate brush
is actually selected, so let's see what's
going on here. I'll increase the radius a bit and now run it
over this top edge. There we go. I'll do that over this side
edge, too, like this, just to cry and get a bit of a a randomness to
it, and there we go. Maybe a little bit
on the bottom here, so suggests that over time, some of the stuffing has sort
of dropped to the bottom. There we go. So I'll use the crease brush
now, grab this one. Let's right click and see
where we're at with it. And let's just see
how this goes. So I'm going to grab one and maybe put it in here like this. G to reduce the
radius. It's too much. Try that again, Nick. Put one
in here. Put one in here. And I'll continue this one, I think across the sofa, put one in here like this, maybe here, and I'll reduce
the radius some more, and maybe put one
across here like this. Maybe increase the strength. Try that. There we go. Maybe one here and here. And maybe one just
that. And there we go. I think that's fine. Maybe just want to cross the back of the
sofa here like this. And I'll leave that
just like that. Okay, so now I'll go
for the cloth modifier. Cloth brush, I'm sorry. And I'm gonna try here now and just see
what effects I get. Maybe increase the radius.
There, that's come. And I'll do the same here now. I putting a few
pulls in this one. Oh, that's looking good.
I like that. Okay. So now I'm just going
to use the soften. Just here, the
smooth. I'm sorry. Maybe increase the
radius a little bit, and just soften
out some of that. And there we go.
That's that one. I think I'm happy with that. So I'll go ahead and go back
to Object mode on that one, and I'll press LTH and
bring back the others. Okay, so I think
they're looking good. So what I'm going to
do now is I'm going to leave you to it
to do the rest of these cushions because it's
simply a repeat of what we've already done on the base and these two cushions up here. So just use the sculpting tool to using the inflate tool
and the crease tool, the smoothing tool, and the fabric tool to create some really nice fabric effects. And if you ever feel
you've gone too far, then just press Controls and
just backstage a little bit. You could always, I suppose, if you finish a cushion and you're happy with it, do a save. And then if it gets to a
stage with the next one where it's just gone far too far and you feel you can't save it, then you can just close Blender without saving, reopen it, and you'll be at a stage
where the last two are done, but this one isn't, so I'll see in a few minutes
when you've got that done. Okay, so I've just finished my last seat back, and
that's looking good now. I'm pleased with those effects. Like I said, you can take it as far or as little as you want. It really is a very personal
thing to how much you want the upholstery to
look old on you or used or unused or what if you really
want to do with these? I might even dip back
in between lectures and maybe soften some maybe
this one and this one. But in the next lecture, you may see these two
slightly softer. I think I've just decided
I'm going to do that, soften the effects in these two. Back in the scalp mode. Anyway, I'm sorry. So
yeah, I'll do that. But then in the next lecture, let's do the piping that we have here on these
upholstered seat bases. Let's put it on these
backs, as well. Alright. Thanks very much. And I'll see you in the next
lecture. Bye bye for now.
48. Lecture 45 Sofa Part 9: Hello, and welcome
now to Lecture 45. And yeah, let's see
if we can finish off our upholstered back
panels in this lecture. So we just have the piping detail to do
on these in this lecture, which we've already done on these upholstered sort
of seat bases here. So we're just going to repeat this process on these top ones. So let's give this a shot. So the first thing
I need to do is, of course, is tap into
Edit mode with this one. Let's press two so
we can select edges rather than vertices.
Zoom in a little bit. And I'll hold Alt, and
I'll select a loop, and I'll go about
there, I think. And I'll hold shift and Alt, and I'll select a back loop. And apologies. This is
actually something that I've just realized or just just found out
is I can actually convert two sets of
curbs at the same time. So yeah, I wish I'd known that before and apologies
to everyone for this, but yeah, we can do two at once. So once we got both selected, I'll press Shift D and X and
bring them back like this. Okay, I'll press Po, and
I'll separate by selection, and then I'll tap
out of Edit mode. Grab these, and I don't think
it'll let me convert them. But let's try. So I'll right
click and convert and no, they're not highlighted, so I need to do something about that. Okay, for some reason, I've
got a lot of stuff open here, so I'm going to close a lot of this first floor
stuff in my outliner, and I'm going to
open up the sofa here and find these
objects, and here they are. I'm just going to rename them, and you can rename
them anything. In fact, I will. I'll
call it anything. There we go. And there we go. And now we can right click and
we can convert to a curve. Okay, you come down to object data properties
and click on this. And down here on the bevel, let's go ahead and
increase that again, and we'll add a right
to the decimal point, and we'll turn that
one into a four, so that it's the
same as the S basis. And we'll up the
resolution to eight, and there we go. They look good. So let's right click again and convert back to a mesh,
right, click again, and shade Autosmooth
and right click a third time and set the
origin back to the geometry. Alright, so let's just
reposition these again now. And see what they look like, and see if those are
in the right position now. I think they're
pretty good. I might just pull it
down just a tiny bit. And that's just purely
my preference, really. Um, no. No, don't like that. I'll put it back a tiny bit. See what we got. See what
it looks like on the base. Maybe I'll just pull
it up a little bit. Maybe I shouldn't have
taken it. And there we go. I think I'm happy with that now. So grab the piping first. So there we go, grab the
piping, whole shift, and then grab the
upulsed back panel, and press Control J to
join them into one. Okay, there we go. So
that's looking great. I'll like that.
Let's do that again. Let's go to the
second one here now. So line up like this, so you
can see the previous one. Tap in it, tap into Edit mode, and hold Alt and
select the loop, which I'll go about there. I
think that's about the same. No, I'll try that again, so I'll hold on to Alt and grab maybe this one here. And
yeah, that's better. And now I'll press
Shift and Alt and I'll select maybe this one here.
I'll look about right. I think it does. And I'll
press Shift D and X, and I'll move that
set back like this. I'll press P, I'll
separate by selection. Tap out of Edi mode. Grab these. Let's just assume we can't
convert them and rename this. And I'll just call
them one, two, three this time. There we go. And now let's grab
them again, right click and convert to a curve. Come down to bevel,
and let's up this. And let's put a zero
to the right of the decimal point and turn the one into a
four, click ender. And now let's turn the
resolution up to eight. There we go. Let's
convert that back to a mesh now and do
a shade or smooth, and let's set the origin to the geometry and now
pull those back. Line them up with
the other ones, but also do a visual inspection on it and see how
it actually looks. I'm going to pull
that down again, just a tiny bit. And there we go, I'm
happy with that. So let's grab the piping detail, then grab the seat back, and let's press Control, J, and join them together. And there we go. Okay, so I'm going to leave you to
do the other ones now. We've kind of done this
process quite a few times now with the seat base
and then these two here. So it's really quite
an easy process. Just go into Edit mode. Hold Alt, select a loop, hold Shift Alt, and then select a second loop, press Shift D, and then move your
copy out out the way, and then press P to
separate by selection, tap out of Edi mode, and convert it to a curve. Alright, so I'll
leave you with that, and I'll see you back
in just a few minutes. Okay, so I'm back.
That's it. I'm done. So hopefully you're done, too, and it's looking good, eh? I like that process because it's just your simple process. But the effect is really
good. I like what it does. It creates a really
nice piping detail, which just adds realism. So I think in this lecture, there's one more
thing I want to do, which is just to clean up our outliner here
on the sofa group. So what I'm going to do is click on the actual main heading of the sofa and
add an extra file, and I'll click on the sofa main heading again
and add a second file. So I like I'm the
first one here, and I'll rename this and call
it seat bases. There we go. And now I'm going
with that selected, I'm going to grab all
these seat bases, one, two, three, four, and
there's one more, five, and I'll press M, and
I'll go to collections, and to ground floor, interior, sofa, and seat bases. And there we go. And go
ahead and compress that. Incidentally, there's
another way of doing that. You could simply drag all
those files into that group. It's completely up
to you. So I'll grab this one here now and
I'll rename this and I'll call this upholstered Bx I guess I should
have called the one above their upholstered
seat basis, but as long as I understand what's being
said, that's cool. Alright, so I'll grab
these ones, one, two, three, four,
five, six, and seven. And I'll press M. Collection, ground floor, interior, sofa upholstered
bags. There we go. And I'll compress that one, too. And the sofa group has
been simplified greatly. Okay, so that's it
for this lecture. And in the next lecture,
we're going to put some loose cushions
on this sofa, and I'm going to show you some super cool functions
within Blender. I'm going to show you
the cloth modifier, and I'm going to show you how to apply gravity to an
object, as well. Okay, thanks very much. And I'll see you in the
next one. Bye bye for now.
49. Lecture 46 Sofa Part 10: Hello, and welcome
now to Lecture 46. And in this lecture, let's have a go at making our
loose cushions, which is kind of the last
stage for this sofa, just to add some extra realism and some extra details and
give it that wow factor. And we're going to use some
new functions in Blender. We're going to learn
a bit more again. And we're going to
use particle physics, and we're going to use we're going to use cloth modifiers. And these are two really
impressive things a Blender do. And what we're basically
do is apply physics to our cushion so that it has
gravity so that it falls. And while it falls, it
interacts with other surfaces. Really quite cool. So
let's make a start. So I think the first
thing I want to do is here on the sofa group,
let's click on this. And let's create a sub file. And here it is here, sofa
three. I'll click on it. And I'll call this
loose cushions. Loose cushions, there. I'll
put an extra O in the loose. Not lost, but loose. There
we Once we've done that, let's actually
just grab this one here and let's press shifts, and let's bring cursor
to the selected. And now let's bring
in a new object. So let's press Shift
A and mesh and cube. Let's scale this object down and then bring it up until we've
got a kind of cushion size. So I'll press S and
scale it down a bit more and S again and scale it down a bit more and
maybe bring that down the Z and maybe scale down
a little bit more again. And there we go. I think
I'm happy with that. So I'll scale this
down in the X now, so I'll press S and X and
reduce the thickness of this. So I think I'll scale this down a little bit more in the X. I'll press SX and
just bring this down. So it looks something
like that. There we go. That's cool. Now that
we've done that, let's fix the rotation
and the scale. So let's press Control A and
apply rotation and scale. All right, so that's
the first step. Let's tap into Edit mode
with this and let's make it have much more geometry
to this, much more faces. First thing we're going to
do is select this edge here, and I'll select all these edges on this angle. So there we go. Everything on the Y axis. Once we've done that, I'll right click and
I'll subdivide it. Here in the number of cuts, I'm going to type in a number. I'm going to just price 75
and click Enter. There we go. So it's quite a lot of
faces, but we need it. We need quite a lot of
mesh for this object. I will select one
edge like this now, and I'll come up here to select, and I'll come down
to select similar, and I'll select all the same
length, and there we go. With that done, I'll right
click and I'll subdivide. And again, I'm
going to make this 75 and click Enter,
and there we go. The next thing I'll do is I'll select this edge here like this, and I'll press Control up. And I'll scroll the mouse
wheel a couple of times, and then I'll left click
and left click again. And in the number of cuts, I'm going to put this maybe
at about eight, I think. I think eight I'll be fine.
Once we've done all that, let's tap out of Edi mode, and that's it for this object. Okay, I think we need to reduce what we're
looking at now, so I'm just going
to select this one, this one, and this one. In fact, before I
go any further, I'm going to select this object, and I'm going to
make a copy of it. So I'll press Shift D and Y and bring a copy over like
this. I just put that there. Okay, now we'll select
this object, this object, and this object, and I'll hit the forward slash
to isolct them. All right. I think the next
thing I'm going to do is do a save because when we start working with
particle physics, it's not unheard of
or blended to crash. So I think I'm going to
do a save right now. So I'll press Controls so
that if it does crash, we've not lost our progress. Alright, so I'll grab this now, and I'll bring this up
in the z axis quite a bit to to about there, I'd say, and then I'll bring it over in the X to about there. I'm going to rotate
that in the Y axis, I'll press R and Y and just
bring this over like this. And I'll also rotate it
slightly in the X axis. I'll press R and X, bring this over just like
that, just a bit. So when it falls, it has a slight leading edge to
give it a bit of randomness. Alright. So now let's apply gravity to this object
and a cloth modifier. So I'll click on the object, and I'll go over here now to
physics and click on this. And with this selected,
I'm going to click on the cloth modifier,
and there we go. Down here on the timeline now, if I press Play, the
object will fall. And there it goes. So why didn't it stop when
it hit these objects? That's because at the moment, Blender doesn't see
these objects as something that this
should interact with. So we need to do
something about that. So we'll hit the reverse key here or the back
to the start key and the timeline so that it's right back
at the top again. And I'm going to
click on this object, and I'm going to add
it as a collision. And I'm going to
click on this object, and I'm going to add
it as a collision. So let's try that
again. There we go. So now Blender has
interacted with an object, and then this material,
which is cloth. We've used a cloth
material on it has actually stopped when it's hit this object and
then this object. So, admittedly, at the moment, it doesn't look
much like a pillow, I must admit, but
we'll deal with that. Don't worry. So
let's hit the back to the start key and bring
that back to the top. And we could also do a
shade oro smooth on this. And here in the
angle, let's max this up to around 100 well, around at least 150. Let's put it somewhere
around that. Okay, so let's click
on this object so that we get the
cloth properties up. Let's bring the speed
multiplier down to about three, so it'll fall a lot slower so we can interact
with it a bit more. And the quality of steps, I'm going to bring this on
my computer up to around 15. If you don't have a
very powerful PC, you might want to reduce the quality of steps
to an eight or a ten. It's very much up to you. If you see your
computer struggling, if it's lagging a lot, then you can always
adjust this down. With that done, let's hit the space key and
see what happens. So now it's falling a lot
slower, so that's a good first. And there we go.
We're starting to get something a
bit more pleasing. So yeah, there we go. Let's
bring that back to the start. So let's just hit
this little one here and bring that
back to the start. So the next thing I want to do is reduce the weight
of the object. So I'll reduce this weight
to about 100 grams, 0.1, and the air viscosity. Let's bring that
up to about 1.9. And the bending model, let's bring that to linear. Let's try that again. This is going to take a
while to get right. We're going to have to
sort of play around with the functions quite a lot. But I'm just going
to take this slow because it's good fun
and we can see what happens. And there we go. It's interacting
with the objects. And obviously, the moment is still not looking
like a cushion, but we'll get there. So I'm going to
hit the space bat, and I'm going to go back
to the start with that. The next thing I'm going
to do is scroll down quite a way to pressure
and turn that on. And I'm going to set this quite high. I'm going to set this. I would say, I'll
start at around 50, but I'll probably have
to up it some more. And with that done, for now, I'm going to increase the
speed to up To around six. I'll probably slow
that down when we get this material looking
the way we want it. But for now, I'll
put it about a six. And I'll hit space bar
and see what we get. And now we're getting
something that looks a bit more like a cushion. Let's see what happens when it interacts with these objects. I'm going to hit the
space bar right there. And yeah, now we're
starting to get something that looks a
lot more of what I want. So we have this gap
here at the base, and we have this gap here. So, let's deal with that next. So I'm going to come down to the bottom here, and
then on collision, let's open that and bring the distance down to the
minimal amount, which is 0.01. Let's start at the
beginning here on the timeline and hit
the space bar again. And get ready to stop it. When am I happy?
Maybe about there. And you can see now that it's
a lot closer to the object. When we convert this
back to a mesh, we can always just drag it down a little bit
more if we want. And there we go. So that's
starting to look really good. Still not exactly what I want, but starting to really
look like a cushion. Okay, so I'm gonna take this
back to the start again. I think the next
thing I'm going to do is here on the top. I'm on the structural here, I'm going to double this number, take it up to about 30. And on the shear, I'm going to put
this at around 20. And on the damping, I think I'll increase the structural on the
damping to around 20. It's just playing around with these numbers really until
we get the results we want. And on the shear, I'll
put this at around 11. And on the bending, I'll
put this, I don't know. Around four. And now
let's see what happens. I'll like the space bar again
and see what results we. It's starting to get
some nice wrinkles in that's starting to
really look like a cloth. And let's get ready to
stop that when we want. And, yeah, that's looking good. That's really starting
to look good. So if I wanted to, I'd increase the
pressure on that. I could try that next. Let's try. I can always
bring it back again. So I'll increase the
pressure up to about an 80. And let's take that back to the start and let
it hit play again. And we're waiting,
and we're waiting. It's falling. Now,
let's see what happens. Get ready with a space bar to stop it when you
like the results. And let's see what we've got. And yeah, that's down to
really look good now. Yep. I think I'm
pleased with that. I think I'm going
to accept that. Yes, I am. I'm going to
say that's what I want. Once you've got the
results that you want, the next thing to do is
actually apply those results. So I'll click on the object, and I'll press Control A, and down here, I will apply
visual geometry and mesh. So I just hit that,
and there we go. And now we'll actually
turn off the collision objects on this and turn off the collision
object on this. So I think the next
thing I want to do with this is actually take it into sculpt mode and play around with it just
a little bit more. So let's do that next. So grab the object, come over here to object, and turn on to sculpt. So I think the first thing we're going to do is use
the grab tool, which is this one here. And I want to try and get the squareness off this corner here. This doesn't look exactly right. I'll right click and I'll just bring the strength down
a bit and see what yet. Okay, I'll grab this
here now and maybe pull this in and pull this in here as well until we get more
of a point than a square. And there we go. So maybe that's right click and increase
the radius a little bit, increase the strength
a little bit. And now let's just pull
this down a little bit, and maybe just pull it
in. And there we go. Let's do the same here
with this one now. Let's reduce the radius. Okay. And now let's
just grab this corner, pull this in, grab
this corner, pull. This ends to get more of
a point. There we go. That's what I'm after. I might come back to this one
and try again on this. Pull this in, pull this to get more of a point,
and there we go. So I'm going to go to the scrape the crease tool here now. And let's right click on this. Leave the radius where it is, reduce the strength slightly, and just put some extra, reduce the radius,
some more, maybe. Try that again. And just put
some extra creases in this. One there, one there, and maybe one across
the base like this. And there we go
very subtle things. So here, there's something that's just not
quite right there. So let's go over to maybe let's try the inflate
tour on this. Let's just click on this a few times and see if
that resolves it. And it has. That's
just sorted that out. Let's go to the other side, too, and just click on the
inflate and now let's go to the cloth brush
and reduce my radius, up my strength,
reduce my smoothing. There we go. That's better. That's more like what
I'm after. Very subtle. So I'll try that here, you
know, And there we go. I think that's cool. So again, I'm going to smooth this off. So again, I'll just apply
a little bit of this to this to get kind of results
I'm after, and there we go. That's cool. That's
exactly what I want. So I think the last thing
I'll do is I'll try inflating this corner
here just a little bit. So I'll right click, reduce the strength and
reduce the radius, and just try doing something
with that, and there we go. Maybe I'll just grab that again now and just pull it
out a little bit. And that's it. That's finished. I'm gonna call that cushion
absolutely finished. So I'll go back into
object mode now. So the next thing I want to
do is apply piping to this, like we have done
with these cushions. So let's do that with these
upholstered backs and bases. So let's tap into
Edit mode with it. And let's take a look. So let's hold hold
and select an edge, and I'm happy with that one. And I'll press Shift D and X and bring that
out. There we go. And I'll press P, and I'll separate by selection
and tap out of mode. So I'll grab this and I'll right click and I'll convert to
a curve and it's letiny. So now I'll go here to
object data properties. Go down to Bevel
and increase this. And let's here make this out of zero and make the one of
four as we normally do. I'll click. Let's
see what we get. Let's increase our resolution
to I think in this case, I'll go for a 12. And now let's convert
that back to a mesh. And now let's go ahead and shade Auto smooth, and
let's increase this. Oh, it's really
quite high already. Then I think we'll leave
that just where it is. So we can right click on
the object and we can set the origin to
the geometry and take that back to the
cush in and put that into position as we
think it should be. So take a minute now just to position that exactly
where it should be. Am I happy with that
maybe over a little and, yeah, that's looking
good there like that. I think I'm happy with
that. So grab the piping, grab the cushion,
and press Control, Jay, and join them.
And there we go. So that's it in
the loose cushion. Alright, so that looks awesome. I'm really pleased
with that result. It's been quite a long lecture, but hopefully you've
learned a lot. So let's bring everything back and see what
the results are, and that's looking good. So I think in the next lecture, I'm going to go ahead
and do exactly the same again with
this one with you, and then I'll leave you to it after that to do a few more. Alright, thanks
very much. And I'll see you in the next
lecture. Bye bye for now.
50. Lecture 47 Sofa Part 11: Hello, and welcome
to Lecture 47. And yeah, let's carry on with the cushions and
see what we can do. So I think the first
thing we want to do is go ahead and make some
duplicates of this item, so I'll grab it and I'll
press Alt D. And Y, bring a copy over and place
it maybe here like this, and I'll press S, and I'll
just scale it up slightly, just so we got
some random sizes. With that done I'm
gonna rotate that, so I'll press Z, nine, zero, enter, and I'll bring this one over and drop this
somewhere else. Okay, I'll put that on
here like this, maybe. So now I'm going to
make a third copy, so I'll grab this and I'll press Alt D and X and bring
this over like this. But so it doesn't
look identical, I'm going to right
click and go ahead and mirror in the X xis. And there we go. Maybe we just need to take
this up a little. Let's have a look. And there
we go. That's cool now. Okay, so now that
we've done that, let's create another cushion. It looks like it's a little
bit still on the surface. I'll bring this up a
little bit like this. I'll rotate in the Y, sulphur us, R and Y. There we go. That's
better. That's fine. Okay, so now that
we've done that, let's maybe make a
duplicate of this again. So I'll press shifty. And why? Take that over there like that
just in case we need it. And now grab this
one, whole shift, and grab these three, and let's hit the
forward slash klan. All right, so let's
reposition this. I'll take this over on the X, now take it up in the. Maybe take it a little bit higher and a little
bit further over. I'm going to change this one
around a little bit so that it has different
characteristics to the last. So I'm going to rotate this a little bit
more on the white. I'll press Ron Y, maybe
take it over a little bit more like this and
take it forward, and I'll rotate that
slightly more on the X, I'll press RX and go ahead and do something
maybe like this. And there we go. Alright, so let's check the scale and the
rotation, and they're out. Let's press Control A and
apply rotation and scale. And let's go over to physics. There we go. And
with this selected, let's press that
cloth like that. Let's take this back to zero. And now let's select
this item and make it a collision and select this item and make
it a collision. Let's go ahead and
start applying some of our settings to
this pillow here. So the quality of steps, I'll take that up to about
15 and the speed multiplier. I bring that down to about six. I'll bring the mass
down to around 0.1 and the viscosity
up to around 1.8, 1.9. The stiffness. I'm going
to go ahead and take that up to around the 30 mark. And the shear I'll
take up to around 22. And I've got to remember,
as well that I want to make sure that the bending
model is linear. And I'll take the shear back
up to around around 20. Now we're gonna take
this up a little bit more. There we go. So let's go down to
pressure and turn this on and take this up to around 80. And let's see what happens. Let's hit the play button
and see what we get. Get ready with that space bar. Stop it when you're happy. And how does that look? Are we happy with
that? What can I do? I think what I'm going to do is I'll take that back
to the beginning. And on the damping, I will take this up to about 21. I'll take the
bending up to around four or five around say,
something like that. I'll hit the space bar
again, and let's try this. And, yeah, starting
to look better. I'll right click and I'll do
a shade oro smooth on this. And I'll come down
here to collisions, and I'll bring this
as low as I can. And I think I'm pretty
much happy with that. I could bring the
pressure down, maybe. Let's see what that does.
Bring that down to around 70. And the structural, I'll
take up a little bit. And the bending here, I'll
take up a little bit. I'll go ahead and
hit the rewind, and I'll hit Play again
and see what we get. And I'll stop there. Yeah,
I like that, actually. I like the way that looks. I didn't want it to be
identical to the other cushion, and it's definitely not that. I think I'm pleased with that. Yeah, I'm going to go with that. So what I'll do next is
I'll select the item, and I'll press Control A, and I'll apply visual geometry
to mesh, and there we go. So I can select this item now and I can take
off the collision, and I can select this item, and I can go ahead and
take off the collision. Okay, I'll hit the
forward slash, and I'll bring everything
back and see what we've got. And yeah, it's different
to the other one, so I'm definitely
pleased about that. So what we could do now, I don't see a huge amount to
be done in sculpting mode, but we'll do a little
bit of cleaning up. So I'll select the item, and I'll go ahead and
tap into sculpt mode. I think the first
thing I'll go and do is have a look at the
corners and see if we want to remove these squared off points,
and I think I do. So the grab tool is selected, so I'll just pull these in, pull this one in as well, until we get more of a point
than a squared edge there. There we go, that's cool, and we'll do the same here now. Just pull those in to eliminate that weird square edge that we There we go. That's cool. So I think they're straightaway. I'm actually just gonna get the inflator and
just do a couple of touches on those to sort of make those slightly slightly
better looking. Alright, so is there
anything else I want to do. So with this inflaate tool, I think I'll also just
do a little bit of trimming here.
That's better there. That's just more like
the way it should be. And let's have a look
on the other side. I think that's good like that. So I'll grab the
crease tool now, and I'll right click and I'll
bring the strength down. And I'll just try and applying a couple of creases
to this surface. I'll put maybe one
here like this. That's nice. And I'll put
maybe one here like this, maybe one across here like this. Really quite subtle.
Maybe increase the strength a little
bit and go again there. And there we go. That's cool. So I'll play around maybe
with a cloth brush, but it's going to be subtle if I do and see
what I'm gonna do, bring the strength
down quite a lot. And let's see. So
I'll maybe just try some few ripples
there like that. I think I'm pretty much there. I just want this to
be really subtle. And I will leave
that just like that. So I'll go ahead and
get my smoothing tool and just do some
touches on this, now, just to go ahead and soften that effect.
And there we go. That's absolutely what I want. So with that done, I'll
go back into Object mode. And I'll go ahead and tap
into Edit mode with this. I'll make sure edges are on, and I'll hold and grab this
edge maybe here like this. I'll press Shift DE and X and bring this copy forward
in this case like this. I'll press P, and
I'll separate by selection and tap
out of edit mode. Okay, now I've got
this one like this. I'm going to right click
and convert to a curve. I'll go down to object
data properties, and in the bevel here,
I'll increase this. Go to add an extra
zero to the right of the decimal point and turn the one into a four
and click Enter. And here on the resolution, I'll up this to about ten, and I'll convert
that back to a mesh. And then let's right
click and shade Auto smooth, and there we go. So I'll right click
again and make sure that the origin is in the geometry, and I pull that back
to the cushion. There we go. That's
cool. So I'll take a minute just to make sure that I have the position correct, that I'm happy with everything. And I think I am, so I'll go ahead and join those
t two together. So I'll grab the piping first, and then I'll grab the cushion, and I'll press Control J
and join them together. So there we go. We've
got a second cushion. So now what I'm going to
go ahead and do now is I'll bring this one out of the way for a moment like that. And actually, I think
I'll scale this up. So I'll make sure that the
origin is in the geometry and press S and go ahead and scale this up a
little bit like this. And I'll just go ahead and
move this out the way for a moment and have a look at where we're at
with the height with this. Make sure this is
sitting nicely on the sofa. And there we go. That's cool. So now
that I've done that, I'll make a copy of this, so I'll press Alt D and Y and bring a copy
over like this and drop this in the
corner like this. And I'll go ahead and
make another copy now. So I'll press Alt D and X and
bring this over like this. And I'll go ahead and
rotate that on his head, so I'll press rs90, Enter. And I'll go ahead and bring
this back on the Y axis. Till it's looking good. And then I think I'll
also right click again and mirror in the X axis. Just to switch that
around a little bit. Okay, so I think
that's looking good. And I think I'm happy now with the amount of cushions
that I've got on the sofa. I don't think I'll
go any further. But if you did, then
please do just carry on. What you could do is
you could also use the cushions that you've already got as collision objects. So you could use an
upholstered back, a seat base plus a cushion as collision objects when you create your next one,
that'd be a nice idea. But for me, that's
more than enough. I don't want any more than that. So it's just one
more thing to do, and that's to create an empty and pair and all
these objects to it. So let's go ahead and do that. So I'll press Shift E
empty and plain axis, and I'll bring
that up like this. So now that we have our axis, the next thing we need to do
is reselect all our objects, so I'll grab that and
the feet and the back, and the upholstered back rests, and the seat bases and
the loose cushions. And then finally,
I'll grab the empty. And with all those selected, I'll press controlP and
I'll set parent to object. And there we go. And then these broken
lines stretching through the whole object tells us that we have
everything parented. Now if we want to move,
all we need to do is just go ahead and
move just the parent. Okay, so that's the
end of this lecture, and that's actually
the end of the sofa. So in the next lecture, what
we're actually going to do is work on the ceiling
here on the ground floor, making a bit of a
recess for lighting. Okay, thanks very much. And I'll see you in
the next lecture. Bye bye for now.
51. Lecture 48 Ground Floor Ceiling: Hello, and welcome
now to Lecture 48. And in this lecture, let's do something with our
ground floor ceiling. Let's create this
light well and just put a little bit more going
on in this quite large area. Okay, so the first
thing I want to do is maybe open the ground floor, and let's hide a few things. So I'll hide the
ground floor walls. I don't think I need those. And I'll hide the sofa.
I don't need that. And this guy, actually, maybe
do I want him at all now? Yeah, I'll keep him for now, but I'll just scoot
him out the way. Don't want him around
at all. And let's hide let's hide the outside. Let's open the
outside, and let's hide the boundary
walls, paving slabs, pool, and poolge In fact, we could have just hid
the entire outside. And with that, D, that's about all I really
need to conceal. So now let's go ahead and bring the cursor back
to the world origin. So let's press shifts and
cursor to world origin. And now let's go ahead
and bring in a cube, so I'll press Shift
A and mesh and cube. All right. I'm going
to press Control seven to get the orthographic view
of the underside like this. I'm going to go and scale
this up now in the X. I'll press SX and bring
this out in a bit more SX, bring this out a bit more, too. Maybe where should we go? About there, I'd say. And now let's scale it up
in the Y. I'll press S and Y and go ahead and do the
same and bring that out, too, maybe there like that. Okay, I'll press one so I can see this from the front now, and I'll go ahead and bring this up so that it goes
inside the ceiling. By about this much. Okay, now I'm going
to bring back the ground floor walls and just see what my spacing's
like with this cube. And the floor here. I'll just hit H and hide that. I want to see that for now
and see what this looks like. I think it's too
wide in the Y axis. So I'll go ahead and scale
this down in the Y. I'll press Y and bring this
in a little bit. Maybe something like that.
I think that's better. And am I happy with that now? Maybe I'll scale it down a little bit more in
the X. I'll press SX, bring it down a little bit
more to about like that. And now with that,
I think I'm happy. So the next thing
I'll do is I'll check this and the scale
and everything is okay. And let's check this cube now. And let's redo this one. So let's press Control A and
apply rotation and scale. Now let's select this one here, go over to our modifiers, add modifier,
generate and boolean. And let's get the little dropper
and drop it on our cube. Let's find our cube here. Here it is and hide it and see if that booleans worked,
and it's worked fine. So now let's go ahead
and apply this boolean. We could bring our
cube back now, and we could go ahead and
reduce that and the z. So I'm going to press
SSD and just scale down the Z axis to maybe
something like that. And I think the next thing
I'm going to do is we can actually go ahead and
fix the scale on this. So I'll press Control A
and apply rotation scale. And it's flip the normals, which is not something I want. So I think I'm going to tap into Edi mode
with it and press AF and I'll go to mesh and go down to normals
and flip, and there we go. Okay, I'll tap out
Edi mode with that. And I want to reduce it, first of all, I
think, in the X axis. So let's see what
the size is like. So in the X it's 13. So I'm going to
make it maybe 12.5. So I'm going to change
the 13 to a 12. And I'm just going to turn this. I'll just put a five
there on its own. Click NE. There we go.
That's what I want. So now in the YX, let's take a look at
the Yee we're at. We're at 4.9. So again, I'll just make this 4.5. Click Enter, and there we go. So next, I'll go ahead and
take this up like this. And let's press one so we can see this in the
orthographic view. And I want to put
it about there. I want it to be a little bit
lower than the main ceiling, so I think that's
about right for me. Okay, so let's find this item. Let's decide where to put it. And I think I'm just going to put it in the interior file, so I'll just grab it and drag
it into the interior group. There we go. And
now I'll name it. And I'll call it ceiling panel. There were you. Now that we've done that, maybe let's put some bevels
on everything. So I think for now, I'm
just going to grab this, and I'm going to hit
the forward slash key to just isolate it. Let's tap into
Edit mode with it. And let's make sure we've got edge selection
on, which we have. I don't think we got it's created some extra edges
here with this Boley, and I don't think I
can get rid of those. I think it's gonna
cause me issues, but I'll try dissolving
it and see what happens. Blender it won't
let me dissolve it. I think that's absolutely
necessary bit of geometry. So we'll select
these edges here, so I'll grab this one
and this one, this one. Use that corner as well. I'll select this
one and this one. Move to the other side, grab this one and this one, this one. I think that's all
of them. So I'll zoom in a little so I can
see what's gonna happen. And now I'll press Control B. And I'll go ahead and create
a bevel on that edge. I'll scroll the mousewheel
a few times to get some extra extra details there, and I'll put a small bevel, something like
that on that edge. That's fine. Okay, so I'll tap out
of Edo mode with that, and I think we're
done with that. Gonna hit the forward slash
to bring everything back. And I'm going to
grab this panel now, and I'll go ahead and
hit the forward slash again now to isolate it. Now I've done that, let's go ahead and fix
the scale on that. So I'll press Control A and
apply rotation in scale. Let's go ahead and
add a modifier to it, and we'll add a bevel
modifier to it. I'll zoom in so we
can see what we got. Let's go ahead and add
an extra two zeros. Click enter. Let's turn
the one to maybe, um, let's try nine and
see what that looks like and maybe increase
the segments to a five. Maybe a four should be good. I'll leave that out
of four. Okay, so I'll go ahead and
apply that bevel. And I'll also do a shade
or too smooth on this, and there we go.
That's all done. Okay, so let's bring
everything back, so I'll had the forward
slash key on the numpad. And that's it for the ceiling. That's all I really
wanted to do with that. But I think there's one
more thing I want to do. I want to put a pair of these sort of door tracks
on the ceiling as well, because these doors would
need similar tracks on the ceiling for them to run. So I'll grab these,
and I'll press Alt D, and I'll take that up in
the Z axis like this. So the next thing we'll
do is we'll rotate this. So I'll press x180, Enter. And they're going to be off center right now, but
we can deal with that. So I'll just bring
this over like this. We'll just see where
that's landed? And I'll press Y. Sorry, I'll press G Y and bring that back until it's kind of in the right
position like this. And that should be good.
Okay, let's go ahead and take that up now and put
that into the ceiling. I'm gonna press Shift B
and recenter. There we go. So I'll grab these
now, and I'll go ahead and take those up
a little bit more. Two, about there. I think that's about
where I want them. Okay, so that's kind of it. So let's go ahead and
bring everything back now and see what we got. And I'll press Alt H and bring back the floor, and there we go. Okay, so I think that's
basically us done with modeling. I don't think we've got
any more modeling to do. We might have some
minor things to do. I think when we start
working on the kitchen, so we'll actually bring in
a kitchen for Blender kit, but we may end up tweaking
that a little bit. So that'll be a tiny
bit of modeling there. But as a rule, I think we're
pretty much done with it. Okay, so I'll see you
in the next lecture where we start thinking
about textures. Thanks very much. Bye bye now.
52. Lecture 49 Extra Edges: Hello, and welcome
to Lecture 49. And in this lecture, we need to do a little bit
of preparation of some more surfaces ready
to start texturing. So the issue that I
have right now is this, the sort of ceiling between the ground floor
and the upper floor. So the outside area
here is going to be like a rendered finish
the same as the walls. But the other side
of this track here, this door track will be
painted, interior painted. So we need to be able
to divide this surface. We need to do the same as well on the edges
as well, there. Oops, if I can get to it. Let me see if I can get
to it. There it is there. We need to sort of
divide that off there. So this little area
here is rendered, but beyond that is just painted. So let's see what we can do. So I think the first thing
I'll do is on the outside, I'm just going to hide all the outside components in one hit, and then I'll also
hide this floor. So I'll just hit H on
that and get rid of that. So we can just see what
we're working with. So I think I'll
hide those as well. So I'll hit H on those,
just to simplify the model. Let's see if there's
anything else we can hide. We can hide the TV wall, where you can hide the sofa, we can hide the ceiling
panel, and there we go. That's just simplified
our model quite a lot. In fact, we can hide
these two, as well. So we'll hit H and
just hide those. Simplify this as much as we can. So now we're going to use a new tool we've not used before. We're going to use
the knife command, and I'll show you
how to do that. So first of all, let's we
tap into Edit mode with this one and make sure you've
got edge selection on. And I'm going to
draw a edge across, so I'm just going to
select an edge here, go to right click and
I'm going to hit Knife. And I'm going to select
about here like this. And now I'll go over
to the other side. I didn't actually mean to flip it, but it works in my favor. Go to the other side and snap
it around there like that. And I'll click Enter
and see what you got. And that has worked
out quite nicely. That's pretty much
exactly where I want that divide line to be sort of halfway across all the doors so that this side could be like
an exterior rendered finish, and this side could be paint, and the door track will
conceal what's in between. Okay, so now we'll just press three select faces and make sure that we've done that.
So that's working well. And we can select this one, too. And yeah, it's divided
these surfaces nicely. So we'll repeat
that now just here. So I'll right click. Sorry, I'll press two so I can select edges. Now
I'll right click. Got a knife, and put one
about there like that, and bring that over and
drop it about there. And here's it. And there we go. I sorted that one out, too, so that this little
area here can be gray, and this area, the other side of it in the middle
can be white. And we'll just do the same
here on this opposite side. Well, just right click and grab the knife and put that
about there like that. And now bring that
over and drop that. About there like that.
And I'll hit Enter. And there we go. So
that's sorted that out. So that's a good start. So I'll tap out edit mode
just for just a minute. I'll go ahead and
grab this piece now, the actual main walls
for the first floor, and I'll hit the forward
slash to eyelid. So, the other thing I want
to be able to do is divide the rendered surfaces upstairs from the internal painted walls. So I need to put some extra
curves in for that, too. So I'll tap into
Edit mode again now, and make sure edge is selected. And I'll grab this edge here. And I will grab this edge
here, and I'll press Control? And I'll put a
loop in like that. And that works nicely for me. Yeah, that's exactly
what I want. So with that done, let's grab
the knife tool this time, so I'll right click and
I'll grab the knife, and I'll just snap
to that edge there, and then I'll bring
that down to somewhere around there looks good to me. And I'll click, and then
I'll click it. Press Enter. And there we go.
That's sort of that one out and put an edge there. So this side will be painted, and then this side
will be rendered. And then the window itself will sort of conceal
anything in between. And if we wanted to,
we can press one, grab this vertice here, and just pull that over. Whoops, I will turn off
proportional editing. And now I can pull
that over if I need to just to square
that up if necessary. Okay, so where next?
Where do we need to go? So we've done that one. So I'll grab maybe first
now I'll press two, and I'll grab maybe
this edge here. I'll whole shift and
grab maybe this edge. And I'll also grab this edge and I'll press Control r and
see if we can get a loop. And we can. That's work. So now we can use the
knife tool again here. So I'll right click. I'll
select the knife tool, snap to that line there,
and then bring this down. Left click, and then hit
Enter. And there we go. And again, if we need to sort of just move those vertices over, when we bring the windows
back in, we can do that. Okay, so we got a
nice curve in there. We could do something
with this now, maybe. I'll press one. I'll grab this vertice here. I'll hold shift.
I'll come over to this side, grab this vertice. I'll now right click and I'll connect vertex paths.
And there we go. So again, this face could be rendered,
and then beyond that, we'll All right, where to now. Now we sort of need
to just repeat ourselves on this side. So I'll press two, so
I can select edges, and I'll grab this
edge, hold shift, and grab this one here. And I'll grab this one here. And with those selected,
I'll press Control up and see if we can
get a loop in there. And we can. There we go. So with that done
now, I'll right click and I'll use
the knife tool. And I'll just grab
there like that, and I'll bring this down and
try and get it reasonably perpendicular and just left
click and press enter. And there we go. And now we just need to connect
those on the floor, so I'll press one so we
can select vertices. Grab the vertices here. Hold shift, grab this one. No, not that one, that one. I'll deselect that one
and re select this one. And now I'll right click and I'll connect vertex
paths, and there we go. So we've got one more
to do, and that's here. So I'll press two so
we can select edges. And I'll grab this edge here. Hole shift, and I'll
grab this one here. And I'll grab this one
here and I'll press Controller and join that with
a loop, and there we go. So now we could do
something with this here, so we could actually right click again and select the knife tool. Click on that there at the top, bring this down as
plum as we can get it. And left click and then hit
Enter. And there we go. So now we can do the same
on the bottom here now, so we can press one so
we can select vertices, grab this vertice here. Hold shift and grab
this one here. And now we can right click and we can connect
to vertex paths. And there we go. So let's put the additional geometry
in that we needed. Actually, there's one more we
can do, which is just here. So if I press one, I
can select this edge here and hold shift and
grab this edge here. And now right click and
connect vertex paths. And there we go. So I
think that is all of them. I think we're ready to go. In the next lecture, we will start setting
up some lighting. Alright, thanks very much. And I'll see you in the
next one. Bye bye for now.
53. Lecture 50 Setting Up Our HDRI Lighting: Hello, and welcome now to Lecture What
lecture have you on? Lecture 50, the big five oh. That's cool. We're making some real progress with this
now. It's great to see. So like I said, we're pretty much done now
with all our modeling, and hopefully now
you've got a good grip a good grasp of basic modeling. And I think it was
a great thing to do this sofa so that you also learn to do some
soft upholstery surfaces, not just hard surfaces. So I guess we could
call this now sort of the second
part of the course now starting to look at making our model now look
really realistic, bringing in some
nice textures and some nice lighting and creating
the lighting in our room, and, of course, importing
assets to populate our scene. So let's make a start at this. So, the first thing
we really need to do is go from layout, or you might have done
this in modeling. It's up to you and come
on over now to shading. Let's click into the shading. And what these tabs up here
are is basically presets. So shading has been set
up for us so that we've got a nice user interface to be able to apply
our textures. This here is where we'll
create our node textures. And when we start creating
nodes at the start, they'll seem a little
intimidating because it's not an easy
thing to learn if I'm honest learning nodes, but you'll quickly get a grasp of it, and you'll
be flying with it. Don't worry. And we'll take
it nice and slow together. Over here on the left, just hit this little
drop down here, and I don't really want
to be an image editor. I want to be UV editor. There we go. And I'll
explain why after. And over here on this side, let's hit the little
camera here so we can set up how we're
going to render our scene, how we're going to display
in our user interface. Let's go from EV to cycles, which is the type of render
engine we're going to use. And here in the viewport
settings, let's hit denoise. And Blender, as standard, has samples surprisingly high
in your viewpoint display, and I've never quite
understood why. So I'm going to bring
this down really far. I'm going to bring this
down to around 20 or 30. We're in the early stages
of rendering our scene. And from my point of view, I don't really need
to take that really high to get an understanding of how the textures
are going to look. The higher the viewport samples, the harder your
computer's working. It's constantly rendering. So we'll keep this quite low. Again, I'm trying to make this course so that
everyone can follow it, not just people with
sort of supercomputers. So this is why I do this. If you've got a
powerful computer, then maybe you want to go
ahead and up this some more, but I'm going to
keep this quite low. Okay, so the next thing
I want to show you is the settings for this light that you can see
in the background. And this blurred, weird background is what
we call a HDRI image. It's a high dynamic range image. And what that is is
it's a photograph, a 360 degree
panoramic photograph, which contains all
the information about the light in
the scene as well. So it has the direction
of the sunlight, the colors within the sun. So all these shadows
that you see now being cast onto our model is
from the HDRI image, the light that's being
generated from that. If we come up here now and actually click on this
little trap down, there's a few things
that we can do here. The first thing we can do is
reduce the blur of our HDRI, and we can actually see
what we've got here, and now you can
see the HDRI image of what this actually is. So this is quite a low
resolution HDRI image as a standard image
within Blender. So we're going to change this
in our rendered viewport. We're not going to
use this one. But for just using in here,
it's absolutely fine. The other thing that we
can change is the opacity, which I think is quite
a good thing to do. So for me personally, as I'm modeling, I have the world I have the
opacity at the bottom. I don't need to see
the hasty rite. In my opinion, it's
just distracting. I need the lights from it, but I don't need to
see the actual image. But for a minute, I'm going to bring it back
after showing you that. The other one is
the strength here, so we can reduce the strength of the HDRI, or we can increase it. And the other one is the
rotation of the HDRI. So we can rotate our HDRI image, and now you can see
the shadows changing as the light from the sun is being cast in a
different direction. So the HDRI image is
rotating, not our model, so that we can actually change the direction of the
sun like being set on. I'm gonna put mine something maybe like that. I think
I quite like that. So I'm gonna take the
opacity down again. And that's kind of
it for this one. The next thing we
want to go to is our actual rendered version. So let's click on that. And now we're in our full
rendered version. So all of a sudden, everything's
gone super dark in here, and the reason it's
gone super dark is we don't have any lights at all
in this scene right now. So what we're going to do
next is actually create a HDRI for this scene, and we'll create a HDRI that we'll be using in
our final image. We can't really start applying textures until we've
got some lights. So down here at the bottom, just click in this area. So just come over here to this
little drop down and just click on this and go to World
output, and there we go. And now we're going
to create our HDRI. So somewhere in
here, we should have a first couple of nodes,
and there they are. So we have our
world output node, and we have a background node. The next thing we need to do is bring in an environment texture. So press Shift A as if you were sort of bringing
in a cube or something, and I search for environment, and there it is, your
environment texture, and go ahead and
bring this in Okay, so the next thing I'll
do is I'll just make a square selecting
square around these two, and I'll hit G, and
I'll bring those over, create a bit more space between. And now I'm gonna
press Shift D again, and I'm going to hit the search, and I'm going to go
for RGV, RGB, sorry. RGB curves, and I'll
bring that in as well. Okay, so the next thing I'm going to do is connect the color here to the color
there at the base. And then I'm going to
connect the color here, to the color here in this background node,
and there we go. Everything's gone this
really bright pink, and that's Blender way of saying there's no
image applied yet. This is just an empty scene. There's no light
in this scene yet. So don't worry, we'll
deal with that very soon. Now on the side here, I need
to get this bar open here, so I'm just going
to press N, and we'll get this one open. And if you remember, at
the very start of this, we did actually
download this one here, the node wrangler. I'm
going to click on this. And this makes it easier to sort out and apply nodes
to our scene. So I'm going to click on
this environment texture here and I'm going to
add texture setup. What it's done here
for me is it's brought in a mapping node so that we can rotate our HDRI
image and we can scale. And the Texti coordinates map, we'll leave that just as it is with generated
plugged inter vector. Okay, so the next
thing we need to do is actually find some nice HDRIs. So I'm going to drag over a
website, and there we go. And I'll just get rid of this advertisement thing,
and I'll expand this. This site is called HDRI Haven, and this is the site I recommend for finding good HDRI images. It's used a lot by
people doing this. It's really popular website, and it's absolutely free. All you have to tolerate is some advertisements
running at the side. And what's really
good about HDRI Haven is you don't need to log in
or register with an account. You know, I get tired
of having to enter my emails into everything
and give my date of birth, et cetera, my address
to create new accounts. This is absolutely free, and you don't need to
log in or register. So I've already decided on two images that
I'm going to use, two HDRIs, but there's
a lot of HDRIs here, and it's completely up
to you what you use. You have a good hunt through here and see if there's
anything that you want to use. There's different environments
here, so there's indoor, there's skies, there's
coastal stuff. There's everything
partly cloudy, nature. It's all in there.
And if you look here, we've got the Blender
monkey at the front here. And what this monkeys doing
here is it's actually showing you how this HDRI
affects models. So you can see this one here, I would say, has got
a very flat light. It's letting the
actual natural color of the model be itself. It's not affecting the color. And the shadows are
basically just non existent. It's a very ambient light, a very flat light. Right next to it, we've
got something that's a lot more dynamic or here, too. So we've got extremely
long shadows. But also the color of
the model has been changed by the light information being held within the HDRI. This one here is almost pink because of the light
from the HDRI. And you can see as we scroll
down this same thing. Some have nice shadows. I would say this one's
quite good actually, because the light and
model the model is not being affected by
the light from the HDRI. It's still keeping
its same color, but we do have some
shadow detail. So I've kind of already chosen the two that
I'm going to use. So the first one is called
cannon, believe it or not. And I'll click Enter on that. And you can see here that the light is
actually very ambient. We're not really creating
any shadows from our HDRI, and the colors are nice and
natural not being affected. So for our scenic
views from our house, this is the image that
I'm going to use. So when we're looking
out in our house, when we're animating
and seeing our vista, seeing our view, this
is the one I'm going to use so that we can see
the coastline beneath. And I just think it's
a really nice setting. But for lighting our scene, it's not very dynamic. We're not getting
many shadows from it. So I'm going to use this one, and I'm going to
use another one. So I'll download this
one to begin with. So first of all,
you can actually choose the file
size that you want. You can go one K, two
K, right up to 24. The HDRI images are large files. They are large files. They contain a lot of
information about sunlight, direction of sunlight,
all the shadows, and it's a 360 degree
high res image. So, yeah, they are big files. So consider carefully
what you use. Maybe start on the low side, and if your computer
towards the end, when you've loaded the scene
up with all your kitchens, your bedroom furniture,
your tables, if you've loaded the scene
up and your computer's fine, you can always download a
larger version and use it. So for start, I'm going
to use an eight K, maybe a four K might be good. I'm going to go with
an eight K. I've got quite a decent PC. I think you can cope
with it, but these are the two that I
would recommend. So I already got
eight K selected, so I'll go ahead
and head Download. And there we go.
That's downloaded. And then from there,
you can actually open it in the download
file and put it into whichever file that you're storing all your
project files in. Okay, so I'll go back now. And I'm going to search for the other one I'm going to use. And it's called if I
remember flat Peak. That's it. Flat
peak. There it is. I'll click on this
and I'll click Aten. And there it is. Flat
Peak Mountain two. So we've got some really
nice long dynamic shadows. We've still got a
reasonably nice scene, lots of clouds in the scene as well to
make it interesting. The colors have been
affected slightly, but nothing too extreme, so I quite like this image. So I'm going to
click on this and I'm going to leave
it at eight K, and I'm going to hit Download. And there we go. It's
download that for us. Then I'll go ahead
in my own time and put that into
my project file. Okay, so I'll drag HDRI
Haven out of the way. And like I said, you don't have to follow
me with the images. You can put in
whatever you want. You know, it's
completely up to you. It's a very personal thing. So maybe take a while scroll through HDRI Haven and find
an image that suits you. For now, I have, so I'm going
to go ahead and use this. So I'm gonna click on open. And I'm gonna go back, and here it is. So I'm going to start with, um, um Rocky Hill above sea.
This is the one here. I'll click on this, and I'll
go ahead and open image. And there we go. We've got that in the scene,
and that's cool. And you can see about the view. I really like this view. I think it suits
our house really nicely to have that
as a view from your house. I think
that's super cool. So the next thing we
need to do is actually just orientate this
the way we want it. So if I sort of think about this from where
the view will be, so from that balcony, this is actually not too bad, but we're kind of
facing this mountain, which is not ideal. So what I'm gonna
do now is come to this mapping node,
and on the z axis, I'm going to go ahead and rotate this to bring this
as we want it, which I'd say It is about there like that. That's kind of where I want the scene to be,
something like that. And I'll rotate around now and see what
we're looking like. And this is why it's called
a cannon scene because there is a cannon back
there on the scene. Maybe this was, like,
Second World War, coastal defense or something. I don't know where
this image is from. But this is kind of
the scene that I want. The next thing we do is go
to the location here and the Z. I'm just going
to move this slightly. Whoops. Bring this back down. Bringing this back down again
slightly into the negative. Just actually drop
this, sort of, so we have some rocky
mountains behind our house. And that's our HDRI image. So this is the image that
we're going to use for our final sort of renders, which will include our view. This is what we're going to use. But we may use the other one for actually
setting up our lights, and any sort of finished
renders from, say, this angle, look into the house, we're going to use
the other HDRI. So let's bring that in next. So I'll click on this
little file here, and it's this flat
peak mountain, too, and I'll go
ahead and open image. And take a minute. And you can see now straightaway that we have a much more sort
of dynamic light. We have shadows in our scene, and we have a stronger light. So from the point of view of actually seeing from, you know, a final reed image, a
little bit of pool, our house, and strong light, this is probably a better image. So let's go ahead and look at the rotation on this one, now. So I'll swing it around in the Z and see where
we want this to be. So I'll just have a
look from the front of the house like this and
hit the rotation here and start bringing a hipster I around to see how the light changes on our house and see how the shadows fall
on our house, as well. We're starting to
get some stronger, slightly longer shadows
being applied now. That's a little too
dark on our house. And I'd say we're getting close to where we'd
like this to be. Keep on rotating a
little bit more. And yeah, I'd say that's
about nice, really. We're getting some nice
shadows there like that. And in the location here, maybe I'll just again
just bring this down slightly in the z and
see what that looks like. We have some nice
shadows in our house. We still have quite
a nice coastal view, actually, but not
as good, I think. Yeah, I'd say
that's ready to go. The other thing we can do
here in the strength in the background is
we can actually increase the strength
of our HDRI, and just get that to a
point where we want it. And we can also just
This is the RGB curve, which will affect the color. So we can just left click on this little line here to put an extra control
point in there. And now you can actually
just pull this around to just adjust the color
slightly in your scene. You can take it to
the extreme and put some different
lights in there, or take it the other way now. And just make it flatter, and you can see how this
is actually affecting the color of the light
applied in your scene. So that's actually quite nice. I put a little bit of warmth into it, which I
think I quite like. Maybe just tweak this
around a little bit. Maybe just add an
extra control pipe by left clicking and now
try twisting this around and just apply some shadows and get
some light in there. Maybe bring this
back down again. And I think I'm going to leave that something like that for
now and see how that goes. We can always adjust this later on and see what results we get. That's better, actually,
something like that. And to be honest, this is the way that a lot
of this will go now. We will be sort of playing
around with textures. Sort of the modeling bit is where you sort of can clinically draw and build and see that things are working
right or wrong. But with lights and textures, it is very experimental. We do sort of sort of set things and then
if we're not happy, maybe revisit it
and adjust lights. And as we apply textures, we might again think maybe we
want to change our lights. So it is something
that's very exploratory. We sort of have to sort of play around with this until
we get the results. For now, I think I'm
pleased with that. So in the next lecture,
we can actually start applying some textures. Okay, thanks very much. And I'll see you in the
next one. Bye bye for now.
54. Lecture 51 U,V Mapping: Hello, and welcome now to
Lecture 51, and don't panic. I haven't deleted
the entire model. We'll come back to that
in just a few minutes. But I wanted to do a quick
lecture on you just explaining UV mapping because
we're going to be doing a lot of UV mapping
going forward now, and we're lucky enough that
the model we've created. The shapes that we've
got are all quite basic. You know, we've got
rectangles and squares and different
variations of that, but nothing
particularly complex. So UV mapping won't be much of a challenge for us
with this project, but it's still something that you kind of need to
understand the basics of, so I'm going to do my best in this lecture to
sort of cover that. Okay, so I'll just click it off. And you don't necessarily need
to follow everything I do. It's up to you can if you
want, but you don't need to. It's just enough
to understand it. So what I'm going to
do is just deselect these two items here and select those items there
and just delete them. Then up here, I'm going
to go into shading and just drop us into
shading with a simple cube. So here in the text you set, it's actually just put us a
BSDF and a material output. I might as well explain while
I'm here what a BSDF is. So a BSDF is the most standard of all
the nodes that we use, and it's basically your
standard template, your starting point for
creating any textures. And in here, you can apply
metallic to a surface, rough to a surface,
reflection to a surface, Alphas, et cetera. So this is your
basic starting point for creating a material. There's different
variations of a BSDF, but this is the one
that Blender always starts you on. Anyway,
that's enough of that. Over here, I'm going
to actually just go from image editor UV editor. This is what I want.
And what is UV editing? Well, UV mapping, sorry, is so textures are basically
two D. But as you can see, in front of us here, we
have a three D object. We have a three
dimensional object. So how do we apply a two D
texture to a three D object? And think of it as
wrapping a parcel. So we have to think,
if we didn't want the paper that we're going to
wrap this cube to overlap, we'd have to measure
and think carefully, where would we put
the cutting points in that wrapping paper
so that it wraps this perfectly
without overlapping. And that's basically
what UV mapping is. So if I select the object and just tap into Edit
mode for a minute. You can see the object
automatically because it's such a basic cube already UV map for Blender has already done this force because it's
such a simple object. It's done the most efficient way of unwrapping that object. And there you go.
It's done it force. So that is UV
mapping in a basic. So we'll actually tap out, and I'll just get rid of this
object. I don't want it. And I'm going to bring in
a cylinder. There we go. Just a simple cylinder, and then I'll tap into Edi mode. And again, we're UV map. There we go. We can UV map. If we've got a more
complex object. If we're doing the windows or something, we need to UV map. So if I press all and I press U, and I go for smart UV project. And here, in a margin, I'll just click on one just to make sure that
the objects here, these islands, we call them, are not touching each other. I don't want them
to be touching. You can give problems, particularly if you
export other software. If your UV maps, if your islands within
your UV maps are touching, you can create problems. So just make sure
there's at least one, like 0.10 or you can
go 20 if you want, and go ahead and unwrap.
And there you go. The maps not change
much because it was already unwrapped and it's
such a simple object. But what if you wanted to make a starting point in this
surface? I'll just press two. So say if you've got a texture. Let's say it wood texture. And you wanted to start
at a certain point on this tubular surface.
How could we do that? So you say that this
point here is where you want the start of your
texture to start and to end. So if I select that
point again now, and then right click and
go ahead and mark a seam, so now that's going to tell
Blender that that will be the start of our surface. That is where it will start, and that's where it'll end. So now what I'll do is I'll hold Control and just select
that surface there. I'm sorry, I'll hold Alt and I'll select
that surface there. And I'll hold Shift and Alt, and I'll grab this one. I'll right click again
and I'll mark a seam. There we go. Now I'm
going to press A for all. And I'm going to press U,
and I'm going to ho not this time not smart UV
project, but just unwrap. Now blenders have to
consider where we've marked our seams to
unwrap this object. So if I go ahead and select
maybe I'll press three now, and I'll select this face here, you can see this face is right
at the edge of the UV map. So now if I go ahead and hold Control and select
maybe to there, you can see what
Blender is done. So it's consecutively started our UV map from the
Sam just there. So that we can decide that
we wanted to put the seam, let's say, at the least
seen side of an object. Say, this is a
simple side table, and this side here
was against the wall, then that's where we
want our seam to be, and so that we can conceal the scene behind another object. And that's the basics
of UV mapping. I think that's all
we need to know, and you'll learn how to UV map a little bit
more as we go through. But like I said, most of the
objects we're going to be applying UV maps to
are very simple, so I don't think it'll ever be too much of a
challenge to us. Okay, so in the next lecture, I think what we'll do
is we'll start applying some glass materials
to our windows. Okay, thanks very
much. I'll see you in the next lecture.
Bye bye for now.
55. Lecture 52 Glass Material: Hello, and welcome
now to Lecture 52. And let's go ahead
and create and apply our first
material to our model. And this is this
is going to become fun because we're going to start applying some realism
to our model. It's good fun. So let's
go over to textIPreview. Let's click on this so we
can see what we've got here. And something I didn't do actually in the
last lecture or in Lecture 50 was within the
render settings here, make sure the device is
actually on GPU, not CPU, so that your graphics
processing unit is handling the
rendering, not your CPU. Okay, once we've done that, down here in the texture editor, make sure that we're in
object rather than world. So the next thing you
want to do in this one, just hit this little drop down
here and make sure you're in UV editor and
not image editor. Hey, once we've done
that, we're a way to go. So I said in the end
of last lecture that we'll start applying glass
materials to our windows. But I think it would be
better, first of all, to apply materials to this one to these
glass panels here. And the reason being because these windows will have
more than one material, they'll have a frame and a
rubber seal and the glass. Whereas these just
have one material applied to them,
which is the glass. So let's work on
these first simply 'cause it's a better
starting point. So with that done,
let's go over to full rendered mode.
And there we go. This will gives a pretty
realistic version. Let's select these
items here and go over here to this one to
material properties. Click on this and go
ahead and click on New. And then in this line here, go and click on this
and let's rename this to Glass. And there we go. Once we've done that, down
here in the texture editor, it will have created
the material for us. Automatically, it's
provided us with a principal BSDF and
a material output. But I want to add to
that. That's not enough. So what I want to do is we need to turn this into a glass. So what we're going to do
is basically for materials, we have two different types. We have what's known as a PBR, a photo based rendering, a physically based rendering. So at the core of the PBR
texture is a photograph. We're going to create
a procedural texture, which means there is no photo. All we're going to do is
manipulate this texture by adding extra nodes and
setting them up correctly. So we'll do that for the glass. Over here now, press Shift E and search for a transparent BSDF. So I'll just start
typing transparent, and then there we
go transparent BSDF and go ahead and enter
bring that in like that. I'll bring this material I
put over here like that. And I want to plug in this transparent BSDF
into this socket here. But also, I still want to have
this one plugged in, too. So we need to be able to bring in something
that can do that. So we'll press Shift A, and we'll search for a mix. Shader. And there it is. Let's bring that in like that. Let's unplug this one and plug this into the bottom
one of the shaders. Grab this one now and plug
this into the top one, and go ahead and
plug this one back into the surface.
And there we go. We have a basic start for
what we're going to do. But I want to go a little bit further with this
glass material. So the next thing we're
going to do is I'm going to go ahead and
bring in another node, and so I'll press
shift A and search for light path. And there it is. I'll bring that in next and just drop that
there like that. Going to bring in
another node now. I'm going to bring
in a math node. So I'll press Shift A and
search for Math node. And there it is right there. We'll leave it on add up here. I'll start just spacing
these out a little bit. There we go, bring
this in like this and type the shadow array
into the value. So just plug that
into that like that. And now on the mixed
Shader go ahead and plug this value
into this one here. Okay, that's cool. Okay, so the next thing I'll do is
here in the value here. I'll bring this down to create
a bit more transparency. I'll bring this down to
maybe one like this. And now in the principal BSDF, I'm going to bring
the roughness down to basically nothing glass
is obviously smooth. And now you can start
to see that we're getting a nice
transparent material. The next thing we want to do
is make sure that we've got some nice reflections
in our glass. So here in the IOR, go ahead and bring that
up to maybe around five, I say, maybe even a six. Let's try that. And we
may well adjust this. As we bring in more materials and we start to
populate our scene, we may want to do
more with this, but for now, that's
absolutely fine. And bring the alpha, as
well to about halfway. And there we go. That's cool. But the next thing I
want to do also is add a tiny bit of tint
to this glass, so it's not perfectly
transparent. So here, in the color of
the transparent BSDF, just click on this and
just bring this bar down a little bit to add a little bit of
darkness to this scene. And there we go. So we've just created our very first material. We've created that with
a procedural texture, using nodes and settings
on nodes to create, in this case, quite
a basic material. And we will be
using this quite a few times to create materials like our rendered texture
that you see on the outside, we'll create it for that. And the interior
painted surfaces will be a procedural
texture as well. Okay, so I think we're pretty much done
with this lecture, but before we call it a day, I think it's a good
time to do a new save. Since we finished the modeling
section of the course, let's do a fresh save
now for the textures. So let's come up to
file and save us. And what I want to do
this time is go over here to this little wheel
here. Click on this. Make sure that we hit Compress because we're going to start creating quite a big file now. As we start applying more and more materials,
it's going to get big. So let's hit Compress to
reduce our file size. Hit the plus sign to call this Render House three now
and click save us. And there we go. So now
we're on a fresh save. Okay, so in the next lecture, let's go ahead and apply our glass materials
to our windows. And also, let's create
some new materials as well for our frame
and our rubber seals. Okay, thanks very much. And I'll see you in the
next one. Bye bye for now.
56. Lecture 53 Windows: Hello, and welcome
now to Lecture 53. And in this one, let's apply
texturing to windows here. Let's start with this one here. So I'll grab this
window here and check the scale and the
rotation, and it's fine. And I'll had the forward
slash key to isolated. Okay. So the next thing I think I'll do is I'll tap
into Edit mode with it, and let's have a
look at our UV maps. So I'll press A for all, and I'll press U, and I'll
go for Smart UV Project. Make sure that you
have an aisle and margin and go ahead and
unwrap. And there you go. Right here now, we have
all our UV surfaces already mapped out for us. Okay, now that we've done that, let's start looking
at materials. So it's time to make a
new material, I think. So I'm going to click
on the new button here. Let's call this window
frame. There we go. And I'll hit Enter. So now
we've created a new material. But of course, it's
nothing right now. It's just white, so we need
to do something with that. So the next thing I'm going
to do is, if you remember, in the resources pack that
we had in the first lecture, within that, you've
got textures. So what I'm going to
do now is just select the principal BSDF and make sure your node wranglers
here on the side tab. If this side tab isn't open, just press N. And with the principal BSDF selected,
add principal setup. It's going to bring you
to this browser window, so now you can find
your texture sets. So come back to textures, wherever you put
them. Click on it. And in the other file here, you'll find doors and
windows, and there we go. The white one here
is the Alpha set. I don't think we're going
to use the Alpha set. So ignore that one and then hold down Shift and
select the others. Once you've got those selected, hit principal textia setup. A Blender kit is
automatically set up a node tree for us with
this. That's really cool. That's the benefit
of node wrangler. It's actually saved us quite a bit of time doing that for us. So here on this side,
you have your mapping. With this, if you want
to, you can scale or you can adjust the position
of your text you set. Here, of course, you
have your base colors and your roughness and your displacement
and your normals. And you have your principal BSDF and these other nodes as well, which control your
displacement and your normals, which we'll go into
at some point. Okay, let's actually just maybe now tap out of Edit
mode for a moment, and let's zoom in on this
and see how it looks. And it has a texture
on it because that's what the texture
set has on this one. Has some dimpling to the
paint. That was intended. But the dimpling the
texture is too big, so we need to do
something with that. So I'll tap into Edit mode
again. Press A for all. And there's our UV map. Do you just put a selection
window around everything now, hit S and scale it
up considerably. Let's try something like that. So let's just zoom in on this now and see what our
texture looks like, and you're just going to
pull in a little bit more. And, yeah, that's kind
of what I wanted. This sort of orange
peg paint effect. I might actually go a
little bit more than that. O press A again for all, and make a selection
window around everything and scale this up even more to about
And there we go. Now we have a nice little
dimpling to the paint. Nothing too much,
but a little bit. So let's refine this material a little bit more. We
can click off this. In fact, we can tap out of bode with this now so we
can see this a bit cleaner. And let's come on over to the principal BSDF let's add a little bit of
metallic to this material, just to give it a little
bit more going on, maybe about half on the
metallic, and there we go. And that's also put a
little bit more reflection. So actually tweak
the IOR to maybe to about 2.5. And there we go. Now we've got a little bit
more going on that material, it's a little more interesting. That's cool. That's our
window frame material. But the problem is,
as you can see, it's also covering our glass, so that doesn't help us much. So with the windows selected, let's tap into heady mode. Make sure you got
surface selection. I'll press three, and I'll go ahead and grab our
window panels. This one, this one, this one, I'll turn it around, and I'll
do the same from this side. Now I'll hit the plus sign here, and I'm going to hit the drop down here because we've
already created the glass, and now it's already
stored. Find our glass. There it is. And with
these selected like this, I'm going to go ahead and
assign. And there we go. Now we have our glass
in our glass panels. It's starting to
look pretty good. So now I need to create
the material for this rubber seal that we
were going to do just here. So let's hit the
plus sign again now. And let's hit new
and let's click on this and let's call
this the rubber seal. There we go. And here, Enter. So with that done?
Let's actually select a face here on this rubber seal. And let's select one face of each of the sets of rubber seal. So that's that
one. And this one. And we do these two here. And then this one, as well. Now we turn the window around, and we'll
do the other side. So I'll select maybe
this one here. As long as it's one face from each of the sets of
the rubber seals. Now, since the rubber seals are a separate component
within the same grouping, we can actually use the
Control plus key to expand the selection on the rubber
seals till we get all of it. Once we've done that,
we can click on the rubber seal here again. And with these still selected, we can hit the assign,
and there we go. We can tap out of Edit
mode with this now, and you can see that the rubber seals are currently white, which I expected
them to be because we haven't really done anything with the
material on this. And this is quite a simple
setup for this one. So let's select the
rubber seal here now, and let's grab our color here on our principal BSDF and bring the color down here
and into the black. We won't go completely black. We'll go to about there
because generally, there's nothing
really that you'll see that has complete
blackness in it. So we'll put that about there. And now in the roughness,
we'll bring this up because Rubber
doesn't really reflect. Break a tiny bit of metallic
into it, and there we go. That's our rubber
material assigned. So there we go. There's
our first window done. So we'll hit the forward
slash key now and bring that back and see how we're looking. And I think we're looking good. I think that's great. So now we can do the same now
with our second window. So let's grab this window
here and isolate it. And let's check it for
scale, and it's out. So press Control A, and apply rotation and scale. Now I'll tap into Edi mode, and I'll press AF, and I'll press U, and I'll
go for a smart UV project. And I'll click
Unwrap, making sure that we have a gap in
the island margins. And let's see if we can find
that here, and there we go. It's all laid out. So now we don't need to
create new materials. We just need to sign. So we'll hit the Plaske and
we'll hit the drop down here. And we're looking for the frame. So we can call this
Is it window framed? Is that what we called it?
Window frame, there it is. So select that, and there we go. So that's already
applied to that now. So now we're going hit
the plus key again, and we can hit the drop down here and we
can look for glass. And with the glass
selected here, we can select these faces, one, two, three, four, five, spin this around, grab these. Make sure the glass
is selected here again and hit the
assign. And there we go. So let's actually
hit the plus key again now to get our
rubber material. Hit this little drop down, and we're looking
for the rubber. So let's grab this here. Was it simply rubber? Rubber seal, there we go.
So we'll click on that. And now that's also
within this window set. Let's grab our rubber
seal actual component. So this is one here. Oh, chef, grab this one, that one, there, and this one. And this one this one. And this one, and we'll spin
this window around now. And let's select on the
other side as well. And last one. Where the surf is selected from each
of those rubber seals, hold down Control and
press plast to expand our selection until
they're all selected. Reselect rubber seal up here
and go ahead and assign. And there we go, let's
tap out of Edi mode, and let's look at
what we've done. There we go, so that's
material selected. Now, you can see that
obviously this is too bumpy for the
window frame material. So let's tap back into
Eddy mode with this. Select a face on the
window frame and hit the Plaskey to expand
our selection. Let's deselect these windows.
We don't want those. There we go. And with
those done like that, let's grab these over here now, and let's scale those up. Let's go again with
that. Grab all of these, and let's hit the S and scale
those up. And there we go. Let's see what we've
got. And that's more like the material
that we want. So I'll tap out of Edit
mode now, and there we go. That's looking good. Okay,
so that's our Windows done. So next lecture, I'll just hit the forward slash key
and bring those back so we can see what we've done,
and that's looking good. In the next lecture,
let's go ahead and repeat that principle now on these
big folding doors here. Okay, thanks very much. And I'll see you in the next
lecture. Bye bye for now.
57. Lecture 54 Bi Folding Doors: Okay. Hello, and welcome
now to Lecture 54. And let's apply our materials in this lecture to
our folding doors. I think it'd be good
to do those next. So let's select this
door on this side. I don't know if you
remember or not, but we actually
created the duplicate of this store by using
the Alt D command. So when I apply the
materials to this door, it'll automatically be
applied to this one, so that should
save us some time. So with that door selected, let's hit the slate button. Let's hit the forward slash key. So we've just got
these doors like this. And I think the next thing
we want to do is up here, hit the plus key and hit the little drop down here and
let's type in window frame. There it is. And
let's select that. That's instantly got the
material on that window. And it's looking a bit funky. You can see we've got
all these weird sort of lines going
through like this, and this is because
we didn't apply the UV maps. So
let's do that now. So I'll tap into Edi mode, and I'll press AFL. I'll press U, and I'll
go Smart UV project. Make sure you have an isle and margin and click wrap,
and there we go. It's all a bit big, so I'll just grab this now and I'll press S, and I'll go ahead and
scale that up like this. Let's see what
we're looking like. It's still a bit texturing. So I'll hit S and
I'll scale up a bit more until we find
it, the happy medium. Yeah that's what
I'm looking for. I can still see a light
texture in there, and that's what I'm Okay, so now that that's done, let's tap into
Edit mode with it. And now let's select the
window faces or the glass. And I don't think I can
get all of them like this. So I'm going to have to press
set and go into wireframe. And now I can select all
of the glass panels. Make sure it's just the glass. I've got selected. There we go. And with that selected now, I'm going to hit the plus key here and I'm going to
hit the drop down. I'm going to find the glass. And with the glass selected, I'm going to go ahead and
assign. Let's tap out of it. Let's go back into solid mode now and go back
into rendered view. And let's see if
that's workforce. Let's tap out of Enomode. And, yeah, that's fine.
I can see through that. I don't think there's any
gray left in there anywhere. No, I can see through
there. That's it. It's just the compound of all those pieces
of glass together, but it's definitely transparent. Okay, with that done,
the next one to do is these black rubber seals. So let's tap back into
Edim moode with this. And let's go back into
wireframe for a moment. And let's select
these rubber seals. This might be a bit more tricky, but it's not too bad down here. So if I select this one, I'll hold shift and grab this one, and let's grab this
one and this one, this one and this one and
this one and this one. And this one, this one, this one, and this one. I'll hit Control plus and expand on that selection,
and there we go. And I'll hit the plusky here, and I'll hit the drop down, and I'll find rubber. And there we go rubber seal. I'll click on that. And
the rubber seal selected, and these still selected, I'll hit the assign. Okay, let's tap out of, let's
go back to solid de now, and let's actually go back into rendered view and
see all we've got. Let's tap out of edit
mode, and there we go. That's looking good. So I'll hit the forward slash key
to bring everything back now and make sure that's been applied to the other side
as it has, and that's good. So now let's just grab
maybe this frame here, whole shift and grab this one, and let's isolate
those two items. Let's have a look at the scales on these. That one's fine. What's this one like here? That one's fine as well. So maybe I'll just tap into Edit mode with this one first, and I'll press A for and U, and let's smart UV project. Make sure you got a
gap and click on wrap, and With that done? Right here this time in the
sort of materials editor tab, I'll just hit the drop down here and I'm going to
find window frame. There it is and go
ahead and assign. Let's just see what that
material looks like. I'm going to hit the Shift B and just select an area
to speed up Blender, and let's have a
look at our texture. It's a little too rough. So I'll press A for,
grab our UV maps, hit the S to scale it, and let's just see what that. And I'm happy with it. Maybe about like that. That's cool. Yeah, that's
what I'm looking for. So I'll tap out of Edi mode with that, and that
looks good to me. Let's do the same with
this one here now. Let's have a look at the
scale, and it's good. So let's tap into Edi mode, and let's press A for O, and U and SmartUVPject. Make sure there's an island
margin and click Unwrap. Let's hit the little
drop down here. Let's find window frame. There it is and go
ahead and assign. Let's look at the actual
texture on this, and of course, it's too big, so
grab our UV maps, hit S, and scale this up
to about the same size. And, yeah, that's looking good to me. I'm happy with that. Maybe I'll go a little
bit more, actually, I'll press A and grab all of it and hit S and scale
it up a little bit more. And there we go. I'm
happy with that. Okay, so that's our
folding doors done. It really is not too
difficult at all. Let's hit the forward slash key, bring it all back, and
see how that all looks. And, yeah, that's
cool. We're quickly adding some nice
materials to this. Okay, so on the next lecture, let's actually do our pocket
doors at the bottom here, which is going to
be pretty much the same as our folding
doors up here. And then we'll move
on to our next one. Thanks very much.
And I'll see you on the next lecture.
Bye bye for now.
58. Lecture 55 Doors and Posts: Okay. Hello, and welcome
now to Lecture 55. And in this lecture,
let's go ahead and apply this same window frame material to our pocket doors here
on the ground floor. And then let's apply
a new material then to these sort of
rail posts just here. Okay, so let's start
with our pocket doors. Let's grab these. And let's go ahead
and isolate them, so I'll hit the forward
slash key on the numpad. And let's have a look at the
scale, and it's all good. And remember, we actually use the old D to duplicate these. So if we apply the materials
once will be fine. So the next thing
we're gonna do is go ahead and tap into Edit
mode with all of them, and I'll press A to select all, and I'll press U, and I'll go ahead and do
a smart UV project. Make sure we have
an island margin and go ahead and unwrap. Now that we've done that,
let's go down here, hit this little drop down. And let's find
window window frame. There it is and select that. And there we go that's done. Let's have a look at the
texture we've got on this, and I can see that
it's a little bumpy. I can just about see
through the selection. So I'll grab our UV maps, hit S, and just go ahead
and do a scale on this. I'll deselect for a minute
so I can see what we've got. Maybe zoom in a little, and I can see the texture, and it's still a
little bit much. I'll press, grab it again, and I'll hit S and
scale up somewhere. And there we go. That's
absolutely fine. That's what I want. Okay,
so it's really easy to apply our textures to our pocket doors,
and that's that. Let's hit the forward slash
key now and bring that back. And now let's have a
look at our new posts or our handrail posts or
whatever you want to call. So I'll grab them
like this and let's isolate them so that we've
just got them like this. Let's look at the
scale, and that's fine. So let's tap into
Edit mode with those, and we've got quite a bit
of UV mapping to do here, but it's still easy,
so we'll press A. And we'll press U and
we'll do smart UV Project. Make sure you've
got the Ilan margin and click and wrap.
And there we go. Let's zoom in a little
bit and see our UV maps. As you can see, there's
quite a few surfaces there, but everything's
looking good. Everything's looking
really nice in uniform. Okay, so over here now, let's hit the plus sign, and let's click on
New because we're gonna create an all
new material now. And let's name this as handrail posts.
That will be good. And there we Enter,
and there we go. So it's created our material
here, our base material. So let's use the node
wrangler to bring in. So let's hit let's click
on the principal BSDF. Add principle setup and
let's go find our textures. There we go. And others and posts
and there we go. Let's press A to select
all and go ahead and hit Principle Texture
setup. And there we go. That's our material. Let's zoom in a little bit and see
what it looks like. Let's actually tap out of Edit mode and see
what we're looking. And let's see what
we can do with this. Let's add some metallic to this. And let's add some
reflection to this, as well. So we get something going
on, and there we go. But what I see so that's
looking fine as a material. I don't think we need to do any more to that than
we've already done. We can increase the metallic if we want to or
bring that down. I'll leave that somewhere
around like that. But it's very flat. We have very little
features going on here. And materials are
generally not like this that it'll be
one uniform color. So what I'm going to
show you now is how to apply a bevel to
this a bevel node, and this can make the difference really between a really nice
render and a normal render. If we can put
shadings on objects, so it's not just a flat color, but we have some variation. So I'm going to show
you how to do that. So the first thing I
need to do is I need to make a duplicate
of this whole thing. So I'm going to
grab it like this. Gonna press Shift D and
bring a copy down like this. And just put it slightly
below like this. I'm going to just bring
this up a little bit to give there's some more space so we can see what we're doing. The next thing you need to do is actually blend
these two together. So I'll grab this and I'll grab this and I'll pull it over. And actually, there's bottom
one here on the output. I'm going to go ahead
and delete this. We don't need that. So now we need to actually
join these two together. So if we go ahead and
press Shift A and type in mix shader and it should be just there
somewhere. There we go. And we'll bring
this in like this. Maybe I'll just bring
this up to here and let that join
itself like that. So now I'll grab this
bottom one here like this, and I'll go ahead
and bring this up and plug this into
this one like this. I can go ahead and disconnect the base color off this one. We don't need that
anymore. And if we want, we can go ahead and delete
that. And there we go. So now I need to bring
in some new nodes. So the first one
I'm going to bring in is called the bevel node. So I'll press Shift
A and search for. It's right there
for me it's Bevel, but I'll type it just
for you. There we go. And there's the bevel node. I'll bring this in, and I'll just put it a nice
distance from the others. Let's space this out a little bit more like this so
we can do this nicely. And now I'll bring
in the next node. I'll press Shift A and
search for a Geo node. Geometry node, there we go. And I'll bring that
in just like that. I'll bring in another
node, and this is going to be a vector math notes. I'll press Shift A and
search for vector math, and I'll bring that
in as well like this. I'll bring in one last note. I'll press Shift A, and I'll search
for a color ramp. And there we go to write though. And I'll bring
this in like this. So the next thing I'm
going to do is go ahead and plug the normals here into the lowest vector
on this vector math. And here on add, I'm going to
make out some dot product, and I'm going to
click the normals here into the vector like this. Then the next thing
we do is plug the dot value into the factor of the
color ramp like this. And then I'm actually going to just so we can see what's
going on with this. I'm now going to plug the color directly into the
material output, and we'll see what
we get with that. Can you see now
that we're getting some darkening on the edges, and that's exactly what I want? So if I just grab this
little thing here on the color ramp and
bring this over, I can actually increase
the level of that darkening and shading
on the edges. And there we go. That's
a nice effect now. We've got some darkening in all the corners, and
that's what I want to see. So with that done, I'll
disconnect this again now, and I'll plug this into the
factor of the mix shader. I'll go ahead and
plug this back into our material I need to
switch these over now, so I'll just grab this one here and plug this into the top one and plug this one now into
the bottom one like this. And now, now we're starting
to get a nice effect. But we haven't got any
color to that bevel yet. I'm going to come down
here and just click on this one and go ahead and bring this down now
into the black. So that we get some darkening on those edges like that.
And there we go. So that's a nice effect now. You can see the darkening at
the base of all these edges. That's looking
really quite cool. So we could, if we
want, maybe just bring down the metallic again
on this one here, and bring down the IOR, maybe. And there we go. That's a cool effect.
I like to now that that's darkening
on those edges, giving that another sort
of level of realism. So I'm going to bring
everything back now. And there's our
posts in position. Okay, so in the next lecture, maybe what we should do
next is have a look at doing some of the
external stuff here, maybe the pool and the paving and the wall
around the outside. Okay, thanks very much. And I'll see you in the next
lecture. Bye bye for now.
59. Lecture 56 Outside Materials: Hello, and welcome
now to Lecture 56. In this lecture, let's
go for some impact. So let's do some
big stuff so that we can quickly see
some nice progression. So I'm thinking we're
going to do maybe the paving here and then
the pool and the wall. And if you've got any time left, maybe this edging here. Maybe that's a bit
much for one lecture. Maybe I'm being a little
bit too optimistic. We'll just see how we go. I need to rein myself a bit of that. We'll take it one step at a time and just
see how far we get. So let's make a start in
this optimistic lecture. Let's grab the paving here
and let's check the scale. And there's a minus there on the scale, so
I'll press Control. And apply rotation and
scale, and there we go. And now let's tap into
Edi mode with it, press A for all,
and let's go for, and let's go for a
smart UV project. Make sure you've got an
island margin and click Rap. And there were you. So
in the materials file, we do actually have
a paving slab. So the next thing you want to
do is actually apply that. So with this selected,
come on over here now to the
materials output and hit the plus sign and click on you because it's a
completely new material. And let's call this paving
slabs. There we go. And down here now, of course, we have the paving slabs. Let's just bring this
up a little bit so that we have a bit more
space in our texture editor. Let's select the principal BSDF. Go over to our node wrangler
and add principle setup. Go to the place
where the textures file is and click on it, and I think it was in outside. So click on Outside
and paving slabs. Click on this, and we'll press A to select and principal
texture setup. There we go. Let's have a look at
that. And the scale is just way too big. So that's the first
thing to deal with. Let's tap into diode with it and make sure that
all is selected. Grab it here on our UV maps and hit S and go ahead
and scale this up. And let's have a look at
what that looks like. Maybe I'll just deselect everything for a moment and
see what it looks like. I'd say that's still too big, so I'll do that a
bit more, so I'll press A for all again, and I'll zoom out a
little bit on the UV map, select everything, and just go ahead and scale up some more. I'll deselect everything
and see what the scales like. I think I'm
pleased with that. Yeah, I think I am. Okay, I'm gonna tap out of
EDI mode on that. Yeah, I think that's absolutely fine. That's working for me. Okay, so that was
easy. So where next? Shall we do the pool?
Yeah, let's do the pool. So let's select the pool. And let's look out first of all, the scale, and it's
ever so slightly out. So press Control, eh? And apply rotation at scale. Let's tap into Edi
mode with this, and we'll press A fall. And let's press U, and let's
go for Smart UV project. Make sure you get an
either margin and click Unwrap. And there we go. Okay, so let's tap out of
Edi mode for a moment now. And with the pool
still selected, let's hit the plus sign because we're going to assign
a new material. Hit New. Click on this because it's an all
new material again. And let's call this the pool
tiles. And there we go. Once we've done that, select
the BSDF here in the texture set and add principal setup
in the node wranguler. Let's go back and find our pool tiles, and
there they are. And should we go pool tile wet? Let's go pull tile wet. Let's select all of them. And let's go ahead and add
the principal texture setup. And there we go. Obviously,
that's a little big, but we can deal with that now. Let's tap into Eymode with this. And with all selected, let's grab it here, hit S, and go ahead and scale this up until it looks about right for the little tiles that
you see in swimming pols. I'll go a little bit more, and looks that looks
about right to me. Okay, I'll click
somewhere else just to deselect and have a
look at what we got. And that's looking pretty good. I wonder, though, if
I just tap out of Eddy mode with it and
see what it looks like, and it's just not
looking right, though. What I'm going to do is try disconnecting
the displacement. Sometimes the displacement
doesn't always work, so I'll disconnect that
and see what we get. And now we're getting the
effect that I'm looking for. We're getting that
sort of shiny surface that you'd expect on the tiles. Yeah, that's absolutely
perfect. That's what I'm after. And it's that easy. There we go. Okay, so what next? Maybe we do the edging
tiles around the pool. Let's see if we do those next. So let's select those. And let's look at the scale, and the scales in the negative. So let's press Control A and
apply rotation and scale. Okay, so now let's tap
into Edit mode with it. Press A for all and press U, and smart UV project and unwrap. And there we go. We'll
zoom in a little bit, and there are the items
there on the UV Okay, so let's tap out of
Edit mode with that. And let's hit the plus sign
here in the material slot. And let's click on new. And let's call this
the pool edge. Tiles. There we go. Click Enter. And there we go. So we have a new material created here now. So let's select
the principal BSDF in the node wrangler here,
add principal setup. We'll go back some, and
we'll find those pool tiles. And did I put it in other? Maybe I put it in others. Let's have a look in there.
No. I stone and tiles. Pull edge tiles. There we go. Let's
click on this. And this is the alpha. And I don't think
I want the alpha, so I'll select everything
else but the alpha. So just hold down Shift and make the selection and add
principal texture setup. And there we go.
Let's have a look at that and see
what it looks like. And it's looking a
bit funky, actually. First of all, let's sort the scale out on this
and see if that helps. No, let's try unplugging the displacement first
and see what that does. And instantly, that's
starting to look better. And now, of course, let's
try scaling that down. So let's tap out of
Eddy mode with this. And let's grab everything here
and hit S and scale this. And let's see what we've got. And, yeah, that's looking good. I think I'm pleased
with that as a tile. But again, it's a bit too
the colors too flat on that. We need to see some
shading here on the edges. Things just don't look
like that, do they? So, actually, I think I'm going to scale it up a little
bit more to begin with, so I'll tap back in edding mode. Operas A for, and I'll go ahead and scale those up
a little bit more again. Maybe something like
that. Let's have a look. And, yeah, that's better. So we're going to
add the bevel node that we added previously. So
let's go ahead and do that. So it looks like, first of all, we don't want the displacement. We're not using that,
so we'll delete that, and we'll delete
the displacement here as well. We're
just not using them. With that done, let's
select everything. And let's press Shift D and
bring a copy down like this, and just drop it right
underneath like this. Okay, let's grab the BSDF
and the material I put here. Let's press G, and just drag those up closer to
the other one like this. Now, this material I
put on the lower one, we don't need that at
all, so I'll delete this. And let's go ahead and grab this now and bring
this over and grab this BSDF and put that
maybe there like that. Okay, so the next one to
bring in is a mixed shader. So let's press a
Shift A and search for a mix shader.
Is it there? It is. It's there, 'cause we've
used it a few times already. And go ahead and bring
that in like this. So I'm going to
put the top BSDF. I'm going to plug
that into the bottom of the shaders for
the mixed shader. Gonna grab this one here
and go ahead and put that into the top one like
this. There we go. Okay, so the next one we
need is the bevel node. So I'll press Shift
A and search for. And we should have it here.
We do the bevel node, and I'll bring
this in like this. And let's go again,
straightaway. Shift A, search for a geometry, and bring that in as well. And now a vector math. Shift A, search for a vector math. And we'll bring this in. And the next one Shift A, search for a color ramp. And there we go. Let's
bring this in as well. All right, so let's
plug the bevel normals here into the bottom vector, and let's plug the normals on this geometry node
into the top vector. Now let's plug this one
into this one here. Once we've done that, just
to see what we've got, disconnect the shades
from the material output, and let's just
bring in this one. Let's just plug in
this color here into this and see what we get. Ah, so here on the
vector math node, turn this from add to dot
product, and there we go. And now let's plug
the value back in again and see what we got. Let's go ahead and up this and take this up so we
start to get some shading. And we can see it now. We can just see it there
forming on the edges. And we're going to
tap out of eddi mode. Oh, and now it's a
lot more apparent. Now we can see that edge
detail coming in nicely. So actually just
add this a little bit more, and there we go. That's cool. That's
what I want to see. So we could actually here in the samples in the
radius on the bevel, just try clicking on this once just to increase
that number. And yeah, I'd say
that's working for us. And I might actually just bring this back down on
the color ramp a little bit and see
what the results are, and that's exactly
what I'm after. Okay, so with that done,
what we'll do is we'll plug this one from the color ramp now into the factor
on the mix shader, and we'll go ahead and
plug the shader back into the surface on the material
and see what we got. So you can see that these
edges are a lot whiter, so let's go ahead and
apply a color to this now. So let's come on down
to the second one here, and let's disconnect
the base color. And let's go ahead
and delete this. And there we go. And now let's go ahead and
add a color to this. So we'll just bring
this down into the black to put some
griminess into this. And there we go. Now
we've got a little bit going on with these more than
just one standard color. That's what I wanted to see. We could try actually just bringing that value back down on the bevel and see if that helps things or makes things
worse. Put it back up again. Let's try increasing the samples and take the samples
back down again, increase the bevel,
that's too much. Yeah, 250 looks
about right to me. We're putting some variation in that now and I'm liking that. Okay, so is there anything else that I want to do to this? I don't think I'm completely happy with the color that
we've got going on here, so maybe I want to do
something with that. So what I'll do now with this actual color here is I'm going to bring
in a mixed color. So I'm gonna press Shift A
and search for a mixed color, and I'll bring
this in like this. And the actual base color
here I'll go and plug this into B like this and go
ahead and plug this back in. And now for this one here, I'm just gonna tap in
with this one now. I'm just gonna bring this
maybe down a little bit. Is to try it,
because they were a little too orange for my liking. So I'll just bring
those down and we'll play on with a factor now. So there we're going back
to the original orange, and now we're coming back
down to a paler color, which I think is
kind of more I like. There we go. That's cool. That's looking good.
So it's a little this bevel details a little
bit dark for me now. So I want to go
find that again and maybe just bring this down
here in the color ramp. S to reduce that effect a
little bit, and there we go. That's looking good now.
That's looking great. Okay, so that's that one done? Okay, so I think we'll leave
this lecture just here. I think I was being a
bit over optimistic, thinking we'd do the cladding
on the walls as well. I think that's a bit too far. So in the next lecture,
we'll go ahead and apply the cladding
to the walls, and then maybe put a
bevel on that as well, just so we have some
high highlightings to the edges of these walls. And then we'll also go ahead and apply that same material to the ground floor
exterior wall surfaces as well. Okay, thanks very much. And I'll see you in the
next one. Bye bye for now.
60. Lecture 57 Wall Clading: Okay. Hello, and
welcome to Lecture 57. And in this lecture, yeah, let's go ahead and create our material for
our boundary walls, wall cladding material.
Let's go ahead and do that. So let's select
the item and make sure the scales
correct, and it is. So let's tap into
Edit mode with it. And let's press A for all, and let's press U and
Smart UV project. Make sure that you
have an island margin and click on wrap
and there we go. Okay, now we've done that.
Let's go ahead here. Let's click on new material. And let's call this
wall cladding. Uh, Clgenter, and there we go. Let's click on the principle
BSDF and come over to the node wrangler and
add principle setup. Let's the drop down. And let's find the texture, and let's click on others. Look, it's not in others, so it must be an outside.
Let's click on that. And stone cladding, there it is. Let's press A for all, and
let's principal texture setup. And there we go. Okay,
it's way too big, so let's press A for,
and let's find it, and there it is.
So I'll grab it. And we'll S, and we'll go
ahead and scale this up like. And let's zoom in and see
what the scales like now. Maybe let's scale up
a little bit more S and scale it up to something
like that looks good. But as you can tell,
the brickwork or the cladding is in the wrong orientation is vertical, and we
don't want that. So we can rotate the UV map. So let's grab it
again. Let's press R and 90 and click
ten, and there we go. Let's have a look at that
now and see what we got. And that's looking good. I think I like the scale that
we've got there. But actual the tiles
or the bricks, or call them what
you will on this face here, don't look right. Come and select
this face here now. And in the UV map, I'm going
to find it, and here it is. And I'm going to rotate
that 90 degrees so press. Ah, 90, Enter. And there we go. So now that actually
works out nicely. That's the same
orientation as the side. Okay, let's do the same
on the opposite side now. So I'll select this face here, and I'll go ahead and grab
it and I'll press Oh, 90 and type Enter,
and there we go. So this one here now, I'm just gonna hit the T to get the tab in the UV editor.
UV Mapper, sorry. And I'll just bring
this down slightly. To try and line that
up with the one above. Zoom in a little. Try that now. And there we go. That's good. Just like
that. That's lined up nicely with that.
That's perfect. Okay, with that done now,
what we could do is tap out Edo mode so we can
see our handiwork and see what we've got. Okay, I'm just
gonna press Chef B. And I'm just gonna reset Blender because it was
running a little slow. And let's have a
look at this wall. And I wonder if I take
the displacement off. Let's see what that looks like. And yeah, I think that's better with the
displacement left off. I think I'm preferring
that results. But I think again this time, I'm going to apply
the bevel node to these top edges just so we get a little more going on,
a little something more. So let's do that. So let's grab everything
we've got here now. And let's press Shift B. And just bring this down until it's beneath the
other one like this. Grab it, take it back up again, and just plant it
just like this. So we can actually delete the base color. We're
not going to use that. And we can delete the
displacement, as well, and delete this one, and we can go ahead and delete the
material output as well. So let's grab the lower principal
BSDF and bring this up. Maybe drop that About
like Let's take this material output over so we can work this
out and then drop these two BSDFt in line with each other, just
for neatness, really. Okay, so now let's set
up the Blender node. So let's press Shift A, and let's search for a lot
of them will be here by now. So here it is the bevel node. Let's bring this in like this. And let's do the same again. Shift A, search for. This time, it's
the geometry node. Bring this in. And
now Shift A again, and search for the vector
math node. There it is. And we'll bring this in and one more shift a search
for color ramp. And there it is. We'll
bring this in as well. We'll move this over a
little bit more like this. And the next node we need to
bring in is a mixed shader, so we can blend these two BSDFs. So let's press Shift A and
search for the mix shader, and we'll bring this in as well. Let's go ahead and
plug the output from this top BSDF into the lower
plug of the mixed shader and this one into
the top plug and put the mixed shader back into the surface of the
material output. And there we go. Okay,
on the vector math, let's turn it from
add to dot product, and let's plug the normals of the geometry node into the
vector of the top one. Let's plug the normal of the
bevel into the lower one. And now let's plug the value into the value on
the color ramp. Okay, it's just to
see what we've got. Let's plug the color now into
the material output color. There we go, and see
what we've got going on. And now in the color ramp, let's go ahead and
increase our blackness. And there we go. We're
getting what we want. There we go. We're getting some nice
blackening to that edge, no. We could try
increasing the radius. There we go. That's cool. And we could try
increasing the samples. So we get something I'd say that's too dark, so
I'll bring that down. Maybe a three. We'll try
increasing this again. No, I'll keep that a
bit lower this radius. I'm going way too
far with it, now. And there we go. Let's
leave that about there. So 0.250, and samples we'll
put out maybe a four. I'll leave it about a four. There we go. That's
looking really good. Okay, so let's take let's
unplug the color ramp and put that into onto the
cyafactor on the mix shader. And now let's plug
the shader back into the material output.
And there we go. So we can see the
whiteness on the edge now. That's because we don't have a color for this bevel node yet, so let's go ahead
and do that next. So let's grab the color, and let's bring that
down now into the black. And, yeah, I'm
liking that result. I'm liking now that we've got
a little bit of coloring, a little bit darkening on
the edge of that wall. That's absolutely perfect. That's the results that I want. I could play around with
maybe a little bit of this, maybe just play around
the color ramp, bring this back to the
middle a bit more, just to soften the
effect a little bit. And there we go. That's
absolutely perfect. I'm liking. Okay, so let's go ahead and apply our wall
cladding now to our lower walls. Let's grab this wall like this and check the scale and
the scale's correct. So let's tap into Ed mode, press A, and press U, and do a smart UV project. Make sure we've got
an aisle and margin and go ahead and unwrap
and there we go. Okay, so now we need
to create material. So I hit the plus sign here, and let's just hit
this little dropdown because we've already made
our wall cladding material. Let's grab it here now, so I'll type wall
cladding, and there it is. I'll click on this,
and there we go. Okay, so obviously,
this is all wrong. So let's press A for all. Let's find our UV
map, and here it is. And let's go ahead
and scale this up to reduce the size
of our cladding. And let's have a look at that. That's a lot better. But also, it's orientated incorrectly. We need to rotate this. So let's press A again. And let's rotate
that sole press R, 90, enter, and there we go. Let's tap out of any mode with this and see what it looks like. Now, we will create a separate material for the inside surface. We're not
gonna leave it like that. But also, I don't think I
like the bevel on this. I think I want this to
look a bit cleaner. So, I can't just remove the bevel because this
materials already been created. If I remove this
bevel from here, if I go ahead and adjust this, then what it's actually
going to do is take the bevel off this wall,
which I don't want to do. So what it needs to do is create a duplicate of this material. So I'll go ahead here
and hit the plus sign. And now this is
wall cladding 01. And with that done,
that means I can adjust this material without losing
the bevel on this edge here. So with that done now,
I'll just go ahead and unconnect the color ramp, and I can actually just
disconnect the mix shader now. I can actually just
go ahead and plug this directly into
here like this, and I can delete
this mic shader, and I can delete this principal BSDF and I can go ahead and delete everything
below here like this. So we just have a much simpler
material for this part. Oh, there we go. I
think that's a bit nicer for the main walls. Okay, so with that done now, what we can do is we can apply that same material to this side. So this was wall cladding 01. So let's select this one now, and let's check the scales
correct, and it is. So let's tap into
Eddy mode, press A. Let's press U, and let's
go for a smart UV project. Make sure we get an eel
the margin and click wrap. There we go. Let's go ahead and
hit the plus sign, and let's hit the drop down, and let's find the
wall cladding. Wall cladding 01,
and there we go. So let's grab our UV maps, and let's rotate that 90 degree. So R, 90, enter, and let's hit S and scale
this up to get the size, something similar to
the opposite side. And is that about the
same or is that smaller? I'd say that's about the same. I'll tap out of Edit mode with that and see what we've got. And yeah, that's looking cool. Let's zoom in on this
and see how it looks. And I'll press Shift B, and just grab an area
so we can zoom in. And, yeah, that's looking good. We've got some nice
displacement in that, and the textures
looking really nice. Okay, so I think there's one
more thing I want to do. So since the previous lecture, I've actually been looking through the HDRI Haven website, which is also called
Ply haven sometimes to see if I could find
a different HDRI. I'm not finding
this very dramatic. I want to try and
do something else. So I found one called Capill. So I just typed Cape hill into Poly haven, and it
comes up nicely. And then you can download
it if you want to do this. But it's completely up to you. So I'll go to World, and I'll just poll in a
little bit of this, and I'll hit the file sign, and I'll go to my HDRIs. Wherever you've put them,
you can do the same. And I'll put up the Cape
Hill file and open image. And as you can see, it's
just a bit more dramatic. We've got some nicer colors and some nicer shading in there. We've got the sun just coming
on it from this angle. And if we want to, we
can adjust things. We can actually turn up
or turn down the power. And, yeah, I'm liking that. Now we're just applying a
bit more color to the scene. We've got slightly
stronger shadows, and it's just a little
bit more dramatic. Okay, so that's cool. So in the next lecture, let's
start applying our sort of interior paint surface
to the downstairs walls. Okay, thanks very
much. I'll see you in the next lecture.
Bye bye for now.
61. Lecture 58 Internal walls: Hello, and welcome
now to lecture. What lecture is this? I
lose track of the lectures. Um, sorry about that. We're on Lecture 58. I'll get there in the
end. So in this lecture, I want to create a material
for internal walls. Um, so I'm going to go for
quite a light material. So probably something
more like a magnolia. I know that I know
that's a boring color, and it's just but I am
playing it kind of safe. I want to create something that appeals to as many
people as possible. So I'm trying to use very neutral colors. Yeah,
I'm going to use that. So that's me defending my
choice of magnolia right there. But I encourage you to
choose your own colors and just do whatever
you want with this really go your own way
with it, definitely. So if I show you how to
create the material, you kind of choose your
own colors as we go. Okay, so let's select
these two walls, and let's hit the
forward slash keel and unpad and there we go. So I think I'll start
with this one because the light is shining into
this one from that direction, so it's going to give
me a better idea of the color we're
going to achieve. So I'll grab this wall, and I'll just press Shift B and just resend a Blender around
this wall. There we go. And I'll tap into Edi
mode with this wall. This one is probably the
first wall that I'll select. Then I'll hold control and select maybe to
there like that. And I'll hold Shift
and select this one, hold control and
select this one. Hold shift, select this one, and hold control and
go out of there. And I think that's all the faces that I want to have
this magnolia paint on. Once I've got all
those selected, I'm gonna go over here, and I'm going to
hit the plus sign, and I'm going to click on you, and I'm gonna cause
material internal walls. Hit Enter. And with
those still selected, I'm going to go ahead and
assign, and there we go. So we can tap out
of Edit mode now. We don't need to
be in edit mode. We have the walls
selected that we needed. And here's our new material, internal walls with a
BSDF and a material Okay, so the next thing I'm going to do is just select
the BSDF on its own. Come over to the node wrangler. And I'm going hit something new. I'm going to hit
add texture setup. So I'll go ahead and do that. And what that's done
for is it's just brought us in a
basic texture map. Now, we have a texture
coordinates node, a mapping node, an image texturing node, and then the two we had before, the BSDF and the
material outbud. So that's all we need to
create a basic material. So that's what node
wrangler has done for us. It's gone pink because there's no material or image
assigned to this yet. So this is Blender telling us that there's nothing
assigned to this yet. So we're going to create
a procedural texture. We're going to basically
manipulate and add nodes to create a texture
with no photo base. It's not a PBR or a physically based rendering
or a photo based rendering. This is a procedural texture. So let's get rid of the image texture because we
don't need that. And here, let's
go ahead and add, let's plug Object into
vector. There we go. And let's grab our BSDF and our material output
and take that over to give us
some extra space. And let's start
bringing in new nodes. So I'll start with a
noise texture node. So I'll press Shift A and search for a noise texture node. There we go. And
I'll bring this in. And I'll plug this into
the vector like this. And I'm going to plug this
straight away now into the output node in the surface
to see what we've got. And you can kind of see the principle of the noise texture. It just creates noise
on the surface. It gives us some nice base textures to be
able to work with. But obviously,
that's far too big. So let's go over to the mapping
node and just bump this up to let's try the 100
and see what we think. Roughly, we don't
need to be exact. And let's see what
that looks like. I'll zoom in on that
so I can see and I'll press Shift B and just
grab a bit so I can see. And then, yeah, I'm
pretty happy with that. Maybe I'll go to 150 with this. There we go. I think
that's slightly better. I think that's looking good. So now we have some texture on that and we have
some speckling, so we haven't just got a
flat monotone one color. Okay, so with that done now, I'll go ahead and unplug that
from the material output, and then I'll plug the
BSDF back in again. And let's bring in some more. So now let's bring in
a displacement node. So I'll press Shea and
search for a displacement. I've got it, but
you just need to type it in there if you don't, so I'll grab it
and bring that in. And with that done, I'm going to plug
the vector from the mapping node into the nulls. And I'm going to
go ahead and plug the factor from the
noise texture node into the height of the
displacement node. And then I'll go ahead
and plug the displacement into the displacement
here like this. And now we have some
height to our texture. Now this wall is no longer flat. We have some nice
details going on. The reason we're
seeing color on this is simply the color
being applied to this wool from the HDRI
is still simply white. So let's actually grab
some colors next. So let's press Shift A. And let's bring in
a mixed color node. There we go. And we'll
bring this in like this. And now let's go ahead
and plug the factor from the noise texture mode into the factor from the mixed node
for the mixed color node. So let's plug this now
into our base color. And let's add some
colours to this. So I'll start with, like, a yellow we colo like
this. There we go. And then this one, maybe
I'll take this slightly into the greenie Make it like an apple green colour
and see what we get. And I think I'm
actually going to bring in another mixed color notes. I'll grab that one, opera shifty and I'll pull the
copy up like this. I'll plug the factor
again from the noise texture node back into
the factor on this one. And now we need to blend
these two together, so I'll grab this one again, and I'll press Shift D, and I'll bring a copy down
to the middle like this. I'll plug this one into B, and I'll grab this one here, and I'll plug this
into A like this. So now we have four
colors that we can manipulate using this mixed
color node in the middle. So if I actually just grab
this color here and bring this to a really strong
color like black, and we can find out where
that is now on which side. So if I go right on
this mixed color node, I'm actually utilizing
the bottom one of these. If I take this over to
the opposite side now, because that's
gone really black, that means I'm using this one. And in fact, I pull
this one down as well, you can see now that
we're definitely using the top mixed color node. So I'll go ahead and
take that back up again. And I'll put a different
color in this one. Put maybe a slight yellow in it. There we go. And
I'll grab this one. I'm actually going to leave
this one in the dark. You bring it up a little
bit to a bit of gray, and there we go. That's cool. So we've got four
quite different colors there now in use. And we'll pull the
factor back into the middle and see
what we've got. And I think for now, I will leave that like that ca I want to bring in
another node again now. So I'll pull this one over,
and I'll pull this one over. And I'll press Chef A and
I'll search for a color ramp. Do I have a color ramp? I do. There we go. And I'll bring this in So using the color ramp now, I can add some darkness or I can add some
lightness to this. I can bring this over and bring more darkness
into this wall. Or I can bring the light in and make this
wall more light. And that's basically what I do. So I'll bring the
darkness out and bring the light in. Let
it go. That's cool. So what I've actually
done here is I've created an interior surface with a
huge amount of adjustment. I don't think I'll
be able to get this wall the way I
want it first time as I apply some interior lights to the scene and we put
some more furniture in it. Probably revisit this, but this is in a really
good place because we have the ability to put more
and more texture or less texture or coarser
texture on our wall. We have four base colors
that I can tweak or change. Then we have the ability to
be able to mix those colors, and then we're able to either lighten the wall or
darken the wall. So this is so we've created a very controllable texture map here to be able to tweak
this wall as we go. Okay, so I think I'm
happy with that for now. So I just need to
go ahead and apply that material now to
the opposite wall. So I'll select this one now. What's happened to
Eddy mode with it? And I'll press Shift B, and I'll just grab the wall
and come in on it a bit. And let's select our surfaces, so I'll grab that one, hold con control and press that
and grab these other ones. Hold control again
and grab this one. And I'll go ahead and hit
the plus sign over here. I'll get the drop down here, and I'll find the
internal wall material, and there it is. And I'll go ahead
and press a sign. And there we go. It's that easy. We now have a material
on this wall, as well. Yep, that's looking good. So we can tap out of Edit
mode with that one now, and then we can go ahead
and bring everything back and see what we've got. And
yeah, that's looking good. I'm pleased with that. I think there's one more
thing I want to do. I want to play around with our stone cladding because since
we've changed our HDRI, we have a much more
dynamic light. I've already noticed
that it actually looks better if we plug the displacement
back in on these. So I'm going to take
the displacement from this stone cladding and
go ahead and plug that back into here like this and see what we
get. I like that now. I'm pleased with that. I think with this extra
lighting in this scene, that really makes it pop. So I've got ahead and plug
the displacement back in. And again, in the color ramp, if I want to for the bevel, I can make that lighter
or darker accordingly. But at least that extra texture
has really made that pop. And I'll do the same for
this one now, as well. I'll grab the wall cladding. And I'll go ahead and plug the displacement back in
on this one, as well. There we go. That's
cool. I like that. That's a lot better.
And it's automatically applied the displacement
to this one as well, because they're sharing
the same material. Okay, so that's cool. In the next lecture,
what we'll do is we'll start creating our external render material for the upstairs external sides. Okay, thanks very much. And I'll see you in the next
lecture. Bye bye for now.
62. Lecture 59 External Render Material: Hello, and welcome
to Lecture 59. And in this lecture,
I want to create our rendered material for the outside of the first
floor. I want to do that. And then if we've got
time, I also want to apply our interior surface
to the top floor, too. So let's just see how
far we do with that. So let's just grab
the top floor here, and let's hit the
forward slash keys isolated. There we go. And I think I'll just bring
this down a little bit, go about 50, 50 on. Let's select the object
and then just see what the scale on the rotations
like, and it's all fine. So we'll tap into Edi mode. We'll press AFL.
And we'll press U, and we'll go for a
smart UV project. Make sure you've got a gap in the island margins and
go ahead and unwrap. Let's have a look at what we
got here. And there we go. So there's our UV map, quite a few components on there, but it's all looking quite neat. So that's good. Okay, so I
think now, let's go ahead. We'll tap out of Edi mode. I don't think we need to
be in Edi mode anymore. We'll hit the plus key here. We'll click on you,
and we'll name this as external render. There we go. I'll click
Enter. And there we go. So now we have our material. So let's see what we're
going to do with this. Let's make a plan. So
I think straightaway, let's click on the
principal BSDF and let's add a texture setup. Let's get rid of
the image texture. We're not going to need that. And I think, in this case, let's delete the mapping as well. I don't think we'll need that. I'll get the texture
coordinates, and I'll bring this
over a little bit. And now I'm going to bring in a new node we've not used
before, it's weird name. It's called the Voranoi. So I'll press heft A and search
for the Voranoi texture. And do we have it there? It is straightaway? I'll
bring this in like this. I'll plug the object
straightaway into the vector. Let's see what this looks like. I'm going to plug the
distance straightaway into the surface on the output. And you can see the pattern
that we get with a vornoi. It's quite organic, actually, but I think it'll work for us. So we can play around
with this if we want. We can click on
this one here and now and we can go for
different things. So we can give the Manhattan. So, yeah, you can play
around with these. But I think for me, I think that this first one I'm not even going to
try and pronounce that. I'll leave that as the choice. So now let's go
ahead and Whoops. Sorry about that. Let's
go ahead and scale this. So let's just grab
the scale here on the vector and just
bring this up. I'll go quite high on this. That makes your eyes
feel a little weird. I'll bring that to around
78, 80 around about there. And I'll leave it at
that point for now. Okay, so now it's time to
bring in another node. So I'll bring in a
displacement node. So I'll press Shift A and search for a displacement
node, and there we go. And I'll drop this in as well. Bring this down a
little bit, maybe. And I'll plug the displacement. I'll plug the object from the texture coordinates
straight into the normals. And now I'll go plug the
displacement directly into the displacement on the
output. And there we go. That's cool. Let's go ahead and unplug the Varanoi now from the material output. And what should we do next? Let's plug the BSDF back into the surface, and there we go. So now we need to start
creating some colors. So I think I'll bring
in a mixed color. So let's press Shift A, and I'll search
for a mixed color and we'll bring
this in like this. Let's plug this into the factor. And let's go and grab
another one of this. I'll press Shift D.
Sorry, I want to do that. I'll just grab this, I'll press Shift D and bring up
a copy like this. And now I'll do the same again. I'll press Shift D and bring another copy into
the middle like this. I'll grab these two nodes here, hit G, and bring
them further over. And I'll start
plugging these in. So I'll plug the distance from the Voronoi texture into the
factor of this mixed color, and then I'll go ahead and plug this one into the bottom of this mixed color and then this one into
the top like this. And now, maybe I'll go for a
color ramp on this as well. So I'll press Shift A and
search for a color ramp. There it is, and I'll bring
this in and drop it there. And I'll drop that
into the factor and then the color
into the colour on the base color. And there we go. So we're starting
to get somewhere. Let's zoom in on this corner so we can see what we're doing. So the next thing
I need to do is actually get this
pattern to show here. So if I go ahead and
plug the distance from the Voronoi into the height of the displacement,
and there we go. So now we're starting to
get a pattern showing. Yeah, that's looking pretty
good for a rendered surface. I think I'm pleased with that. So we can go ahead and play with the scale a little bit here, maybe take it up some more. And yeah, I'd say
that's about right. That's the kind of effect that I'm trying to achieve
with this render. And I can play around
with the roughness, maybe maybe, in this case,
bring the roughness up. I don't want this to shine. And we could try bringing the detail up a little bit, as well. And there we go, How's that now? Maybe bring the scale down a little bit. Maybe
a little bit more. Bring the detail. Talk
about the, how's that? How's that looking for a render? And I think for a
rendered surface, that's looking pretty good now. I think I'm pleased with that. And again, the beauty of
this is we can always tweak it if we decide
to at any stage, I could reduce the scale
a little bit more, just increase the size, maybe even a bit more. And is that better? Maybe you reduce
even further, now. And now, that's pretty good now. Yeah, I'm liking that. I'll
leave that just there. Okay, so let's bring
some colors in now. So to highlight the dark areas, I'll bring in quite a black
color. And there we go. And let's just bring this factor over and make sure that we do actually have that in there.
And yeah, there it is there. And let's go ahead and bring that right down to the black. And now let's bring
in another color. Let's bring in a slightly
creamy color. There we go. So now we got the two colors showing in that wall there now. And now let's bring the
factor back to the middle. And now let's grab this one. And now let's bring in
another quite dark color. I'll bring in a sort
of middle gray. There we go. And I'll also bring in another
light color, too. I'll take this slightly into the sort of the green light
green color, like that. And then we can go ahead and play with a factor as we know, just mixing from one
color or the other. The next thing to do is
look at the color ramp, and now we have sort of adjustability in the lightness or darkness of our material, and we can go ahead and do
whatever we want with that. And I'll leave that kind of I think about there
is working for me. So I think the next
thing I want to do is maybe put a bevel on this. So let's bring in our
bevel nodes that we know, so we'll grab this,
bring it over, grab this one. There we go. That's good. So
I'll press Shift A, and I'll search
for a bevel node, and there it is.
I'll bring this in. And then we'll bring
our geometry node in. So Shift A, search for
geometry. Is that there? There it is at the top and
bring this in as well. And now we'll bring
our vector math in. There it is. I
bring that one in. And now a color ramp. I won't copy for this
one because I want to have one with
default settings, so I'll press Shift A and search for the color ramp and
bring this in as well. Okay, let's bring this
up like this now. And we also need a mixed shader. So I'll press Shift A and
search for a mix shader. And there it is. And let's
plug that in here like this. Okay, so now let's
go ahead and plug the normals from the geometry
into the bottom one here. Oh, I've got the wrong
one here. I'm sorry. Let me delete this. My fault completely. I hope
you didn't follow me. Let's press Shift A and
search for the bevel node, and there it is. That's
the one I wanted. My fault apologies. So let's plug the
normal from the bevel node into the vector here and plug the normal from the geometry into
the vector here. Let's make sure
that we're not on ad. We're actually on dot. So dot product, and now plug that into the FAC
on the color ramp. And now let's go ahead
and plug that for now directly into the output
to see what we get. And, yeah, that's cool.
That's what we want. So I could try increasing
the radius just slightly. And yeah, that's more like
the effect that I'm after. Cool. Let's go plug this now
from the color ramp into the fat on the mix
shader and go ahead and plug the mix shader
into the output. And there we go, now we can see the darkness on that edge. We can tweak that if we want to, bring bring out more prominent, bring some white over,
and there we go. You can see that corner now
darkening quite nicely. So that's again, really
completely up to you. I could try increasing
the radius on that. There we go. Maybe more. That's looking better, I think, and I could try tweaking
these to bring them darker or lighter until I'm
kind of happy with effect. Don't want to go
too much with it. I think I will leave that. Maybe that's too much.
Bring that over, and I think I'll leave that
like that. Yeah, that's good. Okay, so the next
thing I want to do is actually a appeal sorry, apply some more materials
to the internal surfaces. So let's do that next. Let's tap into Edit
mode with this. And let's hit the plus
key here to bring in another material
to this component. Let's hit the little
drop down here, and let's search for
our internal surface, internal walls, and there it is. And now let's start selecting. This might take a few minutes, but we can get it done. I'll select this one and this one and then this
corner here, too. And this one, this corner here, too, and this one,
this one and this one. And this one T two. This corner, and this corner. And this corner here. And this upper one
here, and this one. And this one. Those two. And I think I'll go for
the floor, as well. And this floor, as well. And we'll go for um
where else shall we go? This corner here
is missing some. And in the bathroom or in
the hallway, any others. This one here, and this one, and then this one And this one and the floor in
here and this one, too. And I think that'll do
for my first selection. We don't have to do
it all in one go. So I'll click Select
internal walls and a sign. And there we go. So we're starting
to get that now. I'll tap out Vedamo for a sec, just to have a look
at the results. And yeah, that's looking good. I like these inside
reflections now. That's looking
really nice how the sun's creating these nice
reflections internally. So let's carry on with this. So what's happened
to Edit mode again? And let's just carry
on where we left off. So I'll select
maybe this one and this one and this one and
this one, this one, this one. And this one, of
course, in this corner. Oops I'll leave that
there like that, I think. And this I'll leave this
on the rendered surface, just on these ones, and we'll go for
this one, of course. And this one and this
one here, and this one. This corner here. Let's
have a look up top. This corner. And in here, And let's go ahead and assign that to the internal
walls, as well. Let's check that we
haven't missed any. And I've missed
this corner here, so I'll select maybe the swan here and assign
to the internal walls. And is there any others Okay, let's look at the
underside now, actually. So I'll select this
one and this one. And is that all of them? This one here, and this one. And this one. This one, And this one and this one. And is that all of
them? I think it is, so I'll select internal
walls here again and a sign. And there we go. Okay, so I'll tap out of Edit
mode with that. Yeah, that's cool. I'm liking
this rendered pattern. That's looking really, rather
good. That's super cool. Let's bring everything back now and see how our model looks. And yeah, that's
looking really good. I think there's
actually one more thing I want to do in this lecture. So we're close, but
we're not close enough. So let's re isolate this item. And let's tap into
to mode again. And let's create a fresh
material again inside here. So let's hit the plus
sign for a new material. We'll hit the little
drop down here and we'll search for
the wall cladding. And there it is, and
I'll select that. Maybe I'll select the 01 so we don't have the
grimy bevel on it. And I'm going to
select this wall here and I'm going to
select this wall here, and I'll select this wall here. And with those
selected and the wall cladding highlighted,
I'll click a sign. Now, the scale is all out, so let's go over to
our UV editor and grab our UV maps and let's
hit S and scale this up to reduce the size
of the wall cladding. And then let's
zoom out a little, and we'll press for
rotates and 90, Enter. Let's see what we got. And yet, I'm pleased
with that scale, and I think this will be quite striking
inside the bathroom. I think that's quite
a nice effect. Okay, so let's tap
out of Edit mode for this now and see how that looks. And yeah, that's really looking that's really looking good. I'm pleased with
that as an effect. Okay, so let's bring
everything back again and let's zoom out on
it and see what we got. And this is looking really good. I'm liking this. This
is looking great. I I'm liking our HDRI, the way it's applying
to our house. It's really quite dynamic and making it look really,
really realistic. Even though we're nowhere
near finished yet, it's already starting to pop. I'm liking the
reflection in the glass, and I'm liking the
light on this cladding. It's looking good. Okay, so what shall we do in
the next lecture? What shall be the plan? I think in the next lecture,
let's go up some more. So let's have a look at applying some textures to the
roof here and maybe even to our center piece of sort of whatever we call
this, this piece here. Let's apply some colors and some textures
to that, as well. Okay, thanks very much. And I'll see you in the next
lecture. Bye bye for now.
63. Lecture 60 Roof Materials: Okay. Hello, and welcome
now to Lecture 60. And in this lecture, yeah,
let's have a go at the roof. Let's see what we
can do with that. So let's just grab
the roof and isolate it and check the scale,
and it's all good. So let's go ahead and
apply the UV map. So I'll tap into Eda
mode, press A for, and press U, and let's go
ahead and smart UV project. Make sure you've got an island
margin and click and wrap. Check the UV maps, see
what they look like, and that's nice and
neat. That's fine. All right, so I'll tap out
Edit mode for the minute. I'll click on the
plus sign here, click on new material. And we'll call this the roof. Click Enter. And now let's find our material,
and here it is. Let's grab our BSDF and let's go to the node wrangler
and add principle setup. Find your textures
wherever you save them. And I think it's in other. Let's go in that. Roof material, and we'll press eight,
grab all of them, and principle texture setup. Alright, so that's not too bad, but the scale is a little
bit big for me, I think. So I'm just gonna come
over here to the scale here and just increase
this to maybe a five. And let's see what
we get at that. And it's already improving, but let's go some more. So let's try a tennis and
see what we get with that. Definite improvement, and we'll
go some more. Maybe a 20. And, yeah, that's kind of
the effect that I'm after. Maybe even a little bit more. Strive for 30 And, yeah, that's absolutely fine. Now that's exactly the
effect that I'm after. Okay, so that was easy. So now let's tap into
edit mode with it. And let's select
this top face here. And then sort of roll around to the bottom so you can
see the underside edge. That's a little
closer about there. Hold down control and
press Plus to expand on the selection until it comes around over the top and around
halfway around that bevel. So, you got to kind of that
select it all the way around. Once you've got that, go
ahead and hit the plus sign here and click Onnun. And let's call this roof rubber. And click Ender. And with that done and roof rubber
selected, let's go on a sign. Okay, so let's grab
our principal BSDF. Add principle setup. Let's find that roof rubber
material. There it is. Then we'll press eight
and select all of them, and then we'll add
principal texture setup. Okay, so let's see
how that looks now. And we can tap out Vedamode note so we can see it quite clearly, and it's okay, but the scale, I'd say, is a little bit big. So let's increase this. Let's try the ten mark. And see how we're looking. And I think we could go up
even more. Let's try the 20. And let's even go to sort of 30. Let's see what that looks like. And what we could do now
is just try rotating that. So on the z on the
rotation here, let's just try turning that and see if that helps the
effect that we're getting. And it does. I kind of
just breaks up that line, gives it something a bit
different, and there we go. Let's see what that looks like. And let's tap out of
that just deselect it. And it's looking good. I like that we've got, like,
a two tone on the roof. So we've got this very
reflective black material here. Then we've got the
rubber here as well, which is a lot less reflective. Maybe just try increasing the scale a little
bit more here. And, yep, I think
I'll like that now. I'm going to go one more
time up to the 50. Why not? And I'll leave that just
like that. That's fine. Okay, so the only thing is, I don't want this black
here on the underside, so let's tap in again,
select this surface here. And let's see the plus sign. Let's click on the
drop down here and we'll look for internal. Internal walls. I'm
gonna select that. And with that selected
internal walls highlighted, let us sign. Okay, let's tap out
of Edding mode now. And let's go ahead and bring everything back and see
how our roof looks. Yep, I'm liking that. I'm liking how we've just got that two levels of
reflection on the roof. I mean, the colors
are quite similar, but it stands out
really a lot because of the really reflective
material and the rubber, as well. Yeah,
that's really cool. I like that. So now let's go for this structure
here in the middle. So we'll isolate that. So let's start by
checking the scale, and the scales all good, so let's tap into Eddy
mode with it and press A and, and smart project. Make sure you get an el
margin and click and wrap. And let's have a look,
see what we got. And, yeah, that's all I can get. So over here, go ahead and
hit the plus sign, click on. And let's call this
material Cedar. Click to. And now let's grab
our principal BSDF. Add principal texture setup. Make sure that you've
got CDA selected in your texture file set. So that's right there.
And let's press eight, grab all and add
principle texture setup. Alright, so with it all
still selected like that, let's grab everything here. And let's press, nine, zero, and click Enter. And let's see what we've got. And it's looking good, but I think the scales are a
little bit much yet. So let's go ahead
and adjust that. Maybe let's take
that up to even 20. Let's try that. 20 might be a
little much, but let's see. Yeah, twenty's a bit much. Let's try nine that's
looking better, isn't it? Maybe let's bring that
down even to an eight. Thereabouts, anyway. And, yep, that's about right for me. I
think that's looking good. Let's check the other surface and make sure that
they're making sense, too, and it's looking good underneath and the sides
are looking correct. It's looking good.
That's really cool. So I'll tap out of edit mode for a moment and see what we've got. And I like it, but it
needs a little something. It's just I think we just need to apply the bevel
modifier to this, just to the bevel though, just to get some
darkening on the edges. So let's do that, as well. So let's grab these ones here and pull them over to
make us some space. And yeah, let's do what we do. So let's bring in the bevel. So let's press Shift eight, and let's search for the bevel. And there it is, bring that in. And the next one is, what is it? It's the Geometry node.
Let's bring that in. And we want the vector math. The vector math,
let's bring that in. And now let's bring in the
color ramp. Bring that in. And now we just
want to mix shader. Shift A, search for mix shader and bring that in
as well. And there we go. Okay, so I think
let's go ahead and turn the ad into dot product, plug the normals
into the top one, and the normals here
into the bottom one, plug the value into the
FAC on the color ramp. And now let's go ahead and
plug this directly into the material output and
see what we've got. So it's kind of
darkening everything, which might put a nice effect we could try that or we could
unplug the displacement, and then that would
just do the edges. Let's try with the displacement connected for a moment and
see what that effect is. So let's plug that
into there again, and let's play around
with the color ramp. It might give us the effect
that might be interesting. If not, then we'll just plug
unplug the displacement. Let's plug that into the
top one on the mix shader, plug the BSDF and the bottom of the mix shader and now plug
this into the material, but and see what we get. Is that an effect we like? Bringing a little bit
more darkness out of it, lighting it up a bit. And do I like that? Does Adam I might bring
everything back, actually. And no, I don't think I do. I'm going to unplug
the displacement and do what I really
wanted to do with that. So I'll zoom in a little bit. And let's try bringing up the color ramp to bring
more blackness into this. Let's try increasing
the radius on the bevel to maybe 1.5. I'll just try
tweaking these round till I can see a nice level of darkness on the edge of
these now. There we go. Now I can see some ice darkness try bringing the
black over a bit more. Yeah, that's good. That's more the effect that
I was trying to achieve. I'm liking that now.
That's much better. We've got something looking
a bit more real there now, some contrasting
edges looking good. Okay, so that's it
for this lecture. So in the next lecture,
what shall we do next? I think let's look at the flaws in the next lecture. Let's see
what we can do with those. That's the last big blocks, if you like, that we have to do. After that, we'll be
moving to smaller objects. So yeah, let's do the
flaws in the next lecture. Okay, thanks very much. And I'll see you in the
next one. Bye bye for now.
64. Lecture 61 The Floors: Okay. Hello, and welcome
now to Lecture 61. And yeah, let's have a
go at doing our floors. We'll start upstairs with our polished concrete floors.
I was just looking at this. I really like our render. I think that's looking
really good now in our HDRI like that's really popping, so I'm
pleased with that. Anyway, I'm digressing. So let's grab our floor. Let's hit the forward
slash key to isolate. And I think next thing to do is let's check the
scale, and it's fine. So let's tap into Edit mode, press A for all and U, and let's do a smart UV project. Make sure you've got an
aisle and margin and unwrap. And there we go. And it's right there, and it's
all neat and looking good. Okay, I'll tap out
of Edit mode now, and let's grab this item, and let's hit the Blusky
and let's add new. So let's name this material,
polished concrete. There we go. And click Enter. And we've got our
material, there we go. Let's find our principal
BSDF, select that. Go over to the node wrangler
and add principal setup. Let's find our textures. So it's right there for me, wherever it is for
you, just click on it. And we'll go to stone and tile, and we'll go to
polished concrete. We'll press eight,
grab all of them, and go ahead and principal texture setup, and there we go. And we've added that, and
that's what it looks like. So now that we've done that, let's actually just
have a look at this and see what we want to do. So I think the first thing I
want to do is make sure that object is connected to the
vector, and there we go. That looks better straightaway. And now let's have a
look at the scale. The scale actually
isn't too bad. And let's see. Let's
try increasing that. Incidentally, if you
just click on the arrow here on the top one and
then just scroll down, you can then just drag and
increase or reduce your scale. And let's see what we want. And I'm thinking something
like let's cry a bit more. There we go. About a
0.5 looks good to me. Alright, so that's kind of that's our first layer
of polished concrete. And maybe we could take a look at the normal maps
and see if there's anything. I'll leave that alone. Let's look at our displacement, see if we want to do
anything with that. Let's try increasing our
mid level displacement. And let's also let's
leave that there, but let's have a look
at the BSDF now. And I think the IOR we'll
leave that at around 1,300. And we could try maybe
adding a coat to this. Let's click on the code. Add a bit of weight to the coat. And add a tiny bit
of roughness to that and a tiny bit of Iowa, and we'll leave that
just like that. Okay, so that's the basis
of a polished concrete, and it looks pretty good, but I want to go a
stage further with it. So what I'm gonna do now
is actually select it all. And let's press Shift. And we'll move that down. I don't have my actual my gizmo, so I'm going to just press escape for a second,
and click on this one. Don't know why my gizmo was off, and there we go, so
the gizmos on now. So if you ever have that issue, just go ahead and turn
your gizmo on there. And with that now, I'll just bring down this layer I've just created down just a tiny bit. Let's have a look at it up
close and see where it is. And I just want that just
underneath the first layer. And there we go. That's
kind of where I want it. Once I got that, I'll select it. And in this case, I'm
going to go ahead and delete the material. So I'll come up here and hit the minus key, and there we go. So we still have
the layer on top, but not the layer underneath. Okay, with the layer
top now layer selected, what I want to do
is turn the alphas all the way down to make it completely transparent
for a moment. There we go. And now select the
layer on the bottom. And let's click on
the plus ky hit, add a material, and click new. And let's call this
material rough concrete. And click Enter.
Select the BSDF. Add principle setup, and let's
find our rough concrete. Here it is. And we'll
press A for all, and we'll go ahead and add
principle texture setup. And there we go. So we have that selected, and that's good. So again, make sure the
object is in vector. There we go. And let's
have a look at that. And that's looking pretty good. But let's try reducing
the scale, maybe. And see what I get, and am I happy with that? Yeah, I think I'm
happy with that. Let's try UV again intervector. And, no, that doesn't work. I'll go back to
Object Intervector. I think now, with that done, I'm actually going to
select the top layer, which is our polished concrete. I'm going to go back
up to the alpha, and now I'm going
to increase this. So what we're going to get
is almost a double layer in our concrete so that it feels like there's a
bit more going on. So on the top, we still
have our polished concrete. But under that, we
have more speckling. So it's going to have
some depth to it, and that's the look I was after so that there's
just more going on. I'll try reducing that alpha. And I'll try reducing
IOR on this one, maybe. Maybe 1,100. I don't know. Round about there.
We'll try that. And we can see what we've got, maybe increase the Iowa a bit. Leave it at 13. And you can see the
two layers in that, and that's really cool. You have the polish
swirly surface, and underneath, you have
the gravelly texture. And I think I'm really
pleased with that. That's the kind of
look that I was after. Alright, that's cool. So let's bring everything
back and see how that looks and see how
that looks in place. And, yeah, that's a really
nice polished concrete floor. We could try reducing the roughness or increasing the roughness
slightly of our coat. And let's have a
look at this IOR, see if we want to
reduce it a little bit. I want some reflection,
but I don't want detail loss because
the IOR is too high. And there we go, get some
extra lights on this scene? I think that's gonna look
really, really, really good. Okay, so let's try
for the next one now. So let's select this one. Whoops, not that one.
This one right here. And let's hit the forward
slash key to isolate that. And we're just going to repeat
the process now, really. So let's go ahead and check the scales,
and they're all good. We'll tap into Edi mode. We'll press A, and then U. And let's go ahead and
do a smart UV project. Make sure you got an
island margin and unwrap. Okay, so what we maybe
do straight away now is let's tap out of
Edit mode, grab this one, and then we'll press Shift D, and we'll press G
and Z and take that down just a tiny bit to
about there like that. So again, we've got the
two layers on that. Alright, let's grab
the top layer, and let's hit the plus key, and we'll hit the drop down here and we'll type
in polished concrete. And there it is. And we'll select that
and see what we get. And there we go. So the
scale, we'll leave alone. The settings are
all correct now. Alright, so let's select
the one underneath now. And let's go ahead
and hit the plus key, and let's hit the drop down
and we'll type in rough. And there it is. Or is it rough concrete? And we'll add that
too. And there we go. We've instantly got our
jew layer in the floor. And I think it's looking great. It's a little bit
lost when we bring the building back because it's
still very dark in there. But when you see it like this, I think that's really popping.
I'm pleased with that. Okay, so let's do the last one. So let's hit the forward slash key to bring everything back. And let's grab our last
polished concrete floor. This one here. Let's check the scale,
and it's all good. Let's hit the forward
slash key to isolate. And now let's tap into
Edit mode with that. Let's press A, let's press U. And let's go for
Smart UV project and unwrap. And there we go. Okay, so let's tap out of
Edit mode with that now. And let's press Shift D, and we'll press G and Z and take that down
just a tiny bit. And we'll see where that one is. And is it just
below the surface? And, yeah, that's cool. Okay, so let's select
the one on top, and let's hit the plus key. And it let's hit the
little drop down here, and let's look for
polished concrete. There it is. And
we'll click on that, and there we go. That's done. Select the one underneath, hit the plus key, and we'll
hit the little drop down, and we'll type in rough. And there it is rough concrete, and we'll add that as well. And there's a jewel
layer finish mirror in our polished concrete floor. Okay, so let's hit the forward slash geet to
bring everything back. And there we go. So there's our polished concrete
floors on our upper level. Yep, they're looking really
good. I'm pleased with those. Okay, so have we got time
to do the ground floor? I think we do. Let's take a look at that Okay, so let's select our floor, and let's tap into Edi mode. Sorry, let's isolate the
item using forward slash. Let's check the scale
and the rotation, and it's all good, so
it's tap into Edy mode, and we'll press A and U, and we'll go for a
smart UV project. Since it's really cube, you could argue that we
don't need to do this, but I'm just kind of
doing it on principle, and we'll go ahead
and unwrap it. Okay, so let's tap
out of Edy mode. And let's go ahead and
hit the plus sign, and we'll click on you and we'll call this
ground floor tile. Uh, misspellt that.
Excuse me, a sec. And there'll be a
ground floor to. Got that. Let's click
on the principal BSDF. Let's add texture
principle setup, find your textures
wherever they are. And let's go to stone and tiles and floor tiles.
Let's click on that. Let's press A for, and
we'll go ahead and add principal texture
setup, and there we go. So it's good, but I'm not
happy with the scale, so let's come on over. And again, if you
just hit the arrow on the top one and now
drag down to the others, now we can adjust in multiple. And I'll bring that too. I think about there like that. And that's looking pretty good. I think I'm pleased
with that overall. I think the only thing
I'd like to do is try and even up the tiles this way. So I'll tap into
timed with this. And now I'll grab the whole
thing and select it here and just try moving it over just to try and centralize
the gaps on either side. And that already is better. And, yep, let's leave it about there. I
think that's fine. Okay, so let's tap
out of Edit mode, and let's bring everything back. And that was real easy to get our ground floor in, and
that's looking really good. I think I'm pleased
with the shine on that. I just I won't mess
around with it. That's absolutely fine. Okay, so that's our floors in, and that's the end
of this lecture. So I think in the
next lecture, um, let's start assigning teak
materials to our bathroom. Okay, thanks very much. And I'll see you in the
next one. Bye bye, Fina.
65. Lecture 62 Bathroom Materials: Hello, and welcome
now to Lecture 62. And in this lecture,
let's have a go at applying our materials
to our bathroom, all that sort of
cedar that we're going to put on all our paneling
and our mirror in there. So the first thing
we need to do is sort of be able to see in there. So let's go to our outliner. And let's turn off the let's sort of open
up the first floor. And let's turn off the
first floor walls. And let's turn off the roof, middle roof and the roof. So we just have this paneling and then the mirror,
and that's all we have. Alright, so once
we've done that, let's go ahead and apply
some materials to this. And I'm going to
show you something I've not showed you before, which is a faster way of applying materials
to components. So I'll select the floor and we'll check the scale,
and it's all good, and we will tap into ding
mode and we'll press A, and, and we'll do a
smart UV project. Make sure you have an ail margin and unwrap, and there we go. St zoom in on this and see that the UV maps looking
good and it is. So once you've done that,
we can actually then just come on over here
and hit this little drop down here in the texture editor and see if you can find the
cedar, and there it is. And because we only have one material to comply
to this component, and we've already made
this material before, we can simply just apply it right here
without coming over here and hitting the pluses
and everything much quicker. So now that we've done
that, we can see that the grain direction in that cedar is run
running the wrong way. So let's press A for
come over to the UV map, and we'll press r90 and enter. And let's see what
that looks like. And that's looking good.
That was really easy. That grain's looking
absolutely spot on. I'll tap out Veda mode with that one, and
that one's done. Okay, so I think next one is, let's grab this one here and check the scale,
and it's all good. So we'll tap into Edi mode. We'll press A and, and we'll go for
smart UV project. Make sure you get
an island margin and unwrap. And there we go. There's the UV maps
looking clean. Okay, now that we've done that,
hit this little dropdown, look for the cedar, and
that's it that's applied. And again, the grain direction is all wrong, so I'll press A. I'll grab it over
here and we'll press, 90 and type Enter. That's done. We'll tap out of Edi mode with that, and that's looking good. Okay, now we just have
the ceiling to do. So let's grab that. Check the scales,
and it's all good. Tap into Eddy mode. We'll press A, and then U, and we'll do a smart
UV project and unwrap. And the UV maps are good. So we'll hit the little
drop down and we'll grab cedar, and that's it. I'll imagine the grain
directions the wrong way. Let's zoom in and have a look. And it is. So let's press A. Let's grab it over
here and we'll press 90 and type and there we go. Okay, you can see how
quick that is to do. We've just applied
all the materials to the bathroom in just
a matter of minutes. So the only one that's kind
of left now is the mirror. So let's do that next. Let's actually just click on. So let's come over here now
and we'll hit the plus sign, and we'll click on the new and we'll call this the mirror. And there we go. So we can actually make
a mirror just with the principal BSDF
really simply because the mirror is just a
reflective surface with no imperfections, so we can do that really easy. So let's take the roughness
down to well, zero. And let's take the
metallic up a little bit, which will just
naturally give us a little bit of
reflection anyway. I'll take it up about a quarter. Obviously, that's not enough, so now we'll take
the IOR up a lot. We're going to take this up to, I would say, at
least eight or 900. In fact, I'll just max it
out at 1,000. There we go. And that's a mirror.
That's that easy. So let's play around
with metallics, see if we want to do
anything else with it. And I'll just leave
that about there. Okay, so that's
our bathroom done. Super easy, super quick. So let's bring everything back, so let's bring back
the first floor walls and the middle roof
and the main roof. And remember to do a save, so I'll press Control S. And that was probably one
of our shortest lectures. We could go on in
this lecture and apply materials in the bedrooms, but I think we'll just call it a day with this lecture
right here and we'll pick up applying materials to the wooden surfaces in the
bedrooms in the next lecture. Okay, thanks very much. And I'll see you in the
next one. Bye bye, Fino.
66. Lecture 63 Bedroom Wood Materials: Hello, and welcome
now to Lecture 63. And in this lecture, let's
go ahead and apply some of our wooden surfaces in our bedrooms. Let's go
ahead and do those. So again, let's actually go
over to the first floor, and let's go ahead and turn off the roof and the middle
roof and the walls. So we can see our wooden
surface a lot more clearly and make sure that we have material
properties turned on. And let's see what we can do. So I think I'll start with
this structure here first. So I'll go ahead and grab that. And I'll hit the plus ky,
and I'll click on you. And I'll call this
walnut bed frame. There we go. And I'll click
enter. And there we go. Then I'll grab the
principal BSDF and I'll add the principle setup
in the node wrangler. I'll click on the
drop down here. Find the textures wherever
they are. Click on Wood. While on a bedframe I'll
click on that to expand it. I'll press A, and I'll click on Principal texture
setup. And there we go. So I did forget to apply the
UV map. So let's do that. I'll click on the item,
tap into Edi mode, press A and U and
Smart UV Project. Make sure you have an Ilan
margin and click on UNR. And let's see what we've got. And I think we need to
work on the scale on that. So I'll zoom in so I
can see it nicely, and I'll press A for, and I'll grab everything
in the UV map and hit S and just go
ahead and scale this up. And I think I need to
adjust the scale in this, so I'll come over to
the mapping node. I'll hover over the first one, click here on the arrow, and then just drag
down the mouse. And with the left button
still sort of pressed down, I'll just move this and go
ahead and adjust the scale. And let's leave it
something like that, because then also let's
rotate the grain. So I'll press A fall,
grab the UV map, press R, rotate 90
degrees, and press enter. And now let's try that again
and see what we've got. Obviously, that's better.
So I'll do the same now. I'll just hover over
the top arrow here, hold down the left button, drag to the bottom,
and then just move it along until we get something
that we're looking for. Starting to look better. And I'd say that's
looking good just there. I'll leave that just like that. Yeah, I think I'm
happy with that. That's looking
pretty, pretty good. So I do want to also
look at this end here. Is that okay? And, yeah,
that's looking good. I'm liking that. So the grain here on this end is incorrect, but we'll never see that. So I'll leave that alone because we will kind
of see this edge. And let's just have one
last little look at this and maybe just try again, see if there's a sweeter spot. How is that there? And yeah, I'll leave
that just like that. I think I'm pleased
with that. So I'll tap out do mode with that
and see how that looks. And that's looking good.
I'm pleased with that. Okay, so let's apply
that same material to our skirting board here. So I'll check the scale,
and it's actually out. So I'll press Control A, and we want to correct
the rotation and scale, so I'll click on this
and there we go. I'll tap into Edi mode with
it all still selected. I'll press A, and I'll press U, and I'll go for a
smart UV project, and I'll click on
Rap, and there we go. I'll hit the little drop
down here and I'll find the walnut walnut bed
frame there it is. I'll click on that, and
let's see what we go. Okay, so let's actually
grab everything. Let's press R and
rotate it at 90 degrees and click Enter and
see what we get. And we need to adjust the scale. But remember, we can't
adjust the scale here now in the mapping node unless we created a
separate material. But I don't really
want to do that. So I'll just press A, and I'll come over to
the actual UV map, and I'll grab it O,
and I'll just press S, and I'll try scaling that. Try scaling it down to
increase the scale. And let's see what
that looks like. And we can press A again. And I've tried just rotating it slightly just ever so slightly, just to get something a
bit more random going on, and I think that's cool. This panel here, we need to rotate that
one, so I'll press, 90 and type Enter see what that looks
like, and that's good. And we can press A again and
just try scaling that again. And it's just about really
finding the sweet spot. I might scale it
up just in the Y. So I'll press S and Y, and just try scaling
it up this way a bit. And there we go. That's
cool. That's fine. Now. I'm liking that. I'll tap out of Edit mode with that
one, and there we go. That's the walnut skirting done. Okay, so the next thing to do is head over to the
other bedroom now, so I'll move over there, and I'll press Shift B, and I'll resend a Blender
on this one here. And let's see what we're
going to do with this. So I'll grab this
top bed frame here, check the scale and
the rotations out. So I'll press Control A, and apply rotation and scale. And now let's go ahead and
tap into Edit mode with it, and we'll press A for all, and, and we'll go for a smart UV
project, and we'll unwrap. Let's sort of zoom
in on the UV map, so we've got that right. And let's go ahead and
hit the Plaske here, add new material, and we'll
call this material tok. And there we go.
We'll hit Enter. Once we've done that, let's
find the principal B STF. Click on it, and add the principal setup
and the node wrangul. And let's find our
light oak material. There it is. Light oak
distress. Let's click on that. And we'll press A for all and add principal texture setup. I think first thing
we actually need to do is rotate the whole thing, so I'll grab everything
in the UV map. I'll press r90, and type
endo, and there we go. And let's see what
that looks like. Let's just zoom in on it
and see what we've got. And I might just turn the
displacement down quite a lot. So here on the displacement, let's turn the scale
down a little bit. Two, maybe a one. There we go. And the mid level maybe
turned that down to a three, and that's helped
out a little bit. So I think, first of all, now, let's just press A again, and let's just try
scaling this a little bit just to get
something that we like. I think that's looking
pretty good now. I'm going to leave that alone. So I'll tap out
Voting mode with that and just see what
the results are. And that's looking good.
Okay, so now what? Let's grab this one maybe. And let's look at the
scale, and it's all good. So let's tap into
Edit mode with it. And let's press A for all. And let's press U, and let's go for a
smart UV project and click on Unwrap,
and there we go. So what we can do now is hit
the little drop down here, and we can look for Light ok. Light ok, and there
it is. Let us sign. And we can press A f, and let's go ahead and rotate
everything in the UV map. 90, and type enter. And let's see what we got. I'm gonna press Shift B
just to resent a Blender. It's running a little
slow. There we go. And see what we got. And this is kind of a
distressed surface. That's kind of the
look I was going for. I'll hit the tab key, just to tap out of Edi mode
for a minute just to give us some detail and see
if it's looking good. And I think I'm going to
leave it right there. The grain directions looking good and the scale
is looking good. I'm going to leave
that right there. But this middle
panel is supposed to be a different surface. So let's tap back in again. And let's grab this
middle surface here. And let's come on over here
now and hit the plus key. And let's click on New and we'll call this
quilted leather. There we go. We'll hit Enter, and that's our new material. Let's go over to the
BSDF and click on that. Go to the node wrangul, add principle texture setup. And let's go find our
textile materials. Find our quilted leather. We'll press Av and hit the
principal texture setup. Once we've done that,
we can go ahead and press the assign,
and there we go. So let's just grab
this one here now, and let's press S in
the UV map just to reduce the size of this by increasing the
scale of the object. And see how that looks. And I just want to check
the normal maps on this. I'll select this object, and I'll come over to this
one and face orientation, and it looked like the
normal was out. I was right. So I'll select this item here. I'll go to mesh, go to normals and flip
this one, and there we go. I'll turn the face
orientation back off again, and that's looking better. Okay, so we happy with
that? Is that all good? Am I happy with the scale? I think I want to scale
it up just in the Y axis. So I'll press S and Y. And, scale it up a little
bit more like that. And there we go.
That's much better. Okay, so I'll tap out
ime with this one, and I don't see the
need to do that again, so I'm literally gonna
delete this one here. And I'm going to grab this one, and I'm going to press
three on the numpad, and I'm going to press Alt D and Y and bring this copy over now to the opposite
side like this. And there we go. That's done. So I think the only thing
that remains to do is apply that same quilted material
now to this panel here. So I'll select this panel, and I'll go ahead and hit
the little drop down here, and we will find the
quilted leather, and it's right there, and
we'll assign, and there we go. So let's check maybe the
normals on this one, too, or let's just go ahead and do it.
Let's just try that. So we'll hit the
little drop down and it Face orientation. And no, that's all
good in this case. So I'll turn face
orientation off. We'll tap into Edit mode, and we'll just try
a UV map on it. So I'll press A,
and we'll press U, and we'll go for
Smart UV project and Unlock, and there we go. Let's grab everything in
the UV map here and hit S, and we'll try to scale this
down a little bit like this. And we'll try and
we'll press A again. And we'll try scaling it down
in the X, I'll press SX. And now we'll try SY. I'll click off so we
can see it clearly. And there we go. I think that's good. I think
we're looking good. Tap out de mode so we
can see it more clearly. And, yeah, that's looking good. I'm pleased with that,
no. Okay, so that's our wooden surfaces finished in our bedrooms. So
Oh, no, it's not. Look at this. I missed one. I'm too keen. Let's do this
skirting board here as well. So let's and operas A for, and, and let's go for a smart UV project and
unwrap. And there we go. So now that we've
done that, let's hit the little drop down here, and we'll search for light oak, and we'll grab it
just here like this. Alright, so now let's rotate it, so let's grab it all. Press, 90 and type no. The scale is looking a little
bit off, but remember, we can't adjust the scale here because that's gonna adjust the scale on our bedroom panels. So I'd like to press A again, and let's hit S here
on the maps and just scale this up and see if
we can get a good result. And how does that look? I
think that's looking good. I think I'm pleased with that. That's looking. Just
or is it a little big? I think it's a little
big, actually. Let's press A again, let's press S and scale
up a little bit more. Let's have a look at that. And, yeah, that's
looking better. I'm pleased with that, now. Okay, I'll tap out of
Ed mode with that. And that's the
skirting board done. Let's have a look to see if the maps are correct on
the side, and they are. And, yeah, that's
absolutely fine. Alright, so that is basically all the text is finished
now on the upper level, so let's go ahead and
turn those back on again, so we're all finished. And in the next
lecture, let's start applying the materials now to our sofa and to our
TV wall just here. Okay, so let's save this. Let's press Controls, and I'll see you in the next
lecture. Thanks very much. Bye bye, now.
67. Lecture 64 Feature Wall Materials: Hello, and welcome
now to lecture. What are we on now? Um, 64. We're on lecture 64. So I think in this lecture, let's start applying our materials now to
our ground floor. We kind of we're done
with upstairs now. I think most of our
materials are applied. So yeah, let's start looking at the ground floor and
see what we can do. So first of all, let's
hide the first floor. So let's compress
the first floor file and go ahead and hide that. There we go. And let's
select this item now. I think we'll just hide
this individually. So I'll just hit He to
take that away like that. I want to work on this
sort of feature wall here, and we might as well apply
this sort of metal material to this sort of pocket
door track, as well. So let's go ahead and do those. Let's work, first of all, on a pocket door track,
so I'll select that. And let's check the
scale, and it's okay. I don't know if you're
a member or not, but we actually use
the OltD command to create these ones above. So when we create
the material for the bottom one or when we make the material
for the bottom one, the top ones will automatically have the material
on them, as well. So let's check the scale, and it's all good, so
let's tap into Edit mode, and we'll press A, and we'll go press U or Smart UV project, make sure you've got an aisle
and margin and go ahead and un Once you've done that, we already have created a
stainless steel material, so let's just use that
on these lower ones. So let's select it here. Let's type in here
stainless and stainless. There it is. And let's
see if that's applied. And yeah, that's looking absolutely fine to me.
We're all done with that. And the material's been applied
to the top ones, as well. Okay, so the next
thing I want to do is kind of recenter
on this area here. So I'm going to get blended
to sort of refocus here. So I'm gonna press Shift B. That'll give me that
selection window, and I'll just scroll
over this area like this to zoom
in, and there we go. So let's sort of
make a material now for this walnut,
these panels here. So let's select these and check the scale,
and it's all good. So let's tap into Ed mode. And let's press
eight, select all, press U, and let's go
for a smart UV project. Make sure you've got
an island margin, and then go ahead and unwrap. So there's our UV map. There's a lot of faces there, but we kind of expected that. There are a lot of islands,
is the correct term. But we knew they'd be
there, so that's okay. So now that we've
done that, we can actually hit this
little drop down here because I'm going
to use the material we used on our bed
frame upstairs, the dark walnut color. So I'm going to hit
this little drop down because we already
have the material, and I'll type in here walnut. And we have that the
Walnut bed frame. I'll click on that
and there we go. So it looks like the grain
direction is incorrect. It looks like it's
running horizontally. So I'll zoom in on our UV
map and select everything, and I'll press, 90 and click
Enter, and there we go. Okay, so let's have a look
at that now, and it's okay, but we kind of do have
some repeat knots, which just doesn't
look very realistic. And we could try just
scaling the UV maps. But I think, in this
case, I'd like to adjust the mapping nodes here,
but I can't just do that. If I adjust these mapping nodes, the material that's applied upstairs on that bed is
going to be all wrong. So we need to create a new material using this
one here. So we can do that. If we actually come up here now and come over
to this one here, we can create a new material, but with this node setup. So
I'll click on that there. And now this is called
Walnut bed frame 01. It's a duplicate of the
one we have upstairs. So if we adjust this one now, the one upstairs
will stay as it is. So I think first thing to do is, let's default the scale
here so we start again. So I'm going to
select the top one, and I'm going to press
down the left mouth, the left button, and just
drag down to all of them, and I just bring that
down to the 1,000. So we kind of have
a starting place. I mean, we could have
just scrolled down slowly and about 1,000. There we go. That's
where we want to be. We could have just
scrolled down slowly, but I like to start at the
default and then work up. Maybe there's no logical reason. It's just one of those
things that I do, and I'm kind of passing
it on. I don't know. So I'll hit the tab key now
to tap out of Edit mode so we can see these more clearly
we've got the material here. And now I'm going to just hold down the left
button again and just drag down over the
X and Y. I don't really need the z, and
I'm going to scale. And see what we get. So am I happy around
there around the 15,000. Let's zoom in on this and kind of see what
this looks like. And we've got some
nice patterns in that now. That's looking pretty nice. I think I'm liking that.
We got no repeats, which is quite important
because they'll really stick out if this things
obviously repeating along. And I'm not seeing
that, so that's nice. We could try just upping
the number a little bit. And what's that looking like? That's looking pretty good. And what we could
do now is we can actually tap into
Edit mode with this, and we could press A
to select everything. That'll give us our UV map. And I'm just gonna press R, and I'm just going to
rotate it just ever so slightly so that the grain in the walnut isn't just
perfectly straight. And I'll tap out vote mode
again, and there we go. That's looking good. And yeah, I think that's I think
that's absolutely fine. Leave that just there. So let's just go
over to the IOR now and see if we want to
increase the reflection in this just a little bit to make it look slightly
different to upstairs. And let's have maybe leave
it at around 18, 19. And yeah, I think I'm
happy with that now. That material's just fine. So now we can apply
the material to this panel here and
just decide whether we need to create a
separate material again or if this scale
will work on these. So I'll grab this, and let's check the rotation and the scale, and
it's all good. So let's hit the edit mode. Let's hit the tab key,
and we'll press A, and we'll press U, and let's
go for a smart UV project. Make sure you got
your Ilan margin and go ahead and unwrap. We should have islands all
laid out now on our UV map. There we go. So again, we already have the material, so let's hit this
little drop down here. And let's find Walnut. And we're looking for the
walnut bedframeO one, which is the material
we've just used here. And let's click on this. And the end sort of grain direction is all wrong
as we suspected it would be. So let's zoom out on the
map and grab all of it. And we'll press, 90
and click Enter. And the scale just we can
see repeats in the knots, and that's just not
something I want. We could try just using
the UV map to scale up. Let's try that. I'll press A. And let's hit the SKI and just reduce the
size of the UV map, which will increase the
scale of the texture. And let's have a look
at that around there, maybe, and see what we've got. And that's looking
pretty good, actually. I don't think I
mind that at all. I mean, I don't see any obvious. Yes, we've got some knots there, but they don't look
particularly obvious. We could press A again, and we could try just scaling
it up just in the X just a bit to make it
slightly more random, or maybe scale it
down slightly more in the X. Let's see what
that looks like. And there we go. That's
looking pretty good. I think I'm liking that overall. Yep, I'm happy with it.
I'll tap out of Eddy mode, and I'll leave that
just like that. So that's our material applied
now to these panels here. Okay, so what do we
need to do next? Oh, we have this one here, as well, so let's
select this one. And let's check the
scale. The scale's fine. So let's hit the
Edit mode button. We'll press the tab key, and then we'll press A and U, and we'll go for a smart UV
project, and we'll unwrap. So we'll hit the little
drop down here now, and we'll look for
our Walnut 01, Walnut bed frame
01, and apply that. So I think then let's go ahead and grab everything
and rotate it. So we'll press r90, Enter. And let's have a look
at the scale on that. And yeah, it's repeating. I don't like that. So I'll
press A for all again. And I'll just hit the SK and just bring
this down in size. And let's see what
that looks like. And I think that's looking fine. I'll tap out of Edit mode to get a nice clear view of that. And see, so we have we do
have a set of knots there, so I don't like that,
so I'm gonna tap back into Edit mode with
this and press A. And I'm just gonna try
moving this maybe over in the Y axis just slightly. See if we can eliminate that set of knots and maybe just rotate it
ever so slightly. And let's see what
we got there now. And by rotating it,
that means possibly that that set of knots will just sort of fade out
of the map because they've just run off the UV map, and that's what we seem
to be getting there. I'll tap out of Edim
just to check that out. And yet, I think I'm
happy with that. That's fine. So the next one
now is this actual panel, which is directly behind the TV. So let's select this
and check the scale. Scales all good, so we'll
tap into Edi mode with it, and we'll press A and then U, and then Smart UV project. Check the el margins, okay, and then unwrap. Now we're going to
create a new material. So let's hit the plus
key here and select new. And let's call this the marble. And so I bent it. Let's
select our principal BSDF. Let's add the principal
setup in the node Wrangler. Find where your textures are. Mine's right here, and we'll
go to stone and tiles. We'll select marble.
We'll press A, so all these are selected and hit the principal
texture setup. And let's have a look at
that and see what we got. It's looking pretty good. Do I want to do anything with that? So I'll suppress A
again to select, and I'll grab everything
on the UV map. And I'm just gonna hit R and rotate this a
little bit because, I mean, there isn't really
a direction for marble, so we'll leave that maybe
something like that. And is the scale okay? I'd say the scales
are a little bit. These cracks look bigger
than they should be. So what I'm going to
do is just go over to our mapping node and
select all of them, and then let's try just
reducing the scale, maybe, or increasing the scale. I'll zoom out on this
and see what we like. And that's not bad,
actually, at 4,000. I'd say three? Do I like that? I think I do like that. I think three's a nice number for that. So let's just actually see about the IOR now and see if I want
to do something with this. I'll tap out of ti mode with it so I can see it
nicely and see what the reflectibility
is already like at 1,500 and it's already got some quite nice reflections
in it, actually. But I'll just try playing
around with this. Maybe at 2000 or 1.9. I think I'll leave
that at the 1.9, Mark. I think I'm happy with
that. Quite a lot of reflections, but
I quite like that. And the TV will be
directly in front of this, and I'm gonna back light the TV, so that should just create some extra depth to everything. Okay, so the only
other bit of marble we have is this little
hearth type thing here, so I'll grab this.
Check the scale. It's all good, so I'll
tap into Edy moode. I'll press A and then U, smart UV project, and unwrap. Then I'll hit this
little drop down here, or find the marble material. There it is and select that. Let's tap out of Edi moode and just see what
that looks like. And I think that's absolutely fine where it is just like that. So we've got some nice
reflections in that now of these boards above these
walnut strips that we've got. So that's really
nice. I like it. Okay, so I think we've done
some good in this lecture. We've created some new
material, so that's nice. So let's go ahead and
bring everything back now. I'll open up the
ground floor file, hit the interior and
see if we can find that ceiling panel and
turn that back on. And let's turn on the
first floor, as well. And there we go. That's
everything back in. Let's have a look at
our panels in place. And I think that's
looking really nice. I think I'm liking that.
Alright, so in the next lecture, um, what shall we do next? Let's go ahead and
do our sofa next. That'll be a nice thing to do. Let's apply our
materials to our sofa. Alright, thanks very much. And I'll see you in the
next one. Bye bye, Fino.
68. Lecture 65 Sofa Materials Part 1: Hello, and welcome
now to Lecture 65. And in this lecture, let's start applying materials
to our sofa or our couch. Call it whatever you call it. Let's apply our materials to it. Um, I think this is probably going to take
more than one lecture. I think it's gonna take
two, but that's right. We're learning and we're having fun as we're
going, so it's all good. So I think first
thing to do is to go ahead and isolate the sofa. So in the ground for collection
here in the outline, I just select the
sofa like this. Right click and select objects, and just
collect on there. All the objects now for the
sofa have been selected, so let's hit the
forward slash key on the numpad, and there we go. We've isolated the
sofa in position. So I think in this lecture, let's work on the upholstery. The next lecture, let's work on the hard surfaces on what
will be walnut, I think. So where shall we start? Um So I think I'll start with this seat
based cushion here, so I'll select this. And the scales all good, so I'll tap into Edit
mode with this one. And I'll press A,
select all surfaces. I'll press U. I'll go
for a smart UV project. Make sure you've got
an island margin and go ahead and unwrap. And there we go. So now we need to bring in a new
material for this. So I'm just going to click
on new material over here, and I'm going to call this
material sofa upholstery. And I'll hit Enter,
and there we go. Okay, now that we've done that, let's go ahead and click
on our principal BSDF. Let's add principal setup. And let's go find
our sofa materials, which'll be in textiles
and then sofa upholstery. I'll press A to grab all, and I'll go ahead and
principal texture setup. And let's see what
we've got here. We can actually tap out of Edit mode node so
we can see this. And I think let's go ahead
over to the mapping node. And again, just hover
over the first one, press down the left
mouse button and just bring the cursor
down until you've got all three and then just
increase the scale like this. And let's have a look at
this and see what we got. I'm just going to press Shift B and re center on this cushion
like this. That's better. And see what we've got. Alright, that's
looking pretty good. I'll just tap in Edi
mode one more time, and I'll press A. Wrong cushion? I'll tap out with this
one. On this one here. I'll tap into Edit mode. Just make sure that the actual
UV maps is looking good, and they are, 'cause I just never actually did look at that. So yeah, that's
all looking good. So I'll tap out of Edit mode, and the scale, am
I happy with it? Maybe just go up to maybe 30. Let's see what that looks like. There we go. And yeah, I think I'll leave
that about 30. That's all. Okay, so now that we've done that,
let's do some more. Ah, there we go. Look at that. So because we lt deed
copies for the other two, the materials and the
UV maps have also been applied to
these two, as well. So that's saved us some time. So let's select this one now. And let's look at the scale
and the scales all good. So let's tap into Eddy mode, and we'll press A and then U and go for a smart UV
project and unwrap. We can now tap out of Edit mode, and we can just
hit this one here, and we'll type in sofa
and sofa upholstery. There we go. And just
like that, we're done. So let's do the same, but this one now,
the scale's good. Tap into Edit mode
and press U and smart UV project and unwrap and go ahead and
add our sofa material. There we go. And that's done. Okay, shall we go ahead
and do that now to the back rests?
Let's do those two. So we'll grab the first one, tap into Edit mode, and we'll press A, and, and Smart UV project and unwrap. And we will find our sofa material and go ahead
and apply sofa upholstery. And there we go. Okay, let's just work our way through these. Sofa material. And there we go. And there we go. And we'll
do this one now, as well. And there we go. And we'll just keep on working
them through. Sorry, wrong, button. This one. And so for upholstery, there we go. And now, this one. And the last of these ones now. And there we go. That's all. So at the moment,
they're looking a little darker than
I wanted them to. But I'm not sure if that's not actually something to do
with our current light. So I'm not going to
adjust those just. I'm just going to leave those B. But we could actually
add a color ramp to this material so that we
have an option to do that. So let's go ahead and do that. So I'll select the BSDF
and the material I put, I'll press G. I'll just drag
these over a little bit. I'll press Shift eh, and we'll click on the
search for a color ramp, and we'll smack that
in there like that. Now we can actually,
if we want to, just go ahead and
make this material darker or lighter, as we wish. But the moment, I'll leave the settings just where they are, and we have the option now
to change that if we want. Okay, so now I guess we
go for the cushions. So I'll grab this cushion here, and I'll tap into Ed about
and I'll press A and U, and I'll go for a smart
UV project and unwrap. So this is gonna
be a new material, so let's had the plaski over
here. Let's click on this. And let's call this material
sofa Whoops. Sofa cushion. And we'll click Enter. And now we have a
principal BSDF. Let's click on this.
Add principal setup. And let's go ahead and find
our cushion, and here it is. And we'll press A, and we'll add principal
texture setup. And I'll tap out of Edit
mode and see how that looks. And that looks amazing. That's fantastic. I
really like that. That's absolutely perfect. And again, because
we've got some old Ds, we've actually got
our materials applied to our other cushions
already, as well. So that's a bonus. So let's select this one now, and let's tap into Edi mode, and we'll press A and U
and Smart UV project, unwrap the cushion, and we'll
click on this one here, and we'll click on Sofa. And sofa cushion. There it is. And that's our material
applied. And that's looking it. Just like that, we've
got all the materials applied to our sofa,
so that's cool. But we need to apply
maybe a slightly different material
to our piping. So let's do that next. So let's select this cushion here and we'll tap
into Edit mode. And let's go ahead and select maybe one little face
on this piping here. I'll hold down Shift and select
another one on this one. And with those two selected, I'll hold down Control
and then hold down plus until we've selected
the piping on this piece. There we go. That's
all selected. So with that done, now I
hit the Plaske over here. And I'm going to call
this a actually, I'll call this sofa
upholstery, as well, so I'll click on this one here, and I'll type this in. Sofa upholstery. And what I'll do now is I'm actually just going
to click on this button here to make this a separate material. So
I'll click on that. So now that we can modify this material without changing the color of the main sofa, but we do need to
assign over here, so I'll go ahead and hit assign. And now we can actually
tap out of Adi mode, and we can zoom in a little bit. We can use our color ramp here
now to darken the piping. And just get a slight
contrast change in these two cushions.
And there we go. That's worked out a
treat. That's fine. So now we'll just
work our way down the line repeating this process. So I'll select this cushion, tap into Edi mode,
grab this one here, hold shift, and maybe
grab this one, as well. Hold down control,
hold down plus, and expand on our selection. Once we've done that,
let's hit the plus key. And let's hit this
little drop down here. And let's type in here
sofa upholstery 01, and go ahead and sign. And there we are. So
there's now the material applied to our piping.
Let's do another one. Select this one,
tap into Eddy mode, select the surface,
hold down shift, and select one
over here as well. Hold down control and plus, and expand on our selection. Once you've done all that, hit the plus key and grab this little drop
down, type in here. So upholstery, a one, there it is, and go ahead
and a sign. And there we go. And then I'll go ahead
and do one more. So I'll select this one.
Actually, let's do a base. Let's come over here and we'll
zoom it out a little bit. And this materials looking fantastic, actually, by the way. Anyway, let's tap it, and let's deselect everything, and then just grab
one on this one, hold shift, and grab one
on the lower piping. Hold control and plastic
expand on that selection. And when that cursor stops
moving, it's a good indicator. We've selected all the piping. And now that we've done that, let's go ahead and hit
the Plaske over here. And let's hit the drop down, and let's find that sofa 01. Sofa upholstery, Oh, one, and go ahead and a sign. And there we go.
And that's done. And it's also actually
applied the material to these other two instances,
so that's good. So what I'm going
to do now is I'm actually going to
pause the video because I think hopefully you've got the hang of doing this. It's really not too difficult. And if not, just
rewind the video slightly and just check out
how I did it one more time. So I'll go ahead and pause
the video right now, and when you see me next, all these pipings will
have been applied. Okay, so I'm back again, and that's all the
materials applied or all our upholstery materials
anyway to our hard surfaces. And I think they're looking
really good, actually. There's a lot of detail on that. It's looking really nice. I love these pillows. I really like this material. It's really cool. Okay, so now that
we've done that, in our next lecture, we'll start applying
all our walnut material to our hard surfaces. All right. Thanks very much. And I'll see you in the next
lecture. Bye bye for now.
69. Lecture 66 Sofa Materials Part 2: Hello, and welcome
now to Lecture 66. And in this lecture, let's apply our wood
material to our sofa. Um, I think the first
thing I'm gonna do, though, is play
around with our HDRI. If you recall back to the
lecture when we sort of installed a HDRIs,
I downloaded two. I downloaded this one. And I downloaded another one, and I want to try
that one just to see if the light is
a little flatter and to give us a more
color accurate view of our timber that we're
going to create for our sofa. So I'll come over here
where it says Object, and I'll hit this and
I'll go to World. And now I'll select this little file on this
cape and just like this. I'll go to the cannon one. We're currently in Cape Hill, and you can see here
even the image that this one is a bit flatter,
so I'm going to do this one. And I'm going to
click Open Image. Give it a minute to
apply, and there we go. And now we have slightly
more sort of flatter light, which might give us a more
accurate idea of our color. I'll bring the background
down to probably around 1.5, as well, something like that. And now we have a
more accurate idea of what these colors
actually are. Alright, so let's go ahead
and apply our color. So first of all, let's
go back from world here, back to object.
And let's select. Well, let's turn
off our upholstery. So let's come over to the sofa, and let's turn off
seat bases and upholstered backs
and loose cushions. So we just have
the woodwork here. Now, let's select the base
here and have a look at it, and the rotation's out. So let's press control, eh? And apply rotation and scale. There we go. Let's tap
into Edit mode with it. And let's press A and then U, and let's do a smart UV project. Make sure you have
an either margin, ten or 20, that'll be fine. And go ahead and un Alright, let's have a look at
our UV maps here, see that they're all
laid out nicely, and I think that's looking good. That's looking nice
and efficient. Alright, so let's
create our material. So let's come over here to
our material properties, and let's hit the
little plus sign. And let's click on you. And let's name this what sofa? Sofa. Material. Oh, let's
call it sofa wood material. And clickn. Let's select
our principal BSDF. Go over to Nongler, hit Add Principal setup. Go to where you are your
textures are being hidden. Wow, I really I've clicked
one too many times, I think, so let me
case two, T two. There we go back to
where I need to be. And I'll click on textures, and I'll click on wood, and I'll look for my sofa
material. There it is. And I'll press A
to select all of those and add principal
textures setup. Alright, so the first
thing I kind of notice is that the
rotation isn't good. So let's go over to
the mapping node. And on the rotation here, let's go ahead and
spin this round. Until we're facing
more like 90 degrees. There we go. That's cool. That's looking good. And let's have a look at the
scale as well. So I'll actually just
hover over the top one, press down the
left mouse button, and drag down till all
three are selected and increase the scale to see if we can find a more
accurate number, something that's looking good. Let's see what that looks like. And I'd say that's looking
pretty good like that. Maybe I'll select
this middle one here, and I'll go over to the
UV map and I'll grab it. And I just want to do something
a bit different with it, so I'll move this one over, see if we can find a
slightly different board, and that's looking good. Maybe I'll rotate it slightly. Just to give it a bit
of interesting grain. There we go. And that's
absolutely fine. Let's have a look over here now. I mean, these ones
won't be seen, so I'm not overly worried. So let's just inspect the edges, and
they're looking good. Let's inspect this edge, and maybe I want to do
something with this. It's a little bit repeated. The sort of pattern
is repeated there, so let's grab it here on the
UV map and just try moving this around until we get something that's better.
Just like that, that's fine. Okay. So that's cool. Let's
tap levator mode with that. And I think I'm
happy with that one. Don't think there's
anything else I want to do to that one. I could look at these here. Let's tap in again, and
I'll select this one and this one and this one.
And I'll grab all three. And I'll just try rotating
those 90 degrees, click Enter and just see how that looks.
Do I prefer that? Yes, I think I do.
I'm gonna leave that just like
that, and tap out. There we go. That's cool, now. Okay. So let's work on
the top one next here. So let's look at the scale, and the scales all good, so let's tap into
Edit mode with it. And let's press A, and then and Smart v
project and unwrap. And here it is right
here, looking good. So we can come to this little
dropdown here this time, and we can type in sofa, and we're looking for sofa wood material and click on that. We can see what it looks like and see if there's
anything we want to do. It's looking a little
bit repeated here, and I don't think
I like that much. So I'll press A, and I'll
go over to the UV map. And I'll just grab all
of it and just press S and just try scaling
this down to see if we can get something looking
a bit more interesting. Maybe there like
that? Let's see. Do I like that? It
doesn't look good. I don't think that's
very convincing. And this is quite a
high profile piece. This back here will be seen, so I want to make
sure it looks good. So I will grab everything again. And I'll try scaling it
up a little bit a little bit again to reduce
the size of the wood. And we could try moving
it around in the X and see if we can find
something a bit more nice. Try rotating it. We could try selecting
individual pieces, maybe scale this one. Maybe scale it in the
X, see if that works. We're still getting
quite a few repeats. I don't think I like it. I don't think I like
that very much. It's just not convincing at all. It's just too too repeated. These knots are in a perfect
line going down in here. It just doesn't look good. We need to do something I think
the first thing I'm going to do is I'm going to
press A again and I'm going to reset the UV map. So I'll press U and for
a smart UV project. I'll want to go
ahead and unwrap. Just to rescale the UV map and kind of default that again. And I think the next
thing I'm going to do is I'll just go over to
just shade mode for a minute, just to viewport
shading solid mode. And I'm going to apply
an extra set of curves around here so we can break
this into two boards. I think that's not a bad idea. So let's make sure we can select edges, so
let's press two. Let's grab an edge here. And what press said, as well, let's go into wire frame. And I think let's go ahead
and select all of these. Whoops. I'll go over
here to selector, and I'll just hold down the left mouse button and
come over to select Box. That's better. And I'll select
all of these like this, and I'll press Control R. And see if we can
get a loop in there. It allows us to put one
loop in, so that's a start. So where should we go next? See if we can get
another loop in. So I will select all
of these edges here, and I'll come over
to this side now, and I'll select maybe
all of these edges here. And now I'll press Control R, and I'll go ahead and put
another loop in like this. Let's do this one last time. Let's select all of
these edges here, and all of these edges here. And let's press Control and
go ahead and apply that. And there we are.
So now we kind of split that component
into two boards, and I think that might be nice. All right, so let's tap out
of Edit mode with this now. And let's go back to solid. And let's go back to
rendered as well. And let's see what we can do. And I think the next
thing we're going to do on this sofa material board right here is I'm going to
create a new material on this. So I'm going to hit this
little button here so we can make some alterations
to the scale on this one, on the mapping node, without affecting this other one here. And now what I'm going to do is tap into Eda
mode with this one. And I'm going to grab
this board here, press three so I
can select faces. I'll grab this board here. Actually, before I do that, sorry, I'll come
down to the scale, and I'll hold down
the left button and select all three boards, and I'll go ahead and alter the scale and see if we
can find something more pleasing without affecting the
scale on the other boards. And that's not bad.
That's okay, now. Something around
there will be nice. So now that I've done that, I'll select this board
on its own, now. And I'll come over to the X axis and just try moving this up. And see if we can get something, something like this and then
maybe rotate it slightly. Maybe take it down a little bit, maybe scale it a tiny
bit. Scale it again. Scale increase the
skis size of it, which will reduce the
scale of the object. And let's see what that
looks like. That's better. I think that's a little
more convincing. So this board is
actually not as bad now. Now we're starting to get
something I'm preferring. And I'll just try
moving this board down in the X axis and see if we can get
something that looks good. And I'll try rotating this one. Maybe up like this. And there we go. That's better. That's looking better. I
think I'm liking that now. So the next thing I
need to do, maybe, is actually go ahead and just
grab the engrans here now. And we'll do a rotate on those. Yeah, so the engrain direction
is going the right way, and that's looking better. And you won't see
these boards here, so I'm not overly worried
about those. So that's okay. You may see a tiny
bit of these ones, so let's have a
look at these ones, and they're not
too bad, actually. I like this board's nice. Maybe I'll just move this
around a little bit. And rotate it a little bit. And I can try
adjusting the scale. Just play around with the scale really until you get something pleasing. And there we go. And it's just avoiding
too many repeats. And I think I'm
happy with it now. That's looking a lot better. Okay, so I'll tap out
of Edit mode with that and just take
one final look at it. And I think I'll
please with that. So let's select these ones here. These feet. Let's
check the scale. That's all good. So let's
tap into Edit mode. And let's press A and U, and let's go for a smart UV
project and click on Unwrap. Let's hit the little
drop down here, let's type in Sofa. And shall we go for sofa wood material or
sofa wood material 01. It doesn't really matter. I'll
go for sofa wood material, I think, and see what we
get. Let's have a look. Let's just see what
that looks like. Am I happy with
the scale of that? No, I don't think I am. I'm
gonna press A all again. Gonna grab all of these. And I'm gonna go
ahead and scale this down slightly to
increase the grain size. And let's see what
that looks like. And that's looking pretty good. So we need to actually turn these ones the grain
directions don't run through, so let's grab this one here, and this one here, and let's try rotating
those about 90 degrees. And that's looking
better that way now. And let's see if we need to
do the same with this one. So let's grab maybe Are we
happy with the wood scale? I think I am, so we just
need to actually just sort out these engrains here, this one here, and
this one here, and let's rotate those as well. Around the 90 degree mark. And there we go. Maybe select this one and maybe just move. Around a little bit
until it's sort of looking about right. That's better. See, that's kind of lining through
there and I like that. And there we go.
That's that all done. Let's bring the cushions
and see how we're looking. And let's tap out of Edit mode and see what the
final effect is. And, yep, I'm liking that. That's looking really nice. Okay, so let's hit
the forward slash key now and bring everything back. And see what we've got. And yeah, I'm liking that. I'm liking the contrasting
wood material. I didn't want this to
be walnut as well. It's all going to be too dark. So I'm pleased I've gone with
a lighter material there. If you prefer the
darker material, you could use the walnut from this TV panel on this
and see how you look. But I just wanted to get
some grain coming through. And I felt that the walnut was the grain was going to be a
little bit lost on the sofa. But that's entirely up to you. You can go for it and
maybe switch some of these wood materials
around if you prefer. Okay, so what should we
do in the next lecture? I think we're going
to do a tiny bit of modeling in the next lecture. What we need to do
is we can apply a texture to our stairs here. And I think it'd be nice to see a handrail on the staircase, just to explain that
it is a staircase and to sort of lead off into the distance and show
what it's doing. So let's go ahead and do
that in the next lecture. Okay, thanks very much. And I'll see you
in the next one. Bye bye for now.
70. Lecture 67 Stairs Part 1: Hello, and welcome
now to Lecture 67. And in this one, let's apply a wood material
to our staircase. And then I've been thinking
about it, as well, and I think I'd like to
show a handrails well, so leading up the stairs, just to indicate more
what this is here, because from this
angle, you can't really see that
it's a staircase. So I think a handrail
will kind of just will just suggest
what this actually is. We'll just indicate more
what's happening in here and also indicate that
it's leading upstairs. Alright, so I think the first
thing we could do is we could sort of turn
off the first floor. Let's hide that. So we
just have this like this. And I think all we actually need is the external walls
and the stairs. So let's select both
those items and then hit forward
slash on the numpad. And let's press seven. So we see this in the
orthographic view. And let's have a
look at the stairs. I think I would like to
make sure that I've got a tiny little gap either side of the staircase between the walls
and the stairs. So to do that, let's select
the staircase on its own. And then let's press S, then X, and just bring it down
a little bit like this. And now reposition it
until there's a gap, a small gap either
side of the staircase. Let's have a look, and
yeah, that's fine. I might try and even
up a little bit more, so I'll press G and then X and just bring
that over slightly, and that's looking
good just like that. Okay, so now we need to
create a material for this. Let's look at the scale
first and the scale out. So let's press Control A, and apply rotation and scale. And let's go ahead and tap
into Edit mode with it. And let's press A and then U, and let's do a smart UV project. Make sure you've got an island margin and go ahead and unwrap. Okay, so let's create
a new material. So let's come over here
to the object properties. I'm sorry, to the
material properties. And let's click on New. And let's go ahead
and name this. Um, Stairs. Stair material. There we go. Click Enter. Okay, so let's grab our principal BSDF and
let's add principle setup. Go to wherever your
materials are, click on textures,
click on Wood. And it's up to you, really. I mean, you could use
any of these you want. I'm going to use the
Light ok distressed, but you can use
whatever you want. But I'll click on the
Light Ok distressed, and I'll press A, and I'll
principal textures setup, and so now that we've done that, I think we can go
ahead and isolate the stairs on their own. So I'm just going
to grab the stairs. I'm going to hit
the forward slash, which will bring everything
back for a second, and then I'll hit it again, and that will isolate the
stairs for us on their own. Okay, so I think the
next thing we need to do is actually look at the scale on this and see if we're happy, and the scale looks way
too big. Ignore the sides. We don't really need to worry about what the
sides look like. They'll never be seen. We're just worried
about what's called the tread here and then
the riser boards as well. Said what kind of looking at. Let's go over the scale on this. And if you just hover
over the first one, hold down the left mouse
button and drag down, we can adjust the scale. Until we get something that
looks about I would say, that's pretty nice, now. I think I'm happy with that
wood grain scale on those. Yeah, I think I'm
happy with that. So now that we've done that,
we just need to change the direction of the wood
grain because at the moment, they're opposed to each other. So I'm going to do these faces. I'm going to select these
ones and rotate those. So I'll tap into Edi mode, and I'll grab maybe this face, a whole shift, and I'll
carry on grabbing. I'll grab these ones here, this one, this
one, and this one. And let's grab these as well, And I think we'll just do
those ones to begin with, and I'll grab them
here in the UV map, and I'll press R and
90 and click enter. And let's see if that looks
better, and that's improved. Things no end. That's
looking good now. Okay, let's have a look at these ones and just see if we want to rotate these as well. So I'll select this
one, and then this one, grab the UV maps. Press R, 90, and click
enter, and there we go. That's altered our
wood grain directions to look a little more realistic. Okay. I think there's something else I'd like to do with this. I think I'd like to add that bevel node in
our texture sets to create some shading and some darkness on these edges
like we've done before. So let's do that next. Let's scroll out a little bit. Let's grab the material output and bring that over
a little bit more. And now let's sort of drag
this up a little bit. And now let's press Shift A and search for the bevel
node, and there it is. And we'll bring
that in like that. And we'll go again, we'll
press Shift A and search for the geometry node,
and we'll bring that in. Shift A again, and search for the vector maathnde
and bring that in. Go again. Shift A, search for color ramp. Bring that in and one last one. Shift A, search for
the mix shader. And we'll bring
that one in Okay, so let's go ahead over to this. And here on the vector, let's click on this and
let's go for dot product. And let's plug the normal into the vector and the normal here on the bevel as
well into this vector. Let's plug the value
here into the fac here, and let's plug this into
on the mixed shader. And let's go ahead and add this. Actually, for a minute, let's
unplug from here and plug this directly into the
material output like this. And let's see what we get. I think the next thing
we can do is come down here to our displacement. And here on the scale, let's bring this down to one, and that's helping things. And now let's go back up. And here on the radius, on the bevel, let's increase. And that's looking
good at around five. See some darkness to these edges now and
some shading going on. And yeah, I think
I'm liking that. You can see it on
this back edge, too, which would make sense. Yeah, I think that's
looking good. Okay, we could go over
to the color ramp, and we could tweak this. We could bring this over
to increase the darkness. And now we can see
some real shading going on in these edges,
which is a good look. Okay, so after we've done that, let's go ahead now and
plug this in for real. Let's plug the color
ramp into the fat on the mixed shader let's plug the principal BSDF into the bottom one of the mixed
shader like this. Now go ahead and plug it
back into the material bud. Now we've got a nice
looking staircase. We can go ahead and adjust
this some more if we want. We can bring in some lightness
or some darkness into this bevel. And there we go. I think I'm happy with
that. That's looking good. I like the contrast of a
slightly more distressed, older looking staircase
in a new building. I think that's looking
nice. It's going to give a little
bit of character. Okay, so let's bring everything back now and see what we've got and see how that
staircase looks in set? And, yeah, I think
that's looking good. Okay, so we do have
the handrail to do, but I think it's gonna
take quite a while. So I think we'll pick that
up in the next lecture. So I'll just press Control
this just to do a save. And I'll see you in the next
lecture. Bye bye for now.
71. Lecture 68 Stairs Part 2: Hello, and welcome
now to Lecture 68. And let's do our handrail. Let's have a go at doing this. So we're going to do a
little bit of modeling. We haven't done that in a while, so it'll be good to sort of do a little refresher on this and do a little bit.
So let's do that. So I think the first
thing I actually want to do is I want to work back here in just viewport shading mode in solid display.
So let's do that. And I think all I really
need is the staircase, so I'll just grab that and I'll hit the forward
slash to isolate. Okay, now that we've done that, let's actually press Shift A. And let's bring in
a simple plane. Let's grab it and bring
it over in the X axis. And let's rotate that in the Y, so we'll press Y, nine, zero. Oh. And straightaway,
let's go ahead and scale that down in the z. So we'll press S and Z and go ahead and bring that down
to something like this. Let's bring this up like this. And let's press three
on the numpad to get us the orthographic
view of the side. And now let's go ahead and
bring this up some more. And I think I'm going to scale it down a little
bit more on the z. So I'll press S and z
and bring this down. And I'd say that's about right, and I'll bring
that up some more. And now I'll go ahead
and rotate that. I'll press and rotate
that until it's running sort of parallel with the
staircase, something like that. I'll bring it down a
little bit more on the z, and just eye it up to
sort of what looks like would be the right
height for the handrail. Come down a little bit more, rotate that a little bit more. And I would say that
is about right. Okay, now that we've
done that, go up here, and here in this one in a global transformation click on this and go over to normals. And once you've done that, go ahead and scale
that up in the Y, suppress S and Y, and just go ahead and
pull that up like this. And I'd say that looks
about right to me. Okay, so let's look at
the scale, and it's out, so let's press Control A and
apply rotation and scale. And now let's go ahead
and tap into Edit. Okay, let's press two so
we can do edge selection. And let's go ahead and
grab this edge here. And let's press E for Extrude. And now just press Escape. And now just go
ahead and press R and rotate slightly like this. And now, go ahead
and pull this down. Until you get
something looking like that and rotate it
a little bit more. Maybe just pull it down slightly in the X
and rotate it again. And I'll leave it
just like that. Okay, so now I've done that. I'm going to do the same again. I'm gonna press E, and then
I'm going to press escape. Then I'm gonna press R and
rotate this round like this. I'll bring this
down a little bit. And I'll press, and
I'll rotate it again. Maybe bring it over again. Maybe just bring
it down a tiny bit like this, bring
it back, as well. Rotate it again until
we get this running. We want to go level with
these lines on this grid, so we'll rotate that again. Maybe just bring this forward. Whoops. Until we get that
something like that. Maybe rotate it a
little bit more. Bring it forward a little bit. And then that's looking good. I think I'm pleased with that. I just pull it down a tiny
bit. And there we go. I think that's fine, note. And now, though I've done that. I'll press E, and then
I'll press Escape. And I'll go ahead and bring
this forward like this. And I'll just eye it up with the grid, I
think, at this stage. I think that'll be
absolutely fine. Let's zoom out so we
can see the staircase, and now just bring
this over like this. Until we're level with it, it looks like this line here. So let's have a look at this up close and see what
we need to do. I'm just going to press,
rotate this line a little bit. And now just bring this up to the edge like that.
And there we go. That now should be
absolutely fine. Alright, so now what
do we want to do? I think the next thing
we could do actually is I'll press three again. And I'm just gonna grab
this edge like this. I'm gonna right click, and I'm going to
dissolve that edge. I don't think we
really need it now. And now that we've
done that, I'm going to grab these faces. So I'll press three so
I can select faces. I'll grab this one. Hold shift,
grab this one, this one, and I'm not gonna press E and Z and go ahead and
bring this out like this. To get a little bit of thickness to this handrail.
And there we go. I think that's
about right to me. I'll come up here
again to orientation, click on this and
go back to Global. And I think the next
thing I want to do is I want to create
an offset on the back, so I think we'll do that next. So let's press two so we
can select edges again. Grab this edge here. Let's press Control R, and let's scroll the mouse wheel once to get this like this. And there we go.
That's absolutely. Let's press three and then
we'll grab this face here. Hold shift, and grab
this one and this one. And now let's press
E and then X, E, X, and go ahead and
bring this out like this. By doing that, we've got a
kind of a handrail profile. Alright, so where do we
want to go next with this? I think the next thing
I'm going to do is, let's go ahead and tap out of Edit mode with it for a
minute. And let's press seven. Let's go ahead and
bring that over now, so it's in the right position, bring it over the staircase
and see where that is. And let's press G and X and bring that over like
this. And there we go. Let's have a look at this
position and see how it looks and see if there's
anything else I want to do. I think that's absolutely fine. I'm not too worried
about the top, because I don't
think I'm gonna do any animations or renders
around this area, so I'm not too worried about the handrail,
what it does up there. Just wanted to look
good down here. So now that I've done that,
I'm actually going to think next thing we're
gonna do is let's tap into Edit mode with this. And let's make sure
we can grab edges. And I'll grab press two, and I'll grab this one here, and I'll hold shift and
grab this one here, and I'll press Control B, and I'll bevel those edges. I'll scroll the mouse
wheel a couple of times to get some
extra edges to that, and I'll take that to
something like that. I think that looks
good. Next thing I'm going to do is come
up to here and there, and I'm going to press one
so we can select vertices. And I'm going to grab
this vertices here, hold shift and grab this one. I'm going to right click, and I am going to merge
vertices in the center, and there we go. Do the same. This one, hold, this one,
hold, this one, right, click, and merge
vertices in the center. Let's press two,
grab this edge here, press Control B, and go ahead and bevel
that edge, as well. Put a slide bevel
in there that looks maybe something like that. I'm gonna go over
to the bevel here and maybe reduce the segments on this one to maybe a three,
and that looks good. I think I'm happy with that now. Alright, so now that
we've done that, I think the next thing I want to do is make a duplicate of this. So I'll press three so I can
see this from this side, and I'll press Shift D and Y, and I'll bring a
copy out like this. Now I'm going to rotate it, so I'm going to press
r180, and click Enter. Bring this over like
this a little bit more. Let's press seven on the numpad to see this in the
orthographic view. And let's rotate this,
so I'll press r90. That was the wrong way. So
what I'll do is we'll hit negative on the keypad to change that round,
and there we go. And now let's bring this
forward in the why. And bring it back a little bit until we get that
where we want it. And let's see what
that looks like here, see if we've got that
right orientation. And we have, but
it's way too high, let's bring that down and bring this over like this
and bring it down like this. Okay, let's press seven to
see this from above again. Let's go ahead and bring
this over in the X, so I'll press G and then X and
bring this over like this. And now let's bring it
closer to the wall, so let's press G and Y and bring this closer to what will be the wall. There
we go, like that. Alright, so let's see
what that looks like now. And let's go ahead and just take that up a little bit, so let's grab it like this. Let's press Gs and go ahead
and take this app like this. We could press one on the lump pad to get the
orthographic view from the front, and we could press GSE again and go ahead and just bring that up until we're in the
right position like that. And there we go. That's good. Alright, so
what do we want to do now? I suppose the next thing
we need to do is obviously this is far, far, far too long. So let's actually just
collect this one, and let's tap into Edi mode. And let's make
sure we can select faces. So let's press three. And let's select this face, this one, this
one, and this one. And if we tried moving
the Gizmo right now, it's going to do
weird things for us. So let's click up on this again and let's go
back to normals. And let's pull this up
here in the z axis like. And just see where
we want to end this. And I think I want to go to, I would say about there like that. I
think that looks good. Okay, so let's tap out of
Eddy mode with that one, and let's look at the
scale on that one. And the scale is
a little bit out, so I'll press Control E and
apply rotation and scale. Let's just check this one more
time, and that one's good. Let's find these items now. And they're here in
the ground floor. Let's click on interior,
and they're right here. So I think the next
thing I'm going to do is actually join
those together. So let's press Control J
and join them into one. Let's rename this handrails. And we'll go ahead
and click into. And now let's go ahead
and drag this up to it's in the ground
floor collection, but it's not hidden in sofa. So let's grab it here
and bring it up until we go into ground floor
collection, and there we go. Now it's sitting on its
own in that folder. So we can collapse the sofa and we can collapse the
interior, and it's right there. Okay, so now that
we've done that, what do we want to do next? I think the next thing we
could do is go ahead and apply a bevel to this
and see how that looks. So let's collect the item. We know the scale's good. So let's go over to modifiers. Let's add a modifier. Go to generate, go to bevel, and let's see what
that looks like. Let's go ahead and increase
the decimal points. So let's put zero to
the right click Enter. Let's go ahead and
do that again. And I think let's
increase the segments. So let's go from a
one to maybe a four. And let's turn that one
here into maybe a three. Click to, and see
how that looks. And am I happy with that? We could also right click and do a shade oro smooth on it. And I would say that
is about right. I think that's basically
where I want that now. Okay, so we'll go
ahead and apply our bevel modifier,
and there we go. That's all. So that's
our hand rail models. So now let's go ahead and
apply some textures to this. So let's go back over to our rendered view, and
let's see what we can do. So what material
shall use on this? I think that's the next thing
we need to think about. Let's select the item anyway. Let's hit this little
drop down here, and let's type in Walnut. That's what material
I'm gonna go for. I'm gonna go for Walnut bed
frame and click on that. And see what we've got. So I need to do some
scaling on this. And I want to use the
actual mapping node here. I'm going to just drag this up so we've got a better view. But I can't do that
because I'm going to affect other components
with the same texture. So let's go ahead and create
a new version of this, so we'll click on this here. And now we've created
a new version. We won't affect any other
components with this texture. Let's come on over now
to to the mapping note. Come down here to scale, hold down the left mouse button, and drag down to
select all three, and let's pull the scale down
to where we want it to be. What we could do, which
we've forgotten to do is let's tap into
header mode with it. Let's press A for Oh, and U, and let's do a smart UV project
and go ahead and unwrap. And now it looks better. And let's see what
our scale looks like. I think I still want
to go some more, so I'll grab all three and
increase the scale again. Nope, let's take it down.
Until we get something nice, and I think I will leave
it about there like that. Okay, so let's look at
the rotation on this. Let's try rotating in the Z and swing that round until we
get a nice looking result, which is about there
like that, I'd say. Go back to the scale now and just try increasing
this a little. To something like that, I think. Now I think we need to start individually
orientating the grain on each of these faces. So I'll grab this face. I'll
grab this one and this one. I'll zoom in a
little bit on those. And I'll grab them
now in the UV map, and I'll go ahead
and rotate those. And there we go, that's
looking good like that. Let's have a look at the scale and see if we're
happy with that. I think that's fine. Or
shall I reduce it a bit? Maybe I'll reduce it a bit. Let's grab all three of those again and let's set S and try to scaling these up a
little bit like this. Take this up a little
bit in the Y axis, and let's see what
that looks like. That looks good to me now. I
think I'm happy with that. Okay, so let's grab maybe
these faces here now. And this one and this
one and this one. And we can also grab
these ones here, too. And with those selected, we'll zoom in to a point where
we can see that nicely. Grab them all down here on
the UV map, and we'll press, and we'll do a rotate until we get the right looking
direction on the wood grain. And let's see what
that looks like. And yeah, that's
looking good to me now. I think I'm liking that.
So where shall we go next? I think we need to go
up the stairs now. So let's select this one, hold shift, grab this
one and this one. And with those selected, let's zoom into an
angle that looks good, and let's select the UV maps, and let's do a rotate
on that as well. Until we get the right kind of grain direction
on this timber here, and there we go. Let's
have a look at that. And, yeah, that's
looking good. I think I'm pleased with that overall. We can actually have
a look at the top one and see if there's anything
needs doing with that. We could grab this one and we could do a
rotate on this one. Until we get that
pretty straight like this. And there we go. So we can also do maybe
this one here as well. Grab this one here,
grab the UV map. Well it R, and we'll just turn this one until
it's looking good. And there we go. And now
we can do this one as well. Grab this one. Grab the UV map, press R, and just turn until we're
getting the right results. Just zoom in on
this a little bit. And it's actually
looking pretty good. Alright. Is there any others?
This one here as well. Let's grab this one.
Let's also grab, maybe this one and
this one, this one, this one, these as well. And with those selected, we'll grab the UV map
and I'll press R, and we'll do a rotate on that until we're looking
pretty straight. And I think that's looking good. I think I'm happy with that. Okay, let's tap out of Edi mode now and see what
that all looks like. Yeah, that's looking
really good. Let's bring everything back, so I'll hit the forward
slash scale on Impad and we could bring that back and see how
that handrail looks. And yeah, I'm
really pleased with that. That's doing
a lot of good. It's really just showing
now what's going on and what's
around that corner, kind of leading us up the
stairs. So that's really nice. Okay, so I'll bring back
the first floor, as well, and everything gets really dark, which I think is a good time to mention in the next lecture, let's start lighting our scene. So let's start creating
some interior lights, some really nice, dynamic
controllable lights. Okay, thanks very much. And I'll see you in the next
lecture. Bye bye, Fino.
72. Lecture 69 Interior Lights Part 1: Hello, and welcome
now to Lecture 69. And in this lecture, let's have a look at doing
our interior lights. The whole scene is
looking really good. I'm liking the way
this is going. But internally, it's
all a bit dark, so we need to light this up and start getting some nice
lighting going on. So let's make a start on
this in this lecture. So I think I'm going to
do this back in layout. We haven't been there
in a while, but yeah, let's do this in layout mode,
so let's click on this. And I think all I really
need to start with is this wooden sort of headboard for the bed.
So let's select this. Let's hit the forward
slash just isolate that. Alright, so I think
the next thing I want to do is grab this and
tap into Edit mode. And let's just grab maybe
a face, maybe this one. Then let's press shifts, and let's bring cursor
to the selected. And there we go. That's brought the cursor to where I want it. Okay, I'll tap out of
Edit mode with that now and sort of make
sure it's not selected. And now I'll press Shift A, and I'll bring in mesh, and I'll bring in a cylinder. And let's increase
the vertices on this. Let's bring this up
to maybe even 50. And there we go. Let's
leave that just like that. Next thing we could do
is actually look to see where this is in our outliner. And it looks like it's here in ground floor walls,
and there it is. And that's not what
I want at all. So what I'm going
to do next is go to the first floor and
maybe click on this. And let's click on was this
bedroom one or bedroom two? I think this was bedroom one. So let's click on
bedroom one and expand it, select this item. And let's go ahead
and open a sub file. Let's create a sub file. Click on this. Let's
find it. Here it is. Let's double click on it, and let's name it
bedroom one lights. And then we go let's click. And let's grab this item here. Let's press M. Let's
go to collection. And first floor, bedroom
one and bedroom one lights. Let's go ahead and put it
in there, and there it is. Let's go ahead now and
compress the ground floor. We don't need to see
that. And there we go. So there it is there in
the bedroom one folder. Now that we've done
that, let's press S and scale this down. And let's press seven
to see this from above. And let's go ahead and scale
this down a little bit. Let's go over to item here so we can see the size of a rat. And it's around 23 centimeters. Let's scale this down to
around 15 centimeters. So in Imperial,
that's about 6 ". And there we go.
That's close enough. I'm happy with that.
With our done, let's scale this
down on the z now. So let's press S and Z. Go ahead and scale this down, and let's pull it down as well
so we can see it clearly. Okay, maybe we scale it down
a little bit more on the z. So I'll press S and z
and bring this down. And I'd say that's
about right like that. Okay, I'm going to go
ahead and isolate that. So I'll hit the forward slash, which will bring everything back and hit the forward slash again, and it'll isolate
that object for us. Let's fix the scale on it, so let's press Control A and
apply rotation and scale. And now let's tap into Edi mode. Let's press two so
we can select edges. Hold Alt and click
on this edge here, press Control B, and
let's bevel that edge. Let's scroll the
mouse wheel a couple of times to get some
more segments in this. And we'll take this two about there like that.
And that's looking good. Let's press three so we
can select faces now. Grab this face here,
and we'll press E, and we'll go ahead and take
this up in the Z axis two, about there like that. Okay, so I think the next
thing we want to do is let's press I and inset this a
little bit to around there. And now let's pull
this down in the z. And let's do that
again. We're gonna repeat this a few times now. And now we'll pull
this down in the z. And let's do that again. Pull this down again. And pull this down again. We'll be doing this a few times. Make the insets
slightly smaller now, making the gaps bigger,
something like that. Now, pull that down. And again. Pull this down again. And maybe one more. Pull that down, as
well. And there we go. That's cool. Um let's press
two so we can select edges. Hold Alt, grab this edge here, and let's press Control B
and bevel this one, too. And there we go. That's
cool, just like that. Alright, so let's right
click on the item, and let's shade Auto smooth, and let's see what we've got. We can increase the angle just to soften that edge,
and that's worked there. I don't think we need to actually put a subdivision
surface modifier on this. I think it's looking
fine just as it is. Okay, so now that
we've done that, we can actually go back
into shading mode. So, actually let's
bring everything back first and see
how we're looking. And let's press seven to go
into the orthographic view, and let's press and
go into wire frame. And let's go ahead and take this back into its fine opposition. Which I think will be
around about there. I think I'm happy with
that there like that. Okay, let's press the head and let's go back to solid mode. And now I think it's time
to go back to shading mode. Alright, so again, let's
isolate the object. And now let's start applying
some materials to this. So let's go over to
material properties tab. And let's click on New and
let's call this material. What should we call
this material? Let's call this the light bezel. I'm not sure if that's
the right term. I think it is, but I'm not
sure, but we'll go with it. So now that we've got that,
we've got principal BSDF. And let's go ahead and turn
the metallic up high on this. So I'm gonna go for quite
a chromi looking material, and let's take the
roughness down. And we should now, with that, get a nice looking sort of chromi looking
material, and that's good. So we could actually maybe increase the IOR to around 2.5, and I think that's good. I'm going to apply a little
bit of color to this. I want to go for almost
like a Nicki color, so I'm going to take it a
little bit into the yellow, but very subtle, just like that. All right, so that's our base
material, and that's fine. But now we need a
light lens material. So let's hit the PAs
key here over here, let's click New and let's
call this the Light lens. And click Enter. Let's go ahead and tap into
Edit mode with it. Let's make sure we're
selecting faces. I'll press three,
select this face here, hold en Control on
tap claus until we've selected the entire Light
lens, and that's it like that. Once you got those selected, click on Light lens here
and go ahead and assign. Okay, but this is
really quite simple. We'll just bring the Alpha right down to virtually nothing, and we'll bring the roughness right down to nothing, as well. And we'll just take
the metallic up just a tiny bit to about
there, and there we go. So that is now our light lens. Let's go ahead and
tap out of Edit mode, and we can take the alpha
right down to zero, actually, and that's it. That's our light lens finished. Or should we take the Alpha up just a little bit to
about there like that? All right, so I think now we can go ahead and
bring everything back. So let's hit the
forward slash key and see what we've got. So the next thing I want to do is tap into or just grab this item and
tap into Edit mode. And let's grab that center
a little bit like that. And let's press shifts, and let's bring cursor
to the selected. There we go. Now that
we've done that, we can actually tap
out of edit mode, and we can press Shift A, and we can bring in a light, and we can bring
in an area light. Let's turn the shape
from square to disc, and let's reduce the size. Until it's basically
inside the light vessel. Let's take this up a little bit. And there we go. That's
the effect that I'm after. Alright, so let's
turn the power up. And maybe we'll put this at around around 50 for now and
see how that looks overall. And let's put a little
bit of color on this. Tiny bit of yellow. Yeah, so
it's warmed up a little bit. And that is our first
light. That's kind of done. Maybe we'll take this
a little bit higher to around 75. And that's good. So in the next lecture, let's go ahead and distribute these lights in this bedroom and the other bedroom
and the bathroom. All right, thanks very much. And I'll see you in the next
lecture. Bye bye, foro.
73. Lecture 70 Interior Lights Part 2: Okay. Hello, and welcome
now to Lecture 70. And yeah, let's carry on distributing our
lights in this scene. So, what are we gonna do? I think, first of
all, let's just grab. Well, let's go to wireframe. Let's press S. Et's press, and let's got a
wire frame on this. And now let's just
grab let's deselect this and then grab the light and the light lens
or the light bezel. And now let's hole shift
and grab the light itself. And now let's press seven. And let's see this
from the plan view, from the orthographic view. Um let's turn off the ground floor so we can't see that because it was
a little confusing. And now what shall we do? Let's press Alt D. And X. And let's bring a copy across
now to the opposite side. Roundabout there like that. When we've done that, let's grab both the lights again now. So let's grab that light, and let's grab this one. And let's grab this
light bezel, too. And let's press seven again. And with the two selected, let's press A to D and Y. And let's bring those
down to about like that. Once you've done that, press Shift to repeat
that and Shift R again. And let's see where that's at. And press Shift R
can we do one more? We can just about. So
that's a lights position. So let's go back to
rendered mode note. Let's press set. And let's go back to Rendered
and see how we look. And that's really
light in there now. That's Is that too light, too many lights in there? I think not. I think that's
really I think that's okay. So because we use Alt D, these lights are all sharing
the same properties. So we can actually
go over now to the We can select a light here, and we can click on the
light here on the side, and let's bring the power down. And that will bring the power down on all the lights in one go and allow us to control our lights sort of even that
light up a little bit. And let's see how that looks. That's a really nice even light in there. I think
I'm liking that. I'm bringing it down a
little bit more again. It's a little too strong. So I brought it
down to about 34, and I'll just add a
little bit more colour to it, and there we go. I think that's nice, snow. And now we can see
that our floor, as well, our polished
concrete floor is starting to look good. That's got a nice
effect to it, as well. Okay, so that's our
first one done. Now you can see in
the bedroom lights, we have a full set
here, and that's good. So what we need to do next
is actually select one of the lights and also
the bezel on that light. So we'll grab that, as well. And with those two selected,
let's press seven. And let's turn off
our middle roof. Let's hide that for now. And in fact, we can go ahead
and hide the roof, as well. And with that done, this
time, we're gonna press Shift D. So let's press Shift D and X. And let's bring a copy over
to this side like this. And now that we've done
that, let's actually compress our bedroom one file. And let's open up our
bedroom two file, select bedroom two, and let's hit this button
here to get to subfolder. Let's find that subfolder. There it is. Double click on it. And let's name this bedroom
two lights. There we go. Now that we've done
that, let's go ahead and select these items here. So let's sect the light. And let's also select the bezel. And let's press M, and let's go collection
and first floor, bedroom two, and
bedroom two lights. Okay, now that we've done that, we can actually position these. So let's take this over until
over the actual bed frame, and let's see what that is. Let's actually press seven
to get the plan view. And let's take this back
a little bit like this, and we'll also just take it back like
this here knows well. Let's press Alt D and Y and bring a copy
over to the opposite side. There we go. And let's grab
both those carpis now. So let's grab and this one and
sort of the bezel as well. And let's press seven again. And let's press Old D and X and bring that to sort of the middle
of the frame like this. And let's press Old D and X and bring one
to the front as well, like this. And there we go. So there's our lights in
position now in bedroom two. So let's go ahead now and bring the ceiling back in again,
or the roof, isn't it? That's what it's called, and see how our lights look in here. Again, if we want
to, we can actually go ahead and just
adjust this light. So if we want to turn
this up or turn it down, we can do that now because
we've used Alt D as a command. So all these are sharing
the same properties, we can adjust all the lights at the same time to sort of get a balance in here
that we're happy with. Alright, so I'll leave
that like that now. I'm sort of happy with that one. So the next place I want to go to is the bathroom with this. So let's go over. Let's
compress this one now. And let's compress
bedroom two, as well. And let's compress bedroom one, and let's go over to the
bathroom and expand that. Let's select the bathroom. Let's create a subfolder.
And here it is. So let's double click on it, and let's rename this
bathroom lights. Click Enter. Okay, so let's select one of the lights here in this room. And we'll grab this light here, and let's also select the bezel. There we go. We got the
two items selected. Let's press seven. And let's press sad and let's go to wire. Let's press Shift D and X and bring this over in
the X axis like this. And let's take this over like this until we're
in the bathroom, kind of center of that
timber framework ceiling. Okay, let's make sure
we've got everything selected again, and we do. So let's press seven again. And now let's press Alt
D. And let's press X, and let's bring another
light over like this. And now let's press Old D and X. And let's bring a
third light over like this. And there we go. That's cool. So now what we can do is we can actually have a look for those
bathroom lights again, and they're right here. But the lights in the bathroom aren't
actually in that folder, so that's not worked out for us, so let's deal with that next. Let's select this light here. Oops, let's select this one. And then this one.
And let's also select this one and this one. And now let's
deselect the ceiling, so we'll hold control and just sweep over this,
and there we go. So now, we've just
got three lights in our bathroom selected. So I'll press M. I'll
got a collection, first floor, bathroom,
bathroom lights. And now they are now in that folder, and
that's what we want. So we can collapse that folder,
and that's looking good. So let's press Z, and let's go back to rendered view and
see how we're looking. Let's see what our
bathroom looks like. And that's looking good. Is
that too bright in there? Is that a little too much? It might be a little too much. So we could select maybe
just one of the lights, and now we can
reduce the power of these to maybe something
around there is nice. And we could even now maybe
just adjust this color, maybe into the
blue a little bit, just make this just subtly, a bit colder in
here, there we go. That's cool 'cause we've got
all this lovely red timber. So that's kind of warming it up. So let's cool the
lights down in here, and it brings some nice
colors in this wall. Alright, so that's
the lights done now in our first floor. So in the next lecture, let's distribute those same
lights on the ground floor. Okay, so let's bring
everything back at the model so we can see our
progress, and there we go. That's good. And
all these lights are now looking really nice. And we can, as we start
importing our furniture, if we wish to add more lights
or we wish to reduce power or increase power or even tilt these lights in
certain directions, we can do all these
things as we go. But for now, it's enough just to start getting these
bedrooms lit. Okay, thanks very much. And I'll see you in the next
lecture. Bye bye for now.
74. Lecture 71 Interior Lights Part 3: Hello, and welcome
now to Lecture 71. And yeah, in this lecture, let's go ahead and now put some lighting in on our
ground floor inside here. The first thing that I'm
going to do is I'm finding all these empties
connected to these lights, a little bit distracting. So let's go ahead and
hide those empties. So come up to here
and click on this, just click on Extras, and I'll turn those off. You still got the lights
on inside the rooms, but you've just
lost the controls. Okay, so now that
we've done that, what shall we do next? I think we could go ahead and we can close
the first floor. We can just collapse that. And we can actually
hide that now, I think. So we just have
something like this. We have this panel
here like this. And yeah, that's what I want. Because we're not gonna
run these lights that we've run upstairs
on the ground floor. We're going to use this recess that we've created
in the ceiling. Let's go ahead and bring
that back for a minute. So we have this recessed
panel just here. So we're going to create
some lights behind that. So then this light recess will hopefully illuminate
this ground floor and be enough light for it. In fact, we don't have
a material on this, so let's grab this one. And let's just hit the
little drop down here. And let's find the
interior walls. Internal walls, there they are. And click on that. There we go. We've applied a material
now to this panel. So let's actually let's go ahead and hide that
first floor again. And let's select this panel, and the scales all good in it. So let's now actually tap
into Edit mode with it. Make sure you're
selecting faces. Grab this face here and press Shift D and Z and go ahead and bring that
up just a tiny bit like this. Now that we've done
that, let's actually separate it from
the original model. So let's press P and
separate by selection. Now we can tap out of
Edit mode for a minute. We can select this on its own. Maybe press seven to
see this from above. And let's go ahead now and
scale that down in the Y. So let's press S and Y and bring the scale in on this by
maybe about that much. And now let's do the
same in the X, S and X, and go ahead and bring that
in by maybe that much. Okay, so the next thing
you want to do is go ahead and do an extrude on that. So let's tap into Edit mode
again, grab this piece, and let's press E and Z and go ahead and take
this up like this. So we create a little bit
of thickness to this. And that's cool. Now
we've done that, let's tap out add mode again. And let's create a new
material for this. So let's grab this one here, and we can go ahead and delete this internal war material
from it. So let's do that. Let's select it, and we'll come on over to the material
properties tab over here. We'll click on New and we'll call this material.
What shall we call this? Let's call it emissive One. Emissive one. Is that a Espellemissive? I'm terrible with
spelling, I must admit. Um, I don't know if it is, or it isn't just
keep it between us. Let's click end it,
and there we go. So now we're the principal BSDF. We don't need to add any
extra nodes to this. We should be able to
do it all just here. Let's bring the
roughness down to zero. And let's bring the
Alpha to about half. Let's have a little
bit of metallic and come over to the emissive, which is down here
and click on this. And let's give this
some strength. Maybe around. Let's
try around 30. And now that we've done that, let's go ahead and bring back the first floor and we'll
see what we've got. And now you can see
what that's done. That's actually lighting
the room really nicely. I'm liking what that's doing. Do we want to add
some more strength to that or less or Let's add
some color to this emissive. Let's bring it a little
bit into the put a bit of warmth to. There we go. Something like that. And
shall I bring this down? Let's try bringing it down. Look like I'll for a minute
and see what that looks like. And I think I'm going to leave that just like that.
I think that's good. Maybe I'll tweak the
color a tiny bit. There we go, see what
that looks like. And I'm going to leave
that just there. I think I'm happy with that now. So I want to apply
one more light, and I'm going to apply it to the underside of our
stairway handrail. I think that'll be
quite effective. So let's go ahead
and do that next. Let's maybe just grab
this handrail on its own. And let's hit the forward
slash key to isolate. And let's go ahead and tap into Edit
mode holding onto it. So I'll hit the tab key. Make sure you got
face selection on, and then select maybe this
face here, hold shift, and select this one,
and maybe this one. One last one, which
will be this one. And then go ahead now
and make sure that over here now in the transformations that you're actually in Global, so we straighten up this gizmo. And let's go ahead
and press Shift D and and go ahead and bring
that down just a little bit. And there we go. That's good. So now that we've done
that, let's press P to separate our selection, and let's tap out of
Eddy mode with it. Let's select those pieces we've just made from
duplicating the others, and let's delete the
material from this. And let's click on
this little drop down here and let's call
this the emissive one. Let's add the emissive material
we just created to this. So now that we've done that,
let's bring everything back. So let's hit the forward
slash key again. And yeah, that's
really effective. I'm liking how it's illuminating under the
handrail. That looks good. So I can see now that the handrail is not
really against the wall. I'll press Shift B, and I'll re center to
this area like this. And with that done, I'll just grab this one. And I'll just press G and Y and just bring it
over a little bit. And there we go. Let's try that. See if that's just close
that gap. And it has. That looks better now.
Okay, so we've got the lights underneath
the handrail, that looks really good. And we've got a
nice light recess here, and I'm
really liking that. So I think that's
all the lights that I want to do on
the ground floor. We'll have the TV. I'm going to put a back
lighter behind the TV, so that'll add a little
bit of lightness there. And we've also got a
nice big reading lamp to hang over the back of the sofa. So that'll
add a light. And I've also got a
nice feature light to go above our kitchen. So that's going to
add some light too. So I think that's enough
light for the ground floor. So now that we've done
that, let's go ahead and create a ground floor
file for our lightings. Let's open this up. And let's click on
the ground floor. Let's add a sub file, and where is it? It's there, ground floor
four. Let's grab it. And let's go ahead and call
this ground floor lighting. I click to. And now let's go ahead and grab maybe this one and hold shift and grab
the handrails as well, and hit H to hide them. And now grab this light here and hold shift and grab this
light here as well. And just deselect the
walls. There we go. So we've got the lighting there, and we've got the lighting here. So for those two
selected, let's press M, and it's good at collections and ground floor and ground floor
lighting. And there we go. So now they're in the
ground floor lighting file. So I'll press Altag to unhide
the things that I hid. And there we go. So there's
our ground floor nicely let. Okay, so I think in
the next lecture, I think that's our lighting
pretty much done now. I think we can say
that's nicely lit. So in the next lecture, let's create our water in
our swimming pool. All right, thanks
very much. And I'll see you in the next
lecture. Bye bye for now.
75. Lecture 72 Pool Water Material: Hello, and welcome
now to Lecture 72. And in this lecture, let's go ahead and
see what we can do now with our poor to
see if we can add that. So I think the first
thing I'm going to do is I'm going to bring the cursor to the center
of the swimming pool, so let's select
the swimming pool. And let's press shifts and
let's bring the cursor to the let's bring in a cube
now on that position. So let's press Shift
A and mesh and cube. There we go. Let's press seven so we can see
this from the top. And let's go ahead and scale this up in the X or press S and X and go
ahead and bring this up. And SX again and bring this
up again. And that's good. And now S and Y and bring
this up as well this way. And now bring it for
just a tiny bit. Until it's just
overhanging the wall, so I'll press G and Y and just bring it forward
a tiny bit more too. About there like that, I'd say. Okay, once we've
done that, let's go ahead and bring this up. Until we're getting to
about there like that. I kind of like the water to be lapping over the top of this. So I think I need to bring this here down a
little bit next. So let's grab this item now and tap into di
mode with this one. And maybe we'll isolate
this for a moment. Let's go ahead and
grab this face here. Let's press Control Shift to expand till we get that
little bevel, as well. And let's deselect
this one and deselect this one and select this one and then go ahead
and bring those down. It's actually dragging the
wall down. I don't want that. So what's going on here? Ah, got these little
bevel details here. Let's go ahead and
deselect those, as well. And we'll do the same here. Maybe deselect those
little bevel details, that one there and
that one there. And now we should be able
to go ahead and just drag that down without
too many issues. And there we go. That's fine. Alright. So now let's tap
Edit mode with this one. Let's go ahead and
bring everything back. And maybe we just lift the pool water up
now a little bit. Just a tiny And that
should be good. About there looks good to me. Okay, so now that
we've got that, maybe let's have a look at
the scale and the scales out. So let's press Control A, and apply rotation and scale. And let's go over to the
material properties, and let's click on you. And let's call this
one pool water. Oh, I'll turn my caps
off and try that again. Pooh water. There we go. Click Center. I'll get there in the end. Okay, now
we've done that. We've got our principal
BSDF, of course, and we've got our
material output, and we're going to create a procedural texture
for our water. So I think the first node, why to just to drag this
edge up a little bit, so we've got a large area in
the material added to tab. And I think the first node I'm going to bring
in is going to be a noise texture. Let's
go ahead and bring that in. So let's press Shift A and
search for a noise texture. And there it is,
and I'll bring that in and maybe put it
over here somewhere. I'll grab these two and give myself a little bit of
space, bring these over. Maybe just grab the
material output and pull that up like that. And now I'll grab this
noise texture on its own, and I'll come over
to the node wrangle and I'll add textia setup. And that'll put me
a mapping node and a texture coordinate
node on these. Now that I've done that, let's
actually go ahead and plug the UV map in instead of the
generated into the vector, so that it listens
to our UV map. And that's a point. Let's
actually UV map our cube. So let's select it
tap into Edit mode, press A for all, and U, and let's do a smart UV project. Make sure we've got an island
margin and go ahead and un Okay, that's cool. We can tap out of Eddy
mode again with this. Alright, now that
we've done that, what shall we do next? Let's put a bump node in. So let's press Shift A and search for a bump
node, and there we go. Let's bring that in as well, and drop this in. We can actually plug the factor here into the height
on the bump node. And now we need let's
bring in a glass BSDF. Let's press Shift A and
search for a glass BSDF. Let's plug that in here as well. And let's go ahead and
plug the normals from the glass BSDF into the normals, plug the bump normal into
the glass BSDF normal. And let's also bring
in another one. Let's press shift A. Search for a transparent BSDF. There it is. Let's
bring that in as well. And now we need to sort of
blend all these together. So let's bring in
a mixed shader. So let's shift eh and
search for a mixed shader. We've got one there. So we'll
bring this in like this. And now we can go
ahead and we can plug the BSDF here into the top slot of the mixed
shader and we can plug the transparency BSDF into
the lower slot like this. And now we can go ahead
and plug the shader, the mixed shade into the
top one of the material, now already we're
starting to get something that's
resembling poor water. Let's grab this item, and let's tap into Edit
mode with it for a moment. And let's press two so
we can select edges. Grab this edge here, and
let's put a bevel on this. So let's press Control B, and let's go ahead and
bevel this edge slightly. And maybe not much, maybe
something like that, and increase the
segments to maybe a four or five, four
should be good. And there we go. That's cool. So we can tap out of
Edit mode with that now, and there we Okay, so what do we do next? I think what we could
do we're doing now is just tweaking the water here. I'll put some different waves in this than we've
currently got. So let's go ahead and in the
scale on the noise texture, let's go ahead and
increase this. Let's try it at 50, see
what that looks like. And already we're starting to get something a bit
more effective. I might up that a
little bit more again, maybe to maybe to
around 60 or 65. Maybe try that. Yeah,
that's looking right. And let's let's bring the
detail down a little bit. Let's see what that does. And that's okay.
I'm liking that. And let's bring the roughness down a little bit, it is water. It is a water texture, so it's not going to
be sharp texture. There we go to bring
that down a little bit. And let's put a little
bit of distortion in. And see how that looks.
We'll just leave. We can always come
back to that after. So let's bring the strength
down on the bump node. We actually let's take that right down to the
bottom like that, so it's absolutely glass
flat for a minute. And now let's go ahead and just take that up a little bit. Just a tiny bit. Maybe a bit more than that.
And there we go. That's cool. We're starting to
get something which is starting to resemble
p water, so that's cool. Alright, so we could actually
what could we do next? We could look at adjusting
the factor on the mic Shader. So that is going more
now to the glass BSDF. And if you go this way, we're
going to the transparent. So the transparent on its
own, is no good at all, so we'll take this
closer, I think, to the glass BSDF and
see what look we get. And I think overall, that's looking pretty good. We could look at the IOR, maybe bring this down
slightly and see what we get. That's not bad around there, actually. That's looking okay. So we can bring in
another node now. Let's try bringing in
a light path node, a press Shift A, and search for. Let's type this in
a light path node. Let's bring this in as well. And let's plug the
shadow array into the factor of the mix shader and see what
results we get with that. And that's not ideal just yet. Let's actually try
bringing the IOR around. So let's take the IOR down
here and see what we get. Let's maybe add a
bit of roughness to this and see if that helps. And let's try
tweaking this around. And see what we get
and how is that? That's looking pretty good. I think now we need to see if we can do anything down here. So I think what I'm going
to do is I'm going to add a volume absorption note to the principal BSDF.
Let's do that. Let's press Shift, eh, and search for volume
absorption node, there we go and plug
this in like this. And now let's add
add shader node. Let's press Shift A and search
for an add shader node. And we'll grab this like
this and we'll plug the BSDF into the top one
of the Ad shader node. And now we can plug
the volume into the base one of the Add shader
node and then plug this into the volume here
like this and see if we start to get a nice
appealing pool water. I think I'm going to play
around with the scale, maybe try taking this do we
want to take it up or down? Maybe down a little bit. And let's try taking the
strength down a little bit. And there we go. That's
pretty nice, now. I'm liking that. We could try adjusting the
IOR here again now. At nine, it's just
too reflective. So I think we were going
the right way, actually. I don't think it was far off. And that's not bad just there. We're getting some reflection now from the house,
so that's nice. Try toting a bit higher. Maybe that's too much. Maybe we'll leave that at
around around 12 or 13. I think that's about
right. Okay, so there's pretty much pool water. We can if we want to, we can carry on playing
around with this. You can play around with
the roughness of the water. We can take this down. And you can always play around with
the scale and the detail. To try and get the
results that you want. I encourage you really just play around with the settings, particularly here in
the noise texture, just to get the kind of
results that you're liking. I think I'll just
up that back again. I think I prefer
that quite high. And that's looking better,
I think, just there. I'm liking that. I'll leave
that alone like that. Okay, so there's our
pool water in place. So in the next lecture, I
think it's time to start importing models into our scene, start importing furniture. Okay, thanks very much. And I'll see the next
one. Bye bye, Finn
76. Lecture 73 Impoting Assets Part 1: Hello, and welcome
now to Lecture 73. And in this lecture, let's start importing assets into our project into our scene. And this is a fun time because this is when everything
really starts to pop. When you start bringing the
fixtures and fittings in, everything you get
that detail into it, and it really it
helps everything. So it's a lot of fun, actually. So before we do that,
let's first of all, let's just make sure that we've got the extras highlighted again so that we can see the empties attached to the assets
when we bring them in. And I've got the assets pack
actually open right now, which is a part of this course. And in this, we've got
the optional sofa, and we've got the island, and then we've got the bed head, and we've got the hot tub, and then we've got the day bed. We've got the island lights set, and then we've got
the reading lamp. So I think I'm going to
start with the day bed, which I'll go next to the pool. I think that'll be a
nice one to start with. So the first thing I
want to do is make sure that the ground
floor is selected here so that the day bed comes in on the
ground floor file. And then I'll grab this,
bring it back in again, and I'll select the day bed and I'll just open up the daybed file here and make
sure everything's selected. And with that done,
I'll press Control C, and then I'll just
drag this file as one out of the
way for a moment. Then I'll come back
into this scene. And I'll press Control
V. And there we go. There's our daybed
that's coming over here. I'll I'll just grab the
empty here and bring it over with this
to where I like it, which is somewhere this side. And I'll press seven so I can see this from the
orthographic view. And I'll go ahead and
bring it over like this. Maybe take it back a little bit. Maybe just rotate
it slightly so that the day bed would be viewing the view. So it sees the view. If you're sitting
on the day bed, you'd want to see
out into the view. And there we go, Is it good? Let's see Is it
touching the ground? Let's have a quick look.
Does it want to come down? It does want to come down
a little bit by the look. Yes, it does. So we'll grab the empty again and just pull
the whole thing down until it's just touching the There we go. That's cool. Alright, so there's
our day bed in position. And we can always just
move it around using the empty if we
want to later on. It just position everything
in our scene after. So yeah, there's the day bed in. So I think the next
thing I want to do is what shall
we bring in next? Let's bring in the reading
lamp for the sofa. I'll collapse the first floor. We don't need that for
a moment. I'll just click on the ground
floor file again, and now we'll bring
in this one again. And let's go ahead and find the reading lamp. There it is. Let's compress the daybed file. And let's see if we
can find the lamp, the floor lamp there it is, and make sure that's
all selected and it is. So once we've done that,
let's press Control C. Let's take this
one out of the way. And let's press Controv
and bring it in. Let's find that lamp,
and here it is. And let's just grab the empty and then bring it
in using the empty. I think I'll press seven to see this from the
orthographic view, and I'll press set and
I'll go into wire frame. And I think I'll hide the
first floor for a moment. And then I'll
position the lamp in. So I'm gonna bring it
maybe something like this, just off that floor
track like that. And now I'll go ahead and rotate it to maybe about
there like that. And let's see what
that looks like. Maybe we'll take
it in a little bit more and rotate it on
the z a bit more, Z? But ring that in. Make sure that it's not clashing with the sofa and it doesn't
look like it is. Let's check the height. So maybe let's go back to solid
mode or shaded mode. Let's go to that
rendered mode, sorry. And yeah, it's a little low. Let's pull it up a little bit. And there we go. That's cool. So there's our reading lamp
in and when we're ready, we'll just put a light
in that as well, just to help illuminate
our scene or just illuminate the sofa to help
it look more realistic. Alright, so what's next? Let's go ahead and bring
back the first floor again. And let's bring in next, one of my favorites, let's bring in the hot tub and put
that into position. So I'll select now
the first floor. There we go. And I'll
drag this one over again. And I'll go ahead and
now it hit the hot tub, select all of the
hot tub there we go. And I'll press Control C, and I'll drag this out the way. And I'll press Control
V and bring that in. So it's brought it in
on the ground floor, so let's go ahead
and bring this up. And let's go ahead and make sure the height
is good on that next. So I'll press G's head to
bring it down on the z axis. Until I've just got a slight
shadow underneath it, and that's about right for me. As long as I can see a
slight shadow, I'm happy. And now let's go ahead
and bring that in on the Y axis to
center it a bit more, so I'll press G and Y and
just bring that forward. Until we're kind of
happy with the position. Maybe, is there anything else
we want to do with that? Maybe bring it forward
a bit more on the y, so I'll press G and Y. Bring it forward a
little bit more. And I think I'll just take
it over slightly in the X, so I'll press G and X now and just just bump it
over just a little bit. And I think I think I'm happy with that there. I think that's about right. Okay, so there is something else I want to do now, actually. One of the reasons
to have this kind of roof structure here in the middle is to make some shadowing to add
some extra detail. So I think that's the next
thing I want to do is I want to light up this
area from above. So I'll grab this metal roof. And I'll press Shift S, and I'm going to say cursor
to the selected. There we go. And I'm going to press Shift A, and I'm going to
bring in a light, and I'm going to bring in a sun. Okay, the next thing I'll do is I'll bring that up like this, maybe even higher than that. And I press seven, so I can see this here. And I'll bring it
back in the Y like this and maybe take it
over in the X, as well. There we go. I'm going to
rotate that in the X axis now. So I'll press R and X just
to make sure that the sun shining sort of over the
middle roof section like this. I'll rotate it
slightly in the z, z, and just make sure
that's sort of doing something like
that. That's cool. All right. So let's have a look inside now and see
what that looks like. And, yep, that's created
some nice detail in there. I like what that's
done. That's just added some extra realism to it. So let's click on
the light one now and just see if there's anything
we want to do with this. Do we want to play
around with a color? I think we do. It's the sun, after all. It can't
be that white. So let's put a
little bit of warmth in. There we go. That's cool. And if we can look at changing the
strength, intensify it. Does add a little much? That's maybe a little too much. I'll bring this down. To
some around there, I'd say. And if I just the angle, I'll take the angle
up down to zero, and that makes our shadowing
shading very sharp. So let's go ahead
and take this up now to kind of diffuse
the shadowing a bit. And now you can see we've lost the sharpness of it,
and I quite like that. So I'll bring that
down a little bit. 1.5. That's quite nice. Maybe take it up a
little bit more. And there we go. I
think I like that now. We've just lost the
slight sharpness to it, but it's still looking good. So I could try rotating
that in the X a little bit more and just see
what effect that has. I now you can see it's on
that wall there as well. So do I like that? Or
do I want to keep that I'm gonna leave that about there, I think, just like that. Alright, I think the only other thing I want to do, maybe, is go ahead and take the
hot tub back a little bit. Maybe to about
there. I like that. And there we go. That's cool. Okay, that's looking
good. I like that, now. Um, say we could just play around with the
intensity of the sun, maybe bring the strength
down a bit more. A And I think I'll
leave that about there, but you can see the
effect it's producing. It's just producing some
really nice shadow detail just to add to the
realism of our scene. I think the next thing
you want to do is actually take a walk
around our scene. I don't need to remember,
but I showed you the fly walk mode within Blender, so let's
have a go with that. So if you hold down the
Shift and tilda key, if you don't know which
is the Tilda key, it's not a name used much. It's the button directly
above your tab key. So hold the shift
and the Tilda key. And you'll be in walk fly mode. And now the next thing
to do is apply gravity. So hit the tab key.
And there you go. So now we've hit
the deck. Now we're actually walking on
the ground level. I'm going to press W and just move forward now as if
we're in gaming mode, basically, just to check out
what everything looks like. Careful not to square to
fall in the swimming pool. There we go. That's
looking good. The actual bed frame, the day beds looking good. The walnut is really nice. And the pillows
are looking great. So let's go inside our house
and see how it's looking. And I like that
lamp. That's good. Like I say, we'll put
a light in that soon, and that's looking good. And I like the shadow
on the marble. The highlight the shadow of
the reading lamp is just, you can see that in the
marble. That's nice. Nothing to see there yet.
So let's go up the stairs. And it's going to get
a bit darker up there. I have to sort of feel
our way a little bit. We don't have a light
on the landing. And I'll go up
these stairs here. And I'm going to go ahead and see if I can get
through. And there we go. I've kind of walked through
the wall, but that's okay. And yeah, this is looking good. I like that shadowing
detail. That's nice. I like the shading from
that middle frame there, that middle roof section. And that's looking good. Yeah, that's looking
good. I like that. And the hot tub Yeah,
that's looking good. Oh, yeah, I could spend
some time on that. I'll be quite happy with
that. And this bedroom here, this is looking good as well. Yeah, I'm liking that bed frame. The walnuts popping and the
lights are looking good. We're getting a real sense
of what our animations and our renders are gonna look like by using the walk fly mode. Let's just check
out the bathroom. There we go. We actually accidentally walked into
the hot tub for a minute. And let's have a look
inside the bathroom, see how that looks, and
that's looking good, too. The mirrors looking good
and the color in there, it's really quite
warm colors in there. And then that sort of
cladding on the wall, as well, that's looking good. When we get a bath in
there and we've got some fittings in there,
that's gonna look great. Alright, so I'll hit escape now, so actually just go out
of the walk fly mode, and I think that's
it for this lecture. So on the next
lecture, let's start importing our kitchen from
the Blender kit to file. Alright, thanks very much. And I'll see you in
the next lecture. Bye bye for now.
77. Lecture 74 Kitchen Part 1: Hello, and welcome now to
lecture are we on now. Lecture 74. Welcome
to Lecture 74. And in this lecture, let's import our kitchen
from Blender kit, and let's position that and do any sort of additional things that we need to do with that. Be a fun lecture. We'll
see the kitchen go in, and that's always a lot of fun. So I think the first
thing we need to do is bring the cursor away from the main model so
that when we first of all, import the kitchen,
we've got it clear of everything else so that we
can just check it through. So I think the first
thing I'll do is I'll press seven
on the number pad, so I get this in the
orthographic view. And I'll come over
to the tab here and click on this
one for cursor. This allows us to
reposition the cursor, and I'll stick the cursor anywhere maybe about
here like this. Straightaway, I'll click on the move again because
it's so easy to forget. And then you just
keep on accidentally repositioning the
cursor constantly. So I'll just put the cursor
right there like that. Now I'll right
click and I'll set the origin to the three Dcursor. There we go. Now I'll come up to the Blender
kit tab here at the top, and I'll click on it, of course. And make sure on the side tab here that you have this open, this Blender kit tab and make sure that down here
in Max resolution, you have this quite low. So for me, I'm going
to go 512 by 512. Again, if you're
running a really, really top end GPU, you can set this a bit
higher if you want. But I'm always trying to make
this course for everybody, so I'm going to
keep it quite low. And then if you can import at
a higher rate than you can. But remember, you're going to be importing a lot of assets. So just bear that in mind
when you set your resolution. But for me, I'm going
to leave it really low at 5:12 by 512. So up here now, I'm going to type in here. I'm
going to type kitchen. And of course, I'm going to hit. And there we go, Oh, I'm going to come over to
the filters heat. I'm going to hit this drop down, and I'm going to hit first free first so that we see
the free assets first. And now I'm just going
to look for a kitchen. So we've got some
really nice kitchens. This is a nice one. So I'll right click on this. It's your left click, you
instantly download the assets. I don't want to do that,
so I'll right click. And let's inspect this. And it's only 30 megabytes,
so it's very small. It's a four K resolution. So it's a nice kitchen,
and of course, it's free. I'll close this for now and just carry on looking
for a moment. Here's another nice one here.
I'll right click on this. So it's a rather large file. It's 123 megabytes,
but you can see, it's got a lot of detail in
there, so it's up to you. And of course, this is quite a keystone asset
that we're bringing in the kitchen is always sort
of center of the home. Let's just look around
a little bit more. Let's carry on shopping. There's another
very nice kitchen, bit of a corner kitchen setup. And it's completely up to you what kitchen you kind of choose. There's another one there,
which is quite nice. I'll hit this little icon
here to carry on over. And there's this one. Maybe that's the same
kitchen as we just saw. Another kitchen
there, which is quite nice. A little big, maybe. And I'm already kind of decided I'm going to go for this one. I
quite like this one. So I'm going to
right click on it, just to check it to make
sure that it's not too big. So it's 95 megabytes. It's quite a large file, but it's got quite a
few assets with it. We've got the sink. We've got an oven and a hob,
we've got an island. So there's quite a lot going on. So, yeah, I think I'm
going to use this. So I'll close this like this. And now I'm going
to go ahead and just left click on the item. And that brings that
in just like that. So we can have a look at this now and just see what we think. And so, yeah, that's
looking great. Look at the detail on the hob. It never fails to surprise me the quality of some of the
assets in Blender kit, they're absolutely brilliant,
especially for free assets. So, yeah, that's looking great. I think that's absolutely
absolutely spot on. Yeah, that'll do us just nice. What I did forget
to do actually was actually create a file for this. So we need to find out
where this is just landed. So I'll just maybe select that
item and see where it is. And here it is. It's in the
kitchen here in the outside. So it's not exactly
where I want it. So what I'm going to do is just click on the interior like this, maybe open this file up and just hit on
this little icon here, and I'll double click on interior three because that's
the file we just created. And I'll call this the kitchen. And gl agent. And now I'll go ahead and
compress the kitchen in the outside file and just go ahead and bring that into the kitchen here like this,
so it's in the right place. And now I can compress
the outside Okay, so let's just see
if the empty works. So here's the empty, and let's just make sure that all these objects are
assigned to this empty. So we'll just move the empty and make sure that
everything's working, and it is, that's great. So what I'm going
to do now, I think, is I'm going to go ahead
and we're going to work just in this
in solid display, take the pressure off
our GPUs for a while. I think I'll go ahead and
turn off the first floor. We don't need that. And I'll go ahead and turn off
the ceiling panel as well. And for a moment, I'm
just going to go ahead and just turn off
this Blender kit tab. Hide that. And let's press seven so we can
see this from above. Let's bring this over
slightly in the X. And now let's rotate
that in the z. We'll press, 180 or is
it just 90. I'm sorry. Enter. And now let's go ahead and
bring this over in the Y axis. Bring this over a little bit
more, reposition everything. That we go. Just bring this
over like this until two. And that's about
where I want it. About there. I'll
leave a little bit of space behind, and there we go. That's cool. So I want to leave a
slight bit of gap down the side here because in the
real world with kitchens, you would never get the
doors of a kitchen panel absolutely absolutely
perfectly up against the wall. You would leave a little bit of gap for what's known
as a scribe panel. So we'll do the same just to add to the realism
of our scene. But I'll bring it over
a little bit more in the why to maybe
something like that, and I think that's Okay, so I think the next
thing you want to do is bring the island over. So I'll just select the island
and then the harp here, and I just bring this over and just centralize this more in the room and maybe bring it over in the xs just to bring it out a little bit
more like this. And yeah, that's
good. Let's look at the height and see how
we're doing with that, see if that's sitting
on the floor, and it seems to be, that's good. Okay, I think I'll go back to
rendered view for a moment just to see our progress
and see how it's looking. And yeah, that's ling. That's ing fine. I'll bring back that
ceiling panel just to defuse the light a little bit so we can
see what we've got. Make sure it's sitting on
the floor nicely, and it is. And yeah, I think that's liking, right? I'm really
pleased with that. So I think the next
thing you do is go ahead and put that trim panel that I talked about up the wall on this side just to
close this little gap. So I'll I'll hide the
ground floor walls. Let's go ahead and hide that. Let's go ahead and hide, as well, the outside. So we've just got our kitchen. And now let's go
back to solid mode. Let's go ahead and
select select the base, maybe, and let's tap
into Eddie mode. And let's go ahead and
just grab this face here. I'll press three so
I can select faces. Grab this face here and just bring this out a
little bit like this. That's cool. Maybe a little bit more. It doesn't really matter. Bring this out about there. And now I'll press two
so I can select edges. I wrap that edge of there,
and I'll press Control. I'll bring a loop in, and I'll just bring that loop
to about there like that. I'll press three now,
grab this face here, and I'll press E and then Z and just bring
this up in the Z axis. Carry on bringing that up until it's pretty much flashed
with the other one. And there we go. That's good. So now we have a trim panel
in position, as well. We tap out of edit mode now, and we could go ahead and
bring back the walls. And we could go back into Rendon boot for a minute
just to check that. And yeah, that works now. It just adds to the
realism of the kitchen to have that little
black trim piece up the corner rather than the oak doors hard
up against the wall. So I think that's just a nice little detail to add to this. Is that we've done that, I think the next
thing we need to do is sort of fill this
gap that we've got here, and I'm thinking we're going
to use a fridge to do this. So, yeah, I think
that's what's next. So let's go ahead
and type fridge in here. And let's see what we get. So we got this Coca cola one. This rather strange
steam punk one. So that's really cool. And this is more kind of
what I'm looking for, this one here, so I'll right click on this and just inspect. It's 33 megabytes of six K. So this is quite a nice one. Let's see what else we've got. We've got this one
here, nice one there. It's really up to you
what you bring in. Um, So these two are the two
that's appealing to me most. I'll right click on this
one and have a look. It's just 10 megabytes,
so that's nice. But it's obvious it's up to you, but I think I'm going
to bring this one. So with that done? I'll
just click on the way. And the next thing
we're gonna do is I'm going to go ahead and just make sure that I've
got my kitchen selected, and now I'll go ahead and left click on this fridge like this. And there we go. It's brought in well clear of the
rest of the models, so we can go ahead and just take a look at it and make
sure it's what we want. Again, it's, it's looking
really, really good. I'm fine with that. We have
this electrolyzed badge here. It's got lots of details. And again, if you
want something else, it's completely up to you, but for me, this is absolutely fine. So I grab this item, and it doesn't look like
it's gotten empty on. But it all seems to be joined, so it's going to be easy enough to sort of move and scales. So we're okay. So I'll press
RNs, and I'll press 90. And that's actually
moved it the wrong way. So I'll hit the negative key to bring it around in
the opposite direction. And with that done now,
I'm going to go ahead and go over to just
solid mode for a while, and I'll press seven, and I'll go ahead
and bring this over now and drop it in
position where we want to and I'll go ahead and
take it back a little bit. It's gonna be into the wall, but it doesn't really matter. And let's see what
that looks like. And it's a little small, so I'll go ahead and hit S
and just scale this item up, maybe take it over a little bit more on the Y now, as well. And that's looking good. Do I want to scale
that up anymore anymore and it's just going
to look a little bit silly. If it doesn't already,
to be honest. Is that too big? I think we can get away with
that size wise. Maybe scale it
down a little bit. But I don't really want to scale it up any more than that, which means we need
to kind of scale our kitchen up instead. So I'll take this over, so this is where we want
it. Kind of like here. But maybe before we scale
it, we've got another issue, which is with the handle
being on this side, that means that fridge
doesn't really work, because every time
you open that door, it's going to be
on the wrong side. You can have to
kind of walk around the door to be able
to see inside it. And has a detail that
would really bug me. So I think I'll fix that first. So with the fridge
selected, I'll hit the forward slash
just isolate it. And I mean, we
could go ahead and just make a copy and mirror it. But if we do that,
all this signage, this nice signage
on the front of the fridge will be
the wrong way round. It'll mirror that as well. So that'll look a
little bit weird. So I think we need to do
a little something else. So let's select the item. And I'll hit this I'll just hide this little ink thing
here for a moment and maybe just bring this down
to give us more space. And with the items selected, I'll tap into Edim like this. And I'll make sure that
I'm selecting faces, and I'll grab this face here, maybe this one here and one here as well, one there as well. And I'll hit Control
glass and expand on this selection till
we do all of that. And with that done, I think the next thing I'm going to do is I'm going to press Shift D and Y and bring
this copy over like this. And there we go. With
that done, I'll press P, and I'll go ahead
and separate by selection and we'll
tap out of Edit mode, so we can just work on this one. And I think with that done, I'm going to tap into Edit
mode with this one now. And I'll just select
maybe this face here and I'll press Shift S, and I'll say cursor
to the there. Now I'll tap out of Edit
mode and I'll right click and I'll set the origin
to the three D cursor. The next thing we're going
to do is press Shift D. I'll right click twice, and I'll go ahead and mirror in. Let's try the Y axis. And yeah, that's
worked. That's perfect. With that done, we can go
ahead and delete this one. And we can go ahead and tap into Edit mode
with this one again. And we can go ahead and
delete some of these items. I'll select this one, this one, this one, and this one,
I'll hit Control plus. And then I'll go
ahead and press X, and I'll delete all faces. And there we go, that's good. Okay, so I think the next thing to do is tap out of Edit mode, and let's grab all
these items here, and let's press Control J and
join them into one again. I'll grab the tap into
Edit mode with this again, and I'll select everything here. And I'll just hit Control plus to make sure
that everything is selected. I'll
press seven of them. I'm bad to see this from above, and I'll go ahead and
take this over now. And go ahead and reline this up. To something like that,
let's have a look at that, see how it looks, or maybe we tap out of Edi mode
and see how that's doing. Maybe we can just tweak that
over a little bit more, so I'll just select the item
again, tap into Edi mode, and I'll press G and Y, and just take that over ever so slightly until that's lining up. And there we go.
That's looking good. Alright, I'll tap
out of Edi mode, and I think I'll bring
everything back. And I think the
next thing I need to do is maybe grab
this kitchen here. And I'll just grab the empty, actually, and I'll just
bring this over slightly. And now I just want to
scale it up just in the Y, so I'll press S and Y and just go ahead
and scale this bit. I'll take it over. We'll just need to sort
of tweak this stuff for a moment until we get
what we're looking for. I'll scale up slightly more
in the way and take it over. I want to have just a
little bit of trim left on this side and a little
bit of gap this side, so I'll just take that over again and maybe scale
it up a tiny bit more. I'll press S and Y. Maybe take that over again until we get to so I got a nice little little
gap down that side. And if we got a little gap
here, that's looking good. So I'd say that's
about right like that. No. I think that's So I might just want to scale this up slightly in the z to
press S and head. Just scale this fridge up
just ever so slightly to about there like that
and see how that looks. And that's still looking good. That doesn't look wrong. Okay, so I think we're
looking good overall. I'll just hit the
rendered mode for a moment just to bring
everything back, see how we're looking. Yeah, I think that's looking
good. I like the fridge. And now the doors fixed so that the door opens
the correct way. That was always going
to bug me a little bit. And the kitchen's
looking really nice. Maybe the island just wants
to go over a little bit. Give us some space this side, maybe take the hob over as well. Now the island a little bit. And there we go. That's good. Okay, we just have this space up here that we
need to fix next. So that's my next
little thing to do. So I think the next
thing I'll do is just grab this fridge again, and I'll press press shifts
and curse it to the selected. And I'll press Shift A, we'll bring in a cube. And let's go back over to
shaded mode for a moment. And maybe I'll bring this
up in the Z axis like this. And let's go ahead and scale it. And we can scale down the Z now, press S and Z, and maybe take this up until
that's looking about right. Maybe take it up a little
bit more in the z. Now maybe scale it down in
the X, cell press S and X. Bring this down like
this. There we go. Bring this over. Press seven, so we see this from above. Ah, maybe just bring this
into here like this. Scale it down a tiny bit
in the y, yes, and why? Maybe just bring that
over there like that. And I want a little bit
of gap on this side. And I'd say that's
enough just to introduce a similar
sort of scripeEcuse me, a similar sort of a similar
sort of scribe panel. Sorry I'm choking a bit. I just got to pause from
it, have a bit of a cough. Okay, I'm back.
Sorry about that. So yeah, where where we? We're gonna put a similar bit of a scribe panel on this side. Okay, so let's tap into
a bid with this one, and let's press two. Grab this edge here. And we'll press Controller. Put a loop in and then bring that loop forward to
about there like that. Let's press three, grab this panel here and
we'll extrude that now, so we'll press E and Y and just bring that forward like
this, and there we go. That's cool. So now we have that little
scribe detail there as well. Okay, so let's tap out
of mode with that. And let's go over to item here. Let's fix the scale. So let's press Control A and
apply rotation and scale. Let's go back over
to rendered mode for a moment and
see what we've got. And, of course, that's white,
which is not what we want. And maybe you want to apply just a little bevel
to that, as well. And I'll take it down ever so slightly in this
set to about there. Let's tap back into
Edit mode, it. I just grab some edges or yeah, let's just press two, grab
maybe this edge here. Old shift and grab
this one, this one, and this one and let's go
ahead and press Control B. And let's put ever just
slight Bev on. There we go. Let's zoom in on
this and see what we get and just increase our segments to maybe
three, and there we go. Alright, let's tap out of
Edit mode for a moment. Let's go ahead and bring
our no textures backup. Let's select this one for a moment and see
what it's called, and it's called Oak Vneer. So that's cool. Let's select this one again now. Let's hit this little drop
down and we'll type in here Oak Vneer and there
is oak Vneer. And let's All right, so we need to do
a UV map on this. Let's tap into a moodle
press A and then U, and let's do a smart UV project. Make sure you've got an
island margin and hit unwrap. Let's bring over the UV maps here so we can see
what we've got. Let's grab everything. Let's rotate that. To bring the grain direction about the same as the others. Let's hit S and scale this down to increase
the size of this. And see that's about the same
as the others, isn't it? So, we could just position this now to a place that we like. And I see that's about
similar there like that. I think that's fine,
so that's good. So we just have this black
trim to do here now. So I'll press three so
I can select faces, and I'll just grab that edge there and
then that one there. That's all we really do O
we could grab this one. And then we could go to
material properties tab here, and we could hit the plus sign. And then we could find the
Black MDF, I think it is. Let's just select that. And with Black MDF selected, and then these faces
still selected, let's go ahead and hit a sign. And there we go. That's good. Let's tap out of Added mode
with that and see Okay, we have a bit too much of
a gap above the fridge, so I think we need to
do something with that. So we could either scale our fridge up or we
could adjust this panel. So I think let's go ahead
and adjust this panel. So I'll select the fridge, and then I'll select this panel, and I'll go ahead and
isolate those two. And let's go over to
solid mode for a moment. Let's bring down our
no texture editor. And let's press s and let's
go into Y frame at this. Let's tap into edit mode. And let's press two so
we can select edges. Let's just grab all the
edges just on this fridge here on the top panel
and just bring these down like this until
we've reduced that gap to a reasonable amount like that. That's cool
just like that. Okay, so let's tap out
of edit mode with that. So back in object mode. Let's go back into solid
mode for a moment. Let's see if everything's right. And with that done, let's just go back into rendered mode and
see what we've got. Let's hit the forward slash
to bring everything back. And that's tidied that up and
just made that look nicer. Okay, so with that done, I think that's pretty much
let's bring everything back. Now. Let's bring
back the outside, and let's bring back
the first floor and see how we're looking. And it was a long lecture, but it was definitely
worth doing. That's our kitchen now
looking absolutely awesome. So in the next lecture, what we'll do is just do a few final tweaks to our kitchen. I want to add a little bit of an oak extension to the island so that we can
get some stools around it. So you have sort of
a breakfast area, and we need to bring in our lamp to suspend over our
kitchen island. Okay, thanks very much. And I'll see you in the
next one. Bye bye for now.
78. Lecture 75 Kitchen Part 2: H Hello, and welcome
now to Lecture 75. And in this lecture, let's do a little bit of
work to the island. So I want to bring in, like, an extension to the island
to give us a bit of a breakfast bar off
the island here because it doesn't
seem like there anywhere really to sit, maybe and eat your breakfast, have your morning toast,
or whatever you do. So I want to do something
just to make it look a little bit more inviting
than it is right now. And then I want to put
some feature lights in above this kitchen island
to illuminate this area. So, yeah, let's see
what we can do. So I think the first thing I
actually want to do is just shorten our kitchen
island a little bit. So I think let's go into
solid mode for a while. And now let's go ahead and grab the island itself and
tap into Eddy mode. Make sure you got
faces selected. Grab that that face there, and grab the face of
the Penth as well. And I'll just go ahead and take those back a little
bit like this. To, I think, something like something like that should
be that should be nice. Alright, once I've done,
I'll tap out of Edit mode. In fact, I want I'll tap
back in. Sorry about that. I'll grab that face there, and I'll press Shifts, and then cursor to the select. Alright. For a minute, we'll probably turn it
back on for a minute. Let's tap out of edit mode. And let's cut to this one, and let's turn off
extras to get rid of all these lights
that we're seeing. Now, with that done,
let's press chef day. And let's bring in a cube. And there we go, make
sure that kitchen is in the kitchen setting. And actually, let's go
ahead and name this cube. So we'll name this island what shall we call
this island add on. And now we go
something like that. Name it whatever
you want, really. It's completely up
to you. Click Enter. Let's scale this down straight away in the z. So I'll press. Actually, I'll just scale
it down to begin with. I'll hit S and just scale
this down, bring it up. And let's scale this
down now in the Z, so I'll press S and Z and go ahead and scale this down.
Something like this. I'll now grab this
item and the island. I'll hit the forward slash to isolate them so he
can work these. I think the next thing I want to do is actually
just grab this. I'll press seven to see this
in the orthographic view, and I'll pull this
back in the Y axis to something like that, I think. Now I'll tap into
Edit mode with this. And I'll grab this face here. I'll press seven again now, and I'll go ahead and
pull this face out like this. That should be good. Now I'll go ahead and
grab this face here. I'll press seven again, and then I'll pull this face out to something like
that, I would say. I'll now maybe look at the thickness and just
see if I'm happy with it, and I'll pull it up
a tiny little bit to maybe there like that. That looks good to me. And now
I'll tap out of Edit mode, and I'll press one to get the
orthographic view on this. And I'll go ahead and
take this down until it's just sitting on the island. And that looks good to
me, just like that. Okay, so that's kind of
our kitchen extension. It's really not that bad at all. So now I either need to put some legs or I need
to return this down. I think I'll just return
this down to the ground. I think that'd be
quite a nice feature. So I think I'll tap back
into mode with this one, and I'll press two so
I can select edges. I'll grab this edge here. I'll press Control R, and I'll go ahead and
bring this loop now to the edge. That
looks about right. Now I'll press three. I'll
grab this face like this, and I'll go ahead and
extend that, sorry. So I'll press E and Z
and extrude that out in the Z. I'll press one, so I can see this
orthographically, and now I'll go ahead
and keep on taking this down until it's pretty much level with
the other one like that. Now they've done that,
I'll press I to inset it. Bring it in slightly. Whoops, too much.
That's good like that. I'll press seven to see
this orthographically. Sorry, I'll press one to
see this thgraphically. And now I just want to extrude
that down to the red axis, so I'll press E and just extrude this down until it's sitting on the X axis like this. And that's sort of that's
our feature on that. Okay, so what do
we need to do now? I think we could
actually get rid of some of these curves. I
don't think it's needed. So I'll press two,
we'll grab this one, Hold shift and grab this one. This one, this one, I'll
grab this one as well. Right click, this
one and this one. And I'll right click and I'll go ahead and dissolve
those edges. And that's much cleaner now. That's much simpler geometry,
and that's all we need. And this we can't reduce. This geometry is about as
minimal as we can take on this. Okay, so with that done,
let's tap out of Edit mode, and let's check the
scale and it's out. So let's press Control A, and let's fix
rotation and scale. Let's use a modifier,
add modifier, and let's use generate
modifier and a bevel modifier. Let's have a look at our bevels. Let's add a zero to the
right of the decimal point. Click zero, one,
sorry, click Enter. And let's add
another zero there. Click Enter. And now
we're looking better, and I'll turn that one
into a two. Click Enter. And I'll go ahead and increase the segments two or
four, and there we go. That's perfect. So with that done, I'll go
ahead and apply that. And I'll also do a
shade ato smooth, and there we go. That's
absolutely perfect. Alright, so with that done, let's go over to rendered mode now and see what we're
going to do with this. Okay, so now that's
looking good. I think the next thing
we need to do is apply material to this. So let's grab it. Let's hit the little drop down
here in the node editor. And let's look for a oak veneer, go ahead and click on
this and see what we get. Um, so we need to do
maybe a UV map on this. I'll tap in Edit mode
and I'll press A, and I'll press U and I'll
go for a smart UV project. Make sure you get
an ilu margin of around 20 and go ahead and un and let's press AF. Let's grab our shapes, and let's go ahead
and do a scale on this to try and get
the size that we want. And I'd say that's looking
pretty good now, like that. But the edges the
edges look terrible. They just don't
look good at all, so we'll need to do
something with that. So we need to actually add a little bit more mesh
to this, I think. So what I'll do is
I'll press one so we can select edges,
select vertices. I'll grab that vertices. Eh, hold shift.
I'll grab that one. I'll right click and I'll connect vertex paths.
And there we go. Now without down,
I can press three. I can select this face here, and I can go ahead and
maybe rotate this. Maybe scale this until we get something going on that we like. And yeah,
that's better. So let's do the same
with this one now. We could rotate
this one, as well. And go ahead and scale this. Et's see what that looks like. Maybe a little bit more on that. And there we go,
that's fine with that. Let's just tap out of Edit mode for a minute and
see how that looks. And yeah, that's looking fine. So we just need to do the
same now on this side, 'cause this side still
doesn't look any good. So let's go ahead and
tap back into Edi mode. Make sure that it's vertice
selection we're on. Grab this one, hold shift, and grab this one, right click
and connect vertex paths. And now press three, so I can select faces,
grab this face, and let's go ahead and rotate that to the horizontal,
I think, like this. And let's go ahead
and scale this up. The direction's
wrong, so I'll hit R and rotate that
around this way. And let's see what
that looks like. Maybe we scale that
up a little bit more. And there we go,
that's fine, no. So let's do the
same with this one. Let's go ahead and rotate
that and scale this up. And I think that's just
fine, no, just like that. Okay, so there's our oak
extension to our kitchen island, and I think that looks
absolutely fine. But what we could
do we just putting that little bit of black
material just there. So let's tap into
Edit mode again. And let's press three
so we can select faces. Grab this bottom face here. Hold down control
and press Plus to make more of a selection
until we're there like that. Come over to here and hit the material properties
tab and hit the plus sign. And let's go ahead and find our black MDF, and there it is. And with this still selected, let's go ahead and assign
that. And there we go. That should be as simple as
that. Alright, let's tap out Ed mobile that and
see what we're looking like, and
that's looking good. Let's go ahead and
bring everything back, so we'll hit the
forward slash on the numpad and see
how that's looking. And, yeah, that's
looking fine now. That's made a big
difference to this. So hopefully now when
we get a couple of stools on this side, that
should look really nice. So that we've done that,
let's actually bring in our light to go above our
island. I think that'd be cool. So what we can do is
we can, first of all, let's drag in our Blender assets file and make sure that you select everything to do with this kitchen lamp,
including the empty. And if that's not selectable, then come up here
and make sure that extras is turned on if
you can't see that. So select everything there
and press Control, see? For copy, and then let's just
throw this out that way. And let's zoom out on this one, and let's go ahead and press Control V and bring
this in like this. And for some reason, it's brought it in at the back
here, but it's fine. So now that we've done
that, let's actually just grab the actual empty
and let's rotate that. So let's press z90,
and click Enter. There we go. And now
let's go ahead and take this over in the Y axis. Let's actually go
into shaded mode. And let's grab the light now, and go ahead and take this over now in the X axis like this. Maybe take it over in the
Y and bring it down in the said until it's kind
of in the room like this. Let's actually go into Y frame. It might be easier.
And let's press one, so we see this in the
orthographic view. And let's go ahead
and take this over in the X axis until it's directly
over the kitchen island, which is something like that. Now I'll press three, and
I'll make sure that now it's lined up with the island
in the other direction. Kind of hard to
say, I must admit, but we'll just kind of
get it a little bit. It's something like
that, I think. Let's see where
we're at with that. Maybe take it over a
little bit the other way. And now let's go back over
to the rendered mode. Okay, so that's looking good. Now we've got our
lights in situ. Let's bring this down
slightly on the z. Until those sort of bolts are hanging out of
the ceiling like this, and there we go. That's
absolutely perfect. Okay, so I wonder, actually, if we just go ahead
and scale this down. Let's hit S and go ahead and scale this item
down a little bit. And now we maybe bring it down a little
bit on the z again. Till we get that kind of effect, maybe just bring this over
slightly and see how we look. And I might just
try scaling this down the z a little
bit more. S and z. Bring this up like this. Maybe bring it down
a little bit now. And there we go.
That's much better. That's much more the
effect I'm after. Okay, so what do
we want to do now? I think the next thing we need
to do is go ahead and put some lights in these shades. I think that's the next
thing we need to do. So I'm just gonna
grab these shades. This one, this
one, and this one. And with those three
items selected, I'll go ahead and isolate those. And let's work in just shaded
for a moment. There we go. And what I'll do now
is I'll go ahead and just grab this
item like this and I'll press shifts and cursor
to the selected there. Now they've done that. I'll
go ahead and press Shift A. Or before we do that, let's have a look
at where we are. So let's look at
ground floor lighting. Let's actually
collapse this file. And interior, let's open
ground floor lighting. Let's select this item here. And let's actually grab this
again now and press Shift A. And let's bring in a light. And let's bring
in a point light. Let's bring that
item down like this. Until we're something like that. And now let's go back
over to rendered mode for a moment and see
how we're looking. I need to do some good. I can see a little bit
of light in there. I scale it up a
little bit like this, bring it down a little bit. And maybe let's actually just see what we can
do with this light. Let's increase the
power to around 50, let's increase the warmth. Just bring this into
the red a little bit. And now let's go ahead
and bring everything back and see how we're looking. And that's actually looking really good. I'm
liking that now. So let's go ahead
and make a copy of that and just shift that
over to the others. So with that light selected, I'm just going to grab
these three shades. And I'll hit the forward
slash key to isolate. I'll press seven, and I'll press deselect everything
else and just select the light on its own.
Press seven again. And I'll press lt D. And Y and bring a
copy over like this. And I'll press Alt again. And why? Bring a copy across now to the middle
of this one like this. So Sandra as best as I can. And let's see what we've got. And, yeah, that's looking
good for all three now. I'm happy with that. Let's bring everything back again now
and see how we're looking. And that's really done nice
things for the island now. So what we could do is
we could go ahead and hide our extras for a moment just so we
can see our scene, and those lights really
are illuminating that kitchen. That's
looking really nice. Okay, so in the next lecture, what I want to do is start
bringing some trees into our scene around the outside of our house to add to the
reality of everything. Alright, so I'll see you
in the next lecture. Thanks very much.
Bye bye for now.
79. Lecture 76 Vegetation: Hello, and welcome
now to Lecture 76. And in this lecture, let's add some trees to
our scene, which is, again, something
that's going to add a nice level of
reality to everything. It's really going to make it
look even more convincing. But it comes with a warning. Trees are big files. They're quite big imports, so it's something we
do need to watch. So I wouldn't import too many
different types of trees, and I would look quite closely at the file size before
you import them. Um, because, yeah, it can really clog your scene up and make
your scene a lot larger, make your files a lot larger, and it can use a lot of VRAM
then to actually do it. So I'm going to try and
stay in full rendered mode, but you may find that
you want to come out of this and just end up
in the solid display. It's up to you, but I'll try and just for the
benefit of everybody, stay in rendered mode and see if my computer
can handle it. I will make sure that here in the render properties tab that my viewport samples
are quite low. So I've got it set up at 15, and I kind of encourage
you to do the same so that every
time you move, your PCs not rendering
constantly trying to keep up. Could even reduce this maybe
to ten, and there we go. So you can see now at the top, the computers only rendering
for a second as I move. Okay, so I think the
first thing I want to do is bring the cursor
out into fresh air. So I'll press seven to
see this from above. And I'll hit the cursor tab, and I'll bring the
cursor forward to about here like this. I'll now make sure that
I'm back on the move tab, and I'll right click. Whoops. Let's try that again,
and I'll right click and I'll set the origin to the three D cursor Okay, so let's search for some trees. So we'll come up here
to the Blender kit, and I'll hit trees or
type of trees and click Enter and see what we
get and make sure, of course, that we've
got three on first. And let's see what
we're looking at. So let's just click
on the first tree or right click on
the first tree, and you can see
straightaway file size, 269 megabytes, so
it's quite large. So I'll click away from that and just see there's
an olive tree there. That's quite This feels like it's somewhere warm
Mediterranean, an olive tree might
be a nice idea. Let's right click,
and that's 156, which is probably
where we're gonna be with trees somewhere
around there. And let's see what we can find. Um shopping, shopping for trees. Let's see. Let's click
again and see what we get. Pine tree, let's
have a look at this. So 158 megabytes.
That's a good size. Um, well, let's see. Um, we have trees here, ahorn tree, pine tree. Some of these trees
are quite low poly, which is not really what I want. We got another realistic
pine tree there. And let's see what we've got. So we had an apple tree there, nice willow tree.
That's really pretty. Let's right click on that. That's only 74 megabytes. We
may bring some of those in. We'll come back to that.
There's a palm tree. There's a Jacaranda tree. Let's see what the
size of that is. Oh, wow, that's 1,300
megabytes. That's really big. So I don't think I'll
be bringing that in, even though it's really nice. It's a tall evergreen. Um, And it's worth taking a few minutes to hunt down the right tree for
you're seen at this time. What about this one? Fruit tree, Pruns, Sicilian, or plum. Maybe this one would be
the right one for us. Maybe we bring this one in. Let's just see what
the size of it is 162 megabytes. I
think that's okay. So I'm gonna go ahead and
left click on this and bring it in and see
what it looks like. I'll zoom in on this and just
take a look at our tree. And yeah, that's that's
actually amazing. I can't believe the quality of that for a free item
in Blender kit. So the file size is
you can see that the file size is justified for the amount of polys on this. So from a distance, that's gonna look really good. So we must make sure
now that when we distribute this tree,
we don't press shifty, we press Alt D so
that we can duplicate the properties to each item so we don't have as
much information. So what I'll do is
I'll press seven, and I'll grab our tree, and I'll go ahead
and bring this over, and I'll just place it on
this corner like this. And I'll bring it
down some on the z. And I'll press seven again, and maybe just bring it
in closer like this, maybe just overhanging the wall even just slightly like this. Let's see what that looks like. Maybe bring it down
a little bit more, maybe bring it over
in the X again. And there we go. Let's
see what that looks like. And that's quite nice.
I quite like that. Maybe I'll just take
it back a little bit, and maybe I'll scale this
one And there we go. Let's see what that looks like. Yeah, that's looking
awesome. I'm liking that. You can see the
immediate difference that makes to our scene just
by putting a tree there. So I'm going to duplicate
this tree using the old button and
distribute around our scene. And as I do it, I'll rotate
and scale each one a bit. So I'll press seven,
and I'll grab the tree. And actually, the
next thing we do, we want to make sure that these trees are in the right place. Let's open this file. And let's find our tree. And it's here in ground
floor lighting right now, so that doesn't help us much. So what we'll do is
we'll go to outside here and we'll create a new
file, and we'll find it. It's right here. We'll
call this trees. And what we'll do on this now is we'll just select this one and we'll create a sub file again, and we'll call this
one the fruit tree. I enter, and I'll make
sure this one's selected, and we'll take this
fruit tree here and we'll drag it up into the fruit tree right
here like this. We'll grab this one
now, and we'll press Alt D and Y and bring
a copy up like this. I'll take this one
back a little bit, and I'll rotate it. Here we bring it in a little bit more like this and let's
see what that looks like. Maybe take it up a little
bit, and there we go. That's cool. Yeah, that's nice. I like that. Okay. So now that we've done
that, let's try that again. I'll press seven to
see this from above, and I'll grab this one
again and I'll press old D and Y and
take this one up. I'll take this one
over a little bit, and I'll try scaling this
one up a little bit more, rotating and let's see
what that looks like. Maybe we try taking
it down a little bit, and there we go. That's cool. So that's really broken up
the line of the horizon. You can see the
sort of benefit to making things look much more convincing with
some vegetation. So let's put some of these behind the house now,
so I'll press seven. And I'll grab this again
and I'll press Alt D, and I'll press Y, and I'll bring one around
the back like this. And I'll bring it round the corner like this,
and I'll rotate. And we'll see what
that looks like. I might want to take that
one either up or down. Let's have a look. Maybe I'll take this over in the X axis. I'll take it up a little
bit, and there we go. And for some reason,
I've got a duplicate of my island lamp here, so I'll go ahead
and delete that. I don't know why that's
there, to be honest. And we'll delete that,
and there we go. So let's press seven, and let's grab this again, and we'll press Al D and X and go ahead and bring a
copy around like this now, and we'll rotate this again. Maybe we'll scale it
down a little bit. Maybe what we could do this
time is just try tilting it. So I'll press R and Y and try tilting this treat
over a little bit, so that we have lots of
duplicates saving our file sizes, but we're just trying
to make them all look a little bit different. And I think that works
a treat, actually. That's looking really good. And we've just about hidden
that cannon behind the house, as well, with that, so
that's gonna be good. 's press seven again. And I think I'm going to
duplicate this tree again, so press to D and Y and take another copy back like this and just put it directly here, maybe rotate it
around like this, maybe bring it back in and see if that's helped
with cannon again, some more just
hiding that cannon. And yeah, I think that's done the trick now for hiding
that cannon, so that's nice. Okay, so I think I'll do one
more of these fruit trees. So I'll grab this
tree and I'll press Alt D and X and bring a
copy round like this, maybe just round
to here like this. And there we go. That's cool. So now we got our first set of trees nicely distributed
around our house, and they're looking really nice. That's really added to the feeling of everything,
so that's cool. Okay, so I think we'll bring in another tree now, so
I'll press seven. And let's find a tree file
again, so I'll select this. And let's compress
our fruit tree file. And now let's go ahead
and find another tree. So let's see what we can find. So we have fruit tree prune. That's the one we've
just brought in. And what else have we got? So we got this Douglas fir. Christmas trees. Um, What's this one, chestnut tree? Big tree. That might be cool.
That might be alright. What else have we got? And we've got this one, the tree **** gran folio. Let's have a look
at this. And again, 141 megabytes is a nice size. I think I'm gonna go
ahead with that one. So I'll left click on this one and bring it into the scene. Let's just zoom in on this tree and see what it looks like, see if it suits what we need. And again, that's
looking really good. I like that tree. So I'll press seven to see
this from above. I'll grab the tree,
and maybe a this one, I'll bring over to
this corner like this. I'll rotate it bring it over and let's have a
look at the height now. And, of course,
it's way too high, especially since this house
is kind of on a hill. So we need to sort of think
about that all the time that trees are not going to be sort
of the base of the trees, not going to be level with
the house being on a hill, but that's looking really
nice. I'm liking that. I'll press seven again, now. And I'll grab this tree. And I'll press Alt D and X and bring another
one over like this. I'll rotate this around. Take this back on the
y axis like this. And there we go. That's good. Let's see what that's
like height wise. Is it too high? Is it good? It looks right, actually from
there. I think that's good. I think the next thing I'll do is I'll put one of those again, maybe in the distance
on this side, so I'll press Alt D and X. Bring this over like this, and maybe bring it down
slightly in the Y. Just bring that down like
that. And that's cool. Let's press seven, and
let's grab this again, and we'll make
another duplicate, Al D and X, and bring this over like this. Let's rotate this one as well. And let's try
scaling this one up. And I think actually, I'm going to put one of these as well just on this back corner. So I'll press Al D and Y, and bring this one over
as well, like this. Bring this back and rotate it and see how that's
going to look. Okay, so I'll zoom in in our house now and
see what we got. And that's looking
really good, now. That's actually really
doing nice things. So I could actually just
duplicate maybe this tree again, and there's one there
or maybe this one here. So I'll press Alt D and Y and bring a copy
across like this. Again, just break up that horizon and see how that
looks, and that looks good. Okay, let's have a
look from this site, and that's looking good. And maybe we'll just maybe duplicate that tall tree
again one more time. I'll press seven. And I'll
put a copy just on this side, so press D and X and bring a copy across
this other side like this, maybe overhang the
house a little bit like this, rotate it red. And we'll see what that looks. And I'd say that's
looking really good. There's a little
bit of vegetation coming in, which is
not something I want. So I'll take maybe the height of this tree up a little bit. Maybe try rotating it on the z. Maybe take it up a
little bit more. And let's see what
that looks like. And that's looking good.
I'm liking that now with the vegetation kind
of overhanging the house a little
bit, that works. Maybe we'll bring this one
up a little bit, as well. And there we go. And maybe this one actually wants to go down a little bit. So we'll take that
down, as well. And there we go.
That's looking good. So I don't think maybe I'll
bring in one more tree. Let's see what we can find. So we got this chestnut tree. Let's see if we can find a third tree here
somewhere that we like. Let's do a basic tree there. Um, trees, trees. Who's got a tree that we like. Jack and we looked at that. I was huge file sizes. What's this island tree?
Let's right click on this. And again, that's way too big. We've got this mid poly
tree here, 13 megabytes. That'd be nice for sort of farther away.
Maybe we do that. Maybe that's a nice idea. Let's click on this one and bring this one to
the scene like this. Let's have a look at this tree. And it is we can see, it's much lower poly, but it's still
actually very good. So let's see if
we can distribute this tree a little bit, as well. So I'll press seven, and let's
find where this tree is. And where have we got
it? Let's have a look. Looks like I brought this tree accidentally in at
the first floor. So let's actually
just grab this tree, and let's bring this up and put this into
the trees file here. And there we go. So let's grab this tree, and let's take this way
over into the distance. And let's have a look
at where that is. And maybe let's take
this down like this. And let's scale it up. Take it down a little bit more. And now let's go ahead and
brought another tree in. So let's press seven,
and let's Alt D, and let's press X and bring the same tree now
over here like this. Maybe take it here. And let's do the same again, Alt D and Y and bring
one up like this. And Alt D and X. Bring a tree back here, maybe like this and one more, maybe I'll D and X and bring a tree
further back like this. Let's rotate this one, and let's scale this
one up some more. And let's see about the
heights of our trees. So we can actually take this one up a little bit like this. And we could actually find
the tree that we have behind the house which is here. And we could take
this one up as well. And we could maybe take this up the hill a little bit and
take it up some more. And maybe that's a little too high. We'll bring that down. Let's have a look at
that through the house, see what that looks like, and maybe bring that
down some more. And there we go. That's cool. And I think, is
there anything else? Let's have a look at
these trees here. So we have this one here. Let's take that further down
the hill and take this over. And let's also just see have we got any other trees that
we've put in the scene? We've got this one here, so maybe bring this one down, as well, and we'll bring it forward and see what
that looks like. Maybe grab this tree
here, not that one. This one here, and we'll bring that one forward as
well a little bit. And maybe we'll scale
this one up a bit. And we'll see what we've got. Okay, I think that's
looking good. I don't think maybe I
want to take this tree, and make a copy of this one. So I'll press Aldi and Y and bring this one
forward as well. Maybe bring this one down now
and rotate this on the z. Just to put a little bit more
in the foreground there. I think that's more than
enough trees in the scene. So we'll compress
the trees file here. I think I just want to get a feel for what that looks like. So what I'm going to do is
just hover over our scene. I'm going to press Shift B, and maybe just find an area
to zoom in. There we go. Now what I'm going to do is
I'm going to press Shift and the Tilda key to go into
our fly walker mode. And now I'm going to hit the
tab key to apply gravity. And let's see what
all these trees look like now in our scene. Let's see if that's
improve things. I'm just going to press W
and kind of walk forward. And from this angle, I'd say that's really
added to the realism. I'm really pleased
with that, and the trees are really convincing. I might bring some of these
trees a little bit closer. The fruit trees are fine, but that tall tree,
maybe I can bring one of those a bit
closer into the scene. Let's have a look at
this tree at the back. See what this looks
like. That tree's kind of just in the
wall a little bit, but I think that's
okay because I don't think I'm ever going to have a camera view of
that just there. So I may leave that
just like that. And those trees there
are looking great. I'm liking those. They're
really adding to the scene. I may just in my
own time just put a few trees in the
front, but not too many. And let's have a look from this angle what these look like. And yeah, they look really
good. I'm pleased with those. They just add to the realism
of that quite nicely. So we could go upstairs and see what the trees
look like from the first floor view and see
if we can find a way in. There we go. We're through. Okay, let's have a look from the bedroom
and see what the views like. And that's looking really
good. That trees just framing the corner of
that view really nicely, making it look
really convincing. And from this angle, too, I mean, we've kind of blocked
the view of the town. Well, no, we haven't. I
think that's okay, actually. I think that's
absolutely perfect. That just frames the view in a little bit
with those trees, adding to the
vegetation, makes it all really a lot
more convincing. I think I'm really
pleased with that. Let's just try from
this other bedroom, see if the views work from
here, they think they do. We just blocked out the
corner of the town, which I think is a nice effect. I think I'm really happy
with that, actually. So I'll hit the escape key to come out of the walk fly mode. And I think that's
it for this lecture. So we have added quite a
lot of size to our file. These trees are very
heavy in file size. So this is something you
really will need to play with to decide how
much you can do. But you can always
delete these trees if it starts to bog
your files down. Okay, so in the next lecture, let's move upstairs, and let's put some beds and
some furniture in position. All right, thanks very much. And I'll see you in the
next one. Bye bye fo.
80. Lecture 77 Bedroom Furniture: Hey. Hello, and welcome
now to Lecture 77. And in this lecture,
let's go ahead and import some of the things
we need in the bedrooms. Let's import things like
beds and wardrobes. And I think some sort of rug
for under the bed, as well. I think that'll be
a good thing to do in this lecture and also
keep moving things along. Okay, so where to
start with this? I think first things first, let's go ahead to the
first floor, open this up. And let's hide the roof, and let's hide the middle roof. And also in bedroom one, let's go ahead and hide the
headboard, and there we go. That's sort of just given
us a nice view coming down. I think, actually,
after all our work on our last lecture for now, let's go ahead and hide
the trees as well. So let's open up
the ground floor, and let's find the trees. There they are. Let's
hide those as well. There we go. I'll compress the ground floor file.
We don't need that. And yeah, we're going
to work on bedroom one, so we need this
one, this one open. Okay, now that I've
done that, actually click on bedroom one here. Actually compress these
bi folding door files. And I'll click on bedroom one, and I'll create a new folder, and it's here, and
I'll left click on it. And I'll call this, just call it the Let's call it the
wardrobe. Let's start there. And depending on what part
of the world you are, you can call it what
you want closet, wardrobe, cabinet
it's up to you. But I'll call it the
wardrobe. There we go. Now that you've done
that, make sure, of course, if it's
actually highlighted. And now let's go ahead
and find our wardrobe. Make sure again in
the Blender kit that your Max resolution is low. Let's scarp here now
and click on this. Let's type in wardrobe
and see what we find. Make sure, as well
that on the filters, you've got free first. And let's see what we've got. And to be honest, I've already got mine the one
I'm looking for. So I need to find it. Again,
you can go through these and find anything
that appeals to you. Or if you want, you've got the modeling skills now to
create your own wardrobe. It's completely up to you. And this is the
one I'm thinking. This is my closet bi parada. I'll right click on it and
look at the file size, and it's just 20 megabytes and it's a two K resolution image. So I think with that in mind, what I'm actually going
to do is just increase the Max resolution to
maybe 2048 by 2048. And now I will go ahead
and download this one. So I'll left click
on. There we go. Okay, so let's have a look at this now and see
what it looks like. And, yeah, I mean, that's a nice looking
piece of furniture. I think I'm more than
pleased with that. I'm not overly keen with
just the matte gray doors. I get the effect, but I don't
know if it's what I want. I think I would prefer some
of these to be mirrors, and some of these
to just be walnut. So maybe we'll deal with that. So what I think I'll do
is I'll just snap on this surface here and find out what it is, and it's walnut. So what I want to do
is actually apply the walnut to these surfaces. So I'll grab this
one, hold shift, grab this one, this
one, and this one. And I'm going to show you a new trick for applying texturing. So now that I've grabbed
those four like that, I'm going to hold shift and
grab the walnut itself last. So that's a different
color. Saying it is the last one selected. That I've done that, I
will press Control L, and I will link materials.
And there we go. So instantly, we've applied
the walnut paneling to those doors super
quick, super easy. So I think I'll also do the same thing with this one here. I'll hold shifts,
select this one, and I'll select this one, this one, this
one, and this one. And then finally
the walnut itself. Once I've done that,
I'll press Control L, and I'll go ahead and link
materials, and there we go. That's fine. Okay, so that's looking good.
I'm happy with that. If you wanted to, you could apply a UV map to this and then sort of shake the
orientation around, just mix it up a little bit, or maybe scale up or
scale down the walnut. But I think the
scale of the walnut, I think I'm happy enough with. Okay, so I just want to apply
a mirror no to this one. So I'll select
this surface here, and I'll hit this little drop down here and I'll
search for mirror. And there it is mirror
01, and select that. Now that I've selected
that, I'll select this one. Hold shift, grab this one, this one, finally, the mirror, and then I'll press Control, and I'll go ahead and link
materials, and there we go. That's cool. Let's make sure it is where it's
supposed to be. And it is. It's in the wardrobe
file on bedroom one, my closet by Prada and everything belonging
to it. So that's. We don't have any
empties for it now, and I think that's because
we don't have any empties turned on in the overall image. So come up here now,
click on this one, and let's turn on
extras in the objects. And you can see this piece has actually got a lot of empties because it's actually
a rigged piece of furniture, which
means if you wanted to, you can actually maybe just
click on this empty here, and you could rotate
that on the Zp Z, and you could go ahead and
open the doors on the piece. It's a really nice feature. So it looks like everything
is rigged in it. But the only one we really
need to worry about is this large rig right
here in the middle. So what I'll do is
I'll just grab that. I'll press seven on the lamp pad to give us
the orthographic view. And actually, I
think I'll just go into shaded mode for now, and now I'll bring
that into the scene. I'll press one to get
a front view on this, and now I'll go ahead and
bring this up like this. And bring it over like this. And now I'll press seven. And let's have a look
where we're at with this. And I want to go ahead
and rotate this. So I'll press 90, enter, and now I'll go ahead
and take that back like this. Take that
back to the wall. And I think I'm going to
scoot this back a little bit to I think around there
is where I wanted. Let's have a look
at the height of this now and see where
we're at with that. See if you want to
take this up or down. I think I want to
take it up a little. And I'd say that's about right. Just about there is the
correct height for this. All right, so now
that we've done that, let's go ahead and turn
rendered view back on again, and let's have a look at this
and see what it looks like. And we could bring
back the headboard for a moment and see what that
does the overall scene, and we could also bring back the roof in the file as well. There'll be a middle roof and roof and see how we're looking. And yeah, I'm liking that. That's looking really nice. It's just added to the
warmth of the room and with the lighting,
that's really cool. I'm liking that. And I'm
pleased that I put a mirror in this because it just adds
something to the room. Okay, so I'll go ahead and turn off now the headboard again, or I'll hide the headboard, and I'll go ahead and hide
the roof and the middle roof again for a while so we
can see what we're doing. And I'll press seven. So I'll select the first one of the folders here
in the closet. So my closet by parada and I'll right click and I'll go
ahead and select objects. That selects all the
objects in one go. Now that I've done
that, I'm going to make a duplicate and
put it on this side. So I'm going to press Alt D and X and bring that over now to the opposite
side like this. Now that I've done that, I'll
go ahead and rotate that, so I'll press, 90, and that's actually
rotated it the wrong way. So I'm going to
hit the minus key, and then I'll swing it
around just fine for me. Now I'll take it
back in the Y axis. And I'll go ahead and take
that over in the X like. There we go and then maybe
take this back a little bit more. And there we go. Let's have a look at the height and see if that's
correct in the room. And it looks like, Am
I happy with that? Is that correct? Actually,
it is. That's just fine now. So again, I think that looks
just fine in the room. I could bring the
roof back again and just see what that
does for everything. And, yeah, that's looking great. We may end up having to put some extra light in this room. I think we probably will, and I may end up just
creating a plane and putting it in here and then putting a mirror on
this because to me, this is like a dressing table, so it needs to have a mirror backing in this
area, so I can do that. And, of course, we'll place
a chair in front of it, some books or something
on the shelves, sort of whatever you want to do. Okay, so that's our wardrobes in place now, so that's cool. So what we could actually do now is have a look at bringing
something else in. So I think the next
thing I want to bring in is something for the floor
to go under the bed, a bit of a feature rug. So what I'll do is
I'll rug in here now. Click Enter. And let's
see what we get. That's really nice there, but I don't think
circular is gonna do it. And we've got these
kind of rugs. I'm looking for something
quite traditional. I think it'll be a nice
contrast with everything else being quite clean
and crisp and modern. So, this one's kind of
it, but it's just for me, it's not quite colorful enough, so I'll see if I can
find something with some reds in there,
some warmth to it. And this is more like it, but maybe there's
a different color. So there's a blue one,
another blue one there. And is there any others? And we've got one
here, which is quite nice. And we've got this one. Got this one here. That's
kind of what I'm looking for. I'll right click on this
and see what it is. And it's one K resolution
and just 1 megabyte. I'm wondering if
there's anything with a bit more resolution to it. What's this one here? So
that's two K and 13 megabytes. That's probably more like it. And because it's so small, I'm going to have the resolution quite high on the
import on this. So what we'll do now
is let's actually take the resolution up
to 40 96 by 40 96. Again, this is
completely up to you, but I think that's where
I'll have it for me, and I'll go ahead and click on this item and go ahead and
bring it into the scene. So I forgot to actually
create a file for that. So actually, let's create a file for that and put
that in the right place, let's have a quick
look at the rug itself and see if
we're happy with it. And I think I'm more
than happy with that. That looks absolutely great. So let's find it now. It's here, plain oh three. So let's go ahead and name this. As the rug. I click into. And let's click on
Bedroom one file here, and let's put an
extra file in it. And let's go ahead and call
this the rug. Click Enter. And let's go ahead and
drop this file here, the Persian carpet
file into the rug. There we go. That's cool. So we can compress that file now. Compress the closet
file, and there we go. Okay, so let's do
something with this now. So let's grab this one, and maybe we go back
to shaded mode. And let's go ahead
and let's hide the roof again so we can
see what we're doing. And let's press seven so we
can see this from above, and let's go ahead
and take this in. And I think I'm
gonna rotate that, so I'll press r90. Enter. And I'll take this
back to the wall like this, maybe centralize it a
bit more on the room, and I'll S, and I'll scale
this up a little bit, so it can kind of well, it wants to be to the
edge of the headboard. So I guess sooner or
later, we'll need to bring the headboard in and
scale this properly. So I'll press one now to
see this from the front, and of course, we can't see Oh, we can we can see
that just fine. So I'll go ahead and bring that up now into the room like this. Now we can actually see this. We can position it properly. And that should be good. Okay, so let's bring
back the headboard now so that we can see it
scaled against the headboard. Maybe we need to go
back to rendered view so that we can look at the
pattern when we scale this up. And that looks awesome.
I absolutely love that. That's looking amazing. But I guess we do need to sort of
scale this up a little bit. So do I want to scale the whole thing up or
just scale it in the X? I think I'll just scale it just in the X and see how that looks. So I'll press S and X and go ahead and bring this
out until it's kind of flush with the headboard and have a look at
it from this angle, make sure it's on the floor, and it looks pretty good to me. But I love that rug.
That's looking amazing. Go to say, it never fails to surprise me how good these
assets are from Blender, especially considering
they're free. So please do remember to leave
a rating on these objects. These people really
deserve it who make this stuff and
put these assets out there for Okay, so
that's in place. So I want to also use that same rug for
the other bedrooms. So I'll press seven to see
this orthographically. And I'll go ahead
and press Alt D and X and bring this over now to
the opposite side like this. Let's rotate it. So, 90, Enter. And let's go ahead and
bring this over like this. Bring this into position like this and see what we're looking. And scale wise, whether I end up scaling that
down, I'm not sure. For now, I'll go ahead and
leave that just like that. Or maybe I'll scale it down a tiny bit to the,
something like that. And let's go ahead and
take that back now. To the wall again, like this. Maybe we would take
it down a tiny bit. And there we go. That's cool. Okay, so we've got our
flooring sorted out, and we've got our wardrobe
sorted out, so that's cool. So I guess the next thing
to do is look for a bed. So let's do this.
Let's type in bed. And let's see what we've got. I must admit I've spotted this
one before, and I love it. This Sahara bed is
absolutely amazing. So I'll right click on this
and have a look at it. It's a two K resolution, and its size is 107 megabytes. So I think that's
absolutely spot on. I think I'm going to
go ahead and use that. Before I use it, I'll
click on Bedroom one, and I'll create another file, and I'll name this as the bed. Click Enter and make sure that bed is
actually highlighted. So now that I've done
that, I'll go ahead and click on the item and
bring it in like this. So I did actually forget to reduce the file size right here. So if you wanted to, of course, maybe it's an idea
to reduce that file size. I think I'll leave it and see
if I can get away with it, but I may end up
deleting this item, reimporting it in as
a smaller file size. I can kind of justify
it being that to me, again, it's a major piece
of furniture in the house. It's a real centerpiece. So maybe it's worth having
it as a high resolution, and it is absolutely amazing. The detail is absolutely
fantastic on it. Yeah, that looks
absolutely great. Yeah. Amazing. Really,
really nice work. Okay, so let's go ahead
and bring that in. We'll grab the
empty in this case. And let's go over to
just shaded mode. And let's press seven. And let's go ahead and bring this in and drop it in position. So I'll take it over like this. Take it over like this. I'll press one so we can
see this from the front, and I'll go ahead and
take this up like this. Let's have a look
at this bed and sit you and see
what we need to do. And maybe I need to take
this forward or back. But there is correct, but it's not on the floor, so let's take this down. And that's about on the floor. And let's centralize this. And we'll have, like, a bedside cabinet
either side of this. So that's looking good. And again, if you
guys want to create a couple of pieces
of these furniture, again, now you have some of the skills you need to
be able to do this. I mean, this bed
is very advanced, but the cabinets
and bedside tables, there's nothing stopping
you at all doing that now. You know how to apply textures
now and you know how to mod so let's actually go back to rendered mode for a moment and see what
this looks like. And yeah, absolutely great. Does it look a little
small in the room? Shall I scale it
up? I think I will. I'll go ahead and hit S, and just go ahead and scale
this up a little bit. And now I'm going to hit S, but then I'm going
to press Shift Z, so I don't scale it up
anymore in the Z axis. So I'll press S, Shift Z, and now just scale it
up in the X and the Y. And there we go. That's cool. I'll bring it forward
a little bit, because it's currently
kind of in the wall. And there we go. That's
absolutely awesome. We've still got a space either
side for bedroom cabinets, for little bedside cabinets, and maybe a reading lamp. And that looks about proportionate
now to the wardrobe. It looks absolutely amazing. That's a really nice bed. Okay, what I'm going
to do since now we're starting to bring
in a lot more assets, I'm using personally
the whole rendered view quite a lot is I'm
going to do a lot more saves it's at this stage that Blender
is prone to crashing. So I'm going to go
ahead and just press Control less and do a save, and I encourage you to save a bit more now than
you currently were. And let's go ahead and
bring in the final bed. So let's compress the
bedroom one file, and let's open up the bedroom
two file, click on it, and add an extra file,
find it. It's right there. And let's call this the bed.
And there we go and enter. So that's selected now. Let's go ahead and
bring another bed in. So I'm thinking this one is the one that I'm
wanting for this one. I did have a look before. You can go ahead and
scroll through and see where like This one
is also quite nice. But I think I'm going to
go for this one here. So I'll click on this one
and go ahead and bring it. Again, I brought it in at quite
a high resolution because the beds are quite a
major piece in the rooms. But if you wanted to, of course, you can reduce the resolution
before you import this. I mean, this bed's
a lot more about soft upholstery than the other one, but I
think it's nice. I like the texture on the
Duve. That looks really good. I'll keep an eye on my V round, make sure that it's
not going too high. It's currently about 9.2. Okay, so I'll grab the item now, make sure it's where I want it to be and it is bedroom one. It's bed in bedroom two file, so I'll compress that now, and I'll press seven, and I'll go ahead and
bring it into the room. So I'll grab it here and take it over. And
I'll press one. And I'll go ahead and
take this up like this. Bring it down a little
bit. There we go. I'll press seven now to
see here from above. And I'll go and rotate
that in 90 degrees so Ah, 90, and click Enter. And actually, it's
the wrong way round, so I'll do that again. So I'll press A 180
and click Enter. Okay, I'll take this back
to the wall like this. And I think I'll go
into shaded mode now and go ahead and have
a look at this properly. And maybe take this over like. Center this a bit more. And there, that's looking good. So I think we'll
probably need to scale up this headboard
a little bit more. It's not quite working out. I mean, I could reduce the width on this.
I could do that. But I don't think, let's try. Let's try it and it
and just try reducing the width on this and see if it looks a
little bit ridiculous. Actually, it looks right.
I think that's alright. I think that width is just fine. So I'll take this
back now and put it in position between
the headboards. I may have to sort of juggle
this around a little bit. I'll scale this up
a little bit more. That's why, maybe take
this over like this. And that's okay now, and go ahead and take this back. So it just slots nicely
between these posts. And there we go. That's cool. And I think the bed
looks just fine, reduced in width a little bit. We've not really
compromised anything. So maybe you want to just
take it down a little bit now until it's on
the floor like this, and let's go ahead and enter rendered mode for a moment
and see what we look like. And that's looking great. I think in the next lecture, what we could do is actually
just create a panel above the bed here with the
same leathered panel that we're seeing just on
these side little cheeks. We'll do the same panel there. I think that'll look quite nice. Okay, but that's
sort of the major items added to the bedrooms. We could bring this rug
just back a little bit. I'm seeing a bit of a gap. So I'll press G&XTa
this back a little bit. And there we go. That's cool. Okay, how good is this looking? Let's
bring everything back. Let's bring the roofs back, and we can see what our lighting
effect is looking like. And that's looking great. I think this actually works. I was wondering
whether I wanted to put more light in this room, but I don't think I do. I think this mirror
is helping a lot. And now that we have
some warmer components in the room, some
warmer textures, the gray bed is looking really
nice with the gray floor and then this rug and then these leather panels is
really making that pop. I'm liking this a lot. Okay, so that's the end of this lecture. In the next lecture. Let's bring in a few
more little items. We'll make this
little panel here, and then let's bring in maybe some stuff for the bathroom, a toilet, and a sink and a bath. And let's bring in a
TV and back light it. I think that's enough
for the next lecture. Actually, this one's
stretched on quite far, but I think we're getting a lot done at the moment, so
hopefully you don't mind. Okay, thanks very much. And I'll see you in the
next one. Bye bye for now.
81. Lecture 78 bathroom Fittings: Okay. Hello, and welcome
now to Lecture 78. And in this lecture, let's go ahead and tackle the bathroom. See if we can put
some fittings in that a bath and a toilet and
all that kind of stuff. But before I do that, there's just a few little tweaks I
want to do to the bedroom. So let's just do those first. I think, first of all, though, let's go ahead and hide the
ground floor completely. Let's just get rid of that, just to reduce things for
Blender and our computers. And I think, as well, we could maybe open up
the first floor file here and compress the ground
floor collection. And we can turn off
the middle roof, and we can turn off the roof. And actually, we could
turn off the walls. Let's actually turn off the
first floor walls as well. So we just have this setup
like this, that were you. Um, actually, within the
bedrooms maybe as well, we could hide the windows, and we could hide
the folding doors. And the same in bedroom one, we could hide the window, and we can hide the bifolding
door in that one as well. Let's have everything down
to a sort of a minimum. So the two things I kind of
want to do before we move on is I want to create a panel which goes
here and this space, which will also have this nice quilted leather effect on it. And I want to put a mirror
just here, as well. I think that'll be
worthwhile doing. So let's start, first of all, with this panel here. And I'm just going
to press Shift B, just to resent a Blender
in this area. There we go. And I'll just grab this panel, hold Shift and grab this one. And with the two selected, I'll press Shift S, and I'll say cursor to the
selected, and there we go. Now that we've done that,
let's press Shift A. And let's go ahead
and bring in a cube. Okay, let's scale
this down in the X or process and X and go ahead and
bring this down like this. And I'll go ahead and take
this up in the Z axis. And I'll scale this down
some in the set as well. There maybe something like that. Take that up again and maybe go ahead and
just take this back a little bit and
see what we've got. There we go. That's cool. Maybe bring it forward
just a tiny bit. No, I think I was right in actually just keeping you back. Sorry, I'll just take
that back a little. I just scoot it back. It's just a tiny bit.
There we go. That's cool. So now that I've done that,
I'll tap into Edit mode, and I'll go ahead and just
delete the back face. I'll press X and delete
faces. There we go. So we just have a very
simple, open component now. And then I'll tap back
out of Edit mode, and let's look at the item. Let's fix the scale, so I'll press Control A and
apply rotation and scale. Now that we've done that,
let's actually just select the roof,
this panel as well. And with the two
panels selected, let's press Control L, and let's go ahead
and link materials. And there we go. So obviously, this is far too big. So let's go ahead and just tap into Edit mode just
with this panel now. Let's press A, and
let's press U, and let's do a smart UV project. Make sure you have an island margin and go ahead and unwrap. And that's reduce the size and kind of set the
scale up for us, but it's all, again, it's just way too big. So I'll press A to grab all, and I'll grab the components here in the island
in the UV map, and I'll go ahead
and scale those to reduce the size of
the leather texture. Until it's kind of similar to the scale of the pattern
on the two site pieces. So I'd say that's about
right, something like that. And there, that's done. That's not too bad
at all. I might just actually just check
the normals on that. So I'll head this
little one here, check face orientation, and the face
orientation is correct. There we go. That's done. I'll tap out of do
mode with that. And there we go. So now
that we've done that, I just want to go ahead and put a mirror just here and out. So I'll select this one,
hold shift, select this one, and I'll press Shift S, and I'll say cursor
to the selected. Now that I've done that,
I'll press Shift A, and I'll go ahead
and bring in a plan. I'll rotate that
plane in the X axis. I'll press x90, enter, and then I'll go
ahead and pull that forward in the Y axis like this. I'll go ahead and scale this down in the z, so
I'll press S and, and go ahead and bring this
down to something like this and bring it down, as well. Maybe just take it back
a little bit in the Y. Until it's just about
showing there we go. Now that we've done
that, I'll also just select this
mirrored panel here, too, so that this mirror
has got a yellow outline, and then this one has
an orange outline. And once I've done that,
I'll press Control L, and I'll go ahead and link
materials, and there we go. So I think that does
look better with a mirror just showing
in there like that. So with that done, we can
actually just go ahead and do the same now
in the other bedroom. So I'll grab this one,
hold shift, grab this one, and I'll press Shift S and
curse it to the selected. And then I'll press Shift A, and I'll bring in a plane. I'll rotate that in the
Y axis, Y, 90, enter, bring that forward in the X, scale it down in the Z, and then bring it into
position like this. I'll take it back a little bit until it just shows
itself, there we go it. And I'll select the
mirror, as well. I'll press Control, and I'll link materials.
And there we go. That's that mirror
in place, as well. Okay, so those are the little
jobs that I wanted to do. So now we can actually
look at the bathroom. That's the next thing
that I want to tackle. So let's compress
the bedroom one file and bedroom two file. And let's click on
the bathroom like this and just
select this folder. Okay, let's press seven. And let's go ahead and get
the cursor where we want it. So come over to the tab and hit the cursor key and
then just drop the cursor right
there like that, and then go ahead
and right click and set the origin to
the three D cursor. There we go. Click on
the move tool again. And let's start finding
components now for our bathroom. So I think the first
thing we could actually type in is bath. Let's bring that in and type
inter and see what we get. And let's use the filter to
make sure that we getting the free items first and
see what we're showing. So we got a nice bath
there and one there, and one here with a few
little things on it, as well. So that's quite nice. And
see what else we've got. We've got a nice
vanity there, as well, but getting ahead of myself, really, let's look
at the bath first. This one's quite nice.
Yeah, that's quite nice, because it's got a
towel on it as well, and it's got a few things on it. I'll right click on this
and see what it's like. So we got a nice sort
of taps there as well, and we've got towel,
and we've got some, like, little products and
everything there as well. It's a four k image, and it's 50 1 megabyte. So that's pretty
good. That's fine. Okay, so what I'll
do now is I'll go back to the Blender
kit tab and make sure that we are
importing on a small size because this is mostly
hard services now, so there's not much
detail in hard services, so we can afford to keep
the resolution quite low. And with that done, I'll
actually find the item again. And I'll go ahead and left
click on it to bring it in. And there we go. That's
our bath in place. So let's go ahead
and make sure that the extras are turned on so
we can see what we can see. And I'm not actually seeing
any kind of empty for this, and all these items
are separate. So it's kind of go to
hard to move that. It might get a bit
time consuming. So I think let's bring
in an empty for this. So let's press Shift A, and let's go down to empty, and let's just put in an arrow. Let's go ahead and scale the arrow down a
little bit like this. Now, let's select absolutely everything to do with the bath. Make sure the arrow
is in yellow. If it isn't, you can
always just deselect the arrow and just hold
shift and reselect it. And once you've done that,
you can press Control P, and you can set parent to
object keep transforms. And there we go. So that's
that done now. So there it is. It's also popped up in the outliner in the bathroom
tub set, so that's good. Now that's done. We can
actually just grab this empty, and we can go ahead and
take the whole bath into position as we want
it in the bathroom. So we could bring
this down, of course. And we can rotate
that in the Z axis. So I'll press z90, Enter. And I think I'll go ahead
and bring this over. And I think I'm going to
scale this up a little bit. So I'll hit S and go
ahead and scale this up. It's the wrong way.
Take this up like this. And I think I could scale
it up a little bit more, but I don't want to scale
up the height anymore. That's plenty in the height. So I'll press S, and I'll press Shift Z to eliminate the
z axis in the scaling, and now go ahead and scale this up a little bit more again. To maybe something like this, and I'll go ahead
and take this over. I may have actually
made that a little bit too big. It
looks like I have. It looks like I have, so I'll go ahead and scale this
down a little bit. Whoops, wrong way.
Take that over again. Scale it down a little bit more. Bring this down on the z axis. And take that over in the X
until it's off the mirror. And see how that looks. And, yeah, that's looking
good. I'm liking that. Okay, so now that
we've done that, let's go ahead and select the
battering file again now. And let's go ahead and bring in that vanity that I just saw. I quite like that. So here's
this bathroom vanity, and it's got a lot of
components with it. It's got a mirror and it's got lights and all
that kind of stuff. That's what I want.
So I'll right click on that and just
have a look at it. It's a four K image,
and it's 33 megabytes. That's absolutely fine. I might just actually increase the resolution input
to a 1024 by 1024, and then I'll go ahead and left click on the item
and bring that in. Okay, this time it does have its own empty,
and here it is. So let's go ahead and
rotate that in the X axis. I'll press rx90, Enter. And that's rotate it in the Z, so I'll press rz180, click Enter, and there we go. So let's go ahead and
take that now on the Y. Bring it down on the z axis. I'll just rotate round so I can see clearly where
we are with this, maybe take it over in the axons, bring it down on the z like this until it needs to be
off the floor a little bit. And now we can go ahead and
take this back in the y axis. Take it back a little bit more until it's
just touching the wall. And that's good like that. I'll bring it down a little bit more and take a look at that, and that's looking good to me. I think that's just
fine. Okay, so we do have our item here it is, and it's the Ikea bathroom. So that is in the bathroom file. So that's exactly where Okay, so now we just need
to bring in a toilet. So let's do that next. And I think I saw even a
toilet here in this group, and here it is right here, and that's kind of what I
want a cisternless toilet with a little flush
plate above it. So I like that. So I'll right click and
just take a look at it. It's four k, it's 32 megabytes. I think that's just fine. So I'll go ahead and
bring that in as well. And it has got its own empty, so let's go and rotate it on it. So we'll press Y, 90, and type Enter.
That was incorrect. I'll press Control Z just
to bring that back again. Let's try that again. It's X, 90, Enter, and that's better. Let's rotate that on the Z. We'll press Z, 180 TypeEnter and let's go and take
this back on the y axis. Until it's up against the wall. I'll just rotate around
so we can get a kind of idea of where it is and bring that down
somewhere central between the bath and the vanity. And the scale's
looking a bit off, so I'll go ahead and scale this up a little bit like this, and that's better, and I'll
bring it down a little bit more to something like this. And then I'll take it back
to the wall on the y axis. And, there we go. That's a toilet now in position as well
with a flash plate. And let's just checked,
that's correct. And, yeah, that's
absolutely fine. That's a nice
position on the wall. Okay, so there's our
main bathroom suite in. We could actually, if we wanted to just bring in
some shower stuff. Let's just hit let's just type and shower and see what we get. Type in and see
what items we have. So here we have a
shower controller, and here we have a nice head. So I think this is kind of the thing that I'm looking for. So I'll just go ahead
and grab these. So there's our shower
controller that's come in, it. And again, it doesn't
actually have its own empty. So I think I'm going to go ahead and put an empty on this, so I'll press Shift. A, bring in an empty and
just bring an arrow set. I'll go ahead and
scale this arrow down. I'll hit and bring
this down like this. And I think that's fine, now. So I'll grab the
actual shower itself, and I'll grab the empty, and then I'll press Control P, and I'll set parent to object and keep transforms,
and there we go. So I'll bring this
in it's empty. And I'll rotate
that on the X axis, so I'll press x90, Enter. And I think it's supposed to
be orientated the other way, not in portrait,
but in landscape. So I'll go ahead and
rotate that on the Y now. So I'll press Y, 90 Enter. I think that's correct.
That's the way I'm going to show mine anyway, so I'll bring that in
a little bit more. And now I'll go ahead now. I'll bring in the
actual shower head, so I'll grab this
one, and there we go. So this one again, doesn't have an empty, but
it's only one component, so that doesn't really matter. We don't need an empty
for one component. So I'll go ahead and
rotate down the X, so X nine, zero, enter, and then I'll go ahead
and bring that in as well. All right. So now
that we've done that, and I'll grab this one here. Hold shift, grab this one, and I'll H and just hide those. And now I'll go ahead and bring back the first floor walls. Now that I've done that, we
can actually go ahead now and position these
where we want them. So I'll grab the shower
head first and bring this up to where I kind of want
it, which is about there. And then I'll go and take this back until it's just
touching the wall. And I'll do the same with
the shower controls. I'll just grab the empty
and take this back. Again, until this is
just touching the wall. There we go. Any scale that up just a wee
bit. There we go. And let's see if
that's kind of in line with the shower head. And I think it is, and I think
I'm happy with the height. So that's kind of
that done, though. Okay, so let's go ahead and
bring everything back now. Let's bring back the middle
roof and then the roof. And let's compress these files. And let's have a look
at what we've got. Okay, so we've got
our shower in place, and we've got our bath
and we've got our vanity, and they're all looking good. The only thing is, I
think we're missing our timber surfaces. So I'll press I'll press Aldag and just go ahead and bring all those items back in, and there we go. That's
looking great now. Alright, so that's our
bathroom finished. And that's our kind of
bedrooms looking good now. So in the next lecture, let's bring back the
ground floor, too. In our next lecture,
let's now just bring in a TV and back like that. And let's put a nice little
light inside our lamp. Alright, thanks very much. And I'll see you in the
next one. Bye bye, Fino.
82. Lecture 79 Tv and Floor Lamp Lighting: Hello, and welcome
now to Lecture 79. And in this lecture, let's just do a few more small
little things, which is, I want to put a light in a floor lamp here
hanging over the sofa, we don't have a TV yet
on our feature wall. I'd like to put a backlight
on that TV as well, just as an extra highlight. So let's go ahead and do
those few little things. I think the first thing is
come up to the outliner. Let's compress the
first floor file, and let's go ahead and hide
the entire first floor. Let's open up the
ground floor file. And let's go down to interior. And let's go and turn off
or hide the ceiling light. And let's go and hide the ground floor
lighting for now, as well. Okay, so let's
actually just click on the interior to make sure
what we do comes in on this. And now let's go ahead
and grab the lamp. And I'm gonna press Shift B
just to re center everything. There we go on the
lamp like that, and I'll go ahead and
tap into Edit mode, and I'll just grab
one face of the lamp, and I'll press Control plus, and I'll expand that until
I've got that entire shade, the entire shade
area of the light. And once I've got that,
I'll press shifts, and I'll click on
cursor to the selected. There we go. Now
we can tap out of Edit mode. And we're good to go. So now that I've done that, the next thing we're gonna
do is just press Shift A, and let's go ahead
and bring in a light, and let's go ahead and bring in a point light. And there we go. So I'll just bring that down slightly more on this z axis. And with that still highlighted, I'll come over to here and
I'll click on the light, and I'll go ahead and
increase the power. Maybe to around 70 watts, approximately, and I'll just
make it a little bit warm. I'll bring it into the yellow, yellow red a bit more like that. Now you can see it's casting a nice little shadow
on that wall. And we can always
just go ahead and increase that value
if we want to. So I think I'll go ahead
and just name this. And I'll call this
floor land bulk. And there we go. That's done. So we can go and increase the power on that
if you want later. Okay, so the next
thing I want to do is fix a TV to this wall. Um, I think maybe let's go ahead and hide the
ground floor walls. Let's hide those as well, just to make life a
little bit easier again. Let's grab this marble panel, and let's press shifts, and let's go cursor
to the selected. We might as well right click straightaway and
set the origin to the three D cursor
there we Okay, so let's bring in a TV. So let's go up to Blender kit. And let's type in TV and hit Enter, and
let's see what we get. And let's go ahead and
click on the filters, and let's go free first. And I'm looking
for a wall mounted TV without any kind
of feet on it. So that one's got feet on it, so I'd rather see if I can
find one without that. This one's got a base stand, so I get an ideal. Um, no. What have we got here? So we got a TV screen here. Again, it's got a base on it. That's not really
what I'm looking for. Oh, we got one here,
TV screen LED. Let's just see if
we've got any more. And we've got this
curved one here. And we've got this one here, LG that's a monitor. It looks like that's
about all we've got. Okay, so let's go
back to the LG. I think that'll be fine.
So LG Ola TV there. So I think this is about
Oh, no, that's a monitor. Do we not have a
TV? Well, we do. We have this one. This
one, I'll be fine. Let's have a right click
on this and just check it. It's a two k image, 3 megabytes. And is that the
only one available? Ah, what's this? This
might be the thing. Let's right click on this.
It's a six K 15 megabyte file. This is more, I think,
what we're looking for. Okay, I'll click
off for a minute. I'll increase the resolution
to about 10:24 by 1024, and I'll go ahead and click
on the item and bring it. Okay, here it is. So let's
pour it out on the X. Oops, not the marble, just the TV. And now let's go
ahead and press R and X and 90 to stand it up. And now let's go ahead, press
z90 to turn it this way. Alright, so let's see if we can get this TV where we want it, something like here, maybe, and go ahead and take
this back a little bit. And I think we need to
scale this up, Cyprus S, and just scale this up
some until it kind of fits this wall and has a bit
more of a presence there. And I could scale up
slightly in the Y as well. So I hit S and Y and just give this a bit more
wide proportion like that, a wide screen TV that we'll
just zoom in on this and just see if it's close to the wall or close to
that marble back panel. I'd say that's about right.
I'd say that's good now. So we can just find this
now and see where it is. And it's there. So
it's the wall TV, 60 inch already in position. That's. So I think the next
thing I'm going to do is click on the
interior file again, and I'll grab this and
I'll press Shift A, and I'll go ahead and bring in mesh, and I'll
bring in a plane. And there we go. So
I'll rotate that. I'll press Y, 90,
and click Enter. I'll bring it forward slightly, and I'll go ahead and
scale that down in the z. So I'll press S and
just go ahead and bring that down a little
bit like this. Maybe a little bit more. So as said, go ahead
and scale this down, maybe bring it over a
little bit in the Y axis, and then scale it up slightly
in the Y soll press SY, and go ahead and scale
this up like this. And there we go. That's cool. I pull that closer to the TV. And now let's go
ahead and bring up our no texture editor. And with this plane
that we've just made, actually, let's go
ahead and name this. So I'll call this
the TV backlight. Oops. Go ahead and click Enter. And, okay, so now
that we've done that, let's go ahead now and
give this a color. So let's click on N and let's
call this the TV backlight. Click enter again, and
we've got ourselves a principal BSDF that's the
only thing we really need. So the first thing
I'm going to do is, I'm just going to
come down here to emission and click on this one. And I'm going to just increase the strength of this emission. And that's going to give us an automatic light to this surface. I'll give it a slight color. So I'll go into maybe the
What shall we go into? What about the red? And there we go. So that's cool. So we can play around with
the emission strength and see what we like. Let's bring stuff back now so we can also see what everything
looks like in place. I'll bring back the
ground floor walls, and I'll bring back the first floor and the ground floor lighting
and the ceiling panel. Now we can see what we've got. That's actually already
nicely back lighting. We could play around
with a color maybe, and it's going to put you up to what you do you go into greens, whatever works with
that marble back panel. The green is quite
striking, actually. It could come
slightly into blue, and I think that's quite nice. So, again, if you want to you can increase the
strength of this. That's quite cool, just like
that. I quite like that. That's really highlighting
that marble in the background. So we can bring this
forward or bring it back, whichever kind of suits it. And I'll kind of leave it, I think, something like this. And another way of
adjusting this is we could adjust
the Alpha on this, which would affect the
transparency of that plane, which would, of course,
also affect the emission. So that would be
another way of kind of just affecting that
light if we wanted. And yeah, so that's that. Um I could play around
with this all day. But there we go. I'll
leave that alone. I'll just keep on
playing around with our back light. But there we go. We've got a TV in place, and we've got a nice
light in our lamp now. So those two are really just helping the scene
look really good. Okay, so in the next lecture, what we'll do is we'll just
briefly touch on what's left on assets to input, and then I'll kind of
leave you to it to make this project your own as far as what assets
you want to bring in. Okay, thanks very much. And I'll see you in the
next one. Bye bye for now.
83. Lecture 80 Making it Your Own: Hello, and welcome
now to Lecture 80. And I just want to
say that I think this project is just
looking really good. And I hope you're pleased
with your progress so far. Um, I think it's time for you all to put your individual stamp
on these projects now by importing the
remainder of the assets and deciding yourselves what
assets you'd want to put in. And I'm going to go
ahead and do the same. So when we catch up next, I will have imported
the remainder of the assets that I
want in this scene. So I'll just run through what
I'm personally thinking, but I couldn't highlight this enough that this is
very much your project, so you run with it the
way that you want. Just also when you're
importing assets, always consider your file sizes. So maybe just consider the
VRAM that you're running, and just what I would suggest
if it's hard surfaces, then keep your
resolutions when you import from Blender quite low. And if they're like,
background items, NPCs, if you like, non player characters, if
they're background items, let's go kitchen for a minute. Let's zoom in on that. And we've got these
cabinets here, and I want to put
some things in those. So maybe I'll put some
teas and coffees and some glasses and some plates and maybe some cereals or
something like that. And all those are going
to be way back there, not really seen, so I can bring those in at
lowest resolution. I'm just going to
personally press chifbe for a minute and just
square in on this. Just refocus it up. There we go. And what I also want
to do with a kitchen is I want to bring in maybe
what do I want to bring in? I'd like to bring in
maybe a fruit bowl, and I need to bring
in some stools to put against this area here, and maybe a coffee
maker on the back here, maybe a drying rack, some teas and coffee
making stuff, a toaster, maybe, and maybe
even a socket panel on the back wall so that you
have access to some power. On this wall, possibly maybe
a picture or something or a pinbard because it's
quite a big, empty space. And, of course, we've got
this big space in the middle, so that really is up to you
what you want to do with it, whether you want
to put a nice big central dining table with chairs or whether you want
to put a gym area in there, or an office area in there,
it's completely up to you. You could put a grand
piano in the middle. That'd be quite cool. But,
yeah, it's up to you. The outside, I'm going to put some lounges just
to fill this area, and maybe an outdoor small table and a couple of chairs
in this side here. I'll look at barbecues. I'm going put a barbecue
out here. I'm not sure yet. And maybe on this wall, I might put some
sort of plant in the corner and a
coffee table here, and I might make another
copy of the rugs we've used upstairs and bring those down and put one here as well. I haven't decided that yet. I'm not sure. Um, and maybe
a speaker here under the TV. And, again, maybe some
switches down at the base here just to show that we're thinking that people
are gonna need power. On the upstairs, what
am I going to do there? So I think we need a chair here, maybe a focus point here. So maybe a desk, maybe. I don't know yet. Maybe something on
these walls as well, 'cause they're quite
big empty spaces. So maybe some personal
photographs or something, or, again, some more
artwork on these walls. It's completely up to you. Um, and in the bathroom, I don't think I want to do much more with the bathroom, really. I think I'm pretty
much there with that. I might put some
sort of plant in this corner just to show
a little bit of greenery. And on this back wall here, I might put some sort of bench in maybe where someone can sit. I might consider putting a small table in
the corner here, but I'm not sure about that yet. I'll just see how I go there. And in the master bedroom here, Again, I'll put some
sort of little Oh, we got some stuff
missing on this. Let me just go to
the first floor file and turn everything on
and see what's missing. Bedroom one. We got the
folding doors missing. Let's bring those
back in there we go. And so, anyway, where was I? Sorry. I might put some sort of small
table here on a couple of chairs just to enjoy this beautiful
view that they've got. And yeah, definitely a chair here and
something on these shelves. Probably some books would
be nice on these shelves. Maybe a hair dryer laying
here or something like this. It's completely up to you. That's my point. Actually, I'm gonna keep on talking
for a second. So I'm going to put
some bedside tables in here. That's a definite. And the other bed, as well, and possibly some sort of
little reading lamp, and maybe something to suggest someone is
actually reading. So maybe a book sitting on this bedside table,
something like that. Maybe a pair of glasses on it. Whatever really is in Blender. So, yeah, that's what
I'm going to do now, and I'll catch up with you after I've done that and when
you've done the same as well. If you have any problems
with file sizes, what you can always do is the very last lecture is my
troubleshooting lecture. And in that lecture,
I do sort of cover what you can do to
reduce your file sizes. So you can always refer
to that that excuse me. You can always refer to that last lecture if you want to to see how you can reduce
your file sizes because there are different ways that you can do to do that if you're struggling
with GPU memory size. Okay, so let's get busy, and I'll see you when
I've populated my scene. Thanks very much.
And I'll see you in the next lecture.
Bye bye, Fino.
84. Lecture 81 Compleated Project: Hello, and welcome
to Lecture 81. And yeah, I mean, I've completed bringing in all the assets that I
want in my project, and hopefully you've
done the same. And I really want to hope that yours looks
different to mine. This is the opportunity, really, to make the project your own, and I really can't wait
to see your projects. That'll be a lot of fun to see the directions that you've taken your projects and
see what assets you've brought in to make
yours look different. Anyway, so I just want
to walk around mine and just show you what I've imported to give you some idea. And then in the next lecture, this isn't the only a
short lecture, by the way. In the next lecture, we will start presenting our
projects because ultimately, we've finished SN, guys. This is it, well
done. We finished our project, and
they look amazing. So what we need to do now
is present our project, potentially to your clients. Um, so we're going to do some still renders and we're
going to do some animations. The still renders
shouldn't take too long. That's quite a nice light
thing to talk about, but it will take us a
while to do renders, not only to do the
actual renders, or the animated
renders, I'm sorry, I will take a while to do those, but then actually to bring those together using
Blenders video editor, edit them all into one video,
apply some sound to it. It may take a while. But I'm getting ahead of myself, really. Let's look at this one
first in this lecture. Then in the next lecture, I'll
start tackles renderings. Alright, so what
I'm going to do is press Shift and the Tilda key, so I can go into
Blenders walk fly mode, and then I'll hit the tab key to apply a little
bit of gravity. And I think I'm
standing on a table. I'm standing on the
wall. That's why I feel a little bit tall. So I'll hit the W key, bring me forward, and
I'll jump off the wall. So I've put a ladder
on the pool here. I've done that, and I brought this really nice
outdoor table set in. I'm really impressed with
this. Put this here. So you've got somewhere
nice to maybe drink a coffee or a cold beer
and look at the view. I've also put some nice
sun lounges in as well. It's going to be a
little bit jumpy because I've got a lot
going on in the scene, so you sort of have to
bear with it a little bit. Here in the kitchen,
I've put some stools in. So I've put three
stools in like this. On this little table here, I've got a little coffee pot, and I've got two coffees
and a couple of pastries. I've got a little bit
of wall out there, too. And in these cabinets up here, I've got some cereal in there
and I've got some mixers, and I've got a coffee maker on the worktop there
and some knives, and I've got some other
little things, as well, some mugs and
different things just to populate the kitchen and make it a little bit
more convincing. And we've got fruit
bowl on the table, of course, and a
nice little kettle. We've got the sort
of centerpiece. We've got this
beautiful dining table. I really like this. And we've got some sort of center
decorations on that, these three wood
turn little bowls, and we've got a nice set of dining chairs around there, too. There we go. I brought
in a plant as well, just to sort of fill this corner here and
add a splash of color, and I've got some nice artwork, just to fill that wall, and then a coffee table, really nice coffee table, and then a book and a pair
of glasses just to sort of suggest who this person
is and what they like to do. Okay, let's see
if I can navigate the stairs in walk fly mode. I'll give it a shot. This may go very wrong. So I'll
go up the stairs. And I was already feel
like it's going wrong, and see if I can
head to the light. And I'm like, Hey,
I'm in the bathroom. I landed in the bathroom. Let's leave the bathroom because we know what we've
done in the bathroom already. We've done that
together. We've got the bath and we've
got the vanity, and it's all looking very good, but we kind of know
what we've gotten here. So, again, I've got
this same table that we put on the ground floor. I put in the ground
floor just over there. I've put here, but I've
taken two chairs away just to make it a bit more
compressed into the corner, and I thought This is
another nice place to just enjoy this view. In the master bedroom, I've got some bedside cabinets, of course, and I've got some little reading lamps or
little table lamps on there, too, and another nice pair of chairs with
another little scent, a little table, again, another place to enjoy the few. And I've got a nice little
wall mirror on there, as well, just to add some extra depth to the wall to the room and just to put something
in that big space. I've put some books
there on the shelf, and just to give it
a human element, I've put a teddy bear there. And just to put a human element in this project, I
like to do that. I don't like everything to
look so clinical and to give something a human element
so that people might picture themselves
living in our projects. Okay, so in the other room, it's much as the same, really. So I've got the same
bedside cabinets, and I've got the same lamps, just to reduce file sizes
and keep everything light. I have the same books here, and I didn't put the
teddy in on this one, and I have the same chair there. What I do have
different is I thought I'd bring a workstation
into this bedroom. So I've got a nice
looking little table, and I've got a desktop
PC and a chair, and then a book that
the person might be using as a reference for
whatever they're working on. And I've got a very low
poly bookcase here, and it is low poly,
but that's okay. I think at a distance, I don't think you'll
ever notice it. And I'll make sure as
I'm doing my animations, I never really dwell on that too long, so I
think it'll be fine. And, yeah, that's what I've got. I'm gonna hit the escape
keynote to get out of Walk fly, and that'll bring me
back to where I was. And that's the project, and that's what I've
kind of put in it, and now I'm happy
with where it is. So in the next lecture, let's do what I
talked about before. Let's start doing
some really nice, high quality still renders. Okay, thanks very much. And I'll see you in the next
lecture. Bye bye for now.
85. Lecture 82 Still Renders: Hello, and welcome
now to Lecture 82. In this lecture, let's go
ahead and do some nice, high quality still renders. Nice to present our scene. So yeah, let's show
you how to do that. So I think the first thing is, we don't need to be in the
shading settings anymore. Let's go back to modeling
and click on this. Let's come up here now and
click on this drop down, and let's turn off
relationship lines, bones, motion
paths, and origins. We don't need those anymore. Okay, so now that
we've done that, I think the next thing I need to do is simply bring in a camera. So I'll click on collections so that it comes in at
the bottom here. And, oh, let's set the origin. So let's press Shift S, and let's go cursor
to world origin. There we go, just to put
that there like that. So the camera come in
on that point now. Now that we've done that,
let's press Shift A and scroll all the way down to
camera and click on that. And there it is. There's the camera in the scene. Let's bring it up on
the Z axis like this. Let's press seven, and then I'm pad to see this from above. And we could go into
wireframe mode for a moment, and we could go
ahead and rotate. Whoops. Press seven again. And we could go ahead and
rotate that camera around. I want to start
with the kitchen. So I'm just going to center the camera lens at the
kitchen like this, and there we go. That's done. So now that we've done
that, there's actually one more thing I need to
do before I carry on. We can actually press Sedn. We can go back to
solid mode now. If you remember the
reference image group here, I'll turn it on for
a moment, actually. So we have this cube
that we did early on in the scene to act as a reference for the size
of our ground floor walls. And if we left that there
like that right now, as we rendered it,
that would be seen. So we'd have this great
big white solid cube, just in the middle
of everything. So when we rendered
out our first image, it would just be white and
left wondering why this is. So this reference image file, first of all, let's go
ahead and hide everything. But let's go ahead and hit
this little camera thing as well so that it's not shown
in the final renders. An we could, if we wanted
to delete that file. We don't really have
a purpose for it, but I'll go ahead
and leave it in. Okay, so the next thing I'll
do is we want to be able to view through that camera
and see what it looks like. So I'm just going to press
zero on the number pad. And with that, I can actually
see through the camera. I'll click on the little
camera icon here, and I'll bring the focal
length down to around 40. The camera settings work pretty much just
like a real camera. So if we wanted to, we could change the aperture. So if we click on this
little depth of field, we could click on an object, and we could use a little dropper here
to snap on something, and that would become the center of the focus for the camera. Just like auto focus
on a decent camera, we can change our F stops, we can change the size of
our aperture, if you like, and our lens so that we can have less or more
depth of field. So lower numbers like f28 will
have a low depth of field, high numbers will have
a high depth of field. But we're gonna keep
the camera simple, so I'll turn off this setting. Okay, so the next thing I want to do is to be able to move this camera to be able
to compose this shot. So if I move this camera right now, if I move around right now, the camera will state just where it is, and that's
not what I want. So I'll press the Eero again to go back to the camera view. And now I'll hit N. And we
get this tab open here again. If I go to view, if I click on Lock to three dcursor
and lock camera to view, now I can go ahead and move the camera and hold the
view through the camera. So now I can compose my scene. So I'm going to put
it, I would say, my first camera something like this is looking good to me. I might just tilt the
camera back a little bit. And that's looking pretty good. So I've got the kitchen. I've
got some of the ceiling, but I've also got this
chair here as well, and I've got some of the tables. So I think that's
quite a nice scene. I've also got some of this tree out here and I've got some sky. I personally never
go straight to a high quality render because
they do take some time, so I'll do a test render first to see how
this is looking. So let's come up to the
camera settings here, and I'll just bring this up
so we've got more of this. And Blender for some reason, keeps the render the
samples extremely high, and I've never known why
they've been this high. I've never used this many
samples in a render. So I'll actually set this because this is first
of all, a test render. I will set this very low. So I'll set this at
100. I click Enter. And I'll come down
to performance here, and I'll come down
to final render, and I'll turn on
persistent data. And what that allows
Blender to do is have a memory
of these renders. And any information that's
already done once it can reuse within the next render of the same frame, if
that makes sense. Does it make sense?
So if I've done one render and I go ahead
and do another render, without moving my camera, the second render can use any persistent data
from the first one. Hopefully that makes
some sense, now. So now that I've done
that, I'll actually just click on this icon here now. And let's go ahead and
bring the resolution down. At the moment, it's
set at 19:20 by 1080, which is two K. Let's
bring this down. So I'll click on this first one, and we'll bring this
down to just a HD image. So HD is 12 80 by 720. Click Enter, and there we go. So now we have a low resolution
image with low samples. So with all that done, now we can go ahead and do a render. But before I do that,
I'm going to do a save because it's common for Blender to have a
bit of a moment, maybe even a crash
when you hit F 12. So I'll press Controls and
go ahead and save my scene. Now that I've done that, I
could go up here to render, and I could click on this,
but I'm not going to do that. I'm just going to press
F 12 on my keyboard, which is a fast way
to do a render. So I'll go ahead and
expand this scene. This is probably going to
take a couple of minutes. So I'll pause the video. We don't need to stay here for 2 minutes just
watching paint dry, so I'll go ahead and
pause the image. Pause our video for a minute. Okay, so I'm back. Blender has finished rendering this scene, and I'm actually pleased
with the way it's compiled. I'm missing the fridge
out the corner, so I may just adjust
this a little bit to get some of the fridge in the scene here, so I'll do that. But take a moment when
you do your first render. Is there anything
else in the scene at this time that
you'd like to change? This is kind of your last
chance to change anything. And what I am seeing is this
sharp shadow line here. From these three lamps. So I think I need
to address that. The coffee pot looks a
little bit small, as well. So I think I'll do
something with that. And then these coffee cups here, they're pretty
innocuous like that. So I think I need to do
something with those just so you can see that they
are actually coffee cups. And you can see it's
a low res image. It's quite pixelated
when you zoom in. So I won't save this one. I'll actually go
ahead and just close this one without saving. And I'll go ahead and do
a little bit of my scene. So I'm gonna rotate the camera a little bit more like this, maybe just bring
this over like this. Just to capture a little bit
more of what's going on. Bring that down maybe like this. And that's slightly better now. I can see a little
bit of the fridge. I mean, I want a
little bit of skyline, and I'm willing
to sacrifice some of the fridge to
get that skyline. So I think I'll put my
camera just like that. I think I'm pleased with that. So now that I've done
that. I'll unlock the camera to you
and lock 23d cursor. And it's very easy
to forget that, and then you go and move and then lose your camera position. But I've done that now.
Now that I've done that, I'll go ahead and
roll out of this. And I'll just make these
changes I talked about. So I think the first thing
I'll do is I'll press Shift B, and I'll go ahead and re
center on this kettle. I'll grab the empty
for it and go ahead and scale this kettle
up a little bit like this. And that was easy enough. So now I'll go ahead and do the same no for this coffee pot. I'll grab the coffee pot here. I'll grab the empty for the
coffee pot and go ahead, S and go ahead and scale up. And maybe I'll go ahead and take that over a little
bit like this. Okay, so now I'll do the same
not for the coffee cups, but I don't have an
empty for those. So I just made to make
sure I select everything, so I'll grab the cup and
the handle and the coffee. Do the same for these ones, and I'll go ahead and hit
S and scale these up. And there we go. That's
probably a little bit better. Make sure they're still
down on the surface, and the coffee cup or
the coffee pot isn't. So I'll grab the empty for that and go ahead and
bring that back down, make sure that's
sitting on the surface. Okay, so I think now we need
to actually go ahead and oh, what we can do next is
maybe take these lights here further up inside
the lamp shades. I'll hit control, and
just deselect that. And I'll take the actual lights further up inside the
lamp shades like this. I'll hit Controls
before I go ahead and go to full rendered mode. So I'll hit Controls,
and I'll do a save. And now I'll go ahead and we'll click into rendered
mode like this. And it'll take a minute to render this note, go
into rendered mode. And now that we're
into rendered mode, let's go ahead and
grab the lights, and let's bring the power down on these lights
here a little bit. And now, go ahead
and maybe let's try turning off cast shadows. And that's brought a more
ambient light to this area. I think I'm happier
with that now. Okay, so now that's done. We can go ahead now and
go back to shaded mode. And we can press zero and see
through our camera again. And we can lock the
camera and see if there's any sort of final I'll
lock out for a moment, and I'll just come closer to the camera view and
then lock this again. And is there anything else
I want to do to this view? Am I happy? So I'll rotate a
little bit more like this. And I'm thinking
now that really I shouldn't have worried
too much about that fridge. I'll
leave it like that. I've got most of the
chair in the scene. I've got some skylight
in this tree. So I think it's more
important that I've got those in the scene
than this fridge. I could, I suppose, I could click on
the camera here, and I could maybe look
at the focal length, maybe bring that out a bit. Maybe that's better. And just bring that over
again a bit more. And that's better. Now I've
got the fridge in the scene. I've got some ground.
I've got the ceiling. I'm happy with that. Okay, so I don't think I need to
do another test render. I think now it's time
to do the final render. So what I'm going to do is
click on this one first. In render samples, I'll
increase this to 500. That's about as much as I think personally you ever
really need in samples. And I'll click on
this icon for output. And let's go ahead and
increase the resolution now. So we could go to either a four K or a
two K image, maybe. So that's completely up to you. So a two K is 2048 by 1080, or we could go for a four
K at 40 96 by 21 60. I think I'm going to
go for a four K image. So in this one here, I'm going to go for 40 96. And in the bottom one, I will go for 21 60. Obviously, this is going to
take a lot longer to render. But this means that because
it's a high res image, if for any reason, you need to print up a physical
copy of this, you know, you want something
on paper or for the client to be able
to sort of scroll into the image and look
at fine details, nothing should ever come too pixelated with a high res image. So that's why I've kind
of done that like that. So now that we have
a high res image and we have sample set at 500, we can go ahead and
hit F 12 and render. This is gonna take a while. This is probably gonna
take high estimate for my PC at around
seven or 8 minutes. So I'm going to go
ahead and pause, maybe even make a cup of tea, and I'll see in a minute. Hello, when I'm back again. So yeah, it took a little longer to render than I thought. It took 12, nearly 13 minutes. But you can see
the difference in the high res four k image. As I scroll in, nothing's
becoming pixelated. Everything is absolutely
still looking good. So that just gives the client more freedom to be able to do what they want
with the final image, whether they just
want to print it up to view or whatever
they want to do. It's a high res image, so it has more people
can do more with it. Okay, so I'll go
ahead and save this. So I'll click on Image, and I'll click as Save As. I've already created a new file now here in my Blender
file for this, and I've called
it Still Renders, so I'll click on this one, and Save Image As, we'll call it Kitchen. Maybe I'll call it Kitchen one, and I'll go ahead and
save Images. There we go. So now what I can do is actually
drag over my files here, and I could go find that
still renders, Kitchen one. And there we go. So there's our image, as well, ready to go. Alright, so I
actually just close that and push this
back over again. I can close this now
we've saved the image. And I could go ahead now
and compose another scene. So I'll just move
the came around now, and I think what I'll do
next is I'll do a full sort of nice side image of the house. Do I want to let's have
a look at focal length? Maybe 35 mil. And we just need to take a minute to compose
this as we want. So I want some of
the swimming pool. And I'd like the kitchen and I'd like some of this
balcony and the scene. I'd like some of these trees. And, of course, I'd like some of this table in the foreground. So I think I'm
pleased with that. Maybe just pull it
over a little bit more until I can just see the corner of
the house like that. But then I don't
really want this wall here in the foreground. I don't think that's gonna
make a lot of sense. So I'll pull it up a little
bit maybe to Au there. I think I'm happy with that. I think that should
work just fine. So what I'll do is I'll do
another test render on this. So the samples I'll
bring back down now to maybe very low, maybe 100. And here in the output, I will bring this back down
again to 12 80 by 720. Click into it, and there we go. Now that we've done
that, I'll go ahead and hit F 12 and
do another render. And I'll go ahead and
pause again for a minute, so we're not just watching
this render together. Okay, I'm back again. And because I did such
a low resolution, low sample image, it actually
only took 48 seconds. And I can now decide if
I'm happy with this, the way I've composed
this picture. And I think I am a little
bit of the table and the swimming pool and
the trees and the sky, and the kitchen's looking great. It's a real center
point of the image. And we still have a
little bit of detail upstairs and some
texturing on this wall, which will only improve as we do a high res version. I
think I'm happy with that. If I zoom in, you
can see that it's getting really pixelated again, but that's a curse because
it's a low res image. Okay, so I'll go
ahead and close this. I'll go ahead and change
things around a bit now. So for a start, I'll make this. Shall I do four K or do two K? I think I'll do two
K, so I'll do 2048. By 1080, and click
enter on that. And I'll go back over
to render settings, and I'll go ahead and increase the samples now to the 500 MAC. There we go, bring that
down. And that's it. And so with everything
shown like that, the first thing I'll
do is I'll do a save, so I'll press Controls. And now I'll go ahead
and do a render on that. Again, that's probably going
to take a few minutes. So with that done,
I think I'll go ahead and say that's the
end of this lecture. So between this lecture
and the next lecture, I'll go ahead and do some
more renders just following the same process that we've
done during this lecture. So take the time to have a
look at your first render, see if there's anything in your scene that you'd
like to change. Do a test render, and then if you're happy
with everything, then go ahead and do
your finished render. And I'll see you in the
next lecture when we've got a nice set of
renders ready to go. Okay, thanks very much. I'll
see you in the next one. Bye bye, Fan.
86. Lecture 83 Animation Part 1: Hello, and welcome
now to Lecture 83. And in this lecture,
let's have a go at doing our animation renders. Let's start doing that. It is going to take a
few lectures to do this. And this part of the course
is completely optional. Rendering for animation
is very time consuming, and it is quite a
burden on your PC. Your GPU is going to be working very hard for
quite a while to do this. I would say if we
can put together a 22nd animation
for the average PC, you're probably looking at
around 10 hours of rendering. Your computer running constantly rendering for about 10 hours. You don't have to sit
there and watch it do it, but it will be running
for about 10 hours to do this at a guesstimate
on the average GPU. So yeah, it's up
to you whether you follow the animation portion
of this course or not. If not, then focus on your still renders
and do the best you can and sort of knock out
some really nice ones. But for those who want to do the animations, let's crack on. So I think the first thing
I want to do, actually, before we do that, let's
just share the still. So I'll just double
click on my stills file. And I'm just going
to open those up. So I did this as a still. So this is the master bedroom. And it'll be interesting to see what you guys have done too, and I like this one, even
though it doesn't do much I don't show
much of the house. I think I sell the house because of this
magnificent view, so this is a nice one to me. I think this is my favorite.
I think this one pops. I love our polished concrete. And this bedroom
looks really nice. So I'm pleased with this one, the way this one looks, and our HDRI looks good, and our trees just add to
the realism. This one pops. This one, I think we
did this together. I did this one as well, just a front on
view of the house. And this is another nice
one. I like this one. I like the angle that I
have showing the pool, showing the lounge,
and then showing this perspective of the
house. I like this. Okay, so I'll go
ahead and close that. And yeah, let's start rendering. So the first thing I need to do or the first
thing I do out of habit is I'll go
ahead and delete my camera that I've used
for my still renders. It's just a habit. I find it best practice because that means I
can default my camera. So I actually I'll just
click on this camera, then I'll right click and
I'll go ahead and delete. And there we go. That
camera's gone now. The next thing I'm going to
do is I need to bring in what Blender calls the
timeline. So do that. I'm going to come to
the bottom corner here until I see the plus sign. Once I get there,
I'm going to left click and drag up like this. And what I've done is created
another window in Blender, and I'll take it to
about there like that. Then I'll click
on this one here, and I'll come on over to
timeline and click on this. Now I've got Blenders timeline
in my user interface. So this here, like
I said, this is the timeline,
repeating myself now. So right now, I have
here 250 frames. So each frame represents an
individual still render. So that means right now
0-250 means I'm going to do 250 still renders that we'll
convert into an animation. So let's do some
tweaking on this. So I think the first
thing we'll do is let's have a look
at our samples. We're not going to produce
the same quality of image that we did with
our still animations. We're going to bring
down the quality because we need to
strike a balance between it looking good and
taking forever to render. You know, there's a limit to
how long we can render this, otherwise, there's
going to be smoke coming out of our computers. So I'll go ahead
and click on this, and I'll turn this to 250, 250 samples per single render. We'll come down here
to performance and just make sure this
is really important. The final render has
persistent data turned on. After we've done that,
we'll go to output. And let's go ahead and
bring the resolution down. We're not running at
four K resolution. Let's run at two K resolution. So I'll delete this,
and I'll run this I'll type in 2048
and type Enter, and I'll do the same here, and this one is 1080. Whoops. 1080 and Enter. So there's our resolution. We're going to run 24
frames per second, which is pretty
much the standard. Even within the film industry, 24 is the kind of default. If you drop this down much, your animations will start
to look a little bit clicky. You will be jumping from image to image, and
you don't want that. You don't want it looking
a little bit jerky. You want it looking smooth. So keep it at around
24 frames per second. So at 24 frames per second
and having 250 frames, I did the math on
this, and that's around 10 seconds of animation. And now, assuming that
that's going to take around 2 minutes to
do each rendering, that's 500 minutes it's
going to take to do that. So I can't live with
200 500 minutes. It's too long. So I'm
going to half this. I'm going to make this 120, which is about 5
seconds of animation. And that's not the
total. That's going to be the first clip within around three that we'll edit together with some
music to look good. We've got 120 frames, and we have the
resolution that we want. So now we need to tell Blender
where to save this file. So I'm going to go
ahead and compress this a little bit so that I can actually move this around because I need to bring
in another folder. So I'll bring in another screen. Normally, I would
work two screens, but obviously we have the
restrictions of recording, so I'll just put this like this. And then I'll go ahead and
bring my file in here like this and just compress
this a bit more. There we go, maybe compress this a bit and hopefully we can make this all work. There we go. So I'll just click back on this. And this is this is my project
file for this project. So I've got quite a lot of
the same files that you have. I've got a few more as well,
because I'm recording, you know, a video, so
I've got a few more, but, you know, we
both have textures. We both have the asset back. You probably have
a Blender file. And you also have
your still renders, yeah, your assets back. Am I repeating
myself a little bit. Sorry. Okay, so the next thing to do is actually
create a new file, so I'll click on you and folder, and I'll name this what
shall we name this? I'll call this pre. So
I'll call this pre anime. And there we go. That's
good. Pre animation. I'll click on this
now, and this, of course, is now we can
create another subfolder. So I'll click on this
folder, and I'll call this. I'll just simply call
this one, I think. One and enter, and there we go. Actually, I could
do the same again. I'll click New again folder, and I'll call this two.
I'll do the same again. And I'll call this three. I may do more. I'll
just see how it goes, and I'll just see how it goes. Maybe I'll do four or five, but we'll just see
how this goes. It's up to you as well, how many of these sets
of renders you do. Remember, each one of
these files is going to represent 120 renders. So there's gonna be 120 renders
in each of these files. So there's a lot of time here. Okay, so now that
we've done that, let's go ahead over
back at a Blender. And in output here,
click on the file, and let's go back
now and find it. So I'll click on the storage where I've got this,
click on this one. Whoops. No, this one here. And this is the same folder. So I'm now looking
for my pre anime. I'll click on this and I'll
click on one and accept. And I think I'll just call this one and accept that
as well. There we go. So I'll click on one
here now, and of course, it's empty for a minute because there's nothing
actually done yet. And the next thing I need to do is actually start
positioning my camera. So I'm going to
bring the timeline back to zero here like this. And I'm going to go ahead
and bring in a camera now. So I'll press Shift A, and I'll click on camera and we'll bring a
camera into the scene. I'll go ahead and
lift this camera up a little bit like this. And I'll bring this camera now. Maybe, actually, I'll click
on Loco go back to Global, and I'll bring this
camera back in the Yaxis. Whoops. If I can find my gizmo, here it is, and I'll take
this back like this. Get the camera out in
the open. There we go. I'll press seven, so I get the orthographic
view from the top, and I need to
position my camera. So I'll just bring
it forward a bit now and maybe bring
it over like this. Okay, I'm gonna press zero, so I see through my camera. And I'm actually going to go over to my
camera settings now. And the focal ng for some
reason is just crazy. So I'm going to go
ahead and type in there 45 and click Enter, and there we go. That's better. Okay, so the next thing I'm
going to do is make sure that within the view that
these two are locked, and then I'm going to go
ahead and set my first frame. And I'm thinking, I'm going
to take a minute to do this. I'll just slide this out of the way a little
bit, compress this. And where shall the
first frame be? Maybe I'll bring my camera
focal length down to maybe 40 and bring
this in again now. And maybe I'm happy with that. Once I'm happy with
the camera position and the timeline is set on zero, I'm going to press I. And that will set a series of key stops on the zero frame. The next thing I'm gonna
do is go ahead and move my timeline over to my 120th frame. There we go. Now that I've done
that, I'll press seven so I can see
this from above. And I'll grab my camera and I'll bring this
over like this. To, I'm going to say there, but I'm also going to
bring it forward as well to about there, and I'll rotate it a
little bit around there. Now that I've done
that, I'll press zero to see through
my camera again. And I think I'm happy with that. So I'm going to go
ahead and press I to install another
set of keyframes. Now that I've done
that, I'll had this little icon here to
bring it back to the start, and I'll just press
space bar to play. I'll see what that looks. As you can see now,
Blender has actually configured a nice little
animation for us. It's showing us
how that camera is going to move during
that 5 seconds. Am I happy with that?
Is it running too fast? I don't think it is. I
think I am happy with that. I think, though, I prefer
the camera to just stay over the swimming pool a little bit. It sort of loses. Am I happy with that? I just don't see enough of
the swimming pool. I'm not happy about
that. No, I'm gonna click I'm just gonna hit the space bar again to stop. And I think I'm
going to do is go ahead and grab these
keyframes here, and I'll press Delete,
and there we go. So I'll go ahead and move the
timeline again over to 120. I'll press seven to see
this from above again, and I'll grab the camera again, and I'll just bring this over a little bit like this and
maybe in a little bit. And maybe down a
little bit, maybe. I don't know. Over
a little bit more. And I'll press zero to
see through the camera. And that's not bad, actually. I think I quite like that. So what I'm gonna do
now is with that done, I'm gonna press I and install
another set of keyframes. I'll hit the replay button, and I'll go ahead and hit
the space bar to play this. And I'm still not seeing
enough swimming pool. I just love the idea of having a swimming pool,
and I'm not seeing it. So I think I want to do
something with that. So I'll hit the pause button again by hitting the space bar. And I'll grab these key stops, and I'll go ahead and
press Delete again. And I'll get this
right in a minute. Okay, I'll grab the timeline, bring this back over to 120. And remember, this is
going to run a long time. So get it right. Take that extra couple
of minutes to set it up exactly as you want
it. Opera seven again. And I'll bring this
camera over like this. And I just bring it over the water a little
bit like this. And I'll bring this camera down just so we see some
more of the water, I think. And I will rotate that on the z, so I'll press R and Z. Just bring that camera over
a little bit like this. With that done, I'll press
I to install my key stops. I'll go back to the
beginning on this. I'll press zero so
I can see through the camera and I'll
press Space Bromo play. And now I can see the water just a little bit admittibly,
but I can see it. And I'm happy with the
rate that that's going. Is it going a little far? Does it go too far around
the other side of the house? No, I don't think so. I
think I'm happy with that. It shows the boundaries of
the house quite nicely. I think I'm liking. Okay, so that's done until I
hit the space bar, and I'll take that
back to the start. And I'm just going to
check everything over before I go ahead and play this before I
commence the render. So we have the reference
image off, so that's good. Make sure it's not
seen in the renders. And this is the camera setting. Let's look at output. We're
running two K, as we know, we're running 120 frames,
so that's all good. We are putting it
where we want that, and we'll just check that we're running cycles
in the render engine. We're using our GPUa compute, and we're running 250 samples, and that the persistent
data is turned on. Okay, so we're all good. So to render this now
and animate render, I'm going to go ahead
and press Control F 12. And there we go. It's
off. It's running. So we can see at the bottom here the progress bar to show how far it's going,
how fast it's going. So what I'm going to do is go ahead and pause the video for a moment until it's nearly
finished rendering, and then I'll bring it back in. So I'll see you
in just a second. Okay, so, um, back, and we've done our first render, and it took 2 minutes
and 33 seconds. And it's just showing here. So what I'll do is
I'll go ahead and just maybe just expand
this a little bit. And on view, and I'll
go for a large icon. So there's our first
render, and it's appeared, and it was done in 2
minutes and 33 seconds. And I think this one
will be done a lot less. So it's showing that
it's going to be done in around what? 1 minute 33 seconds. So the second render is running about around 40 or
50 seconds less. So it's already trimmed 40 or 50 seconds off
the second render. So I think I'm happy
with that now. I'm gonna go ahead
and let these run, and I'll do after this two or three
more other animations from different
points in the house. And after I've done that, I'll see you in
the next lecture. Okay, thanks very
much. Bye bye for now.
87. Lecture 84 Animation Part 2: Hello, and welcome
now to Lecture 84. And yeah, in this lecture, let's start putting
together our animations. And I really like
this because this is a really fun part of the
project 'cause it feels like a culmination of all our efforts
come together right now. The sort of the wow
factor the video. So I really love this moment. It's good fun. So let's
do this together. So since our last lecture, I've put together
a set of renders, a set of animations. And I said I'd do 3-5, and I've got a bit carried
away. And I've done seven. And what I'll do is I'll
drag in my files here. So this is my file group here, my pre anime or call
it what you will. I don't know if pre anime
is the right term for it, but that's what I've called it. And I've renamed
them instead of one, two, three, four,
five, six, seven. I've got them sort of
slightly descriptive, so I have a slight idea of
what's on each of them. So we did the sweep bedroom. No, we did the sweep
across front exterior. And let me see if I can
make this a bit bigger. And let's have a look at view
and go a large extra large. And so we have this one here, and which goes across
to the end one here. And this is what we look like. So that sort of sweeps across. Can my computer handle that? It's asking a bit much. But yeah, sort of sweeps across the front
of the property. And that's a really nice view. I like that one. So we got that. And you've got your own
versions, of course. So it'll be interesting
to see what you've got. But I've got a
bathroom one similar, and I've got pan bedroom two, and I've got sweep around
sofa, bedroom one. So I have this is my
bedroom one first image. And that goes right
the way across. This is quite a large file, this one, and this goes
across to this one. So it goes from the side of
the bed to the outside view. So that's a really nice
set of ndas as well. Okay, so that's kind
of what I've got. I can show you the rest, but I'm sure we'll find
them as we go. So we'll go ahead and pull
this out the way again now. We don't need that for a moment. So the next thing we
need to do is actually start editing the
sequence of renders. So what we need to
do for that is to go into Blenders video
editor software. So we don't have
it up here preset. So if we had a little plus sign and we go to video editing, and we go down here to video editing again
and click on that. And now renders sort of
setup for video editing. I'll just pull this down slightly to give us
slightly more space here, maybe just bring this one over. And there we go. That's cool. So what we have here
is our timeline, and this is currently
in seconds. I personally rather
see this in frames. So I'll click on View here. I'll click on this
one, use timecode. And now we're going to see
it in frames rather than seconds because it's frames that we've sort of set
our renders out in, so we'll continue with that. So at the moment, it's
set on 120 frames, which just it's not
enough, not nearly enough. So it'll come up here
now into output, and here on the frame end, I'll go ahead and
take that over, and I'll whack that up to maybe even seven or eight
or 900 for now. It doesn't really matter. We can adjust that
when we've got all our editing in place, all our animations set out. So I'll scroll the mouse
wheel to compress this a little bit and bring this
over so I can see this. Maybe that was too much. I'll put that something
like that, I think. Once we've done that, I'll bring the timeline back to zero. And the next thing we're
going to do is press Shift A. Add Image sequence. And let's go ahead and find our pre anime file or whatever you call
it, let's click on it. And let's bring
in the first one. So I'll start with the sweep
across front Exterior. So I'll make sure that
it's in Channel one here, which will bring this video
set in here on Channel one. So I'll click Sweep
across front Exterior. Add Image, and I'll
press A to select all of them and add Image
strip. And there we go. It's brought it in for
us. Let's have a look. And it's actually brought
it in in reverse. But there's an easy
trick to sort that out. Make sure that it's
actually selected. Come over here to compositing, click on video and click
on reverse frames. Now that we've done that,
we can actually see that. And we can take
that back to zero. And we can go ahead and
hit the space bar and play and get an idea of what
that's gonna look like. And that's gonna look good. That's gonna look
good. I'm liking that. So I'll bring the timeline back to the end there
to what looks like 117. And now I'll bring it back
ten more frames to 107. Or thereabouts. That
looks good to me. Once I've done that,
I'll press Shift A. Add the image sequence. We'll go back one. And we've got sweep across front exterior. So I think I will go with pan across kitchen, so
I'll select this. I'll double click on it.
I'll press A to select all. I'll make sure now that
I'm in Channel two, and I'll add Image strip. And that's it.
Blenders brought that in exactly where I want it. Overlapping the first
one by about ten frames. We cheers about half a second. So that's looking
good. But again, it's running in the
wrong way round. So with that one selected, I'll go ahead and click
on Reverse Frames. I'll go back to the start maybe, and I'll hit the spacebar
and see how this is looking. And you can see in the top
corner here it's running red, which has mean my computer
can't really run fast enough to give us a full
speed version of our video, but that's okay. It doesn't really matter.
It's looking good. I'm liking what we're getting. Okay, so let's bring
in the next one. So I'll bring the timeline
over again to the end, which is 12226, so
I'll take it to 216. There we go. And
I'll press Shift A. Image sequence. We'll put this
this time in Channel one, which it's done for us. We'll click back and this
time sweep around sofa, press A and add Image strip. It's probably in reverse. It is. So we'll hit reverse frames, making sure this is
selected. And there we go. And let's see what
that looks like. And it's looking good. I like the reflection
on that table. That's looking really
nice. And I like this. This little bit of artwork on
the wall just makes it pop. And I like the rug
on the floor, too. After all, the purpose of this whole project is to make something that makes
you want to live there, that you wish you lived there. And I think it's doing it, and I really hope you're pleased with the results
that you're getting, that you're learning from this, and you're proud of the
results that you're getting. Anyway, sorry, I'm digressing. I'm digressing from the course. Alright, so we're on 335. Let's take that back to 325. There we go, 326
is close enough. And we'll press shift, eh? Add image sequence. And we'll go pan to
stairs this time, and we'll press A to select
and add Image strip. And of course, it's in reverse, so we'll hit reverse frame. And there we go. So that's
got that one in now, as well. So we go from sofa to S
starting to lead up the stairs. To give the suggestion now that we're going up
to the first floor. So I'll go again and now and
put that on the end 365, and I'll take that back to
357, something like that. Cause that's quite
a small sequence. So I'll reduce our
overlap a little bit. Now that I've got it set
where I want it the timeline, I'll press Shift A,
Addimage sequence. Make sure we're in channel one. And we'll go Pan two
pound bedroom two. I'll go ahead and
select that. I'll press eight to select all of them, and add Image to strip. And this was quite a big one, and it's running in reverse, sort of hit reverse frame. And I think I'll take it back to the beginning now and
see how we're looking. I really like the kitchen. I like the sort of just
the stuff back here, making it feel like a real home, a few little quirks. And, yeah, I like this one. Leading up the stairs is
good. Telling the story. And now we have the
bedroom, as well. And that's looking nice. I may actually I may
actually, this one, I may turn off the
reverse on this one, and maybe run this from the
hot tub to the bedroom. Maybe that's nicer. Yes, I think I'll do that
with that one. That makes more sense to me. Okay, so again, that's
running a last frame is 508. So I'll run that to 498. And with the timeline
in the right position, I'll press Shift A.
I'll add Image strip. And this time, I want Sue
bedroom one, two outside. So I'll double click on this and I'll press A to select O. Make sure we're in channel two, which we are, and add Image
strip, and there we go. So for this one, I do want to make sure that I'm
reverse frame for this one, and let's have a
look at this now. That's looking good.
It's a nice light room. Feels big, and we lead to
a beautiful vista outside. That's looking great. So let's actually just bring
this over a little bit. And let's bring the timeline to the back here like this now. So 649 appears to be our last. So 639. There we go. And I'll press Shift
A, Add Image sequence. And this time, it's bathroom, so I'll double click on this, and I'll press A, and I'll add Image strip.
And there we go. Let's have a look
at our bathroom. And, I mean, I don't
mind with this, really. That looks quite
nice going that way, but I think I'd prefer to reverse the frames
on that one as well. And let's see what
this looks like. And that's looking good. I think I'm actually
going to go ahead and try slowing down
our frame rate. So I said in the last lecture, 24 frames per second is
the ideal rate, and it is. But I think I'll just
try customizing it. So I'll go ahead and
click on customize, and then I'll bring the
24 down to maybe 20. I'll take this back
to the beginning. And see how this looks. Hopefully, it's slowed down our running speed a little bit, which I think it
has, but I don't want it to appear
looking jerky or jumpy. Everything still needs
to look quite fluid. I think I can get away
with 20 frames per second. I don't see that that's
looking particularly jerky. Okay, so I think I'm
pleased with that. And in the next lecture, what we'll do is, we'll refine this
a little bit more. What we're going to do
we add some fade ins and fade outs at the
end of our video, and we're going to actually add some mergers to these
so that they blend into each other so
that we don't get the snaps between video clips, but we actually
get a nice merger. After we've done that, we'll add a little sound
track to this. And at that stage, that's the end of our
project complete. Alright, so thanks very much. And I'll see you in the next
lecture. Bye bye for now.
88. Lecture 85 Animation Part 3: Hello, and welcome
now to Lecture 85. And yeah, I mean, this is the penultimate video,
the penultimate lecture. And in this lecture, let's
finish off our video editing, and then let's render out our
final video super exciting. And then in the next lecture, let's let's see what's happened. Let's see what it
looks like. So yeah, let's finish this off.
We're nearly done. There's not that
much left to do, so this should be quite an easy and quite a short lecture. It starts with it starts
with a confession. What I actually do is I forgot to leave Channel one clear, and I'll show you in a while
why we needed to do that. So we need to sort of
move all of these up one. So what I'll do is
I'll just maybe select maybe just two of them, and I'll just push them up. So I'll hold a left mouse button and just bring
those up like this. And I'll do the
same with this one. I'll just bring this
one up as well, and just bring this one up. Try not to move them sideways. There we go. And if you do,
it's alright, just sort of reposition them again, and bring this one over
and just center it again and do the same here
and do the same here. Whoops. And just reposition
that again. And there we go. Okay, so where do we go next? Let's have a quick look
at our video sequence. And I was looking at
this between lectures. I'm happy with this, and
I'm happy with this. But I think I want
to bring this one as the final clip because to me, leading towards
that view and then holding that view is cool. I like that. It's the
final kind of clip. So what I think I'm
going to do is just grab this one and
just bring it over. Grab the bathroom
and go ahead and take that up onto Channel three and then kind
of reposition that again. Bring this one down onto Channel two and then
reposition that one again. And that's kind of
what I want now. So I'll finish off
with this one. And then looking
at the bathroom, I don't think I want
this bit leading in here because also I just clip that wall,
which is nice. And it doesn't seem like
it's needed anyway. So I'll bring my
timeline to about there. You probably don't have to do
this because at this stage, you've very much got
your own videos. So this is just me showing
you my kind of approach. So now I've got my timeline, where I want my
bathroom to start. I'll grab this side here and I'll go ahead and
pull that over. To about there like that. So I have shortened my bathroom sequence,
but that's okay. And I'll go ahead
and bring this, and I'll just pull it over. And yes, it at this stage, kind of guess the overlap, and then bring this
one over as well. Now, the last thing
I want to do is I want this to dwell at
this point for a while, when we fade the video clip out. So I'll just come to the end of here and hover over the end, left click and just go ahead
and extend this like this. And I'll just bring that for
maybe around 15, 20 stops. 15, 20 frames, there we go. And now at the end now, it will hold just there
looking at the view. There we go. So with that, I'm kind
of happy now, I think, with my video clips and the way they're formatted and
the way they look. So we can see here now where we can kind of call the last frame, and it's around the 770 mark. So I'll come up here
to frame range, and I'll go ahead and
bring this down now. To what are we looking at
about 780, by the look of it? I'll leave it there. At about
780 is now the last frame. So the next thing we need
to do is kind of I mean, it's all there and it's
how I want it to be, but we need to polish
this diamond a bit. So what I'll do is
I'll go ahead and select this first one here, and I'll right click
and I'll add a fade, and I'll add a fade in. And now we've got
a progressive fade in on this first little video. So we can click this little
drop down box like this, and we can increase or
decrease the amount of time. And in this case, I think I'll leave that at about the second. I think I'm happy with
that at the second. So if we bring the
timeline over now, we can have a look
at that fade in. And that's looking good. But there's a problem because
at the start of the fading, we're getting this
checkered screen. So that's not really ideal. So we need to bring
in a base color so that when it
does its fade in, we have a base color to start
with, so we can do that. So if I go ahead and
press Shift A and click on Color and we're gonna
bring this in on Channel one, which Blender is done for us. And we want this to end. Well, where should we just bring this over like this, maybe? And I'll just bring the
timeline up the way. And I'll just drag
this over like this. And now we can have a look
and see what that looks like. So we start off with
a black screen, and now we go ahead and fade in. And that's kind of what I want. Okay, so now we've done that. Let's do the same now
at the opposite end. Let's do a fade out. So I can select this
one here like this, and I can right click
and I'll go to fade, and I'll click Fade Out. Now, with a fade out, I'll
just hit the drop down again, and I'm going to
increase my fade out to, I think, around
2.5 to 3 seconds. And we can see that there
now, and I'm happy with that. So I'll bring this to the end like this and have a look at this fade out and just
see what that looks like. So we've gone to a still
image at this stage, and then we fade out,
and that's really nice. Let's grab the color. And let's press
Shift D and bring a spare of that color over now to this opposite
side like this, and then just drop
that there like that. And then go ahead and expand this color so that it
covers that fade out. And then let's have
a look at that. And there we go. That
fades out nicely. Quite moody. I like that.
I'm happy with that. So the next thing we need to do is add a transition between these to stop sort of the
snap change in the images. I mean, that's quite snappy, so we can do
something with that. So if I select the first image
or the first video clip, the kind of lead in video clip, if I select that
first and I'll hold shift and select
this one like this. With the two
selected, I can right click and I can add transition, and I'll add a cross transition. And with that done now, I can go ahead and hit Play again, and we can see that
that's softened the transition between
the two video clips. And that looks
much, much better. So let's go ahead and do
that with the rest now. So I'll select this
one, hold shift, and select this one, right click, add transition
and across transition. This one now, hold
shift, and this one, right click, transition and
cross, this one to this one. And now, this one to this one. And then the last one,
this one to this one, right click Add transition
and cross, and there we go. So now we have transitions in place between all our videos. Let's have a quick look at
that, see how that looks. And that's much more fine now. That's looking a lot, nice, so. Yeah, that's cool. Okay, so let's hit the
pause button again. And the next thing I want
to do is actually bring in an audio strip
for this to music. And I'm going to use the
music that I've used for the intro for
absolutely every lecture. So you're more than
familiar with it. But I can't provide a
soundtrack for you. I can't provide you with music. It's I just copyright laws
would just prevent that. And I wouldn't want
to, anyway, because, quite frankly, music is a deeply personal
thing, isn't it? You know, it's very
subjective to what you like. So I will leave that
completely up to you to choose a music.
That you like. And there's lots
of different music out there on the
web you can choose. And I'll just show
you a site that I prefer that I use quite a lot. And it's this one.
It's free sound. And on free sound, there's just thousands and thousands
of different sounds and music strips that you can choose maybe and then download and then apply to your video. Okay, so I'm going to
bring in a music now. So what I'm going to do is
I'm going to press Shift A, and I'm going to go for sound, and I'm going to
find my music vd, which I've got just here, and it's this one here, and I'll add sound strip,
and there we go. I'll bring that over and
start that right there. And my music is a lot
bigger than my video clip, so I'll just zoom out a little bit and grab the end and
pull that in like this. And then I'll
scroll a mousewheel again just expand on this. So again, I could
do a fade on this, so I'll right click
and I'll add fade and I'll fade out on
this. And there we go. And again, the fade
is about 2.9 seconds. Maybe even I'll bring
that a bit longer again. Two, maybe three, maybe 4 seconds for the fade
out on the music. And I'll also add a
fade in on the music. So I'll write like, again, fade and fade in, and I'll reduce this. I
don't want this much. I just want maybe a
second on the start just to sort of soften
the intro on the music. And there we go, so let's
have a look at this, though. And there, it's looking good. So I'll just bring
the music to the end. And you listen to the fade
out, make sure that's good. And, yeah, that's absolutely perfect. That's
just what I want. So with that done? That's our
video editing all finished. So I think the only
thing I want to do now is go ahead and lock these case I accidentally
move anything. So those are all locked now, so we can't actually
touch those. So the next thing
to do is actually format how we
actually save this. So the first thing we need
to do is choose a file. So I'll hit the little
file here in output. I've created this
VIDS file for this, so I'll select this except. And I think I'm just going
to call this VID one. And go ahead and accept. And there we go. So
now we have that. We have a place saved. The next thing I need
to do is look at what format I'm going
to save this in. So I'll hit this
little drop down here, and I'll save this as Feb MPEG. There we go. The next thing I need to do is
look at encoding. So I'll click just here as well. And where it says Matroska, I'll hit the drop down on that, and I'll save as an MPEG
four. I'll click on that. If you've added music or
any sound to your video, come down here to audio and where it currently
says no audio. Again, if you've not
added any audio, then you can leave
it with no audio. But I have, so I'll click
on AAC, and there we go. So with that done, no, that's everything formatted
and ready to go, so we can go ahead and
render out this video. So to do that, I'll
hold down Control, and I'll press F 12,
and there we go. So it's rendering and it does appear quite jerky,
but don't panic. That's just your computer
just formatting this video. It's not running at
the correct speed that you'll be doing it at. So I'll just let this run. Since this is the last
one, I won't pause, I'll just let it go.
And it's looking good. I'm really pleased with this. This is a place that I look
at and I would like to live. Definitely, I would
like to live here. So if I want to live there, then as a video, it's
definitely done its job. Alright, so this is the last one panning around to
this beautiful view. And there we go. That's it. Okay, so that's the
video finished, in the next lecture.
Let's check that out. Let's see what a final
video looks like. Alright, thanks very much. And I'll see you in the final
lecture. Bye bye for now.
89. Lecture 86 Well done: Well, we made it. That's it. That's the
end of the course. And I just want to say a huge, well done to absolutely
everybody for following along. And hopefully you've got some you've developed
some new skills, and you've taken a
lot from this course. And I cannot wait to see what you've done with your
versions of this house. And please do shadow. I love to see what people
do with this course. Then hopefully you've developed some whole set of
skills that you can now take forward and apply
to your own projects. And hopefully, I've
introduced you to Blender. It's a really amazing
piece of software, and it's got infinite possibilities of what
you can do with it. It's so powerful. And there's an amazing
group of people out there that's just creating
fantastic things with Blender. And hopefully you'll
be one of them. Um, so I'm really,
really proud of you. So please, if you've
enjoyed the course, please leave a review, and please check out some of my other videos if you want
to some of my other courses. They're out there on Eudo, and I'll be adding more
courses in the future. But this isn't really about
me. This is about you. So I just want to say that I'm immensely proud of
you all for doing this. And I just want to thank
you for following along. So I think I'll end this course, by showing you my finished
video, and who knows? Maybe I'll see the next one. Thanks so much. Thanks
for following along, and hopefully I'll see you soon. Bye bye, now.
90. Lecture 87 Trouble Shooting: Hello, and welcome to this
extra little lecture, all to do with the common
problems that you might find whilst you're
building this project, common issues that you
might find in Blender. But these are the most
common problems that I find whilst using Blender, so maybe I can just
sort of head you off at the pass on these and just
help you along with them. So one of the things that I find with Blender is as
you start panning around, particularly in
full rendered mode, but also in modeling mode, sometimes you find that
as you zoom in an object, it gets slower and slower and harder to harder to zoom in, particularly in rendered mode. So the two things
that you can do to solve this is you can press Shift B that will
this little cross hair up, and you can just
draw a rectangle around the area that
you want to zoom in on. Blender will refocus
to that object, and it will just become
easier to move around it. The other thing that
you can use for the same reason is the
decimal point on the numpad. So select an object and just hit the decimal
point with the numpad, and Blender will zoom in
automatically to that object. That's a really
quick way of sort of re centering on different
objects in Blender. Okay, so that's sort of zooming
in. That's covered that. One of the easier things
we're going to look at. The next problem you might
find is Blender crashing. In fact, it's more than likely. At some stage, during the process of
building this project, Blender will crash on
you at least once. And if you don't,
you're extremely lucky, particularly as the project
gets more and more complex, and you're starting to
do work a lot more in rendered mode or
rendering, as well. Then there's times when
Blender does crash. So you can recover that file, so reopen Blender, of course, in the same project. Come up here to file. Click on this and
click on Recover, and you can go ahead and
recover last session. That should open up Blender most at the last save
within that project, within the last auto
save in that project. Okay, so the other thing
I want to talk about is keeping file sizes
as small as possible. So what you can do again, do this quite frequently
is come up to file and come down to clean up
and purge unused data. Click on this. And
I don't have much. I have two local data blocks
and nothing else, really. But I'll go ahead and
delete unused data. And that will keep my file
sizes as low as possible. The other thing to do is
to compress our saves. So if I go ahead
and go to file now, and I'll go to save as
to create a new save, and I'll call this six, so I'll hit the plus sign. Come up here to settings and make sure that
compress is highlighted. And that will reduce
your file size significantly and go ahead
and save as. I won't do it. I don't need to
save, to be honest, but that's the way to compress the file to reduce the
file size for Blender. Okay, so what else do
we want you to cover? I think the other thing I
want to cover is beveling. So what I'm going to do is just compress this scene for a moment and go ahead and open up a kind of standard
Blender scene. So brand new, not being used, empty screen, just got
the camera and the light. And I'll bring in a cube. I'll mess this cube around, so I'll scale it in the X, and I'll scale it in the z, and I'll scale it in
the Y, and there we go. So I've done some
scaling on this, and now I want to bevel it. So I'll go ahead and
tap into Edit mode. And I'll press A, and
I'll press Shift B, and I'll go ahead and
scale this object. Now, I was hoping
for a nice bevel, a nice equal bevel, it's
not done it at all. I've just got some weird
beveling going on, which is not at
all what I wanted. So I'll press Control
Z and undo that bevel. So why isn't the bevel working? Why am I not getting equal
bevels on all faces? It's because I forgot
to rescale the object. So if I tap out of Edit mode, look at the scale and
the scales all out. So I'll press Control A, and I'll apply
rotation and scale. Now, if I tap back
into diode, I press A, I'll press Control B, and I can go ahead
and bevel now, and it bevels equally. There we go. That's
the common problem though I get asked about
beveling in Blender. Okay, so there's one last
thing that I'd like to cover, and that is Ram. So I'll go ahead and close this. I don't want Disney. And go
back to our main project. And if we look here
at the bottom, incidentally, if you don't have this stuff
here on the bottom, this information
about your scene, you can right click in the
bottom here and you can turn on and turn off any
of these statistics. The one I'm looking
for here is VRM, video random access memory. Now, Blender will tell
you how much you have, and it's all dependent on the
specification of your GPU. So my GPU has 24
gigabytes of VRAM. And this scene is currently running 18.9 gigabytes of VRAM, which is quite a lot, really. So what can I do to
reduce the VRAM into my scene for the average GPU? But, yes, obviously, different computers are going
to have different VRAM. But if you turn that on
within Blender at the bottom, you can find out how much VRAM
you have available to you. The other thing to do is use your task manager and click
onto performance on that, and that'll show
you how much VRAM and the specifications
of your GPU. So how can we reduce
the VRAM in the scene? Maybe that's just too much
for your computer to handle. So how can we
reduce that to make this scene obtainable
to the average PC? Okay, so the simplest and quickest way to do
this, or, first of all, to reduce it to a
manageable level is to reduce the texture quality
inside the viewport. Not within the final render. This won't affect the quality of your final render just
within the viewport. So we can click on go over here to the render
Properties tab. Come to here to simplify
and click on this. This might take a
second to format. And straightaway, by doing that, we're actually
brought this scene down to actually,
it's not moved. It's not moved. Typical.
Absolutely typical. But if I click on the
properties on this, and I go to texture limits,
and I click on this. And I'm going to bring this
down from no limits to 256. This is going to
take a second or two to format now because
it's going to have to re render the scene and reapply the textures
at a simpler level. So just bear with my computer for a second. And there we go. We can visibly see,
particularly on the wall here and the paving, the texture quality has dropped. And our VRAM is now down to 15. So we reduced the VRAM by about 3 gigabytes
just by doing that. We could reduce the
texture limits again, maybe to 128, if you want to
reduce that even further. And by doing that now, we've reduced the
VRAM down to 14.9. We could reduce the
volume resolution. Maybe half that and also
the chard particles. Bring that down, as well. And let's see what
that's done for us. So now we're down to around about 13.5 gigabytes of V RAM. Actually, down to ten. So by doing that now, obviously, this has reduced the quality
within our viewport, but it won't have affected the quality of our final render. That'll be just the same. So what else can we do to
reduce the VRAM in our scene? We could go back to
shading for a moment. And we could go click on this
one where it says Object, go back to World and
have a look at our HDRI. So my HDRI currently
has a 16 K HDRI, which is a very big file. So I could go ahead
and reduce that. So I've downloaded
from Poly haven. I've actually downloaded,
sorry, from HDRI Haven. I've downloaded some lower
file sizes for our HDRIs. So this is the same HDRI, but I'll go from 16 K down to four K. I've
even got a one k here, but I'll go to four K and go ahead and add that image
instead of the 16 K. So that's definitely
going to help. So we'll go back to
modeling again now. And by doing that now, by reducing our HDRI file size, we've brought the VRAM
down to about 13.8. So we've done a
lot of good things now to reduce our VRAM size. But there's more we
can do if we want to. So what we could do is for actually rendering
out our scene, we don't necessarily need to see the furniture
on the first floor. We could go ahead and hide
that if we wanted to. So we could go back to shading
for a moment, actually. And we go ahead to
full rendered mode, and we'll go from
world to object. And I'll go ahead and grab
maybe the glass here. So I'll tap into Edmode
and select the glass. And what I'm going to do is add some darkness to the glass
to kind of tint the glass, so it's harder to see
the objects inside. So I'll just go ahead
and drag this bar down into the darker
colors like this. Maybe something like that. And, yeah, that's actually
done exactly what I want. So that's actually quite a nice feature
in itself, anyway. I'll tap out of it
mode with that, and you can see
what that's done. So now it's kind
of much harder to see the interior
of the upstairs. So now that I've
done that, what else can we do to reduce the VRAM? So what I could
think about now is, if I'm rendering the ground
floor scenes for videos, I need to see the kitchens and I need to see everything
on the ground floor. But I don't need to see
everything on the top floor. I don't need to see the beds or any of that stuff, really. So what I could do
is go ahead and hide the bedroom one furniture. And if I hit the
little camera here, it'll hide it from the
rendering, as well. And by doing that now, we've reduced the V RAM to 12.9. So we could do the same
as well with bedroom two. We don't need to see that. So we've reduced the VRAM now to about 12, maybe, maybe less. And the bathroom, we
can hide that, too. Which has brought the V RAM
down to about 12 again. And we could actually look at doing some of the
stuff on the veranda, so we could sort of
open the veranda file up and we could
hide the floors, and we could hide the table set, and we could hide the door. There we go. So we've reduced the V Am down now substantially from about 18 or 19
down to about 12.6. So there is other things we could do as well
if we wanted to. We could maybe thin
the trees out, reduce the amount of trees
that we haven't seen because trees are holding
a lot of information. So if I go to the outside file, open trees up, maybe I'll just hide the pine
trees from the scene. And that's reduced the V
Am down to an even 12, and maybe I'll reduce or take these trees here
out of the scene as well. And now we've reduced
the V RAM down to 11. So there we go. So I've shown you how to control the V RAM in your scene
to bring that down. I've shown you how to
reduce your file sizes and how to recover a
file if Blender crashes. We've shown you how
to sort of zoom in on objects when Blender
doesn't seem to want to, and shown you how to
get over beveling problems when you're
working in modeling mode. Okay, so I hope that all helps. And I think in the future,
I will expand on this. I think doing a sort of a troubleshooting lecture
is quite a good. Okay, thanks very
much. And I'll see you next time. Bye bye, Fine.
91. Promo Vid : Hello, my name is Eddie Harding, and I'm a professional three D modeler and three D artist, working in the Sup jot
industry now for 11 years. In this course, I
will show you how to create your own architectural
visualizations. I'm going to show
you how to model it and texture it and set up your own lighting and make your own amazing
renders and animations. And I'm going to show you
how to do all of this using the super powerful and completely free
software of Blender. I want to show you that making your own renders really
isn't that difficult. I'm going to teach
you how to simplify the process and show you
what you need to know to get started and not what you don't so that you can
quickly learn how to create your own amazing projects to impress potential
clients in the future. In the first few lectures, I'm going to show you
the basics of Blender. We're going to take
things nice and slow so you never feel
rushed or left behind. And we'll learn how
to move and scale, and then we'll finish off by creating our own
basic looking house. Then we will input our reference images
that are included in the course and learn how to scale them and move
them into position, lock them, and configure them
so that they can be seen from one side and that
they're semi translucent. After that, we'll start
building our walls, using our reference
images guides to make sure everything's
done to the right size and the right scale. I'm going to show you
how to use some of the more basic functions such as the loop tool and the extrude
tool and the bridging tool. I'm going to show you
how to model walls as efficiently as
possible to save you time going forward and to keep the modeling
measures simple as we can. Then we will start
modeling our sofa. It is included in
the assets pack, which is part of the course. So if you want to
skip it, you can, but it is a great chance to learn to make
upholster surfaces. We'll start by importing a
person into our scene so that we can make sure that we build our sofa to the
correct proportions. We will use the
sculpting tool to make folds and wrinkles and
bumps in our surfaces and learn how to apply gravity to an object to make it fall onto other surfaces to make super realistic
pillows and cushions. Finally, I'll show you
the most efficient way to make piping on seams or fabrics to further make your cushions and upholstery
look even better. Next, we will learn
how to apply textures, using the free texture maps
included with the course. I'll show you how to UV map. I'll show you how to
scale textures and apply extra details to the edges
to add to the realism. Then I will show you how to
light your scene and organize your lights to make them as
easy to adjust as possible. After that, I will
show you how to import assets into your
scenes such as trees and furniture and fittings
to make your house look as welcoming and as
realistic as possible. So why not join me on this
beginner intermediate course? When you finish it, you have
all the skills you need to go forward and make your
own amazing projects. Thanks for watching,
and who knows? Maybe I'll see you in
lecture one. Bye bye, Feno.
 Edward Harding