Transcripts
1. What's It all About Introduction: Hello. My name is Eddie Harding, and I'm a professional three D modeler and three D artist, working in the sup yacht
industry now for 11 years. In this course, I
will show you how to create your own
interior designs. I'm going to show
you how to model it and texture it and set up your own lighting and make your own amazing
renders and animations. And I'm going to show you
how to do all of this using the super powerful and completely free
software of Blender. I want to show you that making your own renders really
isn't that difficult. I'm going to teach
you how to simplify the process and show you
what you need to know to get started and not what you don't so that you can
quickly learn how to create your own amazing projects to impress potential
clients in the future. We will start off by learning
the basics of Blender, such as moving, scaling, and learning to navigate
the user interface. Then we will import
our reference images, position, and scale them and
make them semi translucent. In the modeling
section of the course, we will take things nice
and slow to begin with. We'll be using our
reference images. We'll start by creating
our walls and our windows, and I'll show you how to model efficiently to optimize
your workflow, but also to keep your mesh
as simple as possible. Then we will model our cabinets, using our reference
images again to make sure that we have
convincing world scale. After that, we will
start modeling our oven. I'll show you how to use the
mirror modifiers so that you can make things
symmetrical and save time. I'll show you fast
methods to create more tricky shapes such as
springs and texts on objects. I'll show you how to use
advanced techniques to make realistic looking curtains and how to set up your
cloth modifiers. Once we finish
modeling our kitchen, I'll teach you the
basics of UV mapping. I'll show you how to
use smart UV project, and I'll show you how
to create seams on your objects to
optimize your UV maps. Next, I will show
you how to apply the texture sets that are
provided with the course and also some next level
tricks such as making procedural
textures and using Ambient Occlusion and how to use the node wrangler to save time applying and
scaling your texturing. Next comes the really fun bit. I'm going to show
you how to create still renders and really
impressive animations. I'm going to show you how to
set up your camera and how to use the timeline and
more next level tricks, such as having doors and drawers open and close
in your animations. Finally, we will take
the animations we've created and edit and compile them in Blender
zone video editor to make one super
cool animation. This is without doubt, one
of the most comprehensive interior render animation
courses available. After this, you'll have all
the skills you need to create your own amazing
interior renders and animations to impress
potential clients or have a foundation knowledge to start a new and exciting, rewarding career in
three D modeling and photorealistic
renders and animations. Thanks for watching this
video, and who knows? Maybe I'll see you in
lecture one. Bye bye, Fino.
2. Lecture 1 Introduction: Hello, and welcome
to Lecture one on this interior three D
modeling and rendering course in Blender.
My name is Eddie. I'm going to be
instructor for the next I think it's 86 lectures. I'm a professional
three D modeler, working in the Subi yacht
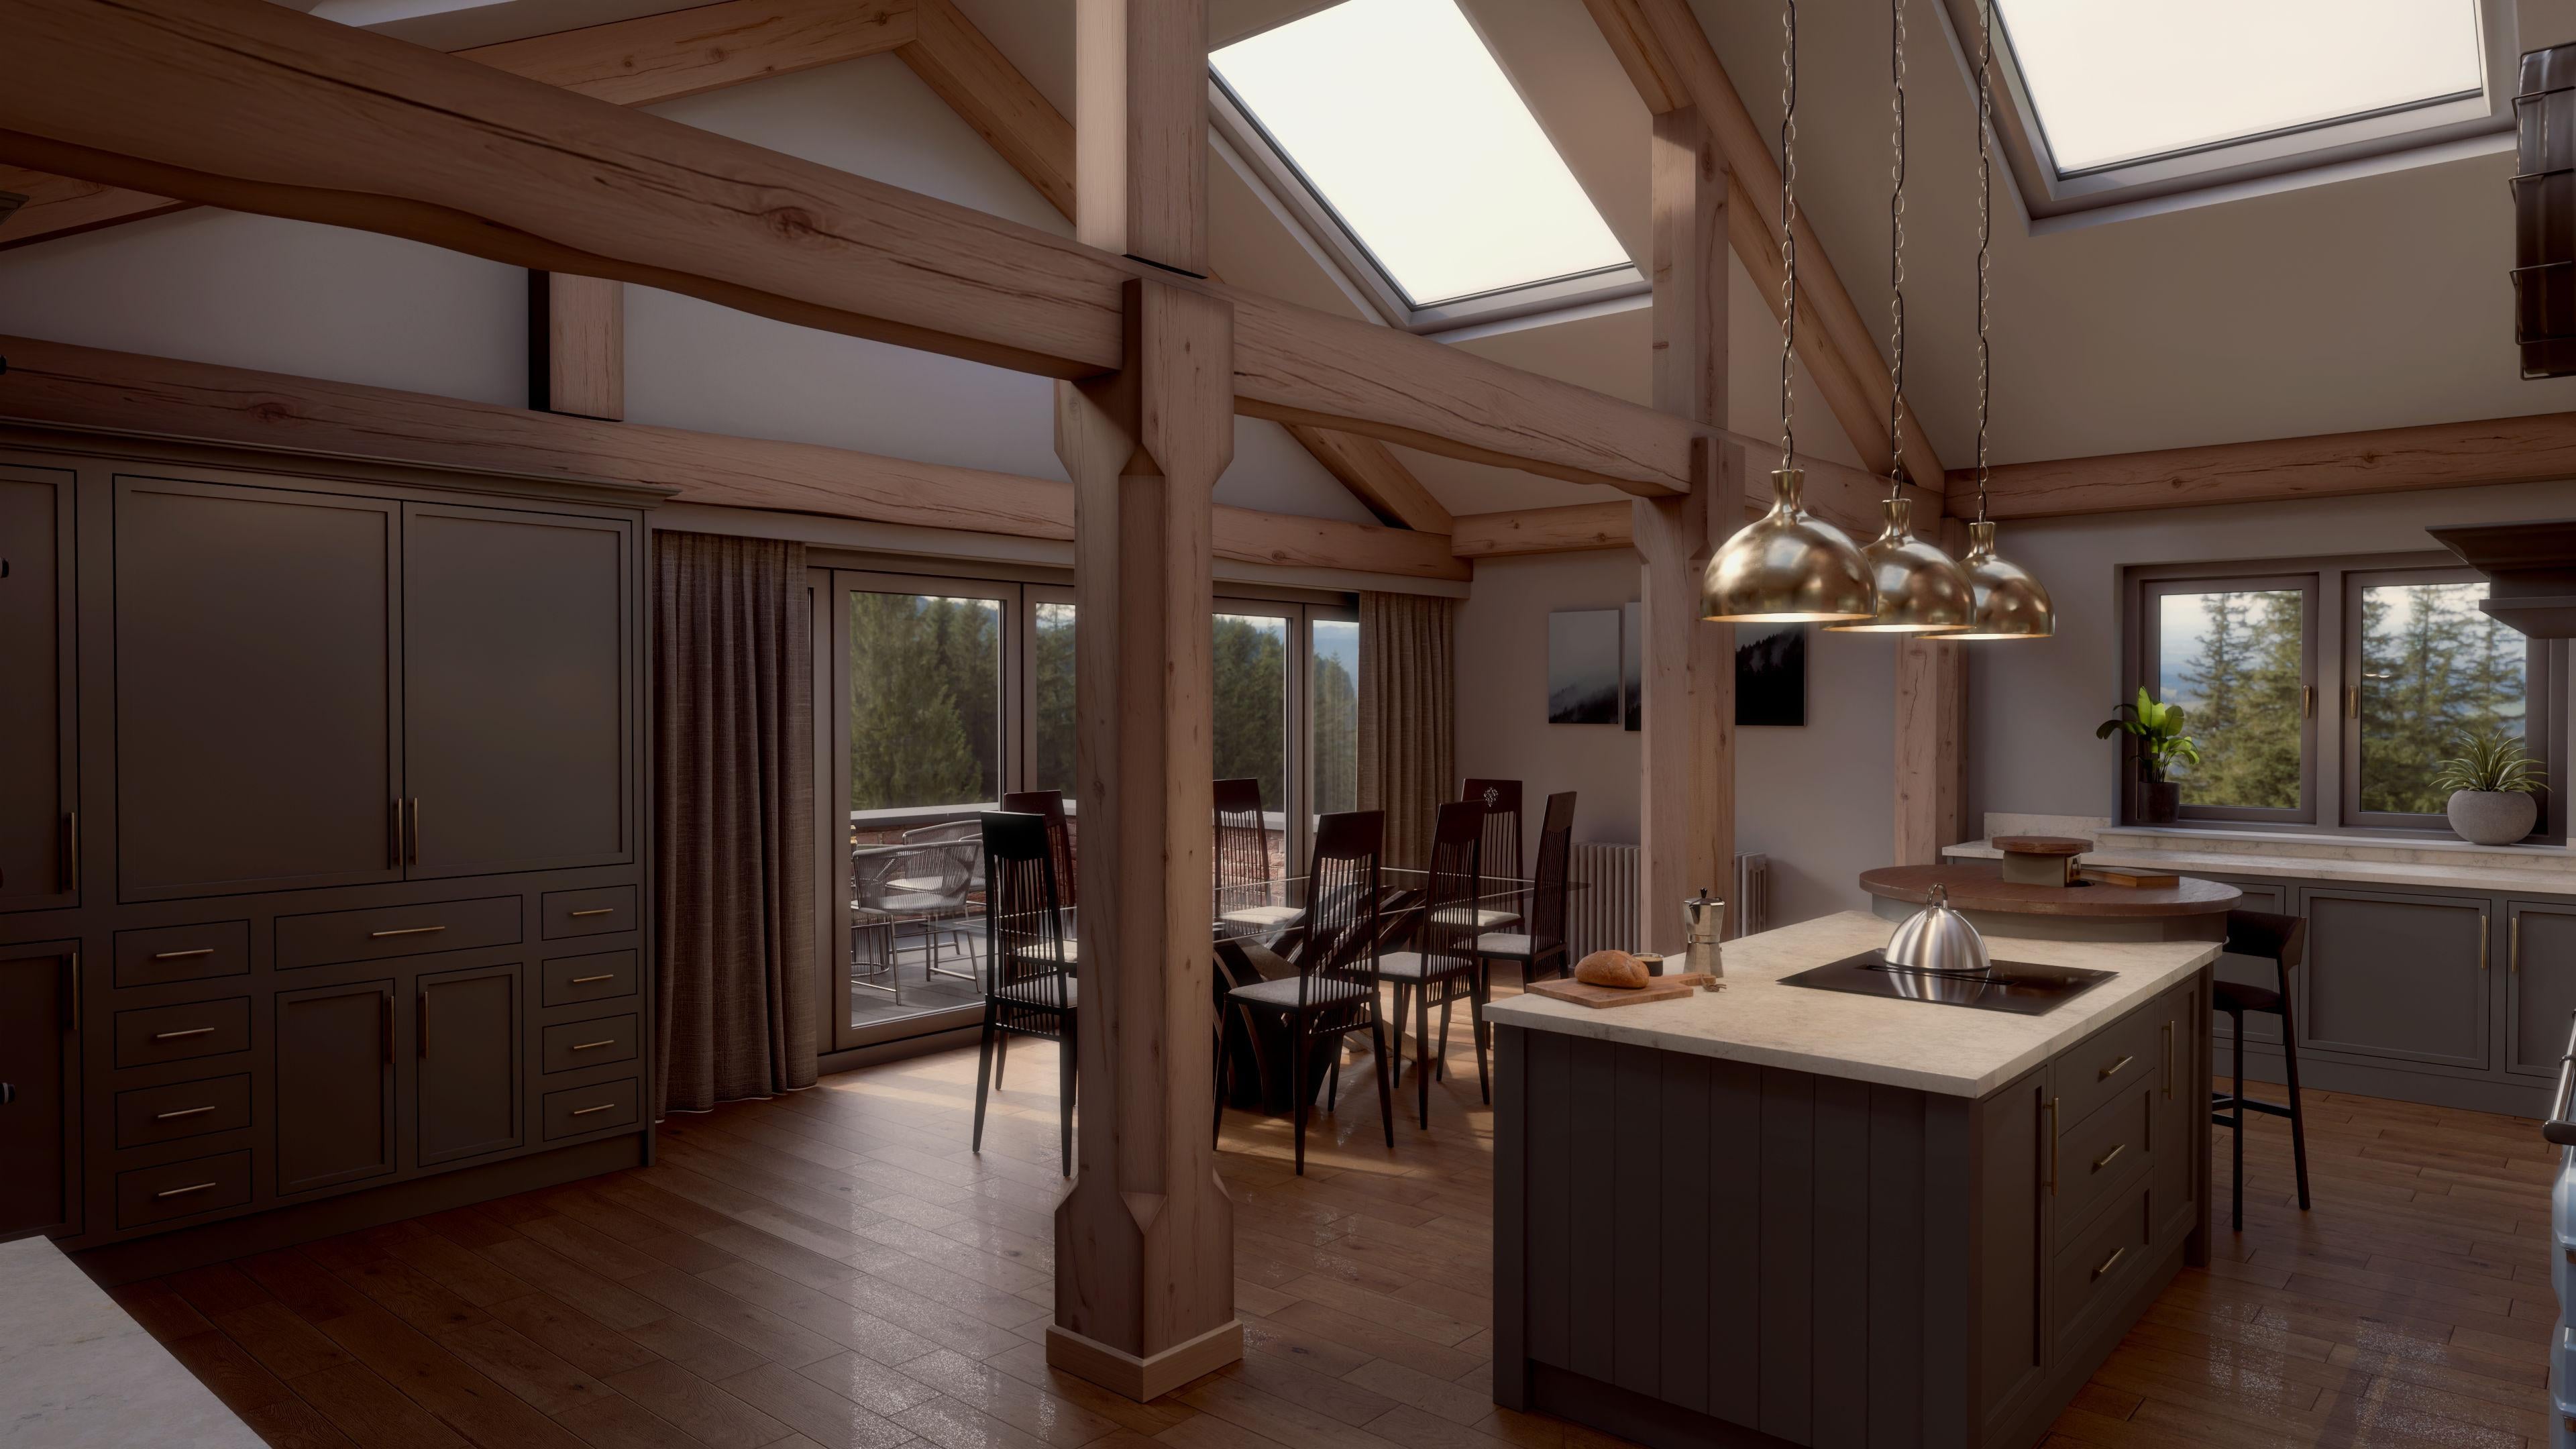
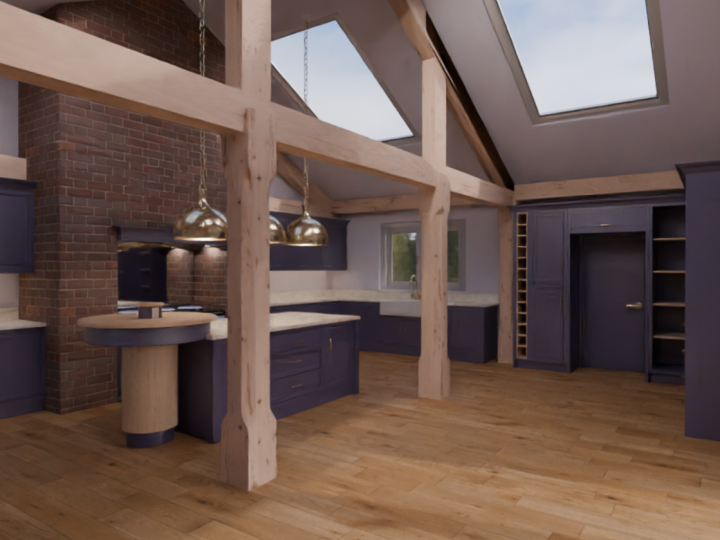
industry now for over 13 years. So at the end of the course, this is what you're
going to have or something similar to this. It might be that you
take it your own way and do things a
little bit different. And I hope you do I
encourage you to do so. But at the end of the course, you should have
something looking like this, if not better. And it's my job to
guide you through the process and get you
all the way to the end. If for any reason you're struggling with any
elements of the course, please don't hesitate
to contact me, and I'll do everything I
can to help you with it. It's in my interests
to make sure that you enjoy this course and
you get everything from it. So please don't
hesitate to contact me. And thank you, by the way, thank you for
purchasing this course. I really hope you enjoy it. And I think you will, and I'm sure you'll
learn lots as we go. Okay, so the reason for Lecture one is just to show you what's included in the course and give you an idea of what
you're going to be doing. So this is what the end
result will look like. What I need to do
now is show you what's included in the course
to help you achieve this. Okay, so I think the first
thing I want to show you is the reference images which
are included in this course, which we'll use to
scale our kitchen, to make sure that we real
world scale in our kitchen. So what I kind of mean
by that is to make sure that our kitchen
cabinets are approximately about a meter high and that our doors are about
2.2 meters high, et cetera, et cetera, to make
sure that we're real scale, real world modeling our course. So let me just go ahead and bring the reference images now, which are included
in this course. They're attached actually to a lecture seven as
one of the resources. So within this reference
image set, we have, let's just go ahead and open up the first one and show
you what they are. So this is the front elevation showing the bifolding door. Let me just scale this up. And this one we
won't be using much, but we will be using
at the start to get the overall size
of a bifolding door. The next one, this is the most commonly used reference
image we'll be using, which is what we call
a sectional image, which is like a slice
through of the kitchen showing the height and the
sizes of the kitchen cabinets. Let's move on to the next one. So again, this is
the side elevation, showing the single side door and the scale and the size and
the position of the window. And we'll also be
using this floor plan, another section showing
a slice through our kitchen showing the
sizes of our cabinets, full height, larder
cabinets on this side, and our base cabinets and our island and the
size of our chimney. And we'll also have this image, which is the rear
of our kitchen, and that's it.
That's all of them. So these are all included in Lecture seven, and
in Lecture seven, I'll show you how to input these into Blender and how to scale them and position
them for us to be able to use to construct
and model our kitchen. Okay, so that's that bit.
That's all included. Let's go ahead and
close this now. And the next thing I want to
bring in is the texturing. So I'll go ahead and
drag those in as well. And included in the course is
this set of textures here. So we have bricks, and we have a brick wall, and we have basins, cabinet paint,
curtains, floor table, lamp brass, marbles, oak beams, et cetera, et cetera. So these textures are
yours now for you to use in this project and any other project that
you do in the future. And this is attached to a later lecture when we
start applying textures. We have options here, let's say, on the brick wall. So we have an aged brick, but we also have a
slightly newer brick. So as we go, we can go ahead and choose our own textures a
little bit that we want to use. Alright, so I'll go
ahead and close that. And there's one more thing
that I want to show you. And this is completely optional, but it's something that I always do at the
start of any project. So I'll go ahead
and drag this in. And this is called My Moodboard. And before I create
a new project, I need a little
bit of direction. So the first thing I do is
sort of create a collage of images to give me some ideas of what my
kitchen will look like, and give me some inspiration
and some direction. So, I use a free piece
of software called PureRef to create my mood
boards. It's completely free. And then I generally my favorite source for
images is Pinterest. And on PITRSt, I can
simply just drag and drop images and scale them
into my PureRef moodboard. So I encourage you
to do the same, but, of course, it's
you don't have to, but it is a useful tool and a useful exercise
to do to start creating your own mood
boards to give you some inspiration of what your kitchen is
going to look like. And incidentally,
these images here, this one, this one, this one, and this one and this
one are the images, the sort of the keystone images, the images that have given me the most inspiration
to create our kitchen. And also sort of recognize ones like
this as well as we go. And, yeah, I recommend sort
of doing the same thing, creating your own moodboard to give you some inspiration
in this project, and more importantly, in
projects going forward. Okay, so I'll go ahead and drag this out
the way, as well. That's kind of it
for Lecture one. It's just an introduction
to what we'll be doing over the next 85 lectures to create this gorgeous
looking kitchen. All right, thanks very much. I'll see you in the next
lecture. Bye bye, Fino.
3. Lecture 2 Blender Intro: Hello, and welcome
now to Lecture two. And in this lecture,
what I want to do is introduce you to Blendo. I want to do a little bit of a sort of a show you around
what we've got here. And if you're looking
all these buttons and tabs and sliders and
you're thinking, Wow, I will never learn
all this. Don't worry. We're going to get
through this together, and we're gonna have a
lot of fun as we do it. Blender is an amazing
piece of software. It's really limitless
with potential. And the fact that
it's free is just amazing because it's
just so powerful. There's other software
out there with the same sort of stuff on it that you pay
a lot of money for. And the fact that blend is
free it's just brilliant. And it's like I said, it
got so much potential, and there's a really
cool community of people using blender
that are really talented. One thing I would suggest you do is maybe just go onto YouTube and look for blender animations
and watch some of them. And you'll get a clue of what blender is capable
of it's amazing. My personal preference,
one I would suggest is called
Blender charge. I'll blow you away. It'll
really just blow you away. The level of quality in
that is exactly the same, if not better than high budget full length
movies, animations, that is. It's just brilliant. I won't give the plot awake. That's a nasty thing to do, but definitely watch it. If you're not watching
it right now, after I've said that
paused it and gone away, if you have, then
please enjoy it. If you haven't stick around. Sorry, I'm waffling already.
That's something I do. Please excuse me when I do that. Okay, let's get back on track. Let's talk about
Blender for a minute. So, what have we got? The first thing that
you see is this, which is called
the splash screen. And the splash screen
you'll get if you open a new project in blender or you're opening blender
for the first time. It just has some basics on here, maybe some previous projects, if you've been using it before, a little donate if you wish to give some
money to the blender, and you can be able to
recover last session if it crashed and some
basic settings. To be honest, I never use it. So I'll just click anywhere
else, and it'll go away. So the next thing I
want to say really is, I pride myself in taking
things nice and slow because I think it's really important that no
one feels rushed. I don't want anyone to
have to stop and start, stop and start and
rewind and play again. I want you to be able
to just follow along at the same pace and never
feel intimidated or rushed. So I take things nice and slow. And only after you've had some time to develop
some skills and you're starting to become
used to blender, then I start to speed up a
little, but never too much. Okay, now I've said
that, let's move on. So what have we got here?
We've got right now, we've got a camera, a cube, and a light, as you can see in the scene. And what Blend is doing
for us is it's created a basic scene for
us to be able to render straight away
from or animate. Everything is here for
us to be able to do. And the next thing I want
to do is I want to set up blender to be a little
more friendly towards us. I personally find that
everything is a little small, especially for me, I look at
screens 12, 14 hours a day. So I I need the resolution to be a bit bigger
and all the sort of texts to be a bit bigger too. So what I do is I
come up here to edit, and I'll go to preferences. The first thing I'll do is go to Interface up here.
Click on this. And on Resolution scale, I'm going to take that
up to I take it up to 120. It's an individual thing. If you want to go
smaller or bigger, you can, that's up to you. But my personal
preference is about 1:20. That feels good to me. After we've done that,
let's go over to system, just here, and let's go
into cycles render devices. Now, here we're able to set up a little bit of our
settings towards our GPU. So I have an invidia GPU, so I have to highlight it. I make sure that it's not
the opposite way around. I don't want my CPU
highlighted and my GPU nut. I want the GPU highlighted. I could have both. I don't personally see any huge benefit. I've
tried it like this. Nothing really speeds up. So for me, I de my GPU. And just above, we have
these settings here, and what these are are settings dedicated to the type
of GPU you have. For me, I have an
invidia I use CUDA, or I could use Optics, but I prefer the CUDA settings. If you're using a
different GPU to invidia, you could go ahead and
Google cycles render devices which
setting for my GPU. Then you could figure out which one you want to use Optics, HIP, one API, or CUDA. So once you've done that,
come on down a little bit to memory limits and
under undo steps, go ahead and max this out. There we go. The max is 256. So what undo steps
does is allows you to go back 256 commands. So I'd put that at the maximum. In case I've run into trouble, I can go back the maxim. It does seem a bit
ridiculous to have 256, but if not, why not? It runs a little bit
more ram memory, but in my opinion,
it's worth it. There is that odd occasion when you want to go
back quite a lot. So once you've done that, we
can go ahead and close that. Okay, once we've done that, there's one more
thing I want to do. I want to come up
here to this tab. Incidentally, if this
tab is not seen, you can just go ahead
and press N and it'll come up and it'll go away
if you press N again. Now, within that,
go down to view. It's upset to say it's in item. Just click on View
and come here to clip Start and add an extra zero to the right of
the decimal point. The reason I do that is
if I zoom in on an item, the standard settings
in within blender, you kind of clip through this item a little bit too
early and see inside it. It's a little bit more than
my personal preference. So by adding another zero, I can get a little bit closer before I clip through into
the inside of the component. And that's something
I personally. Okay, so that's all the changes I want to make at this time. So now that I've done
that, I'll go up here to file and to default, and I'll save startup file. That means whenever I start a new project
or open blender, it will open with these settings that I've
just put in place. So I'll go ahead and
save Startup file. So I'll say overwrite
main startup file, overwrite. And there we go. So now, how we set up Blender right now will be
the way blender will always set up open when we create a new project or
open previous projects. Okay, so the next
thing I want to talk about is this actually, before I talk about this, I just want to mention one
thing to everybody. So your screen might look
slightly different to mine. I do have this
extra tab up here, and I have this little
thing here on the side, this extra tab here. You probably don't
have that right now. It's an add on that
you can add to blender called Blender kit. And Blender kit is a source
of free and pay for assets. And textures and HDRIs. And it really is a
super efficient way of importing assets and
textures into blender. It's just set up with
blender to work perfectly. So this is something
we will be using. Don't worry. It's free. The add on is free, and then the majority of the
assets are free, too. So it's super useful. And I'll show you how to
add this add on later. So don't worry that you see
this extra bar at the moment. Okay, so let's get back on. So the next I want to talk
about is this one here, which is called the tab. And if you don't see it, you can press T on your keyboard, and it'll appear or disappear. And I don't want to show you all the functions on this
because like I said, a lot of this stuff
we'll learn as we go. But there is two that
I want to show you. And the first one is
already highlighted. It's this one here, and this is the selection box. So what you do with a selection box or
how you use it is if you hold down the left button on your mouse and then drag, you create a
selection box around an object that you went over
with your selection box. So in this instance, I've
actually selected the cube, so I'll just click
anywhere else to deselect, and I'll
do that again. I'll hold down the left
mouse button and drag a selection cube over the
component I want to select. So I could do it maybe
with all three this time. I'll just hold down
the left mouse button and select all
three of the items. Let's say I didn't want
to select this camera. If I hold Control and do
a selection box again, I can deselect the camera. So now I just have the light
and the cube selected. So this is the selection
setting on the tab bar. If I left click on this and
hold the left mouse button, I get this come up, and this is a different style of selection. So if I use the select Lasso, I can now create a shape kind of similar to photoshop around
an object to select it. I don't personally
use these much, but maybe you prefer. I think it's a personal thing. I prefer just the selection box. I don't find a reason for using another form of selection. But now, you know,
so there's the asso, and you have a circle
version as well. Okay, so I'm going to go back to the selection box. There we go. The next thing I want to show
you is called the Gizmo. So that's this one here, or in this case, it's
called the Move Tool. But the move tool shows you then or allows you to show the Gizmo on your screen
on your viewport. So the Gizmo is a tool that's used in almost all
three D modeling software. It's given different names such as the gumball and
stuff like that, but it's basically the same. It's called the Gizmo. As you select an object, the Gizmo will
appear if you have the move tool selected
here, on your tab bar. And this is generally
where I'll leave my if I'm generally, most of the time, this is what's selected on my tab
bar just here. So let me explain
the Gizmo to you. As you can see on
the screen now, we have this red line, and we have this green line. And even though
you can't see it, there is a blue line going
vertical as well, directly up. And these are called the axes. So the green line is actually
referred to as the Y axis. And the Y axis runs forward to back the red one is
called the X axis, and this allows us to
move left to right. And the blue one is
called the Z axis, and that allows us
to move up and down. Now, if we move along an axis, we are moving exactly
at 90 degrees. We're moving right at
exactly nine degrees, left at exactly 90 degrees,
forward or backwards. We're not going slightly
left or slightly right. We are going exactly at 90
degrees to the opposite axis. So if I go ahead and hover, let's say over the z axis
here now, the blue or the Z, and then left I and hold
the left mouse button, I can move up the cube up
and down in the z axis. If I go ahead now
and press escape, I will snap back to the center. So I could do that now
with maybe the X axis. I'll press the
left mouse button, hold down whilst hovering over the red arrow of the Gizmo, and I can move now
left to right. I'll deselect again. And now
let's move forward or back, so I'll hover over the Y axis, press down or hold the
left mouse button, and move forward to back. I'll press escape to
snap back to the center. Okay, so now we know the move tool or the
Gizmo, as I refer to it. Okay, so that's all I
want to show you on the tab as we're working, we'll use the measure
tool a little bit, and we might use the cursor
positioning a little bit. But those will sort
of learn as we go. The next thing I
want to show you is the different ways of
viewing inside our viewport. There's four settings for how we see inside this viewport. And those can be seen
up here in the corner. So at the moment we
are in solid mode, this is the standard mode
that we use in blender. This is the easiest
mode to model in. Other than that, we have
the wireframe mode, which is just here, so
I'll click on this. And this is, as is
self explanatory, really, the wireframe mode. So no longer do we
see the surfaces, we see just the
edges of the object. This is a really useful tool because it allows us to select, let's say, this
far bottom corner, but whilst viewing it
from maybe this angle, which if we were in solid mode, we couldn't see that far corner. So that allows us to be able
to select multiple points, even though we
couldn't potentially see them in the
other view modes. What I'm going to show you
now is the shortcut for this. So if I press Z on our keyboard, we are in wireframe. I'm now going to
go back to solid. And the next I want to show you is called Material Preview. So I'll press SED again
for the shortcut, and we'll click on
MateialPreview. Material preview is a lighter version of
the rendered object. So generally, it's not as a detailed render as
the full rendered mode, but it does give us an idea of what textures we're
applying to our components. And finally, we have
the full rendered mode, so I'll press set again, and I'll go to the
full rendered mode. So in this mode right
now, as you can see, we can't really see much. But if we had a texture
applied to this object, we'd see that this is in
the full rendered mode. We'd see the maximum detail
that we can on this object. It does get even
better when we render, but within this viewpoint, rendered is the highest
detail level that we can see. Well, see, you
might ask yourself, why don't we not just stay in
rendered mode all the time. The reason being because
your computer is doing something right now
called real time rendering. So as we're moving
the object around, where the computer is constantly reconfiguring the textures on the surface, reapplying them. And at the same time, it's
constantly considering light, how light will interact
with the surfaces, what reflections
will be there and what bounces and reflections
will be put in place. And it's doing all of that constantly when it's
in render mode. It's constantly real
time rendering. It is quite taxing
on your computer, so we generally don't
stay in it all the time. I'll go back into the shaded
view in the solid view, sorry, so I could
do it just here. I'll click on it just
there or we could have pressed SD and
gone back in that. Okay, so what's the next thing
that I want to show you? I think the next thing I want
to show you is right here. This is called the outliner. So the outliner is
basically a list of all the components that
we have in our scene. So at the moment, as
you can see, we have our camera and our
cube and our light. If I go ahead and
select the cube, it highlights here
in the outliner. Do the same now maybe with
a light, and there you go. I can do that in reverse. I can select the light here, and it will go ahead
and highlight or select the light
in our viewport. As we have more and more
and more components and our scene becomes
more detailed, this will get quite a long list. So we need to apply quite a
lot of discipline in here, naming our objects and creating subfolders to be able to keep everything organized
so that, let's say, our cabinets, we
have a folder for our cabinets named
cabinets and we have a subfolder for our oven, and we have a subfolder for our lights going on,
et cetera, et cetera. So we'll do that. I'll
show you how to organize our outliner to
make sure that it's sufficient and not confusing. The next thing I want to
show you is this one here, and this is the Properties tab. And this is the
important thing here on the Properties tab right now is this little set of tabs here. And we will be using
these quite a lot. Not all of them,
but quite a few. This one here is our
render properties. This will allow us to set up our renders how
we want them to be. This is our output properties. This will allow us to set things like the amount of frames that we have when
we render animations, the resolution of our renders, and where we're
going to save them, and a few other things as well. We have quite an
important one here. If you select a component, we have this one, which
is the modifiers tab. So this is where all
the modifiers are. So this is how we're going
to be able to change. And it's basically a set of tools to be able to model with. And modifiers are something
that's called nondestructive, which means that
anytime you can go back and you can make
changes to that component. Without having to
go back commands. So it's a really
beneficial thing. Once you apply modifiers,
then they're permanent. But while they're not applied, then it's called non
destructive modeling. We're able to go back at
any time and adjust things. We also have things
like the particles tab, and we have our physics tab, which we'll use for
creating our curtains, and this one is
our materials tab. So this is one of the tools
we'll use to be able to create materials on our
surface on our components. So this is an area as well we'll be looking at quite a lot. The next I want to show you
is this tab right here. And the one I want to
show you the most at this stage is the item tab.
So I'll click on this. And what this is is is basic information
about this component. So a cube in this case, is telling us the
size of the cube, so it's 2 meters by 2
meters by 2 meters, and it's telling the scale and
most currently one to one. It has zero rotation on it, and the location is 000. So 000 refers to the point
in which all our axes, our X, our Y, and our Z cross. That is the zero
point of the scene. Or another name for
that is world origin. It is the world origin, the zero point of our whole
model or our whole viewport. So we could go ahead and
change the location by simply sliding this across. So right now we're
moving it in the X axis, and we could move this let's say 10 meters or 5 meters. We
can do whatever we want. I'll go ahead and press Escape to take that back
into the middle. And there we go. So that's
what I want to show you in this one here. At the bottom here, we have
what's known as the timeline, and we'll be using this
towards the end of our course. This is where we will
set up our animations. Here, we're able to move our
camera through a sequence of frames to set up
a nice animation. So we'll be using
this towards the end, but for the majority
of the course, this is something
we'll not be using. Okay. So that is the
end lecture two. Hopefully, no one's feeling
too intimidated by this. And for the next few lectures, we'll go ahead and learn
the basics of blender, how to navigate in it, and how to move components
and some more basic commands. Okay, thanks very much. And I'll see you in Lecture
three. Bye bye for now.
4. Lecture 3 Basic Commands: Hello, and welcome
now to Lecture three. And in this lecture,
what I want to do is just show you some more
basic functions of blender. So in this function,
what I want to show you is how to move, how to view an item from different angles
and how to scale. So let's go ahead and
make a start with that. So I think the first thing I
want to do is let's go ahead and select and delete our
camera and our light. So again, if you hold down
the left mouse button, drag a selection
square over the light, and then go ahead and
just press Delete. Do the same with the camera now. Let's go ahead and select
that and go ahead and delete. And, why don't we just
do the cube as well so that we can import a new object
and learn how to do that? So let's select the cubes. We can actually just select
it it just by clicking on it. And now we can go ahead
and just press Delete and so we've got an empty scene, and you can see and
outline it as well. We have nothing in the scene. So now that we've done
that, let's press Shift A. Let's go on to mesh here and
another window will appear. And let's introduce
Let's introduce Monkey. Let's introduce that I'll left click on that.
And there we go. Monkey is in the scene. By the way, this monkey's name
is actually called Susan. It's a little blender icon, a little mascot of blender. It's been around
for years. I don't know who originally drew it, but, yeah, it's called Susan. And I introduced the monkey because if we just have a
square, it's almost, well, it is impossible
to understand if we're viewing it sometimes
from the top or the bottom, the left or the right
since all faces are equal. So by introducing
a shape like this, we can tell which angle
we're viewing it from. Okay, so now let's go ahead and talk about how
we view the object. So first of all, we can
literally pan round the object. So if I hold down the
middle mouse button or the scroll wheel, and now just push
the mouse around, I can go ahead and
pan round the monkey. I can go ahead and look up, and I can look down. So the monkey is not
actually moving. It's not rotating, it's
staying absolutely static. It's us altering the
angle of the viewport. So if you like, it's us
moving around the monkey. Okay, so that's cool. So no, the next thing I
want to do is talk about what's called
orthographic views. Now, orthographic means
that we're looking at something directly from above or directly from the
front or directly from the side or directly from
the bottom looking up. It's called the
orthographic view. So if you like, we're
centered exactly on the X axis or the Y
axis or the z axis, and looking straight down the axis directly at the monkey. So how do we do that?
Because that's quite important for us because
we're going to be using reference images to scale and to model
our little kitchen. So we need to be able to
look at it orthographically. So the first thing what
I'm going to say is, let's go ahead and press seven on your numpad
of your keyboard. That is how we look at our
monkey directly above. We're looking straight
down the z axis now directly on
top of the monkey. Now, if we go ahead and
press Control seven, we can look at it
directly from the bottom. Okay, so that's the first one. The next one to show you is
if we press one on an pad, we can see it directly
from the front. And if I press Control one
directly from the back, these are the
orthographic views. If I go ahead and
press three now, I can see it from the side. And if I press Control three, I can see it from
the opposite side. So by using those commands, we can see our objects
orthographically, directly from the top,
the front or the side. Incidentally, it's just a suggestion it's
completely up to you, but sometimes it's a good
idea to make written notes of some of the commands we go
over so that at any stage, if you forget any of
these shortcut commands, you've always got written
notes to be able to find them. Rather than searching
back through lectures, trying to find that
point where we talked about different things, maybe it's a good idea
to make paper notes. It's completely up to you, but it's a technique that I use. Okay, so let's get
back on track. So now that I've done that, the next thing I want to talk about is how to move an object. And I think we briefly touched on this on
the last lecture. So we'll go over what we learned to the last
lecture for moving, and then I'll show you
some different ways of moving as well. So if you come over to the
tab bags here and click on the move tab so that we have
the Gizmo introduced again. So we can go ahead and
use the Gizmo to move. So we can just
slide that back in the Y axis to there, maybe. And now we can go ahead and
slide it over in the X axis. And we could take it
up in the Z axis. And there we go. We've moved the monkey over to the one side. So maybe you want to bring
it back to the zero. So to do that, we could
cancel our previous commands. So to do that, we can press Control Z and Control Z again and Control Z one last
time, and there we go. We're back in the original
place that the monkey. Okay, so now let's go over now, select this and
let's click on item. Now we can adjust its location
here in the transform tab. Let's actually make
this maybe 5 meters. And in the Y axis, let's go ahead and
make this 5 meters. And in the Z axis, let's go ahead and
make this 5 meters. So we've got ahead and moved
back 5 meters on the y axis. We've moved right
5 meters on the X, and then 5 meters up in the set. Now we can go ahead
and go back to zero. We could press Control Z to
go back on these commands. Let's go ahead and use
the location command. If I select the top one here and then hold down and select
all three like this, I can make the
command in one go. I'll go ahead and
press zero and click Enter and we've returned
to the zero point. That's a little
bit of time saving over entering each
one individually. Go ahead and left
click the first one, and while still holding
the left mouse button, drag down to the others, and then we can go ahead
and make our change. This time, I'll go 2.5 in
all axes and moved it over. Okay, so that's moving
using the transform tab. I'll go ahead and
press Control Z to go back to the original
settings. There we go. There's one more way
of moving in blender. And this is when we
start to need to know our axes or start using
our knowledge of our axis. So I'll select the item. And by doing this, the benefit
of using G coordinates now is we don't need to have
the cursor on the item. So I'm going to go ahead
and press G for Grab. I'm going to go ahead and
press X to move in the X axis. And you can see the X axis
has actually gone bolder now, and now we're moving
in the X axis. So I'm sliding the
mouse left to right. But I'm not hovering
over the component. So we could go ahead
and enter a number now, so I'll go ahead and
enter 2.5 and enter. So we've done those commands without actually having
to touch the component without having to
click on anything here or make any
adjustments right here. So maybe I'll do that
again now. I'll press G. This time, maybe I'll
go back in the Y axis, so I'll press the Y button, and I'm just going to go ahead
and push the mouse back. I'll do it manually this time. I could even look up
in the location tab and see how far I've gone
back, and there we go. I've gone back about 10 meters. And there we go. So
that's how I done it. Maybe I'll do it one
more time, so I'll press G and then Z, and we're moving
in the Z axis up. And there we go. And
maybe I'll go up 2.7 and click Enter.
And there we go. We've gone up 2.7 meters in the Z axis. Okay, that's cool. So I'm going to go
ahead and press Control Z until the monkey comes back to the world
origins to the zero point. Okay, so the next
thing I want to talk about is scaling an object, scaling the monkey in this case. So if we go ahead and
select our monkey, and we can go over to scale
here on our transform tab, we can hover over the X axis, hold down the left mouse button, drag down to select
all three boxes, and then push them
mouse sideways, and we can scale up like that. And we can see the dimensions increasing at the same
time on the column below. So that's our one way
of scaling an object. Okay. So the next way
we have of scaling an object is select the object so that
the gizmo is showing, and then we can go ahead and
press S to scale the object. And you can see us
scaling some more. So now the monkey is
actually 20 meters wide on the X axis and 12.5
meters on the Y axis, and 14.5 meters on the d axis. So now I want to show you how to scale up but non uniform, meaning that we're
not going to scale up equally on all three
axes at the same time. So we'll select the item again so that we
can see the gizmo. And now I'm going to
go ahead and press S, followed by Y, and just
scale up in the Y axis. And there we go. Got a kind of a
strange shape there. Now let's scale up
just in the X axis. Sell press S, followed by X, and go ahead and
scale up this way. Now let's scale
up in the Y axis. So I'll press S. I'm sorry. Now I'll scale up in the z axis. So I'll press S and then Z and then go
and scale up again. So by doing that, we've
scaled up non uniform. We've scale up in just
one axis at a time. But there's one more
way to do this. Maybe I want to scale up in
the Y axis and the X axis, but not in the Z. I want to
make it wider and longer, but I don't want to make it taller, so we can
do that as well. Let's select the monkey. Let's press S, and then hold
down shift and press Z. Now we're just going to scale
up in the X and the Y axis. And you can see those axes have actually been highlighted. Now we can scale up like that, but we're not
scaling up in the z, so we're making it no higher. Okay, so now let's
go ahead and return the scale of our
monkey to its origins. So let's go ahead and
select the top the X axis. Hold down the left
mouse button and drag down to all
three like this. Let's just press one and
enter, and there we go. So now we've returned the
monkey to its original size. Okay, so the next thing I
want to show you basically is how to rotate an object. So this is quite easy as well. If I go ahead and
select the monkey and make sure that the move tool is selected so that we
can see the Gizmo, it'll just give us
a visual reference. And if I go ahead and press R, we can rotate the monkey. But there's no
control over that. As you can see, it's not
moving along an axis. It's just moving quite randomly. So that would be very difficult
to control the rotation. So I'll press escape to
snap back to its origins. This time, I'm going to
rotate it on an axis. So I'll press R and
then I'll press Z to rotate it on the Z axis. Now I can rotate the monkey
directly on the Z axis, much more controlled
way of rotating Susan. We can go ahead and do the same. So we can press R and now Y and go and rotate
the monkey on the y axis. We'll press escape to zero. And of course, we can
do the same on the X. So if we press R, then X, we can go ahead and rotate in the X axis. And there we go. That's how we rotate. If
we hold down control, we can snap incrementally
on our rotations. So now we're moving in
five degree rotations. We can see that and
the transform bar just here that it's rotating in
five degree increments, which can help us control it when we're modeling
a little easier. Okay, I'll press Escape and go back to our
original position. Okay, so there's just one
more thing I want to do, and that's to show you how
to duplicate an object. So let's go ahead and
select the object. And let's press Shift D, and we'll go ahead and grab a copy and bring
it over like this. And there we go. We've
got a copy of the monkey. And you can see here in the
outliner now, we have two. We have the original, Susan, and we have Susan 01, the copy. Maybe if we want to next
time we make another copy, but make sure we move
in an axis with it. So I'll select the object, and we'll press Shift
D. Then I'll press X, and I'll move the copy monkey over directly in the X axis. And I know now that Susan is directly in the same
line as the original. So let's go ahead and use our numpad now and press
seven to look from above, just so that we can see
that the third one is in exactly the same
position on the X axis, whereas this one has
moved back a little. Okay, so I think that's plenty to learn in the first lecture, but it's quite good
stuff to know. This is all quite
fundamental to blender. Alright, thanks very much. And in the next lecture, I think I'll go ahead and
show you a few modifiers. Okay, thanks very much. I'll see you in the next
one. Bye bye, Fine.
5. Lecture 4 Subdivision Surface Modifier: Hello, and welcome
now to Lecture four. We're going to talk
about something called the subdivision
surface modifier. And this is a really important
tool within blender, and it's used generally in almost all mesh based
modeling softwares. So whether it be TDS
Max or Maya or blender, they all have a subdivision
surface modifier or a variation of that. What the subdivision surface
modifier actually does is it increases the complexity of
the mesh of the component. So we have to sort of
figure out how to use that without making the
mesh of our item too much. And I'll show you that and
show you how we do it. So let's left click anywhere to get rid
of the splash screen. And then let's hold
down the left button, drag a selection
square over the light, and press delete,
and do the same with the camera
and press delete. So we've just got the cube. So now let's actually
select the cube, and let's just pull
it to one side. Using the Gizmo, we hovered
over the little arrow there, and we left clicked, and then we grabbed it, and
we pulled it over. Let's actually add a monkey now. So let's press Shift A
and mesh, and the monkey. There we go. And the
monkeys come in. Let's reselect the monkey. And now let's press Shift D. And let's press X
because we want to move the copy we've
just created using Shift D on the X axis.
So we'll do that. There we go. Let's
do that again. So we've still got that
monkey highlighted. Let's press Shift D, and it's gone white to symbolize that the copy has been made. Let's press the X button to
move the copy in the X axis, and then let's just
slide the mouse over. We've got three
copies of the monkey. Here we go. So I'm
going to press down the shift button and
the middle mouse button and just grab the whole thing and bring it over to sort
of center ourselves. Okay. So let's select the cube. And it's a cube, isn't it? It's a very simple structure. It's got eight sides. I'm sorry, it's got six sides, and it's got eight corners. Let's press the tab button now. What that's done it's put us into what's known
as the edit mode. And whenever we do any modeling, chances are we're going
to be in the edit mode. In this mode, we can
actually move the sides. We can add sides. We can do pretty much everything
within the edit mode. We can do some basic things in the mode we were in before, which was object mode. We can scale and we can rotate. But anything beyond that, we will do here
in the edit mode. At the moment, if you look
at these three items here, we have this one here, which is the vertex selection. The vertex or the vertices, if it's the plural, is the junction points
between the edges. So it's these little dots. So we have this edge, this edge, and this edge, the three edges, they're
joining in the middle, and at that point,
we get a vertices. This one here is edge selection, so let's press that, and
then we can select an edge. There we go. I'm just left clicking on an
edge to select it. And then finally,
I'll go to this one. And this one, this
is face selection. So now I'll left click
on that and I can select a face. There we go. I'll go back to this
one to vertices, and all I really want
to demonstrate is the simplicity of the
mesh on that cube. It's as simple as it
can get right now. So let's hit the tab
button to go out of Edit mode back
into object mode. Let's select the item
again, the cube. Let's go over to
here to the spanner, which is the modifiers. Let's add a modifier, and we will add a
generate modifier, and we will add
subdivision surface. You can see what that's done. It's actually taken that cube and turned it into a
very basic sphere. We could actually here we could go over to this Levels viewport, and we could just click that up and we could make it
an even nicer sphere. And what we could
do then is right click on the item
with it selected, and we could go to
Shade Auto smooth and we could smooth
out even more. So that is what the subdivision
surface modifier does is it takes all the edges and smooths them out
as much as possible. But we need to learn how to control that because obviously we need to figure
out how we can use that tool to model accurately
to what we want to build. So to do that, what we're actually going to
do is first of all, turn on this one on
cage. So select that. And then hit the tab
button on the keyboard. First of all, select the cube, then hit the tab button
on the keyboard, and you can see we've
got this mesh again. So how can we turn this into
rather than being a sphere, a cube, but with softened
edges, with rounded edges. So let's go here so
we can select edges. Let's select this
edge here and then press Control R. And that's put a set of extra
edges in a loop of edges on that cube or sphere,
as we can see it right now. Just press the
leftmost button once, and that's applied to our cube. And you can see straight
away what that's done by adding some extra
framework to it, it's restricted the amount of movement for the subdivision
surface modifier. It's put some extra
framework there, and the subdivision
surface modifier has to listen to that and adjust the way the curves
are being added. Let's actually just move
the mouse up and take that curve closer to the top
and then select that there. Let's select this edge
here, press Control R, and then hit the left
mouse button once, and then bring the mouse down. So that do it anywhere around about there and
left click again, move away from the
object and left click again to
deselect that item. And there you go. You
can see what we've done. So let's do that again. So
let's select this edge now. Press Control R, and let's add an extra ring of edges
there. So left click. And I'm going to move that
over there like that. There we go. And go
to select this edge. G to press Control R. Left click once, and then
move the mouse over. There we go. And I'm going to drop that just there like that. Cool. Let's hit the tab key
to go out of Edit mode. And you can see what's happened. So we have a cube now
with some softened edges. Let's go ahead and apply that. So hit that button there
and press the apply button. So we're going to apply the
subdivision surface modifier. There we go. So you can see
now how we can actually use the subdivision
surface modifier to our advantage to
soften all the edges, create new shapes, but still have some say on what
actually happens. So let's see what we
can do with Susan now using the subdivision
surface modifier. So first of all,
with this first one, you can see that this
is really faceted. It's really jagged
edged and quite crude. And this is what we
call low polyly. So if we go ahead and select
it and then hit the tab key, we can see what mesh has been
used to build this monkey. So let's go up here
to the vertices. Vertice selection
one, press that. And you can see the
verticesi that we have within the
monkeys quite basic. Low poly. But the more edges and the more vertices and
the more faces we have, the more complex the model gets. And the more complex
the model gets, the harder the computers got to work to be able to model it. And then also to render it
when we start plying textures. We have to keep that
in mind because as we build on our scene
or environment, if we make the mesh too complex, we're going to get
to a point where your computer or blender just
can't handle it anymore. It'll just get too complex. So we always have to keep the mesh as simple
as we can whilst also keeping the model itself looking as realistic
as possible. So it's a balancing
act between keeping the mesh low but also keeping
the model looking good. So what can we do?
Let's hit the tab key again to go out of Edit
mode back into object mode. Select Susan, right click
and shade auto smooth. Once you've done that, just come on down to this corner here, click on this expansion, and just adjust
this angle slider until you get the whole thing, the whole monkey
smoothed out nicely. So I think I will go About there like that,
about 85 degrees. So this angle slide
simply adjusts the tolerance of angles that
the auto smooth will affect. And there we go, I'll
leave it just there. The shade auto smooth does
not actually affect the mesh. We've not increased the
complexity of the mesh at all. It's purely Blenders
little visual trick. It's just lying to us a
little bit about the surface. It's visually improved it, but it's not increased the
complexity of the mesh. So that is a good way of
actually just improving our model without increasing
the complexity of the mesh. So let's apply the subdivision surface
modifier to this one. So I'll go there. We'll just
select on the item, so left, click on the monkey, go over to here, click
on the spanner. Add modifiers,
generate modifiers, subdivision surface modifiers, and we will keep that
at its absolute basic. So we'll just keep that at one. So we'll leave that like that. Actually, let's apply it. So let's apply that subdivision surface
modifier, and there we go. But then let's also add
the shade auto smooth. So you can see straightaway the improvement
between the models. So we have a standard model with just the shade auto smooth. Now, for this one, we've applied the most basic level of
subdivision surface modifier, and let's see what
can do with this one. So let's click on this one, and let's add modifier, generate subdivision
surface modifier, and let's click this to the top. There we go. And
then let's apply that So let's hold down the left button and pull a selection window over
all three monkeys. Let's hit the tab key to go into Edit mode. And there we go. It took a minute
because now we've got some differences
in the mesh. We've actually loaded
our computer up quite well now with
quite a lot of polies. So at this one. This
is the first one, which is the low poly version. You can see that our
mesh is really simple. Our vertices are as
minimal as possible. We're actually keeping
a reasonable shape. And we've applied
the auto smooth to that to improve the
looks of our model, but we've not increased the amount of vertices
or faces or edges. So here, we've applied the subdivision surface modifier at its most minimal level. And then we've applied
the auto smooth, and you can see straightaway how much nicer this one looks, but you can also
see that there is an increased amount of
vertices, faces, and edges. Here we've maxed out the
subdivision surface modifier, and it just appears
black. It's not black. It's just that it's so
dense with the vertices, edges and faces that
it appears black. But if we zoom in, there you go. That is a lot of vertices. So that's my point
that you cannot just just max everything out on
subdivision surface modifiers. It will eventually just crash your computer
or crash blender. Because if you think about this kitchen scene we're
going to build, we need to constantly consider the complexity of the mesh. So all the time, we have to consider the mesh that
we're building and the complexity of the mesh and keep the items looking
as good as possible, but at the same time, keep
the mesh as low as possible. So low poly, keep the
vertices as a minimal level, keep the faces and the edges, at the least we can do whilst keeping our actual
modeling looking good. So that is the subdivision
surface modifier. I'm gonna delete this
one straightaway and let my computer breathe. Thanks very much. And I'll
see you in the next lecture. Bye bye, Fino.
6. Lecture 5 Basic Modelling: Hello, and welcome
now to Lecture five. And let's have a
first go at modeling. Let's see if we can
model something together, something very basic. Let's see if we can
do a sort of a cabin, sort of pioneer cabin. Let's see what we
can do with that. So first of all, just click anywhere to remove
the splash screen, and we have the camera,
and we have the light. And let's go ahead
and delete those. So we just grab a selection box around the item by holding
down the left mouse button. Pull over selection, and
then just press X or delete. There we go. So now we
just have the cube. So you've got hopefully
this view up here. And if you haven't, press N on the keyboard to get
it. There we go. And then go ahead here
and click on item. So we want to look at this cube. Now, let's actually set the
proportions of this house. So I'm going to make
it in the Y axis. I'm going to make it 10 meters. I'm gonna press Enter, and there it is 10 meters. And then in the X
axis, the red line, I'm going to make it
half. It's Y axis. So I'm going to make
it five and Enter. And I'm going to make it in
height 3 meters and click a. So right now, the house
isn't at ground level. It's half and half. So let's press one on the
numb pad of your keyboard. Come over here to the tab and go to move selection.
There we go. And now just pull it up on the z axis until it's level
with the top like that. There we go. And there we go. We have as our basic size for
our log cabin. Okay, let's have a look here. So it is in the X axis, which is the red line,
it's 5 meters wide. In the Y axis, the green line, it's 10 meters wide. And in the height in the
Z axis, it's 3 meters. I'm happy with that. But
the scale is out now. So the scale should
still read one, one, and one since we
haven't scaled the item. We've just changed
the dimensions. So let's fix that. So if you hold down
Control and press A, you'll get this apply box up and come on down to rotation and
scale and click on that. Before I do want to explain. So the rotation, actually, when we look at it
is zero, zero, zero. So the rotation is correct. But I always just as a
standard thing to do, always click on rotation scale. In case there is an issue with the scale in the future of
different items we work with, it's instantly corrected too. So rotation and
scale, there we go. Alright, what to do now? Let's go ahead next and
put some height to this. So the first thing I'll do
is I'll tap into Edit mode. I'll hit tab on the keyboard. And right now you can see
we've got vertices selected. So I want edge selection. So I can come up here and I
can click on this like this. But I'm going to start using the keyboard for my shortcuts. So I'm simply going to
press two on the keyboard, and now we have edge selection. If I press one, we
get vert C selection, two for Ed selection, and three for face selection. You can see it
changing up there as I press one, two, and three. I want two, so I'll go there. I'm going to select
this edge here, but a hold shift so I can select more than one edge
and select this one. I'm now going to right click and I'm going to
press on subdivide. And that's simply divided
that face into two halves. It's divided these
edges into two, so it's divided the face into I can now select that
edge there in the middle. Come over here,
make sure and move, and just pull that up. And I can actually press one on the keyboard to see it from the exact orthographic view of the side and carry on pulling
that up in the Z axis. I kind of want my ridge
of my roof to be offset. So I'm going to pull
it over in the X axis now to get kind of
an offset ridge. There we go. And that's kind of our very basic
log cabin shape. The next thing I want
to do is actually grab a copy of this. So I'm actually going to
just grab this face here. So I'll press three
on the keyboard, grab this face, hold down
Shift and grab this one. And now I'm going to press I'm going to make a copy of this. So to do that, I'm
going to press Shift D. And now I'm going to press Z, and I'm going to pull that
copy up in the Z axis. And there it is moving
straight up in the Z axis. Now I want to take
that and separate it from the model of the walls. So while that's still selected,
I'm going to press P, and I'm going to separate by selection because we have
these items selected, so I'm going to press
separated by selection. There we go. I'm now going to hit
the tab button to tap out of Edit mode
back into object mode. And now we have two cubes. We have this one and this one, and you can see here
in the outliner, this one and this one. So let's go ahead and name that. So here, this is I'm going
to call this the walls. So I'm going to come up here
to this cube because that's the one that's selected here,
so it's selected there. And double click on it, and I'm going to call it the walls. There we go. Whoops.
Walls. That's got it. Now we're going to
collect this one here and I'm going to
double click on it, delete that and call it
the roof. There we go. Now the outliner
is ordered for us. We have the walls and the roof. There we go. Let's have
a look at the roof, and the scales all correct and the rotations collect,
so we're happy there. So let's go ahead and
give it some overhangs. So the first thing
I'm going to do is scale it in the Y axis. I'm going to press S. Now if
I scale just by doing that, it scales the whole roof.
And I don't want to do that. I'm going to press escape
to sup that command. Gonna press S again. And this time, I'm
just going to press Y. So it just scales in the Y axis to give it overhangs
on the side. That's cool. That's
what we want. Now I want to make it overhang
on the front and the back. A lot more on the
front, 'cause I want to create like a stoop
on this house. Let's tap into Edit mode with
that, so I'll select it. I'll hit the tab button. I'll press two so we can
go into edge selection, and I'll grab this edge here. Now, the Gizmo is not
lined up with the surface. So if I go ahead and
pull that in the X axis, it's changing the
angle of the roof, so it's not going to
match up with the walls. We don't want that,
so I'm just going to press escape to
cancel that command. And I'm going to
come up here now to this one transform,
transformation orientation. I'm going to hit the drop down, and I'm going to
click on normals. And now the gizmo lines up with the surfaces
of this roof. With that done, I'm
going to pull that out to create a stoop on the
front of our property. I'm going to do the
same, but this one now, pull that out to create a
little overhang on the back. And here on transformation, I'm going to go
back with Global so that now the gizmo lines
up again with the X, Y, and Z axis. Okay, let's actually know. Change the angle of the stoop where it
meets the roof point. So how do we do that?
If we do it now, it's going to change
that whole roof pitch, and we don't want that. So I'm gonna press escape. Gonna select this edge here. Go to hole shift and
select this one. I'm going to right
click and I'm going to sub I'm going to go ahead to the transformation
again and go to normals and go ahead
and pull that down. Whoops, grab this one on its own and pull that down until
it's level with the wall. Maybe change the angle to see where that is,
and that's good. So I'll grab this one here now. And I'm going to go back here to transformation to
Global and just go ahead and pull that up to change the angle
of the roof that. Okay, that's good.
That's what we want. Let's tap out of Oded mode, and the scale slightly out. So let's press Control A and apply the
rotation and scale. And now we're going to add our first modifier to this
roof or to this first thing. So let's go over here to
the spanner, add modifier. Generate, and we'll come down here to solidify
and click on that. And that's added a small amount
of thickness to our roof. I'm actually just going to hover over this until we get
this horizontal arrow and just drag this in the negative until we get a
bit of roof thickness. So I've got 0.13, and I'll make sure
that even thickness is applied. There we go. I'm happy with that. So I'm
going to go ahead up here, hit this drop down and
apply there we go. I'm going to press three on the numpad now to get us
an orthographic view. Actually, I'm going to press one to see this from
the opposite side. There we go. G to grab my roof, and I'm going to pull it down until it's making
contact with the walls. And there we go. That's looking good. So now let's go ahead and put some doors
and windows in this. So to do that, really, we need
to create some extra mesh. So that's our next step. Let's tap into Edi
mode with the walls. Let's select this edge here, hold down shift and
grab this edge. And now let's create
an extra edge there. So we can either subdivide, but in this case,
we're not going to. We're going to press Control R, and that gives us a
nice edge between them. And now we'll go ahead and
take that up like this. Let's actually view this in the orthographic view,
so I'll press one. I'll press three. And now let's
grab this edge again now. Hold shift and grab this one. And now let's press Control R. And I'm going to scroll the mouse wheel once to get an extra line
in there like that. And there we go. Let's
have a look at that. Let's grab this line here
and take this one down quite a ways like this.
Something like that. Let's grab this line
and take this down. And there we go. Maybe
let's take this one up a little bit.
Something like that. Let's grab the bottom
edge here of our house. And now let's press
Control R again. Take the cursor
closer. There we go. And now just bring that
over until it's on the corner here like this.
Let's do that again. I'll press Control
R and drag that over until we've got about a door's width,
something like that. And now let's do it
a little quicker. Let's press Control R. Bring the cursor close
so you see the loop. Before you left click, scroll the mousewheel
once to get two loops, and now left click and just position those
something like that. There we go. That's good. So now let's go ahead and create
our stoop on our property. Let's press three on the
keyboard so we can select faces. It's changed to
faces just there. Now, I could actually
just hole shift and move along selecting these. But it's not too bad. We've only got a few faces, but let's do this. Let me show you an easy way
of doing this for future. So I'll select that first edge. Now we'll hold down Control, go on to the last stage. I don't want to
select, grab that, and it'll select, obviously the first edge and
the last edge, but all the other
edges in between. Now I want to pull that out. But I can't just pull it out. If I do that, it's going
to do weird things because that face is still
connected to the other faces. Go to press escape so it
pops back to where it is. I need to extrude
it in that X axis. So I'll press E,
and now just bring that out to create the
stoop to our property. That's good. That's
what we want. Okay, now let's
look at our door. So I'm going to grab
this edge just here. I'm going to right click and I'm going to dissolve that edge, which means we're
going to delete it, but we're not going to delete
the structure around it. If I just go ahead and delete
that, we have a hole there. That's not what we
want. We don't want a hole. I wanted to keep that. So I'm gonna press Control
Z to go back one move. You didn't need to
do that, by the way. So I'm going to grab
that edge again. Gonna right click and
I'm going to dissolve that edge so that
we keep that face in I'm now going to press three so we can select
faces, grab that face. I'm going to press E and just take that back a
little bit like this. There we go. Now I need
to have a door frame. So to do that, I'm going
to press I to inset that face and just move my mouse a little bit till
I get something like that. And now I'm going to press
E and take that back. There we go. And now
I'm going to press I again to inset a second time. Take that in just a
tiny bit like that. And now I'm gonna
extrude it again, but this time back out. And there we go. Now we've
got a bit of a door detail. Okay, now let's
work on the window. So let's grab this
face like this and let's press E and just
take that back like this. And now let's press
I and inset this. And now let's press E
and just take that. And there we go. There's
our window in place. Okay, I think we just need some posts now on the front
edge, and I think we're done. So let's now, actually, just press Shift A. Let's introduce a mesh, and let's introduce a cube. There's our cube.
It's way too big, but let's bring it
forward on the X axis. And now let's hit S
and scale this down. Bring it up on the Z axis. And now let's press three on the numpad to get the
orthographic view. I'm sorry, let's
press one. And let's bring that out like this. I'm going to hold down shift, press the mouse button, the scroll button and sort
of move ourselves over, and maybe bring it forward. I think I'm happy with the
scale, so there we go. Okay, the next thing
I want to do is actually just take
that top face up. So I'm going to hit
the tab key so edit. I'm going to select
that top face and just go ahead and pull that up until it's in our roof. There we go. That's that.
And that looks good. Okay, the only thing we
want to do different maybe is just bevel these edges. But I want to just check
that the scales correct. I'm going to tap
out of edit mode, and the scales out in this case. So I'm going to press Control A and apply rotation and scale, and now the scales are correct. Gonna grab this item,
hit the tab key. G to press two on the keyboard and now
select these edges. So I'll hold shift
and select one, two, three, and of
course, number four, and I'll zoom in a little. And now with those selectors, I'm going to bevel those edges. So I could come over here
and actually click on Bevel. But I'm going to use a shortcut. I'm going to press Control B. And that little lines popped up there to say that
we're going to bevel. I'm just going to gently
just move the mouse now until we get
something like that. Now, it's more
hamford than bevels, so that's not
really what I want. So to get more of a bevel look, I'm going to move the mouse
wheel a couple of times. There we go. And
that's just added some extra edges to those bevels just to
add a bit more detail. Not going to do too many because we're adding more
complexity to the mesh, but that looks good
just like that. If you just left click once this little box comes up here, I'll click on this and here's the properties
of that bevel. So at this stage
now, if I wanted to, I could increase these segments, and you can see
there on the model you can see the complexity increasing in that bevel and actually just going to
put that back on three. And if I wanted to, I could change the width of the bevel, really make that a round post, or I can take that back Oops. Get there in a
minute. There we go. That's fine. And there we go. That's the bevel done.
I'll tap out of time by hitting the tab key,
and I'll look at that. And I can prove
that a little bit further by clicking on it, and then right click
and shade Auto smooth. And there we go. Okay,
let's press one. I'm sorry. Let's press three on the numpad. Grab this and take this over. Now, to the edge like this. And now let's press Shift D. And now let's move our copy
on the Y axis, so I'll hit Y, which now we can see that
extra line pop up to Y, and I'll bring that over, and I'll just guesstimate it. I'll use the grid
pattern that we can see to estimate
what I'm doing. There we go. So I've got
middle of this cube here, and I'll press Shift D and
Y and bring another copy over to let's say the
middle of this one. And I'll press Shift and Y and bring another one over
to the middle of this one. And shifty and Y and
bring another one over. And actually, I
think I'm going to just distribute these by ice. I'll pull this over like this. Grab this one and
pull this over. And this one until
we get something looking And there we go.
I'm happy with those. So we could now, if
we wanted to maybe just put a horizontal
rail in there. That's one last
little thing to do. So let's grab this one here, let's press Shift D, and we'll press Y, and we'll pull that one
out into the middle. Now, let's look
where the gizmo is. And the gizmo is right on
the bottom edge of this. So if I rotate it,
it will work for me, but it won't be the best. So what I can actually
do is right click and I can set the origin
to the geometry. And now the gizmo is recentered to the
middle of that object. And we can see where
the X axis is, and that's how I want to rotate. So now let's rotate it. So I'll hit R, and I'll press X because I want it
to rotate in the X axis. I'm just going to type nine
and zero and hit Enter. And it's a little long, so let's just scale it down and just the Y axis, the green. So I'll press S and Y and
just bring that down. And there we go. Let's press three so we can see that nicely. Let's grab this and press Shift D and Y and bring
a copy over like this and press Shift D and Y and bring a copy
over here like this. Let's increase the
scale on this one, so we'll press S and Y and just increase the
scale. There we go. There's our log cabin, and that's looking
absolutely fine. Okay, so now we
know how to model. Basically, we're nearly ready to start doing our main
project properly. In our next lecture,
we're just going to do some few more little
tweaks to blender, just setting it up
exactly how we want it, and then we're going
to start modeling. Okay, thanks very much. I'll see you in
the next lecture. Bye bye for now.
7. Lecture 6 Final Tweeks To Blender: Hello, and welcome
now to Lecture six. And in this lecture,
I just want to do a final few little tweaks to blender before we start
our main project. So let's go ahead and do this. So the first one I want to do is over here in the outliner. And you can see we have the items that we
have in our viewport, so we have the camera, the cube, and the point, the point
being a point light. And over here on the right, we have these little eyeballs. And these eyeballs are a way of hiding things in our scene. So let's go ahead and click on the eyeball on the cube here. And now the cube has been
hidden in our viewport. We have this little
camera icon, as well. And what that camera icon does is if I go ahead and click
that one now on our cube, the cube is still in our scene. But when we go ahead and
render out our scene, if that cube was
still in the scene, it wouldn't be seen
in our final render. So if you have things in
your scene that are just for maybe scaling or
proportioning your scene, but you don't want them to
be seen in the final render, you would go ahead and
turn off that camera. But there's one more
icon I want to bring into our outliner,
and it's right here. If I hit little filters tab here and click on this
arrow, and there we go. Now we have these arrows
here in our outliner, too. And these are lockers
for items in our scene. So for the cube, if I go in and hit that little arrow for that, now that I've done that,
I cannot select the cube. No matter how hard I
try, I cannot select it. And that's really
handy because let's see we've modeled all our
walls in our kitchen. And once we finish them
and they're looking great, we don't want to be
able to accidentally move them or change
them again after that. So by locking the walls or anything else that
we've done, we're safe. We know that we
can't accidentally move them later
on down the road. And it's also good maybe for our reference images so that once we scale them
and position them, we can't accidentally move
them because that could cause some issues while
using them as references. So that's our locker. Okay, so the next thing I want to bring in is some add ons for blender. So blender, as we know,
is already really good, but it can be made better. And it can be made better by bringing add
ons into blender. So it's almost
like tuning a car. You know, it comes
out the factory. It's good, but then you add all these other things,
and it gets even better. It's the same thing.
And there are literally thousands of
add ons for blender. And there's a handful that are
free that are really good. And there's two that I want
to bring in now to help us. So the first one, if we
go over here to edit and references and go to add ons
and then find node Wrangler. It's right there. And
once you find it, go ahead and hit that little
tick box, and there we go. Now, the node wngler add on has been added
to our blender. And what is the node
wrangler add on. We'll be using it quite a lot. It's one of those add ons which is just in the background. You never really know
you've got it much, but it speeds things up a lot. I'm not explaining
that very well. So when you're making
node texture maps, it's a way of speeding up the process of making
those node texture maps. It takes away a
lot of the sort of the unnecessary grunt work from it and just speeds up
the whole process. So you'll be seeing that in action about halfway
through the course. Really cool little add on. Almost everybody uses it. The other one I have here
is the Blender kit add on. Now, I don't think that
Blender kit is actually included in the standard
add ons on Blender. I have it here because I
downloaded it a long time ago. So I've turned it off to help you guys install this add on. So we'll go through the process
together. To be honest. I don't really
want to delete it. So I've just turned it
off for the moment. So you're not probably seeing this Blender kit add on
in this panel right here. So let's go ahead and get it. So I'll go ahead and drag
in my browser for a moment. And there we go. And this is the Blender kit website page. And here's the address
here at the top here, excuse me,
www.blenderkit.com. And what is Blender kit? Blender kit is a really
huge asset library that is dedicated to blender. It's been tailor made
to suit blender, and the assets in it
are made for Blender. And it imports effortlessly
and seamlessly into blender without any
sets or tweaks or scaling, you just simply dragon drop into the scene as you can
see them doing just here. It's super awesome.
So let's go over to the subscribe tab
here and click on this. And so we've got three
payment methods. Don't worry. We're going to
do the free one right here. And just to show
you how much there is just even in the free
version of Blender kit, 16,581 assets to import in. 22,500 materials and 2,413 HDRIs plus seams and brushes
and lots of other stuff. It's absolutely brilliant. This is the one here
that we'll be using. The other ones,
they have paid at $9 a month with 51,000 models, tons of stuff, but the free
one is one we'll be using. You can go ahead and register with this as well, if you wish. And once you've registered, then you can go ahead
and leave ratings for the models that you
import into your scene. I strongly suggest
you do it because these good folks are working hard to produce these
assets for us to use. So I think the least we can do is go ahead and
rate them for them. So yeah, let's go ahead
and download this. Go over to the top here to download Blender
ckit and click on this and then just go ahead and download Blender
kit. And there we go. Here's come into our scene. So now we can go ahead and maybe just close our
browser for a moment. And we can go back
up to this tab here. And we can come over to
this little tab here. Click on this and
click on Install from disc and then go
over to Downloads. And here's my Blender kit file. So, here it is in the Downloads. So I'd select this and go ahead and press Install From disc. I'm not going to do that
because I've already got Blender kit installed in
Blender, so I don't need to. But you can go ahead now and
press Install from disc. Okay, and I'll turn that off. Once you've done
that, then blend online asset Library will appear on this list and go ahead and put a
tick in the box. I see straightaway we have this extra tab at the top
of our user interface. All right, so now
that we've done that, now we have a nice easy way of importing items into our scene. So why don't we just
give that a quick go? So just click on this box
here and what shall we input? Let's import a chair. So I'll press just type
in hair and press Enter. Sometimes for some reason,
you need to do it twice, so I'll just click Enter again, and they come in nicely. And you can see we've literally got tons of chairs
to choose from. But a lot of them are locked, meaning that they're for the
paid for subscribed members. So go ahead to the filters here and just click
on free first. And then now it'll show us all the free ones before
it shows us the paid ones. You can see some of these assets are absolutely brilliant. Um, what can we? Let's have a look, see if
there's any we want at import? That's pretty cool. Let's
right click on this one, and let's have a look at it. It's only 5 megabytes, and it's rated at
eight out of ten. So we can input that one or how about this one? Let's
have a look at this one. I'll write click again, and it's 68 megabyte file, and it's got nine out of ten. So I think I'll have
a go with this one. So I'll simply hover over it, hold down the left mouse button, and drag it into the scene. And there we go. It's
coming, and there we go. That's cool. Let's go ahead and maybe delete our cube. I don't
think we need that. And maybe the next thing
we could do is just reposition the chair to the center of our scene
to the world origins. So we could go ahead
maybe and just select the cushion and then we could select the main sort
of plastic bit. And then we could
suggest the metal and this one, this one, And is that
everything, isn't it? Have we miss something, and maybe we did, maybe
we didn't an easier way. We can just use this here, this little cross hair. So, 99% of the time, when you import something
from blender kit, you'll get a little cross
hair with it as well. And this cross hair
is called an empty. And it's cold and empty
because it is empty. It doesn't really
contain any information. There's no vertices. There's no textures. There's no UV maps. There's nothing. There's
just three lines. That's it. So what's the
point of it if it's an empty? It's parented to our chair. And what parented means is
when we move this empty, the chair will follow. So if you like every
component of this chair, you can class as a child. And then this empty, you
can class as the parent, so that then when
you move the parent, the children will always follow. We call that parenting. The chair has been
parented to this empty. And also the same thing
if you scale the parent. I have S, I can scale the
chair down completely. So let's go ahead now and move this to the center of our scene. So I'll click on the Empty. I'll come over here
to the location. I'll hold down the
left mouse key and drag to all three
of those like that. I'll press zero and click
Enter. And there we go. Now we've brought the
chair to the world origin. Why don't we create a little
scene for this quickly? Why not? Let's render this out so we can see
what it looks like. So maybe next thing we can do
is we could press Shift A. We could go for mesh, and we could go for a plane. And we have a nice little
plane underneath it now so that we can get
some nice lighting, and maybe this plane should
come up at the back. So we'll go into edit mode
with the plane selected. Make sure your
edge selection on, select that edge there, press E and then Z and bring
the back up like this. There we go. That's
cool. And then if we want to go a step further, we could maybe just select
that edge again now. We can press Control B to bevel, and we could just apply a
slight slope to the back, scroll the mouse wheel
a couple of times to add some more sections to
that bevel, and there we go. We'll leave that light
there. Now, let's tap out of Ed mode with that. Maybe just apply a
shade or smooth to it, and let's find our light. So it's right here, and we could bring that light down and bring that
into our scene. Let's press seven
to see this from the top so we can see
where this light is, maybe bring this in
like this. There we go. That's good. Maybe bring
it up a little bit. And with that done, let's try now going into our rendered
mode in our viewport. So let's click on
this little button here. And there we go. So now we've got a fully
rendered chair all lit up. We have a nice little scene. You can see the
detail in this chair. It's actually really,
really impressive. So let's try just moving
this light in a little bit, maybe back a little bit. Maybe now we could try
selecting the light itself. If you go over here to the
properties tab, click on this. Maybe we could try
increasing the radius of the light to get a
slightly more ambient, larger light source, and we could try warming
the light up by just adding a little bit of tiny
bit of yellow to that light. There we go. That's cool. Maybe we just try
increasing the power a little bit. And there we go. So let's actually just try
now duplicating that light, so let's select the light, and we can press Shift D and X and bring a copy over to the
opposite side now like this. Maybe take this one back. To illuminate the back of the
chair a bit and maybe take this one forward to put some light on the
front. And there we go. We've got some nice
shading in our chair, and we've got a really nice, evenly distributed
light all around it. That's really cool. So we've imported
our first thing from blender kit and set
up a basic render. You see, blend it.
It's really not that difficult to do cool
things with it, is it? It's not too bad at
all. Anyway, I've actually just gone off track. I've gone off kilter a bit 'cause I didn't really
mean to do any of this. I just wanted to help
you set up blender kit. I didn't really mean to
set up a basic scene, but we've learned lots
while we've done it. We've sort of brought in assets, and we've had to
look at the quality and we've learned
how to move them, and we've set up lighting
and put a backdrop in. So we've learned lots of stuff. I just didn't mean for us to it in this lecture. I do that. I go off track sometimes,
excuse me, when I do. Okay, so we've done
that, and that's cool. So we don't really
need this anymore. We're kind of done
with this. If you wanted to go ahead
and save, you can. You can go over
here now to File, and you can click on Save As, and you can go ahead
and maybe select the file you want to save it
in and go ahead and save. I won't what I'm going to do is go ahead to file and click on New and click on General and Don't
Save. And there we go. We're back now with
an empty scene with just a camera in the
scene and nothing else. So the next thing
we need to do is go ahead and save our
new parameters. So I'll go over to
File, defaults, and save startup file and go ahead and
overwrite. There we go. So now, every time
we open a blender, we'll have the node wrangul, we'll have Blender kit. We'll have this
extra lock tab in our outliner and all
the other things that we set up at the start. Alright. That's everything
for this lecture. In the next lecture, let's start importing our
reference scenes, our reference photos, and
making a start on our kitchen. Alright, thanks very much. And I'll see you in the
next one. Bye bye, Fine.
8. Lecture 7 Reference Images: Hello, and welcome
now to Lecture seven. And in this lecture, let's go ahead and start our
project. I think it's time. We've kind of learned
all the basics that we need to get
started in Blender, and we've prep Blender so that it's got all the
facilities that we need. So let's make a start. So the
first thing that we need to do is bring in our reference
images and set those up. We need to scale
them and make them opaque and make them so that they can only
be seen from one side. And, of course, we need to make sure that they're
dimensionally correct. So we'll go ahead and do
that now in this lecture. Okay, so let's just tap anywhere to get rid
of the splash screen. And let's, I don't think we need the
camera in our outliner. Let's start with a clean slate. So I'll go ahead and select
the collection like this, and I'll press Delete
on my keyboard. And the camera's left. I'll
go ahead and just press Delete one more time.
And there we go. We've got nothing left
in Blender in this file. Now that I've done that, in
our scene collection here, I'm going to go ahead and hit the plus sign to
create a subfolder, and I'm going to
double click on this, and I'm going to call
this references. There we go. References. And then I'll make sure
that this is selected so that when we bring in
our reference images, they'll automatically be
dropped into this file. Alright, now that
we've done that, let's go ahead and bring in
our first reference image. So to do that, I'll
press Chef Day, and I'll go down to Image
and I'll go to a reference. This thing is going to come up here so we can select a file, and wherever you have
saved this file, go ahead and go to it. So for me, this is
UnimCure three, Kitchen, take two, and reference images. And which one shall
we bring in first? I think this is the most
important one of all our plans, the plan section elevation. Let's go ahead and bring
that one in first, that's brought it in, and
it's absolutely fine. But brought it on the wonk, but we know how to fix that. So we'll just go over to
rotation here and we'll hold down the left mouse button and drag toward three like this, and we'll go ahead
and delete those, and we'll just press
zero and enter. And there we go. Now
that is absolutely sitting on the X and Y
plane absolutely flat. So the next thing that Oh, now we can go ahead and name this currently it's
just called an empty. And we know what this
is called. This is called the plan section view. So let's go ahead,
double or click on it, and let's name this. So plan section elevation. There we go. And
that's good for me. Okay, so now that
we've done that, we need to make sure that
this is the correct size. So how do we do that? What we're going to
go ahead and do? I'll click on the reference here again to make sure that it
comes in in the right place. And we'll go ahead
and press Shift A, and we're gonna bring in a cube. Let's do that. Now, we need to be able to see
through this cube a bit. So let's press Z, and let's
go to wireframe mode. Next thing we need to
do is go ahead and make this cube the right size. So let's look at the dimensions
on our section plan, and we can see that the wall is 10 meters and 5 millimeters. Let's ignore the 5 millimeters, and let's just
call it 10 meters. And the wall in this
direction is 8 meters. So it's 10 meters wide
and 8 meters deep. That's the overall
size of our kitchen to the exterior sides of our walls. Okay, so let's look at
the dimensions here, and we want to start in the X. The X is 10 meters. Like I said, we'll ignore
that 5 millimeters. So let's click on the X here, and let's press delete. And let's go ahead and just
put in there ten and enter. And there we go. So now our cube in the X axis is 10 meters long. So now in the Y axis, we need to make it 8 meters. So here in the
dimensions on the tab, let's double click on
the Y and delete that. Let's make that eight
and just go ahead and press Enter. And there we go. So now the height
is still incorrect, but that's okay for a minute.
We won't worry about that. But we do have in the X, we have it at 10 meters, and in the Y, we
have it at 8 meters, and that's exactly what we want. So we need to make sure
that this cube now is in the same position
as our reference image. So let's press one on our numpad to go into
the orthographic view. And I'm just going to hold
down the shift and press the middle mouse button just
to reposition ourselves. And now I'm going to grab the Gizmo with the item selected,
with the cube selected, and then just go ahead and
bring that up manually until that's sitting
on our X axis. Let's zoom in and just check on that, and that's
looking fine. All right, let's
go to seven again. So I'll press seven
on our numpad and see this from the plan
view orthographically. And now let's go ahead and
select our reference image. And let's just press S
and go ahead and scale this There we go. I'll just move this
over using the Gizmo on the x axis to about the middle. I'll go ahead and press S again. Whoops too much, and just take a second now to scale
this upright. So for me, I'll
go ahead and move this down on the Y axis. And let's see how
that's looking. Maybe I'll scale it down just
a little bit and just bring that And just center that. And that's looking
good. I think that's sitting absolutely fine, now. I got a tiny discrepancy on this side about
it's millimeters. Let's see what it's
doing on this side. I think I'm happy with that. Okay, so that is our ground
floor section elevation lined up with our cube. So now that we know our plan is scale correctly. So that's good. So now that we
know that our cube and our plan are
exactly the same size. Okay, now we've done that, I want to be able and
just do a little bit more with this plan,
so I'll select it. And I'll come down over
here to data properties, and I'll select that. And I'll come on over
here to opacity, and I'll click on that one. And I'll go ahead and
bring the opacity down to about half. And that's going
to make our plan a little bit transparent, not completely transparent,
but a little bit. And there's one more
thing we can do, which is really quite helpful. At the moment, this plan is
visible from both sides. What I want is for
it to be seen from the face but not seen from
the rear. So we can do that. If we come over here
to the side on the empty and we go ahead and click front. Now,
let's just check. Let's go around the back
here and have a look, and there we go now. So that plan is visible from the front, but not
from the rear. That's quite handy, really.
That's quite a good thing. So now that we've
done that, we can go ahead and lock this one. So let's come over here to the outliner to our
plan section elevation, and let's just click
on this little arrow. And now we can't
accidentally grab this plan. Alright, so now that
we've done that, let's bring in another
reference image. So let's go ahead
and press Shift A. And let's go to image, and let's go to reference. And let's bring in what
should we bring in? Let's bring in the front
section elevation. Let's click on that and add
empty Image there we go. So again, let's go ahead
and flatten that out. So let's go over
to our rotation. Hold down the left mouse
button on the top one and drag down to all three.
Whoops. Try it again. There we go. And let's press the backspace to
delete them all. Let's press zero, and let's
tap Enter. And there we go. It's set that plan for us. Now that we've done that,
let's rotate this image. So let's press X to
rotate it in the X axis. And now let's press 90 to rotate it 90 degrees and then hit
Enter, and there we go. That we've done that,
let's press one on a num pad to see
that from the front. And now let's go ahead
and just pull that up until it's sitting
on the X axis. We may need to
adjust that again, but let's start like that. And now that we've done
that, let's press S and go ahead and scale that up. And then, again, now
just take a minute, pull the plan up
so it's sitting at the floor level level
with the X axis. And now let's go ahead
and pull that over. And at the moment,
that's a little bit, so we'll hit S and
scale it down. And let's pull that around. It's still a little bit big, so I'll hit S and
just scale that down. That's looking a bit better. I'll just reposition
that just a tiny bit. I think that's fine. With this plan now, we can
see the height of our house. I'm happy enough to go to the height of the internal
corner of the walls here where the wall meets the ceiling that's where I'm going to scale
the height from. So that means this cube, there's a reference
cube of ours. That needs to be
2.926 meters tall. So at the moment, it's 2 meters. So let's click on this
one, and I'll just go ahead and delete that
2 meters for a moment, and I'll make it 2.926, nine, two, six, and
just press Enter. And there we go. That cube
is to the right size now. Let's select that
cube again now and take that backup to the X axis. There we go. Is it
a little bit high? It's a little bit high. I'll
bring it back down again. There we go. That's perfect. Let's select the plan now and go ahead and take that
down back to the floor. And we can see
that's worked out. So I'm happy with our
section plan because the cube is the right size and the plan is
lining up with it. So that means that the plan is now to the right
scale as well. Okay, so let's go ahead
and set that one. So I'll just grab it and
I'll take it back in the Yaxs until it's
level with the corner, let's say of the other plan. And now let's look at the
object data properties. And let's go over to opacity, and let's turn that
down to about half. And then let's put on
this side thing here, let's put it on front. Let's just come around the
other side of the plan to make sure it is
transparent and it is. So you can see the benefit of that from being able to still see our main components
through the plans. That's really good
thing. Okay, so let's select this one,
and let's name it. So I'll double click
on this empty, and we'll call this
front section. There we go. And now
that I've done that, I can actually go
ahead and lock it. We don't need to
move that again. And also, now we don't need
to adjust our cube again, so let's definitely lock that. So let's rename this cube. So we'll call this the ref cube. And there we go, let's go ahead and
lock that too. There we go. Okay, so
let's go ahead now, and let's bring in another plan. So let's press Chef A, and let's bring in
another reference plan. So we've got the front section, and we've got the plan section. So let's go ahead
and let's bring in the front elevation. And one. Okay, straightaway,
let's go to rotation, hold down the left mouse
button and select all three, press zero and press Enter. And let's have a look at that. So now let's go ahead and rotate that 90 degrees on the X axis. So let's press R, X, nine, zero and press Enter. And there we go. Let's press one to see this from the front. That's one on the numpad. And let's press S
and scale this up. And we need to make this plan opaque so we can
see the cue behind. Let's come over to
object data properties, click on this and bring
this plan down now. Let's go ahead and hide the
front section elevation. Let's select this
again now and press scale and take this
over a little bit. Again, just take a
minute to level this up. And I'll take this
over a little bit. Let's check this with the other one. Okay, let's have a look. This is looking pretty
good now, I think. I think that's absolutely fine. So with this one, let's
go ahead and take this over now to the front
here like this. And I think in this case, I don't really want
to see this from O, do I? Yeah, I think that's fine. We'll leave that just
there like that. The opacity we've sent. So let's go ahead now
and make sure that it's seen from the front,
and there we go. That's fine. So now
that we've done that, let's actually name this one. And let's call this
the front elevation. There we go. And that's done. Let's go ahead and lock that
one and let's turn that one. Let's just hide that
one for a moment. Okay, so let's bring in what
should be the last one. Let's press Shift A. Let's bring in a
reference image. We've done front elevation. We've done front section. We've done plan section, so we've just got rear
elevation and left side. Let's click on left side and
bring that in. There we go. Let's go ahead and hold down the left mouse button and
drag through all three. Oops, I'll try that
in. There we go. I'll press zero and enter. Okay, let's have a
look at this one now. And let's rotate this. Let's press RX, 90, Enter. And now let's rotate
it on the Z axis. So let's press rz90, Enter. And let's press three
to be able to see this in the side elevation.
Let's take it up. And let's adjust the opacity
so we can see through. We can see our cube.
It's right there. So let's take this and
let's scale this up. And again, just kind
of move it around. Just take a little while to
scale this up accurately. Maybe a little bit
more. There we go. That's cool. Line that
up and take that up. So it's sitting on the X
axis, which is right there. Now, I have got a confession
here, I'm afraid. This dimension here on
the window is incorrect. We've got what's known
as a slipped dim, so this dimension has taken its reference
from way too low, so please ignore this one here. But it doesn't really
matter because if we've scaled the plan up correctly
now, which we know we have, we can literally use
this plan to find out the size of this window,
so we're fine with that. Okay, so now that
we've done that, let's go ahead and
take this one over. So we'll go ahead and
just drag it over in the axis to the side like this. And once we've done that,
let's go ahead and have a look at which side we need
to make opaque on this one. So I want to be able to
see it from this side, but not from this side. So let's just try seeing
which one we want. So that's incorrect. So
let's go to the front, and that's the way I want it. So I don't want to see
it from this side, but I want to be able to
see it from this side. Saying, Oh, we've done that,
let's go ahead and name this one. So I'll delete that. And I'll call this
left side elevation. There we go. And that's done. And let's go ahead and name Oh, let's go and lock
this one. I'm sorry. Okay, so we've got, I think, one more to bring in. So let's press Shift A. And let's bring in an
empty, an image. I'm sorry. And let's bring in reference. And we're looking
for rear elevation. Let's bring that in. Straight away, let's come
over to the rotation and select door three and just
press zero and Enter. All right, let's
rotate that one. So let's press RX
90, and click Enter. And let's press one to see that from the
orthographic view. And let's go ahead and
scale this one up as well. Until that works out. So again, just take
a sec to do this. Scale up a little bit more. Go ahead and take that up. Maybe bring it down tiny
bit. And that's good. I'm happy with that. So
now that we've done that, let's go ahead and
take that whoops. I'll just cancel that
move and go ahead and take that back in the
y axis like that. So with this one, as well, I want to be able to
see it from this side, but not this side. So let's go ahead and turn this off on the front
and see if that's right. Nope, that's wrong, so let's switch that. And there we go. Now I can see it from this side. Let's go ahead and
make this opaque. Take that to about half. And let's press one to
see if that's I'm sorry. Let's press Control one
to see it from this side. Make sure it's on
the floor and it is. So that one's absolutely
fine, as well. Let's name it. And we'll
call this rear elevation. And there we go. And let's go ahead and lock
that one, as well. So we can go ahead and hide
this rear elevation, I think. And I think we can hide
this left side one. The plan section one, I
think we'll leave that one. That's a really handy plan. And let's leave on
the front section. These are the two
for the moment, which I think are plans
will be using the most. Okay, so there's one
more thing I want to do, and let's go ahead and create
us our first major save. So let's go over to file. And let's go save us. Now, find the file that you
want to save your project in. Maybe you need to create one. So I'll go to mine it's Kitchen Take two
for me and Blender. So this is where I'm
going to save mine. So you DMCs Kitchen,
take two, Blender. But wherever you've created
your file to save into. And then I'm going to
go ahead and name it, and I'll just call
it Kitchen one. There we go. And I'll
go ahead and save ***. And there we go, we've saved our project, and that's okay. Okay, so I think that's a really good start to our course. We've got all our
plans in place, and they've all been scaled and they've all been set
up the way we want. Alright, so the next
in the next lecture, let's go ahead and
start making our walls. Alright. I'll see you in
that one. Bye bye for now.
9. Lecture 8 The Walls Part 1: H Hello, and welcome
now to Lecture eight. And in this lecture, let's go
ahead and build our walls. I want to show you sort
of my personal style of workflow for building walls to simplify the process and make it as quick as we can. So I want to kind of go
ahead and show you that. So what do we need and
why don't we need? I don't think we need our
reference cube at the moment, so let's go ahead and hide that. And I don't think
for a while, anyway, we need the rear section or
the front section elevation. So let's hide that. So now
we just have these two. And for a while, this
is the floor grid. And I don't think I want to see that it's a little distracting. So let's come over
here now to overlays. Let's click on this and go
ahead and turn off the floor. So we have very simplified plan. In fact, let's go
ahead and leave on the front section elevation. Let's leave that on. So we
have these two in like. Alright, so I think the next
thing I want to do is create a new subfolder for our walls. So let's do that. So let's
come up here to the top here where this
little plus icon is. Click on this. Let's
double click on it. And what shall we call this? Let's call this
walls and windows. And doors. There we go. That's cool. Let's make sure this is still selected so that when
we create new objects, I'll drop straight
into this folder. And let's press seven on a numpad to see this in
the orthographic view. Let's press Shift eight
and gown to mesh, and let's bring in a plane. Okay. So we don't really
want to scale this plane up. Let's go ahead and do
this properly because we know our walls are 10
meters by 8 meters. So let's enter those numbers in. So in the X, we know it's 10
meters, so let's do that. Ten and enter. And in the Y, we know it's 8 meters. So let's go ahead
and put 8 meters now in the Y axis.
And there we go. There's our walls or a plane,
which will be our walls, positioned perfectly,
and dimensionally, it's 100% correct. Let's go ahead and name that, so let's double click on it. And let's call this the
walls. And there we go. The walls will just
be one component, so we won't have any
extra ones for that. Okay, so now that
we've done that, the next thing we
can go ahead and do is tap into Edit mode on this. And let's make sure that
edges are selected. There's two ways of doing it. We can come up here and we can select either vertices,
edges or faces, or we can simply press two on our keyboard to select edges. Let's press seven on numpad to get the orthographic
view back again. Let's select this edge here, and let's press Control to
get a control loop in there. Let's without doing
anything else, just roll the mouse wheel once so that we
have two loops in. Now press the left mouse button twice so that we have
those loops in place. Let's scale those both
at the same time. So let's press S and X and
push the mouse upwards, and that will scale those
outwards for us and go ahead and line those up now with the interior
faces of our walls. Take a second to do
it, and there we go. That's perfect. Let's do
the same now with this one. Let's select this edge here. Let's press Controller, roll the mouse wheel once to
get two control loops in, click on the left button twice, and now press S and Y and
kind of pull the mouse left and scale those up until they're lining up with the internal
face of our walls, which is there like
that. That's cool. So now we need to put in
more control loops to mark out our windows and
doors. So let's do that. So let's select this edge again, and let's press Control R. Let's roll the mouse wheel twice
to get two lines in there. And this time,
let's go ahead and hold holt and select
this line on its own and move this up until it's on the edge of
our window, like that. Let's hold down Alt,
select this loop, and now bring this
one up as well until it's level with the
other side of our window. Let's select this edge here now, and let's press Control
to get another loop in. And let's roll the mouse
wheel twice to get to. And now let's go ahead and hold Alt and select
maybe just this one and bring this one down until it's level with
the edge of our door. I'm going to press down
the shift button and press the middle mouse button down and just move the whole
plan up a little bit. If I hold, I can select all those edges and
now I can bring that down to mark the other side of that little
door. There we go. That's cool. Let's do this one now for this big
bifolding door here. Let's press Control R. We'll put two control loops in by rolling the mouse wheel once
and deselect them. Let's hold on and select this one and move this one
over to the edge of this side. Whoops. There we
go. That's done. And let's do this
one. This one's pretty close already, but
we'll get a bit better. So I'll select this
one, and now go ahead and push this one
to the edge of here. I like that. There we go. That's really cool. Okay, so the next thing
we need to do is go ahead and extrude this up. So what we can do is press three on our keyboard so
we can select faces. And you can see
those dots up here, which just tell us in wireframe mode that we're
now in face selection. I'm going to select this
face here on the corner, and I'm going to
hold down Control, move to this side, and
select this one here. And what it does is
because I held control, it selects all faces in between
the two that I selected. So I'll hold control again
now and select this corner. I'll hold control and select this corner and one more
time to there like that. That's all the
faces that we need. So what I'll do now
is I'll press one on an MPad to get us the
orthographic view of the front. And now I'll press
E for Extrude and Z and bring us up in
the Z axis like this. And we know the height, what
this should be is 2926. And here on the transform
tabs on the side, in the Z axis,
it's slightly out. It's 28, 66. So let's double click on this, and we'll just select
just behind that three, and we'll start hitting
the back spaced delete. Until we've got the two and then the decimal point left
and then we'll go nine, two, six, and then press
enter, there we go. Our walls now are
exactly the right size. Let's go ahead and deselect
those for a minute. Let's pan round and
see how we're doing. And we're doing good,
we're doing good. So the next thing we need
to do is go ahead and mark the horizontal
lines of everything. So I think for now, we're
done with this section front, so let's go ahead and hide that. And let's bring in the front elevation.
There we go. That's cool. Okay, let's select this
interior corner here now, and let's press Control R, and let's put a loop in on this. And let's go ahead and
do the outside now. So we'll select this edge here, and we'll press Control R, and we'll go ahead and deselect to get
that loop in there. Let's select both these loops. I'll select this one. Hold Alt, and then select
this one like this. Come to the outside, hold Shift and Alt and
select this one like this. Okay, now that we've
done that, let's press one on numpad to see
this from the front. And let's go ahead and take
these two control loops now up until the
level with the top of our bifolding door and
there we go. That's cool. That's good. So we're pretty
much done with that now, but I think we'll leave
this plan in now, but I want to plan
the side elevation. So let's find this left side
elevation and turn that on. If we press three on our
numpad, we'll see that one. And we can see now that
that loop we've already put in is level with
the bifolding door on the front elevation
and also close enough to being level for our windows as well,
so that's good. So let's create another
set of control loops. So let's go ahead and zoom in a little bit in this corner. Okay, so let's select
this internal edge here, and let's press Control. And bring that loop in on
that face there like that. Let's do this same
on the outside now. Let's select this corner here, and let's press Control R, and deselect that one as well. Okay, so now let's
go ahead and press Alt and select that entire loop. And let's hold Shift and Alt and then click on this
internal loop, as well. So we've got both
loops selected. Now let's press three on numpad to see
this from the side. And let's take those
loops up till they're level with our little side door, which is there like
that. That's cool. Okay, so we're going to repeat that process one more time. So we're going to select
this internal corner again, and we're going to
press Control R, and we're just going to
deselect that one for a moment. Let's go to the outside,
select this corner, and we'll press Control R, and we'll just deselect
that one for a moment. Okay, now let's press
Alt and select this one, now hold Shift and Alt and select this
loop here like this. Let's press three on umpad
to see this from the side. And I'll just pan this over, so I'll hold down
the Shift button, press the middle mouse button, and push our screen over. And this is actually
pretty close already, but we'll just take
this up a little bit like this. And there we go. That just marks
the bottom side of our little windows.
And that's good. So let's go out of wireframe
mode back into solid mode, so I'll press, and I'll go back to solid mode. And that's cool. So we've got our walls in
place, and that's what we want. So for now, let's go
ahead and hide left side, and let's hide our
front elevation. And that's our
walls in position. So let's help out
of dd mode with it. And I just want to show you the view that I
normally model in. So let's come up up here now to this little drop down
here, the shading one. And let's select this mat cap. And now let's select
this little sphere, and we can choose a color
to work in this mat cap. So I choose this one normally. But you can try other things. Maybe you could try the
brown. That's okay. But for me, I work
in the reddish one, this one here, and I find
that the nicest way to model. But that's up to
you. You don't have to do this. You can
stay as you work. But this is my
personal preference, the color that I model. Okay, so that's cool. That's
our walls almost completed. So in the next lecture, what we'll do is we'll
go ahead and cut out for the windows and
then close those up nicely. But let's do a save before
we finish this lecture. So I kind of showed you
how to save normally, which is to hit File here and we could go save
as if we want to create a new save or just save if we want
to save over the top. But there's a shortcut.
Just press hold down Control and press
S. And there we go. Now Blender has just saved or just updated
our save on our project. Okay, so that's it
for this lecture. That was really easy, wasn't it? So in the next one, like I said, we'll go ahead and cut out
our windows and doors. Alright, thanks
very much. And I'll see you in the next
one. Bye bye for now.
10. Lecture 9 Walls Part 2: Hello, and welcome
to Lecture nine. And in this lecture, let's go ahead and finish our walls off. So I think the first
thing we need to do is get a sort of angle on our roof. Let's do that first. So I think what we need to do is bring
in a reference for our roof. So let's bring in front
section elevation drawing. And with the walls selected, let's go ahead and tap
into Edit mode with that. Let's go ahead and press three on our keyboard so
we can select faces. Select one face just there. Go over to select and come down to select similar
and go for Cplaner. Once we've done
that, let's press one so we can see
this from the front. And I'm just going
to hole shift and drag picture down a
little bit like this, holding the middle mouse
wheel at the same time. And now let's go ahead and
take that up in the Z axis. But I want also to extrude, so I'll press E and
go ahead and take that up beyond the height
of the roof like that. There we go. That's cool. I'll tap out of Edit
mode with that. And now let's go ahead and
bring in a plane for our roof. So make sure that Ws, excuse me, walls and windows
and doors is selected here. And let's press Shift A. And let's bring in a plane. There we go, and the
plane's right there. Let's double click on it, and let's call it the roof
click Enter, and there we go. And let's press one again so we can see it from the front. And let's go ahead and maybe
take this up like this. Let's go into wireframe mode for a moment so we can
see what we're doing. And now go ahead and just
take that up in the z axis until that's level with that
center point on that roof, just about there like that. That's cool. Okay, let's go
ahead and scale that up now, so I'll press S and just
scale that up like this. Okay, so now we're still on it. Let's maybe tap into Edit mode and press two on the keyboard
so we can select edges, grab that edge there and press Control R and put a loop
through the middle. That. Let's select
this edge now. Hold shift, and
select this edge. Let's press one on an pad to get the orthographic view
from the front again. And now let's go ahead and bring those two ones
we've selected, which is over here
and over here. Press let's just hover over
the Gizmo on the z axis and bring those down now until they're in the
correct position. So this is a perfect
situation where that GZ command or that
grab command comes in. So I'll press G and then
Z and carry on bringing those down until we
get that in position, and that's it there,
like that. That's cool. All right. Let's go back to
solid mode for a moment now. And the next thing I want to do is we can tap out of
Edit mode with that. And let's have a look
at the scale on this, and the scale is out. That scale wants to
read one, one, and one. So if you like, it's not calibrated anymore
because we've scaled it. And this is a new
thing we'll do. We'll do this quite
a lot, actually, but let's do it for
the first time. So with the roof selected, let's press Control A, and let's go ahead and
press rotation and scale. Now, in this case, you can see that just the scale is out, the rotation is fine. But just as I always just
go rotation and scale, for that one time when
the rotation is out, as well as the scale,
you might as well just press rotation
and scale and one go. So I'll click on that,
and there we go, we've recalibrated
that component. So the scale is correct on that. Let's have a look at our walls while we're
here doing this, and the scale is
out on that, too. So let's press Control A, and let's apply
rotation and scale. And incidentally,
sometimes when you use modifiers or use
the bevel modifier, if you're having
problems with it, the first thing to
always check is, is my scale correct? Do I need to reapply the scale? Always the first thing, dicho. Okay, so now that
we've done that, we can actually apply a
Boolean modifier to our walls. And what that will
do is actually cut our model at the point
where our roof intersects. So let's select the walls. Let's come over here to
properties, to the modifiers. Let's add modifier, go over to generate and come
down to Boolean. We're going to use
Boolean difference, which it's already on. So I'll grab this
little dropper, so I'll left click on this, bring this over and
select our roof, and there we go. But
there's a problem. You can see the
problem. It's actually cut the wrong half. So what we need to do is flip
the normals and our roof. So come on over
here to the top to overlay here and hit
this little drop down. Come down to face orientation
and turn that on. And what that's showing us is, the red side is showing us the negative side
to the normals. So what's normal?
What's going on? So almost Well, all surfaces
have a positive side, a negative side or normals. So if you picture it almost like a cereal box on the good face, you have that nice glossy face that's telling you buy
this cereal, it's great. And on the inside, you've got
that matte gray cardboard. So imagine this red represents the mat gray
side of the cardboard, and this side represents that nice glossy side,
which will look good. So when we apply textures
to these surfaces, the textures won't appear on
the red side of the normals. They'll only appear
on this side. So in this case, I want to flip the normals on this so that it cuts this off and
leaves our kitchen behind. So let's select our roof here. Let's tap into Edit mode. If we press A, we'll
select all of the roof. Now, there's two
ways of doing this. We can either go to mesh here and we can come down
to normals and we can press flip or we
can simply press Alt N and go ahead
and flip the normals. And now by doing that, we've
got exactly what we want. So let's tap out of
Edit mode with this. Let's select our walls, and let's go ahead and apply this bollon.
And there we go. That's cool. So let's go ahead and turn off our face
orientation for a moment. And now let's go ahead and hide our roof
for a little while. So we just come
back to our walls. Let's work on these for now. Okay, so the next
thing we need to do is actually cut out our
windows and doors. So we need some reference
images for doing this. So let's turn off our
front section elevation, and let's bring back our
front elevation for a while. Let's select our walls
and tap into Edit mode. And let's press one on our number pad to get us
in the orthographic view. And let's press three on our
keyboard to select faces. Let's select this face. I'll hold shift and select
this one and then this one. And these are the faces
that I want to delete. But I'm just going to rotate
around because I also want to delete those
faces on the inside too. So I'll select this one,
this one, and this one. Just check that's
the same, and it is. So I'll right click and I'll go ahead and
delete those faces. There we go. That's cool. So for a moment now, we don't
need this front elevation, so let's turn that off. And let's bring in the
left side elevation. Let's press three on a
numpad so we can see that. And now let's select
this panel and this panel and this
panel and this panel. And let's turn around
to the other side, and we can kind of figure
out which one those are. So it's this one and this one
and this one and this one. Is it this one? Let me
just check. No, it's not. And then the other window
on the opposite side is exactly the same location,
just parallel cross. So it's this one and this one, and then this one and this one. With all those selected, right click and go ahead
and delete those faces. And there we go. That's cool. So for a moment, let's go and turn off our reference images, so we've just got this. And now we need to sort of
fill everything and just close up all these
gaps. So let's do that. So now let's go ahead
on our keyboard and press one so we can
select vertices now. And I'll select
this vertice here. I'll hold Shift and
select this vertice here. And we need to kind of fill this gap with an edge
between these two. So let's just press F to do. There is a long way around that. I'm just going to you
don't need to follow me. I'll just press
Control Z just for a second to cancel that command. And I could do with those
two vertices selected, I can right click and I can use New edge or face from vertices. So it's just F to do that. So the shortcut for this command is so I'll just catch
up with you guys. I'll grab that one and
that one, and I'll press F, and there we go. So we also need to get
an edge across here. So let's do that. So I'll select this one and this one,
and I'll press F. And I'll do that here, too, grab this one and this one, and I'll press F there as well. And now I'm going to go
ahead and fill that. So I'll press two so I can select edges. I'll
grab that edge. I'll hold down Shift, and I'll select that one and
that one and then that one, and now I'll press
F again to fill. Okay, let's select
vertices again, so I'll press one so we
can get vertices up. I'll select that one
and then that one, and I'll press F. And now I'm going to go
ahead and press two, so I can select edges, and I'll grab all these edges. And I'll press F and fill those. Now, sometimes, if I just go ahead and select this edge
now, let's see if it'll do it. Blender is a little bit
funny with this coman. Sometimes it'll do a nice
little trick for us. Let's try. If I press F, it just shoots across and figures
out exactly what I want. Sometimes it works,
sometimes it doesn't. Let's press F again and
see if it'll carry on. And it did and F and
F. So Blender kind of anticipates what we
want there and does just that it carries on
filling that across. Like I say, sometimes it
works, sometimes it doesn't. So let's do this here now, so I'll press one so I
can select vertices. Hold shift, select
this one on this one. I'll press F, and
I'll fill that. I'll select this
one on this one, I'll press F, and
I'll fill that. Now I'll press two, so
I can select edges, and I'll hold shift and
select these edges, and I'll press F
and I'll fill that. I'll see if this will work. Just select this one,
and I'll press F, and there we go, blenders
filling that nicely. Okay, so let's do
the other side now. So let's press one so
we can select vertices. Select this one, Holt shift, and select this one,
press F and fill that. Let's select this
one and this one and press F and fill that. Let's press two, so I
can select edges now. Let's select this
edge, and let's try. Press F and fill it,
and there we go. It's working nicely. Press F and F and F. And
that's filled up nicely. Okay, now the last one. So let's press one so
we can select vertices. Select this one and this one, and press F and fill that. Grab this one and
this one and press F. And this one and this one and
press f. Let's press two, select this edge here,
and let's press F again. No, you see, this is
what I'm talking about. Sometime Blender
knows what you want. Other times, it
doesn't quite get it. So we'll just carry on.
I'll press this one here. Is kind of glad that it
did that just to show you that sometimes Blender
doesn't quite get it. So I'll select this
one and this one, and I'll press F and fill that. And now I'll press two
so I can select edges, select this one, hold shift,
and select these others. And press F. I'll
select this top edge, press F and F and
F, and there we go. So there we go, there's
our walls now complete. It really is that easy
and they look just fine. So why don't we just see if
we can apply a bevel to this. So make sure you're
in object mode. Make sure your scale is correct. Come over to add modifier
and generate and bevel. And there you can see a bevel has been applied to this edge. Let's maybe just turn
that one to a two, and see how that looks. And increase the segments. Zoom in a little bit on that. Let's see how that looks. And I think that'll be fine. So we've got three segments, and we've increased it to 0.22. Okay, I won't apply that
bevel modifier yet. I'll just leave that
there in the stack. And that's our walls completed. And I think they look just fine. So in the next lecture,
let's go ahead and finish off our roof and
make that look good. Alright, thanks very much. Oh. Hang on. Let's go ahead and do a save. So let's press Controls
and save our progress. I nearly forgot that.
Alright. Thanks very much. And I'll see you in the
next lecture. Bye bye, fo.
11. Lecture 10 The Roof: Hello, and welcome
now to Lecture ten. And in this lecture, let's go ahead and put a
roof on our house. Let's see if we
can do that next. Alright, so what
do we need to do? I think the first thing
we need to do is bring our roof back, so let's do that. And let's go ahead and bring our reference images
back, as well. And if you remember, we
flipped the normals on our roof so that we could
use it as a boolean cutter. So let's go ahead and
flip the normals back. So let's select this,
tap into Edit mode, and press A to select O, press Alt N, and flip the
normals back again. That's it. We can tap out of edit
mode for a moment on that. Okay, so what next? I don't think we need
this side elevation. So let's go ahead and turn
off this left side elevation. And let's bring in the
front section elevation. As far as the roof goes, I'm not overly worried
about the size of it because we never see the
exterior side of our kitchen. All our animation will
be done from the inside. So it's actually not a
detail that's seen too much. We just need it to fill the hole and look good from the inside. But having said that, this is
a little extreme right now, so let's do something with it. Let's tap into edit mode, and let's make sure
we can select edges, and let's select this
edge and this edge. Let's go ahead and
take those back to maybe that should be good. And let's do the same
on the back, of course, Let's grab this one
and then this one. And let's go ahead
and take that back as well until it's something like
that, that should be good. Okay, so I do want to
sort of take this up a little because this
is obviously going to be very visible
from the windows. But if we go ahead and
select the edge right now, it's kind of going
to give us problems because if we kind of
take it in on the X, it's going to adjust the angle. So we kind of need the Gizmo to follow the angle of the roof. So we can do that right here in this one in transformation
orientation. So click on this and
click on normals. And now the Gizmo is following
the angle of the roof. So with that set, let's
go and take that up now. Until that's about there. We can press one, and we can see this from
the side if we want, and we can kind of
get that right. Like I say, I'm not
overly worried, but I'll take it close to
about there like that. And let's do the same
on this side now. I'll press one again and go ahead and take this
into position as well. To like that. So that's a size of our roof. That's what we want. Okay, so let's go ahead and tap out
of Edit mode with this. And the next thing I want to do, I'll check the scale
and the scale's good. So I'm going to add
a modifier to this. So let's go add
modifiers and generate. And this time, we're going
to use a solidify modifier. Now, the solidify modifier
adds thickness to this. So at the moment, there's
a minimal thickness on it, but you can see it there. But it's going down and
I want it to go up, so I need it to run
in the negative. So I'm going to press one so I can see this from the
orthographic view. And I'm just going
to send this slider over until that's about right for the
thickness of our roof. Like I said, I'm
not overly worried. I might even go a little
bit thicker to about there. But that's fine like that, no. Now that we've done that, I'm actually going to go
ahead and make sure that even thickness is on and go ahead and apply
this modifier. And there we go, we've got
thickness in our roof. I think for this stage, I just want half a roof
because the next thing we want to do is put
our skylights in. And we want to make
sure that the skylights are the same on both sides. So the easiest way to
do that is just to do one side and then
mirror it to the other. So let's select the roof
and tap into Edit mode. Let's press three on the
keyboard so we can select faces. Let's select these
faces here, this one, this one, this one, and, of course, the
one on the inside. Once we've got all
those faces selected, let's right click and let's go ahead and delete those faces. Let's put the orientation
now back on Global. And let's press two so
we can select edges. And let's just go
ahead and fill this. Let's select this
one. I'm sorry, wrong one. Let's
select this one. In fact, we can just hold Alt and select the
whole thing like that, and we can press F and
go ahead and fill. And there we go.
That's good like that. Okay, so now what?
Let's go ahead and lose this at the back
here, this plan. We don't need that for a moment, so I'll turn off front
section elevation. And the next thing
I want to do is go ahead and put some
vertical loops in this. So let's select this
bottom edge here, you know, and let's
press Control, huh? And let's roll the mouse
wheel until we've got four loops just like
that. That's cool. Let's kind of position these. So I'll hold Alt, and I'll grab this one, hold Shift and Alt
and grab this one. And I'll keep this
distance we've got there. And I'll just go ahead and move that over a little
bit like this. Until it's kind of running level with the window, I
think that'll be nice. So I'll go ahead and do the
same with the other ones now, so I'll hold down Alt
and select this one, and I'll press Shift and
Alt and select this one. And I think I'll just send
this over just a little bit like this till it's kind of
level with that door there. And I think that's
now good like that. Okay, so the next thing
we want to do is bring in some loops in on the sort
of the horizontal on this. So let's go ahead and do that. So let's select this
edge here like this. And let's press Controller
and bring in a loop like this and maybe just bring it down
a little bit to about there. But before you click again, we want to sort of make
this loop so it's parallel with the top and the bottom face rather than being angular. So go over to flip and even and turn those
on, and there you go. That's. Let's repeat
that process. Let's select this one
and press Control R, bring that in and just slide that up to
something like that. Because even and
flipped is still on, that's already worked
out nicely for us. Okay, so let's press three
so we can select faces, grab this one on this one. Right click, and go ahead
and delete those faces. Let's grab this one on this one, right click and go ahead
and delete those faces. So now let's go ahead and do the sort of the fill
thing, which we do. So let's press one
so we can select vertices, grab this
one on this one, and press F, and grab this
one on this one, and press F. Let's press two now so we can select edges, grab these edges. And go ahead and press
F and fill that. Now we can select this edge and press F and fill that again. Let's do the same here, so I'll press one so I
can select vertices. Select this one and this one, and press F and fill there, and select this one on this one, and press F and fill it. Now I'll select two,
so I can select edges. I'll grab this one, this one, this one, and this one. And I'll press F,
and I'll fill that. I'll select here,
and I'll press F, and I'll go ahead and
fill that until it's all. Okay, so that's kind
of our roof done, but obviously we need a copy
on the other side here, so let's do that next. Let's tap out of edit
mode and check the scale, and the scales all good. And you can see this little
dot here on our roof, and that's called the origins. So where the center pivot point currently is for that component, and that's exactly
where we want it, it's sort of center and
the top edge of that. And I reckon if we had a
look at the cursor here, we press seven and look down, the cursor and the
origins are basically in the z axis in
exactly the same place. So this is going to make
this easier now to mirror. So let's go ahead
and mirror this. So what I'm going
to do is select it. And I'm going to press Shift D, and you can see that
it's gone white. So that tells us that
we have a copy living in the same place
as the original. Now I'm going to right click twice on the mouse, one, two. I'm going to go down to mirror, and I'm going to go ahead
mirror this in the X axis because we want to bring a
copy over in the X axis. And there we go.
There's our copy now on the opposite side. That's it. That's our roof. And it's a very airy roof,
that's what we want. We want this scene to be really
quite ambient with nice, natural, even light all around. Okay, so let's go ahead
and do a save on this. So let's press Control S. And I'll see you
in the next lecture. Bye bye for now.
12. Lecture 11 Bi Folding Doors Part 1: Hello, and welcome
now to Lecture 11. And in this lecture,
let's have a go at our bifolding doors on the frontier and the
largest of apertures. So yeah, let's
have a go at this. So I don't think we need our reference
images for a while, so let's go ahead
and hide those. And we have the timeline
here at the bottom, and it's going to be quite a few lectures till we need this. So go ahead and
click on View here and area and go ahead
and close area. We will bring that back later. Just gives us a tiny bit
more space in our view pod. Okay, so the first
thing we can do is let's go ahead and
bring in a plane. So let's press Shift A, and we'll go to mesh, and we'll go to a plane,
and there we go. Let's bring that
up a little bit, let's bring it out
on the Y axis. And now let's go ahead and
rotate it in the X axis. So let's press x90, and. Okay, let's press one on our numpad so we can see
this from the front. And so we can understand
what's going on. Let's go into wireframe, so I'll press S and then
I'll click on Wireframe. Okay, with the plane selected, let's tap into Edit
mode using the tab key. And let's press one on our
keyboard to get vertices up. Or again, you can go up here and let's select
these top vertices. And let's take those
up until they're just the very top edge of our aperture of
a hole in our wall. There we go, there like that. Let's check the bottom
and see where that is. That needs to come up a
little bit, so let's do that. Just bring that up a little bit to about there. That's good. And we'll just grab
these ones do, and we'll bring these ones over until they're level
as well to about there. And then the last two,
let's finish that off now. Take those over. To
there like that. And that's cool.
That's all we want. Okay, let's go
back to solid mode for a moment and see if
that's sort of right. And we'll tap out of edit mode. And we'll go ahead and just
put that in the aperture. I just check that's
looking about right. And yeah, that's looking fine. Okay, with this still selected, I think we can go ahead
and isolate it now. So if you hit the forward
slash key on your numpad, we can isolate that plane, obviously with that
plane selected, and there we go we've got
that plane on it, so. Let's have a look over
here. Rotation is out, so let's fix that. So let's select it. And
let's press Control A, and let's fix
rotation and scale. There we go. Alright,
so now what do we do? I think the next
thing we can do is go ahead and tap into
Edit mode with it. And let's press three, so we've got face selection on. And let's press one so we can see it nicely
from the front. Select this main face. And I'm going to use
a new command now. It's called the NSEtTol. So I'll go ahead and press I. And I'll just move the
mouse slightly towards the center to create this border going
all the way around. And this border will
represent our sort of frame for our bifolding door. So I think I'll
make it about that big. I think that
looks good to me. Now that I've done that, I'll press two so I can select edges, and we're going to
use control loops. So I'll select that one,
and I'll press Control, sort of move closer to the
edge so we can see it, and I'll rotate the mouse
wheel until I've got three, four, five faces. So Blender will automatically
divide that equally, so I don't have to work
anything out as long as I don't move
those control loops. So I'll go ahead and press
the left mouse button, and there we go and press
it again. And that's good. Okay, so the next
thing I want to do is sort of inset again now to create just a small gap
here going on each face, going all the way
around these to give the illusion of a gap
between doors and frames. So let's press three so we can select faces, and
we'll grab one, this one, holding shift, select all those faces. And I'll move in
a little bit so I can see in detail what
we're going to do, and I'll press I, and I'll
go ahead and create a gap, kind of like that. Incidentally, if you don't get individual frames in setting
to each of those panels. So if you don't get these
down the middle here, make sure you're an individual
here in your panel. Just make sure that individual is selected, then
it'll do it for you. And yeah, I think I'm happy with that.
That's just what I want. Okay, so now that
I've done that, I'll press one again. And I'm going to go ahead
and inset another time now, so I'll press I, and I'll go ahead and inset now
to create our frames. And that looks good to me about that like
that. That's cool. Alright. So now that
we've done that, I think we can go ahead
and extrude this out. So let's press A to select all. And let's press E and go
ahead and extrude this out. And we'll just take
you sort of guess at this, something like that. That looks good to me. I. Alright, so now, the next thing to
do is go ahead and extrude all of this in. So what I'm going to do
is select this face, this face, this face, this face, and this face. And I don't want to
extrude the outer frame. That needs to stay where it is. But we need to extrude everything
inside of that inwards. So I've selected
those, and now I want to expand on this selection. So rather than individually
selecting each bit, I'm going to go ahead
and press control. I'll hold down control,
and I'll press Plus. And that'll expand the
selection at once. And I'll press it again, and that expands the
selection a second time. And that's cool. Now, done that. Let's go ahead and press E and
go ahead and take that in. And we'll put that about
not much on this face, maybe about there like that. That's cool. That's what
I want. That's good. Now that I've done
that, I'll select these actual panels here, which will be the glass. Let's select those. And let's go ahead and take those back in. So I'll press E and go ahead
and take those in as well, to something like that. And now we're starting to
look a little bit more like a bifolded window or
bifolded door, sorry. So the next thing we
need to do is actually go ahead and take these bits in. And there's no easy
way to do this. We just need to select these. So I'll start selecting all these ones here
on the outer edge, and we'll be taking
these ones in to create a sort of a gap
between the doors. And it's that one there.
And this one here. And this one. And this
one, this one, this one. And just take your
time and sort of select all these
around the outer. Okay, so that's all of them. So let's go ahead
now and just sort of get close to it so we
can see what we're doing. And let's press E extrude, and let's go ahead
and extrude those in just to get a slight bit
of depth on the doors. And now we can sort of see what that's
going to look like. That's quite cool.
That's what I want. Okay, so now let's
go to this side now, and let's select these faces. So let's select
this one, this one, this one, this
one, and this one. Let's hit Control Plus and expand on those selections
till we've got all of those. And now let's go ahead and
take those in as well. So I'll press E, and take those in like this. Just to get a slight bit
of depth on the door. That's good to me. And I'll select this one, this one, this
one, and this one. I'm always holding
Shift when I'm selecting so that I can
select more than one object. And now I'll press E, and I'll go ahead and take
those in like this to get a little bit of
depth to the doors. Like that. That's cool. All right. So now
let's go ahead and create this little gap
between these again, so we need to
select these faces. This one, keep going. Okay, let's go to the
top and have a look. And this one, that one And
then we go that's all of them. So now that we've done
that, let's go ahead and press E and take those in to create a
little bit of depth on the inside of the door.
There we go. That's cool. Okay, so you can see that
really wasn't too bad at all. We've already got some
bifolding doors built. So in the next lecture, let's add some extra details to these. Okay, thanks very much. And I'll see you in the
next one. Bye bye for now.
13. Lecture 12 Bi Folding Doors Part 2: Hello, and welcome
now to Lecture 12. And in this lecture, let's add some extra details to
our bifolding doors. So we've gotten our bifolding
doors sort of modeled now. We've got the glass and
we've got the inner frames, then we've got the
exterior frame. So that's all in, and
that's looking good. But let's add some
seals to all of this so that it's details that
makes a good render. If you don't have
much going on in it, it's never very convincing. So we need things like seals
to make this actually pop. So let's put those in next. The first thing you need to do is make sure you're working on the interior face
of the door now. The exterior will never
actually be seen, so I'm not overly worried
about putting details on that. It's just the inside
that we need to look at. So we could actually just bring everything back for a second, just to confirm which is the inside and
which is the outside. So now that I know, I'm
going to go ahead and press the forward slash
key to isolate it again and go around
to this side. Okay, so let's tap into
Edit mode with this. And the first thing
we want to do is bring in like a glass seal, which will run between
the glass and the frame. So I'll show you a little
trick for doing that. Make sure you're
in edge selection and select these edges here. One, two, three, and four. And once you've got
those, go ahead and press shifty and Y and bring
a copy out like this. And with those still selected, go ahead and press P and separate by selection.
And there we go. If we hadn't done that,
blender would still recognize this little frame that we just extracted as part of
this bifolding door. So we need to do
that so that this is now a completely
separate component. So if we tap out
of edit mode for a moment now, if we select this, if it was still a part
of this bifolding door, when we selected
this in object mode, this would automatically
highlight as well. So we know now that
it's a separate item. Okay, now that we've
done that, let's go ahead and rename it. So let's go over
to the outliner, and you can see it's
highlighted here, so let's double click on it. And let's call this
the glass seals. There we go. That's cool. Once you've done that,
right click and go ahead and convert that to a
curve, and there we go. Make sure you're in
object data properties. What I'll do actually
is I'll just close these down so it looks
more like your screen. So select object
data properties. Select the item first and
select object data properties, and then hit this little
drop down the geometry one. Come down to this bevel section
here, and in the depth, go ahead and just click
this once to the right, and let's see what we've got. And that's cool. That's given us
some thickness snow to that curve, as you can see. So let's go ahead
now take that back. But as you can see, the
gizmo is way over here, nowhere near our
little glass seal. So how do we sort
of deal with that? The reason being is because the origins are
still part of this because it took its copy
from the bifolding door. So select it and right
click and go ahead and set the origin to the
geometry, and there we go. Now we're good to go. Let's go ahead and take this
back a little bit, so it's in position and
see if the scale is good, if the size of this is nice. Maybe you will make it
a little bit bigger. So I'll go over to
the bevel here. And I think I'm just
going to add a two behind the one and click Enter
and see how that looks. And that looks better, I think. So I'm going to go ahead
and press G and Y. Just take that in
a little bit more. So it's about half and half. And the next thing
I'm going to do is go ahead and right click and convert that now back to
a mesh, and that's cool. And now that we've done
that, we can go ahead and apply a shade ato smooth, and there we go. And
that's looking good. I'm pleased with that. Okay, let's press Control one to get the orthographic
view with that seal now. And let's press S and
let's go to wire frame. Let's select our little seal. And let's press Olds D and X and bring a copy over like this. Censor that as best as we can. There we go. That's cool. And once you've done that,
go ahead and press Shift R, and blender will repeat
that last command. That's cool. That's
what we want. So you notice I used
Alt D commands. I did a Shift decommand. And the reason I
did that is because when you use an Alt D command, whatever properties are
in the original seal, which is this one over here, I think, those
properties will then be shared with all
the duplicates. So if I scale the original up or if I apply
textures to this one, all the other ones will have the textures applied to them. And the same applies
to any of them. If I apply textures to this one, all the rest will have
the same textures. If I scale this one, all the rest will be scaled. So one, it speeds up the
process of rendering, actually applying textures
to surfaces, and two, it actually reduces file
size and speeds up renders, because it hasn't got to apply textures and shading to
each of these components, it can apply it to just one and then automatically be
done to the other. So in circumstances like this, we use the Alt D command instead of the
shift for copying. Okay, so let's carry on. So I'll press set, and let's
go back to solid view, and let's see how
that looks now. And yeah, so that's
looking good. We have our seals in position, and we can actually
just maybe take a second to try and
make that a bit better. So I'll press G&X on this one, and go ahead and just buffer that over a little
bit like that. Maybe a little bit more GNX. There we go. That's better.
And let's do this one, too. So I'll press G&X sort of centralize
that one a bit better. That one's okay. And this one, too, maybe we can centralize
this one a bit better, too. And that's cool. That's good. Okay, so we've got a nice
looking little seals between the glass
and the frame now. Okay, so the next thing
you want to do is put like a seal
between the doors. So a seal running vertically
between these doors here. So let's go ahead
and do that next. So let's press seven
on the numpad to see this in the orthographic
view from the top. And let's press seven, and
let's go into wireframe, and let's tap out of
added mode for a moment. And let's go ahead and
bring in cylinder, let's press Shift A and mesh, and let's bring in a
cylinder, and there we go. So we've got 32
vertices in this, and this is way
too much for this. So we'll make this
around 15, I think. Let's select the item, and let's press seven again and let's S
and scale it down. And now let's bring that
into the door like. And sort of position this
right here like this. Bring it back. Bring it in between the doors, which is this little bit here, and then go ahead and press S and scale this down like this. And maybe take it back a little bit and maybe scale
it up a little bit. And I just scale
it down in the X. I'll press S and X, and that's kind of the effect that I want something like that. So I'll go ahead and
press Control one now to see this from the front, and I'll go ahead and take this up a little
bit like this. And position this just there just at the
edge of the doors, and then tap into Eddy mode and press one so it can
select vertices, select all these top vertices, and then go ahead and
take that up like this. To the top like that. Let's go and have a look at the top and see
what that looks like. And there we go. That's cool. Let's tap out of
Add mode with that. And let's go back
into solid mode, and let's have a look
at that in place. See how that looks. Let's do a shade
Auto smooth on it. And I'd say that's good. No. That's looking good.
That's just giving a nice little detail
to everything. Okay, so let's press seven again to get into the
orthographic view. Let's press set and go
let's go wireframe. And now let's press Alt D and X and bring
a copy over like this. Let's position that
where we want it. Which is there like that. And let's do the same again. Now, let's press Alt D and X and bring a
copy over like this. Let's position that
one where we want it. And let's do that again. So press cult D and X and
bring a copy over like this and position this one
where we want it, as well. Is that the last one? That's
the last one. That's cool. Okay, so let's go back to solid mode for a moment now
and just see how that looks. And that seals looking good.
I'm pleased with that. Okay, so we're
gonna, like I said, we're not going to
put any seals on the outside of the window
because they'll never be seen. But I think the next
thing I want to do is go ahead and
maybe just put a seal between the
door and the frame. So let's see what we
can do with that. So let's go back to
wireframe for a while. And let's select our seal here. And let's maybe go seven so
we can see this from above. Now let's press Shift
D in this case, you probably need to scale it. So let's press Shift D and X and bring this
one over like this. Let's bring that now to
the edge of the door here. Put that in position like this and maybe just scale
it down a little bit. Maybe scale it down in the X, S and X, maybe bring
it up a little bit. There we go and scale
it a bit more in the X or S and X. And there we go. Let's have a look at that
and see how it looks. Let's press Control one, get us in the orthographic view. And let's go ahead and bring
this down a little bit. And now let's tap
into Eddy mode, and let's select our
vertices on the top here and go ahead and bring that back up to
the top like this. Okay, that's good. Let's tap out of
Edi mode with that, and let's press seven to
see that from the top. And now we can press Shift D and X and bring a copy over
now to the opposite side. P. That's cool. We're nearly there. Bring
that over here like this. And that's cool. Let's go
ahead now and press Control one to see this in the
orthographic view. And let's make
another copy of this. So let's press Chef D and X, bring a copy out like this. And now let's set the origin to the geometry to bring the origin to
the center of this. Now let's rotate
that and the Y axis. So let's just press, 90, Enter. Let's bring this up now, and let's put a seal
now across the top. Let's have a look
at where that is. Maybe just bring
that up a little bit more to about there like that. And that's good there. Let's
tap into Edy mode with it. And let's select these vertices
here and then bring those over until those are in the
right place on this side. Just sort of flushing up
to the other seal that we put in. There we
go. That's cool. Let's tap out dimode
with that now. And now let's go ahead and press Shift and Z and bring a
copy down to the bottom. Put that in position
now here like this. There we go. That's cool. Okay, so let's go back into solid mode now for a moment and let's have a look
at what we got here. Let's do a shade auto
smooth on some of this. Let's grab this one
and we could do a shade auto smooth on
that, grab this one, do a shade auto smooth, let's do the one
at the top here, grab this one, do a
shade auto smooth. Then that's what are these
like. These are done. They're fine, and there's just this one here
as well, I think. That one there. Do a
shade or smooth on that. Okay, so that's pretty
much our door done. I think the last thing
we need to do is just organize our outliner. So select the walls and
windows and doors just here. And let's hit our
little plus sign here to create a new subfolder. Let's double tap on it, and let's call this the bifolding There we go. That's cool. Now let's grab
absolutely everything here and just make sure we
have everything selected, and press M and then go down to walls and doors and then
select the bi folding door. And now all those
components have been put in our new subfolder,
the bifolding door. So we can actually collapse
that and there we go. So we could go ahead and
turn that off and turn it on just to check that
everything's in that folder. There we go. So that's
our bifolding doors done. So let's hit the forward
slash key to bring that back. Let's select the bifolding doors and select all items in there. So I'll hold down shift and come right down to
the bottom like that. And now let's go ahead
and take that in a little bit until we're
in position like that. Let's have a look at the
inside and see how that looks, see if we're happy.
And there we go. That's cool. That's our
bifolding doors, all finished. So let's go ahead and
do a save on that, now, so we'll hold down
Control and press S. And we've done a save. Okay. That's it. So
in the next lecture, let's have a go at our
little side door here. Okay, thanks very much. And I'll see you on the
next one. Bye bye for now.
14. Lecture 13 Side Door Part 1: Hello, and welcome
now to Lecture 13. And in this lecture,
let's go ahead and do our little side door here. Let's see what we can
do with this one. But there's one thing
I forgot to do with our bifolding doors
from our last lecture. So let's do that quick. And that is, we didn't
apply a bevel to the edges. And it's a really
important thing to do with three D modeling because
almost everything around you doesn't have. If you look around you now at tabletops and the corners of your monitors and everything, everything has a slight
round to an edge. Nothing has an absolutely 90
degree crisp, sharp edge. So if you don't put
a bevel on there, it really detracts
from the realism. So let's go ahead and do that. So let's select it, and let's check the scale on the rotation,
and it's all good. So let's hit the modifiers tab, add modifiers,
generate, and bevel. And there we go. It's applied
a nice bevel to that. Let's try increasing the
segments to maybe a three. And let's zoom out a bit and have a look at that and I
think I'm happy with that. I'm going to go ahead
and apply that. Now that we've done that,
I'll go ahead and do a shade auto smooth on that
as well, and there we go. That's now our bifolding
doors all finished. Cool. That's one thing done. Okay, so now let's
go ahead and have a look at our little side door. Let's see what we
can do with that. So I think the first
thing I'm gonna do is let's go into wire frame, and let's press three to
see this from the side. Let's press Shift A, and let's go ahead
and bring in a cube. Let's take this up a
little bit like this, and let's take it
into the doorway, which is just here, and let's
and scale this down now. Take this over to
the edge like this. And I think I'll tap
into Edit mode with that now. Let's have a look at this. Let's just press G and then Y and then take this over a
little bit to about there. Let's select these
vertices on this edge now, pull back a little bit so we
can see what we're doing. And I just take this over to
get a door frame thickness. And I'd say that's about
right for a door frame. So let's select
these top vertices now and pull these
up to the top. Pull those whoops, pull those all the way
up to the top like that. There we go. Let's select the
bottom vertices now, and take those down. And I think the next
thing we need to do is figure out where
that is in the room. So let's press seven on our lumpad to see
that from above, and let's go ahead and pull
that whole thing over. Maybe tap out of Eddy mode for a moment and now take
that over to our door like this. Put that in position. About there on the
internal edge of our wall. Okay, so let's go back into solid mode now and see
what that looks like. I think that's fine. So
let's go ahead and apply, well, let's fix the
scale on it first. So let's press Control A and
apply rotation and scale. Let's add that bevel
modifier to this. And let's maybe put two zeros to the right
of the decimal point. Press Enter and see
what that looks. And we'll increase the
segments to maybe a three and maybe just
increase that one, two, two, and enter. And I think I'll leave
that just like that. I'm going to go ahead
and apply that modifier. And let's press three to get back into the
orthographic view. And let's press h D and Y and bring this copy over now to the opposite
side like this. Let's pull that to
the edge like this. That's cool. Now let's
make another copy of that. So let's press Shift
D and Y and bring a copy into the middle.
And let's rotate that. So let's press 90, Enter. And let's take that up
to the top like this. And let's just take that
up a little bit zoom in so we can see what we're doing and take that up to about there. And let's just bring
that over now. I'll press G and Y and
bring this one over. Till it's just about on the
edge. Maybe one more time. I'll press G and Y,
and just put that. I'd say about there
like that. That's cool. Let's tap into Edit
mode with this note. And let's press wireframe. Let's go into
wireframe with that, select the vertices and go ahead and bring those back
into where they should be. And I just edge those up to
the other ones like this. There we go. That's cool.
That's what I want. Okay, so let's tap out
of Edit mode with that. And let's just select maybe this one and a whole shift
and select this one. And let's tap into
edit mode with those and select
those top vertices. I think this is maybe
something I need to do. Yours is probably fine, but I'm just going to take
mine up a little bit more. So I'll press G and Z and just tweak those up a little bit more till they're level
with the other ones, like that. There we
go. That's cool. Okay. So now that
we've done that, let's go ahead now
and go back to solid mode for a moment and have a look at our work
and see how it looks. And yeah, that frame's
just what I wanted. That's looking great. Okay, so now let's go ahead
and work on the door. And I think with our frame now, we've got all the
information we need. I don't think we need
the house for a second. So with the frame selected, I'm going to hit the
forward slash key on the number pad
to isolate that. And I'm going to press three, so we see it from the side. And let's bring in another item. So I'm gonna press Shift A, and I'm going to
bring in a cube. Let's hit S straightaway
and scale that down. And let's bring that over and bring that to the kind of edge
of our doorcase like this. Let's see where that is in
relation to our doorcase. I want a tiny little
gap between them, and actually, that works
just nicely as it is there, that little gap between them. Maybe let's go ahead for a set now and let's go into wireframe. Okay, so let's tap into
Edit mode with this. Let's grab these two
vertices here and let's have a look how wide
the side rails, the styles of our
door are going to be. And I'm going to put them
about there like that. That's about right to
me, just like that. And I'll select the top two, and I'll take those and put those about about
there like that, I'd say, again, a slight gap at the top is what
I want to see. And let's grab the
bottom ones now, and let's bring those down. And again, we'll leave an such ever so small gap
at the bottom, as well. Something like
that. That's cool. Let's press seven to
see where that is. And maybe we'll tap out of
edit mode for a moment. And now let's go ahead and just bring that over like this. And let's scale
that down in the X, we'll press S and X and
just bring that down. To about that thick.
That's like that. Now we'll bring it to so it's flush with the interior
face of the door frame. So bring it there like that. That's about right. Okay, so that's the one side
of our door done. So the next thing we do is let's tap into
Edit mode with it. And let's press two on our keyboard so we
can select edges. So let's select this
edge here like this now. And let's press Control. And now let's bring
a loop in like this. Let's roll the mouse wheel
until we've got three loops. Whoops. That's one too
many. There we go. Let's left click twice until we've sort of
set those items, but they're still highlighted. And now let's press S and
then Z to increase the scale. So we're increasing the
spacing, if you like, of those. And now just eye
up what you want the cross rails of
the door to be. And I think that looks
about right to me there. I'll zoom in a little bit, and I'm going to select
this loop here now. Once I've selected that loop, I'm going to press Control B, and I'm going to
go ahead and put a bevel in this one to
get an angle like that. There we go. Do I want to
make that slightly bigger? Think I'm going to press S and Z and go ahead and scale
that up a little bit more? To about that there like that. And that's cool. Okay, so let's go back to solid mode for a moment now, and let's have a look at this. And maybe let's tap out
of dime just for sec. And let's press three to
get us the side view again. And let's press Shift D and Y and bring a copy over now
to the other side like this. And take a sect
to position that. Have a nice sort of
gap down the side. That looks pretty good to me.
Let's leave it like that. Okay, so the next
thing we want to do is sort of bring some
sort of cross rails in. And because we've put these
construction loops in these, it's not going to be
too difficult at all. We're going to use the
bridge tool to do this. But I'm just going to show you what happens if I do this now. So I'm going to press three
so I can select faces. You don't need to
follow along for a sec. So if I select that
face like that, and I'm going to press
that face there like that. So I've selected
those two top ones. I'll right click and I'll
go ahead and bridge faces. And all it's done is
dissolve to those faces. So the bridge tool isn't
currently working. And it's not working
because these are currently two completely
separate components. So we need to make
them one component. So you can see here
in the outline, we have cube oh three and
cube 004, two separate items. So I'm just going to
press Control Z to delete or go back from
that last bridging move. And I'm going to tap out
of Edit mode for a moment. And I'm going to select
this one and then this one. And I'm going to
press Control J, and that's join them
now into one item. And that item now is cube 004. And now if we go
back into Edit mode, so I'll hit the tab key
to go into Edit mode, I still have those
faces selected, so I'll right click
and I'll bridge faces. And now it works just fine. So that's the easiest
way for us now to be able to join those
two faces together. And you'll see how easy it is now to finish off
making our door. I'll select this
one and this one, right click and bridge faces. And we'll do that
again. This one. I'll shift, select this one, right click and bridge faces. And there we go. So
that's our Dorcase. That's our door actually
pretty much made. So what we can do now, maybe, is we need to create some
panels to go in this. So I'll press three on a numpad to get us the
orthographic view again, and I'll press Shift A, and I'll bring in a cube. And let's bring that
over so it's sort of centered to this lower aperture
in this door like this. And let's hit S to
scale this down. And we'll scale this
down to ft like this. Let's maybe tap into Edit
mode with this one now, and let's go into wireframe. Maybe let's go into
vertice selection. We'll grab these
top vertices here, bring these up like this. Grab the lower vertices
and bring those down. And let's finish off. Grab these ones.
Take this over like this and grab these ones and
take this over like this. Okay, so let's press seven,
so we see where that is. And it's probably not near
the door. Here it is here. So let's tap out
of added mode for a moment and bring this
over to the door like this. And now let's go ahead and
scale that down in the X, so I'll press S&X and
bring that down like this. Centralize that in the
door, something like this. And maybe I'll scale it
down a little bit more, so I'll press S&X and bring
that there like that. Okay, so that's cool. So now that we've done
that, let's press three on a numpad again to get
that orthographic view. And this top opening here is identical to
the bottom opening. And I know that because we
just used the control loops, and then we scaled and we created a bevel
for this center one. So that means that everything
is set symmetrical. So let's go ahead and
just bring a copy up to the top using the Alt D command. So I'll press Alt D
and Z and bring a copy up so that now when we create a texture
for the bottom panel, we'll automatically have a
texture for the top panel. And we'll bring that in and
put that there like that. And that's cool. Let's go back to solid mode for a moment. And I think the next
thing we need to do is go ahead and create a
sub folder for this. So I'll click on the walls
and windows and doors, and I'll click on
the little plus side to create a subfolder. Let's find that folder,
and there it is there. So I'll double click on this.
And I'm going to call this the side door. There we go. And now what I'm going to do
is select everything here. And I'm going to press
M, and I'm going to go to walls and windows and
select the side door. And now that everything
that's within this door case and frame now
is in our side door group. So we can actually compress
our bifolding door group, and you can see how
simple our scene is. We just have a bifolding door, side door, roof,
roof one, and walls. And that's it. Okay, so I think that's it
for this lecture. Let's bring everything
back for a moment. Is there anything
else we want to do? Did we apply a bevel
to our door frame? I can't remember if
I'm honest. Did we? Didn't I don't think we did, so let's go ahead and do that. So let's select it. The scale is out, so
let's press Control A. And apply rotation and scale. Let's add the modifier,
generate and bevel, and let's increase the amount of zeros to the right of the
decimal point by two, and click Enter, and there we go straightaway
that's looking a lot better. We'll increase the
segments maybe to three, and that's it. I'll go ahead and apply that. And also, I'll do a shade
auto smooth on that frame. That's it. Now our
frame is complete. So let's do a save, actually, so I'll press Controls
and do a save on that. And in the next lecture, let's go ahead and make some hinges for our door to add a little bit
of realism to it. And we also need a
handle, as well. Okay, thanks very much. And I'll see you in
the next lecture. Bye bye, Fino.
15. Lecture 14 Side Door Part 2: Hello, and welcome
now to Lecture 14. And in this one, let's go ahead and finish off our
little side door here. Let's put some extra
details in it. But one thing I've
noticed with this, if I just click on the
door for a moment. I've used the auto smooth, but it's put like a sort of a rounded appearance
on the surface. And I don't like that, so
I'm just going to back off the angle tolerance
on the smooth here and just see where it sort of clicks
back to having a flat face. There it is. It's just clicked over there. Let's just try. I'll leave it just
there at about 16.7, and it's rounded
over that bevel, which is what we wanted. But it's also left the face of the door flat, so
that's much better. Okay, so now that we've
done that, let's go ahead and select the door
and the frame. And let's hit the
forward slash key and go ahead and isolate. Okay, so now what
are we going to do? I think the next thing we
want to do is we want to bring the cursor
over to the door. So I'm going to go ahead
and select the door, and I'm going to go
ahead and press shifts, and I'm going to say cursor to the selected,
and there we go. And by doing that now, when
we bring in our next item, which will be a cylinder, it'll drop the cylinder right
there on the door, rather than coming in at the world origin there
and us dragging it over, it's going to be pretty
much where we want it. Okay, so let's press Shift A, and let's bring in a cylinder. Let's make sure that is the vertices 32?
Is that too high? I think I'll leave
that where it is. I'll just leave that at
that and I'll hit S, and I'll start
scaling this down. I'll scale it down to
maybe something like that. And now I'll press Control three to get us the
orthographic view, and I'll press y90, Enter. I'll bring this over because I'm going to put the
handle on this side. And obviously, that's a
little too big at the moment. This is going to
be like the rose, which is the back
plate for the handle. So I'll hit S, and
I'll scale this in. Two, I get it maybe about
there in size, I'd say. I'll position this where I
think the handle should be, which is maybe is
that's too much? I'll bring that down.
And I think I'll bring that down to about there. I'd say that's about right. Now that I've done that,
let's have a look at this. And let's bring this
over on the X axis. Until it's just on the surface, let's go ahead and
tap into Edit mode, press three so we
can select faces. Grab this face here. Now
go ahead and take that in. So we've got this kind of
backing plate to our handle. And yeah, I think
I'm happy with that. Now I want to apply a
bevel to this edge, but I know if I go ahead
and apply a bevel, now it won't work because
the scales wrong. So let's tap out of
Edit mode for a moment. Look at the scale and the rotation and the scale is wrong. So let's press Control A. And let's apply the rotation
on the scale. There we go. Now we can tap back
into Edit mode, and we can press two
to select edges. And because we had that
face already selected, blenders automatically selected
that outer edge there. But that done, we can
go ahead and press Control B and go
ahead and bevel that. And I think that'll
be about enough. I'll roll the mouse. Weg to
get some extra edges in that, and I think that looks
good to me just like that. So I've got three segments, and there we go. That's cool. Okay, so I'll leave that
like that for a moment now. And the next I'm going to do is bring the cursor
over to this. So I'm going to press Shift S and cursor to the
selected, and there we go. So now the cursor is dead center to our
little plate here. So I'm going to bring
in another cylinder, so I'm going to press Chef A and cylinder. Let's
bring this in. This time, I'm going
to go ahead and bring the vertices down to maybe 22, I'd say. There we go. And I'll hit S, and
I'll scale it down. And I'll rotate that on the
y axis, so I'll press Y, 90, enter, and I'll hit S and carry on
scaling this down like this. Scale it down a little bit more, a tiny bit more to about
like that. That's cool. I'll go ahead and take this in now until it just about touches the other
surface. There we go. That's cool. I think I'll make
this a little bit longer, so I'll tap into Edit mode, press three, so I
can select faces, grab this one and
just bring it out a little bit more,
and there we go. That's what I want. Okay, so
now that we've done that, let's go ahead and
bring in or shall we? No, I think I'll
just copy that one. So with this one selected, I'll go ahead and
press Shift D and X and bring a copy out
from that one like this. We can go ahead and rotate
that now on the Z axis. So I'll press z90, Enter. And now we'll go ahead and
take that in a little. To about there, and we'll hit S, and we'll scale it up a tiny
bit to something like that. There we go. We can go
ahead and take that over on the y axis now a little
bit to about there. And let's tap into Edit mode with that,
select this face here. And let's press Control three
so we can get a sense of the size of this handle
now and maybe just pull this out to get our handle. And that's about it. I think that's about
right with this do. Maybe in a little bit, actually. And there we go. So now that we've done that, we can tap out of Ada
mode with that. And let's fix the scale on that. So I'll press Control A and
apply rotation and scale. And now let's go ahead and add modifier and generate and bevel. Let's add two zeros to the
right of our decimal point. And let's have a look at that. Maybe let's turn
that one into a two. And let's increase the
segments to three, I think, and that's fine.
I'll go ahead and apply that. Let's do a shade oro smooth
on that one, and there we go. That's good. We can go ahead and do a shade auto
smooth on this one as well, and that's got that sorted. But I want a little gap here between this one and this one to make it look a bit more realistic
because at the moment, it just looks like this one
vanishes into that plate. So let's do that next. Let's select this one and
tap into edit mode with it. Let's press three
so we can select faces, select this face, and I'll press eye
to inset now bring this inset into about
there like that. That I've done that,
I'll press E and X and go ahead and take that back
to get a recess there. I think that's going
to look a little more realistic with that
recess there like that. Could you go ahead and put
a bevel on there, actually. So I'll press two so we can
select edges on the keyboard. I'll hold down Alt and I'll select that edge
there to get all of that. And now I'll press Control B, and I'll put a slide
bevel on that edge, too. Something like that
looks about right to me, and I'll leave that on three segments. Okay,
so that's cool. That's done. Okay, let's
tap out of Edit mode, and let's go ahead and do a
shade auto smooth on that, and let's have a look at our handle and see
what we think. Am I happy with the scale? I think for a minute, I'm
going to bring back the rest of the room just to see. And yeah, I think
I am. I think I might take the whole
thing up a bit. Before I do that, I think I'm gonna join all of
these together. So I'm going to
select this one and this one and this one.
And I'll find it. It's in the side door file, and there they are
cylinder oh eight, oh nine, and oh ten. Were those selected? Let's press Control J and join
them into one. And that's it. Now
it's just one item. And let's go ahead and rename
this. Actually, why not? And we'll call this
the door handle. Whoops, so more like ap son. There we go. Okay, so now
let's have a look at that. Maybe just bring that
up a tiny bit, I think. I'll take it closer to
the edge of the door. Do I want to scale that down
a little bit or am I happy? I think I will leave it
at that size for now. And when I've got a lot
more modelling done, when I've got a lot more
cabinetry around it done, I'll get a sense if that
scale is good or bad. So for now, I'll leave it and maybe further down the road, I'll scale that down a bit. Okay, so let's Let's carry
on with the hinges now. I'll select the frame again. Door. And let's go ahead
and isolate those. I'll press the forward
slash key on the numpad. And what I'll do
now is I'll press Control three to get us
the orthographic view. And I'll go ahead and
bring something else in. So I'll press Shift A, and I'll bring in
another cylinder. This is definitely the lecture
for cylinders, isn't it? For the vertices, I'll bring this down quite
a bit, I think, to maybe a 16, and I'll press S,
and I'll go ahead and scale this down quite a lot. Let's slide this over
on the Y axis now and sort of put this on the edge. And let's have a look at this. Maybe we scale this down. To something like that, I'd say, it's about right. So now that we've
done that, let's go ahead and fix
the scale on that. So let's press Control A and
apply rotation and scale. Let's go ahead and
add a modifier to it and we'll add the
bevel modifier to it, and we'll go ahead and up the zeros to the right of
the decimal point by two. Clagena. And I will leave
that, I think, like that. Maybe increase the
segments to two, and I'll go ahead and apply. And let's go ahead and do a
shade oro smooth on that, and there we go. That's cool. Let's press Control three again to get us into that
orthographic view. Let's grab this, and let's go ahead and
take that up now like this to the top of the door and let's put
this one into position. So we'll sort of bring
it in like this. Maybe too big. I
think maybe it is. I'm going to hit S and scale
this down a little bit more, actually. Just
something like that. I think that's better. And
let's reposition this we scaled. And that's about right. So press Control three to get us that orthographic
view again. And I'll go ahead
and press Alt D and Z and bring us a copy down like this and put it just on the underside like this. Let's zoom in a little
bit and have a look. Put that just underneath that. Let's hold Shift and select both these items now
and press Alt D again, and press Z and take
these down like this and put that
underneath like that. There we go. That's
cool. Okay, so let's select all of these now. And with all four selected, let's go ahead and
press Control J to join those into
one. There we go. And we can go ahead
and name this. It's cylinder 11, and
I'll double click on it, and I'll call this the
henge. There we go. Let's press Control three again to get us the
orthographic view. Zoom out a little bit. And now let's go ahead and
press Alt D and Z and bring a second copy down to the
bottom of the door like this and put that that. Okay, let's hit the forward slash key and
bring everything back. And I think I'm happy
with those hinges. Those are looking good. I'm
not sure about the handle. The handle, I may reduce
the size on that, but I think, like
I said, for now, we'll leave it, get more
going on around it, then decide how it looks. Okay, so I think we'll
call this lecture done, and in the next lecture, we'll go ahead and start
our window, shall we? Actually, let's do a save. So let's press Control S, and let's do a save. Okay, thanks very much. And I'll see you in the next
lecture. Bye bye for now.
16. Lecture 15 Windows Part 1: Hello, and welcome now to
lecture What lecture we are? Lecture 15. And in this lecture, let's have a go at
starting our window. Um, this will probably take a couple of lectures
to get this done, but that's fine.
We're doing well. So I think the first thing we can do is go ahead and bring the cursor now back
to the world origin. That's probably the
best place for it. Instead of do that,
let's go ahead and press Shift S and cursor
to the world origin. Okay, let's press three so we
can see this from the side. And let's press Shift A, and let's bring in a plane. Let's bring that
up a little bit, and let's bring it over
on the Y a little bit. Now let's rotate
it on the y axis. Let's press Y, nine, zero, and. Let's bring in the middle
of the window like this. And let's go ahead and tap
into Edit mode with that. And let's go into wire
frame for a while. Let's press one so we
can select vertices. I'll select these ones here
on the top and we'll bring those until they just level with the edge of
the window opening, the hole in the
wall, if you like. Let's do the same
with the bottom ones now and bring those up. And the side here, let's do the same here. And the last one here. Let's bring that in as
well. And that's cool. Okay, let's tap
out of Edit mode, and let's go ahead and
hit the forward slash key to isolate that object,
and there we go. Let's go back to solid
mode for a while now. And let's fix the
rotation and scale. So let's press Control A and
apply rotation and scale. That didn't work.
Let's try that again. Control A, and apply
rotation scale, there we go. Let's tap into Edit mode
with that one, then. And let's press three
so we can select faces, select this face, and we'll press I to inset, and we'll go ahead
and inset this now to create a window frame. And I'll go, I'd say about
there looks about right to me. I'll press two so I
can select edges. I'll grab that edge there, and I'll press Controller, and I'll put one loop in
the middle like Okay, so I'll select
this one here now, and I'll select maybe
this edge as well, and then this edge, as well. And I'll go ahead and press Control B and go ahead and put a bevel on that edge to create a center in
our window frame. And I'd say that's about right
about there. There we go. Okay, I'll press three,
so we can select everything again now,
and I'll press A, and I'll go ahead and
go ahead and press E and X and go ahead and stru this out to get some thickness snow
to our window. And I'd say, that's about right. Okay, now let's
select these faces, this one, this one, this one, and this one, and we can
go ahead and press X, and we can delete those faces. Go. Let's press one so
we can select vertices. And let's go ahead and
select these vertices here, this one, and this one,
and press F and fill. Do the same again here,
press F and fill. And let's do the
top one as well. And fill, and one more here. And go ahead and
press F to fill. Let's press two now so
we can select edges, select these edges,
this one, this one, and this one, and let's
press F again to fill. Now let's select this edge here, and we'll press F, and blender does this
little magic trick. There we go. That's
all closed in there. So now we need to repeat
that process on this side. So let's go back to
vertices selection, select this one and
this one and press F to fill, and this one on this one, press F. Press F. And
the last one is here. And we'll press F
on that as well. Let's press two so we can select edges and then grab these edges. And let's go ahead and
press F and fill that. We'll select this
edge again now, and we go ahead and press F to fill and close in that gap. There we go. That's cool. So now we need to create
an extra loop on these, so let's do that next. So let's press two so
we can select edges, select this edge here, more press Control R.
Bring the cursor closer, and then just let that
drop maybe in the middle. And now select this one
and press Control R, and just put a loop in
there as well like that. Okay. That's cool. So now we need to sort of bring these new faces
down a little bit. And I want to show you some
tricks with extruding now. So let's press three so
we can select faces. Now, you don't need to
follow along for a second. I'm going to make a
deliberate mistake. If I select these two
bottom faces now, and I press E for Extrude and then Z and
then bring that down, it's extruded that
down as we want. But it's left this face here, this extra face, and
we don't want that. So I'm going to show you
a trick to avoid that. I'm going to press
Control Z just to undo that last command. With those faces still selected, I'm going to go ahead
and press Alt E, and that's going to bring
us up a menu for truding. So we're going to
go for manifold. Click on this, now
bring those down, and now we haven't got
those extra faces. There we go. That's cool. That's
what we want. So, let's go ahead
and repeat that now. Let's grab maybe this face here and hole shift and
select this face here. We'll press Alt E.
We'll go for manifold, and now take that
over like that. There we go. That's cool. Let's repeat that
again. So we'll grab this one here and hold shift
and select this one here, and we'll press Alt E and
manifold and go ahead and take that over as well
to create a step there too. We just got the top to do now. So this face here, hold
shift, and select this one, press Alt E and extrude manifold and take
these up now like this. There we go. That's
cool. So now we've got this extra sort of step
in our window frame. So I think I'll go ahead
and remove some of the extra edges here. So I'll press two and select this one and this
one and this one. I'll right click and
I'll go ahead and dissolve those
edges. There we go. And I'll go ahead and do
the same here, this one, this one, and this one, right click and dissolve those edges. And let's do the
same on the face as well. And one more here. Right click and go ahead
and dissolve those edges. Okay, so I think I don't
want the frames to be on this face here
completely square. So I'm going to do it put
a little angle on this. So I'm going to select maybe this edge here and
this edge here. And I'm going to press Control three to get us the
orthographic view. And I'm going to
go ahead and just drag those edges up a
little bit like this. Just to get a slight
angle on that. I'm going to do the
same on this one now. We're just going to do
this by eye, really. And we'll bring those
ones down as well. A little bit like that. Let's have a look
at both of them. And yeah, that
looks about right. And we'll select this
one now and this one. And let's press
Control three again. And let's bring those
ones over as well. We'll do the last ones here. So this one here, hold
shifts like this one here. I'll press Control three again, and I'll bring those
ones over as well, just to create that angle there, just to create a little
bit extra features and a little bit extra dimensions
to our window frame. So that's our window
frame actually made. So now we need to make
the window casements. So, how are we going to do this? Let's press Control three to get us into the
orthographic view. I'm sorry, let's
just press three. I'll hit the tab key, and I'll press Shift A, and I'll bring in a plane. Let's bring this up, and let's
rotate that on the Y axis. I'll press Y, nine, zero, enter, and let's bring that over to the middle of
our first one like this. Let's tap into Edit
mode with that. Press one so we
can select edges, and let's go ahead
and make this fit. Bring that down to there. Maybe let's go into wire frame. And let's take that up because we want it to go to
that point there. And let's do the bottom one now. And we'll take that
up to that sort of middle line or that line
that's one third over. We'll take that to
there. There we go. And let's grab this
one and do the same. Take it to that line
there, like that. And let's do the last one here. Take that back and put
that there like that. There we go. That's cool.
That's what I want. Okay, let's go back to solid
mode for a moment now. Let's press three and numpad to go into the
orthographic view. And let's go ahead
and press I and let's inset this now to get
a casement frame. And I think I'll
go for about how about that thickness
there like that. That's cool. Once we got that, let's press A to select. And let's go ahead and
extrude that in the X axis. So let's press E and X and go ahead and extrude
that to something like that. Let's press seven to
see this from above, and let's go into wireframe for a while and see what we got, and let's go ahead and
take that to our sort of edge of our sort of
second edge on a frame. Okay, let's press one. And let's grab these ones and then bring this over a
little bit more, just doing some tidying up. And let's do the
same here as well. Let's grab these
ones and take that over a little bit like
that. That's cool. That's what we want. Let's
go back to solid mode, and let's press three
so we can select faces. I'll grab this one
and I'll press E and just take that in
just a little bit, and then I'll grab this
one, and I'll press E, and we'll take this one in a little bit as well like that. And that's looking good to me. That's what I want. Okay, so what else do we want
to do with this? Let's have a look at the
scale and the rotations out. So let's press Control A, and let's apply
rotation and scale. And let's go ahead and tap
back into Eddy mode with it, and let's press two so
we can select edges. Let's hold down Alt and
select this edge here. And let's press Control B. And let's see if we can
put a bevel on that edge, a small one, something
like like that. Maybe increase our
segments to three. Let's have a look
at this upclose. And yeah, that's fine.
That's what I want. Okay, so that's our frame done. Is there anything
else we want to do? Of course, we need to bring this one over to the other side. So I'll press seven again, and let's go back into Y
frame with this one selected. And let's go ahead
and press Alt D and Y and bring over one to this opposite side and sort of position
this manually. And that's looking good.
Yeah, that's looking great. Okay, let's go back to
solid mode for a moment. And what else do we want to do? So let's go ahead and put
a bevel on the frame. So let's select the
frame like this. Let's check the scale. It's all good. So let's add the modifier,
generate, and bevel. Let's have a look at that.
Let's zoom in a little bit. Let's add two zeros
to the right to the decimal point.
Look on Enter. And I think I want a
little bit more than that, so I'm going to turn that one into a three and click Enter. And see how that looks,
and I think I like that. Let's increase the
segments to three. And yeah, I'll go ahead
and apply that. I'm happy. Let's do a shade oro smooth
on it, and there we go. There's a frame. It's
put this sort of weird, sort of streaky angle in that. So let's go ahead and
change the angle on this. And I think at around 15
that should sort that out. There we go. So yeah, around
15. That was a good guess. Okay, so that's
looking good now, and that's our frame complete. So let's just organize
our outliner now. So let's go ahead and create a new folder inside
our Windows and door folder. So with this selected. Let's hit the little plus sign here. And let's double click on this one here, windows
and doors three. And let's call that the small window or Windows. There we go. Let's select the three
components that we have. Let's press M, and
let's go to windows and doors and small
windows, and there we go. So we can compress
that file now, and we're keeping this really nice and neat. I'm liking that. All right, so the next thing
we want to do is bring back the rest of the house
because I don't think this window is in the
right position yet. So let's bring back the house. So I'll hit the forward
slash key on the numpad. And let's hide the roof. And let's press seven
to see this from above. Let's go into wireframe for
a moment, grab our window, deselect the house,
and bring that over until it's kind of flush with the exterior
side of the house. There we go. That's it. Let's go back to solid mode. And see how that looks.
And that's looking good. I'm not sure if the normals are right on that. Let's
have a quick check. So I'll come over
here to overlays, and we'll put on
face orientation, and know they're not now. So we'll select these items, not the walls, just the
frame and the cases. And let's tap into
Edit mode with them. Let's press A to select all. And let's press Alt N, and let's flip the
normals on those. Let's tap out of
Edit mode with that. I think this one here
still is incorrect. Let's make sure that
Face orientation is on. And that's done. That's all done. We're happy with that now. Okay, I'll turn Face
orientation off, and that's correct,
now. That's cool. Okay, so let's do a save, so let's press Controls. In the next lecture,
let's go ahead and put some details on
this window now. So let's put a
sell board here on the internal bottom
side of the wall here and let's have
a look at putting some handles on a
window as well, and maybe some seals between
the window and the glass. Okay, thanks very much. I'll see you in
the next lecture. Bye bye, Fino.
17. Lecture 16 Windows Part 2: Hello, and welcome
now to Lecture 16. And in this lecture,
let's see if we can finish off our
window by putting some more details on
it because it's kind of details that make
things pop in rendering. So let's see what we can do.
So I think, first of all, we need some handles on
our window casements. So let's kind of
start with that. So let's isolate our window. I don't think we need to see the walls and
everything right now. So let's select the frame and the casements and let's hit the forward slash
key on the numpad. Let's press Control three to see this from
an orthographic. Okay, so now, let's go
ahead and press Shift A, and let's bring in
well, actually, first of all, in our
outline and let's select small window subfile. Now let's do that again.
Let's press Shift A, and let's bring
in a cube so that that cube drops nicely
into the correct file. All right, let's press
S and scale that down. And let's bring that over. And let's work the
left casement. So let's bring
that in like that. Let's hit S and scale it
down a little bit more too. About that, I would
say is what I want. I'm going to go ahead and
scale it up now in the Z. Help press S and Z and
go and scale that too. I would say, I'd say that's about nice.
That's about what I want. I'll move it up a
tiny bit like that. And let's see what that
looks like from the side. Let's bring that out
on the X elevation. And let's scale it down slightly on the X.
I'll press S&X. Just brewing it down to
something like that. Now let's go ahead
and take that back again until it's just
about touching our window. And I'll scale it down
a tiny bit more again. So I'll press S&X. And I would say that's about it. And I'll take that back till it's touching the other surface. There we go. That's cool.
Something like that. Okay, so let's go ahead now
and duplicate that object, so we'll select it. And let's press Shift D and press X and bring it
out on the X elevation. And let's take you back now. So it's just about making
contact with the other one. And now let's tap into
Edit mode with that one. Make sure you got
face selection on. Set this main face
on the frontier, and let's bring that
one out like this. Two, I would say about
there like that. That's probably about right. Let's select edges now, so let's press two on our keyboards, select
this edge here. Let's press Control R
and bring a loop in and bring that to About there
like that, I'd say. Let's press three now
so we can select faces, grab this face here, and press E and bring that
down on the Z axis like this. So about there. Let's
have a look at that. Maybe take that up a little bit. And let's see. I think I'm happy with that. I
think I'm good with that. Okay, let's tap out a
edit mode for a moment, and let's look at the scale and the scales out on that one. So let's press Control A, and apply rotation and scale. And let's do the
same with this one, Control A, and apply
rotation and scale. Let's select both items now, and let's press Control J
and join them into one. Okay, now what shall we do? Let's go back into
Edit mode with it. And let's select just
this bottom edge here, and let's bring that
out a little bit, so we get a slight
angle on this. And now let's go ahead and
maybe take this edge up, so I'll press two,
select this edge, and may bring this up a
little bit to about there. And now I'm going to select
this edge and this edge, and I'm going to
press Control B, and I'm going to
bevel that like this. And vertice wise, five segments. I think I'll leave that alone. I think I'll leave
that just like that. Okay, let's do the
same on the top now. Let's select this edge, this edge, and this edge. And this one, this
one, and this one, and let's press Control
B and bevel these edges, too, to get something like that. That's cool. And yeah, I
think we're good with that. I'm going to leave
that like that. So let's tap out of
Edit mode with it. And let's go ahead and add
a bevel modifier to it. So just hit the Luddle spanner, add modifier,
generate and bevel. Okay, of course, that's
way too much of a bevel. So let's start with two zeros to the right
of the decimal point. And let's see what
that looks like, and that's looking
pretty good overall. I think what I do
want to do is I'm going to go ahead and tap
into Edit mode with it. And I'm going to
select some faces. I'm going to press three. So I can select faces
like this one here. I will hold down Control and go to there like that
to get all of those. And I'm going to press S and Y. Go ahead and bring this
in like this to get a slight bit more of a point.
And yeah, that's nice. Okay, I'll tap out of Edit
mode with it again now, and let's have a
look at our bevel. So let's turn our one to
three and see how that looks. And that's way too much. Let's go ahead and
turn that into a two and see how that looks. Increase the segment
count to maybe a five. And yeah, I think that's
pretty good overall. We can go ahead and do
a shade auto smooth on it as well, see
how that looks. And I think, overall,
that's looking pretty good. I'm going to bring
the angle tolerance down on the shade Auto smooth. To It looks like about 11.2. And I'm not happy
with that, so I'll go ahead and
increase that again. And there at 18, I like that. That's fine. We'll leave
it just like that. Okay, so I'll go ahead
and apply these now, so I'll go ahead and
apply the bevel modifier, and I'll leave the smoothing
just there like that. Okay, so I think the next
thing I want to do is maybe just scale it
down a tiny bit, but I don't want to
scale it down in the X. So let's press Control three to see this in the
orthographic view. And let's press Shift X to
exclude scaling in the X axis. And now let's bring this
down a little bit, not up. Down to, I would say that small like it,
something like that. That's better. Yeah, that's
much better. I like that. So now that we've
done that, let's press Control through again. Let's grab this and
let's press Alt D and Y and go ahead and bring a copy across now to the
opposite side like this. I'll bring it a bit closer to that edge there,
and there we go. There's our handles in
place. No. That's cool. Okay, so I think the next
thing that I want to do is create another one
of these sort of glazing seals just here, just as a little bit of detail. So I'll select this case, and we'll tap into Edit mode. I think I'm going to select I'm gonna press two so
I can select edges, and I'm going to
select this edge here. So I'll hold shift
and select this one, and I'll le shift and select this one and I'll hole
shift and select this one, W. I'll go ahead and press Shift D and X and bring
a copy out like this. And now that we've done that,
let's go ahead and press P and separate by selection. Okay, let's tap
out of Edit mode. And let's rename this. And incidentally, sometimes you need to rename things when you extract a curve so that you
can actually convert it. So that's another
reason for doing this. So I'll double click
on this and we'll call it the glass seal. There we go. Okay, so now that
we've done that, let's go ahead and
convert that to a curve. Let's go over here to object data properties and
come down to Bevel, and in the depth,
let's click that once. Let's set the origin to the geometry so we
can actually move this back easily into position so we can see it and see what we need. And I would say that's a
little too big right now, so I'm going to bring that down. So I'll put an extra zero in there to the right
of the decimal point. And increase the one to a five, and let's see what
that looks like. And yeah, that's pretty
much what I want, I think. I don't need much. I just
needed something there. Maybe I'll increase that to a seven and see how
that looks, Lenter. And yeah, let's increase the resolution to
maybe seven, as well. And let's have a look at
that and see how it looks. Let's maybe take that
in a tiny bit more. And there we go. I think I'm happy with that
sort of like that. Okay, so now we've
done that. Let's click on it again and then left click and let's convert that back to a mesh, and there we go. Now we can left click
again and we can go ahead and sha Autosmooth. Alright. That's cool.
That's what we want. So we can press Control
three again now, and we can select
this little seal, and we can press Alt D and Y and bring a copy across to this other
casement here like this. And put this in position. I like that. That's cool. And, yeah, that's looking good. I'm pleased with
that. All right. So now that we've done all that, and we've got everything
in the right file here. If we turn this off, Yeah, we've got everything
in the correct file. Let's hit the forward slash
key to bring everything back. And let's put a sell
board in here next. So let's go ahead
and press Shift A, and let's bring in another cube. Let's go ahead and
scale that down, so I'll hit S straightaway and
bring that down like this. And let's bring this
out on the X axis. And we'll bring this
down until it's kind of touching the wall,
something like that. And let's go ahead and tap
into Eda mode with that. And let's press three
so we can select faces, grab this face here and
go ahead and bring that in until it's just about
touching the window, but a tiny bit back, a really tiny bit. Something like
that. That's cool. Let's select this front edge and bring that out a little bit. And let's select the top now, and bring that down
quite a lot like this. To maybe up a little
bit. That's about right. Okay, so let's tap out of Edit
mode and let's press S and Y and go ahead and scale this
up and a little bit more. S and Y and bring that now
to about there like that. Okay, so now we've done
that. Let's go ahead and put a boolean modifier on
our little window board. So let's add a modifier
and generate and boolean. And let's go ahead and grab our little dropper and put
that onto the walls like that. And you can see that's worked. So we've got this
sudden carto on this. So I'm going to go ahead
and apply that boolean. And after we've done that, let's have a look at the
scale and the scales out, so let's press Control A and
apply rotation and scale. Let's tap into Edit mode and
put a bevel on our window. So let's press two so we can select edges and grab
this one, this one, this one, this one, and this one, this
one, and this one. Let's go ahead and
press Control B and bevel that, as well. Until we get Um, something like that.
That's pretty good. Okay, so let's tap out
of edit mode with that. And let's do a shade
or too smooth, and let's bring the
tolerance down a little bit. Two, maybe around 20. I
think that should be good. Okay, so that's our window finished, and it's looking good. So I think the only
thing left to do now is make a copy
for the other side. So let's select all items
to do with our window. So we've got the casements and we've got these
little seals, and we've got this
little seal, as well. And I think that's everything. So let's go ahead and press Shift D and X and bring
a copy out like this. Let's go ahead and rotate
that in the z axis now. So let's press Z,
90180, I'm sorry. Enter. And let's press seven
to see this from above. And let's go ahead
and take this over now and put this
on the other side. Et's take that in until the sill board is tucked up
nicely against the wall. So that is about
there like that. Let's have a look at that.
Zoom in a little bit. And maybe we'll just press G and X and take that in
a tiny bit more. Whoops. Two about
there, there we go. That's cool. So that's
our two windows complete. So in the next lecture, let's go ahead and bring the
roof back for a moment. I'll just compress our
small windows file, and let's find our
roofs. They're here. So in the next lecture,
let's go ahead now and start our skylights.
Let's have a go at those. We won't do as many details in those because they won't
be seen much in our scene. So let's go ahead and do a save, so let's press Controls. And yeah, that's it
for this lecture. So thanks very much. I'll see you in the next
one. Bye bye, Fino.
18. Lecture 17 Roof Lights: Hello, and welcome
now to Lecture 17. And in this lecture, let's go ahead and
do our roof lights. And to be honest, I'm not
gonna put a huge amount of detail on our roof
lights I don't really plan to do any close up renders
of our roof lights. So I'm going to keep the
details pretty basic in these. But before we do that, there's
something else I noticed, which is our bifolding door. The shade auto smooth
on that doesn't seem to be working correctly
at the moment on that. It's kind of curved
the surfaces. So let's just bring our
angle down to it seems to be on these windows
and doors that 14-16 is the magic number. So let's try bringing it
down there. And there we go. That's just work
now at the 15 mark. Let's try zooming in on
this and see what we get, make sure that the bevels are still looking good,
and they are. So that's that's cool. Alright, then, so let's have
a look at our roof lights. And really, I think all
I need to make this work is one side of the roof.
So I'll select that. I'll hit the forward slash on the numpad to get just the one side of
the roof like that. There we go. Alright, so now, let's tap into
edit mode with it. Make sure we got Edges
selection, which we do. And let's grab this
one, this one, this one, and this one. And let's go ahead and
press Shift D and Z, and take that up like that. Soon as you've got
that, let's press P, and let's separate
it by selection. There we go. That's done. Let's tap out of Edo
mode with that one. And I think actually, let's go ahead now, and let's
create a new subfolder. So let's click on our
walls, windows and doors, and let's hit our
little add folder sign, and let's double
click on this one. And let's call it
the roof lights. And enter, and there we go. So we can actually select
this item here now, and we could go
ahead and put that into our roof lights
file, there we go. So let's tap back into
Edit mode with this one, and let's select all edges. And let's just go ahead
and press F and fill. Okay, so that's cool. Let's
press three and select this. And I kind of for a second, want the Gizmo to
follow this panel. So come up here to this one to transformation orientation, hit the little drop down and
just select normal on this. So the Gizmo is
orientated to this panel. Once we've done that, let's get sort of to a nice angle on this. Let's go ahead and press I and
let's inset this to create a framework for our
panel, and there we go. Now let's press A to select O, and let's go ahead and
press E and extrude this out in the Zadaxs like this. There we go.
That's all we want. Let's select the middle
panel there now and press E again and go ahead and take that up to create
our glass panel. And let's go ahead and take
this one down a little bit. So press E and take this
down, and there we go. We've got our sort of our
panel now for a moment. Okay, so let's tap
out of Edit mode for a moment and maybe just
select this on its own, now. And let's isolate that one. So we'll had the forward slash, which will bring everything
back for a second, and just tap it again, and it'll be isolated, now. Okay, so what to do next? Let's tap back into
Edit mode with it. And I think what
we could do now is maybe select press
edge selection, select these outer edges here. And let's go ahead and
press S to scale and kind of scale those
inwards to get an angle on that molding, on that framework
around our glass, just as a little
bit of a feature. Okay, let's select
now this edge here. That one, that
one, and that one. And let's go ahead and
press Shift D and Z, and take that up like this. And let's press P and
separate by selection. Okay, let's tap out of Edi mode, and let's select this. And we're going to do a
nice little trick for creating sort of
seals for glasses. So so that we can convert this into a curve, we
need to rename it. It's a funny thing, blender. Sometimes you don't need to, sometimes you do, so I just
always just rename it. So here it is. It's already
selected in the outliner. Let's double click on it, and let's call it the
roof like glass seal. Roof like glass
seal, there we go. Let's grab it again
and let's right click and let's go ahead and
convert that to a curve. Let's click on ObjecttaPperti. Come down to Bevel,
and let's click on the depth and see what we get. And that's probably okay. I'd say that probably will work. Let's increase the
resolution to a six, and let's go ahead now and
convert that back to a mesh. Let's go ahead and
ahead and do a shade oro smooth on that. And let's select this item and press one to see this in
the orthographic view now, and let's go ahead
into wireframe. Let's go ahead and
set the origin to the geometry so we can
go ahead and see our gizmo. And let's pull that down now until we've
got that lined up. It's this corner here that
I want to be lined up with. So I'll pull that
down some more, pull that over a bit, and I'd say, that's it there. Let's go back into solid
mode and see how that looks. And, yeah, that's looking
great. That's done. So now we've done that,
let's go ahead and apply a bevel to our main
sort of frame. So let's go over to modifiers. Add modifier, and
generate and bevel. Okay, obviously,
that's way too much, so let's go ahead and put
our normal two zeros to the right of the decimal
point and click Enter. Let's zoom in a
little bit on this. And maybe let's
convert that one into a three and see how that looks. And increase the
segments two or three, and there we go. I think
I'm happy with that. I'll go ahead and apply
that bevel and modify it, and I'll do a shade
oro smooth as well. There we go. That's cool. So the next thing
we're going to do is go ahead and grab all of this, so we got it all selected. And I'm going to press one so we can see
it from this angle, and I'm going to press
set and go to wire frame. And I'm going to hit
the forward slash key to bring back the roof. And I'll press one again
to put it back in. So now let's go ahead and right click and set the
origin to the geometry, and now pull this window
down into position. Go ahead and just take a second to line it up where we want to. And I'd say that's
good, just like that. That's looking
good. So I'll press seven now to see
this from above. And I'm going to go
ahead and press Shift D and Y and bring a copy across
now to here like this. And we can go ahead and put
that in final position like this. There we go. That's cool. Alright, so now we need
two on the opposite side. So let's actually mirror them over for that because
that's a nice way of doing it. So for a minute now, let's go
ahead and select the roof. And let's go ahead and tap
into Edit mode with that. And let's select
this top edge here. Maybe this one in the
middle would be perfect. And with that selected, let's press Shift S, and let's bring the
cursor to that. That's the center point
of the roof, obviously. So that's where we
want the cursor to be. We can actually here
in the orientation, we can actually just
click on this and bring this back to Global now. So let's go ahead and
select our windows. So maybe let's go ahead and
do it in a roof like fight, let's go ahead and select
all these items here. And once we've done
that, let's right click and let's set the origin
to the three D cursor. Now that we've done
that, we can go ahead and press Alt D, and let's right click twice. Let's go to mirror and
mirror in the X axis. And there we go. That was a really easy way of setting
two on the opposite side. All right, so let's go back into solid mode now and have
a look at our handiwork. And I think that's
I think that's it now for all our windows and doors. We're
good to go on that. So I think we're making great progress with
this course, actually. We've got our walls in position, and they're looking good. All windows and doors
is set up, as well. Yeah, I think we're
really looking good. So I think we'll start the next phase in the next lecture, which is going to be all trusses and beams and columns, which, again, would be a
nice thing to add to the scene to really make it pop and give it
some individuality. So I am actually seeing, I think, that that
door, as well, has got the same issue as we had with that bifolding door. It's still a little bit
rounded, so let's select it. And let's go ahead
and bring that angle down and see when that flattens out. And there we go. It's just there at 15, same as the bi folding door. Let's zoom in and
have a look at it. And, yeah, that's kind of the bevel is still
looking fine on the door. Okay, so that's it. So on the
next lecture, like I said, let's have a go at doing all our oak beams or make
a start on that anyway. So this is coming on. We're making some great
progress on this. I hope you're pleased
with how it's going. So I think it's time
for a cup of tea, and I'll see you in
the next lecture. Thanks very much.
Bye bye for now.
19. Lecture 18 Roof Beams Part 1: U Hello, and welcome
now to Lecture 18. And in this lecture,
let's have a go at doing all our roof trusses and all our sort of exposed
roof structures. Let's have a go at
making a start at those. We won't get it done
in just one lecture. There'll be a few
lectures on this. But I think it's quite
a dramatic thing to do. It makes the kitchen really pop and gives it
a sort of period feel. So yeah, let's give it a shot. So let's start by
creating a new file. So let's click on Windows, walls, windows and doors, or should we make a new one? Let's make a new one. Let's
click on scene collection, and let's hit the sub file. And let's call this
roof structure. There we go. And let's highlight it so
everything goes in it. And now that we've done
that, I think, actually, let's go ahead and
hide our roof, I think for now, let's
see if we can hide that. And let's hide our
roof lights as well. I don't think we need. Let's leave our roof
flight sum. Sorry. I'm being indecisive. Let's leave our roof flights. So we need the cursor just where it is dead
center of this roof, kind of running along the ridge line of our brickwork here on the
points here on the gable ends. So we've got it
just there. If it wasn't thing to do would bring back a roof panel like
this and maybe grab this, tap into Edit mode, make sure you got
faces selected, maybe select this one here, and then go ahead and press shifts and cursor
to the selected. And if your cursor
wasn't dead center, it is now having done that. Okay, let's tap
out of Edit mode, and let's go ahead and
hide that roof again. So let's start by bringing
in a cube. Let's do that. Let me just click on my
roof structure file again. Let's press Shift A and mesh, and let's bring in a
cube. There we go. Let's press seven, so we see this from the top, the
orthographic view. And I think we'll use
our dimension box here. And in the Y axis, I'll
double click on it, and I'll delete the
two, and I'll type 0.15 Enter. And there we go. So we've made it 15
centimeters wide. Or should we make it a
bit wider than that? It's looking a bit narrow,
actually, at that. I think I'll make it 0.2. 0.2 and Enter, and there we go. In the z, I'm going
to make it 0.3. 0.3. So that'll be
30 centimeters high. And let's press one now so we can see this
from the front. And I think we could go
into wireframe mode, and let's go ahead and
tap into Edimde with it, and let's press one so
we can select vertices. Let's press A to grab O and just bring the whole thing
down like this for a moment and just run it level
with that line just there. So that it's level with that point in the
roof just there. That's where we're
trying to get it. Okay, now let's
grab these vertices here and bring these over like this and bring them over a little bit more until they're
just touching the wall. That's perfect. Let's do the
same the other side now. Let's grab these and bring these over and bring these level
with the wall, this side. There we go. That's
what we want. Let's tap out of Ed
mode with that now. And with that done, let's press let's right
click and let's go ahead and set the
origin to the geometry. Let's press ChiefD
with it selected and press Z and bring a
copy up like this. Let's rotate that And I want it to run sort of
parallel with the roof line. So I'll bring it
up a little bit, and I'll go ahead
and rotate it until it's just nice and sort of
parallel with the roof. There we go. That's
nice. Okay, so I think the next thing I'm
going to do is I'm going to go ahead and click on
orientation and go to the normals and then bring the whole thing down like this. That's cool. That's
what I. All right. Now that we've done
that, let's go back to solid mode now for a moment. Excuse me. We need
to put a cut there. So I think what I'm going
to do is just cheat. I'm going to grab this one, and I'm going to press Shifty and Y and make a temporary copy. I'm just going to scale
this up in the Y axis. I'm going to press SY and just go ahead and scale this up and then put it
back like this. I think I'll scale up
slightly in the X, as well, so SX and bring it up like this. Okay, now we've done that,
let's grab this one, and let's fix it. So let's press Control A, and apply rotation and scale because that was
a little bit wrong. And let's now select it again, and we'll add modifier
and generate and boolean. Grab our little eyedropper and just select this
item like this. And there we go. That's done. So let's go ahead and apply
that. Can we delete this? I think we can delete it. I'll just go ahead
and get rid of that. Okay, so we have this little
piece here now like this, so let's tap into Edit mode. And let's press three, so we can select faces, grab
this one like this. Hold down the Control
Putton and press Plus until we've
selected all faces, and press X and go
ahead and delete faces. There we go. So we've got
rid of that little piece. Okay, let's go ahead and tap out of Edit mode for a
moment again now. Okay, so now let's
do the top one. So our cursor is still
exactly where I want it. So let's go ahead and press Chef A and mesh and
bring in a plane. And now let's rotate
it on the Y axis. So our Y, nine, zero, enter. And what we do now is go
back to the boolean thing. So let's grab this
one here like this. Add modify, generate,
and boolean. Let's grab our little
eyedropper and just hit the plane like
this. And there we go. Let's go ahead and
apply that one. Let's delete this plane. We're done with that. Now
we've got this trust done. Okay, so let's look at this one and the scale and
rotations good. Let's go ahead and apply
a bevel to this sn, add a modifier,
generate, and bevel. Let's add two zeros to the
right of the decimal point, and let's have a look at it. And I want a bigger
bevel than this, so let's go ahead and add or delete the one and put
a three in its place. And there we go. And let's add maybe put three segments on it. That's cool. So I'll go ahead
and apply that bevel now. And let's have a look
at this one here, and we can fix the
scale on this. Let's press Control. And
apply rotation and scale, Let's add a modifier
again and bevel, let's add two zeros
to the right of the decimal point and turn
the one into a three. Enter, and there we go. Make sure we've got
three segments and go ahead and apply
that one. There we go. That's cool. Okay, so
I think next what we need to do is go ahead and duplicate and mirror
this one here. So with it selected, let's right click and
put the origin where the cursor is to make
that the pivot point. So let's right click and set origins to the three D cursor. And now it'll pivot at the point of the cursor. So
let's grab this. Let's press Shift D.
Right click twice. Mirror in the X axis,
and there we go. We've got our truss
finished, and that's cool. So let's go ahead and
duplicate this trust now. So'll grab those three items. Let's press seven.
See this from above. And let's go ahead
now and press Shift and Y and bring a copy now over to the
end here like this. Let's bring that over till it's just about
touching the wall. It'll be a tiny little gap. There we go. That's what I want. And let's do the same again. Now we'll grab this
one, this one, this one, and we'll press seven, and we'll press Shift D, and Y and bring a copy over
now to here like this. Let's bring this back until it's just about again
touching the wall. Tiny little gap between them,
maybe, something like that. Alright, so I think the next
thing to do is I want to bring a timber along
the walls here, along the internal
edge of the walls here to break up the line between the
ceiling and the wall. So let's do that next. So let's go back DursPress seven on the number pad to get
the orthographic view. Let's press Shift A and mesh,
and let's bring in a cube. Let's bring that
cube over like this. And let's press Z and
go into wireframe. And let's hit S and scale
this down like this. Maybe scale it down a little bit more to something like that. Then bring this over until
it's just about off the wall, just a little bit like this, bring it over this way until it's just about flash
with the other bean. And let's go ahead and
tap into Edit mode. Let's press one now so we
can see it from the side. And oh, it's up here still.
Let's bring it down. Until it's kind of level with this beam here like this.
That's about right. I want it slightly
under to create a subtle shadow to the ceiling.
So that's about right. And now let's press
one so we can select vertices,
grab this one here. Let's put our
orientation back in global and now bring this one down until it's about there
like that. That's cool. Let's press seven again. Let's grab these vertices here and take these to
the opposite side. Let's go ahead and
bring those now, so they're just about
touching the other one. And I'll leave a little gap. This is supposed to
be an old building, so I don't want
absolutely everything touching perfectly with
these old trusses. I want to have a little bit of imperfection to them
because I think that'll add to the realism. So now that we've done that,
let's tap out of Eddy mode, and let's go back to
solid for a minute. Let's have a look at the scale of that and the scales off. So let's press Control A and
apply rotation and scale. And let's go ahead now and
apply a bevel to that. And let's add two zeros to the right to
the decimal point. And let's go ahead and
turn our one into a three. And click Enter. And let's go ahead and
make three segments on it. Zoom in, have a quick look. And do I want to bring
that down slightly? I think I probably do. I'll go ahead and set the origin now back to the geometry, and it looks to me like I
just need to bring it down just a smidge maybe to
there, and there we go. That's what I want. So let's
go ahead and apply that now. And now let's press seven. Let's grab this one, and let's press Shift D and Y and bring a
copy back like this. Let's pull this
over on the Y axis, and let's press G and Y and pull it back that
last little bit like that. Let's go back to wireframe, and let's tap into
Edi mode with it, grab our vertices here on the end and go ahead and pull
those back into position. Something like that.
That's it. Okay, so let's tap out of
AD mode with that. Let's select both
these objects now. And let's go ahead and right
click and set the origin to the three Dcursor and
let's go ahead and press Shift D. So because
they've gone white, that tells us that there's
a duplicated object there. Let's right click
and let's go ahead and mirror in the X
axis, and there we go. Okay, let's go back to solid
mode now. And there we go. So we've got our
trusses in place, and we've got our little beams here in the corners of our roof. So that's a really good start. Okay, so in the next lecture, let's have a go at
doing our columns. So I want to add two columns and maybe even some columns in the corner as well
on this truss. And that'll add a
nice little feature and just add to the
realism of everything. But before we go, let's go ahead and do a save. I nearly forgot. So let's press Controls and go ahead and
save our progress. And thanks, and I'll see you in the next lecture. Bye bye, Fino.
20. Lecture 19 Roof Beams Part 2: Hello, and welcome
now to Lecture 19. In this lecture, let's go
ahead and do our columns, which will support our
middle truss here. I think we'll put four on. We'll put two in the middle here and we'll
put one at either end. Let's see what we
can do with that. Let's press seven to get this in the orthographic plan view. Make sure roof
structure is selected, let's press Shift A, and let's bring in a cube. In the X and the Y, let's go ahead and make this.
What should we make this? Maybe 40 centimeters,
hover over the X, hold down the left mouse button, and drag down to the second
one like this and go ahead and delete what's
there and put 0.4. That will be 40 centimeters
in the X and the Y. And there we go. So that's sort of the size of our columns. Okay, let's press one to go
into the front view now. And let's go into wireframe
mode for a minute. And let's go ahead and
bring this one down now until it's sitting on the floor like that. Let's tap into Edit mode. Grab our top vertices here, and I'm going to take those so they're almost to the
top of this beam, a tiny bit below. To about there should do it. Okay, so now that
we've done that, let's go ahead and go back into solid mode, and let's
have a look at it. And we can tap out of
Edit mode for a moment. And I think the next
thing to do is let's go ahead and add some
extra loops to this. So let's tap back
into Edit mode. Make sure we got
edge selection on, grab an edge, press Control
R, and roll the mouse. Wh to get two loops in and then go ahead
and press S and Z and take those up and down until we get
something like this. There we go. Now that
we've done that, we can select this edge again
and we can press Control R, roll the mouse wheel to get two, click twice, and press S and Z, and go ahead and take
those as well till we get them about there,
I'd say like that. Okay, now that we've
done that, let's type out of Edit mode and hit the forward slash key on
the numpad to isolate this. And maybe we've fixed this. Let's press Control A and
fix the rotation and scale. Let's tap back into
Edit mode now, select this edge here
and press Control R, and roll the mousewheel until we get three loops like that. There we go. That's
cool. Let's do the same on this side now. We'll press Control R, and we'll get three loops
like this. That's cool. Let's press seven now so
we see this from above. And let's press and
let's go into wireframe. Let's press three on the
keyboard so we can select faces. Select half of the faces to one side of the
Y axis like that. Press X and go ahead
and delete the faces. Now, that may have seemed
a little odd thing to do. Let's go back into solid mode, but I want to show you a
different modifier now, and this is a perfect
opportunity for it. It's called the mirror modifier. And that means whatever
we do on this side now, blender will duplicate
on the other. So by doing that, it's going
to save us some time and make sure that we
model accurately. So let's go ahead and tap back into Edit mode
for a moment with it. And let's press one, select that little
vertices there. Press shifts, and let's put the cursor
right there. There we go. We can tap out of Edit mode now, select it, right click and
set the origin to the cursor. Now that we've done
that, so the origins in the right place and the
curse is in the right place, let's select the item, add modifier, generate, and
mirror modifier. There we go. And that's worked
out really well. So the X axis is the axis
that we wanted to mirror in. However, if it was in the Z, it would have done
something like this for us. If we turn off the X, then it would have
just duplicated or mirrored in the Z axis. If we have it on the
X, then it would duplicate in the X
axis and the Z axis, which is basically made
it twice the height. In this case, all
we want to do is just mirror it in the X axis. Make sure that
clipping is turned on so that it joins in the
middle where it mirrors. And let's go ahead now and
tap back into edit mode. And you can see that half
of the mesh is missing, and that represents the
side that is mirrored. All right. The next
thing we want to do is press three so we
can select faces. Select this one,
this one, this one, this one, and this
one and this one, and also one, this
one, this one, this one, this one and this one, and press X and go
ahead and delete faces. You can see the mirror modifier has done that the same for
us on the opposite side. Okay, let's press one so we
can select vertices now, select this one and this one
and press F and fill that. Do the same, press F and fill, and do the same here
and press F and fill. Let's do the same here now, grab this one and this
one and press F and fill, and this one and this
one and press F, and this one and this one and
press F. And there we go. So it's happening on the
other side, just the same. Let's do the same on
the bottom now, then. Let's select this one and
this one and press F. And select this one and press
F. And now here and here. And last one. I'll select
this one and this one and press F. And now select
this one and this one. And here, let's press
F again on that. Let's press two so we can
select edges and select, this one and this one, and
press F again to fill that. Now select these and press
F. Now select these. And press F. There we go. It should be if we select
this edge here now, we'll see if Blender can
do a little magic trick. We'll press F, and, yeah, it's filled it to there for us, at least, and it doesn't
know quite what to do. So let's go ahead
and finish this. And this one here now, and we'll press F on that. We'll press F. And this one. And let's see if Blender
can fill this itself. Let's have a go. And
let's have a look, and it's just left those
two for us to do there. Talk, this one, this one,
and we'll press F on that. And do this one here
now. Press F on that. Okay, so there's our
column kind of done. So let's press one, and let's just make
this a little less regular because it's
supposed to be like an old hand milled
sort of column. So it's not going
to look perfect. So let's tweak this
around a little bit. So I'll pull this like this, maybe pull this down
to adjust the angle, and maybe pull this one
over so that the bevel isn't perfectly symmetrical,
and there we go. And let's do something
with this one. Now maybe with this one,
I'll pull this up like this. And maybe let's go ahead
and grab this one now and just pull this one
over slightly like this. And there we go. That's
all I want to do. And let's do the
same up here now. So I'll grab this one
here and take this up and maybe take it over slightly
on the Y axis like that. Maybe bring this one
down just a touch. We'll do the same here now. I'll take this one up. And we'll go ahead and take this one down a little bit like
that, that's fine. Okay, so let's tap out of
Edi mode with this one now. And let's go ahead and
apply our mirror modifier. And let's check the scale,
and that's all good. So let's add a bevel
modified. No, sorry. I'm getting ahead of myself. Let's now apply a
Boolean modifier to it. So let's bring back
the other item, so I'll hit the forward
slash scale and unpad. I got ahead of myself
then for a second. Okay, so let's grab a little
column here, add modifier, generate and boolean, grab the little eyedropper and just click on
the truss like this. And there we go. That's worked. Can see that that's
notched out now, so let's go ahead
and apply that. There we go. Now we can
apply a bevel modifier. So add modify,
generate, and bevel. So let's try increasing the zeros to the right
at the decimal point. And not much is happening. Not much is happening because The geometry of this column is limiting the amount
the blender can bevel. So let's see what we
can do to tweak this. So what I'm going to
do, first of all, take this back to the
standard settings. So let's delete those two zeros to the right of
the decimal point, and let's increase the segments to three. That we
know we can do. And let's see if we can alter the way the blender is going
to lay down the bevel. So first of all, let's make sure that angle is applied here. And let's go down to geometry
and turn off clamp overlay. Let's go ahead now
and put our two zeros back just so we can
see what's going on. And let's turn out 12 or three. Click Enter and see
what we're getting. And yeah, that's working. You have to be careful when you do this clamp overlay, though. Let's just tap into Emo
this on this and kind of inspect our
geometry and make sure it's okay because what can
happen is blender can now duplicate faces or make
irregular geometry. And it can create some
strange results sometimes. So just check that there's no issues with the geometry,
and everything looks fine. The other thing we can do
is we can actually go into shading now and we can
harden the normals, which should soften
those edges for us. And now that we've done
that, we can tap out of eddy mode and we can go
ahead and apply that. Let's just take a look and
see if that's worked for us, and, yeah, that's worked fine. Let's just take a look at the geometry and
make sure there's no strange things going
on with the geometry. Make sure that there's
no additional faces that have been
strangely created. But everything seems normal and everything's
working just fine. So yeah, if you
find the geometry find that the bevel sorry doesn't seem to work
properly on an object, it's because the geometry of the object is limiting the amount of bevel
that can be applied. So by turning off
the clamp overlays, that helps de
restrict the bevels, but be careful
with it because it can create some sort
of strange results. But in this case, it
seems to be fine. Okay, I'll tap out I edit
mode on that one and take a look at a column and see how it looks, and
it all looks good to me. So let's press seven. And let's go into
wireframe for a moment. And let's move this one over. And I think I'm going
to put it around midpoint of our skylights, maybe back a little bit
off midpoint about there. And I'm just going to
position these by hand. So I'm going to press Alt D and X and bring one over
now to here like this. And I'll grab this
one again now, and I'll press Alt D and
X and bring another one over like this and position this one just
kind of by eye, really. Press Alt D and X again and bring the final one
over to here now like this. Let's come in on this and see where this is
kind of landing. And again, just have this a tiny bit off the wall to
have a slight shadow detail. And let's check this one. And this one just
wants to bring it over a tiny bit to like that. Okay, so let's go
back to solid mode now and see how that's looking. And yeah, they're looking grand. I think that's just
what I wanted on those. They'll definitely
have some presents in the room when they're
sort of rendered up. I think they'll
look really good. Okay, so let's go ahead
and do a save now, so let's press Controls. And in the next lecture, where should we
Oh, well, let's do the chimney breast in our
next lecture. We'll do that. And we'll start looking
possibly at our cabinets. Okay, thanks very
much. And I'll see you in the next
lecture. Bye bye, Fino.
21. Lecture 20 The Chimney: Hello, and welcome
now to Lecture 20. And in this lecture,
let's go ahead and put a sort of brick chimney in. This should be quite a
quick lecture, really. This is, I think, quite a simple
process, this one. Okay, so let's see
what we can do. So I think first thing
we do need to do is I think we can go ahead and hide our roof
structure for a while, and maybe we open up our walls and we can
hide our roof lights. I think that's all we
really need is just that. We could even hide our
windows if we wanted to, windows, side doors,
bifolding doors. So we just have back down to
just the brick wall again. All right, so let's
compress that file, and let's open up
the reference file, and we'll go ahead
and unhide it. And yeah, I think as I'm seeing it now is
how I kind of want it. So I want the front
section elevation on, and I want the plan. The planned section
elevation on as well. And I think that should be enough for us to be
able to make this work. Okay, so I think
the first thing we can do is go ahead
and bring a cube in. So let's press Shift A and
mesh and bring a cube in. Okay, I think we can
go as wireframe. Let's press and go into
wireframe for a while. And let's press seven
to see this from above. And let's start off
by setting this out. So we can see the outline
of the chimney here, so that's what
we're going to try and get this object
to look like. So let's tap into
Edit mode with it, and let's select these
two front vertices now. And let's go ahead
and move those back until they're lining up nicely with the
walls like that. Let's select these two now
and bring these over as well. Grab these two and bring
these over as well. Okay, let's press one now on the num pad to
get the front view. And let's go ahead and pull the lower vertices down
to the floor level. Something like that. And let's grab the upper vertices
and take those up. Of course, they won't be seen up here, so we're
not worried, really. We can put those pretty
much wherever we want, as long as they're
the other side of the roof on the
exterior side. Okay, next thing we want to do is let's have a look
at this, actually. Okay, so the next
thing we want to do is put some loops on this,
some control loops. So let's press two on
our keyboard so we can select fake edges,
select this edge here, press one on the numpad to
be able to see this from the front and press Control R and put a
loop in like this. Roll the mouse wheel
once to get two. And now let's go ahead
and scale this up in the X axis until we get them lining up with
this edge and this edge. So I'll press S and X and
go ahead and bring these out something like this. I'll just move these
over manually, just a tiny bit and line
them through like that. There we go. Now let's select
an edge right here now, and let's press Control. Ah. And let's put one loop
in and bring that down now to About there like that,
I would say should work. I want to go about half
and half because we've got like this hood in here. It's like an extractor
hood above our oven. So I want to put it
somewhere in the middle, and then the extractor
hood will sort of cover up anything else. Okay, so once we got
that, let's press and go back to solid
mode for a while. Okay, so the next
thing I want to do is take this face here backwards. Extrude that back, so
I'll press three so I can select faces,
grab this face here, and I'll press Alt E, and I'll extrude manifold and then go ahead and
take this back like this. Maybe take this back to about that I'm not overly worried too much. I want to gap behind. We're going to put a mirror
on that wall eventually. But I'll just kind of
leave it about there. That should be good, just like. Okay, so let's tap out of
edit mode with that now. And let's look at the scale. Scales all correct
because we did all our sizing in edit mode. So because we did that, none
of the scales are incorrect. All right, so let's
add a modifier to this and put a bevel on it. Add modifier and generate bevel, and let's take a look at this. Let's go ahead and
put two zeros to the right to add more
point like Enter. Let's have a look at
that and maybe turn one to four and enter, and of course, increase our segments to
about four as well. And, yeah, I shall leave that bevel modifier
on there for now, in case we decide we want
to increase that bevel. Okay, so that's our
chimibast done. We can go ahead and
bring stuff back now. So let's go ahead and turn
our roof structure back on, and we can see how
that's looking now. That's looking really good. Okay, so that's
our chimney done. So the next thing we
want to do is cut our roof out around
this chimney. So let's go ahead and
bring our roof back. So let's expand our walls and windows and turn on
our two roof panels. Select our roof
panel, add, modify, generate and boolean,
grab our little dropper, and just click on the chimney
like this. And that's good. So I'll go ahead and apply that. Do the same on the
opposite side. We'll grab this one, add modify, generate and boolean, and grab our little dropper
and go ahead and just click on the chimney
and go ahead and apply that. It's a good practice whenever possible to actually
cut things out. Don't allow objects to fly
into other objects if you can help it because you can
see that in the rendering, even though it's way up
there in the roof space, and we probably won't do a video or still
showing this angle, it's still good
practice to do it. So that's why in this
case, I've done. Okay, so that's
our chimney done. We can go ahead and bring
back other stuff we wanted. We can bring back our
windows and our roof lights, side doors, bifolding doors, and our roof structure. Let's go back into our house now and have a look at
it into our kitchen and see how it's looking.
And that's looking good. I think now we're really ready now to start putting
in our kitchen. Okay, so in the next lecture, let's start doing our kitchen
island in the middle. I think that'll be a
good place to start. Okay, thanks very much. And I'll see you in the next
lecture. Bye bye for now.
22. Lecture 21 Island part 1: Hello, and welcome
now to lecture. Which lecture is this now? 21. Welcome to Lecture 21. And this lecture, let's
start our kitchen cabinets. That's what we're sort
of here to do, isn't it? To build our kitchen cabinets. That's kind of exciting. So
let's make a start with that. And I think we're going to
start with our kitchen island. I think that's a
good place to start. But before we do that, let's select this cube here and let's go
ahead and name it. I forgot to do that
in the last lecture, so let's double click on it. And let's call that the
chimney. There we go. Let's go ahead and just drag that into the walls and windows subfolder straight into there like that. Alright, that's cool. Now we can go ahead
and close that file. And I think the next thing
we're going to do is create all new file for
our kitchen cabinets. So let's click on
scene collection, and let's now
create a subfolder. Let's double click on it, and let's call this
cabinets. There we go. I think within
that straightaway, I'm going to create
another subfolder. I'll click on our
little Add folder icon, and I'll double
click on this one, and I'll name this island. There we go. Let's
leave the island selected so that everything we create now goes
into that subfolder. Let's go ahead and hide our
other two folders right now, so our walls and windows and
even our roof structure. Now we've just got these two
reference drawings left now, these two reference plans. Again, that's all I want
now for this stage. Alright, so let's make a start. So I think the
first thing we can do is go ahead and press seven, so we see this from above. And this is our first
reference here, and we got some numbers
on this one, even. So it's 2.4 meters long. This is our island
by 1.2 meters. And we have this little
feature on the island, which is like a circular
little table to the side, and we'll do that after. Let's not worry about
that bit just now. So we'll just look at this
rectangular shape just here. So let's go ahead and press
Shift A and bring in a cube, so Shift A, mesh and cube. There we go. Let's
go into wireframe. I'll press S and
go into wireframe. And let's just use our transform boar note actually
to dimension this thing. So in the X, we want
to make it 2.4 meters. Double click on the X,
and let's make it 2-4, and go ahead and enter on
that. And there we go. So now it's 2.4 meters that way. So in the Y, we want
to make it 1.2. So let's double click on the Y, delete the two and click one, 0.2, and Enter, and there we go. So now we know that we have
that exactly the right size. Let's go ahead and
bring that over now, so it actually sits where
it's supposed to sit. And there we go just like that. It says something like
this island, the position, don't worry about the fact
that when you zoom in, you sort of lose the
definition of the line. For the purposes,
that's absolutely fine. What we're seeing just
like that. Let's press one now on our numpad, so we see this from the front. And it's always a
shock to me when you suddenly realize that
what you've drawn is actually miles up
in the air and not where you thought it was
at all. But that's right. Don't worry, we'll fix it.
Just waffling for a moment. Okay, so on the z axis, I kind of think that
this kitchen top will be about 4 centimeters, about 40 mil thick. That's typical thickness, particularly for marble.
So let's do that next. So on the Z axis, let's double click on
this and make this 0.04. So that is 4 centimeters or 40 mil thick and click
enter, and there we go. So now we have our worktop
the exact thickness. Let's bring that down.
Let's zoom in a little bit, and I'm just going to hold down the shift bar and hold down the middle mouse
wheel and reposition. There we go. And I'll bring that down until we're happy.
Zoom out a little bit. If you zoom in too far,
you kind of lose it. So about there tells me
what I want to know. And I'll put that just about there like
that. That's fine. Alright, so that's
our top end now. So the next thing
we can bring in, let's go ahead now and bring
our cursor to this object. So let's press Shift S and cursor to the
selected. There we go. So let's now work on
the legs next, I think. So let's go ahead
and press Shift A. And let's go ahead and
bring in another cube. Again, we can dimension this
with our transform tab. I think that these legs
are about 80 millimeters. So in the X and the Y, just hold down the
left mouse button on the X and drag down to the Y, and now go ahead
and put 0.08 enter, and that's 80 centimeters. Let's press one on the numpad so we can see
this from the front. And let's go ahead and bring this over and just
check this out. See how that looks. Do I want to increase that
a tiny little bit? I think I am. I'm
going to increase that to 9 centimeters, I think. So again, I'll just hold down the left mouse
button in the X, drag down to the Y like this, and I'll go ahead and
turn that eight into a nine and click Enter,
and there we go. Okay, let's tap into
Edit mode with it now. Let's press one so we
can select vertices. Let's have a look at
the bottom first. So we can see the floor level. The floor level
is right there on that X axis going across,
so we know where it is. So let's go ahead and
grab these vertices here. And it's a good
thing to not have absolutely everything
touching other surfaces. Because it'll add to
the realism because it allowed very subtle little
shadows to everything, which just adds to the realism. If everything is just
sitting absolutely perfect with the other surface, it just doesn't look right. So just have a tiny little gap, and I'm talking really tiny, something like that
is all I really want, just a tiny little gap. And let's do the
same at the top, because if you had
too much of a gap, it would look like a poor
kitchen cabinet, wouldn't it? It looked like,
you know, like it was a pretty poor affair. So you need something
in between. So a tiny little gap
to add some realism, but not so much that it looks like it's just a bad kitchen. And we'll put that
about there like that. That's perfect. Okay, so let's press one now so we
can see this from above. And for a moment,
I'm just going to go ahead and tap
out of Edit mode, and I'm going to go
ahead and bring this over now and put this about there like
that. That's cool. Let's zoom in on this
and have a look. We've got two grid squares here and we've got approximately
two grid squares here. Now I know that's reasonably evenly set between
these two faces. Okay, so the next
thing we can go ahead and do now is add
a bevel to this. Let's go back to solid
mode for a moment. Let's do that. And let's go ahead and check the
scale, and it's out. So let's press Control A, and apply rotation and scale. Let's add our bevel modifier. And let's go ahead and add two zeros to the right
of the decimal point, click Enter, and let's
see what we got. And let's turn that one into a two and see what
that looks like. Increase our segments to three. And do I want to
go to a three now? Let's try it. So let's turn
that two into a three. Click Enter. And yes, I will leave that like that. So we got three segments
and 0.003 millimeters. I'll go ahead and apply.
After we've done that, we're going to go
ahead and go back to wireframe for a moment. Let's press seven so we
can see this from above. Let's select the item, right click and
set the origin to the three Dcursor because we're going to do
some mirroring. Now that we've done that, let's
go ahead and press Alt D, right click twice, and go ahead
and mirror in the X axis. Let's select both of these now. And let's go ahead
and press Alt D again and right click twice and go ahead and mirror
it in the Y axis. And there we go. We've
got our legs in place. Just looks like a very
simple little table. Let's go back to
solid for a moment so we can see that. And that's. Alright, so the next thing I
want to do is I want to put the little board that you see at the bottom of
the island there. It's just this one here. I call that the plinth, so I want to put the
pnth in next on this. So let's go ahead
and press Chef A, and let's bring in another cube. And obviously, that's a bit
big, but that's alright. Let's press one so we can
see this from the front. And let's go back into
wireframe for a moment, and let's tap into Edi moode. We'll grab these ones here and we'll pull these
down now like this. Let's zoom in and see
what we're doing. And now I think that's right. Zoom in a little bit, and let's press G and Z. Just take that up a tiny bit now to about there like that. Let's grab the bottom once. And let's press G and Z again and go ahead
and take those up. And again, just make it a tiny
bit above the floor level. Just that much is just fine. Let's grab the ends here now. And let's go ahead
and take that over. And again, just leave a tiny gap between them
just something like that, and we'll do the same
on the other side. To something like that. There we go. Let's press seven, and we can see this from above. Let's grab these
vertices here first, and we'll take these back because I want the plinth to be set
back from the legs, so I'll put that about
there like that, maybe maybe forward, a tiny
bit, maybe about there. Let's grab these
other two vertices now and bring those
back like this. And we'll put those
about there like that. That's cool. All right, so let's tap out of edit
mode with that for a moment. And let's look at the scale
and the scales all good. Let's go back to
solid mode for it. Let's apply a bevel to it. And let's do our standard adding two zeros to the right
of the decimal point. Click Enter, and let's up one, two or two and see
how that looks. And let's increase our
segments two or three. And yeah, that's fine. So have a look there on the end, see that looks, and yeah, I'll leave that just like that. So we can go ahead
and apply that bevel. And now let's go
ahead and make sure. Well, actually, in
this case, it is. The origin is already in the cursor, so
we're good to go here. So let's go ahead and press
Alt D. Right click twice, and mirror it in the X axes. I'm sorry that was wrong. I'll right click again,
and I'll mirror it in the Y axes and there Okay, so now let's make
some for the sides. So this time, I'm
going to press Shifty because if I bring one to the end here and I
have to scale it, it's going to affect
this other one. So I'll press Shift and Y and bring that back
to the middle like this. Let's go ahead and
set the origin to the object for a moment
to the geometry. There we go. And
let's rotate that. So let's press R and
Z, and 90, Enter. Alright, let's see
this from above now. So I'll press seven
on the numpad. And let's go into wire frame, and let's take this over. Till we've got that
imposition as we want it, so that's about the, I'd say, like, about
there is good. Let's tap into Ed mode with it, grab these vertices
and take those back. And put those about about well, pretty darn close, really?
A there like that. And we can do the same
here and bring those over, and let's have a look at this. And about there like that. That's cool. Okay, let's go ahead and have a vote
mode with that now. And let's go ahead and set
the origin to the cursor. So right click, set the
origin to the three D cursor, and let's press Alt
D and right click twice and go ahead and
mirror in the X axis. And there we go. Okay. So let's press and go back to solid mode now and
see how we're doing. Have we applied a
bevel to our top? We haven't. Let's do that next. Let's select the top,
and let's fix it. Let's press Control A and
apply rotation and scale. Let's add our bevel
modifier to this. And let's add two zeros, and let's have a good
look at the top. So let's increase
our one to a two. And let's go ahead and increase our segments two or three, and I think that's fine. Let's maybe up our segments
to four because it's the top. And I think I'm going to leave that bevel modifier
there for a moment. So if I change my
mind and I want to apply more of a bevel or less of a
bevel, I can still do it. That's the benefit of these modifiers is
they're non destructive. If you don't want to
apply them at any stage, you can always leave it
so you can make changes. Alright, so now that
we've done that. Actually, I think we'll call
it a day at this lecture. I was gonna carry on and
do these end panels, but I think we'll leave
that for the next lecture. Otherwise, it's just going to
get a little bit too long. Alright, I think that's
some good progress. I think we're doing
just fine here. So let's go ahead and press Controls and
do a save on that. And yeah, there we go.
There's our island. We're about halfway through. Okay, thanks very
much. And I'll see you in the next
one. Bye bye for.
23. Lecture 22 Island Part 2: Hello, and welcome
now to Lecture 22. And in this lecture, I
was gonna do the panels, but I've kind of
changed my mind. I think it'd be cool to
do these face panels here with the two
doors and the drawers. I think that would be
really a nice thing to do. So let's go ahead
and do that next, and it'll make our little
island pop a little bit. So what do we do? Let's press one on a numpad
to get the front view. And let's bring in a plane
Shift A and mesh and plane. There we go. Let's rotate
that on the X axis. Let's press RX 90 enter, and let's go ahead into
wireframe. Let's press one. Oh, sorry, let's tap into Eda moode let's grab
the vertices here, the top two, and
bring those down now. Until you guessed it, they're just a tiny
bit below our worktop. And let's get close
to it so we can have a good look and about
the tiny little gap, maybe even close
up a bit more than that. There we go. That's cool. Let's do the sides
in the same way, so I'll grab these two now. And we'll bring these over, and let's zoom in on
this so we can see it. And yes, bring that really
close to the line like that. Do the same on the other side. Bring this over. Lost my
edge. There it is then. And bring that. So it's just a tiny bit off
like this. There we go. Let's do the same on the bottom. Let's bring the bottom up now. And here's the line
of our plinth, and I just want to be ever
so slightly below it. By about that much. That should be fine.
Roughly on that. It's okay. Alright,
so that's cool. So now we've got our plane. Let's go ahead now and go back into solid mode for a while. And I think what
I want to do now is go ahead and hide the rest. So I'll tap out of Edit mode for a moment. Select that plane. Come down to our island
list here on our outliner, and we can see the plane. That's the one that's
highlighted here. I'll show you another
little trick. If you hold down the
left mouse button on our little eyeballs and just
drag it down everything. There we go. So now we
just have our plane. Let's go back to one so
we can see this nicely. And let's go ahead and
go into wireframe mode. Press let's tap into edit mode. Let's press two so
we can select edges. Let's select this top edge here, and let's press Control R, and let's roll the mouse wheel to get two edges like this. Let's go ahead and scale
those up in the X axis, or press S&X and
go and scale those up until they're about
center with our rails, with our vertical rails. They roughly. We're
not going to be exact. That's fine. Okay,
once you've done that, we can press three so
we can select faces. Wrap this face, this
face, and this face. And now let's go ahead
and press I and inset and inset them till we
get something like this. But don't tap again.
Once we've done that, we realize that we've
still they're joined here, and we want these
to be individual. So go down to the individual tab here in your inset faces
and click on that. And now we've got some
nice even gaps throughout. But these gaps in the middle
are a little bit too wide. They're double the
width of here, so that's not ideal. So I think we'll just
tweak that manually. So I think the first
thing I'll do is I'll press two so I
can select edges, and I'll grab this edge here, and I'll grab maybe
this edge here, and I'll go ahead
and just take those over a little bit like this. And I'll grab this
one, hold shift, and grab this one and take those back in the
opposite direction just to manually narrow that up
a little bit like that. There we go. That's cool. Now I want to put some loops
in on the horizontal, so I'll make sure I'm
an edge selection. I'll select this edge here, and I'll press Control R, and I'll roll at mouse wheel once to get two edges like this. Let's go ahead and
position those now. So I'll just move
those up a little bit. And this bottom one is now midway between those two
drawers, so that's okay. So I'll deselect,
and I'll hold Alt, and I'll select
this one like this. And I'll just move
this one up until it's kind of midway on this rail
here. And that's cool. Once you've done that, we
can delete some of this. I'll grab this one whole
shift, and grab this one, this one, this one, this one, not that one. Sorry. Lose that one. This
one, this one, this one, this one,
this one, this one. This one, this one,
that one, that one. Okay. We got through them. Once we selected all of those, right click and go ahead
and dissolve those edges. Okay, so that's cool.
So the next thing I want to do is go
ahead and press three now so we can select faces
and select this face here, hold shift, and select
this one and this one. And also this one and this one, zoom in a little bit, and now go ahead and
press I and inset, and go ahead and
create a gap between our doors and drawers and our main frame like
that. That's cool. That's just fine. It
has actually created a slightly wider gap
between these draws here, which is the same
kind of issue that we encountered with these
vertical rails here. So I think we'll just
manually deal with that. So we'll press two so
we can select edges, and we'll select maybe
this one and this one. And we'll go ahead and
scale those down the z. So I'll press S and Z and go ahead and bring those down
just to reduce that gap. So it's similar to the rest
of the gaps, and there we go. And now we'll select
this one and this one, and we'll press S and Z and go ahead and bring
that down, as well. So we've got about a similar gap to the rest of the
gaps. And that's. All right. That's looking
good. That's looking great. So I think the next thing
we need to do is create these kind of recesses
in the middle of these. So let's do that next. So let's press one again to get us that
nice orthographic view. And let's press three
so we can select faces, we'll grab this
one and this one, and I'll go ahead
and press I again, and we'll inset these to get those inset faces
on our drawers, and that's about nice
for me just like that. Now we can select this
one and this one, and we can press I again and
go ahead and inset those. And just judge that. And I would say, that's
about right like that. Okay, that's all
cool. Okay, let's go back to solid mode now for a while and see
how we're doing, and it's all looking
pretty good, actually. I think the next
thing you want to do is go ahead and delete
the set of edges here. So I think we'll do that next. Sorry, these set of faces. So if you go ahead
and hold Alt and just go to this little
corner here and click on it. I'll select that
entire loop of faces, hold Shift and Alt and repeat that process and do that
again, shift and Alt. And we can do that with
the other ones, too. So shift and Alt, grab this one and
one last one to do. So shift and Alt and
grab this one as well. Once we got all those, we can right click and go ahead and delete those faces,
and there we go. Alright, this is looking good. So the next thing I want
to do is press A for all, and I'm going to go
ahead and press E and extrude those back to get
some thickness in everything. And we'll just eye this up, and that looks about right
to me. That's great. And then after that,
the next thing I want to do is grab this face, this face, this face,
and then this face. And let's go ahead and press
E and extrude those into. And we'll take those in till
we get something like that. There we go. That's really cool. That's looking good. Okay, so
let's tap out of Edit mode. Let's go ahead and
bring back the rest of our kitchen island so we
can see what's going on. And let's go ahead
and select it. And let's go ahead maybe set the origin to the geometry and bring it forward
on the y axis. And just position that
where we want it. I kind of want it. Something
like that looks good to me. Do I want to send I
think we're going to send the plinth
back a little bit, so I'll grab this
plinth and just take it back a little
bit to create a step. To about there like
that, that's good. Okay, so what else
do we need to do? I'm seeing by the
change of color in our face frame here that I think the normals are
wrong, so I'll select it. I'll tap into Edit mode,
and I'll press A for all. I'll press Alt N, and I'll go ahead and
flip the normals, and there we go.
That's worked out. Okay, so the next
thing I want to do is go ahead and apply
a bevel to this. So make sure it's selected, add, modify,
generate, and bevel. And obviously, that's too much. So let's do our standard thing. Let's add two zeros to the
right of the decimal point. Let's zoom in on this
and see how it looks. And I think I'm happy with that size of bevel
on this, but let's, of course, increase the
segments to four, in this case. And, yeah, I think
that's absolutely fine. Let's go ahead and
apply this bevel. All right. That's cool.
We're looking good. Okay, so I think the next
thing we can do is go ahead and make a copy of
this for the opposite side. So select the object, right, click, set the origin
to the three D cursor, and now go ahead
and press Alt D, right click twice,
and go ahead and mirror in the Y axis.
And there we go. Let's move our length
back a little bit, maybe. Take that back a little bit. And yeah, that's good like
that. Okay, that's great. So I think in the next lecture, let's go ahead and
do our end panels, and then we'll take a look at our little circular
table here on the side. Alright, thanks very much. And I'll see you on the
next one. Bye bye, Fine.
24. Lecture 23 Island Part 3: Hello, and welcome
now to lecture 23. And in this lecture,
let's see if we can finish off our kitchen island. Let's see if we can
get this one done. Okay, so the first thing I
want to do is do our N panels. So let's do that first. So the cursor is still center of our worktop,
so that's great. So let's go ahead
and press Shift A, and let's go ahead
and bring in a cube. Alright, I'm going
to press three so I can see this from the side, and I'm going to tap
straight into Edit mode, and I'm going to press S and
I'm going to go wireframe. Let's press one so we
can get the vertices up, grab these top
vertices and go ahead and bring these down like this. Again, let's put
those just underneath the worktop and take a second
to position those nicely. And again, I'll
leave a tiny, tiny, minuscule little gap
between the top side panel. Let's grab this side
now and bring this in. And let's do the same here. Just take a second, just
to put a tiny gap between. And that looks
about right to me. And we'll do the
other side as well. Grab these ones,
pull those over. Bring those back. And again, just a tiny gap
between. That's plenty. Okay, let's grab the bottom
vertices now and then bring those up and make them. So they're just below or yeah, just below the plinth, something like that.
Okay. That's cool. Let's have a look at this in
the press one on the numpad. See this from the front. Let's grab these vertices here
and let's position those. I'll bring those until they're
level with the plenth. I'm going to send the plenth
back a little bit, I think. So bring those so they're
level with the plenth now grab these ones as well and go ahead
and take those back. Just sort of set the
thickness of our end panel, and I'll make it maybe something like that.
I think that's good. Okay, I'll tap out of
Adi mode with that, and I think I'm going
to go ahead and delete this plinth like that, and then let's grab
the other plinth, and let's go ahead and
take that one back. So I'll go ahead and press
G and X and go ahead and take that back until it's
something like that. That's about right,
I think. All right. That's cool. Let's go
back to solid modes. I'll press and then hit solid. I'll select this end
panel like this, and I'll hit the forward slash
on the numpad to isolate. Alright, so let's grab it
and tap into edit mode. And let's go ahead and press two on a keyboard so
we can select edges. I'll grab this edge here, and I'm going to put some
control loops on this. So I'll press Controller. I'll take the cursor
up to the edge, and the control loop
will just pop in. And I'm going to
roll the mousewheel to create some loops. And I think about that many
is good. So how many is that? I've done seven cuts. Okay, so those still selected, I'm going to go ahead
and press Control B, and I'm going to put
a bevel on those. And I'm going to put
a bevel thickness of about that much like that. And I'm going to put this
out two segments just Okay, so I'm going to grab
this edge here now, and I'll hold Shift and select this one and then this one, and then this one, this one, and this one and this one. And I'm going to
take those back in the X axis to
something like that. Alright, I'll tap out a
radio mode with that. We'll check the scale,
and that's all good. So let's go ahead and
put a bevel on this, add modifier,
generate and bevel. Okay, so I'm going to increase the amount of zeros to the
right to the decimal points. I'll put two there, click Enter. I think am I happy with that? Let's increase the
segments to three. I think I'm happy with that. I'll leave that alone like that. In fact, I'll go ahead and apply that bevel, and there we go. That's cool. Okay, I'll hit the forward slash to
bring everything back. And now we've got
end panel in place, and that's looking great. Alright, we deleted
the plinth on this side because that
was our intention. So now we can grab this
plinth, hold shift, and select this panel and make sure the origins are in the right
place, which they are. So what I'll go ahead and
do now is press Alt D, right click twice,
and go ahead and mirror in the X axis,
and there we go. That's the other side
in place, as well. In fact, for some reason, these ones have actually
come over a little too far, but I won't worry about it. I'll just go ahead and just take those back just a little bit. And that's good.
That's just fine. Let's just check the other side. That's still good. And yeah,
that'll work out just fine. Okay, so the next
thing I want to do is work on our little
circular table, which you can just
about see here, which goes on the
side of our island, which a couple of little
stools will run up against. Kind of place where
you just want to drink your coffee first thing in the morning and look
at your newspaper, something like that, anyway. So we can see the outline
of it here on our plants. Let's press seven. And let's
go ahead and press Shift A. And let's go ahead and
bring in a cylinder. So I'm going to increase the vertices count on this
one, quite high, in fact. I'm going to go to
maybe 70, I think. There we go. I'll press seven
to see this from the top, and I'll press S and
I'll go into wire frame, and I'm going to go
ahead and press S and scale this down like this, and I'll take it over
and drop it in position, and I'll go ahead and
scale it down a tiny bit. And that's just what I want.
That's absolutely fine. Let's press one on our numpad so we can see
this from the front now. And let's go ahead and scale
this down just in the z. So let's press S and z and
go ahead and scale this down to something like this. I'm kind of matching the
thickness of our top. Okay, I'll take this up now, and I'll put this somewhere
like there, I think. Kind of like that.
That'll be fine. Okay, so let's go ahead and
move the cursor to this now. So let's press shifts and
cursor to the selected. All right, let's press
seven again now. And let's press Shift A, and let's bring in
another cylinder. So we'll leave the
vertices count at 70, and we'll hit S and go
ahead and scale this down, and we'll make this I'd
say something like that. Seems good to me. I'll press one on the numpad so I can see
this from the front again. And I'm going to go ahead and
scale this down in the z, so I'll press S and z and
just go ahead and scale this down All right, so I'll bring this
more into position, and I'll tap into
Edit mode with it, and I'll press one so
I can select vertices, grab all these top ones now, and I'll go ahead
and press G and Zed and bring those down. And let's zoom in a bit
more, go G and Z again. And just drop out about
there is good with me. Okay, let's repeat that
process on the bottom now. Let's grab these bottom
vertics and we'll press G and Z and go ahead and bring those down and drop
that there with a wee, tiny little gap between them. Okay, so that one's
good. So let's tap out of Ed mode
with that one. And let's go ahead and
press seven again, and we'll press
Shift A and mesh, and we'll go ahead and
bring in another cylinder. Let's go ahead and
scale this down again. And let's keep on scaling
this one down until it's just clear of the side panel,
which seems about that. Let's press one to see this from the front and bring this down now and put this just
like that. That's cool. Let's tap into Eddy mode with it and see where it's all at. And in this case, I'll let these vertices sort of go up inside this other one, the sub top, just like that, because we'll never see
the underside of it. And now I'll grab
these lower vertices, and I'll go ahead and
bring these down, and I'll set those about like
that. I think that's good. Okay, now I want to
select this bottom face. So I'll press three,
select this bottom face, and press I and go ahead and insert to
something like that. I'll press one again on a numpad to see this from
the face, from the front, and I'll press E, and
we'll bring this down now until it's just
short of the floor. And let's have a look at that and take it down a tiny
bit more to about that. That's cool. All right. Let's go back to solid mode now. So I'll press S and
go back to solid, and let's have a look at
this and see if we're happy. And I think that's good.
It just notches into the worktop there,
but that's okay. I think that's fine. I
think that's looking good. So the next thing we do is
let's tap out of Ada mode, and let's start applying
bevels to our surfaces. Let's select the first
one at the top here, and let's press Control A, and let's apply
rotation and scale. Let's add our bevel modifier. And let's put two zeros to the right of
the decimal point, click Enter, and let's
have a look at this. Maybe turn that one into a
two. Let's see how that looks. And let's increase our
segment count to four. And am I happy with that? I think that's a bit
much. I'm going to put that two back at a one, I think. There we go. I'll leave
that just like that. I'll apply that bevel modifier, let's go ahead and do
a shade auto smooth on that and there we go. That's good. All right. Let's repeat that
process on this one here now. Let's check the scale. It's out, let's press Control A, and apply rotation of scale, add our bevel modifier, add two zeros to the
right the decimal point. I'll leave the bevel
the same as the top, that'll be on one
and I'll increase the segments to four.
Let's have a look at that. It's hard to see on a on a
curved surface, actually. But, yeah, I can see
the bevel on that. I'm happy. So I'll go
ahead and apply that. Let's go ahead and
shade or smooth that, and, yeah, that's looking good. Okay, so let's do the excuse me. Let's do the column next. Let's grab this, and
we'll fix the scale. And let's add our
bevel modifier. But two zeros to the right the
decimal point and increase our segments let's have a look at it from
the bottom there. And yeah, I think that's fine, so I'll go ahead and apply that. And let's go and do a shade
oro smooth, and there we go. Okay, so that's our
kitchen island finished, and I think that's
looking pretty darn good. So in the next lecture,
we'll start doing kitchen cabinets here at the back either side
of our chimney. And we will utilize
quite a few components from our island to do that, because at
the end of the day, that's the name of
sort of rendering architectural renderings is
trying to do things well, but also trying to save
time where possible. So we'll do just that. Okay, thanks very much. And I'll see you in
the next lecture. Bye bye, Fino.
25. Lecture 24 Base Cabinets Part 1: Hello, and welcome
now to Lecture 24. And on this lecture, let's have a go a start doing some
of our base cabinets that we can see here on the sort of walls
between our chimney. Let's see if we can
make a start on those. We won't be able to do
it all in one lecture, but we can make a
good impact on it. And like I said
before, we are going to utilize quite a lot from our island because it's
good practice wherever possible to keep
your work flow fast. Okay, so let's see
what we can do. So I think the first
thing we need to do is create a subgroup. So let's expand on cabinets. So we have Ireland.
Let's click on Cabinets again and
create a subfolder. Let's double click on it, and let's call this
base Cabinets. There we go, click Enter
and we'll keep that selected so that we can drop our objects
straight into it. All right. The next thing
we can do is actually just take this top here and that's the first thing
we'll go ahead and use. Whatever we do, we don't
want to ever move it on the Z axis because of the fact we're
making a copy of this, if we keep it on the Z axis, then the height of the
base cabinets will be exactly the same as
our island cabinet. Let's go ahead and
press Shift D and X, and we'll bring it over
on the X axis like this. Alright, the next
thing you want to do is bring our walls back. So let's hit the little eyeball on our walls and
bring those back. And let's press seven on numpad so we can see this in
the orthographic view, and let's go into wireframe. Alright, let's take this
back now on the Y axis. And let's take this back
until it's just about touching the back wall.
That's good like that. And now let's go ahead and
tap into Edit mode with it, grab these front vertices here, and we'll take those
back until they're kind of middle on our
reference image. So middle of that
back line like that. So we can select these vertices
now and we'll take those back until they're just
about touching the chimney, but not quite, if
that makes sense. So touching but not
touching that we'll go to about that like that.
I think that's good. Let's grab the other ones now. And they're here, and
we'll take those back as well to let's have a
look. Let's get closer. And we'll put those about there like that,
it's about right. All right, so let's press
two so we can select edges, and we'll grab that edge there. And we'll press Control, and we'll bring a loop in and
we'll slide that loop over until it's level with the
worktop going this way, going backwards here like this. And we'll put that
about there like that. Let's press three so
we can select faces, and we'll grab that
face there now, and we'll press E and then Y and bring that
out now like this. Let's press seven again so we
can see this from the top. And let's go ahead
and bring this out now until it's level with
our reference image worktop, which is about there like that. Okay, and just like that, we've got our worktops in place. Let's press Z and go back
to solid for a moment, and let's go ahead
and tap out of Edit. Alright, so the next thing
I want to do is utilize this face frame here
and doors and drawers. And actually, we can
grab the plenths well. And once we got those,
let's go ahead and press Shift D and X and bring
a copy out like this. Okay, so let's press seven
to see this from the top. And let's go back
to wire frame now. And let's go ahead and
set the origins to the geometry and go ahead and pull these
back now, like this. So we'll take those
behind the worktop. We won't set them exactly flush. We'll take them back a little
bit to something like that. Maybe we take it over
a little bit this way to about there like that. And let's press one so we
can see this from the front, and we can see the
reference image behind. So we'll kind of use
that as a guide. And I want to hide the island. But the moment this duplicate is still in the island group. So let's press M. And let's go to cabinets
and base cabinets. And let's go ahead
and click on that to put that over there
in the base cabinets. And we can select
the top, as well. Let's grab that and the plinth. Let's grab that, too.
And let's press M, and let's go ahead and drop
it in the base cabinets. Now we can go ahead and hide our island
units for a while. All right, so let's grab this one now and maybe
this one as well. And let's tap into Edit mode. Let's press one so we
can select vertices. And we'll grab all these
vertices this side. And let's go ahead and
pull those over now until they're just
up to the chimney, Which is let's zoom
in a little bit more. I'll take it back a little bit so I can find out where it is, and it's right there like that. So I'll put that just there. Now this side is a
little bit more tricky because we don't have
the units in yet, but I'll grab those and I'll go ahead and
bring those over, and I'll go ahead and drop those there for the moment,
about there, I think. Now we can see where the door handles are on
our reference image. So I'll grab all those vertices with some of the drawer
vertices and the door. Let's grab those and bring those over now until they're level, just about level with the edge of the drawers on that reference image and
that door like that. That's great. And we'll do
the same with these now. We'll grab these ones, and we'll go ahead and
pull those over. We're making the doors narrower
and the drawers wider, and that looks about
right like that. Okay, let's go ahead
and press Z now and let's go back to solid mode. And let's go ahead and tap out
of edit mode for a moment. And there we go. So
that's good progress. That's looking good already. Let's have a look at the
overhang to make sure that the kitchen worktop has an
overhang to our cabinets, and it has, and I think
that's about right. Yeah, I think that's
looking good. So the next thing I want to
do is take the end panel from the island and put it here
or a copy of it just here. So let's bring the
island back again. And let's grab our N panel
here and let's go ahead and press Shift D and X and
bring a copy out like this. Let's go ahead and set the
origin to the geometry, and let's press z90,
Enter. There we go. Let's press seven so we
can see this from above. And maybe let's go back to wireframe and let's go ahead and take this
over now like this. Take this back like this. And let's zoom in on it, and let's set where this
panel is going to be. So I want the worktop to
overhang the panel a little bit, maybe about that much, and here as well, I want that to be
just set back from the front face of the
worktop by about that much. So you can see this panel is actually in the wall
at the moment here. So we will do something about that. We won't
leave it like that. But at this moment, I'll leave it just so we have the option to change
things if we want to. Okay, I'll press one, so we see this from the
front for a moment. And let's go ahead and tap
into Edit mode with it. We'll grab these lower
vertices here now, and let's pull those
down to the floor. And let's take this in and
go ahead and pull this down. And again, we'll leave a tiny little bit of a gap
to the floor so we have a nice little shadow
detail of about that much. Okay, so, let's have
a look at that. Let's tap out Eta mode, and let's go back to
solid mode for a moment. And, yeah, that's looking good. I think that's looking great. So let's go ahead and duplicate these cabinets now to
the opposite side. I think that's the
next thing to do. So to do that, I'm
going to bring back our roof structure, so let's go ahead
and turn that on. And I think what I needed more really was our roof panels. So I'll go ahead and turn
one of those on like that. And I'll grab this one, and I'll tap into Edy mode. Press three, so I
can select faces, maybe grab that face
there like that, and I'll press shifts
and I'll bring the cursor to there so I know it's perfectly
centered in the room. Okay, so now that
I've done that, I can go ahead and tap
out of Edy moode with that and go ahead and
hide that one again. And we can go ahead and
hide our roof structure. I didn't really need that.
That was a bit of a mistake. Okay, let's grab this one now and then this panel as well, and this main face frames
and that little plinth, let's grab all of those, and let's right click and set the origin to the three dcursor. Now let's go ahead and press Shift D and double click twice, and let's go ahead and mirror to the X axis, and there we go. Now, these may not be perfect. There may be a little
bit of tweaking to do. Let's check that. Let's press seven to see this from the top. Let's press Z and
go into wireframe. Let's see if we've got some
light tweaking to do we do. Let's tap into
Edimde with those, let's go ahead and make sure
we can select vertices. I'll press one, and I'll grab all these vertices here now
and I'll just pull those over until it's just
with a tiny little gap. Just like that. I
think that's cool. Okay, so what else
do we need to do? Let's check it to the wall here. So let's press seven again. And let's grab these
vertices here now. And which are ones,
these ones here. And let's make sure that
that's just off the wall. So that will be there like that. Okay, so let's go back to
solid mode for a moment, and let's tap out of Edda mode, and let's look at our handiwork. And you can see how quickly we've created our wall cabinets. And yeah, they're looking great. Okay, so in the next lecture, we'll go ahead and
do these returns here on this one and
fill in this gap here. And on this one, I need to do, like, a kitchen sink, as well. So we'll do this unit
slightly different, and we'll put a sink
unit in there as well. Okay, thanks very
much. And I'll see you in the next one.
Bye bye for now.
26. Lecture 25 Base Cabinets Part 2: H Hello, and welcome
to Lecture 25. And in this lecture, let's
go ahead and do a sort of face frame for
this side here, this lowest face frame. And I don't think I can
use this one as a copy, modify, because
it's got drawers, and I don't think I want
any drawers on this side. Just because of a practical
side from the kitchen, we've already got
drawers on the island. We've got drawers here
and we've got drawers, sorry, on the
opposite side here. So I don't think I want
any more drawers on the return on this side or
on the opposite side here. So let's go ahead and
make a start on that. So I think the first thing
I want to do is go ahead and hide our windows and walls. So let's go ahead and turn the little light off
on that. There we go. And I don't think I want
to see the island, either. So let's go ahead
and hide the island. Ah. But I did want
this end panel. So let's bring the island
back for a moment. Let's select this end panel. Let's press M. Let's
go to cabinets and put it in the base
cabinets folder. And there we go. Now we can go ahead and
turn off our island. That's cool. Let's bring the origins or the
cursor back down. So let's press Shift S, and let's bring cursor
to world origin. There we go. And let's go
ahead and bring in a plane. So let's press Shift A, and let's got a mesh, and
let's bring in a plane. There we go. Let's rotate
that on the y axis. So let's press y90, Enter. And let's go ahead and take
that back a little bit. Something like that. And
let's press three on our numpad so that we can
see this from the side view. Let's take this over a
little bit like this. And now that we've done that, we can kind of see our end panel here and we can see our
face frame panel here. So let's work this out. Let's go ahead and
tap into Edit mode, and let's press Z and
go into wireframe. So let's bring these
top vertices down a little bit until they're
just underneath the worktop. Let's zoom in a little bit
and see where it needs to be. And about there is good to me. Let's do the side now. Let's grab these and take
this over like this. Let's zoom in a little bit more. Let's go ahead and
press G and Y, and take this over like this. Let's grab the base ones now, and let's take
those up like this. And let's press G and Z and take this up like
this. There we go. That's cool. And let's
do the last ones now. Let's grab these ones, and let's go ahead and take that over to the end panel like this. Let's take that over
that last a little bit. To there. That
looks about right, I think. Yeah, that's good. Okay, let's press
two so we can select edges and grab this edge here. And that's press Control. And how many doors do we want? Let's roll that mouse wheel
and get some doors in there, and should we go four
or shall we go five? Five makes quite small
doors, doesn't it? And that's an odd
number, as well. So if you think about the
cabinets behind the doors, that would mean like two double
cabinets and one single, which you can do,
but aesthetically, I think I'll go four, which is kind of similar
to the width of the doors on the other
side as well on the side, which is on the same
side as the chimney. Am I making sense? I hope so. Yeah, on the same
side as the chimney. So I think that's similar kind of width, so I'll go with that. Okay, let's press three
so I can select faces, and let's grab this
one and then this one, this one, and this one. And let's zoom in
because I want to use this return
panel as a kind of a reference now
because I'm going to inset until it's level
with that there, which is the gap between
the door and the frame. So I'll press I and go
ahead and inset that, and I'll use the grid pattern behind as well as a reference. And that is about it like that. Let's zoom out, and we need
to make sure that this is on individual on inset
faces. And there we go. That's cool. So let's do that again now
to create the gap. Let's press I and bring this in until we get the
gap between them, which is about about there, I'd say that's about right. Let's make sure that's
individual already, and it is. So now we've got
another inset to do to make sure it's
parallel with that one. And that's where the door
sort of recesses in. So let's press I
and inset that one. And let's use the
grid pattern behind. And I'd say that is about
right there like that. Let's just zoom out
and make sure they're still individual, and they are. Again, we've got the
problem and it's just too thick in the middle
because of the inset. So let's fix that. So let's press one so we can
select vertices. And I'm going to select
all of these vertices and I'll hold shift and
grab all of these ones, and I'll hold shift, and I'll grab all of these ones. And we won't do the end because
that's the right width. And now let's go ahead and
move that over on the y axis. Until we get something
like that, I'd say. Let's do the same now.
Let's grab these ones. I whole shift and grab
these ones and these ones. And let's go ahead and
take that over the Y axis now to get about that. That's about right.
That's what I want. Okay, so that's looking good. We can go back to solid
mode now for a moment, and let's press three
so we can select faces and let's go ahead and hold down Alt and just select
that one like that. Okay. Let's press Shift and Alt now and just select
this little edge here, and grab this one, and press Shift and Alt and
select this one. Let's do it one last time. Let's press Shift and Alt and select this one
here like this. Once we get all of
those, let's press X and delete those faces. And there we go. That's cool. All right, so let's
extrude this. Let's press so we can
select all faces, and let's press E and X and go ahead and take that back to get some
thickness in this. And it doesn't matter too
much what the thickness is. We need a little bit
of thickness so we can recess those center
panels in the door, but we'll never be able to
reference that thickness. So it doesn't matter too much. I'll go with
something like that. Now we can select this one, this one, this
one, and this one, and we can go ahead and
press E. And inset that as well like that to get the
thickness of our door panels. And that's cool.
That's looking good. So we can tap out of dit
mode for a moment now. I think we're done with that, and we can go ahead and take that back now until we're
in the right position. So I'm just going
to press G. Sorry, just get myself in position. I'm just going to press G and
X and take this back now. Until we've got that
corner line through, which is about there like that. Let's have a look here
and see how it's looking, and that's looking good.
I'm happy with that. So I think the next
thing we need to do is bring a plinth over
and set that position. So I'll grab this plinth, and I'll right click and set
the origin to the geometry, and I'll go ahead
and press Shift D and Y and bring a
copy out like this. Okay, let's rotate
that in the Z axis. So I'll press and
Z and 90, Enter. And let's go ahead and
take that back like this. Let's take that over
on the Y axis now, and let's zoom in
on this corner. And it's starting to run a
little bit slow blender. So what I'll do is I'll
hit the decimal point to the numpad and just
center on that plinth, and now it'll zoom
in fast again. So I'll go ahead and press G and Y and take that
over a little bit. And now I'll go ahead
and press G and X and bring that back a
little bit until we've got that corner
where we want it. Let's have a look at it here
and what we need to do. I'll press three so we
can see it from the side, and I'll grab this one and
tap into Edit mode with it. And let's go into Y frame two, and let's press one so
we can select vertices, grab those ones there, and
move that over like this. Let's set the
position on this one. And that's good. Let's just have a look at the other side. Yeah, I'll leave that just
where it is. That's fine. Okay, so let's go back to solid mode now and see
how we're looking, and I think we're looking good. I'll tap out of edit
mode with that plinth, and I think looking
at this panel, I'd say the normals are
the wrong way around. You can kind of see that it's
a slightly different color. So let's grab it. Let's tap into
Edit mode with it. And let's press A for O. Let's press Alt N, and let's flip the normals. We can tap out of Edit mode now, and, yeah, that's fine. Now. That's looking better.
What else do we need to do? Well, we kind of
want to put a bevel on this, let's do this next, but I can see that the normals, sorry, the rotation is wrong. So let's select it.
Let's press Control A, and let's go ahead and click on rotation and scale.
And there we go. That's cool. So let's
zoom in so we can see it. And let's go over to
our modifiers group. And let's add our
bevel modifier, so generate and bevel. And, of course, let's
put our standard two zeros to the right
of the decimal point, click Enter, and let's have
a look what we've got. Whoops. Zoom in on
it so we can see. Let's try a two and see
what that looks like. And let's add, of course, four segments, or shall
I go for one on that? I think I'm going to go for one, so I'll replace that two for a one and click
Enter, and there we go. I'll go ahead and apply that
bevel, and there we go. That's that done, and
that's looking really good. So let's bring everything back so we can see our progress. So let's bring back our walls and windows and our
roof structure. And I am seeing that
sort of the cabinets and these columns are sort of intersecting, and
we don't want that. So let's select these columns. This one here and this one and this Oh,
yeah, that's all of them. And let's press seven, maybe, so we can see
this from above. And maybe now let's
just bring that over a little bit until the columns aren't touching the ends of the
kitchen cabinets. Okay, we got a little
repair here to do, as well, so let's maybe grab this one whole shift and grab this one. Let's tap into edit
mode with those. And let's press and
go into wireframe. We'll just grab those like that. Let's zoom in a little bit. And let's go ahead and
press G and Y and fix that. We'll bring those
back up to there like that and tap out of
domode with those. Maybe select this
one, hold shift, and select this one, and let's tap into Edo
moode with that. And let's select
these ends here, whole shift and grab these ones. And let's go ahead and press G and Y and take
those back as well, until that's about right, which is I like that. It looks like, to be honest, pressing seven and
looking at the reference, I didn't have those columns
on the right place. I should have actually checked this reference, but it's okay. It's not a big deal.
We've fixed it. I could actually tap out of Edit mode and just grab this one and maybe reposition this one over a little bit
more like that. And, yeah, that's fine. Okay, so that's looking good. Let's go back to solid mode
now and see what we've got. And yeah, that's better there. That column is now
not sort of touching that end of the
kitchen cabinets. Let's bring back
the rest of things. What else can we bring back?
Let's bring back our island. And we haven't got
windows in this, so let's open up our Windows file and
we can bring back in our small windows and our roof lights and just see
how everything's looking. And it's looking
good. I'm liking the progress that
we've got here. It's really starting
to come together. Excellent. Excellent.
Who's it? Excellent. It was Mr. Burns
from the Simpsons. I remember that now. Mr. Burns. Ah, I like the Simpsons. I haven't seen that in ages. I'm sorry, I'm digressing again. I'm going I'm forgetting
what we're doing. We're making models in blender, not talking about the Simpsons. Let's go back to our kitchen. Okay, so I think that's
actually it for this lecture. Let's leave that on Simpsons. And in the next lecture,
we'll start looking at our return cabinet just there. Okay, so let's go ahead
and do a save on this. Gonna save our good progress. So Express control us. And I'm off to
watch the Simpsons. I'll see you in the exect
you. Bye bye for now.
27. Lecture 26 Base Cabinets Part 3: Hello, and welcome now to Lecture What are
we on Lecture 26. And in this lecture, let's go ahead now and
finish our base cabinet. So we have this frame
to put in here. But also, this is the
elevation that will have the very traditional
looking kitchen sink in there. So we'll put that
one in as well. Well, we won't model the
sink in this lecture, but we'll create the cutout for that. So we'll do that, too. And there is something
else I noticed between lectures that I didn't move this column here when
I moved the other ones, when I moved these
beams and the rest. So I'll just move
that one. So I'll grab it and I'll press seven. And you probably didn't
miss it, but I did. So I'll just move
this over like this. There we go. That's
cool. That's done now. Okay, so let's hide stuff again. First of all, we'll compress
the reference file. We won't hide it. We'll just compress it to make
things look a bit better. And do we need walls
and windows and doors? I don't think we do,
so let's hide that. And let's go ahead and hide
our roof structure, too. We don't need that. So we
just have our cabinets. And I think the next thing we're going to do
is hide the island. But I think probably
this panel is still part of the island.
Let's select it. And you can see that the island has got this icon on it now, which is saying that there's a selected component
within that folder. So that means that it is
still part of the island. So let's go ahead and press M, and let's go down
to cabinets and let's put that in the
base cabinets folder. There we go. Now we can go
ahead and hide the island. That's done. I also want to hide this side here so we
don't confuse ourselves. So we could just select it
all and press H and hide it, but I want to be a bit
more organized than that. So what I'm going to do
is create two subfolders. So this will be
the left cabinets, and that will be the
right cabinets so that we can hide that one
here on our outliner. So let's go to our base
cabinet folder like this and let's hit the
little subfolder icon. Let's double click on it, and let's just call
this left. Now are you? And let's click on our base
cabinets folder again. Let's create another subfolder, and let's call this
right. There we go. That's cool. So let's
select everything here. So I'll just create a selection
square around everything. And this is all
highlighted here. So I'm just going to hold
down the left mouse button and drag and drop that into
the left group like that. And now we can go
ahead and hide that. So let's select all of this now. And let's go ahead and drop that into
the right like this. There we go. That's
better. So now we're quite organized in this. We could go ahead and
compress our left folder. And we've really now this is
nicely organized outliner. There is lots of
components already, but they're nicely organized. We can compress our folders and see exactly what
we're working with. So this is nice organization. Alright, so now that
we've done that, let's go ahead and
bring in a plane. So let's press Shift
A and mesh and plane. There we go. Let's rotate
that on the Y axis. So let's press Y, 90 and enter. Let's press three, so we
see it from the side, and let's go ahead and
bring this over like this. Okay, let's go into wireframe, and let's tap into Edit mode. Let's grab our
vertices. Kind of. We've done this a few times now, so it's the same kind of thing. We'll just bring this down
and drop that in position. I'll just bring it down a
little more to see where I am, and then I'll bring it back
up into position like this. Okay, let's do this,
on this side now, I'll bring this over like this. And now let's get close to it so we can see
what we're doing. And let's press G and Y and bring that over and leave a minuscule
gap between them. Something like that is good. Let's grab these two vertices on the bottom, bring those up. And let's see where we are. And now let's press Gans E and take that up until we're in the right
position with that one. And last ones is just
here, as we know. Let's bring this over
to the end panel like this and drop that in position. And there we are. That's cool. All right, so I guess
the next thing we need to do is, Oh, let's take that over
closer to our piece, so I just we can relate
to it a bit more, drop that in maybe
something like that. And now let's tap into
Edit mode again with it. And let's press two, so
we're selecting edges. Grab this one, and
let's press Control. Let's roll that mouse
wheel and see what we get. And I'm thinking this time, I'm going to do more because
those two middle doors, those two middle gaps, that'll be the size
of our kitchen sink. It is a big sink that
we're putting in. It's a really old
traditional one. So I think, yeah, those
two middle ones will be part of the
cutout for the sink. And then the two on
the left and the two on the right will
be full size doors. So let's go ahead and click on that where it is like that. Okay, I think now we can
go ahead and isolate this, so let's tap out of
Edit mode for a moment. Hit the forward slash key
and isolate it on it. Let's tap back into
Edi moode with it. And let's select the edge here. Let's press Control and
put a loop in here, and I'll take it
up to about there, I would say is about
where I want it. So nearly, if not, two thirds of the way up, just under two thirds
of the way up. Now that I've done that, I will select this edge
here, this edge, this edge, and this edge, I'll right click and I'll go ahead and dissolve those edges. Let's press three. Select
faces, grab this one, and then this one, let's right click and delete those faces. And that's cool.
That's what we want. Okay, let's press
three so we can see this from the
side again nicely. And let's select these faces. Actually, I need to
bring stuff back. I need to bring back this
side so we have a reference. So we'll hit the forward slash
key to bring those back, and then I'll press three so we can see that
from the side again. Okay, so we're going
to inset again, and we're going to bring it
down to that line there, so we have the outer framework. So let's press I inset that. Let's use our frames the grid at the back there to sort of get our
reference from. And that's about right to me. I'll click there. And
I can see without doing anything individual is not selected, so
let's select that. And just to be safe, let's
zoom out and see that that's correct. And
it is. That's fine. Okay, let's press I again
and let's inset again. Use the grid as a reference
to what we're doing and create our door
gaps, and there we go. That's cool. And individual is still selected,
so we're good there. So let's press I again now and go ahead and create the frame to our doors and use the grid as a reference and put that just
there like that. That's cool. Let's
zoom out on this and see what we're doing and see
what we want to achieve. All right, so what do
we want to do now? I think the next thing I
want to do is go ahead and reduce these widths again, as we've done previously. So let's press one so
we can select vertices. And I'll grab all of
these vertices here, and I will grab
these vertices here, and I will grab
these vertices here. And now let's go ahead and take that over a
little bit so we can reduce the gaps between these. Now let's select this
and hold down shift, and select this and hold
down shift and select these. And now let's take that over in the opposite direction to narrow that center rail
down a little bit there like that. That's
cool. That's what we want. So actually, the next
thing we could do is maybe just reduce this one. So I'll just grab this one on its own and pull that over
a little bit, as well. Like that and do the
same here with this one, maybe just pull it over
a little bit like that. And I think that's fine now. We'll leave that alone.
I think I'm happy. Okay, let's go to solid Modo so we can see what we're doing. And let's press three
so we can select faces. And let's go ahead and delete those group of sort
of edges for the door gaps. So I'm struggling to zoom in, which is something I'm pleased
that's happened, really. This is something that happens
now and then we blend it. It just kind of locks, and it won't zoom in anymore. So we need to kind of
recalibrate blender. So there's two ways
of doing this. You can either select the object and you can just hit the
decimal point on the numpad, and that will sort
of recenter blender and allow it to sort
of zoom in again. Or there's another
way you can hold down Shift and
press B and you get these cross hairs
come up and now draw a square around the area that
you want to see closely. I'm going to say there and blender will zoom
in on that area. There's two ways of doing that. I'm pleased that happened. So now that we've done that,
let's select this group. I'll hold Alt, hover over
this little area here, and select that and
hold Shift and Alt, hover over that little area and select that and
let's move along. I'll zoom in here, I'll
press Shift and Alt and select that one.
And I'll go again. So I'll press Shift and
Alt and select that one. Move it ling along
and do that again, Shift Alt and grab this one. And last but not least, Okay. Shift Alt, and select this one. Let's right click and
delete those faces. There we go. I don't think we need these
little random edges here, so let's press two and
select this one and this one and this
one and this one, let's right click and
dissolve those edges as well. Okay, that's cool. So I think the next thing we can do is go ahead and extrude that back. Or, no, before we do that,
let's position this. So actually, let's give it a little bit of
thickness. Sorry. Sorry to sort of go all over this shop, but I
know what I'm doing, really. So let's press A,
and let's press E and X and put a little bit of
thickness to it like this. Now let's press seven, so we can see this in the
orthographic view. Let's actually tap
out of Edit mode, and let's press Z and
let's get a wire frame, and let's put this in position. So let's press G and X
and go ahead and take that back until that's in
position, I like that. There we go, Let's check
that there. And that's cool. So we could tap into
Edit mode with it now, and we could press one, and
we can select all Actually, those vertices are already
selected, so that's cool. And we will take this
back until it's to the wall like that. That's cool. I'm not too worried
about being super close to that because we'll never see the back of a cabinet. That's cool with me
what we've got there. Okay, let's go back to solid
mode and see what we've got. And yeah, that's looking
good. I'm pleased with that. Okay, so the next thing
we can do is press three, and we can select
this one, this one, this one, this one, this one, this one, and we'll go
ahead and take that back, so we'll press E and X and go
ahead and take that back to create the recessed front
panel on our doors like that. That's good. Okay,
I'll press two now, and I'm going to grab
that edge there. I don't think we
need that, so I'll right click and
dissolve that one. And is there anything
else we want to do? I think we're kind of
finished with this, so we can apply bevels
to this, actually. So let's do that next. Let's tap out of
Edit mode with it. And let's look at the scale. The rotation is out, so
let's press Control A, and let's apply the
rotation and scale, and let's add our modify it. Generate and bevel. And
let's go, you know, our usual thing, two zeros to the right to the decimal
point and hit Enter. And let's have a look at this. I'm going to leave that one,
I think, but of course, let's increase the segments to a four or three, if you like. And let's go ahead
and apply that. There we go. That's cool.
That's looking pretty slick. Alright, so I guess
next thing we could do is go ahead and grab that
plinth and make a copy of it. So let's right click on
that and go ahead and set the origin to the geometry. And let's press Shift D and
Y and bring a copy out. And let's rotate that on the z. So let's press R and Z, and nine and zero and enter. Alright. The next thing we
can do is maybe grab these two on their own and hit the forward slash key
to isolate those. And let's press seven
to see this from above. Grab this one on its
own and bring it over and bring it
back like this. And let's get to that corner
and have a look at it. And let's press G and
then X and bring it back into position like
that. That's fine. Okay, so let's bring
back everything. So I'll hit the forward
slash key again, and I'll press seven again
to see this from the top. And I'll press seven. I'll get a wire frame. And I just want
to grab this one, and let's tap into
Edit mode with that. And let's go ahead and press one so we can
select vertices. We'll grab those, and let's pull that over to our
end panel like this. And drop that in
position just like that. I think that's maybe a little
bit closer. There we go. That's cool. All right,
so that's looking good. Let's go back to solid mode and have a look at what we got. And this is looking pretty good. We don't need that plinth. Now, we're done with that, so
let's tap out of Edi mode. And, yeah, that's looking good. So, there's one more
thing I want to do. I want to create the cutout
for the sink in the worktop. So let's do that next. I think I'm going
to bring the walls back for a minute so
we can see those. And yeah, maybe it'll help us a little
bit just as we get this because I want to create
the cutout slightly just slightly smaller
than this surface here, in the Y axis, just a tiny bit smaller. But in this axis here in the X, I want to leave some of the
workup behind so that a tap, a faucet can be put in that area on that
remaining surface. So hopefully you kind of
get what I'm saying now. I'll sort of show
you as we go along. Let's grab this one and
tap into Edit mode. And let's press three
so we can select faces. Grab that face there, press Shift D and Z, and take that up just a
little bit, like that. Okay, now we want to
separate that from the rest of our cabinets
here that are highlighted. So let's press P and separate
by selection. That's it. Now that is a separate object. Okay, let's tap out of Edit
mode and grab this one. And now let's go ahead and
tap back into Edit mode. And let's press one so
we can select vertices. And let's press seven so
we can see it from above, and let's go into wireframe. Let's grab these vertices here. And let's just pull them back. And I'm really saying
just a tiny bit to something like that. Those lines there represent
the edge of the cabinet, so I've just brought
it in just a tiny bit, and we'll do the same
on this one now. I'll grab this one, and we'll just go ahead
and take that back. It's just a tiny bit like that. Okay, let's go back
to solid mode now. And let's press three, so we can select
faces, grab that one, and press E and Z and go
ahead and extrude that up in the z axis like
this. There we go. That's cool. That's
what we want. Okay, so now that
we've done that, let's go ahead and bring
the whole thing forward. So I'll tap out of Edit mode, and we can go ahead
and set the origin to the geometry and go ahead and pull that
forward like this. And let's figure
out how much room we need to put a tap
at the back here. And I think about there
maybe a tiny bit more maybe. That would be about right
to me. Okay, that's cool. So let's check our scale on
this, and it's all good. Let's have a look
at our worktop, as well, and the
scale is out on that. So let's press Control A and
apply rotation and scale. And it flipped the normals, but we'll see what the Boolean does first before
we flip the normals back. Let's select the
worktop on its own now. Let's add a modifier, generate, and we're
looking for the Boolean. And now let's grab
our little dropper and let's select our
cube, and there we go. So the boolean automatically flipped the normals back here. So that worked out, and we can see that that worktop
has now got a cat out. So let's go ahead and
apply that boolean, and let's go ahead
and delete this. And there we go.
We've got our cut out for our kitchen sink, and that's looking just fine. Okay, so that's really good. We can compress this folder because we're kind of done
with that one for now, and we can bring our
island back and we can bring our roof structure back and we can see
how we're doing. In fact, let's bring
everything back so we can see our handiwork. So let's bring back our Well, I'll leave the bifolding
door out so that we can see. But I'll bring back
the side door, and I'll bring back the
roof, and there we go. This is starting to
look really good. We, we can bring back
these ones, too. We're missing this
one. Sorry. So let's bring back our left base
cabinets, and there we go. So, yeah, I mean, that's
looking really good. This is already a kitchen
that I would absolutely love. And that's kind of
the point of what we're doing here
is we're trying to create renders that would sell something that would just if you were the
customer and you go, Wow, I would love
that for a kitchen. Where do I sign? And that's
the point of what we do. So this is working out nice. Okay, so in the next lecture,
what shall we do next? I think we will start
doing our wall unit. So there's two runs
of wall units, one this side, and
one this side. Let's start doing those next. Alright, thanks very much. And I'll see you in the
next one. Bye bye, Fino.
28. Lecture 27 Wall Cabinets: Hello, and welcome
now to Lecture 27. And in this lecture,
let's have a go at doing our wall cabinets, which go on the walls here, either side of the chimney. So let's see if we can do those. So I think the first thing is, we brought everything
back just to get a nice view of all our progress and
see how we're doing. So let's go ahead and hide most of this again
so we can crack on. So we don't need
the roof structure, so let's go ahead and hide that. And within the cabinets, I don't really need
the island now. And actually, while I'm
in this cabinets file, I want to create a subgroup
now for our wall units. So let's click on cabinets just here and hit our
little add sign. Double click on cabinets three and call on
the wall cabinets. There we go. That's
cool. Leave it highlighted so that when
we create objects now, they'll go straight
into that file. And let's go into our walls
and windows group now, and we don't want to see the side door or the small
windows or the roof lights. We do want to see the chimney. Don't need to see the
roof panels, and, yeah, we need to see the walls.
There we go. That's cool. While I'm actually doing this, there's something I
haven't done so far, which I should do, which is I should start locking some items. So the walls here, so we've just selected and have
highlighted here, let's hit our little arrow that we talked about
to go ahead and lock our walls so we can't
accidentally move them. And actually, we could do
the same with a chimney. Let's go ahead and
lock that, too. Go. All right, so let's make sure that our wall cabinets
are highlighted again. And let's go ahead
and press Shift A and mesh and plane. There we go. Let's bring that up slightly
in the z axis like this. Let's rotate it in the X. Let's press x90. Let's press seven so we
can see this from above. And, of course,
'cause it's plane, and we're in solid
mode, it vanishes. So let's go ahead
into wire frame and we'll have it back again. And let's pull it
forward like this. And let's take it over
and position this. About center of this line here, this is our wall cabinets
in the plan view. So let's put it about center. About there, I'd say, Okay, let's tap into Edit
mode with that, and let's press one,
so we've got vertices. Let's get these ones
here and pull them over until they're
to the chimney. And we're seeing a
lot of lines here, and it's because we
have a bevelled object, so we're seeing the
segments of the bevel. So I kind of as a
general rule of thumb, go to the densest point
when you get this. So it's about there,
and that generally will be about the main wall surface, and the rest is the contours
of the bevels, the segments. So let's do the same on
the other side here. Let's grab this
and take it over. And drop that About
there like that. There we go. Let's press one now on a numpad so we
can see this from the front. And let's grab our
lower vertices here and go ahead and
take them up like this. And with this one, I want to put it about halfway between this line and this line. So let's grab these vertices
again. I drop them. Oops. Try again. There we go. And put it about there. The lower section is like a trim panel on the base of the wall cabinets to hide the lights, so we'll
leave that about that. Okay, let's get the top one now, which is these ones here. And let's figure out
where we want that. And I would say, we
want that about well, about level with that dark line, which is the opening for
the bifolding doors. Let's put it about level
with that. There we go. That's cool. That's
our panel in place. Let's tap out of Edit mode, and we can fix the
rotation on this. Let's press Control A and
apply rotation and scale. And let's tap back
into ni mode now, and let's press two so
we can select edges. Grab this edge here, and let's go ahead and press Control and put some loops in. And how many doors
shall we have on this? Do we want four or
do we want five? I'm going to go with four
because it's more symmetrical, so I'll go with that, and I'm happy with
the bigger doors. So I'll go ahead and double click I put those
there like that. Alright, so for a moment now, I don't really think
I want the walls, so I'll go ahead and hide
those as well. There we go. So we just have now the
cabinets and the chimney below. Let's press one again, so we see this from the front, and we need to start putting
some details on this now. So let's press three
so we can select faces or grab those little
dots in the middle. And that's how you
select faces when you're in wireframe mode,
if I haven't told you that. And we're going to use
the grid to be able to scale sort of insets now
on this one from this one. So to the gap between the
doors and the outer frames, we have one, two, three, four, four and a bit. That's my technical
term, four and a bit. So let's see if we can do that. So let's go ahead and press
I and bring that in one, two, three, four, and
a bit. There we go. Make sure here in
inset faces panel, the individual is selected,
and that's happened. We can see that. Okay, let's
take another reference. So our gaps here now is around three quarters of a
square equals the door gap. So let's do that next. So I'll press I and
I'll inset that. There we go to there like that. And now we need the
door frame itself. So it's one, two, three, about three and three quarters. So let's do that as well. So I'll press I,
and I'll go one, two, three, and three quarters
is there, and there we go. And I'm not too
concerned if we've got slightly different
dimensions between the lower cabinet and the upper cabinet as far as
the aperture sizes or sorry, the door sizes and
the gaps in the frame because we've got a large
distance between them, so it's going to
be harder to see. So the ones on the side here, that was quite important
that they're the same because they're
right next to each other. But because we've got this
major gap between them, it's not nearly as important. But I think we're
really close anyway. All right, so we can go back to solid V view for a while now, and let's go ahead now and deselect everything and hold Alt and select that one there. And let's hold Shift down Alt
and select that one there, and Shift Alt and select this one and Shift Alt
and select this one. Let's go ahead and right
click and delete those faces. And let's press A fall, and let's go ahead and
extrude that back in the Y. I'll just do something
like that for a moment, just so we can see that
we have an extrusion. And let's press seven
and see this from above. And let's go ahead and press
and go into wire frame. And now we can go ahead
and carry on taking those back until they're
up to the wall, which is about there like that. Okay, this is looking good. So let's go back
into solid mode now, and let's select this face, this, face, this,
face, and this face. And let's go ahead and
extrude those back to create our recess
in our door panels. So we'll press E and Y and
go ahead and take that back until we get something
like that. There we go. That's good. Okay, let's tap out of Edi mode with that, and let's have a look at it. And it seems to me like
it's a different color, so I think the normals
are incorrect. So I'm going to go ahead and
tap back into Edit mode, and I'll press A, old N, and flip the normals,
and there we go. G let's tap out of Edit mode with it and see
if that's better. And that's better. Alright, is there anything else
we want to do? I'm wondering now looking at it, maybe I've got this
lower horizontal rail, a little too thin. You've probably done
better, but yeah, I think I want to personally,
I want to change that. So I'm gonna tap
back into Edit mode, and never be scared of changing things
around a little bit. You know, we have the ability
to do it, so we should. Let's press one, let's go ahead and just drag
that down just a tiny bit just
to increase that. And that's enough. That's
all I want. There we go. That's cool. Okay, I'll tap back out of
Odomde with that now. The next thing we
can go ahead and do is apply a bevel to this. So let's grab it,
check the scale. That's all good, add our
modifier, generate and bevel. Let's put our
standard two zeros to the right to the
decimal point, enter. And let's up our
segments to four. There we go. And
let's go ahead and apply. Alright,
that's looking good. We've got our wall
cabinets done, so now we just need to
create a duplicate, put it to the other
side, and just check it. So let's bring the
walls back now. So, where's our walls? I think it's this one, actually. Let's select this unit. Let's press seven so
we see it from above. And let's go ahead
and press Shift D and X and take that
over like this. Let's have a look at
that. And it looks like our wall cabinets are
slightly bigger this site, or the gap is slightly smaller, just a tiny bit. So let's just see what
we can do about that. Let's press S so we
can go into wireframe, and let's tap back into Edit mode with it and press
one for vertice selection, grab these ones here and just pull them back
just to about there. I like that. You probably
don't have to do this, but, yeah, this is what I
need to do just to make this. So we'll bring this
one back, as well to about there like that.
And there we go. That's done. Let's go
back to solid mode, and let's tap out of
Eddie mode with that. And there we go. That's good. So let's just have
a look at this. So we have our wall
cabinets here. Here's plane 16 and 17. Okay, so that's it
for our wall units. That's done. So in the next
lecture, what should we do? We can either put the
details on these cabinets. We've got like, we've got the crown moldings
to put on top, and we've got a little
a little molding to go on the base here, and we've also got
a splash back to go on the back of the worktops here and not around the windows. We've got our taps and
we've got our basin. So we've got a few
more details to put on these kitchens yet,
but that's all good. That's really going to make
things look really good. Or maybe we should just carry on and carry
on with the cabinets. Let's ignore that bit. We will do that, of course, but let's leave it a few lectures. Let's carry on doing the
cabinets on this side. We've got a lovely, great big larder cabinets
but on this side, and we've got a cabinet
for storage boxes, and we've got one
as a wine rack, and we've got one for sort of, let's say, brooms and mops and vacuum cleaners
and all that kind of stuff. Yeah, let's make a start
in the next lecture on doing the last of the
cabinets on this side. We're making some great
progress here, everyone. So I hope you're enjoying
the course so far. And yeah, let's pick this
up in the next lecture. Thanks very much.
I'll see you in the next one. Bye bye, Fino.
29. Lecture 28 Tall Cabinets Part 1: Hello, and welcome
now to Lecture 28. And in this lecture, yeah, let's have a go at doing
our wall cabinets. Sorry, our tall cabinets
that'll go along here and then return along this wall
here with our larders and, yeah, wine rack and sort of storage along this side
be quite a lot going on. Yes it's given a year. We'll
take quite a few lectures, 'cause there is quite a lot
of work involved with these, but don't worry.
We'll get through it. It'll be good fun. Okay,
so where do we start? Let's bring stuff back. I really need to see this door, so let's go ahead and
bring this door back in. And I need the roof structure
back in as well so we can figure out where the cabinet is going to start in
relation to this pillar. Um, And now, what
else should we do? Let's go ahead and compress the wall cabinets in
the base cabinets. Let's select the file and
create a new file in there. Let's double click on it, and let's call it the Tall cabinets. There we go. Hit Enter
and leave that selected. Okay, so what's next? Let's
grab this panel here. And let's go ahead
and right click and set the origin to the geometry. And let's go ahead and press
Shift D and Y and bring a copy out like this. Excuse me. And we'll bring
that a little bit more until it's just
up to the hinge. So blenders slowing down on me. It's kind of stalling. So I'm going to press Shift B and kind of just
grab that panel, and now blender will reset
me back up to speed again. And I'll just move this over. I need to leave
that hinge exposed. But that's kind of what I'm
thinking something like that. Alright, so I'll press
Shift again and Y, bring another copy
over like this. I'm going to rotate
that in the Z, so I'll press Z
one, eight, zero, and Enter and take
that over as well to there like that and kind of figure out
where I want that. I think somewhere like
that is about right. Alright, let's select
these two and the walls and maybe this panel and
this face frame maybe, and then the door
and then the frame. So we got we want
selected. We have that. I think that's everything.
Let's go ahead and hit the forward slash key to isolate those objects, so
we know what we're doing. Let's press Control
three now to get this in the orthographic view. And let's press SD and
let's go into WIF. Let's have a look at maybe
this one here and whole shift and this one and see how they're looking
floor level wise. And actually, they're
looking really good. They're
working fine there. So I think now let's go ahead and tap into Edit
mode with those, and let's grab those vertices and go ahead and bring
those up like this. And kind of that will do
for a second about there. Okay, let's pan around on this. And let's go back to
solid mode for a moment. And let's tap out of Odom mode, maybe just grab
this one here now, and let's reset the
origin to the geometry, and let's go ahead and press Shift D and Y and bring
a copy out like this. And now let's rotate
it on the X axis. So let's press RX 90, but that's rotated
it the wrong way. So before I click off, I'm just going to hit
the negative key, and there it flipped it over. Alright, so let's
go now and press Control three so that we can get this in the
side view again. And let's go into wireframe
again and bring this over and put this in position
where we want it, which I would say is
about about like that. Okay, let's deselect that one for a minute and select
this one and this one, let's tap back into Edy mode, but grab those vertices now and go ahead
and take those up. So let's press G and Z and
go ahead and take those up until they're just
touching the other ones, the one we just
set, that's fine. Let's deselect that one
and select this one, tap into Edimod, grab it here, and take this end over now. And go ahead and put that one. Flush on the end, just
like that. There we go. And I sort at the other end. Now, let's grab this one
and go ahead and take this over now until it's kind of
flush on the end, as well. There we go. That's
cool. Okay, let's tap out of Edit mode with that. Okay, let's go back
to solid mode, let's see what we're doing next. Let's grab this panel
here and let's press Shift D and Y and bring a
copy over here like this. Let's press seven to
set it from above for a moment and take that
over to our vertical beam. To about there, I would say So we're kind of creating the space here
for our first cabinet. That's what we're
kind of doing now. So let's tap into Edit
mode with this one. And let's press and
go into wireframe. Let's grab the top vertices, and let's press Control three
and see this from the side. And now let's go ahead
and take that up until it's level
with the window, I would say, is about right. Let's just take that
there like that. Okay, that's cool. That's
great. What's next? Let's go back to solid
mode for a moment and see what we've
got and figure out what we want to do next. I think the next thing I want
to do is I need a plenth. I'm going to hit the forward slash to bring everything back. I want this plenth here. Well, I want a copy of it. Let's go ahead and
press Shift D and Y and bring a copy
across now like this. We'll just put that roughly in position for now just to get a height assessment
of that length. I think we'll
probably need to take that back a little bit more about there like that. Okay, why not while
we're here, actually, we'll sort the size out in
that blenth. We might as well. So let's press Control three, let's press E and go into
wireframe mode on that, let's tap into Edit mode. And let's go ahead and grab the vertices there and
take those into position. Put those there like that. And let's do the same with
these ones and bring that over now and kind of put that
in position as well, which I think is
about there, I think. Let's have a look again.
That's it there like that. Okay, let's tap out of
Edit mode with that, and let's go back to
solid mode again and see what we've got and see
what's working for us. I think the next thing
we should do is go ahead and bring in a
plane. Let's do that. So let's go ahead and press Shift A and mesh, and
let's bring in a plane. We'll bring that up a bit on the z axis and bring
it over a little bit, and let's go ahead and
rotate that in the Y. So Y, nine, zero, and Okay, so let's
isolate objects again. So we've got our plane, and I
want this one and this one, this one, and this one. I think that's all I
need at this stage. Oh, we might as well
bring this one, as well for the ride. So with those selected, let's
go ahead and isolate that. All right, so let's press
Control three again to see it in the side view
and the orthographic view. Let's grab this
and let's go into wireframe and let's
tap into Eddy mode. And let's go ahead and
grab these vertices here now and go ahead and bring
those into position, which is up to that side
panel there like that. Let's bring that in closer.
There we go. That's cool. And let's do the same
on the other side. Let's grab these now
and take this over until this is level with the other panel or flush
to the other panel. Which will find the position
is there like that. Okay, let's do the
bottom vertices next, so we'll bring those
up until they're just below the level
of the plinth. I'll say about there
is where I want that. And, of course, the top, let's grab those and bring those up until they're level with
this highest end panel here. So I'll go ahead and press
G and Z and bring that down into position like
that. There we go. That's. Okay, so I think
the next thing I want to do is I want to bring
the lower cabinets, the base cabinets back in
again for visual reference. So let's tap out of
Edit mode for a minute, and let's hit the forward slash key to bring everything back. And let's go back into
solid mode again. We'll grab this one here, and let's go ahead
and grab this one, this one, this one, and
the plane, of course. And then this panel here. Is there anything else we
need? I don't think so. I think that's it. So we'll hit the forward slash key again. Let's grab this one now, and let's press seven, and
let's go into wireframe. And let's go ahead and bring
that back like this and drop this into position
where we want it, which is, I would say, about there like that. Okay, so let's grab this
one now and tap into edit mode with it and press
two so we can select edges. And let's select this edge here. And let's go ahead and press Control R and put a loop it
and maybe bring this loop over to about there, I would say, I'd say,
that's about right. Okay, so let's grab this panel now, and let's press a loop. Let's put a loop on
this, let's press control and put a loop in there, maybe bring it up a little bit, decide where we want it. And I would say
it's about there. So I'm going to divide
this tall door into two so that you can open the top door or
the lower door on this. Alright, so now that
we've done that, let's let's press three
so we can select faces. And what shall we do next? Let's select this
face and this face. Let's press Control three so we can see this from the
orthographic view. And let's see what we've
got here again, though. So we've got one, two, three, four, about 4.5 squares on that. So let's go ahead and press
I and inset that one, two, three, four, 4.5 like that. Make sure that individual
origins are selected, and there we go. That's cool. That's what we want. Okay,
so what's the next one? Let's go ahead and select
those again, actually. And let's create our door gap, and I'll just wing it this time. So I'll press I and inset and put that much
gap in there like that. And then we have our
final gap to do, which is this one here. Ah, I made a mistake
there, I think. I don't think I Oh,
I did select both. It's all good. Ignore me. I thought I hadn't
selected that top one, so I hadn't got that gap
there, but I'm all good. So let's count what
we've got here. So we've got one, two, three. Let's call it four
on that as well. So let's press I and go for one, two, three, and four. I'll go a little bit more for
good luck. And there we go. That's. Alright, so what
else do I want to do? I want to sort of maybe press two now and
grab this edge here, right click and go ahead
and dissolve that edge. I don't think I want that. Let's press three
again so we can select edges, grab
this one here. And I'm going to do a
smaller inset on this. I'm gonna press I
and just do an inset about about that much there, maybe a bit less, even. About that much, I
think, is about right. Okay, so let's go back to solid mode for a moment and
see what we're looking at. And let's try and figure
out a bit of a plan. So I think these rails
here are a little too big. It's the usual story where
we need to reduce that rail. So maybe let's go ahead
and do that next. So let's press one so
we can see vertices. And let's press Control three to get that orthographic view. Let's grab these ones here
and bring those down. Let's grab these ones here now. And bring those up to reduce
that rail there like that. There we go. I think that's
good. I think that's fine. So I think the next thing
to do is to press three, and let's go ahead and hold Alt and select that loop there. And let's hold Shift and Alt
and select that loop there. Let's right click and
delete those faces. Okay, we can also select
this face here, I think, and go ahead and press right click and go ahead and
delete that face, as well. Okay, so now let's go
ahead and press A for all. And let's go ahead and extrude
that back in the X axis. Let's press E and X, and go ahead and take
that back like this. Let's press seven to
see this from the top. And let's go ahead and
take this back until it's level with this one here. So we'll take that back to about there like
that. That's fine. Okay, so I think the next thing to do is
we can grab this one here and then this one
here and go ahead and extrude those back
in the X axis. So let's press E and X and
go ahead and take that back a little bit. I like that. There we go. And then, we've got our first
frames in position. That's cool. So I think the next thing we can do is
let's bring everything back. Said the forward slash, and let's tap out of
edit mode on that. And yeah, that's looking good. So we're going to
create a sort of a rack in here for a wine. Um so, actually, I'll just bring this one over for a moment so you can see this,
my little reference. So we've kind of
created this one here, and we've got some
of the work done for this over the
door cabinet here, and then we've got this nice wine rack to put in, as well. So let's do those in
the next lecture. Okay, so let's take this
back out of the way again. And yeah, this is looking good, so let's go ahead and do a
save so we'll press Controls. And I'll see you in
the next lecture. Thanks very much.
Bye bye for now.
30. Lecture 29 Tall Cabinets Part 2: Okay. Hello, and welcome
now to Lecture 29. And in this lecture,
let's go ahead and do this cabinet to sort of
the right of the door here. And let's go ahead and do our little cabinet over
the top of the door, let's see if we can kind
of get these two done. So where do we start with this? I think the first
thing we can do is go ahead maybe and
bring a plenth over. So let's make a copy
of this plenth. Let's press Chef D and Y and
bring a copy over like this. Let's go ahead and
position that now. So let's press seven to
see this from above. And let's go ahead and move
that back in the Y axis. And let's do that properly.
Let's have a look at that. So I'll press G and Y and bring this back a little
bit about there like that. Okay, I think the next thing I want to do is bring
the cursor over here. So let's press Shift S and
cursor to the selected. And let's go ahead now
and bring in a cube. Let's press Shift A
and mesh and cube. Okay, let's go into
wireframe mode so we can see our
reference image. And we can kind of
see this outline here represents the return
units on this side. So let's see what we
can do with this. Let's tap into Edit mode
with a cube still selected, let's press one so we
can select vertices, grab these ones here now, and pull these ones over. Whoops. Sorry, my fault. And let's go ahead and take
these back into position. Take your time to
do this nicely. About there like that. And let's do these ones now, let's take these ones back and put those about
there like that. That's cool. Let's
grab these ones now, and we can pull
these over, as well. And we need to know where
these ones are the panels, the cabinets on the
left of the door, and they're just back around
three quarters of a square. So let's do the same here. Let's press G and X and go ahead and take those back about three quarters
of a square. So they're like that. Let's grab these ones at the back
and pull these this way. And I'm not overly worried
about the positions of these ones because they'll
never, ever really be seen. Okay, let's press Control three now and see
this from the side. Let's grab these
vertices here and pull these up so that they're
level with this cabinet. And you can see that
black line going through. Let's just run it up to there, which is there like that. That's cool. Let's grab the
lower vertices now and bring those up and bring those
just below the length, just a little bit
below about there. And there we go. That's cool. So let's go back into solid
mode now for a moment, and let's tap out of edit mode. And let's create this little
cabinet on here next. So let's grab this panel, and let's set the
origin properly to the geometry to
re center that. And now let's go ahead and
press Shift A. Oh, sorry. Let's press Shift S and bring
the cursor to the selected. There we go. Now,
let's press Shift A, and let's go ahead
and bring in a cube. All right, let's press seven
to see this from above. And let's go ahead
into wireframe. And let's tap into
Edit mode with this, grab these vertices on the front and go ahead
and pull those back like this and bring those
level with this one here. So let's press G and X, and bring those so
it's level with the other cabinet
Au there like that. That's cool. Let's sort
of back out next, maybe. Let's pull that in. And again, I'm not overly worried
about the back. I'll put that
somewhere like that. Select these two now and
bring these into position. Which should be where the lines are densest around
there should be good. Let's grab these ones
now and pull these back. And again, put these where
the lines are densest, which is about like that. Okay, let's press Control three so we can see
this from the front. And let's grab
these top vertices and bring these down like this, and check where these are. Let's press G and Z and bring
this down into position. And let's bring the
bottom ones now. Let's take those up on the z. And put those on top
of the panel here. Just like There we
go. That's cool. So I think I want to check
that because it will be easy to be confused by all these edges
that we have now. So I think I do want to check
that this is looking good. So this is looking right here. This is looking nice and close. And it's looking good to the
panel just above the door, and it's looking good here, too. I'm going to go back
into solid though and just check this one
last little time. Might be that it's a little bit out there, but that's right. The top little crown
molding will hide that. And I think, overall, this is looking fine. I think
I'm good with this. Okay, let's press
three now so we can go ahead and select faces and
select this face here. Let's press Control three
on the numpad to get us the orthographic view and let
it go back into wireframe. Okay, so the first thing we
can do is inset it until we get to this line here to create
our sort of out of frame. So let's press I and
go ahead and inset that to something like that. Make sure individuals is on, and let's just check. I'll zoom out, and
it's all good. And let's do the door gap now. So let's press I again and
bring that in like this. And now let's press I again and bring this in to
create the frame, the actual door frame
itself. And there we go. That's cool. That's
what we want. Okay, so let's go back
into solid mode now. And what we can do
next is go ahead and select that ring
of faces there. Let's hold out and
select that one. And this time, I'm just
going to take it in, so I'll press E and X and go and take that in quite
a ways back like that. And now let's grab this panel here and let's extrude
that one back as well. Let's press E and
X and go ahead and take that in as well to create this sort of the
gap in the panel like. All right, that's that
one done, really. So I think the only
other thing we want to do is create
a bevel on that. So let's tap out of edit mode, and the scale and the
rotation are all good. So let's add our modifier. And let's put two zeros to the right at
the decimal point, and let's add segments to four. And let's go ahead
and apply that one. Oh, that's cool. So now we need to create the recess
in this panel here. Let's select this one
and tap into Edit mode. Let's select the face and let's press Control three
so we can see this. And let's go into wireframe let's go ahead and
inset this one as well. So let's press I and inset this one to about
there like that. Make sure individuals
is selected, and that's looking good. Now that we've done that,
we can extrude that in. So let's press E and X and
go ahead and take that back to about there like that. Okay, let's go back
to solid mode now. And let's go ahead and
put a bevel on this one. So let's tap out of edit mode. The rotation, the
scales all git. Let's add modify,
generate, and bevel. Let's add two zeros to the
right to the decimal point. And let's increase
our segments to a four, and there we go. That's cool. That's
what we want. Let's go ahead and
apply that bevel. And there we go. That's our
little cabinets done, now. So in the next
lecture, what we'll do is we'll start building our return cabinets now on this side here. Okay,
thanks very much. Oh, let's do a save. I keep
on for getting the save. Let's press Controls
and do a save, and I'll see you in the next
lecture. Bye bye for now.
31. Lecture 30 Tall Cabinets Part 3: Hello, and welcome now to what lecture are
we on Lecture 30. Welcome to Lecture 30. And in this lecture, let's do the last
of our cabinets. Let's see if we can do
them in one lecture. So it's this return
on this side here. But I'm going to try
and do something I've not done before
with you guys. So I'm going to bring in
an image and set it into our Blender user interface so that we both can see what
we're trying to do here. So let's try that. So I'm going to come to
this corner here. You don't really need
to follow me with this. It's up to you, but I'm going to bring this in so we've
got a reference. We're just going to come
to this corner here until I see this
little cross up here, and then I'm going to left
click and drag down to create an additional
panel on this side. I go to compress stuff, so I'm going to kind of compress our outliner up a
little bit like this and now compress this one here down a
little bit to about. We just need really about
that much of this one. So we got a nice big area here. Then I'm going to
click on this, and I'm going to use the image editor. So now I need to bring an image in, so I'll click on Open, and I need to find the
image that I'm looking for, and I am looking for
UDM Course three. Sorry about this. Just give
me a second. There it is. UDM Course three.
Let's click on this. Kitchen T one and still renders. And I am looking for I think this is the
one that I'm after. So I'll go ahead and
open that image and bring it in here so we can all see now what we're
trying to achieve with this little return here we've
got quite a lot going on. We've got this area
here that we have these what we call pocket doors and then this nice
interior that'll be lit. And then we've got a
nice tall cabinet here, and then we've got
drawers on both sides, a full size drawer on top here, then two little and a little cabinet below with
opening doors. Sorry, I lost my voice
that for a second. Went a bit squeaky, excuse me. So yes, let's try
and go a bit deeper. With these two doors here, Alright, let's see what
we can do with this now. So where do we start? I think, first of all, let's
grab an N panel. Let's grab this one. And let's go ahead and make
a copy of that. So let's press Shift D and X, and let's bring a copy over. We can go ahead and rotate that, so let's press z
nine, zero, enter. Let's hide stuff. I don't think we need the
roof right now, so let's hide that. And let's press seven
to see this from above. Maybe let's go into
wireframe for a moment. And let's go ahead and
bring this in like this, and let's take it up to
the other cabinet so we can kind of get this
set where we want it. So let's take this back
in the Y axis like this. And I'll zoom in on this area here and I'm going
to press G and X and bring this over till it's just touching the
other one about like that. And now I'll take it
back in the Y axis. I'll press G and Y and go
ahead and take that back. And let's press G and X
again. I'll take a second. Sort of get this
way you want it, which to me, that's about right. They're just kissing
on that corner. That's what I. Again, I'm not going to cut this
back here just now. I'll leave this as it is
to give us a little bit of scope to be able to
adjust that if we want. And now I'll go ahead and
bring this over in the X axis. Excuse me, that was my phone.
They're just going off. Telling me it's time I
should get some sleeper. So let's bring this over
in the axis like this. And I'm going to leave
a little bit of corner. I don't want it right up
to the window reveal. So I'm going to leave,
and I think about the Um, so I'm ignoring the
outline this time. I'm sort of winging
it. Again, you can, if you want. There's
nothing stopping you. But I think I'm going
to run it about there like that just to
get a slight edge there. That's just purely
personal preference. Okay, so we've got that
in there like that now. So I think the next thing, let's bring in a plinth. Let's do that next. So we can grab this plinth here, and we can go ahead
and press Shift D and X and bring this over
and rotate it now. So let's press R, then
Z, nine, zero, Enter. Let's press seven again
to see this from above, and let's go ahead and
take this one back now. Let's take this into
the corner like this. And let's kind of set this
where we think it should be. So I'll press G and X
and take this over. And I think I'll take it back
a little bit in the Y axis. Let's press G and Y now
and go ahead and take this back to about there
like that, I would say. We can tap into Edit mode, and we can grab this end now
and we can take this over. And we can actually
make this touch the other plinth. Like that. That's cool. I don't think I'll even bother
shortening this side. I'll leave this plinth this way, just as it is, 'cause we'll
never see anything different. Okay, so that's our
plenthm position. We're looking good there. Let's go ahead and tap out
of mode with that one. And now let's go ahead
and bring in a plane. Let's press Shift A
and mesh, and plane. Okay, let's press seven now
to see this from above. And let's bring
this over in the X. We'll bring this back in the Y. And I think even
before I rotate this, I'm going to kind of
set the width on this. So let's tap into Edit mode. Press one to select vertices, grab these ones here, and let's go ahead and take
that back in the X axis. And let's zoom in on this
and see what we're doing. So let's go ahead and press
G and X and take this back. Take a sec just to get this right here. It's
quite important. Press G and X and take this back the last little bit
to about there like that. Let's do the same this side now. Let's take this one over. Add zoom in a little bit. And let's go ahead and press
G&X and take this one over, like let's see where that is. And that's a bit too far. So I'll press G&X again
and just take that back. And there we go. That's
where I want that. Okay, so let's go ahead and maybe tap out of
Eddy mode with that one, and let's press R and X and 90 to rotate
it, and click enter. And now let's go ahead and
take this back on the Y axis now until we are
happy with this. So I'll zoom in on this corner, and I'll go ahead and
press G and Y and bring this over until it's
just in the corner now. Like that. Okay, let's have a look at what that's
doing now with our end panel. And this is why I didn't sort
of shorten this end panel. We can go ahead now and
maybe just bring this forward a little bit to
about there like that. And no one will ever know.
Okay, so that's good. That's tidy. Let's go back to solid mode now
and see what we've got. And let's maybe just
grab the plinth, and then this panel
on their own, and let's isolate those, so I'll hit the forward
slash in the numpad, and I'll press Control O
to see this from the back. And now let's go
ahead and Woops. We just want this
panel. Let's go ahead and take that down now. Until it's sitting
on the plenth. So I'll press G and Z and go ahead and take that
to a bed there like that. Okay, let's bring
everything back again, so I'll hit forward slash. And now let's just grab maybe this one here and
then this one here, and this panel here, and let's isolate those. And let's press Control one
to see this from the back. And let's tap into
Edit mode with this. Sorry, I just want this one, actually, tap into
head mode with that, grab the vertices now
and go ahead and take that up now until
we're looking good, which is about about
there like that, I think. Let's just check that again. Let's zoom in a little bit. And let's press G
and Z and go ahead and take that up like
this. That's cool. Let's have a look here,
it's not quite right, but it's close enough
for me because we will have like a crown molding
on top of the kitchen, which will sort of hide
details on the top. Okay, so that's cool. Let's hit the forward
slash key and bring everything back and we can tap out of Edit mode
for a moment now. And we can go ahead and
fix the rotation on that. So let's press Control A, and apply rotation and scale. And I think the next thing
I need is like a reference. So I think I'm going
to make a copy of this cabinet and put it next to this so we can see where
our lines need to be. So let's grab this one. And let's press Shift D and X and bring a
copy out like this. Okay, I'm just going to
grab this end panel and this and maybe the penth. And with those selected, I'm going to go ahead
and isolate those, so I'll hit the
forward slash key. And let's press seven now
to see this from above. And let's bring this
over in the Y axis. Let's rotate it. To
about there like that. And bring this back like this and bring it
over like this. Okay, let's press Control one
to see this from the front. And yeah, that's
working just fine. That gives us an idea
of what we can see. Maybe you would bring
this one, actually, to this other side
here like this. That might be a bit easier. Okay, so now we can actually
start creating our insets. So what we've got, like I said, we've got this relatively
wide door here. Then we've got two
wide doors on top, and then we've got a bank
of drawers either side, and then a drawer in the center
and two small ones there. So let's see if we can kind of set the loops out
on this to do this. So let's tap into Edit
mode with this one, and let's press two so
we can select edges. And first of all, let's grab this edge here
and press controller. And let's bring
this loop over to, I would say, A there would do? I would say that's about nice. I think the next
one I want to put in is maybe on this edge. So let's press Control R.
And let's bring this one down to about there like that. And that one there
is going to be that sort of line
there, just there. Okay, so where's next? We can go ahead and put a
line in here now, I think. Let's press Control R on that. And let's put a line in the
middle there like that. There we go. So that's our two doors there and then a door there and a
door there, that's all good. So now we need to sort
of divide this area up. So I'll select this edge here now and I'll
press Controller. And I'm going to
put four, I think, loops three loops in there, creating four sets of
faces in each of these. Okay, so now what do we do? So we need to create
now these doors here. Let's select this edge here
and let's press Control. I'll leave that one just where it is in the center of that one. Let's do the same here now. I'll press ControlR and then we'll just leave that
just where it lies like that. Okay, we need to delete a
few now, this line here, and this line here, I
don't think we want those, so let's right click on that and go ahead
and dissolve those. And what else don't we want? I don't think I want
that one there, so I'll go ahead and
dissolve that one. And I don't think
I want this one, this one, this one or this one, so I'll right click, and I'll go ahead and dissolve those. We've got our four drawers
there, our four draws there, a large draw there,
two doors, two doors. Let's get rid of these now. This one, this
one, and this one, let's right click
and go ahead and dissolve those edges as well. Okay, let's press three now
so we can select faces. And let's grab maybe just
these large doors now first. Let's zoom in in
this corner here. And let's go ahead and press I and go ahead and inset on this until we're roughly about
there like that, I would say. Make sure that individuals
is on on our inset faces. And let's have a look at that
and see how we're running. And yeah, that's what we
want. That's just fine. Okay, let's create our
door gap next here. So let's go ahead and press
I and just bring this in a little bit to create
our door gaps like that. Let's press I again now, and bring this in another
time now to create the frames for our doors. And I'll leave that
about there like that. Let's have a look at these, and, yeah, that's all
working out fine. We can actually get
rid of some edges now, so I'll press two and then
we can actually get rid of this one and this one
and this one and this one, this one, and this one, as well, this one, we
don't need this one, this one, this one. Let's right click and go ahead
and dissolve those edges. Now let's press three
so we can select faces. Grab this one, this
one, this one, this one, this one,
this one, this one, this one, this one,
this one, and this one. And I think with
those selected again, I think we're just going to make this slightly narrower frame. So I'll go ahead and press
I and go ahead and inset these I think to around
there like that. Let's just zoom out. We can always press Control Z
and back that move off. Um, yeah, I'll make
that slightly bigger. I hit Control z and take that move back
and then I'll press I again and inset this and
make this a tiny bit bigger. To I think about there. Is that looking good? Yeah, I think that's
looking better. But keep them selected, and let's go ahead and
press I again now, and inset for a gap.
And there we go. That's our gap. That. Okay,
is there anything else? These two here now. Let's Whoops sorry. Press Control one,
bring that back. These two here now, let's go ahead and inset this now to create our final frame. So let's press I and inset these to create
the frame of our doors. And let's have a look at
that. And, yeah, that's fine. That's just what I
want. That's cool. Okay, this is cool.
This is looking good. So I think the next thing
we can do is go ahead and delete our door gap edges. So I'll press Alt, and
I'll select this one here, and this may take a minute. I'll get all of these, and
I'll press Shift and Alt and select this one
and this one here, Shift and lt. And let's select
this one, shift and Alt And actually, Blender
has slowed down, so I'm just going to press
Shift B and go ahead and just grab a selection square around there
and it's carry on. So I'll press Shift and
Alt and grab this one. Shift and Alt and grab this one. And we're nearly there. Shift
Alt, and then this one. Shift and Alt, and
then this one. Is this the last one? Or if you got one more, that's
all of them, I think. Okay, don't let them go
after all that work. So let's right click
and go ahead and delete those faces. There
we go. That's cool. Dan Okay, so the next
thing I want to do is go ahead and separate
these doors here from the rest of everything
because we're going to treat these doors completely
as a separate entity because we need those doors
to be able to open and close. So let's select this
face here, whole shift, and select this one and then press Control plus to
grab everything there. And let's press P and separate by selection.
And there we go. And those ones have gone
out of Edit mode now because they're no longer
part of this group. We can tap out of Edit mode for a moment and select
maybe this panel, and let's go ahead
and tap back into Edit Mode and I think we're close, but
we're not quite there. So I think I'm going to pick the rest of this up
in the next lecture. There's no point rushing it. So, yeah. I'll see you in the next lecture
when we'll go ahead and finish this cabinet here. Okay, thanks very much.
Oh, let's do a save. Let's press Control
and save our progress. And I'll see you in the next
lecture. Bye bye for now.
32. Lecture 31 Tall Cabinets Part 4: Hello, and welcome
now to Lecture 31. And in this lecture, let's
go ahead and see if we can finish off our nice
set of cabinets here. So let's go ahead and tap
into Edit mode with them. And I've noticed in between lectures that in our
reference image here, we don't have a vertical rail running up here in the middle. So I think the first
thing we need to do is go ahead and
get rid of this. I'll show you how to
do that. Let's press one so we can select vertices. And I want to show you
how to merge vertices. We've not done this
yet. So let's select these vertices here and hole
shift and select this one. I want to merge those two together so two
vertices become one. And I want that to happen in the center between
these two vertices. So I'll go ahead and
right click and I'll go ahead and merge
vertices at center. It's that easy. Let's do
the same at the bottom now. Let's select this one, hold
shift and select this one. Let's go ahead and
right click and merge vertices at center. There we go. Now,
all we need to do is go ahead and select those
edges and delete them. Let's select both of those. Right click and
delete those edges. Grab this one as well, right
click and delete that edge, too. There we go. So after I think we'll just go ahead and move these
doors around after, adjust the vertices on
these to get these right. But I think that's fine
there for a moment. Okay, so the next thing
I want to go ahead and do is dissolve
some more edges. So I'll grab maybe this
one and then this one, this one, and this one. And this one, this one, this one, this
one, and this one. And let's go ahead
and right click and dissolve those edges. And we can also maybe grab
this one and this one, right click on those, and
dissolve those edges. And we can also do this
one and this one, maybe. Let's get rid of those.
And there we go, I'll leave that just like that. Okay, so the next
thing we want to do is extrude all of this back, so let's press A to select all. And let's press seven
to see this from above. Let's press E and Y and go ahead and take
this back like this. To about there like
that, that'll be fine. And there we go. That's
cool. That's looking good. So I think the next thing
we can go ahead and do, maybe is select these panels. Sorry, no, it's just this one and this one and this
one and this one. Let's grab those and let's go ahead and
extrude those back now. So let's press E and Y
and go ahead and take that back to get the
panels in our doors. And there we go. That's
cool. That's looking good. Okay, let's tap out of Edit mode with that and
take a look at it, and all's looking good. So let's go ahead
and put a modifier on this now a bevel modifier,
so let's select it. Add modifier and
generate and bevel. Okay, let's add our
standard two zeros to the right of
the decimal point. Click Enter, and let's put four segments on this
and go ahead and. Okay, that's looking good. So I think the next
thing I want to do, we can actually go ahead
and delete this one. Now, we're done
with that. We need to look at these
doors next, I think. So let's maybe
select these doors. Let's press Control one to get the orthographic
view on this. And let's tap into
Eddy mode with those, and let's press
one for vertices. And let's maybe
go to wire frame. And let's grab these
vertices here now. And we can use this line here
as a bit of a reference. So let's press G&X and bring that in now to
about there like that. Let's grab these other vertices here now, grab these ones, and let's go ahead
and press G and X again and go ahead and pull this in to set the gap between the doors at
something like that. There we go. That's
cool. We can go back to solid mode
again now, there. And we can press three
so we can select faces, and we can press A for all. We can press seven to
see this from above. Let's go into wire frame again. And let's go ahead and
extrude that back in the Y. So I'll press E and
Y and go ahead and bring that back to give
the doors some thickness. And I'll go about
there like that. That's cool. Okay, let's go back to solid again and
let's select the doors. And let's go ahead and
press E and Y and go ahead and take that in to
create the panels in our doors. There we go. That's cool.
That's looking good. So let's tap out of
ddiode with that now, and let's check the scale
and the scales all good. So let's add our
modifier to this. The bevel modifier, of course, add two zeros to the right
of the decimal point. And let's turn the
segments up to four, and let's go ahead and apply
that, and there we go. Okay, I think I'm going to bring everything back to
see how this looks, so I'll hit the
forward slash keel and pad and see how
it's all looking. And yeah, that's looking great. I think we're pretty
much all done with that. So that's the last of
our cabinets built. So over the next
couple of lectures, we'll start just adding
all the extras to these. We'll put a crown
molding at the top, and we'll put the shelves in these and the wine rack in this. And on this side, we'll go ahead and
put splash backs in and crown moldings and, like, a little molding on the base of these
wall cabinets. I think there's
one more thing we can do and make sure
that everything here is in the tall cabinet
group. So let's grab these. So that one that's in
the wall cabinets. Let's grab this and then this, and then the Penth as well. And I'll grab some
more of these. Actually, I'll
grab all of these. And let's just go
ahead and press M and go into cabinets and
go to tall cabinets. Some of those might have
already been in tall cabinets, by selecting all of
them, we just make sure. Okay, we can compress the
tall cabinet file now. And we can bring
some stuff back. We can bring back the island
and then the roof structure. And we could open
up the walls file, maybe, and we could bring
back some other stuff, small windows, roof
lights, and let's see. Let's even bring back the
roof panels now as well, and let's see how we're looking. Whoops. And there we go. I
think that's looking good. Um, so in the next lectures, let's just carry on adding
the details to all of this. Alright, let's press Control
so we can get a save done. And I'll see you in the next
lecture. Bye bye for now.
33. Lecture 32 Crown Mouldings: Hello, and welcome
now to Lecture 32. And in this lecture, what I want to do is in our picture here, you can just see this up here, which is the I call
it the crown molding. So we're going to go
ahead and do this. So we're going to put
this on this unit here, and then the return along here and then back
to the wall here. And, of course, then
we'll go ahead and put it on our wall units either
side of our chimney, along here and along here. And yeah, it'll really
make our units pop, add that extra detail on it. So let's go ahead and do that. So I think, first of all, I only really need this
cabinet for a moment. So I'm going to go ahead
and select those two, and I'll hit the forward
slash on the numpad. And I think the next thing
I want to do is make sure that when I
bring this item in, it comes in where I want it. So I'm going to select
this panel here. Going to tap into Edit mode. Gonna press two so
we can select edges. And I'll go ahead and
grab that edge there. Now I want a cursor
to pop there. So I'm going to press Shift S
and cursor to the selected. Okay, we can tap
out of Edit mode. So now when we bring
our next item in, it will be located
perfectly right. Okay, so let's go ahead
and bring our vitamins. I'm going to bring
in a cylinder. So let's press Shift A and mesh, and let's bring in a cylinder. Let's look at our
vertices count, and I think I'm happy with 32. I'll leave it just like that. So let's grab it now and
rotate it in the Y axis, let's press Y, nine, zero, enter. There we go. And let's go hit, excuse me. Let's go ahead and
hit S and scale down. We'll just bring it down to something like
that for the moment. We'll take some time to
scale it properly after. Okay, so now that we've got that there like
that, I think, really the only thing I want
to see now is this cylinder. So I'm going to hit
the forward slash, and that will bring
everything back. And then I'll just
hit it again now, and we'll just have
that cylinder isolated. Okay, let's press Control three, so we see this nicely
from the side, and let's go into wireframe, and let's tap into Edit mode. Let's press one so
we can see vertices. And I'm going to go ahead and take half of it
away straightaway. So I'll select
half the vertices. I'll right click and
go ahead and delete those vertices. I'm going
to do the same again. I'm going to grab all
of those vertices now, right click and go ahead
and delete vertices. So that's all we've got left. Now I'm going to show
you something new. I'm going to show you
extruding vertices, which is no different really
to extruding a solid object. But yeah I'm going to show you how just extruding vertices. So let's select
these ones here now, and let's bruss E and then z and then go ahead
and take that up to, I'll say something like that. There we go. That's
looking good. I'll press E and Z
and go in the Y and go ahead and take that
over something like that. Now let's take it up. E and Z and go ahead and
take it up like this, now E and Y and go ahead
and pull it back like this. So something like
that for a moment. Let's do the same here now, so I'll grab this one. I'm going to go
ahead and press E. And Y and go ahead and take that back
something like this. And now let's take it
down, let's press E and Z and take it
down like this. And now let's go ahead
and press E and Y and go ahead and take it
back, something like this. And now let's take it up
so it meets this one. So let's press E and Z and go ahead and pull that up
to something like that. Okay, let's go ahead and bring that up some more like this until it's just about
on the same level. So something like here. Let's grab these ones now
and go ahead and bring that over something like there
like that, real close. Let's even bring that
even a little bit closer, something like
that. That's fine. Okay, let's pan round this so we can see this from
kind of this angle. Now at the moment,
we've got two vertices here and we've got
two vertices here. So I want to merge these
vertices so we've got a nice we've got a
nice complete object. So let's grab these
ones here now. Let's right click and merge vertices at the center.
And there we go. Do these ones, right click
and merge vertices at center. Let's go back to solid mode now and have a look at
this, and there we go. So that's looking
really good now. I'm pleased with
that. Let's press two so we can select edges. And let's grab all the edges on the end there like that and
just press F and enclose it. There we go. Let's do the same on the opposite
side here now. Let's grab these ones and
press F and enclose that. Okay, so I think the next
thing I want to do is apply some bevels to this on
maybe these edges here. Let's tap out of Edit mode for a moment and
just check it all. And let's go ahead
and set this right. So let's press Control A and
apply rotation and scale. Bring that back to no.
Oh, that didn't work. Sorry. Try that again. Control A, and apply
rotation scale. I hadn't selected the
object at all. There we go. So let's tap back into
Edit mode with this now, and let's select This one, this one, this one, this one, this
one, and this one. Okay, let's go ahead
and press Control B, and let's bevel those edges. Scroll the mouse way a little bit to get some
vertices in those, and bring that to something like that there maybe
is a nice place to be. Yeah, that's looking
good. Maybe I'll press three now and just grab this edge and just bring that edge over a little
bit more like this. And yeah, I'm pleased with that. Okay, so let's tap out
of di mode with that. We can go ahead and do a shade oro smooth on that as well. And yeah, that's looking like
a nice crown molding now. Okay, let's hit the
forward slash key and bring everything back. And obviously, we need to
reduce the size on that. We'll do that now, but let's
go ahead and hide stuff. So I don't think for a moment we want let's just hide
the roof anyway, and then let's go ahead and hide the whole roof and doors thing. We'll go ahead and
compress that. And let's go ahead and hide the roof structure
as well, though. All right, so let's go ahead and find the right
size for this now. So we'll go ahead and
bring this in a little bit like this into position. And maybe let's go ahead and
try scaling this down now, so we'll press S. And just bring this down
in size like this. And then let's press Control three to see this from the side. And let's go ahead and take this back into position
and take it up. And let's zoom out and just consider the size of the crown molding
that we've put there. And I don't think
that's bad at all. I think I'm liking that as an overall size for
our crown molding. Or do I want to go slightly big? I might just scale
it up a little bit, sell pres ps and go ahead and scale it up a
little bit more, maybe take it over a
little bit more like this. And let's have a look at that. And yeah, I think I'll leave that just like that.
That's looking good to me. So let's press seven now
so we see this from above. And let's press se
go into Y frame, and let's tap into
Eddy mode with it. We'll press one so we
can select vertices. Let's grab these ones here now and go ahead and pull those over way past the end of
the cabinet like that. Grab these ones now and
do the same with these. Go ahead and pull these way past the end of the
cabinet like that. Let's go ahead and tap out
of Edit mode with that. Maybe let's select this one now. And it's in the toll cabinet, so let's open up this
file and find it. So let's double click on it, and let's go ahead
and rename this. Let's name it maybe crown molding because I'm going to make a lot of copies of this. So with that in mind, I might
as well name it so that all copies come in with a
name as well. There we go. That's cool. Okay, so
now that I've done that, let's go ahead and
make a copy of that. So let's press Chef D and Y and go ahead and bring
a copy over like this. Now let's rotate it. So I'll go ahead and rotate
that 90 degrees. So let's press Z, 90, Enter. Let's press seven
again to see it from above and go ahead and
bring this over like this. And I think I need to
see this properly now. So I'm gonna go back
into solid mode, and let's position
this carefully, now. So I will put that. I'm thinking something like
that. I think that's okay. I want to go over a
little bit more, maybe. Ah, that's where I want it. Sorry. That's where I want it. Something like that.
That's better. Let's have a look
at that at the end. And, yeah, that's fine. I'll
leave that just like that. So now we can grab this one, and let's go ahead and
make a copy again. So let's press CFD and X and bring another
copy over like this. Let's go ahead and
take some time to sort of set this one
where we want it. So I'll take this over like this and let's have
a look at that. And let's look at
it from this angle and see that it's kind of equal. And no, I think that needs to come over a little bit more, so I'll press G and X and go ahead and just bring that
over a little bit more. Oops, something like
that is better. Okay, so let's take that
over now in the Y axis. We'll pull this over like this, put that there like that. And now let's grab this one, and let's make a
copy of this one. So let's press Shift D and Y and go ahead and bring
a copy over like this. And let's go ahead and locate
this now on this end panel. So let's press G and Y and
go ahead and pull this over until we get
something like that. Alright, let's go ahead
and take that back now in the X axis position that's
something like that. I think the only other
thing I want to do is make some more copies of this to be able to put
under these units. So I'll grab maybe
this one here now, and I'll go ahead
and press Shift D and Y and bring another
copy over here like this. And I'll just put that
there for a moment. Alright, so now for
something else, we need to sort of finish
off these corners, don't we? We need to put a nice
neat corner on this. So we're going to do
something we call a mitre, which is an angle joint across. So let's do that next. So let's press Shift A, and let's bring in a plane. And I'm going to booley
and modify these corners. I think it's the nicest way and the quick way
to achieve a nice, perfect, clean mited corner. So now that we've
got that in there, let's press Y, 90, Enter. Let's keep that edge selected. Let's press seven to see this
from the orthographic view. Let's let's go ahead and press this head and go
into wire frame with it. And let's go ahead and bring this over into the
corner like this. And let's set this into
the corner of the molding, which I think is
something like there. And now let's go
ahead and rotate that soil press R and go
ahead and rotate that round. So it could actually
hold down control and snap that to 45 degrees. And there we go, 45
degrees is working out nicely on that
corner like that. Okay, so I think let's
go ahead and have a look at that in
solid mode again. So let's click over and
see what that looks like. And yeah, that's
looking good to me. Okay, so let's select
maybe this one first. Let's check the scale and the
rotation and the scale out. So let's press Control A and
apply rotation and scale. Let's go ahead and add a
Boolean modifier to this. And let's grab our eyedropper. And just click on
the plane like this. And it's gone ahead and deleted the wrong side of this piece. So that tells us that normals on this plane are
the wrong way round. So let's select this
and tap into Eddy mode, and everything's already
selected on that. So let's go ahead
and press Alt N and flip the normals on that
plane, and there we go. That's worked out nicely. Let's tap out of
Edi mode with that. Now, select this one again, and let's go ahead and apply the apply the boolean
on that. There we go. Now we know now that the normals
are wrong on this panel. If we go ahead and apply
the Boole into this one, picking this, let's go ahead and going to go ahead and
cut the wrong side. So let's grab this straightaway, tap into Edit mode. Let's press Alt N and flip
the normals on this plane. Okay, we can tap out
mode with that one now, grab this one, add a Boole, and modify it, grab our little eyedropper and go ahead and click on
this one like this. And that's worked
nicely. Let's go ahead and apply that,
and there we go. Okay, let's grab
this plane now and take this over in the
X axis like this. Let's press seven to
see this from above. And let's go ahead
and pull this into position on this
internal corner. Which is something like that.
I think that'll be fine. Alright, so let's
do that again now. So let's select our piece here. Let's add our Boolean modifier. And let's grab our
little eyedropper and go ahead and click
on the plane like that. We need to flip the
normals on that, so let's go ahead
and select this now, tap into Edit mode, press ldn and go ahead and
flip the normals on that. And now that's worked
out well for us. Let's tap out of
Edit mode with that, select this one and go ahead and apply our Boolean Modifier. Let's flip the normals
back on this one. So let's tap into Eddy mode, press Alt N, and go ahead and
flip the normals on that. Tap out of Edi mode with that, select this one now, add a Boolean modifier to it, and grab a little eyedropper, just click on this like this. And there we go. Let's go
ahead and apply that one. And let's go ahead
and select this one now and take this
one over again. So let's press seven to
see this from above. And let's go ahead and move that over in the Y axis
to this corner. And let's try and figure
out where the corner is. It looks like it's
about there, I think, which means that
this one's come up short on mine, so I
can deal with that. I'll tap into Edom moode. I'll press his head
to make sure that I select all the vertices, grab all those ones
on the end there, and pull that over like that. Okay, let's tap out
of Edomode again. Let's go back to solid. And let's have a look,
make sure that's working. And it is, that's fine. So let's select this panel now. Let's add Boolean modifier. Grab a little eyedropper like this and it's
the wrong way round. Let's select this one,
tap into Edit mode, press Alt N and flip the
normals, and there we go. Tap out of Edit mode with that. Go ahead and select this
one again and go ahead and apply our Boolean modifier. Okay, we just got
one more to do. So let's select this plane again now and flip
the normals on that. Edit mode, Alt N, flip and tap back
out of Edit mode. Select our piece here, let's add our Boolean modifier. Grab a little dropper
and click on it like this and go ahead
and apply that one. And there we go. That's done. Okay, let's go
ahead and get this, and we can delete that now. We're done with that. And
that is looking really good. That's looking really
nice on there. That's really finish that off. So is there anything
else we want to do? We could go ahead and bring
the walls back now, maybe. So where's the walls gone? Right here, let's
turn these walls back on, and there we go. So let's select this one, maybe, and holes shift
and select this one. Let's press seven to
see it from above. Let's go ahead and
tap into Edi mode. And let's go ahead and
go into wireframe. Let's maybe grab these
vertices here now and go ahead and pull those
back over to the wall. And let's pull those
back into position. And the corner is I would say, let's do this one next.
Let's grab this one. And let's go ahead
take that over like this and drop this one
in position, as well. And put that there.
So like I said, usually the corner is where
the densest lines are, so I'll go ahead and put
that about there like that. Okay, what else can we Oh, we've got this one here now, so let's maybe tap out of Edit mode for a moment
and grab this one, and we can go ahead
and take this one over and put this
one in position now, maybe something like this. We'll sort out the
position in a moment. But we can go ahead now and
make a copy of that even. So let's go ahead and
press Chef D and X, and bring another
copy over like this. M Okay, so let's have
both of these selected. And let's go back
into solid mode. And let's go ahead and
have a look at these. Let's zoom in on those. I need to press Shift B. And just go ahead and zoom in on that to re center Blender. Okay, the first thing I can see is obviously
they need rotating. So let's go ahead and rotate both of them
at the same time. So if we just press Z
one, eight, zero, enter. And let's go ahead and
just shift those back to the middle, something like that. Okay, let's go ahead
and pull those over in the Y axis and set this
out where we want it. And I will put that
about there like that. That'll be fine with
me. Let's press seven to see this from above. And let's go ahead and pull
that over just like that. Okay, let's just
select one now, then, maybe, and let's tap into
Eddy mode with that. And let's go back into Y and let's go ahead and grab these and take
these over now to the wall. Which is about like that. Let's do the same on
the other side now. Grab these once. And let's go ahead
and take those over now to something like that. Let's do the other side now. Let's grab Oh, let's tap out of Edo mode with the last
one and grab this one. Tap back into Eddy mode, grab the ends here and
go ahead and pull those over into position now,
something like that. That's cool. Last one,
let's do this one now. Let's grab just here and go ahead and pull these
into the corner now, something like
that. There we go. Okay, let's go ahead and
look at our handiwork. So let's tap out of Eddy mode, and let's go back to
solid. And there we go. There's all our crown moldings in place. Quite a long lecture. But I hope you agree
that that's really, really helped these cabinets, make them look
really quite good. Okay, so on the next lecture, I think what we'll
do is we'll go ahead and put the shelves in this one and then the
wine rack in this one. Let's go ahead and
do a save now, so let's press Control. And that was quite
a long lecture. I must admit, but I think
we've made some good progress. And the next one,
I'll make sure it's a little bit shorter, I promise. Okay, so I think I'm going
to go have a cup of tea. I'll see you in
the next lecture. Thanks very much. Bye bye. But
34. Lecture 33 Wine Rack: Hello, and welcome now to Lecture what are
we on Lecture 33. And in this lecture,
I want to put the shelves in in this
open cabinet here, and I want to have a go at doing this wine rack in
this opening here. So let's do this. So I think the first thing
we can do, maybe, is just grab this open cabinet and let's go ahead
and isolate that. So let's hit the forward
slash, and there we go. Let's straightaway, let's
tap into Edi mode with that. And let's press three
so we can select faces. Grab this face here and press Shift D and X and bring a
copy forward like this. Now I want to separate that
from the rest of this one. So let's press P and
separate by selection. There we go. We can tap out of Edit mode now, select this one. I want to isolate that, so we'll press the forward
slash to bring everything back and just press it
again, and there we go. Alright, so the next
thing you want to do is divide or put loops on this. So let's go ahead and tap
into Edit mode on that. And let's press two for edges. Grab this edge here and press ControlR and let's scroll the mouse wheel to put
divisions in that. And how many have I got there? I've got four loops there, which is creating five spaces,
and I'll go with that. I'll go ahead and
left click again and left click one more time,
and I'll accept that. Okay, so I think the next
thing I'm going to do is press Control three so we get a nice orthographic
view of this. And let's go ahead and tap
out of edit mode with that. Let's set the origin
to the object. So right click and set the
origin to the geometry. And now let's press shifts and let's bring the cursor
to the selected, as well. Let's bring in a cube
now to make our shelves. So let's press Shift A and mesh, and let's bring in a cube. I think now we need
to go into wireframe. So let's press and
go into wireframe, and let's tap into Ed
mode with our cube. And let's press one to
select vertices and grab these ones here
now and go ahead and pull those over to the
edge of our panel like this. Just like that. And now
let's grab these ones, too, and bring these ones over
now to something like that. Put that in position just on
the edge of there like that. Okay, we can grab
these ones now, and we can go ahead
and bring those up and go ahead and drop that below the line that we just created with
the loops to about there. Let's grab the top two
now and then bring those down now to create
something like that. I think I'll center that as
nicely as I can on the loop. And there we go. That's
something like that. Okay, let's press one now
to see this from the side. And I think we actually need to bring back the cabinet now. So I'll hit the forward slash
to bring everything back. And let's tap out edit
mode for a moment. And let's select
the cabinet now. There's the cabinet. That's
the three things I want. So I'll hit the forward slash
to isolate those again. And let's press one now
to see it like this. And the next thing I want to do is just tap into
Edit mode with this. And let's grab
these vertices here now and pull those back inside the cabinet like this and pull the back ones inside the
cabinet as well like this. Okay, let's go back
to solid mode now so we can see what we're
doing and see if we're happy. And yeah, I think, do I want to bring that
panel forward slightly? No, I think I'll leave that
just where it is, actually. So I think the next
thing I want to do is I'm going to press
two so I can select edges, and I'll select this
edge and then this edge, and I'll press Control B, and let's go ahead and
bevel those edges. To get something like that. So we get a nice
bevel on those edges. And now let's select
those edges again, this one, this one,
this one and this one. And now let's press Control B again just to soften those
edges we've just created. We'll put another bevel on them. I'll roll the mouse wheel
and just create something like that I'm happy
with. And there we go. That's that panel
pretty much done. Alright, now what? Let's press Control three again so we
can see this from the front. And let's go ahead
into wireframe. So I'll press and there
we go our own wireframe. Now we can see those loops we created again in this panel. So now that I've done
that, I can maybe just select it and put the
origin to the geometry. And now that we've done that,
we can go ahead and press Shift D and Z and bring a copy down like this. There
we go. That's good. And let's do that again.
We'll press Shift D, and Z and bring another one down and
send to that toi loop. And one more time, Shift D, and Z and bring that one down. So you can kind of see what
we were doing by creating that separate panel and
then adding loops to it. We use those loops
to be able to know exactly how to divide those shelves up
evenly in that space. Okay, now that we've done that, we can actually now we
can grab this panel, and we can go ahead and delete
it. We're done with that. And let's go ahead and bring
everything back on that. Maybe for a moment,
let's go back to solid mode and have a
look at our handiwork. And yeah, that worked
out really well. Okay, so now let's go
ahead and grab this one, and let's go ahead
and isolate this one. And let's kind of do
the same thing again. So I think, first of
all, let's create an inner nice looking
frame in this. So I think, first of all, let's get the cursor
where we want it. So let's tap into Edit mode. Let's press three for faces, grab this face, this
face, and then this face. Now let's press Shift and
cursor to the selected. And that's brought the cursor in kind of in the
middle of that space. Okay, let's tap out of
Edit mode for a moment, and let's press Control three to get us the orthographic view. And let's bring in a cube. So let's press Shift A and cube. And let's tap into
edit mode with that. And let's also go wire frame and let's press
one for vertices. Grab these vertices here, now, and bring those over close to
where we want it like that. Grab these ones now and take
those over into position, and let's get closer
so we can see what we're doing and drop that kind of on the edge
here, no like this. Okay, now let's grab
the other vertices and let's kind of set
the width of this panel, and I'll make this panel
kind of this kind of width, something like that, I'd say. So about two cubes, looking at the grid behind. Okay, let's grab these
lower vertices now, and let's take those down to the bottom and set those
up in the right place. So I'll bring that down and just drop that there like that. And let's do the same
at the top here now. I'll grab these ones and
take this one up like this. And let's go ahead and
set this one, too. And we'll kind of put that
one just there like that. Okay, let's press one now
to see this from the side, and let's set this out next. Let's grab these and take these inside the cabinet
about the back like this. Let's grab the front ones now, and let's set these nicely. Let's take those flush with the rest of the
cabinet on the front edge, so we'll put something
there like that. All right, so that's our
first panel created. So let's go back to solid mode. Let's tap out of Eda mode, and let's look at the
scale and that's all good. Let's go ahead and add a
bevel modifier to this. And let's do our standard
two zeros to the right, like enter, and let's put
four segments on this. And I don't think
I'm gonna apply this one just yet because we're going to make lots of copies. So let's go ahead now and press Control three again,
select this one. And now let's press Oh, let's actually set the
origin to the geometry. And now let's press A to D and Y and bring a copy over to
the opposite side like this. And let's go ahead and set
that one where we want. Pull that over a bit
more and just put this in position there like that. That's go. Okay, this time, let's press Shifty because we'll scale this
one and rotate it. And let's go ahead and press Y and bring a copy over
to the middle like this. And now let's rotate it. So let's press r90, enter, and let's tap into
Edo moode with this one. Let's go into wireframe with it. Grab these ones here now and pull them over
into position now. Like this. There we go. That's cool. And let's do the
same on the opposite side. Now, let's grab this
one and bring this one over to the middle like this. Okay, let's just zoom in on
that and see where it is, see if I'm happy, and I am. Okay, let's tap out of
Edd mode with that. And now let's go ahead and press Alt D and Z and pull a
copy down like this. And now let's put this
copy at the bottom. Set this in position. There we go. That's cool.
Let's take the other one here. Let's take that one to the top. And put that one in
position as well. And that's good. So
the next thing we need to do is do that control
loop trick again so that we can divide this space
up equally using Blenders loop tool
to divide nicely. So let's grab this one now, and let's make a
copy of this one. So let's press Shift D. And Y and bring this
one over like this. And let's go ahead now, and let's go back to
solid mode for a moment. And let's tap into Edit
mode with this one and press two so we
can select edges. Grab this edge here, and let's press
Controller and put a loop in. And there we go. Let's scroll the
mousewheel few times and divide this space up. Is that nice like that? Let's have a look. So I'll press Control three to see
this from the face. So I've got 11 cuts in there. Do I want to go 12? Let's have a look. And I
will leave that at 12. I think that's working
nicely for me. Okay, so let's tap out like
that and tap out of Eta mode. And I think the
next thing we can do is select this panel, maybe this one here, and let's go ahead
and isolate those. So I'll hit the forward slash
key again, and there we go. And now let's press Control three to see this from the face. Okay, let's go to wireframe. And now let's grab this panel here and let's press Alt D and Z and go ahead and
bring a copy down to the middle of here like this. And now let's go
ahead and do that. So let's press Alt D again and let's press S
and bring a second one down and center this one nicely to the middle
of here like this. Let's zoom out now, and let's use the
Shift R function to repeat that command. So hold down Shift and press R, and keep on pressing
R until we've got down to the bottom to that last control loop,
and there we are. Okay, we may need to just
manually check these, so let's maybe grab this one now and just a little movement.
We can deal with this. And here, too, just bring
this one down a bit. And let's just centralize
these a little more. Grab this one, bring that to the middle
and this one, too. And this one. Just take a second just to
centralize these up. And there we go.
I think the rest I'm happy with. There we go. Alright, so now this panel, we can go ahead and delete.
We're done with that one. And let's bring everything back. And let's go over to solid mode. And let's have a look
at our handiwork. And, yeah, that's looking good. I think I'm happy with that. Yeah, that's looking good. Okay, so I think that's
it for this lecture. We've done our wine rack here, and we've done our shelving
in this open cabinet here. Alright, thanks very much. And I'll see you in
the next lecture. Bye bye for now. But
35. Lecture 34 Splash Backs: Hello, and welcome
now to Lecture 34. And in this lecture, let's have a go at doing
our little splash backs on the back of our worktops here
and a little down stand, which I'll go on the underside
of our wall cabinets. Let's see if we can
go through those. And we'll on these walls actually notch
underneath our windows. So we'll make that little tweak, as well. Alright,
so let's do this. So what shall we do first? I think, first of all, let's
get the cursor reorientated. Let's just bring that to
the middle of the room. So let's press this chefs, and let's bring cursor
to world origin. And let's create a new folder for all these little
ancillary bits. So we'll click on cabinets and let's hit our
little Ad folder. Here it is cabinets five. Let's double click on it. And let's call this
worktop upstans. There we go. And maybe
as well, let's do one. We haven't done it,
but maybe we should do one for the worktops as well. Let's go
ahead and do that. So let's click on
cabinets again, create a new folder, click on it, and let's just
call this one worktops. There we go. Let's select this one and this
one and this one. Let's press M, and
let's go to cabinets, and let's drop them
in the worktops file. There we go. We can
compress that now. And let's click on the
upstand ones again now so that the items we bring
in drop into that file. And let's go ahead and press Shift A and mesh, and
let's bring in a cube. Okay, so I think the first
thing we're going to do is in the Y axis, let's make this, not very big. Let's make this about 20 millimeters around
2 centimeters. So 0.02 enter, and there we go, Let's just have a look
at this from the side. See that's correct. Shall we make it a little bit thicker? Let's turn that two into
a three. Let's do that. And there we go. And in the z, I'm going to make
this 0.15 enter. And so that's about 15 Well, it is 15 centimeters high. And that's the size of our ups stands. Now,
I'm happy with that. So I think all we really
need for a moment, we can go ahead and reduce
what you've got on our scene. We need this one and
this one and the walls. And I think that's all we
kind of need for the moment. So let's go ahead
and isolate those. Let's grab this piece here now, and let's press seven. And let's take that
back on the y axis like this and drop that into
position like this. And let's go ahead and take
that back a little bit more to something like that. Okay, let's fix the
scale on that and then let's add a bevel modifier. So let's press Control A and
apply rotation and scale. Let's add a modifier,
generate and bevel. Let's add our two zeros, our standard two zeros. And let's turn our one
into a two in this case. Enter and let's put
the segments at four. And let's not apply
that just yet. Okay, so now that
we've done that, we can actually grab it again, and we can take a copy
over to the opposite side. So let's press Shift D and X and take a
copy over like this. And let's grab another copy now. So we'll press Shift and Y and bring a copy
forward like this. Alright, let's grab
this one here now, and let's rotate
that 190 degrees. Enter, and let's take
that back to the one. We're just roughly positioning
them for a second. We're not sort of taking
a lot of time to do this. We'll tweak them a bit more. Let's press G and X
with this one now, and go ahead and take
that one back like this. All right, so let's press Z now. And let's go into wireframe, and let's tap into edit
mode with this one. Let's press one so we
can select vertices, grab these ones, and
just bring them forward. And I'll just stop it a little bit away from the
edge of the worktop, maybe somewhere like
there, I think. And let's grab the other side
and take those back as well to something like this, I think. All right. So let's now
maybe grab this one. Let's tap into Edi
mode with this one. Let's grab this one
and just pull this over into position
now, like this. And we'll stop that
there like that. Okay, and what do
we want to do next? I think the next
thing I want to do is add some loops to this. And we can do this from
this angle, I think. And let's tap Edy mode with that one and grab this one now
and tap into Edi mode. Let's grab that edge there. Whoops. And let's press Control and add
two loops to this. There we go. That's cool.
Let's grab these here now, and let's take these to the
edge of the window like this. And let's do the same
on the bottom one now. Let's grab this one
and take this down now to the edge of
the window like this. Okay, so what do we
want to do next? I think I need another
loop in there, so I'll just grab this edge here now and I'll press Control, and we'll put a loop
in like this, as well. And I think now I want to
go back to solid mode, so let's click on this. And let's go ahead and
grab this edge here now. So I'll hold down Alt
and select all of this. And let's go ahead and bring that loop until we can just about see it here on the window, like
this. There we go. Okay, let's have a look at it
here and see if that works. And that's good there. And let's have a look at it here
and see how that looks. And maybe that one can
come over a little bit, so I'll hold on to Walt
and grab this one, maybe just pull that
one over a little bit more to about like that. Let's just double
check that one, actually. Just make
sure it is good. And I'll hold I'll select it. And it's a tiny little bit. I'll just tweak it over there
too about there like that. Okay, let's press three now. And let's select this face, and let's hole control and go
ahead and select this one. So we've got all
those faces selected. And let's press X and delete those faces. Okay,
we're looking good. Select one, and we
can select vertices, grab this one, and
then this one, let's press F and fill that. And let's do the same on
the opposite side now. Et's grab this one,
and then this one. Let's press F and fill that. Let's press two so
we can select edges, grab these edges here now, and let's press F and fill that. And let's see if Blenders
trick will work for us. Let's go ahead and press F and
F and it's filled it nice. All right, so we have our
bevel modifier applied to that and where we have our little cutter
around our window. Let's go ahead and
bring everything back. I'll hit the forward slash key, and let's have a look at
that and see how it looks. And of course, we can tap out of Edit mode
for a moment now, and we can bring our
soil board forward now until it's back in
the correct position. So I'll just do this
by eye, I think. Take it back a little
bit in the X till we get it something like that.
I think that's cool. Okay. Okay, so let's tap into Edimod with this sell n. And let's press three,
so we can select faces. And it's a bit of a
tricky one to get to. We might have to go wireframe,
let's see if we can do it. I just want that one
there, there we go. And let's go ahead
and pull that back in the X axis until that
white line disappears. And when it does, just
pull it back again so that white line just
about reappears. And there we go. That's our
sell board done on that side. And, yeah, that's looking fine. Okay, so I think let's just check it here and
see how this works. And we've got a little bit
of tweaking to do here, so let's tap into Edo
mode with this one. And let's press let's select the end here and
just go ahead and pull that forward now like this and just let the white line
just appear just like that. Alright, so let's do the
same on this one, now. Et's tap out of Edo
mode and grab this one, and let's just press G and X and bring this over like this. There we go. And let's go
ahead and grab this end now. Let's tap into Edim
mode with this one. Now, let's select
the end here now, and let's go ahead and pull
that to the wall Whoops. Find it again in a
minute. There we go. Drop that in position. I like that, and that's fine. So I have noticed that I think my splash backs are actually far too low at the moment. We
need to raise them up. So I'm just going to select that and maybe the worktop as well. And then the other two
splashbs that one there, and then that one there, and maybe this worktop as well. And let's go ahead
and isolate those. And let's press one so we can see this
from the front view. Let's go ahead and just grab
just the splash backs now. And let's go ahead
and press G and then Z and go ahead and take them up until they're
sitting in the right place. Let's take a look at
that and see there. And yeah, that's
fine just like that. Maybe just a tiny bit lower. I'll grab those again.
And let's go ahead. Yeah, it's still a
little bit high. Let's press G and Z. Take them down a tiny bit. And that's better
just like that. Okay, let's bring
everything back now. So I'll hit the forward
slash, and there we go. And we've just got
a slight problem here with this window now
so we can deal with this. Let's go ahead and grab this
one, tap into Edit mode, grab that one there, and
let's go ahead and pull that one down until that's
making sense again. And we'll kind of put that
just like that. That's fine. All right, so we can tap out of Edit mode with that one now, and we can grab this one. And we can go ahead and
press Shift D and X and bring one over now
to the opposite side and put it in position
on the other window now. And just check the
position this as we go and just see if
everything looks right. I'll zoom in a little bit on this and just have
a look at that. Maybe just move it
a tiny bit more, so I'll press G and X again and just put that in
position. Whoops. A there like that. I
think that's fine. So what else do we need to do? We need to work the sell now, so let's do that next. So let's go ahead and
move that back now. Let's press G and X on
that and go ahead and move that back until that's
looking better, as well. Maybe a bit more.
Let's press G and X, and we'll just make sure
that's where we want it, which is about there, I'd say. So let's grab the internal
face of that soil now, so let's tap into Edi mode, grab this one, and let's go
ahead and pull that back now into position. There we go. That's cool. Okay, so we can tap out of Edit mode
with that one now, and we're done with that. And so the next thing
we want to do is go ahead and make a
little downsnd here. And I think all I'm
going to do is pinch this and reduce it in height. So I'll grab this one, and I'll press Shift D and Z
and bring this up like this. Maybe let's just grab this
cabinet and then this cabinet, and let's hit the forward
slash and isolate those. Let's press seven and
see that from above. And let's tap into
Edit mode with. And find it. There it is. And maybe bring that forward and put that in
position where we want it, which I would say is
about there like that, a little bit back off
the edge, but not much. Now, let's bring a copy of
that to the other side. So let's press Shift D and X and bring a copy over now
to this side like this. And let's check that out
and see how it looks. I think I'll just tap
into Edi mode with it. Press one for vertice selection. Grab the, and let's go ahead and pull that to the end
like this. There we go. And let's do the same
on the other side here. Let's grab this one and go ahead and pull that now to the end. Like that. There we go. Let's press one to see this from the front and
see where these are. And let's tap out of Edit mode and grab
both of these now. And let's go ahead
and take these up. So let's press G and Z. Go ahead and take
them up as a pair and place them just under the
cabinets. So I'll zoom in. I'll press G and Z again
and go ahead and carry on taking those until there's
something like that. Okay, let's tap into Edit
mode with both of those, and let's select all
the lower vertices. And now let's figure out
what height we want this. So let's press G and Z again
and go ahead and bring that up and position those
where we think the want them, which is about there
like that, I'd say. Okay, let's go back to solid mode for a moment
and see how that looks. And, yeah, that's
looking fine to me. They're in position now. So let's go ahead and
bring everything back, so I'll hit the forward slash. And I think that all that
remains really is to go ahead and apply
these bevel modifiers. And this one. Whoops. This one here now, let's apply that one. And did I do this one?
Nope, let's do this one. And then this one,
let's apply this. And then last but not
least, is this one here. Let's go ahead and apply that. Okay, so that's our
splash backs done, which adds a nice little detail. And our little down stands here on the bottom of
our wall cabinets. So in the next lecture, what
I want to do is I want to do this some trono
maneuver at this. This is the problem. As a ing gets larger and more populated, gets a bit harder to move,
but we'll get there. So I want to do the interior
of this cabinet here, which you're still seeing
in this image right here. So that's not too bad at all, but we'll do that in
the next lecture. Okay, thanks very much. And I'll see you in
the next one. Oh, I nearly forgot. Excuse me. Let's do a save.
Let's press control. I wonder if I'll just simply remember to do a save in
any lecture in this course. I hope maybe I should just write it somewhere
in front of me. Remember, save. Remember, save. Okay, try and help me
on the save bit, plea. Alright, so we're there on
that. Thanks very much. And I'll see you in the next
lecture. Bye bye, Fine.
36. Lecture 35 larder Cabinet Interior: Hello, and welcome
now to Lecture. What are we on? Lecture 35. And in this lecture, I want to have a go at doing the interior of our
larder cabinet, this nice wood grain
interior that we see here. We also have like an LED light
strip which goes around, but I think I'll leave
that for this lecture. But let's go ahead and make
our interior for this. Alright, so where are we
going to start with this? I think the first thing
we can go ahead and do is maybe isolate the
doors in the cabinet. So let's hit the forward slash with those selected and
go ahead and do that. And what do we want to do now? The next thing you
want to do actually, I didn't want to do that. I'm sorry, guys. Let me
just back up a little bit. So I'm gonna hit the forward slash and
bring everything back. Sorry about that. I'm just
gonna grab just the doors, and I'm going to go
ahead and isolate those. Alright, so I want to show
you a kind of a new trick. I want to show you
how to rotate from a specified point on
a door or how to make a component rotate from a
point that you specify. So let's go ahead and do that. So first of all,
we have the doors, and maybe let's
go ahead and find those doors in the
cabinets file. So they're not in the
worked up upstands. And you can see here that it's highlighted in the tall cabinet. So let's open this and find it. And there it is. So
let's rename this. And let's call this
the arder doors. There we go. And
what's Miss off Made. There we go. Eta. Now that I've done
that, let's tap into Edit mode with these. And let's press three so we can select faces and grab one face. Hold down control
and press Plus. Hold down plus as well until it expands until all faces
are selected on that item. Once we've done
that, let's press P, and let's separate by selection. And you can see now
we have arder Doors, which is the one we created, and now we have arder doors 001. So that is this one because
we've just separated it from this component.
So that's good. Okay, let's press seven so we can see this from above now. And the next thing you
want to do is move the cursor to this point here. So I want to sort of
get the pivot point in the door where the hinge would naturally make the
door pivot from, which is gonna be about there. So we could go down the route of tapping into Edit
mode on this one, and we could, like,
create a loop, which would go about here maybe, select the cent of that
roop and press Shift S, and we could go cursor
to that geometry point. Don't want to do all that.
That's really long winded. So I'm going to show
you a shortcut. What I'm going to do is hover the mouse exactly where
I want this cursor to be. I'm going to hold down shift
and collect the mouse. And now the cursor has popped to the point where I want
the door to pivot. Now that I've done
that, I need to go ahead and right click
and go ahead and set the origins to the three
Dcursor. And there we go. That's cool. So now
we need to rotate this store exactly 90 degrees
to the open position. So I could press R and I could go ahead and
rotate like this, and I could bring this up to the 90 or I could just type in 90. I'm not going to do that.
What I'm going to do is press R. Now I'm going
to hold down Control, and Blender is going to snap in increments of five degrees. You can see on the top left
corner there going up 75, 80, 85 and 90. And there we go. That's
where the door needs to be. So let's go ahead and
do the other door now. Let's grab this one
here like this. We'll get the mouse
exactly where we want it, which is about there,
the cursor, I mean. I'll hold down Shift, right click and pop the cursor to the point
where I want it to be. Let's go ahead and right
click again now and set the origins to the
three D cursor. And let's press, start
rotating hole control and snap in increments of
five degrees until we get 90. And there we go. That's cool. All right, so let's go ahead and bring the cabinet back now, so I'll hit the forward
slash key once. And now let's go ahead and grab the cabinet and the doors, and let's go ahead and
isolate those as well. So let's hit the forward
slash, and there we go. So I think now the
next thing I want to do is go ahead and
move the cursor again. So I'll press one to see this
from the orthographic view. In fact, I'll press
Control one so with the right way round
on the cabinet. And I'm going to sort of position the cursor kind
of center like that. And I'm going to
hold down Shift and press and just pop the
cursor to that point. So let's go ahead and
bring in a cube now. So let's press Shift A and mesh, and let's go ahead and
bring in a cube like this. Let's scale that cube down like this until we get
it something like that. And then let's go
into edit mode. So let's hit the tab key, and let's press and
go into wireframe. Let's press one so we
get vertice selection. We'll grab maybe these
vertices on the top, and let's go ahead
and bring those to the inside face of the cabinet. So that is there like that. Let's do the same on the bottom. Let's grab these
lower vertices now, and let's bring those down. And let's have a good look
at this, get close to it. And then bring that down too, about there like that, I'd say. Okay, let's grab
these vertices now, and let's bring these ones
in like this and maybe grab these ones and then
bring these in until we get kind
of panel thickness, which I want, which is
something like that. Alright, let's grab all now and then just
bring this over. Kind of to about here like this. So let's just look at
this image for a moment, and you can kind of see it
that the interior cabinet, the interior lining on this side here and on
the opposite side, there's a gap for
the door to go into because we have this what you
call a pocket door system. So the door rotates and then it slides back into
the cabinet like that. So I'm going to need to leave a gap for that door
to slide into. So I think that there is about right what I'm
seeing there like that. Okay, so let's press seven so we can see this
from the top now. And let's go ahead and
take this back like this. And I'm going to put that
about about there like that. And I think I'm happy to leave a little void in the back
of the cabinet as well, so I'll leave that
just like that. I'm wondering if this panel's
a little bit too thick. I think I'll grab this side, and I'll just reduce
the thickness of this door a little
bit about there. Sorry, this interior
lining to about there, I think. I think
that's looking good. All right, so let's go ahead and tap out of Edit mode
with that for a minute. And let's look at the scale and the rotation, and
let's fix that. So let's press Control A and
apply rotation and scale. And for a minute, let's
go back into solid mode. And let's go ahead and
apply a bevel to this. So I add modifier,
generate and bevel, and let's add our two
zeros to the right, and let's increase our
segments two or four. And I won't apply that
bevel modifier yet. I'll leave that as it is. Okay, so let's let's
select this again, and now let's press seven
and see this from above. And let's go into wire frame. And let's go ahead and set
the origin to the geometry. And let's go ahead and
make a copy of that. So I'll press Alt D and X and bring a copy now to the
opposite side like this. And I'll go ahead. And position that where
I think it should be, which is about like that.
I think that's good. Okay, so now we need to rotate one of these
and make a back panel. So I'll press Shift
D in this case and X because we're going
to change this panel, put this something like
this, let's rotate it. So let's press r90, Enter, and let's go ahead and
take this back and maybe take it over to one side or the other. So
I'll go this way with it. And I'll go ahead and
press G and X and take this over. There we go. And let's take it back
notes. Let's press GMY and take it
back, so it's flash. There we go. Let's go ahead and tap into
Edimde with that. And let's select
the vertices now, and let's go ahead and
bring this over. This. Bring that to the other
surface like this, and there we go. That's cool. Okay, so what do
we want to do now? The next thing I
want to do maybe is make another copy of this. So let's press Shift D and Y and bring a copy
over now like this. Let's press three, so we
see this from the side, and let's rotate that. So let's press R, 90, enter, and let's go ahead
and take that one up now until it's
flush with the top. Let me have a look
at this. Let me just go back to solid
mode for a moment. See what I'm seeing here. And yeah, let's press one. And let's go ahead
and take that up. I was finding wireframe a little confusing there to figure
out where to put this. So let's go ahead
and bring that up and snap that in
position like this. And let's do the same no. Let's press G. Sorry, let's press and let's
do the same again. Let's press Shift E and Z and bring a copy note to
the bottom side like this. And let's go ahead and drop that in position
where we want it, which is about there like that. Okay, so we're
looking good overall. So I think the next we want
to do is grab maybe this one So the next thing you
want to do is maybe grab this panel and this panel, and let's press seven
to see this from above. And let's go into wire frame, and let's go ahead and tap
into Edit mode with it. Let's grab the vertices for the top and bottom panel and go ahead and pull those back like this and drop those
into position. Let's see where we are. Let's
go ahead and press G and Y, pull those forward a little
bit like this to about there. And let's do the
same with a back. Now, let's pull those forward. And I'll press G and Y, find where I need to be, which
is right there like that. And there we go. That's cool. Alright, let's go back
to solid mode for a moment and see what we're
doing and if we like it. And yeah, so far so good. Let's have a look
at our interior and see what that looks like. And I think first
thing we can do is go ahead and create another
copy of this panel. So we'll tap out of Edit mode. And I'll just grab one of
these, maybe this one. Let's press Control O to get a nice orthographic
view of this. And let's go ahead and press Shift D and Z and bring a
copy down now, like this. And put this, I would say, about there like that. Now that we've done that, let's make another copy of this. So let's press Shift
D again and Z, and bring another copy up. Let's rotate that, so
let's press r90, Enter. And let's bring that to roughly the center position,
something like this. I'm intending to put
a microwave here, and when I import the microwave, we won't
actually model it. I don't know the exact size
or proportions of that yet. So I'm going to kind
of position these, but we may need to sort of move these again,
so we'll just see. So let's press E and
go into wireframe, and let's tap into
edit mode with that. And maybe let's just grab these bottom vertices and
bring these up like this. Drop that into
position like that, and let's do the
same at the top. Let's grab these
ones and bring these down and drop those
into position. Let's get closer and
have a good look. Something like
that. There we go. Okay, so the next thing we need to do is make
another copy of that. So I'll tap out of Edit
mode for a moment, and I'll press Shift D and X and go ahead and
bring another copy out. And let's go ahead
and rotate that. So I'll press r90, and Okay, so like I said, we may need
to reposition this one, but we'll put it loosely
where we want it, which is about there. And now let's go
ahead and press G and X and bring that over and put it exactly
where we want it. Which is about there. I let's tap into
Edit mode with it, grab the vertices
here and go ahead and bring those over into
position like that. Okay, what else
do we want to do? Let's make some copies for
the opposite side now. So let's tap into Edit mode, and let's press Shift D and
X and bring a copy over. And it won't be exact, so we'll need to sort of tweak this. So let's go ahead and drop
into Edit mode again, grab these vertices and
pull this over like this. And let's grab these ones now and go ahead and
tidy these ones up too. Let's bring those over
to about like that. There we go. Okay, let's
go back into solid mode, and let's have a look at our work and see
how we're doing. And I think it's
looking good overall. I think the only thing
I might have wanted to change is take the shelves back. So I think I'm going to
go ahead and do that. So I'm gonna tap out
of Edit mode and select all these
objects, this one, this one, and this one, and go ahead and tap into Edit mode again
with all of those. Let's press seven to
see this from above, and let's go into wireframe let's grab these
front vertices now, and let's go ahead and
bring those back so that the interior shelving is back from the front
edge of this lining, if you're getting me,
so that we have space for the sort of the
LED light in this. So I'll bring that back to about there, I think,
should be good. Okay, so let's press it
ahead and go back to solid, and let's have a look at that. And even I might take it back a little
bit more, actually. To about there. I'm
happy with that now. Let's tap out of Edit
mode, and there we go. That's done. So that's for now. Our interior for our
larder cabinet finished. Like I said, we may move
things around a little bit, but for now, I think
that's good enough. Okay, so let's do a save. Let's press Control S and go
ahead and save our progress, and I'll see you in the next
lecture. Thanks very much. Bye bye for now.
37. Lecture 36 Kitchen Sink: Hello, and welcome
now to Lecture 36. And in this lecture, let's have a go at doing
our kitchen sink, which goes just
there in that space. And to do that, we're going to use the
subision surface modifier. Can't remember it's the first
time we've really used it, but, yeah, we're going to do
a little bit with that now. So what are we going to
do first? Let's maybe just select the worktop
and the cabinet, and let's hit the forward
slash to isolate those. And maybe now, let's
just go ahead and tap into Edit mode with
just the cabinet. Let's tap into Edit mode
and let's press three, select that folks there
and press Shift S, and cursor to the selected. There we go. Let's tap out
of Edit mode with that. And let's go ahead
and bring in a cube. So let's press Shift A and mesh and cube.
And there we go. Let's hit S straightaway and scale that down to
something like. And let's press Control three to see this in the orthographic
view from the front. Okay, let's go on to Wireframe. Let's tap into edit
mode with that one. And let's press one
to select vertices, grab these ones down here, and let's pull those up into position so that they're
sitting directly on the cabinet just like that.
There we go. That's cool. Let's grab these top ones here, and they want to go just
underneath the worktop. So I'm going to put it
just there like that. Let's grab the side
ones here now, and let's pull those
over to the side here and drop those
right there like that. And let's do the same now
on the opposite side. Let's bring those over and put those just there like that. Let's press seven and
see this from above. And let's figure out what we
want to do with this now. Let's maybe grab
these back vertices and bring those forward to, I would say, about
there like that. So this line here
is our worktop, and I want that to go
underneath our worktop. So that's where I'll
kind of put that. Then I'll grab the front ones, and I'm going to let those come forward a little
bit to about there. So that's going to
be sticking out further than the cabinets
and the worktop. And that's kind of
what I want with that. Alright, now what we want to do? Let's press three so
we can select faces. Let's grab this top face here. Let's press seven to
see it from above. Let's press I and go
ahead and inset that and create a thickness fora basin, which is something like
that, I would say. Now that we've got that,
let's go ahead and extrude that, so
let's press E, and, and go ahead and
take that down to something like that.
And there we go. Alright, let's go back into
solid mode for a moment. And I did notice that
one thing I've done, which I want to change
on the worktop is I want to have the worktop come
over the top of the basin, so it'll kind of stop just a little bit past the
edge here of the basin. So let's go ahead
and do that next. So let's tap out of Added
mode with the basin, and let's grab the worktop, and let's press Control
three to see it from here. And let's go into wireframe. Let's tap into Edit
mode with it and press one to select vertices. Grab these ones here
and go ahead and pull those two about there like that. Let's do the same this side. Let's pull these
over here like this. And let's have a look
at the back again. Let's press seven, and we can see the inside
face there of the basin. So let's grab these back
vertices now and go ahead and pull those forward
to, something like that. Okay, let's tap out of
edit mode with that now. And let's go back to solid mode. I'll press said and go
solid, and there we go. That's kind of better. This is not looking very
kitchen sinky shape, is it? So start using our
subdivision surface modifier to get the shape that we want. Let's select the basin here, and let's hit the forward slash
to bring everything back. And let's hit that
button again to isolate. All right. So let's look at
the scale. We can fix that. So let's press Control A and
apply rotation and scale. And let's add modifier
and generate. And for once, it's not a bevel. Let's grab the subdivision
surface modifier. When I do this, get
ready for a shock. Here we go. There we go. So we've kind of lost the
shape completely for a moment, but that's alright.
We'll get it back. So on the level viewport, let's put that up to two to increase the vertices counter
a little and already, that's looking a
little bit better, but obviously, definitely
not what we want. Let's go ahead and turn
this one on the On cage. And let's tap into
Edit mode with that. Okay, so you can
see what we've got. We don't really
have at this stage, a lot of curves or vertices. And that's the reason why the subdivision
surface modifiers had such a dramatic
effect on this. So we're going to add more
loops to this to get to the shape that we want.
So let's do that. Let's press two. Let's
select this edge here. Let's press Control, get a loop. Let's roll the mouse
wheel to get maybe. Let's try four and
click and add those. Let's do this same this way now. Let's grab this one,
press controller, and let's put in maybe
three loops this way. This. Okay. Now let's bring
some loops in on this side. So let's select maybe this one, and let's press controller. Let's roll that mouse
wheel to get maybe four. Let's drag those down a little bit to about
there like that. And we're already starting to
get something a bit better. I think let's bring some
more loops in on the inside, so let's select that one there. Let's press controller, and
let's have maybe three, and let's bring those down a little bit and put
those there like that. Okay, we're getting better. We're definitely getting better. So I think the next thing
I want to do is just we want a rounded top edge,
but this is too rounded. So let's grab one there. Let's press Controller, and
let's put maybe two in, and let's go ahead
and apply those. And that's good. I
think that's okay. Or should we have done three? No, I think I'm happy with two. So what do we think?
Are we happy? Are we good? I think
I want to sort of just make these edges
a little bit squarer. So I'm gonna select maybe
here, press controller. Put that loop in and just
slide that over a little bit more to about there like that. Let's do this same this
side. Let's grab here. Control. And let's go ahead and bring this
over a little bit, as well to about
there like that. Okay, so I think I want
to bring everything back, so I'll hit the
forward slash key. And let's see what we're
getting as a basin. Whoops. And yeah, let's tap out of Ed mode
with that for a moment. This is pretty much the
shape that I wanted, really. That's kind of
worked out nicely. Let's right click and apply
a shade oro smooth on that. And yeah, that's a really
nice shape, actually. That's the sort of the
kitchen shape done. So this is what we
would call in the UK as we call this a Belfast sink, which is a very
traditional sink, I'm sure in other
countries as well, but that's what we
kind of call in the UK, a Belfast sink. So there we go. That's done. So let's go ahead and do a
save so let's press Controls. And our next lecture,
let's go ahead and start doing our Tapia, just on the worktop just
coming up like this. Okay, thanks very much. And I'll see you in the
next one. Bye bye for now.
38. Lecture 37 The Tap: Hello, and welcome
now to Lecture 37. And in this lecture, since
we've just done the sink, maybe we should go ahead and do the tap while we're still here, while we're still in the area, let's go ahead and do the tap. So between lectures,
I've imported this image of sort
of a kitchen tap, which kind of suits our project. I can't share this with you
for copyright laws, sadly, but we can see what we're
going to do here with this one. So where do we start? I think let's go
ahead and create a sub file now for our taps. Let's select the cabinets here. Let's hit our Ad file button, and let's name this as the tab. Enter. And let's
leave that selected. Okay, let's press Shift A, and let's start by
bringing in a curve. And let's bring in a path curve. Let's work it that way. Let's select the path curve and the worktop
and let's isolate. So let's hit the
forward slash key. Let's rotate our path curve
on 90 degrees and the Y axis, let's press IY 90, enter. And I don't think we've
used a path curve before, so this is a great opportunity
to learn something new. Let's press three and get
this from the side view. And let's hit S on
the path curve, and let's go ahead and
scale this down and bring this up into position,
something like this. Let's actually press one now, so we see this from the side. And with the path
curve selected, let's go ahead and
tap into Edit mode. Let's grab this top vertices here and let's bring this over. And you can see straight
away we get this line here, and we get the orange line. So the orange line
represents the vertices. And then the black line
represents the finish shape that we will get from using
the path curve in this way. So let's go ahead
and bring this over, go ahead and drop this,
something like that. Let's grab this one now. Go ahead and bring this
one up and over like this. And maybe this one now, we'll pull this one back
a little bit like this. Let's grab these two vertices. And with those
selected, I want to add an extra vertices in the middle here to get more
control over our curve, so I'll right click
and subdivide. Let's pull that back again
now. Sorry, just this one. Let's grab this one and pull this back to get
our shape back again. Grab this one and kind
of pull this down. Let's select that one
and that one now, and then let's right click
and subdivide there two. Grab this one and pull this one back into
shape like this. This one, maybe pull that
one down a little bit. And we're getting the kind of shape that I'm after
now, actually. Maybe I'll grab all of these, pull them down a
little bit like this, grab these, pull them out. And we're looking for a
reasonably symmetrical, nice looking curved shape. And overall, I think I'm quite pleased with
that, actually. I don't think I'll carry on
messing around with that. And let's see what
that looks like. And that looks
pretty good overall. I'm going to go ahead and tap out of Edit mode for a
moment with that and go ahead and take that back
kind of more into position, which is there like that. And, yeah, I think I'm happy with that shape. I
think I'm pleased with that. Once you've done that,
with the curve selected, come on down here to
geometry and click on it, and then just come on down
to the bevel tab just here. Okay, start clicking
on the depth, which will give us some
shape now to our path curve. I'm going to go ahead
and take that up to 0.1 and have a look at that. And, yeah, I think
I'm happy with that. I think that's just maybe I'll
take it a little bit more. Maybe up to 0.12. Is that too much? I think
that's pretty good. I'm going to go ahead
and press one just to see that nicely
from the side and tap into Edit mode
one more time, and just do a last little
couple of tweaks on that. Maybe just pull that back
a little bit like this. Maybe just grab this
one and just pull that down and this one, as well. Just pull that over and just tweak the shape in any way
that you think you should. And I think now I'm
absolutely happy with that. I'll tap out of Edit mode, and I'll right click
and I'll go ahead and convert that to Oh, hang on. I'm sorry. I'm getting
ahead of myself. Let's just look at
the resolution. Let's go ahead and up the
resolution to about a six. We will increase the amount
of finished vertices we'll see in this object when we
convert it now to a mesh. So now, sorry about that. Let's right click and
let's go ahead and convert that to mesh,
and there we go. Let's tap into Edit mode
and see how that looks, and now you can see the geometry within our main body of our tap. And that's looking good.
I'm happy with that. We could actually go
ahead and fill this here. So let's press two so
we can select edges. Hold, grab the bottom edge there and just press
F and fill that. Okay, so now what? Let's tap out of edit mode
with that for a moment. I want to get the cursor
now at the base of this. So maybe let's just go
ahead and isolate that. So I'll hit the forward slash. I'll bring everything
back. Then I'll hit the forward slash again, and we'll get that et's tap
into Edit mode with it again. Let's hold select the
bottom here like this now. Let's press F and fill that. And now while we're
here, let's press Shift S and cursor to the
selected, and there we go. Let's tap out of
Edit mode with that, and let's bring
everything back again. And I think the next
thing we can do actually, let's just grab the worktop and the tap now, let's
isolate again. We don't need
everything. Let's go ahead and bring in
another cylinder. Let's create this area here. So let's go ahead and press Shift A and mesh and cylinder. I think I'll leave
this on 32 vertices. That's kind of my favorite
number with the cylinders. And I'll hit S, and I'll go ahead and bring this
down like this. And I'll carry on scaling that down until I'm getting
this kind of diameter. So I'll hit S again and scale this down to
something like that. Let's press Control three to see this from the side nicely now. And let's go ahead and pull this up to something like that. Let's see this
from the side now, actually, let's press three. I'm sorry, let's press one. And let's see that that's
looking good, and that's fine. I just wanted to make
sure that this isn't starting to interact with
a curved area, it's not. Maybe I'll take it up a little
bit more to about there. Now I'll tap back
into Edit mode, and let's go into wireframe. And let's press
one for vertices, grab these ones here and go
ahead and take that down. And we'll put that now, I would say about
there like that. Okay, so you see
here with our image, we've got this sort of other
area here, this like ring. So let's see if we
can create that next. So let's press two so
we can select edges, select one of our
vertical edges, and let's press
Control and let's bring a loop in and set
that where we want to. So I think it's about
there like that. Okay, once we've
done that, let's press three so we
can select faces. Hold Alt, come to the edge here of a face
and go ahead and click, holding Alt at the same time. Let's extrude that
and scale it up. So let's press E and S. But I don't want to
scale it up just yet, because if I go ahead
and scale it up on all three axis, the X, the Y and the Z, it's going
to kind of rise as well. It's going to come
up in the z axis. I don't want to do that. I just want it to scale
in the X and the Y. So what we're going to do
is we're going to press Shift Z to omit
scaling in the z axis. And now we'll go ahead and
pull that out and create our little area there that we're seeing our
little ring area. And there we go, that's cool. Okay, let's go back to solid
mode now for a moment. Let's go ahead and tap out
of Edit mode with that one. Okay, so now let's create another cylinder for
this thing here. Let's do that next.
So let's go ahead and press Shift A and
mesh and cylinder. Let's leave it at 32 and just
hit S and scale this down. And let's go ahead and bring this up a little bit on the z, and let's rotate that on the X. So let's press RX 90, Enter. So I want to scale this down until we kind of
get this effect. So the diameter of this one needs to be
less than this one. So let's hit S and scale this down until we
get something like that. Pull it over the Yaxis
until it looks like that. And that's the effect
that we're getting. Okay, let's tap into
Edit mode with this one, and let's press three,
so we select faces. Grab this one here and
maybe just pull it over a little bit more to
something like that. Let's press E and Y and just pull out another
extrusion like that. And now let's press
E and Y again and pull out another
extrusion like that. Let's have a look at that
and see how it looks. And yeah, that looks fine. Okay, so let's press old Snow, select one of the edges
whilst being able to select surfaces and
grab that like that. Now let's press E, and let's
scale down a little bit. I'll S and go ahead
and scale that down to get a little groove
detail now like that, and that's good.
Alright, what's next? Let's do this bit here
now next, I think. So let's press, let's press three to see
this from the side. And let's press Shift A, and let's go ahead and bring in another cylinder.
Let's scale this down. Bring this over and put this up, and let's scale down some more until we get
something like that, maybe even a little smaller than that, something like that. Well, kind of centralize this on this area and just bring it down into the
surface like this. And now let's go ahead and tap into Edit mode
with this one. Let's make sure we've got
surface selection on. Let's grab this surface. And let's go ahead and pull that up a little bit like this. And now let's go ahead and press E and pull it up again in the Z axis like
this. That's coal. Okay, let's hold Alt
and select an edge here to select all
those surfaces. And now we're going
to do a scale again, but again, we're going to make sure we're not scaling in the. So let's press E and S and then shift Z to emit
the z axis scale, and then go ahead and pull that out to get this kind
of effect like that. There we go. That's
cool. That's kind of it. We just need to finish
this stuff off now. Okay, let's apply
some scales on these. Let's have a look.
Let's fix this one. So let's press Control A and
apply rotation and scale. Let's grab this one,
press Control A, and apply rotation and scale, and this one, Control A, and apply rotation and scale. Alright, so let's bevel
some edges on this, but I don't think
I'm going to use the bevel modify
it because I want more control over the bevels this time. So I'll
select this one. I'll tap into Edit mode. And let's press two so
we can select edges. Hold Alt and select
that edge there. Press Control B, and let's go
ahead and bevel this edge. I'll roll a mouse wheel to get some extra vertices in this, and I'll leave that just
like that, I think. Let's do the bottom
one now, here. Let's hold Alt and
select this one. It'll shift and Alt
and select this one. Let's press Control B. And let's go and
bevel these as well. And I won't do much
here. I'll just babe put something like
that in place, I think. And there
we go. That's cool. Let's tap out of Edit
mode with that one, and let's do a
shade auto smooth. And there we go. That's cool. Let's do this one next. Let's select this one, tap
into Edit mode with it. Let's hold Alt and
select this edge here. Let's press Control B
and bevel this edge. And I'll put something
like that on there, and I'll go ahead and leave
this on three segments. Okay, let's do this one now. So let's hold Alt
and select this one, Shift Alt and select this one. Let's press Control B and
go ahead and bevel these. And we'll put those
something like that. Let's tap out of
Edit mode with that, and let's go ahead and
do a shade Ato smooth. And there we go. That's cool. Okay, so we've got the
last one to do now. So let's go ahead and do
that. Let's select this one. Let's tap into
Edit mode with it. Let's hold Alt and select
this top edge here, and let's press Control B
and go ahead and bevel this. And there we go, that's cool. And let's do the
bottom one's known. Let's hold Alt and
select this edge, hold Shift and Alt,
and select this edge. Let's press Control B, and let's go ahead and bevel these just a little bit
to something like that. Let's tap out of Edit
mode with that one now, and let's go ahead
and do a shade ato smooth on. There we
go. That's cool. I am thinking actually,
I think I want two of these on this one. I'm just going to do a
mirror copy with this. Let's select this object and this object and let's
join those together. Let's press Control J and
join those into one object. Now with those selected, let's right click
and go ahead and set the origin to the
three D cursor. Select it again, press Shift D, right click twice, and go ahead
and mirror in the Y axis. There we go. That's
looking good. Let's go ahead and bring
everything back now, so I'll hit the forward slash and let's have a
look at all this. And that's looking really good. I'm wondering if I want to
scale it up a little bit. I think I will, so
I'll grab, and that, and I'll hit S and just scale this up a little bit more
to something like that. And now, of course, I'll
just bring that up on the z axis until that's
sitting in position. I'm happy with that. That's
looking really good. That's a nice looking tab. Okay, so let's go
ahead and do a Save. Let's press Control. And I'll see you in
the next lecture. Thanks very much. Bye bye, Fine.
39. Lecture 38 The Oven Part 1: Hello, and welcome
now to Lecture 38. And in this lecture, let's go ahead and make
a start on our cooker, which is going to go right
here in the chimney just here. I've been looking forward
to this because I think we can do a really
nice job of this. So I've chosen this
kind of cooker, which is quite a
traditional cooker. We call them gas. So you traditionally
find these lots of old farmhouses
and stuff like that. Um, and they'd always
run on coal and log. But these days, I
think some of them run or they have the option to
run electricity or gas. But traditionally, they'd
run on coal and log. So, yeah, this is
what we're going to try and do over the
next few lectures. Maybe it might take maybe
three or four lectures. We won't rush this, and we'll go through it
and enjoy it as we go. But, yeah, we can give
this a shot, definitely. So I've done a little bit
of digging on the Internet, and these are 150
centimeters wide, and I think we just
need to sort of guesstimate the height
and sort of the depth. We'll do. So let's go
ahead and make a start. So, again, I don't think we need everything that
we see here right now. We just need mainly the chimney. Ah, and the chimneys
currently locked. So I'll come over
to the outline. And on the chimney here, I'll
go ahead and unlock that. So I'll select the
chimney and the walls. And is there anything else we need I think that's it for now. So once we've got
those two items, let's go and hit the forward
slash key, and there we go. So let's bring the
cursor to the origin. So let's press Shift and
cursor to the world origin. And I think before
we go any further, let's go ahead and make
a folder for this. So I'll compress the cabinets
and the walls and windows, and I'll just click
on scene collection. And I'm going to bring in a completely separate
file for this. So let's hit our
little ad file icon. Double click on it, and
call this the Cooker. There we go. And here's enter. Let's leave it
highlighted, of course. And I think the first thing
I want to do is we're going to have a raised area
inside the chimney here, which will probably be slate. So that'll be like a remnant of the old fireplace,
the old hearthstone. So let's put that in first. So let's press chef and mesh, and let's bring in a cube. Let's press seven to
see this from above, and let's go into wireframe. And let's go ahead
and take that back into position like this. Okay, so let's tap
into Edit mode with it and press one so we
can select vertices, grab these back ones here and bring those into
position like that. Grab the front ones, and I'll bring those too
about there like that. So they will protrude
slightly out of the hearth. Let's grab these ones now, and let's take those
over into position. Let's find that position, and it's about like that. And let's go ahead and do the
same on the opposite side. Let's grab these and bring these over now and
drop those, as well. About there like that. Let's press one to see
this from the front now and let's set the
thickness of the stone. Let's grab the lower
ones and bring those up. And let's put those in position
about there like that. And let's grab the upper
vertices and bring those down to create a thickness of the hearthstone of about
that much, I would say. Okay, so let's tap
Edit mode with that. And we can go back to
solid mode for a moment. And let's go ahead and do
a bevel modifier on that. So let's select the item, check the scale.
That's all good. Go to our bevel modifier list, add modifier,
generate and bevel. Let's go ahead and add our two zeros to the right
to the decimal point. And let's go ahead and
turn our one into Oh, let's make it a three, Enter
and see how that looks. Let's increase our
segments to a four. And yeah, I think
I'm happy with that, so I'll go ahead
and apply that one. There we go. We can do a shade or so smooth on that as well. And there we go. That's good. Okay, so I think the first
thing I want to do on the on the oven is work on this little thing
on the bottom here, this black thing, which we're
going to call the plinth. Well, that's kind of what
I'm going to call it. So let's bring that in first. And I'm going to make that
around 7 centimeters high, 70 millimeters, 7 centimeters. We're gonna make it about that. So let's press Shift A, and let's bring in a cube. Okay, so let's look
at the cube here in our transforms tab and let's
work this in the dimensions. So in the X axis, like I said, we're going to make this
150 centimeters wide, so let's click on this one, and let's make this
1.5 and click Enter. In the Y axis, let's try making it
around 80 centimeters. So let's dilute that. Let's press 0.8 and enter. And I think in the Z axis, let's go make this 0.07, which is about 7 centimeters. So 0.07 enter, and there we go. Let's press one, so we
see this from the front. And let's go ahead and
raise that up until it's sitting on our hearthstone, which is about there. I'll
go ahead and take that up. So there's a slight gap
between them just to create a little bit a shadow and a little bit of
depth. Let's see. Best press seven, so we
see this from above now. And let's go into
wireframe and let's pull this back into
position where we want it. So I think about there
like that would be good. Okay, so what's next? I think the next thing
I want to do is, let's go back to solid mode, and let's look at the
scale. Let's fix that. Fly rotation and scale. Okay, so now that
we've done that, I think next thing to do is go ahead and make a copy of this. So let's press Shift and Z, and take a copy up the way
for a moment like that. Okay, so the next
thing I want to do is looking at
our plinth here. There's a slight gap
between the plinth and the main sort of blue
body bit of the oven. So let's see if we can create
a little detail for that. So let's just tap into
Edi mode with it. Let's press three and
select that face. Let's press I and go ahead
and insert that like this. And just put that
about there like that. And now let's go ahead and
extrude that up in the Z, so let's press E and Z and go ahead and take
that up just a little bit to about there
like that, I'd say. Alright. That's cool.
Let's tap out of demone with that and look at this
scale, and it's all good. So let's add a bevel
modifier to that. And let's add two zeros to the right to
the decimal point. And let's go ahead
and turn our one into maybe let's look at a
three and see how that looks. Increase our segments to a four, and maybe I'll bring
that down to a two. Let's try that. And, yeah,
I think that's better. Okay, so I'll go
ahead and apply that. I think I'm happy
with that plenth now. And now let's go ahead
and look at this one, which will be the sort of
the main body of the oven. Let's zoom out on our picture a bit so we
can see what we're doing. And let's go ahead and look
at the dimensions of this. So we're 1.5 meters by it's
0.8 meters in the Y axis. So in the Z axis, let's make this
around 0.8, I think. Let's try that. 0.8 and enter. So that's 80 centimeters. Okay, so let's press one to
see this from the front, and let's go ahead and
bring this down the Z axis. So I'll press G and Z and
go ahead and bring this down now to about
there like that. I think I would like to bring the island back just to sort of get a reference of how this is looking
next to our island. Is it working out
about the same height? So let's go ahead and hit the forward slash key to
bring everything back. Let's press one again and let's check it
against our island. And I think it is working out because we are below the
height of our island, and that's kind of my
target to be level with it. But if you look at the oven, the next bit to do is this sort of area here, this black area, so we'll be doing that
and making that about the same height so that it works out a bit level with
the island in the end. So I think that's
working out overall. Let's grab our oven again, let's grab this cube,
and now this one. And let's hit the forward
slash and isolate those again. And I think the next thing
to do is grab this one. And let's press Shift and Z and go ahead and bring
that copy up like this. And in the z axis on this one, let's fix the scale on this. Let's press Control A and
apply rotation and scale. And let's go ahead and add a zero to the right at the
decimal point, click Enter. And now it is just
8 centimeters deep. And yeah, that's
kind of what I want. So let's press one to see
this from the front again. And let's go ahead and bring
this down into position now. Something like that. Okay, so it's not looking
much like an oven yet, but I think we've got this
sort of we've blocked it out. We've got our sort of three main components blocked out now. So in the next lecture, we'll go ahead and we'll start
adding some more details. Okay, thanks very much.
And I'll see you in the next one. Bye bye for now.
40. Lecture 39 The Oven Part 2: Hello, and welcome
now to Lecture 39. And yeah, I mean,
let's just pick up our oven where we left it, and let's carry on with that. And we've got this image here, and I want to work on this
toppit in this lecture, this area here. This
is what I'm thinking. So let me just drag in my
PURFbard, my mood board. And so this is the image
we're seeing here in Blender. And I've got this one as well, which is basically the same. But you can see we have a
towel rail on the front here. And we have an
upstand at the back, and we have this
vent here as well. So let me just bring in or
just show you this one. So this is the
same kind of oven. It's just that this
is a four door, and the one we're going
to make is a six door. But we have these sort of studs here and we have the
upstand at the back. We have this vent
here, of course, we have the towel rail, and here on the front, there's an extra step out. And we've got quite a
big sort of fillet, quite a big bevel on this front, so we
need to work on that. So that's kind of what
we'll do this lecture. I don't think we'll
get it all done, but let's work on the
details on this top piece. Okay, let's drag out
the way my mood board. And let's see what
we can do. So let's go ahead and isolate it. So we'll just grab it and we'll hit the forward slash key once, and I'll bring everything back. And let's just hit it again.
So that we've got it on it. Alright, so I think
the first thing I want to do is I'm thinking
we're going to use the mirror modifier on this so that we only need
to do half the work. So let's grab it and
let's go ahead and press shifts and bring the
cursor to the selected. So the cursor is dead center. Now that we've done that, let's have a look at the
scale, and it's out. Let's press Control A and
apply rotation and scale. Let's tap into Edit mode. And let's go ahead and press
two so we can select edges, grab that edge there, and
put a loop dead center. So if we just press Controller, don't move that loop and
just click it in like this. And now let's go ahead
and press three. Grab these faces here, too, and let's make sure we got
all selected on the one side. That one and this
one, there we go. And let's press X and go
ahead and delete those faces. Okay, let's tap
out of Edit mode. And now let's go ahead and
apply the mirror modifier. So let's go to AD
modifiers and generate and let's go to mirror
Modifier just there like that. And it's in the X axis, and you can see the X
axis is what we needed. So that's working out nicely. And the only other thing
I want to do is make sure that clipping is on so that the center here
it go ahead and a joins our work to
the mirrored work. So if I tap into
Edi mode with that, that means everything here on the center will go
ahead and be joined. Alright, so what's next? I think, first of all,
let's go ahead and have a look at that
upstand on the back. So let's press two so we can select edges, grab
this edge here, press controller, and
go ahead and bring that back now to about
there, like that. And let's press three, grab
that there, and press E, and take that up to about there
like that. That was easy. That was nice and easy. So
I think the next thing I want to do is go
ahead and work on this little extra bit
here on the bottom. So let's grab that edge there. Let's press Controller. Put a loop in this way
and pull that down now to about there like that. Okay, so let's select this face and then this face
and then this face. And we're going to extrude and
then we're going to scale. So I'll press E to extrude, and then I'll press S. Now I don't want to
scale in the Z axis. I'm going to press Shift Z. So we're just
extruding in the X and the Y and then go ahead
and pull that out to get that sort of lip on
the bottom edge like that. That's cool. What
do we want to do? Maybe we pull this
edge out here, just a little bit more. Grab that one and that
one, and go ahead and pull that out a little bit more like that. There we go. Okay, next, I think, let's go ahead and work on
our towel rail. So what shall we do? Let's press two, so
we select edges. Grab this edge here. Let's press Control and put
two loops in one and two. And with those still selected, let's press S and X and go and
take those to the extense. Something like that there. So we have this one here now. And remember, whatever we create here will be created here, so it'll be double
the thickness. So I think that's okay
just where it is. And with this one here, now, let's grab this edge
here, press Controller, and let's go ahead and
bring another loop in now to about there like that. Okay, let's make some loops
in the horizontal now. Let's press Control R,
put two loops in there. And let's click once
and click twice. And now let's scale
those up in the z, so let's press S and Z and go ahead and
take those up now, like this to about there like
that. Alright. That's cool. Okay, so let's go
ahead and select this face and this face, and let's go ahead and
extrude those out. So I'll press E and pull
those out now, like this. To about there, like that.
I think that's good. Let's press two, and it's
like this edge and this edge, and let's go ahead and bevel these edges next, grab
this one and this one. And let's go ahead and press Control B and bevel these edges. Scroll the mouse wheel to get quite a few segments in there, and I think I'm happy
with that now, like that. So I've got six segments. And we're looking good.
What do we want to do next? I think the next thing
I'm going to do is, let's go ahead and put some
rounded shape to these. So I could go around and
select all the edges here, but instead, let's
select the faces. We'll grab this one, this
one, and then this one. And with those selected, let's press two, so we're
selecting edges instead. So now it'll select
all those edges. Let's grab this one as
well, and then this one, and then this one and this one. And with those edges selected, let's go ahead and
press Control B and round this shape off next. Whoops, that's a bit much to about maybe I'll reduce the segments a little
bit to about here. About there, I'd say, is about where I want it. And
yeah, that's looking good. Okay, so I think the
next thing we go ahead and do is round
off the main edges. I'll select this one and
this one and this one, and then this one, this one,
this one, and this one. Is there any more that I want?
I want this one, as well. And I want this one, this one, this one, this one, this
one, and this one. And this one, this one, this one, one that
one there, that one. We're nearly there, and
this one and this one. I think those are the
edges I want to do next. So let's go ahead and
apply a bevel to those. Let's press Control
B and bevel those. And the reason I'm not using the bevel modifier on this is because some of these bevels, I want varying angles on. So I want these rounded
edges to be more than, let's say, the edges
on the bottom. But I'll go ahead and put
that something like Oops, that now like that.
I'll scroll the mouse. We'll add some extra
segments to it. And there we go. I think
I'm happy with that. That's rounded off those edges. Let's have a look at the back. And yeah, I'm happy with that. Okay, let's maybe get rid
of these ones here now. Let's dissolve those. And this is, again, a benefit
of using the bevel modifier is we automatically this will happen the other
side just the same. Let's maybe grab
this one, as well. And with those selected, let's go ahead and
right click and go ahead and dissolve those edges. We could actually just for neatness, get rid
of those ones, too. And now let's
select these edges. This one, this one, this
one, this one, and this one. Let's select this
one. Let's hold control and select this one, so we select all of that. And now let's just work our way along on that one as well. And then that one and that one. And this one, this one,
and then this one. And is that it? Oh,
we've got the back here, too, and then this one
and then this one. And with those selected, let's go ahead and
press Control B, and let's bevel those
edges, as well. And I will put that somewhere
like that, I think. Let's reduce our segments to
about three, in this case. And there we go. This
is looking quite good. I think this edge here now, we can press Z and we can go
into wireframe for a moment. And we could press one
to select vertices. Just grab these vertices
and go ahead and pull those back to square up that end
like that. That's fine. Okay, let's go back
into solid mode now. And let's go ahead and tap
out of Edd mode for a moment, and we could do a
shade oro smooth on this just to see how
it's all looking. And we could go over actually
to our shade oro smooth. And it's just here and go ahead and crease the angle
on this just to round off more faces. And there we go. That's working now.
And there we go. That's pretty good, no. That's rounded it off nicely. Okay, so is that too much? I
think maybe that's too much. Let's bring this back a
little bit to about there. We'll leave that just like that. Okay, so what do
we want to do now? Let's go ahead and do
these circular studs that we're seeing in the corner? Let's do those next. So
let's bring in a cylinder. Let's press Shift A and mesh, and let's go ahead and
bring in a cylinder. Let's bring this down to maybe
28 and let's hit S and go ahead and scale this down now to something like
that, and bring this over. Let's press seven to
see this from above. Maybe scale this down
a little bit more to something like that and
bring that forward now. To about there. And let's press Shift and Y and go ahead and bring a copy
back now, like this. Two, about there like that. Okay, let's press and
it's going to Y frame, and let's grab both of these. Oops. I just want to
grab this and this. And let's go ahead and take
those up in the z axis. And let's press three so we can see this from the front
so we can see the angle. And let's go ahead and
maybe take this down a little bit now to about
there, I would say. Okay, let's go back into
solid mode for a moment. And let's see what we've got. And now let's go ahead and
do a boolean with these. Let's grab them
first and fix them. So let's press ControllA and
apply rotation and scale. Let's do the same with this one, press ControllA and apply
rotation and scale. And I can sort of tell by the color on these that the
normals are off on these. So let's grab one, tap into
Edit mode, press A for O. Let's press Alt N, and let's go ahead and
flip the normals on that. And let's tap out of Edit mode with that one and do
the same with this one. Grab this one, tap
into Edit mode, press Alt N, and go ahead
and flip the normals. Okay, let's tap out of
Edit mode with that. And now let's try adding a
bevel a boolean modifier. So let's grab this, modify, generate and go for the boolean. And let's now grab the little dropper and just click on this front
cylinder like this. Okay, let's grab this one, and let's press H to hide this and just check that
that's worked, and it has. And the next thing
we can do is maybe press Old H and bring that back. Grab this one again, so it's highlighted
the boolean modifier and go ahead and apply that. Okay, so let's do
the back one now. Let's select this one, and let's add sorry. Let's select this one, sorry, and let's add the
boolean modifier again. Let's grab our little eyedropper and just drop it onto
this cylinder like this. And we could go ahead
and hide this again, make sure that's
worked, and it has. So we'll press old H
and bring that back. Grab this again, and just go ahead and apply that
boolean modifier. Okay, so the next
thing I want to do, I noticed that I missed
applying a bevel to this edge. So let's select
this one, this one, and then this one, and
just this one as well. But those selected,
let's go ahead and press Control B and
bevel that edge, just to get a slight bevel
on the edge, just like that. That's cool. Okay, so the next thing I
want to do is apply a bevel modifier to this. So let's go ahead and add modifier and bevel,
and there we go. Let's go ahead and
add our two zeros to the right at
the decimal point. And let's increase the
segments to three like that, and we'll go ahead
and apply that. We're good with
that. And we can do a shade oro smooth
while we're here. Let's go ahead and do the
same on the front now. Let's grab this one. Let's add modifiers, generate, and bevel, let's go ahead and add two zeros to the
right the decimal point. Click Enter, and let's
increase our segments to three and go ahead
and apply that. Let's go ahead and do a shade or too smooth on that as well. And there we go. I think that's enough progress
for this lecture. Let's go ahead and
bring everything back. And, yeah, that's looking good. So I think in the next lecture, what we'll do is let's bring in my mood
board for a moment. So we're going to go
ahead and make this rail, which is not a big job. But then let's have
a look at these two, these two cappings and the vent, as well on the top. We
need to look at that. Okay, thanks very much. And I'll Oh, let's do a save. Let's press Control S,
and let's do a save. Alright, thanks very much, and I'll see you in the next
lecture. Bye bye for now.
41. Lecture 40 The Oven Part 3: Hello, and welcome
now to Lecture 40. And in this lecture,
let's carry on doing details on top
of our oven here. So what I want to do this time are these sort
of hot plate covers, these sort of circular pieces with sort of the chrome or polished stainless steel on top, and then the black lower level with the handle on the front. And yeah, let's just see
what we can do with this. Okay, so I think all we really need is this one for a moment. So let's grab this and hit the forward slash
key to isolate it. And the curse is in
the ideal place. I think the next thing
we're going to do is go ahead and
bring in a cylinder. So let's press Shift A, and mesh and cylinder. And I think I'm gonna
up the vertices to maybe a what shall I go? Maybe a 38. No, let's go 42. There we go. And let's S and go ahead and
scale that down. And let's press seven
to see this from above. And let's go ahead and scale it down a little bit more
to something like this. Let's press three to see
this from the front, and let's scale that down the z. Let's press S and
Z and bring this down now to something like that, and then bring it up in position
to something like that. Okay, so we've got
our basic shape, so what should we do now? Let's tap into Edit
mode with that. Let's press three so
we can select faces. Grab that top face and just
sit S and go ahead and scale that in to get the angle
that we're seeing just here. I'll go ahead and scale it
down a little bit more, and I think I'm
happy with that now. Maybe I'll take that
down just a little bit about like that. Okay, so the next
thing you want to do is extrude that cell press E, and just extrude that just
a little bit like that. Now let's go press E
again and just extrude that up now to about that. Now let's press S and
go ahead and scale that in to about there like that. I think that should be good. About there. Okay, let's hold on to Alt and
select this ring here. Let's press E and S and go
ahead and take those swoops. Let's try that again.
Let's press E and S and go ahead and take
those in now like this. And we'll take those
in a little bit more to about there. I think
that should be good. Okay, I think what I'm
going to do is I'm going to press two so I can select
edges and press a hold, grab those edges there. Whoops, this one
here. There it is. And I'm just gonna press S, and just scale that one in a little bit like
that. That's better. All right, so what
do we do next? I think I want to
take this top face up a bit more, so
I'll grab this one, go ahead and pull that
one up a little bit more, and maybe scale it in a
little bit more, as well. And there we go. I think
I'm happy with that now. Okay, so let's have a look at the scale overall
and the scale out. Let's press Control A, and apply rotation and scale. And let's tap back
into Edit mode. Okay, I don't think
we can really apply a bevel modifier to
this we've got lots of different lots of different sort of radiuses or diameters as
you want, of bevels on this. So let's just go
ahead and do them individually. Let's press two. Hold Alt and grab this one here. Let's press Control B, and let's bevel this one. And let's go ahead and scroll the mousewheel to get some
extra segments in there. And let's take that to
about there like that, I'd say. There we go. That's cool. That's
helped a lot. Okay, let's grab
the bottom one now, so let's hold out
and select this one. Let's press Control
B and go ahead and bevel this one a little
bit to maybe just a bit, something like that
should be fine. Okay, let's do these ones next. Let's hold lt and
select this one, hold Shift and lt,
and select this one. Let's move in a little bit more. Let's hold Shift and lt and grab this one and shift and
lt and grab this one. Let's press Control B on those and put a smaller
bevel on these. That's not small. Let's
come back on that. To maybe something like that. Let's reduce the segments
maybe to a four. And there we go. Let's
leave that like that. I think I'm happy now with that. Okay, so what do you
want to do next? I think the next thing
we need to do is have a go at creating
this handle here. So I think let's go ahead
and tap out of Edit mode. Grab this. Let's hit
the forward slash key, which will bring everything back and let's hit it again
now to isolate it. Okay, let's press seven
to see this from above. And let's tap into
Edit mode with it. And let's press one so we can select vertices,
grab this one, hold Shift and grab this one, right click, and let's go ahead
and connect vertex pairs. Let's do the same
on the bottom now, so I'll press control or hold down Control and
press seven to flip it. I'll grab this one
here, hold Shift, and grab this one, right click and connect
to vertex pairs. Let's go to wireframe now, and let's press three
so we can select faces. Let's select all these
faces here now, then. And let's press X, and let's
go ahead and delete aces. Okay, I think the next thing
I want to do is go ahead and create a mirror modify this. And we can see that the
origins is just fine, and the cursor is even though it is lower
than the origins, I would still say it's in the same
position in the z axis. So I think it's
fine where it is. So let's tap out of Edit mode. Let's add modifier and generate and mirror modify.
Let's have a look at that. Make sure that
clipping plane is on, and just so we can have
a look at it properly, let's go back into solid. And, yeah, that's fine.
That's working good. So what do we want to do next? I think the next thing
we need to do is create this sort of handle here. Or it's like the mount for
this coil handle here, this spring coil
handle in the middle. But let's anyway,
try and create this. And this is why I've used
the mirror modifier, so I don't need to repeat
myself on the opposite side. And also, if it's mirroring, then the two will be identical. So let's tap into
Edit mode with it, and where are we going
to work this from? I think we'll kind of
work it from here. So yeah, from here, let's say. So let's press E and Y and
go ahead and bring this out now in the Y axis. Like this. And kind of it's time
for a new trick. So as you can see, the
face that we've sort of created is angling back. Either one, it's angle back. So I could sort of
select the edges now, and I could pull this
edge forward, blah, blah. And, is that right? Then I can pull
this edge forward, and how is that looking? There's an easier way
and a quicker way. I'll go ahead and
press Control E to take those moves
back, there we go. And I'll press three
so I can select faces. I'll grab this face here, and I'll consider what axis I want this to happen
in, and it's in the Y. You can see the Y axis is the axis that's
relevant to that face. So I'm going to press S Y, and zero to level. And that's it. That's
level that nicely for us. Okay, so what's next? As you can see, I think
the next thing we need to look at is how this kind of tapers up and in
and reduces in size. So let's have a
look at that next. So let's make sure we've got edge selection on.
Let's grab this edge. Let's press controller,
and let's put maybe two loops into it. And I think the next thing or maybe that should have been
three. I'm going to go three. Excuse that. I'm going
to press Control's ed. And let's try that again. Let's press controller. And let's go ahead and put
three in, I think, like this. Okay, so what's next? I think the next thing
we can do is go ahead and start reducing this face. So I've got another new
trick for you right now. We're full of new
tricks on this lecture. I want to show you a tool, a really good tool called
proportionate editing. And I want to show
you, first of all, the hard way of doing it. So you don't need to follow me. So if I sort of press three now, select this face, and if I take this up now,
I could do that. And I could scale this one in. And then maybe now I can press
two and I could press Alt, and I could select this, and
I could take that one up, I could scale this one in. And you can see the dilemma. It's inaccurate and it's slow. So what can we do
different? Let me just control set
those moves to get rid of them all cause it
looked terrible anyway. I want to show you what
proportionate editing does. So here's proportionate
editing tab right here, so I'll go ahead and turn it on. And the setting here, I
will leave on smooth. There's other settings.
But for this, I'm going to leave on smooth. And what I'm going to do
is select this face here. Now, if I press Gino, I can get this ring. And its chances are
when you do it, the ring is not
visible on the screen. So the first thing to do is
roll the mousewheel forward. It takes quite a while until you get this ring,
something like that. And what I want that
ring to be surrounded, where I want that ring to be is just just sort of in this
area that we've extruded. I don't want it to be sort of overlapping with
anything else. So I think there is
perfect like that. And now, if I go
ahead and move this up you can see what it's doing. It's affecting those
loops behind it, and it's moving those up
in a similar fashion, sort of tapering the
movement as it goes, but sort of moving that up, and you can see
how cool that is. So maybe I'll sort of move this in a little bit
as well like this. And maybe now I'll just go
ahead and grab this face, and I'll scale that down
in the X. I'll press S and X and go ahead and taper
this in now like this. And what else do we want to do? I think let's press two,
select this edge here, move this edge up, and I think now for a second, I'll turn off
proportionate editing and just move that up like that. So there's nothing
stopping us sort of tweaking this by hand
a little bit too, so maybe I'll grab this edge and just move this one down
a little like this. And let's see what
we're getting. And I think that is kind of
the shape that I'm after. Maybe I'll grab this edge, move this in a little bit.
Am I happy with that? I think that's
correct. I think I'm happy with that shape. No, yeah. I'll leave that like that.
We're going to apply a Subdivision Surface
Modifier to this yet, so a lot of things will change. Okay, so the next
thing I'm going to do is go ahead and
grab this one here, maybe, and press controller. And let's go ahead and put three loops in there like that. Let's grab this here now. Let's press Control,
and let's go ahead and put maybe three loops
in it this way as well. Now that we've done that,
let's tap out of Add mode. Let's check the scale
and the scales all good. Let's add a Subdivision
Surface Modifier. And, yeah, I mean, that's looking
pretty good overall. I think, overall, I'm
quite liking that shape. Let's add an extra level in the levels view put to add a
few more vertices to this. And is there anything else
I want to do to this? Let's tap into Edit mode. And let's just grab
these edges here. Let's try just taking
that back a little bit maybe down a little bit, just to round off that
edge, just a little bit, something like this, then this
just to get a bit rounder. We could do the same here
with the bottom edge. Let's try moving that. Move that in, and then
out a little bit, just to round off that edge
a little bit like that. Okay, so let's try adding
a shade auto smooth, so let's tap out of Edit mode. And let's grab this. And let's right click and
go for a shade auto smooth. Let's find the angle adjuster
and just tweak that. Just to try and
soften the angles, let's try a 50 or close enough. And there we go.
That's looking good. Let's go ahead and
bring everything back and look at our
handiwork for a moment. And I think maybe let's grab this cover we've just
made and the top of the oven, and let's isolate again. And let's press seven
to see from above. And maybe I'll just scale this up a Whoops
not everything. Just this. Let's
try scaling this up a little bit
like that, maybe. And let's try taking this over and just see if
three fits nicely. Let's press Shift D and X and go ahead and
bring a copy to the middle. And I'd say that one's too big, so I'll just delete that one, grab this one again
and press and go ahead and scale that down
to something like that. And I'll press Shift D and X and go ahead and
bring a copy to the middle. Do the same again, Shift D, and X, and bring
a third one over. And let's just see
we're looking. Again, I think I
want to scale that one down a little bit more. I'll let S, take it to there, ring that over a little bit, press Shift and X, bring a copy over like this, and again, shifty and X, and bring a copy over, and now we're looking better. Now we can distribute these. And yeah, I think
that'll work for us. Okay, sounds mad, but
the next thing I'm going to do is go ahead and
delete those for a minute. And I think I've got a little bit more
work that I want to do on this, so let's
go ahead and do that. Let's tap into Edit
mode with this now. And let's go ahead and just
grab these three faces here. So I'll press three,
grab this one, this one, and this one, and let's go ahead and extrude
that and the Y. So let's press E and Y and go ahead and bring
that out like that. To about there like that. Let's add some extra
control loops to this now. So let's press two,
grab this one, press Controller, and let's put three loops in like
this, and there we go. That's sort Um, let's go
ahead and re square this now. So maybe let's go ahead
and turn on our cage. Let's select this face, press three, select this
one, this one, and this one. And let's press S and
Y and zero and enter. And now we've gone ahead and
squared that off back there. Okay, so that's kind of it. That's sort of where the
hinges on the back there. Okay, so let's tap out
of Eddy mode with that. And I think I'm
happy with that now. I think that looks great. So in the next lecture,
let's have a go at doing this coil spring handle. So to do that, I'll
be showing you some different modifiers again, and we'll be learning
a few new tricks. Okay, thanks very much. And I'll see in Oh, let's do a save. Okay, let's press Control S and do a save. Oh, my goodness. Alright, let's try that
again. Thanks very much. And I'll see you in the next
lecture. Bye bye for now.
42. Lecture 41 The Oven Part 4: Hello, and welcome
now to Lecture 41. And in this lecture,
what I want to do is go ahead and make a handle that you see here on
what do we call this thing? Let's call it a doo hickey. I don't know what we
name this thing, so let's just call it
do hike from now on. So let's go ahead and put this sort of handle
here on this. Alright, so it looks difficult,
but it's really not. We're just going to
use something called the screw modifier. So this is another opportunity to show you a new modifier. So let's go ahead and do this. Let's just grab
this and let's hit the forward slash key
and bring everything back and hit it
again to isolate it. Let's go ahead and now move the cursor to the
center of this object. So let's press shifts and cursor to the selected,
and there we go. I want to bring in
a new object now. I want to press Shift A. And I want us to
bring in a circle. Have we brought in
a circle before? I don't think we
have. I think it's the first time, but
there's nothing to it. It's just simply a curve. So let's increase the vertices
to 40, and there we go. That's done. Let's
scale this down. Let's press S and go ahead
and scale this down, and maybe now let's just
bring this out a little bit. And let's press seven
to see this from above. And let's go ahead and
scale it down some more till we get roughly
the size that we want, something like that, maybe. Once we've done
that, let's go ahead now and put the origin
back at the cursor. So let's right click and set the origin to the
three D cursor. That's kind of necessary
for the screw modifier to have its pivot point
here at the cursor. So let's grab this,
add modifier, generate and screw
modifier, and there we go. At the moment, it's kind of flat and that's no good to us. So let's play around
with the axis. Let's try it on the X axis. Let's see what that
looks like, and that's exactly what we want. So let's go ahead and
scale that down again. Now, let's press S and
bring this down and scale and just bring this
out now. Let's press three. See this from the
side. And let's press S and go ahead and scale this down and kind of put this into position now where
we want it another time. There we go. That's
kind of cool. So now that we've done that, let's play around now
with our screw settings. So next thing to do
is just go ahead and adjust the screw here now, until we get this
kind of doing that, that's kind of what we want. So I've gone 4 millimeters. Maybe I'll go back a
little bit to about 3.8. And the next thing we can do
is just up the iterations, which will repeat that coil. And I'll just leave it
like that for a moment. Obviously the profile of
our spring is too skinny, so let's increase
this. So do that. Let's just tap into
Edit mode, our circle. The end of the circle here
is already highlighted. Let's just press S and
go ahead and scale this up to get a larger
profile on our coil. Let's now increase the angle. So let's come over to this
right click now and just go ahead and increase this or actually reduce
it in this case, until we get this now, doing this effect like this. That's cool. Now
that we've got that, let's go ahead and reduce
the screw a little bit, join that up a bit. There
we go. That's cool. And let's now increase the iterations and go ahead and make that a
bigger bigger spring. Let's re center this now. Let's bring this over, maybe just increase
the iterations a bit more, and there we go. That's looking good. Maybe just increase those iterations
a little bit more, and there we go.
That's looking good. Okay, so that's got a coil
spring, but as you can see, it kind of tapers down
towards the edge, and it's a lot bigger
in the middle. So let's deal with that next.
So how are we going to do? Maybe we do one more
iteration before we do that maybe just
bring this over a little bit more to sort of hide the last the end
of it just like that. That's cool. Now let's
grab this object. Let's tap Edit mode
with it first, and let's press seven
to see this from above. And now we can go ahead and
convert this to a mesh. Let's click, and let's
convert this to a mesh. Let's actually go into wireframe mode now and let's go ahead and tap
into Edit mode with it. Let's press one so we
can select vertices. Let's go ahead and use our
proportional editing tool. Let's turn that on. Let's just go ahead and use this line here as the reference, and let's go ahead
and grab some of the vertices here in
the middle like this. Let's go ahead and scale
this up a little bit now, but I don't want
to scale it up in the X axis because that's going to make it kind of elongated. I just want to scale it
up in the Y and the Z. So let's press G first and see what our
selector ring looks like. Let's reduce that a bit. So it's kind of like there, I think, maybe there. And now let's press S.
And then shift and X. And now let's go ahead and
scale that up a little bit to get this tapering, and that would be about
right for me just like that. Okay, let's go back
to solid mode now, and let's see what that
looks like. And there we go. There's our sort of
tapered coil spring. Really not too bad at all. Quite a cool effect. So what do we want to do next? I think if you grab this object, let's move the cursor to that. Let's press Shift S and
cursor to the selected. And you kind of can't see, but there is a steel rod
through the middle of this, so that's easy. Let's do that. Let's press Shift A
and mesh and cylinder, and we'll bring the vertices down in this case to maybe a 24. Let's press S and
scale this down. Let's rotate that in the Y. Let's press Y, 90, Enter, let's press S and
scale that down a bit more to
something like that. And now let's scale
it up in the X. Let's press S and
X and go ahead and bring that in now like
that. That's cool. We could grab that now and right click and
go ahead and do a shade autos that's cool.
That's what we want there. So we can actually bring
everything back now. So let's hit the
forward slash key. And there's one more thing I actually want to
do in this lecture, and let's finish off the
back of our doo hike. Let's finish off
that. So we need, like, a hinging mechanism
here at the back. So let's just select this
and the top of the cooker, and let's isolate those. And now that we've
done that, let's just simply bring in a cube. So let's press Shift A and
mesh and cube. There we go. Let's scale that down
to something like that. Let's press seven to
see this from above, and now we maybe bring it back, let's go ahead and scale
it down a little bit more until it kind of fits
in between these two things. Let's press S and scale
it down a bit more. And there we go
something like that. Let's press and go into wire frame and let's tap
into edit mode with it. Grab these vertices here now and we can kind
of pull those back. Let's turn off
proportional editing. We don't need that
now. Grab these ones and pull these forward not
to something like this. Okay, let's press one to
see this from the front. And these vertices here, we'll pull these down now until they're about there
and grab these ones now and pull that down until it's level with the edge
of these things here, which is those little
prongy things on the back. And that's cool.
That's what I want. So let's go back to solid mode now on that, and
that's looking good. So I think all we need
to do now to make that convincing is just
apply some bevels to that. So I think first of all, let's tap out of Edit mode
and readjust to scale. So let's press Control A and
apply rotation and scale. Let's tap back into Edit mode. Let's press two, grab this edge, and this edge, this edge, and this edge, this edge, this edge, and this one and
final one, that one there. Let's press Control B, and let's go ahead
and bevel those. Let's scroll the mouse
wheel a couple of times. And I think that's
kind of cool there. I like that. That's cool. Let's tap out of
Edit mode with that, and let's do a shade ato smooth. And there we go,
that makes sense. You can see now we've got
this sort of scent a bit, which the sort of doohickey
would be rotating on. Okay, let's bring
everything back. Let's hit the forward slash key. And we've got this item, we've got a coil spring, and we've got sort of the
steel pin in the middle of it, and we've got this
thing in the back. So let's go ahead and join all of these items
into one group, just to simplify things.
Let's do that next. But before we do that, let's go ahead and apply our modifiers. So let's start with
the main thing. Let's apply with our doo hickey. And when you apply modifiers, it's good practice to
start from the top. So let's go ahead and
apply our mirror modifier, and let's then go
ahead and apply our Subdivision
Surface Modifier. Let's have a look at the spring. There's none with that. In
fact, the rest is done. This one here has nothing. We don't count the
adjustable smooth. That's fine. So let's
select all these items. Let's start maybe with
that pin in the middle. And then the spring,
this one in the back, and then finally the main thing. Once you've got all of those, let's press Control J and join them into
one. And there we go. That's cool. Let's maybe
just grab this and this now, and let's isolate one last time. And let's press seven to see it from above. Let's grab this. And now let's go ahead
and press Alt D and X and bring a copy over now
to about here like this. And now let's press
Alt D and X and bring another copy now over
to here like this. Let's grab both of these
and just bring them over a little bit more
to about there. And let's grab this one and just move over a little
bit to about there. Maybe we could bring all
three of them forward a little bit to about
there like that. Okay, I'm leaving the sort
of this larger gap on this side because we have
this sort of jointing strip, which is on the top
and down the face. So that's why I'm
kind of leaving that gap there like
that. And that's cool. Let's bring everything
back one more time, and let's look at our handiwork, and that's looking really
good. I'm pleased with that. So in the next lecture, let's go ahead and build
our vent here at the back. And let's put our
towel rail in here and let's apply our jointing
strip on the front face here. Okay, thanks very much. And I'll see you in the next
lecture. Bye bye for now.
43. Lecture 42 The Oven Part 5: Hello, and welcome
now to Lecture 42. And in this lecture, let's carry on putting the details here on
top of our oven. So we need to sort
of put this pipe, this cloth towel rail
on the front here. And we've got this
jointing cover strip, as well to go on here. And we've got this big
vent towards the back, so we've got a few things to do. Well let's just see how we go. Alright, so let's make a start. I think it's my habit to
start with the easiest. So let's start with the
towel rail on the front. So let's just grab the
top and then maybe just these two do hickeys. And let's go ahead and hit the forward slash
to isolate them. Okay, so let's bring
in a cylinder. Let's press Shift A
and mesh and cylinder. Let's rotate that in the y axis. Let's press Y, 90, enter, and let's hit S
and scale this down. Let's press three on the lump pad to see
this from the side, and let's hit S again
and scale it some more. Bring it kind of into
position like this. Maybe scale it down a little bit more to something like
that, I would say. And let's press one to
see it from the front. Let's tap into
Edit mode with it. And maybe let's go press
go into wire frame. Let's press one so I can select vertices,
grab these ones, and pull this back until
it's inside the sort of the mounting thing,
the bracket thing. Bring this this way and pull this into the
bracket this side, too. There we go. That's
cool. Okay, so let's go back to
solid mode on that. And let's tap out of Edit
mode and see if we're happy. And the only thing I would say is it all
seems a bit too close. Maybe I want to do something
with that. Let's press one. Oh, sorry, let's press three
to see this from the side. And let's tap into Edit mode with the main sort
of large component, and let's go to wire frame. And I think I'm
just going to grab all these vertices here and go ahead and pull this forward a bit more to about like that. Okay, let's grab our pipe
now and pull that forward, as well, back into
position like that. Alright, let's go back into solid mode and see if
we're happier with that. And, yes, that looks,
I think, better. I think that's probably how the intention of the design is. Okay, let's right click on this, and let's go ahead and
do a shade auto smooth, and there we go. That one was easy. Okay, so now maybe let's have a go
at this cover strip next. Let's see what we
can do with this. So I'm going to grab
the edge from this in the middle and use that as my starting place.
So let's do that first. Let's just tap into
Edit mode with this. And let's press two so
we can select edges. Maybe grab this edge here, and now hold down Control and
maybe grab this edge here. Once you've got all those,
let's go ahead and press Shift D and Z and
bring a copy up. Now, two copies have come up because this still has
the mirror modifier applied, the mirror these objects here have also inherited
that mirror modifier. But we'll fix that as we go. So now let's go
ahead and separate those curves from
our main object. So to do that, let's press P, and let's separate by selection. And then let's tap
out of Edit mode. Then we'll grab these here, these strips, and we'll go ahead and delete the
mirror modifier. Ooh. What's going on there? That doesn't make any sense. Okay, let's press Control Z, and let's bring that back. And let's try that again. Let's try deleting the mirror
modified, and there we go. I think somehow I had the
cooker top selected, as well. Okay, so I think the next thing I'm going
to do is grab this, check the scale. It's all good. So let's tap into
Edit mode with it, and we'll press A for, and let's go ahead and
extrude that in the X. So let's press E and then
X and then bring this over to get the kind of with
on this that I would like. And I think that will do. For some reason, I can see a couple of flipped
normals on this. So let's deal with that. Actually, let's just
press A for all, and let's press Alt N, and let's go for
recalculate outside. And there we go,
Let's have a look at that. And that's better. Yeah, that's much better. Okay. Is there any mesh Maybe as well. Let's grab this one and
then maybe this one, let's right click and dissolve those edges. I don't
think we need them. And let's have a look at the
back here and see if there's anything similar that
we could get rid of. And no, I think that's better. That's okay there. Okay, let's tap out of Edit
mode with this now. Check the scale. It's all good. And let's apply
another modifier. Let's add modifier and generate, and let's apply the
solidify modifier. The solidify modifier. I'm not sure if we've
used it yet or not. I honestly can't remember, but anyway, excuse me
if I repeat myself. So the solidify modifier
puts thickness to an object. That's its kind of purpose. So if I go ahead
and click on it, and you can see just what
it's done there like that. Let's go ahead and reduce
the thickness of that. So just like the bevel modifier, I'll add an extra
zero and click enter. And well, that's kind
of too skinny now. So I'm going to go ahead
and turn that one. Into maybe a five aclcena. And there we go. Let's see how that is. Okay, what do we do now? Let's go ahead and apply that. And let's go ahead and tap into Edi mode with it
and see how she looks. And it looks okay. Let's maybe add some control curves to this. Maybe let's grab this edge
here, press Control R, and put a couple of curves
in it, something like this, maybe, and maybe put
some on the edges, too. So let's grab an edge here. Let's press ControlR and let's maybe put two on the
edge now like this. Okay, now that we've done that, let's tap out of Edit mode, and let's go ahead and apply the subdivision
surface modifier to this. And let's go ahead and increase
the levels view port two. And let's just have a look at the bottom here and see if
there's anything we can do. Maybe just grab an edge
here, press controller, and bring a loop down closer
to the bottom now like this. Let's have a look at this side, see if it's done
something similar, and there's enough
control curves here to actually sort it out. And there we go. That's
done. That's looking good. Let's go ahead and apply
these modifiers now. Let's apply our subdivision
surface modifier. Excuse me. Let's tap out of edit mode, and now let's go ahead and
apply our subdivision surface. Let's right click and
shade Auto smooth. And now let's go ahead
and put that in position. Let's right click and set
the origins to the geometry, and I'll bring this down
into position like this. I'll press three so I can
see it from the side, and now I'll go ahead and
carry on bringing that down into position,
something like that. Looks like it needs to come
forward, so we can do that, we'll grab it again and just
bring it forward slightly under Y axis. Like that. Let's have a look at
that on the front. And, of course, that
needs to go over. So let's grab it and bring it into position here like this. And also, let's carry on bring this forward a
little bit in the Y. So price G and Y, bring that forward a bit
more now, like that. And there we go. There's our
cover striping position. So I think the next thing or
the last thing we want to do is have a go at this
vent here at the back. So let's see what we
can do with that. So I think I'll
start with a cube, so press Shift A, and
let's bring in a cube. That's a little bit. Let's
press S and scale that down. And maybe let's press seven
to see this from above. And let's bring this back on the Y and kind of
get it in position. Obviously, still
a little bit big, so let's S and bring this down. And I'm going to put a guestimate in at about
that size, I would say. I'll slide it over on the X and take it
back a bit on the Y. And maybe let's press one, see this from above. And let's press from the front. And let's press and Z. Bring this down now a
little bit to about this. And now let's go
ahead and lower that down to the Coker top like that. And yeah, I I think that's about where I
think it should be. And I think that's
about the right size. Alright, so I think
now I want to go ahead and isolate it.
So let's grab it. Let's hit the forward slash. That'll bring everything
back and then hit it again and it'll isolate it. Let's look at the
scale. Let's fix that. So let's press Control A and
apply rotation and scale. Okay, so let's tap
into Edit mode, and let's go ahead and
select maybe one edge here, and let's press Control
R. And let's bring a loop down to about like that. Press three so we can
select faces now. Hold Alt and just select close
to the corner like that. And now let's press
E to extrude, S to scale, but not in the z. So let's press Shift s and
now let's scale that up. So we get a sort of lip on
the bottom edge like that. Okay, I kind of get
the impression that it kind of slopes on the top. So let's do that next. So let's press three so we can select faces, grab this one. Let's hit S and go ahead and
scale this in like this, maybe bring it down a little
bit, and there we go. Okay, we're going to apply the subdivision surface
modifier to this, but I think we can apply a few more control
loops into this first. Do just anticipate
what we need to do? So let's press two
to select edges, grab this one here,
press controller, and maybe let's put three
in there like that. Let's do the same this way, grab this controller, and maybe let's put three
in here now, like that. Let's grab this edge. Control, roll the mouse wheel
and just put two in maybe. And now let's grab this edge, Controller and let's
put two in there. And now let's grab this edge. Let's press Controller,
and let's just put two in here like this and yeah, leave those up Okay, so
that's looking good. Let's tap out mode with that. Let's add the subdivision
surface modifier, and there we go. That's already getting the kind of shape that I see there. Okay, let's increase the
levels of viewport to two, and it really is
looking quite good. We could do a shade
oro smooth to that. And yeah, there we
go. That's the shape that I was after.
Yeah, that's fine. So I think the next thing
I want to do I can go ahead and apply that
subdivision service modifier, actually. There we go. Okay, so the next thing
you want to do is use the Boolean modifier to cut these kind of vents
in the front. So let's bring in a cube. Let's press Shift
A, mesh and cube. Well, scale it down, of course, go ahead and scale
it down some more. Let's press seven to see this from above and bring
it over like this. There we go. And
let's press S and X, and scale it up to
something like this. And now let's press one
to see it from the front, and let's scale it in the Z. S and Z and bring this down
to something like this, maybe maybe a bit in the
X. SX, bring that down. Center that a bit,
and there we go. That's about right. Okay, so
let's fix the scale on that. Let's press Control A and
apply rotation and scale. Let's add a bevel
modifier to this. Add modifier,
generate, and bevel. Let's leave that at 0.1, but let's increase the
segments substantially. To a six, there we go. Alright, that's looking good. So I think now we can
make some copies of this so we could press Shift and Z and make another copy and maybe put that
there like that. And yeah, I'm happy with that. Okay, let's grab
this one again now, and let's add the
Boolean modifier. And let's grab our
little eyedropper and just hit this one like this. Let's select this
one for a second, press H and make
sure that's worked. And yeah, it's worked just fine. So let's go ahead and apply
our Boolean modifier. And let's press ltH and bring this one back
and go ahead and delete. We can do the same again now. We can select this,
add modifier, generate and boolean, grab
our little y dropper, and just click on this one. And I think I'll take the
risk that that's worked. So I'll go ahead and apply that and then go ahead
and delete this. And there we go. That's
our vents cut into this. Let's go ahead and hit
the forward slash. And there's sort of a top of our oven with all the
details that I would expect. Okay, I think the only
thing that I'm missing is these little disks
from this side. So let's go ahead and grab those and hold Shift
and select this. And let's hit the
forward slash to isolate and press seven
to see this from above. Let's grab these, this one
here, and this one here. And we could mirror,
but I think, in this case, I'm just going
to go ahead and duplicate. So let's go ahead and press Alt D and X and bring
these over like this. Let's press Z so we can
see what we're doing. And let's go ahead and bring
those over into position. And I'll go ahead
and press G and X, and bring them in that
last bit to like that. Okay, so let's go back
to solid mode now. And let's go ahead and
bring everything back. And there's the top
of our oven finished. Cool. And let's do a
save, I remembered. Let's press Controls and go
ahead and save our progress. Okay, so in the next lecture, let's start having a
look at our doors. Let's have a look
at the details in those and how we're
gonna make them. Okay, thanks very much. And I'll see you in the
next one. Bye bye, Fino.
44. Lecture 43 The Oven Part 6: Hello, W. Welcome
now to Lecture 43. And on this lecture, I did say I did say at the end
of the last lecture, we're going to be
tackling the doors in this lecture, but sorry. I think what we
want to do next is do this cover strip here, and we have, like, an indent on the base of the
main piece as well. So let's do those.
And then that will allow us to know what
size to make our doors. So yeah, let's go
ahead and do that in this lecture. And
the next lecture. In the next lecture, I promise
we'll tackle the doors. Okay, so let's make a start. So I think let's go ahead
and grab this and this. And with those two selected, let's sit the forward
slash and isolate them. And let's go ahead
and do this sort of recessy thing here on the
base. Let's do that first. So let's select this
and tap into Edit mode. And with edge selection on, let's grab the edge,
press control, and go ahead and bring two
loops in and bring them down to about there like that. Then select the top
loop, grab this one, and bring that down some more
to about there like that. Once you've done that,
we can go ahead and delete or dissolve, sorry. These ones here. We
don't really want these. Let's get all of those,
and then let's right click and go ahead and
dissolve those edges. And let's press three
so we can select faces. Grab this face here. And let's press E and
go ahead and take this in a little bit like this. And then when this
panel click pops up, go ahead and dissolve
orthogonal edges, and that will remove those wasty little bits on the end there. And there we go.
So now we've got that detail. That
was easy enough. Now let's work on
this cover strip. So I brought this cover
strip in here to give us a sort of indication on
the width to make this. So let's press two so we can select dates,
grab that one there, press controller,
and bring a loop in and bring that to the
middle of there like that. Okay, let's just have a look at the rotation scale on this, and it's out, so let's press Control A and apply
rotation and scale. And now let's pop straight
back into Eddy mode. And now let's go ahead and press Alt and
select all of this. And let's press Control B. And let's go ahead
and bevel that edge. To get something about
that, I think, is it? Let's press one and
see from the front. Yeah, that's about right to me. Okay, once we've
got that, we can go ahead and dissolve, again, those edges and those edges, those edges, and those
ones and those ones. Let's we click and go ahead and dissolve those edges.
So we just have this. Now let's press three
so we can select faces, grab this one, hole
control, and go to there. Now let's press Shift E and
Y and bring that copy out. There we go. That's
cool. That's easy. Okay, so we want to be able to separate that from
our selection now. So let's press P and go ahead and separate by selection.
And there we go. While we're here, let's
do some housekeeping. So let's press two so
we can select edges. And let's go ahead and hold
Alt and select this one, hold Shift and Alt,
and select this one. And let's go ahead
and dissolve those. There's no need for that
unnecessary geometry to be kept. Okay, let's tap
out of edit mode, and let's grab this one
here. Scale's good. So let's add that solidify modifier to this to gain
some thickness in it. So let's add modifier and
generate and solidify. And the first thing I notice
is it went the wrong way, so we need to work in the minus. So come on to offset thickness and pull that into the minus. Looks a bit crazy.
Let's fix that. So let's add an extra zero to the right of
the decimal point. Lenter. And shall we
leave that at five? Let's put even thickness on. And yeah, I think I'll
leave that just like that. So let's go ahead and apply
that now, and there we go. So like the top one, we use the Subdivision Surface
Modifier to round it off a bit. So let's go ahead
and do the same. So let's grab it and
tap into Edit mode. And let's start off by putting some control loops
in straight up it. So let's grab this edge
here and press controller. And let's put maybe
maybe that many. That looks good to
me. How many is that? That's five. Okay, so let's put maybe one in
on the edge here now. So let's grab here
and press controller. Or should we put two.
Let's put two in. There we go. Now
let's grab this edge. Let's press controller, maybe
put two in here as well, and just bring
those down a bit to there, and then grab here. Breast controller, and let's
just put one in there. And we'll do the same here, Controller, and
let's put three in. And here as well, there's edge here, controller, and just put one in. And now let's put some
along the straight. So let's grab it here. And let's press controller. And let's go ahead and put
maybe maybe that many. That looks good to
me. How many is that? That's six. Okay, so
let's grab this one, so I'll hold down Alt
and select this one, and I'll go ahead and pull that one closer to the
corner like this. And let's do the same up here. So I'll hold down Alt, grab this one and take this one up closer to the corner
here now, like this. Okay, let's tap out of
Adding mode with this, and let's go ahead and add our Subdivision
Surface Modifier. So add modifiers, generate and the Subdivision
Surface Modifier. And that's looking good
straight out of the box. Let's maybe increase the
level of viewport to two. And let's go ahead and
do a shade oro smooth. And let's go ahead and just take that book back and
see how it looks. So let's press three to
see this from the side. And let's right click
on the object and set the origin to the geometry. And now let's go ahead
and take that back and put that in position. And see how it looks, and something like
that should be good. And let's go ahead and
bring everything back, so we'll hit the forward
slash on the lampad. And, yeah, that's looking fine. That's exactly what we want. The only other
thing we could do. In fact, let's apply the
Subdivision Surface Modifier. We're done with
that now, I think. And let's go ahead and
add a bevel to this. So let's add modifiers,
generate and bevel. That's a little
bit. So let's add our standard two zeros to the right of the decimal point. Get there in a
minute. There we go. And maybe I'll turn
that one into a two. And maybe I'll go ahead and turn the segments to up to a four. Yeah, I'll leave it there. And I'll go ahead
and apply that. And there we go.
So that's our oven now sort of ready for the
doors in the next lecture. And that's one of my
shortest lectures, I think. So, let's go ahead
and do a save. So let's press Controls. And yeah, I'll see you
in the next lecture. Thanks very much.
Bye bye for now.
45. Lecture 44 The Oven Part 7: U Hello, and welcome
to Lecture 44. And in this lecture, yeah, let's go ahead and
do those doors. Let's see what we
can do with those. And sort of looking
at our image, you can kind of see that
these doors are sort of raised in the center with a slight chamfer
on the edges, and we've got these
hinge tags here and, like, a catch on this side. So let's just see what
we can do with this. So let's isolate some objects. Let's grab this and our
little cover plates, and this one, and that
should be enough. Let's hit the forward
slash key with those. Let's press one to see
this from the face. Let's press Shift A
and mesh and cube. Let's S and scale that
down straightaway and bring that into
something like this. Bring it down on the z axis, and now scale it in the z until we get something
like that, I think. I think that's pretty good. Maybe scale up slightly
in the z, S and Z. Take it up slightly. And what I want to
do now is just make some duplicates just to make sure that I'm building
this at the right size. So let's press Shift and
Z, bring a copy down. And I think that's okay. Let's bring this
one up slightly. And yeah, I think
that's fine like that. Let's just try taking that
copy over to the other side. So let's grab both of those, let's press Shift and X and take a copy over like
this and do the same, press Shift and X and
bring a copy over again. And yeah, I think
they're gonna work. Okay, straightaway,
let's hit delete on those because we only
really need the one. So let's get rid of
those for a moment. So we just have
this. Maybe let's press three to see
it from the side. Let's go into wireframe mode. Let's grab it, and let's go ahead and
scale it down the Y. So let's press it and Y and bring this down and just
put this where we want it. Something like that. Let's scale it
down a bit more in the Y to I would say
something like that, and then bring it in till
it's touching the surface. Let's go back to solid mode now. And let's fix the scale. Let's press Control A, and apply rotation and scale. There we go. All
right. What's next? Let's tap into
Edit mode with it. And I think first of all, let's grab this edge here. Let's press Controller and let's put some edge
loops into it, maybe three edge loops, which makes four faces. And now let's grab this edge here and
let's press Controller. And let's go ahead and
put in maybe four loops. Let's try four loops. And let's go the other way now. Let's grab this one and
let's press Controller. And let's put in maybe should
we go four loops again? Yeh, I think so. Let's go
four loops again. Okay. Once we've done that,
let's press three, let's grab maybe
these faces here. And let's go ahead and
pull those forward in the Y axis to
something like that, I would say. Yeah,
that's looking good. Alright, so now we
need to sort of try and create these things, these little hingy things. So how are we going to do that? Maybe let's press two so
we can select edges again, grab this one and
press controller and bring a loop in like this and bring it to about
there, I'd say, like that. Let's grab this one now. Let's press controller. And let's go ahead and
bring a loop down now to about Let's grab here. Let's press Control. And let's go just leave that just where it is and
drop it in like that. Okay, let's press three
so we can select faces. Let's grab this one, this one, this one, this
one, and this one. And this one, this one, this one, this
one, and this one. Let's extrude those
out on the X. Let's press E and X
and pull those out now to something like that. Let's press two so we can select edges and grab maybe
this one and this one. I don't think we want
those, so let's right click and go ahead and
dissolve those edges. And let's grab this
one and this one now, and let's pull that forward on the Y axis to something like
that. I think that's cool. Okay, so now what? That's kind of got the kind
of shape that we want. I think now let's go ahead
and play around with doing this little
one on the front. So let's select maybe this edge here and
press controller, put this one in bring
it closer to the one above until we've got
something like that, I'd say. And let's put another
loop in here now, so I'll grab this one,
press controller. And I'll leave that just where it is in the middle like that. Okay, so let's press three to select faces and grab
this one and this one, this one, this
one, and this one. And let's press E and X, and go ahead and
pull those forward now to create this
little catch thing. Okay, let's press two
so we can select edges, grab this one, right
click and dissolve that. Let's grab this one now and go ahead and
pull that forward on the Y axis like that, I think. Alright, so that's cool. So what's next? Let's go ahead and apply our subdivision surface
modifier, I think. Let's tap out of Edo mode, and check the scale. Of course, that's all
good. Let's add modifier, generate and subdivision
surface modifier. Okay, let's move our
viewpoint levels to two, and let's go ahead and tap
into Edit mode with this. And let's start adding control curves now
to tighten this up. So where shall we start? I think here, let's start here. Let's press Control up, and let's put in maybe
three on here like this. And let's do the same on
this one. Press controller. And let's put maybe
three on this. There we go. That's cool. And let's do the
same with this one. Let's grab this one,
Press controller. And let's put maybe two or
let's go three, as well. Okay, so let's try
and tie up this now. So let's select this edge. Let's press controller,
and maybe let's go ahead and put four in this edge. There we go. And let's do
the same at the bottom. Let's grab this one,
press controller, and let's go ahead and put
four in there like that. And there we go. That's good. All right, so which next? Maybe let's have a go at this. Let's grab this edge. Let's press Control.
And let's put two in, and let's take those up ever so slightly to
something like that. And let's do the same
here, let's grab here. Press control, put two
in here and go ahead and take those down a little bit to maybe something like that. Alright, starting to look good. Let's put some in here, I think. Let's grab this one. Press ControlR. Let's put maybe three in here and leave
them where they lie. And it's just this one here now. Let's press Control R on that. Just there. Maybe
just leave that at one and just bring that
up slightly just like that. Okay, overall, I think
that's looking pretty good. So let's tap out of Edit mode, and let's right click and do
a shade oro smooth on that. And yeah, that's looking
really good now, actually. I'm liking that shape.
That's come along nicely. It's not 1 million
miles from here, and it's definitely
looking good. Okay, so I think the only
thing left to do with this is to just create these
little knuckle things here. So let's go ahead
and do those next. So I think the first thing to
do is maybe grab this door, and let's press shifts, and let's bring cursor
to the selected. And now let's press Shift A, and let's bring in a cube. Let's press one to see
this from the front, and let's hit S and
scale this down. And move in a little
bit and press S again and scale in some
more, maybe bring it over. So it's underneath like this. Let's press S again
and scale it down some more to something like
that, I would say. Let's press Control three
to see this from the side, and maybe now just grab
the door and this one. And it looks like we
need to bring these in a little bit to about here
like this. And that we Alright, that's looking okay. Let's fix the scale on it, so let's press Control A and
apply rotation and scale. And let's tap into Edit mode. Let's grab maybe this edge
here and this edge here. Let's press Control B, and let's bevel those edges. We'll ring that round to sort of round off the front face, and I'll leave those
segments where they are, which is five. And I think that's
looking pretty good now. Let's tap out of
Edit mode with that and just see if we want
to do anything with. Or if we're happy. I
think we're looking good. So let's go ahead and apply a
bevel modifier to this now. Let's add two zeros to the
right of the decimal point. And let's leave
them one, I think. But let's increase the
segments to maybe a three, and let's go ahead
and apply that. Let's do a shade Ato smooth while we're here,
and there we go. That's looking good. So now maybe let's just grab this one. Actually, I wonder
if I just want to reduce the depth on that. So let's just tap into
Edit mode with it. Let's press one for
vertice selection. Maybe let's just
press Z and go into wireframe and just grab the lower vertices and
just bring them up. Two maybe something
more like that. Okay, let's go back to
solid mode on that, tap out of Edit mode and just see, that's slightly better. So let's press once, get the front view and
grab this one, and let's press Shift D and
Z and bring a copy down now. Oh like this. Maybe put
that there just like that. Alright, so now with that done, I think the next
thing I want to do is maybe just duplicate
this around. So let's grab this one and
then this one and this one. And let's go ahead and
join these into one item. So let's go ahead
and press Control, J, and join those into one item. And now that we've done that,
let's go ahead and press Alt D and Zed and
bring a copy down now. So here like this. Okay, let's grab
both of these now, and let's press Alt D and X and bring another
copy over now. And let's do that one more time. Let's press Alt D
and X and bring a final copy over now to
about here like this. And there we go. That's cool. That's our oven now
looking really good. Let's bring everything back. And, yeah, that's
looking really nice now. So I think in the next lecture, we've got a few
last things to do. We need to create
this little badge with Aga on it for the front
of the middle door here. And then you need to create these little stainless
steel blocks to go underneath our catches. Okay, so let's do a
save on our progress. Let's go ahead and
press Controls. I'll see you in
the next lecture. Thanks very much.
Bye bye for now.
46. Lecture 45 The Oven Part 8: Hello, and welcome
now to Lecture 45. And in this lecture,
we've just got two jobs left to do on our oven. We have to put these little
stainless steel things just underneath our
sort of latches here. And then we've also
got the badge to put on that says Aga AGA. But I guess you could
put your initials on there if you want, too,
or whatever you want. Okay, so let's do that. So I think, first of all,
let's start off with a badge. So to do that. Let's select the door, and let's isolate that. So let's hit the forward slash. And make sure the
cursor is on the door. It's just on this little thing Bobbi here, but
that's close enough. And with that done,
let's bring in a circle. So I'll press Shift A
and mesh and circle. Let's look at the vertices. I'm on 42, and I think
I'm happy with that. I'll leave that just
like that. I'll press seven to see this from above. And I'll just take this
off to the side now, I think, and I'll scale
this down a bit like this. And now I want to get
this sort of ovly shape, ignoring the square
ends for a minute. Concentrate on the
oval. So to do that. I'm just going to
scale it up in the X, so I'm going to press S and X, and go ahead and scale
it up like that. Maybe even a little bit more SX. And there we go. That's cool. Okay, so the next thing
I want to do is go ahead and tap into
Edit mode with this. Press one, so we've
got vertices selected. I'm just going to grab
maybe that many vertices. And I'll maybe a few more. I'll go to there, I think. And then I want to
square that end, so I'm going to press
S for scale, X, and then zero to square
it off. And there we go. That's cool. Let's do the same, so I think
it's that many. So I'm going to press
S, X, zero, Enter. Okay, so I think next, I want to just grab
and that and just scale it down in the Y because it kind of kicks up
again, doesn't it? So let's do something with that. So let's press S and Y, and just go ahead and
bring that back in again to something like that. Okay, I want to select all
these middle vertices here. And on this side, let's
grab all of those. And let's go ahead and right
click and go ahead and dissolve those vertices because I don't
think we need them. Okay, maybe I'll
just go ahead and take this in a little
bit like this. Do the same here as well. Take these in a little bit. And I think now the
next thing I want to do is grab these corner vertices and we're
going to bevel them. Up until now, all the bevels we've done have been on edges, and we're not doing
that this time. Obviously, we're just
doing a vertices. It's the same principle, just a slightly
different command. So this time, we're
going to press Control Shift and then B. Once we've done that, we're going to bevel
just the same way, R just drag the mouse. And go ahead and create
a bevel like that. Play around with the amount of vertices you want
to put in there. So I think I'm adding two, and I think I'm happy with that, and I'll go ahead
and left click. So I've got three segments, so I'll leave it just like that. And there we go. That's
cool. Alright, now what? Let's go ahead and
press A to select O, and let's press F to fill
that circle now. All right. Now, I think, let's press
three so we can select faces. Let's grab that face. Let's press E and
just scale that up in the Z axis to
something like that. Let's select that face
again now and maybe press seven to get the
orthographic view, and let's press I to inset
it and go ahead and inset this shape like this till
we get something like that. But I'm seeing the
gaps not even, so I think I'm just
going to manually just scale this up in the X. So I'll press S and X and just
bring that back out again, even that back up again. Once we've done
that, let's press E and go ahead and
take it down now and the Z axis to get sort of frame or whatever
you want to call it. I read this as having
a raised edge. So that's what we've
kind of done there. Okay, so the next
thing I want to do to this is just apply
a bevel to it, so I'll tap out of Edit mode, check the scale and it's out. So let's press Control A. And apply rotation and scale. Okay, so now we have
the scale fixed. Let's go ahead and add our
bevel modifier to this. I think maybe let's add an extra zero to the right of the decimal point
and click Enter. And I think that's pretty good. Let's go ahead and add add
some more segments to this. Maybe let's take it to five. And, yeah, I think
I'm happy with that, so I'm going to go
ahead and apply that. And I'm going to
go ahead and right click and Shade Auto Smooth. And there we go. We've
got our outer frame. So let's press seven now to
get the orthographic view. And let's select the object. Let's press Shift S and
cursor to the selected. Okay, so let's go
ahead and press seven now to get the
orthographic view on this. And next, let's go ahead
and add some text to this, which is something I know
we've not done before, so let's go ahead and do that. So let's press Shift E, and let's bring in text. Let's bring that down
a little bit for a little while and put
that just beneath. The first thing we need to do
is obviously turn that from the word text to the AGA, or
whatever you want to put. So let's go ahead and tap
into Edit mode on it, and we get this blue icon coming up that allows us to
backspace delete, and we'll just put Aga. A, G, A, boops, my caps are on. Turn off Caplocks AGA, enter, and there we go. And then go ahead and just
click back to Object Mode. So now let's go ahead and
just bring that into position and go ahead and scale this until it kind of fits
where we want it to. And let's have a
look where that is. Maybe we need to take that
up a little bit like this. Maybe just put that
like that for a moment. Okay, so obviously
at the moment, that's not good enough.
That's just flat. So let's go ahead and
work this a little bit. So select our letters
and come down to heat now to this new
symbol we have here, and let's go ahead
and click on that. And now that's going to give us some adjustment to our text. So in the render resolutions, let's bring that down
to about an eight. And in the extrude, let's go ahead and hit that and put some thickness
to our letters. And there we go. That's cool. And then let's go ahead
and take that down now, so it's on the surface. Put that about there and have a look at it. Let's press seven. And I think I'm happy with
a scale just like that. So there's only one other
thing I really want to do, and it's here in the depth. I'll just click on
this, and that'll just round off the edges
slightly on our lettuce. And there we go. There's
our badge. It's done. I might just press S and
just scale it down a little bit and just re center
that a little bit again. But basically, we're there. I think that's cool. So make sure that the letters are in contact with the
surface and they are. Okay, now we've done that.
Let's go ahead and right click on it and convert
that back to a mesh. And now that we've done that,
let's go ahead and press Control A and apply
rotation and scale. There we are. That's done. Let's select this and make sure that this is
all good and it is. The next thing we can do is go ahead and join them together. Let's grab the letters first, then our little back frame, and let's press Control J and
join them, and there we go. Alright, so now we
can rotate that. Let's press x90, Enter. Okay, let's press one to
see this from the front. It's a little big.
Let's press S and bring down the scale
on our lettering. Let's bring that over
to the door now. And let's press S and scale
it down a little bit more. I think something like
that would be good. Center it as best we can. And let's go ahead and pull
that through the door now. There we go. That's cool. And just put that in
position wherever you think. So that's pretty good for me. Is it a little bit big? I think I'm going to
bring everything back and just decide if that's a little too big,
and I think it is. So I'll just scale it
down a little bit more. And, yeah, I think I'll
just take that back or decide if it's
on the surface, and it is just there like that. There we go. So
there's our badge on our doors, and I'm happy with Okay, so let's just select maybe the actual main body
of the oven and our doors. And I don't really
need that plaque I just like to see it. So I selected that, as well, and let's go ahead
and isolate that. Okay, let's just select
the main block now, and let's press Shift S and
cursor to the selected. And now let's press Shift A, and let's bring in the last
object for the Cucker. Let's bring in a cube. Obviously, a little bit big. Let's press S and
scale that down. And let's bring that up in the z axis and carry
on scaling that down. To something like that, I'd say, let's press seven
to see this from above, and bring it forward on
the Y axis and drop that in position,
something like that. Let's press one to see
this from the front, bring this down and find
the position for it. I think what I'll do is I'll
tap into Edit mode with it and press S to
go into wireframe, and I'll press one for vertices, and I'll grab these ones here first and go ahead
and pull that over. Maybe grab the bottoms one now and pull that over as well. Let's have a look see if
there's any features to these, and there's not many, really. I think I'll round off that
bottom edge a little bit. So I'll press two,
grab that edge there. Maybe let's check the scale. I'll tap out of Edit mode. And let's press Control A and
apply rotation and scale. Now let's tap back
into Edit mode. Let's press Control B and go ahead and bevel that
bottom edge a little bit, just to get something like that. And now I think let's
tap out of Edit mode, and let's go back to solid view. Okay, so is there anything
else we want to do to this? I think that's pretty much
all I wanted to see on this. So let's go ahead and add
a bevel modifier to it. And let's add two
zeros to the right. And let's go ahead and maybe
turn that one into a two. And let's increase the segments. And there we go. I think that's kind of the shape
that I'm seeing. I'm not sure if it
doesn't sort of do something weird there. Let's see if we can do
something with that. Let's just maybe tap
into Edit mode with it. And let's just add maybe
a control loop to this. So let's press
two, grab it here, press controller, and
just put a loop in there. It's just put one in,
but that's right. We could grab this one
now and just go ahead and pull this up to get
something like that. Okay, let's tap out of
Edit mode with that, let's do a shade or smooth. And there we go. I
think I'll leave the shape alone now,
something like that. Maybe I'll just pull
that more into position, and there we go.
That's all I need. Okay, let's press one to
get the orthographic view, and let's press Alt D and Z and bring a copy down no to
our second door like this. And let's grab
both of these now, and let's go ahead
and press Alt D and X and bring another
two over like this. And let's go ahead and press Alt D and X and pull
another one over. I like this. And there we go. That's cool. Okay, so we've
got everything in place now. Let's hit the forward slash key. And there's our oven complete. So I think that was
definitely worth it. It's been a few lectures
this to get this right. I think this is the eighth.
Correct me if I'm wrong. I'm not sure. But I think
that's really cool. Let's put a big wow
factor in our kitchen. I think that's looking great.
So in the next lecture, we've got a bit
more work to do in this little chimney alcove. I want to put a mirror
in the back here, which just should add a feeling of more space in our room. And we have, like, an
extraction hood to put in in this area here and sort of this ceiling area
of our chimney. All right, so let's do a save. Let's press Control
and save our progress. Yeah, yeah remembered. And I'll see you in
the next lecture. Thanks very much.
Bye bye for now.
47. Lecture 46 The Cooker Hood Part 1: Hello, and welcome
now to Lecture 46. And in this lecture,
let's carry on sort of doing things with our
chimney alcove here. We need to put the
extraction in. So there's a few
features on that, so that might take
one or two lectures, and we have a little
mirror to put in behind just to add some
depth to the room. Okay, so let's start
with the extraction. I think that's the
best place to start. So I think, first of all, let's bring the origins closer
to where we're working. So let's just
select the chimney, tap into Edi mode, press three so we can select
aces, grab that one there, and press Shift and curse
it to the selected. And there we go. Now we've got the origin in the
best place for us. Let's create a new sub
file in our outliner. Let's click on scene
Collection and AddFle. Devil click on it. And let's call this the
Cooker Hood. And there we go. I'll hit Enzo and we'll
keep that selected. Okay, so I think the next thing
we can go ahead and do is let's just isolate our
chimney for a minute. I think that's all
we need. So let's hit the forward slash. And let's press one to
see this from the front. And let's press Shift A, and let's bring in a cube. I think let's straightaway
tap into Edit mode with that. Let's press one so we
can select vertices. And also, let's go
into wireframe. And let's get this
thing where we want it. So I'll grab these vertices
here first and bring them so they're just inside
the chimney alcove like that. Grab these ones and do the same. Just bring those inside
the chimney alcove. Let's set that up nicely,
something like that. And let's just check those ones. And maybe I'll just
grab those ones again and just position
them a bit more accurately and put
them something like a Let's grab these
upper ones now and bring those
down and position those just above the
alcove, just like that. So there's the edge, like the ceiling of that
alcove, if you like. So I've gone just above it. And let's set some thickness
to this extraction now, so I'll go ahead and make that. Something like that, I think. Okay, let's press three, to see it from the side now. Let's grab the, the vertices at the back and
bring those forward. So they're inside
the chimney alcove. Now bring them back into
position like this. Let's grab the
ones at the front, and let's bring those back, but I don't want to
put them inside. I want a slight overhang, so let's press Z now
and go back to solid, and you can kind of
see what I mean. So I'm thinking it should
look something like that, just sticking out slightly. Okay, so that's cool. So that's what's next. Let's maybe just
isolate this object, so we'll hit the forward slash, bring everything back, and then hit it again to isolate it. And now let's create, like, a lipping going around it sort of an area that
sticks out a bit. So let's tap into
Edi Moe press two to select edges, select
that edge there, press Control, put a loop in, and then bring that down
now to something like that. Okay, let's press three
so we can select faces, hold hold, move to the
corner here and click. Now let's press E. Now
let's press S to scale. But let's not scale in the z. So let's press shifts to omit the Z axis scaling and now go ahead and scale that out
a little bit like this. Let's just grab this front edge and pull this out a little bit more to something like
that. There we go. And let's tap out of
edit mode with that, the scales all good. So let's go ahead and add
a bevel modifier to this. And let's add an extra two zeros to the right at
the decimal point. And let's go ahead and
put segments on four. And I think I'll go
ahead and up that 1-2 in the amount. There we go. That's cool. That's
what I want. I think we'll go ahead and apply
that bevel modifier. I don't see me wanting
to change anything. And let's go ahead and bring everything
back for a moment. So there's our sort
of Cooker Hood. But I want to add, like, a crown detail to this. So I'm going to
go ahead and make a copy of these kind
of crowns and then wrap it around the front
edge of our extractor. So, what to do now? Let's go ahead and grab Whoops, maybe this crown and
then this crown. And let's go ahead and set
the origins to the geometry. And let's go ahead
and press Shift and Y and go ahead and pull a
copy forward now like this. Okay, so now that
we've done that, let's grab our cooker, sorry, our chimney and our extractor and our little cornice detail. And let's go ahead and hit the forward slash to
isolate those objects. Now that we've done that, the next thing I
want to do is, like, put a cornice or a detail, like a crown molding
on the top of this. And to do that, I'm
just going to make some copies of the
ones that we've got on the cabinets and then
make them fit around this. So let's go ahead and grab maybe the ones that's here, these two. And let's go ahead and press Shift D and Y and bring
a copy out like this. With those selected, let's
go ahead and maybe also grab our new Cooker
Hood and our chimney, and let's go ahead and
hit the forward slash. Okay, we can go ahead and
put these two moldings here in our Cooker
Hood grouping, so let's press M, and let's go ahead and drop that into
the Cooker Hood group. There we go. Okay, so
let's grab these two now, and let's do a rotate. So let's press Z. No 180. Enter, and there we go. Okay, so now what?
Let's go ahead and press seven to see
this from above. And let's go ahead and
pull this in position now and set that way
we want that to be. So we can bring it in like this and bring it over in the X, and just take a minute
to position this. So let's press G and X and
bring this over like this. And now let's press G and Y and go ahead and take
it back like this. And let's have a look at
that, see how it looks. Okay, let's press
one, and obviously, we need to bring it
down, so let's do that. And drop that in position now on the front
of our Cooker hot. And that's cool. So what
do we need to do now? Obviously, we need to
work on this side, so we haven't got
one for this side, we don't have an
angle that suits, so let's work on that next. So let's maybe grab this one, and let's press Shift D and Y and bring one
forward like this. And now let's
rotate it on the z. So let's press z90. But that's the wrong
way, so I'll just hit the minus key to swing
that round like that. Alright, so let's put
this in position next. Let's press seven to
see this from above. And let's go ahead and position
this where we want it. So let's go ahead and
press GY and take it back. Let's get a bit
closer to this now. And let's press GY
again and just bring it forward until it's flush
here with the other one. And let's take it
in. So let's press G and X and take it in
towards the Cooker Hood. I like this. There we go. Okay, let's tap into Edit mode
with this one, and let's press one so
we can select vertices. Grab that vertices
there and press Shift S and go ahead and put the cursor to the
selected. There we go. Let's tap out of
Edit mode with that. And now let's bring in a plane. So let's press Shift A and mesh, and let's
bring in a plane. Let's rotate that in the Y axis. So let's press Y, 90, enter. And now let's go ahead
and rotate that. So let's press R and then
hold control to snap in five degree increments until we get 45 degrees, and there we go. That's cool. Let's press for a minute and just check that that's lining
through on the tip, and you can see this piece
here coming this way, and you can see this
coming this way, and you can see them meeting
nicely in the corner. So that's worked out nicely. Okay, let's go back
to solid mode, and let's just see how that
boat Boolean works for us. So let's grab this piece and check the scale
of rotations out. So let's press Control A and
apply rotation and scale. Let's grab this one now,
and let's fix this one. Let's press Control A, apply rotation and scale. Let's grab this one, and let's
add the Boolean modifier. Let's grab our little
dropper and just click on this plane now like this,
and that's cut bright. That's great. So let's
go ahead and apply that. And we can go ahead and delete our cutting plane
now. And there we go. We've got our sort
of crown moldings around our Cooker Hood,
around our extraction. So if we wanted to, we could maybe pick that up a little bit. So let's try and see
where we best like it. We can either go
really to the top like this or we could take
it down a little bit, and then you can take it
down to something like that. Let's see. And yeah,
that works for me. But I don't want these
to protrude into the sort of the chimney because that can look
a little bit fake. So let's pull those back. So let's maybe grab
these and this. And let's go ahead and hit the forward slash and then press it again
to isolate them. And let's press seven
to see this from above. And let's press seven
and go into wire frame, and let's tap into Edit mode. Okay, so we've got this mitre
going on here at the back. We've got this angle cut, so let's do something with that. Let's select all the
vertices and let's press S, Y, and zero to square
that back up again. And now we can go ahead
and pull that back now and put that in
position where we want it. So let's just see where
that's supposed to be. And I think something like
that would be about right. Okay, let's do the other one. Let's grab the
vertices here and pull these out and put those as well. In position,
something like that. Alright, so let's go ahead and
bring everything back now. So let's hit the forward slash, and let's go back to solid mode, and let's tap out of edit
mode. And there we go. We've got a basic Cooker
Hood in position, and it's looking good. I think, personally,
this crown molding still seems a bit high to me, so I'll grab this,
and I'll just pull it down slightly on
the Z axis like this. And yeah, I think I prefer
that like that, no. Okay, so there's our
sort of Cooker Hood in. So in the next
lecture, what we'll do is we'll work on some grills on the underside of
this and we'll work on a few spotlights and
maybe the mirror, as well. We'll see how we go. Alright, so let's go ahead and do a save. Let's press Controls. And I'll see you in the next
lecture. Thanks very much. Bye bye for now.
48. Lecture 47 The cooker Hood Part 2: Hello, and welcome
now to Lecture 47. And in this lecture,
I want to add some more details to the
underside of our cocker hood. I want to put some lure
style vents in this, and I also want a
couple of spotlights. So let's go ahead and see
what we can do with that. So let us maybe just
grab this on its own and let's hit the forward
slash to isolate it. And what now? Let's tap into Edy mode with it. Press three, select
that face there, press shifts and bring
the cursor to the selected to put the
cursor where we want it. And now we can tap out
of Edy mode with that. I think next, let's go
ahead and bring in a plane. So let's press Shift A and mesh, and let's
bring in a plane. And now let's go ahead
and press Control seven to get the underside
view of that Cooker Hood. Alright, let's press
S and scale down this plane and put this in
position where we want it. So I think maybe scale it down a little bit more and put
that something like this. But now scale it
up just in the Y. So I'll press S and Y and go ahead and bring
that up to something like. Okay, I'm going to press one so I can see
it from the front, and I'm going to bring
it down a fair way. We don't need it sitting exactly on our Cooker
Hood just yet. And now I don't think we need
anything but this plane, so I'm gonna hit
the forward slash, bring everything
back, and then press it again to isolate our plane. Okay, let's fix
the scale on this. So let's press Control A and
apply rotation and scale. And let's figure out
how we're going to make a vent. Let's figure this out. So let's tap into Eddy mode. And let's press two
so we can select edges and maybe grab this edge. Let's press Control, and
let's put some loops in this. And how many do we want? I think something like
that is about right, and that is 12 cuts. Okay, now select it on this
edge and press Controller. And let's go ahead and
put two in this way. Click once and click again. And before you click off, press S and X and go ahead and scale those
to something like that. And with them still selected
again, let's bevel. Let's press Control B, and let's go ahead
and apply a bevel to these, something like that. Okay, so now what? Let's now hold Alt and select this one and then shift an lt and work our way
down the line this way. And do I want the last one? I don't think I do. I think I'll leave
that like that. And with those selected now, let's press Control B, and let's put ever
so slight bevel on these, something like that. Let's press three so we
can select faces now. And let's select these
skinny little faces. And when you've got
all those, right click and go ahead and
delete those faces. All right, so I think the next, let's press two so
we can select edges, and let's grab these edges here. So like one on each panel. Let's grab all of those, and once we've got them, let's go ahead and
pull up like this. I'm not extruding.
I'm just pulling up to something like that. There we go. That's cool. I think I want to delete
this row of faces here. I don't think I need that,
so I'll press three, and I'll go ahead
and grab these here. And I'll right click and go
ahead and delete those faces. And there we go. That's
cool. That's looking good. Okay, so what's next? I think the next thing I want to do is add a solidify
modifier to this. Let's tap out of Adi mode. And let's add a
solidify modifier. Let's go ahead and add an extra zero to the right
of the decimal point, click Enter, and let's maybe try increasing that one
to What shall we try? Let's try five and Enter. And let's make sure even
thickness is turned. Okay, I'm just going to hit this little compress
icon like this, just to compress that
solidify modifier. But I'm not going
to apply it yet. Let's just play
around for a minute because now I want to see if the bevel modifier
is going to work for us. So let's add modify, generate, and bevel. And yet, it has. It has worked. But I get the feeling that I'm not going to be able to
increase that bevel. I think it's restricted
by the geometry we have and how close some of
these curves are together. So I think I'll go
ahead and apply that. I think the only other
thing I could do is turn off clamp overlap. But that kind of compromises the geometry of the bevels and could give us some problems. So I think in this case, that is enough of a bevel. We could just try increasing the segments
to maybe a three, and then we can compress
this one for a moment. Whoops, no this one here. And now the next thing we
could do is maybe just right click and apply
a shade oro smooth. And then we could leave
that now just like that. Yeah, I think I'm happy
with that as a bevel. I think that looks
absolutely fine. So when you're applying
stacks of modifiers, it's always a good idea
to apply from the top. So let's first of all, apply
the solidify modifier, then the bevel modifier, and I'll leave the
smoothing one intact. There we go. So let's bring everything back now so
we can see where we are. And it looks like our
little lure is upside down. So let's press y180, Enter. Let's maybe just select these two items and
let's isolate again. And let's press one to
see it from in front, grab our little lure
and then pull that up into position where
it should be, which is about like that. Okay, let's press Control seven to see this
from the underside. Let's grab this and let's
press Shift D and X, and bring a copy across now to the opposite
side like this. Maybe just maybe bring
this one in a little bit. And there we go. So there's
our ures now in position, and they're looking
absolutely fine. So let's next, let's
work on our lights. So the cursor is a fine place. So let's press Shift A, and let's bring in a cylinder. Let's increase the vertices
count on this to around 40. Let's press seven,
and let's go ahead and take this out of the
way a minute like this. And we could go ahead
and press S and scale this down a little
bit at this stage. Alright, what are we doing next? Let's fix the scale on this. Let's press Control A and
apply rotation and scale. And now let's tap
into Edit mode. Let's select this bottom face. And now let's press
E and go ahead and extrude that down
something like that. Okay, let's hold
down Alt and just select the complete
row of faces there. And now let's press
E for extrude. Now let's press S.
But now let's press Shift Z so that we don't
scale up in the Z axis. And now let's go ahead
and pull that out to create a kind of a
lip on our cylinder. Alright. Now that
we've done that, I think the next thing I
want to do is let's just grab this face here and let's go ahead and
insert just a tiny bit. So let's press I and just bring this in a tiny bit
now like this. Okay, let's select
this one here. So hold alt and just grab that. And now I'm going to press E
and go ahead and take that up in the Z axis like that. Alright, now, what do
we want? I think now, let's apply some bevels, so let's press two so
we can select edges. Hold out and grab this one. And let's press Control B, and let's try beveling this. Maybe a bevel like that, and I'll roll the mouse wheel to get some extra segments in it. And I've got three segments. Maybe I'll just click on
this here and add four, and there we go, that's fine. Let's do the same
now with this one. Let's hold Alt and
select this one. Now I'll hold Shift and
Alt and select this one. And now let's try
applying bevels to these. Let's press Control B and just put a little
bevel on these now. Something like that, I think. And I'll leave that at
four segments as well. Okay, so that's cool. So I think the next thing is, I need to sort of dome this. This is the light
lens itself here, and I think I want to dome that. So let's press three so
we can select faces. Grab this one. Let's press I and inset this a
little bit like this. And now pull that down in the Z axis a little
bit like that. Let's repeat that a few times. I'll press I, inset that some more or
something like that, and then pull that down as well. Let's do that again. Let's
press I and inset that. Now let's pull that
down the Z axis. Something like that,
and press I and inset and pull that
down in the z. And again, I inset some more and pull that down in the
z. And we're nearly there. Let's press I, inset some
more and pull that down. And do I want to do one more? Maybe one more, press I inset, and then just pull
that down again. And there we go, that's cool. So we've got kind of a rounded
shape on this bit here. Okay, I think I'm going to apply a Subdivision Surface
Modifier to this, but I think we just need to
trick this out a little bit. So maybe now let's just add an extra loop
to the top of this. I'll select this edge here
and I'll press Controller, and I'll go ahead
and bring this loop close to the top here like this. And I'll do the same
on the bottom here. I'll press Controller, and I'll bring a loop
down here like this. And maybe I'll put one or
two in this so wrap here. Press controller, and maybe put maybe three loops in here. And is there anywhere else
maybe here, too, as well. So let's press controller. Let's select this edge here, Controller, and maybe just
two in here like this. There we go. That's
looking pretty. Let's have a pile of added mode. And let's go ahead and add a Subdivision Surface Modifier. And that's already looking good. Let's right click and
do a shade auto smooth, and there we go.
That's our light. I'll leave that levels
viewpoint on one, and I'll go ahead and apply that Subdivision
Surface Modifier. That's looking, right.
I'm liking that. So let's press seven now. And let's grab this
and let's hit S and scale this down some and
now maybe bring this in. And I think I need to
scale that down some more. I'll press S and scale that
down to something like that. Let's press one to
see this in front. And let's go ahead and bring this into position like this. And let's take that over to
about there now, like that. Okay, do I want to
scale that down? I think I'm going to
scale it down a bit more. Maybe something like that. Let's press one again and go ahead and
bring that down again in the Z and put
that in position, and let's have a look at that. And yeah, I think
I'm happy with that. That's absolutely fine. So I think, in this
case, I'm going to use the Boolean modifier to cut
out where that lamp is going. So to do that, let's grab this one.
Let's check the scale. It's all good. Maybe we
check this one more time. Let's fix the scale on that. Let's press Control A, and apply rotation and scale. Grab this again,
add the modifier, generate an boolean, grab our little eyedropper
here and go ahead and click on
this object like this. Let's find this object now
and just for a second, hide it just to confirm that
that worked and it did. So let's go ahead and
grab this one now, and go ahead and
apply that boolean. Let's bring that
little light back. And let's select it, and let's right click and go
ahead and set the origin to the three dcursor.
Let's select it again. And let's press Shift D, right click twice, and mirror in the X axis, and there we go. So let's apply the Boolean
modifier to this one now. So let's select this item, add Modifier generate
and Boolean. Grab our little dropper
and click on this. Let's maybe just go ahead
and hide this for a minute, make sure it's
worked, and it has. So let's select it again
and go ahead and apply that Boolean modifier.
And there we go. So that's our Cooker Hood done. Let's bring everything back
and see what it looks like. So we've got our
spotlights in place, and we've got our lubras
in place as well. We did want to put a
mirror on this back wall, so let's maybe just do
this last little thing. Let's just select the
chimney on its own and maybe this item as well, and let's go ahead and
hit the isolate on those. And now let's go ahead
and bring in a plane. Let's press Shift A. And let's actually
bring in a cube. I'm sorry, not a plane. Let's press one and see
this from the front. And maybe let's go
straight into wireframe, and let's tap into Edi mode
and press one for vertices. Select these vertices here, bring these down now just below the level of the Cooker Hood
About here now, like that. Let's bring these low ones almost down to the floor,
something like this. And let's grab these ones here, and let's bring these over. And let's leave a little gap because I don't want
this to ever sort of go into the brickwork because then it looks really unrealistic. So I'll bring that to
about there like that. And let's do the same
on the other side. Let's bring this in and just put this about there,
I'd say, like that. Okay, let's press three to
see this from the side now. Let's grab these ones here and go ahead and bring
those in like this and grab these ones here now
and go ahead and bring this back to put a tiny bit of
thickness to that mirror. There we go. I'll
leave that like that. Okay, so now that
we've done that, let's go ahead and press set, and let's go back to solid and maybe just grab
this mirror and let's hit the forward slash
to bring everything back and then press it again
just to see it on its own. Okay, let's just add the
bevel modifier to this. Let's add modified,
generate, and bevel. And let's go ahead and add an extra zero to the
right at the decimal point. And maybe let's
just add one more. And let's increase the
segments to maybe a three, and let's increase the one here to maybe a two
and click Enter. And there we go, that's it. Let's go ahead and apply that. And there we go. Let's go ahead and bring
everything back now. Let's hit the forward
slash, and there we go. So there's our Cooker Hood complete with a
mirror behind it. Okay, so let's go
ahead and do a safe. Let's press Controls. And in the next lecture,
what shall we do next? I think in the next lecture, let's we are going to
animate this draw here. So this drawer is going to come out in our animation just to show us the detail and the
quality of our drawers. So let's go ahead and build
a drawer for this draw here. Alright, thanks very
much. And I'll see you in the next lecture.
Bye bye for now.
49. Lecture 48 The Drawer: Hello, and welcome
now to Lecture 48. And on this lecture, let's do what I mentioned at
the end of the last lecture. Let's make one draw behind this draw face
here, this top drawer. The reason being, I
want to show you how to animate a draw coming
in and going out. And the other purposes, I want to be able to demonstrate the quality of the kitchen. And one of the sort
of indicators of good quality kitchen
is the drawer. So when we open this drawer, we're going to see traditional
hand cut dovetail joinery, and we're going to see some
beautiful sort of oak or ash. So that's the reason for
sort of doing this drawer. Before we do that,
I don't think we need this image here anymore, and you probably haven't got it. But if you have, just hold down the middle mouse wheel and pull this over to there like that. And then go ahead
and click on View, go down to Area and close area. And there we go. And
I'll pull this down. So this is about half and half. Okay, so let's make a
start on this draw. So I think the
first thing we need is I want this face
here to be selected, and then also I'll whole
shift and select this one. And I think for the
purposes of this lecture, that's probably all we need. So we'll hit the forward
slash and isolate those. Okay, so the next thing I
want to do is currently, this draw face here is part
of the entire component, so I need to be able
to separate it. So let's tap into Edit mode. Let's press three,
so we select faces. Grab this face here. Hold down control and hold
down your plus key on your numpad to
increase the selection till all faces are
selected there. Once we've done that, we
can go ahead and press P, and we can go ahead and
separate by selection. And now no longer is
this draw part of this. And as you can see, the draw has disappeared from
the other side. And the reason being
is because we use the lt D command to make
a duplicate of this one. So that means the properties of this one are also
linked to this side. It's not really a problem.
Well, just grab this drawface here and maybe let's go ahead and set the
origins to the geometry. Let's press seven, and let's go ahead and press Shift D and Y, and let's just go ahead and pull a copy over to the other side. And let's get that in position and put that where we
think it should be, which is about there like that. Alright, now, so we have
a separated draw face. Let's start work. So let's press seven to get this
into the orthographic view. And maybe let's go
ahead and press Shift S and bring the
cursor to the selected. And now let's go ahead
and press Shift A. And let's go ahead
and bring in a cube. Okay, so let's start
modeling that straightaway. So let's tap into Edit mode, and let's press and
go into wire frame, and let's press one
to select vertices. Grab these vertices here, and let's go ahead and pull
those over to about here. And you can see this is the
edge of the drawface here. So I'm going to put
that about there. We don't want to exactly flush with the edge of the drawface. Let's go ahead and
grab these vertices this side now and maybe pull those over like this to create a thickness
to our draw side. And I'll make it
about that thick. And then I'll grab these vertices and go
ahead and pull those back so that they
are in the end, sort of flushed there
to the draw face. There we go. And now we'll
grab these vertices. And we want these
vertices here about halfway between this
one and this one, roughly roughly about halfway. I'm going to go about Okay, let's press three now. Let's select the lower vertices, and let's take those up. And so here, this here is the bottom edge of our drawface. So let's bring these
vertices down, so they're not quite flush. They're about that much distance between the bottom edge of the draw face and the
edge of our draw side. Let's do the same with the top. Now, let's grab these, pull those down, and let's pull them up a bit
overshot quite a bit. So there is the edge
of our drawface. So in this case, I don't
want them up here somewhere. That's just generally not right. I'll bring that down to
something like that. So we've got, probably in
the real world around 2.5, 3 centimeters between
the draw face top and the actual draw
carcass, the draw box. There we go. So that's got that. Let's press seven now. Sorry, let's press S, and
let's go back to solid. And what else? I think this is just too
thick, so we'll press three, select this face and just bring this over and
consider where we want it. And I think that's about the right thickness now
for the side of a drawbox. Okay, so now what
do we want to do? I think what I'm gonna do now is I'm going to apply a
bevel modifier to this. So let's just select this item, and let's tap out of edit mode, and let's look at the scale, and the scale is
correct because we did all our sizing in edit mode. So let's go ahead and add
a bevel modifier to this. And let's go ahead
and add two zeros to the right to the decimal
point, click Enter. And that's pretty much it. I don't want to round off
these edges too much. Let's increase the segments
to about three. There we go. And now I could leave
this bevel modifier active And then each of the components would also carry this bevel
modifier with them, but they'd be automatically
adjusting as we resize. But if we did that,
then we've got a lot of bevel modifiers to
apply at the end. So I think, in this case, I'm going to go ahead and apply that and we just
need to be mindful. As we sort of modify
these components that we need to also look
at the bevel modifier. We need to look at the
bevels and make sure they're not sort of adjusted
accidentally or changed. Okay, so now that we've
done that, let's grab this. And the origin is center, so we can go ahead
and press Shift D, right click twice, and we can go ahead and mirror in the X axis. And there we go. That's cool. So now we got two
sides to our draw. I think now that
we've done that, all I really want now
is this, this and this. That's the only three
components I want to see. So I'll hit the forward
slash key once, which will bring
everything back, and then I'll just go
ahead and hit it again. Okay. So what's next? So we need a back
to this, obviously. So let's do that next. Let's grab this one.
Let's press seven. And let's go ahead
and press Shift and X and bring a
copy out like this. And let's go ahead and set
the origin to the geometry. And let's go ahead and
rotate that 90 degrees. And let's go ahead and take
that back in the Y axis. And now let's go ahead and pull that over into
position like this. Let's have a look at that
and see what it looks like. Let's press G and Y, bring it down slightly. And let's have a
look at it here. Let's go ahead and
press G&X just bring it over a bit more to
about there like that. Okay, so now let's go ahead and tap into
Edit mode with this, and maybe let's press SID
and go into wire frame. Let's press one for
vertice selection. Make sure that we get all the vertices which are
linked to these bevels now. And let's go ahead
and pull that over now to the opposite
side like this. And let's go ahead and
position that correctly, which is about like
that, I'd say. Okay, so we've got sides
and we've got a back. What do we need next? So I think next let's go ahead and
put in a base to this. So let's press seven and go back to solid for a moment
and tap out of edit mode. Let's press seven to
see this from above. And let's go ahead
and being in a plane. So let's press Shift
A and mesh and plane. Let's tap straight into
Edit mode with this and make sure you're
in vertice selection, grab these top vertices and bring these
over and put those in position just about
just about like that. Grab these ones and
bring these over too. And let's just check that out. Let's put that
something like that. And let's do the same
on the sides now. Let's bring these into position. And let's do the
same on this side. Put that one in
position as well. And let's press seven
to see this sorry, let's press one to see
this from the front now. And let's go ahead and tap
into wire frame with it. Let's press three,
so we select faces, and just press A to
select and now press E and extrude some
thickness to this. Something like that
should be enough. Okay, we can press
A for all now, and then we can go
ahead and bring this down on the z axis until it's something
like that, I would say. Okay, so there we go. Now
we've got a draw bottom in. We can go ahead and press Z,
and we can go back to solid. Okay, it looks like the normals are flipped incorrectly on that. You can kind of see that
that's just a different color, lot darker than the other
components. So let's grab it. Let's tap into Edit mode, press A for all, press Alt N, and go ahead and
flip the normals, and there we go, tap out of
Edit mode with that again. Okay, what do we
want to do next? I want some devi Oh, we also need one here
'cause we're going to show dovetails on this
draw on this front edge. So to do that, really, we need one of these duplicated to here. So let's grab this one here, and let's press seven. Let's make a copy of that one
and bring it down to here. So let's press Shift D and Y and bring a copy
down now, like this. And let's put that
one in position. About like that. There we go. That's
cool. Okay, so now let's make some dividers
to go in our drawer. So let's grab this one. And let's go ahead
and press Shift D and Y and bring a copy
out like this. Let's go ahead and tap into
Edit mode with this one. And let's press S and
go into wire frame. And let's press three to
see this from the side. And let's go ahead and press
one for vertice selection. Let's grab all the
vertices for those bevels, and let's go ahead and
bring those down so that the dividers aren't flush
with the top of the draw, something like that, I'd say. And we can also grab the bottom ones now and we can pull those up so that they're
sitting on the draw base. There we go something. I think the other
thing I want to do. I'll just press three again is reduce the thickness
of the dividers. They don't want to
be as thick as the manger or sides or back, so let's go ahead and
pull those over to reduce the thickness of the dividers to
something like that. Let's go back to solid mode
and see how that looks, and maybe I'll just reduce that thickness
a little bit more, and there we go. That's cool. Okay, so I'll tap out
of do mode with that. And, yeah, that's done. So let's press seven to see
this from above. And let's make sure we're
happy with the position. I think I'll pull that forward
a bit more to about there. And now I'm going to copy this one, but I'm
going to link it. So I'm going to press Alt D
and Y and bring a copy back now to about about
there like that. So between these now, I want to put more
dividers going in the opposite direction
so that you could put in your knives and your forks and your spoons and all the
things here in the middle. And then this sort
of divider here would be for your bigger
kitchen utensils like ladles and serving spoons and whisks and the same
there at the back. So let's go ahead
and do this next. So to do this,
let's press seven, let's grab this one now, and let's press Shift D and Y and bring a
copy out like this. Let's rotate that, so
let's press r90 Enter. And if I just scale
this down now, it's going to affect our bevels. So let's go ahead and
tap into Edit mode. And let's go ahead and press S and go into wire frame,
grab all these bevels, all those vertices there
and bring this up like this to about there
like that, I think. Let's do the same on the back. Let's grab all these vertices
and pull this back into position and put that
there about there. Okay, let's press A for all, let's go ahead and bring
that overno and put that about there like that. Okay, let's go back
to solid mode now. And also, let's tap
out of Edit mode. And let's go ahead
and make sure that the origins are set to the
geometry. There we go. And now let's go ahead and
press Shift D and X and bring a copy over now to
something like that, I think. Now I'm going to repeat that
command, so to do that, I'm going to press
Shift and just carry on pressing Shift to get this to the other
side like that. And, I mean, it may not
be in exact same gap, this side here to
this side here, but actually doesn't
look too bad. Okay, so we've got our
dividers in our drawers, and that's looking pretty good, and all our bevels are
applied to everything. Alright, so there's one last thing
I want to do with this, and I want to put some
dovetails on this here. So I think all we need now is maybe this one and
this one for a moment. I'll probably end up copying this component back over to the other side in
a little while. So with those two selected, let's go ahead and
hit the forward slash to isolate them and
press it again. Okay, so let's
grab this one now, and let's tap into Edit mode. Oops. And let's press two
so we can select edges, grab an edge here,
press controller, and then go ahead
and bring that back now to about like that. Okay, now we can
grab this edge here, and we can press Controller. Let's roll the mouse wheels. And let's get, I would
say about that many. Let's see how many that is. That's six. Do I want to
make this an odd number? So I'll have one dovetail there, one there, one there. I think even numbers is right, but I'm going to increase
that to an eight. And there we go. Let's go ahead and grab all
these vertices here. And then let's take
let's work this out. All of these ones here, and then these ones here, and then these ones here. Let's turn this around
and make sure we've got all the vertices,
those ones, those ones, those ones, whoops, and those ones. And then once we've got those, let's go ahead and take those up now in the Z axis like this. And put those about
there like that. Once you've done that, let's go ahead and grab these vertices. And now these ones, and these ones here, and then these ones here. Let's check we've got them
all on the opposite side. Grab these ones and these ones, and then these ones. And now let's go ahead
and pull that down now in the z axis to
something like That. Let's have a look at that
and see how that looks. And yeah, I think
that looks good. I think that's absolutely fine. Okay, so let's tap
evading mode with that. And we don't see anything
really at this stage of that. But once we apply
textures to that, that'll make a lot more sense. Alright, so I think
the next thing we can go ahead and do is
bring everything back, so let's tap in let's hit
the forward slash key. And for a moment, maybe, let's go ahead and hide
this stone here, so I'll press H to hide that. And I just need to make a copy of that one and
bring it over here. So let's grab this one here. Make sure the origin is dead center with the
cursor here and it is. So we can go ahead and grab
this one and delete this one. Grab this one here, and we can press Shift D, right click twice, and go ahead
and mirror in the X axis, and there we go. That's cool. So again, maybe we'll
just tap into Edit mode, make sure these vertices are all correct, and they
look good to me. Okay, so there we go.
That's our draw done. So I think in the next lecture, we've got one last little
job for our kitchen, and that is the handles. We need to make a
handle and we need to apply it to all of the faces, all the doors and the drawers. I think that's quite a
cool thing to do, as well. That'll be one last thing to
make our kitchen really pop. Okay, so let's go ahead and we'll do that in
the next lecture. Shall I bring my stone
back? I'll do that. Old H. There we go. Alright, so let's
go ahead and do a save. Let's try and
remember to do that. Let's press Controls
and save our progress. And I'll see you in
the next lecture. Thanks very much. Bye bye, Fen.
50. Lecture 49 The Handles: B. Okay. Hello, and
welcome now to Lecture 49. And in this lecture, let's go ahead and make
and then distribute our handles onto all
our kitchen cabinets. And I think that'll
be a nice little finish touch for all of those. But there's one thing
I didn't do with the drawers or with the drawer in the last
lecture, which I'd like to do. So I need to actually
create a group and drop all the objects for that drawer into it
so let's do that. Cause I think right now, those drawer components
are living in this Cooker Hood
file right here. So let's go ahead
and organize those. So I think for a minute,
let's go and hide. Let's just press H and
hide the top like that. And now let's go to cabinets, open this one up, and let's
hit the little AddFle icon, and there it is cabinet eight. Let's double click on
that. And let's call that draw components. There we go. G ends on that, and there we go. So let's grab these now. This one, this one, let's go through and grab all of them. And that one and that
one on the base, of course, and then
this one here. And with all selected, we could either just
drag them up in this case to draw components
or we could press M, and we could go
down to cabinets, and then we could go
to draw components. But in this case, I think I've
normally done it that way, so let's go ahead and
just drag these up. So I'll hold down the left
mouse button and just drag those into draw
components like that. Okay, so that's got that
a little more organized. Alright, so now that
we've done that, maybe I'll just leave that
top off for a minute. I don't think we
really need that. In fact, all we really
need is the cabinets. So let's go and hide the
walls and door file, as well. And let's go ahead and hide the cooker
and the Cooker Hood. So all we really have now is just the cabinets,
and that's what we want. Is there anything I
think the other thing I want to do, which
is something. This is something I actually get trouble for in
the real world. My wife tells me
off all the time for leaving cabinet doors open, and I've done it here. So let's grab this door here, and the pivot point is correct. It's at the back.
It's still correct. So let's just press Z, and now hold down
Control and snap this. And look up in the left
hand corner, you can see, at the moment, it's -45
degrees along the global. Carry on pushing that
in till it hits -90. There it is, and
now it's correct. Let's do the same with this one, we'll press and Z, hold down control,
and then move this. And this time, it's
in the positive and move this to 90 degrees. And there it is. There's
a cabinet doors closed. Alright, so now where
shall we start? I think I'm going to
apply my first handle right here because the curse
is already at this point, so it's a good place
for it to start. So let's press Shift A, and I'm going to make quite
a simple handle and mesh, and let's bring in a cylinder. I'll bring the vertices
down in this case, and I'll bring it
down to around 28. Now I'll rotate
it in the Y axis, I'll press y90, Enter. Now I'll press three to
see this from the side. And I'll press, and
I'll go to Y frame. And I'll press S, and I'll go ahead and scale this
down now like this. And we can see the
dovetail draws out. So we get an idea of
the size of this. I'll go ahead and
scale it down a bit more to something
like that, maybe. And let's go ahead and go
back into solid mode now, and let's pull that forward. Maybe press seven to
see this from above. And let's have a look at this. I think scale is quite important with this to make sure
that we're looking good. So I'll go ahead and press S and scale this down a
little bit more to maybe something like that is about right. I'll
press seven again. And I'll go ahead and scale this up just
in the X axis now. So I'll press S and
X and scale it up, and I'll go again,
S and X and go ahead and scale this
some more like that. I'm going to press one on
numpad to see this from the front and just consider the size and the scale
now for a moment. So I think overall, I'm happy with that in the X axis. I think
that's quite nice. It's taking up a nice amount of the draw because we need to consider it's going to
be on the horizontal as well on these drawers. So I think that's good. I think I'm going to go ahead
and scale it up just in the Y and the z
or scale it down, sorry, but I'm going
to leave it in the X. So I'll press S, and
then I hold down shift, and I'm going to go ahead and
press X, and there we go. And now I just want to scale it down just a tiny bit more. Let's see what that's like.
Hopefully that's cool. Alright, let's press
seven again now. And the next thing I
want to do, maybe, is let's go ahead and bring
the cursor to this now. So let's press shifts and
cursor to the selected. And now let's go ahead and
make a duplicate of this. So let's grab it and
let's go ahead and press Shift D. And let's rotate that. So let's press r90, Enter. Okay, let's tap into
Edit mode with that one, and let's press and
let's go into wireframe. Let's grab all
these vertices here now and just go ahead and
pull these out like this. I'll bring those to
about like that, and I'll grab these ones, and I'll go ahead
and bring these ones in now to about there like that. Let's go back to solid mode, and I think the next
thing I want to do, I'll tap out of Edit
mode for a moment. I want to scale it down, but this time not in the Y, so I'll press S, Shoal
down shift, and press Y, and now go ahead and scale
it down in the Z and the XT something like that, I'd say let's have a look at
that and see how it looks. And yeah, I think
I'm happy with that. So that bit there
is what's going to hold the handle away
from the cabinet, and it's sort of the
mounting place for it. So I want two of those. So
let's press seven again. Let's grab this
and move this over now to something like this. Let's go ahead and
press Shift D and X, and just bring a copy over to the other side and
position that as well. Oh, yeah. That's cool. So I think the next
thing I want to do is let's have a look at the
scale on this and it's out. So let's press Control A and apply the
rotation and scale. And let's do the same
for the other two. Control A, apply rotation and scale, and then
this one as well. Control A, and apply
rotation of scale. Let's tap into Edimde
with this one, and let's press three
so we can select faces. Grab this face here, and then press two, and we'll
have selected that edge. Let's do the same
with the other one. Okay, so now we've done that, let's press two so
we can select edges, hold Alt and just select
all of that edge, and then hold Shift and Alt
and select all of this edge. Now let's go ahead
and press Control B, and let's try
beveling that edge. Let's add some more
vertices to that, and we'll make it something
like that, I'd say. So I've got four
segments in there. There we go. That's
looking good. And these ones, I don't
think it's going to be necessary to bevel those,
so we'll leave that. Okay, let's tap out
of Edward with that, and let's right click on it, and let's shade Auto smooth. And let's do the same with the shade auto smooth. And
then this one is what else? Shade auto smooth. And now let's go ahead and
make this just one object. So let's grab maybe this one, this one, and then
finally this one. And let's go ahead and
hold down Control and press J and join those
into one object. Okay, let's go ahead
and find this now. And you can see by this little
icon here that it's got this square around
it that this is where this handle
currently lives. So let's hit the drop down on this and find it,
and there it is. And let's double click on it, and let's call it the handle. I'm doing that because
we're going to have a lot of duplicates of this, so it'll be good to
know what they all are. I think once we've done that,
we can go ahead and just drop that just into
the cabinet file. So I'll just go ahead and hold down the left mouse button and bring that and just put it into the cabinets
file like this. So it's kind of its
own place there it is. So I'll compress the
drawer components now, and there's the handle. In fact, there's
so many handles. I might even just
create a file for this. In fact, I think I
will. So I'll click on Cabinets and we'll hit
the little ad file thing. And here it is, Cabinets nine. Let's get this. And let's
call this the handles. There we go. And
let's go ahead and drop that handle now
into there like that. Okay, so now we've done that, let's go ahead and make
some duplicates of this. I'll go ahead and press one, and I'll select this item here. I'm going to go ahead and
press Alp D and Z and bring a copy down now and put it dead center of this
one like this. I'll do the same again.
I'll press Alt D and Z and bring a copy down now to the
center of here like this. Okay, let's select both
of these handles now, and let's go ahead
and take those in until they touch
that surface. I find the best way to
do it is you can see, by the way, the color changes. You can see that
there that they're already making contact
with the surface. So I go past for a second, and then I pull it
back, and it gives me a good gauge of
where I need to be. And there we go. That's cool. Okay, so now that we've done
that, I'll go ahead and take this top handle here and I'll press one again to get us
the orthographic view. And let's go ahead and
press Alt D again and X, and bring a copy
over now like this. And let's go ahead
and rotate that. So let's press r90, Enter, and then go ahead
and bring that one down to something like that. Let's go ahead and press
Alt D one more time and X, and let's bring a
copy over now to the other side like that. And there we go. That's cool. So we can do now with making a set exactly the same and
putting them on this side. Okay, so the next thing we
want to do is maybe grab all these handles like this. And let's go ahead and
make a copy of those. So let's press Shift D and Y and bring a
copy out like this. And now with them still
selected, let's rotate them. So let's press rz180, enter, and let's go ahead and take those now to the
opposite side like this. And let's go ahead and
put those in position. So let's just pull those out on the Y axis until they
look about right. Which is about there
like that, I'd say. Okay, so that's all the
handles down the island. What's next? Let's maybe grab just like this
handle here now. And let's press one to
see this from the front. And let's go ahead
and press Alt D, in this case, and X and
bring one over like this. We can press seven now to
see this from the top, and we could bring this
over now like this. Oops. And we could press
S and go into wire frame. And go ahead and
position this one now. Where does it does want
to go there actually? He wants to go here, put
it here on this side. And let's have a look
at that one now. Let's press three to
see this from the side. And let's take
this up like this. And put that I would say
about there like that. And let's press
one to see it from the face and center that to there like that.
Okay, that's cool. Let's go ahead and
press Alt D now and X and bring a copy over
now to here like this. And now let's select
both handles, and let's go ahead and
press Alt D again and X and bring a copy over now
to here like to there, I think that's and this one
doesn't seem quite centered, so I'll just go ahead and grab this one on its own and just pull that back a little bit more in the X, and let's
have a look at those. And they're looking
good now, so I'll grab these four handles. Oops. There it is. D select that one. And now let's go ahead
and press Alt D, and X and go ahead and bring a copy now over to this
side now like this. Let's go ahead and
position those nicely. And there we go. Let's pros and let's
go back to solid mode now and see how that's
looking. They're looking good. I'm liking those
handles. That's really adding the nice detail. So obviously, we've got a
lot more handles to do, but I think I've shown
you the process. We've set up the folder
that it needs to go into, and we've closed the
doors on the cabinet, and we've created a nice amount of handles and
duplicated them around. So all that really remains is to carry on distributing
the handles onto the faces of
the drawers and the cabinets all the way
around these ones as well. So here, maybe you'd want one here and one here since
this is a fixed rail here. One horizontally here. And of course, you've
got the ones for the drawer here and
the cabinets here and maybe just scale
down the version for these ones so that
they're not quite so long. Okay, once we've all done that, let's go ahead and meet
up in the next lecture. Don't forget to do a save after. All right. Thanks very much. I'll see you when
we've all done that. Bye bye for now.
51. Lecture 50 The Lamps Part 1: Hello, and welcome now to Lecture. What
lecture are we on? Lecture 50. Wow. We're
getting through these though. We basically we're at a stage where we're almost at
the end of the modeling. We've just got a few
little last things to do, and then we're going to start
moving on to the texturing. Maybe three or four
more lectures, and we're sort of done
with the modelling. But I'm getting ahead
of myself. Let's get the last, the
modeling done first. I'm always excited this stage to get to the
texturing because at this stae everything
really starts to pop, and I love that bit. But anyway, let's carry on with the modeling and just
get this finished. So we've got all the handles in position now, and
they're looking good. And I'm sure you've
done the same. Got sort of two handles on this cabinet and
on this cabinet, a little horizontal one on that. And I reduce the width of the handles on these little
narrow drawers here. But, yeah, they're
all in position. So in this lecture, I've brought the
image editor back in because I want to
show you these lamps because this is what
we're going to do for this lecture and
possibly the next one. So I just wanted to show you the basic shape of
them before we start. So let's go ahead and
make a start on that. So I think the first
thing I want to do is go ahead and
create a new folder. So I'll go ahead and collapse
the cabinets folder. And I'll click on
scene collection, Add New folder,
double click on it. And let's call this the lamps. And whoops capitals on. Sorry. Click Enter. There we go. Leave that selected
and go ahead and select this now
and press shifts, and let's bring cursor to
the selected. There we go. I'm sorry, I'm going to
click on the lamps again. And once we've done that, let's go ahead and bring in a sphere. So let's press Shift
A and mesh UV sphere. On the segments here, I think I'll go ahead
and leave that a 32. I'll be happy with
that. So let's press one to see this
from the front now. And let's try and
scale this down. So let's press S and
scale this down some and maybe bring it up to approximate height,
something like that. And then kind of figure out what size we want
our lamp to be. And I think that's
actually not too bad. I'll leave that
just about there. Okay, once we've
done that, let's tap into Edit mode with it. And let's press three
so we can select faces. Let's press Z and
go into wireframe. And let's go ahead and grab those vertices
there like that. And let's press X and go
ahead and delete those faces. Okay, so we've got kind
of this shakedown. We can go back to
solid mode now, so I'll press SD and go back. And the next thing
you want to do is select this ring of faces here. So I'll select one like this
and I'll whole control, move along to about
there and select that and just move along until
you put all those selected. Once you've done that,
let's go ahead and press E to extrude and extrude that up in the z axis to something
like that, I would say. There we go. So there's our basic lamp
shape. It's that easy. So now that we've done
that, I just need to sort of taper the neck in in the middle and to
give it a kind of waist to line on the
neck. So let's do that. So let's press two,
grab an edge there, press controller to
put a cut loop in, and let's scroll the mouse
wheel to put two in like this. Let's hold Alt and
select this one, and now take that one up
close to the top like that, and now hold Alt again and grab this one kind of bring that
one to the middle like that, and then press S and go ahead
and scale that down to get something more like that.
There we go. That's cool. Okay, let's tap
out of Edit mode, and let's check the
scale and it's out. So let's press Control A
and apply rotation scale. And let's add a Subdivision
Surface Modifier to this. So let's add modifier, generate and Subdivision
Surface Modifier. Let's increase the Yeah, let's increase the levels view book to two and see
how that looks. And that just rounds off
that top edge nicely. Okay, so the next
thing we can do is maybe do a shade auto smooth. So that's right click
and shade auto smooth. And let's try
increasing the angle just to get rid of that
little square edge there. And yes, there we go. That's that rounded that
edge off now. That's cool. That's looking good. So I think the next
thing I want to do is add some thickness to this. So let's grab it and let's
add another modifier, generate whoops, and let's
add a solidify modifier. And that's looking good. Am I happy with that thickness
or shall I reduce it? Maybe I'll reduce
it a little bit. So I'll add an extra
zero in here, enter, and let's turn that
one into about a six. And there we go. That's better. Make sure that
even thickness is applied. And there we go. Let's go ahead
and apply these modifier. So I'll start at the
top. Let's apply the Subdivision
Surface Modifier, and then let's go ahead and
apply the solidify modifier. Let's select it again and
let's tap into EdmaHo mode. And let's just round off
this edge and this edge. So let's hold Alt
and select that one, then hold Shift and Alt
and select that one. Let's press Control B, and let's bevel those edges slightly to something like that, maybe reduce it a bit. There we go. That's
about right to me, something like that. We'll leave it on three
segments, and there we go. There's our basic lamp shape. Okay, so now we need something
to hang this lamp from. Let's work on that next. So I think the first
thing I want to do is bring the cursor to the center of the
top of this lamp. So let's select it and
tap back into Edit mode, and let's find that
center vertices. So let's press one so
we can select vertices. Grab that middle one there. Let's press Shift S, and then cursor to the selected. There we go. That's cool. So we can tap out of
Edit mode with that now. And the next thing I want
to do is go ahead and bring in a circle. So let's go ahead and press
Shift A and mesh and circle. In fact, let's go ahead and
isolate these objects now. We'll just have these two. So let's select them both
and hit the forward slash. Let's press seven so we
can see this from above. Let's just select
the circle now, and let's press S and
bring this down now to something like
that for a second. We'll probably scale
it down a bit more. But first, let's just
scale it down on the X to turn this circle into a
bit of an oval shape. So let's press then X, and bring this in like this to get a bit more of an
oval shape like that. Okay, let's rotate that
in the X axis now. So let's press RX 90, enter, and let's scale it down till it fits onto our top here. So let's press S again and
go ahead and scale this down until it looks something like that.
I think that's cool. Alright, so the next
thing I want to do is turn this simple circle into more of a have
some thickness to it to turn it into a
link, a chain link. So let's select the item, and let's right click and let's go ahead and
convert this to a curve. Soon as we did that, this
little icon turned up here in the object data
properties, let's click on that. And let's come on down
here to bevel settings, and let's go ahead and
increase the depth on this to get some
thickness like that. And our shape isn't
perfectly circular. I think it's because
our scales out. So let's press Control A, and apply rotation and scale.
And yeah, that'll fix. Let's up the resolution
slightly maybe to a six just to get a bit more detail on
it. Am I happy with that? Maybe I'll take it
down a little bit more to something let's zero
out and have a look at it. Maybe I'll scale it
down a little bit more, press S and scale that down. And maybe I'll just
reduce the depth on this. Maybe that's too much. Let's
have a look at that now. And yeah, I think
that's nice, though. I'll leave that like that.
Okay, so once we've done that, maybe we'd go ahead
and name this. So let's call this chain link. Let's call it chain link. So I'll go ahead and type that. And go ahead and press
Enter, and there we go. With that done, let's go ahead
and make a copy of that. So let's go ahead and press Shift D and then
Z and bring this up like this until it's nearly touching the
other one at the very, very center like that. In fact, let's take
it a bit more. I'll go ahead and
press G, and then Z go ahead and take it up a little bit
more to about there. And now I want to
rotate it 90 degrees. So let's press rz90, Enter. All right. That's cool. So let's actually grab this one now, and we can go ahead and
convert this one back to mesh. So let's right click, convert that back to mesh like that. And now let's go ahead and do a shade or smooth on that one. And there we go.
That's looking good. I think this one, though, I want to reduce the
size on this one. So I'll just press S and go
ahead and scale that down to something like that and then bring it back
into position like this. And do I want to increase
the depth on this? Let's have a look.
Let's just click once. Maybe take that to an
eight, and there we go. I think that's pretty cool now. Alright, I'm going to go
ahead and convert that now to a mesh, and let's go ahead and do a
shade oro smooth on that. And now that we've done that, let's go ahead and grab this. And let's go ahead
and make a copy. Let's press Shift and Z and bring a copy up now to
about there like that. And now let's rotate
that in the Z. Let's press Z, 90, Enter. Okay. That's cool. Let's go ahead and check the
scales on these. Let's grab this one.
Let's press Control A, and let's do a
rotation and scale. I'll grab this one. Do we
need to do the same we do? Let's press Control A, and do a rotation and scale. Now I want to join
these items into one. So I'll select both of them, and I'll go ahead
and press Control J and join those into one item. Okay, now we need
to take this chain up until it's all the
way to the ceiling. So I guess we need to
bring back the ceiling. So let's open the roof, the walls and windows and
doors folder. Click on this. And let's go ahead and bring back the
roof panels like this. Oh, let's hit the forward slash to bring everything back first. Alright, so what do
we want to do now? The next thing we
want to do is maybe grab this chain like this. And I want to add an array
modifier to this now. I'm not sure if we've used
the array modifier or not. What the array modifier does is multiply an object in an axis. So we're gonna multiply
in the Z axis, and well, you'll see
it in action, Disney. So let's add the array modifier. So let's go over to modifiers and add modifier,
generate and array. And you can see it's already
duplicated the object, but it's duplicated in the X axis, and that's
not what we want. So let's take the X axis
to zero. There we go. And let's try taking it
up in the Z axis now. Just click the little button there and take it up like this. And how is that looking? Obviously, that's out.
Let's come down one. And that's just see
a little gap there. Let's see if we can better that. So double click on this and just add a five behind the nine. There we go and click Enter, and let's see how that looks. And that's a lot better. Maybe
we could make that a four. Let's try that. Make that five a four and see how that
looks, and there we go. I think I'm happy
with that. Or, I'm sorry, let's take
that to a three. That would look even
better, wouldn't it? Let's click on that four and
make that a three and click. And there we go. Now
I am happy with that. Once we do that, all we
need to do now is go ahead and increase our
selection, increase our count. So just go ahead
and click on this now and take that to the top. And I think we'll just let
it go ahead and fly out of the roof. And there we go. That's cool. So once
we've done that, we can go ahead and apply
our array modifier. Okay, so I think we'll call
it a day with this lecture, but in the next
lecture, we'll add some more details to this. I think what I want to see is a cable sort of weaving
its way up the chain. I think that would be
quite a cool effect. And this doesn't
look right here. We need to add, like, a
little detail up here, just where the chain
fixes to the ceiling. So I'll go ahead and
do that, as well. And then, of course, we'll
make a copy of this, and we'll go ahead and put that either side of the island, one here and one here. Okay, so let's go ahead
and save our progress. Let's press Controls. And I'll see you in
the next lecture. Thanks very much.
Bye bye for now.
52. Lecture 51 The Lamps Part 2: Hello, and welcome
now to Lecture 51. And in this lecture,
I want to have a power cable which
runs up this chain. But not only does it
run up this chain, it kind of weaves
through it, as well. So let's go ahead and do that in this lecture.
See how we go. So I think the first
thing I want to do is, let's go ahead and
just grab the chain on its own and the lamp, and then maybe that
little extra link there. Let's go ahead and isolate that. And let's go ahead
and press one. And let's just sort of get this in position,
something like this. And now that we've done that, let's go ahead and
bring in a path curve. So let's press Shift A. And curve and path curve. Soon as we got that,
let's rotate that. Let's press r90, enter, and let's go ahead
and take that up to sort of the top of
the chain like this. And where is the
top of the chain? It's kind of hard to find, but it's about there like that. Once we've got that, let's press S and start scaling this down. So it's really quite short,
something like that. And now we can go ahead and
tap into Edit mode with that. For the moment, I'm actually
going to go ahead and delete maybe these
first two vertices. I'll grab those two and
then I'll right click and I'll go ahead and dissolve
those vertices though. Now at the moment I'm
seeing it looking down the Y axis and I need
two views on this. What I'm going to
do is just come over to this corner here. As I sort get close
to the corner, just hold down the left
mouse button and drag this across like this to create a second
window like this. Now, in this one, just
select the chain. Let's tap our meta
mode, actually. And let's go ahead and
select the chain and our curve and our lamp. And with those things selected, let's isolate that view as well. And you can see here we're looking down the Y axis as well. So let's press three N
to look down the X axis. So now we're looking at it from two angles, and
that's what I want. Okay. So now what do we do? Let's select this one here. Let's select our Path curve. And let's tap into Edit mode. And so now they're
both in edit mode. Let's go over to object
data properties, and let's come on
down to the bevel, and let's go ahead and
click on this to put some diameter to our path curve. Let's zoom in and see
what that looks like, and there we go. That's cool. So I think the first thing I'm going to go ahead and do is just pull this over a
little bit like this. And then I'll go ahead and press E to extrude an extra vertices, and I bring this down and
then come along like this. Putting in quite a few
vertices as we go. Now let's have a look at it and see how it looks in this one. And what I want to do is
come through this link here, I think. This will
be the first one. So we can actually
just maybe grab all of these here and just shift them over slightly to about there
like that. And there we go. That's sort of the first
jumping off point. Alright, now that
we've done that, let's just grab this
link here and let's press EFA extrude and just
carry on pressing it. And then just go ahead and
weave through that leg, and then come on down again. And I'm not going
to do every one. Okay, I'm just going to bring this screen up a little bit. I'm going to press E, and now
I'm going to angle through this one like this and then
carry on bringing it down. And now I'll sort of
angle through this one. And I'll carry on ing this down. E, E, E, and now on this one, I think I'll angle
through this one. Maybe bring that a bit
closer. There we go. If I don't do enough
vertices in this, I'm going to get sudden sharp angle changes
in this curve, and it's going to
look unrealistic. So by putting lots
of vertices in, we'll have nice sort
of realistic curves. So let's carry on
going with this. It might take a moment. Let's press E, bring
this one down. And I think I'll go
through this one here, lots of vertices to
make sure we don't get too sort of a sudden
angle change on this. And now on this one, just carry on going down. And I'm just going to pull the screen up and let's go
ahead and go through this one. So I'll press E. Bring that through there like
that. There we go. And then bring this
one down here. Carry on going. And I think I'll come through
this one here now. Move Whoops. Move the
screen up like this, and press E. Maybe
come through here now. There we go. And let's go ahead and bring
the screen up now, and let's go down some
more and more press E. Carry on extruding. Maybe now let's come
through here like this. Ah, let's bring this
down some more. And let's go ahead and brush E. And maybe let's bring
this through here. Bring this down
some more and press E. And let's duck through here now. And let's carry on going. Let's press E. Bring
this one down. Maybe duck through this
one here and out like this. There we go. And there we go. Finally, we're
getting down to the lamp. Let's press E. And maybe
duck through this one. Bring that through
the center like that. So let's have a look at it here on this side and just
see that it makes sense. And if you ever want to sort of just to make it look
slow, more realistic, just tweak it in places, but I wouldn't make
any sudden sort of drastic changes like this. I'd make them all quite subtle. Just to give it that
extra level of realism, because, you know,
it's a power cable. It's never going to be sort
of perfectly straight. There we go. Maybe here, pull this one in a little bit. And yeah, I just add
a few details to it to try and make it a bit
more sort of realistic. Maybe one here like this, pull this one in a
little bit here. Little subtle changes. And let's see how that looks. And it actually looks like the whole thing
wants to go over. So I'll go ahead and tap out of Edit mode for a moment now. And let's see if we
can find the gizmo. And it looks like it needs to just pull over a little bit, so I'll go ahead and pull
that in like this, though. And is that good?
No, that's better. That's kind of pulled in, now, and that's looking
really good, see? Sort of weaving
through as we go. And, yeah, that's looking good. It does take a little bit
to get this looking right. I think now we've got it. That looks really
good, weaving through, check that it's sort
of in the right place, and that's looking good.
Woof. That's cool. I was worried for a minute
there that it wasn't working, but it seems to
have worked nicely. Okay, so let's grab this, and let's consider one
last time the diameter, the depth here and the bevel. Do we want to reduce
this a little bit? Maybe bring it down to an eight? Or a seven, is a
seven looking good? Let's zoom out and
have a look at it. And I think that's looking
good there like that at a seven or maybe an eight. I think I'll go with an eight. Okay, let's just go
ahead and tap into Edit mode one more
time with this. Maybe let's go into
wireframe and just have a look at the
vertices count on this. And let's have a look
at bringing down the resolution preview
to maybe a six. Here in this resolution, as well, maybe just
match that with a six. And now let's tap back into
solid mode to see this. And just see how that's looking. Are there any sort of
sharp turns to this, or is it all looking
quite fluid, which always seems to be here. There's nothing there's
no jagged curves. Everything's just looking quite sort of natural, and
that's what I want. Yeah, I'm happy with
that. That's cool. Okay, I'll tap out of Edit mode, and then I'll right
click and I'll go ahead and convert that to a
mesh, and there we go. There's our cable
now in position. Okay, so I think the next thing we can do is go ahead and bring everything back. And with this one, as well, let's go ahead and
bring everything back and see what we've got. Okay, let's go into wire
framing this view here. And with everything selected, do we have this little
link here, as well? Let's grab that one, too. Let's go ahead and press
Let's press Alt D and X and bring a copy over now
to about here like this. And let's do the same again. Let's press Alt D. And X and bring another copy over
to about here like this. Okay, so now we've got our three lamps in
position, and that's cool. I think this window now
we don't need anymore. So go up here to view
and click on this. Come down to area
and close area. There we go. Back
to One view again. That's cool. Okay, there's
one last thing I want to do. Well, first of
all, I want to see the roof structure
in place here. So let's come to roof structure here outliner and turn that on. And yeah, everything's
looking good. I wondered if we'd put like a beam down the middle
here of the ridge, but we haven't, so
that works out. So I think the next
thing we can do is go ahead and
bring in a sphere. So let's go ahead and
press Chef A and mesh, and let's bring in a UV sphere. We can kind of keep the vertices
quite low at around 26. And with that now, we can
go ahead and isolate that. We can press one to
see it from the front, and we can go ahead and tap into Edit mode and we can
press this head, and we can go into wire frame. Let's press three so
we can select faces. And let's go ahead and delete
maybe this many faces. Let's press X and go ahead and
delete faces. There we go. We can tap out of
Edit mode with that and we can go ahead and
bring everything back now. And let's press one to
see this from the front. And let's go ahead and
bring that up like this. And let's press S
and scale that down, of course, to
something quite small. Let's go ahead and sort of
put that in position now, something like that, I think. Let's press seven to
see this from above. And yeah, that's in
the right position. It's directly beneath the lamp. Let's press one again. Maybe just press S and scale
it down a little bit more again and just bring that down a little bit on the z to
about there like that. Okay, so let's go ahead
and press Shift D now and X and bring a
copy over like this. Let's bring that down like this. And let's go ahead
and rotate this now. So let's press R and
rotate that like this. Bring this over slightly
and bring it down, and there we go. That's cool. Let's do that one last time. Maybe we'll just grab this
one and we'll press Shift D and X and bring a copy over
now to this side like this. And let's go ahead
and rotate that as well to something like this. And now let's just
sort of shift this around a little bit until
it's kind of center. And there we go. That's cool. Let's grab everything
to do with the lamp. So I'll grab that swoops. That's lamp. That's
Control D like that. Grab that and then this
and these here as well. And all of these and this. And let's just see where this
is in the outliner and make sure that it's all in lamps
which it is, so that's cool. Okay, so that's
kind of that done. Let's press Z, and let's
go back to solid view. And yeah, there's our
lamps in position, and I'm really
pleased with those. I like that cable and
the way that's looking. Okay, there's something
wrong there. I see that now. I think what I've
gone ahead and done is sort of leveled up these things here with the underside of this beam,
so that's not correct. So let's grab this
one and this one. And let's press one again
to see this from the front. And let's go ahead and pull these up into
position like this. And how is that looking?
Is that better? These will never really be seen, so I'm not overly
worried about them. They're just something just to look a little
more convincing, but I'm not overly worried. And that's that one there.
And then, yeah, that's fine. We could go ahead and do a shade oro smooth on these, actually. Grab this one,
shade auto smooth, and then this one,
shade auto smooth, and then this one, as
well, shade auto smooth. And there we All right, so there's our lights in place, and that's looking
really good, actually. Let's go ahead and
bring stuff back. Are we missing anything else? Let's bring the cooker back
in and the Coker hood. And let's look at our scene overall for a minute
and see what we think. I think that's
looking really good. I think at some point, we should scale
down these beams, not in Z obviously. We don't want to
adjust the height, but we do want to
sort of scale them down in the Y and the axis. And then I want to also
put a beam going up to this one here
because that would make more sense why that
beam would be there. It would be carrying
the weight of this truss above and the
same here. So we'll do that. And I'd like to put some
sockets on the back wall here, some power outlets
on both sides, just to add an extra
little detail. And then after that, we have
curtains to put in here, where our bifolding door will
go, so let's turn that on. So there'll be some curtains
just covering the corner of this bifolding door and doing the same on
this side as well. And then the very final last
little model detail will be to put something on the outside of this
bifolding door, a little bit of
decking or a patio. Also a wall coming this
way to suggest when you're standing in the
kitchen that there is actually a house and
not just a kitchen, that this is part
of a larger house. So we'll put a kind of
returning wall in here with no other details just to suggest that there is
more than just a kitchen. So I think it's
looking awesome now. It's looking really
good. We've got a really, populated scene. So in the next lecture,
let's go ahead and put our extra sockets in in our back wall and maybe as well scale
down these beams. Let's do that in the
next lecture. All right. Thanks very much. I'll see
you in the next one. Oh. Let's do a save. Let's press Controls and go
ahead and do a save. I'll see you in
the next lecture. Thanks very much.
Bye bye for now.
53. Lecture 52 Refine The Roof Beams: Hello, welcome now
to Lecture 52. And in this lecture, I want to have a
lecture of kind of refining our roof structure, our beams and everything
because these are such an important feature
of our finish render. They will look really good. So let's spend a little
bit of time making sure that they're really as
good as they can be. The things I want to
do is these columns, I think, aren't proportionate
in scale to the rest. So when I reduce
the scale in these, and of course, these ones
on the end, as well. And we have a little bit of
repairs to do to our joinery. These beams here are
coming up short. And there's a few other sort of changes to make in
the corners here. I want a vertical sort
of beam to run up from this point here to this
upper sort of joist here, this truss, this roof beam. Because architecturally, that'll make a lot more
sense because at the moment, these columns truly aren't
supporting anything. So if we send a vertical
one up here as well, this will make a lot
more sense structurally. So let's go ahead and do that
so that it's looking right. And the other thing I want to do is way back there
at the chimney. At the moment, this
one here and this one here are sort of flying
into the brickwork. That's okay, but I want to create holes in the brickwork
for these kind of beams to run into because it's
one of my sort of things that really bugs me is when objects just fly
into each other, but they're not cut through
when we apply textures, they just don't look
very realistic. We need those tiny
little shadows to exist between surfaces to create
more depth and more realism. So let's go ahead
and cut these into the brickwork rather than them just occupying the same space. So we'll do that as well.
So let's have a lecture of tidying up our roof
structure so that it really pops
when we render it. Okay, so let's go ahead
and make a start on that. So I think first
thing is we need to isolate just a few items. So I think straight away, let's go ahead and hide roof
lights on our small windows, side door, roof panels,
let's hide those. We need the chimney. We
can even hide our walls. And then we can also hide our kitchen cabinets and cooker and our cooker
hood and our lamps. So that's kind of all we've
got left in our scene. So where shall we start? I think let's go ahead and start here with our chimney.
Let's fix this first. So let's grab the
actual brickwork, the chimney here, and let's look at the scale,
and that's all good. And let's go over
to our modifiers tab here, and we have a bevel. Let's just compress this
just to give us some space. Let's add a modifier
and generate, and let's go on boolean. Okay, let's actually just
hit get the little dropper, and let's just select
this beam here like this. And I can't tell if
that actually works. So I think I'll just
grab this joist here, go to roof structure, find it, and go ahead and
hide it for a minute. Check that that worked.
And it did. That's fine. So we can go ahead and bring
that one back for a minute. And let's repeat that.
Let's grab this again now. And let's go ahead and
apply that boolean. And let's just add
another boolean to this. And let's get the
little dropper. Maybe we'll put it on
this one this time, and I can see this time
has actually worked. So I'll go ahead
and apply that one. We've got one more to
do for this one here, so let's go ahead and add the boolean modify
one more time, and we'll hit our
little eyedropper and we'll select
this one like this. Let's check that this
one actually worked, let's hide it for a moment. And it did, there we go. So let's go ahead and
apply that boolean. Okay, so I think
now for a moment, we can actually hide
our roof structures and see what we've got here. And let's go ahead and tap
into Edit mode with this one. I don't think we need any of these face panel or
these back faces, so let's select all of these. And let's go ahead
and delete these. So we'll press X,
and we'll go ahead and delete faces,
and there we go. We can expand on that now. We can actually grab
maybe this one, this one, and this one, and we'll
get rid of these as well. And let's press X and go
ahead and delete faces. And we've still got a few left. So I think I'll just go ahead and just grab those like that, and now hold down Control, Deselect those ones, and I'll press X and go ahead
and delete faces. One more time. Grab maybe
those ones and just deselect those and press X and
go ahead and delete faces. There's even one
there by the of it. Maybe that's a curve.
I'll grab there. We go grab that one,
and I'll press X, and I'll go ahead and
delete edges this time. We'll get rid of
these in a minute. Press X, and go
and delete edges. There we go. We got rid of that. I want to do the same here. Let's grab these here and sort of deselect
these ones here. So we just have those
sort of ones there. I want to deselect
that one, too. Go ahead and press X and
go ahead and delete edges, and there we go. That's cool. That's what we want. We
still have a bevel on there. Let's have a look at our bevel. Let's decompress this now. And let's see if we can
increase this bevel. Maybe one of a slight more
bevel detail on that. Maybe that's good. And
we have four segments, and I think that's good now.
I think that's looking good. We have a bevel on this edge. We've got bevels all around. I think I'm happy with that, and I'll go ahead and
apply that bevel now. So I'll go ahead and tap out
of added mode with this, and now I can apply that bevel. There we go. That's cool. So we've fixed the first thing. Let's go ahead and bring
back our roof structures. And see what we can do beams
with our columns next. Let's fix those. So I think, first of all, I'll go ahead
and delete those three. Let's go ahead and press delete those one. So we
just have the one. And let's select this now. And let's press S. Hold down, shift and press Z so that we're not going to scale it
down on the z axis. We want to keep the height. And now I'll go ahead
and just scale this down a little bit to
something like that. There we go. That's cool.
I think that's better. We could actually
just for a minute, go ahead and bring back
some of our walls, just to sort of get a
feel for that and see if that looks about right.
And I think that's better. I think that's
looking a lot nicer. Okay, I think I'll
leave the walls in position now for a while. So let's press seven to
see this from above. And we need to reposition
the other columns. So I think let's
go ahead and turn on our reference images. And let's press S and
let's go into wireframe. Let's select this one here now. I'm not going to use
the old decommand. I'm going to use
the chef decommand. And the reason being is I want the textures to look slightly different
on each column. So if I use the ltd when we
apply textures to the one, we'd apply textures to them all, but in an identical manner,
and I don't want that. I want to be able
to sort of change the textures on each one
because they're such a feature, it won't look realistic if the wood grain and
the patenation is the same on all of them. So in this case,
let's press Shift and X and bring a copy over to here and put that just there like that. And let's
do that again. Let's press Shift and X and
bring a copy over to here. And one last time,
let's press Shift D and X and bring a copy over to here. And there we go. That's cool. Let's go back to solid mode
now and see what we've got. We can go ahead and turn
off our reference images. And I think the next
thing we can do is maybe just tidy
up these corners. This one here is coming up
short, so let's fix that. And then we'll need to
sort of just reduce the height of this
one. So let's do that. Let's select this one now, and let's tap into
Edit mode with it and press three so
we can select faces. And just select that face there. And now hold down Control
and press Plus to expand on your selection
until you get to there. And if you just tap one
too many times by mistake, just hit the minus key above the plus key
just to bring it back. When you've got
that, let's press seven to see it from above. And let's go ahead and pull that to where we actually
want it, which is about. About there, I think
it is about right. That's looking good to me. Alright, so now that
we've done that, what else do we need to do here? I think the next thing we
need to do is bring this one here down so it's
underneath this beam. So let's tap out of Edit
mode with this beam. Let's like this one and
tap back into Edit mode. And let's go ahead and maybe
just select this face here. But there's faces that we can't get to underneath this beam. So we've got two options. We can either just press Z
and go into wireframe and select those or we can come
up here and click on Select. Come down to select similar and then collect select Cplaner. And now all the faces on the same level on
the same plane, I have been selected. So
everything that is coplanar, of the same level on the Y and the X axis
have been selected. Once we've got that,
let's go ahead and press control or hold down Control and press Plus to sort of increase our
selection and select all those bevels and then
go ahead and bring this down now and put
that more like that. That's correct. No. Okay, so
what else do we need to do? Let's go ahead and do those same things on the other side now. Let's fix that next. So let's maybe have a look at this beam here. Let's
select this one. Let's tap into Edit
mode, select that face. Hold down Control and press Plus to expand on the selection. Press seven to get the
orthographic view from the top and go ahead and pull that one over to about there like that. Let's
have a look at that. Let's zoom in, and let's just pull that in a little
bit more to there. Okay, let's tap out of
Edit mode with that now, and let's look at
the next thing, which is just taking a
second to re center, let's just grab this one, tap into Edit Mode, and
select this face here. Come over to select
and go ahead and select similar and
select Cplaner. Hold down Control and hit the plus key to expand on
the selection to there. And now let's go ahead
and bring that down. To there like that. There we go. That's
cool. Let's tap out of Edit mode with that now, and let's see how we're doing. So I think the next thing
we need to do is go ahead and just put our beams in
here, like we talked about. So let's do that next. So let's go ahead and
just select this one, this one, this one,
this one, and this one. Let's hit the forward slash key just to isolate those objects. Let's press one to get a nice
orthographic view of this, maybe just select
this beam here. And let's go ahead
and press Shift D and Z and bring a
copy up like this. And let's go ahead
and rotate that now. Let's press R and go ahead and rotate that down
and just line it up with the grid
behind to make sure that it's reasonably
vertical, and there we go. And now let's go
ahead and bring this over now and put
that in position. Something like that
is about right. Okay, so now let's go ahead and tap into
Edit mode with that. And let's press and
go into wire frame. And let's press one so
we can select vertices. Grab all the vertices of this
sort of piece we've just rotated and now
press S, and then Z. And that's zero that by pressing the zero
key, and there we go. Let's go ahead and take that up now and put that in position. About there like that. Just about there
should be about right. And now we got this one to fix. So I think, in this case, let's go ahead and Boley and this. So let's press A to select all. And I'm just going to reduce
the width slightly on this, so I'll press S and Y. So it's ever so slightly
narrower than this one here. Okay, now that we've done that, let's go ahead and press set, and let's go back
into solid mode. And let's select this one here. And let's go ahead and add our modifier,
generate and boolean. And let's go ahead and grab our little eyedropper and
select this one like this. And there we go. That's cool. Let's go ahead and
apply that boolean. That definitely worked.
Grab this one now, and let's tap into Edit mode. And let's just select
this top face and then hold in control
and press Plus to expand on our selection
to there like. Let's go ahead and press X, and let's go ahead and
delete those faces. Okay, let's tap Edit mode with that one and
see how that looks. And, yeah, that's looking
good. So, what's next? Let's maybe select this one now. And let's get the cursor to
the center of that once. Let's go ahead and press Shift S and then cursor to the selected. Let's grab this one now, and let's go ahead and set
the origin of this one to the three D cursor.
Let's select this one. Let's press Shift D, right click twice,
and go ahead and mirror in the X axis.
And there we go. Now we've brought those over, and they're looking really good. Alright, let's hit the forward slash to bring everything back. And let's go ahead
and turn stuff on. Let's go ahead and hide everything and
see how we're looking. Let's even bring
back the cabinets. Let's maybe compress some of these folders so
it makes more sense. And let's go ahead and turn on our cabinets and our
cooker and our lamp, and let's see how
it's all looking. I think there's one more
thing I want to do, and it looks like this plenth here is another thing that's sort of occupying the
same space. Yes, it is. So let's fix that. So let's just select it and let's look
at the scale and it's out. So let's press Control A. And apply rotation and scale. And let's go ahead and add a Boole and modify
it to this one. Let's grab our little dropper and put it on this
column like this. And there we go. That's
cut round nicely on that. So let's go ahead
and apply that one. Alright, so that's made some
big changes to our sort of beams and made them all look a lot more sort of realistic. And I'm liking the change in
the scale of those columns, and I'm liking these
vertical beams. They're making a lot of sense. Alright, so on the next lecture, let's go ahead and create some sockets that
we'll put in well, wherever we think, really, but I'm going to put
them quite a few on this back wall so
that appliances can be used like mixers and
kettles and coffee makers. So we'll put quite a few on
this back wall here and maybe we'll put some inside
our larder, as well. Okay, so let's do that
in the next lecture. Let's go ahead and do a save. Let's press Controls. And this is a nice angle, isn't it? Just
here? I like this. I think when we do our
renders or our stills, when there's bifolding
patio doors in here, I think I will do an actual
render from this angle. I quite like this. Anyway, I'm going off track again.
Sorry about that. Yeah, let's call
this lecture today, and I'll see you
in the next one. Thanks very much. Bye bye, Fine.
54. Lecture 53 The Power Sockets: Hello, and welcome
now to Lecture 53. And in this lecture,
I want to do the little power sockets
that we'll put along the back wall here on both sides and then maybe just distribute them a few
other places, too. So, yeah, let's have
a go at doing this. So what I want to
do is I'll just bring in an image that
I can't, fortunately, share with you because of
sort of copyright laws, but this is a kind of
a basic UK socket. So I guess if you're
wherever you're living, you can sort of do a little
research and figure out maybe if there's
a different kind of socket that you
want to try and model. You've definitely got sort
of the skills to do it now. But I'm going to
go ahead and just show you how to model this one. So let's drag that
out of the way, and let's see what we can do. So I think the first
thing we can do is, let's go ahead and
hide everything. So let's just turn everything
off here like this. And let's just click
on scene collection, and let's add an extra one. And let's call this
the Power socket. There we go. What is that? A pot voir socket. Let's get rid of that
extra P, and there we go. Alright, let's go
ahead and bring the cursor down to
the world origin. So let's press Shift S and
cursor to world origin. And what should we start with? I think let's start off
by bringing in a cube. So let's press Shift A and mesh, and let's bring in a cube. And let's look at
the dimensions. And I think in the width, I want to make this
about 15 centimeters. So in the X, let's
click on this. And let's go for 0.15
enter, and there we go. And in the Z axis now, I want to make it about
what about 9.5 centimeters. So in this one, let's
delete what we've got. And let's go 0.09
Enter, and there we go. And I'm not so worried so
much about the Y axis. Maybe we just scale
it down the Y. So let's press S and Y and go ahead and
scale this down now to. Let's zoom in a little bit
on this and have a look. Again, S and Y and
scale this down to maybe something like this.
That should be fine. Alright, so let's
just grab this item, and let's hit the decimal
point to re center on it. And what do we want to do now? I think the first
thing we can go ahead and do is put
a bevel on this. So, in fact, before we even
do that, that's a good point. First of all, let's
apply the scale. Let's press Control A. I rotation and scale, and let's go ahead and put
a mirror modifier on this. So let's tap into
Edit mode with it and press two so we
can select edges. Grab this edge here, let's press Controller and put a loop down the
middle like this. Let's press three so
we can select faces, grab these faces here, and let's press X, and let's go ahead and delete those
faces. There we go. So the origins and the cursor
exactly when we want them. So the next thing we can do
is tap out of Edit mode, and let's go ahead and
add a mirror modifier. And there we go. That's cool. Make sure that clipping is on so the two
halves join nicely. And now we can go ahead
and tap into Edit mode, and we can press two. We can select maybe this
edge and then this edge, and this edge, this
one, and this one. And we can go ahead and
we can press Control B, and we can bevel these
edges. Something like that. I'm going to roll the mouse
wheel quite a few times to get nice sort of
detail bevel on this. And I want something
like that, I think. So I've got five segments, and there we go. That's cool. I think next thing
I'm going to do is press three, select faces, grab this face here, and let's go ahead and
delete that face, so it's sort of holo.
And there we go. That's cool. Let's tap out of Edit mode
with that one now. Okay, so now we've
done that one. I want to bring in another cube. So let's press Shift A and mesh, and let's bring in
another cube like this. Okay, let's press one to
see this from the front. And let's press S and go ahead
and scale this like this. And let's zoom in a little bit, and let's press S again and just go ahead and
scale this one in a bit, maybe bring it over
here like this now, and maybe just scale it
down slightly in the X. So let's press S and X
and just bring this down now to something like
this, I would say. And then position it about there, I would say
is about right. Okay, let's press three to
see this from the side now. And let's go ahead and
scale this down the Y. So let's press S and Y and bring this down to
now something like that, but then also just bring it forward in the
Y axis like this. There we go. That's
cool. All right, so let me just bring in my image again for a
moment so you can see it. So this cube we've just made is going to be this
plastic component, this sort of upside
down T. So let's see. This is what I'm
trying to make next. Let's drag this back out
of the way again now. And let's go ahead and
fix the scale on this. Let's press Control A and
apply rotation and scale. And let's go ahead and tap
into Eda mode with it. Okay, first of all, we need
to add some loops to this. So let's grab this edge here
and let's press controller. And now let's bring a loop in about there like
that, I would say. That's about right. It's
like this top edge here now, and let's press controller. And let's go ahead
and bring two loops in now and just put them like that and maybe scale them
out a little bit in the X. Let's press S and X, and just bring them
to about that. I would say that's about Okay, so once we've done that,
let's press three, and let's select
these faces here. And also this one and
this one, there we go. And once you've got
those, go ahead and press X and delete faces. Okay, let's press one
so we can select to Cs, grab this one and this one, and let's press F and fill that. And now let's do the
same on the other side. Let's grab this
one and this one. And let's press F and fill that. Okay, let's press two
so we can select edges, and then select
this one, this one, this one, and then this one, and press F to fill. And now go ahead and
grab this edge here and press F one more time,
and there we go. Let's do the same again. Let's grab these and press
F, grab this edge here, and press F one more time, and Alright, now
we've done that. The next thing I want to
do is go ahead and put the sort of holes in
this that we need. So let's press two so
we can grab edges, grab this one here,
and press controller, and bring two loops in here
and sort of bring these up to about there
like that, I'd say. Now let's go ahead and sort
of select this edge here. And let's press controller. Let's bring two loops in, and let's put those
about there like that. Okay, we'll grab it
just here like this, and we'll press controller, and we'll put two
loops in as well. But let's scale
these up in the X. Let's press S and X, and go ahead and scale these
up a little bit to about there and maybe bring those
closer now to the middle, about there, I'd say. Alright, let's maybe
grab this one here now, and let's press Controller, let's scroll this twice. I want to press one linen pad
to see this from the front, and let's go ahead and press
S and X and scale this up, so it's about the same
width as the other side. And now bring this
over like this. And maybe this is
a little too wide, so I'll press S and
X and bring it down, and they bring it
back to the center. Now, these here, I think I
want to bring them down a bit. So I'm going to press Alt and select this one
and then this one, and I'm just going to
whoops shift and select this one and now bring these down to about there like that. Now let's select
this top edge here, and let's press Controller, and let's scroll the mouse
wheel to get two loops, and let's scale these up
slightly in the XT about there like Alright, now
what do we want to do? I think the next thing
I want to do is maybe press three and maybe just
grab these top edges here, and bring these down
a little bit like this and just reduce
the height of this. I think I had it a
little too high, and maybe even a
little bit more. Let's grab these and bring these down now to
about there like that. And now let's select
these edges again. Let's press Alt and
select this one and maybe bring this one down now
to about there like. Okay, let's press three
and then select this face, this face, and then this face. And let's press E and go
ahead and take those in and extrude those like that.
There we go. That's cool. And I think I want to get rid of this edge here,
so I'll press two, and I'll grab this edge
and then this edge, and that should be enough there. Maybe this one and then
this one or as well, maybe this one, this one,
this one and this one. Let's grab those edges right click and go ahead
and dissolve those. There we go. Okay, let's tap
out of Edit mode with that. And now let's go ahead
and isolate that object. And let's turn it around and
tap back into Edit mode. And let's select everything on the back here. So
let's select that. And now let's come
over here to select. Come down to select similar
and click on Cplaner. Once we have all of those,
go ahead and press X, and let's go ahead and delete
faces. And there we go. That's cool. Alright,
what do we do next? I think maybe we want to
take these a bit deeper, so I'll go ahead and
grab those and take those in a little bit
further like that. I'll press two now, so I can select edges. Maybe just grab
these edges here, maybe these edges here, and right click and go ahead
and dissolve those edges. That's looking pretty
cool. Maybe as well. Let's grab this one and this
one, this one and this one. Let's right click and go ahead
and dissolve those edges. All right, so the next
thing I want to do is maybe put some
bevels on this. So I'm going to grab this edge, this edge, this edge, this edge, and this one, this one, and then this
one, and then this one. And with those
selected, let's press Control B and go ahead
and bevel those edges. Maybe something like that
is about right, I'd say. And segments, I
think I'll go ahead and leave it where
it is on about five. Okay, that's looking good. Is there anything else
you want to do with this? Let's tap out of Edit mode, check the scale,
and it's all good. So I think next thing
we can do is go ahead and add a bevel to this. So let's add modifiers, generate, and bevel,
and there we go. And I think I'm happy enough with the bevel we see on that, but I'll increase the
segments to maybe a three. And there we go.
That's cool. Let's go ahead and apply that bevel. And finally, let's go ahead and do a shade oro smooth on that, and there we go. That's cool. Okay, let's bring
everything back, so I'll hit the forward slash, and I'll bring this back into position now on our face socket. Bring that in now to around about there for
a moment like that. Okay, once we've done that,
let's select this item, and let's add a modifier,
generate and boolean. Let's grab our little
eyedropper and then click on this thing
we've just created, and there we go. That's worked. So I will go ahead
and apply that. Okay, I'll take
this back the rest of the way now, like this. So that's nicely imposition. Like that There we
go. That's good. Okay, what do we
want to do next? The next thing we want to do is maybe look at this little
switch we've got here. Let's see if we can do
something with that. So, how are we going
to do that now? I think next thing
we can do is go ahead and bring in a cube. So let's press Shift, A, and mesh, and let's
bring in another cube. And let's press one to
see this from the front. And let's press S and scale
this down straight away. Let's press S again and
scale it down some more, maybe bring this up, bring it over a little
bit from the center. And now let's scale
it down in the X. So let's press S and X, and bring this down to
something like that, I'd say. Let's press three to
see this from the side. And we can bring it
forward on the Y axis. And now let's go ahead and
scale it down in the Y. Let's press S and Y, bring that down now to
something like that, I'd say. Alright, so that's a start. So now let's fix
the scale on this. So let's press Control A, and apply rotation and scale. Okay, so now what
do we want to do? I think, first of
all, of course, let's tap into Edit mode. And let's go ahead and
select this face here. So I'll press three, select
this one here like this. And let's go ahead
and press I to Inset and bring that in
now to something like. Let's go ahead and take
that back a little bit. So let's press E and Y and go ahead and extrude that
into something like that. And now let's press I again
and inset this a little bit. And now let's extrude
that back out again. So I'll press E and Y and go
ahead and pull that out now, too, something like that. Maybe that's a
little bit too far. I'll pull it in a little bit
more to something like that. And I'll press two now, and I'll select this edge here, and I'll go ahead and
take that back Alright, so this edge here should
be a little bit curved. So I'm going to
select this edge, and I'm going to
put a control loop in, so I'll press controller. And I'll put that
just there like that, and I'll grab that edge there and then go ahead and
pull that in now, like that. That's cool. Alright, I think to sort
of finish this off, we're going to add a subdivision surface modifier to this. But let's add a few
more control loops to this so that we can get a
little bit of control over it. So let's maybe just select this edge here and
press Control R, and let's put maybe three
loops in like this. And now let's grab
this edge here. Let's press Control R, and let's put maybe four
loops in like this. Let's grab this edge here, and let's press Control R. And let's roll that and get two loops in the edge like that, and there we go. That's cool. Alright, so maybe as well, let's just grab it here. Let's press a controller, put one loop in there, and grab this one here, and press a controller and
put one loop in there like. Okay, let's tap out
of Edit mode with that and let's look at the
scale, and it's all good. Let's add modifiers, generate, and let's add the subdivision
surface modifier. And yeah, I mean, that's
looking pretty good. Let's up our levels
viewpoint to two, and let's tap into Edit mode and just see what we can do
to improve this slightly. So I think maybe we're going to add another control loop here. So let's press Control R, and bring this up now
to something like that. And let's do the same on the
bottom. Let's grab this one. Breast controlR and then bring this down now to
something like that. And maybe one here now. Let's press Controller. And let's click
on this and bring this one over a little
bit to about there. And let's do this one, too, Controller, and bring this one over a little bit like
that. And there we go. That's a nice looking switch. I think I'm really
pleased with that. So I'll tap out Vd
mode with that, and I'll go ahead and apply that subdivision
surface modifier. And now, straightaway,
I'm going to go ahead and do a shade oro
smooth on that, and there we go. That's cool. So let's go ahead and take
that back into position now and put that about
there like that. Okay, so let's press that let's press one to see that from the front and kind of figure
out if this is looking good. And yeah, I think
I'm happy with this. So let's select this item now, and let's add another modifier,
generate and boolean. And let's grab our
little dropper and let's just select
our new little switch. And there we go, that's cool. So I'll go ahead and apply that, and that's our cutters in place. Alright, so what do
we want to do now? I think the next thing we
can do is go ahead and grab this and let's go ahead and
apply our mirror modifier. And now let's grab
this item here, right click and go ahead and set the origin to the three dcursor. Let's have a look
at this, and we've just got a smooth on it. So let's go ahead and
apply that in this case, because I'm going to join
all these objects up, and I don't want I don't want any modifiers
in it in this case, because then the other objects will inherit the modifiers. So in this case, I'm going to go ahead and apply that modifier. And I'll do the same
with this one, too. I'll go ahead and
apply that smooth. There we go. So let's
grab this one now, and let's press Shift D.
And let's right click twice and go ahead and mirror in
the X axis, and there we go. Let's do the same
with this one now. Let's right click, and
let's go ahead and set the origin to
the three D cursor. Let's grab it again and press
Shift D. Right click twice, and go ahead and
mirror in the X axis. And there we go. That's go. We're nearly done with this. Okay, the next thing
I want to do, maybe, is just grab these items And grab this one last. And now let's go ahead
and press Control, J, and join those into one item. And there we go. That's cool. That's our finished socket. Okay, this is looking good, but I think the normals
on this one are out. So let's tap into Edit mode. And I think I'm just
going to press A for all. I'm going to press Alt N, and I'm going to go ahead
with recalculate outside, and there we go. Let's
have a look at that. And there we go. Let's fix
the normals on this socket. Alright, so I think now, let's go ahead and just bring this forward slightly
on the Y axis. And let's bring it up some on the Z to sort of
centralize it in our room. And then let's go
over to our outliner, and let's go ahead and
bring everything back. Okay, I think for a moment, let's press set, and
let's go into wireframe. And let's press one to
see this from the front. And let's go ahead
and take this over now and position this
roughly where we want it. And I think I want this
about there on the wall. Okay, let's press three to
see this from the side. And let's go ahead and
bring this back now. And put this on the
wall in position. That should be, I think,
is that about right? About there like that, I think, maybe a little
bit more further back. There we go. Let's
just check that. Let's press S and go back to
solid before we make lots of duplicates of this item,
blenders slowing down, so I'll hit the decimal
point and re center on this, let's have a look to make
sure that's back to the wall, and we can take back a tiny
bit more, and there we go. I want it something like that. Okay, let's press one and see
this from the front again. And let's go ahead and press Z, and let's go back
into Wireframe. And maybe just bring this
to about here like this. And now I'll go ahead
and press Alt D and X and grab a copy. And I'm going to put two
together, I think, like this. Then I'll grab both of
them again and I'll press Alt D and X, and I'll bring
another two over now to about here like this. Now I'll grab them
all together again, and I'll go ahead
and press Alt D and X and bring those over now to the opposite
side like this. And put those in
position as well. And maybe we just need
to refine these ones. I'm just going to grab
maybe just this one and this one and go
ahead and move those over a little bit
more to about like. Okay, let's press it. Let's go back into solid mode. And let's see what
that looks like. There's our sockets in
place, which is a nice, another little detail
just to add to our scene. So if you want to put those sockets anywhere
else in the scene, maybe you want to put some low level ones along this wall, or you want to put
some in the larder. I'll kind of leave that to you where you want to
distribute those sockets. Okay, this has been quite a
long lecture, I must admit, but I sort of figured
we could sort of condense this into one
lecture. I hope you don't mind. So in the next lecture, let's have a go at doing our curtains over
our bifolding door. That's quite a cool thing to do. Okay, so let's go
ahead and do a Save. Let's Express Control S
and save our progress. And I'll see you in
the next lecture. Thanks very much.
Bye bye for now.
55. Lecture 54 The Curtains: Hello, and welcome
now to lecture. What are we on Lecture 54. And in this lecture, let's go ahead and
make our curtains. And this is going to be
quite impressive what we do now because up until now, everything we've
sort of modeled is what you call hard
surface modeling. So there's stone, there's wood, there's brick, there's marble. It's all hard surface modeling. But in this lecture,
we're going to do fabric. We're going to create curtains. And Blender, you're
going to be really impressed with Blender and what it can do in this lecture. So let's crack on
and let's do this. So what do we do first? First thing, let's
start pretty basic. Let's press one in the keyboard to get
the orthographic view. And let's go ahead
and press Shift A, and let's go ahead
and bring in a plane. Let's rotate that in the X axis. So let's press RX 90, Enter. And let's go ahead and
bring this up now until it's kind of that much above
our huge door opening. So that will represent the
top line of our curtains. Let's bring this
over now until it's sort of flush with the edge of our door
opening like this. And let's go ahead and press, and let's go into wireframe. Let's tap into Ed mode and press one for vertice selection. And let's go ahead and grab
these bottom vertices now and kind of bring these two about there like
that. That's cool. Okay, let's grab
these vertices now. And to be fair,
they're not far off. I want this plane to fill about a little more than
one third of the opening. So, something like that
would be about right to me. Alright, once you've done
that, let's go ahead and press set and let's go
back to solid mode. Okay, let's tap
out of Edit mode, and let's go ahead
and bring this plane over to the opening now. So let's grab this
and move it over in the Y axis and drop this in the position where
we actually want it. So something like let's see. I'm just going to let that sort of hit the wall and go through, gives it a good sort of
indicator where we are, and then pull it back a little bit until it looks
something like that. Let's have a look
at it this way, maybe pull it over
a little bit more, and that's about right to me. Okay, so let's press one on the numpad to get us
the orthographic view. And let's hit the forward
slash and isolate that plane. Okay, so let's look
at this and the rotations out. So
let's fix that first. Let's press Control and
apply rotation and scale. And let's go ahead and tap
into Edit mode with it. Let's press two so
we can get edges. And let's go ahead and
select this edge here, press controller, and
let's put some loops in. And let's put maybe
three cuts in like this. Okay, let's grab
this edge here now, and let's press Control, and let's scroll
this way too until we've got sort of three
in this way, as well. Let's press three on the keypad, so we can select faces, press A, so we'll selected. Right click, and let's
go ahead and subdivide. Now, I'm going to press Shift R once to double up on
that subdivision, and then I'm going to
press Shift R again, and I'm going to press
it one more time. So I've pressed it
three times so that we've got that many sort
of faces on our plane now. And that's cool.
That's what we want. Okay, so that's a good start. So the next thing I want
to do is go ahead and press one so we can
select vertices. And I want to grab maybe the first two rows of
vertices like this. And with those selected, I'm going to come down to
object data properties, and I need to create a group for those vertices.
So we can do that. We would those selected, hit the plus sign like this, and let's double click on it. Let's call this curtains. Well, let's just call
it the curtains. And click Enter, and then must go ahead and
assign that like that. Okay, so now what we want to do? The next thing I want
to do is go down to the shape keys to do that, I've got a tap out of Edit
mode and come down to the shape keys here and hit
this twice to get two groups. And make sure that key one
group is assigned here. Once we've done that, tap back into Edit mode
with our plane, and now I need to get
the cursor just here. So I think, in this case,
I'm going to actually just hit the cursor
control here on the tab and just click left click just there
to bring it in like that. I'll go ahead and
click on the move tool again to get that assigned. And now I'll come here
to object orientations, and I'll make sure
that the three Dcursor is assigned to the Gizmo. So now the Gizmo moves right
there to the three D cursor. And with that done, now I'm going to go ahead
and press S and X and go ahead and scale down
in the X axis only vertices, those top two rows of vertices
to something like that, which is probably
about one third of the width of our curtains. And that compressed or
scaled down set of vertices represents how much
our curtains are going to be compressed in
their sort of open position. I hope that kind of makes sense. I've done that, I'll go ahead
and tap out of Edit mode. And now we'll come
down to the value here on our shape keys, and I'll go ahead
and slide that over, and now you can see we've got control over our top
two set of vertices. And that's what I
want. That's cool. All right. So the next
thing I want to do is introduce you
to the timeline. So we will be using the timeline quite a bit when we get to the animation stage
of our course, and let's go ahead and
bring that in now. So bring the cursor down to
the left hand corner here. And when you get
close to the corner, a cross will appear. Hold down the left
mouse button and drag up to create another panel
here now on the bottom. Once you've done that,
come here to this tab, click on this and go ahead
and click on timeline. And now we've got the
timeline in our scene. So these top run of numbers
here represent frames. And if I hit play, this is the counter
here running through those timelines, those frames, and it basically runs through around 24 frames every second. So if we assign a key point to position on our timeline
and another key point, an object will move through its distance while that
timeline kind of slides across. I don't know if I'm
making myself clear. I'm not sure, but kind of
you'll see it as we go here, and hopefully it'll
make a bit more sense. So the first thing
I'm going to do with the curtains in the open
position as you see here, is come on down to the
value here and just go click on this and we get our first set of
keypoints in the scene. So this is assigned
the curtains in this position to frame one. So I'm going to go
ahead and slide our counter over now to frame about 190 we've got all these frames which
are too much here, so I'm going to
reduce the amount of frames because anything to the right of our
counter won't be included. So I'll just go ahead
and slide this over now to something like
that, about 196. Now I'm going to move the
value here now over like this, and then I'm going to go ahead and assign this just like that. So now we've got a second coupon of key points in just like that. Now, if we hit
this one here now, the time frame will drop
right back to the first one. And if I hit play,
you can see now what our timeline is doing
is go ahead and moving across while
the counter goes. So it's moving through its
full range 0-190 frames. And that's cool.
That's what we want. All right, cool.
Let's stop this. And let's take that
back to the beginning. And now we need to assign a material to this plane so it'll no longer
just be a plane. So we're going to go
to the physics tab, which is just here
and click on this. And we're going to go ahead
and hit cloth like this. So now cloth has been
assigned to our plane. We're going to come on
down here now like this. And we're going to
click on shape. Because if we don't is
a good point, actually. I won't do this for a sec. Because now we're working
on the physics tab, and we've assigned
a material to this, that means that the laws of physics have been
applied to Blender. So if I hit play right now, our material will just fall because there's
gravity in play now, and a gravity is
acting on our object. So I'll go ahead and hit take that back to the
beginning like this. And with this still selected, I'll come down to shape now, and I'll go ahead and
click on this and we want our curtains to be
assigned. There we go. So that means that our
top two row of vertices, which we assign to the
group called curtains are now pinned to that
position. They cannot move. So now, if we go
ahead and hit play, now Blender is treating
that as a fabric. How cool is that? Isn't that brilliant?
So I'll kind of roll around this for a second so
we can see what it's doing, and how cool is that? Okay, so let's just go ahead and pause that for a moment,
and let's refine this. So the first and most
basic thing we can do is go ahead and do
a shade oro smooth. And let's take this right over pretty darn high
now to over 100. About 116 seems to work. And already, to be honest, that's actually looking pretty good. I'm quite liking that. But I want to show
you more cause to be honest, I'm right with that. I'm not bad with that at all. But we can see
something up here now. We can see this weird
effect up here. And this is basically surfaces interacting with each other and actually just meshing. So the material up here
isn't acting normal. It's kind of crossing over each other and sort of
blending into each other. And, of course, fabric
wouldn't do that. It's going to sort of oh, it respects the laws of physics. It can't sort of I can't mingle. It It only folds. It can't blend its molecules. So let's do something with that. So if we come on down here now
to collisions and click on this and here in the self collisions, go
ahead and turn that on. But let's bring
the distances down pretty low now to
something like this. Let's take that back
to the beginning now and let it play again. And get ready to pause
this where you like it, which is something like that. Maybe we need to go to the
modifiers tab and increase our smoothing and just take
that up to the max like that. There we go. That's work now. So between the collision
molecules and the smoothing, we seem to have something.
So, how are we looking? We're looking pretty
good. I quite like this pattern
here at the bottom. We could see if
we could do more. We could go back to the
physics tab here now. Let's increase the
quality of steps so that increases the
quality of this material. And let's add some weight to this material because
curtains are quite heavy. So let's make this
around 1.5 kilos. Maybe down a little
bit, maybe about 1.3. Now, this is going to
make this material bounce a little and stretch a little. So let's see if we like that. Let's hit back to the start
key, and let's hit play, and you can see the
material kind of stretching and bouncing a
little, but that's normal. And let's see what that
does. And there we go. That's looking
quite good. I like the irregularity on the
bottom. This is looking good. We can play around, as well.
I'm kind of play around with these settings just to kind
of show you a little bit, so we could adjust the bending on this to maybe a one at 1.2. Let's try that again
and see what that does. And I get a feeling I'll
take these back to where the settings were because I really quite like the
curtains already. But I think I just need to
show you these settings. And let's see. I mean, that's quite nice
like that, actually. The way it sort of splays
at the bottom there. That's quite cool. And
I don't want it to rest too much because
it becomes too uniform, so I probably will kind of take it somewhere
around there, I think. I quite like that there's some irregularity to the bottom
of our curtains, though. Alright, is there anything
else I want to do? Maybe I think I'm going to leave it like
I'll show you this. This is the speed multiplier. So if we go ahead
and adjust this, this will kind of change
the speed in which Blender will affect the fabric modifier
within our timeline. So it'll do less within that
timeline. And there we go. We get a slightly
different effect because of the speed multiplier. So I'll take the back up to one, and I'll leave the
quality steps 12. I can take this up, but again, I'm trying to make sure
that I'm not overstretching everyone's computers that
everyone's computers can kind of handle this. So let's take that back to
the beginning again and press play and see if we
get a nicer result now. And stop this where I want. That's quite nice like that. I quite like that effect. I like that the folds aren't
too regular and we've got some different stuff going
on within those curtains. I'll just hit play a bit more and maybe let
it come back around again and just get ready
to hit that pause button, maybe take that back a little bit and just see
where I like it. That's quite cool. Just that
maybe that's not enough. And do I want to adjust the
bending back a little bit? Let's try taking that back. Take that back to the beginning and just try one last time, and hopefully we've got it. In this case, I don't mind
experimenting a little bit, just to kind of show you that
things like cloth modifier, there's no set
number to work with. There is you do need to sort of adjust the settings and
see what results you get. So that's what I'm trying
to show you here now. It's not just sort
of just set numbers, and there you go. That's done. It's just show that
at this stage, we need to sort of
just play around a little bit and just
get the result we want, because that's quite
cool there like that, the way that kind of splays
there and splays there. But I want the curtain to be more compressed, so
I think I'll hit Play. And that's quite cool, actually, just like that. I think I'm going to go
ahead and accept that. So now we need to
convert this to a mesh because at the
moment, it's not. So to do that, come on back to the object data properties and go ahead and delete
our two shape keys, and there we go. That's done. That's deleted the shape
keys in our timeline here. So now if we go ahead
and press Control A, and we're going to
go ahead and click on visual geometry to mesh to turn visual geometry into a traditional
mesh, and there we go. Okay, so let's go ahead and
get rid of our timeline. Now, we're kind of
done with that, so I'll click on View and area, and I'll go ahead and close
that, and there we go. So what do we want to do next? Let's go over to the modifiers
tab with this selected. And we could have
a go at putting a Subdivision Surface
Modifier on this. Obviously, that's going to increase the density
of the mesh. So this is completely
up to you because we've already got if I
hit the tab key on this, we have acquire a
lot of mesh in this, so it's up to you, but I think I'm going to
go ahead and do it. So I'm going to add
modifier and generate, and Whoops, Subdivision
Surface Modifier, and I'll click on that. And yeah, there's a slight
improvement in our curtains. I think that's looking
slightly better. So I'll go ahead and apply that. And let's have a look at the
density of the mesh now. And yeah, that has increased
the density a little bit. It's not too bad, to be honest for
a cloth material because when you create
cloth materials, you do have to have
quite dense mesh. There's no kind of
other way around. So I want to do one
more thing now, and I want to add some
thickness to our curtains. So let's use the solidify
modifier for that. So let's add modifiers, generate and the
solidify modifier. That's looking a
little too thick, so I think I'll just add 10 to the right of the decimal
point and click Enter. And let's go ahead and
turn that one into maybe a four and see how that
looks. And there we go. I'd say that's about right. I'll turn on even thickness, and then I'll go
ahead and apply that. Okay, so let's
look our curtains, and they're looking really good. So let's go ahead and
bring everything back. So let's hit the forward slash, and let's have a look at
the curtains in the room. And they're looking really good. I think I'm going to
go ahead and move them over slightly in the X axis and move them back slightly on
the Y into the room, and there we go,
How cool is that? So I think let's go
ahead and make a duplicate now for
the opposite site. I'll grab this one, and
let's press Alt D and X, and bring a copy now
over to the other side like this and just go ahead
and put those in position. Slide those right up to
the wall now, like that. And I can just see the
wall breaking through. So I think I'll just pull
them forward slightly on the Y, and there we go. That's cool. There's our
curtains in position. How cool is that? Alright,
so in the next lecture, let's just finish off the
inside of our kitchen. So I need a trim over the top of the curtains here just to sort of hide this area. And I want, another trim board going on the wall
here to the floor. In the UK, we call
that a skirting board, but I think in
different countries, there's different names for it. But we'll go ahead and put in sort of a little trim board to the floor there on this wall. And then I think
that's about it. That's the end of the
interior modeling. Okay, so I'll go
ahead and see you in the next lecture.
Thanks very much. And I'll see you in the
next one. Bye bye for now.
56. Lecture 55 Extra Trims: Hello, and welcome
now to Lecture 55. And in this lecture,
we're just going to do a few basic sort of covers. We're going to do a
little trim cover to hide the top edge
of our curtains here. And we're going to do a little
board on the floor here, another little trim just
between the wall and the floor. So let's go ahead and do those. These should be quite
an easy thing to do. But I was looking at the
curtains between lectures now, and I'm wondering, maybe I might just scale
this down in the X, so I'll press SX and
go ahead and just scale this down a little bit to something like this
and then go ahead and reposition that one
more time like that. And, yeah, I think that's fine. And I'll do the same with this one just to reduce
the width a little bit. I'll press S and X and just go ahead and scale that down to maybe
something like that, or maybe even a bit more SX
something like that, I think. Okay, we could even
if you wanted to. Of course, we're going to
increase thickness doing that, but we can try
pressing S Y and just try increasing the width
of them and the Y axis. I'll just take a
look at the edge and see what that's
done, and that's fine. That doesn't look
weird. So, yeah, I think I'll leave
that at that note. Maybe just pull it
forward slightly in the Y, and there we go. I'll stop messing
around with those now. Okay, so now I want
to do this, like, kind of cover along the
top of the curtains here. So let's do this.
And I'll just select maybe this beam
here and I'll press shifts and bring the
cursor to the selected. And let's go ahead
and press Shift A, and maybe let's bring
in a plane, I think. Let's rotate that in the X axis. Let's press x90, Enter. And I think I'm
just going to press one on the numpad now to
see this from the front, and I'll press to go into wireframe and I'll tap
into Edit mode with. Okay, make sure you're
on a vertices selection, grab these vertices here and
go ahead and bring these down now to maybe
something like that. Grab these ones blown
out and just bring those to I think I want
them about there, I would say,
something like that. Grab these ends one here, and I'll pull these over. And I'll take that
beyond the cabinet, sort of to something
like like that, I'd say. And I'll grab these ones now
and then just pull these over and just tuck those
nicely up against the wall, which is about there like that. Okay, let's press seven now
to see this from above. And let's just make sure that that's hiding the top
edge of the curtain. So I'll pull it forward a
little bit more to about that. Alright, so now what
do we want to do? Let's press Z, and let's
go back to solid mode, and let's have a look at that. And I think I just want to pull that down
a little bit more, so I'll press two,
select that edge there, press G, and then Z and
go ahead and pull that down just a little bit more
to about that, I'd say. Okay, so next, let's go ahead and make some
thickness for this. Let's press three,
select that face there. And now let's go ahead
and press E and Y and go ahead and pull that forward and create some
thickness in that. Maybe a little bit more. I'll press G, and then Y and go ahead and
pull that to about that. No, I think that's
fine. Alright, so what else do we want
to do with this? I think I want this face
here to be up to the beam, so I'll go ahead and
grab that face there. And now, just go ahead and
just pull that up to the beam. So I'll just find
where the gizmo is so I can see what I'm doing. And just pull that now
up to the wooden beam. Maybe take it in so you can get a sense of the thick
to where it is, and then just put that
about there like that. Okay, that's cool. Let's check the rotation and scale on this. Let's go ahead and tap out of Edit mode and the rotations out. Let's press Control A and
apply the rotation and scale. Let's go ahead now and
add the bevel modifier. Let's go and add two zeros to the right of
the decimal point. Let's turn that one into
something like a three. And let's turn the
segments up to maybe three, and there we go. Let's go ahead and apply that. Let's do a shade
or smooth on that, and there we go.
No, that's fine. Okay, so problem I have now is this kind of
like this cornice, this length here, is sort of passing through this
cover we've just created, and I never like that, so I'm just going to go ahead and
do something with that. So I'll just select the item, and now I'll press Z to go into wireframe and I'll tap
into Edit mode with it, and I'll select the
end of it like this. And then I'll press seven
to see this from above. And I'll just go ahead and
pull this forward now until it's just in front of this
cover that we've just created, which is about like that. That's cool. Alright, let's go ahead and go back
into solid mode now, tap out of Edi mode and
see how that looks. And yeah, I think that's fine. That's kind of doing
the job that I want. It's covering the curtains
up there at the top, and that's exactly
what I wanted. Okay, so now we just have
this other one to do here. So let's go ahead and tap into
Edit mode with the walls, and let's press two so
we can select edges, grab that edge there and
go ahead and press Shifts, and let's bring the
cursor at that point. Okay, I'll tap out of
edit mode with the walls. I don't need those anymore.
And let's go ahead now and bring in a cube. So let's press Shift
A and mesh and cube. Let's have a look at this here. So I think in the Z axis, let's go ahead and
make this zero. Whoops. 0.15 enter. Let's pull that up a little
bit in the z axis now till it's sitting pretty
much on the floor. Yeah, yeah, something like that. And now, in the X axis, let's go ahead and make
this 0.02 and enter. So that makes it 2 centimeters
by 15 centimeters. And that's kind
of a typical size of one of these kind
of floor trems. There we go,
something like that. Alright, so I think next, let's go ahead and
hide the curtains. Select it. I'll press
H to hide that. And let's go ahead and tap into Edit mode
with this again. And let's press three
so we can select faces. We'll grab this face here now, and let's go ahead
and pull this over in the Y axis until it's
nicely into this corner. I mean, the curtains
do conceal here, so it's not the end of the
world if we're not exact, but something like that. And let's do the same
on this other side now. Let's grab this and let's
go ahead and pull this up to our wooden column and put that something
like that, I'd say. Here I'll tap our
do mode with that, maybe I'll just go ahead and pull this column over slightly. So I'll press G and
X and go ahead and move that slightly
more towards the wall, something like
that. There we go. Alright, so what else
do we want to do? I think I want to put a bevel
on the top edge of this. So let's fix the scale first. Let's press Control A, and apply rotation and scale. Then let's tap into Edo mode and press two and select this edge. Press Control B, and let's go
ahead and bevel that edge. Let's scroll the mouse wheel
a couple of times to get around on that edge,
and there we go. That's about what
I want. Okay, so I'll tap out of Edom
mode with that, and I'll right click and
I'll shade Auto smooth. And there we go. So we've
got a trim in place there. I'll press ultage to
bring everything back. And I think, just so we can see, I'll go ahead and bring
back our bifolding door. And there we go. So that's
everything in place now. I think with that done, that's all the
modeling finished for the inside of our kitchen.
Well done, everybody. That's a big milestone, Dan. So we got a little bit
more modelling to do outside we might see
outside of this window. In fact, there's a very
good chance that we will, so we need to create
a bit of a scene, a little bit of a decking or a patio just outside
this bifolding door. So we'll go ahead and do
that in the next lecture. Alright, thanks very much. Actually, let's do a save. Let's remember that. Let's press Controls and let's
save our progress. And I'll see in
the next lecture. Thanks very much. Bye bye, Fino.
57. Lecture 56 The Out Side: Hello, and welcome
now to Lecture 56. And on this lecture,
I just want to create a basically like a paved area just outside this window with maybe a small wall going
around just to frame it. And then I want a large
wall this side to kind of suggest when you're inside the kitchen looking out. Then there is more
than just a kitchen. There is more to the house
than just the kitchen. So by having sort of a wall
coming alongside here, it'll sort of suggest that
that is the rest of the house. So let's go ahead and do
that. So where do we start? Let's go ahead and let's compress our folders
and our outliner. And let's click on scene
collection and add a new folder. Let's double click on
it. Let's delete that. And let's go ahead
and call this. Let's just call it outside. Whoops, my caps are on turn
that off. And there we go. Alright, once you've done
that, leave it selected. And let's press seven
to see this from above. And let's bring in
the first cube. Let's press Shift A
and mesh and cube. I think we'll go straight
into wire frame with this, let's go ahead and pull
this forward like this now and put that about there. Let's scale that down the X. Let's press S&X and
scale this down now to something like maybe even a bit more
than that, S and X. To that, I would say. I'll go ahead and pull it
forward slightly in the Y, and I'll go ahead and
leave that like that. Let's press one to see
this from the front now, and I think I'll just go ahead and tap into Edit mode with it. Press one so I can
select vertices, grab these ones here, and
maybe just put those there. Let's consider the
height now for a moment. I'll press. Let's go back to solid and consider
the height of this wall. Press three, grab it this here and it's a
little bit too high. I'll go ahead and
bring that down to about like that. That's cool. That's a start. Let's tap out of Edit mode
with that one now. Let's press seven and let's
go ahead and press Shift A, and let's go ahead and
bring in another cube. I think I'm going
to go ahead and work this by the
numbers this time. So I think in the X and Y, I'm going to make
this 65 centimeters. So if I just hold down the left mouse button in the top one and drag down
to the other one, I can do both at the same time. I'll hit the backspace
to delete that, and I'll press 0.65
enter, and there we go. So that's the kind of
size that I'm after. And in the Z, I'll go and
make this 0.05 enter. And now we've got a typical sort of concrete paving slab size. Okay, so let's fix
the scale on that, so let's press Control A and
apply rotation as scale. And let's tap into
Edit mode with it. And let's press three
so we can select faces, grab that face and press Control B and go ahead and bevel that
edge a little bit too, not much, really,
something like that. And maybe roll the mouse
wheel to get two edges. So I have two segments and
kind of a bevel like that. Alright, that's cool. Let's
tap out of Edit mode, and let's go ahead and do a
shade oro smooth on that. Let's press seven. And let's
go back into wire frame, and let's just grab this one here now and
bring this back to the house like this
and put this in position now in the
corner like this. And now let's have a look at that and make sure it is
where it's supposed to be. Maybe let's press and go
back to solid mode now, and maybe just bring this
back in the Y axis until it's up to our sort of bifolding
window, and that's fine. It's kind of cutting
into that corner there, but I'm not going to worry
about it because it's kind of a place that you'll
never in 1 million years. Okay, so now that
we've done that, let's go ahead and use
the array modifier again. So let's make sure
that this is selected, and let's go ahead and add modifier and generate and array. And it's arraying in the X axis, so that's actually
exactly what we want. So let's have a look at that. And there's no gap
between these, and I want a tiny little gap. So I'm just going to go ahead
and maybe just add an extra zero and then a five and click
Enter and see what we get. And that's close but no cigar, Let's just maybe
reduce that five, two or three and
see how that looks. And yeah, that's
kind of what I want. So once we've got that we've
set our gap in between them, let's just zoom
out a little bit, and let's hit the count and
increase on those until we get to the other side now
like that, and there we go. Once you've done that,
go ahead and apply that array modifier,
and then straightaway, go back to add modifier, generate another array modifier. Okay, I don't want anything
in the X this time, so I'll go ahead and press zero. And now in the Y, let's go ahead and
put one in there. There we go. It's
actually in the minus. So I'll just go ahead
and just tap in front here and put a minus and
click enter, and there we go. Let's just zoom in on
this and have a look. Probably we just
need to increase the gap between them
again, and we do. So let's go ahead and
just add an extra zero and then put a
three and then enter, and there we go. That's cool. So kind of all that
remains to do with that now is just
increase the count. So let's go ahead
and do that and figure how big we
want our pavers. And I think that's kind of the area that I want for
my sort of sundck area. That's cool. Let's go ahead and apply that, and we're
done with that. The array modifier really
does make things super quick. Very quick. Okay, so let's
tap into Edit mode with this, and let's select the end
here and let's press seven. And let's go ahead
and pull this forward now two, something like that. Let's press two, select an
edge here, press controller. And let's go ahead and
bring this control loop now forward now to
something like that. All right. Let's press three
so we can select faces. And let's go ahead
and maybe just grab this face here,
press seven again, and let's go ahead and press E. And just extrude
that out now to what maybe there maybe there
like that. That's cool. Okay, once you've done that, let's go ahead and press Shift
D and X and bring a copy of that face over now to
about there like that. I would say that's
good. Or should we take it back to there? Maybe I'll just take that back to there. That should be fine. And once you've done
that, press seven. And let's go ahead and
press E and go ahead and extrude that out now to
the opposite side like that. Alright, that's cool. So
now that we've done that, we can maybe just add a
bevel modifier to this. So let's tap out of
Edit mode for a moment, and let's fix the scale. So let's press Control A and
apply rotation and scale. And let's go ahead and
add our bevel modifier. Okay, obviously,
that's too much, so let's go ahead
and put two zeros to the right of the decimal
point, click Enter. And let's go ahead and
turn the one into maybe a six and see how that looks and increase our segment
count to maybe a three. And there we go. I
think that's fine. And I think I'm going
to go ahead and apply that. Alright, cool. So I think the next thing
I want to do is I want to put a capping on this wall, so let's go ahead
and do that next. So maybe let's just tap back
into Edit mode with this. Press three like faces, grab that face there and press shifts and cursor
to the selected. Alright, let's tap out of
Edit mode with that one now. Okay, so now that
we've done that, let's go ahead and press seven, to see this from above. Let's press Shift A, and let's go ahead
and bring in a cube. Let's scale that cube down. First of all, on the
X, so let's press S&X bring that down. So it's a bit wider than our
wall, something like that. Let's press one now to
see this from the front. Let's tap into
Edit mode with it, and let's press
Ed for wireframe. And let's press three
for face selection. Grab the bottom here
now and pull that up until it's just sitting on
top of the wall like this. Let's grab the top ones
now and pull those down until you got kind of
that thickness like that. Okay, let's press three
now so we can see this from the side and
see how that looks. And yeah, I'm happy
with that now. Okay, let's press and
let's go back into solid. And let's tap out of Edit mode
for a moment and fix that. So let's press Control
A and apply rotation. Okay, let's tap back
into Edit mode now, and let's press two so
we can select edges. Grab that edge
there, press Control and go ahead and put a loop
in the middle like that. Grab that top one there, and then just pull that up to create a ridge to
this capping tile, and there we go. That's cool. So I think the next thing I'll do is tap out of Edit mode, and let's go ahead and apply
our bevel modifier to this. Let's add two zeros to the
right of the decimal point. And let's turn the
one into maybe a six. Ah, click Enter. And
let's see what we get. Let's increase our
segment count to three. And, yeah, I will
leave that actually. I won't apply that bell
and modify just now. I'll leave it just like that. Okay, let's press seven, so we see this from
above again now, let's press set, and
let's go into wireframe. And let's go ahead and
pull this back now to about there like that. Okay, so let's tap back
into Edit mode with that. And let's press one so
we can select vertices. Grab the end there
now and pull that over to maybe about there like
that, I'm going to guess. Let's tap out of
Edit mode with that, and let's go ahead
and press Shift D and Y and pull another copy forward like this and just put that in position
where we want it. And let's go ahead and
grab another copy now, so I'll press Shift D and Y, and just pull another
one forward now to about there like that. I'll go ahead and tap into
Edit mode with that one, and I'll grab the vertices
and just pull that back just a little bit to about there like
that. That's cool. Let's go ahead and grab a
copy of this now, then. And let's go ahead and
press Shift D and X, bring a copy over like this
and go ahead and rotate that. So let's press r90, Enter. Let's go ahead and
pull that back now till it's level with the
other one like that. And also flush with
it on this side, too. Okay, so let's make
another copy of this. Or, in fact, let's just make this one a little bit longer. Let's tap into Edit mode, grab the ends here
and just pull those forward a bit to about there. We're kind of cheating
a bit, but that's okay. Okay, let's tap
out of Edit mode, and let's go ahead
and press Chef D, and X, and pull a copy
forward to here now. And let's tap back
into Edit mode, grab the ends here and go
ahead and pull those back now to about there like that. There we go. That's cool. Okay,
let's tap out of Ed mode, and let's press, and let's
go back to solid mode. Let's see what we
need to do next. So we need to bring another
copy over here now. So let's press Shift D and X and bring a copy over now
to the other side like this. And let's go ahead
and press Shift D again and X and bring another copy over
now to here like this. Let's tap into Edit
mode with this one. And let's press three,
select these faces, and then go ahead and
pull that back now to something like that, like that. There we go. Alright, so now we just have this
corner here to sort out. So let's go ahead and
press Shift A and mesh. And let's bring in a plane. Let's rotate that in the X axis. So let's press RX 90, Enter. And let's press seven
to see this from above. Let's press s and let's
go into Wireframe. Let's rotate this now until it gets to that
cross point there. We'll take that over
to there like that. And now go ahead and press
R and rotate and hold down Control and snap
to the 45 degrees, which is just there
now like that. All right, let's go
back to solid mode. And let's click on this one. And let's go ahead and
add a Boolean modifier. Let's grab the little
dropper and go ahead and click on this
and see what we get. And that's actually the normals is the wrong way round for that. But before I fix that, I think I'm just going
to select this one now. Add the modifier,
generate and Boolean. Grab our little dropper and just hit this little click on
this little plane here, and then I'll go ahead
and apply that one. Alright. And since
I'm there as well, I'm going to go ahead and apply the bevel on that,
and there we go. Okay, let's select
this one again now. Or, in fact, let's
select this one first. Let's tap into Edit mode, and let's press Alt N, and let's flip the normals
on that. There we go. Now let's tap out of Edit
mode, grab this one, and let's go ahead and
apply our Boolean modifier. And now let's go ahead and apply our bevel,
and there we go. We can also go ahead and delete
this plane now like this. Okay, so let's go
around now just applying the rest of
our bevel modifiers. So we've got that one to do, and then this one, as well. This one, let's apply
this bevel modifier. And then this one as well. Let's apply this one.
There we go. That's cool. So, what do we want to do next? I think, looking at this, I'm just going to go ahead and
turn the angle down now on a shade auto smooth because
it looks a little rounded. So I'll just bring that down
until that kind of corrects, and I think I'll leave
that there like that. Okay, so now the
last thing I want to do is just go ahead and create
a wall on this side now. So let's press seven so we
can see this from above. And let's go ahead and press
Chef A and mesh and cube. Okay, let's bring this
over here like this now. And let's press S and X and scale this down to
something like that, and put that there
now like that. Okay, let's press seven,
and let's go into wireframe and let's
tap into Edit mode. We'll grab the end here
and we'll bring this over, and we'll just bring that
to the wall like that. And we'll grab this end now
and we'll bring this forward to maybe about here like this. Let's press one so we can
see this from the front now, and let's just grab these
top face now and then bring this up to
about here like this. Alright, let's go back to solid mode and tap
out of eddy mode. And do I want to apply
a bevel to this? Is it necessary? I
don't think it is. I don't think I need to
apply a bevel to that. This wall is just
gonna hinge really of something of something
beyond the kitchen. So I think that's absolutely
fine, in this case. Okay, so now that
we've done that, we're kind of that is
the modelling finished. So in the next lecture, let's start looking at textures. Alright, thanks very much. And I'll see you
in the next one. Bye bye. Oh, before I
go, let's do a save. Let's press Control
s and do a save. And I'll see you in
the next lecture. Thanks very much.
Bye bye for now.
58. Lecture 57 U: Hello, and welcome
now to Lecture 57. And the first thing that's probably
you're gonna notice is, where's the project gone? Where's our amazing kitchen
gone? It's vanished. And baby, you're
wondering, have I accidentally gone
back to Lecture one? You haven't. There is a reason for why you're looking at a blank
Blender screen right now. And the reason is, I want
to take I want to spend a lecture talking about the basic principles
of UV mapping. And then after this lecture, I'm going to do another lecture. We'll talk about the basic
principles of texturing. Now, we're not going
to spend long on this because all I really want you to understand is the fundamentals
of it, the basics of it. So understand what it's
for and what it does. I am a really big believer
in project based learning. I don't think it's great to sort of spend
lecture after lecture just talking about
the principles of something or applying it to something that
has no relevance. So I think the project
learning is the way to go. Having said that, we are
going to just touch now on UV mapping with just a cube.
So let's go ahead and do it. And you probably
notice that there's a resource attached
to this lecture, and if you open it and save it, you'll see it's
basically a cereal box. And you're wondering
why on earth has he got a cereal box attached to a lecture. There is
a reason for it. Don't worry. And
you'll see it now. So let's click anywhere. Let's get rid of
our splash screen. And let's start by
bringing in a cube. So let's press Shifte
and mesh and cube. Okay, nothing hard about
that. We know how to do that. Let's press one on the numpad,
to see it from the front, and let's just bring
it up so it sits on the X axis like this. Okay. When I say this now,
the penny will drop. Let's kind of scale this
down and the Y and the X until we get the shape
similar to a box of cereal. So let's press S and Y and go ahead and scale
this down like this. And now let's scale
it down the X, S and X, and scale
it down like this. And there we have now
a basic cereal box. Let's fix the scale. Let's press Control
A, select the item, Control A, and apply rotation
and scale. There we go. So the next thing I want
to do is actually go into the shading mode here. So these up here are all modes, and they're sort of set up and tuned to suit whatever
you're doing. So if you click on to
the UV editing one, then it's all set up
ready for UV editing. If you go into sculpting, then it's all set
up for sculpting, shading, it's all
set up for shading. Now we're going to
stay in shading. This is the one I want to use, and you might be
wondering, why not use the UV editing one here? The reason being because
I also want to have the shader editor on the
bottom of the screen here. So for that reason,
we'll go into this one. Here we have UV map, here we have Shader editing, and of course, here
we have our viewport. Our viewport is in material
preview so that we can actually see our textures
applied to our component. Okay, so let's go
ahead and do this. So the first thing I want to do is come on down
here to the bottom, and just click on this
little one here and make sure that this
is on UV Editor. Now, just sort of hover
over this joint here, and then left click, hold it down and just make this slightly bigger so we
can see our UV map. Okay, the next thing
I want to do is create a basic texture. So all I'm going to
do is come down to our shader editor area here and click on
N, and there we go. Now, we have here
what's known as the principal BSDF
the principal BSDF or any BSDF is basically the main node that you'll be plugging all
other nodes into. So it's the core
node, if you like, the starter node that everything else will
be plugged into. So whenever you create
a new material, you always see a principal BSDF and a final output,
a material output. So this is the last node
that all other nodes will be plugged into
after the principal BSDF. This is the final output, the texture that will be
assigned to the object. Okay, so let's go ahead. Let's just first of
all, press Shift A, and let's bring in a texture, and let's go ahead and bring in an image texture and drop
that just there like that. Okay, just hover over here and hold down the
left mouse button and just drag this little
yellow line out like this and just plug in to
the base color like that. And now we've created a basic texture and
assigned it to our object. Obviously, that's no use. I mean, it's nothing, is it? So let's go ahead and
make this something real. So go ahead and click on open
and then go ahead and find the serial box that you saved that's attached
to this lecture. And there's mine, and
I'll click on it, then I'll create and
I'll just click on Open Image, there we go. Now we have that basic serial
box applied to our object. But it doesn't make any sense. It still doesn't look
like a cereal box. Everything's there, but it's not laid out nicely on our cube, and that is basically the
principles of UV mapping. We have a three
dimensional object, and we've just applied a one
dimensional texture to it. What Blender has done
is it's just simply randomly wrapped it
around our object, but of course, it
doesn't really work. So we need to unwrap our object. We need to imagine we
need to sort of cut it. If it was real, we'd sort of
take a scissors and we'd cut it along here and along here
and on the back as well, and then we'd be able
to unroll it flat. And you can see blenders kind
of done this already here. It's created a basic UV map. It's taken this component here
and it's laid it out flat. But it's currently
very crude because you can see even the scales of these don't even make sense
because we have sort of skinny sides and
we have broad faces. And these all the
faces are equal. So this isn't a very good
UV map at the moment. So how are we going to do this? The first thing
we're going to do is press A so we can select all. And then we're going to press U, which brings up our sort
of UV mapping commands. And we're going to use Blender
zone smart UV project, and it is, as it
says, quite smart. It's very good at
creating basic UV maps. So I'll go ahead
and click on that. Now, this one's quite important, the old island margin here, and this allows us to have
gaps in between our faces. So I'm just going to
go ahead and click on this and take that
up to maybe a 40. After I've done
that, I'll go ahead and unwrap. And there we go. So now blenders actually created a really
good UV map for us. As you can see, we
got one, two, three, four, five, six components, and we have a gap between them because we assigned
an island margin. So each one of these objects, I'm just going to go
over to the side here. I'm going to press T to bring in our normal tab and I'm going to click on Move. There we go. Now, each of these
objects within a UV map is called an island. So this island here, if I go ahead and move it maybe, as you can see that now, looking into our main viewport, you can see, as I move this, the texture is changing on our main object there
in our main screen. You can see that
now moving around. So we can actually do
something with this now. So first of all, let's just
maybe select this face here. So I'll press three so
I can select faces. Here it is here, and
I'm just going to just make this bigger so we can see it, maybe
something like that. And with that done, I'm going to press everything
that's on this one. I'm going to press G. I'm going to bring that to the
middle. I like this. Now, this is the face
that we're working. You could see it move then as we move this one here
I'll just do it some more so you can see it moving and reorientating
on our object. It's upside down, so
that's an easy fix. Let's press r180 enter, and now it's the
right way round. And now all we need to
do is scale this island up until it fits on to
the face of our object. So make sure that you've
got node selection on. Sorry, make sure you got
vertice selection on, and then just bring this up like this until it's at the
top edge like this. And then do the same the bottom, bring that down to about
there and on the sides, too, just bring that over. And this one, too, just
bring that over like this. And there we go. We've created the face to our cereal box. So let's do the same
with the side now. Let's grab this side here, and here it is. Here's the island in our UV map. So we could maybe
bring this over to our ingredients
side, bring this up. So you can see here it's upside
down, so let's rotate it. Let's press Rights 180, Enter. And now let's go ahead and just grab vertices and pull them around until it fits on
that side, there we go. Let's do the same
at the top now. Let's grab these ones and
pull these up like this, again until it fits on the
side. We can do the back. Now we can select this one, and we can grab all
of them like this. Go ahead and pull this up, bring this over, and
let's rotate it. Let's press r180, enter, and let's grab the top vertices and just go ahead and
pull those up to there. And we can grab the bottom vertices and
pull those down to there. Grab these ones,
pull these over, and grab these ones and
pull these over this way. And there we go. I'm sure you're getting the
principle of this now. So we could do the
other side, too, so we could grab this one and move this over
to here like this. Take it up. Let's rotate it. So let's press r180 enter. And let's go ahead and grab these top vertices and
pull these up like this. Grab the lower vertices and
pull these down like this. And there we go. We've got
our cereal box created. We could do the top, as well. So we could grab this one
here, and we could rotate it, r90 enter and go
ahead, take this up. Drop that there like
that, maybe take it over. Go ahead in this case
and scale it down the X, and there we go. There's the top done, as well. I won't worry so much
about the bottom because I think now we've got
the principles. So here we go. That's basically the principles of UV mapping. We're taking a three
dimensional object, and we are laying it flat. We're cutting it out
and we're laying it flat on a one
dimensional texture. We're orientating
that UV map to suit the texture so that we get a finished result
looking right. Okay, that's all I really want
to shut you on UV mapping. Sort of now we've
got the principles of it and the basic ideas of it. So in the next lecture, let's go ahead and do
something similar or a sort of similar kind of lecture,
anyway, with textures. Okay, so in this lecture, I don't think I'm
gonna save this time. So I'll go ahead and close that, and I'll see you in
the next lecture. Thanks very much.
Bye bye for now.
59. Lecture 58 Textures & H: Hello, and welcome
now to Lecture 59. And in this lecture, I just want to just cover
very briefly textures. As I've said before, I'm
a great big believer in sort of project
based learning. We learn as we do things
within the project we develop. It's a lot more fun, and I think you're much more likely to remember what
you're being shown. But I think it is
important that you also just get a
basic understanding first of what is a texture
set and what is a HDRI. So that's what we're going
to do in this lecture. So I think the first
thing we do is, let's just go ahead
and bring in a plane. So let's press Shift A and mesh, and let's bring in a
plane. There we go. That was easy. And
the next thing I want to do is come up here
to the top and click on the shading tab here so that we go into sort
of the shading screen. And within this, we
have our shader editor. We have our viewport. We have a browser and we have I think it's an
image editor right now, but I'd want that to be a
UV editor. There we go. So let's just slide
this down for a sec so we can see
more of this screen. And you can see in
the background, we've got this weird,
blurry background. That is a HDRI, a high dynamic range image. And if I come up to the
right here and click this, it'll drop down,
and I can come to blur and I'll just slide
that down to zero. And now you can see slightly
better what's going on. This is one of Blender's
standard HDRIs. And you can see what
the kind of scene is. It looks like a nice
looking little park on a sort of not a dull day, but not a super sunshiny day, quite a sort of maybe
a slightly cloudy day. And it's a 360 degree image, as you can see. What's that? Looks like a slide. That
looks fun, actually. Anyway, sorry, I'll
get back on track. So this is a 360 degree image. But the most important
thing about a HDRI is the fact that it contains
lots of light information. So we will have a
sun in this scene, or it'll have information
about where the sun is, and it will be sort of focusing
light onto our object, which is quite directional. So you can get lots
of different HDRIs. There's thousands out there,
lots of free, actually. And you sort of need to look at HDRIs and decide what
you need for your scene. So do you want HDRI that is done on quite a
cloudy day so that you get quite ambient and flat light that won't sort of put too
many shadows on your scene, or do you want a sunset or sunrise HDRI that will
create long deep shadows? Do you want one
on a very bright, sunshiny day, or do you
want quite a dull day? So all that information
you just need to consider when you sort
of choose your HDRI. So there is our HDRI, and we'll be learning more about HDRIs in the next lecture. So let's come back to here now and hit this
little drop down. And what I'm going to
do this time, whoops, is just go ahead and send
the world opacity down to zero so that our HDRI is still being applied
to our object, but we just can't
see it anymore. Okay, let's bring this back
up now to about 50 50. And the next thing I want to do is create our very
first texture. So let's come down
to the Shader Editor here and click on
you, and there we go. Every time you create a
new texture and blender, you always get these two nodes, the material output and
the principled BSDF. And as I kind of said
in the last lecture, this node is like the core node that most other nodes
are plugged into. So if you like this
is the mothership if we're on sci fi terms, this is Battlestar
Galactica right here. And then you have
the material output. So this is the very final node, which will dictate what
our texture looks like. So that said, let's go ahead and create our first texture. So the next thing we're
going to do is just press N to bring in this
little tab on the side. And I don't know if
you remember or not, but I think it was in
Lecture five or Lecture six. I think it was Lecture
six. We brought some add ons into our blender when we were doing
some final setups. One was blender kit, which
we've got right here, and the other one's right here. It's node Wrangler. And
in this lecture now, you're going to start to see the benefit of node Wrangler. So, click on your principal
BSDF and then click on Node Wrangular and
add principle setup. That'll take you to your
files within your computer. And now what you need to
do is go to where you saved your textures
for this course. So I think I'm here, there's
my textures right there. So I'm going to select
one of these textures, and you can do the same.
So what shall we choose? Well, maybe we'll choose. Let's choose aged bricks. Let's go for that. When we
do that, we'll get this up. These four little
screens like this. And what we have here is
what you call texture set. Here we have our texture maps. We have four texture maps
making up a texture set. This one right here is
your base color map. This contains all
the information about the color
within your texture. So we have the redness of the bricks varying in
colors, of course, and then we have the grayish
cement between our bricks. Next to this, we have
our roughness map, which is a little bit
self explanatory. This one controls how rough or smooth our
texture set will be, our finished texture, how
rough or smooth it will be. Right here we have
our normals and our normal controls how reflections will
be on our texture. So which areas will be reflective and which
areas won't be. And finally, we have
our displacement, which controls the lows
and highs of our texture. So with those all four together, we have our texture set. So let's go ahead and press
A to select all of those. And let's click on this one, add principled texture
setup, and there we go. So that is what node
wrangler does for us. We would have had
to if we didn't use Node wrangler Import all these four texture sets
here, bring in normals, bring in a displacement, correct the settings on those, make sure that these
are all on non color, and then plug in texture
coordinates and mapping. And up here, where,
hey, we have a texture, and that looks pretty
good. I'm liking that. So we have here this
is the mapping node, and this is a node we'll
be using quite a lot. So at the bottom here, we can adjust the
scale of our texture. So if I just hold down
the left mouse button, hover and then drag
down to all three, I can now adjust the scale
of our texture. There we go. That's cool. So I can
take that up or down. On this one, I can affect
the rotation of our texture. So if I just click on the Z now, I can go ahead and rotate
that texture on our surface. I'll hit escape to
bring that back. And here we have location. So here on location, we
can go ahead and affect the position of our
texture on our surface. And there we go. So there we go. We've created our
very first texture. And that's all I really wanted to show you
with this lecture, what the basic four
texture maps are, creating a set, what
our principal BSDF is and our material
output and our HDRI. Okay, so in the next lecture, this start this will
start to get fun. Let's create our HDRI
lighting within our scene. Okay, thanks very much. And I'll see you in the
next one. Bye bye for now.
60. Lecture 59 H: Hello, and welcome
now to Lecture 60. Wow. We're in lecture 60 already. We're
flying through this. And welcome, as well to sort
of part two of our course, which is texturing and lighting and animating
and rendering our scene. And it's gonna be a lot of fun. I really enjoy this kind
of element of modeling. Everything sort of
comes together, you know? So let's make a start. So I think in this lecture, let's create and set up our
HDRI lighting for our scene, so then we can go forward
and start texturing. So let's do that. So the first thing
I'm going to do is go from layout to the
shading tab like this. The next thing I want to do is make sure we're on the
right render engine. So come on over to the data
properties and make sure that this little render
properties is actually selected. And then come on over
to where it says EV and select cycles. Make sure that it is supported
by your GPU, not your CPU. And here in Viewport, on the samples, bring this down. For some reason, Blender has this really high standard,
and I don't know why. So let's bring down
the samples to, maybe even sort of 30 or
40 somewhere around there. That is the amount of times that blender will actually render
during real time rendering. So it would have rendered like 100 times or created 100
samples of our rendering. So bring that down really low. You still get a very
good idea of what your rendering is going to
look like at 45 samples. And also make sure that
denoise is turned on, and there we go and now
we've done all that, let's just go over to the top
here and let's go ahead and click on full rendered
mode, and there we go. And our scene has
gone really dark, as you can tell, and
that's because we have no lighting set up yet. So let's go ahead
and fix that next. So come on down to the
Shade Editor tab here and go click on Object and
turn that to world. So now we have two
new nodes here. I'll just bring this
up a little bit. We have the background node, and we have the world output. So the next thing
we need to do is, let's go ahead and
bring in a new node. So let's press
Shift A and go for texture and then
go ahead and click on the Environment texture node, and bring this in and drop
this about there like Right. On this side now, make sure that this tab is on display,
and if it's not, go ahead and press N to
make sure that it's on, go ahead and click
on Node Wrangler. Select the Environment
texture node and click on Add Texture setup. Now we've got a texture
coordinate and a mapping node connected to Environment
texture node. There's one more node I want to bring in, which is an RGB, so press Shift A, and search for RGB curve. So if you go ahead and type that in, you would get Whoops. RGB curves, and go
ahead and click on that and bring that in as well. I'll just select this
background and just bring it over a little bit just
to give us some space. Okay, now that you've
done that, go ahead and just hover over this
little tab here, hold down the left mouse button, and drag out this
little thing and just plug that into
the colo like that. Do the same with
this one, go ahead and plug that into the color. And now our scene has turned this bright sort of pink color. And that's blender telling us that all the
nodes are in place, but we need to assign
an actual file to this. So let's do that next. So I'm going to use a
site called Polhaven, so I'll just drag in my browser here and go ahead
and expand that. And this is Polhaven. So Plyhaven is very popular
amongst three D modelers. It contains literally hundreds of high quality HSDRI images. And yeah, it's
just very popular. And the bonuses, they're
all absolutely free. So let's just click
on Outdoor here. And I've already kind of decided what HSDRI I want to use, but you can go ahead and browse all of these and see if there's
something that you like. And incidentally, you
can see on these images, you can see these
spheres on the front. And what they're trying to show you is the type of light
that's in your scene. So if you maybe look
at this one here, this pool beg one, and you can see by the
length of the shadows on these spheres that it's going
to have some high contrast, low angled light on this scene. In contrast, you can see this suburban football
field next to it, which has got a cloudy
day and quite ambient. So here you've got
quite flat shadowing and quite realistic lighting. You can see it as well
here with this one, well, Geo Gap Road. And you can see here that the light is
actually quite warm, and it's creating quite
a yellowish light. And as well, you've got some
quite long shadows in that. So do consider as you're
selecting your HDRI, what your lighting's like. Personally, I'm going to
go for something quite ambient because it creates
quite realistic textures. So I've already decided
which one I'm going to use, so I'm going to just type it in here or just start
typing and here it is. And here's the one
I'm going to use Iman Sara horn, is it? I'm not sure. Iman Sara horn. So this is the one
I'm going to use. I'm going to click on
this. And the option you get here is the quality
of the download you want. And be warned HDRIs
are large files. So do consider that. I
would never start using sort of 19 or 16 k images. I would use somewhere 2-8
k images with my HDRIs. So I'm going to go ahead and
use an AK, but to be honest, I've already
downloaded this image in preparation for this course. But you maybe take a minute and decide which HDRI
you want to use, and then when you're ready,
save it to a relevant file. Okay, I'll pull this
out away again. And so what I'm going to
do now is click on open, and I'm going to go back to my sort of file where I'm keeping all my kitchen files in. So I've got my lectures, et cetera, and blender. And I'll click on the HDRI. And here's my file, my HDRI, and I'll
go ahead and open. And there we go. So now we have some nice natural
lighting in our scene. So the next thing I want
to do is for a moment, I'm going to go ahead and
hide those bifolding doors. So I'll just hide these in
the windows and wall file, and now I'll go ahead
and stand in my kitchen. And I think maybe as well, I'm going to hide
my roof lights, too to bring more ambient
light into my scene. And I like this HDI, particularly because
the view is amazing. So that's really going to set off our house
nicely, our kitchen. But also the light
is quite diffuse. We don't have many really
hard shadows with this HDRI. We have some really
nice diffuse light. I've noticed now as I'm
saying that there's definitely something
wrong with that window, but I'll show you how
I'm going to fix that later. So let's carry on. So the next thing
I want to do is consider the view
from our kitchen. So what I can do is come over to the mapping node here,
and on the rotation, I'm just going to start to turn this and find the
view that I like. But also, as I'm doing it, consider the lighting
coming into this scene. Remember that HI lighting
is kind of directional, so we do need to
consider all the time the lighting. That
is quite nice. We got knots of
nice light flooding into the scene from this angle. And let's just have a look
from our roof lights here. And I'm liking the light as well being created from
these roof lights. It's all really
nice and diffuse. I think I'm going to
go ahead with that. The other thing we can do
is we can have a look at the background node
here and we can increase the strength of our
HDI lighting if we want to. I think I'm going to
keep mine at this stage, I can always change it at
around around 1,300, I think. Okay, so that's our
HER lighting setup, and this now sets us up for the next lecture where we
can start creating textures. Okay, thanks very much. And Oh, let's do a save. Let's press Controls, and let's go ahead and
save our progress. Okay, thanks very much. And
I'll see you in the next one. Bye bye for now.
61. Lecture 60 Glass Material: Uh Hello, and welcome
now to Lecture 61. And in this lecture, yeah, let's start creating
some of our materials. And I think the
first material well, the first material I
generally do when I'm creating for architecture
in interiors is glass, because then we're going to have light filtering in
through the windows, and it'll give us a
good representation of the natural light that
we'll have in our scene. So let's go ahead and
start with our glass. So I think the best one to do is our biggest glass panels, which is our bifolding door. So let's come over
here to the outliner, and let's find our
bifolding door and go ahead and
turn that back on. Let's select the door, and let's press N to see
what the scales are like, and the scales are
good in this one. And let's go over here to the shader editor now
and click on this, and let's bring that to object. Now that we've done
that, we're going to create a glass material. So there's two places
we can do this. We can either click
on this and create a new material here
in the shader editor. Or we can go down here to material properties
and click on this one. And we can click on New here, and now we've created
a new material. I'm going to double click on it here and I'll go ahead and call it glass or
maybe door glass. There we go and hit Enter. So what we've got now
is the same nodes as we've seen in
the last lecture, the principal BSDF and
the material output. But this material is
going to differ from the materials that I showed
you in the last lecture. At the core of the materials in the last lecture were basically
photos, weren't they? We had four texture sets, four images, which
made up our material. And in that case,
that's called a PBR, a physically based rendering, a material made up
at its core photos. This material is
going to be what's known as a procedural texture, and procedural textures
are simply made up from a series of nodes plugged together with
the correct settings. This sort of the advantage of PBR materials often is
we can scale that up to fit any surface
without having any issues of the photo at the heart of the
PBR being repeated. In that case, that's
called tiling. So yeah, let's go
ahead and do this. So I think the first
node I want to bring in is the transparency node. So I'm just going to go
ahead and press Shift A, and I'm going to search
for the transparency node. So I'll type in trans, and there is the
transparent BSDF. And I'll just set
that just there. I'll bring over the material
output like this, now. And as you can see,
the principal BSDF is plugged into the surface
on the material output, and I need to also plug this one here into exactly
the same point. But there's only one, so I can't can't plug both into
the same place. It simply doesn't work. So I need to bring in another node to mix
these two together. So I'm going to press Shift A, and I'm going to search
for a mix shader, and there it is. I'll bring that in like that. So now I'll go ahead and plug this one into this
one like this. Just to remind you, I'll hold
the left mouse button down, while hovering over that one and then drag and
just let it punch in. Whoops, that's the wrong
one. Plug that into there. Now, I'll go ahead and
take the shader and I'll plug that into the
surface like that. And now we have two nodes being blended into
the material output. So now it's time
for another node. So let's press Shift A, and let's search for
the light path node. And there it is, and
we'll grab that and we'll bring that into
the scene like this. Let's bring in another mode now. Let's press Shift A and
search for the math node. There it is. We'll bring
that in like this. Move over the light path a
little bit, bring this one in, and now I'll go ahead and plug the shadow array into
the top value like this, and I'll go and
plug the value into the factor on the mix
shader like this. What I'm going to do now
is go ahead and bring this value down here
to, let's say, a one. And let's play around now with the principal BSDF settings. So on the roughness, as we know, glass is not rough. It's just reflective and shiny. So let's bring this down
to basically nothing, something like that, I think. And now let's go ahead and bring the IOR up to get some
reflectivity in our glass, and there we go, that's cool. And now let's go ahead and take the Iowa and our glass up to, maybe about a six,
something like that. And let's bring the Alpha
down to about half, I would say,
something like that. And there we go. That's cool. So now we have our
glass material, obviously, the whole
thing is in glass. And in the next lecture, we'll start sort of applying
other colors to our frame. I think the last thing
I want to do is add a little bit more
color to our glass. So here on the
transparency B FTF, I'll just click on
the color here. And on this slide here, I'll just bring this down a little bit to
add a little bit, a tiny bit of tint to our glass, and there we go. That's cool. Now, since we have
that material, we can go ahead and share that material now
with our windows. So let's come around the side, and let's maybe select this one, hold shift, and select this one. And now come on down to the shader editor here and click on this little drop down. And here's the first
material we've created. This door glass. So go ahead and click on
that, and there we go. Now we've gone ahead and
shared the glass material from our bifolding doors
to our window there. So we can go ahead and do that on the other side now, as well. We can go ahead
and grab this one, whole shift and grab this one, come to a little
drop down and go ahead and just share
the glass with those. And while we're doing
this, actually, we could turn on our
roof lights again. Let's go ahead and
select this one and maybe hold shift
and select this one. And let's go ahead and click on the glass there and assign
the glass material to those. And let's do these two
now, select both of those. Kick this little drop down
and go ahead and assign the glass material to
those. And there we go. We can actually step into
our building though, and we can start to
see the natural light that we'll have in our scene. And that's cool.
That's looking good. Looking at this, we need to do possibly a little bit
of work to our pillars, our pillars aren't actually
touching the floor yet. So at some point,
we'll sort that out. Okay, so I think the next
thing we need to do is a save. But I think I'm going to go
ahead and do a new save. Since this is sort of a
mile marker on our course, we've just finished
all our modeling, and we're on to texturing. Let's do a new save. So come on up to file here
and go ahead and save us. And next thing I
can do is just hit the little plus sign here to turn this now
into kitchen two. And once you've done that,
let's go ahead and do a save. Alright, there we go.
So in the next lecture, let's go ahead and finish
off our windows and doors. Let's create a material
for our frames, and let's also create
a little sort of black rubber material
for our sort of seals in our doors and windows. Okay, thanks very much. And I'll see you in the next
lecture. Bye bye for now.
62. Lecture 61 Windows & Door Frames: Hello, and welcome
now to Lecture 62. And in this lecture,
I just want to carry on with our windows and
doors and skylights, creating the
materials for these. So I think with this
bifolding door selected, let's go ahead and
hit the forward slash key to isolate it. And in the last lecture, we didn't really create any UV maps for this
bifolding door. And well, we didn't for any
of the windows and doors. And the reason
being because glass is a relatively featureless
thing, you know, it doesn't have any
sort of patterns to it or any grain or anything
like wood or stone. So it hasn't really
been necessary. And the frame itself now is
going to be a gray color. So as well for that,
I don't really see any need at this stage
to apply UV maps. So we need to assign a second
material to this frame, so I'll just go ahead and
tap into Edi mode with it. And yeah, we need to assign a material to this outer frame, leaving the sort of the
center ones as glass. I'll show you how to do this
to assign a second material. So let's go ahead and
hold Alt and just select this out of
frame like this. And now let's roll around
to here and sort of zoom in to get this kind of angle so we can
see what we're doing. And now hold down Control and press the plus
button to expand our selection until we
get to where would it be? About like that. Once we've got all
those selected, make sure here that you're in the materials properties tab, and within this
sort of area here, go in ahead and
hit the plus key. And now we've created a new
material for this component. Let's go ahead and
click the new tab, and let's go ahead and double click on the
material itself. And let's call this window
and door frame material. There we go. We'll click to. And with all this
still assigned now, all these sort of surface
is still selected. Go ahead and hit the assigned
tab, and there we go. So we've sort of selected
those ones. All right. So now what do we want to do? I think looking at this
bifolding door now, I'd say it's way too thick. So I think I'm just going
to go ahead and press A and select all surfaces now. And I think I'm just
going to go ahead and scale this down
in the Y axis. So I'll press T so I can get the tab key up and we'll click
on the move one like this. And now let's go ahead
and press S and Y, and just go ahead and scale this down a little bit because this frame is just too
big, and there we go. We'll leave that just like that. Alright, so now we need to
make sure that we've got the window and door frame
material selected because it's easy to accidentally select the glass and be making
changes to that. So make sure you've
got this one selected. And we're not going to make
a PBR material with this. We're not going to sort of
bring in any texture maps. We're just going to manipulate the principal BSDF to get a
nice looking color on this. So I think let's go ahead and tap out of
Edit mode with it. And let's just sort
of hang around here on this corner so we can
get a sense of reflection. And let's just go into
the base color here. And on the gray scale, I'm just going to
bring this down, so we get a sort of a
well, a gray color. This is what I'm kind of thinking is the material
we're going to do. Okay, once we've done
that, maybe come over to the roughness
here and just slide the roughness down to get a slight reflective
material on this, kind of like that, I think. I think that's kind of nice, maybe a little bit
more. That's too much. We'll put that kind of
about there like that. Let's play around with the IOR. Let's bring this
up a little bit to get a slight bit of
reflection in it. And that's about right. I can see a little bit in it. Maybe I'll bring the roughness up a little bit more again. I just need, not so much
as a glossy shine to it, but more of a sheen, I
think, on this surface. And we can try just increasing
the IOR a little bit. I think that's pretty
much what I want. I think that's fine. I don't want metallic, but I just want a slight shine
to the gray material. Maybe we'll just
bring the Iowa down a little bit,
something like that. And yeah, I think we'll
leave that like that, now. So there we go. We've got our material
now for our frame. Let's go ahead and
bring everything back. So let's hit the
forward slash key, and let's look at that
and see if we like that. I think maybe we could go inside now and take a look at that
from inside the house. And see if we like
that material. And I think that's
working out nicely. So the next thing we need
to do is sort of make a material for all these rubbers that we've got going
on everywhere. So let's go ahead and select
this one now like this. Let's go ahead and click on the new right here in
the Shader Editor. And let's double click
on the material. And let's call this
the glass rubber. Whoops. Turn off my cap locks and glass rubber. There we go. Hit the endo key, and
we're away to go. And again, we're not going to really bring any
texture sets for this. I don't think it's necessary. So I'll go ahead and click on the base color now and we'll bring this down into
the black like this. And I never really go right to the bottom of
the scale with the black, because I find that to
be really unrealistic. So I'll bring that up
to something like that. The roughness will leave
about half and a half. I maybe bringing up a little
bit more rubber materials have very little reflection, if any. And there we go. I think that's kind of
done there now with that. So let's select this
one now here like this. And come to this middle tab here like this and select that one and go ahead and assign
the glass rubber to that. And there we go. Is
there any others? What's this one here? Let's go ahead and assign the glass
rubber to that, as well. And there we go. That's cool. Is there any other
seals anywhere? Is there one up here? This
might be one here as well. Let's select this one and go ahead and assign the
glass rubber to that. And it kind of looks
to me because we've adjusted the size or the
thickness of the window, these sort of rubbers aren't touching the surface anymore. So let's go ahead and
select all these rubbers. This one here, too. And
also the one at the top. Let's select that one. And then let's also select
the frame itself. And now let's go ahead and hit the forward slash
to separate those. Let's deselect the frame, so whole control and just put a selection
window over that. Let's press seven to
see this from above. And let's press, and
let's go into wire frame. And let's try and figure out
now where this needs to be. I'll go ahead and bring
this back again now into sort of this position
now again, like this. And let's see what
that looks like. Let's press S Let's go back to a solid frame for a moment. And let's have a look at this
and see how we're looking. Is there anything
else we need to do? Let's deselect
everything and just see that those seals are
sitting in the right place. And I'd say that's
looking a lot better now. Okay, let's hit
the forward slash. Let's bring everything
back. And let's press said, and let's go back into
the full rendered mode. And there we go. That's
looking a lot better now. Alright, so where do we
want to concentrate next? I think the next
place we can go, maybe, is this window here. Let's have a go
at this. So let's go ahead and select
this frame here. And let's hit this little drop down in the middle and let's assign the window and
door frame material. And there we go. That was easy
enough. Let's select this little rubber
material here now. Let's select this. Where is
it? There we go to that one. Let's hit this little drop down, and let's assign
the glass rubber. And now we just have
this frame to do. So let's maybe select
this frame like this. Let's hit the forward
slash to isolate. Et's go ahead and tap into
Edit mode with this one. And let's go ahead and hold and select this part here now. And let's hold down
Control and press Plus and expand our selection
until we've got to there. So, again, we need to create a new material for
this component. Actually, I'm just going to hold Control and deselect
that panel there. Whoops, let's select this
one and this one as well. Let's select this
one. There we go. And with those selected.
And this one, as well. I'll get them all in a minute. With those selected,
come on over here to the material properties tab
again and hit the plus key. And we already have created the material,
so we don't click new. We just hit this little
drop down here and we find the window frame material. And with this all
still selected, go ahead and assign.
And there we go. That's done. Let's tap out
of it at mid with that, and let's hit the forward slash and bring everything back. There we go. There's
a window done. Let's go over to the window
on the opposite side now, let's go ahead and do this one. So let's select this frame here, and let's just go ahead and assign the window and door frame
material to this. Let's select this little
rubber seal here, hit this little drop
down in the middle and assign the glass
rubber to this. Let's select the main panel now, and let's hit the forward
slash to isolate. And let's go ahead and tap
into Edit mode with this. And let's hold out and
select this edge like this. And now let's hold
Control and plus and go ahead and
select the whole face. Let's deselect just
that middle one there. For some reason that just keeps on deselecting the
rest, but that's right. We can get over that. So we'll just go ahead and
select that one, too. And with those all
selected like that, come on over to the
material properties tab, hit this little plus key, and hit this little
drop down here and find the window frame material
and go ahead and assign. And there we go. That's done. Let's tap out of Edit mode with that and let's go ahead
and bring everything back. And let's see what
we look. Okay, I'm going to press Shift B to
re center on this area. So I'll hold down Shift
and press B and just draw a square around
maybe those handles like that, and there we go. That's cool. Okay, so
with that done now, let's maybe just select
these handles now like this. And let's go ahead and create
a new material for those. Or, actually, before we do that, let's go ahead and do
a UV mapping on these. So let's tap into
Edit mode with them, and let's press A for all. And let's go ahead and press U, and let's do a smart UV project. Make sure we've got an island margin and go ahead and unwrap. And there we go, that's done. Let's create a new material. So let's come over here
now and click on New. And let's call this the
let's call this the handles. There we go. That's cool. Okay, well that's selected. Let's just select
our principal BSDF. And let's come over to
the Blender kit tab, and let's add principal setup. Let's find our materials, wherever you've put
your texturing. So mine's right here. And somewhere here, we should
have a brass material. So we got the lamp brass there. I think that's probably the one. I think it is. I think
it's the lamp brass. So let's go ahead
and click on this, and let's press A to
select all materials. And let's add
principle TextEcea. And there we go. It's that easy. So we've got everything
in place here, and I don't think there's any need to do
anything else to that. I'll tap out of Edit mode.pin so let's go ahead and
to the other side now. And let's go ahead
and press Shift B, and let's do a square around
our windows here like this. And let's select these, and let's go ahead and tap
into Edit mode with it, and let's press U, and
let's go ahead and do a smart UV project
and click on Rap. Let's press A to select A, and let's see if we can see our UV mapping is right there. So let's hit our little
drop it down here and let's go ahead and put
the handle material on this. And there we go. That's cool. That's done, too, as well.
Alright, so where's next? I think the next
place we want to work is the root flights here. Let's go ahead and
do those. So let's see if we can select
this little rubber. Maybe on this one.
Let's try this one. There we go. And
let's go ahead and assign the glass rubber
material to that. Let's try this one again, see if we can just there it is, and see if we can assign the glass rubber
material to that. Let's select this
panel here now, and let's hit the forward
slash to isolate it. And let's go ahead and tap
into Edit mode with it. And let's go ahead and hold down Alt and
select this edge here. And let's hold down
Control and press Plus and expand our selection to
about there like that. Okay, once we've done that, come on over here
to the material properties tab and hit on the plus key to create a new
material for this component. And let's hit this little
drop down here and let's find a window
for a material. And let's go ahead and a sign. And there we go. Let's tap
out of edit mode with. Okay, let's hit the
forward slash key now and bring everything back. And let's do the same now with this one.
Let's select this. Let's hit the forward slash
key and isolate that object. And let's go ahead and
tap into Edit mode. Let's hold out and
select this edge here, and now hold down Control
and press Plus and expand on our selection to
about like that. Let's come over to
material properties, and let's hit the plus key. And let's find our window
frame door material. And now let's go
ahead and assign. And let's hit the forward slash key and bring
everything back. And let's tap out of Edit mode, and let's go inside our house now and see how that's looking. So the windows are looking good, and there's our skylights this, too, and they're
looking good, too. Alright, so I think
in the next lecture, we'll do two things. First of all, we need
to sort of create a material for our window
sills, so let's do that. And then let's create a nice looking material
for our walls. Alright, thanks very much. Oh, let's do a save.
Let's save our progress. So let's press Control S. And I'll see you in
the next lecture. Thanks very much.
Bye bye for now.
63. Lecture 62 Wall Material: Hello, and welcome
now to Lecture 63. And in this lecture,
let's go ahead and create a material now for our walls. Let's see if we can do that. So let's select the walls. I think the first
thing we need to do is make sure we got
a UV map for it. So let's check the scale. That's all good. Let's
tap into Edit mode. And let's press A.
Now let's press U, and let's do a smart UV project. Make sure you've got
an island margin, maybe something like 20
and go ahead and unwrap. Let's look at our UV map, and that's all super neat.
That's looking great. Alright, we can tap out
Edit mode with this now, and we can go ahead and
create a new material. So just select this and
go ahead and click on. Alright, so let's
name this material. Let's double click on materials, and let's call
this Walz clicknt. Okay, so again, we're going to create a procedural
texture with this. Again, a material with
no images at its core, not a PBR, not a physically
based rendering, but a procedural texture. So let's bring in the
first of our nodes. So let's go ahead
and press Shift A, and let's search for
a noise texture. And there it is right there. Go ahead and bring that in and maybe put that over there,
something like that. Now, select this noise texture. Come over to the node wrangler
and add texture setup. And there we go. That's cool. Make sure that the
texture coordinate is in the generated to the vector, as you can see it is there. Okay, now let's go ahead
and plug the noise texture directly into the
material output on the surface plug like this. And the next thing I
want to do is go over to the scale and go ahead
and increase this. And you can kind of see now
what the noise texture is. It just creates a
pattern in our texture. So let's go ahead and bring
this up really high now to, let's just actually
max this out, I think. Let's take this up to Let's
take this up to around 900, something like that.
It may be higher. Let's take this up to Well, let's take it to
the max at 1,000. Now that we've done
that, and we can see a kind of texture there. Let's unplug this and put this directly
into the base color. And now let's go ahead. Whoops. Let's grab the color here, plug that directly
into the base color, and let's plug the BSDF directly into the
surface. And there we go. That's. Okay, so now
that we've done that, let's bring in a color node. So let's press Shift A, and let's search for a mixed
color node, and there it is. Let's bring that in and put
that something like that. Now, let's unplug this. And let's plug the factor from the noise texture into the factor on the
mixed color node. And now let's go ahead and plug the results back
into the base color. Let's create our first
set of colors here. So, actually, before we do that, I'm getting ahead of myself. Let's go ahead and
grab this again now. And let's press Shift D.
And let's bring a copy up now and put this above
because I'm going to have four colors in this. And actually, we could go again. We could grab this
one, and let's press Shift D and bring this now
into the middle like this. Let's plug the result from
the lower shader into B, and let's plug the result from the upper shader
into A like this. And now let's go ahead and grab another from the factor and plug that into the factor on
the top mixed color node. And there we go. So now
we're able to mix one, two, three, four
different colors. So let's create some colors now. Let's maybe go to this
first one and grab this. And I'm going to bring
this up into the light. I'm going to bring this
maybe into the yellow. Let's try that,
something like that. I can't emphasize
enough at this. There is no set color that I'm trying to achieve
here now or set number. When you start making
procedural textures, it's all about playing around with these nodes and getting
the right kind of thing. So I'll bring this one now. I think into the blue like this. And I'll go ahead and take this up a little bit like that. Okay, let's play in
with this one now. So this one here, I
think I'm going to pull this in a bit
more into the blue, something like that maybe bring that up in the light
somewhere like that. And this top one now. Oh, that's very similar to
the bottom one, isn't it? Maybe I'll take
this up more into the turquoise,
something like that. Maybe that's slightly better. And I'll grab the top one now, bring the color up slightly, and bring this more into
sort of the pinkish color. Something like that, sort
of yellowy, muddy color. So now we have
mixed four colors. And if we go over
now to the factor here on the last mixed color, we can go ahead and slide
this left and right to get the effects from
our mixed color node. So if we slide it over
to the right, we get, I think, more of the bottom one, if we move it to
the left, sorry. And if we slide it to the right, we get more from the top one. So we can sort of
play around with these colors and get
whatever effect we want. For now, I think I'm going
to go ahead and leave that. The way we're setting
this up at any stage during our rendering as
we add lighting to this, as we have texture
on our cabinets, texture on our marble worktops, we can revisit this paint and
do whatever we want to it. That's the beauty of working
procedural textures. There is one more thing I
want to do with this though. Let me just pull this over
and pull this one over, and I want one final way of
adjusting this final color. So I'm going to
bring another node. I'm going to press Shift A, and I'm going to search
for an RGB curve, and it's right here. But if you start typing
it in, you'll get it, and I'll go ahead and drop
that in the mix like that, and it's already put
itself in for us. So if I go ahead and click
in the middle of this now, I create an extra control
point in this curve. And if I pull this up, I get a much lighter appearance. And if I pull it
back the other way, I get a much darker appearance. So this is one final
way of getting even more adjustment
in our finished color. So for now, I'll go ahead and leave that right in the middle. And like I said, we may well carry on
adjusting this later. But we've got no texture
to our surface right now. We just have this
nice looking color. So what I want to
bring in now will allow us to put some
texture on the surface. So the next node I'm
going to bring in is called a displacement mode. So I'll press Shift A, and I'll go ahead and search
for a displacement node. It's right here.
But if you start typing it in, you'll get it. I'll bring this in and put this maybe
something like this. Okay, I'm going to grab a
point from the vector here, grab this and put this into the normals on the
displacement node. And I'll grab the factor
from the noise texture and put this into the height
of the displacement node. And now I'll go ahead and grab the displacement node point, and I'll grab that
and put that into the displacement node on the
material output like that. And you can see now
we've got a texture. We actually got a nice looking
texture, and that's cool. But obviously, I think
that's too much. So I think the first
thing I'm going to do is bring the scale
down significantly. So I'm going to grab this
and I'll delete that, and I'm going to start
this with a zero, 0.005. Let's try that. Knock Enter. And now we have
a much lighter texture. That's something
much more like it. And I think what I'm going to do is here on the mapping note, I'm going to increase the scale. Va scale here on
a noise texture. If I just hold
hava over the top, hold down the left mouse button and select all three of these, and I'm just going to
go ahead and increase this texture to increase the scale of our noise texture even further to
something like that. So now we do have texture there, but it's fine as you would expect it to be on
a painted wall. Alright, so I think the last
thing I want to do with this is let's just play around with the principal
BSDF a little bit. So I think I'm going
to bring the roughness down so I have a slight
bit of sheen on this wall. And now I'll go ahead
and bring the IOR up. So we have sort of
a sheny surface. So it is very, very slightly reflective.
And there we go. So that's our painted
wall surface. And I think for now,
I'm happy with that, but like I said, we may
adjust at a later date. But then looking at our
windows next to this, I get the feeling now our
windows are too dark. So I'll click on the windows. And here on the base color,
I'll just select this. And I'm just going to bring this gray scale up a little bit, just to maybe make this
window material now, slightly lighter. Let's have a look at that
and see how that looks. Oops. And yeah, I think
that's slightly better now. Just a slightly lighter gray seems to be working in
combination with our wall color. Okay, so the only other thing I want to do in this
lecture now is create a paint surface on our
sort of seal boards here. We haven't done that yet,
so let's select this one. And let's go ahead and select the one on the
opposite side now. Let's select both of those, and let's hit the forward slash, and let's isolate those. Okay, let's select
maybe one of them. And I'm just going
to press Shift B, and I'm just going to
do a selection square around this just to sort of
zoom in a little bit on it. And let's check the scale on that and the scales all good. So let's tap into
Edit mode on it, and let's press A to select
O, and let's press U. And let's do a smart UV project. Make sure you've got Ilan
margin and go ahead and unwrap. Yeah. So let's tap out of Edit mode with that
now with it still selected. Let's click on N. And let's call this the
wood gloss material. There we go. And this is going
to be sort of, you know, like you get an oil
based paint for wood, and it's called like gloss. So we're going to
be using that kind of sort of paint
surface now on this. So we do have a
texture set for this, so I'm just going to
select the principal BSDF. And I'm going to come
over to the node wrangler and I'm going to
click on this one. And let's go ahead and
find our texture set. So mine's right here, and you need to go wherever
you've saved yours. And somewhere here, I
have a gloss paint. And it's here somewhere here
it is white glass pane. I'll click on this and
I'll press A to select, and I'll add principal texture
setup, and there we go. I'd say that's not
looking right yet. I say, the first
thing we need to do is go ahead and rotate that. I'm going to just come
to this mapping node here and the Z axis, I'm going to slide that over to turn the
rotation of this grain. I want to turn that
until it's running lengthwis on the
surface like that. I'd say the texture is too big. So the next thing I'm going to do is go to the scale here, hold down the left mouse button, drag that to All Whoops. Do you select that
one? Hold down the left mouse button and select all three and go ahead and increase the scale on this one until we get something a bit more like that is
what I'm after. And there we go. That's cool. Okay, so let's select the one
on the opposite side now. And I'll just press Shift B. And I'll just grab this one, draw a selection square
around it and move in on it. And let's repeat this process. So let's select it,
check the scale. It's all good, tap into
Edi mode, press A, and go ahead and press U, and let's do a smart UV project
and go ahead and unwrap. Okay, let's tap
out of edit mode. Let's come down here
to this middle one here and let's find
our new material. And here it is, the
wood glass material, and go ahead and apply that. And there we go. That's cool. Okay, I'll hit the
forward slash, and I'll bring everything back. And yeah, let's just zoom in and have a look
at that in context. And, yeah, that's looking good. We've got a nice little
bit of shine on that, and we have some
texture as well, so that's absolutely perfect. Alright, so we've made some good progress
in this lecture. Now we have a nice wall color, which is making everything
else look really sort of now we haven't got
light absorption. We've got kind of
light reflection, so that just helps us see what
everything's going on now. So I think in the next lecture, maybe we work on
a floor material. I think that'd be a
good one to do next. Alright, so let's
save our progress. Let's press Control S
and save our progress, and then I'll see in
the next lecture. Thanks very much.
Bye bye for now.
64. Lecture 63 Floors & Worktops: Hello, and welcome
to Lecture 64. And in this lecture,
let's go ahead and create some more materials. So let's create maybe
a floor material. I think that would
be a good one. We feel like we're making some really good progress
with the floor material. And then also maybe let's create a material for our worktops. And if we get time, maybe the brick for our chimney,
that would look really good. So let's see what we
can do with this. So I think the first
thing we do is we select our walls and we tap into
edit mode like this. And let's select a
single floor face. And let's go over to select
here and let's go for Select similar and
select all coplanar. And there we go. That's cool. Now let's come over to the
material properties tab, and let's hit the
PASCi here like this. And let's click New and
let's double click this. And let's call this the floor. And go ahead and enter. With that still selected, go ahead and assign,
and there we go. That's cool. We can tap
out of Edi mode now, and we can see what we do. And that's turned
white because we have a new material created to yet, but we don't really
have anything on it. So let's zoom out until we see our principal BSDF and let's
go ahead and select that. Let's go over to
our node Wrangler, and let's click on
Add Principal setup. Let's go find our textures,
and they're right here. And I have a separate file for floor because I have
three choices in here. I have a wooden floor, floor tiles, and stone floor. So let's try, first of all, let's try the stone floor, and I'll press A, and
I'll go ahead and select principal texture
setup, and there we go. Let's go over to the scale here, and let's just
hover over the top, hold down the left
mouse button and select all three.
Whoops. Got that wrong. Let's try that
again. There we go. And now let's try increasing
the scale until we get the sort of size we'd like to see
these stone tiles at. And I would say, Is
that too big still? Maybe let's try taking
that a bit more. To something like that,
maybe is about right. Okay, so there's
sort of option one. And let's sort of explore the other options as well and
just see which we prefer. So that's the first one with this sort of very traditional, very old looking
sort of stone floor. So I think, first of all, let's go ahead and
just delete all of these nodes here and
also the displacement, and let's just go ahead
and delete those. Let's select our principal BSDF again and let's find
the second one. Add principle setup. We'll go back one
to the four tiles. Let's press A, and let's
go ahead and add that. And let's go over to the
mapping node, grab the scale, and go ahead and
increase that until we get something about
what we're thinking, which would be about like that. So there's a second
option on this. And then our third option is, let's go ahead and delete these. And let's add the
principal setup again and add principal setup. And let's go to
the floor wooden. We'll press A for all and go ahead and add principal
texture setup. So let's go ahead and scale that down, of
course. That's huge. So we'll grab all of these and just go ahead and change
this number around. Until we get sort of
about a floor board size, which is, I would say
something like that. And I automatically I like that. I like the warmth of that, and I like the texture of that. I think I'm definitely
going to go for that one. Okay, so I'll leave
that like that. Let's just have a
look at the scale, see if I want to change
that some more. Maybe I do. I'll just go ahead
and select all three, just up the scale slightly more to about there, I
would say like that. And yet, that's my
personal choice. I like that the most.
So there we go. I mean, it's completely up
to you which you prefer, but I'm going to go
for that, I think. And I love the
reflections coming through that window
onto that floor. That really adds a nice
level of realism to. Okay, so that's that the. So
where do we want to go next? Let's move to the
worktops and do that one. So let's select a worktop. Let's select this one maybe. And let's look at the scale. The scale also all good. Let's tap into Edit
mode with that. Let's press A, and
let's press U, and let's do a smart UV project. Make sure you have
an island margin and then go ahead
and unwrap it that. Let's look at our UV map, and that's absolutely fine. So let's create a new
material for that, so let's go ahead and click
on, and let's name it. And let's call it the worktops and go ahead and enter,
and there we go. Okay, so let's select
our principal PSDF and let's go over
to the node wrangle and add principle setup. And let's go back to the
main group of textures, and let's find marble,
and there it is. And let's press A to select all, and let's go ahead and add
principal texture setup. Okay, let's tap out of Edit mode with that now so we can
see what we've got. And that's looking really
good straight out of the box. Let's just have a sort of
a look at this closer to. I don't think I want
to adjust that. I think it's looking
fantastic straightaway. I'm going to leave that, I
think, just where it is. Or let's just I got
to have a play. Sorry, but I've got
to have a play. I'm just going to go ahead
to the scale here and just try increasing the scale
and just see what we get. And I think I'm glad I did that. I think that's looking
slightly better like that. Let's now just go over to
the BSDF let's look at the IOR and just try adding slightly more reflection to
our surface, now, like that. And, yeah, now that's really
cool. I'm liking that. So let's select this piece now, and let's look at the scale and the scales
Oh, the rotations out. So let's press Control A and
apply rotation and scale. And let's tap into
Edit mode with that. Now, Let's press A,
and let's press U, and let's do a smart UV project. Make sure you have
an island margin and go ahead and unwrap. Once you've done that,
tap out of Edit mode. Find our marble material. Worktops there we go. And there we go, there is. And that's our splash
back done now, as well. And that's cool. So let's
go to this one now. Let's do the same thing. Let's go ahead and tap into.
Let's check the scale. The scales all good. Tap into Edit mode, and let's press A. Let's press U and let's
do a smart UV project, and let's go ahead and unwrap. Let's go ahead now and
tap out of Eddy mode, and let's go ahead and add
worktops. And there we go. That's cool. I'm getting quite a lot of repeating
on this pattern here, so I think I want to do
something about that. But you can see here that repeat pattern is just not nice. So there's a few things
we can do with this. We could just tap
into Edit mode, and we could go ahead and press A to select. Oops, wrong one. Let's tap out of edit
mode with that one, select this one and
tap into Edit mode. And we could find
the island here, and we could grab this. And we could do things
like maybe pull this to the middle and we could go ahead and rotate this as
well like this, just to get a slightly
more randomized pattern. But we've still got
repeating in this, which is something that
we don't want to see. But here's the secret. I can adjust this worktop because if I adjust the
scale or anything in here, not only will it change the pattern in this splash
back which we want to, it'll also change
the pattern on this as well. So how do
we get over that? What we need to do is create a copy of this
material for this one. So here, in the worktops, come over to this one now
and create new material. And now we have a worktop 01, meaning this is a copy. And since we've done that now, we can actually maybe let's just tap out of Edmond so we
can see it a bit clearer. We can come over to the
scale now, grab the scale, and go ahead and change that to get something
a bit more realistic. So I'm going to take that to something like
that now, I think. And maybe I'll just go
ahead and rotate that. So I'll tap into Edit
mode with it, press A, maybe just rotate it a bit here now and see if we can find an area which kind of we like
and see what that's like. Don't like that
repeat pattern there, so I'll press A again, and maybe just move this
around, rotate it again. And let's go ahead now. Oh, that's actually not too bad now. I think I'm
alright with that. Yeah, I'm going to leave that
alone now, and there we go. That's what I want
with that splash back. Okay, we could
look at this one. Maybe we can go ahead
and prove this one. Let's take this one now, and let's create a new
material for this, as well. Now we could grab the scale
again and we could try changing the scale around on
this until we get something, which is one slightly
different to the worktop and to kind of the pattern
doesn't repeat. And that's looking a lot
better straightaway. Okay, so let's see what
we can do with this now. Let's go to this side
now and select this one. And let's look at the scale
and the scales all good. So let's go ahead and tap into Edit mode, and let's press A, and let's press U, and let's do a smart UV project and
go ahead and unwrap. Let's go ahead and
select a material now. So we've got three worktops. We don't want to
select the first one because that's scale
to the main worktop. So let's choose one of these. So I'll go ahead and
select this one, I think. Let's tap out of Edit mode
and see how that looks. And we've got some
repeating there, I see. So let's see what we can do. So let's tap back
into Edit mode, grab our UV map, and just pull that around
and maybe rotate it. And because we're adjusting the UV map and not adjusting
the settings on the texture, we're not affecting
the overall texture. So I'll tap out of Edit
mode and see if that's any improvement and just make sure there's no repeating
in that pattern, and that's looking a lot better. Okay, let's select
our main top now. Let's tap into
Edit mode with it. Let's press A. Let's press U and let's go ahead and
do a smart UV project. Go ahead and unwrap. Let's come down to here,
let's click on this one, and let's add our
main worktop group. Now let's tap out
of Edit mode for a moment and let's
see how that looks. And is there any
repeating in that? There is, which means
also there might be some repeating in
the opposite side. So I think I'm just going to go ahead and scale this up a little bit and just see if we get a point or maybe bring it down in the scale to
something like that. Let's have a look. And
maybe something like that. And then let's press A. Sorry, let's tap into
Edit mode with it. And we can grab
all of the UV map, and we could go
ahead and press R, and just try rotating it to get rid of
that repeat pattern. And there we go. That's
looking a lot better, I think. So we can check out the other
side because we've modified this one without
creating a new material, that means the one on the other side will
have changed, too. But I don't see that
as being an issue because the pieces
are so similar. And, yeah, I think
that's absolutely fine. So let's sort of select
this last splash back here. Let's do that one
now. This one here. And let's look at the
scale, and it's out. So let's press Control A. And let's do a
rotation and scale. And let's tap into Edit mode
with it, and let's press A, and let's press U, and let's
do a smart UV project. And let's go ahead and unwrap. Okay, let's select
a material now, and I'll go for Wtops 01, and let's tap out of Edit
mode and see what we get, and that's absolutely fine. I'm happy with that. Okay,
we got one last one to do, which is the main worktop here, so let's go ahead
and select this now. Let's look at the
scale. It's all good. Let's tap into Edit mode. We'll press, and we'll do a smart UV project and
go ahead and unwrap. And now let's go ahead
and select worktops. Not one or two,
just the first one. And there we go.
Let's tap out of Editode and see how that looks. And the does I can see
repeat pattern in this. So I think in this case, I'm
going to go ahead and create a new material again so that I don't change the worktops
in the back there. I'll come over to the top here, hit this little one here and duplicate this to version 03. And now I can select
the scale on this, and I could go ahead and
adjust this scale until I get a non repeating pattern,
something like that. All right. So if I wanted to, I could actually just tap
back into Edit mode now, and I could grab the UV map, and I could go ahead and scale
that maybe a little bit, maybe up or down. And I could go and do
a slight rotate just to see if I don't get
any repeat pattern and see how that looks. And yeah, I think
that's absolutely fine. I'm happy with that.
Okay, so we've done our worktops now and
we've done our floor, but I don't think
in this lecture, we'll have time to do
our brick chimney. I think that would just
be one step too far. So let's go ahead and tackle
that in the next lecture, and we'll go ahead
and do the mirror behind this chimney, as well. Okay, thanks very much. I'll see you in the next
lecture. Bye bye for now.
65. Lecture 64 The Bricks: Hello, and welcome
now to Lecture 65. And I was just between
lectures sort of finding nice views
on our kitchen. And it's really
coming on nicely. I like the color that
we've got on our wall, and I really love this floor. This is my kind of floor, and our worktops too are
already making a difference. So the other big thing
that I think will create a lot of impact is our chimney. So I think in this lecture, let's go ahead and do that. So let's select the chimney, and let's hit the forward
slash and isolate it. And I think what I want to do is reduce the light
for a moment. So I'm going to
go back to world, and let's find this
one, the backdrop. And it's on 1.3.
Let's remember 1.3. And now let's bring this down to about one,
something like that. And let's check the scale,
and that's all good. So let's tap into
Edit mode with it, and let's press A,
and let's press U, and let's go ahead and
do a smart UV project. Make sure we get
an island margin, maybe around 20, and let's
go ahead and unwrap. And let's have a look at our UV map and our islands,
and that's all looking good. Okay, so let's go back now to object before we do anything
else wrong with our world. And let's create New.
Let's click on New. And let's call this the
Brick Walls. Click Enter. And there we go. So now
we've got a texture created. Let's get a material for it. So select the principal BSDF. Head over the node wrangler
and just add principle setup. Let's find our textures. Somewhere here, I have aged
bricks in here of the art. I'll double click on
this and I'll press A our principal texture setup. I'll go ahead and press
this. And there we go. So there's our brickwork. So obviously,
that's far too big. So let's maybe tap out of
Edit mode for a moment, and let's just go ahead now
and come over to the mapping. Let's hold down the left mouse
button, select all three, and let's go ahead and
scale this down until we get this kind of
where we want it, which I think is
roundabout there. I think that will be good. But we do need to
sort of look at this now and pay
some attention to this and make sure that
the bricks line up nicely, and they all make sense. So let's go ahead
and do that next. So I see here on these edges, we have these tiny little
bricks and on this too. So first of all, I
don't think that works, so let's tap back
into Edit mode. And let's select all these
front faces like this. And maybe with that done, let's just go ahead
and make sure we just select a few
on these bevels, so we'll hold down control
and press plaster, sort of meet halfway
on those bevels. And now we've done that,
let's come over to the UV map and
select all of these. And let's just have a look at this from the front now and try moving this until we lose
those little half bricks. And that's kind of not
bad like that now. I'm seeing a bit more
than half of brick there. Maybe I'll try moving this
around again a bit more. And just shunt this
around and see what we get. And that's not bad. We're getting some half
bricks there, which is okay. We just got rid of those
horrible little Oh, we got some tiny
little ones there. Let's try just scaling
this up slightly. So let's just try scaling this up in the X. I'll press S and X. And either scale it up or
scale it down either way, just to get rid of those little
weird little brick ends. I don't want to go
too much on that because I don't want to
stretch the bricks too much. So let's try again now, just moving this round
on the X until we've got some full bricks
and not too many of those weird little tiny
sort of end of bricks. They're no good. And
that's not bad now. I've got half bricks, half
bricks. I'm okay with that. So I think now we're
good with that one. Okay, so let's look
at this end too now. Let's select here and here. And let's just select
half of this bevel. So let's hold Control
and press that plus twice to get
to there like that. Let's select all
the UV maps now. And let's go ahead and just
set the height on this and make sure that the joints
in the brickwork line up, and they do. I think
that's about right. And now let's make sure, again, we've got no weird little
tiny little brick ends, which would be
something like that. Let's just check that line
through and make sure we got either whole bricks or at least no tiny little brick ends. And I think that's a lot better. Okay, so let's do
this same here now. Let's have a look
at this face here. Let's select this one here, and let's go ahead and hit the Control plus and just
expand our selection. I'll just hit the negative just once just to get to there. In fact, no, I'll go one more. I hit Control plus and just
go to there like that. And at the end of the day,
I'm not worried about the back here because we've
got a mirror covering it. So now we got those.
Let's go to our UV map, and let's select
all the islands. And let's go ahead and just
move these around until our brick joints line through again. Let's
have a look at that. And let's try
moving that around. And let's try just scaling
it up slightly in the Y. We'll press SNY try moving this around until we
get the correct brick joints. And now we'll try moving
this on the Y again, and hopefully sooner or later, we'll get the effect
that we want. I'm still not sold on that. I'm going to press S and Y. And yes, try increasing the scale until we get the
brick joints about right. Let's try taking this up a little bit and
just try taking it down. There we go. Let's take a look at that
and see how we look now. Let's tap out of Edit mode. And yeah, that's looking
a lot better now. I think I'm happy with that. Okay, so let's have a look at this other side now and
see how this looks. Let's go ahead and tap into
Edit mode with this one. Let's select this face
here and let's hit Control plus and just expand
our selection to there. And again, let's press
SNY and just try scaling this up a little bit
more to something like that. And now let's try just
bringing this over to make sure we got no weird
little ends in the bricks. And let's just try
moving this up or down until we get these
brick lines lining through. And we're starting to get
that something like that. Oh, my goodness,
that wasn't easy. It's running out a little
bit at the bottom. But I think up here where
the eye will pick it up, I think this is
looking pretty good. Okay, so let's try
this side now, and let's select this
face and this face. And let's hit Control and plus. And let's try just grabbing the island
here and just moving this up or down until we get these bricks lining
up something like. And let's tap out of Edit mode
and see how that's worked. And actually, that
one's worked out just fine without
too much hassle. So let's tap out of Edit mode, and let's try bringing
everything back now. Let's hit the forward
slash. And there we go. We've got our bricks in now, and, yeah, they're looking
pretty darn good in position. So let's bring the light
back up in our scene now. So let's go to world. And here in the backdrop in
the background, let's take this back
up to 1.3. Maybe 1.4. We'll try that this time. And
there we go. That's cool. So now we got this mirror here. Let's do that one. Let's
go back to Object. And let's create a new
material for this mirror. And let's go ahead and
call it the mirror. And go ahead and click Enter. And I think the
first thing I want to do is maybe just
go ahead and bring the metallic up on this really high to the top like this and then bring the
roughness down as well. To almost the bottom. And let's bring the reflection
up. And there we go. Just like that, we've got a mirrored surface back
there just behind our oven, and that looks
absolutely spot on. So we got one more to do that I want to do
in this lecture, and that is this little
thing down here, this little I call it a hearthstone
underneath our bricks, so let's go ahead and do that
underneath our oven, sorry. So with that selected, let's check the scale,
and it's all good. Let's tap into Edit mode. Let's press A, and
let's press U, and let's go ahead and
do a smart UV project. Make sure we got an island
margin and go ahead wrap. Let's look at our islands and our UV maps, and
they're all really good. Let's click on NU, and let's call this. What am I going to
call this? I think I'm going to call this slate. And there we go,
Let's click Enter. Let's select the principal BSDF, add our principal setup, and let's go find our slate
material. There it is. Let's double click
on this. Let's press A to select all of
those texture maps, and let's add principal
texture setup. Let's tap out of Edit mode now and let's see what
that slate looks like. Maybe people just go
ahead and isolate it. And it's actually not too bad, but I think
we can do better. Let's come over to the map here, and let's just select
all the scale, and let's just try reducing the scale or
increasing the scale, actually, until we get something
that we're looking for. Let's zoom in on this
and see what we've got. And I think that'll be
fine just like that. Okay, so let's bring
everything back now. And there's a stone
in place under oven. And to be honest,
you really don't see much of that surface. Okay, so with each sort of step, each lecture, we
make some sort of big changes to our kitchen now. I think that fireplace, that chimney, that brick
chimney is looking really good. So what we could
actually do while we're here and we're
sort of working with the brick material
is we could come outside and we could
grab this wall here, and we could check the
scale, and that's out. Let's press Control A and
apply rotation and scale. And let's tap into Edi mode
with it. Let's press A. Let's press U, and let's do a smart UV project and
go ahead and unwrap. And now let's come to the
little drop down here. Click on this, and let's find our brick walls and go
ahead and apply it. Okay, let's select
maybe this face here. And let's find that island in our UV, let's write this one. Let's do an r90, enter. And that's the only one, to be honest that matters. So there we go.
We've done that one. So let's select let's tap
out of Edit mode with that, and let's select this one now. And let's look at the
scale, and that's good. Tap into Edit mode, press A, and U, and let's go ahead and do a smart UV project, and unwrap. And let's look at the UV map, and that's all very neat. So let's go ahead and grab
our brick wall material. So some are correct and
some are not correct. So let's go ahead
and sort this out. Let's grab this one, this
one, this one, this one, and let's have a
look at the other side, the important side, in fact, we got this one, this one, and this one. And once we've got all of
those, come to the UV map, grab them all and
press, 90, Enter. And let's have a look at those. I'm going to press Shift B and just do a zoom in on this area so I can
see what I'm doing. And let's have a look at that. And yeah, that's absolutely
spot on. That's fine. That's tap out it
made with that. And yeah, that's looking good. So now we can go back in now. And we've got this
brickwork too now, just looking good and
giving us a feeling that there's more to this house
than just the kitchen. We have more to the house. And we have this
little dwarf wall, as well, so that's cool. Okay, so let's zoom back. And I love this floor, and I love the
reflections that we're getting. That's
looking really good. And we've got our timber work, sort of have a texture
on all our beams, and we have these curtains done, that's going to
look really great. Okay, so let's go
ahead and do a save. Let's press Controls. And I'll see you in
the next lecture. Thanks very much.
Bye bye for now.
66. Lecture 65 Cabinet Material: Hello, and welcome
now to Lecture 66. And in this lecture, I think, let's go ahead and create and apply the material
for our cabinets. I think, again, that'll
be something else that'll really make
our scene pop. So let's go ahead and do that. So I think the best one
to sort of select first, I would say, as our island. So let's just select that. And again, I'm not going to UV map because
I'm going to apply, like, a painted
surface to these. So I don't really
see the need to. So I'm going to go ahead
and create a new material, and let's click on it,
and let's rename this. Let's call maybe cabinets. Click Enter, and there we go. Let's select our principal
BSDF let's go over to the node wrangler and add
Let's find cabinet paint. There it is. Double
click on that. Let's press A, and let's
go ahead and assign our principal texture
setup. And there we go. That's cool. Let's just move over our material output
for a second like this. And I want to bring
in one extra node. I want to bring in
the RGB curve node. So I'll press Shift A and search for the RGB curves and
bring this in like this. And I think for a moment, let's just go ahead and assign the material to a few more components so
we get a better idea. So let's select this one. And let's go ahead and put
the cabinet material on that. Grab this one and go ahead and put the cabinet
material on that. And because we used
a lot of old D, we're actually assigning colors to a lot of components at once. So let's select this one and
put the material on this. And then this one, too,
let's do this one, too. And imagine the other side
has already done for us, and it is, that's fine. So we could also do maybe
this top drawer here. And let's see on the other side. We just got this
one here, as well. Alright, that's
cool. So we've got a block of Carla there now so we can see
what we're doing. And I think as well,
I want a slight bit of reflection or more
like sheen off this. So let's go to the
IOR and just up this to maybe 1.9,
something like that. I'd say that's right.
That's looking good. And now, if we just go to the RGB and just
click Dead Center, we can put a control
point in there. And now with that control point, we can either make this
surface lighter or darker. And see what that looks like. And I think me personally, I'm liking a slightly darker, richer color on this
could go lighter. So completely up to you, this is completely subjective. So you can go ahead and do
whatever you want on this. But I think for me, I'm
going to sort of go towards the slightly darker material. Something like that,
I think I quite like. Okay, so now that
we've done that, let's just go ahead and assign this material to other surfaces. And again, because it's one material we're
assigning to everything, we can always come back and adjust this
at any stage we like. So let's select
this one maybe now. And let's just grab the cabinets on this one, this one, too, and select the cabinets, this little piece here,
and the cornice on top. Let's do that. And
this one here as well. And, of course, this
one, and this one. And let's do the end too.
Let's have a look at that. And there we go. That's already making a huge difference
to our kitchen. I am liking that. So let's do our extractor Hood. Let's just grab this
and maybe this one, and let's go ahead and assign the cabinet material
to that and this one. There we go. That's cool. And let's also go
ahead and do this one. Oops. This one here, put the material on
that and this one, too. And then this one too. Got these little ends here.
I haven't done these. Let's go ahead and do those, and maybe I've missed the
one of the other side, too, and I have, so let's grab this one and assign the cabinet
material to that. So we can go ahead and do
these lower cabinets here now. And this one, as well, this little plinth,
let's do that. And this one and the
plinth, as well. And the end panel.
Let's do that, too. So let's turn around now, and let's have a look
at our larger cabinets. Let's select this end
here, let's do this. And the main cabinet.
Let's do that. And let's do the
cornice up here. Let's grab this and do this,
and this little return. And we have this
little plinth piece, and we have the lining
here. Let's do that. And me personally,
I'm going to do the door the same
color as a kitchen, so let's go ahead and grab that. And let's go ahead
and do this one, too. And we also have the
door frame here. Whoops, if I can get
to. There it is. Let's do this one.
And this one here, too. Zoom in a little. Let's see if I get closer to it. There it is. I took a
little while to grab. And let's grab this
one here, too. And we've got the cabinet above. Let's do this one. And
we have this cabinet. Let's do this. And we
have this one as well. And we have the cornice. Let's do that. And a little
return on the cornice, and this one, too.
And the doors. And last but not least, we have these couple
of plints here. Okay, so that's really made a huge difference
to our kitchen now. We have all the
cabinets painted, and everything is really
starting to come together. So that was one of our
shortest lectures ever, and I don't think
I'm gonna push it. I think it's nice to have a
short lecture now and then. So I think in the next lecture, let's start applying textures
to some of our details. So maybe we'll do some of these handles and
we can do the tap. We can do the sink,
and we can do maybe this wine rack
and our shelves. And yeah, let's just
apply some details. We've got the sockets, as well, and maybe even the lamps. But yeah, let's do that
in the next lecture. Okay, so let's definitely
save our project progress. Let's press Controls. And I'll see you in
the next lecture. Thanks very much.
Bye bye for now.
67. Lecture 66 Handles & others: Hello, and welcome
now to Lecture 67. And in this lecture,
let's go ahead and just apply some materials to smaller components now
and see if we can make a big change by applying lots of colors
to small opponents. If you kind of get
my drift on that. Again, that's quite a
high impact thing to do when we start putting
details into everything. So I think the first one I'm
going to do is the handles. So let's just find
a handle, maybe. Select this one
here in the middle. And let's just check the
scale, and that's good. And let's go ahead and create
a new material for this. And let's call this the well, let's just call this
the brass handles. There we go. And let's go ahead and select
the principal BSDF. Let's add principle setup. And let's go over to our textures, wherever
they are for you. And let's go ahead and
find our brass. It's here. I've called it lamp brass, so go ahead and click on this. Let's press A to select, and let's go ahead and apply
principle texture setup. Let's zoom in on that
and let's have a look. And that's absolutely fine. It's a slightly
aged surface brass, and that's exactly
what we want, I think. So by doing that, because we've used old D quite a lot
to create duplicates, that means the material has been carried over to
these other handles. So let's go ahead
and do this one now. Let's select this one. Let's hit it'll drop down like this. Find out brass handles file. Here it is and click on that. Alright. Let's maybe
do the other side now. Let's find these ones. Let's select this one here. Here the little drop down, find our brass handles,
and select that. And that's done all of those. We just have this
one here now to do. Let's grab this one
and brass handles. Alright, so maybe now let's come to this side and see
what's already been done. And these have
already been done, so that's cool because
of the D command. So we just have these
lower ones here. Now. Let's maybe
select this one here, hit the little drop down, and let's apply the
brass handle material. And now that's done, as well. All of these lower
cabinet handles on this side. That's cool. Let's actually come
over to the other side now and see what's been done, and all of these also have
been done. That's really cool. Let's try the tall cabinets now. Let's see what we
need to do on those. Maneuver our way around to it. And it looks like these
ones here need to be done, so let's just select
this one here, add a material,
and add our brass handle material.
And there we go. That's all the handles
done now on the cabinets. But I think, as well,
I'm going to use the same material for
the handle on our door. So I'll select this, as well, hit the little drop down and apply the brass handle material. And again, because this
is no we don't have a wood grain or a
texture or anything, in this case, again, I'm not applying UV map because
looking at that, the details are just fine. Okay, we have these
little hinges, too. You have this one here. Let's select this, and let's apply our brass
material to that. And did we Alt D that one? Yes, we did. That one's
brass now as well. Alright. That's cool. That's
all the handles done. That was very
quick. So now let's do I think let's do the
sockets on the back wall. So what I'm going to do
is just select one maybe, and I'll hit the forward
slash to isolate that because I'm thinking there's gonna be more than one
material on these. Okay, let's go ahead
and select it, and let's look at the scale on the rotation, and that's fine. So let's tap into Edit mode. And I think in this case, I am going to apply UV
map because we're going to have multiple
textures on one surface. So I'm going to go
ahead and press A to select O and then U, and let's go ahead and
do a smart UV project. Let's make sure we've
got an island margin of around 0.20, and let's go ahead and
unwrap. And there we go. That's quite a complex
looking UV map, but it's nicely laid out. That's fine. Okay, I think what I'll do now is
I'll press A to select all. And I'm just going to go ahead and find our brass
handle material. Here it is and go ahead
and apply it. There we go. So I need to create
a new material now for this sort of
these T shapes here, and maybe the switches,
too, we'll see. So coming over to this side now and hit the little Plasky. And I think what
I'm going to do in this case is create
a new material. So I'm going to click
on you, and I'm going to call this black plastic. There we go, go ahead and enter. And I think all we can do
for this material now is, well, first of all, let's select maybe this face here
and this face here. And let's hold down control
and press Plus and expand on our selection until we
get something like that. Now, with that done,
let's click on the black plastic and let's
go ahead and assign that. And that's turned white because
we don't have anything. We haven't adjusted
any properties to the black plastic
material yet. So let's just grab the actual base color and
let's bring that down into the black like,
something like that. And now on the roughness, let's bring this to about
there, I'd say, like that. And let's put a slight bit
of reflection into it. Something like that, I
would say will be fine. Okay, let's tap out of Edit mode and see what
that looks like, and that looks absolutely fine. Alright, let's tap back into
Edit mode with this now. And I think I'm just
going to select dead center of
these two switches, and I'm going to hold down
Control and press plast and expand on our
selection until we've got something like
that, I would say. I think that's about
right. And now let's click on the
black plastic again, and let's assign the
material to those. And while we're
here, these sort of brass centers to these
don't make any sense. So let's hold shift and
select all of these. And again, I think
I'm just going to expand on my selection
just a little bit. So I'm going to hold control and press plast and just expand
a little bit to about there. Now that I've done
that, I'll go over to the corner here and click on black plastic and go ahead
and assign to those as well. Okay, let's tap out of Edit mode at that and see how that looks. And it looks good, but I think
I'd prefer these switches, or do I, or shall I
leave it like that? I'm wondering if they
should be brass. Actually, I think I'll leave it just like that. I
think that's fine. So I'll go ahead and
tap back into I'll go ahead and desolate that by
hitting the forward slash key. And again, because
we've lt deed, this one next to her has got
the same material applied. Let's check the others,
and they have to, and let's have a look
at the other side. And all those now have got the material applied,
and they look right? Alright, so where do
we want to go next? I think the next one would
be that we could do is, let's go ahead and
start applying materials now to
these surfaces here. We've got our wine rack here, and I'm thinking that's
going to be oak, and we've got our shelves
inside this cabinet, and I'm thinking they're
going to be oak as well. So we could do those next. So let's maybe select
this lower shelf here and let's tap into
Edit mode with it. And let's press A and then U, and let's go ahead and
do a smart UV project and go ahead and unwrap
and there we go. So I think we could go ahead and isolate that for a moment. And let's go ahead
and create a material for that now. So
let's click on N. And let's call this
Fine ok. Click Enter. And let's grab the
principal BSDF. Let's go ahead and
add prints and find our Fin oak material. Here it is oak finished. Sorry. Let's press A, and let's go ahead and add
principal texture setup. And let's see what we get. And we've got a little bit of
work to do to this by look. So let's just go over
to the mapping node. Let's hover over
the top one here, hold down the left mouse
button and select all three, and let's go ahead and increase
the scale on this now to get a sort of better
looking oak material, and there we go. Let's select this
top face here now, let's go over to our UV map. We'll grab it and we'll
just go ahead and rotate it 90 degrees and have
a look at that and see how it looks.
Let's have a look. Do I want to do anything
with that, or is that good? I think overall,
that's pretty good. I think with that, I'm going
to go ahead and leave it. You can see just in the
middle there, a line. And you can see a line
here at the front. In fact, I'm just
going to grab it, and I'm just going
to pull it over slightly in the X axis. There we go. And this line
here is called tiling. And this line here is
basically the disadvantage. Of PBR, physically
based renderings, because it is limited by
the size of the photo. So occasionally, you do get
kind of lines like this where the image at the heart of a PBR material
had to be repeated. Alright, let's tap back into
Edit mode with this again. And now let's just select this front face here and
let's go ahead and crab it, and let's press, 90, enter. And there we go. That's cool. I think that's absolutely fine. Let's tap out of
Edit mode with that, and let's go ahead and hit the forward slash key,
bring everything back. And the material has
automatically been applied to all these shelves
here, so that's cool. I'm not sure why that one
there hasn't been applied, but I think, in this
case, what I'll do is just go ahead and
delete that shelf, grab this one, and
press Shift D, and Z, and bring a copy up
to approximately the middle, something like that. There we go. Okay, let's go ahead and grab this
one and this one. And is that the only
ones? I think it is. Let's go ahead and
isolate those next. And let's go ahead and tap into Edit mode with
it, and let's press A, and then U, and let's
go ahead and do a smart UV project and
go ahead and unwrap. And now let's go ahead and
find our nice oak material. Here it is fine oak. And let's go ahead
and apply that. And there we go. That's cool. So I'm not worried at all about this side because
we'll never see it. It's just this side, so I'm just going to
grab this one here, find our UV map, and then go ahead and
press, 90, Enter. And that's gone hard
now and just spun the grain direction
round on that. So also, maybe this one here. Let's find this one on
the UV map here we go, and let's press, 90, Enter. And how's that looking? That's looking fine
now. So there we go. We've got a material now
applied to our wine rack. Let's hit the forward
slash key and bring everything back
and see how that looks, and let's tap out of Edit mode. And there we go. That's cool. Okay, now let's go ahead to
these shelves over here. Maybe let's just grab
the bottom shelf, and maybe let's just hit the forward slash
key to isolate it. Let's tap into Edit
mode, press A, and then U, and let's
go ahead and do a smart UV project and
go ahead and unwrap. And then let's go ahead then
and find our oak material, fine oak and go
ahead and apply it. So I think the directions fine, but I think I just want to just maybe just grab this
UV map here and just go ahead and move it around because we have this line
running up the center, and I'm not keen on
that, which again, that's the tiling from
the procedural texture. So let's try actually
scaling this down, so let's press S and Y, and just scale it this
way a little bit. Then let's press S and X. And let's just try stretching that a
little bit like that. And see now if we
move the X axis, if we can lose that
repeat tiling, move that over a little
bit, and there we go. That's it, fine. Let's
select this front edge here, and let's go ahead and
rotate that 90 degrees. Let's press r90, Enter. And let's have a look at this one and see
how this one looks. And I think, in this case,
that one, I'll be fine. Okay, so there we go. There's a oak material
applied to our shelf. Let's go ahead and
tap out of Edit mode. Let's hit the forward slash and let's bring everything back. And for some reason, that's not actually been
applied to the others. So I think what
I'm going to do in this case is just
grab these shelves. And we'll hit the forward
slash to isolate those. And let's press one to get
in the orthographic view. And let's go ahead and grab
the bottom shelf here. And let's go ahead and press
Shift D and Z and bring a copy up now to here
like this and just drop it in here. And
let's do that again. Let's press Shift D and Z and
bring a copy up like this. And now let's do that again, Shift D and Z and
bring a copy up like this. There we
go. That's cool. Now we can select the white
copies, if you can see, when I can see there
and delete it. And again, I haven't
been super accurate in positioning these ones because I simply just wanted to be
able to see the other ones. I'll go ahead and delete
that. And I'll grab this one, too, and go ahead
and delete that. And there we go. That's cool. Let's hit the forward
slash key now, and let's have a look at
that and see how it looks. And yeah, that's
looking good now. We're getting some nice
details in on this. Okay, so in this
lecture, we've applied all our brass materials to
our switches and our handles, and we've gone ahead and put this nice oak material here on our shelves and our wine rack. So I think in the next lecture, let's go ahead and
do a bit more. Let's do maybe the
tap and the basin. And let's go ahead and apply
our material as well to the inside of our
ada cabinet here. Okay, thanks very much. And I'll see you in the next
lecture. Bye bye for now.
68. Lecture 67 Texture The Small Stuff: Hello, and welcome
now to Lecture 68. And in this lecture, let's carry on just applying
textures to some of the smaller objects in our scene. So let's
go ahead and do that. But I think, first of all,
it's getting a little dark, so I think I want to
increase the light. So I'm going to go from
object here to world, and our strength currently
on our background is 1.4. Just for the moment, I'm
going to go ahead and increase that just to bring
in some more natural light. Maybe take that up to
maybe even there we go. About 4.6 is about where I want. Let's have a quick look outside
and see how that looks. See if that's just too bright
for our finish render. And it's something
we could actually consider leaving it there. I guess we'll sort of
look at that later on, but for the moment,
I'm going to leave it at a sort of 4.5 MAC. Okay, so let's go
back to object now. And let's go ahead
first, and let's do the interior of our
larder cabinet. So I'm just going
to press Shift B, and I'm just going to
select these doors here. So we just sort of zoom in
on those doors like that. And I'm going to grab
both of these doors. I'm just going to
press H to hide them. And now we've got the
interior of our cabinet. Okay, we've got a
back panel, I think. Oh, no, we need to put in
a back panel, actually. We still don't have a
back panel in this, so we'll do that as well. So first of all, let's go
ahead and texture this. Maybe let's just grab this
bottom panel here first. And let's fix the
rotation and scale. So let's press Control A and
apply rotation and scale. And now let's go ahead and
tap into Edit mode with it, and let's press A, and then U, and let's go ahead and
do a smart UV project. Make sure we've got
an island margin and go ahead and unwrap. Okay, let's go ahead and grab
our finished oak material, and there it is fine oak. I keep on thinking finished oak. It's fine oak, and there we go. Okay, let's have a
look at that and it looks like the grain
direction is incorrect, so let's go ahead and grab the actual island in our UV map, and let's just go
ahead and rotate that. Let's press r90, Enter. And now let's have a look at
that and see how that looks. And am I happy with that? I think I'm happy with that. I'll leave that just like that. So I'll grab the face now, and I'll grab the island here, and I'll hit, 90, enter on that. And there we go, that's cool. I'll tap out of Edim with that, and we're
done with that one. Okay, let's grab the top one. And let's go ahead and
do the same thing now. Grab this, let's fix the scale. So let's press
Control A and apply rotation and scale,
tap into Edit mode. A for, U and smart UV project
and go ahead and unwrap. Let's apply our oak again, and there we go, that's cool. Let's have a look at the
direction of the grain. I'm not happy with that,
so I'll grab that one, select it over here
on the UV map, and I'll hit 90, enter, and there we go. That's cool. Let's go ahead and do this
frontage now as well. Let's grab this. Let's
press R, nine, zero, enter, and maybe we'll just re center this
in our map like this. All right, so let's tap out
of Edit mode with that one and see if we're happy,
and I think we are. So let's go ahead and
select maybe a side. Now, let's select this one. The scale's good this time, so let's just tap
into Edit mode. Let's press A, and then U. Let's do a smart UV project, and let's go ahead
and unwrap that one. Okay, let's go
ahead now and apply our fine oak texture.
And how does that look? And again, I need to change the direction of the grain on that, so
I'll select that one. Come over to our UV map, select this and I'll
press R, 90, Enter. Let's just click somewhere
else so we can see that now, and that's fine with me. Okay, let's select this face. And now let's select
it over on the UV map. I'll press R, 90 enter, and maybe just bring this back in somewhere into our UV
map, and there we go. And that's looking good to me. So it looks like those
ones were actually linked, so the pattern is shared, but I guess we still need to do the UV mapping on this one. So let's go ahead
and select this one. Now I tap into Edit
mode, select this face. And let's go ahead
and rotate that. Let's press r90, Enter. And let's go ahead and
select this face here now. And this one has actually
already been done. All right. Oh, I know why that was
actually like that now because we did do
an LSD on this one. This face here has
already been corrected, the face against the wall, but we didn't correct
the other side. That's why we needed to carry
on and correct that face. That makes sense. Okay, let's tap out of Edit
mode with that one. And now, baby, let's select this one here and let's fix it. So let's press Control A, and let's apply the
rotation and scale. Let's tap into Edit mode. Let's press A and then U, and let's do a smart UV project. And then let's go
ahead and nor Okay, let's grab our material, fine oak, and there
we go. That's cool. So it looks like we
need to grab this face here and then we'll
grab it in our UV map. Sorry, that was my
phone telling me I should go to bed.
Anyway, back on this. So let's grab the island
here on our UV map and let's press r90 Enter. Let's see what that looks like, and that looks good to me. Let's select this face, as well. Let's grab it here.
Let's press r90 Enter. And let's go ahead and put
that somewhere like that. Okay, let's tap out of edit mode with that one now and
see how that looks. And yeah, that looks fine to me. So let's grab maybe
this one now. And the scale is out,
so let's fix that. Let's press Control A and
apply rotation and scale. Let's tap into
Edit mode with it. Let's press A, and then U, and let's go ahead
and do a smart UV project and unwrap it. And now let's go ahead and
find our fine oak material. Let's go ahead and just
select somewhere else so we can see the
wood grain direction. It looks good on
the top, actually, but the side there is out. So let's just grab
this, and let's press, nine, zero, Enter. Let's pull this back more into the UV map, and there we go. That's good. Okay, so let's do this one here now.
Let's select this one. Let's fix this one, Control A, apply rotation and scale, tap into Edi mode, A, and let's go ahead and
smart U V project, and let's go ahead and unwrap. Alright, let's go ahead
and apply our material. And there we go. So this one, for some reason, we need
to adjust it a little bit. So I'll just grab
this face here, and I'll go ahead and
rotate, so I'll press, 90 Enter, and I'll just click
somewhere else so we can see it,
and that's fine. Grab this one now, select it, 90 Enter. And there we go. So let's tap out of head
and mode with that one. And we've just got
the last one here to do now, so let's grab this. And I think I'm just
going to go ahead and do it and not sort of talk over the lecture
for a moment because I think we all kind of
know the project now, so let's go ahead and
do this one on our own. So let's press. I'm
so used to talking. I'm gonna try my best to
be quiet for a moment. Okay, I'm back. Did you miss me? Okay. Sorry about that. Silly jokes. Alright, so what are we going to do
now? Let's go ahead and do. Let's put a backing panel in
this because at the moment, we're actually seeing
the wall behind, which is not really
what we want. We either want this to be potentially What could
either make it a mirror surface or we could go
ahead and make this timber. I think I'm gonna I'm going to make this
a mirrored surface. I think what I need to do is let's go back into
just model mode for a moment and maybe
I'll just go back to layout here because I
do prefer the clay stuff. I think what I've
got selected there. I'm going to ahead and
press Control Shift S, sorry, and cursor
to the selected. I'm going to bring in a plane, so let's press Shift A and mesh, and let's go ahead
and bring in a plane. Alright, let's rotate
that on the X axis. Let's press RX, 90, Enter. And let's go ahead and scale
that down in the X axis, let's press S&X and just go
ahead and bring this down now until it's just
within the back panel. So X and how is that? Is that looking better?
Maybe a tiny bit more. X, and bring it
down tiny bit more. There we go. And let's
scale it down the z. So S and z and bring this
down this way now like this and maybe just
pull this down now so it's in position
nicely like that. Okay, let's pull it
forward slightly, so we know that we
have it in our cabinet and just position that slightly off the
back wall like that. And there we go. That's cool. Okay, so we can go ahead
now and go back into our full rendered mode and make sure that we're in shader
editor tab here as well, and go back into full
rendered mode here as well. Alright, so I don't
think we need to UV map a single plane. So let's go ahead and find now our mirror, and here we go. I think that's gonna look
pretty good in there, actually. I think I quite like
that. When we got jars and things
like that in there, so making some reflections. I think that's gonna look quite busy. Okay, so that's cool. Let's go ahead now and press ltH to bring back
our hidden doors, and there we go. That's done. Okay, so what do we
want to do next? I think the next one
we can tackle maybe, is the basin here. Let's go ahead and do that. So let's select it. And the scales all good. So let's go ahead and tap
into Edit mode with it. I'll press A, and then U, and let's go ahead and
do a smart UV project and go ahead and unwrap. Okay, let's create
a new material. Let's select it, and
let's call it a basin. And let's select
our principal BSDF. Come over to our node wrangul
and add principal setup, go to our textures. And I think there is a
basin here somewhere. There it is right there.
And I'll press A to select A and add
principal texture setup. Okay, let's tap out
of Edit mode so we can see that and
see how it looks. And I think overall,
it looks pretty good, but I think I'm
just going to raise the IOR to get a bit
of reflection in that. Maybe take it to around two
and see how that looks. And yeah, I think
that looks fine now. Okay, so now we can
do maybe a tap here. Let's have a look at
this. And at the moment, these are all
separate components, and that's not really
something I wanted. So I think what I'm
going to do is maybe select Everything. And I'm going to
go ahead and press Control J and join
those into one. Alright, now that
I've done that, let's go ahead and add
a material to this. So let's go ahead
and select this. And let's find our brass. Bass handles, there we go. And let's see what
that looks like. And that's cool. I think
I'm happy with that. But I did want these little bits here to be like this
ceramic material. So let's also do that. So let's tap into
Edit mode with it. And I'm just going to press Shift B and just re
center on our taps. There we go. And I just want to select this center face
here of these two, and I'm going to hold
Control and Press Plus and expand on the selection until we get sort of down to the bottom of those little
handle things, there we go. Let's come over here to
material properties tap, and let's hit the
little plus icon here. And let's find our
basin material. And there it is at the top. And then let's go
ahead and assign it to the highlighted material. Okay, let's tap out of Eddy mode for that and see how it looks. And yeah, I think
that looks good. So we just don't have
a single material on that. Now, we have a couple. Okay, we have a basin done, we have our tap done, and we have the interior
of our larder done. So where shall we go now? I think one that I
would like to do maybe is these vents here. So let's go ahead and
select this vent here. Let's look at the scale, and it's out, so let's
press Control A. And apply rotation and scale. And let's go ahead and tap into Edo mode with that and
let's press A and then U, and let's go ahead and
do a smart UV project, and let's go ahead
and unwrap that. Okay, we don't have a material for this yet unless we
wanted to make it brass, which I think I want
to make this more of a metallic chromi material. Let's click on and let's
call this maybe chrome, something like
that. There we go. Well, we could have
called it polished stainless or anything, really. Let's select our principal
BSDF add principal setup. And let's go back to this, and let's find our Chrome. Here we are oven Chrome.
Let's select that. Let's press A, and let's go and add principal texture setup. Okay, let's tap out of
Edit mode with that, and there we go, that cool. So what we could do now is
maybe just go ahead and delete this one and grab this one here, and we could press Alt D and X and bring a copy over now to the opposite
side like this. And there we go. That's cool. Now we have our vents
as well chromed. Alright, so I was
planning to do sort of lamps and a few
more in this lecture, but I think the interior of the larder cabinet took a little bit longer
than I thought. But that's okay. We're
doing good. All right. Thanks very much. And I'll see you soon in the next
one. Bye bye for now.
69. Lecture 68 Texturing The Lamps: Hello, and welcome
now to Lecture 69. And in this lecture,
let's go ahead and sort of carry on texturing
the smaller items. So let's go ahead and do
our sort of our lamps, here, our three lamps. And let's go ahead and do our spotlights here
on our Coker hood, and maybe let's go ahead and do this little nice
little side table. Let's do that as well. Alright, so I think, first of all, what should we do first? Let's have a look
at our lamps first. So let's select
maybe our lamp here. Let's look at the scale,
and it's all good. So let's tap into Edit mode. And let's press A to
select O and press U, and let's do a smart UV project. Make sure you have an el margin
and go ahead and unwrap. And let's have a look at that
and see how it's looking. And we've got quite
a dense UV map, but it's all there
and looking good. So let's just hit the
little drop down here, and let's find our
brass material, brass handles, and there
we go. That's cool. Let's tap out of Edit Mode, no so we can see what we've got. And it's a nice color, but I think this sort
of aging patina, it's just the scale is
all wrong on these lamps, but I can't adjust
the scale on the brass handles because that's going to throw
everything else out. So I need to duplicate
this material. So I'll just come over
to this little one here and go ahead and
duplicate this material. So now we've got
brass handles 01. Now we can go ahead and
adjust the scale on this without ruining the
other brass objects. I'll just drag down on the
scale to select all three. And let's just
adjust this to get a slightly different sort
of surface on the lamps. And that's better.
That's more what I want. So now that we've
done that, we can go ahead and do the chain. So let's go ahead
and select that. And let's apply our brass
material to that, as well. Brass handles 01,
and there we go. And also this one here, too. Let's go ahead and apply our brass handle 01
material to that. And there we go. That's
the lamp's nearly done. So we just need to
do the flexes now, sort of the little wire that we've put in.
So let's grab that. And let's just go
ahead and find. It's the can either
use the black plastic, but I'm thinking more the sort of the rubber material
here is glass rubber. Let's click on that.
And there we go. That's cool. So that's
our lamp stand, and they're looking
good now, I think. That's absolutely fine. So the next one we want to do
is these little ones here. So let's just go ahead and
select one of these, maybe. And let's go ahead and isolate
that so we can see it. And let's have a look
at the scale on that, and the scale's wrong, so let's press Control way. And let's go ahead and
apply rotation, let's go. Okay, let's tap into Edit
mode. Let's press A. And let's press U, and
let's go ahead and do a smart UV project and
go ahead and unwrap. And there we go. That's cool. So first of all, we
can go ahead and apply the brass material to this.
Let's go ahead and do that. So I'll go for Basso
one, and there, that's cool and tap
out of Edit mode for a moment and see how that looks. I think it's fine. I think in this sort of very intense light we've
got at the moment, it's looking a little weird, but I think it'll be fine. So let's tap back into
Eda mode with it now, and let's just zoom into the
middle and let's hold down. Let's select one
of these surfaces, then hold control, and just go around selecting
the rest like that. Once we've done that,
let's go ahead and hit Control plus and expand on our selection until we've got
to about there like that. Now that we've done
that, let's come over to the material properties here, and let's hit the plus key to create a new material
on our lamps. And let's find the
glass material. That's what I want
this time. Door glass. There we go. Let's go
ahead and select that. And with that done, let's go ahead and assign
it. All right. That's cool. Let's tap out of
Edit mode with that, and that's our
lamp now complete. So let's take that back. So
let's hit the forward slash, and there we go. That's cool. So in this case, we
could actually just go ahead and grab this
one and delete it. And we can grab this one now, and we could go ahead maybe let's set the origin
to the object. And let's go ahead and take
that over in the X axis now. So let's press
Shift and X and go ahead and take that over now to this side now, like at that. And there we go. That's cool. That's looking good. So we've got the lamps done there now, and we've got these lamps done, so let's go ahead and do our little table.
Let's do that next. So let's grab the top, and I've actually got a
new material for that. So let's look at the scale,
and the scale's fine. So let's tap into Edit
mode, and let's press A, and then U, and let's go ahead
and do a smart UV project. And let's go ahead
and unwrap that. Okay, so let's create
a new material, and let's call this
the table or tabletop. Let's do that. Whoops. And let's go ahead and click
Entert and there we go. Let's find our principal BSDF. And let's add principle setup. Let's go to our textures. Here's our table.
Now, let's press A to select all and add
principal texture setup. Okay, let's have a look at that. Let's maybe tap out of
Edit mode for a moment, and let's have a
look at the scale. Let's just select all three
and just try increasing the scale slightly to reduce
the size of our wood grain. We can if we want to
also rotate that, but I don't think I'm
too worried about that. I think it's fine. I'm going to keep that direction as it is. But if we can just well, first of all, let's
sort the edge out next. Let's tap into Edit mode, and let's hold Alt
and select this. And let's find our
UV map. There it is. I'll select these items. And I'm going to press r90, Enter and go ahead and take that into the center
somewhere like that. And yeah, that's fine.
That's looking fine, now. Let's tap out of
Edit mode with it. Let's have a look
at our material for a moment and see if there's
any changes we want to make. And I think let's go ahead
and just up the IOR to make it slightly more
reflective, something like that. But also, let's come down here to where you see the
coat and click on this. And let's add some
weight to this, which means let's
add the effect. Let's increase the effect of having It's like a layer of
varnish, basically, this one. So let's go ahead and put some
of that on now like that. Let's increase the
roughness because I don't want sort of gloss. I want a sheen again,
and there we go. And let's increase
the IOR a bit, too, to get some reflectiveness
in this and how's that? I think that's absolutely fine. I'll leave that just like that. So let's select this one now, and let's go ahead and add our cabinet material.
There we go. And let's select this one.
Let's look at the scale. It's all good. So let's tap
into edit mode with this. And shall we let's
just, first of all, let's go ahead and
apply the cabinet material to it, there we go. And I'm thinking I want to turn this area into wood grain. So I'm going to hold Alt and just select this area like this. Now, come over to the
material data properties, and let's go ahead and add
an extra material to this. Let's find our tabletop. So if it's not within
this, it's lower down. So just scroll until you
find it, and there it is. And now that we've done
that, let's go ahead and assign. Okay, that's cool. So first of all, let's go
ahead and rotate this. So let's press Alt and
select all of this. Let's grab this like this
now, and let's do a rotation. So let's press r90, Enter. And let's have a look
at what we've got. I think I want to scale up
the material, but obviously, I can't because that's going to affect our nice
looking tabletop. So I think I need to actually just create a new
material for this now. So I'll hit the little
duplicate material, and now I can go to the scale. Grab this. And we can just go
ahead and reduce the scale now to get a bit more grain
appearing now in our base. That's too much. Let's try
there, something like that. Let's tap out of edit mode. And there we go. I think
that's looking good. Maybe maybe that's
still too much. I'll just grab this and just
take this up a little bit. Maybe there that's looking good. In fact, yeah, that
is looking good, now. Okay, so that's a nice
little side table done, and that's looking good. We've got all our lamps done. So I think that's the end of
the kind of the small stuff. So in the next lecture, let's go ahead and make a start on all our sort of
beams and stuff. And that'll be another
really bold thing to do. Again, that's going to
really make our scene pop. So yeah, let's do that
in the next lecture. Alright, thanks very much.
Let's go ahead and do a save. Let's press Control. And I'll
see you in the next one. Thanks very much.
Bye bye for now.
70. Lecture 69 The Beams & columns Part 1: Hello, and welcome
now to Lecture 70. And in this lecture,
let's go ahead and apply a texture to our
beams and our columns here. And I think this
may take a couple of lectures because we need to sort of concentrate on the orientation of our
grain on our beams. So yeah, let's go ahead and
make a start with that. So I think let's select the
one right in front of us, and let's look at the rotation of the
scale, and that's out. So let's press Control A, and apply rotation and scale. Let's tap into Enomode
and let's press A, and let's press and let's go ahead and do a
smart UV project. And let's make sure we've got an island margin,
something like that. Okay, go ahead and unwrap. And let's have a look at
this and see how it looks. And, I think that'll be okay. Okay, so let's go ahead and
make a material for this. So let's click on Let's call
this the beams and columns. I'll click answer on
that. There we go. Okay. Hey, so now we've got our procedural texture.
Let's just select it. And let's go over to
add principle setup. Let's go find our textures. Here's our oak beam file
here. So let's grab this. Let's press A, and let's go ahead and add
principal texture setup. And there we go. That's cool. So, yeah, that's not
right, though, is it? So I think the
first thing we can do is go ahead and press A, grab all of our UV map, and let's just
select it like this. And let's press r90, Enter. And there we go, Let's
have a look at that. Looking slightly better. Let's go over to our map now, and let's just try moving
it up in the Y and see if that works with
the grain on this because I need to shorten
it in this direction. So let's see if that's on the Y. And no, it looks
like it's on the X. Let's try that. And there we go. That's
looking better now. Now we've got much more looking
realistic knots on that. There we go. That's
cool. That's good. We can also try just
selecting all of them now and just try just gently adjusting that
scale and see what we get. I'll at mode on that. And there we go. That's cool. I think
I'm happy with that. So you can always take a
few minutes just to sort of set these and get them to a point where
you're really happy with these. I'm sort of trying to
balance all the time, trying to keep the
lectures reasonably short. So I could easily spend a couple more minutes
on each of these, setting up the scale and the rotation and getting
them absolutely perfect. But you please, please
go ahead and do that. But I'm also always
just trying to very conscious that I'm
not making the lectures. Too long. So I may well, even in my own time
between lectures, just come back and just work
a little bit on the maps. And yeah, you can go
ahead and do the same and just find that perfect spot
where everything works out. In fact, even just
by doing that, just moving that up to 3.2, that looks a lot better. I'm going to go ahead and
leave that one there. I'm quite pleased
with that one now. Okay, so let's go ahead and
select this one here now. And let's go ahead and fix
the rotation and scale. So let's press Control A, and apply rotation and scale, tap into Eta Mode,
press A and U, and let's go ahead and do a
smart UV project and unwrap. Okay, so let's go ahead and
find our beam material, and here it is
beams and columns. And I think I think I'm going to actually create
a copy of this so that I can manipulate the scale here on the mapping
because I'm prepared to make a few copies for
this because it's quite a prominent thing
within our kitchen. So let's go ahead and
add the Plaske here, and now we have a copy of our
beams and columns material. And let's go ahead
and rotate our map. Let's press r90, Enter. Let's have a look at that
and see how it looks. I think we could
actually just again just try playing
around with this, and let's have a look,
move this down in the X, maybe until we get to a
point where this is looking. We could even try
rotating this in the z axis and just see if we get a
slightly differing effect. And there we go, how's that? Got some nice sort
of diagonal splits on that, which look pretty cool. And let's have our
knots in detail. Let's see if the scale in those lot knots
looks pretty good. We could try just
adjusting the Y and the X axis just to try and get them
slightly more realistic. And there we go,
now those knots are compressing and we're getting something nice on the scale. I'll just try try taking
some of that rotation back. And maybe something like
that. That's looking good. I'm liking that. There we go. I'll leave that one
now just like that. Okay, so now let's do this
column here in the corner. Let's maybe grab this one here. And again, let's fix the scale. Let's press Control A, and apply rotation and scale, and we'll tap into Eda mode, and we'll press A, and then
we'll go ahead and press U. We'll go ahead and do a smart UV project and go
ahead and wrap. Okay, let's find
our beam material. We can use one or
two. It's fine. So I think I'll go back
to one in this case, and I'll grab the UV map, and I'll press, 90, Enter. Let's have a look at
that. Okay, so I can't adjust the scale
on the map without adjusting the scale
on the other columns, so I'm just going to press A, and I'm going to
select all the UV map, and I'm just going to go ahead and try scaling
that up in X. Maybe bring it this
way a little bit. And let's have a look at that. And that's looking
pretty good, actually. Yeah, those knots
are looking good. I mean, I haven't got any
sort of splits in this one, but there's no law to say or no rule to say all of them would have splits,
so that's okay. I think I'll leave that one just like that, actually.
I think that's fine. Okay, so let's do the one
on the opposite side now. Okay, let's select this
and let's fix the scale. Let's tap into Edi mode with it, and let's press A, and then U, and let's go ahead and
do Smart UV project and go ahead and unwrap. Okay, this time, I'm going
to use the beams column 01. Straightaway, let's go ahead
and select our UV map, and let's go ahead and
rotate that 90 degrees. And let's see how that looks. All right, let's press A, and let's grab all of it, and
let's select it right here. And let's try scaling
that down in the X. Let's write S and X, and just try taking this scaling
this up slightly in the X, actually, just to try and get that looking
something like that. Now let's try scaling it in the Y and just see what we get. Let's go the other way with
that and see if that helps. And there we go. That's looking pretty cool now, like that. Let's have a look at
that. And there we go, I think I'll just tap out of Edit mode and see
what that looks like. And I think I like that. I'm
pleased with that result. Okay, so that's got sort
of the columns done now. So let's have a look
at this sort of the main beam coming along here. Let's tap into Edimde with
this one. The scale is good. So sorry, let's
tap into Edi mode. Let's press A and then U, and let's go ahead and
do a Smart UV project, then go ahead and unwrap. Okay, so let's go ahead
and grab our beam here, so I'll grab beams and columns. And I think this time, I'm going to create a new copy again, so I'll click on that. And I'll go ahead
and grab our UV map, and I'll press r90, enter, and I'll go ahead and bring that to
the middle like this. Okay, let's have a look
at the scale here. In fact, I'll go ahead
and select all three, and I'll just go ahead and put one in those and click Enter, just to bring those back to
a sort of a default point. Let's have a look at this now, let's go ahead and select
all three and just move them up a little bit.
See what we get. And now maybe in the X, let's
try moving it this way. And the Y, let's try
this. And there we go. Maybe we leave that. Let's just have a good look at that
and see how it looks. And yeah, I think I'm
pleased with that. I like all these
splits, and I like that dead center knot
there like that. I'm going to tap out of Edmode with that and see how it looks. And yeah, I think I'm
pleased with that. That's looking good. Okay, let's do the same here
now maybe with this one. Okay, let's check the scale,
and the scale's good. Let's tap into
Eddy mode with it. Let's press A and then U, and let's do a smart UV project. And let's go ahead
and add a material. So this time, I think
I'll add beams column 02. Okay, let's grab
our UV map here, and let's have a look at this. Let's just try scaling the whole thing and
see what we get. And we need to rotate
that actually. Let's press r90, Enter. And let's try scaling
it again now. And just find that sweet spot where that material
starts to look good. There we go. How's that looking? That's looking pretty
good, actually. I think I'm liking
that knot, just there. So I think I'll tap out of Ed Ood and have a look at that. And yeah, I'm pleased with that. Okay, let's do this one. Let's tap into Edit
mode with this one. And let's press A, and then U, and let's go ahead
and do a smart UV project and click wrap. Let's grab our materials. So I think I'll just beams
and columns this time. And let's go ahead and grab our UV map,
and let's rotate that. Let's press r90 enter. And again, let's
go ahead and scale that and just find that sweet spot again where everything starts to look good. And that's too big, I'll
bring that back again. I think I'll try just moving
the map and see what we get. Maybe try taking it up.
How's that looking? Okay, let's try just scaling
that down in the Y a little. Let's press S and Y and just try widening
this a little bit, and maybe try taking it
over a bit again now. And there we go. That's cool. I'm liking that. Okay, I'll tap out of Edi mode with
that, and there we go. Yeah, I think that's
looking good. So now let's do this sort of
one here, this truss here. So let's look at the
scale and the scales out, so let's press Control A and
apply rotation and scale. I'll tap into Edit mode. Let's press A, and then U, and let's go ahead
and do the smart EV project and click on Rap. Okay, let's find our material. Let's find maybe beams 02. But then straightaway, let's go ahead and make a new copy. Okay, so let's just
select our UV map, and let's just grab it. And let's try rotating this now until we get
to a point where the grain is running sort of in line with the
angle of the beam, which should be looking at. It's something like
that, I'd say. And there we go. That's actually looking really cool
straight off the mark. I think I'm going to go ahead
and tap out of Eddy mode. And yeah, I'm really
pleased with that one. Actually. That
looks really good. So so let's go ahead and
tap into this one now, and the scale's
good on this one. So let's just tap into Edi mode. Let's put A and then U, and let's go ahead
and do a smart UV project and go
ahead and unwrap. Okay, so let's add
our beam material. So beam column 03. Let's find our UV map here. And again, let's try rotating that until it all
starts to make sense. Maybe take this up a little bit, see if we get a slightly
different beam, and there we go. That's cool. I'll tap
out diode with that. Those two are really quite easy. Okay, so let's have just a look at this and
see how it's looking. And yeah, I mean, that's made a huge
difference to our kitchen. So I think let's go
ahead and do some of these low level
beams now, maybe. Let's do this one here. So let's look at the
scale. It's all good. So let's tap in Edi mode. Let's press A and then U, and let's do a smart UV project. Let's add one of
these materials. So maybe beam column 03. And let's go ahead
and grab our UV map. And let's just try rotating that now and see if we get
something looking good. Okay, let's see how that looks. Let's tap out of Edi mode. And yeah, I think I'll
leave that just like that. Okay, maybe let's
try doing this one. No. Let's grab this one
here. Check the scale. It's all good. We'll
tap into Edy mode, A, and then U and prep.
And there we go. Let's add our material. And now let's grab our UV map, and let's try rotating that. Try moving it around just so we get a
slightly different look, and there we go well tap
out of di mode with that. Okay, so I think these beams
are looking really good now. But like I said before, I
encourage you, if you wish, just to spend longer
than we did just now, having a look at
the orientation, the wood grain, just getting
it looking really great. Alright. Thanks very much. And I'll see you in
the next lecture. Bye bye for now.
71. Lecture 70 Beams & Columns Part 2: Hello, and welcome
now to Lecture 71. And let's just continue where we left off with our beams.
Let's carry on with those. So, I think we could do next maybe these two on this side. So let's grab this one. Let's check the
scale. That's out. Let's press Control A, apply rotation and scale, tap into Eda mode, press A, then U, and do unwrap. Okay, let's find beam materials. So if we go beam column 03, and let's go ahead
and grab our UV maps. Let's do a rotate 90 degrees, enter, and let's go
take a look at that. And I think maybe the scales are a little
bit out on that, so I'll press A,
select all, grab it. And let's just try scaling it in the Y and see if that works. And that's slightly better. I'll just pull it
down a little bit now and pull it in a little bit. And it looks to me like
that's actually out a bit. It's sort of not quite
the right shape. So I'll press S
and Y and just try compressing those knots.
There we go. That's better. Maybe just pull it up again. Now pubs. And there we go. That's cool. Okay, let's tap out of Ed mode
with that one. And let's do the same
now with this one here. Let's select this one here, and let's look at the
scale that's out. So Control A, apply
rotation and scale, tap into Ed mode A, U, and then go ahead and
do a smart UV project. All right, let's find
our material again. And this time I'll
go to columns 02, and I'll grab the map, and I'll just rotate
that 90 degrees and let's have a look at that. And again, I think the
scale slightly out press A, and I'll bring that more
into the middle like this and try just
scaling it up in the Y. Until those knots start
to look pretty good. Let's have a look at that.
Let's press A again. Maybe take that up a little bit more to something like that. And there we go,
that's looking good to me. That's
looking really good. Okay, so that's all
those beams done. So now maybe let's have a
look at doing this one here. So the scale is good. So let's just press
let's tap into mode and press A and then U and
do a smart UV project. And let's go ahead
and grab a material. Oak beams, whichever
you want, really, beams column 02, maybe. And let's try rotating
that 90 degrees, 90 enter. And let's maybe try
scaling that up in the Y. So S and Y and just see what
effect we get with that. And let's just zoom
in a little bit. Now let's try
scaling it in the X. Let's write S and X and just try scaling this around again now. Let's
go the other way. Okay, let's have a look at that. Those knots are starting
to look about right. Let's have a look on the
opposite side of that one. And I think we can go
some more on that. I'm just going to press S and just scale the whole thing up, I think. Or is it down? Let's try that. See, that's
looking pretty cool now. Let's have a look at that from a distance, see how that looks. No, I'm still not
liking that one. I'll press A. And I think what I'll do with
this one actually is let's just try making
a duplicate of it. Let's grab our scale here
on our mapping node, and let's go ahead
and press zero. Sorry, let's press one
on that and click Enter. And now let's just grab it all and just try scaling this up and see if we
get something that we like. Okay, let's try maybe
just in the z in the Y. Sorry. Let's try scaling
this up and see what we get. Try going the other
way, see if that helps. And now we're starting to get something a bit more realistic. There we go. That's
looking good. You just have to play
around with the maps until you get the sort
of the desired result. So maybe I'll just try
playing that roono and the X a little bit,
and there we go. Now we've got some reasonably
circular looking knots. I think I'm happy with that. Okay, let's select this one now. And let's check the scale
on that it's wrong, so let's press Control A and
apply rotation and scale. And let's tap into Edyode, we'll press A and then U
and do a smart UV project. And let's grab a material. Let's grab maybe 04 here. And straightaway, let's go
to our UV map, grab this, and let's press R
and just rotate that until the grain is
looking about right. Let's try something like that. And, yeah, that's
looking pretty good. I think I'm happy with
that just like that. Not all the knots and all the beams need to be sort of large. I think that's looking
good. Okay, let's tap out of Edit
mode with that one, and let's select this one. And the scale is good, so it's tap in Edo mode
and we'll press A, then U and do a
smart UV project. We'll go ahead and unwrap, and let's just grab a material. I think I'll grab 02. Let's
grab our UV maps now, and let's just
press R and rotate that until we get the sort of the grain
direction looking about right, which is something
about there like that. Let's have a look
at that. And there we go. That's cool.
Well, that was easy. Okay, so we just got this
other side here to do now, but these beams are
looking really cool. Let's come to this side now
and just repeat this process. So let's grab this one here now. And we'll sort of find
the right angle on this. There we go. That's cool.
And let's look at the scale. The scale is good,
so let's tap in Edomode and let's
press A and then U, and let's go ahead and unwrap. Let's grab a material. And let's grab our UV map and
then rotate it 90 degrees. So, nine, zero, enter. Let's pull that closer
into the middle like this. And let's just take
a look at that and see if there's anything
we can do with it. And let's press A for O, and let's try scaling that up. And let's have a look at
that and see how that looks. And let's press A, selector, and we'll just try
scaling it down in the X. And there we go, how's that? Let's tap out mode
with that one. And I think I'll scale it
up slightly some more, so I'll tap back into Edit mode with it, and I'll press A. And let's try scaling
it up on the Y. Let's press S and Y and just try scaling that grain
up slightly more. And let's try moving it
around and see what we get. Okay, let's try scaling
it up on the X. Let's press S and X and
just reduce the scale, in fact, just to see what
we can get on this B. And let's have a look at that. Let's tap out of
Edit mode with it. Whoops. And let's try
just scaling it up again. So I'll tap back into Edi
mode with it, press A, and then I'll press S and Y and just try scaling
this up or down, sorry, to try and get that
looking slightly better. There we go. That's
actually pretty good. Now, I'll tap out
Edit mode with that. And yeah, I think I'm
happy with that one. Okay, so let's do
this one here now. And let's check the
scale. That's all good. So let's tap into Edi mode
and press A and then U, and let's do a smart UV project. And let's grab ourselves
in oak beam material, and let's go ahead
and rotate that. And let's have a look at
that and see how it looks. I know if I can do
some scaling up, I'll just press A again, grab it all, and actually just scale it down on the UV map. Maybe just move this around a little bit until we
get a nice looking beam. And there we go. I'll tap out
of Edo mode with that one. And we just got this
last one to do here now. Let's grab this one here. And let's look at the
scale, and that's out. Let's press Control A,
apply rotation and scale, tap into Edy mode, press A, and then U and do an unwrap. And for the last
time, let's grab our material, maybe four. Let's grab our UV map here, rotate that until
that's lining through. And let's go ahead and press
S and scale that down some. Maybe try moving it around. There we go and
pull it around some more and have a look at that. And there we go with
that I'll be fine. Okay, so that's our
beams all done. I hope you'll agree that's made a huge difference
now to our project. So the only thing I
did notice, actually, which is worth changing is
we have a little bit of a gap between the ceiling
and all our sort of trusses, because it looks like there's a little bit too
much of a gap there. So I think what
I'm going to do in this case is I'm going to go
ahead and hide the walls. We don't need those, I think. And maybe just
grab this one now, and we also need to
grab our skylight, so let's go ahead
and grab those. And we can grab this one, too, and the roof and just grab
that little seal inside there. And this little seal
here. There we go. Maybe, let's just press one
to see this from the front, and let's zoom in a little bit. And let's go ahead and take that down a little bit to
something like that. Okay, let's have a look at that now and see how that looks. And yeah, I'd say that's
looking a lot better now. Okay, let's bring
back the walls again. And let's see how we're doing. Yeah, that's made a huge
difference to our project, these last couple of lectures. These beams are looking great. So I think in the next lecture, what we'll go ahead and do is apply the materials to our oven, and let's also have a look
at things like the curtains. We can do those. And
we can also look at applying some
materials to the outside. That might be a bit much for one lecture, but we'll
just see how we go. Alright, thanks very
much. And I'll see you in the next one.
Bye bye for now.
72. Lecture 71 The Oven: Oh oh, welcome now
to Lecture 72. And I think in this lecture, let's go ahead and apply the textures to our
nice looking oven here. The moment it's looking
a little anemic, so we need to sort of
do something with this. I think I said in the last lecture that
we'll do more than that. We'll do the curtains, and maybe we'll texture outside. And this is one of my sort
of little things that I do. I overstretch myself.
I always think, Oh, I'll do all this
and I'll do all this. And it's too much. So let's just go ahead
in this lecture and concentrate on the oven
and we'll get that done. Okay, so where do we start? I think we need a better
view of this oven, but I don't want to just isolate the oven because the light
outside is quite strong. I like to see it
against this brickwork. So I think let's
just go ahead and hide our kitchen island here. So let's go ahead and sort
of compress our windows, walls and windows
and doors file. Let's open up our cabinets file, and let's go ahead
and hide the island. Let's go ahead and hide
our worktops as well. And there we go. There is
a few little items left, but I'm not going to
worry about those. They're not really in the way. So I'll press Shift B. I'm just going to
re center on the oven. There we go. That's better. And where should we
start with this? I think let's go ahead and start with the main body of the oven. Let's do that first,
so we'll select that. And let's go ahead and tap into Ed mode without and
we operate a press A, and then U, and let's go ahead
and do a Smart UV project. Make sure you get an aisle and margin and then go
ahead and unwrap. Let's go ahead and
create a new material. And let's call this
the oven body. Let's call it Let's select our principal BSDF and let's add a principal setup. Let's go to our textures. Oven main body, there we go. And let's press A, and let's
go ahead and select that. Let's tap out of Edit mode. Wow, that's very blue, isn't it? That's very blue. I'm not sure how else to
define that, but very blue. Um I think for now, I will leave that
material where it is, but I think we may change that. I'm not in love with
that as a material. It's not doing much for me. But for now, let's go
ahead and leave it. So let's select
this door here now, and let's go ahead and tap
into Edit mode with that. Let's press A, and then U
and let's go ahead and do a Smart UV project and
go ahead and unwrap. And let's just check our UV map. That's a busy map, but it
all looks pretty good to me. So let's go ahead and select now our oven body, and there we go. That's done. Okay, let's
tap out of Edit mode. And for the moment now, let's just leave that and probably revisit it after we've applied a few
colors to other things. So, what next?
Let's go ahead and select the oven top
here. Let's do that. So let's tap into Edit
mode with it, oh, looking at that, it
looks like we've got a mirror modifier on this, which I've not applied. So let's back out of
edit mode for a moment, and let's go to
our modifiers tab, and there it is right there. Let's go ahead and apply
that mirror modifier. Now we can go back to
the material properties tab and we can tap
into Edit mode again, and we can press A and
then U and let's go ahead and do a smart UV project. And there we go. Let's
create a new material. Let's call this the oven top. And go ahead and click end. Select our principal BSDF
and add a principal setup. Let's go ahead and find the
oven black paint there we go. Let's press A and go
ahead and select that. Okay, let's tap
out of Eddy mode, and that's much nicer. That's a nice material.
It's quite metally. It's like a thick paint of metal. That's
looking really good. Okay, so what now? Let's select this one here. And let's tap into Edi
mode with this one. Let's press A and then U and go ahead and smart Eve
project and unwrap. And let's find our
oven top paint. And there we go. Let's tap out
of Edo mode with that one. And there's that one
applied, as well. Okay, let's also grab
this one here now. And let's tap into Edy
mode with this one. We'll press A, and then and go ahead and do a smart
EV project and unwrap. And let's go and
find our oven paint. And there we go. That's
that one done, too. Cool. Okay, so I think now let's go
ahead and select this. And let's go ahead and
just isolate that object. And again, let's
tap into Edit mode, and let's press A and then U, and let's go ahead and
do a smart UV project and go ahead and unwrap. Okay, let's go ahead and
get a material for this. So we're going to use the
sort of top material, so let's go ahead and
find a oven top material. And there it is. Okay,
let's go ahead and just select these four
top ones here now. And with that done, let's hold down Control on
Press plus and expand on the selection until you've
got kind of that going on. Okay, once you've done that, go ahead over here and
hit the plus key, and let's create a second
material for this. And let's go ahead and
hit this drop down. And let's find the
oven body color and then go ahead and assign, and there we go. That's cool. Alright, now what
do we want to do? I think the next thing
we want to do is, let's go ahead and see if we can select some of this spring. So let's go ahead and select
some of this like this. And see if we can select
some on the front as well. There we go. That's cool. And once you got those selected, hold down Control and hold down plus and go ahead and
expand on that selection. And it might take a minute
just to sort of get all these faces a lot
on this little spring. Once you've done
that, come over to the material properties and add another new
material to this thing. And let's find the chrome
material, and there it is. And let's go ahead
and assign that. Let's tap out of Edit mode
again and see how that looks. And yeah, that's looking good. So I think, as well, there's this, like,
black rod here. So let's make that chrome too. Let's tap into Edit mode again. Let's maybe select
one face of that and hold down Control
and press Blast and select all the rest. Go over to the chrome material here and go ahead and
assign, and there we go. That's cool. Alright. Let's hit the forward slash and
bring everything back. And because we use
the lt decommand, it's actually apply the
materials to the other objects. Now, it's looking
like there's no gap between sort of the
main cooker top and these, and I
don't like that. So let's just select,
and the other one. Let's just go ahead and
lift those up a little bit. Does to have a little
gap between them. And there we go, that's better. Alright, so where's next? I think the next
one we can do is this little chrome pipe here. So let's go ahead and fix
the rotation on that. So let's press Control A and
apply rotation and scale. Let's tap into Edit mode
with it, and let's press A. And then U, and let's go ahead and do a smart UV project
and go ahead and unwrap. And let's go ahead and find our chrome material,
and there it is. And there we go. That's cool. Again, that's a
nice little detail. So we got these little
circular things here as well. Let's go ahead and
just select this one, and let's go ahead and
find our chrome material. It's quite a small object, so I'm not going to
apply a mirror modifier, sorry, a UV map to this. I'm just going to go for
it. And there we go. The other ones are
already applied. So what else have we got? We've got these little
white things here. These little latches. I'm
going to make these the chrome material, so
I'll select that. And again, I'm not going
to bother with the UV map. I'm just gonna apply
those. And that's fine. So we got this little
thing here, too, and I'm not going to
make that the same colour as the main oven body. So let's go ahead and find the oven body color and go
ahead and apply that to that, as well. And there we go. Okay, so we got
this one here, too. Let's go ahead and apply
the oven body color to that. See how that looks. And I must admit I'm skipping
UV mapping a little bit, just because it's
such a flat material that we can get away with
it in a lot of cases. And yeah, that's fine. Okay,
now we've got this sort of the main Aga emblem badge
here. Let's do that next. Let's go ahead and select this. And I think I'm going
to go ahead and isolate that one so we
can see what we're doing. And let's fix the scale on this. Let's press Control A and
apply rotation and scale. Let's tap into Eddy mode, and let's press A, and then U, and let's go ahead and
do a smart UV project and go ahead and wrap that. Okay, so let's go
ahead and sort of apply a base color to this. So I'm going to use the
sort of the oven top color. There it is. And there we go. So now that we've
done that, I'm just going to select the
back like that, and I'm going to hold in control and press
plus and just expand the selection to
get that sort of raised outer edge like that. And now that I've done that, I'm going to create
a new material on our little badge here, and I'm going to sign
the chrome material to that. There it is. And with this still selected, I'm going to go ahead and
hit a sign, and there we go. So I also want to
do these letters, so let's go ahead and
select some faces on those. And again, I'll hold down Control and Press Plus and
just expand the selection. We may need to do that
just on the edges, too, so I'll select some
edges on that, too. And I'll hold Down
Control and PRS plus and just expand our
selection on those. And it looks like
the middle as well. Need to do that one, and
then this one as well. And I'll just repeat
that hold down Control and press plusing
just expand on my selection. Okay, now that I've done that, I'll just go ahead and click on Chrome here and go
ahead and assign. Let's tap out of Edit mode, and let's go ahead and bring
that back into the model, and there we go,
that's looking good. Okay, so now we just have
this sort of this base color. Are we happy with it? I'm
still not happy with it. I must admit, so I think
I'm going to select it. I'm gonna go ahead and just
disconnect the base color, and I'm just going to click
on the base color here, and I'm just going
to just manually just take this into
the blue like this. Maybe just bring this
down a little bit. And in this case, just play with a base colour and get
something straightaway, that's looking a lot better
now just by doing that. I've got this, a lot
more, just a lot nicer. Maybe I'll just try bringing the gray down a little bit more, just darken this a
little bit more again. And that's looking a lot better. So we could try just
bringing up the IOI, increase the reflection on this, and maybe just a little bit
more again. And there we go. Now, that's just
looking so much better. Okay, so there's our oven
done, and that's looking good. Let's go ahead and bring
our island back and our worktops and there we go. That's looking good. So
in the next lecture, let's get back to our curtains. Let's go ahead and do our
curtains. We can do those. And let's do this little
sort of cover here. And we've got this
skirting board here to put a base paint on. And I don't believe we've even applied a material
to our ceiling yet, so we can do that,
as well. All right. Thanks very much. Oh, let's
go ahead and do a save. Let's press Control A
and save our progress. And let's try that again. I'll see you in
the next lecture. Thanks very much.
Bye bye for now.
73. Lecture 72 Curtains & Pavers: Hello, and welcome
now to Lecture 73. And in this lecture, let's go ahead and do our
curtains and our little cover here and our
skirting board here. And then let's take
a look outside and see how far we
can get as well with our paving and our
capping stones on top of our little brick wall. So yeah, let's see
what we can do. So, I think, first
of all, let's just select a curtain, so
let's select this one. And let's look at the scale
and the scales all good, so let's tap into
Eda mode with it. Press A, and then U, and let's go ahead and
do our Smart UV project. Make sure you have
an island margin, and then go ahead and unwrap. All right. Let's click
on new material. Let's call this our
curtains. Click Enter. Let's select our principal BSDF and that's add principal setup. Let's go back to our texts. And let's find our curtains,
and here they are. And let's press A and the
add principal texture setup. Okay, let's take a look at
that and see how it looks. Let's tap out of Edit mode. And I would say that material. I'm just going to press Shift B, actually, and just recenter. On the curtains just
there. There we go. I would say that sort of
materials just a little too big. So I'll go over to the
mapping node here, and I'll hold down the left mouse button
and select all three. And let's just go
ahead and reduce the size of this material
to something like that. Also, it's a little dull. So I think I'm going
to go ahead and put an RGB curve on this. So let's go ahead
and press Shift A and search for an RGB curves and bring this in and
sort of put it in the right position and blend it instantly just connect it. And then let's select the center here and then just adjust the color on this curtain until we get sort of
the desired result. We're sort of bringing
it up into the light. Oh, let's try the dark
and see how that looks. Yeah, no, I definitely prefer it in the
light. Let's try that. And I think I'll leave it
kind of something like that. I think that's okay. Okay,
so now you've done that. Let's select the other curtain. And let's check the scale
and the scales out. So let's press Control A and
apply rotation and scale. Tap into Edit mode, press A, and then U, go ahead and
do a smart UV project. Okay, let's add our
curtain material. There it is. And there we go. Let's tap out of Edit mode with it and see how that looks. And, yeah, that's working fine just there. I'm happy with that. Okay, so this little
cover capping here let's look at the
scale. The scales all good. So let's just go ahead and
sort out UV map for it, so let's tap into
E mode with it, AU, and let's do a smart
UV project and wrap. And I think I'm going to have it the same color as
the walls here. So let's go ahead
and find our walls. And there they are. Let's go ahead and assign those to that. Let's tap out of Edit mode. And yet, that's
working nicely for me. It's kind of blending
into the walls there. Okay, what next? We've got this little
skirting board detail. Let's see if we can do
something with that. So I think I'll
just press Shift B and just re center on that
skirting board again. There we go. And now let's go ahead and look at the scale. The scales all good. Let's go ahead and
sort out our UV map. And let's go ahead
and apply the sort of the wood gloss material
to this one, I think. Where is that Wood gloss
material. There we go. Let's tap out of edit mode with that and see how it looks. And I think I'll just try reducing the scale
of material on that. So I think what I'm going to go ahead and do is just create a copy of this one and then
go over to the mapping node. And let's grab all three and just try tweaking
that until we get a finer wood sort of paint
brush mark on that material. And that's slightly better. Alright, so there's sort of
our skirting board done now, and we've got our curtains done, and we've got our
capping done above. What else do we want
to do? Okay, we've got a ceiling to do,
as well, actually. So maybe let's just
grab the ceiling here, and let's go ahead and
sort the scale out, let's press Control A,
apply rotation and scale, and we can tap
into Ediode and we can press A and then
U and go ahead, do a smart U if you
project and unwrap. Let's tap out of it. And I think I'm just
going to assign the war material to this,
so let's select it. And let's grab our war material. There it is and go
ahead and assign. So at the moment is too dark, but I do like the texture. So I'm going to make
a copy of this one. And then I think
I'm just going to come up here to the
curve to the RGB curve, and just try just
tweaking that to get a lighter variation on that. And there we go, that's cool. Okay, let's go ahead and
do the other side now. We can just go ahead
and select this one. And let's go ahead and check the scale on
that, and that's okay. So let's tap in Ed mode
and we'll press A and then U and go ahead and do a
smart UV project and unwrap. And let's see if we can
find an angle on it. Let's tap out of edit mode, and let's go ahead and
assign walls oh two on this. There it is 01, I'm
sorry, and there we go. Let's tap out of edit mode, and now we have a
texture on the ceiling. Alright. So that
we've done that, we can actually head
outside, I think. It's time to do that. So where do we want to start outside? I think we could start with the paving. Let's do that first. So let's check the scale,
and that's all good. So let's tap into Edi mode, press A, and then U, and
go ahead and unwrap that. And let's create a new material, and let's call this paving. Look enter, and let's add select our principal BSDF
and add principle setup. And let's go ahead and
find our paving material. And here it is. Let's press A and add principle
texture setup. Okay, so obviously that
scale's far too big, so let's go to our mapping node. Let's select all three, and let's just try getting a nicer size applied to
this. See how that is. Let's tap out of Edit mode with that and see how that looks. I'd say that's still too big, so I'll select all three again and just try
bringing that down a little bit more to something
like that, I'd say. Okay, so now what
do we want to do? I think the next
thing we can do is, let's go ahead and
do these cappings. So let's select this capping here. Let's look at the scale. We could fix that.
So let's press Control A and apply
rotation and scale. And let's go ahead and
tap into Edi Mode. Let's press A and then U, and go ahead and unwrap. Okay, let's go ahead and
grab our paving material. If I can find it, there it is. Let's select that. I think the first thing
I'm going to do is go ahead and create a copy of this because I don't
want this color to match exactly where the paving. So now that we've
done that, let's go ahead and press Shift A, and let's go and
bring in an RGB curve and drop that in
position like this. And now let's go ahead and tweak this color maybe
to a darker point, just so it's not matching exactly the paving on the floor. Okay, now that we've
done that, let's go over to our mapping nodes, select that, and let's just see if we can make
this look right. Maybe about there would be about right to me.
That's looking cool. Okay, so let's select
another capping here now. And let's fix the scale on that. Let's press Control A, and apply rotation and
scale, tap into Edit mode. Let's press A, and then U, and let's go ahead and
do a smart UV project. Go ahead and unwrap that. And let's go ahead
and select paver 01, paving 01, and there it is. Let's have a look at
the material on it. Let's tap out of Edo Mode. And yeah, that's looking good
just as it is like that. Okay, let's do one more. So let's select this one
and check the scale. It's all good. Tap into
Edi mode, A, U, unwrap. And let's go ahead
and assign our paving 01 material. And there we go. And just check the
scale on that, and that's looking good, too. So I think what I'm going to do is I'm going to go ahead and pause this lecture for a minute and go ahead and
apply the material to these remaining cappings and I'll see you back
in just a second. I think we've done enough of these now to know
what we're all doing. Okay, so I'll see you
back in just a second. Okay, so I'm back. There we go. All the capping now sort of
got our material on them. So let's have a look
at that from inside the kitchen here and
see how that looks. And it's looking a little bit sort of empty at the moment, but I think once we sort of put we're going to put some
outside furniture in there, a little table and some chairs, and maybe some planted flowers or a log pile
or something like that. So once we've sort of put
some details in there, I think it'll sort of just
bring that out a little bit. Okay, so we really are
just moving on now. There's not much left to
do as far as materials. I think in the next lecture, we have the inside of
this drawer to do. We've not got any
materials in this one yet, so I'll go ahead and do that. And well, I think that's it
for materials, actually. Alright, thanks very much. And I'll see you in the next
lecture. Bye bye for now.
74. Lecture 73 The Drawer: Hello, and welcome
now to Lecture 74, and we're nearly done
with our texturing. I think we've got one major
component left to texture, which is our draw here
in our island units. So in this lecture, let's go ahead and texture that. So let's first of all, start by hiding our island. And also, let's
hide our worktop. So we just got the
drawer itself, and I've got a
confession, folks. I've got a little confession. If I select this side here like this and I go ahead and
tap into Edit mode, if you look at our wood
joint on this side here, which is called a
dovetail joint, actually got these dovetails
the wrong way round. So they sort of flare out towards the end
of the draw side, and they should be
actually flaring out at this point here and narrowing as they get
to the draw side. So, a bit of humble
pie, I'm afraid, folks. We need to make a quick
little fix on this draw side. I'm really sorry about this.
So, how should we do this? I think let's go ahead and just with this
item in edit mode, let's just hit forward
slash to isolate it. And let's press Z. Let's go to wireframe mode. And let's press three to
see this from the side. And let's press one on the keyboard to
get vertic selection. Actually, let's press two on the keyboard to get
edge selection. Hold on to Walt and just
select this loop here. Now hold Shift and hold and select all these
other loops like this. Once you've got all
those selected, press S, and then Z, and then
zero to re level those, and there we go. That's cool. Now let's press
one, so we've got vertices and how are
we doing this now? So this time, let's go ahead and grab these vertices here. These ones and then these ones. And let's go ahead and
bring those in now, like this. There we
go. That's cool. Now let's grab these
ones and these ones, these ones, and these ones. And let's go ahead and
pull those in now. I like that. And there we go, that's cool. That's what I needed to do.
Alright, that wasn't too bad. Let's press ze and let's
go back to rendered mode. Um let's go ahead and
bring everything back. Let's hit the forward slash key. And for a second, let's
tap out of Edit mode, and let's have a
look at the scale, and the scale's good. So with that down,
let's go ahead and tap back into Edit mode. Okay, let's press A,
and let's press U, and let's go ahead and do a
smart UV project on that. Make sure you have an island margin and go
ahead and unwrap. Okay, let's press three
so we can select faces. And now let's go ahead and
find our fine oak material, and there we go. That's cool. Let's select our UV map.
And let's rotate that. Let's press r90 Enter, and let's go ahead and have a look at that and
see how it looks. And I think that's
actually not too bad. Let's just zoom in a little bit. And I think maybe I'm going
to make a duplicate of this. I'll hit this little tab here
to duplicate this material. And I'll just select
the scale and just try tweaking this a little bit
and just see what we get. Maybe we bring the scale
down, see how that looks. That's starting
to look okay now. Somewhere around there, I'd say. Let's tap out of Edit mode now and just see how that looks. And maybe we need to tweet
that a little bit more. I think that scale's too big. I'll tap back into Edit mode, and I think I'll just
press eight a selector. And I'll grab the UV map, maybe, and just try
scaling that I don't know. And just see what we get. And it does take a
while, particularly with wood grain just to get
that really nice effect. And it's worth sort of just putting that little
bit of extra time in. Let's have a look at that
and see how that looks, and I think we can do
better than that, even. Let's press A, and let's press S. And let's try scaling that down even a little bit more
to something like that. Let's have a look at that now. And there we go. That's
looking a lot better. I'm happy with that.
Okay, so we're not seeing those dovetail joints that we were just looking at. I think we need to do
something with those. So with this one selected here, come on over here to the
material properties tab, and let's make a
new material here. Let's tap into Edit
mode with that. Okay, let's go ahead and
select our dovetail. So let's select this
one here and now hold control and just
select that one there. And now go ahead and
hold down Shift and select this one and hold
control and select this one. I'm trying to see around
that little handle. And let's hold shift
and select this one, hold control and
select this one, shift and select this one, and then hold down Control
and select this one. With those selected like that, let's go ahead and
select our new material here and go ahead and assign. And just like that,
they've turned white. Let's go ahead and find our
fine oak material again. And let's select
this fine oak one. But then straightaway, let's make a new duplicate of that. And let's go ahead now and
bring in an RGB curve. So let's press Shift A, and let's search for
an RGB Curves map, and just drop that
in there like that. Okay, let's find a
nice angle on this. Maybe let's go ahead and
tap out of Edit mode. And let's select the
middle here and just try tweaking this now and see what we get and find that nice place
that will look good. There we go. That's starting
to look better straightaway. Let's just try tweaking
that a bit more. And yeah, I'll leave
that just like that. Or maybe just lighten
it up a little bit to something like that. I'd say that's looking good now. Okay, so I like the color
change here on these dovetails, but what I still don't
like is that the grain actually matches between these dovetail
joints and the rest. So we need to do
something with that. So I think make sure you've
got this one selected, and just go to the
scale here and select all three and just try adjusting the scale to something maybe
a bit more dense like that. That's looking much better. Okay, so that's
the end done now. We're happy with that. So let's
go ahead and do the rest. So let's maybe select this
one here like this now, and let's fix the scale. Let's press Control A, and apply rotation and scale. Let's tap into Eddy mode. Let's press A, and then U, and let's go ahead and
do a smart UV project, and let's go ahead and unwrap. And let's find our material. Let's find maybe fine oak 01. And let's go ahead to our
UV map, select all of it. Let's Let's press 90, Enter. Let's have
a look at that. Maybe let's just go ahead
and scale that down, Let's press S and just reduce the scale until we're getting something a
bit more convincing. And I say that's looking pretty
good now there like that. Okay, so that's that one done, let's go maybe to the back now. Again, let's look at the
scale and that's out. Let's press Control A and
apply rotation and scale. Let's tap into Edit mode. Let's press A and then U and do a smart EV project
and go ahead and unwrap. Let's go ahead and
apply our material. Let's find our fine oak. One, and let's go
ahead and rotate that. Or rotate our UV map. Let's press r90, Enter. Let's grab our UV map and
press S and go ahead and scale that until we get
something working out, something like that,
I'd say, there we go. Okay, so we've got those done. They're looking good.
So what's next? Let's do maybe this one here. So let's tap into
Edi mode with it, press A U into a
smart UV project. And let's go ahead and
apply our fine oak. Number one, there we go. Let's grab our UV
map, and let's press, 90 enter, and let's go ahead
and scale our UV map up. There we go. And just get some nice looking grain in our board. Let's
have a look at that. Let's tap out of
Edi mode with that, and that's working just fine. Okay, let's like this one now, and let's do the same. The rotations out.
So let's press Control A and apply
rotation and scale. Let's tap into EI mode, let's press A U
and do an unwrap. And let's go ahead and grab our Fine ok material
and fine ok 01, and let's grab our UV
map, let's rotate it. And let's go ahead and
scale that UV map up. Let's press S, and
just go ahead and scale that up until we got
something about right. Let's have a look at that
and see how that looks. Okay, let's tap out of Edi
mode there, and there we go. Okay, let's grab this
little divider here now, and the scales out, so let's press Control A, and let's do a
rotation and scale. And let's tap into EDI mode. We'll press A, then U and go ahead and do a smart UV project. And let's go ahead and find
our fine oak material. Let's try the 01, and let's go ahead and
just rotate our UV map. Let's press, 90, Enter. Let's have a look at that
and see how that looks. Let's tap out of Edit mode. And yeah, that's
absolutely fine. Okay, so we could sort of go along and apply all the
material to all of these. But I think in this
case, what we're going to do is just grab all of these, and just go ahead
and delete those. And we're going to use
the array modifier, I think, just to duplicate
that real quick. So let's go ahead and grab
this little piece here. And let's go with the
modifiers tab, add modifier, generate and array, and we're doing this in the
X, which is what we want. So let's just go
ahead and increase the gap in the X factor. To maybe something like that, and maybe just shift that over a little bit and now
increase the count on those. Let's try increasing
the gap between them, something like that. Maybe increase this to
eight on the count. And now just take them
back a little bit. And there we go. I'd
say that's about right. All right, so now we just
have the bottom to do, so let's go ahead
and select this one, and let's tap into Eta mode, press A U, and go ahead and do a smart EV
project and unwrap. And let's go ahead and grab
our fine oak number one. Okay, let's grab our islands, and let's just press S, and let's just see what we
can do with the scale on. Okay, so all we need to do
now really is just make a duplicate of this
side for this site. I think we'll go ahead and use the mirror command to do that. So let's go ahead and just go
ahead and delete this one. And let's select this one here. And let's right click
and go ahead and set the origin to its
geometry, and there we go. And let's go ahead and hold
down Shift and press S, and let's go ahead and put
the cursor to the selected. There we go. Get this one now, and let's right click. And let's set the origin to the three Dcursor and now select this one again
and press Shift D, right click twice, and go
ahead mirror in the X axis. And there we go. That's that one in place and looking good. Alright, so we've got
a drawer done now, and that's all good. So let's go ahead and
bring everything back now. So let's unhide the worktops and go ahead and
unhide the island. And I think in the next lecture, I just want to do a few
little tweaks to our kitchen. So there's two things
that's kind of bugging me. The first one is these columns. And I was looking at
these, and of course, we could bring the bottoms of these columns down so
it's touching the floor. But that still wouldn't
be very convincing. I would still look
like the column is sitting on the wooden floor, and that's just not right. So I think what we're
going to do is put a trim around our columns
to cover up the base here, which is probably
what would happen if it was a real kitchen. And then also our
little table here. I don't think I'm happy with it. I think we need to do a
little bit of work to this. The color is a
little bit orange, which is something that's
a bit off putting. But also, it's symmetrically, or it's just not
aesthetically pleasing. So I think what we're going to do is go ahead and have a look at this sort of
this rail here and bring that down or just
increase the width on that until it's level with
the underside of our worktop. And then we'll go ahead and
do some cuts on that with the Boolean modifier and
then see how it looks. So we'll do all of that
in the next lecture. Alright. Thanks very
much. Bye bye for now.
75. Lecture 74 Last Few Tweeks: Hello, and welcome
now to Lecture 75. In this lecture, as I mentioned at the end
of the last lecture, I think I want to start
off by putting like a trim around the
base of our columns. So let's go ahead and
make a start on that. So I think for a while,
we don't need to be in this full shaded mode. So let's go back to layout here, so we go back to our old
sort of roots of modeling. And I think all we
need is a column, so let's grab this one and hit the forward slash
and isolate it. Okay, let's bring the cursor to the base of this, I think. So let's go ahead and tap
into Ed mode with it. And let's press one so we can select vertices,
grab that one there, and go ahead and press shifts and cursor to the
selected, and there we go. Okay, let's go ahead and tap
out of Edit mode with that. And let's press Shift A. Let's go ahead and
bring in a cube. There we go. Let's press seven so we can see
this from above. And let's go ahead and
scale this down the Y. Let's press S and Y and
bring this down like this. Maybe bring this out. And now let's go ahead and
tap into Edit mode with this. Let's press Z and let's
go into wire frame. Let's grab these vertices here and maybe pull
those in like this, grab these one here and go
ahead and pull those in like this and grab these as well and go ahead and
pull those in like this. Okay, let's press A to grab all, and let's go ahead and take
that back now until it's kind of right up to the edge of the beam, something like that. Okay, let's press three to
see this from the side now. And let's grab
these top vertices. Let's bring those down
to where we want them. So I would say I want those
about there like that. Grab these ones and
bring those up until they're going to be sitting just above the axis,
something like this. And I'd say that this trim
is a little too thin, so I'll go ahead and
increase the thickness on it too, something like that. Okay, let's press seven again
to see this from above, and let's tap out of
Edit mode with that. And let's fix the scale on it. Let's press Control A, and
apply rotation and scale. And let's go ahead
and grab this now, let's go ahead and set the
origin to the geometry, and let's press
Shift D and Y and bring a copy back now and put that just over here
now like this. Put that in position
just on the edge of the column, just like that. Let's go ahead and
make another copy. Let's press Shift D and Y
and bring one out like this. Then straightaway,
press, 90, enter, and go ahead and bring
that now to the edge of the column and put that in position just
where it needs to be, which is about like
that, I'd say. Okay, let's go ahead
and make another copy. So let's press Shift D and X and go ahead and bring a copy
now to over here like this. And put that just
about there like that. Okay, so I think for a moment, let's press SD and let's
go back to solid mode. Now, in the past, when
we've done these sort of angle joints in the corners, which we call mitres, when we've done those, we've used the Boolean tool to cut. And that's done a really, really precise, clean
cut between those. But the case of these trims around these very old traditional
looking columns, I don't mind if the joints are a little bit open and a
little bit inaccurate, not really inaccurate
and terrible, but just suggesting that everything is perfectly
square and true in this case. So I'm just going
to go ahead and create these joints
just by hand. And by doing that, it might
not look as perfectly accurate as when we did it
by using the Boolean tool. If that makes sense?
Does that make sense? Hope it does. Alright, so let's go ahead and press seven again to see this from above. And let's grab this
one and this one. And let's go ahead and tap
into Edit mode with those. And let's go ahead and press Z. And let's go into Y frame. Okay, so I'm just going to grab these vertices here to
begin with and pull those back now to something
like that, there, like that. Grab these vertices and pull
those back there like that. So I'll grab all
these vertices here now and I'll go ahead and
pull those back like that, and I'll grab these ones and
go ahead and just pull those back into position,
something like that. There we go. That's cool. And hopefully, you can see that this joint isn't as accurate. But that's kind of the
effect that I'm after. I hope that kind of
makes sense that I'm not going for, like,
perfection on this. I'm going for something
looking a bit traditional. Alright, let's do this side now. Let's tap out of Edit mode for a moment. Select both of these. Let's tap back into
Edit mode again. And let's go ahead
and select these ones and pull these back
to here like this. Grab these ones now, and go
ahead and pull those back to here like this. Grab these ones and
pull these back now. Grab this one here
and pull that back now until that one's in position as well,
something like that. Let's have a look here
and see what we got. And grab these ones here and pull this one back
a little bit like that. And there we go. That's cool. Alright, now, Ed
we want to boom. Now, let's tap out of Edy mode. Let's go ahead and select
this side and this side, and let's go ahead and
tap back into Edi mode. Let's grab these ones here, and let's pull those
back to there like that. Then grab these ones
and pull those back, too, there like that. Okay, let's grab these ones. And let's go ahead
and pull those back now to something like that. Then grab these ones
and pull those back to something like that, I'd say, I think that's
looking pretty good now. Yeah, I leave that alone. Okay, you've got the
last one to do here. And let's select these ones and go ahead and
pull those back. Grab these ones now and
pull those back as well, and go ahead and put those in positions, something like that. Grab these ones here, and just go ahead
and put that in position, something like that. Grab these ones here and go
ahead and pull those back. And again, go ahead
and put those in position and maybe leave
a little bit of a gap. Okay, there we go. Let's press Z, and let's
go back to a solid mode. And let's see what we got. And as you can see,
they're not really open. They're not embarrassingly
bad joints, but we've just got some slight
inaccuracies this time. Okay, let's select
this item here, let's tap into Edit mode, and let's select this edge. And let's press Control B, and let's go ahead
and bevel this edge. Put that something like that, and just make a sort of
mental note of the number. So 0.0 111. And I'm going to leave that with just a single bevel
on it just like that. Okay, let's go ahead and
do these other ones now. Let's tap into Edi
mode with this one, select this one,
press Control B, and go ahead and bevel this. And just try and
level the bevels up. And let's have a look at
that and see how it looks. And again, I'm not looking
for perfect accuracy, so I think that will be
just fine like that. Okay, let's do this one now. Let's tap out of Edi mode. And let's select this one, tap back into Edy mode. And let's go ahead and
select this edge here, and let's press Control B, and let's bevel
this one as well, and just line it
up something like with the other one,
something like that. Okay, let's tap out of
Edi mode with that. Grab this one now, and
let's go ahead and tap into Eddy mode,
grab this edge here, press Control B, and let's
go ahead and bevel this one, too. And there we go. That's cool. Okay, let's
tap diode with that one, and let's select this one. And let's go ahead and add
the bevel modifier to it now. And let's add an extra two zeros to the right to
the decimal point. And let's go ahead and add three segments to
this, and there we go. That's cool. I'll go
ahead and apply that. Let's do the same
all the way around. Let's select this
one, add modify, generate Bevel, two zeros to the right
to the decimal coin. And let's go ahead and add
three segments to this. And there we go, Let's go
ahead and apply that, too. And just carry on
working our way round. Select this one, add modify, generate and bevel, and two zeros to the right
of the decimal coin. Three segments, and there we go, Let's go ahead and apply that. Okay, let's do this last one. Now grab this. Add
modifier and bevel. Two zeros, the rise, the decimal point,
and three segments. Oops, that's four, and go
ahead and apply that as well. Okay, so now that
we've done that. Let's go ahead now, and let's
press Z, and let's go back. Or let's just go to our
shaded mode up here, sorry. And let's have a look at that
and see how it's looking. And we can go ahead and
apply material to this now, so we can select this and
let's tap into Edit mode, and let's press A, and then U, and let's go ahead
and do a smart UV project and go
ahead and unwrap. And let's go ahead and find
our fine oak material. Fine ocho one. And I
think straightaway, I'm going to go ahead and
make a duplicate of this. And I think now, let's go ahead and
select our UV map. And let's press r90, Enter. And let's take a look at
that and see what we think. Let's tap out of Ed mode and see if we want to change
anything. And I think I do. I'll just go ahead and
just grab the scale on this and just play around with a scale a little bit to
something like that. That's cool. Okay, let's
select this one now. Let's tap into Eda mode. Let's press A, U, and do a smart UV project. Make sure you've got
an Ile margin and unwrap and go ahead and find R fine Oak three's
grab our UV maps, and let's press r90, Enter. And I think in this
case, I'll press A, and I'll just move that
around slightly so we get a variation in the pattern
between these two bods. Okay, let's do this
other one here now. Let's select this one. Let's go ahead and tap into Edit mode. Let's press A U and do a
smart UV project and unwrap. Let's find a Fine OCO three. And let's grab our UV
maps and rotate that. Let's press r90, Enter. And let's have a look at that. And let's tap out of Edit
mode, and there we go. All right, let's do
the last one of these. Let's grab this, same thing. Tap in Edit mode, A, U, and go ahead and
unwrap and unwrap. There we go. Let's
add our Fin Oak, 03. Let's grab our UV map and
go ahead and rotate that. And let's just move this around on our UV map a
little bit like this. All right, there we
go. So now we've got a trim on the bottom
of our column. And I think the only
other thing I'd like to do is just try lifting
that up slightly. So I'll just grab all
of those like that. Go ahead and take that
up just a tiny bit, so you have a little bit of a shadow gap to the
floor, and there we go. That's better. That's nice. Okay, let's select this now. Let's select also our columns. Whoops, that column there. We can also select the
columns, that one, and we've got the other
one too. That one there. Let's go ahead and
hit the forward slash and isolate those. Let's press seven, so
we see this from above. Let's go ahead and
select these pieces. Whoops let's go ahead and press Shift D and X and bring this
copy over like this. And let's go ahead and line this up with this column
here, like this. And let's go ahead
and press G and X and just bring this into
alignment. I like that. Okay, let's do that again. Let's press Shift D and X. Bring a copy over like this and go ahead and bring this back to
the wall like this. There we go. That's cool.
And while we've got it, let's go ahead and press
Shift D and X again and bring this copy now over here to this side now like this and go ahead and
position this one. And there we go. That's cool. Okay, let's hit the forward slash and bring everything back. And let's see how they look. And that's looking a lot better. That's making a lot more sense at the base of those columns. It's just now looking
like nice woodwork. Yeah, that's looking
great. Okay, so I think that took quite a while. So I think let's go ahead
and play around with this table in the next lecture rather than just
trying to rush it. Alright, so let's go
ahead and do a save. Let's press Controls. And I'll see you in the next
lecture. Bye bye for now.
76. Lecture 75 Changes To The Table: Hello, and welcome
now to Lecture 76. And in this lecture, I just I'm not happy
with this table. This little table
here, like I said, it just doesn't it doesn't
pop. It doesn't do enough. So let's revisit this because everything
else in this kitchen, I think is looking really good. And I'm sure yours is, too. So I think it's a shame to sort of just settle
for something here. So let's go ahead and
sort of just make a few alterations to this. So let's start off by maybe
let's go to layout mode, so we just go back
to our modeling. And, I'll just hit forward
slash bring everything back. And let's just
isolate, in this case, all I really want is
this one and this one, the worktop and this
little piece here. I'm going to call this the
skirt, the table skirt. And with those two,
I'll go ahead and hit the forward slash to
isolate those. Here we go. So I think the first thing
I want to do is go ahead and bring this lower
surface here down, so it's almost at the same level as the
underside of the stone. I'll probably stop
where we see that bevel there on that sort of
lower edge of the worktop. I'll probably stop
just before that. So let's tap into Edit
mode with this one, and let's go ahead and
select this face here. So I'll press three to
select faces, grab this one. And let's go ahead and just
get a bit more of that bevel. So let's hold down Control and press plus
just to select the bevel. And if you go too
far, just hold down Control and press
minus like that. All right, I'm going
to press one on the numpad now to see
this from the front, and I'm going to go ahead and pull that down in the Z axis, making sure that I stop just before the bevel
on that worktop. I'll press G and then Z and
go ahead and bring this down to about like that, I'd say. That's Okay, now
we've done that, let's tap out of edit mode. And the scale is all good. So now I'm just going to
apply the Boolean modifier to this using our worktop to get a nice cutout because
like I said before, if you just leave
components sort of sort of colliding
with each other, you don't get a
realistic effect. I'll select this
one, add modifier, generate and boolean, grab the little eyedropper and just go ahead and just
click on the worktop. And there we go. We could tell that that actually
works, so that's fine. So I'll go ahead and apply this Boolean now.
I'm done with that. And now I think I just
want to isolate this, so I'll hit the forward slash, which will bring
everything back, and then I'll just hit it again. So I just want to create a slight shadow gap between
the worktop and this one. So I'm just going to
move these surfaces just up and slightly this way, just to create a
gap between them. So let's tap in the edit mode. Let's select this surface here. And let's go ahead and
hold down Control and select that one there,
so we get that. And now I'm just going
to bring it over a tiny amount to something
like that, I'd say. And now I'll do the same. I'll just grab this one and
maybe just this one as well. And now I'll just take those
up a tiny amount, as well. There we go. That's fine. Okay, again, let's
bring everything back, and let's tap out of Edit mode. And let's just see that we've got a nice sort of little gap. There's a gap there. I see that. And I do see as well. I can see a slight gap. On the top, as well. So
I'm happy with that now. That'll look quite realistic. Okay, now what do we want to do? Let's go ahead and
grab this again now, and let's isolate again. And the next thing I want to
do is put a little detail on the bottom edge of our sort
of skirt, table skirt here. Let's do that. So let's tap
into Edit mode with it. And let's press two so
we can select edges. And let's select this edge here, and let's press Controller and go ahead and put a loop in, and then bring that loop down to something like that I would say. Now, I didn't go all the way to the end, but
that's all right. We can deal with that.
Let's just select this one, and let's select this one. Let's right click and let's
go ahead and subdivide. Let's press one so we
can see the vertices. Let's select this vertices
here and this vertices here. Now let's go ahead and
bring that down now. Let's press one so
we see this nicely, and let's just make sure that's reasonably level
without last one there. I would say that is about there like that.
That looks about right. Okay, so now just select this vertices and
then this vertices. Right click and go ahead
and connect vertex paths. Let's do the same
on the other side. Let's select this vertices
and then this vertices. It doesn't really
matter the order. Right click and go ahead and connect vertex paths.
And there we go. That's cool. All right, let's press three so we
can select faces again. Let's grab that face there. And let's hold down
Control and go ahead and select this one and hold down Shift and control,
select maybe to here. And then one last one, shift
and control and go to there. And now that we've
got all those, let's go ahead and extrude those out. But in the transform excuse me, in the transformation
orientation settings, come to this and go
to normals like that. And here as well, in the
transform pivot point, just click on this
and bring this to the median point,
and there we go. And now let's go ahead
and press S. Sorry. And now let's go
ahead and press E for extrude and then S
and go ahead and extrude those out to get this kind of detail now
like that, and that's cool. Alright, so let's go back to the transformation
orientation, go back to Global, and let's hit this one and go back
to individual origins. And now hold on to Alt and
select this edge here, and then hold Shift and Alt
and select this edge here. And with those ones selected, let's go ahead and bevel this. So let's press Control B and go ahead and
bevel that edge. And let's just see if we can get a nice looking detail there. I'll just roll the mouse wheel to get some extra
fillets on that, and there we go, that's cool. Okay, let's tap out of
Edit mode with that and see how it looks,
and that's looking good. I'm pleased with that. So
what do we want to do now? I think another thing
we could do with this is actually put
a drawer on this. I think that would be
quite a nice thing to do. So I think what I'm going to do is let's go ahead
and select this, and let's press shifts and bring the cursor
to the selected. And now let's press Shift, and let's bring in a cube. Let's just press and
scale this down until we get something like that, I'd say. I think that
would be about right. And now, grab this and press Shift D and X and bring a copy
forward now like this. And now grab this one and pull that over now in
the Y axis like this. If you want to, you could
create another one here. I don't think I'm gonna bother. I'm going to leave
mine at two drawers. All right now select these
two surfaces and tap into Edit mode with them and press three so you
can select faces, and go ahead and select those faces and do
the same on this one, too, that one, that one,
that one, and then that one. And with those faces selected, go ahead and press
X and go ahead and delete faces, and there we go. All right, let's tap out
of edit mode for a moment. Let's fix the scales. Let's press Control A, and let's go ahead and
apply rotation and scale. Okay, so the next
thing I'm going to do is go ahead and apply a solidify modifier to these to put some thickness in these
panels. So let's do that. Let's add a solidify modifier, and that's too thick. So let's add our
standard two zeros to the right of
the decimal point, let's go ahead and turn that one maybe into something like a
five and see how that looks. I'd say that's still too thin. So actually, I'm
going to go ahead and delete one of those zeros. And maybe turn that one into maybe three and see
how that looks. And yeah, I'd say
that's about right. I'll go ahead and apply,
I'll turn on even thickness. And then let's go ahead and
apply that solidify modifier. So I'm going to use
the Boolean modifier now to put some cuts in here to give the appearance of two nice flush mounted draws. So let's select this here, and let's look at the
scale. It's all good. Let's add the modifier
generate and boolean. Let's select a little
eyedropper and go ahead and select these
panels like this. Okay, let's find these here. So it's in the outside group. And let's go ahead
and hide it and just see that that
Boolean modifier worked. And it did, it worked perfectly. So there we go. Let's go
ahead and bring that back. Let's select this
and go ahead and apply our Boolean modifier. And now we're done
with these, so we can go ahead and just
delete those items. And there we go. That's cool. Let's bring everything
back and see how it looks. And I'd say that's
looking better. We've got some nice features
now sort of on our table. Alright, what do we
want to do next? I think now we could go back to textures and just go ahead
and sort our textures out. So let's go back to the
shading tab here, now. And let's see if we can
make this less orange. I'm not in love with
this orange finish. So let's select it. And I think let's go ahead and add an RGB
curves node to this. So let's press Shift A. And let's search for
the RGB curves node. If you can't see
it, go ahead and start typing it,
and it'll appear. So I'll select that, and I'll
drop that in like that now. And let's just sort of zoom
in a little bit on our table. And let's go ahead and just add one control point to the
middle and then just pull that over and see if we can get a slightly
better appearance. And that straightaway now, putting that into
a slightly darker, deeper looking timber is
nicer. So what else can we do? Could look at the coat here on the principal BSDF and maybe just give us a slight
bit more sheen. So let's increase the IOR just to give it slight
more reflection. Let's take that up to maybe 2.5, and let's reduce the
roughness slightly and increase the density
of the coat. And there we go. Now we've got quite a nice reflective surface, and I think I'm liking that, in this case, a bit more. Make this table a
bit more refined. Alright, so I think now, let's go ahead and just apply
that to the column here. So I think let's go ahead and
hit this little drop down, and let's find the
tabletop, and here it is. Let's go ahead and apply that. But the grain is too small, so let's go ahead and
make a duplicate of that go over to
the mapping nodes, select all three, and just go ahead and
reduce this to bring some grain back in to the column to something
like that, maybe. Okay, now that's starting to
look a lot better, I think. I think between the drawer
detail there on the front, so I'm not going to
put a handle on that. I'm going to do you
may have heard of it. It's called a push
to open drawer, so I'm going to assume that's
like a push to open drawer, and we have the middle
drawer there as well. So that's looking good. So I think the only other
thing I want to do is make a feature
of this top. So I'm going to use like a
pop up power socket on this. I think that'll
look pretty good. So again, let's select
this top here now. And let's go back to
layout for a while. And let's select this
one and then this one. Let's go ahead and isolate
those for a moment. Let's make a copy of this. So let's press Shift D and Z and go ahead and
bring that up like that. And now let's scale this down, but not in the Z. So let's press S for scale. Hold down shift and press to
omit scaling in the Z axis. And then let's bring this down to something like
that, I would say. I think that'll
probably be okay. Okay, once you've done that, I'm going to scale this up in the z. So let's press S and Z. And go ahead and
scale this up a bit. And now I'm going to press one to see this from the front, and I'm going to bring
this down and drop this sort of
something like that. In fact, I might even scale it up a little bit
more in this head. Let's press SSNs head. Go ahead and scale that
up until it punches through both those
components like that. Okay, now that we've
done that, let's go ahead and apply
the scale to this. That's press Control A, and
apply rotation and scale. All right, I'm going to use
the Boolean modifier now, so let's grab this tabletop, add modifier,
generate and boolean. And let's go ahead and grab this little thing in
the middle here and click on this and we
can see that worked. So I'll go ahead and apply that. Okay, let's select this one
now, and let's do the same. Let's add modifier,
generate and boolean. And let's grab the
little drop it here and just drop on this
one now like this. Let's see that this
actually worked. Let's find this item. And it's here in cabinets. And it's here in Ireland. Let's find this. There it is. Go ahead and turn this off.
And, yeah, it did work. That's absolutely
fine. Okay, let's turn that back on
for a minute now. And let's select this, and let's go ahead and
apply our Boolean modifier. And let's press one to
see this from the front. Select this. And let's go ahead and scale that down now in this head.
So let's press. Let's press S and Z
and go ahead and scale that down to
something like this, and then bring this up
now and go ahead and put that at the top, like that. Once we've done that,
we can go ahead and scale that down again, but not in the d. So let's
press S, Hold down shift, and press, and just scale that down a tiny
bit to get a gap between. Whoops. Something
like that, I'd say. Okay, so now what
do we need to do? I think we have a bevel on the center one because it's
a copy of the tabletop. But we need to apply a bevel
to this. So let's do that. Let's select this,
tap into Edi mood, press two, so we
can select edges, hold on to Alt and
just select this edge, and then hold shift and Old
and just select this edge. And now let's press Control B, and let's put a bevel on this. And, yeah, I think that's
about right just like that. Okay, let's tap
out of Edit mode. And now what do we want to do? So the next thing we can do
is go ahead and hide that. I'll press H and hide that. So we just have this. And now let's go ahead and
bring in a cube. So let's press Shift A, and let's bring in a cube. Let's scale this down, press S and scale this down
and press S again and go ahead and scale this until it's within the limits,
something like that. So it's smaller than the disc
that we've already put in. Okay, let's press one now, so we see this from
the front and let's press S so we see a wire frame. And let's go ahead
and bring this, so it sits on the underside of that
circular piece in the middle, which is there like that. That's good. Alright,
let's press now, and let's go back to solid mode. And I think we could also Oh, let's apply a bevel to this. Let's press Control A and
apply rotation and scale. Let's add the bevel
modifier to it. And let's add two
zeros to the right of the decimal point and
turn the one into three. Let's try three and enter, and there we go. That's cool. And increase the
segments to about three. Alright, let's go ahead
and apply that bevel. And let's bring
everything back. So let's hit the forward slash. And now, also, because
I hid the skirt, we need to sort of bring
that back separately. So let's press Aldag to
bring that back separately. Okay, so now let's go
back to the shaded tab. Let's hit this one and go back to that and see what we've got. Okay, so the wood grain is still looking good
in our tabletop, but we need to do something with this one because the grain
is just too small on that. So let's select this and let's make a copy of the material. And now we can go
ahead and reduce the scale of that material, bring that down a little bit until the scale kind
of looks about right. And I would say, that's
better now like that. Okay, so let's go ahead and hide this
one now and this one. Let's press H holding those. Now let's select this
one and this one, and let's go ahead
and bring those up a little bit to
something like this. And now let's press Old H
and bring those other ones. That's cool. Let's now grab
this socket here and let's press Shift D and Y and
bring this over like this. Okay, let's just
select the tabletop, as well, this piece
and this piece. And let's go ahead
and isolate those, and let's press one so we
see this from the front. Let's select this,
and let's bring this over something like this and
centralize it like that. And that looks pretty
good, actually. We could grab everything here now and maybe just pull it
up a little bit like this. And there we go. Let's press one now. Sorry,
let's press three. And let's find that
socket, and there it is. And let's grab it. And let's position this. Well, let's put one here. And let's also hold
Shift D and Y and bring a copy over now to the
opposite side like this and position that on
the surface like this. And let's do the
same with this one. Let's grab it and we
need to rotate it. So let's press z180, Enter, and then go ahead and bring
that back into position now like that that. Alright, what else
do we need to do? I think the only other
thing I want to do, let's hit the forward slash
and bring everything back. And we have sockets on
there, so that's cool. So I think the only
other thing I want to do is just put a
texture to this cube. So I'll grab this, and I'm just going to apply the cabinet material
to this, I think. So let's select the
drop down here. Let's find our cabinet
material and go ahead and apply. And there we go. That's cool. That's looking good now. I think that was worth it. Putting a little
bit of extra time into that table was
definitely worth it. Now we have a functioning
sort of power, I'm not sure what
you call it's rise and fall power
socket or something. We have some drawers on this. We've deepened the skirt, which has just added some nice
sort of symmetry to this, and we've made the color
look a lot better. A long lecture, I must admit, so I'm sorry about
the length of that, but I thought we'll just push through and get this
done in one lecture. And with that done, I think that's the end of
our texturing now. So that's kind of phase two
of the course finished. So in the next phase, let's light our course. So we need to put lights Well, we can put lights inside
these lamps here, and we can light inside our
oven. We can do that, too. And we're going
to put some under cabinet lighting on
our wall cabinets. And I think maybe as well, this corner here is a
little bit too dark, so we'll light this up too. So let's go ahead and do
that in the next lecture. Okay, I think it's time for
a cup of tea and a biscuit. It's been a long lecture. Alright. Oh, let's do a save. Let's press Control
S. Save our progress. Definitely save that. And I'll see you in
the next lecture. Thanks very much.
Bye bye for now.
77. Lecture 76 Lighting Part 1: Hello, and welcome
now to Lecture 77. And yeah, I mean, I think we're finished with
our textures now, and I think they're
looking amazing. So let's move on to the
sort of the next sort of area of our course,
which is lighting it, creating some really
dynamic lights to further enhance our scene and
further just make it more realistic and
just make it pop. So let's go ahead and do that. So I think the first
thing we need to do is consider our ambient light, consider our HDRI lighting, which is creating all our nice ambient
light in the scene. And it was always my
intention to have a well lit naturally
well lit room. That is why we got such huge
skylights in our scene, and we've got these side windows here and our huge bifolder. So, in itself, that's creating some nice ambient light
that we can work with. We have got a bit of
a dark area here, but we'll address that
at one point or another. But first of all, let's start off by fixing
the light on this side. Okay, sorry, let's get back to our HDRI for a second,
as we look into that. I'm already digressing. I'm already going
off on a tangent. Let's sort of move
the camera around so we can see the majority of our kitchen and we can
also see the HDR right. Let's find that sweet
spot in our scene. And it looks like that is
about it. There like that. Actually, that's a
nice position for a camera ride there,
too, at some point. Anyway, okay, I must
stay on course, not just go off on tangens. So what we're gonna
do now is come down to Object shader here, and let's go ahead and click
on World instead of Object. Let's come down here to
the background note. And let's just bring
that down in strength, paying attention to our HDRI,
it is part of our scene. You know, this beautiful
view is part of this. So let's go ahead and bring
this down and just decide at what point we're happy with the ambient
light in the kitchen. And also happy with the
detail in our HDRI, because you can see, as
we brought that down to 2.6, all of a sudden, those trees have come to life and the green colors
are a lot better, a lot more vivid, where before
when it was up around 4.6, I think, everything's
quite washed out. So let's go ahead and
bring that down now, then and have a look
at that at we go. So even already at 3.7, the trees have more details and the hills are
looking better. Everything's just
looking better. Are we happy with that color? Are we happy with
that light level? Let's bring it down
maybe to a 3.5. And it's looking
much better outside, and our paving isn't
as washed out. Let's have a look
at our kitchen. Let's pan around. And, yeah,
I think I'm happy with it. Obviously, the light levels
have dropped in our room, but it's still well lit
and it's quite ambient. It's lit all the way around, except for this corner here. So I think I'm going to leave
that alone at around 3.5. Okay, let's go ahead and go
back to object again now. And let's go ahead and drag down our shader editor so that we're the majority now in
our viewport like this. Let's go over to Outlooker here, and let's go ahead and
compress all this stuff. We don't need this open anymore. And let's go ahead and
compress cabinets, and we can even compress
the reference file. And let's make sure that we can organize our lights nicely. So let's click on
scene collection, and let's add a new file. And let's go ahead and
call this file Lights. I'll get inter, of course. Leave it selected. And now where shall we start? I think let's go ahead and
start with island lights. That seems like a good
place to sort of begin. So let's select one like this, and let's bring
the cursor to it. So let's press shifts and cursor to the
selected, there you. And now when we
bring our lighting, it'll be perfectly positioned
inside the lamp shade. So how do we bring a light in? It's real easy, really is. Let's press Shift A, and let's go down
to light this time. Usually, it's mesh or curve. This time we're
going down to light. And we have four
choices on light. We have point sun
spot, and area light. The sun is a light for sort of lighting
your entire scene, so we're not going
to use that, so we have a choice
between the three. So I'm going to go
for point light. We will explore as we go
the area light as well. But right now, let's go for
point light. And there we go. Straightaway now, it's created
a nice light in our scene. It's creating a
small shadow here, which I quite like, and the
power levels actually right. But if we make sure that our new light here is
actually selected, come down to here to this new little icon and
click on this one, and now we have some
control over this slide. So what we can do is have
a look at the color. So let's maybe just
click on color here. And let's add a
little bit of warmth. We've got a lot of brass. So we need a color to sort
of complement that brass. So let's bring that into sort
of the warm yellow color. Something like that. Let's have a look how that
is. That's quite nice. And we can play
around with a power, increase it, of course. But that kind of
washes everything out, and it's a little overpowering. So I'm going to leave that. I thought it was
quite nice at ten. I was just kind of showing
you what you can do. And we'll leave that at around
the ten mark like that. So all we need to do now
really is make a copy of that light and drop it
inside the other lamp shades. But let's not use the shift D because if we use the
Shift D to make copies, each of the light will have
independent properties, and we want all properties to be shared between
these three lights. So if we adjust these lights, we adjust all of them. These ones will
share the settings. So let's press Alt D and X and bring a copy across and put it in the
middle one like this. And let's do the same again. Let's press Alt D and X and bring that across now
to this one like this. And at any time during
your rendering, when you're setting
up your camera and considering your scene,
you can always come back. Just click on one
of these lights. Come down to this little icon. Click on this, adjust your
power and adjust your color. The radius adjusts the
size of your lights, but I obviously want
them to be within the confines of my lamp shade. There we go,
something like that. And yeah, that's cool. So your bounce basically
affects the amount of times the light will be
reflected off surface, and I generally don't play
around with it that much. So shadows, of course, whether the shadows will
be created by the lights. So as we turn that off, this shadow here on the underside of our nice
table just disappeared. So I'll turn that
back on because I do want shadows to be
created by these lights. And there we go. That's cool. So we have our first three
lights in our scene, and I think they're
looking good. So where to now? I think the next ones we could do was probably
the Coker hood. I think that would
be a good one to do. So I'm going to press Shift B, and I'm just going to
recenter by sort of drawing a square in this area and just recenter under our Coker hood. And I'm sorry, folks. I'm going to go off
target for a minute. I don't get to just drift. Sorry about this. I'm
personally not happy with this chrome
material on these vents. I was just thinking
it a few minutes before I started this lecture. It's just not doing it for me. So I think everything
else is brass, so I'm going to make
those brass, as well. So I'll just select this and come on down to
the Shader Editor, click on this, find our brass handle material,
and bring that in. And because we use
the old decommand, we have it on the
other one already, as well. I think that's nicer. Why are we using chrome on one item when everything
else is brush? Okay, let's select this
light here and now, and let's press shifts and
cursor to the selected. There Okay, so let's
bring in another light. So let's press Shift A, and let's bring in
another point light. And straightaway,
that's looking good. We could pull the light up, and because that
light's in a cylinder, it's going to act like a torch. Taking the light back,
reduces the arc of the light, bringing it forward,
increases it. So I'll leave that something
like that, I would say. So again, let's put some
more color in this. Let's bring that into the warm. There we go. That's cool. And we can either reduce
the power or increase it. And I think I'm
going to put that somewhere around 15 mark, somewhere around there,
I think. Let's try that. And don't think you're
ever stuck with that. At any time you can come
back and adjust those. So again, let's go ahead
and press Alt D and X and bring a copy across now and put that in the other light. And just drop that in
position on the X axis, and there we go. That's cool. So I did forget to create
a subgroup for that, so let's go ahead
and do that next. Let's click on Lights again, and let's create
a new subfolder, and let's go ahead
and name that. Let's call that the
Coker Hood lights. And go ahead and click Enter. Let's grab those two lights. Let's grab this one here. And then this one here as well. And there they are. There's two lights,
so let's grab these. And let's go ahead and
pull those now into the Coker hood group,
and there we go. We'll compress those. And we have these three lights here
because I think we did. I forgot to actually create
subgroup for the island. So let's go ahead
and do that, too. Let's select these lights. Let's create a subfolder, and let's call these
the island lights. Go ahead and click Enter and select the three point
lights that we have here and go ahead and drag those into the island group lights
like that, and there we go. Okay, so that's a
good start. So next. Let's actually put some lights
under these cabinets here. Let's do that next. So let's maybe select this little downstand
thing magic here, and let's re center on that. So let's right click
and let's go ahead and set the origin to the
three D to the geometry. And let's press Shifts, and let's bring the
cursor to that. So our new we'll
just drop in there. And let's press Shift A. And this time, let's bring in an area light,
and there we go. So the area light I tend to
use where it won't be seen, where the origins of the light won't be seen because it
never looks that natural, but it is great at
a scene lighter. So if you're creating a
typical sort of studio scene, it's a great light to use behind camera or in areas which are concealed or in areas that aren't being going to be seen in render
or animation. This is an ideal place, and also there's so
much control over it. So let's go ahead
and press S and Y to scale it down in the Y Rig, in the Y axis, there we go. And let's go ahead and pull that forward in the Y,
and there we go. And let's have a look at it. And I'm happy with the
height. That's perfect. So I think the only other
thing we want to do, maybe, is go ahead and
scale that up in the X. So let's press SNH
and go ahead and scale that up to about
there like that. I don't generally take
it to its full extent to the very edge of the cabinet that can create
some weird shadows. I'll just show you
don't need to follow. I'll press S and X,
and just pull that out a bit more, and there we go. And I don't like this light
fall off on this side. It's just it might
be a personal thing. Maybe you're fine
with it, but for me, I'm going to keep that
back a little bit. I'll press S&X and just
bring this in so we get a slight shadow and shade
in the corner. There we go. So now really it's
down to color, which is subjective.
It's up to you, really. I mean, we can leave
that as it is in quite a neutral color or we could try taking
this into a cold color. Take it into the blue like this and have a little
slight blue light in there. Emphasizes the sort
of the blue and the marble and emphasizes
the color and the wool. Or we can go ahead
and keep it warm and bring this into
sort of the pinky, yellowy, orangey
color like this. And I think me
personally, I like that. It accentuates the brass. Let's bring the power down because I want these
lights to be quite subtle. Being that down to maybe a five around about
the five, anyway. And yeah, I think
that's looking good. So let's create a
subgroup for that light. So let's click on the Lights
group, create a subgroup. And let's call this
under cabinets lights. And go ahead and click
Enter. There we go. Let's select this light here. And let's just press M, and
let's find our lights group, let's go ahead and put that in the undercabinets light group. Okay, let's get to a
point where we can see both sides now and
you can see Oops, you can see the sort of
the improvement with that under cabinet lights when you compare it
to the other side. We've lost all that weird shadowing and
everything looks good. So let's go ahead and
press Alt DN and X, and let's bring a copy across
the other side, of course. And let's take a second
to position that light. Sort of centralize that, and there we go. That's cool. Okay, so I think that's a
good place to leave it. We've lit our scene on this side of the kitchen,
and it's looking great. So I think in the next lecture, let's go ahead and just
light this corner up. This corner still
needs some work. There's no detail
in there because we don't have enough light, so let's go ahead and do that. Alright, let's go ahead
and save our progress, so let's press Controls. And I'll see you in
the next lecture. Thanks very much.
Bye bye for now.
78. Lecture 77 Lighting Part 2: Hello, and welcome
now to Lecture 58. And in this lecture, let's
go ahead and do some work on this corner here with
all these tall cabinets. So there's two kind of
things I want to do. First of all, we need to
light this corner up. It's not lit at the
moment. It's looking a little dark over here. And the second thing I
want to do is just create some interior lights for our larder cabinet here to make that pop a little bit
when the door opens. So let's go ahead
and do those. So I think the first light I want to bring in is an area light. So let's go ahead
and press Shift A. And let's go down to lights, and let's go for the area
light, and there we go. And let's press seven so we
can see this from above. And let's go ahead and go
into wireframe for a moment. Grab our area light and bring
this over like this until it's middle of the room and center to those two roof lights. Let's press one so we can
see it from the front now, and let's go ahead and take
that up on the z axis. And now let's go ahead and press R and rotate that until it's angled towards our larder
cabinets. There we go. Okay, so I think now
keep this highlighted, and let's press set, and let's go back to our full
rendered mode. And let's see what that's done for our sort
of corner here. Let's see what it's done
for our tall units. And straightaway, that's made the lighting a
lot better in that corner. But let's see what we can do. I think let's go ahead and
just take that light over, first of all, in the Y axis. So if we just press G and Y
with it still highlighted, we can bring this
light over like this. So let's see if we can sort of light this corner up a bit here. So if I just press Z, I'm just going to rotate this
on Z axis like this. Maybe a little bit more z and just bring this round
like this. And there we go. It's sort of lighting
up that corner in now, a bit more just there. And we could try bringing
it down a tiny bit. So let's press G Z and just
bring that light down. And now let's try go
ahead and rotate it. I just need to see which way I'm going to rotate this one. So I want to rotate
that, I think, in the X axis. So let's press R& X and go ahead and bring
this up now, like this. And there we go. Let's have a look at that and
see how that looks. And that's lighting up that
corner a little bit better. I'm just going to press z again, bring that bit more into
the corner again like this. And let's try increasing the
power on that a little bit. Bring that up maybe to about
30 and see how that looks. Let's just try adding a bit
of color to this light. Everything else is a bit warmer. So let's do the same,
and there we go. That's pretty nice now. I think that's
looking pretty good. That corner now
is nicely lit up. That's looking a lot better. Okay, so that's all we really need to do there.
That's looking good. We could try maybe bringing
that light down a tiny bit, but because it's an area light, I never really want it
to be seen in renders. So I want it to be
reasonably high, but I'll press G and Z and just bring it down a little
bit maybe like this. And let's just try
re rotating that. Let's have a look here
and see which way. And let's try rotating
that on the X axis. Let's press R&X and just
bring that light up again, and there we go. That's cool. Try pulling it over on the X a little bit and
see how that goes. And make sure that
light doesn't really affect any other surface
is just this corner. That's all I really
wanted to do. I think that's looking
pretty good now. Okay, now we've got
this corner lit. Again, we can revisit that at
any time, change the power. We could change the color
of that light if we want. But for now, I'll go
ahead and leave that. But the next thing I want
to do is go ahead and create some lighting
in this cabinet. I think, first of all, let's go back to layout here like this. Let's go ahead and
find that cabinet. Here we go. Maybe let's go
ahead and grab these doors, and let's press H
and hide those. And let's select maybe
these edges here, and let's re center on that. So let's right click. And let's go ahead and set the origin to the
geometry. There we go. Let's bring the
cursor to that now, so let's press Shift S and
cursor to the selected. And let's go ahead and
bring an object in now, let's press Shift A, and let's just go ahead
and bring in a cube. Okay, so let's go ahead
and scale that cube down. Let's press S and go ahead and scale that cube down
quite a lot like this. Let's take that
down on the Z axis, and let's bring that forward
now on the Y axis like this. Okay, let's go ahead and scale it down some
more on the Y, S in Y and bring this down
to something like this. And let's scale it down Z S and Z and just bring
that to something like this. Let's fix the scale. Let's press Control A and apply
rotation and scale. And now let's tap into
Edit mode with it. Okay, let's just select
maybe this edge here. Let's press three so I
can select faces, sorry. Let's select this face, and just go ahead and
pull that over now in the X until it sort of drops into that side like this and now pull it back
until it just pops out again. And let's do the same with this. Why's grab this face,
pull this over, and just put that into the surface and then pull it
back a little bit like that. Okay, let's press A,
so we select all, and let's go ahead and pull that down the z axis now so it berries nicely and then pull it up a little
bit again like that. Okay, so let's tap out
of Edit mode with that. And let's go ahead
and press Alt D and Z and bring a copy up now
and put that in the top. And let's go ahead and put that just like that. There we go. Okay, so now we need to
make some copies of this, but because I'm going to
rotate it and scale it, I'm going to make
some separate copies. So I'm going to
press Shift D and Z and bring your
copy down like this. And now I'm going to
right click and go ahead and reset the
origin to the geometry. And now let's go ahead and
rotate that in the Y axis. So let's press Y, 90, enter. And let's go ahead
and pull that over now and put this just in
place like this here now. Put that in the wall until it's just sticking out a little bit. Like like that, I'd say. Okay, so let's tap into
Edit mode with that one, and let's go ahead and
select the end here. And let's take that down and just take that
up to the corner until it meets the other
one like this. There we go. And we can't see here, so let's press, and let's
go into wire frame. Let's go ahead and
select the end like this and pull this up like this. And let's press and go
back to solid mode now. And let's go ahead and
just bring that now into the corner like
this. There we go. That's cool. Let's tap out
of Edit mode with that. And let's go ahead and press No, we can press Alt actually, let's press Alt D and X, and bring a copy over like this and put that now in the
opposite side here like this. Okay, let's bury
that in this side. Put that nicely in position. And there we go. That's cool. Okay, so I think the next
thing we want to do is use the whole Boolean tool. So let's do that. So let's
select the main carcass here, and let's check the scale
on that, and it's all good. Let's go to the AD modifier, and let's hit Degenerate and
let's go down to Boolean. And let's grab our
eyedropper and maybe just put that on
this one here like this. Let's find this
component. Where is it? It's right here
and go hide it for a moment and make sure that
booleans worked and it has. So let's bring that back. And let's go back to
this one and go ahead and apply that modifier. There we go. Okay,
let's grab it again. Add modifier,
generate and boolean. And let's grab our
little dropper and go ahead and hit this
one now like this. Let's go ahead and
hide this one. So let's find it. Here it is,
and go ahead and hide it. Check that it's worked. It has, select this and go
ahead and apply. Okay, let's bring back that
one. And let's go to the top. And let's select
this. And sorry, let's select the main carcass, and let's add modifier, boolean, grab our little dropper, and just go ahead and select
that top one like that. And again, we can go
ahead and hide it, and it's worked, so let's go ahead and
apply that boolean. And let's go ahead and do
the last one here now. Let's select this
side, add modifier, boolean, and go ahead and grab our dropper and go ahead and put it on this one
here and I like this. I think I'm just going
to go ahead and assume that one's work because I can't see why it wouldn't
cause the others have. So I'll go ahead and apply that. Okay, so now that we've done
that, believe it or not, the next thing we can
go ahead and do is just go ahead and
delete these objects. They were just
there basically as cutters to create that
groove for our lights. So let's go ahead
and grab this one. And finally, let's go ahead and grab the bottom one and
take that out, as well. Okay, so now that
we've done that, I think the next thing
we can do is we're going to bring in an area light. Let's go ahead,
maybe just select this piece here or
maybe this piece here. Let's go ahead and press shifts and bring the cursor
to the selected. So we have a reasonably
central position, and let's press Shift A, and let's bring in an area
light, and there we go. Let's take it down a
little bit like this. And let's go ahead
and take it forward. And let's press seven, so we see it from above, and
let's go into wire frame. And let's have a look at this and see what
we're going to do. So let's go ahead and press S and Y and go ahead
and scale this down and bring this into
position in that groove, which I think is right there. So I'll press S and Y again and go ahead and bring this down
so it drops in this groove. Something like that. Okay, the next thing we want to do is scale it up in the X. Let's press S and X and go
ahead and just scale that up to something like that.
And that should be fine. I think I accidentally
scaled it down the Y, so I'll just go ahead
and increase that. And there we go. That's cool. So let's go ahead and bring
that down now on the z axis. Maybe let's go back into solid mode for a moment
and see where that is. Bring that up and
just go ahead and drop that imposition
now. Like that. That's cool. So maybe let's go back to rendered
view now so we can see that. And see how it looks. And that's cool.
Because up until now, we've not really used area
lights visible in our scene. But there's a slender
little light like that, I think it'll be
absolutely fine. We could actually just go
to the light properties and put a bit of
color in that, maybe. Add a bit of warmth to that.
There we go. That's cool. And maybe I'll leave
that ten watts or bring it down a little bit
to something like that. So let's go ahead and
make a copy of that now. So let's press Alt D and Z
and take a copy up like this. And let's go ahead
and put that in the top groove at the very top. And just put that in
the other groove. Just like that. That's cool. So, now that we've done that, let's go ahead and
make another copy. Let's press Alt D and Z and
pull that down like this. Let's rotate that on the y axis. Let's press Y, 90, Enter. And let's go ahead and
take that back now like this and put that in
position as we need it. So something like maybe just try rotating that, maybe. Let's try that. Let's press z, 180, and there we go. That's got it. Okay,
so let's do one more. Let's just bring that
down a little bit. So let's press G and Z, and just try pulling that down, something like
that. There we go. And now let's bring a
copy to the other side. So let's press Alt D
and X and bring that over like this and take a
copy now to the other side. And put that light, as well, inside the groove
where it needs to be. And let's go ahead and
rotate that light. Let's press R, z180, Enter, and there we
go. That's cool. So now we've got
complete lighting all the way around our cabinet, and I think that'll
be really effective. Okay, so let's go ahead and
bring the doors back now. So let's press Alt H and hide everything,
and there we go. So at the moment, we
can kind of see that the lights are on behind that
cabinet, but don't worry. When we start doing our renders, I'm going to show
you how to animate this so that the lights will turn on and off as
these doors are open. So these lights will be off
when the doors are closed, and they'll only
turn on as the doors start to open. How
cool would that be? All right, thanks very much. And I'll see you
in the next one. Bye, Finn. Oh, let's do a save. Let's do a save. Let's press Control S and save our progress. And I'll see you in the
next lecture. Bye Bye Finn.
79. Lecture 78 Parenting Objects: Hello, and welcome
now to Lecture 79. And yeah, we're back
on an empty screen, eh. Again, don't panic. We're not starting
right from the start. I just want to talk to you about parenting and what
that means in blender, and just show you a basic
example of how panting works. So let's just go
ahead and get rid of the splash screen. And
what shall we bring in? We need to bring in an object. It can be anything,
really. Let's press shift, eh, and what shall we bring in? Um, well, let's bring in Susan. Let's bring in the monkey. And let's bring this
one up like this. And maybe now let's make a copy. Let's press Shift and Z and
bring one down like this. Maybe take this one
up a little bit, and maybe go ahead
and scale this one down at something like that, maybe just take that over
now, something like this. Let's press shifty and X and bring a copy over
to the other side. And oh, let's do that again. Let's press shifty
and Y and take a copy back and bring that one
something like to the middle. Nothing too precise. And let's go ahead and
do that one last time, shifty and Y and bring one forward like
this. There we go. So we got four small monkeys, and we've got one large one,
and that's what I want. So parenting, what is it? Let's set it up first, and then me just showing you what it does is the
easiest way to explain it. So what I'm going to do
is go ahead and select all our small monkeys
first, the children. And then I'm going
to go ahead last. I'm going to select the
big one, the parent. And you can see the
order in which I've selected the shows because all
these ones are now orange, and then this one is yellow. Meaning, this was the last
one that was selected, so priority will be
given to this one. Once we've done that, go
ahead and press Control P, and you'll get the
parent command app. And let's go ahead and
set parent to object, but keep the transforms. Meaning keeping
all the positions set to go ahead and do that. And instantly you get
these lines appearing, which they don't panic. They'll never appear
in a finish render, but they're called
relationship lines. And it basically means that these children have a
relationship to the parent, and that's what these lines
are indicating that there is a relationship between
these objects. And now that we've actually
set the parent as this one, if we go ahead and move
it, the children follow. There we go. It's
as simple as that. That is basically
what parenting is. If I move a child, the parent doesn't follow. If I scale a child, the parent doesn't change scale because the children can't
make the parent do something, but the parent can
make the children do. So if I go ahead and
scale the children, the parents sorry, then the
children scale up as well. If I rotate the parent Az, then the children
will also spin. So the parent has control
over the children, but the children don't have any control over the
parent. And there we go. That's the simplest way of
explaining what parenting is. Alright, so now let's
go ahead and go back to our main
sort of projects. I'll just go ahead and
delete this. And let's go ahead and apply that now to our sort of objects
in our scene. So the objects they want
to do this with are one, our little pop up here so
that we can animate that. The other one is
our drawer here, and then the third
one is our handles on our larder
cabinet here because we're going to animate
these three things. We're going to animate
this one. We're going to show the doors opening, and we're going to go ahead
and animate animate this one, and we're going to
animate that one, too. So let's do this.
So I think let's start with the easier.
Let's start with this. So let's go ahead and select
the plugs and the base. So we've got those
items selected. Now, select the top, so the top has priority, and now press Control P, and Object keep transforms,
and there we go. So if we actually grab
this now and lower this, everything else
will lower nicely with it. And vice versa. If we raise it up,
then everything will raise up with
it, and there we go. So that is ready now when
we are ready to animate. Let's just check that we've got that in a nice
finished position, and, yeah, that's
absolutely fine. So let's do the same
with the draw now. So I guess the best way
to do that would be to let's get rid of the worktops. Let's hide those so
we can see our draw. Okay, so let's go ahead and select all of the
draw this time. Let's select the back and
the front and the sides. Let's select the base.
Let's select this one and this one and these
little dividers. Let's select the draw face. And finally, let's select the handle so the handle
will be the parent. And once we've done that,
let's press Control P, and let's set parent, but keep transforms,
and there we go. So let's go ahead and
move the handle now, and then the drawer will come
out nicely. Look at that. That's perfect.
So, in this case, I'm just going to
press Control to let that go back to
its finish place. And there we go, so that's done. So now that we've done that, maybe we could bring
back our worktops. Let's find the cabinets folder. And let's go ahead and find our worktops there they are
and go turn those back on, and there we go. That's cool. Okay, so we've got
the last one to do, which is our tall cabinets here, so let's go ahead and do
something with those. And I think, first
of all, let's press, and let's go to solid
mode for a moment, just so we can see
easily what we're doing. And let's go ahead and
select these two doors, and let's hit the
forward slash to. Actually, let's select
the handles, as well. Sorry, folks. And now we've
got the handles in the doors. Let's hit the forward
slash bring those back. Alright, so there's a little bit more involved with
these with the parenting, but not much, don't worry. So with the animation
with this one, these doors are going to
rotate from the pivot point, and then they're
gonna slide back into the pockets on the larder. And you'll kind of see that
in action when we get to it. So we need to set a pivot
point right here as it is. So let's go ahead and tap
into Edit mode with this one. And it looks like the origins right now is already
in the right place. But actually, I'm going to assume that I'm going
to right click on this and set the origin to the
geometry and put that back in the middle just in case you weren't in
the same place as me. So now we're starting with the origin in the
middle of the door. Let's press seven to
see this from above, and let's have a look at this,
whereas it's right here. And let's go ahead and
reposition our cursor. So I'm just going to
go over to this one. Here, click on this. And now position my
cursor where I want it, which is about there, and then left click to
position that cursor. And now I'll go
back to the move. Okay, so now that
I've done that, I'll go ahead and right
click on this door and set the origin to
the three D cursor. And now that door if
we rotate that door, it will rotate on
that pivot point. If I press RNs and rotate, you can see now it's rotating
on that pivot point, not before where it would
have rotated from the center. So now that I've
done that, we've got our pivot point right there, and we have our cursor set
to our pivot point too. We can bring in an
object at that point. So let's go ahead and press Shift A because I want
to bring in a new thing. I want to bring in an empty, and I'm going to bring
in a plain axis. So you may be wondering
what this is, this is all new to us
again, this empty. And what is it? It's
basically nothing. That's the best thing to
define it as is nothing. That's why it's cold and empty. It doesn't really hold
a lot of information. It doesn't have any curves to it because you can't tap into it and select
vertices or anything. There's no surfaces,
obviously, it's just nothing. Only information
actually holds is its own coordinates until
you apply things to it. So we're going to use
this as the parent, and we're going to
set the other objects to this empty. And don't worry. When we render again, this will not be seen in
our finish render. So let's select the door. And now let's hold shift
and select the handle. And then finally, let's
select the empty. And you can see we have it in the right order because the
empty is actually yellow. Once we've done that,
let's press Control P, and let's object and keep
transforms, and there we go. So now if we grab the empty
and rotate that on the z, the door follows nicely,
and there we go. That's cool. So let's kind of repeat that process on
the opposite side now. But this time, the
origins, in fact, no. Let's put the origins in the
center and do this properly. So I'll right click and set the origins to the geometry to put that back in the middle. And now I'll press seven
to see that from above. And let's go ahead
and grab the cursor, and let's just position it right there at that point in the door. And now let's go ahead and
select the move tool again. And with that done, let's
right click and set the origin to the three
D cursor. There we go. That's cool. So now let's go ahead and
bring in another empty. So let's press Shift A, and let's bring a
plain axis empty in. Let's select the door
and then the handle, and then finally the
parent, and there we go. And now let's press Control P, and let's go ahead and set
parent, but keeper transforms. And now, if we go ahead
and rotate that on the z, that's turning nicely. There we go. That's cool. So now we've pair in these
doors to these empties. So we've done some new
tricks in this lecture. Alright, let's hit
the forward slash and let's bring everything back. And let's go ahead and go
back to our rendered mode. Let's press and go
back to rendered. And there we go. So
in the next lecture, now that we've
kind of done that, I think that's pretty
much everything done as far as setting our
scene up for animation. All our textes are in place, all our objects are drawn, everything's done.
Everything's parented. We have lights in our scene.
We're looking really good. So I think the only
other thing we need to do is what's known
populate our scene. And almost every professional that's working in this kind of industry of archives or
anything along those lines, they all just use
premade assets. So we're going to do the same. We're going to use
blender kit and import premade assets to populate our scene and just add to the whole
feel and the realism. Alright, so we'll do that
in the next lecture. Let's do a save. Let's press Controls. And I'll see you in the
next one. Bye bye for now.
80. Lecture 79 Making The Project Your Own: Hello, and welcome
now to Lecture 80. And at this lecture, yeah,
let's start bringing in some assets from BlandieEcus me, from Blndqet and start
just applying them to our scene and just make
things look real good. But before we do that,
I just for a second, want to talk about
file sizes and make sure that we
sort of consider always the sizes of
the files that we're bringing in before we
import the assets. So just come over to this tab here and just click on
Blender kit on the side here and come down
to import method. And here, it says,
Max resolution. Just go ahead and click on that. And here you can adjust the size of the file of
the assets you import. You can go up and down on this. And I kind of do that. Consider where the
item is in the scene. Is it sort of front and center, or is it way off
in the distance? Is it a tree that's way
off in the distance, or is it a tin in a
cupboard that'll barely be seen or a glass that's way up on the top shelf or a wine
bottle in the wine rack? If it's those kind of items, then I'm going to bring in low, I'm going to bring in at 5:12 by 512 to keep the file sizes
down and keep the VRAM, the video random access
memory low for your GPU. If I'm doing something
front and center, if I'm doing the dining table here, then I'm going to up that. I'm going to consider it
and up that to maybe a 1024 or a 2048 by 2048. I don't generally
go much above that. I don't find any huge
advantage going above that. And also, your files are going
to get whopping, you know. So yeah, just consider before
you import any assets, what size file are you
going to do that in. Alright, so let's crack on. So I think the main one or the most important
one really is a dining table to
put in front of a huge window here,
so bifolding door. So let's do that first. So come on over here to your blender kit and
just click on this. And then let's put
in a dining table. Alright, click
Enter. And sometimes it doesn't come up first time. If it doesn't click on the area and hit Enter
again and it'll come up. The next thing you
want to do is just come over to this
little thing here, the filters tab, hit this and
go free first, there we go. And now it's just simply a case of finding a table,
which you like. So if you want more information, just go ahead,
right click on it, and it'll give you
more information. I'll tell you the resolution of it and the overall size of it. So this one's 12 megabytes
and it's got ten stars. So let's see if we can find another one and
see what there is. And see, I quite like this one, 'cause I think with all the traditional stuff
that we have in our scene, it would be something
it'd be nice to have something
quite contemporary, and the chairs around it are
quite traditional, anyway. So I think that
might be quite nice. But see what else we've got. We've got this one here, and we've got this quite
traditional one here. And what else have we
got that one there? Different ones, really. So just hunt around and see
what you can find. Large table there. Um yeah,
just look around, really. And what else have we got? We got this very
traditional table, and that's a nice
set, that one there. Um, let's just do one more click and see if
there's anything nice. That's quite nice and
quite contemporary. And yeah, I mean, I could keep on going
really and just keep on finding there's
quite a few of these. But I think what I'm
going to do is go back to the very first one and
have a look at that. I think I like this one here. So what I'm going
to do is go ahead and right click on it again. And so it's 26 megabytes, so that's not too bad for
a large table with chairs. So just come down to here and click and drag now
into the scene like this, and it'll set it nicely on
the floor for you like that, and let's see how that looks. And we do have in
the middle of this, you can see this
little line here, and this is an empty. So again, now we're
going back to parenting. So all these other objects
have been parented to this, which is very common
within blender kit. So with the actual
empty selected, let's press Z, 90, Enter. And I'm going to just go ahead
and position this where I like it and try and
figure out where that is. So that's quite nice, obviously, directly in front of that window and the shadows
are kind of falling on it. Am I happy with the scale, having a look at it in
relation to the kitchen? And I think it's a little small. So I've still got this empty selected, so
I'm going to press S, and just go ahead
and scale this up a little bit to
something like that. And just looking
at the height of the table in relation to the kitchen tops,
this what I'm doing. And there we go,
Oh, I think that's pretty cool now. I
think I'm liking that. And I think I'm going
to leave that in place. I think that actually quite complements the rest
of the kitchen. I think I'm quite
pleased with that. So, what else do we want to do? What's something else that
would make this scene pop? So obviously we need some wine bottles in our wine rack here, and we need also something in this alcove here
on the shelves. And we need maybe some stools
around our table here, and we need a few
things to populate our worktops just to
sort of dress those. And we also need
things in our larder. In fact, that'll be a good one. Let's go ahead and find a microwave and put
it in the larder. So I'll just go ahead
and grab these doors, and I'll press H and hide those. And let's go ahead and
look for a microwave now. Let's click here, Delete this, and let's start
typing microwave. And go ahead and click
Enter and see what we get. Again, let's make
sure that we're on free ones, and
that's quite nice. Maybe I'll right click
on that and have a look. And it's 25 megabytes, and it's got a ten star rating, and it's got a one K resolution. I think that'll be
absolutely fine. So again, I'm going to
click and drag and just drop that now on that
shelf there like that. Okay, so maybe I'll just
grab the empty for this. And I'll press S and
just start scaling this down until it kind of
fits where I want it. And maybe bring it forward a little bit on the
Y axis like this, maybe scale it down a bit more. I'll press S, and
maybe now just take a minute just to try and scale this up and fit this
in there as I want it. So I'm going to
scale it down in the X. I'm gonna press S and X, and just scale this
down this way. Maybe move this over a little bit and
scale it up in the z. So I'll press S and Z and
just take it up a tiny bit, and there we go, that's cool. So now we have a microwave
in our larder cabinet. I think the rest of
the lard cabinet, I'll just put things like cups and bowls and plates and maybe some cereals or some pastas and maybe a coffee
maker or something down here. But I'll kind of just
do that as I go. Alright, so where else
can we put something? Let's have a look
for a wine bottle. That'd be something
quite handy, I think. So let's go ahead and
maybe just click on this, and let's put wine bottle. Click Enter. And let's
see what we get. It's taking a minute.
If it takes a minute, just select it and
just hit Enter again, and it usually sort itself out, but it has this time, anyway. And let's find a wine bottle. So maybe I'll select this one. Right click and
have a look at it. It's two K. It's 5
megabytes. It's very small. It's got five star rating. Let's see if we can
find something else. Maybe let's right
click on this one. And it's two K, and
it's got nine stars. And to be honest, we're really not going to
see much of these, so that would probably be fine. So I think I'm just going to go ahead and drag that
into the scene. So I'll come to this
click and drag from here and go ahead and just
put that into the scene. Something like I think I'm going to have to manually
position this one. I'll go ahead and put
it there like that. And let's go ahead and select it and take it up a little bit. And I think I'll go
ahead and scale that up. So, just scale it up a little bit and now take that in
on the X axis like this. Let's have a look at
that and see how it looks and make sure that's
reasonably scented. We don't want perfection here because things are being placed, so they may not necessarily
be perfectly scented. So don't always do that. So I'll go ahead
and press Shift B because it's running a bit slow, so I'll just go ahead and center over that item, and there we go. So I'll select it again.
I just go ahead and take that down and position
that where I want. Maybe I'll press S and just
go ahead and scale that up, maybe just take that
back a little bit in the X axis to
something like that. That should be good. So I'll go make some copies of that now, so I'll go ahead
and press OTD and Z and go and take one up
maybe to the top like this. Let's see how that looks. And actually, it hasn't
taken all of it, so I'll go ahead
and delete that. And let's try that again. Let's make sure the top is
selected and the bottle, and let's press Alt D and Z and go ahead and bring
that up now like this. And maybe I'll do
another one somewhere, so I'll press Alt D and Z and bring this down now
to maybe here like this. And just move that around and make sure
it's looking good. And then after, I'll
go ahead and bring in a different type of
bottle and fill up a few more of these and
maybe do it with three different
bottles so they're not just constantly repeated
with the same bottle. Okay, something I
realized I didn't do is I didn't actually let's
just compress these, wine bottle, dining table. That's it. Let's create a new group for all of our assets that we're
bringing into the scene. So let's click on
Scene collection, create a new file, and let's go ahead
and find that. It's this one here. Double click this and just call this asset. I click Enter. And let's go ahead and grab the dining table and drop it in that
file there like that. Same with the microwave, into assets and wine bottle
two into assets. There we go. Let's close that.
Let's bring that down now. And there we go. That's cool. So, the other thing we could do actually
is these area lights. We need to put that into the lights folder, so
let's click on this. And let's go ahead
and open it up. And let's just create
a new group in this. And let's call this the
arder lights. Click Enter. And let's select
this four lights here and go ahead and put those into the lard Lights
groups like this. And there we go. That's cool. All right, so let's go ahead and compress our lights group again, and let's open up the assets group so we can see
what we've got. So we've got our wine
bottles in there now, and I'll carry on
adding to that. And we've got a
microwave and a larder, and we've got a really
nice looking dining table. Outside, I'll probably
bring another table set out there,
maybe some plants. And it sounds silly,
but I think in blendit there is
actually some weeds, so I might put one
or two little weeds just popping up between the brickwork and the
edge of the paving. So, what else shall we do? Maybe let's go ahead and bring in something for
this alcove here. So I'm going to
look for baskets. And click Enter with that
and see what we get. And let's see if we can
find a nice storage basket to put in those alcoves. Let's see what we go. We've got that one there.
That's quite nice. The WIA basket. Oh, we've got this one here
as well. This is quite nice. By I'll right click on this. See what we can see. It's large. It's 88 megabytes, so
it's quite a large file, but it's got a high rating. It's got ten stars to it. Think I'm going
to give that a go and see what it looks like. So I'll go down to the click and drag from here and
go ahead and do just that and go ahead and position that just
on that shelf, just like that, and
see how it looks. Let it take a minute
to sort of come in, and let's press Shift B and just re center in
this area like this. Yeah, let's go ahead
and grab this, and let's press S and go
ahead and scale this up, something like this, and
then go ahead and reposition that center of that
and see if I like it. Got to admit, I'm
not keen on that. I'm going to go ahead
and delete that one. And I'm going to make sure
that assets are selected here, so the files go in there. And let's carry on looking. Maybe it was a little
too quick to jump then. So we have this one here.
This is quite nice, or we have this one as well. Or this one here. Is there any others? So
I think I'm going to go for Is it this one or
is there another one? This one, let's have
a look at this one. All right, click on this,
it's 230 megabytes, so it's a very large file, it's ten stars, and it's
eight case, it is big. Always consider that before you go ahead and
introduce items. I think in my case, I'm
going to give it a go. But again, if you're not comfort about
bringing in big items, obviously it's going to
increase the size of your file and it's going to increase the time
for rendering as well. It's a balancing act, but I'm going to go ahead
and bring one in now and see if I
can make it work. And let's see what that's
going to look like. I need to scale that up, so I'm going to
press S and go ahead and scale that up to
something like that and re center that and
go ahead and take that back now in the X axis like
that and see how it looks. Then I'll scale it up a
bit in the Z, S and Z. Take that up like
that, and there we go. Yes, that's really
cool. I'm liking that. So I'll grab this item, and I'll press Alt D
and Z and just take a copy up now and just
drop that there like that. I'll do the same again. I'll press Alt D and
Z and take it up. And remember, I'm
using Old D so that I copy all the properties
of each item, which will reduce
the file sizes. I think let's go ahead
and grab all three of those and pull those
forward a little bit, so they just stick
out a bit more. And I think I'll do one more, and I'll leave the bottom empty, so I'll grab this one here, and I'll go ahead
and press Alt D and Z and maybe bring this one down to this
shelf here like this. Maybe just bring it
down a little bit more. And there we go. That's cool. Just check that these are
all sitting on the shelves. This one, maybe I'll
take down a little bit. There we go. That's good. And then this one,
too, maybe I'll take that down a little
bit more like that. Okay, that's looking
good. I'm liking that. So is there anything else? I
mean, there's lots, really. I need to populate
this cabinet here, and we need some stuff here. We need the chairs, maybe around this table. Maybe I'll do that. So
let's look for bar stools. I think that'll be the
right term for these. Let's type in bar stools. Act like Enter and see what we get, and
let's just have a look. So we've got a nice
simple one like that. That's quite cool. And we
have something like that. So we have these nice rustic, sort of metal frame ones, so we have a very
traditional one. We have this sort
of wicker style. That's quite cool. And
I'm not keen on that. We have these ones. And it's very personal tasting, isn't it? Now at this stage. This is when you really
get to call call, you project your own with this. Let's see what we can
find. We've got that. Industrial pub store. We have this one
here, workshop store. So let's see what we can find. They're quite nice. A bar chair. Um, we have this one here. They're quite nice, too,
and they're sort of matching the color
with sort of the top. No, actually, I'm
not told on that. So just take a while, really, to find something that
suits what you want. And I think I'm going to try maybe something
like this, maybe. Yeah, let's right
click on this and have a look at the file.
So it's got eight stars. That's respectable, and it
has a very small file size, so I'm going to go ahead
and bring that in. So I'll drag that in and just
go ahead and put that on the floor now like that
and see how it looks. And maybe just grab it here by it's empty and
go ahead and rotate that on the z and just swing
that around until it's kind of facing
the project like that. And do I like it? You know what? I don't think I do. I'm going to press delete on that item. And let's try that again. It was just I need more
height on the batool I think. So maybe this one. Let's
have a look at this. Let's right click on this one, and let's have a look at it. It's two K, and
it's 55 megabytes. I'm going to give that again. I'll bring that
into the scene and put something like that
and see how it looks. And I think that's more that's more suited
to what we're doing. I'll maybe bring
this in like this. Let's press Z and go
ahead and rotate that. Whoops. To something like that, and pull that back a
little bit on the X axis. And yeah, I won't set
that perfectly table. I'll leave it out
slightly like that. And I'll make a copy of that. So I'll press Alt
D and Y and bring a copy over now like this and
rotate that on the Z axis. Let's press R and
Z and go ahead and bring that in now, like that. Let's just check it. That's not touching anything.
And there we go. Yeah, that's much
better. I'm liking that. Let's go ahead and delete this. Somehow, I've got this
sitting here like this, so let's go ahead and get rid
of that. And there we go. So we've got a bastool here, we've got the WIA baskets.
And yeah, there we go. So this one here, I think that's leftover from the one
that I didn't like, so I'll go ahead and delete
that item, and there we go. So we have these items brought into our scene. So there we go. I'm going to carry
on doing this, and I suggest you do the same, really, and it is a
very personal thing. The considerations are how
powerful is your computer, how large are you
making the files, and the aesthetics of it all, of course, personal choice
and what you're doing. Okay, so I'll see you in the
next lecture when I will have finished populating my
scene with everything else, things on the worktops,
chopping boards, knives, maybe some nice food and the larder and some extra wine bottles and some
paintings on the wall, something outside, maybe a
table and some potplants. And I think I'm going to put some sort of heater
here on this wall, we call it in the UK a radiator, so I'm going to
put something like that on this wall here. Alright, so I'm gonna
save my progress, so I'm going to go ahead
and press Control this. And I'll see you in
the next lecture. Thanks very much.
Bye bye for now.
81. Lecture 80 Ambient Occlusion: Hello and welcome to Lecture 81. And yeah, I mean, oh, it's just awesome,
isn't it? I love it. I love Blender, and I love
what we do with Blender. It's just so much fun. So this is where I'm at now
after importing my assets. And please do share images of what you guys have
done with your project, but this is where
I'm kind of at. So in the larder, I've got a microwave mixer, air fryer, lots of glasses
and some bowls and stuff. And outside, I've got a little table and a
barbecue and some firewood. I thought that kind of
finishes things off nicely. And I've got this well,
you know the table. You know we sort of
brought that in, and I've got this radiator
here on the back wall, and I've got pictures
here as well. And what else have I got? It's I'm like a kid
in a candy shop, you know, just showing you
all the things I've got. And, um, bread on the
counter, you know, nice, freshly baked bread
and some coffee, make the kitchen really
nice and welcoming. And just got some ornaments and some plant
pots on the walls, and I've got a great big
clock on the fireplace there, above above the ga. And
here in the corner, sorry, I'm moving around a
lot till I get to this stuff. I've got a kind of
coffee making corner, so I've got some cups, and I've got a coffee maker and some tins with coffee and sugar and cookies and
all that kind of stuff. So, yeah, that's my scene. I brought in some more
wine bottles as well. I haven't filled them all up, but sort of just left it like that to give the
general impression. I'm really chuffed with this. I think it's looking
great, isn't it? It's, I love it. Love
what we do with Blender. It's just great fun.
I'll calm down. I'll calm myself down. Come on. Take a
breath, take a breath. All right. So what's next? Now I've had a good rant
about how good Blender is. What are we going to do next? So I want to just do one
final thing on texturing, just to share it with you
more than anything else, because it's a great
little texture node that can just add a little bit
more realism to things. So let's go ahead and do that. So let's go over
to the shading to. And I just need to go
back to rendered mode, so go ahead and click
on that and bear with my computer while it sort of applies all the textures,
and there we go. And I'll just pan
around because I want to sort of apply it to these amazing looking
timber columns. I mean, they look great. But I think we can
do a little bit more to add to the realism. So what I want to do
is just select it like that so we can see
texture nodes, and I want to bring
in another node. I want to bring in an
Ambient Occlusion node, which will apply more dark
areas to these beams. So I'll press Chef and I'll search for the Ambient
Occlusion node. And if you haven't got it there, just go ahead and type it. And I need a color amper node. So let's press Shift A and
search for a color amper node, bring that in like that. And so we need to blend the color from
these two into this one. But obviously, we
still need to plug in our principal BSDF let's
bring in a mix shader. So let's press Shift A again
and search for a mix shader. And bring that in, too, and I'll just move over the
material output a little bit, and I'll go ahead and
plug the principal BSDF into the lower slot
on our mix shader. Then go ahead and plug that back in now to the material output. So I'm going to
plug the color from our Ambient Occlusion into
the fac on our color ramp, go ahead and plug the color
from the color ramp into the fac on the mix
shader and there we go. So maybe just move
these up a little bit. There we go, do that. And I think there's one
more node I can bring in, so I press Shift A and
go ahead and search for a diffuse BSDF and
I'll bring that into. And I'll go ahead and plug that into a top color
here like this. And after we've done that, let's have a play around with that. So first of all, let's go ahead and just increase the distance on the color
and see what we get. And let's just add a little
bit of colour to that. And now I'll start to get a little bit of darkness
coming in, I think. I'll bring that down a
little bit like that. Maybe you bring the
whiteness down a little bit. There we go. And now we're starting to get
hopefully some sort of shading in the corners and
shading maybe at the bottom. We can see that, but it's
currently the wrong color. So that's because, sorry just struggling
to get the angle. We need to apply a little bit
of color to this diffuse. I'll go ahead and
click on that and just bring that
down into the dark now like this to put a little
bit of grime on the bottom, now, like that. That's cool. That's the effect that I'm after because I don't think the
beam would be one color. Sorry, this column wouldn't be the same color top to bottom. So I think the base would be a little bit
darker naturally, from things rubbing against it, maybe they've got a dog
or something or yeah, it just would be a
little bit darker. So we can apply we can change
the distance here and just take more into the dark or just keep that balance,
something like that. So we've got a little bit at the top and quite a
bit at the bottom. And I think that's working. That's adding a nice
little detail to it. We can go ahead and just
the color ramp and just tweak the amount of darkness that we see there because I want
it to be quite subtle. There we go. And how is that? That's looking pretty
good, I think. I think I'm liking that now. That's a better beam. I think that's looking
better now with that. So let's go ahead and
apply that to that. So to do that. I
can just select it. And I can go ahead and select these nodes that we've
just brought in, and I'm just going to hold in Control and press C for copy. And I'm going to select this one here and I'm going to press Control V and bring those in
like that. I'll select them. And I'll press G, and just
move those more into position. Let's drag the material
output over like this, and let's go ahead and plug
that into the bottom of the mixed shader and
then go ahead and plug this back now into
the material output. And now, as well,
that's been applied to our other column
here. That's cool. So I think because we
alter deed the ones, that's automatically
been applied to those. I think I'm going
to do this as well outside with these
paving stones. They're looking a little bit blurt, you know, a little bit. There's no variation in there. So let's select those,
and let's press Control V again and
bring that copy in. Let's press G and just move
that around a little bit. Sorry, my explanation was
terrible then, wasn't it? A little bit blat. Sorry.
A little bit blur. I must learn to do
better than that. So material output, let's
pull that over like this. And let's go ahead and unplug
this from the surface, push that into the bottom, one of them shade it,
and then go ahead and plug that back in like that. Here on the color diffuse, let's bring that quite far into the dark, into
the black there. And let's go ahead and
increase the samples. And let's go ahead and
increase the distance, and let's go ahead and just up the sort of the darkness
on the mix ramp there. And now we've got a bit
more going on, I think. Now it's sort of There we
go. Now it's coming in. Now we've got a
slightly bit more sort of shadow and
shading on that. Took a moment for the graphics
card, so I catch up then, but there we Okay, so now what do we want to do? Let's just see that
come back in again. And my graphics card is just
lagging a little bit there. It's nothing to do with
the texture itself. All right, so now what
are we going to do? Maybe let's just go ahead
and do the same on this one. So I'll go ahead
and press Control V and bring a copy in like this and maybe just grab all of them and press G and
move it over a little bit, grab this one, and
go ahead and unplug the principal BSDF and go ahead and put that
in the bottom of the mixed shader and then go ahead and plug that
back into the top. And again, let's go ahead and just bring this
into the dark. And we can see that's helping with the
capping quite nicely. We've got some extra
darkness between them, and we can go ahead and
slide the color ramp over just to increase that a
little bit more like that. And if we wanted to, we can go ahead and
increase the samples, just to increase a little bit more and increase the
distance, as well. And there we go. I think that's helping a little
bit there as well. Maybe just bring
down that distance. It is subtle. There's
no dead there, but I think it does help. There we go. So we've
got some darkness now between these, yeah, that's looking better. Alright, so I think
there's one other place I might play around
with this, actually, if I can get inside my kitchen.
I'm just going to try. This is brave, but I'm
going to try applying it to the cabinets and see if it sort of creates a little
bit of extra shadow there. So I'll select these next,
the cabinet material, and I'll press Control V and
bring those in like that. And if we don't like them,
I'll just unplug them again. It's not really a big deal. Let's press G and just bring those over, grab
the material out, but pull that over, and go
ahead and plug this into the bottom of the
mix shader and go ahead and plug that into
the top here like this. And let's have a look at that. So yeah, I mean, it's definitely adding some more shadowing to the cabinets. I can definitely see that
that's happening. Do I like it? Shall I leave it? Let's just pan around and have a look at our scene from different angles. And yes, I think I do. I
do like the extra sort of shadows that that's
creating on the cabinets. Again, if you wanted to, we can kind of just play
around with that, bring that down or take it up. It's completely up
to us what we do. Bring it down to an
extreme for a second. You can see the shadows, but that's now appearing
more like grunge. And I definitely don't want
this to appear grungy, so let's go ahead and
bring this back up again. And just keep that
sort of there. Eel apply a little bit of light gray shading to some of these edges.
And there we go. I think that is
helping a little bit. Okay, so I think that was just a nice little
finish to our textures. It's up to you if
you use it or not. It's called the Ambient
Occlusion note, and I've shown you
how to set it up, but it's completely up to
you if you want to use it. Okay, so in the next lecture, let's get on and
do some renders. Let's go ahead and
do our First of all, we're going to do
our still renders. So I'll go ahead and show you
how to set up a camera in the next lecture and go ahead and show you how to
set up a still render. Okay, thanks very much. And I'll see you in the next
one. Bye bye for now.
82. Lecture 81 Still Renders: Hello, and welcome
out to Lecture 82. And, yeah, I mean,
let's go ahead and do some really cool
looking renders. Let's go ahead and do
that with this lecture. And I think the best
thing I can say about rendering is is think of
it as simply photography. We have to sort of
compose the shot. That's that's the
most important thing with rendering is just
composing an icy image, just formatting the image so that it's just looking great. So we have some background,
some foreground. We have some pieces
of interest in there. We have shadows. We have lights. We have all those things. Okay, so let's go
ahead and do it. So I think the first
thing I want to do is just come over to the outliner, and if you remember, way back at the
start of the course, we had a reference
file, didn't we? We had reference images, and we had a reference cube,
and they're right here. I can go ahead and turn
them on for a second. So they've been hidden
for a long time. And you can see right
now the cube is back in the scene because we've got
no light from the HDRI. Because the cube is blocking
out the light from that. Now, if we go ahead
and render light with the reference images hidden
in the final render, they will be seen again. So we don't want
that, obviously. So come over to here,
and where you see this little camera icon,
go and click on that. And now that file there, the reference images and
the reference cube will not be seen in the final
render. And there we go. Alright, so the next
thing I want to do is go ahead and split
the screen up, so let's go ahead and do that. So come on down to
the bottom corner here and just come
close to the corner. And when the cursor
turns to across, hold down the left mouse
button and go ahead and slowly drag another window across
to something like that. Okay, so what I want
to do is in this one, I want a plan view in
wireframe mode to be able to see the camera from above and just
position it easily, and this one is
going to be the view from the camera so we
can compose our image. So on this one, we can
go ahead and press M. We don't really
need to see that tab, we can go ahead and
press seven to get the orthographic
view and press Z, and we'll go into Wireframe. Okay, next, let's go ahead
and bring in a camera. Go ahead and select
scene collection, so it comes in at the top
or comes into this file. Now let's go ahead
and press Shift A, and let's go ahead and
bring in a camera. And there we go. That's cool. For some reason,
it's pointing down, but that's not an issue. So let's press x90 Enter, let's go ahead and bring this
up in a Y axis like this. Okay, so now, how
are we going to see through the camera?
It's real easy. Just simply press
zero on your num pad, and now you'll get the bird's
eye view from the camera. But right now, if I
go ahead and rotate, I rotate in the viewport. If I rotate, I lose the
camera view straightaway. So I need to be able to lock the camera view in the viewport. So I'll press zero again, so I see that like that. And what I'm going to
do here is in this tab, make sure that you're in
view like this and go ahead and lock the three D to
cursor and camera to view. But don't lock the rotation. Otherwise, you can't
turn anything. Okay, so now that
we've done that, we can come over
here to this one and we can simply
position our camera. So I'll move it over
like this and maybe move it to the corner
here like this. And I'm going to press R, and I'm just going to
rotate this camera. So I'm watching both view puts, I'm watching the final image and seeing what
that's looking like, and I'm watching the camera as well as I'm positioning
that and moving it. So I'll take it back a
little bit into the corner to get their sort
of maximum angle. Just keep on pulling that back until we don't want it
clipping out, obviously, but we do want the camera back as far as
we can into the corner, maybe bring it
forward a little bit. And there we go. That's cool. I'm going to press
N so we can hide that tab to get sort
of a nice view. And now we can go ahead and set some settings on
our camera itself. But in fact, before we do that, there's a few things
we could do we doing. We could do with for now, turning the lights off
in our larder cabinet. So let's go ahead and just
click on this one here, find the larder lights, and just go ahead
and turn those off. And also, I think
we'll go ahead and hide those in the
render scene for now. There we go. We also need
to bring those doors back, so let's press ALTH and just go ahead and bring those doors back into the scene, and there we go. So let's go find
our camera settings down here now and go
ahead and click on this. And here we have the
focal length of our lens, just like a traditional
SLR camera. At the moment, we
got 50 mil viewpot. So if we go ahead, maybe just
bring that down, typically, a nice standard
is around 35 mil. With photographers as well, a 35 mile lens is a
kind of standard view. I think I may have
read somewhere that 35 mil is about a
human eye view, too. That's what we typically see
in so now we've done that, let's go ahead and click
on this again now. And I'm just going to
go ahead and rotate that camera just to get
the scene that I want, and maybe I'll just
take that back a little bit more now and just see where the
maximum view is that I can get maybe bring it
over a little bit more. Just play around with
composing your image. Really just take your time
and get that perfect shot. So what am I looking for? I'm looking for a
little bit of the view. I'm looking for our
beautiful kitchen island, and I'm also looking
to see the kitchen. So I think I'm going
to go ahead and reduce our focal length even more to maybe a 30 mill.
Maybe that's nice. Now we've got a little bit of
our skylight in the scene. We've got some of our roof work, we've still got our
beautiful view, and we're getting some nice
angles of the kitchen. Let's try taking this
camera over a little bit. And this really is the sort of most important
point of rendering is just to compose
a beautiful scene. So go ahead, bros. Ah, and just sort of bring
that round a little bit, to get a nice amount
of the island, get some of our view outside, get our dining table, get it all into the scene. And there we go.
Maybe I'll just bring the focal length down
a tiny bit more, and there I'm starting to get a little bit of the worktop, which is not enough
for you to understand what it is from the
pictures point of view. So I'll go ahead and
take that forward one, maybe. And there we go. Now we're just clipping
out that worktop. Okay, so I think for my first picture,
I'm happy with that. I think that's quite nice. So next, let's go ahead and set up our camera
the way we want it. So let's come on
down a little bit, and I'll just show you
some of the features. So we've set our focal length. We've done that. So I've got a 29 millimeter lens
on there right now. And here we have our depth of field. So
I can click on this. And if I wanted to focus
on a certain object, I could go ahead and click
on this little thing here and maybe just lock onto
our little socket there. And now the camera
will be locked on focus on that little
thing right there. But I'm going to go
ahead and turn that off. I don't really want to use
that. And here we have our aperture settings if we
did use the depth of field. So then we could go ahead and increase or decrease
our F stops. So the higher the number goes, the greater of depth
of field we have, which means that
there'll be more in focus behind the object that's focused on and more in focus in front if you have
a higher aperture. At f28, the say if we focused on that little
power socket tower thing, that would be
perfectly in focus, but the distance and the foreground would
be in a slight blow. So I'm going to go ahead
and leave that off so we've got no depth of field set. Okay, so now let's go ahead and set the sort of
parameters of our render. So go ahead to the camera
sort of icon right here. And first thing I want to do
is Blender for some reason. Our standard has its samples really high, and
I never know why. And the first thing we're
going to do actually is do a test shot before we go
ahead and do a full render. So I'm going to bring
this down really low. I'm going to bring
this down to maybe oh, 200, I'd say, and go ahead
and click to run that. So now we have our
Max samples of 200. So what are samples? It's a complex subject, and to be honest, from
being absolutely honest, I haven't got a
full grasp of it. Maybe I shouldn't be that
honest, there we go. But samples are basically light paths that are
sent out by Blender. Bouncing off surfaces
for it to get an idea of where it's going to be casting shadows and what lights
will be in our scene. So, the more samples we have, the more realistic our
final render will be. But it comes at a price. The more samples you have, the longer render
time you will have. I hope that kind of explains it. Like I said, I don't fully
understand samples myself. I'm just happy to know that
the higher the samples, the higher quality
our image will be, but at a cost of render times. So typically, if I'm
doing a high end render, I keep my samples
at around 1,200, and I've never found a
benefit to go much higher. For my test renders, I have at about 200. Okay, so now let's go to this one here to our
output properties. And we now need to look at
the resolution of our image. So I think I'm going to start by shooting this in HD quality. So I'm going to
click on this one here and I'm going to
set this one at HD, so that's 12 and 80 pixels. By delete this by
720, I believe, 720. Go ahead and click
enter, and there we go. So now we're set at HD quality. I'm also going to bring
the actual quality down to around 50%, as well. Like I said, we're
not looking for a perfect render
as far as quality. We just need to understand if we've got a nice
scene here or not. And now that we've
done that, there's nothing else at this
stage we need to do. So we are two ways of rendering. We can either come up to here
and go ahead and click on render or we can press
F 12 on our keyboard. Now, go ahead and do that.
And we'll go into Render. A little tip that
I would suggest is when you go ahead
and do a render, maybe do a save just before you hit Render because
it is common for Blender to crash at that stage when you
press the render button. And if you are having problems, maybe do this not so much
in full rendered mode, but go ahead and do it in
sort of normal model mode. And then you can go
ahead and click in and out just to sort
of view your item. But when you hit render
for the final time, if you want to make sure that you're not in your view port in full render mode because you're sort of demanding quite a
lot from your computer. Let's go ahead and expand
on this and see what we're getting and just see
what the final scene is. And there we go. So it's
finished rendering. And you can tell it is
quite a poor quality image, but we knew it was going to be. It's very pixelated, not
particularly focused. But from a point of view,
seeing what we've got. Oh, you're happy with
the scene. And I am. I'm liking how we've got this. We've got a view of our
beautiful sort of mountains. We've got a dining table. We've got an island
almost fully set out, and we've got the toll
cabinets in the scene. And it's well lit, and we've got some nice reflections
on the floor. So I'm liking that,
but obviously I'm not going to go
and save this one, so I'll go ahead and close that. And now we just need
to go ahead and just set this camera
up for a final render. So now let's go ahead and set this up for I'm
going to do this. We can either do a two K or a four K. So two K
is 2048 by 1080, and four K is 3840 by 21 60. So I think I'm going to
go ahead and do this at maybe two K, so I'll go ahead
and do that 2048. Enter, and here and the y. Let's go ahead and do that. It's 1080. There we go. So that's a two K image. Let's go ahead and make sure
we're rendering at 400% now. And let's go back to
our render setup now. And in the samples, I'm going to go ahead
and take that to 1,200 and go ahead and
click Enter on that. And there we go.
We're ready to go. So there actually is one more thing I want to be able to set. So I'm going to
come down here to performance and make sure that persistent
data is turned on. And what that's going to
do, it's going to reuse any information that it
can now between renders. So that's going to increase the render time or sort of
improve the render times, particularly when we get to
a stage when we're doing full animations and we've
got maybe 100 renders to do. We need to drastically
reduce our render times. So that's when persistent
data is a big benefit. Okay, so now that we've
got that laid out, I'm just going to go
ahead and press F 12, and we'll render out our scene. Now, this is gonna take a while. This is probably
gonna take I'm gonna estimate around five
or 6 minutes for me. So I think what I'm gonna do
is go and pause the camera. I'll just pause
our recordings for a moment and go make
myself a cup of tea, and I'll see you back
in just a second. There we go. There's our scene all rendered out. It's
looking fantastic. I'm loving it. So, what next? Let's go ahead and
save this one. So actually, this
one took 4 minutes, 40 seconds for me,
so not too bad. So I'll click on Image here and I'll go ahead
and click on Save As, and find the file that you
want to save your renders in. So I created myself a new file, and I've called
it still Renders, so I'll go ahead
and click on that. And I'll go ahead and
call this image this, so I'll call this
image maybe render one and go ahead
and save Image As. And there we go.
Alright, so let's go ahead and close this window and go back to our
Blender scene. So now we can go ahead
now maybe compose the camera from a
different angle. So now let's go ahead and
compose our next scene. So let's just grab our camera. And what I'm going
to do is go over here to the transformation
properties, and just go ahead and click
on this and go back onto Global and maybe just move this camera over now and just figure out where we
want to put this next. Maybe just bring this
to dead center of the fireplace and press R and go ahead and rotate
this a little bit. And I'm just going to maybe just hide this panel here just so
we can see what we're doing. And maybe I'm just
going to bring the camera down on the Z
now, so I'll press G and z. And just bring this down
now a little bit, maybe. So we get something like this. Am I happy with that as a scene? I don't think that
does much for me. I'm gonna maybe just bring this forward like this and rotate that camera and just see where we want
this next one to be. Maybe try bringing that
camera this way a little bit. That's quite a nice
angle like that. I think I'm quite liking that. Okay, I'm going to go back
to Transformation properties and click on Local again, and I just pull the
camera back a little bit. I don't think I want
the brickwing shot. Maybe something like
that is quite nice. We're getting again all these beautiful pine trees
here in the distance. We're getting sort of the view of the island from
the opposite side, and we're getting some
roof details in as well. I think I'm happy with that. So let's go back to our
settings on our camera, and let's go ahead and bring
the samples back down. So let's bring this back down
to maybe a 200 like Enter. And let's go over to
our output properties. And let's go ahead and put
this now and back into a HD. So let's call this a 12 80. Enter by dolly this, a 720. Enter. And let's reduce the
quality down to around 50%. And there we go. Let's
see what that's like. So now that we've reduced
the quality of this render, let's go ahead and press F
12, and let's render it out. So I'll go ahead and expand on this screen, see what we get. Shall I pause the
video for a second? Don't know how long
this is gonna take. Is there anything
we can talk about? The weather or films or movies.
I think I won't bore you. I think I'll just pause this for a second, and I'll
see you in a minute. Okay, so I'm back again. And I think I'm happy with
the way this is composed. We got these lights
here on line. We've got some nice timber
work in our scene as well. And we've got the island
from the opposite view with this fresh bread and then
the coffee ready to go. So yeah, I'm liking this view. So let's go ahead and just close this because we don't
need to save this image. And let's go ahead and
increase our settings now. So this time, I think I'm
going to go for a four K. So this is 380. Click Enter. By let's go ahead and
delete that by 21 60. I click Enter on that. Whoops. Let's try that again. 3840, I'm sorry.
And there we go. So we got 3840 by 21 60, which is a four k image. Let's go ahead and up
the quality to 100%. And let's go back
to our renders now, and let's go ahead and put
the samples back now at 1,200 and click Enter on that. And there we go. So this
is all ready to render. So I'm going to go
ahead and press Controls just to save our
progress at this stage. And once that's done,
I'm going to go ahead and press F 12 and start our and this is going to take a while
being a four k image. So I will pause this, and I'll see you back
in just a second. Okay, so I'm back. And this one actually did take a while. This one took 16 minutes. But, yeah, I mean, it was a four k image with
1,200 samples. It's quite a high res
image, but I'm loving it. I'm loving the scene outside, and I'm loving this island, the way it and I love the way
the marble, the light on. It's a really nice scene. I'm really pleased
with this one. I'll definitely save this one. I'll go over the image here
and I'll click Save As, and we'll make sure that
it's in still renders and I'll hit the plus
sign to make this two and go ahead
and save images. There we go. There's
the image saved. I'll go ahead and close this and I'm going to carry on
rendering out more stills. And I suggest you do the same. It's quite a personal thing, really, isn't it? It's
quite subjective. So find some beautiful
angles and go ahead and do test renders and then go ahead and do
your final renders. And I'll see you back
in the next lecture, and I will have done
a few more renders, and I'll show you
what I've done. Okay, thanks very much. And
I'll see you in the next one. Bye bye for now.
83. Lecture 82 Animations Part 1: Hello, and welcome
now to Lecture 83. And in this lecture, we're going to start doing some animations. How cool is that?
That'll be really good. But before we do that,
let's just have a look at the renders that we've produced
from the last lecture, so I'm just going to
click on my renders. And I'll just go ahead and
bring one in, and there we go. So I think we looked
at that one together. That's sort of the
first one done. And then the next one that one's quite nice.
I like this one. And let's have a
look at this one. So I did this one as well. And I did this one and this
one, and there we go. I think this is one of my
favorite ones just here. So how many have I
done? I think I've done six renders in total. No, I've done five. And then maybe more after the
end of the course. I'll just see how it goes. Okay, so that worked
out really nicely. So let's go ahead
and close this. And in this lecture, let's go ahead and look at animations. But I just want to say
this first of all, so Animating renders
within Blender, it is hard work
for your computer, and it is hard work
for us as well. It's very time consuming, particularly for rendering.
So I worked out once. If we go ahead and
do, let's say, around 22nd animation,
for the average computer, that's going to take around
20 hours of render time. And that's why when you
look at the sort of the big blocks buster films out there that
using a lot of CGI, you know, the marvel stuff
and everything like that. They often use what's called render Farms to do
their rendering, which is when they use
an outside company with supercomputers just
to render the animation. So they'll send files over with the cameras
in position A, position B, and then the render farms will take
over and do the rendering. But obviously, we don't have
those kind of facilities. But I just wanted to say
that because it is going to be quite a time consuming
part of the course, and it is quite taxing
on your computer. But we will go ahead
and do it. I love it. I love animating, but
it's a personal thing, and also it just depends on
the spec of your computer, whether it can sort
of do it or not. So yeah, if you choose not to do this sort of the rendered
portion of the course, this next sort of
two lectures then, I suggest you go and do some more renders and just have a look at those and see what you can do with it. And then we'll go ahead and
see you in the last lecture. Alright, so for those
who stuck around, let's have a look
at doing rendering. So what are we
going to do first? I think the first
thing we need to do is I'm going to take us
out of full rendered mode. I'm going to go
ahead and put us in solid view here on this one like this because we're
gonna have a lot of screens open now doing a
lot of different things. So let's just go
down to solid view. And we need to bring
in a third screen on the bottom for our
timeline, a third viewport. But as the screen set up
right now, if I do that, it's going to split our timeline here or here if I bring
it in on this side. So for a moment, I'm
going to go ahead and delete this viewport here. Then I'm going to bring the
timeline in on the bottom, and I'll create another
one here again. So to do that, I'll come to
view here. Click on this. I'll come down to Aa and I'll go ahead and close
area, and there we go. We're down to one
viewpoard again. And now I'm going
to come down to the bottom here like this. And when the cursor
turns into a cross, I'm going to hold down the left mouse button and just drag this up to create a viewport
across the bottom like this. Now I'm going to come here
again to this corner, and when the cursor
turns to across, I'll hold down the left
mouse button and drag another view across to
about here like this. So now we've got three
viewports open on our screen. And this one here, I'll press N to get rid of the tab. Don't
really want to see that. And this one, maybe
I'll bring this over to reduce this in size
as much as possible. Okay, so this one here, I want this to be an orthographic
view and wire frame. So let's press Ed and
let's go to wireframe and let's press seven
to see this from above. And let's go ahead and select
the camera. There we go. In this one, this is
basically what I want. I want to be able to see
what the camera sees so we can see how our animations
are going to look. But we can go ahead and lock to three D camera and lock to
camera, and there we go. Then here now we
need our timeline. Come on down to this tab
here, click on this one, and then go ahead up to timeline and bring
that in like this. Okay, so let's take a second
to look at our timeline. Probably yours, you're
looking at 250 here. So if I go to this one, I'll
just start where you are, and I'll go ahead and type 250. You don't need to do
this and go ahead and click Enter. And there we go. Now, within the timeline, if you just roll a mouse wheel, you'll be able to see more of your timeline to
the 250 framework. So what we've got
here is, like I said, we've got 250 frames. And basically, each frame
represents a single rendering. So if we fill this write up, we will have 250 still
renders within our animation. What we have here is a counter, and this goes across like this. If I take that to the zero, so if I hit this
little thing here, it'll go back to the zero. And if I hit the space bar, it'll start coming
across like this. And what this
represents is we can mark with key frames
the position of our object at frame zero to
whatever frame we set it. So let's just show you how to sort of set
this up some more. So the first thing
I do want to do is look at the amount of
frames we've got here. Like I said, right now we've got 250 I think that's way too much. For instance, if
we've got 250 frames or 250 renderings here, and let's say it takes
typically 2 minutes to do that, to do each rendering, we've got 500 minutes of render time to render out this
250 frames of animation. And that's way too much. And we're going to have
I'm going to block this into around 4 seconds
of animation, but we'll have maybe
three or four or five of those five second animations that will then edit together, maybe put a little bit of music in there and make it look nice. So first of all, let's bring down the amount of
frames we've got. So come to frame range here, put yourself into
output properties and then go down to frame
range here and just go ahead and type in here
maybe 120 and click Enter. And now that's going to take
approximately 240 minutes, let's say, to do this
first rendering. And I'll go ahead and roll
a mouse wheel now so we can sort of get this to a
point where we're happy, maybe just bring it
over a little bit like this and there we go so
we can see this nicely. Alright, so now that
we've done that, let's go ahead and set
up our resolution. So we're currently in four K, so that's too much because we need to reduce the quality of our renders now so
that we're not sort of taking 10 minutes to
do each still render. We need to sort of
bring this down. We need to balance
a nice looking rendering against the amount of time it's going to
take to do our animation. So it's kind of a balance. We need to strike a
middle ground on this. So let's bring this
down to maybe two k. So let's go ahead and
put this at 20:48. Click ends are on that.
And here on the Y axis, let's go ahead and put this at 1080 and click ends are on that. And now we're running
at a two K resolution. So we've got 120 frames, and we're running on
a two K resolution. That's cool. Maybe now let's go over to this one
to the Render tab. And we're currently got
1,200 samples per rendering. And here's another thing we
need to bring down because that's going to take a long
time to render, as well. So we need to bring
this number down considerably so that we
can bring our renders, each individual render
to under 2 minutes. So let's go ahead
and click on this. And let's bring this down to
I'm going to start at 300. You can bring that down. If you're finding that your
renders are taking too long, you can bring you
down to a 200 or a 250 and see how that looks. Make sure that denoise is on as well in your render
samples here. Scroll down a little bit
more to performance and make sure that in this final render the persistent data
was turned on. And this is when this will
really help us now in our animation because after it starts rendering a sequence, it'll take the information from the previous renders and
just automatically apply it, saving us time on the renders. Okay. So we have got
our render sets done, so we know we're at 300 samples. We've got an output set
up at a two K image, and we've got frames set at 120. So the next thing we
need to do is make sure we're saving in the file
that we want to save in. So I'm going to go ahead and just click on this so that we can actually just move
Blender over a little bit, and I'll just sort of bring this over so that I can bring
in my file as well. Just bring this to
about here like this. And I'll grab my file, and I'll bring this in too. So I'm sure you've got
something similar to this. So this is where I'm keeping all the files for this project. I've got my Blender
file just like you. I always have an archive setup. For anything that I've done
that I don't want to keep, but I don't want to throw away
either, I have an archive. You'll also probably
have a HDRI file, and you'll have your
reference images and your cereal box and
your texture sets as well. I've got a few more because I'm making the courses I go as well, so ignore these other ones. So let's make a new file here. I'll click on you and
I'll click on folder, and I'll go ahead and name
this and I'll name this anime. And go ahead and click Enter
on that, and there we go. So I'll go ahead and
double click on this now, and I'm going to create
some files within this. So let's go ahead
and click on you, and let's click on folder. And let's call this
we'll just call this. Let's just call
this one, actually. This one, I'll be fine. And let's go ahead
and do that again. And I'm going to create three folders on the
assumption then to begin with, I'm going to create
three different videos. And I'll click on you again, bring another folder, and
we'll just call this three. Okay, so we have three
folders now to be able to save our animation set into. Now that we've done that,
come on down to here now, and here an output, go ahead and click on
this little folder. I'll just bring this
over a little bit, so it's a bit more
readable, there you go. Okay, so go ahead and click on this little folder thing here. And now let's go ahead and find our folder where
we've saved our course, where our course
project folder is, so it's this one here.
Kitchen T two for me. So this is the
folder that I have with all my stuff
relating to this course. So let's find our anime one, and let's go ahead and
click on one like that. And let's call this VD one. And let's go ahead and
accept that. There we go. So now, Blender knows where
to save our animation file. So I'll go ahead and
click on it here. So at the moment, it's empty until we start our
animation running. And now we've got that setup. The next thing we
need to do, I'm just going to drag this over
a little bit, actually. Drag this one over, and I'll just drag this side over so we can see
what we're doing. And I'll press N to
get rid of the tab. Okay, so the next thing we need to do is position our camera. So let's go ahead and
just move our camera over now in the z axis like this. And maybe I'll come
over to the top here and set this at global. And let's go ahead and
rotate our camera around so we can see the
room like this and maybe just move this back
into the corner like this and set this
camera where I think. I'm going to go ahead and rotate this a little bit like this. And there we go. I'm thinking that's
a nice place for the first frame of my
animation, something like that. So with the camera
still selected, I need to bring in
a set of keyframes. So I'm going to press I, and those keyframes have
been brought in, and the camera was
selected at the times. So those keyframes
are for the camera. Okay, so now that
we've done that, the next thing we need
to do is go ahead and bring I'll counter over to
the 120 frame mark like this. And now I'm going to
bring the camera over till my final position
within this 120 frames, which will be something
like that, I'd say. And then I'm going to
go ahead and rotate this a little bit like this, maybe bring this back a
little bit like this. And there we go,
I'm liking that. So now, I'll press I again and bring in a second set of
key frames now like that. So I'll hit this
little tab here and now to take that back
to the beginning, and now I'm going to
go ahead and hit Play. And now I can see the camera moving on the left there
in our orthographic view, you can see the
camera moving across its range within
those 120 frames. And, of course,
in this viewport, you can see the result. And I think I'm liking that. I think that's
looking quite nice. For a first set of frames,
that's looking good. I can see the clock on the wall. We see a little bit of the
oven. We see the island. I'm liking that. Okay, so
I'll hit pause on this. And I'll take this
back to the beginning. And for a moment,
I'm going to go back to full rendered mode, so I'll go ahead and
hit this one like this and just go into
full rendered mode. And let's consider
this for a minute and just visually
see how this looks. So I think my scenes
are a little dark. So I think I'm going
to cheat a little. I think I'm going
to up the light of my HDRI because we can't
see any view at the moment, so I think it's okay to do it. So I'll come over to here
to world and click on this. And here on strength, I'm just going to go ahead
and increase that a little bit to get more ambient
light in our scene, maybe take it up to
a five like that. And there we go. I think
that's maybe okay. Maybe take it even up to a six. And see how we're looking,
and that's looking good. And if I sort of do renders where I'm sort
of more looking out, then I can consider
bringing that down. But for now, I'm going to
leave that where it is. So let's go ahead and just roll this timeline across reasonably slowly and just see
how this is looking. Are we happy with this animation,
how it's going to look? I think I am. I think I'm liking that the
way it's looking. Yeah, I'm liking the way it's looking. I'm
going to go with that. So I'm going to hit this like on here to take that back
to the beginning. And before we go ahead
and hit play on this, let's let's just do one last little final check and make sure we got everything
where we want it. So our timeline is set. We've done that. We've
got our key frames in at our relevant positions. That's done. We've set
some light in our scene. Let's go back to solid mode so that when we start rendering, what we're trying to do is avoid a Blender crash because it's common at this stage
for Blender to crash. So whenever we can, let's keep this in solid
mode at this stage. Let's make sure that our
reference file is turned off, both in final render. It is, so that's
good. We want that. And here in World, we know, let's go
over to render, sorry and make sure that
we got samples quite low, so we've got that at 300, so that's all good and make sure that we've got persistent
data turned on. And let's go on to output, and we have it saved. We have it in VID one file, and we've got 120, and we're running at two K. Okay, I think we're good to go. But before we press start
on this, let's do a save, so I'll press Control
S and just save our progress in case we get a sudden crash
when we hit render. Now, before we hit F
12 to do a render, but that was to do
a still render. Now we're going to start
a rolling animation. So to do that, let's press Control F 12 to set Blender
animating. And there we go. It's off. It's running. So it's going to take a little
while to do this. So I'm going to go
ahead and pause for a second until the
first render is done. Okay, so I'm back, and it's
done its first render, and you can see that it's
saved here on our file. So this is our anime one file, and then it's one and we
have Vid one in there. So when this is finished, we're going to see 120 of these still
renders in this file. And looking at it, it
took the last one took 1 minute 49 seconds to do. And this one here, we're looking at a reduced time. We're looking at about
1 minute 30 seconds, I think, something like that. So it is going to be a reduced
time for the second file. Okay, so I'm going to
carry on with this now. So I'm going to let
my computer run out this set of renders. And then after
that, I'm going to reposition the camera
and then go again. I maybe do maybe two
or three animations, and I suggest you do the same. Remember that make your sort of movements relatively short. You don't want to travel more
than maybe about 2 meters, let's say in scale, if
you know what I mean, of your room, maybe no
more than about 2 meters. We've set our frames at 1:20. So your camera
needs to if you go ahead and go more than 2 meters, your camera's got to travel a greater distance but still
in the same amount of time. So that means that
your camera's going to travel faster, if
that makes sense. So I always think if you want the camera to travel faster, that you're going to have to increase the amount of frames. I try to go for more sort
of smaller movements, maybe some rotations in there, maybe focusing in on
some certain objects. So you get some more
sort of abstract, slightly ethereal
sort of animations. And there we go, so we'll
carry on doing this. And then in the next video, let's have a look at, first of all, what we've set
up from the previous one, our sort of animation sets. And then let's have
a look at animating moving objects within our scene. Alright, thanks very much. And I'll see you in the
next one. Bye bye for now.
84. Lecture 83 Animating Moving Objects: Hello, and welcome now to Lecture What are
we on? Lecture 84. Between this lecture
and the last lecture, I've gone ahead and done
some more sets of renders. I've done four in total. So the first one, we actually saw, I think
we did this together. I'll go ahead and double
click on the first image. And then that was the
first image I did. And then the last image, which was frame 120
looks like this. So kind of gone sideways
across the room. Then after that, I went
ahead and did another one, which was this one here. This was the first frame
from this angle like this and then the last frame
was this one like this, sweeping the other
way across the room, just taking in the
whole room sideways. After that, I did the third set. The first one looks like this, low level on a really nice
looking stove like this. Then the final frame
looked like this. I rose the camera
up and then just started swinging it around to
take in our beautiful view. And then the last one, I got a bit carried away
with the last one. So the last one's number four, and then the first
frame looks like this, taking in the sort
of the side door here and then the
nice looking sink and our storage baskets. I liked these, and then moved
along to the last frame, which was basically a
complete pan of the room, taking in the sort
of the side view here of the mountains
and the trees. This is probably my favorite. But it was big. It did take a long time.
I've got, I think, 250 frames in this one. So to do that, I had to reduce my samples
down to around 200, but it still took a long
time, there's no doubt. So there's my four sets of
stills ready for animation. Okay, so in this lecture, we're going to do some more
of that, but this time, we're going to have
moving objects in our sets of renders. So we're going to animate objects moving in
our little videos. So we got three to do.
We've got the first one, which is our rise and
fall socket here. We've got the second one to
do, which is our drawer, and then we've got
the third one to do, which is our larder
doors opening, closing, with the
lights turning on. So that should look cool. So where to go first. I think the first place
we need to go is, let's grab the camera here, and let's bring the camera over and position that
where we want it, which I think I'm going to
press R and rotate that camera around and bring this around like this and
go ahead and set this. And I'm going to press G
and Z and go ahead and bring the camera down now
to something like that, and maybe take it back
a little bit like this. And there we go, something like that,
I think is right. But I think my camera, I'm going to go ahead and
click on my camera like this. And the focal length, I'm going to go ahead and
bring this down a little bit to maybe 25 millimeters, something like that.
And there we go. I think I'm happy with that. Maybe I'll just move the
camera over slightly on the Y like this and maybe
rotate it around a little bit. And am I happy with that? Maybe take it back a little bit to get in the edge of the table, maybe take it over a little bit like this. And there we go. I think for my first frame,
I'm happy with that. I've got the background
in, which I'm liking, and I've also got the table in maybe I'll just rotate that a little
bit more, actually. So I'll go ahead and press A, and just go ahead and rotate
that a little bit more like this and maybe take it
over a little bit the Y. Take a minute to
compose your images. It's always really good to
do that and maybe increase the focal length to
something like that, I'd say, should be good. I think I'm happy with
that for my first frame. So with that done,
let's go ahead and set our first keyframe
for the camera. So let's go ahead and press I to bring in our first
set of keyframes. So I'm going to leave this at
something like 150 frames. So now let's go ahead and
bring the counter over now to frame 150 like this. Alright, now that's done, let's go ahead and
move the camera. So I'm going to bring it
forward a little bit like this. And to just bring sort of the socket tower
to the left side, sort of bringing into focus
now our bread and our kettle. I'm just going to
press En actually, just to get rid of that tab. And I think that's
fine like that now. Okay, so with that done, I'm going to go ahead
and press I and bring in my second
set of keyframes. Alright, let's hit the rewind and take that back
to the beginning and let's hit Play and
see how that's looking. So this is quite a
subtle move because the focus really is going to be on that actual
socket tower rising. And there, that's fine. That's all I really want to see from the camera
and this one. Okay, so now let's have
a look at the camera. Let's hit pause and take
that back to the beginning. And I think probably the last time you saw this socket tower, it was in its upper
position like this. So I'm just going to
rise it up so we're kind of looking
at the same view. And now I'm going to go
ahead and bring it down again until it's
flush with the table. And so if you go ahead and
do the same now and sort of bring that socket tower
so it's kind of flush. Let's go ahead and
press N again, and let's unlock a camera
to view for a minute, and let's have a look at
this and make sure that I'm happy with the position
of that socket tower, make sure it's not too
low, not too high. Let's go ahead and bring
this up a little bit. There we go. I think
I'm happy with that. And I'll press zero again to go back to the camera
view and then go ahead and lock our
view to camera again. Okay, so with the top
selected here, remember, the components, the
other components are already parented to the top. So with the tops selected, I'm going to go
ahead and press I to bring in a set of key
frames like this. Okay, so I'm going to
bring this over now to maybe frame 150 like this. And in this one now, I'm going to go
ahead and bring this up to maybe this
position like this. And I'm going to go
ahead and press I again and put those in. So now we've got a
set of keyframes for action for this item. So if we rewind on this
now and we press play, let's see what happens. See if we're happy with that. And it's looking good.
I'm pleased with that. That's looking really good.
It's looking really slick. I think the only thing
I might do different, I'll go ahead and hit Space bar, and I'll just select these
keyframes here and I'll hold down the left mouse
button and just maybe drag those to frame
ten like this. Now let's hit the rewind and
go back to the beginning. So now this won't start
rising until frame ten. So the camera gets moving, and then this starts rising. So now let's hit Play on this. And there we go. That's better. So the camera gets moving, and then the tower
starts rising. That's absolutely perfect.
Please with that. Let's go ahead and
hit Rewind on that, put that back to the beginning. And let's go over to our output properties
here. Click on this. And let's make sure we're going to save this
in the right place. So let's go ahead and
hit hit the file here, and let's find the right file. So I've created
some new ones here. So I've got five,
six, and seven. So I'll go ahead and
hit five like this. And I'm going to
go ahead and bring this down so it is
VID five like this, and I'll go ahead and accept. And there we go. That's cool. Let's just take a sec to sort of check the
parameters over. So we've got 150 frames,
as we can see here. That's correct. Let's go over to our render
settings here, and we're running 300 samples,
which is what we want. We got GPU supported.
We're in cycles. And here on performance, let's make sure we got
persistent data turned on. And with that, I think
we're good to go. So with that done, let's go
ahead and press Control L 12, and let's run our first render. Okay, so I'm just going to
pause for a second while my computer renders this first one, and then
I'll be straight back. Okay, so my computer's
rendered the first image, and it's dropped
in the right file. It's in number five here of
Anime One, so that's cool. And it took 1 minute and 44
seconds for the first one, and it's just started rolling on the second rendering now. But I think this one is
going to take last less. It's saying there's
23 seconds done, approximately 40 seconds left. So this first one's
this second one's now going to come in at like
1 minute 15, 1 minute 20. So already we've
reduced the time. Take a minute to have a look
at your first couple of renders and just decide if you're happy with
the image composure, you're happy with
your texturing and your lighting before you go
ahead and render the rest. If you're not, go ahead and
hit the little cross sign. Make whatever changes
you want to make. Go ahead and delete the
first image from this file, and then go ahead and
set it rendering again. I'm happy with this,
so I'm going to let it go ahead and carry
on rendering through. I'll see you back
when this is done. So it's going to be
the magic of TV, so it's going to take a couple of secs for this to happen. But in reality, I've
probably got around 3 hours. But I'll see you back
in just a s. Okay, so I'm back, and my computer's done that first set of renders. So let's just show
you the first one. So there's the first render
as we kind of saw it. And then the last
one looks like this. And there we go. That's cool. So it's gone through
those full stages of renders some 150. Alright, let's go
ahead and close these. And now let's go ahead
and do the next one. So first of all, let's go
ahead and select our camera, and let's go ahead and delete the keyframes on the
camera like this. And now let's select
this and let's go ahead and delete our
keyframes on this as well. And with that done,
let's go ahead and move our camera now. Whoops, that's not the
camera. Let's try that again. Let's grab the camera, and let's go ahead and
move the camera over now and put that in position in front of the
drawer now like this. So I'll go ahead and press
G and Z and bring this down like this and go ahead
and set this up as I want it. I'll go ahead and press just
so I don't see that tab, and I'll just go ahead and maybe bring this out a
little bit like this. Maybe rotate the
camera a little bit. I'll press R and just
bring that round to there, maybe pull it back a
little bit like this. And I think I'm happy enough
with that as my first image. So I'll go ahead and press I and bring my key
frames in like that. Okay, so I'm happy with
the first camera position. So let's go ahead and move our counter overnight
to around 150. And now let's go ahead and
bring our camera over like this to the final position, which I'm thinking will be I'll press G and Z and
take that up, as well. Maybe over a little
bit more like this and take it
in a little bit in the Y and maybe take it up
a little bit more, and Z. To something like that, I'm thinking will
be my final image. So with that done, I'll go ahead and press I and put some key stops
in there as well. Okay, let's hit the
rewind and let's see that move through
and see if we're happy with that as the
camera movement for this one. And yeah,
I think I am. I'm thinking pleased with that
and the way that's going. Okay, so let's take that
back to the beginning now, and let's go ahead and
select our draw like this. And let's go ahead and press I and put in our first set
of key frames like that. Now let's take it to something like 68 maybe somewhere
around there. And then go ahead
and pull the drawer out to about two
thirds of the way out, something like that, I'd say, and then go ahead and
press I on that one. Alright, I'm going
to carry on moving this draw now forward or moving the counter forward
to maybe 72, 71 72. And I'll press I again, and I'll put another set of
keyframes in there like that. This is going to stop the draw for a couple of frames
so that it comes out, pauses just a tiny bit,
and then goes back in. So now I'll move the counter all the way forward to about 150. And now I'll go ahead and
press G and Y and go ahead and move the draw back in
to its final position, which is about there
like that, I'd say. I'm going to go ahead
and press N, actually, and I'm going to
unlock camera to view for a sec and just have a look if I'm happy
with the final position for that draw. And I am. So with that done, I'll
go ahead and press I and bring in the
keyframes and then I'll press zero and bring the camera back to view and
go ahead and lock the camera. Okay, so in theory now, we have our drawer animated, so let's hit the rewind button, and let's see
everything in action. So there's the drawer opening
and the drawer closing. And that's cool.
That's looking good. I don't think I'm
happy with the camera. I'm going to take a second. The camera is moving too much. So I'm going to pause that, and I'm going to take that
back to the beginning, and I'm going to
select the camera, and I'm going to go ahead and delete these keyframes
here like this. And I'll go ahead and
move this note to, like, frame 150 again. And I'll take the camera and I'll just go ahead
and move that. I'll go ahead and
move that up now. I'll press G and Z, and just go ahead and
take that up like this and maybe rotate the
camera in a little bit. And maybe take it up a little
bit more, I'll hit G and Z. And there we go. I'll
stop that there, I think. I think I had too much
movement with the camera, so I'll go ahead and press I and go ahead and put
those keyframes in again. Remember, these are going to
take a long time to render. So take your time
and get them right. You know, if you're not
happy, reconsider, go again. Just keep on tweaking
the camera positions, tweaking your objects
movements until you get exactly what you want
before you hit Play. But in that case, now
I think I'm happy, but I'll hit Rewind one more time, and let's
take a look at it. Let's hit Play, see how it
goes. And that's better. I'm happy with the way
that draws moving. It never sort of moves out of frame during the movement of the draw, and
it did last time. Kind of lost the draw,
so that's cool now. I'm liking that. Alright,
that's good to go. So I'll hit the space
bar to stop this, and I'll hit the rewind on that. Let's go over to our
output properties, and let's hit our little
file here like this. And let's find this time six. And let's double
click on this one. And let's hit the plus
sign to get Vid six, and let's go ahead
and accept Okay, so we've done that, and
we've got 155 frames. We're rendering at
two K resolution, and we have 300 samples, and performance, we have
persistent data turned on. So we're all good to go there. We also have the
reference images turned off and
hidden in rendering. Okay, so let's go
ahead and press Control Fwelve and
let's see this go. So I'll just pause
this for a second, and I'll see you back
in just a second. Okay, so I'm back again, and it's rendered
out its first image, and that was 1 minute
and 44 seconds, but this one is already
looking like it's gonna reduce to maybe 1 minute 30,
something like that. And it's gone ahead and saved
this in the right place. And then looking how this
looks, I'm happy with these. These are looking really nice. So I'll go ahead and let
this render this out, and I'll see you back
when this is finished. Okay, so I'm back again, and my computer's rendered
out this set of animation, this set of renders
for this one here. So my first one looks like this. And then I'll show
you the midpoint because the end basically
looks the same again. So the mid one looks like
this with the drawer open, our dovetails in plain view, and then the last
one looks like this. So that's cool.
That's looking great. I'm pleased with that. So let's
go ahead and close these, and let's go ahead and do
now our last animation. Let's select a draw here and
let's go ahead and delete our keystops. Just like that. And let's select the camera now, and let's delete
those key stops, as well. There we
go. That's cool. And now let's go ahead and
move our camera over now to its final position in
front of our larder. So I'll press and bring
this camera around to something like this, making sure it's
nice and square to the larder and sort
of center to it. And I'll press G and Z and go ahead and bring
this up like this. And maybe take this camera
back a little bit like this. And let's have a look
at our focal length. And we're currently at 30 mil. I think I'll increase that to maybe a 35 mil. There we go. And I'll bring the camera
back a little bit more. I don't want to see the whole of the larder top to bottom, but I just want to see maybe these top three drawers and
then this corny at the top. So you get an understanding
of what you're looking at. And now that I've done that, I've got the camera selected. I'll press I and I'll bring in my first
keystops like that. Okay, we may need more
frames for this one. We'll see how we go, but for now, we'll
leave it around 150. Let's bring the timer
over now to the 150 mark. And now let's go ahead
and bring our camera in to something like that. I'd say. Maybe I'll take
it up a little bit. I'll press G and Z and go
ahead and bring the camera up a little bit to
something like that. And then I'll go
ahead and press I again and put in my
second set of keyframes. Let's hit the rewind
and let's hit Play and just see what that looks
like. And that's cool. Again, I want subtle
small movement because the feature here is going to be the opening doors rather than the sort of the
movement of the camera. And I think I'm
pleased with that. That'll be absolutely fine. Alright, let's hit
the space bar, and let's say the rewind to take our counter back
to the first frame. And now, let's go ahead
and select the door. And let's go ahead
and rotate that. Let's press Az and just see how it's going. And I've
got an issue there. The handles are staying behind. I did pair in the handles, but I think because
the handles are parented to this top pivot point here, they're not moving. So I need to fix that. I
think the easiest way to fix it is just go ahead
and select the handle, hold shift, and select the door and let's
make them one object. So let's press Control J and go ahead and
join those into one. Let's do the same with this
one. Let's select the handle. Then let's select the
door and let's press Control J and join
those into one. Okay, so the next thing
we need to do is actually get these doors opening
in our animation. So I think, first of all, go ahead and slide the
counter to about ten, I'd say, and then make sure
your first door is selected, and go ahead and press I and bring some
keyframes on this one. Go ahead and select this one and bring some keyframes
in on this one. Now let's move our counter
over now to something like 75, something like that. And select this
door and press z90, and the doors actually
swung the wrong way. So hit the minus key on your numpad to make sure it swings the right
way like that, and then press Enter and then press I and insert
your key frames on. Let's grab this one here, and let's press zed. 90, enter, and press to insert
your keyframes on that. Let's hit the rewine
now and see this play, and let's see how it looks. And there we go.
That's looking good. So there's our sort of
first step with the door. Let's go ahead now
and take this over to the 150 mark like this. And let's go ahead
and unlock camera to view and swing
around a little bit. And let's select
both doors together. If I can get the
right angle. There we go hold shift and
select both of them. And take that in
the Y axis like, something like that, I
would say, that's good. And with a counter
there at 1:50, go ahead and press I and bring your last set of
key stops in like that. Okay, let's press zero to
see this from camera view. Let's go ahead and lock
our camera to view again. And let's go ahead
and rewind on that, let's hit Play and
see what we get. And that's looking really good. That's exactly what I want. So those doors are opening nicely and then sliding
back into the pockets. That's absolutely perfect with the camera moving
in, as we know. But we got one more
thing to do on this one. The lights are
permanently on on this. So let's hit the space
bar to stop this. And let's go back to frame one. And let's do a save
to save our progress. Let's press Controls, just in case we get a
crash when we do this. And let's go ahead and turn
on full rendered mode. Okay, I'll take a second
to do this for us. And there we go, that's cool. Okay, so now we're back
in full rendered mode, and we can go to our lights here and let's go ahead and turn
our larder lights back on. So let's hit the little ebl and let's hit this so that
they're rendered in sing. Straightaway, you can
see that the lights are on inside this cabinet
with the doors closed, and that's just not the way
it would be within a kitchen. There'll be a nice
little switch somewhere to turn those lights off
when the doors are closed. So let's see what we
can do to fix this. So let's move over here
to here like this. And let's go ahead and turn
this power down to zero. And let's just click, left click on this one here
to add a keyframe in at one. Now, let's go ahead
and move this over to something like maybe 35. And let's slide the
power now up to on the lights to maybe a
ten and with that done, let's go ahead and add another
key frame there like that. Let's hit the rewind on
this, and there we go. So the lights are off in
the cabinet right now. And between frame
one and frame 35, the power will go 0-10 watts on those lights just gently
fading in as it goes. So let's hit Play and see
that in action. There we go. So the lights come on as
the cabinet doors open, and then the cabinets slide in. That's absolutely perfect.
That's exactly what I want. I love it when a
plan comes together. That's absolutely perfect.
So I'm going to hit pause quickly before I crash my
computer running that. And I'm going to go back
to shaded view like. Okay, so let's take that
back now to frame one. We've got everything
set up within this. And let's go back
now to the output, and let's find where
we want to save this. So let's hit our
little file button. And let's find seven. Let's double click on this and then hit this
little plus sign to call this Vid seven and then
go ahead and accept it. Let's check everything
through here, so we're running a two K frame. We're running 155 frames. Let's go over render settings, 300 samples, and persistent
data is turned on. And yeah, we're ready to go. Let's just go ahead and
check, make sure everything's good again, and
everything's good. There's nothing to worry
about. We've still got reference images turned
off or all good. Let's press control and do a
save on this one last time. And as soon as that's done, let's go ahead and press Control F 12 and
cross our fingers. Okay, and I'll see you back in just a sec when this
is rendered out. Okay, so I'm back again, and it's rendered
out the first image, and it took 1 minute
and 49 seconds, but this next one's
looking like it's gonna take around the 130,
so that's better. And the lights are
off in our cabinet, so that's worked out great. And I'm liking the
way it's framed. We've got a little bit
of the baskets here. We've got a little
bit of the curtains. It's looking great. It's saved in the right place, as well, that's all good.
So we're good to go. I'm going to go ahead and
leave this render out. It'll take maybe about 3 hours. But I'll see you back in just
a sec with the magic of TV. So I'll see you in a sec. Okay, so my computer's finished
rendering those out now. The first one, as we
know, we've just been looking at that looks like that. And then the last
frame looks like this. So that's really that's
worked out nicely. I'm liking that the doors
are in the open position, the lights are on
illuminating the cabinet. That's absolutely perfect. Okay, so this has
been a long lecture, probably the longest
lecture we've done. But I just felt we should sort of get through
this in one lecture. And obviously, for all of us, there's been some very
long pauses in reality, as you've been rendering out
those blocks of animations. But hopefully,
you've learned tons, and I'll see you in
the next lecture. Well, we'll start editing
all of this together to create our sort of approximate 32nd long video of our kitchen. Thanks very much.
And I'll see you in the next lecture.
Bye bye for now.
85. Lecture 84 Video Editing Part 1: Hello, and welcome
now to Lecture 85. And so we finished
all our animation. So all our sets of renders that we'll make into animations
there are all done now. And I think I've got seven. Let me count one, two,
three, four, five, six, seven, seven,
yes, we got seven. And what I've done,
I'm just going to drag in my files here. I'll just pull these in
like this for a second. And all I've done,
if you remember, we had it sort of listed as one, two, three, four,
five, six, seven. Ignore the archive one. That's just my way of I always
put an archive file in, so if there's anything
I don't want to delete, but I don't want to use,
then I just put in. So I've renamed
them just to give them a basic explanation
of what each one is. So this one is table to island, which was the first one we did. This one is a sweep
left to right. This one is power socket rising, the oven, full
rotation of the room, drawer opening, and
larder opening. So I've got all those sort of rename now so I have an
understanding of what they are. And I kind of suggest you just
take a minute to do that. Alright, let's take this
out of the way then. And so we're finished now
with the timeline here. We've done this and we've
done a lot of rendering. So our next place to
visit is video editing. And here in the preset, it's not actually there. So if you go ahead
and hit the plus sign here like this and come down to video editing and then go here to video editing and
go ahead and click on this. And I mean, Blender
is full of surprises. It's just got so much going on. So now we're into Blender's
own video editing suite. I mean, it's not just a three D modeling
piece of software. It just does so much.
It's brilliant. Anyway, sorry, I'll stop my sider rant for a minute
and get back on track. So yeah, we have our
video editing here. So this is our
standard viewport, and this is a blender
browser of files. And this is our
editing panel here. So let's just grab this point
here and bring this down a little bit to
increase the size of our viewport, and there we go. So kind of the first
thing I want to do is while we were rendering, we set our timeline out to
measure in frames, didn't we? So let's set this
out in frames as well so we can relate
to the renders. So come over to view
here and click on this and go ahead and
click on USE Timecode. And now the video
editing is set up in frames rather than seconds. After all, we kind of know how many frames we
have in each sequence, so it just makes it easier
for us to relate to. Okay, so now that
we've done that, we need to go ahead and increase our frame range
because at the moment, it's set at 156, I think we're going to be
running close to 1,000 frames. So let's go ahead and
whack this over real high to around the
thousand mark. We can always bring this down
or take this up as we go. But as a starting point, put it around 1,000, but I'm not precious about
it somewhere around there. Alright, so this is kind
of ready to go now. We can start bringing
in our render sets now. And that is real easy to do. Let's go ahead and press Shift A and come down to image
sequence and click on that. Okay, let's go to
where our render sets. Here's mine Anime one.
I'll double click on this. And here's our files with
all our render sets. So I think I'll
start with this one. This is the very
first one we did together, table to island. So I'll go ahead and
double click on this. And you see here,
it says channel. So here on this listing here, we have channels
all set up for us. So I'm going to bring this
in on Channel two, I think. I'm going to leave a space
underneath it just in case. So I'll go ahead and put that
in Channel two like this. I'll press A to select
all of these and go ahead and add image
strip. And there we go. That's come in. So again, we can move our counter
over and we can see this, and this is working nicely. But it's actually
running in reverse, so we can do
something about that. So if we go ahead, make sure
it's actually selected, and then come over to this side and click on video
and expand that. And here, go ahead
and reverse frames, and there we go, that's done. We can now take this
back to the beginning. And we can just tap Spacebar
and we can see that play. And there we go. That's
cool. That's great. That's looking great. So I will take that to
the last frame, which is looking at it, I would say, probably
120 if I can get to it. There we go. Or maybe it
was 121, but thereabouts. Now, I want my next
sequence that I bring in to slightly
overlap this one because we're going to blend these video editings together to just soften the jump
from one to the other. So let's bring this
back ten frames, which is just under
half a second. So we'll put this on
one, ten like this, ten frames from the end
of this video sequence. And with that done, let's
go ahead and press Shift A. Let's bring in an
image sequence. And let's go back now, and let's find which one
we want to bring in next. So we've done table to island, so I think I'm just
going to work up, and I'm going to do
sweep left to right. So I'll go ahead and
double click on this. I'll press A to select. And I think I'm
going to bring this in this time on Channel three. So I'll go ahead and just
up this to Channel three. So it's going to come
in just here like this. I generally leave
channel one empty in case there's anything else I
want to add at a later date. So with that done,
I'll go ahead and add the image strip,
and there we go. That's cool. It's probably
running in reverse. Let's take a look and it is. So with it selected, go ahead and auto
reverse, and there we go. So now we jump from this one, and here we jump to this one and then we pan across
the room nicely. That is cool. That's
working nicely. So I'm going to go
ahead and scroll the mouse wheel so we can
see more frames like this. I'll go ahead and
just move the slider over to reposition this
to the left like this. There we go. That's cool.
So now we can kind of see up to 850 frames. So I'll move my counting out
to the end of this sequence. So it looks like kind of
249 was the last sequence. Let's jump back ten, so that'll be 239. There
we go. That's cool. And with that done, let's
go ahead and press Shift A. Let's bring in another
image sequence. And we've done these two,
so we're on the oven now, so I'll double click on that and I'll press eight to
select all of them. And this time, blends
anticipated it, bringing it in on Channel
two, that's spot on. So I'll go ahead and add
image strip, and there we go. So let's have a
look at This one. We probably need to
set this in reverse. We do. So go ahead
and reverse frames. And now this one starts at
the base of the oven and rotates up and just swings
around like this to the view. And that's great.
I'm loving that. Okay, let's set this again
at the end, so that's 425. Let's move back ten frames, so that's 415. There we go. That's what we want.
Let's press Shift A. Let's add image sequence. And so we've done oven. So now we are on full rotation. Let's go ahead and
double click on this. Let's press A, and we want to bring this in
on Channel three, and Blenders done
it for us, Fades. Let's go ahead and add image
strip, and there we go. Alright, let's have
a look at this one. We probably need to
reverse it, and we do. So let's go ahead and
hit reverse film, or do we? So I did run it. I'll admit, this is
where in the timeline, this is where I started
from this angle. But now I'm looking at it. Maybe I do prefer it starting at the window and moving
this way. I think I do. I'm not gonna reverse that one. I'm just going to call
that a lucky fluke, and I'm going to leave
this one that way. I think it just works better. So let's go ahead and
take this back to the last frame, which is 688. So let's take that to 678. There we go. That's cool.
Let's press Shift A. Let's bring in an
image sequence, so we've done full rotation. So the archive is nothing. So now we're on to
power socket rising. Let's go ahead and
double click on this. And channel two is correct. We want to bring it in on that. Let's press eight, select all and add image
strip, and there we go. This one probably does
need reversing. It does. I'll go ahead and
reverse frames, and it'll start here like this. And then the power
socket will rise up. That's really cool.
I'm liking that. I might just slide this one over a little bit because I don't want to lose
too much of that. This is one of the
reasons why I didn't set the object to
rise from frame one. I left it to frame
ten to give us that half second
before it rises, and that's worked
nicely there like that. Okay, let's take
this to the end now. So that is 81, so that will be
799. There we go. Let's roll the mouse wheel
to compress this a little bit and go ahead and slide
this over again to the start. And with that done, let's go ahead and
press Shift A, and let's add image sequence. And now we'll go and
find a drawer opening. Let's double click
on this. Let's press eight, select all of them. Check that blends got it right. Channel three is correct and go ahead and add image
strip, and there we go. So it is running in
reverse, I'd imagine. I think it is, yes. So I'll go ahead and click on reverse film, and there we go, that slides over now, and the drawer opens, we pan up and the drawer closes. That's great. Okay, let's go ahead and take
that to the end now. So that is 940. Let's take that back to 930. And let's go ahead
and press Shift A, and let's bring in the
last image sequence. So let's find our
larder opening. There it is. Double
click on this. Let's press eight to select all. Channel two is correct
and add image strip. Okay, let's go
ahead and click on the Auto reverse frames, and now that's
working out great. Okay, let's see what we've got. So our last frame is 1,083. So what I'm going
to do, I've got the calculator open on my phone. So we have 1083. Or you may have something slightly different, but
that's what I've got. And I'm going to go
ahead and divide that by 24 because we're having 24 frames per second and go ahead
and equals, of course. And that is exactly 45
seconds of animation. So I was planning on around 30. Am I happy to leave it at 45? Is there anything I can
do to shorten this? Let's just have a
look at this video. So I want to leave this in, and I can do nothing with that. I want to leave that in, I can do nothing with that. And this is nice, too. And I think this is
a valuable one here. I'm liking that. That just
tells the whole story, pans around the entire kitchen. That's good. And we
need a little bit of focus on the oven after
all the time you put into it, so that needs to stay. Um, so this one and this one, these are the two that
if I was gonna lose any, these are the two I would lose. And I think this one is really basically the same
as this kitchen rotation, not the same but close. They're basically doing
the same job, are they? So I don't really
want to delete it. It's just there's so much
work in them, being honest. But I think I do need to
reduce this a little bit. I mean, I can shave a
second off each of these. I can maybe just shorten
some of these, et cetera. But is that gonna make much
of a difference, really? So the overall I mean, here, we could just stop a little bit earlier
on this rotation. We could stop about there, say. And then I could pull
this over like this. I actually do it
for you. Pull that over to there, like that. And now we could go ahead
and grab all of these a whole shift and
select all of these. And then I'll just
pull them over to maybe let them overlap a bit. And now it sort
of comes to here, and then we come
around from there. So now we're not seeing
the outside view. So I'll do that. I'll
just shorten that one. I'll leave that like
that. Yeah, that's helped a little bit.
What are we on now? We are on thousand 34. That's gonna have made no real
difference, I don't think. We were on 1083 before. So I think we've
shaved maybe about 1.5 seconds off
something like that. I think I'm going to go
ahead and delete this one. I'm going to grab
this one. I'm gonna press Delete and get rid of it. I'm going to grab this one here, hold down the left mouse button, and just push that one up one
channel to there like that. Let's go ahead and grab
all of these like this. Hold down the left mouse button, and just pull those
over and just let those overlap and estimate the sort of
ten frames like that. Now, where are we at? So
now we're at about 908, so I'll just do my
calculation on that. 908/24 equals 37 seconds. That's slightly better.
We've shaved second. We've shaved around
8 seconds off it. I'll leave it at that. I think that's fine. So let's
look at our sequence now. Do we want to move
any of these around? Or am I happy to leave this in this sequence
of animations? I mean, if you want
to at any stage now, pull one out and switch
it for another one, maybe you don't
want all the videos of objects moving running in
sequence at the end here. Maybe you want to
mix these around. It's sort of
completely up to you. For instance, we could pull
this one down like this, move this one over like this, slot this one in like this, and then move this one
over and push this one up and just reconfigure
these again. Move this one over like this and whole shift and
select all three of these and now go ahead
and pull these over. Am I happier with this
starting here, moving across. That's a nice introduction
to the room, that one. And then we go to
the socket rising. That's nice. Because we
end here at the table, and now we go to this. So that's quite cool. Then we go for the full
rotation of the room. Then we go to the oven. Then we go for the drawer open. I think what I'm
going to do actually is I'm going to drag this one. Whoops. Gonna drag this
one down like this. And you grab this one,
pull this one over, and just bring this
one down like this, and maybe bring this
one in now over here. Snap this up like this. Oh, sorry, guys, I sort of just doing this
on the wing, really. Maybe snap this one in
because I don't think the larder is a good
final video because, although I love it, you need something panning
over the view or just panning over the whole
scene as your last sequence. So this one does that. This one ends with a pan
over to our beautiful view, and that's a nice finish to it. Um, I'm going to
leave that like that. So take a while and organize the sequence
of your animations. And I think for me now,
I'm happy with that. I can go ahead and just
make sure I've got a nice little overlap on these of approximately
10 seconds. But I think I'm going to
leave that like that. So I think the last thing
we'll go ahead and do in this lecture is come
back to the frame range now and go ahead and
reduce this until the frame range is just on
the end of our last sequence. Which is I would say
about there like that. So that is 897. And now I'm just going to
take that forward ten. So that's going to be 907. I'll just take that to 907, and there we go, I'll
leave that like that. Okay, so I'm just going to
go ahead and press Shift, eh, and go ahead and
save our progress. And with that done, I'll see you in the next
lecture where we're going to do a little bit
more work on this. So we're going to
create a fade at the start and the end
of our video sequence. We're going to do some
blends between these to soften the sort of the
merger of these sequences. And then we'll look at adding a soundtrack to this, as well. Okay, thanks very much. And I'll see you in the
next lecture. Bye bye foro.
86. Lecture 85 Video Editing Part 2: Hello, and welcome
now to Lecture 86. In this lecture, let's
see if we can finish off our video editing
our animation. So in the last lecture, we went ahead and brought
in all our sets of renders, and we've got it down to, I think, around 37 seconds. And we've sort of constructed this and formatted how
we want this to look. But I think there's one
thing I want to do. I want to switch this
one for this one. So I'll just go ahead and
grab this one and pull it down to channel one
and slide it over, and then grab this one, put this one to about
here like this. Slide this one
over a little bit, and then grab this
one and take it up and go ahead and
slide this over as well, and just sort of guesstimate a nice overlap between these. Go ahead and grab this one
now and then this one, just this one and this one, and pull those over a
little bit like this. And it looks like
I need to sort of just extend my frames, so I'll go ahead and over
to frames here and just go ahead and take this up until that covers the end like that. Frame number 905. So now we have this how
I personally want mine. And again, you can go ahead and construct or edit your set of renders in any way
that you want to. For me, I think I'm happy
with that sequence now. I think that's looking good.
Okay, so the next thing we need to look at is how this is starting and
how this is finishing. So it looks like for a start. If I take this to frame one, it looks like my sequence is
actually not on frame one, so I'll grab a
selection window around all of them and just move those over until that's on frame one like that.
There we go. That's cool. Alright, so first thing
I need to do is bring a fade in into this so
that when it fades, it doesn't just snap in, it sort of fades in from one. So let's see if we can do that. So let's go ahead and put
a select this one here, and let's right
click and let's add a fade and a fade in
on this one like this. And we can go ahead and hit
this little drop down here. And at the moment, we have
a 1 second fade in on this. I'm going to leave
that at 1 second. Now if I go back with
my counting now, you'll see that it sort of just fades out and that's nice. But you can see this isn't
really what we want. We've got this kind of
checkered appearance now, and that's not what
we want either. We want a color there, so
that's easy to do as well. So let's go ahead
and write click. And so let's press Shift A, and let's go ahead
and bring in a color. And it's in on channel
one, and it's good. It's starting on frame one. That's exactly what
we want. That's fine. So let's have a look at that
now and slide that over, and it fades from black into
sort of the first frame. That's exactly what we want. Okay, so that's looking good. That's sort of
fading out nicely. I'm liking that. So let's have a look at the
other end here. At the moment here now, we kind of end up as I want
just with the view like that, but I'd like to kind of dwell on that nice view
for just a second. So what I'm going to
do is just hover over the back end here of
this one and just hold down the left mouse
button and drag this out like this so that we just
extend the back end. And now we'll get a sort of frozen frame there
just at that point. And that's what I wanted
because I wanted to kind of fade out at that point. Let's go ahead and
extend our frame range. Let's take that
back again now so that covers the very
back end of everything. And there we go. That's cool. And let's just right
click on this one. Let's add a fade, and we're
going to add a fade out. And it's currently set
at about 1.5 seconds. Maybe I'll increase that
to maybe 2 seconds. Let's have a look. There we go. That's about 2 seconds,
and that's fine. Let's have a look at this. Let's move the
counter over this. And yeah, that's fading out. That's what I want.
That's really nice. Okay, so let's just grab
this color here now, and let's press Shift to D, and let's bring a
copy of this over to the other side and plunk
it just there like that. But then let's get to
this side and drag this side over so we've
got color to about there. So now this end sort
of fades out to black, and that's what we
want. That's perfect. Okay, so we've got
a fade in and out, and that's working nicely. So the next thing we need now is a nicer transition between
these because at the moment, they kind of just snap, see? They just snap. And
that's not nice. We need to do, like, a softer
transition between these. And that's really easy. Just
select this one like this. So select the lead in one, then le shift and select
the lead out one. With those two selected, right click and
add a transition, and I'm going to add
a cross transition. And now, if we just
move our counter over, you'll see that there's a soft
transition between these, and that's what we want. That's perfect. So
I'll do that again. I'll just grab this one whole
shift, select this one, right click, and
add a transition, and I'll add a cross transition. And that should have worked. Let's have a look
at that. And this is something that
we get sometime, this weird little glitch, and it seems to be just
a glitching blender, but we still need to fix it. So what I would do is select this transition and come
over here to this one here, to strip and come on down here to the effect strip
and just switch these over. So just hit this little
arrow like this, and that should have
resolved that issue. Now it should be sort of
working nicely. And it is. Now it's just crossing over
exactly how we wanted. Okay, let's select this one now. Hold shift and select this one. Let's right click and
add a transition cross, and let's have a look at
that, see if that works. And that's working fine. Now let's select
this one, le shift, and select this one, right click and add a
transition cross. And let's see if this
one's working nicely. And that one is,
that's working great. And now let's select
this one, le shift, select this one, right click
and add a transition cross. And let's just
take this timeline over and this one's
doing it as well. It's kind of going
from that to that, back to that and
then back to that. It's a bit weird. So make
sure this one is selected. Come over to the effects strip and just hit this
crossover like this. Let's see if this worked here, and there we go,
that's work fine no. So there we go. There's our
sort of our animation done. We've got all our
transitions in. We've got our fades
in and our fades out with a color to support
those fade ins. So I think the only other
thing we need to do now is bring some
music into this. So let's go ahead and do that. So what I'm going to do for a minute is I'm just going to go ahead and bring my music in. And I'll just drag
this in like this. So, I can't supply
you with music. Legally, I can't do that because of copyright laws and infringements and all
that kind of thing. But to be honest,
it's far better that you choose your
own music for this. Be music is deeply personal,
isn't it? You know? It's really subjective,
so I think it's ideal that you go ahead and
choose your own music. I thought I'd show
you this website. It's called free sound, and this is where I track
down a lot of my music, but also sound effects. There's gunshots,
there's creaking doors, there's spine chilling stuff. There's bird song, there's
everything on here. So this is where I go ahead
and find most of my stuff. And again, it's free to download these, go
ahead and rate them. And if you do publicly
put these out on, let's say, social media, make sure that you attribute
the sound to the artist. So I'll show you how I do that. So if I go over to the
one I'm going to go, so it's this free
sound, this one here. So this is called
Relaxation Music 69. And I've already
downloaded this, but this is what
I click Download. Make sure you rate the music. And you can go to here
to get attribution, and then you can copy this and then make sure
you also copy and paste this into your
social media posting so that the music is
attributed to the artist. Alright, so that's cool.
That's what I've already done. I've already downloaded this, so I'll go ahead
and hide this one. And so the next thing I need to do is go ahead and
bring some music in. So I'm going to press Shift A, and I'm going to bring in sound. And my music is right here
in downloads right now, and it's this one here, and I'll go ahead and add the sound strip,
and there we go. I'll bring this up where
I want it about here, and the music is a lot larger
than the actual video. So I'll just bring this over
to where I can see it's really starting to ramp up
about there, I would say, and then just grab this side
and pull this side back into our timeline and grab this side and pull
this side in as well. Okay, I'll scroll the mouse. We ought to make
this bigger again, and I'll just trim this some more and trim this some more. And let's just have a little listen to this and
see what we think. That's sounding really good. I'm liking that. Now, this
one isn't too loud, actually. But if you bring music in, you're finding it too loud
and too overpowering, what you can do is go ahead and click on the
object here on music, add a modifier and add
a sound equalizer. Now you can go over to the
modifiers here like this, and I'll just pull our
counter back a little bit, and I'll play again. Grab the equalizer here and go ahead and pull
this down like this, and we can soften and adjust
the volume on our music. Until it's at a point
that I'm happy with it, which is about
there, I would say. It's not overpowering. It's just in the background
making you feel good. Okay. So there we go. That's our music in place. I'll go ahead and
hit pause again. And I'll ahead and select this, and I'll right click
and I'll add a fade, and I'll add a fade in. And this is currently 2 seconds. So I'll go ahead
and reduce this to maybe 1.5 second
dish. There we go. And now I'll right click again, and I'll add a fade out. But for this one, I'll go
ahead and increase this one, take this up to nearly, let's say, about 2.5 minutes,
something like that. And with that done now, that is basically our
finished edited video. So all that really remains to do now is to go ahead and
render out our video. So let's first of all, make sure we're saving it
in the right place. So let's keep it at
a two K resolution, and let's come down to where we're going to
save it here in output. And let's hit our
little file thing here. I've created a new file now
and it's called Finish VID. I'll go ahead and click on this. And I'll go ahead
and reduce this to Vid one. There we go. So it's Vid one in finished Vds, and I'll go ahead and accept. Okay, so we've got it saved
in the right place now. So now we need to
make sure that we're saving in the right format. So come on down to file format now and go ahead and
drop this one open. And let's put this
in FFPEG video. Let's go ahead and assign
that as our group. Let's move down a
little bit to encoding. And here where it
says Matroska open this one up and put this
one in as MPEG four. There we go just
there like that. Next thing you want
to do is audio. Come down to audio, assuming you're putting a
soundtrack on this. If you're not, then leave it
no audio, but if you are, go ahead and click on
this and put this on AAC. And there we go. That's all set. Now that's ready
to go. Alright, so that's that all finished. We've got everything
set out here we want, and we've also assigned this
to where we want to save, and we've got it in
the correct format. So all that's left to do
now is go ahead and press Control F 12 and go ahead
and set this to render. And it will appear
slightly jerky. Don't panic. This is just your computer formatting
this as it's going. This is not how this will run in real time when
this is a video. But this is looking
good. I think since this is our last time doing this,
I'm not going to pause. I'm just going to go ahead
and let this run through. And it's looking really good. I'm really pleased with
the way this looks. This looks like a kitchen I'd like to be in, I must admit. Okay, so we're nearly there. It's nearly finished
rendering this out. And I like this particular
detail as well. I like this the larder. This is looking really good. And this oven, I
think, is one of my favorite things we've
created. It looks fantastic. And then we're
gonna stop looking over this awesome view.
How cool is that? Super cool. Awesome. So there
we go. That's all done. We've finished
rendered that out. And really, this marks
the end of the course. So in the next lecture, let's go ahead and look at our finished video together
and see what we think. Thanks very much.
I'll see you in the last lecture.
Bye bye for now.
87. Lecture 86 Well done Rev 2: Hello, and welcome
to Lecture 87. And I think the first thing
I've got to say is well done. Well done to
absolutely everybody that has finished this course. And if you're watching this
lecture and you've finished, you need to be very
proud of yourself because it's super
cool what you've done. It's super cool what
you've all done. And I really hope that
you've enjoyed it. I know I've really enjoyed sort of doing this lecture
for you guys. Ultimately, this is about you
and what you've done here. So I'm really proud of you guys. And I hope you're also really
hooked on Blender now, and I hope you
continue to use it. I hope this is the tip
of the iceberg for you, and I hope you go on to do some amazing stuff with Blender. And maybe who knows? Maybe I'll see your stuff out
there in the future. So all that really remains for me to do is thank you very, very much for following along. And just again, to say how
proud I am of you all. And what I'm gonna do now
is go ahead and press Play Mon video and play that out and just
say one more time. Thank you so much, guys. I'll see you around.
Bye bye for now.
 Edward Harding