Transcripts
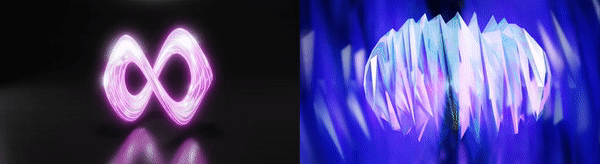
1. Introduction: Three D animation grows in popularity every day
as programs like Blender have made it easier for users to take their
animations to the next level. In this class, I will
be showing you how to make a looping abstract
three D animation. Hi, I'm Isaiah Cardona, and I'm a Senior Art
Director and online teacher. And I love telling stories
through animation. And I have several years
of experience working at advertising agencies that
create video projects, ranging from animate
explainer videos to social content and
broadcast commercials. Today we will be diving
into some powerful features of blender to create a
customizable animation. And I've designed this class for intermediate blender
users that are already familiar
with the program and are wanting to dive
into animation. However, I will be walking you through every step
of the process, from creating a file to rendering out your
final animation. I will also be providing
some helpful resources, including a class guide
in my final working file. Throughout this class, we will be covering multiple topics, including modeling
abstract shapes. How to customize
the appearance of our objects using blender
nodes and material properties. As well as how to set up
your looping animation. And lastly, I will show you how to light and render
your animation. Plus, throughout this process, I will also be showing you
different techniques and examples for customizing
your animation. You can create
personalized animations that you'll be excited
to share with the world. All you need is a computer
and blender software. As a teacher with several
animation classes, it's important to make animation
accessible to everyone. Which is why I'm teaching
this class with Blender, which is a free and open
source three D program. If you're ready to create an
awesome abstract animation, then let's get started.
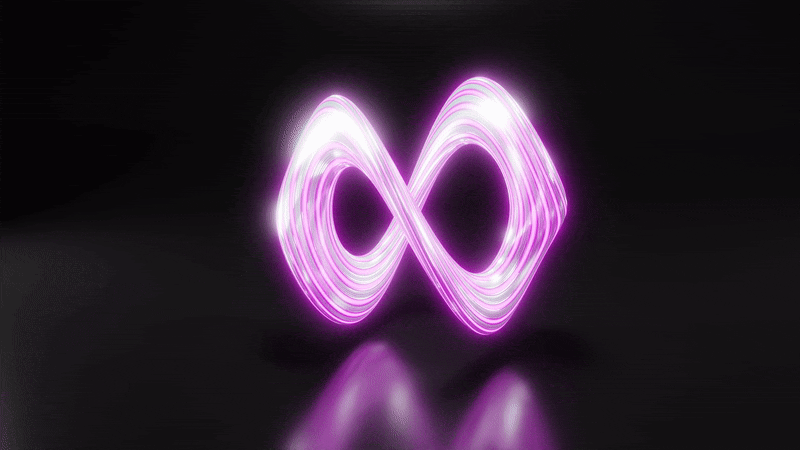
2. Class Overview: Welcome to my class, I'm so excited to have you here. Your class project is to make a looping three D
abstract animation. You have complete freedom to
follow my example or create something super
personalized by playing with the different
customization techniques. I've broken down the class into simple sections allowing you to progress through the process. We will walk through modeling
your abstract shape, how to loop your animation, how to customize the appearance using nodes and
material properties, and then walk through
setting up lighting. Lastly, how to render
your animation. Throughout these
different sections. I will show you
examples of how you can customize these techniques to
personalize your animation. This way you gain a
strong understanding of these blender techniques
as well as how you can apply them to any animation
application you want. For this class, you'll need a computer and blender software. You will also have access to my helpful animation guide
and class working file, which all can be found in the resources section
of this class. These support multiple
learning styles as you can review
screenshots from the class or even dive into the actual file for a hands
on review of my set ups. Once you've finished
watching the lessons, I encourage you to
share your project in the project gallery so we can all see the cool
animation you made. If you get lost or need any help anytime
throughout this class, feel free to leave questions in the discussion
section of the class, and I'll be happy to help. I'm so excited to see
what you all make. Let's start with
our first lesson on modeling the abstract shape.
3. Modeling Abstract Shapes: In this lesson, I will walk you through the
initial file set up, as well as how model your
abstract shape using modifiers. And lastly, show you some ways you can
customize your shape. To get started, let's
set up our file. First thing I will do is
select a new general file. Next, I'll delete the
default collection and I'm going to go
ahead and save my file. Now. Now that we have
our file set up, I'm going to walk
you through how to create our abstract shape. The base of our
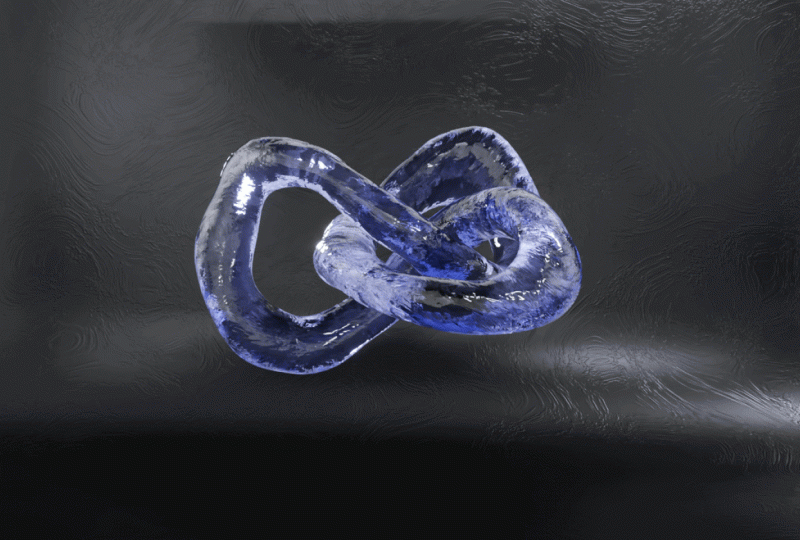
abstract structure is a simple geometric shape. For this example, I'm
going to use a Taurus. So I'm going to tap Shift A and go to Mesh,
then Taurus shape. Now that we have our shape, I'm going to go and click
on the Modifier tab, which looks like a wrench icon. Then I will go to the Ad
Modifier dropdown to select Subdivision Surface
and I'm going to bump up the Viewport
and render to five. Next, I'm going to
use the dropdown to select Simple
Deform modifier. As you can already see, the Simple Deform is already beginning
to alter the shape. I'm going to make sure
twist is selected. Then I'm going to increase the angle until I
get a cool look. I raise mind to 300 degrees. Now to really push the
distorted nature of the shape, I'm going to hit shift D to duplicate the modifier
With this modifier, I'm going to select bend, which you can see really adds a lot more interesting
distortion to the shape. I'm personally wanting
something a little more subtle, so I'm going to actually
play around with the angle until I get
more subtle form. I ended up with
negative 21 degrees as the angle outside of modifier is making it easier
to modify objects. I really like how they're
non constructive, which means that you can always customize the shape
of your object later. I personally have found
that I tend to make adjustments to the shape after
I've applied the material. Now that we have our form, I'm going to click one on the number pad to bring
up the front view. Next I will tap and
Z to move up on the z axis so the object will be able to float above
the background plane. Next step will be to
add a plane that will serve as the backdrop
for our animation. To add a plane, I will
tap Shift A and go Mesh. And then click on Plane. Now I'm going to hit seven on the number pad to go
back to the top view. With the plane selected, I will hit and then ten to
scale up the plane by ten. Now that we have the
base of the backdrop. Next I'll need to extrude back side of the base so I
have a vertical background. To do that, I'm going to hit
Tab to switch to Edit mode. And then I will click
on Edge Select Mode. And select the back
edge of my plane. And tapping all shortcut
to extrude the edge. And then we'll tap Z to lock
the extruded on the z axis, so it goes straight up. Now I will switch
back to object mode. I'm going to go back
to the modifier tab on the right and add
a Beble modifier. I will update the Beble mount to 0.42 and the segments to 75. These values are just
what looks good for me, but feel free to adjust to
your personal preference. Last thing I will do is adjust the positioning
of the plane by tapping and Y to drag the
plane forward on the Y axis. Then I will tap on zero to
return to the front field. Next, I want to walk you through a couple ways that you can
customize your shape to make your project more
personal and show you how versatile these
techniques can be. One way to personalize
your shape is to play around with the
simple form settings. Here I turned up the
angle values to 360, which results in
more intense shape. Another way to customize
your project is to apply the modifiers to
a different base shape. In this example, I start
out with a cone shape, and after applying my modifiers, I get this cool,
solid, twisty shape. There are so many different
variations you can create by playing around with those
shape modifier settings. To recap, we just walk
through how to create an abstract shape using
simple shapes and modifiers. I showed you how you can adjust the simple deformed
modifier settings or use different shapes to create a more customized
abstract shape. And the next lesson, I will walk you through how to set up a looping animation.
4. Looping Animation: In this lesson, I will show you how to set up your
looping animation. Before animating, it's
important to make sure preferences are set up to allow for a seamless
looping animation. So I'm going to go up to Edit, then down to Preferences, and we'll click on
Animation to make sure my default interpolation
is set to linear. And then I'll make
sure, say, preferences. This is important
as if you have, for instance, a
Bezier interpolation. Then you will have a slowing
down in the animation, which will make the
loop more noticeable, linear. You will keep the
movement smooth throughout the animation so that you won't notice when it loops
back to the front. Now I'm going to
click on the top of my time line at the
bottom of the layout, and drag up to expand
the time line. Next with my abstract
shape, select it. I'm going to tap
period and select active element to make
it the active object. This will allow me to easily align the camera to this object. Next, I'm going to tap shift
A and click on Camera. And I will use the
shortcut control zero to line the camera to
view the active object. Next, I'm going to pull up the view settings by
clicking on the right side of the panel and dragging to
the side panel is expanded. And then I will switch to the view settings by
clicking on the view tab. And we'll go down to the view lock area and
check lock camera to view. This will lock the camera
to the viewport to make it easier to move the camera
and adjust its view. I like adjusting the camera in this mode as I can see what the final output will look
like as I adjust its position. Once I'm satisfied with
the camera position, I will expand the view setting again and uncheck the
lock camera to view. This will allow me to move
around my scene without the camera's position. And then I'll drag back to the panel to collapse
the view setting. Next I'll show you how to set up key frames to
create the animation. I'm just going to readjust the panels to make it easier
to see what I'm doing. First thing I'll do is adjust the duration
of the animation. To do this, I'll go to the
end frame here and change it, 250-125 which will make the animation about
5 seconds long. I'm also going to click on
the bar at the bottom of the time line and drag to the left to zoom in
on the time line. Next I'll make sure
my object is selected and go click the Object
Property Tax here, move Playhead to zero. And I'll click on
the dots next to the rotation y and z fields. This will create a key frame of the current values
on frame zero. Next I'll click on the
last Frame button here, which will jump the
playhead to the last frame. And as you can see, the Y
and Z fields all went green, which shows you that I'm
in a different frame. To make the shape loop, I'm going to input 360 degrees, the field color
change to orange. Which lets me know
that I've changed the value but haven't
set new key frames. And I'm using these
numbers because having the first frame zero
and the last frame 360, the object will make
a full rotation, which will produce a
seamless animation tip. If you want to speed
up the animation, you can change the
last frame value to 360 times a number, to multiply the rotations to say the animation
go and click on the empty diamonds next
to each of these fields. As you can see, the
fields changed to yellow and the key frames
appeared in a timeline. Just like that, we now
have a looping animation. Lastly, I'm going to press the play button to play
back the animation. To recap in this lesson, I walk you through how it set up the camera
and how it used the timeline and object
property keyframes to create a looping animation. The next lesson, I
will walk you through Blender nodes and how it set
up your file to use them.
5. Blender Nodes Setup: In this lesson, I will walk
you through blender nodes and how it set up your files
to make the most of them. Blender materials, lights,
and even backgrounds are all defined using a
network of shading nodes. These nodes output values, vectors, colors and shaders. With so many different
kinds of nodes, it's important to understand
that some nodes require a specific render engine or
specific settings to use. But don't worry, I'll
walk you through how it set up all these
different settings. Since creating a node
system requires wrangling, let's make sure the Node
Wrangler add on is enabled. To do that, go up to the Edit menu and
click on Preferences. This will bring up the
Blender Preferences. Next, go to Add Ons here and
search for Node Wrangler. And just make sure it's checked. And then make sure
to save preferences. Now let's go into
the shading tab. And I'm just going to
go over here and close these areas as I don't need them and want more space to
work with the nodes. I'm also going to drag out the properties panel to make it easier to
see what I'm doing. Now that that's all set up, let's get started with the
abstract shape selected, click Add New Material. This will automatically generate the principled BSDF and
material output nodes. Now in order for all
our nodes to work, we will need to make sure we have specific render settings. Since some of these nodes
will require cycles to use, I'm going to make
sure that I have cycles set up for the
render engine for now, I will set my max
samples to six for Viewport and 16 for
render ability for now. And we'll increase
it later when I'm ready to render out
the final output. Now I'll go to Materials
tab on the right and go as Settings Menu and
expand the Options. And go down to Displacement and select
Displacement and Bump. This will allow me to
use displacement node. To recap, we walk through
how set up preferences render in material settings to properly create
our nodes network. The next lesson,
I will dive into my nodes network and walk through the
process of creating it.
6. Creating Node System: In this lesson, I will walk you through using
the shader nodes and material properties to transform the look
of your objects. To start out, let's take a
look at the full nodes network that I used to create my cool
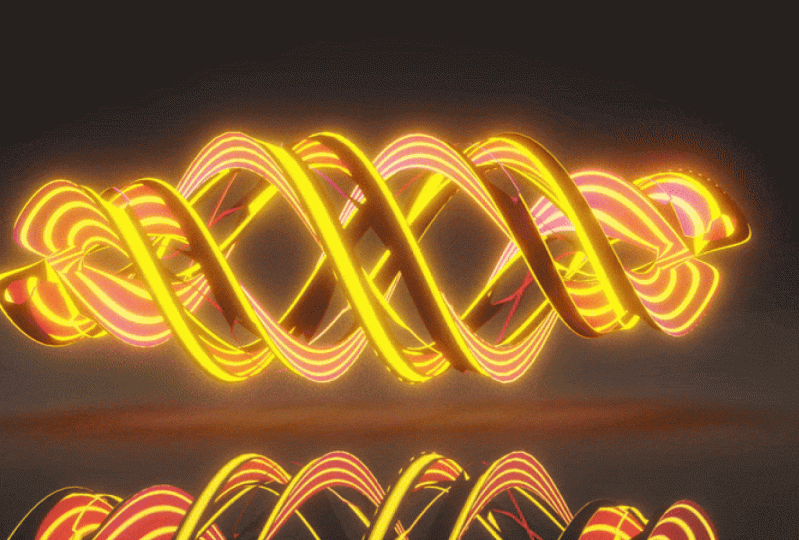
abstract object material. Here you can see what the file nodes network
will look like. On the right side, I have the texture nodes which
will create that rainbow. Next to those is a color
ramp which allows me to add multiple colors and
map out their location. Next we have a node that gives
our object its glossiness. Next we have an emission
node being mixed in. This is what causes the object
to emit a colored light. Then the last group
of nodes down at the bottom produce
the displacement. These will displace the
surface of the object using the same texture to add more detail and dimensions
to the abstract shape. Now that I walk through
the basics of these nodes, let's dive into building it. First, tap shift A to add
the mix or shade or node, and drag in between the nodes to snap
the connector lines. Next, add emission by clicking
shift A and searching for emission and connecting it to the second shader input
of the mixed shader. Now let's add a color ramp and put it in the
mixed shader factor. Next, we'll duplicate
the color ramp twice by clicking Shift
D and dragging it down, And I will end up with
three total color ramps. Next, let's add the
volonoid texture and then a wave texture node. Now let's connect the wave
texture color output to the volonoid vector
input and connect the voronoid texture to
top color ramp factor. Now with the wave
texture selected, I'm going to tap control to
add in texture mapping nodes. And we will connect the
texture coordinate using UV output to vector input
on the mapping node. Now in wave texture, let's change the axis to Y and then connect the Voronoid
to the second color ramp. Now let's duplicate the
texture nodes by selecting all and tapping shift D and dragging them down to
the third color ramp, and connect Voronoid to the third color
ramp factor input. Let's add a displacement node by pressing shift A and
searching for displacement. I will connect the displacement to the displacement input of the material output For the displacement to align
with the texture and colors, I will connect the third
color ramp to height on displacement and
make mid values zero. And I'm going to
put the scale to 0.02 Now let's adjust
the texture values, update the first voronoid
texture scale to three, and update the scale to four
on the wave texture node. In the first color ramp, I'm going to increase the white. Now that we have our
basic node system set up, let's work on setting
up the color. First, I will connect
the second color ramp to the base color on
the principal BSDF. Next, I'm going to add four new points and select
the color for all six points. Feel free to
customize the colors and amount of color
points you use. Once I've chosen all my colors, I'm going to just
redistribute the points until I'm satisfied
with their spacing. Next, I'll change the
setting to cardinal. Now if you notice
we aren't seeing any of these colors in
the viewport above. To see the result, we have to switch
emission input order with the principal SDF. Now we can see the colors though our emission
isn't showing up. I'm going to change
the emission color and increase the strength to 50. Now we can clearly see that, bring the emission on the shape. Next I'll go back to the texture nodes and change
the second Aoi texture scale to three and the wave
texture scale to four to match the settings of
the first texture nodes. This will keep displacement consistent with the
texture and colors. Last thing we'll need to do is update the third color ramp. So I'll increase the black to
0.687 And essentially what I'm doing is I'm flipping the white and black values
in their placement. So the first and the
third color ramps will essentially be
opposites of each other. To add some polish to
my abstract object, I'm going to add a
glossy effect to it. So I will create some space B dragging these nodes over here, and I'll just move the
emission node here. And now I can add
an add shader node and place it in between the
principal and mix shader. Next, I'm going to
add a glossy BSDF and connect it to the
second shader input. And I will just
decrease the roughness to 0.185 And I'll go ahead and reduce
the specular and roughness on the principal
BSDF to both zero. Lastly, I decided I want to update the emission
color to pink. Last thing I will do is add material for the background
plane, just like before. I start by selecting the background plane and then clicking New in
the shader editor, which will automatically
generate those two nodes. And I'm just going to zoom inside the panel
and go to Roughness and reduce it to 0.218 which
will allow some reflection. And then I'll go up
to the base color and I'll select a very
dark gray color. Then that way like this cool bright pink
abstract shape animation will really pop.
And then that's it. To recap, I just walk
you through how to use the shader nodes and material properties to transform the look of your objects. And the next lesson I will walk you through
lighting your scene.
7. Lighting Scene: In this lesson, I will walk you through how to set up
lighting for your scene. Step 13 Point Lighting. Back in the layout tab, I'm going to tap
shift A and go to light and choose area
to add an area light. I like lighting my scenes
with area lights as it works like a light box which is used
in real life photography. Next, I'm going to
use the Objects properties panel to move the light up on the
z axis to eight. And then I'll click on the icon to open
the light settings. And I will go to the shape drop down and change the shaped disc. Next, I'm going to increase the power of the light to 600. And actually I think I'm
going to increase it more and make it 700
so it's brighter. Next I'm going to tap
S on the keyboard and drag my mouse to
scale up the light. Next I'll tap seven to go to the top you
to make it easier. See where I'm positioning
the other lights. I'm going to duplicate my current area light
by clicking Shift, And we'll move it over
to the right side using and the
respective axis keys. Next, I'll move it down
on the z axis using the shortcut Z and dragging
it down with my mouse. And I will rotate the
light using shift, so light is pointing towards the Taurus shape in the
object property panels. Let's reduce this power to 500 since it'll be
a secondary light. Now let's duplicate
the second area light and move it over
to the left side using and x and lower further on the z
axis using and keys. And then I'll rotate
this third light using shift in my mouse so
it's pointing at the subject. This third light, being
on the other side, will help cancel out shadows as my shape is
completely lighted. Lastly, I will click on the camera icon to toggle
on the camera view. To recap, in this lesson, we walk through how a three
point lighting system. Feel free to adjust
your lighting set up to your
personal preferences. And the next lesson, I will walk you through rendering
your animation.
8. Rendering: In this lesson, I
will walk you through how set up your rendering
settings and how I use encompassing tab to add
polish to your animation and share some tricks for customizing your
final animation. Step one rendering settings. To get started, I'll go to
the Render Properties tab and make sure my render
engine is switched to cycles. And if your device supports it, I would use GPU Compute
for faster rendering. Next, I'm going to
adjust my Viewport sampling to 16 and my
render sampling to 64. This will help
reduce render times and still produce
cool final animation. Also, make sure
noise is checked. Next, I'm going to go down to color management and change
my look to high contrast. Now I'm going to go to
Output Properties tab here, and we'll go down
to Output Setting. First thing I will do is
click the folder and select the location I want to save
my rendered animation to. Next I'll go to the file format, drop down and select
FF and Pay video. Then I'll go and click encoding to expand the options. Next I will change the
container to put four as NP fours are a widely
supported video format. Lastly, I will go to Output Quality and select
perceptually Lossless. Now that I have my
rendering setting set up, I'm going to walk
you through how use the compassing tab to add some
polish to your animations. Now click on the tab and
then the top left corner. Make sure to check, use nodes to automatically add the default render layers to the
composite nodes. Next, I'm going
to click and drag the composite node over and
tap Shift A to bring up Add Menu, and we'll
search for viewer. As you can see now we
have this black box behind the nodes which reflects the color
of the viewer node. Once I connect the render
layers node to the viewer node, the black box
disappears as it's now reflecting the render
node which is empty. Because I will want
to add a node that will affect both the
composite and viewer nodes. I will join the nodes
by tapping shift and right clicking on
the mouse and then dragging across the
two connector lines. Now in order to see
what I'm working with, I will need to render an image. So I'll go to Render Menu at the top and click
on Render Image. And then this may
take a little time depending on your computer. And once done, you will see the rendered image now in the background behind the nodes, which will help us see
how the new nodes that we will add will change
the look of our image. Next, I'm just going to
slice both nodes and drag them over to the right to
create space to add a new node. Now I'm going to tap on shift
A and search for glare. And I will just draw
the node in between the merged lines and the
rendered layer node, so it automatically gets
connected in place. Now I'm just moving the nodes
around to make it easier to see how the glare node is
impacting that rendered image. As you can see, we now have these light streaks
around the shape, which depending on
what you're going for, it could be a nice
accent to your shape. I'm wanting something
more subtle though, so I'm going to change the
glare type to fog below, which now gives it
a more subtle glow. To dial it in more, I'm going to switch the
second drop down to high, which instantly
reduces the glow. I will also tweak
the threshold to 0.8 and increase
the size to nine. By playing with these settings, I get this more subtle
glow that really reflects where the light is
directly hitting the shape, which makes my abstract object look more
sleek and shiny. Now it's time to
render the animation. All I have to do
is go back up to the render menu and
click render animation. After some time, I get this
nice looping animation. Now that we've walked through
the encompassing stages, I wanted to walk
through some ways you can further customize
your animation. We've already looked
at how streaks and fall glow can affect
the look of animation. This next example, I want to show you another
option that will instantly customize
your animation using the glare node dropdown. I'm going to select
oh, and it gives me cool ghost reflections effect. Which you can see as
the animation plays, it creates a really cool effect. Here's another example that uses the ghost setting
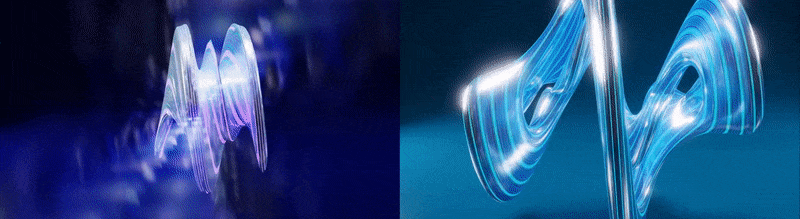
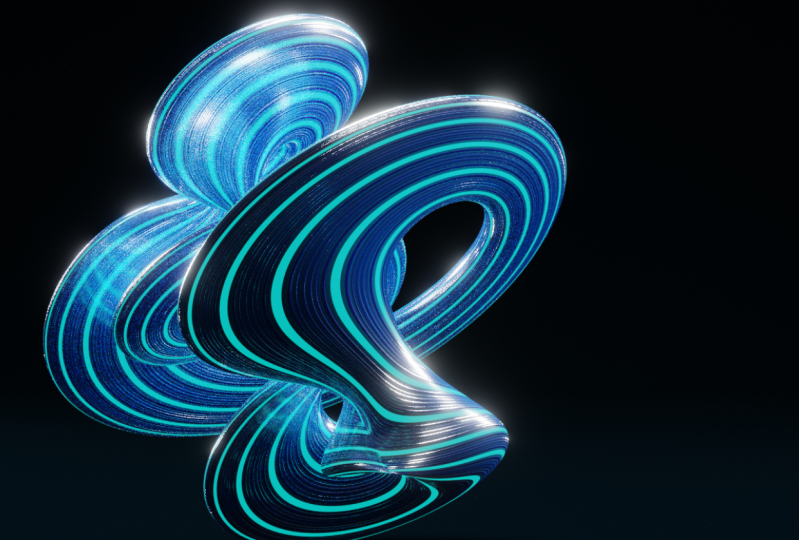
and the glare node. In this example, I have
used different shape and simple deform modifier settings paired with a dark
blue background plane, which creates a more intense
animation as it blends the reflections and colors
of my more complex shape. As you can see with
all my examples, there's so many ways to apply these techniques and
my tips throughout on customizing settings to create some really cool and diverse
abstract animations. To recap, we just walk through
to render your project and how to polish the animation using the compositor nodes. I also showed you how
you can customize the passing settings to create unique effects to
personalize your animation. And the next lesson, I will walk you through
the class project.
9. Class Project: Now it's your turn to
apply the skills and techniques from this class to
create your class project. The class project is to create your own abstract
looping animation. You have complete freedom to
follow my example or create something super personalized by playing with a different
customization techniques. Once you have created and
rendered your animation, you can upload your video to a video hosting platform like Youtube or Vimeo and
embed it in your project. Another option is to upload your video
to a site like Easy Gift.com to create a
looping animated gift which you can directly
upload to the class project. Once again, if you run into
any problems or questions, please post them in the class discussion and I'll
be happy to help you out. The next lesson, we will
wrap up this class.
10. Final Thoughts: Congrats on completing
this class. I hope you have
successfully created a fun abstract animation that you are excited to
share with the world. And I really want to thank you for taking the time
to take my class. Throughout this class, we have walked through
multiple topics, from modeling your
abstract shapes to using blender nodes to customize the appearance
of your objects. And we walk through
how to create a looping animation and how to light and
render your animation. As well as walking you through multiple ways you can customize your shape and appearance to
personalize your animation. I hope this class has shown you how fun three D animation can be and has inspired you to apply these skills
to future projects. I'm very excited to see
what you've created. So be sure to post your work to the project section
of this class. Sharing your project with
the skillshare community is a great way to help inspire each other
and continue growing. And if you would
like more classes to help you learn animation, then follow me on Skillshare
and check out some of my other classes on
animation and motion design. If you enjoyed this class and
found the lessons useful, please take a moment
to leave a review. Positive reviews like yours helps other students
find this class. Thanks again for taking this class and I hope
to see you in a future. One soon bye for now.
 Isaiah Creates, Art Director & Motion Designer