Transcripts
1. Introduction: Hi, my name is Maria Abramovic and I'm an animator, illustrator, and director of animated movies. During my years of experience, I have discovered that the more you do, the better you become one instead of good animation, I was a little fearful that I was not going to be able to handle this enormous task of animating a character. But you know what? You do not have to handle a task. From the end. You have to handle it from the beginning. You have to start with the four steps with understanding the animation techniques, with understanding and body mechanics, and how to keep the form the solid. That's why this course is men see you who's still starting with animation and doesn't know where to start or what to do. I am going to give you a very simple tools and very simple techniques that will help you to start moving your characters. And the thing is that you can start with a stick figure. You can start with a ball. It doesn't matter how advanced two-character is. When you're animating. The main thing is the body movement. It's not really the drawing. I will even show you how we do very sketchy and a rough animation drawings. You can convey the idea of walking, running, etc. I'm going to go through the animation principles. And what are they about? I'm going to explain them in each chapter. And why do we need animation principles? Are they set in stone and how we need to use them? I hope that you will follow me on this journey of starting your animation career one step at a time. So I hope you're excited to start animating. Have an, I hope I've inspired you enough. I'm inviting you here and I hope you're having fun with this lecture and see you on the other side.
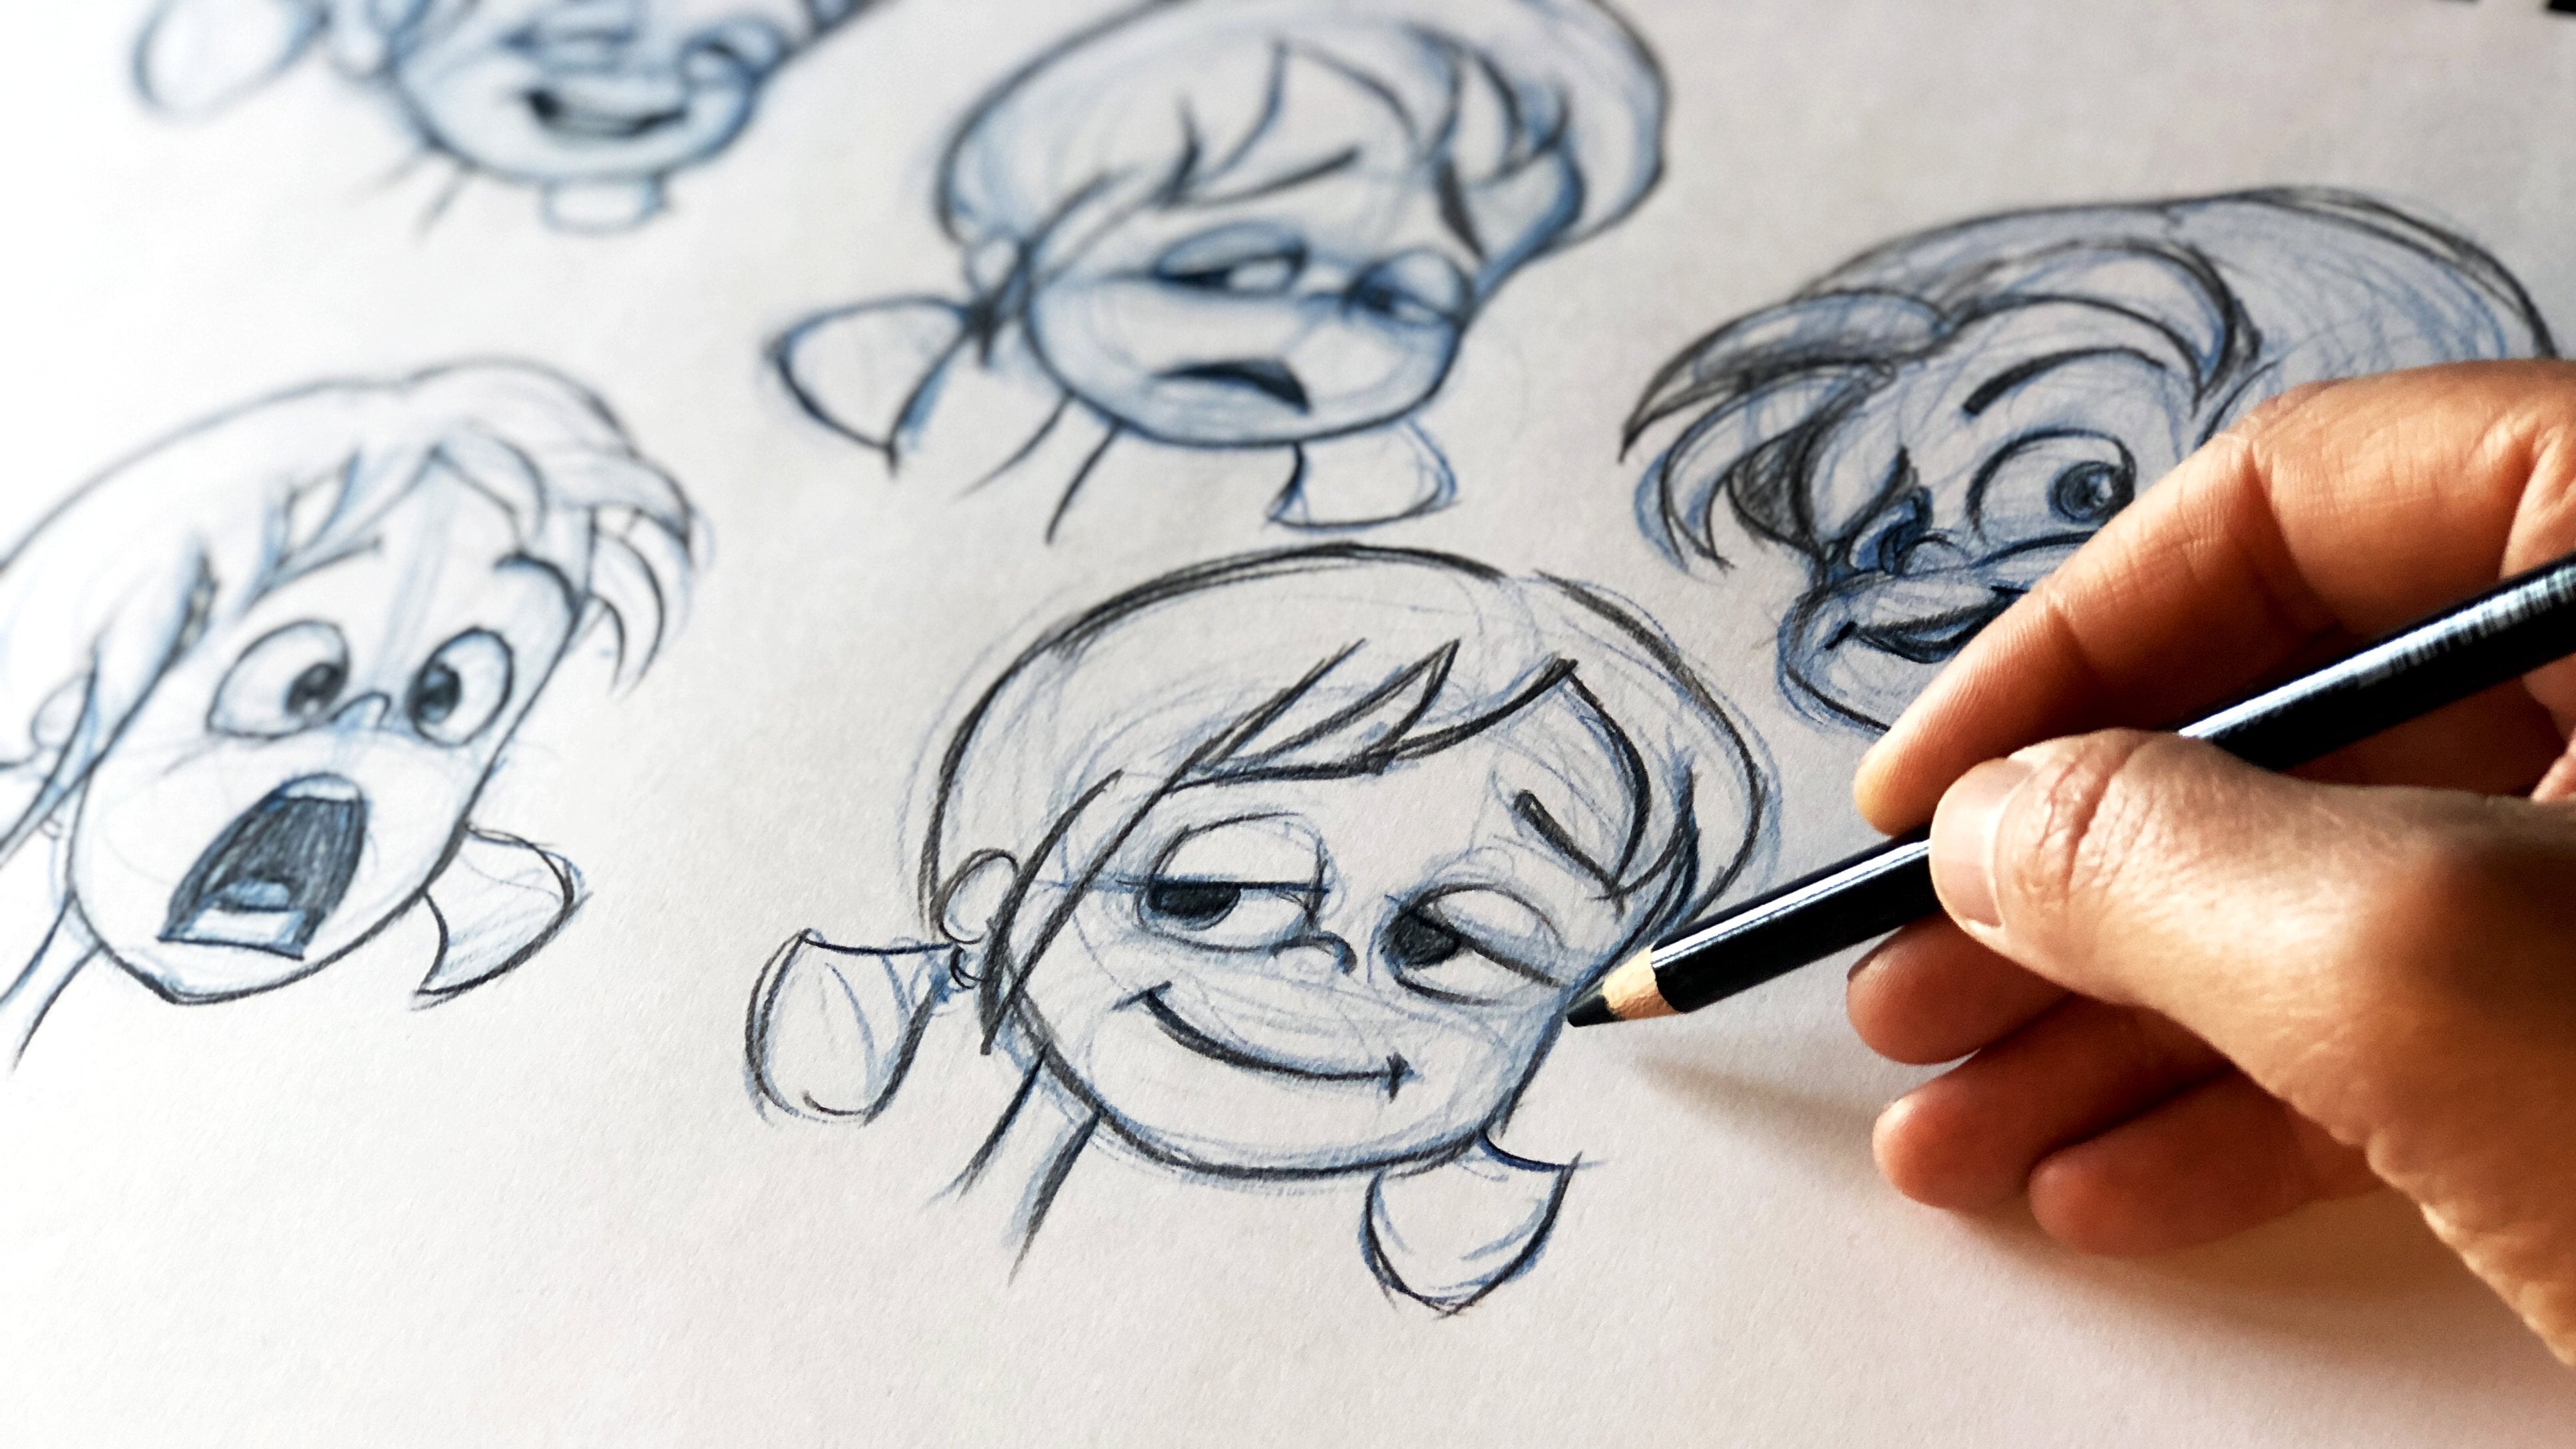
2. Principles Of Animation - Learn how the 12 Principles of Animation apply to your animation. With a v: The 12 principles of animation and what they really are all Disney animators when they started producing their animated movies and animating, found a way that by doing certain things and drawing in a certain way, ie, the animation became better and more alive. They put this founding and paper and posted on to newer animators who started in animation. So they can use the experience of the old animators and better their animations. These principles are not really rules. There are guidelines for you to, to make your animation battle. So what are the known 12 principles of animation? These are squash and stretch, is in a nice out. Timing, anticipation, follow through and overlapping action, exaggeration. Arcs, secondary action, pose to pose and straight ahead appeal, staging and solid drawing. I'm going to show you examples of how these principles are used and how you can use them in your work. And later on, I'm going to animate some characters. What I'm going to show you, how I use some or most of the principles. So I hope you have an enjoyable time with improving your animation skills.
3. Squash and Stretch - Squash and Stretch - see the difference it makes to an animated object weight a: Squash and stretch, or squash and stretch gives more weight to your animation. I'm going to demonstrate this principle with two bouncing balls. One bouncing ball will not have any squash and stretch. It will move up and down without changing its shape. And the other one I will apply squash and stretch to. So observe the difference between how these two balls come to life. This is a bouncing ball that has no squash and stretch. And here is the symbol, but it squashes on the extreme frame over year. And it stretches just before it rises up. And this is its stretches a little bit. It drags up a little bit on the way up. And I hear it starts draining shape again, but just before returning to its basic shape, it squashes again. And here they are at same shape. And here the ball starts stretching again and structures on the way down and stretches just before it's quizzes the ground. And here is squashes before it takes its natural shape. But it also squashes and stretches for just some few frames until it's false. Instead of just standing still and look at a laptop makes for the animation of this pole. The conclusion is that with squash and stretch, every object becomes more alive. It also has more weight to it. Even though it changes shapes. For a brief moment of time. The impact of the extreme shapes of the squash and stretch and more life to the ball and make it look as if it's more solid, then the actual solid ball, squash and stretch is used in every animation more or less. If you don't have an object that is actually solid, like for example, animating a stone, squash and stretch is preferable to give more impact and more life to objects and animals. Here's an example of a fox that I did. And here you can see how it squashes. On the way down. It just brings all its feet and all its body shape in a squash form. And then it stretches on the way up to come up in the air where it squashes again and then it stretches again. And then if you play the animation, you see that it has fluency to it, it has weight to it, it has life to it. So let's continue with the other principles.
4. Ease In and Ease Out - Learn how the spacing between frames or how you Ease In and Out of the moveme: Ease in and ease out. What this applies to is basically how an object starts to move and how an object ends the move. When an object is still, it doesn't start moving in the same pace as it's moving in the middle. It has a few more frames where the object, Jane space, That's an easy one, is ease in into the movement. And then before it stops, the object decreases in pace. So it has a few extra frames before it comes to stop. An ease out, it doesn't stop immediately. If an object is moving constantly, it means it doesn't have an easy ease out. It means that it's a constant pace. It has moved our continuous in time and where it has started and where it ends is something that we don't see. This is okay to do. If you have motions that are repetitive and you want to show, for example, that this object is moving like for example, if you have a planet orbiting another planet, you will not have an ease in and ease out because it has a constant movement. So this is what the principle applied to.
5. Timing - How you time your objects effects their weight and gives a different impression of what mat: Timing. Timing is about how fast an object moves. Here we have three similar balls, but I have changed their timing, so they continue moving in different pace. These balls Slater and moves up faster. While this boat is a little slower, it has more frame on the ease in and ease out and continues to reach this place much slower, while this ball has even fewer frames in between and doesn't even go up that high. So the half completely different timing. And look what this has for an effect for your animation. If I just play that, this one feels as if it's a rubber ball, it just jumps really fast. While this one feels like It's, this one is really light, maybe a beach ball or something. Well, this one feels really heavy. So the timing with which you are, you move your objects or your characters, is going to define how their material, or how heavy, or how jumpy it will feel like. And this also justifies the frames in between because timing, the more frames you have, the slower something moves, the faster the few frames you have, the heavier something fails. And this also justifies if you have different materials. Like for example, as we said, a rubber ball, beach ball, or some kind of all metal ball or heavy, heavy material. So this applies for timing.
6. Anticipation - Learn how anticipating the movememnt adds more impact to it.: And dissipation refers to how you prepare the movement before the actual movement. It means that the more you anticipate the movement, which means that the more you prepare for the movement, the stronger and more impactful the movement itself is going to be. Now, I'm going to give you an example here with the two balls. Again. One ball is moving straight forward without anticipating the movement. Yes, you see the ball moving from point a to point B. Nothing wrong with that. But what will happen if we anticipate the movement? In the second ball? We are going to prepare for the movement, which means we are going to push the ball backwards and stretch it and squash it. So we prepare the ball for taking a big leap before it moves forward. And look what happens to the movement of the ball. So we have prepared a movement while the first ball has already completed the movement. The second one is still going on preparing and, or anticipating the movement. But look at the impact it has on the movement itself. The second ball gets to the position, be in a shorter pace, in a shorter time. But it's movement feels much more impactful, much stronger. Because we've anticipated it. You can use this principle most of the occasions, but the amount of your anticipation, how much you're going to anticipate each movement really depends on the situation. You don't have to anticipated as strong every time. Or sometimes if your animation feels week, maybe you lack some of this anticipation. You have to feel that within the animation. But this is basically what this principle refers to. So here is a little example about anticipation in acting and how anticipating, preparing the movement before it happens gives the movements more impact. Here we have two characters, and one of the character is going to give a flower to this female character. And this is an action that is without dissipation. So the character is just giving the flower straight away. And thus how it looks like. It's just bringing the flower Forge and giving it to the character. Now how would that look like if we have an anticipated the movement? And here is what I did to show you that he's preparing. And it's much more smooth and it has much more impact. So just to compare, I'm going to play the video again. And you can see the difference between these two animations, how anticipation made or animation much better.
7. Follow Through and Overlapping Action - What is Follow Through and What is an Overlapping Action? In: Follow through and overlapping action. This rule applies to all other attributes on the character that are not the main body of the character. Such as ponytail, ears, floppy arms, close, belts or anything that is hanging. And it's not forum on the character. There is a follow through action of each attributes on a character that follows a certain rule. They are not moving at the same pacing as the body, but they are overlapping the action of the body, which means that when the body starts moving in one direction, the attributes on the character are moving first in the opposite direction and then starts following through the action of the main body. Like for example, if the character has a ponytail, Let's give or little ball a ponytail. So in the character starts anticipating the movement, the follow-through action of the ponytail will be on, will start moving in the opposite direction are the anticipation. It will just follow a little bit later, the movement of the main body, and then it will follow through the movement. And what overlapping action means is that when the object stops, when our ball stops, the ponytail continues moving a little bit more to complete, to overlap the action of the ball of the main character. It sounds a little bit complicated, but it is pretty simple. If you see floppy ears, pony tails, if you see close flopping around on the character, they need to follow the role of follow through and overlapping action. So let's move on.
8. Exaggregation - What is the difference between Exaggeration and Anticipation? How will exaggeration : Exaggeration. This principle refers to something that the old Disney animators and discovered that if they exaggerate the movement, if they make an extreme pose or extreme animation to anticipate the movement and make it broader, wilder, more extreme. This can refer to a pose or just kinda referred to on animation altogether. Also, a way of acting on the character's acting than the movement itself, becomes more alive and becomes more impactful. Exaggeration does have similarities with anticipation and squash and stretch. I mean, squash and stretch. Anticipation is a form of exaggeration. So there is no a line between these two principles. They're used altogether. But let me show you an example of exaggeration. For example, we have our character here, or little ball that will start running in the first animation, will give him running just straight away. In the second example, I'm going to exaggerate his movement. I'm going to anticipate in an exaggerated motion. So he would jump in the air. Extremely happy. He'll run with your feet in the air and then he'll start moving forward. And the impact of the character is much more impressive. You can see not only that the character is running, but you can also get a sense that the character is happy. It just gives an extra layer of who the character is and what he's actually doing.
9. Arcs - Why does everything have to move in clear arcs. See the examples here.: Arcs. Arcs applied to the principles that every character should move in an arc and one is going from one place to another. And not only the character should do that, but every part of the body should make a smooth arc. Next pose, Let's say this character is jumping in the air like that, for example. Now, all the poses of this character moving in one smooth arc. So when the animators do the animation, when you turned on your skin, you see that the character, even though is a straight line here, it's moving in one smooth arc. So if we assume that this character, this character's body is I yellow line and D arm in some blue line. These leg is a red line and this arm is green line, and this leg is a pink line. We'll see that in each frame, if we follow 1 of these characters, arm or foot or anything, we'll see today are building an arc through out the whole town. And thus how it looks like they're making a perfect arc. And even though this arc here is curvy, It's building a smooth line, a line of action and arc. Now, what will happen if the character doesn't move in Arc? Let's see an example of that and have this character jump not on an arc, but just randomly and just go from here to here. But it doesn't follow an arc less than the O'Neill scheme to see how this character is doing it. So he jumps a little here and there, and there. And there you see the whole arc and with the arms and everything is simply broken. And how does it look like? In animation? You see that without an arc, it doesn't look like the character is jumping so smoothly. It doesn't have a weight. And the movement is Starkey. And it doesn't feel nice to the eye. Just as compare it to the other character to see the difference. See the above jumping the same, same time, but one character has everything moving arc while the other character is moving randomly. And this feels much more fluent and nice. And it looks like a real jump while the other character felt like it has some issues. You didn't, you didn't know sorry. Felt that it was jumping correctly.
10. Secondary Action - What is Secondary Action and how is it different from Overlapping Action or Follo: Secondary action. Many may confuse this rule or where the rule of overlapping action and follow through. This is actually a completely different and secondary reaction describes how the character is doing something or why the character is doing something. For example, let me show you an example with little sphere with legs and arms. And this character is trying to open the door. We don't know why he's trying to open the door. We just know that the main action is the character or tries to open the door which is locked. Now, let's add a secondary action to it. The character turns around and looks around, and the hand that tries to open the door is barely reaching the door knob. Because his attention is not really on opening the door. His attention is also on checking if someone is watching is someone is or has discovered him. So he's hiding something. So the main action as opening the door, the secondary action is trying to sneak in, trying to open the door while sneaking in. So no one season secondary action is describable action. He describes how and why the character is doing something. Here is another example. Again. All character is trying to open the door frantically. But first, before it opens a door, it kinds of hold himself as if he needs to go to the bathroom urgently. So now we know even without assign this might be a bathroom door or may be his flat and he's in a hurry to go to the bathroom. So the main action is the character opening the door, but he's trying to open the door because he's in a hurry and he needs to P. So I hope this bring some clarity to what this rule is all about.
11. Pose to Pose and Straight Ahead - Learn how to use those two different ways of working with your ani: Pose to pose. And straight ahead. This rule simply applies to how you do an animation. How you approach the process. Both tuples or refers to, for example, that you draw the main key poses. Like for example, if we have our bouncing ball here, you draw just the key poses when the ball is hitting the ground or when the ball is at its highest position up in the air. And when you have that settled and you try it out, you just draw the in-betweens. You can draw the in-betweens in a different order. You can first find the in-betweens that are closer to the main key poses. Or you can spread them out in-between the two key poses of the ball. Straight ahead refers to that we are animating without placing the main key poses first. A very good example of straight ahead animation is the stop-motion animation. They're going pose to pose is basically impossible because you have to move the object one frame at a time. But sometimes you would like to go animate straight ahead. Even if you animate in 2D. If you get the flow of animation, you'll kind of feel what the next bot is going to be. Usually, it is a combination of those two principles. You go sometimes and draw the key poses and then for the mob, or sometimes you go just straight ahead between two key poses. So there is no right and wrong way of doing it is just the way you feel. How works best for you. Usually, I like to do straight ahead animation. When I get into the flow of animation, it just gives me the gut feeling of the timing of the character.
12. Appeal - Why is appeal one of the 12 Principles of Animation? What does it refer to?: Appeal. This rule has nothing to do with animation, but with a design on the character. It says that the more appealing and character is, the better it is to connect with the audience. Appealing characters are becoming an iconic characters. The design of the character is very important for portraying the motions and the character. Usually big eyes and around faces. Cute characters are more appealing for the audience, especially when the audience are small children. One of the characters look like small children or like puppies. We are more tend to attach to them. But again, this rule has nothing to do with the animation, but with the design of the character. It is still very important. Mansion, even though it's not about animation, because animation is all about conveying emotions. So how the character is being portrayed is also very important of how the character will be able to convey these emotions.
13. Staging - What is Staging and how does it apply to animation?: Staging. Staging again has nothing to do with the animation per se, but with the composition and the background of the animation. Like here, for example, we have our little character that is running from a little monster. What is nice about the staging of this composition is that we have clear silhouettes. We have a shadow in front of the character that suggests some kind of a danger. And we have a similar shadow from the little monster running towards us, chasing or little cute character. Also, the framing of the composition is done by two trees on both sides. And there is nothing in the composition that is in the middle. Try not to place anything in your composition in the middle of the frame. Of course, this character will be moving and they're moving in diagonal. Which is also a very pleasant for the eye and very dramatic for the action. This is a broad topic about staging and how you compose your backgrounds and how you compose your action within the scene. So that's why there is a separate rule just about staging.
14. Solid Drawing - This is a principle that refers to the 2D drawing part of the Animation. With 3D ani: Solid drawing. This rule applies to keeping the right size of a character all the time. Sometimes when we draw, especially when you're a beginner, you will notice that your character becomes smaller and some frames and bigger and the other frames. This is very normal. But what solid drawing or refers to is that we need to keep the character the same size for the whole scene. But now with 3D animation coming in the scene, there is not so much problem with keeping the character solid. This only a refers to drawn animation.
15. Jumping Elephant Part 1 - Start by drawing a rough, round shaped characters to practice your animati: And let's do a short animation of an elephant jumping using the principles of automation. And I'm going to choose, here is my board, and I'm going to choose a color, a blue color. So I can draw really sketchy. As I mentioned before, the reason for it is so that we don't feel something is final. And so we have the option of making mistakes. Also, I'm bringing, I'll bring the opacity down. This will also give us on more on finalized look of our animation. Because the more visible the line is and the more black it is, we kind of tend to see it as something solid and final and we try to make perfect drawing switches. At that stage, you should not be doing that. So I'm just going to pull the opacity down to around 50. And let's see, That's good. So and we're going to animate, or elephants. And we will start with just doing with circles. I think I'm just going to drag the opacity a little bit more down because I'm getting distracted by seeing the line too well. And just go in and delete out and see that. Yes, that's parallel. So I can just make more lines to define the circle. And this is our elephant body. And let's just make the elephant head. So assume that this is the head. And let's find the center of our elephants have where the eyes and the phases basically. Any, if you want to know more about it, just go to my other lecture. Dot is designing cartoony characters. And their explain more how you can design these characters. But let's say that here we have the trunk and the eyes, the eyes of the elephant. But we're not going to put them there are right now. So I'm just going to undo undo the trunk. All I want on the hour I want to know is the position of the face and I'm not even going to put any legs or anything. I'm just going to note that the ground is approximately here, so I'm going to need to, I'm going to have some legs over here. Or let's just, let's just put them in this drawing. And I'm going to use only circles. Nothing else, nothing Not definition or anything. Just to make it easier for you, if you're a beginner, you only want to see movements. And the simpler you might have for yourself, the better it is for your animation. And let's make this character jump. So this is our first drawing. The character is spending. And let's make him start jumping. So I'm going to add another frame. And here I can see the drawing before. And what I wanna do, I'm just going to ignore the, the legs for now. I'm going to start anticipating the movement, as we mentioned in the lecture of anticipation. So I'm going to make, the body starts going down and squashing. And I'm going to let the head follow through and just stay a little bit up. I'm going to do this animation straight ahead as if you animate stop motion, which means you only made a clay puppet where you don't have an undo button. And this is a useful exercise for you to just do frame-by-frame because you learn a lot. But this is not the only way I'm going to show you that. So you can follow my steps and you get such a great sense of timing doing that. So let's squash him. And the next frame, Let's bring even the head down and starting to lift up the body. But not much. We just want to have all the parts, all parts of the body moving in a direction. They should never really stay. They should always be in motion. And the head tilts down in an arc. And let's have him now jump and not add another frame. You kind of see the drawing underneath as with an onion skin. So you can approximately know what's happening. And this frame, we're going to drag the body up. Really deforming the 60s, jumping with the front legs and dragging with the back legs. And here's approximately the body. Let's have his head also drag down approximately here. Just do throughout, do as many circles as you want. That's why my previous lecture on drawing cartoony characters, I emphasize the importance of having a free hand and drawing as many circles as you can because you see you get the perfect shape of the drawing. After doodling, your hand gets loose, but somewhere here you get a perfect circle. So you don't have to like, draw precise lines like that. Just doodle it out and you get there. So that's the next frame. Let's drag it out a little more. One extreme, extreme pose. And now the head is also catching up. Just try to make all the body parts move in a different pace. That will give you an animation much more character. So let's go to the next frame. So the way up is really quick. Uh, we talked about pacing. And where you have more frames is when the character is standing still or preparing to change the direction of a movement. So here we have the character squashes. So let's make him squash a little more even. And the head is still dragging. So it means that the head is staying almost in one position. And in the next frame. Let's have the head and the shape coming back to his normal shape in keeping the character solid will take you a while, but you can use that as the guidelines. And this is all about practicing because at some point, if you're a beginner, your character will get smaller. Somewhere in new animation. It three times you get like drawing smaller and smaller. So just keep practicing. So he will hang up in the air for a while and there he will change direction. So we'll have the head lift up while the body is getting out and actually start falling here. So the head is continuing the movement as, as a follow, as an overlapping or action. Because the gravity is taking over here. I mean, it doesn't have any control of what body part is. I mean, there or not if it doesn't use any force. So just the head is following the action of the body and the body is heavier, so it just goes first. And because he's been using a power to push himself up. So the body has more speed than the head, and the head follows that action. And in the next frame, just have him linger a little more. But that the body starts falling by. And I had this tilting up a little more. And now we'll have the character already going down. So let's exaggerate. That frame is also very short movement down. The head is also dragging. And do some experimenting depending on how you want the jump to be. It will take for you some experimenting with the frames, but you will never gets your animation grade the first time. Even great animators don't do that. It's a timing is built in your immune system. And to get the timing right, first, you have to copy some animations, some frames to see, to teach your body how the timing works and how the illusion of timing works in, on paper. Because you had to start with this, learning an instrument. The courts out there, but you don't know when to hit them. And this is about practice. So let's have the next frame already. Squashing mean. So is falling, so let's wash it like that. But we'll have the head still up in the air. Still catching up. You can also make him come up with his back feet first. But I'm going to do y cubed like bone, bouncing really heavily on the ground. And you see that I'm following the drawing, the first drawing, you can see it underneath some following that shape. And I've got another drawing. And now the body is coming up. And the head is because we have a force of gravity full because the the body meets, meets the ground and we have a drastic change of the reaction. So the head is going is overlapping that dot-dot-dot movement. So a slide down. And then let's settle in because the pore is going up again and then it needs to stop the final position and some initial position here. And because you know, all the parts don't end up abruptly blade, so you have to easing the motion. So the head is still there. And the body's like making, making a sudden like bom, bom move. So let's add another settling framing here. And let's settle, even raise the head into its initial position. So, here you go. And we have this initial first movement. And let's see what we've got. So you go to a play button on this app. You can do that in any possible way. There are a lot of apps out there, doesn't matter how you do it. You can do it on paper. Self-serve the cameras, or you feel your frames. And you can do that even in iMovie so you don't have to do or in any other editing program. I'm, I'm gonna put out to 12 frames per second. And here you can play little bit with the timing of the frames here. Usually when you make a movie and you have to use either if you're in the United States, 24 or 30 frames per second, or if you're in Europe, you can use 24 or five frames per second. But if you play a movie on 12 frames per second, you get like a double, double frame, like in stop motion, you use 12 frames per second. So you get like to the computer says two frames. So you get 24 frames by slowing down the motion. So you don't have to draw another 12 frames to complete the movement. Of course, you, if you're in a bigger production, you will have to do that, but not. Now for this exercise. So let's see what we've got. Or elephant is already jumping, sees a nice movement. He is forced agency. And it looks like a young elephants. So because it bounces really quickly, let's use that motion and add his features. In the next video.
16. Jumping Elephant Part 2 - Observe how the movement overlapp with the main action. This is very simpl: So let's put the features of our elephant. Now we have the solid movement in here. You can see all the frames. You can always change this frames if you feel something is not moving in the right directions here, maybe, like you see this frame. There is a pop in the head over here. I want to fix that and I want to drag the head down a little bit so it doesn't go that fast. So in this frame, I'm just going to lower the head a little bit. And I'm going to also drag the opacity for the eraser because I don't want to have that. It's also disturbing to have full opacity on that. So I'm going to have a drawing maybe over here to make it smooth over. So now let's see like that and then it goes up. So let's see how it looks like. It's much better. You don't see it right night. These are details that you will see when you're, I guess, better at animating. And now let's add some details. So the first drawing is that we know where the legs are. And let's define them a little bit. Let's just use spheres. And here we can add the trunk. The trunk is here. And lets out the ears. We will not add the ICF. And on the ears got two. So let's add them a little bit up here so we can see the changes. And the other year goals too, on the other side. So you will not see the all of it, but I still draw it in so I know. So I can follow the shape. Again. Do not go too much into details with this character will end up stage because you will have the opportunity later on to clean and to finalize your animation and you will draw another line on top of that. So at that stage, what do you want to do is just follow the movement, see the movements. Clean drawings are not important. So let's go to the next frame. And here or a character start to squeeze. So we'll add a little squeeze on the legs. On the legs here, this squeezing. We can barely see them from underneath, but they're there. And the face, as you see, the phase is moving slightly up. So we'll have a follow through on the trunk and the trunk will start dragging down not so much. A little bit. So just dragging down a little bit because the face is pulling the upper part and the ears will go up because they've still moving up from the motion. There's still anticipating that most of them, they have up. So just slight movement. In the next frame. The body is going in the hell is going drastically down and the feet are squashing really hard to understate this movement up. So just squash them. And the trunk is going up first. Because when the head is going down, the trunk is still following the motion before and it's slightly going up, not too much. And the years also go up because their contrary, they're following the previous movement. Before they start following the new movement, there is a change of direction here. So let's drag them up. Next frame. The body is going into jumping. So drag the feet, the front feet, because they have a higher amplitude from where they were to where they're going. You can really stretch them here. And the back feet are also stretching, but maybe not as much as the front feet. And here we have the trunk and try to make an arc. So just drag the trunk still following the previous motion now it's going down. Is that because the head one down before. So it's going down. The years are going down. So the next frame, everything is drugged, is dragging down. The motion is really strong, It's really powerful up and the frames are very few frames up, so shorter movement up. So here you can use this motion of dragging down everything that overlaps, overlaps the main movement. And here we have the back, the also the front feet still dragging. And the next frame, He's starting, the body start to change direction. So two reaches a point where from here is going to start changing pace. But the trunk doesn't know that yet. So the trunk continues moving. His continuous dragging and the ears are still also drag down the continuum, the previous movement before they start overlapping the new movement. But the legs are starts questioning as well because they are part of the body. And they're shorter as amassed is shorter than the triangle and the ears, and they are heavier. So how the things follow through also depends on their weight and their mass and their thickness. And don't worry about it. It's something you will learn to do with a lot of practice. But as soon as you learn the principles and we know how to practice, you will be free to go and you will be a great animator. And here we have the trunk now responding to the action of the head moving up. So the lower part of the trunk stops and the ending of the trunk starts changing direction as so as the years. The years also respond to this drastic movement in, in pace and direction. And here we have the feed coming up and they even lift up in the body. And here we have the trunk moving even higher up, but just make it slow in all the pacing. Here. Thinks that it's moving slower than when there were down here. Because it's where your body changes direction and the ears starts moving up slowly. The legs are still moving up. We have y1, another frame here. They're moving up. If this is the middle of the body, they are like spreading out in the air. And the next frame, the trunk is already high up, but still the ending of the trunk is continuing to move up. The arrows are almost all the way up and the front feet are even higher up. Now the body starts falling, but the feet are still following the previous movement. And because the gravity starts calling back or elephant and he is but is heavier, it starts falling first. And now we have that frame. The trunk is dragged up. The last piece of the trunk is already up. The ears are all up, dragged. In a real life arc. You can follow the art. The front legs are still moving up, but the back legs are preparing to pick up the weight because but if we want to bump or elephant in the ground, if he's like delta known that he was going to land nicely, we will probably have the feed still up in the air and he will bump on his stomach. But now the elephant is jumping consciously. So we want him to prepare for, to take up his white and not to hurt himself. And here we really drag the trunk and the years are stretched up. The back. Feet are start coming down from, feet are still up, but start coming down as well. And here drastically the elephant bumps on the ground. Splat. But also controlled, is not unconsciously jumping and extend that trunk to get this nice movement. And the ears are also still dragging down. The next frame, the body changes space. So or trunk dot, dot the same. The ears start changing directions as well, but not drastically. And the feet are starting to pick up there the volume. And in the next frame, the trunk. Just bump thin on the ground because he has a long trunk. So the ears are following that motion down and the legs are stretching just tiny, tiny little bit because it's a small bounce. And here the elephant is taking its initial position. The feet come back, the years are still down. The trunk follows this on the whole these movements. And if we want to have some easing, which means that the motion doesn't stop immediately. The parts of the body they'll have started last. They continue movement, moving even if the elephant is already still. So just duplicate that frame. Let's do that in another layer and add layer here. So we have the movement following the head and triangles slightly moves up in the air and so does the years just duplicate this frame again by clicking on the duplicate button and then go to the Layer menu and clear that layer. And here the trunk subtle seen a mother frame up, duplicates. And again a frame clear not one. And now it starts settling means 0. The upper part is coming down and just a little bit of this trunk moving and the ears are already almost still. And duplicate that. Just to clarify why I'm duplicating erasing frames is just because the program is very simple. If you work on the more advanced program, you don't need to erase the trunk. Of course, you have a clean layer to work on and just go in and delete the trunk too subtle way. It moves in this direction and then duplicate another frame. Delete the trunk. And just a little bounds here. This tip, tip of the trunk just slightly moves in any bulges over here. Because this little thing and the last frame, just delete the trunk and bring it to still. So let's see what we got here and play that animation. So here, I mean, the ears are still need some fall for action because as you see here, they feel a little feel more like home. Pick ears. They don't feel that the field to still some bumpiness in them. You don't you? So you have to do some more condos ears. So let's, let's do that. But you see that we already have a solid movement. We can play with the frames, with the timing in here. And we will probably need some frames more here. And when the elephant stands, space in the air, will need to add even more frames. But let's add some more frames with the ears when he's standing. So they are start coming down here. We will need to have some more frames up. Because they are more, they're lighter. They are right now. They'll look as if they're like a bouncing ball. And so their speed should be lower in that frame there, so it comes slower down. So doubtful, drag down and that one, they should now come down here. And in disk. In this frame, those slowly pick up the pace up, but slightly dragging down still. And in this frame, they can be around here. Let's see what we've got. Now it feels a little better. And now because we're using balls, it feels like they're moving from the hole, from the bottom down. And when you add the animation, you will not draw this inner part of the ears. You just draw the outer part. But we do have now a movement of a jumping elephant. And even if it needs corrections, you see how the principles of animations can help you do this simple exercise. So just follow the steps and do this exercise yourself. And I'll move to the next lecture.
17. Walkcycle Introduction - Walkcycle is simple and difficult at the same time. In this lecture you can: Hi there. Before we start working on the walk cycle, or elephant, I'm going to talk about in general was a walk cycle actually is. And here I'm going to demonstrate with a few frames what we are going to be talking about later on and just give you a quick overview with a very simple method. So a walk cycle is mostly like like a curve, a movement that goes from up, down and up and down. And there is a highest point here. And then there is a lowest point is right over here after every step. And we used to view a walk cycle as controlled falling. So our body starts moving up and we push or about the AP, and then the body starts flowing over a year approximately, and we're picking up the body ways with the other foot. So if we assume this is the grounds over here and always starts working, this is our party here. And let's start making this frame here as if the character is just, is his just made one frame. And it's just about sake. The next frame. And here, this is the lowest point where the body weight is shifting and the character is resting on the phone, picks up the weights. Thus why the light is bending to pick up the white and this foot is now the characters right foot is now moving. Moving forward, starts moving forward and the party starts moving tau. And the next frame is starting to transition the party, which means that this food continues moving, Moving forward now. So we're transitioning the body to take the next step over here really quickly. And you don't have to worry now about my same as drawing second duties exercise on your own. I left foot is moving back here. That's the transition of the party to keep the body white in walk cycle. One foot is always on the ground while the food that is on the ground never leaves the ground before the other one, to the other party whites. And now we're ending up here with the first frame of the next leg in a cycle. A cycle is when you make once that, which means one step with one leg and then once that with the other leg. And that's, we'll go into loop so you can make your character work in that way. So here we have the first step with the right, like transitioning and picking up the pace over here where the character is going to make the next step. Now, you can add more frames here. In-between, where we'll have light going, you have the main poses and you can make the woke more smoother. Now we're going to talk about what is keyframe. Now, this one and this one here, our keyframes and in-betweens are the frame in between this frame. And what is key-frame? Key-frame is a frame that define the movements. Now the width or frames dot the first true. This one, this one. This one, this one. The first four frames. They describe the movements, what is happening. I'm, the character is walking and the in-betweens in this crime, how is it working? Does it leave this leg more up? There was a drag him down. Does this have it in the air like that? It describes how dark is an in-between. So if we have the body here, the body is actually moving in the opposite direction. The hands, the arms are moving in the opposite direction of the feet and the legs. So the body, what are the legs and the arms? Two pages trying to keep us in balance. Sometimes if you try to walk with your arms going in the same direction as the leg, you will soon be very uncomfortable. You can't really go freely. So assume this is all hat and this is the body or here. So the leg, the right leg is front and the right arm is behind. The left leg is back, but the left arm meets the right leg. It's like it's like a shift and also the left are the left shoulder is lower down and the right hip is higher up. So it has this methodical movement up and down. It is like they are, they're going in the opposite directions. Hips and shoulders in the last keyframe, key pose, they're going in the opposite direction. And then the kind of switching directions later on. This is our first step. And just to make sure that we know what friends we are animating, I'm going to name the frames 1, 2, 3, and 4. This frame is the last one from bulky like cycle. So we'll start with this frame and this frame when we are animating, it doesn't really matter where you start from. You can start from this frame as long as you remember where you started from and what's the next, what's the next move? Because walk cycle, even though it looks, it looks simple. It's a pretty complicated motion. So you have to be careful where you're going and what do you do well, and so this is the four frame of the right leg. So left leg for, right leg for they're very similar. But as you see here, the right leg is behind. And here the left leg is behind. Just to remember that. And then most iconic stars again. So if you put that in software in the app and you translate all these frames, this is all Frame 1, 2, 3, 4. And this is frame 4, which means the right leg is here behind. And here is number 4 for the left leg. And the left leg is back here. And then I've just added the same frames here for your sake. They are exactly the same number of frames. You see this is four. This is number one for the right leg, number two for the right leg, and number three. And then it starts with number 4 or the other leg. And thus how it looks like or walk cycle. That is all you need to get the walk cycle working. And of course, you can add some in-betweens between these frames. But you see that you have a pretty solid walk cycle. Now, the character has weight, it has a nice space. And I'm going to use this frames, this video in between while I'm showing you how to make a walk cycle with the character with oral elephants. Because this is a different body structure. But nevertheless, the walk cycle, the principle is exactly the same. So so you can easily follow these steps and create your own, your own walk cycle with any character you have or you like. So let's go further with the lecture with walking elephants and see you there.
18. Overview of The App Flippa Clip - A short overview of the app we are going to be using here called F: Hi there. In this lecture, we're going to animate a walk cycle. And I'm going to use this character here that I've designed in the other course, the ultimate guide to cartoon drawings. If you want to check. And I'm going to use an app called flipper clip. It's very simple, but has some really nice pictures. Here. You can start by choosing a background. You can either choose a scene and that they have here, or you can use a different kind of film paper. You can change this setting later on. So I'm going to get a nice grainy paper. It feels really nice to draw on this paper refuse collector, traditional drawing in the way. And we're going to have a name here, elephants woke. And there is a, there are different settings here. I'm going to choose the YouTube 720 pixels. I'm pretty standard. And you can change that also later on. And I'm going to choose 12 frames per second for this one. And this one, they show you in a way how the speed is. If you just scroll up, the bot will start going faster and faster. It will slow down. So t is just a preview. And this, you can change also later on. But the difference from the other program is that you can't use that during your animation and scroll up and down. He had to go out of your project, then just change the settings. So I'm just going to create the settings, the project. And here we have some different options. Here are on the lower down with one is all frames here or pencils. If I click on the pencil here, that it gives me different options. Either I'd want a pencil or a brush, or I can take a pencil and have the size here of how much. If I just drag it here and show me how much how thick is going to be. You can change the color here. A little bit more sketchy and they give you a whole palette if you want to. I'm just gonna use the basic one. And if you switch back, you can use the eraser, you can select. And you have the paint back in and you can write a really simple but very, very useful. And here you can record the sound which we'll do later on. You'll record a sound and you can animate on sound. Yeah, just click back on this button. And if you go to the menu and here you have a copy, you have the line here. You can create simple shapes. You can change the grid and the grid settings from here, add it, you can increase the opacity of the grid so you see more of the grid and it helps you to stay consistent with the shape of your character, which is very, very useful. And you can just increase the spacing on the vertical and the horizontal lines. So let's give it 51. You can also add onion skin, and you can add the onion skin depending on how many pictures you want to see frames before. It means that you want to see three frames before. The one that you are just drawing. Frames after. It means that the friends that you've already drawn. And I'm gonna keep that for now. Here is a colored frame, so you have the frames before. Is it the frames I've drawn before? Three frames, and the frames that are after in green is one frame. And on your loop, I haven't used that one moment, So yeah. So I don't really know what it does, but I don't really need it so far. And that's what all we need to do. Here will have or a layers in the lower corner. You can add more layers. I'm going to do that within the process so you can see how I'm doing it. And we're going to use this software for this exercise. So you're going to have a grip of the program. If you want to use dots. Again, you don't have to use Justice Program. There are a lot of different apps. Or you can even work on a computer, whatever software you have. Or you can also work on pen and paper.
19. Walkcycle of Cartoony Elephant - Part 1 - Start with roughly drawing the main shapes of the Elephant: Let's start the exercise. So at this stage, don't try to make perfect drawings. Just do though freely. But what is important here is the motion of rather than a clean drawing. So we will start from one frame. Let's, let's see how the characters will look like. We'll have a roughly the I in here. We will get the trunk and the trunk we draw like with many, many circles like that. So we'll forum slightly the trunk or short one. And let's make now the first pose averse cycle. Very simple character, very simplified. If you want to learn animation, you have to learn the body mechanics. And it is actually harder to animate mechanical movements like running and walking and flying, for example, for birds. But especially if human need characters, it is much harder to draw them because it's such a complex movements the whole body is involved in that. And there's a lot of things to think about. So when we have the right leg forward, the opposite had the right. The left hand is also forward. We can see it a little bit here. And I'm going to do a shadow, pass on that just to darken it so we know which is front and which is behind. So this is our first frame. Another feature in this program is that you can put a grid in here and you can see where the character is stepping. Just for the sake of dots, we will move the character and the line here and go back to that. So now we know where the ground is. And it's easier for us to follow the shapes of the character and to keep and to give them the volumes. Because in animation it is important to keep the volumes. And here we have hips I. So, so this is over a little elephant. We have the year here. So now we're not going to draw in such detail of the rest of the frames at that stage. And here, if you hold your pencil or your finger on that first drawing, you get an option menu. And here you can duplicate that frame. You can delete it, you can copy it, or you can add another frame. I'm going to add another frame here. And you see with the onion skin, I get with the red lines where the character has been the previous frame. So now what I'm gonna do is actually draw the exact same pose, but with the other leg. So I'm not going to draw the next pulse of the elephant, but, but this time, this foot will be over there, would be back, back there. And the other one is going to be on the front. And now the right hand is port. The upper body twists in the opposite direction of the hips. And the other arm is maybe we can see a little bit of it over here, but maybe we will not see anything actually because it's healed. He is not going to move that much. So it's somewhere behind in the party as you see around here. But we don't but we don't see it. And we'll draw the head. Just keep it to wrap the head. And we will draw the eye. And we'll draw just very vaguely now, the trunk, because we are going to anticipate the tongue, we need to make an overlapping action, so dispose of the trunk will not be the same as in this frame. We'll add this later on when you've done the cycle and see how the trunk overlaps this movement, it means that the triangle is dragged once by the gravity and nothing is by the force of the head, the movement of the head. So it follows, it tries to go down this direction, but it also gets tracked by how the head is moving. So now we have these two pulses. And what we'll do is start doing the in-between these poses to get the four step. So government go here and I'm going to take care and another frame in-between. Now we want to have the middle frame of all of them. And it's going to be around here. And in that pose, the body will go up a little. So very small adjustments because our character is very tiny and we don't have to make big changes to get this nice bouncy effect on, on the character. And draw the head and in that position. So this leg needs to move forward. Now, why are we draw the leg going backwards instead of forward? Because because he don't go backwards when you walk, is that because we're doing a cycle? A cycle is as if you were walking on a treadmill. And if you're doing that in animation, it means the background is moving instead to create the illusion of the character moving in space. So now we have, the arm will be approximately in the middle over here. And we have the I over here. And the trunk just markets slightly. We'll deal with that later, like just a line or something. And now we're going to add the same frame for the opposite leg, which means left leg is moving back and right leg is transitioning forward. So exactly the same stat, the same frame, but for the opposite leg, we have to add same frame from this one to this one. So for the sake of having it close to this one, I'm going to go and and copy this frame. And I'm going to go to the frame three, and I'm going to paste that frame here while we are copying the first frame and pasting it at the end between the frame that we're drawing is because we wanted to show on the onion skin and we want to have an overview from which frame we are coming from and to which frame we are going to keep the weight of the character and the volume, right? And also the place of the arms and legs. So we're going to delete this frame later on and we're not going to need it, but just as a guidelines. And then I'm going to do the same thing as the, as the one before. So I'm going to add another frame in-between. And I'm going to draw the same frame, but this time, left leg is moving back and right leg is transitioning forward. In that position. Their leg needs to pick up the weight. And now disarm has been up France or it has to come around here and starts moving backwards. And now we're going to delete this frame because we have two of the same frames. So we don't need to have those stop, remove the frame. Now we have four frames and we need to add the in-betweens. These are basically the breakdowns of our walk cycle. And if you play, it will have a really fast but nice walk cycle if we go to the library, to the project setting. And if you put, for example, six friends per second, increase the amount of time. These frames are visible on screen. Save changes and we play. We'll see that we already, just with the four frames, we gather a walk cycle we gather or character to walk. And now let's put the in-betweens. And you don't have to put too many in-betweens, because if you do that, the character will walk very slow. Depending on how fast you want the character to walk, you can increase the amount of drawings, for example, on the way up or on the way down, that would change the character of the walk cycle. This is more complex. So if you use a beginner, it's nice to practice for a very simple walk cycle, which has everything complex in itself. So for you to get an understanding of the body mechanics. So the next one, I'm going to go from this frame to this frame. So the left foot starts moving up. And here we have a frame where the body lifts up. And we have Tourette's of the walk cycle. So the body will raise up while this foot is going up, the left foot is coming forward. Now you see the body limbs forward as if to fall. And now this arm, it starts moving forward. So from this frame to this frame, this arm has to be approximately here. And I have to watch now the body, the body has lived up, so the shoulders is also lift up. So not only I have to match the position of the arm, but I need to watch out for that changes kinda in the body's position. Also, because I need to follow the anatomy of the character. Here. The heads, because the body is lifting up, the head will be going down a little. Because the head is following the previous movement of the body. How the body down so just tilt the head forward a little bit. And because the head is round, this will be signified by his eyes coming a little bit lower. Here's the trunk. So we have this, this, this character starts moving forward. Here we might see when the mother, the other arm. And here we need another frame where the character is stretching is its foot. Just add another frame. And this is going to be the highest frame for this character, where the body's stretches and it stretches on his toes. Even though he doesn't have a tall twist boat. The mesh here a little bit as if he had a toe and and this arm is now coming forward. We'll leave up the head as well. Just keep it throughout, just to do it out. Don't worry so much about the mass and the drawing. And you see when you enter 0 and this kind of a background, it feels more like a school book. And it feels like more traditional feels nice. I mean, I tend to actually like more. The line test animation, the, what you call the line test is just this rough animation lines and it's not cleaned up. I tend to like this more actually, I keep my animation, my animations very rough. So here we have the elephant rising, up, up, up and down. Let's play it. Now we don't have the other step, but let's play just to see what we've got already. You see, we've got already one step. It's going smooth. And let's do the other step. We repeat the same steps. Now. The other foot starch moving forward. And if you want, again, just copy this frame, the last frame. So you have something to relate to because you do need to think about keeping the volume of the character. This is something important in animation that you have to keep the volume and you can paste it here. So now we'll have, we'll add in-betweens between this frame and this frame. So add another frame. And it can be confusing first in R2, to think which foot is moving in, which one? Where was I? This is confusing, so that's why I just flip. And also these programs go flip a clip because before the old animate Thursday in this need they didn't have the digital software they use to flip their papers, both for back to the previous drawings and the next drawings and how the motion is happening. So the body is moving. Forward. You can even copy dot frame and that's on the other side and do its opposite. You can just copy, duplicate the frame, go after dot frame and paste it. And here you have it. So you have to basically draw on the same frame, but the opposite. So this time you will have this leg forward and the left the left foot would be behind. And the head is over here up and in slightly tilted down because it follows, it follows through the action of the body. And here is the trunk. And the eye is approximately here. So now this, because the arms are or moving the opposite direction, this arm will go back and the other one will start moving forward. Now delete up frame. So you don't get confused because it doesn't belong here. And you have one more frame to do. We have 232, you have this last frame. You can also copy that and you go to the next frame and you paste it. You add another frame after frame seven. And here while you will add this last frame here for the elephant, where his stretches his legs throughout the body. And now the right foot is on the front. And the left foot is stretched. And the back just color it little bit. So you know, we're rich food IO working with. And the arm. And the opposite run the art, right arm is now forward and that's left arm is back. So you can now actually deleted and dot frame attached. You don't need remove and you can match the position of the arm from here to here to here. It has to come in the middle, this one. So we have this frame and this frame up and this arm is approximately here. And we'll have the left arm coming forward. This arm is also lifting, lifted up because as we said, the shoulders are also moving and lifted up. So here, here and here, you can check that will keep the eye around it so you don't have to deal with a lot of deformation of the eye if you have it prospectively correct, you have to be like an ellipse. But LBO beginner, and you have to deal with transformations that will give you an extra difficulty. So for now, keep it just round and cartoony and simple. Deal. Oh, you want to have things simple right now. So thus our cycle and what you need to do is delete this last frame because it's basically a double frame we have done already in the beginning. Let's remove it and let's see what we've got. Just play the animation. Let me have a nice walk cycle with the elephant. And this is 46 friends per second. It works nicely. If you do want that pace of animation, you'll have to fill the in-betweens to match the setting of 12 frames per second. So you have to do the same process as I did. Just just match the middle frame of each frame inbetween to give, to get more frames and have a slower pace elephant for 12 frames. But now we have a nice bumpy elephant. And it's working nicely. We see he has a little attitude as well, but let's keep the pacing for maybe eights, eight frames per seconds. And the thing is that you can also render animation in that base. If you were doing like a small animations and you don't work for a feature film. It's, it's completely fine to animate with a lower frame rate and rendered out for your animation. This looks like a nice space for elephant. So in the next video, we are going to deal with overlapping actions. And the trunk.
20. Walkcycle of Cartoony Elephant - Part 2, Overlapping Action - Walkcycle of Cartoony Elephant - Par: Hello there, here we're going to animate the trunk and the elephant. And the trunk follows the overlapping action and follow through action of the head. Which means that when the head moves up, the trunk is drugged up with the head. And the tip of the trunk follows through either the head, the action of the head, or the previous action of the top of the trunk. Hi, this is something that is more difficult for beginners. So it will come to you by practice. But first, observe. And one thing that you can have as a rule of thumb is never drastically change the direction of the trunk quarter overlapping action on one or two frames. Just see that the movement follows an arc. But on the other hand, if you can also experiment when you know the basic rules, you can go back and change your animation and played up, back and forth and change it and refine it every, every word, every piece of work. No matter how advanced you are, an animation, demands several takes, several polishes and to get this right, and even Disney animators and professionals need to do that. So just don't be intimidated by or encouraged if you don't do it right the first time. So in this frame, this frame might change later on. Let's see how the body behaves and the trunk behaves later on, we can put that in another layer if you want. By adding an extra layer, I'm not gonna do that. I'm just going to keep the same layer because I feel that I'm more fluent when I can add some little details on the head as well at the same time, just polish while I'm animating the trunk. So here the head is going a little bit down. And which means that the trunk, the upper part of the trunk, it's thicker. So it doesn't have so much movement as the lower part of the trunk. It the it moves up to slight a little bit. And this means that it drags the lower part of the trunk. So the law power suddenly change of direction just to get roughly the first pass and see how it plays out. Now, the trunk here is still dragging up and I'm a little bit forward, which means that the tip of the trunk will go back a little bit because it follows the movement, the previous movement where it was still over year always tries to sell imbalance and to be dragged down at the, at, at rest. But other forces are operating. So 1, 2, 3, the trunk is going backwards. And here we see that the trunk must react to the movement up. It had enough time to go down. And now it's dodge going back. Also going up, just reacting to the Polar Pro action of the head. And now as the head is going up again, it follows that motion. And now the head is still or moving up. So the trunk, the upper part, is almost keeping the same position while the lower part, which is lighter, is reacting to this upper movement by bending to the other way. It's like having two different shapes, one here and y here. And this one is moving in there like connected with the court. And this one is moving separately. So this is like it's overlapping the shape, the upper part. And here the trunk continues moving up, as I mentioned before, continue the movement ever, even if you think now the head is going down, why wouldn't it go down as well? Yes, but it has started moving up. So complete this movement. You have to finish up before, before it times a starts going down. And this is a matter about timing and about how you feel. The timing and the feeling of timing happens only with practice, practice, practice and practice. And just when you sit in front of the TV to have this apps and I don't know, I have a piece of paper, use a block of paper and just remember like, I don't know if you did that, but you drew a small characters on every sheet and then you flip them and they start moving. The walking man or I did that a lot. Just something to keep your sense of timing going. And now the trunk is that this part is going up again. And the lower part completes movement up, any starch going down. So it's not, there is no symmetry in the frames as we used to have, as we had before. And let's see how it plays out, is see what we have to change. It plays out pretty nicely. Smoothing obtain kids works pretty nice.
21. Walkcycle of Cartoony Elephant - Part 3, Adding The Ears - Add all additional attributes to the cha: Hi there. In this section, I'm going to show you how to make the ear. And I have put the ear here in the new layer over here. And what is important to know here is that when you come to the smallest details of your character is getting very tedious and very more difficult to do things. So you're going to see very few differences from one year to another. But I'm going to explain to you a little bit the rule of thumb of what it, what it makes a floppy ear. So basically the ER is like a sheet of paper, not about flows like data a little bit. So the lower part a goes down when the law part is moving. And a lower part of the ear, the outer part is moving much faster. So you have this floppy movement of the year for four and back when the character is moving. And if you want to have the year moving fast for from back, then it needs to have a very, very small adjustments. So I have put this year in one layer here. And I'm going to show you from one frame to the other how this plays out. So in this one we have the first year, the first frame here of the year being in this position. And then what we have here is the year is going backwards and it's tilting a little bit so it makes, it makes it a, making this curve here. So on the next frame, on the frame 3, there's two things that are happening when the head is moving forward. The position of this part of the year is also changing because now we have, we have to measure the distance from the eye to the ear. Also, we need to follow the volume of the head in where the year is positioned in the style of the head. So we'll have to live there up. So you will be misguided if you try to only follow the frames and make a small adjustments, you will also, besides that, you're flopping the ear. You're following a principle of the weights of what this ear and the follow through and follow through action. You will also have to measure the position of the year on the head. So this frame, the ear is drastically moving forward as an overlapping action. And this is some, it's more like a jittery kind of IRR that is flopping quickly when the elephant walks. And in this position and the year continues the movement forward of the ear. So almost the same frame because this frame and this frame are very close to one another. And we have, we have to imagine the year being 3-dimensional also. So it kind of like if you imagine this part of the ear being here and this upper part just bending, you'll have to think of that as a three-dimensional flesh. To say. In this one, the, again, the year now is moving, is moving down from this frame to this frame. Again, you measure the part from the eye to the ear. And now the year is kind of like again, following the motion forward. It continues this motion that is already started, but the back part, the lower part of the year, starts moving backwards. And now here the ear is start coming in into its original position. And this continues on the next frame. Now the ear is continuing, moving backwards again and backwards again. So it has this moving up and down, up and down. Very, very fast paced, as well as the follow the the volume of their knee follow the IRS position in relation to the eye and the head, and how the head is tilted, how the head raised up from the body. So this is a complex, a complex animation. So if you feel uncomfortable to take this part right now, you can do it later on when you feel more confident of your skills. I just wanted to give you an extra scope to go with. You can also copy these frames from the files that I have given you below. And just have your elephants walking. And here is the animation. With the floppy ear. You see how the ear is going for from back. So I'll see you in the next lecture.
22. Walkcycle of Cartoony Elephant - Part 4, Outlines - Start polish your drawings.: Hello there. Now we have our little elephant woke. It's looking, it's looking cute. What we can have here also is we can change the settings here. For example, we can add a different paper and different backgrounds. Like for example, school paper. In. You see when you play slide you've drawn in a school book. That is pretty nice. So if you want, you don't need to outline that. I'm going to show you how to outline it and to clean up the drawings out line. I'm going to create another layer here. And this is a very tedious part. So not, not every animator like to do that. This is just a mechanical part where you basically is to be very tedious and to follow the outline and define you character. And I'm going to get a pencil from here, from the set of pencils there is this black pen. This program is not really optimal. It don't have the nice tip that you get. For example, when you work on a different program on your computer, if you work on the Tomb, boom more. I don't know what other programs, 2D programs also. This one is not a vector graphic. What does it, what does it mean a vector graph? It means that it creates a vector for those who don't know. And you can drag the vector and you can make smoother lines around it. You see this one is just very crudely is making outline and is just pixel graphic, which means you can drag it and make a nice around the line. It is just only one new works. You to just draw the line and it doesn't get a smooth line. The one that we get with vector is still a little jittery, but I think this program is good cause of dots because it creates a more hand-drawn look of the animation. I really liked that. And so I'll keep my lines are really rough as well to get this kind of uneven look on them as you see here. This is fine by me. But if you, if you're willing to get another effect for your short-term wins, you have another kind of look that you're looking for. Then you should use another program. There is a vector graphic. And then you maybe you don't even need to draw the head. You can just use basic shapes like circles. It that you adjust, you will get a much more undefined, much proper look of your character. When you do that. Instead of trying to trace it like dots manually. But for me, because I'm using this disk up, what I want to show you also that this is also something that you can train your eye to eyeball things. You will not get things right the first time. And that's, that's okay. In the industry, there are people who actually fortunately do that as a job. Because they're animators who are very good at animation and just getting the poses right, the action, the acting, and the whole animation, right? But they're not, they're not good at outlining things. They, and there are people who are more tedious, more precise, and they also enjoy that. Many people find this outlining very meditative, very common, because it's not much of a thought process going on here. And what you can do also here is if you want to put the trunk in another layer, because the trunk is turned in a little bit size in the drawings. Thus because we've done it really rough. If you are uncertain, you can put it in another layer and you can scale the size. But I'm just going to be bold and do that in the same layer. And And mouth. I'm going to actually put the years and the eyes are no separate layer because B might be needing to copy the eyes to keep them in the same size. So here you see that you get much more defined line and the onion skin. And the head is going up here, Nomex drawing. And what is nice with this program. It creates a layer for the whole sequence, so you don't have to another layer on each frame. While in the other program that I used before, I mentioned creator HD. It's so simple and you'll have to create a layer for, for each, for each frame. What is also nice about this one that you can rotate the canvas and, and you can really adjust the canvas the way you want it. Now, it's a little confusing. What is what? Because the thinner lines are much more invisible. So I'm going to go back and turn off the onion skin, see what I'm doing here. So the trunk is a little bigger here. So I'm going to I don't want I want to have a more smooth as trunk. So going to adjust the two dots. When you have your character sheet. Now it's at the same time that we are animating. We're also discovering the character. When you have an animation, you have so-called character sheet, which means you will have the character from term, from different sides. And that will give you a direction of how big everything is. If you are in production, the producers, the directors, there'll be very specific about every single detail like that. So it's much more tedious. But if you're doing things, if you're just trying things out, it's okay to just have the character a little bit more free. Not to care so much about too many details. But the better you become, the more these things will matter. And if you are doing, for example, short film, it is important then for your character to be the same size. So when you use this as a practice, now, have these things in mind that things will, I will come to you and there will be looking better and better the more you work with it. So you just tried to compare with the previous frame a little bit. So you know that ian naught of of volume for your character, switch off the onion skin now and then to know to see what you are doing. There's some elements in there when you start drawing that stress you out that tells your brain that now you have to be perfect and it can be stressful. So use whatever you can, the elements you can do when you start to calm yourself down that to try to experiment. Experimentation is very important. When you start something, when you learn something, you don't have to be perfect to start with. Especially animation is a lot about experimenting and trying out different approaches, different things. Because you can always, you can always redo things and you will be doing things also. Now I'm not going to complete this line because we have the, the right leg of the elephant, which is up front. And now we're not going to shade the left leg because later on we're going to color it. So so let's try to keep things neat. This is a good time. Also when you can relax. Put, put on a podcast would on your, on your music. And just relax too in that blood is nice with it. That still keeps all your attention focused because you still have to keep track of what you're doing. As you see that if you get this truck that's a little bit. And you kind of lose track where you are withdrawing IV or doing. Sometimes, I prefer to turn off the onion skin and just flip the drawings for from biochem just to remember where the previous line was. I mean, you can imagine how, how time-consuming this is. If you have a project where the character is doing more than just walking. So it's one thing when you're animated and mentions done, but then you have to adjust that. You have to clean it up. You have to color it. It is it is time consuming. And there is no I'm not a way of doing it. There's no other way of doing it. I mean, now there are programs where you can, you can put or you can color all frames at the same time, but it's still use them. We have to go forward to later on and see if you have a missed anything in something, but it still, it saves a lot of time. This program is not like that. This is a very simple program. What is good with animating on your iPad is that you can take it it can take it anywhere. While you were waiting for you sitting in line if you're sitting in traffic, I mean, obviously not if you are driving. But if you are taking commute and you have your little iPad, iPad Mini or whatever you have. And you can see there and just do these exercises and animate on the go. If you're traveling a lot. Sitting in airports, train stations, It's a very nice thing to to do to let the time pass and do something that is also very calming. So now we have all the body. Dom. Let's see what we've got. We've got a really nice outline, so it's much more defined even though the lines are pretty crude. They keep this nice sense of hand-drawn animation. And I see that I have forgotten to draw a hand. Somewhere. Here is 11 hand. And that's that. And why is there? Here is the other one. And I'm going to hide this layer. We see that we don't have the eyes now. I'm gonna draw them on a separate layer. But we have one nice, nicely walking elephant as a map outline. So let's leave it for now and continue with adding the other features in the next lecture.
23. Walkcycle of Cartoony Elephant - Part 5, Clean up: So let's add the ears and the eyes. In this layer. Let's turn on our main layer. And here I'm going to add the years. Just continue tracing. And now we don't have to and trace the inside of a year. Because if we have if you have that designed claimed, we will have maybe just the outlines of the outside of the year. So we'll just trace that and try to keep this design. And we have our little. Now, let's not add dots to start with, because the more details you add to your drawing, the more you commit to them. So if you're a beginner, just to make sure your, your get a good result. And you can be proud of what to animate, because it's important to get a nice feedback from your work. It keeps you motivated. So to do that, keep it simple. Don't add extra stuff that you know well, just be difficult for you to to trace and to add this just so unimportant, you have the cycle already. You have your character moving and walking. So if you, if you keep it simple, you will be more willing to do that next time. And when you start getting better, when you get improve, you can, you can add more things to your animation. You can even add clothes. Clothes are very demanding. Do animate. So unless you are confident with your skills, don't animate characters who have a lot of clouds that are flapping around. And this here will have to animate that because we want to show that the ear is going this part of the years going forward. What we'll need to add just a little bit. So let's see what we've got. Well, we didn't have to clean it up. Yes. Usually, when you define things are clear movement. But you will also have to be more careful with the same. If things are undefined. Demo for giving. Yes. It's much better now.
24. Walkcycle of Cartoony Elephant - Part 6, Adding the eyes - Adding the eyes so they stay firm and sol: Hello there. Now let's continue with polishing the eyes. Here is our elephant walking. And you still got the layer underneath. So let's add the facial features and we'll add them in an extra layer. I'm going to add the mouth first in one layer. Here it is. And I'm going to add a little cheek curve on the end just to make it look cuter. And I will turn on the onion skin here to be more precise. So now, what are we going to see? Turn off the layer warm and gonna see like the distance between this point of the trunk to the mouth. So I'm going to match that as a guideline to wide mouth should be. So eyeballed is distance over here. And eyeball also the rotation of the head. So it's slightly rotate it. So you kind of fall twice that. You need to have it even bigger now, even small, small adjustments here matter like that. It's here that the head is a little bit more tilted. So we'll add the mouth approximately here. Lifted up a little bit. And the cheeks needs to be Baker. So in the next one is much closer to the previous one. And the elephant is going back to the same position that it was. So a mouth here. Same here. Now starts moving downwards, tilts the hat, and again measure the distance from the end of the trunk to where the mouth is and add. And also the perspective, that head tilting thing to it. And this one is approximately here. Let's play it. It looks pretty nice. It does give a little bit. The idea of, of flesh pulling down so it looks pretty steady. So let's now add the eyes. Let's open up our layer. And we'll start from this frame. And now we will only add the white, the eyeballs. We are not going to add the pupils. So let's again turn off that layer and see the distance from this point to the eye. Still adopt. And we eyeball also the size of the eye. We can also select it. And here up a can copy it. And we can paste it in that frame as well. And we can move it up. So you can do that too. And rotate. Now, this program is not optimal. You, every time you need to do a selection, you have to do it all over again. And but this simplicity is good because it, it, it helps you to focus on the main things, which is the movement. Let's copy it. Paste it here as well. Follow the distance. Paste. It's also a little bit tilted here. So the head, so let's move that shape so it rotates. So are you rotate it, is you grab the handle up and you rotate it. Here we go. The lazy way of doing it. Here. I think this one is a little bit more higher up. I think it's it's good. Let's look at it. The thing is that if you do it that way, you see that all the other lines are more alive, more moving. So and this one is still. So I'm going to go ahead and I'm going to just trace that I, so it has this moving line. So what I wanna do is that I want to have this kind of outlines like we have in the body because here we have just copied I and the eyes, the line on the eyes not moving. So I'm just going to do that off screen because it shows the tedious work that we already went through. And I'm just going to trace these eyes that I already did. And I'm going to come back for adding the pupils.
25. Walkcycle of Cartoony Elephant - Part 7, Adding the Pupils - Adding the pupils of the Elephant so th: Hi there. Now I've added an extra layer on top of the old one. So here is my layer 8, where the, the copied art was. And what you do is that you hold this opacity here and just hold a little bit down and you can add the opacity here on this layer. So if you have it more transparent, and then you add an extra layer on top of that where I've actually drawn the eye as, as I did for the other outlines because I wanted to have a more lively, more alive line to that. And it looks, it looks much better. And it looks more fleshy as well. So now we're going to add pupil. And I'm going to, because it's a limitation on this program, I'm going to delete this layer where the other I1 so I can have more space. And yes, here, it gives you a message that if you add more layers, you performance will slow your device. But add layer. I wouldn't care about that because I already deleted layer. And here we're going to add the pupil. And I'm going to unhide that layer. And I'm going to just and draw this pupil and I'm going to hide that to see how it looks like. It looks nice. So let's do that and copy dot, copy and paste in the other layer. And let's put it in place. And here we can just adjust that so the L'Enfant look straight ahead of him. So here we will have to leave that up volatile. Make sure you select the area based. We can later adjusted if something is not quite as we want it. Like that. Now let's play the animation. It's looking pretty good. So we're going to leave it with that. So let's color this animation.
26. Walkcycle of Cartoony Elephant - Part 8, Coloring - When you are happy with your walkcycle overall, : So here we are going to color the animation. And I'm going to add another layer here. Now it's going to ask me this again. It's fine. I'm fine with it. Slowed the performance. He doesn't really slow the performance. But it's good to be warned. So I'm going to choose the brush from here. And I'm going to choose. If you click on this little square, you'll get an option to choose a color. And I will choose a blue, a blue color, elephants. So I'm just going to take that color and I'm going to increase the opacity of my brush. And the thing is that there is a bucket here, but unless you have your lines are completely close to the bucket, we'll color everything. You need to initially be really thorough and enclose all the gaps in the lines. So I'm not gonna do that. And also I'm still looking for more of a scheduled kind of low. So I would like my lines to be more rough, end to see in a way some brush strokes so, so that the things are coming out a little bit, the colors coming out a little bit from the main shape. Changing. A little bit here. Yeah. So I'm going to do that really quickly. And you see that charging up, charging up the drawings takes much longer time than actually animating it. So it is or tedious work. But the rewards, as I said, again, of seeing things coming to life, things seeing things completed. It's, the rewards are so much greater than all the work you put in. It's kind of a Fields warfare. So I'm just going to do that and I'm going to speed up this animation, this film, because I'm just going to develop the shapes with a color. So I'm not going to talk now. We're just good luck with color and then come back when I'm done. And we're going to add some shadows on our character. So here we have or pink or blue elephants. And you see, I've left a little bit on imperfections in the coloring because it gives more life to the character as if it's as if it's drawn on physical paper. And you see that the effect of it, it looks much more alive. So I'm going to fill up the eye with a white color. And I'm just going to do that in the same layer. So just going to put a white color and go through all the frames. So let's play the animation. And Jane, our elephant, is coming to life.
27. Walkcycle of Cartoony Elephant - Part 9, Adding Shadows - Adding some shadow on the Elephant will gi: So in this lecture, we're going to add some shadows to or elephant. And that will give us more volume of the elephant and we'll make it look more realistic. So I'm going to hide some layers that are the ears here, this one. And I'm going to add an extra layer on top of the colored layer. And now I have one name, these layers. It's good if you do that. But I know what is on what layer, and I'm just going to focus on during the animation. So from this frame, from this color, I'm going to pick up the color. I'm just going to choose a slightly darker blue, like this one. And I'm going to bring the opacity down a little bit. And, and this extra layer, I'm just going to assume that there is a light coming from this side. And which means that I'm going to have shadow on this side of the elephant. Just a very little one. You don't have to do a lot. Because the more shadow you add, the more it will demand the view to correct it to follow also the solid shape. So, so turn to you too much at that point. But if you are more advanced and you want to challenge yourself and you much more advanced animation. Even after this first lectures, you're welcome to do that. It's a challenge, is always good. But because this is a course for beginners, I'm just going to do that as simple for you as possible. So you get a handle of it first and then add an extra layer of complexity to your animation. So I'm going to add a little shadow on the trunk, on the lower part of the trunk and the heads will stop around here. Um, I want to keep the same roughness of the shapes as it is in the lines and wouldn't have the more hand-drawn look. You know, a lot of the animated shows on TV and they are very, very clean. And that is because they don't have the time as well to keep the drawing. So live included, don't have the time to draw each Troy. And they have a lot of frames that are still. And because if the TV show, they need to produce a lot of episodes for a very short amount of time. So they have, For example, they have the body still have one frame for the body and they have a head only moving or the lips on removing and adding dialogue. And in a way that has lost a little bit of the character of the animation itself. The animators, the true animators, they liked this kind of lock in on the most capture look. But of course, if you're a beginner and your, you've grown up by watching those TV shows, you may not see the problem with that and that's totally fine. I mean, this is just a matter of taste. So if you have short film or maybe one minute, two minutes that you can do on your spare time. You can, you can add the style. We can do this style of animation that is more hand-drawn kind of feel to it. And using reusing animation is a good way to do that as well. For example, now, we have this character going and walking, and this eight frames will be looked. So you can use loops as well. You can, you can decide the action of the film that you will have. Things that happened in the film that are more likable, like loops or loci reuse, reuse animation. That will bring you up to speed with your short film. But if you're just starting and you just want to animate cool characters, you can spend time. Doing hand-drawn animation and enjoy, enjoy the process. Because it is much more enjoyable to do that forehand and to craft, to craft your drawings basically. So now, roughly follow that shadow. We'll see how it plays out later on. And if we need to delete it or not, or adjusted, adjust some, some shapes. This program does not have masking. It will be nice. See in other program, you can have masking where you actually shape the shadow in a certain way that follows the character and each much more precise. This is not the case here. But also, again, as I talked about about that before, it is nice for you to be able to eyeball things, to learn to IPO things. So follow that shape. And yes, so I know a lot of digital artists, digital animators, who are working with 3D, 3D animation. They are nostalgic about the 2D animation because when this started out, they did this exactly that way. We're doing it. And then they think that the digital animation, not being able to just draw these lines, you know, crafted, he has taken some pleasure over the bit that it has become more mechanical. It is understandable. I mean, the 3D software is just another tool and I work a lot with 3D animation, actually work with more with 3D animation. Then I work with 2D animation. But when I come back from work, I really like to do some 2D animation to relax. Actually, it just to turn on a favorite TV show and just do some nice 2D animation just to relax. And also, when I do that, the more, more animations I do, I train my I and my brain to see the movement, to explore the movement much more than I do when I have a 3D animation. Because you have to draw every frame, you have to spend more time with the frame. Of course, mean you do that with 3D as well. But then there you have to, you have different challenges you have to struggle with with rigs. You have to find a way around to work with different rigs. You have also the time pressure on you to deliver animation quickly. And it's not, it's not in the same way where you can explore things. So if you are new to that, just discovered the pleasure of doing it and not stress out. So now we have this shadow and let's see how place. Now our character has a volume. You see there is a popping here in the lower part of the head of the shadow a little bit, just this corner. So I'm going to go through all the drawings and smooth this out. It doesn't really follow the same properly. So I'm going to just make it a little more pointy as if it ends up in the corner of the other head here and it defines the head a little better. Just extend this one here. And this one needs to be closer. So whatever applies, the shapes of our character the same applies to its shadow. It shouldn't be a drastic differences in shape. It's it's the same rule there. You should be very similar or very close to one frame to the next. And even if there's a slight differences in that, which creates more, as we say, like the hand-drawn feeling to it. But probably won't be like that if you're working on production, they'll be different kind of rules may be you have to draw the shadow that is exactly the same, the same size and not moving as much here, but we have the freedom to do that here when we are working on your own and we can do a more lively character. And the shadow is pretty much the same. Here is a little bit more thicker than here. Let's add some volume to this side. Over here. It's much closer to this one. And this one. Let's play it again. Now it plays out much nicer. A one on the bottom of the head. And it feels as if also the head is moving. If it's too precise, there is a danger. If it's too precise to feel too rigid. And because the body is moving, the rigidness 0 will actually take away from the character then rather than contributes to a cleaner drawing. So let's add another shadow underneath the character as if the character is walking on the ground and add another layer. And this time I'm going to choose a black color and I'm going to bring the opacity down. And just underneath the character, I'm going to bring the opacity down even more. Ingoing, increase the brush stroke. It's still a lot. Let's bring it down. Almost too much. That's task. All right? And just make a shadow underneath this, the elephant. And you see that the shadow beneath the elephant is not always the same either. It's most closely to and darker to the where he contacts the ground. So whenever you have a fields up in the air, you kind of tune down the shadow and just added what a, what a character is touching the ground. And over here, he's almost touching the ground. We've both feet, but very little. So just extend the shadow and keep the shadows straight because we fundamentally this character from the perspective SVO looking at the character straight, straight ahead. And the last frame known it's this shadow came a little bit twisted as if it's hanging in the air and not on the ground. Just even the shadow follows the rules of perspective and I'm volumes so to keep the shadow on the ground. So it's not you'll get a fill of it when you do this exercise and when you practice. So we see how our elephant is now in space and it became more volumetric. Now in the next, in the next episodes of these tutorials, I'm going to add a background to it and I'm going to show you how you can move the character in space or create illusion of character moving.
28. Walkcycle of Cartoony Elephant - Part 10, Adding Background - Right now our Elephant is walking in : Hello again. Now we have or little elephant. And what we want to do now is just make him move in space. Because now he is like on a treadmill, walking on in one spot. So how do we do that? So what you do is design a background. And one thing that how we perceive movement is basically one, we have other objects around us that we can relate to. So when we are out in space and we don't have anything that we can relate to around us, then we will not know actually if we're moving. So the same thing, we can use an animation. If the character is standing still. We need to have an object that is moving in relation to the character. And that's how we would create the illusion that the character is moving and not the object. And I'm going to show you how to do that. Let's create another layer. Obviously, there is no more layers I can create, so I can, I'm going to combine some layers here. So I think now we've got some scope to add. Another layer. Will add another layer here. And we'll start again with the pencil who starts rubbing it out across eight frames. So we have eight frames to make the object with this character move in relation to the character. And what we do is that we need to match the pace of the character. They can't move too fast because the character doesn't walk that past. They can't move too slow because the character walks in a normal pace. So how do we do that? And we have to find a way to animate surrounding characters. If we have just eight frames, will try to find objects and we'll try to place them in such places where it makes sense for them to move as fast as the character to create the illusion that he's walking with a proper, proper amount of time. So let's have him walk on a on a path. And the thing is that the farther away we go from where we are standing, from one we are looking, the slower the objects move. If you've traveled by a car and you watched outside the window, you may see that the bushes that are next to the road are flushing by really quickly. You can not there kind of like a blur. You can't even see them while you can easily see the sunset and the background and the houses if they're further away on the horizon. These are something that you can easily see. So the closer we are to an object while it's moving, the faster it moves, and the farther away we go, slower, it will move. So what we do is to create this loop, we need to have some objects disappear and appear again and to look like if there are a different objects. So we will have a horizon, for example, approximately here. And we won't place anything there in this horizon because it will break or a loop. It cannot disappear in eight frames. So what we need to place should be something on the foreground. And you see. So if we add this buff and copy it and go to the next frame and paste it. And paste it here too, and here, and here, and here, and here, and here. So we have a background. And if you see now that the background is not moving and we don't get any effects of our character moving. To change that. First, we're going to hand animate even the background as if it's a, it's a wavy line, the path. So I'm going to delete that frame. I'm just going to clear it. I'm going to delete it. And I'm going to turn on the onion skin. And I'm going to hand animate the frames. So it's a little bit. So there is a noise in the line, is if the line, the line is curving up a little bit. And even the horizon, I mean, the more, the further away you go from the object, the more you have to be careful with the line in the distance. But this line, that is the path that the character is walking, this can be a more of a wavy, wavy line. Not, not too much. Just, just a thought. So I'm going to do the same thing for every frame. Just clear this out and trace it. And this one, we can have a little bit more wavy. Let's do that for this frame as well. Select, delete and trace. Just to add some variations in the line. And even if I'm not finished doing that, I'll show you the effect of it just by tracing the light line. You see that if you'd like, he's walking in the first frames and then it stops. So let's let's do that for that frame as well. Yes. If you are working with again with a longer shot, you don't have to do that a lot because you have a longer panel that will stretch outside of this drawing area. So you basically what you do, you animate that panel and you move it in the opposite direction, in the opposite direction of your character. And what you have to trace them is the speed that this panel is moving. Because it has to match the steps. Because if you trace the panel too fast, the character will look as if it's gliding, if it's like Moonwalking, so to say, and if it's too slow, it will glide backwards. So you have to trace the pace of the character so the feet are stepping steady on the ground and not gliding. And now let's play the animation. You see that it feels as if now the character is walking on a path just by making the lines wavy. And you see that the horizon is popping up a little bit too much on the background. Because as we said, the horizon needs to be of a more of a steel still lie line. So so you should adjust that. And it looks like it's coming to life. What else you can add to that feeling of movement is a stone that is on the foreground. As I said before, that the objects that are closer to us are moving faster. Let's add these in this layer as if now I've started from the wrong drawing lessons from the beginning, as if a stone is passing by. So starting here in the next frame, stone will be in the foreground. And we can put that in a different layer. Now it's just moving too slow. Let's decrease the pace. The pacing is decreased. By drawing. The drawing is further away from each other. The closer the stone is two, the next drawing, the slower it moves. So let's have a stone that is really close and moving fast. And then it has to be uneven pacing because or character is moving pretty evenly. And then the stone disappears here. And I'll look at the effect of that. Now, the stone is moving a little bit too fast. So what you do is just move at a more drawings to the stone. Move this one closer. And this one a little closer to the previous one. And this one? No, I've moved the Bible that a little closer completed and then add another stone. We can decrease the pace a little bit more. So just add another stone here and make it disappear over here. Now it feels more as its spacing. Another thing we can add is something as a smaller stone that is on the road. To add. Let's see if yes, we can make another layer. So the stone will start probably over here. Smaller Stone writes on the road. And this will be over here. When moves over here, it will walk, it will go with a slower pace than the beaker stone. And we would add two more frames of this tone until it disappears in the next. And now we have a more and spacious animation where you see that the character is actually moving forward in time. And we will not have to, we will not have time to add anything on the background because we see that the stones are already moving too fast. And anything added on the background, which will break the illusion that the character is moving in space because we need more time for adults. So let's add some color on unknown Omar background.
29. Walkcycle of Cartoony Elephant - Part 11, Coloring the Background - Add color to the background with: So I put together some layers to the space for the background. And I'm going to continue with coloring or background. Let's start from the sky and with the paint bucket and make the sky. Let's do a pink sky actually because or character is blue. So it's going to be nice if we have a kind of dream economy environment that is more of a warmer color than it is the color of our elephant. And I'm going to make it a little bit brighter, brighter, pink. This one is okay. I'm going to turn off the onion skin and do that for all the frames. And now we have that. It starts to have mice environment. And then I'm going to add another layer for the foreground. Now, I'm going to do the foreground not with a bucket, but I'm going to paint it again. So we have more painted feeling to it. And I'm going to do kind of, let's see, some also warmer color, orange, orange, slightly darker. And with a larger brush. I'm just going to paint it even larger. Now, if you want, you could outline your background as well. Depending on the effects you want to have remote service. Many backgrounds in, even in old Disney style and all the animation, they didn't have the outlines. Then we'll like really like paintings or complete paintings where you have the shadow there. They were very realistic. But the animation module, the common style is that they have outlines and might seem some. For example, the environments have outlines and have this Cortona look. So it's up to your preferences and what you want to achieve with your projects. It gets a little bit very warm feeling to it. And the thing is that you can always change the color later. We can put the car later on composite chain. The fuming compositing where you can play with hue and saturation and with the color balance. And you can change that at a later stage. But right now, I'm just adding to it to add an atmosphere and have, have it look like a complete film completes our animation. And the thing is that now, because we don't have the luxury of having a longer frame. So we will need to have the lines because the lines are giving us the sense of direction, sense of movement, just moving the line, making it a little bit uneven in January gave us the feeling of the character moving in space and that he's changing places where he is, as if the road is changing and he's moving forward. And let's see what we've got. It's a nice walking elephant and you can also keep this sketch style for afford is for the background. Now let's add another color for the road. I'm going to choose a brighter color of the same or maybe slightly yellowish color for the main road. And you just follow the the outlines here. Sketch of the road. Also with the coloring weekend, be more forgiving here with the lines because we want the line to be uneven on the road. And now we have all character walking on the path. And if I close this, this layer, and it does get what you need to be more precise with the line because especially on the background, he just got a little bit too much too much movement on the line of what we required. So let's go and actually add a line on that, outline it in another layer. And I will choose this one again, but this time, I'm not going to add a black line. I'm just going to make it slightly softer, softer, brown, just not politically dark. Just to differentiate or character. And I'm going to do this background line as straight as possible. You can also use the grid. Now. You see the grid was here and let's put on the onion skin and try to be as precise as possible here. Just following this line, you will see that just adding this one outline of the horizon. Even though or color is uneven. Because or I will have something to relate to now, will have a steady line to relate to. Even if the coloring is jittery and uneven, we'll get the perception, a sense of the character of a horizon being still. So what film is, what animation is, is really creating an illusion of life. It's how we perceive the world, how or I and or six senses perceive the world and finding a way to add them to our animation to create an illusion that things are real and things move according to the law of physics. And it takes some time to learn that in, if you're wondering, if you're wondering how people are doing the thing, these things, I mean, like for example, you ought have taken for granted backgrounds that if you don't notice anything, anything unusual in the animation, then it means the animation is well done. Then you're focusing on the acting on who the character is and you accept the character is real. The Sunni notice that something is wrong in the animation. You wouldn't know as a viewer where to put your finger on. I mean, what is really wrong? You wouldn't you wouldn't know. You will know what it is, but you will feel because we have an inbuilt sense of reality and of how things move. So let's see if I have done it well here or if something is bubbling. Yeah, it looks pretty good. So we'll we'll just have to adjust the paint here. Let's go in here. And just, if you open that box, you can pick the color with these two here. And in the color layer, you can just adjust this color a little bit. So we have a more even. Background. Let's play it. And now we have a more even backgrounds, but we see that or row this now, too jittery. The paint is too sloppy, even though in places he feels nice, it needs to be evened out. So I'm going to continue with cleaning up the lines. And I'm going to turn this on now. I will work with lines of the row following the sketch that we already did. I'm going to change that. And I'm going to add a more nicer lines and keep it neatly so it doesn't fluctuate that much as it does now. And I will continue having this rough style of drawing. But you see how beneficial that is to the animation. Now we have a line over here that goes up. So I'm going to clean it up a little bit. This one bring it down. So it's just tiny changes. But now we have our character walking even though we don't have the stones. And if you see, if I just hide this and let though this sketchy drawing door. I mean, it still looks nice. And let's put the stones. So unjust going to add the stones here, and I'm going to decrease this line. So it's less visible, which we will look nicer like that. And I'm going to just do that and just fast-forward the film. And I'm not going to talk during that time, so just follow the steps. I'm going to do the bigger stone on the same layer. So we have 1 ninth animation. I'm elephant moving. And it's look, it looks like a scene from an animated movie. So I hope you enjoyed this section. And I'm going to do some more exercises about movement and even dialogue in the next session or in other section. So I hope you enjoyed this exercise. I continue to the next.
30. Runcycle Introduction - Get an understanding of what a runcycle is, frame by frame.: Hi there. In this section, we're going to do a run cycle. And for the font sake, I'm going to change the character to a bunny. Disbanding dove drew in the other course. You don't have to get the course too to do this bunny. Why I'm doing it is because it's very simple forms is just spears. And also because it has feet and hemes and, or little elephant had no feet, although there was suggested. So I would like to show you half the feet reacts well within a run cycle. And also a now to help to make an overlapping action on the ears. It's not going to be exactly this plugin because the bunny is too detailed. There's too many things going on. So if you are a beginner dot will be a lot of big handful to animate around cycle without. So I'm just going to simplify this bunny forum and do a run cycle for you. Just to show you how the pulses are and how you time the steps for the run cycle. So for the run cycle of the bunny, a weekend approach, if we draw the first pulse of the bunny, it's going to look something like that. We can simplify the process by using just fears and the legs can be just lines. And I'm going to mark their ears here just to see the overlapping action. But the difference between the walk cycle and the run cycle, it's that during the run cycle, the bunny at some point lift itself up and it's all body is in the air. While during the walk cycle, the bunny puts its, its weight on one leg and it doesn't release other leg from the ground before the weight is transferred to the other leg. So if we start with the first pose here, we're going to do the run cycle in five poses for each leg. The second pulse looks something like that. Where down here, the right food is on the ground and the left foot starts transferring forward. The third pose is where the left foot starts transferring forward and the bunny starts pushing his body up while taking speed to push his body and jump up. So the body will be in the air in the next frame. And here I'm also drawing it with a red leg, the leg that is behind, so you know which leg you're working with. And here, the next one, the bond, the bomb is pushing his body up. And here I'm using the principles of squash and stretch. As you see, when the body is coming up, the bodies Does stretching here. While, when the body is still down, the body is squashing a little bit. And here I'm using the extremes between the most squash when the body is starting to lift up and when it actually comes up, I'm using the squash and stretch because as I talked before, the contrast is what gives more speed to the character. And here is the pulse where the bunny is up in the air. And now these are the frames from for one leg. And here r is the line. The body will move in, wave kind of movement up and down, where this is the highest point and this is the lowest point of the character. And we're applying the same frames for the right leg. So if I split those five frames in the middle, those time frames where here in the blue line we have all the poses for the left leg, wide left leg is behind. And here where the right leg is behind and here the right leg transitions forward. Where? The right, the last pose of the right leg is here, the first pulse when the cycle starts again. So these are the numbered frames. If you have difficulty to follow the run cycle of the bunny, you can come back to those simple frames. I'm going to put them as a file. And you can just follow the system of those frames to get the cycle right. And let's now continue and get into the real cycle with a bunny. See you in the next lecture.
31. RunCycle of a Cartoony Bunny - Part 1, Draw the frames - Draw the rough frames of the Bunny running.: So I'm going to make a new project here, and I'm going to name it run cycle. And I'm going to choose a background. I guess. Like a paper background is really nice too to draw on it. And especially on your drawings sketchy, which this program is mostly for two like sketches, drawings and have this freehand sketch style, I'm going to choose four now. The resolution that is given in the settings 12 frames per second. I can change that at anytime later to speed up or slow down the motion in depending on what I wanna do with my runs around cycle. And I'm just going to create a project. And here I have the project already and I have the Greet already in setting, because you start from the previous settings. You can change the grid, grid settings from here, add it. You can increase the capacity of the grid so you see more of the grid and it helps you to stay consistent with the shape of your character, which is very, very useful. And you can just increase the spacing of the vertical and the horizontal lines. So let's give it 51 for this time because or Bernie is going to have a small body and a larger head. And but you can, you can try it out and see what's, what's best for you. So I'm going to prove that we have like a small agreed now. And what I'm going to start the same thing as a run cycle. I'm going to, I'm choosing a pencil from here. There is a set of tools. They're not so many for this program. So this is also an advantage. Sometimes if you have too many things, it's just that you want and test them all and you don't know which one is the right one, just to speak one. And we have this limited frame, limited versions. Then you just go with what you have and you concentrate on making a good drawing. And thus I'm gonna do here. So let's start from this frame and this time I'm going to put the bonnie this little bit on the side, because over here I'm going to do a front of front run of the bunny. So you can see the same steps but upfront. And I'm going to do also the bunny that with the background. And to see how to easily make a bunny woods a few drawings to make him move in space, in from the side and from from the front. So let's start with the first frame, like we did in the and the other section. So drawing really roughly the first frame. And I'm going to start with the characters right leg, straight, straight up. And this time, you know, when I talked about the squash and stretch thing. So this is the frame where the character is stretched. So let's have this frame. The body is actually a little stretch. You can always fix that little later. Now we are trying to find the poses first. So two stewards roughly don't don't be too cautious about it. And we'll have the foot over here and we'll have the leg behind him. And just referred out just a rough shapes circles. Just market is leg. This is the left leg. So you don't mix it up and tilt the head a little bit up. This is because the previous frame, which we now don't, we don't see the British frame has been down. The bombing has just started raising his hand up. But let's see how it flows. We'll just mark the face with a line and the line, the vertical line applies where the middle of the faces. This is an easy way to draw features, to know where the faces without drawing eyes and nose and all these details. Because this is not needed when you, when you just start drafting your movement. Make, make a big difference between drawings and movements. Because when you draw an animation, what you're drafting is the movement is not the drawing. So you allow it to be. A little sloppy in the beginning. Just to find how the character is moving. We'll just go over the years like really roughly like that. So as, as the run cycle, the opposite arm is meeting the other length. So if this is the right leg, the left arm is up front, and the other arm is much more pushed back because in the run, we push ourselves up and we allow our body to fall down much more and we pick it out really fast. As I mentioned, was running cycle is controlled falling, the arms are pushing up because we are trying to keep the balance. If we have the heavy, if you've run with the arms straight up like that, it's not very easy. Because you you don't keep the balance. The arm stretching up is helping us to keep the balance. And let's do the opposite foot. So the same frame but with the left foot down. And this time, let's let's change it a little bit so, so they're not exactly the same place if there is differences, the position of the body parts, the movement loops, mover, or eyes are not used too much symmetry. We need to have some differences to actually see the movement. So let's mark this leg now with dark and, and now we'll go on and tilt this foot with insights because you know that when you run you kind of like your, your leg is a little bit tilted up from this direction. So that's why I'm going to tilt this photo a little bit, insights, some perspective, and then let's add a body. And now the right arm is in front. Really pushing. So it's right over here. And we are, we are twisting also or all upper body to do these movements. So let's just sketch this out and we see that the harm, we see the left arm behind the body. Let's market. So now we have these two frames and let the rest of them. So what's coming next? After this frame, which is a stretch frame for the bunny, will have a squashed frame where the Barney steps in really squashes down. So this is the contrast frame. So to add another frame in this program, after this frame, you just click on this plus. You click on the frame. You hold it, and you add this little plus because otherwise it adds another frame. Over days. You want to have a frame in between these two frames. So now we're going to draw the squash frame of our body. So when the foot lands and the bonnie is dodging a new take on the rung is pushing himself up. So this is the contrast frame. So the contrast is creating weight. So if you want to have someone looking really happy or stepping on the ground and you really fast just have to contrast frame next to each other. One that is really stretched and one that is really squashed. They actually did experimenting when they started to do motion capture. That when they filmed elephant and they animated the exact frame as their frames of the elephant was moving. The elephant felt weightless even though they just copied the frames. And why was it that they discovered that to perceive weight, we need to have contrast. We need to have one frame that is stretched and one that is squashed to get the illusion of weight. So here we have a now, now we have that frame with the banding come down and now he's starting to push his arm. The arm is still in the air, but he's coming to come down to make the transition to the other pulse. Let's have the face and the AUC. The head is a little bit stretched because even though you need to keep the form right on the squash and stretch, you allow to change the CEP just for a purpose to add more impact, more weight. But then you need to quickly get back within the safe and to keep the same shape. Say just sketching the ears here very roughly. We're gonna deal with that later if that's correct. And now let's go to the next pose. I'm just going to add another drawing. Just make sure you do not click on this plus on the site. But open the drawing and click another plus on the drawing. So you get a frame besides this drawing. So this is the third frame out for a run cycle for the bunny. And here, the left leg starts transitioning forward and the weight is on the right leg. You can flip between frames before and after just to make sure the run cycle is going smoothly. What you need to keep track of is that the placing of your Bonnie needs to be in the right spot. So the body doesn't ago forefront back to March and the feet move backwards in uneven amount of space. The foot that is on the ground will have to move backwards in even spacing. That is to create fluency in the run cycle. So let's go ahead and create the fourth frame for all run cycle. If you want to have a faster paced run cycle, you can skip one of those frames, either frame 3 and frame for. Or if you want to have a heavier, slower paced run cycle, you can add some more in-betweens between those two frames or between frame two and frame 5. So let's draft out even frame for, and this is an opportunity to stretch the body to find the contrast between this frame and the next 11, the body will be up in the air. But here we can have the body taking pace and stretch it up. So we can kind of squashed both the body, the head, and lift up both legs in the air for the next frame and prepare for a bigger impact. That's what's going to give speed and weight 2 or character. So here, the right arm starts moving forward to meet the left leg is forward and to complete control movement of the upper part of the body towards the lower part of the body. And now let's do the last frame for the left leg of our cycle, where the character is in the air and prepare to complete the cycle with the next leg. Just draw this frame roughly. We can refine that later and adjust the position of the bonnie, go back and forth to see that you have a nice movement there and the placement of the body is at the right position. So now let's do the frames for the right leg, where the right leg is back and the left leg is forward. You add another frame. If you want. You can copy that frame just to have a direction of where you're going. Copy it and you can add it after friends 6 can paste that frame here so you have the possibility to see where you're going. So I'm just going to go and repeat the process as I did for the left leg. And you can do the same in your own time. And I'll come back when it's done. As you see, I'm drawing the frames for the other leg. One thing you can do is copy the frames that you're already drawn for the left leg. And just change the legs, which are front and back, and also change the arms. This is another way of doing it, although makes sure that you add small differences between the frames that you have for the left leg and the frames that you have for the right leg, even if the foot is tilted in words of upwards or the legs a little bit lower or a little bit higher than the frame. You are copying it from. Why we do that is the called the position and the differences we see from one leg to another. It can give us the feeling that both legs are moving. Otherwise, we'll get the feeling that only one leg is moving if things are too precise. So just add some small differences between the same poses for each leg. And now let's play the animation and let's see what we've got. You see that even if we drew the frames really roughly, we can see that even the ear is moving. We have, There's only on several frames, not much. We can see the face. We just have the perception of this is a bunny running and such a few details. Now, let's refine that and see how this improves later on.
32. RunCycle of a Cartoony Bunny - Part 2, Refining the Drawings: Hi there. Now we're going to refine or Bonnie. And I'm going to put another layer on top of this one. I'm just going to name it cleaner drawing, so something. So let me just draw this bunny are little cleaner on this layer. Still, still having it with this pencil drawing seal following that. And just, just draw some extra features on, on the drawings that we already have. Perhaps having the fingers here. Refining the animation. Just add in the toes. Now I'm going to even just lift the toes a little bit up on this frame. Just to add an extra, an extra contrast for the next frame. You the opportunity for this contrast and add whatever you can, defining it a little bit more. And now we shouldn't forget that this is the left leg back there. In this frame. Coming down. The body is squashing. The body mechanics, even though there are different for each character. And you'll still have to keep the weight and the characters features in the right place. The body mechanics are very similar to each other. Whatever, whether you are drawing a person, this can be just a human or whatever you're drawing cartoony character. The body mechanics are the same. Now I'm going to turn off The Onion skin a little bit for a while just to see, just to catch the frame. And I think, I mean, it's really nice to have this pencil, pencil drawings. You can even just sketch it scattered, whereas a pencil join. And it's much more forgiving in ON you have the pencil drawing and it looks like moving close life hand-drawn. It's much more forgiving to animate. And even if you don't have a perfect circle or a perfect shape, just having it as a drawing, as, as having the potential of the animation being completed. It gives you more like satisfaction of seeing the character, moving it in a way it gives more life to it. So it's good that you're in this more drafting, more sketching out. And you can use some, some Graham colors later on. And we the same way, the same strokes. You can also color your bunny. So you continue to keep this feeling of being more sketchy. And here I'm going to drag the feet down a little bit. So to create a little bit of floppy feet. Now we don't see the other arm. And this one is starts turning, so we see a little bit of the fingers, but not as much. And the head is still down. We can even add the mouse here so we see what's happening with the hat. The beauty of animation is It's not, not ready until it's ready. When you start. What you will find challenging, perhaps, is that you have to redraw it so many times. But the thing is, the more you draw the memorial, find that this is actually the beauty of it. That you can redraw so many times. Because it's meditative. It's really peaceful to be able to animate. And the more you're redraw, the better you will know your character. So this arm is actually the over there. Send this back. And now let's go back. One I started to animate, mean just thinking of our animation while so for me was. Impossible because that's what I thought it was like, Oh my God, do I have to two, I have to redraw all these drawings over and over. And if I make a mistake to have to start over, This was it was too much work. But you know, this is this is every profession is like, I mean, if you are if you are a baker or fear something else you done, we don't do things. Only one see you do it like over and over to become good at it. And now that I see the pile of drawings that I have to do, I feel satisfied that I've explored, explored this movement. And that's what it is. You don't feel satisfied by only finishing a drawing, but also of the exploration you've done on that drawing, on the movement. You know better the next time. And this is, there is such a pleasure in it. So don't be scared to redo things. And to start over. Now the heads, now we see the more you draw, the more the movement suggests to us. Where things should be. Just give us hints, like to have to keep the head up a little bit more to complete this movements. Or here, you need to have a more of a contrasting frame to just get more impacts for the next frame. And the one thing is like how you start to feel the drawings is like we have, I just think that if we watch something with stars, like experiencing it to width or body. So especially it's true for when you draw the animation, if you've ever been to an amusement park, there is this chamber, this room when you go and when you watch a film of cars driving really high pace. And if you're standing, for example, you bought it starts tilting in one or other directions. As if you work yourself driving, even though it's standing still, you feel the movement of the scar. It's the same thing. When you start experiencing the timing of the animation, you'll start making faces or you start feeling the running and whatever movement to your drawing, you start filling it in the body. And if someone is watching you sometimes even when you start like drawing dialogues. And so they'll see you like copying the character the way they're moving. So you'll feel this tension, this running in the body. And thus how you will know what to do next. This is, this is the inbuilt timing I'm talking about. But when you are a beginner is like driving a car. When you start driving a car, all you have to think about is everything that you have to push and you have to, and you have to think about when you're driving, it's overwhelming. It's the same thing here. If you're starting, you will be overwhelmed with these frames. So if you want to copy them, just copied, I mean, if you, you need to be encouraged to draw, so encouragment comes from doing a good job. If you've done a good job with your animation, you'll be encouraged to continue drawing. If you're struggling, if you said like it doesn't happen, it didn't happen for me and will never happen. Well, you'll not get encouraged. But the more you draw, the more you start to get this feeling, you know, when you drive a car and you're not thinking of all I'm going to have to press this and that you just driving and it comes natural. That's how is it also with animation? But in the beginning, it's good to watch these videos and to see that it's happening one frame at a time. And also why I'm guiding you here for this animation. I'm not just giving you the reading frames because you can fast-forward is VT0 And get to the end. But what I want to tell you, what I want to show you here is that the process, whatever, no matter how trained you are, the process is the same. You just do one frame at a time and you adjust the frame if it's not right, and you continue doing it. So the movement, but there is like so many other things to think about. And thus why I want to encourage you, when you see this, this video to see that dust, the process you are doing, you're doing it correctly, you're doing it right. So just continue doing it and you get there. So now we've finished the body. Let's play it. And we see that this little thing that we just erase the toes up, it just adds more floppiness to defeat a better movement. Now, let's define the ears in the next chapter and continue with the front view.
33. RunCycle of a Cartoony Bunny - Part 3, Adding the Ears: So let's add the ears to our animation. I'm going to make a third layer, name and ears. And let's go ahead and do that. Let's start from this frame where they're following, still, the head moving up. Let's just drop the Nordic past. It's good that there is an asymmetry to the years so you don't have to keep them too symmetrical. Which means that in this frame, I'm just going to turn on again the onion skin. They have been down. They continue going up here. And let's have the left here going a little faster than the other ear. They're still going up because they are continuing the previous movement. And here, the years are changing direction. This upper part, you see the upper part is building an arc here when this air is changing direction. And this one is moving faster just to create some more movement in the ears. And the overlapping action of the previous motion. You keep the arc nice. And now they're changing direction again. Following the head. This year is following up a little bit later than the other one. Just for the sake of asymmetry. And the back, back in the notion, really rough sketches of the year. And now they're up. Because the head has been up. The left here is more as Foster is doing its business up there. And now let's start moving up again. Now let's check this frame with the first frame. If that is a good match, or if we have to change it. And let's play the animation. Well, maybe this flap of there, even though it looks nice because or Bonnie has a forward movement, maybe it was too much to add. So let's just have them in one direction and are moved this flap. So if this is, if the, if this rings are up, the ears are too much farther up. In a way, slows down or RAM. Here, don't stop going up like that. And let's play the animation. So now the ears are much more fluent and they're more appropriate to 0 or run. Maybe one thing here is that the face is moving too much for up and down. Even though it's nice, Let's, let's come down a little bit and have the Bunyan look a little bit more forward. Instead. Just keep it, keep the head movement as it is now. It's nice because the head is overlapping the body, but make it more subtle. Whatever we can. For example here, let's just lift the head a little bit up, not as much. And this one comes closer to the next frame. And this one too. And maybe not as much thrips this one. And lower down. Let's play it out. Now. It's slightly less. There is one frame popping up here, which is going to March down. Let's do this one. And this one is going to match up. Just small, small adjustments will have this fluency to the round. And let's play it and you see that it's much more fluent than the previous one. And then you can clean this up and then adjust. And also it's exactly the same size. The smaller you go in the details, the harder it is to to keep them the same. So this is something you have to practice. But I'm going to keep the run cycle a rough like that. And I'm going to do a run cycle from, from the front using the same frames and show you how to do a run cycle of Bonnie running towards us.
34. RunCycle of a Cartoony Bunny - Part 4, Front Run - Here you will learn how to make a character run t: Hello there. So now I'm going to draw down the run cycle where the bunny is running towards us. So sometimes it's more difficult to draw that because you have to use the perspective changes to convey the idea that one foot is towards us. And as a beginner, this can be a little bit challenging. So I'm going to show you how to do that. I'm going to add another layer and I'm going to name it from R1. So here I'm going to use these guidelines of the grid to place them approximately where the bunnies and the frames are going to be exactly the same, although they are going to be from the front. So just, just row roughly, again doodled a circle, as I've shown many times before. And the eyes are over here, have the nodes will have the body tilted over here. So the, so the backside of the body here. And because we have a slight leaning of the body forward. So we'll have the budget a little bit backwards. And I'm also going to draw the middle line of the body and by the middle line of and this is the vertical line. The horizontal line. I'm going to just give an assumption of where the belly button is to use it as a guidelines. So the right foot is back and the left foot is in front. To do that, we're going to use perspective because we want to stretch that foot as much as possible. And what we do is that we make it much bigger, much larger. It actually is. And the length here is more like a cone. You just squeeze it in perspective for you till you make it as if it disappears, it continues somewhere behind. And the other foot is behind the bunnies. So you draw it. Again, he use circles and you draw it also in perspective, it's much, much smaller. And you draw the the food here long behind them. It's also needs to look nice in the frame, so don't be too blinded by word exactly is in India the one IV has to look nice in the frame as well. And we have tools here, so, so now Bonnie's right arm is in front. Again, use perspective and enlarge this, this hand, which is close to us. Convey the idea. The arm is in front of the face and the other arm is farther back. Make it a really much smaller. And now let's add the ears. Somewhere here. There will not have as much impact here on the years because we will see them less. So this is the pose one. Let's do the next pose here. The bunny is stepping down and make, and this time the fourth will move farther back. Because as you can see, a treadmill Again. So the foot starts getting smaller than the previous frame. Because the perspective changes are changing in all the things that are up front vowels are much bigger than the things that are farther away. I'm not going to go too much into just the rules of perspective, but just to, I'm going to show you how these work in a run cycle. And it lowers the body much more down. This arm starts. Pulling back, but first it has a little bit of an overlap here. It just twists on on the elbow before it starts moving back. Just have a nice arc like dots of the arm changing direction. And the other 40 starts moving towards us. And this arm is beginning to move forward. The head is stretching. And here we see the foot. We can mark it with a little bit of shadow. So to assume that this is further back. And this time, I mean, it's absolutely obvious which foot is in front and which foot is back. So it's not as confusing as the side poses. The ears are going upwards. And we go to the next pose. In this pose, the bunny starts moving up again. So, and the food is left foot is lifting up the body. So let's lift it up and start getting smaller. And also twist it a little bit towards the body. Because when we push ourselves up the the weight of the body, there is a line going through the body, through the whole body like dot-dot-dot keeps the weight. And usually we try always to balance a foot that is on the ground. We trying to find the balance so we don't fall immediately, so don't put the food too much far out like here, for example, because it will look as if he's losing balance. And now this leg is coming even more forward. It's changing direction. And even the other hand is getting bigger in the picture in this transition posts. So a little bit of a foot here. The face is tilting down. The ears are start changing direction. Here. They are also moving in a perspective. So, so what you see here is the perspective change of this upper part as if the moving higher back even, we can maybe even not see them that much because they're up in the air. So I'm actually going to move them and this line and just increase the perspective here so they're farther back. And I'm going to check that even in the other drawings, they need to be somewhat lower, lower down. We can deal with that later. Let's continue with the main poses. So we have now this leg much farther up and we're going to lift the knee. And the knee now it's gone. I get a really much bigger perspective. And we have the foot increasing in size compared to the other one. And the other one is pushed much further back. And it's looking much, much smaller. And let's mark it just to create more depth to the picture to make it a little sad, I want it. And now the left. Arm is coming towards us. So we'll make it bigger. And just to have a nice posing, just suggest to even the elbow here. The head is going up, but the face is moving still down. Use you see is this direction here, smoothing down and the other arm is moving back. And the ears here are drugged downwards. So we don't even see the part of the years. The other part because they're behind the head. And now we have this false where this leg is in the air. But with the perspective, Mandy's fought really big. This will give us some speed, some speed to the bunny, and just move it at the site. So we have histones here is really big and we barely actually see see his leg. The whole thing is just a quote. And then make this his left hand the really big as he's really pushing. And the phase is almost on the same place. He's standing still while the body is now pushing upwards. And we see the other foot. Just a little bit of the knee over there. Just a little bit of the foot farther out. So I'm just going to have the toes. So you see that this is the foot and everything is just round shapes. So it's easy for you to just to fill it out. You don't have to, you don't have to worry at the beginning. You don't have to worry about the form just to throw it out really roughly. And the movement is just you just gonna get us right very quickly. Have the face here, and then they ears or starts changing direction. So we'll need to make the lower part of the year here as a, as a separate surface because it creates a wrinkle. Here in the perspective we see just a wrinkle, how the other shape goes down. And there's this shape that ends up here. And the other shape is going down and following this motion of the body and lends to the other. Now the leg is coming down again, this other one. And let's make the food again bigger than the other one. But now this is stretched. So we see the knee. It gets slightly smaller because now it starts going backwards. But the leg is like a cone here. The body is coming down. This leg is lifting up a little bit as a follow through motion. And the hand is also following four with a nice arc twisting up from the elbow. Now I'm marking the torso as twisting this way because as the arm comes towards us, the whole upper body is twisted to following the left arm. And the right arm is very small up there behind the body. And we have the head moving up. And now the ears starts following through without motion, so they are going. And the next frame, it's the contact frame and also those squashed frame of the run cycle. So again, bring the body down and the foot is coming to its normal size. The arm starts moving backwards with an arc, MS slight twist and that their head is stretching in this position. Which means also the face is up. It's slightly stretched. Now the other arm is moving forward. This is like a locomotion. It's two parts that are moving in the opposite direction to create this motion so we don't fall like the upper part of our body and the lower part, hips and chest moving in opposite direction and creates this speed and the motion of running. And now the ears are up again. In the next frame, we continue with just starting the next the next step of the RAM. When you drive the foot like that, you're also creating like more weight to the character because if, if the bunny speeds are goofy and heavy, just dragging, dragging them after the body creates yes, committed some goodness resemble some weight to the defeat. It looks like they are fluffy and they're big. And the arm starts moving back. And now the head is moving down. And the ear somewhere there. The head is tilting forward. In the RM side comes France in the middle arm. I'm probably not the most confusing frames to know what to do because they are the transition frames in animation. You have a main poses and you have breakdowns. Main pulse, or sees how they define the axon, like for example, the poles where the bunnies up. This is a pulse that defines the axon. These both year when the bunny steps down is also a defining pulse. But the post from what just transitioning from this pose to this pose death are almost similar breakdown poses. It means how the body is doing this jump and this R1. And this can be a little challenging and confusing. But with practice, you will get there. And we have these leg moving forward and the body starts lifting and the other leg going back. And now the right arm is coming towards us and the other one is moving back. So now the ears are behind the head. Like that. It's good to rough it out. Don't, don't get caught in details. And now this is the extreme pose where the bunnies in the air with this other leg. So just increase the size of it. Really bake to create more contrast. And also the other are the opposite are I'm, I'm eyeballing really where the head is. I'm not measuring two to properly water I'm concerned noun is the posters. Just watching what is poses and translating into the other posts. And now this is really father. Father bought smaller, really tiny compared to its real size. And the ears start changing directions here, but also getting very tiny. And that's it. So now let's play the run cycle. You see how even though we have the feeds really big, they don't really a little big. They just look as if he is running. He's running towards us and the head is looking nicely. Moving forefront back as an overlapping action to the body and the running cycle. Now let's make them around in space. And what we need actually is only three images that we can copy. So we'll go to the first frame. And as I said for a so we'll split the screen as if this is too like over here. And then we'll have this bunny, the pineal rounding up front. Around me as if there is a street like here. And the perspective is really low, like, like here is the horizon, for example. Let's say that is a field. And as I mentioned, with a walk cycle before, all you need to do is just have lines moving the same line, just withdrawal the same line three times. That's all you need to create. The illusion of movement. Though they are moving in space. As if this is a wild three black dots. I'm not gonna draw the horizon. Does Yan fat? And here you'll just need to do the same street. But on this side. And we'll just need to image. I'll show you the magic of it. And here is the horizon, father away. So on the next image will have onions can just make another image moving of the street. And I will slightly weaker horizon line dot. And here just trace Dodd-Frank roughly. And also the horizon. And one more. This is for the binding for an front to be even better. I mean, for images is slightly better than three. But even three is enough. And I'm going to show you how I use those. So let's select this. I did not select everything. Let's select these ground and copy it. Maybe duplicate, paste now. So image1, do the same thing. Copy and paste it on image for paste. An image tree. Do the same thing. Copy and paste it on image 5. Paste. Now we have, now look where my play it. I need some images to copy. So on image one is Copy. And then we will paste it on image seven. Based on image ten. Paste the ground on image to copy. We'll based on image eight based. And the ground on image three. Copy. We're going to paste on image nine based. And that's it. So let's play the animation. Someone we have a double frame that is next to each other. That's why at some place it looks like a standstill. They're all different. But somewhere I have based at a firm that is too similar. So I'm going to change our frame. And this one here, and this one here to slightly more different. I drew them to perfectly. So remember this. Now we are drawing a split screen as if there was a split screen between these two images. And let's play it again. And C17 for me. I won't need an extra frame.
35. RunCycle of a Cartoony Bunny - Part 5, Adding the Facials - You add the tiniest details last and mak: So in the last lecture of our running Bunny, I'm going to add some visual features. I'm going to add the eyes. And you see how to use the facial, the facial line here to find where the ICR is very useful because you already see the face here. And I'm just going to draft it. You see that this line moves a little bit at the side here. So I'm going to do it on both sides. And again, you can refer it out. This is the mouth, but that line is guiding us to know where we have to put the ice. So it's very useful to just use that marking, that lines when you, when you animate your character because it will make it easier for you later to draw details on the face to following that line and keeping the eye straight. So the gaze needs to be always forward, even though the Mao, the face move downwards. The eyes look forward because that's what we do. We'll look at, we'll look at our destination. We need to keep our eyes on the road. It's a natural thing for us to do so, so keep the eyes on the road. So here I'm not going to do completely around the eyes on the side like I did with the elephant. I'm going to twist them because you see the head moves on from site to site as well. Here the head moves in this direction. And I have to note that even on this site. So I'm just going to make it as an ellipse here and move the eyes thrown so slightly on the left screen, lefty, which means that the bromine is right. And just the mouth over here. And now the head is start shifting again. So we do move or head from side to side in order to keep our balance. We can see the other ICT coming into picture here. The facials are very sensitive to the movement. As soon as we have facials, we're easier looking at the eyes. Immediately we're drawn to the eyes. We don't look at the character's body. So here I'm going to squash the eyes a little bit and bring the pupils down because the head is tilted up. And here I'm going to stretch the eyes and move them a little bit on the side and slightly just add the other eye over here on the side view. And the head is up. So from this perspective, I'm going to the ISO going to be smaller. And the band is still looking forward. And the mouth or his so-called small checks here and the mouth. There'll be slightly bigger because stretch and because of the perspective we are aiming for. And here is the squashed frame, so the eyes go back to its previous position, its original position and size. And the eyes move front. Watch looking at us. Just do the same thing here. And you have to move them a little bit on the side here to follow these kind of this head tilt on this side. The mouth just and just have the perspective changes so it gets smaller. And here we have the head starts turning on the other direction. So we lose this I on the other side over here. And the mouth is getting smaller, kind of squashed because of the perspective of the tilted head downwards. And the pupils are moving towards us now, this is looking a little bit on the sides. I'm going to correct that already now. This is things that you can, correct, correct. Or even later. But if you feel something is wrong, just corrected immediately. Don't be afraid of dots, but if you don't, it will correct it later. So don't worry too much. Worrying in animation is a total waste of time. Dwelling on your mistakes in animation is complete waste of time because you will not learn anything and anything from putting your self-worth on the fact that you've not done the proper animation. Something, as I said before, animation is about practice. Practice is about knowing that you have to put in the work and the hours and you have to reduce this. So here is our first draft of the eyes. We have unseen plane right now we have just follow this line, the facial line that you drew and we saw that the facial light is working smoothly. You can see the face even without any facial features. So let's see how it's working and it's working pretty nicely, is working smoothly. So we can just leave it at that. And when you polish your animation, you will, you can adjust this things. But we see that the bunnies running nicely at 12 frames per second. So we didn't have to slow it down. So it means that if we have 24 frames per seconds for, for a movie, if you are in the US or 25 frames per seconds for Europe, then you can just fill up the frame so you can add more in-betweens. Remember what we said? The in-betweens are the poses from one pose to the other. This is what the in-betweens, you just draw more frames. But this is a pretty nice cycle. So I hope you enjoyed that and just go ahead and draw the frames, follow this exercise and make your animated cycle. Bonnie, or whatever, whatever character you choose to do.
36. Dialogue - Drawing Thumbnails - Learn how to prepare a scene. Why is it important to draw Thumbnails: Hi. In this section, I'm going to talk about dialogue. Now, let's take a very simple character, the one I used to when I explained the animation principles. So I'm just going to use a simple character, which is just a ball with legs and arms. But of course, let's give it some phase because we need to animate, animate the facials. I'm using an app called Procreate, which you may be familiar with, but it doesn't matter what you use. This is just a setup for you to draw your character, to know how your character looks like, and to prepare your seam. When you do a dialogue, it's very important to know what the character is going to say and record in advance what the character is saying, the beats of the dialogue, and how the character is saying things is very, very important. So here is a scene that I've thought through a character or the flower. And the character is going to say, I love you flower. So I have this scene. And I am going to draw some so-called thumbnails, which means simple drawings to describe the keyframes, the key poses of this character while saying, I love you. Let's break down the dialogue first. We have dialogue. I love you and how do you say it? I love you, I love you. So thinking about this dialogue, I can draw a graph that may look a little bit like this. It starts very low on i, i, low view. And there is an OH here, which opens up the whole face. Also when we say, oh, we kind of like Lyft or phrase up to take some more breath. This gives us an opportunity to stretch the character. Remember when we talked about squash and stretch. This is also valid here in this case. So what I need is to find some contrast. And I can do that when I see that I have a stretch frame on one, the character says, oh, so I can prepare the character to squash and even to turn on the other side to have a bigger contrast without other frame and then settle in the word hue. So how can that look like? We have seen here? And what I can do is that I can turn a way that the character from the flower can draw a path like that to start with what a character will say i. Then the character squashes on the syllable el, and then it stretches. When he says O. And then it settles in, in the pulse and looks at the flower. When he says you, I love you. And also move, opens up his body while moving one, moving his right arm away from the body. So it has a very clear contrast and all the four pulses are very different from each other. So I create some contrasts and you see a clear silhouettes and a clear movement. So I have this four key poses for I love you. And what I'm going to do now is add the spouses into the timeline and record and record the dialogue in flipper clip, the program that I've been using, and start putting in this process. And in the timeline.
37. Dialogue - Timing the Key Poses - After doing the thumbnails, now it is time to put these frames as : Now that we're ready with our thumbnails, let's put them in the timeline. First, let's draw the first frame of our animation. We know that the character is going to be turned away from the flower. So let's draw it out. We'll draw the flower in a separate layer. And so far we don't need to draw the flower anymore because we will focus on the animation. When you complete this animation, you can copy and paste the flower for the frame of the flower to have the flower visible all the time. But here we are going to focus just on our character. Let's first record the sound. So you open the sound menu from the little megaphone here on the site, and you click on the red plus button below. And this will open a sound track. And here, if you press, press and hold to record, you've got this little microphone. So there you can press and record your sound. So I'm going to go with a couple of drafts and say, I love you. This one was a little weak, so I'm going to record a new one. I love you. Now this one feels better. I'm going to go without. And now we can see that there are more frames added to the timeline. And they're stretching all the way to cover the sound truck. So we'll see that we will need to add approximately of 23 frames to complete the animation for this soundtrack. And here we can also note that if it's a scribble on the timeline, we can see exactly what syllables and what words the character is same. So we can time that with our drawings. So here we have our character and here is the dialogue. I love you, I love you. And we have 23 frames. And each frame we can see what the character is saying. So in frame 20, we have to complete three or dialogues. So let's turn on the onion skin here. Onion skin, let's give it some more frames, three frames before entry, frames after done. So, let's add the phrase dot we sketched as the term nails. We have a squashed frame on the syllable l. I love you. So it doesn't matter where you put the frame because later on you can adjust, then you can move it into a proper place. So let's squash, that's due to squash and to anticipate the movement. And we keep the arms up on the same place while the body starts moving down. The one thing to think about is that it is good to offset different parts of the body. So if the body starts moving, keep some parts of the body is still in the same place. Not everything is moving at the same pace. That will give you an animation, more fluency. And for now we'll just go on and leave the flower. And you don't need to draw this lip-sync yet, and you don't need to draw the face. Now, what you need to do is though, with the middle line is and where the eyeline is approximately as we've done before. So we assume that the head goes down here. And we'll say on, I love you. Here is approximately, we can have an R. Let's see if we can have more frames for the grid. It's not enough to support the frame in. Just so we make sure about the character is at the same spot. And the other frame on the law is a stretch frame. So squash and stretch. Love will say that the OH is here. We can draw the lip sync later on. Now the lip sync that the OH is just mark that. Here we have a Node.js stretch. We use a syllable to stretch the body because o is an open syllable. So we can use the opportunity to, for the forest nice stretch. This is something that you can get used to like where to stretch, what to do. It's a matter of practice and a matter of sensibility. There are many ways of animating this scene. So you can try different approaches, but use whatever you can in the dialogue to have the character more allies and to use squash and stretch principles. And last frame is you. Lets us hear you. And we have the character open, open up upon his arms like that. I love you. And here it's, he's going to say EQ. And squashes. Again. Just draw it roughly. You don't need to worry now about the shape. You don't need to worry about the facial. Just find the poses. So here we have the main poses. We have the spouse, we have the squash. When the character start to say I. And here we have frames that are empty, but by how long we're going to hold this pose. Like for example, on frame 10, the character starts saying l. And it means that the character is going to soon start saying log view. So we'll keep the pose in 10. Here we have the POS o. And we keep that pose as a keyframe. And you, so we have some, but we still, even though we have this empty praise, we have four poses for key poses that we can move around and now build-up or a dialogue. Now first we need to time this friends so they match the movement. Let's play the animation and see what they've got. Love you. I love you. I love you. We see that it is don't lie there. We see it's almost there, but it takes some time until the character say, love you. It feels that it starts too early. So let's adjust that. I love you. So this frame needs to come a little bit later. So while we do is basically copy the frames. This program is not as advanced. So the way you deal with Egypt, just copy frame and then you paste it later and you paste it again. And so and later on we can delete the unnecessary frame. Let's see. So we'll delete this one or we'll just put an extra frame and 11. And then so we can space it out. We can see the timing. And here we can delete these frames instead because we need to hit Love you a little bit earlier. So what do you do? You just delete the frame to come to the end and complete the word love. You. Continue with deleting frame 16. Remove it. There are better programs that you can do dialogue, but if you're on the go and if you have an iPad or on your own, you can do it on the phone. It does why it's so easy because you have a recording tool and you have a screen, you can, you can animate on the goal. It's very comfortable and convenient to practice that way. But of course, there are other better programs that you can use. I love you. I love you. I love you. Okay. Now here it needs to, the character needs to say V needs to come down. So we'll delete this last frames. Delete, delete this one as well. And this one. But let's play the a and B you, I love you, I love you. I love you. Nylon. But we need now to add some more frames here on a lobbyist. Now we're going to add some in-betweens, make the animation a little bit more fluent. So let's go to the drawing mode and add the V, the way from the squash, from the stretch. And add a frame from the stretch too. When it comes down, basically the in-between. So it just drags up a little bit, holds that pulse. But the arm, the arm starts going from in-between these posts. You see this pose here and this pose and stretch the arm. So it's something in between. Adding in-betweens when you already have the main key poses, it's much, much easier. And you can see how with only four poses, you can actually time you dialogue and you can have a clear idea where the character is going. While this is, this is how we use straight ahead and pose to pose drawing. Now we are doing Australia, a pulse, the pulse drawing to find the keyframes. And now what we're doing is straight ahead because we are combining these two techniques. We are filling the in-betweens. Here it's saying the face has gained and then it's moving down. There is still some stretch. And we can draw the syllable v. We can mark wider noses. And let's kill you. I love you. I love you. I love you. I love you. Humming along. Now let's complete the in-betweens. This pose can come a little bit later and we can copy it here. We can copy this pose and pasted here. And instead on this one, we can just start anticipating the posts from this one. From this one, from this one, this one. Let's anticipate it. And let's have a slight stretch here. On i, a little stretch before we go into a squash. And here we can add the mouth by the mouse. Here. We can still keep the arms at the same position. Even though the shoulders are moving up. The legs are slightly coming up. Let's see what we've got. I love you. I love you. Let's continue. Let's hold this pose a little longer. So copy it and paste it. Just another, another frame of that. Let's see. I love you, I love you, I love you. So now let's add l. L, l, We need an IEE. So let's put another frame here. Just I have another frame and pursue the in-between. This one and it starts going down. But now the arm starts moving forward about the hand. The nose is still a little bit up. In. Squeeze, squash the mouth a little bit on i. And u here we can have a blink as well. Let's lift up this frame a little bit more. And here we can go straight ahead and just feel how it is. Just leave the mouth. The mouth a little more. El, Maybe not that not that squashed. Let's minimize the squash because we have two short time for that. Ino. If you do all big anticipation, you need to give enough time for the anticipation to read. If you don't have enough time as here, we have just a few frames. It means that we need to minimize the anticipation. So, so the anticipation is redouble. Everything is in a relation with something else. So when you animate, you have to, you have to feel what is good for animation, how much it can anticipate and how much you have to be. You can continue moving the body on L. L until we go to the extreme position, leading with the nose. And now turn the head down. Before it goes up. It starts saying, are still in this position. Before squash that, before you go into a stretch. Squash AND I find the opportunity to squash everything. And then we don't need this frame. Will can have the in-between between the frame when the frame is squashed and the frame is stretched. The character styles going up. Let's remove this frame. And let's see how that. Let's play that. I love you. I love you. I love you. I love you. I love you. Now, it's my eye line. You can go. I love you polishing. I love you. I love.
38. Dialogue - Polishing the Animation - You´ve done the preparation. Now it is time to polish your anim: So welcome back. Here, we will continue to polish the animation going for from bike and trying different frames, different approaches. So we can find the best balls and the smoothest action for this, for this dialogue, for this character. So here we'll add, will polish this other frame. That is on I. We will open the mouth now we can add the ice. One thing I want to point your attention is, is that the character's eyes also in diagonal to create a more interesting line of action and to prepare the character for doing a nice arc. You remember that when we talked about arc is like the more opportunities you have to make a nice arc on the character is turning around and saying, I love you, is going up and down in a nice flow and arc will just add to your movement to better animation. So just keep the arms still. Again. When we move, we don't move all or body parts at the same time. We start with some body part and then we offset. So let's try it out. I love you. Let's open the mouth more on AI. And let's start adding the blink already. When the character says, I keep the arms at the same spot and lift the body up a little bit more. Now that we know what it does to 2D animation to the character and start going into the syllable I. Already in the slightly stretched position. After the bodies, after the character says, I saw, it merges nicely together. Again, the animation, especially when we go in the polish phase, is really trial and error. You have to, you cannot keep the frames as they are if they don't fit, you just have to find the best position. This is how it works basically. So let's see how it works. It's stretched so little on AI and starts going down very slightly. When you have a character still standing still. The changes in the body are very, very minimal. You see that the lines, the bosses are very close to one another compared to the character who is, for example, doing broad movements like jumping or running, when you can really do very, very big contrast and the character can be indifferent, completely different places from one host to another. But when you do dialogue, we do not move that much. So even slightest movement adds to the character, to the character's animation and movement. So that's why we need to be in the Polish state. That's why we need to be more precise for what a character is doing. Now, let's transition the l. I love you. So it doesn't need to be just one frame. When you do, for example, an animation in a limited budget, you can keep one frame and transition into until the stretch frame. Like for example, as we did, we copied the frame, the squashed frame when the character says, said, and held it until the character says, Oh, but if you want to do fluent animation, you will need to add frames for, for even the term and make it more fluent. So that's what I'm doing here. Transitioning basically the movement from L2. When the character says, oh, and the arms are still keeping in the same position and starts slowly moving with the body. You see there in the same position. But as the body moves, they need to follow the perspective changes of the body. And here is a transition frame before the character starts to say, Oh, so the in-between, between the squashed frame and stretch frame. And here stretches so really wildly. So let's put in that and let's keep it for another frame. But still animate the, OH, just stretch even the mouth to say, Oh, a little bit more. And now we hear in the dialogue, the character starts saying a long view a little bit earlier. So let us start and do the syllable V on the stretch, both already before we prepare the clerestory anticipated character to come down and complete the sentence. I love you. So let's keep the V for a longer. It's really about feeling the timing. It there is no rule that says how much you need to keep and how much you need to stretch the frame. You will need to feel the timing. And that comes only with practice and trial and error. So what I'm doing here is the common way of working in animation. Just go forth and back, draw the key poses and then move them around and add in-betweens and feel the timing, refine, refine, refine. So here the character is saying you. And we can try it. I love you. I love you. I love you. I love you. I love you. We can keep the VI palsy a little bit longer because it feels as if the character is still a little bit of sync. One micelles these, so let's skip along the whole world I love and then bring the character down. Only interview with him. I love you. I love you. I love you. I love you. So it works much better. Now let's hold the character, the poses of I love you or little longer. So it doesn't really start a loop immediately. You can continue this scene. And if you have a particular scene you wanna do later on, you can continue copying frames and make the animation even longer. Have the character linger in front of the flower and maybe add some more blinks and so on. But for the sake of this dialogue, I'm just going to put enough frames to just add some pulse in our animation. And so we can see the dialogue unfolding and all the bits being in place. I love you, I love you. I love you. I love you. I love you. So basically, that is how you animate the dialogue. Again, lip-sync is not the first thing you do. The first thing you do is actually fixed the body language. Think about all the other things, the squash and stretch, the silhouette, the anticipation of the character. What can is used in dialogue to make the animation more fluid, more life, using the principles of animating lip-sync into later on, you have fixed the movement and when you know the word syllabus will fit in place. Also, when you do lip-sync, you did not put all the lip sync, all the words there. You'd have to practice in front of the mirror and see how you say the words. Do you need to say? I do have to bring the tongue out. When you say owl, no, you don't have to. You have to see how the things are said. Not all the syllables that are her needs to be animated. So. So I hope you enjoyed this lecture. Interests, go ahead and practice.
39. How to make an animated GIF - Set Up: Hello there. In this video, I'm going to
show you how to have fun with an animation apps
and how you can turn your Instagram photos. Do interesting fun
animations, animated gifs. So what I'm going to
be working here is an app called Animation
create our HD. So you can, if John have it, you can go to the App
Store and you can just type a search for animation. I knew my creator HD, and there are a
couple of versions and some versions are
even free versions. This is Ashley, my
product because I've done a whole project on this
app is very simple. There is some
disadvantages about it, but the advantage of it, It's very, very simple. But you can use any
program there is this animation desk also. These are not as good, but I'm going to use this app. You just choose the free version if you don't want to buy it. And that's gonna do the trick. And just go in and choose
this little cross here. And create a project
and just let's choose. It doesn't matter
what you choose to approximately this size because
you can adjust it later. And you can choose
Edit animation. And now you can open
this error here. So you can have this menu. And you can go to backdrop
here and choose photo. You can choose your
photo as background for, for your image, for
your animation. And this is something
you can do, e.g. if you go to albums, resound and scroll down. So let's, let's say
that we want to have a nice fun animation
with your soup, e.g. you photograph your food
for your Instagram account. And now let's have
some fun with it. And let's have some fun updating your Instagram account and teach you how to do
the fun animations. We choose this soup
and the thing is that this image, oops. Now I'm not going to.it. And you see that I'm
using Apple Pencil, but you can just as well
use a pencil like that. Just, it works just as well. This cost like, I don't know, $6 or I don't remember $1
or there's like very easy, very simple, and very
cheap pencils with thick. That works too. You just
have to be more careful. You have to zoom in more
to make more details. But if you have, like, if you have an Apple Pencil, I invested in that. It's not, it's of
course much better. But this is expensive. So if you're not a
professional manner, but you don't want to
invest in them anywhere. You have tells you image. And now what we can
do and it's like, can you imagine something
swimming in your soup? The idea is also very important. So what can you think about
something swimming there? And let's have a tiny
monsters swimming in there. So each of these images
here is your frame. If you check the layers, here are your layers. It says layers can just press it and you
see here is blank. So there is nothing
on this layer is because now the background, the image that appears
in the background, it doesn't register here. It just read through
all the animation. That's pretty easy
because you don't need to get confused or anything. So when you draw on this layer, it's going to, that's going to be null so you don't
have to make a new layer. So what you have to do first, now you can stare at
like four from bag. You can zoom in here. Now, let's use this
soup as the basis. And now we can choose color
and let choose alike, darker color, black color. So what we need to do, unless change here two pencils and here you can have
right in this corner, you can have pencil and
eraser, pencil and eraser. So I can just go for from
backward the fingers even about you can
also do it from here. It's so, so simple that
is just it's easy to use. It's more intuitive,
even though it can, it's difficult to have, don't have real timeline here you can now like
stretch animation. It's difficult. This is the limit
of this program, but it's free version
and it's simple. So let's have a monster coming
from the soup, jumping in, jumping under, jumping up here, jumping out, diving in, and going all the way around. When you make gifts, you need to have some
contour in Unity. You need to have, it
looks like it's looping. It looks like it's
continuous movement.
40. Sketching it out: I'm sorry, you, you grab
your pencil and you choose Pixel tree for
the size of the pencil, and you start just
sketching really loose. So this is going to be
delta monster that is kind of far one shape. And you start with
the first frame. Let's start with a shape where
the monster is coming up. So it's his arms like that. Use really, really
loose drawing. Maybe you can pass
some males here about, don't worry so much about it. So now you can add
another image from here. You will see that this
image will disappear, but you will see this image
that's underneath here. So you can compare it where
the previous image has been. And what you wanna
do is you want to jump in this, in this arc. Basically. You want the
monster to jump in, in an arc from here to here, and from here to here. So let's delete that and just work intuitively
with this drawing. Go back to the pencil. And now we have
the monster coming out just roughly for a moment, but makes sure that the place
where the master came out, we keep that place here so
it don't move it up and down because we need to have
the most are coming from the same spot. Basically. We have this. We have the eyes over here at a really,
really loose down. We want to do this
monster thing. Very loose. We have some legs so
you just draw them as fierce as spheres it
they're like chunky legs. And then we have
the arms diving, just make sure the arms
are also diving in an arc. We have some ice here. Maybe it will have
some nodes here. Let's add another frame. And the master is start
diving in over here. So we have his body almost
already in the water. We have his legs are up. And then add another frame. And in this frame, the monster is
basically already know it needs to happen really fast because it's a fast motion. So the monster is inside, the legs are only
outside, like a doubt. And we have some
kind of a splashes. And we have some splashes
over here as well. To start with. Now that we have the splashes
are getting even bigger. So you can signify a splash like a cartoony
splash like that. It's getting bigger
and it's like drops of water or a soup. Just spreading around. And then we add another frame. The motor is already
on the water, but the splashes continue. They need to fall. And the splash of
continuum also in a line like that in an arc. And they fall down into the
soup and in some kind of arc. So some more splashes coming
out from the monster, jumping into the soup like that. And then we add another frame. Let's settle. The splashes. They continue getting smaller. Some splashes are
already in the water. So the drops are kind of like creating another ripple
effect in the soup. Like dots and some splashes
are still falling. And then you have another one. Just follow this through. I'm not a repulse. Here. Splashes already,
creating also a ripple effect. Maybe some ripples here in
the soup add another frame. They are kind of settling. But now, because the
soup is very short, we need to have the monster
coming already from here. So at the same time, we want to see the monster
now coming towards us. And we have the motor comes
from this part of the soup. And we have his eyes like that. We have the arms. What do you need to
think about here is basically just motion. Rather than, rather than character so much or
making clear drawings. So add another frame. Now the splashes have continued. The monster is coming out
of the war of the soup. Like dots. Hands is in the air. You signify where the face is with these kind of
lines over here. So the lines, the
middle line splits the face into symmetrical half. So this is, these are his eyes. He's kind of grasping for air. And then you. And then he's also splashing some drops here when
he's coming out. Even here, it's like drops
are coming from the monster. Dot, dots. Now add another frame here. The monster is coming
out of the water and in this position when the monster is kind
of in the middle. Two. Hence, the effect of
the monster jumping. The cartoony effect make them
most are slightly larger, so storage scheme a little bit. There is a principle in animation and calls for
squash and stretch. And when you stretch something, it just creates more motion. We have also feet, his legs coming out
and we still try to do this movement in an arc. And he's still
having droplets of soup coming after him
at another drawing. Now the monster is going
back to the soup again. Just draw the face and now
we have some splashes again. Over here. His face, his legs are already over here. Like dot. Add another frame. The master is the soup again. The legs are coming
closer to the soup. The splashes are
getting bigger and hiding the whole
body of the monster. Add another frame. And now we just have
splashes like dots. And on the other side, splashing most articles,
he's kind of heavy. And add another frame. The flashes, the
splashes are settling. So they're kind of like
falling again in the soup. And there are some drops also following through
at another frame. The splashes are settling
in the water in the soup. Here, just leaving
this ripple effect. Add another frame. And they're kind
of like settling. And add another, add another
frame, and it's nothing. So now let's play this animation
to see what they've got. You hit the play button. And here we have some
options for asda. Normal is, as a default
is 25 frames per second, but we want to make it smoother or slower because we don't
want to draw so many drawings. So it means that 1 s of animation to have
a small drawing, need to draw 25 frames to be smooth so that the motion here is going to go really fast, but we want to have that. So we want to have one
drawing of beer twice. And that's how we will still
have smooth animation. But we don't need to
draw so many friends. So hit play. And you'll see what
we already got. We've got a pretty
nice animation. We just do those, so we just like stretchers,
sentence-like Genki monster. So let's go to the next step
and define the monster.
41. Defining the Little Monster: Hello there. So now that we
have drawn or a monster, remember how it looked
like splashing and it's going nice and nice curve you see how important
it was the goal, the motor to jump
into this curve. And the thing is that
you can slow down the animation by just
choosing to have less frames. And this actually
looks pretty good to have a ten frames per second. Instead. It can adjust it pretty
much here and you can have a really fast animation if
you'd like to add more frames, which means that you need to
add more spacing in-between. So let's go with that and
let's fix our monster now. So it's not just catch up, but it looks real. So we can trick our
friends and say, Look, I have a monster
in my soup. Right? So here you have the layers
where your animation is. So what do you wanna
do is you want to do a clean drawing on
top of the animation. So you add another layer and
make sure this next layer is highlighted in red so you
don't paint on this layer. So you have this
layer as a sketch. We are going to clear
it or hide it later on. But you want to paint, you only use that
as a guideline. So now let's choose
a different color. And I want to choose a
color that will contrast. I love this color, but also the background. Because if the, if the image is the most girls
from the background, I don't want them also
to be obviously black because I'm going to lose
some friends over here. So I'm going to choose
a contrasting color. Let's decide on maybe green. A green monster is in my soup. Right? This is a little bit harder
to navigate with this whale. Greenish. Let's have
maybe blue, blue monster. That's a nice one. Blow monster in my soup. So I'll choose this blue color. Now I'm going to start outlining
painting this monster. So I'm going to basically just tried to outline some kind of a shape
around this monster. And here is the body. And now I can make the body starts from here
and here is the arm. Here is the other arm. So I'm going to do it like that. And now now I can feel it. I can make it easier to feel by increasing the size
of this tensile. So I'm just going
to feel a nice too big there and other programs, if you do it on, if you don't do it on iPad. There are alike
easier feeling tools, but I kind of like feeling it in because
sometimes it leaves. So some spots. I'm finished and it looks
really like a life. It gives a little bit of a
hand-drawn feeling to it. And now I'm leaving
some spots here. I'm finished because I want
to see the armor is later on. I can either choose to color it with black or just
leave it like that, or shaders to make
sure that the monster, it looks better in an
integrates better. So I'm just going to go to the next frame and you
don't add the frame now, don't add another frame. Make sure that you
don't do that. You just move forward
another frame. So now you don't, you can see the
frame underneath. So if you want to see
your friends underneath, you go to photos. And for the time being, kind of change the
palette and you choose maybe white-collar
to start with. Let's see how I can easily
see the frames beneath. Or maybe darker color gives me a better view of this
frame underneath. So what do you want to do? Now? Add another layer
down, forget dots, and just outline this
monster, the arms. Now you can be more tidyr. You can have the arms
like chunk, chunky arms. Like squares and a
little bit around it. The thing with animation, especially when you keep
your characters very simple, is that it gives you
the possibility to draw extremely simple shapes
and don't have to be too precise to get good
results. You can do though. You can like laying the
couch and watch some TV, doodle, some massive monster. As long as you follow the principles of
animation like e.g. following an arc, like
we did this time, this monster is
jumping in an arc. What I showed you, that it follows these arrows, that one line of action. Then it looks like
a real monster. It looks like a creature
and you don't really see the imperfections or if
you're drawing them so well. So that looks good. Let's move on to
the next drawing. Another thing, add another
layer, and repeat. So I'm just going to go and
do that for all the drawings. And I'm going to speed it up. Now that we have
the splashes left, we're going to continue. You're going to
forward to where we have the monster because we
don't want to change colors. So just go to where
we see the monster again and continue with
adding the frames. Now, here we have the
monsters eyes even, but we're going to leave that for later because when
you pick up a color, you can have a better flow. If you let, if you draw all of your drawings with the same
color before you move on. So you're just continue with the monster and then
forward another layer. Don't forget to
add another layer, but also don't forget
to highlight it. So add another layer. I liked it and continue
with a chunky arms, their legs, squares,
doodle them out and makes sure that you have
some kind of a curvature. As I told you when the mouth, they'll start
stretching forward. Just you can enlarge the arms. You can make them longer, not not wider, but longer because that's the
principle of a stretch. That when you stretch something, it looks like the motion
is in this direction. It just gives you better motion. So just do that. And so far, don't worry
about the splashes. And I'm going to complete
the next a few drawings. So now we're done
with the monster. And now we can go back to
backdrop and we go to photos. And you go to your
photo library. Let's choose the same, Let's choose the same image. We can play it.
And let's play it. Now we have a blue
little monster. And now let's, let's refine
the rest of the animation. Now we can add features and
shadows to the monster.
42. Adding Features: So now let's go and
refined or a monster. So now we're going to work
on this layer that we've worked with, the colored layer. So what we're gonna do
is now try to refine or to refine the features. And I'm going to give
it some shading. So I'm going to
give the shading in this direction because the
light is coming from here. So I'm just going to go for
a darker color like that. And I'm going to add
with a thinner line, some some outlines and some shading of the
monster on this side. Now this is a little
bit too dark maybe. So what you can do is go back
and with a pin with these to pick the color here and go
back and adjust the scale. Just choose a darker
of the same color and make sure that you
change to pencil later on. Maybe like that. I'm going to shade
approximately like is if it's around monster and I'm going to have
the shadow falls, fall on this arm. And I'm going to
have the shading coming here all around this R. And now I'm going to even here. And I'm going to continue
to the next frame. And here I'm going to turn off this frame to see
what a monster is. And just continue
with adding the arms. Adding this shading
as if the monster is, has a volume because
this is a real photo. So we want the monster to merge. Well, in this photo,
it looks real. And I'm going to round this up. And I'm going to here around
his daily and the legs here. And the legs are around in
the water like that here. So let's continue
over the next frame. It's a lot of small work
here to get it right. But as soon as you
have the animation, you can experiment and you
can do whatever you want. It's very simple. And this arms here now and these legs are on
top of the body because, because we see like their
belly a little bit here, we are going to have the
face over here like a dot, and then the other leg
will be beneath the body. So we're going to have shading over here and
align or modifying line. And we're going to see the
lower part of the legs. So we have this sphere
here defines that we see the lower part of the legs
or the feet like that. And now let's have
the other one here. Close that one. And now we have, we can see a lower part
of the legs again. So this one is on top the body. And we have the
shading over here. Now later on you can add
another color for the shading, for the contour. Maybe. This is a process
that you can also explore while you're drawing it. As soon as you have
the animation, you can add four to the monster. You can add whatever you want. As you have this doodles
animation is just fun, fun, fun from here on. And now the monster
is gone here. And now let's have, let's see why the next month or is now we underwrite frame. We don't need to hide the
frame, the blackness anymore. Oops. Make sure you don't do
it all with your hand. And now we have the
face over here, but we'll just go and
choose this line so far. And choose this color. And just go through
all the monster before we do anything
else. The shading. And the shading doesn't
always need to make sense. It is sometimes
it's just have to have you just have
to have nice look. The frame needs to
look a lot at night. So if you had the the shading from the other side when the
monster was on the other side. Now it's on this side. Well, it's not a big deal. Needs, it needs to look nice. People are not. Think about it. But you want to have
the face clear. You want to see
the face clearly. So you just defined it here and one here, outline it. And this is the arm over here. Like that. Let's go
to the next frame. The monster is coming in. Some shading over here
and shading over here. Now we don't see
already the slow part. Now the stomach is on top. This food is coming out but
we don't see the lower part. We see the front side of the foot and the
body is stretching. See that I'm doodling event
this line because it looks so nice with some live
lines later on. It looks very much alive. This little monster. Next one. And now you see
that we are already automatically on this frame. And now this arm is
coming here and it's touching the surface
of the soup. There's one here. And again, now we have the face
looking down already. So the shading is on this side. And now this this leg is on front and the other one
is behind the body. We don't see the lower
part of the food because we sit the mouth
or from this side. So I would just add
some shading over here. And then this frame. Now we can see some lower
part of the foot here. And some of them are here. And also around the stomach. And then the monster is gone. So now let's play the animation
and see what we've got. We have already or
a monster jumping. Now, let's add some
features on the monster.
43. Adding Nails: So this time, let's have some
features on our monster. And we can start from the
beginning, the first frame. And let's see what we
can give him here. Let's give him nails and nails. They're going to be maybe
darker blue, darker blue nails. It's gone on to be nice. So we can start from here. And we can have nails here. As soon as you add a
detail to the most there, you can clearly define how
the perspective is as well. It defines your InDesign. It gives suggestion like
how the hand is turned. And I'm going to
give the nails only on the hand as if fingers. It looks nicer. Don't have nails here. What else do we have nails? They're coming here and then
front of this sphere here. The nails. And they
are over here again. And this arms are over here. Can you imagine a
swimming pools? How would it look like? And just follow it through and down with the nails. Let's play it. Now. It's getting there.
44. Adding the Face: In this section, let's add the monsters,
eyes and features. So exit from here. And now let's start
from the beginning and see where we see
the monsters eyes. But maybe we can add
another layer on top and have now white, white, kind of bluish here. And let's have some eyes over
here in profile like that. And we'll have them
over here in profile. And we'll have them
now they're gone. Next time we see ice
was going to be. Now I didn't change the layer, but that doesn't matter. You can add another layer
still to have more control. And here we have the
full EIS visible. And here they are very visible. We can see the
monsters expression. And they are also a longer dot signifies that the whole
body is stretched. So remember when we say
that the body is stretched, it just gives a nicer movement. And it is enough with a
few frames to get like a batter movement and more
impact of your animation. Like dots. Here the monster
is done downwards. Now I now before we
play the animation, Let's add some
pupils on the ice. So let's go with the black. And let's have the
most are looking down here and looking down. And he's gone. Next frame we see
the ice is here. He's really trying hard. And here the thing is that what else is
with black is his mouth. So let's add his
mouth over here, grasping for air like that. And let's go to the next frame. It's like looking down and
steel grasping for air. Next one he's in. And now let's add with the
white or kind of grayish. Some teeth for the monster. Some teeth here. And here. He is, grasping for air. And now let's play
the animation again. Now it's getting
better and better, and now it's time to make
the slashes. Let's do that.
45. Painting The Spashes: So to make the splashes, we need to have a color that is similar to this soup scholar. On one of the disadvantages
of this program is that you can't pick the color with this
because it's not working. And so you'll have to find
yourself a color that is similar to this color
and drying it out. So this is obviously
not very good. This is not good, but the
color needs to be slightly lighter so that you
can see that splash, but you need to simulate
basically, I'll splash yourself. So let's open this layer
and see what we have. And maybe add another layer. And we'll have the monster kind of like having
this drops coming. Even though I haven't drawn
them in the beginning. We will have these
droplets coming from this frame of
the monster and some kind of a repulse
already in this frame. Now, these are,
here are the eyes. We can use this frame. Even add some, some re-post
here, some splashes. And we have a splash like that. Mean we signifies blushes with some kind of round
shapes like that. In the kitchen
movies you've seen splashes of water and drops. They're kind of round. And that's how we
signify splashes. So we signify ripples. Here. We go to the next
frame and there's splashes even come in in the
feeds, like dots. They're dropping, somewhat
dropping like that. Splashes from the other foods following the movement
from the water. Splashes here are kind
of like already fallen, like this one here. This one here is
also like fallen. They change shape so they don't have to be the same shape. So they change shape in the
water and hear their gum. Or they have some kind
of repulse already. Here we have new splashes. You can open up this
layer and another layer. And you can just paint
this flushes over here. Big splashes. You can increase the
size of your pencil. And B, being more brave
when drawing this splashes, bell-like larger splashes
because we have a big monster. And don't go too fast with
the splashes because it takes time even for the
splashes to Jane speed. So they need to start there. And we have another one here. So add another layer. And then we have
bigger splashes. They're just growing this
plotters we had before, just growing and growing. So just make them bigger and don't forget to make
them from around the legs here for day
come from the same, the same space, the
same epicenter. They're not spread
around everywhere. They need to come from
the central word where the monster has just dived. So now the splashes
are getting bigger. And here because this
layer is on top, we need to be careful around
the legs of the monster. And here you see how we have the splash coming outside and just continuing on
the darkness of the photograph like that. And here you continue on the next frame and
here are just slashes, so just let's add another layer. And now we paint
even this frame. And I mean, as long as you
follow, you follow through. So you have this
movement with splashes, like going up, then
increasing then down. You don't have to be too
precise with the shape of the splashes because
it's still animation. You need to just follow
through with these shapes. And to be patient, don't finish your
drawing too fast. Here. Let's go to the
next frame now they're settling at another frame
and settle them down. Like that. Here you have. Let's go with a
smaller pencil now because the splashes are
getting spread around like dots and lead to
add another layer. Because we're going to hide
these layers later on. Maybe another here and here, another layer. And now we continue with following through this
splashes over here. And now we start
with a new splashes, with a new monster
coming out like that. And he's doing some ripples
and add another layer. Now he's like splashing, having these
droplets coming from him because he's
been in the soup. And just making repulse
got the soup is thick. Another thing to think about
is also the thickness of the liquid that
your character is. And if you want to have your
character swimming in T e.g. and that's going to be
also another thing. Soldiers continue where
there's droplets coming from, the monster and following
this movement here, the monster, there
is this space. And they're kind of like
falling back into the soup, living some repulse, some more. I forgot to make another
layer, but that's good. That's okay. It's still not on
the outlines layer. And now I can make
another layer for the splashes that are
in front of the monster because it's starting
to splash on the other side like that. And it's covering the monster. And now the bigger splashes. So just increase them
and feel them up. They're coming from here. And I'm just going to
complete these clashes. So here is where he settled the splashes and they fall
not in the same place, but a little bit further away. So to have this kind
of arc as well, they fall slightly further away where it started from here. And you have still this epicenter
of why the monster dove and settled them. And I'm the one. So now let's go and hide these layers
all away, all along. The one with the drafts, with the black pencil. Before we preview them. To see how well integrated
or monster is in this soup. And you can brag to
your friends is like, you know what I had in my soup. I had a real monster. And I mean, you can
use that to make your Instagram accounts or
other accounts more fun. And what I wanna show you here is a really quick
way of doing it. You don't have to have super
knowledge of animation. But how we can very easily
design a fun images, fun animation just to make
your social media better. Maybe Jane more followers. Everyone needs more smiles now. So now it's done. So let's preview it. It's pretty nice, right? But now what we can do
is add more shadows, more shading on the soup, on the drops out of the soup. So let's do that as a next step.
46. Adding Shading: What we want to do
next is basically have this droplets
look more real, more integrated like we have this shading here on the slope. So let's add that in
the droplets as well. So let's try to match this
color here approximately. And habits a little darker, so this is pretty good. So you just go at
the same you did, whether the sense that you
did where the shading of the monster here and just draw some shading
on the droplets. Even here. Just on one side. You're already on the layer
where the droplets are. Maybe not, maybe not that dark, so lighten it up a
little bit. Now. I'm just going to redo. That means picking up the color. Picking up the color here. And just increasing slightly
the darkness and then switching back just slightly brown and not
so much orange like that. And we can have a nice
contrast on this one. Maybe some slightly darker here. Because we want to work
with contrasts like that. And now even here, just a little bit
on each droplet. And now here are, they're starting to come out. And now we want to
pay attention to each shape here because
they have different volume. So we add more
shading like that, each shape separately
and even here. So every thing plumped like this as a separate chunk
of water, so to say. And here is, don't add too much though because it's pretty
nice as it is now. Just very little. It takes very little
to make it look even better and more integrated. And I want to have
slightly lighter here, not that much for this part of the
water or the soup. And you can always go back and grab this color and
don't forget to switch. So you can continue
with the next drawing. Here we don't have
shapes anymore, so we can let that be. We can add this to this new droplets from
the monster coming out. Just choose the larger
droplets to add that too. Not all the droplets needs
to have this shading. They have also different
shading otherwise. So I'm here with Dr. new, one new set of shading. And especially here, it's
very important because it's such a big set of
chunk of water. So it's important to
have more volume. It's such spots. So just pay attention to
each shape of the water. So it also gets very cartoony, so it doesn't have to
be photorealistic. We have a curtain in
monster and that's, that's the fun with it. That we have a cartoony monster
jumping out of the soup. And it feels real, but also feels cartoony. Another thing is that you can do choose to have
a better impact. You need to choose
images that are still don't have a lot of movement in them because it's gonna
be more believable. Like e.g. if you had the
soup that was steaming, that wouldn't have
the same effect because the steam will be still. And that's not
happening in real life. So choose soup that
doesn't have steam, so that you have a
better animation, better effect of your animation. You can add animation
on film as well. But especially this program, it's not allowing to edit film. You have to break it down
in different frames, so it's more complex. But this one, you can
just snap a photograph, especially with your food and just add some funny animation. It's very, very simple. It's very easy and you see that doesn't take a lot of efforts
and this one is lost. And now let's play or animation. If getting nicer right.
47. Adding Highlights: So here is one last
thing we're going to do. We're going to add
highlights on the water. So just choose a color
that is slightly brighter, some yellowish, something
like dots even more. And go. And that these droplets and just add some highlights
here and there. It's going to give more
volume to the water. Maybe slightly
darker because it's, after all, it's a soup. And you add highlights
on this part. On the part of water. When light is coming from. Maybe you can add some
slight highlights even here. That's how you can separate
the droplets even more from the background and have
an even better contrast added to each chunk of water. You see, I'm not super precise, but it doesn't really matter
a lot for this animation. Because animation is about
many images together. It's not about only one image. So even if you draw
pretty rough animation, pretty rough shapes,
you'll still be able to get a nice animation. So this is the fun with it. That's, yeah, you don't have
to spend so many hours. You can just be more
playful with your images. And let's follow through. With each image. Sometimes as you see, these effects takes more work than the character
itself, right? So now we have another
monster coming in, and it's done. So let's play the animation. And here you go. You have a little monster
jumping in your soup.
48. Exporting GIF: So how do you export
this animation? You exit the animation, and here you have your project. You can rename that project and, or you can export it
as an animated GIF. Here you just click
export and save images. And then you go to your images. And here you have
your animation as an animated GIF that you can place anywhere you want in your, on your Facebook or on Instagram account and
just have fun with it.
49. Exporting Video: Another thing that
you can do is export video and hear it. This doesn't seem to work. It used to work for before. But export as a
video and say video. And later on you can add and
you can go to your program. What I'm using is video lip. You go in and individually and you allow access
to your photos. You can choose that project. And you can even select that
project and duplicate it. So you can have a longer,
a longer project. And here you can
export it as a video.
50. Adding Sound: Now how you can add sound to your project in Visual lip here. Or you can record your own
sound with splashing water. But there are also a lot of
sound to get from internet. And obviously here in
video or leave it, there are some, there
are sound effects. And I can type splashing, water. Splash, splashes, search. And I can try that out. This is too long. This one is good. So I'm just going
to download it. And I'm going to try
to match it to when here at the splashing
sound moments. So I'm just going to match, match those sounds to where the monster is jumping in
the water like over here. This is the first plush. And and there should
be a second partial. I can just split that. Splits. I need it. So this one here, split it, delete that. And then just go in
here and duplicate and just drag it to the second splash,
which is approximately. And then duplicate. Let's add it to the
next brush over here. And the last one, duplicate and R here. And that's what we get. That's maybe too much. So It's because it is
not enough video for, for this, what we
can do is speed up and lower slow the
speed for these videos. And even this one. Spread them out a little bit. And now the splashes over here. And this one is over here, like that. And now you can run the dots and you can play it as
many times as you want on your accounts. So I hope you enjoyed
this lecture and I hope you can have a lot
of fun with your photos, doing fun animations.
Buy from me.
 Maria Avramova, Illustrator/Animator/Filmmaker