Transcripts
1. Introduction: Hello everyone, I'm Hallease, a digital storyteller, YouTuber, and the Creative Director and Executive Producer for StumbleWell productions. I've produced content for big tech companies, clothing brands, and also PBS. On my YouTube channel, I like to document my chaotic good life through documentary style vlogs, which I call vlogucumentaries, tutorials, reviews, and whatever else I'm vibing. In this class, I'm going to teach you the basics of Premiere Pro, focusing on exactly what I think you'll need to edit a "How-To" video for YouTube. So if you've never touched Premiere Pro before, if you've never opened up the program, this is the class for you. Our project for this class will be to edit a plant how-to video because I love plants. The footage will be provided in the description so you can follow along as well. We'll go over the Premiere Pro interface and how to set up your project and import your footage. Then cut together a role, which is the main footage content that you'll use. Then put in our B-roll footage, which is just another word for the supplemental content. We'll put in basic graphics using text. Also, create a little intro for the video using some images and then also create an end screen for the video as well. Finally, we'll go over some basic color correction, how to add and balance music for the background, and also how to do a few simple audio tweaks as well, before we finally set it up to export. I'll show you how to export your video from Premier Pro directly or how to export your video from encoder if you have the full Creative Cloud suite. It's going to be a lot of fun. I can't wait to hop into this with you. Thank you so much for joining me. Let's get started.
2. The Premiere Pro Interface: Once the loading screen is done with Premiere, it should have some opening box like this. We're going to click on ''New Project'' and then we're going to call our new project whatever you want to call it, let's call it, I don't know, how to plant. Keep it simple and then we're going to put it in whatever location we want to put it in. We're going to hit that ''Browse'' button and save it wherever we want to save it. I'm currently going to save it on the desktop. In the how-to plant footage that I have provided, I have a duplicate of everything I've provided for you to follow along and edit. I'm going to make a new folder in this main folder. I'm going to call it premiere. I'm going to choose and put it in there. The reason for that is I find that whenever I'm editing a video for YouTube, I like to have all the footage for that video, all the assets, images, everything like that, all in one place. I think that makes it a lot easier to reference if you ever need to come back to a video, re-edited, changed some things, you're not looking for media everywhere. I find that keeping everything all in one root folder is really good, especially when it comes to all of the Premiere assets that come along. Now, don't really worry too much about the rest of everything that's in this box. I think the main thing to make sure is head over to scratch disks, and make sure all of them are same as the project. I think that's the best thing for when you're trying to again, edit specifically in a YouTube type environment hitting same as project is going to be really good because again, it's going to put everything in that premiere folder that you've created. Go ahead and hit ''Okay''. Now when premiere finally opens up, it should look something like this. If it doesn't, that's fine. I'm going to go ahead and walk you through how to make sure the layout for premiere looks like mine so that way we're on the same page. Let's go ahead and click at the very top here you'll see this row of different layouts that you can choose from. Go ahead and just hit ''Editing''. You'll see that changes the whole layout. Now, before I get into each of the different panels that I think you'll need to edit this how-to video. Let's go ahead and import our footage so that way you can see it because I think once we import the footage, that'll help with explaining everything as well. The way to import footage, you can hit ''Command I'' if you're on a Mac or I believe it's Control I if you're on a PC and then we're going to head over to wherever you have saved the footage that I provided for you. Mine is again on the desktop and you'll see I have it organized by assets, footage, images, music, and then our new premiere folder that we have created. Obviously we're not going to import the premiere folder itself because that does makes sense. But we can go ahead and highlight all four of those folders and then hit "Import''. You'll see that it has dropped all of the different folders that I had created for you, assets, footage, images, music, everything you'll need to edit this video together. It is now all in what is called the project panel. That's basically a space where you can organize all of the different clips and media that you bring into your project to begin to work. If for some reason Premiere hasn't created these bins for you, it's just dropped everything in. You can create these bins and name them yourself. I'll show you how to do that now. The first way is you can go down to the bottom, this little folder and if you see you, I hover on it. It says new bin. You can click that and a new bin will come up. You can then type in whatever you want to type in. Let's say music 2 or music 1, sure, and then drag and drop things into it. If I wanted to put this image into there, I can, and that's something you can do. Another way you can create a new bin is to also just hit Command B/Control B and that'll also bring up a new bin. Throughout this class, I'm going to tell you the shortcuts because I really think that knowing the shortcuts is what will help you to become a much more proficient and faster editor, which is what we all, that's the name of the game. It gets a little annoying at first, but I really would recommend learning the shortcuts. I will be using them to edit this as we go. I think it's really important to do that. Let's get into the rest of the interface, now that we've imported our footage. If you need a pause for a second so you can organize things the way you want. Feel free, but let them keep moving forward. Go ahead and after you've organized everything to your liking, everything looks pretty good. Go ahead and hit Command S/Control S, and let's save, you better make sure you save often. That way you don't end up losing your footage or losing the projects. Everything you've worked hard for save often, always all the time. The last thing I want do in this project panel before we move forward is let's go ahead and make a sequence bin, Command B or Control B if you're on a PC. Let's call this sequences. This is where we're going to save the actual timeline of what our final how-to video will look like, it'll be the compilation of all the footage we've pulled in and all of the selects we've made. We'll call this sequence. Then I want you to go ahead and hit Command N/Control N. It's going to bring up this new sequence box. Again, if you don't want to do that, you can go down to the bottom here and do new item and go up to sequence. Now the footage I have given you was shot on my Sony a7 III. It's going to be a digital SLR, 1080P, and it's going to be at 1080P24 frames per second. Now, if for some reason you don't actually know what the specifications of your footage are. If you just pick something random and hit ''Okay'' and then drop your footage in, it'll autocorrect and ask if you would like it to adjust based on what your footage actually is. Usually it's going to be a good guess to say yes. Let's go ahead and name our sequence, how to plant again. We're going to be a little redundant. We're going to hit ''Okay''. Now we have our program monitor open and you can see how to plant. We have our timeline available here. Our frame rate is there. Then you also see in our timeline panel right here, things have changed as well. Let's get into what some of these panels mean and some of the basics of it, and let's keep moving forward. Let's start over here on the left side, which is our source panel, as you can see right now it says no clip. If any of these panels are not appearing for you, again, head over to window and you can make sure that they pop up as we keep going. If for some reason any of them don't pop up, head over to window at the top, and pick whatever panel I am describing. Then it should appear for you. First, we're going to talk about the Source panel. This is where you can see the footage or assets that you've imported without actually putting them into the finished product or the timeline itself. For example, if I go to images and click here, it's going to bring up this image and now I can see that it's there and what it looks like and just basically a bigger view of what it is. The source panel will be good when you're trying to make selects from the footage that you've captured and bring them into your video timeline. That's the Source panel that brings me to our timeline, which is this area down here. Think of the timeline as where you will actually build the video itself. All the compilations of the different cuts, of the different clips you've used, where you'll add your graphics, effects, that will all live down here in this timeline. It consists of a few video tracks and a few audio tracks. The main thing to remember with this is whatever is highlighted is where you can be the most active. So if you're ever working on a section of a video and you don't want that track to change really, you can adjust by making sure it is not highlighted. Let's go ahead and just drop some footage into it so you can just see what that looks like. We're going to head over to footage. Let's hit CAM A, and I'm going to scrub through it a little bit in my timelines. So you can see up here, and this is called your play head, this little blue arrow. We're going to scrub through a little bit and as you can see. Our footage is there and that's how we're able to watch that clip without having to put it into the timeline. Let's just go ahead and drag and drop it. Don't worry about doing anything crazy awesome, but literally click on this, drag, holding, and drop, and you'll see now it has been presented into our timeline and it now appears in our program, which shows you essentially what the video is that you're building. Now, I like to drag and drop. I think that's the easiest way to do it, just for me and my style of editing. But another way to add footage into your timeline as you're picking things out is to use these little buttons over here, the insert and the overwrite. Go ahead and play with them a little bit if you want. But to insert, hit the button, it's going to drop it down. You'll notice how it dropped it into the second A2 audio panel and that's because this insert overwrite is highlighted here. If I moved it up and then hit "Insert" again, you see it would add it on the top audio layer. So that's something to keep in mind. The other thing is we're using the insert. So all it's going to do is whatever is there already in the timeline is going to insert whatever you put in after it. Now if you wanted to maybe put something in front of this or around it, for example, then we would want to hit the "Overwrite" button. You'll see how it has taken up the space now of what was originally there, it is overwritten the information that was in that area. Go ahead and take them in and play around with that if you want. Again, for me and my style of editing, I usually just like to drag and drop. But I know a lot of other editors that really enjoy using the overwrite and the insert buttons. Using your keyboard shortcuts is always a good thing. So insert is the comma and overwrite is period. So keep that in mind. Now, let's check out our affects control panel because this is another panel you'll use quite a bit. It's over here, usually next to the Source panel, at the top. When do you do that, that brings up some different effects that you'll need to know about as you're starting to do some basic graphics and whatnot so you can change position, scale, rotation. I'll just show you a little bit. So you change the scale there, position of the footage right here. Really simple stuff and all of this will make more sense as we keep going throughout the class, so don't freak out. Rotation of the footage itself. You can do a lot of awesome stuff in here. This is just a good panel to be aware of because we will be using it in this class to do some tweaks. The next panel I'm going to talk about that I think is important to know is the effects panel. So this is the effects controls, and this is the actual effects panel. Here's where you can add different effects to the footage, your audio as well and when you do that, they will also appear in your effects control panel. So that way you can make tweaks and adjustments in that panel itself. Think of the effects panel as just where they all live, and then the effects control panel as where you can tweak them. The next panel we're going to talk about is the essential graphics panel. For me it's on the right side over here and then again one more time, if you are not seeing these panels pop up, go over to window and you can find them there and click on them and then they'll appear for you. So your essential graphics panel, this is actually where you can build different little graphical templates, if you will. Adobe offers a lot of them for free. In a later class, we will go over finding them and using them. As you can see, I have quite a few because I use them often. But we're going to end up using this panel because this is also not only where you can get free templates to build graphics in, but if you create any graphics for yourself, you can edit them using the essential graphics panel. This is going to be a good panel for us to use. It'll be a good time. The next one we're going to talk about is the essential sound panel. Again, if it doesn't appear for you, head over to window, hit a essential sound panel. This is how we'll make some different audio tweaks, editing, how we'll balance our music. It'll all be done in this panel. Then final, our lumetri color. This is where we'll do very, very basic color correction for our video. As you can see, we'll be able to mess with the temperature if we want to. We'll be able to mess with the temperature a little bit. We'll be able to mess with exposure and all of that sort of fun stuff. Again, I will go over some of the basics of color correction. I won't get too much into it. I would rather you play around and enjoy yourself. That's the basics of the Premiere Pro interface. Obviously, I didn't show you all the panels that you would need. I just wanted to focus on the panels that we're going to use to edit our how-to video. So go ahead and save again if you haven't already and in the next class I'm going to show you exactly how to begin to construct your A roll cut, which is the main footage, the main informational footage of your video.
3. The A-Roll Edit: Welcome back. We have learned the basics of the Premiere Pro interface and what panels we're going to use. Now, we're ready to actually get into editing our A-Roll. If you have anything in your sequence already, go ahead and delete it so we can all start fresh together. When I'm doing how-to videos, I generally film them in order because that's just the nature of a how-to video. I usually just like to edit that main A-Roll content from the timeline itself. Let's go ahead and click on our source panel footage and drag and drop. Again, this is Cam A-1. In order for us to see the whole thing in our timeline, you can hit the backslash key, and that'll make it all appear in whatever length it is. If we move our play ahead, you can click and drag. Then we can just hit the spacebar, which is to play. You all are going to have a great time editing this video, let me tell you, because you'll get to see behind the scenes and how much you end up having to start, and restart, and start over again. This should be good. As you can see, as I walk into frame and everything, I don't actually get right into making the video. We need to get rid of this intro of me actually talking to you, the editor of the footage. What we're going to do is we're going to actually play it until I stop talking about all of that and actually start the content of the video. Let's do that. You can see that even people who have been in YouTube for a while, it's a lot of editing to make this work. Here we go. There we go. That's when I'm about to start my intro, "Hey, everyone. I'm [inaudible]." I've paused, I've hit the spacebar again which has paused it. Now I'm going to use my back arrow key to make sure that I get that full intro. There we go. Then I'm going to get rid of it. I'm going to get rid of this beginning section because we don't need any of it for our video. Now, there are a few ways to do that. One way, since this is the only clip down here right now, is if you hover towards the front of it, you'll see this red bracket appear. Now if we click, it'll highlight that and then we can drag. If you have snapping turned on, you should feel it snap to your playhead where you have stopped because you know that's where I want to start. That's one way. If you don't have snapping turned on, to turn it on, all you have to do is hit the Esc key, and that will turn it on. Or hit this little magnet right here, that also turns on snapping. That's one way to do it. Another way would be to use the keyboard shortcuts for the blade tool which this is going to be, at least for my editing style, this is how I get a lot of my editing done very quickly. If nothing is highlighted and you hit Command K, you'll see it has now separated this first section from the back section of the clip itself. This section is all of the little flubs that I did at the beginning of the video to introduce you as the editor to editing me. We can now have that highlighted, hit the Delete key, and it's gone. I want my video to maybe start there now, so I can highlight this space in-between and hit again the Delete key and scoot it over. Now, when we drag our playhead to the top of the video, now I can tell I have cut myself off just a little bit, so what I'm going to do is click and drag to highlight the clip, scoot it over just a little bit, and then I'm going to zoom in because I think I want a little more precision. To zoom in, just hit the plus key as much or as little as you want. I'm going to highlight again in the top, drag it out, and play. You can see here in the waveform, this is when I start talking saying, ''Hey, everyone.'' I'll give it a couple of frames, but let's have it start there. Again, command K, Control K. Delete it. Click the space in between, delete that, hit the backslash key to see everything again in your timeline, move your playhead to the front. Hey, everyone. I'm [inaudible] , endeavoring to persevere as always. If you're new here, I make videos about my chaotic good life. Subscribe, follow, social media, all of that. Awesome. That is how we've just made our first A-Roll cut. You did it. I'm going to continue to edit this a little bit. You do a couple more cuts so you can see how it works, see how I have developed a rhythm for myself. Then at your own pace, go through the rest of the camera A footage and keep adding it to your timeline at the end and working through to cut it down until you feel like you've gotten the main content of the video where you want it. Let's keep going. Hey, everyone. I'm [inaudible] , endeavoring to persevere as always. If you're new here, I make videos about my chaotic good life. Subscribe, follow, social media, all of that. In today's video, I am going to show you how I'm going to, uh, take. I said uh there, I don't really like that. Let's zoom in a little bit by hitting the plus key on our keyboard. I'm going to go back. I'm using the waveforms which is the audio clip to see where I'm talking and where I'm not. I think our uh was right around here. I was right. I want to get rid of the uh, I always like to try to sound as succinct as possible when in videos. I'm going to move my play head right to here. I'm going to hit Command K, Control K if you're on a PC again. Then I'm going to move my playhead, drag it, click and drag, hold and drag to right about here, I think this is when I stopped my uh. Make sure nothing is highlighted, then hit Command K, Control K. Then I'm going to delete it. Then we're going to play it back. Show you how I'm going to take my propagated Monstera that I have been propagating for some time now and transfer it to the LECA system or what is also known as semi-hydroponics. I got rid of that uh. Feel good about that. Let's keep going. This is a way to grow plants without using dirt. I first learned about this when I was scouring YouTube looking for tips in the YouTube plant community on how to get rid of gnats. Now, I already know that in this video, I start going into a whole issue with gnats. That is not relevant to this video. We want to get into the meat of the video which is around again, LECA and planting plants in this alternate growing medium. Again, we're going to let me finish the word gnats. Right about here is when I stopped saying that word. To make your audio appear more larger so that we can really see the waveforms well, hold down shift, and hit the plus key while it's highlighted. You can see now we really have more space to see those audio waveforms. Again, that was shift plus. Now again, if you want to just make the timeline itself to zoom in and out of the timeline, hit plus and minus without the shift key. But when you hit the shift key, that makes the actual tracks get bigger. We know that I said the word gnats there. Again, we're going to hit Command K, Control K. I know I talk about gnats for a minute because it is a problem. Apparently, there is some gnat eggs that were larvaed that were in the dirt and I didn't know. Planting my plant and as soon as I brought it in, within a few days, I had a whole bunch of gnats. It was the worst thing. We actually discovered. As you can see, I go on and on about the gnats. How fun editing that out. I'm going to go ahead and guess, I'm going to move my playhead forward and guess that I probably stop talking about it and get back on topic right about here. Let's see. Hit the spacebar to play. In my apartment. I really think this is a great system if you are someone. Awesome. There we go. I talk about LECA again there. Again, similarly, going to move our playhead over to about that area and then I'm going to hit Command K, Control K. I'm going to delete all of the things I was saying about gnats that are not relevant to the true content of this video. Whenever you're getting on YouTube to make a how-to video, you want to get right into the meat and potatoes of what you're doing. Deleted it. Now let's play it back. In the YouTube plant community on how to get rid of gnat. I really think this is a great system. I cut off my S in gnats a little bit, so here's a great thing you can do. I basically want to extend this clip a little bit more because I cut off the S in gnats. What I'm going to do is I'm going to highlight the clip after it. I'm going to hit the A key on my keyboard, and that's going to bring up my tool. You see these two double arrows. Now, what that means is, I'm going to zoom out from my timeline so you can see, it will have highlighted everything from this beyond in the timeline. If there were a lot of other things all on the timeline in different tracks, all of them will be highlighted, and I can now scoot it over to make space so I can put the S back on gnats. I'm going to hit the plus button a couple more times now so I can get to my S. I'm going to hit the V key, V as in Victor, to go back to my regular selection tool, which is just the arrow basically. I'm going to highlight the edge of it here, and then I'm going to click and drag a little bit so I can get that S. Let's see. Plant community on how to get rid of gnats. There we go. We got my S back in there. Now that I've made the space, again highlight it, hit that Delete key. There you go. Knowing how to do this, how to bring the footage into your timeline and use our shortcuts to begin to cut it up, go ahead and cut me up, get all of my main content into the timeline and make sure that I have completely explained to you how to plant this Monstera into LECA. When you're done, your timeline should look something like this. Here is my finished A-Roll cut. You can see I've made a lot of snippets here and there, getting rid of things, scooting things over, maybe change the order of how I said the whole thing. It's all up to you. You're the editor, you're in control. My current A-Roll cut is about 15 minutes. I feel pretty good about that. I feel like there's a lot of stuff I just wanted to make sure is said about the topic. But you might feel like I should not be talking this long and I need to make it shorter. You're in control. You're the editor. In the next video, we're going to talk about our B-Roll cut and how to incorporate the B-Roll into this A-Roll cut. Again, B-Roll is just supplemental footage that reinforces the main content of what you're talking about. In our case, it's going to be a lot of close-ups. Let's get into it.
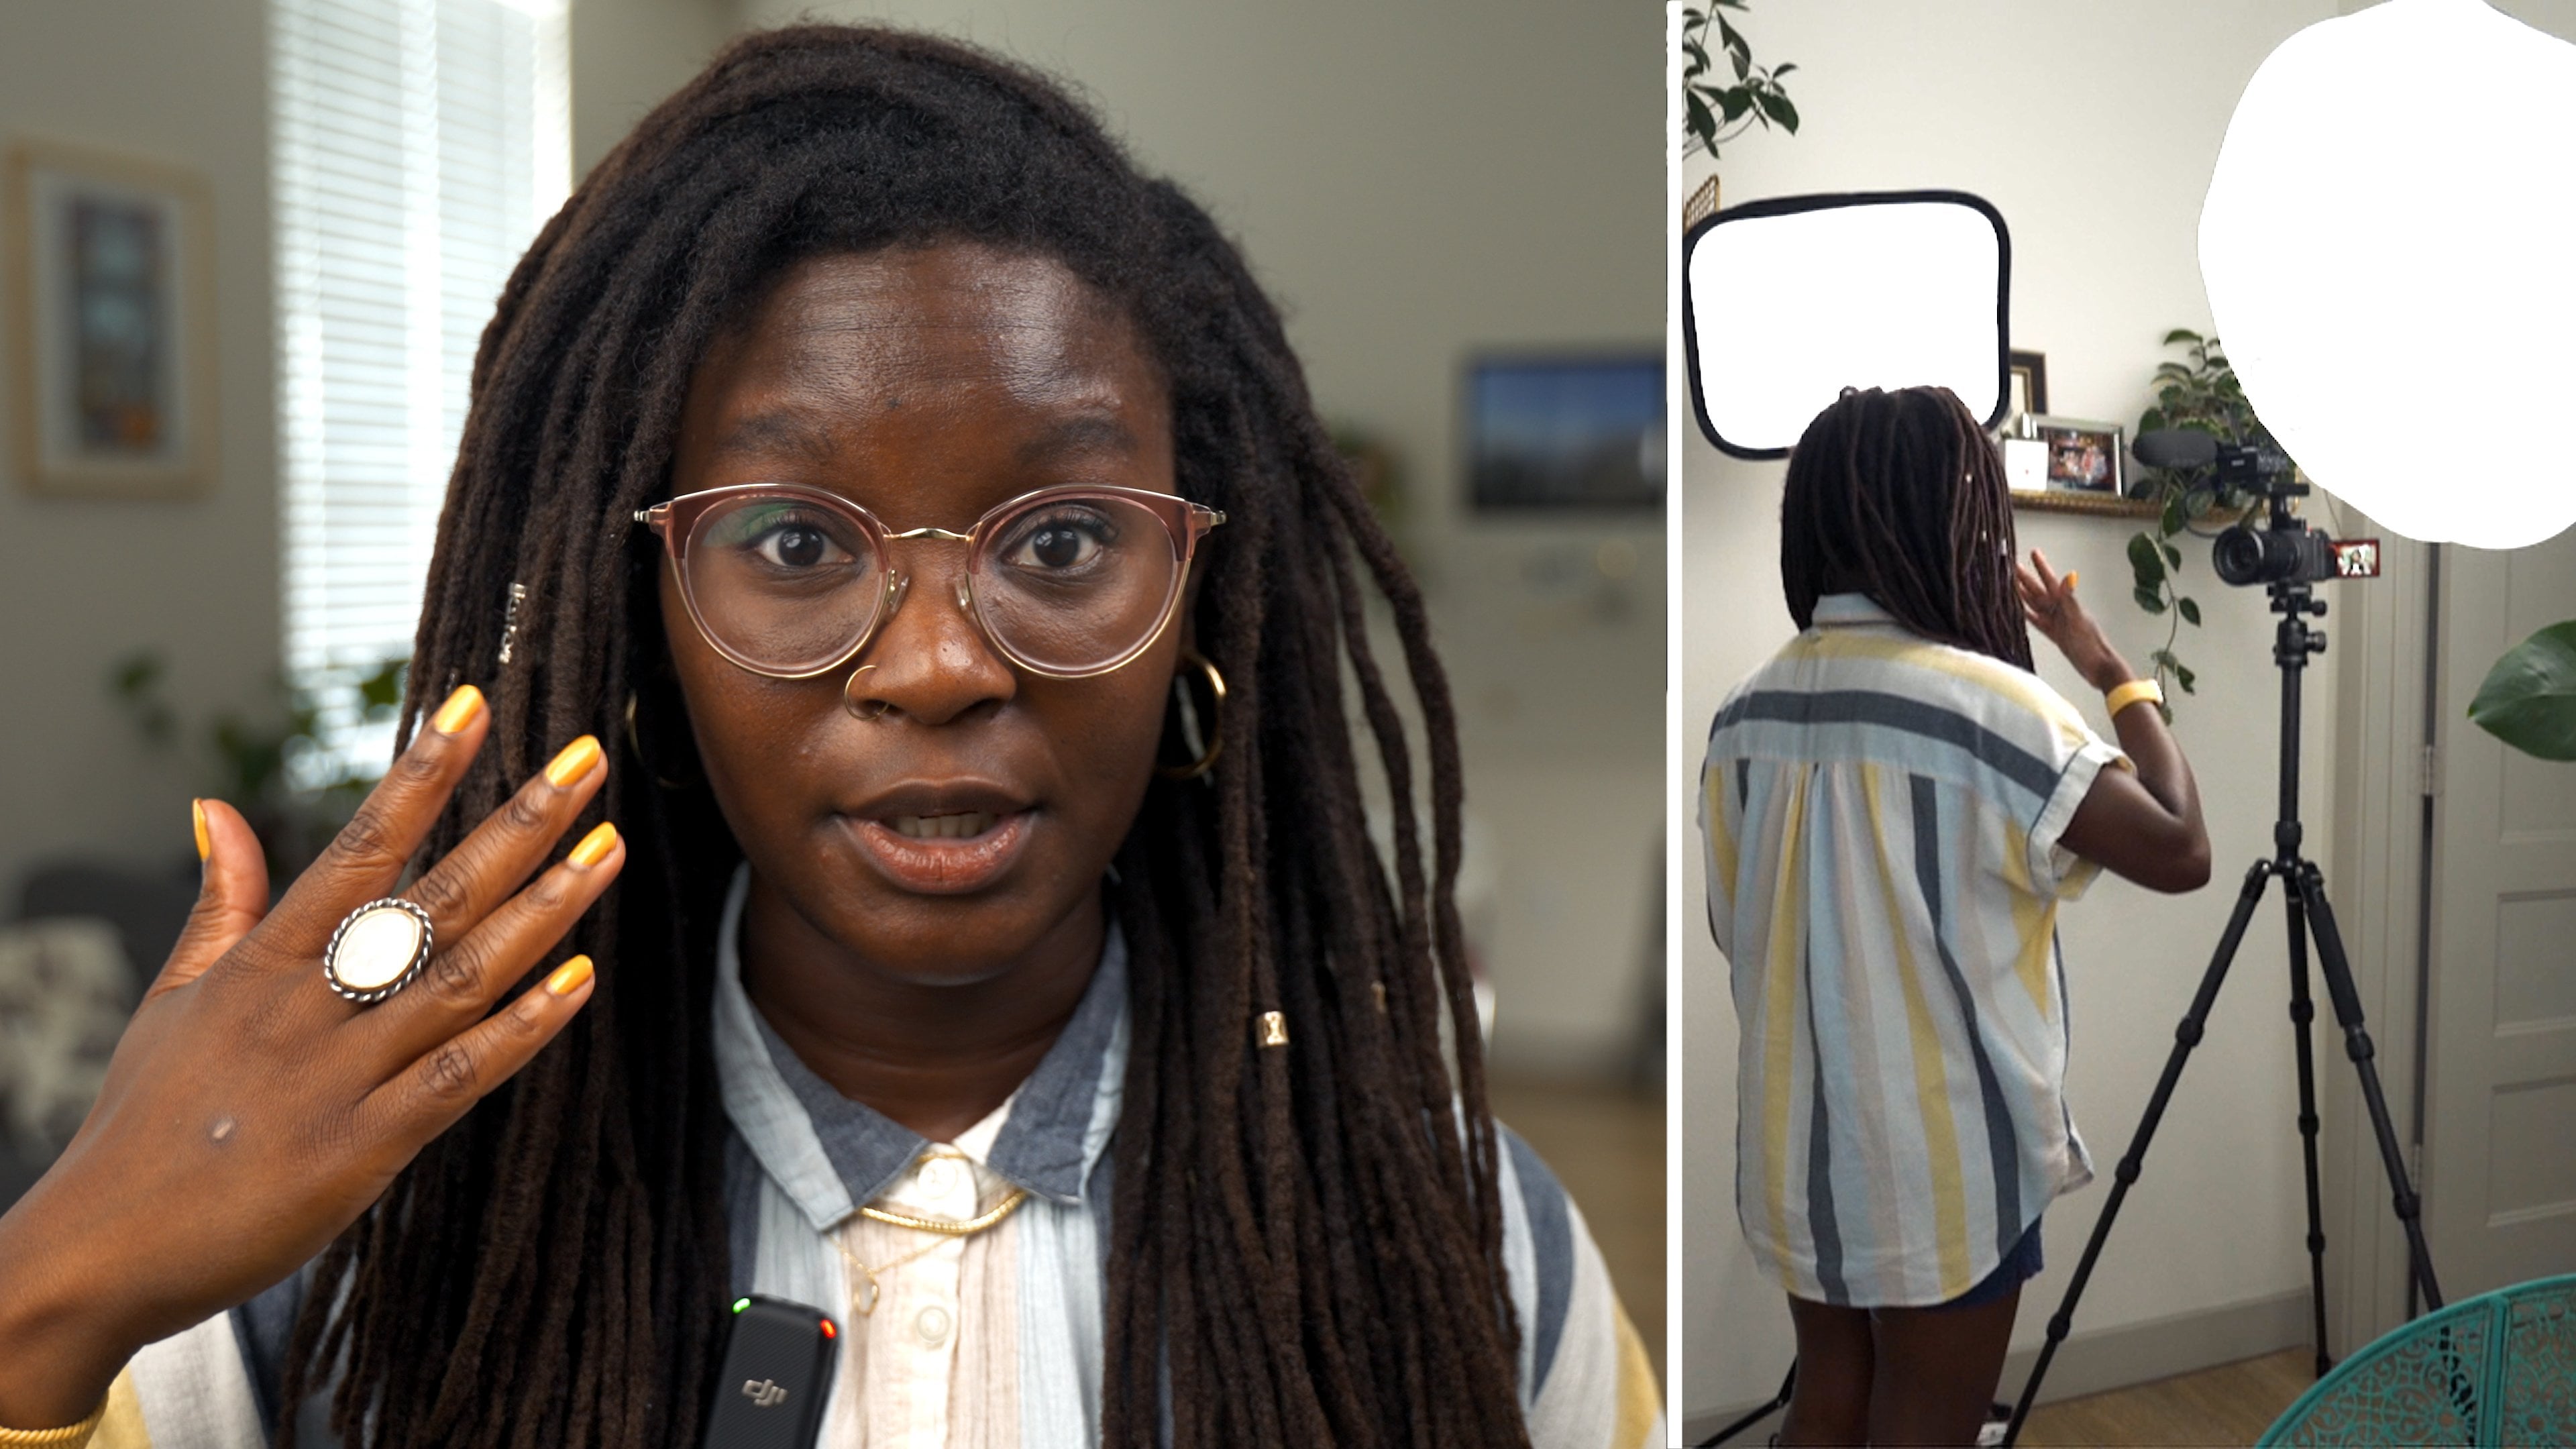
4. The B-Roll Edit: Welcome back. We have our A-roll track here builds of all of the main content of the video. Now we're going to begin to add our B-roll track, which is really going to be essentially close ups of what I am doing in the A role. First and foremost, we want to make sure that as we're adding our B-roll to our project, it doesn't end up inadvertently covering up or messing with our A-roll tracks. We're going to highlight the V2 track and the A2 track to make sure that when we are adding clips in, they're being prioritized to be added on the V2 track and not on the V1 track or the A1 track. We don't want to accidentally remove some of our audio or some of our footage from the main content because you never know when you might need it again. Now you should have familiarized yourself with the A-roll. You have a pretty good idea and understanding of how LECA works with semi-hydroponics. Congratulations on knowing that. We want to go in and now begin to start to add our B-roll on top of our A-roll. Let's go over to the first section that I know I'm going to want to have a B-roll shot too. We're going to go to our B-roll footage, CAM B-1. I believe I talked to you as I'm filming this footage as well. But it's essentially I'm doing close-ups of all of the things that I'm holding. Let's go to a nice section where I'm holding up the monstera, which is the plant that we're propagating. We only want 5-10 seconds of this footage. Instead of like we did for the A-roll where we drag the whole thing down, that's going to be a little too redundant and a little too cumbersome with the B-roll since we only need snippets of it every now and then. What I'm going to do is I'm going to mark an in and an out and then drag it down to where I want it to go. The first thing I do is find where I want to put this clip and this clip is just of the monstera. That's a nice close-up. Let's watch and see where I want to put it. I am going to show you how am going to take my propagated monstera. I hold up the plant right there and I say what it is, and throughout this whole video I say monstera wrong, which is hilarious, but neither here nor there. We've pulled it up. I want to go back a couple of frames just to make sure I have right when I'm starting to lift it up, and so to do that, I'm going to use my back and forward arrow keys to just click back or so until right about there. Then while the timeline is still selected, just so I don't lose where I am, I'm going to hit I, which is the in. It's called an in-point. You'll have an in-point and an outpoint. Just by know where I am in case my play head moves, I can always go back to where this new indention is now. Then up here, I'm going to do the same thing. I'm going to mark an in and an out for this source clip. Here I am holding the monstera. I'm going to go ahead and click I to mark an in, and we just need a couple of seconds. I think that's good. I'm going to hit O on my keyboard for the outpoint. Then in the same way that you dragged and dropped your A-roll footage, we're going to drag and drop this B-roll sub clip that we've made with our in and outpoint. We're going to click on this filmstrip icon right below it in the source panel and click and drag from that rather than the main window like we've been dragging before. We're going to do that. When you do that, you'll see this hand appear, click and drag, and it'll drop it right now on V2. I'm going to hit the plus sign a couple times so we can zoom in. You can see our clip is there now on top of our A-roll, which is our V1 track. Let's go back to the beginning and hit the space bar and see what we've got. Hey everyone, I'm [inaudible] , endeavoring to persevere as always. If you are new here, I make videos about my [inaudible] life. Subscribe, follow, social media, all of that. I am going to show you how I'm going to take my propagated monstera that I've been propagating for a long time now. As you can see, now we have a really great close up cut to of our monstera that I had filmed. You can see it a little bit better and you can see the intricacies of the leaves and all that nice greenage and all of that fun stuff. Now another way you can add B-roll footage to your timeline is again, using the insert and overwrite tools. Let's get to another section where we can add another B-roll clip and I'll show you how to do it that way as well. Let's see. We're going to move a little faster here. We can see that I'm showing you the Folgers mug for some reason. I'm just giving you all a lot of different stuff to play around with. Here we go. This is when I'm showing you the roots of the plant and how awesome they look. We're going to, again mark our in and out. It looks like about here is good, so hit I on our keyboard. Let it play a little bit. Again, you really only need a couple of seconds just so people can see. Okay. Hit O. Now let's go to where in our timeline where I also again showed the roots. Now I'm not sure again, where you're going to have that in your timeline, but I'm going to scrub ahead and try and find where I talk about it. Here's a spot where I'm talking about the roots. That's awesome right about there. Let's go back a few frames by hitting our back arrow key. We actually want, let's zoom in by hitting our plus key. We want to line it up with this cut so that way it doesn't feel too jarring. Click the yes key to make sure snapping is on, and if you hold down shift while you drag your play head, it will snap to the next cut you've made. Just snapped there at those little arrows. In the same way again that we use our in and out in our source monitor to just say what portion of this clip we want to add in, we're going to use our in again in the timeline itself to say where we want to add this clip in, so we can hit the I key to mark our in-point. We want it to begin here. Then if we hit the period key, as you can see, it has now added our close-up of the roots. Let's move our play head back a little bit, and then let's see. You could see it is very ready to be patted into something. Now I'm trying to show you multiple ways to bring things into the timeline just so you've got it. With this, you can see that because we didn't do our drag from the video film strip button, we now have the audio included as well, and you probably know what the B-roll, that I'm talking and saying things that are only relevant to you as the editor in the B-roll. It is not something you want in the footage itself, so we need to get rid of this audio clip. But you'll notice that when we click on it, they're both connected together. They're locked together. We can't get rid of one without doing something to the other, which we don't want to do. What we're going to do is we're going to have it highlighted. We're going to hit Command L or Control L, and what that does is it's going to unlock these two clips and make the video clip on V2 it's own thing and make the audio for it its own thing. This is how you can begin to take audio from other clips and put it with other things in the future, if you want to do that. For this we just want to get rid of it. Now that they're not connected anymore, we can just click on that audio, hit the Delete button, and it's gone. That's another way that you can put your B-roll footage on top of your A-roll footage. Now again, I really prefer to just do the drag and drop method. For me, it just works really well. I like it and I feel like I can edit quickly that way. But I wanted to show you a couple another way to do it, just so you have that in your repertoire and you can figure out what works for you. I'm going to go ahead and add a couple more clips of B-roll footage so you can take a look and then, hey, go ham and start adding your own. Let's see. Let's look for another clip here. Close-ups of the monstera, close-ups of its roots, and here is my Jolla Crimson Crown and I'm showing that I've already put this plant into LECA and it's doing really well. Let's add something from this. I believe I'm going to scrub through our timeline here again to see where I'm talking about it. It looks about right here. I'm going to hit the plus key a couple times to get to that spot. I'm going to hold down shift to lock and snap onto right where I'm talking about this Crimson Crown. Then I'm going to switch to my source monitor, click on that window so it becomes active. I'm going to go ahead and hit the I key because I like this shot that's happening. I'm going to hit the space bar to play it. That looks really good, it's in-focus, that's nice. Only need a couple of seconds, hit the space bar again to stop, hit the O key to mark my out. I think that's enough space. I'm going to take my cursor and hover it over the video film strip icon, click hold and drag it, and put it where I want it because I just want the video. Then we're going to play. Get my feet wet on the process. One of them is this Jolla Crimson Crown named [inaudible] as you can see. There you go. That looks great. You can begin to do this with all of the B-roll I have included for the whole video. When you're done, your timeline will probably look something like this. Having all of the clips you want to add into your video on top of your A-roll and everything looks good. The one thing I am going to touch on real quick though before we end this segment of the class, is how to begin to adjust some of your footage. As you've probably worked through the footage, you've probably noticed that some of the clips, even though they're are close ups, the B-roll is a close up, it still needs a little bit of work. It still feels like it's a little too far away. The people watching the video still might not be able to see what I'm showing. Let me show you how to zoom in on footage. We're going to do that very, very quickly. It's really simple. One section where I think it's hard to see what I'm doing is when I am P-H balancing the water. What we're going to do is we're going to go to one of those clips, and here is one such clip. This is an okay size. I think for YouTube though, I would want to zoom in just a little bit more so people can really see the numbers and what not. I have this clip highlighted and then I'm going to go over to our effect controls. This is where we can begin to zoom in on this to make it more visible to the audience. We're going to play around mostly with scale and position. Now make sure that neither of these stopwatches are clicked on at all. We don't want to mess with that just yet because we want this clip to stay the same size, scale, and position for the entire time it is available on the timeline. I'm going to just scale it up. I think I'm going to scale it to about there, 150-ish. There's a little bit of pixelation, but I'm okay with that. Then I'm going to adjust it down to make sure that I'm a little more centered, and that's it. Now when I go and play back. Looking at this color and based on the color spectrum, we are closer to five. I would like to see it be a [inaudible]. I like that a little bit better than what it was before. I think before it was still a little too far away and people couldn't really see the numbers very well. That is how you can scale and position something to make it be a little bit bigger using your footage. Now this is looking pretty good. We have our A-roll, we have our B-roll. At the end of the day is probably a very informative video, but it's missing a little je ne sais quoi, is missing that little finesse that'll keep it entertaining, keep it fun, that'll give it a style and brand and look and feel. In the next video, I'm going to show you some of the simple graphics that you can add to a video to make it have a little bit of an extra spark and begin to introduce people to your identity and brand. Let's get into it.
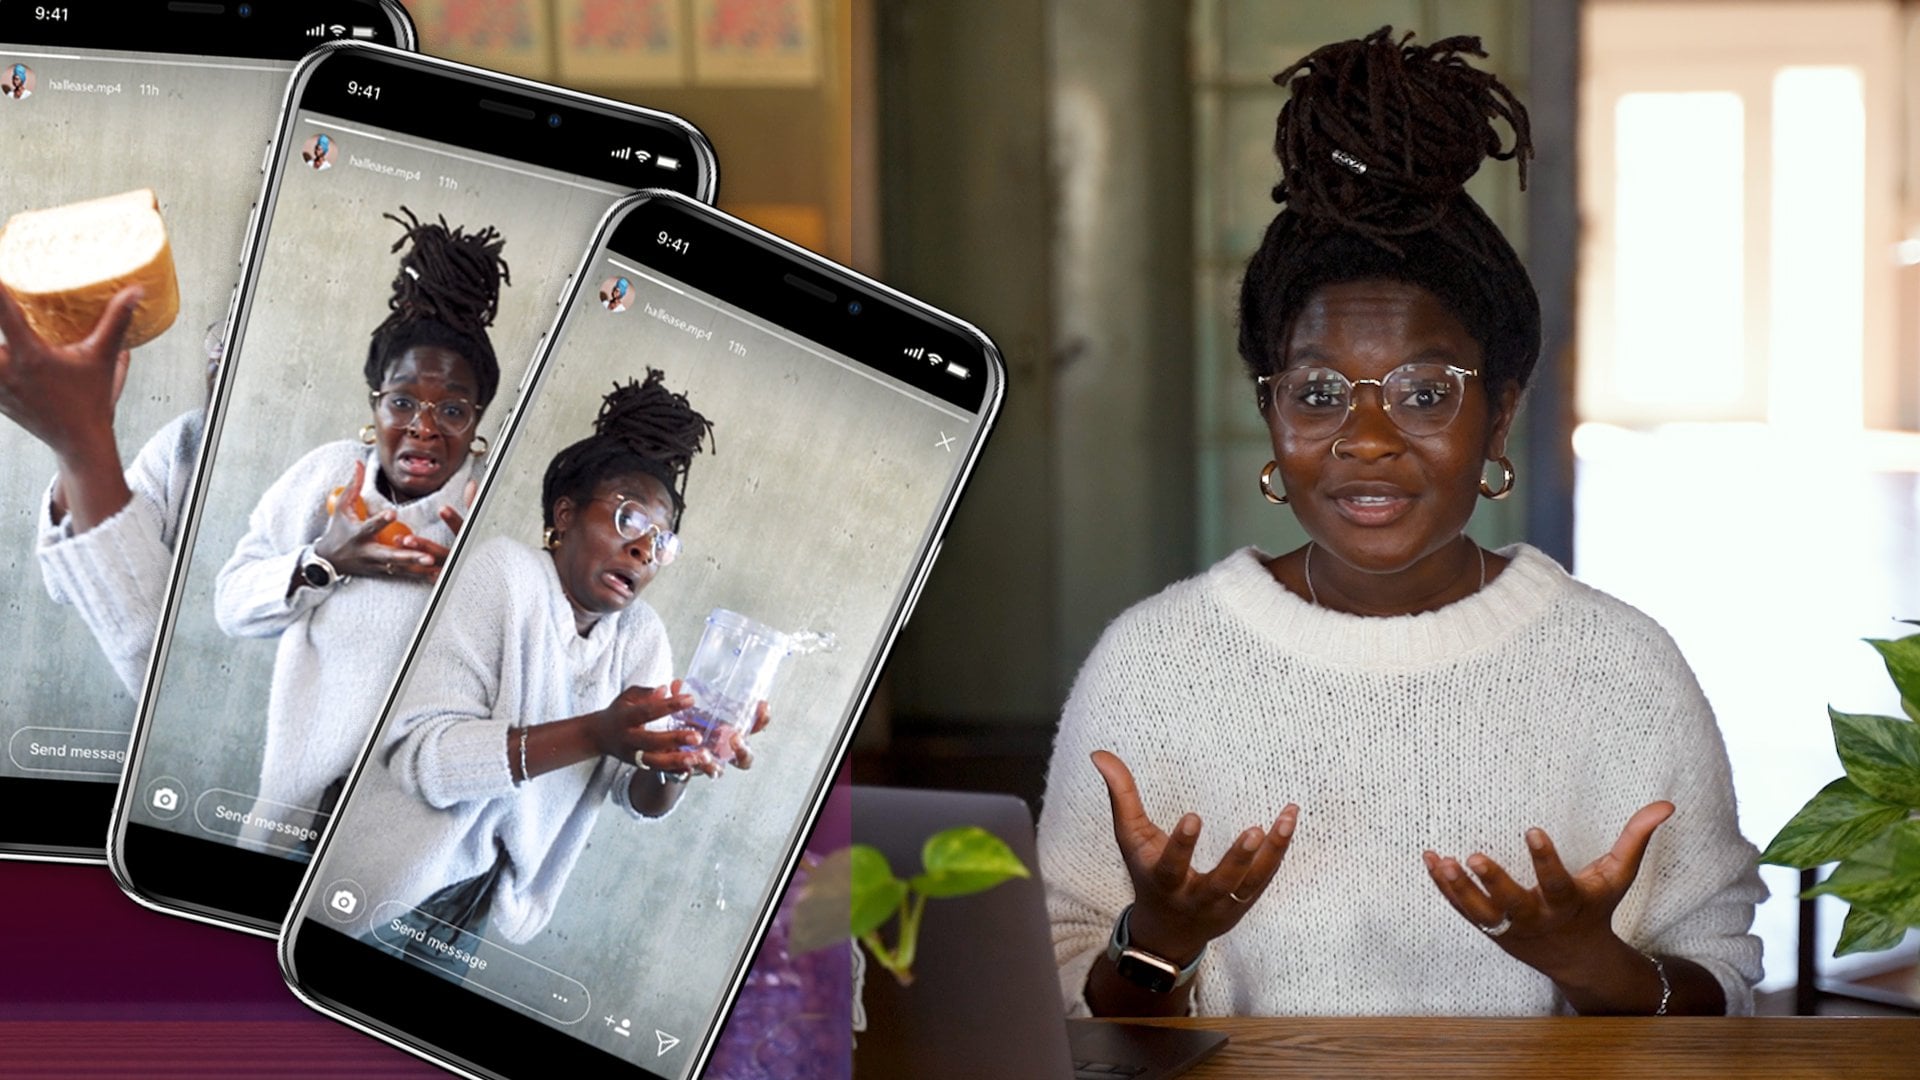
5. Basic Keyframing: All right, welcome back to the next installment. We have our A roll down, we have our B-roll down, looking good. We have a great content video, but we need to add some finesse, we want to begin to add a little bit of flare, a little bit of 'je ne sais quoi 'if you will. Now Premier has a lot of tools that you can use to begin to add flare and essence to your video. But we're going to go over just a few simple ones. The first one, we're going to create an intro for our video. It's a way to introduce a little bit of branding, a little bit of an idea of who we are in this video and what we're trying to do. Let's get our intro started. Now our intro is going to be just almost like a boomerang-esque little fun thing. I've included four images in your downloads that you can have. Four images of me with the monstera that ended up being the final thing. Some of the images, as you can see, are kind of cutesy, kind of fun. We're just having a good time with this plant. So we want to create a little quick snippet of these four images and repeat them for four or five seconds and then add some fun text on top. Let's do that. The first thing we need to do is make space for our intro. The intro is going to be at the beginning of the video. So what we're going to do is hit the A key that turns on the track select forward tool. You can see these double arrows when we click, it'll highlight everything from where it is beyond. Say if I click here, it only highlights from there beyond. But we want to do everything, so we're going to click that and then we're going to click and drag and just scoot everything over, give ourselves some room to play basically. Click the V key, V as in Victor, to get back to your regular selection tool, and your play head should be at the front. The first thing we're going to do is just take our first image and drag it onto the timeline. Now you already see it's really big. It's a lot bigger than the native size of the frame. We're going to go ahead and go to our effect controls, and we're going to go ahead and scale it down. I would say go ahead and scale it back down to about 33 or so. We just want to make sure we don't have those black boxes there on the sides. Remember to scale down, I am clicking and dragging to the left and right to change that, or if you know what value you want, you can just click once and it'll highlight and you can type in a number and that'll change it for you. Then I also want to not have my head be cut off too much. Scoot it down a little bit, and that looks pretty good, that doesn't look bad. Now this is a little too long of a clip. We only needed it to be a few frames long. Make sure your play head is all the way at the beginning of the clip and just go plus eight. So that's going to scoot it over about eight frames, not even about, it will be eight frames. It will scoot it over eight frames. Then we're going to make sure that it goes to there. So end the clip at the eight frames. Then we're going to drag in the next clip. We're going to bring it in, and essentially do the same thing we just did for this first one. Resize it and all of that. To make it go by faster, we're going to click on the first clip, highlight motion. Click on it by highlighting it. Hit command C, control C on a Mac or on a PC. Go back to our new clip and you can see it's too big. Then control V Command V. Boom, it has taken our scale and positioning and applied it to this one as well. Now at the beginning of this clip to lock it in, remember hold shift and drag to lock to place. Go ahead and highlight in the time code and hit plus eight. That's scoots it over eight frames again. Then make it that size and repeat this for the other two. Then make it that size again. Now let's play this back. Yeah. It's like a little boomerang effect. It's like a little, oh look at these fun little photos of me with the plant going back and forth. Now they are obviously way too short for anything to happen. We've already built our little template here. We have our four photos. There are in, they are the right exact length we need them to be. So we're just going to highlight them and we're going to hit Command C or Control C if you're on a PC. Align our play head by holding shift to the very end. Then we're going hit Command V, control V. Now let's do it three more times. Then let's play it back. That's pretty cute. Then we're going to take our space here at the front, and we're going to highlight it. Hit the delete key. Boom, we have it all connected now. Now this is cute or whatever. But it would be a lot better if we again begin to incorporate some branding into it. Let's add a little title sequence to this. Let's also add some color. I think some color would be nice. I want to put a little color overlay on these photos. That way it feels more like a little intro to this video. You can begin to know who I am, what this video is maybe going to be about, give some context. The first thing we're going to do is we're going go down here to our new item button. We're going to click it and we are going to create a color mat. This will come in really handy when you're just wanting to have a solid color available to drop onto your footage to just do a variety of things. Whatever usually are the settings that Premiers has, it's usually going to just mimic what the timelines video settings are. Go ahead and click Okay usually for that. Then it's going to bring up a color picker. This is a plant video, we're doing plant stuff. Let's make our color be some variation of green that we like. I like this green, this looks pretty good. Yeah, let's go with that. I'm going to hit okay. Then I'm going to name it. Let's name it green. You'll see it now appears here in our project panel. Because it's essentially a new asset that we can now use and reference. I'm going to click on it and I'm going to drag it over on top of our images. Make sure it goes the length of our images. You can see that now all we see is green. That's not ideal. But again, highlight our green. Go to our effects panel, affects controls. I want to make the opacity how much the green seeps through a little bit lower, so we see my images under. Let's make it like 60 percent maybe. Now you'll notice that a key frame began to form here. For this we don't want that to happen. So go ahead and click the toggle animation button to get rid of that and hit Okay. We want our green to stay 60 percent the entire time. And this will make more sense to you in a second. We've added this little overlay of me with green. Okay, we're getting there. Let's give this a little bit of a title now, let's give this a little bit of some text coming in, to again make it a little fun. Okay, so here's what we're going do next. We're now going to begin to incorporate using some of the essential graphics that we've been holding off on. Go ahead and move your play head to the beginning and hit the T key, which will bring up your text tool or you can just hit the Type Tool on the side. But again, shortcuts are awesome. Hit the T Key, click relatively in the center of the frame. Relatively, it doesn't need to be perfect. We'll fix it in a second. Click once. You'll notice a new graphic has appeared in our V3 video track, which is fine, and we can now type. So I'm going name this video: planting with Holly's. Okay. You can see it appears there, it's just some texts. It's not doing anything. It's a default text font, nothing too amazing. But that's okay, we're going to make it amazing. Now, we're going to go to our central graphics. What I've created is already there. Awesome. The first thing we're going to do, is we're going to go ahead and change the font to what we want. So to do that, go ahead and make sure all of the characters of the text you have is highlighted. You can do that by just double-clicking on the layer here, like so, and it's highlighted all of it. I'm going to change this to Open Sans Pro. It's a nice simple font, easier to read. Open Sans Regular, excuse me. It's really simple, easy to read and it's not too bad. I think I'm going to go bold because it's a title. We want people to know it's a title. I'm also going to change this to be center aligned. So I'm going to mess with our center alignment, which is going to do some things to it. That's fine, don't freak out. Then up here at the top, I'm going to make sure that our text is completely aligned in the center of the frame, vertically and horizontally. So if I hit this one, it will center it horizontally, and that one will center it vertically. Now it's in the exact center of our frame. Then you know what else I want to do? I want to add a little bit of a drop shadow to this text to make sure that you can really see it against the green and the sequence of images that I've got going. So we're going to come down here to the Appearance section and we're just going to turn on the Shadow. Nice. You can see the shadow appeared. Let's click away from it for a second and see what we've got. Let's play it back. This isn't bad. Hi everyone. That isn't bad. That's a nice little intro to introduce us into what's about to happen. We're Planting with Hallease. Awesome. I still want to add a little bit of some mesh. Just a little bit of je ne sais quoi. So what I want to do is, I want this text to not be there. Then fade in as it moves up into this position where it is right now. Be there, you can see it all working together and then go back down and fade out. That's how we're going to get into the next part which I want to talk about, which is keyframing. Keyframing is the basis of a lot of things and not only Premier Pro, but After Effects as well. This is essentially how you begin to build graphical elements, and everything you learn about creating graphics is built around keyframes. Here we go. We're going to make our Planting with Hallease text to do something a little fun. While it's highlighted, we're going to go over to our Effects Controls panel, and we're not going to touch the graphics portion of our text control panel, we're just going to touch the video itself. Basically, I want everything that this clip here is to follow what I'm about to change here. So we're going to mess around with just the video portion of our Effects Controls panel. What we're going to do is, we are going to turn on these little toggle animations. They're little stopwatches. This is how you begin to put the different keyframes to tell it, at this point, do here, at this point, make this happen. This is how you begin to turn on those controls. So we're going to turn on the opacity which is already on, it's at 100, which is cool. Then we're going to turn on the position where it ends up. I want to make sure to have one keyframe at the beginning for both of them. Then I want to scoot the playhead over just a little bit. Not too much, maybe by the second photo. By the time the second photo appears, then I'm going to hit these key frames again. Now I'm going to hit this back button to go back to the previous keyframe. What I'm going to do is, I'm going to then go to our Y-position and just lower it down just a little bit. You'll see now when I hit "Play", it moves up and moves back up to the spot because I'd already had a keyframe there that said, "At this point, be at 960-540, which is centered if you're working in a TDP timeline. Now, at the beginning of here, I want the opacity to be zero. I want it to be gone. So that way by the time it gets to the second keyframe, it's at 100, so it fades in. That's not bad. Now, I want to add a little more flair. I mean, don't get me wrong. This is cool, it's not bad, but I want to add a little more flair. So what I always do to my keyframes, especially here in Premier Pro, I right-click on them and then I go to ease in, because you want it to ease into whatever this metric is now. Then on the front one, I go ease out, ease out of whatever metric I have set. I do that for each one. Ease in. On this front one, it's going to be ease out. That is what helps give the animation, make it not so jarring, not so like robotic. It smooths it a little bit more. Now, let's watch it. I'm liking that. I think that looks good. That's like just a nice little subtle thing. Now I want the text to go away the same way it appeared. So right about the second-to-last image and I put my playhead there, and I'll make sure that my text is highlighted. I'm going to go to my Effects panel and I'm going to click the "Position", and I'm going to click the "Opacity" again, because I want it to stay up until that point. Then I'm going to go towards the end, add a new keyframe. Let it drop down a bit. Again, come down to the opacity new keyframe. Now let's watch. I think that looks good. I think that looks pretty good, and we haven't fade out really nicely. Hi everyone. I'm Hallease. I think that's nice. That's a nice little easy, subtle touch that you can do to text that you have in your video. I'm going to go ahead and move, and make sure that the end keyframes are right at the edge of the clip so I get the most out of that movement. But that looks pretty good. I like that a lot. Now, something to think about is you can then take this idea of animated text and add it to different parts of the video to reinforce things I'm saying. So right here, I'm beginning to talk about overview of what I'm going to do. I think this is another great place to add some text. So I'm going to copy the text I've created. Again, work smarter, not harder with this. I take this text, I'm going to hit "Command C, Control-C". I'm going to line up my playhead and I'm going to make sure that v3 is now highlighted, because I want what I'm about to do to go on that track, not any of these tracks, and I'm going to hit "Command V, control V" and paste it there. Now, this is too high. Now, I have it designed already to where it comes up. It stays there for a while and it goes away. That looks pretty good. What I'm going to do is, I actually want it to be a lower third. I want to appear more towards the bottom of the frame. So I'm going to come over here into the essential graphic side. I'm going to move the text down, and I'm going to move it to about right there. Then I'm going to change my text to semi-hydroponics( LECA). Again, giving context to what this is about. There you go. Let's watch her text. Propagated Monastera, that I have been propagating for sometime now, and transfer it to the LECA system. I actually don't say semi-hydroponics LECA, until a little bit later. Let's move it down. Let's move it to here. To the LECA system or what is also known as semi-hydroponics. So this is a way to grow plants without using dirt. That's awesome. Now, you see how you can begin to add text to your video to reinforce some of the steps through the directions you're taking, all of that stuff. Maybe you want to make sure people know exactly how much to measure out of something, or something like that. You can put all of that stuff in texts and that reinforces the idea, and again adds a little bit of that flair, a little bit of that, je ne sais quio, to your video.
6. End Screens: The last thing I want to show you is how to create an end screen for your video. If you are on YouTube, end screens are a great way to keep people on the platform by promoting other videos you have on your channel at the end of your video. You can create a really simple layout that looks good at the end. One way, I would say to have a good end screen is to literally take our intro and have that BR in screen. Go back to the beginning of the video, hit the "Plus" key a couple times to zoom in, and highlight just the images and our green color, hit "Command C", "Control C" if you're on a PC. I hit the "Backslash" button to see the whole thing so I could get back to the end. Zoom in again by hitting the "Plus" key a couple times. As you can see, I had the V3 video track selected, so it put it up there. It started off up there. I wanted to come down though. It doesn't really matter, but I just want it down because I'm organized like that. Now we have a really great end screen. When I go and upload this into YouTube, I'll have this dead space of this cute little ending I've created, and I can have my videos that I want to add via the YouTube platform itself. That's how you add end screen videos. I can put my little Subscribe button here that YouTube provides for you and the screen area of YouTube Creator Studio, I can put to watch a certain video or certain playlist over in the corner. It's just a nice little ending. I can make it a little bit longer if I want by simply, again, just copying and pasting our four photos. We'll just copy and paste them a couple more times. Make sure V1 is highlighted. A couple more times if we want our end screen to be a little longer than our intro, stretch out our green a little bit more. There you go. It will be nice and long when we export. That's one way to do the end screen. I actually think that's a pretty decent end screen. I think that that's nice. That's some nice little branding and stuff there for sure. Another way to do an end screen is just have a simple just solid colors. Take our green that we created and have it just be green, just have a simple solid color. Maybe your color ends up being white or black or something like that. But just have space to when you upload your video to YouTube, you can easily tell where it begins and you can add your end screen videos, or you can add the assets you want to be on your end screen within YouTube Creator Studio. That's another thing, just solid green. Finally, the other thing you can do is again, Premiere has a lot of free templates that you can have. If we go to the Essential Graphics panel, and then we go to Adobe Stock, hit that button. Make sure our Free button, because we like free, is highlighted. You begin to see all these different templates that Adobe has created that you can use in your videos for free, no problems at all. I'm going to type in just end and hit "Enter". You will need an Internet connection for this to work. You can see some people have designed a couple of pretty decent end screen templates for you to use. I already actually have a couple downloaded into my templates. But what you'll do is if you want one, you just hit this little "Download" button and it'll download. You will need an Internet connection again for this part. Then once it's downloaded, you can go back to my templates, and I'll have to search for mine, but it is indeed in here. Again, I have a lot of templates in here because I am always on the lookout for cool stuff to add to my videos to make them look better. You literally just again, drag and drop. Once you do that, you'll see this pops up. This is pretty awesome template and you can go in and begin to adjust all of the text that is here. You can see they've taken the time to build a little intro animation for you for it and everything. That looks great, that's really cool. If you want, you can click on different text layers, double-click and change what they say. Maybe I'll put, please subscribe, and so on and so forth. They leave these different spaces here for where when you are in Creator Studio adding your end screen. That is how you adjust the size of your end screen videos for that. That's another just free service that Adobe provides through Adobe Stock. Definitely check it out in the Essential Graphics panel. If you're looking for something that's a little bit more, again, another bit of flare and other bit of that jenesequa for your video. I think you can even change. You can change the background color. If I highlight background color here, we can change it back to be closer to our green that we had before. I think we are more in the foresty type of it. So like [inaudible]. It's green now, which obviously this is a little extra, I would change all the other colors to go with it a little better, but you can get what I'm saying. Now you can play around with it and make it look like your own even though you didn't have to build it from scratch, which is always great. I always recommend work smarter when you're editing, not harder. That's another great option as well. We've created a fun little intro for a video, we've added some text to it. We've added some texts throughout the video, and then I've also shown you a few ways to add an end screen into your video, which is really great if you're going to upload this to YouTube specifically. In this next section, we're going to start getting into some of the really nitpicky tweaks that we want to do to really put that final finesse on our video. I'll see you in the next class.
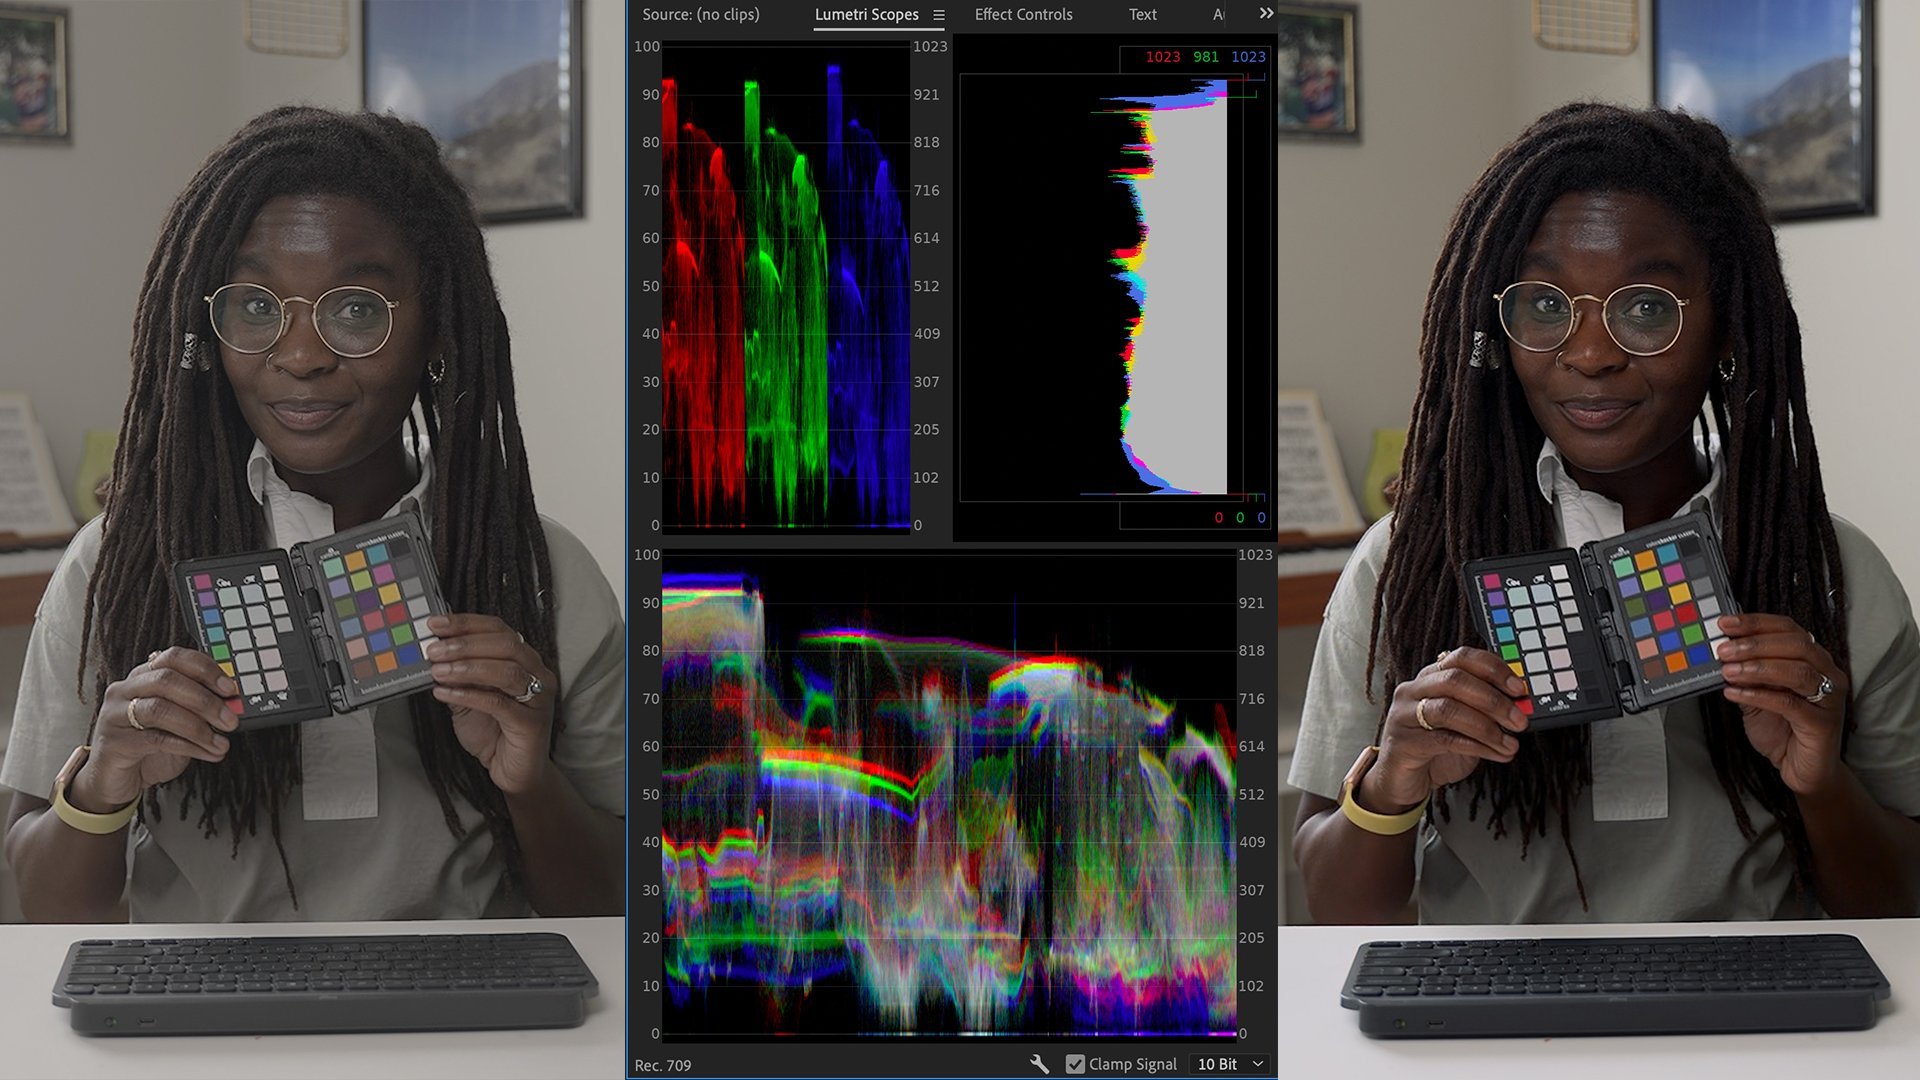
7. Color Correction & Grading: We are in the final tweaking stages of our video. We've put down our A-roll, our B-roll, we've added our simple graphics, our in-screen or intro, all of that. Now we want to color correct our video. We're going to do that in a very simple way. Color correction and color grading can get as epic as you want it to. But again, this is a how-to video. We're just going to keep it pretty basic. We're not going to go too ham on color correction in this. This is just an intro to get you used to it. We wan to make sure our Lumetri Scopes are available as well. Usually, they will be in this left pane. But again, if they don't show up, it's really easy to have them show up. You just go to window in the top area and hit "Lumetri Scopes"." With our Lumetri Scopes up and our Lumetri Color panel showing as well, let's go ahead and just click on this clip. This is a good clip. This is just like the intro clip that I have. You'll see as I scrubbed through the clip, you can see our Lumetri Scopes start to move around a little bit, which is cool. You'll use this to gauge the different color correcting tools that we're going to use. We're really not going to do too much with this, because again it's already pretty balanced. We're just going to mess around with the blacks, the whites, maybe check the white balance a little bit and do a little bit of exposure. That will be our color correcting. With the blacks, you're going to go to this tab. With the blacks, what you're really looking for is you usually want the blacks to hit right at zero. Now again, we don't have a crazy awesome monitor that's been calibrated to be the best color grades and all that stuff. But whatever you're editing on is probably fine because it'll probably be similar to the phone that you end up watching this final video on or the computer you end up watching this final video on. It should be okay. You have to start somewhere. We want to make sure that our blacks are just touching zero. Right about there is pretty good. You want to see that it's just skimming zero with our Blacks. Then similarly with our whites, you want to make sure they're just skimming 100. That's going to bring the whites down to about there. Yeah, that looks pretty good. That's pretty good. Our whites are about there, our blacks are there. I think our overall exposure is pretty good as well. I might drop it down as gouache. We're really just kissing our 100 and zero just a little bit. Then the other thing I usually like to play around with my color correction is the contrast depending on what camera you're using and your picture profiles and all stuff that you may or may not get into ever. I generally like a little bit more contrast to my footage. As you can see, what the contrast does to is it spreads out, you see how it spreads out the colors even more, so it's more dramatic. Again, I don't want to add too much. I really like that. It's pretty color balance now. If I want to take it off so you can see what the footage was before, I just hit this little checkmark. That's what it was before. That's what it is now. You see before how it was a little more flat, and now just by playing around with the whites, the blacks, the contrast, and a smidge of exposure, it already looks a little bit more vibrant, a little more fun. Very straight forward. I think this is pretty good and I think this is a pretty good standard to have the rest of the footage be. As we continue to go through and watch, we can make tweaks to different clips, but I think overall, this is going to probably be good for most of the video. Again, work smarter, not harder. We are going to go ahead and go to our effects control panel, and you can see the Lumetri colors that we've been playing around with here for this clip are now over in the effects control panel because we did stuff. These are effects that we have added to the footage. We're going to highlight it. We're going to hit "Command C", "Control C" on a PC. Then we're going to come down to our timeline. We're going to hit the "A" key, and you remember that A key highlights everything from where it is placed beyond. Obviously, we don't want to do it to all of our graphics and things like that. When we hit the A key this time we're going to hold down shift, and you see that makes it just one arrow now. It's this one arrow, we have it right hovering over our video track 1. Then we're going to hit the key one more time, and you see while I have Shift held down and I've hit the mouse one more time, and now it is just highlighting only that row. Then we are going to hit, you guessed it, Command V, Control V on a PC. You can see how all the little fx here, they all turned purple. That means that it has now added that color correction that we had on this one clip. It has added it to all those other clips now. Now you can see all the clips just from that row have the balance. That works out really well. That's great. Now, when we go to our B-roll, we're going to turn the screen off for now. Now our B-roll, I feel like our B-roll is pretty close to, so let's just go ahead and Command V, Control V. That doesn't look bad. I think this color correction will work for our B-roll as well. Yeah, this actually looks really, we're going to add it to another one. I'm not mad at that. What we're going to do then is go to the V2 layer. Hit "R", "A" again, hit "Shift", hold down Shift. It's just our B-roll layer. Let me do that so you can see. Hold down Shift, so it's just our B-roll layer, it's just these clips here. Hit "Command V", "Control V" on a PC. You can see, you know that it has added the effect because they turned purple. Now we've added that color correction to all of our clips. Now again, you can go in and tweak things to your liking. That looks like it matches pretty well seamlessly when you go from your A-roll to your B-roll. I think the B-roll is a little orange compared to the A-roll, just a little bit. I'm going to click on that clip and I'm going to just bring it back a little more towards the blue and the temperature. That feels a little more seamless to me. You can go through and begin to do those little minor tweaks based on watching the whole thing and making those minor tweaks. But because you already had it pretty much balanced, you're just going through and making minor tweaks. You're not having to go through and literally color correct every clip. Now that's color correcting. Correcting anything that maybe while you're filming, it didn't go so well and you need to balance things out. Once that's done though, you usually end up wanting to maybe give an overall style or an overall look to the piece. Now that everything is matched and looks like it fits together seamlessly and it's pretty clean, pretty accurate, color accurate, now you can begin to play around with adding an overall look to the entire video. I'm going to show you how to do that too. To do that, we're going to go down to the New Item Tool at the bottom and we're going to click it and we're going to hit "Adjustment layer". Again, it's going to bring up a box that is basically going to just copy and replicate whatever the sequence is, the settings within your sequence. You partly ever probably going to change that. Go ahead and click "Okay". You'll see this brings up the Adjustment layer, and we're going to bring it onto a layer that is just above everything, we've done, everything, the whole project we've done, and we're going to stretch it out to cover the entire project as well. All the way to the last clip. Because we want whatever we do on this layer, again to affect everything underneath it. Here while the Adjustment layer is highlighted, we're going to go to our Lumetri Color panel. Instead of playing around with the basic color correction because we've done that already. We've done that for all the clips they're good, we're going to go to the Creative tab. Here is where you can start to play around with giving your overall vibe or color to the footage that you want. This is more of a style. This begins to be color grading, not color correcting. This really just depends on what your what your vibe is, what your mood is. I'll show you a few that I really enjoy. I tend to use Clean Kodak a lot. I feel like it looks very good. I feel like it adds a little bit of a softness to my footage. That looks really nice. Again, here it is without it, and then here it is with it. There is a slight tweak of warmth to it that I really like. Another one that I play around with a lot is the Kodak 2395 by Adobe, and that gives you a little bit more of this interesting monochromy filmy green. I'll usually play around with the intensity of it. Maybe only have it at like 50 percent. I tend to like that a lot in some of my videos. Here it is without it. Here it is with it. Then another one that I like to play around with too is Clean Kodak B. Again, this one feels a little more saturated to me. It really brings out a lot of the saturation and color, and really pumps the contrast to an interesting level that I like. Again, I'll play around with the intensity of it depending on what my mood is and so on and so forth. But there's a lot of different looks that you can begin to play around with to really add something to your footage or give your overall video a vibe of just what mood you're in. One thing I will say is, remember this is a how-to video. You don't want to go to epic on the color grading, which again is just an artistic preference of how you want the end product to look. You want your color grading to have a purpose. You don't want it to just look a certain way, just because it looks a certain way. Are you trying to maybe create a feeling of coldness, like to be cold and to be scared or something like that? Maybe you bump up the blues of what you're filming. Or maybe you're in a space and you want it to feel warm and inviting. Maybe you play around with one of the looks that is all about oranges and things like that. Make sure you're having some rhyme or reason to the color grading that you add to your footage. Or maybe it's just as simple as this is a instructional video. I just want to make sure it's balanced really well and I'm lit well and you can see me and you can see what I'm doing very well, and that's it. I just want to create a very neutral look. But you can begin to play around with that. All of the things you do to this creative panel here will just be on top of this Adjustment layer. When you turn it off, it's gone. Play around with that, have fun with it. But again, remember, we have some rhyme or reason to what you're doing. Don't just go ham on color grading, just to go ham. Remember what purpose the video is serving. If it's a how-to video, it probably just needs to be neutral and lit very well, and maybe you pick a color look that intensifies that neutral, nice lighting that you did.
8. Basic Audio Editing : Now let's add some music and do some basic audio editing to our how-to video. I've included a free song for you all to use in the video. Let's go ahead and make sure my audio, me speaking in the video is where we want it to be. What you're going to do is click on the first clip where I am actually speaking. What would be considered my speaking voice from my timeline, it's going to be this clip again right about here. Then we're going to go to the Essential Sound panel and we're going to highlight the clip, the audio specifically. We're going to mark it as Dialogue because I'm speaking. Over here to the right is our audio meter. As I'm speaking, you can see that the volume of my voice and how much is being picked up is being registered by the audio meters. It's pretty good. It's looking like it's averaging right around. It looks like I'm peaking at my loudest. I'm right around negative 10 dB or so and that's okay. I think usually what I try to strive for with my audio, with my dialogue specifically, I usually want to have my dialogue sit comfortably between negative 12 and negative six. I want it to stay there. The lowest it goes when I'm speaking is negative 12 and the highest it goes is negative six, negative three at its peak, but obviously you never want to be hitting zero and peaking too much. Right now I'm peaking at negative 10, which is a little too low. What I'm going to do is, I am going to raise the volume. You can do that by clicking and dragging on this little line. You'll see how my cursor has transformed to adjust the volume level. I'm going to add just like 2.8 dB to my volume and see where that puts me with our meters. I still feel like I'm a smidge low. As you can see, the highest the volume went was what looks like a negative seven dB. I can go a little bit louder than that. Let's go to about 5.2 or so. That's not too bad. I still feel like I'm a smidge too low, but I think that's pretty good. We can go up a little more. Let's go up to eight. That's looking pretty good. In this clip anyway, specifically, we're peaking at negative four which is pretty good. I'm going to go ahead and apply this level to most of the audio because again, I speak pretty similarly through most of the video and I think it should be fine. We're going to copy "Command C" "Control C". Hey. Hit our "A" key and then hold down Shift so it just does the audio. If for some reason yours is doing the audio and the video, that's okay. With everything highlighted hit "Command L" or "Control L" to unlock the video from the audio. But again, we'll do "A" hold down Shift, it should just do our A1 audio track, which is just me speaking. Then we're going to right click and hit "Paste Attributes". With this, which attributes do we want to paste from that original clip onto the rest of these? The only attribute we want to paste to it, is the audio volume that we've used. We don't want any of these essential sound stuff over here to go on there or anything like that. We just really want the Volume, Channel Volume and Panner. Then we're going to hit "Okay". You see it adjusted all of them now to be at that level. That's pretty loud. When I'm putting the balls into the vase, that's loud, it's grading on the ears, even though the audio was balanced for me talking, that section, that little smidge is loud. With that, let's make just this part where the balls are hitting the vase. Let's make that not so loud. What we're going to do is we're going to hit the "P" on our keyboard. P as in pen, which is for the Pen tool. Similarly to the keyframes, how we've used before, we're going to use keyframes on just this audio track to fix it. Then we're going to hit "V" to go back to our selection tool and then we're going to drop it down. Now we just click and drag on it to drop it down. Say something false while you're filming or something like that. You can adjust using the Pen tool and creating these keyframes to lower and raise the volume. If you want the volume to come back up slowly, you can stretch out how long it takes for it to come back up to where you've had it before. Or if you want it to be fast, you can shorten it. Really simple, really easy to do. Now, let's add some music to our video. We're going to our song and we're just going to drag and drop it. Drag and drop it where you want it to start officially. Obviously make sure that you're not overlapping any of the dialogue that I'm speaking in the video because you want this to compliment it. What I usually do for my audio editing, is that I always use the essential sound panel for this and I highlight the music, make sure the music is highlighted and then I assign what it is. I tag the music. I tag it as music. You noticed I tagged my stuff as dialogue because it's me talking and then I'm going to tag them music now as music. That doesn't change anything to it. It just lets Premier know, this is music. This is the preset I use for a lot of the music whenever I'm just adding it to my videos. Balanced background music. That immediately dropped the volume of the music itself. I still think it's a little too loud, but that helped a lot. What we're going to do now is we're going to use our Pen tool again, hit "P" on your keyboard and create some keyframes. Two on one side of my cold open intro and then two on the other side of where I start talking. You'll remember that this is the fun little intro we created before. Now I'm going to hit the "V" tool, V as in Victor, to get our selection tool and I'm going to drop the music on either side. I'm going to drop it down to about negative 14 dB. Maybe a little lower. Around negative 14, negative 15, it's not an exact science. Now once we get to my little cold open, I want the music to come back up. I'm going to make this crescendo a little bit more pronounced on both sides. To make sure it stays even, hold the Shift key while you move the keyframes. Then I'm also going to turn this up way louder. Because remember, we already put the balanced background music, so that lowered it across everything, anyway. We can turn it up quite a bit. Now, let's go back a little further and play. If we look over at our waveforms, we saw that the music was right around negative nine-ish hitting right around there, which is what you want. Then you notice as soon as I start talking again, I dropped the music back down. That's pretty good. Obviously though the song does not go for the entirety of the video. What we can do is, we can copy paste it just point-blank to finish off the rest of the timeline. Make sure A2, where the music is selected, is highlighted. Command C, Control C. Move to the end of the song and you can hold down Shift to enable snapping to get to the end of where the song is. Then just "Command V" the rest of the way. Wait. If I "Command V", now I have that little intro audio work that I had done before and I don't want that for the rest of them. Good point. Let's just copy paste it once, remove those. Because we do like the audio level that it's at for the rest of the video, now it's clear. Copy. Again, go to the end of it "Command V", "Control V" for PC to the end. Now we have great background music, while I am talking. To take it a step further, again, we can take our keyframes. In some sections, I didn't feel like what I was saying was interesting, but I wanted to show what I was doing and make sure people saw that. In those sections I think it's great to let the music come up a bit again. Here's a section right here where I didn't think what I was saying was important, but I wanted to make sure people saw me putting the balls into the vase. At this point, I'm going to add two keyframes, right towards the end of this clip where I'm talking and then add another two keyframes towards the beginning of this clip where there's going to be audio. You do that by hitting the Pen tool, which is the P on your keyboard, P as in pen. Then we're going to hit the "V" key V as in Victor, to go back to our selection tool. Click and drag it up a little bit and there you go. Now, you never really have that awkward silence when you take away audio because you feel like what you're saying isn't useful. You can just bring the audio up in the music at those parts. Once again, take the time to go through and find where those parts are relevant for you. You don't want to do it too often or if maybe nobody's talking for a second or two, it might not be worth it to do it then because it's a little too jarring to the audience. But I think at that part right there, it felt like a good place to let the music come back up and just remind people that there is music in the background and remind people of the vibe that we're going for. Go ahead and do any other final audio editing tweaks you want to because we're getting down to the wire. This video is pretty much done.
9. Exporting: This will arguably be the easiest part of this entire thing, exporting it for YouTube. We have put all of our hard work into this and we took the time to edit our A roll edit our B roll, add effects, some simple graphics, musics, color correction, color grading, all the things we're really happy with where we've ended up here. It looks good. We've watched it a few times to do any final tweaks to make sure everything's accurate, spell checking everything, all of that fun stuff. It is time to export. Exporting is incredibly easy in Premier. We're going to go all the way to the end of our timeline of everything we want to be exported in the video. We're going to try to be as accurate as possible. We're going to hit the plus sign a couple times and then move our playhead to the very end. Then we're going to hit the "O" key. That'll create our out point for the video. We want Premier to export everything up until the out point. Then we are literally just going to hit "Command M" or "Control M", if you are on a PC. That is going to bring up our export settings. From here, I usually work with the presets built into Premier Pro. If you do not have encoder available to you, if you don't have the full Adobe Creative Cloud suite, which provides encoder, then go ahead and put it to H264 and use the YouTube 1080p preset for this video specifically because it'll go ahead and export it and optimize it to play well on the YouTube platform. With every update, they make sure to keep these presets up to date as well. I find that it's pretty accurate, it works pretty well. The next thing you're going to do is just literally hit the "Export" button and it will run in the background and export your video. You won't be able to do anything else on Premiere while it's exporting, it's going to burn to a lot of your CPU power exporting from Premier Pro. Make sure, once you've decided that you're done and you're ready to export, enclose all the other applications that are maybe on your laptop, something like that, and export your video. Now, you can do that or you can hit the "Q" button. If you hit the "Q" button, that is going to bring up encoder. What encoder does is it's a way to have things exporting in the background, and then you can still be working in Adobe Creative Cloud programs. As I'm talking right now, encoder is opening up and doing what it needs to do and Premier Pro is essentially sending all the information from this timeline sequence from our in and out point to encoder. This is helpful if you're the type of person who wants to export multiple versions of a video. Maybe you have a version of this for Instagram, you have a version of this for Facebook, you have a version of this for something else. You can build all the timelines you want and then queue them up in encoder. Then they can just be exporting in the background and you're good to go. That's very helpful if you're considering being a person who is creating on many platforms which a lot of creators are. Encoder has popped up and it has queued up How To Plant, and you can go ahead and save it to wherever you want to save it. For me, I'm just going to save my video to that folder that we built, the Plant How To Footage. I'm creating a new folder called Exports. That is where I'm going to put it in. I'm just going to hit "Save." With encoder open, I can save from here and close it altogether. I don't need it anymore if I have put it in encoder. Once I hit this "Play" button here, it will begin to export in the background and I can be answering e-mails, doing other things, so on and so forth, but encoder is just handling, exporting the video in the background. That is it. You have now opened the Premier for the first time, edited your first video, completed it, and are currently exporting it hopefully. Your next stop after your video is done exporting is to head over to YouTube and upload it and do everything you need to do on that end with your descriptions, thumbnails, all of that fun stuff. Thank you so much for hanging out with me and taking this class. I hope it was helpful if you end up making some interesting versions of my Plant How To video, please upload them to the platform so I can take a look and have a good chuckle with you, maybe about what you've done with my footage. Then also if you have any questions and concerns, please use the platform to message me and get in touch with me. I'm more than happy to contact you. I'm also always interested in constructive criticism. I want to make sure these classes are beneficial to you as much as possible. Feel free to let me know on things you feel like I could improve upon and make these classes better. Or if you have ideas for other things you think I could teach that you would like to learn from me specifically, please let me know. Again, I really appreciate that you hang out with me for this time. I'm [inaudible]. I'll see you when I see you.
 Hallease, Digital Storyteller, Video Producer