Transcripts
1. Introduction: Hello everyone. I am Hallease, a digital storyteller and Youtuber. I'm also the creative director of StumbleWell, my production company. I originally went to film school to become a feature film editor. I loved studying how an editor could change an entire tone of a piece with a few simple edits. I ended up finding a creative career online instead, but I still incorporate a lot of these techniques into every short film and video I produce, whether it's for my channel or for my clients. In this class, I'm going to show you some intermediate editing techniques using Adobe Premiere Pro. These are skills and techniques that are often separate beginner editors from seasoned professional editors. Some of the techniques will be subtle, but I promise, combined, they'll make your edit stand out and give them that je ne sais quoi. This class will be useful for anyone who's learned the basics of Adobe Premiere Pro and wants to start incorporating more advanced cuts and graphical elements into their videos. Whether you are a freelance video editor, work as an in-house editor with a company, or are trying to up your creativity as a content creator online, I think you'll gain something from this class. However, if you've never opened Adobe Premiere Pro before or don't have a firm understanding of the interface tools and some of the keyboard shortcuts, I recommend that you take my Intro to Premier Pro class first. To take this class, you will need to have the latest version of Adobe Premiere Pro on your computer to practice along with me. You will also need access to the essential graphics panel and closed-captions panel via an Internet connection. The Internet will also allow you to download my footage, but you can always just use your own. I'm excited that you're joining me for this class. Thank you for trusting me with your time, and let's get started.
2. Class Project: For our class project, we're going to edit together a two-camera interview of me talking about this now. I've also included some B-roll, which is just supplemental footage to enhance the interview as well for you to work with. We'll use this as a backdrop to move through all of the lessons. Again, you don't need to use the footage I have provided if you don't want to. Feel free to let me know how you used what you learned in this class in your work. This class will be broken up into three different sections. Section 1 will cover the technical. I'll get into different shortcuts and technical aspects that are Adobe Premiere Pro-specific, including how to sync video and audio together in a two-camera set up or how to alter footage shot at higher frame rate to make it slow motion. I'll also go over the essential graphics panel in Premiere, which is a really awesome tool for adding graphics to videos without needing to learn more software like After Effects. Then we'll move into Section 2, editing techniques. These on the surface may seem subtle, but combined with the technical know-how, this is really what separates beginner editors from intermediate and the more advanced editors. Finally, we'll create some shortened versions of our final video for social in 4 by 5 and 9 by 16, along with closed captions, so you can think about how to promote your video on platforms like Instagram. This is going to be cool.
3. My Snow Day Video: When I think about the snow, I kind of become a child again. It reminds me of my youth of playing pretend. When there's enough snow, it feels like you're in a dream. My name is Hallease Narvaez and I am a video producer and digital storyteller. I like the snow. It's been interesting to experience snow as a Texan, because we don't usually get it very often. This year I got the opportunity to film it and I did. I filmed it with my dog because my dog is an Australian Shepherd cattle dog mix named Dakota. She gets very hot living here in Texas. When the temperature drops for the winter time, she really enjoys it. She really feels like her coat has purpose and meaning and it makes her very happy. The two of us running through the snow is definitely a memory I will keep with me for the rest of my life long after she is gone.
4. Syncing Sound: Welcome to Section 1, The Technical. Let's hop right into this by syncing a two camera interview. If you're an in-house editor for a company or agency, a lot of your videos will be interviews or testimonials that a video team has filmed. Usually the sound is a separate audio track or synced already to one camera. In this lesson, I'm going to show you two ways to sync sound manually or using a built-in feature in Premier. I think it's good to know how to do this by hand, because you never know what can happen or what type of audio you may need to sync. For example, in a short film, the audio might be so low that it can't be synced using the plugin or features, and it's just a good skill to have. I think. In this humble editor's opinion, I think it's just a good skill to have. Go ahead and open up your Premier and set up your project. If you're using the footage I gave you, import it into your project and organize it however you want. Then create a new 24 FPS sequence and name it whatever you'd like to call it. I'll call mine Interview Sync. You'll see I gave you two camera angles. The good audio is in cam A and the reference audio is cam B, in both you'll see that I clap to help with syncing sound. In the bass, they usually use a clapper, but for this, a simple hand clap that's visible in the frame is fine. Scrub through cam A in the source panel until you see my clap. Then mark an in point a little before, which is the I key on your keyboard, then bring it onto the timeline. By the way, throughout this class, I'm going to use the shortcuts when directing you because the shortcuts are how you become a more proficient editor as well. Stick with me. The shortcuts matter, learner. Go ahead and enlarge the audio track of the timeline by hitting the Option plus or Alt plus keys. You'll need to see this so you can sync up the two clips to each other. Do not rely on what you see in the video. Always use the waveforms to sync sound. Go ahead and line your play head up exactly where you see the clap and the waveform and hit I again. This will mark an in point in your timeline right at the clap. Then go to cam B and scrub through it in the source monitor to find the same clap there and mark an in point there as well. Now, drag in B into the timeline and line it up right with your other in point. Then go ahead and mute cam B's audio and let's see if things are synced up. That is for you all as well. Let's talk about some snow. Yeah. That's that. If you want to practice again, take cam A2 and cam B2 and go again. Now, that's the way to do it manually. But Premier Pro also has the synchronize feature that will do it automatically for you and save you time. I'll show you how to do that as well real quick. Bring your two clips into the timeline that you want to sync together. Don't worry about matching them up, well or anything like that, just layer them on top of each other. With both clips selected, right-click to bring up the drop-down and select Synchronize. A new window should appear with some options. Since we want to match up the audio, make sure the Synchronize Point is set to Audio and then select whatever track the hero audio or the good audio is on. In mine it's on track 2. Hit "OK" and voila, it synced it right up. Isn't it awesome? You can repeat this for however many clips you have that need to be synced, something to keep in mind though when using the synchronize feature, you can't synchronize multiple camera clips to one audio track. For example, some videographers will film an interview and just let the audio role while they start and stop the camera. If that happens, you'll need to break up the audio into separate clips. That's why I taught you how to do it manually at the top of the lesson. Go ahead and sync everything up. I'll see you in the next lesson.
5. Working with Slow Motion Footage: Let's work with some slow motion footage. If you're using what I've provided you, you probably noticed that some of it is filmed at a higher frame rate. In this lesson, I'll show you three ways to manipulate the footage and make it slow motion. If you're working with your own footage, pay attention to the different frame rates that the videographer has used. That can give you a good clue as to their artistic intent with the footage. My interview is filmed at 24 frames per second, so any other footage that's different from that is meant to be slowed down. Here's three ways to do that. The first is via the clip speed and duration window. Take one of the clips I've provided that's at a higher frame rate and make a selection and drop it into the sequence. Now with the clip highlighted, hit "Command R," "Control R" to bring up the clip speed and duration window. Since this was shot at a 120 frames per second, you can slow it down quite a bit before it starts to look choppy or blurry. Play around with changing it to like 50 percent, then try 30 percent and then drop it down to 10 percent. That way you can just see what those differences are for yourself. The higher the FPS, the slower you can make the footage before it starts to look choppy. Conversely, you can also use this to speed up the footage as well. Let's change it to something crazy like 200 percent and see what happens. The second way to do this is to select your footage in the project panel and right-click to bring up the mouse window. Then select "Modify" and then go to "Interpret Footage." This will bring up the modified clip menu. At the top section that says frame rate, click, "Assume this frame rate" and change it to your native sequence frame rate. Again, mine is 23.98, 24, so I'm going to put that. Hit "Okay." Now playback the clip in the source monitor. You'll see it's now playing slowly and is a lot longer. The clip itself, you should see that it's a lot longer. You can now scrub through the whole clip at this new frame rate, which can make pulling selects a lot easier and also it help you see more interesting moments in the slow-motion footage rather than trying to guess where you think a moment can be. Something I often do is, I'll take all the clips that are shot at a higher frame rate, create a new bin, so "Command B" "Control B" and call it slow-mo and copy and paste them into there. Then I'll modify them all at the same time. This way I have the original versions at the higher frame rates if I need them and I have the slow motion versions too, I usually change the color on one so they're easy to spot while editing as well in a project. I'm a Virgo, so organization is just my jam when editing, but live your life however you want if organization isn't your thing, then fine. The last way I'll show you how to manipulate slow-motion footage is via time remapping. For this example, I'll build upon the clips we've already modified via the Interpret Footage feature, because it'll be super clear what timely remapping does by using footage that's already slowed down. Let's take this clip of the Cota looking super majestic as the snow falls on her in slow motion. Wow, much regal. Let's take about 10 seconds of it and just drop it into our timeline and then right-click to bring up the mouse window again. From there, go to the bottom and hover over Show Clip Keyframes and then Time Remapping, and then click on Speed. You'll see the clip has changed in our timeline. Now, hit the P key on your keyboard and bring up the Pen tool. right towards the beginning of the clip, create an endpoint by clicking, you'll notice a dotted vertical line and the end point you've created, you can click and drag and now separate it. Now this is where it gets a little crazy time you say. Just bear with me. Zoom in if you need to again, and remember that's the plus key. Hit the V key on your keyboard to go back to your selection tool. Hover right at the velocity bar, which is that new bar that's there and move it up or down to ramp the speed faster or slower. I'm going to change mine to something crazy,600 percent faster and hit Play. You see how it started off slow and then ramped up to that super fast speed. What you're doing is using that split in and out that you create to make the time that is in that space faster or slower. Now, conversely, let's do it on the other side and slow it back down. You see how this can be used to do a lot of fun transitions with footage to create emphasis or give space to a piece. Especially, think about it if you have like a swell in the music at a certain point and can time your remap to that music. The possibilities are endless with this, but it is a little weird to just wrap your head around. I know for me it took a while to understand time remapping and just understand how it's presented spatially in the software. But once you get it, you got it. That's three ways to manipulate slow motion footage, play around with it, and think about how you can use this in your next project. I'll see you in the next lesson.
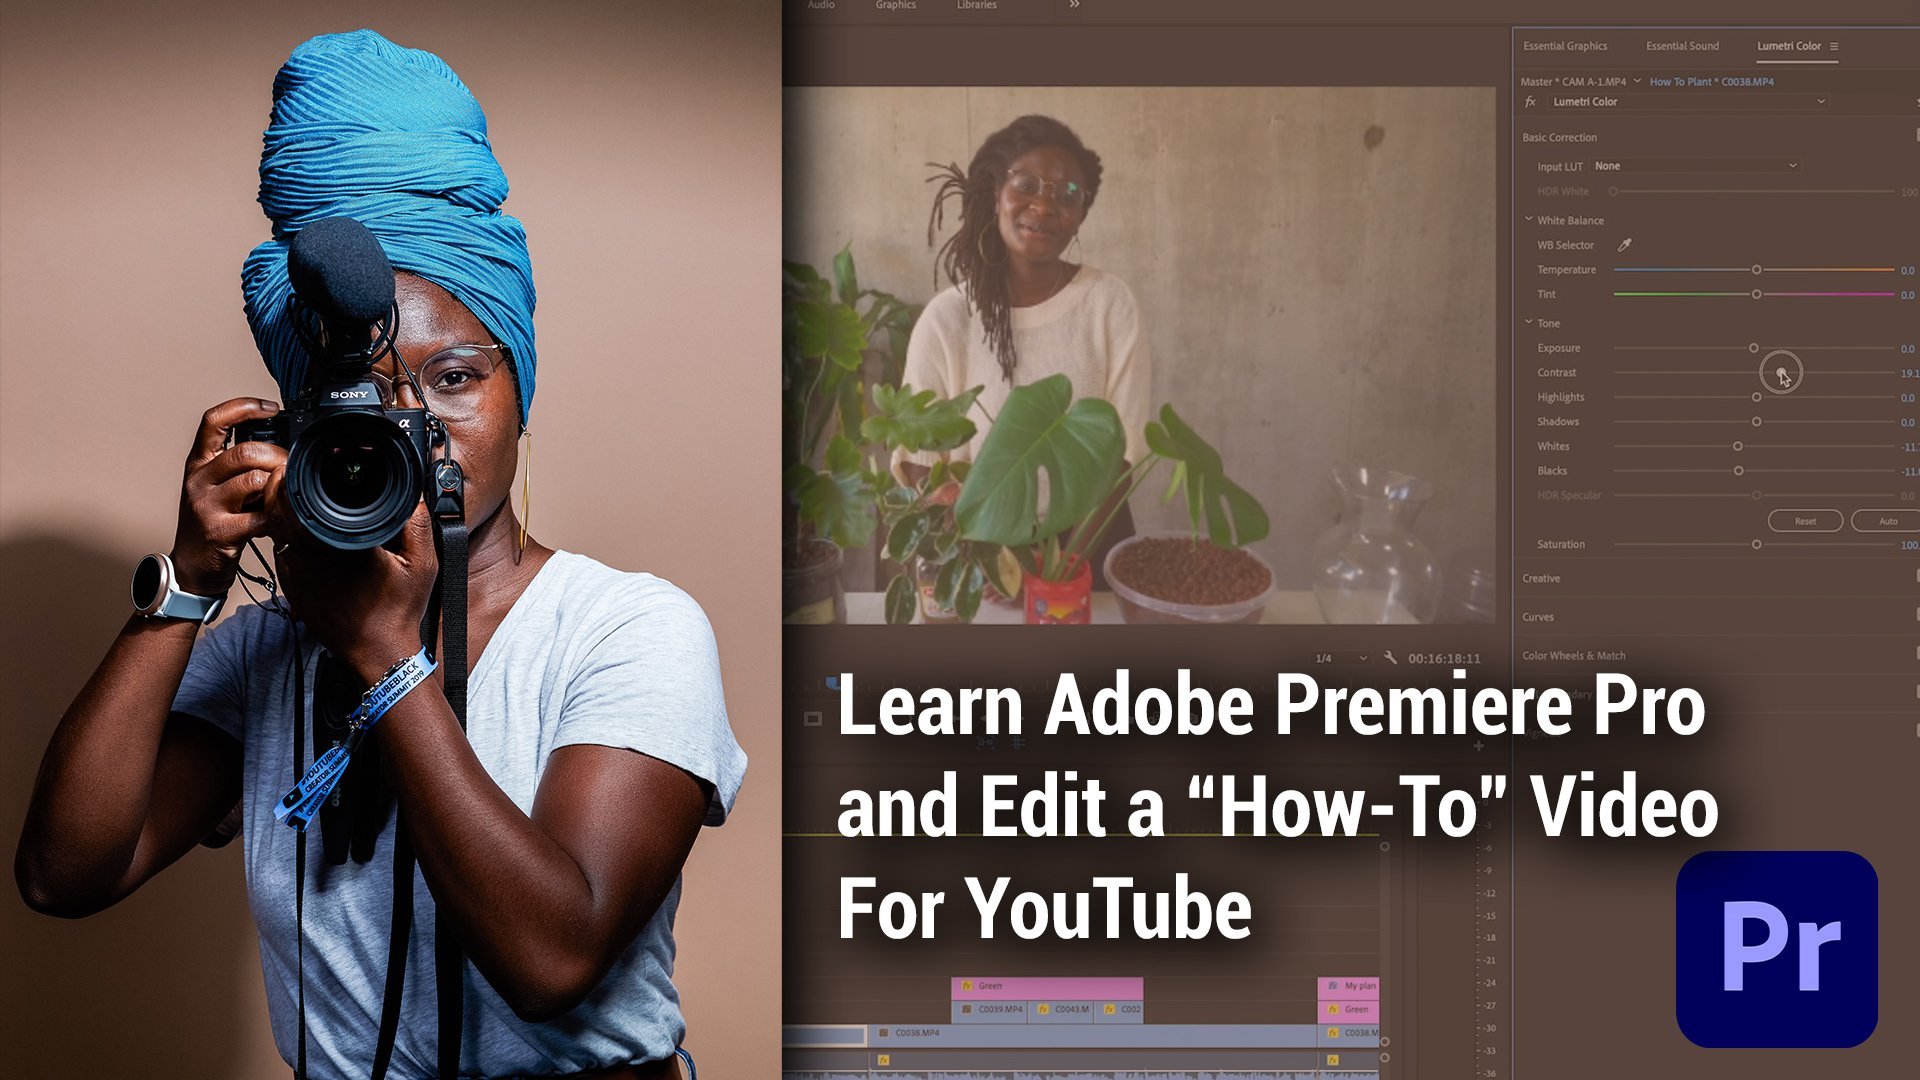
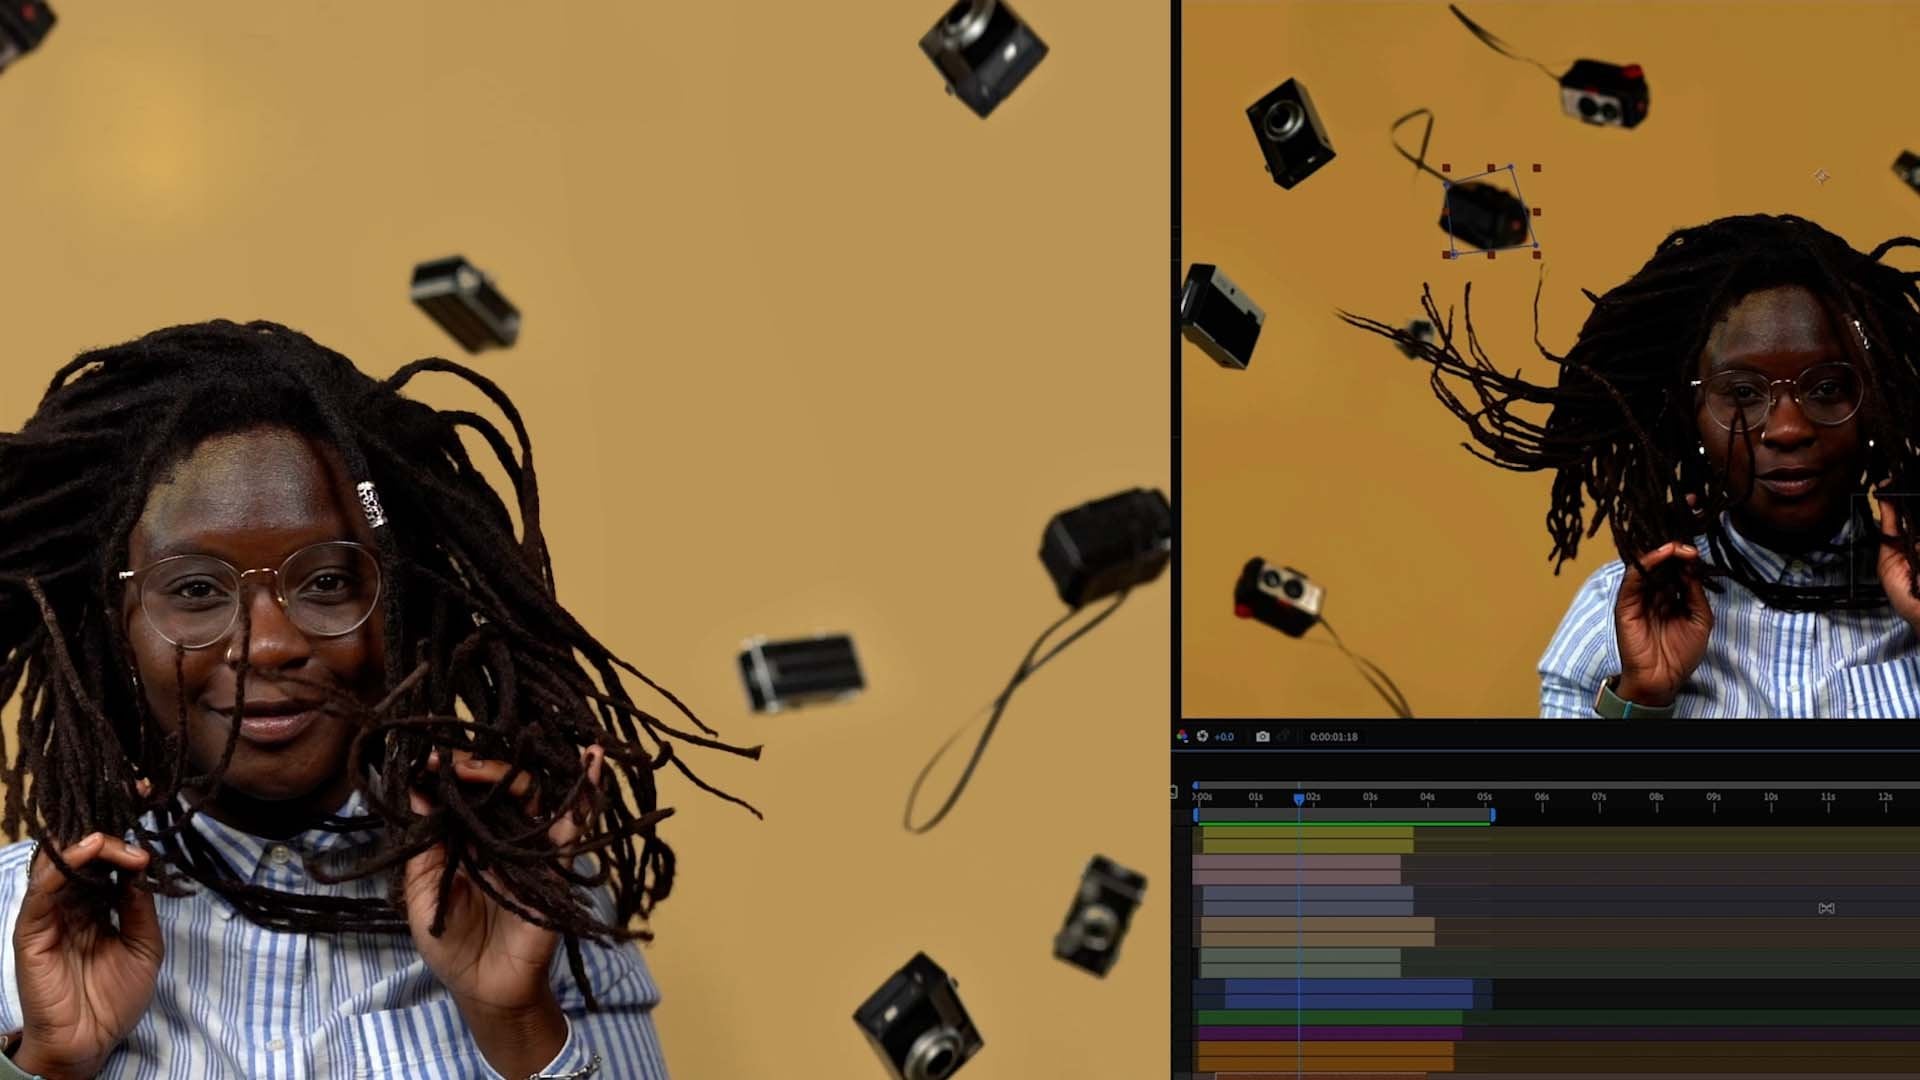
6. Essential Graphics Panel: Hello, hello, hello, and welcome back. In my version of the snow interview, you'll notice I added some simple motion graphics and transitions to give the video more movement. Usually, you would have to create those from scratch using a crazy amount of keyframes. Or you would need to move to After Effects and build them all as well. Now, Adobe Premier Pro has the essential graphics panel, which is a hub to take pre-built graphics and assets and add them to your video. I think that one of the most helpful assets in the Essential Graphics Panel are the lower thirds. Because those end up getting used a lot by in-house editors for corporate videos or testimonials, things like that. So the essential graphics panel can save you a lot of time. To use it is really, really simple. So first, you can get the Essential Graphics Panel to appear in a few ways. The first is by going to the top and selecting the Graphics layout. It should appear to the right somewhere over here. Another way to have it appear if you already like the way your Premiere Pro layout is and don't want to change it is by just going to Window up at the top and clicking on Essential Graphics to have it show up somewhere. There will already be a few different graphics already available to you in the panel that come native to Premiere. Now, feel free to check out those if you need something really, really quick. But I would recommend searching for more stuff via Adobe Stock so that way you aren't using things that are already available to everybody. Let's find some lower thirds to use for my name and title. Oh, and then make sure you have an Internet connection for this, you'll need the Internet. In the panel click on the Adobe Stock tab. Just thumbing through, you can see there's a lot of stuff that's pre-built in here for you to use. If you're trying to be budget-conscious, which who isn't, click the "Free" box. Now type in lower third and let's see what comes up. There's still a lot of stuff here, even for free 99, so awesome. You can preview templates before you download them by clicking on it once to activate it in the panel, and then sliding your mouse over it without clicking to play it. I tend to prefer minimal graphics, especially for something like this. I'm going to download Under Line Title on page 8. It's on page 8 for me, I don't know what page it's on for you, but hopefully, you can find it and then hit the little cloud to license and download it. Once it's available, you'll see a checkmark appear in the corner. You can see I already have a checkmark on mine now because I've downloaded it. I also really like this Line Accent Lower Third on page 1 for me. I'm going to download that one too. Again, these are free, which is really cool. Now, go back to the My Templates section and scroll until you see the templates you've downloaded. From here, you can drag and drop the templates onto your footage. If you're a Creative Cloud member, Premiere will automatically activate the fonts originally used in the template if you don't already have them on your computer. I definitely want to make some adjustments to this template. So let's go back up to the panel and with the graphic highlighted in the timeline, click "Edit". This will show you all the layers of the graphic and then over in the Effects control panel, you can see all of the keyframes used to create this animation. Something that's neat about templates here is that you can also change the duration in your timeline. I can make it shorter or longer without having to worry about moving a whole bunch of keyframes over or anything like that. The first thing you'll want to do is to change the font to something else, I like to use Seravek. I don't even know if I'm pronouncing it right. But I like to use Seravek for my YouTube videos. But if your agency, your company has a specific font, you can make those adjustments based on their brand toolkit. I like adding italics and playing around with caps versus all lowercase, just to add some design elements whenever I can. I like that, but I don't like how the job title slides in sideways. You see that? So I'm going to go fix it in the keyframes. Let's go to the Effects Controls panel and open the drop-down for Digital Storyteller. Let's hit the plus key a few times with the panel highlighted to zoom in so we can see what's going on. First, let's adjust when the opacity starts because to me it looks like a mistake that the job title comes up so soon. It feels wrong watching it. Now I wanted to not come in at an angle like it is right now, but I can't seem to adjust that in the Effects Controls panel. This is something that happens often in templates, is because its movement is based on another layer's movement. Go back into the essential graphics panel and see what's happening in the responsive design position, nine times out of 10 it's something to do with that. If you're familiar with After Effects, this would be like using the pick whip or the parent tool to connect one layer of actions to another. That's basically what this is. Let's click on the layer that's my job title and sure enough, it's pinned to the line itself and the line comes in sideways a bit. That's why my job title is doing that too. Let's change it to be pinned just to my name, but now it's not lined up at all. That's okay. Command Z, Control Z to undo. Then let's move the play ahead on the graphic to a point where it's even at the end of the animation and then change it to be pinned to my name now. So it'll adjust anything you change based on the value it's currently had. Since I started lower and I changed the painting there, it kept it below. That looks really clean, smooth and since I used my own font based on my personal brand and adjusted the animation, a smidge, just a smidge, it's a unique lower third just for me. See, I didn't have to waste time going to After Effects and building this out with easy ease, keyframes, etc. Just drag-drop and make a few adjustments. This is great. Let's do the other template we downloaded the Under Line template title. Go ahead and drag and drop it onto your footage. Let's just play it to see what we've got because we don't know. This one has a background. So let's go to the Edit tab and the Essential Graphics Panel. This one has a lot more and is a lot more involved. Whoever built it wanted to give the editor a lot of options to adjust things. So that's very considerable. Thank you. They built some position presets for you as well so you can make this title into a lower third by just clicking this and unclicking the others. That's really neat. This one also seems to allow you to change the X, Y position of it and scale it. That's cool. Now let's move down to the text controls and change it to be something else. I don't want a background, so I'm going to turn that off. You see just by making a few adjustments, you can add a lot of graphic flair to your videos in very little time. It gets even better if you have a little bit of budget to purchase some templates through Adobe Stock or there's a lot of other online exchange sites as well. Go ahead and explore the templates and play around with them and try to see how you can make some of them your own. Now, I've come at the Essential Graphics Panel purely from the video editor side of things. But if you would like another class on how you can build your own Essential Graphics Templates in After Effects and bring them into Premiere Pro and use them over and over again to simplify an editor's workflow, for example, let me know in the discussion down below and maybe I'll make that happen.
7. Editing for the Blink: Hello and welcome back. Now we're moving into Section 2, which is all about editing theory. This is a bit more film school, a bit more academic if you will. If you're trying to have a career in editing, these theories will come up a lot as you edit so they're worth knowing. If you really want to get into the art of editing, I recommend reading In The Blink Of An Eye by Walter Murch. He's a well-known feature film editor who's worked on a lot of iconic films. In his book, he breaks down his take on editing via the rule of six. While these ideas are focused more on narrative films, it definitely applies to more traditional corporate videos and online content as well. It is the combination of incorporating all of these things that makes a video feel seamless even though you as the editor have made all of these adjustments and cuts. Incorporating the rule of six is why people watch a video and can't exactly say what you did that made it great or they can't point to one specific moment because the whole thing flowed together so well from start to finish. For the most part in editing, the goal is to not bring attention to yourself as the editor. On the more corporate side of things, it's to make the interviewees seem composed, confident, and well spoken. They're trusting you. In fact, I'm trusting you actually, if you're using the footage I gave you with my image and my likeness so take the edit seriously. My favorite cutting technique from Walter Murch is this idea of cutting to the blinks. He believes that people tend to blink when they've mentally completed an idea or thought in their head and we as a viewer pick up on that mini completion. By cutting right at a blink, we're preparing the viewer for a new idea or at the very least, a different shot. To demonstrate this, let's go back to the video I cut together of myself, of the snow. I'm going to play a section of the video where I cut around myself based on when I blinked to finish an idea. It feels like you're in a dream. My name is Hallease Narvaez, and I am a Video Producer and Digital Storyteller and I like the snow. It's been interesting to experience snow as a Texan. Now I'm going to go into my Edit of the video and scoot the cut over a frame or two to right before the blink. Then let's play it back. It feels like you're in a dream. My name is Hallease Narvaez, and I am a Video Producer and Digital Storyteller and I like the snow. It's been interesting to experience snow as a Texan. Did you see slash feel the difference in that? Did it feel slightly off at all to you? Maybe it did or maybe it didn't. Let's watch them back to back so that way you can see. It feels like you're in a dream. My name is Hallease Narvaez, and I am a Video Producer and Digital Storyteller, and I like the snow. It's been interesting to experience snow as a Texan. It feels like you're in a dream. My name is Hallease Narvaez, and I am a Video Producer and Digital Storyteller, and I like the snow. It's been interesting to experience snow as a Texan. It's a very, very subtle shift. But these are the differences between a seamless story progression and calling attention to yourself as the editor. Let's try this again with another section. Let's actually do this between cutting between cam A and B. This is something I actually do a lot whenever I'm doing that. If I feel like I need to break up me and just change something in the frame, maybe it's for attention span or something like that. I don't really have any B-roll to cut to or anything like that, I'm just going to cut between cam A and B a little bit more. I use this cutting to the blinks technique for that too. Let me show you cutting from cam A to cam B, cutting to the blink, and then cutting not to the blink, just willy nilly. She really enjoys it. She really feels like her coat has purpose and meaning, and it makes her very happy. She really enjoys it. She really feels like her coat has purpose and meaning, and it makes her very happy. I think there's a difference, but if you don't see it, that's fine. Again, this is all editing theory. When I'm editing myself in videos and even throughout this class, I try to edit myself based on the blinks. This is something to keep in mind whenever you're editing interviews and trying to string together multiple ideas into one piece. Use the blinks of the interviewee to signify the beginning of something or just the end of an idea. As you continue to progress as an editor, which I think you will, doing this will become second nature to you. Trust me, you won't even think about it. You'll cut right when people are blinking. If you're putting together a version of me for your class project, keep that in mind as you cut me up and make me say all sorts of crazy things. If you're not, no worries, I'm excited to see what you create with your own footage. Make sure to share it down below.
8. L-Cuts & J-Cuts: Welcome back. Let's talk about L-cuts and J-cuts. This is a pretty basic concept, but you'd be surprised how many videos I watched that I forget to include them or could be just better if they just utilize them more. L-cuts and J-cuts are pretty straightforward. The letters signify the shape of the cut in your timeline, and they help audibly and visually transition a viewer from one one to the next. An L-cut is when you extend the audio from one clip to overlap the second clip. Visually, this means you see what's happening, but hear, what's from the first clip. Conversely, a J-cut is when you audibly hear what's happening from the second clip during the first clip, this concept of the L-cut and J-cut is very simple, but it helps with transitioning between ideas or spaces, and it makes an entire piece less choppy. If you're not using L-cuts and J-cuts, you're probably doing a standard cut and that's when you're just putting two different shots when next to each other on the timeline. Now, explaining all this is one thing, but seeing it play out in a piece is another. Let me demonstrate it for you now. Here I have the piece I created of myself with the snow again, I've turned some of my cuts into standard cuts instead of L-cuts and J-cuts. You can see this by that Lego-like effect on the timeline. Let's play this section so you can see it. When I think about the snow I become a child again, it reminds me of my youth, of playing pretend. When there's enough snow, it feels like you're in a dream. My name is Hallease Narvaez and I am a video producer and digital storyteller and I like the snow. Did you see and hear the difference? Again, it can be really subtle in that shift, but using L-cuts and J-cuts combined with editing on the blinks. Then on top of that, the technical skills in premiere I've covered in Section 1, you'll start to notice that your edits flow and feel a lot more clean, which is great because that leads to less revisions. So you can get on to the next project. Now that I've shown you that start to think about how you can incorporate L-cuts and J-cuts into either your class project or whatever other work you're working on. In the next lesson, we're going to take a section of my video and create some promotional pieces for Instagram stories and your IG feed. I'll see you over there.
9. Creating Promos & Closed Captions: Hello again and welcome back. In this lesson, I'm going to show you a few ways you can take a section of your video to make promotional content for IG stories or an Instagram feed. If you're an in-house editor for a company, you might be asked to help build assets for the marketing team to then put on socials. Or if you work for an agency with clients, this might be something that you get asked to do as well quite a bit. First off, we're going to make sure that our timeline is the right size for this promotional content. I would suggest creating a custom sequence and just saving it so you always have it. That way, you can build it once, and then you can always reference it again. Go ahead and act like you're going to make a new sequence, which is Command N, Control N, which brings up the new sequence window. What I usually do is I use the DSLR 1080p24 FPS because generally, that's what I shoot my stuff at. But with that selected, we're going to go into the Settings tab and then down to Video. You can see it's 16 by 9. For a phone, it's 9 by 16. We're just going to flip it. You'll see it says 9 by 16 now as the ratio. Now, rather than just hitting "Enter" and having to do this every time, we want to make a timeline like this, go down to "Save Preset" and name it. I would recommend naming it 9 by 16 vertical or something like that. Add a description to it if you want, and then hit "Okay". When you do it, it'll reload the new sequence window with a new folder at the bottom called Custom. There, your new present will live. I have now just saved you a ton of time. Alright, so let's do this again with a four-by-five sequence as well, just so we have it. By the way, four by five is 1080 by 1350. You don't have to go look that up. Now we have our sequences built and this is where it gets a little redundant. But what is editing but doing the same thing with a slight variation over and over again. I'm going to take this beginning section of my video and put it into a four-by-five sequence. What I usually do is I adjust one clip to be the right size and then I highlight the motion section in the Effects Control panel, Command C, Control C to copy those features and it will paste the zooming in that I did to everything. Then from there, I can just go through and watch it and do some more little tweaks and stuff like that. This gets the bulk of it done, which is great. This is looking pretty good. Now, something I want to do is add closed captions to it as well though, I think it's a really smart idea if you're making promotional content of any kind, to put closed captions for the hearing impaired, and also for people who are watching your content to learn a new language maybe or so people can actively procrastinate and watch your content instead of working and do that without sound. We've all been there. All around is a smart choice. Premiere Pro now offers a really great Closed Captions panel. I'm going to walk you through it. First off, if you have an Internet connection, you will love this because Premiere now has AI transcribing built into the software. Generally speaking, it's pretty accurate. It's awesome. To bring up the Closed Captions panel, you can head to the top and click on "Captions" to bring up this pre-built workspace. Or, again, go to Window and click "Text". To have your sequence transcribed by the AI, click "Transcribe Sequence" and it's going to bring up a new box. Go to transcription settings and for audio analysis, switch it to audio on the track and then pick the track that my dialogue is on or if you're editing your own project, the track that has all the dialogue. Or you can pick mix if you have multiple dialogue tracks as well. There's a disclaimer of course, but hit "Transcribe" and watch it shoot it to the Cloud, and then poof, a now relatively accurate transcription of what I said. You'll see that you can play the sequence and the transcription will highlight as I'm speaking. You can also double-click to make adjustments as well if it got a few things wrong. Now, here's where it gets even cooler, all you have to do now is hit "Create captions". From this, I usually select "Subtitles" and you'll see a new track on your timeline appears. The captions are basically individual graphics clips that you can make further adjustments to if you want. Conversely, you can also do this by hand by switching to the captions tab and just start typing and creating your own captions. But I always say work smarter, not harder when you can. They're offering to transcribe stuff for you for free. I'm going to take it. I don't know about you all, but I'm going to take it. Let's design the captions a little bit now to match my overall brand. But again, this may be something you want to do for a client or the company that you work for, or just your personal brand if you're a content creator. I'm going to go ahead and adjust the font. I can do that really easily just by highlighting everything and going over to the panel and adjusting things. Then we're going to also mess with the color a little bit, just so it's a little more visible. I also really like to add an outline to the text. I think that helps. The last thing I'm going to show you is Adobe's Auto Reframe Sequence feature. I don't use it as part of my promotion-building workflow, but I know a lot of other editors that seem to enjoy it and use it regularly. Basically everything I did at the top of this lesson with building a custom sequence and then bringing things over manually, adjusting the scale movement manually. Adobe has a feature that will do all of that for you. I always like to show you how to do things from scratch though, so that way you never feel stuck, you know how to do things on your own. All these features that Adobe has, they should be tools for you not crutches. I'm going to go ahead and throw my new promo section of the video into a regular 1080p timeline. Then I'm going to go to the Project panel and right-click on the timeline and select "Auto Reframe Sequence". That's going to bring up a new window. You'll see, you can reframe it to the usual selections. A square, four by five, 9 by 16, or you can have it create a custom one that you decide. I usually select nest clips when I do use this feature because I want it to take a stab at re-framing, resizing everything to fit in this new sequence size, and hit "Create". It created a new sequence with the AI's best guess of how everything should fit. You can go in and make adjustments now. As you can see, there's no excuse now, you have so many tools at your disposal to not only create an original work but promote that original work easily. Definitely utilize these tools with your class project to not only make an original piece but also a promotional piece to go along with it. I'd love to see both. With that, let's wrap up this class.
10. Conclusion: Wow, you completed the class, congratulations, and thanks for sticking it out with me. At the top of the class, we'll learn some technical tools within Adobe Premiere Pro that can make your edits that much cleaner, especially utilizing the essential graphics panel to easily up your motion graphics without opening or learning After Effects. Loved that. Then we followed that up with some good old-fashioned academic editing theory. This is stuff that I learned in film school and it made my edits a lot better. I wanted to pass it along. Now you don't have to go to film school if you don't want to. Finally, I gave you a few more technical tips and tools to create promotional content, some are unique to Premier, but of course, I showed you how to do it by hand if you need to. With that, I believe we have concluded this class. Again, I am interested to see what you create, so please share down below. As always, I'm Hallease endeavoring to persevere. Thank you so much for trusting me with your time and I'll see you when I see you.
 Hallease, Digital Storyteller, Video Producer