Transcripts
1. Welcome to Leafy Doodles!: Hello, and welcome
to Leafy Doodles. I'm Holly Thomas, and as well
as a skill share teacher, I'm a bedding designer. So I'm just showing
you here a few of the designs I've done
over the last year, along the same vein as the class we're going
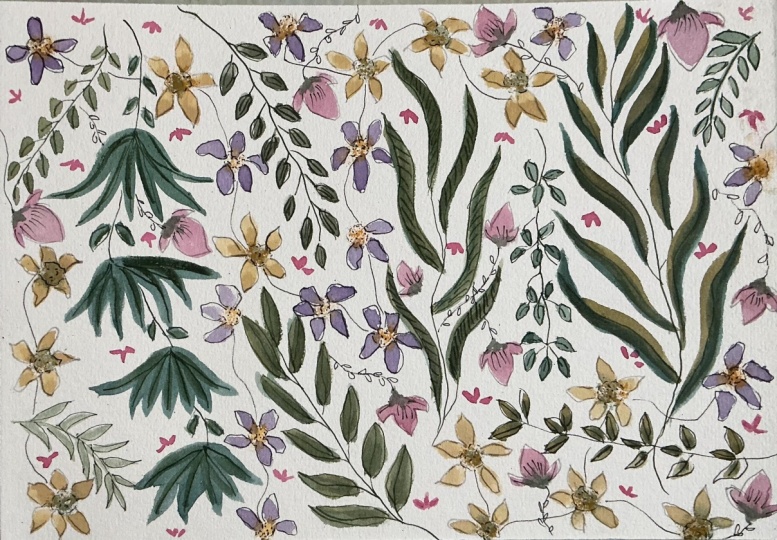
to be doing today. Today is all about creating
beautiful botanical shapes, lots of leaves, and some
supporting flowers. So this time, we're going
slightly bigger than the Scottish
wildflower series of classes, celebrating
botanical shapes. We'll be creating a
six by 12 inch study. If you don't have
this sized paper, you could always tape off your page to these measurements. And as for paints
for this class, you could use either gouache or watercolor or a mix of both. So who is this class for? It's primarily for those who love doodling
as much as I do. And it's also aimed at
confident beginners. Those of you who
want to just branch out a little and
add some details. It will also build on your glossary of leaf
and flower shapes so that you're able
to recreate these freely without recourse
to references. We're going to be using our
filbert and round brushes, and also pencil and pen. I also like to
bring in something just a little bit
different to each class. I'll be sharing with
you a tip on how we can create easy centers
for our flowers, which does not involve
an artist's brush. We're going to be mixing complimentary colors here
with the buttery yellow, with your choice of
warm yellow and white, your choice of pink or lilac, and we're just going to add a little white gase or
water color to that. Not to mention the lovely, warm green and bluey green
that we're going to be creating to form our
main leaf motifs. So you may want to
hold an awareness, the interior design code, namely the 70 2010 ratio. I'm sure you're
already aware of that, and I've translated that
over to this class. We'll start to see
that being put into action with our
larger leaf motifs, our supporting flowers,
and our finishing touches. And just before we move
on with the class, let me just draw
your attention to our projects and resources area. And you can upload your project here under my project
to the right. I can't wait to see your
projects and to chat with you. If you have any questions,
do let me know. And also, if you have any
tips to share with us all, that's always really
helpful, too. So let's move on with
our first lesson.
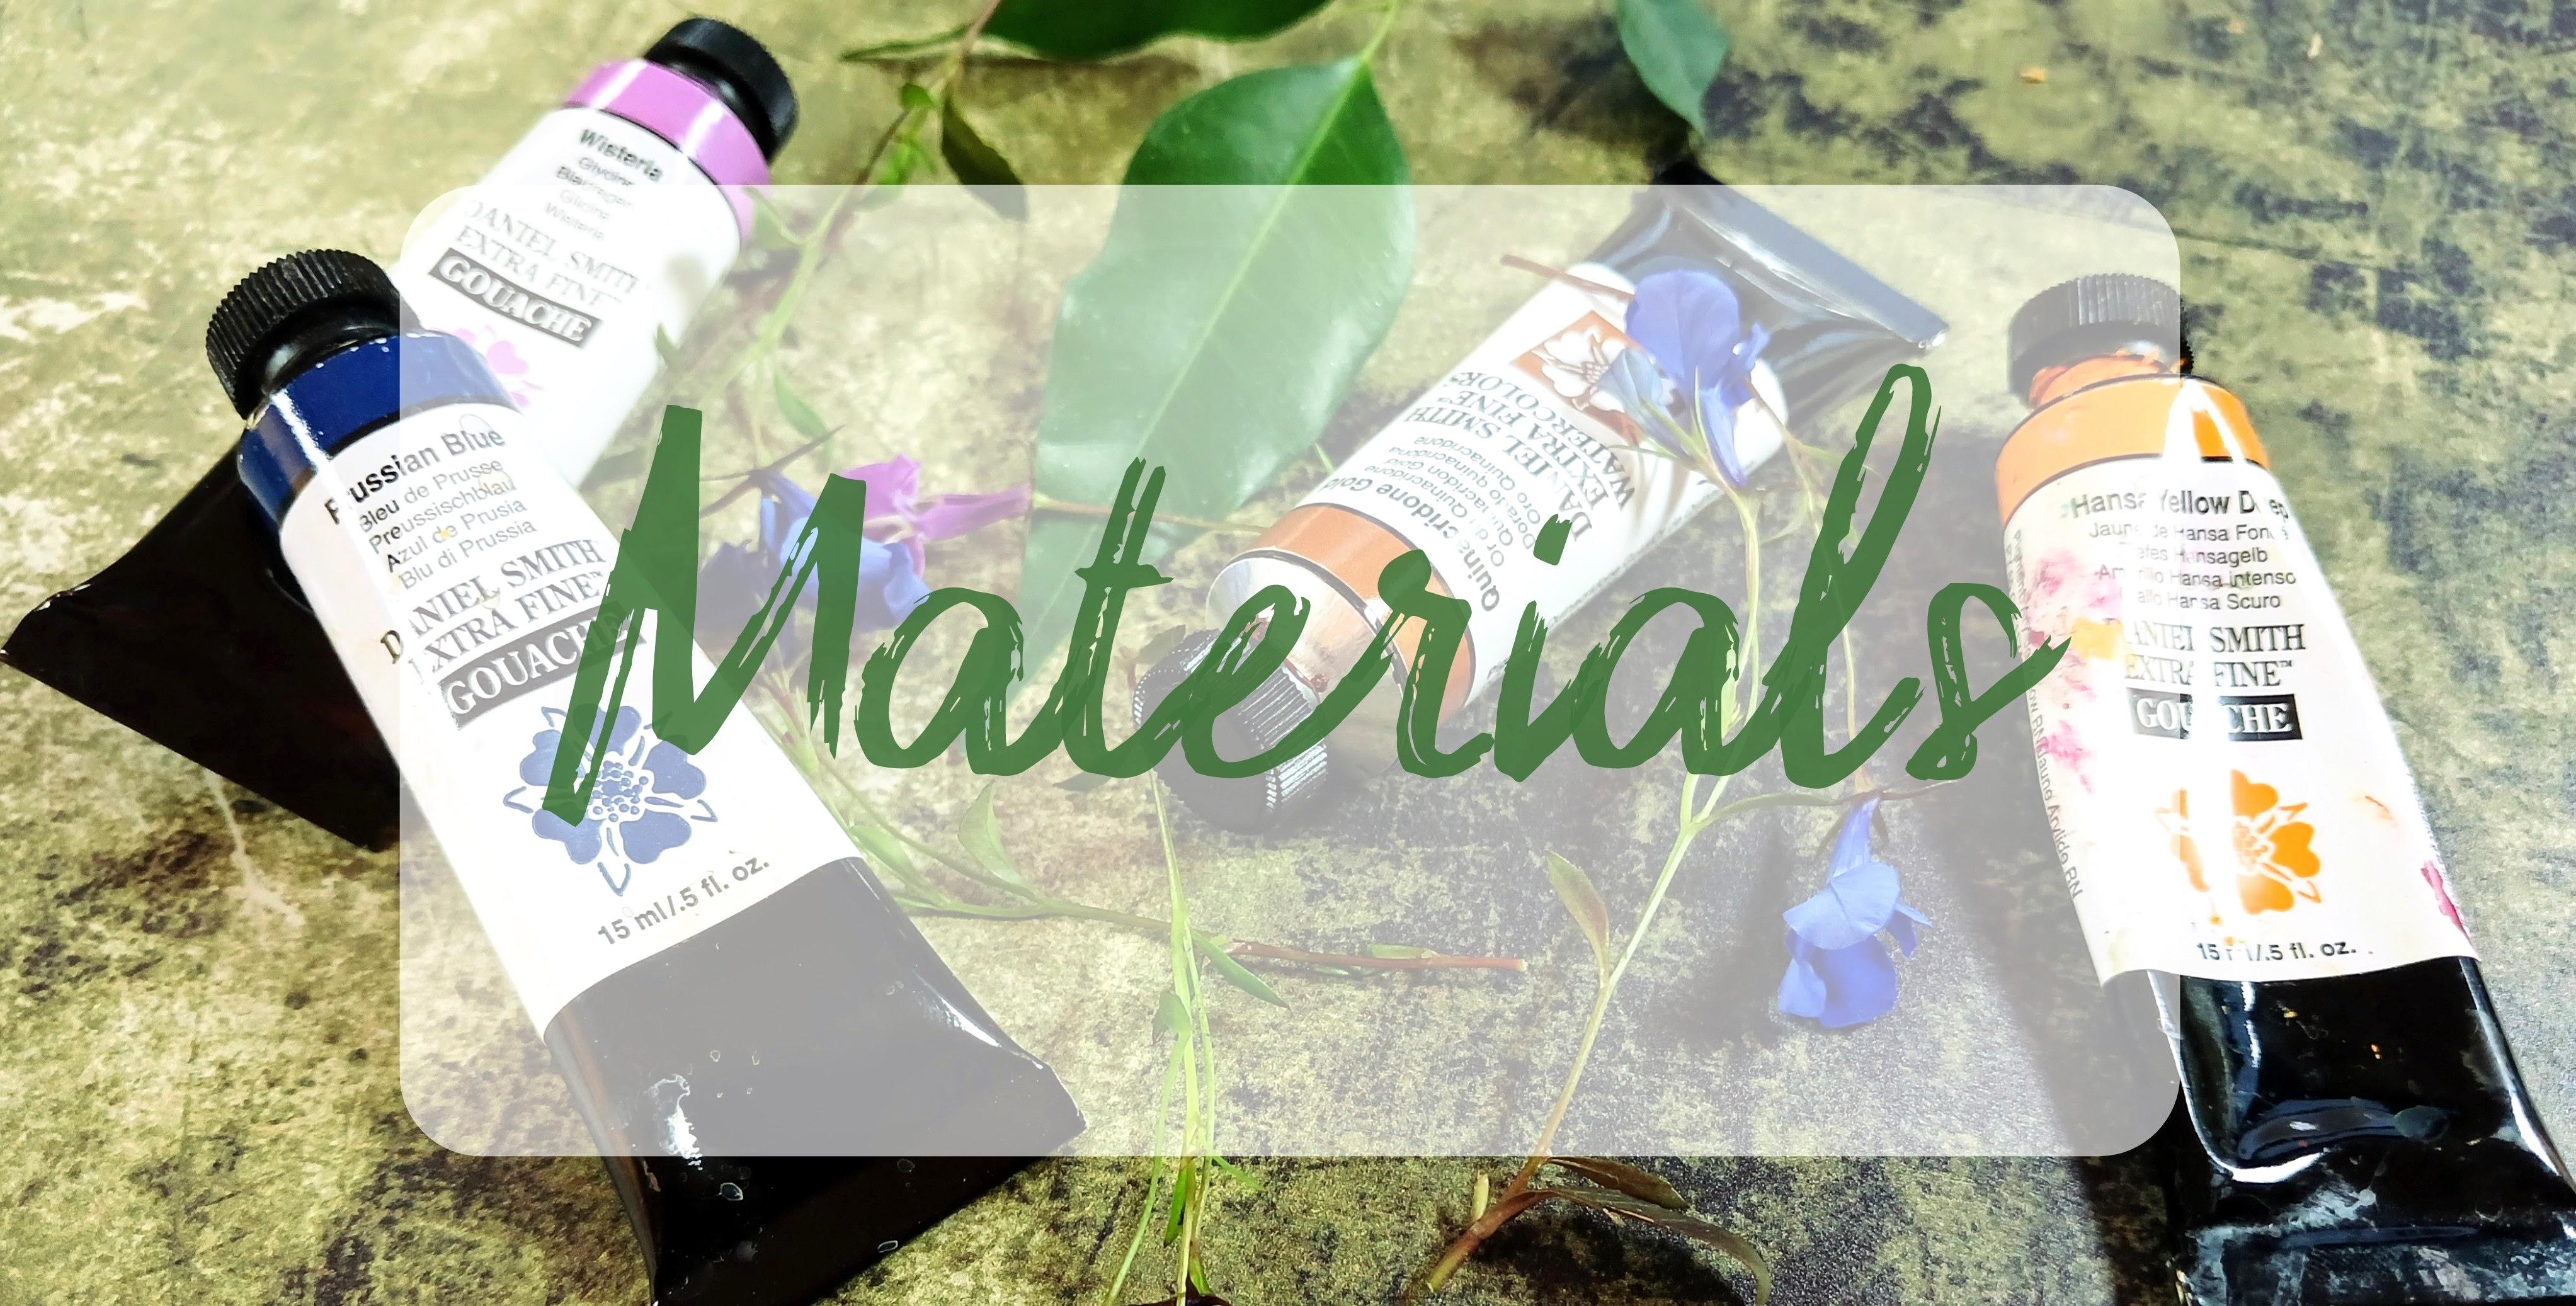
2. Creating Our Leaf Motifs: So let's prepare our
colors together. This is the brusco olive green, which is a pigment powder, and I'm going to
water that down. Got gage Prussian blue. Green appetite, which is a
water color, Hans yellow deep, which I used a guage for, and mixing the cooler green
there with the Prussian blue. So that we have some
different greens to dip into. So let's start with
the warmer mix and our pointed fill bet. I can see here I'm starting the movement before I
hit the page almost, and it allows me just to make those very intuitive
quick movements. So on some of these strokes, I'm pushing right
through to the bottom of the brush and on others like
the very small one there, just the tip and maybe a
third of the way down. So adding a little bit
more prussian blue now, so we have a very cool green, leaning very much
towards the blue. I'm using the same brush, but just using the tip to a third of the
way down the brush. I find this works best
if it's done quickly, but if you have a
different style you can bring to this,
and you go ahead. This could also be done with a size four or a size
two round brush. I'm varying the size
of the leaves as well. So let's move on
to our third zone, very similar swoops through right to the bottom
of the brush. This is that size
eight pointed filbert. But we're just creating
a tropical leaf here, where they all meet
in the center. You can see also that it's very pleasing because the
way that it dries, particularly on the
hot press paper, Now, let's look
at the zones that we have and keep
to a similar size. So I'm now going to do a leaf, which we did in the
Concertina book class. It's one of my favorite moves. So we're just going to start
out with some watery leaves, and we can vary the
value and the color. So more watery, more pigmented, from warm to cool. So the two warm leaves there are leaning towards the hands yellow deep and the bluey leaves towards the Prussian blue. And we just drawing
them down very slowly, taking our time, and then we're going to load up our dip pen. I'm just dropping in color there to the base of the leaves, and now I'm going to mix
up the brusho olive green. So at this point, if
you don't have brusho, you would just bring in a
dark green of your choice. That can be anything
from olive green to green or undersea green. I'm just putting
a tiny amount in because I do blot quite a lot. I saw an artist do this
where they just put in a tiny amount via a brush with the dip
pen upside down, and I'm now using it
the right way around. Drawing it up to these leaves, and you can see what a
beautiful effect it has. It's so effective. So adding some longer
leaves to this and going back to our
size f round brush. Varying the colors again
from to cool greens. Dropping in some of that deeper blue to the
base of the leaves. Going to flip the page around now just so I can
get an overview. And we're going to mix up this
lovely kind of gray green, which can easily be mixed
up with a warm pink, and I'm using and olive
green or any dark green. Oh I'm going to use very
swift movements again. Very similar to the
pointed filbert, but with our round brush. It's kind of a jabby movement, and I'm using
different movements. So I'm putting the
point down and sometimes not going very
far down the brush. And then on others, drawing right through to
the bottom of the brush. And this can be done
really slowly as well. I moving quickly like this, just makes them
feel a little bit more organic and have
some movement to them. And as you can see,
I'm just making the bottom leaves
a little larger. And I'm also remembering
that I don't need to overwork these leaves because we're going to be going in
and doing some doodling. So I've mixed a
really warm green now with our olive green
and handsy yellow deep. So let's do some
more ribbon leaves. So you can either
wiggle your brush from side to side as you
draw it through, almost like a snake, or you can do a halting movement where
your brush is straight. You're not moving
from side to side, but you're lifting up and down
on the brush a little bit. And just adding some
little tips to the leaves. I find it easier to do this after you've
painted the leaves. And now I'm going to
use the olive green. And I'm going to map out a stem, just to get me going
and to know how big to go here because this is a smaller space than
the other zones. We're going back to a
very simple movement that you've probably done in a lot
of other classes as well, just pushing down on
the tip of the brush, allowing it to flare out, and then bringing it up. Tip, and up to a tip again. Tip, and up again. And you can do that
with a side sweep. Now, I often do a side sweep, and you will have seen
it a lot in my classes. And it really does
make the leaves a little bit more natural.
There's one there. You can see, it's
just a lovely shape. So now we've painted
all our leaves. Let's move on to our flowers. A
3. Creating Our Floral Motifs: So I'm putting some
white gage down, or you could use watercolor and replenishing the
handsy yellow deep. We're going to be mixing
a lovely cream color, and we use this mix
in Bry rose as well. If you're using a gage, you probably need only a
touch of paint to the white, particularly if you have
handsy yellow deep. It is so vibrant. So I'm just adding
a tiny bit there, adding some water to it. Just getting it to a
nice cream type mixture. That's a little too pale. I'm just going to add a
little bit more of the color. I'm just doing these
two sweet petals. Using our round brush. And painting four
or five petals, leaving a little
space in the middle. Again, I move quite quickly. Sometimes out of necessity because I struggle
with muscle weakness, but you can approach this in any way you like and
just take your time. We're just slowly going to build these up in the
spaces that we have. Just remembering to
pan out and keep looking over whether
we are placing them, leaving enough space around. Are they getting a little
cramped or crowded? I'm also just adding some tiny little two
petaled flowers. Now let's mix a really
quick lilac color, and I'm using the rose madder, adding some water to it. Then I'm going to
add a little bit of the Prussian blue or whichever
blue that you're using. The reason why I've lilac is that it's the complimentary
color to yellow, and these two harmonize we. L et's just check, and
that looks gorgeous. I just want a very
delicate violet color. And then I'm going to create
these little flowers, very similar to the yellow ones, Little two sweet petals, leaving a little
space in the middle. I've got a surprise
for you there. Think you're going to enjoy it. Here it is. This
is a makeup brush. I use this technique on a larger scale with
my design det. Now, makeup brushes have all
the same shapes that you can find in watercolor or acrylic brushes for a
fraction of the price. And this is what you
would call a stippler. Mine's oval shapes. So I'm trying to squash
it into a circle. What I'm doing is spending
time getting the majority of the paint off because
we want it quite dry, just to drop into the
centers of the flowers. Leaving that space
and knowing that we can use this stippling
effect in the center. I like to get in quick whilst the lilac petals are still wet, and then it just blooms
slightly in the middle there. Definitely try out how
wet the sip brushes. We want it with just enough
moisture to travel a bit. They are so satisfying to do. Little we flower
there and stippling, shaping it, stippling in
any green of your choice. I've just done a little
bit of everything there. I like to leave these
quite watery and pale because we can
add details to them. Constantly thinking about that we're going to be
doodling and doodling really comes into
its own when we have different values of
leaves and flowers. So I'm just finding some extra
little spaces on the page. Getting in there
with the stippler. Remembering that it needs
to be on the dry side. Being careful now because I
don't want to do too much. But just adding these
little solitary flowers in some of the spaces, I think looks really
cute in with the si. I might put some hands
yellow deep in this one. That's cute. I was just going round to add a little bit of yellow
to the others as well. I think one or two more of
these little violet flowers. Trying to keep it round. If you have a round
stiper makeup brush like this, that
would be perfect. So just finishing up this
little cluster of flowers. And the violet and the buttery yellow
look so nice together. It's one of my favorite
color combinations. So a bit of everything there, a bit more hands yellow deep. Maybe some white. I'm going to put this
down first this time, just to see if it works
the other way around. Just adding a little
bit more moisture to this one and then get
in very quickly if you can with the round brush and bring those
petals to the center, just touching the
center and allowing the color to bleed
out a little bit. Let's move on now to
P one of our doodles.
4. Doodling With Pen & Pencil Part 1: So moving on to our doodling, and I've got my Pigma Micron, and I'm using a 01, but I use it very lightly. I just trash the ones
that are smaller, because tend to go
through paint with them. So let me show you
on this little piece of paper what I'm doing. Just I'm doing it
larger, so you can see, they're just little
squiggles really and dots, like a little row of s. Squiggles and dots, and then just joining them
up with a little stem. And moving down to
the violet flowers. I'm just thinking
about which direction I want the stems to flow. I'm going to move on to this
little sprig of leaves here. I tend to keep it really simple. We're just going to
run a line through it and it doesn't
have to be through every leaf or I outline them or add a
small extra leaf in pen. And again, I tend to
work quite quickly, but you can work at your pace. I'm just adding a
couple of leaves. Oh. So casting your eye around and choosing
your next motif, and I'm moving over to pencil. I do like the difference in texture between
the pencil and pen, and I often mix the two. So I'm either tracing
the whole leaf or half the leaf or just running a line through
it as I did with the others. Extending the stem
a little here. A. Restful to do at this stage. Of course, you can always add little bits
of paint as well. I'm just going to do a little blotch of
green here over these looked I really like when they don't actually match exactly
what the pen has drawn. And while I'm here,
I'm just going to add a few baby leaves. Okay, I'm happy with that. So looking around. I'm just pausing because that's all part of the process, really. And I do like to run these little lines from
the center of the flower, just two little lines
or three little lines. And then I'm tracing
around the petals. Switching back to the brush. And I was thinking of doing some little shadows
on these flowers, so And on just one side, around the center, I'm going
to add a little shading. So we're just using a little
less water in the mix. So we get closer to
a more purple color. So I'm just extending these shadows just around
half of the middle, and it just makes
those centers pop atle Just working my
way round slowly. If you put down color that
just feels a little too dark, swill your brush in water, take the excess water
off and just go in and just pull it out a little
bit and smudge the edge. And because we've
got the violet, right next to that greeny yellow that really
harmonizes very well. Just the lightest of touches. So I'm mixing some green
appetite there with the handsome yellow
deep a nice warm green. I'm just wondering what
it would be like with a little bit of the
creamy yellow in it. So I'm going to
use a fresh brush the clean brush because I might want to go
back to the yellow. So let's add some sea curves to the center of
the yellow flowers. It's the simplest of centers, and it looks so effective. And maybe some dots. Maybe both. Turning my page round just so that I get an overview of the
whole as we go along. I'm just adding some
tiny little leaves to these stems now,
little side sweep. A smaller version of what we
were doing with the flowers. So I'm going back to
the pigma micron. And I'm just going to work on these little yellow flowers
over here. Adding a stem. So I'm noticing here that one
side of my page is slightly more knit together on the left there and the
right is more spaced out. So I know then
that I need to add a bit more detail
to the right side. But we'll work on that slowly. So I'm now adding
those little leaves to this little
cluster of flowers. Tip down, and then gently
on the side of the brush, bring it up to a tip again. I think once you've got
this side sweep movement, you will use it a
lot. It's so cute. And I don't want to forget
this little cluster here. And putting them
around the petals, as well as on the stem. And this is just that mix of green appetite and
handsy yellow deep. It's no wonder, really that my doodles get
quite complicated. And that's because I can't stop. It's it's very relaxing,
very enjoyable. And just doing these
little V shaped leaves. What really makes a pie so prey is varying all
these little styles of leaves and the size, the color, and the hue. And these can go over
existing leaves as well. And if you wanted
to, you could use your pigma micron here
instead of the brush. Just wondering now, what next? So I'm just going over to add a few little dots further
out from the center. When we look at the whole, we don't always see
all the tiny details. And when someone's looking
on to one of our paintings, they're not quite
sure why it works. But the reason why it
works is we have variety. We have different hues, we have different values, and a great attention to detail, and not to forget, hopefully, the fun and the
relaxation involved. So shall we move on to
Doodles P two? I think we.
5. Doodling With Pen & Pencil Part 2 : So I've got the pigma
micron again and joining up these lovely tocisy
tropical leaves. And I'm just doing
the same really as I did with the green leaves. And I'm just drawing the
pen down like one line, like the vein of the leaf. And I like to go beyond
the leaf a little bit. Some of them, I'm
going right round. And also going around some of these leaves just to define
them a little bit more. When I've got a weaving
leaf like that ribony leaf. I tried to go with
the feel of the leaf, so I'll also wiggle
my pen a little bit. And I wanted to go
round all of that one. Defining the leaf
on the top also helps to separate out
those two leaves. The same here with our large
green leaves, wiggly line. Start to define
the leaves that we feel weren't thoroughly
defined with the paint. So there again, I have a
leaf going over another one. So I've just defined
the top one. So I'm going back
to the mix that we had of rose Mudder
and olive green, and I've added some
of the blue to it. I wanted more of a
kind of a gray color. And now what I'm doing is working on what
I noticed earlier, which was that the left side is more detail than the right. So what I'm doing is I'm just choosing a very simple leaf, using all of the colors really, apart from the yellow. And just to fill in
some of these spaces and start to balance
the whole painting. And it already is starting to look more balanced
with the left. This is a simple trick. I find it very useful, just to go in with
very soft leaves and just dropping in a slightly
darker hue to the base. Just adding a couple more. Mixing up some of the
hands yellow deep now. And I'm going to add
a few extra leaves to this grouping here. And again, that will start to work to fill out this
half of the page. And I'm adding stems and little leaves to these neutral
gray leaves that we added. Tiny little stem,
tiny little leaf. It's amazing how just
these simple details can really bring balance. So I'm really happy now. I think it's very
challenging when you're working on a detailed
painting like this. It's so easy to
lose perspective. So back to my pencil now, and I just want to outline
some of these petals. Pencil is always very gentle. I'm not keen on that
little line there, so I'm just going
to rub that out. So, yes, I use pencil quite a lot because
it's nice and subtle. So I think I'm going
to go round most of these little violet
or lilac flowers. You can see how painting
a more watery flower, it leaves us open then to
lots of doodling ideas. So out with the rose mad again. When we're thinking
about interior design, for example, it's 2010. 70% your main focus, 20% of your supporting
color or texture, and 10% final details, just tiny little touches. I'm using that here and
bringing it over to this class. Now I feel that I'm on the 10%, and I'm just going to add these tiny little
rose madder petals, We have the leaves,
the main event. We have the flowers, which
are the Support Act, the 20%, and we have the finishing details
like this for the 10%. I generally use a very warm, soft green for this. But because this
is mostly leaves, some have got out of green, I felt like a pink would
be nice and balancing. I'm echoing those tiny
little leaves that we did earlier with
the rose Mudder. I'm back using that
pointed filbert, which is so good for these little throwaway
petals like confetti. And the pressure on the brush decides the length of the petal. So just a tiny little
touchdown would be these minute
little pink petals. And if we pushed more, it would be more elongated. Trust in your eyes here. You eyes will automatically
pick out areas that have white space where you might need to just
add these little details. I just wanted to point out again how easily we can
bring a painting back into balance by adding more details to one side of the page to balance
with the other. So casting my eye over
the whole painting now. And just thinking about
what I might want to just bring to the fore with
a little bit more pencil. Lots of little lines
on that petal. I love doing that.
Such a nice doodle. So now just moving to
and fro from the brush, the pencil, and the pen. And that's enough. I'm
really happy with it.
6. Thank You! :O): Thanks so much for joining me in this class, leafy doodles. We've touched on
different leaf shapes and colors, pretty
little flowers, and we've also been
mindful of how we've spaced our motifs
across the page, starting with the larger ones, then adding our flowers through
to the finishing touches. But perhaps the most
important part of this class is the doodling because
doodling calms us. And if there was one
thing I wanted to achieve in this class
is that I've been able to provide some calm and tranquility away from
the challenges of life. That's what I feel
doodling is all about, just getting really engrossed
and experiencing flow time. I usually sign off from my
classes by saying goodbye, but this is actually
the beginning. So I look forward so
much to your projects, and also just your
feedback on the class, what you've enjoyed most, what you've struggled with, and we can all support each other. I really enjoy that
aspect of skill share. And I hope you feel
really supported, not just by me, but by
the Skillshare community. So I shan't say goodbye. I'll just see you over in class discussions and
overall Instagram. In the meantime, take
really good care of yourself. Thanks again.
7. Sienna - BONUS lesson - Leaves: Uh, U U U, Oh. Oh. Oh. Yeah. U U Yeah. Yeah. M U
8. Sienna - BONUS Lesson - Flowers: Oh. O oh.
9. Sienna - BONUS Lesson - More Flowers: O. M. A De De a O O Oh Oh. Oh
10. Sienna - BONUS Lesson - Doodles: Oh. Oh O Oh. Oh. Uh
11. Sienna - BONUS Lesson - More Doodles!: Oh h a Oh living in a a Oh. T Oh O
 Holly Tomas Art, Watercolour | Gouache | Mixed Media