Transcripts
1. Introduction Trailer: My name is Emil Sligas and I will be your instructor
for this course. After a lot of hard work, we have an exciting new
environment course for you. In this course, you will
learn how to create an entire Western
town environment completely from start to finish. There is a lot that will
be covered in this course, but the main topics
are as followed. One, using modular workflows to create environments
quickly and effectively. Two, creating highly flexible
procedural materials. Three, creating unique
textures and painting masks. Four, doing level
design and level art in Unreal Engine five, five, creating advanced shaders in Unreal Engine five that
give you flexibility over everything from
vertex painting to dirt and variation masks
to parallax mapping. Six, using the brand
new modeling tools in Unwel Engine five to
speed up our workflow. Seven, using the new
Lumen system and doing environment lighting again
in nalgen V, and eight, I will show you how to generate quick and easy character
animations and even on how to manually
animate a horse and place the characters in our
level to bring it to life. Now, as you imagine, there are so many more things that will
be covered in this course. Essentially, the way
that you should think about is that at the
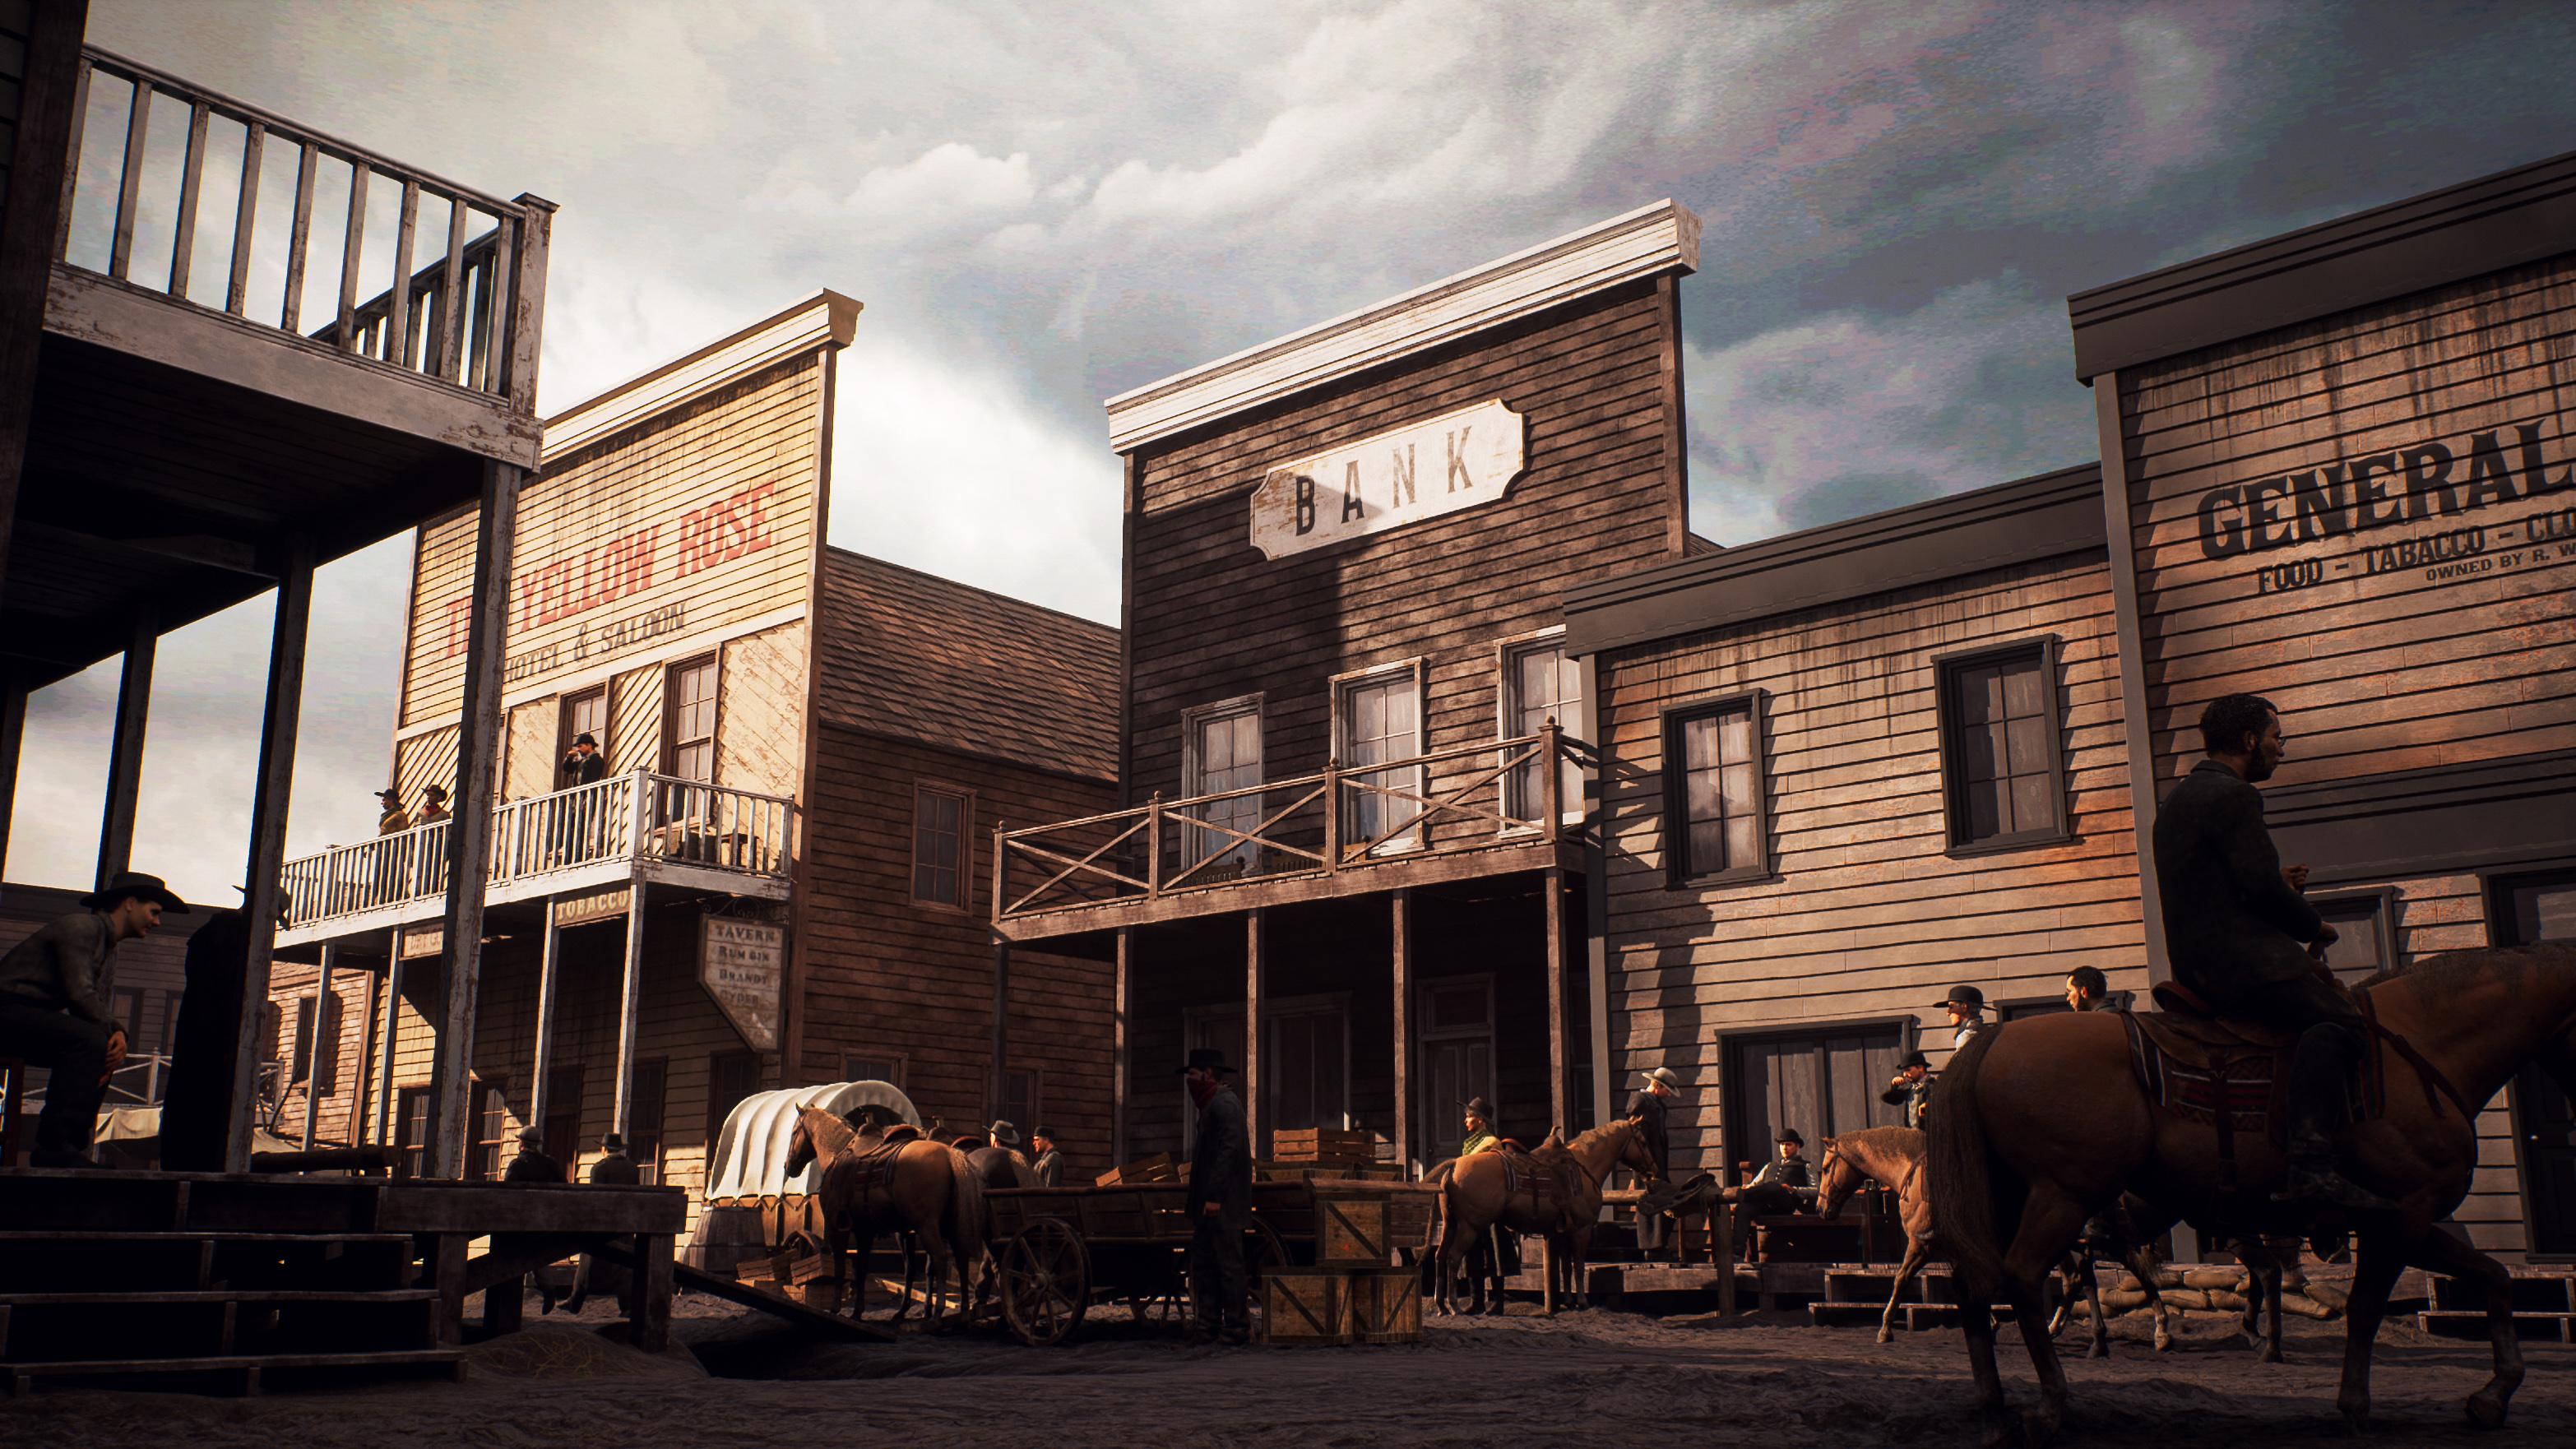
end of this course, you will be able to
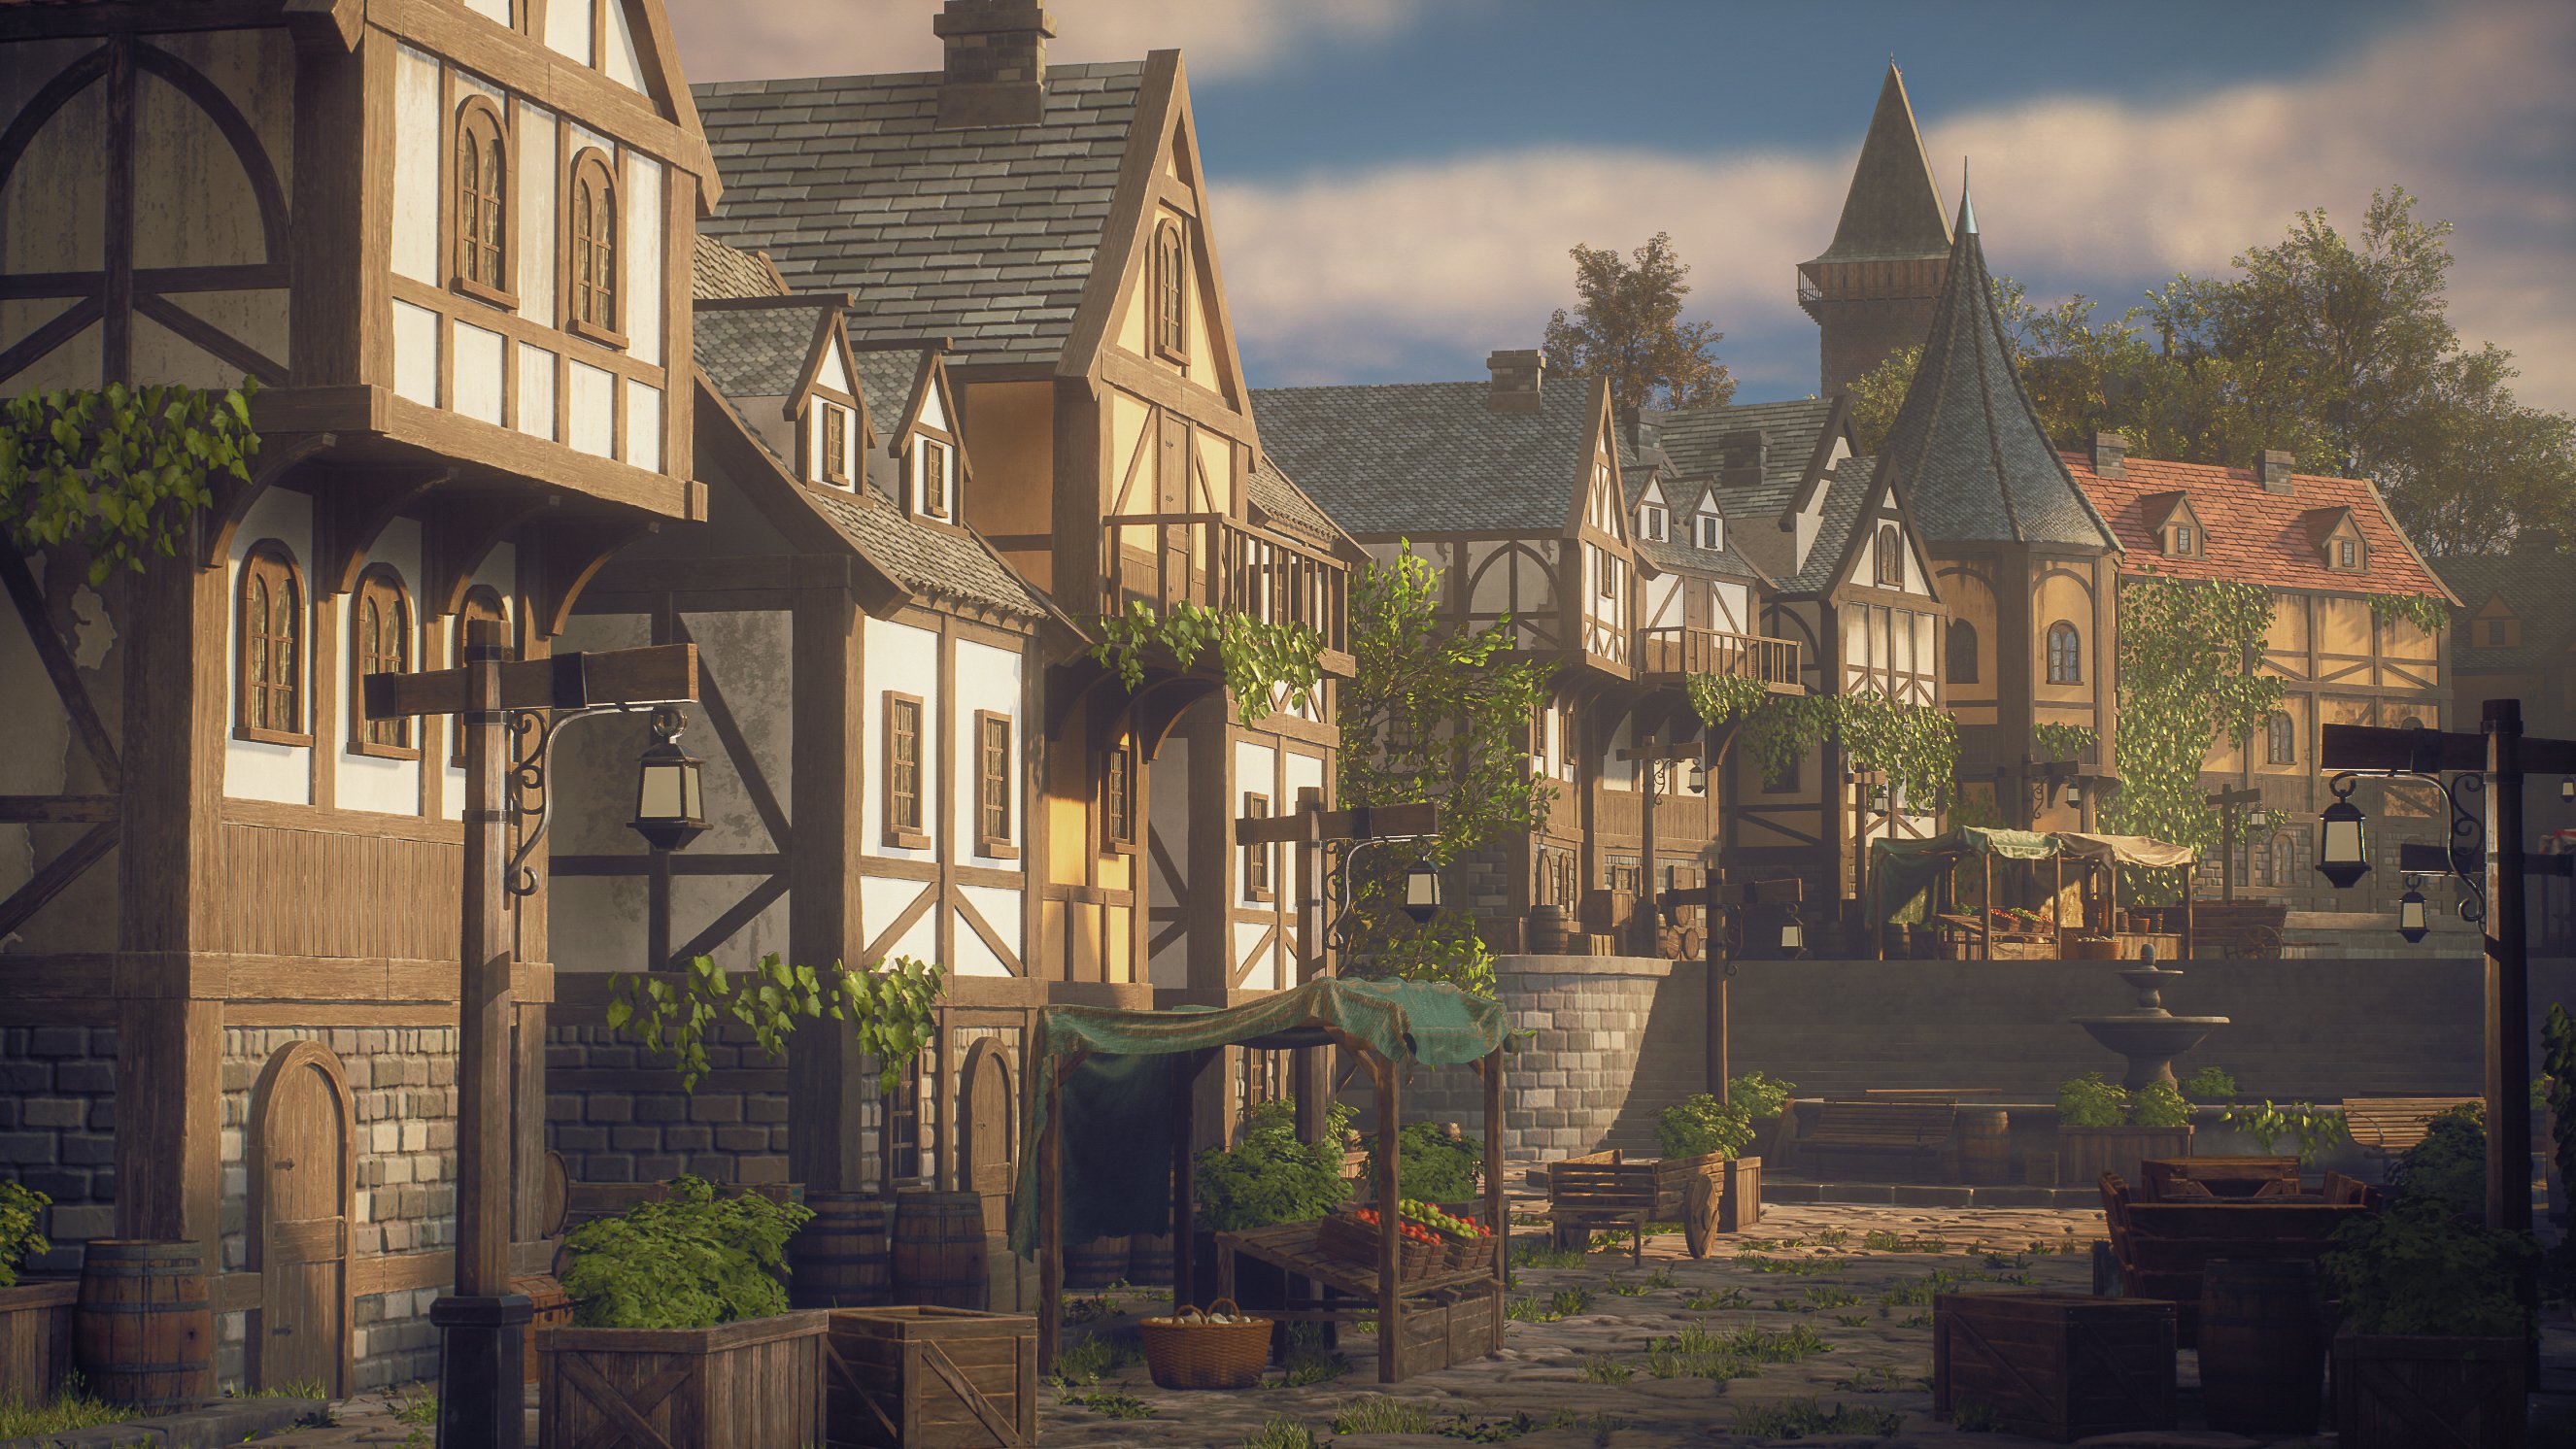
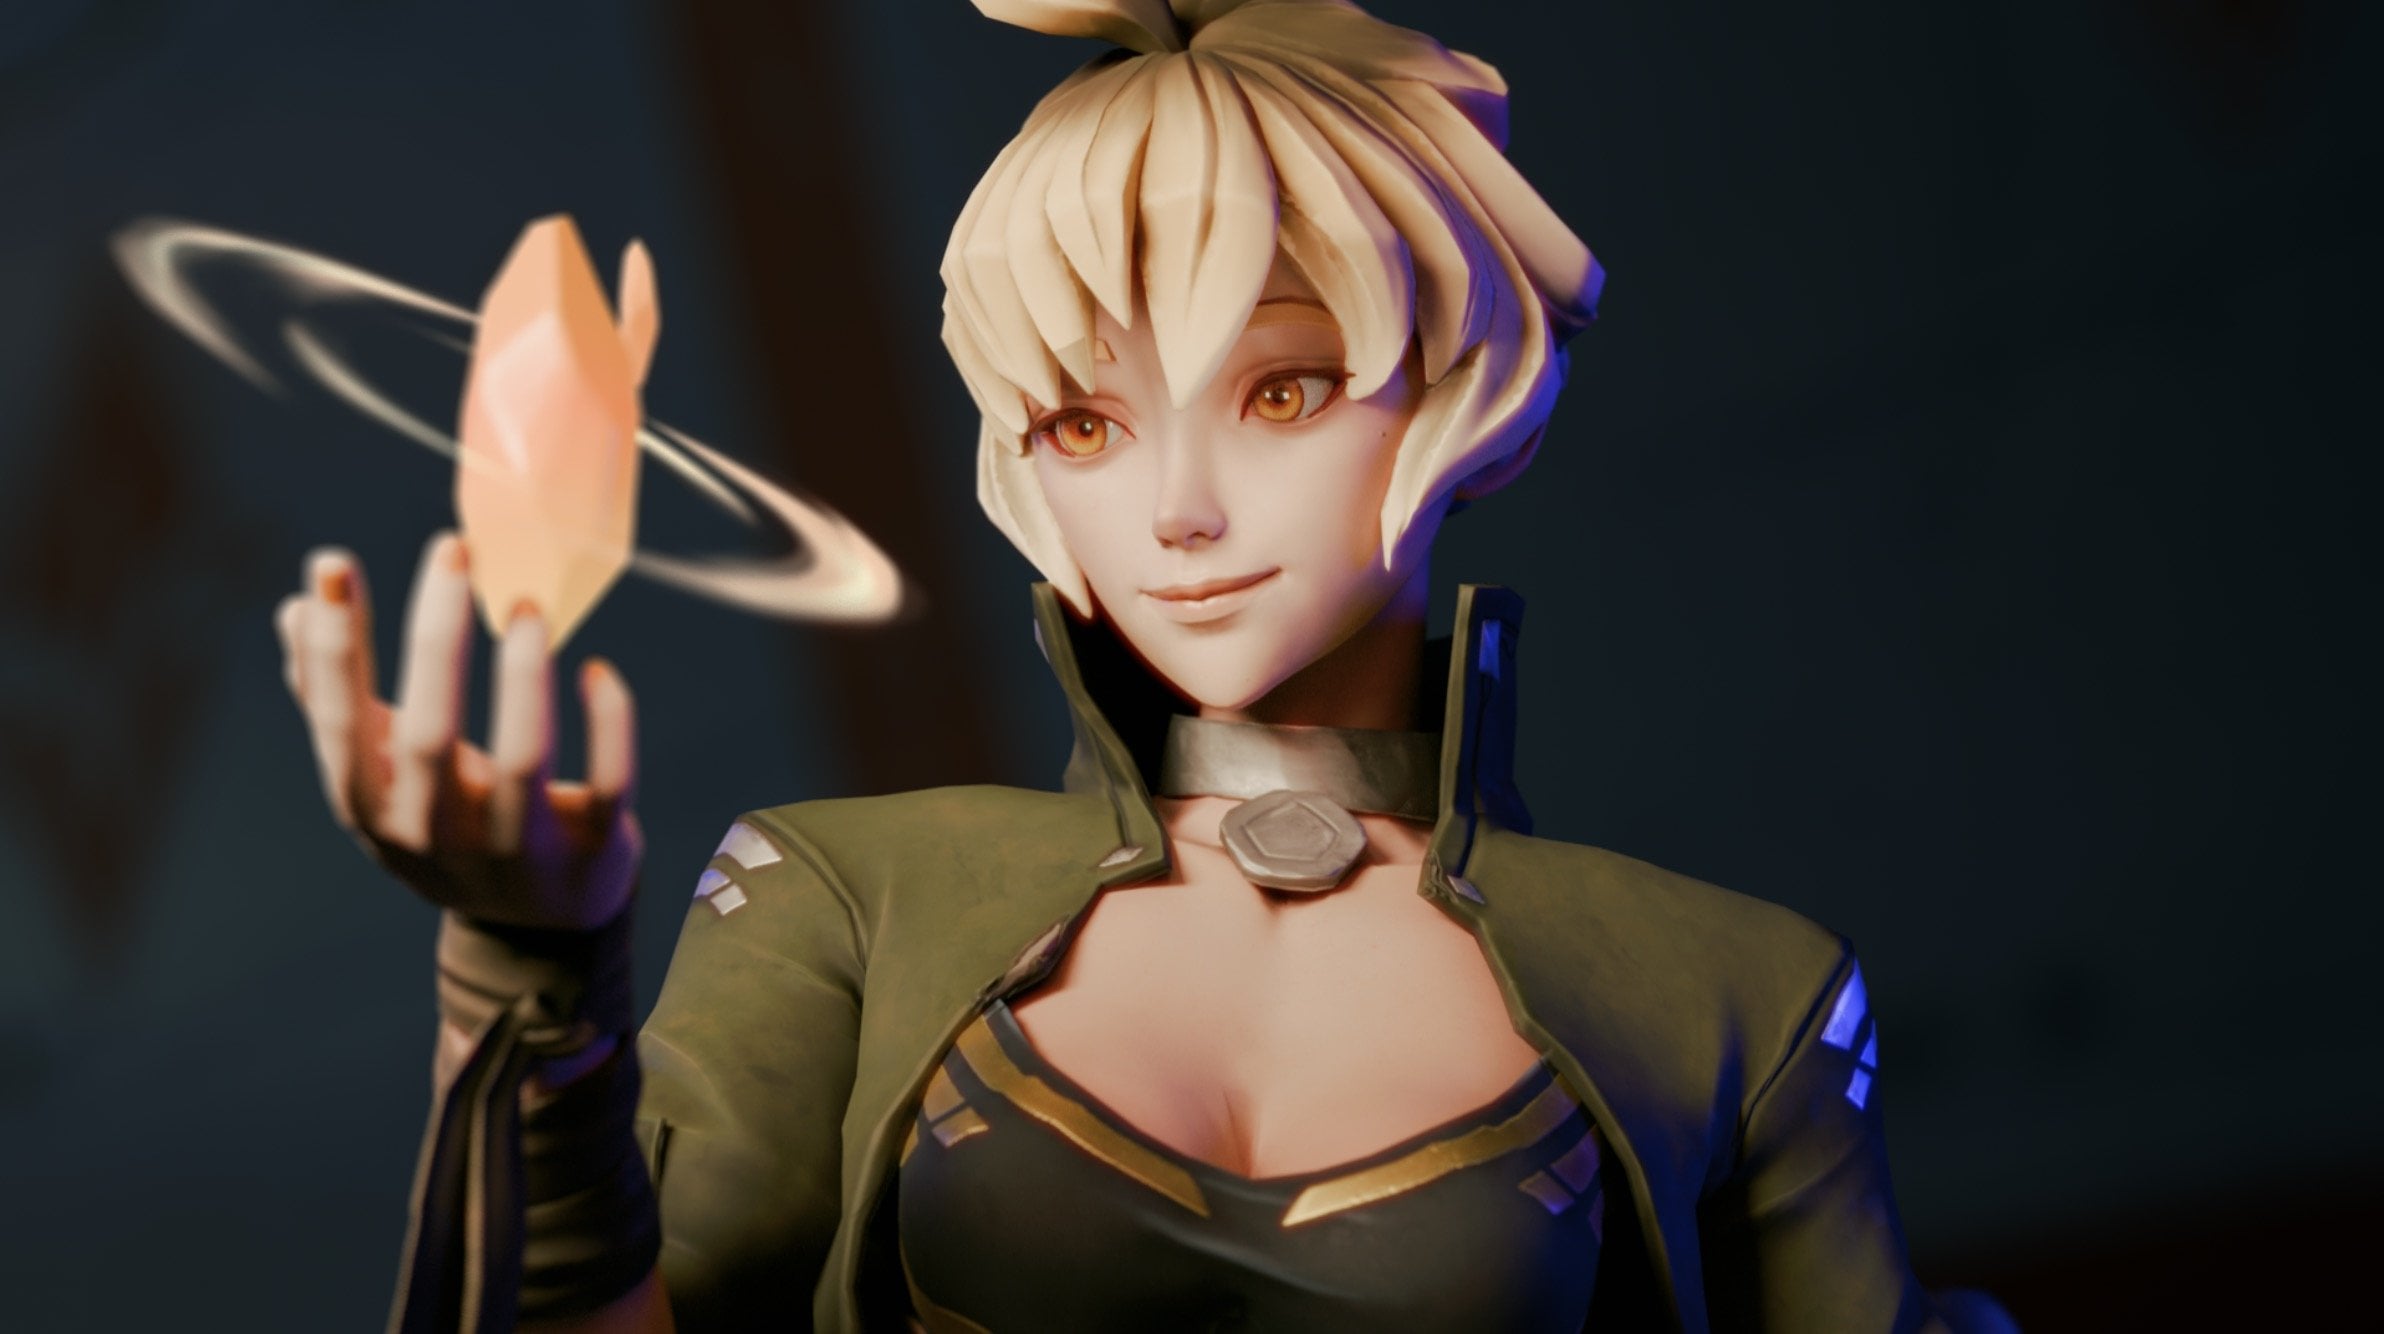
create exactly what you see in this trailer. As a fill disclaimer, the characters and some of the static assets are not
included in this course. This is because this is not a character art creation course, so I do not have the actual
rights to the characters. And because of
that, I am not able to include them into
our source files. However, the concepts that I
show you on how to animate the characters and
how to place them in the level are exactly the same, no matter what type of
character you have. It does not matter if it is a cowboy or for example,
if it is an alien. As for the programs
that we will use, we will be using Blender
three D for the modeling, substance Tweedy designer and substance Tweedy painter
for our texture work. Unreal Engine five for building our level and bringing
everything together, and Mm setback four for
some additional rendering. This course contains
subtitles for English, Russian, Spanish, and Chinese. However, the subtitles are
auto generated and translated. This means that they are
not completely perfect, but should be around
80 to 90% accurate. With a total of 31 plus hours of video content in this course, it is considered
quite a large course, but I feel confident that
at the end of this course, you will have the know
how on how to create many different types of high
quality game environments. As always, although there are a few small time lapses
for repetitive tasks, these time lapses are also included in real
time as a bonus. Next to this, all
the source files for the content that we
create is also included. Now, this course is
targeted more towards intermediate artists
who already have a basic understanding of
the programs mentioned. If you are an absolute
beginner artist, I do recommend that you first view some introduction courses, especially on blender
and Unreal Engine. I hope that you will
enjoy this course, and I hope that it will have a positive impact on your life.
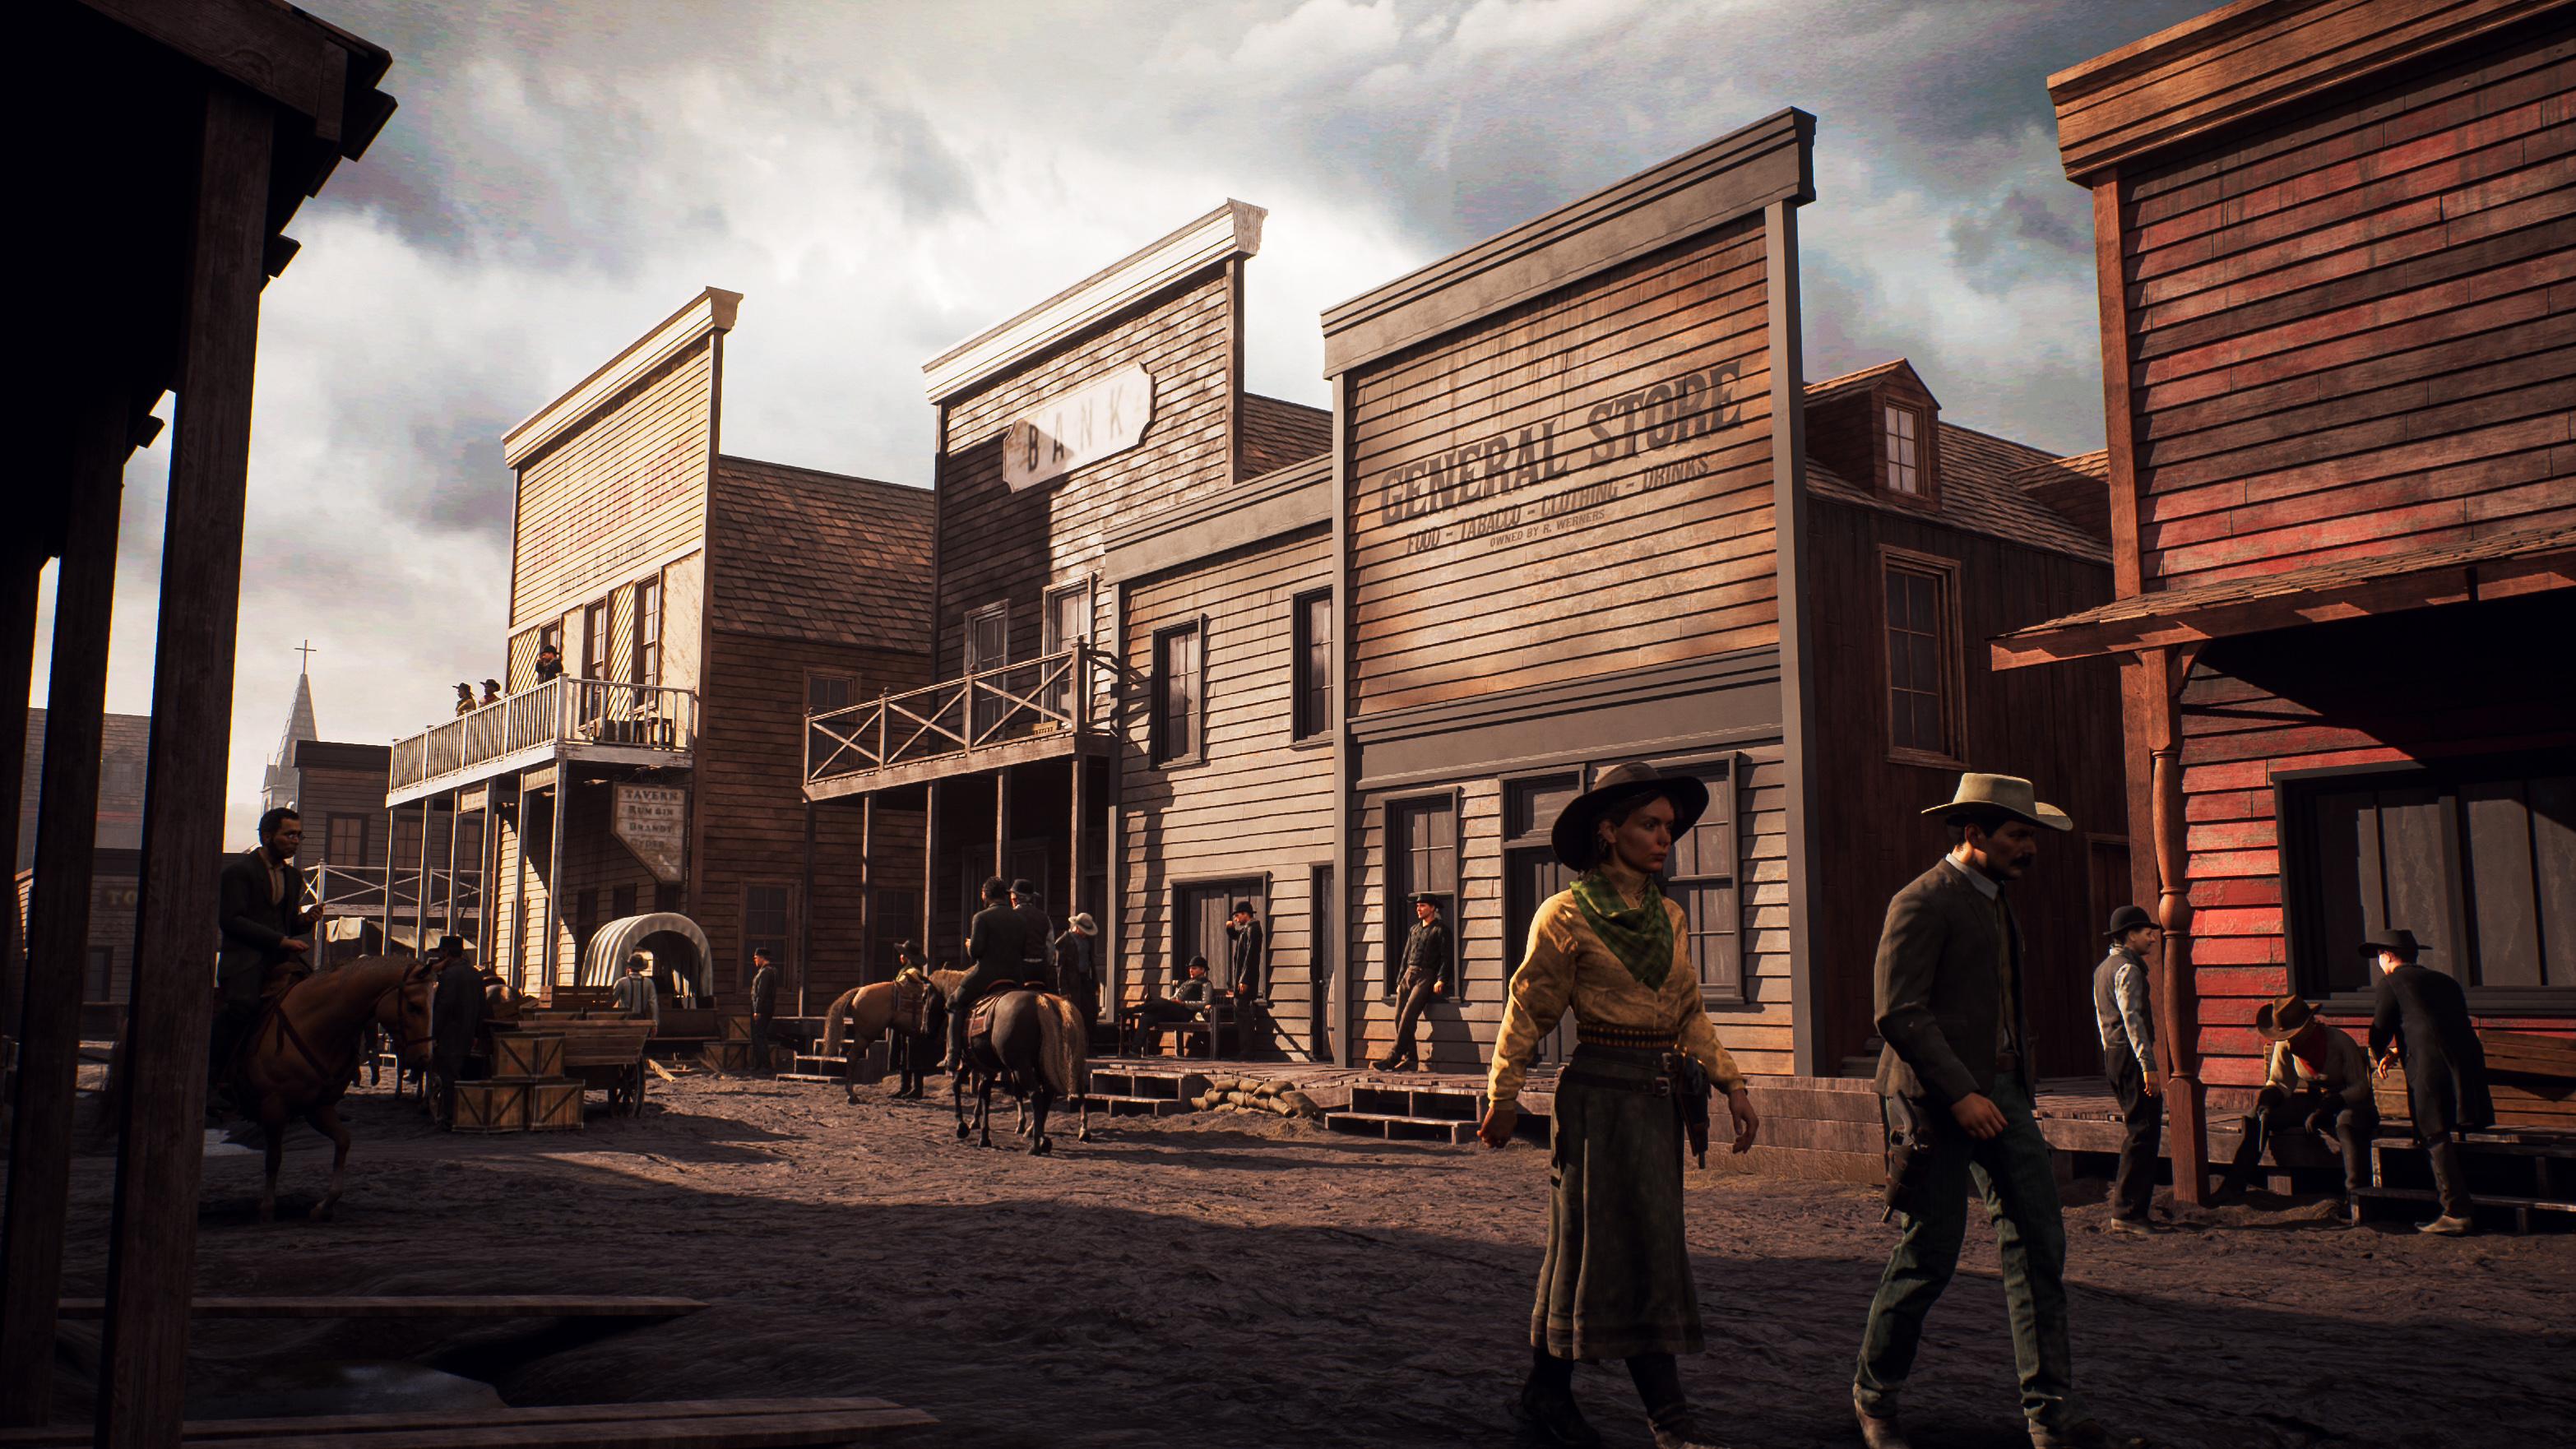
2. 01 Going Over Our Reference And Creating An Asset List: Hello, everyone, and welcome to the first chapter
of this course. So what we're going to do is we are going to go
ahead and jump right in and go over our reference and also doing some planning. This is something that
you should always do when you are working
on an environment. So over here, I have an image. By the way, I am using a
program called Pure Rp. In your folder, I will need to go ahead and this
program will overlay, but in your folder, I
will have an object. And you will need
to go ahead and you will need to download PUR Rf, which you can just go ahead
and just on Google is free. And the reason you need to do that is because these images, these separate images,
unfortunately, I am not allowed to actually
supply them with you. This is because of copyright. So I will actually be
removing these images. However, I can
supply them within the PUR RF file because you cannot just take
them out of it. So keep that in mind, Pure Rf. It's quite an easy program. It's very useful to use. The only thing is that it is overlaying on top of everything. You can turn it off, but then, of course, for me, that's not very handy, so we
will sometimes need to move out of the way. In any case. So, I have a bunch of
images, as you can see. However, the reason
that I'm zooming in on this image is because this is the general feel
I want to go for. Now, of course, I most likely will not be having any characters
or something like that, so it will be more like the
feel for the environment. But I think that this
is quite a nice look because when you look at
this, what do you see? You see some unevenness. You see that the environment is kind of like going around. It's not just like a
perfect straight street, which is what they often do, and I don't
really like that. So you can see, like
some cool unevenness. You can also see a
nice silhouette. With a silhouette, what
I mean is if you look at the tops, you can
see that the tops, they are also going
upwards and upwards, and you can also see that
reflecting on the walkway. So that's something like quite a nice general feel
I want to get. I do want to keep everything
a little bit more cramped. I also want to
create this kind of stuff where we have the
really watery stuff, and we are going to really mess up the terrain and the road, make it look very
messy and everything. But I'm going to make
everything a little bit closer together because for
a game environment, at least for a
tutorial environment, this is a little bit easier because it always looks
a little bit plain and boring when it's like
this big open environment when we do not actually have any people or anything going on. And that's what
we will be doing. We'll be mostly focusing
on the environment. We'll be focusing on the
drank rage and everything. And of course, we will
do some small assets like the hitching
post for your horses, the drinking bins or
whatever they are called. And that's about it. I think at that
point, we already have already quite
a long tutorial, but that will also
give you the skills to do some more
complicated assets, like, for example, one of the
carts and stuff like that. So next is, I have went
over some reference. It's actually very difficult
to find reference, because I do not
live in the USA, I cannot just go
to, like, one of those historically acurd places where you can actually
see all this stuff happening see all this stuff. So I had to mostly rely
on movies, basically, and also on some other tree
art from other people, which is always a
little bit tricky. And I also had to rely on read that redemption,
too, by the way, which I also took a bunch of screenshots because that's
also great reference. So as you know, this
is our main reference, then over here, we will not
be doing a stone building. I do recommend a stone
building is cool. The reason that we will not
be doing it most likely in this tutorial is because it would simply
add too much work. Because if we focus
everything on wood, if we need to add
a stone building, that will add another five to 10 hours for just one building. And in my case, it's
simply not worth it because you won't really learn
that much extra from it. So here, we got,
like, a bunch of cool different scenes over here. Of course, I forgot the movie. Um, it's a very famous
movie. Janko Unchanged? Yeah, that's the
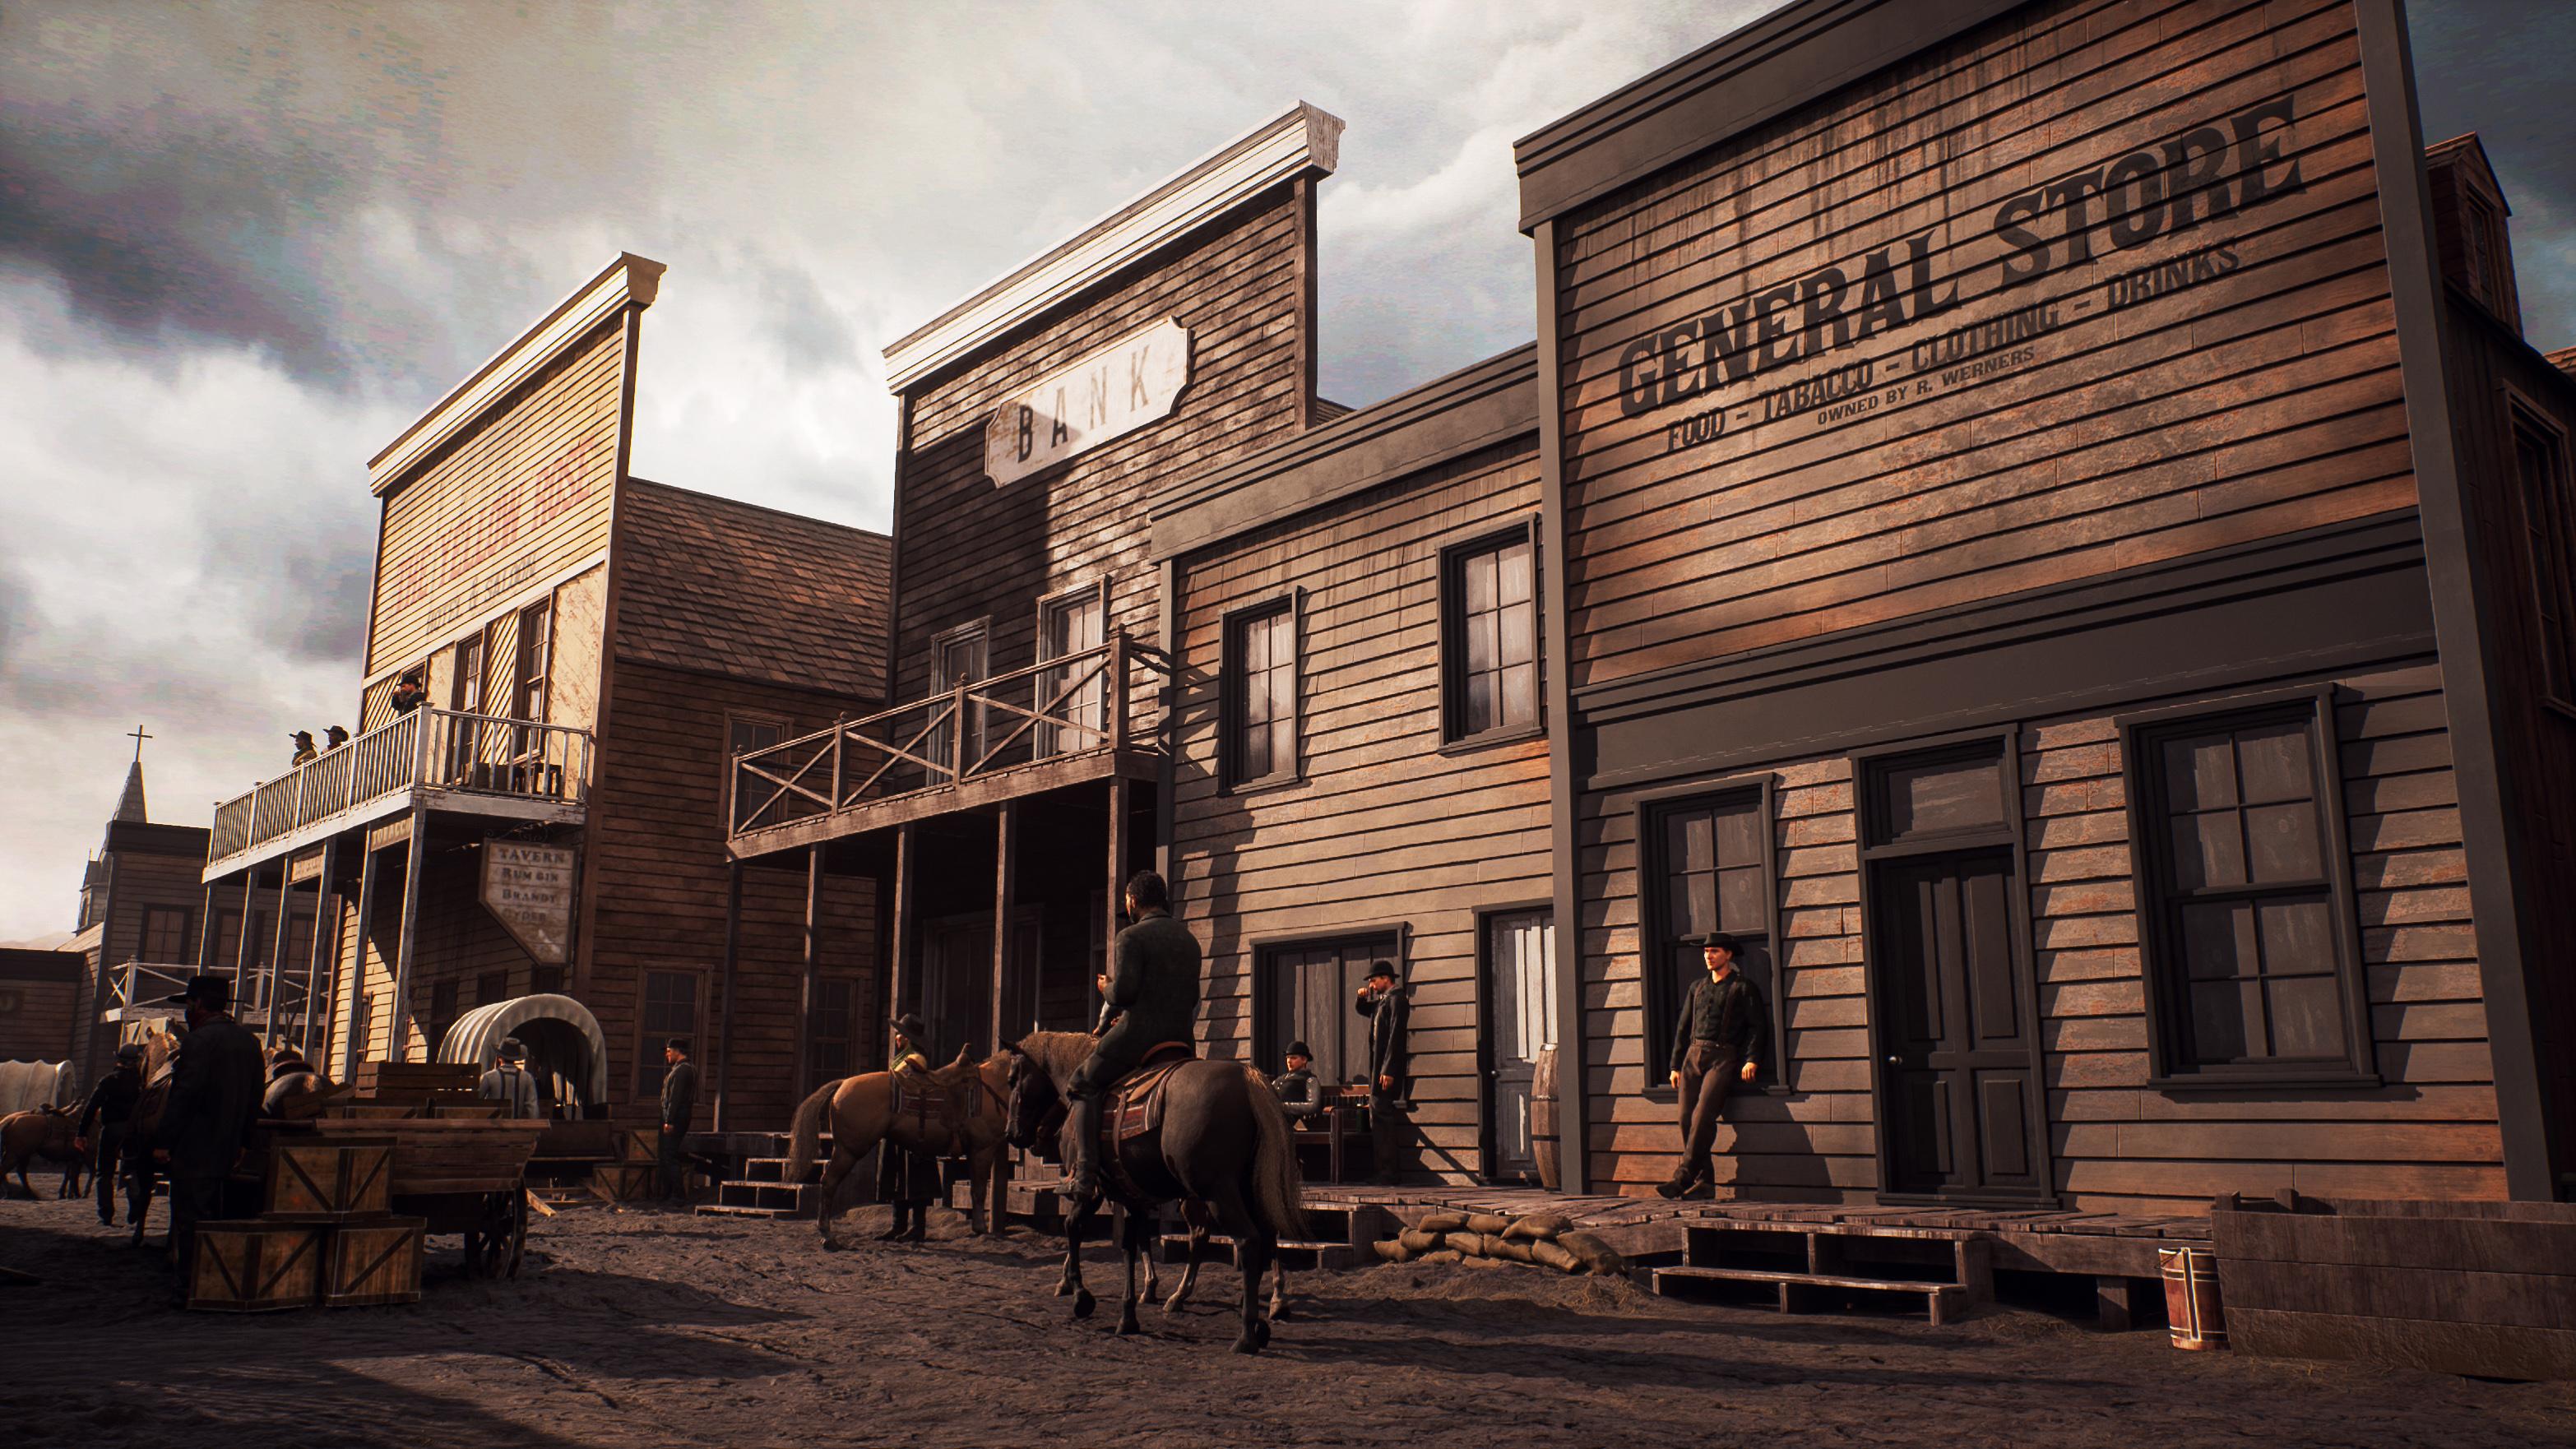
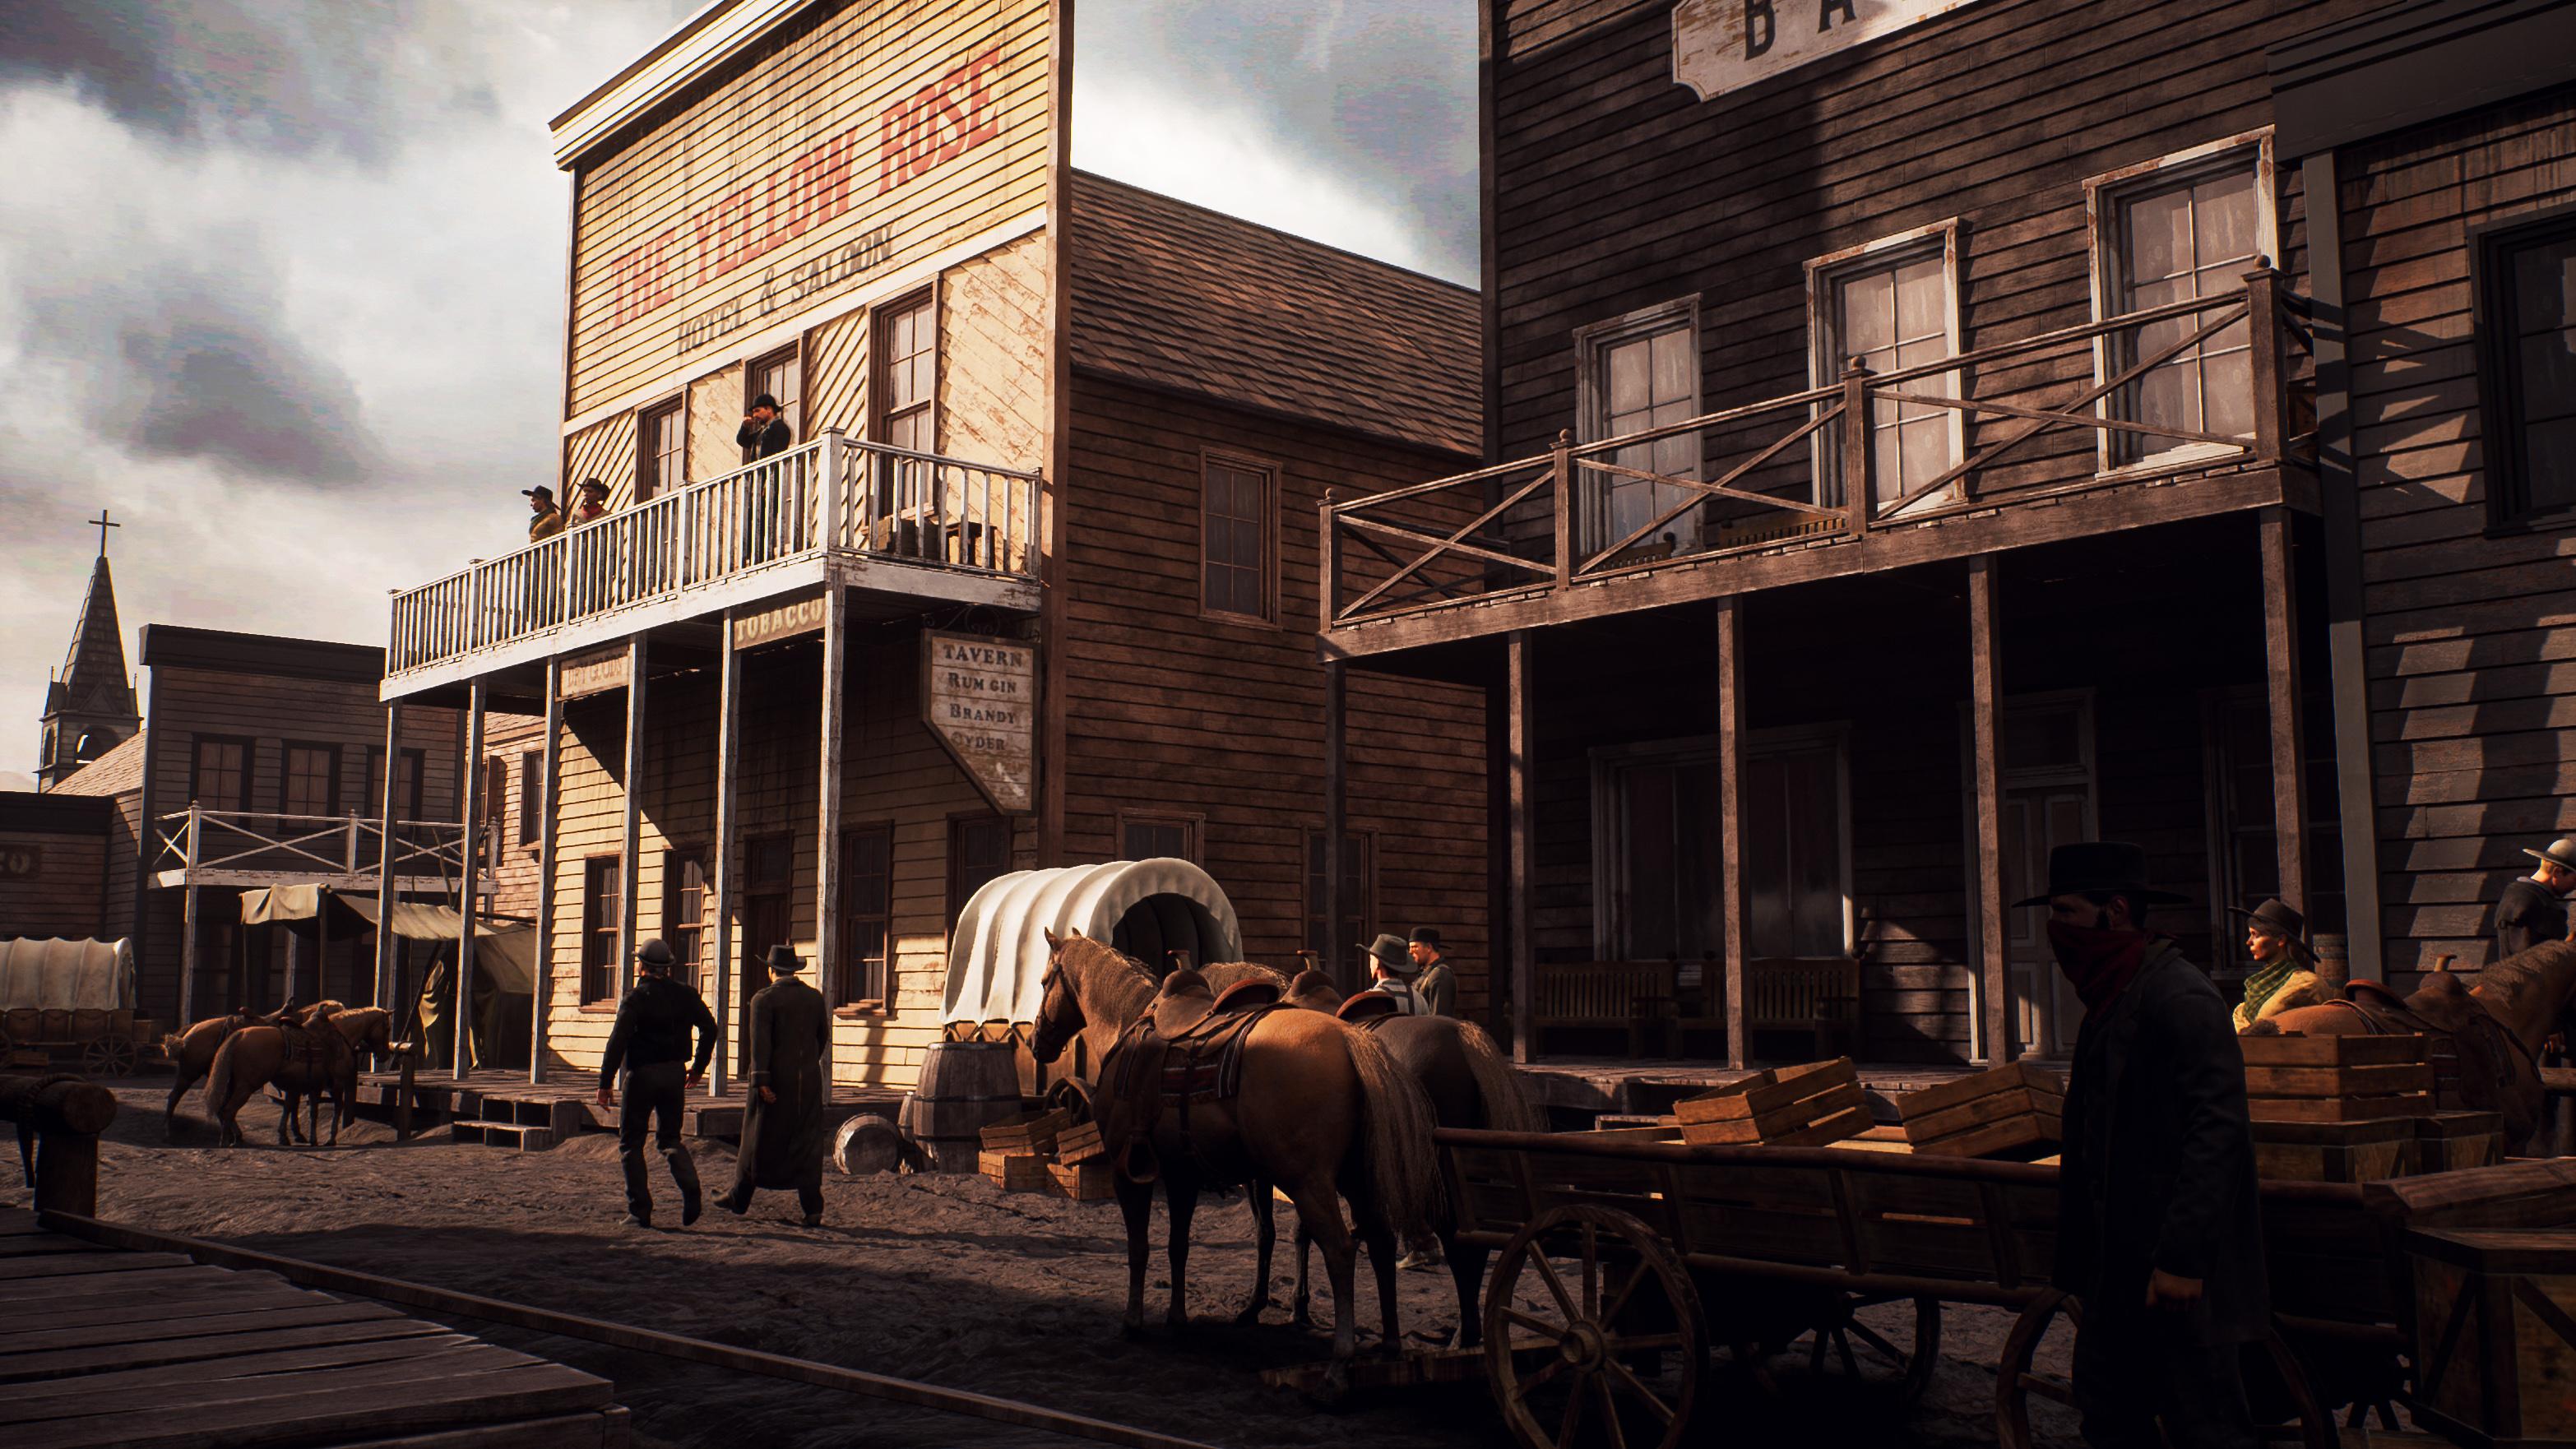
one. That's the one. So, in any case, over here, you can also see, quite
the interesting silhouette with the buildings that
we want to go for. This one I quite like
because it kind of, like, shows us how the wood is placed and then how also the
windows are placed in here. And by the way, for the windows, I will use a very cool technique that I will
show you later on. Technique I've
never used before, because it is new for
Unreal engine five, and it is about
literally cutting out the shape of the window
inside of Un Engine five. So doing booleant functions
inside of UnwelEngine five. So that's going to
be really cool. It also shows us how
they do like the text, how they kind of,
like, just have the text sitting on
top of it like that. And just in general,
maybe also some handy posts over here, like
some reference for that. This is treaty. This is by Letters Studios, I
think it is called. It's just like a treaty
pack that they created. And I know, it was just like, some handy information, especially like just
this kind of stuff. Quite cool how they did that. And it will give us a bit
more of a sense, like, Okay, how would it actually work in a video game and everything? So yeah, here, you have, another one that's all
looking quite cool. Of course, it is much more
populated with assets, which we unfortunately
don't have the time for to
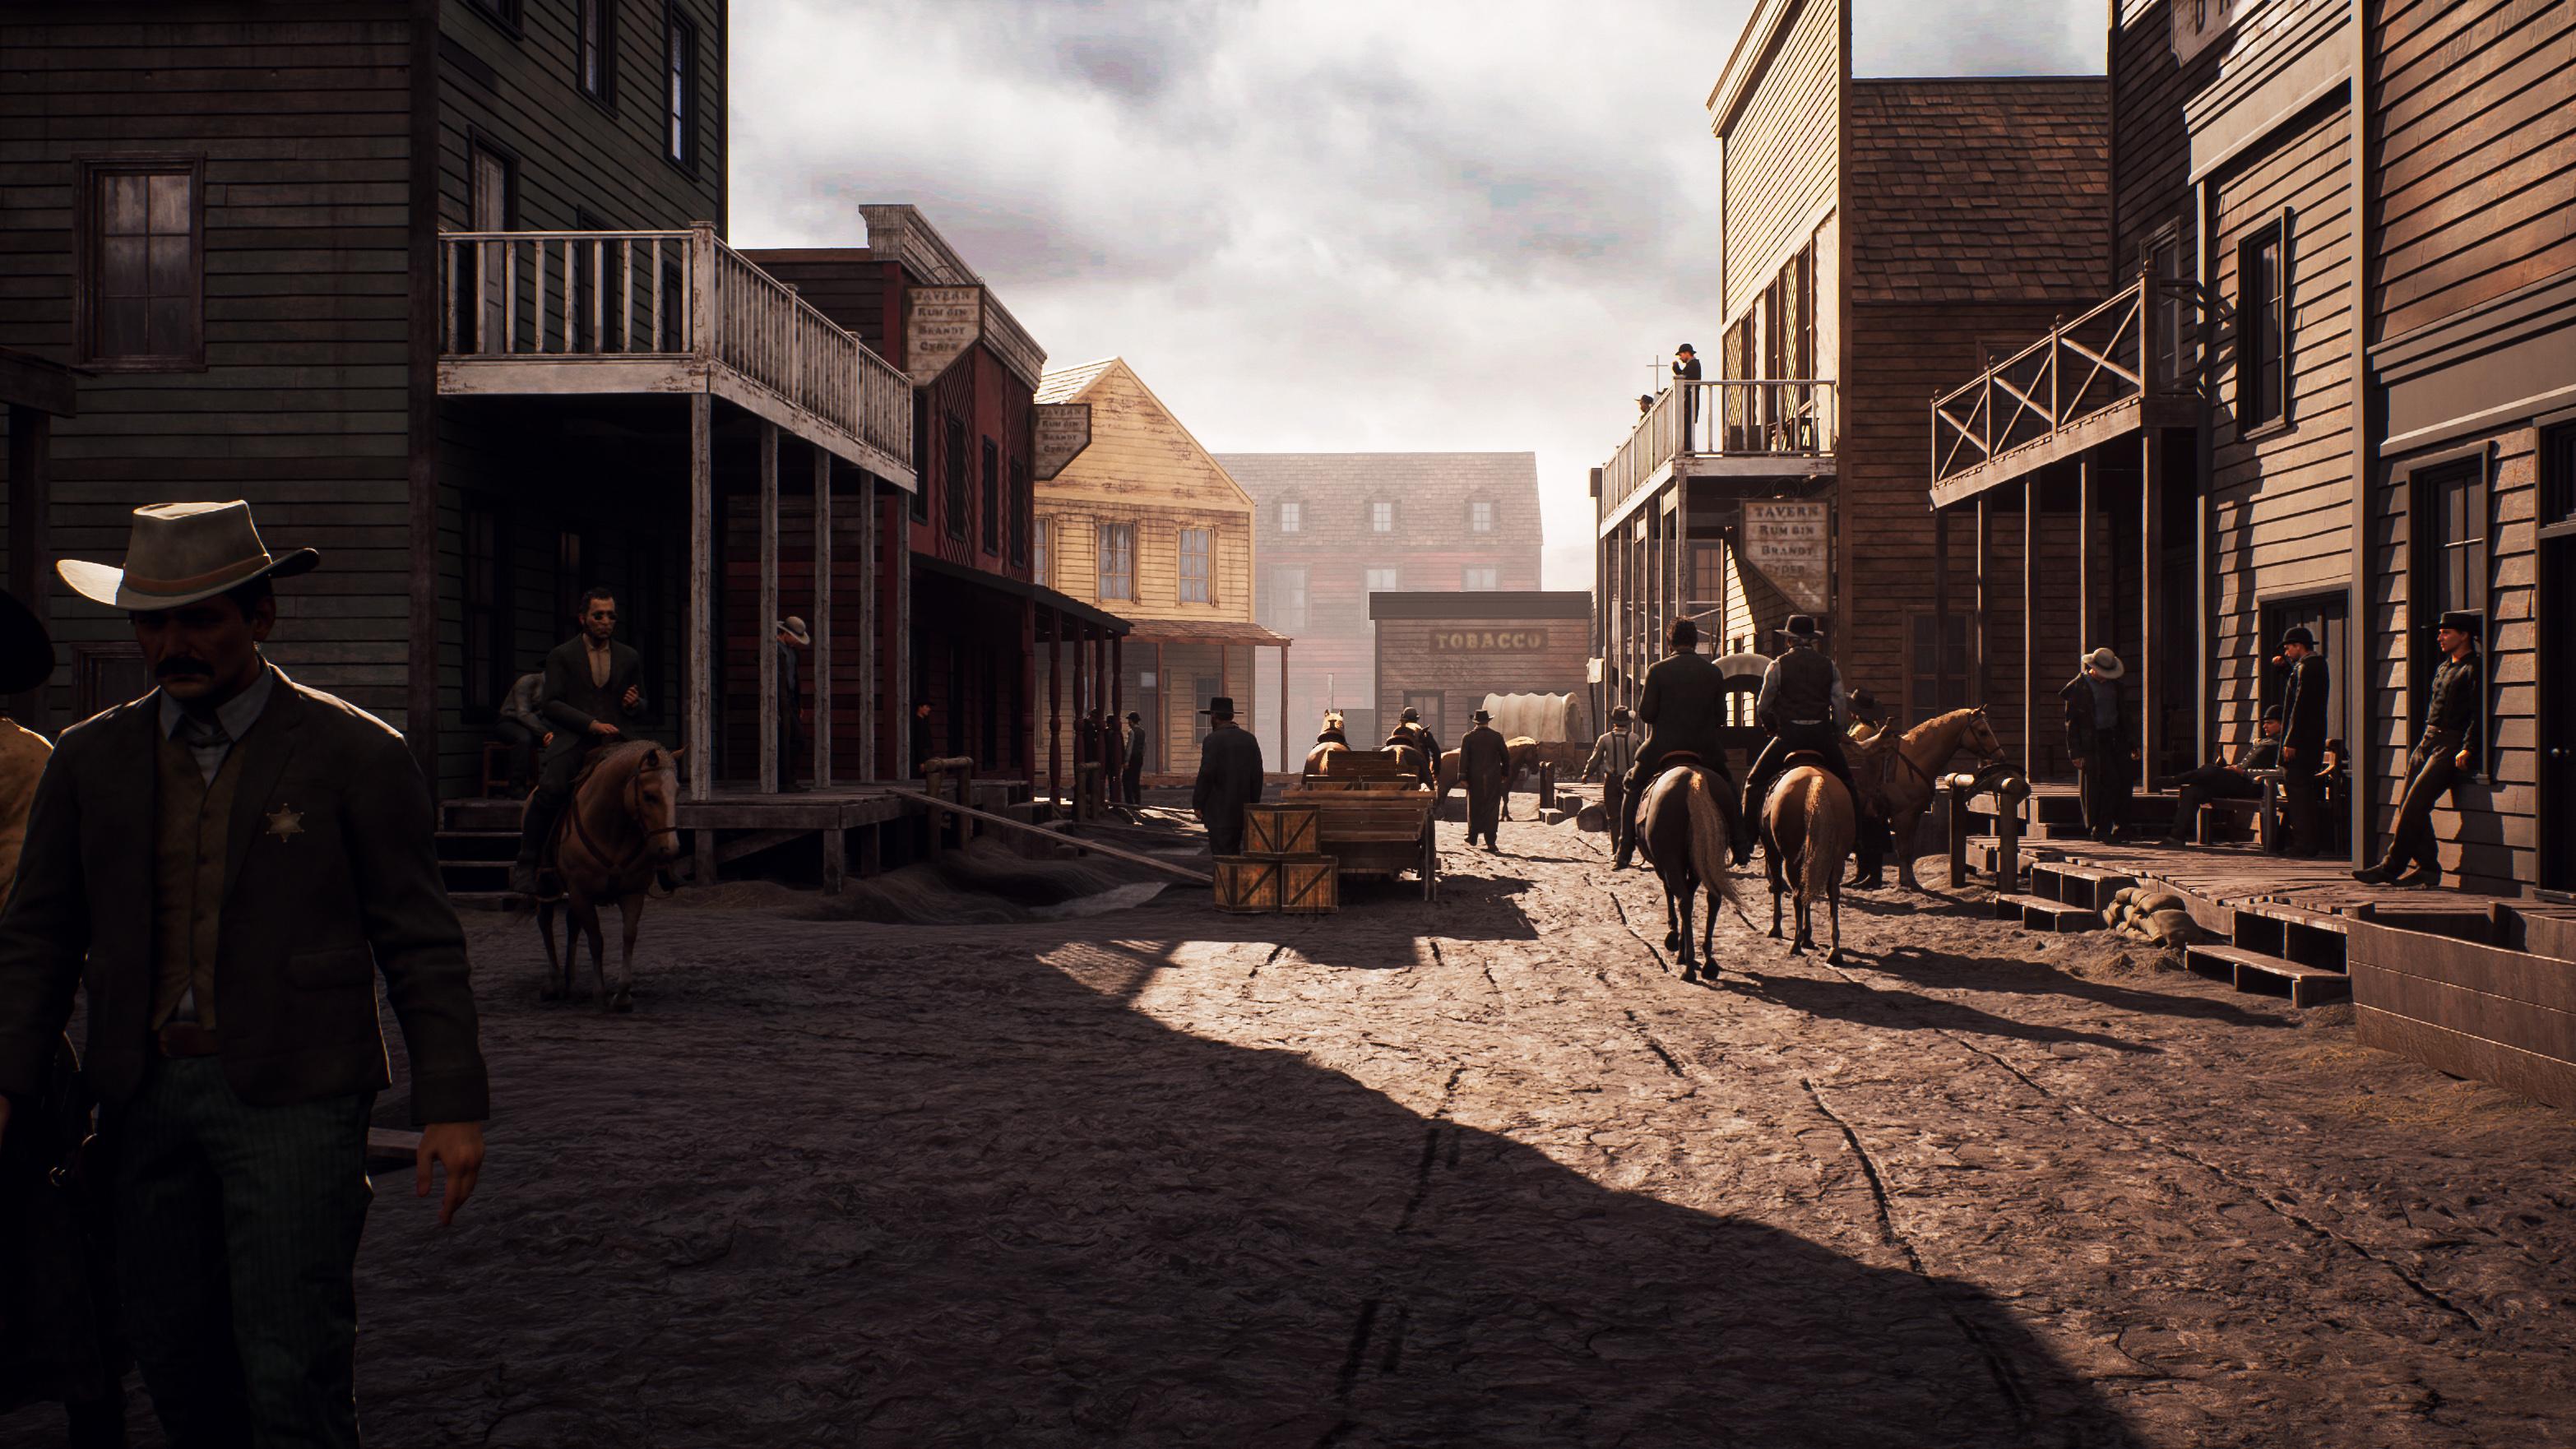
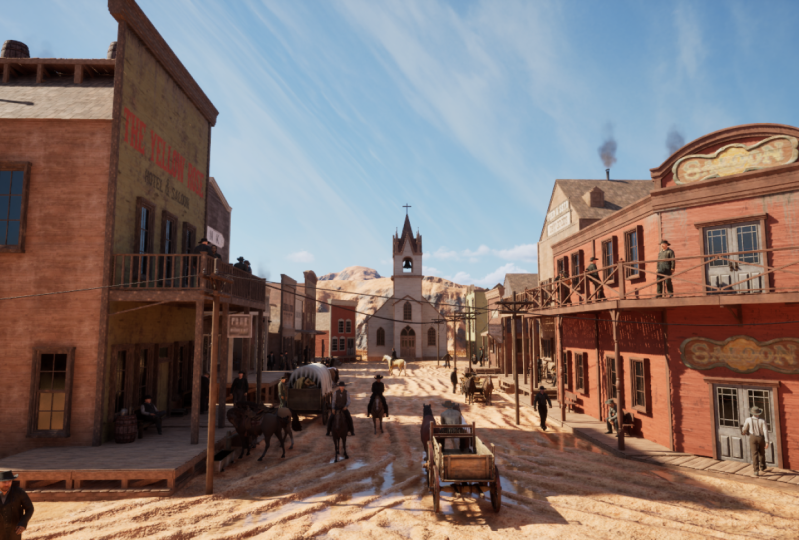
create all of them. This is a really great image
where you can see over here. Yeah, so it is quite straight, but you can also see
that like the buildings, they are not aligned. So some are sticking out, some are sticking
in, stuff like that. So it feels quite messy, but it's also nice
for us to, like, see how they are all connected together and
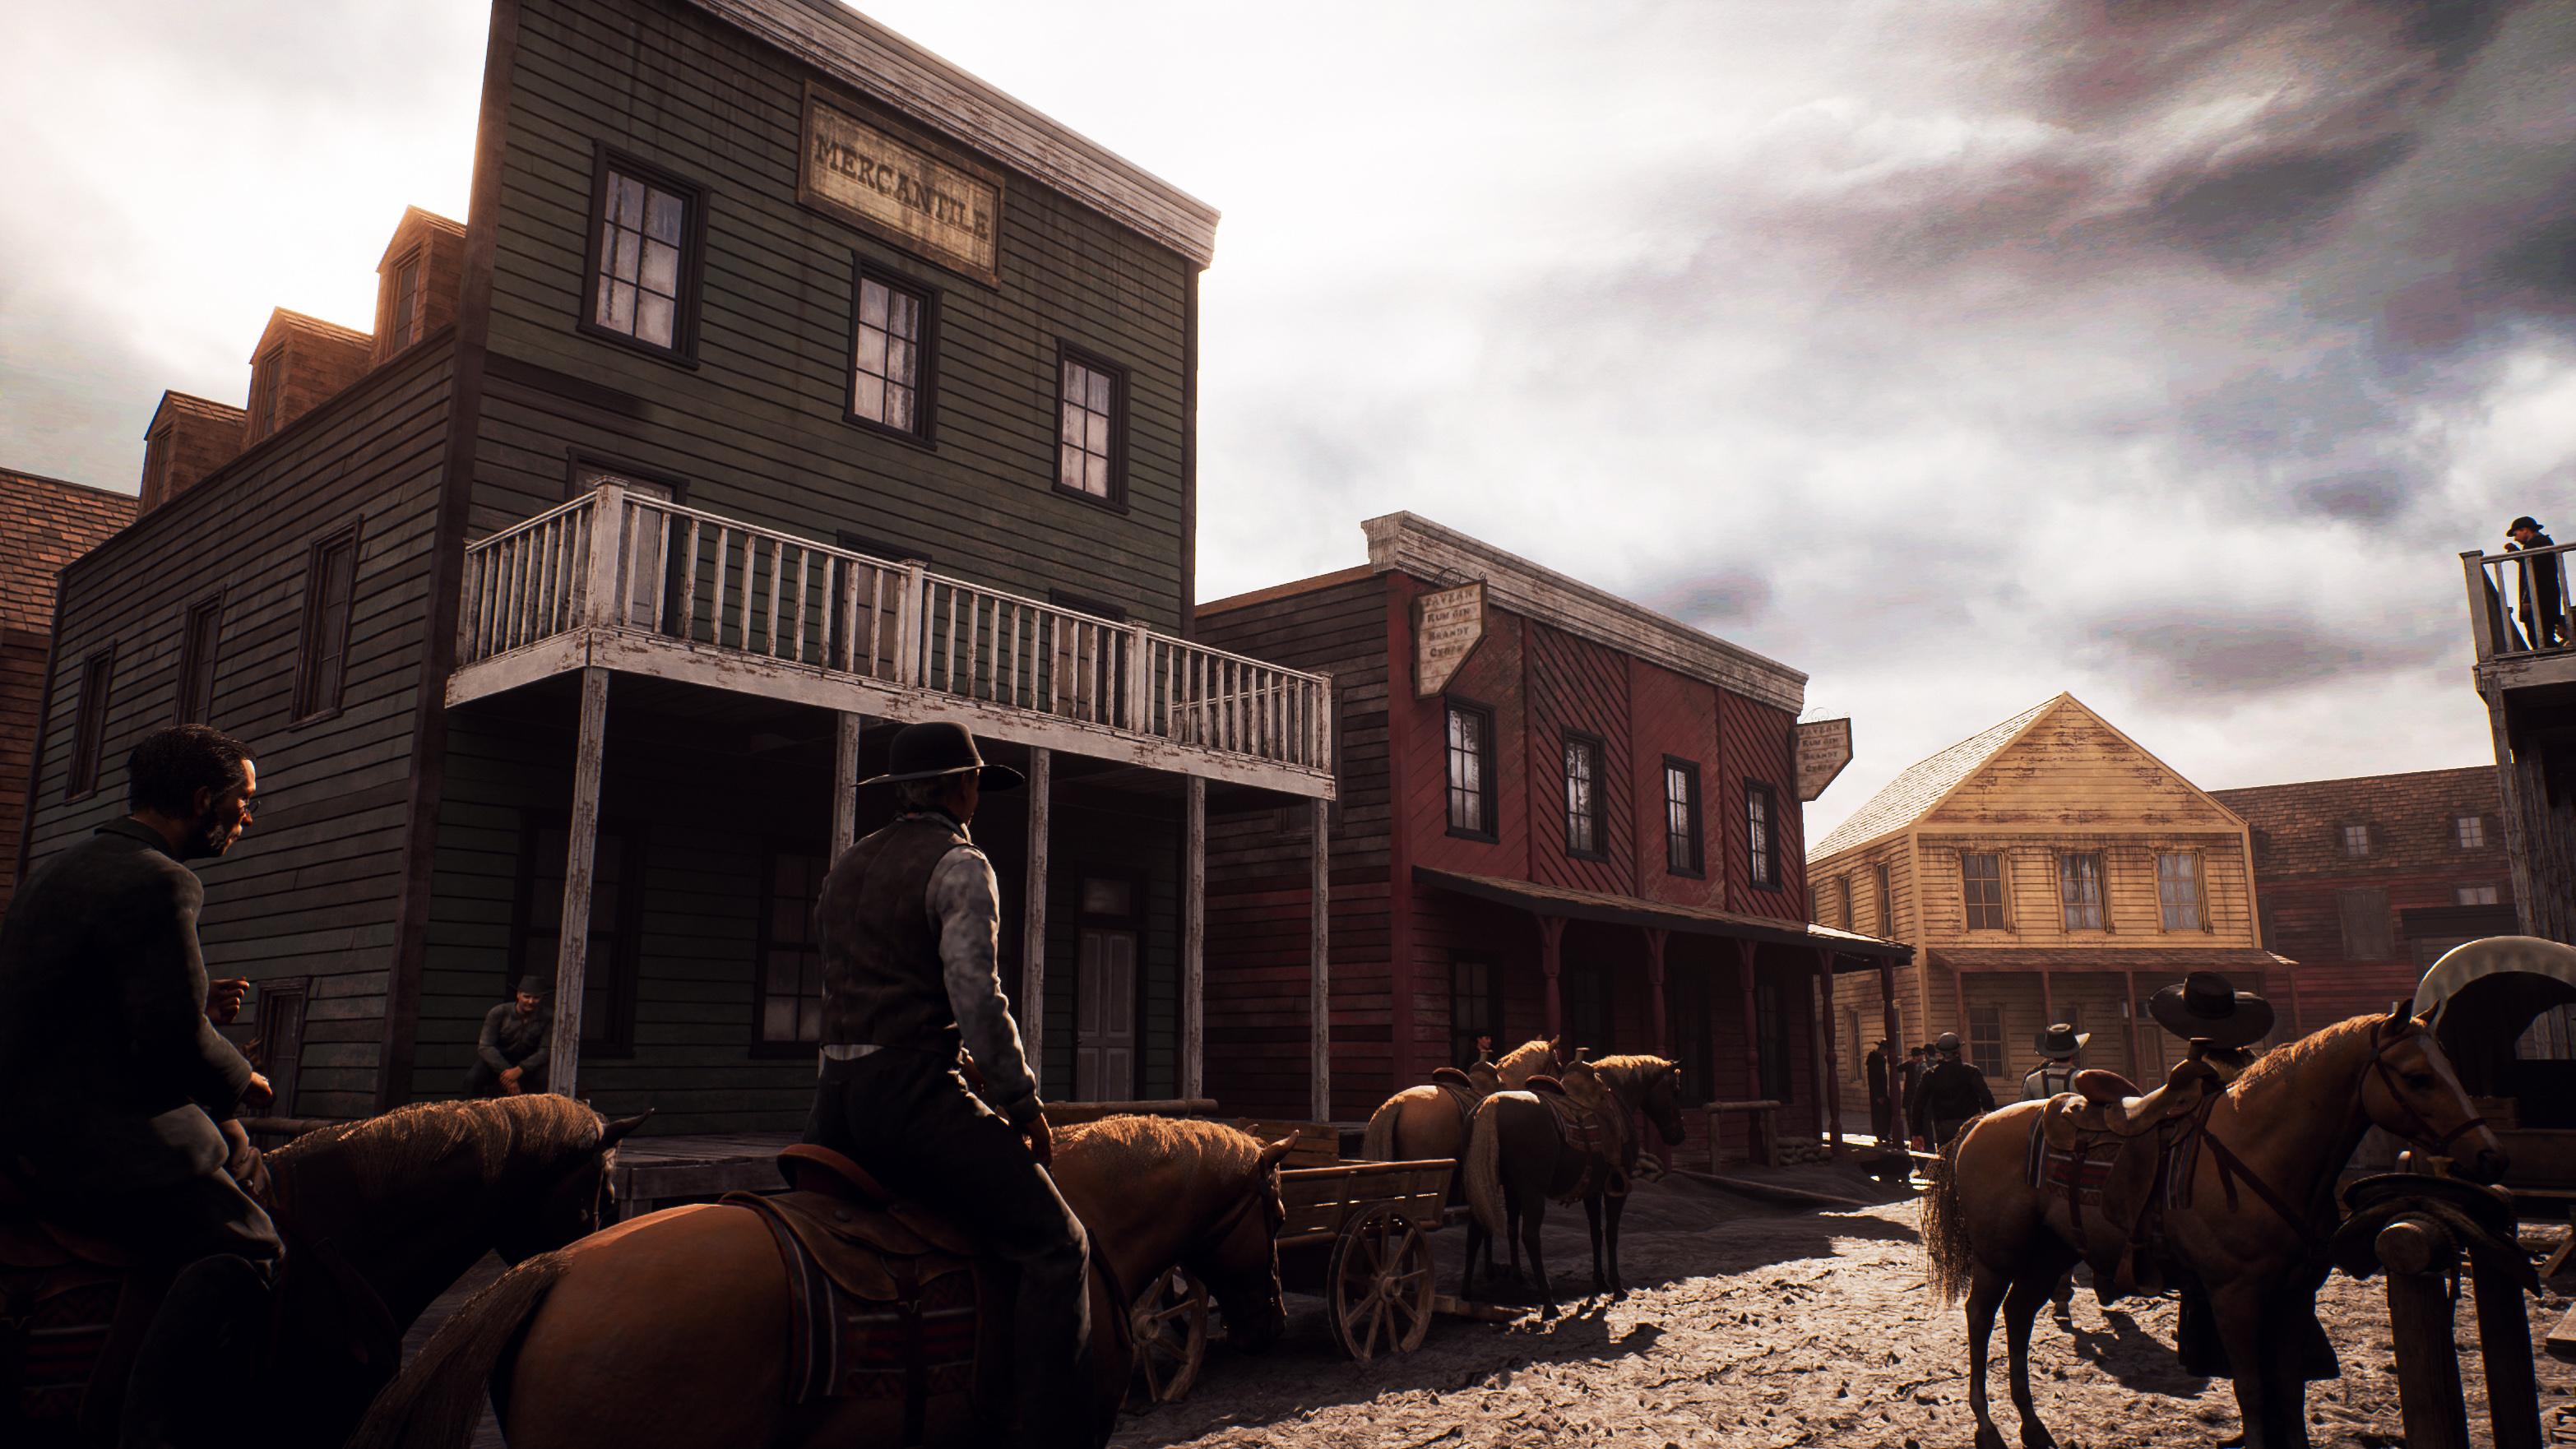
everything like that. Over here, we just
have some more. I like this because of the
wood and everything and just like some
general reference. And that's pretty much it. Most of this is all general reference because, for example, I like the window or I liked how the wood was placed and
all that kind of stuff. Like, over here,
we can do, like, some ornate pieces
and all that stuff. So that was quite handy. And here we also have like a general feel for
maybe how we can do, like the colors and
everything like that. And then next to
this, I also have a bunch of red that
redemption images, which I just went into the game, especially like
the ground I like, but I want to make it even
more messy because yeah, I just want to really,
like, mess that up. And for us, it just shows interesting reference on
how the wood is worn down, general shape, how everything
is connected together with, for example, over here,
these planks and everything. Of course, one thing that you
need to keep in mind with red redemption is that everything needs to
work for gameplay. Now, we are also
going to do that, but we are a little bit
more flexible because we are not stating what kind
of gameplay needs to be. So our metrics and everything
can be a little bit easier. This would maybe also
be cool to have, some of these polls here, although it does feel like
this doesn't really happen, but sometimes it happens. So, you can see one, too. So you can see that
they probably got the idea from the same
reference as I did. You often see that back,
like in the treaty, everyone's using the
same reference because there's so little
reference to be found. But yeah, just in general,
it just shows, like, quite a nice view and also
of some of the wood and everything and maybe like some more ornate
pieces like this. So what we are going
to do now is we are going to get started and go
back to our first image, and we are going to
make an asset list. Now, for our asset list, what I have is I'm going
to probably do this. Let's start focusing on here. And I have simply
a text document, so like a notepad
document over here. And what I'm going to
do this, I'm just going to write down my asset list. You can find this
asset list while I see how little space I have when I need to do
it on one screen. You can find this asset list in your reference. This
is quite important. So what I'm going to do is
I'm already going to, like, envision how I'm going to do everything using the workflows
that we are going to use. Now, as I said, we
are going to use different brand new
workflows that well, I'm not sure if I've
developed them. I'm sure other people have
also come up with them. But basically, I've never
displayed these workflows. The cool thing about these
workflows is that it means that we can minimize the amount of assets
that we need to make. And because we are going to
every door and every window, we are simply going to
cut out of a flat wall. So I'll show you what I mean.
What do we need for this? We need a plane will shot and a plane while long.
These are very easy. A short and long one
is what I always do because it makes it easier for me if I
ever need to do, like, long pieces like, for example, the side
of the buildings. Next to this, what
else do I need? I need to have, like
a double sided wall, which you can see over here. Double sided wall. And I will just make
that one like shot only so that because we don't
need to use that often. I need to have a
generic generic beam, which is going to
be just like one of those beams that we can
often use to kind of, like, close off all of our walls and everything and to
also transition them. I need a generic
angled roof piece. This is just going to
be like a roof piece, so we can now do that. So now we already
have the walls. We already have the tops. For our trims, I'm
going to go for, like, let's do like shop, top trim underscore
A, and underscore B. So let's have two variations
of those so that we have a very basic one
and a more ornate one. And now what we can do is
we can most likely also use this ornate one for these
pieces down here, for example. Okay, so we have that.
Now we need to have a door door with window, which is going to be the
little window on top, shop window, large small window. So I'm going to go ahead and
we have a large shop window. Now we have, like,
a small window for those pieces over there.
What else do we need? We need to have a This is going to most likely just
be our generic beam again. So we will have a angled canopy or a Let's call it an
overhead, angled overhead. Generic. Let's see. Do we need to have more
than one variation? No, I don't think
so. I think what we can do is we can
do one variation, then we can kind of, like, maybe apply I saw that over here. Then we can sort of
apply Where are you? Oh, yeah, over here. We
can apply, like an ornate. So let's do, um,
overhead ornate, don straight, don angled. So with that we have a
straight and angles version. So we can just do
something like that. That's no problem.
That we'll add a bunch of more
variation to this. Then we have over here, balcony underscore fence
underscore straight. Yeah, that should
be do maybe also a balcony fence underscore beam, just in case that we want
to close things off with, like, the beams and
everything like that. Then we'll have a
balcony floor piece. So yeah, you can see that we very quickly start
adding more assets. I will later on also
have a quick look if we can reduce those again. But let's say, so those are now the structure pieces I
believe for our buildings. So let's see. So we got those. I might later on also make some extra pieces
in, like, a time naps, and those will be
things like maybe I want to make an extra stare or something random like
that that will be a bit more out of e. So
it's not as important, but it will just, like, add a little extra
flavor to our scene. So we can also do
something like that, but I do expect that
this environment. I don't know how long
it's going to take, but it can easily
be 30 plus hours depending on how much
we are adding to this. So that's just something that we'll see how
long it takes. Okay, so we got our windows. We got all of that stuff done. Now let's go ahead and let's do. So this one is actually
really important. I want to really put
a lot of focus on the walkways and make them
look very interesting. So we'll have walkway
on the score straight. And I will make the walkways. I will make them that they
can sink into the ground, making it that I can basically
just make them higher or lower simply by
moving them up and down. We'll have walkway
underscore stair. Same case. This stair, if I make
a four piece stair, I can simply sink it into the ground and turn it
into a two piece stair. So we are going to do that one. Now, a very, very
cool thing that we're also going to
do with our walkway. I saw it over here. So you often see and
red that redemption, you see these very small but very nice
looking variations. Let's see, it's just like
some general variation. I saw it here somewhere, but I cannot remember. Also over here, like the transition pieces and
everything like that. And I do want to also
go ahead and Oh, yeah, here, this stuff where
is like, kind of sunken in. That kind of stuff.
I'm also going to use a very good
technique inside of reel engine so that we do not need to make an
extra piece that we, for example, would call
Wel Quay sunken in. Now if for some reason, because we are using Unreal engine five, if for some reason they deprecate
this tool that we have, you can simply just create more variations of your
modular pieces and use that. So it's not a loss, it's just a little bit
more time consuming. So we will have horse. Actually, because those
are structural pieces. Let's do like this, and
then we'll have, like, horse hitching post, horse drinking bucket. Let's also do, like,
a wood barrel. Now, I know that
substance mega scans also has a few different assets. And those assets we will most likely also
use to just, like, add a little bit extra of a punch to our
environment because it would simply be way too long in order to
actually do that. I see over here some
like walking planks. So there are going to be like these cool looking
planks over here, and I will make, like, a
big variation like a small. So walking planks underscore. White walking,
planks on the score. Tin. So as you can see, we have quite a bit
of stuff to do. And the cool thing is that we will be doing it in blender, which I do not often use
blender for tutorials anymore. But this time, I'm going to use completely default of blender because I feel like the moding
is not too complicated, so it's quite easy for me
to just showcase that you, while for much more
complicated moding I would also turn to I
will always turn to, like, Maya or to Tres Max. So what else? So there are some small stuff like a
stair and everything, but all that stuff I'm
going to add later on. So I just want to have mostly,
like, structural pieces. Maybe we can do, like, another. So we have store window
large, large score white. Let's have another one
that is just, like, slightly different that will hopefully because what we can
do is we can reuse these. We can pick the large one and
we can just make it white, and then instantly we will have an extra window that we can use. So let's see what else
is there in here. So we got our
supporting pillars. This is like what I mean
with the wall gray white. So we got, like, our
supporting pillars. We got all that stuff going
on. That's pretty cool. I think at this point, we should probably
not add too much more because else will
take a little bit long. So now that we
have these pieces, we can save our text document. So we now have our seam. We now kind of, like,
know what we need to now, one thing that is very important is that we are going
to create a blockout. And for this, we are going
to go ahead and we are already going to set up
this blockout in reel. And this is because the metrics are so important for this. With metrics, I
mean the scaling. If I mess up the scaling, if I make this completely
to final right away, and I then go into reel, set it up and and I find out that I
messed up the scaling, it will be a lot of rework. I do not want to
do that. But also what is important is that we get a feel for our environment when we already
create a blockout. And we can also see if
we missed any pieces. So we are going to go ahead
and create a blockout. It's still going to
be very, very basic. But when we have
created a blockout, we are already going
to probably set up our entire scene
using this blockout. I'm going to make
the blockout in, like, mid fidelity, pretty much. So it's not going
to be only boxes, so it will have some detail, but we will need to, like,
rework our detail later on. So let's go ahead and continue with that in our next chapter.
3. 02 Setting Up Our Project And Metrics: Okay, so let's not go
ahead and waste any time. We are going to go ahead and set up our Unreal Engine
five project, and then we're going to go
ahead and jump right in start by getting our base metrics down and start working
on our blockouts. So I'm sure that most of you know you can get Unreal engine five simply by wherever you
always get UnreelEngent four, there will be now an
Unreal Engine five tab, and here you can go ahead
and get the early access. This is a disclaimer.
It is early access. Some things might
change, although the UBI and everything will most likely stay quite the same. There might be some
bugs here and there, like, for example,
the new lumen system. We will not be using the
Nanite system for this. We will be using
original techniques and there is a reason for this, this because the Nanite
system is specific to unreal. However, if you want to get
a job in the game industry, many companies do
not actually use unreal, especially A companies, they often have
in house engines, so they will need you to
know traditional techniques. So I don't want to teach you techniques that you will
most likely not be using. The only difference is that
unreal Nante is hypole. But we have actually
created one course on it, which is the metro course. If you go to a profile,
you can find it. In any case, over here, so when you go ahead and
download Unreal and start Dup, you can create a new project. We are going to go
ahead and we are going to go for just the games, and we're going to probably
go for like a blank project. I guess you can go for
third person if you want, or we can go for first person.
It doesn't really matter. So if you want, you can
just input this one, and then you want to
go ahead and what is set a project location. So for a project location,
I'm going to go ahead, create a new folder that I'll call Unreal in capital letters, and this is where
everything that has to do with our Unreal engine
project will live. So I can go in here. That.
And I will call this. I would like to keep my
name short because I already have a very
long project location. And the thing is that Unwil has a limit of 188 characters, I believe, or 250 characters. And then it starts
giving you errors. So let's call this West
run Underscore Tot. See? 130. That's what the one. And that's why I'm saying
you why I'm telling you this West Underscore Tot. Yeah. So let's just do this. So yeah, it will be a bit of
a silly name, but oh, well. Target platform, we are
going to go for desktop. We are just focusing mostly
on PC and console graphics. So we want to set the
quality, preset the maximum. And what we're
going to focus on, so just press create is we are going to go
ahead and we will, of course, push
everything a little bit more just for your quality. Now, this will go ahead and
it will initialize over here, so that should all
be totally fine. And then what we also
have is while this is loading up is over here,
we are going to use blender. A cool thing that sausen
you from this tutorial, I will hope that I do
not forget to turn it on quite often is that
we will have keypress. So whenever key I press, you will be able to
see whatever I'm pressing in case
I forget to tell you. So this is quite handy. For the rest, we
are going to use the complete default of blender. However, there's one plug
in that I will be using, and this plugin is called the Mcivist Interactive
Tools over here. Now you can get
this tool for free on Maxi Vs vist.gm.com, and then you will be
able to also find this. And it also has some
documentation if you want. However, it is quite
straightforward. What I've done is I have added a blender folder in your source files that
has the tool in here. And in case you
didn't know how to install it is simply
going to file, sorry, edit preferences, and this is
considered an add on. So in here, you can
simply press Install, and then you can select
your Maxi Vs tools. You might need to turn it on. However, it will pop up, but you can also
just type in Max, and here you can
find the generic Maxwstols and you
can turn it on. This will simply art
this little window over here to the
side, and that's it. This window is really
great because it has some very easy
features like doing quick pivot and pivot editing, turning on target
belt and a bunch of other stuff that although
they are really nice, we will not be using them a
lot, but they will be there. Now at this point, as
you can see over here, our third person
scene has activated. We can also go ahead
and we can play, and then you can
see that over here, we can just play just like normal and do whatever we want. Now this is quite
nice, actually, because we can also use
this third person character wide away for our
scale reference. So what we're going to
do is we are going to go ahead and I do want
to create a new scene. So let's get started by just
doing some organization. I'm going to get started by
creating a brand new folder, and I will call this
folder, Western town. This is where all of our
stuff will be located. All of this other stuff, it
is just mostly unreal stuff, but this is where
we will have all of our assets, so let's
create a folder. It's called assets.
And by the way, if you do not see this content
browser, it is down here. For this, I do expect
that you already have a basic understanding of unreal
and how it is being used. And else, I would
recommend that you just watch a quick introduction, just like where the
UY is and everything. Forrest's not too difficult, and there is some stuff
that will most likely be it will most likely not be explained in,
like, the introduction. But then, of course,
I will just explain it to you. So we have assets. Rice click, creates
a new folder, textures right click New folder, materials, right
click New folder. Saves let's stick
with this for now. So in the saves folder,
we will save our scene. For this, what we can do is
we can go ahead and we can go to Let's file, and let's do a brand new level. Let's grab for now a time of day level because it already has some handy
lighting right away. Now for this level, we can
go into our World Outliner, and there's a bunch of
stuff that we do not need. We do not need to use text
renders the material preview. We do not need the player
start we don't need. Yeah, no, we don't
don't need the floor. All that you want to have left is is some of the lighting, which is our direction light
and just our sky over here. Then what we can do
is we can go to file, save current levels, and this will be our
final level later on. So Western Town saves and we
are going to call this one. Western town scene
and press Save. Perfect. So we now got
our base level set up. If you want to go ahead
and you just want to always load up this
level whenever you close down your engine
because I assume that you're not doing this entireoal
course in one go. I certainly will not.
Then we can go to project settings over
here to the site, and then you can go
to maps and modes. And in here, you can find
your Editor startup map, which will be our Western
town in our game default map, which will also be
our Western Town. So this is quite handy. Now what we can do
is it will just load up this scene. Okay, perfect. Now, there's a few smart things that I want to set up before we can get started by just
creating our first walls. The first thing that
I want to set up now is I want to already
set up a basic train. This train will not actually
have anything in it yet. It's just going to be like
a very basic train that we might or we will most
likely remove and redo, or we can already use it. It kind of depends on how big
our scene is going to be. The way that we're going to do this is we are going to go up here to activate our
landscape editing mode. And now what we get is we get this massive green
box over here. One thing that is very important that we need to keep in mind for this project is
that I want to have a lot of geometry in
my train in this area. And the reason for that
is because I'm going to have everything from food steps to cart wheels to horse
steps to, like, dance. Everything is going
to be in our train. And I want to actually have
this geometry because I want to really push the limits of what
we can do with this. So knowing that, a cool trick that you can do to push in
more geometry into your train, right now, your train is very, very large, and as you can see, the squares are not very small. This sort of corresponds
with geometry. However, if we make our train insanely large, so we make it, for example, 255 quads
and two sections. This is probably the No you
can probably go even larger, but let's say that now we have this massive train over here. However, if we now set our
scaling to, for example, one by one by one,
what you can see will happen is that it will become
an incredibly dense train. So it will be a little
bit more expensive. However, that train does have built in
optimization tools. And it will be a
lot more interest. So if we go five
by five by five, for example, he'll see
how big that is already. So two by two by two maybe. And I think two by two
by two might actually be let's do for just in case four by four
by four. And let's do that. I feel like this is big enough. The reason why I say
that we will most likely remove it is
because as you can see, we don't really
have a perspective of how large this actually is. You then go ahead
and press Create, and that will create
our train over here. There we go. And at this point, you can see that you can sculpt, but we can just close this. So this is our train. Now, as I said, I was curious
how big this actually is. So if we go to create
shapes and create a cube, and then in your
cube, if you press a little button next
to your transform, you can reset it to
zero, zero, zero. So this cube is 1 meter
by 1 meter by 1 meter. That's very good because this will also be our base scale. So as you can see, one
by one by 1 meter, it looks like that our terrain might actually be a
little bit small. But for now, that
does not matter. So over here we have our cube. Now, what I want to do is
I just want to drag in my third person
blueprint. Let's see. I think third person character. Or is it this one? I
forgot if it was this. No, why? Of course not this
one. This one over here. There we go. So here
we have our character. So this is great
because we can use a character to basically
just run around. So I believe that we do not even need to
play a start for this. If we just go ahead and
we now go and press play Oh, no, wait. So we do Oh, I get it. So it automatically adds
it in a players start. That's the thing with the third
person counter over here. But it does mean
that it will still keep this tur person
counter in here. So if I just to test, yeah, see? Yeah. So it will just automatically drop in
Tur person coounter. This is an engine
thing. The engine will actually just do this for us. That's a buck. Okay?
That's what weird. But in any case, that
is good to know. However, I still want to drag in my third person character
over here temporarily. And then if I just grab
my cube over here, what I can do is I can
grab this cube and I can scale it to be the
size of this character. Or maybe we can we
find the model, maybe? It would be nice
if I can just find the actual model because
it will be a lot cheaper. Third person mannequin
characters mesh. T this There we go. Let's do that one. So
this is the model that makes it a bit
easier because then I don't need to do my cube. I'm going to use this
model for scaling. It's basically just going
to be here so that I know about my correct
scale because there's always a little mismatch I find between blender scale
and unreal scale, even though everything
is set to meters and it is 1 meter by 1
meter by momere, it still seems to
sometimes mess up. So wall plane short
and wall plane long. Now, what we want to do is
now want to go ahead and go into blender and we will
start by creating that. I'm going to go ahead and
I'm going to shift A, go to mesh, and start
with a simple plane. So this is going to
be our wall because it's just going to be blockouts. For our wall, um, right now, it's a little bit of guesswork. I know
that the height. So I can guess, if the person, let's say that this is 2 meters, this is probably around
four to 5 meters. So let's do 5 meters. The length is something that I need to kind of, like, guess. I think what I want to do
is I want to say 10 meters, just because I know
from experience that we often need to go a bit. Larger in game than
it would be in real life in order to make the perspectives work correctly, but you will not really
actually notice that in game. So let's do short five by
ten and long five by 20. I think that's sort of the general idea that
I want to go for. So what I can do is
I have over here, I have my plane. You sometimes might see me
pressing the Wong buttons. This is because I'm currently
working on a project in Maya and also a
project in Blender. And that's the annoying
thing that when you switch, it's quite annoying
to just transition over to these shortcuts. The way that I'm
going to do this is so we have this
plane over here. We can go to item, and then over here we do
have our dimensions. So right now it's two by two, or you can use your scale. It kind of depends. So these kind of correspond
with each other. If I set this scale, I don't know which one, this
one. This is the scale. So actually, I need to
go for the Y scale. If I set to 10 meters, you can see here that
this becomes 20 meters. So if I do 10 meters here, Yeah, so we might actually want to go for 20
meter. Let's just see. So let's do 10 meters here
and let's do 5 meters high. You'll see, that's what I mean.
So we might actually want to double it inside of blender. So if we go 10 meters
by 20, which basically, then it makes it easier
for me to use this one because these values are a little bit easier
to read for me. I know. It is quite large. We just need to see.
We need to see. So let's say that we have this. What I'm going to
do is I'm going to go to my Maxifst tools, and I'm going to
press AdditPivt. This is very nice
because now I can just freely move around my
pivot and I don't need to mess around with all that
weird snapping stuff that happens in Blender that I personally I am
not a big fan of. Now I want to snap this
pivot to my corner. So I'm going to go
up here to snapping, and I'm going to
snap it to vertex. Then when I move this, I can snap this to this
vertice over here, and then I can press at a pivot again so that
it is turned off. At this point, we can go ahead
and set a location to 000, which means that this is where
our pivot point will be. The way that Unreal
reads is Unreal will always place your
PIVOPoint on 000. All your models need to be on, you guessed it 000. Now that we have
this one over here, I will have a look
if I need to go. Let's start with 5 meters. Let's do a simple square
to get started with. It's handy to keep
it a square because then it is very easy for
us to keep it tilable. Now, in terms of organization, we need to always go
ahead and we need to organize it in this way to keep everything
nice and clean. We go ahead and we right click and create a new collection, double click on it and give it the name of our asset list, which is plain, wow short. This is why I gave so much
attention to our asset list and the naming so that we
can correspond everything. In here, we can also go ahead
and we can also keep track. For example, if we've
done the blockout, we can say slash B. If we done the final modeling, we can say slash F.
And just like that, we can just go ahead and
get everything done. So you just want to go
ahead and drag your plane into your plane well
short, or you can, of course, right click move to collection plane well
short, whatever you want. We have our wall now over here. That's all we need
to do. We can go ahead and we can start by just doing a save as on our scene. And we are going to
go ahead and we are going to save it in
our source files. Let's create a
folder called saves. And let's call this
one structural pieces so that we have small props
separately from this. Structure pieces and press save. We can now go at the Expot and we want to export
this as an FBX file. So in here, if we go ahead and let's create
an Expos folder, you can export it
directly to Unreel. I like to have it in this
folder just because this is a tutorials that people have
an easier way of finding it. And you can go ahead
and over here, too, Unreal, a folder. And in this one, call it once again the same
as your scene collection. Do not call it different names. Just keep everything the same because else it will
become a pain later on. Turn on select objects. It will remember you having this turned on for
everything else. And then for scaling, often the scaling needs
to be set to three. I know this does not
really make any sense, but as I said, there seems to be a mismatch between blender and
between unreal. Now, I can dive into
metrics and setting up specific metrics between
the two programs to get everything correct, or I can literally just set the scaling to three
and be done with it. So make your life easy. So yeah, let's go ahead
and press port FBX. And now what we can
do is we can go into unreal and now if we go into
your Western Town assets, we can go ahead and
we can import this. So let me just navigate to the
folder, exports to unreal. Here's our FBX. And
this is the nice thing. We can create a blockout, and later on we are just
going to overwrite this with our final version and it will automatically
be replaced. So you just want to
click and write this in. And now there's a
few settings here. Do not build nanite
at least unless you want to use nanite but we're
not going to use nanite. We want to drop down
and very important, set the combined
meshes, turn it on. Everything else is
pretty much the same. Yeah, we don't need to
really do anything else, so we can now go
ahead and just press Import, and there we go. So now we have our WAL. What we can do with this
is we can drag it in, and now we can go ahead
and we can rotate it. So here we can see, for example, that our WAL, I think we need to set this to 0.1 in
terms of scale. So I think our scale is
a little bit too much. Although we can
also twin and set the scaling in here.
Normally, it's three. I can twin and set the scaling in here to make it
maybe a bit easier. It doesn't matter. It will remember all
of these scalings. So let's set this to
one, export again. Right click and press reimport. Here you'll see, so that's
still a little bit too large. Now, what we can do? So there is like a
starter content in here, and the starter
content, oxygen, now, we can use this.To one, 2.5. There we go. That's pretty much the rough scale that you
need to go. Don't worry. We are going to
create a door frame next and a door frame, and then we are going
to create a window, and that will kind of, like,
fit everything together. That's all we need
to do. So for now, we can see this over here. What I'm going to do is
I'm just going to go ahead and set my
scaling down here. So if you double click
on your wall short, you will open up
the mesh editor. And if you go down to
transforms that set us to 0.5, for example. It's
a bit of a weird. On the scaling is behaving
a little bit strange, but as you can see, So 0.4. Then we are just going to set a scaling inside of this one. So over here, in the end, the primitives will
stay the same. We will have even spacing, which means that if
we Oh, no, wait. I'm doing this wrong. No, no, no, wait. I'm
doing this right. I'm talking about grid snapping. I need to make sure that
my grid snapping works, and 0.4 does give me correct grid snapping,
so that's totally fine. Okay, test it out. Just press CtraZing Contra V. Then you can go
ahead and you can just move this around
and just make sure that everything fits together. I can remember in the past accidentally making
a mistake with that, but that was actually
something different. So right now over here, we
have something like this. If you want, we can actually
make this even easier. We can go to shapes, cube. I don't know why I
didn't think of this before. That's my fault. I can simply set the cube to be 5 meters that I know
here. So you see? So I made a mistake after all. But I always like to leave in my mistakes as long
as they're small. So if this is five by 5 meters, I can simply go in here
and I can simply set my scaling to be exactly this. And then the metrics
are exactly correct. So it looks like that we had
to go for 0.5 after all. See, 0.5. So that was
the correct metric. We just had to split
it up into half, and that makes more sense. So this wild is now correct. Everything that we import is
going to be imported at 0.5. And now what we need
to do is we kind of need to guess how we are going to have our windows and
everything like that. However, we will go at and we will do that in
our next chapter.
4. 03 Creating Our Blockout Pieces Part1: Okay, so let's have a look. So we're going to go ahead and start with our windows
and our doors. Why is this stuff so important? This is so important because remember how we also
have this walkway. So we need to kind
of, like, guess that we have a spacing
for the walkway, that we have a door
that is big enough, and that we then also have a little trim that
we can fit on top. So as you can see, all of this kind of,
like, ties together. And once we have
this one spacing, we can base everything on this. So that is the general
goal for this. So if we go ahead and
let's go into blender. Now, for this piece over here, yeah, that is actually
a tricky one. I need to have a
quick look at it. So let's go ahead and let's create like a very basic cube, shift a mesh cube. And by the way, I need
to move this up because Alsa can never see my
settings over here. And for this cube,
what I'm going to do is I'm going
to set a scaling. Let's see. I'm just going to use these scalings
for this most likely. Now, actually, you know,
let's turn on snapping increments and snap this to an absolute grid over here so
that we can just here, see. That way we can snap this
properly to our grid. And then the nice
thing about this is if you press tab to go, of course, into your edit mode, we can press three to go into face mode and
select this face, and it will just snap
everything to the grid. So what I'm guessing
is three grid points by one grid point
is like the base. And then we can always
make it higher. But when we make
it higher, we will simply move the
building up and down. So that's what I'm
talking about. So we want to have a basis, and then on top of that basis, we can move things up and down. So let's say that this is going
to be a pretty good base. Actually, you know what
having this piece. We can literally just
create a new collection, drag this in here and just call this sorry, what was the name? Walk quay straight.
There we go. See? So we can literally
just do this. So we already have
a wa Quay strait. We can go file export FBX. Walkway straight
and export this. We can go right away,
jump into unreal. Where's my folder?
Here's my folder. Got a love three screens. I recently got a new screen. So now I can just
quickly do this. And then I just need to
set my uniform scale to 0.5, remember? I just need to do this once. It will always remember your settings after the
first time you do it. But we didn't do it last time, so we do this, and this
should now fit perfectly. So with snapping on,
if we drag this well, okay, rotate it a bit. Here you can see, all the
snapping just works perfectly. Okay, so that's already a bit higher. So
we got this point. Now we want to have a door, and the door needs to be
actually quite a bit higher. So let's go ahead and make
the door two meter fifth. That feels really
large for a door. But okay, maybe that was just the way that
it was at that time. So all the person
is really short. Yeah, let's do like
ten to 24 door. Let's go ahead. Shift A mesh
and just do another cube, and we can just use increments. What I'm going to do is I'm
going to go ahead and yeah, this door I can try
to do basic scaling, but I'm not sure if that will actually work
as well in this case. So let's go in the Z axis 2.2. Yeah, I see here, that would
probably would not work. So what I'm going to do is
because this door logically, this door needs to sit almost
all the way to the top. So logically, if
we go ahead and we scale this down and we don't use snapping or anything
like that anymore, we're just going to scale this
in and it's just going to be like a mostly like a test. So we got this one. And now I'm going to go in my edit mode. Let's go ahead and
let's move this here, let's tune on incumbents. Let's move this up
until this point. Go back to object mode, maybe, like, scale it
down a little bit. And I just need to fit it. I'm going to fit it, and
then it should be fine. So let's go ahead and call
this door underscore A, for example, just because in case we want to
make more doors, export it, and let's
just give this a go. So the beginning part, I always find a bit
annoying just because everything needs to kind
of, like, work together. But because of the couch I can basically just
guess my wit and scale. Normally, in a game or if
you're working on the game, you have all of this predefined. You have technical
artists that make everything perfectly
logical for you. In here, what I
can, for example, now notice is that, yeah, okay, so it turns out that our wall is most
likely way too high. So that was then my fault. So let's go ahead
and if you want, you can also actually
export this. If you want, what
you can do, just to get a better guess is
you can right click, convert SK Mank to static
asset and press Save. And now with this
one, you can right click on your asset
that it just created. Asset actions, and you
can actually export this. And you can go in here. You can say from unreal just
call this base character, for example, and
export it like that. And it gives us a better guess in here when we import this in here, from in real. Now, as I said
before, the metrics will most likely mess up again. So we'll see how it goes. So let's import this. Yeah,
you'll see too small. So I think we want to
probably scale it up by, um, No, sorry, its
imported level of details, which I forgot to turn off. So there we go. Okay, now it is too big. See? That's what
I mean. So let's go ahead and go
into our scaling, and let's set this
little like 0.1. Or maybe I can set
it to one over here. Now, see, that is the tricky thing about
this. That the scaling. I don't know if it
needs to be 0.01. 0.05 maybe. You see? It just completely messes it
up all of the metrics, and that is the annoying thing. I know that there is a
way that we can fix this. However, out of my head, I forgot what it was. But it's not really worth it because I can
just go ahead and I can just kind of like it might not be the
most accurate way, but I can just go in and I can compare
this kind of stuff, just to get a general
feel for things. Like this. And then we just need to go ahead and we just
need to move this down. So this might be a
little bit more fiddly, but this is just often
the way that I do it because yeah,
I don't know why. It's just the way
that I like to do it. Only if I need to work on video games where we have
very specific metrics, I would actually go in and
do something very specific. But this door is also not really a normal metric, as you can see. So for this, we're going
to go ahead and let's now, skill it in a little bit more. I think a character needs
to be a little bit lower? Let's export this. Let's see. So we're almost there. Okay, so the width of it, no, the width can actually
go a little bit less. Scale in a little bit more. Let's move this down.
Probably a little bit. I feel like that this character
actually does nothing. I just want to show
you how to input it. So I'm just going to go
ahead and I'm just going to delete that because I
don't feel it's useful. I actually only adds
confusion to my scene. I think something like
this is pretty good. So over here, we got, yeah,
we got like this door. If you want, you can, of course, do the whole measurement
thing and see how close that we got to one point
or 2.1 meter, although it does not
matter because I'm not going to go for
those specific metrics. Yeah. So if this is like one, we can do like 2.1 or something. 2.2, so, so see. We got quite close to it. So 2.2, if you want,
you can, of course, scale it down a little bit
more if you want to get the exact matrix of 2.2
that we had in mind. And I would do that
simply by going in here. By the way, I sometimes press
AldX to go into X ray mode, and I do this so
that I can select everything because in blender, you cannot Well, I'm sure
there are settings for it, but you cannot just
in the default, select everything if
you cannot see it. So I just scale this
down, and just like that, I can get it pretty much
maybe like a difference of, like, a few centimeters, I
can get it pretty close. So I can go ahead and I
can do this one last time. Fine. Honestly, I don't really care about it too
much with stuff like that, especially in those times the doors were not
all perfect metrics. They were probably a
little bit uneven. So, okay, so we got our door over here, so
that's pretty good. Now, what we're
going to do is we're also going to go ahead
and create a few windows, and we want to go
ahead and create a window above this door. So that's going to be our
first thing, actually. Well now, first of all, and see, that's why I said that it
does not matter too much. It's because now I'm going to go ahead and go
into Face mode, and I'm just going to press E, and I'm just going to
extrude this to give it like a nice window, and don't make it
a square window, as you can see, it's not square. So this is going to be
like our metric over here. Now, what we can
do with this is we can turn off the
plane while short. We can right click, create a new collection and call
this door under score A. And grab your cube and
throw it into door A. This way, we can also
turn off our walkway. And then with this
door, all we need to do is we need to turn on
snapping to vertex, go to our Mcivit tools, and then snap this to, like, the corner over here, turn
off at the pivot again. And now what we can do is
we can snap to increments, and then we can just
snap this to our grid. Or what you can do is
you can go ahead and you can go into item and
set this to 000. So we have a door over
here. That's pretty good. Now, just to indicate that
this is going to be a door, what we can do is
we can go in here. And if you press I,
you can inset this. Now, sometimes this happens. When you do your inset,
it is not accurate anymore because we did
a lot of moving around, so your transforms are
a little bit messed up. If that happens,
what I recommend you do is you can go to Object, apply, and all transforms. Now, one thing is that I actually don't really
like using shortcuts. Not in Blender, not
in any program. I like to use menus myself. And that's what I will
be doing. I know that Blender is a very
shortcut heavy program, but I'm not going to
learn the shortcuts of every single program we use because I use ten plus programs, so that's way too
much to remember. So what I like to
whenever I use something, I like to add it to
my quick favorites. So you just right click artist
to your quick favorites. And this is the one shortcut that I have there is
that when I press Q, I can overhear and I
have my quick favorites. This shortcut, if you
go to preferences, Kemp, I don't think
it is in here. So if you just type
in quick favorites, set it to whatever you want. I set mine to Q just by
selecting it and pressing Q. And now that I've
reset my transforms, the only one that I will
use is Contra B for Bvl, I for ISAT and E for extrude. So now if I do E or sorry, E, I for ISAT, you can see
that now this works. So what I can do with
this is I can go ahead and I can just
for my blockout, I can Oh, sorry, my snapping was turned on. I can go ahead and I
can just push this in. So this is going to
be like my window. And then it has, like,
a little trim above it, which I also want to
go ahead and create. So let's make my window a
little bit down over here. And then what I'm going to do is it looks like
that I just want to hold E and just
extrude this hold E, press E, and then we can go ahead and we
can select these pieces. Now, extruding these
will not work. And this is because we
need to go ahead and we need to go I
have it over here, extrude phases along normals. You can find it over here in phase and extrude
phase along normals will basically allow
you to extrude them based upon the direction
of every phase. This means that this phase will go ahead and go
in this direction, this phase, in this direction,
and everything like that. Doing this does sometimes, as you can see over
here, change some stuff. So what you can do, wait. I'll show you again over here. So as you can see, when
you do that on the corner, it does not always
extrude straight. What you can do is you
can select this side. You can simply move your scaling to scale
it a little bit flat, and then in your resize
step, set this to zero. This way, you know that
it is 100% straight. And then over here,
it looks like we just want to move this one
out. There we go. So that's pretty
much like our door. We can go ahead and do another inset over here if you want. Maybe go to edge mode by pressing two and
move this edge up. And then what we can
do is for this one, let's go ahead and E
extrude this in like this. And I can also go ahead and I can just delete these
pieces over here. So right now if I press delete, I just want to go
ahead and go faces. No, sorry, I don't
want to do that. I want to go I always forget. I need to set this
to a new shortcut. Is it face? Yeah,
yeah, it is faces. I just forgot to press
X. Delete faces, okay. If I just do delete, right,
click Assign shortcut. Delete. Right, click
Remove shortcut. There we go. Now if I press
delete, it should do my face. Well, it does do your faces. It just brings up your menu. This is something I
can change. Oh, God. I have not done this in
a long time. So key map. Delete, if I set my key
binding to delete, I can go, like, here, this da da da. Was it the outliner? I need to look. So
basically in here, I forgot which one this. It's like, you can do, delete phases or
maybe it's in here. I don't want to spend
too much time on it because I don't
even know what I'm doing. Yeah, here. In any case, I will
figure it out off camera. But if you press the lead, what you can do is you can turn off the fact that it
will show your menu. So I just quickly
forgot about that. In any case, what we want
to do with this door, now that we have this is we can simply go ahead
and go to Vertex mode, select all of these Wertzs, scale them flat, and
then set this to zero. There you go. And
then if you want, you can turn on
snapping and just snap this to absolute grid, which will mean that
it will be exactly on the bottom over
here. There we go. So this is like our
blockout for our door. We can go ahead and we can
export this once more. Door A. And now we also have
a window over here. And so for the window, you can see that the window
is at the same level. So it's quite a large window, and it's just like at a lower level over here with our door. If we go ahead and we just go in and press Conti Contrave, for example, or you can press Chef D and
then right click, we can go ahead and we can add the new collection and call this store window Actually, that's just store window and move your door into
your store window. So for our store
window, for this piece, what we can pretty much do is if we go ahead and select
this base over here, let's just simply
move this down. And, oh, it's still snapping. Let's quickly turn on
my door just so that I know roughly how high
I want this to be. Let's do I'm just guessing, something like this looks like a nice height compared to
what we have over here. Once we've done that,
we can go ahead and if you press
next to the one, you have the little wavy button. I always forget
what it is called. It's even called
just like a dead key inside of my key registration. You can just go ahead
and it looks like that we need to go
to the right view. We can then go to
face mode, Alt x, and just select all of these
faces and just press delete. And I want, delete phases. Next to that, we
can go ahead and I will show you another one,
which is the bridging. So if you go ahead and select
over here these two edges, over here by using Shift, not control. I keep
forgetting that. Select these two edges, and
now you want to bridge them. For this one, you can go to
edge and bridge edge loops. Or you can go ahead
and do what I do, which is Q and press
bridge edge loops, and that will just
add the quick bridge. Now having this one done, we can go ahead and we
can go to our MaxifsTols. We Wong button. We can go ahead and
press AdditPivot. Once again, we can snap this to the vertes and just
snap this to the base. And then what we can
do is if we want, we can go in here,
set this to zero. Do that after you've
turned off at a pivot and set this one to zero over
here, just like that. Now, also nice thing
that we can do is we can turn on
the iframe toggle. This way, we will always see
our Wireframe over here. However, you can also do
that by going down here and just pressing the
iframe toggle down there. Depends what you want
to use. In any case, file export FBX, and this is going to be store
window and that was it. Store window. There we go. And so why was all of
this so important? If I now go ahead and
I'm just going to import my store window. Where are you? So I'm doing this on my
other screen because I'm a little bit blind and I
cannot seem to find it. Oh, there are. Store window. Import. So SSM, we can also, click on a door and
press R Import. So this was important because we can now use this image
to roughly guess what the base size of
the front of a store is because we can just guess
the distances between them. If we go in and we just go ahead and move this up over here. This is fine. We can just have our door over here.
Yeah, there we go. So it's quite a tin door. And what I can also do
it is even by engines, one, two, three, four, five, six, seven, eight, nine, ten. So yeah, four, four. So now I know that my door
is exactly in the center. What I can then do is I can give some spacing so I can say, Okay, I want to
have another door, but this time, it's going
to be my store window. Just move it up so that it is at the same level as
your door over here. And now you can
basically say, Okay, so there's a little bit of
space here here and here. Now, it would be
nice if this space, it feels a little bit, that feels a little bit
cramped, to be honest. Although it would have been a really nice metric
if we use that. I'm not sure if this is good because what it will do is it will just make everything
feel a little bit short. Let's say if I would go
for an ideal version, I would bring a little
bit more space here. A little bit more space here, which means that I
will probably, like, extend this out to
an uneven number. So right now it is five by five. Oh, no, wait, it might
not be an uneven number because we need to
lower this down anyway. So let's go let's see. Let's do on my Yeah, ten. No, you need to be like eight, you need to be like 128 by
12. Let's try that one. It's always a bit tricky to do this because of the tiling mode. So if we do this, we need to just keep that in mind
when we do our tiling. So let's do eight by 12
and let's re import. Okay, so that's
pretty good. So we got a little bit of
space for our trim. So 8 meters height
is quite nice. And then if we go in here
and move all of these three, like in the center a
bit more, how is that? Does it have too much
space, too little space? This is the important one.
I might be slow right now, but this is the important
one because this is the one that from which we
will make everything. Yes, I think I like this. So this is going
to be our metrics. Our official metrics are
going to be 12 metres long, 8 meters high, which means
that for the longer wall, for example, Contra Contrave, we can d a new collection. Call this one plane
while underscore, long. And then for this
plane while long, it would be 8 meters by
24 meters over here. Like that. And then we can go ahead and we can also
export that one. So just like that,
plain while short. This one is going to
be plain while long. We have now two metrics over
here. Okay, that's perfect. The only thing I'm
going to do is I'm just going to
go in my walkway, and my malt may needs
to be 12 meters long. And then what I
also need to do is I just need to re
snap it back to the grid for which I don't think increments
is going to work. No, so I need to
do an add pivot, snap this to the corner,
turn off add a pivot, and then just go
ahead and set this back to zero, zero, zero. There we go. 12 meters long. And this one is 3 meters. Yeah, 3 meters feels fine. Sorry, I say meters.
I mean grid points because right now I cannot
really trust the grid anymore, but I can still use it for like to make everything
nice and even. So this one is going to
be walkway straight. So if we go in
here, right click, reimport walkway
straight, check, and then we will have
our plane while long. And these pieces always
need to be double. If we do not do that, then we end up just messing
things up later on. But right now, everything's
even number still, which means that if I
turn on my grid snapping, I can nicely snap this
to grid, and then I can, for example, click and drag and turn my plane while
long into here. And now you can see
that now we have a long version,
which, for example, will be great to have
the back like that, as you can see, and we
will have a short version. Okay, now that we
have a solid base, everything will
go a lot quicker. So in our next chapter, we will continue creating
our blockout pieces, but as I said, everything will be a lot quicker at that time.
5. 04 Creating Our Blockout Pieces Part2: Okay, so let's go ahead and
continue with our blockout. So we got a pretty
decent window. You know what the windows,
they can actually be a little bit wider,
now I look at it. So let's go ahead and just quickly finish off
this stuff because we took quite a rapid
ending in the last part, and that will simply because
we were quite a bit over time because I try to
always keep these pieces below 20 to 30 minutes for
you so that it's a little bit easier to digest
all of the information. So we have a store window,
and then what I'm also going to do is we have
our walkway straight, and I just want to make this one a little bit more interesting. So what I'm going to get
started with is so far walkway, remember how I said that
I was going to make it longest that we
can basically move it up and down whenever we want. That's what I'm going to do
now. So we have this piece. Let's turn on increments, and let's just press E. Let's
just here, let's do that. That should be long enough,
something like that, I think. And then what I'm going to
do is I'm just going to do something very basic. So this shortcut, it
is contre R for me, which basically adds
a loop and slide. Oh, I should not do
that using snapping. It is very handy to just very quickly add some extra
loops like this. And then, for example, here, like, doing stuff like that. The only thing is that this
is an interesting one. So this one, it is slightly
different than your loop cut, but oh, no, wait, it is not. Yeah, yeah, no, wait. It
should be this one, I believe. Contra R. So it's
sort of different. The only difference that
BS is is that if I do CtraR yeah, so let
me just press this. If I do contre, I click, and then I can
immediately move it around or I can right click
to leave it in place. However, this one,
this loop cut, you need to click and then
you need to hold your mouse, and then you need to drag
to put it into place. And then as soon as you turn off your drag, then
it will place. It is a very small difference. I didn't actually realize how small of a difference
it really was. However, if you
want to use mine, you can find it only
in your preferences you keep up and it's called
Loop, cut and slide. This is the one that
you want. This one, there is actually
no menu for it, so I cannot actually
add it into, like, my quick favorites
or anything like that. So, just keep that in mind. Also, by the way,
all of this stuff, it will go a lot faster when we get more into, like,
all of the modeling. In the beginning now,
everything will just go a bit slower in terms of
me explaining things. In any case, what
I'm going to do is I'm just going to
go ahead and select all these pieces and just press delete and just
delete the faces. And then what I want to do is I just want to go ahead and select these two Q bridge edge loops. Do the same over here, cube,
bridge edge loops like that. So now it's just
to indicate that there's like a different
plank over here. To be honest, when I
really look at it, it actually can be
a lot thinner even. And now what I'm going to do is I'm just going
to go ahead and I'm going to do a contra
which will place a loop. Now, Coldsig if you right click, you can actually set
a number of loops. So what I can do is I can say, like, so I'm having a
look at my reference. Let's do something like this. And then I can just go
ahead and I can go in here. I can then Alt Shift, double click or Alt Shift click on here to
select the loop. Oh, still need to get
used to that shortcut because in other programs
as control, double click. And then you can do
like a contro B, which will basically just
place like a bevel like this. And then if you
do like one extra ControR also place an
edge on this side, and it also place an
edge on this side. Now the nice thing what I can do is this is just basically me indicating if I also
place one over here, that all of this stuff
can go backwards. So I don't think that
we need these pieces. So if you just
click Hold Control and click on the
face down there. Yeah, I know about that one. I often forget about that
one, but now I know. And oh, you know what? Actually, that's double as long. So yeah, well, it does
not matter for blockout. In any case, for blockout, I'm just going to do E,
and I'm just going to, like, extrude this in to a point where you
cannot see it anymore. And then I'm just going to
also delete these pieces. This is basically the
goal. It's just that it kind of looks like there's
something going on there. Of course, it's not evenly
spaced, but honestly, I could not care less for something like this
because it's a blockout. So this one is going to
be Walkway straight, and we can now go
ahead and go in here. Store window, let's
reimport that. Maybe move that back a little bit to make sure everything
fits nicely. And our walkway. See, it's just that we have an indication that this is going to be our walkway
and that it has, like, these kind
of pieces in here. Okay, let's have a look
at our asset list. So dash, B, blockout, done. Dash, B, blockout done, double sided window
or double sided wall. Yeah, we can do
that one. That is basically like this
kind of wall over here. It will just have two sides in case you can never
see the other side. Of course, you could just
technically use two planes. But I think for this one, it's just easier if we just
do like a double sided wall. And the way that
we're going to do that is we grab our wall short. We duplicate it
Contra C, Contra V. Right click New collection. Double sided. Wall throw this in here and now we can turn
off our plane while shot. And then for this one,
all that we need to do is if we go ahead
and go into tab mode, let's extend this one backwards. So let's hold E and just
extrude this out backwards. For the thickness, it doesn't
need to be too thick right now because we are going
to improve this later on. So for now, actually, this
should already be fine. So yeah, because the
thickness does not really say anything
because we will have these beams
sitting next to it. So we can go in, export this, so this will be
double sided wall. And I know that I made
a small mistake where I accidentally did it on my wall short instead of the other one. Does that matter.
I can just swap these two around. There we go. And then turn off my well short. Okay, double sided will check. Shift A mesh and create a cube, and this one is going to be like our if we set to increment, this one is going
to be our pillar. So we want to go
ahead for a dimension of sorry on the Z axis,
a dimension of eight. Huh? Oh, wait. Sorry, this
one needs to be eight. Dimension of eight.
No, not that one. Z axis, eight, there we go. And here, let's just
boost up the increments. And then I'm gonna go
for 0.5 probably by 0.5. You know what might
actually still be too much. 00.4. Or you can just do 0.4. That also works. 0.4, yeah, that seems a bit easier. So right click New
collection, is two here, and just call this generic beam File Export, FBX generic beam. And let's just go ahead and
also set these ones up. You might have guessed
what we're going to do. We are just slowly
going to build up a few houses that we
know everything works. And once we've built up
every individual house, we can then go ahead
and just nicely organize it into folders,
place it together. These pieces over here,
we probably need to, like, a bit more work on, but that will come
a little bit later. So generic beam and
double sided wall. Let's import those. Here, so now that the metrics are done, it's a lot easier to work with. So what I can do is I
have over here my wall. I can turn on grid snapping up here and I can snap
this to my grid, and this is going to be double
sided while there we go. It looks like a the
wall is inverted. For this, the way
that you can fix it, this sometimes happens
when we extrude this because we extrude probably
the one way around. You can also see
this. If you go down here and turn on
phase orientation, you can see that it is inverted. So if you just go ahead and you basically want
to go in edit mode, press A to select everything
and press Shift N. Shift N will basically
recalculate your normals, which are often inverted
into the right location. If something is still red, you just select that one
phase, you press Shift N, and then you just press
the inside button, and that's one can
flip it around. Now we can just turn
this off. And we can go ahead and
we can export this to be double sided
wall. So there. Let's fix it. And the
only thing that I need to make sure of
this one is flat, so that it always goes
backwards because else, yeah, it just might
cause some problems. Okay, so what do
we now have here? So we need a rooftop.
We do need some. So here we have
our generic beam. Coulswig if you
select your wall, Right click on your
location and press Copy. You can grab your beam,
right click and press paste, and that we'll just
instantly paste it nicely together like that C, and that often already
does the trick. And then you can just go ahead and you can duplicate this. And because we are
using even numbers, everything is just
nicely duplicated exactly to the
centimeter correctly, and do the same over here. So that also looks nice. Now over here, we
have this wall. For this one, we can just go
ahead and weg rotate it 180. Move it over here and then
rot it and then move it back. There you go. So now we have two of those walls
sitting over there. That's also working. And
now what we can do is, let's get started a bit like
our generic roof, shall we? So for our generic roof, if we, by the way, save your blenosine, it's been a while
since I've done that. Now, for roof, we can pretty
much state that it almost always will be based upon the short length, as
you can see over here. And even if that
is not the case, we can literally just
scale up the roof. So that should not
really be a problem. So if we go ahead and let's turn on over
here while short, now, this is a tricky thing
that does sometimes happen. So we have our wall short, and then we also have
these pillows on top. But it's very hard to keep in mind like the actual metrics of our pillows on
top of the rest. And the reason why this is difficult is because
we never know where exactly we're going
to use our pillows or our beams and where not. So it's kind of like guesswork. I'm going to go ahead and create a didn't mean to do that. Shift A, create a cube. Metrics is turned
on, which is fine. So I can go in, and what I'm
going to do is I'm going to, let's see what metrics
shall we use for this? So you are 12 meters long. Well, okay, so that one is. So this one actually 12.5. So as I said before,
we are going to just, like, push it out
a little bit more. For the backside,
shall we go for eight? I feel like eight
would be logical. Yeah, because then
we can duplicate it over and over again
whenever we want. So let's go for eight.
And then if we go for so this eight is
pretty much like four. So let's go for like four. To get started with. And once you've done that, let's
go into Edit mode. Pase select and your scaled
is flat. There we go. It's very basic, but for now, it hopefully does the twig. So now what we can do
is we can just go ahead and right click New collection. Generic roof A, just in case
we want to make new ones. And what we can do with this one is I'm going to go ahead and I'm going to Maxivsd the pivot, set my snapping to vertex and
just snap it to the site, and I'm going to just
set this back to zero, zero, zero, like that. There we go. File export
FPS FBX, generic roof A. Do that one. And if we go ahead and
then also go in here and import it, Cool. It's rotated 90 degrees. And then for this one,
as I said before, it's a bit streaky to get it's like an exact lineup, I
think, something like that. Here, 0.5. Wow, that's
pretty spot on, actually. Oh, no, no, wait.
It's not spot on. But that's no problem. That's what I was
intending to have that it does not that it does not
really need to fit perfectly. So now that we have this one, it will fit perfectly
on this side. So we can go ahead
and we can just, like, duplicate this three time, and it should give us, like, a nice effect over here. And then if we grab
these pillows, that's the only thing that
I'm a bit worried about. I wonder if they
stick out or not, and else we can just
No, I see here. That's pretty perfect. Kind of like I almost feel like that I want to make
the stick out. So you can, if you want, turn off your snapping
in the scaling. You can scale this like
a tiny bit sometimes, just to give it like that
little stick out effect. Now, at this point,
you basically can go ahead and rotate this. Set this to be a
plain wall short. And now we have a
closed off roof. See? There we go. Of course, later on, we can have some small windows
in here and we can make it all look
really nice and cool. But it is already starting to look a little bit more
like what we have over here. So for a plane wall short, I feel like my roof needs
to be a bit higher. So let's make the generic roof. Let's just snap this with increments just to
keep it fairly even. There we go. Snap it one higher. So one grid point higher
and that's tight again. Yeah, see, here, that
feels a bit better. Okay, so we've done that one. We can go ahead and
go into our list. Generic Bam Bam, B. Well, short B, generic
angled roof, B. So now we are going to start
working on our shop trims, and our shop trims are
just going to be like these two versions that
we have over here, which should be quite basic. Now, what I'm thinking is so this version over here,
I don't really like it. But we also have this
piece down here. So I think I'm going to
turn this into a version, and I'm going to turn
this one into a version. The first version is
going to be very easy. All we really need to do is we need to open up, let's say, our double sided wall over
here, create a new cube. Shift A, create a cube. There we go. Move
those down here. So no, not X. I always
forget which one is. On the Y axis, eight.
Not eight, 12. Sorry. So 12 on the Y axis. Now, this one also once again, needs to be often a
little bit bigger, and also it has an ending. So because it has an ending, it might be easier if
we go instead of 12. If we go for 6.5, that extra 0.5 is that it sticks out over here
because we have, of course, our beams. And then if we do 6.5, as you can see over here,
it sticks out a tiny bit, my thought is that we have
an end and then in unwel, we simply rotate this end around to basically
close it off. So that will still mean that we only need to make one piece. Now, if we go in here and
let's set this to 0.5, I feel like 0.5 might be
like pretty decent metric. I don't worry too much that
it is not offset correctly. I'm just having a think about
how thick this needs to be. So we are basically
going to judge. No, wait, we need to
have it based upon the thickness of our beam. That's it. So our
generic beam over here, let's go ahead and turn
off our double sided well. It needs to be based Perfect. Oh, yeah, so that's
already good. Okay, great. Okay, so we got this
piece over here. Now, in terms of, like, our height, what
we're going to do. So I'm basically going to,
like, draw this profile. And for that, if we go
ahead and it's right click, create a new collection, throw this in here and scull this. Shop top trim. A? Okay, so we have our I don't know
why box was turned on. So we have our straight.
I'm just having a guess about how high this needs to be. It needs to be quite high. Let's turn off
increment scaling. Let's start with
something like this. We can always change later on. And I'm just going to have a very basic profile
here just for now. And this profile is
going to be a contre R looks like it has like
around here where it basically just you sticks in calls R over here. And then it pushes out. And then for the ending. So for the ending, let's see. What kind of ending would
be interesting for us? Can we just, like, push
this out like this? That might just be enough
already to keep it quite basic? So we now got
something like this, and now what I want
to do is I just want to have it on both sides. For this, what I like to do is my pivot point is still at the center,
which is pretty good. I like to go down here into
my modifier properties. Art modifier and I try and I always art just
like a simple mirror. The mirror, it will
basically flip it around. And because our Pivot point
is still in the center, it will just do
like a good flip. Now, also go ahead
and turn on bisect and set your merge threshold
maybe a little bit higher. Turning on bisec
basically means that it will not just keep
it as two models, but it will actually merge
these models together. You can see that
it works when it has a perfect center line. If your PIV points not
exactly in center, you can use the added pivot as you can see over here, see? To basically move it around. There we go. But I'm going to
just leave that like this. Once that is done, you can click on your modifier,
press contra A, and that will basically
apply the modifier, which means that you no longer
need to worry about it. Um, I'm going to go ahead
and just select this line, and I'm going to press delete. And this time I'm going
to delete my edge loops, which will basically just delete this one edge loop along
with the vertices with it, just to keep things
nice and clean. And that should already
be it. So at this point, we can turn off a generic beam. I'm going to go ahead and
edit my pivot and snap it to this little corner over here and set all
of this to zero, and there we go. That
should do the twig. So we have file, export, FBX, Shop, top,
trim underscore A. Let's export that, and that's the final one that we
will do this chapter. So shop top, trim A. Let's go ahead and
import it in here. And we can start by just moving it in here to make sure that it works. Seems to work. We're not going to use
snapping this time, we're just going to
have it over here. And with this one,
as I said before, what we're going to
do is we're basically going to kind of, like, move it out like that. And then if we go in and we
can just Consul C contro V, rotate it 180, and now what you can do is if you
go ahead and you hold V, you can actually snap
your piece to erzi. So we can actually snap this
exactly to this erzie and that we'll just make
sure that they are perfectly aligned and they
are perfectly flowing over. At which point, we can just
go ahead and make this more nicely in the center like
this, and there we go. So now we have this shop trim. And what I was going to try
is to then duplicate this and hopefully also have this over here or we might want
to do like yeah here. So we might need to do a little cut or
something like that. In order to make this work or at the very least like
do like a scaling, but that's something that
we can do at the very end. So when we have a final match, we can simply cut off after
we've done all the texturing, we can just cut it off,
and that will kind of, like, make it fit over there. And there we go. So
that is going to be our first little
window over here. I just want to make
sure, so yeah, as you can see over
here, the roofs, they are a little bit closer. I actually quite
like that because it feels a little bit unlogical to me that you have such a
big slab of yeah, see, it just feels logical to me that you have a big slab of boot with all of the weathering
effects and everything like that, that it would work. So I'm not sure if we can maybe make this
one a bit higher, because we need to make
wall version anyway, and this wall version
is going to be like cut in half, basically. So I wonder if I feel like it would make more sense if
I do something like this. Now, for this wall version, as I said before,
we cut it in half, or what we try to do is we
can try to basically do this, where we move this
one up by default. Until nicely fitted. Then we turn on grid snapping, and then we basically
move it down. Doing this technique
might sometimes also be handy for when we want to
move our walls up and down, but it kind of depends. So I will make a shortcut, like a half cut anyway, but I will do that
in my next chapter. Save scene and let's continue
to the next chapter.
6. 05 Creating Our Blockout Pieces Part3: Okay, so we now got a pretty basic looking thing done, so that's
looking pretty good. Although it feels
a little bit high, but that's something that
is mostly just angles. So what I'm going to do
is I just want to go ahead and see if we can also create like this little bit next there just to see
how everything works. So, let's say that this
is a real case scenario, which will become later on. We would most likely,
like, duplicate this. And then it would just be
like we would probably, like, grab this wall over here. Here, see, and
that's where we get into trouble, as you can see, because we do not have a
short piece of, like, a wall. So that's why I'm testing. Basically, what I'm
talking about is if we would grab this piece over here, what we would need
to do for this one is it looks like it is a
little bit further back. So we would go in and we would, like, push this further back in. Now, I can see
that there are now a few problems
that we would get. So we can go ahead and do this. We first of all, need to
probably, like, move this piece, also back so that we have
a little bit of yeah, that we can, like, play around with things
a little bit more. Now, next thing is that this
one would go halfway there. So we would need to, in any case, have
some kind of, like, a system where let's say
we push this one up here. And then once we've done that, we can see, like, Oh, wait, we need to push it forward because else it will be
looking strange in the roof. And then I guess that we can go ahead and we can
move this down here. So that would work. And
then if we grab this piece. So maybe we don't have a
problem now that I look at it. Yeah, maybe we can
actually make this work. So we say, Okay, so I want to
grab this piece over here, and this is going to be
the little roof piece. And that kind of
just sits in there. And then over here, what it will do is it would
most likely just turn back into a normal bow so yeah, actually, you know what?
This works pretty well. I did not expect it
to work this one. It's just like they're
pushing it out. We need to be very careful
about this that we do not accidentally or that I do not accidentally
mess things up. Of course, I'm not saying
that you will mess it up, but I'm quite prone to messing
things up quite quickly. So like I turned this into
like, Oh, no, you know what? Let's keep this
like a short one. So this is going to be
like a little short piece, because we can later on
just use these pieces also. So this would then become
like a short piece. And then down here, yeah, it's more like a
matter of if you want, you can rotate this 180, move this back and
then move it in here, and then have it just sitting
like in front of that. So that can work like that. Do we need tops
for these pieces? I wonder if we need to have a
specific flat roof in here, or if we will never
ever see that anyway. I don't think we will ever
see that unless we do, like, a flyover piece like this, which I guess if we go
high, we can make that, but let's just make
that in like default. So you should use like a default shape like a
cube in order to do that. In any case, let's say that
we now have this piece, and then over here, we select, let me just select these pieces. Okay, so we place some of
these pieces over here. We would grab one of these shapes, and this
would become like back. And then later on we will do is, we will populate this with
small little windows, maybe like a back door or something
interesting like that, and then everything kind
of fits all together. So we have something like that, this and that would
work quite well. Okay, so that works quite well. So for this piece, in order
to basically push it back, I think this is always
clipping inside of a building. Because this clipping
inside of building, we do not have to do this,
but we can just go in. And if we grab our
walkway straight, we simply also just want
to move this a little bit more if we just oh, sorry. If we just go ahead and
add X, select this, turn on my snapping
to incumbens, I'm going to go maybe
like two back like this, so it will basically be
clipping into a wall. And because it will be
clipping into the wall, we just won't be able
to see it anymore, which should hopefully give us a nice look. So while
quite straight. So if I now go ahead
and I can go in here, while quite straight and
re import, there we go. So we basically get like
an effect like that, which should work pretty well. And then what will happen is
there will be like a door. So this is another
one that we can make. So we have a door with a window, but I also wanted to make
like a door without a window. Um this door feels
actually, no, no, wait. That feels correct. In
this specific context, it doesn't feel very nice, but that's something
we can also work on. So let's say that we
have, where are you door? Door A. Let's duplicate that. Let's
add a new collection and artist to here and call
this door score B, and door B will just
not have a window. So door B will basically just
become let's go add mode, Mold X, let's delete this stuff. Oh, turn off door A. There we go. So, you know what? I'm going to also delete
this stuff over here. And I'm just going to
go ahead and just going to Oh, turn off snapping. Yeah, let's do
something like that. And now what we can do is
we can always go ahead and we can select these pieces, Q, bridge edge loops. There we go. Sim Easy does it. So export FBX. Door underscore B. Let's export that one and then we can go ahead
and just in here, we can import door B. That one is now also sorted out, and what we can do is we can replace our door A
with our door B, then this one
would, for example, become a door here, and then it has a smaller, let's do a smaller
window for this one. We got a large windows. For blockout, we can pretty
much just repurpose this. So we have our store
window over here. Let's duplicate this and
let's start actually with a new collection. Artist studies. Call
this store window white because I was going
to make one of those. And then if I just go ahead
and ld X and select this, incumbents, one,
two, there we go. So we have like a store
window white that we can use. So that's already one, FBX. Store window white. Over here. And then what we're
going to do is we are going to go back into our store window again,
CantleC conto V. And this one, we can add
a new collection and call this one small window. And if we ever want to,
we can also do actually, let's do small Window A so
that if we ever want to, we can also have multiple
variations of this. Now, for our small window, what I'm going to do is it's going to mostly be used
for, like, stuff like this. So for now, I'm just going
to leave the same profile, but, of course, I will
not use this profile. So let's just move the top down Let's move the
side in a little bit. There we go.
Something like that. So just going to be
like a smaller window. So file export FBX, and this one is going to be
small window under score A. And we can just go
ahead and go in here, store window white
and small window A. Let's track those in here. Import. There we go. So that's pretty good. So
now over here, we can do, like, you know, let's do like a store
window white for this one. So we have like a
store window white, which I need to make a lot
lower in terms of over here. Oh, yeah, because we don't have a window,
that's why it's like that. So yeah, we need to go ahead
and store window white. We need to go in here. Actually, no, always do
it from the top because else becomes a bit
more annoying. Here we go. Let's
make it a bit lower, and I'm still using increments. I like to use
increments wherever I can just because I know
that those are even. So just in case it's just like a good practice
to twine keep everything a little
bit even move this up. Probably up until this
point, there we go. So we have a store window white and it has a little
piece over there. And then what we can
maybe do is maybe what will also be cool
is we duplicate this, and then we grab our small
window A and just have, let's see if we do
this, a small window A, I'm going to make
them a bit wider, but then a bit smaller. I think that looks a bit
nicer. So let's go in here. Let's not to
increments this time. Let's make them a
little bit wider and then a little bit smaller. Maybe it's a bit too much. Yeah, let's try
something like that. So export, small window A. Here we go. So that
already looks quite nice. So we got now two
pieces over here. So that's pretty good. Okay. So the next one that
we're going to do and what also would be cool is if we sometimes do
like a little step. We can pretty much
do that because we are going to now because of the new techniques that we're
going to use where we are going to cut out our doors, we can later on also just like always just
whenever we want art a little step and just
make stuff a bit larger. Okay, now the next one would be that we
are going to create a longer building and
this longer building, it will not so much be longer, but it will be higher located, and then we're going
to start working on our balconies and everything. So if we go in here, oh, yeah, we need to also create
another rooftop trim for that door, slash B, white, slash B, small windows, slash B. So we are slowly getting there. Walkway straight, slash B. There we go. Okay,
so for this one, is it the same width? Yeah, this one feels wider. So this one is like a wider one. For this one, I just want to see how much variation there is. So long thin, long,
so there isn't. There's a little bit of
variation in between the pieces. I do want to see if I can get that same variation sort of in here just because it will look nice if we just add
that extra variation. So let's see. So now we have this piece. Can we maybe, like, cut it in half that we have like
an even shorter piece? That might work. We just
need to be careful. It might work, but we
will need to be careful. So if we go plain wall, short, contro contro vis
Expect a number. There we go. That
works. New collection. Plain while extra short. And let's art this one in here. Let's turn off the original one. Okay, so plain while extra short is basically going to have a contra R click like this. And then if we
just simply delete this phase, there we go. So this is going to be plain
while extra short FBX. Plain will extra short. I could have done naming
a little bit better, but that's not too
big of a deal. It's input as, okay, like this. So we have that one input. And yeah, so this is basically just going
to be a process. It might take a while. So it might take us a couple hours. Probably if we
also want to place everything together and
place everything into place, but in the end, at least we
have we already have a ton. So all we need to do is
turn it into finals, texture it, and then we
instant already have it. So it is actually
really important. So we got these pieces. I'm going to make this
piece a bit longer. And then I wonder
how that will work like over here with these. So if we go ahead and
turn on more snapping. So let's say that
this piece will become a bit higher like that. Over here. So this one is
still sitting next to it. So if we go in here, we grab these pieces over here. If we then grab these
pieces and move them back, but turn them into plain while extra short, here we go see. So that's how we can
add an extra piece. The only thing that
I need to be careful about for the balcony pieces, I probably need to make
them as short as this. So you kinda want to
make them as short as the shortest piece that
you will most likely use. So we got this piece over here. It looks like it's going backwards a little
bit more again. So this is an interesting one. This This is one where we kind of need to
decide how far back do we actually want to
have all of these pieces. So first of all, I'm going to go ahead and I'm
going to move this up, and I can basically
move this up. As long as it
doesn't get higher, then this piece over here, it should be fine, although that might actually cause
problems in the end. So maybe just move it down here. So that is not high enough. If it is not high enough, then I rather just
want to go in here. Let's see, I move this
back. I make this. I know, you know what,
because we're going to have a double window. So
maybe we do this. We then grab this one,
but now you can see what will happen
is that if we grab this piece and we
turn this one into our double sided
short over here, as you can see, it means that we are missing
a while over here, and that is always a
bit annoying plus. Is it too high? No, you know what? No, the
height is fine. Okay, so the double sided
window or double sided wall, in this case, does
not technically work. However, what we can try to do is we can tie them for
this specific piece, duplicate this over
so that this at least fits together nicely. And then for this
double sided window, which by the way, oh, no, it only feels like
there's a loop. We can later on grab this piece and we can
literally rotate it. Move it like this and then
place it into location. And I kind of want to try
this anyway because I want to see if this
works fairly well. We might actually be
able to also save a little bit of time by just not making this wall over here and just turning it
into another plain wall. So over here, that does work. I just hope that it will also
work when we actually have geometry on here
because this will not be a flat wall when
we actually work on it. So let's say that
we got something like this going on over here. Now, in the back, we will have a wall over here. Well, roof over here, I should say, a roof. And what I'm going to
do is I'm going to move this down here, and I'm just going to basically see, I'm going to move this up. And I want to basically
scale this out like this until it hits the back
and then move this down. And that should work. So even though we
have the scaling, it should still give
me decent snapping. It does not give me de snapping because I did not do
the scaling exact. So let's do a scaling
of 1.5 exactly. Oh, you know that, if you just press this
little lock and then do 1.5, you get an exact scaling
on every single axis. Here we go. And that
should hopefully matter and give us
a better snapping. So he's an out snap, so unreal just likes even numbers when we work with
snapping and everything. So we got this piece. Now, if we go ahead and now
duplicate, for example, this side over here, We
can move it down here, and then we can turn
this into our plane while long like that. And then we have this one. And then over here, we can
pretty much do the same. And I know that you can
technically just art like two. L on your plane wall, you can technically just
art a wall on every side, and then just, Yeah, so you can add a wall
on every single side. So on this side on this side, so that you do not
need to rotate it, but it will add extra
expense that will be not really useless or useful. Now, having that done, I'm going to turn off my grid snapping, move this one down so that it actually fits with the wall. And see. There we go. Okay, so
that looks pretty good. So let's get started
well, first of all, these pieces, we
need to probably cut one in half so that we
have an extra piece. But let's get started
with the top trim. For the top trim,
we're going to go for a little bit more
of an ornate one. So let's do that
one, and then we can close off this chapter. So if we go ahead and use our, where are you, by the way. Was this one? Okay. So this
one was like a nice length. So let's try and get
roughly the same length. So if we go in here, we
want to turn on just like a generic beam over here. And shop trim A, okay? So we got that one. Now for this one,
I actually want to use a slightly
different technique, which I will still
be a blockout. So basically, if we go in here, so if this is the beam, then I can actually turn off the beam and
can use this one. If we press next to the one, the little button
and go to, like, our I'm clicking too fast. I always do that. Go
over here to this view. What we can do is we can
actually create a plane, shift a mesh plane. I know that Blender
has a spine system, but I also know that I just, it is not useful for me because it's just not good enough for what I'm
used to, at least. So I have my plane over here. I'm going to snap using
increments like this. And then what I want to do is if I just go ahead and
get started with it's going into vertex
mode, move this down. Oh, make sure to press Alt X that you select
everything, move this down. And now what you can do is
if you move this down also, and I'm just having
a quick look at my reference and maybe
move it out a little bit. We can now go ahead and
we can go into edge mode. And if we just quickly
rotate around, let's grab this edge over
here and just hold E Okay, maybe it's easier if we do
this into our front view. So basically, we're all E, and then we move this one down. But I'm more focused on
this edge over here. Yeah, so I'm just making sure
that I have it selected. So let's move this down over here. Now,
let's move one back. And now I'm just going
to basically guess what it's going to look
like because I don't have enough resolution
to actually know, but I'm just going to
make a rough guess, and then when we are actually,
sorry, I keep doing that. When we are actually
going to create a final, then we can just go ahead
and mess around it. The nice thing about this
that I can just press E, and because it is
snapping to the grid, I can simply go
ahead and I can snap this until I hit this
high point over here. So what I can do is
I can, for example, snap this over here, do
something like this, this here, let's do something
like like over here. Actually, let's also
now select both of these and just move them
out a little bit more. And then what I can do is
I can grab this one and I can do one extra E
and just move it down. See, and then I can just
very quickly create a very basic looking
profile like that. At this point, you can go ahead
and for these two pieces. You can just press Q, merge
at Center, which I added, but you can also go to Mash, merge at Center and you
can right click and, of course, add this one
to your quick favorites. See, and that one
goes quite quickly. At this point, we can turn
off our increment snapping. We basically move
this over here, and now for our thickness, we simply add, once again,
our mirror modifier. We mirror it on the Z axis
and also do a bisect. And this time, you can see that my pivot point is not
in the right location. So I can go to my Maxafs
tools, press Added pivot, move it out a bit, and often
it is quite sensitive, so you need to not
move it out too far. Like this. And that's
looking pretty good. So at this point,
we can just press Contra A on the
modifier to apply it. With this done, what you
can do is you can go ahead and if we just turn
off our shop trim, we can select these two
pieces and just do, delete and delete the
edge loops this time. And now, if we go
to Vertex mode, select this side, Shop trim A, I want to go ahead and
I want to move this. Up here. Let's see. Is this one already at 000? I just want to make extra sure by turning
on my increments. There we go, see,
it was not at 000. So we got this one. Let's turn off shop trim A. And what I'm going to do is, it looks like it only
at the very last bit, it is actually pushing out. So it looks like it
kind of just looks. Well, actually,
you know, maybe we can do it like one further. Let's do this. No, no, I
don't like that, actually. Let's just do something
like this. I'm sure that they would not
spend too much time on the woodwork because
you're in the white best. There's a lot of
dust and everything. You're not going to
make very amazing ornate looking designs
or something like that. So then we go ahead and we just shift click and you
can see it down here, of course, hold control, and then then the
select these two edges. And now you can cue and you
can bridge the edge loops. There we go. That
should do the trick. Maybe for good measure, we
want to do the same over here. So we also want to do a bridge edge loop
just in case in here. And we can go ahead and we
can art a new collection, and we will call this
one Shop top Trim B. And then what we can do is
we can file export FBX, and this one is going to
be Shop top trim B export. Let's go in here and
let's just import it. And the nice thing
is because it's all the same metrics compared to the other shop top over here, we can go ahead and
we can use this one. Now, as we know, this one
is a little bit longer, so that's going to be
a bit interesting to see how it will
behave and if we can maybe use some
small scaling or if there's anything else very
specific that we need to do. However, that is not
really something for the blockout because that's
more for our modeling tools. So if we go ahead and we
grab this piece over here. We can now just
swap these around for Trim number B, you
can see over here. I feel like trim
number B does actually need to come in a little bit, so it does not need
to push out as much. So if we go in here
and let's see. Let's move this out. Yeah, so we need to have an
extra piece in here, we can try and duplicate
it and see if it, for example, does not
show the clipping as bad. That can sometimes work.
However, I'm not sure of it yet. That's something that we can figure out a little bit later. For now, over here, if we just go ahead
and go to Vertex mode, select this and just
scale it in a little bit more and maybe move
it in a little bit. There we go, so that it's not as white or not as extended. So let's re input this. There we go. So that's
not as extended. And what I'm going to do
is I'm just going to go ahead and I'm going to just use this one version over
here. And let's see. I think we want to
scale it maximum 1.25. If you scale it
above that point, you will see texture
stretching later on. So that's why I'm not just
scaling it very far out. So what I can do
now is I can grab this piece, rotate it 180. And actually, that's
properly move this in here. Don't know where my
pivot point is located. My pivot point is not located
in the right location. Oh, yeah, here, see, it's not. So what I need to do, first
of all, is add a pivot. I need to snap this pivot
to one of the vertices. And then I need to set
all of this to 000. This is why setting your pivot point in the right
location is so important. So we can re input
this one over here. And now that we've done that, my Pivot point will be in
the right location for me to then use press V and to
then snap it together. Oh, wait, this is
because we did not do an even scaling,
but that's no problem. This is just a blockout. I do not care about that
specific thing. So we got this version. See, as you can see, we are missing a small
version over here, so that is a tricky one. We might just want to go
ahead and make, like, centerpiece that is just
like a small extra piece. For now, what we can do.
So we can work with that later on because I have a
few ideas that we can use. For now, I do this.
I scale this in, but I do this while
knowing that I will replace this because yeah, for now, it just needs to look a little bit decent. So
we got this stuff. Let's save scene.
And in next chapter, let's go ahead and start working mostly on, like, a balcony. We can already add some
windows and everything and just make this look like a house. So let's
continue with that.
7. 06 Creating Our Blockout Pieces Part4: Okay, so let's go
ahead and continue. So at this point, we do
need to make a choice. So first of all, yeah, we
need to cut one in half. But basically the choice we
need to make is I cannot just keep extending
this piece infantly. So at this point, I feel like
it is better if we would, for example, move it like this. And then maybe we'll just have something in here
to block it up. Or what we can do is
we can rotate it. And if we are very careful, we can perfectly line everything up so that
when we rotate it, we can simply move it down here and it will still,
flow over properly. However, these pieces
have also been like their own single planks, so it should not be too difficult to do
something like that. For the other piece,
however, what we're going to do is let's grab our walkway
straight over here. Let's go ahead and duplicate it. And let's add the
new collection. Walkway score. Straight score. Short. Let's turn off the old one.
And then for this one, well, there's already like an exact center
line, pretty much. So all we need to do is we
just need to go to face mode, select all of this
and delete it. That's pretty much
it for now at least. And then what you
can do is share. So again, if you
want, I don't know, bridge edge loops over here. And then if we go
ahead and let's see. Let's do a bridge
edge loop here. I don't know, it does not allow me to do
that. We can do one here. Oh, it's because I'm using
control once again to select, which I always forget that
I should will not do. Here's a good one. So over here, we have too many vertices, as
you can see, or, don't we? Oh, no, no, wait.
No, we don't mind. Just ignore what I
just said. I'm going to move this one up, however. Select these two
Bridge edge loops and select these two
Bridgedge loops. There we go, Good
enough for now. It's just going
to be a blockout. So we're going to remake
all of this anyway. So, this one is going
to be our walkway straight underscore
short there we go. So that will go ahead and
that will fix that one. So Walqay straight short. That's arts in here. Import. Perfect. And then this one, I
think we can just use grid snapping because
it should fit together. There we go. And for now, I'm just going to snap it
like this because I know that we'll place this
properly later on. So okay, so we have
our walkway over here. That's pretty cool because it's already, a little bit higher. Now, this one, we're going
to go ahead and we're going to have once
again like a door, and then we will
just have probably two shop windows in here. So I'm going to go in, and I think I will
do a normal door, so we will keep this
one a little bit lower. So let's grab like
a normal door. Oh, sorry, this is a window. I need to grab a
door B over here. Okay, so we grab a normal door. Wow, that feels really small. It does feel really
small compared to, like, what we have over here,
but I can make it work. So we'll have one door here. What if we then do like
one Yeah, you know what? I think for these pieces,
it's better if we do like a larger door because else everything just does not
really fit together properly. So we will have one
door over there. Then we will have one
window sitting here. And then my idea
is to have another one that is going to be like a store window white over here. And maybe it would,
in this case, be beneficial if we scale
this one up a little bit. So that kind of fits
together a bit better. And then we got to move it in. I don't know if exactly
that will work nicely, but we will see. So we got this one over here. Yeah, I think I might want to make my door
a little bit wider, but that's something we will balance this out a
little bit later on. So then it will have
an extra piece, and then we go ahead and
we can start by creating our balcony floor straight. So let's do that one. I want to make that one based
upon the shortest version, which means that it will
become this length. So if we go plain wall
extra smile short, that's art a cube. And this cube is basically do incremental snapping over here. Here, let's see. So this cube, it's going to be let's do. So normally it was 12, right? This one is like 6
meters, I believe. Yes, 6 meters. 0.5.
Oh, no, sorry. This one needs to
be three, actually. I think that's one
I'm just guessing. 0.50 0.4, maybe. So 0.4. And now we basically
to turn over snapping because
we can no longer do incremental snapping. And what I'm going to do is I'm just going to go ahead and I'm going to go to my Maxafs tools, add a pivot, snap the
vertices and just snap it down here and then
set all of this back to 000. So that one works like
that. Okay, so let's see if that balcony sticks out far enough. So we can use this one. We can add a new collection. Call this one balcony on
the score floor over here. Select it and export this. So this will be balcony
underscore floor. Okay, let's see. Let's see how we're
going to do this. So we will have a balcony
floor to rotate at 90 degrees. So this balcony
floor will basically sit up until probably
this point over here. And now I just need to
guess how high it will be. I think this high
should be fine. Now we are basically
going to just duplicate this over here. Okay, so it looks like
that we need to have a balcony floor like
this after all. But that's no
problem. And else we can always do like some scaling. Okay, so next thing is
that when I look at this, that is a very short area. So we want to make this
one a little bit longer. So let's go ahead and go in here and turn on our
grid snapping again. Let's make it too longer. Let's see, because
they can be longer. It's not like it
doesn't have supports. So that should be fine.
So let's try that again. R Import. Uh, here, you. I want to grab you and
place you over here. Yeah, that seems like quite a nice area so that you can walk around
and everything. So that's pretty good.
Now, I'm already going to quickly place some
of these windows over here, and these are going to
be our smaller windows. So it will be store window, no. Oh, yeah, wait, here it is. Small window. So we
will have this one. And actually, you know what
this one kind of like, I can use a bigger window. When I see this, I do feel
like it can use some windows, but I think that we can
use upscaling for this. I think we can basically
just scale this up to basically get it to our correct size
without it feeling wong. So we got this one. Let's start by just setting one in the center because
we want to have three. So one, two, yeah, see that feels a lot better
if we do something like that. Three, so we got
these three pieces, then we have this
one around here, and then we have a lower
one sitting down here. So that feels pretty decent. Only I want to make my
door a little bit wider, which I'm actually I've already mentioned it
like three times now, so I'm just really
annoyed by it. So what I'm going to do is
I'm going to go to my door A, and I'm just already
going to do that now. So let's set this to 2.5 here,
just a little bit wider. Doesn't need to be too
precise and door B. Let's do the same like that. Okay, so first of all, let's go ahead and
export door B. And now we can also
go ahead and we can file export FBX door A. See, that feels a lot better. Yeah, here, that feels a
lot better. And it doesn't. And it also still does not feel too big or
anything like that. Okay, perfect. So we got those
pieces, so we got those. Now what we're going to do
is we are going to work on then our balcony fences. So we've got that one done. Yeah, so our balcony fences. And for that one,
I'm going to make it very easy right now, yeah. Let's just make it
like a very basic one. If we open up our
balcony floor over here, right now, the size
is one, two, three, four, five, one, two,
three, four, five, six. Okay, so that is a little bit unfortunate that we cannot
just go six by six. Yeah, no, we can't can't go six by six. That
would be too much. In that case, go in here, shift a mesh and just
create like a basic cube. And we're basically going to just move this cube down here. In terms of the size, I kind of need to guess for now and then I can later
on just move that properly. So let's do something like this. And basically what we'll
do is we will have one. Let's see. Let's have one
large post on this side. So this post just press a little blue angle to basically set it into
the right location. And I will go at it and I will move this properly later on. So we will have one large post, and then what we
have is we will have one much thinner post like this. And this post is basically just sitting probably this distance. And then finally,
we will also have another one that if
you hold control that is rotated, like this. And we just move this down. We grab this side and
just in increments, just set it to roughly
those increments. And now for this
piece over here, what you can do just
to make it even is you can alter a modifier and you
can add an array modifier. And if you go ahead and
set this modifier on the y axis to like two or more, until we have a default spacing, so maybe like 3.5, and then we can just
go ahead and we can set how many pieces
we want to have here. Let's go at for nine
because we need to leave some space over for this
large piece over here, and then you can
press Control A. At this point, the
balcony floor, we can just move down. These pieces over here, what
we can do is we can press Control J to basically
combine them together. Then you guessed
it, add a pivot, snap to vertices and
snap this one over here. Turn off at the pivot again, and now we can go ahead
and in our transform, we can set this to zero, zero, zero, and we can go
ahead and use this one. So right click New collection. Let's call this
collection, Balcony, underscore, fence.
Underscore straight. We can go ahead. And what
I actually want to do with this one is I actually
want to go ahead and I want to go to press three. Oh, I don't have my
shortcut set up. So there is this shortcut. If you set this up, if
you go preferences, key Maps, and just
press Select Linked. And we want to have
this under our mesh. And here we have Select Linked, and okay, right now, it's L. I want to actually set this to I think
it's this one, right? Yeah, I think it's this
one. I can double check. So if I press L,
no, Contra L. Okay, so Contra L is the one because, yeah, they have the
same name, of course. Select Linked mesh Control L, I want to set this to
four because I'm used to using four to basically
select everything like this. And once you've done that,
you can go ahead and or you can press P,
which will separate it. Or what I like to
do once again is I like to mesh,
separate selection. Yeah, let's tie do quick
favorites because I am stubborn and I just
want to use menus. There we go. And the reason I'm doing this is that this one, we can do, like a simple export. So this will be balcony
Balcony fence straight. But then what we can
do is we can also just select this single
one and export that one also and call this
Balcony fence beam. And doing it this way, we don't need to make
any extra models. We can just quickly
grab that one model, and we have two for
the price of one. So if we now go ahead
and just import these pieces in here, Import. Here we go. Nicely
throw this one in here. Rotate is nine degrees. Oh, turn off my grid snapping. I can't really use grid
snapping right now. And for this stuff, we don't
really need grid snapping. We can just go ahead
and we can nicely move it until it
all fits together. And then over here in these
pieces, well, actually, for these ones, we
can just do this because it needs to go
down in here anyway. So let's do this one. But then over here, if you want, you can go ahead
and turn this into, like, a balcony
beam, and you can have a nice closure
off like this. So you can just kind
of like close this off as if it is going
inside of our mesh. And then over here,
this one is a bit more tricky because we already
have a tick beam here. So we kind just want
to go ahead and invert this one. You can see over here. Okay, so that one
is a little bit showing up near the end,
which I don't like, so let's see if I move this in, I need to kind of move
this one in over here, and then I kind of just
need to scale this in. You won't notice
small scalings like that. Oh, but I don't like that. So let's move this
in a bit more here. But then if we just scale
multiple of these a little bit, so we move this one in and
we do the same over here, that kind of all evens out when you do
something like that. And then you can use like
your balcony pole over here. Like that. So as you can see, now we have a balcony. And then what I can
also notice that, okay, so this balcony
is a little bit high. Not too, you can see that your arms need to be or you
need to be around your waist. So we need to go a little
bit lower for this. But for this, we
can just go ahead and we grab both of these, go to added mode, select all of this, simply move it down. And then if we go ahead and we just go ahead and export it, so balcony fence straight see, that works a bit better. And then we can
also go in here and just grab this single one again, File Export FBX
Balcony fence beam. Like that. And we have ourselves
a pretty good balcony. Okay, save scene. Now, those beams that we have, so those extra bits over here, it would be nice if
we can just reuse our generic beam for this and, like, maybe scale
it down a little bit because once again,
it just saves time. The more that we can reuse, the more it will
simply save time. So if I do this, and also, we might later on need to also make a nicer
version of this. I think for this one, I also I need to start
by moving this down, and I just need to scale
this in because it's not going to work else
the way that I wanted to. Okay, so we got these ones. I'm going to make it a
little bit thinner here. You can just scale
it like in blender, you can also scale it on
these two axes simply by pressing the little
square in between. So let's say we have
something like this. Let's move it. And
unfortunately, we don't have an array mode, so I kind of just always do this where I just
split it up into two. And let's see. No, that's not too bad. That actually does
work quite well. So we can go ahead
and save scene. So over here, what
do we have now? Balcony beam, blockout,
balcony straight blockout. The angled ornate overhead
would be next one. But let's first of all
see if this all work. So we have our roof. But yeah, actually, our roof is fine. So if we have these pieces, I just want to see
if everything works. So there's quite like a
flat piece over here. We will have some text in
here just to fill it up. We have a balcony
sitting over here. Oh, sorry, I'm looking
at the wong one. Yeah, so we have a fence here,
and that is pretty cool. So yeah, you can
imagine, like, a cowboy. He's just, like, kind of, like,
walking across this area. Maybe we want to move
this one bit forward. But we are going to
later on split all of these houses up into their
own little house that we can move around and we can place and everything and just have
everything look correct. So that's pretty good. I'm
going to save my scene. What we will do in the next chapter is
we will get started by doing this tilted overhead
that we have over here, do some smaller pieces like over here, our
stair and everything, and then just make sure that everything works quite
well and also maybe, work on, like, a
larger building. So let's go ahead and continue with that
in the next chapter.
8. 07 Creating Our Blockout Pieces Part5: Okay. So what we're going
to do now is we are going to work on our let's see. So we've got those pieces done. Yeah, so our angled roof. And then yeah, then it's just a stair and then
we are printed my son. Like these extra pieces, I'm not going to do a
blockout of those just yet just because they are very basic and they're
standalone props. So we'll do that later. Okay,
so for our angled roof, do we have maybe a little bit better reference
for this somewhere? Yeah, like here in the back, it sort of looks like, Oh, well, yeah, we can, I
guess, use these ones also. But I don't really want to use three D reference just because I don't know their
logic behind it. They might have had different
logics behind things. So maybe, like,
something like this is, like, quite a cool
reference over here. Um, yeah, it just means that this is going to probably be
like its own little pole, something like that,
because we need to be able to make
this sort of modular. So let's just go ahead. And let's use that one,
for example, on here, just like a test, for example, or maybe on here does not
really matter too much. I'm going to go ahead and I'm
going to probably make it, probably the same
length as that. So let's just go and
try something out. I'm not sure what I want to do. So we have a balcony floor. Let's go ahead and
duplicate that. Artists to a new collection, and I will call this
collection. What was it? Angled overhead,
generic. Like this. And then for this angled
overread generic, I'm going to make
it a bit thinner. Maybe I actually do
want to go ahead and just turn on increment snapping
and I want to snap it, maybe like one furter
and then like 12 down. To down seems like
quite a nice area. And then what we
will do is, so we are going to create a few
more pieces where we will go ahead and just create
like one of these pieces over here and also
on the other side. Now, I'm not yet sure, actually, if I'm going to do
the ornate pieces. For now, I'm not
going to do them just because I'm not sure
if we even need those. That's more when we start placing all of these
blockouts into their actual position that we kind know where do we
need to add some stuff, do we need to improve some
stuff, stuff like that. So angled over at generic is what we're going
to start with, and then we will also go ahead
and just do like an yeah, like one of these and then
maybe like an extra beam. Let's do that. So we
got this overhead. Let's file Export FBX. It's generic. Let's export that. First of all, we need to make sure
that the angle is white before we
do anything else. Let's go over here.
Let's import this. Okay, let's say that
I just press height. So this is like a good use case because it's like
a default thing. Let's say we we have
a building like this, we just basically move
this up a little bit more. Yeah, it is only just above. So this is actually
the correct angle. But then I got Vox sample. Now, see, and this
is why we test, I can see that this is
a little bit too far. So let's go ahead
and let's make this. Let's see. Let's move it up once in once because
when you move it in, it also becomes a
little bit more angled. So let's try this one. And
let's see if that one works. So right click Riport Yeah, here, see, that
looks quite nice. And then if we
just go ahead, oh, turn on my grid snapping. Here we go. So I'm
just snapping this to my grid and then moving
it back into the center. Okay, so if I move it
back into the center, I will most likely
get a problem or not. Ah, yes, I will most
likely get a problem over here where we want to
have this against it. So knowing that, I probably
want to move this over here, and then I probably want to
just give it like a tiny bit. I do know that I will
break my modular flow, but I think it is better if we just give this a tiny bit of turn off grid saving,
like a scaling back. This is pretty cool. So we are almost at a
point where we can go ahead and we can actually
see if this all works. So now we can also have this
one and just move it back. Here, sees and now we have everything fit a
little bit better. So for this one, what we're going to do
is I will go ahead and already do a contre R and I'll just make
like a plank here, a plank here and a
plank over here. Et's go ahead and just do
E and then move it down. Let's see, something like this. There we go. So this
is just like a plank. If you want, you can
also already just do only actually only
select this one and then do like an E and then maybe like extrude it out a
little bit like that. And now that we know
that we have this one, now what we can do is
just for a very basic, we create like a cube. Let's see. We just
like scale is flat, something like
this, scale is in. That's a nice thing
about the Western. So all of the shapes are
often very simplistic on purpose because it's about just making everything
very quickly. So this would be like a
cube that we kind of, like, just push in here. That should be fine. So this
one will be pushed in there. And then it will
have another cube, maybe a little bit thicker, but also not as white. And this cube will
kind of, like, just sit in here. Like that. And then how this
will work is it will sit here just through
the side later on. So we can just go ahead and
do something like this. So if we have our
angled balcony, let's go ahead and create a new collection and art these to this angled overhead support. Here we go. So this is the angled overhead
support. Angled overhead. Support. Let's do
that one over here. Let's just saw where the
import this, where are we? There we go. Here we go. Let's
go ahead and Import this. Import. And then you can just
nicely move this in here and we can start by
moving this against it, move it up. Like that. Then we can also just quickly
re export file export FBX, and we can go ahead
and we can re export our overhead generic. So we got that one done. And now for our balcony, we have a square beam. It would be cool if we
maybe also switch it around for like a round
beam or over here, they also have two
different ones. So it might be interesting if we here seeing here,
they also do that. So let's just grab a basic
cylinder and use that one. So for that, I'm
going to quickly turn on my plain will shot, mesh, create a cylinder. Let's make it only like 18
sides or something like that. Doesn't need to be a lot right now just throw away work mostly. Move this like over here, maybe, like, scale it in
a little bit more. Let's move this up. Actually, we can just do
increment scaling over there. Here we go. So let's say that we have
something like this. Let's turn off
playing while short. Maybe we may move it
in a little bit more. And then what we
can do is we can go ahead and we can duplicate this. And then for this version, what I'm going to do
is I'm just going to press quick pivot
in my Maxifst tools, which will quickly just
center your pivot. And then I'm just going
to go ahead and I'm going to scale this entire thing in move it out a
little bit like this. And then what you can do is
if you go into Addit mode, you have another one, so
you have your knife tool. If you press K, you
have your knife tool and let's press Add x here. Okay, I can press my knife tool, and I can actually just
do something like that where I just basically
cut it along. And if you do that,
if you now go ahead and go to Face Select,
you can select these, and then you just
delete the face Oh, so my knife tool did
not go all the way. That's unfortunate. I would have been nice. I can't remember that normally it goes
all the way, but then not. In that case, you do
contre R. There you go. It makes no difference,
pretty much. So it deletes all of this stuff. Come on. What's going on here? Um, let's go ahead and press Shift And Shift what it will do is it will just hide
all the unselected objects. Let's undo all of
this stuff because I think something meant a little bit wong, so
let's til it again. So here, we can do like Shift Although now doing Shift
H now doesn't really make any sense because
I just need to make sure you see that goes
all the way around. So if I go ahead
and if I then press dH to unhide everything,
let's ty it again. So conto R, Thank you. Contra R, thank you.
That's all I wanted. Don't know why I
didn't do that the first time. Let's select this. Press contra I to basically invertile selection and then
delete all of these faces. And then what I recommend
here for the top, you can go ahead and just
select the top and just scale flat and then do the same technique where you
just press zero. And then for cylness
you often kind of need to here bend them
around a little bit. But we can, for example,
move this along here, and then we can say, Okay,
so this now exactly along. So I can now go in
and also over here, I can also I don't know
what's going on here. My rotate all of a sudden
decided to stop working, which is a bit strange. Oh, no, wait. It's because
I'm pressing E. Sorry, that's that's just me. It's because in object
mode in blender, you can press E to
do like a rotate. But in here, you
need to do was it. Oh, no, wait, here rotates. But it's also extrude.
That is confusing. Shifty. No, that is very confusing. I think my shortcuts are messed up because normally rotate does not show up like that. If you ever have overlapping, I will just leave this in the tutil because
it can be good. So here, the rotate sets
to shortcut E. However, that is overlapping in here. But if we then go
ahead and go to, like, our filer preferences, it is overlapping
with our extrude. So if we go in key Map, type in extrude and we find the extrude in the
addit mesh tab. So here, mesh, extrude
and move on normals. We can go ahead and, we
can do Alt E, for example. And I believe that now here,
see, now it does work. And now if I do Alt E, there we go. Then we can extra. So it's a bit
strange that I only now noticed that it was wrong. So okay, fair enough. In any case, what we're going to do is we're going
to duplicate this. We are going to go ahead
and we're going to rotate this 180. Oops. Sets to 180. There we go. And move this over
here to this side. And that should be enough now. So we got the pole over here. We can go ahead
and we can create a new collection and add
it to here and call this. What did I call the first
one? Generic beam A. Generic beam B. Why not? And then we can go ahead
and we can just export this generic beam B and export. There we go. So that
should do the trick. Now go ahead and go
in generic beam B, import U. Yeah,
import. That's fine. So yeah, this one, of course, it will just work
fine like this. I know that we've hidden it, but what I want to know about generic beam B is
that when we place it like this, Well,
that's interesting. Because of the spots, we don't need to have one very close. So we can kind of just
like, move it here, move it down, and I will have
it kind of close like this. Okay, so this will be
sitting in front of it. However, most of the time, but that kind just depends
on the walkway. Like, how is this extending? If I go ahead and, like, move these ones closer, I feel like that then this piece over here would
become a bit small. Yeah, maybe a little bit maybe make it a
little bit smaller. So if we go to the
overhead generic, maybe if we make it a little
bit smaller like this, and let's start by just
exporting this one. Yeah, so I think that will make it feel
a little bit better. So here we go. That's a little bit
close together. Yeah, okay, that feels
a little bit better. And then for these ones,
what we need to do is we just need to go ahead and
actually for now, it's fine. We will, of course, just make sure that that works later on. But for now, that's pretty good. Let's go ahead and save
our scene. So there we go. We also now have
the overheads done, which is pretty cool. So let's have a look. Top, you are a blockout. So I think we've got
everything done. Oh, no, wait, the
walkway stairs. That's the one that
we still need to do. And the walkway stairs
will just be quite basic. So I'm just gonna
create some stairs, and we will just use
those, and let's do, like, four stairs or
something like that. So let's turn this off.
And for our stairs, if we just do a mesh
stood like a cube. Let's have our Where are you? Wal gray straight also turned on temporarily so
that we kind of, like, know the scaling and
everything of these pieces. I know. Let's move this. I feel like they would not leave that little bit of, like, a trim over because then
you can trip on it and fall and although there probably wouldn't be lawsuits back then, it still would be
a bit dangerous. Et's go for something like this. And then if we go
ahead and let's see, we can try to use an array
modifier and do like four. And then what we can do is, Oh, not that one. Here
we can do this. So then we kind of,
like, step it down. And if we now go to, like, where are we front view or
something like that, here, we can kind
of move this down. Yeah, that looks pretty good. Press contra A. Now if we just go ahead and also create very quickly
something in between here and in most of
time it would just be here, let's duplicate this. Let's go ahead and go
into added mode and just press four to
select this one, contra I and just
delete everything else. And now we just go
and vertex mode, I can just go ahead and I can, like, basically
select these pieces. Oh, maybe this one would
be good to snap to the ground or not exactly the
ground, but snap somewhere. And no if we go to face mode, if we just go ahead and
do like a contre R, we can place the contre R here. Oh, LTE, see? Now I now get confused about
those shortcuts again, and that's why I don't
like using shortcuts because they it's only
for very obvious things. Like, I guess extrude is
one of the obvious ones. But you've already seen
me spend multiple times where because I'm using multiple programs, it
gets quite annoying. And it is something you
should actually keep in mind, because if you are a
professional artist, you will be using multiple
different programs. Um, although the modeling
program will most time be one. So I am a special
case in that one that I need to use three
different modeling programs, so Max, Maya, and Blender, but that's just for teaching
for personal projects, although I started
with Tres Max, and I still prefer Trees Max. I'm currently trying
to switch to Maya, also for personal projects, which is just because, yeah, it I just like it. But in any case, the
reason that I'm telling this is that there is some reasoning behind not always using very
specific shortcuts. In any case, do add
a pivot, vertex, snap it to that one,
set this all to zero. There we go, and then we can go ahead and we can add
a new collection. Walkway underscore
Sir having this one, we can go ahead export
FBX, Walkway Sir. Here we go. Now if we go in we can input it and we can
go ahead and add this one. I feel like something
is here or see, I already saw it happening
that the normals are inverted. I don't know exactly why
that happened for this one, but just select everything
by pressing A in dit mode and just do a
quick shift N and doing that shift N should
immediately fix everything. So you can see it
from the thumbnail. Oh, hello. No, face orientation. What do you mean, no?
You are totally fine. Let's go ahead and press Q, and let's just reset
all of our transforms just by pressing the
Apply button tick. Are you still Ai, here. So that's a good one. So object, apply and all transforms. As I said, sometimes things
mess up a little bit, and then it's great to
just quickly try that out. So wel Quest, and
now it should work. There we go, a bit more logical. And then we basically
place this here. And whenever we have a
small stair, we do this, or basically we can just do, something like this over
here for small bits. And then if we ever
have a higher stair, like over here, we can go
ahead and we can, for example, grab this and we can
just move this out, and then we instantly
have a higher stair. So that's a nice thing
about just sinking stuff in here like that. And then over here, same thing. You can just go ahead and
just have another one there. Okay, perfect. So we
got our blockade done, as you can see, we can pretty much create quite
a bit from this. With a grand total of 22 items, that's not that many objects in order to basically
create an entire town. Of course, we might
want to change some stuff around
and everything, so don't worry about that. But these are like
our main objects. Oting to keep in mind,
for our plain walls, we have like one to
three plain walls. The double sided wall,
I'm going to get rid of. So that's one I will
actually not be using. So the double sided wall, we will get rid of, so
that's already 21 objects. The three plain walls,
you only need to make one and then the rest, that's only so yeah, that makes 19 objects, and we can reuse a bunch
of different pieces. So in the end, honestly, modeling wise, we
are pretty good. We can really put our focus on texturing and make sure that everything looks amazing and doing lighting and the
twain and everything. So this is looking great.
Okay. In the next chapter, what we will do is
I will actually leave this off by just
setting the double sided wall back to a plain wall short over here and maybe moving this forward a little bit and then duplicating it
and moving it back. Like that. And then what we
can do is if we save a sine, we can now safely remove
our double sided well, like that so that we do not
get confused with that. Perfect. Okay.
Having these pieces, what I like to do to leave off this chapter is I like
to go into my materials, right click and just create
a very plain material. So create material and
just call this like plain and this plain material will
just have like a color. So if you open it up, we will go over materials way more
in depth later on. But for now, simply right
click and trust me, add a constant tree vector, right click, type in constant, and then you can find
it and set this to be a slightly darker gray color like this, and then
just press safe. Because what I want to do is I want to for all of these pieces, I just want to quickly
add this color. Now, if we go ahead and
just open up a pieces, which I can see is a little bit annoying to do
it all one by one. But then we have full
control over all of our colors as like a base. And I prefer it that way because
I do not like to look at the squares or the
square texture when we have not yet textured anything or done any UVs
or anything like that. So I basically go in
here. And after this, it will be quite quick
to add our material. Your PC might run a little bit slower when you open
up this many models. So basically, if you now
go to your materials, click once on your plane. You can go to every mesh, and you can basically
go ahead and just press the little button, and
then you can close it. So here I can also press a little button and
it will outer save. So it's easier if
I do it over here. Close, press. Press, close, press
close, and you get it. So that's why everything
will automatically be added. And then all we need to
do is we need to press save once on
everything at one go. So just press save all, and
that should do the trick. And then in the next chapter, what we can do is we can
start by actually building our city and make it look
very nice and interesting, and then we can immediately
see what we are missing in terms of,
like, a blockout. And we can also just get a
feel for our environment. So that one will actually
be quite a big chapter. And with the chapter, part
of it will be time lapsed. So but as you can see over here, now we have this, and what we can do is we can always go in here
and maybe make it a bit darker, rest safe. Here we go a bit darker.
So now this is a little bit nicer to preview everything. Okay, perfect. So we
got all of this done. In our next chapter, I will go ahead and I will show you and we will start by just creating
this one street over here. And then in the time laps,
we will do the other street. And of course, our terrain, we cannot yet do too much of our train until we have our
materials and everything. So that will be the next focus. The next focus is
actually going to be creating all
of our materials. And once we've created
all of our materials, it's much easier for us to
then create our final models. So let's go ahead
and continue with that in our next few chapters.
9. 08 Setting Up Our Level Part1: Okay, so what we're
going to now is we're going to start
replacing our level together. So, I had a quick
look off camera, and I feel like that
these are still straight. Like, I basically all said,
like, a look over here. And yeah, so I
think it is not so much that they look like they are going a little bit bend, or maybe they go for,
like, this specific scene. However, I think
it's easier if we go for a little bit
straight and that we then, as you can see, over
here, move them back and forth a little bit to add a
little bit more interest. Also something that I
find quite interesting is that this is the one
side is fully packed, and then the other side is
a little bit more sparse. So we have some extra room for roads and
everything in that. I think that will also be quite interesting if we do
something like that. So let's go ahead and yeah, let's do that because I don't think there's much difference. It would be cool if we
can maybe later on, like some extra different
pieces over here, just like some of
these type of things. Oh, maybe something like
this would be quite cool, but we'll see how it goes. Yes. So, in any case, let's go ahead and
move this over here, and let's get started with this. So I'm going to go ahead and
let's make this bit bigger. Let's move my keyboard
registration. Okay, perfect. Now, the first thing
that I'm going to do is I need to sort these into folders because these are already
quite far done. So we can just go ahead and reuse these, and then
we can work with that. Another thing is that
I just want to have a look that when I
drag in an asset, Okay, so we want to
have our main side to this side because that makes it easier when
we drag an acid. So we just want to rotate these pieces around a little bit. For this, I should have
done this in the beginning. I should have done
everything into, like, folders into the
beginning, but oh, well. So I'm going to go
ahead and I'm going to just select most
of this stuff. And I don't think, let's select like this
backside over here. I don't think it will take
too long to select this. Yeah, let's also select the balcony or balcony,
select the overpass. Luckily, we don't
have like many, many small pieces, so this
doesn't take too long, else, it would have been a bit more annoying
and I would have probably just done
it off camera. But now, for
something like this, we can just go ahead and
do this stuff over here. I think that's one.
You can just test it by just moving it, and
then you can see, Oh, let's say we forgot something, and then we can move it again because I can't
remember Ds nothing. There we go. And once we
have our house selected, we can just go ahead
and go up here and create a folder and call this house underscore
01, for example. And the easy thing is that
now I can turn it off. So that way I can just go
ahead and I can go in here, and all I need to
do is do this one, and then the other one is automatically everything
that is left. So that's why it doesn't take
too long to select this. We don't have that many pieces. Uh, oh, yeah. It's a bit
difficult to see sometimes, because everything
is still gray scale. Yeah, but we're just going to do stuff like this where we
move it back and forth, just create some interest. And for the rest, we
will also just make use of simple cubes to basically already start kind of like
map out where we want everything to be.
So let's move this. Oh, is that everything already? Okay. So this one is going
to be house underscore 02. There we go. We can hide this. Now, if I just go ahead and just grab all of
this other stuff, which is our landscape,
our lighting, our mannequins, Well, I will remove those mannequins
later on our sky dome, our skylight, and our
volumetric clouds. And I'm just going to quickly throw this into foll
called lighting. I know that not everything
here is lighting. The mannequins, we can go ahead and we can delete for now. But this way I can
just turn it off. Oh, well, not turn it off. This way, it will just
be in its own location, which means that now I can just click Shift click and
select everything else. And then I notice that this one, you need to be into
House 02, I believe. No, House 01. So where are you? You need to be in house 01. There we go. So two, one. Yeah. Okay. So we
got that stuff done, and this one will be House 03. And that's a really
good starting point. So it's quite nice. So we have tested out
our blockout pieces, but we wide away
House underscore 03. We right away
already have all of these pieces set up
correctly. Okay, perfect. So we have that stuff. Now, I'm going to go ahead and
let's make this our center point of our environment
to just get started with. So that's kind of where we
will place everything from. So let's go and get
started with House 01. This stuff is quite
easy because all we need to do is right click on it, go to Select and then
press Immediate children, and this will just
select everything. If we go to rotate, we can go ahead and just make sure
that snap rotator is on. It will just snap
everything as one object. So we can just nicely
snap this 90 degrees and then we can I think this is
actually a pretty good spot. So we got this one over here. As you can see, it does
feel a little bit long, but that's something
that we might just work with once we
actually have a camera set up. So we got that one. Now let's
go ahead and go House 02. Right click Select Immediate
children, 90 degrees. And then for this one, it looks like that as
we've done before. So these ones will be
pretty much the same, but here we go. And I have my snapping
turn on still, so that makes all of the
pieces quite easy to move. See, this one, we already
had, like, interlocation. And then how 03 was going to
be like this one over here, which I believe is also fine. So I guess we could have
just rotated everything, but I wanted to have the option to move it around if needed. So that's why I didn't just
rotate everything in one go so that now I can just
go ahead and I can also go, like in here and I can see, like, check, like what I
want to do with this stuff. Let's see. So we are clipping this in? Yes, we are clipping this
in. And I don't know. So if we go over here, Let's have a quick look
here you'll see because you sometimes see that the walkways, they are actually in a
slightly different place, so that might also be
an interesting thing to have that the walkways over here are also in
different place, and then we will have a small
walkway sitting over here. So let's say something like this actually
looks quite cool. And then, for
example, over here, what you can do is
with this walkway, you can rotate this one, and you should be able to
just move this one in here. Let's turn off snapping. Move it a bit closer. There you go, see. Here, that already starts
to look quite cool. Okay, so we got this
stuff ready to go. That's all fine. Let's see. So where are you? There you are. Let's go with, like,
the one next to it, which is just, like, a little bit lower,
but pretty much around the same
height. Let's see. One large store window, and for the rest we make
up whatever we want. So for that one, we will
use these pieces over here. So for now, let's move them. Oh, let's also use this one. Give it a second out to save. So we're going to move
these pieces around. So let's have a look. So we got this one over here,
one, two, three. I'm going to use my reference to see if there's any
more inspiration. For example, maybe
something like this that we can do that we
maybe make it like, just like a little bit lower. Yeah, I think oh, and also some of
these random trims, and then we can, like,
change the wood. Stuff like that is also
quite interesting. So let's let's keep that
in mind, I should say. So we got this one. 1 second.
I'm just having a look. There looks to be
space between them. So I want to actually I want to actually get some
space in between those. So if we go for house one, I think we can
repurpose House one. That's the easiest one
to repurpose, yes. So let's go ahead and select Oh, actually, no, we don't
even need to do that. We just need to go ahead
and Contras Contra V, and that will automatically
turn on this house. Oh, no, sorry, we do need to
select our media children, Contras contra V, and then drag those
into your duplicate. The duplicating does
work if you select the media children and then select the folder
and then duplicate. I just forgot to do that. But that's one way
that you can do this. Now, let's go ahead
and let's move this. So we are going to give it
a bit of space like this, almost like a little walkway so that people can go behind it. This would also be nice
because what we can then do, yeah, I know about this. What we can then do is we can give it some
extra side doors and maybe even a window or
something like that so that people actually do
have an interesting walk. Now, knowing this, these ones you guys need
to go into House 04. So what we're going
to do is let's delete this trim over here. Let's select all of this stuff, I know that one of them is
still located in house 01. But let's select this
stuff over here. So this one, you need
to go in house 04. There we go. And
then what I wanted to do is I need to
measure something out. So if we have this one,
let's turn on my snapping. It's nice to snap it like this, and we want to get our balcony
walkway short for this. And then we know, kind of,
like, what would be in handy distance for us to
basically space these out. So now I can go House four,
select immediate children. Now, because I accidentally
broken my Here we go. I accidentally
broken my snapping, so I do need to go in and
over here, move it by hand. But now we can see that now we have some spacing
in between here. What I'm going to do is I'm going to later on
also just create a piece and this piece will basically just
be like a plane, and that can be placed around here to fill up these
kind of spaces. I think that will be good. So we got this one now for this one, because I don't
really want to make it the exact same height. What we can do is sometimes we can just
go ahead and, like, move this down and
see if that's enough. Uh, N, this feels too basic. So instead, what
I'm going to do is, let's see, 'cause if
this feels too basic, maybe if we switch this one to our ornate looking
haprem B over here, Let's turn off my grid snapping. Okay, so this is like
the more ornate piece. And let's see. So
we can move this down up until the
very end, like that. There we go. That looks
a little bit better. If we just move it down, so we can, like, play
around to things. And then, yes, we have our roof sitting over here, but
that is no problem. Worst case scenario is we can make this roof a
little bit less angled like this and just, like,
make it a bit shorter. That should be no problem, but I think that this
is actually fine. So having these
pieces over here, let's press H to height
the roof temporarily. Let's go ahead and
hold V. Oh, Oh. Come on. You can do it. Hold fee, Snap. There we go. So that one
is now sort of snap. Of course, it's not perfect, but we know why because I didn't really pay
attention to that. So we got this one. Now, for this one, I'm going
to go for a let's do, like, a large store window along
with a simple door. So door B. I move the Large store window, make sure that it's
all on one line because I do think that
they would do that. They still do nowadays. So Okay, so we got Large
store window. There we go. See, now we got, this
little extra bit. You need to be moved back
a little bit like that. There is some spacing
going on in between here. I guess that we can just
move this up a little bit, and then you won't notice. Okay, perfect. So we got this stuff over here
done. That's pretty good. Now, I think at this point, I'm going to probably
end my town or end. Yeah, that will be the last one. And that's mostly just
to save some time. I don't know if
there's anything else. Maybe we can later on,
we can also create like a very generic house
that we can just place. However, for now, since we do not yet have
a generic house, I'm going to go ahead
and I'm going to create a very simple cube over here. Move this cube down,
and then this cube will basically just
mimic I don't know, like a house or
something like that. And the reason that I do
this is mostly shadows. So I just place this
cube here so that I get, some kind of shadows
from it later on. But what I can do is I can go
ahead and I can once again, give it a bit more spacing. And then if we
ever have shadows, the shadows will kind
of just cover here. I can maybe move it
forward a little bit. I can go to my materials and just give it
the same material. There we go, see.
So that if we ever rotate our directional
light around like this, Okay, now it doesn't
happen to hit, but there are times where it
can actually hit this house. So that's something that I
kind of want to work on. Or maybe, like, make it move
it a little bit closer. Okay, perfect. My directional light, since we're here anyway,
just move it in, like, a location that makes it easy to just see the
entire environment. Something like this.
That's fine for now. So we got that one. Let's
double check our work. So we got this one. We got
like little step ups going on. Maybe it would be
nice to also have a step duplicate,
rotate 90 degrees. Maybe it would be nice to
also have a step over here. Or maybe I will make
it I will probably do like a plank later on because the step is
a little bit too long. But now I can just do a step and maybe scale it
down a little bit. But later on, what I will
most likely do is just like a simple plank that will
be moved across here. So, yeah, there we go. So
we got that one going on. All of these windows
and everything we will, of course, cut out. Then we have a flat store that will have some
branding on it. Two windows and small, and then three windows.
That's pretty good. Now, what I'm going
to do is I'm also going to go ahead and just
make this one next to it. And for this one, if we
just have a quick look, yeah, it kind of
feels like that one. Maybe I will make some
signs on it later on. But that's pretty good. So if we do something
like that with, like, another balcony,
but we want to make the balcony and
everything a little bit higher, that should be doable. That would be interesting. So if we go ahead and
we probably want to make the building a little bit larger because as
you can see here, these three windows, they have way less space than these
three windows over here. So I'm going to go
ahead and I'm going to duplicate my
building on my house erot so right click Select
Immediate Children. And this time also go
ahead and select House 03, ControZ contro V. And now
we'll have it as House 05. So that's what I meant
that you can do. So with House 05, we can go ahead and we can
move this around. I'm going to get
rid of this one. And what I'm going to do
is once again select it. Let's see. I'm just
having a look. I think we want to move
this forward, yes. So we're going to move
this forward over here. At this point, I will set up a camera pretty
soon, but for now, just go ahead and do a
camera like this that we have a little
view of our town. Let's see. Move
it forward. Okay. And then we're
just going to move everything up a little bit and maybe give it a little
bit more height, but that's about it. So let's see. So
we got this one. Let's go ahead and move
these pieces down. So these are going to be low. I think that will
look quite nice. Oh, I need to fix
stuff like that, but that will come later. Now, over here, these
pieces become higher. Then if I do I have the space, or is there some I
think I have the space. If I go ahead and just
select all of this. Oh, that's not a lot. Yeah, that's not a lot of, of wiggle room, basically. In that case, what we're
going to do is we're going to go ahead and
we're doing the same trick where we basically select these side pieces over
here and also over here. And with all of that selected, we are going to move this
up to the point that I feel like is correct. So let's move this up a
little bit more like, okay, I guess around here. And then what we're
going to do is we're going to simply select only the bottom walls over here and we're going
to duplicate those, turn on my snapping
and snap those down. Now, over here, we will have a door and then we'll
just have a bunch of windows, but let's wait with
that because first, what I'm going to do is I'm going to go
ahead and I'm going to grab my entire balcony. And also set that
one a little bit higher. So we have my balcony. Is there any Yeah, I can remember placing those, so let's place these over here. Okay, so we have my
balcony over here. Let's go ahead and move
this up quite a bit. Probably up until, let's say, to this point over here
that looks quite nice. We don't need to beat exactly to the reference because
we're not working from a concept art like we did last time with the other course. Okay, so we got
something like this. Now, I was going to make
it a little bit longer. Um, what if we just
do like, two of them. So if we have these
pieces over here, walkway straight.
Let's have a look. So is that going to be too long? No, I don't think that
will be too long. So we basically here. So we have like these
small pieces over here. What we're going to do is
we're basically just gonna go ahead and crab
these short walls, turn them back into
or extra short walls, turn them back into short walls. Then go ahead and do
the same over here. So this one, you need
to be an extra short, and you need to be
an extra short. And then if I grab everything, including those beams over here, I should be able
to just kind of, like, Come on, select, move it all at the same time. And hopefully my
snapping will work. And then it nicely
snaps together. Let's do. Something like this. I think. No, I feel
like we need to go one more like this. Okay? So yeah, so then does mean that over here
we have a little bit more that it would be nice if we just turn off our snapping and just temporarily move this into the center to make it all
a little bit more even. So we got this one over here. Now, our balcony is fine. I'm going to now go ahead
and actually these windows, I'm not going to
change the spacing. I am going to turn these into store windows so that they
are a little bit larger. And then I'm going
to just simply set them into the center. And then maybe push these
out a little bit more. But I assume that
even in those times, they had some sort
of metrics that they followed. So we got that one. Now we have the center bit
which we no longer need, so we can now go ahead and just temporarily
do once again, something like this because we still need to fix that stuff. But the goal is that we have something here that at least
represents the building. Okay? So we got those pieces. Now let's turn on
my snapping again, and I'm going to just add one extra balcony
piece over here. I'm going to go ahead
and I'm going to grab this piece and move
it to the side. And then if I just duplicate
this one piece over here, let's see. So I'm ending there. I'm not ending here, which means that I most likely just want to go
ahead and I want to, let's see, select these
pieces over here. So that I place it
into the center a bit more so that it at least feels
a little bit more logical. Yes, R, the modeling for this
is going to be quite easy. I'm quite excited to really
just spend my time on all of the texture work and just make sure that the texture work
is spot on and just perfect. In any case, so we have
these pieces over here. Now, I'm going to simply scale these up
a little bit, I think. So we have this.
Let's move it down. Just scaled up, and we'll see
we will see if this works. And if this doesn't
work, then we can, of course, just duplicate
it down into the ground. So we got this balcony done. Now, for our roof, we need to start by moving
these pieces further back. Over here, we have a Bwall
which we no longer need. Let's go ahead and delete that. Let's grab our roof over here. Move it down or so
scale it up 1.9. Ah, A chance that N
that would be too much. In that case, can
we do two, maybe? Let's see, two is, I think two is doable
if we just turn off our snapping because at least then it will just snap properly. So I think two is doable. We moved a little bit further. And then what we're
going to do is we're going to go ahead
and we're going to just duplicate this,
snap it over here. And I feel like
that this building, because it's such
a large building, it would make sense if it is
also a little bit longer. So let's go for
plane while extra short no Suplain
while short, maybe. Also, no okay, let's u
plain while extra short. And then maybe like
turn on snap scaling, maybe a little bit
lower, 0.1, two, five. There we go. That should
sort of do the trick. Just try the same over here. This one is a bit easier because it is the
other way around. So we have play
while extra short. We snap it out. We quickly grab these
pieces over here. I did not grab all of
them, Let's try again. We quickly grab these pieces, and also let's do the same over here where we grab these ones. I think you kind of get
the point for this. After we've done this house, what I will do is
I will most likely just kick in the time labs,
and we will just, like, have a quick look on
all of the other pieces and just place them
all slowly together just to get something that
looks quite interesting. But don't worry any
time laps that I do, I will also include
in real time. I'll just not have
any audio on it. So just be prepared for that. Extra short. Scale it in a little bit. There we go. Then if you
want, you can also grab. These pieces,
duplicate, rotate 180, and then move them a bit. There we go. Okay, so this
house now works pretty well. Let's just make sure that everything's still
in the same folder. Nice, it is. Okay.
That is pretty good. The only thing that we
need to do is our windows. So for our windows, I kind of feel
like a double door would be great for this stuff. So I don't know if I can maybe
make like a double door, but let's say that
this door would most likely be like
in the center. And then it would
have these windows, and this is a store
window. Yes, it is. These windows would basically be on the same level over here, as you can see also over here. And then we will have, say, let's do one window per
here in the center. So one here, one here. Oh let's try the same
over here roughly. So we'll have those windows. Although I don't feel like they don't yet give me the
effect that I want, so I will need to, like, mess around with that a
little bit more. And then there will
also be a shop window sitting over here and maybe
like another one over here. But that's something that we are also going to,
like, work with. For example, we
can also move this up and go for, like,
a small window. And then over here,
we have, for example, one, two, and, like, three little small windows
or something like that. But, yeah, that's something
that I will go ahead and in the next chapter, we will just kind of like
finalize this stuff. In any case, what I
want to leave off with is that we go ahead
and we basically move. So let's minimize it. We basically go ahead
and we set our camera roughly to where we want it
to be, which is around here. And then if we go down here, we can go to create camera here and create
a camera actor. Now, if you then go
to your perspective and set this to be
your camera actor, this way, we now have a camera, and then we can kind of match
it up with something like this that we know exactly
what our main angle will be. Of course, we'll have
multiple angles later on, but now it's about
our main angle. So when I see this, I want
to set my aspect ratio down because I want to get the long feel that we
have over here. Because I think that looks quite interesting if we do
something like that. Now, I'm just going to go
ahead and twin, sort of, like, match up my camera angle. We can also work on Pape
on our field of view, which if we said is
a little bit closer, will give us that more
Zoomed in effect, which I think looks quite nice. So let's get started with
something like this. Also, something cool. These shadows right now
they are really jagged. If you want to fix this,
there are two ways that you can fix this for like
screenshots, for example. One of them is you
go down here and you set your screen percente to 200. As you can see
over here, it will increase the resolution
and basically double it. The next one, if you want to even improve it on top of that, you can go here into the
console at the bottom, and you can type in R dot
shadow Virtual that Resolution, and then Big bias
Local, I believe. And we want to go
ahead and set this to like minus one, I believe. Was it directional? Maybe
it was directional. Directional minus one? I think it was directional. Maybe else we already
at our limits. There is, like, a limit for it. I think it was directional. But yeah, if that does not work, then we are already
at our limit. In which case, we
will go ahead and we will just improve that in
different ways later on. In any case, what we have right now is looking
pretty good. I could see a few
lighting arrows over here, but
that's no problem. In our next chapter, what
we will do is we will go ahead and I will start
by just first of all, doing some general cubes on the other side so that I
know which buildings I want, general improvements
to this side, and just like, try and
improve a bunch of stuff. This will be done in a time laps just to save a
little bit of time. So let's go ahead and continue with that
in our next chapter.
10. 09 Setting Up Our Level Part2 Narrated Timelapse: Okay, so I now kicked
in the time laps, and this time labs will
come in two parts. One part I will narrate. The other part will just
have some music under it, but everything will
also, of course, still be in real time as
like an extra chapter. So the reason that I'm doing
this one as a narration is because a lot of the stuff that I'm doing
here is visual language. It's about just getting the general shape and
feel for the things. It's not so much
about new techniques, but just how we
place everything. So that's what I'm
doing over here. I'm splitting my
viewpod into two. You can do that by pressing
the little 3 bars and then going down to your views
and then setting into two, or you can go over at the top to window viewbod and just
create a new viewpod. And I'm basically
just creating cubes. The main goal for
these cubes are scale, height, and position. So we are placing these cubes
in order to basically get, like, a general idea of where
I want everything to be. This because I wanted
to get a little bit of a contrast between the
two rows of buildings. Like this building over
here or like right row, I mean, the right row, it has all of these buildings
really close together. They are all kind of,
like, linked together, and for the rest, they
are all in even levels. What I wanted to do
with the left row is I actually wanted to just intersect some
streets into here. Almost like that
the streets go to a sideways angle and
stuff like that. And for the rest also have less buildings but have
them a little bit bigger. So I went for, like, a saloon
or something like that or, like, the corner, and then just like a general
building on the side. So you see me over here just trying to get some inspiration
of how everything looks. And doing that, this image I also
actually used quite bit. Doing that was quite interesting.
So I'm just doing that. And then what I was doing is I wanted to create some kind of a way that we have one side
of our street closed off. And I did this with
almost making it into, like, a corner,
into, like, a bend. This is because, like,
I can get away with, like, having the backside to not have wheel
anything there. So that backside, we will
not aim our camera to that. So for this presentation, I
don't need to do anything. However, when I have
a view like this, I do not just want
to the environment stop dead in its twigs, and then just have some
mountains in the background. That will not look
very interesting. So instead, I'm trying
to, like, create a bend, and this is what I
often saw happening, also in my reference images, where one of the buildings
is kind of, like, slightly tilted and
then they kind of, like, just go into
that direction. So I was trying to get
roughly the same effect, and that's what you
will see me doing here. So over here, I'm
grabbing a building. I'm kind of moving
it to the side, and I'm giving it
space that we have one road that still turns left. And then over here, we have
one building that is tilted, and then the other two
buildings, they are straight. And doing that actually gave us quite an interesting effect. Now I just had another building that I just
placed in the back, and this was just to
close off my field of view so that we cannot see
whatever is behind it. And this turned out to be quite an interesting look
to get something like this. Now, at this point, once
you have your cubes done, and this is a very handy
way to just kind of, like, get the general
feel for things. Of course, with our
balconies and everything, it will change a little bit. But once you have
your cubes done, what I'm doing over here is
I'm just simply starting to duplicate some of my buildings and then turning them into
the buildings that I want. So over here, for example,
I do make changes, of course, as you
can see over here. Just to make sure
that the building looks a little bit different. And then once I'm happy with it, I can start placing it in the
position. So I can move it. And for this building,
I place it here. And the buildings they
can look similar, but don't make them too similar. Change around the doors, change around the windows, maybe play around a
little bit more with the length and stuff like that. And you will see me doing that also a little bit later on. Over here, I'm now,
once again, as I said, this piece of the building,
I'm just making brand new. So I'm just grabbing, like, a site because I want
to have the building, and then I want to
have a much smaller building sitting next to it. But I want to make it
as if this building is kind of like linked
to the other building. And this was quite
an interesting look, and we can actually reuse this building once
more later on. And yeah, just in general. So I went for, like,
a wall that was one short and then one super short so that we get
something like this. Rest, it's just
placing around walls. It is a little bit similar to the one that we
have to the site. But don't forget that our camera is also
quite close to this. So a lot of this you might never really see or you might
only see it in one angle. This is why it's not always that bad to have the
buildings look similar. All I would recommend is
that for your buildings, I would say that
grab your main view. We know about our main view. Our main view will show the
right side of our street. So grab your main view
and just make sure that the main view will
look very different. Everything just kind
of looks different, and it has, like, a very
interesting variation going on. We will personally do that
a lot using texture work, so don't worry about that. Over here, I decided that I was going to
make like a stair. For now, I'm just
doing this very basic. However, I am going
to later on in the second part of our
or maybe it this part. I don't know yet,
which one it was, but I'm just going
to make like a blockout of a longer stair, which was just very basic. However, with our second part, I actually end up not doing that much of the blockout as
that I was planning, because I feel like it would be much easier if we first of all, start by creating our materials. So after we've done all of
the time so our blockout, we will actually leave these mesh and everything
for quite a while for quite a few hours because
we are just going to focus on materials because in
this specific environment, doing the materials
first will give us a much better overview of how we need to
create everything. But don't worry about
that because that stuff, I will discuss that
when we actually start doing our materials,
the reasoning behind it. In any case, over here, I'm
just doing basic stuff. I'm adding some doors.
I'm adding some windows. Just remember that, of
course, these windows, they are not going to
just be sitting on top. They will actually later on
be embedded into the wall. But for now, it is just like a very simple basic
look over here. Now, this building
this building, you can even if you want, you can actually just
turn it into stone. If you want to create
like a stone texture, or we can go, for example, to,
like, mega scans, and you can grab like
a stone texture. That could be quite
interesting if you just make it like
a stone building. I most likely won't need
to do that or won't do that because the tricky thing is that with megascan textures, I cannot actually use those. Like, I can use them, but I cannot supply them with you with these project files and to create an entire
new brick texture for one small building that
we will only see for, like, a tiny bit in
maybe one angle. Yeah, you can guess that
that's simply not worth three, 4 hours worth of work. What I can do is there is one thing I might
be able to do, and that is used the stone material that
often usually brick wall material that
we created for a texture course that we
have done fast tracked oils. So that could be one
thing that I can do. I will have to think about it. It more depends on,
like, the variation. So here you see me
just creating balcony. That's why I don't really bother explain to you what I'm doing. So that just depends
on variation. If I find that using all the wood is not enough variation within
our environment, then of course, I
will make it work. I will add some more variation because even though
this is a tutorial, I want to get a very good polish looking scene, excuse me. And next to this
polish looking scene, of course, yes, it needs
to look very interesting, but it is also useful
if I explain to how to create all of this
variation because I could just use one mood texture if
I want to throw it in there, and it would look okay, but it would not look
very interesting. I'd much rather want to
give you the options to explain to you how we can make this look much
more interesting. So we have that building done. Now what we're going to
do is I'm just going over here and I'm just moving
across this building. I'm giving it some spacing
in between the buildings. Once again, just to
space things out a bit just because it
might look interesting, depending on which angle
we are going to go for. And I'm just playing
around with, like, the height and just the general
scale of the buildings. Now I'm as always having a
quick look at my reference, also at the at the
Redemption reference. So over here just
to see if there's something interesting
that we can use here. And once I've decided
which building I already created that is the closest
to the one that I need, I can duplicate the building and the folder and I can just
simply move it into position, and then I can take
it from there, and I can start
by just improving this building to make
it fit a bit better. So over here, what
I end up doing is I was having a look and I quite like that this one is
actually quite high. So I actually end
up leaving it at this height just because that's what you also
see in our reference. And for the rest, I'm just going to change the windows
and the doors and everything to get a little bit more of
like a different look. Yeah, you can see me over here just placing a few windows. But yeah, most this
stuff is very generic. What we will do is
after we've done all of our textures and all
of our final models, which have the textures applied, then we will, of course,
do another pass, and this pass will
just make sure that every object is placed
properly and nicely. I will also add
some extra objects. At the very end of the tutil, you might see me
doing like aT eness where I add like
extra don objects, which are just very small
objects that will just like, add to your scene, but it
will be no new information. It will simply be me doing
some extra modeling. Um, and those kind of things, they're just time consuming. They can take a couple hours, but they will not
actually teach you anything that I've not
taught you before. So, but we will sort it out. Over here, keep in mind
about the windows. If they don't fit perfectly, you can kind of, like,
get away with it, but I just yeah, I want
to be careful with it, so I'm not doing it
too over the top. And over here, you see me
constantly flying around my scene just to see
if I can also look at different angles to make
sure how everything feels. Of course, there's a lot of
thinking process going behind the scenes in my head on, like
how everything will look. And now what I'm going
to do with this one is I'm going to get started, and I'm going to create a bar, and I will actually do this one completely from
scratch or mostly. So over here for the bar, I wanted to get,
like, a corner bit. What I'm doing is I'm just splitting everything
up into two pieces. But what I noticed is that
I cannot see the center, so I did it again. And then what we can
do on the side is we can rotate it 45
degrees exactly. So you can see me setting my
snap rotation to 45 degrees, and then we can just have
this 45 degree angle. Now, this angle, what
it does mean is that we need to create some custom
pieces for it later on. But that's no problem.
That's once again, one of those things that
I will do as an ardo. That will just be
like some extra work. But I don't know. I
think it looks cool and maybe we can use it
in some way or another. We will see how it goes. The same goes with
the buildings. Maybe I end up also
just duplicating that around bit around and just placing it on
the other side also. Once we have all of our pieces done and we have
our buildings done, it's not that big of a deal
to add some extra buildings. The most the thing that we need to pay attention
to most is our terrain. So it is about that our
terrain actually does look logical compared to the
placement of the buildings. That's why we also
have those cubes, and that's why we
also place the cubes, even in locations where we will not have actual
buildings because they fall outside
of our camera view. So for the rest over here, this 45 degree angle will not have anything
special in it. It's just to fit, to make sure that the
building fits a little bit. And then for the rest, I'm
just starting to duplicate some pieces from other
areas and stuff like that. So over here and this is
just, like, a very base. But I think, yeah,
it looks quite cool. And then a nice thing
what you can see slowly is when we move back to
our original view boot or to our original main view
is that you can see all of those balconies just slightly sticking out on the left
side of our camera, and it will give us a
very interesting effect, and it will give us
a very cool look. Over here, I'm just temporarily
placing these models. However, this is temporarily. These models, as I said before, we need to create
special pieces. Currently, the reason
that I'm placing them there is so that I can later
on export these pieces. And inside of blender, I have the measurements so that
I can make them properly. And for stay just doing some
scaling and stuff like that, that kind of stuff
is no problem. And then over here,
I'm, for example, changing around like the pilar just to get a bit more like an interesting looking
and stuff like that. And just in general,
it's quite basic stuff. Same with like over here. The reason that I place
a door there is that I can measure out the
height that I want my overhead to be because you can see that I wanted to get it a
little bit higher. And before I go
scale up my pillar, I, of course, want
to know the height. So that's what you
see me doing here. And now I'm just nicely,
like, placing these pillows on every um quarter. And it is good to often have your pillars and everything
at the same length, at the same areas as that you have your beams on your
building and everything, because it makes it
show that all of the supports that the building
has, they are all even. All of these supports, they are all supporting the same weight, which is the specific walls. Stuff like this that kind of comes into the area of knowing about architecture a little bit. So that one is always
a little bit more tricky and like an actual building artist
who does it professionally, they will be able to
explain to you much better. But most time just
look at the logics. For example, just
like a few logics that you can just always
keep in mind is that, for example, windows, if you
have a two storey building, the windows will be
on the same level. You would not have
two windows down, and then all of a
sudden at the top, have a window in
the center because that window, it would
break the support. It would make the
building unstable. Over here also bit
like these beams and everything that
we have over here. All of these beams they are all placed in very
specific locations, and I try to also then have everything just
feel a little bit more logical in terms of having the overhead supported by the
beams and stuff like that. You can also see
it in real life. So that's like the kind of
stuff that we are doing. Now, over here, I'm
going to go ahead and I'm now just working
on the top trim, and the top trim for now, I'm just doing some
basic placement, but we will completely
just create an extra variation of a top trim when we
have finish this one. And that variation will
just be a straight piece. So with that variation, what we can then do
because it doesn't have the corner or like
the angled piece, can just freely move this
around for ever want. So that's what you
can see me over here. And you can just see me kind
of moving everything around. And then at that
point, I just end up closing off because I
felt like it was not worth my time to then also the trim all the way along here when I can just
quickly grab one of our beams and just kind of
like place it like that. Stuff like that is okay, because you will most likely
never even see it. So it's more like just in
case that you can see it, that it at least looks okay, that it does not
feel out of place. That's the main goal
for this kind of stuff. But afters here, you can see. So we have a nice
little corner piece. We just need to do, like,
some balancing for it, and then I'm just placing some extra windows
here and there. And that's about
it. So here now you can see how on the left side, we get all of this
interesting look. So we get, like the height
of, like, our walkways. We get the different
heights of, like, a balcony and of our overhead
and all of that stuff. It's just looking
really interesting. And that was the general goal of getting this angle to get,
like, an interesting look. So that's mostly the
function of the left side. Now I will also, of course, just make some screenshots
of the left side, so I still want to make it
look nice in the very end. But for now, we
can keep it quite basic because we need to
make sure, first of all, that our right side
is the best one, that our right side has all of the focused points that we want to capture
for our environment. And then the left
side, we can just kind of, like, do
that as an extra. And at this point, it is getting pretty close to
the end of this time laps. In the next time
laps, we will create some very simple
blockout pieces, and I will also create some more generic buildings and also do those buildings
at the very end, and it will just
be building that. So it will be no new
stuff will be covered. So let's go ahead and
continue to that in our next chapter that will be the last
time lapse chapter.
11. 10 Setting Up Our Level Part3 Timelapse: I I B an B. E D. D D.
12. 11 Preparing Our Scenes For Material Creation: Okay, so what we're going
to do now is we are going to jump right in into
creating our materials. Now, if you've viewed
past tutorials of mine, you might be thinking
that this is a little bit strange because
often what I do is I always try to make
as many of my models completely to final before
I create my materials. But this is different.
In this case, I find that our environment
relies so incredibly heavy on materials because all of the actual meshes
are very simplistic. That was just the
case in those times. In those times, they didn't
really go in the middle of, like, a desert or something for, like, very ornate stuff. So so much of this stuff
relies on materials. And actual geometry,
for example, the actual geometry on the wood also needs to
be defined by materials. And this is why I
first want to go ahead and I just want to go ahead and create all of our materials. This is going to be
our wood materials for which I already have
all of my reference. It's going to be also the
wood slate roof material, but both of these, they kind
of tie into each other. And then later on, it's also going to be our train materials. So that is a plan for this. Now, what we're going to do
is so for our materials, if we have a look at our scene, you can see that almost
everything is wood. This is quite handy
because this means that all we need to do is we
need to create a very, very well done procedural
plain wood material. And then what we also need to do is we will need to create a very well done wood
planks material that is like the tilted
slate roof materials that you can see over here. And using those two, we can
basically create everything. We have our plain wood for
which we can do most of, like, these pieces,
and, for example, our ornate trims
and everything and also our window frames probably also even our
wood planks over here. Although our wood planks,
I do want to then add a little mask to add some
extra dirt, but that's later. And then we have our wood
planks and our wood planks, we can give it control over the colors that we can
have, like, painted wood. We can give it
control over, like, newness to have, like, this new wood compared to, like, old wood and all
that kind of stuff. And later on, we can also
use our plain wood to implant its use in our actual
slate roofs over here. And we can also do
it for our door. Although our door will
require a bit more texturing. And maybe if we do a door
and we do our windows, it would maybe be cool to do
a unique texture for this, even though, yeah, it's
not really needed, but it would be nice if we
can do something like that. So that's Genda you can
see almost everything is wood and most of it's just like painted wood
and stuff like that. So that's going to be
our main focus on this. So for our wood, we
are now going to start by creating a
plain wood material, and then we'll move
on to the planks, and the planks will be where everything becomes
very flexible. If we have a look at this, I want my plain wood material to more in this direction,
as you can see over here. Of course, these are planks, but it still gives us, like, a general feel for our material. So it's going to
be a bit of, like, that direction, and we're just going to combine it a little bit more with, like,
some other stuff. Over here, you can
see, like, another one that is quite close by. So we can just get a nice
general feel for it. We're going to start
with our height map, and then we will
move on from there. So let's go ahead and
just dive right in. I want to do in this chapter
is I just want to do setup. I'm going to set up
substance designer, and I'm going to set up MmsetTolbag because we will
be previewing our material in Marmo Set Tolbag
as it will give us a little bit more
flexibility over the lighting and
rendering controls. But it will also be great for our final renders that we
can display in our scene. So let's go ahead and
in substance designer, this is my layout
that I often have. Let's first of all, create a new scene, and
then I can show you. File, New package
and substance graph. This is the latest substance
signer, which by this point, the name has changed to
substance three D designer, just so you know, and
we're going to call this plain Wood over here. Let's just do that then
simply press Okay. Okay, so our layout. This is our default layout. What I always like to
have is I like to have my graph as the biggest
one at the very center. I always click away my TD view because
I don't tend to use it since I use Momset and then we will have our
base color to the view, our library next to that, and our explorer plus our
parameters on the right side. So that's mostly it. Of
course, all of these views, you can move them
around and you can move them wherever you
want, as you can see. So that's how I got
to this layout. This my layout, of course, feel free to use whatever
layout you want. Now, for our maps, what I tend to do is I tend to already just delete
all of these maps. Although wood is not metallic, we might be creating some nails, although those nails or they would be rusty,
so I'm not sure yet. So I'll leave in
the output for now. But often when something
is not metallic, I often just get rid of that output. So
that's already it. So for this one, you just
want to go to your explorer, right click and press saves. And let's go ahead
and create a new folder that's called textures. And in here we will make a fool car plain
under scoe boot. So our Wood is really by far, our most important
material to get white. So plain wood let's go
ahead and save this. Now what I also have
is I have Momset. So I am using Moms Tubac four. The reason I'm saying this is because if you're still
using Mom's at three, you will not have the tracing. So your scene will need some other twigs in order to get the same quality
as that I have. However, in Mount took four, we have some rate racing
just kind of push it. But in the end, because
it ends up in unreal, it's an optional program
that you can use. You don't need to use Momset. I just really prefer using it. So within Momoset, I always have a basic
setup that I like to do. So I will just run
you through it. First of all, we have a render. We are not yet going to
turn on our rate racing, and we're just going to
leave everything to default. I just quickly tick on
ambient oclusion and I set the ambient
strength halfway. I don't even look at
the numbers anymore. It's just a feeling
that I go for. This will be useful later on, so this will just add
some ambient occlusion. Then if we scroll down even more over here, we
have the output. So for the output, it
would be nice if we just go textures and just create
a folic called images. Often we do want
to create a render because I'm currently
working in ten ATP, but I am working on
four K materials. And that always gives this little difference
that it might feel a little bit blurry and not
as high detail to me, but then as soon as I
render out an image, and I can zoom in, then the details are
actually quite well. So I'm just going to
go ahead and open this up and just
in these images, just call this plain
underscore boot. You want to go ahead and
just save it as like a JPA. We don't need anything
special and just press Save. So that's why the
set up that we can very quickly render
out an image. For our resolution, because they are materials and they are just being displayed on a sphere, I often like to set my
resolution to a square. So I just copy the 1920 and also paste it in here so that
we have 1920 by 1920. This is actually important
because in our main camera, we actually can add
our safety frames, and the safety frames will
reference your resolution. So basically, what they will do is because this is now a square, if we set our safety frames
on and set this to black, it will just create these
black bars which will draw in the focus to only our material
and not anything else. So this will actually
make a huge difference on how we preview things. So what do I do?
I go ahead and I always just go ahead and
press contra D on my camera, and I call this
camera underscore A. In camera A, this
camera will later on once we have it
placed correctly, it will just be locked so that we cannot
accidentally move it. For this camera, I tend to set my sharpening in the middle, set my bloom at the same
level as the size of the bloom and my vignetting in the middle,
something like this. Now, once we've done
that, we do want to also work on
our tone mapping, but let's do that a
little bit later when we actually have a
material to work with. Okay, so what else? Sky. I like to set
my sky backdrop to color and just make it like a bit more
of a darker color. See something like
that. Once again, I just don't want to
have any distractions. In terms of the preset, it kind of depends on, oh, it's opened up my
preset on my screen. In terms of the
preset, it depends on what preset we want to do. So for example, this is
like a Western thing. So we might already
that's like a base, go for something that's
a little bit outdoor, something like that,
but you never know which preset will
work perfectly fine. So for example, I don't know, do like a beach or sand or something like that
that just feels our door, but I don't think there's much
interesting stuff in here that stands out wide away for this one,
maybe, park statue. That could be the case or else we also have some
outdoor preset here. And these will just be our sky. I'm going to go ahead
and let's do, like, this driveway or
something like that, or maybe like this one. And the reason I
do that is because it has a bit of a warm feeling. And I think for scene we are going to go a little bit
more for that warm feeling. Okay, one more
thing that we need to do is we need to
actually import our sphere. Now, don't worry. We
don't even need to jump into like a tree
modeling program. All we need to do is
if we go to substance, click on a random
noise, for example, right click and
select this URL file. Now, it will then
open up your scene. And the reason you
want to do this is because you want to
go back to resources. Three D shapes.
And look at that. Over here, you have
an actual sphere that is already properly
UVNwrapped and everything. So if I go to Momset and
just drag in that sphere to this like that, there we go. And now we have our sphere.
Now, if we go ahead and go from our main camera
to cameras to camera A, Prasctra F, if you have a
strange look like that. So over here we have camera A. You can see that it's
like a really warm color, so I'm not sure this might
be a little bit too much. But what I like to
do in my camera A is I like to go
ahead and let's see. Set the rotation always
like zero and zero and then just kind of like move this nicely into place so
that we have now, like a nice view of our sphere. If you now want to just
lock your movement, you can always go
in here and you can just press this
little lock button, although it will also
lock your settings, but for now, that's fine. In my presets for my sky, I'm just going to go ahead and I don't want to
have a discwarm. So just double click
and get something that's a little bit less intense and else we will just temporarily use something
else like a street here, like street cobblestone, for example, something like that. It does not matter
right now because we don't actually have a
material yet to render. Okay, lights. That's the last thing
that we will be doing. For our lights, if you just
right click in your viewpod, you want to the light and you
want to directional light. Now, I'm going to use the
three point lighting system. This is basically
often three lights that you place in your scene. One of them is your main light, two of them are rim lights. Rim lights are lights
that come from the back. So over here we have our light. And if we just press
E to go to rotate, you can see that now you can
rotate your light around. I tend to get started
by always setting one of the lights over here, and they will
basically be mostly covering half of our sphere,
as you can see like that. Color wise, I tend
to make them like a little bit of like an orange
color, like very subtle. And then I just press okay. Now, this light, I don't
know yet what to do with it. Most of these lights we first of all, need to
create the material. Right now, it's just we are
working on a blank slate. I just want to do the basics. Then you press contra D, and this light, you basically
want to move to the back. And what I really make this
like a very strong Yeah, see, like a strong light that comes from, let's say, like the top, and let's turn this light into a bit more like a
stronger blue color. And then we can press
Contra D again, and this light comes from the very bottom and
in the very back. So once again, we
move this down, and you will know how
this will look later on. So later on, we are
going to define this. For now we're just
going to make it, for example, yeah,
like a white color. But, for example, this is this like a material
that I created, and here you can
see it in action. So here you can see, like
a main light coming here. Then you can see, like a slightly softer
light that's sitting here, and then see like a really strong light here at the bottom. And that's the
general idea for like a three point lighting system
to do something like that. And by the way, let's
set our color of a sky a bit darker. There we go. And that's about it for
our setup right now. The rest of the setup, once
we have a base material, we can just play around
with that stuff. For now, what we can do
is we can go ahead and we can let me just file save CNS, and let's go ahead and save it. That's two in the
safe folder and just call this texture render, because we can use this for
multiple different materials. So texture render, that's safe. Perfect. We are now ready to go. In the next chapter,
what we will do is we will get
started by creating the basis of our wood grains
in our plain wood material. So let's go ahead and continue with that in our next chapter.
13. 12 Creating Our Plain Wood Material Part1: Okay, so let's go ahead and get started by creating
our wood cranes. Now, I always have
a specific workflow that I use to create
my wood cranes. And then once that workflow,
I've run through it, then I just go ahead and I like polish things up to make
them look more like this. So if we have a
look, for example, so this is the one that I want to use for the wood cranes, a few key focus points. There is a difference
between sometimes having these willy white
wood greens and sometimes having much thinner
ones that you can see. So here you can see,
like, Willy white, now you can see them
going very thin again and back and
forth, back and forth. That's something I
want to capture. Another one is that
wood greens warp around our knots or knots or whatever
you want to call them, the ends, and, of course, that they have the ends. So the warping that
we have around here, that's something that I
also want to capture. And one thing that's pretty
cool is that you can see that it has these
little fibers over here. Now, this kind of
depends on resolution. We can give it a go and
see if we can make it, although it would
most likely just turn into a little bit
like noise from, like, a larger perspective, because from over here,
it's hard to see. But that's no problem
because that noise is still something to just add some
extra surface detail to this. And add to that, like some deeper or
thicker slashes, whatever you want to
call them in here. So that's the ones
that we will also add. And then on top of that, yeah, it's just going to be like some small balancing
and stuff like that. Okay. So that's the plan. Now, to create my wood grains, the first thing that I need
to do is we need to create a gradient map that we
can turn into the grains. This gradient map,
it's basically going to be long streaks. That's basically what
it's going to be. So let's say that I often
just start with, like, a grunge let's say Crunch
map 002, for example. And now, the way
that this works is, so we have crunch map zero, 02. Let's say that we set
our contrast quite up, and we do want to actually get a bunch of, like,
smaller streaks. So let's say we have
something like this. Now, what I like to do is I always like to go for
direction and I always like to go for horizontal direction when it comes to most materials. Sorry, I lost my voice
there for a second. So what I'm going to do is I'm going to add the transform map. Now, sorry if I went a
bit quickly for this. I should say, I do
expect that you know the basics of
substance designer, and the basics in this
case is most time I will just press space bar and I
will type in whatever I need. So if I need to transform, I will type in TRA and then press Enter to get
the transform to D, or you can use your
arrow keys up and down to basically
navigate like that. Just keep that in
mind. So for the rest, this course will not so much be about explaining how the
actual program works, but more explaining how
to create materials, the thought process behind them, what the tools actually
do, stuff like that. So we have a transform, and then if we go down here, we want to press one of the 90s. So this will just simply rotate
it to a 90 degree angle. Now, what we're going
to do is we need to add a directional blur because we
need this to be not sharp, but we need this to be
like soft gradients. So for our directional blur, if you just type in Di and
you get the directional blur, you basically want to
keep the angle at zero, but set the intensity very strong to like 500 or
something like that. So that's what you
get then is you get these really streaky lines over here, something like this. Now, with these lines, they
are now way too sharp. So these are not actually
going to be our grains. So these are way too sharp. So what we need to do is we need to go ahead
and we need to, for example, blur them
this time a normal blur. And for that, I
want to use a blur, high quality gray scale. So what this woman will do is it will just nicely,
as she can see, blow my lines that we get all of these really light streaky
lines that we have over here. Now, at this point, you can pretty much play
around with like, for example, adding
a histogram scan. And what aHcrum scan does, if you just type in HIS, the HCRm scan allows you to
basically change the levels. So you have the position
and the contrast. And this can sometimes
be just nice to have. So see can make it
stronger or less strong. What I tend to do is
I tend to art this on here and just pick like a
general position that I like, for example, 0.65
in the position. And then at least
while it is here, I can change it later on
if needed. Okay, perfect. So what we're going to do now is now these will be
transformed into streaks. You cannot see it
yet, but trust me, they will be turned into
streaks a little bit later on. I now want to add
some general warping. General warping is the
stuff that you can see, not so much around the knobs, but it's just like some
general here, see? You can see some
general moving around. And here you can see, like
some bumps and everything. It is not perfectly straight. Also over here,
you can see that. The way that I tend to do this because at this
point we are still quite flexible with it is by arming something called
a directional warp, and a directional
warp is pretty cool. So what you can do is you can input a gray scale
map into this. And then what it will try
to do is it will try to warp your textures
around this grayscale. Now, for this warp, if we go to our patrons in our library, we can use a tile
generator over here. Basically, what we
want to do is we want to get a bunch
of different dots, and those are the ones that
will be warped around it. To get these dots, you want to scroll down to the pattern, and the tile generator
is quite a big note. We will cover it more in depth later on when
we create our planks. But for now, you can just go to your pattern and set this to be, I don't know, like a
paraboil for example, and that will give you
all of these little dots. Now we need to have
some variation in this. If we scroll down to size, we can set a scale random, which will just give
it some random scale. If we scroll down to position, we can give a position random over here on
the X and on the Y, so that will give us some
position random like this. Luminance random will basically make them darker or lighter. This will also affect
how strongly that they will be affected by
the directional warp. So just like a
bunch of variation. You can try rotation
if you want, but it won't actually do much. And for the blending mode,
let's set this to Max. Setting the blending mode
to Mx, as you can see, it will just decide how
we intersect together. If we set this to
max, they will just kind of cut each
other off like this. So we got almost like this
really fun looking shape, like a bubble shape.
I don't know. It kind of reminds me of
the ball pits that you have like McDonald's
or something like that for some reason, you
would eat a lot more. But basically, we plug this into our directional warp and then as soon as we move
our warp angle up, you can see that we get
something like this. Okay, so we have now
our direction warp. The first thing that
I noticed is that it is that we probably
need to blur it a lot. So let's add a blur, high quality gray scale behind
it so that there we goes. See that looks a
bit more logical. We don't want to have it
sharp, so just nicely blur it. And then in your
direction warp maybe, like, move around
with intensity. See, so just going to give some general random bumps
into our mesh like that. Okay, so at this point, what we're going to
do is now what we need to do is we
need to go ahead and probably turn this
already into grains. Yes, we need to do
that in two ways. So first of all, we have
this one over here. I'm just having to
think if I should do the knobs first or later. But that's the cool thing
about procedural texturing. It doesn't matter if I
need to do it later. I can just add it later. So how are these
grains going to work? The way that we are
going to do this is we are going to use a gradient map. So if you go ahead and press space and type in gradient map, you get this map over here. Now, with this map,
you can basically map colors based
upon the gradients, and that's why this
needs to be blurry. When this is blurry, it will have 255 different gradients. So as you can see, we can get a lot of
grains out of this. Even if you look
at it over here, because of the bitmap ratio, you can even see that over
here almost see like grains. It kind of feels like that. So we are just going to
make those more intense. I'm not going to lie. This is going to be tedious process. So basically, all we need to do is go into our grain editor, and it's a bit time consuming, but just make your
gradient editor quite large to make it a
bit easier for you. And you basically click on your gradient pieces
like one like this. Now, you are going
to click very close. So you have black. You
click once again, White. Click very close
next to that, Black. Click very close
next to that, white. Click very close next to that, Black, and then white. Now, what you will see
happening is if we do this about 100 times
or something like that. So yes, as I said
before, it's tedious. But you can start seeing
that we are starting to slowly map out these
little grains over here. And the closer we
have them together, the thinner the grains
are going to be. So we are just going
to keep mapping this closer together like this until we get probably to around the midway point
or slightly above it, and then we can see
just how it looks. So over here, you can see me. Or, you can see me. You can see the grains slowly starting to appear over here. Now, if they are
not large enough, we can always just
try and, like, select this and try and move this a little
bit closer together, just by kind of like
clamping this all down. Sometimes this is
needed just to get it exactly like the right spots. Here, season now we got
like these thinner greens. And yeah, so this
will take a while. But in the end, we only do this once, and then the grains are
looking really good. And what I recommend is that you literally just
save these grains. If you ever make wood again, you can just save this stuff, and then you can
just apply it again. So here, if you
want, you can also do it like this where
you, for example, place two next to each other, and then you just move
that one closer together. As you can see that can
also be a solution. It just kind of depends
on what you want to do. Like can see over here. And if you keep doing that many, many times, in the end, it will have filled up most
of the space except for, like, some very large areas. So over here, we kind
of need to get to the point where we hit just the right grayscale because often the
grayscale here, sometimes it can just
as you can see, see, you can see that it sometimes just takes a while before it actually here before it actually applies to grains
wherever we want them to have. So that's why it is just
something that takes a bit. But, yeah, so what we're
actually going to do, I'll talk while doing this, and else I might just, like, pass the video and
just do it off camera. But basically, what
we're going to do after this is we are also going to make some grains
that are very, very white, and then we are going to blend
between the two. And that will create that
effect that I was talking about where we have some grains
that are very widely, very widely distance
from each other. And then also like some grains that are very closely together, and it will just give
us some nice variation. Once that's done, we can
add some knobs on top of them and start warping
those together nicely, and that should do the trick. Here, see, here, you already
start to like Wi seed, although they are still quite far together or quite far away. But what we can also do is
we can also mess around a little bit more with
the blur later on. For example, if we close this, and now let's say that
we go into our blur, let's see if we
tone down our blur. Here see. You can see if
you tone down your blur, you can basically almost, like, control how closely
together the grains are. Of course, we need a bunch
more grains for this, but I just wanted
to show you that. So what I'm going
to do is I'm just going to go ahead and I
will pause the video and I will do this stuff up until there are almost no
changes happening anymore. That will most likely be
around this area over here. So we'll see how it goes, but it's literally
just me doing this, and I don't feel
like that's really worth recording half an
hour of me doing this. So I'm sure that there are
faster ways of doing it, but this way always just
works really well for me. And I'm stubborn. I'm quite stubborn, so I like to just stick with my workflow. So let's go ahead
and pass the video until this is done. Here we go. So I just went ahead
and I just kept going. And then near the end, I
found that yeah, the edges, they did not really
have that much of an effect anymore, so
I just went ahead and, like, at a bigger
spacing to save some time because they didn't
really do much anymore. So, now that we have this stuff, you can see that now we start to sort of get some
grains. Don't worry. This is far from what we actually are going to
get in the very end. But now what we want to do
is we want to blend this together using a mask that
has like some wider grains. For this, let's first of all, get started by creating
the wider grains. They are going to be a
bit easier. Don't worry. So they are basically
going to be a here, let's move this over here, like a pattern. No, not a pattern. Let's do a gradient linear because these all look a
little bit like gradient. So let's do gradient
linear one like this, which is just like
a simple gradient. But then if we set the tiling
like Wi Wi high to like 25, six, for example, yeah, 256 seems about fine. You can see that it
will just give us, these really long
pieces over here. Now, at this point,
what we're going to do is maybe use like
a Hogram scan once again and just mess around a little bit more with
the values to make them you're less or more strong. You can also play around
with your contrast, basically. Like that. Okay. And now, what we're going to do is we
are going to basically warp this all around to get like these really
strong streaks. For this, we're going to
art the directional warp. Then with this direction
warp into the gradient, we are going to grab a
pearling noise over here, which is quite a nice noise. And it's basically just like
these really soft looks. So you basically can set this
quite low, a bit like this. And you just kind
of throw this into your direction warp
and set the warp up, and then you get this
effect over here. Yeah, you can see with
so many little lines that your computer screen
cannot really keep up. So just like twin to zoom
in and just try to have a general look and
see how they are kind of like warping
all the way along. So let's set this
to around four. There we go. That's what
give us some nice warping. Now with this warp done, we can now go ahead and
we can add a warp note, and the warp note will basically
be from all directions. And what we can try
to do is then warp it using this directional
warp over here, which will hopefully
get interesting look. Let's see so here.
So it will also give us a little bit more of these looks over
here where we get, like all of these little
lines sitting in. The only thing that's new to me is that they are very sharp, but everything is 16 bits wide. Let's go up here. Output 16. Yeah, yeah, everything
is 16 bits, so that's interesting
that it looks so sharp. That is quite new. Hm. Maybe they change something
around in this graph. It should not really be a prom. So we can basically just
warp this along here. Don't make it too intense, something like
that, for example. And if we then go ahead
and let's now like a blur, high quality grayscale and that will hopefully get rid of the sharpness a little bit. Let's do 0.1 in our
blur. There we go. So that will hopefully get rid of the sharpening a little bit. So we now have these
really much larger warps. We can also still play
around with our warping to get less or more strong. Maybe we actually
want to go for, like, some more softer
warps like this. I'm not sure yet. It all depends on how it looks in
the end result. But for now, let's say that
we have something like this. Okay. Now what we're going to do is we are going to
blend these two together. And what I often
find the easiest way to blend them together is to, yes, grab a blend node. So you just type in blend, and you blend this one and
this one together over here. Into your gradient map, go ahead and convert your
gradient map back into a grayscale by selecting
this line and typing in GR, which is the grayscale
conversion node. Because this is a height map. We don't need to have the
height map to be color. In terms of the mask to decide
where everything becomes, what we're going to
do is we are going to add another Grady map. But don't worry. This one
will not be as difficult. And for this Grady map, let's go ahead and let's, let's do like let's click ones. So we have black. Let's do white. Yeah,
and I'm just kind of, like, pushing this together. And I'm white again. And I'm just going
to see if I can get, like, let's see.
Let's do black again. I'm just trying to get, like, an interesting mask somewhere. Let's delete this
white over here. Oh, yeah, here, that works better if we delete that white. So we can basically
now go ahead and we can also make this a little
bit softer if we want. And we just want to
see if we get, like, a mask that is, like, on
an interesting location. You can kind of just
move these things around to get more
or less of the mask. So for me, I don't
want to have too many of these really thick lines. So I think something around
this area is quite nice. We still have a little bit. I'm not too happy
yet about this area over here, but we'll
see how it looks. I'm just guessing
here, so I don't know. I go ahead and input
this into my pasty, and once again, I need to add
a grayscal conversion note. And now what you
will see happening, although it is the one
way around, I believe. So let's go ahead and
just plug these in the other way
around. There we go. So now what we should see,
it's a bit hard to see, but now you have your green
map and then you can see that we are inserting some
of these Wi small bits. And coincidentally, because this one often masks the gradients, it is masking the
gradients exactly in the areas that are
very plain looking, and very uninteresting looking. So I basically art
this stuff over here, but I still keep in
a bunch of, like, these really small bits, and then I can go back
into my gradient, and then I don't even
need to open it. I can just go in here and I can, see if I want to, like, increase or decrease
the amounts that I have over here until we get something that's
a bit interesting. Like, right now, what
I feel is, let's see. It is replacing a lot of stuff. That's what I feel right now. If I go ahead and I temporarily add an invert
grayscal over here, just to see how it
work or what it does. Yeah, so the invert
grayscal is not very good. Um, Oh, one, one, I need to open up this one. So let's go ahead and let's see. So if I tone this down, it should show me a lot
less of this stuff. Correct? Or should I actually
move this up a lot more? I think what I need to do
is I need to move it up, and then I just
use my white slide or my black slide actually. Over here to get more
of this masked out. It takes some time to get everything looking correct
because right now I feel like it is using these really simple grains a majority of the time.
But I do not want that. I want to have the
complex grains, and then I'd rather
just have these ones over here being replaced. So that's what I'm
trying to get. So let's see, these warps
are the ones over here. I'm just trying to
kind maybe if I invert this just by swapping around my black and
my white slider. I'm not sure of that. Nah, so we don't want to invert this. It was already correct.
Yeah, it's a tricky one. Normally, oops.
Normally, it's not this difficult to get the mask right. I wonder I'm honestly not sure what I'm
going to do with this, which mask I want to get. There are different ways
that we can do this. We can, for example, also, like a histogram scan and add this to our bi and
then use the position and the contrast to basically control roughly where we
want to have blending to be. So that is quite similar to what we have over
here, for example. And then plug this one in, and then you can also
go in here and you can also set the position and
everything like that. So I don't know. Maybe
that's an easier way of doing it, in this case, because normally your green map does give you a
bit more control, but I feel like in this case,
it does not actually work. So that stuff is
fine. Let's see. This stuff I want to keep which I'm pretty much
keeping in this stuff. So I think that yeah,
okay, that should be fine. I think this will
look quite nice. So at this point, we have
some very, very basic grains. We still need to turn
them into actual, like, these really fine grains, but that's what we're going
to do in the next chapter. So let's go ahead and continue with this in the next chapter.
14. 13 Creating Our Plain Wood Material Part2: Okay, so now that we got
our base grains over here, now what we're going
to do is we're going to focus on these
knots over here. So these come in two stages. The first stage is by warping our shapes over here
around these knots. That's the first one
that we're going to do. And the second stage is that
we are going to actually create these little knobs or knots or whatever
they're called. So we need to get
started by just deciding where we actually
are going to place those. For this, if we go to patrons, we will go ahead and use a simple tile generator
once again over here. And this time this tile
generator can be very basic. We are going to go ahead and set this patron to be a
disk over here, see? So that's quite easy. Now, you can kind of
decide how many you want. I don't want to have
too many of them. So maybe ten by ten is
actually fine. We'll see. Because what we're going
to do is we're going to scroll down and at the
scale set these a lot smaller. And then also do a scale random like this so that they
become even smaller. Don't do too much, actually. Then if you also
go ahead and set the random over here,
what it should do. Oh, no, wait, sorry, for that, we first need to also do
some scaling like this. But what we can also
do is you can also scale them a little
bit flatter like this, although you need to
set the inter ste. I hope I say this correctly, up a little bit before we can actually do the random stuff. But now we have over
here as you can see, we have some very
small scale variation. Now if you just go into
the position random, we can just go ahead
and we can give it like a random position. If you want a random rotation, and the goal for this
is that now we can go all the way down
here to the color, and then we have a random mask. The nice thing about
this random mask is that when you move it up, you can see that we
can basically choose how many of these
pieces we want to have. So just like that, we
can easily just move around with this to
change our random mask. So let's say 0.75
to get started. And now let's say that
I don't really like the position because right now it is all in this location. Now, we can go ahead
and we can set the position here or do,
even a global offset. Or what you can try to do is go all the way up to
your random seat, and this will just
generate a random seat based upon your parameters. And for example, if it sets to number three, that
looks pretty good. Okay, so we now got
these pieces over here. Now, what we're going to do with these pieces is that I
want to split them up. So let's go ahead. And basically, we need to turn this into, like, some noise. If we go in here and
add a directional blur, we're going to make this
a little bit wider. So I'm adding like a
directional blur over here, as you can see, and that will just make everything like a
little bit wider, so it will discover a
larger surface area. Then if I go ahead and maybe
add what if I then add a blur high quality
gray scale to make it a little bit thicker, that
we get something like this. So we get these really white
looking pieces over here. And now what we're
going to do is we're basically just
going to generate, once again, like a gradient map. So if we, for example,
have this gradient map, what would happen is
it should here, see? So it will generate
some of these pieces. Now, of course, this kind
needs to fit in properly. So if we blend this one
together, actually, blend is on the
top, and blend is together using our original
directional warp over here. Let's have a look. So here if we set this to
maybe like art, here you can see that now we
start to get that warping. So right now the blending
mode set to art, you can use your scroll
wheel to actually scroll through them to see if there's maybe something that
blends a little bit better. For example, like soft
light or Max Lighten, no, and then there's
sometimes also like a soft light all
the way at the bottom. That sometimes works. But no, it looks like that we
want to go for art. Okay, so if I go for art, I actually want to
have a check because normally I do this separately, but if I have a look at this, it feels like that we don't actually have to
do this separately. So that's pretty cool if we
can save that little step. So we have this one
over here, okay? Well, yeah, we do have some really strong piece,
but that's okay. So I'm going to set my
direction blur even higher because I want
to see if I can Well, I don't want to
set it that high. That's a tricky one. Like,
I want to set it higher, but I don't want to get like, Hey, I want to just
have a round effect. I feel like that
looks pretty good. So here it nicely
goes around it. So if I have a look at
this, it looks like that. Oh, no way, that's why I'm
adding it always later on because we are overlaying
this to this piece. And what might
happen is when you overlay like that, that
it will not show up. So that's why I tend to
do the blend after it. We can give this a go,
however, we can see if it. He'll see, so then we do miss some of these
locations where they are placed, as you can see. So that is a tricky one. I'm not sure. Yeah, I think we'll just go like the traditional way
that I always do. So the traditional way
is something like this. It's a little bit more messy, but it's basically like
a blend behind it. We then throw in our grad
map into the top and just add a gray scale
conversion to convert it. And then once we've done that, we can go ahead and we just
need to create another mask, and that's basically
going to be it. So for this mask, I want to
go ahead and I want to grab, probably like this one, add a histogram scan to this blur to basically push it out as far
as I can, like that. And then we kind of need
to add another blur, high quality gray
scale on top of that. But then you will kind of
just blend everything out. And doing that, you can see that now if
we play around bu, we can sort of, like, make
them fade in and out. Don't go too much because
if you go too much, you can see that it
starts to show through. So just sit like this level. And at the point that when
we're actually done with this, it will be so noisy that it
will all just fit together. So that's one way to, like, add the extra warping
on top of that. If you want, you can go ahead and also use
this one over here. So using this one over here, I think that does give a nice
effect because it kind of, like, continues the warping. And then what we will
do is we will add the warping later on on top just for these
areas over here. So that's a new technique. I will use this
technique from now on. No, you cannot really
see it that often, but it does give
like a nice effect. Okay, so we got this over here. So now we have a
pretty solid base. Now, later on, we are going to actually art our little knots, which they need to be over here. So actually could
probably art those now. Let's art a blend. And let's
just go ahead and grab the very original one
over here and throw this at the very top and
set this to be subtract. So here will be our little knots and
everything like that. Now, they are not too
special the knots. As you can see, over here, they kind of like just
lay on the top. Most of it comes from the color. And yes, there are some over here, like
some cuts in here. So what I'm going to do is I'm going to I am
improvising right now, so, well, I've been
improvising this entire time, but I mean, I'm not working
for memory anymore. So if we have these, it would maybe be nice
if we just, like, add some cuts to these
pieces already in here. There's a few ways
that we can do this. The first way is that we
can go ahead and we can go into our patrons and grab
a shape pattern over here. And with the shape pattern,
if you set this to be a disc, you just have a normal disc. Now, as you can see
here, the cuts, they kind of, like, just go from the center and
they kind of, like, go out. There is actually a note
that we can use for this, and it's called like um like a star note or star burst note, I
believe it is called. No, not a star burst. Well, maybe it is a star
burst or like a polygon. No, I think it is
a star burst node. So the star burst node, what we can do is we can
blend our shape using this and just set the mode to be subtract so that it's actually
cutting out. And then in our
actual star burst, you can go ahead
and you can say, like, Okay, how many etches,
for example, do you want? Then we have the blur amount, which can make it a bit sharper, size minimum and
the size maximum. It's always nice to just give it a little bit more variation. Including the size variation. Then you can see
that we start to get a little bit more
of that cut look, as you can see, randomness. You can also add, that we
just add some randomness. And with this one, if
we now just add a very quick and it's a note I don't
think I've coveted yet, it's the multidirectional
warp grayscale. It's quite a name, but this
note you will love this note. It's one of my favorites. If you go to your noises and
you plug in the noise here, it will basically warp
along this noise. So if we go for, like, clouds two is the one
that I tend to use. And plug it into the intensity. Now, if you set the mode to minimum and the
direction is to one, it will basically
just kind of move your stars around,
see, like this. Now, maybe clouds two does not work in
this specific case. We can also try like
a pearling noise just to see if works. And if we just make it a bit smaller because we just want to get some general
warping in here. Something like this
will look quite nice. So let's do like a pearl noise, and then we are basically warping this together over here. And now it's just a matter of maybe going in here
and maybe setting our size minimum and our size
maximum out a little bit more in order to fit it. But that's basically
how we can just very quickly add some
of these pieces. Now, if you go ahead
and, for example, now duplicate this
you can also go ahead and duplicate
your starburst and your directional warp. And just for this one, I'm only going to give it
like two variations. I'm just going to
set my randomness different and maybe like set my branches a little
bit like less, maybe four or
something like that. And then artists
one to the tops. Now we have these two
different variations. So in your tile generator input, what you want to do is
you want to go ahead and you want to set
this pattern to be an image input and set the pattern image
input number to two. This way, we can simply plug in over here two images,
as you can see, which will give us this
little knob over here, which can then later on
also be added in here, but we'll work on that
a little bit later on. So we got these
pieces right now. That's pretty good.
I just need to make sure that when I blur
it, there we go. So that it does
not interfere with our blurring or
anything like that, but that looks totally fine. And now for this one, what I'm going to
do is so let's see. It does have a little ring
around it, but for the rest, it's pretty much on like
the flat area over here. So what I might do is I might simply do this into
the color and for now. So right now we have it set
to be a tart mean input. But if we go ahead and
actually use this one, this tile generator as a mask by plugging
it into our paste, we can most likely just
use a uniform color, and a uniform color is just
like a flat color at the top. Oh, and set the
blending mode to copy. And then with our uniform color, I can basically, kind
of match this out. So we need to be a
little bit careful that we do not go over the
top because then we will be able to
actually see it in our hipoly we will
be able to see it moving around, and we
don't really want it. So let's just set it to roughly
like quite a white color. Maybe just do a simple zero
point and little bit dark. Let's do 0.4 over here so they will just be overlaying on top
of it like this. I guess on top of this,
what we can do is we can do slope grayscale so adding a slope bl grayscal can
break up our edges. I don't know. Have
I done that before? Oh, no, I've not
done that before. So a slope blur gray skulls also note you will really love. So with this one,
if, for example, grab like Cloud sto,
and plug it in here. What it will do is if
you set your samples up, your mode to minimum and
your intensity down, you can see that it will
break up your shape, see? The mode basically just
says blur means that it goes on both sides. Minimum just means that it will ignore everything
that is black, and maximum means that it will ignore everything
that is white. So just keep that in mind. And then what we can do
is we can just give it some small like 0.1. It's very sensitive, but give it some small
variations like this, which will in turn just make everything feel a
little bit more organic and a little bit more realistic because it's no
longer perfectly round. Yeah, you can
basically just, like, mess around with the intensity, maybe like 0.12, for example, and just get something that
looks quite nice out of this. Okay, so that is pretty good. At this point, what
we're going to do is we're just going to add
some general noise. Let's do like a multi
directional warb gray scale. And I don't know if I want to
go for like a clouds noise, which by the way, I just used, or if I want to go for
a really small pearl in noise by setting the
scale of my purlin nown. So let's see, we have this one. Now you can see that this
looks very, very noisy, but if we set the modem minimum, and just set the angles down, maybe set the direction
to, like, one. It's just about like adding some general waviness
to our shape. So we have this one
or we have our Yeah, I think I like the clouds
too more in this case. So we can using this and just
move your warp angle down, you can see over here
that we can start like some very small waviness and just add some imperfections
to our shape, see? And I think that will
look quite nice, and it feels once again more
organic because right now, everything is just
way too perfect. So let's do something like this. You can try and play around
with multiple directions, but often one direction is fine. Now, doing it this way, I do find that it has a different look compared
to the directional warp, and that's why I'm using
the multidirectional warp. It seems to just work a
little bit better than a directional warp or
like a normal warp. I know a lot of pieces
are called warp. So we got this one over here. That is all looking pretty good. Now, what we're going to do now is we are going to slowly
just start adding, like, a bunch of extra pieces. So we have, like, some
stronger streaks. Let's do those first. So we got this one that's
art and Bland, and for our stronger streaks, I'm going to go in and let's just use
an anastrophic noise. Nostrophic noise has, like, all of these really
long streaks, and we can basically set
the Y amount by resolution, which will make
them a lot thinner. And the X amount is basically
going to be like how many of these or how
long the lines are. So I'm going to set this
to probably like three, not too long, not too small. Ah, yeah, okay. That looks pretty good. So now that we have this, we are going to start
with the histogram scan. Come on, histogram scan. And this one can just
basically push out and just give me a few lines, as
you can see over here. So having these few lines, I'm now going to do a
multidirectional warp gray scale. Or maybe like a normal warp. Let's try them both out just
to see which one works best. And we are going to warp this
once again using our very original just use this
one, our original noise. Okay, so this one does
push it around quite well, but we don't want
to push it as much. And this one, if we set you to minimum in a direction
of one and down, I'm going to go for the multi
direction warp as always. So as you can see over here, I'm just warping it a little bit in the direction of how
everything looks just to make everything feel a
little bit more interesting. But I'm not doing it too much. I then add another
multidirection warp, and this one will be more
for, like, random noise. So if we just set
the mode to minimum, directions to one,
I'm going to use, for example, let's start with just trying
like a Cloud two. Cloud two is pretty good, but I think I want to have
something a bit bigger, maybe like a purlin noise. Honestly, I kind of want
to have both of them. Let's duplicate our
multi direction wb. Wow, I don't often
have so many in a row. So number three
and number three, I want to just here, add like some of this noise. Like that. That
looks pretty good. And now just to kind
of, like, break it up. I think at this point, it might actually be nice if I just add, like some clean up. So let's just do that first. So here, clean up if you just select your notes that you
want to have organized, you can right click and
you can press art frame. This is quite nice because
you can give the frame a name so we can say nots. Then we can go ahead
and go in here and we can say over here, we can say like frame and this
will be grain generation. And then over here,
this will just be like the combining
that we will have. Grain and not combine. There we go. And then we
kind of move it from there. And then this one will
become strong cuts, for example, something
like that, for example. Okay, so we have a
multi direction wp. The last thing that I'm going
to do is I'm going to go ahead and blend it
using a grunge map, and this will just kind of make sure that it's
not all over the place, that it's yeah, a
little bit less. For our grunge map, I'm going to want something
a bit more directional. So didn't we use Oh, but we use the contrast a lot. Hmm. What we can try to do. So if this is the effect
that we need to get, just to save some
space or to save some memory because you can see that these are
very expensive. The way that
milliseconds works is, whenever you change
something in your graph, it needs to run through
all of these notes. All of these notes are the few milliseconds to generate it, so you want to try and keep
your milliseconds down. 92 is quite expensive. These grunches are
always quite expensive. So that's why I am trying to always keep
everything into the green. One way that we can do
this to get this effect is we can go ahead and grab this grinch map and set
the balance back to, like, something like this,
so a little bit less. And then ter CAM scan, which we'll sort of do the same thing and use that to kind of, like, push the balance back in. So I'm just now
trying to get Yeah, it's not completely the same. So if we now go in here
and maybe like set our contrast down a little bit, because I need to
get it very similar. There we go. See? So it
looks very similar now. Maybe like tone down the
position a little bit over here. So the reason I'm doing this is because I can now just
plug this one in here, so that should not have
changed anything, really. It has created this one
tick line, of course, see how small changes can
even make a big difference. You can go ahead and
go into your position. It in contrast and
just trying to get it a little bit better. That's annoying that we
have that exact one line. Is that one in here? It is. Can I maybe just
like art then some extra? Oh, yeah, here. See, I just need to art like
some extra grains. It just happens to
have pushed out exactly that last little
bit of gray scale. So over here, I'm just adding, like, a few extra grains. And the reason that I'm
doing all of this is because now this one
we can throw away, but this one I can now use. So I can now add the
transform to D to this. I rotated 90 degrees, and this is just that it is
going along with our greens. And then I can
throw this in here. I can add a histogram
scan on top of this set the position up, throw this into the top, and then finally set this
to be a subtract. And now what you can see is
now with this simple slider, we can control how much or how little of our grains were actually want
to have showing up. That's it. We can now go ahead and we can plug
this here into the top, set the mode be subtract because we want to
have it going down. And now you can see that we got, these stronger lines, and
we can take it from here. So we can go ahead and we can like in anastopic
noise, if you want, you can set the imunt
By resolution off, and then you can mess
around with over here, like like ten, 24, to basically give it more thickness and all
that kind of stuff. Length, you can also go ahead and set the length
to, for example, two, to give it like longer
lengths and just make it run across and all that kind of fancy stuff to just get
it all looking perfect. For now, I'm going to
leave it off here. I'm going to save my scene. And what we will be doing
in the next chapter is we will just be probably
completing, actually, yeah, we will probably
be completing our main grains and actually preview them inside of Marmoset. But this is already starting
to look quite well. I'm going to end up with just
doing if it allows me to. Come on, there we go. G to start by end up doing
this, and that's about it. So let's continue
to next chapter.
15. 14 Creating Our Plain Wood Material Part3: Okay, so let's go ahead and continue with our wood grains. We are getting pretty close. Although over here, those overlays that we did is
maybe a bit too strong, so you can always just tone down the opaste a little
bit if needed. So now that we have this stuff, I just want to make
the wood grains feel a little bit more
grainy, I guess. And the way that I'm going
to do that is I'm going to add a slope blur gray
scale after this. And for this one, I want to get, like, sort of like a combo. So let's grab a moisture
noise with, like, quite a low scale this time because these are
very small grains. And because I'm going to not so much like these little
what do you call them? Chips or whatever
they are called. And the reason that
I'm not doing that is because we just don't have
the resolution for it. But I am going to kind of, like, fake the unevenness
that we get from these. Yeah. You can see like
we just wouldn't have the resolution to
do something like this when we are looking at, like, multiple different planks. So the way that I have that
in mind is I grab is noise. I then go to patterns and I
grab like a tile generator. And I want this tile
generator to be a gradient. Where are you? Gradiation. Oh,
yeah, gradiation. Then what I'm going
to do is I'm going to go ahead and I'm going to set my rotation random
up so that we have a bunch of different rotations. It's also thrown the
symmetry random. Let's set our mounts way up. So now we have all of these
little squares over here. Now if we go ahead
and I don't know, for my scale, let's set
our scale maybe up. But then if we scroll
all the way down, set our blending mode to max. Etc all the way up
again. You know what? No. Maybe it's not nice to have the scaling up. Let's see. Um, I kind of want to
have them not square, so I don't know which one
I need to move for that. It doesn't actually matter
which one I need to move because we have all of
these random rotations. There we go. So now it's not as square. Let's tone down
our scale randoms, that we do keep these
quite close together. Position random. Um, yeah, you know what this
might actually work. If we do position random
and then boost up our scaling quite a bit
and then set the mode. So what else do we
have? We have max. Art. Yeah, so we will
need to go for max. So we just get this
mess, basically. But that's fine that's kind
of what I'm going for. Maybe set the interstine scale and random and everything up. So that we basically
just get like a bunch of different
variation in here. And it's just that we
get something like this. It doesn't really
need to be precise. It's just to get some kind
of squariness in our noise. Because then if we blend
our moisture noise using this style generation
and do like a multiply, tone this down a little bit like this and throw this
into our noise. This might actually be I might actually need to do
a safe transform. Let's add a safe
transform grayscale. It's very similar to
the normal transform. Only this time for tiling,
we have a simple slider. So I'm going to make this
a lot smaller like that. There we go. And now we get
these really squares pieces. And then in your slope
blow gray scale, you want to set the samples up, mod the minimum,
and just tone down. And now, if we go ahead and very carefully move our intense Whoa, move our intensity to like 0.01. Here, see, you can now
see that we get like these squariness looking shapes. One thing that I want to make sure is if I go to my
safe transform and set my rotation to 90 degrees to see if that
works better or not. Yeah, I do feel like that
works a tiny bit better, just because they now go
like, with the grain. And as you can see
that instantly just makes all of our
moods and everything feel a lot less perfect
and more organic. Let's do 0.003, probably. And just like that,
we now have, like, some nice uneven woods
going on over here. I would say that at this point, I'm quite happy with it. So what I'm going to do
is I'm going to actually throw this into yeah, I'm going to go ahead
and throw this into a norm map and then
go into MomsaTolbg. So for the norm map,
we want to go ahead and add a normal node over here, and this normal nodes will
just convert your height map, which is our grade
scale to a norm map. We are working in OpenGL, even though nal
engine is direct X. I feel like reading norm maps in open GL is much easier because, for example, if you now tone
down the intensity, Yeah, you can see that
now it does feel a little bit more
like wood grains. So that is pretty good. So
we got this stuff over here. The only thing that I'm not
sure about is that sometimes our really thick lines are
running through our knots, but that's something that
we can kind of just see. So what I'm going to do
is let's tone this down because we want to
have this very soft. 0.1 is probably still too much, but let's
just try it out. Let's go ahead and
set these ticker or the stronger lines
down a little bit more to make them a
bit more intense. So now we have
like these cutting lines sitting through here. Which can sometimes
be quite nice. And we can just throw this
into our ambient occlusion. Now, as for our height, we technically don't
really have a height. For now, I will just input this height that
we have over here, but we won't be using it. So for this wood, the height
will only come when we do our actual planks
and everything. Ambient occlusion. There are two types of ambient occlusion. If you type it in, we
have HBAO and RT AO. I forgot what HB stands for. Horizon based ambient occlusion, and the other one stands for
atrace ambient occlusion. I quite am in love with
the tres and be inclusion. It is more expensive, but it does give us a better effect. Just plug this in
here. We probably won't be using a lot of it. But with this one, you can just like your
height scale down. To 0.001, for example, or 02, and just give it a little
bit of that occlusion, and we can actually control the intensity of this
inside of marmoset. But as you can see, it
is quite expensive. The other one, the HBAO
if we do that one, you can see that
that's one if we turn on GPU optimization, it is a little bit cheaper, but it does also look
different as you can see. 0.002, for example, here, see, you can see that it is not as good in capturing
those really, really small details,
but I want to capture those small details
because it is wood, and I need to have every inch of resolution I can get when
it comes to tin grains. So we got these pieces over here. That's looking
pretty good. Let's say arsine
and let's actually preview this inside of Mamosat. Let's go to our textures, plain Wood and create
a folder called final. This will be the folder in which we will be exporting
our textures. The way that you can
export inside of substance designer is you
can go to your plain Wood. Right click Export
Outputs as Bitmap. And then in here, you just want to navigate
to your final folder. Selected. I always
export as a TGA. One thing to keep in mind
is that TGA is great, although sometimes
if you have very, very strong height maps that you need to have
displacement on, you might want to export as PNG. PNG will be much slower, but it does give you
better result because of the Bitmap rate or
the bitmap depth, I should say, within PNGs. Now next this, we turn on automatic exports
when outputs change. This is very important.
T because we want to preview our material
inside of Mamaset. Setting the setting
will basically mean that whenever
we make a change, it will automatically
export so that we can just switch to Maset and we
can see our changes. So at this point, we can
go ahead and we can now go into Momset create a new material by pressing a little plus sign and call
this Wood un score plane. Now in here, we now
have our maps exported, so we are just going to dragon our nom map over
here. Here we go. And then what we also want
to do is you want to go down here to our ambu occlusion and take occlusion and just
pot in our occlusion map. Now, when we throw this on here, you can see that now
we get our grains. Let's set the ambient
occlusion quite a bit lower. And there's two
things I want to do. First of all, I want to go to my texture and set my
tiling up here to two. I always tend to
do that, so we can see the grades a little
bit more intense. The next thing is I'm going to set my roughness a little bit down so that it
is not as strong. Okay, so this is what
we got right now. Now, I'm not really
happy about it just yet. There's a few things that
I do need to work on. Let's see. So yeah, yeah, there's a few things
I need to work on. So now it's time for,
like, some balancing. So if we have this stuff,
what do I see here? These strong cuts, I want to warp them a little bit stronger. Some of these warps feel
a little bit too even, so I want to, like,
randomize that. And I want to make
these warps over here a little bit less strong. And yeah, I think
that's a good start. So we're going to get
started by going in here. And where we are warping
these strong cuts, maybe we need to
use a warp anyway. The reason why I
say that is because the warp does technically
warp in all directions, which in this case, might Oh,
sorry, we need to do that. All the way over here,
actually. I believe. No. Oh Oh, wait. I'm warping it not with
the correct noise. That's why. So let's hold control and just
plug this in here. There we go. So m, I don't know. It does not give as
noise of an effect. What if we set our
directions to two? No, two just also breaks
it. That's a tricky one. In that case, I'm
going to use my warp. I'm just using this one, but I need to be a
bit careful about it. So let's delete our multi directional and use this warp
and we'll see how it goes. So here it does start to warp a little bit better around
things, as you can see. So hopefully that will
work a bit better. Now, the next thing
that I'm going to do is I was actually,
first of all, going to my sloper making this a bit stronger
to like 0.005. And I was going to make over here, these
bumps that we have. I was going to make them
a little bit more uneven. Ways that we can do
that is we can go into a tile generator,
set our scaling up, and then set a scale random up so that we have these
larger areas over here. The second one is to go into our directional warp
and just not make them as intense, something like this. Here, see now we got
these different types of scaling that should
be fine over here. So we got this one but I'm
adding on top of this, and that is giving me
quite strong warping. So the warping is
great over here. I really don't like it in here. I'm just going to
temporarily turn it off just to see if it makes
a big difference. So if you now switch back
to Mumset it should have outloaded and you can see
that it has now outloaded. So that does make actually a big difference if we just have those knobs not as intense
in some of those areas. Let's see. One way that we
could maybe do that is Okay, so we have the
warping over here. So I'm using this one for that. What if I duplicate this blend
and I'm just making this, it's also like duplicate this
blur high quality grisco? What if I just make
it like a lot less? It probably won't give me, like, a very nice look, but maybe it will be better than
what we have right now. No, that will not be better. What if I make it way more? Like that so that it just like, adds some type of
warping in there that might actually
work a bit better, yes. Yeah, I think that works
a little bit better. Let's have, yeah, yeah,
I think that works. Especially once we have
our actual how you say it, our actual base color on it. Our base color will kind of
hide some of these pieces. Okay, so that's already looking
like a little bit better. So we got this wood green
going on over here. So that's pretty good. If I have a quick look
at some of my reference. So we got this wood grain. I am still missing
some of these pieces over here where
it's kind of like warping together like pinching, like
you can see over here. Oh, no, yeah, I sort of got
those not as many of them. I wonder if we now, let's say, mess
around over here. So, what if I scale this up so
that we have a few more of those pieces
that should kind of, like, layer those in, and maybe we need to
set our gradient linear tiling to like 350 or something like that to
make it a little bit smaller. I think that might
work in our favor. Yeah, here, so that does look a little bit more interesting. So we already start to get
quite a nice looking grain. I think at this point, so we will need to do a little
bit more balancing. But I think at this point,
what would be nice if we just start with working
on our base colors, especially like if we set
the tiling back to one, you can see that the grain
does actually have a lot of fidelity sitting in here. We just kind of need to
balance out the tiling on how big or small we are
going to make everything. And based upon that,
we kind of like, know what we want to do. That's the thing with
this type of grain. Cannot really that easily
control the scale. I would say the
easiest way for us to control the scale would be
if we would go in here. We would like, add
a transform to D, and then we can, set the
scaling one up over here. But that might be too much, or you can hold control shift, and you can move this down and you can set the
scaling like that. But then the thing the problem is that if
you press space, you can see that it is no longer tilable as you can
see over here. And a way to fix that
would be to maybe add a note that is called make
it tile Photo grayscale. And this note will make a tile. Sometimes, oh, in this case,
it does a really good job. Doesn't always. So
you can see, like, a very soft line that you
can see it over here. You can play around with
your mask precision, let's say, on the Vxs. Yeah. See, and then
you can let's see. Yeah, you can just
mess around with your mask position
to get sort of. Yeah, let's not set the mask
size too high to kind of, like, get some more
variation in here. It's a little bit tricky to see. But if it's tricky to see,
that means that it will hopefully also just
work fine in here. Here see in our nomp, now this is working
a little bit better. The good thing about this
is basically that it will give us He see some control. So if I now set this to two, you can see that now
even on a tiling of two, our grains are a little bit bigger, and that is quite nice. Only problem with
doing it this way is that whenever we add knobs
or knots or anything, then it will not look as good. I guess what we can
try to do for that because I need to use
the mask of my knots. Over here, you see, because I'm already
adding this all the way back here,
it doesn't matter. Then it just means that we would also need to use this technique later on for whenever we do
something in our base colors. Just keep that in mind. For now, let's go ahead and go in here. Add a frame. Call
this damage ardon and add a frame over here. Call this one scale correct, and then add one more frame over here and call this one outputs. There we go. Let's say I
see in the next chapter, we will move on
to our base color and we will move on
to our roughness. And once those things are done, then we already have a
pretty solid base with them, we can just continue
on from there.
16. 15 Creating Our Plain Wood Material Part4: Okay, so now that we have our base greens over here,
let me just move this. What we're going to do
is we are now going to go ahead and start working
on our base color. So our base color is
going to be a bit of a tricky one to choose
which base color we get. So we kind of want
to give control over having different types of base colors
because over here, so we have the painted one. But I think what
will be quite cool, as you can see over here,
this looks not like painted. This looks like a plain called
like this is newer wood. And then this is like a
little bit older wood. And then this feels like
very, very old wood, and then some of
the other ones are a bit painted as you
can see over here. But they also have
this type of wood. So it's a bit tricky for us to know exactly which woods
we are going to pick. Because of that, let's
just do a few variations. Let's get started with,
like, newer wood, and then I will move on to probably something more in
direction of this stuff. This stuff over here also
looks quite interesting, but I'm not This is a
very specific base color. I do not want to
spend too much time on the different base colors. I want to be able to
with a single switch, switch around
different base colors. In any case, let's
just get started with this and not
waste any more time. So over here, let's
move our outputs. Let's have a look. I'm
going to go ahead. And we most likely will be using the gradient
map technique. The gradient map technique
is basically this. You grab a grading map, and just like we can map
colors to gradients, we can also do this
with base colors with actual normal colors. The way that this
works is you grab, I think it is this
one over here. Yeah, we can just grab
the final height map for our grains that
looks about fine. Then if you go to
the gradient editor, you can pack pig gradient. What will happen when
you do pick gradient? Let me just try and do
this all on one screen. You know, let's say that this is quite a nice neutral color. I can press big gradient and I can then click
and drag over here. And then what it'll try
to do is it will try to map these colors to your mesh. And like this, you can see that it will do this with
different colors. And if you have if you only
drag a tiny bit like this, you can see that
you will not get as many colors as when you do really high density or really erratic like this over
here, then you get noise. So knowing that, we're just
going to go ahead and, like, oh, I was going to say we're going to go ahead and
try a few different colors, but this one actually
looks quite cool. What you can also do is
so you can go over here. You can also give it a
few different twice, where you just duplicate
your graded map and you just grab like
a few different colors. And then later on, you
kind of like know, Okay, which one will
be the nicest one. So we got these, and
now if I go ahead and maybe over here. See like that, you can also get lighter wood and dark wood
and all that kind of stuff. So that stuff is not
too difficult to do. These ones are way too intense, so we're not going to go ahead
and do that, but we can, of course, try doing like
this one and over here, see? So you can see this actually is also quite a
nice one over here. This one I also quite
like. So that's basically the general idea for doing the gray M technique. And then what we want
to do is we just basically want to lay
your stuff on top. Um, actually, I think I
like this one more. Do I? Yeah, I think I
like this one more. Let's just go ahead
and start with this one and leave
these ones in the back. Now, on top of this one, what I tend to do is I want
to sometimes just give a slightly color differences or slightly balance
out the colors. I can do this by adding a
replace color range node. With this node, the way that it works is you grab
your source color, which is just going to be one
of these colors over here, and then you set your source
range all the way up. Now, as you can see,
it will try to replace those colors into
your target colors. Over here, I have
my source color. If I go to my targets color, select the little picker and click on my
source color again, what you can see it is
now exactly the same. However, if I then go
in my target color, and, for example,
make slight changes, you can see that
I can very easily change the entire color of my texture while
still keeping in all of those really
nice details. And it's just very handy
to do stuff like that. So if we let's go ahead and just do this one first.
So we have this one. I quite like the pattern
distribution of, like, the color
distribution, I should say. So what I'm going to do is I'm going to go to
my target color, and I'm going to make
it a little bit more, like the orange direction like this so that it
kind of matches here. Okay, as you can see, so what would be the next thing
that you want to do? We want to go ahead and
we now go get started with some of these
darken areas over here. And for those darkened areas, we can do those in a
few different ways. One of them is by
adding a blend. And then we grab, for example, like a let me quickly check. Yeah, I think it's
just like an overlay. So we grab, for example,
like a uniform color, and this uniform
color we set this to be like a dark brownish color. I think something like
that will work quite well. Yeah, something like
this, for example. Now what we need is
so we plug this in, but now we need a mask for this. For the mask, we can often grab a bunch of different
masks from this part. What I'm going to start with
is doing a shadow mask. Shadow mask can sometimes
be nice to just give us some very specific
directional shapes. So here we have a shadow mask, and the cool thing
about shadow mask is so you can basically
set the angle, and you want to look
at the black area. So over here, if I
set my angle up, the shadow will go downwards. And here you can see
that I can also have control over how much
of it I want to have. And if you want, I can
set up my samples, but let's leave those
to eight, for example. Now with your Shao mask, if
you then go ahead and do an invert gray scale
so that we can actually select these areas. And then we can do his gram
scan and set the position for this 2.5 to leave it at default and plug this in. Now
what you can see is here. If we switch back
and forth, see, we now already have some extra dark lines that
we can work with. Now on top of this,
we can now just start layering on top
more and more details. Let's add another blend, and let's grab a uniform color and make this
uniform color black. For this uniform color,
what I'm going to do is we have over here these
really strong lines. Now, this is also where
the scale correct comes in and it is a
little bit tricky. So sometimes, if you do this, you just want to go
ahead and copy this. Luckily, they are
not too expensive. But, um, it is a
little bit easier, but yeah, you do need to make sure that everything
matches up together. Now, what you can, of course, do is you can mess around a
lot more with these areas, although it's a bit
more of a pain to get larger scale grains. However, in terms
of this tutorial, I'm just going to use
this scale method. The reason why I
say it is because it's slightly more
expensive as it would be when we would just reuse
these notes over here. But of course, it's also easier. So other than this, we now get over here like
these darker areas. We can use our
opacity to basically, you see, to basically increase or decrease the
amount that you want. So let's do 0.4 maybe. There we go. And then we get, like, some of these darker bits. Okay, what else do
we want to have? I want to have some
more darker areas, but I need to be very
careful with this. And the reason I need to
be careful with this is because if those are too obvious, you
will see the tiling. And because we need to repeat this texture over and over
and over again quite often, we really do not
want to see tiling. So let's go ahead and
add another blend. And I think we can just reuse our brownish color that
we have over here. And let's see. So what
shall we do with this one? I don't really think that
we have a good crunch map, so we might just
want to remake one. Now, I have my own grunch maps that I sometimes want
to take a look at. These crunch maps,
you can also get them you can get all of them for a very cheap
price on my channel. But if I ever use one
of these crunch maps, I will, of course, go ahead and provide them with this tutorial. So the reason I say this
is because this one is one of my favorites because it has this really grainy look. And with this one,
what I can do is, let's say, I can move
the seed around. So I will go ahead
and I will supply this one for you guys. This is as easy as me just
opening it up like this. And what I will do is
I will just copy it, and then I will
place it for you in the textis plain wood. Here, I'll just place it over here so that
you know where it is. Okay, so we have this
one ter transform to rotate it 90 degrees. Maybe also just have
another look at the scale until we get
something interesting. Yeah, let's do this one artist. Yeah, see? So, this has this
really sharp looking dirt. That's a little bit grainy,
and I just like it. I think it will fit
well if we then, tone it down a bit
more, and it will not be too obvious in terms
of tiling, hopefully. And else we can always
mess around with our seat here, like
this seat actually. Yeah, this might actually be a bit harder to see in tilling. You can test this out by
pressing space and here. So now, okay, so with space, we can see that it's
a little bit strong. So let's do 0.4,
and 0.5 for now. We'll see how it goes.
And then we can, art a few of those details. Now, the next few
details that we will probably need to do is
the knot over here. And then I also can
see some whitish stuff sometimes gathering
around our grains so that's something
that we can also add. So for our knots, what
we're going to do is, I think, if I go
ahead and I grab, so it looks like it
comes in two stages. We have a dark outline, and then we have our
actual color in here. If I do a gradient
or a gradip, yes. I don't think we have a lot
of detail in here, do we? Yeah, it's just white. The thing is that when it is white, the Gray map just will
not work as well. And I don't think, let's see. Do I even does it even art ERC, so it just becomes
a plain colour. But I do not want plain colour. I, of course, want to get something a bit
more interesting. When we have those
type of cases, it's sometimes better
to simply go ahead and go to our noises
and then just grab an actual noise like B&W spots too and just plug in the noise and then map
your colors to this. So if we go to our
gradient editor, we can pick gradients
and we can grab, for example, over here. I think I want to have it
a little bit more noisy. Let me just I messed up. Let me just really do this
a lot of times that I get, hopefully a bit more noisy. Yeah, I think that will work. Okay, so we got this one. Now, on top of
this, I want to add those dark cuts that we have. And we can do those by adding a black color at the
top, using a blend. And then all I need to do is I just need to duplicate once again these notes over here. And I'm going to grab and
yeah, that should be fine. I'm going to grab this one, and I want to invert it. And then the rest is black, don't worry about that,
so I want to invert it. The reason that you should not worry about it because
we will cut it out. So now we have those dark
outlines sitting over here. Finally, I want to
have one last blend, and this blend will basically
have a dark ring around it. We can do this
using an HSL node. And if you plug in your
green map in the HL node, it's a very easy
way to just very quickly make your
texture a bit darker. And then all we need to do
is we need to create oops, a mask and this mask
that we create. Sorry, I actually forgot
that I need to do this. There we go. It's a bit better. So this mask that we create, we can go ahead and
we can what Oh, yeah. I keep losing my
train of thought. We are going to art and
Edge detect over here. Set the edge width all the way down and the edge roundness, and as you can see if
you then press invert. It will give us a dark edge. Now, unfortunately, let's
move this up a little bit. It looks like the
edgetect in this case, can actually register
those small edges. Maybe we can try to
play around with our tolerance to see if we
can tone it up and down, but that does not
look like the case. Because of that, it's
sometimes easier to just duplicate or transform. And we also created like a
mask for this white somewhere. Oh, I can remember
creating also strong mask. In that case, just
do an HSL node or a Hcrum scan node, I mean. And if we just plug in this into our Hcrum scan and set the
position all the way up, there we go. Does the trick. So we can now go ahead and we
can use this one over here. And throw this into
our edge detect. See now we have these
thin rings around it, and now we can just go
into our edge width. And if we move this up, we can get these stronger rings. The only thing that I don't
understand is why these don't have a look. That's interesting.
Like why doesn't this one detect? That's correct. We then scale it up. I think that the make it tile
photo gray scale, in this case, for some reason, it is making our mask
have a gradient. That's probably that
it happens to twy and blend exactly on the areas where we have these masks,
which I do not want. I think if we add
in his come scan after this and pushes up again. Set your contrast also up. There we go. That
should bring it out. Let's mess around a little bit more with our
position over here. Yeah, there we go. It does not need to be on every
single one, but I do, of course, want to have
this looking a bit decent. So we can push this out. There we go. Now we
have a dark ring. Let's just give this
a twi for now before we do anything else.
Let's add a blend. And what we're going to do is we're going to just
plug this into the top and we want to
pretty much plug in. Actually, I think
this one, this one we want to plug into the
bottom over here. So that we have these
dark bits. Oh, wow. Yeah, give me a second. It is also doing the same, I believe, over here,
where it is just, you see, it's just
breaking the k, which is a little
bit unfortunate. In that case, let's
have a think. In that case, for now,
let's get rid of this one. And let's see. So now we have, so now we do actually have all of our bits
just sitting here. We can tone down the
intensity a little bit more. And what we can also
do is we can also add an HSL note before it
goes into the blend, and this HL note is handy for
us to basically move around our lightness to
make it lighter or darker because I don't want to have these pieces
to be too obvious. Okay, now, yeah, like the cuts, I wonder maybe the ambient occlusion will take
care of those. They will not.
Okay, fair enough. In that case, maybe it's easier if we just add the
cuts later on. So if we go ahead and we add
like a blend on top of this. And for this blend, if we
grab a black color over here, so we're just going to make
a mask for these cuts. Means that this one over here, we can pretty much
delete. So let's see. So over here, we have
our tile sampler. You know what? Let's just
do this a bit easier. Let's literally just duplicate our tile generator because
they are so cheap, anyway, here, they're literally 3 seconds three milliseconds. And now that we duplicate it, these will only show
our cuts so that now if we go ahead and we
grab our transform, and we just grab those cuts. That is probably a better way. So there we go. So now they
are in the right location. The fine. I thought I was going to
do like an easier way, but it turns out that
this was the easier way. Okay, so we got, some of
those pieces also done. Finally, what we need to do is we need to have one last blend. And for this blend, I'm going
to add a uniform color. And this time, I'm going
to make the color white. Let's plug this in and let's
just go ahead and let's re grab our grunge
control over here. But this time, first of
all, change the seat. That's sorry, change the seat. That's quite
important, like this. And then set the
balance quite down. And let's just
plug this in here. So this will just
give us some of these white areas like this, which will just give us
some nice color variation. I do see that it is
warping around our layers. I wonder if it is as easy as
just adding a warp around here and grabbing
our Scale correct, kind of, like, do some warping. Yeah, it does actually
kind of work. It does kind of, like,
go around the layers. Yeah, see here, so that
does actually work. I'm just wondering if
I grab the warping before we add all of those
really grainy details, if that will give
me a little bit of, like, a better result. Okay, it seems
like it does that. So let's warp it around it
quite strongly like this. Now, don't forget
that we do need to go ahead and we need
to in this warp, once again, use our scaling. So it might be a little
bit inefficient. Now I think of it to do
the scaling like this. But at this point, we're
already done, so that's okay. And then tone down our opacity a little bit to not
make it as strong. And there we go. Oh, it turned out to be a bigger
graft than expected. But as you can see, now we have a nice little base
color going on. So let's go ahead and
just select the stuff. Right, click out of frame
and call this base color. And then the cool
thing that we can do later on is we
can simply change the color around because if you look at it from
the end over here, here, this does look
very much like wood. And then if we go ahead
and switch it around, you can see that we can just add different colors
wood just like that. And it will be very easy. What we're going to do is we are actually going
to then, like, expose some of these values that would like a simple slider. All in one place,
we can increase or decrease the white staff
and all that kind of stuff. And it will be very flexible. But that's something we will
go over in the next chapter. Let's set this to 0.2 in those dark extra lines
that we have over here, and I think that
that's the trick. So we can plug this into our base color. We
can save our scene. I'm not yet going to preview
it inside of marmoset, and the reason I'm
not going to do that is because I first want
to create a roughness. So that's what we're going
to do in the next chapter. In the next chapter, we will create our
roughness and we will hopefully finalize our
plain wood material. And then what we can do
is we can start focusing. Let's do first on the planks and then on the painted
wood variation. Oh, and also on some colors.
So let's continue with that.
17. 16 Creating Our Plain Wood Material Part5: Okay, so we have our
base color done now. Now, what we're going
to do is we are just going to generate
a simple roughness. Wood doesn't really often need
a very specific roughness, so it can be quite simple. The way that we're
going to do this is by adding a gray scale
conversion node. And what I always like to
do is I always like to grab my very base over
here, like the color. Convert it into a gray scale. And then I like to add histogram
range note after this. Hiscm range note is just easy because if we set
the range all the way up, we can basically use the
position to control it. Lighter means that
it looks very dull, darker means that it
looks very shiny. So we want to go
ahead and go for something like it's wood, so, oh, actually, you know what 0.5 might actually be fine. So I do want to give it
a little bit of a shine. Then on top of this, we are basically
going to layer masks, which will give us the
variation that we need. Let's do a few blends. Here, like three, so you can just do three in a
row, for example. And then the first one is
going to be this blend, which is going to
be a bit more dirt. I like to set my
blending mode to art, which will basically mean white, and then it will just art
this dirt on top of it, which can be quite cool that this just looks a
little bit duller. Then we have this
dirt over here, which is our brownish dirt. Let's once again also
set this to art, but let's not make
this one too intense. And then finally, we will
have our whitish dirt, mostly, yes, because this
one is just are not. So our whitish dirt over here. Let's go ahead and
set this to be subtract to just give it Oops, that's multiply here
to make it black, and that will just give it
a little bit more shine. So as you can see, super, super easy to just create
a base roughness. We can right click and
add a frame to it. Call it roughness,
and there we go. So base color normal. Seems
like everything is done. We can save our scene. And let's go ahead and try
this out, shall we? So if we go over here, I just need to go ahead and
I need to open up my folder. No way, that's the images,
plain wood, final. There we go. So
everything is in here. So if we now go ahead and we can just arts to our wood plain. We have our albino
map. Strike that in. We have our roughness
map. Strike that in also. Okay, so that's already looking pretty damn good,
if I say so myself. Let's see. What is the problem
that we have over here? If I have a look at
this, you can hold Shift and right mouse button
to rotate your sky around. And I feel like that the
wood color is pretty good. Maybe my roughness
is a bit too shiny. So let's go ahead and go
into our histogram range. Let's make this a little bit
lighter to 0.6, for example. There we go see now that
looks a bit duller. The next thing I'm
going to do is I'm just going to adjust my
lights a little bit. So here we have this light. Let's make this a
little bit brighter. And this is like our main light, the light coming from over here. Yeah, let's set this halfway
so that we get this. Now, cool thing that you can do. If you want to have this
shadow to be softer, you can go into your
area and shape, and if you set your
diameter bigger, your shadow will basically
become a little bit softer. Second light is light over here. This light I'm going to
have not as intense, but I'm going to just move
it still from the top. I don't know. Maybe we
actually want to make this light a little bit
more like orange or yellow, like a bit more intense,
something like this. So like a yellow, orange
color, something like that. You can also mess around
a little bit more with the brightness, and
then you can, of course, mess around with the diameter to make this a harsh
or a soft cut. And finally, we have this
light over here at the bottom. Let's make that one a
little bit brighter. Let's see. That one is
xy already pretty good. Let's set the intensity to 6.4, and the color is
also pretty good. So as you can see over
here, we already have quite a nice looking wood. The knots over here, they are
a little bit too obvious. In my case. The wood itself
is looking really nice. I quite like that. So I'm going
to go ahead and I'm going to let's go ahead and go
back into our base color. So now we're just going to
balance some stuff out. Let's see. So here
I are these knots. I'm going to make them a little bit more desaturated and maybe a tiny bit lighter. Yeah, so let's set down the
saturation a little bit to 0.47 and maybe set the
lightness to 0.54. And then if we switch back, you can see that now it has changed. It's maybe a little
bit too light. So let's do 0.52. There we go, see, and now they blend in a little bit nicer. Another thing is, let's
go into our camera A, turn off our lock, and there's
two things that we can do. So to sharpen, you can always
play around with that. Although you need to
be careful with this if you are working in ten ATP. And the reason for this
is because in ten ATP, it will always look a
little bit less sharp as it would normally look
like when we are, of course, working on four K. Now what we can also do is we can actually turn on
our rate racing, which will actually make not that big of a difference
for models like this, but still some difference. Let's turn on our rate racing, and then you can see
that the lighting specifically makes a difference. Now, what you can see here is you can see some jaggedness. This is because in rate racing, the lighting will often use your actual geometry in order to define where the
shadows need to be. The way that we can increase
the geometry of a sphere is by going into a sphere,
turning on subdivide, and you can instantly see it
working better and just set it like three subdivisions or maybe four or
something like that. The more intense you
have your height map, the more subdivisions
you might need. So we are now already at 6
million, but that's fine. And maybe go in light tree and just make it a
little bit softer. Now you can especially
see how the light looks softer like
this. And there we go. That already, as you can
see, gives a nicer look. So tracing is turned on. That's all fine. Camera A. If you want, a cool thing
that you can do is you can give it some blur, so you can give some
depth of field. If you just turn on
the depth of field, set the near blur
all the way down, and then set the far
blur a little bit down, and then just work on
your focal distance. You can basically make
it that you have only some slight blurring
the outer edges, see. So here you can see
width, without. So it just gives you a tiny
bit of like a blurring on the outer edges to make everything feel a
little bit softer. But that's actually
looking pretty cool. That's like a base
wood, don't you think? So what we can do now is we
can probably just generate an image and see up close if
it is actually working well. So I'm quite
surprised how little I need to actually
change on my base color. Of course, this one is a
little bit more colorful, but that's mostly just, that's mostly just the
light and everything. I want to actually go
a little bit duller because we are in a
desert or in, like, a really warm place with, like, the western town, so I don't
want to make it too perfect. One thing I actually forgot is let's go into our camera A, and let's play around
with our tone mapping. I often set my tone
mapping to HJL, which is like a more
intense tone mapping, but it gives me some
nicer reflections. And then I often just
go ahead and, like, work a little bit more
like my exposure, set this to 1.2, for example, and also just work in my sky and just play around with the
brightness of your sky. Like this, actually, 1.4. Let's do that. And then
you can also hold shift, and you can rotate
your sky around to basically mess
around with things. And I quite like this that we have one area that
is quite dark, maybe even that
we want to, like, rotate one of these
lights to be a little bit more down near the
bottom, like that. And that always just gives a nice contrast if
you want to make, like, a nice material render. Okay, so that is
all pretty good. See, we've done that stuff. I'm just checking
that I did not forget anything that we can start
by making our render. Now, I think we can save
our scene and think. I think that we can
start with our render. So over here, did we already give it the right
location? No, we did not. I just need to give
it the right location where we save our images. So images, and there's
going to be plain boot. Be whenever you set this
in a different scene, it sometimes also changes it in here or like your location. But this should be fine. So right now it's 1920 by 1920. Let's set this a bit
higher to higher, sorry, bit higher to 3840 by
3840. I like Fouquet. And it doesn't take
too long to render. So we got 3840 by
3840 at a JPEG, samples 25, six, honestly, at that point, you cannot
really see that much anyway. So what you can
do now is you can just press render image. And then what it will do is it will render a nice image for us. But now I'm quite excited how
easily the base color went. We just happened to hit that green map that is just right, which is always nice when
stuff happens like that. Maybe we can make the darkening under some of our edge a little
bit darker, for example. But let's go ahead and
open up our image. Oh, whoops, I made a mistake. The image is accidentally
looking at the main camera. You need to go down here.
And in the render cameras, just go ahead and
get rid of the O, let's add our camera A and then get rid of the main camera just
by turning it off. And now it will actually
render our camera A. So let's go ahead
and try that once more by rendering our
image. And let's see. So after we've done this,
so our roughness is done, we got this stuff done. So I think then what we can do is we can start
by first of all, creating our variations
of our wood. Let's do that first, like
some color variations. And after that, we can probably continue on with our plans. Maybe do some exposing. Yeah, let's do some exposing. That would also be handy. And we will still do that
in this chapter. So I just want to
create a quick render, which for some reason is
taking longer than normal, but that should be the
fine once we've done that. In the meantime,
we can already go in here and just
have a quick look. First of all, what we can do is we can work
on the exposing. So is the render done? No, it's not done yet.
With the exposing, what I mean is that we
are able to basically expose things like the opacite and we can give it
very specific names. I will show you how this works. Let's say we have over
here our white dirt. What I can do is
next to my opacity, I can drop this little
button down here and I can press expose
as new graph input. Now in here, I can call
this white dirt amount. And I want to copy the
identifier also in the label. The identifier is for the
system to know what it is. The label is for us
to know what it is. And in the group, you can give
the group like base color, and then it will be placed
in its own little group. And why am I doing
this? Later on we are going to
create our planks. However, we will not actually
be using this graph. We will be exporting this graph and then
building upon it. When we export, we do not really have access to all of
these notes anymore. However, when we expose
the values of these nodes, it will give us access to it. So let's say I press Okay now. The way that you can see
this, now you can see that I can no longer
change it in here, but I can now go
in my plain wood. And then what you can see here is you can see a parameter. What this parameter will
look like is if you go to BriviewT is how it will
look like Base color. And then here you can
see that I can change it and you have a
click on this one. You can see that I can now increase and decrease
this value very easily. And that's the
entire goal of this. So just like that, I can, for
example, run through this. I can say replace color range. Let's expose the new
graph input and call this one base or
let's say main color, for example, copy in layer. An artist to your base color or you can just press
the drop down and select base color and then press Okay. Now, what
are we doing here? We are adding some
dirt over here. For this dirt, you can
expose this if you want. I don't think for this one, what I'm going to
do is I'm going to make my dirt a
little bit darker, and I'm just going to expose
your passage so that we can increase or decrease
the dirt amount. So we can go in here
and we can say, this is going to be
grain underscored dirt. Copy this into your
label and call an artist to our
base color group. Press Okay. Then we add
some of these streaks. That's fine. Then this
one is quite important. So this is going to
be dark dirt overlay. And we can then
go ahead and copy and paste this into our label, and we can set this to
be our base scholar. And we can once again
just press Okay. So dark dirt overlay check. Now we add our knots over here. Those are our knots. That is a good one, actually. So if we change the
color of our wood, we would most likely also want to change the color
of our knots. Now, for now, we can
try doing it in here. So I don't know, that gives us a lot of extra. Let's go ahead and just add a replace color range like this. Set the source color to be
like one of these colors, and set your target color
to be your source color. And source range
all the way out. Doing it this way, I only need
to expose my target color. So that way I can control
all of the colors with this. Knots underscore. Color, see? And also, you go into the base color.
And let's press okay. Tara. Easy does it. So we got this stuff done. What's this one? This one
is okay, like the cuts. That's fine. So that's
all pretty good. We can go into our Htum
range, and in our position, we can expose this
and call this, for example, wood roughness. Artists to a label and artists to a group called roughness. And just like that, we also
now have control over this. We can also do the same
with DRT over here. We can expose this and
call this DT roughness. And in the roughness. And just like that,
we can have all of this control in here,
which is really nice. This one we call
we can expose and call this normal strength. And now because we don't
have a height map, we can just add this to normal, but also anything that
we do in our height map, we can also add to our normal. So let's say what
would be something that we can add in
our height map? Maybe like edge damage amount. Let's expose this one and
call this edge damage amount. Artists to our group normal
because this will just be translated into normal
and no pretty cool thing. So over here, you can see that the intensity is very, very low. However, the minimum and the
maximum over here is 0-16. But we don't need that. We
can be 0-0 0.5, for example. And that's why it will
make it easier for us to move our slide around
because at 0.5, it will just stop
instead of at 16. That means that we no longer
have the issue that we need to very specifically
enter our values. We can just drag a slider and it will all just look
a little bit better. Now here we have some wood
warping. That's fine. I'm just going to
leave that stuff. And I think I'm quite happy with what we get what
we got over here. Maybe I can do something
like a knots amount. So here we have, like, did
we use our random scale, by any chance? Yes, we did. Random mask. Let's expose this and call this nots
underscore amount. Then I'm going to
show you another cult into the group, normal. Now the cool thing for
this is that we have a second type generator
that needs to stay exactly the same
as the first one. We can simply go to the
second type generator, go to the random mask and
we can say nots amount, which means that it will
reference the first one. So it will always stay
the exact same value. And that's all perfect. At
this point, we can save scene. And now if we go ahead
and go into Mm set, you can see that nothing
has really changed, although I might have increased accidentally my dirt a bit more, but we can also open
up our image and tada. Here is our first wood, which is looking
nice and realistic. I'm quite happy with that. Now with this done, we can go ahead and start by
just setting my base, so I accidentally
increase the dirt. So I'm just going to
go into my plain wood. And now, if we go to parameters, we can go to our
dark dirt overlay and tone this down
a little bit more. To 0.3 as a default. So what I'm going to
show you now is preset. These presets are
handy if we want to just quickly change
the color and the look over our boots without needing to change all of
these settings non stop. We can do this by going into presets and we can first of all, get started and add a
label and just call this Wood underscore 01. Once that is done,
just press new. What it will now have done is it will have created a Wood 01. Now we are not actually
going to change Wood 01. What we're going to do is
we're going to press Wood 02 and press new again. Now, what you can see
is that now we have a Wood 01 and a wood 02. So we can go into the wood 02, and now we can start
just changing. So let's say we go into
our base color and we want to make our main color to be a bit more like the Wi brown stuff.
We can go over here. We can grab our color
picker and we can actually just make this like
a brown color. Looks like that we
need to do this. I think it's not able to really pick the image exactly
the way I wanted to. Yeah, here, it's not so we kind of need to just do it by hand. But we are able I
feel like it's more like a red, purplish, no. So we are able to just very easily change the
color of our wood. Um, I don't know. Maybe let's actually have a look over here that
might be better. I want to have it so this is like the one
that we have now. I want to have it
like a bit more of like a brownish color. Maybe I can pick maybe I
can pick from this area. Oh, wow. I was literally
super, super close with it. Okay, so now, for example,
we have our main wood. Now that we created
our main wood, we noticed that our
white dirt mount is a little bit too much,
so we tone that down. We know it's our dark
dirt mount can be a little bit more because
it is harder to see. And we can see that
our not color can be a little bit darker
to kind of fit in. So just like that, we have
changed all of these areas. Now we can also change the
roughness, for example. So let's say that
now this roughness, if we look at our thumbnail, because we have made it darker, that will also make
our roughness darker. So I can now go into
my wood roughness and I can just make it a little bit lighter again to compensate for the darker
color that we have. And then, of course,
you have a normal, but we don't really need
to do anything with that. I can then press Update. This is very important.
If you forget to do this, it will not save because
update just means saving. And now, see the magic
happen, wood 01, tick it becomes wood 01, wood 02, and it instantly
becomes Wood 02. If I leave this on wood
02 and I go into Momset, you can see that it has
instantly changed the wood. And that's the
power of substance, how easily that we
can change this. I will do one more, which
is going to be like this very just old looking wood, and it's very dull. So let's say wood
03, and press new. In our wood 03, I'm going to go ahead
and I'm going to set my main color to be this
very dull looking color. I'm going to set my knots color. Then, of course, the same way to kind of
compensate for it. And then I'm going to
set my dark dirt overlay or maybe my white dirt overlay. Let's increase my
white dirt overlay and my dark dirt to make
it a little bit more like a stronger color.
Okay? So we got that. Now let's have a look
at our roughness. Roughness looks Let's make
it a little bit duller. So this roughness
is just like it's a very boring looking
wood, maybe 0.75. And maybe in our normal, we can now also go
ahead and we can double click on our normal
map and zoom in. And if we go back
to our plain wood, we can go to set the
normal edge damage. And now you can see what I mean that I can just very carefully, change this around like that. It might have even been
a little bit less. Let's do 0.01. So we make a little bit
of a stronger effect, and maybe just maybe we
can also go ahead and we can also go in our plain wood
and set the knots amount. To be a bit more over
here, so you see. And that we'll just
automatically change everything by just
adding a few more. Let's do 0.65. There we go.
Let's see how that looks. Press update, go in here. And there we go.
And just like that, we have multiple
different boots. Maybe make our knots a little bit lighter, but
that's about it. So that is the power of this. We can now go ahead and we can just make a lot of
different changes for this. Let's make this a bit
darker, see how that looks. Here, see, so that
blends in nicely. So what we will be doing in the next chapter is we will start by actually
creating our planks. And our planks is going
to be an interesting one. It's going to be
like not this one. It's going to really be
like this outer layer. I have an idea of
what I want to do. I can sort see it here, but I know, I'll see
which kind of planks. We can have multiple
different planks, so that does not really matter. So let's go ahead and continue with that
in our next chapter.
18. 17 Creating Our Wood Planks Part1: Okay, so now that we
have our plain wood, now what we're going to do is we are going to
create our planks. And we're going to do a
few of them. One of them. The first one is going to
be this type of layering, as you can see where
they are just, like, slightly overlaid
on top of each other. And after that, we are going to transition to more like the
stuff that we see in here. So I want to do well, actually, this is the one with
like the layering. But I think over here, it was extra good to
see. Where are you? Over here, I wanted to do one
of these where it is, like, just like a really uneven plankiness whatever
you want to call it. So that's one that I want to do. Let's see, that's
still overlaying. Yeah, this one is also
still like the uneven one. Maybe like, of course,
just like a more even one. We can also do stuff like that. But just in general,
because what I'm planning to do is do
the actual geometry, not just a parallax map, but I want to do the
actual geometry inside of Maya inside of Blender. So I want to just get the
actual geometry there. Maybe one of these where it is, like, a little bit shorter. That would also be
like a nice one. And then we can kind
of take it from there. Like these planks, they will be all jom try planks, as
you can see over here. So I'm not too worried
about that stuff. It's not very expensive to do these kind of cubes
because we're not going to add
any weight normals, which means we're
not going to add any very bevels or
very soft edges. Yeah, I think for the
rest, that should be fine. So for that one over
here, let's have a look. So first of all, I need
to make sure that I have all the control that I want
within this wood texture, which I think I do because we gave everything in
the last chapter. So if we go ahead and
go to, like, a preview, yeah, so we should have more
than enough. Okay, perfect. What we're going to do is
we're going to right click on this on the plain Wood, dot SPs, and we're going to publish at SPSAR file over here. Now, this SPSER file, if you go ahead and set
the file part for it, what this file is, I'm sure that many of
you already know, but this file is
basically just like a compressed file that will have all of
those settings in it, but it will not just
have the entire graph. This file you can
also often be used as a SMAT material inside
of substance painter. So we're going to go plain
Wood and then in here, we're going to call
this, just plain wood. And I will show you what
it is. So let's save. Fresh, you can just go ahead and p publish and give this second. Now, actually, one
thing that I want to do before we move on is I want
to do some optimizations. So right now, I actually
did this on purpose. Don't worry, even though it
might not sound like that. If I drag in my dad SPSR file, what you can see is that
it is 930 milliseconds. This is what I meant
earlier that we need to keep things
optimized because over here, it needs to run through this entire graph to
basically generate this. Now, 930 milliseconds,
it's not that bad yet, but it can be so much better. So what we're going to do
is we're just going to ask some small changes to
generally optimize everything. What kind of changes can we do? One that impacts a lot
is often a resolution. So right now we are
working on four K, which is fine for us. What we can do is, for example, over here, we have
a plain color. This plain color is
four k in resolution, but that's not needed
because it's a plain color. It can just be like 16 bits. So what you can do is you can change the base
parameters over here, and then you can
change the output size and set it down
until it becomes, for example, 32 by 32 bits. Now, as long as
it's not your base, so this is your background. As long as it is something
that you add on top, like you add it on
the foreground, it will not change
your base resolution. If you would go ahead and
change this resolution, it would change
the resolution of the entire graph because
this is a parent of it. So we can go ahead and
we can go in here. And we can set all of
these to this resolution. Here we have another one.
Here we go. 32 by 32. That's fine. Okay, so that's one way that we can do
this kind of stuff. Now, let's just go ahead
and go to the very font, and let's have a
look at what we have over here. We have a grunge map. Grunge maps are often
very expensive, so I always try to,
like, reduce those. And if I have a look, I
can see that over here. This grunge map, it does
not really do that much. Se see, because it kind
of, like, just asks that. So what I can do is I can
go ahead and I can reduce my grunge map and then what you will most likely
see happening. So if I got to set
this one to two K, I'm just having a look
over here and make sure maybe I can go even lower. Maybe I can even go to one
K. Though I'm not 100% sure. And what you can see now is that everything has
turned into one K, which is, of course,
not what we want. Now there's a few things that we can do or we can go ahead in our Ht gram scan and set
this back to fork like this, or you can just like
a transform nose in between and set
that one to Fok. It's like a little buffer. So we can do that one and this
one doesn't matter because it is two K. So now
that these are reduced, I do want to of course, double check because they sometimes do tend to change our
material slightly, but let's have a look. It looks pretty decent. Yeah, here, see,
you can see that it changed a tiny
bit, but not enough. But that already saves us
quite a bit of space here. We went from 100 milliseconds
to 50 milliseconds. So then we can go over here. Like these one milliseconds, they are not too much. If you have a blur high
quality gray scale, just leave the quality off because else it becomes
more expensive, and let's have a look over here. These are all very cheap notes, so I'm not too
worried about that. Over here, we have
also, once again, let's right click and press compute Noetumbnails.
Zero milliseconds. That does not feel
logical, but okay. The dose are zero milliseconds. I think that's not
completely correct. But still, it's still fine. Over here, we have
another uniform color that we can go ahead
and just tone down. We have a cloud. Sometimes
you just need to open it. If you have this,
it can sometimes just be case that we need
to reopen some stuff. Yeah, yeah, see, it's
completely messed up. What I'm going to do, so it probably just
needs to recalculate. Let's say clear node thumbnails. I sometimes try this and then
compute node thumbnails. And if this does not work, we can also try going right click in here and press
Compute outputs, see? And there we go.
Now it has updated. Yeah, okay, so it is back. 40 milliseconds
for a cloud stool that we use quite often. I want to leave
that. However, this moisture noise over here. Let's see what am
I using this for? I am using this. Oh, okay, so I am actually
I need a detail. The reason I need the detail is because that really
small detail over here. So I cannot just go ahead
and reduce that amount. And these ones are not worth reducing for the
quality that we lose. So that's fine. Then
yeah, okay, over here, we have like a make it tile, but that's also
not too expensive. So we are already
starting to get quite a bit more
optimized graph. B&W spots, we need to leave at high resolution because we
need that crispiness of it. This one, we might be able to just set this down one more because it
is quite a sharp, this is quite a sharp measure. We might be able to
set it down one more. And then over here we have
the crunch control also. Yeah, let's set this one
lcodon down one more. It should not make too big of a difference. So
we've done that one. Over here, we can just look and if it's green,
it's often fine. Then over here you have
your ambient occlusion, but this is the atras
embilen seclusion. The reason I'm not
too worried about this one is because it
is at the very end, meaning that it does not need to run through the entire graph. It will just run through
it at the very end. And yeah, for that one,
it is a tricky one. So it will still cost
time, of course. I can have a look and see if the normal ambient
occlusion over here. If it is good enough,
I think it is. I think we might want to just go ahead and use
this one after all, because if I go ahead
and set it is very, very low, set the radius down. It's at 0.005 or
something like that. Okay, less 0.02.
Yeah, there we go. I don't think we
will be able to see much of a difference.
So let's use this one. And then Col one, use
GPU optimization, and this will make
everything a lot cheaper. So we went from 230 milliseconds now to 51 with,
like, a cheap note. But of course, you
can see that there is a quality difference in this. But I think for the ambient
occlusion, for this one, it doesn't matter
too much because it's quite a flat
ambient eclusion. Okay, I'm quite happy with that. Let's go ahead and save scene. And now what we can do
is we can republish, right click and republish
the dot SPSAR file. So once we've done that,
it will go ahead and it will have it at two here. And now if we it again. So we had 900 before, and now we will have Hello. Oh, wait, sorry, that's the SBS, 900 before, and now we have 650. See? So we optimize quite
a bit while without sacrificing pretty much any
quality within our wood. See? Lo still like the same. Okay, perfect. So
we've done that. Now all that we need to do is
we need to save our scene, and we're going to now
create a new scene for our planks to keep everything
nice and organized. If we go to file new package
and create a new substance, we will call this Wood
underscore, plank underscore. Let's use the wood planks. Normally, I say
underscore generator, for example, but in this
case, I don't really need it. It's not that much of a
generator. So here we go. I think in this case, we
need all of our notes because we are going to
have nails and everything, so it would be nice to just
keep the metallic there. And we can just drag in our plain wood to
get started with. Cs we have immediately our plain wood with all of our
inputs, so that's perfect. Let's get started
with the first one, which is going to be these
type of planks over here. So these planks,
there are two things, although I don't have
too much reference. One of them is that
I do want to have this transition piece in between them just to make them look a little bit more interesting. And then, of course,
we just want to have the simple overlaying
that you often see. These planks over here,
they are pretty cool, but they are to ornate for
something that we want. However, these planks are great. Just have a look at, like, how we are going
to do the paint. So for these planks, let's see. Let's go to patterns, and let's grab a I think
we can do this with, like, a tile generator. Let's grab a tile generator. Now in a star generator, if we set our pattern
from brick to our not gasian
gradiation over here, you can always see that it
kind of does what I want. The only thing that
I want to make sure is that over here, it has a nice transition going
from one plane to another. So we have the
gradiation over here. Let's go ahead and set the patron specific
all the way down, and we want to go ahead and set the I kind of want
to flip this around. It's 90 degrees over
here, that's better. So 90 degrees, and
this is a height map. This time we are actually
going to use our full height. So just remember that black
means down, white means up. So having this, I can
go ahead and I can set the X amount all the way down because we don't
really need it. Although, no, wait.
Yeah, we might need it. We get for a transition. Let's set the X amount
to, like, four, and let's set our
scaling. Here we go, see. We can set our
scaling this time, it's just to preview. Let's set our X amount to maybe one or two. Yeah,
let's set it to two. No, wait. Let's set this to one. Sorry, I'm still deciding. Let's set this to one,
and then for our size, let's go ahead and set
we need an offset. Let's do like an offset
random like that. There we go. So now we
got an offset random, and we also have an offset random seat
so we can have this, for example, a little bit
more scattered because right now it feels
like it's there we go. That's more what I wanted. I would just want to
have it like a bit all over the place to
have it nice and sloppy. And then if we go ahead
and go back in here, we can set our
interstines to 0.002. And you can even, play around with some randomness
to this, if you want. There we go, just to get that really thin line in between. Okay, so we've done those
pieces, that's fine. Now, I am tempted to also
go into my scale and set my Inter stance. Why? I don't think I can
go minus, can I? Oh yeah, yeah, wait,
I can go minus. To said it's a little
bit minus in order to overlap things
a little bit more. However, then I do
need to go in here, and I need to see if let's
say art, let's do max. Yeah, if we set this to max, it will at least overlap
a little bit less. So now at least it will not feel as tilted
and they will just slightly give that
overlapping effect hopefully that we
have over here. And I say hopefully because
I'm still guessing over here. So we got this one.
That's pretty good. Of course, it is really,
really sharp right now, but at least it is like a begin. So having this, for
the sharpening, I guess we can just
give it a blur. I guess we can just do a
blur high quality rascal. And if that doesn't work, we can use a non uniform blur rascal. And it's slightly different. But I think this one
is already fine. 0.1. Yeah, lets do X 0.2. I want to give a bit
of softness to it. And now we already have
some very basic planks. We are going to test these out. For now, let's go ahead
and let's first of all, add some general deformity,
like directional warp. And with this direction warp, if we throw in, like, a parlis, for example, at, like, quite a high level, throw
this into the intensity. We have already been over this. We can go ahead and actually set the Pearlie even
bigger here see. Throw down your intensiy
and just give it a little bit of like
this type of warping. And then maybe do another
multidirectional warp. And for this one,
we're going to go for maybe like a clouds too. Throw this one in here,
set the mode to minimum, directions to probably
like one, move it up. Oh, yeah, I need
to be very careful with this because
we have a gradient. It can be very sensitive. So this is just going to be like some very small edges like that. Tiny bit more, but
I need to be very careful with this because
CD will show up in normal. If I make this really strong, I can just double check and set this to like a normal map of 20. You can see it already
showing up like a tiny bit. I don't think it's that bad yet, but just keep it in mind. Okay, so we got this
stuff over here done. Press space to just
double check that everything is still nice
and tilable which it is. And then we can go ahead and
we can start by adding this. So let's go ahead and temporarily
just for testing out, already add this to our outputs. So over here, we
have our height, and then we want to do
an ambit seclusion. And you know what, in this case, because this note will not be included into again
as another S SAR, I'm going to go for like a
rate race ambient seclusion. And here you can see, my warping going a
little bit strong, but I don't think
it's too strong yet. Set to 0.04, and there we go. Now we have already, like, a very basic
stuff going on. Cool. Let's go
ahead and save sin. And that is the won
location. There we go. Textis. Let's make another
one called wood planks. And in here, we can just
go ahead and save it. And now we also
want to export it. So right click Export. And for this one in
the wood planks, we want to create a
folder called final. Now, I need to see if I
can get away with TJ. I hope so because TJ is much easier and much
faster to work with. But else I might
need to go ahead and export my height
as a PNG at the end. This is because TJ exporting form substance
designer only goes in eight bit, but height maps are often needed as 16 bits, but it
kind of depends. Not always. It just depends on how complicated
the height is. These are gradients, so I do expect that they are
probably complicated, but we'll see.
Okay, in marmoset. This time we want
to go ahead and just right click and duplicate our wood plane and go ahead
and call this wood planks. For this one, I'm
going to get rid of my albedo map and
my roughness map. I'm going to art a displacement over here, so arch your height. And then if we
navigate to our maps, we have our height
map over here. We have our normal
map over here, and we have our ambient
seclusion map over here. Now, what will happen
is if I drag this in it will probably be very
strong as expected. So you just kind of want
to tone down your height. And now you can see
that now it looks like a nice slate roof C, exactly what I was hoping for. Having this stuff, I
can see that over here, my damages are a little
bit too intense, so I'm going to go
ahead and go in here and just tone
down this intensity, and then it will
just out or export. The thing with marmoset is that the height does not
always properly update. So whenever you export, I recommend just quickly turning
on and off your height. You do need a fast
PC to do that. Another thing that you can
do that's a little bit quicker if you have a
slower PC is to turn on and off the
rate raising or to first turn off the rate raising, then turn this on and off, and then turn it back on. It depends what you want to do. That one is a bit faster. Let's go into our sphere tiles, and let's just add one
extra subdivision to this, just to make sure that
we have more than enough resolution
because I feel like it's cutting a little bit in
a way that I do not like it. It might take a second
at this point because we're probably going to
go to like 24 million. But as you can see, that
does look a bit better. Don't worry. Of course,
we will make this different inside of unwel. But as you can see,
it is working. We got, like, these
separations over here. What I would say is, I'm just going to
go ahead and add some extra warping to
just those separations. So if we let's see. Let's do another directional
warp because direction warp is a little bit more
precise, I should say, turn on the pearl noise, set our direction
warp yet to the side, set our scaling
down until we get a little bit more like this
kind of warping over here, and then tone down
your intensity a little bit so that it just has a little bit of this
unevenness in our edges, which will then
also go ahead and translate over here into, like, having some unevenness. It can even go a
little bit stronger. And maybe I want to go in
my tile generator and set my Inter stints. Geez. Why is that so difficult to say? It sets to 0.0 015, so a little bit down. And I think that
looks quite nice. Okay. Cool. So at this point, what we're going to do
in the next chapter. So we now have a pretty decent base is we're
just going to, like, add some screws to this, for, like, the bear versions. Like here, you can see them
over here like the nails. I mean, add some nails. And then we are just
going to, like, also implant our actual
wood on top of that. So let's go ahead and continue with that
in the next chapter.
19. 18 Creating Our Wood Planks Part2: Okay, so let's go ahead and
continue with our planks. So this is what
we got right now, which now that I look at
it, let's have a look. What do I need to change? Maybe, give it a little
bit more warping in, like, the very first one. So let's make this, like, a little bit more
intense like that. But then fresh like it
should be pretty fine. As far as I know, let's have a look at,
like, this one over here. Okay, so one thing that
we can see is that there is a little bit of variation with like how angled they are, and also how far they
are sticking out. This is something
that we need to create these masks anyway, so this will be actually
good to just do that now. So if we go ahead and
for the sticking out, what we can do is we can actually use something called the flood fill which I
think I already showed. We'll see if I
already showed it. The only thing is
that over here, I need to let's see, I need to then duplicate
my tile generator, which luckily is
very, very cheap. And then if we go ahead
and we need to set our pattern probably to just
simply be like a square. And then if we set
our luminans random, m, yeah, I guess
that should work. The flood fill is a bit tricky. So the flood fill needs to be surrounded by black lines in
order to reach the shape. And that's why I'm having
like a tink over here. So what I was thinking
is, so I have this. Now, I can go ahead and, like, maybe do some
scaling in here, I guess. But then if I would change the scaling, that
would be annoying. Another thing that I can do is add an edge detect over here, which will be able to
detect these edges. And then if I set my edge
roundness all the way down, and then just set
this very close. So this does seem
to detect all of the edges just fine,
as far as I can see. Okay. Yes, that's fine. Now, we are adding all of
these directional warps here. That's why it might be super helpful if I happen to be able to detect the edges
already over here. Sort of. Yeah,
that sort of work. They are a little bit wider, but I can always go in my dgetect and see
if I can lower this. I can lower this down to one. So that does work
surprisingly well. I did not expect that to work, but it will save us needing to also duplicate these nodes. So having this edge detect, if we now go ahead and
add a flood fill node, the flood fill note
will basically convert these edge
detects to position data, which will allow us to add a bunch of different
types of generators. For example, we have a flood filter red
in the gray scale. And this one is quite cool because we can use
this one in order to basically have a different
heights within our planks. And then we also
have, for example, a flood fill to
gradient over here. And this one you might
recognize it will kind of turn stuff
into gradients, where if we set our
angle variation up and down or our angle variation up, you can see that everything just kind of goes up and down, and it just has different
angle variations over here. And this can actually be
very interesting also to just art very softly on top. Now we have one problem. And that problem
is that over here, you can see that we
don't actually have edges in between this
while over here, we now have these withick edges. For that's what I recommend
is using a distance node. A distance node, what it can do is it can basically
push out the shapes. So what we want to do is
we want to go ahead and in the source input,
use our flood fill. And then in the mask input, we want to use our
mask over here, and then set the maximum
distance all the way up. Let's go ahead and see, so our mask, was it invert? No, no, it was not invent. I think we just need
to then blur it. This sometimes happens. I just forgot it most likely happens because
of these pieces, you see. So these pieces over here
are being the issue. Um, I don't know which one I honestly don't
know which one I need to blur. If it was the mask
that I need to blur in order to kind
of, like, fix this? Yeah, that's it. So I had to
blur the mask. Yes and no. Doesn't work everywhere. Another thing that we can
do is we can go in here, and we can basically try,
get rid of these pieces. And the way that you
can get rid of these is it's actually a bit more tricky because
we have gradients. So we can normally,
if it was a mask, you would blur it a tiny bit, like a little bit,
just like 0.1. And then what you would
do is you would use like levels or like a histagram scan. As you can see over
here, basically, push everything out until
you get those shapes. The problem over here is
that we have gradients, and with those gradients, this becomes a little
bit more tricky. It's tier levels. Levels can give me sometimes a little bit
more control that I can, like, push this stuff out, but I can then,
like, push back in. My gradient is a little bit
do not make them too intense, but honestly, I don't
think Yeah, here's. I'm just not happy
with that effect or with how it looks. So
let's not do that. Let's not do the blur because
we are not able to do that. In that case, this
might just be fine. We might just leave
it like this, and else we would need to
go ahead and Oh, wait. We can probably use
our adj tact actually. Yeah, we can use the chitact
Here, if we are blur. Sorry, I completely
forgot that we, of course, have a mask
that we divert this from. If we are blur and
then a scam scan, what we can do is we
can just blur out these small bits and then
use the HcaM scan, see? And then use the contrast
on the HCAM scan to basically make it sharper. There we go. I was thinking way too difficult
about this stuff. And that will give us, like, a proper push,
as you can see. After we've done this push,
it's just a matter of adding a very quick blue
high quality griskle just to give it a little bit of, like, that softening around the edges just to make
it not as intense. 0.15, for example, and we can now use the same
technique. That's perfect. We, of course, just have a
simple mask here C. So now we have done the same over here where it will just push it out. And it looks like
that it is not able to generate per
plank in this case. It's not the best one,
the random gray scale, but it still works quite well, so I'm fine with that. To artists, let's go to our multidirectional
warp and arts blend. Let's art in the beginning
this one over here. So we often want to
just set this to multiply and then let's set this like 0.5 to
get started with. And then maybe let's add like another blend and
do the stop one, and also set this
one to be multiply. But this is all overlay, so everything becomes
a little bit darker, so we do need to be careful
that we don't do it too much. But this is just
general variation. If I now go in here, let's go ahead and turn on and
off my displacement. See? You can now see that there's general variation
between our lengths. This one is a bit higher
than this one, etc et cta. Everything has
become a bit darker, so we might want to just
set our displacement up a little bit. But
that's quite good. I don't want to have
it too intense. I want to just have it like
this nice little balance, and I'm quite happy with this. I think, even if we like
tile this a lot of times. So imagine that
this is going to be tiled a lot of times. Here, see. You can just see, like, the
small bits of bans over here, and that is quite nice. I'm happy with that.
Okay, perfect. Now, let's go ahead
and let's do, like, probably some damage. Yeah, I feel like we
can probably just a little bit more damage just because it's quite old and worn. Doing the damage
around only the edges, what we can do is
we can actually use that mask that we generated. So if we go ahead
and go in here, we can add a slope
blur gray scale. And for our slope, I guess we can use
the clouds too, or else I want to use
a moisture noise, but I guess I can do clouds
to that is much more intense. Here, see. So it is
much more intense, so that it really has
these little cracks. I think what I'm going to
do is in my Clouds two, add a transform node and
set this one to X two. So when the Cloud
two becomes bigger, these damages also become
a little bit bigger. Now, what it does to it,
it breaks the tiling, so you just need to add a make a tile photo greyscal behind it, and that will just
instantly fix that. Okay, so we have this one.
Now what we're going to do is if we add another blend in here, use your old blend
for like the blur. And then in the top, we have a blur high quality grayscale. In the bottom, we
have the one without. Now, as you can
guess, all we need to do now is we
just need to grab a quick mask and we can use
that mask to basically, like the text where that
we want to have our edges. Let's go ahead and
just duplicate this because I need to have
my edges a little bit wider. And then I'm just
going to nicely blur this so that
it is very soft. And if I go into my edge tact, let's turn on invert like that. See? So now because
we are blurring it, you can see over here
that if I make the sharp, it has a sharp cut off, but
because I'm blurring it, it just transitions
nicely into it, but it will only be
around the edges, which is perfect because we
do not want to have all of this really weird detail
in our actual gradient. We got this one done. Et's
turn on nova displacement. See? Now we have
some small edges. Maybe they are a little
bit too intense, so we can go ahead and go
into our slope gray scale. Maybe set 0.1, for example, but that's looking pretty good. So over here, we have
a plank generation. We can go frame plank generator. And then you can
guess that what we can do later on is
we can literally just grab this tile generator
and we can just simply generate different
type of planks and just use a switch to basically
switch between them. And that's going
to basically be it because all of these variations, they can just be added on top. So that's why I love
procedural workflows, because it is just so
handy and so fast. Having this stuff, let's
go into our normal. And what I'm going to
do in my normal map, set Whoa, set it to OpenGL. That might make a
big difference. I forgot that I didn't do that. We were still in
that stage where it didn't make such a
massive difference, but you can see that things are a little bit more
defined now, so that's good. Let's set this to, like, three. I want to have this
nice nice and strong. And then what I'm going to
do is I'm going to go ahead and I'm going to add
a normal combine. Over here, set it
to high quality, and you guessed it,
we are now going to start implanting our normals. So this norm map, if
I would just do this, it does not feel very logical, because that would
almost make it look like all of these
planks are perfectly just aligned and
they're all just like perfectly from the same slate because everything transitions. So we want to give
it some variation. We can do this simply by adding a directional warp to this. And in this direction
warp, guess what we have, we happen to have exactly
our random gradients over here, that's pretty nice. Although it's not as perfect
as I was hoping it to be, it is still totally fine. Plugging in these
random gradients, it will basically warp
around the gradients, but because they are entire
blocks of gradients, if I move this down and set this to like 500
in my intensity, it will, as you can see,
it's a bit difficult to see, but you can see that it
no longer transitions. It cuts it off, which
once we have our Wood, will actually look a lot more logical that just cuts it off. This stuff I can live with. It's not perfect. We can try, get rid of it in some ways, but I don't really think
that it will be worth it, so we'll see how it goes. So we got over here our
Wood, so that's pretty good. Now, oh, yeah, I was
going to art some nails. That's also something
that I want to art. So that's what we're going
to do after this one. First of all, let's have
a look. See? We now got our nice little wood
normal sitting on top of that. And then what we can later
on do is transition to, like, bainted wood and
everything like that. So that's starting
to look pretty good. Let's save my scene. And let's go ahead and finish this chapter off by
just adding some nails. So for the nails, we are
using a tile generator. It's just always a
little bit tricky because we kind of need to sync up all of these tiles perfectly. So for that, right now,
I'm doing it here, but we are actually going to art the nails at the very end. So if we have our
tile generator, I'm going to go ahead and I'm going to actually
do a fresh start. Um, tile generator over here. And for this one,
in the pattern, we're gonna go, these are nails, so we want to go for like disc. If you want bolts, you
could use paraboil, but for nails, we just
want to go for like disc. And now for the disc, let's
say, where's my reference? Oh, here it is. Uh, let's see. One per. Let's try two. Let's try doing
just two pop plank, and we're just going to do them. And then the tricky thing
is that I also want to have those nails sitting like over here on the end
of these planks. But that is often a
little bit tricky to do, especially if we want to keep everything procedural
for the next planks. So if we have these, if we
would say two pop plank, the first thing
that we're going to do scroll down and in scale, just go ahead and set
this like nice and low. Now, if we go ahead
and art a blend note, we can art our planks with our nails and just set this to art so that I can actually
see what I'm doing. Then I can get started
by, for example, setting the Y amount until
we hit Tupa plank like this. So over here, we now
are hitting twopaplank. Although, as you can
see, it is kind of like it never really
lines up perfectly, which is always a
little bit annoying. Now on the wire mount, if
you want to have this round, we could go in here and do this, or we can just mess
around with the scale. Let's go ahead and set our
scale a little bit larger now. So let's say that we
now have those nails. So with the offset over here, so it's starting
to look like here, it's starting to completely
break the offset, which is a bit of a shame. Just going to go ahead
and go in here and just quickly copy my
offset random sheet. So 0.17 one Go here, 0.17 one, and then the
seed copy over here. That will just like
transition that out. Oh, now, see, that doesn't work. We can't use that technique because we have two
lines over here, which is a bit of a shame. In that case, turn off
your offset like this. Yeah, maybe a little
bit of offset random just to give it some
small variation. But this offset, it is always a little bit
tricky to get this right. So these nails, I'm not too confident that these will work exactly the way
that I wanted to. So if we go to our planks, our planks are
exactly so we need to keep the numbers even because
LC offset doesn't work. The planks are exactly ten. So if we go into
my tile generator and temporarily set
this back to ten, that will have created Okay, so that will
have created one. Would it be easy enough to say that 20 exactly creates two? Sort of. Yeah, actually,
you know what? That works surprisingly well. Okay, so doing two over here, that creates two planks
in that direction. That's good. So we can use this. And then over here, if
we just set this to 20 so that they are nice and
round, that should be fine. Scale. Let's do a
small scale random, just to give a little
bit of randoms to it. Yeah, so we had our
offset random over here. Which I am going to just keep not as strong because over
here you can see like that, it goes quite intense. So 0.015 for offset random. Okay, so we have these nails
over here. That is fine. I guess that we could
also try and detect nails around these areas
because what we're going to do now is we're
going to use like a mask. So for this, if we go ahead and we have
over here a tile generator, we can start by adding a blend. Now, with our mask, the first
one is very easy because the first one is
just going to be because we only want to have
them on the outer sides. It is going to be like
a shape over here. And then if we just go
ahead and push down the X size like this and
then add an invert note, you can see that
we instantly have created a mask that's
just on the sides. Now, adding this to our
blend if we set this to be like art subtractor No, sorry. Let's see. There we go. Multiply sets to multiply. You can see that now we only have the screws left over here. The next thing would be to
detect these edges over here, which is a little bit trickier
than you might think. So let's have a think about
to keep it non destructive. It's easy. Of course, if I want, I can just literally just
grab my tile generator, push them out, done. However, I want to try and keep this as non
destructive as possible so that we actually can use these nails with
different types of planks even no matter
how we generate them. So there is an interesting one. Et's try using the push method. So let's go ahead and we have our, actually,
no, you know what? Let's try this. So we
are able to detect this. If we add a histogram scan, if we can isolate
our black lines. Good enough that
only day show up. Okay. So we have that one. We can maybe use
the same technique as that we do for our boot. So we have a black lines. Now, if we go ahead and add
a directional blur to this, it becomes a box. Now, if we've done
that, if we now add a histogram scan again, set contrast all the way up
and just give it like I know, maybe not set contrast
all the way up. Do something like
this. That's like the initial HT gram scan. And once we've done that, we can do another
histogram scan, and this one is just to, like, really push out the values. I've never used this
technique before, but that works
surprisingly well. I'm actually kind of
impressed by myself. So we got this one. And now if we go ahead and
go in here and we just like a blend, art is on top. So let's set this to well, let's first of all,
invert gray scale this. And let's set this to
art. Does that work? It does. Yeah. Good
enough. Over here. That's a little bit
of, like, a cut off. But for the rest and like
here, there's a little nail. But these nails over here, those are leftover because we
do an offset random. So maybe set it even lower.
Maybe you set it off. Oh, no, they are just very, very close together.
That's interesting. In that case, we might
actually want to set our offset random a little
bit higher to zero point. No, let's not do that.
Let's use just zero point. It's not completely perfect. It has, like, some
cuts here and there, and it's like cutting
some pieces off. I guess what we can do
is we can set our blur a little bit lower so that it
basically just becomes in, like, a smaller area
around our shapes. In order to basically does mean that sometimes
we don't have them. But that way we are basically eliminating the ones that
are not completely perfect, except for over here
like a tiny bit. But let's say that
this is a solid base. We got this stuff over
here, ready to go. We do dd our warping,
but we should be able. If I move this over here, we should be able to do the same technique after we've
done our warping or not. Sort of, yes, I guess that
that sort of works, yes. Okay, so we got those
pieces done. That is fine. Now, if we go ahead and
add a blend to this one, throw in our nails, else, we might need to do the
nails at the very beginning. Throw in my nails, and
we can set them to art and then if I
said it very low, it should blend the nails
a little bit with, like, the gradients so that they blend with the
gradients along with it. Yeah, see? So we
got, these nails sitting there kind
of like on top. And now what we can do is we
can kind of change nails. So for these ones, I kind of want to be honest. I don't think I need to
have a fine adjitect. The fine adjitect is a note
that you need to download. Uh, maybe, maybe that works. So the reason why
I'm going for, like, this little ring around it is because it will
make it feel like, well, if I need to probably
invert it, there we go. It would make it feel like the pieces are like
inverted into it. It does look like
that over here. We seem to have Okay, so let's not invert it. So we have this one now inverted over here. I think
that should do. Here. So it makes it feel like the
nails are kind of, like, embedded into our wood, and then we can just make
this ring around it wood. But then this stuff over here, we can make it
into, like, nails. Overhe then I'm not too
happy about that stuff, but I guess you can go in and, like, do some very
small balancing. And just try to get the
best thing you can get. And once we've done that, we can also add like a tiny blur, high quality gray
scale, like a very, very small one because these
are very small pixels. So like the smallest here, see, the smallest thing
will destroy it already. Let's do 0.1, and
let's add this here. Okay, 0.1 is too much,
0.050 0.07, maybe. 0.06. Okay, open 06. There we go. So we got
some nails over here. That's looking pretty
good. And now it's just a matter of going
with our paste and, like, toning them down because I don't want to
have them that obvious. And if we go here,
we have our nails. Um, I don't know
why they're over. Oh, wait, they are here
because of the ends. That is tricky. I think we
are running out of time, so I will have to
think about it. So we are now placing
them at the end. However, the end does not always mean that it is
the end somewhere else, which means that we most
likely just want to place the nails randomly? Yeah, we can place them, like, or randomly or just
around these areas. But the system is in
place. All we need to do now is we just need
to work on our mask. So let's save a scene. And in the next chapter, we are going to
work on our mask, and then we immediately
going to, like, do a base color
and our roughness and just get everything done. And then in one instance, we will have our first planks done. So let's continue with
that in the next chapter.
20. 19 Creating Our Wood Planks Part3: Okay, so we left off with our screws or nails over
here, not being very good. So I want to change that around. What I'm going to do instead is, instead of having it at
very specific locations, I am going to then just have it like in like a separation. I think that will also be a
bit easier. I say separation. That's because I can't think of the word even even distance. That is it, yes, even distance. Sorry, as I said before, I'm not a native
English speaker, so sometimes it's
still lacking a bit. So doing an even distance, that just means that we
need to change up our mask. And we can still keep this
one to have the nails, especially in these areas. First of all, to
change up a mask. So over here, it means
that every other one, every other row we
want to get rid of. Now, hopefully, because
this is a tile generator, we can use one of these masks. So horizontal, I think it literally exactly grabs the one that I do
not want to get. And as far as I know, well,
yeah, as far as I know, for horizontal masks, you
cannot actually flip it around. Oh, wait, maybe reverse. Yeah, there we go.
Reverse rendering order. Wow, I never used
that button before. I never had to do this
specifically in this way, so that is, again, a
new thing for me too. Okay, so we have
over here a shape. What we can do is instead
of using our shape, we can use stripes, which should hopefully give us a
bit of an easier option. So if we set our shift to zero, and if we then go ahead and add a transform to the behind it and just rotate
it is 90 degrees. So now we kind of like,
with our stripes, now we can basically just say, how often we want to have our
bolts or nails to be here. So I kind of just need to check. So if we go in here,
what does that do? Okay, so it does At some. It's not completely even,
which is a bit strange. Let's go into our
stripes and just, like, mess around with it until we get like
an even number. I think we need to
actually go a lot lower. Oh, wait. It's a width. That's what's causing it
not to be even There we go. So four looks pretty
decent, actually. So we got these four over here. Now, if I now go in
my tile generator and now I can actually do a little bit of offset
random, where are you? So here, offset random. To make them a little bit more interesting in terms
of their placement. Let's see how that works. Okay, so they are there. I think I want to have
them a little bit lower. If we go back into
our tile generator, we should be able to just very carefully set the position. You like the global
Osset on the Y axis. Oh, that's very sensitive. 0.01. There we go. So that
now should have been pushed a bit
low everywhere. I'm just a bit worried that, Oh, no, wait, that's
all looking fine. Okay, so we got that
one. That's pretty good. Now, another thing
is that right now, it has actual wood, as you can see, shining through, which is something
that I do not want. For that, it might
be easier if we do this in our norm map
instead of trying to get everything balanced
based upon this map. So if we go over here, we
have our normap Oh, no, wait. Sorry. Yeah, that's actually
exactly what we need to do because we are
adding the wood after it. So here we have our wood. Let's add a blend to this
wood to this norm map, and then add a
normal color node. So this normal color, you
guess what I'm going to do. I'm just going to grab a mask, and I should be able to pretty much just grab
this mask over here. Add it in here.
There we go, see. And now it will no longer show the wood wherever
we have our nails. So let's have a look at
that. Let's go in here. Actually, it's
looking pretty good, especially out here, it's
like, at the sites also. Yeah, that is
looking quite nice. Yeah, yeah, you know what? I'm fine with that
with the distance. You can go a little
bit lower if you want. But I think for us, it's quite an interesting look if we just go for a
distance like this. Although double check if I do we might maybe we can
get rid of one of them. Let's just go ahead
and render it at three tiles that we
know how it looks. Um, now, you know, though, I think it will
make sense if they make these things that they
just really nail them shut because you often have
really heavy winds and everything in
these environments. So I'm guessing that
that's pretty good. So we got those things also
done. That's pretty good. I think we are ready
for a base color. Yeah, you know what? I think we are ready for a base color. Perfect. Okay, so we got
our planks over here. Now, if we go ahead, go in here before we
do our base color, we just going to go ahead
and leave this one here. So this one is going
to be art frame nails. This one art frame,
normal combine. And this one art frame, and this one is
going to be outputs. If you ever have
over here that you don't like these lines, just run straight through, you can right click and
you can add the dot note. This dot notes handy
to basically here. So you select line,
right click dot node and it's very handy kind of just move your lines
down like this. I do not tend to
use myself quite often just because it takes long to just
add those things, although I'm sure there's
a shortcut for it, and I just forgot
which one it was. But for now, this is
looking pretty good. So we got these
pieces over here. Now, we are going to go ahead
and do more plans later on. However, for now, I just want
to focus on our base color. For a base color, it should be quite easy. That's art to blend. And we have over
here a base color, but remember how we did
our directional warp. Now for this directional
warp, I want to just copy it. And also artist to
my base color like this so that even my base color, as you can see, is being shifted around exactly in the
same way because else, they no longer line up. Now that that is done, what we're going to do is
we are going to add some actual dirt or something because we need to
have something to actually, just kind of like enhance
the feeling for this. At this point, I think it
is good if we go more in this that we go and
have a look at like this image over here
while doing this. So we got our directional
warp that is fine. Now, I'm going to simply add a uniform color at the
top and make it like a dark brown color or
something like this. So it's like dirt or something. Maybe that's too dark, but
we can always use our past. Now, for our generation, we can use a dirt note. It's a bit expensive. So if you go over here, you
have a dirt note over here, as you can see, so it's
a little bit expensive, but it's like quite a
good dirt generator. If we grab that one and we go ahead and just grab
our ambient occlusion, throw it in here, and then add a curvature map, which we can grab just a planks, not on noise because
curvature shows up in noise very clearly. So where you plug
these to in here? Oh, and by the way,
for your position map, we might be able to
just use our flood fill over here to position data. Here, see, we get this effect. And it does show our dirt a little bit more
than like the tops. So we now can control
our dirt level. And sometimes it's
just in handy weight. Just very quickly add some dirt. So we can like dirt level
to a dirt contrast, play around with
your grunge amount to reduce it or increase it, stuff like that, so
that's pretty good. We can use a custom grunge
for which we can try and oh, I used it in this
one, not in this one. In that case, just go to noises. Or, sorry, I just want to try that imported crunch that I
had. This one I've imported. We can go into grunge
maps. Oh, you know what? No, I don't like that.
Let's not do that. Let's then go into grunch. So we can use a custom grunch
which often quite nice. Let's do grunge 013. And then what we can do is if we are to transfer node and rotate is 90 degrees. Hmm. It does look a
little bit softer, I do like that it's softer. Maybe play around with our
balance a little bit more. So I do like that it's softer. It's just not yet perfect. Cool thing that you can also do is you can actually just add a directional warp to this grunge and you can
simply grab the same mask. And then even this grunge
you can just set to, like, an intensity of 500
to swap it around. And then in here, as you
can see, there we go. Then the dt will feel a little bit more
localized to this area. The only thing is
that over here, oh, no, no, wait,
that should be fine. So we got these
pieces over here. Let's just add
this to our blend. And here you can see
that now we are starting to get some of
this dirt in here. Let's tone down the intensity a little bit so that we don't
have it like two intense. Let's do zero point
actually, let's do 0.9. There we go. So now, way we can see much clearer that these are actual plagues,
so that's quite nice. Now, let's go ahead
and add another blend. And for this one, let's
have a lighter color. And I'm going to show
you how to create like some leaks effect. So let's go for, like, maybe, like, a whitish color. You never know if
that looks cool. So for our leaks, for leaks, you basically
need like a mask, which we can pretty
much just generate from something that we have over
here like ambient seclusion. We can generate it from
an ambient eclusion. I don't know unless we
can reuse this one. Maybe we might be able to reuse this one if
we are the Hcam scan and play around
with your contrast. So you basically want
to generate sort of like a mask effect like this. And then once we've done this, it doesn't need to be super
clean. So we have a mask. Let's invert grayscale
so that this is white. And now, the way
that we are doing this is we are using Oh, God. I have a brain freeze
moot What was it again? Non uniform blur, grayscale. Oh, multidirectional
warp grayscale. One of the two. I think it
was a non uniform blur. Nah, that does not look correct. And the reason doesn't look
correct is because I vote in different won one, non uniform. I'm so used to using this one that I automatically
just go down there, non uniform blur gray scale. Okay, what you want to
do is in the gray scale. So the nice thing about this is that we can give it an angle. So in the grayscale,
we basically go ahead and just
plug in our mask, and then we plug in an
inverted version for which I just realized we can just
use this one in here, set our samples up, and
then if we go ahead and Oh, maybe this is too soft. No way. That's not it. I think
the invert function works slightly
different in here. Ah, let's see. No, maybe it was this one that
we need to invert. Okay, it's not working
the way I should I should work. Let me
just quickly check. So I checked, and the thing
that we forgot to do is I forgot to set the anastrophe up, which will basically
create the leaks effect. And the next de I also think that our
masters isn't good enough. Asymmetry, you can
also use asymmetry, you can basically Oh,
that's a bit annoying. That goes in the
wrong direction. Let's set our angle down. Asymmetry, you can
use to give it like a cut off in the direction. So let's set this to
270 degrees over here. So now we get, like, some
more of those leaks. So that was the problem. We can then go ahead and we
get reduced leaks. And now, with this, what I want to do is so we
have this mask over here. And yeah, okay,
so it is working. We even get some leaks
from our actual rings. I'm going to now add a blend because I want to
add the noise in between. When I add the noise
in between this, what it will do is it
will break up this mask. So we are going to go ahead
and just grab like a noise, and I don't know. This noise is probably,
this is way too soft. Let me just try out
my own noise again. I just like this one.
It's one of my favorites. And then if we set
this to subtract, what it should do is
it should here, see? I should break up the leaks. Now, having the
subtract maybe if we then add like a
histogram scan in between, because it feels like
that this mask here. Now we have full
control over, like, how many leaks want because
this mask is so messy. But as you can see that
now we can kind of, like, generate these
type of leaks. And that's kind of
like what I was going for. So we got this stuff. We can pretty much
use our intensity to control how many or how
little we have of them. And once we've done that, yeah, you can just basically also
mess around with the seed in your mask to generate where exactly
you want the leaks to be. So that's pretty good. Now, what I do not like so much
is that over here, can you like the it's that everything is
in an even number. So I'm just having
a quick think about the best way that I
can control that. Just playing around
to the position here. Okay, so yeah, I think the best way that we
can control that is, what if we duplicate
this uniform, this non uniform blur. We set the length a lot lower, and then we simply blend
these two together. I'm going way too
advanced in these leaks, but leaks are always
quite cool to make. So we are basically blending
these two together, and we are blending
them using a mask. What if we grab, for
example, this mask? Okay, that mask sort of works, but I think we need to have
a his scrum scan in between, and this one is just
here so that we can control how
sharp the mask is. And that way, my
idea was that maybe, like, mess around with contras, is that it will, kind of,
like, blend together. Hmm, that's not a
mask that I like. Let's go ahead and go in here. What if we do like a
simple clouds too? We boost up the scaling, and then we art here come
scanned in between this one. Maybe that gives me
a better effect. And maybe we can
even start with, like, setting the
contrast all the way up. Okay, maybe setting the
contrast up is not a good idea. Sit down. Yeah, there we go. So that does already,
like, break it up. It just kind of, like, depends on exactly where our levels
are and where our cloud is. But here you can see that now we have, quite a bit
of a difference. And honestly, I think for what we are going to see,
this should be fine. So we basically add to the top, and now we have some leaking. I already have immediately decided that I'm not
going to use white. Instead, I want to just
add my brownness to these leaks also so that they kind because it looks like the leaks are longer. So if we just temporarily
move this up over here, that seems to give me a
better effect so that now it is kind of like dirt
and then the leaks are kind of like
continuing with this dirt. What we can do is we
can make one of these a lot longer also like
this so that we get really like that leaking
effect. Okay, perfect. So we got that stuff done. Now what we can do is we can go ahead and we can add
some nails to this. So we grab over
here a base color. And honestly, for the nails, we often shall we go for, like, rust or shall we go for
just like an old metal? I think we just want
to go for, like, old metal or
something like that, and not so much rust. You like this kind
of metal over here. Although the rust actually does look nice, but it's
a lot more work. Let's go for, like,
some old metal. Let's add a gradient map. Actually, let's
throw in our clouds, too, since we have
this one anyway. And in our gradient editor, just pick gradients and let's
just see if we can pick from this area over here. Okay, so that does sort of work. The only thing is that, of
course, it is very, very blue. And yeah, the noise
I don't like, I think the noise that I want
to use, what's this one? Oh, that's just the old shape. I think the noise
that I want to use is our B&W spots, too, because it's always very sharp, as you can see here, and just
gets like a sharp feeling. And what I'm done
going to do is, let's just do a clear and let's just do this a
little bit manually. Let's just add a bunch of notes. And most of these I
want to just have it's like over here, like, pretty much gray scales. And then what I can
do is I can now go in here and I can start by adding some variation
like this. There we go. So I think that will work
a little bit better. So we got that one.
Now for nails. Most of it's going to
be in our roughness, and maybe add an HSL note bind it just so
that we can easily, change the darkness of them. And then for our mask, I think we can just use
this mask over here. So I have. Yeah, that looks
that looks pretty good. Maybe the mask is a little
bit too strong, and, of course, oh, hey,
I forgot to do that. We need to use the mask
after our blending. Let's just go ahead and
duplicate this blend. Do this over here so that we are now blending it together. And let's do the same over
here in our normal map. Where am I over here and
Also then over here. Completely forgot about that. Although I would have
noticed it quite quickly. There we go. So that looks a little bit
better. So we got this one. I can see that I want my
HL quite a bit darker. So I don't want this to
really be that noticeable. And let's just go ahead and plug this into our base color. Now, for our roughness,
so our metallic, um, I don't think that
these nails are metallic. They are so corroded and they have so much dirt
and everything on them that they probably would not really be metallic anymore. So for now, let's
leave that black. For my roughness, however, I'm going to duplicate this note and just plug
in my roughness in here. It's moved over here. So this
is already our roughness. And then with our roughness,
we can just add two blends, and one of the blend is
going to be a combination. Here, let's add another blend. One of the blend is going
to be a combination between my dirt and my leaks. So we basically add both
of these and set them to max lighten so that they
are or maybe even art. So that they get arded. So this is the
first one. So this will just look a
little bit duller. So we can go into our blend
mode and says the art. You see? So we can make
our dart a bit duller. And then we will
have our nails for which I can just go
ahead and use this mask. And our nails are
going to be subtract, a little bit of,
like, a lower level so that they become a
little bit more shiny. And that is our base
roughness over here. Okay, perfect. Let's
go ahead and save our scene. Let's close that one. And now if we go
ahead and go in here, we can I just need to
navigate to my textures. So we have our displacement. We have our normal map. So let's go ahead and
drag in our albino map. And our roughness map. And there we go. Okay, so when I have
a look at this, the first thing I'm going to do is I think I'm going to make my wood crane
smaller because over here you can see the difference. So I'm going to just
tie them by twice, but that should be an easy one. So if we go over here, just add a transform in
between all of them, and just at the
transform to minus two. That's often the easiest way. Or what we actually, you know what a better practice is to art a safe transform over here. That's a bad practice
because then you can remember what you set it to. So we can go here, also safe transform Grayscal
too, and here. And then the nice
thing what you can, of course, also do is in
the safe transform Griskl, you can actually
expose the tiling, and then we can just
go ahead and we can full control over it. So making this a
little bit smaller, I think that will do a good
trick over here, also with, like, the knots and
everything. Yeah, I see here. That does work better. I'm
going to make my nails a little bit lighter
because they are a little bit
too dark right now. Make them a little bit
lighter, 0.4 or something. You can see like
the little shine coming off them, so
that's quite nice. Okay, so my nails are
also looking pretty good. We got those things. We got, like, the damage going on. I'm going to make my nails
a little bit darker. 0.35 maybe. And what I'm going to do is I'm going to go into my planks, and I'm just going to give
them a bit stronger warping. Oh, wai, that's a
sideways warping. Let's go ahead and do two. Let's duplicate. Not that one. Let's duplicate this
direction warp over here. And let's duplicate
our pearl noise, and this one, we
are going to set a scale just like a
little bit bigger. So this one will control and
maybe set a random seed of the Pearlie to make sure that
the directional warp does not go in the exact
same direction. There we go. So I want to have these planks looking
like really organic and, like, really old and
worn down sometimes. So now I have control over that. So if I go in here, of course,
reset your displacement. Let's see how that looks. Set the tiling to three, just to double check. Yeah, see, okay. So now we have larger tiling, we can see that we get,
all of these small planks. Okay, this is great. So we've got this stuff done. What we'll be doing
in the next chapter is we can go ahead and we can start by adding multiple different variations
of planks and everything. But the general system is here. What I will do one last
thing is I will go ahead and I will let me just double check, okay, this is the right location.
I will render an image. Here we go. So plain wood, check. Wood planks one, check. Awesome. Okay, let's go ahead and continue
to next chapter.
21. 20 Creating Our Wood Planks Part4: Okay, so we now got a
pretty good base for this. We're going to create a
few different planks. Let's go ahead, and so we
already now like this layering. I now want to go for
the one that I saw over here where it's just like
the planks are simply in, like, a different position, and they are far longer.
Let's go for that one. Now this stuff it's super easy. So we got this one over here. So what we can say is
this one is the layering, then we can go ahead
and we can just duplicate the style generator. And for this tile generator, what we can do is, let me
just make this bigger. Let's go ahead and set
the patron to square. And then if we go ahead and set the I think they are white
on top of each other, so we don't really want
to give it any spacing. Let's turn on a luminous random. And then what we need to
do is we just need to go ahead and just set
the spacing down. So for this one, we did like this spacing over here that it needs
to be back to zero. There we go. So the spacing is white on top of each other. We don't need any
spacing for that because we're actually going
to push this in and out. So we got this stuff over here. Now, if we go up, okay, so we already have
an amount of one. That is a tricky one. We already have
an amount of one. If I want to make this larger, because if I pre space here, there isn't a lot. Basically, what I'm
thinking about now, I think that we
just need to reduce them because what
I cannot do here, if I just have one line here, then I can make them larger. However, I cannot have one on every single line
because if I do that, we will get the same
effects that we've had before that they
just look a lot smaller. So if I reduce them, look, what am I? Let's see. So we have our offset over here. No, we can't really
do that size mode. And that is actually a tricky
one. That is a tricky one. Oh, no, wait. I
know what I can do. I can go ahead and
where's my offset. I can go to my offset over here and my offset
random. So let's see. So right now it is all one line. And then if I go ahead and
now set my offset random, actually, just my
offset over here up a little bit to only have
one or two of them. Maybe I need an offset random. Basically, the goal is that I set a few of these a
little bit further out. And then I add a transform. And because these are one lines, if I hold control
shift on my transform, I basically push them out. And what that will
do is it should. Oh, wait, not control shift. What was it? Alt? Oh, God. I always forget. Shift.
Shift Alt W a bet? No. Okay, never mind. Then
I'm just gonna do shift. Doesn't really matter. I am a bit annoyed because
what was that? Now, wait, Control
shift is correct, then why is it not lining
up? Now it is lining up. Okay. Fair enough. So Control Shift was correct. I must have accidentally, I don't know, like,
pressed the wrong button. But basically, if I
can just push it out, over here now we have few less. So now we have a
press space, you can see that we only
have two over there, and then some of these planks
just go on infinitely. And even though they
go on infinitely, what I then kind of expect is that they are so long that by the time that it starts
to look strange, the wall will have
already stopped, so we don't really need
to worry about that. So we got this one over here. Now, another thing that
might be nice if I just have a quick look, is the thickness. Maybe we can make this
one you know what? No, I'm going to
leave the thickness. If I stop messing with
the thickness now, I would need to also do all of the nails and
everything like that. It's not worth it to
get one extra plank. But basically,
having this stuff, if we add a multi switch
gray scale over here, what you can do is
you can add inputs. So we can say input one and input two and plug
this into your blend. Now with the multi
switch gray scale, we can then, of course, go
over here, we can expose this. So input selection zero
input selection one. Now it now that
this is set to one, sorry, we can go ahead and
now you can see over here. So, okay, so it seems like the only problem that we have is most likely our flood fill, because we are using a flood
fill to basically add here. So we are using
our flood film and then let's see, how
does it behave? Okay, so our flood fill is not able to differentiate
between these pieces. And the reason that
it's not able to do that is because
these are infinite, and it does not really
like infinite pieces. What do we use our flood
fill exactly for again? Oh, yeah, we use it
for angle variations. Hm, I do want angle variations. That would be nice.
If I use those. I guess one way that we can do this is so over here we have our flat fill or our edge dett. I don't know if
it's going to work, we'll see, but we
can add the blend. And then later on we'll
just use a switch for this, and then we can add a shape. I'm going to fake it.
I have no idea how it will look because I
rarely do this stuff, at least this specific thing. So I'm going to
basically, here we go, give it the tiniest line I can get artist to our
blend and set this to be she multiply over here. I think we need to go
a little bit bigger. 0.095 maybe 99. Give it just to the point that the flood fill is able to
differentiate between the two. So 0.0. Oh, wait. We can actually not
go lower than this. So now we do have
these positions, which means that
we have this one, and it means that we have
this one. So that does work. The only thing is of course,
that when we press space, it will not transition
correctly over here, and that is of course,
then the tricky thing. The question is, will we notice? That's
mostly the question. So if we have a look over here, And then maybe for
the gradients, we can turn off the gradients. So let's see. So over here, we can see that there's different
distances between the two. The nails are broken
a little bit, so we'll need to fix that. But this can all be
solved with like a switch later on. And
we got these pieces. So if we, for example, now have look to unlove our gray scale. Okay, so what do
we have over here? So they are being pushed out. I think what I'm going
to do is I'm going to go ahead and start
adding my switches. So we have this switch
expose as new graph input, and this will be plank
underscore selection. Art is over here. Actually, let's leave
the group for now. Let's press Okay. So we
have a plank selection. Now we just need
to run through it. So over here, we have this
one and we have this one. These two are obsolete. So what I can do is
this I can now expose, and let's just call this
a gradient art amount because then I can
just turn them off whenever we have
this second plank. Gradient art amount and
height, art amount. There's do height score
variation amount over here. So those two, I can turn off then they run
in my settings. These are all fine over here, so I'm adding my nails, and my nails are, for some reason, broken, and they are broken because of this histogram
scan over here. However, this Hgram scan,
as far as I can remember, it wasn't very useful
in the beginning anyway with the new
technique that we do. So it might be more flexible
if we simply remove that. So let's see, we are. So we have our norm map. We
our stuff on top of here. Then we still are
using this one to basically swap around between
the normals, which is fine. You won't be able
to really notice, I think, this small
transition over here. Yeah, I see. Then we do have a problem over here
where we use this dirt, and that is because we are
using our position map. Now, I want to see if
I remove my position. Okay, so that's not the one. Is it the planks? Okay, so it is the planks.
That is interesting. So where is this
line coming from? So all we need to do
is we need to see a way to cut that one out. So right now with our planks, if we ever look so, I
feel like that over here, there is a pixel
mismatch going on, and it seems that that is
probably causing, yeah, see, that's probably
causing the problem, this Pixel mismatch,
which is interesting. So if we go ahead and let's get rid of this transform to D, maybe if we do like a Save Oops, safe transform gray
scale over here. And then in my safe
transforms gray scale. Oh, no, wait, of course,
that wouldn't work. Sorry, I mean, do a transform, but we're going to use
values instead of numbers. So if we go in here and
we set our width to be, for example, 110%, that means that it
will scale up by 10%. So if I press apply, over here, you can see that
that is scaled up, and I think that's more precise. I don't know why maybe by
hand, for some reason, I managed like, move
it this one pixel, and that is causing the problem. Let's see if this is now still a problem once I've done this. Okay, so that is
still a problem. That's most likely actually
coming from our aztect. So if we actually go
ahead and save scene, go to our wood normal, and now if we go
into our presets, what we can do is
we can say this one is overlapping planks
and just press new. And then the overlapping
planks will be like a plank number one. And then we will go
ahead and we will do like flat planks, new, and that one
will be number two. But then the gradient and the height variation
is turned off. And the reason that this is
turned off is because we already have that stuff
now handling over here, and we don't really
need that many gradient variations on
something like this. So that seems to do the trick. So if we now go ahead and have look down on off
my displacement. Okay, so there we go. So
that looks pretty good. Now as you can see how
displacement is quite strong, but that's just a matter
of going in here and, like, slightly changing
around the displacement. That should not
really be a problem. So, we got these
pieces over here. Now, over here, you can see that the wood is also
quite a bit rougher. That would be nice if
we just like arding this extra bit that can just
make it look extra rough. For the rest, that looks
pretty straightforward. Like, most of this
is extruded out. So that's something
that we also need to keep in mind that this
is actual geometry, and this is not just like a
displacement most likely. Or it must be the best parallax I've ever seen, but
I don't think so. So, for our wood, one thing that we can do is
we can go ahead and we can, of course, have
control in here over our normal strength and
edge damage amount. If we go ahead and go
back into our normal, we can go in here,
and I believe that you can actually expose
and then expose again. We have a norm strength. So we can expose this again and just call this
normal strength. Let's do this grain
underscore normal strength, just to differentiate.
Press okay. And then the edge damage amount, expose this. Grain underscore. And also grains edge
damage amount over here, so that now I should be able to go back into
my wood planks. And here we have a flat
planks, just press update. And then, like I said, for the flat planks, I
want to, for example, set my grain a bit
stronger and my amount As a bit stronger, just for the damages over here. And then if I on top of this, also expose some
values like over here, for example, the
warping is fine. I think it's this one that
we want to probably expose. It's very difficult for me
to see. Let me just quickly. Here we go in here. Oh, no, that's not the one.
Where is that one? I think it's this one over
here. Yeah, that's the one. So, this one over here, we can go ahead and
expose this one and just call this Edge damage. And that's a plank, sorry, plank underscore edge
damage over here. And let's just throw
this also into the normal group and
just press okay. So we can also have
control over that, so we can just go in here. Let's pass updates
on our flat planks and then in our
plank edge damage, we can go ahead and we can
set is a bit stronger. It's maybe a bit too much. Let's do 0.4. So we got those ones also done, so that's quite nice.
Let's have a look. Yeah, so now we get, like this really much more rough looking
planks and everything. Okay, maybe our edge damage
is a little bit too strong, so let's go ahead and just
tone that down back to 0.25, for example, over here
just to tone it down. And I think at this point,
that should be pretty good. So let's right click the frame. And this one we will
call base color. And then, wow, I
really can type today. Base color. And I still
didn't type it right. Base Color. Thank you. Okay. So we got those ones done. So if we now have a, we got two plank
variations over here. What I'm going to do is because I think these
are pretty much for now, the only ones that we need
because our plain mood will dictate a lot of
the other planks, also. So that's why we need
to keep that in mind. But this is looking pretty good. I'm going to go ahead.
Yeah. He'll see. So another one is maybe
like a plank variation where it's actually where
it has a lot of planks. So that's like the next
one that we can do, and we will finish it
off there for this one. So we got this one, if we don't just grab
a tile generator, and for this tile generator, we set our let's see, offset random and
our offset here a lot closer so that now all of these planks are,
of course, a lot smaller. And then we can go
into our multi switch, set the input number to three. And then we can add this
third input over here. So having this done, let's go ahead and
set up a preset. So we're going to set up a
bunch of different presets. First of all, Axe,
one that we need to expose is in our base color. We need to go ahead
and we kind of, like, also need to
expose this stuff. So if we go ahead
and expose value, just say main column
you can just keep this. So that one is important. The dark dirt overlay
is important. Yeah, I guess we can also just
re expose the white dirt, and we can just press
okay because it has all the same
settings as before. For now, this is fine. So we got those.
Actually, yeah, yeah. So we got those. That is fine. So now if we go into
our wood planks, I'm going to press update
on the flat planks, but let's start with the
overlapping planks over here. So overlapping planks. If I just double click on this, are all the settings still
correct? Does look like it. If we now go ahead and
just quickly double check, No, the settings are
not yet correct. So if I do this one out
a lot more Too much. Okay, so the
settings are broken. That sometimes happens.
Sorry about that. So that the settings are
broken, that sometimes happens. So that means that
we just need to quickly go into settings. Plank selection, grain amount, height variation
amount that is fine. Let's go ahead and just
also turn these on. So a plank edge damage. Set this one back to 0.1. And I'm sure that I
probably have accidentally added a blend in between
here or something like that. I forgot where it was. Oh, this one we can get rid of. Ah, where did I do this?
I completely forgot. I can remember that I
added like a blend. Oh, yeah, here I did that. So I added a blend over
here, I believe. I don't know what this blend
is doing because it doesn't seem like it does anything, so that should actually be fine. So let's see, planks. Oh, wait, that shape but for
later on, that was it. So that shape we can just get rid of because we
no longer need it. So now, these
planks are correct. White? Still breaks. Let me just do like
a fresh export. Maybe that works because I can't remember changing
anything like that. Sometimes it can just
use a fresh export. There we go, see? So
that was the trick. So fresh export,
and there we go. So that sometimes happens. I don't know exactly
why it happens. You can also go in here
and, like, reload. Your texture maps
used to be 100% sure. But, okay, so we got
our planks over here. That's fine. And we
set that to, like, a height of around 0.02. Then what we have is we can
go ahead and save this, and then the next
one would so update. Next one will be our flat planks and our flat planks over here. Let's have a look at how they look, except for, of course, the height, but that's
something that we'll do later. Okay, so nails are there and everything else is
there. That is fine. There is still some
cutting over here, which I actually do not like, and that cutting comes
from these bits. Over here where they cut, and that's because they are
cutting a broken version. However, what we can
do is for this one, if we go ahead and add
a switch grayscale, and then we can say, actually, let's set this into falls. And then we can say,
flat planks let's do default falls,
expose flat planks. So if flat planks is true, then what it will do is
it will not use that one, but instead it will use
this version over here, which already has all
of the gradients dded. Let's see. That should
do the trick. Or not. Let's have a look.
Oh, yeah, wait, it would be nice if I
actually set this to true in our plank. So flat planks if let's see
flat planks is equal to true. There we go. That
should fix that. Perfect. Okay, so flat
lnk is also done, and then the next
one would simply be that here, let's update. And then if we say flat
planks, underscore short. And the only thing
that we need to do for flat plank short is just press new and please set our
plank selection to three. And that will give
us a better here. So that will give
us this effect. Now, all I wonder is that
if for this one, here, let's just press update, if we go ahead and set
this back to false, if it will give us some
gradient variation. So if we set this to
falls and then add some gradient and well, you don't need to
do a height map, but let's add some
gradient map variation that could give us maybe like
a more interesting look. Yeah, Cesar, that gives us
quite an interesting look. If we just give it
like a slight bits of gradients, that should be fine. So maybe, like, a
little bit more even. And then, of course,
for these ones, what you can do is you can go ahead and you can
duplicate this material, call it flat lengths. Well, yeah, it's
called flat planks. And then for this one, you
can go ahead and you can set your displacement low so
that we don't need to constantly mess
around with that. So we got this one over here. So these are flat planks, and they now also have
some gradients going on only over here that
I feel like they can actually use a
tiny bit of space. So I think for both of them, but let's first of
all, do them here. If we set our interstins to 0.02, maybe a little bit less. 0.01. Just waiting
for it to export. There we go. I think that will
look a little bit better. So 0.01, then over here, we
probably need to do the same. 0.01. There we go. Okay, we already way
overdue with this chapter. So let's just go ahead. And the next chapter, we will
do some polishing. We will work on
some of the colors. And then once all
of that is done and everything is looking great
for all of our default boots, and we got all of
our variations done, then what we're going
to do is we are going to use our
paint layer mask, and we are going to
create that one. So let's continue with
that in our next chapter.
22. 21 Creating Our Wood Planks Part5: Okay, so we finished off
these planks over here, so that's looking pretty good. So we already got, like,
that balance going on. Um, the only thing that
I feel like I feel like that this distance over here is a
little bit too much, but I want to make sure
that it's not just my ambient occlusion
messing with my head. So let's just go down to our rando settings
and tone that down. Yeah, it does kind of
feel like, C here. So it does feel like it is
not the ambient occlusion. So let's see if we can just push that in a little bit more, especially in these
areas. Here we go. So if we go down to interstineY, I believe this 00 zop Oh, no, wait, sorry. This one. Let's actually let's the
random amount lower. 0.001. There we go. Let's just try and
really push it down as far as we can before
it starts breaking. And also like this
one over here. Same thing. There we go. So that should still be fine if we do
something like this. Hmm. It works a little. And what you can also
do is just switch to your main camera and then
you can have a closer look. And maybe it might also just be our dirt that is
causing this effect. If we just temporarily turn off our bidoO, ambient occlusion? Oh, it's our ambient
occlusion that is I thought I turned it off. I think it's a bit
of everything. It looks like that it's part our ambient occlusion
and parts the rest. So what we're going
to do is we're just going to go ahead and tone this one down a little bit more. Oh, yeah, see, here,
it's pitch black. So let's set this to 0.02, so we don't need that strong
of an image seclusion. Now, we can balance
out our height. I'm just a bit worried
to sometimes do that. So what we can do is we can
go ahead and go in here. We'll just need to
see how it works. If we add a histogram
range over here, you can see that it
balances out your height. You can set your
range basically up to basically increase or
decrease the height. So if we set this a little bit lower and actually do
the same on this one, the only thing that I'm always
worried about is that it then detects my edges just
like a little bit different. And because it detects
them different, it ends up like
breaking something. And that's why I always need to be very
careful about this. But what this does over here, it also does reduce our height, just in general, so that
it's a little bit less. So if we do this one,
and then for the rest, I'm just going to finish it
off by maybe toning down my AO to 0.01 as a lasting
and also going in here. And I want to just, let's see. So here we have our dirt.
Well, you know what? I'm going to set my dirt
a little bit stronger. But then what I'm
going to do is we can actually implant
a mask over here. So with this dirt, if we do, like, do I have a mask
for this one somewhere? I think I have this
one over here. Let's go ahead and
grab this one, and let's just move it over
here in empty space and add a histogram range so that
we can kind of, like, set a range up,
but then I can Uh, sorry, let's set
the position up, kind of just balance it out. It's not working the
way I want it to. Let's instead alter levels. I don't often use
the levels anymore, but it can sometimes
still be handy. So if we go here, and
the reason I want to then the levels is
because it's just a bit easier for me to
move my black slider down over here and then just
tone down that intensity. If we are this, it should. Yeah, we should be able
to now mask this out, and based upon this, we
can set it completely off, or we can still have it
shine through a little bit, like you can see over here, and that should, as you can see, compensate in not having,
like, as strong edges. So having that done, it's looking pretty
good. Let's have a look. Here, see now that's already toned down a lot more,
so that's a bit better. Okay, last thing
that we need to do. I can see some weird
looking streaks. See, this stuff. I don't know what it
is. I want to fix that. And once we've
finally fixed that, then what we're going
to do is we're going to work on colors and just prepare everything to
create our painted variation. So if we have a look over
here, where are the streaks? Alright, don't see them here. Maybe if I do a fresh export, maybe that already fixes
it. I can see them. So to a fresh new export. See, I don't know. Sometimes, yeah, it
just bugs a little bit. But perfect. So we got
all of this stuff done. Now that we've done that,
what we can do is we can work on our colors.
Let's save a scene. Let's add a frame,
and this one is going to be called roughness. And now that we have
these pieces over here for our colors, what would be nice is
so we actually give it full control over
our main color in here. But what might be nice instead
of us needing to, like, create a bunch of
different presets, we can actually go back into
our original plain color. So if we good plain
wood over here, Okay. So in here, what we can do is we can so this one we
have exposed, perfect. And we can just duplicate
this and already give almost like a
preset within a preset. So we have this ringe color
and we can give it like a few different colours
for like our wood. Did I I think I actually got
these colors also in here. Yes, I got these colors in
here. Now I think of it. Already. Yeah. So actually, I completely forgot about that. So we should be able to just
go into our wood planks. You can just double click
on the name to open it up. And if I go in here, it should still have Oh, it should still have a preset. So technically, I don't
even need to do that. I wanted to do it
in a different way, but this is actually I think a fine way because
so we do the preset. It looks like that
it does remove our exposing, as you can see. Oh, no, wait, no, wait. It
does not remove our exposing. It looks like sort of. Whatever changes it tends to remove the exposing that we did. But that should be fine
because even on the old wood, I actually already increased
this kind of stuff. So we got that one. So
that's actually pretty good. Now, the only thing
is that I do not think I can actually expose. Yeah, I don't think I can actually expose
the preset itself. So that's something that kind of depends what you want to do. You can try and duplicate it and everything, but honestly, we really want to
go through all that effort when over here, we can just have it, like, done. Ready to go. So I'm actually
quite happy with that. I think what we can
do is at this point, we can start by
working on our paint. And for our paint, we're
going to go ahead and we are going to have a
very plain version, like, very thin paint. And then maybe it
would also be nice. So if we have a look over here, yeah, most of this is
actually very thin paint. So let's go ahead and do that. However, just for good measure, I will also show you a
little bit of, like, the peeling technique that you see here because I'm sure that many people would like to know how to do like this
type of peeling. So this is actually tin
paint, so we'll see. Um, oh, we are
only at 8 minutes, so we can just as well
do that over here. Let's already get started paint. So we have our wood planks. I'm going to actually
pass update in our flat planks and then go back to our overlapping planks. So that's the one that
we will mostly be using. Perfect. So if we now
have a look, and open it. Here, see? That
looks really cool. Maybe that our sky is now
a little bit too dark, so we can just in general, mess around a little bit
more like our sky and just made to like brightness
of tree like that, and then you can also
rotate your sky around. Okay, for our paint, for our paint, most of this is just going to be
mask generation. So we just need to
create a really interesting, nice looking mask. Now, what do we see over here? If you have a look over here,
we basically want to go ahead and we want to control that paint is not on
every single plank, or at least in large
areas of the planks, they are not there. However, when there is paint, it kind of just has like
this type of a look. That's kind of what
I want to go for. So it's like this
little wavy look. Now, the paint does over
here go across the grains. However, doing stuff like
that is quite tricky, and that would be more something if we really want to, like, dive into this, it would almost be its
own little tutorial of a couple hours because I
cannot spend 5 hours just, like, making the perfect paint when I have so much
other stuff to do. So we got that one yeah,
that should be fine. So let's just go Oh, and also by the way, I
like this kind of stuff. So we'll see how it goes. We'll see if we can get like those tweaks in here
and stuff like that. So for our paint,
let's go to designer. Let's go ahead and just let's
make the mask over here, and then we can just
go ahead and art that. So we basically add a blend. And for now, this blend will just have like a uniform color. And just set the color
to be like white, and this is just so that
we can later on test out our mask and just have it overlaying white
on top of this. If I have a look at this,
what am I going to do? I'm going to get started. But let's say, let's see
what we can use from this. Okay, so we are using the
wood cranes over here. Maybe we can use the
ambient occlusion from our wood cranes and do something
interesting with that. So what if we add a histogram? So I am going to try a
little bit of those tweaks. So what if we add
a histogram scan, so it can be useful to
have this anyway to our ambient occlusion
for our grains. And now as you can see, so if we set up a contrast
all the way up here, basically, we can kind of, like, already generate some
of these grains. Now, if I need to have a tin, let's make white
to be where there is paint where so white
is paint, basically. So now we already get like
some of these grains, okay. Let's add a slop gray scale, and scrub like Cloud
two over here. Oh, that's an interesting noise. I need to keep that in mind, because I can sometimes use
just like a noise like that. But basically, if we just
set our intensity to zero point that tilt
my 0.05 over here. And now I first want to have a look at some of my crunches. So the ones that I created
because they are a lot easier. So over here, I wear like a quick look which
painted crunch I have. I have this one, and
I have this one. If I end up using it, I
will, of course, include it. And then F let's see. Yeah, this one is not wearing
noise. This one also not. So actually, I'm, actually, that one was also actually
quite interesting, but I'm mostly
interested probably in this one because it's
like a longer streak. If we go ahead and
let's delete this, now, these SPSR files, they come
with a dual overlay function. If I press through,
you can see that it will just overlay it twice. And now my idea was that I transformed this and I
rotate this 90 degrees. You know what? Let's do Save
transform to make it easier. Save transform
rotated 90 degrees. Tie it twice, and then maybe
also in my grunge control, duplicate it and give it a different sat over here
and do the same thing. So we get, like, a
bunch of these type of I can just mess
around with my seat. Until I get something nice. And then if we blend
them together. So I'm just trying to get a lot more of like this
kind of painty effect. So if I blend this together
using a max lighten, I then need to mess around a bit more with my seed to make sure that it's
interesting locations. And let's say that I
then blend this on top. I still have no idea if this is going to
work, by the way. It's just me trying
some stuff out. Okay? So if I blend this on top, it will not show enough let's see if I just add this one on top to
get started with. I add this one on top. I I will add the other one later on because I'm not
sure yet about that one. I add the directional
warp and I just copy the same intensity
that I have over here once again to just
kind of like to 500, just to mess around
with your position. So now that we have
these positions, that does give me
this effect a little bit here and there. So
that is quite good. And then if I would
go ahead and I can mess around with my balance. So I said that white was going to be
where there is paint. I'm not sure about
it now anymore. Maybe we will go for like
black is where there is paint. You can kind of, like,
play out at your contest. Wow, maybe one of
them is enough. Why not? Nah, maybe not. It's
a trick you want people. I just need to get a nice
balance to see if I can maybe, like, boost up my
contuest, tone this down. There's only so much I
can do with this one. Let's try to here, we have our save transform. Let's twice just do
like a transform to D, and let's see if we can
just really clamp it down. So let's go in here, hold Shift and simply
clamp this down. I want to see if I can
make this like smaller. Okay, so that does give
me an interesting effect. Of course, I know
that the tiling is probably broken,
although, actually, it doesn't even matter
if the tiling is broken because we are literally
swapping it around anyway. So in the end, the
tiling should be well, broken anyway, but
in a good way. So we got this stuff. Now, if on top of that, I then add a blend. And for this blend, I like grab this sloplo gray
scale, and I don't know. I maybe like let's see if I
do art what if I do an art, but I like add another blend in between here and I just
mask it out with something. So I add another blend
in between here. I need to if I add white, I'm going to add
a uniform color. No wait, I'm going to add black. So I'm going to add
a uniform color that is white to this. And then do I happen to
already have a grunge map? Actually, over here,
this one I can use. Let's do a histogram scan. Let's use this one, and we're just going to
use this grunge map basically in order to let's
give it a bit more space. See now you can see
how I work when I really just need to play around with things because this stuff it's doing this paint. I wanted to get it
better than what I normally do because normally
I do it way too basic, so I really want
to give you guys, like, a better material. But does mean that
we just need to play around with
things a bit more. Here we see, so we got,
like, some of those streaks. And if I art inst subtract, let's do art subtract. No, maybe if I invert this, then it works a bit better
if I do art. There we go. See? Okay, so now we get
those streaks in there, which means that now
they kind of like, they should kind of
like paint in here. Let's see. So I want to actually duplicate
this direction warp and make it
exactly the same, because else I feel like
there's going to be a mismatch. There we go. So that now? Okay, so now we get some of those streaks and it's
like a faded paint effect. So that's also pretty good. So we got that stuff done. Now that we have
this stuff done, what we can do is we can
now just go ahead and we can control how much
paint that we want. So for this one, if we play
around with the balance, it should increase the pain, but it will have a limit. So if I have a look at this, it always feels like that we kind need to invert this
what we have right now, that the pain peeling is
the other way around. So if I do an invert
grayscale over here, Mmm. Let's see. So the
invert grace carl does not look very
nice over there. What if we do it at
the very beginning? So if we go to this
crunch control, there is an invert button. Let's try and do that.
Yeah, see, that's why. Okay, fair enough. It
changes the balance around. That's why I tend to
not use this one. Instead, let's do an
invert Grace car over here. And let's see. So then we continue this
on, and then this one, instead of an art,
needs to be subtracted. Ah, it's always so confusing
to get everything right. And then we have this
one, and now if we add one last histogram scan, we will clean this up a
little bit more later on. And this histogram scan is
here basically so that we can mess around a little
bit more with, like, the final position, as
you can see over here, so we can get, like, some of
this harsh looking stuff. Let's make my uniform
color a little bit down, darker, I mean, and let's just see how
this actually looks. Okay, so this is what
we got right now. So most of the paint is now, so it is also located around the edges and just in
general around other areas. That is pretty good. But if I now add one last
mask on top of this. And then this one over here, I can kind of use to just increase or decrease
the amount of paint also. So for now, let's just leave
that one. So let's see. So we got this stuff over here. Now, if I have my directional
warp, see my Hcrum scan. Let's add one extra blend. And we had this one over here, which I think is
quite interesting. And then if we just play
around with our seed, maybe do like a dual overlay. Here, something like this, to transform and rotate
this 90 degrees. Let's see if I now add this stuff on top
as like a lasting. See that most of the
paint is still located. There we go. So now we got, that paint fading over there. So that is looking pretty good. Yeah, I'm quite happy with that. I am going to give,
like, a tiny bit of, like, a height. But
I quite like this. And I think also it's not
too bad that we have, like, some of these really thin
looking areas over here because I think they will
actually render quite well. And else what you can do is
you can do this before or before your histograb
scan. Like this. And that will also clamp everything down a
little bit more. Okay, so just as a recap,
we grab the noise. We ordered a safe transform. We tied it flat. Then
we have this blend. Now we can just go ahead
and get rid of it. We invert this stuff. Then we add some of these
little streaks that we have generated from an
ambient oclusion on top of it. Once all of that is done, we add a directional warp to kind of mess around with
the deposition of a paint, and then we add one
extra grunge map on top of it to kind of fade
out some of the paint. And this crunch map, maybe
if I just set my contrast a bit higher and like, mess up with my balance
a little bit more, and then finally some finer balancing with our hisgam scan, which gives us
something like this. Okay, wow, that's quite a bit. Now to add a norm map to this, we can just go ahead and we can overhear grab a
normal combine. Oh. That's annoying.
It's very annoying. Come on. There we go. Okay, so we have our
non map combine. Now what we can do is we can
add a normal blend node. And this normal blend node, it will basically, yeah, just add these norm maps
on top based upon a mask. And for that, we need
to have this mask. So if we grab this
mask over here, throw it into the bottom. And then into the top, we
are going to add a normal, and this normal will also
be generated from a mask. As an open gel, but it
will be very, very, very soft like this
and throw this on top. So what that will do is
now it will just replace it pretty much with like
a flat normal over here. You probably cannot
even see this normal because technically,
it gets cut out. You can see the tiny bit. I just now need to make sure that the stuff that is being cut out is
the correct stuff. So let's double check simply by looking at this area and
then double clicking here. Okay, so see. So yeah, that is being correctly. And now what we can do
is in the next chapter, we can start by actually
creating a paint, base color and a norm map. And then I will also show
you how to do some peeling. Uh, I think I also
want to go ahead and I would improve my mask
a little bit more, but you know what I will
do is I will off camera, I will just have a
quick extra loop. This is already
looking pretty good. I just want to get, like,
a little bit more stuff around these edges
and everything. So let's continue with
that in our next chapter.
23. 22 Creating Our Wood Planks Part6: Okay, so we left off with this thin looking paint over
here, which is pretty good. But I just wanted
to first of all, increase or improve
my mask a little bit. So I need to give
this more space because right now it's
getting a little bit cramped. So what I wanted to do is I wanted to basically just add like some
edge detecting, which will basically
just give us, like, some nice little
edges over here. We can do this using a blend. And honestly, I think
there are probably, like, good edge
detect notes here. Edge lect Hmm. Yeah, it's been a while since I've used that one,
but that could work. And let's add the curvature node because it needs a
curvature input. Set is to be open GL, and then we just want
to grab this one. So just like the planks, not with all the grains because else it will
not work very well. And let's have a look
and see if this works. So we can use this one, maybe. Let's see, convex edge width. If you increase that, that
often just adds a bit more. It's very, very sensitive. Let's see if I set
my levels down here. So you also have the
concave edge width, which will make everything
like a little bit blurry. So, to be honest, this pretty much looks like the normal edge detective.
I look at it like this. I was thinking like, Oh, maybe it'll give me an
interesting effect, but I guess not. We can, however, go
ahead and just, like, add a mask to this. Let's see. So that mask I
don't really like. No, I don't like this.
Let's see if there's a different type of edge.
Edge damages, maybe. Most of these do always just need a curvature or like
an ambient eclusion. However, compared to painter, these notes are not
always very good to here, like, that's still
not what I want. Let's instead go for,
like, an edge were. Alright, here, see that one
looks already a bit better. Let's tone down my levels. Yeah, there we go. So this one already looks like a
little bit better. So having this now, of course, we do want to once
again just grab an interesting looking mask which will basically just mask out in many areas that we have those edges
so that we don't have this damage everywhere. So let's try out do
a histogram scan, and let's try out
this mask over here. I think we actually did a
histogram scan also over here, but let's just do
another one, just to make sure I full
control over everything. There we go. See? That
looks a little bit better. Let's go ahead and blend this, and we are going to subtract
this one most likely. Yeah, we're going
to subtract it, which should now also give us
some extra edges over here. Now, sometimes we kind of need to move these up a little bit, so I don't know
if that happened. Yeah, you see, that's
what happened over here. So just, because
of the placement, we sometimes need to
move it up a tiny bit. And for this, what you
can do is honestly, what I tend to do in these
cases is I just go in here, and I first of all, try just like a
simple transform, and I just simply move this
transform up a tiny bit. Like this to make sure
that that is working. Uh, it's interesting that it does not show
up that obvious. Let's go ahead and go
into our main camera. Yeah, okay, I guess
it is showing up. Yeah, here, see, so it
is actually showing up. It's just not as much. So maybe we can just increase the damage amount a little bit. So if we go into our edge I don't even know if the
transform is needed, so let's have a look
at that later on. Let's set our edge
wear amount up. Yeah, let's let's actually gets rid of that one.
Let's in our mask. Give it a bit more
edge wear over here, just by playing around to the
position of a historumscan. And let's then do a
slope blur gray scale finally to just give it
like that last little push. Here, let's pick like our
clouds two over here. And just a last
little damage push, I should say. Here, see? And I'm just leaving it to blur probably
because I don't think a minimum now I think blur
looks quite cool in this case. So let's do blur at 0.1, maybe. Yeah, so here, I can
see it a little bit. Let's make it even thicker. Didn't expect that it had
to go this big, Buto. So even more. There we go. Now we start to really get it. Okay, perfect. So
now we start to get some of these edge
damages also over here. I think we can
even push it more. Feels like a lot, but I guess that let's just
do a full export. Just make sure that
I'm not accidentally, exporting something
that I forgot. But yeah, this is our applied, so that should all
work just fine. Yeah, here, so we get it. So basically, just go for,
like, how tick you want. Right now, this
is what I wanted, like the small little edges around here, so
that's pretty good. Okay, now that we have this, let's get started
with, first of all, just going over a
base color method. So, for our base
color of our paint, um, here we go. So here we have a pretty good
look for like a base color. It comes in two ways. We can see tiny bits of the
grains still in it, and then for the rest, it is a pretty clean
looking base color. I think what we want to do is we want to grab a gradient map, and maybe just like
a simple clouds to, we'll do the twig or maybe like a grunge map zero, three, maybe. Actually, you know
what? Let's grab it on the sideways over here. And now if we go in here and
do like a gradient editor, we can pick gradient and
just kind of, like, do this. Perfect. See exactly
what I wanted. Okay, great. So we
got this stuff. Now we want to kind
of like blents with some very,
very soft grains. And I don't know if we can just probably like use our
ambient occlusion over here. So our ambient occlusion is going into this histogram scan. Let's duplicate this
histogram scan, and let's just set the position up a bit and maybe like set
our contrast down a bit. Until we got, these
really soft grains. And let's add these to the
top and add the grain map in between to convert it from
a greyscal to a color. And it set this to be like
a multiply. Yeah, see? So we can see like
these really thin looking grains in between here. So that should already make quite a nice looking
wood texture. Now one thing to, of
course, remember, is these very specific
diesels over here. We are not actually going
to include those because we need to tie this so many times that that would
not look very good. But over here,
here, you can also see like a little bit more. This paint, it is chipping
a little bit different. So it is something that we
can see if we can maybe, like, reduce some of
these really small specs, but it kind of is just
like a preference thing. Right now, I think this is like a pretty good basics and that
we can just work with this. So we got now a pretty
good color going on. Now let's also go
ahead and do the same with our roughness over here. So we have our roughness.
Let's blend this roughness, and we are going to pretty
much blend it using a Griskal conversion and
a histogram range node. The Griskal conversion will have our actual color over here. The Hgram range node
is pretty good, but it will mostly just
be for the position. So let's make this a little bit darker so that it's more shiny. And for the mask, we
use the same mask that we are using over here
and plug it in here. Do I need to No, wait, this is
correct, I believe. Yeah, here, see, so now we
get some shine in there. Yeah, that works. So we get now like some nice
shining in there, so that's looking
pretty good also. So now that we've got those
things done and we've got, like, this clipping over
here, that's all fine. Maybe I want to, like,
increase the pain peeling on my small etches a
little bit more. So over here, we
have these etches. Let's go ahead and mess around with this histrum scan to give a few more of them, get a bit more pain peeling because I quite
like the look of that. And one thing that I
quickly wanted to show you that we will most
likely not be using, but that is how to get, like, the peeling effect
that is flipping over. Basically, the way
that you can do something like this is you grab a non uniform blur
gray scale like this. You then grab your paint mask and throw it
in both of these. And then what you
tend to do is you tend to like your
samples all the way up. Then you go into your direction. And what this will do as
you can see over here, it will already create like this little soft look over here. Now, if I add a normal to this, this is how it will
basically look like. Well, okay, if we
invert it for now, I will just do a direct X. So this is basically
how it will look like. And then if you would grab
this and you would blend it together with once again your mask and set
the blending mode. I always need to look at
my norm map for this. Set the blending mode to There we go to divide,
I think it is. Then it will kind of cut out, and then what you can see is it will just give you
like this effect. Samples are up. I was expecting a better
resolution maybe because we just need
to set this to 16 bit. Let's go absolute 16 bits. There we go. That's
better. So that's why, of course, for this version, it's not the best method. And the reason it's
not the best method is because we are
not going to go for, like, large chunks, but
more for smaller ones. But now you can add a
normal combined to this. And if you would then
go in and add over here like this layering
effect at a very low level, I am going to set to open GL
and just do like an invert. Maybe we can add like this or keep this in like
a tiny bit here. But you can basically see that
if I set this, of course, like a bit higher, you can see that it looks
like pain peeling. And that's also what it
will do in here, see. So it will give us that
pain peeling effect. It does look quite
nice. So maybe we will give it like a little bit. Here, I don't have
my height map on, you can see it a
little bit better. So let's artist
like a little bit. I was not actually
planning to do that, but let's artist like a
little bit over here. Also, quite a cool thing that
you could see happening. Another thing that non
newfonbluGray scale is quite good at is it is quite good
at getting rid of, like, these really
small details. So if I, for example, grab my non unfmbluGray
sku like this, and set my samples
all the way up here. See, you can see that it will try and like some
of these details, it will make them a
little bit softer. At which point, if you
would art a hist cram scan, for example, you should
be able to sort of, do something like this where the paint is a lot more fluid, and then you can play
around with your intensity, and you can make it like
stronger or less strong. Now, the heavy thinging for
this so that if you want, we can, for example,
literally swap this around. I won't do this, but
just for examples. We can swap this around, and then we can say,
like, Okay, see? Now we instantly have a
different looking paint. So this paint is really
like it's not so much it's more for ticker paint that you want to have
something like this. So I just wanted
to show you that because I know that
when it comes to paint, there are so many different
ways that you can do this. I will leave this one
just sitting here, if I don't extent,
remove it later on. But for now, we
have a pretty good looking paint going
on over here. See? So I'm going
to go for this one. Let's go ahead, and as
always, let's save our scene, and let's do a
quick render image so that we can have a better
look at it. Here we go. So Plainwood check.
Bre wood planks, check painted wood
planks, check. And if you zoom in, you can see, all the detail in it, and
that's looking pretty good. Of course, we still need quite so here this, also
the reflections good. We still need some
balancing here and there to make it all
fit with unreal. But for now, we have
a pretty good base. The only thing I would say
is that if we go to the top, I just want to make my
grains a little bit less intense, but
that's about it. So we got our paint wood. Now, one thing that we're
going to do is we're going to space and add a switch color. And we can go ahead and we
can expose this wide away and call this has paint. This way, we can
turn it on and off. So we will have the has paint. Let's just press
Okay. And then if a paint is true,
it does this one. And if it is false,
actually, you know what? No, I know even better way. Let's actually delete it.
Let's do it over here. Let's do here a switch
gray card this time. If has paint is true, and if it is false, it will become a simple
black uniform color. And then a paint by default, I want to set to false. And then I want to expose
this to the has paints. We already created it, so we
can already, use this one. And then we go, save. And let's say that we
go in our wood planks, I just need to double check. So here we have our
overlapping wood, has paint. Let's set this off. No, this
is not completely correct. Let's reset this one. Maybe
I did expose it incorrectly. Has paint. White? Okay, so now
it works, I think. So now we can just double check. So our wood seems
to be looking fine. So this was like
the previous one. So our wood is fine, our normal. Also now just gets ignored. Our roughness map gets ignored
because it uses a mask. Everything gets ignored
now, so that's good. So we got that stuff done. The only thing that I
can remember is that my ambient occlusion most likely does not have
the paint included. So if we now save
this Okay, see? Only things like these trees. I can't remember
them looking like this, which is a bit strange. Oh, that's why. So,
for some reason, this one is Oh, it's because of a
switch gray scale. So we need to go into our
overlapping and we need to set the Oh, God, this is confusing. So what is this one? If you can go ahead and you can
edit the function graph. Okay, so this is flat planks. So what we need to do is
we need to go in here. Flat planks is eager to false. In our overlapping, that's fine. But now we have two has pins and I feel like one of them
just doesn't do anything. So if we go into our
parameters, let's see, we have the has
paint and we have the has paint underscore one. Let's delete this
one. You know what? Let's delete both of them.
Let's delete both of them. Let's go a reset our switch. Falls by default,
expose, has paint. Twy that again. There
we go. Fresh start. So our wood is now almost crack. I think it still breaks a
little bit because of this, and it most likely breaks
because we had to do, like, a mask generation over
here that we removed. However, I feel like it's more because we don't
have the preset turned on. That's it. It's
because we didn't have the preset turn on. So flood planks and
he paint is false. So now that's all looking fine. Then if I turn on he
paint, so now it is true. This is just testing. So
now we have paint here, our nor map details are
here, our roughness is here. And then the last
thing that we need to do is we have our
ambient occlusion, and for our ambient occlusion, we are going to go
ahead and add a blend. And this blend will
include you guessed it, our mask on top of this. And we are going to set this one m probably to arts that just, like, yeah, just maps it out. Okay, perfect. Finally. So that stuff should
do the trick. So if we now save scene, it should still there we go. So that's all looking fine. But now we have done our switch, and now we can just
easily turn it on and off just like that. So just press update, and then we can go ahead
and we can, like, turn it off whenever
we want, and it should still
also look correct. I know it can be
a little bit of, like, a hassle to
go back and forth. Here you can see that
there is now also still some strange warping going
on that was not here before. So it's all that kind of
stuff that we kind of, like, need to look at and make sure exactly why it is
doing all of that stuff. So the warping Oh, no way, the warping
was going on. It's probably just more intense because we look at
it like over here. Maybe what else we can do
is, that is interesting. So I think it just cuts it out in,
like, some strange areas. So that stuff that we can, of course, we can just
balance it out. In any case, just to
finish this stuff off, what I want to do is
I actually want to give control over my
painted wood color, and I want to give that control
inside of unreal engine. So that's something
that's good to remember. So we now got a good
enough base so that we can start by using this base
on all of our models. So in the next chapter,
what we will do is we will actually start by turning
our models into final, and then we can start by
also mapping on our wood, and then based upon
that, art improvements. Doing environment
art is very fluent. You can just keep improving
upon things because it's hard to know wide the way if everything is
completely perfect. In any case, as I was saying, what I want to do is I want
to create one extra output. So press space and
type in output, and call this paint
underscore mask. Copy the identifier into the label and set the
group into material. Now, this paint
mask will basically have this mask over
here because what we can then do is we can use this paint mask inside
of Unreal engine, and inside of reel engine, we can basically just
overlay a color on top of it just like we
would do it over here. So that's about it.
Now, having this done, you can do quite a bit
of cleanup on this. However, because this chapter is already a little bit overdue, what we will do is later
on when we have done all of our materials
because we still need to create our twain
materials and everything. Then I will just run
through everything and I will do general
optimizations. So let's go ahead and
continue by actually turning our models finally into final
models in next chapter, mapping our texts on it, and it's going to look really cool. So let's continue with that.
24. 23 Creating Our Final Assets Part1: Okay, so what we're
going to do in this chapter is we are going to get start with our finer models. However, we are going to take a tiny little bit of
like a det, sort of. So what I want to do, because we are going to use a brand new system for adding like our
windows and everything, I wanted to go ahead and I already wanted to complete
one of our walls, and I wanted to complete one
of our windows so that we can basically make sure that the system works in
Unle engine five. This is always good
practice also so that you know about the workflow
that we're going to do, but also for me because even
though I've done my testing, the tools are brand new, so they have not yet been
tested that extensively. So we just need to make
sure that it works. And if it doesn't work for
some reason or another, try to find a solution and else, of course, just find
different options. So what I'm going to
do is, first of all, going to go ahead and
I'm going to start by exporting my textures that we at least got like
something in here. I will go ahead and
for these textures, although we will have multiple
different variations, let's start with Wood zero, which is just going to be
our bright wood over here. Then you can see it
like this. This is going to be our first one
that we're going to use. If we go to our wood planks, we want to right click
on our wood planks, Export outputs as Bitmap, and you just want
to go ahead and turn off the automatic export. Now, this will not save until
we press Export once more. But basically, the reason that we're going to
do this is because we are going to go
into our wood planks. And what I find the easiest way, although it does keep
the naming the same, although you can easily just change those names
later on in the engine. I like to go in my
wood planks and then in final,
create a new folder. And for every texture variation, I just create a folder so
that we can export it. So for example, this one
is going to be layered, boot Bar, for example, I can then select
this folder and I can press Export like that. And just like that,
having this one, I can also go ahead and do
that now with if, for example, I go to the wood planks, I can well, actually, let's update the
overlapping planks, and then let's go
ahead and just turn on the has paint over here. So now with this stuff, I can go ahead and I
can export it again. And this time, I can go
like layered, wood painted. Now, one thing
that's quite nice, we will not do all of
the exporting yet, is because these planks have roughly the same amount of planks that are like the
same heights from them, like the same amount
on one texture. So because of that, for
Maya to preview everything, we kind of like only need
these two variations. And then if we also go
into our plain wood, we can once again press export. Oh, I pressed export already. I meant to say turning off automatic export
when outputs change, and then pressing export
so that it saves. And then if we go
ahead and go in here, we have plain wood final, and then we can say plain wood underscore A because
they don't have as many. And later on we will also
ask painted variations. But now what we can do is
we can also export this. So now we have exported
enough so that we can go inside of wel engine and we can actually
test this stuff out. Maybe one of them
that would be nice to make sure that it is correct is to go into our wood planks and just so overlapping planks, go ahead and grab
your flat planks over here and also turn
off the has painted. There we go. We can also just
go ahead and maybe export this one just so that we
have some difference. This is going to be flat
planks bare, for example. Select folder, and then we can go ahead and
we can export this, just so that we also
have these ones. And then like painted versions, we can export those
when we get to Umil. So having this done, now, if we go into blender, the way that we're
going to do this, we want to go ahead
and we want to have actual geometry as
our wood blanks. You can often over
here in real life, you can very clearly see it. But if we, for example, take
inspiration from games, you can also see
that often there's actual geometry here
that they push out, and I think that
they did it by hand. I do not have the feeling
that they used parallax or some kind of other type of geometry because it would be
very expensive to use that. Now, of course, sure, you
could use Nant for this, and that's where you can kind
of, like, get rid of that. But we will not be teaching those techniques
in this tutorial. I want to teach you the
techniques that you would use for any other
type of game engine, and over here you can clearly
see how that all works. So, the first thing that
we need to do is we over here have our plain well shot. That's a good one.
Let's do that. Go down to your
material properties and create a new material, and let's call this um layered wood planks
bare, for example. Now, all we need to do
is we just need to input the base color so that we
can see what we are doing. For our base color over here, if we just click the
little yellow button and go to a image
texture over here, we can now open up a texture. So the one that we want to
open up is if we go down textures and we want
to go wood planks, final layered woods bare. And I think you can also
press a little arrow button. Oh, no, sorry. I thought
that would show a preview. Oh, no, wait, that's
Maya. Never mind. Sorry. We basically
need to get one that we can clearly see
how everything is defined, and that might
actually be better if we use a height map for this or maybe like a normal map because then we can
see it a bit clear. Let's try a norm map over here. So we got our wood planks
sitting here all ready to go. If you want to preview your
texture inside of blended, just go ahead and go to
your viewbod shading, and now over here we
can see our preview. It's not looking very good, but that's something
that we will work on, of course, right now. So the first thing that we
need to do is we need to start by doing some
UV unwrapping on this to make sure that we can properly map
everything together. It is very important that we
get the UV unwrapping white, so we want to go to UV editing. And now to make our life easier, there is an don that
we want to install. It's called SRUV.
I've outed it into the blender folder and you install it the same way
as your Maxivs tools. So you just go once you get to file or so into
edit preferences, and then in here, you
just want to enter this. So this is the Shu UV. Now, this tool is very handy because it will save
us a lot of time and does the unwrapping pretty much for us and makes
everything perfectly tillable. So with this tool, what
we can do is it will be down here in the RUVtap and you basically select over here your model and you
simply press UV box Map. Now, when you do that,
what it will do is it if we go to added mode, what you can see is that it
has unwrapped our model. Now, I think we can also if we just select
everything like this, we should be able to
also see it happening. As soon as you do that,
you get down here this drop down and you can
basically set the size. So we have right now five. So we can do like two, three, four, five, doesn't
really matter. So based upon this,
we can basically decide how many planks I want. So if I do four or
three, I think four. I do keep it even numbers. It's best if we keep
it even numbers. And now everything
should still be tilable if the tool works. So
we got this stuff. First of all, over here, yeah, that does look all
nicely repetitive. If we now Okay, so we still
have our snapping turn on. If we now go ahead and
just hold Shift, no. Let's duplicate this and
I don't know why this. Am I snap Oh, I'm
snapping to vertex. That's why it's acting
strange. Snap to increments. So we do this, and then
we just double check. I don't see. Oh, wait. So if I need to look here, it looks like that it
perfectly transition. See how easy that was.
So just like that, we can just make this all
perfectly transition. So now that we know
that this one is fine, of course, you can also do
this with the other pieces. But for now, let's just temporarily go back
into our layout mode. And now what we're
going to do is we are actually going to go
ahead and we are going to add some extra geometry here so that we
can push this out. Now, this geometry
doesn't need to be perfect because
as you can see, we do have some waviness over here that we might want
to reduce later on. But for now, if you
just go to Addit mode, just go ahead and press
CtraR I should do that here. Contour R. I'll
have snapping on. Third time is the harm, contour R. And I'm basically over here. I'm just going to go
ahead and I'm going to art. My segments here. It might seem like a lot, but compared to the expense
of using or parallax or doing actual displacement
mapping and everything, this will still be quite
cheap because remember, it's a very large asset. When you have a
very large asset, it's not that bad just add a bunch of extra
geometry to it. Sometimes you even need
it for vertex painting. Like we will most likely need it for vertex painting anyway. So what we're going to
do is we are going to add this stuff over here
to get started with. Then what you want to
do is we want to just give it like a
small bevel because these ones actually,
yeah, it kind of depends. If we are going to go
for the flat planks, then we cannot give the bevel, but if we are not going to
go for the flat planks, then we do want to
give the barrel. So we most likely end up
with a few variations. Just keep that in mind. So let's go ahead and let's
go in and I'll shift. And let's just go ahead and
select all of this over here. And we can just re
unwrap it later on, or you can use the tool, or we can just go ahead and
now do like Contra BEC, and then it will not
actually change the UVs, but we just need to have
this a little bit like that. So that's what we can then
do is we can basically I'll shift and just
click on this one. Oh, try it again. Click on this one. And then we can basically move
this one forward. See? And then it will basically
just give that same effect. So if we go ahead and just
do that for all of them, so we are basically just
moving them forward. So it's always a bit annoying for me to select, but
it kind of depends. And this way, we can also
give it more variation. So what we're going to
do is we are going to get started by moving
it forward like this, and then later on also
in those intersections, we can just add like a few extra edges just to
make it more interesting. And because we are
going to most likely do vertex painting where
we can paint between, for example, like
our painted wood and our bear wood
and everything, because we are most likely
also going to do that. We want to add some extra
geometry to this anyway. So like this, I can
just go ahead and I can add some more variation. And then the cool thing
is, so after this, what we will do is we will
turn our window to vinyl, and then you can kind of get a sense for what I
was talking about all this time with like having the windows just sitting
on top and everything. Uh see, am I still going while? Yeah, I am. So we do this stuff. And then, yeah, you
can imagine that when we do our other planks, we kind of need to have
a different version. But that's something
that's just details. That's a variation
that we can add. That kind of variation,
I can just do as a time laps because it's
just very repetitive. So we got that stuff over
here. That's all pretty good. Now what we can do
is we can decide on some of them, for example, over here to also
place a contre and let's say that we do
another one down here. I'm not going to do
this everywhere, so most of them
will just be fine. But let's go ahead and give
it like a few of them. And then if we go in and I
believe that for this one, we can pretty much just select all of them and
already at the bevel. It does mean that we
add like a bit of extra geometry
because technically, you can also just add
like a bevel over here. But when you do that, well, I guess if you do this. If you just add this,
you can add the bevel, and then you can
see that it does add over here like
this effect down here, which should not be too bad, but just keep that in mind because it does break
your topology flow. While if you're adding
a bevel everywhere, it will not actually
break your topology flow. Having this one done, what we can do is for this one,
we can, for example, let's go ahead and I
don't know, maybe, like, move it down and then
maybe in a little bit more. And maybe also over
here, move it in. So that we basically
get this effect. Maybe we need to place our edges a little bit closer.
Let's try that. Let's, let's try this one. I think I went a
little bit too far. So let's just do contra B
like a really small one. And then for this one, if we
go ahead and just move this in and then down and you don't have to
move it in completely, just needs to be sort of in. Here we go. S. So then we
get some small differences. And then what we can later
on also do is we can even in geometry, we can even over here, add some small variations where our wood is even warping
which geometry itself. You see? And that can also give us an interesting
effect over here. But first of all, so we had one over here. Contro B. Nice and small. Let's grab this
one. Actually, no. Let's grab the other
one for change. Let's move this in over
here. There we go. So we got that one. Let's see. What else do we have? Over
here, we have another one. See, this might be a
little bit time consuming, but small variations like this are quite nice to just have. And I guess that it
doesn't take that long to do small
stuff like this. There we go. Over here,
we have another one. Let's go ahead and use this
one over here. Like this. And although you don't see me do it, you can
just, of course, go ahead and press the dot on your numpad to basically
zoom into stuff. The reason that I don't often do it is because it
means that I need to take my hand off my mouse, and I don't really
like doing that because well, I'm moving stuff. I'm not really in the mood then need to keep switching
back and forth. It's a picky thing that I have. But basically, we can go ahead
and we can also over here. Let's do this one. And
then you can zoom in. It does zoom in sometimes
also quite far. And just like that, we can
add some small variations. Okay, so we got that stuff
pretty much done unless there is one very obvious
one that I forgot. Now, we got those ones done, so maybe this one is like
quite an obvious one that I forgot because I
have a short term memory. I already forgot where I
actually placed all of these. But this one is quite nice we
close together. Here we go. Then what we can do is we can also don't do this on the edges because
then it will break. But within these areas, we can go in and for example, add some small variations by simply moving up lengths
up and down like this. And those small variations, it will be appreciated on the bigger scale that you just get these
really small variations. You can also see them
over here that there's some small variations
going on here or there. Of course, I'm not spending as much time as they did
on red de redemption, because it's logical,
it's a tutorial. I don't I'm not a
team of artists. But if I now go ahead and I have this stuff and just do like a
wire frantgle. Here you go. Here you can see that now it does have quite an
interesting look. So we got this one over
here. So that's pretty good. Let's save sen. And now what I want to do is
I also wanted to go in, and I wanted to make one of our windows final. So
let's just do that first. Let's go to our store
window over here, as we have this one over here. And let's turn on
my wife Rm toggle. I first of all need to see
exactly how this looks. So okay, so I use this one, but that's not really
a handy close up. What I think I'm going to do is this one is great for
like a small window, but I might want to go
in and actually find some better reference for like our store windows to get
something nice out of it. So I'm going to go
ahead and I'm going to Oh, no, you know what? That stuff might be good. This stuff is good
enough reference for me. Let's do this one.
So okay, this one. So we are just going to create the outer profile and
then also the inner ones. And then for the windows, for now, we will just
leave them like blank. It will just be like a plain. But having that stuff,
one thing that you need to keep in mind is construction of
the store windows. In these times, the construction should be very, very easy. As you can see, it's just
like a block on top, a block with a small profile over here on the side
and on this side, a block with maybe, again, a different profile
on the bottom, and then it just has these
extra pieces in between. Okay, so let's go ahead and start by just
creating a base profile. So we have our store
window over here. Now, for this profile,
I've already showed you how to do this with
the roof trim. So Shift A mesh, and we are going to get started
with like a simple plane. Wait, let me just bring
this up over there. Now for this plane,
we can pretty much already turn on our
snapping to increments. And let's just rotate this
Oops 90 degrees like that, and then we can already start snapping this to the increments. Okay, so for our mesh, actually, let's
start off snapping to increments for
a second there. So I need to see
I do not want to. It's a little bit bulkier
than what we had, but we can very
quickly go wrong with this in terms that the
bulkiness just looks off. So let's just go
ahead and just push this a little bit
more in like this. And then if we go ahead
and go to Addit mode, we can grab our shape over here. So let's say that, okay, at this point, actually, we can even probably do
switching between Altex. So at this point,
that should be fine. Then we do like an E. Sorry, LTE, and then we push this out. I'm just following the
I'm just trying to follow the reference right now. So it looks like that
I'm pushing this out. And then I do another Alt E and I just right click so
that it's leaves in place. Then I'm pushing it up
until here, probably. Then it looks like another
Alt E. Push it out. At this point, let's switch over to our X ray mode so
that I can see it. Alt E and then another one. I think at this point. Yeah, I think I just want to have roughly the same length
as that one. Let's do that. Yeah, that looks fine. And
then another Alt E. Oh, sorry, Alt E. And then we go back in, and then we are making this
one a little bit ticker. Probably something like this. Yeah, that should do the trick. And then if we just
turn all snapping, we can do one more Alt E, and then we can just
push this back in. At which point, we can
select these two pieces, and we can just do a cue
and a bridge edge loop. So let's do quick pivot
the rear, push this up. So that's pretty
much our profile. So quite easy. Let's
go ahead and here, let's push this one
up until actually, not up until the entire way. Let's push it up until
this point over here. So we have this one. I still feels a little bit thick,
to be honest on this side. Let's push this back
in a little bit, just to make it feel
a little bit thinner, because if we make our
profile a bit thinner, it will make our window feel a little bit longer
and a little bit bigger compared to when we have this really big bulky profile. So at this point,
let's do a sorry, let's select this.
Let's do a quick pivot. And let's just go ahead
and duplicate it, and then I'm going to go in
and I'm going to just rotate this 180 degrees and push this one around this point
over here. There we go. Okay, so we got that one.
Now, the top profile seems to be quite
easy, actually. It seems to be like
the top profile is pretty much this
piece over here. Then we just rotate this. And it seems like this
is just sitting on top. So if at this point, let's just go ahead and
temporarily hide this. So it looks like this
profile is sitting on top up until around
this point over here. And then if we go
in and let's see. So it looks like that it's sticking out a little
bit on both sides. So let's go ahead and do that. Honestly, we don't
even need to do it on this side because we can
probably just mirror it. So let's just focus more on this side, and
then we'll mirror it. Let's do a contra R, and we are going to have a contra
R sitting over here. We are going to have a
contra R sitting over here, and the reason I'm doing it here is that now it becomes
easier for me to place these here and here. Okay, that's looking good. Now if we go to our faces, we can go ahead and
we can just, um, Oops, delete those pieces and actually delete all of this. Maybe it's handy if I do led eggs that I can actually see. Oh, no, wait, over here. One
last thing I need to do. So let's actually do that
because I need to add one extra loop over here so
that now when I delete them, I don't need to, like,
re art that entire face. So we got this stuff over here and we got this
stuff over here. Except for these. I do
not want to delete those. That should do the trick. If
I just quickly press height? Yeah, okay, so that
should do the trick. And oh, sorry, I accidentally turned
on a different model. I don't know which
one I turned on. Okay. Weird. Fair enough. Let's go ahead and let's grab over
here these two edges. Wow, I just came from Maya, so I still need to once again, need to get a little bit used to the blender controls.
And let's just do this. So now if we do Control Alt H, it looks like that all we
need to do is actually, at this point, let's
delete this one. And then let's select these
two Q bridge edge loops. See? So at this point, we don't really need
to do anything because they are kind of like
just sitting here fine. And we just kind of want to have these nicely sitting
on top over here. So at this point, let's
do a quick bivot, edit, and let's do a quick mirror over here on the Y axis
and do a bisect. Oh, perfect. Think that works. So Console A, let's
double check. So if I just go ahead. Oh,
no, wait. I almost worked. Looks like we need to
push it a little bit more in this direction
just to fit it all in. See? And there we go. We have a very basic looking top window. Now, the bottom
window, it looks like that the trim is a
little bit different. So we are going to pretty
much use this one. So if we do a quick pivot, we can go ahead and just Ba, I keep you holding shift. Oh, that's honestly, when you are using
multiple programs, you know what it's like.
It's quite annoying. How like one small button is
different from another one. But unfortunately, in my job, I need to use mostly Maya and blender and also often three
years Max in between that. So it's always a bit tricky. But in any case,
that's just my fault. That's not up to you. You shouldn't need to see this
stuff, so I do apologize. I'm going to add a Edge
over. No, you know what? No, that's too difficult. Let's do this a bit easier. Let's go ahead. I don't know why I'm doing that.
I can just do this. Let's grab this bottom, and I'm going to move
this one down and then press control E. And then what I'm going to do is I'm
going to go ahead and select these ones
over here and then do like Alt E to extrude
this one down again. And that should pretty much be enough for
what I'm looking for. So here, so we get a little
bit of like a piece here. What we can do is we can
also go ahead and select this side and maybe push this
forward a little bit more. And you know what?
Let's also select this and push this forward
a little bit more. There we go, see. So it has this little
trim sitting around it. Okay, that is
looking pretty good. So that's a pretty decent basis. Now, for these pieces, we are going to use the
weight normals technique, which we often use
for structure pieces, which means that we need
to add bevels to this, and then we need to
go ahead and add the weight normals modifier. That basically looks like this. So we got this one over here. We basically for simple
pieces like this, we can add a modifier, and we can add a bevel modifier. Now adding this bevel
modifier if we go to geometry and turn
off clamp overlap, and I said the amount way lower, you basically want
to give every edge a small little bevel like this. What will happen is when
we have this bevel, we can manipulate the
vertex normals to make them look like
they are hypol. The way that you do this
is so you have your bevel, so at this point, we can probably just go
ahead and press A. And one thing I
was worried about, which I can see over here
is this stuff over here, where some of the edges are
now not correct anymore. For this stuff, I guess it might be easier if we
just go ahead and just add some pass to this. But let's first of all,
just continue this. So what you need to
do is you need to go to modified and
wait at normals. Now, it will give us an error saying that the outer smooth
needs to be turned on. Outer smooth, you
can find by going down into the object
properties over here, normals and then turn
on outer smooth. Now, if I turn off
my wife Rental, what you can see
over here that has happened is over here, although yeah, let's
set the weight to like 100 to make
it a bit sharper. It will add smoothing
to our meshes, and then it will
create almost like a buffer in between
these bevels, and that's called
weighted normals. There is a much more in depth tutorial on this on
my YouTube channel. I'm going to keep this
nice and easy for now because it's quite a
technical explanation. But basically, what this
will do is in the engine. I will look hipoly
even though we only added a very limited amount
of polygons to this. And this is how it
works, basically. So we got this stuff over
here, that's pretty good. We still need to add some imperfections to
this, but for now, we have this one and
we can then well, we can probably just
duplicate this. However, one thing
that I was worried about is that if
we go over here, if we temporarily hide this, turn on my wife Rm toggle. So, can I maybe just bridge these to basically make everything go a
little bit better. So these ones I can
sort of bridge. Over here, there
seems to be a bit of, like, messiness going on. Let's see. Let's
bridge these also. Yeah, so then this one, if we shift, let's do a Q. Oh, hey, we
don't have that one. Right click, in that case, and just press fill, and that will kind of just
fill these faces in. Now, if you go ahead and so over here you can see that we
kind of need a loop still, we can just technically
do a contra R. We are going to do
optimizations later on anyway, select these two etches, and
then merge them at center. Should have, that should
have done the trick. And now that is at
least filled up. So I'm not worried
that now if I press Alt H, that will be fine. So we got this one over here. Let's at this point
just delete that one. The blockout. We don't
really need it anymore. So we got this
version over here. I think I still need to now
go in and redo my mirror, Y, and bisect control A, lt X, and just go ahead and push this out to make
sure that's correct. Okay. Yeah, that's all
still looking fine. And then for this
one, we can also go ahead and we can add our bevel, and we went to shading, turn off clamp overlap, and we went down to
quite a low value. 0.01 actually seems
quite high for this one. Let's do 0.005. There we go. So now we have this value. Over here, it might
still show, like, a tiny bit of messiness,
but it's not that bad. We can press contra A, and oh, did it odd bevels? Wait, wait. I did
not dd bevels here. That's because we still
need to get rid of those. We still need to
do optimizations. But if you would add the
weight normals to this, don't forget to turn
on outer smooth. You can see that that
actually does fit in, oh, actually back to 50. That does fit in quite well. And then for this one,
you, for example, just want to push it out in so that it is just
clipping in here. As I said before, we are going
to keep for this project, the models very easy. You can go much more complicated in this if you want,
but I don't want to. So I'm going to go ahead. Select these lines
and just press or x or press delete,
and do edge loops. So we got those ones over there. And then over here, what
you can do is you can, if you want to optimize this
by pressing the target belt Trcal and then going in here and basically start welding these pieces together like this. So that is a little
bit time consuming. Be it's time consuming, I will show you how to
do it for this one. However, I will not be doing it myself for the other pieces. I highly recommend that
you do do this for the other pieces because else it's just like
waste the geometry. For me, it's just because
this is not for Well, it is sort of for video
game, but it's a tutorial. So I can handle, like a few extra poles, while for other games,
you might not want that. Another good thing that
you can do is you can merge it down here, and
then you can see, like, Okay, so where does this bevel end over here? I
can select this. Now if I go back to my
selection mourn of target Atal, I'll shift and click this. What will happen is that because we merge
this together here, this is where the
selection will stop, and it will then also stop here. At which point,
we can just press X and delete the edge loops. So that's another easy way to do that. So we got this one. I guess that once again, if you want, you can go ahead
and you can do a mirror. I'm really bad with forgetting
when I actually need to do the final mirror because I
keep changing my mind. Bye. So just like this,
you can just nicely. Whenever it does not
affect the geometry, you can often just merge
it together like this. It kind of depends
if you want to animate like characters. Of course, you need to go
for Wi green topology, but this is not a
character to toil. So, for us, as you
can see, like this, we can nicely just
merge this altogether, which will give us a
much better result. Okay, so what we will be doing
is I will finish this off. Let's remove our
weighted normals by adding one last mirror. And then in the next chatter, we will simply go
ahead and we will continue this process of
creating this window. And once that is done, it will look turn off target togle. Once that is done,
it will look nice, and then we can preview
it inside of heel. Let's rear the weighted normals. There you go. Turn off our wireframe toggle
and just like that. See? So that does
look like it has, like, a nice
connection going on. Okay, let's go ahead
to the Sava scene. In next chapter, we
will just go ahead and we will continue
with this window.
25. 24 Creating Our Final Assets Part2: Okay, so let's continue
with our window. This part is almost done anyway. So let's see. We have
the top part down. We have the bottom part down, so all we need to
do for this one is one extra quick pivot,
duplicate this. And just like relocate
this over here. And just kind of like match the wall with the
back wall like this, and then set the other
one, just delete it. Okay, so those two are all fine. Now for this one, there's my
wife frame. There we are. There's my re frame. So
for this one, oh, yeah, so about the optimizations, as I said before, I will not be doing the
actual optimizations. I think for this one, however, it is easier if we redo this. Yes, it is probably
easier if we redo this. So let's just go ahead
and press Shift H, which will hide the unselected. I tend to keep
forgetting about that. And then, see, target welds
weld actually, know what? I keep forgetting. I
can just do a mirror, so we don't even need
to do that one side. I just need to weld this stuff. And then over here, we just
need to do like a connection. So that actually looks
a little bit strange, but let's just see
what we can do. Q Bridge hatch loops. This one, we can do
bridge edge loops. Oh, yeah, wait, this
does look normal. Now I remember. For
me, it's another day. So in my case, it was quite late yesterday, so, right click Phil. So for me, this is
a fresh new day, so I just need to warm up again. Anyway, we have this
stuff over here. Let's do a quick haf
or chamfer bevel. No way, so it's still remember
my settings this time. No way, I did not
remember my settings. It just happened to be
looking quite good. So 0.005, probably. That seems about all white. Let's go ahead and
press Contra A. And now if we just go
ahead and press Aldag, we can grab this piece, do a mirror on the
Yaxs with a bisect, Contra A again,
and at this point, we can just go ahead
and select this side. Kind of like oh, hello. That is incorrect. Let's EU know that.
I think I went the one way around. I
should have flipped it. Let's try it again. So, okay, we got this one. What
the hell did I do? Mirror on the Y axis. That is correct.
Is this one not? Oh, I need to flip it. That's strange
because the other one we didn't need to flip, so that's what threw me
off. Just flip it around. So apparently, for some reason, probably because we
rotated, it's 180 degrees. It's the opposite
way. So, there we go. So that now fixes it. That threw me off for a
moment there. So, let's see. We have this one. Let's turn off my tug Dell toggle because
that one was still on. And then we could just kind of snap this together over here. But that should be fine.
Like, at this point, we have a pretty decent window frame for
something like this. So now all we need to do is we have these window
frames over here. Now, these ones we can
pretty much just grab like a cube almost for
it and, like, inset it. And then over here,
I do want to get a tiny little profile
just to make it look still a little
bit more interesting. For that piece,
let's do a shift A, and let's just create a cube and then split it up into two. So this cube, first of all, we are going to decide on, like, the general thickness
of our window, and I'm going to make it
quite thin like this, and then we will,
of course, just have one of them extending out. So I grab this piece over here. I now just move it
nicely into place. Select these sites and
move them also into place. Here we go. And now for this
one, what we can do is if we just go
ahead and move this up, we can just do like
a contra R. Shift H, contra R. Oh, diode,
contra R. See? I keep forgetting about stuff
like that. There we go. Now, that one is
exactly in the center, and knowing that that one
is exactly in center, now what we can do is we can
just go ahead and we can pretty much select this
bottom side over here, and then we can
separate selection, which I already
had. So over here. And just as refresher, that's one you can find in mesh, separate and then selection. So now they are two different
meshes, which is good. So for the bottom mesh, mesh, what we can do is just do
a quick bridge edge loops. Same for the top mesh, so that now it has
become one thing. And then for the top mesh, I'm going to do a quick pivot and I'm going to move
this one forward. So that we actually
have like there we go. So that we have,
that type of window. Yeah, that's looking critical. Okay, so for the inset, what we need to do for this? I think we can actually
make one window and then because
it will fit white. Yeah, it will fit totally fine. So let's just make one window. And then this window,
we can kind of, like, just delete for now. I'm going to go ahead, select the bottom or the
front and the back, press I, and do,
like, a nice inset. And I'm going to make the
inset thin on the side, and then a little bit thicker
on the horizontal side like this that it kind gets
pushed in a little bit. Now, at this point, if I do E, it will
most like not work, but if I do a Q and extrude
face along normals, it will nicely extrude in like this on both
sides at the same time. There you go. While with
E, it would not do that. Then do one more inset like
this and then press delete. We can just go ahead and we can delete the phases over here. Now, at this point, we
just go ahead and I'll shift to these two and do
like a bridge edge loops. There we go, that bridge
nicely. So there we go. That's like a very basic
frame that you already have. And all that we need to
do is we need to put in some extra frames
in between here. For these frames, you
can see that it's, we don't have the resolution to see about this, but
that doesn't matter. It should be very basic. So we only need to have
these on the outer side. And because of that, I think I'm just going to grab a cube. Technically, even this
profile over here, we technically don't
even have to have it, but I just wanted
to make it just in case because it was
almost no extra effort. In any case, I'm going
to grab this cube, and this cube will basically
become our profile. So if we go ahead and move
it over here, Um, let's see. So this is fine. Let's
go into face mode. We kind of want to move
this halfway here. I'm already going
to scale it up, and then I can see that I probably need to scale
it in a little bit. Here we go. Let's make
it a bit thinner. And for this, what I
had in mind is if I do a contour R and add
two edges like this, I can kind of scale
them out and I can just do like something very
simple like an ld E, which is just like an
extrude and we are going to, like, extrude it like this. Then at the back,
delete that over here. For this one, if you want, if you want to actually, don't even not if you want, go ahead and select these lines. Press contra I to invert it because we don't
actually need those. So delete them also. And then all that we have
left is these few pieces. With these pieces, I guess
that we can just do manually, where we just do
like a contra B. We don't really need to
use the ham for modifier. Once this is done over
here, that is totally fine. So this is the one
that we can use. And what we will have is
we will have the glass actually sitting in between
these grooves over here, and that will work quite well. What I'm going to do for this shape over
here is I'm doing a contre ar here and
a contre R here. And you probably guessed
why it is so that I have an exact center point in
which I can place my model. So I can now simply
place it like this. I can select the
top and just make sure that the top is moved
into over here like that. And now all that we need
to do is a quick pivot, duplicate it rotated
180 degrees. It is interesting
that you can see over here like it's not
exactly in the center. It kind of depends on how
you look at it. You see? I think this is actually
exactly in the center of because we have set
it in the center here. So maybe there might be
like, a small offset. And now for this
window, you guessed it. Do a bevel. Go to Jumtree, turn off our clamp overlap. Yeah, the modeling of this
is so easy that we can do. Um, that is not giving
me a nice result. Let's go ahead and
quickly press Q and reset all of the
transforms and try again. Is that better? 0.05. Wow, 0.01. Okay, 0.005. It is better. It's just way more
sensitive now. So as you can see, the settings
change whenever we reset. Let's make it bigger. 0.03. Yeah, let's do contra
A. Should do the trick. Okay. So we got these pieces over here,
and for these pieces, all we need to do now is
maybe already like Ara glass, which is just going
to be a simple plane. And this plain I
don't want to split up this plane into
the four windows because what I later
want to do is I want to create a very nice
looking roughness map, which will basically
give glass to look almost like this that
you cannot look through it. But it's not like a very
plain looking glass. You cannot see through
it, but it will actually look very
interesting and, like, dirty and
everything like that. And I think that will look quite nice if we do
something like that. So over here, I think it's
better if I first of all, do this one so that
I can actually see where I'm placing
it. There we go. So we have this glass over here. And instead of just
moving it everywhere, what I'm going to do is I'm
just going to duplicate it. So instead of me making
one large plane, I'm just going to go ahead
and I'm going to create two of them over here. Okay, so we got
this window done. We can now go ahead
and we can pretty much select it, duplicate it. And then on this side, we just need to move this
one back, I believe. Until just sitting like that. And there we go. If we now
turn off our if Rm togel, you can see that now
we have a window. So what we're going
to do now to finalize this is we are going to
add small variations. So with the small variations,
basically going to be this. You go to Add mode, you place
a few contre ars like this. And have I showed
you this before? Well, yes, I have. Technically, it's the
same as on the wall, only this time we
do it on models. So we place like a
few contras here. We then tend to go to
Vertex mode and just, for example, grab a few pieces and move them out like this. Be careful to not overdo it. If we overdo it, you
will be able to see the repetitiveness
because this window is being reused a lot. So I want the artist because
it is nice to have, like, some organic looking variations. However, I don't
want to overdo this because then it will
not look good at all. So vehicles see me, randomly selecting some pieces
and just making, for example, the woods a little bit more uneven
and stuff like that. We can do the same over
here with these etches, just kind of move them back. And I don't know if I need
vertex painting for this yet. I don't think we really
need vertex painting. So for now, we're
not going to add any extra geometry for
that kind of stuff. But just keep that in mind
for maybe, like, the future. Let's see. Let's
do this one also, move it in, so that's like
a little bit sunken in. There we go. Small variations can actually make
a big difference. I would say, at this point, just go ahead and start adding
your weight to normals. Don't forget to turn
on your outer smooth. Same over here. Actually, you know
what, for this one, let's just go ahead and select
these pieces over here, Control J to join them, and then turn on Oto smooth. That saves us a
little bit of time. Weighted normals over here, select them, Control J, join, out to smooth,
weighted normals. And this one we also did. So a stir of five from
Tokon as you can see, we have this nice high
resolution looking window, even though it is
still game resolution. And I froze to save my
seam before I lose it. Okay, perfect. So we got
our base window done, and we got our door done. Last thing I'm going to
do with my base window is I'm already going to just do some basic UVN wrapping
so that we can actually add the wood to this just so that we already
see how it looks. I think it's good if we just
do the UVN wrapping per model instead of
first making all of our models and then
doing the UVN wrapping. So for this one,
except for the glass, the glass, we can just
temporarily hide. So the glass does not need
to have this material. But all of these
pieces over here, I want you guys to
use the same material and call this plain wood. Oh, I forgot the
blend of dust this. Which one did I add it to? I added to one of them. In any case, I forgot
about blender dust this, so you cannot just
multi select materials. You need to select one.
Add your material. And then what you need
to do is you need to go ahead and select the rest. And then you need
to go down here to this little arrow button and press copy material
to select it. And when you do that, it should have the same material
on every single thing. And you can see that over
here, the name doesn't change. And then if we go
into our base coolor, we can grab an image
exture, open this stuff up. And if we go textures,
plain wood, final, plain wood A, we can
use our base color, and then it should show up. On all of them. See? Of course, no UVs yet, but it is fine. For these ones, we can
pretty much just use the same sure UV map for this. So for these, let's
do a box map. And then the first thing
we need to do with a box map is we need to decide on the direction and we need to
decide on the size. The size is actually quite good. The direction, we
still need to kind of like mess around with
this, so don't get me wrong. Maybe it's even good if we just press Q and reset
all the transforms. Let's try it again. So box map, you'll see when we
reset the transforms, it's able to read
every direction. And over here, you can
actually set the rotation. So if we set this to 90
degrees on all of them, over here, you can see
that now it has flipped around 90 degrees.
So that's perfect. Now we can do the
same over here and it will remember our settings. And then, for example,
for this one, you can see that it's
the Wong direction because we want to
go with the grain, you would almost never really
cut against the grain. So then for this one, I can
just set this back to zero. Oh, then this one
seems needs to be 90. See? And just like that,
it still saves us a lot of time compared to doing
the manual UVN wrapping. This one, I feel like
there's No, this one, maybe? Oh, no. Oh, wait. Sorry, I'm looking
at the wrong model. This model over here is going to be a bit
more interesting. So we are going to
do the box map. And let's just go ahead and
it doesn't really matter which direction we go
for p zero to make o, so this one needs
to stay in writing, because we need to go
into our UVnwapper and we need to change
these a bit round. So do also box map over
here. So what I mean? So we now have these pieces. Now, at this point, we just want to make some small
changes where, for example, we grab
these pieces over here. We go to our UV editing. Okay, let's just go over here. It's still showing the other
texture for some reason, we can just press that little
cross button over there. Sorry, we can press the little cross button over
there to get rid of it. And for this one, what you want to do is if we
go to face mode, we can just go ahead and we
can double click this one. And whenever we have one
selected that we want to rotate, we can just go
ahead and we can I tend to just go over here
to this rotation tool, and then I just tend to go in and rotated 90 degrees
using snapping, like this. And that's all I need to do. Don't worry about overlapping. We don't need to do
stuff like that. Now. If we decide to create a mask later
on for some dirt, that will be something
that comes later on. So now you can see that
now they are rotated. They are in the right location. These ones over here are
a little bit more tricky. So we kind of need to decide
if it is word for us. To rotate these or if we
want to actually keep them connected because
that will create a seam here if we rotate them. So having these
pieces over here, we can just go ahead and we can rotate these 90
degrees like this. And then I just need to see if I can live with the seam
that we have created. So let's go into
MaxVstols turn of Y, Fram toggle. You know what? I can live with that. It
almost feels like it was intentional that they kind
of merge this together, and it's not like one
solid piece of wood. So, I think I can
live with that. And else there are ways
that I can hide it. So for now, let's just do that. Same technique over here. So we have this one. We need
to rotate this 90 degrees, and then we need to go lt x, select this side and this side. Oh, almost press the lid, and we need to also rotate
this one. There we go. The most basic UVN wrapping
you can do, but it works. So that's all that matters. So we got our window over here. That's pretty good. Let's
go ahead and do an artH. And then all I'm
going to do is sew these windows over here,
let's press Control J. Same over here, Control J. And, oh, so that's where I
must have added my wood. Let's get rid of that material, create a new one and
called the glass. And then if we just go
ahead and select the top one over here, we can press copy material
to select it. Oh, hello. I thought I turned
you into Glass? Okay. Let's get rid of you. H, I don't trust that.
So other way around. The direction in
which you need to select is often a bit strange. So now is working. So if I did not really
narrate over it, I think I accidentally
selected this piece over here, and I really do not want
this piece to be wooed. So what I want to do is I'm just going to copy
material to select again. So basically, the
way that it works is the one that is
highlighted that has your material needs to end up being the highlighted
version at the end. If I do this, it will
automatically highlight the second selection that I have created, but that
does not always work. So sometimes you see me doing
it the other way around, where I first select the models that do not
have the correct material. And then at the very end, I select the model that does
have the correct material. When I do that, you are able
to copy of your materials. But I am aware that it is a little bit confusing sometimes. In any case, let's
get this done. So I'm going to go
ahead and this window, let's just select it, right click, move to
collection store window. So that one is all ready to go. What we can do now is we
can open up in real Engine. Oh, wow. 21 minutes already. In the next chapter, we will go ahead and open
up in Real Engine, and I will actually showcase to you importing some materials, getting importing some texts, getting some very
basic materials. And then what we will do is
I will show you the workflow that we're going to do to add
our windows to our pieces. So let's go ahead and
continue with that.
26. 25 Creating Our Final Assets Part3: Okay, so here we are in Unreal, and we are going to
just test this out. So this is how it's
going to work. Let's go ahead and
quickly drag in our plane wall short
to get started with, and let's just rotate
this 90 degrees. Then what we're going to do is we have our store
window over here. Let's also rotate this one in here and just kind
of place it in, like, a logical location. Maybe like I know something like this and maybe
I do like, two of them. This is going to be tested
that I'm going to show you the workflow that we
will be repeating many, many times in here. The only tricky thing
is that this workflow, we can only do it
at the very end because it will
duplicate models. But I'll show you what I mean. Now inside of blender. Let's go ahead and
select this one. And let's go ahead and
go file export FBX, and we are going
to export these to unreel store window,
where are you? Store window over here. Oh, onalslect
objects, definitely. So this one is going to
be our store window. And we can go ahead and we have plain will short over here, which we can also go
file export, FBX, plain while short, like that. Perfect. Let's have a look. Right click re input
on the store window. And yeah, just reset the AVX. Look at that. We have a store
window and as you can see all the weighted normals are
all in here, so that's nice. And then our plane while short, we can also do that,
reset the AVX, and there is our
plane while short. Shadows are a little bit
etchi, but remember, you can just go in here
and temporarily set this to 200 to get, like,
a better result. But I'm not yet going to do that because I know other techniques to make them look
better later on. So the next thing
that we need to do is we just need to
import our textures. I'm not going to
import everything yet. I'm just going to
import the ones that I need in a per use basis. I want to try this
out where normally I always do first
all the textures, then I do all the models. Then I do all the UVs, and then I do all the importing. I now kind of want to just go back and forth a little bit, because I feel like that maybe
this gives for you guys, it might feel like a little bit more relaxed,
especially for me also. So new folder, plain wood. And in this plain
wood, we will go ahead and do a variation underscore A. You cannot see what I'm
typing. There we go. Then I'm also going
to do New folder, wood planks, and in wood
planks, variation underscore. Oh, variation on
score A over here. Okay, so for our plain wood, this is going to be very simple because we just need
to dig them in. So we have our plain wood final. And then over here, we need
to grab the plain wood A. It's quite important
that we use this one. And for our shader, yeah, let's just import everything
except for the height. We don't need a
height map for this. Yes, because it's plain wood, so we don't need a height map. So let's just do
everything except for the height map and
just drag it in here. Now one thing that's very
important is that we have created this in OpenGL. However, UNL engine reads as
direct X with your normals. So all you need to
do is you need to double click on your normal. Press this little drop
down. Not that one. Oh, hello. Are you
not setting norm map? Oh, wait, you are setting norm. They changed it. There
we go. Disc drop down. Sorry, they changed the
windows. I forgot about that. So go to the texture drop
down and simply drop down the button and press
flip green channel. And I'll just say this one. So that's what we will
be doing nonstop. Now the next one
that we can do is we have our so that's
our plain woods, and now we also have
our wood planks, final, layered wood there, this one is
the one that I need. For this one, we
can also have it. Now, the height map is going to be a tricky one for this one. If we are going to
do our height map, and we don't need our metallic. Our height map, we will need to have it
also in the Alpha. So let's go ahead and start
by importing this one. Oh, make sure to go
to the right folder. So let's start with
importing this. And when we need a height
because we will most likely use our height and
use parallax mapping for, like, very plain
walls that are in the distance that do not need to have anything
special on them. But for now, this
should be fine. So let's just double
click and flip the green channel for this
one also. Okay, perfect. So to show you how this works, we are going to create
a very basic material, but later on this will become
this very complex material. Let's go into our materials,
right click material, and just call this main
underscore master. So this will be our
master material, and this material will later
on support pretty much every single model that we have created except for a landscape. We can open it up just
by double clicking. And all that we're going
to do for now is we are going to go ahead and go
into, for example, over here, our textures, and let's
grab the plain wood as like a base and simply
drag these in here. Now, you can just click
and drag to basically move them away from each
other like this. And then all we need to do
is we have a base color, drag it into your
base color slot. You have ambient seclusion into ambient seclusion,
normal into normal. And roughness into roughness. So you can see
very easy for now. One thing that we do
want to do is we want to right click and
we want to convert to parameter on
these texture files and call this base color. What this will do is it
will expose this parameter. It's the same way as that we've done in
substance designer, where it will simply
expose our parameter, and then we can enter different texture maps
on a engine level basis. So I will show you what I mean. So this one is AO,
which by the way, let's just flip
these two around. This one, right click roughness
and this one right click, convert the perimeter. Normal. So that is now done. Last thing that I want to do is maybe give us control over the tiling. For that, if you right click, you can get this window, and you want to add a
texture coordinate. Over here, this is
the red button. Now, this button itself, it cannot be turned
into a parameter. If we want to be able
to control our tiling via a parameter so that we expose it and
we can control it, we need to also add
a scalar parameter. Now, you can type in
scalar parameter in here or you can simply
hold S and click once, and that will create
a scalar parameter, which we'll call tiling. Set the default to one. So
the tiling is probably one. Then all we need to
do is right click and multiply because we are
multiplying these values, so we are adding them
on top of each other. So we have this tiling.
So one by one by one, in this context, it means
that nothing changes. But as soon as I set this to two, these will
also turn to two. You will see what I mean. So it doesn't need to be
very technical. We just want to drag this into our UV slot of our textures, and that is our
material for now. So that the way that this works is that now if we go
into our materials, we can right click on our main master and press Create
material instance and call this bare wood
variation, A, for example. And then when you open
this up, you can see that now we can
control the tiling. And if I turn it on
and set the two, you can see in the sphere
that the tiling changes. That's the general idea of this. So with this done, although we have pretty much
done our tiling pretty well, we can also right click and duplicate our material
instance again, or you can just create
a new instance and call this wood planks variation A. For this one, we of course, need to enter our wood planks textures so we can
turn these pieces on. It's often easier to just
drag your window down here. And then what we can
do is we can go to our wood planks and we can
drag in our base color, our normal, our roughness, and our ambient occlusion,
and then we can brush save. That's it. To artists,
good practice, do not just drag in your
material on your model, instead, open up your model like this, like we've done before,
and add it in here. So if we have this model, let me just quickly
also open up my window. And then our windows, of course, will not have a
actual glass yet, but this is basically
how it's going to be. Plain while short. We
can go to materials, and we can grab our wood
planks variation A. And there you go. So we can instantly see
that that is working. And for our store window, we just want to grab our
bare wood master over here. And then maybe just
do, like, plain in your windows over here. So this is what we
have right now. Now maybe at this point,
I will just temporarily set my resolution to
200 for, like, my wall. But as you can see, now
we have a wall over here, which is looking
pretty good, although it still needs some variation, but it is looking
nice and realistic. So we got a really nice
looking wall, see? And you can already
see that that will also automatically be
applied everywhere. So, for example, over here,
you can see that we almost already have like this entire
thing built with the walls. So now this part is important. The way that we are
going to do this, that we are going
to have our windows in here is, of course, later on, we want to have
these windows nicely embedded in here so that the frames only just stick
out licely around here. But then, of course, we can
no longer see our model. So, for example, we
place this around and we just make this at like
a nice position like this. Let's say like this. For this, the way that we are
going to do it, we are going to use our modeling tools. The modeling tools are brand
new in nal engine five. They are still in Beta, and there has been talk about maybe not including them
into the first release, but for now they are existing
and they are super useful. So I just have faith that they will
actually include them. These modeling
tools, once again, if the tools are not included, you can just create more
modular pieces where you actually cut it out inside
of blender using booleans. So we need to actually load
up these modeling tools. I don't think I even have them loading loaded up right now. So if we just go ahead
and save our scene, we then want to go ahead
and we want to Mw, come on. We want to go to edit, and then we want
to go to plug ins. Now, in here in the plug ins,
if you type in modeling, you should be able the
modeling tools editor mode, and you can see that it
is in Beta version 0.1. This is the one that
you want to enable. It will say, this is a Beta
version. It is unstable. I know, but I like
to take risks, so I'm just going to use it. The reason that I'm not too
worried about it is because I'm only using one
single feature of it, and a feature I have
tested and it works. So you need to restart, so let me just pass
the video and restart. Here we go. So that
is now enabled. So what will happen now is
that you can see over here. Yeah, let me just
quickly set this back to 200 just to give us
a bit nicer shadows. What you can see over
here is that now we have a activate modeling
editing mode. That is the one that we need. So this is how it works. You click on it and it
will open up this window. And in this window, you have some basic modeling
tools that you can use. The most important
one is so we have our shapes in which we can
just create basic shapes. You can do parts and everything. This is similar to
using sketch up, and then we have our Poly model, which is where we can also
add some small changes. We also have doing some cleanup, cutting holes and
all that kind of stuff and the forming
and transforming, there's quite a
bit of stuff here. However, I will not be covering most of this because
I've not used it myself since it has
not been needed before. And you can do an outer
UV, which is pretty cool. One that we are focused
on is basic shape. It is over here doing the
sub D because we want to just do some general
changes and the boolean. So how are we going to cut
this out? This is very easy. We are going to
actually make use of the thickness of
our frame over here, and we need to get
started by adding a box. When you add the box, you
can see that over here, you get this box and it
will automatically snap. What you can do is
you can just go ahead and you can turn
over line to normal, and then you can see that
it will just kind of like, it will not try to sit
this on top of your model. And then you just want
to go ahead and you want to click and then
press complete. Now, once you've
clicked this, you are able to now go ahead
and scale this box up, and you basically want to
scale it up until it is halfway into your
frame like this. So we're just going to
carefully scale this up. And this is basically, you can imagine that
we are going to cut out the box from our wall. So we got this one over here. I can remember that. I
can just duplicate this. Yes, and it will still
register in the tool. As I said before,
this tool is so new that I have done my test but I still need
to work with it. Okay, so we got
these two over here. Now what we can do is we can go ahead and we
can use our Boolean. The way that this works
is you need to grab your model that you
want to cut something out of and then hold
Control and select the models that you
want to go ahead and you want to Boolean. Oh, it looks like that we
can only do one at a time. As soon as you've done that, all you need to do is just press little Boolean button over
here, and there we go. Now you can see that
that has worked, and it has cut out our model, and I will show you how
this works later on. So just press Accept and then quickly do it again over
here, Boolean and Accept. Ada, see why I love this, how easy this is compared to me needing to make ten
different pieces of models, just to add all of
these windows over here to have them in an
interesting location. Now, about the
technical side of this. Let's turn off our molingTols. This has now become
its own new model. This means that this over here, you can see that it has become a Boolean model that
you can find in here. Because of this, this means
that even if we would go ahead and we would update
our original model, inside of blender, it
will not update this. That is very important to know, because that means that
once we have done this, here, you can see that
it cuts really nicely, and it works really well. But it does mean that we need to do this
at the very, very end. Now, don't worry,
because, of course, these booleans, on our
weights, we cannot save them. Yeah, see, so
that's also tricky. We cannot actually
save the booleans. So if we would update our model, we would need to redo
all of our booleans. So I hope let's just
wait until the very, very end before we are
actually going to do that. So it will look ugly. In the beginning, we
will just have, like, all of these windows
sitting here in front. But you can see
that the end result works really well where we
just have these windows, and they just kind of, like, fit in here and look at that. We have this nice wood, and this wood is all sticking
out with all its geometry, but it still has these lines. And then let's see,
sometimes it should have Oh, I think I exactly have it like around the
boolins over here. Over here. So that's like a
little bit of stretching, but it's not too bad,
and it's still just adds like this nice
extra variation. So that's all
looking pretty good. So now that you
know the workflow, what we're going to do is
now it's just going to be a matter of us turning all
of these models into vinyl. And this will come
in two stages. The models that we
have right now, I will turn into
final, I will U Vnmap. However, I will not yet
import it into the engine. I said that I was
going to do that, but I think I will actually wait with that a little bit longer. The second stage is that
I add model variations. Model variations are
going to be, for example, a different variation of, like, of this thing over here, this fence, just to make it look a bit more
interesting because what you can often see over here
also is that there are many different types of fences
and poles and everything. And also, if you look at games, you can see, here you have,
like, a fence like this. But then a little bit further, you have a fence like over here that looks
slightly different. You have some ornate
pieces and all that stuff. That stuff, however, will
be done in the time laps. So I hope that now that I
showed you this technique, I'm one of those
guys that actually gets excited about this stuff, but I hope that you
are excited for it. Last thing I'm
going to do before we finish this off is go into my main master and turn on the two sided material
and save that. This will just make sure
that we can look at it from both sides over here, and that will cause less
errors. So there we go. Okay, for this one, I will just leave it in here
as like a reminder for us, how we are going
to do everything. But the MlinkTols
is really cool. And I think we have
2 minutes left. So in those 2 minutes, I'm just going to mess around
with this to show you. Another cool one is the
sub D and not sub D. Sorry, not subdivided.
It is the Oh, God, what was it
called Lets over here. And basically what
it allows us to do is we can set our segments. So if I set this segment, I think it's a axis two. No, not that one. This one. There we go to one. What we can do over here is we can
actually go ahead and we can, for example, grab these pieces, and we can just move them
down up and down, see? And you can see that
this is very powerful because I can literally
if I want even in here, I can, like, art
some variations. But why is this powerful
is remember how over here, I sometimes want to
have this sunken in. I can literally just
grab this model. I can make one of
them sunken in. And just like that, we get like these really easy looking
areas where we can just sink things in and just
make them or art variation. And this kind of stuff,
that's why I really hope this unreal arts
because it's so useful. I do hope that they can make a better system so
that we do not just end up with unique measures for every single function.
That would be nice. But for the rest, it
is just so easy for us if you do stuff like this where we can just add small variations like that. See, that's pretty
much that one. And for the rest, there are
a few more where you can actually add extra loops and
everything to your model. You can, of course,
extrude and stuff like that, and you can duplicate. But for now, that's about it. Okay, let's continue
to next chapter, where we will start by just finishing off
our other walls.
27. 26 Creating Our Final Assets Part4: Okay, welcome. So as
you might notice, my audio sounds very different. And this is because I just got upgraded to a brand
new microphone. It was quite an investment, but I really hope that you enjoy the better audio quality. Now, I had to make a choice to continue this
entire course with my old microphone
for consistency or to just go ahead and continue
with my new microphone. And I figured that
you guys would rather prefer to have
better audio quality, even though it's halfway
through than not. And basically, this is all
just it's an extra bonus, it's all about just
the information. So the audio quality
might still change a little bit here and there
throughout this course, because I might be refining
it and improving it. But for now, this is the new audio quality,
so I hope you enjoy it. Okay, so we are going to just go ahead and continue
by creating our models. Now we have our plane
while short over here, but then we also have
a plane whale long, and as you can see, it's
just double the size. So with those, what we
can pretty much do is we can just go ahead and if we let's do like shifty
or Control C contra V, whatever you want to do. Let's go ahead and
add this one to our plane while long over here, and then we can turn
off the short version and turn on the long version. There we go. Yeah, see
it's the exact value. So we can even just go
ahead and delete this one, duplicate this one, and
turn on our snapping. Oh, sorry, I think I
still have target well turned on. Yeah, there we go. So increments, move absolute grid snap, turn
it on, that should work. So let's go ahead and
just move this over here. There we go, see. And we
can just go ahead and continue like this, and
that should do trick. You can see a little
line over here, but that's most likely
our vertex line, or it's most likely some kind of like just like the
ambient occlusion in C. I do not think. Yeah, I do not think that it is actual mismatching geometry. But we can see soon enough. So this looks pretty good. So we already got
this one, as you can see very easy to
do stuff like this. Only is that I need to
re ard this one also to our right click Plain
wall long. There we go. We got the walls already
sorted out. Let's see. Plain wall short
check. Our walkway is going to be
pretty interesting. What we're going to do for our walkway is we
are going to take a note from read that redemption and we are
going to make our planks, as you can see over here, just
like these unique planks. This is quite interesting
that over here, they cut it out. However, we will most
likely not be doing that. And the reason that we will
not be doing it is because we simply cannot guess exactly where we
want to cut it out. If we want to, we can
use the Boolean function to literally cut out a Boolean
and then have it go down. So let's go ahead and let's use this one probably as
like a nice reference. You can see that there's quite a bit of unevenness going on. I think that will
look quite nice. Yeah, that should be fine. And else we can also
have a look at this one. Oh, yeah, this is
quite cool that we have multiple different pieces. Okay, so for this, I assume that I'm just
going to make a guess at, like, how this
would roughly look. I also want to actually
have a look over here. So over here, they
are giving it. See, I quite like
that there is some spacing in between
here, to be honest. So I might include that
spacing in between here. So we're going to get started. Shift A, mesh, and
create a cube, and we're going to
pretty much get started just like a transition piece. So here we go.'s turn
off our grid snap. Let's scale in, and we're just going to start with
the building blocks. And these building
blocks are going to mostly be like
these cubes over here, which I will go ahead
and I will place, say, let's place one over here. Here we go. And
then just go ahead and select the bottom
and then move it in. So we have these
cubes over here. Let's go ahead and place them. Also on the back
side, so we have one, two, and then we also want to place them
in, like, the center. It's two aldeggs.
This is a little bit annoying in the
beginning to match it. Let's turn on like a wire frame. And let's just place it
roughly into the center. They would not really
measure this out to have it perfectly into the center,
so I'm not too worried. So I'm going to now go ahead and also place these ones over here. And once we have the
base scaling done, then we can basically
just hide our blockout. So we got these
ones, and it does look that they roughly go for, like, an even value. So if we go ahead and
let's do one in the center over here, and honestly, I think I have a
look here, yeah, like one in the
cent Oh, actually, this does transition
very nicely, doesn't it? Oh, no, wait, it
does not, sort of. No, it's just that it happens to hide exactly on these points. In that case, what I'm going to do is I'm
going to do this. So I'm going to have one in center and then one on
each side over here. I think that will
look nice. Okay, in this point, we can
just hide this. So this is going to be like
our framework for this. Now, with these pieces done, we're going to get sold by just, first of all, adding
these planks around it, and then we'll add mostly
the planks on top. So let's continue with
that. And all of this, it's basically just
going to be cubes. It's just like for these planks, we kind, need to
define the first one, and once we've
properly defined it, then we can go ahead and
just continue using it. So if I have this one, zoom in. This one I want to have a
little bit thicker because it kind of needs
to hold everything together and holds
a lot of weight. So they will probably use,
like, a ticker plank for this. Over here. And then
what I'm going to do is I'm going to go ahead and use this
one over here. Now, as you can
see, for example, in red that redemption, they did not use weighted
normals on the planks. Where are you? Here, see, they did not use
weighted normals. It's all very sharp
looking planks. However, they did use weight normals unlike
the larger planks, see. So you can see that even read that redemption uses
these techniques. I think I'm fine with
also doing that. It will save a
little bit of time. So once we have done
a plank like this, maybe like a little
bit of variation, and this is going
to be a base plank. So let's go ahead and do this. Let's add a few segments
in between here so that we can immediately add small
variations like this. You can see over here, so just like some small variations. And then once we
have done this one, we can do a quick pivot. We can get started
by just duplicating this one over here.
Actually, know what? Maybe, no, we will do our
weighted normals after this. Rotate this, just to add a little bit more variation
in places one over here. And then the most important one is going to be this one at the site for which we can go
ahead and we can place this. Oh, make sure that you rotate
it exactly nine degrees. Here we go. I do hope
that the audio is good. This is the first time using this microphone while doing an actual tutorial
instead of just testing. So I hope that everything
is going well. But basically, I'm just going to go
ahead and continue this. And what I want to do is let's make this a bit
more interesting. So we got this one over here. You just see me keep
switching back and forth between X ray modes that
we can select everything. Let's go ahead and
do a double one. So now we have this
one over here. And once again, because we
are using this so often, I want to make sure that
I do not make it too unique because then we will be able to see the
difference for that. So over here, I'm
just eyeing this. Ah, here, see that fits
actually quite nicely. Let's stick this out a
little bit more like that. Yeah, see? So it just looks a little bit
messy, but it does work. So we've got those things, and now we will
have these planks, and these planks are
basically sitting on top. Because the planks
are sitting on top, technically, there should
also be a backside. Since I don't know in which context that we
are going to use this, I will just make a backside
because you never know. However, for this one, what
I'm going to do is I'm just going to make this
one long plank. So I'm just basically
pushing out these segments until they
hit the end over here, and then maybe also compensate a little bit and make this
look a little bit nicer. Like that. There we go. So that's basically the
framework that you would do. Now, in here, you would often also because there needs to be some structural
pieces in here. I guess what would be logical for people to
do in those times, maybe they would
just be very lazy. I shouldn't say it
like that, but I mean, it in a good way
that they would, like, just place some of these
planks and they would say, Okay, so we have these planks. We are just going to
basically zig zag them, maybe make these ones
a little bit thinner. Yeah, so they say like, Okay, we have these leftover planks. What we're going to do is
we are basically going to zigzag these planks
around like this. And push them out
a little bit more. And then they would
like na side. But of course, I don't want to spend too much time in this because you most likely will not be able to
see much of this. Unless we have our camera angle, really, really low, but
we don't often have that. So we have this one,
so we can do the same where we move this out. And then what we can do is
basically have one over here. And then these ones also they
do not need weight normals. I can then go ahead
and I can say, like this one goes over here. This one goes over here. And then finally,
I'm just going to go ahead and swap
these two around. Like this, just to add
some X ra variation C. So then we kind of just
do something like that, probably just to enhance
the strength of this shape. Now, for our planks, we are basically going to create two or three different planks, and then we're already
going to unwrap them so that we can then just reuse
them over and over again. So yeah, you can see over here that in red dead
they on purpose most likely place these
planks here so that you cannot look under
it or cal under it, or in some way bug the game. Of course, we don't
have that type of intense game design that
we need to do for this. So I'm going to go ahead and I'm going to create a new cube. And this one is going to
be like our base plank, and we're just going to create
a few variations of it. And then the variations we can basically use over
and over and over again, and not just in this one, but in every single model that we
need to, we can use it. Let's go ahead and serve a look. Where is Okay, so yeah, that is quite they often
use quite tick planks, because that's a
nice thing, like, of course, getting inspiration from games
is totally fine. The games they have done
so much research and everything that often
they most of the time, it is quite accurate the
stuff that they are doing. So it's great for us
to just then save a little bit of time when we are just doing
like a tutorial. Of course, if you
have your own game, do your own research,
that would be nice. But in any case, so
we have this one. What I'm going to do
is I'm going to go ahead and we can do, like a Shift D. Although I personally like this contra
C contra V myself more, and we're going to go for, say, four, let's do five versions, five different
versions over here. So we got this blank over here. This blank is going
to be very simple. We need to have it very generic, so it's just going to
have a few small segments and maybe like another
one over here like this. Then this version over here, I'm going to go ahead
and I'm going to add a bunch more segments. To give like imperfections, maybe do like this
one is kind of like actually, no,
let's do this one. It's kind of like
sunken in over here. And then this one
is going inside, inside and like that. So that is that
one, so basic one. Then this one is going
to be slightly thinner. And let's also make it
slightly thinner like this. So that's one is just having a little bit of like
a sunken in effect. And then over here,
it is going to be quite a bit
stronger deformed, like you can see over here. And then what I'm going to
do is I'm going to go ahead and add a few more
segments once again. And maybe also add like a
few segments over here. So what we can do is
we can go ahead and we can add like cuts like
you can see over here. So we can do stuff like that. And then we will just go ahead, and we will optimize this one because we will be
using this one so much, it feels a bit silly
not to optimize this. So this one will once again
be sunken in, maybe, like, go a little bit sideways over here, also do
stuff like this. And now what we can do with
these ones is we can go ahead and just do a target
weltggle using the Maxifs tools and just
kind of move these together, and you probably guess what
we're going to do then. We're going to turn off
target Well toggle, and we're just going
to go ahead and select these three and
just press delete and delete only the edge loops. There you go, see.
So now we have a get like a cut,
so that's that one. Now for this one, what I'm going to do is I'm
going to go ahead. Let's move it over here and let's turn this into
like two planks. So we got this plank over here. Give it maybe like a
few more segments. Maybe over here,
there's like a bit moved up. You can
see over there. So it's kind of
maybe this one also. So here, it's kind
of squeaking up. This one goes down here. And then for this one,
let's do a quick pivot. So yeah, you kind of guess what we're
doing by this point. We are going to go
ahead and maybe, like, move this one down. I'm fine with just like that and then move this more straight. See, so we have like that one. Let's move this
back and maybe do, like, a little bit of
movement like this. There we go see. So
we have that one. And then finally, the last one, and I'm just still looking at my reference to see if I can get like maybe like some bandy stuff that
would be quite cool. So we like Let's make this one like a little
bit tilted like this. Maybe like a little bit back. At maybe just a couple segments just to give it a
bit more variation. And then maybe like press contra and use
your scroll wheel, and then you can place multiple
lines at the same time. We kind of, like, bend this
up or something like that. Move this back down a little
bit more. And there we go. So we now have these few different
planks that we can just use over and
over and over again. So what I'm going to
do at this point. So for these planks,
it's better if we already do like
some UVN wrapping. So let's move these over here. But this is going to,
of course, be very, very simple UVN wrapping. We are not going to
use weighted normals. No, I'm just going to
keep them nice and low because there are going
to be so many of them. So I'm just going to
go ahead and if I go, I can probably just
duplicate this. I need to have my store window. So if I go ahead
and just select, select all of these pieces, selection is being
a bit strange. And then select one
of my store windows, and then we can go down here and press copy material
to select it. And that should grab the same material
as my store window. At which point I
can turn it off. And for these pieces, I can
just select all of them, go to my Sure UV and
do like a box map Um, it's Undo that because
I don't trust. It's probably because I
did not select everything. Oh, yeah. Okay, so it looks like the box map only goes per map. In that case, we will
do this one. It's 20. That's an interesting one
by wait, that's rotation. 90, 90 I think my reset X
forms need to be turned on. Let's go ahead and select them. Q and reset all the transforms. I think that is the problem.
See, that was the problem. Okay, in that case,
this now is done, and now we can just do like
a box map on all of them. And the box map will just also
randomly grab it from UV, meaning that these will always look a little
bit different, so we don't need
to work with Ted, but we are later on just
going to add more variation. So we got those pieces also
ready to go at this point. Let's turn off our text strings. So now that we know that
these are UVNwpped. So now you probably guess
what we're going to do. Select all of these. Go to our MaxiVstols and
do a quick pivot so that they are
all in the center. And then I'm just going to
go ahead and I'm going to place these quite close
together for now. And then, this one we
can pretty much only have in these areas.
Just keep that in mind. So if we do one here and one, maybe like over here
and then rotate it because these ones they need to kind of like B top
of something, there we go. And now for these ones, they can be pretty
much everywhere, so we can just select them
and just make sure that we have quite close together areas over here so that
when we repeat this, it will just be repetitive. So now, at this
point, let's see. So we have these ones. Let's duplicate them, and
let's rotate them over here. Now let's also duplicate them
again and this time rotate them two ways like
this. Here we go. That will give us
enough variation. At which point that
we can just start by grabbing random
pieces over here, and then we can go ahead
and we can move this. So over here, you can see that now I can move away a
little bit from it, but I need to be sure
that this kind of fits. So I'm kind just spacing
things out a little bit better so that it
does sort of fit. And sometimes it's fine if you just give it a little
bit of like a rotation. It's actually good
if you do that, just to give it a little bit
more of like an interest, that this is quite badly built, but it does sort of work because I assume that
these are often like settlers, and these settlers, they are not all perfect builders
and everything, but they just want to make
a life for themselves. So they just work on, like, making it with
the skills that they have and stuff like that. So there's always there can
always be some storytelling. No matter how small,
there's always some storytelling going on when you are making
viments. Here we go. You'll see we can
rotate this a bit. And as you can see, we can pretty quickly get quite
an interesting look. So now I can just
go ahead and I can randomly start by
grabbing some pieces, especially once
we rotated a few. We can just keep grabbing. Oh, accidentally duplicate
it twice, but that's okay. We can just keep grabbing
them and just try to not have the exact same one next to
each other twice in a row. That never really looks good. This one I'm also going
to actually rotate a bit. So let's do this one. Then this one then we will
go ahead and grab let's see, one that we've not done
yet too many times. So we can grab like this one, move this one over here. And then we can also
add small variations to the unique planks after we've done this to just increase our variation
amount even more. And then the small variations, they will just simply be like this stuff I can do even though they are the same
because they rooted. That small variation stuff, it will basically
how do you say that? It will not affect our UVs. Yeah, that's what
I meant to say. Okay, so we get now
near the end already. Let's go ahead and see if we can kind of fit this together. Yeah, this should fit. If we go and grab which
was that thinner one? I think it was actually, you know what we
can do is we can actually also just
grab one of these, scale them in a little bit. Here we go. So we got this one. Now, this kind of needs
to sit right next to it. Maybe scale one of these
also down a little bit more and just kind see if we can push this
close enough together. Maybe like here's fixing
this rotation over here, push this close
enough together so that everything
just fits in here. And what I can also
do is I can also go ahead and I can, for
example, select face. And unlike real life, I am able to just quickly move this stuff
around like that. There we go. Okay, so we
now got this stuff done. Another thing that
you can do is just do some very small
imperfections like this where you just kind of move them back and
forth a little bit. Oh, it looks like that
we have a duplicate there. Here we go. So moving back and forth, which will give us, once again, some nice, small variation. That. Then for these
ones over here, go ahead and go to
your modifiers, Bevel, and let's go
ahead, actually. Let's first of
all, select all of them because ls need to dri four times. Let's select all of them. Control J for good measure, do a Q and reset the transforms. Now if we do modifier bevel, see that way looks a
little bit better. In geometry, turn off the clamp overlap and
set this to like 0.05. Okay? That's 0.01. There we go. So that's where t are Bevels A, modify weighted normals
and don't forget to turn on your outer
smooth, and there we go. So there are weighted
normals. And I do sometimes set this to 100. If they are simple shapes just to make it all a
little bit sharper. These ones are probably also obvious enough that we can give them
weighted normals. So let's go ahead and do that. But another thing that we can do with this just for
some optimization. So press contra J, Q reset transforms is
because on a weight, you can see the tops, but
you cannot see the bottoms. So we can just go ahead
and select all of these bottom faces
and delete them. And that will make sure that it will not generate
any bevels on there, which in turn will
make it a bit cheaper. So we can just throw a
bevel on here, Jome tree, turn off clamps, 0.05, 0.0 let's do one. Actually, let's do 0.015. Control A, turn on the outer
smooth and weight normals. Okay, turn off five
frame, and there you go. There is our quite messy
looking skiesz planks. So, let's go ahead and like maybe like a
bit more variation wherever I can see that I
want to have more variation. Oh, I miss clicked. Sorry, I accidentally clicked the text tap. Yeah, just funny. You can see me pressing AldX, but still it registers sometimes thinking that I
want to go ahead and have, like yeah, it registers as if that I
want to delete something, but I don't I can just remap the delete button to fix that that would
actually be good. So at this point, we
are pretty much done, so you can move on
to the next chapter. It's just like some
very small variation. I will save my scene,
and I will just very quickly go to preferences. And if I go Key Map and then key binding X
in my where are you? Object mode. Here,
I want to just turn it off because it's
getting really annoying. Yeah, I will use
because I will just use the delete button to
basically delete stuff here, I can still oh, and now it does. Fair enough. Now
the menu does work. On no way, that's because I'm
in object mode, of course. So in this mode, here or
see that still works. However, X no longer
gives me problems. Perfect. Another problem solved. Let's save scene, and this
is now looking pretty good. If you want, you can later
on also add some decails to add like some bolts
or something like that, but or just add like
a texture that has, like, a lot of nails in it. However, I will not be doing
that because it will be such a small detail that for tutorial, it's
not really worth it. I've covered this in many
different tutorials, including YouTube free YouTube tutorials on how
to do that stuff. So let's save scene. And in the next chapter, we are going to go
ahead and first of all, add all of this to our
walkway straight over here. Perfect. I get rid
of like a blockout. There we go. And
the next chapter, we will go ahead
and continue with our door and yeah, we'll
take it from there.
28. 27 Creating Our Final Assets Part5: Great, let's go ahead and continue by creating our models. So over here for our door, we can pretty much steal our window or most of
it. Let's just steal. Well, actually, let's just
temporarily steal everything. So let's just duplicate this. Right click, move to
collection door A, and then we can turn
this one off because the door is pretty much
going to be a top window, and then it's just going to be a simple frame like a bottom. So we can pretty much
use all of this. What I would say is
for the top window, if we simply grab
this stuff over here, and it's still on my wife Rem Togo so that I
can kind of see what I'm doing. Okay, so
you have this on. And then for our bottom window, we can probably just reuse,
something like this. And I will, of course,
just make sure that it looks a
little bit better. This one, we can delete. Now if we press height on
this one, tapi, let's see. For our class, let's
move it out of the way. For this piece, let's go
ahead and go into Added mode. And let's go ahead and delete
this one and this one. Yeah, that should be fine. And then if I go ahead
and go to Edge mode, and I'm going to also delete
these edge loops over here. And actually, that's also
do the same over here. Delete edge loops. There we go. And then this one
can be moved up. And now if we do Alt edge
over here so that we can move this back just go to try and move this back so that I can
see what I'm doing. Okay, so for this one,
what we're going to do is this one is just going
to be like the base window, which will be around
this height over here. And then what we need to
do is we also need to have this piece pretty much
just sitting down here. So, actually, we probably want to do that
completely down there. So if we do a quick
pivot on this one, let's duplicate
it, and let's see. Let's rotate it 180. And if we now just press
height on this one, this one is going to
be up here like this, although probably yeah, I need to move this stuff exactly along with
this line over here. And then we are going
to have another frame sitting below it. So let's move this
one down there, this one up here because
the actual door frame will look a little
bit different. So for these pieces over here, we can probably just go
ahead and let's get rid of these two edges. Same over here. Delete
these two edges. And now if we go ahead and
just move this up, like that. So that will
basically be the base for our window frame over here. So it will follow the same
design because it would be strange if they all of a sudden just change the design around. And then from the very bottom, we can go ahead and probably go for something a bit simpler. If I, for example, do a quick pivot and I just duplicate this
version over here. And let's once again here, let's delete that edge loop. Oh, I just meant to
select this one. You know, there we go. I was a bit confused if I was in edit mode already or not. And for this one,
what I want to do is, I think I just want to select these few faces over here
and simply delete them. Not the edge loops, delete
the faces over here. And then for this one, you can probably go to your what was it? Font view, right view
over here and just move this one back
until the lines. Now what we can do is
we can select these two and do a bridge loop. And then if you want, you can
also scale it flat just to make 100% sure that this
is perfectly aligned. Actually, let's do that
for both of these. Scale flat, as
zero. There we go. S. So that now has
become a simpler frame, but it still kind of feels
like it belongs to the rest. At this point, it's
just a matter of moving this one down over here. And then this is going to be basically where the
door is sitting on. So I'm going to probably
go ahead and Um, to be honest, that does
look very different. It kind of looks like
it only has this. It doesn't look like it
has any of the top bits. So I can probably just go
ahead and delete all of these. It's delete this. Delete this. Oh, it looks like
that to me I need to delete all of the
bevels over here. I will just do it up
here, and then the rest I will just do
like a mirror on it. So if I have this one, if I just do Shift H so
that I can isolate this, I can at least get rid
of those few bits. And then we do have a
bevel over here, actually. Let's just redo that
bevel later on. So for now, I'm just going
to go ahead and I'm going to connect or bridge
these few pieces. So let's do a bridge edge loops. And then if I just do a quick
contre r and just place one extra contra R here and move it then maybe like
a target we toggle. There we go. We'll
just turn this back into a simple bevel. Then for all of these
bits over here, let me just delete
them like that. A that we have left is just a very basic looking
shape over here. I just going to temporarily
turn off my weighted normals. It's to Altage
let's go ahead and new quick pivot
and actually let's add a pivot over here
because we are going to add a mirror to
this on the y axis, bisect and flip. Perfect. Okay. And yeah, it's fine if that
sticks out a little bit. So let's go ahead
and also go in here. Let's have it stick out
a little bit more over here, a little bit more. There we go. And if
we just go ahead and delete this edge
loop over here. There we go. So that's
like a very simple base. Okay, perfect. If I go ahead and this
is a blockout, isn't it? Yes. So at this point, we
no longer need a blockout, so we can kind of
just delete that. Just do a quick pivot,
and for this one, we can just go
ahead and rotate it 180, place to the other side. Move a little bit closer. How close is this one? Okay, so it's just
in front of it. Actually, why am I
being difficult? I can just move my pivot up here thanks to the
quick added pivot tool, and then I can just
zoom in and I can move this a little bit
closer in front. There we go, see? So that is basically our
base door frame. And then over here, what we
can do is we can, of course, just delete over
here these faces, do a quick pivot, and then
use this as like a window. So we can move this nicely
behind here, for example. Go to Edge mode and
just scale this up. There we go. That's
our window done also. And all that we need to do is we need to create our actual door. For our actual door, I got a quick reference image over here
just so that we can see and we are just going
to give it a basic profile. We are not going to
do this center bit because our door
is a lot smaller, so we're just going
to do like these, one of these, and then
two next to each other. For us this profile, it should
be very easy to create. Yeah, it should
all be very easy. We're going to just have a
simplified version of it. So I think the easiest way to do the door is we
are going to create a brand new cube and just scale this in to roughly the thickness
you want the door to be. Of course, this door is not
actually going to be open. Yeah, I'm not going to
ever have this door open, so I can just focus
on the front. Although you can, of course, do a mirror if you also want
to have, like, the back. So we have this cube over here. Oh, that's actually
really nice size. I want to make sure that
I am only just touching the wood because
else it will give me inconsistencies when
I do an inset on this. Just touching the wood
on all of these areas. And then just move this up.
Okay, so if I see this, yeah, it does feel
s an extra look. Yeah, it does kind
of look that test, too, so they will just
be a little bit thinner. So now that we have this, we are just going to basically
split this up into two bits,
pretty much, yeah. So let's do a control R. No, it's going to add a mode
Cs R one in the center. And one, but this one
just make it a little bit lower so that we have
a lower bit over here. And once we've done that, I believe that all we need
to do is so if we go ahead and select all of these,
we can do an inset. However, if I do an
inset like this, I would need to
change some settings. So in these settings, I need to go for
individual up here, which will basically give
me the individual settings. And then I just need
to play around with my thickness because both of these insets need to
become as thick as one of these beams over here. So that's why I don't
want to go to tick. So maybe like something
like that looks quite good. And now we are basically just
going to extrude this in, in out and everything
to get this profile. So at this point,
it's going to be basically like Alt
E extrude this in. And I'm just roughly
getting the profile. Version is going to be a
little bit more simplistic, however, and I do that on purpose to kind of
fit the environment. So I'm then going to
go a tiny bit in. Then I'm going to extrude this. Yes, I am going to extrude
this in up until this point. However, with this extrusion, Oh, wait. Proportional editing. I should have these settings. So if I do proportional editing, I should be able to it's
going the wrong direction. That sometimes happen minus one. Yeah, that is a little
bit unfortunate. Okay, in that case, what
I'm going to do is, so we have this one. Let's see. Then in that case, what I'm going to do is I'm
going to just inset it. I was going to do this. I wanted to extrude this and
then also move it. But if that doesn't
work, just inset it and then move
it back like this. And that should also
kind of do the trick. Do one extra. Oh,
no, you know what? Let's not do an inset out. Let's do an extrude going
in. Yeah, let's do that. And then do a final
inset that is quite a bit further
in like this. And this will just
create like these inner panels over here. And then it looks like that we want to go ahead and
extrude this out. Inset this in a little bit. Then inset this in a larger bit and then push
this out once again like this. And let's see. Let's then do
like one extra extrude out. Think that does it. So here you can see
that we have some quite interesting
paneling going on. Okay, so that is pretty good. Now for this one, it is going to be interesting if we are
going to add bevels to this. Let's give that a look.
Let's add bevels. Actually, you know what,
before we do that, let's press Q reset
all of our transforms. Seemed to do something, so
it's good that we did that. So we have our barrel
over here, geometry, turn off clamp overlap,
stone this down. To 0.005, no, 0.003 maybe or like 20.002. Okay, so that does give
me like a small bevel. In these cases, these bevels are here more to just
capture the lighting. They are not so
much about really making your mesh look
perfectly smooth. It's more about
capturing the lighting. So having this one
looks pretty good. And if I then do like a weighted normals soon out a smooth. Turn off a wire rim
toggle. There we go, see. So technically, you
don't have to apply the bevel if you want to.
I'm just used to doing it. But that does give
us very quickly, a very interesting looking door. And then for the door
knob, which is just going to be a very basic metal, I'm going to grab I
can make this very simple because you
probably won't even notice nine
out of ten times. Let's grab a UV
sphere and make it like 16 probably eight sides. No, wait, let's
let's do 16 sides. 12. Let's do 12 sides, and then the rings also to 12. Probably still to high pool, but for now, this is fine. So we are basically
going to have the door knob probably up here, and we move it over here. Then what we do is we rotate
it 90 degrees this way. Then the goal is mostly
to just make sure that scaling looks logical,
which it does over here. It's an interesting
door. They did not make the door perfect. It's a little bit lower. Although we can always go ahead and we can
always hire this, so we can simply go into
our added mode and we can move this a little bit higher
if we want to or lower. However, I'm going to keep it. We got this one over here, and then what I'm
going to do is let's go into added mode
and phase mode. Let's select these
phases over here. Let's go ahead and start
by scaling these flat, set them to zero,
moving them back in. Maybe one less, maybe one less. It's twice this
scale this B flat. I messed up, Z. Once again, scale this flat.
Move it back in. Then maybe do like an inset. Oh, well, yeah, do an inset, but turn off your individual. There we go. So we are
just scaling this in, and then we do like a shift E. Alt, Alt not shifty. Then we do an Alt E,
probably like this. Then we do one more Alt E like this and then delete
the back faces. Because what we can do then is we can just go ahead and we can select this ring, Q, and extrude the
faces along normal, and then maybe scale them out a little bit more like this. So this is the most
basic looking, but it does work that if
we move this in here, I don't know why my
walkways turned on. Let's turn it off. We
have something like this. Yeah, and it does not feel
too big. So we got this one. Let's go at new Shift
H very quickly. Delete the backside because
you can never see that. And for the rest, what I
should say is with this one, I'm just going to go ahead
and add a single bevel here. And for the rest, I'm just
doing like an outer smooth. And then right click
and Shade Smooth. I forgot to do that. Right
click and shade smooth. So if you do an outer
smooth with a shade smooth, what it will do is
it will just on these harsh angles over here. I will just here see, make everything nice and smooth.
So we got this one done. So if we now go
ahead and do Aldag, maybe if I That is a trigger. Let's not do an outer smooth. Let's instead just
do it manually. So because I only want to
have this one over here, right click and I want to have
this one shade flat, see? Because that's what
I more want to have. So this is, of course,
very, very small. So what you will see
is you will see this. What happened here? That is not logical. What has happened here? It out window, we are
missing pieces. Old Age. Yeah, so file just
have a look at see. Show hidden objects.
So it's not a walkway. So somewhere. Door. Oh, okay. For some reason, my
door was turned off. Gee, Oh, that scared me. I thought I lost, like, most of my model again
just after finsing it. So here, when we see it in
the context of this door, we can probably even, like, scale this up a little bit more. And move this out. There we go. So that, that might be a little bit too much maybe like scale down a little more. But you kind of, like, get a general
idea of this. Let's do Shift H, and let's also shade flat this area over here. Come on. There we go. I did not want to
register. Shade flat. Yeah, there we go. I
should do the trick. So ldHe. Done. Okay, so that is our
door ready to go. Perfect. So with this
one right click, move to collection door A that
everything is in the door. And then in our next chapter, we will go ahead and
we will continue on with the double side
while has been cut. We are not going to do that
one. Our generic beam. Honestly, our generic beam, all it really needs is
it just needs yeah, maybe give it like a top, but only do like a bevel
on these sides over here, just do contra B
and then just do a few contra Rs and give it
some random deformation. So our generic beam,
we can even do that in this chapter because
it's literally going to be doing small variations
like you can see over here, where you just kind
of like move this in maybe also like move this in here so that
now if we have a look at it, Yeah, see, so that
from every side, it looks slightly different, but it does still give
an interesting look off. And once you've done that, all you really need
to do in this one is you need to do an outer
smooth and then just do, once again, like a
weighted normals. However, in this case,
we can go ahead and we can if you press A, we should be able
to then just select this one or separate it. Now, we're going to separate
that. That's easier. If we just press Q and
separate the selection, and right click and
shade flat D pieces. There we go. I just need to re
arterate to reset it. Resetting it is sometimes
a little bit tricky. But basically, there
we go. So that's a very generic pool. If I just ter weight almost this one and set the
weight to like 100, that gives me a better result. Okay, so the beam is done. So let's go ahead and
in the next chapter, continue on with
the generic roof, which is going to be very basic.
29. 28 Creating Our Final Assets Part6: Okay, so let's go
ahead and continue. So the roof is going to
be pretty easy because we are going to create an
extra texture for the roof. Although down here,
we might want to go ahead and then later on
when we have our texture, just do some improvements and extrude them
out a little bit, or, like, add some
extra slates to this. So for now for our roof, we mostly just want to focus
over here on this area. So if we go ahead and I
just need to double check. Because this roof,
yeah, like over here, it has almost no
thickness to it, does it? Let's just have a
think about this. Because we over here, I want to get something
in here for this roof. So for that, I will need to first of all, create
some thickness. If we go to our Etche mode, let's select these two
etches and let's start by just giving them a contra B. Maybe, first of all, proscere
a reset of transforms. Okay, so over here, so now we have some of this
thickness going on. That's pretty good. Maybe a little bit less.
Maybe something like this. And then what we can do is we can just kind of push this out. So if we go over here and
let's add you know that. Let's add two edges over
here and scale them out. Then my idea is that I basically
push it out like this. But then at this point, the roof you cannot actually
see anything anymore. So I'm expecting to do
something like this, and then maybe just in case
in case we can see it, we can do an LTE and we can actually extrude
this down again. Over here. So doing this, hopefully that
will at least have a little extra
overhead over here, which will make it look
a bit more interesting, but we still get the rest
all completely fine. Now, over here, what we
can do is we can go ahead and I want to say if I want to see if
we can do like an offset, and then if we can just
revert the offset. So if we do -0.95 and then I wonder if I go
over here and go 0.95. Okay, so this one also
needs to be -0.95. There we go. So now it is
in perfectly even number, and that can give us
that extrusion up here. So at this point, we can just go ahead and go into face mode, select these, press Q, and do extrude along normals. See, so we're just going to
go ahead and extrude this. And honestly, I think that we can even just leave
it like this. We don't even need
to do anything very special about this stuff. Now, the last thing
that I want to do is, I just want to make sure. So, okay, so there are
backsides to this. Even though we can
most of the time not see the backsides over here, we do sometimes Oh wait,
especially over here. Yeah, we can actually see them. That's important to know
that we can do that. If we can see them, we are going to basically improvise
a little bit, and we're just going
to, like, stick out the backside also a bit more. Is there any reference at
all that I can use for this? Maybe like over here, we
can do something like that. So let's have a look. So if we go ahead
and go in here. So this backside, I just
want to get something that's sticking on
the bottom of it. Um, I'm just having a t here. So which side that I want
to go ahead and do this on? So this is actually a tricky one because we
need to, of course, keep this module, so we can almost only have
the shapes in here. Let's get started by just doing holding K and adding a
simple cut over here, and then just kind of
like end it down there. I forgot to press Enter
or space over here. So we are going to
later on to a mirror, so that's why I'm not
just continuing this. So doing the cut here and here. Like this, this will give me the option to at least insert this shape into itself
a little bit better. So if we insert this, let's
do something like this. So we are going to keep
it very thin for now, that over here you can see that it has started overlapping. So we just need to press Q
and merge these at center. And then over here,
we can do the same where we can
select these Q, merge at center. Okay,
so we got those. Now if we do an Alt
E and extrude this in to get started with Yeah, so we are extruding
this in over here. So this will be
like the overlay. The only thing that I might
not like is that over here, that it, yeah, we might want to go ahead and actually
extrude that with it. Let's just press Undo. And let's instead go ahead and try and
extrude this with it. So it will most likely give
us arrows, but we'll see. Yeah, I see here. So it
will give us some arrows. But these arrows can
be solved simply by deleting some of these pass, and we will just,
like, clean this up a little bit better later on. So we got over here
now this extrusion in, which looks pretty decent. And then what I want to do is I probably just want to just add like an extra
plank on top of here, and this plank will just
kind of like be cut off. I think that will look best. So if we first of
all, go ahead and just Select these pieces and
do like bridge edge loops. Same over here, close it off. Bridge edge loops. There we
go. So that's extruded out. And now if we go ahead
and just grab a plank from let's say we have
our walkway over here. Here, let's just grab like this one or
something like that. There we go. Right click,
move to collection. I want you to go into
our generic roof, and then we can
turn off a walkway. And then with this one, if we just also turn on
a IFrame toggle, what we can do is we can
make it a little bit thinner and just make it
fit a little bit better. But in general, it should
give us a pretty good fit. So let's go ahead and
rotate this 90 degrees. 90 degrees like this. Move
it into place over here, and then go ahead and
rotate this over here. There we go. So this will just if we now
just kind of, like, fit it in here, like this. And then I will, of
course, close this up. But first of all, let's
just move it over here. And move it down here
and see at this point, maybe move this one
carefully back so that it still feels like it is
roughly the same thickness. And then what you can
do is you can also go ahead and you can
do, for example, contre ar over here, and then we can move
this piece down in here. So we got this one over
here. That's pretty good. Now, I'm just going to
do a quick with it, duplicate it, rotate it 180. Move this one back so that fits. And then over here, we
basically just want to make all of this properly fit. There we go. We don't need
to close it off completely, but this will just give
me something in here, and then over here we will
just have like normal planks. So these will be normal planks. There will be slate
roof around here, and all of these stuffs will
just be like normal wood. And then over here,
we can go ahead and we can get this on both sides. So if we do a quick
pivot on this one, and then do like a mirror, Just have on the other side. For this mirror, I'm
going to go on the wait, I think I need to
be on the X xs. I just need to flip it around. Why not? Y axis. No, no, wait. X, but don't flip it around.
That's the one. And then we can just
press Contra A. So we got that one, and then we can just go ahead
and duplicate this. And move this over here. There we go. Okay. So we got those pieces done, and that is pretty
much for now our roof, and then we will do the
unwrapping a little bit later because I once again changed my mind on when
to do the unwrapping, just because I'm going a little
bit in the modeling mood. It also all depends on,
of course, my mood. So let's right click
move to collection, generic roof. So
we've done that one. Shop top trim A over
here. Oh, yeah, this one. This one was an
interesting one because we need to create
more variations. So I think this is this
variation over here. And what I'm going to do is
I'm just going to make it flat to make it a little bit
easier and more manageable. And then later on, we
will kind of just go in and give it some
kind of like an end, most likely, although, yeah,
so there is an end here. So we will just go ahead
and give it like an end. So let's go ahead and go into our blender scene over here. This is not the right
one. This is the one. Yes, this is the one. Okay. So with this scene, I want to make it somehow a
little bit more interesting. Let's have a look. How can
I make this interesting? Maybe just by doing a
simple profile in here. Yeah, let's just
make the profile a tiny bit more complicated, and that should do the twig. So if we go ahead and
just do Shift A mesh, and create a new plane for this, we can go ahead and rotate
this plane 90 degrees. Turn on our snapping, and we can just go
ahead and snap this to the top and to the
side over here, turn off our snapping
and maybe move this forward a little bit so
that we can now grab this. Edge over here. Let's move
this up until this point. Select, actually, we don't even need to select these two. I don't know why I did that. So we just need to place two
edges over here like this, like a contra B, to split it up, select this face and move it in. So let's do something like that. Now here at the top, we
can go ahead and we can this point do like an extrusion. Let me just move it like this. Like an extrusion like that, let's go to our left view lt E, and let's move this up up
until roughly this point. And then we are going
to extrude this out, and this is just going to be
a simple extrude like this. Let's go back to my left view, lx and extrude this out again. And at this point, we
can just move this back. I think that looks like a pretty interesting profile
for us to have. And then, of course,
don't forget to also over here move this back. Okay, so, that's pretty
interesting. So we got this one. Now, we can al really
just do a mirror because we are going to use the
bevel modifier for the rest. So I don't need to first
give it some bevels. Let's go ahead and bisect I think we need to just edit
our pivot a little bit. No, wait, it's not on the
Z axis. That's the one. So we need to be on
the Z axis like this. And we can just go ahead
and press Control A, because what we can do is
we can basically select these two lines over here and just delete only
the edge loops. And then it's just
a matter of moving this back over here. Grabbing this side and
moving this back like this. And then grab this side, turn on our snapping
and snap this out, and we are going to just snap this a little further like this. There we go. And
now for this one, what we can do is we can
just delete it for now. So we got this block over here. That is looking pretty good. Now, on the ends, we do
not actually want to, the ends, we need
to keep them sharp. And that's why I want to like
an ending piece later on. But for now, I'm just going
to go ahead and I'm going to grab this piece, do
a quick bevel on it. Let's go to geometry, turn off our clamp overlap and give it like a 0.005 bevel
or something like that. There we go. It's fine. Let's pass contre A, so I'm just already going
to close it off. And then, of course, you can
turn on your outer smooth. And if you want, you can already do your weighted normals. However, what I'm going
to first of all, do, so I'm going to go ahead and
I'm going to slack the side, right click and do a fill. Yeah, that looks messy, but
it is actually doable and then it should press Q engine
separate the selection. It might look a little bit messy because the fill will
automatically try to connect it, Q and separate the selection. But I think for this case,
I don't really care. If you want, you can do
very precise cutting and you can cut all of this up to make it all look perfect. But honestly, it's not always needed for
something like this, especially not because this is most likely going to be hidden. It is just there as a
safeguard in case I accidentally move my mesh 1 centimeter and I
don't notice it, then I won't have a big gap. But instead, it will just
kind of stay like this. So we now have a
weighted normals also on here, and there we go, C. So that's just like a
simple looking roof trim, which we can now right
click, move to collection, shop, trim A, Shop top
trim A, I should say. So we got that one
so we can save scene and we can move
on to the next piece. Door B, I will do in the time laps because it's
just re using door A, store window wide, same case, small windows, same case. Those are all reuses. Plain wall short,
same case is a reuse. Yeah, okay, let's
create a Pv for this. I think that's good to have
this one in real time, also. But also for the walkway short, I will do all of those in
time laps because it's just all using already
existing measures. So with this piece over here, I wonder if we can maybe already re use this or we can
maybe already use this one. So if I go ahead and let's
go to our face select, let's select these piece
and just delete them. We don't need those. Select the backside over here. Let's do add X. Delete those. Select these vertss,
scale them flat at zero. Okay, so now we
have this profile. If I just go ahead and I'm just going to see what
I can do with this. If I move this one
down a little bit, because it might
save us some time. So this one down, I'm going to go ahead and
do a double contra R. Actually, you know
what? I will just do a mirror on this later on. So a double contra ar like
this and try it again. So double contre R and maybe
I can do like Oh, wait. They always move like that. In that case, just do
three of them and then just get rid of one
because it's on an angle, so I cannot just do
an easy scaling. I guess I can go down
here, and like I said, it's the local, but this
works just as well. So we got these two.
Let's do contra B. And let's go ahead and
select this version and move this in over here. Let's see. So we got that
shape, that shape, that's fine. Honestly, I think this
is actually quite good. So maybe push this one
in a little bit more, maybe push this one
in a little bit more, and then also these
pieces like that. Yeah, that should work. Honestly, that should
work as a roof profile. It doesn't need to
be super special. They would probably not spend that much time on it anyway. So do a quick pivot. Mirror it on the Xaxis bisect
Turn on Y Frentgle. Okay, so that's fine, Contra A. Select these cental two bits, and let's just go
ahead and delete them. And I just want to move this
back a little bit because I saw it moving out a little bit. So we got these
versions over here, and now what we can do
is same thing as before, we can just select this line. Right click and do
like a fill and then also do Q and separate
selection and do the Oh, sorry, I'm going
ahead of myself. I first of all need to
give it some bevels, because else those bevels will not match up
with that backside. So instead, let's
add some bevels, turn off clam overlap. What did I do? 0.005 or
something like that? Press contra A, there we go. And now we can go ahead and
select this Q right click Transform Q selection
Same over here. Right click Fill selection. And then for this
one, if you want, you can already turn
on the outer smooth, and you can turn on
the weighted normals. Set them to like 100 to
keep them a bit sharper. There we go. So
that's that trim. It might look a
little bit beefy, so we might want to mess around with that scale
a little bit more, but for now, this
should be fine. So we can go ahead
and we can save this. And at this point, I think I will
stop this chapter. So well quite short time laps. And then what we are going to do next chapter is we are going to work mostly on the balconies
and on the angled overheads, which will be quite similar. Generic B B. Yeah, let's also do that one. So let's continue with
this in next chapter.
30. 29 Creating Our Final Assets Part7: Okay, so let's go
ahead and continue with our balcony
floor over here, which should be very easy because what we can do is we can simply grab our walkway
straight over here. And let's see, I'm
going to grab, let's grab these ones,
and let's then also just grab like a bunch
of these over here. That should be good enough. Contros Contra V. Right click, move to collection, and this is going to
be Balcony floor. And now we can just
turn this off. There we go. Okay, so
for the balcony floor, it's kind of like going to be the same stuff as that
we have over here. I got, like, some reference. Well, okay, so this
one is not very good, but there was one that I saw. Only it was a little
bit difficulty. Well, over here, you can
also see how they do it. So you can see that
they just, like, add those planks and
everything over here, you can all see it a little bit. So that's what we're going
to do. Let's do this one. So a little bit wider
should be fine. Let's get started. By just grabbing this piece. I'm just going to do a
quick pivot over here. And I'm just going to
move this in here, which happens to be pretty much the exact same dimensions. If we move this back, so pretty much the exact
same dimensions. Then what we can do is
we can go to tap mode. Let's go ahead and
select this one and get rid of it, delete pass. This is a long one, isn't it? You know what I'm going to do is I'm going to get
rid of this one. And then this one, we can even just keep
it like combined. I'm just going to
move this over here. I know the other pieces are
a little bit in the way, but right now I
can just as well, kind of do this. There we go. So we got
that one over there. Now let's press height on our blockout piece so that I
can go ahead and I can do, like, a proper one
where I will say, let's move it over here, and then let's go ahead and
just go to Vertex mode. Oh, Alex. There we go. That should already do the trick to have
something like that. I do feel like I want to
make it a little bit longer. So let me just move this back. And now let's go ahead and
select just the entire bottom, and I'm just going to carefully make it a little
bit longer over here. We need to adjust it
anyway. So let's do that. And now for these pieces, the only one is that these
ones would not be very logical to have them
on an actual balcony. So we're just going to kind of, like, move this back. Move this down, and then
we can just use this one. Over here, see how quickly
it goes when we reuse stuff. So what I can do is
I can let's see. Let's go ahead and push
this a little bit over. And then I probably want to
make it a little bit cleaner. So if we push this
a little bit over, then go to tap mode. I'm going to grab old X,
grab all of these pieces, and I'm going to just
scale them carefully a little bit more flat so that I can nicely
move this in here. And then over here, just make things like a
little bit more clean. Let's scale this one
a little bit flatter. Let's move this one
in a little bit more. So I'm just going to make this
one a little bit cleaner. As if that they did, of course, do a bit of a better job with these ones compared
to the walkway, because if you mess
these ones up, someone can fall to their dead. So they, of course, do not want that,
so's some rotation. Yeah, that's basically why I'm just moving some stuff around to make it look
a little bit cleaner. I know that it will mess up UVs, but you know or you've seen
how quickly with that. We can just redo those. Wow, I can speak. I need to warm up because
it's morning here. So I will just warm up. So we got these ones over here. And then, yeah, just having that piece left should be fine. Whatever I just Go ahead
and come on Deselect. There you go. Whatever I just go ahead and just move
this in a little bit. And there we go. Very simple looking
walkway. Let's right click. Move to collection just to make sure again move everything to the balcony and now we can go ahead and save this. So
that was an easy one. Balcony floor, the
blockout version that's deleted by this point. And now if we move
on to the next one, it is going to be the
balcony fence straight, which comes in two versions. So for this, we are
going to later on make a few more variations
or at least I am, and then you guys can,
of course, see that. But I think for
this one, I want to keep it like a simple one. And I saw this one over
here, but over here, I saw a more clear example
where you can see, so this is basically like a very basic looking pole
or beam or whatever. And then we have just like these pieces sitting on top
of it with a little on piece. So I think that will be quite
interesting if we do that. So let's go ahead
and get started with the first one over here. So shift A, and let's start with a fresh new cube that we
can use and scale it down. And then for this cube, we can I'm going. This is going to
be my base pole. I do want to make the base
a little bit thicker. This does mean that we might
need to move some stuff around a tiny bit
inside of our level, but I feel like else,
it will be too thin. So let's say that if this is our base pole, and
we can just like, move it up a little
bit over here, I'm going to for the base,
make it very simple. That's the contre R's place like a simple segment like this. Then select all of
this and then Q, extrude faces along normal. So let's give this one a very
simple extrude like this. Almost as if they can place their screws and
everything in there. Then it pretty much
just looks like it goes quite basic
until the very top. There is something that I
do want to make in here, so I think I am going to actually make it a
little bit thicker. But basically, so they
just move it just above, and then it just has this
little ornate piece, which I'm just going to
kind guess what it is. So I'm going to start
with the lt E and then just right click
to leave it into place and then scale it out. Then another lt E. This time, move it up probably and looks like it's almost
like a little tilted edge. Let's move it out a little
bit more like this. Then it looks like another lt E, but this time, right
away, move it out. Al E and then move it. Let's say up, and
then just an inset, which goes up until this point, and then maybe another
inset up until here, and just move this like that. Yeah, that looks pretty good. Let's just go ahead and just
move this up a little bit more I feel like
it is too angled. So let me just quickly select
these pieces and just kind of scale them out a bit more. Okay? So that looks good. Now I'm going to make
this a little bit wider, as I said before, like this. I think what I can also do
is I can also go ahead and move this up a little
bit so that it looks a little bit thicker so that we can see it a
little bit better. But basically, the
reason that I want to do this is because I do
want to kind of, like, make almost like a hole in the sides where they
kind of just chiseled out a little bit of the sides so that they can stick
in these poles. That's most likely
how they would do it. They wouldn't use
nails and like, do it very perfly they
would just probably, like, chisel it out, stick these beams in here, and
then just move along, and then maybe, like, add
some nails here and there, just, like, improve it. So knowing that, I
think I first of all, need to make the cross beam
before we can move on. For the cross beam, it goes in two versions. Start
with the cube. Looks like the first
version is going to be I'm just having a look, so it looks like it's
going to be at the bottom, and it can just be very simple. So pushes out. So this will also decide the
thickness of everything. So that's why I'm just making extra sure that
this looks correct. So we will push
this out over here, kind of, move it
into the center. And tone on why introgo. Then what I'm going to do is it's so difficult to
see what resolution. I think what it does
is if we go to, let's make it a bit thicker
do contra R over here. And then it looks
like it kind of just if we just
select all of these, Q extrude faces along normal. Yeah, it kind of looks
like it does this. And then, of course, they
are a little bit angled, so you just want to
scale them flat, just to make sure that they
are nice and flat, like that. And at that point,
the back, you can, of course, then,
delete all the faces. Okay, so I'm not going to
extend it all the way out yet. So we got this one, and
then at the top one, it's basically going to be let's see, we have
multiple variations. This one looks like
it actually is round, which would be quite cool. Let's do that. Let's
actually do that. So we can just reuse this one, so we can duplicate it. And then in order to reuse it, I had in mind that we simply
scale this up quite a bit, maybe scale this one
out a little bit more. Like that. Also, let's get rid of the back because it
will just be in our way. So we scale those out
a little bit more. And then if we go ahead and we select these corners over
here, we can do contra B. I think I need to
quickly just in case Q and just apply all
of our transforms. Now Control B, C, that
works a bit better. Then we simply give it
using your skull wheel, give it a few
segments like this. Then what we can do is we can
select these segments over here that are really
close together and just delete the edge loops. And finally, what we need to
do because over here they will all be merged
very close together. We can just go ahead
and select everything, Q and then do a
merge by distance. And as you can see, removed four word Cs because over
here, whenever you do this, it will just keep going and
going and it will just keep merging more and more faces
into the center point. But that looks pretty good. The only thing is that this one, let me just scale
this flat over here. And just in case to
make things nice, let's also do it over
here, scaled flat. There we go. Yeah, the segments, I'm
fine with the segments. You can maybe, optimize it by just getting rid
of every other one, but I don't think
that that is needed. So let's go ahead and
do a quick pivot. Let's move this into location. And that means that at
this point, for this one, we can pretty much
move it to the side. So let's go ahead and
go to our left us fine. And then go ahead and
select this side. Incumbent snapping, thank you, and go and snap it over
there. Same over here. Although, let me just
quickly delete those faces. And just scale this flat because it will make the increment
snapping easier. There we go. So now increment snapping this one also Tara. So that's looking pretty good. At this point, we can
pretty much delete our blockout because now
we have the distance. And now over here,
what I wanted to do in the very beginning
already is do a contra R. Move one contraR here. It doesn't need to
look very nice. It's just like that
little extra detail and do the same over here where we move a contro R around here. But we move it just below it so that we can actually
see what we're doing. Like that. And for this one, just to
use the same polygons, simply move this out over here because else it would be a little bit of like a waste. And now you can simply
select these two faces, lt E, and just push them
back in a little bit. There we go. Now for this one, yeah, okay, this is a little bit too much for
me to just leave. So I'm just going to do
a target weld toggle, and I'm just welding these ends shut because it's very
easy to just optimize. And I'm welding these
ends over here, shut. Because then what I
can do if I turn off Target All toggle is I can
simply go ahead and I can, select this and this line
over here, loop it around. So I'll have loop it around, and then we can just
delete the edge loops. And then for these ones, you can, of course, also
merge them together. But those ones I care less about, so I
won't be doing that. It was just like
the Wi long one. So we got this one.
That's pretty good. At this point, I think we just
need to add like a bevel. I wonder if this is too thin
for a bevel, but we'll see. So let's add the bevel, set our geometry to clamp
overlap, and just really, like, yeah, that looks
almost like it can do it. Over here, it kind
of gets confused. Yeah, you can use this
little centre button to kind of turn it on and off. Hmm. It's interesting that it
gets confused over there. There must be Oh, no, wait. It's an overlap. So if I do a clamp overlap, Oh, then just
completely breaks also. Oh, no way, that's because
I didn't turn it on. So if I do a clamp overlap, it might be a little bit better because what it
will do is it will just make sure that
it does not overlap beyond that phase. So over here, it will
just automatically stop. The thing with the clamp overlap does mean that over here, these edges are a
little bit thinner. But I think for this point, yeah, I'm not too
happy about it. I think I'm going to do
this like a custom way. I think I'm just
going to go ahead and I'm going to select
these pieces, for example. And it's also these. And I'm just placing my bevels customly, which should be fine. So let's do Contra B. You'll
see because then I have way more control over
where I want to place them and how thick they
are and everything. So this one, this one, this one, this one, this
one, and this one. There we go. So you
are quite thin. And then we have these corners. So let's make these
a little bit wider. Hmm. Yeah, so let's do that. So let's make these all
a little bit thicker. And then over here. We can make these very thin. And the thinness for these, they are more here just to
support our weighted normals. They are not really
here to actually add any value except for just making sure
that nothing breaks. Then we can do a
target well toggle. We can just weld these pieces together so that
they kind of go from small to big over here, and
that should do the trick, and then what I will do is the insight over here
because they are so small, and they are so close to
the edge, as you can see. Although this edge is
a little bit thinner, so this edge can technically
become bit thicker. We will most likely
simply just make them harve angles so that
you cannot actually see in it or not. Maybe only have the outer edge. Give it a little bevel. But the inner edges, we
will just make hard. So if we go ahead and
it's like this one, tiniest edge. There you go. Super small edge. There we go. So that looks a
little bit better. So now that we have these ones, what we can do is we can go ahead and turn on outer smooth, check our weighted normals, set them to like 100. I forgot to add my voice at normals to this piece over
here at the bottom. So let me just add that. And it looks like it had already
merged into each other. So just go ahead and select these Q and merge by distance, and that should fix that. So we got those ones done, and then in here, at this point, you
cannot really see it. Else, you can do the technique
where which I always do, that I just separated. So I can do, like, shift H because with
the outer smooth on, you cannot turn off outer
smooth for specific phases. So then what I would do
is I would simply go ahead and I would
like separate them, and then they would
become harsh edges. So, separate selection, select these pieces and
then turn off out smooth. See? And then they just
become harsh edges. There is what I found
to be the simplest way. So we got those ones,
that's all fine. For these ones over here, we can just use our Bevel modifier. So we can go in here, bevel, clamp overlap Um, actually, this can be a little bit Or not. Can it be big or not?
No, it cannot be bigger. Yeah, Bevo modifier is always a little bit tricky on
very, very thin edges. So let's go ahead and then
add the weight in normal. So oh, set the weight in normals to 100 makes it a bit sharper. For this one, Oh, one button. I always press two accidentally because I want to
switch to edge mode, but I'm not yet in edge mode. I'm going to go ahead
and I'm going to do it manually because we only
really need to do these four. Here, see, and then the
rest will kind of stay. So let's go ahead and do
smooth weighted normals 100. Nice. Those are done. Last stop is going to be
our little beams over here. And now, of course, we
could go in and we could extrude this in in every
single beam if we want to, but it feels a little
bit of like an overkill. So instead, what I'm
going to do is I'm going to cheat our
way out a little bit, not so much cheat,
but we're just going to make a
simpler version of it. And that simpler
version will basically be a beam with like a
little foot at both ends. So here we have for
example, the beam. Let's make it a
little bit thinner. Scale this out so that I get
a sense for its thickness. Let's make it a little
bit thinner over here. Okay. And then just
move this one. And this one, didn't
mean to press insert. Contra I delete to invert our selection
and delete those faces. And now it's just a question now it's just a matter of doing a double edge over here.
Pushing these edges out. Then you can select
these face as contra I to invert it and then Q and then just
extrude face along normals. And that will just extrude
everything in one go. See? So that's just
like a cheaper way of just quickly getting
this to work fine. And then at this
point, I do want to probably have weighted
normals on this, so let's add the Bvl modifier, clamp Oh, looks like that. We need to press Q and apply all of our transforms
because it's not working. Let's try again,
bevel, clamp, ear. So the apply our transform
stuff works really well. And I'm going to go for 0.005. Should you contra eight
or by the applied. Outer smooth weighted normals, there we go. Okay. Easy does it. So
we got this one. At this point, it's
just a matter of adding an array
modifier pretty much. So what I'm going to
do is I'm actually going to probably end this one. Let's see. So it goes a
little bit into our pillar. So if we end it over around
here, that should be fine. And now if we just go ahead
and add an array modifier on the Y axis in the minus. So let's do minus one or
minus two minus three. Yeah, minus three should work. And else we just need
to balance it out. Okay, so let's say minus three point oh, wow, that's sensitive. -3.05. There we go.
Let you do this wick. So we got these ones over here. One last thing you need
to do. Do a quick pivot over here on your beam. Let's temporarily turn
off weight to normals, and we are just going
to add a mirror to this mirror it on the Let's see. YXs like this. Yes, that should be fine. So contre A, weight
at normals, 100. And then for these
pieces over here, just do like a quick pivot, and we should be able if it is a quick pivot exactly in center, we should be able
to simply rotate this 180 and just quickly
like places here. That should not
really be a big deal. There we go. So now that it
is at both sides, it will, of course, be able to receive on this end. But there we go. If we turn over WY Rm togo, you can see that now
we have a pretty nice looking what was it called? I already forgot Balcony fence. So we can just go ahead and
we can select all of it, move to collection,
Balcony fence. There we go. Perfect. I feel like I might have a
blockout or something. Yeah, here, see. This one's
deleted old age to get back. Okay. So that is now
all ready to go. So in our next chapter,
what we'll do is we will continue on with our, let's do the angled overhead, although we cannot really
do much yet because we don't have a roof material
yet, and we kind of need it. So we will do the
angled overhead, and the support I'm going to make the support a
little bit more interesting, a little bit more like
this thing over here. So we will make them the sport, and then we can continue
on with the generic beams.
31. 30 Creating Our Final Assets Part8: Okay, so let's go
ahead and go over our angled overhead over here, which if we look
at some reference, it's most likely just going
to be like quite a simple. Oh, they have beams. That
is quite interesting. Let's see if we have
some more reference. B, so they will most likely have the beams just sitting
like below it in this one, which I think might
actually be a little bit better because it will give us a little bit more flexibility. Yeah, so let's do that. Let's go ahead and let's just
have a beam in between. Having this stuff,
what we can do is we can simply, once again, steal our balcony floor and just steal the
bottom piece over here. And let's go ahead
and add this one to our angled overhead
generic. Here we go. And now what we can do with this one is we can go ahead and if we just select this one, sorry, Q, separate selection, select this one, Q
separate selection, this one, Q separate selection. And let's do a quick
pivot so that we have everything nicely
placed together. I still do want to have a
plank behind here because it would be logical if
you have a plank that kind of like
holds everything up. So let's have this one. And if we just go
to Vertex mode, I am not going to make
this one as white. So it can just want
to move this back. I'm going to make these pieces fairly straight so
that they properly, like, flow over from
one to another. So we have that one.
Same over here. See, this modeling is all
going to be very simple. This is also why I
have decided to mostly just go for a Tenabs
for the other pieces. So we got this one over here. I'm just going to moves up. So then once we've
done the time maps, it will go a lot faster
to get all of this done because I don't really
want to spend 15 hours. Yeah, just doing this stuff. It would be a bit of
a shame in terms of, like, the time that we
need to spend on stuff. So we got this one over here. Let's go ahead and let's
get rid of these lines over here of these edge loops
so that it is a little bit easier for me to then go to my vertex mode and just
properly places into place. So let's have a
think about this. This probably needs to
be a little bit thinner because else it will not
have any space for the roof. So the roof is going
to be very thin, and it's going to be like
those thin slate roof pieces that we are going to also
use on our main roof. But I do want to make this
a little bit thinner. So let's go see
something like that. And then for these one, just
go ahead and like yeah, move them over here. I think I want to move this out a little bit more because it feels that it's not the
same thickness else. So something like this
looks more logical to me. And then here at the top, we just need to go ahead
and just move this also down a little bit so that we have space for our roof. Okay, so at this point,
let's just put height on our blockout so that I can
actually properly place this. So this one is going
to go over here. It's going to go ahead and I'm going to duplicate
this one also. Do I also want to do it over here or do I
want to have like, Yeah, I need to
have it over here because I might have an ending. So I'll just have it over here, and then we will just have
two next to each other. So we got those pieces,
delete this one. And then we have
one piece that's a little bit longer
that is sticking out, for which we can just use
this one that's no pum. So we got one piece over here. It's a little bit longer. Let's move this up a little bit. I am going to go move this one back and then also move these
two a little bit back. Like this and same over here. And then for the bottom ones, just make it a
little bit longer. Over here, that's just
kind of sticking out. Okay, so that's pretty good. Then for the beams,
what we can do is, let's say that we only
have two beams per piece. We can just go ahead
and we can just select. One of these pieces, just make them a lot thicker. Let's make sure that they are just nicely
sitting against this. So they will probably
just like use nails in here on this side, and then on this side, they would probably use
them sideways, or they would first
of all, yeah, they would probably actually, first of all, make
this in, like, a separate piece, and
then they would nail it against the actual ceiling. So let's go ahead and
have this one over here. And then the only thing
that I need to do is, oh, yeah, I'm just going to move this
in, like, the center. That's Betsio because
we don't have a fill, which is quite surprising that
we don't have a fill grid. I need to have a quick check on that later on in unwel to make sure that I did not accidentally make it to short or
anything like that. I can check. No, here, so I did
not make it to Short. I'm curious to know why
we didn't do a fill grid. If we go to a top
view, did we do a fill grid like
this? Oh, yeah, okay. So we did technically
follow the grid, only not as precise. But in any case, one, two, three, four, 5.5. So if I just place
this one roughly around here in the center, I can then go ahead and I
can then move the ones that I t want to move. So
let's do one here. One here. Oh, God. That does not look
good. Still this. There we go. Let's do
something like this. So we have thin, white, thin, white, thin white, and that's kind of
like how it goes. Just to break it up a little bit more and just make it a little bit more interesting. Then for some of these, I can go in just in case
we like, look below it. It would be nice if it's
still some variation. Same over here. So it's just a little bit of
variation just in case we can ever see below it. And for these ones,
I'm going to, I can give them a little
bit of variation, but it's mostly just going to be moving up and
down at this place. That's the variation
that we're going to go for. Over here. There we go, because
we don't want to move it side to
side because then, of course, once again, it
will not match up properly. So we got our base frame done. And now for our actual roof, as I said before, that one is going to be a
little bit tricky. For now it's just going
to be a simple cube. And then once we actually
have our texture, then what we can do
is we can just make this give it like a proper
end where we kind of, like, stick out those
slates a little bit and then extrude
them out on the end. So let's do Y frentogle. But for now, here,
let's scale this. It's like a very thin slate. Let's move it here. Yeah, that should do the trick. I'm already going to move
this all the way down, and then what I will do is, here, I need to have this angle. So we are going to move our
plank a little bit lower, and we are just going
to have this sticking out up until this point, and then remember that it will
stick out a tiny bit more. Then up here, what I'm going
to do is I'm going to add an extra contra R edge loop and move this up a
little bit so that it fits a little bit better. And then for this one,
grab it. Move it down. And I guess that they would
go through the effort. Here we go to our front view, I guess that they would
go through the effort to saw it off at an angle because it's not like they were stupid at those times, not at all. So they would, of course,
still put in some effort. It's just that they're all
homesteads and many people, they do not actually
have all of the skills needed to make
everything look perfect. So there will still
be, of course, builders and everything,
but it takes time. So at least that's
just my story behind it to make everything a little
bit more messy, basically. So it's just my way of cheating. Let's go ahead and let's
set increment snapping on. And can I snap if I
go to my top view? Can I just snap to the side? Looks like it to this side also. There we go. At least now I know that it is all
perfectly tilable. Okay, so for now, nice and simple, but that
should do the trick. So we got this one. Right click, move to collection angled
overhead over here. And now for our support, beam that we have over here. So yeah, I said I was going
to make it a little bit more interesting because I wanted to do, like,
something like this. However, maybe on the side that would not be too
interesting to actually do that. This looks quite
interesting, actually. Yeah, let's go for
one like this. It's a little bit of, like, a different design, but
I think it will work. So, for one of these, I guess I will once
again just like steal. Let's not steal these. Let's go for a balcony floor. I'm going to, let's just only steal this
one again. Over here. Move the collection,
overhead support. And then what I'm going to do is I'm going to go ahead
and I'm only going to grab one of them. Here. And then the rest, we can
kind of like just delete. And then for this one, Let's go ahead to select
all of these lines and just get rid of them. Do a quick pivot. And now we
can start by just rotating this nine degrees and another
nine degrees over here. We can start by just
moving this one. So this is still going
to be the same plank because we do need to
have a sporting plank. Over here. So that's all fine. But then what we're going
to do is we're just going to swap these things
around a little bit. So we are going to get started. We're probably just doing
a duplicate of this, rotating it 90 degrees. Moving it up until see, up until this point. Let's do this point
because this one, of course, depends on the angle. So if that would be
the angle that we have next to it, actually,
you know what? Let's move this one
down a little bit, because we will just
have it sitting against the side once again. So we got this one over here, and we can also push it back out a little
bit more like this. Then what I'm going to do is
I'm going to just give it less thickness. Like this. But I will make it look
a little bit more beef here by pushing this out so that it becomes more
of like four by two kind of block over here. Did I say that
correctly, four by two? Probably, maybe. I don't know. In any case, this point,
we can probably delete our blockout over here. So we got this one, maybe stick
it out a little bit more. And then what we can do
is we can just duplicate this beam move it a
little bit lower. Let's see. Let's give it a bit more of like a steeper angle. Let's do something like this. And let's carefully
move this up here. Grab this end and then
move this end back here. Do the same over here. And back here
again, there we go. And for this one, let's
make it even thinner. Then a pillar like this. And then over here, we
can kind of compensate. So this one can be a
little bit thinner over here and also this one, so they wouldn't probably waste too much wood on
this. There we go. So very simple looking beam, but it does do the trick. Maybe only over here. Let's add a few imperfections. But yeah, this stuff
does not need a lot. Also, like on this beam, like I don't think it
really needs a lot. Maybe, like one edge
just to kind of like gives us a
little imperfection at one side, but
that's about it. So we got this one also done. Right click, move to
collection, overhead support. So we've done that one. So now all that is left is
we have a generic beam, a walkway stair. I
forgot about that one. And then the sides there, I'm going to do that
one in time laps. And the roof window, I'm also
going to do in time labs. So for this beam, let's turn this one off. We can go for a design like this so it is a little
bit round so that would maybe be
interesting or we can go for more of a bare bones design. Let's see. Is there
something in here? They probably even use
the same reference. Maybe something like that
actually looks quite cool. I'm not sure if it would
work because we have, of course, such a
basic overhead. So let's go and actually
have a look Okay, so I use it over here. Do I also Oh, yeah, okay. So since I'm also using it on, like, the bar or the saloon, which is going to be like one of those wy fancy looking places, I think I want to go
for, like, something a little bit nicer looking. Scene does, where
it starts to feel a little bit like an
environment. So that's nice. So we are going to go
for the one that I saw, which was on, where are you? This one. This one I quite like. So let's go ahead and go for this one, which should
be quite simple. So we're going to
start with the bases. And then for the angles, we are going to probably
use an angle like this or something a little bit
more basic. I don't know yet. So in any case, for this, start with a simple
cube over here, and then we can go ahead
and we can scale this in to roughly the
size that we want to. Let's move this up a little bit. That feels very thin. Oh, no, no, they are quite
thick. Just ignore me. Just a feeling. So we can now go ahead and we can move this up a little bit more. So let's say up
until this point. Now, let's do Shift H that
we can focus on this one. As you can see, it kind of has a bevel sitting over here at the very top,
and that's about it. Now, it's been a while since
I've done this in Blende, so I hope that still works, but you are able to actually
also bevel vertices. Although I think in this case, I already saw it happening
that it does not really yeah, here or see it, so it does not register exactly the
way that I wanted to. Another way that we can
do it is very simple. Contre R place two edges
here, two edges here. And then simply go ahead and select these ones over
here and push them down. That's another way that
you can get pretty much the same look as you can
see over here because you can see that it's
pretty much like a bevel. The verts, it sometimes works. Well, depending on three D modeling
program, sometimes works. In my IMC, I believe that it works where it will simply
split it up into three. So once we've done
this, we can press K and we can think it's
better if we just place a cut like this
because as you can see, the faces do not respond
correctly to our movement. But if we place a cut
like this, they will. So now you can see that now it just has become
a simple movement. So we got this one. We
can go ahead and we can do dH. Oh, shortcuts. I keep forgetting them. So let's go ahead
and duplicate this. Rotate it 180 degrees. Move this at the
top, and the top is a little bit smaller
than the bottom. So let's move this up here. Let's move this in, and now we have a
little bit of space. And what I'm also
going to do is I'm also actually going to
go to my face select and just delete these top faces and these bottom faces
because they will be a waste. So that's delete those. And what you can do is, of
course, if you want, you can just merge
these vertss over here and then merge them
simply down to these sites. But I'm not going to
bother with that. Going to delete
this one. And now, for this shape, so this shape, we can pretty much just do this. We don't need to use spines
or anything because I'm just going to stay away from the spine tools
inside of blender. What we can do is we can
use an original cylinder. So if we go mesh, cylinder, 32. Let's go 24. Yeah, even 24 is probably still a little
bit at the high end, but at least we can
then use level of detail or LODs to kind
of, like, hodoce it. So I'm going to get
started by zooming in, scale this in a little bit. So this is going to be probably our base up until this point. And now, all you need to do
is let's go to our face mode, and we are just going to
kind of follow this profile. Whenever we have a
round bit like this, what we're going to do is we are going to use
the same technique as that we did on the railing, where we are going
to later beevel it. So we are going to,
first of all, extrude this and then later unbvel it. So if we have this one, it's
going to look like this. So at this point, we
get like a round bit. So what we can do
is we can do an Alt E. Move it round over here. I can move this later on. And then we do like
an Alt E again. And then, actually,
at this point, it looks like it's going
to be like an inset. So we have this, and then
what we can do is we can just go ahead and
select this line, Q, extrude face along normals, extrude this out like this. And then just a
matter of selecting these bottom and
top lines and doing contra B with a
bunch of segments like you can see over
here, like that. And then what you can
do you can once again, delete one of those willy
thin lines over here. And actually, these
ones Um, so I'll shift. This one can go and this
one can go. There we go. And then over here if
you want, for example, if you want to give, like,
a little bit more flow, you can just move
this out and down. So that's kind of going to be
the general idea for this. So we got this one, and
all we need to do is it looks like we only need
to create one of these, and then we can just duplicate
it, because this one, this is just like a centre bit, so we can almost,
like, mirror it. Yeah, it almost
looks like a sphere. So now what we're going to do to extrude this out? Let's see. So we got this one let's
move this down a little bit more and maybe scale
it out a little bit more like over here, and then just do an
Alt E. And it's a little bit tricky always to see exactly how high
that we need to go. But let's guess that
we go this height. We can then do a quick pivot
and just very quickly do a mirror that we have the
bottom detail also at the top, which needs to be on the
Z axis and insect and then flip it around like
this. Press contre A. That's all we need
to do. And then we will be left over with
this one line over here, which we can
actually use already because we can just scale
this out quite large. And then if we do Contra B
with a bunch of segments, you can see that then
it scales out thinner. Let's make this a
little bit larger. Then if we do Contra B
with a bunch of segments, it will just scale
itself back and then we instantly have a shape like
you can see over here. Now at this point,
it would be like a matter of us needing to measure it out
and as we can see, we are way too small, like how everything looks, and because we are this small, let's go ahead and create I
need to have a center point. Let's create a very quick cube. Oh, sorry, actually, do it. Undo this up until
this point. Yes. And now we want to
go ahead and create cube because I do
not want to add all of those segments because else I need to
change all of them until I actually know exactly where everything
needs to end up. So what I can do is I can
use a cube to measure. I can simply grab cube and then grab this face over here
and move this to the top and then what I can do is
I can do Control R. So this is the actual center
point of this edge over here. And then what I
can do is I can do Contra B to basically decide how thick the center blob, whatever it is, is going to be. Now, this does feel quite high, so that's
just double check. No, that's look incorrect. So now that we know that, we can move this one
up until this point, and then this one, still move
it kind of like in center. At which point we can
select it contre B, give the bond segments,
and now you can also see that now it
has become bigger. It also means that we need
to scale this one out. There we go. That looks a
little bit more logical. So we got this one ready to go. Let's not delete it. Let's just move it over here, temporarily. So we got this one ready to go. Let's go ahead and
now duplicate it, and then I will see if I
can literally just throw a sphere in between here to kind of,
like, measure it out. So what if we although
actually a sphere might not work as well? You
know what? Let's do this. Let's grab this piece over here, temporarily do a shift H, and let's go into
our face select. And let's go to our left view. Let's delete all of these pass because then we're just going to
scale this down and in, and hopefully that will
save us some time. Old H. There we go. So we got this
one. So basically, we're just going to
scale this in, see? And then it will automatically
kind of like deform in the same way that it looks
like in our reference. And I don't even need to think that we need
to scale it in. We just need to
place it like this. Yeah, Nice. And then if you, of course want, you can use your blue scaling over here to make it thicker or thinner, if you want. But this is looking pretty good. So we got this one if we
turn off a iFrame toggle. And okay, so these
ones you probably want to right click and shade smooth. Then you can see
that it does work. Do we need weighted
normals for this? Let's have a look at our edges. So the way that I look weighted
normals is often simply by double checking if the
edges are super super thin, then I don't really
want to add it, or if they will actually
add a benefit to it. I feel like this one
might just benefit from a simple outer smooth. See? I think that
one will actually benefit more from it because the edges are a little
bit too small. This one, however, I think that the edges are large enough. So what I can do is
I can go ahead and I can add a bevel
modifier to this. Clamp values, tone this
way down 0.005 over here, and then let's do a weighted normals and
turn on outer smooth. Yeah, that too. So 0.005. Let me just very quickly
replicate that bevel. Jump tree clamp, 0.005, because if I'm very
honest with you guys, I forgot if you can
copy over modifiers. If you have made it this
far into the tutorial, just let me know, like we have a discord. So you will get the
discord on, like, every product page
and everything, so just keep that in mind. Then we can, like, have L. Then you can mention it
there if you want. So let's go ahead
and save Racine. Now, this is looking
pretty good. So we really got quite an
interesting looking pillar. But we are way over time. So in the next chapter,
what we will do is we will probably
create a shape like this. It's not going to
be too difficult. And yeah, then that
should also be done.
32. 31 Creating Our Final Assets Part9: Okay, so now all that we need to do is we need to go
ahead and create these overheads for
which we are just going to mimic the ones that
we have over here. That should be fine.
So I'm going to get started by creating
a simple cube. Here we go, let's
move it up, and let's go ahead and
just scale this in. And for the thickness, let's go for like a thickness a little bit thinner than the
one that we originally had. Maybe something like this
should be fine over here. Okay, so we got this one
over here, so that's fine. I think at this
point, you know what? I can already get
rid of it because I know where it needs to end, so I don't really need to do
anything special for that. So we got this piece over here. I'm just going to scale it out, make it look a little bit nice. So, this one is quite easy. Then, of course, over
here, we kind of need to have this pattern in it. If we go to face Mode, and let's go to our
left view or actually, let's do a right view.
That's a bit easier. Let's go to our right
view over here. And if we have this
it as easy maybe, we will need to compensate it, but just go ahead and
rotate it 90 degrees. That was weird.
Let's try it again, 90 degrees and then move it up and then move it out to
the angle that you want. One, two, three, four,
one, two, three. Yeah, so around this angle
actually will be fine, maybe a little bit further out. Now go to vertex mode and compensate a little
bit more for, of course, the warping that we have because
of our scaling. So we got this
one. So of course, this angle is already fine. Now, over here,
what you can see, so it looks like
that we have a bend down large bend in bend again. Do we need to mirror this? I'm not sure. Oh, Oops. So for our bend. So bend down, which means
that if I do bend down, I need to define
this piece first. So let's just go
ahead and let's do a loop, say around here. This is a brain teaser. So a loop around here, yes. And then another loop around
here so that this one goes. Yeah, okay, so this.
So this one will bend. So we will extrude this out. Then it will hit this point,
then it will go down. Then it will bend over here, and then it will move down here. Because of the angle, mirroring probably is not that easy. So let's just go ahead
and then instead, let's make it ourselves again. So now I just need to
do it the opposite way. So this one needs
to go like this. So bend edge loop. Looks very strange right now, but let's just see if we
can actually add the bends. So if we go ahead and
just select these angles, and pretty much let's say
move this straight and then just Shift click it. You cannot see it, but I
am just looping it around. And do like a contra B. Let's see. So the bend is
not here, it's too far away, so let's go ahead and
move this a little bit closer. Let's try it again. Okay, so that looks fine. I do need to fix it
on the other side. So we have a bend,
then we have a loop, and let's make this
loop a little bit less. So round loop, and
then it will go in. And now we just go ahead
and do the same over here. So contra R. Yeah, this one is also
probably like it needs to be moved
down most likely. What am I doing here? I'm
doing round one cube. So if I now go ahead, select this Control B, so we have a bend over here. But this bend, it just
does not look very nice. I feel like maybe we
need to push it out. Make sure to do it in your X ray mode because that's why you see me constantly
switching back and forth. Come on. Edge mode. Thank you. No, that also
does not look nice. Then I think I rather
want to keep it like this and maybe push it out a little bit
more like this. Contle B. Let's see. Yeah. Okay, so this band can
actually work if we do this. The only thing is
something looks strange. Oh, it's the overlapping
of the faces. That's what it's
looking strange. I can ignore that for now. So we go here and then we go in. So okay, that should work. Now, for our faces, if we go ahead and we select start by just selecting
all of these, Q, merge them at center. Same over here cue,
merge them at center, then do a target Weltgle and just weld these closer
together over here. And let's do a shift H so that I can actually see what I'm doing. And over here, let's do
also Target Weltogle. Here, let's merge these
pieces together like this. Q at center, Q at center. Okay, so that's good enough. So we got those
pieces ready to go, turn off target l toggle, and now if we go to our
right, now we just need to do the same method as that we
did with the center pieces, which is that if we go ahead and just do like a
single CtraR over here, we can move this way back like
this and then do Contra B. Like that, you can
kind of move it, but looks like that we
moved it too far back. Let's twi that. And just ignore that it's over here that it is
clipping and everything. No, I don't like that. I want
to move it further back. It's still it's an surprisingly
annoying shape to make. Didn't think about I didn't think it would
be that annoying. If I see this, I almost feel like that this
piece is too far down. Like it needs to be moved up
a little bit to compensate, because it just looks
really strange. You see? Here at the top, it reaches the top far quicker than it
reaches the bottom. So that makes me think that if I move this up a little bit, that everything will
look a little bit more even because right
now it feels uneven. While right now, we are
getting pretty close to making it look properly. So let's just go ahead and do that and think
that's the one. Yeah, see here,
that's good enough. So we got this piece over
here, so that's pretty good. We still have a big mess
going on on the other side. Te if I move this
down a little bit, I think, like
something like this, it almost like it looks messy, but it actually I quite
like that because it makes it feel like it is just like kind of
slapped together. And then for the target welts, if we do a target weld
like this to, of course, remove that
overlapping over here. There we go. That
should do the trick. So let's have a look. So we cut this one. We go
down here. We move down. I'm just checking my reference. Yeah, I can't really
do that on the screen. So we go down here. I feel like my bend
is not as nice. So let's go ahead and
go into our right view. Let's see if we can just
do some very careful Oh, turn off target, toggle. Let's see if we can do
some very careful, like, moving around just to kind of, like, compensate for everything. Here, so that bevel
looks a bit nicer, that bevel looks a little
bit nicer. We got this one. And then if we go ahead and maybe move this a
bit further back, then move this a bit
further back and then move these ones
a bit further back. And finally, this one also. This one is quite annoying, but it does start to look a
little bit better already. Ah, yeah, I think I
can live with that. Without the Wireframe
toggle, here, see. Without the wireframe, it does
look a little bit better. So that's pretty good. Might be a tiny bit lowly
around these edges, but if I really check
this out with the rest. So if I do like Odd g over here, yeah, see, then it is
not that low poly. So we got this one over here. I'm going to go ahead
and I'm just going to give it some bevels
at this point. So is there any optimization
that we need to do? You can optimize it
also down here if you want. Let's just
quickly do that. Through Target Well toggle. And for these pieces, we can just kind of
like push them down. Push these up, and then maybe just move these
ones to the center. Like over here, and
then these ones. Like over there.
Okay, so there we go. Q. That was one. I meant to say Q, transforms. And then what I'm going to
do is I'm just going to add a simple bevel.
It's pretty close. But it's clamping and
I don't like clamping, so let's just turn it down so that I can have full
control over them. 0.005 probably a
little bit bigger. 0.008 maybe. And then what I'm going
to do is just out smooth. Arterwighted normals, set them to 100 to make
them a bit sharper. And then if we turn off a target well toggle or a Y frame toggle. There we go. So that
looks pretty good. I removed something, but
it's not like I removed it. It's more that I
probably generic beam, there we go, that I turn it off. So let's delete that
one. So this one is now just to double
check because yeah, okay, so this one is
now at the same level. So we can do a quick
pivot, duplicate it. Rotate this 180 degrees. Move it, and there we go. So that looks pretty good. Let's save sin, and let's go ahead and
select all of this. Right click Move to
collection generic beam B. So that one is now also done. Took longer than expected, but we do have an interesting
looking beam right now. So of course we still need
to unwrap it, but it's good. So we have our walkway stair, and then that is the last one that I will
do in real time. So my planning is to
do this one. Yeah. So this one I will go
ahead and do in real time. And then the unwrapping, I will also do as a
time map because we are just going to use
the SUU V map for this, so it's very, very simple to do. And of course, all of our time laps will be
included also in real time. So for this one,
because I always tend to talk too much and not get straight to the point over here. How would they would probably
just have different planks. And those planks, they
would then kind of, like, just nail together
or wait, no wait. They would cut it
out of a sheet. You always need to think about
how stuff is constructed. I think for this one, they would probably just
cut it out of a sheet of wood or not. Yeah, or they like, Well, do they have glue
in those times? I don't think they
really like the type of glue that would do
this kind of stuff. Let's do planks. Let's be
safe. Let's do planks. It cannot hurt
anyway. You'll see, because these are
all sheets of woods, so that's why I'm a
little bit confused. But I'm just going
to play it safe. So if we are going to do planks, we are going to go ahead
and we are going to grab our Let's go ahead and
steal our walkway straight, and I am going to
steal This one. See, do I need anything else? Yeah, okay, let's just also
do these ones over here. Let's just go ahead and
do this right click, move to collection, and you
are going to be walkway Sir. And then for these pieces, what we can do is basically what we're going to do is
we're just going to have horizontal beams. So having this one, I'm going to go select
this one Q selection, this one, separate
selection, and this one. Oh, separate selection. That should be fine.
Delete the rest. These ones, I'm
going to move out, so they are going to be
our planks later on. And for these pieces, for now, just go ahead and do, like, a quick pivot, and you want to start by just rotating
them 90 degrees. Turn on my wife, Rm tool, and we're basically
just going to place these very
close together so that they are really lined
up together perfectly. So whenever we have, one of
these edges sticking out, just go ahead and just
remove the edge loops. Then move this down.
Remove the edge loops. Ooh. Move this down. And then it's just a
matter of going here. So these ones don't really
need a lot of variation. So then it's just a matter of, like, placing this over here. And honestly, I can just reuse this one now
I think of it. I'm just going to
place this one. Duplicate it. And again, and again over here. And then this one, just move it down. This one, move it down. And then for this one, let's go ahead and just
remove the edge loops. There we go. And then
for these pieces, I guess what you can
do is you can try and get a tiny bit of
variation here and there. But honestly, it probably
isn't even worth it. So we got these
pieces over here now. Now what I'm going to do is
I'm just going to go ahead and select them, press Control. Do I have all of the
correct ones selected? Yes. Plus Control J to make
our lives a bit easier, and then just go ahead
and just duplicate it to the other side. And at this point,
we can just hide. Oh, well, we probably want to also duplicate it into
the center, by the way. Over here and height. There we go. That
should do the trick. And it turns out that I do
not even need these ones. And now for these
planks over here, we can just reuse these planks, and then we are
just going to add bevels to them later on. So I'm going to get
started by just moving the planks on their location. We do not want to
make these two unique because we are only
having one stair of this, and the stair will only
have very few planks. So it's very easy
to see if we have any very specific details. So we got these
planks over here. Now, we can pretty much select all of
them at the same time, select like half of the vertices
and just move them back. And we can just stick
this out a little bit. That is no problem at
all because they are not going to be aligned to any other pieces like
they're not as modular. And then what we can
do is if we go ahead and just move all of this back, You see, multitasking or
multi editing, so to speak. So over here, I'm just
going to reduce this. I'm just basically moving this in a horizontal
way, nicely together. Maybe for this one, move
it back a little bit more. This one, we can
move it out a bit. And there we go. This one move it like that. Okay, so we've got those
pieces ready to go. Now if we do another quick
pivot, at this point, we're just going to
simply scale this up because we are going
to redo our UVs anyway. And for these planks, we do want to go ahead and
just move these back in so that they do kind of
fit a little bit better. Let's see. And I'll see how it, of course, looks when
I scale them up. So this one is looking
still pretty good. There we go. Let's
just move this down. Yeah, they're quite
a bit thicker. I don't know if
you want, you can, like, split it up
into two planks. They do look quite
thin over here, but I'm just going
to stick with this. And if needed, I can always just go ahead and just
make this thinner. If I end up when everything
is really in the environment, although it didn't
really feel like it. Maybe it feels a
little bit thick. Maybe it feels a
little bit tick. Let's just do
something like this. There's no signs bends. I'm just kind of scaling
them in a little bit. And this one scaled out a
little bit more. There we go. Let's just do something
like this. Then it's just as simple as
moving it back. So this one will be
moved over here. Then we have these planks. So let's go ahead and actually select all
of this at the same time. Move this back a little bit. The next plank will be moved
Move this back a little bit. Next one here. Oops. Seem that does actually save
a lot of spacing. Wow, that saves way more
space than I thought. So it's good that we try
the stuff out. Over here. Okay, so that's a
little bit thinner, but it will still
work totally fine. For these pieces,
all we need to do is we're going to go ahead
and add a quick bevel. And I forgot that
bevels, of course, do not go with multiple
pieces at one time. But if we just press Control J, then we can Oh, Q, reset the transforms
just in case. Now we can add the bevel, turn off clamping, tone
this way down. Over here, perfect. Outer smooth and add a
weight normals at 100. There we go. And now if
we turn off a wife from toggle we have over
here our plans. Perfect. So that
is now also done. And that will mark
pretty much the end. So if you right click Move
to Colection walkways there, that pretty much marks the end of most of the real
time modeling. We will, of course, just go back and
forth between things. But what will be the plan
for the next chapter? Plan for next chapter to finally also save
some extra time. That's the eta blockout
is to go in and I will just do some modeling on
these type of pieces. The reason I'm not
doing this one real time is because
I will just be using the same elements
that we've already created. The roof is also going
to be very basic, so I will just go ahead
and do that in Tabs, and any other pieces that
we have not done yet, I will also do in the Tabs. And then I will UV Unwrap. Once all of that's
done, we will go back to real time and
we will first of all, get everything into the engine. Once everything is
into the engine and we balance it out a little bit, then we will have another
real time chapter, and that chapter will just be me adding some extra
variation models. Although I might
actually, you know what? No, I will do that
chapter a little while later until we have
everything kind of sorted out. So that is our plan. For
now, we're going to do that. We also then, of
course, later on, have some of these basic props, so we will probably do some
of those in real time. But let's go ahead
and continue with our time lapse
chapters after this.
33. 32 Creating Our Final Assets Part10 Timelapse: A. A B. I Oh. Do I
34. 33 Creating Our Final Assets Part11 Timelapse: A I Don't do. Ir
35. 34 Importing All Our Final Assets In Ue5: Okay, so we're now
going to do something quite exciting that
I always like to do. So I've been modeling
now for a few hours, and I personally, I have a
very short attention span, so I like to change things up. And that's what I'm
going to do now. We're just going to
change things up a little bit before we move on
to the next big thing. So what I want to do is I want to go ahead
and I just want to start by exporting all of
our final models and setting them already
up inside unreal. We do not need to set them
up with textures yet. I just want to see
my final models, and then while we're at it, we can just also do some moving around and just make sure that
everything looks correct. So that's the general
plan for this chapter. And then in the next chapter, we will go ahead and
Well, we have a taxes. So what we'll probably do is start creating our shader and start defining exactly the look and the flexibility
that we want to create. So for now, it is
going to be very simple because all that
we need to do is export. Now one thing we do
need to keep in mind because we've been exporting
a lot of material. So this one we already did. The Walkway traders, for
example, one that we can do. One thing that we basically
need to keep in mind is that they all have the
exact same material. Here you can see
something going wrong. So over here, because
of all the copy it whenever you copy a object, even when it already
has a material, it will just create
a new material. And this is actually
quite bad because it will import this material. All these materials,
it will just import separately inside of unreal.
And we do not want that. Basically, the
quickest and easiest way to fix it that I tend to do, although it does break
a little bit more of my non destructiveness is to
press Control J and join it. I just need to make sure
because I forgot if Control J applies my modifiers. Now, here I see, so it does
not apply to modifiers. That is a little
bit more annoying. Um, in that case,
what we can do, another technique is to
just select everything, and then we basically
just select one that we want to have MMT on.
So this is all wood. The only thing with
this that I need to remember exactly
which material this. I guess, in this case, it's very easy because it's
all wood materials. But then I can go
down here and I can go copy material to select it. And now they should all have the exact same wood
material, which they do. This will also speed up your
scene greatly, by the way. So I'm going to go ahead
and I'm just going to go in here and just open
up these things. So here we have Wood 23, 21. Here you can see the same thing. And then with these ones, that's where it becomes a
little bit more annoying that I need to deselect, first of all, my window, and then I need to select once again like
another piece of wood, and then I can copy
material to select it. We will most likely change our materials around again
a little bit later on, but that all depends
on our shader. So for now, you just
know how it needs to go. So we do this. Then we
deselect our windows, and then we select one of our wood and cup
material to select it. Here, see I did it wrong. And that's why it is
annoying because, here, wait, we can just
do this. Let's hide. There we go. I don't know why I'm doing
things so difficult, and then I can just press old
age to get rid of it again. The long while the
long ball here, even this one has
different types of wood. So we just want to go
ahead and make sure that they both are the same material. I don't really care
about the material name. I just care about
the actual material. So over here, this one
is bare, plain wood. Okay, so this is all fine, and then this one still needs a lot of changes
because we don't have the actual texture yet for our wood roof. We still
need to do that one. 0808, so that one is fine. Our door is most
likely not fine. So we have a metal, so
let's just hide that one. Sorry, it's a little bit slow whenever I work with
text for some reason. And then it sometimes
freezes up a little bit. It's a bit strange. But anyway, let's copy material to
select it and unhide again. So that's our door. Window
white, we can do the same. So actually, here, we
have also our glass. We need to actually make
sure that our glass is all the same material
also and this one. So it's a bit of an
annoying process, but it's not too difficult. Means reassigning all
of our materials. Here you can see that we have two materials of the glass, but they are already combined. So all we need to do is
we need to get rid of this glass material so that only this one is left,
and that's about it. So now we should be able to
just hide that. Select this. Copy material to
select it and then unhide again because
else we will get a massive mess whenever we export it in real
because you will import like 100 materials if you have 100 objects that you
accidentally copied over. And it will just be such a
pain that this is easier. The walkway shocked I
just need to do this. So with this one, what I did
on purpose is I just left this side this
piece away because I don't think we need that piece because we want to
have this repetitive. So this now also
just looks fine. So we can just ignore
that other piece. Do same over here, select one, copy material to select it. For these pieces, I
don't even question it. I just automatically do this, even though it
might be fine just to make sure that it is fine. Same over here. This is
all the same material, so we can just copy
material to select it. This one I can just
check. They are fine. This one seems to also be fine. This one would 33, 33, 33, 33. That one is also
fine. The stair, I'm pretty sure that that
one will not be fine. You can see how long
it takes to load. I don't know, it's
a bit strange. I don't know where the
bottleneck is because I don't know anything from really like the technical
side of blender. So I don't know if
the bottleneck is too many materials or too
many objects with materials. But in any case, this is all
using the same material. So we can just in case, do this, and now they all have
the same material. So we can even test
if I turn off and on. It seems to now
be a lot quicker. So I think it was
too many materials. We did so many copying that
when we turn this object on, it needs to load in like
50 different materials, and I have a feeling that that is going to be the problem. This one Wood bear window. Let's get rid of one
of the glass window. And then all of
this stuff, we can just go ahead and
do a copy material. And then ldge, of course. Perfect. That one is done. Save your scene to make sure. And now what we can do is we
can just start by exporting. Walkwaytrat, and I crashed. Of course, that is not too good. Luckily, I literally saved like a second before
we did this, see? So let's try it again.
I don't know why, but that is why we save. So we have our walkway
over here, file export. And these are all
going to be FVX files. And in the exports
folder, to unreal. So walkway straight, we just
walkway straight over here. Oh, turn on selected objects. And yes, that's the
only thing that we do. So walkway straight,
and now we can just continue on and start
exporting everything. So here we have FBX,
here we have door A. And although we cannot
yet place the doors in their actual position
where we start doing the Bleions because I want to first make sure that everything
looks completely final, it will still be a nice piece. Store window,
actually, I already exported store window, so I
don't need to do that again. This one is an interesting one. So plain while long,
where are you? Plain while long. Yeah, this one will be a
little bit boring, but oh. Export FBX, this is going
to be our generic beam. This one is going to
be our generic roof. Top trim A. Where are you store? No, shop, top trim A. Yeah, this one is
not too exciting. This one is going to be. But
once we import everything, then it's going to be quite exciting because then
all of a sudden, all of our models will turn into finer models with all these nice weighted
normals and everything. That always looks quite nice. Then, of course, we might need
to move some stuff around, but for rest, should be fine. Store window wide. Small Window is also one that we will be
using a lot. Small Window A. Plain will super
short, this one, we most likely
still need to mess around with UVs a little bit. Just make sure that everything
works, but we'll see. Plain while extra short. Top trim B, this one. We have not yet made ends, but that is something
that we will do in the next time lapse part. I don't like to do
time lapses for, like, really small pieces. When I do a time lapse I
just want to do, like, a bunch of different stuff
all in the same time, just to keep things
nice and organized. Walkway extra straight,
short, balcony floor. And this is a relaxing chapter. This is just a chapter where you can cool down a little bit, have a general overview of
everything, stuff like that. This will be our balcony
fence straight angled. Oh, sorry, I forgot. The balcony fence
straight also has a beam. File Export FBX,
balcony beam over here. Then we have our
angled overhead. And we're almost there. Here's our angled overhead
support. Generic Beam B. I'm quite excited to also
see how this one looks. I think it will look quite nice. Generic beam B Walkway file export walkway stair A big one side stairway. So, side stair, I mean. And finally, we have
our little roof window. Roof, Roof roof, where
are you? Roof window. Tao. Everything has
now been exploited. Perfect. So we got all of that stuff done.
Let's do another save. And now what we're
going to do is we are going to go
ahead and go into real, and we are going to start
by importing everything. Now, for this, I am actually
going to go ahead and turn our plain wall back to just
a normal gray material, which I believe that we just did this in material, so plain. And this is just because I want to not take away from
the actual look. I just want to have
everything feel a little bit more
the same steel. These things we can delete
because those were just tests. And over here we have our store window and
do the same thing. Just art plane. So everything is going to just have the plane. Okay, let's go ahead, go to, like, a nice camerangle. I like doing this, so
that's why I'm, like, really starting to just
do everything Rein port. So let's have a look over here. Okay. So actually,
you know what? I'm not going to
do a camerangle. So what do we have here? Oh, yeah, so that's
just a simple roof. So it would not change too much. Do a re input for
this one. Reset FBX. Okay, looks like these
are working well. We just need to readjust
them a little bit. So I will go ahead and I will probably do all of
this at the very end. So balcony fence B. Let's have a look
at the balconies. I think I can already
foresee a problem over here. So yeah, this one,
I can see, but with this one, the straight. And the problem is
that around corners. So this stuff is
working great, see? Here, that looks really nice. But then around corners,
I expect that yeah, that it does this stuff.
That's a tricky one. That is a tricky one. So maybe that we make
the corner beam. Closed on one side, and then we just take peace with the fact that
it will just be clipping in because I think it will look worse if
we do not do that. Pale or what? No, no, wait. We cannot just split them up. But in any case, the
balcony itself looks great. So what else do we
have Balcony floor? Reset to FBX. Okay. Ooh. That is interesting how
it's doing the lighting. I wonder if that's going
to be good or bad. But the balcony floor over here is also working quite well. Now, door A, door number
A, let's have a look. Not bad. Not bad. Yeah, I can go a
little bit higher, but for the rest, and
when it goes higher, it does mean that it
looks like that we overshadow a tiny bit,
but we can just do this. But now it looks very nice. Yeah, nice, nice quality. And I love the lumen system. It's really good to
just do this stuff. So door number B, it is like over here. So
let's try that one out. Should be pretty much the same. Reset? Yeah, so it looks like
the only thing that we did is we made everything
a little bit too low. But it kind of depends.
Like sometimes we would want to have
it nice and low. Generic beam is going to be a
simple one. Reset the Avex. There you go. It has
some smoothing problems. Those kind of things I do
want to fix right away. So let's go in our generic
Where are you generic beam A? There we go. So U
that is interesting. It might be just
because we have moved. Oh, there we go.
That is the problem. I was already thinking
that was interesting. Let's do contre B. Give it a quick bevel over there,
and you know what? This piece of is just annoying me, so I'm just deleting it. I don't think we
actually need it anyway. So that is now looking correct. So let's just re export
this. Generic beam. Let's try it again. So
that's also why I'm checking to make sure that
everything is correct. There we go. That should do
the trick. Oh, this one. You know what? I'm going
to watch it over here. Generic beam B. Wow. Nice. Yeah, that looks cool. I like that. We still need to do this kind
of stuff, but I will. Generic roof, probably
not too special, but still very useful. Reset. There we go. So just just like those bits. And then over here, it will just have its own
little material. Plain wall extra short. Let's just re import
this reset Bx. Plain wall extra short. Like the jom tree is fine. I'm just more worried about
the texts. Where am I? I am in the back. So,
jom tree is fine. Yeah, I was just
worried about texts, plain wall extra long, which is going to be
probably this one over here. Yeah, that works. Cool. So now we already start to get a little bit more shape. Plain wall short, we
already did. Roof windows. Hello, Roof window. It's
reimport. Ah, that looks nice. Yeah, totally fine. The top trims, those are always a little bit messy because we still need
to add changes to them. But I will do those changes
after we've done textures. So this is number one,
which is looking fine. So yeah, we definitely need
to just do some changes. Is this one not completely
straight? You would think so. Shop top trim A. Let's see. Shop, top
trim A. Where are you? Shop top trim A over here. Zoom in. Okay. Are you not Oh, no, you are not
completely straight. That is strange. Let's
just scale it flat. Set it to completely zero. I does mean that these
pieces are here. Let's just get rid
of them for now, and then we will probably just readd them a
little bit later. So we got these ones, same zero. And now what we can
do with this stuff is we can select it, right click and do a fill. And if we go to Face Mode, we can also press Q and
immediately separate selection. Do the same over here. Go to Edge Mode,
select all of this. Right click Fill, press two to go or three to go into face
mode, Q, separate selection. And now if we go
ahead and select these pieces and then
select our base, we can also go ahead and
copy material to select it. And finally, all we
need to do is just do a quick ShuUVO here. Doesn't need to be anything
special. There we go. Okay, so that's that one
fixed. Shop top trim A. There we go. That's better. So that can now
just probably work. And then we will just work
on the end caps later on. Hopefully Shop top Trim B
does not have the same thing. No, Shop top trim B has a
different prom going on. Although, no, it still yeah,
it does have the same thing. That's a bummer. I really thought that I already
fixed that stuff. But okay, let's
just delete these. You know what? Let's go
to Edge Mode, by the way. Select this scale flat. Oh. Or are you? No,
yeah, here, see. You are not straight. Right,
click, fill. Que selection. Right, click, fill.
Que selection. Oh, hey, they keep the
same wood material. Well, of course, so I don't
even need to do anything. I just need to go to my chuUV select these pieces and
just quickly add them. There we go. Doesn't
take too long, although we are a
little bit overtime. So this is shop top trim B. There we go. And we will, of
course, make that. All look nice later on. Okay, so Air, let's
do it over here. Are was an interesting one. So it takes a little while to import because it has many different pieces that
it needs to combine. But I always like to keep my pieces separate. There we go. That looks pretty good. So,
of course, we do need to, like, remove this or move this
a little bit differently. And move this in. But for the
rest, I can live with that. Here, it's like an
interesting looking site. Oh, it doesn't have a
back. I forgot about that. But for the rest, that
should be totally fine. Like, it's something that does not that will not be
very much into view. So I'm not too worried about
it. So we got that one done. Small window. Cool.
Let's try that one. Rimport. Nice. Cute. Okay, store window we've done,
large store window. Oh, that's the store window. Large store window, reset AVX. And then for these ones, yeah, you probably
want to, like, temporarily, maybe, like, move
them forward a little bit. But we will just do like a
chapter where we will, like, slowly start adding
all these extra pieces and just cleaning everything up. Then we have our
Oh, the walkways. I'm curious about that one. So let's reset
that. Pretty good. Walkways straight.
That's the big one. Let's give that a go because that one will actually
define a lot. Okay, okay. And the
short one you know what? I think we did a
pretty damn good job. It is starting to look
even for just like the very basic stuff
and not any materials. As you can see, this is starting to look
pretty cool already. So I'm quite happy about it. We just need to, like,
do some small movements, just to make it look extra nice. But for the rest, that's
looking pretty good. Okay, and what you can also do, let's go to like 200 resolution just to fix the
shadows temporarily. Yeah, so this kind of stuff, it might actually become buggy, so we kind of need to see
how we're going to do that, depending on the
lighting and everything. But it's looking
pretty damn good. So in the next chapter. We will do some
general polishing and movement, most likely. Once we have done that, we are going to go
ahead and we are going to start working
on our shader. And with our shader, I mean that we are going to make a material, and we are going to decide
exactly what do we want from this material to get
exactly the look that we want. So let's go ahead and go over
that in our next chapter.
36. 35 Cleaning Up Object Placement And Shader Planning: Okay, so we are going to get started in this
chapter just by doing some general movement and just making sure
that everything is a little bit more polished. Just for my sanity, what I want to do is
I'm just going to move these windows
in front of it. They are already in
the right location. We just need to make
sure that they are all looking a little bit
more logical because it will take quite a while
before we actually will turn these windows into
their final version. And I'm also going
to go ahead and overhear move this up and down. So it all kind of depends
on what we want to do. But basically, once
we've done this stuff, what we're going to
do is we're going to fix the tops.
That's another one. And then what we're
going to do is we are going to plan
for our Shader. It's like these
ones I already did. Looks like that I already
did most of it correctly. Well, actually, I did pretty
much all of them correctly. Nice. This one, as long
as you have space, it would be nice to just move this one up a little bit more. And then I guess
that if you want, you can go ahead and just match the window height also with it. Just make it a little
bit more even. And then up here, we can also go ahead and just
move this forward. Yeah, so all that stuff is fine. So our roof is doing well. I'm just going to ignore
those stops for now. And then these ones, right now, we move them forward,
and then later on they will need
to be moved back. For this kind of stuff,
as I said before, you don't always
need to move it up. We can sometimes
just go ahead and just leave it like
that if you want to. These ones I do want to go ahead and move
forward a little bit. Yeah, this stuff is actually, it's a little bit boring. But honestly, we're almost done, so I should I will not time laps it because then I
will time lapse for 1 minute, and that feels a
little bit Well, for me, it's a lot of work
to turn it into a time laps. But also, yeah, by the time that it's ramping up, it
will be done already. This one, I'm going
to actually leave. Yeah, I'm going to leave
this one like this, especially around this area. It will be quite far
away from our camera, most likely, although it
will still be presentable. Like we are still going to
make all of these buildings. They will still
look final quality. So that's something
to keep in mind that they will still
look very nice. And therefore, you can
just take picture of it. If you are good with
it, like if I do this, over here, like an
angle like this, I could still just take
a final looking picture. Only is that I would
then need to spend a little bit more time just making sure that the
twain looks nice. But that's about it. So keep that in mind that you
can do that if you want. So you will just go ahead and do the twain. I might also do that. I might just go ahead and after
I've done the main areas, the train, I will just do, like a time map where
I will just like, improve the general
train everywhere. Just save some time
because that's also just like painting. So it's not very
interesting after you've seen it after you've seen me
doing it for the first time. But yeah, over here, so
that's all looking fine. Maybe. And while I'm doing this. So while I'm doing this, I'm also just checking out the buildings and just make sure that everything
looks correct. It's not just about moving. It's also about just
looking at my work. And that's why I don't mind just spending a little bit of time just making sure
that this works. So that happens because we
don't have our settings yet. Once we have our settings, stuff like that will not
happen anymore, but it has to do with
the post effects. For this one, I'm going
to leave it like that. The transition transition
might be a little bit awkward. We might want to move the
very last one forward. Okay, keep that in mind. Let's keep that in mind
that we might want to move the very last one
forward because it looks like that
I do not often have them sitting on
top of each other. That's one of the locations
where I will have it. This one, definitely, I
want to just move it up. And, so this trim over here
is actually doing quite well. So we just need to double
check all the trims, because, of course, we did some scaling and everything on that. This one, it doesn't really
have space to be sinking in. So we are just going to make
sure that it's also moved. Let's see, we got that stuff
done. So same over here. This one, I'm going to
probably also just keep it. It's like a long version. And And yes, it is taking longer
than I expected. I do apologize for that. But of course, the luxury you guys have is you
can just skip this. So if you don't want to
see this, just skip. It's that easy. So
we got this one. These versions over here. And this one I'm also just
going to keep nice and low. Okay. Let's make this
one high. Why not? Although this is like one
of those outside buildings, so you probably cannot really
see it anyway anymore. And we probably won't
be pointing a lot of screenshots in this direction. But at least you will see that once we see the
general overview, this will already
look better, even though it's just
floating in front of it. This version, I'm going to
move it up a little bit. Yeah, I think that looks better. And then for these
versions, yeah, it's kind of like, so the stair, I do want to push it
back in a little bit. The stair is just
like a tricky one. Like, we most likely
won't really see it, so I don't want to spend
too much time on it. So if it really becomes
a problem, then I will, of course, just make
sure that everything is perfect and improve it. But if not, then I'm just
not going to do much on it. Wow. I already forgot that. Oh, wait, I placed
this stuff here, of course, because
I just duplicated this house over and over again. So it will most likely also
windows here on this side. But you know what, on this side. I'm just going to delete them. It will also be
wasted geometry if I even add these over here. So let's just go ahead
and delete those. But now, in general, if
we just have a look, you can see that now if you
just look past the fact that the frames look very big,
this is looking pretty good. Still, these ones, And this door over here,
let's move that forward. This stair is looking, the stair is fine,
so that's also good. Okay, perfect. So we
got now all windows. Now, for our pieces over here, I think all we need to
do is just press V. Just try and, like,
connect this correctly. It's always a bit tricky.
I think that's the one. No, it's not. As I said, it's really tricky
to get this white. Also, my pivot point
is on the Wong. My pivot point is Wong, yes. It's probably because
we scaled it. So if we go ahead and
let's go in here and press Control A to apply our weight to normals and press Control J. And I think I want to then go to my McafsTols add a pivot turn
on snapping to vertexes. Over here. Yeah, that works and now we
go to increment. There we go. We set this back. Let me guess that shop trim A has
probably the same thing. So contra A to apply, CtraJ to join, add a pivot, snap to vertex, snap this
vertex to the very corner, turn off add a pivot, and then snap the increments. There we go see. So it looks
like this one has the same. So these trims are being
quite annoying. Shop trim A. Shop top trim A, sorry, and shop top trim B. Because, yeah, in this state, we simply cannot properly snap. So it's better to just
fix it right away, re import. There we go. Okay, so now that we
have these pieces, what I can say is I
can say, like, Okay, so this piece goes here. Maybe like this
piece, we never mind. We cannot look in there, so then I'm just going
to do this piece. Over here, I'm just
going to Come on. You can do it. There you go. Snap it. And then just
select both of them. Make sure that they are in
the center. There we go. So that one now just
perfectly aligned. That's fine. Same over here. We just want to go ahead and it's already perfectly aligned? I don't trust it, so I'm just going to redo
it. There we go, see. It's not perfectly
aligned. Now it is. For this one, once again, just make sure that
it's moved nicely. I think we actually need to
redo this for most of them. So hopefully, the
snapping will go easy. And then over here we
have this problem. I think with this
problem, I think it is better if we scale it instead of like if we just scale two up instead of
the other way around. We could, of course,
also leave it like this because
we are going to probably make end pieces. So it kind of depends, do you want to leave it
and make end pieces or are we just going to literally make this
as like an end piece? Tricky one. For now, I'm just going to go ahead and I'm just going to scale it out. And I will just decide if I really need an
end piece or not. This piece, I'm
going to, let's see. Let's just redo this. Let's turn on grid snapping. So we should be able to snap. Oh, that's a shame. Maybe if we snap it to five,
let's try that. No, snap it to one. It Oh, that's really mean. But it is mean because
the scaling is off. That's why, one, one, one. Here, see, that's why it's not working.
The scaling was off. Let's try that again. So
we got this one over here. Set the snapping to,
like, ten again. Although I have a feeling that we just broke the snapping. Let's just do this for now. I have a feeling like it's overlapping like a
tiny bit, but I will. Here we go. And now we just go ahead and
select all of these. We can now go ahead and
we can Oh, try it again. We can scale it down a little bit, so let's
just move it in. And there we go. That
should do the trick. So that one will be fine. I also want to make
sure that these pieces are sitting nicely in
the center over here. I know we are not
leaving a lot of time left for our shade of work, but then we will just do
that in next chapter. That's no problem. I think
it is more important to just make sure
that all of this is correct so that we
don't forget about it. Okay, so we got those
pieces done over there. Over here, we can also, of
course, do these pieces. But let's see. First of all, I just want to make
sure that these buildings over here are correct. And that stuff like this
it is not happening. Is there a way that we
can nicely solve this? I guess we could just
scale everything down, but I'm not sure if I
move this in and then, scale it in Oh, I froze. There we go. It's back.
It's twilight again. So if I move it down, and then I scale this in Ah. Looks like I need to
really scale it small. What you can do to kind
of manipulate where your pivot will end up is
to just select the one that you want to have your pivot end up
and select it last. So that seems to work fine
if we do it that way. This one is fine. Yeah, so we can just move
this forward a little bit. Just with these
pieces, just make sure that everything
looks correct. Over here, we do
have a little bit of intersecting going on, but I don't think it is too bad. We can do, some movement. So yeah, I don't think
that one is too bad. And then over here, let's move this down a little
bit and move this out. There's some lagging going on inside of unreal.
I don't know why. It's definitely not MBC, so maybe there's something else going on that I've missed or, like, something with my
recording. I don't know. In any case, so that's
looking pretty good. So we got those
pieces, and yeah, I think at this point, this
is a pretty solid start. Everything else, what we
can do is we can basically just do to the time es because we now know
how everything works. For these pieces,
you just kind of, like, want to move them up. But I realized that
this is going to actually take way
longer than I expected. And I don't want to just keep distracted by doing
small stuff like this. So what I will do is
I will go ahead and I will finalize just
quickly these piece. And then what we will do
is we will start making a list of requirements
for our material. And once we have made this list, then what we can do in
the next chapter is we actually start by
creating our material. So over here, let's say
that that is now fine. So yeah, and maybe like
quickly move this one. Looks like we need to move
it down a little bit. And this one we need to move out a little bit and
down a little bit. There we go. Maybe move it
down a little bit more. Okay. So for our shader list, what we're going to do is we are just going to literally make a small little list. Here we go. Okay, so I have my notepad. Now what we're
basically going to do is we are going to white down what exactly our material
or a shader needs to do. Sorry if I switch between the names, that's
force of habit. I often just call it a shader, but in real it is technically
called a material. So what kind of flexibility
do we want to have in this? First of all, of course,
it's just default textures. And then we want to
have color overlay, control, roughness, normal et cetera, strength, control so that we can
control the roughness, the normal and all of
the other strengths. Then what we want to do
is now comes to one where we just want to
define exactly for, like, the painting and
everything, our flexibility. So if we have a look at this, and also let's also
have look like in game because in games like pretty good to see
this kind of stuff. So I want to have control. Oh, I like the scropes.
I want to have control over M. M. Let's do Okay, so let's have a mask, maybe. First of all, let's do cool. Variation control
based on tile mask. And basically what
I'm going to do with this is I'm going
to export a mask, which is almost like a
flood field type of mask, and I'm going to export it from substance designer and
then inside of unwel, I can give it very
small variations in color to just break up the texture a little
bit and to make it look less like this
where it is very plain. Next to this, there's another
control that we need. So we are going
to create a mask. So we are going to have
a um variation mask. And then what we're going to
do is in the red channel, we will have paint removal in the green channel. So in the red channel, whatever we paint in the red
channel of this mask, it will basically just remove
the paint and everything. Then in the green channel, we will do dirt. So RGB, in the B channel, we will do okay, so dirt. We have all of this stuff.
Maybe ambient occlusion. I don't I think we can use something maybe like highlights. Yeah, let's do highlights
in the B, RGB, and then we also have an
Alpha channel if needed, do we need something in our
Alpha channel just in case? Yeah, we could do an ambient
clusion Alpha channel, but I don't know. Or maybe like an extra
color variation. I'm just having a look if I can create everything
with what I have right now. Yeah, so I can pretty much just create everything
I want with this. And, of course, the thing
with these masks are also that they need to stay
generic because we can, of course, not have all
of the stuff around here. For that, we will have decals that we'll just
add on top of her. So let's just do a none for now. So we can do default textures. We can control the
color of our base. We can control we have
color variation control. We can control all of our maps, and we have a special
mask that can control wherever we
want to have paint. It can control where we want to have dirt and
where we want to have highlights. That is pretty good. One thing that I'm missing
here is vertex control. The thing with vertex control is that we want to go ahead and
we want to remove paint. That is totally fine in here, and that does often work. However, sometimes we
want to remove paint, and you can especially see
it in games. Let's see. Is there any well, you can see it over here
where the paint gets removed mostly around
the outer edges. However, whenever we are
using modular pieces, these outer edges we can, of
course, not define as well. So because of that,
we need vertex paint. So with vertex paints, we can just in our
actual engine. We can start by just selecting the stuff and just
painting it out. It will look a
little bit less nice because unlike our
mask, in our mask, we can have the paint
removal really, like, fade out and we can make
it look really cool and, like, have some sharp
chips and everything. But we will need to have vertex paint removal option also. So we'll have a
vertex paint removal, and we will have a
variation mask removal. I think that's about it. So that will be our
master material that we can use for
most of our pieces. So that should be totally fine. Okay, now that we've done
that, in our next chapter, let's save sin or let's save our thing and also save
sin in our next chapter, what we'll do is we
will start by creating our material and just
test everything out. And we will most
likely use, like, for example, window or
something to test this out. So let's continue with
that in our next chapter.
37. 36 Creating Our Master Material Part1: Okay, so in this chapter,
what we're going to do is we are going
to get started by actually creating our
material or a shader. I'm going to get
started and let's grab our door A over here. So this will be like
our trial model that we'll be using the
shader on. So here we go. A, so this is why
everything's sunken in, because the pivot
point is slightly off. In any case, this is quite a good one
because we can just get everything that we wanted
to get easily in here. And the stuff that
we wanted to get, of course, have a little
notepads over here. So, this is the stuff that
we're going to include. Now, before I'm going
to create my material, I already want to create
an extra mask for this because a lot of
it will rely on it, so it's easier if we already
just have a basic mask. So knowing that, the way that we're going
to do this mask. So because we have
tilable materials, our first UV, as we go into blender over here,
and we, for example, select everything this time, our first UV, as you can see, it will not work
because for a mask, we need to have a unique,
non overlapping UV. Knowing that, what we can do is we can go ahead and we can actually start by creating
a new UV channel. So you have multiple UV
channels that you can use. I'm sure that many of
you have heard from it. For example, Unreal Engine uses UV Channel one for the text UVs, and then UV Channel
two, for example, for the light maps,
and then UV Channel three and four are still open. We are basically going
to do the same thing. But because we don't
need any light maps, we can just well, go ahead and use the UV channel to just to make it a little bit easier. So if we go ahead and we go over here, this
is the first UV. Over here, you can see
that we have our UV map. Now, it's been a while
since I've done this. I believe that we
need to go up here into our object data
properties, IS. And then in our UV maps, we can go ahead and we can
select the second UV map, and we can call this,
for example, mask. Doesn't really matter
what you call it. Now what will have happened
is here at the top, you can see that
we can now switch between our UV map and our mask. Let's say we grab
our mask over here. Let's say we select everything, and then we go to UV
and first of all, press average island scale. What this will do is it
will basically scale UVs based upon how large
everything is in here. You can see that it
does not look correct, and this is because we
often in order to use this, we need to select
all of our models, press Q, and then apply
all of the transforms. If we do not do that, it's
often a little bit buggy. So if we try this again, average island scale, here you go. See. So now you can see that it makes quite a big difference. I can see over here that it's still uses this really long. So these are bugs that
can sometimes happen. We just kind of need to
see how bad they are. But basically, right now, we are in our UV map, so that's not correct. So let's go ahead and very
quickly undo all of this. What has happened to our Maybe
it's easier if we just go, Yeah, it's easier if
we collapse this. So let's go ahead
and just select everything except for our
glass. We don't need our glass. So let's select
everything over here. Why are you wood? You are
supposed to be metal. The metal also does
not need a mask, so we can also hide that one. Let's start with just this
one. Let's pass Contra J. We selected Contra J, and that will make our lives
a little bit easier. We can always just
detach it later on. Our material is fine. Our mask over here should still
be the original, so that should also be fine. So let's add the new UV map. Let's call this mask. Now
if we go into added mode. Okay, so UV map, and
now we have mask. And then if we select
the mask UV up here, we can go UV average
Island scale. And then if we also do a
UV and the PAC Islands, Seas enough we go to UV map, you can see that it has saved the UV map, which is
the original one. We want to just
leave it like this. But then the rest over
here will be fine. So I'm just double
checking because I'm worried that something that something went
wrong over here. And you can kind of see
it happening over here. So if we select this one, I'm not sure if
the sure UV AardN also works just on selection. Oh, perfect. It does. I forgot
about that if it did that. So let's go ahead and
just rotate our che vi. There we go. So that one
now looks correct again. I think everything else
still looks correct. So, in any case,
we got this stuff. Now, if we go into
our mask over here, as you can see, we now
have a pretty decent mask. Still has some messiness going on here and there, but
that does not matter. This mask does not
need to be clean. I just need to have information in here that I can
use to paint on. So now that we have
this channel over here, now what we want to do is
we want to go ahead and we want to of
course export this. We want to do this in two ways. The first one is we will
go ahead to do ALDH. We select everything, and we go file export and then export
it as an FBX to our normal. Don't forget to turn on
select objects to our normal to unreal folder.
So this is door A. Now, I'm just going
to quickly go ahead and go in here and I'm going to make sure if I re
import this yes, you can just press done that
everything is still correct. Okay, everything is still
correct. That's perfect. So the way that you can
check if your second UV has imported is by double clicking
on it. To open it up. And then if you go
over here in UV, you will now see that you have two UV channels,
UV channel zero, which looks really messy
and UV channel one, which does not look correct, and it most likely
does not look correct because it's being
overwritten by our lightmap. Let's see. If we go
import settings, mesh, here, generate
lightmap UVs. It is overwriting everything. So if we just go
ahead and deselect that and press reimport. Now, this is a
little bit annoying. So basically, because it
has already generated, it will kind of just
leave these things. We can try and remove selected. It's got loose, Phil. Okay. It's complaining. Fair enough. If it is
complaining about that, we just need to add it
to another UV channel. So, in that case, let's
call this UV two. And then what we can do is we can simply go ahead and press, select this one and press the plus sign and call
this UV tree. Fair enough. So actually, we will
now be using this one. It's a little bit
messy, but UV tree should be copied
over from UV two, and UV map should still be fine. So if you want, you
can still add it to the UV two first and then
later on the UV three. But in this case, now
that this one has added, that should do the trick. So if we now export this, A, e, the first time, it's always a little
bit messy to just get into the mood, I should say. So now we have a UV channel two. There we go. That's
the one that I want. So yes, it is confusing. Unreal, they count
from zero, one, two. However, in blender, we often tend to count
from one, two, three. So just make sure that you
end up with a UV channel two that has your
nicely packed UV. That's basically the
main takeaway from this. Now there's one thing
which is still quite annoying and I hope that
substance fixes it soon, and that is that
if we want to go ahead and paint a mask on this, substance painter can only
read the first UV channel, which means that we
temporarily need to transfer our UV t to the UV map, and then we need to export it. Now, a very easy way that we
can just make our lives a bit easier is by using a tool. So I have added for you a tool over here that is called
the UV Map Tools. It is a dot PY, and the credit to this tool goes to someone called Bova Sun. It is, so it is a
community made tool. It's not a professional, release tool or
anything like that. But basically what it does is it will add these two
buttons over here. I just activate it,
and these buttons basically allow us to
move around UV maps. This tool you just import
it the same way as always, just go edit preferences and then install and
then turn it on. So over here, here's your tool, and here you can see the outso. So all the credit goes to them. But it is a public use license, so I can give you
guys this tool. What we can do with this
tool is we can temporarily, for example, move
up our UV tree. Then what we can say is, Okay, then export the FBX. But this time, let's go
back and export it in a two painter folder,
which I've created. And just call it Dora.
Once you've done that, you can go ahead and
move it down again and it will be back in
its original location. So this is very handy
because now we can very quickly just
move our UV map up, export, and then
move it down again, and that's a little
bit like a workaround. So now that we have done the
workflow inside of blender, I know that it might
seem like a lot, but we only need
to do this once, and you will get into the mood for it to just
do it quite quickly. What we're going to do
now is we are going to go ahead and we are going to
open up Substance Painter. So here we are in
substance painter. There are three objectives here. One of them is to set up a base project that we
will save as a template. The second one is to set up a smart material that
we can always dragon drop to instantly get mask generation and keep
everything nice and procedural. And the third one is
to actually properly export our mask and
create an export preset. The way that we're going to
do this is we are going to go to file and go to new. And then in here, we can
already get started. So I'm going to just start with a basic PBR metallic
roughness template. Then in our file, we
can go to select, and we can go ahead and we
can grab the two painter and grab our door
a file over here. Document resolution. I'm going to start high. Let's say two k is
quite high for a mask, but then we can
always lower it down if needed inside
of unweel engine. I will most likely
not lower it down because I just want to
really push the quality. However, if you are
working on the game, you of course, want to keep
your resolution at a minimum. Once that is done,
just go ahead and make sure to turn off
Outer wrap over here. I don't know why that
one was turned on, and then we can simply
press Okay. And here we go. If I go up here to this button, I can switch to three D only. And of course, I do expect that you know the basics
of substance painter, although substance painter
is very easy to understand, especially when we've already
done substance designer. So we will just have
all of our assets on the left side and all of our
settings on the right side, and then the viewpod basically. First things first, let's
make sure if we go to two D only that we have the
correct U V. Perfect. We do. Okay, now the next thing that we're going to
do is we are going to set up our scene and
save it as a template. To set up a scene, what I'm
going to do is first of all, get rid of this first layer. I don't need it. Then if we
go into our text shat list, we can call this and call
this the name of your asset. So Dorner score A. This is the name that your
file will also be named, so just keep that in mind that this will be your
file name later on. Then we can go to our
text set settings, and this is where we will really start doing
a bunch of stuff. First of all, we do
not need a height, roughness metallic or normal. Remember, we need only R, G, B, and later on A. So what we can do is
we need a base color. The only reason we need the base color is so that we can actually preview the masks
that we are creating. But for the rest, we simply
want to go to our channels, go to user channels, and we want to grab
a user channel. A user channel is like an
empty channel that we can just re use that we can just
have free use over. So R G, B, Hence A. G, B and A. What we can also do is we
can also now go ahead and we can see we can bake
some mesh maps, although, of course, when we save this, they
would not be applied. I'm just going to
leave it for now. I think that this is already everything that
we need, I believe. Yes. So this should already be everything
that needs to be done. So with all of these
channels set up, we can now go to file, and then we can do Save as template and you can save
this however you want. I'm going to save this to West Western mask
tooth, for example. Let's save. Now
what this will do is whenever we go
to file and new, in our template,
we will now have a Western mask which will
already have this scene. Sorry, for some reason, I again cannot really speak anymore. The second part that
we need to do is we need to create a SMAC
material that will already have some
basic mask generation that is very easy for us to use. First of all, we need to go down here and we need to
bake our mesh maps. Even though we do not
have a high pool, we still need to
bake them because basically we can bake it from a low poly so that the mask generators that
substance painter uses, it can utilize this to
basically generate our masks. So output size, we
set to two A and we simply turn on use low
poly mesh as high poly. And that's it.
That's all I need. I can just press bake Dor
A, and I can just wait. And it will also make a
cool ambient occlusion, as you can see. So that is now done. That's all that was needed. Now, if we go ahead and
we go to our layers, we can create a new
folder and call this Western mask tooth, for example, and in here, we can start by creating
all of our scenes. Now, follow exactly what I do. We start with a fill layer. I don't know why
it took so long. And this one we will call base. This will be our very
base fill layer. What you want to do with
the base fill layer is you want to set
everything to black. The reason for this
is because our masks need to be white. So everything in the background, this basically our
background will be black. Then we create
another fill layer, and we can call this R paint. Removal. What we can do with this one is we can only set the color and our red channel. All of the other channels,
we can just turn off and make sure that the
color is completely white. Next, all we need to do
is we need to right click and duplicate G dirt, and then simply swap
it from red to green. And if you want,
you can also turn off the base color temporarily. Next to that, we had
paint dirt highlights, and you know what? I will do AO just in
case we can use it. So paint removal
dirt highlights AO. R, G, duplicate B. Highlights, and this one
we can set this to B. And then right click
and again, RGB, A AO this one will be
your ambient seclusion. Although, technically,
you know what? No, we don't need it. We don't need it
because we can just input our ambient
occlusion when we export. So we now have a
paint removal note, and we have a dirt and
a highlights note. For our paint removal note, I'm going to get started by
just adding a black mask. Actually, let's add the
black mask to all of them, to make sure that
they are all blank. So down here, you just
go art black mask. Then whatever we paint into this mask, that's
what will happen. That's what will be applied
in our shader. Paint removal. Now, although this
door will most likely not have actual
paint to remove, what we can do is we can
still temporarily input a mask just so that we have something that we can
test our shader on. The way that we're going to
do that is we are simply going to go down here
to our mask generators, and then we just want to
quickly grab something that kind of works as like
a paint removal mask. Let's say we go for this one, maybe like a surface
worn over here. You see it. So just as
like some paint removal. It does not need to be specific. We are going to paint removal is going to be something
very specific later on. So for now just turn off
the global contrast and just give it some random
whiteness like this. Next, we will have our dirt. Whenever we switch
over to a channel, we can basically click on the
origin channel and turn off color and then click on the
next one and turn on color. For our dirt, I
always like to go in, and I like to grab our
dust occlusion over here, which will always give us like this interesting
looking occlusion. I do want to go ahead and let's tone down the dirt
level over here. It does seem like some of the UVs are a little bit
messed up in this one, but at this point, it's often easier to just kind
of paint that out. So let's say that
this is our dirt. If we want to paint
something out, we can go down here and we
can go and add a paint layer. When you have this paint
layer, you can see that now you can start by
painting stuff in and out. What we can do is we can
simply go to our brush, grab like an interesting brush like a dirt one, for example. If your color is white, you simply need to press X
to swap around your color. And then what we can do is
we can just here or see paint out this dirt to just improve it a
little bit better. That's one way if you
have some bad UVs, but you do not want to go in and completely
fix them again. This is a handy way to just quickly try and fix it
simply by painting it out. This might not be
the best method, but in this specific case, it's fine for what I need. I just want to have
something in here. What we can also do with
this is we can also, for example, add
some extra dirt. So we can also, if we set a
flow very low and press X, we can give it some extra dirt, like you can see over here. Let's set the size lower. Here you see, so we can paint in extra dorts
wherever we want to. So let's for now just
leave it like this because it's mostly
going to be like a test. So what we can do is
we can press X again. For some reason, wherever
we switch to black, the flow becomes less strong, so we kind of need to
boost up our flow again. Just like that, let's say we have something like over here. Fine. So that's our dirt. Lastly, we need our
edge highlights. For our edge highlights, I tend to just go
and create a mask, and we just want to
get something that's like I don't know, concrete edges often
do not work very well. But over here we have
some actual edge damages. So let's go for
edges. What was it? Edges dusty? Turn off the color and turn on
the color up here. And here, actually,
this is really nice. So edges dusty is
working quite well, because what it will do
is it will just give us some slight lightness to
these areas over here. So we now have a
mask ready to go. With this mask, what we
can do is, first of all, simply right click on your actual folder and
create a SMAT material. This way, it will just
save this material, and will always whenever you restart painter, it
will always be here. So because this is
one of the things that will not be included
in our template, and that is actual setups. So we can just drag in the smart material
and be done with it. Finally, we can save sin. That's quite an important one. And I'm going to go ahead and let's go ahead
and go textures. Let's make a new
folder called masks. And in here, we can just
go ahead and save this, and this folder might
become a little bit crowded, but it
should not be too bad. Underscore A. And
let's press save. Next step is to go to
File Export textures. And now what we want
to do is we want to go ahead and first of all, create a template
that will export our specific mask because we do not really have
a template like that. We can do this by going into output templates and pressing the little plus
button over here. And then what you
can do is you can double click on it
and give it a name. So let's call this one Western underscore
mask, Underscore tooth. Just keep everything the same. Now we have a bunch
of output maps, and the one that
we want to pick is the R plus G plus B plus A. What it will do is
it will split up our RGB into its
own little folder. Now, the first thing
that we need to do is we need to give the name. For this, substance painter is using flags or reference points. And basically the
way that this works is we select this dollar sign, and we say dollar
sign texture set. Remember how we set this
to a specific name? What it will do is it will name our texture or our filename
to our texture set, which we called DornscoreA. You can also set this to be your project name,
your mesh name, or if you use multi UV layouts, which we do not use, you
can use a UDIM name. After we've done
that, we simply want to do underscore, mask. That's it. Now, R, G, B and A. Remember, user
channel zero in R, drag it in and just
pick gray channel. User channel one in G, gray channel, user Channel
two in B, gray channel, and Alpha is going to be our
mesh maps, ambienteclusion, because our mesh maps are
basically our baked maps, so we want to just go ahead and grab our ambient declusion. That's it. That's all
we need. If you want, you can set this to TGA, but often this stuff
gets overwritten anyway, so it does not really matter. Now that this is done,
we can go into settings. And first of all, we
need to create you know, let's make a new
folder called final. We need to create
an export folder. So we can go ahead and we can select this export folder
and press Select Folder. And then all we need to do is we need to go into our
output template, and we want to scroll down and grab our Western mask tooth. The next time that you restart
your substance painter, it will automatically be
organized by alphabet, which I guess, because it's W, it will be at the bottom anyway. So the location will
not actually change. But if you had
started to write A, it will, for example, be
at the top of the list. File type TGA document
size is fine. We then simply pass
Export and save, and we end up with a TGA file. Now, we are already
quite over time here. So what I'm going to do
is I'm just going to import the TGA file in here, and then in our next chapter, we can start by building
our actual material. So inner texts, right click
and creates new folder, call it masks, and in here, you simply want to
drag in your TGA file. Now as you can see the file
has some really funny colors, but if we open it over here, what you will see is that if
I turn off these channels, we will have our paint
layer, our dirt layer, our highlights layer, and our Alpha map all
completely done, which will in turn create
this specific map over here. So that was quite a workflow, but it only took us 24 minutes or only took me 24
minutes to explain. So in our next chapter,
what we'll do is we will go ahead and actually start by building our material, and we should get something
really nice out of that. Let's go ahead and continue with that in our next chapter.
38. 37 Creating Our Master Material Part2: Okay, so let's get started by creating
our actual material. So we got a little list of everything that
you need to do, but we already create like a main master material over here. So let's have a
look. Okay, so it looks like I already exposed
them, so that's pretty good. So you already went over that. So, as you can see over
here, quite basic. We just have our tiling, and then we have our
textures already. So that's already the
defaultexs. So that's something. Now, what we're going to do is we're going
to go ahead and let's start by just
doing some simple controls with these textures. The first one is to control
the color of our base color. This is very easy. All we need to do is
we need to multiply, right click and to multiply, and we want to multiply our base color with
another color. In this case, the
way that you can create a plain color inside of unreal engine is by right
clicking and adding a constant t vector. And constant vector
just means RGB, so it's just like a basic color. Then with this color, we can
right away, right click, convert this to a
parameter and call this color overlay
and make it white. White basically means
because it is a multiply, white means that it will
not be affecting anything, and as soon as we change the color from white
to something else, it will just become that color. So that's one. Now we
can do something very similar with our roughness and then also with
our normal strength. With our roughness,
you basically want to multiply your roughness. Using a scalar parameter, which I've already
created over here, so you know how it works. S click and just call this
roughness strength over here. And default, I believe, needs to be one, and then
it will not be affected. So we plug this
into our roughness, and now we also have control
over our roughness strength. For our normal map, we want to kind
of like duplicate the roughness strength and just call this normal strength. And it's a slightly
different node. If you right click, it is
called the flatten normal node. And this node, as you can see, it allows you to
input a norm map, and then it allows you
to control the flatness. But of course, if the flatness
is set higher than one, it will also just increase it instead of just
making stuff flat. So you can turn off
your normal with this, but you can also increase
the normal strength of it. So that already gives us some general control
over our roughness, normal, and other strength controls. So that's pretty good. Now, we had a variation
control mask. That's also another one. That
one is quite interesting. I actually do want to use that because I think it would be cool if I can simply
select based upon, for example, polygons
or something, but not just on actual masks. Select which pieces
I want to have darker or which I
want to have lighter. For example, over here,
I might want to have these faces over here
a little bit darker. Now this is a little
bit tricky to select. So I think we are going
to do it in two ways. The first way is going to be by controlling some vertex colors and then using that version. And the second way would be
to create an extra mask, and that mask will be, for example, the mask
that we use over here. Or, no, that's better. That's the better
way of doing it. So knowing that, if
we go into blender, these type of vertex colors, we need to do on
our object itself. However, this is always
a bit tricky because, um Inside of blender, personally, yeah.
Well, I'll show you. So the way that I
tend to work with vertex color in blender
is let's start by just going ahead and selecting the pieces that we want to
have a different color. So right now it will just
be these pieces over here. And for the rest, it just
works like a color overlay. It's just that we need to set
this up inside of blender, which is always taking
a little bit longer. So it's been a while
since I've done this. But what's often easier is if we just press Q and then separate our
selection over here. That tends to often be
easier because they say that selections take over into when we
do vertex painting, but I personally
cannot make that work. So basically, we
have these pieces. We then go to texture paint. And then in here,
you want to go from texture paint to vertex
paint down here. And now you can see that we can actually control the paint. So I believe that we just want to go for the
red color, yes. So make sure that this
is just set to zero, one, one, and then you can
also go to blue or green. So whatever channel
you want to do. So in this case, for
the red channel, we were going to go ahead and do some of these highlights, and then for the
green channel, we will do paint chipping. And then once it's done, you can just go
ahead and quickly simply click and drag
over these faces. To add them, although there
should also be a fill option. As I said before, to be honest, I've not used this very often inside of blender because it is a little bit
of a pain, I find. Let's see. Oh, here,
set vertex colors. So if you paint
set verte colors, that seems to do the trick. Okay, in any case, we
got this stuff done. Now if we go back to our layout, that should be good. And I crashed and
I did not save. Okay, so blender is getting
a little bit buggy, so let me just go ahead
and redo that off camera. Okay. So we are back, so
I those vertex colors, and now I'm just
going to reimport this or re export this and
then re input it into unwel. But then into reel, there
is a setting that we need to set that I most likely
turn off in the beginning, and that is that we want to
import our vertex colors. We can do this by going
and opening up our model. And if you scroll down to your import settings in the
vertex color import option, you want to start with,
like, an overweight. Now, when you do this, do make sure that if
you make changes to your vertex colors after
you've already painted in live vertex colors
inside of wheel engine, you will lose that
live painting, so just keep that in mind. But in any case, let's just
press reimport over here, and that should do the trick. So oh, sorry, set it to replace, not overt, replace over here. Now if we go to show vertex
colors, there you go, see? Now you will have the
red color in here and it should detect this as
being for the red channel. So having that done, now if we go ahead and now
we can just test it out. So over here, we now have
already our color overlay, and then what we can do is
we can do another multiply. Move this little
bit up like this. And then if we once again just multiply this
color that we have, and then we want to
duplicate our color overlay. So this one is going to be color variation like this
and plug it in here. Now, what we're
later on going to do is we can actually
use a Boolean or a switch to basically switch
between different modes. So this mode will be
our vertex color mode, but we can also switch
between a mask mode. But for that, I
first need a mask. So for now, we're not
going to do that. The way that we can use vertex colors and
basically detected almost is like a mask is by right
clicking and adding a larp, which is a linear interpolate. When you add this
one, what you can do is you can larp number A, which is before we do, so this is just like
our normal texture, and we are larping it
using our overlay texture. Now, with larping, it basically
is like a blend inside of substance designer where you a blend and then you art a mask. To detect the vertex
colors, this is super easy. You simply right click
and type in vertex color. And then we just want to grab the red channel and
plug this in here, and then we plug this
into our base color. So we can now get started and just try to
see if this works. So we got this one
over here. We save it. And then for our door, if we go to our materials, I want to go ahead and
I want to actually right click on our
mass material, create material
instance and call this door Ace A underscore Wood. So we do need separate materials for these specific pieces. For now, I'm just
going to drag it on because I just want
to test it out, and then over here, we can see that we just have our Woot. Now, if we double click on here, we will have a few settings. So let's just go
ahead and test out a bunch of stuff to make sure
that everything is correct. So we want to just go
ahead and turn these on, and let's get started with, like, our normal strength. So right now this is
one, and if I set it to like five, Yeah, it's hard to see
with the lighting, but you can definitely
see it getting stronger or less strong. So that's good. Our
roughly strength. Yeah, so we can make a
door very shiny or not. So that's fine. And
then we have a tiling, of course, which
we can set to two if one or one doesn't
really matter. Perfect. Then we have
a color overlay, which will be our
very first overlay, and that seems also work. So see we can actually
change the color of mesh. Now we have the color variation. That one I'm curious about if the vertex colors
went correctly. So if I move it down, Okay, so that one is not working. I feel like it is not
working because of the I feel like the vertex collars
are not being detected in the correct channel. I
think that might be. Although this is red, so it should be like
the red channel. It should at least
detect something. You would think so, at least. So what I'm going to do is I'm just going to have
a quick look off camera because I'm not sure
why it is not detecting. So let me just quickly
check that out. Okay, so I figured
out the problem. So the problem is that if we
go into our texture paint, we had to make the red black. So if we go to vertex paint,
you can see that now, I just turned my
color to black and everything except for this
is done the red color, so it will detect the red. But because it was
detecting this as white, it actually gave us every
single vertex color. So white basically means
that the red was filled, the green was filled, and the
blue was completely full. And, of course, because of that we didn't see a difference. So now this should do the trick. So you make everything
that you do not want to have a vertex color black, or you make it blue or you make it green depending on
what vertex color you want. And everything that you want
to have a vertex color, like you can see if we go
over here like this one, we just make it the
actual channel color, in this case, red,
green or blue. So that is the general trick. Now, if we go ahead and
so I already export this, and then if we go into unreal, we can go ahead and if you set your color a little bit darker, you can see that this happened. Now the reason that this
happened is because sometimes you just need to simply
invert your vertex colors, and you do this using a
one minus node over here. You just plug this in between your red color and
your Alpha mask. And what this will do is it will simply invert. It's
just an invert. We spread save and there we go. So now we have control over vertex colors where we want to, like, just, like, have
different darkness. So now I can control
over here, see. So this is very handy for me that even though I
have a Tya material, I can just add this kind of
control, and don't forget. I can also do this
in actual colors. So I can also go ahead
and I can also give it like color control
and maybe give it like a bit more of like brownish darkening over here,
as you can see. So just like that,
we are able to just do some quite
interesting stuff. Okay, so that system
is also working. As you can see,
that already adds quite a bit to our scene. I don't know if
maybe it would be nicer to actually
control this one, but for now, this is fine. Now, that is the color
variation control. The only thing that we
later on need to do is we simply need
to art and mask, but we will do that when
we start prototyping our Wall now what we'll have is we will have
our variation mask over here. For this variation mask, we do need paint removal. So for that, we do need, like, a paint texture
to also be added. If we go ahead and go in here, we have our plain wood, but we never did
plain wood painted. Yes, so we never did that. That is something that we
do want to go ahead and create just so that we
can cover all bases. Now, let's first of all, just go ahead and create over here like
something very simple. So we have this stuff over here, and we can call this stuff. If you press C, you can add a comment and call this color over lace over here just to keep
that nice and organized. It's a little bit like
adding a box or a shelf. I forgot what was called
inside of substance designer. So if we grab a mask like
the mask that we created, we can drag it in here, and
as you can see this mask, we can control all
of our outputs. So we have paint removal
in the red channel. Then we have dirt in the B channel and highlights
in the AO channel. Now, for the paint removal, we kind of need to also decide whenever we do or
do not want to have paint. So I'm just having a tink over here because we are
going to larp this, but I want to have a think
when I'm going to lurp this. If I'm going to lurp this after my color overlay or before. I think I want to
do this before. So here we will have control. So if we move this down, let's get started with
the paint removal. So for now as a placeholder, I will just do a constant
color over here. And this is all
going to be larps. So we basically want to lurp
number B with number A, and this will be paint removal. So basically, wherever
this mask is there, that's where we will
have our paint removed. Then we lurp it again. Over here. And this larp will have a dirt overlay so
we can discolor OX, discolor overlay,
let's call it Temp. And then discolor overlay, let's call it dirt. And let's make this one more like a brownish color over
here to get started with. So this is our dirt color, and we use the green channel to basically lurp between this. We might need to invert on
channels here and there, and then we have our
highlights channel. The highlights channel let's do a larp but let's do this
a little bit different. Instead of a color
because it's highlight, let's do so here, let's P channel up. Let's do a art note. And let's see if we can just
art our original lp with a scale parameter that we'll
call highlight amount. And set this to zero by default. And doing what I'm
hoping that will happen. So it's been a while since I've done this
one specifically. So I don't know if it was an art or if it was a power node, but what it will do is it will just simply increase
the color a little bit. Over here, you can see that it's already looking quite wrong, and this is most likely
simply because we need to, like, invert and masks. We also had the AO
map, and that one, we can Oh, because we already have an embitlusion map,
let's multiply that. So we can multiply our tilable material
ambient occlusion with the ambient occlusion from our actual object and
art is over here. Okay, so as you can
see, not too difficult. So what we're going to
do is, first of all, most likely a one minus, I believe on a Dort note. And what you can also do is you can also swap the lubs around, but I just tend to do this. Okay? So yeah, I think we need to have a one minus
on everything. It's also on our red
channel over here. Here, S so now I'm just looking, and although this
sphere, of course, does not represent our model, it does work to just
preview everything. So that would also mean
that we most likely need a one minus for our
highlights over here. Yeah. Okay, so we
can now go ahead and press Save and we
can give this a go. So we now have this one, and I will clean it up a
little bit later. But let's go into
our western town. And for these pieces, I forgot that I need to set the UV channel because
else, this does not work. So if we add a texture
coordinate over here, and what we want
to do is you can see the texture
coordinate index. Now remember, Neal reads as 012. So number two is actually
our third channel. So if we set this to two and plug this into our UVs and
just keep the tiling to one, it knows that it
will just need to use the normal UV without tile in channel number two or channel number three, depending on
how you look at it. If I save this, that
should do the trick. There we go. Okay, perfect. So we got this stuff. Now what we can do
is we can go at and where is my material. So what is starting to
look like something. Okay, so we have our
temp, which is our paint. So our paint is detecting
that it will basically just, like, tear away the paint. I think for that one, we
would not need a one minus, but it kind of depends
how we want to do this. What we can do is we can
do a paint invert note. So what if we do this? We add
a static switch parameter. Over here, and we can call
this paint mask invert. And that will give
us control over, if we want to invert
our paint mask or not. And then simply
what we do is if it is true, use this mask, and if it is false, use befety one minus and simply plug
this into your Alpha. So this will just give us
an option to invert that. So if we do that, ever
we want, we can here. So now you can see that now only the dirt is over
here in these areas. But then what I can do
is I can simply go in, paint invert mask, turn it on, and then it will just invert. So that gives us a little
bit more flexibility. Next, we have our dirt. So if we go to our dirt, let's just turn this to
black just so that I can see I can see it, I
guess a little bit. I can see it a tiny bit, but it is nowhere
near strong enough. So if we go in here,
move this out. So this one will be the paint
overlay. This is a mask. And I can later on give it
comments, but I first of all, like to always make my material before you start
commenting it out. So over here, we have our dirt. Now, what we can do is we can go ahead and after
our one minus, we can add a multiply
like this and just call this or add
a scale perimeter that we'll call dirt amount. And then if we set
a default to one, we can plug this
into our multiplier, so now we have control
over our dirt amount. So let's go ahead and save this. And then, of course, we also
just need to keep in mind whenever we are in painted that we might need to,
like, increase this. So if we now go to
our dirt amount over here and increase it, the tricky thing with
a mask is that it can. Okay, so I need to
do this before. Yeah, I need to do
this before one minus. The tricky thing about this is that I lost my train of thought. So. Oh, wow. I have
a complete blank. I don't know what I'm
talking about anymore. Oh, well, I'm sure that it
wasn't too important then. Oh, yeah, that we need
to keep an eye out also in substance painter to make everything strong enough. So I'm doing this
before we artists, so let's go ahead and
save. And let's see. So it might just do like
an overall No here. So yeah, it does add the dirt, but it looks like that the dirt, like you can increase it. It's just a little bit sharp. So we need, like I said, it's
really high to like 700. And then we need to, of course, go into our dirt and tone down. But then what we get is we
get this problem over here, which is always interesting
to me because it is a mask, so it is bleeding out the
colors to be this strong. But that's always
interesting because it is, of course, a mask. Now, something else
that we can do instead is if we go to
our master material, we can go ahead and we
can add a power node. So a poweroid often
keeps a little bit of everything better in check.
Let me say it like that. If you hold Control, you
can actually just move over here your output, so we can just move
them like this and just swap around
from the multiply. And let's go ahead and actually that's set the dart amount
to zero by default, in this case, because the poweroidPower node
is very sensitive. Actually, let's do 0.1. So let's press Save. And now over here you
can see that nothing happens because we
set it to like 700. If we start with zero, you
can see that over here, if I now move, you see, so the powerid node
is quite strong. But it does breaks my mask. I do not like that. I
don't want it to break. This is a tricky one, so I kind of need to
decide between the two. In that case, we might just go for just like a multiply
like we did before. However, we might just want to increase it inside of
substance painter. That might be a better solution. So it seems like the system is just pushing it to
its limits already. So if I just go ahead and
multiply this, let's save this. And basically, what I mean is that if we go into painter over here and we go into
our dirt color, we just need to keep in mind that even though
this looks nice, we always in on dirt
just need to add a levels note down here,
add the levels note, and just push the white
slider up quite a bit, like this until it
is very strong, and then just re export it. So then now if we
just tie it out, so we've done this
stuff over here, you can see that it's
almost not working. We might set our dirt
amount maybe to like ten so that we can
see it a little bit. And then if we go into our
masks and just re import, see? So we are increasing
it basically inside of substance painter instead of
doing it inside of Unreal, because Unreal has
hit its limits. So you can see multiple
different ways to kind of do the same thing. So over here, there seems to be another problem going on because this is not normal, the colors are so
off, it feels like. Here see they are off. What might be happening is that our color overlays are
clashing together. So our color overlays over here, what we might want to do just to see if they work better is we replace this larp over here
because this is our dirt, so our dirt will be
added on top anyway. And then grab our dirt and then instead
move it over here. So it will be like the last
thing that gets added. Like this, because
I have feeling like these collar overlays over
here are just breaking it. And if we now press save Hmm, let's set my dt amount to one. Is it really that
strong in amount? So I'm just not I
might be the material. I'm just not used to
seeing it this strong. Here, see? I'm not used
to seeing this strong. So then, but the color does correspond at this
point with what I want. So Okay. That is a learning
moment for me that I guess if I want to just
have my strong dirt, I really just need to
only apply it inside of substance painter and maybe then also go into
my dirt levels and, like, increase the dirt
levels because it looks like it just loses
a lot of this detail, which is a bit of a shame, but it's not that bad to do. It's just something we
need to keep in mind. It was just nice if I added this control because
I've, of course, added control before inside
of. Yeah, this works. I've added control
before inside of unreal, but it does not always
work exactly the same. Okay, in any case, so we got
this stuff done over here. The last one would
be our highlights. So if we have a door over here, let's see, the temp,
can I just like here, I'm just going to turn you off. So the temp, we can even
use Temp if we want, like as an extra dirt overlay. So for our highlights, scholar, if we increase this, something
happen, set to like 50. Okay, so something does happen. So we do have our highlights
colors over here. We just need to set it
a little bit higher. So let's say that ten, five here, I think five
is quite a nice color. So you can see that
we now get some small highlights over here. So if we set the
default to five, highlights color default five over here, that
should do the trick. And we can just leave our dirt over here
that does not really matter too much where we
actually input it, apparently. So let's just have these ones. So here we will have
C, paint, mask. C, highlight, mask, and see. Come on. DRT. Mask. Okay,
so those are now also done. Now in the next chapter, we will just go
ahead and we will just start by exporting
an actual paint texture. But as you can see, the
difference. So we have this one. So this is now our door, and
this was the previous door. Oh. Of course, the previous
door does not work that way. That is a little bit awkward. It's because of a Num to. Let's go ahead and
right click and convert the parameter and call this
mask, our actual mask. Over here. Now, in any case, you know what it looked like. You know what the previous
door looked like. It's a bit tricky for me
to now go in and, like, show it to you because
I don't really have a material laying around because we all use
this material. In any case, what we're going to do is in
the next chapter, we are going to finish
off our material. I would say that it's already starting to
look pretty good. So we already got a really
interesting looking wood that does not at all look like
a tilable wood material. So let's continue with
this in our next chapter.
39. 38 Creating Our Master Material Part3: Okay, so now that you have
a pretty good shader, we just need to test
it a little bit more. So what we're going to do is we need to have a few
more textures. I'm going to actually go
ahead and use my wood planks for this because this
is often an easier way. So if we go wood planks, right click and new folder,
variation, Caps lock. Variation on Scot B. Let's move this a little bit up. And then we already have
some wood planks over here. So as you can see, we have
our painted wood also. Layered wood painted over here. So we want to get our I don't think we need our
ibient occlusion for this. So let's do a base color. Normal paint mask
and our roughness. Oh, yeah, paint mask. I
forgot about that one. So let's go ahead and
just import these. Give that second,
and there we go. Just double click on
a normal and don't forget to just quickly swap around the flip around
the green channel. For some reason, I need
to Wow, I cannot speak. For some reason I
cannot speak anymore. Okay, so in any case, what we're going
to do is we have over here these paint maps. Let's go ahead and
just select all of them and start
by dragging them into my mask material so
that we can utilize them. So first of all, over here we have
our paint mask. Lo where we want to kind of, like, paint this stuff out. For this one, we can
pretty much just go ahead and if we just place
this down here. This is, of course,
then, like a template. I can later on also just have a switch that says that
if it has paint or not. So we want to go ahead
and we have this one. This is a roughness. This is our actual mask, so our actual mask
needs to go up here, and this is our normal, if you want to just
go ahead and place down here and let's have our
ambient occlusion up here. Okay, so while we had
our temp over here, we can go ahead and just replace our temp with our actual paint. We can right click and convert
this to peremter and Carl this base color paint, for example, because I know that pretty much every single one
will have a paint variation. Right click, convert
to perimeter, roughness underscore
paint, and also here, convert to perimeter,
normal underscore paint. Okay, so we got those ones. Now all we need to do is
we just need to input the same UV channels or
the same UVs. Over here. There we go. So we've
done those things also. And now, what we're going
to do is so first of all, I kind want to be able
to turn it on and off. Yeah, that's probably the
first thing I want to do. So for this, let's create
a static switch parameter, and let's call this
has painted version. And with the has painted
version if we go ahead and we can
probably just use this one because I
still want to be able to use my highlights
and everything. If it is true, grab this one. If it is false,
grab a base color. And throw this in
here like this. Now for these ones, we just
need to do the same lbs. So if we just go ahead and
duplicate the lub here, and then let's see. So this one goes into B, this one goes into A,
normal goes into B, and then the normal
paint goes into A, and then we basically
grab the same mask over here to all of them so that we can instantly
just turn them all on. Next stop, plug this
into its outputs. And I just copy over the static bull over here because we can do
the same thing over here. We can say if it is false, and if it is true, we will
add our lub over here. And same with the normal
map if it is true, and if it is false, it will
just be our default normal. So now we can instantly
turn this on and off. The only thing I want to
do is I probably just want to turn it on by default. And what you can see is
when I turn it on and off, because they all
have the same name, they will all be updated. So they are all
instances of each other. So that is the nice
thing about this, we don't need to
check three options. We will just have
this one option and we are able to check it. The next top will be that
we have a paint over here. I'm going to multiply it. And I want to multiply it using a constant t vector that we convert the perimeter
and call this paint color. Now for this paint color, I'm going to set this to
white by default. And then what I'm
going to do is I'm going to lurk this together, so we will have a
linear interpolate. And you guessed it. So over
here we have our paint mask. So let's convert this
to pemeterPaint mask. That has the same UVs. Now what we can do is
we can plug this into our Alpha, and then
we can say, Okay, so our paint color,
in this case, I'm going to do it
in the A, I believe. Let me just check and
then our base color into the B so that I
don't have to invert it. Although I might
still need to input it. I'm always mistaken. I think that looks pretty good. So, okay, so we now have control over our
paint over here, and we have control over where
we want to have our paint. So let's go ahead and save scene and actually try this out. So save sen. Now, if we go in here, we don't
need to do it for this one. So I want to go in and grab my plane will
short over here, and you are going to be my
prototype for this stuff. So our plane will short. If we go to materials, we can go ahead and let's
actually grab because this one. So for example, this one
will not have a mask. So we kind of want
to work with that. So here we have our wood
planks variation A. Let's go ahead and just
duplicate this and just call this plane wall short. Or do we need to? No,
wait, we don't need that. Sorry, we don't
need that because we don't have a specific mask, so we can actually use
this one over here, and this is like
our paint as well. So, yeah, that's
all looking fine. So if we just go ahead and open this up and just
turn everything on. So the first one is that I need to be able to turn on and off if it has a mask because I do not want to use my
mask all the time. So I'm going to go in here and let's see.
So we have a mask. So if I duplicate my static
switch pemeter and call this has variation
mask over here. So we can just turn this
off whenever we want to. And that means that
for our paint, it will not use the mask, but then what we
can do is we can switch between vertex
colors or mask. Yes. So that means
that over here, if it has a mask, it is true. Sorry, let's duplicate
this three times. So if it has a mask, it is true. And then what we
can do is we can hold control and we
can actually swap this around like this to just
copy over our inputs. Oops. One more. Over here. And then if it is false, we want to have a
constant three vector, two of them, one of them
black, one of them white. We need the white one for
our ambient occlusion, and we need the
black one just for our masks so that they
will basically say, Yeah, we have nothing
in here like this. Okay, so we got that
stuff done now, and by default, it
just set to true. So if I now go and save this, I should be able to now go in here and a variation
mask, turn it off. Okay, that does look better. I don't know why my frame rate all of a
sudden dropped like that. But okay, so that works. So we can now turn off
our variation mask. And as you can see it
now also doesn't show up anymore in here because we
just don't use it anymore. So now what we want to do is we want to go ahead
and we want to have control, so all this stuff will go
away or will not work now. But the color overlay should
still work. That is fine. And then we have a paint color, and our paint color
needs to be inverted, it looks like. So
let's go in here. So after all, I
need to invert it. But I can just go ahead
and do it like this. See if I just invert
this lube that should do the same effect as me
doing on one minus. Tara. Okay. So we
got that stuff done. So, of course, our paint color, we don't want to
go this intense. So if this is white, we are
able to change the colour to, for example, as you
can see here, like, a little bit of like here, let's say that red is often, something that
they like to do. Like this. So now we
have a red color. The only thing I need
to do is I need to extend my mask a tiny
bit because right now, it still has some of that
whiteness on top of it, and I don't really like that. So I need to extend my mask a little bit more.
Okay, perfect. So this stuff is no alco donone. So we're just
running down a list here, basically. Save cine. So the next one would
be that we want to have control that if
we do not use a mask, we want to have control
over using vertex paint. So over here, we are
swapping in our mask. And then we say, if the
paint mask is true, we will use this one. And if it is false, we will use wait. Sorry, that's a
paint mask invert. I was already thinking. Okay, so that's a paint mask invert. So now if we go ahead and now if we add another one
on top of this, it will basically be
duplicates vertex. I'm not typing for some reason. Vertex paint removal. Yeah, let's do that one. If
vertex paint removal is true, so if it is false,
we use this one. But if it is true, we will grab our green channel of
our vertex color. Now what we want to do is we just want to swap this around. Like this. So now what it
will do is it will include our vertex color if it is true or actually know it will most likely overwrite
our vertex color. So we might want to play around with this
a little bit more, but we will do that
when we get an example. So if I now go ahead
and have this, that means that if
I now go and select my model and I go over here
to my active mesh paint, this is our vertex
color painting. If we go to paint, we can set so let's set our
strength to one, and let's set in
our green channel, our paint color to
black maybe. Hmm. Okay, so that does
not seem to work. Is it turned off? Okay, so it's turned
off by default. Um, let's go ahead and just
go in here and turn it on. So we have our vertex paint
removal. Let's turn this on. Okay, so if I turn it on, it will be the
opposite direction. So we will need to invert this. But as you can see, now
I am able to paint in my wood based upon
my vertex colors. So although for this, it
doesn't really matter because what we can do is we can
just do a fill over here, and then everything
will be paint. And now if we paint with white, you can see that now I
can basically paint away. For example, on these edges, as you can often see, I can paint away my vertex
colors like this, and I can just leave in, like, a little bit of this paint, and then I can also swap around my colors if I want
to increase it again. Let's say, like we
do for our example, we have only here at
this area over here. Like that. Okay, perfect. So that, nicely fades
away and stuff like that. So that one is also working. And then when you
close this window, it will just stay, so it
will remember all of this. Okay, so that one is good. Now the next one
is I probably want to have control to paint between our chipped paint and our clean paint so that we
also have control over that. So we are getting quite
bigger, anyway, the shader. But it should be fine. So let's select this star, C, and this is going to be
variation mask over here. So we got this stuff done. At this point, we no
longer are following our notes because we
are past that point. So we have control over here that it will
automatically be turned on. Then we still have
control over roughness and all of this extra stuff. So let's save Racine. So here we are in substance designer, and we just need to export
a clean painted version. So we have layer wood painted. Let's do layer. Wood
painted clean over here, and that one is where
we will export this. So if we go into our presets, we most likely need to make
a small added to this. So first of all, go
into our presets and let's go at the set this to be our overlapping planks. Okay. And then our paint
is already turned on. Yeah, so we can just
turn it on and off. And then for our hes paint, we want to have another version that will be like the
mask will just be clean. So first of all I need to kind
of see where is our mask. I believe over here is our mask. So if we go ahead and
add another switch, so space switch, grayscale. If it is true, and then if it is false, it
will be a uniform color. Or do I should already
have a uniform color? Oh, God, now I'm getting
confused with unreal engine. Editor. So this switch, basically what it
will do is exposed if broken paint is true, then it will go
ahead and do this. And if it is false,
it will just stay. So we got this stuff that
throws it into our base color. There we go. And now if we
go into our wood blanks, Actually, let's double click on our base color so
that I can see it. It's going to our wood
planks over here. And then in our
overlapping planks, it should have this as paint. Oh, no, wait, I added this
to my base color, of course. So broken paint, I can turn
it off. I will clean this up. But now at least
now it is just like a plain painted version, and it should still
apply to everywhere. Okay, so that's a problem. So this is actually a problem
that we need to fix anyway. So it looks like that the
paint is actually removing our map because we
are blending with it, but we do not actually
want to remove nor map. We just want, not the
actual planks normal. That's the one that we
do not want to remove. So let's see if we have
a paint over here, this paint simply needs
to be blended with, like, a cleaner
version of our normal. So this version over here, what we basically want to do is we want to do a normal combine, and we want to blend this
paint with this normal. Really, does this
paint have like, Oh, no, of course, it
doesn't have any detail because I literally
just turned it off. So now it will still keep that normal map. So
that should be fine. So now if I save my scene, I can export my bit maps, and this one is going to be
layered wood painted clean. And let's go ahead
and we do not need a paint mask for this ambient occlusion, height or metallic. Let's export this. Over here. And then what I want
to do is I just want to quickly turn it back off over here so that we have so
that now we do have also, our correct paints over here. So what I can do is I can now
export this because we need to re export this
because I wanted to get this effect
over here anyway. So we got that stuff good. So let's export and you are going to be layered
wood painted normal, and I need you to
just also export so that we can just reimport
that norm map also. Okay, I hope that
this is not too confusing because we all
of a sudden have a lot of texture maps to work
with and a lot of stuff. But once the system is done, then it should be easy
going from there. In my wood planks,
let's start by just going ahead and going
into variation B. Right click and just reimport my norm maps that it has
that extra Added normal. Then variation C. Variation C, we are just going to import. Our clean painted
wood over here. Once again, just double click on your norm map and just make sure that you turn on
the flip green channel. Now what we're going
to do is we're just going to go ahead and
we are going to add this to our master material over here. So we got this one. Start with our base color.
So if we go over here, we have a base color paint. So yeah, well, this comment
needs to be a lot bigger. I already know that.
So we first of all, control the paint amount, but then we use our paint
mask automatically. We use our paint
mask automatically, but the paint mask, yes, it's actually,
no, this is correct. So the paint mask will only
use this one. That is fine. But then if we lurp behind it, so we do another larp here. And basically, with this larp, what we say is B is default, and then in A, we want to use our actual
clean painted version. However, our clean
painted version, if we just right click, convert the perimeter,
paste color paint clean. Then this version also needs
to have the same multiply. So this version needs to
have the same paint color. Like this. However, this one, of course, because
it is all paint, we don't need to have any mask. So we can just plug this in
here, plug this in number A. And then in our Alpha we
want to choose, for example, the blue channel of our vertex
colors to paint in here. Okay, let's actually
first of all, test this out before you start
applying this to the rest. So now, if we have this
version over here, I don't know why my
frame rate is tanking. Uno five does sometimes
have some frame tanking. Then you can see that now it
starts to go better again, so it does sometimes happen. So if we go to our paint, we set this on our blue
channel. There we go. And then if I paint this out, I can now paint in
perfectly clean paint. Perfect. So now we have
full control over this. So you can see how
powerful this is going to become where when we can
go ahead and we can paint, we can change the paint color, and then we can paint between the different types of paint, and we can remove paint
like you can see over here. But we can also do
like a mask and do all of this into
the same material. And then just imagine that on top of that, we throw decals, which are like leaks and
general dirt and everything. So that is perfect. So
we got that stuff done. Now all we need to do
is we need to go ahead. Apply it also over here
to these versions. So we got this larp, and we want to do another
larp so one lobe here, one lobe here and we
want to do this lb before we have this stuff. So we have our I
forgot I need to do the exact same
order in number B. So paint B, and this
one is going to right, click, convert to perimeter. Roughness, paint, clean you
are going to go into A. This one, right, click, convert
to perimeter, Roughness, paint, normal paint
clean over here. So this one is
going to go into A, you are going to go
into B, and we plug you into our next lub. And then all we need
to do is we just need to grab our blue channel over here and nicely plug
it into the Alpha. Okay, so that should
do all of that. So now if I save, that
should show up correctly. So if I go in here,
I go outside of my vertex collar
Yeah, here we go. So that should pretty much work. You can also go into Show
and revise it into ID. They always change it around. No, no, I think this
one is into show. And then if you go
into your advance, we are able to actually
display the roughness. I just forgot where it was again because they changed stuff around in
Emule engine five. Now, then it should
be here, right? Visualizers. Mm, that's strange. It should be in here somewhere. Oh, yeah, wait, here,
buffer visualization. And then we want
to go roughness, and then we can kind of see if the roughness is
working correctly. And seems like that it is working because this
is our wood roughness, and then you can see that
this one is a lot more plain. So that's all working correctly. And, of course, if
you want, you can do the same with your norm map, although your norm map is a
little bit trickier to see. Um, yeah, you know what? I'm
not gonna bother with that. So, okay, perfect. Let's have a look over it. So
I think we have everything. Of course, we can always
go back in and we can, like, change things around. But you can see that this one is also still looking the same. So what we can now
do with our door, so we should be able to now
also into our door material, and we should be able to
say that this one does not have has painted version. There we go. So now if
we turn this one off, it still keeps all of our dirt, but it does not have
the painted version. So just like that, we
have now that done, and then our door would
technically be called done. Maybe you want to make
your door a different color overall, like a
different material. But for now, that is
looking pretty good, and this one is also
looking pretty good. So for our master material, just to close this
chapter off, C, normal map over here, another C Roughness map. Then over here we will have this is like our
AO map over here. For this one, we can do C.
We can do map, control. And finally, so over here, we have all of these maps that are also done, and
we have these ones. Okay, perfect. So all of
that stuff is now done. Only thing that I need to do
is paste cool clean paints. We just need to add our
UVs. I forgot about that. So they need to be the same UVs as the S that we've used before. Like that, because else it
will not look very good. We just didn't notice because we are not actually
changing the UVs, but it's still
good to have this. And I think that is about it. So everything else
can be turned off. So yeah, I'm quite
happy with that. So it might lookalike a lot, but I hope that this made sense. So we now have a
master material. So the next step would be, I believe to start, well, let's start by just
exporting all of our proper textures
and everything and have all of our texture
variations in here. And then what I'm going
to do is we are just basically going to
take all the models to final one by one, starting with this door
where we will also go ahead and import like
a metal texture, for which we are going
to do it very simple. And we can also go ahead
and already create a prototype for our
glass over here. But for the rest, this
is looking pretty good. You can see that if this
would be like in here, it would just be like
an interesting look. So let's go ahead and continue with this in our next chapter.
40. 39 Importing Materials And Doing Our First Lighting Pass Part1: Okay, so the focus for this chapter will be to
export a bunch more textures, and then what we're
also going to do is, of course, input them. But I actually want to work a little bit on my
lighting of my scene, because if we are going to
start working with materials, it is good if we already have
a basic bit of lighting. So what we have right now is
we have if we go to final. Okay, so we have our
flat planks bare. Okay, so that one
is working fine. Layout would B. That
one is working fine. Then we have the painted
version of today it'sod. Let's just keep only the layered would painted because else it will be overwhelming the amount
of textures that we have. One thing I do want
to do is I want to start by just changing
some colors around. So if we go ahead and I need to actually have a look
at my reference for this, here we go. So for our colors, first of all, I want
to see over here. So yeah, I think
our layer planks, we just want to
change our colors. But then I think
for our flat planks that we probably do not need to change too many colors. So most of these planks
will not be flat. We will make some
variation later on. But for now, what
I'm going to do is if we go into our
wood planks over here, we can go ahead
and in our preset. So these are our
overlapping planks. What I'm going to do is I'm just going to go ahead and
I'm going to turn off the hairs paint.
There were going. That should just fix
everything, right, right away. I always need a quick reminder.
That's all press update. This is the default
one, but I can remember that we actually
have base colors, and I can remember that we can set those base colors in here, right? So in here. I thought we had Oh, no, wait, we have presets in
here. That's it. So Wood 01 is most likely
this one, Wood 02. Okay so that's the darker color. Basically, what I'm going to do is I'm just going to export my base colors for this because everything else pretty
much taste the same. So what I can do is I can
go ahead and I can go to my final and I can do Layered wood variation B, for example, because
variation A is the default. And then, yeah, so we do
need to create folders. The reason that we
need to create folders is because the way
that I export, the file names will
stay the same. So if I throw it into
the same folder, it will just simply go ahead and it will overwit the files. We do not really want that. And variation C. So I'm just
duplicating the folders. So this is variation
B, and then we can simply turn on just
the base color and press Expot and off we go ahead and we click
on our plain Wood again, we can now again go to Wood
03, which is this one, and we can simply go file and export this to
variation C. Okay, so that should do that should do that trick. So
that's now all done. Let's see. I think,
that is about it. So we've got this one done. Now what I'm going
to do is I'm just going to go ahead and
I'm going to also have, my plain wood and I
also want to have a plain wood that's like a
painted version, most likely, because I do think we probably want to have a painted version. Let's first of all, just
go ahead and let's open up our plain wood over
here. Here we go. And let's also start by
exporting this stuff. So for this stuff, I believe
that we only need to do like color variations
because everything else pretty much stays the same. Oh, no, wait, we did make a small variation where some of the other wood looks
a little bit older, so we can just as well do that. So let's go ahead and export. Not export outputs a bit better. Let's go ahead and go to textis. Plain wood, final. Variation B, variation
C over here. And now that we've done that, we can go ahead and we can go to our presets and we can start
with 01 we've already done. This one can go to 02, so variation B, export. Give that a second.
Come on. There you go. And 03, export, and you
go into variation C. Over here. And then, yeah, so for the
painted variation, we kind of need to have a think about how we want to do that. So it might be easier
to actually do the painted variation
inside of the wood planks, because what we can do is we can technically just
turn off the planks, and then we have a plain
wood painted most likely. So if I go ahead and go in
here, what I want to try out. So we have our presets. Okay, so those are our presets. The planks short, I actually
need to have a look at that. Woodblanks final,
wood planks bare. Layers. Okay, so we also
still need to export those. So let's go for flat
planks over here. So we have our flat planks. I'm going to you know what? I quite like this
color for flat planks. Let's start with this
color for flat planks. I'm just needing to double
check over here my maps, okay. And then we can
just export this. So this one will be final flat planks B variation two or variation B. Yeah, let's also just do
these two variations. So this one we will only have the base color and the
norm map most likely. The rest kind of stays the same. Although, no, actually, we will probably also
have more dirt on it. So let's also do our roughness. Okay, so we got these
variations now done. That's quite a bit of stuff,
but that should be fine. Now what we're going to do
is we are going to have a paint and for paint, I basically want to turn
off my planks in a way. And then once I've done that, I can just add some more stuff. So if we go to the very base, Um, no, you know what? Let's go to the very top. So over here, we have this one. So if I turn this into white, so if I add a switch grayscale, and I go ahead and I
just expose this white away and call this has planks, and the default should be true. So this one will be has planks. So if has planks is true,
it just goes in here. But then if it is false, do I already have a white color? No, I don't think
so. Then just like a uniform color and make it
grayscale and make it white. So if it is false,
it becomes that one. Now I just want to
see how that behaves. Most likely, our flood
fill or something will still break,
but we will see. So if we go to our wood planks
for this one, actually, let's go ahead and set this back to wood 01 in our preset. There we go. So we have
these wood planks. Now what? If I go ahead and I grab the overlapping
planks preset over here. And then what I'm going
to do is I'm going to do this plain wood painted and press new. So now
we have this one. If we go to the a
planks to set is false, I want to just see how it
behaves. Surprisingly well. I behaves surprisingly well. So let's see, in our norm map, it looks like that
all it does is the directional warp kind of
like switches stuff around. But for the rest, that
works quite well. So our directional stuff, we do that over here and we
grab it from this version. But what we can do is if we just go to our switch Grayscale. Oh, wait. Hey, look at that. We already did the switch, or maybe what we can do is
if we set flat planks to, now, that's too bad, so
it does not do that. So in that case, let's do
another switch grayscale. And this time, this one
will be has planks. So if has planks is true, it will do it like normal, and if it is false, it
will just become white. Let's give that a go. So now if we go ahead
and look in here, see, now all of our boot
is going correctly, and we still have these nails, but we can kind of
keep the nails. I don't really mind that. So now that we have these things done, now what we can do is if we go ahead and turn on has paint, let's see how that behaves. So that pays pretty well. The only thing is that
it does use a mask. So if we have a look over here, so around how okay, so I switch this mask up over here in my directional warp. Yes. And then I just add
more stuff on top of it. So if I would turn off
this directional warp, but this directional warp
is going to this one, which should be turned off. So if I go in here, it should be if I say has plank
is egal to falls, it should be turned
off, so I don't know. You he paints. That's why I'm mistaken myself. Reset, you need to be
has planks over here. That is strange
that it then still looked like all of the switching or maybe I just did not look
good enough. There we go. Now we have the hes paint,
and now it will not be split up into our woods. This is quite cool.
So now we have, these two versions that are
all working really well. Okay, so this one, what we
can do is we can export this, and we can say into this
one, yeah, you know what? Let's leave it into our wood planks
because else I need to keep navigating whenever
I want to make a change. So let's just call this
plain wood painted, damaged. And let's like this folder. And let's go ahead
and just have also the paint mask just in case
and have the ambit occlusion. So let's export this And now what we also want to
do is we probably also want to grab a clean version. So first of all, press update
so that we have this one. And then what we can do
is for our clean version, didn't we add this
to our base color? Yeah, here, broken paints. Let's turn this off to false. There we go. So now we
can go export this. And this one will be finely
plain, wood painted, clean. Okay, that must be enough
materials for now. So let's go ahead and
export this stuff over here. There we go. Okay, wow, that was
a lot of stuff. So if we go ahead
and go in here, we do now need to go
ahead and import it. So we have our plain wood. Let's do variation
A, variation B, variation C, and I think even variation D. So variation
A will be this wood. Now if I go to variation B, that one will be this
version over here. So I'm just going to slowly
start inputting everything. So for this one, I only
need a base color, normal roughness. Variation C. Most likely we don't even need the roughness because we can just reuse it. But in any case, variation C, we will go ahead and
also grab this one. Oh, yeah, by the way,
same with the normal. The normal I'll
leave it for now, but you can most likely get away with
just not using that, and that will be a little
bit cheaper on your scene. I even need to have a variation E. So variation D will
be the painted version. So if we go Wolnks
final and let you paint it clean, over here. And variation E will
be our painted damage, and don't forget to also
import your paint mask with this stuff. Wow, okay. So that's quite a bit of stuff. Now we have our wood blanks. Our Wood blanks is
going to B. Let's see. Variation A, we
already have B and C, we already have D and E is I think the
only one that we need. So yeah, you just
know by the variances how much wood this
environment will have. So number B is just going
to be a simple base color. And number C is also going to be a simple base
color over here. Okay, so we got
all of this stuff, and then what we can
do is we can simply just create materials, and then we can include
those materials in here. However, this is all kind of
like on a per object basis, so we will create these
materials later on. For now, what I'm going
to do is I'm going to save all of this
stuff over here. So, now that we have all
of these variations here, what we're going to do is
this wood and everything. Let's just temporarily
move it over here. We are going to just make our scene look a little bit
more visually appealing, so that when we are
working with materials, at least we have a
little bit better lighting and
everything like that. So what I'm going to do is
I'm going to go down to perspective and go
to my camera actor, and this is probably the
one that I want to use. Let's move this.
And now over here, so we have quite a
clean looking scene already. That's quite nice. We are going to
get started doing a little bit of lighting
for this most likely. So if we just go ahead and
move this, for the lighting, I do want to go ahead and
switch my screen percentage. To 200 over here so that
it is a little bit higher. And now, so we have
a directional light, and then we have, of course, yeah,
we have landscape, and we have a sky atmosphere. So this was the base lighting that we had at the
very beginning. And for now, this is
fine, although I might want to change the sky
a little bit later on. Okay, so if we have
a look at this, let's start with our
directional light. What our directional light right now is doing is because it is based upon a real life light, whenever we move our light, it will also change our color. We just kind of need to see how much that we
want to do for that. So if I move my light,
we want to go for, like, an interesting
looking lighting. Now, in here, it's
an overcast sky, so it's not very interesting. So we are going to go maybe
just rotate things around. Oh, turn off your snap
rotation for this. And here what you can see is when you move your sky around, you can see that you get
very different lighting. Now, the color of this lighting is accurate.
So that is quite nice. No, that it is accurate. So I want to just go
ahead and I want to see if maybe you want to
go for, like, sunset. You can even go
for, like, night, although night, of course,
doesn't really work for this. But I basically just want
to go ahead and rotate my sky around and see. I quite like this where I have still some
shadows over here. What these shadows
do is they almost create a silhouette
of their own. As you can see,
it also minimizes over here with our planks, but I don't want to overdo it. Let's go for
something like this. Now we can also rotate on the other axis and we can see if we want to change. For some reason over here,
so it's losing the axis. Over here, you can see, I always quite like a little bit
of strong lighting. This might be a little
bit too strong though. I think maybe we would go for like something. You know what? On the one hand, it
feels very strong, but on the other
hand, it does look really cool if we do
something like this. Let's see what else do we have? And this is also why
it's important to add all those
buildings later on. So what else do we
have? We have this one. This one does not
really work because we don't really have the
buildings to support that. So, you know, I might so
we'll go for this one, or I will go for I think I'm going to go for
this variation over here. And then I also just want
to keep playing around with my lighting to see
if I can maybe get stronger or
less strong light. Here something in this d.
So you kind of need to look for yourself what you
like and what you want to get. So when we have this lighting, we can, of course, in
here set our intensity. So if we set this to 0.5, for example, here, it kind of, like, reduces things
a little bit, but this will also reduce the overall GI because
with the new lumen system, the GI and everything
is very affected. However, it's hard
for us to really work on intensity for lighting
because everything is white, we just cannot properly see which direction
we want to go. So we can also go
to our light color. And if we set our
light color, down. It will not over
white the color, but it will add
this color on top. So what we can do is we can
go ahead and we can give this a bit more like
an orange here. If we set completely
to orange and then tone down this slider, you can see that it
slightly just changes. I feel like this environment
can use a little bit of orange because it feels like
a really warm environment. It's probably located in the desert or
something like that. That's another thing
that we can do. Now, on top of
this, if you want, you can also use
your temperature, which will basically allow you
to set like a temperature. And the soft angle
is quite important. Look at these lines over here. The soft angle will basically
soften out those shapes, although it does not do it
as strongly as I expected. Oh, that's interesting.
Normally, it does. Normally, it will make
everything a lot stronger. Maybe it has to do Oh, I honestly don't know why it
doesn't do that this time. I've used it like
a few days ago, so we'll have to
have a look at that. I don't think shadow resolution
really does something, but you can try set your
shadow resolution higher. The soften angle,
it is PBR equid, so it might work in some areas, but I'm not completely sure. But over here, this
is quite nice. So now we have an area, and with the new lumen system, it will look very
realistic right away. So we will have an area
that is in shadow, and we will have an area that is in really strong lighting. So it will give us a very
interesting looking contrast. So I'm quite happy that
we found this angle. If we go down here, so these
are all extra settings. We don't really
need to touch them. Distant field shadows,
all of this stuff, it will just do its own. Yeah, we don't really need
to change these settings. I know that I just did, but we don't really have to
change these settings. So let's say that
our directional warp or directional light
is currently done. So our sky atmosphere we
never really have to change. It's just like our sky, but we will later on most
likely replace those for, like, a custom sky. Same with our sky dome mesh, and then we have our skylight. So our skylight has real
time capture turned on. I just want to also set this
one in the center over here. And basically, it means that it will capture this environment. You can use an HRI map
for this if you want. However, I tend
not to do that for outdoor scenes because once we have our materials
and everything, it will actually just
build this environment and all the reflections or all the material response
will be correct. I do tend to just set up
the cube map resolution a little bit higher to 256. Over here, you can
see also if you ERC, you can see how it affects. So you can set this stronger
or less strong if you want, and you can even give
it a general color. Now, all of this stuff we
don't really need to work. Occlusion combining, I always
said this to multiply. Basically, if we have
any post effects, it will just throw this on
top instead of replace it. And for the rest, yeah, you can sometimes
press recapture, but it often does
that automatically. So this one is also
already correct. So honestly, we don't
need to change that much. You have your volumetric clouds that if you want,
you can change it. Here you can see
that you can see your clouds basically change, so we can change
this quite a bit, but it does, of course,
affect our lighting also. So this is more something that you want to be a
little bit careful about. And not go too high because
then it will change, then it will become an
overcast because it is using our clouds and it will basically use our clouds to also cast some
reflections on here, to cast some shadows on here. So we got this stuff now, so that's looking pretty good. The next thing
that we want is we want to have
reflection captures. Reflection captures just make sure that your
reflections are correct. And for exterior environment,
they can be quite large. So if we go ahead and go
to create visual effects, and then we want to grab a sphere reflection
capture over here. Now this capture,
what you can see is it will have an outline and this orange outline that's where the reflections
will be included. What I'm going to do
is I'm going to go ahead and I'm going to let's say place one over here
and they can overlap. I'm just going to duplicate
that, place another one here, and another one here
and another one, let's say here and maybe
also a few more over here. Now, why do I do this? This is because if I only have one in the
entire environment, what could happen is if
I have, for example, a reflective window here, it might show a reflection
that is all the way over here, and we
do not want that. So I really have to admire the
Lumen system because it is just so much easier
to do stuff in here with lumen compared
to Un engine four. So it's really cool. You can
see how it just looks nice. In anyway, we now already
have some base lighting done. What we'll do in the
next chapter is we will just quickly go over
some post effects, and then what we
can do is we can already start by creating some new materials like a roof material or already setting up the
default materials. Let's go ahead and continue with this in our next chapter.
41. 40 Doing Our First Lighting Pass Part2: Okay, so I want to start
this chapter off by creating post effects so that we can already make
some general changes to it. So first of all, let's
go ahead and just grab our sphere reflections
and throw these also into our lighting
folder over here. Now, for post effects, so apost effects is simply a volume that you
can find in create, visual effects and your
post process volume, these are effects
that will be added to your camera after
everything else. I'm sure that many people
have heard of this. So these are basically
almost like camera effects. They are everything from screen space emulaticltion to adding vignetting to adding
color grading and a bunch of other stuff. Now, we will go a little bit more advanced
into this later on, but for now we just want
to do some basic setup. So if you go ahead
and just open this, the first thing you
want to do is scroll all the way down and
turn on infinite extent. When you do that, what will
happen is it will make sure that no matter where you
are in the environment, these post effects
will be applied. Then what we're going
to do is we're going to scroll up and let's
just run through this. In here, there's a few things
that are very important. So first of all,
we have a bloom. That is fine. If you
want to have more bloom, you can do that to give it
a bit more like a glow. However, I'm quite
happy with the default, so I can just leave that off. The exposure is very important. You have already seen me struggling with it, that
if I'm, for example, I think it was here, do this, that everything just
becomes pitch black, and then when I look
again, see it changes. This is basically the system tying to make that effect that your eyes need to adjust
to the new light. However, I do not want that. This is an art environment,
not a realistic game. Well, it is realistic
game environment, but I do not want to
have these settings. I want to have full
control over my exposure. The way that I can turn this off is by going into exposure, and in our minimum
maximum brightness, we want to set this
to the same value, and I tend to start with 0.1. Oh, here, C 0.1 spot on. If you set this
to zero, what you will see is it becomes white. If you set, for example, to 0.5, you can see that
it becomes darker. But 0.1 seems to be spot on, and that's why it's
often my default value. Now, chromatic aberration
is that effect that you get on the
outside of your lens, it can sometimes be
nice and, like, a very, very low level,
like 0.0 0.1, even. So just like very, very
subtle. Is my resolution? Yeah, my resolution still fine. We don't need stuff
like dirt mask or camera settings or
anything like that. Maybe daptal fields
would be cool. We can ty depth of field. So first of all, let's go
into our image effects. And here we have vignetting, which is basically like the
darkness around your corners, and sets to 0.5. We also grain. You know what? This might be a nice
environment to include grain to get like that
film grain effect. So if we go ahead and make
this bigger, basically, the grain Jeter will be how
much that it moves around. And then the
intensity over here. See, I can just add
some intensity. So this could actually
be quite nice. I can see that yeah, maybe because we have
a white environment, it still feels a little
bit buggy in these areas. Like our anti alysing
almost feels like it's not very nice, but weight is most likely
the shadow over here. But we can set some grain. So we will most likely set
this more intense later on. But for now, let's
set this to 0.05. Just like a little bit of, like, a grain or not, or will it just make
everything feel like yeah, on the one hand, I think we need to wait with
this until we have color because grain works a lot better when we have color, and then we can make it
very strong, like 0.2. But right now, what it will do is because everything is white, it will just give
us a little bit of an effect that everything
is moving a little bit, and that is not
actually what I want. So I'm actually going
to turn it off for now. We have adapt field.
So adaptive fields pretty cool, that's
we can use this. So what we can do with this
is we have a focal distance, and then we have adept. The
way that you can see this. So if we go to our
focal distance, the set is x one set
is very low to 0.1. What you can see is now
at a very low value, it will just completely,
make everything blurry. If we set it to like 0.1, maybe, no ten, you can see
that starts to improve 15. But what I'm more focused
about is we can set over here. If we go to Advanced, we should be able to set or we should be able to
preview adapt or field. So visualize depth of field. No, not dept of field layers. Oh, I froze. Whoa. Okay, fair
enough. Fair enough. It's unreal engine five.
It sometimes happens. So you kind of need
to get used this. I just hope that I save. Okay, so I only lost the creation of my boost
effect. So that is fine. So here we are back again. I just restarted the engine. So keep that in
mind. Save often. It's we do out of saving also. Any case, depth of field. So I was going to go ahead and I was going to go in
here, visualize, and then you can
set the depth of field also like a distance, but now I don't really trust
that anymore, of course. So instead, let's just go ahead and just play around
with that distance. So if we set this to 50, so 50 is still 100. Here see, you can see
that it starts to 200. 500. Here, see, so
that's more what I want. So now you can see
that over here, we get this little bit of
blurring here compared to if I turn this on off. You can see that it
does a little bit of blurring, and that's
kind of what I want. So this works better with a cinematic camera if
we have one of those. However, we currently do
not have those set up, and we will work
on that later on. This is just like a
basic quick thing. Let's do 400 maybe. 500 that's to 500. I also want to make sure. So it does also add already
like some softness here. So it's a little bit
tricky, in this case, how we are going to use
adaptive field because the environment is so large. So you can leave it, but let's cycle back to this when we
actually have our colors. A lot of this stuff depends on when we have our materials. Our color grading, here we can just do general
color grading. The color lute is
currently broken, although I will
see if I can find a workground because
with the color lute, what you can do is you can
do your color grading in, for example, Photoshop, and
then you can just input it. However, you can also do
basic color grading in here. So for example, in our shadows, one thing that I
often like to do is I like to go into my Gamma. Let's move this like this.
I like to make my shadows like a little bit of like
a bluish color over here. If you make it very dense,
you can see what it does. So here it will just
give my shadows like this little bit
of like a blue color. And I think that often just looks quite interesting
because what I then basically am faking is that the sky the shadows are basically reflecting
from the sky, and they will just
reflect that tiny bit of blue color that
we get from our sky. Next to this, we can also
go into Global and we can set things like contrast
using just like a slider. So we can set the
contrast to, for example, 1.05, just to make it
a little bit sharper. And, of course, we can also
set our Gamma if we want, but I'm going to leave that because kind of
defeats the purpose. And just like that,
so we can kind of, like, mess around with things. We don't really need to
do much now because we don't really have
anything to color grate, but just keep that in mind. Film you can ignore
the global animation, normally, we had a
lot of settings here. But right now because
everything is set to lumen, the only thing that I would
do is I'm just going to set my quality to two over here. Reflections is also lumen. A set the quality to two, just go highest quality that you can do. That's
what I tend to do. Over here in our engine
scalability settings, I also have this to cinematic. So these things, yeah, you
don't really need to do much. Our ambit occlusion gets
overwritten by the lumen, so it does not really
matter anymore. And everything else,
we can kind of, like, leave the default. I still need to also
get used that I have less settings that
I need to adjust here. But it is already starting to
look pretty good over here. So we got all of
this stuff done. Let's go at the Sava scene. And let's see, is there anything else that we need
to do for this? One thing I can show
you is if we go at it, if you go to your lighting and your directional light, in here, what you can see is
you can also have control over your
volumetric scattering, so I should not do that. Volumetric scattering
intensity and our indirect lighting intensity. When I do this, well, this one doesn't tend to
do much, but over here, you can see that it basically
affects your GI and it will give you stronger
or sharper shadows. So we can just leave
this to one for now. I think the last
thing I will do is I will give it some fogginess. So I don't know here if we can see over here
in the background, you can see, just from
the heat and everything, you can see that there is a
little bit of softness to it. So we can also do that with
a very simple fork modifier. If you ever get this setting, reflection captures
need to be rebuilt. You can just go to build and press Build reflection captures. Over here. It's just for
those probes that we had. In any case, if we go to
create visual effects, exponential height
fog over here, this will just add a fog volume or a mist volume or whatever
you want to call it. Now what we can do with
this is, first of all, we can give it the
height fall off to make sure that it does not go
all the way up to the sky. Then what we can do is we can give it a starting distance. And basically what it will do
is it will push it kind of, like, back to the
very back over here. And another thing
that I like to do. So the starting distance here, this is a bug that is
a little bit sharp, so we need to be
careful with this. But I like to start
by just setting, let's set my fork density down. Let's set the colo to be
more like a orange color, like you can see over here. And then if we go down, we can sometimes try to do
the volumetric fog over here, and then it will kind of be
affected by the lighting, and that often gives me a
slightly better result. For this one, you
also want to then set the color to be a bit more of like an orange color. Like over here, not too orange.
It's, like, very subtle. And in here, you also
have a view distance. She can see. So the
lower we set that, the less we see of it. But if we set it higher, our viewer distance
will be longer way. And what we can do is we also
have an extinction scale, so we can give it
like here, see. We can just give it some
general fog like low here. So if we set this to 1.2, and I tend to just like
drag round the sliders. There's no rocket
science in this. I just drag around sliders. And now what will happen is remember how we
have in our light. So if I go ahead and, well, you can also change
the opacity over here. Let's just turn this
on off so that we can see. So difference before. After. Let's set this to
be a little bit less, and I'll set our
intensity to be a little bit less to
maybe like 0.5, because for now I want to
keep this very subtle. So now before, after. See, I just adds
something to our scene. But what I was talking about is that our directional light, we now have that second setting, which is our volumetric
scattering intensity. If we set this to
zero or to like five, you can see that it
affects the fork. Now, it does it very subtle, but I'm going to set this
to two, and it is there. So this is more about just explaining to
you which settings we have. Don't worry later
on when we actually have all of our materials
and everything, then we will really
sit down and we will make sure that we do like
a proper lighting pass, and I will explain
much more to you, like the reason why I'm
doing this contrast, which I already
explained a little bit, so that we almost have a divider sitting in between our scene. And how we go from
quite a strong angle and also just in
general, we here. Look at all of these interesting looking things that we have. This stuff, we also need to fix, but we can do that
using an outer smooth. So that is another one
that we need to fix. Um, because we are
almost over time, what we will do is
we will just fix it now because then what we will
do Blender crashed again. Wow. We have a lot
of crashes lately. That is quite interesting.
I don't know. Could it be something in
my hardware? Oh, great. It crashed, and then
it there we go. Sometimes when it crashes, you just need to
swap back and forth between the channels to
kind of, like, reset it. I don't know why Blender
is crashing this time. Um, now, it cannot
be my hardware. Like yeah, I highly doubt
that it is my hardware. But anyway, t's just
do an outer smooth. I will see if I maybe need
to update some drivers, but I normally never
have it this much. So I wonder exactly
why it is crashing. There might be sometimes
it's just like this one thing that just
is not going very well. I'm going to now select
all of these pieces right clear and right click
and Shade Smooth. And I can hear thunder outside. So this is probably
my sign to stop recording because else you
guys will hear a lot of noise. But in any case, so
we have this one. What we can do is we can
just go ahead and we can re export this Exports, turn on selected
objects, too unreal, and this is our
walkway straight. Let's go back in
here, save my scene, by the way, before I forget. And now I can just go
in here and should have fixed that smoothing
that we have. So let's give that
second because, yeah, we do not want to
have harsh angles, and we don't have
weight noomals. Oh, you didn't fix that. Let's turn off our I Rim togel. Now, that seems to be fine. Over here, these ones are also actually having
some problems, but it should still have fixed that's stuff. Well
quite straight. Did I maybe export
it to a Wong one. I think also at this point, what might be easier is
if I go ahead and go to my front view, and I simply select all of these planks over here
at the same time. Now, I'm just going to pass ContoJ because I know
that I cannot turn on a smooth at them
with them separately. So right click Shade Smooth. Okay, so this stuff should work. File, Export, FBX, to unreal, Wale Que straight,
selected objects. Export. It should work. It would be very unlogical if it works, if it doesn't work. Oh, it's because this
is the short version. That is why. See, I told you, so here is actually working. I'm not going to edit
the short version yet because we will most
likely throw it away when we create our UVs for this version so that
we can reuse that. In any case, let's
have just, like, a nice little look
and admire our scene. So we are getting,
quite far in the scene. So this is looking
really good. As you can see over here, we
can just have look. This view still needs
quite a bit to do. Maybe we can just do some interesting depth of
field or something. But for the rest, everything
is working quite well. See? Yeah. So we got some really interesting
looking things going on. Perfect. Okay, in
our next scene, what we will do is
I think what we are going to do is we
are going to get started by just creating
our other materials. So we will create our
slate roof material, and I will also quickly
import just from an external resource
a metal material because we have almost no metal, so I don't want to spend
too much time on that when we only have a single
door knob over here. So let's go ahead and continue with that
in our next chapter.
42. 41 Creating Our Roof Material Part1: Okay, so what we're going to do in this chapter
is we're going to start by creating our slate
roof tiles over here. We're not going to make
them as messy as this. We are going to make
them quite clean, a little bit in this direction. And yeah, that should not
be too difficult to do, or this one is also quite good. So for this, let's
go ahead and let's start by creating a
new substance graph. And we will just call
this roof tiles, for example, Woops. Tiles over here, and PB
metallic roughness is fine, so let's go ahead
and export or Epoet, let's go ahead and set that on. I do not need a metallic map. I do want a height map
because I will most likely have parallax
occlusion mapping for these tiles because
we're not going to just have all these tiles
into geometry. So all of this stuff is fine. Now, the first thing that
we need to do is we need to actually create
the height map scale. So if we go to our patterns, we want to get started probably with I think like a tile
generator should be fine. Let's get started with a
tile generator over here. With the tile generator, we can go ahead and first of all, we want to decide how
many slate roofs. So let's go for seven. Although, now I think of it. Let's also maybe a tile random
might actually be nicer, but I'm not completely
sure about that. So a tile random,
basically what we need to do is we do want to just get some of this unevenness
that you can see over here. But I also think that I want to maybe get some
different thicknesses. Now, the unevenness is
very easy to do with a tile sampler because we
can just use our scaling. However, the rest I'm not so
sure about if it is easy. But then again, here, the
mask is being quite annoying. Yeah, okay, so let's use
a tile generator for now, because else it will become very complicated very quickly. So let's go ahead and set
the X amount to around yeah, let's do around eight,
and then the Y amount a little bit longer like six. And then in our patron, we
want to go for a gradient. So let's go for
gradiation over here, and we want to set
the rotation to be 90 degrees like this. The next so that we need to
do is we need to go ahead and let's go into our scale and just tone that down so
that we actually have, you can see over here some
different scaling going on. And so we do want to keep these quite close,
but not too close. Then we have the inter
stints over here, which if we set the Y axis, to a random and then
play around to it. This is what I mean getting
that randomness over here. So that's totally fine
so that we get some of that randomness in
there. Size mode. It's a size keep aspect
ratio absolute or pixel. Yeah, so we just need to
go interstize over here. That should be the best one. Now we can also just add
some scaling over here, but this is the problem
that I was talking about, is that doing this scaling, it will just leave a gap, while with the other node
with the tile random node, it does not technically do that. For this, we can also
go ahead and we could also use this for
random scaling. If we use our horizontal
sliders over here. Yeah, our horizontal sliders, that can give us a little
bit more variation. Let's do that one. That's better. So
we have that one. And then finally, let's
also like a small scale random just to give
it a little bit of a randomized scaling. So we got this stuff over here. You can do a position
random if you want. For the rest, maybe
like a position random at a very,
very low level, like 0.01 for both of them, again, some more unevenness. And maybe set my sclerandom a little bit lower because
else we have really thickness, really thick pieces
in between here. And then for our rotation, we can try to do, like, a 0.01. No, that's too much, 0.002, like a tiny bit of rotation.
We can try that also. But I'm basically working
towards that we do need to overlay these over
here, as you can see. So this will not work exactly
the way that we wanted to. However, if we go ahead and we go down over here to a color, and this is why I decide to use the tile generator and
not the tile random, it is because I can
do a horizontal mask. So I can just like
scale it up like this. Having that done,
what I can do is I can basically create
pretty much like three variations of this and I can blend between them.
So we have that one. Over here, what I can do is
I can just go all the way up and mess around
with my random seat, and also over here, mess
around with my random seat. And then what I can also
do is I can also go ahead and play around with
my horizontal size. And maybe some other
pieces to basically get like differences in variation in between
my pieces over here. So we now have these
three variations. Now all that we need to
do is we need to start by adding these on top of here. So we got this one over here. Now, what I'm going to do is so this one is nice and tilable. I'm going to add a blend note, and I basically want to blend this one with a transform note. Actually, maybe like a safe
transform would be easier. Yeah, let's do a safe
transform node over here and plug in the
second tile generator. Now, the only thing that
we need to do now is we do need to create
a mask for this, I'm just going to use
a histogram scan, and I'm going to
plug in my first tile generator in here and then push up the
positions that we get this cutting out effect. Now at this point because
we have these two, all we need to do
is we need to go into our safe transform, then if we go to our Y axis, we should be able to basically give this like I think
we need to invert, maybe, or do we need
to use this mask? Maybe we need to use this mask. We basically just need to
mess around with this. Yeah, here, so we need
to invert it. That's it. So let's go ahead and
in our Hcam scan, that's an invert gray scale. And I just need to get it white. There we go. Now, I get it. See? So now what we can
do is we can basically go ahead and we can do
this with our offset, and we can even also move
our offset like this. So we have fill control, and this will give us
that overlapping effect, as you can kind of see
already happening. The only thing is that
our position over here, it is adding some cutouts, and I'm not sure which
cutouts these exactly are. We need to be very
careful with that. Okay, so here's the cutout So maybe we actually need
to have this cut out. Yeah, there we go. So we do
need to grab the first one. So we need to grab
the first one. Now we have overlaid this. Now we want to add
another blend. And this blend we'll have
this tile generator. So let's add a safe transform
gray scale up here. And that's already
moved this down. And then we grab
our his Scam scan, and I believe that we just
need to grab this one. So let's see, we blend
this, invert it, and now we should be
able to just art No, wait, we do not want to
do that because it is not going then it does
not overlay anymore. This one, or this one. I need to have This is
always a tricky one, so you need to have a
think about exactly which node is the one
that we need to use. So it is basically this mask, but then we want to remove
away one of the masks again. So it is always like
a brain teaser. So we have like this one,
and then we want to remove away and see which version, this version we want
to remove away. So if we thy that out, let's go ahead and let's
add another Hogram scan and grab this version and then
blend between the two. And set the blend mode to be subtracted. Plug this in here. Mm. Or art. No, so it is subtracted. So I think we need
to do this after. So we have our
invert gray skull. So if I now add a
blend in between here and throw this one
in here and set this to be, I believe art. You'll see, it's quite messy how to figure out exactly
which one I need to get. Okay, let's start over. So we got this one. We don't want to add
this one on top. We want to basically mask out these pieces over here.
And then I have it on top. So I am masking
out these pieces. God, this is a brain teaser. So I'm masking out these pieces. Just give me a second here. I like to do this in
real time instead, just like magically
having it here. So we got this one. No, I am
masking out the wong ones. I should be masking out
probably like this one, but that does not really
make sense because we need to have
overlaying on top of it, because right now it is not
overlaying on top of it. So what if instead let's set our blending mode to art
that we can kind of see. So what if instead we
cut it out over here? So we add a blend
in between here and then we grab like a his
crim scan. And let's see. So we need to cut out Oh,
well, that's temporarily. We need to cut out these
versions which are these ones. So let's add the blend. And now we have this mask,
so let's go ahead and simply cut out this mask like this. Oh, there we go. Yes. So that now all looks no wait, it almost looks correct, because if I need to set this to copy. And let's get rid of
this mask over here. So for this one, we kind of need to grab,
I believe this this one. Or is it this one?
No, not that one. Oh, God, this is
going wong again. We are so close.
Let's try again. We are so close. So
we add this on top. That is fine, but then
what happens over here is that it gets
added on top also. So we kind of need to cut
out the pieces in here. So if I have this one, if
I add a blend over here, and I cut out this shape, so I set this to subtract, and then I add this on
top and set this to copy. A, come on. What am I doing wrong here.
So we got this one. We cut out the shape,
but we only want to cut it out at one of them. We only want to cut it out
at these ones over here. Correct? Yes. I believe so that
that is correct. So we only want to cut
it out of these ones, and these ones are these. So if we swap this around, get this blend over here, I will showcase it
properly later on, but this is just like a
bit of twil and error. So we add this one, then
we add this one on top. And now if we just said
to start, there we go. Okay, finally, we got it. Oh, wow. That was a bit more
trickier than I expected. So basically what we are doing, if I just go ahead and clean
this up a little bit more. Here, let me just kind of like just make it a little
bit more organized. So over here, we are going to go ahead and we
basically blend this one, so we grab our original one and we cut out the very last one. Wherever we have black, that's the one that
we will cut out. Then on top of that,
we blend another node, which is just a very
simple mask where it is just adding it on top and then masking out this
specific version here. And then finally, we add
the third one on top, but the third one
because we have cut out the black over here. And because we have cut
out the black over here, whenever we add the
third one on top, it will simply ignore all
of those cut out pieces. But it should still
be flexible for us to now completely
change this around. So we should still be
able to now, for example, if I go to my Safe Transform, I should be able to still,
mess around with this. And that's also what I want to do is I just want to kind of like move this one down a little bit more just to overlay it a little bit better. And now if we press
space, it should still be perfectly tlable. So now we have our roof slates done, which is pretty good. This one we can get rid of,
so we don't need that mask. So I know that it
can be a little bit confusing, at least for me, it is a little bit confusing, just to figure it
out the first time. But once we got it, it's done, and we can just keep editing. I'm just going to
go in my textures. Roof tiles and just save
it in here, like that. Okay. And now, what I
want to do is I probably want to give it like this little lip that we have over here. You can often see
that happening. And I think it is
good if we just add this to our actual shape. Now, we are actually
able to add a petun. So what we could do is we
could go into our petus, add a shape that already
has the lip in it, and then it will just
include that lip everywhere. So if we go in here and
we add a shape like this, and this shape is going to be a simple gasian not
a gasian gradiation. And I already rotated in
here, so that should be fine. And then at the very end, what we can do is if we add a blend and then add a
transform, over here. Now, for this transform, we basically want
to rotate it 180, and then we want to
kind of scale it in. But what happens is
when you scale it in, because it is set to tiling,
it will try to tile it. So if we go into
our tiling mode, set this to absolute and
turn off the tiling, we can now add this one on top. So if we now go ahead
and just set this one to be let's start with art. And then if we grab
our original gradient, and for original gradients, we basically just
want to scale this back until they are
perfectly matching. The only thing is that this
needs to be pixel perfect. Another thing that is happening over here is that
the mapping mode, or sorry, the filtering, let's set the filtering to nearest. When we set the
filtering to nearest, it will give us a
sharper edge over here compared to the other one. So now we have
something like this. So having this piece, if we artists do
our patron input, let's see if this works. Pattern Image input,
C. So now we have this flow that we still need to mess around
with it a little bit, of course, but at
least it is working. So we can now kind of just
test out inside of Mamoset. So we can go ahead
and we can set an image input to all
of these. Like this. Once we have all of them done, we can add one final blur high quality
gray scale just for the side edges and give it like a tiny bit
of like a blurring, 0.2 maybe or 0.150 0.15. So we now got all
of these roofs. Now, we still need to
add a lot of variation, but let's actually
see if this works. So this one, I feel like the blackness behind it is probably
not good, but we'll see. So first of all, this one
goes into our height. Then we have a rat race
embutoclusion over here, for which we can use this
one and just tone it down. Here we go. So the rate
race emt oclusion. And then if we add
a normal node, we can also plug this
into normal nodes, open GL, and set this to three
to make it extra strong. And now we have our
basis here ready to go. So if we go ahead and save this, we can start by exporting our textures and we can
create a new folder. That we will call final
in our roof tiles, and we can go ahead
and just turn on automatic export. There we go. Okay. Now, if we go to Momset, we can go ahead and let's just let's just grab our woop langs and
just duplicate it. And it's just called this
hoof tiles over here. Now, we can temporarily
just go ahead and turn off the albedo
and the roughness. And then if we go
to our textures, and I'm doing this
on my other screen, we can go ahead and we
can drag in our height, normal and ambient oglusion
and we can throw it on here. Uh, that's already pretty good
effect for the first try. Two is fine. Let's just go ahead and tone this
down a little bit. Okay, so if we see this, the angle is a little
bit too sharp, but it does give us a
pretty good effect. So we just need to add like a bunch more variation to this. But it is pretty good.
So I'm just going to make the angle a
little bit less sharp, and then the next chapter, we will add all of
these variations to it. So to make the angle a little bit less sharp, it's very easy. We just go to a transform and we just basically
tone this down. See? We just push this back and then grab
the other transform. Just zoom in. And
there we go, push it. Yeah, see, I moved it
a little bit too far. So it really needs
to be pixel perfect. Well, actually, technically does not need to be pixel perfect because most likely the blur
at the end will kind of, like, fade it out. Yeah, see here, so the blur at the end will
kind of faded out. But now that we've done
this, we can just turn on nova displacement just to
test it, and there we go. So that's the basis
of a slate roof. The very beginning
is always a little bit tricky, and I
keep forgetting that. So I hope that you were not too bored with me trying
to figure it out. But in the next
chapter, what we will do is we will go ahead
and start adding a bunch of different variations to this, warping and everything. And then it's simply a
matter of throwing on our wood wood smart material. And then we already
have a slate roof. So let's go ahead and continue with this in the next chapter.
43. 42 Creating Our Roof Material Part2: Okay, so we're now going to get started with some
general variations. So we got our base over here. Let's get started with a and I'm just going
to add them in here. Let's do a directional warp. Let's do another
directional warp. Let's do a multi directional
warp, gray scale. And then, of course,
for our slope blur grayscal that I do
want to add later on, that ones of course, a bit trickier because
we have gradients. But in any case, the reason I'm doing this is because
I want to have a pearl noise that is
very large over here. Let's plug it in here. Let's
set the warp angle down. See, let's move it up
a little bit more, and then just tone
down the intensity. So this is just like
some general small bits of warping over here. Then I want to duplicate
the pearly noise and grab like a smaller
pearly noise over here. Once again, set it down, maybe like a little bit
to the side just to make it a bit
more interesting. And let's just give it a little
bit more of an intensity, maybe like 1.3 inch,
something like that. And then the multidirectional
warp I want to go ahead and grab at like a cloud two. Throw that in here, set
the mode to minimum, and set the directions
also to one and then like tone this to the side or go a little
bit to the side like this. Now, it looks like
this one will actually already affect our gradient.
So we'll see how bad it is. If it is very subtle and it can be covered
up by our wood, then of course, I'm not going to bother
doing anything else. Okay, so we got this one. Now
the next thing would be to add maybe some gradient
variation and stuff like that. I don't know if we want to
do that before or after. Maybe it's easier if
we do this before, actually. So let's move this up. Now, the thing that we need to keep in
mind for this one is mostly that we need
to have a think about how we are going
to do our flood fills. And by the way, there's,
like, this tiny little I wonder if that
is causing us problems. No, it doesn't look
like. So there was, like, a little black edge, but it looks like it is not causing you can see the
tiny bit over here, but I think by the time that we are actually
done with this, it will not cause us that
many problems anymore. So yeah, just keep it in mind. Okay, so for our flood
fill, as I said before, that one is a little
bit trickier because of the way that these
etches are all created. So I don't think it
will actually work. Yeah, this one will
definitely not work. If I do a flood fill, here, see, it's not really
able to detect. And as you lot fill
to random grayscale. However, maybe we can somehow do maybe like an edge detect. Let's see how that
detects everything. It sort of does
something, I guess. Is that enough for
us if we blur it, will that be enough? Maybe. So only these versions over here are a
little bit strange, where, I think if
we set edge down, but Okay, so we cannot
really get rid of that. Maybe play around
with our tolerance. No, that doesn't work. So we might want to be able to just live with those
extra edges over there. They might look a
little bit strange, but let's just see if
this works in some way. Let's just give this
quite a bit of blurring. And then let's add a blend. Plug this on here and set
this to be a simple multiply. And then we can see if it sort of works
because what I'm hoping is that because we are
multiplying this on such a low level that you will not see
those imperfections. And that would save a bit of
time because else we need to find a way to completely clean
it up and all that stuff. And that's just a
pain to do. And then we might end up needing to, like, replicate
all of this stuff, and I'm just not really
in the mood for that. I'm also going to
have a flood fill to gradient over here and add
some angle variations, and then also add a blur
to this one and throw this on top of here and set this
to also be a multiple Yeah, so let's say we have
something like this. Um, how does this
look in my norm map? It looks pretty decent
still in my norm map. Over here, it is
starting to break. But let's just have a
look and see if this actually does something nice. Okay, so it does as
some variation, but, yeah, it is also starting to break a little
bit here and there. So you can see that
it is starting to break, which I
don't really like. So I guess that we do need to find a slightly better
way of doing this. First of all, let's
just go ahead and let's then in that case, increase this to
make sure that it gives me the effect that I want. So let's increase all of this. Now, if I just throw
my displacement again, maybe I increase
it a little bit. Okay, so that does give
me a bit more variation. I think the only thing is that our very first overlay
needs to be a lot lower. So 0.25 maybe. Once I've done that, Yeah, okay, so that's working
a little bit better. So see now especially over here, we can see that we get some
small angle variations. So that's quite nice.
That one can work. Okay, the next problem
is that our mask is not working completely the
way that I want it to. So for this mask, it
is quite interesting. So it is because of
those pieces over there, I wonder what happens
if I simply change, for example, this
fill over here. If I just move it
around. Okay, so that makes it further away. And if I move it back. Okay,
so that also gets rid of it. So that one is not
really an option. Another option is that
we can try and set our edge width to
be a little bit bigger and then maybe
like blur it out so much. You won't really notice. But then the palm that
we have over here is that it is
starting to push out. Now, another thing
that we could try with that is we could try
a distance node. So we add basically a
distance node to this, and then we throw in
our source input. And then for our mask,
we grab our edge detect, and that will basically push out our shape evenly into
the edges like this. And then if we set the
maximum distance really high, if we then blur it, that
might be a solution. We set our adjetect a lot lower so that it
just cuts these piece out, but then we push it out again and hopefully that will
compensate good enough. You can see some small
arrows here and there. But that just needs to be a margin of errors
that we can live with. We got this although I see a
small arrow here and there, I feel like these arrows, I don't think that they
will actually stay. If we have this, let's just blur this out
a little bit more. So let's go ahead and
just set our intensity. Let's blurt this out
a little bit more. And then over here, we probably want to do
the same thing because it could very well
be that the arrows actually come from this one. So source input, there we go. So this one also
gets pushed out. And I think if we
now go ahead and try this one more time, Yeah, okay. You know what? I
can live with that. So there is a few small problems here and there, as you can see. But for the rest, I
think because this is such a it's a roof,
it's far away. It's quite messy. I
think it will still look very cool. And it
does look very cool. Here, we already get quite an
interesting look over here. So we have these
pieces done like this. So what we can do is we can add a frame here and call
this shape, creation. And then if we go ahead
and add a frame here, we will go ahead
and we will call this shape score
variation over here. Okay, so those two are now done. Now what we can do is we
can start by importing our dot SPSCR file of our actual plain
wood. So here we go. Let's drag it in. And now the perfect thing is because we have already done our flat fill, so we had to do this
anyway, we can immediately, also swap things around and just make them look
interesting again. This time it is in
the one direction. So this time we do
want to go in, like, a direction that is, if we
add a transform to this. Actually, maybe it's
better if we do like a safe transform
just to make sure. And then, of course, you
want to set that degrees to 90 degrees and maybe
also set that tiling to probably like two
because I want to have this a little bit smaller.
So we got this one. You have another
one that is called safe transform normal, I believe, or normal transform. Which for rotating,
you should use this one because when you
rotate, normal slightly change. And if we do that with
the normal transform, it can give us
incorrect normals. So this one we just need to go ahead and go in here,
non map format, open GL, angle, 90 degrees. I just hope that I,
I think I need to go the other way around.
I have no idea. Um, 180. That's just not enough. Oh, wait, it's because we have not done the tiling.
So tiling minus two. And now we just
need to figure out, so if I look at this one,
Okay, it's not here. So if I do 180 rotation, and this is not going well. Tiling, tiling two. But our norm map is not correct, and I simply don't trust that. In that case, I'm going
to do normal transform. So basically what we do, so we go 90 minus two. Okay, that should
be simple enough. Normal transform over here. 90 minus two. That shoot now, now
everything is on one line. That's a little
bit strange, but. And then we can just
go ahead and we can copy over this transform. So all we need is we
need roughness and the other ones we don't
really need in this case. So we got these
pieces over here. Now we need to have
a directional warp. So let's get started with
this one directional warp and just simply throw in
this one over here. No age, we cannot do that. Oh, that's annoying.
We cannot do that because we are our
warping after this. We can try and see if we can
manage an edge detect after this point and then
just duplicate the flood filled random
grayscal distance and blur. But, well, we will see if it's actually
oh, sorry about that. Yeah, that actually does work pretty decent. So
we got this one. We flood fill it.
Random gray scale. Oh, the distance node
is not working because the distance node
needs to use this one. And then we do not actually
need to blur this. So we want to actually
make this sharp. There we go. So that
should do the trick. I'm glad that that
still worked correctly. Saves us a lot of effort. So is that the warp angle somewhere and just
go for like 500. You like the changes?
So the only thing is that if we set this
to like 5,000, so make this really
strong because I feel like the warping is,
see, now it is working. So if you keep the warping
low to what we had before, even though we cannot see it, the system can see some kind of pixels which will mess it up. So just make sure that the warping is really, really high. So like 5,000, and then it kind of just makes extra
sure that it is sharp. And then what we can do is
we can just go ahead and duplicate so this one is
normal, this one is roughness. I will automatically convert to the correct color
node, and there we go. So that system is not so done. So we got those
pieces ready to go. The heights, we don't
need to do something, and the oclusion we
can also just leave. So at this point, we can have our base color. Oh,
yeah, this one. Let's go ahead and
in our normal, let's add a normal combine, let's actually grab our
normal map over here. And you said this
to high quality. I'm not going to spend
too much time on this material because
this material, of course, it will be very far away from the
camera. You won't see it. So I want to make it
look really nice, but I'm not going to
go overboard with it. Another thing that
I can do to save sometimes is so we
have these ones. So that's looking pretty good. Now, what we're going
to do is we're just going to go to our wood planks, and on our wood planks, I'm just going to steal some of the notes that
we've already created, which is going to
be like our dirt. So if we have a look over here, so we want to grab this
one, um, let's see. This one, and I'm
just double checking. Okay. This one, this
one, this one, this one. This one over here. This one, this one, I'm not
sure what that arts. Wait, let me just switch to my precept because else,
it's a little bit annoying. So update you are going to be overlapping planks so that I can actually see
what I'm doing. I feel like that overlapping
planks still does not work. So probably just like miss the setting has
planks, is egal to true. Okay, I think that
one works now. As paint is falls, flat planks is falls, broken paint is falls. Okay, so that one works now. So now we can go ahead and
we can just add this stuff. And at this point,
you know what? Here, I'm thinking
too difficult. Let's just literally
grab this and just see what we
can take out of it. So let's go into our wood ties, and we can just go
ahead and we can, like, quickly press Contra vi
and just spaces in here, and then we can just see
what we're going to do. So this is where the
start is going to be. Then what we do is
we add some dirt, so it looks like
that we need like this one for, like, a curvature. This one for, like,
our ambient occlusion. Let's get rid of the mask. And let's see. Okay, so
this will add some dut. Okay. It has a
custom grunge map, and I'm swapping the
grunge map around looks like using the same
technique like this. Okay? So that one
we'll add some dirt. That is fine. That's already
looking pretty good. Then over here, what we have
is we grab a histogram scan, and we add some stuff to this. So this is like some
general setting, but I'm not going to
do it as intense. Let's just go ahead and grab
only our mask over here. Let's just add this like this. Let's delete everything else. So we grab a mask, and I'm just going to like tone down
the opacity for this. Okay, so just add
some extra dirt. Then over here,
I'm adding metal, which we do not have, so let's go ahead and
get rid of that one. And then I'm Oh, really. I'm
adding so little of this. A, and this is the paint.
Okay, I did not realize how little I was actually
adding into my Dt. But that is fine. So let's
see. We got this one. Is there anything else
that I want to get? Maybe like some more edge
damage on the corners. Yeah, that could
be one that I can add because you can see it
over here a little bit. So let's just do that one last. Let's add some
extra edge damage. So over here, we
can go ahead and just right click art frame. Wood underscore Import. And then if we go ahead
and have this one, art frame base
color. There we go. And we can already plug
this stuff in here. And then for our edge damages, we are going to go
ahead and go in here, and we need to have a
slope blur gray scale. And let's grab like a moisture
noise this time over here. So we plug this in the gray
scale with a moisture noise. We set the samples really high, intensity all the way down, mode to minimum, and
then it's just a matter of going in here
and breaking up. And then what I
can see is I just need to go into my
moisture noise, add a transform and set this to X two to make it
a little bit bigger. There we go. Now we
have some more damages. And then don't forget that this transform is
no longer tilable, so you just need
to add a make it tile photo grayscale
note behind it. And there we go. And I
just press D to dock it. So we got these ones done. Now it is just a matter
of adding a blend. And I want to add
this Let's see. Oh, sorry, let's hold
Shift, swap it around. And then this one needs
to go back up here. So we are swapping this around, and then this one goes in here so that we can mask it out. So we have this stuff now. And now if we just go ahead
and grab an invert grayscale, I'm sure that we can steal, for example, this
mask or this one. This one. Let's steal
this mask over here. So we do an invert greyscale, and then we do a simple
blur high quality grayscale just to kind of fade it out. Throw this in here,
and there we go. See? Now we have some damages just on our corners
and also over here, which should translate nicely into our norm maps
and everything. And the only thing
I would say is that maybe it's a little
bit too strong, so we can tone it down in our opacity over
here to like 0.45. Let's turn on and
off our height. Give the second to load. So our nor map is
looking pretty good, but I think I want to make
my norm map actually a little bit stronger
for this specific one. I don't know if we already added nor map strength in here. I don't Oh, yeah, wait, we did add something. Let's just go to a normal, let's just see if I set my
norm map strength a bit higher. Okay, so that does work. So we are adding norm
map strengths in here. But then, of course,
because we scale it down, it kind of gets tone
down a little bit more. So let's set this
quite a bit stronger. And now let's go
ahead and go in here. And now here, I can
see that this already looks quite a bit stronger, so I'm quite happy about that. Okay, so our nor map
strengths are here, and now it's just a matter of importing our other textures. So roof tiles, final. We can go ahead and we can
import our Beto Map and our roughness map.
And there we go. Okay, so seeing this, one thing that I want
to do is I want to add some more random color
variation to this. I think we can simply
use our gradient. So if we go ahead and let's add a blend before we
start adding our dirt. And in this blend, literally just grab this distance note, throw it at the top, add a
gradient map in between, and then maybe also a
blur map, but we'll see. Yeah, I need a blur
map. Let's add a blur, high quality color. Let's go ahead and tone
this down so that we have a soft edge and simply
set to be a multiplier. So this is the easiest
way to just add some general color variation,
just doing stuff like this. And then if we go ahead and
have L, here you go see. Might be a little bit too
intense, but you get the point. So instead of us
needing to, like, map specific colors because we can do this also with
like actual colors, but that will just
take very long. So let's do 0.3. To 0.25 maybe. And I think after that is done, we got a pretty
solid base going. Okay, perfect. So
we got this one. Now the last thing that I'm
going to do next to saving machine is to quickly
go into my plain wood, and let's say that we set
this to like wood three, which is that really
old looking wood, just to see how that looks. So that we have new
wood and il wood. Perfect. That you do the trick. Sure, we have some
small arrows over here, but you will never
see those in unreal, and for the rest, this
is looking quite nice. So we can go ahead
and we can start by adding a screenshot of this. So let's render out
the screenshot, just like we've done before. And now we already starting to get some quite nice
images over here. So let's pass the video
until this is done. Here we go. So let's open it up. And there we go. So that's
looking really nice. Now, the next thing that you would maybe want
to do if you want art improvements is
to just go ahead and overhear get rid of these areas. But honestly, it's organic wood. Like, you probably
won't even notice that. But for the rest, we have a pretty simple but
very effective looking wood. I think the only thing
that I might want to add is some very strong leaks, just to go down the roof. I think that's the last
thing that I will add. It does mean that this chapter
gets a little bit longer, but I think it is
a good one to art. Also, we cannot
really see our dirt, so that might actually be a
little bit of like a problem. So let's set this
temporarily back to wood zero so that we can actually see some
of the dirt over here. Okay, so we can see
some of the dirt. So now let's go ahead and
let's add some leaks. And I think we cut out
the leaks from this one. So if we go back to our
wood planks over here, we should be able to steal it. So I just need to see
where this one comes from. So this one comes from the
Oh, the ambient occlusion. That's why I ignored it. So it looks like that I need this one, this one, this one, and just remember that we
will use our grunge, this, this, this Okay, so these pieces over
here, let's copy them. Let's go back to our roof tiles. So we just need to remember
where the outputs are. So if we go ahead and
just make this bigger. So in this blend, we
go and add this one, and then for Hcrum scan, we wanted to go ahead and grab our ambient occlusion over here. And this is because we need
to get some of these edges. So if we go ahead and set up
position a little bit lower, let's see how the
end result looks. Okay, oh, hey, perfect. So the end result does actually add some really
good looking leaks. So that's nice that we can just very quickly copy
and paste this. Why make something twice when you can just as well do this. And then we have
this dirt over here. So let's go ahead
and art this on top, but maybe make this
dirt a little bit lighter or maybe actually darker so I just want
to be able to see it. So let's Let's make it a little bit browner.
Let's do something like this. And then let's go
ahead and just make this a little bit more intense. So we do that with our non
uniform blur grayscale. Yeah, so we like art this one and then maybe also this
non uniform blur grayscale. And if we now go
ahead and go in here, maybe, I guess make this a little bit darker so that
we can actually see it. It's really hard
to see this stuff. Maybe if you do like a histogram
scan behind it, just to, like, see if we can maybe, like, push it out a bit more. There we go. Now we got
some of those leaks. Let's push it out a little bit more and then maybe make the leaks a little
bit less strong. Over here. And then
also, of course, one thing that we can do or that we still need to do is we need to add a blend to our roughness. Let's add two blends. One of them is for
our dirt over here. So we add this blend
and we set this to be art so that it
looks a lot duller. And another one is for
our leaks over here. It's art that one, too,
and's set this one to art to once again, just make this a little bit duller so that it stands
out a little bit more. See? So now we start to
get some of those leaks. And of course, you can just go ahead and mess around with it and just do whatever you
want until it looks correct. So that's pretty good. The
only thing that I would say is maybe mask out these really
thick lines over here. But at this point,
I'm first of all, just going to see how
this looks inside of real because we are already way
overdone with our chapter. So let's go ahead and
in our next chapter, we are going to go ahead and
art this into our engine, properly unwrap our models, art in a metal, and then we can slowly start by just setting
up all of our models.
44. 43 Setting Up Our Final Models Part1: So now that we've created
our roof tiles over here, what I want to do is I first want to apply them
to our models. For this, we only need
to really apply them to the generic roof A over here. So let's go into
our texture step. And then, so I'm on no wait,
I need to apply the two. I'm going to apply it,
and then I'm going to see the best way
for us to, like, add those extra variations
here at the bottom, and if it is really needed
and stuff like that. So having this piece over here, let's go ahead and
you know what? Let's go into dit mode, and I think I'm
going to separate. Oh, I think I'm going to
separate these planes over here, because that makes it
a little bit easier. Also, yeah, I also
separate the bottom one. Cause I think that one also
needs to be roof tiles. Or not. Oh, that's a tricky one. Let's not do the bottom one. I think I have a different idea. So basically, we're
just going to create a prototype of how it
will look extra nice. Luckily, because we
only have two pieces, we only do this once because
this might take a while. Press Q, separate selection. And now that we
have this one, we can go into our materials, get rid of the wood, press N, and go ahead and open
up an image texture, which is going to be R plus open it's going to be our
roof tiles over here. There we go. Okay,
so first of all, our roof tiles are well, on one side, they're inverted. Let's do a Sure U V map. Do a box map, and now we can
go ahead and have a look. So if I do five, no three maybe, and
this one is correct, so I will just flip
this one around. So I think yeah, a going round three,
that should be fine. So let's go ahead and now go into our UV editing
tab over here. And what I'm going
to do is, first of all, I'm going
to select this one. And for this one, if we
go to our move tool, I'm going to move it at the top, so that it has, like, a nice
breakpoint, see, like that. So that basically they kind
of like start over there, not that they are
halfway halfway through. And then at the bottom, oh, yeah, we do actually also
have quite a nice breakpoint. So I'll see how we can
improve that later on. Now, on the other one, which is this one over here,
we can just select it. All I'm going to do is I'm
going to go and go to my tool. No, not tool, where are you. Over here, go to my transform. Sorry, that was the
name transform. And now what I'm going
to do is I'm going to go ahead and I do want
to rotate this. Hold control when doing this, rotate this 180 over here, and then do the same thing
where we go to our of and we basically move
this up like this. Okay, so now if we go to layout, now at least our roof already has a pretty decent
looking layout. The next thing that I
wanted to do is I wanted to see if I can add some
variation over here. Now, what I'm thinking of
in terms of variation, if we go to added mode because I don't know
do we really need a variation because we are
quite spot on basically, my type of variation
would be this where we go ahead and we add, for example, a loop over here, and we add like a
loop over here. And then we have, for
example, like this piece. And then what I would
do is I would do like an Alt E and I will
basically extrude this out. And that way I would like
art and extra variation. Then I would just UV Nwrapd
so that it properly works. So that was my idea
of adding variation. But what I did not realize
is that this one is actually looking pretty good. So we'll kind of see, so maybe if we go over here. Like, on the one hand, it can
benefit from the variation. On the other hand,
it might be a lot of work to actually do that. But yeah, okay, so we
can just have a look. So if we go ahead and do contra, let's go ahead and just like
in some of these areas, maybe if we go for, like, a cutting technique instead.
What if we do that? What if we go for, like,
a technique where I basically just cut some
of these pieces off, and then I just move everything
forward a little bit. I think that will also save
us some time in our UVs. So I'm basically
going get and pading a loop pretty much
on every line. Over here. And I know
that the cutting will then cut off some
areas very abruptly. But I think from a distance, all you will really
see is the silhouette. And so that's kind
of like the plan for now. So I basically do this. And I add a few more
segments here and there. Okay. Then my plan was
to go ahead and go into Vertex mode,
select all of these. And then carefully
if we go to, like, our left view or right view, I want to kind of push these forward over here so that it's
kind of like overlapping. Okay, so that one
is pushed forward. Whoops. Am I No, I am in prospective mode. No, wait, I'm not
I'm accidentally in different viewpoint. So let's switch this back
to There we go. Weird. Okay. Fair enough. In any case, what I was talking about is
to now go ahead and maybe, like, add two extra lines. So we like one that is very
close and one that is, like, a little bit further away. And then what we can
do is we can basically just go into, like, a face sect. And sometimes undo, face select, and then sometimes
just get rid of, like, some of these pass. So here I can go a
little bit straight, and then I can say, Okay, I want, maybe actually this one, let's go longer away, longer away and then this
one S. And then we kind of, like, just add some
artificial variation. And I have no idea yet
how it is going to look, but that is something
that we will see. You know, let's
leave that one. Let's get rid of this
one. Sometimes it's good to also just leave both of them. Let's see, let's get. Here we go. So from a distance, we kind of see this very small little bits of
overlap going on. And that was kind of
like the general idea. Having this one, I don't know
why I would actually keep this one because I can
just delete the ***, grab this version, go to my MaxifsTols and do
like a quick pivot. And if we then go ahead
and just quickly do like a mirror over here. I actually let's
do add a pivot and let's go ahead and snap my pivot to vertex and just snap
it to the top over here. Turn off at a pivot. Okay, and then on the Y axis. Oh, maybe I need to actually snap it to this site over here. Add a pivot. Let's
see if I do that. Oh, no, wait. So it's not
that precise, unfortunately. Well, in that case, I'm just
going to move it myself. So we got this one, let's
just press Contra A. Let's go ahead and select
this one, press four. And I just need to go
ahead and I need to go into my right view over here. And I just need
to go in and just move it up until the
point that it is just on top of these areas
over here. Like that. So that saves me a
little bit of time. Okay, so we got this one, so let's actually see
how this looks. So if we have this
one, let's go ahead and file export all of this. Oh, right click. First of all, move this to our
generic roof layer. File export FBX. Turn on selected objects, and then in exports to
unreelGeneric roof A. Now, if we go in here, we can have a look and
see how this looks. So, oh, my tools in the way. Where are you? Generic
Roof A, reimport. Reset RFX. So that
is very subtle, but yeah, that is
actually very subtle. But I think that once
we actually have our text on it, it
will be better. What we can also do is we
can also try and see if we can maybe move the pieces
a little bit longer. If we go back to our right view, do make sure that
you select this one. If we go back to our right view, Wow, I'm really
messy with, like, how I select everything that we go in and we, for example, just hold alt eggs, and, like, move these
out at different levels. Like that to make them a
little bit more noticeable. Yeah, I think that will work
a little bit better, maybe. And then over here, same thing, old eggs. Move these out. By the way over here, they are
going away from our model. So we basically move this
stuff out like this. So it is some small stretching, but it will not matter too much. There we go, let's just
do something like this. File export, FBX, and this
is our generic roof A. So we can go ahead and
we can also export that and have that
done. He import. See? Yeah, it is a subtle
detail, but it will be there. For these pieces, I
do want to go ahead and I want to go a
little bit more intense. Oh, by the way, these
are sticking out. And that's because
they are a little bit closer to our scene. So that's why I
want to just kind of like improve them
a little bit more. For that, what I'm going to do is we are going to actually, lay on roof tiles. It will take even longer to do, but it will most likely
look a little bit better. And this is actually perfect
timing because after that, we were going to
go ahead and turn all of our models to final and look which one is exactly the first one that we
need to turn to final. It's our angled over at generic. So that's just a
nice coincidence. So we need to take that one as the first
one to final anyway, so we can just as
well do that now. So we have our angled
overhead generic over here. Okay. And then this is the
one that we need for this. Once again, for the top, we
only really need a plane. So we can go ahead and
we can select Altex. We can go ahead and just
select the top bit over here and queue and just separate
the selection like that. Now what we can do,
let's zoom in so that I can easily move. Let's go ahead and go to our material, get
rid of that one, new open our image texture, and I'm just going to
navigate to it again. Scholar. Okay. And then
we need to have a SUV, so let's do a UV. Let's first of all, rotate this this goes in
the right direction. Don't know which one
I need to rotate. I think the last one. Okay. And then three. Let's do five.
Yeah, I think five might work best from a distance. Yeah, okay, so let's do five.
Okay, so we got this one. Now what we're going to do
is we're going to go ahead and we're going to go
to our UV editing. And then if we just navigate
to this one over here, do the same thing where we just move this up a little bit. Like this. Only this time, it looks like that it is not of a perfect match over here. And maybe I also don't want it. Maybe I actually want to have it moving further so that I can actually have these
slate roofs uniquely. So the way that we're going to do this is so now
we have this plane, and as you can
imagine, for this one, because it is so
close to the camera, it will not look
nearly as good if we just use this
technique like a plane. This is a fast
technique to do it, but it's just like a technique that's more used in
the distance for the smallest bits of
resolution that you can still see something happening. The way that we're going to
do it for this one is whoops, one is that we are literally
going to model a few of these slates and then
we're just going to kind of like place them
and sink them in there. And then, along with
parallax clusion mapping, it will hopefully just
all fit together nicely. So let's save your
scene, and let's do a, maybe we can even do this. Maybe we can literally duplicate this over here and
just cut them out. So let's say that
we cut these out. What we're doing is we will, for example, grab like this. Like that will be
like one slate. And then we can do the
same thing over here. Actually, before we
do that, let's go ahead and just cue,
separate selection. And now we can go ahead
and just do that one. And over here, you know what I'm just
going to dd an extra one. Q, separate selection. Next to one here, one here, is that the same one that we've
just cut out? No, it's not. Wait, I should not
look at the grains. Well, it should be fine. So here we go ahead and we
can go and let's say we que, separate selection,
cut that one out. And let's see if we do one left. Let's do this one over
here. Here we go. And then we can go
ahead and we can select this, and
separate selection. So we now got a few of those
little pieces over here. We can, first of all, select
them, do a quick pivot, and it's done on a YRntgl and
let's get started by just pressing delete on
these edge loops that are in the center
because we don't need them. Delete edge loops,
delete edge loops. Then let's move them closer
together so that they are all on one line. So I just need to redo my quick pivot because I
accidentally moved one of these. Here we go. So we
got these ones. And now, basically, to
turn this one into final, all we need to do is we just need to go
ahead and we need to select all of these
edges over here. And I feel like for this one, the quickest way is
actually if we do like a small inset like this and then select the edges because then
we don't need to go into our UV editor and do anything because we can just go ahead and we can
just move this down. And you can see if
we move this down, maybe move this one like
a bit more forward. And then here at the bottom, what we can do is we can do
a cube bridge edge loops, and then this one, you can see, so it kind of like just
twice the reserve the UV, which does a pretty good job. So that is the general
idea for these ones. We do a small little
inset on them. Like that. Then we go
ahead and we select this, move it down, out a little bit. We like these and
bridge edge loops. And I guess he had
this technique. So maybe in like a time
naps as like a polishing. If I really do not
like the bigger roof, then I will use this
technique also on it. But, of course, the
bigger roof, this one, placing it here, it only has, like, I don't know, like ten. However, on the big
roof, I immediately need to do like 20 or 30 of them. And then I want to make sure that if I am going to
spend the time on that, I always need to make
sure that it is worth it. So that's why I often like to use, simpler
techniques first. And if those techniques
do not work, then I will go ahead and say, Okay, I will
spend the time. But a half hour in the
tutorial is a long time. It's even for
tutorial this large. So, in any case, we now have these little
slates over here, and what we can do
with these slates is so here, at this point, it's a little bit tricky because we need to have a cutoff, but it will
transition perfectly. As long as I can remember, it should be perfectly tilable. So we kind of just want to
ignore those last ones. And then for these ones, we basically just start
by placing them, and sometimes you can go
ahead and just scale them up, and you basically
want to do this. So you want to kind of
like sink them in here. And then kind of, like, have
them going out like that. So let's say that
I have this one. And sometimes I can also just
go ahead and cut it off. Because they are sunken in, so I can just cut them off. But basically, if I do this, and let's say that
this one is going a little bit further down that
we have this variation, I hope that you
can see that will give us an interesting
looking roof. Hopefully, that is the plan. I don't know if the plan will
work, but that is the plan. So like this one, you can also sometimes just sink
it in very far down, and we just need to really place these into locations once, and then it's just a matter of quickly duplicating
them and moving them. And do try to get roughly close. Here. You can see me sometimes struggling because I just want to make sure that I get
them quite close to the end. Not that close. And then what we will do is later on we will have parallax occlusion mapping, which is basically
faking the height. And once we've done
that, hopefully it will kind of
like tie together. So that's what we'll
do in the next chapter because we are going
to take all of these nicely to final completely
from start to finish. Also, do any shader changes, we will just do everything
to final right away. So I am going to create a parallax occlusion
mapping variation of a shader that we can use. Yeah, just no, that's. So we got like this
one, I can maybe, like, scale it down
a little bit more. Let's see this one
over here. Like that. Yeah, and just kind of place
this one, for example, over here, maybe move it
up a little bit more. And just like that, that should give us quite
an interesting look. And then, yeah, so the ends, we kind of just need to
ignore the ends for now. I know that might feel a
bit strange to ignore them. But I don't know how we are. Well, fifth fifth, we can
try and create an end. So we can try to, like,
create another one like this and just kind of, like, leave it over here at
this point, maybe, like, move it back a little
bit more to have it very close to the end. Come on. There we go. And then grab the same
tile and just in case I have it also over here. But yet this transition, you probably won't notice that the transition might look
a little bit strange, but we'll see how it goes. So let's say that we have this. So now if I turn off
my wife Ren togle, you can see that it will
be harder for you to even differentiate between
three D and two D, especially when we have norm maps and parallax
occlusion, everything. But from a distance, you will be able to see all
of these little pieces. And then, yes, we do have
this problem over here, where this one, they
are sticking through, and it is up to you if you want, you can go ahead and do this, or you can just say, like, Oh, what I will never see because it will be on an overhead or I make like my plank a little bit thicker
because this is, of course, also a risk
that it becomes too flat. I think I just in case, because I never know where I'm going to take my screenshots, I'm just going to carefully, move these a little bit
up only as far as they absolutely have to. Here we go. You only as far as
absolutely needed. And then just make sure that still looks correct over here. And then what we can
do is we can save sin, and at this point, this
one should be ready to go. So let's go ahead
and export this. Export FBX. This is going to be our
angled overed generic. We can go ahead and
go in here and we can right click and reimport it. Oh, yeah, press done. That was that problem that I told you about that
all of these pieces we always need to go
ahead and we need to kind of like select them, go down here, copy material to select it so
that they all have the same roof material because else it will try and to
import every single material. And there you saw
an example of that. So that's why it again,
reimport. Over here. And now what might have happened is that
when we re import, it will still leave all of
these materials in here. Oh, and I can see that
they are inverted. So what we need to do
is we need to just go ahead and press
the lead on them. See? And then these are the
last ones that we have left. So if we just also
drag in temporarily the plane in here, there we go. And then the next
thing is that I believe that all of my faces are flipped and we can
see that by going down here into face orientation, and red is bad. If you have red, just go to
Add mode and press Shift N. See? And I believe, yeah, we do need to go to Add
mode and select everything. So the shift and will basically recalculate your
normals and flip them because if they are in the warn way, so they are red, then they will act as if
whenever you have a plane, you can see that
the plane only has one side and the other
side is invisible, and that's how they will act
like the invisible side. But if I do this, there we go. Now they are properly working, and then I can just
re export that. And now I know that the model itself should be
pretty much done. So we are quite a bit over time. So what we're going to
do in the next chapter is we are just going to create a variation of our material that has the parallax
mapping in it, or maybe we can use
our original material. But over here, as you can see, that doesn't really
look a little bit more interesting to have
the slates like that. So I think that will
look quite nice. So let's go ahead and continue with this in our next chapter.
45. 44 Setting Up Our Final Models Part2: Okay, so let's go ahead
and we can start by taking our angled overhead over
here officially to final. So what we're going to do is I'm going to edit our
original mass shader, actually, and I will add some parallax occlusion
mapping functionality. So yeah, I decided to
just do it in here just to keep everything nice
and organized in one thing. So for our parallax oclusion, parallax seclusion is basically faking the loop of height. It is still a little
bit expensive, but it is better than
adding extra geometry. So the way that we're going to do this is
there is an map, and it is called the parallax. Oh, Parallax Oclusion
mapping map over here. Now, this map might seem
quite overwhelming, but it is not that bad. So first of all,
what we're going to do is we are going
to go ahead and we are going to also create
a static switch parameter, and this one will
basically be having our has parallax over here. So he parallax will
by default be false. And then what we
can do is we can go ahead and we can hold Control and we can plug our tiling into here because the
way that the parallax, oh, sorry, I knocked
against my micphone. The way that the parallax
works is that it works by inputting all of your
settings into your UVs. So with this he
parallax, if it is true, what we can do is we can
go ahead and we can have our so if it is false, we can have our original
tiling and if it is true, we can have our parallax tiling. Now, next this one, you also need to go ahead and
you need to duplicate this because this will not actually turn off our parallax. The only thing that
this will do is it will switch around the way
that we are using UVs. To actually turn it off, I'm saying this one, anti. No, yes, no, 50 50. Technically there
is an easier way, but on the other hand, it does not really
matter too much because what I can do
is with this parallax, I can go ahead and I can set my pixel depth offset the true. And if it is false, I can add a constant node, which is zero. This one can actually
turn it off. What I just realized, basically, why I stopped is
because technically, even though this
one is turned off, it will still read UVs. So technically,
we do not need to actually switch
around those UVs, and we can just go ahead
and just do this over here. So this is the important
one, the He parallax. If we plug this all the way into our pixel depth offset
input over here, that will basically be
able to turn on and off our parallax
occlusion mapping. Now that we've done that, we still do need to
have UVs over here. These UVs we can actually use because we can
use them by going into our UVs to over here
and simply plug them in. So that will still
work the same. It will just link this UV and then it will output
the same UV in here. Now what we need to do is we
need to get started by just importing a bunch of different
textures and settings. The first one is our height Map. Now, for height
Map, if we go ahead and this is actually
great to use our roof, we can right click New folder, Roof tiles over here. Now, our roof tiles
is almost done. What you need for a height
map to work inside of unreal is the height map also needs to be
in the Alpha map. So what we need to do is we
need to right click or right click space and go
ahead and art an R, G, B, and an Alpha
merge node over here. So the Alpha merge
node, as you can see, I don't know why
my senior so slow, but what we can
do is we can hold Control and we can basically plug this into both nodes and
plug this into my height. And then, of course,
you select this line, press space and art
the gradient map, and then you can just
press D to docket. So what it will do is it
will just add our height into both the RGB
and into the alpha, and it will output this
so that now we have a proper Alpha map in
here in our roof tiles. Now that all of those
things are done, what we can do is we
can start by going into unreal and simply importing all of our roof tile
maps over here. So the roof tiles will be like our base or base height map. Don't forget, go into your
normal flip the green channel. And now if we go ahead
and grab our roof ties, we can artist to our
main master node. Now, this height map, it actually takes
a object texture. It's slightly different
from a parallax texture. But basically, all you need to do is you need to right click, and then you need
to go ahead and convert this to a
texture object. And then you need to
right click again, and then you can convert it to a parameter and call
this height Map. So this texture object, as you can see, we don't have any U V inputs and everything. You always need to do
that in different ways. But this one, we just
need to plug it in here. If we would use over here, like a parameter,
it would simply not allow us to plug it in. So we got that one done. Our height ratio is going to be a scalar parameter that
we will call height. And we want to set this at
a very low value of 0.05. This will basically control how much parallax
occlusion mapping we will actually have. Our minimum steps and our maximum steps is basically
like a quality slider. So you basically go Min, and you duplicate
this and also go MX. And what I tend to
do, is I like to set my minimum often to 32 and
then my maximum to 64. And basically, the way the
parallax occlusion works is it will place a lot of
planes very close together. And when you place all of these planes very close together, what will happen is that it will give the illusionist
if there is height. You can even already, sort
of see it happening in here, but this is, of course,
not yet a good example. Now we need this one, which is our height map channel. That one is always a
little bit strange. It is basically a
constant three vector that is converted to perimeter, and it is called a V four, for example, doesn't
really matter. The only thing that matters is that this one is set to read. And for this one,
I cannot explain to you what exactly does. I just know that without
it, it doesn't work. And then we need a
note that is called an append note. Over here. We want to basically append the RGB with the Alpha and
plug it into Hight channel. I know that this
is a strange one. I don't know why,
but it is needed. Next, we have our
reference plane. Our reference plane,
let's set is well, we can do like scale
pemter and call this ref. Set this to one. The
reference plane, it's almost like the illusion
of where the height starts. That's how I always
tend to say it. Something in that direction. So let's see. So we have
these ones over here. Now, the last thing that
I would need to do is our normal maps often
have a more specific UV. So our normal maps,
we have a note, and it's called the DDX and
the DD Y value over here. And basically, the way
that this one works, it is for the MD mapping to give you a better result whenever
you do texture streaming. You basically plug we basically
plug our tiling in here. Yes. And then once
we've done our tiling, we can go ahead and we
can move this down here. And then what you need to
do is in your normal maps. That one looks funny.
There's a different color. In your normal maps,
you need to go and set your MIP value to be derivative. And then you can see that you
have a DDX and a DDY input, and we just kind of
need to do that for X, do we need to do that
for all of them? Yeah, let's just in case just in case do
that for all of them. Because technically, often
when we use Parallax, we will most likely not be using any painted versions,
but I don't know that. Who knows? I might change
my mind again later on. I will most likely
change my mind again later on because
I know myself. So we now got all of
these inputs over here. We got all of this
stuff also done. There is another thing
that they sometimes do, which they say gives
a better result, and I think it does
give a better result. That is that in our
maximum steps over here, we basically add a what's it
called Ditter temporal AA. And I can't for life,
me explain to you why. But when you lurk, the ditter it controls sort of like the
fade out, I believe. So again, I'm not a
technical artist. I just know how it works. But that's as far as I go. So basically what
you do is you lurp the ditter in the Alpha
with a not a comment. Go away, you with a
constant that is set to, like, one or like yeah, I think I believe
it's like one or 1.5, and we then multiply this with our maximum steps over here and throw this
into our MX steps. So let's see. Height Map
check, control, min max, reference plane, high channel, textures, and we can turn it on and off so that
it is set to zero. That should be everything. Everything should now
be done. So if we save this, that
should do the trick. So having this by default, it will be, of course,
set off, which is good. So that's what I want, so that now if I go ahead and
go into my materials, I can grab, for example, my Ooh, we have a error. That is new. The black
structure of a vector type. What am I missing here? Could it be this one?
Oh, samples exceeded. Oh, that the sampls
when they exceed, basically what it
means is that we have too many sampler
maps, I believe. Although that is interesting
that it has that. We can test this out to see by, for example, getting rid of some I like a sample
map that I can get rid of? I I just temporarily get rid of these and then I
just press Save. I need to see if
it still gives me arrows because I need
to wait for it to compile in shades
before we can see about arrows because LSA might
be like a setting. There's like a limited of 11 or 12 sampler maps that you can have into your graph before it starts to complain. Okay, see? So
that's the problem. So if I now quickly do this. Okay, so that is a tricky one. That means that we probably want to go ahead and we want to combine some stuff in here. Mm. So we have our roughness and we have
our roughness paint. What we could do is
we could get rid of, like our roughness paint. We could go ahead and
like get rid of that, and we can lurp it with, for example, our
roughness damage. But I'm not sure. So is there any way base colors,
base color paint? I just need to find
a way to, like, basically reduce my
amount of samples. Or ambient oclusion could be it. Often, the way that
you can also reduce samples is by combining
maps together. For example, you art your roughness map in the Alpha of your base color
or something like that. However, for us, that is quite a paint to
do at this point. So that's why I'm
trying to see if I can avoid it because I'm so close. I literally need to
save one extra map, and Base coolor paint clean. I think I feel like
our paint mask, we can maybe do something with
our paint mask over here. So, no way, because we
control the paint with it. Yeah, I think the
only way that we can do or we can get rid of, like, our AO map over here. Or what we can do is
we can go ahead and, like, over here, only use
one roughness paint map. And in that case, I'm going to use the roughness clean map. So let's plug this in most likely will
not be able to see it. Although, no, you know what? I'm going to do it like this. So this one needs to go here. I'm going to just have the roughness clean
in both slots because I cannot remember exactly
where I painted out. So if I do this, let's go ahead and save our scene,
and let's see if that works. So it's compiling the shaders. So I now have reduced one. Hopefully, I don't need to
reduce two. I don't think so. It looks like that
we were just at the amount, like
the maximum amount. Okay, so that works.
So that means that we have reached the limit
of maps that we can use. If we want to change
this and add more maps, we need to go much more
drastic where we need to start combining
different channels like you can see over here, where we like to
have one channel for the ambient occlusion, the other one for the roughness, and the other one for,
like, metallic maps. But we don't even have
metallic maps right now. So just keep that in mind
for now, this is fine. If we now go in here,
we can go ahead and we have our let's do
our wood planks. Variation. Let's
duplicate this and call this roof tiles blank. And what I'm going to do
is whenever I say blank, I'm basically meaning
that it will not have any dirt masks or
anything like that. So I can grab this one, and
I know that this one will not have any dirt masks because I don't need it for the roof. Dirt masks are the way that we are going to do all
the painting inside of substance painter is just for very important pieces
like over here, the wall quays and our
doors and everything. It's not going to
be for plain pieces like this. So we have this one. We can go ahead and so
variation mask is turned off. And then if we go into our
roof tiles, let's see. So we have our
ambient occlusion. Base color. Then we will
have a painted version, but we don't need
the painted version, so just turn it off. Let's turn off vertex
paint removal. So we can just get rid
of all of that one. It looks like that we probably, so we are walking against again, like some arrows, but we'll see. So we just need the
normal and we need the we also don't
need to bait mask, so that's probably
like the where the arrows. So we have a roughness. Then we have a norm map in here. We have a height map in here. So base color, AO,
height, normal roughness. And I think what is going on is that it is still
referencing our paint mask. So here, if we turn off has
painted version, there we go. That's more like it. I
knew that I added that. So we got these piece over here. Then we have the height,
min, and maximum. You can see over
here it is very, very intense, so let's
set this back to 0.01. And once that is done, we can start applying
it to our model. Now, the way that
we're going to apply final materials is
by actually going in here and applying it in
here. So we got this one. We can press Isolate
to just make sure which one we need looks like
we need the second one. Now we just quickly
click on our roof tiles. And just press a
little arrow button. There we go. So as you can
see, this is the parallax. See, it almost feels
like there is height, but there actually
isn't any height. If you go why up close, you can see that it's
still like the same plane. But then the general idea is that because we have
already this height, everything will blend
in together, see? And then, of course, up close, well, even up close, it
holds up really well. But then from a distance,
as you can see over here, it will blend in quite well, although we do seem to
have some overlapping going on that we need
to be careful about. So it does blending quite well. The only thing is that
it is not completely tilable which I need to
have a quick look at. So that's something that
we also need to fix. But as you can see,
that looks quite nice. So that's how we are basically going to do this kind of stuff. Great. So we now have some quite nice tilable
looking materials. Now for the bottom one, this
is the roof planks version. For the bottom one, we are going to go ahead and we are going to, let's see, right click
duplicate the roof tiles, and this one we will call wood underscore bear
underscore blank. And then the wood bear blank, this one will just
have some bear wood. So if we go to our
plain wood over here, it will just be
like variation one. So first of all,
what we need to do is we need to go ahead and oh, hey, that's not correct. The parallax should
be off by default. Let's go ahead and so
here are roof tiles. So this one should
have parallax on. Okay. So it has parallax on, but then this one
also has parallax on. That is. But this one looks like a better
result in the parallax. First of all, let's go ahead and go
to our reference plane. S. Does that do anything?
No. No, it does not. Okay, let's have a look in our shade Let's see
what's going on. It might be because we
are just using a plane. So first of all, let's actually prototype this because I do want to make sure that
the switch is working. So if we grab a simple
cube over here, Tada, we throw on
our roof tiles. So right now, the parallax. If it is off, Okay, so it looks like that
when the parallax of it, it is not actually
turning it off, which is interesting because
we set up pixel depth offset to zero over
here, if this is false. So maybe we after all, do need to do
something like this. Maybe after all we do
need to go hes parallax. If it is true, or, now, wait, sorry, let's hold control. Let's see if that works. So maybe I was white, although it does not make complete
sense to me, but we'll see. And if it's false,
it just does this. So let's see if
we save this one. And let's have a look. So
are you turning off now? Come on, compiling shaders. Oh, that's interesting. The
compiling shaders window goes away when we have
not done anything. So you do not turn off. Now, for the people that
don't know about Parallax, this is highly unlogical
because we are literally setting the pixel
adapt offset to zero. So maybe no, they did not change anything on Unreal
engine five, I believe. We can test it out. If we set the pixel dept offset
to zero over here, let's see if that
actually does something. I will just Okay, so the shading is done. So that is new. Normally, what happens is the pixel that offset
what it can do? Is it can turn off
our height maps. But in this case, it looks
like it is not doing that. Another thing is that we
can well, actually, no, wait, what if we just
set the height to zero? Oh, it's a combination. It's a combination of
setting the height to zero and then turning
off my height maps. Okay, knowing that,
what I'm going to do is so the pixel de offset does work because you did see
some changes happening. So what we're going
to do and the parallax, you can just
leave it if you want. It does not really matter. So we are going to use this in
the Pixel deep offset, but we are going to
set our height by default to zero over here.
That should do the trick. So having that done by
default, we can turn it off. So what we can say with this one is that
this one is 0.01, and it has parallax, and you can see that
if I turn it off, Oh, okay, that's logical. So now it does work. Okay, I have no idea what's
going on here. I do, but it's a
little bit strange. In any case, it is working now. So when it is off,
it will stay away, but then when it is
on, it will get back. So another thing with
the paralex although the parallax is actually
holding up really well, I'm not used to holding up
this well around corners. The only problem that
we have over here is that most likely our plane is too low because the parallax often tends to sink in
your mesh over here. And that's what you
can see over here. Now, I don't think if I
do minus, yeah, here. I don't think normally, you can use your
reference plane to, like, mess around with
it a little bit, but it does not work
specifically in that way. Our minimum and maximum
strength, we also cannot do, and our V four, whenever
I change the color, it does do something, but
it also doesn't work. So let's go ahead and
let's see if we can instead compensate it
inside of blender. And that will be the last thing that we will do
for this chapter. So let's say that for
this piece in blender, I will just ignore my
extra shapes temporarily. Let's say I have this one, and I then go ahead and I can do an AldE and I just
push it out like this. Let's see if that pushes
it out far enough. So we export this
and then we will, of course, just clean
up the rest later on. So assets angled roof
reimport almost, it is super, super close because like the sites we
cannot see the sites anyway. So that's why I'm not
too worried about them. Because they will be covered in assets or against
other assets. So instead, if I go from
global up here to local, Oh, it does not
normal over here. I pushes up a little bit more. And then what we can also
do is we can select all of these areas or these
pieces over here, and we can go ahead and set
this one to global carefully, like push this up also. Let's try that. Export,
FBX, and got over it. See, this is just
how it goes when, when we are creating
our new systems, everything, just to make sure that everything
looks correct. So now we go and see that now we do have a really
nice looking roof, and you can see that
it's super high quality. Even if I go super close,
you can see how well it is. Now, what will happen
is, of course, if you don't go in
and you would set your maximum to 16 and
your minimum to like six, you can see that the
quality greatly reduces. It will be cheaper
if you do that. But I personally,
I always like to just go as high as possible. Like this to make sure that
everything looks correct. So we got this one ready to go. Our planks are
nicely oversticking. You can pretty much not see the difference anymore
between them, also. And that is how you create really high quality
looking roofs inside of unreal and other te games. So the only thing
that we now need to do is we have our materials. We have our wood
planks bare over here, and now the parallax
has been turned off, and now everything is
working correctly. So what we can do
is we can go to our plain wood, and
we can input it. I still don't know what
made it work correctly. Maybe I just didn't wait long enough for it to recalculate. But in any case, we can just
go ahead and save this one. And if we go into our Oh, wait, we already
have it over here. If we go ahead and select
our wood bear and art it, save, there we go. That
should do the twig. So for some simple wood,
that should be fine. And what we can also
do is we can also go ahead and maybe dupld wood, bear, blank, score variation B. Over here, let's just
say we add this one. And then for this one,
if we open it up, we will grab the
darker wood for this. Maybe that one looks nicer. Not the red wood, but
like the dull wood. Here you see, just to give that little bit of contrast
between the two pieces. Okay, perfect. That one
is working totally fine. The only thing with Palex
is that the shadows are often a little bit
broken, as you can see. And for this one, that's
always a little bit tricky because the only
way to currently fix it because it's a bug inside of nul is five is literally
turn off cast shadow. And then it tends to work
if you do cast shadow. Yeah, so that works,
but then of course, it does not cast anything anymore over here. So
that is the problem. So it kind of depends on if it is bad enough,
then we can fix it, but we will go over that a little bit later
on because, of course, with the cast shadow
here, you can see that there's not that much of a
difference between them. So yeah, it is a bug.
Just keep that in mind. In any case, I'm talking
way too much right now. I'm going to save my scene,
and the next chapter, we will just go
ahead and continue by setting up all of our models.
46. 45 Setting Up Our Final Models Part3: Okay, so now that our roof
over here is pretty much done, although I will see if I can somehow fix a little
shadow problems over here, but right now they're not
bothering me too much, and I think there literally
is not a fix for it. I've looked online,
and it seems to be just like an unnual engine
five buck. That can happen. In any case, we have
the angled overed spot, which is the next one, but that one we honestly
can just throw on, like, a simple woods bear
blank over here. Just throw that one
on. There were going. That should already do the
trick for most of these. And then of course,
we probably want to do some nicer movement. Actually, you know
what, for this one, it might be better if we do
the variation B fit together. We got those ones also done. Now what we're going
to do is we have a little bit more
of a bigger one. We have our balcony fan beam and then we have
over here this one. But then we also have the floor. I'm actually going to do
is, I think, if possible, I want to combine all
of these pieces and give them the same mask so that we still
have a mask for it, but we will basically just give the same mask for all of them. Also, one thing that I did
need to do is I had to, like, change this stuff. So that's the first
thing we will do. We will first of all,
change those things around, and then we can create
like a mask for this. So if we go into blender, Let's add these pieces to
our angled overhead generic. And then we have where are you? Balcony fence
straight over here. There we go. And so, yeah. So for this one, what
we're going to do is we are basically just going to go ahead and for these pieces, you know, let's press
height on this stuff. And then for these pieces,
I'm going to delete them. And it looks like that, yeah, all that effort that we put in, unfortunately, it was wasted. So it looks like it just
doesn't work that way. I'm just going to
right click and I'm going to add
like a fill layer. Or actually, I believe
that if we do like a bridge that it might give me or it might
keep the same UV. So let's do Q and
bridge. There we go. So yeah, like having
that tiny little bit of, like, a dent. I don't
really care about that. You can remove it or not. I'm just going to
not do that just to save a little bit of time.
Ah, that's unfortunate. So it looks like we do
need to do redo our UV, because it looks
like that it cannot calculate it correctly. So let's go ahead
and just redo UV. So we have this one,
Sure U V map, UV box, and I believe that we were
going to set it to like two and 90 degrees
seems to be fine, okay. Also, by the way, one
thing that you can do is you can go ahead and do this, and now delete the edge loops. I guess that doesn't
take too long. I should not cut corners this
small. I tend to do that. I tend to cut really small
corners like this where, like, really small
stuff because I think that it will
save me a lot of time. But if I really think about it, it would only save me like 30 seconds or
something like that. But anyway, 30 seconds
are still 30 seconds. And then just do
another box map. Okay, so that one
is now ready to go. So what I wanted to do is I wanted to add
the different UV. So if we go ahead
and press ALDH, we already have this one. Now, adding multiple objects to the same UV channel is a
little bit tricky blender. So I'm going to get started
by just selecting this and pressing CtraJ so that we have one of
these, one of these. And now what I'm going to
do. So we have these ones. Let's re add these back to
our balcony fence strait. And then we also have a
balcony floor over here. And for that one, I'm just
going to select everything and do also Contra J so
that we have one floor. Oh, sorry, before we do
that, make sure to apply. So Contra A, apply your pieces. There we go. Now
that works better. White? No, it removes it. That's a pain. Or not? Yeah, yes, yeah,
so it removes it. If it removes it, in that case, just hide this and just
do this one as like a contro j because I do want to keep my weight
at normals in there. So we now got these
pieces over here. Now, one of the tricky
things is that I want to go ahead and I
want to keep these all in, like, I need to move them
away from each other, but I don't really
want to do that. So if I have a look
at this, yeah, I kind of like need to create
some space between them. But it's very difficult to, of course, do that without
moving anything away. Now, for this, we could go ahead and mess around with
animation where we would turn on auto key and then we
can set one frame and then go forward and
set another frame to basically keep it so that we can easily switch
between two positions. However, what I find to be
a much easier way is to simply export it like this and then just quickly input this
into a clean blender scene, move it apart, and
then re export it again because we only need
to really do it once. So all of the objects
that we want to combine into one mask,
we want to export. Let's see. So these ones
we can all combine. Let's see how we are going
to combine everything. So we will go ahead and
our door is already here. So we will have our door and all of our windows
combined into one piece. We will have our walkway and our walkway straight combined. The walkway sites there. I'm not actually going
to do the mask because I don't think it's
worth it for now, because it just does
not art enough. And I think that's already
it for all of our masks. So that let's do it in that way. If we go ahead and
so for these pieces, what we need to do is we do need to go in every
single piece, and that's why I
want to minimize the amount of pieces
as much as possible. We can go into our UV maps and we just need to press the plus twice and just
call this UV tree. Now, let's go ahead and
do the same over here, plus twice, UV three. Over here plus three
times UV three. And here plus three
times UV three. Okay, perfect. So they now
will have all of the same UVs, and that should all be fine. So if I now go ahead and just double check by going
to my UV editor, Okay, UV three, as we can see, A has these pieces. Another thing that I want to check because I
think I noticed it. Yeah, see, I knew that, shift in and just quickly swap around. So this is something that we need to be a little bit careful about because inside
of over here, it's very difficult to see. You can only see sort of like the reflections that they
are the opposite way. But because we are rendering two sided, this is very
difficult to see. So just keep that
in mind that we do need to double
check those things. In any case, now that we
have all of these UV trees, we should be able to
select all of them. Go over here, and
now we are editing the UV tree map on all of
these at the same time. So since as far as
I know in Blender, we can multi UV multiple
different objects. So we should be able to simply
pass A, then go into UV. Oh, actually, let's go
ahead and F one plus Q and just apply all of our
transforms to make sure. And then we need to go
to UV average Islands, UV PAC Islands. Now we can just go ahead
and we can double check. So if we now go to UV Map zero, uh, I think the switching
it will not do. So let's just switch one by one. So UV three, UV zero. So that one is fine.
Let's do this. I only need to do this
once, U three, UV Zero. Okay, so that one works. And then once I know
that this system works, because I've never
actually done it in this specific way because most time this kind of workflows, I always use in Maya. So this is the first time, not the first time,
but the first, I mean, like a year that I'm
doing it inside of blender. So just keep that
in mind, whenever I just double check something, it's good for you guys to see. But it's also just me making sure that it works before
I start messing up. In any case, all of these pieces are now done. That is good. So with these
pieces, what we can do is if we go ahead and
we can save a scene, and I think the dis stuff we can already export
because we can also switch around the
UV channels later on. So if we go to File Export FBX, And it was Mong folder. Over here, this is the right
folder, exports to painter, and we will call
this Balcony pieces. Okay, let's see.
Turn off animation, geometry, everything
should be fine, so it should export everything. So once we've done
that, what we can do is because these are
all still the same, we can just save our scene. And we can also now
go ahead and select this one file export FBX. And this one needs
to go to unreal. So this one is going to be
our balcony where are you? Balcony fence beam, this one, export FBX, balcony
fence straight. And this one export
FBX, balcony floor. Okay, so those now all exported inside of wheel, so
that should be fine. Now what we can do
is we can simply create a new general scene. And then we go to
File, Import and FBX, And then if we go to our
EpotsFolder to painter, and in here we have
our balcony pieces. We want to go ahead
and import them, and that's double check
to make sure that all of our UVs maps are still
here, which they are. The only thing that is
strange is for some reason, my plugin is not loaded in yet. So preferences, Adons why
are you not loaded in? I even forgot what
it was called. UV Underscore Map Tools.
That's not the one. So let's just go
ahead and quickly install UV map
tools, Install don. Oh, wait, no, wait. I was
called UV tools over here. Okay, for some reason,
it was turned off. In any case, what we can
do now with these pieces is we can go ahead and since this one only goes to painter, we can start by moving these
apart so that they will not be affected by occlusion or by other masks or
anything like that. And now that these
are moved apart, what we can do is we can
go ahead and most like, yeah, no way that it
will do multi select. So just move up, move up, move up, and move
up. There we go. And now we can just
go ahead and re export this to the same FBX. If we go ahead and
go in here, exports. And then to painter. And here we have
selected objects, and this is going to be our
balcony pieces. There we go. Okay, so that should
just do the trick. So we can also now go
ahead and if we want, we can go in, resent and open up our
structural pieces. We don't even need
to save the scene. So this one is now all good, and it's all totally fine. Now what we can do is we can go ahead and go to
Substance Painter. Here we go, and then
we can go file new. Don't forget our template. We created template so we
can grab our Western mask, and then we can go to I'm just navigating
through the folder. In our file, we can go ahead and we can go to our balcony pieces over here, open that one up. Document resolution k is fine, open GL is fine, and we
can just press Okay. Perfect. So all of these
pieces are now in here. We can double check
to make sure that our UVs are correct by going to TD Vew and they look
totally fine to me. I believe yes, because
these are blanks, so they will all look straight. And else we will notice soon enough if
something is wrong. So we got all of these pieces. All we need to do now
is we need to go ahead. Oh, no, wait. Sorry, we have
two materials. That's wrong. So we just need to go ahead
and quickly go to blender, New General, and then go ahead and just re import
once again our FBX. Over here, which is just going
to be our balcony pieces. So we just want to
quickly import them. And I'm just going to select
everything, select one, go into my materials
and just press copy material to select it so that everything is the
exact same material, else, it will not work. So let's go ahead and just
quickly re export this. Over here and let's go to our
balcony pieces and Export. Now if we go back into
Substance Painter, just quickly create a new scene, and then we can have our
balcony pieces in here. Press Okay, disregard
this. Let's see. Now we have this
one, Bkiny pieces in our text set list,
we don't need a layer. Now in our text set settings, we just want to go
ahead and go down here. You can see that it
has our RGBA channels, and we just want to go
into our bake mesh maps, set this two k and
add our low poly mesh as high poly and just bake
everything nicely like this. Okay, now that those are done, all we need to do is go into
our layers and remember, we have a SMRT material for
this that we called Western, so we can simply type
in West at the top. Go ahead and just input
this, and there we go. Okay, so highlights are actually fine because that one was just like a mask generation. So those are maybe a
little bit strong, maybe go into our
mask editor and just tone down the global
balance of them a little bit. But for the rest, like,
here, that's fine. That stuff is not too special. Then we have our dirt over here. So our dirt is it has some
nice dirt at the bottom. I feel like our dirt.
So first of all, get rid of the paint because the paint is always specific. Let's set our dirt levels a
little bit higher over here. And maybe what we
will also want to do is maybe now go ahead
and add the paint layer, and then if we go ahead
and go into our brushes, we can grab like a
first of all, No, wait, let's do like a
dirt one at, like, quite a low flow and a high
size and just kind of like, Oh, we need to go way
low with the flow. And just like in one area, just kind of like, No,
let's you know that. I kind of, like, just want
to have it a little bit where you meet the wall, I just want to get a little
bit more dirt like that. And also, what I want to do is I also want to go
ahead and maybe, like, give it, like, a
little bit more dirt. I like the bottom
pieces over here. Like that. I may also you
like a little bit over here. So just give it some random dirt here and there, stuff like that. Now, I can remember
that our dirt that we had to go ahead and add the levels on top of this to
really push out the dirt. So let's go ahead
and do that also. That does mean that
over here, this kind of dirt might be a
little bit too strong. So you might want to
set your flow up, press X, and just kind of like reduce it
again a little bit. I don't know those streaks
are a little bit interesting. So let's just, let's get rid of those also because
I don't really trust that. And we still need to do our weight normals on
this or weight normals, our smooth normals,
but that's okay. Paint removal for these ones, I'm not sure if we
actually need that. But just in case we want to
have a white painted fence, we can go ahead and we
can go over here on our paint removal and
get rid of this one. So if we want to have
a white painted fence, it would most likely be again around the areas where we have occlusion and
stuff like that. Let's go into our
smart materials, and let's see if we
can find something. So for those, I kind
of want to go for like a moss from top and
see if that one works. So the moss from top, if
you go ahead and invert it, does kind of like
work here and there, but not the way that
I want it to work. So let's not do that. Let's
do a ground durt maybe. Let me just move this. So we
have ground dirt over here. Get rid of the first ground
map. I never like that one. But then if we go ahead
and scroll down to our position map, here, it's basically arts like some extra dirt or some extra paint
peeling in those areas, which looks like it
works okay for, like, these kind of areas over here, although it does not
work nicely over there. You know what let's do
some hand painting. I don't think I can really
find something I like. So for the hand painting, this is going to
be paint removal, so we can go for,
like, a harsher map. So let's go for the artistic
heavy sponge over here. And this one, you can see that we can do this kind
of hand painting. So what I can do is I can
go ahead and just, like, give it some randomness, like, a painting like that. And also over here. So that kind just have some pain
peeling going on. And then what we can do is we can if we only want to have the pain
peeling in those areas, we can go ahead and
make our p a bit smaller and see if we can remove some of this
paint removal over here, and then also kind remove it
on those areas in between. So that the paint
removal will kind of stay in these areas. Normally, I don't spend
this much time on masks, but seeing that we
are only going to have two or three
of these masks, I think it's this
good if we just spend a little bit extra time. I might have more variations, but those variations come
from whenever I will go in and do some custom extra
pieces that I will time laps. Then I might also add
those pieces to a mask, but that is something that
will be done in time laps, so I'm not really in a rush
in time rush for those. So we got the over here. Same over here, we
can go ahead and we can do this. There we go. So that
we'll just have some paint peeling
in those areas. And then over here, maybe
we can also go ahead and, like, press X and maybe, like, give it some kind of paint peeling. This
is quite interesting. Stuff that we get over
here, I'm not used to getting that from these areas. And then maybe over here,
we can also go ahead and do the same where we have
over here in these areas, where we can also just
do some general paint peeling same over
here, like that. And then if needed, we
can also always have vertex colors. Of course. But this stuff is just
here just in case. And then over here,
I'm just doing it really messy like that, just to get like
something in there. Over here, something like that. I don't know yet how
good it will look, but that's something that
we can see soon enough. And then maybe also actually here on the top a little bit, just because the top feels
like one of those places where a lot of people will
be touching the area, so the pains will go away. As you might have noticed, it is sometimes a little bit annoying to move
around with this, and that's just because we have the piece is quite far away. So over here, I'm
just going to have also a little bit on
the top like that. There we go. Okay, so we
got these pieces now done. What we can do is we
can, first of all, start by saving scene, and we are going to
save this one as balcony pieces over here, save. And I'm just going to
navigate to my export folder, and then we can go
file export textures. In here, balcony pieces
in our masks folder, and then we can just grab our Western mask tutorial at
the TGA and press Export. There we go. That's done. Now
if we go ahead and quickly go into real engine,
first of all, these balcony piece over here, reimport all of
them. Oh, whoops. I forgot to do that. So let's go ahead and go
open stock shop pieces. No. And then I want
to just export this one as the straight
version with the other piece. Export to unreal
selected objects. So balcony fence
straight. Try it again. Okay, great. So we got
those now all done. All we need to do now is
we need to go to textures, masks, import our balcony
pieces mask over here. So that one is now also done. And now what we can do so these ones do need to
have unique materials. So if we have as you can see, there's also like a
white painted balcony. Yeah, you know what? Let's
do that one because then we can use our paint
mask to kind of like, have a look at it. So I believe that
we already had, like, a painted here. So we already had, like,
painted white wood. So what we're going to do,
they all can use pretty much, I assume everything
will be painted. So they can all pretty much
use the same material. So we can go into our materials. We can grab let's do
our um door A wood, and let's duplicate
this one and call this one balcony pieces
painted over here. And then for this one,
we need to go ahead and just open up
all these pieces, and we can get started with it's just going to be
like a clean painted wood. So let's have our normal
roughness over here. We need to have our
balcony mask over here. He painted version
needs to be turned on. Then what we can do is we
also have our damage paint so we can go this base color. Oh, yeah, so that's
the paint clean, which is also going to
be the wood over here. And then we have our
normal norm paints clean. This one needs to go in here. No paint damage, this
one needs to go in here. Our paint mask is
going to be this one, and our roughness clean is going to be this
one over here. Okay, so all of these maps are now inputted, so
that's our fine. We got all of that stuff done, so if we now go
ahead to save it, and if we first of all, go ahead and open up our three models, I know that these chapters are quite a bit
longer than normal, but yeah, I just need to
get all of this stuff done, so it's easier if I do this
in slightly longer chapters. So our balcony pieces, we can go ahead and go in here and just add them to here.
We can have a look. Okay, so you can see that the paint peeling is
already working quite well. So this is the stuff
that we have over here with our painted versions. So that's pretty good already. Let's go ahead and just
do some small tweaks, and then we can
continue with that. First of all, dart amount. Okay, so dart amount,
leaving it to one is fine. Highlight amount, our
highlight amount, I'm going to set a
little bit higher to maybe like 15 so that we have slightly more highlights
going on. So that is fine. Our normal strength. Yeah, normal strength
doesn't need to change. Our roughness does
not need to change. So that's actually
already quite spot on. Yeah, maybe, like, No, wait, our dirt
color is also fine. I think the only thing
that I'm going to do is I'm going to
go back to painter. For this one, I'm
going to go ahead and I'm going to just add my size, and I'm just adding some more random paint damages like that. And I believe if I have
a look, Yeah, also, maybe like some more random
paint damages here that I like sometimes go, like, a little bit
higher in terms of, like, where all my paint
and everything is. Yeah, see here. So we get some nice damages and maybe also have a little bit more in one area that we have over here, like one streak like that
or something like that. There we go, that we also have one damage area like that.
So that one is all fine. And then in my dirt over here, I was going to go
ahead and I was going to go in my levels
and just push this out a little bit more because if I also have look over here, it is hard to even
see most of the dirt. So we are pushing that out, and now let's go ahead
and export this. Give this a look, masks, balcony pieces re import. Here, see? So we now get like
this dirt included in it, and then we have some
more damage going on. Nice. And we got
this dirt over here. So that's all
looking pretty good. Let's save our scene. And
I've lifted it over here. Here we can see
like in full glory. So, see, that's
looking quite nice. So we have some dirt going on. We have our paint peeling, so they're not all perfect, and that's all
looking pretty good. And then what we
can also do is we can also simply
have a variation. So we have our balcony
pieces painted. We can duplicate, call
this balcony pieces. Bare and then for this one, we can just go ahead and
has painted version we can turn off and we
can simply grab. Let's say we grab y. So let's go for the
darker wood again. So base color, normal roughness like this.
We can save this. And then whenever we want to have a balcony
with these pieces, all we need to do is grab our balcony pieces bare,
drag them on here. And just like that, even this actually also looks really cool, where we have a difference
between the two. But we can simply now drag on our pieces wherever we want
to have our variation, and you can see that this
all looks very interesting, especially with our
edge highlights, we can just mess
around with those. And like this, you
can very quickly and make it very flexible to add really interesting look
developments to your scene. So over here, what I can
do is I can say, like, Okay, I want to have my
highlights mount back to, like, ten, and maybe
like even five, just to tone it
down a little bit. I don't know, maybe
ten. And then we still have all of our
dort sitting on here. And just like that, we have two different types
of balconies. Perfect. So those are now done. In the next chapter, what
we will do is we will go ahead and we will
continue with our door A, we already have, so we can actually just go
ahead and art that. On not, we still need to add
some more stuff to door A. So we will finish door A, and then what we're going
to do is we're going to do door B and all of our
windows all in one go. So let's continue with
that in our next chapter.
47. 46 Setting Up Our Final Models Part4: Okay. So now that we have done our balcony
pieces over here, let's go ahead and
just get rid of them. The next one is going
to be our door A. Let's go ahead and just
finish this one off. So for our door A, we already did most of the wood. We just need to import
the metal over here. So if we have this one, let's go ahead and well, first of all, let's close all of these pieces because every model
will add some expense, and it will make
everything run a bit slow. Safe. Close this. Now, in our
materials, door A selected. Oh, open up door A. There we go select it, and then we need to go
ahead and we need to add it over here. So
that is totally fine. Let's go ahead and
save our scene. Now, yes, so we had to do some metal over here and
Oh, yeah, and the glass. That's another thing that
we needed to work on. So for our metal, what
I'm going to do is because metal is
very easy to create, I do not really
want to spend time on it for only a door knob. So I'm just going to go
ahead and type in metal. Over here. And I am
going to cheat a bit, and I'm just going to
download a simple metal. So if we go to text.com, we can go to often to Oh, well, often PBM teals will be the
one that have metals in it. And if you go down here,
you will have metal. So what we can do is we simply
quickly just grab a metal from here because these are all free PBM teals that we can use. And let's go for, like, so we probably want
to go for, like, just like a simple plain steel or maybe like a brush
steel. I don't know. Clean stainless steel. That's super like a
plain steel over here. And all we need
to do is you just need to create an account. And then what you can do is
you can download up to one K, which is more than
enough for what we need. So let's download the albedo
normal roughness over here and simply drag
that one into a folder, which I have over here, so
I've drag it into a folder. And now the next thing that we need to do is we just need to import these over here. And then what we can
do is so over here, these materials are very
intense, but the metal. I don't really need
to do all that stuff. So what I'm going to
do is I'm going to just create a new
material that I will call a basic underscore master, for example, and
this one will just have some very simple
materials in here. What we can do is we
can go to our metal. You can just direct
this in here. And then if we ever need
some very basic materials, we can just use this one. So we can go ahead
and normal roughness, Do like a scalar
parameter that we call Metallic over here. And then also right
click and just convert the parameter or map
this is base color. Convert the parameter,
normal map. And this one will be converted perimeter roughness
map over here. So we got all of those done. We can just go
ahead and save it. So there we go. It's that easy. So let's go into our materials, and then we have our basic
master simply create the material instance and call this metal underscore polished. And the only thing that we
need to do for this one is we need to go into our metallic
and set this to one. And then you can see
that we have now this polished metal over here. That's it. We can
go into our door, make sure the metal
polish is selected, and we just want to
go ahead and artist over here and save it. And now what I can see is I can see that it is way too dark. So for this, we do want to
have a little bit of control. Let's Go ahead and we can actually control
it into our textures. Let's start by just opening up over here our base
scroller texture. And then if we drag it
down and scroll down, over here, we can
set our brightness. So if we set our
brightness a two, it can become a
little bit stronger. Then we can also go at and do
the same for our roughness. So I just want to kind
of, like, balance it out. The only one that I
do not really want to edit is going to be our metallic map
because something is metallic or it is not metallic. The only thing 0-1
in metallic is dirt, but we don't really have dirt. So what we can do is we can
grab over here our roughness. And if I said this the
two or maybe five, you can see that it
becomes less, even ten. Here seen then it becomes
a little bit less strong. 15 maybe even let's
do 12. There we go. So that is basically a way
that we can adjust that, and I'm fine with that
for now. Okay, perfect. So we also got
those pieces done. Now, I need to make
a decision on how I'm going to do my
glass over here, which actually tricky one
because we have a lot of glass that we probably want to do all at the same time. So what we might want to do for now is we might actually
want to go ahead and do all of that glass separately into its own
little thing later on. Another thing that I want to do is I think I want to change the material of my door to have a slightly
different material. So if we go ahead and
go into a blender, we turn off the balcony stuff
and we grab our door A. What I want to do is in
our door A over here. Let's see. So we
have one material. I want to just go ahead and
I want to select this door. 1 second. Let's just tag and
select and then press four. Are you selecting?
Wait, let's do this. Oh, yeah, wait, because I separated that material.
I forgot about that. So we want to go ahead
and just select our door. Let's do que and just separate
our selection over here. Okay? The weight normals
are still intact. So we have over here door, and what I'm going to
do is for our door, I'm just going to go ahead
and I'm going to change the naming to plain Wood 24. Oh, wait. Of course,
that does not work. Um, close it. Let's go over here.
Close it, New. Would be doesn't matter the name and then also artists
who like the center bit. So copy them to like
the there we go. Okay. So now that we
have these pieces done, we can go ahead and we
can just re export this. And that way, I can just
slightly change my door color, which will hopefully break up the plain color
a little bit more. So we re import
this, we press done. And then all we need to do
is if we go into materials, we have our door A wood door A wood
underscore variation B. And then for this variation, what we're going to
do is we are simply going to change the
colors around a bit. Uh, let's first apply
it to our scene. So here we have door A,
door A wood variation B. We can just go ahead and
apply it just like that. It should still have my
vertex colors just in here. Or not? Let's go to vertex colors and set
this to RGB channels. Yeah, yeah, so it
still has it in here. So why are you not showing
that is interesting. But let's first of all, have
a look at that later on. First of all, we have
this one over here, and I just want to go at and I just want to
change the colors. So we have a base color,
normal roughness, and that's the one that
I want to focus on. And then in our
plain wood, we can just basically swap
around colors. Let's say we want to
go for maybe like a darker wood or
maybe older wood. I think the red wood
looks quite nice. Let's go for our
red wood over here. Our color overlay is
fine, our dirt overlay, I'm going to make that one a little bit darker
also like that, so that yeah actually a
little bit darker even more. And I'm going to make
my color variation. Okay, so it looks like
my color variation. I decided to once again
break, which is interesting. I don't exactly know why, but we will figure that out. Sorry. So we got
over here this door, and the only thing
that I would say is that if we just go right in our plain wood over here
track it over here, and let's just set our color to our brightness
to be a little bit lighter. So if we set this the
two, Let's do 1.5. So we said this
used to be a little bit brighter over
here. There we go. And now that does like an
interesting difference, see? So we go like this interesting difference going on over here. For this vertex color over here, that one is a
little bit strange. If we go to our vertex colors, it is reading just
fine over here. We just had it working. Let's turn off vertex colors. So Oh, no, wait,
it is white again. Maybe it reset the vertex
colors when Did this. So that might be the case. So if we go into object mode, we select this one over here, go into vertex mode, you need to be black. Paint set vertex
colors. There we go. Okay, so I guess
that it once again, just as soon as we separate
it for some reason, it removes our vertex colors. I didn't actually
know that. That feels a little bit strange
that it does that, but OL we have fixed it, so now we can go ahead and
we can re import this. There we go. And now we can
see that now we do have a small difference once again between our verte scholars.
So that's our door. So the window of a
door we will work on a little bit later,
but that's pretty good. So now that we have
our door done, now what we're going to do is we are going to go ahead and door B actually does not I said that we were
going to do door B, but door B is just
like a copy of door A. So as far as I know, all we
need to do is we just need to once again,
like, replace this. So if we have the let's go
outside of texture mode. If we have these pieces, if we do a Shift D
or Shift D. Yeah, yeah, wait, Shift D is
still fine or conto C or Contra V. Right
click Move to collection, so this is going to be door B. And then if we go into door
B, so we have this one. Now, the tricky thing is to actually differentiate
between the two. I cannot really do
that as easily. I can temporarily just move
them to the site over here, and then I guess
I could do that. So if I have this one, it's going to added mode, this I can get rid of
this I can get rid of. This I can get rid of this one. And then for this one, it
looks like that's all we need to do is we just
needed to go in. Let's go into left view
or something like that. And delete this stuff. Over here, so we
were going to go ahead and we were going
to delete this stuff. And then maybe what I can do is that I can avoid
needing to, like, it. Oh, no, that probably
won't look very good if we push this down just so
that we do not need to, like, edit UVs again. Although maybe it works. It might work. Now I look at it. If we move this one also down? I'm just trying to
save some time by not needing to redo my UVs because I want to keep my UVs very
much the same for this one, because I also, of course,
I have my mask UVs. So if I am able to just do some very small little
bits of stretching and everything like that and
just have it work like that, then of course, I
would like to do that. So we have this one. Let's
move this one up a little bit. And then it looks like that
if we go to Vertex mode, we just want to go ahead
and move this one up here. Move this one up
here. Move this one up here, and finally. Also move that one. There we go. Okay, so we got this door. Now it's just a
matter of setting the door in exactly
the same place. Like this, contra I
delete the old one, and that should do the trick. So if you just quickly
switch back over here, yeah, that is not too bad
in terms of stretching. So now that we have got
this stuff done, oh, hey, um we are setting keyframes. Setting keyframes is
actually quite bad because you right click and
just delete key frames. If you accidentally
set a keyframe, it can actually really mess up your model because
it will try to keep setting your position back whenever you make a change
and you do not want that. But in any case, let's save
our scene, export FBX. So let's export this as Dorb let's see if this
worked correctly. So right click, reimport Looks
like it worked correctly. So now all we need to do is, let's just drag it over here. And then we have
our door A wood. Metal polished and door B wood. Okay, it looks like that.
Now as you can see here, it is using all the same UVs. So we once again
saved a bunch of time by not needing
to redo any of that. And now we will also have our wood just sitting over here. And that will all
work totally fine. Perfect. So that is already
our doors over here. We still need to
create quite a bit of variations because you can
see them all over the place. But for now, this
is pretty good. So the next one is going to be. So yes, we want to do this,
but let's first of all, just go ahead and
just quickly open up because these
ones are very easy, we will have a generic beam, and we will have
a generic beam B, and you guys can just
use a normal wood, and we're just going to start with like a base
wood and then we can always swap it
around later on. So I feel like for
the generic beam, I will use a clean wood. So if I go over here, we will have wood bear blank, and then for lumber B, I will use like older
wood over here. There we go. So that's
already it for those ones, as you can see those are now nicely being applied everywhere, and then we can have
more variations later on our generic roof over here. Okay, so that one is
quite interesting. I believe because we've already done everything
that all we need to do is just apply UVs to this because we do not need to have a mask for this once again. I don't think mask
will be useful. We can just use some
decals if needed. So we will have our planks for which I'm going to
use the wood variation B, and the reason I'm
using that one is because I feel like this would be the wood that would
not be as maintained. We have the front
and for the front, we can actually
use parallax also. So for the front one, if we just move this
out of the way, let's use not the
angled version, but actually use
the flat version. So if we have, where are you? Bare wood variation, is
this the one? Plain wood? No, that's not the
one. I want to know because we created like a version wood planks
variation A. That's the one. So woodblanks variation A. I assume that you
are at Angled Wood. Yes, you are at Angled Wood. So if we go ahead and
go into our materials, right click duplicate
this and call this Wood Blank variation B and apply this one to our scene. And variation number B U, I want you to have if we go
to our Woodplanks let's see. I don't think we have actually
exported that one yet. So I want to have one
of my flatter planks. So if we go ahead
and go in here, these are our roof tiles. If we go ahead and go to our wood planks over here,
we can right away do this. And we also want it just
for our height map. Per space Alpha merge over here, convert this one to a grade map. There we go. So that's
already properly set up. And we want to go
ahead and we want to export the following one, which in our preset is going
to be are flat planks short. I think that one will
be quite nice to do. And then all I need to do is
I do need to double check because we might not have
updated it for a while. So I just need to double
check that all of these things still look correct. Okay, so it looks like
that all looks correct. So our flat planks short has planks is true,
has paint is false. And then in our base
color, broken paint is, of course, also false, but
that does not really matter. So that's all good. Let's
go ahead and export this. Final. Oh, wait. Did I already export this? Hold on. I think I already did. I just did not input it. Wood planks, final
flat planks bear variation B. No, wait. I did not I think I just
did like a color variation. So if we have this one,
let's just redo this. Flat planks bare, short.
Let's use that one. And let's go ahead and also
export the height map in here and do not export
the paint mask. And yes, let's just go
ahead and export this. And while that's exporting, we can go back in
here, wood planks. Then we go right, click flat. And then in here, we can right click variation underscore A. See, maybe I should have managed the naming
a little bit better, but it should not be too bad. So if we have this one,
we can just go ahead and we can grab our Well, let's just grab all
of our maps and just input them. Over here. Then if we go ahead
and go to our normal, we just want to flip around
the green channel over here, and now we can start
by adding this. So we have our wood blanks, and we also have our
painted wood planks. However, for now, we are not
going to art our painted, but we do want to art
our parallax. Over here. Has painted variation. Yeah, I need to have
a look at that. So somewhere on a
weight here we go. Turn that one off. There we
go. I keep forgetting that. So now we can just go at them, we can drag in our planks over here, including our height. So we have our roughness,
and then we have our height. And then if we go down
here to a height, we set this to 0.01. Ah, the shadows are too
broken. That's a shame. As I said before, shadows are broken with
parallax mapping, unfortunately, and
I feel like that, in this case, they are
broken too strong. We can go into our normal
intensity and set this to two. Oh, I think our normal
intensity is flipped. So let's set this to minus
S minus one or minus two. In the last tutorial, we
also had this problem that sometimes we need
to flip it around. I think it is minus one. I just need to very
quickly go into my master material and flip the default around to be minus one also because else
I keep forgetting that. So you need to be minus
one by default and safe. Over here. So a
parallax turned off, but I think it is still
quite noticeable. So it's not too bad that we don't have
parallax on this one. And for the rest, everything
else should now also have a proper norm map sitting here. So yeah, that should be good. Maybe here the norm map can
be a little bit stronger. If we set this
normal strength to minus two minus one because we already
set this up and that's why it is
already overwritten. So we sometimes just
need to go in here and just quickly set
this back to minus one. Whenever we have overwritten it, minus one, Minus one, or you can a one
minus to your scene. Kind depends on what
you want to do. Roof tiles, minus one, Woodbre yeah, I am a little bit worried
about the roof tiles and the parallax mapping. It's a little bit annoying
that this happens, but right now, there isn't really much to do
about it. I feel like that. What I feel like that
basically unreal is just so focused on nanite that they are starting to forget
about things like parallax, because they expect everyone
to just use nanite, but I don't feel like
that is the way to go. So over here, that
does still look okay. But yeah, give Parallax
some love. Epic, please. But in any case, so we
got all of this stuff. So let's just go ahead and
close it off just to keep my Project a little bit clean. Let's save scene
and close this one. And then we have a woodlanx
variation we can close, basic master, we can close, and our door we can also close. And now the last one
that we need to do is so over here, as
I said before, yes, we will need to get
some shadows on this, which is a little bit annoying. So I have feeling that we also want to go ahead
and go so we can use our roof tiles,
but I feel like. Oh, here, no, wait, the shadows are probably not broken because it
is not in shadow, while if I would do this, Yeah, okay, so it feels less broken. Okay, fair enough.
But in any case, so that is working quite well. So we got our roof.
It is looking nice. So that's why we really do need to have parallax for this. So let's just go ahead
and delete this, and let's just have
L. Yeah, see here. So that stuff is
working quite well. So we got this stuff over here. It is not sinking through it's sinking through a
tiny bit over here, which we can fix if we
want to by moving it up. But I think for now, this
should be fine to have. So let's save scene. And
in the next chapter, what we will do is we will
go ahead and let's see. Oh, wait, extra plain
walls short. Oh, yeah. So in the next
chapter, what we'll do is we will set up
our plain walls. And yeah, we can also set up
a roof window and the tops, and then we can go ahead
and create another mask. So let's continue with
that in the next chapter.
48. 47 Setting Up Our Final Models Part5: Okay, so let's go ahead and
continue with our setup. Now, of course, as you can see, all the wood now looks
very much the same because we are mostly using our plain wood, but don't worry. We are going to create
variation materials later on. So we have, I think I actually
need more space for this. We have our plain
wall Short over here. Plain while long, and our plain while extra Extra short, yeah. I set it in the wrong order,
but we do have these ones. And for these ones,
I believe that we already have everything
set up, don't we? So we have our Wood
blanks variation A. Yeah, so Wood blanks variation A
already has everything set up. So all we really need to do is we just need to open
up these models. Typical unreal that
it randomly opens one window somewhere
else, select our planks. And then all we need to do is we just need to go
ahead and go in here and apply them like that, and then we can go
ahead and we can save. So instantly, all of our walls on our
text shut, as you can see, it looks very boring, but that's where the
vertex paint and all the other painting and all the variations and
everything comes in later on. So for now, that is pretty good. We got those things done,
and now it just looks like everything is just perfect
brand new wood over here. Okay, the next one is going to be our little roof
window over here. Once again, we are going to
ignore the actual windows. This roof window because
it is so far away, I'm not going to bother
creating an entire mask for it. I'm just going to go
ahead and open it up and just use defaults. So the first one, if we isolate, oh, yeah, we did not texture
our actual plates for this. So we do need to do that first. We need to go in here. Door B, turn off, and then we
have our roof window. And for this one,
I'm going to add some of those pieces
that are extended over it and all
that kind of stuff. I am going to turn on
Outer smooth on here and right click Shade Smooth, just to fix that
kind of small stuff. And I'm going to go
ahead and I'm going to select these
pieces over here, Q, separate the selection. And then if we go into
our textured view, we can go ahead and go
in here and get rid of this material, new material, image texture, open it and textis roof tiles final, and let's just
select that one. Okay. And then if we just
go into our SRUV non, we can just do like a box
map at five maybe or six. Let's do six, and let's
just rotate this. Well, we don't even
need to rotate this because this one
is pretty much fine. So we just need to go
ahead and we need to go into our UV
editing once again. Go in here and just
select, for example, this one, and see, for this one, we need
to go to a transform, rotate this 180, nicely move
this down, select this one. Um, this one, I'm
going to move down. And then I almost want to maybe
scale it up a little bit. There we go, and then
move up a little bit. There we go, so that we have
slightly better transition. So even though we are
not going to, like, spend a lot of time
on this because it's like a tiny roof window, I still want to just
get the transition in. So we can now go ahead
and we can export this and just export this as
simple FBX once again, and it's going to
be our roof window. Where are you? Roof window
over here.'s press reimport. Done, and there we go. Now we have four
materials. Okay, so the first material is
going to be plain wood. So let me just scale my window
a little bit over here. Wood Breblank. There we go. The second one is going to be our windows. We're not
going to do that one. The third one is
just going to be our wood blanks variation B, and then the last
one is going to be our roof tiles over
here. Can save this. Up close, as you can see, the roof tiles will
not look very good, and they will be a
little bit warped. But from a distance,
they will look fine. So we will need to find a solution on what exactly are going to
do with the parallax, because on the one hand,
we do need parallax, but on the other hand, it does not look absolutely amazing. In any case, that's it for
that very small little window. For now, that's just fine, because we're going to do
a massive polishing phase after this later on, anyway. So we got these ones over here. Now for these ones,
I believe that we also can just go
ahead and we can add a very simple material
maybe later on, I decide to make a
mask for these ones, but if I do that, I will
do that in a time laps. I don't really want
to do that right now. So I'm going to go ahead
and this is going to be so the basic one, I'm just going to do
the blank version. And then for the ornate
one, can we have, like, so Wood planks B Woot
blanks variation, B, duplicate, Wood
blanks variation. C, and then in number C, I'm just going to go ahead
and I'm going to grab maybe, like, a painted woods
as like a default. Yeah, I guess something
like that will work. And then we can just improve it later on a little bit more. But I'm just so focused right now on just getting
the basis done for these assets and just
getting my masks in because it's so much
easier for me to then go in, tweak around my
shaders a little bit, tweak around my textures, and just make
everything actually look like this in terms
of, all the breakup. So we're going to end this
chapter off by just doing the windows and doing a mask generation for all
of these windows over here. So if we go into
blender, save acne. Let's start with just like
our store window over here. Now, we do not need a mask
generation for these pieces, so I'm going to hide them. And for all of these windows, I'm just going to pass CtalJ to make our lives a
little bit easier. Now if I just go ahead and
go to my, where are you? Window Small. I can
once again hide. Select all of these
pieces, ControJ. And then we have our store
Window wit where I can also I think I'm
crashing no, I'm not. Save my scene just in case. We can go ahead and select this ControJ and also have this one. Okay, so that stuff is fine. Now I'm just going
to go down here, and I'm just going
to create once again two maps, UV three. And then do the same
with the other ones. Select this one to UV Maps, UV three, and
finally, another one. Where are you store
window. Here we are. To maps, UV three over here. Now if we just go ahead and turn all of them
on at the same time, although they will
be intersecting, that does not matter because we can just go ahead
and go into UV editing. We can get started by pressing
and just doing transforms, and then make sure that
everything is set to UV three. So when we do, everything
is selected to UV three. That's fine. We can
select all of them. We can go ahead and we can
press A to select everything. Average islands, UV B islands. And it looks like that we have a small bug going on over here. This sometimes happens
where it cannot differentiate between such
a incredibly large piece. So we can just go ahead
and select this, UV, average Islands, and then
move this one back in. It does not really
matter for a mask, so we can just kind of
leave this in here. Of course, it would be more logical if it was scaled down. So if you want, you
can scale it down. But as I said before, for something this basic,
it doesn't matter. We just need to have a mask so that we have somewhere
to place our data. So now that we have all
of these things done, I just want to always
go in, double check. Okay, that's all looking fine. And now what we can do is we can just go ahead and we
can select all of these, file export FBX, two painter windows or let's say Window pieces
and export all of that. Now if we just go
ahead and we press ALDH to unhide everything, we can now go in and we can start by just also
exporting them individually. So let's go ahead
and export this one, this one, two in real. It's going to be store, window. This one is going to
store Window wide, and this one is going to be
small window A over here. There we go. That stuff
is done, so we can save. Now if we go new general
file import FBX, and we can go to
painter window pieces, and all we need to do
is we just need to move them out of each other and
we need to go in here, go to our UV maps
and simply grab UV Map three and move
it up to UV Map one. Like that, and then we can
just re export this once more. FBA, oh, wait, I forgot
to do one thing. Make sure that they all
have the same material, which we can do by
going down here, copy material to selected, and now we can do fine Export. Don't forget to turn
on selected objects again to painter, window pieces over here,
so that's now all done. And now if we just go
ahead and go into Painter, we can file save, and we can start by importing
them to see if it works Western tutorial, window pieces. Everything else is
still fine, BS default. Call it window pieces
in our TexSet list. And after we go ahead and
our text set settings, we can just bake
all of our maps. Don't forget two K, use low polish high polen
that's all we need to do. So we can go ahead and
we can bake this stuff. These ones should be quite easy. They don't need anything special like the paint
peeling or something. Although, yeah, maybe some
paint peeling will be nice. In any case, let's go
to our Smart material, type in Western. At material. And let's see. So our highlights can
be a little bit less, so let's go ahead and set the balance of that
a little bit lower. Dirt. We can get
rid of the paint. But Fres dort is actually
pretty good, yeah. Yeah, I'm quite happy
with that. So let's just go ahead and add
a simple filter. Oh, not a filter. At the levels. Push up the dirt
intensity so that it will actually show
up inside of heal. And finally, we can
turn off this color. We can go to our paint removal. And for our paint removal, we can go ahead and
we can close this, and we can mostly, once
again, focus around the corners because
that's where the paint would probably be removed. So let's double click on our artistic heavy sponge
plus X to go into our color. And let's start by just doing
some big strokes like that. Over here. And what we can do is we can go to
smaller strokes like over here so that we can still add a little
bit more variation. We can also press X
to get rid of some of these areas to make it look a little bit
more interesting, as you can see over here. And same happens over here. See, these corners
where they meet, this is just where
I want to start really adding my damage
if I have paint just in case because I assume that I will most likely just add some painted variations
here and there, just to break our scene
a little bit more. So let's go ahead and do this.
But we are getting pretty close to finalizing all
of our base models, and then it's just going
to be a bunch of polish. And it's just going to be that's quite fun doing the polish
because we're just going to add more material
variations and start adding those material
variations in our scene. So that is going to
look quite nice. But for now, this stuff is just might be a little
bit tedious to do, but it is very
important stuff to do. Over here, there we go. To do the trick. Perfect. So
we got all of those done. We can go ahead and
start by saving scene, and this is going to be window
pieces, save file export. Set our export folder to be
in textis masks and final. Output template is going to
be our Western mask tooth, a TJ format and press exxport. And now nice thing is because we already pretty much
set up a door. We just need to
duplicate that material. So first of all,
let'siport our mask, which I'm navigating to now. So window pieces
over here, imported. Next, we need to go in
here and we just need to go ahead and select
our window pieces, right click and reimport them. Just to add all of
those UVs back. One, two, and three, our window pieces, ready to go. And now if we go
into our materials, all we need to do is
we just need to go ahead and grab our door A wood, duplicate this and call this
window pieces variation A. And then if we go ahead
and open up all of our windows, over here. We can then go to our materials, and we have our window
pieces variation A, and we can go ahead and we can add it's two here like that. Then lastly, if we open it up. The last thing that we need
to do is we just need to add our own mask to this
so we can go mask, go to masks, window pieces. And now we should have
everything working. We can see the dirt
in here so you can mess around a bit more with the dirt
color if you want, maybe like 1.5, maybe make our dirt color
a little bit darker. Alright, let's set this to one and then make it a bit darker. But you know the drill. So we got this stuff,
so that's pretty good. We can also go ahead
and we can set our highlight amount,
maybe to like ten. And just in general, we can
just play around with this. But those are our window pieces now also ded, as you can see. Okay, perfect. In
our next chapter, we are finally ready
for our last one, which is going to be turning
the wil quas to final. Once we have turned our
wall ques to vinyl, we will go ahead and
we will first of all, do a massive pass where we
will make it look more like this so that there's
actual variation going on between the materials. And after that, we
will go ahead and we will start by
doing our windows. So let's go ahead and continue with that
in our next chapter.
49. 48 Setting Up Our Final Models Part6: Okay, so we are getting close to having our
base setup done. The last one that we're
going to do for now, at least, is going to be
over here our walkway. And we only need to do
these two because this one, the short one, it's just
this one cut in half. So I'm not going to also
do that one completely. So knowing that we only
need to do these two, we can go ahead and we
can go inside of blender. And we just want to
go ahead and open up our original structural
pieces scene because we don't need
to save that stuff. And let's see. So we
will need to go up here. So walkways straight. And
for our walkway straight, I'm going to go ahead and
is this already Okay, it's not completely split
up, but it's pretty close. So if we go to our left
view and just select everything and press Contra J, I just want to split
up the top piece over here that's working
with the bottom piece. Next up, we can go
ahead and we can go to our walkway
stair over here, and temporarily turn
off our walkway straight because I'm going to go ahead and
select all of this. I think I need to, here, I need to press A
on everything just to Make sure it is applied. Select everything contro J, and let's just add the quick
weighted normals again after that because it did not apply the weighted
normals everywhere. But in any case, so now
we also got this one. So for this one, we can go ahead and
do the same process. We add a UV three we then go to our walkway
straight, we select this. Add a UV tree, select the bottom, and add
another UV tree. There we go. Now if we go into
our UV editing, we just want to
go ahead and make sure that everything
is at UV three, select everything
in object mode, Q, apply all the transforms, and then go into the dit
mode, select everything, and then we just do a
simple UV average islands, UV pack islands. Look at that nicely densely packed. But that's what we want. So that is now all ready to go. Yes. So all we need to do now is we just need to go ahead
and select all of this. Start by well, actually
start by saving and then start by exporting
this as an FBX, and we're going to
export this turn on select objects to painter, and this is going to be
Waal Quay pieces, export. And then what we also
want to do is we also are going to export
this already to Unreal. So to the unreal pieces, this is going to be
Wall Quay stair. And this one is going
to be export FBX, walkway straight, and then the short one we will do
a little bit later. So we can now go at
the save our sine, file new general
file import FBX. Go ahead and import
our walkway pieces, move them away from each other. Select everything, go
to your materials, copy materials,
selected to make sure that we have one
material for everything. And finally, what we need to do is we just
need to go in here, and then in our UV map, simply move up our
UV tree. To the top. See, Easy does it, and then we can go
ahead and export it. It's a little bit of a
workaround compared to MoMax but it still
works like a charm. So we can go ahead
and we can export this selected objects,
wllqaPieces over here. And now we just
need to go through the same process over
here inside of real, where we can start
by, let's save. Let's go new Western
tooth in our template, Wal Quay pieces in our file, and we can press open. The first thing
that we notice is that we have some flip faces, which we definitely do not want. So what I'm going to do is I'm just going to flip
them everywhere. So I'm going to
first of flip them here inside our new
scene, and don't forget. Oh, no, wait, this
one, actually, I don't care about weighted
normals for this one, because I just care
about UV data. If you want, I guess
that you can just add a quick weighted normals
modifier to compensate, but it's not really needed.
So we got this one. Let's just quickly reexpt
this FBX, walkway pieces. And then just so that
we do not forget, also go back into our
structural pieces and then in here set this to text view. Phase orientation. We
just need to go in here. Shift N, go in here, shift N. And then for this one, just add a new weight norms modifier, 100 and export this once again. So this one goes to export to unreal walkway stare and
this one once again. And then I will just do a quick overview after
we've done this one to make sure that there's
no other flip faces so I'll just walk through
all of the pieces. But first of all,
let's go ahead and go here and just quickly
recreate this scene, and we can just quickly grab
our same object and just press Okay and discard the
old one, and there we go. So let's go ahead and down here. Textht list, walkway
underscore pieces, text set settings, bake two K used lowlis hypol and let's go ahead
and bake this stuff. Perfect. And finally, we can go ahead and just
add our smart material. Here's our Western
smart material. So, now it goes nice and quick. Now we really got in the mood. We got in the mood at
our very last piece. I'm sure that for you guys, of course, I'm doing
this all very quickly, but I'm sure that you
guys already know how to really streamline this and just get everything perfect. So over here we have our dirt. Let's get rid of our paint. And let's go ahead and in our dirt layer let's increase
the dirt a little bit. Um, let's increase the
dirt a little bit, but then I do want to
get something else. Let's go into our mask and let's add a ground
dirt on top of this. So if we add a ground
dirt on top of this and then get rid
of this grunge web, the only thing that you
need to do is in your maske make sure to set
this to multiply. And then I believe that we
might need to invert our dirt. Let's see. Oh, no, sorry, we do not need
to invert our dirt. Okay, it seems like
multiplier isn't working. In that case, just right click and duplicate your dirt again. That does not matter. Then
we can just go ahead and we can add it as its
own little mask. I just need to make sure
that it gets added on top of it so that I can now go ahead and go into my position
gradient and you can see here, I can get some
position dirt that comes creeping up from the
bottom going to the top. Now, up here, I do kind of
want to do something else. So let's go to our
original dirt. Let's like a paint layer. And then if we go
into our brushes, we can probably describe
like a dirt brush over here. Tone down the size. Tone down also the flow a
little bit so that this one is not going
to be as intense. This one is not giving me. So I click and then I hold Shift. And then what you can do, but you do need to click correctly. Yeah, you can add almost
like straight lines of dirt, but it does not always
work as perfect whenever we have gaps in
between our meshes. So what my plan was
is to first of all, do this, where it is
way too over the top, and then I was going
to go ahead and go in. So click hold Shift, click. Then I was going to go ahead
and I was going to go in and break it up a
little bit more again. So we got these
pieces over here. Okay, here we go. And then just make your size
a little bit bigger, set on X, set your flow
a little bit stronger, and then just go ahead
and like randomly just paint out the dirt in
certain locations like this. So it kind of is not
all over the place, but it's just giving us some
random dirt here and there. Something like that
should work quite well. And I finally do remember to
add the levels, push it up. And because we also
have a ground dirt, we also need the levels
here, push it up also. But that should do the trick.
So we got these pieces. I think lastly maybe go
in here and just, like, reduce the intensity on these areas a little bit more just because it's a
little bit strong and, of course, the strong because
of the ambient occlusion. So let's just reduce
that a little bit more. And if you want, you
can even, maybe, like, add some extra dirt
around here and then, reduce it back a
little bit more. Again, like something like that. Okay, in any case, that is the dirt, so we can now go ahead and
turn off our colors. And for this one, yeah, we are not going
to do any painted. So for our paint removal, right now it is just
like this default stuff, so we can just leave
this just in case. And the only thing
that I do not like, so let's add a filter, and let's add an
artistic soft sponge. Sorry, not a filter. Let's add a paint layer, artistic soft sponge, and
then just go ahead and, like, get rid of that line as, in case that we are going to do something with paint peeling
or something like that, at least we have something
in this direction. This actually looks quite cool for our dirt, now I look at it. Hmm. I think that might actually look cooler
than what we have over here. Let's go ahead and
let's duplicate this. And then if we turn this off, set this from R to G. And then here we have our
dirt. I'll turn that on. What I'm going to do
is let's actually get rid of my paint layer. And let's go ahead and
call this G top dirt. Let's just move it
here at the top. So for this one, what I'm going
to do is I'm going to get rid of my paint layer and
add a new paint layer. And then if we go up here, we can use a polygon fill, and a polygon fills
like an element select, where if we set this to black, you can see that we can click and drag and we can basically just Make sure that it only
gets attached to one area. So doing this here,
we can still have a dirt over here that
I can turn on and off, but it has a little bit
of like a cooler effect. So let's try that one instead. And else we can also always undo it if it doesn't
look as nice. But let's do
something like this. So we have quite an
interesting looking dirt, and then we also have a paint. Let's save our scene,
and let's call this walkway, on
the scope pieces. Now we can also go
ahead and we can also file export texts, and we are going to go
ahead and export it to textis masks final. We want to use our
Western mask tout at a Targa file and export,
and there we go. So if we now go ahead
and go into unwel, let's start by
importing our mask, which I'm just navigating to. So we have our walkway
pieces over here. So let's import our mask. It looks very green, but okay. Next, if we go to our assets, we just want to go ahead and
re import these two assets. And finally, we want
to go ahead and we probably want to grab
the door A version. So let's duplicate this and call this walkway pieces
underscore Old, for example, just to
make them nice and old. And then what I'm going to
do is I'm just going to, as you might have
guessed, replace both the mask but
also the textures. So in here, I'm going to, first of all, go into, like, my plain wood and grab
my old plain wood. Like that, and then go
into my masks and grab my walkway pieces mask, save it. These store windows
we can turn off. And now if we go to assets, we can just go ahead and open up these two pieces and
then go to materials, grab our walkway pieces old
and apply them to here. Here we go. So we have
our dirt going on, and what I'm going to
do for this one is probably make my
dirt a lot darker. So let's go ahead
and set our dirt. There we go, so we are
making it a bit darker. 1.5 maybe. Now, let's do one for the dirt
amount. There we go. And now we have our
walkway pieces, and then maybe set my
highlights amount to like ten, just to bring out some
of those highlights. Let's set my dart amount to 0.8 to make it a
little bit less. But as you can see
now over here, that will give us some
nice dirt and as you can see that also applies
everywhere else. So we have quite nice
looking walkway. And even though these pieces
over here do not have any nor baking or any
weighted normals, because of our highlights and because of the
good lighting, it still gives the
feeling as if they are not as low ply, as you can see. So that's quite nice that
we have also got that done. So we have our walkway pieces. All we need to do now is we
need to go into blender, turn off our walkway stair. And then for our walkway
straight over here, I'm going to go ahead and we'll temporarily turn
it off because we want to have a walkway
straight short. And for this one, I'm just
going to press contro J. Over here, just to
combine them all. And then what I'm going to
do is I'm going to go to my Walkway straight, select it. Go ahead and do like ContoCKtoV. Right click, move to
collection. Wal Quay Short. Turn off the straight version. And then in our short version, what we can do is we can get started by selecting
this piece over here, press four and delete that phase and then just
delete everything else. Over here. Oh, I x over here. And then over here, we
can do the same where we can delete this one. You know what? Not completely. Let's go ahead and
delete this one. But then let's grab this one
and move it into its place. Over here so that we can
just re use this mask. Oh, one thing that we do need to do for this is
we need to go ahead, we need to rotate it 180 because now we will
have the dirt. We will have more
dirt at the bottom, so we do want to compensate
for that. So we got that one. Now, if we grab our old
walkway, we can just delete it. And here, just double check. And it looks like
that for this one, all of these pieces over here, we can just press four.
Delete the faces. Select all of this. Oh, led X, select all of this.
Delete the paces. Let's go over here and let's turn off our
face orientation. So there we go. Now we got
this one also ready to go. So that should all be
good. So having this one, we can file export FBX, and this is going to be
walkway straight short. Now, one thing I am aware
of is that over here, we have added weighted normals
to these pieces over here, which might not look very good. So let's just press
Q and separate the selection and
then get rid of the weighted normals modifier
on those specific pieces. And then we can
just go ahead and re export this once more. Export FBX, walkway
straight short. And then if we go ahead
and turn this off, we can also go into our walkway straight. Same basic concept. We are just going to go
ahead and we are going to select these pieces, press four Q separate selection because
now we can do that. Now that we no longer need
to keep everything separate, export this as our walkway straight. So that
one is also done. And finally, one last thing
that we're going to do is we are going to
go ahead and we are going to turn on
phase orientation, and I just want to have a
quick look at everything. So I just basically cycle
through all of my models. And if I see any
very specific red, not on the inside, of course, but if I see any very obvious
red, like for example, this one is one, I can just go ahead and select
it and press Shift N. Here, C. Shift N. Shift N. And
as soon as I've done that, I can go ahead and just
export it once more. And we just need to keep in mind which ones
we are exporting. So this is going to
be generic Roof A. Let's go ahead and go
to our trims over here. So that one is fine. That one
is fine. That one is fine. Um, Okay, it looks like
that we did not have any, it looks like that
we did not have too much errors after this. Here we have another one, see? It's always good
to double check. Even though we have
double sided materials, it still will be quite bad because the lighting always just behaves slightly
different whenever we have the backside of a face. So it just cannot be trusted. Oh. This is a lot. Let's go ahead and
select all of it. Control J. Did I No, wait, I did not do
anything on this one yet. Shift, so we are just
swapping it all around. So for this one, I'm
going to go ahead and let's duplicate this
while I'm here anyway. And let's go ahead and
just move this up here. Move this up here,
delete this one, and select this site
and just quickly, move it back in a little bit. Now it goes. Now it has a back. And this one is just going
to have the normal stuff. So it doesn't have any special, it's just going to
be sites there, does not have anything special in it. I do want to right
click, move to collection sites there again. And finally, we have our roof
window, which is also good. Perfect. So all of these
pieces are now ready to go. So if we go back into unreal, we can get started by just re
importing our generic roof, sits there, walkways short. Those are the three that aight
and our generic B and B. So let's re import all
of them. Over here. Press Done. I think the sites there actually
messed up a little bit, but that's something
that we can fix. First of all, Walway short. We are going to go
into our materials, simply grab our WilquayPieces
Old and Artists studio. And there we go. So now that one also all works completely fine. For our sites there, I think that we made
a small mistake. Yes, we did, or I did. And that is that we need
to go ahead and go to our sites there and just let's turn off our face orientation. I
am going to go ahead. And I'm going to make
so first of all, let's go ahead and
select everything. Go to our materials and press
copy material to select it. But I think what I want to do is I want to go ahead and I want to select all of these pieces over here. See. Is that everything? Yes. And I want to just give them a
slightly different material. So if we just close, create a new material and
just call it Wood B, for example, there we go. So now we can just do
like, dark and light. And let's export this one
side there over here. Let's go back into n
reel, re import it. And then once that is done,
what we can do is we can, yeah, just press done. We can remove the extra
material that we had. So this one is
going to be and see Wood bear blank for the first one and Wood bear
old for the second one. There we go. F now
that should be fine. So we now also have
done the walkway, and I think that's it. Yeah, because this one
that's just white paint. That's why it looks white. So we still need to, like, of
course, do some balancing. But we finally have
all of our textures. We have the masks done, and we have all of the UVs and
everything imported so. Of course, right now, everything
feels very, very plain. It looks like this is
a brand new a town that literally got
built like yesterday. That's almost like
what it feels like. So what we're going
to do next chapter is we are going to really like art, a lot of variation and
just make it look a whole lot more interesting
than what we have here. So let's go ahead and start with that in our next chapter.
50. 49 Adding Variation To Our Environment Part1: Okay, so the next few chapters are going to be pretty
fun because what we're going to do is we are going to start by making our
scene look a little bit more like this and have
a lot of variation in the types of wood
that we use and like the painting already
and all that kind of stuff. So it will most like be
a combination of this. And then next this,
we will, of course, like, get some
inspiration, for example, from Radd and just like some general inspiration over here from, like, other areas. So that is the plan. What I'm going to do is
we're just going to go building by building. So this building over here is already pretty good,
as you can see. So we pretty much already have
the defaults ready to go. Now for this building, what
I'm going to do is I want to get the red planks in here. Now, I do understand
that over here, we already have a different
look as you can see. So compared to like the
planks that we have exported, I mean, I believe, from
what I can remember. Yeah, see here. So these
planks, oh, no, no, wait. Sorry, they are correct.
I can remember that we did the flat planks and
export them like that. So in that case, we simply whenever we want to
change the material, we can just look up the
material, right click, duplicate Woot planks variation
I believe it is D. Yeah, number D. So we can go ahead and wood planks variation D.
And then for this one, we can just go ahead and
we can just swap out the base color for our
red planks over here. After we've done that, it's
just a matter of going in here and dragging
on just like that. Wood blanks variation D. There we go. And like that, we already have quickly
a different change. So all of this stuff over
here is quite white, so we got like these
pieces over here. For these ones, I
think what I will do is I will just very quickly swap them around
for the red boot over here, even though it is a
slightly different boot, I think that should be fine. Now at the front, you
can see that this one, it looks like it is painted, and then it is like a bit
of like a grayish paint. So I do also want
to get that one. Over here, if we have a look. So these are Wood
planks variation A, so we are using the
painted versions of this. So what I can do is I can go ahead and I can just
duplicate this, and I do need to go
for some good naming. So wood planks painted Gray. Let's do that. Let's do
a naming like that so that it is a little
bit better named. And then we can just
drag this on here. And then the first thing that
we need to do is so we can open this up to
the site already. And for our vertex painting, we want to go ahead
and go into our paint, and I believe that
our green channel was the one that we
then need to fill. So if we set this to the green channel and then press fill, oh, I think we need
to go to black. Here we go. And then
press fill. No, wait. We want to go to the blue
channel because I want to have clean paints wood
to get started with. So blue channel fill. Like that, we now
have already some black or some red colors. Now, if I just press G, and then it's a
bit annoying to do this on one screen,
then go in here. And then if we go
to our paint color, just go ahead and we
want to make this like a bit of a grayish paint color. Maybe, give it a little bit
of like yellowish tint. I don't know, like an orange
tint. Now, you know what? Let's do gray. And let's just
make this like quite dark. So I think something like
this looks quite good. And then, of course,
what we can do is once we have done
a color like this, we can always just go
into our painting. Although I will most likely not be doing this per building, but just do, like an
entire vertex paint pass. But just for this
one, what we can do is we can go to the
green channel and we can, like, let's see,
set this to black. I think we need to Let's see. I think we need to set this one to Let's make our size a bit bigger and our
strength a bit bigger. I need to have a look like
where I need to paint this. So Green? No. Yeah, let's try this. Let's fill our blue channel white and fill our
green channel Black. So now if I set my blue
channel to white or sorry, to black and then set this to white and then paint.
No, that does not work. Okay, then another way
that we can do this, we can simply add like a fill over here and
then set this to black. Wally, wait, I can still
not paint this out. That is a bit strange that
I cannot paint this out. The reason why this
strange there is a bug inside of EmulV that sometimes
the vertex painting does not work and we need to re open up the window in order to basically
get it to work. Looks like that this time
it's not that problem. Yeah, here, because it's
ignoring when painting. So that might be the problem, but it's a bit strange that it does it like that.
What was the bug? So the bug was, I believe, that if we move our
viewpoard when painting, it breaks for some reason
in Unule engine five. And just like just one of
those extra bugs that happen. So as soon as we swap to paint, let's not move our viewpod Okay, let's see if we now go
to our blue channel, does that do anything at all? I don't think so. So I think I will need to actually go ahead
and I need to have, look at this because yeah, I will need to, just
do some prototyping. So for now, let's just
leave it because I can remember that in our previous in the
large environment, tutorial, we also had
problems like this. So for now, let's just go
ahead and leave it for now. And what I'm going to do is I do want to go ahead and I want to add some more changes
to those pieces over here. So if we have our wood planks, I want to also go for
some painted wood. So here we have Wood
bear blank variation C. I want to go ahead and I want
to duplicate this and call this Wood bear blank,
painted, dark. And then for this one, if we go ahead and in our plain mood, let's turn this to be just some simple plain
painted surfaces like this to get started with. And we just want to make the colors to be
like quite dark. If we just go ahead and apply this we're basically
just doing this one. The more materials we make, the easier it will become to line and later on replace them all because we just need to
make less and less material. Right now, we probably
need to make quite a bit. But let's say that we
have something like this, and then we will have once
again our wood planks painted, although I am using no wait, I'm using the same material. Then once again, we can
go ahead and in here. We can swap this to gray and
then we do need to go into our vertex painting
and on black to white, you just need to
fill it. Oh there. Okay, so we first need to
fill it black on the green. Let's do it on both
at the same time. Okay, so green and blue, remember that green
and blue fills up black because I always forget the order in which I'm
actually doing this stuff. And then around here, it does show that the
doors also have like, sometimes just like
a darker tone, which could be quite nice
if we are there, too. So here we have door A wood. So if we just go ahead
and duplicate this door A wood dark, for example. And then for this one, we
are going to go ahead and we are going to go for,
like, a painted wood. And then we can add some extra painting or
something later on. But for now, it's just about
the visual look of things. That's the most important thing. So that we have a
general look of how everything will work. If I just go ahead
and just quickly open up my dark material, I can go to my color overlay and I can simply
copy over the SRGB. So contra Contra Z, sorry. I switch back to Dutch
for a moment there. Contra V. Okay, so
that's now darker. And then all we should
need to do is we have a door A wood, which
now becomes dark. And then now you can see
that we also need to, like, for example, change our dirt. So we need to make our
dirt like this more. It can be brownish,
but it needs to be just like a little
bit darker in general. Something like this. Okay, so we can go ahead and we
can save this stuff. And just like that, we can
very quickly also switch this around for our other pieces. So we have door A woods dark. Let's duplicate this and call
this window pieces dark. See, as I said before,
only in the beginning, we need to make so many
different materials. And then for the
window piece is dark, we just want to
quickly swap around our mask because everything
else can stay the same. So window piece is dark. Let's save. And let's
add that one over here. Here, see? That's pretty good. And then door A dark,
if we just do this. There we go. So we already
get quite a big difference. Of course, we do need to play around a little bit more
with our roughness. For example, over
here, the roughness feels a little bit too strong. So what we can do is we can
go to the painted versions. And then in our
roughness strength, we can, for example, let's see. So this one is the dark wood. Let's set this to 0.7. And
if we also go for, like, the wood planks painted
gray, for this one, let's do 0.5 maybe, no, wait, maybe 1.5 to make $1.01 0.2. Let's do Let's say 1.4. And then we have our dark pieces over here, so our roughness, which is this one, 1.2, one. Let's do 1.2. There we go. So we make
those a little bit duller. Okay, so we have already
quite a nice contrast and quite a nice difference between those two areas over here,
so that's pretty good. Another one is going to be that it would make sense to
have this one also gray. So we already kind of did that for this where we did
the dark painted. And let's say instead of dark, let's call it gray and apply
this to this one over here. So everyone just owns
their little house, and they are just adding
their own variations to it. Same over here, we just
need to add this stuff. And this stuff, they
would probably, I'm just going to stay with my reference for now and then I can always later on improve it. So here we go. So
let's make that just like nice and gray.
And there we go. First house is already done, and it stands out like
an eyesore right now, but that's because
we, of course, are going to just add
a bunch more stuff. Then the house next
to it, and I'm just following my
reference over here, we are going to go
for some wood blanks painted gray for those ones, and then we will have
our window pieces dark. So in here, applied. We will have our
door dark applied, and maybe let's leave this door and make it
like white later on. And we will have our gray
painted versions over here, and once again, our dark
painted versions over here. And then all we need
to do is just quickly select these two
pieces over here. Go to our vertex paint and remember green, blue black fill. And then over here, I just
I forgot to add this one. There we go. So those
are those pieces. Let's turn these
also to there we go. So that's the first
two. Now, yes, I can see that this
is more white, so we do need to do some
balancing later on. Although later on, why
not just do it now? Come on, Emil, just do it now. So let's go ahead and
just do the paint color. Let's make it a
little bit whiter. But let's art a bit of orange,
and it needs to be duller. It needs to be way
duller because s it just does not look correct. I set us to like
two. There we go. So we set a little bit duller. And then we do need art
like a bunch of dirt and grime and everything
to this a little bit later on because right now, of course, it is
way too perfect, but we're also going
to do vertex painting. The one next to it, we
are going to go for our wood planks variation B. Is that the one?
I don't think so. No, that's not the one.
So what do we have now? Wood planks variation A. That's duplicated
Woodplank variation C. And then number C over here, you will get
variation A, B, C, D, over here E. I know that it's a little bit
off, but after a while, we can just simply select
the materials that we want, and we can, of course, see
also the reference of it. So this one we'll have our darker woods
going on over here. Then we will go
ahead and oh yeah, that's quite nice that
I already did that. So this one is also fine. Now, we have a dark
wood blank variation B, which we can use over here. And then what I'm going
to do is I'm going to do blank variation, C. No, I'm going to use my
windows window pieces, window pieces painted white. Yeah, I think I'm going
to change the names later on and just make them
a little bit more logical. So window pieces painted white. Let's go ahead and just
already add them over here. And for these pieces, what
we want to do is we are just going to go ahead
and just change this to our plain wood, and then later on,
we will most likely also add vertex
painting to this. Although we might not even need to because we have a mask, so we can probably
add like here, if it has painted variation. Yeah, you can instantly
see that that works. The only thing
that we need to do is we need to swap this around. Oh, sorry, I'm adding wood planks. I need
to add plain wood. So with this one, what we
can do is our base colog. You, let's just add everything. So basically, we
have our base color, which will just be plain. And then we also
have the plain color over here that we just
need to add just in case because I forgot in
which order that we added. So plain plain. And then roughness and roughness clean is
going to stay the same. And then what we're just going
to do is go to number E, and we will have a paint mask, and then we will
have a paint version and a base color paint
version like this. And there we go. We
instantly have all of our windows because I forgot that we did that
actual mask painting, that is looking
quite interesting. The only thing that
I would say is that I'm going to make my paint a little bit darker for this one, because, else, it's
a bit too intense. So let's go into our paint color and just tone that down
a little bit more. Oh, hey, it looks
like the paint color and the overlay color,
they are still separate. That doesn't really
matter too much, but it's something we
need to keep in mind. And let's go ahead and set
our roughness strength to maybe like 1.5 to
make it a bit duller. Okay, great. So we got that one, and now we can just go ahead and we can arts over here, too. And that means that
also from now on, we also have painted
white windows, and what we'll probably
do is do the same with the door. So here
we have a door. We can just use this
one and just say, like door underscore, A, underscore,
painted underscore, white, and quickly just
swap out the mask. That's faster than just setting
it up again for our door. So door A mask over here
should do the trick. So now if we go do a
painted white tada. Ooh. Let's go ahead
and just tone down my dirt color strength a
little bit, like that. And do we also need to
tone it down over here? Yeah, maybe, like, a little bit, also now, painted pieces. And later on, of
course, whenever we change one of
these materials, they will be changed everywhere, which is a good thing, but sometimes also a bad thing. So we got over
here these pieces. So that's looking pretty
good. We got those. I am going to make this red. Because I quite
like that contrast, and that's also how it
is in our reference. The backsides, if you want, you can put in the effort
to also turn those red, but that is up to you. Make this side red. I will just do like a pass for the
backside later on. And what I'm going to do
is we have over here. Do we have a plain bare
blank variation B over here? Yes, let's make it this color. I know that in a reference,
it's like a red color, but I don't really
feel like using red for the actual
corners over here. So we got this one, and
then here at the top, we have like white
painted, which is fine, although maybe we just
want to also for this one, tone it down a little
bit, because else, it becomes a little
bit too intense white, especially for such a dull,
dirty place over there. There we go. Now it's already starting to
look a lot more interesting. So we got those pieces
done save our scene. I can see that we do
need to add later on more variation
to our walkways. So having these pieces done, I can see that over here, it might be nice to also add a window pieces dark to this one and a door
dark to this one. Do I also have a door white? I do white, yes, door white. Cool. Let's do the
same over here. Or not, or shall
we go for m. Now, I think it would be more
logical if they just use white. So over here, we can also do the same that we have
those pieces done. Here at the top, you can
just leave this stuff. Maybe for this one, we are just going to go for a simple wood, and maybe we go for,
like, let's see. No that would not be logical. This looks like
quite a new house. Variation C. So let's
go ahead and duplicate this maybe Wood blank red. Yeah, I need to start really just doing the proper naming. Over here, we have
the red version. So let's go ahead
and add that one. Let's see if that looks better. Red, or shall we just go
for, like, the default? Ah, that's a tricky one.
That is a tricky one. Let's do red on the sides. And let's do red on these sides. Maybe, I think that will just like just enough variation to make it look a little
bit more interesting. So let's do the same over here, red on these sides and
red on the very corners. So we got that one done.
We got that stuff. Then down here, we can just
leave our windows normal. That should be no problem. Yeah, so I'm happy with that. Would it be logical to
have this wood here? Or would we just
go also red red? I think red would be more
logical also for those woods. Okay, so we got those like they're almost in the
middle of painting. So we got this one, this one. Now, over here, we can see
that we have, once again, a very light color, but
it still feels painted. These sights look like they are just like normal bear wood, but it feels like we want
to almost go for like a yellowish wood for the rest. I'm going to get
started, first of all, let's just go ahead
and right click rename this to wood
blank painted white. So I'm just slowly going to also improve all of my naming. So we got this stuff over here. Then we will have the
plain versions over there, and then I'm going to go for a wood planks painted gray
and duplicate this and call this wood planks painted yellow and apply
this one over here. And then what we
first of all need to do is let's go ahead and select all of these pieces over here, only
the font, however. There we go. Vertex paint, paint, fill, and then we
can immediately close it. And then for this version, we are going to go into yellow, and we are going to make this, as I said, yellowish. So let's make this
like really like a light yellow or maybe
like orange color. Now, I think I want to
go for, like, yellow. Almost like I almost
stands out like how bad it looks like
a beige yellow color, like you can see over here, it's just trying to get that color, which is surprisingly difficult. A, yeah, it is surprisingly difficult to get exactly
the color I want. I feel like this, I
think is the color. So my color is FADEBA if you
want to copy it one on one, but just mess around
with it and you can find whatever color you
want for this stuff. Let's go ahead and art
this one over everywhere. The red house is pretty cool, so I do want to
actually incorporate maybe some stronger
red colors later on. But there we go. Now
we have that one done. You can see our he
works pretty well. Yeah, my roughness is fine. So now we got that one done. The sides also
need to be yellow. So what I'm going to do is I'm
just going to go ahead and copy this paint color. And then go to my window. Window pieces painted white, duplicate this window
pieces painted. Yellow. And then for this one, we can go ahead and go down, set this SRGB to yellow
and don't forget to also do it in your
color overlay. Now what we can do
is we can just add these pieces over
here to this side. And over here, I don't know. Let's see. It kind of looks
nice to actually have it. Maybe we can go ahead and, like, make it like a darker yellow. You know what? I think I like it more if we
just do not paint those. Yeah, I think I like that more. So let's just go ahead
and do that stuff. It just feels Oh, I I meant to go here. Yeah, yeah, it stands
out a little bit better. I think I like this more. So let's go ahead
and do that one. The only thing is
that at the top, I am going to go for,
like, yellow also again. So we just want to go for
bear woods painted white, duplicate bare woods
painted yellow. Going in here, set
the color overlay to be the yellow color.
And you know what? I'm also going to go ahead
and I'm going to just add my plain paint over here. Let's see. Painted yellow. Let's do this and maybe make this one, slightly
darker yellow. I know that I need to be careful with this because
else, of course, you can see the difference
between the two, in case I ever used the
next to each other, and I need to have
the same difference. But of course, as you can see, that already adds quite a
bit of interest to this. So we got this one.
That is quite nice. I still want to
go ahead and mess around a bit more
with stronger colors, like you can see over here where we have some
red and then green, and then you have the plain
version, then you have white. So we kind of like, I'll start
to get some white in here. We start to get some
default in here. Maybe we want to go
ahead and end up making this one like a red or
a blue or something. But this is looking pretty good. At this point, oh, wow, we are way over time. What we're going to do
in the next chapter is we are going to just
start by also adding interesting colors to the
other side and just make sure that we have a nice
whole of an environment. For now, let's here,
if we set this to 200. See, that's already
looking quite interesting. Still lots of decails
and everything to do, but it is a start. Let's go ahead and continue with this in our next chapter.
51. 50 Adding Variation To Our Environment Part2: Okay, so now that you
have a pretty good base of this side over here. Now, we're just going to
go ahead and we're just going to add some changes
to the other side. And once we've done
that, we are going to do some vertex painting, and then we will add some
more artistic changes, which is like dramatic colors and everything just to
change things up a bit. So if we have this one over
here, let's have a look. I think I'm just
going to make this like a brand new building, which means that we will go like red blanks over here and
red planks over here. And then maybe also like
red on the corners. Yeah, let's leave
that one over there. So I think that
will look a little bit more interesting
if we just have red on all of these
sites over here also. And then, of course,
at this point, you probably cannot even see the building anymore because we probably won't have an
angle going from this area. I'm going to set my windows. So my door. Let's leave my
door like this, actually. Let's leave my door like
this, so we have this one. And then we over here,
another default one. And I'm just going to leave
it this default look. I am going to turn these into The older versions
because I think I turned those into red version. So let's turn this one into like an older version. You know what? Maybe turn the top bits into an older version.
Yeah, let's do that. Oh, way, that's Wood Bar blank. I need to have wood C over
here in order to turn that. Then the Wood bear can go
on the sides over here. And we can just leave this
to also like a default site. So we have this one over here. Now, for our windows, what if we go for
like white windows? To just kind of break
things up a little bit. I think that will
look interesting. So let's go for
some white windows and also for like a door painted white over here.
Yeah, there we go. That should do the trick.
This one over here, I'm going to go for
maybe also red. No, let's just leave it
the way it is right now. Okay, so we got those ones
and then here on the side. Let's turn this one also
into brown and then at the top Um, let's turn top into maybe already like maybe it's
already, like, painted. Or maybe we go for, like, a darker color. I
don't know yet. Let's keep it the
darker color for now, but I'm not sure yet what I'm
going to do with that one. So we got this one over here. Yes, we actually,
we have this side, but this side is fine for now, so it's almost
like this building just is not finished yet. So we got this one over here. Right now, we have a
white painted balcony, which I guess should be fine. And I think what I want to do
is I now want to just have a quick look and maybe go for some green that
I saw over here. So if I have some green, then maybe for this balcony, yeah, it would make
sense if it is white. Turn these pieces
also into white. Like this. And if
we go for green, so that means that I'm going
to go ahead and wood plank C. Let's do wood planks painted. So which one is that? Wood
planks painted yellow. Let's duplicate that. Wood
planks painted green. And let's add this one here
and let's art it over here. Then the first thing
that we want to do is we just want to
go ahead and we want to start by selecting all
of these pieces over here. Go to our vertex collars, paint and press fill. And now we also
know where that we need to add more of those. And now we're just
going to go for, like, a dull green color,
something like that. So if we have this
one, open it up. And for the dull green color, if we just go into our color, we go for like this
quite dark dull green, maybe something like
this. Let's see. Yeah, I think maybe something
like this can work. We can always change
it around if we do not like it. So let's
go for this one. And then for our windows, what would make sense
for our windows? If we where are you? Windows, window pieces,
so we have this one, yellow or maybe just white. Yeah, I think then if we are going to do something
like this, or black, actually, you know what Black looks a little bit
better. So let's go for black. So let's turn these
window pieces into dark. And then we can also turn
door into a dark door with maybe like a
white painted door. Here, also window pieces dark. And then door with like a
white painted door over here. Okay, so we got those ones. Now on the side, do we want to just go ahead and
turn this to the side also? Often, I feel like that
they do often only paint like the front and
see it even over here. They kind of just
paint the front, maybe because it's
just expensive to do something else, and
then they go to the side. Also, what you can see
is that over here, this is a lot rough
looking paint, and I do want to
later on just pilise that out so that we get something
a bit better like that. So for the side view, let's go ahead and let's go for maybe like some
duller planks like this, almost like they
have renovated it. A little bit more just
by giving it like a coating of paint.
So we got this one. Then we got this
one, then we got the dark versions to
the side over here. W a white balcony here that
gets an interesting look. We got those and then
over here, these ones. Probably also just
painted black. No, it would not really make sense to paint a black maybe. Oh wait, sorry, that's
the Wacay pieces. Window pieces, variation A. Let's just go ahead
and duplicate this. Windows pieces old strike
that one on, open it up, and then we are just going to go into our plain
wood and turn this into plain wood
number C over here. So that is like the old
looking plain wood over here. There we go. Instantly gives
us old looking windows. So the side is just
lt and then they just gave it like a
coating of paint. And for our door, we probably also need to
turn this into Alt. So let's first of all,
do these ones over here. And then for our door, we
can go door A wood door A wood underscore Alt and let's go ahead and drag
this one on here, open it up. And if we go to variation C, we can just once again import these extra
variations over here. There we go. So we got
our old wood over here. These areas over here, I'm not yet going to spend
any time on them until I know that I actually need
to spend time on them, and else I will do
that in time laps, but I'm not going to spend
time on it in real time. For now. So we got this one. Oh, it looks like that our wall is kind of like
clipping through it. So if you want,
you can just kind of move this out a
little bit. There we go. But yeah, so basically, if we have a camerangles, I'm only right now really focused on the stuff
that I can see. So here like this camerangle I can still see all
of these areas. And then I have a
few more camerangles like one here, one here. So this saloon, I feel like the saloon
would be cool if it is like red or something like that. So what if we do that? What if we go red and
then maybe just a painted white on the top of it? So we have the painted
white over here. Of course, saloon we
still need to do an area that we need to turn
into a proper color. And then the wood over here, maybe we would go for, like, a light red, but
like a dark red. So let's start with
the first one. Wood blanks. You
know, let's see. No, I think I want to
go for, like, painted. So wood planks painted
green. Let's arose. And then, oh, sorry,
let's not add those. Let's duplicate those and call this red wood planks
painted red. There we go. Then we can go in
here. And let's just only do this again, like on the front. So we basically grab
the front over here. We go to our vertex paint, paint fill because it keeps
our old settings reminded. And then we just need
to, like, later on, turn these materials
into a more well, first of all, we have vertex paint to make the paint
look a little bit rougher. But I also just want to
have the clean paint, and I think I'm going to
just play around with the clean paint to make it look a little bit more logical. So we got this one, and then we are just going to go ahead and if we go down
in our paint color, set this to be like almost
like a deep red color. Something like that. And let's copy this color value, save it. And then if we also go ahead
and go to our wood bear painted gray and duplicate
this wood bear painted red. And then in here, we can
just go ahead and go into the color overlay and just
paste again our hex RGB. For which we can use
this one on the site. And it's like a saloon. So
it's a place of business, so they would want
to make it just look really nice and everything. So they will probably do
this and then they would do black windows or
something like that, just to give it a sense of
fashion or style or something. Then later on we just need
to make everything look a bunch or a little bit more older and a little
bit more worn down than what we have right
now, but that's about it. So we got these ones over here. Saloon, you would almost feel like it's one of the first things that
they would build. So the site would probably be quite old wood by this point. I can see some weird
looking arrows over here, but that might just
be shadow arrows, so we are going to give
it like a roof later on. So we have our wood, and
then we also need to have our wood bare over here. For these pieces, So I
can only just fit in it. And now, what we're
going to do is so the side is going to probably
be window pieces old. And then over here,
they say, like, Okay, these ones we actually
want to have painted. So they would be window
pieces like dark because I think even in
those times they had, like, a sense of, Oh, yeah, so black kind of goes with red. Because it kind of does,
see? It's kind of does. So we have these ones over
here. Let's swap them all out. This one is going to be our door and then maybe like
painted white. Nah you know what?
Let's paint also black. And then we will go back to
our window pieces over here. To add those. Those
are the window pieces. Now if we go ahead
and go down here, we will probably make this trim. Wood bear painted black
around this trim. Then I want to go for a
darker wood for Well, this one, I can add for now, but I'm going to
remove it later on. Then I'm going to go
for a darker wood for the side or for the
pole over here. We have a bare wood red, duplicate this and
call this bere Oops, right click and rename. Bar wood dark red. Add it to this one, and then just go ahead and go
in here and just make this more like an intense darker
looking red over here. Just to add a tiny bit of variation in between
the color paints. So we got those ones over here. And then maybe this
one is the one that I do want to make my
walquay slightly different. But I'm not sure yet. Maybe we want to go for,
like, a new walkway. So if we have wll
quay pieces old, if we just duplicate
this wall quay pieces, new let's open it up. And this is going
to be plain wood, so we want to just have like
our brand new plain wood. A the two this over here. And let's see if that
one works a bit better. Wal quin New yeah,
you know what? I think that will work a
little bit better if we do for a new walkway, like, they just renovated the walkway or
something like that. So this is going to
be a bustling town. It is going to be like
a town that is actually in use and not like
an abandoned town. But that looks
quite interesting. So we just have some
near the edges. They are not really spending
too much time on them. And because they are near
the edge of the towns, you would imagine that
this is the place where they would
build new buildings. And then over here,
it gets, like, the more older buildings
that we have over here, just nicely sitting here, and then down here,
we have another few. And for these ones,
what we're going to do this one feels to me
like a yellow house. So let's just go ahead and go for window pieces that
are painted yellow. Let's go ahead and go for
wood planks painted yellow. Also here to the side.
I think by this point, I just need to go ahead and
I need to actually select them because I cannot
see anything yet. Oh, this one is going
to be interesting. So over there, we also need to have the
vertex painting going on. So let's start with these ones. Actually, let's also do this one and just go ahead and paint, fill, and we can close
our paint again. At this point,
let's actually save sin before we lose
anything else, or not anything
else before we lose anything. And then the sides. So there's this
nice little yellow painted building
settlers came here, and they just painted yellow. Let's rename this painted
yellow underscore dark. And then if we also go
ahead and we duplicate this and call this just painted yellow
normal bright. For some reason, I think it is still remembering this name, and that's why we
cannot add this name. But in any case,
what we can do with this one is we can
go ahead and go into our color overlay and just make this like a light
or yellow color like this. And then we can use this
one over here on the sides. And a cross. Oh, these are
Did I never are those? So Window pieces painted yellow. Are those not these ones?
Windows pieces vary. No, I think I never
actually did, like, a proper yellow
paint on them, almost. That's what it looks
like. I wait. I did. Um I wonder what is
causing that problem then. Let's have a look. So
window pieces mask. So that's all fine.
We have our wood over here. Wood planks. Wait, these are all wood planks, but they should not
be wood planks. They should be plain wood
because this is window pieces, so we need to go to plain wood, and we need art our plain
wood base color paint clean, normal, normal clean
roughness and Oh, wait, of course, they are
all called wood blanks. That's one thing that's annoying about our naming is that they
are all called wood blanks. So we can, of course, change the name later
on if we want to. But no, that makes sense. So window piece is
yellow, for now, let's just go ahead
and use these ones before I change my mind. And then we have our doors. We kept our door normal. But for this one, I do want
to have a door yellow. So if I go ahead and just
have my door A painted white. Let's duplicate that
door, A, painted yellow. And that's Artist two here. And then all we need to do
is we just need to quickly grab our window pieces, copy the hex SRGB, go back to our door
painted yellow. And paste this into our color overlay and
the rest. Like that. So now we have a
painted door yellow, which we can also go ahead
and just add over here. Oh, and one I forgot
that's a dark version. I want to have the
light version. Is these overhead
pieces over here. Let's also go ahead and just
turn those into yellow. And maybe at that point, they kind of, like,
just stopped. So that's fine if we then
stop it there. There we go. And they, like, spend
a lot of time just making this completely perfect.
It's a brand new house. It's nicely painted,
all that fancy stuff. Settlers are ready
to start settling. And you kind of just
need to make up a story behind all
of this stuff. And if you would have
such a pristine, perfect house, oh,
that's a door. If you would have such a
pristine, perfect house, you would probably also have
a nicer walkway over here. So let's go ahead and let's
say that they go for, like, some nice red wood
along these areas. Or maybe they still
needed to paint it, and it's just been this
really clean wood. And then they went ahead
and went down here, and I don't think, red
probably doesn't look nice. Let's go walkway new. We're just going to
go ahead and add these new walkway pieces
to here like this. I know that we still need
to fix some clipping, but we can do that later
on. So there we go. That's like a nice little a roof over there or a nice
little building over here. Now for the back building, I kind of want to make
the back building stand out by making it old. So if we go for wood blanks
variation C over here, let's make this back
building like very old, or maybe it's almost like a
barn or something like that. Let's also just add
the wood blanks to these areas over here because nowhere
that you can ever see those anyway from
like Willi up Close. And then we are going
to go at it and go for our window pieces old. Also, like this. And then we have our door lt. And you know what let's
leave in the other door. And then finally, last one
that we're going to do is just have some lt areas over here. Alright, and I still need to
fix also the window pieces. So we got these
ones, and the rest, I will just do in a
time laps later on. So for these pieces,
we are going to go for window pieces old once again. In a way, they use a
plain collar, I believe. Yeah, because we
did not use that. So wood Bar blank, that's the one that
they use for this. There we go. So that
from a distance, it will give quite a bit of contrast between new
and old like that. And then finally,
we have this one. And for this one,
what I'm going to do is I'm just
going to give this, like, a nice color once again. So let's do wood planks, bear yeah, that looks Wood. Wood, bare, blank. No, that's not the correct
one I need to have. Wood, planks painted gray. That is the one I need to have. And let's now go ahead and go
in here. Same for this one. It's just once again, art our vertex colors like that. And then add the
correct material. So these ones are
going to be gray, and we are going to give it
some white walkways with some nice white
pillars over here. Then the side bills are just
going to be gray again, or maybe we want to
go for a darker gray, not just like a
normal Woodbar planks gray on this side
and on this side. And then we have a
darker version at the top and also a darker
version over here. I'm going to move this one down a little bit so that it's not clipping as much and give them
also like a gray version. And then on the side, I'm
going to go for maybe like some red this one is still
using the very old stair. So let's for now just go ahead
and get rid of this stair. And let's see. So this is going
to be a red door over here with some
red planks like that, and some red columns on
the side and on the top, Oh, before you know
it, 24 minutes has just flown by quite quickly. Let's go ahead and turn
this one into, like, the gray version over here. Don't know why it's so
much darker, but okay. And then this one is going to be our red version again.
Oh, no, you know what? This one is also
going to be gray. Et's go ahead and select this. Apply our vertex
colors. There we go. So that one is also just
going to be nicely gray. So we got those once,
and then over here, we can go for some red again. And then for our windows, we can go ahead and
do window pieces. Variation A, so we don't have red window pieces yet, do we? But I think at this point, we can just kind of
like leave those. And then we can do windows
pieces dark over here. And also over here, and
then we also have a door. So yeah, we definitely
need to make everything look a lot older because
else it just does not give me the same
feeling that I want to get. So we have dark and dark, especially like this kind
of stuff is also too dark. But it is, like, a pretty
overall good sight. So as you can see,
we have this stuff. And then down here
will probably be the only place where we can
actually see our stair. So if we go to Assets
and grab one of our side stairs place it
into position, move it down. Over here, move it in
as fast as you can. So we got this one, and
then what I'm going to do is I am going to
probably go for, like, maybe, like, a
painted look like that. I don't know if we
also want to do like, now let's not do paint there. Let's just have a paint
look on that one. There we go. We got
those ones also. And then this one over here
would then just become again, like a yellow house. But for now, I'm just
going to do that in a time laps because you can no longer
see it, it's out of view. This is the general look that we now have end up with where we have most of our buildings
with some decent colors. In the next chapter, what we're going to do
is we are going to do our vertex painting,
and once that is done, we are just going to mess around a little bit more
with the colors, see if we can maybe get create some more interest and
some more variation. Let's go ahead and continue with that in the next chapter.
52. 51 Adding Variation To Our Environment Part3: Okay, so let's go
ahead and continue. So what I want to do now is we are going to work a little
bit more on variations. This is mostly going to be in the form of vertex painting, and then I'm just going
to play around with the colors a little bit and
see how we can improve it. The cool thing is because
these vertex paints, they are inside the actual mesh, we can simply change our materials around and even
change all of the colors, and it will not affect
anything to the vertex paint. So last chapter, it's already been a few days because I had to do
some other work. Last chapter, I can remember that we had some problems
with our vertex pane. So let's actually have a look
and see what is going on? We go to paint. Now, let's
say we have our red. Our red on the
white does nothing. Oh wait, let me set my
strength a bit higher. My red on the white
does nothing and on the black also does nothing. Then we have the green,
No, that's interesting. So it seems like all my vertex painting is pretty much broken. Now,
what we can do. So the first thing that I would then do is I would first of all, look at my RGB channels and then just make sure
that I can actually paint. So when I have a look at this, it almost feels like
I'm not able to paint. Here, if I set my let's say that I set
everything to black. On the way, let's set my red to black. Okay, that might be it. So I'm setting red to black, and then if I paint
in some green, Ah, that's the problem. Red seems to be
overpowering everything. So even now go to blue, Okay, so red seems to be
overpowering everything, and then blue seems to
be completely gone, but is that because we
did not do anything? I forgot what we added
exactly to the blue channel. I don't think we did anything. So basic master main
master there you are. Let's have a quick look. So our blue channel, in our vertex colors
is taking care of oh, yeah, well, we use it
for the clean paint. So something is
definitely wrong. Let's turn off our RGB channel. So here we can see
that when we do the red channel or sorry, when we do the green
channel, we can paint. So when the red channels black, we can paint in emptiness. Then if I go to my red channel, start painting this in,
so it does not overt. So it seems like that we have some problems going on
with the actual blending, which is quite interesting
because it's not like I've done a special
setup with my blending. So let's have a look at this. I'm going to just go
ahead and move this over here so that I can
have a proper look. So the red channel
simply blends. It blends between a color
overlay, which is interesting. Yeah, here it blends
between this color overlay. A color variation, that's it. So it blends between
the color variation. If I go ahead and we have our
root blanks painted gray, let's also go ahead
and just open up this material, and then
we can have a look. The color variation, that's
why I cannot see it. Let's say that I do
this, there we go. Okay, so that's good. We can do color variation. I'm just adding this darker that I can actually
see what I'm doing. I am able to paint in my red channel and black
means no color variation, and white means that we simply add some general
darkening to it. That is good. So I need
to keep that in mind. I'm actually going
to write that down. So this is my to do
list, by the way, vertex, paint Red, White is default. Red Black is color variation. And then what we are going to do is if
we now have a look, let's go back to our paint. So the RGB channels
okay over here so I can basically paint out. Oh, no, sorry. This one needs
to be the other opposite. So if this takes second,
but if I do this now, at least we know how
everything goes, red black. So we always need to
go for default for red black. That is fine. So if we do this, so black and then white, we can go rear. Now, for our green,
green, black. So green black is main texture. Green white is bare
texture over here. So with green black, we can go ahead and do that. And then with green white, we
can just paint in this one. Okay? That is also good.
And then the last one. So the blue, I assume
blends between the two different
types of painting. But what most likely
will happen is that I maybe just do not have
it turned on correctly. That could be it. No, no, wait. I do have it turned
on over here. So if we go blue,
what can also be the case is if I just go
ahead and have a look. So my red channel,
my green channel. Oh, no, so my green channel
is not overpowering. My blue channel is arsenat. So if I now go in
my blue channel. Okay, so I can paint in blue. Oh, okay, so now it does work. That is strange that it
didn't work the first time. But, okay, so now Blue, white is old paint. Blue Black is clean paint. Okay, so now that we
got all of that stuff, let's go ahead to
Next, get started. Over here, what you can see is let's say that we use this
ones like a good example. You can see that
it kind of flows between the different pieces. So let's see if we can also introduce
something like that. So what I'm going
to do is I'm going to set everything to black. So fill, everything
is clean, black. Then what I'm going to
do is I'm going to go my green No way it's red, black. Oh, yeah, yeah, because this
was color age, of course. So then I'm going to go green, and then we want to
have white over here. And now if I set my size
a little bit lower, let's go ahead and do
something like this. So we basically go in here and
we do something like that. Now let's set my strength
a little bit lower. And then I'm just
going to, like, paint this out in like a few
locations, a little bit more. Something like that.
Okay, so we got that one. Then what we can do is
we can go to the red, and we need the red white and maybe just at your strength not too strong
and then add your size. And then maybe add
a little bit of color variation here and there just to make things
a bit more interesting. See? So now we get some color variation
going on here and there. Let's press X so that we can switch between
the two colors. Okay, so we got that
one. And then we want to grab a blue white. And then in some of these areas, wherever that it starts peel, so the paint starts to peel away because this is all
like the old paint. We want to start getting some of this stuff going over here. And now the last thing is that
we do need to, of course, make sure that it looks
not as overwhelming. So what I got over here, Wow, it looks even worse
with all the antalsing. But what I got over here is
does not feel as logical. Over here, it is very strong, but that is mostly
because of the color. So what I want to
do with this one, I'm just going to now tone
it down a little bit. So our paint is fine. I think what I'm going to
do is in my green channel, set my size a bit
stronger and let's set the strength a
little bit lower. And I'm just going to go
ahead and I'm going to, like, tone down and
have it mostly, let's say, at one corner, instead of just having it
going all the way around, let's try it like one corner. So this is almost like a
prototype piece to just see and to get into the mood. So let's say we have
this one over here. Let's close my viewpoint. Let's go to Camera one, and let's just quickly throw
in like 200 resolution. See? Yeah, that works. So it is more a
little bit localized. I think I want to
just, like, get rid of the black color a little bit more. Let's
save my scene first. So let's say that we go
back into our paint. We grab our red color and
we want to grab the black. Oh, I don't have the
correct thing you selected. There we go. Black at,
like, a low level. And then like here, tone down some of that really strong
blackness over here. But there we go. That
looks pretty good. Awesome. So that is number
one that we're going to do. I think like here at the bottom, I am going to do some
vertical painting, but I think I will do
that as like a time laps because there is a lot of vertex painting
that needs to be done. So that is the first tile. I first of all, just
want to show you a few examples before I
just kick in the T laps. Next one is, let's say
that we do this one. So by default, we
want to go ahead and fill it black in
the red channel. And then if we go to white, this one is also quite nice if we set the strength
a bit higher. And then if we just
paint in here, oh, we need to go ahead and select
the material over here. So that is something that
I do need to keep in mind. So select the material,
and then we first of all, just need to go down and
in the color variation, we can also make
this like a dark or orange, for example, see? So that's really cool. So it is subtle, but it will add a
lot of variation because else it will just
look perfectly clean. So at this point,
especially down here, I can just go ahead
and I can, like, arts and like a tiny bit, maybe like here at the bottom so that we get
something like that. And you can see that
it is very subtle, but I think that it
will work great. If I now, for example,
just keep messing around. So let's say that I will I don't really have
a lot of space for this. But let's say that now I
can just go ahead and I can not the dirt,
color variation. I can make it
darker or stronger, and then we will just do
some general balancing for this a little bit later on. But that's looking pretty good. Let's say that we have this
one to get start with. So that's when we go
into our camera one, you can see that
over here that looks a lot more interesting and
subtle details like that. So you can imagine having
these details everywhere else, it is going to look great. Now, we are going to add
some more extra models later on in time laps. One of these models
will most likely be a different type of wall that will be like
our flat planks. That is something to
keep in mind that. I might need to
then later on just redo a little bit
more of those models, and also like small edits like this over here where I just need to make sure that
everything works. Okay, so we got that one. Let's have a look
at like over here. So this kind of stuff is also crittical where we just
have some bits of painting. I only I don't really
need to show you that. That's quite basic. Here we have also
like some planks. So we were going to
go ahead and do, like, a variation mask
for that, didn't we? Yeah, we were going to do that. Um, I believe that I
already even put in, like, most of, like, the, um, Let's see, the clean
paint, base color paint. Somewhere along here, I can remember that we added
like a variation mask. Hm, that is strange that I
cannot really find it anymore. In any case, what we can
do is over here, we can, of course, is like say that
we do some paint peeling. One thing I am a bit
worried about now is the variation mask. I do
need to have a look at that. So what I will do is I will
just quickly over here show you that you can also
go ahead and you can multi select the tiles, then go into your paint, go
into the red char and sorry, the red channel
needs to be black and just make sure to fill it. And if you go to
your green channel and we are no, not green, blue channel and make it
white. Here see, there we go. So let's set is a bit lower. Let's paint it out, but
then we can go ahead and we can, for example, do some quite mess stuff and especially like
around your windows, that's where you often want
to just like have most of the damage. Here, see. Like that and like
that, we can just get a bit more damage here and there and like here at the bottom. So that all looks quite cool. Okay, so we got that stuff. Now, for our variation, I do want to have a look
because for this kind of stuff, having the variation
would be perfect. Doing this variation mask, I can swear that we
like it to here. But if we didn't I wanted to add it later
on, that's most like it. I most wanted to add it later
on, but I didn't do that. So here you can
see our variation. Now, what we can do is we can multiply this with
like a special mask. So if we go quickly into
substance design, here we go. So here we are at
substance designer. And as you can see, so these are just like our normal planks. We can quickly go into
our wood planks and then we can go ahead and
just set the preset. So I want to most
likely just grab the overlapping planks preset for this to get started with. And now what I'm
going to do is I'm just going to create
an extra output. So let's type in
output over here. And just call this
variation mask and also copy this into
your label over here. Preferably, I would like to steal from the variation mask. For example, this one, I would like to steal this
one, for example. Yeah, that works pretty well. So it's just like
our gradient map, and just use that one. So we should be able
to just use this. And then if we go ahead
and export this and I want to temporarily turn
off my material and just keep the
default variation mask and add this to
your wood planks. That's the wood
planks and final. And then yeah, let's
just add them to the layered wood where are you? You know what? Let's just
add it to the default because we have so
many pieces by now, it's getting a little
bit confusing. So texts, woodlanks, final. There we go. So here
is our variation mask. Now, if we quickly just go
ahead and go back into real. We can go ahead and first
of all, it's save scene. Let's go into
textures, wood planks, and just like added to the
default one over here, because all of our planks
will be following this type. And now another tricky
thing is that I believe that we are
already at our limit. So if I add this one, it will not actually allow us
to do anything with it. However, this limit, as
far as I can remember, it's a sampler limit, which means that if we right
click and we, for example, do not actually expose this, so it's a parameter limit, I mean, it should be fine. Or maybe we need to convert this to an actual object parameter, but we'll have to
think about that. In anyway, we have a color
variation over here. Now, what I want to do is I
actually want to use both. So I want to use my vertex color as like
a color variation, but then I want to
have this one on top. I'm not sure how it will look, but what we can try to do is
we can try to do a multiply. The thing I'm worried about
is that with the multiply, I have a feeling that
it will always display. So we might want
to do is switch. So let's say we
multiply these two, and then we do a static
switch parameter. And we can call this
color variation mask. And then if it is true,
we will use the multiply, and if it is false, we will just use
the one minus node and throw this into our Alpha. Let's see if something
like this works, and then the default will
just always be false. Now, is it going to
show me an error? I'll pass it until it is done. Okay, so yeah, because we are not exposing
this as a parameter, it looks like that we can
just leave it like this. So as long as all of our wood kind falls
the same pattern, I don't think it
will be a problem, but, of course, we just
need to have a look. So let's go ahead and we
grab this one and we have a Wood length variation
C. Where are you? There you are. So
let's have a try. Call our variation mask. Let's add this on top
of it. And let's see. So what I'm worried
about is that it will need vertex colors in order to basically
get the painting. So first of all, what we can do is we can go ahead and we can actually know it might actually be that we just
need the color variation. Okay, so the color variation is automatically turning black. That's not too good.
Let's go ahead and quickly just try out our vertex colors
just to make sure. So we're just doing
some testing, and we want to go ahead
and make the red channel white going red channel. Oh, no, no. We need
to first of all, fill the red channel
to be black. There we go. So if we fill
the red channel to be black, we get our color variation. And let's see if we
then go white. Nice. And then we can add the
color variation on top. Perfect. Okay. So we
got this working. So it does mean that we
need to go ahead and we need to go into most
of these pieces and just quickly like invert the vertex colors. But let's
say that we have this. So if I just go ahead and here, let me just quickly paint this out and just give
a quick example. So let's just only do it
a little bit down here. That is number one. So if we go ahead and go in here,
we can, first of all, just set our color variation
to be a more logical number, and then we can see if we
need to have control over how much we want to have
a mask affecting it. I do not think I
need my mask to be affected a lot because
as you can see, here, it is not as strong here. I just make it a
little bit darker, but it is working quite well. So if I would go ahead, and select all of these
pieces that use this version. We simply go to vertex paint, paint, set it to black,
and then just press fill. So now this has become
a new variation. And as you can see that
already adds like quite a bit, because if you can see
before, and after. See? So it adds some
general color variations. So that's quite
nice. And now we can just go ahead and we
can just paint this in. So great. Yeah, that is looking good. So then we can just add some extra darkening here and there. And for this one, that's what we would most likely do.
We would select this. And then the only thing that
we would do because we don't have any paint is we would
go to our red channel, and I would just go
in and start painting in some general darkening
mostly around the windows also. Like that, just to give it
some general effect like that, and then we can just
nicely break it up. Okay, perfect. So I've now showing you how to
do all of this stuff. What we're going to do
in the next chapter is we are going to
kick in the time naps. In this T naps, I will go in and I will just mess around
with things, basically. This can take me an hour.
It can take me 2 hours. I don't care how long it takes. I just want to make
everything look really nice and just have pop
up vertex painting. Once that is done, I
will go ahead and I will also just like invert all of these vertex colors
on the darker bits. And then I'm going
to just play around a little bit more with my
materials because that's also a little bit of back and forth to make sure that
everything works correctly. But as you can see over here, if you simply look at
these two bits over here, you can see that this already
adds a lot of variation. The only thing that
I can see also here is that it is no longer
the correct color. So we might want to then, of course, mess around
with the color, but that could just be color variation problem
that's most likely it. Yeah, it's most likely
just because we now have a color variation
down here that once again, we just need to go in here
and then go into the paint, and then with your red
channel, you just want to fill the red channel and
then it becomes white again. So let's go ahead and continue with this in our next chapter.
53. 52 Adding Vertex Painting Variation Timelapse: He I The I I I a
54. 53 Creating Our Window Glass Textures: Okay, so now that we are pretty much done over here with
our vertex painting, for now at least, we
can still, of course, improve later on, but it is starting to look really
good and really nice. What I want to do is I
just quickly want to create our actual
window textures. And once we've done that, then what we can do is we
can go ahead and we can do a massive time naps where I will create all of the
additional pieces. Those pieces are just going
to be variation pieces. They are going to be a
different assortment of, like, pillar of, like, balcony, stuff like that, or just like some small variation in the
way that the stair works, and they are just
going to be add ons. So don't worry
about it too much. It's just quite basic stuff. So for our windows, what I'm going to do is
I'm just going to go ahead and we are
going to keep this very easy because we have very little different
window looks, so to speak. So it looks like that's
what we have is, so we have this one, but this
one can be in the square. So if I go to my
store, where are you? Shop? No. Store
window, there are. So basically, if I just
go ahead and reset or do a quick Bivt the first one is that we just have a
simple square window. This is not even the Oh. This is the one. So
simple square window. That's the first one
that we're going to do. The second one would be just
like a longer version of this because we had
our shop window white. And this is pretty good
because once we've done that, we can pretty much
just reuse these. So if we also duplicate
this one and once again, get rid of one of these
sites, there we go. And these two,
let's right click, move to collection new collection
Windows. Oh, no, wait. That's window glass. Let's do that because
I'm not making windows, I'm making the glass. So
this is pretty much it. Now, the nice thing
about this is so we can basically do these
and we can cover a lot, so we can cover any type of
square window, any type of, like, long windows so that
does not really matter. Now, what I'm going to do is I'm going to go
ahead and because we have way more space in our
UV to actually do this, it would be nice if
we, for example, add a few variations of the windows that
we're going to do. So let's say that we have,
um one to let's say that, actually, no, I do want to
keep these at same scale. Maybe we do like three square variations
and two small ones. And basically, once
you have these things, all you need to do is just
quickly throw them into a UV. The windows that we
are going to do are, of course, not
going to be trough. So we are just going to go in substance painter and make pretty much like a unique
material for this. So we got over here
these windows. Let's just press U
and press Unwrap. There we go. So yeah,
that fits quite well. The unwrap is a little bit Oh, let's go ahead and just press S and just scale them down a
little bit because they are a little bit too much in
terms of, like, Scale. There we go. Let's just go
ahead and move these out. And let's go ahead and then
move this one over here. See, so just give
it a little bit of room to breathe like that. So that is no problem that
we have something like this. It will also make it easier
for us where we are going to UV unwrap all of
our other windows. So we got this stuff
over here done. That is all good. Now, all that we need to do is
we need to go ahead. Well, actually, save scene. But then once we've done that. Why does it take
so long to save? That's right. We
can go file export and just export them as an FBX. And I'm going to go into
Turnal select objects, Export to painter,
window underscore glass. And let's go ahead
and export that. Now inside of
painter, all we need to do is just go
ahead a new scene. Well, why is my PC being so
slow? Come on, you can do it. Thank you. New PC. Yes, PBR metallic
roughness is fine. Then if we go into our file, we want to go ahead
into painter, and then we have
our window glass. Let's open that one up. Resolution, yeah,
we only need 1024. So what I will do is I
will do two k resolution, then I can right the way
show you how to, like, downress your textures inside of substance inside
of nil engine. So for now, all we need to
do is we just need to press. Okay. And here we go. Now, these Window texts
are going to be very easy. Let's go over here. I forgot to give it the same material. That's one of the
things that I find quite annoying on Blender that
whenever you duplicate it, it will not just reference
the original material, but it will just create
some brand new material. But anyway, I just did to
copy everything to material. So now we can just go
ahead and window glass. Let's tile it again.
Oh, that's unreal. New window glass. Luckily, it doesn't
take too long to create a new project over
here, discard this one. There we go. And just call
this window un score glass. So most of this window
glass is going to be simply our roughness. Yeah, actually, our roughness. Yeah, maybe a little
bit base color, but mostly just our roughness. So what I'm going to do
is we can bake our maps. I don't think I will
actually need them, but just in case we can go ahead and use low polis hi
pol and just quickly, like, bake these windows. They won't actually
have any data in them. It's just handy to
sometimes have it, for example, for position
data or something like that. Now for the rest, all of
this stuff, we can keep. And all I'm going to do
for these windows is, let's create a folder, window glass, and we're
going to get started with, like, a simple fill layer. Base glass. Okay,
then it's fill. The thing is that I need to rely mostly on the
environment to light this. So we're going to make the
roughness all the way up. Do we want to I feel like yeah, it might be better
if we do metallic so that we really got
that reflectiveness. And then on top of this, we are going to
basically pile on roughness maps to make it
look a lot more dirty. So we got this one
I don't think yeah, you can kind of just
keep the base color the way it is, and we
don't need to height. So basically, we
have this stuff. Now, the first thing
that we're going to do is we will go ahead and we will have a roughness
variation A. This one is going
to be very simple, just going to be some leaking or something in that direction. So let's go ahead and just set this roughness to be if
this is the roughness, see, we are just going to
set it a little bit lower. Then we add a black mask. And now for our leaks, we can add it into a fill layer or we can go ahead and
just paint it out. I feel like if we
just add it here. So just add a fill layer, and I feel like if we
just add it in here, it should be already fine. So let's scroll down, and then we should see
like some kind of here, like leaks or stains
or how's this one? Uh, here it is
going to be sud on, maybe if we just
increase our roughness a little bit, here see. So that's like the first one. So it's just going to be some
general over here leaks. I am going to go
in my base class, and I'm going to set my
actual roughness also a little bit lower over here. And the environment
that you see, it's simply the environment
that's being used over here. As you can see if I hold
Shift and right click, simply the environment
being used. If you want to change
this, you can simply go up here to the environment
button and we can, for example, grab
something like this. For example, this
might be a little bit easier to look at if we do
like a more natural color. In any case, so this
roughness, let's tone it down. So this is going to be
quite a dirty window, especially with all of
the dust and everything. I don't think in the base
color it will matter much. I don't think we can maybe see that a little bit if we just give it
a little bit of, like, a base color over here. And then the second one,
if we just duplicate this. So the second one we want
to get rid of a filler, and it's more going to be
like a localized dirt. So we are actually
going to paint this in, and it's going to be
something like I don't think I want to do
dirt one because dirt one feels a
little bit too sharp. Oh, actually, no, you know what? It does not feel
sharp. You can choose. Or you can do a
first soft white, which is this really soft
looking, I said my flow higher. See, this is really
soft looking roughness, or we can do our dirt one sharp. So I think I'm actually going
to go out for a dirt one, and just around the corners, just go ahead and give
it some roughness. This will give you
that cool effect that you often see
in video games where the corners
of the windows are really dirty because
that's where they meet the actual frame. So you can go ahead
and you can, like, mess around with that over here, and same with this, just give it like
interesting look. And and after this, I'm just going to mess around a little bit more with my leaks. But let's first of all,
just see how this looks. This is one of those things
where we just need to quickly check inside of Unreal engine to make sure that
everything looks correct. But once we have
this one, we know whether how our UVs
are going to be, and we only need to UV
unwrap like three models. So over here, we got this stuff. Now, if you want to go ahead and just change the
scale of your leaks, what I like to do is I like to set my UV unwrapping over here, not the UV projection, but to triplanar projection. This is almost like
world space projection where if you now press R, just like in many programs, you can scale this up and down, and you can just mess around to the leaks and you can also
if you want, move it around. So it will simply no
longer look at your UVs, and it will almost like
project it as like a simple cube on top of this. So like this, I can just mess around with it and
just see how it looks. And now we got quite a bit
of difference. Okay, cool. So let's say that at this point, I'm going to go ahead and
I'm going to save my scene, and I'm just going to save it. Let's go textures. And then what we're going
to do is I'm going to go to window glass. And the final name is just going to be window glass, also. There we go. And now we just
need to quickly export this. Textures, window glass. Let's make a new
folic called final. And in here, we can
just export this as a Targa file and just leave everything to
default, so let's save. Okay. Perfect. Now,
all that we need to do is we need to go ahead
and inside of blender, we are just going to
UVNwp our pieces. So first of all,
let's right click, move to collection, Window glass to make sure that
everything is included. And then we're just going to get started with the first one, which is going to be our
door A, most likely. So basically with
this, for your glass, what you can do is, yeah, we can probably just use
this glass material. Let's do an image
texture, open it up. And then what we want
to do is we want to go textures, window glass, final, and I believe that our roughness is
most likely going to be the easiest one to
see this stuff on. So let's open it up. Let's go
over to our textures view, and now if we go to UV editing, um is it located in here? It should be located in here,
window glass roughness. No, that's not very handy. In that case, what
I'm going to do is I'm going to go ahead and
I'm going to temporarily, set my roughness over here. Oh, no, wait because my
roughness is already fine. Hmm. Let's just temporarily do this. Let's just create
a new fill layer. And with this fill
layer, just make your color. Completely black. Create another fill layer. For this one, make the
color completely white and set this to a black mask and then simply go over
a polygon selected and just select these pieces. So I'm just trying to
see if this will create a basic mask because normally
I do this in different way, but that takes longer. Here, there we go. So now we have a basic mask.
That's basically. And then I just
temporarily export it. And then, of course,
when we go to unreal, when we have everything
Uv unwrapped, then it should be fine. So
let's say we have this one. We can just go ahead and
we can go in here and just reopen this
textis window glass, final, and just pick the
base color this time. Oh, actually, let's
also remove it in here. Now what I'm just going to
open it up in here too, instead of just
trying to navigate to it because you can also
open up individual images. Oh, really? That is
strange that you do that. Okay, so it looks like it's getting to differentiate
between the background. Honestly, what I tend to then do is I simply tend
to go in here, right click and then
just export mask. I'll export it to, like, a file. And then in here, you can just export it and just
call it a mask. Fine. There are many
ways to do this. I was hoping that it would just be easier for me
to do it that way, but I guess that
this way is easier. So now it has export
like a proper mask, which means that we do have
an extra texture file, not that we're going to use it, but it will just
cloud our folder. I'm just going to save
my scene and just, like, remove the stuff
that we just did. So now if I go in
here, I open this up. Window glass, final mask. Tara. There you go. So much effort
for something so little. In any case, what I'm also going to do is I'm also going to go ahead textis window glass, final and set this one
back to my roughness, for example, and open that up. Okay, finally. So now, all that we really have to do is we have over here our window. We just press and we unwrap it. And this one is actually one of the few ones
that we are going to deform a little bit so that it kind of fits this
one window over here. So for that, I just tend to go ahead and use my
transform over here. And then if I hold what was it, control, no console shift. I forgot I forgot the shot gut. Okay, so amazingly, I
forgot the shortcut. I know that there is a shortcut, but I simply even
cannot find it online. And it's just not
worth my time to try and spend half an hour
just trying to find one shortcut when everything
that I can do is I can just go ahead and go
press one and just do this. Just select your vertss. So yeah, sorry about
that. Typical. There are so many
shortcuts in Blender, I just tend to forget
them after a while. But in any case, this one should now just be totally fine. So it is now unwrapped, although you cannot really
see it here because it is quite flat, it should work totally fine. So we got that one over
here with our door. Now, what we can do is
we are just going to also do this for
the store window. So here we go, store window. And if I just go ahead and go to plus three to go
into Phase mode, I'm just going to unwrap each of these separately like this. Then I'm going to
select all of them, hold S, to scale them
and then move them down. And these should fit
perfectly, pretty much. Oops. I am going to, like, of course, move them
a little bit in front of my edges so
that I do not risk. Come on, move so
that I do not risk accidentally going
outside of the edges. Here we go. And then just go
ahead and select them one by one and just randomly give
them a different window. Like this. Here we go. Okay, so that's now fine. So we have those all selected. And now that you have
these Windows Uv unwapp, we can pretty much
just go ahead. Oh, why is my Sorry, my key shots are for
some reason playing. What I can do is I can
basically just delete this one and I can just go ahead and I can
duplicate this window. Maybe for good measure, go ahead and rotate it 180
degrees to once again, add that extra bit of variation and then just move
it into place. There we go. So that
should do the twig. If we now go ahead and we just go in here and start
by exporting these pieces. So this one, if we go to
Unreal, to unreal, sorry, and this is going to be window
or store where are you? Store Window, yes. Okay. And then we're also
going to do the door. Oh, right click Move to collection store window
also our door over here, File export FBX, A. And then what we can do
is we can go into reel. We can go ahead and
go to our assets. So we have our door A that
we want to just reimport. And let's just go ahead and just load it in here so that
we can have a look at it. And we have our store window or yeah, store window over here. And then this one,
yeah, plus done. The reason why it's doing
that is because once again, because I duplicated my window, I forgot to copy
over my material. So I just need to go ahead
and go back in here. And then in my store window, select select the bottom
window then select the top window and just do a quick copy material
to select it. Where are you? Well, I'm
really blind today that I just cannot find My assets. Let's reimport
this. There we go. Okay, so we've done this stuff. Let's move my keyboard
over here or my shortcuts. Let's right click, create
new folding textures that we call Window nscoreGlass. And in this one, you can
go ahead and you can just import your window glass. Let's re export these textures
so that they do reset. And now all we need
to do is we have our we don't need metallic because it
will be fully metallic, so else because the metallic is just
like a white texture. So we have these three. Techie we also don't
need a normal, but I will just input it. So now, now it is just a
simple matter of setting up our material for which we had like a simple
also version, right? I swear we have a
simple version in here. Basic master over here. So let's create a
new material instant called this class window. Let's open this up, and let's see the basic master. Ah, yes. Exactly what I need.
Perfect. So if we go ahead and go to
our window glasses, we have our base color. We have an map, not
that it does anything. And the most important one are roughness and our metallic,
we want to set to one. We can save this. And
we do, of course, then of course, need to play
around with it a little bit. But if we go ahead and
just open up our window, we can give this a go. So glass window,
let's artist to here. Roughness needs to be a lot
more intense looks like, and I need to make
everything duller. I'm also going to
make my metallic. Windows are one of the few
things where I cheat with the metallicness and set it to 0.5 sometimes. It just depends. Normally, you should not do this because something is
metallic or it is not metallic and Windows is one of those few exemptions
that I tend to make. So if I go ahead and go in
here and I have my material, if I go and let's try first of all, setting
the here, see. I'm setting this to, let's
say, 0.7, maybe 0.6. And now that we've done that, what we can do is we can
just go ahead and it looks like that we need to
boost up our roughness. But as you can see,
the reflections are working pretty decently. They're not perfect,
so that's why we also want to
make it very dirty, but they are working, at least. Oh, wait. I mean, my two E view. There we go. So in
our three review, let's go ahead and let's set
our roughness to be really, really strong like this. Let's try that. So if
we now export it again, and we go in here and we go to our window glass
and re import this. Okay, so that's starting
to look a little bit better already. So
we got that stuff. So now if we go
ahead and let's see, let's make our
leaks a little bit duller and then make actual
base glass roughness, also a bit duller. So that's what I mean, it's really hard to see inside of painter which
version is good. So that's why it's handy if you just mess around to things until you get quite a
dirty looking glass. It almost feels like you
can just see through it, even though you cannot. Also just look at it in context. So if we have era
glass, for example, we just want to
go ahead and make sure that it looks correct. So we got this stuff over here. I'm going to make the base color a little
bit less orange on them. Like this. I'm going to make my base glass lighter over here. It's got to push out that
lightness and re export and just this time set both of them and just
right click and re import. Okay, so that's now a little bit lighter. Hm. You know what? I actually want to go darker. Yeah, I want to go darker. So my roughness is
working pretty well. And I want to make
it look even duller. So let's go into our base. Let's set the roughness down, and let's actually
make my base color a lot darker instead. And let's try and
export this once more. Okay, so we are getting there. We're getting there.
I'm going to make everything a little bit duller
even with my roughness. I'm surprised how
much reflections it still keeps, actually. So let's try this one more time. There we go. So now we
got like this Wi dull. We can kindness see through it. And what we see through, that's mostly the
metallic, I assume. So if I go ahead and go in here, and I set my metallicness
to like 0.4, for example, you can see that
it becomes less and less. So 0.4, let's do zero
point. Let's do 0.45. Now if I just quickly go
into my window and if I make the actual
base colors in here, also a little bit
darker so that they are so that they fit
a little bit better. Let's export this.
So we are basically just toning everything
down a little bit. Now we can go back to our
window glass and we can just re import. There we go. So that looks a little
bit duller and dirty. You can see the
outside over here, but we can still see glimpses of the window sitting next to it. So I think that is working
pretty well if we do this. Of course, over here, yeah, you would go ahead and do this. But I think that's
working pretty well. I think a, especially
like over here, it depends, of course, where the reflections
are coming from. But I think in general, this
is working pretty nicely. I think the last thing that
I'm going to do is I'm going to go ahead and go into my
actual stains over here, roughness, and I'm going to
make them a little bit bigger because it turns out it
does not look as nice unlike the smaller windows
when they are so small. So that's the last
thing that I will do. At this point, we can also go ahead and nicely save our scene. We can go in here, we
can right click and reimport this one
last time. We go. So now those are a
little bit bigger. And finally, you might have guessed what we need
to do now is we just need to go ahead and
we have other windows that we need to here, so our store window white. We can just go ahead and we
can select all of these, and then we can go
into our UV editing, and it will still have
the same mask over here. So if we just go ahead and go, unwrap unwrap,
select you unwrap, select you unwrap. Here we go. Select all of them, press S, place them into the
first window slot. Over here, and then
just click on one and just carefully move it
to the second window slot. And so we've done this one. So let's say that we also do, let's say this one over here. And, of course, what you
can also do on a weight, we cannot rotate it
because we have localized. I was going to say
you can rotate it, but if you rotate
it, then of course, the leaks will go
the opposite way. So we do not really
want to do that. So we got this one
at this point. There we go. Now I'm in
mode or in object mode. We can go ahead and export this. So this is going to be
our store window white. So we're going to go
store window white. And now the last one is going
to be our small window, as far as I can remember. Yeah, that should be
our small window. So if we go to UV
Editing once more, we can just go ahead
and you unwrap. You unwrap, you
unwrap, you unwrap. Yeah, let's just do all
of them. Oh, then I miss. Unwrap. Oh, maybe
we need to just pass Q and just reset
all the transforms. Oh, I should not do that.
Let's try that again. Unwrap, unwrap, unwrap, unwrap. Because if I do them all at the same time, it
will outer pack. So it looks like this
one, we just need to go ahead and just, like, rotate it 90 degrees and then just move it into
location with the other ones. There we go. It's just so
that we can scale them all at the same time over here. And then what I can do is
I can move them like this. Then if we go to Vertex mode, I can just go ahead
and I can just move all of them
at the same time. So there might be a tiny
bit of stretching going on. But once we've done that,
it is just a matter of, let's say, selecting the
windows and moving them down. So let's say this one,
I want to move down, this one, I want to move down. This one I want to move down and this one I
want to move down. There we go, that should
be enough variation. And with this one done, we can also go ahead
and we can export FBX. This is going to
be small window A. So we can go ahead and
we can export that one. And now, it's just a
matter of going in here. And we have our store
window and small window A, and we just go ahead and
reimport those also. Oh, am I missing something?
How am I missing those? That's interesting because it's not like I did anything
special to them. So that's store window. So let's also just import
our small window. Even though I'm
missing those, I can already go ahead and
just open them up, select our glass window, and then just quickly assign our glass window
to these pieces. There we go. So
that's looking fine. It's just a bit strange that our store window is not here. I must have just
messed something up. This was store window white over here. So let's try it again. File, Export, FBX,
store Window wide. I know that we are quite a bit over time, but this
is the last thing. Right click reimport,
and there we go. Now we have some cool
looking windows without actually needing to make entire interiors and
everything like that. There is a way that you can fake interiors inside
of a real engine. However, that is a lot of work, so I will not cover that
in this zoo course. But all of our windows
are now ready to go. So what we will be
doing in next chapter or what you will see me doing in the next chapter is I'm going to add a bunch of
variation assets. I don't even know
yet which ones. It could be most likely
variations over here, maybe some extradate
ardons like this. I'm going to finish the corner over here, and just in general, I'm going to do a bunch of
different small variations. Now, there are going to be smaller pieces that
we are going to create things like some barrels and some wooden posts
and everything. Those I will still
do in real time. So don't worry too
much about those. So let's go ahead
and continue with this in the next few chapters.
55. 54 Creating Our Saloon Corner Timelapse: I
56. 55 Creating Additional Assets Timelapse: I I like that. M n.
57. 56 Doing Our Boolean Process: Okay, so now that we have
created some additional assets, mostly focusing on just
like some additional walls, and over here also
like this extra bit, just to make it look extra nice. Now what I'm going to do is we're going to start
the boolean process, and that's why the walls
were so important. So at this point,
you do kind need to make sure that your walls
are completely correct. By the way, for this
stuff over here, I'm going to move
you in the center. I only just saw this. So for the booleans,
they are the same as the way that
I showed you before. Yeah, but that's why everything
does need to be exactly perfect because if we would
need to change this later on, that means that you
would need to redo the entire boolean process, which can be a bit of a pain. But I do have found
a way that we can sort of keep our process
safe, if that makes sense. So basically, let's say that we have these
ones over here. So we have a default door
and we have a window. This is basically how
we're going to do it. We are going to of
course, double check, make sure that everything
is in the right location, over here also, just make sure everything is in
the right location. And then what I want to do
is to keep things organized, I'm basically going
to start by placing a bunch of cubes everywhere where we want
to have our windows. So for this, let
me just quickly, I need to clean up over here, I need to clean
up just my scene. So this one needs
to be in house 08. So I just grab the saloon corner and throw it over
here in house 08. Let's see. Then we
have some doors. I don't even know
where they are. Oh, these ones, let's go
ahead and delete the stuff. We don't need those anymore.
The cubes we can keep. The shop top trim also needs
to be in house 08 over here. And then we have
our sides there, which is going to be this one, and you need to go in
house 09. There we go. So going in house 09. There we go, see,
so we want to keep the scene very nice
and optimized. Now what I'm going to do is
if we go back over here, basically for our booleans, we are just going
to create cubes. Now, you can create cubes using your modeling tools, but
I do not want to do that. The reason I want to create my default cubes like this
is because what I can then do is I can actually duplicate these and save almost
like a copy of them. So I'm just saving copy of them, and that copy will be perfect
because that copy we can then if we ever need to redo
a Boolean, we can use that. So let's say that over here. It also doesn't need
to be too precise, so we do want to, of course, leave a little
bit of space here and there. Let's say over here and
over here, that's fine. Also of course, these cubes, you only need to
create them once while if we would do it
in our modeling tools, it means that we need to
redo it every single time. I'm personally not really
in the mood for that. So let's say we go over here. Actually, by this point,
turn off your grid snapping. You do not want to have
that. There we go. So we got this cube over here. And then what we're going to do is we're just going
to go ahead and duplicate it and do
the same over here. And we only need to do
the door and everything. We only need to create
this cube once, and then it's just a matter
of placing and the placement, I will just do it in time
laps because at this point, I'm pretty sure that you
know how to place stuff. So I'm not too worried about not showing
that in real time. So basically, over here, that looks yeah, that
looks about fine. Maybe a bit higher. There we
go. So we got these pieces. So my plan is that we're basically going to go
ahead and we have these. We're going to add them
to a folder and call these lockout underscore
not blockout, Boolean underscore cubes, and we're just going
to throw them in here. And then later on when we
have all of them placed, we're just going to duplicate it and then save a copy of it. So for these cubes, and then we're doing
the same process. So what I'm going to
do at this point is I'm going to go ahead
and I'm going to kick in the time labs and I'm just
going to place all of these cubes everywhere,
which will take a while.
58. 57 Doing Our Boolean Process Part2: Okay, so we have now
placed a booleans. As you might notice,
on some of the houses, I've not done it, and this is simply for me
to save some time. So you can do it if you want,
but I checked my angles, and so far, I can see
that these houses, you just cannot see them. So they are more here for the actual shadows and everything. I can always change my mind. If I end up changing
a different angle where I can see the houses, then I will just, of course, go ahead and I will
add the Bollians. But for now, just to save time. So it took quite a while. What we're going to do
now is we're going to go ahead and first of
all, here we go. Let's have a look at everything. So right now in the
Boolean cubes over here, so it already placed
it into the folder because that's the last place
that replaced everything. I just need to double check, just right click and then press Select Media children and
just have a flight through, double check everything, make sure that everything
is selected. Yeah, that's all looking fine. Okay, now we're going to
get start with the process. Now, you already know
how this process goes. The first thing that we need
to do is we need to go ahead and select everything,
including our folder, and then we're going
to just go ahead and press Control C and Contra V. Once you've done that,
we will have a backup. So this was the goal for this. So this one, we can just
right click Edit, rename. Boolean cubes backup. And then we can just go
ahead and turn it off. So this backup, whenever
you restart your engine, it will be turned on again. That's just an unreal thing. However, for now,
this should be fine. So we can get started
and try this out. We are going to go ahead
and go to our molingtols. And basically all
we're going to do is e we keep going and we
can select everything. One thing that we
can try to do is if we select both of these
assets over here, there is a new feature
in n engine five. I've never used
it, but let's try. So right click Merge actors, merge to a single
static mesh actor. Let's see. That might actually be a little bit easier if we then throw this
into geometry and meshes. Let's press Save. Oh, wait, it does not replace
it. Then it's not worth it. I believe merge and
simplify merge to an actor. Yeah, I think I can go into the settings to
see if it replaces it, but honestly, I don't think
it will actually do that. Yeah, that's too bad.
So with this way, you can merge piece together. It's great for batching, but the reason I wanted to
tile that is because now will need to boolean twice because for everything
we need to boolean twice. So if we select the val, we can select over here this piece, and we can just go ahead
and press Boolean. There we go, there we just
need to press Accept. But then, ooh. That sucks. Looks like it removes
our vertex colors. I didn't know about
that. Split mesh into selected using second mesh. Nah, that also still does it. That is too bad. That
does mean that I need to pretty much redo a bunch
of my vertex colors. Oh, I'm quite sad about that. It makes sense because
it creates a new mesh. So I just didn't I didn't test it out when I was
doing all my testing. Um, okay, nothing
to do about it. It will not take too long. I will do those vertex calls off camera because by this point,
we've already done it. So we're just going to
go ahead and Boolean, select a mesh again, Boolean
again. Double check. Okay. So now if I would go
ahead and move this back in, this should all work very
nicely. Yeah, it does. There we go. Okay, so
that's pretty good. Let's go ahead and
just keep doing this. So yeah, Boolean,
except Boolean, except. Luckily, the Boolean function
is quite good here in real, ironically, because normally
boolean functions are not very good even in three
modeling software. But basically, we are
just going to boolean it, and then we will just go ahead and move this back right away. Let's go ahead and
turn on lid mode. Oh, you are. Can I just
scale you like a tiny bit? There we go. Just
scale it a tiny bit just that it's
not clipping through. But okay, that is looking
pretty nice here. See, now, it really does feel like it is all just
part of one big thing. Okay, great. So let's
go ahead and continue. Boolean, and I will also
remember that I need to save my scene a little
bit more often because, of course, this tool is in Beta, so it is a little bit more
cash heavy sometimes. Also, one thing that
I want to check is, yeah, okay, so it just
keeps all of the materials. So we are able to
change our materials after which should
be no problem. So the only thing
that we, of course, cannot change is the
location of the holes. Then we would need to redo
it. Yeah, that's about it. But over here, that
looks quite nice. Okay, so let's save my sea, because you can see
that it does create a new mesh every time we do a
boolean. That is one thing. So it might make the
meshes a little bit messy, and it will have almost like a lot of unique
meshes, so to speak. But yeah, what do
you consider unique? Because at this point, oh,
this is an interesting one. I'm just going to move it
over here because yeah, at this point, unique,
it's relative. We are near the end
of the project. We don't really need
specific modularity anymore. So what we can do with these pieces is we
can just go ahead and make them
unique in this way, if you would consider
this unique. Huh. That's almost like GI in Sea
Sorry, I got distracted. So yeah, for these ones,
Boolean Oh, it's a shame. I really like this vertex color. I'm lucky that I can keep this one because I
really like that one. But it's a shame. I spent all this time on vertex
colors. But that's just me. I should have tested that out. I do apologize if you are annoyed right now because you need to redo
your vertex colors. But if, honestly, it's good
practice, I would say. Oh, yeah. So over heres I
overshot it a little bit. So I can move it back and forth just to make sure that
everything still fits. So that should not really
be that big of a problem. Nah, see? So that does fit nicely. Okay, great. Let's
just go ahead and continue. Oh, this
is another one. Another one of those where it is often when we have
that kind of stuff, it is easier to just move it
down a little bit because bullying around two
different pieces that's just really annoying. Because then we would
need to make use of our backup basically
in order to boolean, so I will try to avoid that. But yeah, this is the
first time that I'm using the Boolean function
in such an extent. So that's often how it goes. I do my testing whenever
I have a new feature. And the thing with unlogenFb is that there is no
documentation will yet. So the testing is
literally me just messing around and figuring out how
to get everything working. And after that point, I
just do the tutorial, and then we go for
like a larger scale. Like, over here, we
have another problem. So this one we cannot
really get around, so I can boolean this one. However, at this
stage, what I'm going to do is I'm just going to go ahead and I'm going to
first of all, boolean this. And then what I need to
do is I need to go ahead, I need to go into
my backup cubes, duplicate the backup cube, throw it back just to keep
it clean into our boolean, and then turn it off again,
and then do another boolean. So that's the way that
you would do that. And as you can see,
that is quite a hassle. So that's why I'm
trying to avoid doing it too many times. Okay. Nice. Ooh, what was that? Actually, quite like
that. I'm going to make this scene a
little bit more blue. Oh, wait, we need to do
color grading anyway. The color grading is
going to be cool. We are actually going
to use a brand new tool also for the color grading, which is Da Vinci Revolve. So it's a tool that is
actually being used by Hollywood to color grade
all of their movies. But it is free nowadays. It used to be paste,
but now it's free, and we are going to go
ahead and use that for color grading to get really
nice cinematic color grading. This one I again, cannot
really get around, so I will just go
ahead and bullion it. Unless I can push it far now. Yeah, here see. That won't work. So, in that case, we
just need to go ahead. Duplicate it. Scull
up, throw it in here. There we go. Just
select all of these three at the same time and
push it back. Oh, hey. That is strange. So it did
push it back over here. Oh, there's something behind it. You are behind it.
You know what? I'm going to just
nuke you because I cannot see this anyway. So in my case, I'm
going to nuke it. In your case, if you
have an open world and you want to be able to see behind it, then what
you can, of course, do is you can a boolean
those other pieces also, or you can try and, like, move it forward as far as you can to kind of,
like, avoid it. But in my case, for the putoil there's no reason for me
to really do that stuff. It'll just add a
lot of extra time. These ones are also
quite interesting. So for these ones, if we are going to lose our
vertex colors anyway, it might be easier if we
select all four of them, right click and press
Convert on our weights, and we cannot do the merging. Yes, we can replace it. But then I wonder if we are going to replace
it. You know what? I have another idea. So for these ones, we're just going to kind
of break our backups. So we will do this over here, and then we will just
turn on our backup. And then do it
again. Here we go. So we got those. Now if we
just turn on our backup, I'm just going to go
ahead and do this. Like if we need to
replace a few of them, I am not too worried. This one is going to be
is it going to be a pain? Yes, that is going to be a pain. I need to go ahead and I
need to duplicate this, and then first do this one. Duplicate it again,
then to the bottom one. Wow, this one is really like an annoying position.
There we go. So the top, luckily that the Boolean
functions go so fast. So this is still vastly faster than when we would
need to actually go in and create all of these
unique modular pieces with windows in them and
have the windows at different locations and
everything, that kind of stuff. I would take so much longer
than just doing this. And, of course, I
just want to show off this cool new
technique over here. So we got those ones. That's fine. These ones seem to not be too special
except for this one. Let's go ahead and bool in this. Bull in this. Oh, wait. I'm doing the
backups, I believe. Seems like it doesn't
matter if I did the backups because everything
is now working fine. I think this one can be
moved forward a little bit. And I will turn off the backups
because oh, yeah, okay, so I already turned them off, because else I just get confused by which ones I already
did or which not. So yeah, not too difficult. And it is looking pretty cool. So once we've done
this one, yeah, okay, so with the verte colors, we cannot get the
full feeling yet. So we will need to redo those. But that stuff I will
just do off camera. This also getting quite
late where I am right now. So this will be the
last part for today and then tomorrow fresh new day, we will go ahead and
we will continue. By that point, I will have already done the
vertex painting, and then we're going
to continue by adding finally our decals. And finally, once
our decals are done, then we can start moving
our focus towards the Ah, it looks nice. We are going to
move our focus more towards the terrain and everything and finalizing
our environment, adding extra props and
everything, stuff like that. So that's also going
to be quite cool. So I don't know. I think we have another seven to 10 hours to go. There is also some
extra stuff I want to the let's just do this. There we go. I'm not going
to worry about that. See, there is some extra stuff that I want to do at the end. However, I still
need to test it out, so that's why I'm
not telling you yet. But if it works, it is going to be quite cool. If it doesn't work,
then that sucks. But then OL, it's because it has to do with transferring assets from Unreal Engine
four to Unreal Engine five. And that's why it is tricky. I know, I know I'm
really a tease that I just do not tell you, but I don't want
to get your hopes up because it's something I literally just came up with yesterday that
I wanted to do this. So it is not yet
in the planning. It's just, like, an
additional bonus thing. Oh, turn off my backups. I just realized that
I might be able to merge pieces
together. Let's try. Let's say that we have these
three because this one does combine Selexi into new static message because
this one does replace it. If I press Except Ooh. This one does replace it, which means that now I
can just do this. And if I don't do Boolean. Well, wish I tried it
out first or earlier. But that's the thing.
This tool is brand new. I'm also learning it,
but this is quite handy. So we can basically it does mean that we have
even more meshes. But we are basically able to save quite a bit
of time like that, and we still have
a boolean backup, so that's no problem.
So we got those. So the next plan is to
simply select these. Hopefully, some of you guys have
already figured this out, so you were not
doing this nonstop. But then these meshes, we again, have that problem that do we
really want to append them? Because then right now
they are modular pieces. So I feel like right now I
do not want to append them. I can duplicate this mesh. So see, I'm also
evolving this time, now what I'm thinking about, is that I no longer use my backup. I simply duplicate
the mesh and boolean it because I expect
it when I boolean it, it will basically remove
the original mesh. So just like that, I just
keep improving and improving, also myself while
doing the tutorial in speeding things up because that's often
how workflows work. You do it a bunch of times, and then you start realizing like ways that you
can speed things up, and then you just slowly
make it better and better. Yeah, just like that, we are now already really
speeding things up. So here over here,
I can see this one, and what I'm going to do is
I'm just not going to bother with having that small seam and I can just go
ahead and do this. And let's just go
ahead and append these and these because they all kind of stay with
their own little wall. I know, they do not. In that case, we
will duplicate it. Boolean Boolean. Move this back. We have
this problem again where we just need to and I'm just going to go
ahead and delete. This back side over here. Oh, yeah, we do need
to be careful because the roof is very
close to this one. So just like move a tiny
bit forward like that. Okay, so that's working. And then over here, I guess
we need to do the same thing. So Boolean and
Boolean here's again. It's nice to move this back. So, these materials, we
can change because I feel like I don't know if I want to do the
darkness everywhere, so we kind of have to see. And here I can
check, like, Okay, so this one is halfway. So when it is halfway,
it does not really matter because I need to
do double the work anyway, so I can just as well
append all of them, duplicate them, Boolean one. Boolean number two. And if you cannot see it,
because we have not yet done, really, really proper
lighting and everything. So there are still
some dark areas that are very
difficult to see in. This is stuff that we
will also fix later on. Although the lumen system
does have a tendency, and I'm sure that they will
improve this later on. It does have a tendency
to almost like art the same effect that we
turned off with lightness. When you get closer, everything just becomes a bit darker. So that is something that you just need to always
keep in mind. It's appendees bullying them. There we go. And because
we are bullying them, even though we append them and we add another
mesh to our scene, because, of course,
too many mesh to your scene will also
slow down your scene. But because the boolean
removes them again, it actually makes no
difference in the end. Oh, cancel. Append Let's
do this one and this one. And here are also these
angled wood pieces. I think they look quite cool. You can see that
some of them work a little bit better than others. This is because of the
way that the shadows work and the direction
of the sunlight because if you rotate
your sunlight, the other one would work better. So it is what it is. But I think it's still like arts quite a bit
of an improvement. Oh, wow. We have already been
doing this for 20 minutes. Sorry that it is taking so long. Trying to go fast, but it
looks like I'm not that fast. Although with the
append technique, things are going a lot faster. Oh, wow. Let's save
our scene, actually. It's been way too long
since I've saved my scene. There we go. That's better. So we are going to appendos
and appendee over here. Perfect. So now we can
just use these balls. Bullying everything. And then our saloon is also ready to go. Yeah, I think once the
vertex colors are back in, this will look really nice. So then we will get
this really cool look. And I also quite like that we're got to go
for a little bit more realistic and not for
this classic or classic, I should say, typical, like, really dusty, really hot looking like western town
that is just completely, like, crumbled down and it is just broken
up and everything. So I quite like that we more go for like something
that is still in use, and people are still
going around and, like, maintaining everything
and stuff like that. I think that will
look quite nice, especially once we have
our how you say it, especially once we have
our tray materials, because the tray materials
are going to be darker, so they will actually add
a lot to our lighting because we will have light buildings with a
dark underground. If you want, you can
already, make the train. Right now, I think it is
using the plain color. So if you want, you
can already make the train darker so that you get a feeling in terms of
lighting, how it will look. But of course, we will do
another lighting pass a little bit later on
after we've done our train to make sure that
everything is perfect. AppendeeFor this one,
it does not matter, so we can just
append them again. Oh, immediate press append. Okay. And then for these ones,
because they are like a seam, we're just going
to duplicate them, Boolean one and Boolean two. And because it does not
boolean when there is no mesh, it will not give us any arrows. I was a bit worried about that that it would just throw
in an arrow saying, Yeah, this boolean falls outside of the mesh so, we're
not going to do anything. Over here, a few
more that I forgot. Although these ones you
can most likely not see, but it will only take a second, so we can just as well just in case because
they are still at this angle where you
might be able to see them just a little bit. So let's go ahead and
just push it back. There we go. And these ones, I'm not doing the sites. I don't know why I'm
not doing the sites. I think I'm just
going to go ahead and do the sites anyway, because I must have
forgotten to arts. However, I think that
this one is still quite important because you can see
it literally off that side. So it would be a little
bit more unlogical if it was not included. The only thing is that
the door frame will be a little bit thicker
because of stair. But that should be
fine. There we go. Here, our door frame to see how far back you can go before it starts showing you
the end of the door. And, of course, the
window can just kind of, like, do whatever it wants. Oh, we have another double. In that case, let's just
append all of them, duplicate them Boolean one, and Boolean number two. Bendis bullying them wide away. And I think this
is the last one, so let's append these
and final boolean. Okay. I think that does it. Yeah, looks like
everything is now done. So this all now feels
a lot more grounded, as you can see, so that
works a lot better. I quite like that. Oh, wait. For these ones, I already did
the booleans, right? Yeah. It was more that
I needed to push them back in because they
did have some problems, but it seems that
that goes far enough. Okay, perfect. Quick fly around, make sure I didn't forget
anything. It all looks fine. Everything looks like it is
meant to be in these areas. So that is all looking great. Okay. Awesome. So we
got that stuff done. If you want you can
fill in this hole, that might be better because
we do have these windows. However, for the windows,
I'm just going to go ahead and if we go into
our basic master, just turn on two sided. And I will just fill in this
hole a little bit later on. It's going to be part
of the final polishing. But I've been talking for
way too long already. So this is looking great.
Let's go into our cameraangle. In the next chapter, what
we will do is we will go ahead and we will start working on just some extra decals. These are going to
be nothing special, just some small little bits of leaks and some little dirt
buildup here and there. So let's go ahead and continue with this
in the next chapter.
59. 58 Creating Our Decals And Placing Them: Okay, so the Boolean
process is now done, and as you can see, I've just re added some of the
vertex painting again. It might not be
exactly the same, but it's good enough. So what we're going to do now is we are just going to go
ahead and add some details. And that will be the last
thing before we start focusing on the train
because right now, of course, train
looks very boring. These decals, they are
going to be quite easy. We only need some very
basic looking decals, and all I really want is, I just want to get some general, like some leaks
here and there and just maybe some grunges just
make it look extra dirty. And we will usually build in system inside of
Unwel for the decals. So I don't know if they're
like, here you can see, like, a little bit of, like, a grunge, but let's actually look in
the game because in a game, it's often a little bit better. Yeah, I guess you can see, like a little bit of leaks
here and there. But yeah, we kind of
just need to improvise most of this, so
that should be fine. Okay, so knowing that, what I want to do is
I want to go ahead and I want to go to textis.com. This website provides a lot of free content, which
is really great, everything from
reference photography to tree materials to scan
materials and everything. But of course, they
also have paid content if you want to go
for higher resolution. All we need to do is we
need to go to decals, and in here, we already have a nice little library
of some decals. So let's say that we are going to go for maybe
like one leaking, one bottom dirt and one
that's like a stain. I think that should be enough. So we can go to leaks, and let's say that we have
dark leaks over here, and then you get like a bunch of these dark leak decals
that we can use. So knowing that,
I just want to go ahead and grab one that is not too repetitive and
that looks quite interesting. So I'm just scrolling about this one looks
quite interesting, but let's just quickly continue. This one looks too specific. We want to get
something that just looks very
nonspecific, actually. I know that this one is specific,
but this is quite good. But let's go for
which one did I have? I think this was the one. I then just middle click
and I just open it up in another tab so that I can just quickly already
find the rest. So let's say we have
a bottom decal. For the bottom decal, stuff like that
looks quite cool, although it might be a
little bit soft in terms of, like, the strength or
maybe something like this. I don't know. Um, yeah, the bottom decals are quite a bit stronger,
as you can see. So I don't think there's much left that I
really think like, Oh, yeah, okay, so
we got some dust. But now let's go for something that's a
little bit more subtle. We can just increase
the strength of it inside of heel if needed anyway. So it was this one. So
let's open up this one. And finally, we can go ahead
and we can go subtle stains. And in here, we can
try to find one that also looks a
bit interesting. Maybe like this one over here. Okay, so we now got
our three candidates. First thing you need
to do is you need to, of course, go ahead and
open up an account, and then you get 15
free credits per day, and you can use these credits to basically get your textures. So let's just download
the leaks to get started. Now, I'm going to use
Poteshop for this. You can use whatever you want,
even substance designer, but Photoshop seems to be
the easiest thing for me. So over here, I have just like
a simple new hotsho file, and I just have a 2048 by 2048 Canvas that is brand
new. That is this one. Now, all we will need to do is we need to go ahead
and go in here. Click and drag your leaks, and then you just
want to go ahead and you want to make
them very large. Now the thing with these
leaks are because we are using the system
inside of Photoshop, it does mean that we can only
use one decal per canvas. We cannot have two
decals on here and then split them up using UVs. That's simply not
how it works when we use the system
inside of unreal. So we are just going to
have this one canvas. Now, there's two
things that we need. We need a mask,
and for this one, we need to, of course, have
also a proper background. So let's first of all
do the background. We click on the backcount and then we go to the little
circle icon down here, and we simply press solid color. When you press the solid color, you just kind of want to grab a solid color just
by clicking on your decal that is roughly the same as the
color of your decal. The reason you want to do
this is the same as what we have with the paint,
which I still need to fix, is that there isn't
like a white outline around it because of the mask. So we got this one over here. Yes, it has, like, some little
holes and stuff like that, but I'm not too
worried about that. So, and if I haven't, then I can always
just remove it. So the next one is going
to be to create a mask. The way that I tend to do
this is I tend to go ahead and just hold Control and
select these two layers, right click and then
press duplicate layers. And then once you've done
that, in your duplicate, double click on your
color and make it black. And then on the top
layer, which is your leaks, right click, go to blending options, go to color overlay, and then click on the color
and set this to be white. C, Instant mask. So now that you have this mask, I just tend to select both
of them, right click, and then I like to merge
my layers down into one. And then it's just a matter of throwing this into
your Alpha map. So you press Contra,
you press C, sorry, contro C. You turn it off, and then you go down
here to channels. Click on the Little
Plus button to create an Alpha channel and press
Contra V. That's it. So now we have a texture that has a base color
and an Alpha map. And that's all we need for
leaks because the leaks don't really need
anything more specific. So once you've done that, what you can do is you can
go ahead and let's just go create a photo
called Tcals in here. And we can just go
ahead and we can get started by just
saving the PSD. So let's do a saves. And let's get started by just
saving this as a PSD. So leaks Under score
01. Like that. And then what you want
to do is you want to immediately do a save a copy, or for the earlier versions of PhotoShop, it
is just save as. But for later versions of
Photoshop, it is save a copy. And it will just open up the same folders that
you saved your PSD, and you want to save a TGA file and just make sure that
Alpha channels is selected. Oh, and by the way,
you can also get rid of the naming that it says copy. So we save this,
and there we go. Our first decal is now done. Now what we can do is
we can just go ahead, and if you want, you
can reuse this file. So if we go to textures, we can use the bottom
one, download. Drag it in here. And
then for this one, you can see that it has this
really strong background. I don't want that, so I'm
just going to hold Oh, hold. I'm just going to
carefully move this down. Now having this one just
turn off your leaks. You can also delete it if you want and delete the old mask. In your color,
just try and match the color of your decal. And once you've done that,
you can just go ahead and do the same process where you
duplicate your layers. Set the bottom one to black, right click blending options, color overlays at the
top one to white. Right click merge
layers, Contra A, Contra C, go to your channels, Contra V, and that's it. Then for this one, we
might then want to like later on, increase
it a little bit. But we can also do that using the actual shader.
This is number two. Make sure to do a saves this time and not safe because
else it will just overwrite our original file and call this bottom underscore 01 and save and then
also save a copy, and this copy is going to be a TGA file, bottom
underscore 01. Here we go. Perfect.
Now, the last one was going to be like
some general grunge. So let's go ahead and go to that one and just do the exact
same process once more. Yeah. So this one is
not very decal heavy. So, luckily, we only need
to do three of them. If you have ever followed my post ocalyptic
game environment, then you know that
Decas are very handy, but in those we made
like 20 of them. So then, of course, it's a
lot more time consuming. So for this one, I'm
going to go ahead and let's say that I'm not
too happy about the color. You can right click and
press Rest Rice layer. This basically allows
you to edit it. And then if you go
to image adjustment and the hue and saturation, we can, for example, tone
down the color to make it a little bit more gray scale
in the saturation over here. So this is the same as an HSL node inside of
substance designer. Now, at that point, just select your background and
kind of match it up. Right click and let's
duplicate these layers. Bottom layer black, top
layer blending options, color overlay, make them mite, select them both, merge layers, Contra A, Contra C, Contra V. There we go. And this one we
can do a save as, and this one is going to be
generic dirt under score 01. And then we can finally do
another save as copy and just save this as a TJ
file, Generic DRT 01. Perfect. So those
are now all done. Now, if we go ahead
and go into Unreal, then I accidentally move my
camera. It was about here. I will, of course, later on, just replace the cameras
with a better version. But let's go ahead and
let's go into Unreal. Now, what I'm going
to do is if we go to textures and then create a new folder that
we call decals. In here, you just want to
import your TGA files. So I'm just selecting
all of them and importing them. There we go. Now, of course,
what we need to do is we need to create
the material. For this, what I'm going
to do is let's just make a new folder that I will call decals just to
keep things nice and clean. And I right click Create material, decal
underscore Master. Now for open this up, this
material is going to be a lot simpler than
most other materials. All we really need to do is we need to import
one of our decals. Let's say that we start
with the leaks over here. And you basically
want to do this. So let's say what kind of
control we want to have. Let's do a multiply, and let's give it some
color overlay control. So add a constant three vector. And then for this one,
you can right click, convert and just call it
decal underscore base color. This one, right click,
convert the premter and call this color overlay. And of course, make it white
just to make sure that it does not do
anything by default. So that's like the
first one. We can throw it into a base color. Next, what we can
do is we can add a SClick scale pemter that we call roughness and set the default to one to have it quite dull or maybe like 0.8, just to have it not as
dull but still quite dull. So that's the
roughness. And then the last one that we need to do is we need to go ahead and have a scale perimeter that we call mask underscore intensity. And if you set this
one to one, I believe, then we simply want to
multiply our Alpha mask, which is this Alpha
button over here with our mask intensity and then we need to art it to the
mask. So that's already it. It's very basic. We
have a color overlay. We have an actual map. We have a mask intensity
and a roughness. Now, the last thing
that we need to do is we need to go to
our decal master, and then we need to set the
Oh, that's a bit annoying. Then we need to go ahead and we set the material domain to be a deferred decal to tell
it, A, this is a decal. The blending mode needs to be translucent because
else you get an error. And then the decarblend mode, you want to be de buffer,
translucent, color roughness. This way, what we are telling
it is this is a decal. It is translucent, which means that it is a little bit true and that the decal accepts
color and roughness maps. So we don't need an
actual normal map. You then simply plug in your mask intensity
into your opacity, roughness in roughness and
base color interface color. And that is all you need.
So now you can just go ahead and press
Save, and that's it. So at this point, all
we need to do is oh let's close that one is we
need to go into our decals, and then we have a decal master. We can right click create one that we'll call
leaks on score 01. Right click create
one that we'll call bottom On score 01
and right click. Oh, sorry. 1 second. Oh, yeah, so here now it's
referencing the Wong one. 1 second. Let's delete
that bottom 01. I meant to say duplicate
the leaks. Score zero. Because if we create an
instance from an instance, it will always reference the original and we don't
really want to do that. And let's duplicate and call
this generic underscore 01. Perfect. Now at this point, we can just go ahead
and we can open them. All of them over here. Great. So we've done that. And most likely we only really need to change the base decal and
then maybe do some tweaking. So this one is going to be generic dirt and this one
is going to be bottom 01. Okay, so those
things are now done. Now, all that we need to do is very simple, drag in your decal. So if you have your leaks,
you simply drag it in. And as you can
see, in the leaks, they will kind of like
display on top of our mesh. It does mean that on the side, you can see over here that
it goes against sight. This is because if you press G to go back into
your editor mode, you can see that it has like
a box that goes with it. So let's say that we
have our decals here, generic gringemp and we
have our bottom over here. Now the general idea
is that we just basically we add them on here, and then we can
mess around with it a bit and just make sure that
everything looks correct. So at this point, I'm just
moving my window over here. Let's say that we
have this building. I want to grab some leaks, so I drag in my leaks. I don't need to rotate this
arrow towards the building. So if we rotate
it, nine degrees, and I can see that
I need to rotate it another 90 degrees like this. Over here. Now, what I like to do is I
like to always just scale this in a
little bit to avoid any arrows because if
this is really large, it can sometimes
start to overlap. And then what we can do
is we can simply scale up our Digal to kind of like fit
this roof. And there we go. Now we have some very
simple leaks over here, which if we need to, we can always go ahead and go
into our color Oval, and we can say,
like, Okay, I want these to be a little bit darker. And we can also go
into our roughness. And let's say, do you want these to be shiny,
actually, instead of, like 0.3, for example, so that they are a
little bit shiny, but I'm not going to do that. I think I'm going to
make them quite dull. Also, your mask intensity,
let's see if that works, if I set this to
two. A, I see here. So the higher I set this, the stronger your mask will be. But we're just going
to stick with. So that's great. So we have
these leaks over here. You can just reuse these
leaks wherever you want. So if I just duplicate it, just Control C contro V.
I can add them over here, and I can just go in
here and do this. Now another cool thing is
just like with meshes, we are able to now
duplicate this and then drag in a different
material into our deca material. For example, this
one, the generic 01. And let's say that
I just add this one and I just kind
of like rotate it. Now for generic 01, it looks like that we
cannot really see it. So what we can do is we can
go into a color overlay. And you said it's a little bit darker, like you
can see over here. Another cool thing is that you
can kind of improve or you can kind of control the
intensity simply by moving your decal further
away from the surface, see? So you can kind
of, like, control how intense you want it to be. So use all the tools you have to your
advantage with that. So let's say I have this one. It's a bit too intense, I just
move it back a little bit instead of changing the material because then if I
change the material, everywhere, it will
be less strong. So this kind of stuff we
mostly want to have on, like, the more obvious
buildings where we can see it. So like maybe over here, we also want to have it
and then maybe tone it down a little bit just
by moving further away. So it is quite subtle
stuff like that. So we can now kind of just go ahead and just mess
around to this. So over here, there's no
point in doing leaks. You won't really be
able to see them. However, what we can do
is we can go ahead and like over here in the larger one and then just make the leaks also a lot larger. T it will look cool if
we sometimes just have the leaks at like
different sizes, and then have this one
quite subtle because it's a really light surface. So you kind of just want
to be careful with it. You know, scale this in a little bit so that it's not extently overlapping too much. And also, if you want to have more control over the opacity, then you can scale it out a
little bit so that you have a little bit more control
over how strong it is. And it's just that
we can, suddenly, if we can even go over here, it's just that we can,
like, kind of suddenly see like some leaks
sitting here and there. And that's, like, quite cool if we have that kind of stuff. Also, what you can do with
your leaks is you can also duplicate them and, for example, place
them on your roofs. Like this. The decals
go on everything. It doesn't matter
if it is parallax or if it is some kind
of special surface, they will just simply be on everything, which
means that over here, you can see that they are being included, which
can also be nice, for example, over here,
if you want to do your roof, you can
just duplicate this. Rotate this 90 degrees. Move it over here and
then just kind of, like, rotate it. Until it fits. There we go see and
then you can also create a really
dirty looking roof. And if you duplicate your decal and just moves
off the surface, it will simply not render. So yes, it will render
like over here, but it's not like
we can see that. However, from this distance, we can kind of see
those small little bits of leaks coming off the roof. So this one I'm once again, not going to spend too
much time on just because it can be quite time
consuming process for just simply placement. You know, it's just
like one over here. Also, like some of these leaks. Sometimes you can see
me over here switching pivot mode so that it is
easier for me to place. Okay, so we got some
leaks over there. We got some stuff over here. If you want, you can ty
mess around with like a generic dirt here and there. Say that I place one
over here, for example, and then I can move it in or out just to make sure that
it's not too intense. For this one, I'm going to
maybe only have the leaks. Here, let's grab
this one over here. Especially because
it is sideways. This is a bit of like an
annoying place to place them, but just in case we can see it, I will go ahead and I
will just place like some leaks down here. And for this one, I think I'm once again
just going to, like, scale it up a little bit and just have them not as intense, and then everything
should kind of, like, just fit together. So we got this There we go, see, just like have
some leaks over there. Over here, I'm not sure if maybe I will do something
with like the top. Let's say that we
do this one next. So we got over here, these leaks, let's
just rotate them 180. Let's say we place like a few
more over here like that. Maybe have them
not as intense and maybe the nozzle rotate them 90 degrees and then
move them down here. Also have them fitted. There
we go, see, subtle details. But those subtle details often
will look quite nice in, like, the bigger
spectrum of things. Over here, like a generic one, what we can do is we can have this generic one rotate
it a little bit, maybe even scale
it up quite a bit. Kind of like have it like
plastered over the roof. And then if you just
scale this in also, here, see, we can
go ahead and we can maybe have this to the side. And then maybe have another one. And there's another one,
we move a little bit up, and then we just make it like
a bit stronger like this. See? And just get some
general details in here. So I think I'm going to
actually leave it at this. As I said before, I
don't need too many. Oh, wait, maybe like one
over here on the side, and that's probably the
last one that I will do because it is the side
you can see very well. So it would be nice if we can maybe push the detail a
little bit more in here. Simply by adding some leaks. And also feels like
this would be like a logical place for some leaks, especially because the wood is going in a downwards position. So if I do this, see, it feels quite logical. Okay, perfect. So we got
those things all done. That's looking pretty good.
I know that I said one more, but I'm going to do
one more down here. And maybe like push it in
a bit more. There we go. Okay. So those
decas are now done. So our overall buildings and everything are
looking really good. It still needs a lighting pass, but it is looking really good, especially when you would go to your screen percentage of 200. Then you can see that
everything looks really nice and crisp.
So that's great. Now, what we're going to
do in the next chapter is we are going to finally get
started with the twain. We will start by creating
our tain material. And we are going to do this
in basically a couple stages. We are going to create
a tray material, and that material will
have a few variations. It will most likely just
have a floor variation, and then it will have an
even messier floor variation that we can have like around the water and stuff like that. Maybe as like a stretch goal, we can also have one that has
like hay scattered in it. Now, because I want to go
ahead and I want to go for quite a messy look
like you cut over here, we are going to that's
a little bit different. We are actually going
to go ahead and use decals or DgalsUse
Alphas from mega scans. And there was Alphas
we can use to basically imprint on our twain. So we are going to use a
little bit of mega scans because else you would need
to create Alphas for, like, footprints and Alphas for, like, things like over here, and that would simply cost hours for something that will not
be a very large detail. We've done all of our
material preparation, then what we are going
to do is we are going to start by applying
a basic material. Then we're going to
do terrain editing, then we are going to do some more painting of our material. And once all of that
is finally done, then what we can do is we can do another lighting pass and then everything will look very cool, and then we are getting near the end of our
tutorial course. So let's go ahead and continue with this in the next chapters.
60. 59 Creating Our Terrain Material Part1: Okay, so let's go ahead and get started with train material. Now, I went ahead and I found a few more references
from art reference.org. And in here, as
you can see, yeah, it's just like some muddy
references that I got. And also these ones, they do have like
modern tracks in them. But it is just, it's just a good idea to get,
like, something like this. So we are going to go for muddy. So it's basically going to be like quite a plain
material like this, but then we're going to
randomly throw in, like, some extra like larger
bumps and everything. And then on top of this, we will have our actual
terrain inside of unwel, which will do most of
the heavy lifting. And also, later on in unhel we will also add
probably like some water, which is just going to
be something very basic, but it should all work
together quite nicely. So let's first of all, get out and make something
that's more in this direction. What I quite like is that
you can see over here it's almost like the rain has
created almost like a pattern. So we got these ones,
and then on top of this, we, of course, also can go
ahead and look over here. Over here, you can also
see that the train. Well, I don't know if I don't think they will have
done train painting. I feel like that they
would use decals on this. So these are most
likely just like parallax occlusion decals
and stuff like that. But their system is way
better than the one that we currently have in real, at least the one
that I will set up. So that's the idea,
and then we will also add some hay and
everything to that. Okay. Inside of substance
Ziner we are back again. Let's go ahead and create
a new substance graph, and let's call this train Let's do muddy ground, actually. Metallic roughness,
and let's just do nice four k by four K,
and let's press okay. Okay. Once again,
let's get rid of our tree view, and
let's have a look. We don't need a
metallic, we might want to have the rest of the maps that should not
really be a problem. So, going from big
to small shapes, let's get started
by just creating mostly like some larger shapes. So we will have
some general bumps and then some larger shapes. If we go ahead and we
go into our noises, we can have a look and I
want to go, let's see. Let's go for the base. What cloud spots 03 maybe? Well, then, let me just fix my UI a little bit over
here. There we go. So if we do a clouds
clouds spots 03, and if we would then
go ahead and we do like a histogram range, and this can just kind
of like, as you can see, tone down the range a little bit to not make it as intense. And now if we go ahead
and on top of this, we are going to blend. And I want to blend like
maybe like clouds two. That might be a
little bit smaller. Yeah, let's Clouds to that's
a little bit smaller. And then let's use a multidirectional warp
or we can do a slow blur. By the way, come on. Multi direction wop grazer. By the way, so this
specific material, it is not being rehearsed. We are doing this completely from scratch for the first time. But I have, of course,
created Mud materials before. So we got that one.
All we else we can do is a slope raceel. But yeah, the reason
I'm telling you that is because of this kind of stuff where I'm just
messing around with things. First one is always trying like a slope blu rascal into
both outputs over here. And what that will do is it will create almost
like a blow up. Here, if I go see minimum, here, see it almost creates like it blows everything
up a little bit. No, no, I think blur might actually look
a little bit better. Yeah, and then we can
play around with that, or we can use the multi
direction warp gray scale, where if we warp it with itself, then you can see that it does
also like a little bit of, like, a softening, but it will most likely look a
little bit more liquid. One way that we
can test this out is we can art andal map, open GL and set the intensity
to three. And let's see. So we got this one
Oh, we got this one. So this one actually
feels more like a rock, while this one does
feel a little bit more like it is just being blown up. So let's go ahead
and use this one. So we got this
version over here. It is getting a little
bit, bumpy and everything. So now we can very simply
probably like a blur, high quality grayscal over here. Have a look at our normals, and then we can go ahead
and we can over here, we can, like, soften
this out quite a bit. And this is mostly going
to be the height map. The norm map is going to be
a little bit more simpler. So we got this version. Let's go into our
slope, Gray Count. Let's just see if I Hmm. If I push this down,
see minimum, maximum. Okay, so that does not
really matter too much. You can sometimes play
around with your samples, and it will actually
make a change. Okay, so I think that we
are already at its limit. So another thing that we can
try to do is to actually have this blur in front
of our clouds over here. And that does
sometimes also just give like an interesting effect. Oh, yeah, you can already
see it where it shows us a little bit more
of like this will like cracked looking
ground almost. And then if we just
push this blur, you can see that now we get
like some more softer bits. So let's say that we
have this one over here, that already starts to
look quite a bit better. So at this point, we can even go into, like,
a clouds and, like, said, Oh, wait, our scale does not really matter because
we are blurring it, so you won't really be
able to do much of it. But let's just mess around
with it a little bit more. So what I want to
do is I probably want to blend in
like two versions. I want to blend in this
version over here, which is like this
really large version. And then what I want to do is I want to go ahead and I want to let's swap this around because I really just
need a nor map to see this. Then I want to have
a sharper version, a little bit like this. Then maybe play around a little bit more with
your intensity. 0.05 maybe. There we go. So it's like a version a little bit more like
in this direction. So let's say that we got
these two versions over here. That should be quite good. So to blend between them, we can simply add a blend. And we do need to have something very soft to basically
blend between them. So let's say that we
pick, for example, like a pearling noise,
throw that in there. I don't know why I
remove my normal because I will need
it right away. But anyway, so we got this one. And then if after Pearl noise, we are like a HCRm scan, we can at least, mess around
with it a bit more, see. And we can just get
like, there we go. So we get, a little bit more
of an interesting look, and everything is just kind
of like blending together. So let's say we have
these pieces over here. We then go ahead and
we add them on top. Swans can add my normal. And let's say for
the blending mode, I'm going to go for
maybe like a multiply. No, you know what? I want
to do the other way around. So I want to have the Hcam range on top so that now if I go
ahead and do a multiply, it will just add
some of those bumps. Or maybe what we can do is
we can just do like a copy. No, let's not do a
copy. So multiply. Max ten. Or Min darken.
N you know what? Let's go for multiply, but
just leave it very low. I do I think I'm just going
to use it for surface noise. So let's just add that
very low, like that. Okay, so let's say that we
got like this as like a base. And then the next
thing would be that now we are going to create these little bits that
you can see over here. Here you can see it
really well. So it's almost like a pattern
that we want to have. For this pattern, it
almost looks like an inverted like bubbles. Oh, wait. We actually have acaustics here. I've never used it before, but Oh, no, you know what? I don't think it actually will. Yeah, it does not
work like that. Sorry, I got thrown off
by the actual image. In that case, for the bubbles, it's like a cells over here. And that's kind of
what it looks like. So it's like a cells like this. And then you blend
your cells together. Oh, it's been a while
since I've done this one. So we blend it together, and then we subtract
it, I believe. But then if you like, mess
around with your cells, and I play around
more with, like, the intensity, no,
that's not the one. I think instead, what we need to do is let's
get rid of these. I think we simply
need to invert it. Let's zoo invert
grayscale over here. Yeah, and then what we need
to do is we need to add a histogram range in between. There we go. That's more, yeah, that kind of looks
like this, and then we break it
up a little bit. So we just set a range and we want to have the
range that does not give too strong
of like an effect. But then, of course, right
now it is way too sharp. So now what we want to do is we'll probably do like a
multidirectional warp, I think that one will
work quite well. And then for the intensity, we can simply reuse
our clouds too. There we go, see. So that
kind of breaks it up. You can see if you
can go for, like, minimum or no minimum
actually makes it sharp. So yeah, let's just do average. And then we kind of
mess around a bit, and then for your directions, you can also you can kind of mess around to see
which directions you want. So if we do two or four, I think we actually want to go for four because
it does add like quite a bit of softening
to it. There we go. Let's now go ahead and add
a blend on top of this. And let's just have
a look at this. So this is currently normal, so now in my blend, I set this to be I think it's
just going to be a copy. Yeah, I think I just
need to do like a opate no, you know what? No, nopacity
probably won't work. Instead, what we
can do is we can also add it just
in our normal map. Because I'm not sure with art, we can see it a little bit. So if we go and make ourselves
quite a bit smaller, you can kind of
see it happening. But I have a feeling
that it's just, like, a little bit
too strong, maybe. It does you can see, it does start to look like it. Maybe it will work. We'll see. Let's just go ahead
and let's set the intensity a
little bit stronger. Actually, let's go
into normal and then mess around with our
multidirectional war. There we go, so that it
does look quite messy. So let's say that
we try this out. And I do not know yet if the height map will look very good with
this, but we'll see. So if we just temporarily just get rid of all
of these pieces, we have our normal over here, and else we might
want to just use this one as a height map.
That's basically what I mean. That's a nice ra
trace embiticgltion, for height, and let's also throw in our
actual height map. And now for ra
trace embitGltion, that does look really
nice, but let's just set the height scale a
little bit lower. But that does start
to look really nice. Okay. So we got
these pieces done, right click and save a scene. And now what we can do is we can already
just check it out. So let's just go ahead,
create a folder called final into our muddy ground texture folder
that I already created. TGA, ometriEport and
Export. Easy does it. Okay, so now if we go ahead and we go to Mm set over here, and this is just our
normal rando scene, I'm going to go ahead and let's just create a fresh
new material that we'll call muddy
underscore ground. And let's add this
material to here. Now, having that done
if we go ahead and I'm just navigating to my muddy ground on
the other screen. Let's add a
displacement over here, and let's add an ambient
occlusion, like always. And then let's just
go ahead and drag it height into displacement, normal into normal,
AO into AO Huh. That does look interesting. It's a little bit too sharp, but honestly, that actually
looks really interesting. Let's set our ambitoclusion
map a little bit lower. Maybe set our Bedo
map also, like, a little bit darker and now mess around with your
displacement a little bit more. But to be honest, that
looks pretty cool. I'm not gonna lie. Why
would I lie? I made it. So it would not Makes sense
if I say that it's not good. But no, that does
look really nice. So I'm quite happy with that. Let's just tone
down maybe, like, my displacement a
little bit lower. So we just need to make
this a little bit softer. But especially like this is also the kind of
stuff that I wanted, where we get like
some of these cuts. So we're going to make
the bits a little bit. Actually, no, we don't
need to make them larger. We can just go ahead
and do two over here. Okay, and then we need to
adjust our displacement again. Okay, so we need to look at this like a bigger tiling mode, because if we don't do that, it will be a little bit more
difficult to really get a grasp of how everything
looks because on a train, this will, of course, be
tiling a lot of times. That's why we most likely will create a few different
seats of this. Okay, so I'm going to go
ahead and I'm going to set these small bits a little bit less strong And then just turn on and off your
displacement, just to see. Okay, so when it's a
little bit less strong, we don't really need to
make them sharp again. And then we still got, like, this really muddy
look over here. So I'm quite happy
with that, actually. Yeah, I am. Um, it
is pretty spolen. I'm not used to that. Yeah, so these are piles are
quite a bit bigger, and you do have like flattening sitting in between
with some softness, I guess that we could
try something like that. Let's see. What if
we so the softness will most likely be in
your ambient occlusion. So what if we add an
ambient occlusion node and just like the cheaper one? Go in here and then
set our radius to be lower said this to
be a bit stronger. So now we have an
ember occlusion of will like the in between bits. Now if we add a Hum scan,
and this hiscom scan, we'll just kind of like push out just those little
bits over here. Then if we are to blend
and we blend this using a mask basically to break it up, maybe I'll set my Hiscrm scan
then a little bit lower. So I need a mask for this. I don't want to reuse
my clouds two again, so let's just grab maybe like a Clouds one over
here with also once again, scrum scan because we simply the clouds notes do
not have contrast sliders. So we basically do
something like this. Art is on top and
set this to be art. And then based upon
our HCRM scan, we can, of course, just
increase and decrease it. Okay, so we now got
this stuff over here. Now, if I would go
ahead and I would simply blend our height map, and we are going
to blend it with a blurred version of itself. Not too blurred, but just
add some softening to it. And we are going to
blend this using a mask. However, I believe
that we need to set our mask Yeah, the
opposite ways. Lets do an invert gray scale
and press D to dock it. So now you should be
able to see here, especially if I go here. See if I really soften this out. You can see that it just like
art like a softer version. So it kind blends between the
two. Here you can see it. So if I would go ahead
and would set like zero. Yeah, so that does work. And now all I want to do is I
might want to just go into my HCM scan and maybe or maybe go in here and just give it a
bit more to work with. Here we go. Let's set our
radius up a little bit. Here comes Ken there we go. So now it has a little
bit more to work with. Just to, like, add some
general softening. Oh, that looks very different. It's Oh, no, wait, that does not look
different. Okay. I cannot remember it
looking like this, but let's have a look. So if we now just turn on
of our displacement here. So now it has like some of these soft areas sitting
in between here, in between the cracks,
and the soft areas are now created because that's where the water basically flows. And because the
water flows there, it kind of just makes
everything a little bit softer. So I think that this is a
good point for us to pass. So what we're going to
do in the next chapter is we are just going to go ahead and create our base color. So first of all, the frame over here and
call this height Map. Height map. Like that. And so in the next chapter,
what we're going to do is create a base color
on our roughness map, which are going to
be quite important. I'm not sure we will most likely not add the
water in here. So we will make
the roughness map really shiny and sticky, a
bit like you can see here. But we will not add fill on
water because if we do that, you will be able to see it repeating too
often when we tie it. Yeah, so let's go
ahead and continue with this in the next chapter.
61. 60 Creating Our Terrain Material Part2: Okay. So what we're going to do now is we are going to get
started with our base color. Now, looking at this, our base
color should be very easy. It looks like it's most
like a plain color. And if we have a
quick look over here, you can see there is some
small color variation, but even here, it's like,
quite a plain color. So we will also have a few
variations that we'll paint on the twain to basically break up the tiling and
all that kind of stuff. So seeing this, I'm going to
go for something like this. Okay, let's see. Let's use the gradient
map technique. So we have a gradient map. Now, for a color, I still want to grab
something sharp. And one of my favorites is the B&W spots because it's this really
sharp looking noise. So let's grab this
for the color. Now, I don't know how much we will get out of
this, but we'll see. So if we do this, yeah, most of it is roughness. So I'll see what it does. It most like you will
just look awful. Oh, I do not I do
not stand correctly. I don't know the opposite.
I stand correctly, sorry. But that's actually that works. That is nice. That's cool. Okay, so we got this one. Now, what I'm going to do
on top of this is I'm just going to add some
blending and I'm just going to blend a simple
black uniform color and just give it like some of this we
do like an inverto no, wait. We don't even need to do that. We have an invert color here. If we grab this one,
let's arts to here and just like to give it like a black color tone
down the intensity. So that's just going
to be a little bit of a black color on there. And then if we simply
blend this once more, and now as I said before,
we need to be very careful. This needs to look very,
very tlable even right now, you can already start
seeing a few small bits. So I'm going to add and let's so HSL note and grab my
gradient map over here. I'm going to make this like
a slightly bit lighter, and maybe if I can also
go make it a little bit. No, I do not have enough. You can mess around with
your saturation to try and get into a different color, but I don't have
enough of, like, a color difference.
There's no problem. I was thinking of maybe
making it like a warmer, like a bit of an orange color, but that's not really needed. So we can throw
this into the top, and now in the
bottom, let's go to, one of our custom grunches. And the one that
we've used before, the grunge map. What was it 004? Yeah, I think that was the one. And let's see if
we just go ahead and use this at the bottom, yeah, just like for that tiniest
bit of, like, variation. Yeah, that's all too much. Let's tone it down
a little bit more. I think we're honestly just
going to keep it at this. So as I said before, the base color is going
to be very simple. This why it's also not
a big stretch for us to also create a hay variation, one that has, like,
hay and everything in it. So we got this one. We just need to make
sure that we make a few more variations later on. For now, what I'm going
to do is I'm going to go ahead and let's go into
our roughness over here. And let's see. The roughness,
how does this look? It's, so it's like the tips, like the higher points
are less rough than the lower points.
So we can use that. So we can go ahead and lad a gray scale conversion
node to get started with. Throw in our grading
map over here, and then add a histogram
range note on top of that. So white, it looks dull,
black looks rough. So we are going to go for
maybe a little bit darker. Something like that. And now to really at that shin,
let's add a blend. And let's see, I
think we can just reuse our ambient occlusion, but we want to use
this one in this case, for the ambient
occlusion over here. So we have this
ambient occlusion. Now, if we go ahead
and let's say, if we go into, you know what? Let's leave our
radius quite low. Let's do an invert gray scale. Throw this into the
top and set this to be like a subtract, correct? Um, I want these tips. Wait, I'm not doing this, White. I do not need to
invert it. Do I? No, I do need to. Oh,
wow, this is confusing. Okay. Anyway, I will just
mess around with it, and I will just check it
out inside of Momset. So just art this on top. Yeah, so this is the cavity.
So yeah, this is correct. Oh, I don't know why
I'm being so difficult. In any case, let's throw this into our roughness
so that we have, like this version over
here. Save our scene. And now let's go
ahead and go back into marmoset over here. Set our base color
back to white. This will probably be way
too dark, but we'll see. So we're going to
art our base color, and we're going to art
our roughness over here. And let it render. Okay, so right now,
the paste color is actually pretty fine. I do I want to add
some variation, but I'm so scared to
add more variation because I know that
inside of unreal, the tiling will be worse. Let's add a little
bit more of like some darkening and
maybe let's add, like a little bit more of
like the lightning over here. And now for this one,
what we need to do is, first of all, let's go at the
set is really, really dark. And the reason I'm
doing that is just that I can double check. So here, now we really
get like this muddy look. Let's go into our main
camera so that we can kind of double check where
the mode comes from. Yeah, I'm going to make the
base dollar. So we got this. So we already get now a little
bit more color variation, a little bit more darkening
and everything like that. So let's for now leave it and we will go at and
what we are and real. We will just, like,
balance it out. What I'm going to do
is I'm going to make this one Here, let's set
the range all the way up. Let's make this one a
little bit lighter. Oh. What the hell? I thought
I added my roughness. Oh, okay. So that's why I
didn't see a lot of changes. In that case, let's undo this
and let's tone this down. I swear I directed my roughness. Okay, it looks
like in that case, we want to make this one
quite a bit lighter. So over here, it is working. Now let's go into my main
camera. Just have a look. Just in case I'm going to
also see what it looks like before the invert to make sure that I am actually
adding the right one. Before the invert, it does. I know that now
before the invert, it is the opposite ways. Now the insides are duller, but it does make it
look a lot more clear. See? If you look at this, compared to when
I do the invert, the invert, it kind of
takes away the details. So I think in this case,
I'm just going to take an artistic choice that
I'm not adding the invert, but instead just going
the opposite direction, might not look as logical, but as you can see, it
does work a lot better. It's just tone down the intensity of the
shine a little bit more. Maybe a little bit more. We just need to
check all of this inside of in real to make sure. But okay, so now we have quite an interesting looking dirt going on over here. So let's say that
we have this one. Let's for now, let's
save our scene, and let's say that this is
already a very solid base. So what we can do is we can
go ahead and go in here, art frame, base color. Et's go ahead and going in here, art frame outputs, and over
here, art frame roughness. Now, later on, we
are going to just create a bunch of different
presets of course. However, for now, let's just
go ahead and start with one. The only thing
that I now want to art that already
will be in a preset later on is some hay.
So let's art a blend. And then for the hay,
I'm talking about, how do you guys might call
it stra something like that. There's like different
names for it. It's like this stuff over here. So doing this stuff, I am tempted to simply go to substance source and
simply download, like a Hay texture over there, which is going to be
like a deGal version, or maybe go to mega
scans and do it. That is quite a bit easier. Um, however, because these are
technically paid resources, I will not be using
them, and I'm just going to create my own version. So for my own
version, basically, what we're going to do is
if you go to your patrons, there should be a scratch
generator in here. So here scratches generator. And let's actually go ahead
and artist here at the top. So this one we can use. It does need a little
bit more work, but as you can see, we can
sort of, use this one. So we got this one over here. Now, if we go ahead and set a spline number quite a bit up, maximum segments post
spline can be up, spline rotation random, can
be all the way up, yes. The scaling, here you can basically control how long
you want these pieces to be. Scale random is quite
important to have that on. Distortion is quite nice. So we're not going
to go too intense, but we still want to
give it some distortion and also give our
distortion random, also a little bit more size. The spline width is
quite important. So we want to set
this all the way up. And then the random version also all the way
up because you can see over here also that there's different
versions and everything. So we got those done
distortion width position is fine because else it will
actually, you know what? Else it does do
something like this. That could be quite interesting. Let's set the
position like this. Now, that might seem strange, but just hang on. I'll tell you why. Now,
for our fade mode, if you do none,
they will not fade. If you start and end, they will kind of fade in and
out. Quite like the start. Like, it starts thick,
and then it goes into, like, less thick. So let's say, what do we have? No, it doesn't really
matter. Let's go start. Okay, so let's say that we
now have this hay over here, so that's looking pretty cool. Now what we can
do is we can make a tile patch gray scale is
a node that we can use, which will basically allow us to scatter a bunch
of stuff around. Now with this one, what I was hoping is that if we
tone down the octave, which is like the tiling amount, over here, you can see that we get quite a bit of, like, hey. And then what we can
do the cool thing about is that we can
add size variations, disders over here, but
also rotation variation. So like that, we can very quickly and here play around
with like a size variation. We can very quickly just give it a really interesting
looking look, as you can see like this. So that's quite a cool
thing that you can remember because you can do the same thing for
grunges and everything. So we now got some, we got quite an
interesting look. Now what I'm going to
do is I'm going to go ahead and maybe add like
a bit more variation. So let's say that we add like a blend note,
and then we grab, for example, noises, and I'm quite liking the
Grinch m001 for this one. So let's grab Grunge M Ser one, and we're just going to
fade in and out a bit more. So let's tone down the balance. Contrast. Yeah, I think it
is fine if we fade it out. You can also see it over here. Here you can even see that
they used vertex painting, just like as if it's
like under the mud. Under the mud, under the mud. Wow, Yeah, mud. I can't pronounce
the word anymore. In any case, we're going
to artist to our blend. And then what we're going to do is we're just going
to set this to subtract, and then
you know the drill, play around a little
bit more, maybe, like, tone down your contrast and just in general, here we go see. So we get quite an
interesting look. Let's do something
like this. Of course, we are going to do some
vertex painting between this. So let's say we now
have this version. Now we're going to do
this in two parts. The first part is going
to be a gradient map, and we're going to
add this version in here because these
are all gradients, so we can perfectly use them. Now, what I'm going to do is I'm just going
to go ahead and I'm not doing the same thing where I just like, drag it out. Instead, I'm going to just
grab two versions over here, and let's delete the center one. And let's start with the
first version to be like a darker brownish color. And the second version to be a more lighter yellowish color. Now you can go in and you
can try and go in here in the center and give it
a bit more variation. But for now, let's say that
we have something like this. So it's just going to be
like this typical str color. I still need to play
around with it. I feel like maybe it's a
little bit too colorful, so let's just go ahead
and set this one. Let's set this a
little bit duller, just by moving it to the
left a little bit more, and that might actually
look a little bit better. Here, let's see. Let's try that. So we
artist to our blend. And then on top of this, we add a histogram scan,
and this Hcoum scan. Although I don't know if
we even need a Hcum scan. Let's first of all, try a mask. Okay, we need a histogram scan. So we just need to use that to push it out a
little bit more, but I want to be careful
because I still want to capture some
of these details. So the default is
this 0.5, here. So these details, I do
want to have them softer, but I feel like we do need to go ahead and we need
to push this out a little bit more so that it
actually shows up in here. Yeah, let's just do
something like that. So we got some stra
going on like that. That's looking pretty cool. Now, what we're going to do is we are going
to first of all, also artists do our normal map. I don't think we want the
artists to our height. So let's do a normal combine. No, we want to do a normal
blend, most likely. And then we want to
add a normal modifier. And once again, we can just grab this mask because
it's a height map. OpenGL. Stone down the intensity and throw this into the top. And for our mask, we can throw
this histogram scanning. There we go, see? So now we
get all of these pieces. Maybe, I would say, give it like a
tiny bit of, like, a blur high quality gray scale before we add this
to our normal, just because it looks a
little bit too sharp. Yeah, let's at this to like 0.1. Maybe 0.15. There we go. So give it a little
bit of, like, a normal detail like that. And finally, we can also go
into our roughness, blend. And in our roughness, we might actually use our original mask. And we are just going to
artist on top because this one will always be
a little bit duller. So we kind of like
artists on top over here. Let's give this a go. Okay, so we got our
straws over here. You can see that it is quite a bit more
dense in these areas, and there's also quite a
bit of a size difference. Plus the color is not
completely correct. And so now we are getting
in a territory where, you know, we just kind of need
to mess around with this. So let's say we have
a scratch generator, let's duplicate that one. And let's say for this one, we set our spine, not so much a scale, but maybe our width
can I set this higher four. Maybe even five. So we set this a
little bit stronger, and then we set the spl
number down a bit more, and you can also mess around
with your random seed. And let's go ahead and
blend these two together. So we're going to
blend them using probably like a Max ten. So that will add hopefully
a layer of variation on top over here. You know what? I'm not even sure if this
mask over here will work, because we are kind of painting
this out later on anyway. So I think we already
have enough of, like, a breakup going on. So we got this stuff over here. So now we got, that str. It's a little bit
thicker, so that's good. Let's set our normal
map to be a little bit stronger. Over here. And you know what I want to
do is I want to probably set a size, let's see. So we have a spectrn
width and height. Let's set this one a
little bit higher, which will basically just push out the colors and everything. And luminosity variation. Now, let's leave that.
Now, you know what? Actually, I'm going to I
should not have done that. I should have gone not that big. Yeah, you know what? Actually, this might
actually be fine. Maybe we even want to go a little bit smaller now
I really look at it. So let's set this to 150
by 150 in veteran size. And then I'm just going to
set my scale variation. Mm. Also play around like a mask precision and the mask warping if you want to. But that's not really
what I'm on about. Just about filling
this stuff up. So we can fill up by setting
our octave higher or lower. I'm not sure. Well, actually, we can fill it up by setting
our patron size higher, but I'm not sure if
I really want to. Let's see here because
I quite like the size. So we can set our
petrol size higher and then tone it down or we
can just leave it at this. But I'm not sure if
I'm happy with that. Another thing that we can
do is we can try to add a blend and then add
a transform on top. Come set this stuff to be a max lighten and then click on your transform and then here, move it around until you get
more of the area covered. And then we do over here
art bunch more stuff, play around my transform
a little bit more just to make it just until it
feels a little bit more natural,
something like that. A one thing I'm
going to do is I'm going to add an HSL note after I've done
my bits so that I can easily go ahead
and just tone down the saturation like
that. There we go. So see, so now we
have some straw. I think this is
like a good start. We still need to play around
with it, but I first of all, just want to check inside
of Unreal engine because this one is a lot harder to
really think about like, Oh, yeah, this will work or not compared to Unreal engine. Also, maybe one cool thing just for rendering
that you can do, like a tiny bit
is to art a blend and to art your mask in here. And then set this to be an art, but set it like a
very low level. And I also wonder if I
do this. Yeah, here see. So very low levels in both of our ambient occlusion
and the other one. I think it can go a
little bit higher like this. Here we go, see. Just to give the
tiniest bit of height, but that's mostly just for our final render inside
of MamosetTolbag. Okay, so that's
looking pretty good. What you can do is we can
once again, as always, go in here and let's see this
one is not the correct one. Let's go ahead and go
into our source files. Textis images. And this one is going
to be muddy ground. That's safe, and let's
create a quick image. And while that
image is creating, we can go ahead and already
set up some switches. So we want to go ahead and set
up a switch for over here. So let's do a switch color. And then we just say,
basically, if it is true, if he is true and
if it is false, although maybe we can
just turn this off. Just let me just double check. So if I add a uniform color
instead and just do this, let's see how that reacts. Okay, so that gets turned off, that gets turned off,
that gets turned off. Oh, yeah, see,
that's a lot easier. So then let's get rid
of a switch color and instead add a
switch grayscale. And we just say I he is true, hold shift and swap that
one around. There we go. Expose it has Hey over here, and we can go ahead
and if you want, you can set the
default to fills. I'm just going to
leave it on for now. So that should all be fine. And then we can just
go into our muddy ground and we can just quickly, R just quickly turn it off once the image creation
is done, it is. So let's go ahead and
turn this one off also. It's like let us reload. And then what we
can do is we can create one more image over here. So let's give this a look. So first one, muddy ground. Hmm. I'm not liking the
thickness over here. So that kind of stuff
I need kind of, like, play around to it. So, this one is great. This
one is looking really nice. This one I just think, like, yeah, the thickness is too much. So that's the last thing
that I will quickly fix. Let's set this back to true. And let's just go
ahead and go in here, and we're just gonna, let's see. For the thickness one
or for the ticker one, let's set our fade
mode to start and end. And yeah, let's set our
spline width a bit down. And then maybe another thing that we can do on top of this is we can add a multi
directional web gray scale, set the directions to one
and the mode to minimum, and just give it like a
clouds two. You know what? Maybe give it like a
clouds two that is blurred already. Over here. And then just kind of like, okay, maybe blurred,
not the w one. How about this one? Is
this one still blurred? Yeah, okay, then maybe
do the unblurd version. And Yeah, so we're basically going to
tone this down a little bit, but just give it some
general messiness going on. Like that. See? Yeah,
that works a bit better. And I'm going to just make
it like a tiny bit lighter. But for that, I can use
my HSL note and just set a hue to be like a little
bit more lighter like this. And maybe also set the
lightness even up a little bit. See? And now it does feel like a little
bit more like this. Of course, it's nowhere near
this quality, but for that, we would need to spend
quite a bit of time, and this is more
like an album one. So I will most likely spend a little bit more time later on. But first, I need to see how it actually looks
inside of Unreal. So we got this version. I'm just going to go
ahead and by default, turn off the hay. And what we will do
in the next chapter is we will import
this into Unreal, and then we'll
start by setting up our landscape materials
that we at least can already get the base texture in there and see
how it all looks.
62. 61 Creating Our Landscape Material: Okay, so let's now go
ahead and go into Unreal, and we are going
to get started by, of course, importing
our material. So textures, let's create a new folder called
muddy ground. In here, we will just
create another folder called variation underscore A. For this texture, I do want to once again do proper exporting. Let's go into
exports and turn off the automatic export
when outputs change. Press export outputs once more just so that it
saves the setting. And then we can go
ahead and go in here. In our final folder, we will do variation
underscore A, and I learned from my mistakes. I'm just going to say clean, and then I'm just going to do underscore different
names, basically. We got this one, export. By the way, it does mean
that we need to go in here, right click and rename
variation A underscore clean. Variation A will just
state the variation, and then the clean
version is just like in this case, just
normal clean version. Then we also want to probably do a new variation underscore A, underscore light so
that we also have a lighter variation because in order for us to
test out our material, we will need at least two
of them because we want to be able to blend together
between materials. So knowing that,
what we're going to do is we're going to go ahead and go to substance over here. And for the lighter version, I'm simply going to go
ahead and add an HSL note. So let's add an HSL, and let's expose the lightness. Call it base underscore
lightness over here. And I'm doing this quite
quickly because I'm quite excited to get this into New
Y and see how it all looks. So in our muddy ground, we can now just go ahead and
go into our presets and call this one variation on score
a score clean and press new. And then say variation
on score a score light. And then press new again. So this time we have a
clean and a light version. And then for our light version, if we click on our base color, we can just go
ahead and just set the lightness up a
little bit more, and I'm going to set
quite intense now just for testing purposes. And then I can go
ahead and go in here. Variation A clean, New folder,
variation underscore A, score Light, select
folder and export. And that should do the trick. Okay, so Art way is not
going to have any height. We're just going to keep
this nice and simple, and we are going to
have a base color, roughness and normal map. So for this, if we
just go ahead and start with our clean
version over here, we can go ahead and
import that one. Just give me 1 second because
I went out of the folder. And we want to just
grab our base color, normal roughness. Here we go. And then our light version, we only want to grab
pretty much like a base color because the light version does not
have any specific changes, so else it would just
be a waste of textures. And then, of course,
in our normal map, just go ahead and turn on
the flip green channel. Okay, so we got that stuff done. Now, if we go ahead and
now go into our materials, we are going to
create another folder that we'll call
terrain or landscape. Unreal is unreal really likes landscape. But
I just call it Train. I'm just going to go ahead and create some new
material that I'll call terrain underscore master.
And let's open this up. Over here. So with
our Trainmster, there's just a few small different things
that we need to do. First of all, if we go ahead
and just grab our textures, we can drag them in here. And let's also go ahead and grab in the light
variation over here. So we have our roughness, normal, and then the base color. We will have the
clean version at the top and the light
versions at the bottom. And of course,
these ones, because they reuse the same thing, we don't really need
to worry about that. Now, the first thing
that we need to do is we need to give it some UVs. The UVs do work quite a
bit different in here, and that is because
we need to use a landscape coordinate node for this landscape layer cords
over here. There we go. And so this one is the one
that we can actually use. And let's set the mapping scale I always do like
a default of two. And then what we
want to do is we simply want to now do the
same thing as always, where we multiply this using a scale parameter that
we'll call tiling. And set this one to be A two. So we're tiling by
two as a default, which for such a large landscape will probably not be that much, but something that we can check. So we basically arts to all of our UVs to make sure
that they are correct. And of course, you can have
multiple different type of UVs depending
on your texture. Now, next that we
have over here, we have a nice little
layers and stuff like that. And what I'm going to do is I'm going to
start with, like, a Constant three vector. Convert this pemter and call this color overlay,
map, underscore A. Set to white. Then let's
simply duplicate this and call this color overlay map B so that we have control
over the colors. And then it's just once again, simple multiplies. This
stuff is all the same. So we basically multiply
these maps using the assigned color overlay
over here like that. Okay, now comes the
actual blending. For the actual blending,
we need to have a landscape blending node. We can do this by just
going to landscape, and then we want to have
a landscape layer blend. That's the node that
you want to grab. And then in here, we basically set how many materials you want. So if you selected,
you can go up here to layers and you
can press the plus sign, and let's press it twice. So Index one, Index one, we are going to go ahead and
we are going to call it just like Mud underscore clean and
then index you in the way. Then index two, we will call Mud underscore light. Over here. And this is basically
a name that will correspond when
we are painting, so we know exactly
what we are painting. So we got this one. Let's
see. Layer blend is fine. Preview weight, let's say, 0.5. This is just default values. It's a bit tricky for me to explain exactly
what I mean by it. It's just like a default
that I always use. So we got this one because I'm not a big expert in
landscape materials. That's why I like to keep
this nice and basic, also. But we can basically plug in multiples in here,
and that's it. We just plug this in here. We go ahead and copy and
then paste the layer blend. And then in this
case, for this one, we are just going to
paste the same roughness into both of them like this. And for the roughness, we probably also want
to do a multiply, and I think we want
to do this after. So this is just going to be
a general roughness amount, so you scale a perimeter. Call it roughness amount with a default of one
to make sure that it is just default plane. And then we can do one more
layer blend over here, which for now, we will just use the exact same normal maps. And let's go ahead doing like flattened normal that we also
have a normal strength node with a scalar pemeter
that we'll call normal strength and set this one to minus one that
should be the right direction. Although with
unreal, I never know because every time I think
I have the right direction, it seems like I'm mistaken. But the main goal is
now we have this. So we have our UVs. We have the amount of
textures that we want to add, and we can add a lot
of textures on here. So I think up to eight or
16 or something like that. So they have a color overlay
and this layer blend will correspond with how we are going to set up our
actual material later on. So we save our scene over here. Now, if we go ahead and go into our WestanTwn western town, if we just go into
our main level, we can go to our train, right click and create an instance and call this Train underscore
Maine, for example. And now, if we just quickly
click on our Train, I want to go into my
train editing mode. And actually, not even
my train editing mode. I just want to go
in, for example, I need to see like a wireframe. Okay, yes, so we made this
really nice and dense. This is very, very important,
although we can always, of course, just add a
new train later on. But it is very important because we want to
be able to handle, small footsteps and
everything like that. So for that, we do
need to go for, like, a really dense train. Normally for games,
you would most likely use specific train decals, but those are quite complicated. And those are really, like, built into the engine
and real engine five, because they have changed the way that they do
their testlation, it is not as handy anymore, so that is something that for now, we will not be covering. We will do it a little
less optimized, but it does give us
actual geometry, which is really cool. So we got our
landscape over here. We scroll down and over here you get your
landscape material, and you can just drag
in your train master. Did I said something
wrong, roughness. Maybe do like a
constant that I'll call metallic, that is zero. I don't know, it almost
feels like it's metallic, or maybe it just
needs to generate. I'm not sure. That is strange
Twain master, come on. Oh, wait, Twain Maine
is the one that I need. That still does not really do. That is interesting. Why are you looking like
you are metallic? It's just like a complete plan. Let's go into our
actual textures, and maybe we just need
to set up our textures, although this is not response
that I expected from that, but we can see. So if we go ahead and
over here to our train or our landscape editing
mode, we can go to paint. And now in your paint,
yeah, there we go. You can see that you
have your layers, mud, clean and mud light. This is most likely the problem. So what we want to
do is we want to go ahead and press a
plus sign over here, and we want to create a
weight blended layer. Now, these weight
blended layers, what they will basically do is they will simply just
tell the system like, Okay, this is going
to be your mud clean. This is going to
be your mud light. So in here, we can just by
default, just press save, and then it should give
it a second. There we go. Now it works. And
then over here, do the same mud light
and just press safe. So you can see that
now over here, they are in here and
they are all generated. Oh, you will see my
name in the generator, but okay, and here
you can see Ableans. I thought I had that
one somewhere else, but must have been my test. So if I go ahead and just set my brush size really low so that I can actually
see what I'm doing, or I can go to my sculpt or even just go out of it so that
I can actually check. Okay, so right now, the
tiling is way too small. So we can go ahead and we can go in here and set a tiling. 0.1, looks like I had
to go a lot lower. 0.00 0.01. Let's go into our
perspective mode and then just mess
around with it. So if we have this one, 0.02, 0.02 does feel a
little bit better. So we got this
version over here. The next thing that
I'm going to do is I'm going to go
ahead and set my, which one, variation A
over here, color overlay. Let's make it a
little bit darker. Oh, I think I only have Oh, no, wait. You do need to press. Okay, it does not
update in real time when we are talking
about our overlay map. So we got this one over here. Now, the next thing
I'm going to do, let's set the to 0.025. Let's go into our roughness
amount and set that to 1.5. 1.3 maybe. There we go. Just to tone it
down a little bit. And also, one thing
I just remembered is that actually for the second
for the light version, we want to go at and we want to export everything
because what we are going to do is for
the light version, we are basically going to just change the seed a little bit, and that seed is most likely going to be
this one over here. So what we can do is we
can just mess around with the random sad of this cells and of the clouds
and this cells. And that will just ever so
slightly change the order, which means that now we can
go at and if we export this once again to our
light variation. There we go. Go in here and just import your normal
and your roughness A. Don't forget, flip
green channel. I think that will give us a tiling breakup,
so that's also good. And then we can even
do another variation. One of the variations
is going to be like a darker version, and the other one is going
to be a lighter version. So for now, let's do this. Over here, and maybe we can
even use the darker version. Later on, let's do so light is this one. Yes. And then if we go
ahead and go into our layer blend and let's add another member and
call this one Mudd, clean underscore variation B. Copy that name and don't
forget to set a weight to 0.5. Go in here and then
press the plus sign. M variation B, and also
here the plus sign. Mud variation B. And now, what I'm going to do is I'm actually going to use the second norm map in my variation B because
the second norm map, actually, for this one
for the roughness, the first roughness,
and then for this one, I'm going to use my
first base color. So the reason I'm doing this is that they
will kind of like, oh, sorry, pick this one. The reason that I'm
doing this is that we will have those two
variations that have slightly different
positioning in our noises, and that will be able to
give us more variation. So I'll show you. It's
easier if I just show you. So we go over here and we go to our landscape
materials, go to paint. And then create a new
weighted layer blend. Now, if I set my brush size really small over here so
that we can properly see it, this basically out it goes.
So we have a mud clean. If I click on my mud clean
variation B and paint on it, give the second to compile. You should be able to
see over here if I set my brush or actually, not my brush far off
set my tool strength be fairly on. Yeah, you can see. So you can see that
there is a difference. Am I missing
something? Because it Oh, that's what I'm missing. I'm missing the UVs. So let's make sure that we
dd the UVs Lh do the trick. Oh, and that one we already did. Safe. Because, of course, s does not really matter. There we go. Now,
it's a bit slow, but now give the second
to load. There we go. Now you can see that we are
being able to break it up. If you see this line over here, if I just go ahead and do this, you can see that all
of a sudden because I'm just changing
it around randomly, like very small increments, it gives me a different breakup. And then over here,
I can do this. So you can see that we are
now breaking up our mesh. So we can nicely just
paint in this version, and then over here we have
another version like that. It will be very subtle. And then what we also have
is we have a mud light. Give it a second to once
again, like arts in. And then over here we have
a mud that is like light. And this will be great
for small variations, but also if we ever create
like any hills like over here, it will be great to
just artist like on these tips over here. Yeah, I do need to probably also work a bit
more on the material, but because this
material over here, I'm trying to find a balance
between this and this. Our material right now looks
a little bit too shiny. So we will coat and
mess around with that. But with these painted, what we can do is we can
teparate just close this. We can then go ahead
and we can go into our train material over here. And then for the second version, let's not tell it this light. So we basically,
I suppose, okay. Let's make it a little bit
darker. Little bit dock. It's going to be like a
subtle difference over here. Okay, so that's pretty cool. So we got those pieces done. Now there's one more
thing that I'm going to do that I'm going
to also show you, and that is that you
actually have the option to use masks whenever
you are painting. So right now this is
a perfect round bit, and it just does not work very well, especially
for variation. However, what we are able to do, if I just move this down again, is we can actually
use a mask over here. So if we go Alpha precious,
we can enter a mask. Or a grunge map. Sorry,
I should say grunge map. So what I'm going to do is
I'm going to right click on my textures and
call this Granges. And now, if we go into designer, let's save muddy grounds. And by the way, what we can also do
is we can already presets variation
B on the score. Hey, press new. And then for this one, we
are going to set the H true and the color 2.5. Let's go ahead and just
quickly export this. Variation underscore B,
underscore There we go. So we can already
export that one. But basically, what we're
going to do now is we are just going to export a few
different grunges. So if we go file and just
create a new substance graph, make it empty and just call this Train underscore
grunges for example. Now with this one, let's
pick a few of them. One of them is going to be my custom one, which is this one. Maybe mess around
with your seat a bit until you get
something interesting. The second one is
going to be maybe like a grunge map zero, zero, one. And the third one is
going to be maybe like a grunge map 013. Okay, so this one
is already fine. Maybe like play around with your contrast a little bit more. This one, let's mess around with our seat and with our
balance a bit more. And this one Ah, yeah, let's leave it
at the default seat. And once again, I'll
mess around to a little bit more like a
balance in your contrast. Now, there's one more thing
that we need to do right now. It is really sharp
around these edges. So we just want to
use the brush pattern down here to basically
break up that sharpness. So I'm actually going
to set this quite low. So as you can see it will
just break it up quite a bit. My original version
does not have this, so what I'm going to do
is I'm simply going to blend my original crunch
using this crunch map, but then set the
balance all the way up. And just lower down
your brush size like this so that if you set this one into the four counts of your blend and set your
blending mode to multiply, for example, you can see that over here and
you can play around a little bit more like your
balance to make it softer. But as you can see, so
this will just blend. And that's it. We just go ahead
and we add a few outputs. So let's add one, call
this grunge underscore A. Duplicate this three times. Call this one B, we
are a bit overtime, but I'll show you
this one last and C, plug in your
designated crunch maps over here, and that's it. Can be any easier. So we are just going to
go ahead and save this, and we will save
this in textures. Let's make a folder
called Grunges Save. And you know what?
Just right away, export this just as a TGA,
doesn't really matter. Like this. All I care about now is to get it
into my engine quickly. So we have our grunges. I
just grab those DJ files, we just export it, throw
them in here. And that's it. Now if we, for example,
grab the first one and throw this into the texture that we
have just created, you can see that now it
is using this texture. We can then play around with the brush eyes and look at that. And you can even turn off
the auto rotate so that it is a little bit
more targeted. Now, let's say that I
want to, for example, have some general lightness. I can now go ahead
and click ones. And as you can see, it will use my grunge map to add
some general lightness. So I can go ahead and
I can, for example, click on this a few
times like this so that I will add some overall
lightness to my scene. Now what I can say is, okay, now I want to have variation V. I can turn on out a rotate, and let's say that I grab, for example, a different texture. I can then go ahead and
I can now, for example, set my brush eye a bit lower, and I can just randomly
click in here, which will automatically add some general variation
to our scene. At which point, if
we go over here, you can see that there's no
very obvious tiling anymore. Yeah, if you see a bit,
you can just click in it, or you can click
back on your mud green just to make
sure that it's okay. But as you can see, this is a very powerful
way that we can start by just painting on our train and just
look very interesting. Now, you might have guessed
what we're going with. So what we're going to do next chapter is we are actually
going to paint our train, and as you might have guessed, we can use the same style with
like grunges but then use height maps in order to actually paint that train and make it look really, really interesting. So let's go ahead and continue with this in our next chapter.
63. 62 Adding Terrain Details Part1: Okay, so now that we have a basic material going
over our ground, what we're going to
do is we are finally going to start with
some train painting. Now rain painting is not
going to be that special. Most of it is going to be on this side where I
do want to add like these little bumps and everything and maybe have
some water in there. And for the rest,
as you can see, yeah, well, of course, we are going to do
the height maps. Don't get me wrong about that, so that one will be special. But the actual, big heights
that you can see over here, yeah, it won't be that
much different stuff. So let's use this one as
like a nice reference also. So for train painting, let's go ahead and go into
our landscape sculpting, and we want to go to our
sculpt tool over here. So to get started,
what I'm going to do is if we first of all, just create the biggest
details, which is this one. I think what I'm going to do
is I'm just going to, like, end it over here because you
would think that over here, they would make sure that
there's nothing in between. So for this one, this is just
going to be a simple one. Just going to be a
brush size of maybe, maybe a little bit higher 100. And then most of this
if I have a look, Oh, it would be nice
if I actually hold control or shift.
Yeah, hold shift. And then you can see that
now we can paint it down. I'm going to set my
tool strength a little bit lower because
if I set it lower, then I have a little bit
more control over it. And let's see if I do this, what I'm going to do
is I'm going to set my brush size maybe
to, like, 80. So we just kind of need
to make sure that this is correct and that
this is all working. So let's say that I go
ahead and start over here, and here it will have
multiple different bumps. And then it kind of
just goes over here. And also, one thing
that we can do that might be easier is
if we go ahead and just quickly turn off our
landscape editing tool and already mimic the
water to be there. So for this, we can
go ahead and we can go and grab a plane. And it's very simple. So we basically just grab
a plane and we scale it up and we just move it down to roughly where the
water level would be, and then just a matter
of screening this out. So this is also how we are later on going to kind of,
like, create this water. But this is a little bit
more handy so that we can properly see what we're doing. So now I can go ahead and I
can go in here, hold Shift, and I can just carefully you can see mess
around with the water. Maybe let's give it
a little bit more of a something like this, and we can then have some planks going across these areas. That's pretty cool. So let's
just do something like that. Let's make this nice and
uneven also like that so that it's not,
not as perfect. So we got over here, we
got something like that. That looks quite interesting, then maybe have it
go a little bit more out maybe a little
bit more like this. There we go. Then we kind
of just stop it over there. So that's looking pretty cool. So we already got a few
little bits here and there. Yeah, I think I'm going to
leave it at this, actually. So if we have a
look so we can see, like certain areas
we can see you know, especially in this area,
we can see those bits. And I don't know if maybe we want to go ahead
and this over here. And I know that there
is no plane over here, so we might want to
just quickly close that duplicate this
and have it over here. And I don't know.
Let's have a look. So we can see like a
tiny bit over here, and we can see like a
little bit over here, so that might also be
nice, but I'm not sure. Maybe if we then here also just make the area around
it quite messy like this, just by carefully
clicking a bunch of times because else it just
feels like way too perfect. Same over here. Just randomly click a few times next to it, just to see some general
bumps sitting in here. Now, there are
more tools that we can use to like art variation. This is like the simplest one. And those are tools like
if we just go ahead and, you know, so I just had
to adjust my microphone. Over here, we have erosion
and hydro and everything, but these tools are
often quite strong. If I, for example, do hydro, Okay, that one doesn't
do much erosion. Oh, yeah, here, over
here at erosion, you can see that it does
add some small changes. Maybe if you set your tool
strength a bit higher. But it kind of depends
on where you art it. So those are things
that you can do or you can also play
around with, like, noise, which should give
us some noise or not. Oh, not in this case.
As I said before, it works better, like mountains
and everything like that. But anyway, so this is fine for, like,
something like this. Now, what I'm going
to do is I am going to go back into sculpt. And if we didn't go ahead
and just use an Alpha brush, maybe what we can do is
we can just probably reuse just like these type of Alphas because they are
technically alza heights. We don't need to have an
actual height map for this. And if we just go ahead
and make this like here, let's set the brush scale
a little bit lower. And what I'm trying to
do is if I hold shift, I just want to see
if I can give it some very soft variation. Let's set that tool
strength a bit lower. No, that still does not work. Also, if I have a
look over here, I'm a little bit worried if
we will actually be able to art our footsteps and everything
the way that I want to. I should have probably test that before doing
all of this stuff. Let's undo this, let's
just set this to 0.05. Let's set our brush size
a little bit bigger. And the goal is that
we go in and just give it some very maybe
brise a little bit small, give it some general,
very soft variation here. You can kind of see
it a little bit. Over here, you can a
special see it if we like set a bit lower. But it's just going to be
like some general variation. That's way too much. So I'm
just clicking once or twice. But I need to have
a quick look at my terrain to make sure that I can also add
those extra bits. So I will show you how to do
that after this. Here we go. So this is like some general
variation here and there. Here, I'm also
clicking like twice. Maybe make this one a little bit higher and then go down here. There we go. So it's just like
it's very small variation. So as I said before, the thing that I'm a
little bit worried about is if we have a
dense enough piece, because we can
change it over here, but we will most likely
not be able to save our sculpt on a weight, maybe. So we can do a copy paste, but what I assume is that when we make
our geometry denser, the copy paste will not
actually work as well. So, in any case, for the footsteps and everything
to see if those are working, what we're going to do is we
are going to, first of all, save our and now we want to go to quicks.com
slash Mega Scans. The reason we are
not going to use the Built in mega scan tool for this is because
the building tool does not often
export a height map, and we need specifically a tmp. Don't worry. You can simply
go up here to log in and you can simply log in with
your Unreal engine ID. So everything is still for
free for Unreal engine. So if we go ahead
and go to our well, actually, we don't even
need to go to services. Just type in, like,
footsteps, for example. And then we can go, Okay, so these are
not very good. Tracks maybe. And else we will need to do some
more custom searches here. So we have a dirt road. It has some tracks on it, but I'm not sure if that's
like the tracks that I want. But you can see that we can find different types of tracks
and all that kind of stuff. It just kind of
depends what we want, because most of these
are, of course, modern, so we need to be a
little bit careful about it that we don't go for, like, really specific tire
tracks or something like that. No, that also does not work. Ooh. This is not looking. This one might know it's too Oh, wait, here,
we have snow. Snow actually works quite
well for this kind of stuff. So we can actually go for maybe like here. So let's
do some snow. And then what you
basic want to do is just set the
resolution to like two K we don't need a lot
and then simply download it. So let's do this one. And let's also do the lesser
one, this one. Let's also download this one. Oh, hello. Okay, I did download. For some reason, it just gave me an error. So we got that stuff. So if we now go ahead and
let's go into our surfaces, and let's find snow
because snow seems to be quite a good one because it just really retains all those
shapes that we want to get. So we have some
tracks over here, but I don't really want
to get specific tracks, but it might be a little bit difficult to find specifically, like the Cat tracks and
everything like that. Yeah, here, because they are
just like these indents, and else we might want to
just do those separately. Although this one might work.
Let's just give it a try. I'll download this
one over here. And let's see, is there
anything else that we can do? No, that's snowmobile. Oh snowmobile Snowmobile. Alright, and that's
just, like, icy cliff. So Nah, but okay, so this is working pretty well. So we already got some stuff here and there that
we can already use. And these trikes,
they're not too difficult if we really
need to make those. So we got this
stuff. I'm basically dragging these all
into a folder. Over here. And then
with these win as, if you just go ahead
and just right click and just extract all
of them in here. What we can do is we can
basically, first of all, just press delete
and then select everything and then only deselect your displacement
maps over here, and then just delete
everything else because we don't need
all of those other maps. Okay, so now that we have
those displacement maps, all we really need to do
is we need to go into in now if we go to our textures, let's create a new
folder that we'll call Twain underscore height. And in here, we can just
drag in our displacements. Now, we are going
to give this go. I hope that it works, and else we will need to make our twain even higher geometry to
properly get it working. But if we now go into
our landscape mode, we have over here a sculpt
tool, and this time, we can just replace this
sculpt with a simple, let's say we do the footsteps, for example, and then turn
off our outer rotate. Now at this point, we need to set, of
course, the brush eye. And then when you
click on it, Okay, maybe set the tool strength
a little bit higher. Let's try something very
high to get start with. So when you click
on it, it does. I was hoping that
it will give us some I was hoping that it
will give us some footsteps. We just need to play
around with things. So if we go ahead, so this one does not seem to work as well, let's
try this one. It's almost like
it needs to be way smaller for it to look correct, but then it, of course,
becomes too small. So that's a little
bit unfortunate. And if this really
does not work, then we will need to go at it. We will need to use
decals for this. So if we would use
decals for this, it does mean a little
bit of extra work, but I guess that it should
be fine if we do that. So let's see. I don't think I'm going to be able
to do it with geometry, unfortunately. That was my plan. It sometimes works, but I
think that we just don't have exactly the maps that we would want for
this type of stuff. So if we would go ahead
and do this with decals, it is not that big of
a stretch because they are actually normal only decals. That does mean that
what I'm going to do is I'm simply going to still use mega scans because I got to
save time somewhere. We have already spent quite a
bit of time on this course, and if I would need to go in and make all of these decals
completely from scratch, it would easily cost me
like five plus hours. So I don't think that you
guys also want to do that. And you already know enough
about design for this now. So let's go ahead
and do an empty, and let's just call this
Train underscore decals, and let's just press okay. Basically what we
can do in here is we can actually go
ahead and grab, for example, here, we just
grab these import resources. And then what we can
also do is we can also immediately get
those curved roads. So let's just drag these in here and call
them Import resources. And then you simply want to
add a norm map behind it. Also turn these resources to a gray scale simply
by clicking on them. Here. And then when you
turn them into a norm map, it should still show us if we set it a bit
stronger, here, see. So should still show
us our norm details. So we have this one. This one, I'm not sure if we
want to use it. I don't think it will
actually look very good. So let's delete this one. And then we have these ones, which are the tracks. The tracks, I'm not sure. I don't think I'm going to
actually use the tracks also. So let's say that we only have the footsteps that is really
like the one that we want. However, we can just go ahead and just have a
quick extra look. Oh, that was already
the end of this. But we can still just
go in for example, sand, and then we
can, for example, try beach sand and see if
there's maybe something in here with lots of footsteps and messiness
and something like that. You can always just go
ahead and just have a look. Over here, you have pretty
good footsteps also. So we might use that one or we have this one. That one
I don't really like. But just try to
find something and mostly focus, let's
only do this one. Focus really just on your height maps. So
we have this one. I'm going to just drag this
into my folder. Extract here. Now, unfortunately, I will
include these all into unreel, but I cannot include them
into our actual texts folder. So all of this stuff
will be removed, and you will only have
to unreel texture. The reason for this is that
is simply because copyright. Mega scent is from Unreal. I can use it in
unreal for tutorials. That is no prom, but I cannot specifically use it
outside of Unreal. And unfortunately,
this is one of those areas where I am
technically outside of it. So I can just edit it.
That's no problem, but it needs to be
used in unreal. So I'm just going to go ahead
and let's see which one? The Thai beach, which is, I believe this one's Imported. So let's do two types
of footsteps and two types of swags. So the tracks we are
going to make ourselves, but they are only going to be norm map. So we got this one. Yeah, I don't honestly, I don't think that
one will do much. In any case. So we got
a normap over here. All we are going to do now
is we are going to blend this norm map with a simple
normal color note over here. And you guessed it, grab
your grunge map 01, add a brush pattern and throw up your balance and just throw
that into the bottom. And then what we most
likely want to do is we just want to do an invert
gray scale in between. So the footsteps are only here, but they are softening out and we can play around
to the balance to make sure that they are here
so that they are nicely softly flowing over. Like that. So that should be no problem, so we got that stuff done. Okay, so footsteps check. Now, for those card
things over here, what I'm going to do is
I'm going to keep this very easy just as like a ptotype and we're going to
go ahead and go to our patterns and then simply go in and grab probably like a tile
generator should be fine. Let's grab a tile generator. Let's set Y amount
all the way to one. Let's set our X amount
to maybe like five. Set the pattern to be a square. Set the interte I hope
I say it correctly, quite low and also just
do random notes that we add some random
bits of thickness. And then what we want to
do is we just want to go ahead and do
an offset random. Really, maybe position random. There we go position random. And then we will kind of overlay a bunch of those
at the same time. So we got this one over
here that is looking fine. Now what we want to
do is we want to add a directional warp and maybe just add like
a pearling noise, for example, doing this, if we set up pearl noise quite a bit lower like this, here, see, we can just give it
some unevenness, like you can see over here, maybe give Berlin noise a
little bit of like there we go. And then what we're going to do is we're going to blend this once more using the same mask. I set is to be multiplied. So we got these ones over here. And we can also go into our tile generator and
we can, for example, change our seat maybe get
a more interesting look, something like
this, for example. It can be very, very basic. So we got these
ones, and then for the round bits over here, that one is a little bit
tricky because you cannot just bend stuff inside
of substance Zina. The only way that you can do it is you can
kind of war bits. But then what I feel
like we can do is we can maybe just fake it with like
a bunch of different decals. And so for now, let's just use this
one and then we will go ahead and fake it
a little bit later on. I first of all need to make
this into a proper height. So we got this one.
Let's add a bevel note. We're basically going to bevel this inwards so
that oh, no, sorry. Yeah, yeah, we want to
bevel this inwards. That's fine. We just need
to invert it later on. Like this, give it
still like a flat bit, but don't go too
intense in it. Come on. Zero point -0.015 maybe. Yeah, there we go.
We got this height. We are then breaking it up. Then if we add a
normal note to this, we can go ahead and after
we've done this normal nodes, we just need to do a blur
high quality gray scale first just to give
it some softening. By the way, you can also go into your bevel and set
the smoothing on. There we go. That will
also work a little bit. Then what we're going to
do is we are going to just do an invert
gray scale here. There we go. So now
that they are inverted, now we have these track lines. The only thing that I do
not like is that over here, this is not working very well. So what I'm going to do
is I'm just going to blur this mask a lot until you'll see
until it almost like fades out so that we don't have those
really strong details. So this is like a very
simple version of this one. Let's just go ahead
and give this a go because we are a
little bit over time and then we can just improve
this in the next chapter. So we are going to add an
output note on both of them. So this one we'll
call footsteps, underscore N, and also in
the label, duplicate this. And this one call wagon
tracks underscore N. There we go. Okay, so we
got these pieces done. Now, in our Twain height maps, we can just go ahead
and save this scene. You know what? We can
just go ahead and we can also export it in
here right way. So we just export all of this. So now we are left over
with these two norm maps. These text show here,
we can pretty much just delete them because we
no longer need those. And then in here in your
resources, if you want, you can also delete these bits because you also don't
need them anymore. Okay, so now in reel, we can just use a
train height folder. That's no problem, and we're just going to
go ahead and import these train decals and then
just flip the green channel. Like this. Now, the last thing that we need to do is we need to go ahead and go
into our materials. And then we have our
train decals over here. No, sorry, our decals over here. And just duplicate your
decal master and call it decal normal master. Let's open this up, and so
we need to have two things. So first of all, this one, let's just go ahead
and delete it. We also can delete the
base color roughness. We only will need a mask
and we need a norm map. So in your decal normal master, set your blending mode to
be D buffer translucent normal so that it only accepts a norm map
and an opacity map. We can then go ahead
and we can drag in let's say our footsteps
to get started with. We can drag in our footsteps. Convert this to peremter
and call this normal. And just throw this into
your norm map over here. Now, the next thing
that we want to do is we just want to go
ahead and go in here, and we should be able to use the alpha map of our
norm map for this. So if we go in here and just add a RGB Alpha merge over here, we can have the RGB in the top, and in the Alpha, we
can basically just grab actually, we just
want to grab this one. So this is going to be
like our Alpha map, and we can do the
same over here, RGB into the top, and then the blurry
Alpha into the bottom. There we go. Now that
should include it. So we can just go ahead and
we can export this stuff. By the way, if we
get this, this is because we removed
some resources, so we can just go ahead
and select them and press remove also
inherent substance to get rid of that error. But in any case, so that's one where those are now imported. So if I now right click
and reimport, there we go. They should have
an alpha Map pot. No, they have not exported
with the Alpha map. They show up as the
day of the off Map. Maybe that then in that case, I think that unreal
just does not accept the off map into a norm map,
which is a bit of a shame. It just means that we
need to export our Alpha. But honestly, maybe we are able to simply use our
grunges, aren't we? They might need to be a little bit strong, but let's
just try that out. Let's see if we can
just quickly use a grunge map that would
save me some time. So let's just throw
this into my grunge. Right click, Covert
premor call it mask. Save this. Sorry that
it's taking so long. We're almost done, and then we can just move on to next chapter so that now if we go into
our material decals, we can create an
instant and call this food steps under score A. And if we drag this on here, you can see the food steps. They're not very
strong, but then we can go in here and
we can do a flatten normal with a scalar
peimeter that will call normal strength and set this to minus
two by default, so that it's extra strong. Throw this now in our norm map and we can also open this up. So here, if we go ahead and set the mask intensity to two, there we go and
normal strength to minus five or even
or just minus three, you can see that
that now does work. So you can imagine that now
that we have this deco, we can decide how big
that we want it to be, and we can now just
go ahead and we can duplicate this around to basically create as if a lot of people have been
walking along here. And what you can also
do is you can also overlap the decals, like this. And then you can
have them like that they are also walking over here, and then it will just
blend in quite nicely. So just like that, although
from a low perspective, it might not look
as interesting, it does give us, like,
a very good look in just creating, all
of these details. What we'll be doing in
the next chapter is we are going to go
ahead and we are going to just add a
few more details. We are going to improve the
ones that you already have. I'm also going to create
hopefully a system that we can have them going around the
corner and stuff like that. That should all be fine, then we can just keep
the train as it is. Although I do want to also add some general bump
to the train first. Let's go ahead and continue with this in the next chapter.
64. 63 Adding Terrain Details Part2: Okay, so let's go
ahead and continue. So we are just going to put more focus on all of this stuff. And now, of course, we might not get the extra water in here. If you want to get
that kind of stuff, you need to make
the entire decal, including the base color
roughness and just have a decal like that and have everything matching up,
then we can do water. But yeah, I'm not going
to have it that intense. I think I'm going to go more
in, like, a bit of, like, this direction and
just have, like, the water sitting
around these areas. I'm going to get
started by just going into my train over here, and I just wanted to go ahead. Don't think these grunges
will really do much. Yeah, so let's just go
to a norm brush type. And just at a very
low tool strength, I'm just going to give
it some general heights. You can kind of see me doing it. It's Undo, that one, and that's at the brush size a
little bit lower. And then sometimes
just press shift, and the other times just
press do not press shift. And it's basically just to give it some extra bumps
here and there. And then what I can do is I
can also go by the houses, and I can also mess around
with that kind of stuff. It's just that we need to make this rain look a lot
more interesting. So I'm just holding
shift in this case, see? And I'm just adding some random bits and pieces here and there. And then what I'm
going to do is I'm also going to go
ahead and just go into closer to the houses
and actually do some stuff. I don't think, if I do this, like if I set my brush
settings like very low, I don't think I
can just do, like, a line Yeah, see, we don't have the resolution
if I wanted to create actual lines that are for the tire tracks
and stuff like that. But that's no problem. Set your brush sis
a little bit lower. Go over here and just, like, mess around with it
a little bit more. Maybe like these larger bits, just set your brush sie a little bit bigger because
it will be far away. Oh, let's set that tool
strength a little bit. Sorry Idoing is a
little bit slow. Yeah, let's set the tool
strength a little bit lower. But yeah, there we go. So we can just go ahead and
we can mess around with this just to make everything feel a
little bit more organic and not as perfect. Here, see, it's already
starting to work. Let's set our tools
strength a bit lower and set our brush a
little bit lower. And over here, let's
make some tracks. So, if people often
vault over here, then it makes sense that everything is like
a little bit dented in. Same happens on tarmac
and everything, so it would happen
even stronger on here. And then over here, of course,
sometimes we do have like this really messy
looking terrain which actually does
look quite nice. So maybe I want to just try and get that a little bit more. So if I go to my sculpt,
let's go over here, and let's just grab
like, once again, our I think it was
like the third crunch. Turn outer rotate. Yeah, here, it was like the third crunch. So we got that one, so we can just go ahead
and go in here and maybe, like, sometimes hold
shift, sometimes not. Just see if we can give it a little bit more like
an interesting look. It might be a little
bit slow to do very quick clicks
like this because it just needs to
keep recalculating. But as you can see, here, it does already
give our material like almost like
an extra height, which I think will
look very interesting. Yeah, so this is starting
to look a lot better, even though we cannot
do the actual stuff, we have this one, and then we are just
going to, like, do the decals and
then we're going to just generally
improve things. But I first of all I want to do this before doing the decals because I want to make sure that my train
is already correct. So yeah, then we're
going to just improve the materials
a little bit, maybe create like dryer version, painting like the rest
should all be fine. There we go. So now over here, that's already starting
to look a lot better. So we got that stuff done.
What was the next thing? Oh, yeah, the next thing
was that we turn off our train and just go to a
brush type and then go ahead and just set your tool
strength quite low and your brush size quite
low and do a pass next to these
buildings where you just have the scent and
everything just piling up a little bit more because it
would make sense that around here because people are not
walking here too often. You may set up brush
size even lower. It would just pile up a little
bit more here and there, and we can just make
advantage of that to also include that. So we can just go out
and just do that stuff. There we go. Just small details like this will
actually add a lot. I'm sure that you
can also see it. I'm sure that they've
also done it in Rad. Well, yeah, here, they actually have really logical pile up. Our pile up is not as intense. Although we can always
just go for, like, 40 and like a slightly larger tool
strength to also give it like these higher
bits to give it a bit more of like a pile
up around the sides. Yeah, you know what?
That will actually add quite some interest. So let's do it.
Let's just do that. So let's just go ahead
and make this a little bit more like an
intense pile up. And then later on we are just
going to have the straw or the hay and everything also
scattered on the ground. It's a lugaresome
once it's all done. And at that point, you cannot
really see it anymore, so I'm just going to leave. Here we go. Sir, of course, I
would recommend that you spend a lot more
time on this than I do, because I'm doing
this quite quickly, just to dedicate my
time specifically. But if you really just
spent the time and just, like, take an hour or
something to really, like, make everything
really fine details, then you can get something
really interesting. So I'm just going to go next to the building a little bit
more because I know that my camera angle is here and I assume that this
is the green building, seeing that it is green. You maybe like, make it go
down a little bit more in these areas be bit too much. Okay, and I'm also going to just do another pass over
here where I just make this a little
bit more intense. Here we go. So we
got that stuff, maybe reduce it here and there a little bit because it's a little bit too much. And also maybe give it more like a fade out just by painting in front of it a
little bit more. But just in general,
that looks pretty good. So we can now also go in here. Even though we will most
likely not see these areas, it's always good just just
in case, like a little bit, because I might do some fl throughs where the cameras
just flying through it, and then it's always just
nice if we just spend an extra bit of attention to
these bits here and there. Yeah, there we go. Here we go. So our rain is already starting to look
quite interesting. Okay, so let's save sine. That's like the actual rain painting is pretty
much done now. And now remember how
we have over here. Our footsteps, which we
can go ahead and we can, add, like, a bunch more of them. Now, one thing I also want to do is I'm actually
going to move them closer to the ground so that if we add extra props
and everything on here, that they will not be included. So if we just go ahead and
just go to our footsteps over here, select all of them. Just move them
down a little bit. There we go, so
that we do not have any issues whenever we
have them on the ground. So we got all of this stuff, and we can just nicely, it does mean that we need
to select below it. But what we can do
is we can just start by first of all,
having the footsteps. So let's say that most
people would have walked in this area because the other areas,
of course, flooded. So this is just
like a busy street. You know, some people maybe,
like, turned that direction. Other people started, angling
more in that direction. And just like that,
you can, of course, just mess around
with this and just keep duplicating a bunch of them to add more and more
interest into your scene. And at this point, although it might be very difficult
especially because of the shadow, People will have to come here. These decals, they show up
specifically whenever we have light falling on them and else the shadow
will just hide it. But as you can see over here,
that's looking pretty good. We already got some of
that messiness going on. Let's go ahead and also have
the footsteps going in here. And maybe we can
go to unlit mode, or wait unlit mode will not work because it's a normal map. It's not an actual texture, so then we kind of
just need to guess. And the reason I'm still
placing them here is because here you can
see them like tiny bit. So just in case that you
can see them a tiny bit, I want to add them, and we can also go ahead and we can also
have them going down here. Now at this point, what
you can also do is you can also go in here and then sometimes just
duplicate them and have them sitting on the top. Maybe you can even have
some of the norm map actually sitting on
top of those areas. But in any case, what we can
do is we can go in here, kind of like this sideways one
where they have walked up. So that's pretty good.
So we got those ones. Now, I will most likely
also make this muddy. So I know more and more
stuff keeps getting added, but just to keep
everything realistic, I'm still trying
to keep it down. So we still need to, of course, a variation to these things. So we will most likely have like a muddy decal variation and then also do some actual movement variation
just to dent it in. But for now, if we
just go quickly to our camera actor and just set the screen
percentage to 200, Yeah, that is already looking quite interesting,
if I say so myself. So that is looking quite nice. Now we will, of
course, have assets and everything filling it up. So what I'm going to do if I
look at this, set it back. I'm just going to, like, reduce the height over here a tiny bit. So let's just go
ahead and like here, reduce it like a little
bit so that it is not too intense and
that it also does not look like very typical
just like painted bumps Yeah, sometimes I literally just
go into my camera angle, and then I like,
start painting out. Like that. So that's
looking pretty good. Maybe only over here a little
bit less. There we go. So that's all starting
to look pretty good. So we got those things done. Now, let's do our
tracks, shall we? So we can save scene. We can go to our decals
and we have footsteps A. Let's duplicate this and call
this tracks underscore A. Open it up and we just want to grab our norm map for this. And we want to grab a here
tracks and just replace those. So now if we go to Tracks A,
let's see. What do we have? Okay, so you can see the
tracks, so that's good. Let's once again, reduce this. And they will all be
blended together. All of these norm maps
will be blended together. I think with this
one, I do need to go ahead in and make
it a bit stronger. So let's set this to minus five. And another thing that you
can do is set the priority. If you set the SOT order
to something high, like ten, it will
kind of like sort. Oh, no, wait, so they will
not be blended, of course. Um this socked order, basically what it
does is it will over white so that they technically do not
get blended as well. However, what we can do is we can just go ahead
and just grab this normal, add a normal combine
and grab this normal. And just says the
high quality, see? So yeah, it does
not really matter. So we can just do this. We
can just re export this, and then they will all
still fit together. So if we now go into
our rain height, right click and reimport, see? And then we don't even need
to go in and set the normal, so we can just set the
normal to minus three again. Here you see. And then it's just a matter of over here, duplicating these. So these are going to be
like the little tracks. The reason I'm not using
parallex occlusion details is because from my experience, especially in unrealized five, they just simply
do not look good. So, or at least not the way that I tend to make them.
But you can do it. It's the exact same
setup as doing it inside of your normal materials
like we've already done. So you can do it, but be warned that it might
not look as nice. So we got this stuff over here. Sometimes it would be maybe
nice if we also like this. But then the problem with
that is that it's kind of just, kind of like
if we do that, we kind of need to blend them
together back into, like, one version because else it will look strange
that we have, all these random
bits and pieces. But yeah, so we can use this. And then over here, what
I'm going to do is I'm probably just going
to go ahead and just scale it in a little bit. And yeah, I said that we
were going to go around it. But with our lighting, you probably will not see it. So what I'm going to do is I'm
just going to make it very messy and then here. So if I just do multiple
different tracks, going to different directions, it will make it difficult
anyway for the system to really see or for your eyes to really see which
direction you need to go to. But yeah, it kind of depends. See if I go low to the ground, it will already be
quite difficult to see. So maybe it's better if we
go from like a side angle. I said, By the way, let's just carefully move my camera up a little bit and down
to see if I can maybe, like, make some changes. So here, if we grab this one, no, that's not the
right footsteps. I need to have the other one. Quite a bit of degils
at this point. But what we can do is we
can go ahead and grab these ones and do the same
thing where we kind of just carefully overlay them on top of each other and then rotate them like a tiny bit. And hopefully, the messiness of all of
this stuff will make it so that it's hard to
even see what's going on because we then go to just crisscross through them here and there to basically
Include those. Yeah. So instead of placing
them next to each other, just like keep rotating
them around each other. Like over here. And then we
can sometimes just like here, do another track in between. So these are quite a bit
of decals at this point. So I will just go ahead and kind of cool down at this point with the amount
of decaals because, of course, decals
do bear an expense. So in your game, you would most likely depending on the
game you're making, you would not have this many decas and
you probably just pay for, like,
material blending. But we chose not to do that. So let's just say that I'm going to stick with
this over here. If we now have a look,
especially from the top, you can see that we have already quite an interesting
looking train. It's really messy over here, and you can see
that these heights, remember how we did
the console commands, so we can set it to minus one or forgot which one
it was to just like, improve the lighting,
but just in general, this is already
looking pretty good. So we got that stuff
already ready to go. Let's have a look just at, see, especially in these
camera angles, you can see that it
looks quite well. And then maybe I'm just going
to add a few more here. So at this point,
you kind just mess around depending on
your camera angle. Oh, sorry, that's
not a white decal. Let's grab just like
a new footsteps, So you kind of just want to
mess around with things, also depending on
your camera angle. So if I do this, I can see
like from this camera angle. See, it just like that
extra bit of normal detail. But now, this is
looking pretty good. So we got this stuff done. Let's say that for now we
have our deco placement. We have it all ready
to go. Save sea. What we're going
to do in the next chapter is we are, first of all, just going to quickly
balance out our textures to be a little bit more of like a brownish dirt and
not so much a blackish dirt and maybe make it also
like a little bit drier. And after we've done that, we are going to just add
like the haze stuff. Once that is done, we can
also just go ahead and create a very quick material just for our water and just like arts and water and
stuff like that. So that's about it for the plan. Let's go ahead and continue with this in our next chapter.
65. 64 Adding Terrain Details Part3: Okay, so what I want to do in this chapter is we are
just going to balance out our materials a little bit and just add some
general improvements. So the first thing I'm going to do is I'm
actually going to go into my rain main
material over here, and I think I'm going to lower down my roughness
a little bit more. So let's do 3.5. Even
two, 1.8 maybe, 1.6. Let's do 1.7. Yeah, so that it just does
not look as intense, but that we can still
get over here, see? So we still get some nice
looking roughness effects. So the next thing that I
want to do is I wanted to try and get the color a little bit more in
this direction, just to see how that looks. And then what we
can do is we can also do some general color
painting and stuff like that, just to improve everything. So if we go to substance Ziner over here
and let's just go to our muddy ground
SPS here we go. Now, the easiest thing
that we can try is we can simply try to duplicate
our gradient map. And for this gradient map, if we go ahead and open it up, we can simply grab from
this image over here, so if I do pick gradient, we can grab something like
this and then you can see that it does add more, so maybe we will need to
do this a bunch of times. It's not able to get it as well. Is that maybe closer one? That's three D. I stay away from three D images whenever I make this it's quite hard to get from these images
to get something good. Okay, in that case, yeah, just really try to, like, get them all in here. Well, I guess for now,
it's close enough. The only thing that
I'm going to do this for the light versions, let's go ahead and tone them down so that it looks
a little bit better. It's just because
I first of all, just need to see if this
actually works well. So when we got this
one, double check. Okay, so this is
the stra version. So we just need to
go into our presets, press update on the hay version, and go back to the
clean version, and then we can just go
ahead and we can export this and just see how
it actually looks. So if we export this to our
clean version over here, it's press export. There we go. And now if we give this a go, so if we go over here
in our textures, muddy ground clean, let's just right click
and reimport this. Oh, see? That does look better. That does look better if
we go for that version. So I'm quite happy with
doing something like this. Yeah. Maybe I will then make
it a little bit darker, but I can just go
ahead and I can go in here and try like, Oh, wait. We have lightness in here. So if we go in here, let's see. Yeah. And if we don't go in, our variation clean just said it's like to be
a little bit darker. Let's do this. Let's
export this once more, and then we can also export
the other variations, which, of course, will be like lighter versions and everything. So that's right click
Rimport. There we go. Yeah, I quite like that. I do want to make then also
my wood because right now it's really similar to the
wood that we're walking on. So I kind of try to
get the variation. But over here, that already
looks like a lot better compared to what we had
before. So we got this one. Now if we just go ahead and
update our clean variation, go to our light variation. And for a light variation, we can once again
export this right away into variation A light. And then we also have the
variation with the hay that we also need to
edit our material on. So let's now go to
the hay version. And let's also go ahead and
export that one over here. Okay, so that one
is also exporting. So if we now already
go to light version, we can just go ahead
and reimport those, and I know that I
forgot to actually change the seed for this. So if we just go
ahead and quickly adjust this seed and
adjust this sat over here. And if we then go ahead and
go back to our let's say, our light version, and we
can just go ahead and we export this once
more, final time. Here we go. So
let's export this. And now we can also go
in here, muddy ground, new folder, variation,
underscore B, underscore. And then in this variation, what we can do is we can
just go ahead and we an import our hay version, which I'm just navigating to. Give me 1 second. Here we go. Load in. Let's flip
the green channel. Let's actually close
some of these things. Yeah, I want to save you, but I just want to
also close you. Here we go. Train master. And what we can
also do is we can also go ahead and
just once again, re import our light version
over here. There we go. Okay, then over
here, all we need to do is we just need
to add another one. So if we go ahead and
just add another member, this one is going to
be mud underscore H and just set this 2.5. Go in here, new member. Mud sca hay, 0.5, go here, new member, MutH 0.5. And now it's just a matter
of dragging these in here. Should not have done
it right on top. So this one is going to be
our Did we ever No wait, we don't need to turn
these into parameters because we are just going
to use them as they are. So let's plug in these versions. And you know what I'm going
to do is I'm going to use the very first multiply
over here for this one. Just keep it,
basically the same. And then over here, I just
need to make some space, and then we have our
roughness over here, and this one is just our normal. So that's all fine, so now we can go ahead and save scene. Go over here and now if we
go ahead and we need to go to our landscape material,
paint, scroll down. Oh, does it not add my layers? I should have. Yeah,
everything should be fine. So it should have added those. Not sure if it still
needs to update. I think it landscape material
needs to be rebuilt. If we go to build
build all landscapes, I believe that we can just do. There we go. And
now if we just set the brush type different Oh, no. That is strange. So we
got all of our levo, but it does not seem to show up the last one. That
is very strange. So that one is looking fine and we have
everything plugged in, except for that we have
still not plugged in UVs, which I keep forgetting to do. But I am a little bit
curious why it doesn't update because it
is supposed to, of course, update
just like normal. So let's go ahead
and save this once more. There we go.
Now it is there. Okay, very well. It's bugging out really badly, but now it seems to work. So, create a new layer info. Okay, fair enough. So I'm going to go ahead and get started with the light one, and I want to just get
the light versions, maybe, like, around here. So I will just go ahead and
like around these areas. Although you would think that these would actually probably be better if they
are dark versions. But I don't know. You can kind of, like, decide for yourself
what you want to do. Maybe it's already like it started to dry up or
something like that. But then I would need to, like, because if I need
to make these dark, I would basically need to
swap around my light version, which might not be that bad. So I can pretty much, even though it is called light, I can just mess around with my parameters to make it dark. We know what the
material is used for. It's mostly used around
these water banks over here. So it's not like we I'm working in a massive
development team and where we need to make the naming super specific
and that we need to spend extra time just changing
a small little name. So let's say that we got
this stuff over here. And so as I said before, what we can do is we can go
ahead and go into our train. Rain main over here, and we can just mess around with
basically the lightness. So if we go in here, let's say that we have
a look over here, I can go to my second
color Oh, make that dark. Yeah, there we go, see. I forget that for the landscape material, we need to actually press Okay. Yeah, so it does not really
matter, light, dark. It's all the same as long as we get some darkening going over
here, so that's all good. And now for the next one, which is going to
be our hy material, let's see if we can make this a bit more interesting
by adding, once again, like a grunge map. Add the second one. I've
not yet used that one. And give the second to load
in for the first time. Okay, so that does
look pretty good. The only thing is that we
need to go ahead and we need to make the actual hay a little bit smaller
because right now, this one is looking a
little bit too strong. We can see if we can maybe, like, change the overall tiling, but it's good that we are using a mask for this in
order to not have, like, the perfect round brush. So we can go ahead
and we can here, see, because now we can also
just mess around with this. And if we first of
all, do this one, where we mostly just, like, do around these areas over here and sometimes like
go outside of them, then what we can do
in the next one is we can set our fate a
little bit lower, and then we can give it a
little bit of like a fade out. So let's for now,
do this. Over here. And then after this done, what we'll do is well
finally go ahead and do another lighting
pass. Here we go. And they also probably
use a straw to, like, keep everything dry around these areas, not that
it worked very well. But yeah, after this, we're
going to do lighting pass, which is going to be extra cool because we are going
to do color grading, and you will not
believe how much of a difference color
grading actually makes. So a lighting pass is
going to be quite short. It's most going to
be like a optimizer, post effect pass rather
than a lighting pass. But because we already got most of the stuff
done and ready to go. But in any case, I'm just now
doing this stuff over here. Let's give the
second to load in. Same over here, load
it in like that. And then at this point,
you cannot really see it, so I'm just going to
leave it over there. And only when I find out that I can see it from the
angles I want it, then we can go ahead
and just change. But for now, let's just
do this. Over here. Now what you can do is
you can just go ahead and set your tool strength to 50%, maybe set your brush eyes like
a little bit bigger to 60. And then, again,
sometimes if you want, just create some
general fade out in certain areas where there would have been a bit
of a buildup going on. So over here, you see me
doing it quite quickly. But I am just adding some
small fade outs over here. Almost like here. Like a lot
of trampling happens where people are walking
over it and it just gets trampled, and
that's like a nice area. Over here, just to break
up like that straightness, it would also be extra nice. And sometimes you can click
Double just to make sure that it is correct. And here you can see
over here, musk, like in Petun where people started walking
and everything like that. And it's just like a
general fade. Like this. And then if we go to our
cameraangle, here we go, see? So that already adds quite
a bit of a difference. And then maybe what we can
do is we can here and there, add like a little bit of hay
in between our material. But we are starting
to get a really interesting looking
rain already. So that is quite nice
that we have this. And as you can see, we are
not doing anything special. It's just like it's
a very basic train, but it works. It's
quite powerful. Granted that we are
using quite a bit of extra geometry in here
compared to normal, like normal games will probably not push this much
geometry in it, although they might
push it in it, but only when you get
very close to it, it kind of depends on how the game and the engine and
everything has been set up. And then yeah, around here, if you want, you can also add it, but you will most
likely not be able to see anything this far away. Now, but this is
good, like over here, sometimes also like
in the in betweens, like, give it some hay. L over here, get, like, some difference
also. There we go. And let's see. So if we don't go ahead over here, there we go. So that's looking
really interesting. Okay, I am quite
happy about this. If we just go ahead
and switch to our other actors.
Yeah, see here. So we got a lot of fidelity
and a lot of variation, even though the material
might feel very plain, there is actually a
lot of stuff going on. So that's looking really cool. Okay, so having that done, let's close our landscape tool. Let's save our settings. And now last thing that I'm
going to do is I'm just going to go ahead and I'm just
going to add some water, and then we will move on to our lighting pass most likely. So for the water, we already
have this over here. We can keep the water
very, very simple. All we need to do is create actually unique
material for this, just to make it extra simple. Let's create the material.
Simply call this water. And what you can do is you
can already drag this on. I'm not even going to
bother creating an instance because this material
will not have any textures or
anything like that. It will simply be a plain color, so it will be a
constant three vector. And this concentry vector
is going to be a bit of a muddy looking brown color. And this is pretty
much the same concept as using as doing our windows. So we basically add a
constant that we set to 0.6 or something like
that for our metallic, and then we add another
constant, another constant. And this one is going to be for roughness and we
set this to 0.1, so that will give us
the roughness effect. And then finally,
what we want to do is we want to go ahead and
quickly go to substance. Let's open up our
terrain decals node. We can just use
this one. And then all we need to do is
create another output or just duplicate this one and call this water
underscore waves. And this one we'll
just have a norm map. So it's just going to
have a pearling noise at quite a large level and then a simple normal
node on top of it, which will give us some of this very soft warping.
And that's pretty much it. We can just go ahead
and we can export this one over here. So I'm just now re using
it just to save some time. And then if we go
to our height maps, go in here and just quickly use same folder train height
and just have over here, like the water waves, and we
simply throw this in here. We will add a flattened
normal with a constant. So the reason I'm
using constants is because I do not need
to expose anything. So a constant and
the constant will be -0.5 probably so that
it's not as strong. We basically throw
this into our normal, and finally, to create
a UVs for a normal, we want to get a world, aligned normal node over here, which might look very
big and intimidating. But basically all you need
to do is you need to go ahead and set your right
click on your texture sample, convert it to a texture object. There we go plug this
in here and then plug the XYZ texture in here. And then for your texture size, you want to have a constant
that is very large, so I'd say 200. Into the texter sise. Okay, that might have gone a little bit
quick. What am I doing here? I'm basically giving
this no map world UVs, which means that
they are UVs that are tiled across
the entire world. So basically, they are
the same UVs as that roughly the landscape
material uses. You can kind of
see it like that. I'm then going ahead
and adding that texture to our flatenrmal to
control the strength. And then we just have
some general coloring. And over here you can see
that this is the output. So I can now go ahead and
I can save my material, and then based upon
that, I can just balance it out and just
see what I want to do. So I save it. I go in here and you can see that this is quite a dirty looking teal. Now, looking at this,
what do I want to do? I'm going to set my normal to 300 and my normal
flatness to maybe like 0.5 Sorry, -0.3, actually. Let's do that. And then I'm going to go ahead
and I'm going to Oh, yeah, yeah, you can even
see pretty much out or updating already or not. No, wait. I don't think you can. I think that was
just like a bug. So if I just save this, here
we go, so we can see that. And I'm going to make the
water a little bit darker. And the roughness, 0.3,
a little bit duller. Save that. Here we go. Especially over here you
can see that it just has this little bit of water. Let's actually, what
if I set my metallic to zero and my
roughness to like 0.1, just to see if that
looks any better? And I probably also want to
go ahead and set my flatness, if I just set this
to zero and save. Okay, so this is what
we got right now. So that is starting
to get there. I'm going to set my flatness to maybe 0.5, then after all. Although I think that only
after one, it will actually, if we do 1.2, or three, then it will only
start showing two. Yeah, 1.5. Let's try that. And I'm going to actually
make my color very dark. Turns out. So let's
make it very dark. Let's go ahead and
save this once more. Okay, so let's set this
to 0.2 in my roughness. And I know maybe I
should have made an instance. I guess
it was easier. I didn't expect that I had to go back and
forth this often. But, okay, so this
is pretty good. So we now got over
here our water, but we still got all of these
materials on here also. And what you can do on top
of this is, if you want, you can twin throw on a decal. So this is quite a messy one, but we're just doing this, to get something very quick
quick and dirty, so to speak, in here so that I do not need to put in any effort creating an actual material, but I rather just use
whatever I already have in the engine to basically quickly art this because it's
not so much a focus point. Here we go. And see now
even with these decals, you can see that that
already adds something. And it's more like
that on the side. If we go to these angles, you can just see that
there's something a little bit in here, as you can see. So it is not too special, but, hey, it works. So we got this one. Maybe we will improve it a little
bit more later on. But for now, this is
looking pretty good. So I'm quite happy with that and also like
the straw over here. I said that I was
going to make it smaller, but when I look at it, maybe it's better if I
do not do that because else from a distance, it might not look as nice. So in any case, we got
this now all done. Perfect. What we
are going to do in the next chapter is we are going to do another
lighting pass, just double checking
to make sure that everything is working
with the lights, and then we are going to use
DaVinci Resolve revolve, sorry, in order to do
the color grading. So let's go ahead and continue with that in the next chapter.
66. 65 Doing Our Second Lighting Pass: Okay, so what we're going to do is we are going
to get started which is doing our
second and most likely our final lighting parts. So for this, over here,
we have a lighting. We also have a lot of
booleans that, of course, have been replaced
and they are now no longer in the correct folders. Now, you can try and
sort this all out, but what I'm going
to do at this point, it's just make a folder called Boolean finl that I
will just save them in. And for the rest, we also
have all of our decals. So this is the lighting, and then over here we have
all of these decals. So let's just go ahead
and first of all, select all of them. Then deselect the stuff that
is not a decal over here. And then you can just create another folder called decals. There we go to keep things
nice and organized. Okay. And yeah,
this is the plane. Yeah, just leave it.
I don't really care. So if we have a look over here, we already did like
a bunch of stuff. Now, for lighting, we cannot really look
over here because it's like overcast and this one is
also quite a dark lighting. So there isn't too much
lighting that I can work with. Maybe like this one
is quite interesting. So if we have a look at this, now that our ground is
a little bit darker, you can see that everything just slightly changed
a little bit. What I'm going to do is
I'm just going to go to my lighting and I'm just going to double
check everything. So here we have our
directional light. Let's see if we use temperature
for directional light. We can actually set the
temperature for the light itself. So let's say that we set
this a little bit warmer. And let's set the intensity
maybe to 1.5 maybe. Let's set the intensity to 1.5, but let's set our
indirect lighting to 0.5. I should tone it down and also our volumetric
scattering to one. No, that does not tone it down. In that case, I'm just
going to leave it at one. But we can use that
temperature to basically get a warmer temperature or
like a colder temperature. So you can kind of
mess around with that. Until we get something we like. And I quite like this one, which is 5,730, pretty much. Okay, now, the soft angle, it didn't work last time, but this time, all of a
sudden, it does work. Over here, if you go
to your soft angle, you can choose between Wi sharp shadows and
like softer shadows. So we do want to just
make sure that they are a little bit soft, not too much, but just that there's a little bit of,
like, a softness going on. I quite like that.
Now if we go down, all of this stuff I don't
really care too much about. Yeah, that should be
fine. Atmosphere sun. Oh, yeah, that makes
sense that it uses the atmosphere. Cast shadows. What do I say, cast shadows on opaque measures onto clouds. Yeah, that's not really needed. So honestly, I'm fine with that. That stuff is not too special. Our sky atmosphere,
I believe that one just has the actual
clouds and everything. Or not. No way this does
not have our clouds. Now, this is atmosphere
which we can just leave. I am tempted to actually change the sky atmosphere
with a custom sky. Now, this custom sky, I bat it online, so I'm not able to
supply it with you, but I can just add this, and I will show you how to do that just to see
if it looks good. Before we do that, we have
a skylight over here. RealT capture is fine. S zero. One, 0.5, we'll give it
maybe a bit more contrast. Now, let's leave it at one. Most of this contrast stuff like the small balancing, we
will actually go at, and we will do that
using the color balance, which is a lute that we
are going to create, which is a color lookup table. But I will go over that
a little bit later. Max occlusion distance that we don't really need to
do anything about this. As I said before, because
we already did most of the lighting, it
is not too special. Like the only thing is
that maybe if you want, you can mess around a little
bit more with your angle. And let's say that we, we can change angle
around to see if we can maybe get something a bit more interesting
at this point. It does look kind of nice
that we have this soft light, but I'm not sure I want
to actually do that, or we can move it down or up maybe move it up a
tiny bit like this. Yeah, that I quite like. So I just moved my
light up a tiny bit, not too much, just
like a small bit. And for the rest, all
of this stuff is fine. So we have our skylight,
which is fine. We have all of these
reflection captures, which is fine,
although if you want, you can go to build
and just build all of your reflection captures to make sure that they
are all updated. Then we have our
volumetric cloud. So as I said before, you
can mess around with this with your clouds to see
if it makes a difference. I'm going to actually leave it as it is because the clouds because we are using our
sun and our atmosphere, the clouds actually matter a lot with the lighting
that we have now. If I would go ahead
and change them now, it will just end up costing me more time to basically
balance everything out. Instead, what I'm
going to do is I have bought this mad
painting skybox pack, and this is just on
the marketplace. This is in your lounger. Now, the reason I'm
showing you this. So I cannot supply
this with you. But as you can see, these are really cool looking
skies that we can use. Of course, some of them won't
make sense like this stuff, but these are
really cool to use. So I always like to just
give it a twi by to see if this one is a
sky that I like to use. Now, if you want to
spend the money on it, I recommend it because
it's really useful. So you can just go ahead
and just type in this name. And the reason I
show you this is because if we go ahead and
we open this up into unreal, the marketplace
currently does not work with Unreal Engine five
because we are still in the early excess of Unreal Engine five by the
time of recording this. That means that you will
need to import this into an Unreal
Engine four version, once you've imported it into a project of Unreal Engine four, this is Unreal engine four, you can see it looks
quite different. What you basically want
to do is you want to go to the pack that you
have just imported, which is this one over here and you can see that
everything is in here. Then you want to simply right
click and press Migrate. Once you've done that,
you can press Okay, and you basically
want to migrate this if we go to our folder to your source files,
unreal, folder content. This is where you
want to migrate it. So you want to
select the folder, and then it will
nicely copy everything over and then it will show
up into Unreal Engine five. Now, you cannot always
promise that it will work in Unreal Engine five
because all of these packs are made
for Unreal Engine four. But I know for a
fact that this one will work because
it's simply textures. For really more advanced stuff, it might not always
work as well. But so far, I found that 90% or 80% of the stuff simply works
also in Unreal Engine five. So it will basically
copy these files over, and once they are copied over, which I will just pass
the video, here we go. You will see content migration
completed successfully. And now if we would go
to Unreal Engine five, go outside of this camera mode, it should show up in here. So here we go, Skybox pack. Perfect, see. So it is
now shown up in there. So now that we have done that, what we can do is, let's go ahead and save
our scene at this point. We are simply going to use it, so we can just use
it like normal. It might need to just update. But what I'm going to do in
this one, and of course, you guys cannot really follow along unless you buy this pack. But we are just going
to go ahead and open up the SM Skybox mesh over here, which is just like
this big round bit. I'm going to go ahead and turn
off cast shadow for this. I don't know why
it's still so dark. Oh, wait, it's so dark
because it's not big enough. And then what I'm
going to do is I'm going to set my scale to, like, 100 by 100 by 100. So it is like a massive scale. You will never be able to
actually switch between it. So we got that one. Now, if
we go ahead and go over here, all we need to do now is we
need to give it a material. And this skybox pack specifically
actually has over here. It has all of these sky, so I can literally just
drag in the material, and then it should show up. Now, right now, it feel
like that the problem is that my fork is
actually reducing it. So let's say if we set
this from 100 to like 50. Oh, yeah, yeah, see,
so it's way too large. Let's set this to like
2010? Really? Okay. Five. So that is
still looking fine. What we also are
going to do is when we go to our
exponential height for, simply set cut the fork
cut off distance lower. Basically, what this
will do is we will tell the system, if I go here. We will basically
tell the system that at a specific area, we do not want to have the
fort like a really high area. I don't know why the
value is this high. That does not really do much. Is my skybox that large? Normally, I don't have
this much trouble with a simple skybox. That's two. So at two, it breaks, but as you can see, I
cannot see anything. So that sentence does not
really make any sense. So I need to be outside of the reflection
captures basically. But if I go four,
I should see it. Let's turn off our
exponential height fog. That seems to not be working. Let's see where does
this come from. So the height fog has
not been working. Is it the clouds? No skylight, no directional light, no. That is interesting because if we would move closer, here, you can kind of see
it, or is it that the material is not N, the materials should be fine. Like, I can try different
materials on here, but they do not seem
to work as well. If we open them up, maybe
it's like the power. So it has like a
material that over here, if we just turn this
off, there we go. So the power for some
reason is making it warm. So if we go ahead and do this, maybe rotate the sky there we go. Now we are
getting somewhere. So we can basically use a
multiply to change the power. So let's say that we
set this to, like, a tree and then over here, I just need to also
just set this to three because I need to, of course, play around to
it, see which one works. So we have this one over here, it's not really so
much as sunset, but it does have some sky. No, I don't really like that. And once again,
as I said before, it can very well be that none of these are actually working
the way that I wanted to. We have this one, so let's
set this one also to three. This one is adding a lot to our GI, which is a bit strange. Yeah, that's really intense. Wow. Let's just add this
one here and just see if we can maybe change it
around a little bit more. S zero, no, ten? No, one, two. There we go. Two. Okay, so yeah, it's basically it
looks like that it is just adding a bit
too much color, as you can see, with the
glow and everything. So that is just it
with the skyboxes. So that's one I also don't like. Oh, we are running
out of skies to use. So if this does not
work, then you can pretty much just ignore
this entire thing, but I still want to go
over it because I want to tell you like, the logics behind everything. So let's say this one over here. If we go base power of 1.5, and maybe let's say Star maybe
we set this to like six. I'm not sure. I think
this is not going to This is probably the
first time that I'm not using or that I'm not
having the sky and it does not look correct or at
least the way I want it to. But sometimes that happens. But like this sky here, it feels a little
bit too out there. It feels a little
bit too strong. Maybe then the second one would be the only one that
I would say is good. But the thing is that with
this one, I don't know. We kind of like need to then
where are you number two? Maybe if you like, make the
color a little bit more like warmer color that
works a little bit better. Yeah, that could work.
So if we pick like a slightly warmer
color over here, because I just like to have
some more defined clouds. So we pick like some
warmer color like this. We then rotate it around and get exactly like some
nice clouds there, clouds in there, and just like mess around a little bit more like the position. And let's say so the sky
comes from that area. So over here, like that kind
of stuff, that can work. So our base power if we set
this to two, Let's do this. Let's say 1.5. 1.3
maybe. There we go. Okay, so we're getting
there four in our multiply, power of one point. So 1.2 maybe 1.3. Let's do 1.3 in the power. Let's get some nice
clouds exactly in these areas that we get a nice little bit of
breakup like this. Now, if I can, I will scale up this mesh over here just to make sure
that it does not interact. And now I do feel like that everything is a
little bit too dark, so I'm just going to go in
my directional light and set the intensity to maybe
like 1.3 or 1.2, just to give that little bit of extra lightness over here, 1.1. It's really sensitive. I'm
quite surprised about that. 1.15 No, 1.2. Okay. So it's environment art. You simply need to go
back and forth a lot of times. But I now got this. So this sky will not be
included for you guys, but I just want to
include the sky because it does make it look quite a bit more interesting. Okay, at this point, we pretty much have
everything done. We got our fork over here, also. Maybe for this one,
I'm going to go for, like, more of like
a reddish color. So I basically here we
have the distance cutoff, which I can just,
let's just set lower. Let's see. Okay, so
we have a density, so we can just set our
density a bit higher. Oh, we already made it a
little bit of a reddish color. So that's pretty good. So we got this bit of a reddish color. Maybe that's even a little bit
too much, stone that down, and then set the density
back a little bit, and then set the star distance. And start distance does not really do much because
we most likely, yeah, we are using
volumetric lights. That's why they are
not working as well. In that case, set over the extinction scale
down a little bit. There we go, see, we just got that more like a
warmer feel still. And now that we finally
got all of this done, now what we're going
to do is we're going to work on
the color grading. So if you go into
your post effects, I already went over
most of this as far as I know, our bloom. I'm just going to set
that a little bit higher. Let's set this to 0.9, just to give it a little
bit more like a glow. Our exposure is already correct. Our chromatic aberration. Okay, so we already
did all of that stuff. Sorry, I'm just going to
set my exponential height for a little bit less over here. Now, it is quite interesting
because you can see that the lighting it
slightly changes. I wonder if it is because
our clouds are moving. That could be very
well the case. That's why the lighting,
very subtly changes, but I don't know. You can go into your
volumetric clouds and, like, see if they have anything on here but
doesn't look like it. In any case, see, you can see that
there's some very small movement going on in the clouds, and I have a feeling
that the clouds are moving very softly, which is causing these problems. In any case, for now, it
does not really matter. What I first want to
do is I first of all, want to go ahead and
just have a quick look, see if there's anything
else that we need to do. We had a depth of
field over here. No, we did not yet
want to change this. So you know what? Let's say that, let's do
our color grading now. So for color grading, the
way that is going to work, we are going to create a lute. A Lute is basically called a color lookup table.
That's what it stands for. And what you can do
with a lute is you can give colors on an
image inside of, for example, Photoshop or in
our case, DaVinci Revolve. And then what you can
do is you can translate the colors that you
give on that image into our real time environment. So the first thing
that we need to do for this is we need
to create an image. For this, make sure to
save a scene because doing this is sometimes a little bit buggy inside of unreal. And then what you want to do is I'm going
to, first of all, set my screen percentage to 200 to get the full resolution, which way looks really nice. Then I go down here again at the top and go to the
high resolution screenshot. And I tend to set this to two, and then I create a
simple screenshot. Now what it will
show you is it will show you the folder over
here, which you can click. And then over here you
can see your folder. As you can see, I've
created screenshots before. But once that is done,
we can set this back to 100 and we can have a look. So if we go over here, this is our screenshot. It's quite cool because
now you cannot see here. So this one I also took, you can see how far that
we've gotten with everything. And I've even took
like here, see? This was a few days ago, yesterday, I believe, just
before we did the Bollon. So you can see that
it actually makes a really big difference to
how everything is looking. In any case, so we got
our screenshot now. Now what we're going
to do is we are going to open up the Vinci revolve. Sorry about the name.
It is Da vinci Resolve. I mistaken about that. Then what I'm going to do is
I'm just going to go ahead and I'm going to create
a new project over here, and I will just call this
Western toot underscore 01 and create. Here we go. Okay. Now, this
might feel very overwhelming, but this is because
DaVinci Resolve has a bunch of
different other tools. They can do everything
from actual editing and everything to adding things
on top and all that stuff. We only are interested
about the color. So what we can do
is we can drag in that image that we have in here. And then what you want to
do is you want to drag this image down here. That's it. The only
reason we are dragging this image in this timeline
is so that we can see it. Once it's done, all
we need to do is click down here at
the bottom on color. And there we go. That's
all we really need to do. So here we have our color. What we're going to do
is I just want to go ahead and change
mostly the base color. For this, what I like to do is I like to go in and I like to set see where am I. I
like to click on here, and I like to go for,
like, a split screen. Oh, no, sorry. I'm in the
Wong Window mode. Where am I? This one? This button over
here, so many buttons. Go to Enhance Viewer. And now that you've done that, you can go up here
and you can go to the split screen button
and click on it. And what that basically
will do is it will allow us to
go to the version and we can that's not the
one, this one, sorry. Image wipe, that's the one. No, that's still not
the one. Where are you? Split screen. Version. Oh, Virgins and original. So I'm mistaken with the name. Okay, sorry about that. I have not used this
program too often also split screen, Virgins
and original. Once you've done
that, you can use your scroll wheel in here
to basically zoom in. And we can now see the original version and the edited version. Okay, so we have a bunch
of different tools here. We have over here our primaries, which are just like
our general colors. Then we have our curves, and those are the main focus
ones that we want to do. There's a bunch of
other stuff here, but let's just focus on this. So you can see a bunch of stuff. You can see like
the temperature, although our temperature
is quite good. We can see like our contrast, and if we then
click and drag with the contrast, you can see, see. So you can see just
the contrast changing. You can, of course,
also indo that. So let's say that we give our scene a tiny bit more
contrast. Let's do 1.1. You can just click
and type on it. You have your pivot,
which will basically shift around your
contrast a little bit, but that's stuff I'm
not too worried about. Then we have the Mth
and we have the detail. This will add a little bit
of detail to your scene. However, this does
not always translate exactly the same
inside of unreal. So I'm going to set this to 50. Now we have our
curves. Our curves are basically giving us control over just like you see over our general
contrast and everything. So what we can do is if we
just click on this line, we can set our curves
lighter or darker. We can also go to these
lines down here which will basically boost up
or down our contrast. So what I can do with
this is I can say, Okay, I want to have my highlights to come out a little bit more. And let's just leave the
darkening like it is. So I'm just basically
pushing out my highlights a little
bit more like this. So that's quite fine.
Now, next to this, we have a bunch of
different modes. If you click on these
buttons up here, you can choose everything. So over here, it will say it
in the name Hue versus Hue, Hue versus saturation
saturation versus luminance. And all of these
modes, they basically are all curves that
we can change around. Now here, for example, can say luminance
versus saturation. So we can say that if
something is darker, it will be more saturated. So if I set this to light, you can see that the
lighter area gets, the more saturation it gets. And just like that, I
can also do like a clam. So let's say that I want to
keep my darkness quite low, I can click on here and I can
basically A click Next it, basically pushes down, and
I can push these ones up. Now what I can do is here, I can basically say that I want to increase
my saturation a little bit like this whenever we get like some
of these lighter areas. Now, this stuff is
not too special. Over here, you also
have luminance versus luminance sorry, saturation
versus saturation. And all of these
things, they basically just control different aspects. You just need to play around
with it, to be honest. What I want to do instead is there's a few things
that I want to do. So we also have control over
our gamma and everything. I tend to not need
to use too much, but they are good if we want to just like
an overall color. For example, if we click on our gamma and move
our mouse around, you can see that we can
change the overall color. We can make it very drastic, or we can make it quite
nice and realistic. What I'm going to
do is I'm basically going to move my
color a little bit. And here you can see
that I'm just very carefully here because we had like a little
bit too much warm. So I'm just going
to change my gamma around until we get a little bit more like a
realistic feel almost. So I'm just very carefully
moving my color around. And I think something like
this looks quite nice, see? You can see that
there's quite a bit of a difference
between these two. Now, let's say that we want to go ahead
and we want to well, you can boost your
color also if you want, but that would kind of defeat the purpose
that we just did. And you can also change the
saturation and everything. Highlights, we can boost, which can be quite nice. The highlight boosting basically boosts whenever
something is lighter. So we can just give our sunlight like a little bit
of a small boost. But what I want to do
is I actually want to go ahead and I want
to see if I can basically add like some general color difference
between channel. Sorry, that took way
too much effort to say. The way that you
can do this is you can go over here and
you can basically control the curves for
every single color. So what we can do is
we can say, Okay, let's say that we are on our blue channel and we want
to go ahead and we want to, like, take away some
blue or we want to, like, increase some blue in,
like, the higher levels. So if I go ahead
and go over here, I can basically play
around to that. So let's say that in my
red channel, let's see, Let's say that I want to
actually, I'm not sure. So in my blue channel, I
want to just go ahead and just bring a little
bit more blue, but I want to, I want
to not do it as strong, maybe I can push this up. I need to be very
careful with this. So I'm just going to give it,
like, the tiniest bit of, like, a bluish tint. So if we go before, and after. So it's very, very subtle to
add a bluish tint over here. So now you can see that
here. We are now color grading so that is already
looking a little bit better. Now, another thing that we
can do is we are able to also basically give control
over each individual color. Although I most don't need to do that, I
just want to show you. However, if I just
have a look at this, I feel like that I'm actually including a little
bit too much blue. So maybe then if
we go at the top, we can just tone down the
blue a little bit more. Maybe like this. So I'm
just giving the blue like a tiny bit of a tone
down near the top, so where everything
gets in highlights. So I basically get a little bit more blue whenever
it is darker, just to compensate with the
shadow and then a little bit more light whenever it
is a little bit lighter. Oh, wow, we are quite
far along already. So the last thing
that I wanted to show you is that we can also
control separate colors. Although I most likely don't
actually need to use it. Yeah, I don't need
to use it, but I'll just show you just in case. If we go ahead and turn off the advanced view
over here at the top, can see that over here,
you get these nodes. If you want to basically
control specific colors, for example, you
have a red color and you want to make
it more intense. The way that you can
do that is you can right click Art Node, and you want to add a
layer mixer over here. No wait. Sorry not
a layer mixer. Art node corrector. You
want to add a corrector. And then you basically
want to plug this in here. What you can do with
this corrector. This corrector is
basically default, but if we click on it, and if we then go back
to our original view, you can see that
everything has reset. It's not so much reset as
that the corrector will basically just give us
control over specific colors. Let's say that now I want
to just go ahead and I want to press this link button to just edit all of my channels. I can go to this color
picker over here, and I can basically say that I want to go ahead and I want to pick basically on my
red channel over here. I don't know why
it's not working. Now, for some reason, my
color picker is not working. Normally, you will hold control, and then you can select
actually the color, but doesn't matter because
you can also do it manually. You can do it
manually by basically clicking over here
and you can basically click and drag and then use your arokes to basically
select a general color. So what we can do is, although I believe that we
are in the opposite way, but we can know
that soon enough, you basically go over here
and you select your color. And then if you go
into your curves, let's say that for these curves, I'm just going to quickly
make this very dark. Okay, so it looks like that
I'm not in the right color. But you can see that
I can basically almost like mask out my colors. Oh, there we go. We
just want to do this. Basically what I can do
now is I can try and mask out all the red
colors like this, and then I can, for
example, later on, give them a stronger effect. So that is general idea. So over here, I'm now trying
to push my red colors, and you can also
then go, of course, to your luminans and you can set this lower or brighter
or something like that. So let's say that I set it quite only the bright red colors
basically do something. So right now I'm saying,
Okay, red color, only the bright areas of
my red colors in my image. Will be, maybe a little bit
lighter, will be affected. I can then go in here, and I think I need to
have a bit more. Come on, you can do it. You guys saw it working, so it's really strange
that now all of a sudden it just decides
not to work anymore. That is actually really strange. So if I set this really extreme, for some reason, my color
picker is not doing Oh, wait. It's just the colors
seem to be very low. There we go. Okay, so
now we can kind of see it working. Okay,
that's very strange. I didn't expect my
saturation to be that low. But in any case, what we can do if you right click,
you can reset this. But what we can say is we
can say on a red color. We want to move our slider. So we can say that here, see, we can basically make
everything that is red, and we can just make it a
little bit more intense red. So that's basically I just
wanted to show you this. So we have this one and you can do this with
basically everything. Let's say that I now,
you can do it for brown, but I'm not going
to do that because most of our wood is also brown. But just in general, this
is basically what I mean. So you can mess around a little bit more with your
colors and everything. Okay, so this is going to be a very long chapter. I
do apologize for that. But let's say that now you
are happy with your colors. We have already made
quite a bit of changes, and you can see that it
looks quite different. Now, let's say that we want
to actually apply this. What we're going to do is we want to go ahead
and first of all, let's save our
project over here. And then if we go back into our normal version and we
right click on this timeline, we can press generate
Lute and you want to pick a 65 point cube
and click on that. Now these Lutes, you can choose wherever you
want to place them. I'm going for you guys
to make it easier. In my texture
folder, I'm going to create a folder called LUT. And in this folder, I'm going to go ahead and
I'm going to save this, and I'm going to call this Westcor Lute
underscore profile, and just press Save. Now, what you will
get is you will get this really strange cube file, so dot cube file, but we can actually use this file
inside of Photoshop. So the way that this works is we need to go ahead and
open up Photoshop. Here we go. Then we need to
find some documentation. If you type in
Unreal engine out, you will be able to find
this documentation, or you can just use the
one that I'm giving you. But if you scroll
all the way down, it will basically show you
what lutes are and everything, but you will see soon enough. We want to pick this
Lute texture example. Then we want to go ahead and we want to right click on it, saves you just want
to go ahead and you want to save this in your
Lute folder as a PNG file. The reason for that
is because this is basically a clean lute. It is a lute that does not have any color changes on it yet. So we are going to now add the color changes
from our texture. So all of those changes
that we have added, they are stored in here. We can give this to our
lute and this lute. The engine can basically
read this lute to basically give the colors to
our real time environment. That's a basic how it works. So we basically
drag in over here our lute Oh, we can
simply do this. We can simply drag it in here. And then all we need to
do is we need to go to image adjustments, color lookup. And then what you want
to do is you want to click on the TD Lute file, and then it will tell you,
Okay, where is this file? You can now navigate
to your out folder and you can click
the dot cube file, load it up and simply
press Okay. That's it. Now we can go ahead and
we can do save a copy. And in here, we can just
go ahead and we can save this as a PNG and call this Lut underscore
01 and press Save. Okay, we're almost
there, people. So now if we go ahead and we
are here inside of unreal, we can go to our western town create a nice new texture
folder called LUT. And in here, you want to
drag in your Lut 01 dot png. Now one thing that's
very important if we go ahead and open this up, we need to set our MDMp
settings to no MD Maps, and we need to set
our texture group to be a color lookup table. If we don't do that,
it will be broken. You then want to press save,
and now this is ready to go. So to apply your Lute, all you need to do is
you need to go ahead and go down here to
your post effects. And then if you go ahead
and go down to Misk, you will here have
your color grading and your color grading intensity. So let's see if this
works. We drag it on here. Boom. So this is
the color grading. It might be slightly different
from the one that we had because there's always a little bit of stuff
that you mismatch, but this is looking pretty good. And I will off camera just
have a look if I can change the movement of the
clouds because you can see that it's basically
going up and down. Now, you can use
this slider over here to have less or more. So you can see like
before, after. So you can see
that this actually makes quite a lot of difference. What I'm going to
do is let's say I'm going to set this to like 0.9 or 0.8 is often a value
that I like. But 0.85. So 0.85 seems to be
quite a good value. Now, that is pretty much it. If we now would move around,
Whoa, that was fast. If we would now move around, you can see that our environment still looks exactly the same. And if we nicely go to like
200 screen percentage, you can see that we have
this really hyper crisp, nice looking environment,
and everything is also up to the upclose. It is just looking all
really nice and really good. So that is all looking great. Here we got also like our
terrain working quite nicely. So I'm quite happy about how
this is starting to show. Okay, so what will be the
plan for the next chapter? In the next chapter, I will also fixed the Cloud
movement, hopefully. And then what we're
going to do is we are just going to go ahead and start by creating a
few small extra assets. I will just showcase
you how to do those. There are assets like these little pools and
stuff like that. Once those are done, here, like the little pools
and maybe one of these. Once those are done, and
you know the workflow, although the workflow is
pretty much the same. Then what we're going to do is I'm going to go ahead
and I'm going to just download some assets online and just use them
to populate our scene. And I will also showcase you something that's
also quite interesting. But we will go over
that later on. And what we also need to
do is we also need to create some details for
our stores over here. So that's something
to also keep in mind that we want to art
stuff like that, just to make everything feel
a little bit more alive. So that's the plan for
the next few chapters.
67. 66 Creating Aditional Assets Part1: Okay, so what I
want to focus on in the next few chapters is I want to create some of
the additional assets. Now, I'm not going to
create all of them. I actually have some
assets ready to go that we can use
in our environment. However, I still, of course, want to show you the process
of creating a few of them. So what I had in mind is
to create one of these, one of the walking planks, one of these like water
things and a simple barrel. Now, what I want to do, although it is not
really needed, I feel like that this
is quite a good moment to just show you how
trim sheets works. I'm going to create these
assets using trim sheets. We can technically
easily do it with just unique textures or with tilable texture or
something like that. But trim sheets will
also save some time. Basically what
trim sheets are or they are almost like
you can see this like an atlas or like a tilable
texture that just has a few different components that we can reuse on these assets. So keep that in mind. Although for the
wood and everything, it is not that much needed, for this kind of
wood, we could just throw on a tilable material. However, for example, to also get these little bits of
metal here and there, or to get the metal
rings around here and get actual directional leaking, all that kind of
stuff, then it can be handy to have
something like this. So now you just know how
we're going to do it, so it should be quite easy. S, those are the essays
that we're going to make, if I have a look at it, so we
are going to first of all, create the actual trim
sheet, the actual texture. So first of all, I want
to kind have a look. So if I have a think about this, I would need a wood strip, and let's say that we have
one wood strip that has dirt from the bottom so that
wood strip we can reuse. We will have another
strip that will be metal. We will have another strip
that will be like rope, although you cannot
see it around here, so I will have some rope. And the metal will also have
bolts and everything in it. And yeah, so that's the main tart and maybe like
a different type of wood. Let's see. Is there
anything else that we can get from here? So yeah, you can, of course, add, like, a bunch
of stuff here. Oh, yes another few barrels. But yeah, it should
be pretty basic. And then for our
barrel, I don't know. The wood is very close together. I think we are still
gonna do our barrel as just geometry because we can use the geometry.
That's no problem. Okay, you can also
see like some barrels going on and like some
crates and everything. Okay, so that's the plan. So I'm going to use
substance painter. You can use designer, you can use Photoshop. It doesn't really matter. They all have their
pros and cons. For example, in
Photoshop, you can do more precise selecting. However, because you
need to work with both a norm map and a base
color and a roughness map, it can be a little bit tedious. In painter, we can easily
add specific dirt and bolts. However, the dividing up is
a little bit more tricky, and in design of
the dividing up is easy and repetitive
details are easy. However, once again, you have
the bolts and everything. So if we go ahead in here, let's create a new texture,
metallic roughness. And then for our file, we need to actually
have just like a plane. So if we just go ahead
and go into over here. I'm going to create a plane, and I'm going to have
it sideways because then I can see the material
response a little bit better. So just create a quick
plane inside of blender. And yeah, you know what? We can actually use this plane
to also do some breakup. So if we use this plane, let's see for the breakup. So if we do just
some simple edges, let's say that I have
an edge, let's see. So one of them is
going to be the wood. Let's have an edge that's
going to be down here. So this will be the wood. Then we will have another edge down here, which will be a rope. Then maybe have some spacing. Then we will have
another edge down here, which will be metal.
So wood metal. And then the wood will have
some actual directional dirt. And then on here,
you can, like, add a bunch more stuff if you want. So like, that is the metal. However, we can go ahead
and, like, add more stuff. If I just have a look here,
is there anything else. Kelvie they also
use these brackets. This kind of wood is
kind of like plain. So maybe we also then
go ahead and add like another piece of wood over here, and this wood is just going
to be nice plain wood. So we will have some wood with, like, specific dirt. We
will have some rope. We will have some metal that has, like, bolts
in them in there. Then we have some specific wood, and then for the other one,
you can kind of choose. Although we don't
really need anything, I'm just having a quick look. Maybe I can add an extra asset. Oh, maybe I can do, like, basic metal or
something like that. It's not really needed for me. However, if we are
doing it, yes. So just guess, fill
it up with something. I'll fill it up with just metal. I don't really care
too much about it. That's not really
the point of this. So over here, we've already
divided this stuff up, and that will actually make it a little bit easier to do this in painter because we can
just select the polygons. So at this point, we
can just go ahead and we can export
this as an FBX, and I'm going to export to
painter, selected objects. Um Trim sheet underscore
01 underscore plane. And then later on
I will show you some examples because the
assets that I am using, although I downloaded them,
so they are not mine. They are also using trim
sheets because they're made by concept artists and concept artists really like
trim sheets also. So I'll, showcase them to you. So first of all, we
go back in here. We go ahead and we select
the file and we want to grab our trimset plane two K, OpenGL. Actually, let's do four
K, then we can always downrest the two k
and then just presso. There we go. Simple plain as
if nothing ever happened. Now, in our texture, we're
just going to call this. Come on. Trim sheet on score 01. And then in here,
we do need to bake it just in case that we
want to use some maps. So let's just bake it
at two k and just bake. And so now that we have
all of this setup, now we can just
slowly get started with creating all of our pieces. One of them, however, is going to be the
wood, and for that, we can actually use
our own wood because that one it would fit a little bit better
if we use that one. So if we go ahead
and go in textures, and if we go to plain wood, final there we go. We can basically
just reuse this one. Are we going to go new or old? I feel like it would make
more sense if we go old, yes. No, I don't have
a real open, but, yes, I feel like all
would make more sense. So now we're basically going
to divide all of this up. So we can create folders
for every element. So let's say that
we call this wood. Now what I can do is, of course, we do have smart materials
that also include wood, which you might want to try
and use if you want to. So here you have,
like, some wood, see? So there is, like, some interesting
wood in here that we might be able to also
use for something. I don't know if maybe
for the barrel, we want to create a
different kind of wood. However, if we would make
that for the barrel, then these pieces
would not really make too much sense anymore. So let's just do file
import resource, and I'm just going to
import my base color, normal roughness of that wood that we've just navigated to. And we simply want set
this to be a texture. And set this to be the project. Current session
means that as soon as we close it, it will be gone. Project means this
actual project, although it is a strange name because I have not saved it yet, Library means that it will
forever stay in your library. So we're going to want
to go for the project. And let's just already
save our scene. So let's do a save us and
let's go ahead and save it. Let's do a folder. Trim sheet underscore 01,
and let's save it in here. So this one, trimset
underscore 01. We can just go ahead and save. Okay, so for our wood, we are going to create
a new fill arrow here, call this Wood underscore
base, for example. And then all that
we need to do is we just need to go ahead and drag in our base color
into the base color. Normal into the
normal roughness, into the roughness over here. There we go. So we
have some wood. I'm going to set my tiling
probably to like two. And once that's done,
with your wood, you can add over here a black mask so that you're
basically masking out. And then and then if you
use your polygon fill tool, you can see over here that I can select polygons and
I can actually, for example, just
simply click on here, and then I can add my woods
just to this area over here. So just like that, it's
very easy for then map our barrel to this also. So we got this stuff
done, for example. Now what we can do is before we start really adding
all of the details, let's first of all, just
add some more stuff. So let's add another folder. Call it metal. And this will
be like dark, rusted metal. So for this, we can go
ahead and we can go into our smart materials because the smart materials do have some really good metals over here. So steel, painted, steel, worn. Let's see. So
steel, dark, stain. I quite like the steel worn, but then I just probably, Oh, actually, let's do the
steel rust over here. Like this. Then if we go
at an in our steel rust, let's scroll down to our
base metal and let's make this like one of
those darker steels. See, so make them
darker than let's see. So it looks like our metal
scratches also need to go quite a bit darker like this. We have a rust over here. I'm going to, let's just
also in our rust gradient. Tonee everything down,
basically. That's it. We are just going to
tone everything down to basically get like
this really dark looking metal over here. The only thing is that
it is very cloudy. Let's go into our scratches, and I'm going to set my
scale back to one over here. Now, you can use your
scaling up here. So now it is not as cloudy, so I think that
looks a bit better. And remember that
we only need to see a very small strip of this. So let's say that now
we have the metal. We can once again just
add a black mask, go to our polygon fill, and on the way, this one was going to be rope. So this one was
going to be metal, and then later on we do want to add some nice bolts and
everything to this. So, okay, so we got that one. Now, for our root, what we can do is we
can actually also, let's say that we
Okay, so this metal. So if we just add what if we add a different
wood to this one, just to make things a
bit more interesting? That could work. Let's also add the
wood over here. And then if we just go out
into this wood base, yeah, just select these separately because then we
go because I saw, like a really strong
wood is what I saw. Like this. And that might work. You never know. So the
first wood was upwards. This one I will just
leave sideways. And what I'm going to do with this one is
I'm going to add a black mask and only
have it over here. And then, of course, do
balance it out a little bit. This is really, really intense. So we just want to go
all the way down to our Woodrog and maybe just like, go for like a Yeah. So this one will be
like a newer wood, so we can go for, like,
a texture like this. So, you can see very
different types of woods. These ones almost feel
like more stylized while ours feels very much
more realistic. But it can give, like,
a nice difference. So we got those pieces
ready to go. That is good. Um let's see, we were gonna
add metal to that slot. But honestly, let's see. At this point, so I
still need to create some I still need to
create some signs. Yes, I still need to
create some signs. For our signs, we can use
the wood for the base. Let's see over here. So, yeah, we can use
the wood for the base, but then we would need to
go ahead and we would need to also change the colors of it, which will be a
little bit of a pain, especially because there
are different colors here. Or what we can do is we
might be able to just, like, divide it up in here. So let's see. This
wood for the base. Ah, no, no, wait. I'm just going to change
the colors inside of the actual engine that
feels a bit better. So what I'm going to do
is we have these woods. And now I'm just going to
use this one over here. I'm also going to once again
duplicate this wood base. Here we go to duplicate it
set this to be a black mask, and then go to your polygon
fill and just select this one and also go to your original wood
and select this one. And what I'm going to
do with this wood, call it Wood underscore light so that I can change the color. So with our wood light, we simply want to click on the
actual layer over here and then go down to
this magic one tool and then go ahead
and add a filter. And in your filter, you want to add something called an HL node, which is just use
saturation and lightness. And we're going to
tone this one down. And make it quite
a bit lighter like this so that it almost becomes white wood so that
inside of the engine, we can simply change
the colors around. So the signs will all be
working with this one. This wood will just be
something very specific, like, let's say that we do
our hitching post with it. Over here, this one
will be our metal, which will most likely include the metal around our barrel. This one over here will
be our actual barrel. It will have some ground dirt, and finally, the last one that
we need is we need a rope. However, I don't think
we actually have a rope. So what we're going to do is we are going to find one because this is not a tutorial or this part is not about
creating brand new textures. So we can just go to
text.com, type in rope. And in here, you can often see, or you can even download
some of this rope, but they have actually
already created some rope for you that we can
use totally fine. So let's just go ahead
and use this one. It is at a very low resolution, but that's no problem because we don't need a high resolution. So what I can do is I can
go ahead and just download the base color normal roughness. And I'm just throwing that into a folder called rope inside
of a trim sheets folder. Although you can see me
doing it. There you go. Because I really always want to just show you everything
that I'm doing, even though it is just
very small stuff. We can go ahead and we
can import these in here. Into the project, all we need to do is just
create another folder. Just drag it up if it
accidentally places it in another folder and
just call this rope. In here, we're going to go for a texture or a fillle,
let's call it rope. Then we have a base color,
normal and roughness. At which point we can set
a scale probably to four. And then all we want to do is we just want to simply rotate this like this that it
is rotated horizontally. And now if we just go ahead and go in here and add a black mask, we just want to go ahead and
go to our polygon fill and only have the rope in this area. See, and that actually
already works quite well, though it is not
perfectly rotated. See 67. Here we go. And you can also
play around also, but it's pretty important
that we just have these streaks going along here, and that's
all we really need. So for a rope, it's
actually totally fine. So this might look very silly, but this is a general idea of, like, a trims texture. Now, normally, in
trims textures, if you have something
very complicated, let's say we have
something sci fi, you would go really more
in depth than this. You would just have Sci Fi
paneling and they would have super little bits of details and everything on it
that you can just reuse. However, we are just
going to reuse these. So we can already create
a few props out of this. So our rope is pretty
much fine, I would say. There isn't really much that we need to do about
something like that. Our metal, let's start with
just doing our metal first. I want ter fill layer to my
metal that I will call bolts. For this fill layer, I want
to go ahead and only have a actually, you know what? Let's have my roughness
a little bit up. So my roughness is a
little bit shiner. For the height, we need to
set our height slider a little bit up so that
it is going outwards. Your height will later be translated into a normal
map. Keep that in mind. So all of the changes
that we make inside the substance painter will
simply be from our height map. And then for our base color, make sure that in your layers
you are set to base color. And then what you can
do is you can change the actual opacity
of your base color. So we can actually tone this way down so that it is
very, very light. And at this point, all we need
to do is add a black mask. And we need to start
adding our bolts. So if we go ahead and we
go over here, for example, to our brushes and we
pick a basic hard brush, double click on it and pick it. Now, you can set your size over here to make it a
little bit smaller. And then what you
want to do is you want to go down to your Alpha, and right now, your Alpha
is just a hard round bit. But if you scroll
all the way down, there are often alphas that
look a little bit like bolts, and they are called um
over here, shape paraboil. That's the one that
you want to click. Now, if I would go ahead
and click on here, you can see that
now I create bolts, just like that, but they are also still
fitting quite nicely. Now, one thing that we can try, it doesn't always work is
but you can try and set the spacing up so that
where you click once, hold Shift and click again. It will actually
show some spacing. It depends on your
texture resolution. In this case, it works
actually quite well. So what we can do
is we can simply click over here, hold Shift, make sure that it is as
straight as possible like this and click again. And there we go.
It's that simple. Now we have some bolts, although they are not exactly
in the center, so let me just here
it's like click Click. There we go. So now we have
these bolts already here. Now it's just a matter of
going into your fill layer. That's a nice thing
about the fill layer. You can edit it after
you've played stuff. So I can increase my
height if I want. I can play around
with my roughness, make it a little bit duller, or I can go ahead and also in
my base color, I can also, tone down my base color
to see if I want to, like, get rid of some
of these highlights. And you can also make
this actually metallic. Yeah, it's good if we
make this metallic. So let's make it metallic. Let's set the color brighter. Okay, maybe not that
bright. There we go. So now we got these
bolts ready to go. So it's that easy,
doing stuff like that. And on top of this, if you want, you can, for example, add some rust or
something like that. So let's say that you want to add some rust on top of this. We can go to our SMRT materials
and just type in rust. Oh, wait, this rust I made myself, so you
guys won't have it. Then let's go into our default materials and type in rust. So this one is like
the default rust. You can simply drag it
in let's make this like a really dark rust color.
You can see over here. And then just add a black mask. And now, all you
need to do is, let's say that we want to
have some leaking, then we can go ahead and we
can go to turn off rust. We can go to our brushes, and there are actual leak brush. So yes, you can go
ahead and you can, for example, grab something. You can grab a brush
and then you can, if you want to mimic the leaks, or what you can do is you
can use a particle system, which we do have over here to just quickly add some leaks. So if we go all the way down, you should get over here, particles like the realistic
leaks I made myself. So once again, I
will not be using that one just because else, yeah, it would be strange
for you guys to see it. But let's say we go
for here, leaks. You just double click on it, and now if you would paint in, you can see that you
can create some leaks. Now, this one is not perfect. Over here, it's woolly spread out, doesn't look very good. So we can change the setting. So what we can do
is we can go here, set the spine spread
all the way down so that everything
that we have is, like, very specific
to our brush. Second thing is to
go ahead and set our brush here at the top,
a little bit smaller. This will automatically also
make your particles small. Okay, that might be
a bit too small. Then another thing that we
want to do is we want to set our life a particle life way
out so that when we paint, a particle life, maybe lit
it up so that we paint, we only get some very small
leaks over here, see? And that's at the rent which is random, also up a little bit. So now that we have done that, you can just pretty much
go ahead and if you want. You can paint in some
leaks in certain areas. This might be a little
bit too strong. But I can go ahead
and I can go in here. And if you want, you
can also do it up here. You can later on, make your leaks a
little bit stronger. But let's say that
for now. We are just going to make it
a little bit less. And also, if you press
X, you can also, paint out the leaks again. So I'm just going to, like, here we go, paint
this in a little bit. And then on top of this, we
can also add some more rust. But just like that, we can very quickly just add
some nice details. And that's the thing
with these type compared to like
tile wall materials. Tym materials, it's a lot harder to do
this kind of stuff, and it will also be
very repetitive. So let's say that
I just skip one, and let's say at this area, we just have less leaks so
it's not yet as rusted. Um, say that I skip another two. Maybe going here. There we go. So now we got these
leaks over here. And now all you need to do is you just need to go
to the original, and let's say that we just like balance out our rust color
mostly a little bit. Yeah, it like a bit darker, a little bit more orange,
something like that. And just like that, you just get some nice subtle leaks just
sitting on top of your bolts. So that's another
way that we can just very quickly do some
small stuff like this. And if you want, you can always go in here and
you can always like art. Let's say that we set our particle life a
little bit higher. Bit more so that it goes
down to the bottom. And what you can
do is you can then add a paint layer
on top of this. Adding the paint
layer will give us separate control over
whatever we paint in here, including of our roughness. So if we now set our brush
size a little bit larger, and I, for example, do this, over here, you can see
that we get all of these leaks sitting
in this area. And then over here,
if I go a lot faster, then what you can see is that the leaks don't
have as much time. Oh, I do need to twine, do this, like, quite carefully. Here we go. So that it shows less leaks
than at the beginning. And now the cool thing
about this is that I can simply go into my paint and I can simply like tone down the
intensity of it like this. But now you can see that we now have like this leaky
looking metal. So that's basically
the idea behind this. Not too difficult. So
we now got some metal. We can go ahead and
we can save a scene. And just to finish this off, let's go ahead and just
add some bottom dirt and then I think for now
that we are already, like, it's pretty
good by this point. So we have our wood
base over here. We go simply arifll Wood underscore base,
underscore dirt. Let's set the roughness
to be quite low. We can turn off metallic, we can turn off null,
we can turn off. Actually, maybe give
it a tiniest bit of a height, very, very low, like 0.01 and make the color to be like a bit
more of like a brownish dirt. At which point, you would
just go ahead and it would go in and add a black mask. And then in here, we
can simply go ahead and we can grab a brush, let's say, dt one. The
size a bit bigger. And we can, for example, over here, we can just
paint in some dirt. Or what you can
do is once again, you can use a particle or you can use different brushes also. So let's say that I grab my
dirt one brush, very large. And it's just like to get
like some general dirt. And let's say that I
then grab, for example, my artistic head over here or heavy sponge,
artistic heavy sponge. I press X, and I set my
flow a little bit lower. I can, for example, go in here. I like make it a bit
more interesting. So that's another way
that we can do it. Or what we can do is
we can go and we can try an art over here, like a dirt ground, maybe. That one I don't
think will work. Let's do a ground
dirt over here. And because the position
map is just a plane, we can actually get
rid of a ground map, and then we can go into
our ground dirt over here, and we can, for example, play
around with like a balance. Although this does definitely need some breakup,
as you can see. So you can go ahead and
lower down this texture. And then in a
position gradients, also just like lower this down. So let's say we have
this, we can then go ahead and we can add a
paint layer on top of this, and we can go ahead and
then add like our dirt one, press X to go to make it black and then you can go at and you can
give it over here, a little bit of variation. Maybe in our base color, let's tone the base color down a little bit so that we can see a bit of the wood behind it. But at this point,
you can go at and you can mess around
with your height, see? So your height will actually add some height to your dirt to maybe make it stand
out a bit more. And what you can
also do is you can also, of course, if you want, replace this with some
kind of dirt that you can have in your
smart materials. I don't know if
there's something in here and else you can
just download it. No, I don't think we actually have something specific in it, but that does not really matter. For something this
basic, it is no problem. So let's say that we now
have all of this done. We are going to maybe add
some improvements later on. But for now, because we've been already spending
30 minutes on this, let's create a folder
called Oops final. Et's go ahead and
file export textures. Set these to be
the final folder, PBR metallic roughness, Taga, four k, and press Export. Now these are exported.
So what we can do in the next chapter
is we can start by creating our models and then applying our actual
materials to that.
68. 67 Creating Aditional Assets Part2: Okay, so now that we over here, have our texture
done, now what we can do is we can start by
creating our models. So this plane, by now, we can just delete
it because it will be saved as an FBX file. So four models,
as I said before, I will make one of these.
I will make one of these. I will make the planks, and
I will make a simple barrel. So let's just get started
with like a simple one. Let's actually start with
this thing over here. Oh, for that, I do actually
want to try and see if I can there we go. That's like a more logical. Okay, what we can
do for this is, it looks like it's just a
simple mesh and a cylinder. Of course, this version,
if you really want to, you can make it really
look like wood, and you could do, like, entire sculpting
and all that stuff. I don't really want to do that, so I'm just going
to go for, like, something a little
bit more easy. So we have over here a cylinder. It doesn't need to be 32. Let's go for, like, 18 sides. By the way, let's
turn off our text fw. Oh, hey, I was still
in X ray mode. And I'm just going to
go ahead and I'm going to make this a bit lower. If I go in here, I just need to check for
the height. Where are you? Walkway straight. I'm just going to use you as a height and
as a thickness reference. So first of all, let's set the thickness down quite a bit. Now, this thing does
need to hold horses, so it does need to
be quite powerful and maybe move this
up a little bit more like this and maybe like set thickness
a little bit more down. Yeah, there we go.
I think that will be quite a logical thickness. So we basically got
this version over here. Then what we can do
is we can just go ahead and do contre
R and maybe, like, give it a few random
segments like this. And then we can start by just doing some general movement, but also X and also maybe do some
movement that goes like, inwards like that
so that it's not like all just like perfect
side to side movement, but this is actually like a very messy pole and
this quite dense, so what you can even do is
you can even go and scale it, scale it down or up here and there, here,
something like that. And once we've done that, we don't really need
to make the other one, so I'm just going
to go ahead and I'm just going to
create the top version. So we got this one. Let's go ahead and for the
bottom version, let's delete that phase. And then for the top version,
give it a quick bevel. Oh, see, the bevel is won, so we just need to press Q and reset all of the transforms, and now the bevel is white. So maybe we can actually
give it a few segments. Why not? Let's give it a few
small seconds like that. Once we've done that, I'm just going to go ahead
and select the top, press I to insert it and
then Q and then just merge at center just
to make sure that the top is also closed off. We got one of those. Now what we're going to do is we're
basically just going to go ahead and we are going to duplicate them, rotate them 180. And honestly, with
these kind of pieces, you can simply go
ahead and you can add a mirror tool over here, and mirror it on the X axis, and then also just bisect it. And then just press
Contra A. There you go. And what you can do with
this one is if you want. Oh, let's go to Vertex mode. We can, like, select
the bottom and maybe, like, sync it in a
little bit more. And also like over here just to change it around a bit more, but it does not need
to be too special. So we got one of those
sitting over here. And then before we start just
duplicating this one over, we do want to do like an unwrap. So having this one, we just go back to our walkway. So this walkway, yeah,
that is quite long. So this is actually quite
a decent looking size. So we got over here,
we got these pieces. And now, finally,
all we need to do is let's also create
a quick cube. And this cube was just going
to be like those brackets. I'm going to keep these
models very, very simple. I do recommend that you spend maybe a bit more time on it, but these models are
there just like an extra because I could technically just download a bunch of
models and add them. And for you guys,
you pretty much I already know most of
the techniques needed. The only thing that I want to show is I want to show, like, the trim sheet technique that
many people seem to like. I don't often use it too much. It's just not really included in my workflows, the
way that I work. But, um, yeah, I can see that
it is a useful technique. I have used it in the past. Only I call them atlas textures. But basically, what
we can do is we can just go ahead and do
something like this. It's bit too tick, so let's go ahead and
just move this back. Over here. And I
think for this one, I think it is too small to
really art weighted normals. So for these pieces, what we can do is we can just
do a shade smooth, right click Shade Smooth, because they are quite simple. This one, it feels like
that it would probably be a little bit too much for that, and we are going
to like arts and bolts to have weighted
normals on it. So I'm just going to
leave it like this. Okay, so let's say
that we have this one. Now, let's first of all, just go ahead and continue
and already create the other ones before
we do anything else. So for this one,
we basically just need let's say that
we only create like three planks
and we just have like this bit over
here in between. So how did they make
that waterproof? That must be really tightly shut if they make it waterproof. Huh. Interesting. I never
thought about that. Sorry, my mind
sometimes does that. So for this, we can pretty
much steal stuff once again. So if we go over here, let's just go ahead and
let's duplicate this one. And I actually do not have
a Let's just right click, move to collection,
new collection. Additional assets. There we go. Let's do that for now. There we go. Okay, so we
have these ones over here. What I'm going to do is I'm
just going to go ahead and I'm going to select this one, delete the pass, and
then I can just alt X and just delete
everything else. And then for these
pieces, just select them and then
separate selection. Let's see. These ones actually, they need to be very, I don't know exactly why I'm doing this because I just said that. Yeah, I don't know
why I'm doing this. I literally just said that
they need to be very specific. So we can pretty much delete everything
except for this one. And even this one, we
just need to delete this edge loop because it
needs to be, very specific. On the sides, it can
have some angling, but else it will just not work. So let's press a quick
pivot in our Maxivs tools. Let's rotate this.
90 degrees, not 95. Move this over here.
A nine degrees. And I think the size, I feel like it would
probably be oops, a little bit longer,
maybe, like, something like this in
terms of, like, size. So what we're going to do
is we just have this one, and I'm just going to
go ahead and yeah, let's whether just add
a quick bevel modifier. Actually, you know what? No, I don't even
need to do that. Let's just add transforms, select everything, just
add like a quick bevel. Like a single one. This one
will be using weighted nulls. Don't make the bevel too large. So we got this. And
now if we just do, once again, like a quick
bevet let's down or download. Let's duplicate this
three times over here. And what we can do with this
one is we can just go ahead. Let's say, make this
a little bit nicer. I think I'm actually going
to go for like four times. So maybe I can just make
it a little bit wider. Yeah, let's say that
I select all of these and I just make
them a little bit wider. Set this closer to the bottom, so it is not as low. And let's just really move these on top of each
other like this. This one is a little bit higher, but I think I can
work with this. If I just like at the platform, I'll be a little bit higher. So we got these, and then for the top one, for the top one, we can just add a few segments and then maybe go in here and just make the top a little
bit more imperfect. Because the top one was one
of those that they just use the leftover planks just to make sure that it is still fine. So we got this stuff done,
and now we can, of course, then reuse these over
and over again in there. The only thing is like
for the short ones, we probably also
want to go ahead and redo our UVs later on. And for this piece
over here, honestly, it looks like that
it's just like a very simple cube
that is scaled in probably like this size. Over here, select the top. Let's make it stick
out a little bit more. And then this size, what it
will do is we will go ahead and rotated a little
bit like this. Maybe move back a
little bit more because you can see that
there's some angling going on. And for these ones, because they need to
be very specific, all that we are going to do is we are just going
to go ahead and cue, reset transforms, select everything and just
do like a simple bevel, and that's all we're
going to do with this. Over here, that
should do the trick. Okay, so we got
those pieces down. So as you can see,
very little pieces are needed for all
of this stuff. Now, for our barrel, the barrel is just going
to be quite basic. I can just find a
picture of a barrel, but I can remember
well, over here, you can even have,
like, a picture, but take care remember
here. There we go. Okay, so for our barrel, what we need to do is, um, yeah, you know what? Let's do that one
separately because that one is a little
bit more complicated. Okay, let's actually,
first of all, just do the textures for this. So we got all of these
pieces over here. All we need to do now is
let's select all of them. Or, actually, let's
select one of them, art and material, and
just call this Trimset. Go to your base color
image texture, open it up, and we are going to open up
our trim sheet final texture, and then just open
up the base color. And now just go ahead
and select everything. Down here, copy
material to select it, and then we can go
to our text view. Okay, so what we need to do for this is going
to be very simple. The only thing is
that we can not really use a sure
UV map anymore. So what we are going to do
is we are just going to do some more traditional
UV editing. If we go into our UV
editing tab over here, what I want to do is over
here we have the top bit. Let's go ahead and just hold Altex and select this top bit. Once you have it selected,
if we go ahead and go in here, so many pieces. Grab the trim sheet on that we can actually
see our texture. I'm going to start with
the top it and just press U and simply do like an unwrap. And then we can do like
an S and move this. I don't know why my
texture is sideways. Not that it really matters, but Oh, I don't I don't know how to change that, so
I'm not going to. I forgot or is it like No, sorry, I forgot how
to change that. That is my fault, and
I'm not really going to Google it right now because it's not
really that important. In any case, we got
this one over here, and now what we can do is
we can just do a control I, select everything else,
U and do an unwrap. Now, this unwrap will break because we
need to have a seam. So if we go ahead and we
just select over here, this seam, we can press U, and we can press Mark Sam so that now if we go ahead
and we select this again, unwrap, it will recognize that seam and it will
just place it there. So we got this one.
Now for this one, I do want to probably on the way we were going to use
this version over here. So let's go ahead and scale
this down just holding S. Let's go ahead and just
rotate this 90 degrees, and then basically, you
can just place it in here. Now, the thing is that if
your UV would be too small, you would probably
need to split it up into two and then scale it up, but that will not
always look very good. And by the way, also means that this one
needs to go in here. However, it seems like if I look at this, that seems fine. Maybe over here we will
need to do a split up. So if we have these
ones over here, we might want to go ahead and select this bottom U unwrap. Scale and then move it
over here. Select this. You unwrap scale and
also move it over here and you can just have
everything overlapping that is no problem
for stuff like this. And now if I just go
ahead and go to my tools, I can just go ahead
and I can select. Oh, no, wait, let's
select the bottom because these seems
they are very visible. So we just want to go ahead and see if we can select the bottom. It's probably better
over here, Mark Sm. And now comes the
thing that I will see if we have enough
resolution, but I'm not sure. So and Unwb, see, this one is very large. What I might do
is I might select this and I might just go
ahead and see rotate. Or do I just need
to move it down? I'm just having a
look at see how to make this the least
repetitive possible, but I think I need to
rotate it for this. I think I need to rotate this. And now if I just go
ahead and select it, I just kind of like
place into position. And then if we just
go to Vertex mode, just move this down to make sure that none of them are
showing the metal. So that does mean that we
see a small seam here, but it kind just depends how
obvious the seam will be. Seeing this, I
think I did rotate it into the wong direction. So if I go ahead and go in here, hold control, rotate it back. Oh, and I also need
to go ahead and I need to select both of these, and I need to move them out because they are extending out. So yeah, it's a bunch of, like, just messing
around with your UVs. So this one does seem to
work a little bit better. To be honest, I feel
like I can even maybe, like, try and match it
up a little bit better. Although the matching up will probably not be exactly perfect. You can always try
and like you know, almost give it like
a feeling like it's matching up so
that from a distance, it will be hard to
even see the seam. So we got this one
over here. A done. Now for this one, what
we're going to do is we are simply going to unwrap. I think we only really
need to unwrap the front. That is the important
one. So you unwrap Oh, press Q and just
reset the transforms. Try it again, U unwrap, see? And now you can see
that the changes. And I'll contra I and do
another U and unwrap. Now, for this unwrap, what I'm going to
do is this one, I'm just going to scale down because it does not
you cannot really see it. So we just want to scale
this down and just kind of like places in here. It does not really
matter because as I said before, you
cannot really see it. This one, however, does matter. That's why I needed it to
be perfectly straight. So this one I keep
pressing W for move, but inside of the UV editor, the shortcuts once
again changed. For this one, what we can do is we can actually go in here. And, oh, that is interesting. So the leaks are kind of
depends how you look at it. So the leaks might not
be looking as nice on here because they
are going sideways. But you can kind of just,
you can mess around with it. I'm just going to make this a little bit smaller, most likely. Over here so that we only
have like three of them, maybe also move it so that the bolts are a little bit
more logical locations. Let's do something like
this. There we go. So from distance,
it will just be a simple piece of metal.
So that's no problem. Now, for these pieces, we were going to go ahead
and we were going to probably use this or we
can use the original wood. That does not really
metal too much. I'm going to select the
bottom, unwrap that, and let's say I think I'm
just going to use this one over here because it has like
dirt then select the top. You unwrap this, scale
it down, stroll in here. And then finally, we can
just select all the corners. Unwrap, give it
like a single seam, so we can just and
press mark seam. Then if we go ahead
and try it again, unwrap over here, we can then
also scale this one down, and this one can have
the actual dirt. I looks like we need to
rotate it for the dirt. Oh, yeah, I need to still
create a rope also. I forgot about that. So scale this down
a little bit more. Here we go. And if you want, you can even go, like, a little bit nicer. Were you can go at and, um, Yeah, move this, but it
does not work that easily. Never mind. I'm because, of course, the
movement it is linked to each other, which is, again. Let's just say that
I do not really like U Von wrapping
inside of Blender, because the tool is left
to be desired quite a bit. But in any case, so we got
those pieces done over there. Now for these pieces,
what we can do is maybe we can tw
a quick automated. So if we just go ahead
and select this, why are you not working
anymore? Oh, yeah. Um, you can also go
in here and you can do a cube projection instead of Smart U
VPAC is the automated. Often here. But you
can pass like okay. Yeah, actually, you know
what that might work. So let's do that. Smart U VPAGo. Smart U VPAC, okay. Okay, so those are now
all three working. So if I now select all
of them, Oh, UV three. Yes, UV three. The only reason
why there is a UV tree is, of course, because this one is using a mask because
we duplicate it. So make sure that we
are in the right UV. So if I just double
check, UV map, UV map, UV map. Okay. Sorry about that. Let's try it again. UnwpUh I'm doing so much wrong
U SMATUVPject. Thank you. Try it again. Smart UV project. Finally,
SmartVPject. Okay, wow. So we now got these pieces. We basically move them here. And what we can do is, yeah, the direction of the
grains are not correct. I think I'm actually
going to move the direction of my grains. It's a tricky one because I want to move the
direction of my grains, but I know that for my barrel, I will most likely, once again, need the opposite direction. So for this one, we can
ty and rotate this. But it would most
likely not give us nearly enough resolution if we then need to scale this
down and move it over. You see, that would not
give us enough resolution. So that's why I like using a D because then what I can do, I can simply say, like, move this one, and I could have then rotated this and
moved a bit of it. This is one of the
reasons why, also, I don't always enjoy
using trim sheets because the flexibility that
you have is a lot less. So for now, let's just leave the grains and see how they go. And if they are really
bad inside of the engine, I will just use a
different method, or I can simply just throw
on like a tile warm table. Then we will just not use
the trim sheet for this one, because I focus mostly on the barrel when
creating the stuff. But anyway, so we
got now these pieces over here pretty much
done. So that is fine. Now what you can also do at
this point is you can select this one and you can duplicate it and move
it also like over here. There we go. So we have
our hitching post. And for these pieces,
what we can do is we can move
them all together. So if we just do a quick pivot, we are a little bit over time,
but that should be fine. So let's do a quick pivot here. Let's just go ahead and
do, like, a mirror. And then press added pivot that we do an added
pivot and move it out. Hey, that's actually
quite a good size. And then at this
point, what we are going to do is if we just have a quick look Okay, so it looks like that if
I just rotate this stuff, give it a little bit of spacing, but do not give it any
spacing over here. So just make sure that
this one over here is very closely together. Like that. And then
maybe for this one, maybe move it down
a little bit more. And because of the
mirror, it will automatically also move
down the other side. So we got these
pieces over here. Let's go ahead and just
quickly duplicate them. See, let's delete this one because that one is
like a top piece, and let's rotate
these 90 degrees. Okay, that one is not
working correctly yet. In that case, I'm
just going to quickly rotate it the other way around. And for this one, I'm just
going to move it in here. Go to added mode. And we
are basically going to see, we actually want to move
this back over here. As I said before,
I'm going to make these actually quite sloppy in terms of just
creating this stuff. So we got these three over here, which means that we just need
to add a pivot on a mirror. I think I do want to keep
my mirror intact this time just in case I want to make some extra changes later on. So I'm just going to spend the extra effort to make sure
that everything is correct. Let's push out a little
bit more over here. Now what we can do
is we can select these three CtraJ then also
go ahead and do a mirror. Press Add a pivot
first. There we go. And I want to mirror it. Oh, this one does
not do the mirror. In that case, just go ahead and press contra A because if
it does not do the mirror, then I can just go ahead
and move it like this. Swapped around. Maybe if
I reset my transforms, it would have worked,
but at this point, I'm already quite far on. Yeah, so we do need to probably fix those UVs a little
bit more later on. But for now, so we
got these ones, we can simply move
this stuff over here. But and now what we
can do is we can just grab these three duplicate them. Rotate them nine degrees. Maybe just press
Control J, if you want. Rotate them again.
In these pieces, we will need to go
ahead and just redo the UVs again later on, but this should all
be fairly straight. So I should be able to just go ahead and grab
the stuff over here. Oh no, I did not
rotate it correctly. Now it should be fairly
straight. Yeah, okay. So now what we can do
is we can just go ahead and just make this like
very tightly packed, because you would assume that
if there is water in here, they would really like tightly
packed this altogether. Same over here. Maybe move this one down a little bit more. Yeah, for this one, since we
need to redo the UVs anyway, we can just go ahead
and also do those. I'm going to go ahead and go in here and just move this bit forward. Here we go. So for this one, let's quickly
going to your UV editing. Oh, that's interesting.
That it's so broken. Let's just do a smart UV over here and go ahead
and rotate this. Though I don't think we actually want to use the rotate function, I think we just want to kind of like overlap this on
top of each other. Mm. Sorry, I don't
really like that. This time, it's
not going as well. Let's go ahead and just
select these backsides U Maxim, select
everything, unwrap. And then my hope was that
if I now go ahead and press Control L is the tool that you need to do for Select Linked inside of here, instead of pressing four because once again,
shortcuts are different. Control L. Control L. Okay, so I was guessing just to
do something like that, just to make it make our
lives a little bit easier. And then over here, we also
need to go ahead and we need to select this one if
we just press four. And looks like that we
need to just move it back. Oh, yeah, there's
more of this stuff. Select this Control L.
Let's move this back. So I just did not see
that. There we go. So that fixes that stuff. So we now go back into layout. Yeah, again, a 30
minute chapter. I'm willing spending too
long because I always want to keep my
chapters below 20, 25 minutes. But oh, well. So we got all of
this stuff done, and now at this point, you can just go ahead and
you can go in here and just double check
that out the smooth is on and when all of it is on. Oh, wait, we cannot add
modifiers to multiple objects, so then just do them
separately. Over here. Select these three.
Let's just press Control J, weight normals. And now if I would turn off my wire frame
toggle, there we go. So that one is now
also working and there's some dirt at the sides. Over here, the dirt is, of
course, gone, unfortunately. So that's something
that we will also then later on need to
work on i proof. But we will move over with
this in the next chapter. In the next chapter, we will
go ahead and finalize these. We will add some
rope to this one, and then we'll just go
ahead and create a barrel.
69. 68 Creating Aditional Assets Part3: Okay, so let's go ahead and
continue with our assets. So I was just going
to go ahead and it's a bit strange that my
UVs just did not map over, but okay, let's go
into our UV editing. And I was going to press
four, grab this one. Oh, wait, that's why
they didn't go over because I changed it around. I think I need to
rotate it 180 degrees. I think that's the
problem. Oh, no, wait. I don't need to rotate
it in 180 degrees. That's strange. You said maybe like here, I think
this is the problem. If I grab this one, see? I think that was just
simply the problem. So if I now move
this There we go. Now I get some actual
dirt. Okay, great. So we got that one. For once, we can tag you same over here. So you can just go
ahead and press control L. I think we need to once
again rotate this 180. There we go a little
bit of dirt there. And finally, if we just
go ahead and go in here. Oh, it looks like this one
because it is rotated. We need to Oh, we only
have this one phase. Let's just move this
one. There we go. Honestly, that's good enough
for something like this. It's going to be a smile. I said, I don't want to
spend hours on this. We got that one pretty much
ready to go. That's fine. We can just go ahead
and save our scene. Now for this one, I
wanted to go ahead and I just wanted to add
some rope to this. So for the rope
inside of blender, I forgot that I was
doing this in blender, but we are still
going to use splines. Just placing splines in blender is a little
bit more tricky. If we go to Shift A curve
and Bassi A curve, oh, wow. I only now notice that
my keyboard shortcut. I'm really sorry about that,
that it was not hung up. Basically, now we
have this curve over here and we are able to then later on go in added mode and move
this curve around. So what I'm going to do is
I'm going to, first of all, get this curve in the best
position I can get it in, which is going to be
something like this. Let's say that it's
hang around here. Now basically for the curves, what you would want
to do is you just want to go ahead and select the top and I'm just
going to move this down. And you can also, select these
points over here because the Bezier curve will just
kind of like move around here. And I'm just going to basically create like a starting point. So over here, also,
if your points are too long, just move them down. And let's say that
this one over here, this is where it will just
kind of like be hanging. So we got this over here. And now, if we go
to our left view, no, to our front view. Yeah, over here, go
to our front view. And now what we can
do is we can press E. And when you press E, you will basically just
extrude this down. And now the annoying
thing about this once again is that our rotate has now changed the
shortcuts once again. So what we need to
do is we need to go ahead and move this down. Why are my shortcuts
changed, actually? I think specifically
for splines, they changed for some reason. But anyway, we
basically just want to keep manipulating these
points and moving them around, and we're just
going to wrap this around a couple of times. So
let's say that we have this. Oh, sorry, I need to
go back to my front. I'm going to go ahead and also move this one down because else, we will just get the
same prom and then select this point,
press E again. There we go. And
now it is starting to go a little bit better. So now if we go ahead and
we rotate this Sorry if I sometimes press won shortcuts
that I'm so used to pressing W ENR in order
to change my settings, all of a sudden
need to change it. Same with the middle
mouse button I'm so used to using mill mouse
button to rotate around that these things they
are just force of habits and I cannot
really control them. So over here, we basically want to go
ahead and once again, do the same thing where
we just move this around. And I'm not going to do
this too many times. Let's say that I wrap
it around two times, and then I will just duplicate that probably. So
we got this one. Let's say that we
now just once again, rotate this over here. Rotate this over
here. Actually, let's go around one more time
after we've done this. Not too many times, just like once more, that should be fine. Now what we need
to do is we also need to do some other moving. Let's say at let's
go around here. Let's just have it
hanging like this. Now if we go to our side view because they will
most likely all be at exactly the same place. So what we now want
to do is we just want to move them slightly away from each other. Like this. And then this one
is actually fine, so we then move it around again. Okay, so we just have
like this one over here. Okay, so that's pretty decent. So let's say that now that
we have this and you can, of course, make
this a little bit more intense if you want. What we can do now is we can go down here to our
spline settings, then go down to geometry, and then you basically just
want to not the offset, sorry, down here, set the depth. Which will basically
create like a cable. So having this cable now, we can still go in edit mode, and we are still able
to now move this around and just
change this around. So let's say that this cable is actually a little bit too thick, so let's say 0.025
maybe. Here we go. And then I'm just going
to kind of move it quite close together because
I think that will look nicer. Over here. But as you can see, so you can basically mess around
with these cables, and it might take a second, but you are able to
then just, like, create a pretty decent
looking cable or cable, I should say rope over
here, and then this one, let's move it back
a little bit more. There we go. And then
from the distance here, you can see that we just
have this one cable. Okay, now that we have
this cable over here, we can go ahead and now what
we want to do is we want to just go and turn this
into an extra geometry. So now that you have your cable, all you will need to
do is right click and convert this to
a mesh over here. So now it should be just
like its own little mesh. There we go. So we now have a geometry. So
for these geometry amounts, you are able to actually
set the resolution. If I just undo this over here. So this is now a spline again. I can do, my wife toggle. You cannot go over here and you can set a resolution
of your cable. So you can make it a little bit lower in the resolution preview. And the only thing
is that, of course, over here does give us a little
bit more less resolution. So it kind of depends you kind, need to play around with it. But let's set my resolution
to probably like nine. And at this point, here. So I'm just going to yeah, convert this to a mesh. Just to see how it looks, I would also go in and maybe grab another one
and rotate it 180. Oh, so quick pivot to make
sure that it's in center. Yeah, like a 180, just to see see and
then if I place two, it already feels a little
bit more like Dancer. Now, of course, before
we are going to do that, we first want to just
unwrap this one. Unwrapping should be quite easy. So we do have these
ends over here. I will guess that we can just right click and press
new face from edges. Here also right click
New face for matches, also press Altex that I go
outside of my editing mode. And now, this one, it does often try to already do
some automatic UVs, but I'm just going to
reset my transforms. I'm going to then simply
click here Al Chief Double click and that will just
place an entire line all the way around, press U, and then simply press
Unrep No, sorry, maxim, and then also over here, Markem, and also
over here, Mark. And now if we just select
everything unwrap, there we go. So then the first thing that I'm going to do is I'm going
to go into my face mode, press Contra and select
this piece over here. I'm going to go ahead
and rotate this. Go into my okay, so I am already in
my text ship mode. In that case, quickly
copy over your material. Here, so we select
the rope, we select, for example, the wood, copy
material to select it. There we go. And now
we should be able to move this around, scale it. And if the scaling is not
working as well as we expected, we can always go ahead
and go to, like, this scale and see if we
can maybe produce it, but, yeah, we won't be able
to really make it ticker. But something like this,
it should already work. It might look very
bad, but I think that it will work totally fine. And then the last thing
that we need to do is just these two pieces over here, and I'm just going
to simply move them. They don't really
need any resolution, so I'm just going
to scale them down really tiny,
something like this. So there we go. We quickly just created the cable just to show you
how to actually do it. You're gonna do a quick pivot. Then I'm going to
simply duplicate this. Rotate this 180 and
just move it again, and then have this,
like, nice and close. And now, as you
can see over here, we have two cables, and
maybe you can also go ahead and place
another one down here. So this is like where the
horses will be sitting. So that's pretty much it. So we got these two
pieces over here now ready to go and they
can go to the engine. The last one that
I wanted to do is I just wanted to
create the barrel. And our far barrel, it's
not too difficult, also. It's just that it requires
a lot more modifiers. So with our barrel, as
you might have noticed, it's simply going to be
like, Where are you? Ah. Oh, God. I lost it again. They are. So here, the barrel
is just going to be planks really
closely knit together, and we're just going
to rotate them around, and then we're going to scale the top and the bottom down, and that's pretty
much going to be it. So first of all,
let's select all of this, so that I remember, select one of these
pieces and once again, copy all the materials to select them because we did a
lot of copy pasting. Now we are sure that they
all have the same material. And I can just temporarily move this to actually
let's do new collections. Let's say this one, move to
collection, hitching post. There we go, so we keep it a
little bit more organized. This one. Move to collection. How do they call trough? I think they call
it like a trough. I don't know if I
write that correctly. Okay, so we have
the water trough, the hitching post, I'm going
to move also in the center. And now what we can do is we can just we have a random
cube that we can delete. Now we can just
focus on our barrel. So for our barrel, we
basically just need to create a simple cube
to get started with. First of all, go
outside of our mode. Let's scale this in. Let's turn on Y, Frango and we basically just
decide on the thickness. So if I have this bear
if I just quickly grab my hitching post as a
reference for the height, I would say something
like this is quite a good height as a guess. Okay, so let's say that we
now this plank over here. Now what we're going to
do is we are going to go ahead and I press the wrong
button. Sorry about that. Here we go. We are
going to press Q doing transforms then let's go ahead and go in edit
mode, select everything. Let's start by adding a
very small bevel like this. Then we press contre R, and we need to actually
give it a bunch of segments so that it can
nicely bend around. So like ten, 11 segments
doesn't really matter. I'm actually going to go for 14. Okay, so now it can bend around. Now what we want to do
is we're just going to art already UVs. So let's just go ahead and press copy material
to select it. And for this material, I'm going to go ahead and go to
my UV editing tool. Plus W. Okay, so
we got this one, I'm just going to let's see. Let's select this line. And let's also select one
at the top at the bottom, like this, U maxim. Okay, now if we
select everything, unwrap, it will be just
like these two pieces, which we should be
able to rotate, move, and scale and then try to scale them as big as you can within our frame. And then later on
what we can do is we can simply go
ahead and we can place them in
different positions on here just to change
around the wood. Okay, so we got this
stuff now all done. So now that we have this one, now what we need to do
is we need to save. And then what we can do
is we can go ahead and we can probably start with an
array and then a bend, right? Yeah, because we
have a bend here. So if we start with
an array and we set the array on the spre
zero on the X on the Y, and yeah, okay so perfectly
two is actually fine. So then we can kind of decide, the more that we get,
the bigger the radius. So we kind of need to guess. If I go for 16, honestly, I have no idea.
I just need to guess. Let's start with 14. And then if we go down here, I'll modifier, mesh the
form, not mash the form. What was it? Simple
the form or something? Simple deform. That was
one. Then we go bend. And what the bend is
on the Uh, XxsYxs. Oh, no, wait. Oh, it does not recognize the
array modifier yet. So I need to actually press
Control A, most likely on it. And now if I would do a
bend, simple to form bend. Sorry, I'm just
checking because it looks like my bet is in the w. If your bends
in the wrong way, there is another way
that you can do this. So let's just go ahead
and remove this. So another way that we can do this is we can go ahead and if you press Shift A and then go to empty and create new axis, we are able to basically
rotate these axes around, which will give us the ability. If I just move this
over here and let's set my axis increments
to the center, it will basically give
us the ability to flip around the axis
that we have over here. The way that you do that is you click over here on your model, you go to the origin. Grab this origin, and now it is just a matter of messing
around with things. So if I set this to let's say 180 degrees to
get start with, I can then go in here, if I
just rotate this, let's see. I might actually need to be on the ZXs now I think of it.
Although I'm not sure. Let's try So that, okay, y, so that does work, although it does not
do it exactly the way. There we go. Okay. So
yes, that looks correct. So yeah, it's a bit of mess. You kind of need to play around with things and
everything like that. If I have this one
empty one ATZ, I want to just
quickly try because I feel like we now should probably be able to just select out of this and
just delete it temporarily. Oh, sorry. Oh my shortcuts? Oh, no, wait, my
shortcuts are not done. After you've done your UV
unwrapping, once again, your shortcuts change because it can no longer linked
because it does not count, there's linked
because of our UVs. So but in any case, just end up with,
like, one piece, and I just want to once again
try the array modifier. And then I want to try
on the bend modifier. And then if I set
the bend modifier to the Z axis with
the orange point, this one, there we go. So the reason I
wanted to do this is because now if I go for 90, I can basically just
mess around and I can see if we want this
one to be 360 degrees, I can then basically mess
around with this and give it more and more segments
until I am happy with it, see? So it's a bit of a messy
way of doing things, but at least it works. So we got this one
now over here. Yeah, that must be a good thick. Now, as you can see, centristi and then kind of
like tables off. So for this, what we can try is we can try a
lattice note over here, but I don't think if
I select the object, no, it doesn't work
the same way in here. In that case, what we can do
is I'm going to go ahead. I'm going to duplicate this and just kind of save
it because I want to just go at new contra
A on everything over here so that we basically
have one big mesh. Then if I go to my quick pivot, another thing that we can twice, we can try to set up the
quick FFD over here. What the quick FFD
does this tool, it basically allows me
to here I press scale. It allows me to basically
manipulate and scale my assets based upon,
like, a simple box. The only thing is that
I actually expected to get a little bit more segments. If I can I press contre R? No. Let me just quickly
check. Wait, here, I see it. We need to go in here and
then what is it called? Object data properties. And then over here, we
can set the segments. Yeah, this looks more familiar. I don't use this
tool very often. But basically, what we can do
is if we just go ahead and give this a bunch of segments, actually, not a
bunch of segments. Let's give it only four. Now what we can do is if
we go to added mode and we select the top and we
select the bottom, then we should be
able to scale it. Although can I just go to
my scale tool over here? Let's only scale it
on the black axis. And we basically scale this in a little bit more like this. Ah, let's try and set
this a little bit lower. Interpolation. I'm just messing around two things
here. 1 second. Because I'm just trying
to see if we can maybe, like, do it like a smooth way. This looks like a smooth way. So now I've scaled it. Oh, no, wait. It's not that smooth. Um, how about now? Sort of works. Let's see. Is there anything? I've never
used these other tools, so I'm just messing around
with things to see. Nah, you know what? I don't
think that's going to work. In that case, we
will do it manually. So if we are doing
this manually, you basically set this top one to be the scale that you want. So let's say that we
move it in like this. And then, basically what we're
going to do is we are just going to select now this one and then scaled in like a little
bit more there we go. And maybe we even want
to go ahead and like a few more segments
because if we add a few more
segments after this, what it will do is
it will kind of add these segments in between, which will slowly smooth
everything out a little bit. Now, it might be a
little bit confusing, but it does seem to work. So let's say now
we have this one. So now if we go ahead
and just press contre A, so this one is selected. So this we can now delete. Now what I want to do is
I want to see if I can now maybe like a bit, scale it down a little bit, and maybe scale it out a little bit so that I get it more to my ideal size that I want to
get plays into the center. Here we go. So we got
something like that. Let's turn off I Rim too. Yeah, that looks pretty
much like a barrel. So we got this one over here. Is there anything else
that I need to do? I feel like I'm
forgetting something, but I'm not exactly sure what
it would be. In any case. So hopefully, I don't
forget anything. What I can do now is I can
just go ahead and go in here. And although I don't really
care about the center, I basically just go in and
I can just select this one. I can press four, move it out, select this 14, move it out, this 14, and just
keep doing that. And the reason that we do this
is to add some variation. And sometimes you see me
just like skipping one. This is just because
I'm basically moving it in a different
position anyway. Over here, it looks like this is going to be
another long chapter again. But yeah, I just want to
make sure that the pat ones are not exactly the
same because that will not look very nice. Looks
like we're almost there. So this one, this one, and
we can leave that one. Okay, perfect. So we've
got that one done, so now UVs are fairly unique. We can now go ahead
and we can just do a Shift A mesh and
create a cylinder. And for the cylinder, we just want to basically
select the top, press contra I and
delete everything else. Do a quick pivot on the top. And I'm sure that you know
where this is going to go. Uh, over. Let's move the bit back over here. Okay, so
we got that one. Just for good measure, let's
insert this and press Q and not separate selection,
merge at center. And then for this one,
we can once again, we can select the barrel. We can copy over
material to this piece. Quickly go to UV Editing, unwrap scale, move. There we go. So we got that one
now also done. And now what we can do is we can just go ahead
and we can duplicate this Move it out here. Yeah, that goes quite a bit into just creating
a simple barrel. Although I must admit
in three as Max, this kind of stuff is a little bit easier
to do, by the way. So we now got these ones, and now all that we need
to do is we just need to create the metal over here. So we'll have one at the top, and then we will just have
some in between pieces. So for metal, it's easier if we probably just go ahead and create like a cube. And that started like the center one because the top ones we
can probably just scale in. So we probably want to go
for the thickest version. So let's say we
have one over here. And then just for good measure, I'm already going
to so one here, one there, and one there,
okay, that's fine. So if I now go ahead
and just scale this in like the thickness
I want it to be, then I'll also scale
it in over here. And our last thing
is that, of course, guessing, the size is always going to be a
little bit tricky. So I'm not sure exactly
what size it needs to be. So what I can do is I can start
with something like this, and then I can
just scale this in because we are not
having UVNps yet. So I can just do contre R, and I can just, like, add
a bunch of segments here. And now if I just
quickly add my modifier, simple deform,
bend, 180 degrees. Let's plus Q and just
reset my transforms. Let's ty that
again. Quick pivot. Simple deform because it
should not react that way. Oh, W, do I need to
do the axis stuff? Let's grab just like
our original axis. And that seems to already
been like the right location. So 360 degrees. And now that we've done that, what we can do is we can
simply scale down mesh. And because the bend isn't modified, it gets added on top, whenever we scale down
a mesh over here, it will reduce it. We do not have enough segments. That's the only thing
that is quite annoying. So do I need to scale
it down even more? Okay, no, so you are now
at the correct scaling. The only thing is that
you are way too low poly. If we just temporarily
turn off our bending. Oh, wait. I said it to be. Yeah, I went way too small. In any case, what
I'm going through here is I'm just going to go
ahead and press Contra B, and I'm just going to
split all of these polys, and then maybe also place an
extra one in between here. There we go. So we are
basically just adding a bunch of extra polygons here. And now if we scale this down
so basically just force it. So even though it's
completely flat, there we go. So we have that done. Now, for this one, if we just go ahead
and duplicate this, will this be as easy as moving it up here and
maybe doing the same? Oh, yeah. So it seems like it's curious that
it does work like that. Okay. In any case, what we can do with this one
is we can go ahead and Okay, so the polygon count
is a little bit uneven. Which is
really no problem. I can remember that
Blender does have a tool if you want change that, but honestly, it's
not really problem. So I can just press Contra A. So this has now become
its own little mesh. If I just go to my left view, I select the bottom, basically. I just want to go in here,
and with my bottom select, I want to tone this down,
then we have a top. And now what we can do is we can just go ahead and we can select. Oh, sorry, Q, reset
transforms, Contra B. So we are just adding
these transforms. And also lets you shift H, and I'm just going to go
ahead and I'm just going to I don't think it,
I don't think it can. On a wait, it can register
Igster over here. It has like this in
between phase, like that. That's why it didn't register. So now if we do conceit now, we can just basically remove the back and then do
tag. So there we go. So that one is now ready to go. If you want, you can just
go ahead and already, the weighted normals
and you need to turn on out smooth. But that's
a general goal. So we got that one, and now
we only to do this one here, and then we can also have
them on the other side. So for this one over here, Contle A select the top. Scale the top out a little bit. So contra I just
invert my selection. Select the bottom, scale
this in a little bit, move this up a little bit over here so that it
just like, extends out. Now if I go ahead and I'm
just going to contra B, it's Q Risa transforms,
Contra B over here. Yikes. I'm spending a lot
of time on this 30 minutes. So we have this one done.
We're almost there. So I will do the importing. I will do that in
the next chapter. So what I want to do
is I kind of like me to check wherever we had that. There we go. There is
like the center bit. And now we can just
delete the back. Perfect. So we got that
one done. H over here. And now all that we need
to do for this one is, I'm just going to go
ahead and also over here like already up
my weight normals. And then simply select
everything unwrap and it should give us it's not the best
unwrap that we have. So what I'm going to do,
by the way, first of all, let's go ahead and just press copy material over here
so that we can see it. So, this one is definitely
not the best one. In that case, what I'm
going to do is I'm going to go ahead and I'm going to just select this outer ring, do a U and an unwrap. And in this one
we are just going to edit a little bit more. Actually, you know what
I have a better idea. Let's just do this. Here we
go so that we have one piece. And then we are just going to select the straight
one, which is this one. Then we press L to select
everything or contra. And then you want to
go ahead and on space, I have my search. Oh,
it's already there. If you go to preferences over here in your
space by action, just set this to search
if you don't get this. And yeah, you want
to basically type in follow active quads. And then when you do
that and press Okay, it will basically do its best to straighten out
your UVs like this. At which point we should be able to pretty much move this here, maybe even scale
it up to give it a bit more resolution because
it is a tile ball UV. Don't scale it up
too much because then even though it does follow active quads,
it is not perfect. We just want to see, that's what I mean, it's
not exactly perfect. I am actually going
to just scale this maybe I can hold shift
and, like, come on. Rotate, hold shift, and then maybe I can rotate
this very precisely. And that can give
me a better result. So even now, just go
off my selection. You can see that the bolts and
everything they are there. So this is working. And now we just need to go ahead and just do the same
with the other one. We select everything you unwrap. We move it here, we
select like one of these L space,
active quads, okay. And then it looks like
that we need to do another thing where
we just basically rotate this and then hold shift, and then rotate this
very precisely until it is pretty much
straight like this. Maybe scale it down a little bit more. Uh oh. Does not look like
it has a very here, that one looks actually
a little bit warped. Honestly, by this point, we are spending way too
much time on this. So what I'm going to do
is I'm going to go ahead and I'm going to just continue with this in the next chapter.
70. 69 Creating Aditional Assets Part4: Okay, so we left off by
creating these metal bars. One thing that we're
going to do is we're just going to go
ahead and select one side, and then we are just going to scale this and then
hold shift and basically scale them pretty much straight so that there
is not as much warping, especially like this one
had a lot of screwing going on where we just
need to scale this, hold shift, and just do, like, some more precise
scale and if you want, you can, mostly look at
your texture for scaling. Something like this.
I think something like this will work quite well when we are
eventually unreal. So let's say we have
these two over here. It's plus contre J to join them. Let's go ahead and
just do a quick pivot. And now what we can do is we
can do a mirror on the Oh, let's do an added
pivot, actually, and move this up because Elsa
cannot see what I'm doing. On the Z axis, okay? Mirror on the Zaxs's move
down a pivot a little bit, maybe move it up like
a tiny bit over here. But there we go. Okay,
we got a barrel. So that's pretty much I
know it was quite a bit of, like, back and forth, but now if you just go
ahead and also out to smooth and add a simple
weighted normals over here plus contre A. So of your at a pivot
and there we go. We have now created our barrel. So I tried to do it quickly. I wasn't as quick as I expected, but a barrel. There we go. So we now got our SS done. Now let's just go
ahead and get all of this inside of Unreal. So first of all, I'm just
going to right click ID data and just rename
to rename my map, or I could have just
done a long click. Let's call this barrel and
just add all of this here, move to collection barrel. So now we have all of these
also nicely sorted out. Let's go ahead and save us, and I'm going to get started
by just selecting my barrel. Just deselect those
empty face over there, and I'm just going to
go ahead and export this as an FBX to Unreal and just call
this barrel on score 01. Export. This one. Oh, actually, it is better if I just in case, select everything,
select one of them, and go into our materials and do a copy material to select it. I need to be sure
of that because else it will just import
multiple materials again. So this one was Barrel 01. Hitching post, we
can do the same. We can just select
one, copy material to select it just to be sure. Export FBX. Hitching post. And finally, we will have a water thing. Once again, copy
material selected. Export FX Water score Trougt. I have no idea if trough is the actual name
for it, but okay. So we got these pieces here, although this one might actually
go a little bit more in the center. There we go. Okay, so here we
are in our level. It's looking really cool. Now what we can
do is we can just go ahead and we can start by
importing just as normal. So Western town assets. Let's go in here and Oh, wait, it looks like that I first of all want to import
my trim sheet. New folder, trimset. Base color, normal roughness and metallic
is the one that we need. Here we go, and don't
forget your normal. Oh, don't know why
it went over there. It's because my other
screens are four k. So that's why this window
is often really large, just because it goes from four k to one K or two K. So
we have a textures. And now if we just
go to our assets, and I'm just going to
import the assets that we have just exported,
just give me 1 second. So we have a barrel,
water trough, and our hitching post. And I do know that we still
need to do the store signs. However, because we also need to create text details for that, I'm going to do that in
its own little chapter. So let's just import
all of these pieces. We have a barrel. Hitching
post feels a little bit large. Oh, that's our decals. That's it. Hitching post
this is why we had to keep our decals really low and our water trough. So
let's say we have these. So first of all, I just
need to go in here, and this is what I mean
try to keep your decals low because else you get
these problems over here. So that's why I just
need to lower them down. I still need to be able to see. Also, one thing that you
actually can do is you can select your models
like your hitching post, and you can scroll
all the way down. I completely forgot about this. Actually, we can do
that with multiple. Let's say we select
these models. We can scroll all the way down
over here to not physics. Rendering, I believe,
and then just press the drop down and then there is a received decals and
you can turn this off. And then basically what
it will do is it will simply not receive
our decals anymore. Also, it looks like that
our barrel is flipped. So let's first of all, fix that. So if we go down here to
our pace orientation, Shift N, you know the drill. So we swap around the
pace orientation, barrel 01, just double check
the hitching post and water. And that's all totally fine. That's now also done. Save sine. It's going to unreelRimport
our barrel. There we go. Okay. Now all we need to do is we need
to create the material, and I believe that we
can use a basic master for this. Yes, we can. The only thing that I need to do is let's grab our trim sheet. Metallic over here, throw it in here, convert it to perimeter. Call it metallic
map and then add a static switch
parameter has metal map. And if it is true, we
will use this one, and if it is false, we will simply use the metallic
value over here. And then the default value
will simply be false. So we can go ahead and we
can save this. Here we go. Now if we just go
into our materials, create the material
instance from our basic master and just call this trim sheet underscore 01. And then in here,
if we just go ahead and turn on the
hesmtllic map also, it is just a matter of importing or placing our trim sheets. And now we can actually
see how this works. Let's say that we
have a hitching post. We can open up these models. So let's open up
the hitching post, water trough and the
barrel over here. And then all we need
to do is just simply add our trim sheet 01 the specs over
here. And over here. There we go. The only
thing is that this one, it is not smooth, so that's something that we
do need to fix. So if we go over here, I need
to set my smoothening down. So if we go down to
our smoothening, let's just right click
and shade smooth. On the way to outer
smooth is correct. It's just that I forgot to do a shade smooth. So same over here. Right click, shade smooth, and then art your
weighted normals. There we go. And
that should do that. Or that should fix that.
Export is once more, barrel 01. Let's go in here. Right, click Ribot. And now you can see
we have a barrel. We have a metal over here, all working just fine. We got over here like our
water trough that has, like, the dirt and
everything in it. So let's basically it
with like a trim sheet. And then over here, you
can also see that we also have our rope sitting over here, although it is a
little bit shiny and we have all of
these extra pieces. So having these pieces now. Now, it's just a matter
of first of all, we need to go ahead
and I'm going to place them very basically
in some areas over here, and it's more to make
sure that the scaling is correct and that the actual materials
are also correct. So let's say we have this
one, have it like over here. And just, like,
feel free to, like, kind of sink it in a little bit into the ground, not too much. Okay, so let's say
we have this stuff. Now, the water trout, I
think, is pretty decent. Here, you can see that
it's quite like a big one. Oh, yeah, and the
planks, but the planks, we will do differently. This one, what I'm going
to do is I'm just going to scale down my hitching
post a little bit. And blender crashed, okay? Don't know why that
made it crash, but let's try it again. Did I, wait, now, I just need to redo the shade smooth and the weighted normals because it looks like it's a
lost at work. There we go. Save my scene. Hitching post, as I said before, selected. I'm just going to
press Control J most likely at this point. And then edit my pivot and just snap my
pivot to the center. Scale this down a little bit. Um, that should be fine. So, oops, one, one. So if we just scale this
down a little bit over here, file export FBX
Export to unreal. Where are you hitching?
There you are. Yeah, no way that we could have done all of this in
the next chapter. So we got our hitching
post over here. Okay, so having that stuff done, now what I'm going to
do is I'm just going to edit my materials
a little bit. I'm going to get started over here. Let's just get started. So our base wood our base
wood is pretty much fine, and the dirt maybe make the dust like a little bit lighter,
but that's about it. Here we go. Dirt a
little bit lighter. Then we have this
second wood over here for which I want to go ahead and I want to make the color a little bit duller. Like this. Then we have
our metal over here, for which I want to
make my base metal. Lighter. And yeah,
so metallic map, it's always zero or one, so we don't really
need to change that. So we got those
things also done. And then for my rope, if you just go
ahead and press C, you can switch between
the different channels. So I want to go into
my roughness channel, and for my rope, I want to go ahead
and add a levels. However, I want to only affect my roughness
channel in these levels, and then I want to set
this to be lighter that it so that it will look
duller, basically. And let's try and export this. Go in here. Grab your
trim sheets re import. Give the second to load here. So that's now a
little bit lighter. Hitching post now fits a little bit better
in the environment. The rope is now looking duller. Yeah, then over here,
then this metal, that's the only one where
it's not super nice looking. But honestly, from a distance,
I'm not worried about it. You can improve it if you want. I just don't think that I am
going to improve it myself. Let's say that we now have
these few pieces over here. It's working pretty decently.
I don't know if this one. Oh, yeah, wait for this one, we did not have any
dirt because we were going to use different one. But anyway, your assets,
they are working, and that was the main goal
just to show you that it can all just work just fine and
how to use trim sheets. One thing that I forgot to actually show you that
I can show you now is how to change the
resolution because right now we are importing
this as a four k resolution. If you ever want to change this, all you need to
do is you need to go ahead and you need to go in, oh, God, they changed
the location of it. Oh, yeah, they moved it down. Maximum texture size, you
can just set this to 2048. And then what will
happen is it will only display a maximum of
2048 in your textures, so that you can just
go ahead and you can save this and do
this on multiple. Also, a cool trick that we often use in
the game industry. Let's say that this texture
over here, it is metallic. I can actually set
that even lower because it does not
require as much detail, while a norm map does
require a lot of detail, so you would want to, like,
set that one to 2048. Then, for example, things
like roughness maps. Although roughness maps,
I will also leave 248. But things like metallic maps or other less important maps, you can just lower
them down even more, and you won't really be
able to see difference. So here, this is now two K, and it still looks
pretty much fine. Okay, so that was it for
just creating these assets. Now, what we're
going to do then in the next chapter is we are
going to get started by just creating a few store signs that you have over here and also creating some decals that we
have over here of our store. So that's going
to be most of it, and then we will still
reuse our trim texture. Uh, I don't think I
forgot anything else. I will show you later on how
we are going to do that, how the other assets
look that I have, and all that kind of stuff. But for now, I think that we
are pretty much good to go. The only things that here, I forgot I just need to fix that. So I just need to go here, shade smooth and turn on out the smooth shade smooth,
turn on out the smooth. Same here. Out a
smooth, right click, Shade Smooth, and then
add my weight to normals. There we go. That's pretty much the only thing that I
had to do for this. So now I can just once
again, I can export this. And of course, if you
spend a lot more time, 1 second, let me just water. If you spent a lot more time on your trim texture and
really plan it out, then of course, you can
get something much more interesting and much
more highly detailed. However, for this example, I'm just going to
keep it nice and simple. See, can I delete those? Yes. Let's just delete all of these leftover things.
So there we go. We actually have quite
a bit, 31 models, so that's already
quite a bit of stuff. But okay, so that's now done. Let's go ahead and continue
on to the next chapter.
71. 70 Creating Text Decals: Okay, so what we're going to
do now is we are going to focus on the decals
for our store names. And I will most likely only
do like two or three of them, so it is not going
to be too much work. I said that I was
also going to create like some of these
plates over here, but it turns out that I
have quite a bit of those. So at this point, I feel confident
that you already know which ones they are. But I have like over here. If you go in my props, I have a bunch of
different props that I will showcase in
a later chapter. But the goal is that I
literally have all of these panels over here
that I can just use. So that would just save
me a little bit of time to just add some
extra stuff to this. Especially like
things like the bank. But as you can see, if
you look at these things, what you would do is you would
literally just make this the same way and just use your trim sheet
or use some wood. It doesn't really matter.
And then for the text, you would just go ahead and use if you would like a decal, the same way that we are
going to cover right now. Yeah, we got bunch
of cool stuff here. Also a barrel. So you can see the difference between
their barrel and barrel. So in any case, I will showcase this
to you later on. For now, what we're going
to do is for our decals. Yeah, as you can see
over here we can see a few different names. I'm going to go
for maybe a hotel, general store, and
maybe something interesting also on top of that. The first thing that
we're going to do is we are going to create
this in vote shop, and here we are in vote
shop with a blank profile. I'm then going to go ahead
and I'm going to go to my textures and create
a new folder that I will call text decals. And basically in this folder, we first of all need some funds. If you go to dove fund.com, you are over here able to add or to basically find a
lot of different funds, which is really nice
that we can use. There's a few things
to keep in mind. Not all of these
have actual here, licenses for commercial use. I am a commercial user because I'm creating
this for a tutorial. You guys, if you are just
using it for personal use, you can of course look over here and use for personal use. So what I'm going to do is I'm going to go to more options, and I'm going to only sort
at public domain 100% free. And then I'm just
going to press Submit. And then the cool thing is
you can also give some text. Let's say that I call
this general store. I can then press Submit, and what they will do
is it will actually white everything in
the general store. And then over here,
I can see like, Okay, so this one I quite like, for example, I can simply press Download and
it will download it. So if I go into my text decals, create a folder called fonts. In here, we can just go ahead. So we have a general store, and now I will do
something like let's see. Let's I think I do want to
have something interesting. So not just hotel,
but I want to have something like a name. Can we maybe do something? Now, because all of my
naming that is with, like, fast track tutorials
and everything, that's not very interesting. Let's do something like
this. The yellow rose. Something like that
will work. Let's do the yellow rose.
Let's press submit. Okay, so this is
done for a hotel. So this will probably be something that's a
little bit more fancy. The yellow rose, this
one looks quite nice. There are not too many
that are in, like, commercially free, so you guys will have a lot more
options than me. But let's just
have a quick look. Yeah, I don't think there's
much extra in here. Because, of course, I want
to have it very readable, and it wouldn't go too intense because they would need someone
that can even paint it. So let's find what
was it this one? Yeah, I believe it was
that one over here. So let's go ahead and
download this one also. Okay, so we have
these two over here. We can just go ahead
right click and just extract them if you
are using Win Ra, for example, and
I'm just going to delete everything except for
these two pieces over here. Now, what you want to
do is you want to go over to your Windows bar, and you want to simply type in fonts and then press Enter. When you do that
over here, you can basically install a bunch
of different fonts. So I can now go in and I can simply drag in those two
fonts that I've created. And they are now
installed, and they will automatically show up
inside of Photoshop. So here we are in Photoshop. So let's get started with
the first one which is just going to be
a general store. The general store,
we want to probably go for a little bit of,
like, a darkish color. So we go over here to text. We find our text, which
is going to be ACA Pose, posse or something, and
set the color to be black. And then simply go
ahead and I'm just going to set my text to start at the left side, general store. And then what I'm going
to do is I'm going to go up here to my rectangular tool, right click, Free Transform. And then I'm just going to
simply select the side. Okay, so actually,
this is probably the yellow rose, I believe. I think we need to go for if
we just select everything, Duba on a way, that
was a yellow rose. Never mind. So this
is the correct one. So we have, for example,
general store and what we can do is we can say, like, Okay, so this
is a general store. I'm going to make the text
like a little bit of, like, a lighter bluish
color. Like that. And then maybe we can go ahead and so we
have General Store. Then if we go up
here to our MO tool, we can hold Alt
Shift and then we can actually
duplicate this text. And then what I can do is I can actually let's go to our
free transform again. We can just scale this down, move over here, and then
we can say, for example, food, tobacco dash clothing dash drinks. So it's like a
little bit of, like, advertisement that
they would do. Right click Free Transform. And maybe we can then do another interesting thing owned by dt Werners. And I have no idea
why this would work, but I just feel like in
those times for some reason, they would like to
stick their name on it. So let's just do
like an owned by Werns let's see in the
center or maybe in the side. Let's do it in the center. Here we go. Just like that, we can
very quickly create some very basic looking
text that we got over here. I'm just going to go
ahead and I'm going to do my general move and
just hold Shift to carefully move it up here. So once you've done
this one over here, you pretty much know how
this is going to go. We've done decals before, so we just need to go ahead. Add a solid color that is
the same color like this, so now it will just be plain. But then if we just go ahead and duplicate all of these layers, Bottom layer is
going to be black. The top layers, we are
just going to merge them. So if we just go ahead
and go convert to Smart Object and then right click and press
Rasterize layer. That's the way that
you can convert text. And then just the
same thing where we just do like a color
overlay like this. Then we can go ahead and we can merge these layers once more, select them, art an Alpha and
paste them in. That's it. So now what we can do is we can just go ahead and we can file, save us and just save this
into our decals and just call this general store text, save. And now we can also
do save a copy, and this copy is
just going to be simple TGA file over here. Okay, so that is
it for that one. Now for the next one, what
we're going to do is I'm going to go for what was it? The white rose or I already
forgot what it said. Yellow Rose. So
now what we can do is we can go ahead
and go in here. D yellow rose. Right, click, free transform, makes the bit smalls,
that it fits. And then we go like Hotel and bar then let's get
rid of the owned buy. So we have Hotel and bar. Let's right, click
free transform. And let's make a
little bit bigger. And it kind of fits
like the yellow rose because our building
was also yellow. So we are going to
have this over here. And what I can do is with this, maybe let's go let's go for like a red
color or something. Well, actually, it would
not really make sense. Well, it's kind of funny
if we would do the red, even though it's like the yellow rose because the
building is yellow. So if we would then also
make the text yellow, yeah, that would not
really work very well. But if we just go
ahead and just copy the hash of this color and
then select the bottom one. Oh, yeah, you know what? No. Let's leave the bottom
one. I quite like that. Let's leave the bottom
one to that color. The yellow Rose hotel and bar. Uh, wait. They don't call
it a bar in those times. They call it a saloon. There we go. That would
make more sense because at least I assume
that they would say something like saloon,
just like a bit in movies. And then we can do
it through a saves, and this one is going
to be hotel text, save. And now what we want
to do is we want to go ahead and we are going
to keep the text probably. Actually, let's
make the text red. But then let's go ahead and
make this text over here. If we duplicate this, Actually, a cool thing, if you
have selections on, you can just go at
it and you can just go down here and
add a solid color, and it will automatically
fill in your selection. So let's do this over here. And now all we need to
do is we just need to go ahead and let's
select these three. Right click, duplicate them, and I will just now
do this very quickly. So one of them is black, two of them convert to Smart Object, right click rests, because here, this is normally
the speed that I go at when I do this kind of stuff. So then, of course,
it doesn't take as long to quickly just add
something like this. See? So that's a lot quicker. When you get used
to the workflow, you will do this
very, very quickly. So I'm just going to save this and then save a copy that
is going to be a taka file. And let's just do
save over here. Okay. Perfect. So we got those decals ready to go. That was not too special. So we can just go in
decals and we can actually just add them to here. So that's arts. And
then all we need to do so we already have
our decal material even, so we can just go
into metals, decal. And if we grab our decal, let's just grab Leak era one, duplicate this and call
this general store text. Open this up. And because we
have used the same workflow, all we need to do is
just go into decals, d in our general store text. And yeah, the roughness
is going to be quite low. So all of that stuff is fine. And then it's just a matter
of adding this in here. So if I press G so that I
can see what I'm doing. 90 degrees, 90 degrees. Just like that. Scale
in a little bit, and then it's just up to, like, maybe make play around a
little bit more intensity. But as you can see
from a distance, that is working very well. So that's basically
the general concept about creating these type
of decals over here. I might create more later
on, but I'm not sure yet. So we got this one. I can now already duplicate
it artist over here. And all I need to do for
that one is just duplicate my general store and
call it hotel text. And just like this, go ahead and make as many
variations as you want. If you want, you can
create entire logos. You can do everything
you want with this. Just in our case,
it's just going to be something a bit more simple. So we can just do hotel text. Yeah, yeah, see that looks
actually quite cool. The yellow rose,
like nice big text. But let's make this text
a little bit faded out, so that's not so intense. We can do this using scale. I think I need to scale
this actually quite a bit. Here we go. Yeah, let's make it a
little bit more intense, just so that we can see
it from my main angle. Like that. So we got over here, we got the text, we got
the general store text. And with all of this stuff,
that is looking great. You now know also
as I said before, how to create these signs. But if I would, for
example, I will go over this way more in
depth in later chapter. So if I go, for example, to the signs over here, I can, for example, go here, let's say that
this is like a bank. I can art this white
sign of a bank, simply just place it in
front of it over here, scale it up a little bit. Do this. And it's like
small things like this. They are very time
consuming to do, so you can spend hours on this, but they will add a lot
more to your environment, and they are very effective.
So let's have a look. So we got this stuff
over here done now. If I have a look at my notes, oh, yeah, we still need to do some variation
to the walkway. The variation to the Volk way, it's basically just going to be sometimes in some
very important spots. So if we, for example,
have a look over here, we can see that, for example, this would be quite
an important spot. What we can then do is we can simply use our
modeling tools. So first of all, let's
just close all of our tabs over here. There we go. We can simply use our
modeling tools and then use your lattice over here and
set it like a resolution, maybe a bit higher,
let's say ten. Oh, sorry, that is
not the correct one. Let's set this one to
zero or two, at least. This 110 over here. And then it's just a matter
of selecting these pieces over here and then
moving this down. Okay, so that's not
working as well. So maybe if we go
like a resolution of five and then I'll go in and
just select both of these, I think it's a
matter of segments. I think if we just cancel this, I think it has to do that we
do not have enough segments in our walkway straight. Yeah, because let's say we probably need two
segments there and maybe like a few more over here to really be able
to push that out. So let's just add a few extra
segments here and there. Don't worry about this is still not that
much geometry to art, especially when we
would do something like vertex painting sometimes. So let's say that we do
something like this, and let's just export this
FBX walkway straight. I hope I do not ig. And also, by the way,
I also want to change the colors of the planks. So that's another thing
that we are going to do. So if we go ahead and go in assets, walkway
straight, reimport. Okay. So now let's
try that again. You see now it is able to
go a little bit better. And then what you
can do is you can sometimes just click and drag. We are just going to do
some small changes like this where sometimes
we just have things are like sinking in and maybe
they are just a little bit messy or maybe they are
pushing back like that. So just like this, we
can just pass accept and it will keep actually
our original shape. Oh, wait, if it keeps
our original shape, it will probably artists
to everything, doesn't it? Yeah, here, so it
added to everything. Although it is not too bad, I do want to show
you a technique if you do not want the
artist to everything. And that is that if you select
this one, first of all, just press duplicate up
here and then simply press Accept and then it will
just duplicate this mesh. Are we seriously going
to say that you do not duplicate the
second UV channel? Because that would
be really sad. I think it actually does not duplicate the second UV channel. Let's just open it up
and let's just see. As I said before,
no wait, it does. No, it does not. Okay,
as I said before, this is Unreal engine five. Stuff like this can happen. It's just simple that
it just can happen. In that case, let's do the
walkway straight again. I guess one way that
we could do this, although it is a bit
destructive is simply to right click and duplicate and call this walkway underscore straight underscore
crooked, for example. And then we can go ahead
and we can replace this, and then we can just, like, add the changes only to this one. Then every time you want to
have very specific changes, you could add those. So let's now grab these ones, and I just move them in, and I really move them down. So this is like a let's say
this is going to be like a really messy looking
version over here. And it is like all over the
place and all that stuff. And also, stuff like that, you can do if you want. Yeah. So let's say that this
is really just like a much more messier version that we normally have, then
we can do stuff like this. So the modeling tools, 50 50. I'll give it to 50 50. So over here, now this is
like a lot more crooked, which looks quite nice
because then over here, you can actually
see that there is, like, some matchings going on. And if it is needed,
we can always then replace this one over here. And let's say that now, you can see that now it
adds it over here also. I don't really want
to do that because it is very specific detail. But let's say that I go over
here and let's add it also, let's add one of them over here. And maybe let's add
one of them over here. And maybe like one over here. There we go. So we just make it nice and messy and
stuff like that. Just to add that extra
bit of variation that we have here and there.
Okay, so perfect. So we got those pieces done. By the way, I was like
having a look at, like, trying to get
the collar to work. If you set your ground radius in your sky atmosphere lower, you actually get a little
bit more of the sun, and the sun will also stay at this stage a little bit better. Because remember how like
a bit of a while ago, we had problems with, like, the sun going down
and up and down, up in terms of, like, intensity. You can still see like
a tiny bit over here, but it is not as bad anymore. Because I think for
the rest, I am using an atmosphere somewhere in my
direction light, I believe. Oh, wait, here, cast Cloudshad. Oh, no, wait. I needed to
have the cloud shadow. So yeah, I actually
looked online and I cannot find any way to really
turn it off completely. So that's something I just
need to have an extra look at. In any case, these pieces are now done with ta store decals. What we're going to do
in the next chapter. The next chapter is going
to be super exciting. In the next chapter,
we are going to dress our scene with more
assets that we have. And on top of that, if
everything goes well, I even have actual people
that we can also use, so actual humans so that
we can make the scene feel more busy, like
you can see over here. So that's going to be
really, really cool. And at this point,
I would say that all the material creation and all the object creation
is done at this point. At least for me, it is. You can, of course, spend a
little bit more time. So next chapters, we might do
a little bit of animation, and then for the rest, we will just really, finalize the scene. And I might like one extra
chapter where I just create maybe a few extra assets just to really push this
environment to the next level. But for now, let's just go ahead and let's
leave it at this.
72. 71 Place Aditional Static Assets: Okay, so this is quite
an interesting chapter. So what we're going to do in this chapter is we
are going to do our first asset pass where we will place extra
assets in our scene. Now, of course, by this point, I have shown you all the techniques
that you need to know. You know how to
create buildings. You know how to create
separate assets. You know how to
create materials, unique texts, everything. But of course, there is one
thing left, and that is time. I cannot spend another 50 hours creating assets using the
exact same techniques. So instead, what I'm going
to do is I'm going to just simply download some
assets and use them. Now, there are a few
resources that you can use. The resource that I
am using is paid. Because it is paid,
I am not able to actually give
you this resource. So the one that I'm using
is I went to Gumroad, and there is this concept artist or I think it's also
like a movie artist, that's called Jemma Jura F, I hope I agree, and
I'm not going to lie. The one that I got
is pretty expensive. I got this one, the Wild
West collection bundle, which is $400. But this version over here, basically what it includes
is it included buildings. I included really high
detailed rigged characters. It included also assets. Just a lot of stuff
was included in this. And that was the
really cool thing about this that because there was a lot
of stuff included in this, it had on my knees. It even has horses. It has rigged horses.
It has so much stuff. So I want to show
you. Now, of course, I do not expect you guys to
pay these kind of prices. I really hope that
it pays off and that you enjoy that I'm showing you this and that I
will also show you how to do actual animations
and stuff like that. But what you can do is
there is a lot more stuff. First of all, one of
the most obvious ones that is also free is that
you can go to content, and you can use the
Quicksaw Bridge to go ahead and get
some mega scans. So in these mega
scans over here, there is actually a lot
of Tweedy assets also. So if you go to Tweedy assets, you can go ahead and
you can go to props, and then there was like historical or
something like that. So over here you have
wheels, you have weapons. But there's also like there was, like, historical stuff. But let's see. Oh, yeah, wait here,
historical. Oh, no. Oh, yeah, wild west
over here, there we go. So over here, what
you can see is you can see crates, you have fences. You have extra props here, see, L a lot of really
cool, interesting stuff. Again, I cannot
include this stuff, but this is also
like some of the resources that we could use. So we could have
some interesting saddles, maybe do, like, something like the
stone wells or, like, have some extra benches. So there's a lot of stuff
in here that's also free, so that's great, so
that you can also use. So here, we also have a
lot of really interesting, high quality wood barrels. These are, of course, the
quality of these to do those by hand manually
would take you hours. So it's just great that you
have all of this stuff. And it is all three.
And next dish, you can, of course, also go to the unreal
marketplace and there. You can also find
a lot of stuff. So what are the assets
that we have over here? So it's really cool. I will just show you a little bit of the
stuff that we have, but we are going to
mostly focus on props. So over here, in the
bundle that I have bought, I have a bunch of
different props over here, and the ones that I am
most interested in, I believe that I can actually go in here and they have a
scene that I added to this. So let me just quickly
open up the scene. Here we go. So these are
the assets included. Now, the essence that
I'm most interested about is these little
carts over here, which as you can
see, it's just wood. And then for rest, we have some benches,
which are quite nice. Here, you also have some of these wattle things
and everything, and even the hitching post. And for S, it is the signs that I'm quite interested about. Now also interesting thing
about this that you can see is that they
should all show, Oh no way, these are all
still unique textures, but there's also
buildings in here. So if I go for the
buildings, I won't use them, but the reason I
want to show you is because they use trim sheets. So you can really see how
did everything works. So if we go over here
and it looks like that we just need to wait for the static meshes to appear. So the cool thing about this,
I already had like a look. All of these buildings are
basically using trim sheets. If we go over here,
you can see that they only have a
single material. And if we open up this material, although it is not
yet loaded in, hopefully I can already open it. Ah, yes, over here. And
that's like a cool shader. But then the interesting
thing is that this is the only texture that is
using a trim sheet texture. And that's what I mean
with, like, the power. So here you can see how they use the trim sheet texture and how they really just plant
everything out perfectly, and how with like a
few different types of wood planks and everything, they are able to
literally texture this entire building
and do everything. So I will cover trim sheets a little bit like later
in future tutorials, just to show you how to really make proper use of them for, like, these kinds of
really large things. Of course, the resolution of it is it's okay, but
this resolution, these buildings are
more made for, like, not for games, but rather for, like, concept art
and everything. And that's why the
resolution and the quality is always
a little bit less. We got some really
cool buildings over here that we can also use. Now, what's really cool is that next to this, we also
have characters. And these characters we will
do in the next chapter, if we go back to our
restaurant town over here and don't forget to
just turn off your Booleans. Give the second because now because it is loading
in those old assets, it still needs to
load in these assets, which means that they are
looking black right now. But don't worry that
once this is done, I will just pass the
video. Here we go. So it has just done loading. It just simply need to
keep loading everything. So over here, what I want to show you is next to
these buildings, we will go over this later on. We have two types of characters. We have crowd characters, which are basically characters
that are just static. And what I will do is I will use them just as, like,
background characters. And then what I want to try and do is we have hero characters,
which are really cool. And these hero characters,
they are completely rigged, which means that I
can animate them, and they also include horses. So what my plan is, although I must say I've not yet done
a lot of testing on this, but my plan is to basically
have a scene like this and then have a few of the characters like
one with a horse, so we are going to create
a horse animation. And then I want
to basically have one or two characters
that are just sitting on a horse
that are walking and they are actually walking
through the environment. And we also have some other
characters that are just, like, walking around
that are just like, interacting with
each other using just like gestures and
everything like that. So we need to kind
of do the planning to see how we can do
this best because, of course, only the hero
characters are rigged. All of these crowd characters, as far as I can remember, they are not rigged, although I do need
to have a look, so for that to make sure.
So that is like the plan. As you can see over here
with the crowd characters, they work really great
because, for example, if I go, here, let's say that I just grab
like this guy, here, see? You can just enter him.
And just like that, I just have like a guy that is just sitting here
looking at something. Or maybe what I can do is I can, for example, have like one
guy that is just like here. He's just nicely sitting. Porch. Okay, then in this case, it just does not fit
completely correctly. But let's say that
we just have one guy that is sitting here, for example, Let's turn
off like a snap potato. There we go. He's
just sitting on here. And then what we can
say is we can have another guy if we loaded in the first time
that it needs load in, it's always a bit slow. But basically, if we just
have one guy that is just kind of like standing here, and then we have, for
example, a horse. And for that, I need to
go into my hero meshes. And let's say that I just have a horse that is simply standing. And then this horse, it
did import incorrectly, so I need to fix this stuff. But as you can see,
I can literally just have a horse standing here. Then I can also have another
where I can go like, Okay, another horse is
just, like, walking by. This horse does not
have any textures, so let's just pick my
hero horse over here. So we have a horse that
is just walking by, and then this horse
would then have a guy sitting on top of it. Over here. And you can just
have like this guy. So you can imagine that this will just add a
lot to our environment. Environments take
a very, very long time to make a very high level. So that is why we are
using these extra assets, but you can already see
that this just already adds a lot more life
to our environment. So, these choats we are
not yet going to do that. We are going to focus
on those heavily in, like, the next few chapters. For now, what I want to do
is I want to focus more on, like, some buildings
and some props. What I mean with buildings is that if we look in these areas, I can still use some
of these buildings, even though they
look nothing like the buildings that we have,
it would still be cool, for example, to hear it
like the background to, for example, pick like
one of the churches. Let's say that I
pick like one of the churches and I just move it, and it does not need to
be anything special. We can just move it see, I can just have it sitting
here so that I just have a little bit of that
look of the church. Now, I don't know if
there is anything else in here that is
really high that can work. So if we go ahead and go
over here to let's move this a little bit more like our side views, we can
of course have look. But of course, I made my
side views very specific. So for the buildings,
there might not be that much extra
special things that we are going to actually art. We might work on the camera
angles later on also, but for now, this is fine. And what you can also
do is if you want, you can also just replace these buildings
over here just like some of these just to give maybe like a slightly more
perfect shadow. However, that kind of
depends on your lighting. If your lighting goes
from the other direction, then it would be handy to do this, but we don't have this. So let's say the buildings, I'm just going to quickly
grab this church over here, which will just add like
that little bit extra. And it does not even matter
that it's like, Yeah, I can just push it further back and then it's not
intersecting anymore. You know, maybe, like, move it a little
bit more like this. There we go. And then
we can just have, this church, I am going to actually move it a little
bit more, just like that. So we can just have
like this church like an interesting location. Okay, the next thing that
we're going to do is we are going to work a little
bit more on our props. So I have a bunch
of props over here, and I also have some props
that are inside of mega scans. Mega scans is once again one of those things I'm not
allowed to supply, but we can go ahead and
quickly go to mega scans, and let's just have
an import of, like, some props that I
think will be nice. So historical Wild West. And then if I go in here. So what kind of stuff would be interesting for stogst art? Maybe like an old saddle over
here. That would be cool. We can kind of just
place it somewhere. I need to sign in. Here we go. So I signed in, and I already
showed you how to do this. You simply want to go
ahead and let's just go for medium quality,
or if you want, you can even go for Nant, but I'm just going
to go for medium, and I'm just going to download this and then we can
import it later on. Now, let's say also some sandbags would
maybe also be cool, but I'm not sure
about that one yet. So you just basically
wait for it to download, and then you can just add this to your CNN will automatically import. Okay, so what else? These benches, Nah, they are probably a
little bit too specific. Here we have some wooden crates. So let's just add this
wooden crate also. And I will also add a few of these barrels just because they are simply higher quality. I'm here to teach
you, but the quality, of course, of photogram tree is a little bit hard
to beat sometimes. This wooden crate, I
just don't feel like it. Like the wooden crate
is very common. Let's just grab this barrel over here. Let's art that one. Oh, yeah, and the barstool
would also be quite cool. The hitching post, we
don't really need to. The one that I
have, I find fine. So let's just press art. So here we have an crate. We can do the same over here. And I don't know,
do I want to have sandbags or am I just going
to use, like my sand? So we got the crates,
and then maybe also have a broken wheel over here. Let's let's add that one. And I think that's about it for, like, in the Wildwst section. Yeah, like maybe we can do, like some horse manure. Because it would make sense
because we have horses here. So, let's do that one.
Let's add this one also. Even though it's
on the background, maybe we can push it into our ground to still have
the benefits of it. So let's go ahead and also
use this one over here. And I think at this point, yeah, that should be fine for,
like, something like this. If you want, you can also
just type in sandbags, although they are
modern sandbags. Yeah, so they are like these
modern sandbags, however. So unsure, we can,
like, add them to this. Also just to be extra sure. Let's give that a
second. There we go. Okay, so that is Mega scans. I will not be using in real engine store because
by this point, I cannot spend any more
money on extra bits. I've already spent
so much money on it. So because yeah, for
Tutorial like this, $400 is still quite
a bit of money. I'm just going to go ahead and I will actually edit
my train later on that I will improve
this and just have my train along
with my props. So, having all of this stuff, let's get started, first of all, with some props
for the buildings. So we can go over here
to our buildings, and then we can say, like, Okay, we have a bunch of signs. So let's say that one
doesn't need anything. We have a general store, then we have a bank,
then we have a saloon. And now over here, let's do
like a tobacco store, maybe. So I just dragon Oh, turn on my snap
rotation this time. I just drag in
this tobacco sign, and I just make it a
little bit bigger. So, let's say that we have like a tobacco store over here. And the reason I'm showing you all of this
stuff is simply to show you how we can create visual interest with everything. So we got this one.
Now over here, if you want, you can, of
course, also do like a saloon, which I'm sure that we have
one here, Dry Goods bank, general store, telegraph shoes. Come on, no saloon. Let's
just do hotel, maybe. Saloon and hotel. So this will be just like another hotel. And this one can nicely
just go in here. Maybe turn off my snap rotation, just rotate it a
little bit better. Yeah. And just like that,
you can just art this, even though you most likely won't even be able
to see this one. And then over here, what we can do is we can call
this the sheriff's office. So this is, like the
sheriff's office. And if I have a look at that, it looks like that I
want to actually arts one on top of here because
that's how this one is made. So we can just go
ahead and we can say, like, Okay, this is
the sheriff's office. And then over here,
we will have a um Uh, actually, oh,
that's pretty cool. We can use this one over here. Tan. And let's use also
one like over here. That will be quite
cool. And then over here, what is this one. Mohant Man Merchant. I don't know which word it is, but we can do
something like this. So that we just add some
extra signs to there. That is quite cool.
That looks nice. So now that we've
got those pieces, now what we can do is
we can just start by introducing some larger props. So let's say that we have
this hitching post over here. We can go ahead and we can
also have this hitching post. Let's say that we also have it over here, have another one. And these are our own
hitching post, of course. Let's do another one over here. Like that? And another one here, even though you cannot
really reach it, that does not mean
that they wouldn't have these hitching post sitting here before the
water started to creep up. So we got some hitching
posts. That's pretty cool. We got our barrels.
I just want to also add add the mega
scan barrel to this. So just so that we can kind
of see the difference. So here we have a wooden barrel. And yeah, so you can
see that, of course, the difference in
quality is there. But remember that this one is literally scanned
from real life, so not really as fair. But they do kind of, like, from a distance, they
kind of, like, still fit. Maybe you want to
make this one like a little bit thinner. And if we just go
ahead and just copy the exact same values over, Oh. There we go. Here we go. So that's kind of fits already
like a little bit better. So knowing that, so we will have this barrel over here just to
honor our own little bits. And then maybe have
like one and like two barrels over
here. Like this. And that would make sense. So these are close
to general store. I don't want to have the barrels everywhere because
that would always feel a little bit strange if we just have random barrels
sitting everywhere. Now, next to this, we also
have the wheels, sandbags. Oh, let's see if we can do
something like sandbags. If I grab my sandbags over here, and rotate it, Oh,
they are very clean. And then maybe if we make
them a little bit darker. So here we have some
sandbags and maybe if we also do that like,
actually, you know what? Here, let's do omit mode. It would make more sense for the sandbags to probably be in this area where they kind
of just twine boil them up. So let's say we have
some sandbags here, and now I'm going to just
turn off my snap rotation. Also, maybe have some of
them sitting over here. It doesn't need to
be a lot of them. I just want to get
like something of a visual interest
that I can see. And what you can do is
in your material of your mega scans material, we can go into the albedo
tint and just like, tone these down a little
bit to make them a bit darker so that they fit a little bit better into
this environment. Okay, so we got that stuff. So over here, we have
the water trougt although it might be
a little bit big, so let's just set it down or scale this down
a little bit more. And then what we
would want to do is we probably want
to go ahead and, like, a very low tool strength. Here, I'm just going
to increase once again my train a bit more so
that it actually fits. Then I can also go
into my paint and I can just click
on my hay paint. I can just art some
of that stuff, also. There we go, see that
immediately all fits together. So we got those months
done, horse manure. Let's see if that one works if we just go ahead
and art this over here, scale it a little bit bigger, and let's see when
I move it down, I don't think, Wow, this does not nearly look
as good as LLD tree. Why do you only import
LLD tree for me? That is a little bit
strange. Like, I did not ask for just LLD tree. I asked for every single one. If I open Oh, okay, LOD zero is here. So for some reason, there is something going
on with the LODs. If you want to go ahead
and remove those, you can go over
here to number of LODs and just set them
to zero and press apply. And now we are basically forcing it to always be LOD zero. Oh, but that's still
that is strange. This looks Oh, no, wait. It's just our lighting. This is still a bad one. Okay, then I think that one
is a little bit broken. But honestly, I'm not
going to really miss it. So I'm not too
worried about that. So what we can do with
this is, let's see. So we have the wooden stool, so we will do a pass
on that later on. I'm just curious if I can you, or is it possible
to just have this sitting on top of here and that it does
not fall off, I wonder. So yeah, just like
some general level art just to make it a bit
more interesting, see? Yeah. Just like
stuff like that just adds so much interest
to your environment. But yeah, these assets they
just take a long time. So now if we just go
ahead and go back here, let's say that we would go for a nice looking bench over here. Let's have a bench
so we can have some people sitting
on it later on. So we have a cool bench here, and maybe then we also in here, you can see the
difference between their hitching post and Rs. So I like Rs more. So what we can do over here is maybe have a different
bench sitting over here. I have, like, two of them
like this. Let's see. Maybe also over here, if I just go to my
mega scan assets, remember how like
that wooden stool. You can just, like, have
the stool over here also. And maybe also over here. So these are just
like the stools that people are just
sitting on and relaxing. Let's go back to our
messages over here. So you can see that we already slowly starting to add
more and more to this. I first of all, just want to
focus around the buildings, and then I will
focus on the road. So that's why you see me
mostly doing this stuff. That's just a random table. I don't really need that. Yeah, we got this wheel here, but we actually have probably a nicer looking wheel over
here that we can also use. There we go. So we can just
have this wheel sitting here, so people are just working on repairing it or
something like that. And then what we can do is
we do have some crates, but we also have some
crates over here. So let's start with these crates over here that we are
just going to place. And I do know that,
as I said before, here we have a crate also it might sometimes feel a bit strange to have the
difference in quality, but often from a distance, you won't really
notice that as much. So we have like two of
these crates over here, so people are like, and I'm just trying to
find out the story. That's why you can
hear me saying, like, Oh, people are doing
this, people are doing that. Over here, you would say like,
Okay, so it's like water. So you would probably have a
bucket sitting next to it, and this bucket is being
used for that kind of stuff. Ooh, some electric pools although we do not
have any cables, although we could use
cables with the spine, but that would be yeah, I don't think that that
would really work. Also, over here, you
don't often see. The only place where you see
electric poles is over here, which does like this
interest with the cables. So I will have a think about that because I have not
used the spine system, or I have used spine system
inside of unreal for cables. However, I've never made
the cables from scratch. I always just used
to plug in for that. So over here, what
we can do is we can maybe have some firewood
just sitting here. We can nicely rotate it, and all this stuff, you can
just do this quite quickly. Like, it doesn't need to be the most amazing
type of quality. It's just to add some
extra interest to your scene. Random gun. So let's see what
else do we have? We have a locker. We have here, maybe some
extra piles of wood. Oh, no, wait. I literally
just used that one. I thought this was
a different one. So we got, like, stuff
like that. I don't know. Do you want to have,
like, an apple? If you want, you can
also do that stuff. So there is not too much
going on over here. Maybe like some bottles
here and there that we have placed down below it. Now, this basket does not
really make much sense. We have some bags over here, so let's have a quick look
now at our other pieces. Okay, so we used
all of those also, although maybe we can also
just let's scale this up. Also use like one of these. Now if we go back to
our meshes, we can, for example, throw like
a bottle on there. So at least we already
have something going on. Now what we're going
to do is we are also going to focus more on getting some interesting stuff going on on the actual road, because that's the
biggest reason why I'm using these assets. It is mostly because
the roads, of course, very flat, and we just want to have something
interesting in here. Over here, you can
also see that there's just stuff going on on
the roads and everything. So what we can do is
we can go over here, and then we can say, like, Okay, I want to let's say that
there's like a wagon. That is like standing
over here or here. And often I do want to just
have a quick look around to see if there's anything
that needs to be change. Let's say that we have the
wagon standing over here, and then what we can do is
we can say, like, Okay, so this wagon, it has where are you some crates
standing next to it. Some of these crates over
here and over here that we just drag them
in and they are just being placed next to this. And then let's say that we go to our own assets and
we just grab one of our barrels or two
of them over here, just to also add
some of that stuff. And maybe let's say that
we scale this barrel down because you do have different
scaling in barrels. And it's like, one of them is, like, a little bit
rotated over here. And like that, we can just kind of like mess around to things. I can see that the
normals are not working, but we can later on just
say, do not affect decals. Sorry, I mean, the decals are not working. So there we go. We already have a little bit of storytelling going
on over there. Now we can just go ahead and
we can keep going with this. So for example, over here,
let's say that we have, like, one of these wagons,
and these wagons, they are very, very bright. So I will need to probably, like, change the
textures of them. Let's have this one. Let's see. I need to have a quick
think about that because the texture does
not look very nice. Unfortunately, these wagons,
they are always like static. So I do not think I can
have one that I can just, like, spend some horses on it. Maybe. Maybe if I do like, one that is like over here
like this to kind of, like, block the view,
and then we will have two horses
sitting behind it. And maybe if we then grab, I don't know, like some crates. That would not make sense to
have them stacked like that. So maybe grab some
crates over here, and then like some
of these bits over here and just kind of like
stack it all fills that there's still some
story going on. We will have some horses that are standing behind
it that are waiting, and we will have some horses here on the street
and all that stuff. So just like this, we can just
slowly start by including more and more stuff until we have just everything
that we want. So let's say over here, you can do say we grab this barrel and we grab some
bottles sitting on top of it. The hitching post,
we already did. Maybe over here, I want to
do another hitching post. Oh, Whoa, time has
flow flown by. It's already 30 minutes. But we are almost
done with placing our base assets. So
we got this stuff. Over here, you can go
ahead and just maybe have another one or two hitching
posts like that. There we go. So we can just create a
bunch of interesting stuff. I don't know we don't
really need fences, but already, it's
starting to get a little bit more
lively over here. So we can save our scene. I'm just going to go ahead
and I'm going to maybe add a few more things. Let's say that I add more
like some benches over here, and maybe then also like, add some crates over here. I don't know if we go over here, we can maybe art
like a stool or two, make it a bit bigger so that it's a little bit more visible. But most of this stuff, people will simply just
be standing on here, just to art a little
bit more interest. So let's have a look now. Okay, if I press G,
you can see that that's already arts
quite a bit of interest. Only thing I'm going to
do is I'm just going to go ahead and also
art like a wagon, probably like over here, just like it doesn't need
to have anything special. The wagon is just here
so that from a distance, you can see that
there's also some stuff happening in this area. So we got a cool
wagon over here, and this wagon has maybe some
crates sitting next to it. And then next to this, we also have like a hitching post
sitting around here. Yeah, there would
then also be like a hitching post
probably around here, but you cannot really
see that anymore. So we got this stuff. Maybe we do like something
with some barrels around. Over there. Let's see. Maybe like another barrier. So you can really
spend a lot of time just messing around with
this if you want to. I'm not really
going to go there. I'm just going to kind of,
like, leave it like this. And that's all we're
looking pretty good. So what we'll do in the next chapter is in the next chapter, we will start by adding
our static characters, and once that is done, then what we'll do
is we'll start by adding our more
animated characters, and we will really just like improve everything
based upon that.
73. 72 Placing Our Characters: Okay, so it is now time for the second part in which we are going to work
with characters. Now, as I've shown you, we have a crowd of
characters over here, which are characters in a
bunch of different poses, and then we have our hero
characters over here. Now, I checked and I have rigged versions of all
of these characters. Unless you're character artist, then it would be different. But most time if you are downloading these
characters from, for example, the unreal
marketplace or from Gumroad, just double check that they
are rigged and if they are, or if they are at least in a Tepost that's
already often enough just being in a Tepost then
you are able to animate them. Now we are going to use
an auto rigger later on to make sure that all
of them are animated. But the reason I'm
telling you this is because even though I
use these characters, you can apply this to any type of character. That does
not really matter. So I'm sure that you
know about the tipos, it's with their hands
stretched out and their feet stretch out so that
there's a lot of space in between the
body and the arms. I don't know if I don't
think I can actually show you one here that
actually does it. But basically, the
main goal is that I'm going to show you later on how to actually
animate these characters. The reason why I'm
telling you this now is because we cannot go in
animate all of the characters. If we are going to
place 50 characters in here to get, like, a crowded scene, I cannot go in and animate every
single character. Instead, what I will do is
within all those characters, there will be a few
main characters. For example, we will animate only like a walk
cycle for the horse, and then if we have
this entire crowd, people are talking
and everything, what we will do
is we will simply have only a few horses walking, and we will have a few characters that are
maybe walking and maybe a few of them that are just talking
and just gesturing. And that will be plenty
enough of work to do that. So knowing all of that, if we have a look, I have
these hero characters. It doesn't really matter which
character you are using. If you just want to have a lone cowboy just walking the street, all of this, same basic
concept. It all just works. But what I'm going to do is I'm going to start by basically setting down as many static
characters as I can. And for this, of course,
as I said before, we kind of need to have a story. So we're just going to
basically clutter around different stories of characters
that are doing stuff. Let's say that
over here. We have this story that
we see over here. Now, what can we do here? We can, for example, have
a cowboy sitting here. The first time that I
need to drag it in, it can be a little bit slow. But we can, for example,
say that, okay, there is a cowboy that is just
sitting here on the bench. If we have very small clipping, you can see over there,
that is not too bad to do. By the way, I know
that I still need to add a little bit more
variation over here. To our wood, but we are going to do one more extra chapter
after everything is placed, it's just like
general balancing. So let's say that we have
like this one character here, and then we have this other
character that is just standing here that
has its back to it. And he's like
almost like talking to someone, for example. And then we have
another character that's just standing over here. So they are just like,
kind of, you know what? Let's replace this one with
this character over here. They are just kind
of hanging around. Oh, wait, this character kind of needs to go here because it is standing or it is holding
his hands somewhere. So in that case, let's just
go ahead and do a character that's just standing over here. So here you can have a story
of two people are talking, and these other guy is just
kind of like listening and then this guy is just relaxing
in front of the street. So that's the first
one that we can do. Then I can go to my
hero characters, and I can grab, for
example, a horse. And by this point, I
have already fixed the horses, and I
can say, like, Okay, there's one horse that
is standing over here, maybe a little bit angled
in like the hitching post. And then we have, for example, one lady that is kind of like just standing next to the horse so that she
just got off the horse. And just like that
here, we already get a very lively looking scene. Now, these horses that we
are going to place now, they are going to be animated. But what we can do is
we can go ahead and already start by placing them. So let's say that we have,
these two horses over here, and later on, I can even, like, change the
colour if I want. So that would also be cool. So here, yeah, actually,
let's do that. Let's see if I can
go to my horse skin. Um, yeah, I should
be able to do this. If I just quickly go to my skin material and I'm
opening this up and I just multiply because
most of these things are, oh, wait. Yeah, we
already have that. So I can just go ahead
and I can duplicate this. Skin material underscore dark and add this one
to our horse skin. Oh, it's not a Oh, wait,
it is a parameter. Sorry, let me just swap this around. This is
not the right one. No, it's Let's Undo. There we go. That's weird. Okay, Akay in anyway, duplicate this horse
skin underscore dark. And then what we can
do is we can just replace this with our
original horse skin, and we can just go ahead
and make this one dark because that we also have a
bit more variation in there. So let's go ahead
and go in here and just let's make this like
almost like a black horse. There we go, see.
And I don't know why the texts are all of
a sudden not loaded in. It's a bit strange.
Let's save asen. Hello. That must be like a
little bag or something. Yeah, that must be
it. That's weird. I don't know here
build landscapes. No. Okay, first time
that this happens. So what I can do is I can
maybe just go ahead and, like, reload my scene, and I'm
sure that will fix it. Come on, textis. Looks
like it's a Dagles. Okay, in any case, it does not really matter
too much right now, although I am still
annoyed by it, so I'm just going to let me
just restart the engine. Okay, I restarted my
engine and that now works. So that's a strange one.
Never read that one before. In any case, we have
these horses over here, and now what we can do
is we can go ahead and we have hero characters, and we have crowd characters. So what we will most likely only have the
horses moving around. I know that over here,
there's like one. So what if we go ahead and
grab over here, one of these? And these ones, it
looks like that their pivot point is
a little bit higher. So if we just click
on our horse, right, click on the location and copy and then paste it, maybe Oh, no, so that's not I expected
that that would be working, but then we can just
go ahead and we can do something like this. That does not really
matter. So we have this one and let's
also then go into our hero characters because I think we also have like here. We have a doctor which we can
also just place over here. There we go. So now we
have also already dose. So Oh, and our booleans
are still turned on. Still nose off. There we go. So that's already
looking pretty cool. So we got that stuff
going on here. Let's go ahead and have
a horse that is just like drinking like that. But that's already quite nice. So this is going to be
like our main scene. So it's nice that we over here have, most of the characters. Now what we can do is we can go ahead and maybe go down
here and do we have, maybe like something leaning like someone leaning
against something? Yeah, well, we
have this one, but it would have been
nice if we had, like, a sideways
leaning. Let's see. Any over here? That looks like it works. Yeah, and it's even like this
is the sheriff's office. So if we go ahead and
grab this one and maybe, like, you know,
let's just have him, lean a little bit
against over there. So we got like one of those. And then maybe, like,
have something in here. So these are bandits,
it looks like. Let's see. If I just
go ahead and just have one person sitting here, See, I'm just kind of like start adding more and more characters
like that over here. So that's looking
well, actually, I don't know if that's
looking pretty gool because I cannot
see, all of this. Yeah, actually, I'm hiding too much detail, so
let's not do that. Okay, so we got these
pieces over here. Now, with the horses, if we just go ahead
and just have like one horse standing here, and then another horse that is just like
standing next to it, that should already be fine. So we have these two
horses over here. Once again, you can just
go ahead and you can change the horse skin,
for example, to dark. And from a distance,
it will just look like the horses are standing on the
wagon and stuff like that. Now, I want to have more stuff
going on over here also. Let's see. What else do we have? Maybe we can have a hero
character standing over here, and he's like, he
will walk past. So we have the character here. We need to make the
animation really good if we are going to make him
walk past this close. But let's say that, let's see. Let's have him over
here or over here. I'm just sorry, it's
a bit hard moving. I'm not sure if we
want to have, like in the corner or if we want to already have him
going past here, maybe, like, have
him I don't know, like somewhere over here. Now, I think it's easier if we do it on, like, a sideways. So let's have him just
hanging around here. And then what I want
to do is I just want to be able to still see some of the horses over here. So let's do
something like this. I think that will work
a little bit better. And now what we can do
is we can just go ahead and grab. So we have the doctor. Do we have any other one Now
because that's just sitting, so let's go into our
hero characters. We have this one and this one. Let's just grab
this one over here. And what we can do is
we can grab the horse, copy mostly the rotation, and then right click and paste this rotation in
here and the rest, it's just a matter of
moving this in here. But I am going to actually
replace the character, but I do want to Yeah, let's just have it over here, probably somewhere over here. And the character, I'm
just going to go ahead and I'm going to replace it
with a hero character because they hold the horse a little bit better here, see. See? So they hold the horse a little
bit better like that. And I think that will
be also a bit nicer. I don't know if I need
to move this one up. Yeah, maybe that
works. Over here. So we got the doctor
over there. That's fine. Now, I want to also have,
maybe something over here. So we got the doctor, which is the main character,
and we got already the girl, which is also a main character. Then, oh, yeah, here
we have another girl, but we did not use it. What if we pick like
the sitting version of her? Let's see. So whatever I grab her and
place her like over here. Yeah, that looks pretty good. And then maybe that she is, like, talking with someone, so let's go into
our meshes and we can go over here, like, talk, but maybe, like,
this guy over here. Although, this guy
does what is this one? This one might maybe, it feels like an interesting story that
she's like, talking to, like, a classy guy because
she is like a cowboy with, like, a gun and everything. So yeah, I think that
looks quite interesting. So I keep going back
to these camera angles to keep trying to, like, add more
life to our scene. So we already got this stuff. Now, let's say that we just want to go
ahead and just have, someone that is like, mid walk. So this is the crowd. If we just go into our meshes, I know that we have
like the girl, but she's all the
way over there, so let's just reuse her again. And let's just have a simple
character like walking past, and then let's move
this over here. So the horse is over there.
So we got that stuff done, so we have a walking
past like that. And I almost feel like it
would be nice if we have another person sitting next
to that that's also walking. So although the doctor
is white behind here, so I don't want to
reuse the doctor again, and the girl is right there. So we do have over here,
we have the sheriff again. So what if we do that?
What if we just have the sheriff like this. And I also just keep checking over here and just see how
everything is working. It would have been
nice if we have, some people that are
doing some more stuff, but animation wise, that
would be like a lot of work to add all of those extra bits and
pieces and everything. So here we have here's
the villain, but to me, he is just like a
random character that just stands with his back just that we cannot
see the mouth covering. So that would hopefully give
a little bit more sense. And if we then go into a crouch, we can also over here, we can also have, let's say, someone walking over here. And maybe have
another one that is like walking over here. Here we go. So we
still get some people, if we go for this angle, if we go for this angle, I
kind of want to do this, but we can, of course,
just, like, remove some characters
whenever we have. Like, for example, for
this angle over here, the guy is leaning against something and I
can no longer see. But I can, of course, just
do this and remove him. This angle also just
doesn't work anymore. So we kind of need to
adjust our angles. This is a really nice angle
now. So that's really cool. I can go ahead and I
can, for example, say, let's have like one guy that is kind of like sitting up here and then maybe
make the bar stool, like a little bit
larger like that. So he's just kind of
hanging out over there. And just like that, we can have a bunch of different people. This one, I can have Oh, yeah, here, this one
is like leaning. Here see, so we get
some couts over there. Now what we can also do
is we can also go all the way up here and we can say, like, Okay, I want to have
just some people standing. So let's just have a guy oops, that is standing over here. Oh, our railings do feel
a little bit too big, so maybe make this one a little bit bigger
just to fake it. So we got like this guy, and then maybe have
also another hero of like I don't know, like a girl Because
from that distance, you probably cannot
see that we are reusing the character so often. You see, if you see
this, you cannot really notice that we are reusing
the character so often. Let's say that we have a
guy there and that we have one girl here, and
then another girl. That's just like standing
over. Here we go. Maybe rotate her. So we got, some people standing over there that are just doing stuff. There are people walking over
here, people just chatting. So this is like, really
the main street. And over here, it
makes sense that many people are sitting on this side because
what do you have? You have a sheriff's office, and then for the rest, you have, like, a lot of water just
sitting in front of it. So I just feel like that would make sense if
we just do this. Now, over here, what
we can on the ways, we probably cannot do a
horse because of the camera, but we can just try and add some more horses here and there. Let's say we add one over here. And this is like a
bar and everything. So we can also do, another
one that's just like kind of standing here also.
So that's a bar. Would there be like
we don't really have a lot of water of those
water things, do we? Maybe that's not really needed. So we got like one
sitting over there. Maybe this guy, I'm going to, like, move him
forward a little bit. No, you know what? No, it was
nicer if they walked back. But as you can see, over here, our environment already starts, like a lot of interesting
looking characters, and everything is starting
to look really good. So I'm just having a quick
think if there's, like, any more things that you want to do like maybe
here at the saloon, but you most likely won't
be able to actually see many of these characters,
so just keep that in mind. So we can have,
like, another guy leaning against here,
like with the saloon. And then maybe we
can have a group of people that are
talking over here. So we have like one guy
that's just standing here. Then we have another guy that's just standing against here. So we just have a group
of people talking, another guy that's
just standing over here and don't know from, so you can maybe see tiny
glimpses, but not a lot. Now, maybe over here, it would be interesting if
there's something happening. So let's just grab
this guy over here and maybe he's doing something. We can have this guy over here, which is I don't think
we've used him before. And he's just, like, walking
along with his friends. Yeah, so we got that
stuff going on. Maybe you have, like,
another guy just going over here. Ah, I don't know. Let's see. Now, let's just leave that open so that we can actually
see everything. So let's leave that one open. So we got this stuff over here. Is there anything else
that we need to do? Maybe there was one guy
that was also sitting here. This guy and he's kind
of, like, talking. So let's say that
he is just, like, standing on here, and he's kind of like just talking
away with his friends. Oh, no, wait because that
I can no longer see them. Maybe he's then talking
away somewhere over here. But, okay, so we got some
pretty decent placement. So when we see this, and we got these people over here, now, imagine that I'm
going to try and find some audio that is just like the audio of people doing
stuff and everything, what would be the guys
that we want to move? We would want to have
these two over here, just moving around walking. So that would be like a
pretty good one to have. This guy, it would be nice if we maybe also have him just coming from over here and just
walking also like this. And we would want to
have these two people over here also walking. And I think at that point, maybe have these people over here, just do maybe like a
general movement animation, this person that is just standing like he's
looking around. And then the rest we can
kind of just have them, or maybe also have this one. So the rest of
people, they can be quite quiet and just
standing still. But that is a pretty good idea. So now we have over
here, we can go ahead and we can have this one, the fog is way too
strong, but okay. We can go ahead and we can have this angle a little
bit better over here. We can have this angle over
here changed a little bit. And that's why I was also so focused on making sure
that we are still adding, a lot of stuff on the other angles in case
things changed. But let's now already do this. And let's say that
we, first of all, just quickly set our
for a little bit lower. So we have our
exponential height. I need to clean up the
scene a lot, definitely. That's set the density
like a little bit less. Over here. Yeah,
let's just do this. There we go. The
density is a little bit less, tiny bit more. And what we can also do is just let's set the screen
percentage to 200 so that we can really
see all of the sharpness. Okay, so that's all
looking pretty damn good. So this is looking
really interesting. We got environment, and it has a bunch of
stuff going on there. Only thing is that over here,
it feels a little bit flat. So I'm going to see if I can maybe do something in this area. I don't know yet. We'll see. In any case, for now, let's just go ahead and
close of this chapter. In the next chapter, I will
show you how we are going to do the animations
for characters. And then the chapter after that, I will show you how to do the animations for
like the horse because the horse
is an animation we need to actually
make by hand. The characters and
everything, those animations, we can generate,
but the horse is one that we need to do by
hand because of the rig. So let's continue with
this in the next chapter.
74. 73 Creating Our Character Animations Part1: Okay, so this is going to be quite an interesting chapter. What we are going to do in this chapter is I'm going to show you already on how to
do the animations. And I will just show you first the entire workflow because the workflow is the
same for everything, so we just kind of
need to replicate it. So for this, what you need is you need to have a
character that is in a tepos. It does not even have to
be rigged or anything, or it doesn't even have
to have a skeleton. It just needs to be in
the Tepos because we are going to use a
tool that is made by Adobe that can
automatically rig and skin your characters
and then give you animations, which is very handy. Luckily for me, I have this. If I go ahead and let's say that we use this one over here. This is the Sheriff B. What I can do is I can go ahead and I have my hero
characters here. And then this is Max Maximo, Maximo. I always say Maximo. So, in any case,
this one, luckily, the guy that made all of
these characters already prepared a T post for them.
But this is pretty good. So although I don't
need this stuff. So what I can do is I have
over here the sheriff, and those are the
hero characters. So these are all
hero characters. So having that FBX ready to go, what we can do is we
can go to maximo.com. Maximo Maximo. Honestly
I would just say Maximo. And then what you want to
do is you just want to log in with your Adobe account. It is completely free,
by the way. Here we go. So that's a cool thing that
it is completely free, so you guys can
also just use it. That's why I wanted
to show you this. This was very
specifically because you can just download any
character you want. Even if you just want to
have one character walking around or even have a horse
or do some basic animations, it is still good for
me to show you this. So over here, what it
will do is it will load. And although it has loaded
in my test character that I created like a while
back because I had to, of course, make a test, we are just going to press
Upload character, and then you simply want
to drag in your character. In my case, I'm going
to drag in the sheriff. What it will do is it
will upload the coater. However, it is 95 MBs, so I will just pass the
video until this is done. Or actually even better. While that is uploading, I can just go ahead
and I can go in here, make new folder, and I will call this Sheriff
Underscore Animation and the sheriff will
only have a walk cycle. We can just go ahead
and use this one. I wonder, I don't think
that we can actually use, we will not be able to use the same animations
on other ones. We might be able to. Yeah, I guess if we do all
of them in Maximo, the animations will
stay the same. So for example, we can here you have a sitting
laughing animation. We can actually give
our other characters the exact same animation file. So we only need to import
the animation once, and we only need to import
the characters once. That will save us a
little bit of time. So keep that in mind. We are going to
keep that in mind. So we are going to have this
guy and this girl walking, so we can have the same
walking animations on those. We are going to have maybe
we had one laughing. Let's have this girl sitting
and laughing, for example. Then, of course,
these guys, they are a little bit more unique because they are going to be horses. But we're going to use
a really cool technique that I will show
you in just a bit. So let me just pass
the video again. So here you can see that the
next step is that it doesn't outoigger and it will automatically rig over
here your skeleton. Then you can see also
that it will play in animation and it will
test it out for you. So this is looking really good. So you can see that it's
just completely rigged. I didn't have to do anything. It is just it's working,
which is really nice. I can then just
simply press next. Your tree character
will be uploaded, proceed with the new character, and then just press next
again, there we go. Here we have now
our character and we can just click
and rotate around. So all that we need to do now is we just need to
find a walk cycle. So we can just go to search, type in walk, and we just want to get a
natural walk cycle. Let's say we do a guy. Yeah, that's a weird walking. So let's say walking
confidently, or just do this one. Let's
do this one over here. You can click on here, and then what it will do is it
will do a walk cycle. However, the characters
now moving forward, and we do not want that, so
we can simply press in place. And when we do that, here go. See? Now, if something
is clipping, like you can see over
here, you can actually set the character arm space
a little bit higher. And what it will do, see, is it will just move the characters further away from
your character. So that's really good.
So we already have this, and it's a perfectly
looping animation. And that is pretty much it. I believe overdrive
is like the slowness. Here overdrive, so that one basically controls
how fast it goes. So let's say that we go for a little bit slower like this. Let's say that we have
20. Perfect. Okay. Now when you are done
with this character, you can simply press Download, and then you can say, Okay,
I want to download this as an FPX with the skinning. Frames per second, we can, 30 frames per second
is more than enough, and we can simply
press Download, and then it will
download your character. So what we can do is we can actually use this character for, like, multiple
different animations. So then all we need to do is later on for the
other characters, we simply just need
to go in and only generate a maximal character for them, and that's about it. And just throw on
a Dat animation. So if I go ahead and,
like, closes now, now what I can do is I had, like, here, sitting
and laughing. So let's say that That
does not look really nice. Let's let's do
another walking cycle first. Actually, let's do walk. Let's do another walking cycle
that is a little bit more maybe female or
something like that. Or maybe not. Yeah, I don't actually. Yeah, I don't think
there is a lot of it. Standard walk.
Let's try that one. Yeah, actually,
standard walk can work. So let's do in place. This one, let's set our arm space
a little bit lower. And let's set this
time let's set the walking a little bit faster. So we have like 30, for example, instead of 20. There we go. Now we
have this walking. And now that we've
done that, we can Watscan Download and we
can just press Download. So the original one is
by this point done. So what we can do is we can
drag it into our folder, and meanwhile the other
one is downloading, we can just go
ahead and do this. We can do Sheriff underscore
walk underscore A. And now the cool thing that
we can do with this is we can simply import it and just reuse everything
that already exists. So if we go in here, we have our hero meshes, in this case. Of course, for you
guys, it might all look very different
because unless you literally paid $400 for
the same pack as me, but I do not assume many of you people will
actually do that. But what we can do with
this and delete that one. I don't need that is
I can go ahead and I can create an fool card
custom, for example. Wow, I really cannot type. Custom over here. And then I can do another for the sheriff. Over here. I probably
vote at Wong. But what we can
do here is we can just drag in the sheriff walk. Now, this is very important. Make sure that skeleton mesh is turned on and that import
mesh is turned on, but make sure that you do
not pick a skeleton in here. You want to just leave
the default skeleton. So do not pick any type
of skeleton in here. For the rest, everything
is pretty much fine because it's already
correctly set up. Just make sure that import
animation is turned on, and that the animation
length is the export time. And that's pretty much
all you need to do. At this point, you
can simply press Import and we can
have a look at this. So it will initially import
probably like oh, wait. I forgot if you scroll down, turn on, do not
import materials. I believe that, here, because it still reads material. So just remember that
that scroll down, I cannot show you again.
Well, I can, actually. I can just hold control. And if you hold
control, it does like new settings or not. Oh, no, it might
not do the setting. Anyway, scroll down
and just turn on, do not import materials. Do not import textures because
we already have those. So now if we, for example, have our sheriff over
here, we can see that we have over here
all of these materials. All we need to do
is just open up our original sheriff,
which is the static one. And I can then simply click
on the Share of clothes, and I can know, Okay, that's
the first one I need. Then I can click on
the share of skin. Then I know, Okay,
so that's this one. Then I can click on, Okay, it looks like we need
again, sheriff's skin. Then we need hair for
the sheriff like this. And then that's just
like a default material, but that's most likely the gun. Although I don't think we
actually have a gun in here. I know, yeah, here. So we need like No, wait, it looks like that this
one needs to be don't I assume that the share
of clothes does not, so it doesn't do it. So for that one, just make like something that's just black because I do not
think that I have the actual textures
for the guns anymore. Yeah, if I go in materials, I do not see any type of, like, gun material or
anything like that. So they must have
just forgotten that. But I don't really care
about that too much. I can just go into my
materials and I can just grab Willie no play, let's just scrap the
play material for now and we will just add like
something else later on. I can also pres isolate, and then I can see that this one is supposed to be the hair. So here we have sheriff hair. We can add that.
Let's isolate this. Okay, so those are the eyes. Okay, perfect. So we have our sheriff over
here ready to go. We can simply save him,
close the old one. So now if we go to custom
and we drag this in, you will be able to see that
we just have the sheriff. And this was the original tepost that I was talking about. Having the share of now, what you can do is we are going to later on art and animation. However, you might also be able to already art the
animation in here. If you go to animation mode and set this to use animation asset, you can drag in the
underscore anim that has also imported
and drag it in here. Now, if I would go ahead
and I would press Play, what you can see is
that now you can see so now we are just
playing our level, and you can see that the
character over here is baking. Now, of course, it is
not moving forward, so that's the next
thing that we would do. This is going to be the
basic concept for this. We basically have this
character over here. And the cool thing
is that he already kind of is in a
walking animation. Although depending on it, I might swap out between
the original characters and like the ones that
are static because static ones are a little
bit more interesting. So what I might do at
this point is go in here. I will also at this
point, select all of my Boolean cubes.
You delete them. I don't need them anymore.
Okay, so now if I just quickly go and let's do
a little bit of cleanup. So we are going to select
all of this stuff, and we're simply going
to add a new folder called static
Underscore characters. The barrels and stuff like that, we need to be a
little bit careful. So some of these
barrels we want to keep because they are
going to be our assets, but some of the other barrels
we do not want to keep. So these ones we can just
static assets ours, ours. And then we over here, we have like
characters once again. So these are our characters
that we can throw into the static characters. The doctor is also
a static character. The hitching posts are going
to be static assets hours. The horses are going to be
in the static characters. The plane is water. Rachel is going to be in the
static characters. And then over here
we start to get a few other pieces where most of these
are all not from us. So we can just
select all of them. And the, not the way straight. And we can just go at the
press a plus and call this one static or, not ours. And the reason I do
this is because I need to remove these whenever I supply you the
files because I'm not allowed to actually
add them to you. Static assets not ours. Well quatrat is going to be, just like a boolean
nl, whatever. The Water loft is going
to be static asset hours. The villain is going to
be static characters, and that should do the trick. Okay, so we have this
static character over here. What I'm going to do is
whenever I have this, I just have like let's make a fold that we'll just call B so that we can turn it off. Okay, so how are we going
to make this guy walk? Now, this is the same concept that we are going to
do for everything. Let's say that we
have these people, and let's say that
for our actual scene, we are going to have them a
little bit forward already, so that they are
just walking by. What you're going to do is we are going to create
a sequence file, and the cool thing about
the sequence file is we can add multiple character
animations in here, and then all we need
to do is press play, and then we can actually
in our viewport, see everyone moving
around and interacting. So if we go ahead and
for this sequence, I will do this in my own folder, although it will most
likely just say, like, Oh, it's corrupt
or something like that. When you guys open it, let's do a folder called Animations. And in here, I'm going to create a new right click animation
level sequence and call this characters or character
movement, for example. Now, when you open this
up, you get this window. So it looks quite familiar if you've ever done any editing. All that we need to do is we
have a sheriff walk cycle. We simply want to drag
the sheriff in here, and now we are able to
basically animate him. We are not able to animate the actual hands and everything. However, if you have unreal
engine compatible character like the Mannequin or you have any characters
that are based upon that, you are actually able
to also animate hands and walk cycles and everything
directly into Unreal. But for our version, what we need to do is we need
to first of all, hold Control and scroll and we are going to set this
a lot larger over here, and this is basically
your animation length. Now, once that is done, we are going to go ahead
and in our sheriff, we are going to click on this keyframe to add a keyframe wherever we have
our sheriff currently. And then what we can
do is we can set another keyframe and I'm
going to set it around here. And then I'm simply going to move my sheriff out of the view. So you can see that
now he is just walking away out of the view, and then I press
another keyframe. What has happened now is that now if we switch back and forth, you can see that the
character is moving. However, there is a problem. Whenever I press play, what
you will see is that he will start slow and
then all of a sudden, he will go faster, faster and faster over here and we
don't really want that. The way that we can fix this, it is very easy is to simply go over here into the
show animation keys. All you want to do is you
want to click on the green, which is your transform
and you simply want to move these little buttons
to make them straight. It's almost like a
curve so that now it is a straight line and
then just press save. So that when you
do that, it will just basically be
like an even look. The next step is the
arter animation. We can go up here to
animation and we can simply press the
Sheriff walk a nim. Now with this animation, we
want to just set this higher, but what we now need
to do is we need to match the speed
with the animation. So if I do this, you can see that it is a
little bit too slow. So I can go ahead
and I can move this back and move my animation back. Now if I try again,
still a bit too slow. Let's move this
back one more and I just do this until I hit a sweet spot over here. Close. But as you can see, it
is not rocket science. It's actually really easy
to just add animations to your cars like this.
Let's press play. So now if I go ahead
and go into my camera, and let's say that we have
this camera and we press play. Let's say that we
want to make it a little bit faster over here. We can just basically
mess around with this. Just make sure that
the animation starts. See? And just like that, we have our character
walking around. And we can basically just
do that with all of them. So now that we have this stuff
done, we can press Save. And you can imagine
that if we do this with multiple different
characters and we have all of them just walking
around and interacting, that should work quite well. So now that we have
these pieces done, all we will need to do is
we go into the Wild West. Let's turn off our
sequence for now. And then here we
have our custom, and then we are just
going to import multiple different sheriffs, but we are importing them
because of our animation. So over here we have this one,
and I just downloaded it. So I can go ahead and I
can just drag this in. And then if I go in here,
I can simply drag it in. Unfortunately, into
unreal, you need to always import also
your skeletal mesh. But the cool thing
is that it remembers the old skeleton and
it matches it up. So all we need to do now is
we need to press Import, and now what you will be
able to see is that we can actually apply multiple
different animations. So over here, if we now go
ahead and let's go into, for example, our outer save. Let's say that we now
go into our sequence. So this is the one
that we have now. But then if I go
ahead and go in here, and I would set the animation track to
be a different one, for example, our standard walk. I believe that then Sheriff walk like this one, we
need to press delete. And now if I have
the standard walk, you can see that E
walks differently. And of course, then
we would need to edit the speed and everything, but you can see that
that works totally fine. And that's the whole
goal for this. So I'm just going to
Undo that close this. So at this point, we just want to have
a bunch of animation. So we have two walk
cycles, that's fine. That's blender. Those two walk cycles are
fine for these people. Now what we want to
do is we want to have another walk cycle that
is probably just sitting. So what we can do is we can
go ahead and we can sit. And then I can go
in here and I can basically Let's say this one.
This one looks pretty cool. I can basically have
this character, and then I can see if
the arms are not good, I can play around with
my character arm space. But there's always like, see, this one is not
really compatible. So then I can do another one, like the rubbing
arms, for example. Although he is looking
down a little bit more. So just like this, I
can just make here. Let's say that we
pick the idle one, for example, and then with Idle one if we do the
character arm space. Okay, that one is not
really working also. No, this one maybe. And just like this, we can kind of just mess around with things. Character arm space. Over here, what is energy level?
That one I don't know. Yeah, let's just do this one. So over here, so we
have this one and then we can just go ahead
and press Download, and we can once
again download this. So these sitting and
these other animations, they are really easy because they are just looping animation. So we can actually
do more of those. So if we just go ahead
and do standing, for example, we can have
an idol standing maybe. Let's try this one over here. I feel like that kind
of animation is too small for us to really
bother with it. What if we just Let's see. I just want to get
something that's a bit more. This one, maybe? Come on, just give me,
standing greeting. No, that texting
wouldn't really matter. I just basically want to get something that's like an idol. He's just, like, standing
around and just, like, moving a little
bit here and there. You can also pick
these characters. That's no problem. You can
pick whatever you want. Let's do this one. There we go. The sitting one, we can now
just also drag that one in. Let's download this one over here over here.
That's also done. And just like that, we
can just keep adding more and more
character animations. Now, in next chapter, what we'll do is we will just go ahead and continue our search to
get different animations, and then we will
start to apply them.
75. 74 Creating Our Character Animations Part2: Okay, so let's just
continue right away. So we have now the
standing version, and let's see how many standing characters
do we really have? So if we have one
standing character there, oh, yeah, I still wanted to do something
with, like, sitting, right? On no way, I already
did the sitting. Maybe like another standing
character over here. So let's do one more
standing animation. So we can just go ahead and go in here and
we can just say, like, boards is maybe
not too interesting. This one is pretty good. Only I don't think it will
perfectly fit the way that I want it to
fit. Maybe this one? Oh, no, never mind. So, we do want to get, like, some big movements because these characters are quite far away. So if we do not
have big movements, then it would be a
shame because you cannot really see anything. I feel like these
are all just poses, so they are not
actually moving around. Stand up idle. See, I'm just kind of trying to see if I can
just spin in place. Seriously. I just want to
do like people talking. Why is this so special? So those are poses. Come on. Talking on
phone that would not really make sense in the
Wildwst to talk on the phone. Well, we still have
quite a few pages left, so I just need to have that one extra animation
that I really like. What if we just do talking? Oh, sitting talking
is also pretty cool. Let's see if that
one actually works. Maybe it will work from, like, a long distance that we can use that one because
we also can use the Cut. So yeah, let's just do that. Let's add this one just in case it's just a simple download. At this point, it's not
that much extra effort to just add some extra pieces. And then we just need
to basically import all of the characters that we want to use, and
that's about it. So over here, we can do
another talking This one, this one, I think
looks really great. There we go. So we can
also download this one. Okay, so that is it for those. So we have covered
all of the talking. We have covered all
of the sitting. We have covered all
of the walking. I think for the rest, yeah,
and then maybe over here, we can even do some
more walking cycles, but I don't think it's worth it because they are so far away. So I don't think that
will really matter. I think the next one that we
would then need to do is, of course, the horses,
but those ones are quite a bit different. So let's just first of all,
focus on our characters. So if we go ahead and go
into our hero characters and our sheriff, we
have the standard. I want to go ahead and import
the sitting over here. And this is by the
way, what I meant, turn off your material, do not search and
import materials, do not create materials and
turn off the import textures. So this stuff we can go ahead and we can
import, totally fine. So we have Sheriff
Walk Standard walk, sitting, standing,
arguing is another one. Import. And then the next ones. Are they downloaded yet, so they're almost done. So here we have
talking. And then we also have sitting talking, which is done in just a
second. Sitting talking. Perfect. Okay, so while all of those before we import
those, let's first of all, just go ahead and
upload a new character, and I'm going to upload
girl number one over here. And while this uploading, we can just start by
importing the rest. Oh, this one is still importing. Okay, so then we
have our talking. Yes, let's add that one.
So let's import that one. And then all of
these animations, they will work with
every single character that we are going to import,
which is really nice. That's why we can
really just ramp up. And I think that I'm
actually going to do more animations than I
expected because of this. So we have sitting
talking is another one. And I think that's the last
one that we needed to do. Now, another cool thing to keep in mind that I
will show you in just like a second if
this is importing. See, all of these other
codes, we can just add. So what you can do in real, you have your doctor and you
have your horse H over here. I can simply drag my
doctor into horse and now whenever I move my horse, the doctor
moves with it. So as you can imagine,
although we will not have the actual doctor bobbing
up and down on the horse, we can simply just have the horse over here and
we can just have it move in a loop cycle, and we just need to create
the actual cycle for that. But in any case, let's
go ahead and let's just test out our materials. First of all, okay,
so that one is I just need to look back
at that once in a while. So if we go into our
movement over here, what we can do is we can
go into our animation, and we should be able to basically get any
animation we want. So don't think can
I replace this? I don't think you can literally replace it in that way.
Oh, no, wait here. You can go properties. Animation. Let's do
the sitting animation. Oh, yeah, because we are, of course, moving that around. What we can do is we can just temporarily delete this
keyframe over here. And here you can
see that here is just, like, sitting around. So that's all looking fine. So yeah, let's just delete that. So let's right click properties. Next one is sitting talking. Oh. Here, you see, small movements like that will actually make a big difference. Sitting talking, we
have standard walk, and the standing talking is another one that
we had to test out. Yeah, yeah, that's perfect
for over here for this guy, for example, and
stuff like that. And then the last one
properties talking animation. Yeah, I think that will
work. So let's just go ahead and undo until I
get my little dot back. There we go. And now, oh, let's undo this
again. There we go. Oh, hello. I think I
broke it a little bit. Let's try it again.
Properties Sheriff walk A. Come on. You can do it. I feel like that. I
think I broke it. So let's just go ahead
and just remove that. And this is just going
to be the sheriff walk A animation and just artist to here over
here. There we go. Now that works again. So I think it just got confused
a little bit. So we got those ones done, and now what we need to
do is we just need to start by applying these to
all of the other characters. That means that at this point, I'm just going to
go ahead and do other characters because I
only need to import them once. And in these other
characters, all you will need to do is you
just need to go ahead and you have your outer rigger
and you can see that this one is working pretty
decently over here. It's a little bit, but
we'll see how it goes. So we can just go
ahead and press next. And then for this one, you
can just whatever you want. So let's say that we
do like the talking, we can just right away download it and just press Download because all we need is we need the actual rig for
our character. And what I'm going to do is
I'm going to paste the video, and I'm doing the same process
for all of my characters. That means that I'm going to
do it for girl number two. I'm going to do it for this guy, which is just yeah,
the crowd one. The same guy, I can, looks like that I
can use the same guy here for the sitting animation. And I will do this
guy and this guy, and think I will
leave it at that. Because I can just reuse those guys also
for other places. So that should all be fine because these guys
are not rigged, so they will not work. So let me just go ahead
and start doing that in the off camera. Okay, something I want
to show you that's quite interesting is it turns
out that in this back, not all characters are
already have a base rig. Over here, you can see that I'm using the outer rigger tool. And what you want to do
is you just want to press next if your character
literally has nothing in there, and then you just
simply want to grab the wrist, throw
them on the wrist, elbow on the elbows, knees on the knees, and then on the groin. The outrigger actually does an amazing job. I'm
really surprised. So it turns out that the
other pieces they apparently already had the rig
completely set up. Basically, what we can do
now is it will out rig, and then it will just
get everything done. It does also mean that
some of these characters, they seem not to
be the same ones as that we have in our engine. I will have a quick look and see because I do have these ones
which are in our engine, but what I expect happens is that these already
have their poses, which will mean that they are useless for
rigging because we cannot just rig those
specific poses. However, what we can do is why
the last one is generating is I can go into custom
and then in here, I can go new folder, make a folder called Or. I already over here
already have some of the characters that we
already have rig on. I can actually already
just import these. And then for our skeleton, we want to press the
Sheriff walk a skeleton, most likely, and press Import. Unless it gives me an error, I hope not. Oh. Hm. Okay, so that is interesting. So it seems to have
different notes. Um, let's go ahead and
press Cancel for now. So you need to be
very careful about this because you can
completely break it. So what we first want to do is we want to try a few things. So let's first of
all, just import girl one and then just
import it like normal, just to see if we
can actually apply the same animations to this or if they will just completely break
or not even work. So I expect that they
just won't work. So let's say that I
have girl A over here, and else you need to export the animations for the
specific character. So it's not like
that big of a deal, but it just takes a bit longer. Use animation sets. Okay, see here, I'm not able
to use that unfortunately. And what will most likely happen is if I go ahead and yes, delete that one, and let's go ahead and select all of these and
delete them also. Just do it like a force delete. It's quickly safe machine. I expect that if I import this and try to match
the other skeleton, it will just completely break. So if I would go ahead
and go in here and select this skeleton, yeah,
it will break. I just know that it will break. So if I would press Import I'll. So it looks like that the
girl just so they apparently just changed around the
bones a little bit. Which is quite annoying. I'm not going to do that.
That just means that we need to basically export
per character. We need to export all
of the animations. So what I'm going
to do is I'm going to import this girl with
a walking animation. I'm going to import this girl with a sitting
talking animation, and then these default guys are just going to have also
talking animations. That is going to take
me quite a while. At this point, I
will just go ahead and finish off this chapter. And in the next chapter,
what we will do is we will go ahead and we will
implant all of those, make them actually move around, make them all interact, so that we already have
that kind of stuff done. So let's go ahead and continue with that
in the next chapter.
76. 75 Creating Our Character Animations Part3: Okay, so we are back. So over here, I have already
imported my characters, and these are rigged characters
that we have over here. I had quite a bit of trouble
with this one because her skirt is basically
showing her feet through it. So we will most likely not
be using that one for, like, walking animations, except for maybe
in the distance. But knowing that we now
have these few characters, what we can do is
we can, first of all, start by replacing them. I am going to actually
replace this one over here. Like this. And what I want to do is whenever we
have an animation, we can just go down here, use the animation and already
use, like a default. Oh, so she has a sitting, but she should also have
a walking animation, 02 walking over here. Excuse me. Why can you not be
used? That is strange. Okay, then I guess that
we also need to drag in, like, the walking animations. That's a pain that I need to do that, because that
means that I need to, like, re art my materials
every single time. So, okay, fair enough,
let me just go ahead and for the sitting, we
cannot really do that. So maybe I will have,
like, her sitting over here instead of the guy. Yeah. So she's sitting
over here like this. And then of course, these
guys and everything, they are in the B folder, so I can just turn
them on and off. So then I know which
ones I want to animate. Just give me a second to, like, re art the materials to
every single character. So that's a little bit of pain, but I guess that we
cannot get around it. Okay, so I've now just
added all of my materials. Of course, one thing to keep
in mind is that this will go a lot easier if
you, of course, have one character that you
have specifically rigged or that you have
multiple characters that are rigged using the
exact same bones. All of my characters seem
to be slightly different, which I have no choice in
because I did not create them, nor can I create
them, of course. But in any case, so here we can do character standing talking. Use animation and play
the standard talking. So we have one sitting
here, one sitting there. And what we can then keep doing is we can
keep turning off. So let's see the next one would be that we need to have
one character here sitting. So I'm going to replace her
sitting with probably like a guy sitting over here. So we have the guy, use
animation asset, guy sitting. There we go. So we will
use this one over here. Move it up a little
bit. Temporarily turn her off. There we go. So we have now the guy
sitting over here, and then we also had a
guy talking, I believe. Yeah, so let's go ahead
and just do that. So for the guy talking, we have the girl over there. We have a girl one walking. However, we do not have
a girl one talking, I believe, which is too bad. I forgot to add that animation. So this girl will
just later on become a girl talking, let
me move it over here. Then we also have the girl
one walking at this point. So let's see. I'm going to turn
off the B functions. This guy, this guy, and
this girl can go away. You use animation assets, so this is the walking girl and she can go over
here. So she's walking. And if we just go ahead and just maybe, move it
forward a little bit. So if we have a look over here, by the way, her move
her forward like this. This one will be for
the static shots. So we have those all replaced. We have these replaced. And then the last
one that I will replace is I will
also have the girl walking over here because even though the walking
animation is broken, I can most likely get away
with adding it over here. So that's where we look
at it from distance because you can only just
see her walking away, and I don't think it will
really be a problem with, like, the girl
standing over here. So that is about it
for our animation. So we got all of those done. Now, it's just a matter of
temporarily turning these off. And then last one that we
need to do is we just need to replace this one to be
a talking animation. However this character
is still processing, so we can always
do that later on. For now, what I'm going to
do is I'm going to go into my animations and open up finally my character
movement over here. Okay, so what do we have? We have a sheriff
that is over here, and he is walking at a pretty
correct speed like this. Now let's go ahead
and now let's do her. So we can simply drag in the girl on top of this and
then close down the sheriff. And what we can say is,
Okay, so with the girl, let's go ahead and let's
grab a transform over here. I don't know why there's
sort of like a leg going on, which is a little bit strange. So let's go ahead and now move her over here and add
another transform. And now you can see, so
now we have these two. So there we go. And then if we just
go ahead and go to the animation and grab the
girl walking animation, we can just test
it out, make sure that it is at the right level. Oh, for her selected. And don't forget that we need
to make this at an angle. Over here and then press safe so that she does
not start slower. So let's have a look
at this and maybe, have a look at it for
the main camecor. Okay, so she moves a
little bit too fast. So what we want to do
is we just want to go ahead and actually, we want to move this
further out over here. Mmm. I still feel like, you can
embassy like that there is a she she moves faster or not. It almost feels like
she's moving faster, but I'm not 100% sure.
Maybe this can be fine. Or maybe like the guy. Maybe it's the guy that
is for some reason. Here, if you just go to
the sheriff ValkOh hey, the sheriff valk is
not having this angle. Let's try that and save. Let's look back.
Transformation. Okay, so that should now be fines. Let's try that out.
Yeah, there we go. So that looks a
little bit better. Okay, so we got those two walking over there.
That is fine. Now those were pretty much
like the difficult ones. Now come the more easier ones. So first of all, what I'm
going to do is I got the girl. So girl on score 01
on score standing. I can just go ahead
and I can go in here. I can go to Custom Or and
just import this one. And it's quite press Import. That's strange. Did I
accidentally turn something on? Oh, yeah, here. I
do not want it. Let's clear that over here
and now press Import. So I do not want
to reuse skeleton. I think for some reason, we recognized as if I wanted
to have an extra skeleton. But in any case, what we can
do is we can just go ahead and replace this
character with this one. And then in our animation, it will be like the standing
animation like over here. And then what we can
do is we just need to apply our materials again, which I will just pass
the video and do. Here we go. So that's
now also done. Perfect. So if we now
go into our sequencer, we can already just go
ahead and grab this girl. So all we want her to do
is we just want to add the standing animation and just have it going
on for a long time. So basically, when
we are talking, you can see that she is just
moving and talking around, and it will just basically
loop the animation, but that is all that
we really need. We can just keep
doing this. So here we have the guys we sitting. We drag him in. We art
the animation track that it belongs to him,
and now we have over here. See, we have these talking,
we have these sitting. They're interacting with each other, all that kind of stuff. And the other guy just
happens to stand quite still. That's basically what
we're going to go for. So that when we look
at it from a distance, and we go into like a
camera, you'll see, we have these people talking,
these people walking. And just like that when
we also have the horses, and the main focus
will most likely be on the horses because those are the biggest objects
that are moving. So you will automatically
look at those objects mostly. But you can see that
this is going to be very easy to just edit. Here, we can just minimize these girl 02
sitting, animation. Over here, we have the guy
06 standing animation. Make sure that the animations
are nice and long. And now if we just press play, you can see that now
these people are also interacting totally fine. Great. Now, over here,
we have this girl. She used animation
asset walking. And what we're going
to do is for her. Let's add this animation track. Oh, sorry, I want to
have this animation starting at the very beginning. Do want to make sure that all of my animation start
at the beginning. So let me just double
check that later on. But for now, we can also just
have a transform over here. And then if we go to around
like let's say, like 180. Let's say that we are
just moving her around over here, do another transform. Let's see how that looks. Here, you can see that the feet just go through the skirt, but you cannot really
see that from the back. Okay, so we need to
move this a lot closer. So let's try that.
Now a lot further. Let's also quickly
go into our curve. And we just want to
click on the transform and just make sure
that this curve is straight and save that. Let's try that again.
Maybe a little bit slower. There we go. So now
she is also walking. And let's see, from a distance, is there anything
else that we can see? So if we have this, I'm just going to
go ahead and I'm just going to double check that all my animations are
at the beginning. So it was mostly
like the guys that I wanted to double check
that the animations are correct because I thought
I saw something moving. Oh, yeah, the sheriff,
we can also re use. So what we can do is we
have these ones over here. If we know pas play, you can
see some people talking. Yeah, that is
looking really good. And then if we just go ahead
and also add the sheriff somewhere else, maybe
like over here, because we had, like, a lot of sheriffs now that are all just, you know, walking,
sitting, talking. I believe that if I do this one, can this one reuse
the same animation? Because it worked
in here, which is strange that it does
not work anywhere else. So this one is like
talking, no, arguing. Well, it does not
really make sense for him to argue, actually. Or for him to talk.
Now I think about it. So even if I would set him here, that does not make any sense. Let's instead use him over here. And let's have the
sheriff standard walk. Here, Sheriff standard Walk. Oh, wait. We can
just use this one. Animation, sheriff
standard walk. And let's just have
him replace this guy. So actually, for this guy, I'm
going to add him to the B. Okay, so we have this guy, and then for this, we can just go ahead and we can
art him in here. Add the transform note. And maybe what we will
do is we will make him go this direction, so we rotate him and make him go somewhere along here and
add another transform note. And all we need to do
is in our animation, we are going to go for a
standard walk animation. Make sure that it
starts at the end. And now we can just play around. Oh, as always, go in here, click on Transform
and just set this to be a nice straight line. Over here, it's twilight again. So let's press play. I goes a little bit fast. Let's
move that further back. Press play again. Yeah, that
works actually pretty well. And sure you can make
him, rotate if you want. You can make him, go in here, rotate him more, and then
add another transform. And then what he will do is he will just play with
his rotation over here. But from this distance, what I care about
is just that when I look over here, yeah, you can see that now everything
already starts to get a lot more alive just with
lows few movements, and everyone else is just
kind of standing there. But that is looking great.
So here we got some talking, we got some walking around. And this will imagine that you have a shot that goes like this, and then it nicely, pens up. So we can also do that
over here if you want. Let's say that we have
a shot like this. We can even animate our camera. So we can even go in here, grab our camera actor. And what we can do is we can add this camera
actor if I press G, set my mode to
movement over here. And then what I can
say is I want to start this camera
over here, transform, and then around the 200, just to nicely move
this up a little bit and rotate this
down a little bit, and add another transform. So now if I go into my camera, everything
is linked together. So now if I just press G, you can imagine that
if I press this. Look at that. And like that, you can just have a
nice final scene. I would say throw in some
extra screen percentage, and then you can
go up here in your render settings and
you can render it out. But of course, we still need
to have some stuff to do. But as you can
see, our scene now feels like it feels quite alive, especially once the
horses are here. I will all feel really
nicely and alive. The only thing is that
over here you can see the sheriff still
walking into place. So there's some small balancing that we
probably need to do. Over here, where we would go in and let's say
that at this point, we grab our sheriff, and we then go ahead
and we just grab his transform and move it like way further
like over here. Maybe, move it a little bit further even
so that it's like a lot slower. Even further. Let's try that
again. And sometimes the rotation does not
properly register. It does do it now, but not exactly the way
that I wanted to. So I can go in here and just grab this guy and
just set my rotation a little bit better. See, at this point, this guy
will be sitting over here. I feel like that it has reset. Oh, yeah, here, so it has reset this setting, which makes sense. It is because we are adding
a lot of extra stuff. So here we just want
to kind of, like, move this correctly like this and press save again just to make sure that
you have the same angle. So now you can see that the guy he's just like nicely walking. He just walks over here.
And now it looks like that we do need to go ahead and just set this a little bit closer because we
changed our curve. But as you can see now this guys walking around over here, which means that from
our original viewpoint, and I will do these
camera animations, of course, a lot
better later on. But for now, I can just see
the guy walking and the girl. Let's see. I can see her
walking into place also. And technically, this guy
is also just like in place, but that does not matter too much because you don't
notice it as much. But what I can do is I can
have the girl going up here. And then add like a transform. And then once again,
we just need to double check that if we go into
our transform over here, that the girl is going
at like a nice angle. Let's move this down, change the angle around. There we go. And now let's see. So
now she walks over here. There we go. And we
just have a walking Wi slows that he gets out of view. At least by the time that the
camera is done animating, no one will be just
walking into place. So we get like this. We
get those people talking. We get those people over
there walking around, so you can still see
some movement going on, and then by that point,
it will be fade to black because your camera
is completely done. Okay, perfect. So we
got these pieces done. What we are going to do
now in the next chapter is we are going to start
by animating our horses, and I will do a walk cycle, and maybe I will do, like a standing cycle where the horse is just
kind of looking around. We will do this animation
inside of Blender. So this is one of the few ones where we
can simply not use Maximo because Maximo does not have the type of rigs
that support horses. So let's go ahead and continue with that
in our next chapter.
77. 76 Animating Our Horse Part1: Okay, so there are only two tasks left to do
that we're going to do. First of all, we are
going to now focus on animating a rock
cycle of our horse, and we are actually going
to do this manually because Maximo does not actually give us the ability
to animate horses. And after that, there will be one final chapter which will
just be general polish, and that will just
be timeless chapter. It's going to be things like placing some planks
here and there, maybe adding some more signs,
small stuff like that. So what we're going to do is, if you look at your sequence, we already have, most of
this stuff happening. So we have the people
talking and walking around. In the poly cycle,
I will probably also like a few more
people walking around. So we are now going
to get started with the horse walk cycle. Now, if we go at a switch
to blender over here, not that one, this
one over here. Here, you can see that
I already have a horse and it even is
completely rigged. This is because when I
bought this package, this horse came with it, and
it is looking really cool. So we are going to
animate this for you, because I do not expect many people to
have bought this package. What I expect to happen is you just need
to have an animal, so like a horse, and
you just need to have it rigged and skinned.
That's all you need. The concept is exactly the same on how we are going to
now animate our horse. It doesn't even
need to be a horse. All of this, you can
same basic concept. So what we're going to do
now is if, for example, click over here, I click
on the base of my horse, and this is actually my rig. And now if I go to the top
from object mode to pose mode, and I'm going to go ahead
and I'm going to set this to transparency up here
to the X ray mode. Here you can see that this is how this horse has been rigged. So that is why I
want to show you this because all the
rigging is often the same. As long as you have a character, for example, you bat the character or
something like that, and it is rigged and skinned
or if you have the skills, even make it yourself, this will just be the same concept
of how to animate it. So this is our horse. So we
have a few things over here. For example, if you for example, click on a bone, you can
then go, for example, to rotate, and then
you can see that it does rotate around and everything just
goes along with it. So it is not too difficult. Let me just Undoing is
very slow, however. But there is one thing and it's that I am not
an animator at all. So what I will show you
will be just the basics. Now, this is a good
and bad thing. On the one hand, it's a bad
thing because I will not be able to show you super in
depth how to do animations, especially not for animals, but it's also a good thing because I will show
you, of course, the most simple way to do it
because as a beginner, well, sort of beginner in animation, I also just want to keep
it nice and simple. So we are going to
keep this very simple. And the first thing
that we're going to do is that I would
not know where to start when I actually
want to know the positions of creating
a perfect walk cycle. However, what I do have is
over here in our reference, I got a bunch of images. So in your reference
and in your horse, these will be supplied, and
I found these images online. So if you just go online and type in horse walk
cycle drawing, I got this one, and this is
perfect because what we can do is we can simply map this onto a plane because
it's a perfect square. And if I would now cycle
through the images, you can see that it is
literally a walk cycle. See? And then it goes back to the beginning again.
So this is really good. So it is just like a
nice animation that is perfectly looping and if
I would cycle this fast, you can see that it is
now just walking around. So we are going to
use these images to our advantage
because then all we need to do is we
basically need to create 12 different poses,
and that's it. Once you have those 12 poses, we will also have a walk cycle. So what I'm going to do
is I'm going to go ahead, press Shift A and I'm
going to create a plane. Let's go ahead and just
scaled up a little bit. Excuse me. Let's rotate this 90 degrees like this so
that it is behind the horse. Sorry, my over here, my thing is in the way. Okay, now all that we need to do is we need to go
ad and d of material, and we are going to just
load in an image texture, and we are just going to load in that horse that
we've had before. So let's go ahead and open this. Number one, and we're going to get started
with number one. There we go. Okay, it looks like I need to rotate this
90 degrees like this. And then what I'm
going to do is press that button next to the one and then just go to,
like, your right. And now, what we want to
do is we just want to line up this horse with
the other horse. It's mostly important
to just line up roughly whether the legs
are going to be located. So we want to kind of
match the scale with that. It doesn't need to be perfect. It just has to be like sort
of in the right location. So if my voice breaks up
sometimes a little bit, I have a little bit of a gold, but shouldn't be too bad. So roughly something like this, and we just need to
get it lined up once, and then it is Algod. So we got this one. We kind of, like, want to
just, of course, keep its distance from the
actual horse, and that's it. So what we're going to do
now is we are basically going to go to our VU.
I will save my scene. Of course, this scene
will not be supplied, unfortunately, because I'm not allowed to supply the horse. But we're going to go ahead
and click on the horse, and then we want to go
into our post mode. Now, this is going to
be our very first post that we are going to
get started with. So what you want to do
is you want to go into your layout, and it
is quite simple. Here we have all of our
key frames over here. The first thing
that we're going to do is we are simply going to set this horse to
give it its pose. So mostly just want
to use rotate, although sometimes we will use the move tool,
but that's about it. I am just going to
go ahead and all of these bones, they
kind of fit together. If I move this one, the other ones will
also fit together. So they kind of, are all linked. One thing I forgot to actually
do is let's press Oh, we need to go outside
of pose mode for this. Let's press Shift
A, create a cube, make it a bit taller and
just make it very thin, but not as thin as a plane. And this is going to
be just to measure out where the floor is
going to be over here, so that the feet are actually
sitting on the floor. I like this model. It
is really detailed. But okay, so we got
this stuff over here. Let's now go ahead and
go back into Bose mode. Oh, we do need to click
on our base horse for this. Bose mode, like this. And now what we can do
is we can just basically go ahead and rotate this
roughly the way we want to. I will also have this
one on my other screen. And the reason for this
is because I, of course, need to make sure that I set the front and the
back legs correctly. So the darker ones are
the back legs, always. So we have this. We rotate this, and then we can see
that over here, we kind of just want to
rotate this nicely on here. Now with this one,
what I expect to happen is that the muscles will actually move
backwards for this one. Over here, we want to set a movement to global
instead of local, and here you can see
that you can actually move your back leg back. Don't do it too much,
but basically what you will see happening
is that over here. See, I literally just moves part of the entire
muscle group back. So if I now go ahead and
go to my right view, I am able to move this
back, give this a rotation. Yeah. And now what we can do. So if we just roughly give
this an echo totation, you can see that it will just
move those muscles back. It will push them in here. Once again, it doesn't need to be perfectly precise because, of course, this horse is not the exact same
from the drawing. But what I can do is I can
then go ahead and, like, do this, and let's say that I move this one
down a little bit more. And of course, this
is also on the way, we have a horse that
goes quite close by, so I do want to make
this quite well. And what you can do is when
it is not hitting the ground, then you can just
carefully, move this down. So I'm going to
actually go ahead and I'm going to rotate
this a bit more. Go over here and then go
ahead and do this one. And I will probably
do around oh, sorry, it's not flat. I will probably do around
three or four walk cycles. And after that, I will kick in the Taps because this is
quite time consuming, as you can see if you want
to do it really well. So let's say that we have
this one over here. Great. Okay, so over here we have the font leg. Let's
see, that's this one. And the front leg is that is why I always like to,
have a look over here. I also need to kind
of like double check make sure where the front
leg and the back leg are. So these ones are over here. And this one, you can see
over here that the hoofs. He's in the middle of
stretching out his leg. And then over here, this one, he has his leg on the floor, so they need to be
quite properly packed. And then, of course, make
sure that you go ahead and move it correctly. I think we need to go ahead and we need to rotate this one. You might want to change
your shortcuts in pose mode. Right click assigned shortcut W. I need to go in here and see. What's this one set
to? Sorry, 1 second. Shift space for R, really? Can I just do Rotate, move. Rotate move. Okay, so you can just right click and
sent your shortcuts. It's because every single window every single window often
has its own shortcuts. So even though
with editing mode, we have W and E or object
mode in the pose mode, we do not yet have that, but this is, of course,
a lot easier. If I now go ahead and I
simply move this around. So we got over here.
We got a horse and this one is sitting
quite nicely. So here is our first horse. Maybe for this one, we just kind of want to
move it up a little bit, but here is basically our
first pose over here. So, that's great. So what we're going to do now is now
that we have this pose, let's go ahead and go
back to our right view. We actually want to go
ahead and first of all, select all of our pieces, and then I'm going to set my
key frame down here to zero. Now what we need to
do is we need to give all of these
pieces a keyframe. So this is going to be
like the base keyframe. We can do this by first of all, go ahead and press
over here auto keying. What this will do is
whenever we move something, it will automatically
place a keyframe. When we place
multiple keyframes, so we change the positions
on multiple keyframes, what it will do is it will
do the same as in unreal, where it will basically smoothly just cycle between
those keyframes. So with this one to do
everything in Mango, you want to go over
here to keying, and then you want to click on here and you want to just scroll down oh, I don't think. Um, that's annoying. You cannot see it
because of that Gifre. You basically want
to skull down. All the way to the whole
character over here. And once you've done
that, you want to press key over here, which is the little
plus sign with the key. And then you can see
successfully added 433 keys. We only need to do this
one at the beginning. So now that we have
this keyframe, I messed up my viewpod because I was so
focused on the cutting. Now that we have this keyframe, now what we're going to do is, let's say we set our
keys now to around ten. And then what we can do is we can simply click on the plane. So let's go Object mode,
click on the plane, and you then want
to go ahead and just change your reference to picture number two over here and now you can
see that picture number two is
slightly different. So I'm going to over here. Here, C picture number two
is like a little bit back. So what we can do is we can
now go ahead and we can just click back on our horse and make sure that
you are on ten, make sure you are not on zero because else you are
going to overweight, and I do not expect that
you want to do that. So now with our horse, what we can do is we have this one, we can move it
back a little bit, and then you can see that
as soon as we move it, it will create a keyframe. So I can move this one
down, this one out. This one back and move this one up so
that it is in center. And just like that, I
can also go over here. This one, let's say
that it started to move around like this, and it looks like that it has its leg already
slightly into the air. So what I'm going to
do is for this one, I'm going to also, move it up. Maybe rotate this
one a little bit. Yeah, and you just
kind of want to make sure that you, of course, move it up far enough so that it's not clipping
into the ground. A tiny bit of clipping we
can handle for our version. Of course, if you're
making this for, if this is like a
game character, then of course, you want
to go absolutely perfect, but we are just going
to go for, like, something quick and easy. Now, it looks like
this one needs to be moved forward
a little bit, because this is like the back leg that you
can see over here, and it looks like this,
so he has his leg, but he does not
have it completely. So down. So he's basically
already starting to move a little bit like this. And then his back leg over here, just move that one
out a little bit. His back leg goes over here. And then later on what
we can also do is we can also do some head
bobbing and just have the head like properly
moving with it. There we go. We have this cycle. So
what has happened now? We have now moved these cycles. So now if I would
switch between the two, you can see that it smoothly switches
between these cycles. And you can imagine that
once we have all of them, it will just be a walk cycle. So if I now would go ahead
and press Play, here you see, and based upon the speed
that we want to do, we can change the
speed later on also. So now that we have this
one, we go to number 20. We go back into our object mode. Let's go ahead and let's
grab the third one. Yeah, I will do three and four, and then I will
do the time laps. So here we have a third one. Now we can go ahead and we
can click on our horse again, go back into Post mode. And now what I'm
going to do is I'm just going to go
ahead and let's see. Let's move this one forward. And now he is in, like,
a full bend already. So he has already,
completely lifted up his hoofs like this. Maybe move it down, maybe not do not rotate it too bad like that. And then over here, if
I just have a look. Okay, so his front leg is sweeping over the
floor even more. So we just want to
move this one back. Let's see. Let's move this down. Make this a little
bit more straight. Yeah, so something like that. And then for his back legs, his completely behind neck over here is probably
moving forward. And then it is,
like, completely Oh. That wasn't won rotation. Do make sure that
you do not do won rotation because's your leg, because it can also
rotate this way. But of course, that would
not look very logical. So just be careful about that. So let's
go back to our right. Okay, so a font leg, I think I need to move the actual muscle forward
a little bit more. So we have a font leg over here. And then this one is starting to prepare to hit the ground, which means that this
wants to go nice and forward and then give it a little bit of
an angle like this. And the backside over here, it has changed very little. So we just kind of want to
move it around like this. Okay, so we got this one. Now what you will see is we can go ahead and
we have over here, all of these cycles like this. What you can also
see is that there is no keyframe in between here. Normally, that's not
too bad because it does mean that it will lurp between this one and this one, but often that is totally fine. Of course, if in this version, this leg would be
bend extremely, then by the time that
you get to this band, then it would all of
a sudden just lower. But that should be fine. So if we now go ahead
and press Play, for example, you can see that now it is
starting to do that cycle. And now we just want to have
the horse walking calmly. That's why I go for like
ten key frames per piece. So let's go ahead and let's
do the last one over here, which is going to be number 30, and we're just going to go in object mode. Well, last one. I mean, like the last one
that I will do in real time. And then this is number four
that we're going to do. Yeah, it's not too difficult when you have these pictures. And Po tip, these pictures, you can characters also
have these pictures. So it is just if you're
new to animation, it is a lot easier than trying to figure it out all yourself. So this one, the horse leg, let's say that the muscle
just cannot go any further. No, wait, it does need to
go a little bit further. So the muscle goes a
little bit further. It is bend, and then
it bends this one. And then it bends this
version like this. So it is starting to prepare
to put its foods down. And then over here,
it has this version. At this point, this version is completely straight,
pretty much still. Here you can see it is just moving its upper
muscle a little bit. So we're just going to move
this a little bit down. And then the backside is now taking quite
a transformation. So if we move this forward, let's see, let's move
this forward a bit more. You go here, and then this one is now fully
going like that. So it is moving
that one forward. And then the back muscle we
already pretty much did. Although this one is a
little bit straighter now. So it almost looks
like it This is going backwards. This
one is going down. This one is now a
little bit straighter, and then move this one
up a little bit more so that it is properly
just sitting here. Okay, so we got that one
done so now we can see that if we press
play there we go. So he's now slowly
starting to walk. Okay, so that is these four. What we're going to do
in the next chapter is the next chapter will be a time lapse chapter
where I will just go ahead and create the
entire walk cycle, and after that, it will
just be the posing. Then we will go straight
away to real time, and then we will start
to get this animation and the character and
everything into Unreal engine, and that's going
to look very nice. So let's go ahead and continue with that
in our next chapter.
78. 77 Animating Our Horse Part2 Timelapse: I M.
79. 78 Animating Our Horse Part3: Okay, so we now have a
pretty decent animation. The thing that you
saw me doing at the very end was that I simply set my
keyframes to the end, which was 120 because
we had up until 110, and then I simply selected
everything, all of my bones. I clicked on the first keyframe, and I right click and
then press duplicate. And I placed that at the end
keyframe so that we have the same loop that
you can see over here where it goes like this, and then when it goes to 12, you can see that over here, it kind of just switches back. Now, it's not yet looking
as nice as I want to, but this is most
likely because of the speed because right now our horse is a
little bit slow. But basically, if we
go ahead and, like, walk quite quickly, you can see that it wood. Yeah,
so let's see. So the first key
frame, that is fine. The only thing that
I would say is that I feel like at this point, yeah, something feels a bit
wrong with the keyframe. Let's go ahead and let's go to object mode, select this one. So this one is number
12. So it looks like that one of our feet
are a little bit wrong, which is most likely
because we copied it, it archs this keyframe
at the very end. But if there's nothing
in here, then you can see that the cycle
will kind of break. So what we need to do is we
just need to go ahead and we need to make sure
that this one over here, that it has a few
keyframes in between. So that it looks a
little bit more logical. So we just basically move it around a little bit,
and that's about it. So we just have keyframe
here and here, see. So we just make sure that
the cycle is correct. See. And that should
do the trick. So if we just move this one
over here, there we go. So they now all have
key frames from the very end to the
beginning C so yeah, that looks a bit logical
or a bit more logical. So now let's just go through it a little bit slow so
that we just have a quick look if we see any
problems. So number one. Number two, the back feet
go into the air first, and they hit the ground again. These feet go over here
and hit the ground again. Well, sorry I'm
going too quickly. So those feet are
going over there, and then the fourth feet
go into the U here we have a problem because it is not possible for a horse to have
three feet into the air. So let's see, so
we go over here, and then number 70,
let's have a look. So let's see. This is 60, which means
that this one needs to be number seven, I believe. Yeah, okay. So
number seven, Whoa. It all of a sudden closed down every single program I have.
1 second. There we go. That's weird. Okay, so I'm looking on this
on my on screen. So number seven is correct. Then number eight,
in number eight, this one goes forward,
that is fine. This one goes
backward, that's fine. This one goes into
the air, that's fine. This one is still on the
floor, that is fine. Let's see the number nine. This one over here,
number nine is weg. This number nine should
still be on the floor. I don't really need to
have the image for this. I just need to make sure that number nine is on the floor. So number nine, and then the backwards
feet are on the floor. This feet is in the
air. You'll see, I'm just basically looking, and that feet is kind of bent. And then in number ten, this feet is further
on the floor. Right now it is going
a little bit too far from what I feel comfortable
with testing out. So let me just quickly grab the image that I
can properly do it. Number ten is the
one that we need. Oh, yeah, see. So I don't
know why that one Wong. In the tips you could also see that I accidentally
for two frames, I accidentally had
the Wong feet. Oh, yeah, here,
see. There's a lot of distance going
on in between here. So it's most likely
the rotation of this leg that is
causing the problem. It's probably it. So if we
just have this one over here. Okay, so this
rotation of this leg. So over here, the rotation
does not really matter, but over here, it needs
to kind of, like, help. Okay, so we have now number ten, and then we go
over to number 11. Number 11, this food is forward. This food is on the ground. This Food is now,
that's not logical. It's a bit tricky
to see this one. This food is on the
ground, both of them. So this one, we probably
need to just go ahead and rotate a little bit and move it over here
and rotate this. So this food is on the ground. And this food is
also on the ground, which you can see that, yeah, it's just those two key frames. So that's what I was
talking about that sometimes normally
doesn't really matter, but sometimes the lurping
between them is so far away that it doesn't work. So we go then like this. And then the next one has
this food going forward, this foot going down. This food is still on the
ground, and this one is back. And then it goes back
into its own position. I'm just going to go ahead and I'm just going to
give this, like, a little wiggle so that we have, at least a frame over there because else I don't
really trust it. So let's see. And then over here, you
know what? I'm going to just give this
like a little frame. Like that. So there we
go. Now here frame. Okay, so now walk cycle,
forward, backwards. Forward. Okay, so that is looking a little
bit more logical. Let's go ahead and
just save our scene. So that is that one. This is now all playing, so we can just go ahead
and we can over here, as you can see, we can have
the walk cycle. Like that. We probably want to go
ahead and we do want to have this going a
little bit faster, especially around here,
I don't know what it is. It's almost like a hesitation. So we go over here. Maybe it's not a hesitation. Maybe it's just a
bit strange that there are so much movement
in the front legs. But then in the back legs,
they are kind of not moving. But when we walk a
little bit faster, they should not really
be that noticeable. Another thing that I
want to do is that I want to go ahead and just have
my horse spine over here. So let's say that if we do this, let's see up until
here, this point. Let's go ahead and just
move this up a little bit. Then it goes onto the ground, then move it down a little bit. And then we can go up again. Although, no, wait, sorry, I'm going to do
the other way up. I do it one again. I
meant to say down. So you go down, then you go up again. Then you go down again because then the cycle
just continues properly. And then you go up again. So now, when we walk, you can see that
the horse is going and is doing its head. And then, of course, what
we can also do is we can also go ahead and
we can also give it a little bit more life
by just like moving a few more pieces in his face. It doesn't need to
be too perfect. I'm going to see in unreal how much we
need to do for this. But at least now
is how we say it. Now he's also just
moving like this. Now we can also go ahead
and we can also have a quick look over here for if there's anything else that we need
to kind of move. Maybe there's some
general movement, although these pieces will
most likely not move, but maybe over here, there could be some
general movement. Where I like grab these
pieces and move them around. And then maybe like over here, that they are just
like jiggling around. They don't have
anything special. It's just like that they
are kind of like moving. But we need to be a
little bit more careful about this because, of
course, we have characters. So we need to be careful
that we do not make too drastic changes to the places where the
characters are sitting. But here, so just
something like this, just so that there's a little
bit more movement going on. And I don't think
there's anything that we really want to
do in our body. Yeah, I don't think
maybe. Let's see. So if these bits
are into the air, then maybe it would be
cool if it's like there's, like, a tiny bit of, like,
a rotation going on. And then here it's
the ground again, and then the rotation
goes, like back again, but I'm not sure
if this should be fine or if this here
this will work. So let's see. So now, yeah, you know what? Let's leave it at
something like this. I think if we go too much
with all of this stuff, because I'm not
the best animator, I would probably just
end up ruining it again. So at this point, we
just want to know roughly when that we actually want to have all
of this animation. So we basically going
to select everything, and then we just like,
select one of them. So ten was a bit too slow. Let's see. If we set it to 50% of speed,
would that be enough? Maybe. So what you can do is
you can simply go ahead and, you can hold this button over here to give us a better animation view
or not this button, but I mean, use is dragging that we have all the in between. So let's go ahead
and see if we like now select all of this and we
basically just move it up. Oh, that feels like
it is very slow. So even now, let's
see if I cross play. Huh? Why are you going backwards? Did I you know what? Maybe that might work. Let's go ahead and
just simply select these keyframes and just move
them a little bit closer. Instead of ten,
we are just going to move them five frames apart, which will hopefully
make the cycle faster, not too fast because, of course, if it's too fast, then we get the problem that it looks like the
horse is almost like running or it
looks unnatural. But if we go to slow, then you can see that the
animation is not that amazing. So if we go for 60, and that's at the end,
I'll to like 60 over here. So it starts playing. Let's see that. Let's
have a look at that. Yeah, that does work. That's just like,
for some reason, something still feels wrong.
Let's have a quick look. That looks fine up until
20 frames looks fine. I think it's near the end. I think when it's looping it is giving me a little
bit of a strange look. Mm. That is a tricky one. Maybe it's better if we just go ahead. It's like over here, there's
a lot of movement going on, but it's not that bad. You know what? Let's
get it into reel. I think it's better
to set over there. Right now, I don't
do it dust it. So I'm going to turn
off my outer animation. I'm just going to go
ahead and save this. Okay, so we got our horse now. We got all of that stuff done. We can go into object mode. And just to keep it easier, I'm just going to
hide these planes, and I'm just going to
go ahead and I'm going to basically select
everything over here. Just click on the top,
select everything. And yeah, save a scene. And then what I'm going
to do is I'm just going to go ahead and
export this to FBX. And I'm going to export
this to exports. Oh, sorry, I cannot
do that over here. Horse, because, of course, I'm not allowed to give you guys this horse, unfortunately. So let's make a folder
called exports in the actual folder where
this horse saved. Selected objects. Horse,
underscore walk, underscore nim. Oh, let's not do anim walk
horse, underscore walk. Okay, that's all
turn on. We have our bake animation
all turned on. So that's all fine. So let's
go ahead and export that. And let's see if that works. So if I just save my scene, I hope that all
the materials are still correct because
I have not yet tested out the exporting of this horse file
because these horses, of course, are static, so
they kind already work. In any case, if we go
ahead and go in here, what did we do? We went into this folder and I'm just going to make a
new folder called horse. Which makes it easier
for me so that I can just remove it
when we are done. And now I'm just going
to navigate to my file. Horse exports. Okay, let's go ahead and
just import this horse. I also am not completely
sure about the scaling. I guess that scaling is fine, so let's just get started with
one and just press Import. And then we can just
give this a go. Okay, so yes, that is fine. So if I now go ahead and let's
say place next this horse, Okay, so the horse scaling
is a little bit too much. Let's go ahead and go in here. And what we can do is
we can scroll down, transform, 0.9 maybe, and let's just press
press reimport in here? Let's do this.
Rimport. 0.8 maybe. This one is always a bit trickier when you
have animations on it than because
the displays change. So let's reimport this. Okay, 0.8 is fine. Now if I quickly go to my horse, I want to see what kind
of materials it has, and then I can go
ahead and go in here and just make sure that those
materials are the same. Okay. Hello, horsey.
Let's go up. Okay, three materials,
so that's looking good. I'm just going to see if I can
just drag in the material. So I will do this
on my other screen. Okay, that one is correct.
We have our hair. No, that is not the
hair. This one we need. And then we have our outfit. Okay, so outfit is incorrect. I think No, wait, I
think it is this way. That's the outfit.
This is the horse. So it's always a bit backward. There we go. We have our horse. Let's go ahead and save zi. Bit laggy. There we go. Not this one, this one. We have a horse over here. Let's go ahead and let's go into our animation set and then we can just play and we
play the horse animation. I think it is this one.
Yes, that's the one. Now what you can do
is just go ahead and press play just to
see how it works. Let's see. Am I accidentally
bending something strange? No. How is it looking
from the distance? Not perfect, but it is already, like, a good beginning. So I think that is fine. Like, it is a beginning that
we can get started with. Hmm. I'm just trying to figure
out exactly what's wrong. It feels a bit floaty. I think that's yeah, I
think that's the problem. Like, it does not feel like it like it has a lot
of weight to it. So that's something that I
will go ahead and try and fix. However, we already have
like the base horse in mansuO I will
go ahead and try and fix that in the time laps of, like, all
the polishing. So at this point, this horse is pretty good, although
for some reason, it just reset all of
the scaling again, and that is a
little bit strange. Is it because of the animation? Oh, the animation. That is tricky. I did
not think of that. If we go ahead and go in here, I think what we need to do is I'm just going
to do a reimport. So if we go ahead and look, what was the final scale 0.8. Yeah, I'm going to go ahead
and delete all of this. Delete the horse, save your scene because
this is easier for me. If I just go ahead
and delete all of this stuff, like that. And then if I just go
ahead and reimport it, but this time set my scaling
to 0.8, that should be fine. So basically, what
we're going to do now is we are going to
set up our sequence, which should be
pretty much the same. So over here we have a horse. I just need to quickly drag on the materials which are going to be the horse. Outfit or skin. At least now I know which
ones I need to have. So the horse is now done. And now over here we have our doctor and we
have our horse. I'm going to go ahead and I don't think like the doctor we really need to animate except for maybe bobbing him up
and down a little bit. But for the rest, that means that what I will do is I
will select the doctor and the horse and I will
go ahead and I will duplicate them over here, and this one is going to go into our animated
characters folder. And then this doctor and the
horse is going to go into the B folder, which
can be hidden. So now in our
animated characters folder, the first thing
I'm going to do is, I'm going to replace
my horse with the animated version over
here. So we got a horse. Let's go ahead and
grab it over here. Now I'm going to go ahead
and grab the old horse. Or, actually, let's
where's my new horse. Horse, walk, let's throw this also into the animated
characters folder. Link the doctor to this horse. Oh, cannot Oh, that's annoying. I didn't know that that
you cannot attach it. In that case, we just need
to animate it separately. In that case, so let's first of all, get
rid of this horse. Now, we have a doctor. Let's go ahead and just sit
the doctor down here. Like this. Yeah, it
should still be fine. Is my horse not looking too
small? I don't think so. I think that is a
pretty decent size. It's a little bit smaller, but I don't think we can
really twine scale it up, but in the animation,
it might just say, like, no, I don't
want to be skelted, then we'll just revert it. So let's say that we
got this one over here. What we're going to do now is we are going to
give the animation. So if we go ahead and go into our town animations then we are here, we have
our character movement. So now what we can
do is we can just go ahead and start
adding this one. So we have our horse and we
have our doctor over here, so let's go ahead and add
both of these two here. Horse walk. Okay. And with our horse walk, if we go ahead and go
into our transform, let's have a look. I'm going to first
of all, animation, grab the horse walk animation. Let's have that one just
running all the way through. And then in our transform, I'm just going to go
ahead and select it, click on our Transform, and
this one we will go ahead and we will simply move it
from here to over here. Oh, sorry, we do need
to have it at the end. Let's say this is
probably the right speed. We need to figure
out the right speed. So let's have it roughly
around over here. Now, first of all, let's press plate to see if the
speed is correct. Oh, I forgot to do that. I forgot to go ahead and go into our bridge transform and just make sure that
this is rotated. Flat. I really don't know
why they would do that, why they would not just keep
it like this. It's safe. Let's twilight again. So horse, No, you are going too fast,
so let's move this back. Let's play it out to it again. Whoa, still too fast. Let's go ahead and go back. Even more. Let's try that. Wow, this one really needs to go
quite far in order to. So the horses they are
walking very slowly, which, of course, makes sense. Horses often even
walk slower than people if they are in the
town, you would think. Mm, I just need to double check because I feel like,
yeah, here, see, because we move this,
it is trying to once again mess around
with our curve. So we just need to
reset this back. It's twilight again.
So play. There we go. So that's looking a
little bit more logical. Yeah, we will, of
course, just fix the animation a
little bit later on, but we only need to do
this animation once. Okay, so we got our
horse over here. And now we have also our doctor, which is sitting all
the way up here. And with our doctor, what I'm going to do is, first of all, let's
just go ahead and try, go to our horse walk,
and then right, click on transform Damn this thing is getting
annoying all of a sudden. Right, click on a
transform copy. Go to our doctor, let's go ahead and paste over here
because there is not a, there is not a link
function, I believe, to this and online, I can also not really find
any way to easily do that. So let's just go ahead and
press Paste over here. And then the next thing
that we're going to do is let's see this one, let's just go ahead
and press delete that transform so that we only
have last transform left. For last transform, all we need to do is we do need
to go ahead and we need to place it properly
into position like this. And then what we need to
do is we just need to also make sure that the curve
is correct, which it is. Now, I have feeling
that this is going to not work as well. Oh, hey, wait, it's
working perfectly. Okay, fair enough. Okay, so we got this
position over here. What we can try to do with this, just to give it a little bit
more life is, let's see. If the horse does this, we go down a little bit. It's a little bit
slow for some reason. Oh, and now it is not linking. That is interesting. But I only want to
really transform it on my Which location
is this on my XYZ, on my Z location. So if I maybe go only
over here, here, if I move this one down
over here and then do a Z location, now it works. So if we just set this
on our Z location, then it does not get confused and try to change
our curve again. Let's just do this a little bit, just to see if it
is even working before I spend my
time doing it more. It's on the location. Let's see. So you
have an operas play. Not perfect. But let's go ahead and just see how it looks if we go over here. Yeah, so we definitely
need to give the horse a lot more weight. That's
definitely one thing. I feel like the person, if a year is not moving, it's not the worst
thing in the world. You can go ahead and you can. I will not probably do that, but we can go a little bit
more drastic in terms of, like, the movements up and down, only that will probably
take quite a bit of time to really do this, or maybe we can go
ahead and, like, select these duplicate them, duplicate them again
and again and again. Something like this. And I
don't know if that maybe, like, gives me a better look. Yeah, because you can see
him bobbing up and down. But yeah, you just need to have a look and see whatever
works best for you. So at this point, I would
say that this is for me, this is looking pretty good. So we got the horses
walking around. So the only thing that I need
to do in the next chapter, which will be a
time match chapter is I need to go ahead and art this cycle also for this
horse and for this horse. Then I'm going to do a little
bit more enviamin polish. And after that, what
I can do is I can probably add a few
more animations, just like I have a few more
people walking and maybe have another animation
for the horse in which he's just like drinking
or something like that. That is about it.
So at this point, this will be the end of
our real time chapters. So I really hope
that you enjoyed it. I will go ahead and I will just do a quick out row later on, so you will still
hear my voice for just a few more minutes
at the very, very end. So let's for now continue to our very final chapter
in which we'll just do some general polish
and just really make sure that this is going
to become an end product.
80. 79 Final Polishing Of Our Scene Timelapse: I h Do M No. And I Uh, Do a Banana. Okay. D. D. D. D. D.
81. 80 Outro: Okay, so here we are.
Welcome to the Outrow. Wow. That was quite a big course that we have covered over here. But I think that the end
result speaks for itself, and it is looking awesome, if I say so myself. So, of course, as always, I always recommend that you spend quite a bit more
time on it than I do. Unfortunately, the
nature of tutorials, I cannot simply spend 100 hours on an environment.
However, you can. So I definitely recommend that. So in the quick time laps that we did in
the previous chapter, so we just improved
the horse animation. We added some more animations. We added some more
walking animations and some general assets and
signs and stuff like that. Yeah, that was about it for
us a little bit of cleanup, a little bit of balancing
here and there. But look at this. We have a really cool
looking environment. Of course, this now
is just like a still, but we have fill on
animations and everything. So that's looking
great. And as you know, you can go ahead and create a high resolution
screenshot here. Don't forget to set your
screen percentage to 200 if you really want to get the best of the
best out of it. And of course, let's
just have a quick look just because it is nice
look, let's turn these off. Let's go into our animations. And here we have our
final sequence animation for which we just
need to quickly. There we go. We just had to reset it because it's
a little bit broken. But let's have a play. So
you can see camera moving. Everyone is just doing
their own thing. They're talking,
they're walking. The horses are walking.
It's looking great. Okay, that is really cool. Of course, of course, you can improve more on this. You can have more characters walking and talking
and just being idle. You can have more horse
animations of them being idle. But I'm going to just
leave it off here because I'm pretty sure that
you get the point by now. Yeah, we also like these
planks and everything. And some decals over
here that is just like some dirt decals.
Okay, so that's great. So I'm sure that by this point you already know what we've
covered, but just in general, the biggest recap is
that we went over on how to do modular
asset creation. We went over on how to
do procedural textures, how to create decals, how to do advanced shaders and materials inside of
Unreal Engine five. How to create training
in real engine five, how to create also those
normal details for those. We did, of course, general
presentation, lighting. We went over how to
use the modeling tools to easily create these Boolean functions
and everything like that. We went over set dressing, which basically means just
the level art of our level. And on top of that,
we also went over as a bonus on how to easily
animate some characters, how to place some
characters around, and also how to even manually
edit or animate horses, which was all
looking really cool. So this is looking great. This little guy over here, I will go ahead and just fix. Oh, wait, we don't
need to fix them. We just need to go
ahead and switch this back just to give you,
like, the final look. I will go ahead and I
will clean up the scene a little bit more just like
in our World Outliner. But for the rest, everything
will be included. Every single source file
is included in here. The only thing that will not be included are the characters, the horses, and those
few static assets. And I already
explained to you why. I really hope you enjoyed
this tutorial course. Next to this, I also recommend that you have a look at
our YouTube channel, which is also fast tutorials, as we have a lot of
free content there. And, for example, in there, we sometimes cover things
like weighted normals. We cover them a little
bit more in depth, which we cannot really
do when we have so much stuff to do in
these tutorial courses. There's also a
discourse. You can find it when you've
bought discourse. You can find it on YouTube bits scattered
all over the place. And, of course, do
not forget to please leave a good review if you have enjoyed this
tutorial course. If you did not enjoy it,
then please, of course, first talk to me
before you leave like one star review
because those things are not really nice to receive, and I'll see what I can do to improve discourse
or future courses. If you need any help, the discourse is the
best place to go. In any case, that was the Outro. I really hope you enjoyed
this Dial course. There are many more
courses to come. So let's go ahead
and keep learning.
 FastTrackTutorials, Premium 3D Art Education