Transcripts
1. Intro: Hello everybody and welcome to my new class for jewelry
design in this series. In this class I'm going
to talk more about building and designing
simple engagement ring. And I'm going to talk
more in detail about some specific tools
that we use in Rhino. Some of the tools
may be used already before in some of the
tools for you to be new. So I hope you'll be
able to follow along. I'll try to make this
tutorial as detailed as possible so the new
users can follow easily as well as some
intermediate users would find some new interesting
techniques of how to bring our model
later to ZBrush, to weld it all together, and to render it in K shot. So let's get to work and hope
you enjoyed this content.
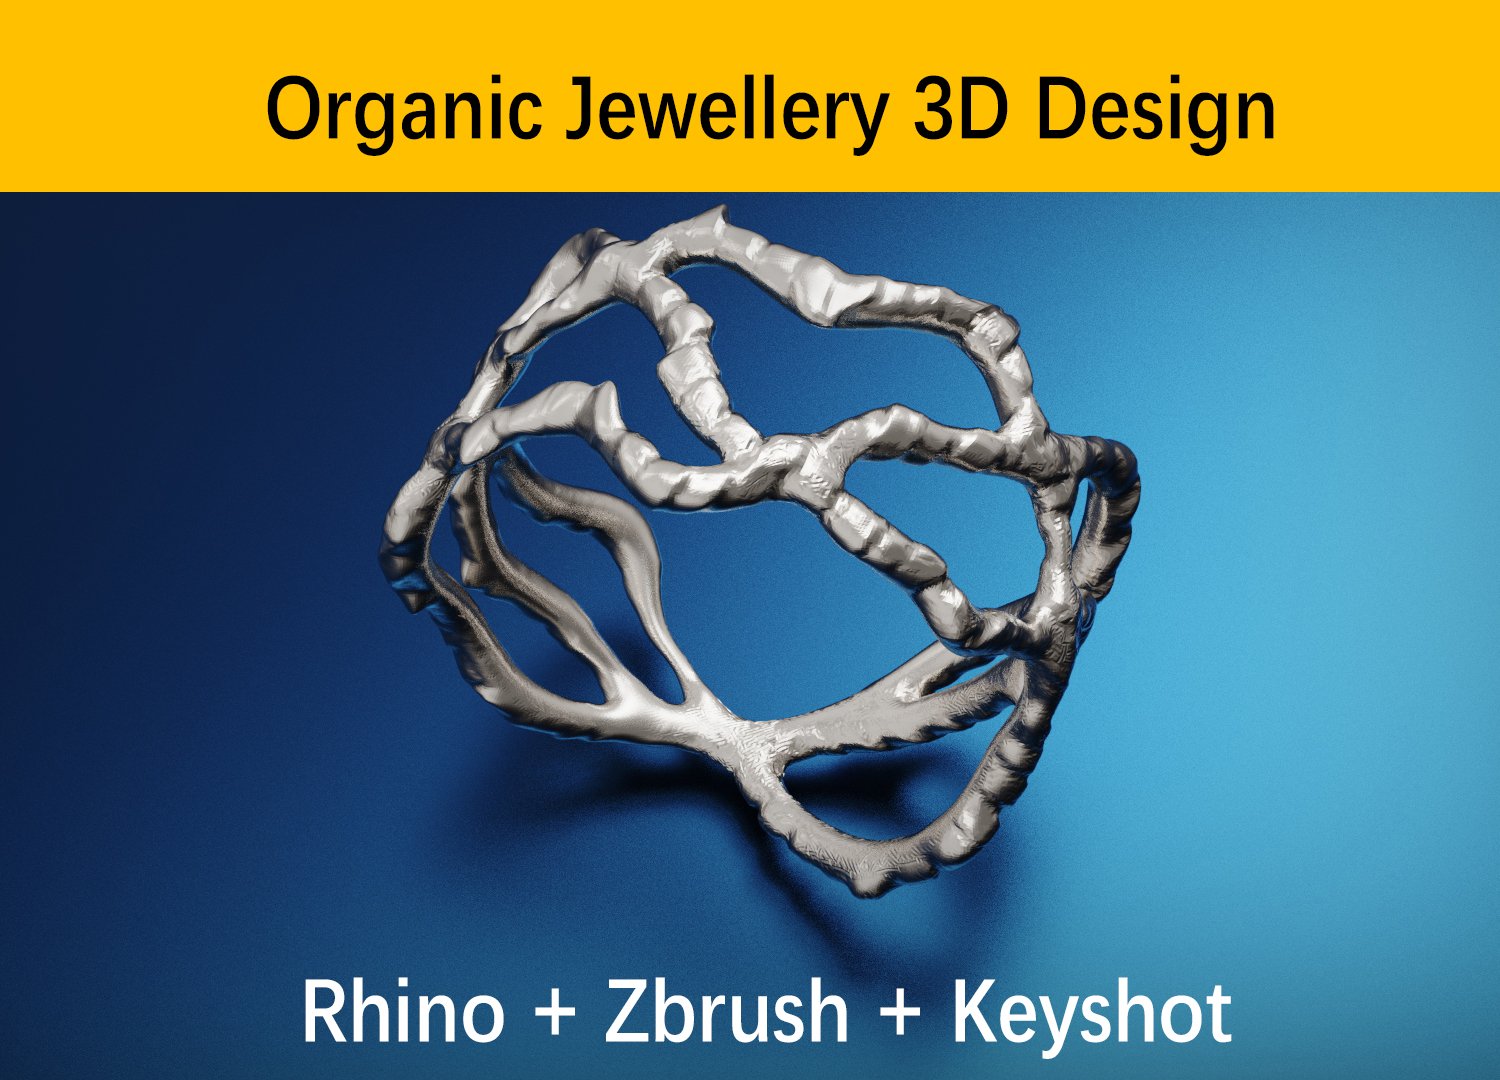
2. Part 1 diamond setting: Okay, everybody, so let's
start our tutorial. When we're trying to build. Today is a ring that has a
similar baskets setting, diamonds, I think like this. And as you can see, it looks really nicely handmade
and everything is welded together like a
really nice shape without some sharp edges. That's because it's
a handmade ring. And we're going to try
to emulate that by using first Rhino to
build the first shape, and then by using
ZBrush to wield it altogether to make it
look for our rendering, almost like it's done by hand. So for the purpose, what we can see, we're going
to use a one carat diamond, which is probably
slightly bigger than the diamond to this image here, this is maybe 0.5 are a
bit bigger than that. But we're going to use a one
carat diamond and try to achieve something similar
to this stone setting. Now, let's proceed by first
drawing our ring rail. We can use it as a
reference point. So we type on a circle for
the center of a circle with type 0 because we want
it to always start from 0. And for diameter
we tied to 17.5. Of course, you can use
any other dimension or her rink according to
your needs and are designed and also the request of your clients because everybody
has a different ring size. But for this purpose we
use 70.5 for the tutorial. So feel free to use
any other dimension. Now that we have this
rhinorrhea as a, as a reference point,
we're going to lock it. So you've got here on
viewport layout or visibility and new type
click lock object. You can also just type lock
and that would also do that. So every function that you
can see around in Rhino, if you just type that
function in your command. That's functional
automatically be activated. And you might even have some
other options that you can click around and play with. So for now, we can go
to our diamond and start building this basket that's going to
hold our diamond. So for this purpose, we can see that the
basket goals has a slightly inward angle
with the prompts. We're going to try to
achieve the same look. And also we can see that
the diamond is a fairly above the top rail here, which is also called
like a doughnut real. So we can try to achieve
that by pushing diameter. And then start building. First our prompts.
For our prongs. We're going to start by drawing a line somewhere outside of a diamond and toward the
bottom. Something like this. What you can do is you can,
before drawing this line, you can click record
history and all that will make like once
I draw this line, I'll be able to move
this line later. And that will affect
the way of my design. So for example, if I
use the pipe tool now under here, under this box. So you have this
triangle that you can click and open
other options. And there is a pipe tool. Once I click the type tool, I can click my
polyline that I drew. And now for the diameter, I can type 0.6 and another 0.6. And that will create
something like this. Okay? So we have the first shape of our trunk and we're going to move our prongs
a little bit to the left. So we have maybe 30 per cent of our diamond
entering our Proc, always bear in mind that
you don't want to be, you don't want a diamond
to cut too much into Prague because that later it can easily break the problem. But these problems
are very small. 0.6 millimeters
is, is very small. So if you have too much of a diamond cutting inside
of a problem that they were easily break
in post-production. The production for Rick. This why are we not going
to go for more than 30 per cent offering actually entering in our in our trunk or cutting
inside of our punk. Okay, so now if we select our
now if we select our prong, one another thing that I
want to tell you is you need to bear in mind that
for the setting, you want two types of a setting. One, it is a prongs setting for the rendering
and one for the production. For the production, you
always want the pronged to shoot much more
above the diamond. The diamond center
and a jeweler has a space to work with
your prongs setting. So for example, if
for the rendering, this is something
that would have really good result for
our rendering because it will look realistic and it will look just how it should be. But for the diamond
center or the jeweler, if you give him
something like this, there is no space for him to work on actually
setting this diamond. You would have to either
move this up later by hand. Or if you're smart, you're going to make
two types of models. Or one prong setting, that's going to be for the diamond center and
one for the rendering. It's usually fairly simple. We'll just make it
a little bit longer and start from there. And then for your
rendering purposes, you can just click on
this down by controlling shift and click and just
pull it a bit down. And then you can have
something like this. Okay? Now, I'm going to focus
now on the rendering part, so I'm not going to worry about how long my prongs are,
but just so you know, if you're working for
later producing this ring, maybe your prongs
needs to be like this, so the jeweler can
actually work with it. Okay, so now that I have this, I'm going to go to my top view. I'm going to click on my prompt, and I'm going to
type Array polar. So you type array in first off option that I got
this Array Polar, I press Enter
central polar array. I'm going to type 0,
and that will just put the center on this
center dot over here. So when I type 0, makes
sure that you are in a top view because this is not going to work if
you're in any other view. So type 0, number of items, I tap four and I press Enter
and press Enter again. So it's 360 degrees. Make sure that it's also for
you 360 degrees if it's not, type it in presenter. And now when we exit our view, we're going to see
something like this. Okay? So we're going to make
now to two parts. One rail that's going to where the diamonds going
to sit inside of it, It's basket and it's going to make more stable and better. And another that's
gonna be point where our ring shoulder is going to connect to our stone setting. There's somewhere around here. Okay, so let's start
building dose. We're going to go
to our front view. And first we're going to
select everything that we see and lock it down
again in a visibility, lock it down or
just type a lock. That way we're not
going to interfere with anything that
we're doing here. So for the part where
diamonds going to sit, we can because some line
like somewhere around here and just start
drawing a line along that, the angle of a diamond,
something like this. And this is our first. So we're going to continue
with drawing the control curve 0.1 line because it's a straight line,
we can draw a polyline. But the second one,
we're going to draw it the control curve point. So I'm going to click there. I can extend it up
a bit forward and then start drawing the shape. So this is the point. I mean, we're going to build the place where
diamonds can properly sit and then this prongs are
going to collide on top. So this way there's a little bit of pressure from up and
bottom and a diamond, the diamond is really stable, is set in its place. Now that we have that, we can go and revolve this, maybe I'm going to
make it a little bit. I'm going to make
it slightly bigger. But the one thing that
you need to bear in mind, you don't go too much
behind this line. So you see this is
where the diamond ends. So you don't want this part of a basket
to go too much outside because it will be visible from the upper angle and that's
not really visually pleasant. So let's start doing it again, but try to be somewhere
in that dimension. Okay? Something like this
would be okay. You see it doesn't go too much behind it and it's going
inside of our prongs, so that will be
okay and it will be stable for the diamond as
well as it will be visually. Okay. Don't worry about
the general look of it right now because
we can bring everything in ZBrush later where we're
going to wield it altogether and polish it in a way to
make it look much nicer. So what I wanna do
now is going to draw one line as a
reference point. So I can take polyline and
turn on the grid snap, which will enable me
to draw on a grid and go from a center
and draw it upwards. And this is going to
be my reference line because now I'm going
to revolve this shape. So to have a reference
line as a center axis, revolving action can happen. Before I do that,
I need to connect these two lines by clicking
them and clicking Join. Makes sure that in
your planner view, a perspective view that
everything is one plane. So everything that you drew should be like
this in mm plate, if some of the lines are
sticking out, maybe like this. So let's say if you have
something like this, but actually it looks
okay from this angle. But when you go to
your perspective here, it looks like this. Sometimes this can happen if some snapping
options are enabled. All you have to do is
go to your front view, click on your shape and try
and type project to see plain wasn't going to do is going to just bring
it all in one plane. So protect the C plane
and deleting put objects, I click Yes, and that's it. Now I can see that this
problem is solved. This often it happens and I find it really important
to tell you this function. So now that we have that,
let's go to revolve this around the axis and
to build that shape. So we go to a front view, click on our shape, and
it will type a revolve. Start with the axis. This is where we're
going to use that line when we draw as a control point. So click on the bottom up. And it's just now you
start. Tango is always 0. Revolution angle is also 360. You see it all the
information here. So we press Enter, Enter, and that'll create this shape. We can go a little bit to our reference image and see that that's more or less what
we're trying to achieve. Our design is
slightly different, but that's okay because we don't need to make
it something similar. We're just trying to emulate
specific style setting, not necessarily the
whole design itself. Okay? What I wanna do now is like, I would like to first bring this prongs
slightly together. So how we can achieve that simply is first we're going
to unlock everything. And I'm going to select those
prompts by holding Shift. And I'm going to type cage edit, which I taught you in
my tutorials before. It's a really powerful tool. We killed the
bounding box and type enter and enter and enter again. So now that we have this, I'm going to just select
the bottom points of my cage edit tool. I don't need to dose
circles and lines. Once with that selected, I can hold Shift and just
slightly move it inwards. But what happens is
my grid snap is on, so I turned off
grid snap and just slightly move it inwards. We don't need to
move it too much, but a little bit of
movement would be okay. See how it looks like. Because too much of an angle, it also can create attention and then can easily break later. So we don't want it that what
do we want to achieve is just a slight better
visual angle for prongs. And now we can take this
shape and hold Alt, and we can just copy
it on the bottom. So this is going to be the shape which we can
just easily reuse. And this is where
our diamond drink. Diamond stone setting is going
to connect to the shank, to their body and
shoulders of our ring. So let's take a look
how this looks like. That's more or less okay. Let's start building
the ring body. So for now, this are
going to use this as my, as my diamond setting. And of course, don't worry about the final
look of it right now because we can avail
this altogether in ZBrush and fix the element. That's why this
tutorial is focused on Rhino to ZBrush workflow. So you can see the power, this specific design
method which you're going to help you achieve
some really nice results. So this is end of the part one. Now we go to the second part. We're going to work on
building the body of her rink.
3. Part 2 ring body: Okay, So this is the part two. If you followed along,
you were able to create this diamond
stone setting, which is the basket
setting with four prompts. And now let's work on
building something like dislike a body where with
the shoulders separated, where we're going to connect our body to the diamond setting. So first, what we're gonna do is I'm going to move
this slightly downwards. So first, always make
sure that this is your This is your ringer rail. So we need to work
with that in mind. We don't want to cut too
much into our ring rail. Later, we're going to
cut our shapes out. But for now we can just play a little bit,
wet it like this. And what we're gonna do
is we're going to bring this upwards and also
do the cage edit, edit, bounding
box, Enter, Enter. So for now I can hide dose because they're
just distracting. And this one as well, I can hide this height it. Okay, let's see
what's going on here. So this should be hidden. Okay? And this one also
we need to hide. Okay, so now we just work with this little
donor to the twin. Let's go with that that
we have on the bottom. We're going to take those
lines and hold Shift and just move them
a little bit down. And as those shapes, we're going to move a
little bit data words. So it follows the
line of her rink. Like this. There is another way we can
do is with the bend tool. But for now, this
serves the purpose. So we click now back to
shore object and then these are our prompts, their back. So we can see how
that looks like. Okay, it looks slightly
better than it looked before because we've got
that nice little angle. And it's gonna make a ring more comfortable also at that point, distal part of a prongs. This we're going to cut
later using a ring wire cut. But for now let's
build the ring body. So we want to build something
the resembles this. And how we can achieve that
is going to our front view. And using first that ring
rail and typing offset. Now that you have
offset where you can further distance
typo one-point date, and click anywhere
outside of that circle. So now we have two lines. One that's offset another line, and the distance from
here to here and every point is 1.8. So what we're gonna
do is we're going to bring this up a little bit. Now, I want you to
also do a little bit of a bawling and
distancing. Why? Because it's important in
jewelry design that you are able to measure distance
just by looking at it. By looking at this, you
should be able to say, Okay, this part here
is maybe to ten. On this part, there is
too thick for that. We use also the distance
tool to measure. So we see these as
two millimeters here, that's completely
fine and distance, distance, we're going
to use tool there. And you'll see that the
distance here is 1.38. So I can always tell you the dimensions
that you need to use, but you need to
bear in mind that every person design and
every ring is different. So if you just learn the
specific dimensions, then maybe you won't be able to do any design that
you have in mind. And it's really important
to try to draw as much freely as you can and then measured the
dimensions and then fix, because this will
help you in two ways. First, do or not to rely only on numbers in a computer
to do the design, but also your creativity. And second thing
is that you will make a lot of mistakes
by doing this. Because later when you measure
distances, you'll see, oh, this is too small and
I'm going to have a problem in the production because you need to do it again. And by doing it and
modelling it again, You actually going to learn the software and that
workflow much better. So I really recommend
people to try to also eyeball things and then measure and then find the mistakes and then fix
them and do them again because that we're
going to force yourself to remodel it a couple of times. And by doing that, you're
just going to learn to program and the
workflow much quicker. So that's one of my
recommendations. You can take it or leave
it, it's up to you. Now let's start to draw the
things that can connect. This diamond setting basket
to our body of our ring. So first, we're going
to lock this up, lock these objects so we don't
click accidentally on it. Now first we're going to
draw a line that connects our outer ring rail to this
point where our diamond sits. So it's gonna look
something like that. So this point here, Let's do by using
control point curve from somewhere here. Click a little bit outside, not directly here because
you're not going to be able to get the
good curve you see. So we can do it, maybe something like this. And that should be okay. Let's see the point of contact is important because sometimes we can make a
mistake by doing this. So we start by, I mean, we continue by
clicking on the end point. If you don't snap
to the end point and make sure that you are, oh, snap is on and your end
point here is clicked on. That way like your
dad is clicked, then you'll be able to snap to the end point of your line. Also, we have a near point,
point, midpoint center, not vertex and every other snapping option like in
most of tree software. But for now let's focus on this and click at the
end of your line. Continue drawing it a
little bit inwards. And this shape now is completely irrelevant because
what we're just trying here to achieve is
just connected to this part, to this part of our
diamond setting. Specific rail. So the shape is not important. We're going to fix that
all in ZBrush for now. We're just trying to draw it as close as possible
to what we need. Something like this would work
and connect it over here. I'm going to connect this
a little bit more upwards. Something like that. Okay? So now that I have this shape, first I'm do is connect
these two shapes. So I'm going to
join them together. And now I'm going to
do some trimming. Trimming by zooming in here to see where those
two lines connect. And if there are any mistakes, we might have a problem here, but let's see how
it goes for select these two lines and
click the trim function. What does it going to help you
where those lines connect? We can trim everything
that's outside. So before doing that, we're going to use our
reference line that's here. Make it a little bit
bigger or just draw a new one by using grid snap tool and
bring it to the center. Like this. The grid snap on. Now for us, we're going
to use this line to trim the right part of the ring rail that we drew
because we don't need that. So it's just going to
trim trim, autopilot. It's possible to trim because everything on the same plane. I'm going to show
this like here. You see everything is connecting all these lines
that are on the same plane. If they're not, probably, you'll find a problem tree. Now that we have that.
Well, let's use this part that we drew recently and
also use the trim function. And just remove this parts
which we don't meet. So one is here, one was there. And one thing that you
need to bear in mind, it's sometimes those lines
I too close to each other. We can have some problems on the point where they connect. So I'll need to examine
now this point to see if there any leftover from
the previous line. But it seems like there are
no problems whatsoever. The only problem that
I see is that they are not properly connected. Or maybe let me see. Maybe they are just like I didn't see properly
in my software. Let's try to connect
them together. Join. Yeah, that works fine. So yeah, there were connected. So there's no problem. We're going to join
these two together. And now we have this shape. Also, there are
different ways how you can achieve this specific shape. You don't need to
do it like this. I'm just teaching
with this method because it's much more simple. Way is just to use to use a sweep one or sweep
two rails tool. And then create here a profile that's going to first sweep the bottom part and one that's going to sweep
the upper part. And you can also achieve more or less similar, similar results. But this method is
much more simple. So you're going to
practice a little bit of drawing and also going
to learn other things. So for this tutorial
purpose of this tutorial, I teach you this specific one. So now that we have this shape, we're going to join it together. And we see that joining this
parts, they don't work. You see, like I click, let's see, you
experienced this problem. That is great because
you'll know how to fix it. I like when I experienced
a problem when I work because most
of your work also. You will find some problems
that you will try to fix. So let's see where's
the problem and probably you're going to face
the same problem like me, so you know how to fix it. We're going to click on
this line and we will see that it ends over here, but there's a leftover
from this previous line. So how do we fix this is just by clicking on
one of those lines, zooming in, go to trim and just cut everything that's
was the leftover. You can see now we click
this line and that line, and we see that their
endpoint is the same spot. If we go back, we'll see that that
was not the case. If we click this line here, it ends here and this
line ends there. So that's how we fix it. We take one part of it. We click on a trig function
and we remove one edge. And now everything
should be okay. So we're going to select them
now again and click Join. And two curves joined
into one open curve. You can see that's
one curve and it's open because here is open,
here it's not closed. And what we're gonna
do is we're going to mirror this on the right side. So it click it here
with that mirror. And we're just gonna, because we have our
endpoint snap on, which is going to type
click on one end point and hold Shift click upwards. And now we mirror this on
the right side as well. We're going to click both of our lines that
we drew and join. That will create
something like that, which we can easily
now use to extrude. So let's click on
it, go to surface, extrude curve, and
extrude straight. So this is a very
simple way to extrude. And also you can click
forest here solid, so you want it to be solid. But another thing you need to
bear in mind is you can go right view and you can type the dimension how big
you want this to be, but you also can practice
what I said to you. That is eyeballing. You know, that one box here is one millimeter and you
know that you shouldn't go anywhere below maybe 1.3 millimeters to be on the
safe side, 1.4 millimeters. So we're gonna go
something like this. Now let's take a look. We can measure it so
we know what we did. There's probably 1.6 or eight. Let's try to see not
this 1.5 millimeters. And I'm okay with this. I mentioned when I zoom out, I see, because I did many rings, I said that this dimension is okay also I know by the distance that is be able to be produced and there won't be
any issues in production. Now that we have
that, we want to click on that ring shank
and we're going to type bucks, bucks, Cajete it. Also click the bounding
box and type Enter twice. And we're going to select
this middle points. And we're gonna
make them slightly bigger because we want
our ring to kill Bill, slightly fatter and thinner on the bottom and apart
because that will create a much
better visual rink. And not so select those parts
here and make them just slightly smaller, too big. Make sure if something happens crazy when you
change these dimensions. Like it's just if
it moves too much. Sure that your grid snap is off. Because if your grid snap is on, once you move this, it's going to move
on my bike grid. And that can give you
some big differences. You want to fine tune it. You need to go eat
side like this. Now that we have that done, we can delete our bounding box because it's not needed in. We're gonna do some trimming. So let's see you in the third part where
we do the trimming. And after we do the trimming, we can go to our ZBrush and
connected altogether as you can see how that is going
to look much different.
4. Part 3 finishing touches and fixes: Okay, now let's work a little bit on these points
of connections and also do some training on
this part because we don't want this we don't want this prongs to be sticking down too much because that will make the ring
uncomfortable. So first we're going
to unlock our object. And we're going to select all
this prompts and a diamond. And we're going to
rotate everything for 45 degrees because we want the point of
connection to be here. So we're just going
to rotate our prongs. In this case, like this. Click here and type 45. So now we have our prongs on the side and we have
something like this. That's good. Let's go and trim everything that's sticking out so we can make this
ring comfortable. So first, we should
have ring rail, which we don't have now because
we use it for data shape. So let's draw now a new one. Also center is 0 and diameter
which we used before, you'll be probably
written against 70.5 and this type Enter. So now when I click here, you can type this, plug this curve, and
I can see this curve. So what I see is this doughnut part is sticking out a little
bit into the ring. And also these two prongs, the four products
are sticking out. So we're going to
wire cut that all out so we can make it a
proper ring shape. So we have nothing too. Actually. Our ring, if it's produced
later or with my art, jewelry needs to polish
and stuff like that. We can do it right here so everything fits
appropriately di dimension. So by selecting this circle, we're going to do the wire cut. Wire cut will do the function
where we can use this as a wire to cut through the
shapes in front plane. So we just type wire, cut and press Enter. Now that we have that, we can select objects to cut. So that would be this part. And I'm gonna go to my
perspective view and select these four prongs
and press Enter. Press Enter again. And you can see that the
wire cut through all of it. But because you can click on this poly surface here
and you can delete it. So that's what I'm gonna do now. Delete all these parts
that were sticking out. And you don't need to worry
about the visuals here right now because we're
going to fix all of that in our Rhino later. For now, this is all good. The final step
that wanna do is I want to do some cutting
inside of these prongs. We don't need to do this for the production because most of the jewelers can do the
stone setting themselves. You don't need to cut
prompts beforehand. But for the purpose
of rendering, if we have too much
material on our prong, that the diamond goes
inside of a Prong. We can have a really weird
look on the rendering because software is going to calculate the light going
through this diamond. Diamond is going in a piece of metal is sticking
inside of a diamond, then the rendering of the
light won't be really good. So we need to cut that part out Frankfurter
rendering purposes, and we're gonna do this by
going. And the side view. We have our reference
line and we're going to draw a shape that
follows the shape of a diamond and use it
as a cutter later in arm with our
Boolean function. So let's do that
by going polyline. Start from the
center of that line. If you don't have this reference point line, just draw one. We're going to start doing
something like this. You see the contact is over
here and the girdle part. So for me it's, this upper part is
not that important. Important is to follow really precisely the girl
that part up to here. And then we can finish
something like this. Now, this shape we're going
to revolve around this axis. So we're going to have the color that's going to
cut this products. So you're going to type
revolve, press Enter, Start at the axis, here and here along the axis
that which will be four. And start angle is always 0. And revolution angle
is 360 because with the full circle and this is
the shape that we've got. Let's see it from a side view. So you can see that this shape cuts inside of those prongs. So now we're going to use
is a Boolean function to use this prongs and from
them remove this shapes, which isn't going to
do a small cup here, which is following exactly
the shape of a diamond. We do that by going
into Boolean, boolean difference
and asked you select the surfaces of poly
surfaces to subtract from. So those are our prongs. Shift and click enter. And what do we subtract with? This is the catheter and we click it and press
Enter afterwards. And this is what we get here. Don't see the
results immediately, but if you go and
remove it like this, you can see it's
properly cut this way. If we're rendering purposes, everything will be Perfect. Now that we have
this. So let's export this file to SDL and imported into ZBrush and then just welded nicely
together there. So we have all this sharp edge is going to disappear and
everything is going to look really smooth
and almost like in this picture, done by hand. So let's go and select
everything besides our diamond. And go to File. Export, select it and
call it wedding, ring. Z, brush. Ready. You can call
it any way you like. I just use this name for now. So SDL tolerance 0.01 is fine. You don't need to worry
about that for now. Click Okay. And that's the end of the
rhino modelling part. Now we're gonna go in ZBrush
and see how can we use some really simple
techniques and Z brush to just
wielded all together. And what is really
good about ZBrush. So thank you for following. And let's see you next
part of the tutorial.
5. Part 4 Zbrush remodeling: Okay, so now let's work
with our ZBrush and see how we can wield all
the elements together and just use the power of ZBrush
guru with ZBrush is good. Use the power of
rhino for rhino, rhinos goods rhinos is
really good to make a very precise 3D models that are ready for
production and treaty. But ZBrush is really good at making things look
much more organic. So we're going to utilize a
tool of both of these and make the best way possible
to make our jewelry designs. So let's import our STL file by clicking Import
here on the right. And we're just
going to find file, I believe is here. Yes. Wedding rings, the brush
ready? This is my file. I'm going to click, Okay.
I'm going to click here. I'm going to draw, just click and drag. And this is going to
pull the ring out. And after that,
I'm going to click Edit if you don't do that, and if you keep on drawing, this is what's going to happen. You're going to have plenty of rings drawn. You don't
know what's happening. It looks like a mistake.
So we're going to go back. I'm going to click and draw
because you import SDO model, first thing you need
to is to dry them. So I'm going to dry then
to doubt to our document. And once I draw it in,
I can now click Edit. Don't forget to do that
part is really important, otherwise, everything will look like a mess for you over there. Edit. And now when I click on a site, I can just rotate and
see it from every angle. So what you can see now is we go right-click and poly
drug poly frame. We can see that poly
frame are really bad because rhino STL file doesn't have really
nice poly frame export. But the ZBrush is really good at wielding it altogether and just say remeshing the
whole mesh for you. So you get a really
nice mesh to work with. And also you can easily
smooth out all the parts. So what we're gonna
do now is gonna go to our geometry
top on the right. As you can see,
ZBrush can be very complicated with
its user interface, but just follow me and you don't need to be intimidated by the
way, how's the brush looks? Because it can be
really good tool if you know what you're doing. So go to geometry. And under geometry you have DynaMesh to something that I talked to my previous tutorials. And it's a very important
function that we're going to use a lot here in our tutorials. So under DynaMesh, we can
see the resolution is 128. So maybe we're going to
crank that up to 200. Once we did that 200, we're going to click
DynaMesh function. And what that does is it wielded all the parts
together as you can see. So I'm going to click on
Draw Polyphemus and maybe, maybe I want to use a little
bit higher resolution. So maybe manganese 224. And click DynaMesh again to see. Now I see that the formation of my model after wielding
is not too big. And I can accept that. I think this is pretty good. What I'm going to do now is
I'm gonna go to deformation. And here is interesting part. We can just click Polish
by clicking on Polish and moving a little bit
to the right, 20, maybe. We see, you see the
results we got. Everything became
really smoothed. And also remember those we'll
points here that we had. By the way, I'm zooming in by clicking Control
and right-click, I'm clicking holding control and I clicked in my right-click
somewhere in this space. And I can do this. And if I click Alt, click and Right-click
Alt and right-click, I can move around. I can pan my object. So let's see how
this looks like. The thing is that there's
too many polygons here. And if we go to render this, it's going to create
a little squares that not going to look nice. So I've go right-click
can draw poly frame line. You can see how that looks like. It's not ideal. So what we can do at
this moment, go back. And we can go to
geometry and we can now divide it once again. And we see once we divided
it became much smaller. Here you can play with some
materials if you click on a material tab and
just import some Chrome blue or maybe even gold to see general vibe
and how it looks like. You can see already by
reflections of this material. You can see that this model is much different than
our Rhino model. So random model looks
really sharp and messy. And to smooth it out altogether, Yes, we can do it in Rhino, but it's still not
going to look organic, which we can see in ZBrush. This really looks like it's something that could
have been done by hand. Or you can do some specific
smoothing by holding Shift and just smoked some
edges like this by hand. If that's what you want to do, especially if you want
to make the rendering look more realistic. I would advise you to go and do a little bit random smoothing. Some, some smart part
can be smooth it out and some can be left alone. That way you're going to achieve much more randomized effect. Also, if you'd like to
draw on your model, will draw some little milligram
or some small details. You can do that
easily now in ZBrush. So that is all up to you. If you like what
you have right now, you can maybe go
one more time and do some Polish
just a little bit. Just to make it
slightly more polished. And I'm pretty satisfied
with this model right now. What I'm gonna do
is I'm going to bring it back
altogether to my Rhino. And then from Rhino, I'm gonna bring it to my
key shot for rendering. So let's follow this to the next part of tutorial
and see how it all goes. But before that,
let me not forget, I'm going to export
this else DO file. So I'm gonna go to my
Skillshare lesson folder. And this is now called
Rhino ready, my OBJ file. And it's exported,
and that's it. Let's go to next
part of tutorial.
6. Part 5 Preparation for rendering: So let's go back
to our Rhino and then import that file that
we just did in ZBrush. And from there we're
going to export the Rhino file for K shot, where everything is going
to be separated and easy to render in key shut. So what we're gonna
do now is select everything besides
dark diamonds. And we can group the
object together and we can hide it for now because we don't need it and we don't
need this line as well. So we're going to file and
import what we just created. So we have a Rhino 3D object file and click
Okay, then import it in. And it should be perfectly
placed like this. If it's not, you can
easily rotate it. But if you did
everything like me, everything should be
in a proper axis. So you see here, we don't need to focus now. It has too many polygons
and for now you can work too much on
this file in Rhino. Because once you bring it
back from ZBrush, That's it. Rhinovirus can only
work with the rhino. Polygons shapes that
you create in Rhino. But once you bring STR OBJ
file from other software, then there's no more changes
you can do to this file. So make sure that all
the precision work you've done in Rhino is already done before you work
in ZBrush on it. So now we can export this
File, Export Selected. We're going to
pick a Rhino file. Rhino six model is fine and RNC ready. So that's it. Now let's go to our
key sharp and do some rendering of
our beautiful piece of jewelry and see how it goes.
7. Part 6 Keyshot rendering: Okay, So this will be the
last part of our tutorial, probably the most fun one, that is when we
managed to see what we did with the proper materials and light settings and
render isn't setting. So let's see what we
worked on so far. And let's import this file in our key shot as we did
it before as well. We just do a simple drag
and drop off our file. It can save the treaty and
phi like any like Rhino file, everything will
work pretty well. So because in our scene, we save the file and there's some other elements
which we might not need. We can go to overdose elements,
so I'll just delete them. And what we need is like a
rink as well as our gem, which in this case
will be our diamond. So if you want to pan around, you click on Pen tool. So remember that Kesher
does a little bit different than Rhino or ZBrush. So we need to use these
three buttons here, tumble pen and Dali to
move around our scene. First, what I wanna do is
I want to rotate my rank. So I'm going to
look for my file, double-click it here
or just one click and then right-click
and more selection. Once we have a
mode selection on, I can just rotate this. I want, or I can type
here minus 90 degrees. And that is perfect
rotation for 90 degrees, which I can use
for my rendering. Another thing here which you
can see is that the plane, which is a default plane, but because in case you have a default plane that is there
is not visible, is there. As you can see, it's
kinda cutting on my ring. So what we wanna do is if
you have a key shot ten, you can snap to ground or not. If you don't, you
need to do it maybe manually so I can
snap the ground. But if you don't
have that option, you just move your ring a little bit above
the ground so you can kinda proper shadows and everything is
rendered properly. Now that we have a disk, we're going to start
changing some materials. So first, let's put a
brushed platinum on our, on our ring body, or maybe this brush platinum
or putting them on rough. I think platinum rough
look really nice. Or even silver rough depending on what you want to achieve. But I think silver
ruffles look nice. And to be honest, even with the black diamond, right now, it looks pretty good. But what do we want
to do is we're going to change this to some
gem stone material. So if you go to your materials, you can find gemstones. You can pick from some
that are already here, like sapphire
rubbed the DYAMAND. Similar to this. Maybe for this I can
use the aquamarine just to see how that looks
like or maybe amethyst. You can just play around. This is the beauty
of the key shot. You can play around and see the different results
that you can get. If you were wondering
where I got this first silver material
is just under and metal. And under metal you
have a precious metal. And this is what
we're going to have all your pressure metal or
another way to find it. You go to favorite, it got to jewelry and most
of them should be here. So we've got a
precious material. And I'm going to just
changes too rough or goal. Now that I have those two, I'm going to add the plane, which this case I can use, the black plane that's
kinda reflected. So it's got to do
this, add geometry. So now we go to edit and add the geometry similar to what we did in our
previous tutorial. So if you follow the
previous tutorial for you despite should be easy. We click on plane and
maybe we don't see it now. But if we go Right-click
Move Selection, Okay, We can see it's a
little bit to the right, I mean to the left or far model. So first we're
going to scale it. So click on a scale. I mean, once you click,
right-click and move selection, you can have this option to translate the scale
and rotate and you can just disable what you don't need and enable what you need. So we can scale it like this. Or just click on
a yellow cube in the center and just square
it all in all directions. Once we have deaths, we go back to our material
and we're going to try to find some kind of
a reflective material that we're going to
change its color to black and still keep it so reflective and get maybe a
little bit of his textures. So let's try to find something. Maybe what we used
before would look nice. Let's see this. Okay, this material looks
fairly good and I like it. But what we're gonna do is we're going to change
its properties. So we're going to
change the way it's color and keep maybe the roughness and
reflectiveness solid. Or what you wanna do is
go here on the right, you can see properties
position in material. So once we have this
plane selected, probably going to have
this material here. So go to our material,
double-click it. And what do we want to do now is we're going to click on Color and we're going
to change its color to. So this becomes grayish. And that is because we have our light setting
in a certain way. I believe we change
our environment. That's going to change as well. So we're gonna go now to
our environment setting. Actually. We're gonna go to
our favorite setting and go to jewelry tab. And under jewelry
tapping going to see different light setup. Some light tense which
we can bring insight and we can have different
results of my setting. Almost like when you do that photography
for jewelry piece. So this imitates this
kind of a light setups. You can experiment by different light setup such as by clicking and dragging and dropping them inside of your
model is on your work plane. So just click and drag and
drop and see which one for you kinda brings the nicest
and best results. Some of them are
more like contrast, some of them are less contrast. So it depends on which
light setup it is. You can what I want
to achieve now, I like this very contrast, kind of a feeling. I want to play with
that right now. Another thing that you can
do is click hold control and click somewhere around here and drag to
the left and right. And it will make that
light setup rotate. You can see it from
different angles. Sometimes some angles produce a much better shadows
and someone goes, don't produce
really good shadow. So you need to
bear that in mind. So try to rotate it so you get the best possible result
that suit your needs. Another thing that
we can keep in mind is how much we want to zoom
in to our piece of jewelry. Always when you do a rendering, I tried to leave some space on the side because maybe
some other software. So for post-processing
you're going to do some cutting and other things. So best is to leave
it a little bit on the side so you have
space to work with. Now. And we go to the right. There are a couple
of things that we can change to our environments. So right now we've seen
our environment tab. So you have seen material
camera and environment. In the Environment tab. We can see our light setup
this disliked tenth, so it's here, right over here. So what we can do, we can change its size, color, brightness,
and other tastes. So you can start to play
a little bit like this, like how much is it elevated? This is going to influence
some shadows on the ground. So if you make it less elevated, at least specific points, especially with this dark point, then we're going to have
more dark on the ground. And I can, for this
purpose, I like that. One other thing that we can do. We can adjust this brightness, like how bright does. And we can adjust its size, can make it smaller or bigger. And this is for the O pins. Currently we have a site
black pin selected, this pink over here. This bin is because Anki shot, you can create little pins that are controlling the light
environment around you. So some of these
pins group control the light to some of these pins like black one
control the shadow. So if I move this
black one around, I'll see my black shadows
on my model can change. And this is something
that I really like it, this moment in which I can utilize to make it more
contrasty and create. For example, this edge here, much more interesting
than before. So easy and simple way to play around with it to get the
best possible result. Another thing that we can play around is
lightening presets. You can use basic cues, product. You can use interior, which is fairly quick, can use jewelry, lighting setup, and this one will create
much better reflections, but it will take more time
to process everything. At the end, what we
can do is we can go to our image mode and all
little bit exposure. So we're going to play a
little bit with exporter, merely a little bit overexposed, but not too much, maybe just
a little bit so you can get that nice shine
on certain edges. We're going to
click photographic. But that's going to
allow us is to play with certain elements
like white balance. So we can turn it
from completely maybe a black to kinda warm
on black feeling which one? I like. Other thing that you can do in a post-processing
software, which will be good
to do is you can remove the saturation from
this part of your diamond. Because right now we've got this re-balancing from our
gold part from behind, which creates a
little bit nice to see colors on our diamond because this Alex
rendering the ray box. So what we can do this instance, we can use other color
correction software. Any one, any software
at gel-like, just mask this part out
and remove the situation. Maybe make it a little
bit brighter so it's white, just like diamond. And therefore you can
recreate those like famous brands are most do
kind of a jewelry models. So you can see if we're
looking from a side, side view of our top view. You can find the best view
for a piece of jewelry. And once we're happy with that, we can click Render. So in this instance, I more or less
satisfied with this. But for the material, I do want to actually add slight little bit from maybe
blue tint to my background. Not too much though,
but just like. So I can have a little bit
to variation between warm, which is gold and cold, which is this background. So this is maybe too much, maybe a little bit like this. So now I get this really
nice reflection on my ring, which I, which I, which I really liked red. Now, if you want to
add some dynamic, you can play with
the perspective, which is right over here. But for me 76, we'll do the job. Once you're happy with more or less light setup
and everything, you can click the Render button. So let me just do the
final adjustments. I'm going to pick up this pin is controlling my
black bar points. Then I'm going to move it a
little bit around just to see what kind of
shadows I can achieve. This one, it's too much. Let's try to see
something like this. Okay? This is something this
moment are paddle-like. I'm going to move it a
little bit like this. So I have this really nice
reflection on the bottom and nice shape of
my diamond drink. I'm going to click
the Render button. Select the folder where
you can render everything. That's gonna be my
engagement drink. And I'm going to call
it final rendered. Then once I click render,
rendering window start. And this is what we get. Now at four or 5% is going to depend on your computer
processing power. But it's for still images
which are not too big. Like maybe one K like
nineteen hundred, ten hundred for those
kinds of images. Rendering speed would
be fairly okay. Yeah, got to render quite quick. Wanting that you can also do is you can render
smaller images. And once you run
this smaller images, you can then move to when you're satisfied
with the result, you can move to render much bigger image that
you can use right now. So for now, let's wait a little bit for this rendering to see
how that will end up. And, um, let's see also. Take a look at our
model, for example. So for example, you can take a look at these
edges just in a second. Now we see that my
rendering is finished. So this is my final image, which I'm quite
satisfied right now. And another thing I'm
going to show you why we did all of this
in this way is so we can create this fairly realistic look
of handmade done model. So if you just did
this in Rhino, you'll never be able
to achieve this edges. So that's why
combining right now with ZBrush were able to achieve much smoother
edges and also the feeling the tomato
was done by hand, which a lot of clients these
days really like to see. Because when they see some really computerized
models, that's not good. And they prefer to see something that's
more done by hand. So I believe that this
workflow will also teach you how to
utilize this best. Of course, all of these
images you can let her play in your post-production and maybe even add more feeling or artistic expression to them. I hope this tutorial
helped you achieve some certain level of design for this kind of a
specific engagement drink. And see you in my
next tutorial where I'm going to talk
more about rhinos, ZBrush, and T-Shirt
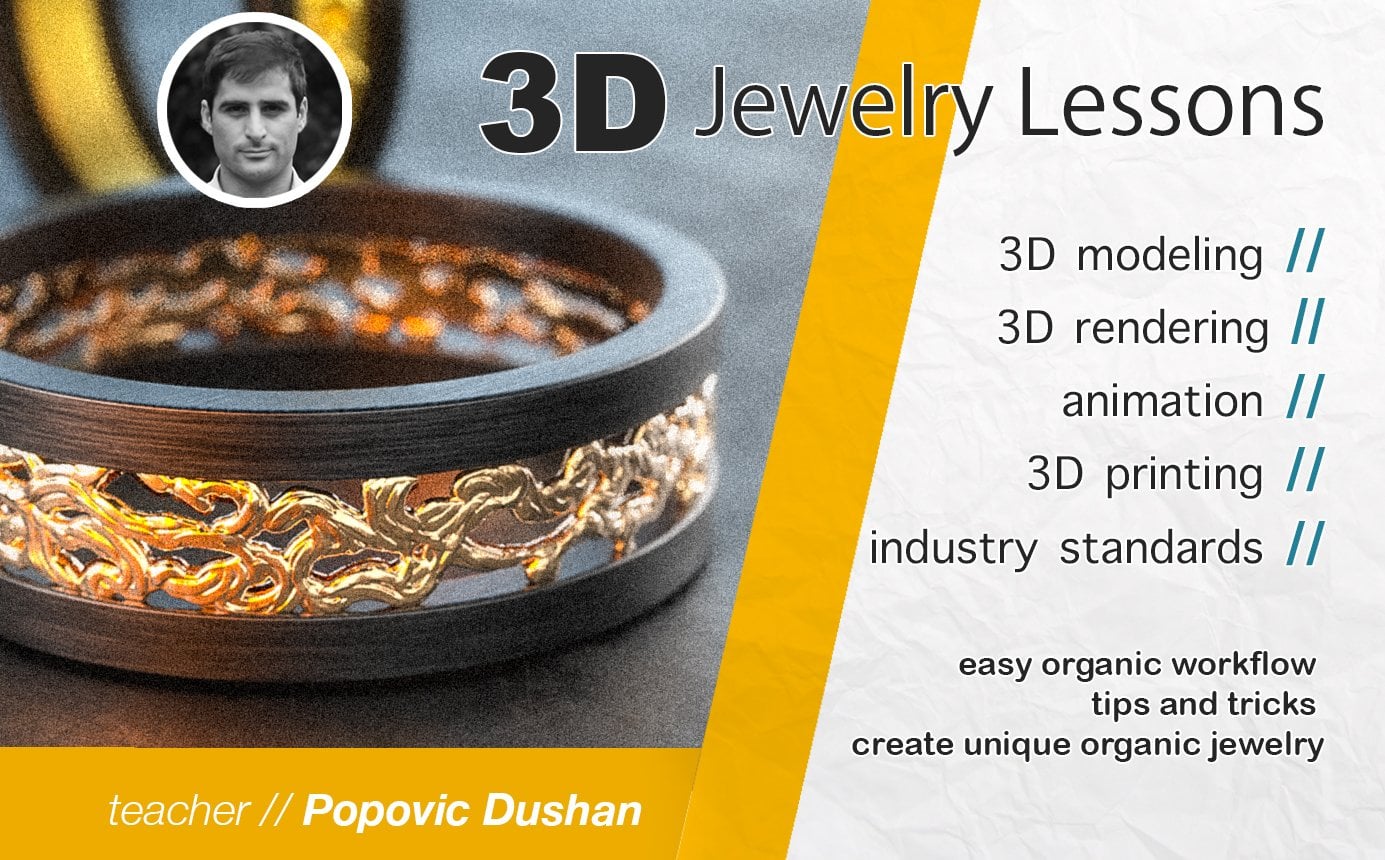
for jewelry design. Thinking very much. My name is Duchenne Popovich, and I've been a professional
jewelry designer as well as the 3D modeler
for many years now. And thank you for
following my tutorial.
 Dusan Popovic, Learn to Live Live to Learn