Transcripts
1. Class Introduction: Have you ever looked at
a photo and thought, I wish I could take
pictures like that, but all you have is your iPhone. Guess what? That's
more than enough. Hi, I'm Rose, a
mom, photographer, and Skillshare top
teacher who's helped thousands of students fall
in love with photography. Using the camera they already
have in their pocket. I used to feel overwhelmed
by all the settings. My photos felt dull and flattering and nothing
like the ones I admired. But everything changed the moment I learned to
work with light, simplify my process and
shoot with intention. That's exactly what I'll be sharing with
you in this class. Together, we'll walk through the photography foundations
that matter most, lighting, focus and exposure, composition, color,
style, and emotion. You'll learn how to master
your iPhone camera tools. Use natural light
to evoke emotion. Post photos that feel
alive and intentional. Discover your personal
style through color and tell meaningful
stories through a photo series. Whether you're just starting or have been taking
pictures for years, this class will help
you reconnect with your creative eye and
find joy in the ordinary. By the end, you'll create a mini photo story that
reflects your life, your style, and your heart, and I'll be right
here to guide you. Through gentle lessons,
heartfelt examples, and a real life photo
walk where I show you exactly how I
apply these tools in action because
photography isn't just about pretty pictures,
it's about presences. It's about storytelling. It's about remembering
the small moments that make up a beautiful life. So grab your iPhone, take a deep breath,
and let's get started.
2. Welcome to the Masterclass: You Already Have What It Takes: Hi and welcome. I am
so glad you're here. If you've ever thought,
I am not a photographer, I want to pause you right there because this class is
going to change that. Photography isn't about having the fanciest gear or mastering
every technical term. It's about learning to
see with more intention, more emotion, more presence. It's about slowing
down just enough to notice the magic that's
already around you, your morning light, the
art in your coffee, the smile of someone you love, that moment of peace when
the world feels still. You already have what it takes. Your iPhone is more than enough. You are enough. In this class, we'll go on a journey to rediscover the beauty
of everyday life. You'll learn how to
find the best light, frame a photo with purpose, and tell stories that resonate, not just with others,
but with yourself. You don't need
permission to create. You don't need
perfection to begin. You just need to start
seeing differently. And that's what we're going
to practice together. As Seth Godin says
in the practice, creativity is a choice. It's not a bolt of
lightning from the gods. It's something we nurture. So let this class be your
permission slip to explore, to notice, to create, even if it's messy, even if you're
just starting out. By the end, you'll not only have new photos to be proud of, you'll have a new way
of seeing the world. And once you learn to see differently, everything changes.
3. Why iPhone Photography?: H let's start by taking a moment to talk about
something really important. Maybe you felt it, too. This pressure to have more
before you can create more. Like, you need better
equipment, perfect timing, or even a totally different life before your creativity is valid. But I want to gently
challenge that today because what if I told you
the camera in your pocket, your iPhone is already powerful enough to tell
the stories that matter. You already hold an
incredible tool, one that's not only convenient, it's creative, responsive,
and quietly brilliant. We often overlook the ordinary. But it's in the ordinary that
we find the extraordinary. I know it sounds like
a tongue twister, but this idea is
beautifully captured in Austin Cleon's
Show your work. It says, you don't
have to be a genius. You just have to be yourself. And with your iPhone, being yourself becomes
instantly sharable. No gatekeepers, no
studio, no excuses. I know it can be
tempting to say, but I am not a
real photographer. But what is a real
photographer anyway? Susan Sontag once wrote it on photography that to photograph
is to confer importance. So when you lift
your phone and take a photo of your
child's silliness, your beautiful painting, or
your coffee on a hard day, you're conferring
importance to your life. That is photography.
That is real, and that is enough. The iPhone camera
has come such a long way from portrait mode
to cinematic video, from ultra wide
lenses to night mode. You can shoot a raw. You
can edit on the spot. You can even create
your own visual style right in your pocket. But beyond features, here's
what really matters. It's accessible. It's
always with you, and it invites you to see the world differently
moment by moment. Uncertain times, creativity
becomes more than a hobby. It becomes a way to stay
grounded, present and connected. So if you've ever
doubted yourself because you only have a phone, this is your sign to
throw that thought away because this class is going to show you how to
use what you have, where you are with confidence,
clarity, and creativity. So let's go deeper in the
next lesson where I'll walk you through
how to actually use your iPhone camera like a P. You're going to love it.
4. Understanding Your Camera: Features That Actually Matter: In this lesson, we're diving into your iPhone
camera features. But before you worry about specs or settings, let me say this. You don't need to
be a tech expert to take beautiful photos. You just need to know
which features help you tell your story and how
to use them simply. So in this lesson, I'm walking you through
the camera modes and tools that actually matter
and when to use each one. Photo Mode is the default
setting on your iPhone camera. And honestly, it's the one you'll probably use
90% of the time. It's fast, intuitive and incredibly versatile
because it adjusts automatically to whatever
you're trying to capture without needing to
think too much about settings. It works beautifully for everyday moments
like capturing food, art flats, behind the scenes, snippets, family time or
your travel adventures. Let's say you're out with your family at your
favorite restaurant. Just grab your phone, tap to focus on the food
or a candid moment. And shoot in photo mode. No fuss, no pressure. Just point, tap, and
capture the memory. Portrait mode uses
depth detection to blur the background, that creamy, dreamy
effect called bouquet. It mimics the look
of A DSLR camera, which is why it's so
powerful for storytelling. Portrait mode is perfect
for people, pets, flowers, cozy corners, and even
detailed flat lays, where you want the subject
to really stand out. And here's a top tip. Step
back a little and make sure there's some space between your subject and the background. This helps create the depth
portrait mode is known for. And whenever possible, use natural light because it's
portrait mode's best friend. Some iPhones still have
square mode built in, but even if yours doesn't, it's still important to frame with the final photo in mind. This mode or mindset is
especially helpful when creating content for Instagram or anywhere that a tighter
crop is best or needed. Let's say you're photographing
your morning coffee. Instead of shooting wide
and cropping later, try visualizing the
final crop as you shoot, whether that's square or
vertical four by five frame, that way, your cup stays
where you need it to be. Your background
stays balanced and your photo feels
intentional from the start. It's a small shift, but it
makes your photo feel so much more polished and saves
time when posting too. Borst mode is your best friend when life refuses to stay still. It takes multiple photos
in rapid succession, which means you're
more likely to catch the moment
instead of missing it. It's perfect for lively, unpredictable scenes
like kids playing, pets running, twirling dresses, or mid jump laughter. Imagine you're spending a
playful afternoon at the park. Your child is running through bubbles or spinning with joy. Just hold down the shutter
button to activate burst mode. Then later scroll
through to pick the frame that captures
that perfect spark. The wind and the
hair, their feet off the ground or that split second
smile you almost missed. Ive photos are like
mini memories. Your iPhone captures 1.5 seconds before and after
you take the photo. So even if you're a bit late, you still have the magic saved. This mode is great for
toddlers, giggles, with blown hair,
subtle movements, and those blink and
you'll miss it moments. Let's say you're photographing
your child laughing. You press the shutter, but the best part happens
a second later. No problem because
you can tap edit, go to Live photo, and choose the exact frame that feels like the heartbeat
of the moment. It's also a fun way
to relive memories. Just press and hold
the live photo and watch that second
come alive again. If your iPhone has
multiple lenses, you have access to even
more creative control. 0.5 X or ultra wide gives
you dramatic sweeping views. One X or wide is your most
natural balanced perspective. Two X or three X, the telephoto, helps you
zoom in without moving. Perfect for portraits or
intimate detail shots. Let's say you're
standing in front of a breath taking volcano
in a lake view. Use 0.5 X or the ultra wide lens to
take in the full scene, the sky, the volcano,
the lake, the moment. Later, you sit with
a coffe in hand. Switch to two X or
three X to focus in on the cup or you with the cup with a majestic
view softly blurred behind. Each lens helps you tell
the story differently. Try them all and
see which one feels right for the mood
you want to capture. Don't worry, because you don't
need to memorize all this. You just need to try them and feel the difference.
Ask yourself. What do you want
this photo to say? What do I want people to
feel when they look at it? Use photo mode when
life is happening fast. Use portrait mode to bring
emotion to the front. Use burst mode when the
moment won't sit still. Use ultra wide when you
want to show the world. Use telephoto when you want to isolate and zoom in on beauty. It's not about using
all the tools. It's about choosing the one that helps tell the story
you want to tell. You've already got
what it takes. Now, let's keep exploring
what's possible. See you in the next lesson.
5. iPhone Camera Deep Dive: Modes & Tools That Elevate Your Shots: Now that we've explored the
essential camera features, it's time to go a little deeper, not in a complicated
or technical way, but in an empowering one. Your iPhone is filled with tiny tools that when
used with intention, can create a big impact. These aren't hidden tricks
just for techie people. They're intuitive tools that once you know where to
find them and how to use them can completely transform how your photos feel
more cinematic, more expressive, more you. In this lesson, I'll
walk you through the camera modes and tools
I personally use the most. The ones that quietly
but powerfully elevate your shots without adding
stress or overwhelm. So let's unlock some
everyday magic together. We talked about
burst mode earlier, but now let's take it one step further because
this tool is gold when it comes to
capturing real unpost emotion. To activate burst mode, open photo Mode and simply drag the shutter
button to the left. Your phone will take a
rapid series of photos, giving you a
beautiful collection of frames to choose from. Use it when your
subject is moving fast, and you only have one chance to catch that perfect moment. And here's a top tip. Keep your fingers steady
as you hold the shutter. Burst captures a lot of frames, so you'll have plenty
to choose from. Then just pick the one
that sings to your heart. When your iPhone
senses low light, night mode activates
automatically. You'll see a little
moon icon pop up. It works by capturing multiple
frames over a few seconds, then blending them to brighten the scene without using flash. The result clearer,
brighter photos that still keep the mood
and atmosphere intact. Example, on evenings
during wind down, we turn off our main room light and just keep the
fairy lights on. It's warm and cozy, so we usually end up having the most precious
moments while relaxing. And sometimes I
want to capture it. Instead of turning
on the harsh flash and blowing out the cozy glow, I let night mode do
its quiet magic. The warmth stays,
the vibe stays, and so does the memory. So here's a quick top tip. Hold your phone extra
still or rest it on a stable surface or a tripod
for the best results. A few seconds of patience
goes a long way. This little combo is your ticket to more
inclusive storytelling. No more missing
from the frame or awkward arm length selfies. Just tap the clock icon, choose three or 10 seconds, and step into the moment. For example, you want a
family photo at the park, Prop your phone on
a stack of books, a chair, or a tripod. Then hit the timer and run
into the frame, laugh, hug, be in it, et life unfold, and let your iPhone catch it. And here's a bonus step. If you love taking
self portraits, try combining timer
and portrait mode. It gives you solo
photos that feels like a professional shoot styled
by live captured by you. Sometimes magic happens fast. Your child lets go of a balloon, someone breaks into a dance, you laugh so hard, you
almost drop your drink. That's where quick
take comes in. Just hold down the
shutter button in photo mode to instantly
start recording video. No need to switch modes
and miss the moment. It's your one handed shortcut to keeping real life in real time. Ones for the storytellers who
love a little consistency. Photographic styles
aren't filters. There live adjustments built right into your iPhone camera. They let you shape
the overall mood of your photos by adjusting
two key things, tone for contrast and richness and warmth
for color temperature, while keeping skin
tones natural. To try it, go to
settings, camera, photographic styles, and then choose from one of the
four built in styles. You have rich contrast, which is bold and moody, vibrant, bright and punchy, warm, golden and soft. Cool, calm and bluish. Once you've chosen a base style, you can tweak it further using the sliders for tone and warmth. So while you can't create a fully custom
style from scratch, you can make a version
that feels uniquely yours. For example, if you love soft creamy tones with
a nostalgic vibe, try starting with a
warm style and lowering the tone for a muted
film like feel. This is especially
helpful if you want your photos to feel
consistent and intentional. You're building a
personal brand and you want to spend less
time editing later. On set, your chosen style stays active in the camera app
until you change it. So every photo you take reflects your vibe
right from the start. Now that we've explored the most powerful
modes and tools, I want to leave you
with a few bonus gems, small features that
often go unnoticed, but can quietly elevate
your shooting experience. Your iPhone can
now recognize and copy text directly
from your photos. Think about signs, menus,
handwritten notes, super helpful for
documenting travel, journaling, or grabbing
details from everyday life. Tap the lighting bolt icon
to turn the flash off. Natural Light will almost
always give you better results. It's softer, more flattering
and tells a truer story. Now, I know it's a lot of tools, but you don't have to master
everything all at once. Instead, start small. Pick just one new feature
to try today or this week. Maybe turn on
photographic styles and play with different vibes or go for a quiet morning walk and experiment with portrait
mode and the timer. Let each tool become a
natural part of your flow. Little by little, you'll
start to notice the shift from shooting randomly to
creating intentionally. And that's when your photos begin to carry something more. That's when they go
from nice to magical. In the next lesson, we'll
talk about something juicy, how to set up your iPhone
camera for success. See you there.
6. Set Your iPhone Camera Up for Success: Your Handy Settings Cheat Sheet: Before we dive deeper into
shooting and storytelling, let's do something
simple but powerful, something that will
save your time, energy, and creative
frustration down the road. We're going to set up your
iPhone camera intentionally, so it works with you, not against you because
here's the truth. Your iPhone is already a
powerful creative tool. But without the right
settings turned on, it might not show up
the way you need it to, especially when a
magic moment is happening and you don't have
time to fiddle with options. So in this lesson, I'll walk you through
a few quick settings. You can adjust right now to
make your camera smarter, smoother and more aligned
with the way you shoot. If you want photos
that feel thoughtful, balanced and beautifully framed, this tool is your
quiet secret weapon. Go to settings, camera, grid, and then toggle on. You'll now see a
three by three grade appear when you
open your camera. This grid helps you apply
the rule of thirds, align your subject more
intentionally and keep your photos straight without second guessing your framing. Think of it as a gentle
guide in your viewfinder, not a rigid rulebook, but a soft reminder to compose
with care and clarity. The newer iPhones,
there's a bonus. A yellow level line appears when your phone is perfectly
flat or level, especially helpful
for flat lease, overhead shots or
anything top down. For example, you're
photographing your journal, morning coffee, and a
few flowers from above. That yellow line helps you
keep everything aligned. No tilts, no crooked
frames, just clean, polished composition that feels intentional without needing
extra editing later. Ing on the grid might
seem like a small step, but it makes a
huge difference in how confident and
composed your shots feel, especially as you're learning to see with a photographer's eye. To turn on mirror front camera, just go to settings, camera and then mirror front camera
and then toggle on. If you love taking selfies or recording stories
with a front camera, this setting is a game changer. Without it, your
selfie gets flipped. That means your pose, part line, or even text in the
background might look off. When this is turned on, what
you see is what you get. Your photo mirrors the way
you see yourself on screen. So here's a top tip. If you want natural unflipped
portraits, turn it off. If you want your camera to match what you see in real
life, keep it on. To turn this on, go to settings, camera, and then preserve
settings and then toggle on. This saves your camera mode, creative controls like filters, aspect ratio, lighting, live photo, and
exposure adjustment. Now, why is this important? Because it tells your iPhone to remember how you like to shoot. So no more readjusting every single time
you open the camera. Whether you like using
a specific photo style, shoot in square mode or
keep live photos off, this setting saves
your creative rhythm. It's a small setup step, but brings you closer
to effortless shooting. And that's exactly what we want. HDR stands for high
dynamic range, and it's designed to help your iPhone handle tricky
lighting situations. It works by blending multiple
exposures into one photo. So you get more detail in both
the bright and dark areas. It's especially helpful when you're shooting outdoors with harsh sunlight or in back lit scenes like standing
near a bright window. Helps your photo look
more balanced without the highlights blowing out or
the shadows turning muddy. But here's something most
tutorials don't tell you. HDR doesn't always
fit every style. While HDR is helpful
for preserving detail, it can sometimes
make photos feel a little too processed or flat. Especially with skin tones
or dramatic lighting. Some creators even
turn HDR off when they want more contrast and
mood in their photos, a cinematic or editorial feel and full control
for editing later. So should you leave HDR on? Yes, if you want beautifully balanced shots
right out of your camera, especially for everyday moments, outdoor family photos or landscapes with strong
light contrast, maybe turn it off if you're
aiming for more drama, shooting skin tones
that look off with HDR, or you want full creative
control in editing. My advice, try both. Explore, compare. There's no perfect setting, only the one that feels
right for your photo, your mood, your story. And here's a quick note. On some iPhone models, HDR is automatic and doesn't
show up in the settings. That's okay because it's
still working quietly in the background when your phone
detects the need for it. If you love capturing video
moments, too, for example, your child running towards you a sunset walk or a cooking
moment in your kitchen, this one's worth a quick visit. Go back to settings and then camera and
then record video. You'll see a few options here. Then ATP at 30 FPS is great quality with
smaller file size. So it's perfect for
everyday moments. Four K at 24 FPS is beautiful, and it has a cinematic feel. Just keep in mind that
it has larger files. So choose what fits your needs. The goal is not perfection. It's to make your
camera fit your story. If you've taken one or two
or too many of my classes, you've already heard
me say this before. And there's a reason
I keep repeating it. It's simple. It's
often forgotten. But it makes a huge difference. No matter how perfect
your settings are, if your lens is smudgy, your photos will
look hazy and dull. The colors won't pop and
the details won't shine. So before you shoot, take a
quick moment to gently wipe your camera lens
with a soft cloth or the edge of your
shirt in a pinch. That tiny gesture, it
instantly gives you sharper, clearer, more vibrant photos. It's the smallest habit
that makes the biggest. And just like that,
your iPhone is now tuned for creativity. You're not just
adjusting settings. You're setting the stage. You're preparing
your creative space like a painter laying out their brushes or a writer opening the first page
of a fresh notebook. This moment says, I am ready. I am creating with intention. And because I know it's
a lot to remember, all at once, I've made a
little something for you. A handy iPhone camera
settings cheat cheat. You can print it, save it, or screenshot it. Keep it close. It's like a tiny tech
assistant for those. Wait. Where's that
setting again, Moments. Now that your iPhone is dialed in and ready
to capture magic, let's go even deeper. In the next lessons, we'll explore how to
work with light, focus, and exposure to create
photos that feel alive, photos that tell stories
and state emotion. You've got this, so
let's keep going.
7. Photography Foundations: Mastering Natural Light: If there's one thing
that separates an okay photo from one that
stops you in your tracks, it's not the gear, it's not
the model. It's the light. Even the most
expensive camera in the world cannot
fix poor lighting. But even your iPhone, the one in your hand right now, can create breathtaking
images once you learn how to truly see
and work with light. In this lesson, we'll
explore how light behaves, how to use it intentionally, and how to find it wherever
you are. Let's dive in. Let's start by getting familiar with the two main types of natural light you'll come across soft light
versus harsh light. Soft light is
diffused and gentle. It wraps around your subject, smoothing out lines and
creating a flattering glow. Think about cloudy
days window light with chair curtains or standing
in the shade during noon. On the contrary,
harsh light creates strong highlights
and deep shadows. It's more dramatic, but can
also be tricky to manage. Think about direct sunlight at noon or a bright
spotlight on a face. Neither one is wrong. They
just tell different stories. But as a beginner, soft light will usually be your safest, most forgiving friend. Next, golden hour versus midday. Golden Hour is that magical
time about an hour after sunrise or before sunset when the light is warm,
soft and directional. It's a dream for portraits, storytelling and
capturing emotion. Midday light, on the other hand, is strong and overhead. It can be harsh, but
it's not unusable. Find open shade or use the light intentionally to
play with contrast, especially when photographing
textures or action. Light doesn't just
change based on time. It also transforms depending
on where it's coming from. Here are the three
main directions of light to pay attention to. First is front light. This light direction hits
your subject straight on. It's even and safe, but can look a little flat. It's great for clear details, but not always the most dynamic. Sidelight comes in from
the left or right, adding depth, texture
and beautiful contrast. Perfect for food, portraits, and anything where you want
a little drama and shape, Back light shines from
behind your subject. It's dreamy, glowy,
and full of emotion, especially when your
subject has movement or translucent elements like
flowers, hair or fabric. Now, here's a little experiment. Take something
simple like a mug, flower, or in my case, a fruit. Slowly turn it in
front of a window. Watch how the mood shifts as the light hits it from
different angles, front, side, and back lighting. That's how you learn to
see like a photographer. When indoors, the
best way to find the best lighting is
to look for windows, look for soft indirect light, especially from north
or east facing windows. Avoid overhead,
fluorescent lighting, and turn it off if you can. Don't be afraid to move around. Sometimes just
stepping a foot closer to the window completely
transform the shot. For outdoor lighting,
cloudy days are perfect for portraits. The sky becomes a
giant soft box. On sunny days, find
open shade under trees next to buildings or
behind light fabric curtains. If you want to brighten up
shadows, use reflectors. Even a white wall,
piece of paper or cardboard can bounce
beautiful light back onto your subject. You see, light is more than just brightness. It's a feeling. It's the difference between
a snapshot and a story. Like I always say, here
and in my other classes, you don't need fancy tools. You just need a little patience, a willingness to observe, and a heart that's ready
to create with intention. Everything changed when I
stopped rushing to take the photo and started
pausing to feel the moment. I remember one of our
regular afternoon walks. We'd pass the same abandoned
building every time. One most people in our
neighborhood called an eyesore. But one day, I noticed
how the Lusun cast this warm orange
glow and created strong shadows that
highlighted its architecture. That light transformed
everything. What once looked forgotten
suddenly felt poetic. So I took a photo. From then on, I started paying attention. Kept photographing that
same building under different skies and
at different times. On cloudy afternoons when everything looked
soft and muted, when the sun was high and harsh, right before a storm with
dramatic clouds rolling in. Most people saw gloom and decay. I saw character. I
saw storytelling. It was the same subject, but every time the light
changed, the story changed. And you can do this, too. You don't need to overthink
or complicate anything. Just choose something
ordinary, something familiar. Meaningful to you and photograph it in
different kinds of light. Watch how lighting alone
can shift the entire mood. It's one of the most
powerful ways to train your eye and deepen
your storytelling. Now it's your turn.
Find a simple object, your hand, your art, a coffee mug, or even
your child's toy. Now try photographing it in three different
lighting situations by a window with sidelight, outside in open shade. With backlight from
a window or door. Take your time, slow down, observe how the light
changes the mood. Notice how shadows move, how warmth shifts, how emotion
shows up in small ways. Then ask yourself, how does the mood shift
between each one? Which photo feels most like you? Which one tells the
strongest story? Let this be a gentle reminder. You don't need a
perfect setup or a big moment to make
something beautiful. All you need is a little light and the willingness
to notice it. As George Eastman, the
founder of Kodak, once said, Light makes photography,
embrace light, admire it, love it. But above all, know it. When you understand light, how to find it, how
to play with it, how to feel it, you can create
beautiful photos anywhere. Next up, let's put it all
together using your iPhone. In the next lesson, I'll
show you how to control focus and exposure
to take sharper, more intentional photos.
I'll see you there.
8. Focus & Exposure: Take Sharper, More Intentional Photos: Now that you've learned
how to see light differently and tune your
iPhone camera for creativity, let's unlock two more
quiet but powerful tools, focus and exposure. These tools don't require
any fancy settings or apps. They're literally
at your fingertips and they're how you shift from simply taking photos to directing them with
care and emotion. Focus is how you tell the
viewer where to look. It's your way of
saying, right here, this is the heart of the story. To set focus, tap on your subject to bring
it into sharp detail. Tap and hold until
you see AE AF lock. This locks both focus
and exposure in place. Why does this matter? Because without locking,
your phone might shift focus or adjust
brightness mid shot, especially if your subject
moves or you reframe. With a lock on, you
stay in control. This is especially helpful when photographing children
or pets who move a lot. Hands holding
something meaningful, flat lay or still life scenes
where composition matters. Once focus is locked, you'll see a small sun icon
next to the focus box. Simply swipe up to brighten or swipe down
to darken your image. This tiny gesture gives you full control over
the emotional tone. Brighter exposure, clean,
airy, joyful vibes, darker exposure, moodier,
warmer, more cinematic feel. It's not just about
technical perfection. It's about intention. You're shaping the light to match the feeling you
want to preserve. Now let's put it all
into perspective. Let's say your child is
gently holding a flower. You tap to focus on
their little fingers wrapped around the stem. Then you lower the
exposure just a bit, letting the sunlight kiss their skin softly
without blowing it out. And here's the result a
photo that feels timeless, gentle, and full of love. That's the power of using
these tools with intention. Remember the exercise you
did earlier with lighting. If you did, you already
have your simple subject. Again, it could be your hand, your art, a coffee mug, or even your child's toy. This time, tap and
hold to lock focus, swipe up or down to
adjust exposure. Take the shot. Then move
slightly and try again, maybe from a different angle
or in a different light. Notice how much you
are now directing the final image,
not your camera. You just unlock the most
powerful creative tools in iPhone photography, not by upgrading your gear, not by memorizing complex rules, but by learning to pause, look closer, and choose
what matters most. May seem small, but this is the beginning of
more intentional, more emotional, more photos. Next up, we'll pair this with another essential composition because once you see the light, it's time to know where to
place your subject in it. So I'll see you in
the next lesson.
9. Composition Made Simple: Telling Stories with Intention: Let's talk about composition. Not in a rule heavy
textbook kind of way that makes photography feel
stiff or overwhelming, but in a way that helps
you see with intention, feel more deeply and capture your world in a way
that truly resonates. You don't need a fancy
formal training to create photos that feel
beautiful and meaningful. All you need is a
few thoughtful tools and a fresh perspective. So let's begin with
one of my favorites. You've probably heard
of this one before, maybe even 1 million times. But let me refresh it in a
way that might feel new. Imagine your frame divided into a three by three grid like
tick tack toe for your camera. Then taste your subject along the lines or at one
of the intersections. But here's the part
that often gets missed. This rule isn't
meant to box you in. It's not about perfection. It's about space,
breathing room that makes your photo feel calm,
open, and intentional. Helps the viewer's eye
move naturally through the image without getting
stuck or overwhelmed. And if you're feeling a
little more adventurous, go ahead and nut your
subject slightly above, below or off center
from those lines. That little bit of play
can add personality and tension in a way that
feels beautifully human. The rule of thirds is best
used when you want to draw attention to something
without shouting for it. You want your subject
to feel grounded and balanced within the frame. Want to create a sense of calm movement or
quiet storytelling. If you haven't already, you can turn on
the rule of thirds grid on your iPhone
by going to settings, camera, grid, and
then toggle on. Remember, it's not a rule book. It's a gentle guide like a
soft suggestion from a friend. There to help you compose with a little more care and clarity. Lines are everywhere. Pads, fences, shadows, staircases, even arms, legs, book edges, and beams of light. They're not just shapes,
they're visual invitations. They whisper, Look here, and then follow me. Leading lines help guide your viewer's eye
through the frame. They create movement, adept and turn your photo into a
quiet little journey, not just a still image. Use leading lines when you want to draw attention
to your subject, add flow or direction
to your shot, make a photo feel
dynamic and layered, and a top tip before we
move on to the next. Try crouching lower,
standing off center, or tilting your phone slightly. A small shift in
perspective can reveal beautiful lines that weren't
visible at eye level. Framing is all about using
what's already around you. Dorways, leaves,
curtains, mirrors, hands, windows to gently surround your subject and
pull your viewer in. But framing doesn't
just focus attention. It sets the mood.
It creates a sense of place, story, and emotion. A shot taken through a car
window, it feels nostalgic. A portrait framed by plants feels soft, secret,
and intimate. A child frame between
two playground bars feels like a snapshot
of childhood itself. Framing says, pause here. Look at this moment.
Isn't it worth noticing? These three composition
tools, rule of thirds, leading lines, and framing, aren't rules to memorize. They're tools to help you
create with more awareness, more emotion, and more you. Try one at a time,
experiment, play, and you'll be amazed at how your photos begin to
feel more thoughtful, more balanced, and more alive. Choose one of the
three techniques. Role of thirds, leading lines or framing and try it today. Pick a familiar subject. Again, your morning
coffee, your art, your child's toy, a
corner of your home, or even your own reflection. Try shooting it using one of the composition tools
we've discussed. Then if you're feeling inspired, try another or combine two. Ask yourself, how did it feel to slow down and compose
with intention? Did the mood of the photo shift when you changed your framing? Which photo felt most you you don't have
to get it perfect. Just be curious. Let this be a quiet experiment in
seeing differently. Composition isn't about
getting everything right. It's about paying attention. It's about choosing
how you want to frame your world visually
and emotionally. Every photo you take, you're not just documenting what's
in front of you. You're choosing how
it's remembered. You're shaping the story. So trust your instincts, start simple and let
your camera become a reflection of how you
see and feel the world. You're doing so beautifully.
Let's keep going. In the next lesson,
we'll take it a step further and talk about
composition with feeling, choosing what to include and what to leave
out. See you there.
10. Composition With Feeling: Choosing What to Include (and What to Leave Out): If you're still here, it means
you're ready to go deeper, to look beyond the surface, to start composing photos
that don't just look good, but that feel meaningful. And here's something most
tutorials won't tell you. Composition isn't just about
where to place your subject. It's about how you
want someone to feel when they look
at your photo. That's why in this lesson, we're focusing on
simplifying your frame, trusting your instincts,
and letting emotion lead. Let's begin with
a beautiful truth from Richard Garvey Williams, author of Mastering Composition. One of the greatest
challenges and skills of composition is
knowing what to leave out. You don't need a
perfect setting. You don't need a
busy background or 1,000 elements fighting
for attention. Sometimes what makes a photo powerful is exactly
what's not in the frame. That quiet space,
that empty wall, that breath of air
around your subject. That's called negative space. And when used with intention, it creates calm,
clarity and emotion. Think of it like writing a poem. You don't use every
word in the dictionary. You choose the ones that
carry the most weight. Photography is the same. Each photo is a visual poem. To help you apply this in
your iPhone photography, here are three techniques
to compose with feeling. Strip your frame down to its
most essential elements. Ask yourself, what do I want
the viewer to notice first? Then gently remove anything
that distracts from it. Let the important things shine. For example, you're
taking a photo of your child's hand
holding a crayon. Instead of capturing
the whole messy table, zoom in, fill the frame
with just the hand, the crayon, and a
bit of blank paper. Let the simplicity speak. Let the quiet detail
tell the story. Use empty areas like
plain wall, the sky, or a soft stretch of floor to give your subject
room to breathe. Brenda Tharpe wrote in extraordinary
everyday photography. Negative space gives your
subject more weight, more power, and more room
to breathe emotionally. It creates stillness. It invites reflection. It lets the photo whisper
instead of shout. For example, when I first tried photographing this coffee, I styled it with a
few extra elements. But something felt
off the beauty of the atte art was getting
lost. It didn't stand out. So I paused and asked myself, what's the heart of this photo? I realized it was the coffee, the warmth, the quiet, the simplicity of
that little moment. So I removed the
distractions and allowed for more empty
space around the cup. I let the photo breathe. Now, the Latte art stands out. The frame feels calm, the moment feels
more intentional. By using negative space, I gave the subject more weight, more power, and more
room to be felt. Use light, focus,
distance or framing to gently separate your subject from everything
else in the scene. This technique draws the
viewers attention with clarity and adds emotional
weight to your photo. It's your way of saying, This is what matters. Look closer. For example, when I was
photographing this bouquet, I was surrounded by beauty. There were so many
stunning flowers all layered and
blooming at once. But at that moment, one flower
quietly stood out to me. The way the light
hit its petals, the texture, the softness,
it felt special. In my first shot, I captured
the bouquet as a whole. But something didn't sit right. The other flowers were
competing for attention. My eyes knew what I
wanted to highlight, but my photo didn't
reflect it yet. So I zoomed in, I
shifted my angle. I gently isolated
just that one flower, framing it with intention
and allowing it to breathe. In the final image, the
background softened, the noise faded, and
the subject felt seen. And with a bit of editing to match how I remembered
it in that moment, I finally captured what I felt. So here's a top dip
from this example. Something catches
your eye, trust it. Move a little closer, zoom in, tap to focus, blur
the background, let one subject speak for itself because sometimes photography
isn't about showing more. It's about knowing when
less reveals more. Before you take the
shot, pause, breathe. Look at your scene
with soft eyes. Then ask yourself, what emotion do I want this photo to carry? What's distracting
from that emotion? What can I gently let
go of in the frame? Now, go ahead and capture
a quiet scene using negative space or simplicity.
Let it feel open. Let it feel honest. Let it breathe. You don't need more to say
something powerful. Sometimes the most moving
images come from less, less clutter, less noise, more meaning, more heart. Now, let's keep
training our eyes and our hearts to notice
what truly matters. In the next lesson,
we'll explore something different movement,
energy, and emotion. Let's bring your photos to
life in a whole new way.
11. Movement, Energy & Emotion: Bring Your Frame to Life: If our last lesson was about
stillness and simplicity, this one is about the opposite, energy, rhythm, and life. We're now stepping
into how you can bring your frame to life using dynamic composition
techniques that make your photos feel vibrant, multidimensional, and
emotionally rich. Be even in stillness, a photo can move someone, and I am here to show you how. It's common to start with
safe centered compositions. Subjects placed
right in the middle, backgrounds that are
flat and unclottered, and everything shot from
eye level. And that's okay. Simplicity is a great
place to begin. But as you grow, you'll
start to feel the pull to go deeper because photography isn't just about showing what
something looked like. It's about expressing
how it felt. To do that, we need to start infusing movement and
emotion into the frame. Not always through
motion itself, though that's a part of it, but through visual elements
that lead the eye, create tension or anticipation, suggests that something just happened or is about to happen. When you compose with
these ideas in mind, your photos start to feel more
alive and more immersive. Now, let's explore a few tools and techniques that will help you add visual movement and emotional rhythm to your photos. So they don't just look good. They feel like something. While vertical and
horizontal lines often feel calm and stable, diagonal lines introduce
energy and motion. Think of staircases,
leaning shadows, tilted roads, or even
outstretched arms and legs. They naturally guide the
viewer's eye across the frame, adding movement and
a dynamic rhythm. Curves feel soft, natural, and a little bit magical, whether it's a winding path, the edge of a coffee cup or
the shape of flowing hair, curves gently lead the eye and invite the viewer
to pause and feel. They're a beautiful emotional
contrast to hard lines, offering a sense of grace, fluidity, and quiet wonder. Repeating shapes and patterns
create a visual rhythm, like the steady beat in a song. Rows of trees, tiled floors, ripples in water,
raindrops on a window. They all add flow and harmony. They help structure
the image while keeping it alive and engaging. When your photo includes a
foreground, middle ground, and background, it creates a sense of dimension
and presence. So try shooting through
something like leaves, curtains or a window frame to adept or a sense of intimacy. It makes the viewer feel like they're peeking
into a moment, not just observing
it from the outside. Not every photo needs
to be razor sharp. Sometimes a little
intentional blur tells the story better, a hand in motion,
a swaying dress, kids running past, a
breeze lifting your hair. These tiny movements
can evoke energy, joy, and even nostalgia. Try using live photos or explore slow shutter apps to play
with motion creatively. It probably had movement
in it, not just action, but flow, something
your eye could follow, something your
heart could sense. That's the kind of magic we're
exploring in this lesson. The kind that turns
photos into experiences. Capture something in motion. It could be your child spinning, your paint brush while painting, steam rising from your tea, your hair catching the wind or coffee being
poured into a cup, or try using leading lines, a road, a railing, a beam of sunlight to guide the eye and
create visual movement. Remember, composition is
more than arranging shapes. It's how we direct attention. It's how we invite emotion. It's how we help people
feel what we felt. So go ahead, play, tilt your camera, move your
body, follow the light. In the next lesson,
we'll talk about finding your style and what
feels good to you. So I'll see you there.
12. Finding Your Style: What Feels Good to You: By now, you've learned how
to compose photos that are visually strong and
emotionally thoughtful. But let's take a moment to zoom out and ask something deeper. What feels good to you? Not just what looks right, but what feels
true because that, my friend, is where
your style lives. Sometimes the most
powerful choice is to place your subject
right in the middle. It breaks the rule of thirds, but it centers the emotion. Centering can make your photo feel strong, serene, undeniable. It says, Look at this. It matters. Try it when you
want to highlight strength. You're drawn to
minimalism or symmetry. You want your subject
to feel anchored. For example, when we visited Sumlon Island in
Cebu Philippines, every corner of the
place felt magical. But this tree in the middle of their infinity pool completely
stole my attention. There were so many
beautiful elements to capture the curve of the pool, the vast ocean, the endless sky. It was honestly hard to
choose what to focus on. But in the middle of it all, this perfectly placed tree
felt like the anchor. So I made a simple
but powerful choice. I centered the
tree in the frame. By doing that, the photo immediately felt strong,
serene and grounded. Draws the eye in and says, This matters, pause here. Centering doesn't just
highlight the subject, it amplifies the emotion. And in this case, it allowed
the peaceful energy of the scene to shine
through in the quietest, most powerful way. There's something soothing
about symmetry, two windows, a reflection in water, a pair of bare
feet side by side. Symmetry brings calm,
order, intentionality. It feels like a deep breath in the middle of a noisy world. And sometimes it's your own inner rhythm
showing up in the frame. When we visited 10,000
Ross Cafe in Simu, I felt the same creative poll I experienced at Sumlan Island. There were so many ways I
could capture the space. Of course, I took a
souvenir photo with my family because what's a
trip without memories, right? But beyond that, I
really wanted to honor the iconic white roses that
make this cafe so unique. They weren't perfectly aligned, and yet they felt intentional, as if they arranged themselves to welcome us with quiet beauty. So I chose a composition rooted in symmetry
and repetition. Instead of trying to frame
the entire landscape, I focused on the rows
of flowers using their even spacing and soft glow to create a harmonious feel. And when I stepped back to
include the palm trees, I noticed how their placement brought even more
balance to the scene. Not perfect symmetry
but emotional balance. So here's a top tip. Don't be afraid to flip your
phone horizontally or change your angle to find symmetry
in everyday places. Door frames, cafe tables, rows of chairs, even your
favorite dessert shot. It doesn't have to be
exact to be beautiful. Sometimes it's about
the feeling of order, peace and quiet rhythm. Let's be honest, some of the most unforgettable photos
don't follow the rules. They cut off heads,
they blur at the edges, they tilt or overexpose or
center something wrong. And still, they work. Why? Because they
come from instinct, from curiosity, from emotion. Sometimes the only rule
worth following is, does it move you? Oh, here's another
personal example. One afternoon I set out
to take self portraits, not for work or social
media, but for me, my intention to romanticize an ordinary day
and reconnect with something I hadn't felt in a long time, peace,
confidence, gratitude. So I wore my favorite
floral dress. I brought flowers.
I felt excited, like a kid playing dress
up in the golden light. I danced, ran through the grass, and laughed out loud
with no one watching. I reviewed the photos,
something surprised me. Some of my favorites broke
every rule I'd ever learned. One had my body
cropped mid movement, but you could feel the
freedom in my spin. Another was soft and blurry, but it was filled with joy. One had flowers
flying into the lens, partially blocking my face, and it was perfect. Those images didn't care about
being technically correct. They cared about being honest. They weren't perfect.
They were real. So you can use
rule breaking when the moment matters more
than the composition. You're chasing light,
movement, or magic. And most especially when you're creating from the heart,
not from the manual. So if you find yourself bending
the rules of composition, don't panic. Ask
yourself instead. Does it feel alive?
Does it feel like me? If the answer is yes, then maybe that's the
real masterpiece. Ast but definitely
not the least color. Color is one of the most powerful and quietest
storytellers in your photos.
It sets the tone. I stirs emotion. It
creates connection. Warm tones can feel nostalgic, comforting, like golden
hour on your skin. Cool tones can whisper calm,
softness or melancholy. Complimentary colors
like pink and green or blue and orange
can bring playfulness, contrast, and a
little visual spark. To make the most
of color harmony, start noticing which
colors pull you in. Which tones you
always go back to, whether you're
shooting or editing? Are they muted and dreamy, bold and punchy, earthy
and soft, pastel and airy? There's no right or wrong here, your creative fingerprint, the way you see and
feel the world. For example, I personally
love warm tones. You'll often see
them in my photos. Soft oranges, sun
drenched highlights, and gentle golden glows. Why? Because I am a
sentimental person, the kind who clings
to little joys, the kind who tries
to see the light, even when things feel dark. I guess I'm a bit like
that aunt who always says, Look at the bright side,
even when no one asks. But that's how I survive. That outlook, finding
beauty in chaos, light in heaviness
has carried me through some of the hardest
seasons of my life. And now, when those
moments shine through my photos, I feel seen. And I am not ashamed
to share that anymore. It took years to get here. I went through every phase
over saturated edits, super bright filters, dreamy
pastels, moody contrast, they still play with other
styles depending on the vibe, bright and airy for
cozy cafe moments, bold and dramatic
for beach trips, cool and cinematic when I'm feeling quiet or introspective. But warm tones, their home. Your style isn't in a textbook. It's not something you learn. It's something you recognize. It's like a song you
forgot you love. It's like coming
home to yourself. So here's your gentle reminder. Stop worrying about
getting it right. Let's start getting it real. Find an old photo you love, one that still makes
you feel something. Then ask yourself, what
rules did it follow? Which ones did it break? Was it the sharpness,
the lighting, the colors, or was
it the feeling? That's your style.
That's your voice. Follow it, nurture it, trust it, and the
rest will come.
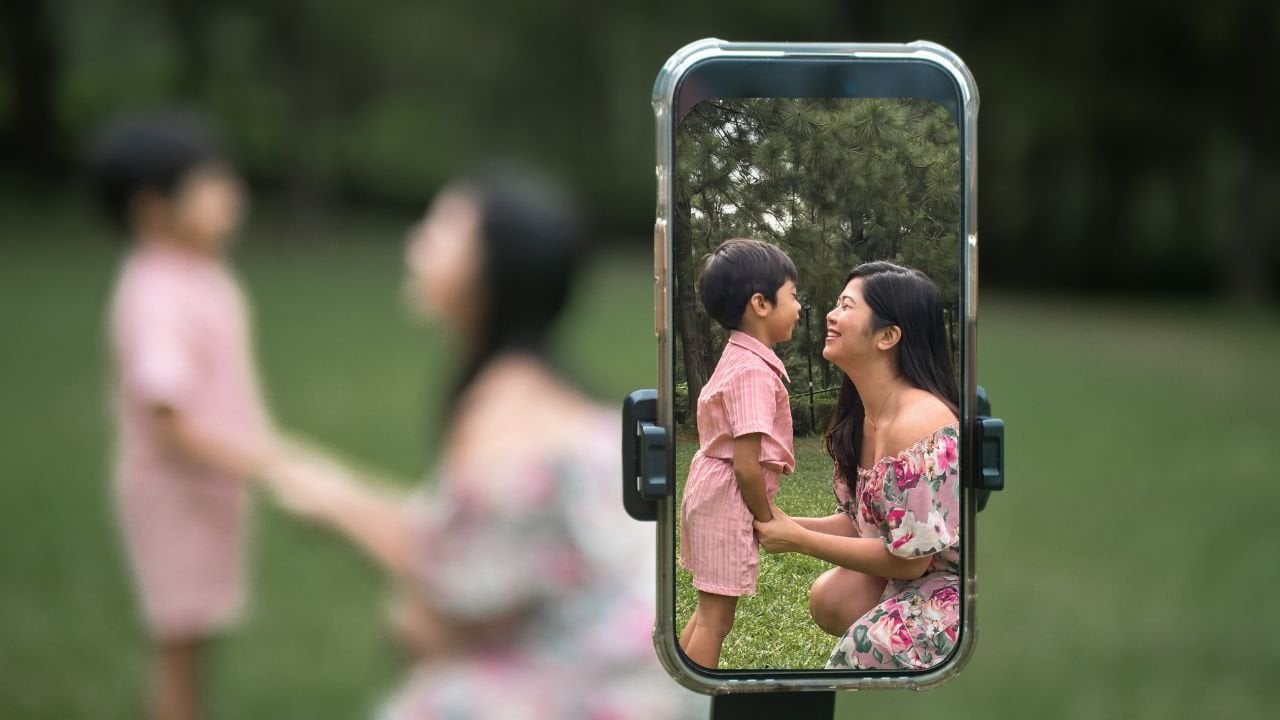
13. How to Tell Stories Through Your Photos: Emotion, Sequence & Memory: You've come so far. You've learned how
to work with light, how to compose intentionally, how to find your rhythm, and trust your instincts. Now it's time to go
even deeper into the soul of photography,
storytelling. The best photos don't
just look beautiful. They feel like something. They whisper memories,
they hold emotion, even long after the
moment has passed. A great photo makes a stranger feel like they were
there with you. That's the kind of
photo we're after. Emotion is what makes
a photo timeless. It doesn't always come
from faces or smiles. Sometimes it's in
the curve of a hand, the quiet blur of a hug
or a table after a meal. Before you press the shutter, gently ask yourself, What do I want this
photo to feel like? Not just what it should show, but what it should say
without using a single word. Your answer might be love, awe, calm, gratitude,
longing, joy, nostalgia. This is where photography
becomes more than a skill. Becomes a way to heal, to process, to see your
life with new eyes. One photo can say a lot, but a small series of photos, it can immerse
someone in a story. Try this approach next time
you document a moment. Wide shot sets the scene and to answer the
questions, where are we? What's the atmosphere, and then follow it up
with a medium shot. This brings us closer. It answers the questions, what's happening
and who's involved. Last but not the least
is the close up shots. Here you capture detail. What would we miss
if we blinked? You can absolutely add more. Movement shots over
the shoulder views, abstract frames that simply
capture the feeling. But these three are
your storytelling core. Think of it as established,
emotion, essence. You already have a powerful
camera in your pocket. You just need to be present
and curious enough to ask, what's the story here? Photos are time machines, but they only work
if we point the lens toward what actually
matters to us. Not just the highlights, not just the big events, but the quiet ordinary moments that will one day feel sacred. That might be your art scattered on the
floor or in my case, the table after a creative day, a half drunk cup of morning
coffee glowing in the light or a simple afternoon at
the park with your child, laughter echoing in the breeze. Little moments might not
seem like much right now, but one day, you look back and they'll
feel like treasure. For example, these are just a few photos
I've collected over the years of me and my son in ordinary but
deeply meaningful moments. Most of it wasn't
planned shoots, real everyday scenes
where I ask my husband, Can you take a
quick photo of us? At the time, it
already felt special. But seeing them now while
gathering them for this lesson, I felt something
deeper. I smiled. Okay, I cried a little
because in these frames, I saw a love letter
to my motherhood, to my son, to that fleeting
magic of right now. Each photo is like a piece
of my heart frozen in time, and I can't wait for the
day my son sees them and feels without a doubt
how deeply loved he is. All that said, here's something I hope
you'll carry with you. Don't wait for a
perfect vacation or a once in a lifetime event. Start capturing life
exactly as it is, because that's the real story. And a gentle top tip. You don't need a perfect
story to be a storyteller. You just need intention. So the next time you
reach your iPhone, pause for a moment
and ask yourself, what's the truth of this moment? What's the emotion I
want to hold onto? In the next lesson, I'll
take you along with me as I work on my very
own class project. You've already seen
a few photos from that photo walk
earlier in this class. But this time, I'll walk you
through the entire process, how I work with light, how I compose with intention, and how I lean
into storytelling, how I reflect my personal
style through it all. I am so excited to show
you behind the scenes. See you in the next lesson.
14. Come With Me: Photo Walk Demo: You've learned the essentials. Now it's time to see
them come to life. In this lesson, I'm inviting
you to walk with me. Nothing fancy, no
big production, me, my iPhone, my little family, and the quiet magic of
the world around us. We're going to chase the light, find beauty in the ordinary, and most importantly,
let go of perfection. Before I shoot, I always
begin with a light. Is it soft, harsh?
Where is it falling? How is it dancing
through the trees? For today's photo walk, it's golden hour, my
favorite time to shoot. Right now, I'm drawn to this small patch of
shadow and sunlight. The way it kisses the grass, touches our skin, brushes the
petals of this one flower. So I pause. I
adjust my exposure, I lock my focus, then I take a test shot. Then I move just a little to shift the background and
add a little human element. And then I take
another test shot. I am not rushing,
I wait, I observe. I listen because sometimes
the photo reveals itself only when you slow
down enough to truly see it. As we keep walking, I take a few more test
shots making sure my settings match
the light we are getting and the feeling
I am going for. My husband and I take
turns, by the way. He loves taking photos
just as much as I do. It's like our little
creative dance. And even if we're just starting, I can already feel the
mood of this photo series. It's going to be warm, gentle, full of gratitude. As the light shapes the scene, the story becomes clear. This is a story
of warmth of joy, of how we turn everyday walks
into memory making moments. Most people just pass
through this park on their morning runs or
afternoon errands. But for us, it's
become sacred ground, a place full of laughter,
discovery, and connection. Through my iPhone lens, I want to make this ordinary
space feel extraordinary. So I go back to our
storytelling framework. Establish emotion, essence. First, we started
with a few photos to show where we are, our
establishing shots. These give context.
They set the scene. They answer the question,
where are we in this story? Then we followed up with
lots of medium shots. Why? Because this brings
our viewers closer. It invites them in. Medium
shots tell more of the story. They answer what's
happening, who's involved? For us, it's the
story of a quiet, intimate afternoon of
our daily routine, of the dynamic we
share as a family, how we make the
most of the time we have together, our warmth, our playfulness, our connection, all captured in these frames. We also brought Tim's bike and some bubbles
as little props, not just for the photos, but to give him
something to enjoy, something to play with, so he forgets the camera
is even there. That's how we capture
real unscripted moments, the joy, the
spontaneity, the truth. And finally, the close
ups, the detail shots. These are the ones that ask, What would we miss
if we blinked? In this series, it's the real
things our unlimited hugs, piggyback rides,
sweet simple gestures like Tim handing me a flower. These are the details that
carry the emotion that tell the deeper story
without a single word. Now let's stack composition. Remember the tools
we learned, framing, symmetry, leading
lines, negative space. They're not rigid rules. They're gentle guides to
help your story shine. You'll see me use them
here intuitively, centering a subject
for strength, tilting my phone to follow
the movement of a laugh, using soft background
blur to isolate a moment. It's less about getting it right and more about feeling it. In this photo of Tim
riding his bike, I use the grass on both sides of the road as natural
leading lines. They guide your eye
to the subject, but also add drama, depth and quiet symmetry. There's something grounding
and peaceful about it. In this photo of
Paul carrying Tim, I leaned into negative space
to isolate the emotion, to frame not just the moment but the message,
a father's love, our unending love for Tim, still carrying him, even now that he's big
enough to walk. I used that same technique in this nostalgic POV shot
of Dim Riding ahead, a story of bravery
and exploration, a wide open road because he
knows we're right behind him. For this photo of cogon
grass and a flower, I use diagon alliance to create a sense of
movement and energy. Even in a still image, I wanted to capture
the way I see them. Dancing in the wind
alive, gentle, free. And the rest we just
followed our hearts. We let the moment guide us. We photograph what we felt a simple life
filled with love, joy, freedom, and
deep quiet gratitude. So here are all the photos we took from this golden
afternoon walk. They're raw, warm and beautiful. But for me, just
a little editing can help bring my vision to life to show not just how
it looked, but how it felt. I use edited photos in almost all the examples you've seen throughout
this class. So let me give you a quick
glimpse into how I edit my images right on my iPhone
for the best results. We'll use this photo
as our example. I personally use through
Mobile for most of my edits. It's my GT app because it gives me so much
creative control. There's a free version
and a paid version, so you can choose what
works best for you. I've already created a preset for my favorite
Golden Hour vibe, but I'll still walk you through a quick demo using
this exact photo. Call this preset dreamy
nostalgic because that's how I see these
moments dreamy and tender. The kind of memory
we return to later in life to remember the
joy in something simple. Alright, let's edit. I always start with
the light sliders. I add a bit of exposure just a little if the photo
is properly exposed, more if it's too flat or dark. I lower the highlights
to bring back detail, then lift the shadows to
brighten up the image, especially when I want that
joyful light filled feel. I adjust whites and blacks just slightly depending
on the scene. Next is the collar sliders. This is where the magic happens. I warm the photo by increasing the temperature to
around ten to 20. Try starting at ten, then adjust to match the
mood you're going for. I also add a little
tin toward magenta, a touch of vibrance and slightly lower saturation
to keep it soft and airy. Then I play with
the HSL sliders, that's hue, saturation
and luminance. For people and nature shots, I usually desaturate
and darken the greens, so they don't
overpower the image. I boost the oranges a little. This enhances skin tones and
brings warmth to the scene. Since this was shot
in portrait mode, I already have background blur, so I skip the blur part
or the blur slider. For the effects, I reduce texture because iPhones
tend to over sharpen. I also lower clarity. This softens the image, making it feel more
dreamy and film like. Then I add a soft vignette around negative ten to 20 to suddenly draw the
eye to the center. Now for the finishing touches, because this was
taken near sunset, I add a bit of noise
reduction to smooth out the shadows and keep
that clean, gentle look. Finally, I adjust the crop
for better composition. For this photo, I
chose the one by one square and use the
rule of thirds grid to align Tim's I along the upper third line
and place emotion of the moment at
the very center. And here's hour
before and after. Now imagine doing these same
edits for 20 more photos. That's why I saved all
these settings into a preset and just apply them to the rest
of the photo series. Now, they look all cohesive like they truly belong together. I know that editing part
flew by, but don't worry. I have a whole class that dives deep into iPhone photo editing, so you can learn
how to fine tune your photos exactly
how you want. And it's the perfect next
step after this class. So here they are.
Again, my favorite photos from our Golden
afternoon walk. You saw how I worked with
the light composed with intention and told a story not
just through the subjects, but through the feeling
behind every image because sometimes all
it takes is to pause, to look a little closer to see the extraordinary
in the everyday. No, I didn't plan every shot. Okay, maybe a few. But the best ones, they happened when
I stopped trying and simply started being now. It's your turn. In
the next lesson, I'll walk you through your
class project step by step. Let's make something
meaningful and beautiful together.
I'll see you there.
15. Final Class Project: Tell a Visual Story of “A Day in Your Life”: For your class project, I invite you to create a mini photo story
using your iPhone, not of something grand
or picture perfect, but something real,
meaningful and true to you. Choose one of the
following themes, a slow morning, afternoon light, my everyday joys,
a moment I want to remember a love letter
to my ordinary life. Your mission, should you wish
to accept it is to capture three to seven photos that tell a story around
your chosen theme. Use what you've
learned in this class. Notice the light, use it to tell emotion, compose with intention. Use rules or break them. Use focus and exposure to
control how your photo feels. Try a storytelling sequence,
wide medium detail. Play with color and mood. Let your style shine. Choose moments that feel
emotional, not just visual. Think of it as a photo poem. It doesn't have to be perfect. It just has to be yours. When you're ready, upload your photo story to the project gallery
here on Skillshare. Feel free to add a short
caption to each photo. Totally optional but powerful. Tell us the story or
feeling behind your images. Share which tools or
techniques you use. Reflect on what you discovered
about your creative eye. This is your chance to
celebrate the beauty in your life to turn everyday moments into
a visual love letter. I'll be checking the
project gallery regularly, and I would truly love to
celebrate your work with you. You ever catch
yourself thinking, my photos aren't good enough. They're not worthy of sharing, please take a deep breath
and remember this. This project isn't
about showing off. It's about slowing down, seeing your life with new eyes and creating something
that feels honest, emotional, and beautiful
in its own quiet way. Your photos already matter
because you matter. This be your way of saying this moment was
worth remembering. So grab your phone, step outside or simply explore
the light in your own home. Look for moments for movement, for mood, document a small part of your day like it's your
favorite movie scene. It doesn't have to be
flawless to be beautiful. It just has to be honest. Don't overthink it, let
it unfold naturally. Then take a step back
and ask yourself. What story did I just tell? You might be surprised of how
much meaning you captured, even in the simplest frame.
16. Final Thoughts: Keep Seeing, Keep Creating: And just like that, you've made it to the end of
this master class. But I hope in some small
way this is really just the beginning because iPhone photography isn't
just about better photos. It's about noticing the
light in your coffee, the softness in
your child's laugh, the quiet beauty of your
life exactly as it is. You don't need perfect gear
or perfect conditions. You just need to slow down, look closer and shoot
with intention. Remember, the best photos don't come from following rules. They come from feeling something and choosing
to press record. So whether you're
capturing joy, stillness, chaos or love, let it be
real, let it be yours. You're not just documenting your life. You're honoring it. If you found this class helpful, I would be so grateful
if you left a review. It helps other students find it, and your words truly
mean the world to me. And don't forget to
upload your project, even just a few photos that tell a story or show how your
perspective has shifted. I'd really love to see your
voice and your vision. And if you want to
take your iPhone photography to the next level, I have a follow up class all
about iPhone photo editing. It's the perfect next step to help you shape your
photos with feeling, refine your style, and let your images tell even
stronger stories. Learn how I edit with heart, not to fake a moment,
but to honor it. Don't forget to follow
me here on Skillshare, so you'll be the
first to know when I publish more iPhone
photography classes, and so you don't miss out on my fun little giveaways, too. Thank you for
letting me guide you and for showing up
for your creativity. Thank you for choosing to see
the magic in the ordinary. Now go out there and keep
creating with heart. You've got this,
and I'm cheering you on every step of the way.
 Rose Nene, Photographer & Videographer