Transcripts
1. Introduction: I've had a lot of
questions recently in some of my classes on tips to take better photos to share for the class
that they're taking, or for some social media
things that they want to wow their friends and
family and collectors with. This class came up
from those questions. I'm Denise Love and
I'm an artist and photographer out of
Atlanta, Georgia. I've been a professional
photographer now more than a decade and taught tons and tons of photography
workshops through the years. In this workshop, I want to
show you some simple tips. I've boiled it down
to the basics so that anybody who's
not a photographer could do some of these tips
and tricks and things to get better photos of the art they're creating that they're
excited to share. We're going to find a
place in your house, a window that we
can set up next to, preferably one that you
don't have to break it down. Just leave your little setup, your little table there, and then get excited about
running over after we create some art and very quickly create some pictures to go along
with that to share. I want to make
this process easy. I don't want it to
be over complicated. I didn't want to throw
lots of equipment and supplies and options at you. I've paired it down
to what is our setup. What are some props? Let's do some styling. What does our
lighting look like? Then let's take some
great pictures. I have focused on
taking photos with my phone because I'm thinking most of the people doing
some art are doing a quick snapshot and
then sharing it. You can still do a quick
snapshot that can look like a professional photo
if you just move your environment a little
bit closer to a window, add in some styling, and take your photo
instead of just snapping it on your dining
table with the overhead light. I wanted to break the process down and make
it as simple as possible, not big and overwhelming. I hope that you take some photos in this
class that you're like, aha, okay, I get it, and you get excited
about taking photos of the art that you're
making and you come back and share those. I'm really excited to
have you in class today. I hope this demystifies some of the good
photo-taking tips that maybe you just didn't
think or didn't know and come up with some great photos of
your art after this. Let's get started.
2. Class Project: Your class project today is
to do a setup of your art with some of your supplies that you used in that
art styled around it, in a window with some
natural light coming in all the lights in
the room turned off, and take some photos
of your art with some of the tips that we've
talked about in class today. Then I want you to, if you can retake a setup
that you've already done, maybe it's a project
that you've shared, and retake that photo with some of these tips
that we've done today. Then look at the
before and after and see the difference
in how you improve. The longer that you do
some of these things, the easier it gets and a guarantee you're going
to love some of the photos that you take and you can't wait to share them with people showing off your different
awesome art projects that you've done. Try some of these
techniques and come back and show me some of your photos that you've taken of your art. Can't wait to see what
you come up with. I'll see you in class.
3. Setup And Lighting: [MUSIC] Let's talk about
where we're going to set our little table
to photograph on. I like photographing
in a window. This is a little window in my spare bedroom
that I've turned into a studio and I pull the table right
up to the window, and I use the window
light to photograph. The window light is the
most natural light and it looks the most wonderful
for keeping the colors true on your artwork
and when you're photographing and the
light that's my favorite. I have studio lights, but I don't use them
for shooting my photos. Air the photos that I
post are always going to be over here from this window with the light coming in
the window and I turn all the lights in
the room off so I have no competing
light coming in. I don't have the yellow
incandescent room lights coming in or anything. I only want the light from
the window on my scene. I've set up a window that gets
the light in the morning. This is an east facing
window and so the light comes in until about noon,
and then about noon, the sun's on the top of the building and then I have some good diffused lighting, and then the sun tips
over the building and the light is a little bit too dark to be shooting
in this window. If you want to shoot
in the morning, find a window that faces
where the sun is coming up. If I wanted to shoot
in the afternoon, then when the sun tips
over the building after lunch and starts
heading down, that way, I could shoot in a
window on that side of the house in the afternoon and that's a west facing window. If you prefer to shoot
in the afternoon, you want the sun coming in those windows in the afternoon. Find a window that
is facing the west. If you don't have
any windows that are east or west and you're like, well, there's a little bit
of light coming in all day, but it's not direct light, that's probably a
north or south facing window and you're
just going to have to judge if you're getting
photos that you like in windows that don't have
any direct light at all. Indirect light is
good, but sometimes, it's just not bright enough so you're just going
to have to judge that. Because I'm shooting in
an east facing window, I have the sun coming
in really harshly in the morning and so even though I want that good
lighting coming in, I also want to
diffuse that lighting so that it's very
pretty soft light. In the window, I have a photography scrim. This is a photography diffuser and this is what
that looks like, a little smaller version of it and that's a
photography diffuser. If you have any harsh direct
light coming in where it's going to be showing harsh sun on your
table and right now, the sun is behind the clouds, so we're not going to see it. But if you have any harsh
light coming in on the table, then you need to
diffuse it and if you don't have a
photography diffuser, you can defuse that light
with white curtains. I just have white curtains up here in the window
that are a little bit too thin and so because
they're so thin, I do use that
diffuser behind them. If you have a little bit
thicker white curtains, that would be good to
diffuse the light. Just decide what do you
have there and make some adjustments for shooting
your photos in that window. I like to pull up
an old wood table. That's my favorite
surface to shoot on. But you could shoot on several different types of surfaces. I'll show those to
you in just a bit. You want to make sure you turn
all the lights in the room off so you have no
competing light sources and you don't have to really have anything behind
the table because you can focus your
camera to shoot down, up and down on it or at
an angle and you can make it where you
don't really see anything back behind that. I have a crate and
some old books and just some pretty little
antique pieces that sit on my table as a backdrop just because I like
them and I have them. You don't have to have that. You could just have the table and then
when you're shooting, just don't shoot in such a way that you see back behind it. This is the basic
setup that I use. I always shoot in a window. I make my art run right
over here to my window, take my photos, and
then I'm good to go. I want you to look
around your house, find a window that you think, this is where I want
to be shooting in about the time of day
that I think I want to be shooting my photos and plan to set up there to
take some good photos. You don't want to be in a room with regular lights
taken photos. You don't want there
to be anything like your overhead lights
on your dining table, that's generally not going
to give you the best photos. You want a little
folding table, TV tray, something that's big
enough that you'll be able to put your artwork on
and take some photos. You could even set
up on the floor. If I wanted to, I
could set up on this floor and take photos. But getting on the floor, it's hard that where you get. [LAUGHTER] I do prefer to have a dedicated table to
shoot on personally, but you can set up
on it if you've got a nice wood floor, near a window that
you want to shoot at. That could be just fine also. I'll see you in the
next video. [MUSIC]
4. Backdrop Options: Let's take a look
at some options for photography boards or surfaces that you
could shoot on. I have a lot of
different options to shoot on because I do studio photography and
still life photography and I like having
lots of options. I've tried just about everything that you could think
of over the years. Some of my favorite options are photography boards
and these you can buy from people that make photography boards or you could make your own
photography boards. This is a pre-purchased
one that's painted. It's beautiful. I've used it for a
different art setups and little still lifes. What I like about these is
they're two-sided so one side might be this and then
on the other side, you'll have some other fun
texture that you love, and this is a beautiful texture
for shooting still lifes. It looks like some
abandoned building, some cool texture that
you might see on a wall. That tends to be services that I like to
shoot on the best, surfaces that look old, like they came out of
an abandoned building, and if you happen to
have photos that you took of some great wall
surfaces like that, you could have those printed
out on a piece of canvas and have your own vinyl backdrop
or something like that. This is a painted
surface and it's about 24 inches by 36 inches. That's my favorite
size to shoot on, two foot by three foot. It's the perfect size
to store in a closet. You could set a TV
tray up by window, set this board on that TV tray, and you have the
perfect surface. You can also put this board on the floor and shoot
right off of the floor. I do like photography boards. Those are probably one of the more
expensive options. You'll spend on average $175-200
for something like that. You could also set
up on say like a TV tray or a
little folding table and use a vinyl backdrop. Now, if you're using
a vinyl backdrop that's bigger than your table, you might get a
little two-foot by three-foot piece
of plywood to be your surface and then you could set some type of vinyl
backdrop on there. You can find photography
vinyl backdrops on Etsy. You might find them on eBay. You can find them in quite a few places if you
Google photography backdrops. SwankyPrints has been a
favorite source of mine. They have their own website
and they have an Etsy store. They carry this two-foot by three-foot vinyl
backdrop surfaces. I tend to like ones that
are a little more neutral. They're not so busy
that they're competing with my things that
I'm photographing. I'll be honest, like the
one that we're looking at, now that I have played on
some of these surfaces, this is way too busy and
this is way too busy. But the reason why I have vinyl backdrops is because I
can use them on my art table and shoot down on them
to film art classes and when the backdrop has
too much paint on it, I can just pitch it and put a new backdrop as my background. Photography-wise, I do like it to look like a
piece of beat up wood, but I don't want
it to be so busy, especially with a lot of color that may or may
not go with everything I want to photograph and I don't want it to
have chipped paint on it like this because this looks terrible in
some of those photos. I might never use this. I don't know, it'd be okay
for filming on, I guess. Look for those, something
that's neutral, a pattern that's not
going to compete with everything that you're trying
to do, and shoot on it. This right here is
another option. This is a photography
board that I made. It's made with lumber from the Home Depot or Lowe's or
any home improvement store, and it's already
a pre-cut piece. They sell those in two-foot
by three-foot pieces, I believe already pre-cut, a lot of these places. It was a piece of Luon, which is flooring under
alignment plywood, which means it has
a nicer finish on it than a regular
piece of plywood. Regular plywood's pretty rough, doesn't give you a really
pretty nice finish. The Luon has this really
nice surface on it and so you can stain it
and you can paint it. I even took my Dremel
tool and I dremeled fake lines on it
so it looks like a nice wide flooring plank. I stained it. Then I have the most
gorgeous photography board with just a little bit
of my own elbow grease. I probably spent in total, because I already
had the Dremel tool, I just needed a little
cord of stain or paint and that board so
it might have been $15. It's a really nice
economical way to get a pretty photography
board that you can just have and use over and over. You can set this on the floor, you could set this
on your TV tray, or your folding table or some small surface near a window and that's
perfect for shooting on. I do love the DIY. Look how pretty this is. That's a really
nice play to have a board that you didn't spend
hundreds of dollars on. The other thing that I love
is an old beat up table. This beat up table is a foot bigger than I
really would have wanted it. But when I came across it at the antique market, I'm like, this is the table of all tables, I have to have it. It weighs like 300 pounds, I'm thinking I almost broke
myself trying to get it up the stairs into the studio the day I bought
it all by myself. A nice beat up wood surface from the antique market is always a really nice
thing to shoot on. I really like drop leaf
dining room tables because you can drop the leafs down and push it
out of your way and then pull it back out when
you want to shoot photos. Those are really nice. Look around at the antique
store and see if you can find a small
table that you think, this is my photo table, and then you can set other
photo backdrops on top of it. They're super versatile. I want it to be something
that you can pull up to a window and shoot on. Lots of choices there
for backdrops from the very cheap to the
very expensive, depending on what you find and
what you find interesting. Be looking around for surfaces
that you're thinking, I think I loved this. Make sure it's not too busy. The ones that have
chippy paint on it, take that with a grain of salt and realize that you may or may not like the chippy
paint under every art photo. I'll see you back in class.
5. Art Props: So another thing that I
like to think through besides the surface that
I'm going to shoot on is some of the props that I'm
going to include in my photos. I use the props to style the photo to make
it really cool and interesting rather
than just snapping a piece of the art on the dining room table
with the overhead light, and then thinking, oh, why didn't this look
as good as some of the ones I see
on the Internet, on Instagram, or in my
classes, or whatever. What I like to do is I like
to shoot in the window with natural light on a fun
beat up wood surface. If you like light
and bright surfaces, then you might shoot on a
light-colored background versus the dark colored
background I generally choose. Then I like to pick out props to style the photos when
I'm done with my art. So part of the props that are
the easiest are going to be the paints and the
paint brushes that you used in a particular project. So I did a lot of paintings with these yummy
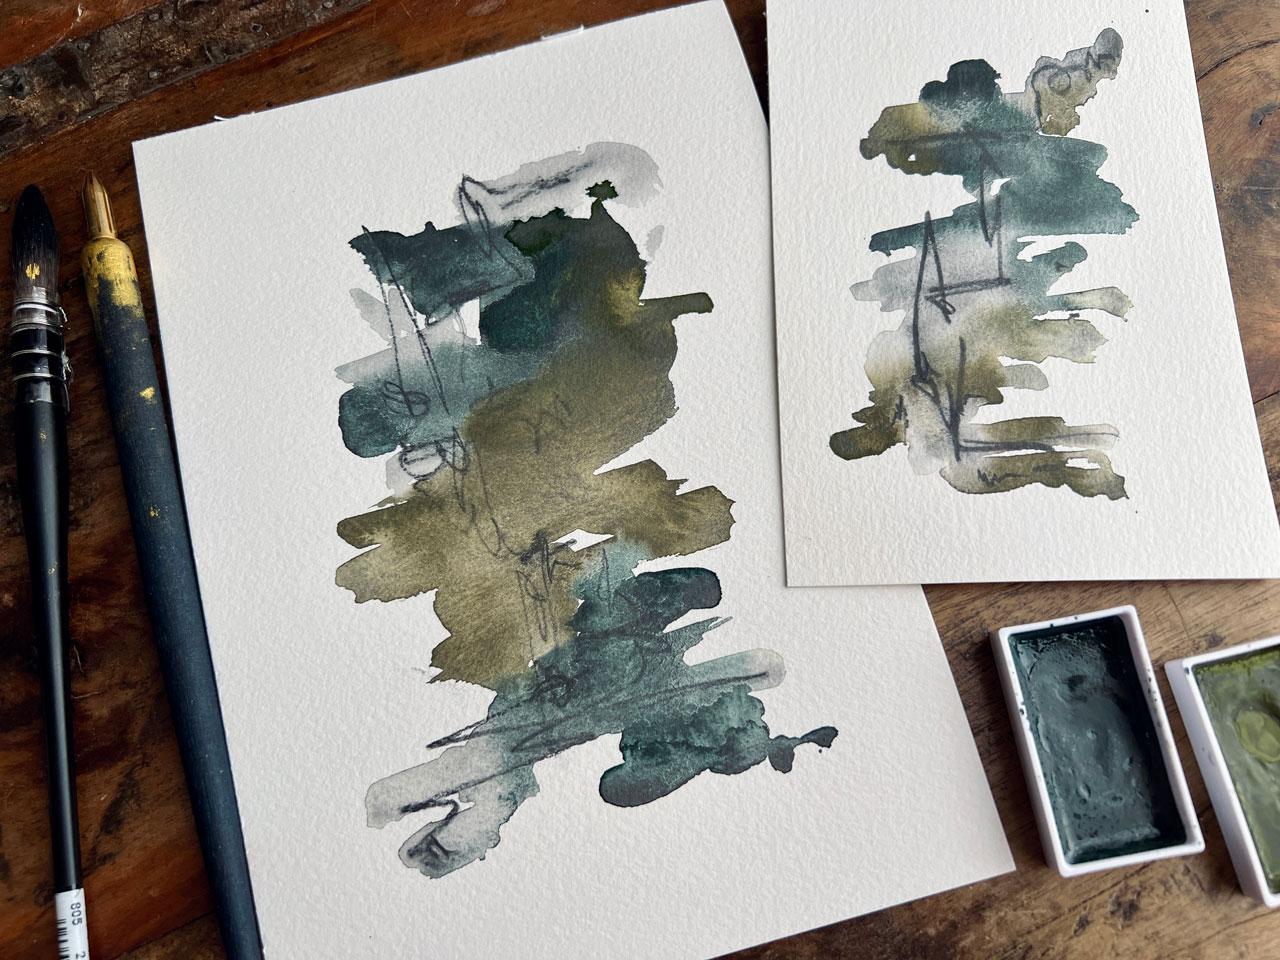
graphite watercolors. So when I style the
graphite paintings, and we'll do some
styling setups, I want to use the
watercolor pens in the colors that I used
as part of my styling. Have some of the
supplies that you use to paint your art available. Along with the paint, any kind of paintbrush,
mark making tool, anything like that
that you use to create the piece art that you created, have those available. That's the most obvious
and easiest accessories. The paint and the paint
brushes, mark making tools. If you used little
acrylic paints, have those little
bottles available. Whatever it is that
you use to create, those are going to be some
of your styling props. Now in addition to that, sometimes I like to put my art materials in
little trays or dishes, and so I like having
little trays, dishes. They can be white. These are little hors d'oeuvres bowls from
the kitchen store, and this one actually still has a price on it, it was $5.99. These are pretty cheap.
You can go to TJ Maxx, you can go to any place that
sells fun kitchen things, and I like TJ Maxx a lot because I always get good
stuff there pretty cheap. I like having bowls and vessels. What you can do with these
is then you can have some of your art supplies, materials, maybe small pieces of art in the bowls as some cool
props to be using. That's super fun. Here's another little
antique bowl that I found, and so you can go to
the antique market and find antique sources. Those are my really
favorite things to find are antique sources. So I like accessories like this, and I don't like them to have too much pattern
or color unless it compliments the art that
I'm showcasing because you don't want to draw your eye away from your piece of art. You want the things
around the art to say, look, here's what I
made the art with. You don't want them to be like, what's that bowl
sitting next to that. I think I need one of those. Then they might ask you
what bowl you used. You don't want to distract
from your art in that way. Another thing that I love is the paint palette that
I used to paint on, and this is a TJ Maxx find. This is an Orderve serving tray and it was like six bucks
and these are white, and so I want you to look around in all your
kitchen serving things, and if you like ceramic
palettes like I do, these are fantastic for photo opportunities
with your paint on it. This is one of my
favorite finds. I do have some artisan palettes that I also have collected over the last many years because
I came obsessed with them. Those are particularly
interesting. If you use those, they make
beautiful props in photos. But my favorite one,
weirdly enough, is this more modern looking one that came from the TJ Maxx. It's an Orderve serving tray, and it's the best
tray to use painting and looks beautiful
in my photos. Ceramic brushes and things that you might find from
artisans that make palettes, those make interesting
photo props. Some people use them,
and some people like myself just
use them as props. You could maybe
demonstrate how you might use that brush and
use it once or twice. But some of these fun photo
things are just photo things and some of the things
that I use all the time, like the brushes and stuff, those are the ones
that really get dirty. Just something to consider,
fun ceramic things. Another thing that
I love is when the art supplies are really
colorful, like pastels. Those you can scatter around in dishes or around your setup
and they're really beautiful. If you use any kind of
pastels in your photo, those make gorgeous props. Another thing I'm particularly obsessed with is paint pigment. I love pigment in little glass test tubes
with the cork tops. You can make some of these
pretty cheap for yourself. I'm a little pigment snob with my little
Japanese pigments. But you can get some paint
pigment from the art store and you can get some of
these little test tubes. I think this is the five
mil size from Amazon, and you can put some of your own pigments in
these little test tubes, and these are
beautiful photo props. I love every photo that's got little tubes
of pigment sitting in it. I do like to make some
of my own paint so it's appropriate that I have
pigment sitting around. Another little fun
thing that I like to use is antique props. If you make some of
your own watercolor or something fun like that, you can get some
little old vessels that are not intended for paint. But you could turn them into
paint vessels or use this as something sitting around with some of your other
supplies sitting in it. Like I could have had a
little pastel sitting in it. But we could do this
with handmade paint. This is a little salt
container so that everybody at the table
had their own salt. So that's a great
paint pigment piece. These are antique escargot pots, so little snail pots
to eat snails out of. But how amazing with some
handmade paint in there, would that be as a
prop in your styling. I love things like this. Think of unusual
vessels, antiques, things that you might
find that aren't normally used for art or paint and let those be
some of your art supplies. Then I actually like
antique art supplies. If you use any kind of pen
and ink or something fun and you have like a really
cool old ink well, that could be a
great photo prop. Another great photo prop is antique art supplies that I
got off of like eBay or Etsy. I've got some fun antique pastels and these I've
used a little bit of. You got to be careful with antique art supplies because
some of them are toxic. Most of them are probably toxic, but they are fun as photo props, and so I have gotten
antique pigments. I've gotten these
yummy antique pastels. These are pretty cheap actually. You could just look around
on eBay and Etsy and see what fun antique art supplies you think would be interesting. I like antique paint brushes. I've also gotten an old art box, so I've got that back here, and in the old art box is some fun old bottles
that we could set up as part of our little props and little
containers of pigment. Again, most of the old stuff, I probably wouldn't use the art pigment
because they're toxic, but they do make amazing photos. This is an antique mortar,
pestle where you grind pigment. How beautiful is that. I've never seen one
quite like that in a modern day
mortars and pedestal. But this one, amazing, and I use it to grind pigments. That's a cool prop to sit along different things that I create
as a styling setup too. Just showing you
different options for you to be thinking of. At the minimum, I want you to be using the supplies that you
use to paint your paintings, your brush, and whatever mark
making tool that you used, and the paint palette that
you were using to paint on. Those are going to
be the easiest, most beautiful accessories
to your photos. All the other stuff is just things that I
like and collect. At the minimum, paint palette, paints and brushes that
you used on your pieces, have those ready and available to photograph when
you style your setup. I hope that gives you
some really good ideas and some fun things that
you might look for. You don't need a whole bunch of styling props, just a few, maybe a couple of different
sets that you can be like, this is styling set 1
and this is styling set 2 and you can change it up
every time you do some photos. But just look around and
see what do you have that you could add
interest into your pieces, and those are what we're going
to use to do some styling. All right. I'll see
you back in class.
6. Canvas Lamp: Another thing I
want to recommend, and you certainly don't have to use a gadget like this but I recommend some type
of tripod if you could, and what I have on
the table there is a canvas lamp C-A-N-V-A-S lamp. What's really cool about it is it's a little bitty
light source for artists like this who want to maybe take videos or maybe do time
lapses of your work, or maybe set it up and
take photos of your work. What I really like is that
if you really needed it, you could turn it on and
it's a lamp for light, so you can get better photos if you needed some type
of light and you could change the quality of the light and make it
go dimmer or brighter. Even though I don't like using lights for my photography work, this is one of the few gadgets that I
have enjoyed using because I shoot videos for
Instagram, like reels, showing different pieces of art, maybe throwing down all of the pieces that I
painted in a series and then you can set
that to music and it can be a video real for
your Instagram. It has been the most
helpful gadget for filming and shooting
on my phone. I'm assuming that a lot of people who are making art or probably shooting
on their phone. You may not have the full
photo setup like I do with several big cameras
and lots of lenses. Maybe the phone is
you're shooting thing and you're shooting videos
and you're shooting photos. This little canvas
lamp is the thing that will allow me to shoot the videos and things like that. It's also super
helpful for styling. If I've got everything
go in here and I'm like, let's just move
this a little bit. I can see the whole thing that's in my frame that
I'm photographing. I'm going to be like,
it's a little off. Let me move this over and
then I can shoot the photo. The other thing that I really
loved that I just got, it's a new product that they
have added into their line. It's called the canvas
remote shutter. It's got this fun
little remote shutter that goes with your
phone and it pairs. You can shoot your
video and your phone without touching the phone
and making it jiggle. That's made me love this
whole little setup even more. That's the canvas shutter, pairs with my phone
shoots photos, and starts and stops the video. This is the canvas lamp. It holds my phone and I
have the MagSafe phone, so it's got the
magnet on the back. I have a little MagSafe
attachment on here. I can just attach the phone, other phones will have like a little claw that clamps that. This is what it looks like. I took that off to put this on, but it clamps the phone
in there and it's adjustable for whichever
phone you have. I do actually like the magnet. The magnet made me
like this setup even more because trying to get the phone in
and out of the clamp, I found frustrating
when they came out with the magnet and
the shutter release. I'm like, now this is a
favorite little gadget. That's super fun and
something to consider. You can definitely take photos, just shooting on your phone, moving the phone
around, and doing that. I do find videos
harder to handhold. If you like shooting reels and little Instagram videos
and things like that, try to find some way, even if it's like
a gorilla pod that holds your phone or you can get a phone
attachment for a tripod. There's so many
little gadgets out there to stabilize that phone, but you need to stabilize
the phone for video because your hand moves and shakes and your video's
going to be terrible. But you can stabilize a
phone to take photos and I'm assuming most of you
are taking photos with your phone for art sharing. This is my favorite little
gadget for doing that. I'll see you back in class.
7. Your Camera / Phone: Let's talk about your equipment that you'll be shooting with. I'm assuming, most people
shooting photos of their art to share are using their phone and your phone is just fine. These newer phones have cameras that are so crazy amazing that if I'd had such a
good camera early on, I might not ever learned
how to use a big camera. But if you're shooting
with a big camera, I will talk about that also. This is a 5D Mark III. It's a Canon, I
like shooting with Canon because I
started with Canon. It's not any better than
any of the other cameras, it's simply the one that I
started buying lenses for. Then once you start
investing in the lenses that go with your camera, you're stuck with that line. That being said, I do like some
of the mirrorless cameras. I shoot all my video
on a Lumix G7. This is my little
mirrorless camera that I like to shoot video on. It's small, it's lightweight, it has lots of lens choices. If I were using it
for my photography, I would use this camera body and a lens that's equivalent to like a 50 millimeter
lens, like a nifty 50. With the mirrorless, that's probably going
to be 25 millimeters in 1.8 aperture or
a 1.4 aperture. Because I like blur, so I want to shoot with the option of not
everything being in focus. I want my subject to be in focus and pretty blur around it. That's what I would choose if I were using my
mirrorless camera, I would choose one that's equivalent to
50 or 60 millimeters, and a 1.8 or a 1.4 aperture, so that's a nice choice. I use this for video filming. Then it gives us
some great video, goes all the way up to 4K. If you're a video shooter, this has been a
fantastic choice for me now for seven years,
so I have two of them. I got a newer one recently
because I thought, let me do with
two-camera shooting. I did get a newer one. It's been a fantastic choice. Big camera-wise, Canon Nikon, it doesn't matter my
favorite lens to shoot the art photography is
my 50 millimeter 1.8 or 50 millimeter 1.4, or if you've got
the 24-70 2.8 lens, that tends to be the lens I
shoot a lot of my art with, and that would be the
most versatile lens if you just have
one lens choice, the 24-70 2.8 is the
go-to for anything really that I could want to shoot. That would be my choice there. If I were shooting on
like a Canon Rebel, I would still pick that 24-70 or the 50 millimeter 1.8
or 1.4 aperture lens. Now, all that sounded
like gobbledygook to you. Don't worry. Not necessary. I just wanted to address that for people interested in
using a bigger camera. If you're using your phone,
that's perfectly fine. We can get great
photos from the phone. A lot of shoots, and a lot of classes, and blog posts and
things on my website, I have a variety of both. I have some phone photos because I can sometimes
get a wider angle or it just formats a
little differently. Then the camera comes in, so I have a little mix of both so I shoot on my phone
and my big camera. Shooting on your
phone is just fine. If that's what you've got, then that's what we'll go with. Consider possibly some type
of tripod or Canvas lamp, and maybe a remote shutter because you get better photos and great videos that way and then you could
venture into videos for things like
Instagram and TikTok. That's equipment wise. I'm going to go ahead
and just focus on the phone camera for
this particular class. But those are the other
cameras that I do use and would recommend. All right, I'll see
you back in class.
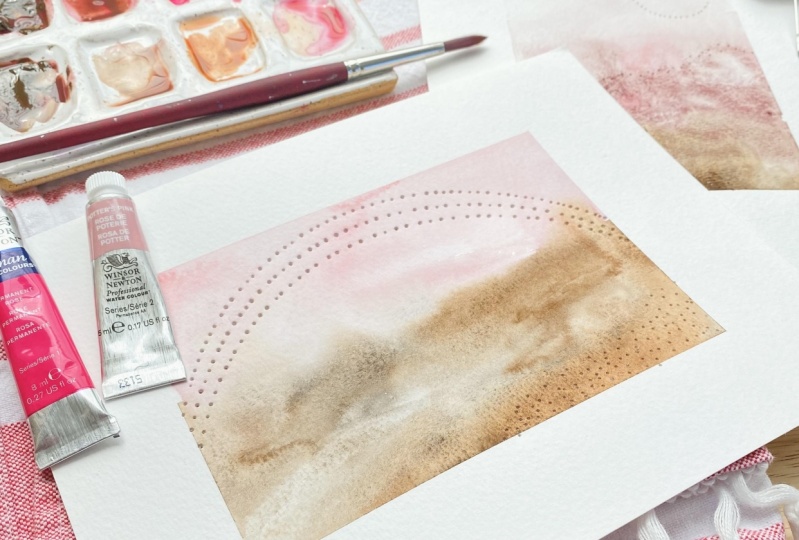
8. Styling Your Setup: Let's style a few sets. I have a couple of
classes that I've done on some graphite watercolor
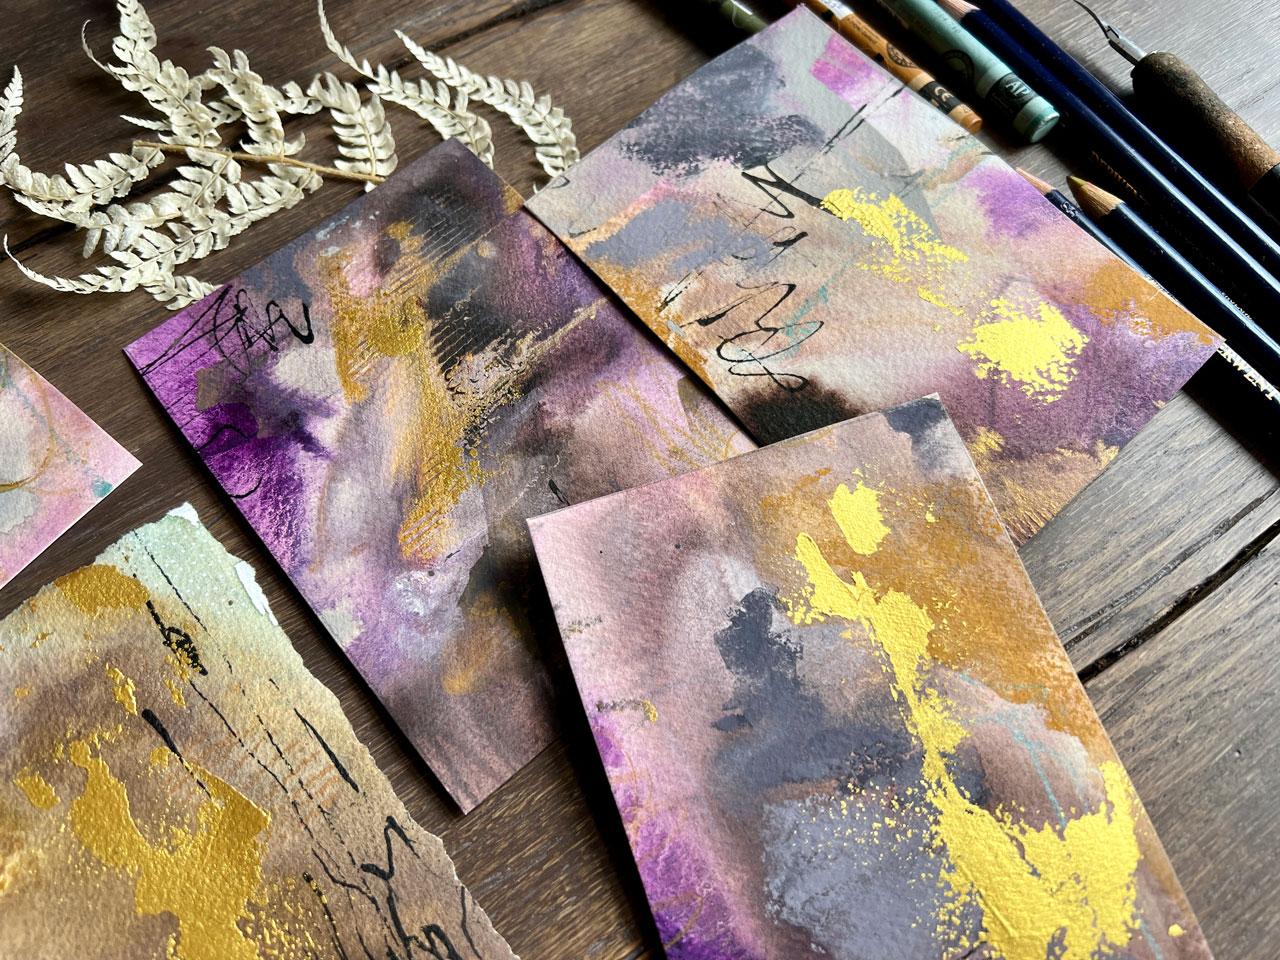
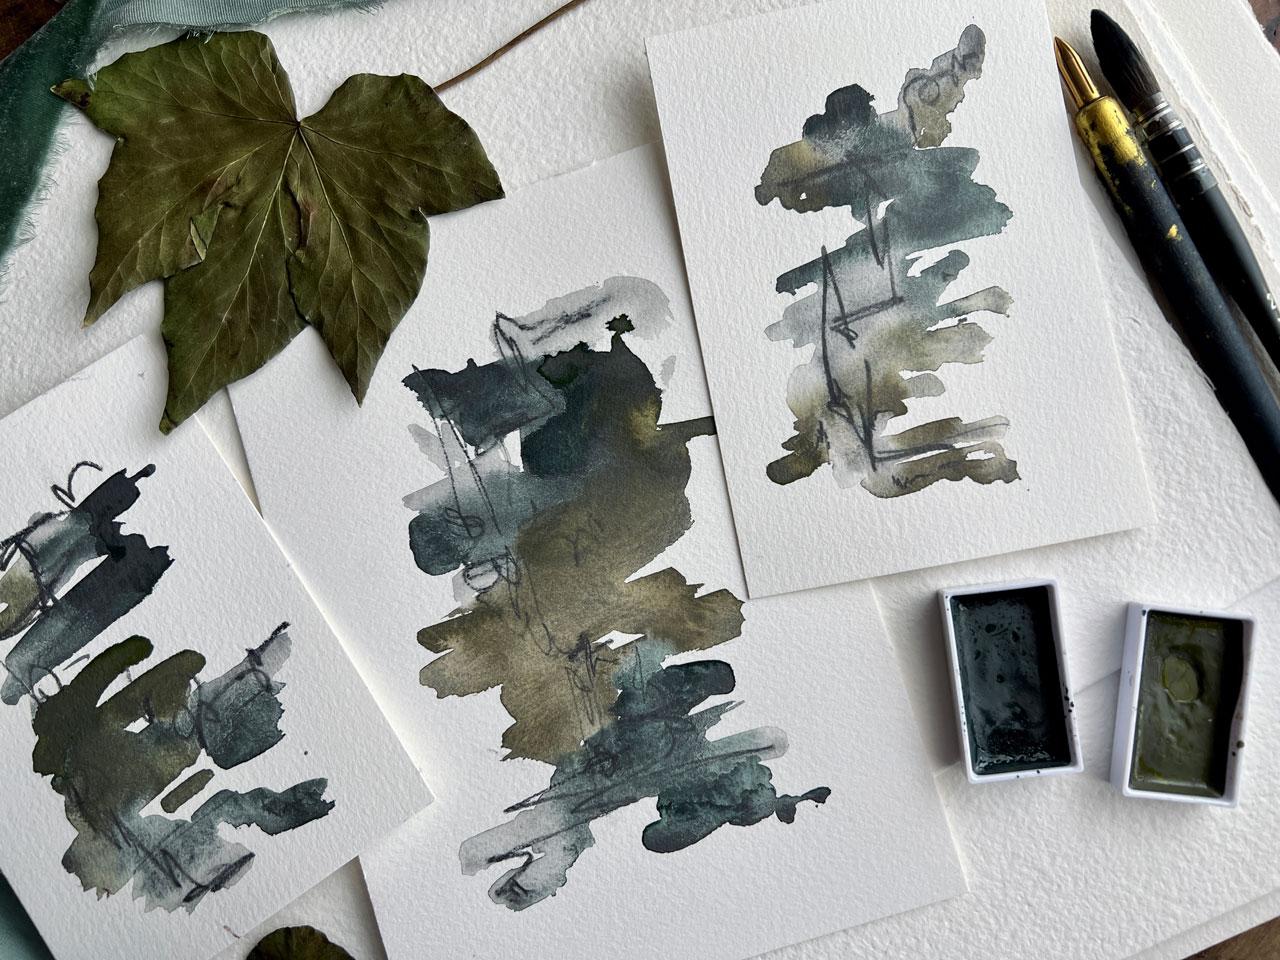
that are super cool. It's basically some watercolor with graphite in the mixture, and they give you a yummy, smokey look, and they
give you a little bit of a metallic pencil sheen
in the pieces of art. These I'm going to
style different setups and take a few pictures. I really loved these
two colorways. I love the abstract art, and so if I had more
than one colorway, I would pair these up with say, a larger or just pair
up single pieces. If I were going to
do a single piece, I would go ahead
and have my tools that I used and maybe
style those around there, and then if I were
taking this photo, now, I could come right in
and just take that photo. Then I would be able to look
back at the photo and say, "Okay, that's what I like or
that's what I don't like." Now, in shooting these, we want to be in the window that we were pulled up towards. We want to turn all the
lights in the room off, which currently
the lights are on because I want you to be
able to see the setup, and then I want to
take this photo. Then once I take that photo, I want to move things around and I want to have
the things close enough so that in my
viewfinder doesn't look like I'm looking at things
that are splayed way out. So I want to be looking at
these while I'm adjusting. I might have my phone there and then I might start moving
things around slightly, and then maybe I'm like, "Oh,
I can't see this brush," and then I'm like, "Oh,
okay, I love that." Then let's just see what we got. Then we've got our photo. I would spend some
time at this setup, moving everything around,
adjusting things, and then I would
start adding things, and maybe I would
take this photo here, and maybe I would put these in the little
gap that I created, and maybe my brushes
on this side, or maybe my brushes
over here on the end. Then I would take that photo, and then I will move
this over here, and I would take this photo and maybe I would decide to
offset this a little, and then I would
take this photo. I'm usually not taking a
photo of just the art, but you certainly could, and then if it were like a set, maybe I would put
these three in there and then maybe pull my
brushes in from the top so that I'm just
getting that top part and maybe take this photo, and maybe I would move
my brushes down here. Maybe I could move
one of these up. Maybe angle these. They don't have to be straight, and then maybe take this photo and then I would maybe
change those out to the different colorway, and these are the colors
I used in that art. If I changed them, I need to change out the colors
that I'm putting with it. I don't want to have
the wrong colors with the piece of art, and then think that
wasn't what created that. Then maybe I could
have those in there. I could just take the single
piece with the utensils, the paintbrush next to it. Take that photo. I'm always thinking what
went into that art and what could I put around
this to take that photo. That's fun. Then I'll probably come
back and set these up, take some photos to show you. But I want to just talk about some different things
while we're styling. I've got this set that's also
the graphite watercolor, and I did some yummy
different projects with it. This is something where if you do some
different projects, but it's the same material, maybe we can come in with
things not straight, a little bit angled. Maybe I've got a couple of
the colors that we used, few of the paint brushes, and then maybe this is a photo. Let's just take a look at what that looks like on the camera. I could come in and I can see I've got this gap right
here that I've left. If I had not been looking
at this on the camera, I wouldn't have seen
that I left a weird gap. Maybe I can come
in there like that or maybe come in from the top. Maybe I can angle it. Maybe with that angle, we can see bits and parts
coming in the frame, and I just want to play
around and adjust. Maybe I can put the
paintbrushes over here. Maybe the paints over here, maybe a little more angled. Maybe this is a photo. Let's go backwards. Maybe this is my photo so
I can see as I'm moving, I don't have the brushes in, so maybe I can pull the
brushes in here on this side. I always want to be
checking my viewfinder and seeing what did
I get in the frame? Did I like where
these were placed? Adjust these around
until you end up with a photo that you're like, "Aha. I love this." Even though I have
other lights on, you'll see even on this phone, I'm getting really
good photos with this, even though I've got
studio lights on to film. Normally though I want to
turn these lights off. We might not be able to see if I turn the lights
off but let's turn them off and take a photo, and then we can see
the difference real quick of taking that same
photo basically up close. Then let's see. Here's
with the lights off. Lights aren't very similar
actually with the iPhone. I do like it would
just the lights off because then it comes
in at the angle, gives me true color to what those pieces really
are, and I love that. I want you to experiment with
your setup and the props, the things that you
brought in that you were using to create
that piece of art, and just start playing with
setups and styling it. This is a time too that I
would bring other things in. Like actually this used a
dip pen and some gold ink. I could use my
antique ink thing. I could also use a little
miniature serving tray, and I could have
these on my tray. That could be somehow
a prop in my setup. Could have maybe these
two and my brushes and somehow this could
be my style set. So just be looking at
these and thinking, what can I do here? Just look in, and I'm thinking,
oh, that's fun there. That would be maybe a photo. Probably not the one
I would use because I want the art to be a
little more straight. Maybe if I'm over here, maybe I want paintbrushes
coming in there. Let's try that. It's just a game. A game of what looks good where. Oh, that's pretty. Let's take a look at that. That's fun. I'd be careful cutting
stuff off, overlapping, but just play and see, let's take the white plate away. Maybe I want the ink
and the colors in here. Maybe I'll put the ink near
that and the paint below. Just let's see. Oh, that's different. I like that. I would usually sit
here at my art table moving stuff around,
rearranging. Now, these have all
come down from the top. But you'll also notice
on a lot of my stuff, I come in from an angle. I love that right there. Come in from an angle. It's also coming from this
direction and this direction and above and see
what you can get, and you'll notice on
all of these photos, you can't see the
background or anything that I have sitting
back here behind it. So stuff in the background
is not as important as what you're doing right here, and how can I come
in from this way and get something interesting? How can I shoot straight down and get something interesting? Then I can come in
and get details. Look at that detailed shot. You can see a little
bit of prop behind it, but I can get close in
details with the phone and you've got the
good lighting. I love doing stuff like that. These are fantastic. Think what I'm going to do
is take my little art pieces and move stuff around and
take a bunch of photos, and then I'll show
you what I got.
9. Shoot Recap And Editing On Phone: Let's take a look at some
of the photos that I took so I can talk a little
bit about some editing. Once you take your photo
and you're like okay, I think I love that. Then, you can edit the photo, and I try with artwork to
keep the photo editing basic. If you are a Lightroom user, then definitely edit in Lightroom or Photoshop if that's where you
feel comfortable. But I don't like using lots of weird colored filters and
actions and different things. I like to keep it
pretty standard. So a lot of times, especially with the iPhone, it's a little bit newer iPhone. I like to come in here and then look at what
the auto-edit does. Then I might actually come
through and click each setting in that and
tweak it to see, do I like what it did. Do I want a little less? Do I want a little more? Do I want it more moody? Do I want it more, whatever it is
that I'm thinking? What I also like
to do is come into these little presets that
come in the iPhone now, and I like to just
look at those, and I have decided that
I like dramatic cool. But you notice how blue that is, and I don't like it
at full strength. So a lot of times, I will apply a preset
and then pull down that intensity to
where I'm like, I think I like that right there. Then I'll hit done,
and now I'm ready to post that or use it on my website or whatever it is that I'd like
to do with that. So I've got several
different photos, some that I've taken today, some that I had taken
when I made this class. I do the same on
every one of these. I look at the auto, and then I come into the preset, and then I'm like I like
the way that that's edited. I did that exactly
the same way that I just did that first one, and I had several really
beautiful photos. Now, this is how I use that crate with the
books back there. I will actually
prop up a piece of art and take some
individual pictures. Sometimes I'll take a
picture of just the art down on the table and sometimes
you can see a prop in there, and sometimes you can't. But just being in
the natural light gives me the best
possible photo. I take a bunch of those
and some close-ups. This one looks upside
down. There we go. This one I just took so I might just go
ahead and edit that. Let's get the phone where
it's right-side up so I can go ahead and edit. I'll go ahead and do auto. I'll come over here,
apply my filter. I'll come back down on that. I'll go ahead and adjust that. If you're using Lightroom, you can also sync
all these filters in your Lightroom
program to your phone, and I like to do
that a lot if I have a particular art
preset that I like. I like this layout. I like how I can see some of the supplies, I can see the tools that
I use and I'm like, that's what she
used to paint that. I like being able to
see some of these. If I go ahead and just
do that same thing, come back to my
preset that I like, but tone it down. Go ahead and rotate
it and I'm done. It doesn't take a long
time to edit these. I just want some
basic edits with the shadows and the
light and the contrast, and then maybe a
touch of a preset, but not too much. There's lots of apps out
there that you might experiment with to see if
you like any of those. But for art, I like
the art to shine on its own and not have some weird Instagramy
kind of preset on it. You can also take these into Instagram and tweak them
with an Instagram preset. Then, tone down the
intensity of that preset, though some of those are nice. One thing I want to
talk about real quick, I took several just
different ideas. If you're going to
do some of these where you're holding
it in your hand, you're going to want to
have some cuticle oil or some olive oil in your art room or wherever you're taking photos somewhere near. You want to use the cuticle
oil or the olive oil, and you want to
moisten your hands and your cuticles so that they
don't end up super dry, and you don't end
up with weird cut, cuticles that people
are then looking at your fingers rather
than your piece of art. I just wanted to
throw that in there. I even knew that with filming, like I put the oil
on my hands and my fingers before I started filming this
because I thought, my hands are going
to be in the frame. I don't want them paying
attention to my dry cuticles. Let's put the oil on. So we can edit this. Come through with
our preset that we like, and there we go. I'm ready to now post that. That's a really easiest way
to get really beautiful photos of your art true to the color that
you're trying to show off. Edit these in Lightroom, take them with a bigger
camera if you want. A lot of my photos are taken
with my bigger camera. That will be an even
nicer quality photo. But if the phone
is what you have, this is how easy it is
to use the phone to create some of these great
photos and then share them. I hope that gives you a really good idea about
how you might set up, photograph, and then edit
your photos in an easy, hopefully low-stress,
low-key way. Ready to share. I'll see you back in class.
10. Experimenting With Settings: I wanted to talk
about a couple more settings here on your phone. If you've got an iPhone, this is a newer iPhone for
when I'm filming this video. These settings will change
as they do updates. If you've got, say,
an Android phone, you might have slightly
different settings. But I do encourage you to play with the
settings in your phone. After you've done all the
tips, you're taking photos, you're feeling pretty good about using your phone camera to take your phone to
take your art photos. I want you to then start
experimenting because say your photo is too blue
or say it is too yellow. In the editing we can cool it
down or we can warm it up. That's what I was doing
in some of those presets, but I want you to explore some of the individual settings. This is what my screen looks
like when I'm just on photo. I can tap around the photo
if I want the focus to be in a different place than what
the phone is focusing on. That really only matters if you're taking
the photo angled, then some of it will be in blur and some of them
will be in focus. If you're doing a flat lay where it's straight up and down, everything should be in focus. But there might be
a place that you want the phone to expose for. If that's so, move
that little box around just by touching your screen and getting
a different exposure. There's also other settings. I've got this little arrow
up here that reveals them. You may have similar
settings or not, but you can turn on the flash. I don't take flash photos. That's why I work in
the natural light. I keep the flash turned off. You can also have something
called Live View turned on, which takes a moving picture, which really only matters if
something's actually moving. I don't want to take a picture
of my hand doing this. I keep the Live View turned off. If you have random
weird moving pictures in your camera roll and you didn't know
why, well, that's why. You could also get a macro
mode with these newer cameras. I can get real close on things, and I can change that
setting to wide angle if I don't want it to be macro, even if I'm real
close to the photo. Play with that. You can also change
the aspect ratio. We're at 4/3 right now. You could change it to 16 by 9, which is the ratio that
cameras take photos at. The 4/3 is the ratio
that Instagram likes when you have the
photo fully showing. You could also do square if you wanted to
take square photos. Different aspect ratios, it's defaulting to the
four by three on mine, which is basically
like an 8 by 10. If you did that 16 by 9 ratio, that's like an 8 by 12 size. Those you can determine which one do you want to
be taking that photo as. You can also, if you hit
that little plus minus 1, we can change the exposure manually if we don't
like what it's done, or maybe we'd like our photos high-key and we want it
exposed a little higher. We can manually
adjust the exposure. 99.9 percent of the time I leave it at what the
camera is already doing. These cameras have
gotten so great that I just go ahead and
let it do its thing. Then if I need to cool
it down or warm it up, I'll put that warm or
cool preset on it and I'll turn down that intensity
and then I'm good to go. I don't fuss with the pictures
coming out of my phone nearly as much as
I like the fuss with pictures coming
out of my big camera. You can also do timer like
I can have this setup on my little Canvas tripod
and I can have a delay. What's good about the delay
is if you are holding it, then you get a chance
to really get stable and then snap the picture. You don't have any blur. I find I have less
blur with the phone than I do with the camera. It's also good if you're
still tweaking it and you want one
last second to say, move something in the frame. It gives you that little tiny bit of notice to be
like, that's perfect. Let me take that picture. You do have delays in here, and that's what that
little clock is. Then that's our
different settings. Then this has a macro setting. I can turn the macro on or off. Now what's nice about
the macro off is, we're just getting a flat
version of the photo. If we turn the macro on, actually undistorts it, and gives us a truer scene
of something close ups. I really like this macro feature that these have started
coming up with. I just want you to start playing with the different settings. If you're in a photo and we're going to
say edit that photo, I want you to start also looking in the different
settings available to you here in your edit mode. Here we can manually change if we want it to be
more warm or more cool. This is the warm, so I can cool it down
or I can warm it up. That's the setting
that does that. Just pick a photo and start playing in each
of these and seeing, what do they do? Are they making the
photo better or worse? Do you just want to play
in a preset that might be included on your phone
and turn that down. It looks like on the presets, you can just adjust
the intensity. Then if you do your
manual settings yourself, you can adjust each
item individually. Just get in there and start playing with
what your settings do. Once you're comfortable,
setting up my window, letting the light come in, taking your photos and you're feeling
pretty good about it, start exploring the other
things that are in here. You might like a little
bit of sharpening, and there's a sharpening
in here, sharpness. You might like a little bit of sharpening if nothing else. I want you to start
getting familiar with the different settings
in your phone. Taking a picture
with your camera, and then in the edit menu, what are the different
settings there? Then you can explore different
apps that are available for different presets
that you might check out. That's always fun
in the beginning, I think you'll
find after a while the apps' presets may
be a little overdone, and you come back towards
something more natural, but that's personal preference. You may also start
experimenting in Lightroom and have some of your own
presets in Lightroom. That is probably my favorite
way to edit things. There is a mobile app, Lightroom app for your phone. Just start to experiment
to play and play and advance in your
phone photography. The longer you do this. I just want you to play and experiment with your
phone and figure out, what does the phone do? Let's take some better
pictures and experiment with some of the settings once we
feel better about using it. I've really enjoyed
having you in class. I hope you enjoy just
playing in your phone. I'll see you next time.
11. Extra Styling Idea: I wanted to give you
another easy styling idea with a few extra ideas beyond what we
already talked about. In this setup,
I've actually just got a stack of watercolor paper. That's a really great base to
photograph your art on it, especially if that's the
paper that you're using, some type of watercolor paper. You can get a couple of sheets
of this at any art store. I love it. So you can get Canson 140 Pound
cold press in the sheets. This would be a perfect base
for any of your art photos. You could just set it up
on top of a cheap table because we're not actually
taking a photo of the table, and pull that up to the window. I'm still interested in using some of my art supplies
in these photos. So whatever I used
to paint my art, I've got those in there. But I also thought
it's fun to throw in some natural elements. If you've got some
flowers, ferns, Ivy, anything outside that's
growing that you love, those would be some
nice extra accents. Ribbon. I love this velvet ribbon. You can find this about an
inch and a half or two inches. You can find these
pretty ribbons. I got some on Etsy. I just picked a few colors
that were in my color palette. Then I just have them
sitting to the side to possibly use in photo shoots. To do that, I just
throw the ribbon down so it's adding a
little bit of color, maybe some wrinkles, maybe
a little bit of texture. It's just an element that you can run through
your styling setup if you wanted to do
different layouts. It's just something
interesting to consider. Then I also wanted to talk about some of these
I dry and just keep. If you want to make
an effort to go out and find some wonderful
leaves and Ivy, some ferns, and then stack them
in some book pages and let them dry out, then you just always
have them available. Another fun thing
that you can include, any natural elements
like sticks or twigs. If you make your own pigment, you could have couple of
rocks may be broke up into some pigment and
that pigment splayed out. There several things that
we can include nature wise, anything that inspired
that piece of art for you that might have been
natural outside. Maybe try to pull some of
that element into your art. I'm going to take a couple
of pictures of this and then see what we got. I just wanted to throw
the extra ideas out there so that you get your
thinking cap on and you look around and think, okay, so I didn't have
some of the other stuff, but this I could definitely do. I'll see you back in class.
12. Composition: I want to talk about
composition for a minute. When I am taking these photos, my main goal is to
fill the frame. I don't want the photo to
be taken from so far back that you're like straining to see what it is you're
taking a picture of. I want to get right
up in on the artwork. I want to include the
different elements that I've scattered around, and I want to have a
little bit of movement. A lot of times I'm
taking that photo, maybe slightly angled
the other way. I've pulled all of my
little accessories in so they're not sitting
so far out that it's like, what is that doing there, it's not even related. I'm coming in from the top
and in from the sides, so you can see some
little bit differences in me moving my body around to
take some of these photos. I love diagonals, where your eye is strolling through
and has a place to go, and it goes this way,
and then it's like, what's this fun
thing here and here? I'm creating movement and
I'm filling the frame. I love this, all your
different elements are there. That's my goal. Even when I'm
taking a photo with my hand holding a
piece of the art, I'm filling the whole frame. I want maybe a little bit of background back there in blur. But I want the art
to be the focus. I'm going to pull it right in where you can see
what I'm focused on. Then these are some earlier
shots just on the table. But again, I'm angled. I'm moving my way
through and looking at where the different little
styling elements are sitting. If I'm taking up photos, portrait instead of landscape. Again, just moving the
different elements around and I'm filling the frame. Don't be real far back
taking that photo, I want you to get right up
in where that artwork is, the main large piece
that's in there. We could talk about, trying to do rule of thirds
and things like that. But to be honest, I'm thinking more fill the
frame and move the eye around. I'm not thinking let
me off-center it. But if you've just
got one element and you need to off-center
that photo, then do that. Just trying to give
you some ideas there and show you some of the
pictures that I've taken. I do like getting
write-up in on it and again, I'm big piece of art. Now, this is a little
off to the side so you can see some
other elements there moving around the frame. Just try to keep that in mind. Getting close, get as much
in that frame as you can, and see what you
can come up with. I'll see you back in class.
13. Final Thoughts: What do you think about taking the photos in a window
with some natural light, with some of your
props around it that you use while
creating the art? How much better do
your photos look in that natural light versus
sitting on your dining table with the overhead light
shining on it and a quick snap because you're trying to
get a photo to share? How much better does your photo look in the natural light? I can't wait to see
some of the photos that you start taking after
implementing a few of the tips that we talked about
in class today. This class I've kept simple. I've used my phone, I want you in the natural light, pick a great surface
to shoot on, put a few props together
to style your scene, and then take some
photos of the art and see how much better it
looks than some of the stuff that you were taking before. We could do elaborate setups with big cameras and tripods and all lighting and
different things like that, but it's just not necessary when you just want to take a
beautiful photo of the art that you want to share. I hope that some
of these tips make that a lot less intimidating and you can't wait to now find
an area to set the table up and have a little mini
studio that you can then run over with your art and
take better photos of. It's going to be stuff that
you can share on social media, stuff that you can wow, perspective buyers
of your art with because they're like, look at the stuff
she's creating. It's things that you can post
pretty easily, fairly fast. I like having setups that
are always just set up. If you have a spot that you can have as like a permanent
table sitting in a window that you can just run
over and take photos of, that makes it a
whole lot easier. Because the way
that I do things, especially for the art is
I'll film in my art table, I'll come over here to this wall and film the welcome video and I'll go over to that window and take pictures of the art to then have to
put in my videos. It's like I had permanent
little stations set up. It's like I've streamlined
the way that I do things and I like having
the permanent table set because then I
can just run over, take some photos and I'm like, look at this great
stuff I have to share. I think if you'll have
a little area that you can dedicate to
photography near a window with some natural
light coming in and then get used to
setting your props around and taking some photos, you're going to
get excited about sharing some of the
stuff that you do, especially in some
of my classes. I want you to be excited
to take the photos. After you make
them and then come share them and it
not be this big, huge ordeal where you're like, I can't take a good photo. I don't have good lighting. I don't know how you take that
great photo you're taking. I don't feel like I can share because my photo is terrible. I want you to get past
all of these barriers that you give yourself. I want you to run over and take some photos and
come back and share them. I hope you enjoy the
tips in this class. I've tried to keep it
as minimum and simple as I could so that you
are like, I can do this. I can't wait to see some of
the photos you start sharing. Come back and show me a shoot
that you did for this class and then when you're taking
some of the other classes, get excited about running over, pulling together a
photo, and sharing that. I've really enjoyed having
you in class today. I hope this helps you out
with your photos for your art and I'll see you next time.
 DENISE LOVE, Artist & Creative Educator