Transcripts
1. Introduction: [MUSIC] Today I'm
experimenting some more. This is some of my favorite
ways to create art. I'm Denise Love and I'm an
artist and photographer. Today I want you to come
and experiment with me. I want you to get
into the habit of practice and play
in your art room for the sake of
building skills and discovering new materials
and how they work, and figuring out what you love because sometimes the
longer we do art, the less we give ourselves
permission to play, we don't give ourselves
permission to experiment, and these are the ways that
we learn and grow and push outside the box that maybe we've gotten ourselves locked into. So today we're
going to experiment with some peerless watercolors. You can substitute
whatever watercolors you have on hand to
do these projects, I don't want you to go out and
buy a ton of new supplies. But I wanted to experiment with something in my art room
that I haven't pulled out in a while and just see
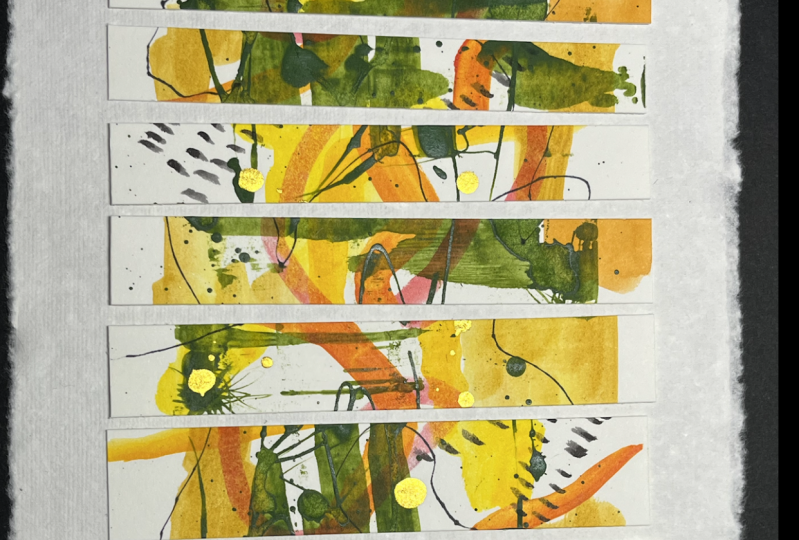
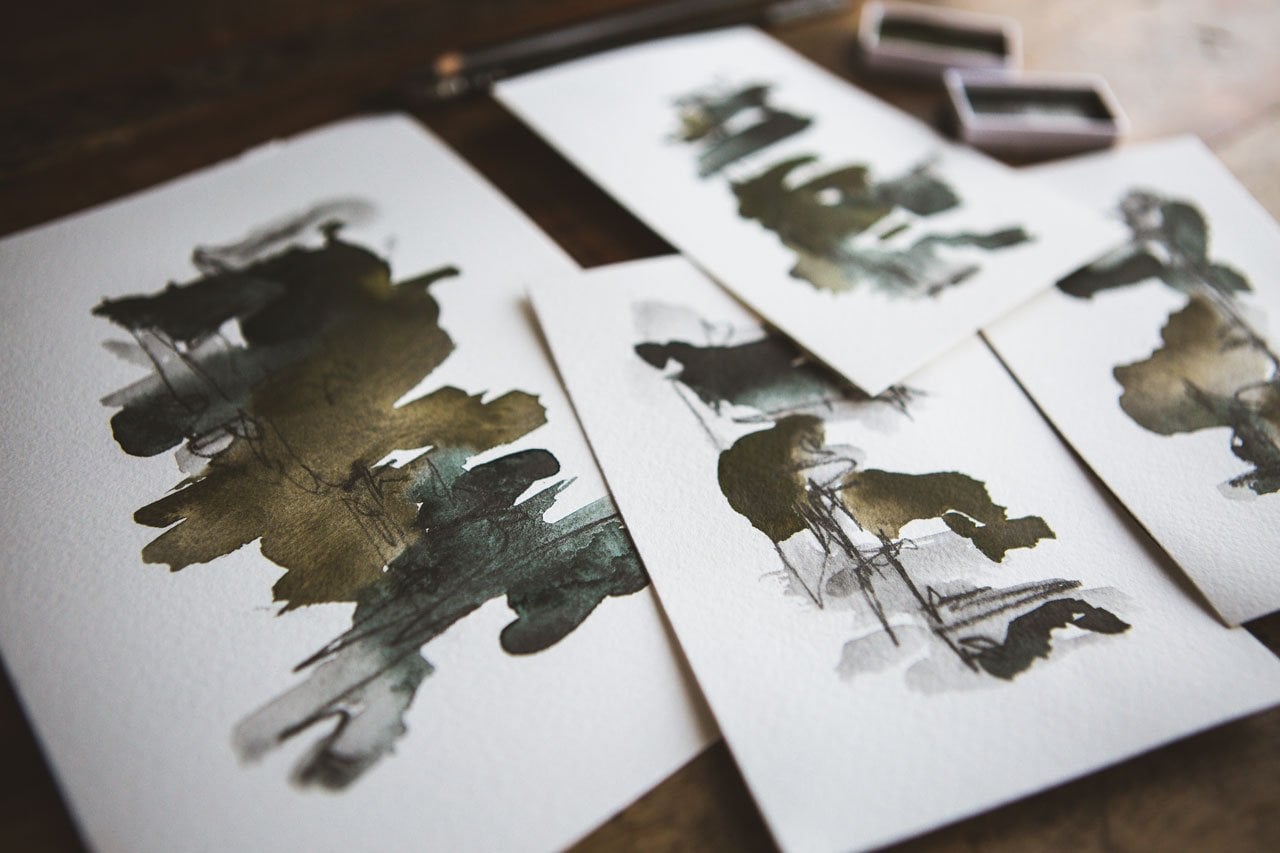
what can we create today. So we're going to take four
pieces of paper together and work on the project
like it's a big painting, and then peel those apart and
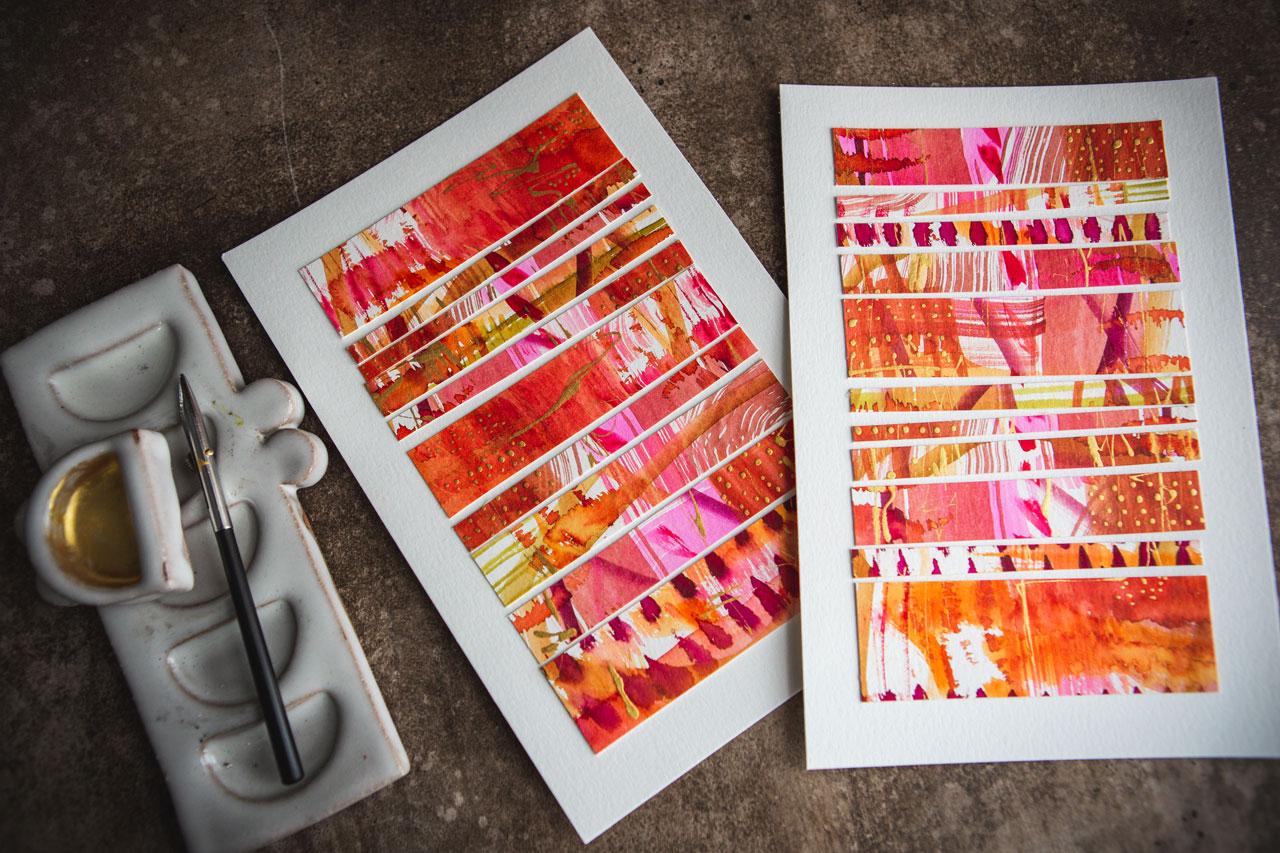
reveal what we've created. Then today, there's two that I loved and
two that I was like, yeah, so we're going to
cut up the ones that we don't love and create a junk art collage out of those, which is one of my very
favorite ways to repurpose the art into something that magically turns into
something super cool, something about the stripes in different orders
and the white lines in-between that suddenly makes the piece really
super interesting, you want to come in close
and look at the details, whereas the piece originally, as you painted, may not have
been as interesting to you. So today we're going to
do a couple of projects, we're going to paint the
big project and then cut up some to create a
junk art collage. I can't wait to see
what you're creating. So come back and
share those with me. I love logging in and seeing some art and seeing what colors you picked
and the marks you made, and seeing how you interpreted what we did in class today. So come back and
share those with me, and I'll see you
in class. [MUSIC]
2. Class Project: [MUSIC] Your class project
is to come back and share some of the abstracts
that you created in class. Did you try the
peerless watercolors? How super cool are they? Did you go with something else? What color palettes
did you pick? Did you love the pieces
once you peel the tape or did you decide to cut a
couple up like I did? I can't wait to see what
decisions you made, what colors you used, what marks you made, what did you end up loving, what did you end up cutting up? I want to see all your projects. So come back and
share those with me and let's get
started. [MUSIC]
3. Supplies: [MUSIC] Let's take a look at the supplies I was
using in class today. Today's intuitive
painting session, I actually was using another product that I
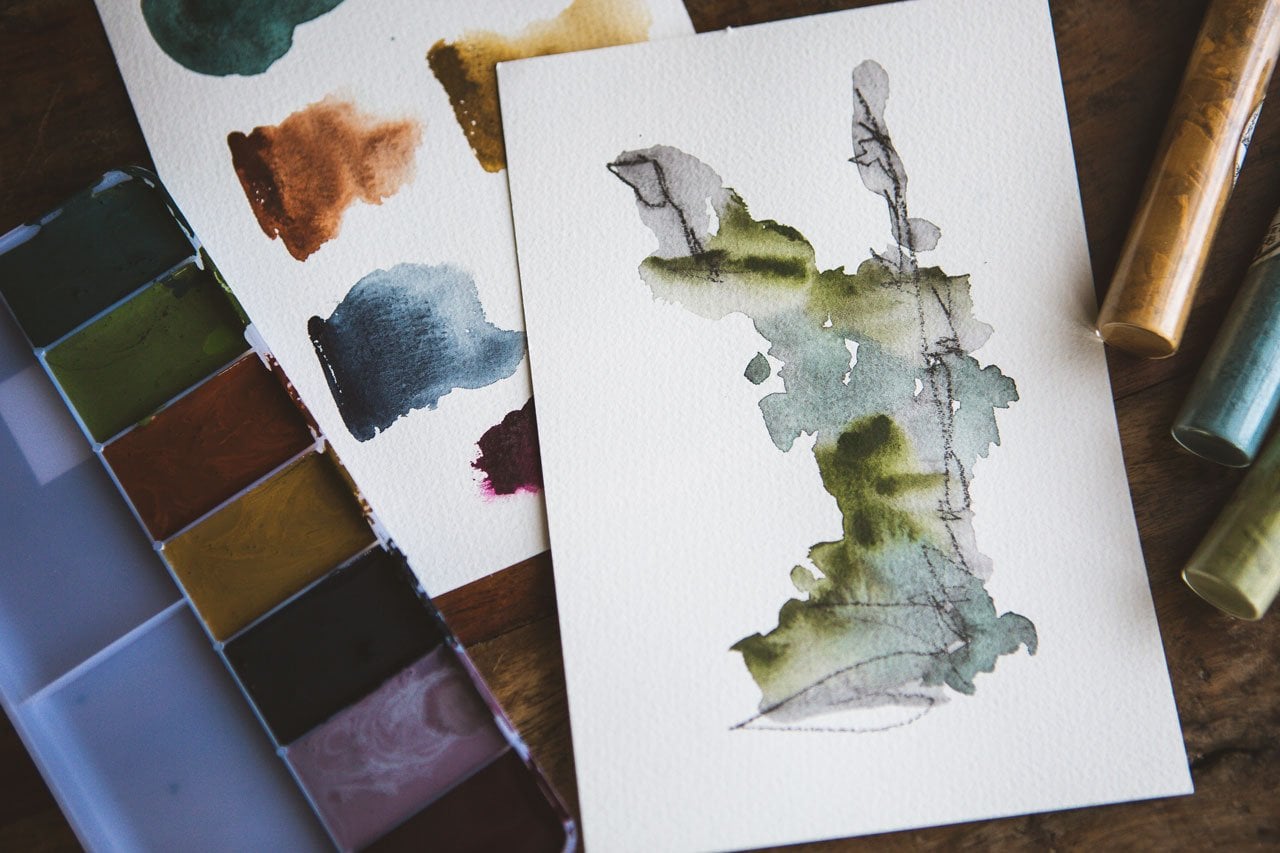
don't pull out very often, but I truly love. That is my peerless watercolors. You can do these projects with
anything you have on hand, any watercolors you want to. But what I liked about these
peerless watercolors is they are very vibrant pigment, brushed on this paper basically, and you wet the paper
to get the color off of it, which is unusual. But they're super fun, and
there's so much color on there that these things
just keep on going. I've had these peerless colors
now for well over a year, and randomly, sporadically, I'll pull them out
to do something and they just keep on going. I really love that they
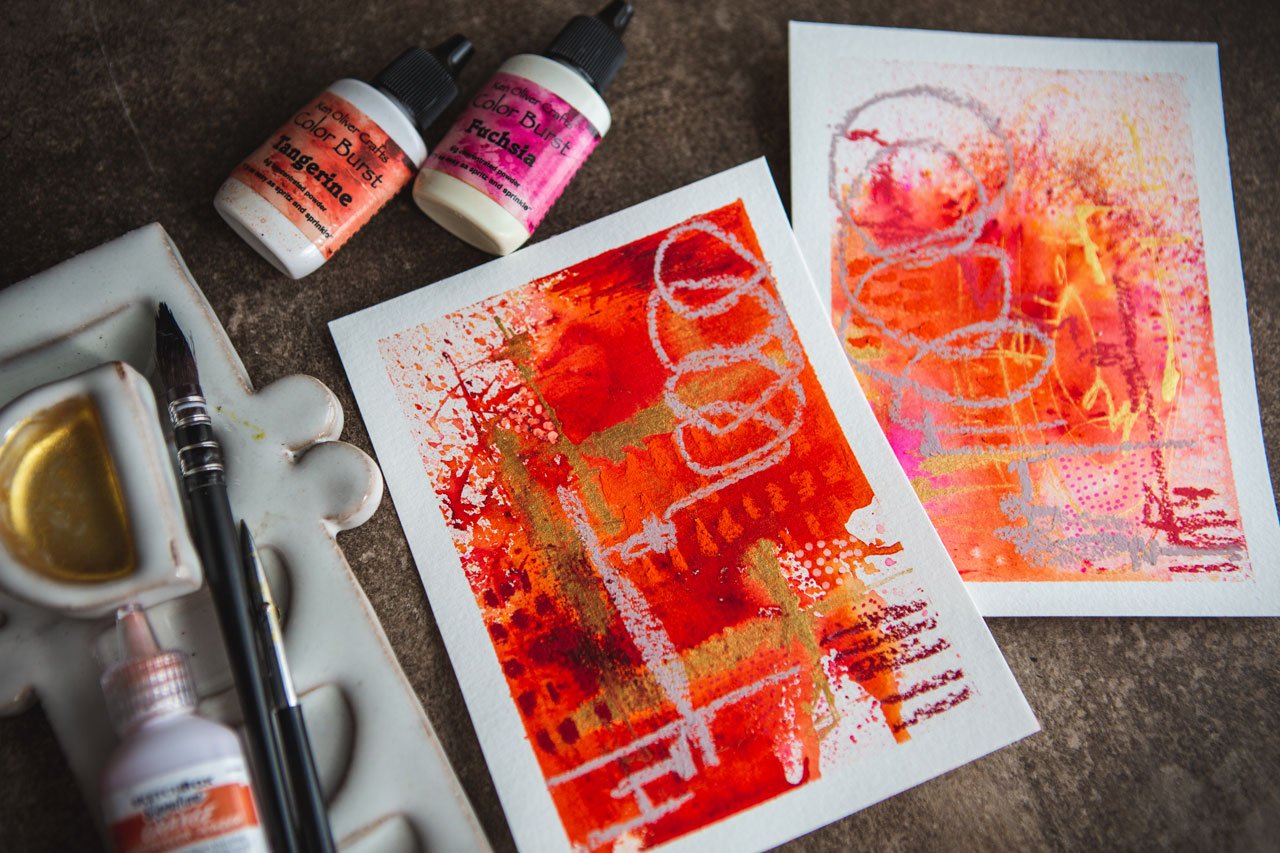
do go for a long time. I was playing in the
bonus pack today because I just wanted to pull out lots of oranges and reds and pinks and see
what could we create. I'm playing in the bonus pack. They're fun because there
are so many colors in there for you to experiment
with along the color wheel. I want you to just see what
do you think of these? Would you use them again? Do you love the colors? Do you love the vibrancy? I love how really pigmented these are. That's
what I'm applying in. I have the complete edition, the face tones, and the bonus pack,
and I'm applying in the bonus pack. Those are fun. But use any watercolor
that you want. I also have a paper
cutter up here because I ended up intuitively
painting and then going ahead and doing an
additional project with two of the paintings because I
love to cut stuff up, and today I did that. I did some cutup art and
we'll take a look at that. Pair of scissors
or a paper cutter is super convenient
for cutting stuff up. I was working on the Canson
XL watercolor paper, 140 pound cold press. These are 9 by 12 sheets
and I just cut them in half to work on
half sheets today. Then I was experimenting with some different
brushes to paint with. I started off with
an angle brush, which was my half-inch
Princeton angle shader. Then I was applying with
my Raphael SoftAqua zero, a little moppy-looking brush. Then my fan brush, which is Utrecht 208 fan. I like this because it's the stiffer fan brush rather
than a watercolor fan brush. The watercolor fan brush
I have is way too soft. This one is a little
bit stiffer like it was made for maybe acrylic
paint or oil paint, but it's fantastic
and its mark making. Then I ended up pulling out
this funky angled brush. This is the sketch box
signature try wedge number 8. It was kind of cool,
not my favorite, but I wanted to try it. I've never used it, and it was interesting,
different marks. I think it would make
a good pedal and stem if you were flower paintings, so
that's pretty cool. Then I pulled out a Simply
Simmons three-quarter inch wash brush because I thought let's just pull some other brushes
out as we're working. I'm working intuitively. I'm just going with the flow. I'm like, what
else could we try? Those are the brushes I
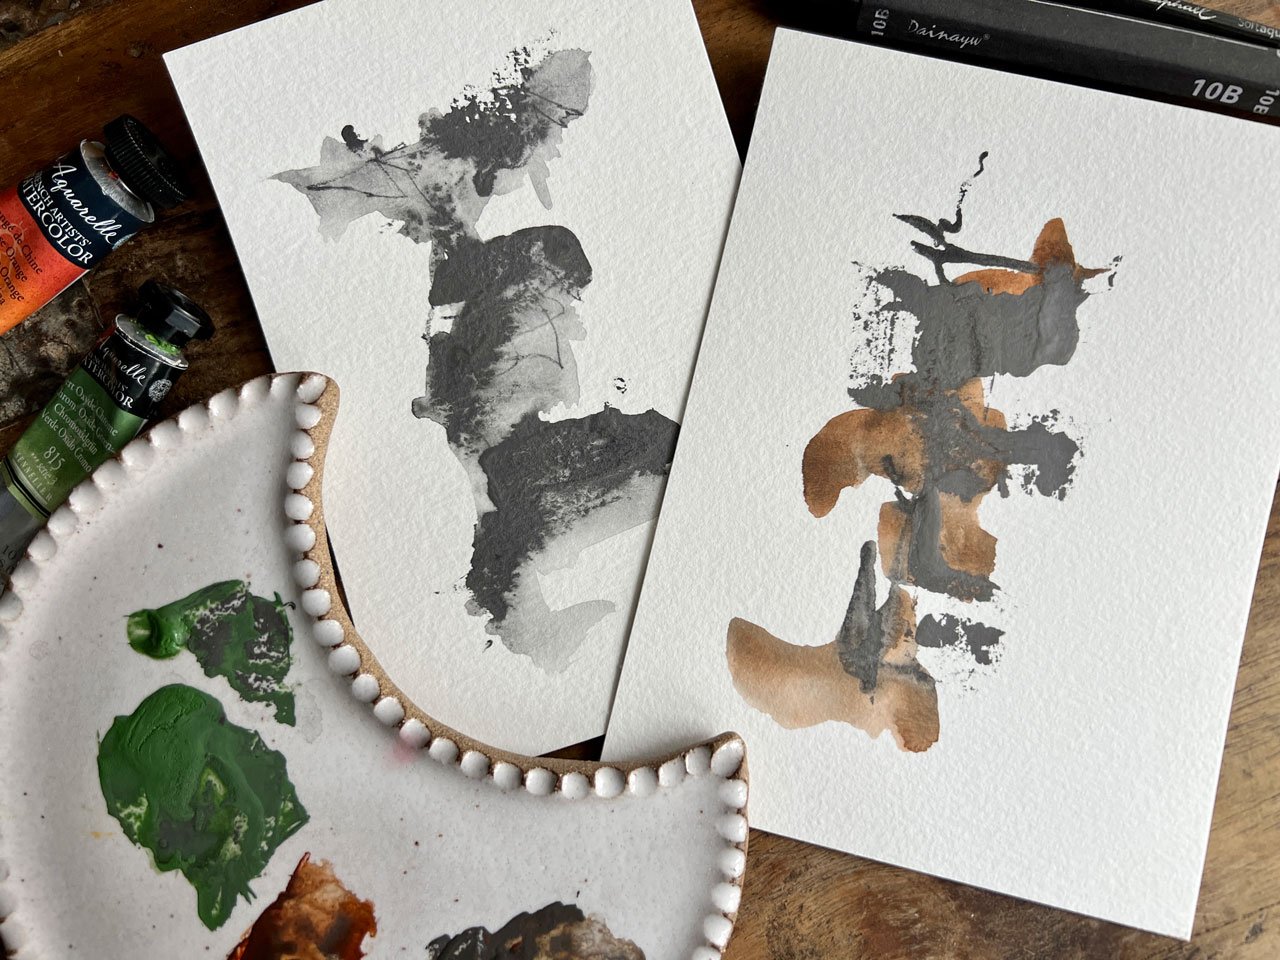
ended up using in class. I also did some Gold
Mica Ink because man, I do love the gold
ink by Kuretake. I thought, let's try this glass pen that I've
never tried before. It was kind of cool
and you dip it in. It's very fine point, so it didn't give me as much ink on the
paper as I wanted. Now that I'm having
it out, it's glass. So I can see very
easily breaking that tip [LAUGHTER] with
like one extra jab too much. It actually feels broken now. I may have jabbed in the
water and broke the tip. Even though this was inexpensive
and super cool looking, I don't love it. So that one may never
come out again. Then I try my
Kakimori brass nib. But I thought, okay, I
love that but I'm not getting the heavy lines
like I was wanting, so let's use the ruling pen. I got out a ruling
pen to do my dots and lines and that was
the one that I loved. I also am using some Yes Paste and just
a cheap plastic knife. That's what I did to do my junk art collage pieces in addition to the pieces that
I painted and I loved. I hope you have fun with
this project in class today. You can substitute any of your materials to
do these projects, any watercolors are just fine. I want you to experiment
with your brushes and your mark-making and just
see what you can get. Then if you don't
love your piece, don't be scared to cut it
up and make something like a gorgeous stripe piece because
these were kind of mere. But now they're like, wow. For some reason reorganizing and having the white
lines in between, which really adds
this dimension to the pieces that make them
turn into something amazing. I hope you love doing
today's projects. Let's get started. [MUSIC]
4. Painting Big: [MUSIC] I thought
it would be fun to do an intuitive painting session today with my
peerless watercolors. I hadn't had these
out in a while, but I really love them, and I have several
little sets here. I have a whole set of
little half sheets, I've got the complete edition, I've got the
expressive face tones. What these are, are
watercolor on paper. It's a really saturated layer of watercolor on this paper, the colors are super vibrant, and I thought it
would be fun to step outside the box and play in something I don't
normally play in and experiment again with these
peerless watercolors. What I'm going to do is have a little sample sheet
here to the side. If I'm really doubting a color, I can dab it on the paper
to see exactly what it is. I thought, hey, let's play with these. What's really neat about some of these is you can flip
it to the back side of the paper and get an idea
what that color might be. That's not an exact
representation, but it will at least
say, oh, look, this is a green, maybe this is close to the
color, let's try that. So it will get us
a little closer. I'm not sure what color
palette we want to do today. Let's see. Let's just take
a look at some of these. This is the bonus
pack of extra colors. At the time when I
get a new art supply, I just totally start obsessing. It's my very favorite new thing, it's the newest shiny thing. I absolutely love whatever
is new and shiny, and I can't wait to play in it. That's exactly what happened
with these watercolors. So I got one pack in my
art box and I'm like, what are these amazing things? Then I immediately ordered several more packs
because you can order these pretty easily online. I'm like, oh, yeah,
coolest stuff ever. What if we go with shades
of pink and orange? I like pink and orange,
and maybe yellow. Look at that, that could be a fun color palette right there. You can also go with one of my color palette ideas where I pull a color
palette from a book, that mountain green
is really pretty, and try to match your colors
up as close as you can to a color palette that you
have found or come up with. But I'm feeling that
ecru is pretty, that olive green
is really pretty. What do we want to do today? Do we want to do
pink and yellows? I can put this ecru over here. Here's a good chrome
orange. Look at that. Let's just use these
little half sheets because it's pretty easy to
pick some colors out of that. Let's just go for it. [LAUGHTER] Got to have
fun at your art table. The more I do these with you, the funner I get adjusting
even my own mind. Look at that color right there,
let's pull that one out. I just loosen up even more and more the more of these I do. Golden yellow, I don't know
about that. What is this one? Marigold Yellow. I like
more of the ecrus. Anyway, it just gets more fun every time I
do these with you guys. I know I sound like
a little crazy lady, but I'm an old lady, there's no shame here. [LAUGHTER] Sit and
have some fun with me. [LAUGHTER] I started day
at the art table going, what can I make today? I swear that's exactly
what I said to the dogs. I get up, just checking
all the extra colors here, scarlett is fun, I get up and feed the dogs, and I eat breakfast,
and then I'm okay, girls, what can we make today? [LAUGHTER] I come upstairs and that's exactly what I think. What can I make? I've got all these extra
colors but we're going to stick with whatever
I've pulled out here. We'll just see what these
are as we're going. I don't want to use 15 colors. You know what? Maybe I do. Maybe I do want to use 15
colors. Let's just see. I don't want to see these, they're more red, this one's more red. Maybe I just want
a flower garden or maybe I want one of those
where everything's moving. Now we'll say, here is
the problem with these. As you're touching the papers, you're getting this
watercolor powder or whatever that is they've coded on there, on your fingers. If you were to go with
that with some water, it would be a vibrant color. But what I'm going to
do is try my best not to touch my paper with
all my fingertips, which apparently I've done that, or something touched it, and get little
fingerprints everywhere. So be real careful
when you're doing something like this with
these little colored cards. [LAUGHTER] Let's try
something crazy. What if we use this anonymously? Let's just pick a color and say, let's paint with this color, let's paint with that color, and let's paint with this color, and just see what we get totally anonymously not even
thinking of the color. I'm feeling this. I've pulled some different paintbrushes
to experiment with. I love this fan brush, I've mentioned it a
couple of times now. Play with a fan brush. This is not the
watercolor fan brush, those are too soft. I like this one with
the stiff bristles, it gives me some good
separation and some lines. I've got my favorite
little mop brush here and my soft Aqua
Raphael number 0. Then I thought, what if we
used an angle brush today? Because we can get
some fine lines and some different marks with that than we're getting with some other things that we tried. [LAUGHTER] I've got
some water back here. I also reserve the
right to use some ink and Posca pen on these when we're done,
so let's just see. Let's just see what
we can make today. [LAUGHTER] I'm just going
to go crazy and say, let's just pull this one out. I don't know what this
is, let's just go. Look at that. That's an orange. I can see it's an orange
but it's like orange, orange look at that.
Let's just paint. This is one big sheet of paper. Don't even pay
attention to the tape. You see these are so cool, you just wet that down. Pull the water off. These, surprisingly enough, go quite a long way. Let's see what that was,
that was chrome orange. I'm sad if you really
truly loved it, could you get it again? Maybe not. So just be aware. Let's go with this one. This
one is [inaudible] red. It looks like hot pink.
Let's see what it is. Let's do it with the fan. [LAUGHTER] Look at that color. Just play in here. Look, we got a dot. We got a splat. Let's pull the splat out, I don't know that I want
the splat. You know what? Again, as I'm painting, look at that, it combined
with the orange, [LAUGHTER] what if we pick up a tiny bit of orange and come
back and pick up some pink? What would that look like? See, it totally changed the color of that
pink. You know what? We can mix these by dab here dab here [LAUGHTER] Coolness. [LAUGHTER] Let's see
what else do we get. Now, another thing, when you're working with
these, check it out. This stays wet so you
can't stack them on top of each other because then
they stick to each other. This is like a
piece of paper that I need to set this
to the side and dry, same thing with these
little watercolors. You need to set them
in a safe place where they're not stacking
on top of each other, you're not running that
ink off on everything, and let them dry. I'm feeling pretty crazy here. Let's just pick up this one. This is yellow ocher. Let's try our other brush. The goal here is to, look at that fun, look, we can make
different marks. Check that out. [NOISE] This is like a greenish yellow. I don't really feel
like that's like my favorite ocher color. We can come back with a line, see that's more like
an olive green to me. But look how we can paint
different shapes and lines. This is definitely
outside my comfort zone. I'm looking at this color, did I make a bad choice? [LAUGHTER] But you know what? We're having fun, I'm
still laughing with you, so check it out. We're still accomplishing
good things. We're learning what these do, we learning about some brush
things that we can do. We are figuring stuff out
like that was not a ocher. Let's go back with whatever. Let's just pick this. I'm just blindly
picking a color. This is scarlet lake. Let's go here with the brush. I'm going to start doing some
who, well, what the heck? That was not what I expected. I thought I was going to get a red out of there,
but we did not, we got an orange. There we go. Not what I expected at all, but we're going to go for it. We'll just go ahead and
mark it on each one, and just set that to the side. Let's pick, what is this? This is blood red. That sounds promising. Let's try with the fan brush, it's got pink still
in it [LAUGHTER]. Maybe I want a line
right down here, so that could be a blood
red. I agree with that. [LAUGHTER] I'm going over some other colors because
now we'll get to see, is that going to change the color of what
we've got going there, or these going to rewind what are we going
to get from that? It's interesting just to see what would we get
if we did this. What would we get if we did
that feel and attitude? See now I'm feeling
that right there. Yeah, see now that right there, but it took me four times to
even get there [LAUGHTER]. See there we got a
little bit of paint, you get the lines. I'm loving that. Let's do that right down there. I like blood red,
blood red is good. Let's see what else we got here. Let's just randomly pick.
What do we got here? We got tea rose pink. Let's check it out. Let's
see what tea rose does. Let's do the angle brush, look at this, now some of these are blending right there. Holy cow, that's
looking super cool. That's what I love
about watercolor, is they start to blend and do some magical things that
maybe we didn't expect, and if we just let them
dry and do their thing, that's fun to see
what do we get. What is this color? Let's see. [NOISE] Look at that color. Just go ahead and go right around that like
that, that's fun. Just testing the waters here. There we go. Let's
pick this one, e crew. What so far as you're painting has been
your favorite brush? Like when you're doing these, what have you got? That's my favorite. I feel like my own favorite has been that fan
brush right there. Just to remind you, we're doing these, I'm
not thinking composition, I'm not thinking
this going to work, not thinking on this one. Obviously, I picked
a color palette, but it was a little bit of some serendipity as to
what we're going to get. Let's see what is this color, this is Rose red. It's more about, let's
do this right here. Learning your supplies and not getting hung up on trying to create an amazing masterpiece because that's not
the purpose here, the purpose here is to have
some fun with your supplies, which we don't let
ourselves do enough of, and use your brushes and your paints in new ways that
maybe we didn't think of, and it's this playing and
this experimenting that gets you leveled up in your art. Look at that [NOISE]. This is how we figure
out what do we like, what works, what doesn't work? Who we want to do here? Want to do hoover, [NOISE] look at that. That's super fun. But, weirdly enough, after I do like all these
weirdo experiments with these, I always end up with
some that I love, even though the whole
time I'm painting, I'd totally doubt, [LAUGHTER] what we're getting. I always weirdly enough end up with something
amazing that I'm like, okay, I didn't expect that. It always happens
after I peel the tape. Not before. Not during this
process of painting and adding and layering and
mark-making and coloring, it's not this part that
I find things I love, it's this part that I'm like, I don't know, did I make
some wrong choices here? [LAUGHTER]. My goal is to use all
these colors I pulled out. What do we got here? We
have points that are red. You know what though I didn't
use that color on this one. I'm trying to use all the
colors on all the pages. I like the shape that this brush makes when we just dab it down. Look at that when we dab
it into other colors, we can still see the shape and that changes a
little [LAUGHTER], I like that. Let's try this. Let's see points that are red. I'm feeling like the fan brush. Let's use the fan brush
a little differently. Before we dragged it through, what if this is now our
mark-making element, like we just did with
that other brush, what would we get doing that? [LAUGHTER] That's pretty cool. Check that out. Check it out. That's a super fun mark. I don't know if you're
feeling it like I am, but [LAUGHTER]. Then look here,
we can go down in a different row like
this [LAUGHTER]. I'm well and that right
there [LAUGHTER]. Let's just do that
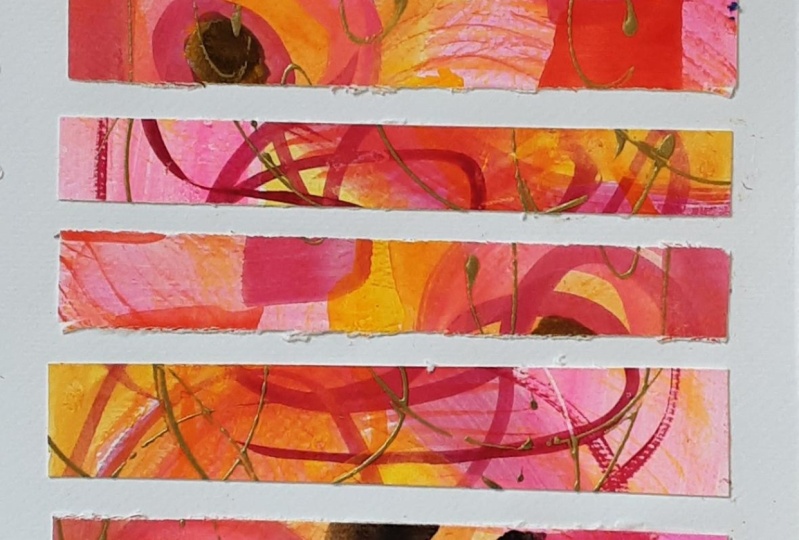
over here too. Because sometimes especially
on these abstracts, the more layers
and marks you get, the better they turn out, or we could just be
totally running them all. But you know what, we cut it up into something different, this is Arbutus pink. [MUSIC]
5. Mark Making & Evaluating: [MUSIC] Into
something different. This is Arbutus pink. Arbutus pink, let's see. Is there another brush
that we want to try? Let's just look at this, I've got this funky brush right here that comes to a
really tight point. I know I just introduced you to another brush on the
fly, but that's okay. What is this? This is
a sketch box brush. The try wedge Number 8, but it's a wedge
brush basically, it's got this
really tight point. But look what we
could do with it. We got to get some
more on there, let's really get that saturated. We could do some tiny line work, I'm not really
getting some of that, I'm just getting some swoosh. [LAUGHTER] Look at that, we can get a different
mark than we were getting on the round brush, like that. I didn't like that so much, I wanted more color. I wanted it to really saturate
and give me a line there. I'll see, now, I can get
a line a little bit. That's different. I could get a little bit
bigger one that was fun. That's fun there, I did like it there. We did that, tried out that one. Any other brushes over
here in my little stash? I'm sure there is, but
just look over here, maybe we can go ahead and
pull a wash brush out. This is going to be
a stiffer brush, it's probably an acrylic brush, but it's like a wash. This is my Simply Simmons 3/4 brush. [LAUGHTER]. What is this color? I'll tell you in a second,
we'll take a look. I actually like
it, look at that. This is scarlet vermilion. It's a really super
beautiful orangey red. Maybe we can just do
some lines like that, I like these overlapping
of the lines, that's fun. I like this red though, these is pretty red. Fun, let's put a little
of this color over here. I'm not so worried about
composition at this point, so I'm doubting if I even have a composition
in any of these, but we'll see what we get. [LAUGHTER] Cadmium yellow, let's do some cadmium yellow. I'm filling the fan brush, I love my fan brush. I don't think I like that yellow though, check that out, that is a crazy color. Let's just add a little one there now that we've started it, brighter than I had expected. What about this Arbutus pink? Let's see what we got here. I'm going to stick
with the fan brush. Just maybe mix some in
to some spaces here. See now if we re-wet
those that just reactivated and moved
around a little bit, really good information to
know as we're moving forward, are we going to
reactivate these. But keep in mind, these are watercolor, they are going to be able to be reactivated, moved around, you can create interesting areas where the watercolor
then blooms on itself and does
some other things. Keep in mind that
it is a watercolor, you're going to be
doing some funky stuff. Now, you know what, I
have used all the colors. [LAUGHTER] Man, is this
thing looking crazy? I'm not feeling like
we're going to have something that we love, but maybe we will. I have some gold-micah ink
and my gold-micah paste, I do reserve the
right on everything I do to make some ink choices. What if I've got this newish, sometimes I get things and
I set them out of the way, [LAUGHTER] I might forget I have them till I remember them. This is a handmade glass pen, these are very cheap on Amazon. What if we use the glass pen? It's a dip pen, just like our other dip pens and man have I've been wanting
to try it out so, what better thing than
something like this. You basically dip the
ink in and you draw with it and just see
what can you get. It's a real fine line, it's real pretty in
that color I used. I'm going to have to
look on the video to see what that color was
but this color where I dabbed the brush in,
most beautiful color. What I really love
when these dry, is how vibrant,
but flat they are. Now I know dip pen, super fine line and doesn't
really go very far, how interesting is that? But it is fun to say; well, I used a glass pen on this, this might be really
good for writing. I think I'm going to set that in water and I'm going
to go back to my kakimori dip pen because
I know I'm going to get good lines and
marks with it, I hope. [LAUGHTER] Because I want to do some nice lines and
mark-making here with the ink. I might even get that
paced out, why not? We'll see. I like what this corner is doing,
that's really beautiful. I like this, some of
this is still wet so it moves this
around in there a little bit and you can do
this with a regular dip pen, I'm just playing with what I happen to have and
what I like using. These are the Kakimory nib is pricey but a regular dip
pen does this just as well. The ink goes a little
longer and you can go up and down with the size. You know what, I could
have done this with the ruling pen looking here, let's get that ruling
pen out because it actually does amazing jobs. Let's choose, so this
is a dip pen and I can mark over here to change the size of that by just
changing the knob there. The ruling pen might actually
be the better choice for something like
this because I can get much larger amounts
of ink on the paper. Look at that. [NOISE]
I really love, that the fan brush line
that we did here and that orangey reddish
color is gorgeous. Look at here. Let's see, I want maybe some dots. Oh, check it out, what a pretty dot. I love it with the oranges and the pinks because
we've got gold, orange, pink, how
amazing is that? I've done the same
thing that I always do, I start in the corner
where my hand is when I should start this way
and work that way, more likely, of course, to get my hand in this nail. [LAUGHTER] [MUSIC]. I got a lot
of the dipping done, I'm not sure that I want
to do any more gold yet. Actually, I'm going to
let some of this dry so that I'm not
smearing all the gold and stuff that I just put on here before we look at it and decide if this is
where we want to stop. I'm going to let this dry
some and I'll be back. These are mostly dry, I'd say 99% dry, I did go ahead after I was sure that it was
getting really close to being dry and hit
it with a heat gun because I'm inpatient
just like you. The only thing that
may not be dry are a few of these larger gold dots, but everything else is basically dry and I want to see what we got because, all the
time I've been painting, I thought, I'm I
going to like any of these and I am ready with some extra projects in
mind if I don't like them. So let's just peel
the tape and evaluate it and we're still going to have a successful
art day, tell yourself this, you're still going
to have a good art day even if you don't like the straight painting
because we can cut these up, I'm all about cutting art, that's almost my favorite part is getting to cut something up. [LAUGHTER] You need to
get into that mindset. I'm like what can I
cut this up into? [LAUGHTER] Then the
longer I look at that, the more I thought I really
am liking some of these. If it's a completely different
style than you normally do and this is probably more
in my little chaotic style, more is more, not less is more. [LAUGHTER] I have a real problem with white space
for some reason, I feel the need to fill
all the white space and sometimes that's not
so good and sometimes more is more and
sometimes more is not more but you just
got to work with whatever the moment gives
you and this is how we get past some of the
challenges that we run into when we're painting
and how we get past those. [NOISE] Let's check them out so, I want to see what they
look like turned this way, I was really feeling
like this one. Cool, I like how
the gold shines, very interesting, definitely different than my normal style,
I'm feeling it this way. [LAUGHTER] This one
now in it's chaos, I love this bottom corner. I love the gold and
the stripe going up. I love the gold that shines
in the light and I love these crisscrossy lines at
the top so that's super fun. If you're painting in a style that ends up being something way far
from your norm, don't immediately say, I hate
these and throw them away. I want you to live with
these for a little while or maybe [NOISE] say no, I was excited about
this right here. Maybe think, I'm going to live
with these for a few days, but I definitely feel that
I'm going to cut them up. This one I'm not feeling, this one is definitely
a candidate for cut up, but the others if you're
like, I'm not sure, live with those for a while because I'll be honest
with you these two, I'm digging and I don't think I want to cut
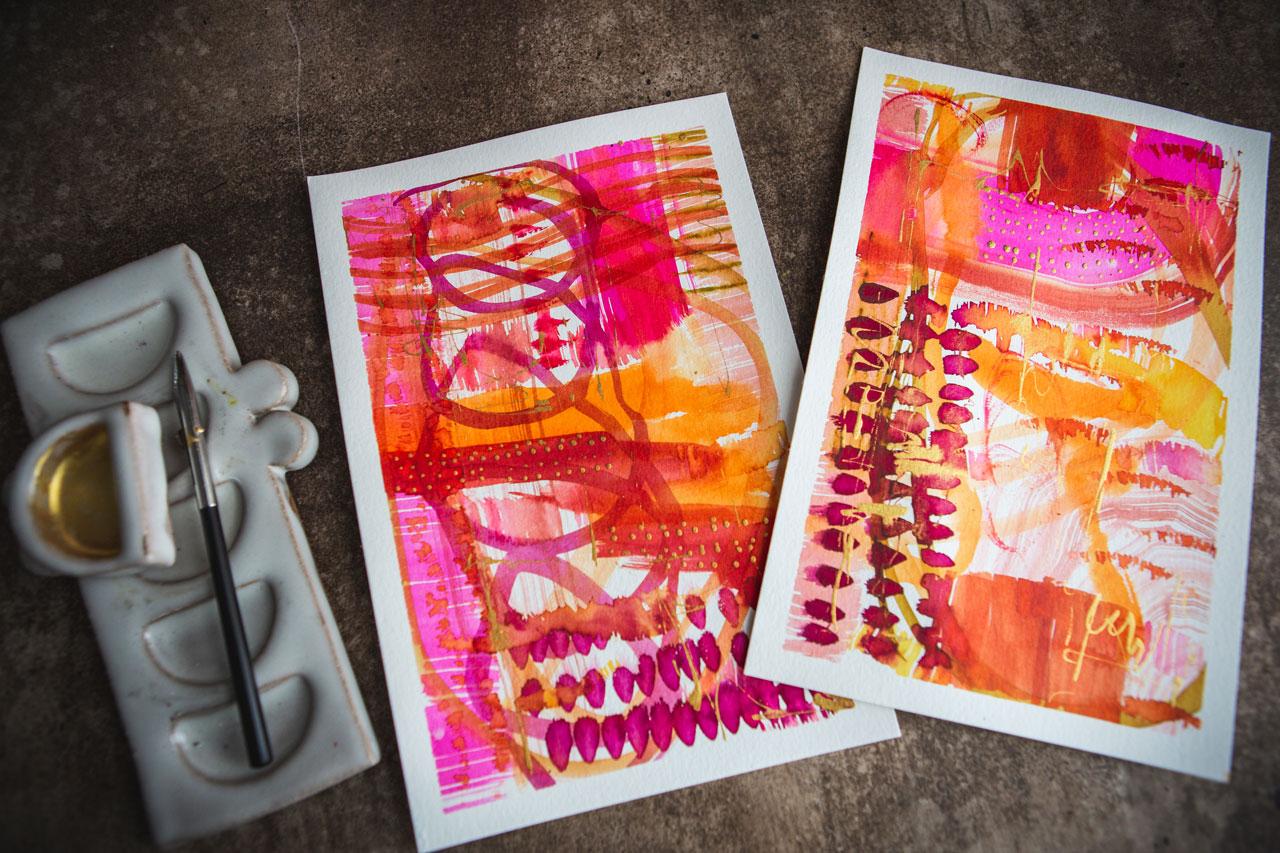
them up and as a pair, they really match as a pair. Look at this, if I put
a frame around it, we've elevated that into
a finished piece of art. While this is not my normal
style that I create in, look how super cool that is, the color, the movement, the extra gold marks
that we put in there, those two are pretty cool. These two, I love the colors, but for some reason I
maybe dig this one, this one not at all. Some feeling like this one. We could cut this up and create something else with
it and so I want to do that project with you on
this one before we cut out today from our
intuitive painting because I feel like
this could be amazing. I love the colors, I like the movement. I didn't like it, but I don't know that I love
it and I just want to see. This one, I'm still
on the fence about, maybe I love it so we'll see. These two I do actually love. Look at them framed up. [LAUGHTER] I love that. Those two are definitely
going to keep like they are. I want to do a cut up
project with the ones that are iffy and I could cut both these up and
make a little trio maybe. Let's just do that, let's
make some junk art collage, let's keep these as
our yummy pieces so let me get that together and I'll see you
in the next video. [MUSIC]
6. Junk Art Collage Pieces: [MUSIC]. Today I was just
painting on my Canson XL, 140 pound cold press
watercolor paper. I just took one sheet out
of this 9 by 12 pad to create two more half sheets like the sheets I
was painting on. This will be the new
base of a piece of art. What I'm going to do is
chop these up and make some junk art collage
stripes and I really love stripes so I'm going
to use these stripes. Because I know that the
paper I'm working on is very similar
to the size here. I can decide how much I want
to cut off because I want the stripes to be centered
and I just want it striped all the
way down the page. I can cut off the edges of my piece here and then
whatever I end up with, that's the size of my
stripes in the width. Now I know that this is how wide those stripes will
be and I'll have a nice white edge around it. I'm going to just cut these into different sized stripes so I don't want them to
be the same size, I don't want uniformity, I don't want things to be even. I want this to be a more modern collage stripe and let's do different sizes. I'm just moving that paper down, cutting out some stuff. You can do this with scissors, you don't have to
do this on a little paper cutter like this, but look how much
easier it is if you did have a little paper
cutter like this. [LAUGHTER] If we could just move it down the line
and cut those stripes. Put my nail back.
[LAUGHTER] There we go. Let's take a look at this
and I'll decide if I want to cut this other one up to
be part of my stripes. I might, should cut that up. The goal is not to realign these back the way they came out, I want to realign
them differently in different sections because I
want this to look different, still be part of the collection, but give me a totally
different feel. It's not my goal to have perfect stripes
perfectly in line, we could do a little wonky
stripes just like that. [LAUGHTER] Filling that
right there and look at that. You know what? I'm just filling that
right there. Look at that. That right there just totally
changed the whole piece. Now these two are almost
identical and so I might even just flip it to give me a little difference and
I love this stripe here, it's got some gold run
through it and align. Look at that, that
is super cool. I'm filling a pair of these. Now, I love this so much. Let's go ahead and cut
these other one into a stripe because that just
got so much more interesting. The goal is to basically
have these two match, so I'm going to take one of
the stripes here that I just created and let that be my guide on where
to cut this one. Let's just keep right up
here at the top so I can actually see if that's
the right spot. How about that? [LAUGHTER]
Right there. There it is. Let's do that right there. You're off. Look
how pretty that is. That section right
there, gorgeous. Save that for a
piece of collage. Let's cut the end off and
just like I just did, I'm going for random
stripes, different sizes. If you see a section
that you think, wow I love that so much
make it a fatter strike. You don't have to
have skinny strikes. We can have fat stripes. If you're thinking
there's a lot of amazing things going on
in there, let's use it. Like really this last one here I'm feeling it's
amazing so let's get that near the end
and cut that now. Now because I have two art
works worth of stripes, I can now come back
in and pick and choose for both pieces. There we go. I did a really
good job of getting them the same size so yay. [LAUGHTER] How funny are we? Let's see. This one right here, totally speaking to me. This one, I liked it
a little fatter and now we can look at both pieces
at the same time and say, well, do we want to trade that
out and put this one over here and maybe this
one over here. Color wise, I actually think
that I don't like that, so we'll put that back. Maybe we will keep this over here. I don't know. Let's see. I do like these in particular, do we want to put something
over here with that? Like right here,
that might be fun. This one might be fun over here. I like all the little stripe, isn't this one quite a bit? Look at that. I do like this with the little
darts in here. If I pull any of these
a little tighter, I probably do have
enough room for that to be in here. Let's just see. Because we can maybe set
that right in there. That's interesting. Look at that one
and look at these. I got some bigger ones here. Maybe what if we did
that? That's fine. I do like the bigger
at the bottom, that can be a nice
anchor at the bottom. Different but similar. Maybe this one at
the bottom there. Look at these. You could do this all
day long. This is fun. [LAUGHTER] Look at this stripe. That's a gorgeous stripe,
loving that stripe. This gets so much more fun
when you cut them into other things and all
the sudden you're seeing these little bits that
you're like look at that, look at the little dots
on the edge of that one. I feel like this pink stripe is running everywhere
of the center, so I want to change that out. What if we did that that way? I'm filling this. What about the skinny stripe? What about this other
standing straight? Let's do this one. Look
how pretty that stripe is. See how much more fun these
just got when we cut them up. Check that out, what do
you think that that? Fill in that right there. I do like fat at the top, fat at the bottom, but we can do these
a little different. We can say one has that and
the other can be different. [LAUGHTER] Here's my goal too, my goal is not to be straight, my goal is not to get them all perfectly the same
amount of space apart. I want them to be a
little bit wonky, so if they don't line up
perfect, that's okay. If they don't have
the same amount of space in between
them, that's perfect. I want them to be wonky art
striped collage things. But I do want them to look good. I don't like that
one on the top, let's see, what about that one? No, let's see what
about this one? See there I like that one. Well, let's flip it and have those dots different
because I got dots and I want to
make those different. Let's do this one this way. I got way more stripes in
this one than I do this one, but as long as we're taking up the same amount of space,
it doesn't matter. But what if we come
in here and throw in a stripe variation there, is actually the same, let's make it that way. Let's change one of this here. Put that up there, yeah, there we go. I don't want the exact stripes
sitting next to it and there's this pink line that
just looks like it continued. I'm trying to break
that up a little bit. Yeah, let's do that right there. [LAUGHTER] Let's
start gluing down. If I got to fit
another stripe in, I can. I'm using Yes! paste because this is very
thick paper and this Yes! paste is very thick paste. It's like a glue stick in a container [LAUGHTER]
and I love it. I can just slap it on with a palette knife
and keep on going. I'm going to start
this at the bottom, making sure that maybe each of these has the same amount of
space there at the bottom. I'll try to get that
even at the top too, there we go, what do
you think of that? I think that looks pretty good. I look it up into my little camera screen just to make sure if you
want to get exact, feel free to measure
that bottom piece, but I'm feeling
pretty good about that there and then we'll just glue all these pieces down. The nice thing also
about this glue is it's not going to attach
permanently immediately, so you have a little
bit of work time, which I feel like on
pieces like this maybe we need that little tiny bit of time because then
I can move it up, or down, or around if I need to. If you're using a glue that
dries super-duper fast, you don't have that
work time and I feel like on these stripes
I need that little bit of work time just so that I can really get them
right where I want them. I don't want so much
glue on the back that I'm oozing
lots of glue out, but I don't want it so thin
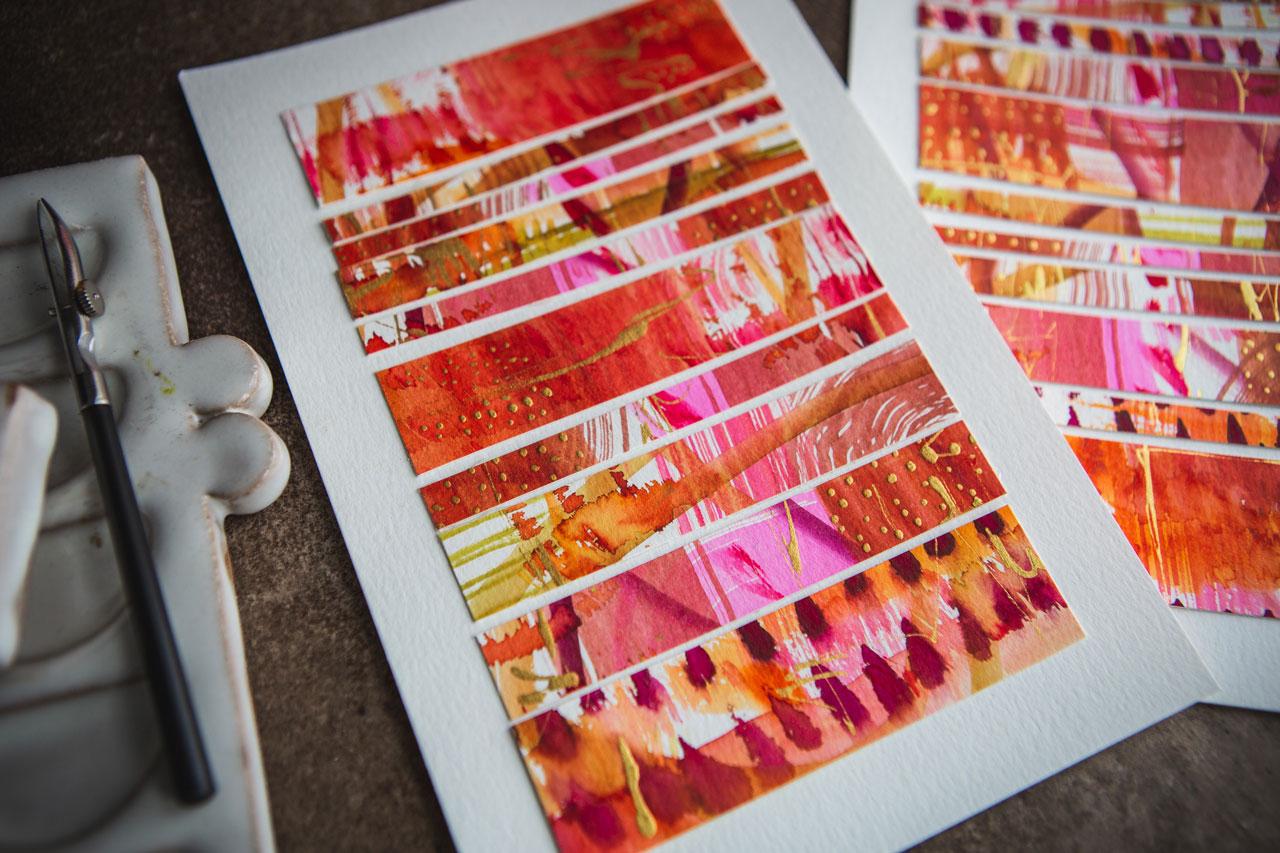
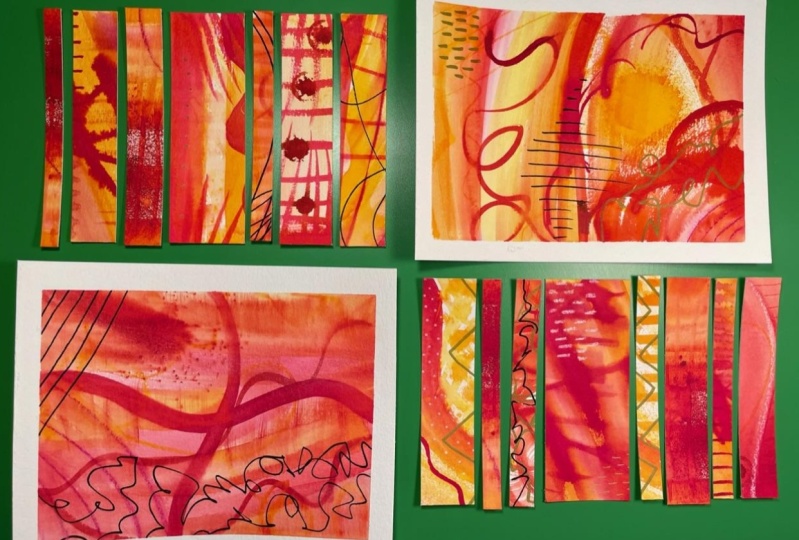
that it doesn't stick, so just judge that. Look how pretty this is, now this glue does dry clear, so that is nice. [MUSIC] Check it out. Now check it out. Still are yummy, chaotic
looking paintings, but separate it out
and put together in a different way to make them
so much more interesting. I can't tell you how
much I love making junk art collage stripe things. They don't have to be perfect, just enlarge around it, and all of a sudden
you've turned those pieces that
you didn't love, love into something amazing. Take a look at that with the original paintings that
we did not cut up and tell me which way actually
looks a tiny bit more interesting,
the stripes, right? I'm feeling the stripes. I do love these and I don't
want to cut these two up. But now, the other
two that I was, "Look how amazing these are, " and can you just see these framed up with
a mat and a frame? How crazy gorgeous
that would be. These are gorgeous, I would totally sell these. All right, so now I want
you to experiment and play. You can play with whatever
watercolors you have on hand, but if you have
these peerless ones and you thought they looked interesting and you
thought, "What is that? Maybe I need to try it." Just pull these back out. They're definitely really fun. The complete edition
I was using, the bonus pack and then there's some face tones which
are really pretty. These are super cool, they go a long way, I've painted a lot of different things with
these and I'm still using the same packs that I
originally had. I love that. You'd think that's
not much watercolor, but that really is a
ton of watercolor. I really, because these
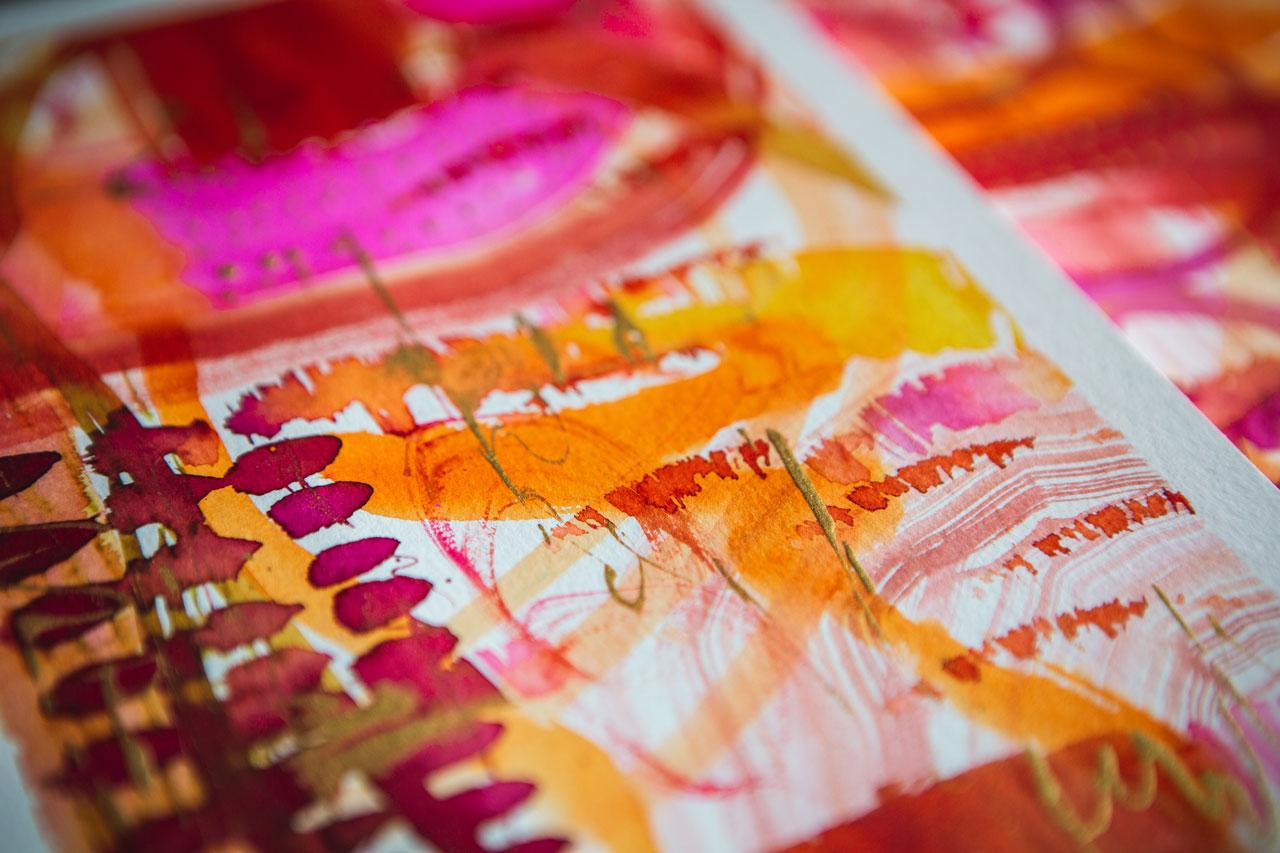
come out so vibrant, that's what I like about it. These colors are super vibrant, a little bit like an ink
almost, they're gorgeous. I really love that
they're matte, they're not shiny, and these areas where they
combine, super exciting. It'd be really fun to do more overlay of some of these colors and watch
these colors combine, this right here is gorgeous. I want you to experiment, play with some
different brushes, and then see what do you
think when you're done. If you don't love them, try some of these
junk art collage where you cut the pieces up and stripe them into a new piece of art because I guarantee you if you didn't
love the original, you're going to love the
stripes, they're gorgeous. I'll see you next time. [MUSIC]
7. Final Thoughts: [MUSIC] Did you have as
many doubts as we were painting today, as I did? Today, I was actually doubting the things
and I was like, not my normal color palette. I have actually even pulled colors differently than
I ever would before, where I was like;
let's just have a pile and randomly
pull colors out of it. I actually enjoy doing that. Now I'm going to
have to go back and watch the video again for myself because there's a couple of colors in here that I'm like, greatest color ever, and now I'm thinking
what was that? So now I'm glad I
got it on video. Because I can go back and take a look and see what I used. These were super fun. I want you to get as much enjoyment at
your art table as I did. So I want you to make it
a regular practice to do some type of art like these intuitive
painting sessions, to experiment and
push your way out of whatever current
art box you're in. I want you to push your
way into new discoveries, new techniques, different supplies that
you don't normally do, color palettes that don't normally speak to you
or you didn't think of or maybe you pulled
a color palette from your favorite
resource and you're like, let's experiment with
this color palette today. I've had the best discoveries
just by sitting and playing and giving myself
permission to relax, and it's okay if the
piece is great or not great when I'm done because
I can always cut it up. So I want you to
start getting into the habit of giving yourself
this permission to play, come and do some intuitive
paintings with me and come back and share what discoveries you made and the
pieces you created. I can't wait to see those, and I'll see you
next time. [MUSIC]
 DENISE LOVE, Artist & Creative Educator