Transcripts
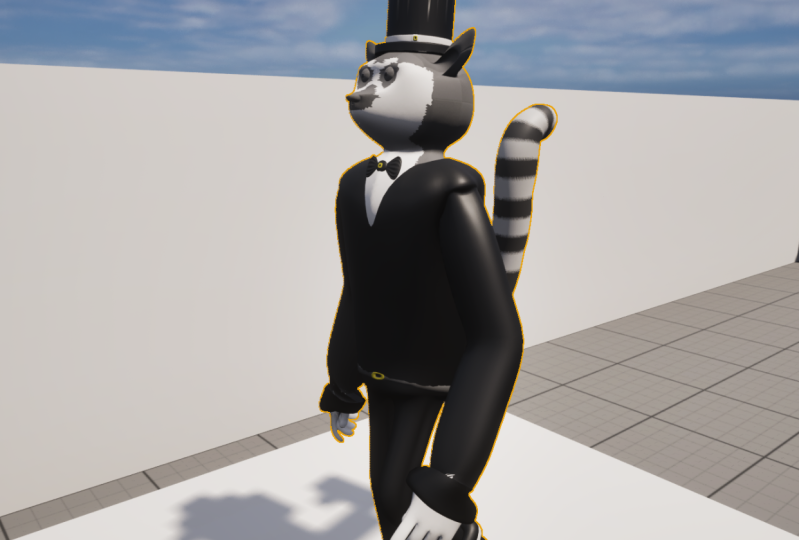
1. Tredy Intro Rect2 1: Do you like 3D animated movies? Do you like video games? Do you have lots of creative ideas just rattling around in your hand? Well, it's time they're bringing those ideas to life. In this course, you're going to learn how to create a character and bring that character to life in a video game, you're going to use the hottest free 3D modeling software on the planet, Blender 3D. You'll learn about the interface and how to make a character. You'll cover everything from modelling materials. And then we're going to show you how to quickly give your character polished animations from a list of hundreds for free using myxoma. Finally, we're going to introduce you to Unreal Engine, one of the hottest video game game engines out there. Games like Fortnite, Dragon Ball fighter, Z, Street Fighter, fire, mortal combat, and more. All created with Unreal Engine and all of this software. Absolutely free. You ready? Let's get started.
2. Blender 2: Making the Hat: So, the first thing that we are going to model is the hat. We're going to start
with something simple. We're going to do the hat. Then we're going
to do the shoes, and then we'll do the
bears, head and body. But let's start with the hat. So whenever you want
to model something, a good place to start
is with a reference. So the place I love to go
to for references is Pints. Now, if you go to Pints, you could obviously go to just Googling it and
looking at the images. But Pintres does
a pretty good job of giving you the types of pictures that you would need
in order to do the modeling. Now, what I'm going to give
you at the end of this, you'll also have this picture
or you have a picture of the finished hat to use as a reference if you
would like to. With that being said, let's go ahead and start
modeling our hat. So we're just going
to start from scratch here by doing new general. We're not going to save this because I already have it saved. So this is what you usually start with and a lot of people will delete the default que, but I find that in
a lot of cases, the default queue is fine
for what we want to do. So we're going to make a hat. And I have this reference here. I'm going to put
off to the side. You don't need to see it, but
I am going to look at it. And the first thing I'm going to do is go
into front view. So in order to go
into front view, I'm going to hit
one on the numpad. And let me just make sure
that you can see that here. Okay. So if I hit one on the num pad that takes
me to front view, if I hit three on the num pad
that takes me to side view, and if I hit seven
on the numb pad, that takes me to the
view from above. So I'm going to
click on our cube. I'm going to hit tab
to go into edit mode. And the first thing I'm going to do because I only want to
model half of this hat. Now, I could do both sides. That's perfectly fine,
but a lot of times if you want something to
be completely symmetric, and you can kind of
cut the work down, you don't necessarily
cut it down in half. But you can cut the work down by just modeling half of it. So in order to do that, I need to put a line
down the center, and you'll see how you'll see
why I did that in a second. But in order to do
that, I hit Control R, and this allows me to
put a loop cut here. And now, if I roll
the mouse wheel, I can put many different cuts, but I only want one and I
want to be in the center. So I just hit Enter, and that puts and
then I hit escape, so because usually you can
slide it back and forth. But I don't want to do that. I want it to be dead center. The next thing I'm going to
do is hit B for box select. Actually, I'm going to
hit Control A, I sorry, Alt A to deselect everything because I don't
want anything selected. The other thing I'm going
to do is turn on X ray, which is up here in
the top right corner. And this just means
that when I want to select vertices that I
can't necessarily see, I'll have it in tray mode. So x ray mode was off, right, and I did
this same movement. You can see I don't select
the vertices in the back, but I actually want
those in the back. So I turn on X ray
for the time being, I hit B for box select, select these, and I'm just
going to delete them. Because I don't actually want to have to model
that left side. Now, here's the magic. If I go to the modifier the Mifi tab here in
the properties panel, I click Add Modifier. And from there, I'm going to
choose the mirror modifier. So once I have the mirror
modifier selected, you can see that the left side is now kind of ghosted there. And that just means that it's a reproduction of what's
on the right side. So now I can start actually modeling what I want
this to look like. So the general shape, this will be kind
of the back end of the hat that goes
over your head. Let's do the bill part of this. And so if you
remember from before, we're going to go
into face select mode by selecting this tab here. I'm going to select this face, and I'm going to
hit for extrude. Right? And that's just to give me this general shape here. So what I'm going to do
right now is kind of go back and forth between
the different modes, and I'm going to give it
the shape that I want. So I'm just going to grab
these and pull these down to give it a little
bit more shape here. I'm going to get this one. Grab, G for grab to pull it forward to give it
that curve in the brim. I'm going to go to side view. So three for box select. I'm going to grab for grab. Oh. See, that's why it's good to unselect everything before
you do some selecting. So that was Alt A to unselect, but then G for grab and then Z to pull it down to
get it a little bit better. And then I'm going
to Alt A again. B for grab, and then
y to pull it forward. And that is our general
shape for the hat. Now, what you'll see here is that there's this
line in the center. And there for two reasons. First of all, when we want our pieces to connect
in the center, for the mirror modifier. It's good to have clipping on. Clipping just means that the edges don't cross
over one another. So if I turn clipping
off and I say, grab x, I can move it and you see that it's
not really connected here. But if I have clipping on, and I'm just going
to select these ones that are at the edge
here in front view, turn clipping on, and then I grab and you see that
they stick together. So this is a good
way if you want your model to have
continuity in the center, you can keep that continuity. But the issue here is we have these internal these
internal vertices and faces. So that's because
when we extruded it, it had the actual face
here on the inside, and that's going to cause us
some problems in the future. So we want to get
rid of that face. So the The easiest
way to do that, we're going to turn off
this mirror modifier, and I can do that by hitting this real time panel here that turns it off in the display. And I'm going to go
into face select mode, I'm going to select this face. I hit X, which allows
me to delete things, but I'm just going
to I'm just going to delete the face, right? And now when I
turn that back on, I tab to get out of edit mode, you can see that we don't
have that issue there. So right now, we
have this kind of weird looking house ish
warehouse looking thing, and we're going to easily
bring that a little bit closer to looking like a hat
by adding another modifier. So that's the subdivision
surface modifiers. So the subdivision
surface modifier looks at your geometry and then adds more vertices and shows you what it would look like with this many vertices, given where you put
the vertices before. And this is a way that you're able to model
something that looks like it has a lot of vertices
without actually looking at without working with the
specific vertices at first. This way, you're only working with what you need
to work with because what you don't want is to have a really complicated
model off start, right? You want it to be as simple
as possible because then it takes the least amount of
resources for your computer. So Right here, you can
see that we already have kind of a rudimentary
hat and it looks okay, it's not really quite the
style that we want yet. So just now, I increase
the levels here, which just means it
adds more vertices. So we are almost actually looking at
something that looks usable. But there are a couple of
things that I want to change. So if we look at
this, you see here, we have this, very
gradual gradual curve. So we're going to add
a loop cut there, so we're going to hit control R, and we're going to
drag that back. And now you can see
that it's a lot. It's a lot more. It's a lot less gradual
than it was before. And we can do that exact
same thing here. All right. And now we have a hat
that looks a little bit different from what
it looked like before. So from here, I'm just
going to use cut, and I'm going to
use just grab and translate to kind of get this
in the shape that I want. So I'm not going
to make you listen to me that entire time. I'm gonna play some music, and I'm going to speed this
up and kind of just move this around until I get
the shape that I want. And I want you to
do the same thing. So I want you to create your
own version of the hat. It doesn't have to
be this baseball style hat that I'm using, but it can't be. It can't be. All right, so there you have it. We have this hat that
we were going for. So I'm really curious to see
what your hat looks like. So make sure you post
it so I can see it. So next we'll be working
on the shoes. Okay.
3. Blender 3: Saving the Hat File: Now that you've
created this model, let's talk about how to save it and how to put
it in the best form. So when we import it
into the bigger model, it'll be something
that makes sense. So if you'll bring your attention
to the right side here, you can see that our hat, and we know this is
the hat because it's orange here and it's orange
in our three D viewport. It's called cube. Now, it's called cube because we started with a cube
when we were making it. However, if we usually
start with a cube, we'll end up with a bunch
of objects all called cubes that aren't
actually cubes. So to make sure that
this makes sense when we import it
into the larger file, we're going to double click
here on the outliner, and we're going to
change that to hat. That way, when we import it, it'll have a name that
makes complete sense to us. And then when we
have that, you can see here, it's called hat. If we go to other places, we could have actually
changed it here as well. This portion here is called
the object properties. We could have changed this
name to hat here as well. But now it's called hat. So, the other thing you need
to make sure that you always do is you go to file and save. It doesn't matter particularly
where you put it, just that you know where it is and you call it
something that makes sense. So in this case, I would think you probably want to
call it something like hat. All right. So there you have it. Make sure you change everything
we do in the future. Make sure you change the
name to something that makes sense before you save it
and make sure you save it.
4. Blender 4: Making the Shoe: Now, the next thing that you're going to create is a shoe. And you're going to use your new found
modeling capabilities to create the shoe
that you see here. Now, this is a shoe
that I already made. I'm going to make another
one so you can watch me. And just like before, I want you to start with a reference. Now, I just randomly
Google this. You can Google
whatever you want for your style of shoe
that you want to make. It's good though,
if you can find in enough angles so that you can tell what the shoe
actually looks like. So that's the shoe
we're going to do, and this is what it looks like. I'm going to go over also some new tricks to add
to the tricks that I showed you last
time that'll make you a better overall modeler. So, let's get started. So I'm just going to say file, new general. We'll
save that last one. And I'm going to go ahead
and start with the Q begin. So just like before, we want to create
that general shape. So I want to put the bottom of the shoe
on this line here. So I'm going to tap
into edit mode. I hit B for box
select, G for grab. And you see that I move the
front and not the back, so I'm going to
turn on X ray mode, and I'm going to hit A to select all because
we're inside of the model. So if I hit A inside
of edit mode, I get all of the vertices, so I could hit G for grab, Z to move it straight up, and that's where we wanted just cause that just
makes sense, right? Bottom of the shoes
should be on the floor. And now it'll be on the
floor of our model. So right now, I hit
three to put us in, and that was three on the numpad to put us in side view mode. And then if I keep an
eye on My reference, I'm going to pull
that to the side, and you can use whatever
reference you want to use. But I see that that's
the general shape. So the first thing I'm going to do to give it that
general shape, I'm going to hit Control R to
give us this loop cut here. All right. And the
exact position isn't a big deal right now
because we can change it. So the first thing
I want to teach you that I did not
show you last time is let's say that you want to move a vertice along
these lines, right? So if I hit G for grab, you know, I can move it around. I can't necessarily move it
precisely along this line. So let's say hypothetically, I'm going to control Z to undo. I'm going to go back and
make sure I'm in X ray mode, hit B for boxelect, I'm going to grab this,
and I'm just going to pull this out some just
to make a point here. So let's say that
I wanted to move this vertice along this line. That's virtually
impossible for me to do with just G for grab
and then picking an axis. So if I do that, then
it's impossible. I could try to do it
freehand like this. And it's easier if
I only pick one, but if I picked both of these and then tried to
do it freehand, This angle constantly changes. So in order to do that,
you hit twice G. So GG, GG, and then now it moves along this line
that is on before. And this is really useful. I'm going to use this a bunch of times when I'm doing this. So if you see this
kind of movement, And if you see this
kind of movement, down here, it's just
going to say G one. Even if I hit G twice, it's just going to
say G one time. So if you see that kind of behavior, that's what happened. So that's sliding it along the edge and
that's hitting G twice. So the next thing I'm going
to do is extrude here, so I'm going to go to face mode just because that
makes it easier. And I'm going to
extrude it here, right? And this is I'm
just trying to get this general shape of the shoe. And I don't quite
have it yet, grab. I grab and then y here, The next thing I'm going to do is make sure we're still
in X ray mode and we are. I'm going to go to
vertex select mode. When in doubt, you can always do things in vertex select mode. And I'm going to grab these. I'm going to pull this forward a bit because when I
look at my model, I see that it's a very
gradual angle here. So let me do that again, so It's better sometimes if you can
keep vertices lined up. So right now I have this edge
loop that follows around. So if I can keep that
kind of symmetry, that makes it a
little bit easier when I'm doing things
in the future. So grab and then Z, and I can start to
create this here. Now, if I wanted to, I could pick this front face
again and extrude. The other thing I can do Is to just put a loop cut. So I hit Control R. I'll
put a loop cut there. I can deselect by hitting Alt A, B for box select, and then G for grab,
y, and pull it out. And now I can further grab. I can further create this let me do what
I just showed you. I said I was going to do. I can keep them lined up. Here, right? And the other
thing is this line here. So I didn't necessarily have
to create this slanted line. But this is a good time for me to show you about the pivot. So the pivot has to do with the three D doesn't it's not
always the three D cursor, but it's where things when
you do certain actions, what's what is with
respect to matters. So, for example, I'm
going to tab out of edit mode and then
go to object mode. And you can see that
this right here at this point is the
origin of our object. And if I hit R for rotate, you can see that our object rotates about the origin, right? And sometimes that's good, and sometimes that's
not what you want. Now, also, if I
were to scale this, you see that it scales
about its center. But I could let's say that you didn't want to
scale it like that. Let's say you wanted to scale it with respect to
this bottom plane. So you only wanted to
scale it kind of in the z. But not about its center. So you can go over here.
This is the pivot point. And right now, it's
basically the median point, but you can select
the three D cursor. So right now, the
three D cursor is at the bottom here
where the origin is. But if I hit scale and Z now, you can see that it scales with respect to
this bottom plane. So right now, I think
it was a bit too high, so I'm going to scale
it down a bit here. But wait, wait, there's more. That's kind of the
theme of this. I said that a bunch of times, don't think that I say
that all the time. This is completely new to me. I say, wait, wait,
there's more when I'm doing classes, I don't know why. But, back to back to
what we were saying. So We can do things with
respect to this three D cursor. So how do we move this three
D cursor along around. So the best way I think
to move the cursor around is to select something that's in the place
that you want it to be. So I want it to be right
between these two vertices. So I select these two vertices. I hit Shift S, and that brings up
this pie chart here, and I say cursor to
selected, right? And that pops my
cursor right there. Now, this is a secret
abundant secret. You can't tell
anybody. But let's say that I want these to
all line up on one plane. I could hit scale
So S z zero, right? So I scaled it down to
zero, which basically, when you pick a
particular axes puts everything on the point that
you're scaling it down to. So right now,
because I'm scaling it with respect to
the three D cursor, it puts it in line with
the three Dcursor. So if you ever need to level something or put something
in line with something else, that's how you can do it. So we talked about scaling with respect to the
three D cursor. You can also I can also rotate with respect to
that three D cursor, right? So if I hit If I hit rotate now, you can see that it's with respect to that three D cursor. So that's how you can scale and rotate and you can change the pivot point
that you're using. We already covered loop cutting, but that's really important
for what we're doing here. Loop cutting is control R, and you can create
a loop cut here. I'm going to hit
escape after I create that loop cut because I actually wanted to stay in the center. I'm going to hit one
to go into front view, A to A, to deselect the front. And I'm going to do
that thing that I did last time where
I'm only going to model I'm only going to
model one side of it. Now, I can't do that
for the whole model, or I necessarily
shouldn't do that for a shoe model because the
shoes are not symmetric. But I think for our character, the shoes can be symmetric, I don't think
anyone will notice, especially if you
don't tell anybody. So what we're going to do now is add that modifier
like we did before. And if you remember, that's
the mirror modifier. So with this active, and it says here, x axis. So if you were doing this
in on another plane, you'd have to change
what axis this is here. But because I always do it
in front view, when I hit X, delete the vertices, you can
see that it's still here, which means that
it's working right. So everything I do
from this point forward will be some
form of extruding, loop cut, grab, rotate, and just tweaking it until I get it to look the
way I want it to. And then at the end,
well, towards the end, I will add this subdivision
surface modifier that will bring it a little bit close to the a little bit closer to the
structure that I want. And then after that, the
modeling will be done. So from this point on, You can sort of just
watch what I'm doing. And I play this a
little bit faster, so you don't have to sit
through 30 minutes or however long this is going
to take me of doing it. Okay. Okay. Okay. Oh.
5. Blender 5: Saving the Shoe File: Now, let's talk about how
to save your model and prepare for it to
be in another file. So the first thing
I want you to do is change the name
of this object. So yours does not
say Shu right now. It undoubtedly says
something like Q. Right. But when we put
this in a larger file, I being called cube, just like everything
else being called Cube doesn't really help you. So I want you to left clicked in the outliner on your cube and you're going to
double click there, and we're going to call it
something that makes sense. So I personally think
calling a shoe makes sense. You can call it something else. And perhaps you're from you
speak a different language, and you want to
call it something like zapatos or,
you know, whatever. Call it something that
makes sense to you. So I changed the name here
that when we import it into a file that has all of the other objects,
it will make sense. Now, you simply go to file, and then you click
Save and you put it in the location that you
want where you can find it. That part of it is
completely up to you. It's not particularly
important where you put it. I would name it something like shoe or something that
makes sense to you, just like we did with
the name of the object. So that's it. Every
time we do an object, every time we do a model, make sure you save it,
make sure you give it a name that makes sense. All right. Okay.
6. Blender 6: Making the Shoe Material: So now that you have
this shoe model. We're going to
work on materials, we're giving your
model some color. Now, there's a lot of
different ways we can do this. We could go very deep into what's called
procedural materials, where we don't use any textures. We could also use different image textures that
we get off the Internet. I'm going to just
introduce you to this, so we're just going to scratch the surface of blenders
material system. So I'm going to do
the shoe in depth, Some of the other pieces will
do a little bit quicker, but I do want you to
get this concept. So instead of going
to the shading panel, and this is what is
called the blender. And in a lot of other programs, when you're doing materials, we're not going to use
this particular interface because there's a couple of panels that we
don't need, right? So we're not going to
talk about UV editing, which is organizing the pixels so that you can place images, and we're not going to
be messing with images, so we don't really
need this panel here. So we're going to go back
to our default layout, and we're going to go
to this bottom section here where the timeline is. And you're going to hover over this horizontal line, and
we're going to drag it up. Now, we're not actually doing
any animation in this step. So we're going to change this
and we're going to do that. We're going to this
left hand corner tab and changing this from the timeline to the shader
editor. And that's right here. So blenders material
system and also its composite and
many other things is a node based system. And what that just means
is you can you can create new materials in this case by fitting
together nodes. And you could think of nodes to a certain degree
as puzzle pieces that you can put together in various different ways that give you a different
picture in the end. What it actually is is operations done mathematically
to a set of numbers. So each individual location, I'm going to tab out
of edit mode here, sorry, tab into edit mode. Each individual location has a certain set of properties
associated with it, right? And the properties
could be the color, it could be the reflectivity, it could be the roughness, and it could be some
other things as well. And you can change those
things based on these nodes. But Don't worry. Is if that sounds
really complicated. And if it doesn't sound
complicated, good for you. There's one node that
you can get away with using 95% of the time. And that's the principal BSDF. And that's what comes when
you initially this is the default that shows up when you open the shader editor. Now, the materials panel is here on the right, and
this is important. Actually, I'm going to go
ahead and delete this, so we start from nothing. So when you open this up, this is the set of materials that you
have here available. And you can see that we
don't have any materials, but it's for this
object called cube. So let's go ahead and fix that
because when we initially when we later bring this model
into all the other models, we don't want them
all to be called cube because remember, we started from
cube to make this. So we're going to
change this to shot. And I don't need
that to be all caps. So we're going to
change that to shoe. So now when we import it
into the bigger model, the naming will make sense. So now we need our
first material. You can either click New here
or you can click New there. So, this gives us our
first default material. And I'm going to call
this because we're going to have a default
white material. I'm going to call it
white, and you can see down here that it's
already white. Now, I'm going to
come out of this view of viewport shading and then go to the actual EV render panel. So this is basically what it's
going to look like closely approximate what it's going to look like when we bring this into another editor or in something like unreal engine
that we might see later. So you can see the whole
thing is white right now, and we don't really
have to worry about lights because we
have a light here. And we don't have to
worry about a camera. We're not really
rendering it here either. So now the whole thing is
white, and that's fine. If you remember my
reference in this case, it looks like this, right? So we can keep that in mind of what this is going to
look like in the end. So we know that this main
section here is white, and the bottom part is white, and the very, very
bottom part is black. So it's fine that we have the main piece
here being white, but we do need some
other colors, right? We do need a black. So in order to get a new color, I'm going to hit plus here. I'm going to hit new.
I'm going to give it another color called and now
I'm going to make it black. So in order to change the color, and you can zoom in here just
the same way you zoom in the three D report with
the middle mouse button. So you can give this a new color by going in the principle of BSDF and clicking the
color this color bar here. And then I can simply
drag this to be black. So you're probably wondering how you work with these here. So if I hit control
left and drag, that's the knife,
just so you know, you connect the node these node handles here,
inputs and outputs. So this is the material output, and everything you put
into the node tree. That's what they call
when there's a lot of nodes ends at this
material output. We're not doing anything
extremely complicated because we can get
everything we need from this principle BSDF, right? And The important things here and there are a lot of things here you don't even need, but the important things here to notice are the base color, which is we're
picking to be black, how metallic it is, right? Because if we wanted this to be metallic, let's
pick another color. So you can see what
that looks like, and we're going to go ahead
and assign one section here. So I'm going to go
and face select mode. That's the easiest, I think, to pick colors here. So we're going to pick We kind of want this area
here to be black. But we're just I'm just showing
you what that looks like. So in order to make
this a different color, I need to select that color
and then say a sign, right? So that tells us what
this looks like. The metallic tab or
the metallic slider tells me how much it looks
like a metal, right? So now, this looks more gold. Now, just to make that a little bit more easy
for you to see, I can tab out of edit mode. I can go to object,
shade smooth, right? And this just gives
you a slightly better look at what that is. Now, I'm looking at this, I would say that it could
have a little bit more light. So I'm going to do two things. I'm going to select this slight. I'm going to duplicate
it. This is a new thing. So duplicate is just shift D, and I'm going to hit X
to move it along the x, just so we have
light on both sides. Right. And then now
you can see that this is a little bit more metallic. But we don't necessarily want
metallic because whatever, I don't want metallic,
you can have metallic. So I'm going to change this back to Black because this was more. This was more what my
reference looks look like. And yep, this all looks
good. So this is black. So the next part is on my shoe, it actually has a red
piece up here on the top. So I'm going to hit plus again
because I need a new slot. I hit new for the material. I'm going to change the
material name over here this time just so you can see
it can be done over here. I'm going to call it red. And I'm going to just drag
this color here to red, right? And just like before,
you don't really see it manifest here
until I select these. And I select red and say a sign. So now, I have this red piece on the top with the black
piece on the side. So Now, in the
reference that I have, there is a blue
section that goes here on kind of the
wide part of the foot. But you can see
that I don't really have I don't really have a set of vertices
that match that. So there's a lot of
ways you could do this, but we're doing this the
simplest way that we can. And it looks like what's
going to work for us is to put some of
our own loop cuts here. So let's go ahead and do that. So if I hit K for knife, select, and I'm going
to start it here, and I'm just going to
pull this down like this. And we're going to
pull it all the way down until we get on the bottom. And then, like before, we want four sided. We don't want anything more
than a four sided face. So I'm going to just terminate that with a three
sided face here. So now I can add
this blue piece, so I can hit the plus mark. The material, the material, I can call this blue. I can change that
base color to blue. And then now I can
just select this here. And now it's blue, right? Now, it just so happens
when I look at this, I think I would prefer that
it go farther up here. So let's go ahead and do that. Someone hit K. I'm going
to go from here to here. I'm going to select this face. And I'm going to make it blue. I'm going to say a sign. Yeah. And that's
generally what I want, but I also want it
on the left side. So let's do that as well. So it K. And I'm just going to take
this all the way across. That way, I can do
it on both sides. Now, I could have I could have
made it meat here, right? Because if you remember before, I terminated this
here, like that. Well, I terminated it like this. But we don't actually
need to do that. Let's see. And
let's go ahead and terminate this in three
sides so we'll do this. So it looks ugly on the bottom. But that's okay because
we're not doing anything particularly
interesting on the bottom, but we do have the loop st
that we want on the top. Okay. And I'm just going to select these because
now I want these to be. And we're going to assign. So, you get the idea. You can decorate
model your shoe. However you want
to do your shoe. I'm going to turn
off the audio here. I'll play some music
in the background, and you can watch me as I do my shoe and how I create
the geometries that I need. You can just do your
shoe as one color, and you can move on
to the next section, or you can spend a lot
of time making a lot of intricate coloring here
with the knife cut tool. So I look forward to what
your kicks look like.
7. Blender 7: Modeling the Head: So the next thing
we're going to create is our Teddy Bear
characters head. And this is just an example
of the first one that I made, and it doesn't need
to be anything exact. But it should carry
just the general idea and spirit of what
you want to create. So just like before, we start with a reference. So in our reference, we can see that The head is fairly wide. It's got little round ears, and I don't know
why I'm explaining to you what this looks like. But it's good to kind of take note of the general shapes here. So we got some circles,
ovalish circles, and pretty much that's
the entire thing, and we can look at
different examples of that. And I will keep this off to
the side as a reference. Now, you can pick
whatever reference you want on the Internet, and I'll also be
providing what we create here so you can
use that as a reference. So I'm going to do file new, and we'll do general. So instead of actually
starting with a sphere, because you're thinking,
Oh, it's kind of circle. It's kind of it's
kind of roundish. Well, we could
start with spheres, and we will in a c a
certain kind of way. But it turns out probably the best modeling kind of sphere comes from the
cube crazy enough, right? So in order to start off with the shape that we
want to begin with, I'm going to show you a
little shortcut here. So I'm going to go to
the modifier panel. I'm going to pick the
subdivision surface modifier that you're familiar
with, right? And you can see that when you apply one level of
subdivision surface modifier, we get this kind of
spherical approximation. And that's a good
place to start. So I'm going to apply this because if I
go into edit mode, I don't actually have access
to these these vertices. So I'm going to tap
out of edit mode, so I'm in object mode. I'm going to go to
the modifier panel. I'm going to click Apply. So now if I tab, you can see that these
corners now are, in fact, the vertices. And this is the
magical part of this. If I'm going to say Add
modifier, subdivision surface, And now I have a much
more usable shape, right? So if I tap out of this, now I have this as my main shape for modeling and kind of a low polygon,
low vertice method. And I could apply this and then work with
this bigger model, but that's not necessary. It's a lot of times it's best to work with the simplest model you can before you add more and more sophistication
and vertices and think, and detail detail is the word. I'm searching for
sophistication. I don't really think
that was the right word, but before you add more
detail to your model. So, let's go ahead and start. So we have our general shape. And right now, this
is pretty oval ish, but let's just
scale it in the x, just a little bit to give
us a little bit more of what that shape looked like when we saw it on the bear. So the next thing we're going to cover because we just want to do this general shape
first is the snout. So in order to do this snout, I am going to go into
my face select mode. I'm going to select
both of these faces, and I'm going to
use the inset face. So, if you remember, that's I. So I hit for inset face. Then I go into side view mode by hitting num Pad
three G for grab, and I'm just going to position this so it can kind of be
this snout area, right? And if I turn this
off just to get an idea of what this looks like, and I can see right off top, this is a little bit too wide. So I can hit scale and then
x and bring it down some. The other thing I'm
going to do, I'm going to use that trick
that I showed you for flattening the vertices set. So I'm going to go into vertex mode so you
can see this better. I'm going to scale, y, and then you can
see that I kind of flatten this out, right? And that's what I'm
going for because I want this snout area to be a little
bit more defined and flat. So the next thing
I'm going to do is just do a little bit of just modifying this
just a little bit. Okay. So I have this
snout area here, and I'm okay with that, but it's not very
defined, right? Like, we could
probably get away with the way it is now, but
it's not very defined. So I'm going to give it a
little bit more definition by hit and Control R to
give it a loop cut. I only need one loop cut. I left click to put it in place, and then I can slide
it to where I want it. And that gives us more definition
here for this snu area. And this is pretty
much what we're looking for for this sn area. Now, we're not going to worry about yes because
we're going to just give him or her
sunglasses instead. But we're all set for this
kind of general shape. So the next thing we're going to do is now that we have
our general shape, we want to just model half
of it like we did before. So I'm going to
turn on X ray mode. I'm gonna hit B for box select. I'm going to select
half of our model. I'm going to double
check. Make sure we got that whole model here. I'm gonna hit X for
delete vertices. Half our models are gone, and you should not be
panicking because you know that we are going to
add a mirror modifier here. So we're going to
make sure we go to this modifier panel tab here, click Add modifier and then
choose mirror modifier. And this is already set
up to be along the x. If you're doing this and you ended up on a different axes, you might have to change
this to be y, or z. It can be all of them at
once or just one of them. So a good thing is happening here that I want you to see just so you know
why it's happening. So you see how this is, like, pointy here, right? And if you don't know
anything about Blender, you'll be thinking
that you need to fix that by just grabbing
this and moving it down. And you know that kind of works, but that's actually
not the problem. It's because the subdivision
surface modifier is happening before the
mirror modifier. So if we move the mirror
modifier up that fixes that. So if you ever
have that problem, It may be because
of the order of where your mirror
modifier is landing. So, actually, we're almost
done with the head here. The next thing we need to do
that's important is the ear. For me, I feel like the
Teddy Bear should fall more on the side of the head and because we have the
mirror modifier on, it's really easy for us to
do just one side at a time, but I'm going to go
into face select mode, and I'm going to select the whole side of his
face here, right? And can you guess what
I'm going to type? I'm going to type
for inset face. And I'm going to paste I'm going to place this piece here, which is where the
ear is going to go. Now, I'm just going
to do some editing to get that in the
right location. So I'm going to select
these vertices here. I'm going to hit G G, so twice because I want to
move them along the axes. And right now, I'm just going to move these around to get
them into the general shape. So one challenge
with modeling like this is sometimes you can't
see the model, right? You can't see the model
because it's being covered or you can't see the vertice because it's being
covered by the model. You can always turn the
subdivision surface modifier off. And that gives us a way that we can look directly at what
the faces look like, and then we can interact
with it like this, right? And I am trying to
get a surface that I like for the ears and where
I want the ears to start. Right? So, this looks like a good starting
point for the ears. I'm going to turn
on my subdivision surface modifier back on. And now I'm going
to hit extrude. And you can see that
didn't work because I only had one vertice selected, so I'm going to select Here, I'm going to hit extrude. And at first, it
looks like horns, which is really not
what we're going for. But we can do the same loop
select tool or loop cut tool. And so I did control art. And then that puts
the loop cut there, that looks fine to me. Now, the next thing
I'm going to do, I'm going to show you
a little trick here. I said, I wouldn't
show you a trick, but you don't really
have to know this one, but I think this is a good one. We're going to go to the normal orientation
transforms, right? Because I want to work in
kind of this plane here. So in order to do
that, I say scale, and then I say x, and I say that x isn't
quite what I need. I do y isn't quite
what I need either. And I say scale z Actually, maybe none of them
are quite well need. Scale z x, y, y is what I want. So now I can kind of flatten that area there
because I want this to be a relatively normal
edge loop, right? So that gives me an edge
loop there and this is going to allow me to control
the structure of the ear. So I'm going to go into
vertex select mode. Now, when I was working on this, the really interesting thing I was thinking about
is when you're doing a face or
actually a head here, and it's the head of
something like a bear, right? So a bear versus a mouse's head. They are kind of similar. And I realize if
I make the ears, too big in certain cases, I very much looks
like a mouse, right? And if I make the
nose too small, it also looks like a mouse. So if you're making a bear
instead of a mouse and you feel like it looks more like Mickey mouse than
Winnie the Pooh, then it might be because the
snout area is probably too small or the ears
might be too big. So the size of this
ear we have now is Okay, actually. It's okay. The only issue is that
we have this area here, and that's not
typically what you see when you see a teddy bear. There's not this area where it kind of
leads up to the ear. Not on your average
everyday teddy bear. So I want to select that ear. I'm going to turn
on loop X ray mode, and I could box select it here, right? There's another trick. If you hit C for circle select, it gives you this circle here, and if you use your middle
mouse wheel and you roll it, you can make it bigger. So you can have a little bit more control
over what you select. Now, another trick if you hit the middle mouse button
again, instead of left click, if you use the
middle mouse button, you can deselect
whatever you want. So you can select
it with the left, deselect it with the
middle mouse buttons. So I'm giving you all
kinds of, like, really, really good secrets to blender. They're not really secrets, but they're it's useful information. There's a lot hidden
inside of Blender. So I don't know.
What do you think? Should we make the ears bigger? I think this is actually okay. So I'm going to turn off x ray, and I'm just going to grab that whole set and just
set it into his body. So I could hit scale, make them a little bit bigger. And so we sank them kind
of inside a head here. And if we were going to do
a lot of a lot of modeling, a lot of animation
for this area, that would make it a little
bit more complicated. But I think I'm okay with that. I think that looks
bare enough to me. So the last thing that we want
to add is the nose, right? So I'm going to hit Control R. I want to put
a loop cut here. Now, the way that this is it would put a lop cut because
of the way I did the ear, and maybe I didn't do this as I didn't do this the
best way possible, I think, for thinking
about the nose, I should have done
the nose first. So I'm actually
not going to loop cut to create this nose here. I am going to free hand cut
the vertices for the nose. So in order to do
that, I'm going to hit I'm going to
use the knife tool. So in order to use
the knife tool, I'm gonna hit K. And that gives me this
little knife here. The people who make under very smart and made this actually
shape like a knife. I'm going to left click here. And so it's important that
you keep your vertices, your faces down
to three or four. You don't want to be more than four and two is impossible. So I'm going to create
this nose area here. And so now I have this
nose, but in actuality, this is a little bit
of a problem because I have this face
here that has one, two, three, four, five, six. Did I count that
right? One, two, three, four, five, six. One, two, three, four, five. Yeah, it has six faces. So that's not actually
what we want. So one thing we can do because
quads are really nice. We can go ahead and
give this some quads. So we can say, the knife tool, and then we can just follow
this down our model. And then at the end, we can
end it down here. Okay. But you know what? I'm
not going to do that because we actually this
area is kind of important. So I'm going to do that again. And we're going to cut all the way back here because this area, we don't really care
that much about. We're going to end by creating a instead of five side here, we're going to create
three sided, right? Well, so this is a three
side, this is a four sided. So we shouldn't have
any problems with anything in the
future because we make sure everything is a quad. So now I can create this no. So I'm going to go into
face select mode here. Select the nose there. And once again, we're
in normal mode. I'm going to say scale Z
is kind of what we want just to make that a little bit more tilted
towards the nose area, I'm going to do face. Actually, I don't want
to do inset face. So the thing is, so there's
a way to do set where it doesn't where it kind
of respects this line, but the way to keep it so that the symmetric across
is not inset face. There's a way to use inset face, but if you hit extrude
inter scale, All right. It's making me a lie
for some reason. So, we're having
some issues here. So let's try to figure out what is causing it, so
we're going to do do. And one way to kind
of see why is this happening is to make sure that everything is in line, right? And it looks like
everything is in line. And if I hit extruded here, I get these two. Let's see. Oh, okay. So clipping needs to be on in order for this to
be respected here. So now if I had extrude Oh, clipping is off
because I did it. Right. So now when
I hit extrude, I get this piece that's symmetric across this
line of symmetry. So clipping is important, too. We talked about why clipping is important when you're
doing this because you want things to remain connected across the
line of symmetry. And this is just
another example of why you need to
keep it connected. So from here, I just hit Control R because I'm going to create a loop cut because I want that nose to be a
bit more defined, right? And now it is. So I feel like
This is kind of ambiguous. It could be a mouse,
but I think it's Barry. Is kind of Bar, right? Yeah. I think maybe
the ears are too big. Let's do something about this. Let's turn X ray mode on. I'm going to select
this whole area here, and then I'm going to
scale it down just a bit. Yeah. This definitely, to me, personally, looks a little
bit more like a bear. And, you know, I'm not super happy with my edge loops here. I would have rathered
one edge loop that goes completely
down the center, but it's not a big deal. And this is how you
create the head.
8. Blender 8: Modeling The Body: So now that we finish the head, the next thing we're
going to do is the body. And we're actually going to
do clothes instead of body. So we're not gonna do a naked teddy bear, but
strangely enough, most teddy bears I've
seen are, in fact, naked. I mean, think about
a Winnie the Pooh. I mean, he's wearing
a shirt, but, I mean, he's not wearing
any pant anyway. So we're going to
do the clothes. So the shirt in the hand area, and then the pants, but
we're gonna do kind of, like, a baggy jeans, and that's gonna give us that's gonna save us
a little bit of time. So just like before, this is kind of our inspiration. So obviously, we're not
going to do the gun. We're not going to do we're not going to do
the chain either, but we are going to do
the jeans and a hoodie. So we're going to try to come
to something close to that. And I am going to cover some
new tips that will help you do more modeling and easier
modeling in the future. So I'm not going to start
from scratch here because I'm going to use this
model to do that. So, undoubtedly, your model
does not look like this. It doesn't have this coloring. And if you want it to
have that coloring, all you have to do is
in this mode here, so we're in viewport
shading, solid mode. If I click this
little down arrow, yours looks like this, probably. But to make it look like what
I use, you go to Matt CAP, you click here, and then you
can select this Matt here. And let me make
sure that you can see what I'm typing
and not you can. So if you want I
think that I can see the detail in the
model better like this, but if you prefer
the other style, that's completely fine. So the first thing
we're going to do is give him a give him or her, depending on what you
are making or them. We're going to give
them a neck area. So we're not going to do
anything you don't already know. I'm just going to go
to face select mode. Shift select these
here. I'm going to hit. For set face and realize I is not what I want, so
I'm going to hit escape. So I'm going to extrude, and I'm just going
to pull down, right. And right now he has
a very wide neck. That's not quite what we want, but there's a few things
we can make changes to. So I want to flatten this out. So I'm going to hit S for scale, z, and then zero, that gives me a flat base there. The next thing I'm going to do, and I'm going to turn
this normal off. It's not a big deal, but I'm going to make it
be global there. I'm going to hit Control R. And I'm going to
scale that down. And then the next thing I'm
going to do because still, this is a wider neck than
what I want to give him. I'm going to go ahead into turn off the
subdivisions here. I'm also going to
make it so it's worth respect to
the three dcursor and the three dcursors here. And then I'm going to scale, so S for scale and the x, and I'm just going to
bring this in here. So this is looking better, but he doesn't really
have any chin. And that's because of
where this line is here. So if I hit G for grab, Z and pull it up, now he has
a little bit more of a face. And now I need to make
this smaller here. So I'm going to shift
select all of these, hit S for scale and the X And now his head
looks much better. So he doesn't actually
need this long of a neck. I'm going to hit for G for
grab, z to bring it up. I'm going to hit S for scale
x to bring it back in, and now I have a much
more usable neck. But if I look from the side, by hitting now if I
look from the side, by hitting three on the num pad, it's kind of wide this way. So I'm going to hit S for scale, and then y in this case, and then bring it in
just a little bit. The next thing I want to do is I feel like for most heads, This is not really
quite in the center. The head sits a
little bit forward from the actual from the
actual neck, typically. So in order to do that, I'm going to go into
face select mode, X ray mode, make sure
I'm inside view. I'm going to hit
B for box select, and I'm just going
to make sure I select all of these spaces. So in order to select faces, the part you have to
include is this little dot. This little dot
represents the face. So you see if I click
here, it's fine. I can kind of get the face But if I hit B for
box select and I don't get this
little dot here, it won't be included. So that's Bundy's
way of telling you, Yes, this is the whole face, but here is the
indication for this face, so the point in the
center of the face. So I'm going to hit
B for box select. I'm going to select those
on the bottom there, and I'm hit G for grab, and I'm just going to
shift this back just a little bit because
I think that's a little bit more realistic. Not that teddy bears
wearing clothes need to be terribly realistic,
but I mean, come on. We're doing the
best we can here. Alright, so this is the general look let's turn our subdivision
surface modifier back on, turn the X ray off. And yes, this looks good to me. And now, actually creating
the body, creating, like, a very rudimentary body is actually really
simple in blender. But before I do that, let me level this out here. That's just going
to make our life a little bit easier here. So I'm going to hit
scale S for scale, Z. Actually, I need to turn
off the three dcursor. Go back to median point, which just means it's the middle of the points
you're selecting. So S for scale, zero, and now I can extrude down, and I can just pull down, right? Grab z. And this is my torso, right? So, it's kind of like a kind
of like a Pez dispenser now. And this is kind of a
good starting point for creating a body. So in order to
create the arm area, all we're going to
do is so what I just did hit Control R, And after I'm loop
cutting there. And now that I have now
that I have this here, what I am going to do
is create the arms. But before I do that, I want to you see how
flat this side is? That's not terribly realistic. Like, nobody has, like, flat sides like that unless you're talking about
the palm of your hand. So I'm going G for grab x.
I'm going to pull that off, pull that out just a little bit, and it's just going to
make our life easier later that we don't have any
completely flat size here. And I can do that same thing
by select shift selecting these hitting G G and then
moving it along the axis here, just to give us some more roundness to work with because things being
completely flat. Is not terribly realistic
or aesthetically pleasing for any type of
humanoid something, right? So now, I'm just going
to shift select Bs. I'm going to hit for extrude, and we have the
beginnings of his arms. So I'm going to
look cut this here. I'm going to bring
this to the side. I'm going to hit S for scale x. S for scale, X zero, just to get that really
pristine loop cut there. Then I'm going to do
another loop cut, and I'm going to again, do S x zero. So pull that in. And now we have kind
of a stick figure, which is what we're going
for initially, right? So we have this
part of the body, the arms, and very simple arms, and that's all we need
at first, actually. And I'm looking at
this, and I feel like his neck is a bit too
big, a bit too fic. So in order to fix that, I'm going to turn on I'm going
to turn on the X ray mode, control R. And then
I'm going to go back to the three D cursor
as our pivot point. I'm going to s for scale x. Just to pull that in a bit. I'm going to make
sure S y pull that in some Just to give him not
such a thick neck here. Now, where his neck
meets this bottom part, we're going to
specifically address that because remember that these are going to end
up being closed. But let's give him
some beat here. So I'm going to turn off clipping and you'll
see why in a second. So I'm gonna go to
face select mode. Select the Shift
select these bottom. Then I'm going to
hit for extrude. And what I'm trying to
do is make sure that it is get it to come off
to the side just a bit. And now, in order to force that, what I'm going to do is
rotate this piece down here. So I'm going to turn off our
three D cursor pivot point, rotate this Turn clipping back on just so I can make
sure that this is connected. Then I'm going to turn it off. I'm gonna hit for extrude. And now I have two legs, right? And this is just an easy way. Now I can turn clipping back on. This is just an easy way for me to give him
these two legs. So I'm hitting going to
front view by hitting one, G for grab, and I'm
just pulling it down. And I think that's a bit wide. I'm going to hit control R to loop cut here and I'm
going to pull that in. Right? And this gives
me the beginnings of his general shape. So, off tops, I think that
his torso is a bit too long. So I'm going to do
for box select. I'm going to select all
that stuff down there. One numpag one to go
into the front view, for grab and Z because I
want to pull it straight up, and I'm just going to pull
it up just a little bit. So that gives us a good
stick figure to start with. And so you can see
here on the leg, we have this area here. I'm going to turn off X ray. And it's definitely rounded. But this area here because
it was in the center of something that didn't exist
before, it isn't, right? So we definitely want there to be some
roundness down here, and we can easily fix that by going into
vertex select mode. And I'm just going to free hand hit G for grab and
pull this out. I'm going to go up here. I'm going to turn on X ray
so I can see this vertice. And I'm going to grab, pull it out just a little bit. I don't I don't want to pass that center line because then clipping is going to
make it stick there. But I do want to just give it just a little bit of around. So the next thing
I'm going to do, I'm going to pick
this edge loop here. This one that's really
close to this other one because really it doesn't
need to be that close, and I'm going to hit GG,
and I'm just going to slide it a bit to give us
some more rounded geometry. And I can do that same
thing for this piece here because this could give us
some better geometry as well. So you can see that there's a big op, that's
actually the wrong ver. There's some space
here. It's really close to this one.
I'm gonna hit GG. Move it just a bit. I'm
going to take that one, pull it out just a
little bit to give it a more round look. So this is just like the starting place for
creating the clothes. So what I want you to learn
here is the rip command. Now, RIP is what's
going to allow us to take one set of vertices and disconnect
it from another set. So we want his neck
to go in the clothes, and you can consider everything
down here, his clothes. So the rip command
is down here on the bottom's down here on
the bottom left corner. So in order to do that, I'm going to select
all of these vertices here because this
is where we want the neck to meet like the collar area of
where the hoodie is. So I'm going to then select
this the rip button here, and I'm just going to move
it a little bit, right? After I move it, you can see
that it disconnects itself. From those vertices. So I'm just going to move it
up just a little bit so I can maintain so I can
see that distance. I'm going to turn off that, and we're going to go
back to normal select. Then I'm going to select
these to loop select. Then I'm going to hit
scale just because I want to open it up here, right? Then I'm going to select these And I can then just
extrude those straight down. I can Z for extra straight down. And now if I turn X ray off, you can see that these
can act like GG, that these can now
act like collar. So this is the beginning
of making the clothes. On the next one,
we'll talk about we'll start from here, exactly. So save your blond file. That's a really easy
file and then save. Okay. We'll make
more specifically. We'll go into more
specifics about how to actually create the morphology or the geometry that
looks like the hoodie. So now we are working
on the hoodie. So the first thing
we want to do is also give him some sleeves here. So if we say that
this is the hand, we can do that same trick we did before and we
can rip this here. So I'm going to go to X ray. Then B for box select. I'm going to select these here. I'm going to actually,
we want to rip it, so I only need I only need these to make sure
I have them all selected. Yep. I'm going to go to a rip. Right? And now it's separate, right? So what I can do if I hit this arrow to going
back into the normal mode. So now if I select something
hover over it and hit L, it only selects the vertices
that are connected to it. So I'm going to scale
that part down. And you know what? Let's
I'm gonna hit L again, scale it down a little bit more. And hit Alt left click
to select the loop, E for extrude, hit x,
goes straight through. And now we kind of have
this place here for a hand. I'm going to turn
off X ray mode. And now, I'm going to teach you another secret or another
good to schon columns. No one thinks it's a secret. So the thing is now I want
to work specifically on this hoodie without making any changes to the
rest of the bear. So I'm going to select
one of those hit L, and it's going to select
all of these pieces, right? And I want to separate it. But actually, before that, let's also yeah, let's do that. So let's hit P, and then
this gives us a separation, so we can separate
selection, right? And this makes the other area or the other gemetry the
body a separate object. So if I hit tab to go
back into object mode, then I select that body piece. Now I can tap back
into edit mode. Now, I don't have to
worry about making any changes to the actual bear. So the next thing I want to do is I want to create the hoodie, the sweatshirt separate
from the genes. So I'm going to hit
Control R to loop cut, I'm going to pull this down to about where his
waist would be. Then I'm hit scale, S for scale, z zero because I want it to be flat and completely around. And then I'm going to
rip these as well. So I'm going to hit
this rip region here. Then I'm going to put it, right? Then I can go back
to the normal one. I can select these, and
then I'm going to hit P again to separate the region. So now we can work on
just his sweatshirt. So this part is
actually quite easy. The hardest part is the hood if you want
to make the hood, and that's completely up to you. But let's make the sweatshirt. So the sweatshirt, something that's that every sweatshirt
has is this area. I'm going to put
another loop cut here. Is this area that gets
smaller around the wrist. So before I do that, you see how this is really flat. This is not quite as realistic
as we would like it to be. So what we're going to do is select these corner tics here, I'm going to hit GG and I'm
going to slide it down. And I'm going to do that
same thing for all four of these because I want there to be a little bit more
roundness to this. Now, because we're using
subdivision surface, it gives it some amount
of roundness already. But I want it to be a
little bit more around. I'm okay with that.
So let's give it that kind of cuff area here. And that's really simple. I'm going to go back
into X ray mode, B for box select. I'm going to select
these varices here, and I'm going to make sure I'm out of the three D cursor mode. I am. I'm in median select, and then I'm just going
to scale it, right? And that's going to
give me that region. That's going to give
me that region here, so if I turn off X ray mode. And we're beginning to have it. I'm going to hit period on the num pad just to recenter it. It's beginning to
give us that area. But the other problem is
this hand is a bit big. Or we can make this area
bigger. So let's do that. I'm going to hit Alt and
left click and it's not. So I gave me that. I'm going to hit scale to make it bigger. Then I'm going to go
back into X ray mode, select these scale them
to make them bigger. Right. And this is the idea. Now, to make this look
more like a sweatshirt, I have to make it
look a lot more. I have to make it look a
lot more baggy, right? So I have to make
the whole thing kind of bigger a
little bit, at least. So I'm going to hit
B for box select, select depth area there. I'm going to scale it actually. I'm hit C for circle select, and I'm going to use
the middle mouse button to select that region there. Then I'm going to
scale this up here. So I just hit S scale. I didn't hit anything
in particular. So it's a bit bigger. And I also need to do that
on the bottom, right? I'm going to S for
scale, make this bigger. Now, let's take a
look at this here. I'm going to put
another loop cut here. And if I look at this, do
you see how sharp that is? So let's go ahead and fix that
that's not normal looking. And the other thing that
we have going on is that when I'm working on this,
you can see the pants. But remember, we
separated the pants. And that's because
I had them both selected when we
went into edit mode. So if I don't want
that to be the case, I need to make sure just
one of them is selected. That's fairly new to blender, where you can select two objects and edit them at the same time. But sometimes you
don't want to do that. So G for grab and
then to pull that in. And I'm going to do
that same thing on the back because that's
really not what we want. So G for grab and why? Because we want to bring
that in just a bit. And right now, I'm just
really trying to get the general shape of
the sweatshirt, right? Because the sweatshirt, like, a really baggy sweatshirt kind of It kind of what's the
right I'm looking for. It collects at the
bottom, right? This kind of looks like what we want from the side,
but not quite. I feel like it's actually
a little bit too big. So I'm going to go back into and then we're going to
scale it down a little bit. And we're going to actually look at these edge loops here. And we're going to scale
these specifically in the y. And like I said before, I think it looks better if the bottom is bigger
than the top. So I know I said
before it was too big, but honestly, now I think
I need to make it bigger. And that's what
modeling is, right? You fiddle with it until you get really angry and
you throw the computer. Or you level with yourself
and you say you're done, one of the two, right? So, I really feel like it
needs a little bit more. I'm just going to slide these
up. I'm going to scale it. I'm going to pull these out two, but I need to go into edit mode. So hopefully,
you're also working on yours while you watch
me fiddle with this. But one last thing I want you to learn before I leave
you to do your own. So we need to do
the hood, right? So, you don't have to
do a hood if you want, but you do need to
do some kind of collar or something, right? I think right now this
hot is probably too high. So I'm going to G G and
bring it down some. And now I'm going to select
these vertices here. So this is like the back half. I'm going to hit for extrude, and I'm just going to hit y
to pull the straight back. Right. And I'm going to do
this to create the hood. There's probably a bunch of ways that you could go about
creating the hood. I think this is probably the
easiest way or at least. You know what? I'm going
to try a different way. So I practiced this before, and there's one way that I feel like works really
well works well, but I think you you've given me the inspiration grab to try
a slightly different way. So I'm going to loop cut here. I'm going to cut
that right there. Okay. And I'm just going to bend this
down like it's fabric. I'm going to go side view, grab. I'm going to bring it I'm going to bend it down just like that. Okay. And this is
going to simulate. You know, I shouldn't struggle I do simulation in my other job. So I shouldn't really be tripping on that
particular word. So that gives us this, beginning of the hood, right? So let's go ahead
and finish that off. Extrude again to pull this out. Then I'm going to
extrude it up like this. And that's almost what we want. It's not closed right there, but closing it is really easy. I'm going to select
these four on the open side, and
I'm going to hit And that will close
those spaces. So now if you look at this, we have the hood, right? So, you'll also notice that we have these really
sharp edges here. And obviously, that's
not what we want. So one really easy way to
do that is with a modifier. So we can add a
solidify modifier, which will take which we'll take edges and give
them some thickness, right? So now, our sweatshirt
looks a little bit better. The other thing we
can do to kind of fix our sweatshirt is to give it a little bit of opening in the front because the sword
shirt would have that. The other thing we could do is make it come a little
bit closer to the neck, but I don't really think
that's a big deal. The other thing we will do
is loop cut here to make the cuff area a little bit more pronounced and that
will control loop cut. I'm going to turn
X ray on again. The grab, pull that out just to give them some more to
the cuff area there. So I'm okay with this
hoodie, actually. So the next thing we're going
to do is work on the pants. But good job. You
got the hoodie. Don't worry about materials. We're gonna cover the materials. Alright, so now we are
working on the pants. So our pants right now
are not very interesting. But we're going to just really quickly make some baggy pants. So if I'm going to
tab out of edit mode, and we can see down here, we got some really
interesting things happening with our geometry. And that's because
we just don't have enough loops and
vertices down here. So I'm gonna control. I'm
going to bring it down. And that's going to give us some more geometry to work with. And the other thing we
want to kind of address here is this very
flat area here. Like, I really don't like that. So one thing we're going to do is simply bring these
two vertices together. So I'm going to scale y, bring them together,
and that's going to give us some more
roundness here. The other thing
we're going to do is bring it away from
this vertice here. I'm going to hit G, and I'm just going to
pull it a little bit. I'm going to turn on X ray so that see that we're not
doing anything too crazy here, and it's a little bit rounder. It's not perfect, but nothing
is perfect, my friends. So I don't actually think it's baggy enough to match
what we have up here. So I'm going to go
back into X ray mode. I'm going to scale it. Ooh. These are connected there. I'm going to scale it here. I'm going to select those. I'm going to scale these a
little bit, but not a lot. And the other issue, I think
is maybe it's too far out. Like, this is too much
in like a expose. So I'm going to like just these. I'm going to grab, put them a
little bit closer together. I'm going to be
really careful to not cross that center line because I do not want my clipping to
kick in and start missing. It's okay, that it's a
little bit of an exposition. So This is what we got
here. It's not bad. He's got no but, of course,
but that's all right. So we have this general
actually, you know what? Let Let's make this part
just a little bit bigger. So in order to make
this bigger so that it does but we don't want it to go into this center line here, So what we're going to do is move the three
D cursor there. So in order to do that, I hit
Shift S cursor to selected, and now make the pivot
point the three D cursor. So when I select this
here and I scale it, it'll get bigger in
that way, right? But actually, I think I'm
going to select this now, and I did not mention this, but this is a useful
thing to know. If you want to model and something is in
the way you can hide it. And it's really
simple to hide it. You select it, you hit H, and now it's hidden. To get it back, you hit
Alt H. So to hide H, to unhide Alt H. So let's let's give him a little
bit more waist line here. So I'm going to go here.
I'm going to select this. We still do not want to reach
into this center line area, so I'm just going to
scale this out a bit. But I can see that
it's going higher, and I don't actually want that. So we're going to hit
scale and then shift Z so that it does not
actually get higher. It's a tab, I can hit
all H now. I can look. And yes, it does in
fact look better. So now, it definitely has the more baggy look with the
hoodie. But you know what? You know, I keep it's
getting really long, but Let's just make this part so that it's a little bit longer
here in the center. So I'm going to hit G for
grab, z to pull it down. I'm also going to hit these two here just because it
doesn't look normal now, G, G. Actually, we're going
to pull that one up, and we're going to
pull these up and we hit G G and pull that up, and that gives us
a little bit more. So you can stop here. We've done the modeling
for everything, and now we can start
talking about materials.
9. Blender 9: Assembly: So now that we've done just about all the modeling
you have to do, I'm going to show you how
to assemble all the pieces. And then when we're
assembling everything, you'll learn some
more tricks and tips for how to
do some modeling. We'll also finish off
some materials that we didn't do for things like
the head and the clothes. And then you'll have
your complete model. So, the one that I
want you to open now is the one that has
the head and the clothes. And I'm going to show you how to import the rest that we did. So the hat and the shoes. Okay.
10. Blender 10: How to Import Objects: So to import something
in Blender from another blend file is different than importing it from another file type
or another program. So to import something
from Blender, you're not actually
going to do import. You're going to do Append. Now, you're going
to go to Append. And within append,
you're going to pick the blender file that has
the part that you need. So, in this case, the
first thing we're going to append or import is the hat. So I'm going to
double pick the hat. And there are a lot of different things
that we can append. We can take just the material. We can take the object, which includes the material and various different
other things. But we want the
object in this case. And lucky for us, we named the object hat. Now, if we didn't,
it would have been called cube or Cube zero one. If you didn't name yours, that's probably
what it's called. So whether yours is
called hat or cube, we're going to double
click on that, and that imports it here. Now, on mine, it happened
to be near his head, but that is completely
coincidental. When things are imported, they're imported at the center
point of the world here, which is the zero,
zero, zero point. And it happens that
the way we did this model or the way
I did this model, that's right where the head is. But so if yours is somewhere
else, don't worry about it. We need to just position it
the way we need it first. So I'm going to hit three
to go into side view. Then I'm just going
to hit G to grab. And I'm going to kind of put this where I think
it needs to be. So you can see here that
the size isn't quite right. Like, the hat is a little big. So in order to get this
to the size we want, I'm going to actually
tab out of edit mode into it some to tap object
mode into edit mode, but you can see that I also got his jacket,
and I don't want that. So I'm going to make sure that the only thing that's
selected is this hat. Then I'm going to hit tab, and now that's the only
thing that's selected. Now, the reason I'm
doing this is because I don't want to have
to apply the scale. So when you're doing things, if I was to scale
this in object mode. Blender remembers that
if I scale it like this, Blender remembers that this
wasn't the original scale. And sometimes when you're doing animations, other
things in Blender, things won't work out
right because it'll remember that this is
not the right scale. So we need to make it so that it is the actual right scale. I'm gonna hit Control Z, and there's two ways that
you can do that. We can hit tab and we can
scale it here, right? And it's scaling according to the three D cursor,
but we don't want that. We want it to do median point. And we can scale it here, or what we can do
is in object mode. We can go ahead and scale
it the way we want it. And I'm just going to
position this here. And then I'm going
to hit S scale. And I think that's just about the right about the right size. I'm going to tip it
here just a little bit. Then I'm going to go to the top. I'm going to rotate it around. I'm going to grab it to
pull it forward again. And I see you have this section here that is still visible
through the back of his head. I'm going to move this. Have a little
section right there, so we're just going to move
it just a little bit. Right. Okay, so this is
where we want it in the position and also the scale, but I'm going to say object. And then I'm going to
look for the part that says set scale or let's
see, where is it? So what we're looking for
is apply scale, right? And that's what we want
here. Apply scale. This means that when Blender
wants to do anything, you'll say, Oh, okay, this is the scale that you
want it to be. So, our hat is all
said and done. I made the hat like
this so that we all actually have to
do eyes as well. If you want to do eyes, when we do when we do the head, I can show you how to do eyes, but you don't necessarily
have to do eyes. So the next thing we're going
to do is import the shoes, or the better word that you
now know is append the shoes. I'm gonna hit append. Now, I'm going to look for the shoes, and I'm going to go up until I see shoes with
materials because we did give the shoes
some materials. And I'm going to do
the exact same thing. And luckily, again,
I called this shoe. But if you didn't change
the name for yours, it's called cube, which would make it a
little bit more confusing. So I'm going to go to side
view again, hit G for grab. I'm going to move that down. I'm going to hit one to be
in front view, G for grab. And this is kind
of what we want. So, if you are doing this and yours do not
have good names. Like, for example, if I
click on his Hoodie here, it says cube zero one. So you could double click up here and you could change it. The other option
is for you to go to the kind of object
properties area here. Technically, this is the
object properties, right? And I'm going to
change this to Hodie. And I'm not sure
that I spell hoodie, right, but that's where
we're going to call it. That's how we're
going to spell it. And here, I'm going
to do this one different just so you
can see how that's done. I'm going to call this
one pants, right? And then I'm going
to go up here. And that's his head.
So let's call that. Head, and it also included
his hands, but that's okay. So we got shoe shoe
Pants pants hood, hoodie, head, head, and
then hat as his hat. So that's how you
import everything, and that's how you changed
the names to make sure everything has the name
that you want it to have. So now I'm going to do just
the same thing I did for the hat and make sure these shoes are the
approximate right size. So if I look here from the side, I really feel like these shoes
are a little bit too big. I'm going to scale them down. Let's put them about here. And I think that's a
good size for the shoe. Now, to create another shoe, I could there are a couple
of ways I could do this. I could do the mirror modifier, the same the same way
that we did the pants. But I'm going to do something different so you'll learn
something new here. Actually, I think
I covered this in another and another
one of the tutorials. But I'm going to hit
Shift D for duplicate, and then X to make sure it
goes straight along the X. Right. And I made sure that we had the size that we wanted before before I
actually did that because now if I make
changes to this one, and you can see if
I grab that around. Nothing happens to
the one on the left, because they are completely
different shoes. So now we have
shoe and shoe 001, but let's give this
slightly a better name. So this one we'll call
she underscore R. Actually, this one is
underscore L is left shoe. And the other one, we will say, underscore for his
right shoe. Okay.
11. Blender 11: Fixing Geometry: So if you wanted to
stop here, you could, but if you look
at the materials, the only thing that has any
materials are his shoes. So I think you probably want
a little bit more than this. So there are a couple of
things I think we also want to change before we do
the coloring for this. So I want to fix his
pants a little bit. His pants look okay to me. Okay. However, I think they
could definitely look better. So I want to make it so that the kind of the front
of the shoe is visible. So I'm going to change just this portion. So
I'm going to go here. Okay. Make sure I have only the pieces I
care about so this front, and I'm going to hit G for grab and I'm going
to pull this ups. And then I'm going to
turn off the X ray. I'm going to grab these two here and I'm going to say G G because I want them to move
along the axes. And I'm going to
select them again. I'm going to say for
rotate from this angle. Then I'm going to say G and then because I'm going to pull
them back a little bit. Right? And this just
makes it so it looks like his jeans are caught on
the lip of his shoe. And on the back, I'm going
to go ahead and make this a little bit longer
because right now, his jeans look a little short. So I'm just going to go ahead and pull these vertices
here down a little bit. So G and then Z to pull
them straight down. Then I'm going to
turn off Right. And I'm going to
leave them like this. This is fine. This
is fine for me. You can move them
around a little bit more if you want
a different look. The next thing I
want to do, and this is the final kind of model thing we're going to do is I want
to give some more edge loops. So, if you look
here at our model, there's not a lot
of edge loops here, and by edge loops, I mean, like, vertices in loops. And when we're doing animation, it's important that it has enough geometry to
know where to move. So you could think
of each one of these vertices as a pivot point. So if you don't have
any pivot points here, it's going to be hard for it to figure out how to do this. Now, in our case, we're
using subdivision surface. So there's actually
some extra geometry here that comes from the
subdivision surface, and we can see that if I
go to wireframe mode here. Actually, you can't see it
that well in iframe mode. Well, you get the point. We need some more geometry in this area. You can see that we
need the geometry in a wireframe mode, actually. So what I'm going to do is hit Control R while my
mouse is in this area. I'm going to roll
the mouse wheel, and I'm just going to
add some geometry here. And I'm going to left
click to lock that in. And that's just going
to make it easier when we actually do the animation, it's going to look better. I have that same problem
for this area here. I'm not going to
have that geometry, but because his elbows are here, there's going to be
a lot of bending. So what I'm going to do is I'm going to add
this geometry here. And that's just going to
make our life much easier, and things are
going to look much better when we do our animation. So this is the
modeling aspect of it, and we're pretty much done. So if we look at what everything is going to
look like with lighting, we can see this, but lighting is not that important
to us right now. We want to see what the
actual model is going to look like with colors
or materials. Okay.
12. Blender 12: Finishing Materials: So the first thing we're
going to do is the hat. If I'm looking at
the hat and you want to only look at the hat. The best way to
do that is to hit Shift H. Now, don't panic. Our model did not go away. Shift H just means isolate. Now if I wanted to get
everything back, I hit Alt H. I hit Shift H because I only
want to look at this hat, and I can select the hat, hit numpad period, and now
I'm focused on this hat. I don't know. What do you think? Color should we make this hat. Let's go to the materials panel. Right now, it's
called material 001. And if we look at our
available materials, you'll see we have this
black blue, red and white. And these are the colors that came from the shoe, actually. So we can continue to use this. So I want to go with a
red hat, partially red. Now, let's make the front
portion of the hat. Let's make that.
Who do you think? Blue? Yeah, let's
make that blue. We'll keep a theme here for his clothes because
we'll just assume that he's good at matching his clothes. So we'll
make this part. Blue. And if you remember, nothing happens because we
have to assign these areas. So I'm going to go
to face a mode. I'm going to select
this portion here. Then I'm going to go to
blue and hit a sign, right? And if you want, we
can even give it, make sure the back
of it has, like, the slightly different
look if you've ever seen, like the trucker style hats. Actually, I don't know
what they're called. And we'll go ahead
and make this all around like this,
even the inside. Maybe not the inside. Maybe just that portion. And then we'll add
one more slot. I'll hit the plus sign here. Then I'll go to white. I'll hit a sign. I
actually, I don't like it. Oh, I hit undo, and we lost everything
so we can go to edit. We do redo. Let's not make the whole back of
the hat white like that. Let's Let's make it blue.
See what that looks like. I'm still not a fan. Let's just keep it red. We'll keep it red. And let's add some. Should we add white in
here at all, really? No. We can go ahead and we can get rid of this white
slice by just hitting. And that gives us
the general look. So now we can hit Alt H. Make
sure when you hit Alt H, you're in object mode. Otherwise, it won't
work, and you probably will feel like
you lost everything. So now let's do the head. So I'm going to select the head. I'm going to say shift
H. So now it's isolated. I'm going to do a
new material here. We're going to call
this one Brown. Because it's a bear, so we're going to do brown. And instead of going
into the shader tab, actually, let's go
into the shader tab, make sure it looks
the way we need. So we're going to do that
the same way we did here where I just went to
this area. I dragged up. The Shader section,
shader editor, and we can see that it's here. It's also here, so we don't
necessarily have to go here, but it's a good habit, as I'm teaching you for you to get comfortable interfacing with the node editor
because this is one of the truly powerful parts of the things that
you'll be doing. So we're going to
make this brown, and we don't want it
to be too orange. How about right there. All right. So we'll go
with this general color. It's a little bit orange to me. We'll make it darker. And, b. So the next thing
we're going to do is change this snout area here. So in order to do that, I'm going to do just
like we have been doing. I'm in face select mode. I'm going to select
just this snout area. And I'm going to add
another color slot. We'll say new here. And I'm just going
to call this snout, because I don't think
I'm going to have a good name for the color. Unfortunately, you know
what? I'm not that great at knowing names of colors. Am I the only person
that's not good at that? I don't really know.
I'm not really sure. So I want it to be
kind of similar, but more in the light area. So let's do that. And
I'm going to hit a sign. And let's just make this
a little bit darker. But what you see here is that we have this area around
the nose that we would rather be kind of a color of this snout region, but isn't. So in order to fix that,
we're going to first, we're going to turn on X ray so we can see the entire area. The next thing
we're going to do, actually, I want to try. And when you're doing yours, you can change as much
stuff as you like. The next thing I'm
going to do is try and assign this whole part. And I think that looks
much better, actually. And I'm going to select
this portion here. And I'm going to make
that the snow color. Right? And then for this
portion, This is his nose. We could leave it
as a brown nose. But we'll go ahead and make
this nose here black and we already have a black
consequently as the blacks shoes, but I think it's
okay for this time. Right. And if you don't like how there's this little
region here that has some of his snout color
on his nose, we can fix that. But, you know, it looks okay. But if you wanted to fix that, we can go into our
vertex mode here, select the vertices
by shift clicking, making sure we get all of them, and then hitting GG and
we can move them down. Right. And now we have a bear And the last thing I want to fix for our bear here is to
pull this down some. So in order to do
that, I'm going to do a loop cut around the edge. At least I could do a
loop cut around the edge, but let's not do a loop cut. Let's do a knife cut from here. And we're going to just do
that and take it to here, ter. And then I'm just
going to finish that around the back because we don't want there to be any
issues with the animation. So we have some three sided
faces here, but that's okay. And then in order to
and you can already see that it's
pushed down, right? And we have a little bit of piece that's pulling
forward here. And we can fix that by just grab grabbing this portion
and pulling it back. Just to give it nice smooth
because he doesn't really need to have such such
a pronounced cheekbone. Alright, so we're all done. This is the bear
that we want it now. If you want to put eyes, you can. It's hard. You're going to need to mess with them a lot in order
to get them right. But if you hit eye
for inset face, and then go into But what you can see
here is that you can use the knife tool and you can shape this the way you want
it to be shaped, right? And then you can give this the color that you want, right? And you can do that and you can use the nike tool to make this exactly the
shape that you want. I am not going to do
that because I think it's fine for him
because he has the hat. So I'm going to do Shift actually Alt H to
unhide everything. Now we're going
to do his jacket. So I don't feel like we need
to do the isolation here. But we are just going
to change the color. So we could just make this red. Actually, let's make it blue. Actually, let's make
the pants blue, so we'll make the jacket red. And then we'll make the plants blue because they're
like, blue jeans, right? Who wears this red pants? Actually, I actually
wear red pants. I think they look good on me. But they're not this color red. Well, actually, you know, they are kind of this color red. But whatever. But this is a little bit
too bright for pants, we would say, if we wanted them to be anything close to jeans. So the easy thing to do here is to create a color
that's based on this color. In order to do that, we can
create a material that's based on this material by
hitting this button here, which says new material. And it's a copy of the
material that we had selected. So we can call this
one dark blue. And we're just going
to darken it up here, just because I think that
looks a lot more normal. So now we have the colors, we have materials, and your bear, actually,
you know what? You can't really see
our bear's nose. Let's fix that a little bit. Let's just tilt it some so
you can kind of see the nose. And we don't want his
head to show through, so that's important to fix. And then the other
thing we can do also, if you've seen teddy bears, let me go ahead and isolate. They have a portion on
the inside of the ear, a lot of times that is lighter. So just to show you
how to do that. I'm going to turn off X ray. And I'm just going to
select these portion here. I'm going to hit to
hit the inset face, then select the snout color. We're going to tab out
of that Altag to unhide. And don't forget to save it. So there you have it.
You've got your bear, it's got colors,
it's got materials. He's got attitude, he's got
nice shoes. He's ready to go. So from here, we'll tell you, we're going to show
you how to go through all the rest of the steps of doing different
things with the bear. Okay.
13. Exporting FBX for Mixamo: Now that you're done doing all of that amazing modelling and materials, let me show you how to specifically prepare this model for getting your animations and maxima. So I show you how to do it if you've got your model from somewhere else and then it has a skeleton. But it actually does not need bones or a skeleton in order to give it animations and actually give it the skeleton. That's what makes them most, or is to give it a skeleton and do the reading for you. So it's really easy. You're going to make sure that you are there is completely selected. And I'm just going to hit B for box select and then select the entire thing. And once that's selected, I'm going to, I'm going to go to File Export. And what we export for Unreal Engine 4 is FBX. I'm going to go ahead and select FBX. And this is what I get here. So there are just a few important things that you need to make sure I selected. The first is you want to limit to selected objects. So you're going to go ahead and click limited selected objects. The next thing you're gonna do on this is really the only tricky part. You're going to go to Path mode. And under path mode you're going to click Copy. And then you're going to click this box here. And now that does, is makes sure that all of your materials and textures are whip your character when they're in unreal. Now when you take it into, when you take it into maximal, they won't necessarily appear right? But then when you do bring them into Unreal Engine, they will. So once again, this copy, turn this on, this little cutie thing called embedded textures. Make sure that's selected objects is checked. The other thing that you can check on but is usually on is apply modifiers. So we use different modifiers when we were creating this. We don't want to necessarily apply them in the model because we don't need to. And then the second thing that you can check for is z forward, which means which axises forward, which also prescribes which axis is up. So for us, if we look over here, we see that y is actually forward. So we can say Y4 over here. Now, that's all you really need to do. So select wherever you want this to go and then click export FBX. I already have one, so I'm not gonna do it, but that's all you need to do to take this file and prepare it from Mixamo. It does not need bonds, doesn't need skeletons. You don't have to do any rigging when you bring the file out of maximal into either unreal or if you wanted to, you could bring it into Blender. It will then have bones and a skeleton and animations too. So good luck.
14. Blender 13: Final Blend Files: Now, for the upcoming sections, you're going to need a model. So I realize there's a
chance maybe that you didn't finish the last part of the tutorial or you don't
like what you made. I'm sure it's beautiful, but just in case you
don't like what you made, I have provided
two files for you. There's a student version here called student version one, which is this blend file, and student version two here,
which is the one we did. In the tutorial, whichever
one you want to use, they are both available to you. And to get them, all
you need to do is go to the project description
part of the class, and you'll see resources, and you'll see cool
Teddy Bear version. So, cool Teddy Bear version, if you click this cool
Teddy Bear version one, the two megabyte one, is this one here, and I believe the other one, which is slightly smaller, is this one on the right. So the first one is
that one on the left, and the second one is
this one on the right, and all you have to
do to get those is go to the resource section
in the project description. So that's all you got to do. You don't have to have finished the entire first part
of the tutorial. You can simply start from
here, and you're good to go.
15. UE4 1: How to install Unreal Engine: If you don't already have Unreal Engine, you don't want to get started by going ahead and downloading it. So you're gonna wanna go to Unreal Engine.com. There you'll find a page that says Get started now. So we're gonna go ahead and click on Get started now. And then you'll be presented with some publishing licence absence. So the one that you're going to want is publishing licence. This is the one for creating games. The other ones have some other uses. So go ahead and quit Publishing game and download. Now. So now you can pick where you want to actually put the installer. And this is actually being installed for the launcher, not the game itself. So you're going to go ahead and select where you want to put the installer file. And then from there, once you start the installer, you can select where you want the launcher to be located. In the launcher is where you can use to start Epic Games, applications and things like that. So from there, you can start with sign-in with Epic Games. And once again, this is for the launcher. After you click Sign-in with Epic Games, if you don't already have a sign-up in some form or fashion, you can click sign up and then you can decide how you want to sign up. You can either go sign up with email or Facebook or Google, whichever works for you. I personally picked sign up with email. And after you sign up with email, you're then presented with a screen that allows you to select Unreal Engine. And then from there is where we actually do the install. So you can select Install engine. Now you're actually installing the engine itself. And then you select the location where you want to install the engine. And after you haven't installed, you can then click watch. So right now at the time of this video, the most recent is 4.26. So if you're using anything after that, that's fine. If you installed anything before that, you probably weren't listening to this video. So go ahead and install for 0.26. So congratulations, you are proud owner of Unreal Engine on your PC.
16. UE 4 2: Intro to Mixamo : The terminal section, you have some options. Now let's say hypothetically that you didn't do any of the desirable for this fine. There is a blend file that you can use to export for maxima, which is the part that comes after this. There's also an FBX that has this character here. You can go ahead and take into maxima. And maxima is just how we can add those animations without going through the whole process of doing the tutorial. But for this, so just once again, you have the option to use the FBX and I'll show you how to import that into Mexico. Or you can do the export yourself from blender with this existing file, as well as totally up to you. So it's perfectly fine if you didn't do the tutorial up to this point and you want to start here.
17. UE4 2-1: Using Mixamo: So if you've made it this far, you're doing really good. You understand how to create a mesh. You understand how to create different animations and save those animations and do different poses. And maybe even you have something that looks like this. So what I'm going to show you now as we prepare to go into Unreal Engine, is how to prepare this model for Unreal Engine. Or if you don't have any animations or if you haven't done the tutorial, if you haven't done the class. If you haven't done the class up to now, I'm going to show you how you can do the rest of this without any prior work. And I'm going to show you also how you can use what you already have. So we're gonna use something called Mixamo. It makes them all as an online software that allows you to give an animation to a mesh, whether that's one of your mesh or one of the messages they already have there. But I'm also going to show you how to do this if you have your own mass. So if you have your own mesh and it already has an armature like this one. What you need to do in order to be able to give it animations. If it doesn't already have animations, is get it into a T-pose. So if you've been following this tutorial or you did this on your own, you're going to need to get it into the T-pose. So for me, this model is already set up to have a T-Pose, but we're going to go instead of object mode, we're going to go into pose mode. We're going to select our armature. We're going to hit all, we're going to hit a to select all the bones in the armature. And I have this T-pose here, so I can select the T-pose and then hit this magnifying glass, and that puts us in a T-pose. So now when I export our mesh as an FBX, it will have the right pose for maximal. So an artists to do that, I just saved file and I say Export, and we want an FBX. So I'm going to find a Bx here and slightly blind find FBX. I have my mesh selected. And I'm just going to call this simple Teddy. Let's just call it simple vx. I'm going to select the right folder. And what's important here, I wanted to do selected objects. I also wanted to. The other thing we want to change, we don't actually have any, any animations or bombs that were taken. In this case, if we were exploiting this directly fun Unreal Engine, you would want to take the big animations and you'd want to take the armatures within this case. We don't really have any of that and we don't have any of these either because we're only taking selected objects. But we are looking for is where we tell it to apply the modified apply modifiers. So it's important that you have applied modifiers selected here. The other thing we're gonna do, so it makes sure it takes all of the different materials with it. And we're going to change out o to copy, and we're going to make that blue. Now this makes sure that all of them materials and things comes along with our bare. So all of that is set and we're going to say export FBX, so we should be straight there. So the easiest way to check that is to say file new general. We're not going to save that one just to see if it, just to see what export it. We're going to import hi FBX. And we're just gonna go to where we have it. That's our simple. We're going to import the FBX. And the normals are a little bit weird, but that's okay. Everything imported, okay, we can always fix this normal issue by just recalculating them. We're just checking them, make sure they got in and it did. So let's say hypothetically that you already have a model that doesn't have any parts to it, doesn't have any armatures to it, but it has a lot of different pieces and it also has a lot of different textures, right? So this model, which is in your project and is online and you can use instead of the model you have, if you like, it has all of these faces. So in this case, I'm gonna make sure that I select all the pieces, right. And then I say File export, FBX. I'm gonna do those same things, copy selected objects. And this time I'm going to call it simple too, right? And then we're going to hit Export. And now I have this one exploited as well. So now let's go to make them all. So mixed model is right here. If you've never used it before and I'm assuming you haven't, you're going to have to sign up for free. But you have to sign up first. I already signed up. I'm just going to login using my Google account. So when you enter into MXML, this is what you're greeted with. So you can see here there's already lots of different animations. And also, what's interesting here is you can go up here to character and you can select a character. Let's say hypothetically you don't like the character you have, or you don't have a character. You can simply click on any of these. And we can begin to add animations to it, right? So from here we've got two animations and we can select anything. So let's say dancing animations. Because I like dancing and pick like a baby boy kind of thing, right? This is what you would do if you didn't have a model and you're preparing to take it into Unreal Engine. But let's say that you do have a model. So we're going to hit a blue character. We're going to now go to the character, recreate it. Let's do simple to, in this case. It doesn't matter so much. Which one we do because we exploited both of them. But I want you to be able to see how they do it. So it's gonna take a little while. And now we have our character here. It doesn't have the textures, but it'll have it when you import it into Unreal Engine. So we're going to hit next. And this is the beauty of maximal. So there's a lot of effort into rigging you do yourself. Now if you did the tutorial for this, you know how much effort goes into actually rigging your model. But if you use Mixamo and consequently you can read it and mix them all and then import it back into Blender so you don't have to do all that. Now, all I'm doing is reading what it says and then just putting it over this section, write this as Neil said, wrist. I'm gonna say that's his wrist or if they're actually these were supposed to be elbows. See, I almost messed up big time. These are supposed to be able so they need to be about where his elbows I will say about right there. That says right wrist, his knees. We'll go with a nice skull. And that's all you really have to do. Four, actually rigging because it makes them out as a genius software that will do the rig for you. So this is standard skeleton that we're using and we're using cemetery. That's why we only had to do one side at a time. We hit Next. And now we have to wait and we just have to wait for Mexico to kind of figure it out. All right. So you know that it's working when you can see that it's making the right poses. And we can look here and we can see that it is in fact done correctly. So if we hit Next and we hit Next again. And now we can see that it's got our character in it. So whatever animation we pick, it will do. Isn't that amazing? So in our case, if you're doing the tutorial, it's a con, you'll want to jump animation, not a dance animation. You want just the jump animation, right? And it's probably easier if you do a running jump animation or probably any of these animations will work. You can just pick the one that you like the most, right? The only kicker is that when you pick an animation, you're going to make sure that you do it in place, right? Because you don't break gonna do the actual motion and Unreal. So if it's not, if it's moving in the animation to that makes things a little bit more complicated. So make sure you pick one where it's actually moving. And you can do that by making sure that you click on place. And the same is this. The same is the case for walking, right? We can just type walking in our search. And we can pick a walking animation. Same thing we wanted to be in place because we don't want the animation that dictate the speed and the distance. Now, when you do this, in order to prep it for important to unreal, you're just going to hit download. And for the first one, you're gonna do FBX like before. With skin keyframe reduction. You don't need any of this stuff on. And then you click Download, right? And that's all you have to do. You're going to want to do this for walking, jumping, and running. Those are the three that you're going to need for the rest of the tutorial. So you'll do what I just did three times. Once for walking and running and once for jumping. Now we're just going to pick a good place to put this. And that's all you have to do it. So you're just gonna do that on your own other. You do that three more times for walking, jumping, and running, the ones that you like, and you can search and maximum. So now let me show you how easy it is for you to get what we just created and then import that into Unreal Engine. So what I have now here is just an empty project. I deleted some of the things that you start off with just so you can have a clean, kinda clean slate here. But the import process is so easy. So what we exported the name of the animation was female tough walk, right? And all I have to do is just click and drag this over into our content browser. And it's simply going to ask us some questions. We want to take this skeletal mesh here. We want to import the mesh of the corpse, of course, and everything else can remain the same, convert the scene units. I always turn that on, but other than that we're just going to hit Import. All right, And it takes a second. No smooth grew information was found. I always get this warning, don't worry about it. And we see that all our stuff comes in here. So all of the different textures and everything else, and all I need to do is take the one, that's it. So there's a bunch that say female tough one, but one of them says n, and that's your animation. So I'm just going to drag this out here. And if I hit Play, we can see that it's moving now it's up close. And that's because we started here and we don't have anything really set up. But by the relevance. And go ahead and start from here. And I hit Play. You can see we got so importing as is as easy as that. So that's it. That's all you have to do.
18. UE4 3: Preparing Blender Files for Mixamo: So if you've made it this far, you're doing really good. You understand how to create a mesh. You understand how to create different animations and save those animations and do different poses. And maybe even you have something that looks like this. So what I'm going to show you now as we prepare to go into Unreal Engine, is how to prepare this model for Unreal Engine. Or if you don't have any animations or if you haven't done the tutorial, if you haven't done the class. If you haven't done the class up to now, I'm going to show you how you can do the rest of this without any prior work. And I'm going to show you also how you can use what you already have. So we're gonna use something called Mixamo and mix them all as an online software that allows you to give an animation to a mesh, whether that's one of your mesh or one of the messages they already have there. But I'm also going to show you how to do this if you have your own maps. So if you have your own mesh and it already has an armature like this one. What you need to do in order to be able to give it animations. If it doesn't already have animations, is get it into a T-pose. So if you've been following the tutorial or you do this on your own, you're going to need to get it into the T-pose. So for me, this model is already set up to have a T pose, but we're going to go instead of object mode, we're going to go into pose mode. We're going to select our armature. We're going to hit, We're going to hit a, to select all the bonds in the armature. And I have this T-pose here, so I can select the T-pose and then hit this magnifying glass, and that puts us in a T-pose. So now when I export our mesh as an FBX, it will have the right pose for maximal. So in order to do that, I just save file and I say Export. And we want an FBX. I have my mesh selected. And I'm just going to call the simple Teddy was just call it simple vx. I'm going to select the right folder. And what's important here, I wanted to do selected objects. I also wanted to. The other thing we want to change, we don't actually have any, any animations or bombs that were taken. In this case, if we were exploiting this directly fine Unreal Engine human wanna take the big animations and you'd want to take the armatures within this case. We don't really have any of that and we don't have any of this either because we're only taking selected objects, but we are looking for apply modifiers. So it's important that you have applied modifiers selected here. The other thing we're gonna do, so it makes sure it takes all of the different materials with it. And we're going to change ATO to copy and we're going to make that blue. Now this makes sure that all of our materials and things comes along with our bare. So all of that is our set. And we're going to say export FBX, so we should be all straight there. So the easiest way to check that, let's just say file new general. We're not going to save that one. Just to see if it, just to see what export it. We're going to import our FBX and we're just going to go to where we have it. That's our simple import FBX. And the normals are a little bit weird, but that's okay. Everything imported, okay, we can always fix this normal issue by just recalculating them, but we're just checking to make sure I got in and it did. So let's say hypothetically that you already have a model that doesn't have any parts to it, doesn't have any arm wishes to it, but has a lot of different pieces. And it also has a lot of different textures, right? So this model, which is in your project and is online and you can use instead of the model you have, if you like, it has all of these faces. So in this case, I'm going to make sure that I select all the pieces, right. And then I say File export, FBX. I'm gonna do those same things, copy selected objects. And this time I'm gonna call it simple to write. And then we're going to hit Export. And now I have this one, export it as well.
19. UE4 4: Game Engines: For the purposes of this course, you can think of Unreal Engine as having three main parts to it. Now, Unreal Engine has lots of parts to it, but just for the purpose of this course, let's just break it down into three main sections. So Project Settings, this is all the drop-down menus and checkboxes that you have for your game in order to make it function the way that you want to make it function next and probably the most important or something Unreal Engine calls blueprints. Now blueprints give us the ability to do the programming without ever writing a line of code. So yeah, You heard that, right? You do not have to code in C plus plus like you used to have to do on Unreal Engine. It's a node base graphical programming language that we're going to cover in a little bit of depth here. Now the last and probably the part that you're already a little bit familiar with are the actors slash objects slash assets. Now these are the things that a lot of time represent the visual parts of your game. Also materials, the characters, the different objects that might be there. And for the purpose of this course, these are the three things you sit thinking about now there are multiple things within this that we'll cover. But for right now, it's only three things. That's easy, right?
20. UE4 5: State Machines: So let's briefly talk about what a state machine is. A state machine is something that allows you within you E4 to control what mode something is in depending on different circumstances, right? Those moles can transition from one thing to the neck. I'm using my only because it's a synonym really we're talking about states. So a good example. A state machine would be a traffic light. So a traffic light has three states. It can be green, yellow, or red, and it transitions from green to yellow, yellow to red based on a timer, right? And so that's a state machine. Now these transitions, which are the arrows in-between, can have more conditions. Write it. Not only is there a timer that says with their transition, when that transitions that happen. It could also be somebody pushing a button at a crosswalk, right? The pushing a button if a crosswalk can initiate the green to change to yellow, to change to red. And that's just the conditions of the transitions that control what the state is. That's it. That's the state machine. That's a simple example of a state machine anyway.
21. UE4 6: Importing Objects : So if you don't have your projects selected already, we're going to go ahead and open that project. If it's not open already and you're gonna just gonna double-click it or we're going to just start from the place where we were before. And the first thing we're going to do before we import our objects, and I am going to show you just what it looks like when you re-import, when you import them. These are the different FBX files that we have, that our animations and the meshes and the skeletons and the bonds for everything we're gonna do. But just to make things a little bit easier, we're going to start with creating some folders just to make things a little bit more organized. First folder I'm going to create something, I'm just going to call it just treading is going to have IT poles and mesh and all the other things in it. Then I'm going to make another one. And this one is where the animations, the animations we exploited don't necessarily have that, are that mesh information in it. So the first thing I'm going to import is that T pose now all you have to do is just drag it straight in to that folder. Now you want to make sure that the skeleton is selected here because that's what you are, that's what you're importing and you need it to have you need to have the skeleton in there. That's the same skeleton that the other animations are going to use. And this is what it looks like when it's completely imported. While it's importing right now you can see that it says it's compiling the shader. So everything that makes up the character, the shaders are the materials. And it's basically reading that information in. And you can see that in this bottom section here, there are our TeddyBear has this kind of gray shirt and necessary because it hasn't read of information in it, you say, and you can see now it's red. So the next thing we wanna do is import those animations. So the first animation we're going to do is I call it, or they call that listening to music is just kind of a resting pose. And we're gonna select that skeleton that we already imported. And then we can click import all. And once we do that and once we click import all, you'll be able to see it in our content browser. And if we just drag that into the environment, we can see it. And you can see right here, we have this giant teddy if my hip play, like you know how to do to start the engine, you can see what it actually looks like. So just to give you an idea how you can check and make sure you import it, what you'd thought you import it were an important one more, which is our walking animation. And we don't really need to make sure it looks right this time because we already checked to with our resting animation. And we're gonna do that same thing. Wanna make sure we select the Teddy skeleton and click Import 0. So that gives us our two mesh and I2 animations. So for you, you want to go ahead and import all your animations. I did that just so you didn't have to watch me import stuff over and over, but now you have it, you are ready to do the next section.
22. UE4 7: Create Character & Game mode : The next thing we're gonna do is create some of these blueprints There we are we've been talking about. So you're going to right-click on that content area, click Blueprint class. And the first one we're gonna do is Character Blueprint. Now this is our teddybear0 character, so we're going to call it Teddy underscore character and then BP just so we know what it is. The next one is the Gamow blueprints are going to left-click on that content area, go to Game Mode and their blueprints. And we're going to just call this just like we did before recording, sorry, Game Mode. Now, these are two Blueprints we need for having our main character and also controlling the different game settings that we want to be able to use their character.
23. UE4 8: Character Scaling : Now that we have our mesh and our skeleton and animations in the actual engine. Let's go ahead and bring it into the game so that we can use it with our playable character like replayed on to later. So I double-click the blueprint, I drag the tabs up, I click on my left side mesh and on the right side look for a match. And I go ahead and select that teddy bear to pose skeleton that we have. And you see that it's really big. So I'm going to scale it down to about 0.23. And you can see right now that, that Locke is checked and I just make sure everything is proportional to get it the right orientation. I know that if I just rotated in the x about negative 90 degrees or exactly negative 90 degrees. And I can just use the arrow to go ahead and drag it down. So I can also see that it's also right here. It's like a little big for this area. So I'm gonna go ahead and scale it down a little bit more to zero-point to one. You can see now it's inside that capsule. And that is useful because as our targets are runs around the environment, johnson two things. The capsule is actually what the environment is interacting with. So it's not interacting with our mesh because that would increase computational load our lives. So it interacts with this kind of capsule here. And that's how our TeddyBear are. Teddy bear is going to interact with the environment. So now you said it is not quite ready, but is Elise in the game?
24. UE4 9: Game mode : In other, we have our Teddy character in the environment. There are some settings that we need to take care of in order to get it to work. So you're gonna double-click on your game mode. And under game mode, you are going to go under classes on the right side. And then you're gonna go to default Python class. And you're going to select our teddy, teddy Character Blueprint there. So that's the first setting that you need to do. Unfortunately, it will not be a good laugh. So after that, We're gonna go to our project settings, which are in the upper right and we're going to go to maps and modes, and that's under project on the left, we're going to make sure maps and modes is selected. Then under default Game Mode, make sure that we select our Teddy game or we created. Now you may recall there was something different, but you should be able to find it here. It's whatever you call it. So we're gonna go ahead and select our game mode. And then from there we can go to World settings. But before we actually changes where it says, but it's just going to drag our character blueprint. And you can see here that now our character blueprint has that mass associated with it. And that's because we set that up earlier. And now I'm just going to go ahead and fix this so his feet are now completely in the ground. And then we're gonna go back to just doing some of these settings to make sure everything works the way we want. So under the world settings, we're going to go to the game mode. Another game mode is Game Mode override. And under Gamow override, we're going to select our game mode that we created. Now this is just making sure that our engine is looking for information on where we want it to look. The next thing we're going to do is go to the details and the details. We're going to search for a particular setting. But before you, That makes sure that the teddy bears is selected or the favorite book on a selected. And we're going to just type Python here. And now this is a good way to look for settings if you can't find them. Unreal has tons of different places for setting. So right now, auto process player is disabled. We are going to change that from this table to play 0. Now once again, this is one of the settings that allows us to have our character ensure that i character is the one that's playable. So we're all set there. If I hit play, you can see there were from behind the inside of the player. So I'm going to just going to hit Stop and then zoom out and you can see that our character is in place. And then when we hit play room inside the character, and that's what we're looking for at this point.
25. UE4 10: Camera : So before we get into anything else, you remember that when I hit play, we end up looking out of his left ear and that's definitely not what we want. So let's go ahead and fix that before we do anything else. So in order to fix that, I'm going to go to the Trevi character blueprint that we already created. I'm just going to double-click on that. And it's going to come up with its own window here. And I'm going to just drag this tab up to dark repair. And then I'm going to click Open for Blueprint editor. And this just allows us to see everything that we really want to see when we're using it. And now I'm looking at the event graph and we'll talk more about this later, but particularly rate now I want you to click on the viewport. So when you click on the viewport, you see that this blue arrow is pointing out of his left side. Now that's why we end up looking out of his left ear. So let's go ahead and fix that right now. So I'm just gonna select, I'm just going to go ahead and select our character mesh. I'm going to go over here to the right side, under Details and under transform. And I'm going to go to the z and z around. You can see that this is what rotates him in the way that we want. Now I could put 270 degrees, but it's just as easy to put minus 90 degrees. And now he's basing in the right direction. So if I hit Compile and Save and now I hit play, you can see that we're looking right out of his front because you can see the bill of his cap. So the next thing we wanna do is not be looking from the inside of his head. In order to do that, we need a camera. But before we add a camera, we're going to add something called a is playing. Now in order to do that, I click Add components here on the left side, and I'm just going to type spring or SVR. Yeah. I don't even have to completely tape spring. So spring arm and if I hover over, it says the component tries to maintain its children at a fixed distance. And that just means that the camera tries to respect a certain distance that you said. But it still has some interaction with the environment. Sometimes based on where walls iron things, the camera direction kind of needs, the camera location kinda needs to change and your spring arm is going to allow that. Now, with the spring I'm selected, I am going to add another planet and I'm going to add a camera. So now the camera is H high yield of the spring I'm was just means that it's going to move around with the spring I'm and we see that the spring I M is actually a child of the capsule, which is this outer portion here, which is actually our character. Now, if I hit Compile and Save and I hit Play, you can see that the camera is farther back, but you can't really see anything if we do that. So I'm gonna go ahead and select this camera. I'm going to move it up. But I'm also gonna go into this perspective, but I want to see this from a different angle and I'm going to select rate. So now I get this view from the side and I can change the angle by going up here and clicking the rotate button. And then I can just drag this with bit just to change that angle. Now if I hit Compile, Save, cleared, it's a little bit better. I fancy, you know, honestly, let's go ahead and move this up just a little bit more. So I have this camera selected like it is now. Now I'm going to go to the Translate and I'm just going to drag this up a little bit more. Not forward, but yep. And I hit Compile and Save and then play. And once again, I can see a little bit better of what's beneath. So after I hit start, I'm going to go ahead and take this back to perspective. So it said a normal way to see it. And just so you can see even better, I'm going to select the capsule, hit F, hold down, Alt, move it around. And now you can see our environments. So now if you go to this minimal default window and I back out, again, Alt, hold down the Alt key. And you can see now that the camera is a part of our environment. You can even see here what's being seen from the camera direction when it's being select, when it's selected, right? So there you have it. That's how to add the camera so that we can control it and we can see the environment around it.
26. UE4 11: Moving Forward: Now that you know what nodes are and you cannot understand how game engines work, Let's go ahead and create an event like we said for us. So the event we're gonna do is hitting the key and causing some movement, right? So the first thing we're going to do is get Unreal Engine to understand that we're actually going to create an event by hitting a key. In order to do that, I'm gonna go to Project Settings, which I have up here. If you don't have it up there, you can go to Edit Project Settings and that will open. And so under Project Settings, and we're gonna go to input. And under input and under bindings, I'm going to hit the plus mark and access mapping. Now I'm going to, I'm going to name this forward because that's the direction is going to mean. And just to set it apart from all the other things that are inside Unreal Engine. I'm gonna hit an underscore t there just so we can tell. Now, I want to map this access event to a particular key, so where it has none here, I'm just gonna click, I'm gonna go to keyboard and we're going to use WASD for these directions. And then we'll look for w and C w. And that's all you really need to do to map the key to a Pacific. That's all you really need to do to map the key to an event. But now we need to tell unreal what to do when you hit that w. So if we go to our default, a fewer Teddy character blueprint or whatever blueprint you have. The character blueprint isn't Ultron. You can go ahead and open that by double-clicking it. I'm going to dab it up here like I did before. And this time we're going to look at the Event Graph. Now, in the event graph, you have some things here that don't really matter at the moment. So we're just going to right-click and drag that out of the way. So the first thing we're gonna do is get the node that corresponds to that particular key. So I'm going to right-click on the Event Graph space. And I'm going to just type that forward that we put in here before. So forward, I'm going to spell it right eventually, and we see that one. So the reason I put this underscore t here is because or it appears in Unreal Engine a bunch of times. But we know that this is the one we want and we want the input axis events. Because remember how we said events are kinda what's happening inside our virtual world. Now when we look at this, this isn't known as you've seen before, and this is the execution pen. And with the execution pin does, is it creates that cycle of events that we talked about before. So this node will execute, and then after it executes, after it executes, whatever it's connected to via this execution pen will then execute after. So we get this thing called the flow of execution, which is I think one of the unreal terms. So we have our first node, i next node. Is, we're just going to right-click and we want the add movement input. So there's two ways we could do this. We can click, we can just type add movement. And we see that this is the add movement input to the other way. You could have done that as drag from the execution ten and then let go, and then anything that's here now, things that can possibly connect here so we can do it this way. We can't really connect anything wrong. But we knew that we wanted this add movement input and this is simply, simply put, is going to add movement to our character. So because we want before of execution for this to happen, and then this to happen, we're going to drag from this execution pen to this execution pen. So this will allow this particular node to cause this particular node to activate after the first node is finished. So you can imagine that if we had a really complex set of actions and events we needed to happen, this node can connect to another nodes, connect to another node, and so on and so forth. But we also said that when we're doing, when we're doing these events and actions and reactions, there's some other information we may need to pull in to be able to do that. So in order to, in order to get our actor to move forward in, in sono work forward direction is and that's lucky for us. And existing node that's called good actor forward. So good actor forward. Right? So get actor forward vector. Now not going to go in depth into what a vector is, but just think of it as a mathematical thing that has a direction and a magnitude or size to it. And what we care about is the direction. So it's going to tell us the direction is going to come out of this node. And it's going to connect to the world direction here. So this tells Unreal Engine what direction forward is in response to this particular actor. And if you remember that blue arrow that we had on our setup, that was the forward direction. And now this function here add movement input nose with that forward direction is the next thing we need to do is connect the axis value to the scale value. So this is how bast it needs to go. So this axis inputs are typically between 01, but because this is a key, just 0 or one. So when we hit W, it's going to be one. When we're not hitting it, it's going to be 0. Now this is essentially all you need to be able to make your character go forward. So I'm going to hit Compile and saved. Then I'm going to hit play. Now if I click on the window first and I hit W, you can see that our character goes forward. So that's the essence of this whole blueprint and how this, everything else has to do with different types of information, different blows of execution, and how you manipulate that information on what information you access. But if you understand this general idea, you understand the engine in general and you understand blueprints in general. Now just to give you now a useful thing that Unreal Engine does is it allows you to visualize what's happening in your event graph. So I'm going to click simulation so we can kind of see what that is. I'm going to select the character blueprint now this is something that you don't necessarily need to do. But just so you can see, if I hit play here, I'm just going to pull this to the side just a little bit. And you can see that this flow of execution is actively going from this to this. So it's actively implementing the access, whether it's 0 or one, is constantly doing that into the ad movement input. And if I hit W, you'll see that it moves forward. And the reason that you don't see anything here is it's always sending something. Rate is always sending 0 or one. And that's always resulting in movement. If it was a conditional statement, you might only see, you might only see this orange flow when you hit a button, but that's not the case. So there you go. You now understand blueprints.
27. UE4 12: Moving Backward : So now that you understand how to do the wor word vector or forward movement, go ahead and pause this and see if you can figure out how to do backward movement. There's a little trick to it, but I think you might be able to figure it out. Go ahead and check or composite. Alright, so let me show you how to do the backward direction. So the first thing we're gonna do is go back to our project settings. We're gonna go back to Input and we're going to add another axis mapping, right? So this part you probably got, so I'm going to type this time. I'm going to type backwards. Once again, I'm going to try to spell it correctly, and that's weird. So I'm going to put backwards here, I'm gonna go ahead and put that underscore t so we can tell it separate from any of the others. And in this case, like I said before, we're using WASD, so S is what we want, and I'm just going to select S. So the only real difference between forwards and backwards is that they're just opposites, right? So all you have to do, and this was the trick that I bet you figured out. But if you didn't, it's okay. I didn't figure it out the first time I saw either. It's just add another one here. So if we take the value, this negative one value, and then we go to our character blueprint. I add movement doesn't really care. It's just 01 or in this case is 0 or negative one. So all I'm going to do is right-click and drag. I'm going to Control C to copy. Then I'm going to Control V to paste. All right, I'm gonna get rid of this input axis mapping. And then I'll right-click. And then I'm going to say backwards this time. And it's case sensitive, so be careful about that. So axis events backwards underscore t, that's me. And I'm going to put that in exactly like I did before. And so now you can see that I have forward and backward. So let's hit Compile, Save. Now we're going to hit play. Drag that over so you can see it. We have forward, I hit W and if I hit S, we have boundless. So now we have or word and we have backwards.
28. UE4 13: Left & Right : Now you've got backwards and forwards. Let's do left and right. So left and right has a quite, it's still, it's just as easy, but it's got extra trick to it. But I want you to just go ahead and try it, see if you can figure it out. There's probably lots of different ways you can do it. Go ahead and try. All right, So now let me show you how I was taught and how I typically do right and left turning movements. So we're going to, just like before, we're going to go back to Project Settings. And under input just like we did before this part, you probably got we're going to hit access mapping. And when you go straight to the left or straight to the rain, I am video games a lot of time they call that right straight. And we're gonna put an underscore. And right stuff is going to be d. So I'm gonna go to the keyboard, I'm going to hit D. And I'm going to do that same thing or left, right. So I'm gonna do another access mapping. And this time is going to be left. And also go to the keyboard. And this is going to be a, all right, so now I have my key setup here, right? So I got right is D and I have left as a, actually W, a S and D, and then S is backwards. If we collapse those, we have all of our four directions as far as camera movement on that. As far as moving the player goes, not all considering camera motion because we're still going to rotate the camera around. So now I'm going to go back to our character blueprint. And now let's set up this right and left direction. So we're still going to have is this add movement, add movement input. So I'm going to put that over here. And similar to before, we want the input axis, but in this case we want our strafe input axis, right? So we have our left strength. I'm going to put that down here and I'll go ahead and get the node for our registration. And I see this right axis event and that's the one that I want. So now that that's in place, this part, you probably could figure it out. No problem. The trick is what direction do you tell it? Right? So in this case, I want it to go to the right and you could probably figure out a way to do this with vectors. But luckily, with Unreal Engine, it already has a node this good for that. So we have good actor rate vector. So we're just going to hook that up the same way we did before with these execution pin. The axis value into the scale value and the direction into the return value into World direction. Now, I'm going to just copy and paste these two down here because they're not going to change, right? But can you spot I'm going to pick these up the same way. Same way as I did before. It can use, but what we didn't do yet, this is set up, but these go left and go right, are gonna do the same thing right there. They're vectors are pointing in the same way. We didn't get a good actor left vector here we have to get actor right vectors. And the trick, and I bet you figure it out was that in Project Settings under left, we can just add a negative here the same way we did before, right? So I'm going to compile and save. And I'm going to hit Play. Click. So I'll check our forward, backward direction still work and I left m right direction and still were raised. So now I can move around the environment. I can't turn around yet, but I can move around this environment. So that's a lot you figured out how to move your character around. The next thing we're gonna do is figure out how to animate your character. But you've come a long way. We're almost finished.
29. UE4 14: Pitch & Yaw : So if you've ever played a video game, you know that with one hand you can control what direction you're kind of translating in. And the other hand, you can control kinda we're looking at those things, have an interplay. Now that's what we're gonna do here. So we're going to basically control the cameras JAR and pitch and yaw is just kinda looking from the side, the side and pitches looking up and down. And we're going to do that in very similar to the same way we did the others. So we're gonna go to Project Settings. Under Project Settings, we're going to go in the engine and click input. Now, our first four things we have here was our translational directions, right, left, forward, back. But now we're going to add what we're going to call pitch underscore t. And this is going to be done with the mouth this time. So instead of keyboard, we're going to go under mouse and under Mao's, we're gonna go to y. So as you move the mouse up and down like this, that will change where the camera is looking. So we have pitch, I'm going to add one more. And this one is going to be ER. So I'm going to try to keep it the same. Why a w on the score of t? And we are going to, for ya, we're gonna make it bx. So if it moves, if I move the mouse like left to right, then the camera will also move left to right. So we have pitch and we have yeah, so let's go ahead and code this N. So I'm gonna go to my minimum, my minimal default to see my theme. And let's open our your should already be opened. If not, you can double-click it and go ahead and dock it. I want to redo this here. Actually, no, that was close animals do it every day before. We're going to now add this yarn pitch. So just like before we want n input access, right? So we're going to go ahead and put yarn so we can find our yard dash t. Yep, I regard the capitalize the T. And let's go ahead while we're here and get this other pitch. Pitch underscore t. So we have both of these events and they will work pretty much exactly the same as the others. Only difference is this information is coming from the mouse. So now instead of head movement input, we want to match the ER. And lucky for us, unreal already has add controller instead of add character. And you see we have here add controller, roll and pitch when I use enroll, but we are going to use RAW. You are. And let's go ahead and get pitch. While we're here. We're going to do that add controller. And I need to pitch this time. I'll go ahead and connect these here. So access to access value, axis, value to value, and then the execution pin for our pitched also to the pitch input axis. Now this is. All we need to do for the event graph. But it's something quirky about the way that it's not really quirky. But in order to get it to work the way we need to, there's one more setting we need to do. I know we did settings before, but there's one more setting we need to do. So we need to go to this Shady Character Blueprint are already here. And under view-port, we're going to go ahead and select that camera. And on the right side, under Details and a camera options Use Pawn Control, rotation. We are going to go ahead and click that, that'll make it. So all of our rotation commands will work with a camera in the way that we wanted to. So I'm going to click, Compile and Save. And now when I hit play, let's see if this works. So I'm going to click down on here. And just like I need to, I can move, I can look left and right and down and up. But when I'm looked down and up young, notice that it's really January, so we don't actually want to move too fast, right? This is too, too fast. So let's go ahead and address that. Under pitch input. Now, there are a lot of different ways you could do this. But one easy way is to just divide this number down a bit. So when we divide this number down or take this value is coming here and only take a fraction of it. It won't move as fast as it could as it was just there. It won't quite be as jittery. So all I'm going to do, I'm going to go ahead and delete that. I'm going to drag this out. And then I'm going to type divide here. And you can see here divide by four. Right? So I'm going to connect this. And I'm just going to divide it by, let's say 1 to right. And that's gonna give us just a little bit of cushion there, fire movement, right? And now this movement up and down is much easier right? Now also, if I hit W, I can control where I would go and it moves kind of fast, are truly character is a little bit fast, but came off the edge. We now have control of him like this, right? And if we wanted to change the speed that he's going, we could do this same trick by dividing it by a number and that would slow him down by whatever percentage rate divided by. So there you have it. Now we have how we control the character and also how we control its movement, but not at the animation. We are going to do the animation though. And that's coming up soon.
30. UE4 15: Animations : So in order to do our blend space, There's a couple of things we need to set up. The first is we need to create some blueprints. So, or at least one blueprint. So let's go ahead and create an animation blueprint. So I'm going to right-click on the content browser. I'm going to go to animation. And under animation, I am going to look for Animation Blueprint. So right here, Animation Blueprint, I cake, I, I click, I select the skeleton that I want. And I say, okay, so I'm just going to name this instead of the whole word, instead of the whole word, I'm gonna say underscore B P. And it's just going to be NM underscore BP. Right. Now, I can double-click on the Animation Blueprint. I can go ahead and darkness. And this is what the animation blueprint looks like. Now in here, we'll go our state machine. And in the state machine will go the blend space and not worry about state machines yet, I'm going to explain exactly what they are. But now that you know what a blend spaces, we're gonna go ahead and do the blend space, but before we can do the blend space, if you remember, the blend space was contingent on the speed. So in order to have the speed, we need to make the speed accessible to the Animation Blueprint. So to do that, we're going to go into the Event Graph. We're going to use this event Blueprint update and we are going to connect a cast to our player. Right? So we have our character blueprint now you may have named or something different, but it should still be there. Now, in order to cast, casting is, is accessing some of the information in another blueprint. And in order to get that to work, we're going to drag this out to the side and we're going to say player character. This is just one of the things that required, that's required when you're casting to get information from a particular Blueprint. Now, after this, we're also the next thing we're gonna do is we want that velocity, right? So we're gonna say get velocity and we see get velocity down here. And now we have the velocity and speed. Technically, if you've ever taken physics or a calculus, you know, speed is, velocity is a vector in speed is a scalar. So that just means velocity is three numbers like or two numbers depending on if you're in 3D. So its speed, its speed in the x direction or y direction and the z direction. But speed itself is just one number. So in order to get the speed as just one number instead of as a vector, we want vector length. And as I type that in, now in order to do this, I'm just dragging off to the side and then eggs giving me this part to do this. So. That's vector length. And now this is essentially our speed. So we want to save this in a variable. So we're gonna go here to the left under my blueprint and under variable. And then I click this plus sign. And I'm gonna change this to speed, right? And right now if I look at this and look at speed over here, you see that it's a Boolean. That's not quite what we want. We want it to be a float. So I'm gonna change this to a float. Then I can just drag this over. And then it gives me the option to pick good speed or set speed. So right now we want to set the speed. So I'm going to click Set speed and put that value there. So now we have this speed value That's going to be accessible to us in our animation blueprint, right? So we're gonna go, sorry, unimaginable for an event graph and now it's going to be available to us in our state machine. So within the state machine, you can see that we just has a result. It doesn't have anything as far as what to do. So we're going to add a new state machine. And you see add new state machine here. And we're going to connect that to our output pose. Now that's really all we need to do our hear everything else we need to do is kind of inside our state machine. And like I said before, don't worry, I'm going to explain with state machines are but let's go ahead and handle the blend space. Let's go ahead and create a blend space. So in order to go, in order to create a blend space, I'm going to go to this minimal, minimal default window. And I'm going to write for like I did before. And under animation, I am going to select blend space. Now I could do a blend space 1D, but I think it's a good idea for you to see what 2D space looks like. So I'm gonna click blend space here. I'm going to select our skeleton that we already have. So same skeleton is everything else. Nm, blend space because it's not a it's spelled one space rate. It's not explicitly a blueprint, It's a bone space. Alright, so we have animation blend space. Now, if I go to Animation Blueprint bus do components, if we're inside of injury and we're going to take this and planned space is over here on the right side under asset browser. And you can find this animation blend space that a drastically misspelled. But don't worry about it for now. I guess we can fix it right there. And I'm going to connect it, right. So we're not done yet, but we are going to now, we now have the ability to look inside of this blend space. So in here you see our urban space has a couple of inputs to it. However, before I show you that, Let's go ahead and show you that button space. So right now our character is face down, but let's go ahead and drop some different animations in here. So we have arbitrary listening to music. We're gonna put that there. And then we have our The walk, right? And I can test what's happening in this. When I move this screen, I'm just clicking, clicking and dragging. So you can see that when it's close to the bottom, he's basically walking. And as I move a little bit more and more to the walking animation, he is walking. Now it turns out that I know that when we send a signal of speed, the way we have a setup, I'm doing this on the vertical axis that the maximum is actually 600. So that's what I'm going to put in here from 0 to 600 and is still going to walk the same. This is just how it scales. So our animation in space is for the most part, setup almost. Now. In order to finish setting it up, we're gonna go click Save. We're going to go back to our animation blend space. And remember we need the speed to be what entered into this blend space. So in order to enter speed in, we're going to drag this over. And this time we just want to get the speed we're not setting this week. We did the setting of this read and the other one. And I'm going to input that there. Now, when I double-click on the band space, we have this as being the speed and I'm going to type speed in here. And this should be what we need in order to get everything to work. So I'm going to go over to File and then click Save All. And now, if we hit Play on, There's actually a few other things we need to make sure I set. So let's go to our Teddy, our main blueprint. Tell you Character Blueprint, which is a double-click that and open it. We're going to select the mesh. And under animation, we're going to make sure we have our animation blueprint. We didn't do that earlier because we didn't have an Animation Blueprint. So I can say Save all here, compile, save. Now let's go to our viewport. Be viewport here, right here. This is good that we actually got this issue. This will happen sometimes when you're importing a different animation, something will happen where it won't be faced in the direction that you want. So our import, let's go to Animation. And let's find our trading animation. So this is the animation for just listening to music. Right? I'm gonna double-click it. And we can see it looks like this, but actually in order for it to look the way we needed to work, it needs to be rotated sum. So we're going to re-import it. So this is listening to music. And then click Open. Right, so that reimported it. But we're going to need to do some rotation here. So let's click 90, therefore rotation. And then we're going to re-import it. No. So that wasn't the right one. So. It's 0. Then it's back to the normal 90 here. And was re-import it. So that will probably be what we need to fix. So let's go back here and we see that it's standing up straight. So that might be what you need to do in order to get your animations to be, sometimes to be in the right orientation. So now if we hit Play, you can see that it's working. So if I hit W for forward, we also see that our animation isn't quite working, isn't quite working yet. So let's go ahead to our Animation Blueprint. And we see right now that this is probably not connected to the right option. So let's connect it to the top option. Actually it was connected here, this looks correct. And we're going to say, Well, let's close our animation bootstrap file and save. So you can see as we hit Play here, we are not getting him to actually do that movement. And that's because if we go back to our Animation Blueprint, we're just going to compile and save it. That wasn't the problem though. We're not actually connecting the set to an execution pen, right? So if you remember the flow of execution and requires that something, when something has an execution pen, and it has to be part of the execution. So in order to do that, we connect the caster Character Blueprint, execution ten to the execution plan. And now we're also going to get something strange, but I want you to see it before we fix it. So now if I hit Forward and you can see that my character is going down and you can imagine why that is. That's because we need to also re-import our walking animation. So let's go to the walking animation and we are going to reimport it. So truly walking. Right? And then we're going to change this one the same way we change the other one. I changed it to 90, then re-import. Now let's go ahead and save it. And let's go ahead and hit play. Now if I hit that w, you see that we get that walk, right? So it doesn't quite work for backwards, but we get the walking animation with the movement. Now, if in your case you don't have a walking animation, you have a running animation. Run animations are going to actually work a lot better for being able to match, match the speed and how it's actually running. So let's go ahead and match. Let's go ahead and do a running animation. And with their money animation, we're going to have to do the same thing that we did before because that's just the nature of how these animations import it. So we have Charlie jogging here. I'm going to bring that in. I'm going to select the skeleton that we want and we know that in order to get the historic I'm meeting to hit 90 degrees on the import. And now we're gonna go to our Animation Blueprint. And within the animation blueprint we're going to double-click, go inside of our blend space. And instead of using WACC, we are going to use this jogging blueprint or this jogging enemies, right? So this is the jug. So all I did was replace one with the other. So now if I hit save, and now I hit Play, and I hit W, right? We can now run. Oop. Yep. And one thing we can do to make this a little bit easier to deal with, Let's go ahead and scale this a bit, right? So we're actually going to scale it, scale in this direction. And just so we can have a lot of space to run in. Now if I hit Play and I hit W, you can see that we have are running character, right? The only thing we don't have is the ability to jump. But we will do that when we do state machines.
31. UE4 16: Walk animation : First things you'll need to understand before you jump into doing state machines and other types of craziness. So let's say hypothetically that you have certain animations that you want to go together, like walking, running, jogging, or maybe even jumping. And you don't want to just go from walking to jogging or abruptly go from standing to walking. You want to transition continuously from one to the other. Now if we have these different, now if we have these different animations, you can see here, we can put them on a blank space like this. So you can see here, Teddy character is just standing there. Now as I transitioned his speed and that's what I'm feeding into this. You can see that he begins to kinda walk slowly. And as I move this up here, he is now wacky. And then as I move it even higher, here begins to run. Now, the thing I'm using to control whether he's doing his running animation or his wacky animation or a standing animation is the speed. Now that is dependent on how you program. It could be something else, you could be blending other things together. But this is generally just how blend spaces where it anytime you want to continuously transition and smoothly transition from one thing to another. And there you have it.
32. UE4 17: Jump Animation : So now that you understand what a state machine is, let's go ahead and create a state machine. So the first thing we're gonna need is the animation that corresponds with the state machine we're going to do, which is a jumping action or a state machine that's going to contain the jumping action. So right now we don't have the state machine in here, but we're gonna go ahead and import it, just like we did the walking and all the other animations. So we want the jump here. So I'm just going to drag this in. And when you look at it, you see that just like before, it's setup for 90 degrees rotation, we import it and that's exactly fine. That's what I mean. When you're doing your rotations, you probably won't have to do that. But if you do you at least know how to do it. So we're going to select the skeleton that we have in here. Then I'm going to hit Import. So now if I go to my animation blueprint, I would have access to it. But just to be sure, let's go ahead and take a look at our Teddy jump animation. And It's based around way just like it should be. But yeah, that's what it is. It looks crazy now because he's facing the wrong way, but that's correct. If you wanted to have another look at it, we can look directly at the animation, but we don't have to do that yet. The other thing we need to do is make sure that we have an action that corresponds to jumping. So we're going to go into our engine just like we did before. We're going to click input instead of access mapping both. This time, we want a action mapping because jumping is in action and we don't necessarily need it to be numbers between 01, we just needed to be on enough. So I'm going to hit the plus sign and I'm going to tape jump here. And for me I think jumped makes sense to be the spacebar. So instead of searching for spacebar, I'm just going to type space. We're going to put space by there. So now when I hit the space bar, I have access to that event graph of the Animation Blueprint. So let's go ahead to the Animation Blueprint. So Animation Blueprint, we have these things here. In the Animation Blueprint we have what we, what we did for velocity, but this time we're going to do for jumping. So in order to figure out whether a character is jumping or not and connect that. Actually before that, why don't I go ahead and show you what it means to make the character jumps or we're gonna go to the Character Blueprint. And that's here. Let's go to Shady Character Blueprint. I'm going to double-click. And it turns out we don't have to do anything crazy here, that there's already a jump function. All right, So we haven't jumped function here. And just like we did before, we also have our Action Events jump, right? So that's the one, that's why a lot of times I name it something slightly different. So we don't have the issue of trying to figure out which one is ours. But I'll, I have to do is connected this to jump. And that's pretty much it as far as the actual player, but not the animation. So if I hit compile and save, and then I hit play and I hit Space bar. You can see that I carried it goes up in the air. Now he doesn't have a jumping animation. Honestly, we could probably live with this if this was the bare minimum. But let's go ahead and give him a jumping animation. So now let's go back to the Animation Blueprint. And what's interesting about this is that now that we have the character in the air, there are certain functions that are just available to you to tell you whether you've jumped or not. In this case, that's all we care about. So now I can click, I can drag off of this blue wire and we want to type is falling, right? So you E4 basically always thinks it is using this, this particular function. If you're off the ground, then you're falling. And from a business perspective, it's correct even if you're going up in their own thinking my eye, you can't feel it but it's, it's it's nitpicking. Any physics, Nick Piketty, physics. I had to say that weird. Okay, anyway, so when the character is falling or basically is in the air, this is going to be initiated and return a value of either true or false. Now, one cool thing about blueprints that I haven't shown you is the ability to check and see what's happening when you're playing it. So you can do something called print string. And you can see print string here. And this is just going to print it out to that main screen so we can tell what's happening, right? And it's going to go ahead and convert this into a string. It's actually a Boolean here. I'm going to connect this execution plan here, so it stays in our flow of execution. Then I hit Play. And now you can see it goes to true on this left side when I hit my spacebar, right? And that's exactly what we want. Now you can use this print string to check almost anything in your advanced graphs. If you do anything more complicated, I'm sure you'll be doing it a lot. So now is falling. So now we want to be able to access this in our animation blueprint. So what we're gonna do is add another variable and we're just going to call this in air. All right, so now I have this variable called an air. I'm going to drag it into the Event Graph and I'm going to click Set in air. I'm going to connect it here, and then I'm going to connect it in our flow of execution. So now it's going to set the speed, is going to set this in air here. Now when I go to our Animation Blueprint, I can add this same thing, right? So I have our animation blend space which covers running and standing in place. But now I want to include giving our charity character the ability to jump. So I'm just going to drag this jump animation for my animation preview editor on the right side. And here it is. So it's really simple. It's really simple at least to get it into the window. So I'm just going to click on the edge and then it turns white on this edge, right? So now it's almost capable of jumping from one to the other, but we need to implement that condition of it being in the air. So in order to do that, this is actually the condition simple here. I just click or double-click on that. And in here, What's sets? This transition is guess, Yeah, You got it. We're gonna put that in air. We're going to get an error this time and we're just going to directly connect that. And that's because it's Boolean, right? It's either true or false. One is true. We want it to transition. When it's false, we don't want it to transition. Now. That just covers one direction, right? We don't want him to be jumping the entire time. We want him to jump and then transition back to a normal condition or a normal state. So in order to do that, we're going to pick this arrow and go back the other way. And now this is the era that transistors from jump back to our walking and running. We're going to double-click on it. And this time we're going to take that exact same one. So get in air the set we want this to do the opposite of what it did before. So instead of connecting a directly we're going to look for are not to Boolean and this means AND NOT symbol. If you're not familiar with any of this, if this is true, then this is just going to negate it. So if this is true, then what comes out of this is false. This is false. What comes out of this end is true. So we're just going to connect those. And that's pretty much it. So in order to go back one, this works kind of like a folder system. They're just click here. And this is what's going to allow those two states the transition from one to the other. So we're going to hit File, Save, hit Play. And now when I jump, we have our jump animation, right? And that's exactly what we were looking for. So there you have it. You have your state machine, you have your controllers. The only thing left is to, let's go ahead and make it slightly more interesting to play.
33. UE4 18: Create Objects : So now that you've done all of this work, Let's just make this a little bit more like a game. So what we're gonna do is just make this like a little running circuit. And we're just going to give him certain things to run over or run around or jumped through. And I'm just gonna do that by giving some obstacles here. So let's do that really quickly. I want you to do this as well. And you can do yours in whichever way you like. So I just dragged a cube over and I use the skill property here, this scale. I use the scale object widget to bring it over here. Now, once that's in place, I can go back to the Transform, the translation transform. I hold down Alt and I can just copy it, right? And I can put multiple ones of these here. And I can just go ahead and do this, which you might want to do is also make some that are taller than others, right? Because you want to see if you wanted you want them to jump over stuff. And then probably others you want him to just jump, not be able to jump over, right? So I'm just going to do that. Let's make this really tall so you can't jump over it. And like I said, you can do this as well. So now if I play the game, hit Play, Barcelona, do Save and play, right? I can jump over certain things. Let me go back and go back again. Well, let's do that again. Let's see if I can make it over this. Right? This is too high, so I have to run around it. And this one is also probably too high. So that's a run around it. So you can make like a little gauntlet here for your character to run down, run down, and then run through just like I did. And I can't wait to see what yours looks like.
34. UE4 19: Export Game Without Logo: Now that you've created this game that you can play and you've created this playable character. Now let's go ahead and export this or packaged as the UB04. People say we're going to package it into a executable that your friends and family can get to play into how amazing you are at making playable characters. But before we do that, there's something very important that we need to do. And that is make it so you can actually quit out of, again. No one wants an infinitely playable game that you can ever quit out of. So we're gonna make a very simple keystroke for quitting. So we're going to go to our action mapping, hit Plus. And in here, I'm going to hit Q. I'm just going to type clip. I don't know. I feel like I need to spell it, but I'm going to put underscore t. Just saw we know where, just so we can find it easier. And under the Hebrew word, I am going to bind this to escape because that's what you're used to hearing raid when you want to come out or something, you hit the escape button. So that's all we have to do here. The next thing we're gonna do is go to our character blueprint. And we're gonna go ahead and decrypt this. You probably don't need to ducky. You've probably already had been opened. So the first thing I'm gonna do is get this input action, some of the type quit it, those are quick t. And you probably already saw that there's a quit function. So I'm going to click again. There's quick game. And all I have to do is map that. So just so you know, without this, it's really inconvenient to quit the game because you have to go into the Task Manager or you have to trick the Windows button into coming up or hitting the Windows button. But this is going to make it really easy to quit. So are you going to do is hit Escape. And again, we'll quit just like you think it should. So I'm going to compile, Save. Now. We just want to check a couple of things. So I want you to go to Project Settings and under maps and modes, you're going to make sure that our default game mode is set to charity game, just like we set up before. The other thing that you want to check is the world settings. So in order to go to the World settings, you go to Window world settings. I already have it checked here. And it's over here on the right. And again, mode is set to game or override or under game on overhead. Make sure that's set to charity game mode. So now finally, I go to File package project. I am on a Windows system, so I'm going to put, I'm going to pick Windows 64 bit. Now I just need to pick where I want this to go. And let's call this package project. And we'll say packaged project to actually say, I need to actually create that folder first two, right? So I select this folder. Now, that's where all the packaging is gonna go. So this could take awhile. Actually. There is, there are ways to do this where you package, where you don't pack as much stuff that is happening. Now I've already done this a couple of times, so packaging it as much faster. But the first time you do this, and depending on the speed of your computer, it could take who knows how long, but be patient when it's over. Let's go ahead to that folder. So that folder was there in fact is Project 2. I'll open that up. That was the name up and here is our game. So I didn't jump. Yeah. Can run around. I'm using the mouse, so control the direction because that's the easiest way. We definitely put things in here. Or being able to control strafe, but stripe doesn't quite make as much sense unless we put strafing animations in here. So there you have it. I can't wait to see what you create when you put up yours and you pull up your game. And it's been an honor. See you on the next one.
 EduCraft Ideas, 3D Animation with your imagination!