Transcripts
1. Introduction: Hello daughters. My name is Sam Malcolm's my own car studio in the hills of Central Virginia. I started working with clay seven years ago and for getting out of the Navy is going back to school on the GI Bill and sort of stumbled my way into clay. And without meaning to found a medium that I love to work with and has become a real passion. I started teaching poverty few years ago and love helping others work due to issues with clay. It's exciting. Helping beginners break through those barriers and begin building the foundations needed to make good pots. So let's get into today's class on the basics of throwing pottery on the wheel, where I'll be covering and demonstrating basic skills needed to make a simple cylinder on the wheel. First going over some basic fundamentals to keep in mind when thrilling and getting into how to compare clay and tools and ourselves to work on the week. No one beginning that clay on the wheel, centering it, throwing it. And lastly, doing some simple training. Now being said, let's get into the basics I like to keep in mind when you're working on.
2. Fundamentals: There are three simple but very important aspects to successful wheel throwing. The first is leverage, the second is stability, and the third is sensitivity. Leverages a pretty simple concept and it's really just influence. And having to leverage means being able to effectively influence something. When it comes to making paths, we're looking for mechanical leverage by bracing our hands or arms, whatever it is we're using against another part of our body. So we need to think about how we're influencing the clay. Start from where you're touching the clay, even with part of hand, evil part of your hand you're using. And then working your way back and seeing what's supporting what and finding ways to support whatever part of your hand or tool is touching the clay of the time. When it comes to stability, speed, stability. It comes from two places, either brute strength or understanding leverage. And I highly recommend using leverage as it makes life much easier. I've heard so many times from students that they're not strong enough to work with certain amounts of clay. And I told them that's not true. It's not getting stronger although your muscles do develop with it. It's more learning where to place your hands, arms, and body in ways that support each other. And this will come with experience. So you'll sort it out much quicker, keeping in mind while you're throwing until those comfortable and more secure positions become a habit. Third, sensitivity is the most important part of drawing and working with clay in general. You have to know the tolerances of the clay while working with it. Knowing your clay body is the first step in this. What is it designed to do? Is it better for throwing, hand building? What have you? Then answer, finding your touch and learning when to apply pressure, where and how, when to back off and be delicate and went to be more aggressive. Cultivating our sensitivity will allow us to go from making a pot, okay, plots, the great pots. So keeping these fundamentals in mind, let's move on and get ready to do some time to prepare.
3. Preparation: The first thing we'll do to prepare is just warm up a little bit. Shake out your hands, maybe do some other stretches for your bag and tips. As someone with a serious back injury, I have to be careful how I work on the wheel and find it very useful to get the body moving a bit before hunkering down into thrill. Now, let's get our tools and equipment ready. The first thing we'll need is our wheel. I use this Jimbo. It's a great wheel, but I recommend using whatever you have at your disposal will need a bucket of warm water and our hand tools. I like to keep it simple when it comes to clay tools, mostly only using a sponge, a couple of ribs like throwing knife which I made out of bamboo. One group I made out of cedar, and my wire and needle tool. After that, we'll get our clay out of the bag, way out to Alan and get into wedging. Alright, now we're gonna get into wedging. So I'm going to take this rough cut piece of clay that probably has a bunch of air bubbles, maybe some inconsistency is in it. It's just not, even it's not ready to get on the wheel yet. So we're going to wedge it. And wedging is very simple. It's just the process of pushing the clay into itself over and over again in order to work out some of those air bubbles. So there's two types. There's the Western method, which is just kind of a straight forward and back. Sorry about my creaky table. But I'm going to go at the spiral wedging technique or the Eastern method. In this method I'm going to rock the clave forward and kind of twist it at an angle, rocket back and twist it again. So as I go on and try to position the sequence Si and more. So rock and back, pushing forward, rock them back and pushing forward each time and trying to keep by the same amount of pressure. And what I'm looking for as I go here, I start to see this spiral. And that's just showing you that I'm pushing all of these little layers of clay into each other. And like I said, what that does is it gets all the air bubbles out. It also makes the claim more homogenous and easy to work with. If you have any spots that are too wet or too dry within the clay, this has helped get all that evened out and give you a nice uniform clay body to work with? Some working with about two pounds. So you don't need to wedge forever. I like to do at least 30 iterations. Now I've been running my mouth, so I haven't been counting how much I've been doing this. We usually around 30 as well. I like to stick with and as you go up and wait, you'll also want to go up and how much, how much you wedge because that's just more clay that you have to work through. All right, That should be good. Someone to start doing a little solar, little smaller and smaller wedges. Rock that bottom. I want a smooth bottom here because this is what I'm going to attach to the wheel head itself. I don't want to use this side because it's full of all these spirals in cracks and that cause the bottom of our pot the crack later on. So I want to use this side. I'm just going to tap this into a ball real quick. Just make it a little easier to work with. And maintaining that nice smooth uniform bottom right there, because that's what's gonna go on our wheel. There we go. Now that we have everything ready, Let's get seated at our wheel and start throwing.
4. Centering: All right, First, we're gonna get our clay on the bat and centered. So the first thing I'm gonna do before putting the clay on this band. Let's get my sponge a little wet. First thing I'm gonna do before the first thing I do is turn my wheel on very important step. And I'm gonna take my wet sponge and just put a little layer of water on the middle of my god Here. And that's just going to give the clay something to stick to when I smack it down on that. So I'm gonna take my ball of clay making sure to use that rounded bottom that I that I made when I watched that I made sure I had I'm going to smack it down right in the center of the wheel here. Just like that. And you can see I didn't really get it perfectly in the center, but that's okay. We're going to fix that right now. One of the things you can do is you can kinda smack it around a little bit too, if you need to have them not gonna do that. So I'm not going to shake my camera them much. Sum's gonna do regular Saturday. Somebody get plenty of water. Don't be afraid to use as much water as you need to use while you're doing this. So I'm just going to rest my left hand here. I'm not going to brace anything. I'm not going to push anything. Just kinda get a feel for what's going on here. I'm going to rest this base part of my hand here. This is really what I'm gonna do a lot of the work. This base part of my hand, right where my hand connects to my wrist. I'm going to rest this right on the shoulder right here. And I'm going to take my left elbow and kinda tuck it into my tuck it into my hip here. And then I'll lock that elbow. And so now my arm can't be pushed back and forths. And now you can see my hands starting to see a little more seti study Macleay still moving around a lot. But you can see that even once I lean in a little bit more, it starts to get pushed more and more into that central, central position. But that's not enough. So that's where this right-hand comes in. So there's left-hand is kinda my base, kinda my platform. I keep my left arm anchored and I have this firm backdrop. And this right-hand comes in and applies that downward pressure. And that downward pressure kind of creates this, this little encapsulated area where the clay is going to rest. And this is where you're leveraging your stability really, really come into play as well. You're centering. Because this is where a lot of the most, I guess kind of the grunt work is done where the most effort has to be applied. And that's where people start to think they're not strong enough to work with surgeons amounts of clay because they think they can't center certain amounts of clay. That's not the case. Especially when you learn just where to put your elbows, how to fix your lists, how to hold your hands. And also I would recommend while you're centering, it's kinda looking at your hands and seeing if there's anything that's moving around. Look at your hands, see if there's anything moving. And then after doing that, close your eyes. Close your eyes and just feel how the clay feels spinning through your hands. Does it feel steady? Does it feel like it's moving? If it does or if it looks like it's moving, you probably need to apply a little bit more pressure. And sometimes things are just a little bit shaky. Somebody is just right there really close. And then it's just an issue of applying that in a little bit extra pressure. Sometimes people are afraid to really lean into it. And that's what they had to do. It's now I'm gonna cone up and I'm just going to squeeze this clay together, bring it up into a cone shape, and then press it back down. And this is sort of just another way to wedge the clay, but just on the wheel. And I just kinda continually just kinda scrape away anything down here at the bottom. This because they can start to push your hands around. So for centering, you really are required to think about those three, those three fundamentals. Because you really, really have to be mindful of your leverage. So you're not having to work in so hard, making sure your hands stay stable. So you're not have been pushed around by the clay. And also you make sure that you're the one controlling the client. And that sensitivity also comes into play here because you don't want to squeeze too hard. You don't want to squeeze too soft. You really gotta dial in the right amount of pressure to use when centering and you'll figure that out. It's one of those things that people often really struggle with until they don't. And they just kinda get it. They, they, they they get that muscle memory and they understand where to put them, where to put themselves or to put their hands, elbows, shoulders, all that stuff in a way that allows them to have the most leverage and the most control over the claim. Okay, so now that we've got this centered, Let's get it opened up and ready to throw.
5. Throwing: Okay, Now that we have our clay centered, Let's get it opened up and these walls lifted. So the first thing I'm going to do is with a wet right hand, I'm going to rest my thumb right here on the top center of this clay. That curve and my thumb is I'm going to slowly push that curve down into the top of that clay and create this little dimple. So crater right here. I'm gonna put some water in that little crater. And then using my left thumb and holding it with my right hand. I'm going to press the tip of my left thumb down into that crater. I'm going to press down at a slight angle so it flares the clay out a little bit as I go, not too much but enough so I can see I can kinda see how far down my hand is going to ease off. Take my sponge, get this water out of the base of the pot, then take my needle tool, stab the center there, slide my finger down the needle tool until it hits the clay. And I see I've got about a centimeter of clay there and that's perfect. That's just a little more water in here. And when I rest my hand in here with my right fingertips kinda resting against the base of the base of the glacier. And I'm going to press back with my left hand and start to open this clay, a blue. There we go. Get the water out of the base here. And then I'm going to use my cedar ribs here to really compress the floor of this pot. I want that nice and strong, nice and flat. And that does a couple of things. One, it's going to make it easier to throw, it's going to make it easier to lift that claim. But it's also going to make it stronger. It's going to make it much more resistant to cracking. That base is just going to be nice and tight. Yeah. And like I said, just be a lot less susceptible to any any damage, any stress. A little more water on here. And before I lift up, I'm just going to collect this rim and a little bit. I'm not going to squeeze all the clay, just, just this part just going to get this REM moving in a little bit. Because one of things I want to keep in mind when throwing is I want to keep this in a conical shape as much as possible. I want to keep all of this clay as close to the center of the wheel head as I possibly can. And that's just because of physics. The more this clay is closer to the edge of the wheel, a faster it's spinning, the more centrifugal force is being applied to that clay. The closer I can keep this clay to the center of the wheel, I can spin it really, really fast and not that much force is being applied to it. Now this is flared way out here. It would be a lot of stress on the clay. So as you're working, be mindful of how close it is to the center of the wheel, that clay is, how close it is in being mindful to keep it there. We're gonna do that throughout the throwing process. We're going to keep making sure this isn't a nice cone shape. But now we're ready to throw this clay up. We've got our nice horizontal bottom met by a vertical wall. And this is exactly what we want. Because having this clear transition from horizontal to vertical and gives our hands and place to grab this clay a little bit and I'll let you know what I mean by that. So when I go to lift this clay, I need to make my hands into a sort of an extruder. And I do that by arresting my right hand down here against the clay in the bat and my left hand in this corner of clay I just made. And now this makes them slightly offset my life, my left hand is going to be slightly higher than my right hand. And that's okay if they were dead even you create this really thin pinched spot of the clay and it makes it really easy to rip. If you offset your hands a little bit, it creates this S, this little extruder and that will help me lift that clay up while keeping its strong. So let's do this. I'm going to push in a little bit. I'm also going to overlap my thumbs here. Remember when we talked about leverage and stability, I'm looking for any opportunity I can to keep my hands and tools connected. Some of start to press them with his right hand. Nice and easy. Going a little bit of a lip here. I'm just gonna do a nice little easy lift there. And I just want to get the class started. And then I'm gonna move it and compress, compress, compress. I'm going to keep this in that cone shape. And then also in that cone shape makes it easier to compress because it's easier to withstand that downward pressure. Here we go scrape some at least clay off the time. I was wondering there, pull some water out of the inside. Like I said, don't be afraid of using too much water, but do be mindful of letting standing water sit in your pod for too long. They can sit there for quite a while, but just don't let a gallon of water sitting there all day. And then do the same thing, press them with their right hand. Press L with that left-hand speed of my wheel just a little bit and then nice and easy. Slowly bring this clay up together. Men. Before I get to the top, I'm going to stop. And I always stop before I get to the talks. I like to leave this nice thick band of clay up here. And having that nice thick band of clay just gives you a lot more freedom. You can do a lot more with it. You can make a nice thick top for a bottle. You can pull it to make a pitcher, you can undulate it, or you can hack it off and make a thin rim if that's what you want. But this thick rim of clay also, very importantly, while I'm throwing, helps keep a lot of this clay contained, helps keep a wrangling. I've got this nice thick band up top that's just kind of acting as a security blanket. In the meantime, compress this again. And when I'm compressing, I'm supporting both sides. I'm not squeezing both sides, I'm just supporting both sides. And then either with a sponge or with your hand? Miguel, He's the crook of my thumb. Sometimes you just press that down and see support and sometimes even lift up a little bit while this is squeezing down anything you can do to apply maximum pressure to this RAM while applying minimum pressure to the body. Sounds counter-intuitive and it is, but that's kinda the trick with compression, is finding a way to support the area that you're compressing and compressing it without messing with the program tonight. But that's also where that stability and leverage and sensitivity comes in. You really need to focus on, not focus on just practice, practice, working with all three. Let's get one more easy throw. Press out with this left-hand, catch it with me, right? Nice and easy. Just gonna go straight up. Nice and easy. Here we go. And stopping right before I get to the top. And there we have it. This is a throne cylinder. We've gone from opening that clay up, establishing a nice horizontal bottom met by that vertical wall, pushing into that vertical wall from the inside and under it from the outside. Lifting, lifting, lifting, lifting, nice and slow, bring in that clay up. And then after every iteration, making sure that clay is Condon and making sure we're compressing this rim. And doing those things will really help us keep this pod strong and durable and able to be worked with. So last thing I'm gonna do that's part of my throwing here is I'm going to compress this ram. Somebody hold my robe on the outside from the inside into this rib. And that's also just an extra little layer of security that's gonna make this claim much stronger, much less susceptible to breaking or crack and but also It's going to make it easier to glaze, easier to fire. Having this compressed, this compress the clay. It's just easier for the, it's easier for everything. Just makes everything easier. Okay? So now we have our clay throne, and now we're just gonna do some basic trimming, some basic finishing. And that will be all. Let's get into it.
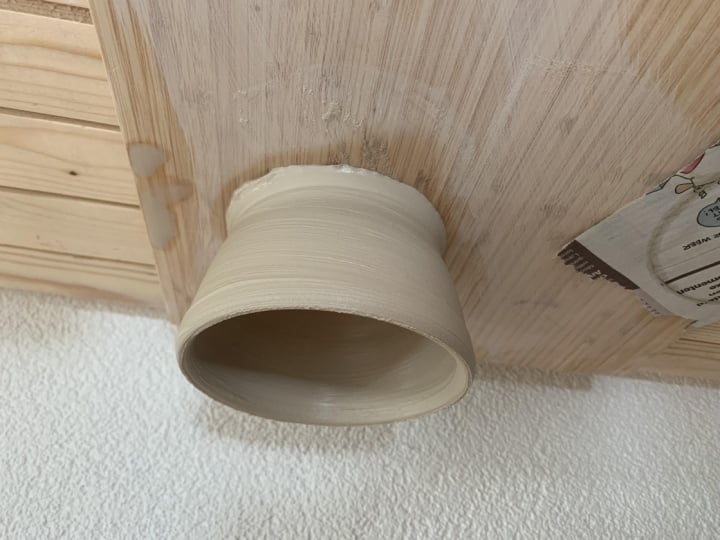
6. Finishing Touches: Okay, Now that we're done throwing our basic cylinder, Let's do our final polishing moves here and get it taken off the wheel. So the next thing you'd really be doing is if you were gonna do any alterations to it. If I was going to flare out the body, if I was going to bring anything in. But for the sake of this video, we just want to get a cylinder because the cylinder is the the, the form from which all other forms spring. For the most part, not everything but the cylinder is really just kind of the most basic, basic thing that you need to learn how to throw if you're going to be successful working on the wheel. This is, this is where it all starts and I recommend starting with two pounds as it's a good amount of clay to get your hands around. It's not too much, but it's also not too little tour. You can't control it. So if you're just starting out, if you're just trying to learn, I recommend sticking them between 12 pounds to begin with, and then scaling up or down from there depending on what you wanna do. So, since I'm not going to be doing any fancy alterations or making it into a bottle or spouse or anything like that. I'm just gonna go over how to get some of those Cloud and the base here. And then how to get it off the bat. Pretty simple. So I've got my bamboo throwing knife here, pretty simple. And you can get all sorts of different throwing knives from different places. Just like this one. It's a it's a shape that I like and I made it myself, so I like it even more because of that. So let me get this wheel turning a little bit. And you can hold this tool a couple of different ways. It's multifaceted, so I'm going to flip it so the blade is up slowly and once again, stability and leveraged and keeping everything connected, keeping everything strong slowly start pushing that blade into the side and just scrape off some of that clay there. Not all of it. And I'm going to flip that blade over and lay it against the bat here. And again, just scrape that clay away that got stuck to that. And now I'm gonna show you all a trimming on the wheel technique that that is, that'll take a bit of practice. As aside from just pressing N, This is probably the easiest way to trim something on the wheel is just a press and when you're throwing tool. But what can end up happening sometimes is end up compressing the wall in, instead of actually trimming clay away, you just squeeze it all together. In an A-B, squeezing the inside of your pot, making it less functional. All that. So a way to avoid that is to set the tip of the knife up a little higher against the part of the pot we're not trimming and then slowly driving that point down. And so now instead of pressing that clay in PSAT into sideways, excuse me, sideways into the pot. I'm pressing it down into the bat. So it doesn't it doesn't stress the pot on it all. And then I can just split my blade over, drag it along the bat there, scrape all that clay off. A little touches here. And whatever it is I'm working on, I always like to have just a slight little bevel. It's nice little lift there and just creates a nice little shade line. Just creates a little bit of lift, little something extra. And while we're here, we might as well do something with this room. Not just leave it all. And I'll just leave it all crazy. And so with the rim, kinda like this bottom here, I don't want to just sitting flat. I like a little bit of curve to it, just kinda keeps any tension, any tension moving. I'm not going to get too far into the weeds on this. That's not what we're doing today. I'm just going to have a little fun real quick. Show you how I like to push around rooms. I loved it like alter things and just kinda squeeze things around a little bit. There we go. Got a nice chunky rumbles cylinder there. A nice shape. And then I could use this to either form it into a bottle, could cut a gallery in this and use the lid. But for now, what we're looking for is just the cylinder, very simple shape and yet a very important shape when it comes to working on the wheel. All right, Now let's get this cut off the bat. Set aside. So I'm gonna do is I'm going to grab my wire tool, both hands as you wrapped around my left-hand or however much I need to wrap it around swag, but well, about the width of the pot. And I'll take both my thumbs and press down. Now press that down into the back and start to pull back. But I'm also going to turn the wheel while I'm doing it. Pulled through under there, like in the old spinning. And why I keep the wheels spinning is because as that wire moves onto the clay, It's going to drag some of that clay so it might distort the pot. So it's kinda just good habit to keep it spinning. So while you go through it, it's not pulling the pod one direction. It's kind of a swooping motion. Once we have that cut, you want to have to clean dry hands as clean as dry as possible. Get as much of your hand around. There's possible rocket a little bit and then take it off. And you've got a nice little cylinder there and then you can set it aside, put it on a ware board, whatever you wanna do, let it dry out and go from there. Let me go.
7. Final Thoughts: Thanks so much for spending some time with me today. I hope you enjoyed the video and now you're able to learn something. Starting on the wheel is challenging. And if you're just starting out, I would encourage you to keep at it and find as many features as you can as each one will have something different to show you. Because humans have been making class for a long time. And very few of those potters thought history I've done in exactly the same way. Which in my opinion, as well as the coolest parts, about five, That's very open-ended. So don't be afraid to make mistakes and don't be afraid to explore. Remember the learning the basic mechanics of drug. Being confident, wedging, centering, growling, and trimming is very important in that exploration. And that's made much easier by being mindful of our leverage. How do we support ourselves while throwing our stability? How we maintain a solid position and sensitive, how we maintain a gentle position. All of these aspects support each other and will help you cultivate a healthy and happy relationship with the claim. Thanks again for watching and see you next time.
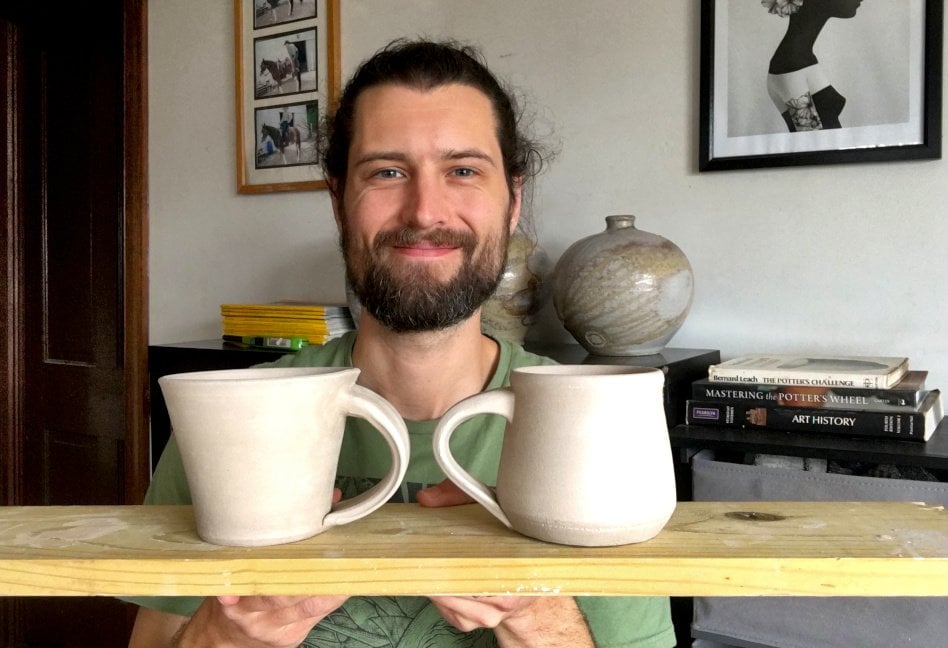
 Samuel Deering, Lets make some pots!