Transcripts
1. Introduction: Have you heard about
technical pens? What are they? Are they
just fancy, fine liners. What can they be used for? Can they only make
straight lines? Can you sketch with them? Is there any point
to them at all? If you have any of these burning questions
that you need answering, like keeping you up at night, then you're in the right place. If you've always
been curious about technical pens or if you want to just try out a new
art medium and two, or if you just want to
feed that pen addiction, then you've come to
the right place. So let me introduce you to the wonderful world
of technical pens. In this class, we're
going to delve into the technicalities
of technical pens. We're going to look at
how to use these pens. We're going to look at
how to maintain them, clean them, ink them, and use them for
sketching purposes. We will also look at the different surfaces that
we can use these pens on. Then we will move on to the exciting part of actually
going ahead and using the amazing worksheet that is specifically designed
for this class that you can download. In the resources section, we will look at
practicing how to create hatching lines in vertical, horizontal, diagonal directions. We will then move on
to looking at how we use these lines to produce
wonderful textures, but creating crosshatching at different levels using
the different points that we have available. We will also look at how to use stippling and
scribbling effects. She's gorgeous tonal areas
of our illustrations. And then we will do a short
little exercise to bring together all of these
lovely textures that we've practiced to produce a
simple little elements of an illustration to compare and contrast and be surprised by the results that
we can achieve. And then we're going
to do a full sketch and step-by-step on all of the techniques that
we've learned and put it all together in a
beautiful small, mini, easy to follow
design that you can practice once you've completed the worksheet and on the
step-by-step for sketch, you will be ready. Go ahead and unleash your creativity on
your class projects by producing a gorgeous
illustration using all of the techniques that you've learned
and practiced. And once you've done your class
project to make sure that you leave a beautiful
review on the class so that other students
can find the class and learned from your personal
experience using these pens. And we can all learn together in this lovely world
of technical pens. Are you excited as I am? Can't wait to get started. Then what are you waiting for? Grab yourself a nice drink, get yourself a
nice little treat. Sit back. Relax, get your
technical pens ready. And let's get started
with this class.
2. Technicalities of Technical Pens: Okay, welcome back.
Let's now talk about the technicalities
of technical pens. What our technical
pens, technical pens, or specialized instruments
used by engineers, architects are drafters
to make lines of constant width for architectural engineering
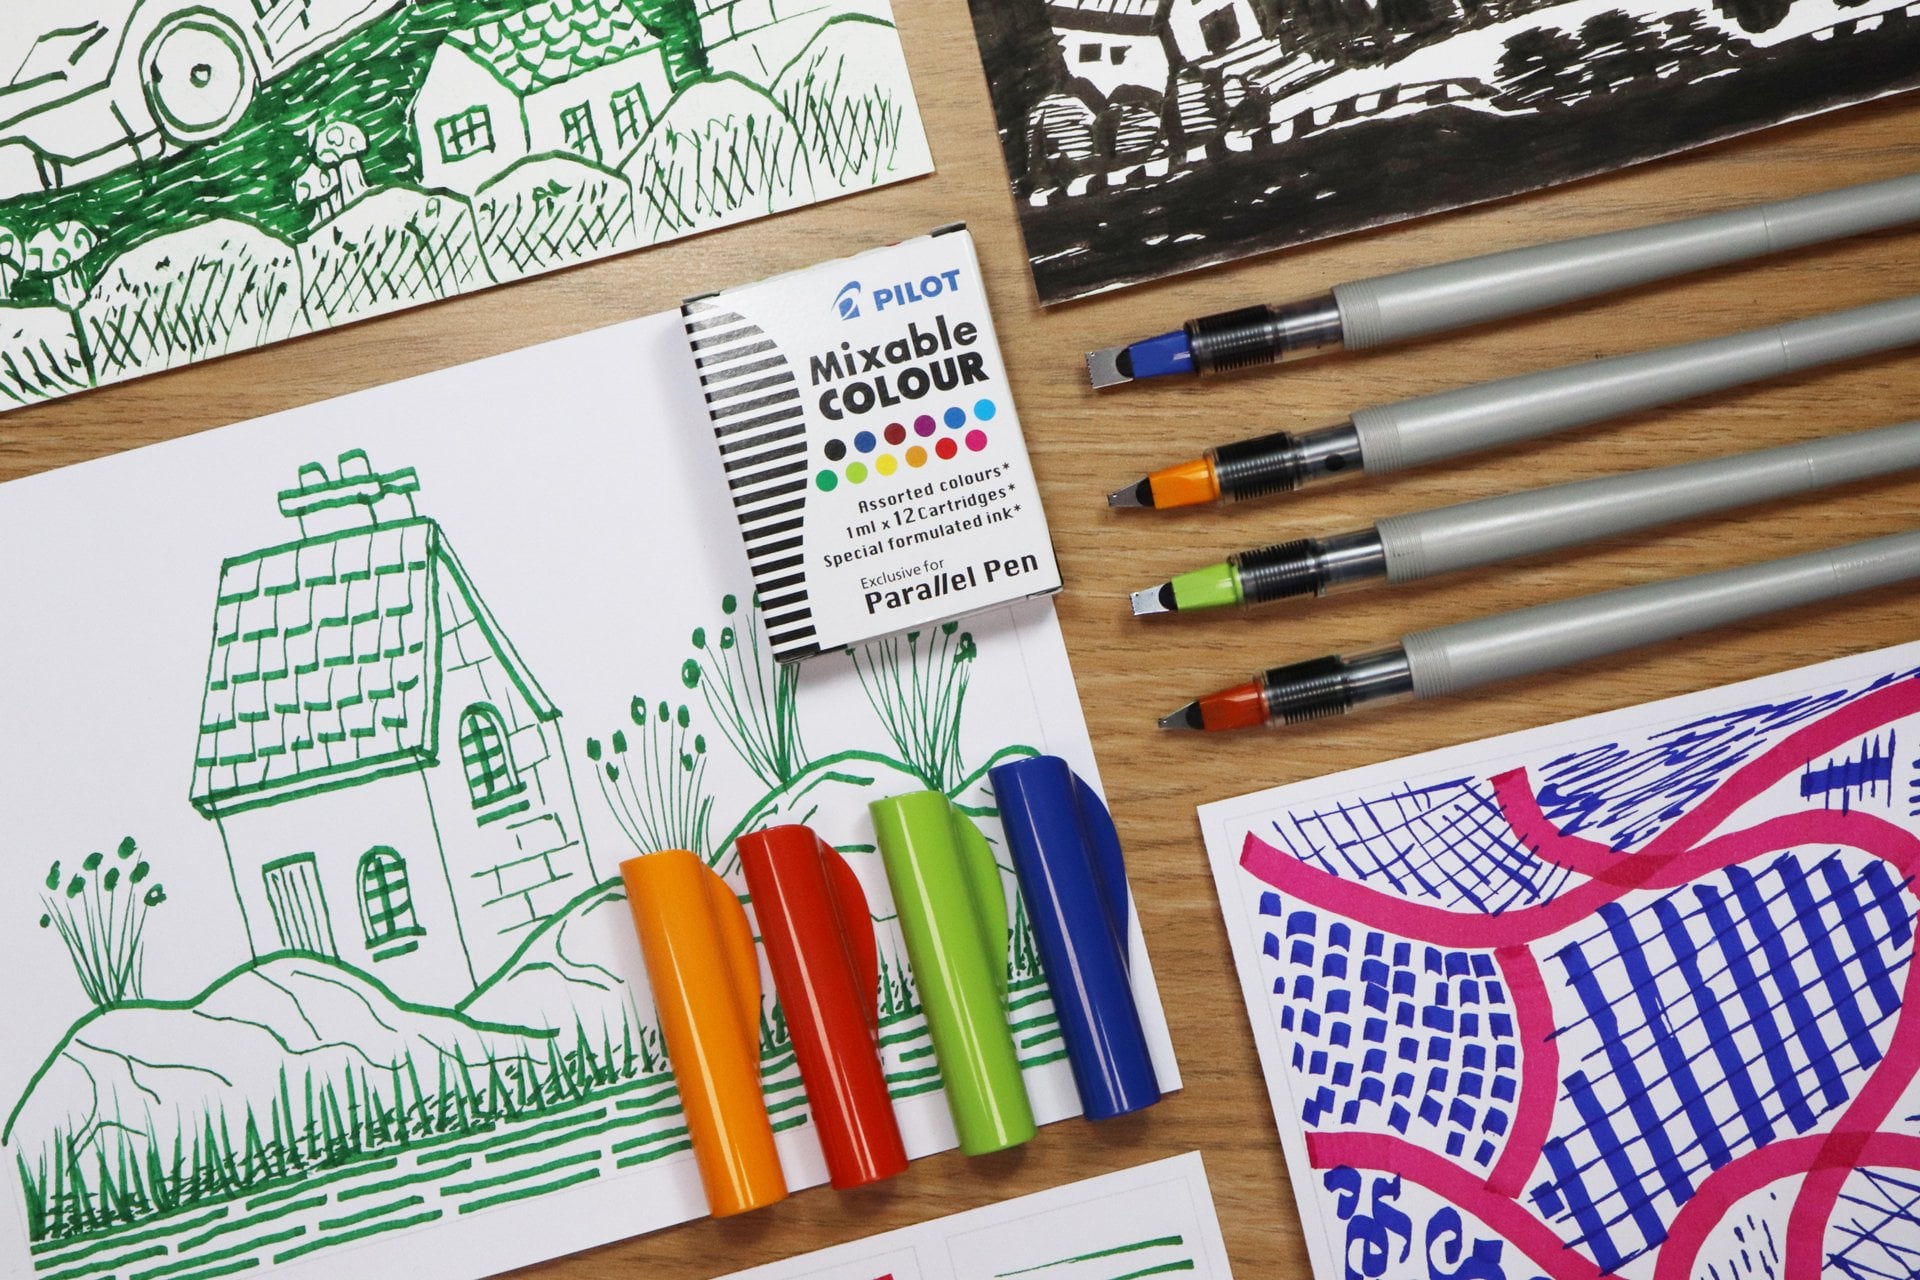
or technical drawings. Technical pens available today fall into three main categories. Number one, the
classic steel nib pen, which is what we're gonna
be talking about and demonstrating
throughout this class. Number two, disposable pens, which can also be referred
to as fine liners. And refillable pens,
where you have the ink that can be
refilled and used. Again. Steel nib technical
pens generally work best when they're held
at a steeper angle, like 90 degrees to the
surface of the paper, and therefore can
be a bit difficult to sketch with when
you're sketching faster or if you're used to
doodling at a faster rate. The plastic nib variety
can be used much more like a normal
pen in terms of holding position and
speed of use and are generally easier
to use for sketching. However, I personally
use steel Nick versions myself to produce highly
detailed sketches. I also use them very
similar to how I hold normal plastic nib
disposable pens in this class, we will therefore be focusing on the steel nib technical pens and demonstrates how we
can sketch with them by creating wonderful
lines and textures. These pens give you
the most predictable, fixed width lines and can
be filled with pigment, drawing ink either from a
bottle or by using a cartridge. The nib sizes of these
pens are usually quoted in millimeters and they represent the linewidth that
you can expect. Unlike the relatively
arbitrary numbering of disposable fiber
nib drawing pens, they are generally
cheap to run as the bottled ink is cheaper
than buying refills, but the pens are more expensive to buy in
the first place. And they can be rather
expensive depending on what brand you buy
and whereabouts in the world you are
geographically located. They also need more careful
maintenance than other types. If the ink is allowed to
dry out inside the pen, it can be very difficult
or even sometimes impossible to clean out
the nib unit again. And therefore, you
may have to buy a replacement you nib unit, which can cost usually a similar price of the
entire pen itself. However, if you
properly care for your lovely steel nib pen, these pens can last
for many years rotating have two options
for their steel nib pens. Number one, the ISO graph, which has replaceable nibs
and we can use bottled ink in the reservoir holder
number to the repeater graph. This also has replacing nibs. However, you cannot use
bottled ink with these. You've got to use the
replaceable cartridges for the standard
Lamar's metallic pens. These also have replaceable
nibs and these have a unique sprung seal
in their mechanism to eliminate the problem
drying ink in the nib. And for these ones, you
can use bottled ink. For both brands. They have their own
sized cartridges, whether you're gonna be using the refillable cartridges or the permanent cartridges
that you can replace. So you cannot really
use cartridges that are available
from other brands or other types of pens
because they are specifically designed to
fit that particular brand. Both Rob drink and
Staedtler have a wide range of NIB
and point sizes, and they can be purchased
as a single pens or units. Or they can be bought in lovely fancy sets where you have a range of
different points, sizes. As mentioned earlier,
each pen has its own replaceable
nibs that you can buy if you break
them or lose them. However, the cost of these
are usually quite high. Let's now look at the inking, cleaning, and maintenance
of our lovely pens. As mentioned earlier, you
can use bottled ink for both the rotary ISO graph and the Staedtler Mars metallic. This works out much cheaper in the long run
and is better for the environment due to less plastic cartridges
being used and thrown away. Rotating and Staedtler both have their own ink to use for
their technical pens. However, you can also use any other good-quality ink
using the rotary Inc would be the easiest option as the
bottle is specifically designed to fit into the
reservoir holder of the pen, and therefore you'll
have minimum leakage. Here's when you go ahead
and refill that reservoir. However, I personally prefer using my waterproof
fountain pen ink, which is less thicker
inconsistency and flows better in my personal opinion for my
personal style of sketching, refilling using other
ring can be tricky. However, it can be
easily done using a syringe and this is
how I do it myself. A nice step-by-step illustration on how to ink and clean
your altering and Staedtler pens can be found on the instructions in the box
that each pen comes in. It may be a laborious task, but I would highly recommend cleaning out your
pens regularly, especially if you don't
use them for awhile and follow the instructions that specifically come with each pen. The Staedtler has a lovely
little mechanism where you can remove the nib by using the
back of the cup of the pen. Whereas with a rotating,
the mechanism, again is similar in opening up the pen and the
components easily come out and you can
actually go ahead and literally clean every
part of your pen. And finally, let's now talk about the surfaces that
we're going to use. Our steel need depends on the angle and position
you hold your steel nib technical pens will depend on the nib size and the texture
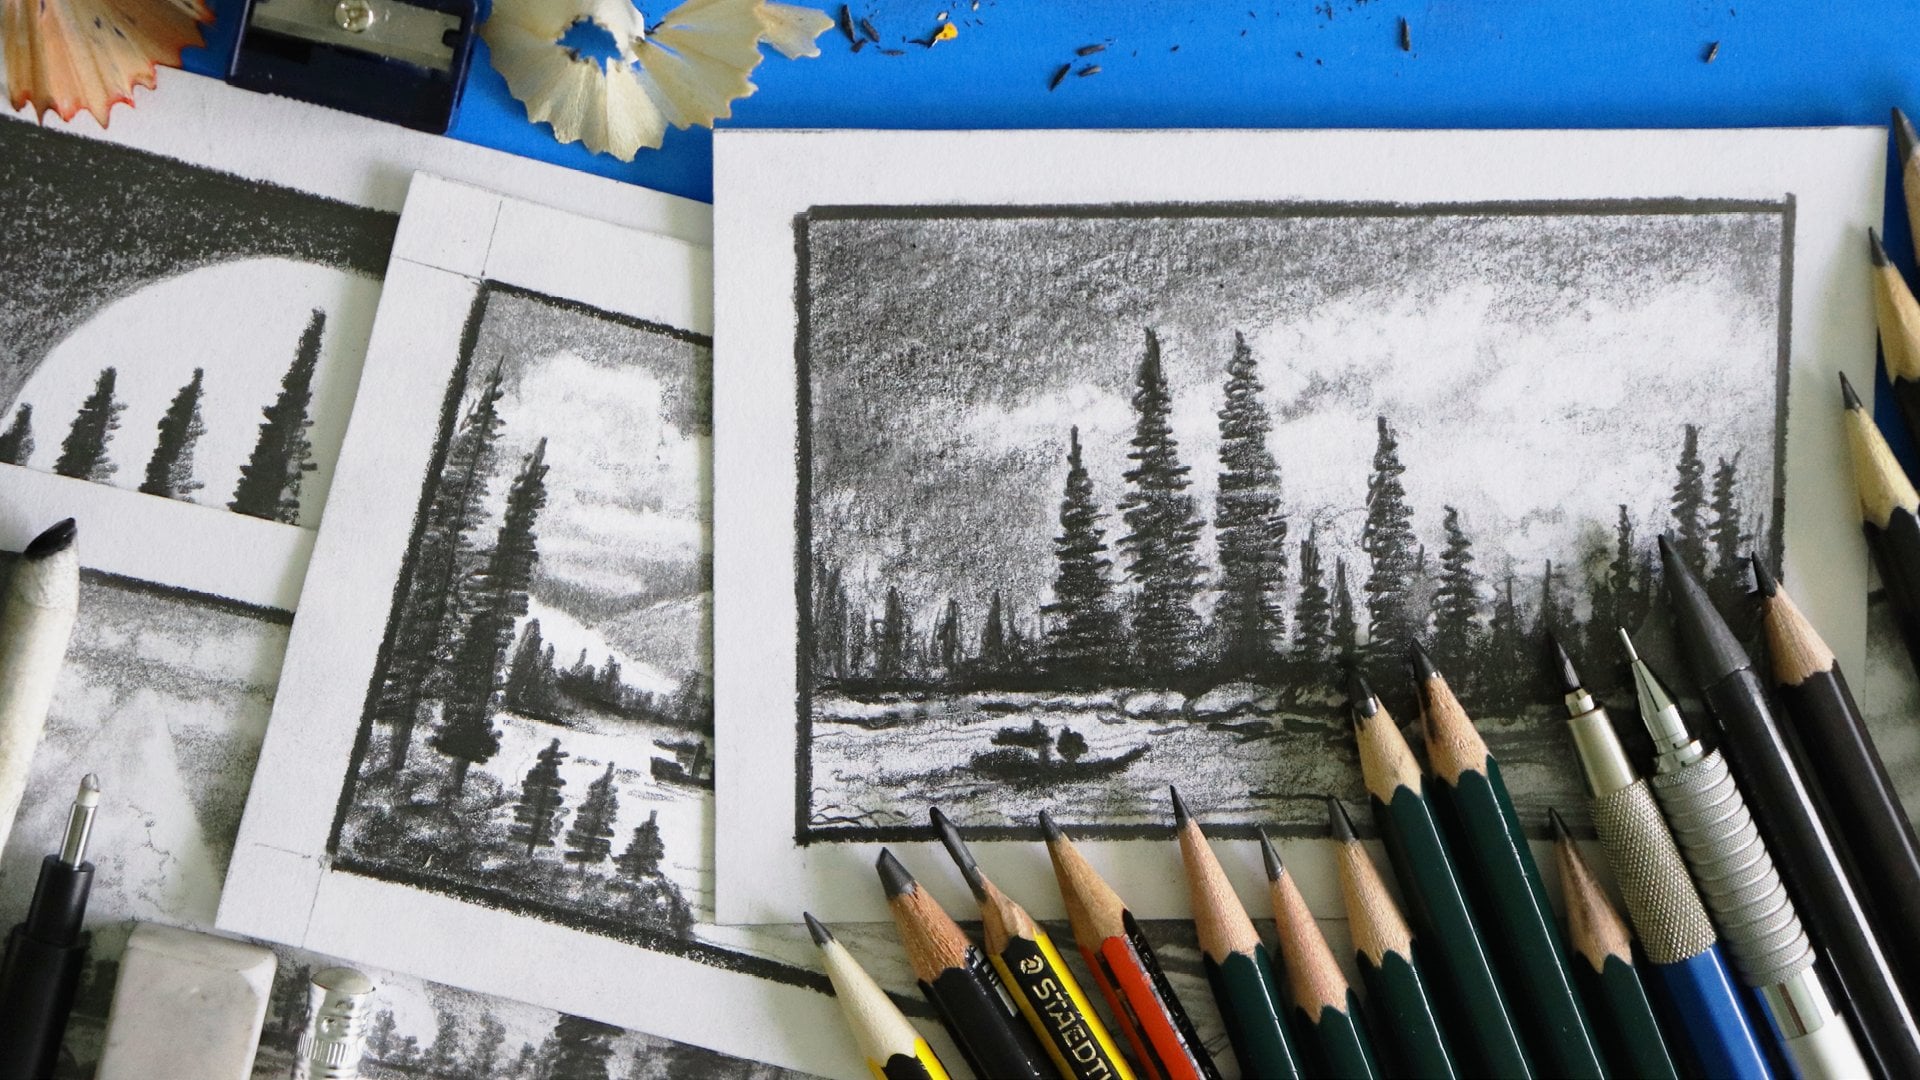
of the surface that you use. From my experience, I have
found that the thinnest nib will tend to work more like an ordinary plastic
nib, fine liner. But the more wider
nib can require a steeper angle for
the ink to flow. The more textured
your surface is, the more skipping you will
generally get from the nib. So I would advise using
a smooth surface like a bristle board paper or a smooth cartridge
paper for sketching. I personally use
Bristol board paper when using these pens, a list of my
recommended surfaces and other supplies can be
viewed in the resource pack. So do check that out
when you get a chance. And that's about it for the basic technicalities
of the technical bands. Let's now move on to the
exciting part and start creating some gorgeous
lines with our steel nibs.
3. Hatching: Welcome back. Let's now have a look
at our worksheets. So what I want you
to do is print off the worksheet that's attached to the class resource sheets. And once you've done that, let's now focus
on the exercises. So on the table over here I've
got the worksheet printed off and you can see that we
have four different sections. We have hatching, crosshatching, then we have stippling
and scribbling. And then we finally have these four little boxes that have these circular
shapes in them. So I've done for the purpose of this class is to
go ahead and cut these four sections out
so that it makes it easier for me to do the
exercises for you to save, but you don't need
to do this at all. Keep your sheet intact as it is. You don't need to
cut anything else. So I'm just going to
bring on the screen my cutout middle
versions of this shifts. And just like that, we have four nice
little rectangles of the four sections
of the worksheet. So let's now focus
on the first one, which is the hatching. So I can just move these
other ones out of the way. Get them out of
the way so that we can have a nice zoom in, zoom in on this and
we're just going to get a quick Zoom is zoom in on this. That's looking
fantastic so that you don't miss anything
on the screen. Beautiful stuff and we want
to get a nice focus on this. So it looks nice, crisp and sharp, just
like this morning's. Let's now have a look
at our technical pens. So with our technical pens now, as I mentioned before in
the previous lessons, I have my three
lovely technical pens over here with my
different widths. So what I'm gonna do is I'm
going to use all three of them in this exercise
worksheet now, you may not have or three or
four different line width, you may just have one. So just go ahead and
use the one that you have and just maybe
practice doing different shapes and
patterns as you go along in these four elements of this
worksheet and exercises. So I'm going to start off
with my finished points which I currently have as
the naught 0.10. So I'm going to open
this up and it should be nicely lubricated with ink. So let's go in and
do this exercise. This exercise is
just really simple. It's just to get you warmed
up to really get yourself ready to start doing drawing and sketching
with these wonderful pen. So before I start, I'm actually going to go
ahead and we're going to put a piece of paper underneath here because I don't
want to go ahead and press too hard and then damage my paper and damage my pencil if you're using a thin paper,
Here's another tip. Always use maybe a couple
of sheets of paper underneath that paper
that you're drawing on. So what I'm gonna do is I'm
going to grab hold of a, just a plain sheet of paper now. And just like that, I'm just going to
place that underneath that we have a nice
cushioned effect, our lovely sheets
of hatching paper. So what I'm gonna do now is
I'm going to hold my pen in the normal position that I usually hold my opinion
when I'm using fine liners. So just like this, I'm going to hold it in
that normal position at an angled slope. And then I'm going to
start off by going on this first box on the left
where we have vertical lines. Now the second box, it says
horizontal, third and fourth, say diagonal lines and
we'll move on to them next. So vertical lines,
all I'm gonna do now here is with my pen,
just normal pressure. I'm just going to draw in some lovely vertical lines
like this just to get the ink flowing and to really get the mood going in this
technical pen class. So just like that, quickly filling this in. And what this will do
is this will give you an idea of how far
your pen can go, depending on the width of the pen that you
have, the tip size. So let's just continue. And just like that, I've got
some nice vertical lines. So what you can do
is you can go ahead and do the next box
underneath this. So if you don't have
another tip size, then just go ahead and do
another one underneath this. I'm going to leave that for
the next point that I've got. So after I've left pretty much a nice equal gap in-between
these vertical lines. If you want to make them a bit tighter, go ahead and do that. I can actually demonstrate that. So just in-between each
one of these gaps, maybe just have a couple of
more lines, just like this. So you can vary it to
create that tonal effect. And that's what
we're trying to do. We're just trying to create this gradient of tonal effects, going from dark to light with our beautiful
technical pens. So let's move on now to the horizontal lines
and I'm just going to tilt my paper to the side because you
know what I'm like. I always like to work
on angles that are comfortable for me and I
suggest you do this as well. So just tilting it the
other way so that it can easily bring the lines
in down like this. Let's just make sure that
you can see on the screen. So we've got horizontal line, so exactly the same. I'm just gonna go
from top to bottom. And I'm going to use
a nice slow motion to just create these lines. I'm not gonna go fast. We're going to leave
the fast movements to the next part of the class. So let's just keep it
nice and slow and steady. And that's gonna be great. So just like that, I'm just going to go
in and I'm gonna go and continue doing
these lovely lines, and that one is done. So let's just tilt this back
to make sure that we're all on the same page or should
I say on the same sheet? So let's now move on
to the diagonal lines. Now, for these diagonal lines, I've got these two
boxes over here. All I'm gonna do
is I'm going to go diagonal in one direction,
in one of them. And then on the other one, I'm gonna go in the
other direction. And this will just create that variance and give you a couple of options
to practice on. So with the diagonal
on the first box, I'm gonna go in, maybe starting
off in this direction. So just going from
right to left, I'm just going to create that
similar line coming across. And it's looking fantastic. Now you'll notice I'm
not sure if you can hear this on the sound
of the microphone, but because this is
the thinnest tip, as we mentioned before, it creates that real nice. Or maybe if you don't
like that noise, that kind of like
textured feedback noise, you can sometimes call
it a scratchy noise. You like I said before. So you can hear more of
that with the thinner tip. And again, that's
just the physics of how physics works in
our wonderful world. So let's just continue
doing that again. Keeping it nice and neat, not doing anything
too complicated. So from right to left,
that box is done. Now let's just go ahead
and do the next one. And for the next one I'm going
to go from left to right. So again, I'm maybe start
at the bottom here for me. It's just more comfortable
for me to do it this way. Again, you don't
need to start in any specific order like I am. You can maybe start off
just doing diagonal lines at first and then go to the
vertical and horizontal, it's entirely up to you. It's super flexible,
just like me. So let's just continue
with this one. Just like that. Nice and easy, lovely stuff. So couple more there. And we don't. How good was that so
easy and simple to do? And now you've got yourself a nice little effective swatch of lovely lines and
tones that you've created with your
technical pens. So what I'm gonna do now is I'm gonna go ahead and
repeat that now in all these other boxes
for my other pen sizes. So I'm just going to
give this one a dance, close it close, and let's
move on to the next one. So for the next one, again, I've got my nought 0.35 tips. So I'm just going to
open that up and I'm going to repeat that
process going across. So I'll start off doing
the vertical line again. So just like this, with a vertical line, and you can see we have a really nice thicker line point on this one compared
to the first one. And it just looks
fantastic, doesn't it? So you've got this
beautiful uniform line. And again, this one flows a lot quicker because
it's a thicker tip. So what we're doing
here is we're just continuing that movement. And it's looking fun plastics. So again, I'm just going
to repeat that same thing going across the
next three boxes and I'll see you
once I've done that. Okay, so there it is. We've done the nought 0.35, the medium-size tip that I have. And we've done it
across here and it's looking fantastic, isn't it? So you can see there's a clear
visual difference between the thickness of
the point and you can use this for your sketches. Absolutely fine. So what I'm gonna do now is
I'm going to finish this off now by using my nought 0.8. So I'm just going to
quickly give that to a close and close and let's open up
the nought 0.8 tip, the thickest tip that I
have with the stylus pen. And again, I'm just gonna make sure that I
have a bit of an enclosed giving a shaky shake just to make sure there's
no blockages in there. And then let's just
start off over here. So I'll just bring this
a little bit higher on the screen so that you can
see this a little bit better. Then again, with that tip, all I'm going to do is create the vertical line
and look at that, look at the size of that tip. It's huge, that isn't it? It looks like a
felt tip marker pen doesn't say
absolutely fantastic. Oh, look at that gorgeous
stuff right now. All I'm doing is I'm
just going to go ahead and do this like that. And we are nearly done on the vertical,
the vertical stuff. So just like that, don't worry if you don't create
perfectly straight lines, it makes absolutely
no difference. The whole point
of this worksheet is so that you can
just practice, that you have something to do with your technical pens just to get yourself warmed up before you start
doing your sketching. And again, it's
just a fun little relaxing exercise now, isn't it? So what I'm gonna do now is I'm just gonna go
ahead and I'm going to continue with the rest of those boxes and then I'll
speak to you once that's done. Okay, fantastic stuff. Now, we have completed our hatching section
of the worksheet. And if we just analyze, you can see we've created
these gorgeous hatching lines, beautiful straight lines with three different pen
size variations. And it just looks
fantastic, doesn't it? Now if you noticed, I
worked quite slow with this pen because purely because
it's a really thick tip. And again with the other ones, just working slow will give you a nice uniform line so that
we don't have any slippages, as we mentioned earlier in
the other parts of the class. So just ensure that
you're working at a nice, slow and steady pace to complete these exercises so that
you don't get frustrated. So we've done the first
section of the worksheet. Let's now move on
to the next one.
4. Cross Hatching: Okay, welcome back. Let's now continue and do the second section
of the worksheet. So what we're going
to concentrate on now is the cross hatching. So this is basically just
an additional exercise to the hatching exercise where
we produce lines that create that intersection
cross pattern. So therefore it's crosshatching. So what I've got here now on the screen is I've
got three columns. Now, where it's labeled
vertical and horizontal lines, then I've got diagonal lines, and then I've got vertical, horizontal, and diagonal lines. So it's a nice mixture of the three different lines like we did in the previous one. So let's start off my finished
tip with my nought 0.10. And what I'm gonna do is I'm just gonna go ahead
and I'm going to start doing them
straight vertical lines, just like this,
like I did before. And let's just quickly
put these in now. Okay, so the vertical
ones I've put in, now, let's just tilt this page over now and make sure that you
can see what I'm doing. And then all I'm gonna
do is I'm going to create the horizontal lines on top of these
vertical lines in the same distance or
similar distance. That will create our
lovely crosshatching. So let's do that. So we just starting
off from this side, bringing it down and look
how nice that looks. Look at that gorgeous
cross hatch pattern. I absolutely love crosshatching. And if you've watched any of
my previous classes or if you've watched any of my
artworks that I produce, then you'll know that I absolutely love
crosshatching and I feature this type of technique in my art
work all the time. It just looks so great. And it's a very old
school style of art. I'm just applying any medium, really not just ink. You can do this with a pencil, you can do it with
watercolor brushes as well. Yes, you can. You can do it with literally anything
that makes a mark. You can go ahead and create a beautiful crosshatched
pattern that looks so good. So let's just get this one back the right way round
and look at that. It looks fantastic. So what I'm gonna
do is I'm gonna go ahead and do
the diagonal one. Now, where the diagonal again, all it is is a case of
going in one direction. So I might start off
here by going from left to right in this motion, movement that I'm doing, whatever position that
you find comfortable with your lines or your
worth to apply marks, just move yourself into that position I'm
always advocating. Don't put yourself in a difficult position
when you're doing art. Because art is not
about being stressed, it's about being relaxed. So the only way you're
gonna be relaxed is if you're in a
relaxed position, so get yourself nice and relaxed and do whatever
works for you best. So just continuing to do
that and that one is done. I'm going to do now is I'm
just going to tilt this a little bit to this
angle that I've got here so that I can easily do the cross hatching lines,
that diagonal motion. So I'm going in from
this angle now, just like I did in
the previous box, going in creating these lines. And again, don't worry if
your lines are not straight. Mine and never straight. They're always nice,
raw and organic. So that's absolutely great. We're not here creating
architectural drawings that are perfectly symmetrical or
in perfect perspective. That's not what this
class is about. This class is all about
enjoying yourself with these wonderful technical pens and just having a great time. I can tell I'm
having a great time, you yeah. Hi. I'm indeed. So Let's just
continue with that. So just like that, I've got
the crosshatching done. And if we just tell
this to the side, you can see, you can see now we have two different
cross hatches. Effectively, we've
done the same lines in different angles and it
produces a different results. So it looks fantastic. So let's now move on
to the final one. For this one, we've got
vertical and horizontal lines, also got diagonal lines on top. So it's effectively a
three-way crosshatch, or I might even do
it to a four ways. So let's do this one now. I'm just going to drop in
those vertical lines first. Okay? And now I'm going to put in those horizontal lines
just like we did before. So let's do that now. Okay, now the basic
cross hatches, Dawn, Let's now add in the
diagonal lines on top. So I'm gonna go in, in
one direction first. So just like this, I'm gonna go in this direction. You can see what effectively
doing It's creating a third layer of that beautiful
texture that we've got. And you'll notice that because I'm using a very thin point, you can get a really crisp, clean line when it
overlaps across this entire section to create a beautiful,
wonderful texture. Now, it'll be a bit more
difficult to create a clean texture with
a thicker point where we will come to see when
we do the next ones. But that's just something that
you need to bear in mind. The size of your tip
that you have on your technical pens
will determine what type of result you're going to get with crosshatching. And it's really a case of thinking about how far you
want to keep these lines. The thinner the point, the closer you can get
your texture lines to be. And the thicker the point, the more further apart
you'll have to do them. Otherwise they're just going
to merge into each other. And we will come to
see this when we do the nought 0.8 tips. So you can see that
created a beautiful, lovely web like texture. It's like a net,
so that isn't it. And we can use this so
well in our sketches. Absolutely fantastic. Well, we can go ahead and do is we can actually go ahead and do a nother diagonal line
on the opposite side, just to give you an idea of
what that's gonna look like. So that's what I'm gonna do. I'm just going to go ahead
on the other side now. And I'm just going to
go and start adding that texture all the way across. Just like that. And you can see it's intensified
that patterning again. But again, you don't need to
do this if you don't want. So if you want to just
use one diagonal line, and if you think that's enough, then absolutely, but
do try it out again. Like I said, print as many
of these worksheets as you want and practice doing
different shapes and sizes. If you have more
than one line tip, then just use that one. If you've just got the same
one individual line tip like I'm using here. Just if you've just
got to say e.g. a. Nought 0.1, then
just use that to produce different lines
and just see how it goes. Just experiment and
enjoy the process. So on the screen now we've completed all three
of these and you can see that it's produced such a nice pattern
with the same pen. So remember, we're creating beautiful patterns with
the same pen width. So what I'm gonna do now is I'm gonna go ahead as I did before. I'm going to use the nought
0.35 that I've got over here. So they're not buying
35 and I'm going to use my nought 0.8 Staedtler. And once I'm done with that, then we'll sit down and we'll have a nice coffee and
discuss the results. So let's do that next. Okay, so the nought 0.35
tip one has been done. And again, you can see
there's a huge difference in the thickness and the contrast compared
to the naught 0.1. So I'm just going
to continue with the nought 0.8 and then we'll have our final discussion
on this section. So let's continue
with that one next. Okay, fantastic stuff. Now we've completed our
cross hatching section, and you can see that we've
got some wonderful results. So let's have a
quick look at these. I can see my papers or
curling up position say that because it's a small
paper and it's fairly thin. Okay, so what we've got
here is we've gotten the vertical and
horizontal lines. You can see with the thin point, it was nice, crisp and clear. And then we went to
the nought 0.35, a thickened up a little
bit and the lines have to be slightly more further apart. And then we have that
wonderful nought, 0.8 where we've
had keep the lines really far apart before they start merging
into each other. So just be mindful of that. If you have a thick
and thin tip size. And then what we did was we did the same with the
diagonal lines. It just looks like
a gorgeous net of beautiful crosshatched
lines now doesn't taste. Finally, we did that
monstrous crosshatch app, the end where we did the
kind of matrix style of horizontal and vertical lines meshed up with diagonal lines. And you can see that you have this beautiful gradual
increase in thickness. And towards the end where
we've got the nought, 0.8 just becomes really, really nice and thick. You can use this
at your advantage, especially when you
want to start creating darker areas in
your ink sketches with these technical plans, it just works fantastic. So that's it for that second
section of the worksheet. Try it out, prints out
a couple of copies. See how you go and
start experimenting. So what we're gonna
do now is we're going to move on
to the next part, and that one is the
lovely stippling part. So let's move on to that next.
5. Stippling & Scribbling: Okay, welcome back.
Now let's move on to the third section
of our worksheet. And this time we're looking
at stippling and scribbling. So let's have a
look on the screen. We've got this divided
into four parts. The first one is even stippling. Second one is random stippling. Third is tight scribbles, and the last one
is wide scribbles. So what we're gonna do now is we're gonna do the
same process again. I'm going to use my
nought 0.1 and then 0.35, then the nought 0.8 to
complete this section. So let's get started. So let's now open
up the thin one, the naught 0.10 tip, and it should get
this on the screen. And what I mean by
stippling is just done. So you can see over
here in this first box, all I'm gonna do is I'm
just going to place nice little dotty
dots in this box. And I'm just going to
try keeping them as even and uniform as I can. It doesn't matter if you have them randomly stippled
all over the place. It's just a case of just putting these dots
down within that box. Now, do remember
with these pairs, you don't want to be
pressing too hard with them, especially if you're
doing a stippling. So what you don't want
to do once you get the pen and start
doing this really, really hard on your paper because that's just
going to damage the tip. Now you can see that I've
just done that little shaky, shaky movement on the camera. And you can see if you can see this properly
on the screen, but let me just see if I
can bring that closer. You can see now a little bit of an ink droplet has
formed at the end. So do be aware of that. If you are going
to shake your pen, then you are going to get a little bit of an ink droplets. So to remove that, what I'm going to do is just
on a scrap bits of paper. I'm just going to go
ahead and I'm just going to tap that away just like this. And again, what that'll do is it'll just give me
that nice clean points. So that's a nice
little tip just in case you shake your pen
for whatever reason, you will have a little drip, drip at the tip of
the ink and that can ruin your artwork if that's not the desired
effect that you want. So let's just continue
with the stipple. So again, I'm just creating this lovely even style stipple. But again, it's kind of go
in a bit all over the place, but it doesn't matter. So it's nice and semi
uniform, Let's call it. So it's basically an
idea of filling in the gaps and not leaving
too much of a gap. And you can see, it
looks really nice. We're going to move on
to the random stippling. So for this one,
all I'm gonna do is I'm just going
to add the dots in randomly to fill
that area of that box. And you can see that that
looks really nice as well. Don't want to keep it uniform. I am not really bothered about
filling in all the gaps. Some of the gaps
are empty overhear, some are more filled in. That's what I mean with
the random stippling. So just like that
random stippled, just to fill it in, then let's move on
to that scribbling. Scribbling. This is the fun part, isn't it? So we're just going
to scribble away all our worries on
a piece of paper. So what we want to do
is we just want to use a kind of random
scribbly movement. Just fill in this box. So again, tie scribble. And what I mean by
tight scribbles is that we just want the scribbles
to be close together. We don't want them to
be too widely spread. And you can see all
I'm doing is I'm just overlapping the scribbles. So it effectively creates
this kind of rough texture. And again, it's just using this round circular motion going back and forth randomly
just to fill in the area. And again, just using maybe some little wobbly
lines going across. And that's what
I'm talking about. So with the wider scribbles, what we're gonna do is we're
going to do exactly the same like we did
for the tight ones. Or we're gonna do is
we're gonna go in and create a bigger scribbles. So it's just creating biggest
scribbles that are more widely placed instead of having
them all close together. So just like that, we've got this lovely wide
scribble so you can see that it's produced
a variance in texture. So with that one out of the way, let's now move on
to the next pencil. I've gotten the nought
0.35 that I've been using. So again, I'm going to do is
I'm going to just do some nice tight Even
staples like this. And you can see the
thicker the point, the more prominent
your stipple will be. And it's always nice to use stippled in your ink drawings. It just adds that
beautiful texture. And when we come
on to using this in our worksheets in
the last section, you'll see that you
can use a mixture of these techniques to produce
a really wonderful, wonderful texture and look. And again, what I'm
gonna do now is just go in and do these
random staples and have them dispersed all
the way across this box, just in a random fashion. And you can see we have a
nice concentrated look here. And then we have a nice. Wide, more diluted
look over here. So moving on to the
scribbles, scribbles. So I'm just going to move
that a little bit higher on my screen so you can
see it's a bit better. So again, tighty, tight scribbled over here,
nice and close. Look at that beautiful
line, a gorgeous stuff. I get so excited about
my art materials. So that's what's
happening right now, is just fantastic stuff. This is such a
relaxing exercise. I mean, just think about it. If you just stressed and
you just want to wind down, just grab yourself a nice
bits of coffee and just go ahead and do this worksheet
with your technical pens. And even if you don't
have technical pens, you can do this worksheet
with any other pen. It's just a great way to just relax your mind where you
don't really have to even think about anything and just unleash that gorgeous ink on a bit of paper while this upon some lovely, lovely drinks. So let's do the wide
scribble over here. So wide scribbly we believe
all the way on this side, nice and easy, nice and relaxed. No stress, just chill out
and enjoy that experience. Lovely stuff. And now for the phone
one where we've got Mr. nought, 0.8. So let's just close this
one and we've got our nice, lovely thick point over here. Now the staples on
this one are going to look fantastic because it's a nice thick points
that let me just get that right on the screen. So again, let's draw pin
them staples, look at that. Say they look like little
blobs of chocolates. Gorgeous. You can feel this
kind of like contrast, especially if you're using a thin point and then you
move on to a thicker point. It just feels great. So look at that Gorgeous to a lovely little dotty dots in a box with a beautiful
thick points. So let's now just
do the random ones that are more widely
spaced apart, just like that fantastic stuff. And then let's have a bit of fun with the scribbling Weebly. And again, because we
have a thick point, we can easily fill
this areas so quickly. That's another advantage
of using these techniques. It's effectively
just about filling the areas with
different techniques, rather than just using it completely to fill
a solid color. Just very it with some
beautiful textures. That's how it makes your art
work a bit more interesting. So finally, let's just do the widest scribbles that are
more spaced out like this. Really nice and easy and quick. Look at that. Just took a
few seconds and we're done. So let's just give
that pen close. You don't want the
tip to dry out? We don't. So let's just do that. And let's just have a look at the screen now so you can see we went ahead and did the
stippling exercise with a three point sizes. And you can see it produces
beautiful varied results. And again, then we have some
fun doing the scribbling, we believe stuff, but
with some type of scribbles and some
wide scribbles. And you can see there's a huge
contrast in the tip size. So what we've
finished now is we've finished the first three
sections of the worksheet. Let's just get a zoom in. Zoom back on this. Okay, so now we've completed all three exercises from the worksheets and we
just add one more to do. We've done the
hatching, crosshatching and we've done the
stippling and scribbling. And we finally just got
this last one to do where we have these beautiful,
funny-looking shapes. And what we're gonna
do now is a practice, all three of these
lovely techniques and use them in this
little drawing here. So let's now move on
to that one next.
6. Building Textures: Okey-dokey, welcome back. Let's now do the final
exercise on this worksheet. And we're going to look at
these wonderful shapes. So what I'm gonna do
for this exercises, I'm gonna go ahead and
use my nought 0.35 tip for mainly these
first three parts. And then the final part, I'm going to probably use a mixture of the
points that I have. But again, just use whichever size tip that you
have for this exercise. So what we're gonna do now
is let's get a Zoom meeting. Zoom in on this. I want this to be nice and close up so you can
see what we're doing. So let's just make
sure that we have a lovely focus on
that fantastic stuff. So what we're gonna
do is we're going to concentrate on this
first one here. And let's open up our pen, keep that to the side. And what I'm gonna do here
is I'm gonna go ahead and I'm going to use
the hatching lines for this first part of this exercise to fill
in these three shapes. Now I'm imagining that
these three shapes adjust. Maybe some rocks on a scene in a landscape
sketch that I've done. And what I'm going
to think about is where the light source is. So the light source, I'm going to say
it's probably coming in from the top over here. So if I just draw a
little line over here, I'm just going to think that the light source
is coming in From here on this actual three made-up object
thing that I've got. So with that in mind, I can start thinking about where I'm going to place
those hatching lines. So again, I'm just going
to use hatching lines to the first one that we
did not cross hatching yet. This just gives me a bit of a guide onset thinking
about the bigger picture. So let's now maybe start off
by using our pen and just creating some hatching lines in this distance, just like this. And when gonna do these vertical hatching lines over here. Now remember I'm thinking that the light sources
coming in from the top. So these top sections, I'm going to be the lightest in terms tone and the bottom area is going to be more darker. So that'll give me an idea
where I wanted to place these. So again, I'm gonna
do here is I'm just going to create
these hatching lines, nice and simple, just on the
lower part of this shape. And then I'm going to repeat the same thing on
this next shape. So I'm going to maybe
start at this point here. And I'm just gonna go ahead and create these hatching lines. Just by that. Maybe make them a bit
more bigger as they tail off towards the end
of that middle shape. Just like that, fantastic. And then maybe just adding some more hatching lines On
this last one over here. And again, just thinking about where the light
source is coming from. And in this example, I'm imagining light's
coming in from the top. So just like this, throwing in those
lovely hatching lines and keeping the distance
similar in-between them on. I can see by just adding
in those hatching lines, we've already created some
elements of depth and understanding that these are 3D objects with the
lightest part on top. And then we've got nice bit
too dark at the bottom. Now this is just a simple
example with hatching lines. What we're gonna do
now is we're going to move on to the next one. So let's just move
the sheet across like this so that we have
exactly the same point. And this time I'm going to start doing a little bit
of cross hatching. So again, I'm just
going to go ahead and repeat that pattern
on this one again. So let's quickly do this. I'm just going to throw in these hatching lines
just like this, trying to keep them the
same distance apart. But again, if you go a little bit bigger or smaller in
terms of the distance, That's absolutely no problem. Just practice. Because the more you
practice this technique, the better you will get a tip. And it really is a case
of taking your time, obviously teaching his class. And I'm recording it as I teach, so I've got to work
at a certain speed. But what I want you to
do is I want you to really take your time, relax and do this exercise
and just build up that understanding and
experience as you go along. And then when you come to start sketching with these pens, you won't even need
to think about this. This just eventually
becomes second nature. So now we've got pretty much the same hatching lines that
we did in the first one. So just like that, it's very similar and I'll
just move this back. What we're gonna do is
I'm gonna go ahead and make some lines that
go the other way. So the bottom parts of these objects are going to be
at the most darkest points. So let's make them dark. So all I'm going to do
is go ahead and just do some lines in the opposite
direction, just like this. And I'm not gonna do it
all the way to the top. I'm just going to
keep them halfway. So if you have a look, all I'm doing here is just creating these
crosshatching lines. In that first shape over here, you can see that's the shape of that first semicircle thing. And just like that,
now you can see that's created that lovely cross
hatch at the bottom. So again, I'm gonna
do the same now for the next one and continue it. And I'm just going
to keep it half the size of the previous ones that
go in the other direction. Just trying to follow
the pattern and shape of that original thing
that we've got there. And then again, we
just wanted to go ahead and just keep doing this. On the last one. Take it all the way to the edge. And let's look back
and look at that. It looks fantastic, doesn't it? So if we just compare and
contrast both of them, these were just with standard
normal hatching lines that just went in one direction. Then we went ahead and we added in some lines to create
some crosshatching. So what this does is it
just creates that depth and that extra level of texture
onto just a simple shape. And you can see all
of a sudden it starts emerging as something
a bit more 3D like. So that's it for that one. Let's now maybe move on to
the next one over here. So if we just move on the
bottom left hand side, and for this one now, Let's start introducing
stump steeply with police and also we can add in some extra layers
of crosshatching. So let's now go ahead
and maybe just do exactly that same pattern
that we had on the one above. So let's just go
ahead and just add in those hatching lines. So just like that, I'm going in with those hatching lines and I'm
going to do these a little bit quicker so that I'm not
thinking too much about them. Again, work at a pace that
you're comfortable with. So just like that,
hatching lines going in one direction, nice
little diagonal. You can use vertical or horizontal ones
for these as well, just to practice and see what
textures you come up with. But again, this demonstration, I'm just going to use
the diagonal ones. Because for me, it
worked out really nice and it's a lot more comfortable for
me with my hands. So just like that, what I'm gonna do
is I'm gonna go ahead and I'm going to
do the crosshatch now. Again, that's
similar cross hatch that we did in the previous one. So I'm going to do that
really quickly over here to fill that first shape and
then fill the second shape, not taking it all
the way to the top. And then fill in that third shape over
there, looking fantastic. Now what I'm gonna do is
add some beautiful stipple. So let's maybe add
in some stippled. In this top section, we're just going to add
in some nice concentrated stippled above those
hatching lines, not all the way to the top. We just want to keep it above those hatching lines.
Just like that. Some beautiful staples
and you can see it's added another layer of texture. So we're going to just
completely do that for all of these lovely semi-circles. It could be these
beautiful rocks on a beautiful little islands somewhere where you
have a gorgeous, whimsical, lovely house
or even a coffee shop, and they're beautiful bit
of mid ground elements. And then again, just like
that with my lovely pen, just adding those deeply staples and you can see what
this does is it effectively creates a
lovely tonal variance. I crosshatch texture all the
way to a lovely stipple. And then that just
blends away into the lovely white
of the highlights. So that looks fantastic. What we can also do is
we can go ahead and darken up the basis of
each of these shapes. I'm just going to
slightly turn this just to make it easy for myself. And then what I'm gonna
do is I'm going to add in some horizontal lines. So just like that, adding some lovely
horizontal lines. Then where these edges are, I'm just going to add in
some smaller ones that go all the way where
that cross hatch is. And then from this
section I'm just going to bring some in just like that and then maybe throw in a broken
one over there. So you can see what
that's done is that added a little bit more
depth and I'm going to continue and do that for
the other ones as well. So just like this, maybe
a couple more here, just adding a bit of interests and then
just take them to the top and leave a little bit
of a gap in the middle. Looking great. So again, on this last one that
I've got down here, just go ahead and throw in those horizontal lines
and then throw in half lines that go just towards the edge and
maybe a few over here. Let's turn this back
around and let's concentrate on it and look at that gorgeous bit of texture. So let's just bring this
back so you can see all four of them maybe do a zoom back so it's
a bit more clearer. That's looking great. So over here we've just got
standard hatching lines. It gives it a nice effect instead of having
them just plain. Then we've added a
bit more depth by going in with some
crosshatching lines. Then on this one we've
added crosshatching lines, Staples, and then we've also added another layer
of hatching lines. So we've effectively got
three lines crisscrossing over to create that
beautiful tonal gradient, just using one pen.
7. Creating Depth: Absolutely fantastic. So what we're gonna do now
is we're just going to move on to this
last one over here. So let's get back to a
Zoom is zoom on that one. So nicely me zoom on that one. And for this one, I'm going
to use my other pens as well to really
intensify the texture. So again, But this one, what I might do is I
might go ahead and start with doing some
vertical lines first. So I want this one to be really
nice and highly textured. So for this one, I'm
just going to go in with vertical
lines like this. If you're following step-by-step and then just go ahead and follow the similar style of pattern that
I'm creating here. Yours might not be
exactly the same as mine and that's
absolutely fine. Just follow along
the best you can. Create your own
textures and patterns. Just experiment. And that's how you will gain that beautiful first-hand
experience of using these technical pens in a way that you may never
have used them before. So it's all good. So again, I'm just
going to throw in these vertical lines going upwards to create that
first level of hatching. And just going up like that. Very nice and smooth. Then what I'm gonna do is
I'm going to tilt this to the side just to make
it easier for myself. Keep it nice and easy. So this one, Let's maybe throw in some lines going
in like this, all the way to the edge there. And then maybe from this
edge just going into the side of that semicircle. And then I'm going to repeat
the same on this one. Just going in like this. And then from that, I'm just going to bring
them in like that, varying my lines just to keep it nice and organic so it
doesn't look too mechanical. And then just go on
this side over here. Just very loose and relaxed. And then on this side again, just bringing that in, looking fantastic, let's
just turn that around. And I think we shall add in
some stippling with police. So just adding in some nice thin stippled on this
section over here. Just like that, fantastic. And then again,
quickly adding in some stippled on this section. Just to fill in that area to produce that gorgeous
tonal gradient. And that's about it for
the nought 0.35 tips. So what I'm gonna do
now is I'm going to move on semi lovely, no points eight now. So I'm gonna get that
nought 0.8 tip out. Now, let's get intense
now with our ink. So let's just tilt this
to the side over here. And what I'm gonna do
now is I'm going to go ahead and actually add
in some more staples. But because we have
a thicker point, we're going to get a more
heavier mark that we make. So let's do that now. So with this one,
maybe I'll just keep this like this on the screen. Don't want you to
get all dizzy by looking at this page,
turning around. So let's just do that. And what I'm gonna
do is I'm going to overlap these tuples
that have already done. Then I'm just going
to throw in that was beautiful, intense dots. Look at that gorgeous stuff. That isn't a beautiful stuff. And I'm going to bring
them down now all the way to where the cross
hatching is happening. And what that does is
it adds that further level of texture
over cross hatching. So it's effectively
crosshatched, stick on. So it looks fantastic. Look at that. I mean, this could
effectively be some sweet kind of
branches coming and growing on top of
these rocks that we have in our wonderful
whimsical seen. Just look at the half
fantastic stuff, isn't it? So let's just continue and do that for
this next one here. So just adding in these nice thick dots all the way to the staples
that we had previously, just to fill in this space. And then just filling
it up with that lovely, intense, gorgeous intense ink. Hadn't, That's looking great. So just for the final one, doing exactly the same, just filling in that gap and really enhancing the texture. I mean, these were
just three simple little semicircle
shapes where they are. Now look at them. They've become a beautiful mark on a page that represent
something special. So just like adding that in
and that's looking great. So what I'm gonna do now is
I'm going to maybe throw in a couple of lines just to intensify it furthers.
I'm an ally. I'm going to tilt it. So I'm going to
tilt it because it just makes it easier
for me as you know. Then what I'm gonna do
is I'm gonna go in and just do a nice straight
line like this. And then just
lightly and loosely. So in a couple of
lines on that side. And then I'm gonna do
exactly the same overhead, nice lines going
in just like this. Then maybe a couple
of adults here. So again, on the last one, nice thick line going
in from this edge. And then a couple of dots there. So what that's done
is that intensified the darkness and the overlap. What I really want to do
is I want to really make this area that all these
are overlapping each other. I want to make them very dark. So let's maybe adding a couple more stiff
boards and to really block out that color. So you can see it and maybe
add in a line at the bottom. Maybe you could just
add in a line on the edge, really going in, really dark onto that one, then really dark on to that one. And what that does is it makes that previous shape pop out
and that's creating contrast. So just like that going
in really dark on this. And again, I'm doing this
in a very random fashion. I'm trying not to block it
out completely with black. I'm trying to leave
some gaps because that just makes it look
a lot more organic. And we don't want
to just ferritin because we're not coloring in a coloring book now away
with just adding in texture. And that's what it's all about. Just maintaining a nice
balance of texture and filling in those areas
with some beautiful, lovely, lovely, lovely ink. Now look at that. That looks really good. Now I'm going to move
away from my thick point before I just go ahead and fill the whole thing in gorgeous egg. And I'm gonna go
into the thin one. So I've got the naught 0.1
here with the nought 0.1, the thinness tip that
I'm just going to hold the paper down and
I'm just going to effectively soften up this
area so it transitions into the lighter part of
the shape rather than have that really sharp
contrast from dark to light. So just be the thin point. All I'm gonna do now is I'm going to fill in
the gaps that we have over here from the
previous marks that we've made. And you can see what that's
doing is it's just filling in that tonal variance
and it's just creating a beautiful,
beautiful gradients. So just like that,
dropping in some really nice thin stippled
just to cross here. Just to effectively merge the more harsh lines from the lighter
areas, just like that. Again, from the front, I'm just going to add
in the stippling, stippled, just overlap
it a little bit. And that's looking great. So finally what I'm
gonna do is I'm gonna go ahead and I'm going
to do some scribbles. So I'm gonna do it with the
thin point here and just some light wide scribbles
over here again, just to marry up
that texture so that it looks a bit more
tonally balanced. So again, just like
that, some scribble, like scribbles on top and
this can see just adding in those lights scribbles just
makes it look so nice. So again, with this area here, just very, very
lightly scribble, just circular motions here. Not too much, just keeping
it nice and clean. Maybe finishing off
with some staples. Now if you find that
when you'd add scribbles or add some texture and
it's just too much. Just add in a couple of
staples just to dilute it out so that it looks
really nice and balanced. So again, I'm just
going to add in some stippled over
that scribble area. And then on this first one here, just a couple of scribbles, very light scribbled over here just to create
beautiful texture. And then that's it.
Then all we're doing is just adding in some
stippling, stippled. And look at bats greater than six and you're
going to put my pen away. Then what we can
do is we can have a look at this whole sheets. There is Zoom is
zoom back on that. That looking fantastical. If I do say so myself. So let's just get a zoom in. Zoom, you don't
want to live Zoom. So on the screen now we have
completed our worksheet. This was the final section. It was just bringing together all those techniques
that we learned, the hatching,
crosshatching, stippling, and scribbling and to really produce that kind of
buildup of texture in the four boxes that
we have to get an idea of how we can use
these pens in our sketching. So you can see if you just
want light bit of hatching, a bit of tonal work, just stick to the normal
hatching if you want to intensify it a little bit and make it a bit
more interesting, start adding in lines the opposite direction to create that beautiful
cross hatch. And then if you want to
add in something special, then just go ahead and add
in some stippling with please on top of the cross hatching that
you've already done. And then maybe add in some
more cross hatching from different angles to add
an extra depth of layer. Then if you want to go
all out hardcore texture, then go ahead and create beautiful texture work and build it up with crosshatching, hatching, stippling, scribbling, and then
merge it all up with beautiful light little stippling to create this
wonderful texture, to really bring some
basic shapes into a wonderful whimsical world
of hatching with ink. So that's it Now
for the worksheets. So that's most of the class
nearly done and we can get on now the exciting part
of doing our sketch. So I think I'm gonna go
get myself a nice coffee. I need a nice bits of coffee and maybe I might get myself
a doughnut as well. So let's have a break then. I'll see you once that's done. So see you on the next one.
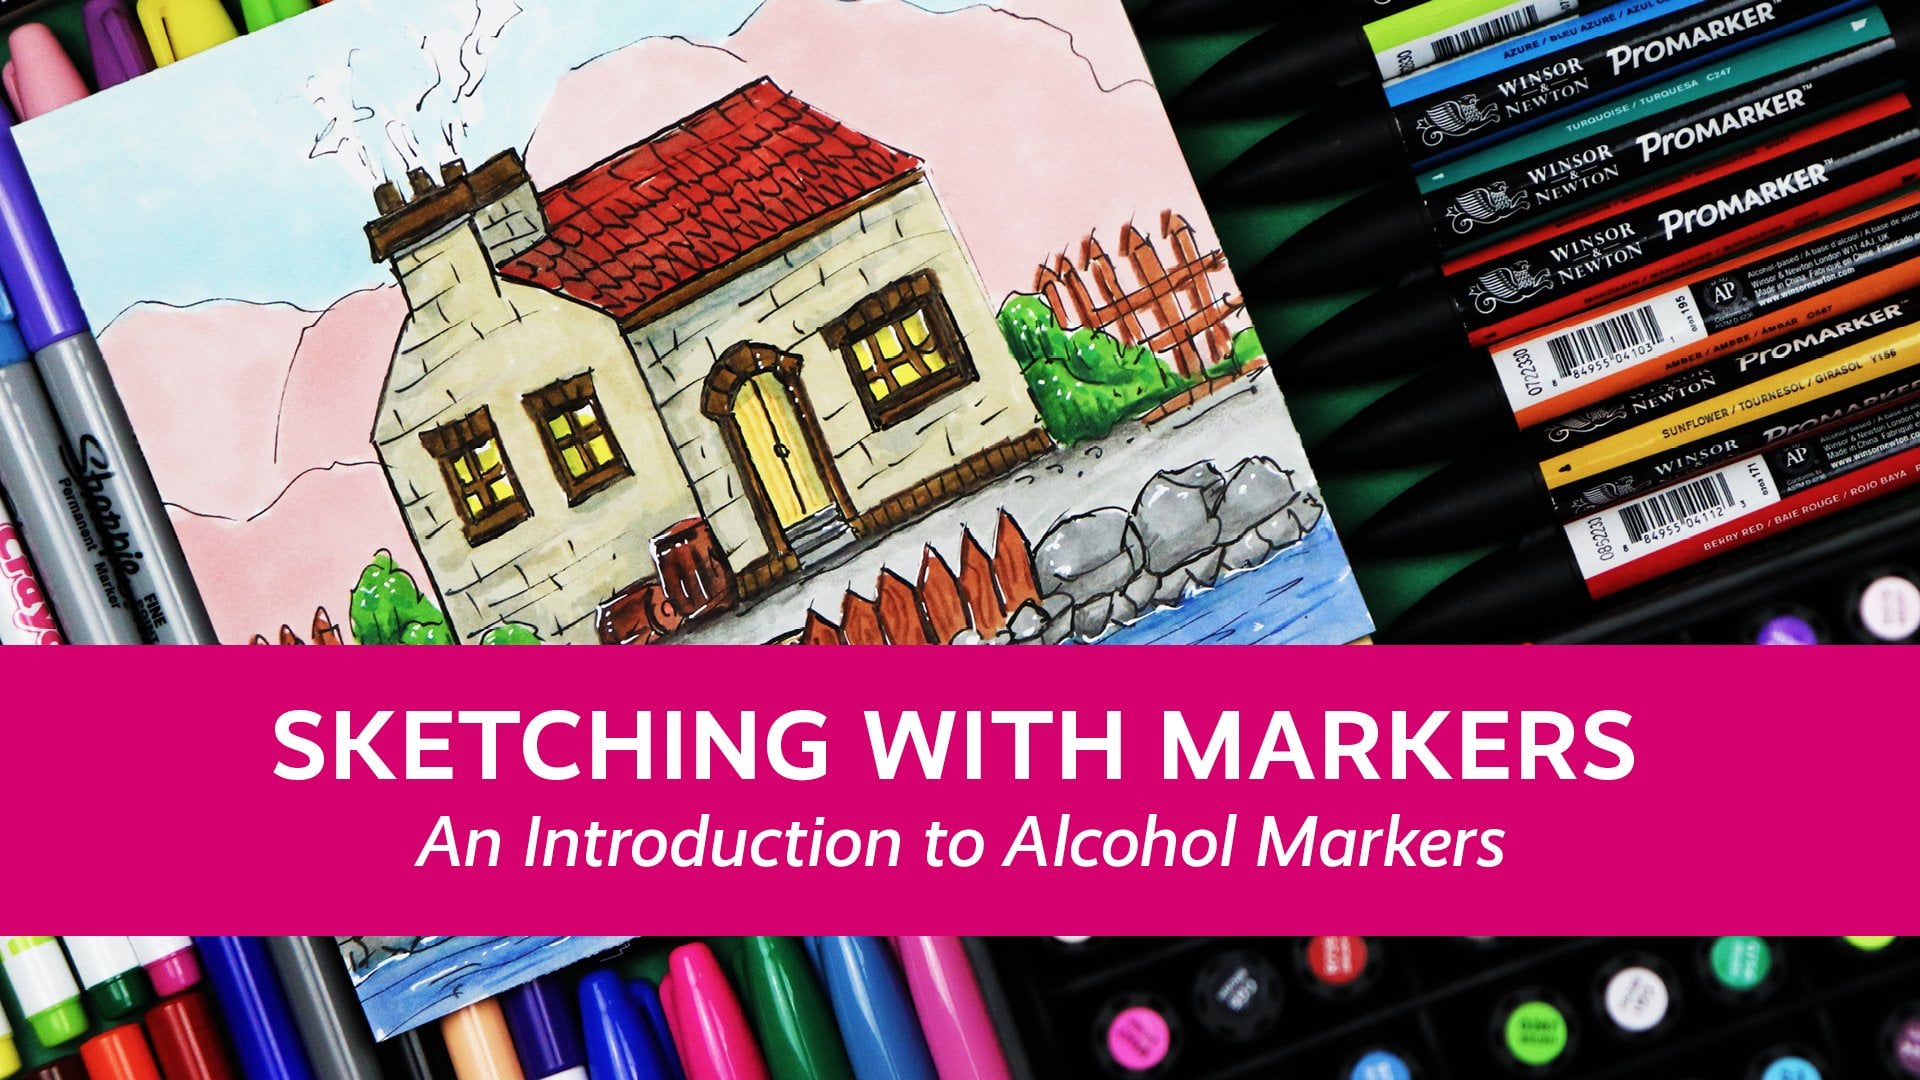
8. Interaction with Mediums: Okay, welcome back. Let's now do a quick little
exercise and look at how some different
mediums or react and interact with
our technical pens. On the screen. I've got a lovely
little piece of Bristol board paper cut
into a gorgeous tiny size. And I've got my
nought 0.35 tip pen, which I'm going to use to
demonstrate this exercise. Let's just open our pen up. And I'm going to reveal my
lovely little setup over here. As you can see, I've
got this divided into some fine columns and rows. So over here on the left, Let's start off by
looking at graphite. So I'm just going to use
normal HB graphite pencil. Then I'm gonna go to the colored pencil
and the one that I'm going to use is an oil-based
polychrome most pencil. And then number three,
I'm going to be using a standard marker
that is water-based. And then number four, and when I look at a marker
that is alcohol-based, and then finally, I'm
going to do number five, which is just using
normal watercolor paint. So what I'm gonna do here
is on this first row, I'm going to look at the
actual medium first. So I'm just going to create a little swatch of each medium. Then in this second
row over here, I'm going to just
go ahead and draw in some lines with my pen first. And then we're going to apply
the medium on top of that. I'm going to quickly go
ahead and do that as you sit back and sip on
your lovely tea, coffee, or cold drinks. So I'll see you
once that's done. Okay, Now we're done with our lovely little
swatch examples. So you can see on this
first row over here, I've got my swatches of my
five different mediums. Then on this second row, I've just created some
hatching lines for each one of these examples so that we
can compare and contrast. Now, if you're using wet
mediums with this pen, then it's absolutely fine. However, just bear in
mind that your medium needs to completely dry before
you go ahead and apply it. So you can see over here
with my watercolor swatch, It's a little bit moist now, so I'm not going to
apply that immediately. I'm going to wait until
it completely dries out. And another thing
that we need to be mindful of is the ink that we use inside our
lovely technical pens. Now if you remember in
the earlier lessons we discussed what types of
inks you can use in this, I personally use
my document Inc., which is waterproof after it's dry in my lovely technical pens. So it's entirely up to you which enqueue use you might
use the one that actually is recommended by rotating the little funny little bottle that
I've got over here. I'll show you quickly again. So we've got that funny
little bottle over here, but I tend not to
use this again, like I said before, this one
for me is a little bit too thick and I like being to
flow a little bit quicker. But again, depending on
the ink that you use, test out the mediums that
you have them and you might not have all of
these mediums to hand. Just give it a go and
experiment doing this exercise. So I think now that
watercolor swatch should be pretty much dry because
I've got quite a lot of nice bright lights over here,
so it should have dried. It was only a little. But what we'll do is
because it's the last one, we can start doing the exercise from the graphite on number one. So I'm just going to get my pen and all I'm gonna do
is I'm gonna go in and I'm going to
basically just draw in some hatching lines
over that graphite. And you can see now that
that's so easy to do, the graphite doesn't
interrupt interfere with the ink and the flow
of ink is absolutely Great. I'll see if we can get a
bit more of a zoom in, zoom in on that so you can
see that lovely stuff, right? I don't want to lose the focus, the focus because then you
won't be able to see properly. So let's get that band on. Lovely stuff. Again with the graphite. I've gone in with the lovely lines that I've created them
standard hatching lines, if you remember from
the previous exercises, just normal hatching lines. Just try this out with graphite. You're most likely to have
a pencil lying around. So just keep that
little experiment and see what type of
results you get. So moving onto the
colored pencil. And for this one, I'm using my polychrome most oil-based colored pencil use
whichever color pen. So you have lying
around and test it out. So we're gonna do
the same again. So just few lines coming down. I can see my pen is a
little bit dried out because I think I may
have to refill it because I've been
enjoying myself so much. So you can see just like that, the pen glide really nicely onto that
pigment of that pencil. So using colored pencils with these pens is
absolutely fine. Then let's move
on to the market. And now this is just
my water-based marker. This is the Crayola. Can see over here the ink
flow is absolutely beautiful. I mean, look at that gorgeous
bit of ink flows there. Now I don't know if you've
noticed this on the camera, but the actual ink flow on the colored pencil
is a little bit more stretchy if that's
the right word to describe it and you
get a thinner line. And the reason for that is that because the colored pencil
that I've got here, so I'll just show
you on the screen, this is the colored pencil. This is my polychrome as
fabric pastel color pencil, absolutely great colored
pencil by the way, this one is an oil-based
pencil because the surface area of oil is a little bit thicker
once it's applied, effectively get a
coating on the paper, but you've got to apply your pen on so you can see with that, it does have a slightly
different results compared to the graphite
and the marker. So let's now move on to the market which is
the alcohol based one, and see if we have any
different results. So again, I'm just going
to go over that just like this and look at that
absolutely fantastic stuff. So you can see that the ink glides and is
released really well. There's no blockages, There's no interference
from that mediums. So alcohol markers work
absolutely great with this. And let's just see if our
watercolor swatch has dried. Yeah, I think that's
dry to the touch. I'm gonna go ahead and do this. So let's just draw in our lines. And as expected, with
watercolor paints, these pens work absolutely fine if you'd going
on top of the medium. So just looking back
at these results, you can see our
lovely five mediums. We've used the pen on top
of the medium once it's completely dry and it
works absolutely fine. So you're flexible
as you are with normal fine liners
or fountain pens or any other type of ink pen in technical pens where you can
use them with other mediums. Let's now use the medium over the lines that we did
with our technical pens. Let's move on to that one now. Okay, So what I'm gonna
do now is I'm just going to use my graphite pencil to do a little swatch
over that ink. And again, my ink is
completely dried out. Do bear in mind that your ink really needs to
be dried out if you're going to go ahead and
use this technique of using your medium
over your ink. And you can see it's
absolutely fantastic. There's no smearing of the ink. It's not making a mess. It looks absolutely great. The graphite looks fine. So you can see that the
difference is very minimal with the order in which you apply the medium and the ink
from the technical pen, you get very similar results. Let's now move on to
the colored pencil. So we're just going to
add in our polychrome most over here like this. And you can see that
I'm just giving it a nice medium pressure
push on the pencil. And it's working fantastic. So just like that. Looking great. So moving on to the marker, the Crayola water-based marker. And you got to remember when
you're using wet mediums, they can interact
differently with the ink, especially if you're not using a water-based ink
that's waterproof. So depending on which
one you're using, you may get different results. So you may get a
horrible smear and moodiness of color once you've applied your
marker on top. So just be aware of that. So let's just say we're gonna get any muddy
lines over here. No, we're not looking at
that beautiful stuff. So if you want to do your sketch first and then maybe color
with markers on top. You can absolutely do that
with watercolor markers. So moving on to the
alcohol markers. Now, alcohol markers can
be a little bit funny when they interact
with other mediums. And let's see what
results we get. So again, I'm just going to
apply my alcohol marker on top really slowly
and look at that. We've got a gorgeous, clean result That's
fantastic, that isn't it. So you can use this pen,
this technical pen, and the ink that you use, and you can use an
alcohol marker on top. Fantastic stuff. So finally, let's move on
to the lovely watercolor. So I'm just going
to add a little bit of water to my brush and just pick up that
same color that I had before for consistency. And let's just drop this over. And you can see, because
we're using waterproof ink, we've got a gorgeous
bits of color, skip bit more pigment on there. And it works really
nice with watercolor. So again, my pigment is a
little bit weak on that one because I've not picked up
enough color, just like that. Let that dry and see
what results you get. But just generally it
works absolutely fine. So let's just take a look at
the entire thing over here. So you can see that we've
got five beautiful mediums interacting and being created with the ink from
our technical pens. So in summary, you can use other mediums with
your technical pens to produce gorgeous art. You're not restricted at all. Just make sure that you do a test like I've done over here. If you want to follow
along, try other mediums, maybe come up with some
crosshatching on top or underneath the medium and
see what results you get. It's all about experimenting
and enjoying yourself. So that's it for the
exercise part of the class. Now we can move on. So the font stuff and have a look at some of the
sketches that I've done to inspire you to
start the full sketch. So let's move on
to that one next.
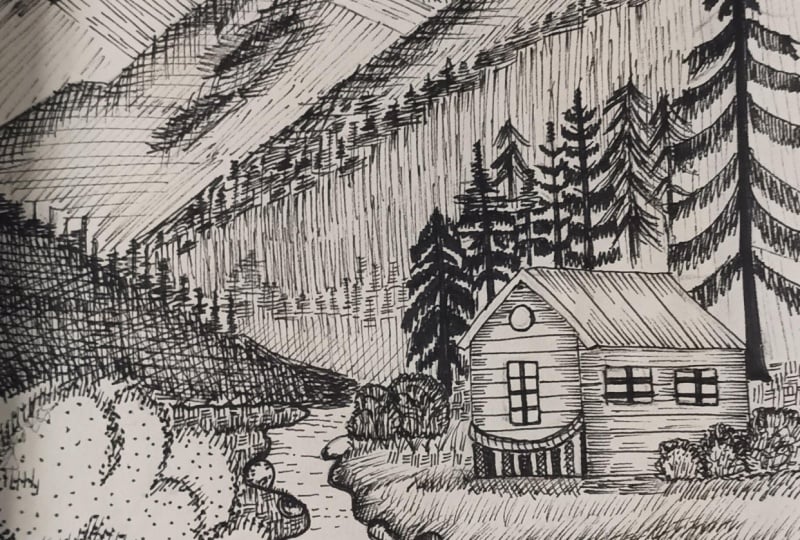
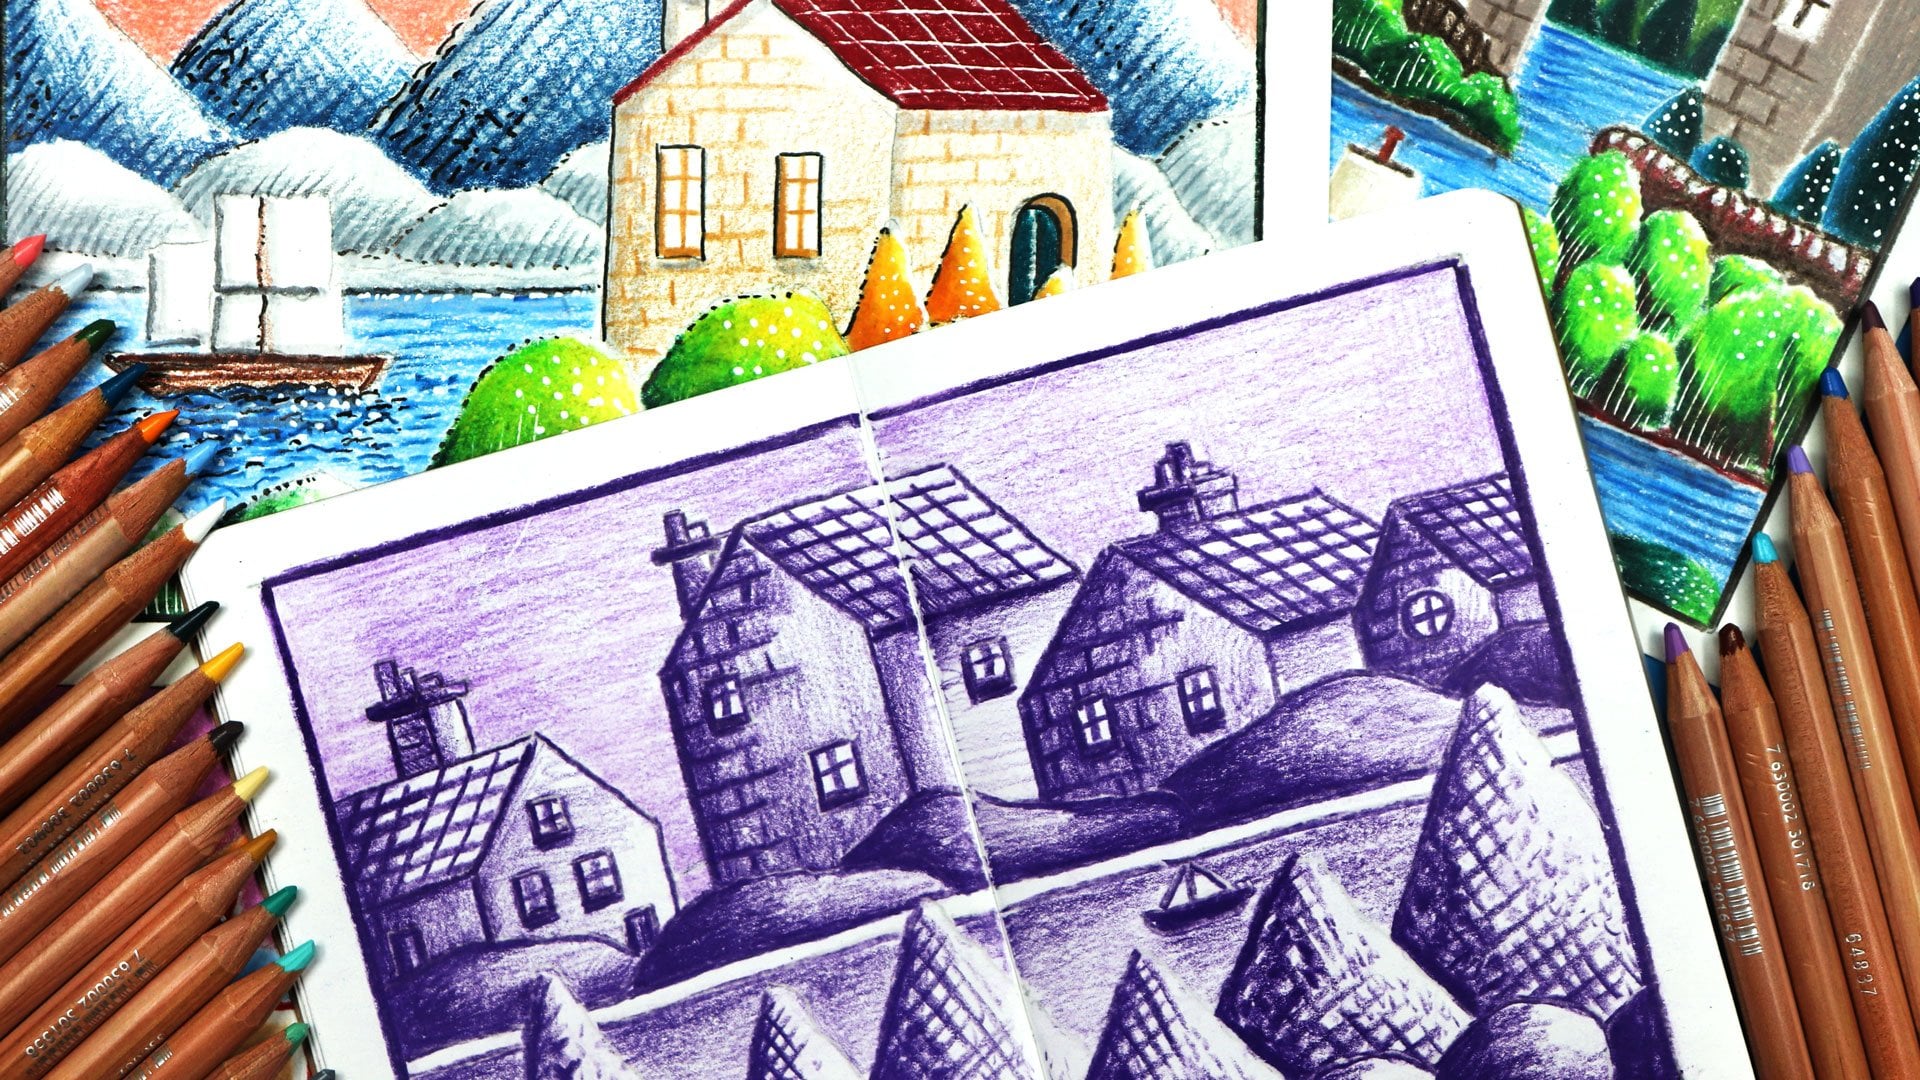
9. Sketching Inspiration: Okay, welcome back. Let's now start with the
exciting stuff and look at doing a complete sketch
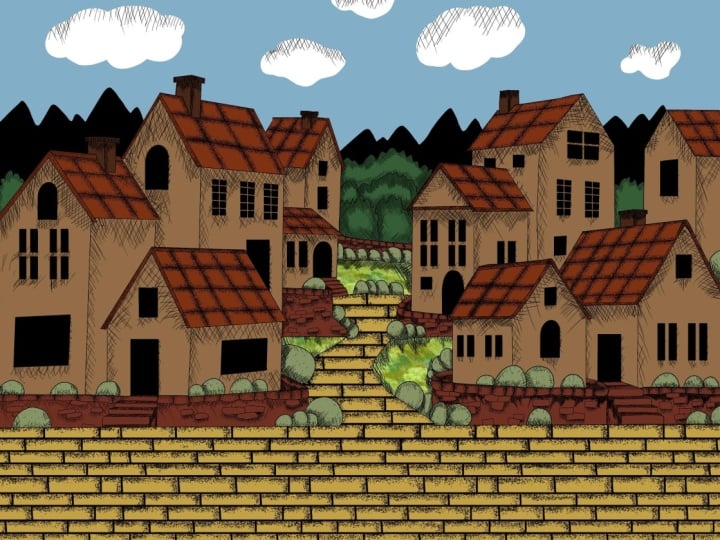
by incorporating all the techniques that we learned in the previous lessons. So if I bring your attention to the table over here and you can see that I've got a little
work that I've created, all using my three
technical pens, the naught 0.10, 0.35,
and the nought 0.8. And I've created this kind of panoramic design using
Bristol board paper, sticking to just
technical pen only. I have not used
any other mediums. I've just used maybe
just a graphite pencil to sketch out the
design initially. And then I've just gone over and created outlines and created these really deep and intense
crosshatching textures to bring out a lovely contrast and just create this really
funky little designs. So if we just concentrate on some of these
areas over here, I know they seem quite complex, but I promise you they're not. Once you get started, you'll be able to
produce beautiful, lovely artwork like this with some gorgeous textures and crosshatching using
your technical pens. We concentrate over here
on the left-hand side, you can see on this house, I've got some nice little crosshatching
going on over here. So this is just the
diagonal cross hatching. Let's see if we can get a Zoom. Is zoom in on this a bit better if you can see
this on the screen. So just here, I've got some lovely crosshatching
using diagonals. And then on this other
house, roof area, I've just got the
horizontal cross hatching going there across. And then if you look on the side area over
here of the house, on the areas where we have a lot of crosshatching
work and sexual work. You can see I've got
a mixture stippling and I've got crosshatching, normal hatching and
what that does it it just builds up
that intensity. So you've got a lot of dark
at the bottom and it's going up towards the lighter
areas of the illustration. And then on this background area where we've got these
triangular peaks, you can see I've just kept it to just a simple cross hatching. And what that does is we
create contrast and variation. If you use the same
crosshatching techniques on every little element that you
have in your illustration, then you won't be able
to get much contrast. It just becomes a bit
difficult to see. So leaving areas white and concentrating on
the darkest part where you think the
shadows are going to be. And then using the background as the lightest area of
your texture work. It just works great
to add depth and layers within your
beautiful illustration. So you can see over here again, if we move across this section, this middle panel area, I've got a lot of y t, and then I've got
some stippling work, just some plain stippled
going on at the top area. And then over here I've
just got the details of the bricks are no texture
work over here at all just to maintain some contrast and some
visual interests. And then in these
little round ball thing shapes that I've got here, I've got that similar technique that I used up, if you remember, we used this lovely
technique that we have over here where we're just building up using the
different textures, but we've got dark
going onto light. You can see that, that's
actually happening over here. So you can see we've got
that dark building up at the bottom right-hand side where the light source is
coming from the left. And it's just using a
mixture of those textures to produce something
really nice. So you can see when I
moved that you thought, Hey, has a broken,
Here's a picture. Well, let's give
you a little peak. There you go. This is a triple peace picture, what I call a triple B's. I don't know what the
official term for that is, but it's one of these
jigsaw style drawings. So I tend to just do
a little sketch and then I just add another one in the middle and another
one at the end. And it just makes it a bit
more fun, doesn't say, you don't have to do
this is just me and my wonderful mind going
crazy in the world of art. So let's just put that
picture back together so it doesn't cause any
distortion on the camera. And you can see again, I've
got some nice dark areas on this foreground where I've got this big shape over here
with a lot of lovely, lovely cross hatching going on, really dark and intense. And then I've got
this little kind of like brick area down here
where there's not much, there's just a bit of stippling. Then again, I've just got this wonderful curvy
type of shape, kind of jailing the
entire picture together. So just practice doing
these techniques. And the best practice
you can do is doing a quick little doodle sketch
and then building this up. And now you may have
noticed that I've gotten just pure black on the top part of this actual
picture and all of them. And that one is, I've
just used my nought 0.8 pen and just gone in
and I've just slowly, slowly added in lines. And if you think that
that takes too long, then you can just
go ahead and use your ink with a brush and just fill in the areas you want
to block out in black. It's absolutely fine to do that. There's no hard and fast rule that you have to just
use technical pens. This class is just an
introduction to technical pens, but use other mediums
like we did in the exercise previously where we see how they interact
use graphite, use maybe a fountain
pen or use watercolor, or even just plain ink
with a brush just to experiment and add a bit
of depth to your drawing. So that was the three-part
picture that I had. Let's just move this
one to this side now and break it up and
puts it on the side. And I've got another
one over here. So this one is
just a single one. So again, just a
nice little scene, simple and easy shapes
gone in with the dark where there's water area is to create a bit of a contrast. And then I've got
a lighter sky area with just a bit of stippled, some simple hatching
lines on the roofs, and then just leaving
the front part of the house just plain as it
tastes with the details. And then again, just using
some hatching lines and the similar techniques that
we used in the exercises. So that's another example and maybe show you a third
example over here. So let's just bring this one. You can see this is just
a single illustration. Again, we're just doing the same technique
using our textures, crosshatching with our
technical pens to produce a nice little sketch
That's really easy to do. So I think that's it for now for me showing you some of
the things that I've done. Hopefully this has inspired
you and got you all geared up and ready and you've got your nice warm
drink next to you, and we can start
doing a full sketch. So let's move on
to that one next.
10. Sketch & Outline: Okay, welcome back. Now, it's time to
get excited and do our full sketch and incorporate all of the techniques that we've learned in the previous lessons. So what I'm going
to start off with is doing a quick
little pencil sketch. So let's bring our attention
back to the screen. So over here I've got a nice little rectangle
of bristle board paper, one of my favorite papers. So I've just cut this
out into a nice, manageable size that I can do a quick little illustration on that you can find
out step-by-step. So I'm going to
start off by doing a quick little
pencil sketch just using a standard HB pencil. So let's just maybe throw in a nice curvy curve at
the bottom like this, a nice little curvy design. And then we might have a few little bumpy bumps
in this area like this. And then maybe another one in this area and then closing
it off with a another round, the round over there. So you can see, I'm just creating these nice
little basic shapes that we can use to start filling in with
our technical pen. And don't worry if you can't follow this exactly as it says, once I've done the
pencil sketch, I will make that available as an image in the resource pack. So you can just go ahead, just copy it and then
you don't have to worry about producing this
particular sketch. Remember, this is
just an illustration of using the techniques that we did in the
previous lessons in a nice, concise little drawing. So you can have a
look and be amazed at your wonderful skill that
you've learned in this class. So I'm just going to
quickly continue with this. Maybe I might drop in a house, the house over here. So I'm just going to drop
in a line like this, keeping it nice and rough. Not worried about perspective
or anything like that. Just having a nice time having some fun while we're just
throwing in some marks. So again, if you've watched
any of my classes before, you'll know that I just loved to do these whimsical
style sketches. So let's continue with that. Maybe just drop in a little
chimney, chimney down here. With a little chimney
shoots up the top. Then maybe have a
nice curly willy with some fancy stuff coming
out of that chimney. So just like that, some nice kills over
there looking great. And then maybe we might have
a little mushroom here. So how about having a hidden has little machinery me
house down here in the corner that's tucked
away behind that house. There may be just bring
in a shoot like that and then close off that
circle from the top there. And then maybe just
throw in a couple of these classical mushroom
house roof top dots, of course can't
leave out them dots. So maybe just throw
in a little window to indicate that this is a
mushroom house like that. And then possibly just have a window over here
on the house itself. Just a simple little
rectangular window and maybe just have a
little door over here. How about around
the door down here with a simple little design. And then until dawn up there. And then possibly
just some lines of details going
across over here. Again. Just keep it nice and simple. No need to over-complicate
anything at this stage because we're
just practicing, aren't we? So how about having some nice little design elements on top of this actual curly, curly type things that
we've got the front hair. So maybe just add in a
couple of curves there. Then we could possibly have
a horizon line down here, this little horizon
line over there, and then some bumpy
bumps at the background. To just give this a bit
more understanding. And then maybe just throw
in some triangular elements out of the back just
like this, very loose. I think that's about it. So I'm going to
leave it as that. So again, this actual image
itself There's drawing, this little pencil
sketch will be available in the resource pack. So do check that out
if you don't want to draw it out by hand yourself, just go ahead and have a look and just give
it a little copy. So what I'm going to do next is move on to using
my technical pen. So let's move on to that one
next. Okay, welcome back. Now, I'm gonna be using my lovely three sizes
of my technical pens. Do the filling area
and the texture work onto our lovely little
doodle, doodle with pencil. So remember, if you don't
have more than one tip, if you just have, say maybe a
nought 0.3 or a nought 0.5. Just go ahead and use that
and produce the textures. It makes no difference
whether you have a set of ten different sized pens or whether you just
have one or two. It's all about just practicing these techniques on
this little drawing. So what I'm gonna do
now is I'm just gonna go ahead and use my medium tip, which is my nought 0.35 has, you know, and I'll just give
that a nice little open. So just opening up
the nought 0.35. And let's maybe get
in a bit of zooming, zooming on this so that you
can see this a bit better. You don't want to miss anything, not one little second. So let's just get that focus, right. So brilliant stuff. Okay, so all I'm gonna do now is I'm just gonna
go ahead and just outline all those pencil
marks so we don't want the pencil marks and merging
into our lovely line. So I'm just going
to quickly go ahead and do that with my nought, 0.35, and I'll see
you once that's done. Okey-dokey. Now, I've just done the outline using
my nought 0.35. And if you noticed, I did a
quick little eraser robots of those pencil lines so that we
have a nice clean outline. So try this out. Try doing the similar
picture like myself. But if you don't
want to follow this picture that I've drawn, then just go ahead and
do your own doodle and then just follow the
techniques as we go along. But again, it's available
in the resource pack, the pencil sketch and
this outline sketch. So let's now move on
to the next stage.
11. Starting Point: Hello and welcome back. Let's now start off
by adding in some of the darkest areas and mapping them out on
our illustrations. So for this one, I'm
going to stick to my nought 0.35 pen. So what I want to try
doing is I want to try achieving this texture
that I've got. If you can see on the screen, we've got that exercise
that we did where we did that lovely mixture of the horizontal lines and
vertical lines and the hard stop playing and the
little scribbles in-between. This is the texture
that I want to achieve on this initial stage to get out those darks and
really bring them out and think about where my
light source is going to be. So let's move that to the side and let's have a
look at our drawing. So over here, I'm
going to think that the actual light source
is coming in from this side if I just put
my pencil over here. So the light source I'm
thinking is going to come in, in this direction where
the pencil is facing. So effectively, we're going
to have the darkest areas in the bottom right-hand
corners of the object. So let's start doing that. Let's get our
technical pen open. And I'm going to start off with maybe these elements here, these three little roundish
elements over here. And all I'm gonna do is
just go ahead and start dropping in some
lines just like this, to just fill in those areas. And I'm going to
have these all the way to the top because I want this area to
be nice and dark. So just some vertical hatching
lines just like that. And then I'm going to repeat
that pattern on these three. So let's just quickly
go ahead and do that. Okay, so we've got a nice
little vertical fill of hatching lines across
them, three elements. I'm not going to look at this
base elements over here. I'm going to probably leave that towards the middle part
because I wanted to establish where my darks and
lights are on the image. So what I'm going to do now is I'm going to build that texture. I'm just gonna go ahead
and do my tilted, tilt of my page to make
this easier for me. So let's just again, continue with this
one and add it in some horizontal lines just
like this on the base. I'm just going to add in
these really nice thin lines. So just like that, I'm just going to do
these horizontal lines coming across here. Now notice I'm not filling
in all the way to the edge, and that's the pattern
that I'm going to repeat. So I'm just going to
repeat that pattern halfway across with
horizontal lines. And let's just do that now. Okay, now what I'm gonna do is I'm going to tilt
that back so we can have a look in
the right order. So you can see
we've got light on this right hand side
and then we've got this slightly darker
texture on the left. Now I'm going to switch my pen. Let's go to our lovely
thick nought 0.8. So let's just get that nought
0.8 pen ready over here. And with my nought 0.8 pen, I'm going to start doing the right-hand side
of these elements. So again, we're just gonna
go and do my tilted, tilt just like that. So it's easy for me. And then I'm going to
add these lines in now. So let's do that. From the top. I'm going to bring in
that line and you can see we've got that gorgeous, gorgeous thick ink in the middle over here
in-between this area and this, I'm just going to add
in some stippled dots just to blend it in and
just let it cross over. So you can see now with that, I've just quickly added in a nice bits of dark on the right-hand side
of this element. And it looks like we have
some nice light going on top. So again, I'm just going
to tilt this across the screen and then
I'm going to repeat that pattern in the middle
and the one on the end. So let's just quickly do that. Now you can see that
what I've got here is I've got quite a lot of ink, and the ink is flowing
pretty fast in this pen. And you've got to
remember just to keep in mind that if you're working
on a small illustration, if you're using a really
thick tip like this, then sometimes if you get a little blob like
I got over here, it can be a little bit too much. However, once you've got
used to your pen and you can control the
flow of ink on it, then it's absolutely fine. Just bear in mind that
because in this class, I'm recording on a screen. I'm keeping the sizes of this
illustration really small. Generally, I would
say maybe work on an A5 size sheets when
you're doing e.g. your class projects,
rather than doing really, really tiny, tiny
drawings like this. So you can actually follow this particularly drawing
on an A5 sheet. You don't need to
have a small mini little A7 size,
things like that. I've got it. So just bear that in mind. So again, let's just turn this around and you can see we've quickly created that lovely
little texture over there. So I'm gonna do now is
I'm gonna go in with my thin point to really
balanced this out. Now, I've got my nought 0.10. Let's open that. And this is now just a case of I ink the actual
image itself and seeing where we need to add in maybe a little bit of texture just to get it nicely blended. Melted away from a one
darkness to the lighter areas. So just with my thin point now, all I'm gonna do is I'm going to do diagonal little lines. So we've got a diagonal
going there just to kind of lightly fill in the
area just from the bottom. And then again, over here, I'm just going to do
some diagonals just to give that lovely, lovely texture that
we've been working on. Just like that. So again, in this area and maybe just throw in a couple
more of them diagonals, just like and do bear in mind if you're using
the thicker tips, then you're gonna be working
with a lot more ink. So it is going to take a bit
more time for it to dry. So just be careful
not to smudge it with your hand while you're
creating these textures. Now, I'm going to do is for
the edges of the shapes. I'm just going to go ahead
and I'm just going to fill in some horizontal
lines here because I want it to really be
nicely blocked out. And then I'm just going
to scribble motions. If you remember, we did
the scribbling technique, just some scribble motion over it just to give it
a bit more form. So let's move on to this
middle one over here. I don't like the way that blob is coming out on the sides. So to cover that, all I'm gonna do is
I'm just going to draw a scribble around it
and it disappeared. So what we've done is
we've just improvised on our drawing to do these scribble
motions just like this, to fix these happy
little errors. So just like that, you may end up having a blob
here, there or everywhere. Just don't worry about it. I don't want you to stress. This is not about
creating perfect artwork. This is all about relaxing. Didn't just enjoying my journey with this wonderful medium. So let's just do
some more roundy, round scribbles like this, just in circular motions, just to fill in those areas. And you can see now we have this lovely little
division between the darkest area of this shape. And we've got the lightest
part of that shape, so that's enough on that one. Then maybe just adding
some more scribbles in the middle just to
get it blended over. And maybe just add in a couple that scribbled lines over here. And that's the advantage of
using a really thin point. You can add scribbled over the texture and you
won't lose your details. So let's just finish that off with the one at the end
that we've got here. So just a few little
round these scribbles. Tight scribbled,
if you remember, we had Thai scribbles
and wide scribbles. These you just tie
scribbles that we're doing to overlay on top
of the texture. So just to bring it out, define it to create that lovely barrier and
that edge of contrast. Look at that gorgeous
stuff, right? Okay, so what I'm gonna
do now is I'm just going to work on
the tops of these, on the tops of these,
I'm not going to make them as dark as the bottom. So I'm going to switch
back to my nought 0.35. Now remember, as I said before, if you only have just one point, so you got, have no 0.35 or 0.5. Then just go ahead and just do the texture work with that, add more texture with that same point and just
leave the lighter areas with more distance in between
the lines that you put down for your hatching and
crosshatching with the 0.35. What I'm gonna do here is
I'm just going to go ahead. I'm just going to add in some
diagonal lines like this, just like diagonal lines
spaced out a little bit more. And I'm not going to go
all the way to the top, so I'm just going to
have it like this. And then again, what I'm
gonna do is on the other way, I'm just going to
go ahead and create that crosshatch just
up to this point here. So we've pretty much got maybe just half of that
circle area there. And that's about
it for that one. And then I'm just gonna
go ahead and repeat that pattern across
the other ones. So let's quickly do that now. Okay, so now you can see we
have this lovely buildup of a gradient tonal effect with our texture is going from dark on the bottom
right-hand side, evolving into a nice, a lighter area on the
top looking fantastic. So to finish this one off, all I'm gonna do is add
in those lovely stippled. So let's do that from this side. So just with my nought, 0.35, I'm just going to overlay the crosshatched area
with some stippled just on the right-hand side area and I'm going to leave
this area white. So just with the
right-hand side, just a bit distinctly stipple. And then again,
on the middle one overhear some stippled just to cover that area and
add a bit more texture and interest to just
make it look fantastic. So just like that over here, lovely Staples and
then finish this off, just adding some more
stippled over here. So just like that,
beautiful staples. And we're done on these
first three elements. I'm going to leave
it at that point. Another thing to remember
is that don't go into too much detail in
individual elements. Because what you want to do
is you want to see whether your entire drawing is gonna
be balanced out or not. If you put too much
detail in one area, then sometimes it
can get a bit too crowded and concentrates it. So do some details, leave a little bit of white and move on to the next element. And that way it'll give you
some nice breathing space. And then right at the end, when you have a look at
your overall drawing, you can just go in and
start doing touch up work with your pens and then
just bring it altogether. So I'm happy with
that middle part. I'm going to leave it as it is. Maybe just do a
thick line where we have that division from
the top to the bottom. So if you want to do that, let's just quickly drop that in. I could do that with
probably the bigger points. So let's just do that
with the naught points. Eight couldn't do it
with the same point, but it's just quicker doing
with the naught point a, I'm gonna do is I'm
just gonna make sure I don't have
a blobby blobs. So I'm just going to
get another piece of paper and make sure that
there's no blobby blobs. So let's just make sure we've
got a nice smooth line. Again, that's a good
way to test out your pen before you go ahead and add it onto your artwork. So Let's just do a nice
division line between this. So I'm going to take
it from the top. I'm just going to
bring it in like that and then just add
some staples there. And then from this one, I'm just going to
bring it in like that and adding
some staples there. And then from that
one, bring it in, follow that curve that
we initially had. And I think that
looks rather nice. So let's just go back, get it on the screen. Lovely stuff, so I'm
happy with that. Let's now move on
to the next part.
12. Intense Texture: Okay, welcome back. Let's now
move on to the next step of filling in our lovely textures
on our little sketch. So what I want to do now is bring your attention
back to the screen. We have the house
area over here, which is the main feature
of this illustration. And what I'm thinking
of doing here is having a nice little bits of
texture on this side. And if you remember, in the crosshatching sheet
exercise that we did, we produced the three
different lovely textures that have the mixture of
the vertical, horizontal, and diagonal lines going in
all directions to produce this gorgeous texture that's
really deep and intense. And that's what I want to
do in this area over here. In this area over here, I'm thinking maybe this
middle one which was the nought 0.35 tip
that I use to produce. So that's what I'm going
to go ahead and do. Let's start on that one. Let's move this one out of the way and let's
get a nice zoom, zoom in on this so that
we don't miss anything. I want it to be nice and sharp. So let's open up our pen. And all I'm gonna do here is I'm just gonna
do a little tilt it tilt so that it's easier
for me to work on. And then I'm just gonna
go ahead and drop in these Lovely vertical lines, keeping them as
tight as possible, not having too much
distance in between. Because I really
want this edge of the house to be
incomplete, dark tone. And the best way to get that is just keep the lines as tight, as close together as
you possibly can. And that way, when we do the
hatching and crosshatching, the vertical lines
and diagonal lines, you'll get a beautiful, beautiful uniform texture all
the way through this shape. So we've just done that now. Now let's do the
horizontal ones. For the horizontal
ones, I'm just going to turn it
the other way over here so that you can
see this on the screen. And again, all I'm gonna do is I'm going to start
off from here. I'm just going to
bring it down and continue across the top
part of that shape. And then I've got this
little gap, a gap over here. So I'm just gonna
go ahead and just do a few over there
just to fill it up. Again. Just going to carry on just like this all the way to the top. So I'll do this and then I'll come back to you once it's done. Okey-dokey. Now we've
done the standard crosshatching with our
vertical and horizontal. Let's go in with
the diagonal lines. So again, I'm just going
to tilt this back to an angle that suits
my comfort zone. So that angle works nice for me. And I'm going to start off in this bottom corner over here. So just going in with the pen, just keeping it nice and steady, creating the diagonal lines
going across to create that gorgeous overlap
of crisscross texture. And you can see it's
looking fantastic. So I'm just going to
continue doing this now. Okay? Uh, so what we've
done now is we've completed the diagonal
in one direction. And then what I'm gonna
do is I'm going to turn this around again to suit my hand angle and make sure that you can
see this on the screen. And then I'm gonna go
in the other way using the diagonal lines
so that we have the final diagonal crisscross. So let's do that now. So I'm just going to go in and I'm going to go in
from this corner. Now you can see sometimes
you might not be able to see the line that you're actually doing while you're
doing this because there's so much texture already there. But don't worry about that. Just keep moving
forward with it. Once it's complete and you have a look when
you stand back, you'll see that it
looks fantastic. So just like this, I'm just going to
follow it along and just keep moving my pen a little bit forward so we have a nice distance
in-between those lines. And that texture just keeps getting more and more intense. So just carrying on like this, just dragging it along. Now, if you do a line that's not there or you skip a line,
that's absolutely fine. Don't worry about being
super precise in this. Just get that texture down
the best that you can. Fill in the gaps and
we're all good to go. So let's just turn this
back around so we can have a look at the entire
picture. Look at that. Let's get our zoom in,
zoom back on this. So let's have a look, great stuff. Look at that. A gorgeous bit of
texture over there on the right-hand side of
the house where we've got the most shadow areas. So what I want to
do now is I want to work on these roof
tiles over here. And for that one, I'm gonna go ahead and use my finished point. And again, that one
is the naught 0.1. So let's just give that an open. And for this one,
I want to have. Nice dark area. However, I don't want
it to be too intense. Otherwise those tile shapes, it just kinda get
lost in the texture. So to maintain some
shape and form, if you're doing a lot
of cross hatching, what you need to really do
is vary your line width. So having a thin point
to do the texture work. And then over that, if you use a thicker point
like the nought 0.8, which is what I'm gonna do, then that will create that contrast and you'll be able to see the
visual difference. So what I'm gonna do now is I'm just going to tilt this
to the side like this. Let's go back to a zooming. So I'm just gonna go in
now with my nought 0.1. I'm just going to create
these really thin lines that follow the direction of
the tiles just like this. And that's basically
as it just like that, 123 and maybe this
fourth one over here. And that's enough.
So just like that, I'm just going to go ahead and repeat those lines in between the gaps just to fill it in and create that
initial light texture. So let's go ahead and do that. Okey-dokey, that's now done. So what I'm gonna do
is I'm just going to tilt this a again on the other side so that I can follow the lines going
in the other direction. I'm just going to do these horizontal and vertical lines to follow the flow of
those tile shapes. So again, from this one maybe starts off at
the bottom over here. I can probably fit in a nice little line,
a line over there. And then just going to
carry on just like this, dropping in three to four lines in between each one
of those spaces. So just like that, I'm going to carry on with that. Okay, that's now done. Let's just turn this around so that we can see
the whole thing again. Zoom in, zoom back, and look at that
fantastic stuff. A, we've got a nice
bit of dark there, and then we've got
dark hair as well, but slightly more
spaced out and thin, and it just creates a
gorgeous, lovely variants. So what I'm gonna do
now is I'm just gonna go ahead and close my pen. Don't forget to close the pens, otherwise you're going
to have them dry, horrible tips and then you can not gonna
be very happy now. Oh yeah, no, you're not. Let's do the nought 0.8 now. So we're nice thick tip now. And what I'm gonna do
is just go ahead and outline the tiles
I initially had, the pattern of this roof. So what I'm gonna
do is let's get that zoom back in so you
can see what I'm doing. They can see you might be a
little bit difficult to see those initial lines because
we've gone over them. However, on the camera, it's probably more
difficult to see, but I can actually go ahead
and see this the closer I get my eyes to the
actual board itself. So what I'm gonna do is
it's just going to tilt that so we can see
it a bit better. And so the flow is
great as you just get that in the center
so that you can see. And then with my lovely 0.8. But before I go ahead
and do the points eight, Let's just do a scribbly
Whipple on this to make sure that we don't
have any blobs coming out. We don't want them
blobby blobs to a ruin our artwork
and no, we don't. So let's just go ahead and
start doing this outline. So just like this, look
at that gorgeous stuff. Look at that, say
love that thick line. So adding the thick line there. And then the next
one was over here. And you can see we've
got that separation now. So I'm just going to go
ahead and carry on with this and maybe just
do it from the top. Otherwise, my hand wheel
slip and just do that again and maybe drop one in over there and then do
a tilt it till t. And let's continue
the other way. So let's just finish
that one off at the end. We had one here and
I can see one down here and then one
more down there. And then the last one
is around about here. And then we might
as well just do a nice thick line on the
top part of that roof. So let's turn it around
and have a look, look at that beautiful stuff. So a bit of a zoom back. You can see it again all in It's a lovely form that
looks fantastic. That doesn't say, yep, it does. So let's just close our pen. Now. You could have actually
gone ahead and done the thicker line first and
then gone in with a thin line. It's entirely up
to you which way round you want to go
ahead and do that, but do give it a go if you
have these different points, if you have a really
thick point and a thin point, then do it. If you say just have maybe a nought 0.35 and a nought 0.1. Then do it with that user nought 0.35 to do the outer lining. Once you've done
the details with the thin point and
you'll have lots of fun. So let's move on now to
maybe the chimney areas. So let's just get a zoom
zoom on the chimney area. Okay, for the chimney area, what I'm gonna do is
I'm going to basically repeat this pattern
that I had over here with my nought
0.35 in this section. So we've got this
right-hand section which is going to
be in the dark, so I'm just going to go
ahead and do that now let's just do a
quick zoom, zoom in. And basically it's just gonna
be a case of dropping in them horizontal lines
and vertical lines, just creating a quick little
cruzi cross cross hatch. Looking fantastic, so quick
and easy to do, isn't it? And then just throwing
in a couple of diagonals all the way across just to mimic this beautiful texture
that we have here, so that it looks a bit more nicer and it all gels together. So again, just do
another diagonal this way and maybe add a couple more diagonal lines just to get it nice and dark. And then what I'm gonna do
is I'm just gonna go ahead and just do a bit more
on the outline there. Then I'm just going to
move on to this section. So just move that a
little bit down and then just do some
vertical lines. And then on the shoot, just gonna go ahead and just do a couple of vertical
lines there. And maybe just do some horizontal lines that go across and then just
maybe one over there. And that's about
it for that one, we don't need to do
the diagonals on that because otherwise
we don't want to lose the overall form and
shape of that chimney shoots. So now what we can do is
we can go ahead and work on the front panel of the house so that's where
the light is hitting. So we've got this
front area where we've gotten a little lighter area, and let's move on
to that one next.
13. Lighter Texture: Okay, welcome back. Let's now move on to the details of the front
part of the house. So I'm gonna be using my
nought 0.354 this area. So I'm just gonna
go ahead and do a tilted tilt to make
this easier for me again. So just let's get a zoom, zoom in. Fantastic stuff. So with my nought 0.35, all I'm gonna do is I'm going
to actually start off with a chimney so that we
can move downwards. So for the chimney, or it is a case of
just dropping in some horizontal lines
just like this. Just to indicate that
we have some type of brick laying going
on over there. And then on this
area on the top, just lightly just dropping
some wiggly lines on the edge. And then for the shoot,
again, for the shoot, just a couple of
wiggly wiggly on uniform lines just to indicate that we have
something going on. So that's basically
the chimney done. And I'm going to
repeat that same thing now for the house, but we're going to make it
a little bit more detailed. So what we're gonna
do is we're just gonna go in and we're going to throw in these
lines like this. And if you notice what I'm
doing is I'm doing this in a quick and fast movement where I've got a little
bit of skipping. So that's the kind of
effect I want to achieve. I'm just doing this kind
of movement like this. I'll just quickly show you that movement on another
separate piece of card. So it's effectively
just pressing down onto your paper and then moving in a quick
movement and then lifting up. So again, I'll do that
a couple of times here. Pressing down, moving and
lifting, moving and lifting. So we get this kind of broke
combined effect over here. So you can see we've got this
lovely broken line effect. And I think that
looks really nice. Now, again, if you don't
want to do this there, you don't have to go
ahead and do this. But I'd just like to
vary my line shape and my forms to just make the illustration a
bit more interesting. So let's just get
back to it now. Then what we're gonna
do now is we're just gonna go ahead and continue and maybe do a few more
from here doing that motion where we've just got that breakages
of that line. And then again, I'm going
to turn this around and I'm going to repeat
the same from this side, going in from here. Just like that, keeping
it really loose. Lifting it up. So we get a bit
of a broken line. And that's about it. So let's just get this
nicely set up on the screen. What I'm gonna do now
is I'm just going to throw in some brick lines. So just like this, just throwing in
some brake lines just to indicate that we have a nice brick top panel on the front part of this house, just randomly throwing them
in, creating that pattern. And then again, just a
little one over here. Just dropping it in where I
feel I need to just indicate a little bit of detailed
information and that's about it. So you can see how
quickly we just created this lovely texture, hard texture on the right, a lighter texture at the front. And it just looks fantastic. So what I'm gonna do now is I'm going to just
maybe darken up that window area over here so that we can see this a bit more. And it doesn't just get
lost in the texture. Just with my nought, 0.35 again, I'm just going to go ahead and add a little bit more ink to the outer border of that window frame just to
make it a bit more prominent. And we're gonna do the same
for the door over here. So just like that, I'm just going to go in
and just maybe just add in a little bit of a
border with my ink. And this will just make these elements stick
out a little bit more and then maybe add a little bit of texture
on the door like this, just a couple of
lines going up from the bottom and maybe a couple of lines
going from the top. And then that middle
part just go in with a darker line and the
doorknob just like that. So you can see we've
just quickly added nice bit of texture on the door. Let's now move on to this wonderful little side guy over here, the mushroom house. So for the mushroom house, what I'm gonna do is
I'm going to again use my nought 0.352
and tilted, tilt. And then you can see this
on the screen a bit better. Now again, most of
that mushroom house is going to be facing
towards the light, so we're not going to have
too much dark going on there. So what we can
actually do is we can use our thin point actually, let's just move to
our thin point. You don't want it to be
too overwhelming and dark. We want to have contrast.
That's what it's all about. Contrast with my nought, 0.1. All I'm gonna do here is
I'm going to start off at the base and I'm
just going to go ahead. I'm just going to throw in a couple of hatching lines that follow the direction of that mushroom house
stalk Harrier. So just like that, there are a couple of
really light lines there. And then I'm going
to turn it around. And then I'm gonna do
the same for this side. So just a couple of light
lines going in this direction. And then maybe a little
bit of a cross hatch. So turn it around again, just going in like this from the bottom so that we have
a little bit of contrast. With this white area of
the foreground elements. So we've got a nice little bits of gradient going on there, so it's not completely white. Then this kind of underside of the actual top part
of the mushroom head. I'm just gonna go
in and just create some lines going in
like that over there. A couple of more lines there
just to make sure that we have something
rather than nothing. Let's just continue. And then maybe with the dots, Let's just maybe have these dots a little
bit more prominent. I'm going to create some
more nice darker areas on the rims of those dots so that they look a
little bit better. And I think that
looking quite nice. Now what I want to do is go
ahead and do some stippling. Stippled with minor 0.35
just to vary the texture. So let's go ahead and
drop in some stippled. So from this side, we're going to have the
most darkest point. I'm just going to go ahead and
add in these nice concise, tight stippled that
are close together. And then just keep
moving that as we go towards the left hand side
of that mushroom house, had the roof of that
mushroom house. And just keep moving it forward. And as we go in this direction, I'm going to spread out
those stippled more widely so that it looks like that we have light
hitting it from here. And we've got a dark a bit
of shadow on that side. And then just like that,
I'm just going to work this in so that we have a nice eventual gradation
of tone from dark to light. So again, just keeping
it nice and simple. Or with the nought 0.35, we don't really need to go in with the naught point
a or any thicker point because we just want this
element to stand on its own and not really interfere with the background
or the house. So just like that, having good, Nice keeping it nice and tight and just
filling in that area. Just for this stippled. Don't want to do
any hatching and crosshatching to
make it too intense. Just like that, it
will look really good. Just making sure that we have quite a lot of
these stippled around the dot area and
quite a lot where the edge is meeting
the edge of the house. So just like this over
here, carrying on, trying to fill in all those
gaps on this right-hand side. And it's such a great exercises. And then just to
go ahead and just fill in this lovely shape. But does so relaxing, such a great little exercise of mindfulness is
carrying on with this. So there we go. And I think that's emerging into a beautiful little illustration
elements on our drawing. So I think I'm going
to leave it at that. And maybe we come
back to it later once we've gone ahead and done
the rest of the picture. So what we've got here
now is we've got most of this right-hand side midground
of our illustration done, we can now move on to some of these
background elements and maybe add in some details where we've got
this lovely wiggly, wiggly stuff coming
out from the chimney. Shoot. So let's move
on to that one next.
14. Background Lines: Okay, welcome back. Let's now focus on the
background elements. Are we going to have
minimal details and textures so you can
quickly get them done now. So let's have a look. So over here we've got these round little bumps
that we have at the back, but the triangle
things on the top. And we have this lovely
curly rarely stuff coming out of that chimney. So let's focus on these bits. So I'm just going to
do a quick little zoom in, zoom on that. Now for this one, all I'm
gonna do is I'm just going to use my nought 0.35 and I'm
just going to go ahead. I'm just going to add in
some just vertical lines, lighten this so you can see all I'm doing here
is vertical lines, not all the way to the top. I'm just creating a quick little light texture
with vertical lines. And that's all I'm gonna
do for this element because the background doesn't need to have too
much detail in it. We want the detail to mainly
be in the midground and foreground of our illustration so that we can focus
on those elements. The background area
really is just to fill in this space so that
it doesn't look too empty. And just like that, I've
quickly added in that texture. Now, what I'm gonna do for the triangle areas isn't
gonna do something similar. I'm just going to
go ahead and do the kind of hatching lines going in a diagonal direction
just following the shape, this shape of that triangle. So just like that, I really like doing that
skipping movement with the pen to produce a
lovely little texture. So again, from here, really fast and quick. Let that pen skip to use at your advantage to create
really nice, lovely textures. And that's it for that. So I'm going to maybe
add in a little bit more once the actual
image is complete. So let's now focus on this area. So we've got this
lovely smoky stuff coming out of the chimney. Just bring this down a little
bit so we don't get dizzy. So what I'm going
to do for this one is I'm going to create
a bit of a variance. So I'm gonna go to
my nought 0.8 tip, but so let's get
that nought 0.8 tip out and just going to do a
little tilt, tilt on this. And what I really do in all of my illustrations is I
always have some type of smoky type of
puffy area that goes up into these clouds
of puffs of smoke. And it just looks really nice and different from
the straight lines. So adding an element of a curved line or a
bit of curvature, see your artwork just gives it that visual difference and just makes it look a bit more interesting and really
a bit more whimsical. So let's just do this
now with my thick point. What I'm going to do is
I'm going to firstly just go ahead and outline. Well, I've already got there so that it makes it a
little bit prominent. Then I'm just going to
create another line that basically just follows
that initial curve. So just like this, it's just going to
follow that curve. And then I'm going to
repeat this from here, going in, creating this
lovely wavy pattern. And then I'm going to start at this point over here
to continue it. And just keep that pattern going so that it looks like we have this lovely, wonderful, swirly worthy of
smokey smoke stuff just coming out of
that chimney and just following it as it is. Now, you might not be able
to produce the same type of curvatures on these
lines that I'm producing. And that's fine. Just
go along and see where it takes you that
the formula at all. So from this point here, I might just go ahead and just shoots off in another direction. So just like this, I'm just going to vary it and adding some
more curvy curves. Just like this. It looks a bit more varied, fantastic stuff. And then I tilt my page a little bit more than
I'm just going to maybe go ahead and follow that curvy curve that
I've put in over there. And then maybe I might
just switch my pen to might not point a three-five to give it a little
bit of variance. So just with my nought 0.35, I'm going to start adding in another curvy curve and following that line
of the thicker point. So that way it
looks like we have a nice little
variation and it just makes it look a little
bit more interesting. Visual maze lookout master. So just going to
turn that again. I'm just going to follow
along wherever I see a gap just to fill in that space to create
this beautiful patterns. So just like that over there. And then maybe just start
off on the edge over here to follow the initial line and
then bring it in from here. And it's just a case
of just filling it in wherever you see a gap and just
follow the curves or the previous line or just
adding another curved line. And that's about it.
Look at that today. Let's get a zoom back
on that so we can see this in a bit more perspective. Fantastic stuff so quickly, I just went ahead and just added in some normal hatching
lines over here. Diagonal hatching lines
at then some curly will ease with my thick point
and then my median points. So give that a go with
whichever pens you have. And it just adds that
varied visual interests. So all we have now to do is
fill in three more areas. We have the sky area over here. Then we've got this middle area, which is probably
going to be the water area of the scene. And then we've got this
base area that we could go ahead and start adding some
funky little patterns on. But we'll leave that
right at the end. So let's now concentrate
on this guy area. And for the sky area, all I'm going to do is do some really light staples
just to fill in this space. So let's do that now. Let's just get a zoom in. Zoom on this Okey-dokey. So I'm just going to
stick to my nor 0.35. And all I'm going to do is just lightly start at
this point here. Maybe have some concentrated stippled over here,
just like that. And then as we go
up on the page, I'm just going to
let those stippled spread out a little
bit more so that it looks like we have a nice movement of stippled
going on in the background. They could effectively be little round suites that are
just falling from the sky. Lovely little trees. Again, just continuing in
that same style with a lot of concentrated bonds where we've got the triangle elements
and then as we dealt up, spreading them out like that so that they don't
all look the same. So again, on here, I'm just going to spread
it out on the top part. And then I'm going to bring
it in and have it more concentrated where it meets
the elements of our drawing. And then moving on to this side, bit more concentrated over here, where we have the chimney. Bit more concentrated,
where we have the edge of the
roof on the house. Just like that, nicely
concentrated so it fills it up. There's not too much space. And then as we go
up into the air, to the wonderful air we fly. We just go ahead and spread out these nice little
stiffly stippled dots. Let them fly in the air
and enjoy themselves. So that's about it.
How quick was that? We literally did that
within a minute or two. So let's just move back
and see how it looks. So you can see we've got a nice little texture fill
all across this image. Now we can go ahead and
concentrate on this area. So this area, this is
where I'm imagining that we've got this
kind of water area. We could possibly add
another element to this. So maybe let's have a nice coffee and I should drink and have a bit of a break. And then think
about what element we could add to this
if we really want. So I'll see you on the next one.
15. Darkest Lines & Patterns: Oh, that was a
really nice coffee that gorgeous stuff for. Okay, welcome back. Let's just put the coffee mug on the side before it
interferes and everything. Let's move that to the side. That was a really nice
coffee that okay. Now, while I was
having my coffee, I had to think about
what I'm going to add in this lovely water
imaginary area. And you know what it's gonna be. It's gonna be about the boats. So let's just drop in
a little bowtie boats. I'm gonna get my nought 0.35. And then let's just do a
zoom in zoom so we can see all the wonderful details
of my little bowtie belts. I'm just going to keep it
really simple, just like this. Just going to create
this little shape. Curl it up out there, and then maybe just
do a little top area, throw in some sales little
rectangle piece over there. And then another
little rectangle. And then maybe a line
coming in at the bottom. And that's about say,
How easy was that little bowtie volts
in our scene? So I'm gonna go ahead now and do the filling area of
that water element. So with that, I'm going
to use my nought 0.8. So let's get the nought 0.8 out and then maybe tilt
this to the side. And all I'm gonna
do for this is I'm just going to use
my nought 0.8 pen. And I'm just gonna go
ahead and just start adding winds across here, keeping them really nice and
tight and close together. Just maybe leaving a few gaps. And that's looking great. So we want this nice
dark area over here to really make those
lighter details pop. And then just having that little bowtie bolts
in that area, we'll just add a
bit more interests. I just like this. I'm just going to add
these lovely lines on the edge part of
that mushroom and then just fill that gap up
and it's looking superb. So just like this, quickly going to go
ahead and do that. So I'll do that and then we'll have a look
once it's done. Okay, Now you can
see that I've got these wonderful lines that are creating this
kind of movement, motion of maybe some water
where this bolt is now, if you want to go ahead
and maybe adding a couple of staples just to darken
that up a bit more, you can go ahead and do that. And I've just noticed I've left a little gap, a gap over here. If you can see the
gap in-between the mushroom and the
background of that water. So let's just quickly
fill that up just like that so that it's all
looking nice and complete. Don't want to leave
anything else. So maybe what we can do is let's just do another
till it till on this, I can see that I've
got quite a lot of white gaps over here. And I'm just gonna
go ahead and just randomly fill them
up with my pen so that we have a
nice strong bits of dark contrast from
the mushroom house. Just like that. It's going to drop in some
broken lines in this area. So it looks great. Just get that finished up. So just from the edge, I'm just going to
bring in some lines, nice big thick lines over here. And then from the edge of
that boat where we've got the sale dropping in them lines. Now what you can do
is you can just fill this entire thing in with
your ink if you don't want to have these broken
lines or if you don't want any texture here
That's entirely up to you. Just go ahead and fill it in. Basically just color it
in with your lovely pen. Or if you have
some, I think it's just normal ink that you're
using to fill these pens up. Then just go ahead and use that ink with a brush to fill in this area if you don't
want it to be texturize, do if you don't want to spend too much time going
ahead and doing this, they're just like that. We've got a nice little
bit of design going there. I'm just going to go ahead
and I'm just going to outline the edge of that boat so that it doesn't get lost in all that texture. Just go, go ahead
and outline that. And then maybe outline this
area of the mushroom house. And this little element here throwing in some outline lines. And then again over here, just creating a more prominent
edge to where it meets. And then maybe a little one
over here, just like that. And then maybe one where
it meets this midground. Fantastic stuff. So again, I'm just going to just drop
in a little bit of kind of inclines where I see that there's too much
of those whites. But like I said before, you can do this
however you want. You don't have to
follow this exact step. And then ask just
turn this again. I think that looks rather nice. So maybe get a zoom back to
see what we've done so far. So we've got our lovely picture, which is nearly done now. And we've got all the elements
done that we've designed. The only thing
we've got left now is this lovely little base. So let's move on to that
one next and maybe just add in a little design elements are just going to
close my nought 0.8. I'm gonna go back
to my nought 0.35. And for this and thinking maybe let's just
create a border. So if we just get
this on the screen again in a good angle. So just like this,
what I'm gonna do is we're just
going to drop in a border edge where it meets. The detailed work above. So just like that, I'm
just going to follow this along and create
a nice border edge. And then till that back again. Then what I might
do is I might just throw in some lines like this. So effectively it looks like a brick fence that's in front of all our wonderful elements than lovely round
rocks and the house. And it just creates
a effective frame for the front part of
your illustration. Now, you can drop in any
pattern or design in this area. If you just want to do bricks, you can go ahead and do that. What I'm thinking
of doing this just maybe let's just
give a tilted tilt. I might just drop in some
round circle elements here. So what I'm gonna do is
I'm just going to create some little round circle
elements like this, random and spread out. And then maybe have them
tighter in this area. And all that is, is
it's just creating another visual interest part for this illustration so
it doesn't look the same. And then again, maybe
have a couple more down here and then
just spreading it out. It could effectively
just be some kind of like stone fence with these round like broken stones like you see in these
beautiful areas of the world. We get quite a lot in
the UK where you get these lovely couple fences. They look absolutely gorgeous. So just like that, randomly
spacing them out and then maybe just have a couple of lines that are coming
down from here. So just throwing in some normal lines that
just come in like that. Okey-dokey. So you can see we've just got
this rough little pattern. What I'm gonna do now is
switch to my nice nought 0.8. And let's add in a little bit of texture to make it
more interesting. So I'm just going
to tilt that to the side so that you can see
and make it easy for myself. Then maybe where
we've got these dots, Let's just drop in a couple of nice dark dots in-between those kind of circles
that we created. And what this will do
is this will create a nice random pattern that looks like we've got this beautiful
cobbled style fence, is lovely stone fence right in front of our main elements, just like dash dropping
them in randomly. You don't need to
follow this exact step. There's create whatever
pattern you like in this, if you want it to be
Brixton, do bricks. And then I'm just
going to add in some staples that kind of follow these lines up to
this point over here. Again, just some staples
that follow the line. Just design it as you
go along, improvise, whatever you feel like, just dropped that type
of a texture in it. Absolutely fine. So you can see
this is just added a bit more visual interest
to the entire design itself. And all I'm gonna
do now is I'm just going to use that thick point. Go ahead and outline the edge of the brick
part of this fence. So just a nice little
outline there. And then I'm going to do
the same for the top, just so that we
have little bit of a prominent division that
goes all the way across. And then let's just maybe
turn this back down. And then we could possibly
just add some more steeply with please follow
the lines that we've done. So just like this, you
can see what I'm doing. I'll just bring this up a
little bit so it's a bit easier for you to just lovely. So just by that, I'm
just adding in these lovely stippled
that kind of form, a broken line
that's going in and rising from the base
all the way to the top. And I think that
looks quite nice. It just makes it look so much more interesting
than just having plain lines I just scattered on the base
of this illustration. So just like this, adding in
these wiggly dotted lines following the direction of those initial lines that we did. So that's looking good. Let's now just get a zoom
back and let's have a look at our wonderful little
drawing so that it now, so what I've basically
done is I've just filled this entire illustration with some lovely textures that
we did in the class. And that's looking great. So give that a go. It's really easy to do. Don't worry, if you don't
have the same textures like me, that's absolutely fine. You can do your crosshatching
in a different way. You can maybe have
darker elements at the back or have more
stippling on the top. It's absolutely fine. It's not about producing
this exact image. It's about practicing
those techniques that you've done in
producing a complete sketch. So that's all I'm gonna
do for the detail part. I may go in and adding
some extra lines later on, but there's no need for it. We can go ahead and do all our fancy work in
our class projects. So let's move on to that one. Next.
16. Class Project: Welcome back. It's that time now, it's time for you to do
your class projects. So let's quickly go through what you need
to do for your class. Project number one, we need
to go through the worksheets, the technical pen
worksheet where we had the four different
exercises, print them off. If you have a printer, if you don't have a
printed, remember, just go ahead and just copy the actual boxes
that we've got. And that way you can do the
follow along and practice, practice as much as you can. And once you've done that, go ahead and do the
step-by-step, a full sketch. And once you've completed that, then what I want you to do is do a complete illustration or a quick sketch with your
technical pens and try incorporating as many of those techniques
that we learned, the hatching,
crosshatching, stippling, and using different points
if you have them available, a thicker point on the technical
pen and a thin point to create a contrast of
variants and texture. If you only have one point, then just go ahead and
use that one point. Spread out the lines that you have in between
you're hatching lines to create more of a lighter
feel and a lighter tone, bring them closer together
to have a darker tone. So whatever technical
pen you have, just go ahead and use that. And that is all you need to
do for your class project. But the most important
part is to upload your class projects onto the class project
gallery so that we can all have a look at your
wonderful work and ask me any question that you
want on technical pens or on any other
mediums that you have any questions on
that I have covered in any of my other classes. And that's all you got
to do, simple stuff. So I'm going to let you get
on that and then we can move on to the final thoughts
and conclude the class.
17. Final Thoughts: Okay, welcome back. Just a couple of final thoughts on the conclusion of the class. So hopefully you
learned how to create beautiful textures at the
beginning when we went through the worksheet and it's increased your knowledge of technical pens when we
went through how to maintain technical pens
or what they used for. This would have just given you
a nice little insights and first-hand experience
practicing with these wonderful little tools. So you'll be more comfortable now going forward and producing gorgeous artwork and sketches and doodles with these pens, hopefully, you would have
followed the step-by-step, a lovely little
drawing that we did. And then that motivated you
to do your class project. Do ensure that you post your class project onto
the project gallery, and also ensure that you leave a lovely
review on the class. This will help other students find the class and learn from your experience and
be motivated by your beautiful artwork
that you upload. And what that will do
is that we'll have more lovely students
like yourself producing gorgeous
artwork and learning more about this wonderful
technical pen. So hopefully, that wraps up the class and you enjoyed
this lovely journey. I did and I'm excited as usual, I think I might
have to have a cake to celebrate and
you get yourself a nice treat to
celebrate as well if you've reached this far. So do follow me on Skillshare
and on social media. I post sketches every day. I'm quite active in the world of art and illustration
as you already know. And I have a really busy
lifestyle which you can watch and follow on my
Instagram channel on YouTube. You can also follow me on Skillshare to learn more
about what I'm doing. And I'm constantly
producing classes for brilliant students
like yourself. So do follow me on Skillshare and do check out
my other classes. On Skillshare. I have 20
classes now after this one. And hopefully these will just enrich your
experience and really give you that lovely window into the wonderful world
of traditional art. And I also have a couple of classes on digital art
if you're interested. So with that in mind, I hope you enjoyed the
journey like I did. Keep doodling, keep sketching, and keep illustrating
with technical pens. And if you have any questions, then drop me a question in the discussion
area of the class, or you can email me or you can get in touch through
social media, whatever way you are
comfortable with. Do get in touch. I will respond to you
as quickly as I can, and I will try helping you in the best way possible
to really help you in this journey of getting
back to sketching and art through the beautiful world
of traditional mediums. So have a nice day. Carry on sketching. Look after yourself. Don't stress. We don't want to stress,
we want to relax. Let's use art, Let's use
traditional materials. So just relax and escape
away from our daily grind. And hopefully I'll shall
see you on the next one. So take care of yourself, look after yourself, and peace.
 Imran Mughal, Graphic Designer & Illustrator