Transcripts
1. Introduction with class: Procreate is the best iPad
app for creators on the move, all you need to do is grab your iPad and you
are ready to create. Wherever you are,
you can just go grab your counsel and start
with your illustrations. You can sketch paint, simply enjoy while you're
working in procreate. I am here to start this journey
with you in this class, you will learn how to use
programmed in no time. After this class you
will have a knowledge to create anything in procreate. All you need is
creative mind and $10 to purchase this
program from App Store. In this class, we will cover
all necessary tools that you need to know to start working comfortably
in Procreate, we will cover layers, we will explain layers, will explain colors, brushes, everything you need to
know to start working. And we will get comfortable
with gesture moves. Because procreate is amazing. Because of that,
you'll be ready to start uploading your artwork and sell it or find some clients with skills you've
just learned here. I really hope to see
you inside this glass. Bye.
2. Procreate Introduction: Hi everyone and welcome. In this video we will learn some basic things
about Procreate. I will introduce you
with Procreate. Once. When we open Procreate, this is first thing
that we will see. This is some of the work that
people did in Procreate. Let's go check that out. This is really amazing. Just imagine how much time you need it for
something like this. Details are really,
really amazing. So this is someone's work. Okay, Let's go back to gallery. And once when we want
to create a new file, we will just go up here
at this plus icon. Once I click up here, they will give me to choose
between some of those. If I don't want any of those, I will just go click
up here at this plus, and I will create on my own. For example, let's
just say I want to go with something like this, okay? And this is the DPI and how
maximum layers are allowed for me to use in this
document with this size. It's really a depends
on which iPad using. For example, if you're
using some iPad Air, it will probably be
much less than 166, but it doesn't matter really. You don't need to go
that deep with layers. So let's go create a
new file from our peer. We can also choose
color profile, time-lapse settings, and
countless properties. So for example, everything
we do later on we will get, for example, let me just say
good radio of your work, time-lapse of your work. So it only it, from up here we choose which quality one to
save that file is, for example, I will just
go with Ben 80 beam. Would this with these
dimensions and just hit Create. And now he's here
it is our five. So we can go just by
with our fingers. We can rotate, we can fill that. We can zoom out, zoom in. And the stuff like
that. For example. If I go just do it like this, it will automatically
fill that for me. Know, if we want to go back and just hit Gallery
or bringing back your work from up here we have actions, we
have adjustments. We can go and select
them, move things. And the main thing is brushes. This is our brush tool. This is eraser
layers and colors. Let's go pick some Example. Brush. I will go with inking and big this income brush
with color, blue. Now if I want to paint, you will see what will I get. This is the brush that
I choose from up here. We can choose the brush size. So I can go make it smaller. You'll see, or make it larger. And from our peer,
we can go choose and reduce the opacity to
get something like this. Now let's go back 100. From up here. We're going to go and
undo those steps. We can do the same
things to undo that stops with two fingers. If you place two fingers at
the same time on your screen, it's allowed automatically
go step back. So this is really time-saving
feature they added. From up here. You'll see we got a lot of different brushes. Later on, you can
add your own brush or you can create
your own brush, or you can download
some brush for free. There are also some
paint brushes, but you don't really need them. You can create on your own
or downloaded for free. So you'll see guys, there is a lot of
different brushes. So what's good in Procreate
each of those brushes, we can go and edit the settings. You'll see we can play with it. We can add a lot of different things we can change
and the stuff like that. I won't bother you without just saying there is an option. Okay. Let's just see how this looks. It really looks nice. Let's go step back. 12. Great. And what does smudge tool do? It does what it says. It's much things and
let me just go bring my bring back my brush. If I go with smudge, you'll see what it does. It's much those edges, so it's really can be helpful. Sometimes you can go zoom in, make a brush smaller, and we can play with it. So this is what the
smudge tool does and what's what do we need to learn? And when we pick
smudge tool each, each time we can choose
different smudge effect. For example, I want this
effect on my smudge tool. Let me just go back. Now we got different effect
with different brushes, but we still using smudge tool. So keep that in mind. Eraser with the eraser,
we delete things. We can also play with it. We can increase the size
of our eraser or you can reduce the opacity
and stuff like that. And also with the eraser, we can choose any brush. We're like, okay,
now let me go back. Great. And this is later, just imagine layers
as empty vapor. So for example, if I go
and add base of paper, transparent piece of paper and create something like this. Now, I add one more vapor
at the top of that and choose some color
black, stuff like that. So now I have two piece
of paper or two layers. And if I want to go
and move this one, I can go move that layer or move what's
inside that layer, just like that, by picking
my selection tools, I can go decrease the size, increase a Kingo, rotate it. The similar stuff. We can go with
different uniforms. We can go warp ID, we can go distort
whatever you like. You'll see. There is a really cool
effect that we can get by using this gay legis. Am satisfied with it. This is later, for example, if I want to add this
yellow at the top of that, I will just go bring
my layer below that. And now my layer one is too great if we are not
satisfied with something. For example, if we want
to delete this layer, we can just go from
up here and delete. Or we can lock it, duplicate, you know what, the duplicates me
and it will create a copy of it and in a new layer. And we can lock it. And just in case we want
to paint something, but we want just
imagine once you lock your layer and you are satisfied with what
you've done on that layer. You don't want to
mess that work. Just in any case, you don't want a
message, you lock it. Now if I want to paint on it, it will show me locked layer. We can go open layers or unlock
this layer or cancel it. So it'll go just from up here, unlock, and that's it. Let me just show
you a duplicate, a duplicate that layer and
move it just like that. Okay? If I go and do stuff
like this, for example, if I click up here, we got a lot of different
sets of options. For example, we can
rename that layer, we can select it, we can copy, Fill glia Alpha Lock, mask, clipping mask, invert a
lot of different options. For example, let's
just go with layer one and I want to go
it helpful lock. So for example, I've got
alpha lock and I want to decrease the size of it
and choose a black color. Now, when my Lear
is an Alpha Lock, it will it will
allow me to paint only on what's currently
on that layer. So if I go try to do something like this,
nothing happened, but if I go with over
this yellow area, it fulfill that
with black color. Just go, let's go
pick with some color like this to have better. Meaning. You'll see once
I'm with my alpha locked, I can go and do stuff like this. This could be really
useful options. Sometimes masks are similar
but it's not the same. I will show you the
difference, for example, now I want to go
and unlock this, and I want to add a mask. Now. If I paint
with black color, it will automatically remove
anything from my layer one. You see? But if I choose a white color, it will automatically
bring stuff like that, but it will not
destroy my main layer. In anytime literacy. Let me just show you
with black colors. Let's just say I want
to do stuff like this. I really want them as this one. But I didn't destroy my layer. I only apply this
effect on my mask. If I go and close this masks, my layer is untouched. So this is difference between
masks and alpha lock. So keep that in mind. Great. M from up here are
colors. There. There is a disk, you see disk like this. You can choose any
color you like. There is a classic they use
like this one the most. And I was working in Photoshop, but I prefer disk for now. This is a classic,
this is harmony. It's really will give you
a complimentary colors. For example, if I
choose this color, my complimentary color
will be this one. If I choose this color, my complimentary color is
going to be in this one. It's really, sometimes
if you lack imagination, just could be really helpful
for my pure our values. If you want to add color
sweet value, for example, you can just go from up
here and type that color and you will have that
color automatically. We have pallets. It's really depends how
you prefer to work. From up here, there
are cards with different ballots or compact. So it's really how to prepare. I like to use disk. Great. This little thing up
here is color picker. If I just can call it like that. For example, if I click up here and click on
this yellow color, it will automatically
bring yellow color for me. For example, if I go up here
and click on this black, it will automatically
bring black color for us. Or we can go with, or we can go with our pencil. Hold a second and pick
any color you like, just like that and it will
bring that color for you. And now you can paint. Another cool thing
that we need to know is It's really useful, is for example, if you
ever used Photoshop, it's it's called
Paint Bucket tool. And this is the similar
stuff, for example, all we need is a closed
selection, closed object. For example, a circle
that is closed. There was a lot of different, I will show you
just in a second. There was a lot of
different brushes, but this one is closed and sure. So now I'll just bring
this color and upon release it will automatically
fill this one for me. So now I can just go paint those edges and logistic
say I have a circle. Great. Now let me just close everything and create some new. For example, with
driving, with this one. Excuse me, I forgot to
create a new layer. It fulfilled it. But if I go and reduce the
size and try to do that, Let's see what's
going to happen. It will automatically
fill the whole layer. Why? Because our circle
was not close. So let me go step back. You'll see there is a
lot of different things. Move from where color can go through and it will automatically
fill the whole layer. So when you want to fill your
layer suggests like I did, you need to choose your
brushes carefully. Let's go and do that. Create something like this. And from up here we
can go and add hue, saturation, brightness,
color balance, everything. For example, phi one
to add some adjustment like like blur, I will just go. And if I go from right to left, from left to right, you'll see how much I currently
applied. There is a 2%. You see, if I move
forward it will automatically add
more to my layer. You'll see stuff
that we are getting. Now. For example,
if we wanted to play with hue saturation
and brightness, and just like that, we can play with those sliders, and this is the color
that we are going to get. So that's something
to keep in mind. You need to go and have fun with Procreate to learn
all of those things. It's really fun and easy to use and you cannot mess anything. That's the good thing. If we want to move it just
like that, we can move it. And that's it. Okay guys, and now we'll learn some
basic things about Procreate. In the next couple of videos, we are going to
create cold things. And one more thing, how we can see what will work. For example, let's
go back to gallery. And let just say, we want to select
this one and we want to share it from up here. It will ask you which
format we like, B as the PDF, JPEG, PNG, and stuff like that. Let's just say I wanted
to save this as a JPEG. And from IPR I can choose anything legitimacy I
want to save it to Files. I will save this one
on a files and choose procreate and let just
say save it to prove it. That's it. Ended now, we have
our file ready to upload anywhere
really like that's it. Thank you all for watching. If you have any questions
about those basic things, let me know and see you in
the next couple of videos. Bye.
3. Find inspiration and extract lines from anything: Hi everyone and welcome. In this video, I will show
you how to add any image for inspiration to create something unique and
special on your own. For example, let's
go on a Google or I don't know any
other website you can go on Pinterest or something like that
and you'll find some, and you'll find some
image that you want to go and create something similar. For example, let's just say
I'm satisfied and I want to these flowers into my
Procreate as a reference. So how we can do
that, for example, we can go just
hold a second copy and let's go back
to our procreate. From up here we can just go
base and here we have it. Those flowers. Now I can go and reduce
the opacity for my peer. I can reduce the opacity
of those flowers and create the new layer. And now I can have
fun and create something similar. That's it. So now we can go
up here and have a nice time creating
stuff like this. Now once we have our
layer one as a reference, I can go to Brushes flying some brush
that I'm satisfied with. For example, I can
go with this brush and just paint
something like this. It can create some
flowers in no time. This is just me having fun. It doesn't really matter, but you guys know how you
can add any file out there. Once when you are satisfied
with your design, you can go close this one. Now, you can export this file, for example, this funny flower. If you want to add a
couple more things, you just go back to
your, I don't know. Let's just say we want something like we want something
like this or this. You see, it's not allowed
to use this image. But we can use them as
reference to create something similar to extract
some line from that. That's not really a bad thing. So for example, we
can copy this one. Let's go back to procreate
from up here, just based it. And I can increase the size. And now we can have
fun n duplicate this, create a new layer. You can reduce the opacity
of it if you want. If you don't, you just go
and paint over that layer. Now when you have
your reference ready, you can go and duplicate. For example, I want
to extract some, some lines up here I can
go and do that right now, for example, I can just
go zoom in a bit more. And now I can go and
replicate this one. I created similar lips. Now we can go up here and
do the same thing for nose. You'll see we use
those as a reference. We can go and extract
those lines in no time. You'll see what's
mindful in here. What's important
to understand you, you cannot go and
copy others work. You can just use a couple
of things as a reference. So be unique with your designs. Don't copy other people's, so this is just helping
me and that's it. If you have any questions, if you have trouble
extracting those lines, feel free to ask me and I will gladly help you. But I didn't.
4. Create and edit brushes : Hi guys and welcome. In this video we are going
to create our own brush. How we can do that, for example, we can go and add some
objects for our brushes. We can add a trees. For example, I will go and
add a tree as a brush. How we can do that, just go on Google and type tree PNG or
something like that. Now I will go and click
and hold until I see copy. And I will bring back my
procreate and paste it. Paste it up here. Now when I'm satisfied with
how it will my brush looks, I will just go from up here and I want to save
this as a DJ back. So I exported this
as a JPEG and I will save this to
my image gallery. Okay, now when we are
done with this step, I can go from up
here at the brushes. And you'll see this is
a recent just go move this below until
you see this plus. Once. When we see
our plus button, it will ask which name we want to add for
this set of brush, I will just go add trees. And once I click
this click there, I can go and add a brush
for my, for my gallery. In the now, once we
are selected shape, we can go up here
at the Edit and we can go import, import a photo. And this is the photo
that I want done. And this is our brush. Now we can go and change
couple of things. We can change spacing. We can change some other things. We can go just to shapes. And I will go at this
and I will debit twice. I will tap it with
my two fingers to invert this because we want
our brushes to be white. And that's it. I will save that. Now we can go from up here, we can add the spacing. Or we can just say I
want to add the spacing. I want to change that, or I don't just play
now and that's it. I will increase
the maximum size. Something like this. Minimum size. From up here about the brush. You can add your name. For example, I will type my name and I will
go click Done. Now, when I go up here at the trees and let
just say this is, my background is
going to be black. How we can do that? Go to New Layer and
choose your tree brush. And now when I
increase the size and choose white color
for my brushwork, some green color, blue, this is my brush. This is how we can add
the brush in procreate. Now we can go find the project that we did
couple videos before, and we can add stuff up here. For example, we can
add those trees on a couple of different layers
with different sizes. This is my current layer and I will make sure it's selected. And I will just go, decrease the size of my tree. And I can go and add
that tree any larger. You'll see that
affect the tree just adding the tree at
the top of here. We can go and add the tree. And the last layer. I will just make sure
it's the right color. I will just go at
that tree up here. We cannot see anything moving up here because
it's Alpha locked. So I will go on log that. And I will click up here
and add those trees. Just like that. And I can decrease
the size. Smaller. Basically, that's it. That's how you can add
brushes into your procreate. Or we can go, for example, let's go on this layer. It doesn't even matter, or we can create a new alleles, go create a new file. Let's go edit a
couple of brushes. For example, this is currently mercury and this
is how it looks. Let me just go zoom in. This is too much. Let's go to something like 25. It's too much. Just give me a second patient. This is how currently
this brush looks. If I go click up here. Now I can go and change this. It can go change it to just this from 20 something
percent to 78. Okay. This is the same brush
everything the same. I just changed this spacing
and this is how it will look. So keep that in mind. You can go play with those
options in Procreate. And this is really nice because
you see the effect that you are getting and you
can try it on right here. For example, go with
something like this. This is how my
brush. We'll look. Let's go back to done. And I think we're back
to the previous effect. So this is how you can create your own brushes from
a PNG or JPEG files, and how you can edit
any brush from up here. So that's it from
me in this video, I hope you'll learn
something new. See you later.
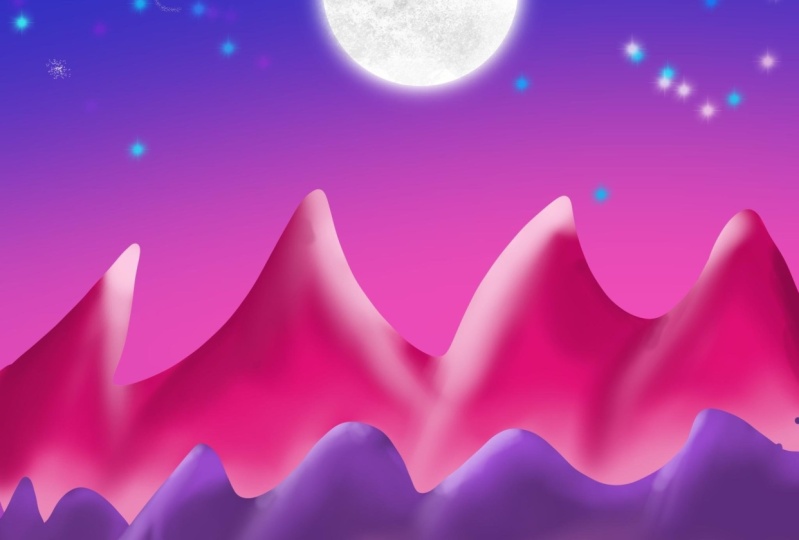
5. Creating Cool Artwork with Simple Tehnics: Hi everyone. In this video we
are going to create something amazing and simple. So let's get started. First, I need some blue
color for our sky, for example, I will go
with some color like this. This is going to be
something like this. And I will fill my
background with this color. Next color that I'm going to
need is something like this. Maybe even brighter. Now, I am going to use some airbrushing and
I will use soft brush. Now, I will go and increase this brush to see
this is too much. Let me go with
something like this. I want to paint
appear, automate. Next move will go
from Adjustments, and I will use Gaussian
blur to get this fact. Something like this. Once I'm satisfied with, I will go and
create a new layer. So this is my layer one. Now, make sure to
create a new layer. Let's go to layer two. This is the color that we
used in a previous move. Now I am going to use
this mono line brush. You can find it
under calligraphy. So let's go and we can go
with some color like this. I will just zoom out a bit till I see what
time going to get. Now. I'm going to paint
and create some. In. Now. I am going to, now I'm going to
create some mountains. So I will just go
random like this. I want to make sure I
close this selection rate. Now I can go and bring
this color up here. Now, let's go
create a new layer. This layer I need to grab
some color like this. In this layer will continue to create some random effects
for our mountains. And I'll make sure I
close this selection and now I will just fill
this one with color. That's it. Make sure to create a new layer and continue
with a bit darker color, create some similar effect. Mount. Go create one or two more. I will go with a darker color. Make sure you are
on a new layer. And that's it. One more time and I
think we're done. We'll just go with
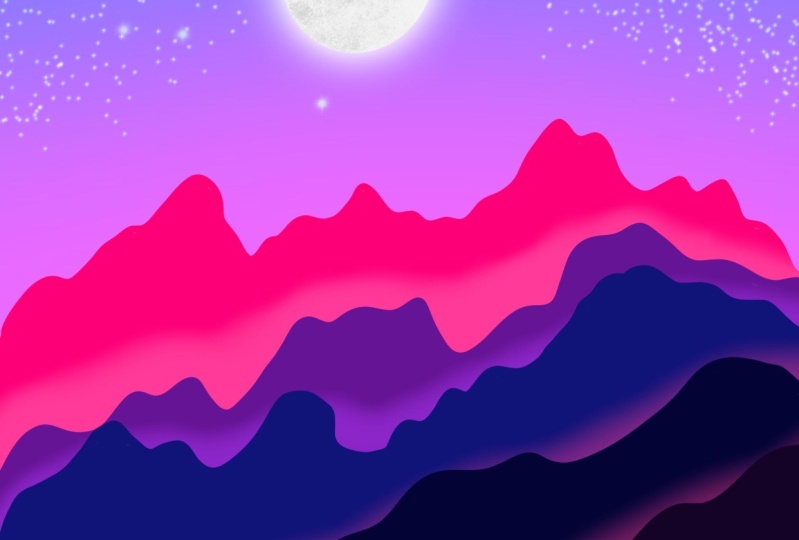
a darker color. That's it. Great. We created some mountains in a couple of different layers. Now we need to add some
shading effect on it. So how we're going to do that? Let's go to our
layer, layer two. I will take a sample
of this color. We need a bit brighter
color for it. Great. Next step is we need
to alpha lock this. We don't go over that area. So we only stay
inside this layer. Let me undo that. Great, but for that we
need to change brush. Now let's go up here at the airbrushing and I will
choose solve the brush. And let's have fun
with this brush. Make sure your layer
is Alpha locked. And let's go paint some shading. This is really large and I
will do make it smaller. This is the effect we needed. Something like this. We are done with this layer. Now let's move to a layer three. I will also make sure
this is alpha lock. And now let's go at
something up here. Just great. Continue to layer four. Let's go alpha lock
layer four and did the same thing to get
this bloom effect. Now, let's go to layer four. And just to see this effect, rate, one more time to
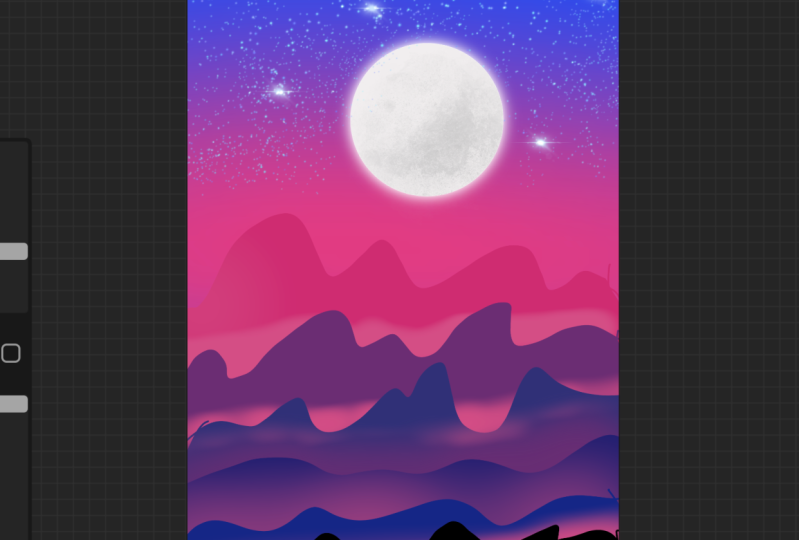
layer five, alpha lock. That's it. Now we can go up here and make sure to create
a new layer at the top. Great for this one, I will go with white color. I will change a brush, something like I will change the brush to one a line. And I will create
a small circle. Something like this. This is currently ellipse. We can go to Edit Shape and
create a circle effect rate. Now let's go and fill this
circle. And that's it. Now we can go make it larger or make it smaller or move it. I will just go and
place it up here. Just a bit smaller,
and that's it. Now, when we created
this circle distribute, this is going to be our moon. I want to go and
create a copy of it, so I will just go
move it up here, move it to the left
and click Duplicate. I will make sure I am
at the bottom layer. And now let's go add
some bloom effect. So up here, click once up here, the adjustments and click bloom. And now just slide your finger or a pencil
until you get this effect. Once I'm satisfied,
I will go up here. At the last layer. I will create, excuse me, I need to undo that. I will click up here and
I will hit clipping mask. For this effect, I will go up, you're at industrial. I think. I need some effect like
this, rusted decay. And I will just choose
some color like this. Let me just reduce the opacity. Increase the size until
we see the effect. This looks really nice. But I think we must
stop something. So let me just go and do that. We'll create one more
copy of this one. Now let's go and do that. It will go create
a clipping mask, and I will repeat this step. Now. It's only inside this
area and I'm satisfied. This is the effect
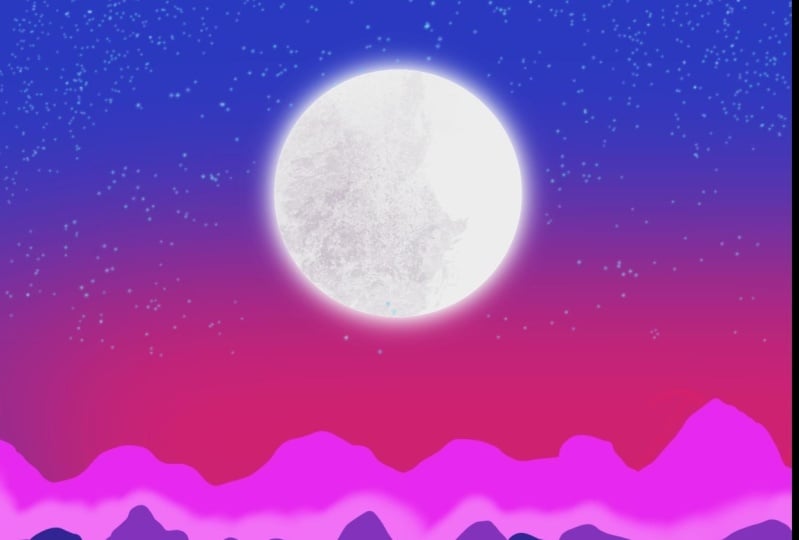
I wanted rate. So this is our moon. And the last thing
that we can go and add is something like, for example, we can go with
some blue color like this. We can find a brush
that is under here. We can go add glimmer
effect on a new layer. I think I need to get
this smaller node. This is too much. I think I need to
get different color. Okay. Great. This is the effect I needed. Just need to get
it a bit smaller. And maybe I will go
up here to settings of this one and I will
increase the spacing. So something like
this. Let's go. Let's see what we are getting. This is nice, so I will just go do this once or two times. Great. You can just go and
have fun doing this. Just go randomly. Last thing we can
go from appear to flare and see what
we are getting. We can decrease this. We can go a couple of those. Great. This is it. We can probably do a
couple more things. For example, I can go from up here and add one more layer, one more darker layer,
just like this. So you'll go with, make sure to select this one, and I will go almost
black on this one. Just let me find my
mono line brush. I will paint. I can add more scholar appear. Just let me take a sample. We'll just go with this. And that's it. I can go bring my soft brush. And I can now have fun
doing this. Alpha locked. And let's repeat this
step for this layer. We can add more shading
up here and more stuff, but that's it from
me in this video, I really hope you learned
something new from this video, you saw how you can
manipulate your layers, how you can move
them, and that's it. Thank you all for
watching this video. And if you have any questions, feel free to ask, and I hope to see
you in the next one. Bye.
6. Adding and Editing Text in Procreate : Hi guys and welcome. In this video we
are going to add just that text into our image. So I will show you
how you can do that. This is image that we used
in a couple of video, a couple of previous videos. And now let just
say we want to add some text and how
we can do that. For example, if you've ever used Photoshop or other stuff, uci dot icon for a text, you just press it and use it. In Procreate. You
need to go up here. In Procreate, you
need to go up here at the actions and
up here at the x. And now I can go and
add any text I want. For example, I can go just type example. I'm really bad with
this keyboard. And that's it. Now you see this text
is on a new layer, and if we want to move it, just go grab your move tool and move it wherever you
like. From our period. See it's an, a new
layer completely. And from up here, we can go and edit text. We can go type something
else, and that's it. From up here. You'll see, if we
go select this one. Just go click up
here at the end. And we can go find any
other font from up here and use that
font for our text. For example, let's just
say I wanted this funny. I want to increase the size. I will increase the size. And we can go play
with those options. You'll see what we get in. This is really important. This is, this editor is called. You will get what you see. So that's it. Just go have fun play with
those sliders and that's it. We can go add underline, we can go bold it
and stuff like that. Great. We can add all upper letters just
by clicking up here, so I won't do that. Once you're satisfied,
just press Done. Now again, we can move it, we can rotate this one. And that's it. For example. Example, for example,
duplicate this layer. And let's go move it. Now let's go add adjustment. We can add different color. For example, we can play
with hue saturation. You can add saturated or we
can add stuff like that. Let's go with something crazy. Crazy color, just like that. Okay. Apply. And now let's go
to caution blur. We can go motion blur. Let's go with motion blur and
add some effects like this. We need to move this
below our example. And now we have some cool
effect underneath our ladders. This is how you can play
with your text in Procreate. I hope you'll learn something
new from this video. And if you have any
questions or if you have any trouble with our
texts, let me know.
7. Sketch and Paint : Hi everyone and welcome. In this video we are going
to start with some sketch. We are going to do sketch first. Later on we are going
to paint that sketch. First thing first,
create a new document, then come up here
at the brushes and choose some of those
pencils for sketching. I will go with this one. I think I need a smaller one, for example,
something like this. We are going to paint
and create some ways, weight some plants on it. So how we are going to do that? So let's go and have some fun. Make sure to feel
comfortable with Procreate. We cannot do anything wrong. So just relax and enjoy. For example, I will go
with some ways like this. This is just me having fun. I will go with
something similar. Let just say this is
something I want to paint. This is my vase. From up here. We can add some stripes, something like this, or
we can add some circles. We can go again with
something like this. I don't know, make fun. Just enjoy yourself, do some
random stuff. And that's it. From up here. Let's just go and create
some, something like this. Going to, That's some
something like this. Later on we are going to see you cannot do
anything wrong. Just relax and enjoy yourself. This is just random sketch. It's really messed up, but later on we can have fun
and create something cool. Let just say this is our sketch. And later on we can go and reduce the
opacity of this one. So we can paint on the top of
this one in a normal year. But let's just say I
will stay with this one. Okay? Now, let's go create a new layer and choose
a different brush. For this, I will go with, we can go with painting, or we can go with
something like this. I will choose monoline, for example, for this step. I will go with some
color for my ways. With something like this. Make sure you are
on a new layer. And now let's just go
create something like this. I will drag a line. We'll do the same thing. On the other hand. Now connect those two. That's it. In no time we created a base. Now, let just go
and fill this one. Great. We are done. Once that is done. Now let's go create a new layer. I will use this layer
for a clipping mask. Now everything I do
on this layer will only be shown up here
at this layer two. I will do that to add
some extra stuff, and I will use this color. So you'll see
whatever I paint it, the lonely affect this later. Now let's zoom in to
close this selection. That's it. Now just drag this
color inside this area. And I can do the
same thing up here. That's it. We can add
some, something like this. One there, another one here. This is me just having fun and create a random stuff up here. Great. I will do the
same thing up here. We can go and fill
those or we can leave them as they are. Now let's go create
a new layer and focus up here at the leaves. And for our next step, I will use this
color with a brush that is called Blackburn
inside the driving. And I will make
this brush smaller. Now, let's go have fun. I will move this layer below
whatever I paint up here. It will not be shown, it will only be shown
up here at the top. Keep that. And now
let's have fun. So I will just create
similar leaves for this one. You can go close selection
and fill this area. Now let's go create a new
layer and change a color. So I will go with a
bit brighter color. I will go with some
color like this. We can close the
selection is still much. Just go and create
something like this. Okay, now, what
do we need to do? We need to fill these areas. Excuse me. Probably it's not
close selection. That's why it won't fit it. Let's bring it up
here and that's it. And move this layer
below layer four. Now continue, Let's Create
Layer seven and move this below this layer and choose
a bit brighter color. For example, I can
go with this color. Let's paint. Let's fill in those. That's it. So this is
really some beginner stuff. But let just say now we need
to add a couple more things. Now, let's go and bring
the opacity to 100. And let's start painting. For this one, I need
to use Alpha Lock. So whatever I do it alone, it will stay inside the area. Okay. So I will make this larger. So I will just go and
create something like this. And I will repeat that on the other side with
some larger brush. Great. And that's it. Now I
can make it smaller. I can go something like this. We are just having fun and
create some random stuff. This is, call it a practice. Now let's do the
same thing up here. We can do something
on the other side. Great. Now let's go move to
layer four. For example. Alpha Lock it. Create a larger size of a brush and just go over this area. Or I wonder that I
will stay with this. I really hope you're all
enjoying doing this. It's really fun and relaxing. So this is really important to have fun and relax while
you are doing something. So this is just basic
and beginner stuff. I just want you to
feel comfortable. You see this is really
nothing special. This is not artistically right? But we're just having fun. And that's all what
we're doing right now. So I will do the
same thing up here. This one. You see I combined only two or
three different brushes. And we're getting
really nice effect. That's it. Guys. We can go and add a couple
more stuff up here, bled just say for example, I want some shading up here. How I will do that, I will just decrease the
opacity of this one. And I will make sure this is
layer three, activate it. And I will use Alpha Lock also. I will only paint up here
to add some extra shadow, for example, like this. But I need to reduce the
opacity to around five or 6% and only go over this area. Add this shadow effect. You see how it
begins to turn on. I will do the same
thing up here. Great. We can add up here
at this layer, I will go to layer two, alpha locked and
repeat this step. You see how it turns
on a little bit. That's it. How we can work in procreate and create some
really funny thing, but it doesn't really matter. We just have to learn a couple
new things in Procreate. So keep in mind, this is tutorial for beginners. If you have any questions, please feel free to ask. And I hope you enjoyed and learned something
new from this video. See you guys in the next one. Bye.
8. Stay Organized With Your Files: Hi everyone. In this
video we will learn how to stay organized
with Procreate. For example, you see
this is a real mass. It's not mess
because they're not, because there's not a
lot of different work. Just imagine you have a 100 different images appear and you need to stay organized and
insert them into a group. How you can do that? So let just say, I want to add those three into
one group because this is a work for one client and those four are for
the second client. And those three
or four files are for the third client and
how we can stay organized. So I will just go click up
here and select those two. Now I can go stack them and
they are now into one group. This is one stack. We can go from up here, just click and you can go
and change a name of it. For example, I will
just type client one. This is work for my client one. And once I click there, there is all of work that
I have for my client want. Now let's go do the same
thing for this dose for it, we'll make sure to select them. And I will hit stack leak at the stack by client to great. Now, when my client to CMS, I know where are
those files for him? Which files to send to him because I'm organized
in procreate. This is really important because maybe if
you're a beginner, it's not that much important. But once when you
start working and earning from procreate and
working in this program, you need to stay organized with your files because it will
be a real mess if you don't. Okay, now let's go
and do the same thing for the third one stack. That's it. Client number four.
Number three. And that's it. So this is work for
my third client. And if I want to
change something, I'm ready to go. This is really important. Procreate is amazing program. You can just click and you are
ready to go and that's it. We can now go select those two and we can
go share them as JPEG, PNG, or PDF, BSD. It's really up to you
which files you need. Let just see client one. Once their files, how
we can send them. I will just go select them
and I can go share SHA back. I export this to my gallery. Save, to, save those three. Export successful. And now we can go to our images. And there are those images. We can go now and send
those files to our client. And that's it. So this is how we can work in procreate and how
to stay organized. If you have any
questions about this, please let me know. See in the next video, Bye.
 Aldin P., Designer