Transcripts
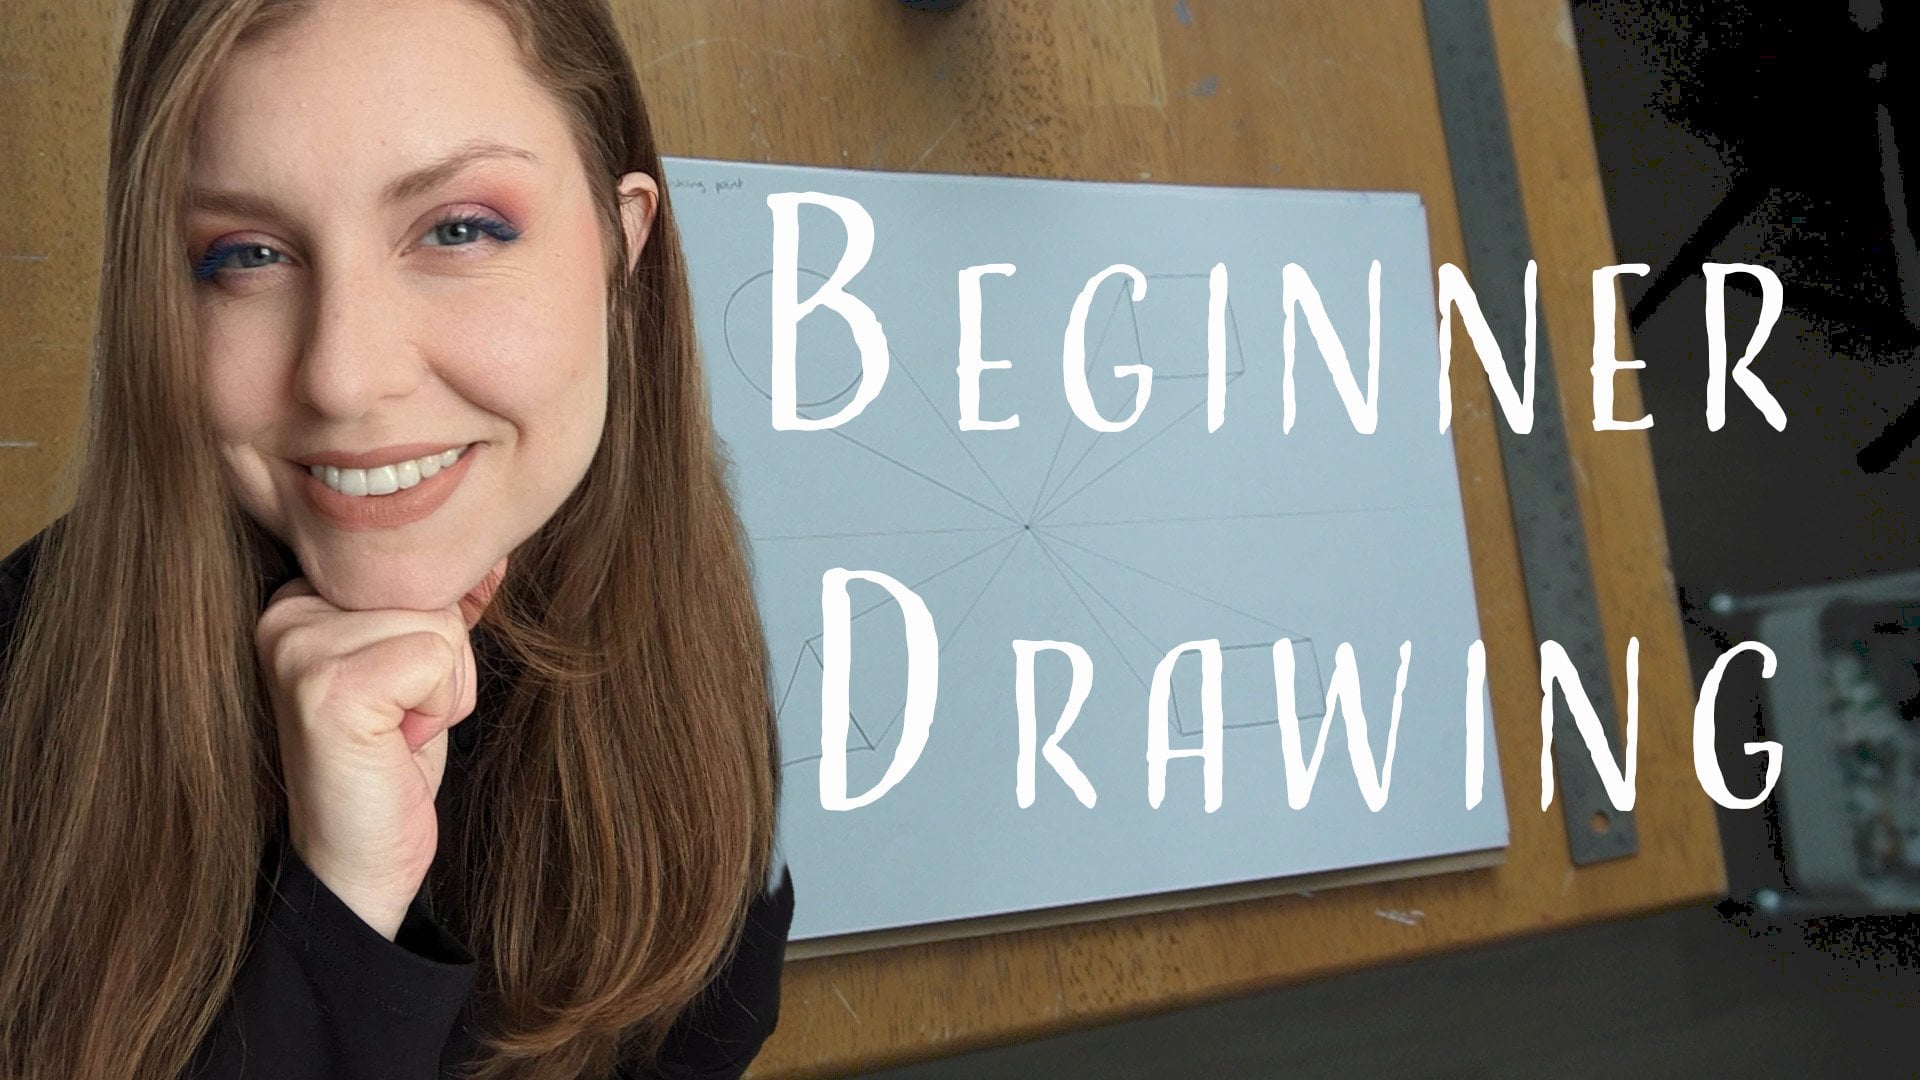
1. Introduction: Hey, are you new to draw? Wondering what two point
perspective is all about? Maybe need some help with it. Or maybe you just
took my one point perspective class and
you're ready for more. And this is the class for you with limited materials needed. You're going to be able to build some really essential skills to make your art look realistic, look like it's coming
right off of the page. With linear perspective
techniques such as one point and two point perspective that we're learning in these two classes, you'll be able to make a flat surface look three
dimensional, which is so cool. And that's what
this is all about. This is a really good
fundamental drawing lesson that will really help
you in future projects. Whether you're drawing
the interior of a room or whether
you're drawing letters, maybe you're making cards. Whether you're drawing
a straight corner, all of these things are
going to help you out. And we're building on those
one point perspective skills. If you don't know what one point perspective
is all about, make sure you go back and
check out that class first. And then come back
to this one so you can build on your skills and be a powerhouse illustrator without further ado.
Let's get into it.
2. Review and Materials: In the previous lesson, we looked at one point perspective. If you haven't done that lesson, I highly recommend doing that. And this one will be much easier if you've done the lesson on one point perspective. If you already know how to
do one point perspective and you're looking on how to
do two point perspective, then you're in the right place. Just an overview of what we
did in one point perspective. We looked at how to create
shapes that look like they are three D on a flat surface with one converging
0.1 vanishing point. That's our point right there. Okay, we did a few
exercises trying different, if you're working on a
city scape or that thing. What it would look like if
you're creating a pathway. How you would formulate that. Also if you're doing
some graphic arts, like trying to do some lettering and how you can use one point
perspective for that. Today's lesson, we're going to talk about two
point perspective. What we need is
some paper, an HB, pencil eraser, probably a
pencil sharpener if you need, and a ruler as well. Pretty easy. Things that you hopefully already
have at home. If not, you don't need to spend much money to make this
lesson work for you.
3. What is Two Point Perspective: What is two point perspective? Two point perspective is lines that converge on
two vanishing points. Linear perspective is a
technique for representing three dimensional ******
on a flat surface. That's what we're doing
with perspective. We're trying to create a three dimensional space
on this flat surface.
4. First Excercise Street Corner: You'll most often see two
point perspective being used for an interior of a
room or for a street corner. We're going to start with
a street corner and then we're going to try a
room interior as well. Let's set up our page. Grab yourself a ruler and
create your horizon line. Let's do it nice and light easy. Then we're going to, instead of doing a vanishing point
right in the middle, we're going to use
opposite ends. And two vanishing points just make a small mark on
one side of the page. Then we'll make
it nice and wide, leave a lot of space in between. Don't bring them this close together, it's not
really going to work. We want to bring
them further apart. We'll see if this is
even far enough apart. Okay, next what I want you to
do is draw a vertical line. Now, you don't have
to use a ruler, but I'm going to. Okay, we have our vertical line. Doesn't have to be 100% straight up and down with a 90
degree angle here, but depends on what
you're drawing. If you want it to be exact, then you might want to make sure that you're getting
that nice angle. If you remember back when we
did one point perspective, we drew in a shape
first and then we, these lines vanishing
to our point. Now a two point
perspective is almost as if we're taking one of these shapes and we're turning
it and it's the corner, that's the closest thing to us. Instead of the flat shape
that's in front of us, like this being in front of us, instead turning
it on its corner, and that's the thing
that's closest to us. Just imagine that as we
work on this piece here. I'm going to create
a corner building. If you're in the streets of a city and you have
those corner buildings, what we're going
to do is, instead of taking the
corners of a shape, because right now we
don't have any corners of a shape, we just have a line. What we want to do is take
the ends of the line. It is going to be our
start and finish point for our shapes top and bottom. What we're going to do
is I'm going to take this point here and connect it to my vanishing point there without hopefully
making little marks. The same thing with the bottom. Then I'm going to do the same
thing with this point here. Let's get going and I'll
show you what it looks like. And then you give
it a try. I'm going to draw the lines
somewhat light, especially as they get
to the vanishing point. Because I don't want it to be heavy with lines there socially, because we might decide we want to erase some of those lines. You can press a bit harder
and then get a bit lighter. It creates an
atmospheric line there. An atmospheric line just shows depth by the
heaviness of the line. The heavier the line, the closer and then the
lighter the line showing that it's getting
further away from you, which is what this is doing. All right, so you
could see that's a bit stronger of a line. Then it gets nice and light. It's a bit easier to erase those lines when they're
light like that as well. Okay, then this last line here. All right, Now we have
the corner of a building. You might already be able to
envision now how this is. Maybe a corner walkway,
maybe it's a fence. Maybe you're standing on a corner here and you
see a fence here. Okay. Now we're going
to start actually defining the ends of
our shape so that we could have multiple
buildings throughout here. What we're going to
do is we're going to draw another vertical line. Remember how we were matching lines in the previous
exercise to end the shape? It's going to be
a similar process depending on how long
you want your building to be a Costco or is it
just a small building? Totally up to you. Depends
also what you want to add in. If you make it a bit smaller, you might have more room
to add in more things. I'm just going to try and match up that by pulling it across. I don't mind making this line fairly strong because I know that's like it's an
edge of my shape, so I want it to be visible. I'm going to do the same
thing on the other side. Is going to be equal
on the other side, or is it going to be a
little further away? Depends on the shape
of the building. I'm going to get
myself positioned, hopefully, nice, vertical there, without holding your ruler
on an angle like that. That's going to really skew it, make sure you really
follow that line. That's going to be
really important. Okay, We basically already
have our first shape, and that's the basics of
doing two point perspective, but so much more to it. How do we really make
things look real? How do we create a room? All of these things.
So how do we make this look like a building?
Like, what else do we do? How do we add in a door,
that kind of thing? Let's try that out before we go on to adding
details to this shape. What happens if we have a
shape that's above us in the sky or if we have a shape
that's on the ground below? Let's give it a try
and see what happens.
5. Object Below the Horizon Line: Okay, so if we have
a shape above, what are we going to do first? I'm not going to erase any of these lines at this point
because there might be other things that I want to have the same height in
line with that. That's where we're going to
leave those lines for now. But what I want to do is I'm
going to put in a shape. We're just going to stick
to boxes right now. It's going to make
it a lot easier now you can make
it in front of it, you can make it over here. The easiest thing is going
to be not having it really overlapping too much
the first line. Anyways, I'm going to make
this shape down below. Okay? How we make our shape as we start
with that vertical line. Now it's a little on an
angle, but that's okay. I'm going to show
you what happens when you do a vertical
line a little bit off. Then we're going to
do one above as well. I'm going to do it over here. Okay, just draw a vertical line. That's how we're adding
in these box shapes. We're going to do
the same process. We're going to
take the bottom of our line and match it up with a vanishing
point on the right. Again, let's make some
atmospheric lines start a bit heavier
and then disappear. Not quite disappearing,
but it gets so light that it makes you
think it's disappearing. Then we do the
same with the top. This is going to overlap that. Just let it overlap for now, and we'll discuss
that in a minute. Don't worry about it. Same on this side for the
left vanishing point. Get that nice atmospheric line
going on. Get to the top. And same thing. Okay, now we've done the same thing as this except for
adding in the edges. Let's add in those sides. How wide do we want
the shape to be? Totally up to you? And this time I'm going to definitely
match up to this. Okay, draw the line, that's the edge, my
left edge of the shape. Then I'm going to do
the same over here. Now the question is, where
do you want to put it? I'm not going to overlap
it in front of this line, so I'm not going to go
past this line for now. Anyways, match that up. So just slide across.
Draw your line. Now you can see the
start of a shape. This one here, we had
a finished shape. Then this one here, it doesn't quite look
like a finish shape. It looks like a weird
book or something. This is how we finish
the shape when it's below and not crossing
over our horizon line. When we cross over
our horizon line, you're not seeing
the top of the shape and you're not
seeing the bottom of the shape below
the horizon line. It's as if you can see
the top of the shape. We're missing this part
here. How do we fix that? Well, we use these edges here as if they are points that need to line up
with our horizon. Because we need to
make a line here and we need to make a line here. But how do we make
sure they line up? This is how, using my
right vanishing point. Well, I already have a
line going across here. I don't need to do
this point here. But over here, I don't
have anything connecting. What I'm going to do is
I'm going to connect that there with this vanishing
point on the right. Again, I don't care right now, if I'm drawing over
top a little bit, it's not a big deal. We want to get the
concepts in first, okay? Then you can see we've got
that shape rolling in there. Doing the same thing
with this side. If I have this here, well, it doesn't make sense to draw a line
to this point here, because the line
is already there. But we're missing the line here. We need to know the angle according to our
vanishing points. Now you can see, if I were
to draw this line that was already existing and
make it parallel, it would not be the
same as this line here. That's the important part
about two point perspective, because these lines
here are getting closer to one another as they're getting to
that vanishing point. That's why we need to
have the two points and that we're matching
those top lines up like we just did. Now let's move on to the top. What if object is above
the horizon line.
6. Object Above the Horizon Line: If an object is above
the horizon line, which part of the shape do
you think we're seeing? Well, let's bring it
back to our one point. When you have an object above, which part are you seeing? We're seeing the underneath.
We're not seeing the top. It is With this one we are well, three sides of the shape. We're going to do the same thing we did with this one here. We're going to have
the base added in. Let's first, in those lines that we first want
to start with, lining up the bottom line, our vertical line,
and the top of our vertical line to
our vanishing points. The closer you are to
your vanishing points, the closer your shape is
to your vanishing points, the more of a strong angle you're going to
have on that side. You can see that this
is a stronger angle, more angular, then
when it gets to here, it's less angled, it's more
like the horizon line. Okay, let's match up the top of the vertical line using
those atmospheric lines. It's a really great
practice for pressure, making sure you're not putting too much pressure on your
page with your pencil, which will help
you with shading. Okay, now to match it up with
our left vanishing point, line it up and let
it drag across a very lightly and
the same thing with the top end of our vertical
line that we created. Let's make that vanish as well. Okay, we have our shape Now
we need to add in the lines. Where is it going to finish? Is it, is it touching
this building? Is it attached to the building? Is it floating in the air? What is it? We don't know. That's up to you to decide. Let's make it not
attached right now. We're going to keep things
as simple as we can. We want to match up the end, like the edges to this line we created same on the other side. Match it up, slide it
across. Draw your line. Okay, That gives us our corners that we need to match up
with our vanishing points. Now you know that if we
start with this one here, if I go over here, yeah, I need to draw that line. If I go over this way, well, that line already exists.
We don't have to draw that. I'm just reiterating that just so you have a
better understanding as to why I'm drawing
from this side. The same with this one,
the line already there. We just need this
vanishing point to tell us what is that shape
going to look like? What angles are we going to have now I know my
shape ended there, so I could have just
stopped my line. But maybe you're adding in other shapes that are corresponding. Maybe there's a repeating
pattern that you need to know. Okay, well maybe this is
a street lamp and any of the street lamps
are all going to be the same height because
they're constructed that way. Then you want to have
a continued line so you can add them
in throughout. Okay, Now you can see
how the shapes are. Now if we want, let's erase
the lines so that we can see what it looks like with just the shapes and not the
confusion of the lines. Now, if you're worried about not seeing how
you created this, then I recommend
trying this again. Try this exercise again. Maybe put the shape over here. Try different sizes of
the shapes on your own. See how you do, but
I'm going to erase it. And then we're going
to come back and see what that looks like. I want you to try a second one so that you can erase the line. Maybe keep one so you have a recollection of
how it was created. This gives us a
little roadmap, okay? These lines here, these go here and then
create another one. Maybe move around the
shapes if you want, and erase one of them. Whichever one you
want to choose. I'm going to show you how, Don't worry, we'll do it together. Let's do that in
the next exercise.
7. Cleaning Up The Lines: Okay, so you've done two
of these now and you're ready to erase some of the lines so you can
just see the shapes. We're going to
make sure we don't actually erase the shapes. I know my shape here. This is in front of that. I'm going to erase this bit. Just talk a little bit there. I'm going to erase these lines. These lines that are going into the vanishing point are
called orthogonal lines. They're basically
parallel lines which converge on the vanishing point. They make it look like it, even though parallel lines never meet these technically are parallel lines in the sense that visually we're
creating that illusion. Okay? I'm just going to not
erase the horizon line, okay? I'm going to erase all
these other lines. I'm going to keep
my horizon line, I'm going to keep my
vanishing points. What's cool though is if you did erase your vanishing points, you could actually
find out where the vanishing points are on an image based
on these angles. If I didn't have these
vanishing points, and it was like a test, where
are the vanishing points? All I'd have to do is line up
my ruler, draw some lines. And then I would see all of these lines going
into two points. You would be able to
find them. Don't worry. If you feel like if you've erased them, you can
find them again. As this line I did,
a little strong, could have made that
one a little lighter. That shape is alot free. Now we got to race the
lines that went over top of this building here or
box or whatever it is. Now, if I was adding in detail, I might keep some of those
lines just so I don't have to add in additional lines in case they're
already in a spot. That works for what
I'm doing now. I'm going to erase the part of the horizon line
here that's behind my shape going out
into the horizon, you can see the shapes
starting to come to life, come into fruition. There we go. This one isn't really an harder than one
point perspective. Maybe you can get a little confusing when you start adding
lots of different shapes. But I think if you understand
one point perspective, then you're going
to be grasping this one pretty well if you're
struggling with it. All you have to do
is connect with me. Share in the projects
student gallery, create a new discussion
regarding the project. Let's build a community
and help each other. You shouldn't feel alone
on your artistic journey. You got to start somewhere
and you keep learning. I'm still learning. Okay. All right. So look at that now. You can see the shapes separate and you can kind of get a more of a sense of what I mean by we're seeing the
top of this shape. Like maybe this is a bin on the street, maybe
this is a building. I don't know what that would
be because it's a bit odd. You don't really see
boxes in the sky, but that's all right. You could connect a
shape to the building. Maybe there's beams that
come out of the building and that's how you can learn
how to create that. There we have
basically your intro into two point perspective.
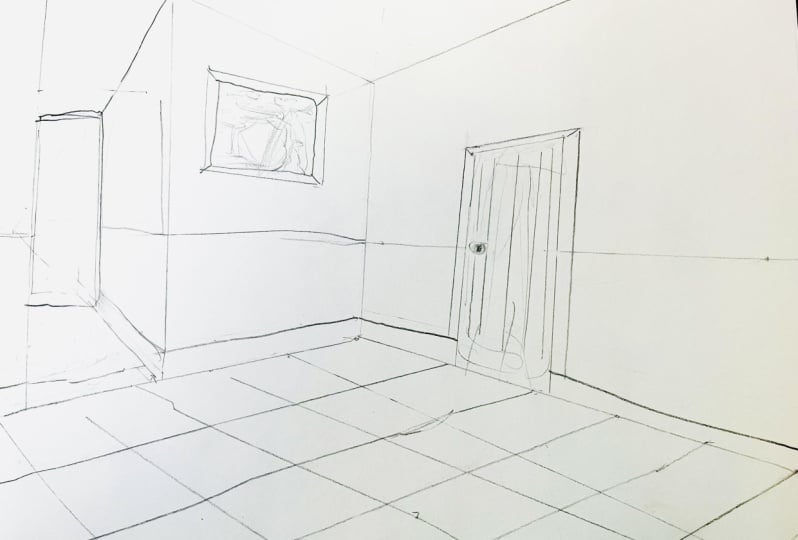
8. Second Exercise Part One: One of the coolest things
about two point perspective, in my opinion, is being able to draw an interior of a room. And I think it's really cool. Let's get our page started
with our horizon line. Trying to get it
in the middle are two points, nice and wide. Then I'm going to draw a line. And this is going to be
the corner of the room. On the far end of the room. Okay. The back
corner of the room. In the other image we did, it was the forefront. Now we're actually
making it the back. I think it's interesting
to try both so you can get a sense of how two
point perspective can work in real life. All right, we're going to
make sure this line crosses over the horizon line. Next up, instead of just we're still going to line up our point to
our vertical edge, But instead of drawing
this first line, and that being the
basis of our shape, it's actually going
to be the line after I'm basically pretending
I'm going to draw a line. I'm not going to draw
that first bit of line. Going to look a little
too messy. Stick with me. We're going to start
here with that angle. You can imagine
the line drawing. Start here and draw the line right to the outer edge of the page right off the page. Okay, we're going to do the
same thing on the other side. Line up your vanishing point on the right with the bottom
of your vertical line. Pretend you're drawing the
first bit, then begin drawing. Once you hit your vertical line, goes right off the page. Al ready? You might
be able to notice, hey, that looks like the floor. If you imagine
this is the floor. This is that inner back
corner of the wall. So how do we get those ceilings? We're going to have
the ceiling up here. Well, you might have guessed. It's okay if you didn't that. I'm going to line up my
vanishing point on the right, at the top of my vertical line. And make sure my
ruler goes across the page till it
exits off the page. All right, we're
going to pretend, pretend, and then start drawing. Just after, Just as you
hit the line there, look, we have a wall. Yeah. Okay, let's get
this wall in place. Do the same thing but
on the other side, line up that left vanishing point to the top of
your vertical line. Let it go look at that. We have a wall, a wall
floor, and a ceiling. How cool is that? All right, let's add some
features to this room. How do we add some
cool things, features? Alright, let's do it. Let's start by adding a
floor which is really cool. We're going to add in
a checkered floor. We're going to do
a checkered floor. You could do hardwood
floor because you could the lines coming across. Now, if I just drew
these lines like this, all matching this line here, our perspective
would get skewed. Okay? Trust the process, You might want to
draw out where the, where they're going to start
and you want to keep them a good similar distance
depending on if it's really an extreme
distance away. Because it's not super extreme, like this room doesn't look like that's like way far
away. It's not that far. I'm going to keep them close
to the same distance apart. You don't want to get them
smaller as you get this way. If anything, they would
get slightly bigger. Okay. Then we want about
the same distance. I'm just eyeballing
it on this side. That one's a little too close. Okay. Now what we're going
to do is I'm going to line up my bench part.
Let's are on the left. I'm going to line that up with these little marks I made here. Again, it wouldn't make sense to do it here because there's already a line right here. And I'm not going to draw that first part
that's on our wall. We're going to draw
the line on the floor. There we go. There's
our first line. Look at that. Do a little
happy dance if that made you feel empowered in your drawing
abilities. Same thing. We're just going to continue on with the little markings
we don't draw there. We can imagine that if
we needed to go there, right here, start
here, Beautiful. And one more look at this. Doesn't this feel weird to
draw the line like this? Doesn't seem like
it's wrong in a way. Well, let's start this side and see how it's
really not wrong.
9. Second Exercise Part Two: Okay. Our right vanishing point lined up with the dot
we made on that line. We pretend and then we
actually draw the line. Now look at that. We
did our first set of checkers right
there. Great job. Remember, that was
a little mistake. Dot, let's go to make sure if you draw a mistake
and then you re draw the, you know which one to choose. Pretend and draw. Line it up. Now we're getting
strong angles here. Feels weird, but just
trust the process. Pretend and draw, especially as we get here,
feels really awkward. Pretend. Then this backwards there, our vanishing points. I'm sticking to my rules
that I created for myself. That's how we created our floor. How cool is that? Okay, do
you think we could add? What do you think?
Maybe. All right, well let's give it a
try and see if we can. All right, so we
could add a door here by just creating
a vertical line, making sure it matches up
to this vertical line, I think would be the best way. Okay, now our door isn't
going to go to the top. It goes fairly high
end at the floor. Make sure you make
sense of the page. Okay. It's going to
end on the floor. I don't know where
draw this line yet, because I need my
finishing point to tell me where that's going to be. Okay, I don't need
to draw all that. What I want to know
is this part here. You can just use
that as the guide. And then here it's
going to tell me. Then I might imagine
where my door might end. Let's maybe not make it
any longer than that. Then all I have to do is draw a vertical line to
match the one is true, because doors, they should be paralleled this
way vertically. Then we can erase this
line in the middle here, because in the way
there, awesome. Check that out. You could draw
a door frame with it even, or door handle on it. If you want to draw
a door handle, where would it be?
Maybe about here. We've got a little door handle. Let's add in edging
here, baseboards. How do we do that? I
think I want my base, I don't want my baseboards
to be too high. I'm going to start
them right here. We'll make a little
mark, the link it up. Now we're starting to add
in some detail, right? I want my baseboard,
I don't want my baseboard to
go over the door. Okay, Now I already have my line to match
up on this side. I'm just going to take this to my other venting point so
I can get the left wall. Yes, there we go. Then the door usually has
a frame on it, right? Let's draw a frame on it. How tall would the frame be, you'd imagine close to the
baseboard height, potentially. Maybe we'll make
it a bit smaller. Just draw a little
dot there so we know where we want it to go to. I'm not going to
draw that first bit, remember we're just
drawing where that is. And I'm going to draw
a little further because I don't know where
it's going to end yet. Actually, I do need to draw
a little bit of head so that we can actually frame
the front bit of the door. To draw that front bit, good, then we're going to draw a vertical line
where we want it to end. It should be either the
same size or a bit smaller. Because it's closer
to our back wall. Back corner, Okay. The frames connecting to the baseboard there,
which is fine. Then this side, same thing. Maybe a bit wider, for the perspective sake, don't go too wide. But again, depends on how
extreme all of your lines are. That should work. Now we have a nice little frame we can draw in the corner. Sometimes you see that corner, little corner bit there. And our vanishing line on here
won't make sense for that. Just going to go corner to
corner to make sense of that. All right, perfect.
There we have it. There's the interior of a room. And you can do much
more detailing, but as beginners, I think this is far enough for an
interior of a room. But if you wanted
to try adding maybe a picture on the wall or
maybe adding a hallway, that's really going to be
a lot more challenging. Maybe we'll do that as
a challenge at the end. A little bonus challenge. All right.
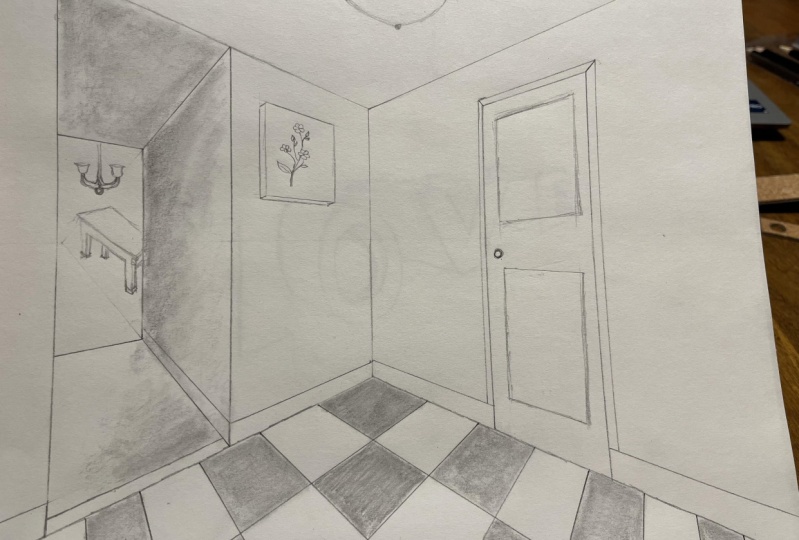
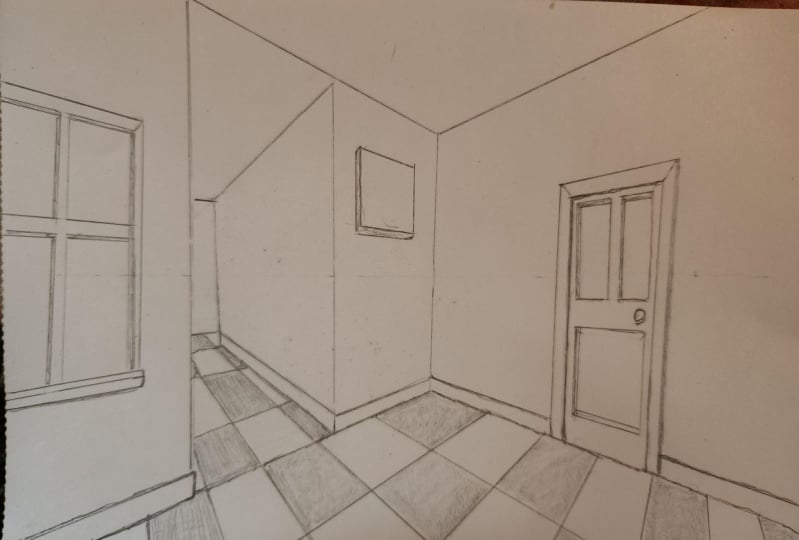
10. Bonus Challenge: Okay, here's a little bonus challenge that I
said we would do. If you're feeling
more confident, you want to give
this a go, we're going to create a hallway. What we want to do is create
the edge of the hallway. Where's the hallway starting? I'm going to create
a vertical line to show the end of this wall. It's going to go
right to my ceiling and right to the ground. Right to the floor. Then
I'm going to create the other side of depends on
the width of your walkway. Obviously, this would
be too small to have a walkway compared to
the size of the door. Maybe you don't even it's it's
just the section of wall, maybe this is just totally open. After that, you do have
to consider the floor. Once you get to that
point too, though, we might need to add
in more flooring and take that into
consideration. Let's add in a second wall. This is just a hallway, not just an opening. This is a hallway
after you've drawn in where your walls are
going to start and finish, the walkway going through, then what we want to do is create the base of the wall
line from floor to wall. And we're going to use
our vanishing point. And this little edge we created. And the same with the top. Okay, perfect. And we're going to go because there are vanishing
points over here. We don't need to draw this side, that, that side of the wall
is not going to show up. Okay? Then from here I can
draw a line along here. Like if there was
a room starting on this wall or
something like that. Or if it goes right to the
end of the hallway. Okay? And then this line here, this vanishing point over here, is going to help me create
the top and the bottom line. Okay? Now we basically it's
going into there. Now I want to make sure my
baseboards go into there. Just draw the line until it hits the door
or the end of the space. Whatever is at the end there, that's not going to be
a baseboard anymore. It depends if you're carrying
through the flooring into that space or is it a
change in flooring. Okay. Can erase these lines
because that's a door or end of the hall
wall, whatever. You decide that
line disappeared. Okay. Good. So you can
decide whether you want to continue the
flooring into here. Then you would just
have this going in and then you just need to draw more lines matching up with that vanishing line.
Or maybe it's carpet. You have a break here, you have one of those
little break lines between the flooring there. Then maybe you have a
door frame perhaps. Usually if there's
a door at the end, you're also going to
have a little bit of space in between. You don't usually just just
have a door at the end. There's usually a little bit of buffer so you can have the
door frame and all of that, and maybe there's
a little dry wall. Its not usually just
a door at the end. We'll just leave that as
the end of the hallway. But you can see how you can really do a lot of
interesting things. Like I said, you can add
in a little picture frame here, something like that. And when you're adding in a picture frame,
let's just go for it. I'm just going to use my vanishing point
and draw a line here. And then another line now
depends is the picture going all the way down
or is it just above? This one's going
to be just above. Okay. And I went further than what I wanted
to for my shape, to make sure that
I could draw in my vertical lines member. Match those up, match them up, can erase those. Now if it's sitting, like if it has a frame, if it's a canvas,
it pops forward. Which part are we going to see? Are going to see the bottom of the shape or are
going to see the top? It's a canvas. Remember this shape is
above the horizon line, so we're going to see the
bottom of the canvas. The top, I'm just going to draw a little line a little bit
longer than it needs to be. Then over here,
this line here is going to tell us
where to finish off. This is when you get into the
little nitty gritty details of the pieces. Those details that make
it look more realistic. Okay, that's the edge of it. Now I really, It's a really
big box. What can I say? It's a bit of a boxy frame. Okay, have some fun with it. Then we erase on this side. Need to match up those
ends with this one. Then this side you have the
front in the bottom line. And then this side you have your bottom side edges
to finish that off. Now you have a little
picture there that you can put some detail into. That's how you can
create an interior room. There's your little
extra bonus there.
11. Third Exercise Graphic Letters: Okay, let's try some
graphic letters. I'm going to take
this up a little bit because I'm going to actually
put my letters below. You can actually bring this
up higher if you like. Draw your horizon line. Place your vanishing
points at obstinence. Now what I'm going to do is I'm actually going to
draw my line over here. This is going to be
the starting letter. Depends how dramatic
you want it to be. The further away it's going
to be a little more dramatic. You're going to see
more of the top then. The closer to the line, it's a little bit less dramatic or angles aren't as strong. I'm going to draw a faint, I don't want it to be too strong so that I can erase some of it. Pull it down just a bit, a little bit like that. And then the top of it, I want my lettering
to be all below. Okay. I'm just going to start like that and what
I'm going to do now is put in my
word or letters. Let's just start with Ok. So block letters. I'm actually going to put
it all right, in this. It's going to make it a bit
easier for the beginner. I'm not using my ruler. Hi, balling net like so. Okay, you could do
more letters or just try to your initials and
see from there how it goes. Okay, we actually do
want this side as well. I'm just going to do lightly because I'm going
to end the shape. Now what I want to do
is I'm going to erase anything that's unnecessary
as part of my shape. I'm taking away these lines here and leaving
the block letters in place careful
when you do this. You might be smudging your page. You can actually use a brush, like a soft paint brush, and make sure it's dry. Just brush it across
and that it's less likely to smudge
than using your hands. We have oils in our
fingers and we just sometimes it gets really messy. That's just something
to keep in mind. Now, I'm going to continue my shape at all my
corners starting here. Let's go to the top. Let's
just do the top section first. Just a little bit. I don't know how long
I'm making it yet, so I'm just going to make my lines a little bit
longer to begin with, always aligning the edge of the shape to my vanishing point. Let's go right on over to the M. When we
have this position, maybe you decide
you want it to be a longer then your shape is
already in place there. Okay, let's see if we need
to draw any of these lines. Now, this will be similar to
our one point perspective. We don't want to draw
over top of the shape. We're keeping that in mind. Soon as I hit a shape, I stop. That's not going to show,
that's not going to show. This one here is stop. When you get to a
shape, this shape is in front of this shape, so you're not going to
see it show up in here. Okay, keep that there. Bit of the m right
there. That middle bit. It's going to have a
little bit right there. That one. Don't want to draw over the shape,
this one there.
12. Third Exercise Graphic Letters Part Two: Okay, now if you want
to cut the shape off, you're going to do
like what we did in one point perspective, at least. For where you're cutting off
any vertical type of lines. Anything that is not vertical, anything horizontal, we're
going to want to mesh. Match up to this
here, okay? This top. In fact, it might just be
easier to just start like that and draw across our shape. Now, we're only going to want
to draw these bits here, because this bit here goes down in the top bits
of the letters. Okay, we can erase anything
that's in the way. I do have a needle
eraser. They're flexible. They help to keep your hands clean when you're needing them. I also just find
that you can shape it and use it as a small eraser. It just eras really well. I do love having a need able. They start off looking like a square that are a bit thick
like that or rectangular. This one has seen a lot of action in the sketchbook and
it's looking a little rough. They're usually light
gray when you get them. You can get colored
ones as well. Okay, let's erase these marks that can become confusing
if they're still there. Okay, now we want to add
in our vertical lines. Well, we've already given
ourselves the pinpoint. If you used a ruler, then use a ruler for this part. First letter, I used
a ruler for this bit. I'm going to use a
ruler like that. Then this part here. Now, I'm not going to draw
straight up and down, because this is the line
I want to follow here. This is a vertical line. When you're letters, you're not going to all have just everything straight
up and down, right? You're going to have some
things that are on angles. Well, this isn't going to
match up with any of these. The two point isn't
going to help us there. So I'm just going to match
it up the best I can, like eyeball it to match that. Okay, now this one up here, it's the right, the
rest of it is hidden. So I'm not worried about that. I can erase this bit Now, redraw that, okay, You can start seeing how
it's coming to life now. Right? This one here definitely
needs some stopping. And we've got that bit
there to stop us there. This one's going to
match this line here. Then here, it looks
pretty close. I feel like it's
probably hidden. It's close though. One way I could see is because
I have this point here. I can match this to this and see where that
one's going to end. It's just like right there, so you barely have anything
showing on the back. So if you wanted
to have something you could see a little bit more. You just have to make,
it could have cut this down shorter then you would have cut that shorter as well. But I made my blocks thicker. Okay. And then here, let's erase these lines here. This could be a fun project if you're wanting
to put your name in your room or maybe you're making a card and
you could use words. Thank you. Right? If you
wanted to do another row, you could do two rows, right? And you put another
letter here as a row. And then just make sure you're not drawing over top
of the letters there. Play around with that and
see if you can create something really interesting
as a card, as a work of art. Just practicing those skills of using that two point
perspective in a new way. Maybe you can try a round shape, try something different, and see if you can make that work. Now, what else is
really cool about this? You can press to
erase just lightly. Like if you're just wanting
to lightly erase something, not fully erase it. That can be really handy too. If you want to add
onto your challenge, you could create a light
source and then shade this. That could be a next step. If you want to take
it to the next level, you could color it, add color, you could use this. Now what I love to do with
the sketchbook is use the sketchbook as the area where you're creating
a rough draft. And then you can take this,
use something to trace it. If you have a light table.
I love my light table. It's quite light. I didn't mean to be funny, but it's lightweight and
it's easy to card around. And it just plugs
in and then I put something on top of it and
maybe a new paper that's a bit nicer and then I
can trace it or put a trace my card so that I don't have to create all these lines that
I need to erase. That's one way to
use your sketchbook. And those are just some
additional tidbits to take your project and
make it into something else. I think a card would be really cool because adding
a graphic design, maybe it's someone's
birthday, use their initials. Do something that's
unique for them, you're just doing thank you. You could do Y for thank you. You could try doing
a heart shape. You could try some
Minecraft thing. Like there's so many
possibilities with this, you could have a
lot of fun with it. I hope you do. I hope that this was a really
helpful lesson for you.
13. Conclusion: Congratulations on
completing this class. Give yourself a little pat
on the back. Hi, five. Thank you so much for
taking class with me. I hope you had fun and
that you learn something. If you have a moment
to leave me a review, I'd really appreciate that so I can understand how I can make my classes better and more suited to you and
your learning style. Be sure to follow me so
you can be notified. When the next class is ready, I'll be focusing my classes
on drawing and painting. My favorite painting method
is acrylic painting, but I do plan on also doing
some watercolor classes. If you are interested in
that, go check it out. I already have some
classes there ready to go, where you can follow
along with me and explore acrylic painting. I have some fun drawing
classes out there as well. Thanks so much and we'll see you in the
next class by now.
 Kristina (Moyor) Choy, fine artist