Transcripts
1. Introduction: Hello everyone. Welcome to this introductory
blended course. My name is Monica and I'm
a professional 3D artists. I have been working with lender for more than seven years. I have experienced working
on tv productions and I am currently involved in the
VFX and animation industry. They scores is intended for anyone who is
looking to begin working with 3D and wants
to know how to get started. In this case, we're
going to be using Blender as our main software, which is a very powerful program that is also free
and open-source. He has a great variety of
tools made for modelling, animation, shading,
lighting, rendering, and so much more. I will be giving you
a broad overview of this program by showing you the principles of 3D in covering some of the basic
tools is specific to Blender. Then you need to
understand in order to start creating
your own things. In after we've gone through
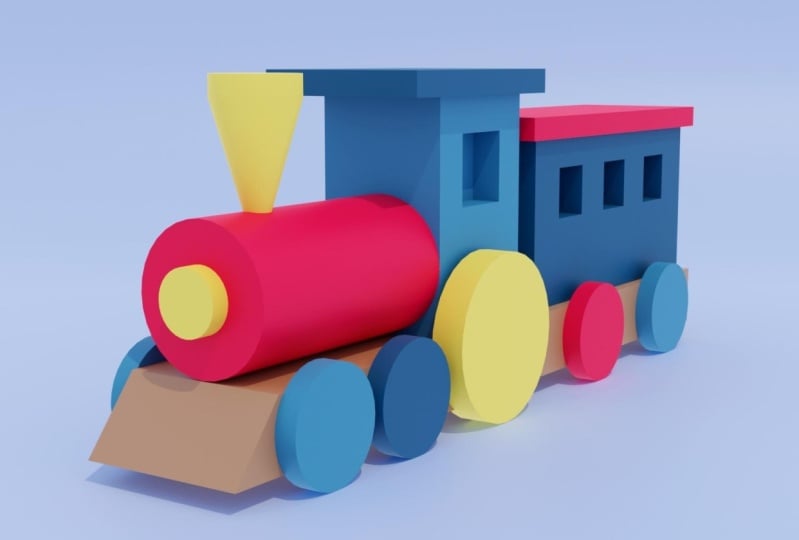
all of the fundamentals, we will work on a project. You will create your
first 3D model, which is going to
be a toy train. You're going to build it using all of the concepts
learned previously, such as moving
around the viewport, understanding the interface
using primitive shapes, modifying the geometry,
applying some basic materials, and doing a final
render of your projects so you can display your
work as a resulting image. So if you're a beginner using Blender or you've never
worked with 3D before. And once you get
started in this world, this is the right
course for you. I hope you follow me along this fun journey as you start your process of
mastering blender, I look forward to see
your final toy train or even some different objects that you might come up with. So without further ado,
let's get into it.
2. Downloading Blender: Alright guys, so the first thing we got to do to start off this course is to download Blender if you haven't already. So to do that, let's go
to the web browser of your preference and go
to plunder that org. Here you will find the
main page of Blender will, you will see many things like the latest news while
they're developing. Remember that Blender, it's
an open source software, which means that it's
completely free. So you didn't need any type
of licensing to work with it. You will also find
different things like the descriptions of the things
that lender is able to do. Then there is a
very powerful tool. So you will see
everything that you will be able to do
with this program. You will see the
explanations right here. But for now let's just focus
on downloading the program. So let's go to the top. And you can click either here in this big blue button that
says Download lender. Or you can go to the top menu. On the top that says Download. I'm gonna hit on
the blue button. And I'm going to be
redirected to this page. Here you will find these big blue button that
says download Blender. And the number that you see
right after that gonna be the version that we're
getting for this course, we're going to start working
with a 3.2.1 version. Don't worry, if you have a
different version than this, you will be able to work
perfectly as long as the version is higher
than the 2.9 version. For the purpose of this
course you're gonna be okay. So the other thing that
you've got to keep in mind is the operating system that
you're working with. In my case, I'm
working with Windows. So that's why it
appears right here. Lender is telling me to
download that version. But if you have
something different, if you're working with
MC or with Linux, you will find other versions
down here on this list. You will find different
windows versions, versions for macOS and Linux. You can choose whatever
works for you. If you're working with Windows, there is a cool feature
and it's the windows can download Blender
as a portable file. Which means that
if you don't have permissions on your computer, like administration permissions
to install a program. You can always download
it as a seep file. And from there you
just uncompress it and you will be
able to work with it, which is really cool. So now I'm going to hit that blue button that
says Download lender. So once I do that, I will be redirected to this page where you
will be able to save your installer
wherever you want you and wait till it gets
completely downloaded. Once it's done downloading, you will just open
the installer. And you will see the setup
wizard come up here. You will just follow
the steps that the installer is going
to tell you to do. So I'm just going to
click on next because I have downloaded
already blender. I won't follow these steps, but basically you just
finish the whole operation. I'm going to hit
Cancel and say yes, and then you will see that
it's completely installed. You just say Finish. You're ready to go. As soon as you finish
installing vendor, you can open up the program. And this is the first
thing you're going to see. Basically here. You will see this picture of these sailboats. If you don't have
the same picture, it means that you probably
got a different version, but don't worry much about it. Now is simply just the
version that you are getting. We're gonna leave the settings
that we see at first, just like they are. Basically if you click away, you will be able to start
working with the program. So we have downloaded
winter already. I'll see you guys
in the next video.
3. Setting up Blender: Before we begin working
with lender itself, we need to change some settings. So go up here and they are the Edit tab and
go to Preferences. And you will find these
window right here. You gotta go into input. And there are two things that
I want you to keep in mind. One is that if you don't have
a numpad on your keyboard, you got to check this option up here that says amulet numpad, just because we're
going to need it later. The other thing that I want
you to keep in mind is that I highly recommend that you use
a mouse for these scores. And in any 3D program really you need to have
a three button mouse. Just because most of the
interfaces for three buttons, if by any chance you don't
have one, it's okay. Blender lets us check the
assumptions that says, Emily, a three button mouse. If you check on
that, you're going to still be able to work. But again, I repeat, I recommend that you use
a mouse for the scores. If you don't, it's okay. You can always check
this option right here that says Emily
three button mouse. The other thing that
I do recommend doing, it's going to atoms. Down here. There are so many
things you can add two blender that is not
installed by default. Just because there are
so many tools that people have created for Blender, given that it's an
open source software. The one thing that I
wanted you to check on, it's an add-on called
the extra objects. So just search for
extra objects. And you will find two atoms. One that says ATC curve extra
objects and the second one, add mesh extra objects. The one that I want you to check is the add extra objects. We're not going to
really be needing that for these cores. But in general, I suggest that you always
have these activated. So you can just click on
these books right here, and you will be able
to activate it. And that's it. Those are the settings
that we needed to have for the scores. I'll see you in the next lesson.
4. Blender's interface: So let's start by learning about the interface of blender to know where everything
is located and we don't get lost while
working with a program. So the first thing you will
see is the splash screen. Here you'll be able
to create a new file, open a different file, or see the recent ones. You can also access the manual, the blender website that we
saw in the first video, etc. But usually I just
click away and I don't worry much
about that window. Now, here in blender that
are many places you can go. It might seem
overwhelming at first, but we'll try to get into
each part of these interface. So you know, with very well. So blenders interface is
separated into three main parts. We have the top bar
at the very top. Then we have some areas
of work in the middle, which is everything that
we will care about mostly. In. Lastly, we have a status, a status bar right
here at the bottom. Let's begin understanding
the top work. Here you will have the
main menu of blender, which is in this
part right here. Then we will have
the workspaces. Each one of them is different depending on what
we want to do with wonder. We will get into those later understanding
each one of them. And then we will have the
scene and layer option. This is mostly for
when you're doing animations and you have
a couple of scenes, these is where you will
be able to control them. Now, the middle
area is going to be the most important one is
gonna be our main focus of interests because that's
where we're going to create everything and the one that we need to understand that better. Right now I'm going to explain that default workspace
that lender has, which is called the layout workspace if you see it up here. And that's the workspace
that I'm going to be explaining because each one of them has a different layout. So let's see into it. We could divide this area
into four main spaces. So the bigger one is going to
be the most important one. It's called the viewport
is this one right here. And here you will be able to see everything that
we are creating. You will be able to
see our 3D models, the animations, everything
that we're doing, we're gonna be able
to see it here. Then on the top right, we're gonna be able
to see the outliner. Here. We're going
to see everything that we have on our 3D scene. But it's gonna be listed out. Then we have our properties. Space on the bottom right, and it's going to be
the space right here. Depending on what we're doing, these properties might change, but in general, all of
their properties we'll always be set in these plays. And lastly, we
have the timeline, which is this part
at the bottom. And here if we're
doing animations, That's where you will be
able to create keyframes and things that we're gonna
be talking about later. The last main part
that we have in Blender is the status bar that we see right at the bottom. And this is where Blender displays contextual information, such as keyboard
shortcuts messages or statistical information. So we don't really care
about these much for now. Now, let's look into
the regions that we have for our main space, that it's going to
be the viewport. So first we have the
header right here. You will find some
menus and some tools. It changes depending on
what we're doing and what we're creating on the
action that we're doing. The parts of our viewport
are going to change depending on the action
that we're doing. Then we have the toolbar that is going to be
on the left side. Here you will find the
most important tools for the action that you're particularly doing
at the moment. You also have the sidebar that right now you're not
able to see it because we have depress n
in order to take it out and we press N
to bring it back in. But basically here you will have all other types of properties or other type of tools that
we're going to see later. And lastly, we'll domain partner is going to be the viewport. That's where everything
will be seen and we're gonna be able to
create stuff in there.
5. Modularity: So the last thing I want
to talk about is one of the most important
features blender has made suits
modular interface. So basically we are
going to be able to modify the interface
however we want to. We could scale things up. So for example, I can
scale the timeline up so it's bigger and
I can see it better. I could also scale my
properties and my outliner. Like that. I can change the
scaling of my areas, but I could also
create new areas. So for example, if
I wanted to have two viewports instead of one, I could go to the
top right corner. And you will see that my cursor immediately changes to across. That's how I know
that I'm going to be creating a new area. So if I click on that
and I drag to the left, I will be creating a new space. That's very useful
because I can create as many areas as I want. Now, if I don't want to have two viewports,
but instead of one, I have a different
workspace in here. You're going to
be able to change that with the top-left corner. So usually in there you will
see an icon every space, every area has a different icon on that button on
the top corner. If I click on that, I will see a list of all
the workspace I could get. For example, if I want to have another timeline
in here, I could. It's the same timeline
that I have down here, but now I have it
up here as well. There are too many workspaces. We're not gonna get
into those yet, but you could change
them as you wish. Now, if you want to
change and you want to close one of the areas
that you just open. You can do that by closing
the other way you open it up. So what I mean is
basically you go to the same corner
where you opened it, but you go to the other way and you will see that
a narrow appears. That's how you know
that you're closing your area and you just
release your click in, that area is going to be closed. So basically that's what you
can do with an interface. It's completely modular. You can change it
however you want to.
6. Workspaces: Now let's review the workspace that we can find in Blender, although we won't be using them. I want you to understand
what you can find in this program and
everything that you can do because this
program is very, very powerful and there are many editors you can work with. The main one is the layout, that's the default one, and he's the one that
we're gonna be using. So let's move on
to the other one. The modelling one is going
to be for modelling. It's a specified for modelling. It's going to be
easier for you to find some tools with these interface. It doesn't mean that we won't be able to modeling the layout. We definitely can. It's just that these workspaces more specified to
work modelling. And in general, then
we have sculpting. You're going to find all these different tools on the left. And it basically will they use
coped like other programs. And it's very, very useful. Then we have UV Editing. This is what will allow
us to create textures, to not create textures, but place textures
in our objects. This is more advanced so
we don't get into it yet. Then we have texture painting. You can create
textures in blender, which is also very nice. Nbc's the workspace that
will allow you to do that. Then we have shading. Shading is where we create
materials and we make things seem like they're
alive, they're real. Then we have animation, as its name says. It basically is where you're
gonna be able to animate. Again, you're gonna be able
to animate on the layout tab. But this is more specified. The layout is more
distributed to animating a easier way than
we have rendering, which mainly it's just creating all of our images and
bringing them out to life. We have compositing. This is also where you
will be able to combine certain things when you have your images already rendered. This is another concept that
we will be getting into yet. We have Geometry notes. This is one of their
most recent features. And basically here you can
create geometry and create models with procedural methods. This is also more complex. We won't get into that yet. Then we have scripting
and basically you can code and program things
in Blender as well. So those are all of the workspaces that we have
that we have available to us. I know there are some others
that we don't see here, but these are the ones
that are displayed for us. For now, let's just focus
on the layout because that's the one that we're
gonna be using all the time.
7. Navigating the viewport: So now that you've learned
about the interface of Blender and you know where
everything is located. Let's move on into how to
move around our viewport. So there are three different
ways you can move around. One is going around our objects. So basically doing a rotation, we can do a pan of our viewport, which is moving the
position basically. And then we can do zooming
in or zooming out movement, which will allow us to get closer to an object or
getting farther away. So I'm going to explain first how to do it with
a mouse and then I'm going to explain
how to do it if you don't have a mouse
by any chance. So let's start with the mouse. If we want to rotate
around that object, if we want to go around, we're just going to click
our middle mouse button. So basically I'm just hitting my middle mouse and
I'm going around. My object. Is that simple. If I want to pan around, I'm going to press Shift
and middle mouse button. So with pining, see
that different, the difference of the movement. Basically here I'm
just painting around my 3D scene instead of
going around my object. It's different. So basically I can pan around
or go around my object. And the last thing you can
do is zoom in or zoom out. If you have a middle
mouse button, it probably will
allow you to zoom in and zoom out by
just scrolling. So this is a movement of
zooming in or zooming out. But if you want to get closer or have more accurate movements, you can do it by
pressing control. And then with your
middle mouse button, you go up and down. You're gonna be able to
zoom in or zoom out. So getting closer or
getting farther away. Now let's see how you move
around without a mouse. So the first thing makes
sure that you have checked the option of emulating three button mouse
on your preference, like I showed you,
once you have that, the movements are
going to be the same and it's gonna
be pretty simple. So instead of having
a middle mouse are going to use Alt and left-click for using like
simulating our middle mouse. So basically if I hit
Alt and left-click, I will be able to rotate around just as if I were just
pressing my middle mouse. So basically Alt and
right in the left-click is going to be replacing
my middle mouse. If I want to pan around, I have to hit Alt and
left-click bandwidth shift. So basically I do Alt Shift and left-click and then I'm
able to pan around. So basically the Alt and click is simulating
my middle mouse. Then if I want to
zoom in or zoom out, guess what he's going to
be the same is going to be Alt and click with control as I, as I mentioned, if
you have a mouse, so basically Control
Alt and left-click, it's going to allow
me to go in or out. So basically I can zoom in
or zoom out on my scene. So that's how you work. If you don't have
middle mouse button.
8. Perspective vs. orthographic views: So now I want to explain
to you a concept that I think it's very important
when working with 3D. And that is the
difference between perspective and
orthographic views. So basically, any 3D software will usually have
two types of views. The way we visualize things and its width perspective
or without perspective, the one that is
without perspective, we call it an orthographic view. So let me explain a little
bit of how it works. In the real-world. We see everything
with perspective. Imagine you are
being in a street. You see the people that are far, far away or the cars
that are far, far away. You will see them smaller than the people that you
see right next to you, that you have right next to you. That's how perspective works. The farther two things are, the smaller they're gonna seem, the closer they are, the bigger they're
going to see him. That's how real life works. In real life, we don't have
an or geographic view ever. There is not such thing as centered geographic
view in real life. Here if we see it
on our 3D sulfur, you can fake it. So right now we're looking
at the perspective view. We can check that by looking up here where it says
user perspective. We know that we're using
a perspective view. The other way you
can check it out is by looking at the grid
that we have right here. So the greatest, these
floor fool of squares, if we see the squares
that are closer to us, they're much bigger than the
ones that are farther away. That's how we know we're
using perspective. You can also check it. For example, in this cube, if you see these edge that
is in the front, that edge, it's way, way bigger and larger that the ones that
we see on the sides. Even though we know a cube has the same measurement
on all of their edges. Right now we see
that this one looks larger and that's because
we're using perspective. But now let's move on
into our geographic view. I'm gonna hit F5 to go
into energy graphic view. As you can see right now,
my cube looks very strange, and that's because
we're not used to see things in our Geographic modes. But if you see now, if you want to measure all of my edges have the same size. And that's because we're
using under geographic view. Another way you
can check it out. Again by checking the grid. If you see the
squares on the front, they have mostly the same size as the ones that
are on the back. And also you can check here on your left corner where it
says user or to graphic. You might be wondering, why do I need an orthographic view? Well, mainly when we're using, when we're modelling,
you want to do things in our Geographic modes. Because if I do it
with a perspective, I might be modeling things with the wrong scale because
if I see things on the back, they might see, they
might seem smaller. And I think they
have the right size, but when I actually put
them as they should be, they will be much, much larger than what I
pictured, it would be. So that's why it's important to work with our geographic views. Now, in the next lesson, I'm going to show you
the different views that we have AND or geographic mode. We can check the
front, the back, and different parts of our model with different
orthographic views. So let's go into that.
9. Orthographic views: For the purpose of this video, I have added a new object. It's a monkey head that
blender brings by default. She's called Suzanne. It's one of the most
famous models by blender. So basically with here I'm
going to explain to you the different views that we have with the orthographic mode. Right now, I have her in
the perspective view. I can move around
and you will see that her face looks like that. I can barely see her
ear on the back. We know we're on a
perspective mode. If I press F5 again, I'm going to have under
geographic view of her, I can still move around. What we're going to have
under geographic view. See that now I can see a little bit of her
ear a little bit more. Let's see if I put
it this way and I press F5 again to bring
back the perspective mode, I won't be able to see it. But then if I press F5 again, I'm able to say it a little bit. So basically now,
what if I just want to see some parts in
some projections of her? That's how our geographic
views are meant to be. So we can see the
front, the back, the right side, the left side, the bottom, and the
top of any model. So to do that, we're
going to check into some shortcuts to get
into those views. So if you want to see the front of the model or of
your scene in general, you're going to press
one on your numpad. It's important that
you use the numpad. If you don't have
a numpad, you got, I can check the button that I showed you before to
emulate a numpad. You can do it with the numbers on the top of your keyboard, but use your numpad
if you have one, the top, the front view
is going to be one. By pressing one, I go to the
front view and right now I'm seeing a prediction
of the front part. What we see in the
front of our monkey. If I want to see this side, I'm going to press three. So that is how I'm seeing
the right side of my monkey. It's again a projection
of my 3D model. If I want to see the
top of my monkey, I'm gonna, I'm gonna hit seven. With seven, I will
be able to see just the top of my monkey. Now, what if I want
to see the back, the left side, and the bottom? Let's pretty easy to see the back That's like the
other way of the front. So I'm going to hit Control one. And I'm going to go to
the back of my monkey. Again. If I press Control three, I'm going to hit the
side of my monkey. I'm going to see the
side of my monkey. If I press Control seven, I'm going to see the
bottom of my monkey, basically just the opposite. If I, the back of my monkey, I note that front is one. If I press Control one, I'm
going to see the black. If I see the right
side, I press three. But if I want to
see the left side is going to be controlled three, then if I want to see
the top, I press seven. But if I want to see the bottom, I'm going to press
Control seven. And that's how I see the
bottom part of my monkey. This is very useful. We will get into this later. But it's important
that you understand the different views
that you can have within our geographic mode. Again, you can also check
the left corner on the top. You can check not only that you're using the
cartographic mode, but what view are you using? So right now I see I'm used to seeing the bottom of my scene. If I press seven, I'm going
to see the top of my scene. One for the front and
the wrist as well. You might think, well,
that's easy to know right now I have the
face of the front. I know it's the front. Sometimes it's not that
easy because you might have a large scene and
you didn't really have a front that is
very recognizable. So checking it up here is very, very useful to know what view you're
visualizing at the moment. So basically those
are all of the views that you will handle in Blender.
10. Selecting objects: So now that we know
how to move around, Let's see how you
select some objects. Right now in my scene, I have three objects. I have a cube, I have a camera, and I have a light. The simplest way to
select each one of these objects is by
just clicking on them. If I click on my cube, I will be selecting it. And I know that because it
is highlighted on the edges. If I want to select my camera, it's also going to be
highlighted as well as my light. So that's the simplest
way to select by just clicking on
the object itself. But I could also select
things from the outliner, which is this part right here. You see, I will talk about
these later by UC that I currently have three
objects because that's the amount of
objects I have on my scene. I have a camera, I have a
cube, and I have a light. And I can also select
my objects from here. If I want us to look my
cube on the outliner, I just click on it
and immediately will see that it turns
highlighted in my scene. If I select one of the objects by clicking
on the 3D view port. So let's say I want
to select the camera. If I click on this, you will see that it also turns highlighted
in the outliner. It turns blue. So I know that's the object I am highlighting I am selecting. But what if I don't want
to select just one object, but I want to
select all of them. The easiest way to select all of my objects in my scene
is by pressing a. So I'm going to de-select
this object by just clicking away on my grid
anywhere that it's not, that is not contained
in an object, I can click away and I will
be deselected my objects. But now I want to
select all of them. So what I do, I press
a and by pressing a, now I'm selecting
all of my objects. You will see that
all of them are highlighted and also they are
highlighted on my outliner. So that's how I know that I am selecting all of my objects. Now, if I wanted to select
all of my objects at once, there are two ways to do it. One is just to click away, just like we did before. But the other shortcut
you can do to de-select all of your objects
is by pressing a twice. So if I press a two times, I will be de-selecting
all of my objects. But what if I don't
want to select all of my objects at once? Maybe I just want to
select multiple objects, but not all of them necessarily. That's very simple. You just select on the
object that you want. And then you press
shift and you click on the other object that you want
to add to your selection. So I'm just going to press click and I will be selecting
my camera that way. Now I have selected multiple
objects without having any to select all of them
at once by pressing a. I could also go and select
the light in this case. And that way you just keep
going and going and selecting more objects by just
clicking and pressing shift. The last thing I want to show you are some different methods that you also have available to select things
when your scene. If you go to the
toolbar on your left, you will see an icon on the top that is
highlighted in blue. By default, this is how
a blender opens up. This is the selection tool. If you hover your mouse,
you will see it says select box and that's how I know this is the selection tool. But now if I click and hold, I will see there are four
different options for selecting floats,
each one of them. The first one is tweak, and this one we live me, click every single object just
like I showed you before. But that's mainly it. That's the only thing
this tool can do. I can just select each one of my objects also by pressing
shift if I wanted. But it's just like
thing like that. Let's see the second
one, the select box, which is the default one. And the one that
we had previously selected is the one that will
allow us to create a box. If I click and drag
and everything that's inside that
box will be selected. So now that I release my mouse, everything that was inside
my box will be selected. Now, if I want to just
select these two objects, I can just click and drag and create a box around them
and they will be selected. So that's the main difference
between those two. Now let's check into
the select circle. What this basically does is that everything that will touch
my circle will be selected. So let me explain. If I click and I hover
over my objects, they will be selected. So as long as the circle
hovers over any object, that object will be selected. I'm not releasing my click yet. I'm holding my click. And everything that's touching my circle will be selecting. Now let's check on the last one. The select lasso tool. This one right here is kinda similar to the select box tool. But this time I'm not going
to create a square around my objects by I can create
any shape that I want. So let's look at it. If I click and drag, I'm gonna be able
to create a shape around all of my objects. Any shape I want, everything that's inside
my shape will be selected. Once again, I'm not
releasing my clinic. I'm just creating a shape around the objects
that I want to select. And when I'm done,
I just click away. Now click away. I released my clinic and I know that anything that was inside
my shape will be selected. So that's useful when you
have a lot of objects. And you want to be really careful about what
you're selecting. These is the best tool to use. I suggest that you keep the
select books as default. I think that's the
easier one to handle, but you can use any
of them as you want. Another thing I want
to explain is that it has a shortcut, which is w. So if I click w, I will jump between each
of my selection modes. So you can see that
the icon right here is changing
whenever I click w. So like I said, I suggest that you
keep it on select box, but you can use any other
method that you prefer.
11. Deleting objects: Now let's look into some things that we can do to our objects. The first thing is I'm going to teach you how to delete objects. Right now. I only want
to work with my cube. So if I want to delete the
camera and the light first, I'm going to select the camera. And to delete it, I
can just hit delete that delete key and
it will be gone. There is another method
which is proper to Blender, and it's by clicking, I'm going to click now my
light and I'm going to hit X. When I hit x, these
menu pops up. And he's asking me if
I do want to delete the object by just
clicking Delete, I will be deleting it. That's the main key that you need to use
when deleting objects. Just because you
want to make sure that you want to delete
what you are hitting. Sometimes you can delete by mistake and it
might be difficult, difficult to recover
things later. So I always prefer to use
the x key for deleting.
12. Transformations: Tool bar: Alright, so now that I have
my cube alone in my scene, I'm going to show you some of the transformations you
can do on any object. Right now, if you
go to the toolbar, you will see that
our planning of icon's going to explain the ones that are
right in the middle. We're not going to touch either. These are these ones yet. We're only going to focus on the four ones that we have here. So first I'm going
to select my object. And there are three
different transformations that we can do on our cube. The first one is the Move tool. We can move it around, we can change its position. We can also rotate it and change the angle or how it is rotated. And then we have the scale tool. That's the one that is
going to allow me to change the size of our object. We're going to leave
that one for later. Let's see the move tool first. I'm going to click on that. And I will see
three arrows going from the center of my object. These arrows represent
the direction where I'm going to
move my object. So remember that in 3D, we work with three,
three-dimensions. We have the x-axis, the y-axis, and the z-axis. So these arrows are
representing that. The red one is going to be
representing the x axis. So basically when I move my
object with the red arrow, just going to click on that. And then I will be able to move my object from side-to-side. So basically from the
left to the right, I know because we are
in perspective mode, we can't really tell which one
is our left and our right. You can see that if I
go to the front view, I will see the x-axis
is the red line. And that's how I know
I'm moving it from the left to the right. Let's go back to
perspective view. So that's the first one. The red arrow is gonna be to
the left and to the right. Now the green arrow
represents the y-axis. So this one will live me bring my object to the
front or to the back, to the front or to the back. So that's basically
allowing me to move my object in the
death of my scene. And lastly, we have
the blue arrow that, that is going to allow me to move my object in the z-axis. So basically I can move it up or move it down,
move it up or down. So basically the red line and the red arrow is
going to be the x-axis. The green arrow is
going to be the y-axis, and the C, and the blue area
is going to be the C axis. So that's very important
to understand. Now let's move on to
the rotation tool. To rotate, I'm going to
go back to my toolbar and that's going to
be the second option, this one right here. So if I click on that, you will see that my
handles are different. Now they're not arrows. They are this type of
circles around my object. The same concept applies. If I want to rotate my
object along the x-axis, I can just click on the red
circle and I'm going to be rotating my cube
along the x-axis. If I wanted to rotate
it along the y-axis, I'm going to hit
the green circle. That's going to be
rotating along my y-axis. Same for the c-axis. If I click on my blue circle, I'm gonna be able to rotate
it along the z-axis. Now you might be wondering, what is this white circle
around my object that basically we'll
rotate your object along the view that you
have at the moment. So if I click on this, I'm going to rotate my object
just as I'm looking at it. If I change my view
to let say this way, somehow to the front, I'm going to rotate it
and it's probably rotate something near the lake
around the y-axis. But not really because he
has the perspective view. So it's not really
doing it on the y-axis, but it's barely getting there. So basically, whenever
I move my viewport, these rotation will be applied depending on what I'm
viewing at the moment. So that is the rotation tool. Lastly, let's look
into the scaling tool. So I'm going to hit the third
icon I have right here. And that's going to again change my manipulators on the
object. Right now. They look similar to the arrows, but they have these cube ends. So that's how I know this
is the scaling tool. The same concept applies. The red. This is not an error,
but the red handle is going to allow me to scale my object
only on the x-axis. So if I hit on that, this scaling will be
only along the x-axis. Same for the y-axis and
same for the z-axis. So basically I'm his
killing depending on the axes that I'm moving. But what if I want to scale
the whole, I can do that. I can scale proportionally. And again, if you see the
circle around my object, that's going to allow me to
scale things proportionally. So if I hit on the circle
and I drag my mouse, I will be able to
scale up and down proportionally without the need of scaling with each arrow. I'm going to, for example, if I have these uptick right here and I want to
keep the shape, but I want to make it bigger. I can now hit the white circle. And I'm gonna be
able to scale it up or scaling down with
the same proportion. So let's go back to our cube. So now you might be
wondering, well, if there are only
three transformations we can do on our object, what does the tool do? So basically I'm going to
click on that fourth icon that we see right here
on L2 on our toolbar. And this one is going to show me all of the handles at once. So basically I will be
able to move my thing, my object, because I have the move tools,
they move arrows. But I could also scale it up on the direction that I want. I could also rotate
it however I wanted. So I have all of the
handles in the same place. Sometimes this is
useful if you want, if you don't want to click
on each one of them. But sometimes we do
need to click on a specific one if we want
to do different actions. But basically these
will allow you to have all of your handles at once. So that's what the
fourth tool do.
13. Transformations: Handles: So now that you understand
the transformations that we're able to do
in our 3D objects. I'm going to show
you another part of the handles that I think it's
important to understand. So right now I'm going to select my cube and I'm going to
select the move tool. Right now you will see I have
these arrows showing up. Well, you will see that
there are not only I rose, but I also have these tiny squares in
the middle of my arrows. So what are those four? Basically, those are for
combining two axes at once. So I'm going to explain it
now with the move tool, but actually I'm going to
change it to the scale tool. You will see that the
scale tool also has those squares in the middle. The rotation tool
does not just for the move tool and for the
scale tool, these applies. Basically, what it does is
that it can allow me to, in this case, scale my
object in two axes at once. So for example, if I
want to scale it up, so in the z-axis, but I also want to
scale it in the y-axis. Then I will choose the color
that is not right there. So if I want to select, let's say blue and green, then I'm going to select
the red square to move, to scale my object
in both directions. So both in the z-axis
and on the y-axis. So let's see how it works. Now I'm going to click on that square and
I'm going to drag. You will see that now I have a flat like kinda
walk kinda thing. And that's because I'm
scaling only on the z-axis, but as well as on the y-axis. Like not scaling
things on the x-axis. So basically, if I want to
do the same, Let's go back. If I want to do the same for the x-axis and the
y-axis and the z-axis, then I will choose
the green square because that
represents the y-axis. And now I'm going to
scale it like that. You will see now I have my
wool in a different direction. The same applies for
if I want to create, let's say a floor. I can just select these one. And it's going to
be applying the scaling on both the
x-axis and the y-axis. So that is a very handful
tool to understand. Same applies for the move tool. If I change this
to the Move tool. Now if I want to move
my cube upwards, but also to the right, I can do this and then I will be moving it on the, on that axis. And you will see, will, maybe
you're moving it around. But not really, I'm not
moving it on the y-axis, adult sticking to the
middle part in the y-axis. So that's also very
useful to understand.
14. Transformations: Shortcuts: The last thing I want
you to learn about transformations are
the shortcuts we can use so that we don't have to click on the toolbar
all the time. So I'm going to select my cube and I'm going to try to move it, but I'm not going to move
it with the handles are the toolbar options
that we have here. So basically for
any transformation, I have a shortcut
available for me. So for moving, the shortcut
though we need to use is G. So if I hit G on my keyboard, now I'm gonna be able to
move my object around. The reason why the letter is G, It's because I'm grabbing my object and I'm
moving it around. So that's one thing. You can press G for
moving your objects. When you are happy with the
position, you just click, and then it's going to
stay there for rotation. Guess what is R for rotation? So if I hate, are going
to be able to rotate my object on the direction that I'm seeing depending
on the viewport. So that's also a cool
shirt good that we have available when you're ready and you're good with the
rotation that you want, you just click and then it's
going to stay like that. Lastly, for scaling, guess what? It's going to be S for scaling. So if I hit S, I'm
going to be able to scale things
proportionally right now. I can scale them up and down. But what if I don't want to
scale things proportionally? Or maybe I want to
rotate my object on a specific angle or
on a specific axis. Well, we can combine shirt goods until blender
exactly what to do. So for example, if
I want to rotate my cube right now
along the x-axis, I can tell vendor to
do that by hitting R and then the axis
that I want to rotate. So let's say I want to
rotate it along the x-axis. I'm going to hit X before doing
the rotation that I want. Now I'm kinda locking my rotation to that
a specific axis. So now I will be
only able to rotate along the x axis
and nothing more. Same for, let's say moving. So if I hit G and I want
to move it up and down, I can hit Z right after. And then I'm going to be able to move it just up and down. So that's also very useful. And the same applies for
scaling if I want to scale it, Let's say only on the
y-axis I can do that. Hate why after hitting us, I'll be able to scale
it just on the y-axis. But you could also
tell blender how much you want those
transformations to be. So I'm gonna go to the
front view right now. Maybe I want to move my cube. I don't know, four
units to the right. So I can say lender, Hey, you're going to move my cube so G on the x-axis because I
want to move it to the right. So I'm gonna hit X. And then I'm going to
tell him how much I'm going to tell it how
much I want to move. So I'm going to hit F4. And once I do that, blender is going to
immediately move my cube four units and then I hit Enter when I'm happy
with the result. So I can do very
specific transformations with these shortcuts. You could, for example,
do our rotation. So let's say I want
to rotate my cube on the c-axis, 45 degrees. So let's do that. I
can just hit rotate, so heat are then
I'm going to hit C. I love the rotation
for the z-axis only. And then I'm going to hit 45. There. I just rotated my
cube 45 degrees exactly. So those are the
awesome transformations you can do with shortcuts. Now, before I forget, I also want to say
that you can do these transformations on the
properties tool as well. We're going to get
into this later. But I just want to show
you that because we rotated the cube 45 degrees, I can see now under rotation transformation that
eat rotated 45 degrees. So any transformation
can be also modified from the
Properties panel. I can change the location. I can change the scaling
on a different axis. So basically you can do any type of transformation from the
properties panel as well. But we're gonna get into
that a little bit later.
15. Adding objects: Alright, let's continue
by seeing how do we add new objects to our scene. Right now I have three
optics on my team, but I actually want
to delete all of those and I want to start
with a blank scene. So again, I just selected all of them and I hit X to delete them. Now that I have an empty scene, you will see there's
nothing here. So how do I add new objects? Well, it's pretty easy. If you go up here to these menu, you will see there is
an option that says at, if I click on that, I will see a menu pop up. And this right here
is all the things I can add to any
scene in Blender. We have meshes,
curves, surfaces, metal balls, decks,
volume grease, pencil. This is for rigging. We cannot reference images, we can add lights, cameras,
we cannot simulations. Anyway, there are so many
things that we can add, but for now we're only going to focus on how to add new meshes, which are what we're going to
work with with 3D modeling. So the default object that we see on her seeing
is usually a cube. So if I go to Add mesh
and then I select a cube, I will see the main default cube that we see every time
we open up Blender. But I can add more things. So I do it at that and I'm going to add
something different. Let's add a new vSphere. Newest fear is basically
just a simple sphere. I can see it right here. I just added as fear, I will delete that and then I'm going to add a new object. Let's see if I want
to add a torus. This is a special one. There are so many different
objects we can start adding. But there is a
shortcut to do this. Instead of going up here and choosing whatever
I want to add, I can actually press Shift a and the menu will pop up the same
menu that I had up here. I will see it. Wherever I have my
mouse hovering. I press Shift day, I can
add whatever I want. So for example, I can add Suzanne that we
have seen before, which is the monkey. Remember the monkey
that we use before? So we can add any object
that we want on our scene. What's particular
about this is that whenever I add a new object, let's say I had a cylinder. So right now you might
seem like everything. It might seem like
everything is fine. But there's actually a new
window that popped up right here under like just
above the timeline. It says Add Cylinder. If I expand this with this
arrow that I see on the left, I will see these menu. And this menu are actually
the properties of the object as soon as I
import it as I added. So right now I can say how many vertices
it has, how many, how big it is, how long it is,
where it is located. There are so many
things that I can improve or change as soon
as I add a new object. So for example, if I
don't want 32 vertices, which means how many vertices
I have a long my cylinder. I can change this
to probably eight. Then I will have a
rough for cylinders, steel cylinder, but I
have less vertices. We'll get into this later. But it's important that you know that these menu will pop up whenever you create a new
object, a new object. So let's try with a cube. If I add it, I will see
the properties change, but I still have some
properties of the cube. In this case, I can
only change the, how big each edge is. So right now it's two meters. You can change it
to probably five and it's going to
be much larger. So each object has its
own properties that you can change whenever
these menu pops up. So that's all about
how objects work.
16. 3D cursor: So Rhino, whenever
I add a new object is always coming up in
the middle of my world. If I delete this and
I add a new object, whichever it is, it's
always going to come up right in the
center of my world. Let's add another one. It's at the monkey for example, and it's going to be
right in the center. Let's add a new one, a cube. They're all going to be
right in the middle. So if I want to see all of them, I will have to grab them
and change the position of each one so I
can see them all. But what if I want
to add a new object in a different spot that
it's not in the middle. Well, that is very easy to do. I'm going to delete
all of my objects. I'm going to change the place where I'm going to
add new objects. So that's where the new tool called the cursor
comes in handy. So you see there is
right in the center, there is this little circle around the middle
point of my scene. If you see it's very
similar to the one we have right here on the left
under the selection tool. And that it's called the cursor. The cursor will allow me to
change or add new objects. And it's actually also useful for other things in modelling as well that we're not going
to talk about right now. But mainly I can change the
position of the cursor. So right now it is
right in the center. That's when, whatever I add, Whenever add a new object that's going to come right
in the middle. But now I'm going to
change my tool from selection to the cursor
when I click on that. Now whenever I click
a different spot, the cursor is going
to change its please. It's no longer in the middle, but it's actually going to be anywhere but there
whenever I click, wherever I click, it's
going to be right there. So now let's say that I
have my cursor right there. If I tried to add a new object, it's going to come right where my cursor is at the moment, if I change my cursor up
here and I add a new object, it's going to stay right
there where I have my cursor. What's important about this? It's that with a cursor, you can not select anything, you're just moving your cursor. So if I want to select
my cube in this case, and I have the cursor
tool selected. I'm gonna not gonna
select my cube. It's only going to change
where my cursor is located. Located. So now I have to go
back to my selection tool. And that's how I can
select things back again. So that's important. And whenever
sometimes you try to select things and you see
they're not selecting. It's probably because you have the coarser activated and
not the Selection tool. So you've got to be
careful with it. But what if I want my cursor
back to its original place? What if I want to bring things in the center
of the world? Again? Well, that's very easy. You have to press Shift S, and you will see
these menu come up. Remember that you have to
keep pressing Shift S, otherwise the menu is
going to disappear. So I'm going to
press Shift S again. Here. There are so many
options I can do, but the one that I want to focus right now is the one that says cursor to world origin. So if I click on that, I will see that the
cursor is again right in the middle
of my work world. I can also go back and
change it whatever I wanted. But if I press Shift S, I can bring my cursor
back to the world origin. There are other options
that we have right here. We can put this
election that we have right now into our
cursor, for example. So the tourists that
I have selected, I can bring it to the cursor, see that it moved
where the cursor was. There are so many things that
we can do with our cursor. We can change our cursor
to the selection. So instead of moving my
selection to the cursor, I can move my cursor
to the selection. If I press on that, I
will see that my cursor, cursor went back to
where my selection was. There are so many
things that we can do with the cursor
is very useful. You need to understand it well. For now I will leave it
in the world origin. So it stays right in the middle. And then I'm going to
click back again to the selection box
so I can select my objects and delete them if I wanted to. So that's about it. That's all you need to
know about the cursor.
17. Render modes: Now let's talk about
rendering modes. Render Mozart, basically how we visualize our 3D models
in our viewport. As you can see right now, our sphere, it has a
great color to it. That's the default
color that blenders shows with every 3D model
that we see on our scene. As you can see up here, we
have four different spheres. And the one that we
have selected right now is the second one. That means that we
are visualizing our models with a solid color. So basically all of
the models that I add, all of the geometry
that I add is going to be shaded with these gray color. But what if I change
it to the first one? Let's see, the first
one that has some lines in-between making the
middle of the sphere. If I click on that, I will see that now my
sphere is not solid, but it seems like it
was made with wire. I can see everything
that's inside. And basically I can see also what's behind of
my own, my sphere. What this represents. It's the geometry that
is making up my sphere. I will talk about these later, but basically you can see the, that the model is actually
composed of connections, of points that create
some sort of grid. And that's called a
wireframe in 3D modelling. So this is another way to
visualize while we're doing. We see everything
with wireframe, or we can see everything
with a solid color. So it's useful to have the
wireframe mode when I want to see what's inside or something that it's
behind my model. This is useful, or
if you just want to see how the
geometry is really, is really looking at the
second one is the solid color. Let's see the third one. The third one is a special one. As you can see, it turned white. And why is that? It's
because the sphere has by default and
material that is white. We haven't applied any materials yet and we haven't really
talked about that. But by default, Blender always applies a white material
to the objects. So that's what I'm
visualizing here. Basically, the third option
will show me all of them. The materials that are
applied to our optics. We haven't really
done any of that. But basically this is
the view that you will use when you already have
so Material supplied. And lastly, we will
have the render option. So basically, if
I click on this, I will see that now my
sphere has some shadow here. If you can see that
in some light. Basically this is how
they're rendered. Version will look. Why is there a light? Well, I already have a light on my scene right here.
I have a camera. I don't really care about
that, but I have a light. And because I have a light, that is how it's affecting
my sphere right here. And that's why I'm
seeing that my sphere has some shading to it.
It has some shadows. He had some highlights. If I move my light around, I will see that that shading changes depending
on where the light is. So if my lights where
she's coming from here, I can see that it's
affecting my sphere. Because now these parties, the one that is lighter than
the one that it's under, which is creating some shadow. So basically, those are all the four render options
you have on your viewport. You have your iframe, you have your solid color, you have your shading
or materials, and then you have
your rendered option.
18. Outliner: Now let's talk
about the outliner. We have talked about it
a little bit previously, but we haven't really gone into the cell. Let's look into it. Right now I have added a bunch of objects on my view port. I have some meshes, I have some lights, I have a
camera and I have an image. Those are all the 3D objects
I have at the moment. And they might be a
little bit disorganized and it might seem like
there's a lot going on here. Sometimes it's hard to know exactly what is going
on in your viewport, and that's when the
outliner comes in handy. So I'm going to open up
the space a little bit. Remember that the outliner is located on the top
right of your window. Right here. I will see that all of
the objects I have on my scene are listed
out down here. And there. They all have different names in there under something called
the collection. So basically collections
are like groups. Or I can keep all of my
objects, some folders. So I keep everything organized. Right now. They're
under the same folder, under the same collection. And that might be a
little bit messy. It might be kinda hard to understand what's going
on on your scene. So why can we do, we can add different collections so we keep everything
more organized. So for example, right now, I have five meshes. How do I knew that? I could basically
just count them. It's not that hard, but
sometimes you might get a, a lot and a lot of geometry going on here,
different objects. And you might not
know how many things you have from your scene, but you can see them right here. So the first thing that I a tip that I would
like to give you, so you should know the
name of your objects. You should know what
is going on here. Right now. They all
have the default name. When I added the object, the camera, It's called camera. I have to cube. So the
first one is called cube. When I created a new one, it's called cube that 001. That's an odd name. That's not very understandable. We have a cylinder, we have an empty. These empty. It's the image that
I have right here, which is also not
the right name. You have a lied. We have a sun, but we don't know what type of
light these are. We have a sphere and we have Suzanne that
I know it's the monkey, but maybe nobody knows
that her name is Suzanne. Maybe I want to rename that. We can do that. So let's go ahead and
change some names. I wouldn't like to keep
cubed, that's 001. So I can change this into something like
bucks for example. I know this object right here, it's called box or
whatever it is, doesn't necessarily have
to be on a specific name, can be whatever you want. I'm going to rename
Susannah as well. Her name is not gonna
be so sad anymore. I'm just gonna call
her monkey so it's easier to understand
what I'm referring to. Unless the, I'm gonna grab my image and the image
is called empty, I'm going to rename
it Blender logo. So it's easier for me to
know what is going on here. Now I want to divide all of my objects into
different collections. I want to separate them. So how do I do that? First, I will create
a new collection by right-clicking
on these gray area. I just right-click and
I say new collection. So now I created
a new collection. Now, the way I want to
separate my objects, it's by the type of
objects that we have. So right now, we have meshes, lights, images, and cameras. So we should have
for collections to separate each one of those
objects into different groups. So I'm going to keep the
first one as my meshes. I'm going to rename
my collection mesh. I know that everything that is under here is going
to be a mesh. Then I'm going to say Image. Actually I'm going
to say reference just because usually our
images are references. So it's just a thing that I
prefer to call reference. Then we have lights. Lights. Lastly, we will have cameras. So I just rename it. Now we need to organize our objects into
these collections. So how do I know what type
of object I'm having? Well, it's very easy. If you see every
single object that I have listed out has an icon
to the left and orange icon. Each one of them is different. So basically for meshes, It's the down beat
down triangle, the one that is looking down. So these represents a
mesh for our lights. We have a light bulb, for cameras, we have a camera. And then for images we
have the square root. We'd like a triangle
and a circle inside. So I can go ahead and
reorder my things. I'm going to grab
my image and I'm going to bring it
out to reference. And that's going to be now under my collection called reference. Now I'm going to grab
my camera and I'm going to bring it
down to cameras. And then for my life, I can just click on one and then press Control a to
select a different one. Or I can simply select them
all my viewport width shift. And I'm going to bring both of both of them under
delights collection. So now everything is way
more organized and it's much easier to understand
what is going on in my scene. Lastly, I want to tell
you that you can hide elements so you don't
see everything at once. Let's say you're just
modelling and you just, you only need the meshes. You can go ahead and disable the viewing
of the other objects. So how do I do that? I can go here where I see these little eyes on every object that represents the visibility on my viewport. If I only want to see my meshes, I can simply disable the
groups that are not meshes. And then I'm going to only see the mesh that I have
all my viewport. I can do also individual thing. So let's say I only
want to see the monkey. I'm going to disable each
of the other objects, and I'm only going
to leave the monkey there so I can
only work with it. You can bring them back
by clicking again. And it's just that simple. So you can disable or ringing
the elements that you want. You can also do that by
pressing H on the viewport. So for example,
if I want to hide my image right now,
I click on it. And if I press, I press H, I'm going to disable
the visibility of it. You can see it right
here and I can simply bring it back by pressing the little
eye right there. So that's basically
what we need to know about how to organize
things on our outliner.
19. Properties panel: So now let's see what we can find under the properties panel. Remember that the
properties can be found on your right is gonna be
the spinal right here. I'm going to expand it so we can see it a
little bit better. Now let's see what happens. Each of my objects will have properties depending on the type of object that it is. So these spinal right here will change depending on the
object that I have selected. Right now I have
my cube selected, which is a mesh. And the meshes will have different properties
than cameras, lights or anything else. So I can see that down here. These will be the
properties for my meshes. The ones that are on top. The first, I don't know, seven or eight taps
that we have right here are going to remain the same for every single object. They're always gonna be there. But the ones that are
below these orange icon, they're going to change depending on the type of
object that I'm selecting. So right now we can see the cube has these properties down here. Now, if I select the
camera, look what happens. The camera has less
properties than my cube. That's because it's
a different type of object and it has
its own objects. Instead of you has
four instead of the cube which
has, I don't know, like six or seven
properties different, same applies for delight. If I click on the light, the properties might
change as well. So let's see a little bit
what's inside all of these. I'm not going to really go into depth except for someone's. But yeah, let's see what's inside of each one
of these tabs. The first one that we have
right here is basically some properties in the options for the type of selection
that I'm doing. I really wouldn't mess with it. It's not necessary at all. Now let's look at
the second one. The second one is the
render properties. So basically here I can change the renderer
that I'm using. Remember that we have
EV workbench or cycles, the most used or EV, or cycles, EVs real-time rendering
and cycles is not the normal rendering
that it's the most used under
in 3D in general. Here we can change the
render properties. So how many samples do we have? If I want to apply
machine learning? There's a lot of
concepts that we didn't really care
about much right now. But this is the
Render properties. Then we have the
output properties. So right here I can change
the resolution where I'm sending my images are my final
videos or whatever it is. Here's where I'm gonna
be able to change that. Then we have the view
layer properties, which is for exporting different
images of our renders. This is more for compositing, so I won't get into this at all. Then we have our
scene properties. This is to know what type of camera where you'd
like what camera is gonna be our main one. We can see the audio
if it's using gravity, what type of units right now we're using
the metric system. A bunch of things that also, I don't like to mess
around with much. Then we have the
world properties or to the environment
properties. Here we can change how the environment is
gonna look right now we have a gray color. We can change that. We can put volume to it, we can add I'm
environment lighting. We can do a bunch of things. So I'm gonna we're gonna be
able to do that in here. Then we have the
collection properties, which is for manipulating
our collections up here. But I don't really
mess with this at all. So let's look into the
object properties. This is the main tab that
is always going to look. It's gotta be by default. And here's where we're going
to change the location and the main transformations
of our objects. We can see the visibility we
can see collection is add. So basically the object itself, not the type of object, but like an object itself. So basically this is a mesh, but it's an object, that camera, it's a camera,
but it's also an object. And all of these are objects. So the properties
will remain the same. I only care about
the transformations that that object path. So for example, the
camera right now has these location right here,
these particular rotation. So you can see the
basic transformations under this tab for each object. Now let's look into the mesh property that
is only for meshes. And it's going to be
this one right here, which is the
modifier properties. So basically here you can
add modifiers to the cube. We won't get into that yet. But if I drag these menu down, you will see there
are a bunch of modifiers we can
apply to our objects. These are really
useful when modelling, so we're going to look
into that maybe later. But yeah, these are
important when modeling. Then we have the
particle properties. So basically to create particle, particle systems, which is
a little bit more advanced, we also have physics. So these are the physics
properties we can add rigid bodies, force fields, and so many other things
for gradient effects, we won't get into that, um, then we also
have constraints. So constraints are also some part of modelling
and rigging. It is useful for
many, many things. It also has a bunch
of constraints we can create to each object on
getting to that adult, we have object data properties. So basically he will be able
to add groups of vertices. We can add shape keys
when we do rigging, this is way more advanced, but I just wanted you to
know what's in there. Then we have unimportant tab, which are the
material properties here you cannot materials. Remember that I showed you that our meshes have a wide
material by default, He's the one that we have here, but we can always
change the material, the color, how bright it is, how shiny it is. We can change all of the properties of
materials for our objects. So this is a very important tab. And lastly, we have the
texture properties. We can paint textures
inside Blender. And this is where we will be
able to manage all of that. So now let's look
into the camera. The camera has
basically the same except for these
camera tap right here. So if I click on my camera tab, you will see that
now I can change properties that are like
only for the camera. So I can change
the focal length, I can change the type of lens that is two that
is being applied. The clipping. If we want to add
there fulfilled, we can see the sensor. We can change a lot
of things that are appropriate to the camera. Also, we have the light. So if I click on the light, I will see these new tab that
is for a specific lights. Here, I can change the type
of light up that I'm using, the power, the color,
how bright it is. All of the light properties
will be changed here. Every single object will have a different property right here. So for example, if
I add an image, whatever it is, I have
this one right here. And these will also have a new tab that is
specific for images. And here I can change the image that I saw
that I'm selecting. I can change the size of it. I can change where he's located. So every object we have its own properties
and they will always be found under the same panel. So that's all we need to
know about properties. We won't really get into
much detail of this, but I wanted to
know what's there.
20. Object modes: Alright, so now let's
talk about modes. If you go in the header up here, you will see there's an
option that says Object Mode. If I click on that, you
will see that at least pops up basically molds or an
object oriented feature, which means that depending on the object that
I have selected, these layers may vary the
options that I have available. We'll defer. The meshes like the
cube are the ones that have the most options
for us available. But for example, if I
click on the camera, you will see that it only
has one type of mode, which is the object mode. Same for the light, you'd only has one type of mode of the objects might
have different modes. All of them will have the
object mode by default, but they might have
different ones as well. So let's talk about
the modes that we can find for the meshes. So I'm going to click on my cube and I'm going
to go into the list. And I'll try to
explain all of these. The first one, which
is the optic mode, is the default one. All of the objects might have an optic mode available for you. This is where we
will be able to do the basic transformations
that we've already seen, like changing the position, the rotation, the size. So we can do that
with any object that we have when
our scene we will be able to change its position,
the rotation, etc. So all of the objects we'll have available the object mode, and this is where we will do
the basic transformations. Now let's go into
the second one, which is the Edit Mode. If I go into edit mode, this is particular for meshes, but you can also use
that for, I believe, curves and maybe even strokes
with the grease pencil. There are different objects that have the edit mode
available for you. But let's talk about what
we can find with a mesh. So basically, here's what we
will be able to manipulate the basic elements that
compose my object. So in this case, this cube
has different elements to it. And here's where
we'll be able to manipulate those elements
to create different shapes. And that's how we can
actually start modelling. I will talk about these
in the next lesson. Just because this is a
very extensive topic that I would like to go deeper into. But for now, let's move on
to the next type of mode. So the next one will
be the sculpt mode. So if you're not
modelling traditionally, which it's more
logical in some way, you have these sculpting
mode available for you. And this will allow you
to create models and create shapes in a
more organic way, just as if you were
sculpting in real life. So it works more
like having a clay in your computer and you can start shaping it as you want. We won't get into that for now, but this is where you can
actually sculpt elements. Then we have the verdict Spain. This is where you can assign different colors to the vertices
that compose your mesh. We won't get into these,
but this is also very useful if you want to
paint by 0 points, then we have the weight paint. This is mostly used when you want to create an
object that is gonna be, it's gonna be available
for animation. Basically, if you want
to create a rig and create a skeleton
for your object, here is where you
will assign how much each part of your
model is going to move. So this is also very, not very buddies
mode, more advanced. So we want to touch this yet. Then we have the texture paint, which basically will
allow us to paint textures directly
into our 3D mesh. So that's also very useful. We can start painting on top of our 3D models, whatever we want. So those are all the types
of modes that we have available for 3D
meshes in Blender.
21. Vertices, edges and faces: Okay, so now that
we've seen most of the Blender interface
and we understand it. We're gonna go ahead and
start talking about modeling. So what is modeling? Basically, it's a
technique for creating digital representations
of any object or surface that we can
find in the real-world. How do we do that? Well, basically, we
use difference or first-line blender to manipulate points in a virtual space. In this case, our
virtual spaces, the view port that
we have right now. With these points, we are
able to create meshes. So basically a mesh, like
I've been telling you about, these cube is a mesh and it's
basically a collection of points of vertices
that form the object. So let's see how
that really works. In order to access all
of those vertices and other elements that are
composing my object, we need to go into edit mode, the one that we
just talked about. So to go there, I
will just click on my cube and I will go up here
and select the edit mode. You can also access the
edit mode by pressing Tab. So if I press Tab
on my keyboard, I will be going
into the edit mode. And I can also go back to the object mode by
pressing Tab again. So if I press that,
I will be going into and out of the edit mode. So inside the edit mode, here is we will be
able to manipulate all of these vertices in all
of these elements to start creating more
complex shapes and different meshes and
create different objects. Instead of having
those primitives that we've already seen, like the cube, the sphere, the colon, and all of that. So how is an object made of? So basically here
you will notice that we have points that
are making up my cube. Those little dots
that you see up here and around the cube, those are the points
that are making up the shape and the object itself. Those points are
called vertices. So each verdicts
making up my cube. How is that possible? Well, the basic, the most basic element that we have
here are those vertices. But if I connect two vertices, I will be creating a
line between them. And that line is called an edge. So those edges are
also being Connect, are connecting my dots. That is the second
element that we have when we work with 3D. So two vertices makeup on edge. If you go up here, you'll see we have three different options. So if I want to select
a point or a verdict, I can just go up here, and that's the option that
we have selected here. But if I select
the second option, I will be able to select each edge instead of
selecting vertices, which is also very useful. So what happens when we
connect all of my edges while the fight select
all of these four edges. I will see that if
they're connected, they're creating that flat
surface and that flat surface, it's called a face, which is the surface
that you see right here. If you go up these menu again, you will see that
the third option, We will allow us to select
each face individually. Instead of selecting points,
are selecting edges. If I want to go back and
select on a specific point, a specific verdicts,
I will go up here and then I can
select those again. So we have three elements that
are basic to any 3D model, which are the vertices, the edges, and the faces. So a phase is usually composed
by three or more vertices. And why he's that. So basically, if you think are most basic
shape will be a triangle. That is because when we
have three points in space, wherever it is, we will be
able to create a flat surface. That's the bare minimum. We need to create a
face, a flat surface. Here. We're not using three, but instead we're using four
points to create a face. Usually in 3D, we have two
different modes of working. One is by using a squares
like we have here, face, faces that are squares, but we could also use
triangles for faces. Those are called
tries and those are not recommended for
using when you model. It's better to use squares. Those squares are our cold. I'm sorry, are called quads. When we work with squares, those are called quads and it's much easier to
understand for us. It's easier to manipulate measures when we're
working with gloves. In reality, the
sulfur is actually a rating tries just because
it's the bare minimum. And if you think
about it as square, it's actually two triangles. So if I create an
invisible line right here, you will notice that
we have two triangles. But it's common that
we work with quads. So our faces should always
be quads when possible. Doesn't mean that
if we have a try, It's gonna be terrible. No, because actually
the software is making up its reading tries
instead of reading quads. I know this is kind of complex, but in general, we
will have vertices, edges, and faces that are the ones that are
making up my model. Now, we will be able
to edit these things to get more shapes
and more different, more complex objects instead
of just having a cube. But those are the most
important terms and the most important concepts that you need to understand
when doing 3D modeling.
22. Modeling tools: Now I'm going to explain to
you of the tools that we have available when going into
edit mode with our object. So you will see
in the toolbar on your left that we have all of these options
available to us. Now, I'm going to go one by
one explaining what they do and how useful are them. So let's go into the first one, which is the extrude region. Basically, if I click
and keep it pressed, I will see that I have a lot
of options for extruding, but I'm only going to
focus on the extra region. So when I do that, you will see that the tool
appears on my object. In order to extrude, we need to select faces because
extruding is only well. You could actually do
it with edges as well, but it's recommended to
extrude on the faces, not vertices, edges
in some cases. But usually you
will extrude faces. I need to go and select
faces instead of vertices. I click on that. And now I'll be able
to extrude my faces. So let's say I want to
extrude these phase right here with these tool that
I have available now, I can click on this plus button and you will see
that I'm extruding. So basically what it
does is that it creates new geometry out of the
object that I already have. This is how we can
start creating new shapes because
we will be able to add more geometry to our object. So if I wanted to create
different things, so let's say I want to
extrude right here. I can start creating different
shapes with extruding, this is like one of
the most basic tools and the most important ones. I can also extrude in a different direction
than the one that the face is going. So right now, these
face is facing upwards and that's why the face, if I extruded, it's
gonna go upwards. But if I just click
outside of it, I'm like around the sport, I will be able to extrude in a different direction
than the face was going. So this is all of the ways
that you can do extrusion. There is a shortcut for this. So if I have my selection
tool activate it, I can also extrude by pressing E. So if I want to extrude these
phase right here, I can just press E and I'll
be able to extrude as well. So now I have a
more complex shape. Now I'm going to
create a new object. So I'm actually gonna
go outside edit mode. I'm going to move this a
little bit to my left, and I'm going to
create a new cube. So I'm going to add a new cube. Now inside this one, I will show you the next tool, which is the inset faces. So just like extruding, you can actually create
faces inside our faces, the ones that we already have. So again, with the
Face Selection Tool, activate it, going to hit on these phase right here or
maybe this one right here. And I'm going to select
the inset faces tool. So you see that this
circle appears. What this does is if
I click and drag, I will be inserting a
face inside that face. Therefore, not just
creating one facing side, but I'm also creating for
more faces around that face. So although these are
not perfect squares, they're still faces because
they have four points that are making up
a flat surface. What can we do with this? So for example, if I click
on this face right here, if I want to create a
whole, I can extrude. But instead of
extruding outwards, I can actually extrude inwards. So if I hit the
extrude region tool, I can actually bring this in. And I will create some sort
of like a box sort of thing. So you can actually extrude
while having an insert. And I can keep on doing this
if I want to insert again. And maybe I want
to bring this out, I can extrude and then I will be creating these random shapes. So that's also inserting
faces for inciting faces. There's also a
shortcut which is I. So if I press, I have my selection
tool and if I press I, I can insert my face. So e for extrusion,
I for Insert. Now once again I'm going to
go back into object mode. I'm going to move this a
little bit to my left. And now let's actually move
both things to order lift. And now I'm going to add a
new object, again, a cube. So I'm going to hit Tab
to go into edit mode. And now let's look
into the Bevel tool. So bevel is the next tool
that we have right here. And what this will do is
that it will actually make our edges less sharp. What I mean with that, I'm going to select
the edges right here. And I'm actually going to
select these edges at the top. I'm going to select
the four of them. You have to select edges, not faces and not
vertices, edges. With these edges selected, I can actually hit
on the Bevel tool. And now these handle appears and I can
actually bring it up. You will see that I'm creating these type of looks
like a house right now, but I'm just like dividing
the edges into two. But I can actually will still dragging without
releasing my mouse. I can go up, hit my scroll, going up, and I can add
more edges into it. Do you see with more
edges I'm creating a more curved edge, if that makes sense, I'm
creating more geometry. You have to keep in mind
that while doing this, you are creating more
faces and more geometry. But now I don't have a
sharp edge at the end, but I actually have
a more curvier, like a curvier edge at the end. So that's what beveling does. I can also do it by
going to do it under it. So I'm actually going to
select four of them as well. By pressing Control B, you will be able to
create the bevel as well. And I can scroll down if I want less edges or
if I want more, I can just scroll up and I'll be able to create my bubble. So that's what beveling does. Once again, I'm gonna go
back into object mode, going to move this a little bit. And now let's look
into the next tool, which will be the loop cut. So basically we'd look good. I can create cuts around my mesh without affecting the
shape that I already have. So for example, if I want
to divide this cube and I don't want to have
the someone on faces, but I want to have more faces. I can do so with a loop. If I click here, I can actually create a loop
around my faces, my cube. So for example, if I want to create this loop that
is showing up here, you will see that you will, like a yellow line will appear. If I click, I will be able
to create a loop good. So I click and I create
a loop good, right now, I've created more faces without
affecting the geometry. And the shape that
might not the geometry, the shape that my q pass. Ready, it's still looks like a cube if I go into object mode. But if I go inside it, I will see that it has more
faces than it used to. And this is useful when, let's say I want to extrude
these phase right here. I can select this face
at the top and then say Extrude and then I'm going to bring it forward as well. And now I have these
type of shape. I can create loop
guts with the stool, but there is another way, and it is by doing control R. So if I press Control R, you will be able to
create a loop cut. But instead of having it
always in the middle, when I click, I can
actually drag it. So I can choose where I want. My lip got to be. If I wanted right here,
I can just click. And then my loop God is going to be right where I tell it to. You can also create a loop cut in the
middle with Control R. So let's say I press
Control R and then I click on the, on the option. But what if I moved it and I
want it right in the center? If I just right-click, it's going to go right in
the middle of my faces. So that's another way to
do a little loop cuts. The last thing I
want to show you, there's actually add a
new cube, mesh cube. I'm going to bring it to
the left, to the right. And right now I want to
show you the knife tool. So that's the last
tool that we're gonna be talking about today. You've gotta be
really careful with this tool because it's going
to be these ones down here. I'm going to click on knife. And what you will see that these nice appears on my mouse. So what it does is
that I can actually cut my faces however I want to. So let's see. I'm going to
actually click away. Oops. So I'm going to
click away for now. And then I'm going to
select the knife tool. I can actually create
cuts wherever I want to. So let's say I want
to create a cut here. And actually it doesn't have to be on an
edge or a verdicts. It could actually be in
the center of a face. I can start cut, cutting however I want it. But two ended, it has to
end on an edge or a vertex. So I'm going to
end it right here. And then when I'm good with it, when I'm done, I'm just
going to press Enter. And I just created a
random cut is not perfect. It's not linear,
it's a random cut. While you had a, gotta be
really careful with this tool. It's because these
geometry is messed up. It's actually not
great for working in. Why is that? It's because now we
have faces that have more than four vertices
and that's not okay in 3D. If you see, I'm going to
actually see the vertices that these faces have. You will see that
these first phase has, let's see, 1234567 vertices. And that's just not okay. These can create errors and
can create things that are not great when doing
renders or certain things, animations and just deforming the geometry is gonna
be really messy. So you've got to be careful
with the knife tool. This is something that
you shouldn't do. Instead, if you really want
to use the knife tool, I'm going to go,
I'm gonna go back. And if you want to
use the knife tool, you could use it for. So for example, if I want
to create a cut here, and then one cut here, I'm creating two faces. But you gotta be careful
because now the one on the top, we will have five vertices. So if I want to end it, you have to be careful
and maybe I could bring it here and create
a try a triangle. And that's gonna be okay. So the knife tool is for
more specific things. I usually don't
use it unless it's completely necessary when
doing more advanced topology. But it's also there for you. If you don't want to
use the loop cut tool, you can do cuts with the knife as well as I'm
going to just hit enter. Now I have two new faces here, one triangle here, and one
with four phases here. Now if you look at the
one that's in the bottom, is going to have five vertices. So I will have to go and fix that as well
with the knife tool. Then I feel is not great. I don't suggest you use it now, but it's available for you. There are more tools down here, but I won't go into those
because I just don't think they are really necessary for
understanding 3D in general. So those are all of the tools that you have
available for you. Bcs, how modelling works, and this is how we
can actually start creating more complex shapes.
23. Smooth and flat shading: So before we start
working with our project, there are still two
concepts that I haven't mentioned that I think are
important to understand. The first one is smooth shading. What that means is
that if you see I have a sphere right
now on my viewport. But when I look at it,
I'm able to see all of the phases that are
making up my sphere. Doesn't look great for a sphere, especially if I have a cubic
doesn't really matter. But for a sphere, this is actually
not looking great. So there is an option
that we can activate to see a smooth shading
on my sphere. If I right-click, I will
see the first two options, say Shade smooth or shade flat. Right now the one that I have activated is shaved flat because it's the one that
lender has by default. But when I hit Shade Smooth, you will see that now my, my sphere has a
more flat surface, is not flat surface, but
it looks like more smooth. Item C, all of the faces that
are making up my sphere. I'm going to bring
another spherical. And just so you see
the comparison. Now you see these flat shading
and DC smooth shading. I want to bring this back
to these original phase. I can do that by
saying shade flood. And I will see the sphere
with all of these phases. But if I want to have a
really nice smooth look, I can just say Shade Smooth
and I will have this option. Now, what happens when I
do these with our cube? I'm going to say Add Cube. When I bring, is, bring this
to the right, right there. So right now this is
with the flat shading. But what if I hit Shade Smooth? Now we'll see these dark spots showing up and it doesn't
look really great. And that is because I have very sharp edges
that are 90 degrees. And that just makes it
impossible for blender to shade smoothly because
it's just very sharp. The edges are 90 degrees and therefore they are very sharp. We could change this. If I go here, if I go on the green triangle, these are gonna be our
object data properties. And if I go into normals, I could activate the
outer smooth tool, which will allow me
to smooth things. If they are, if they have an angle lower than 30,
it's going to be smooth. But if the angle is higher, it's not going to be smooth. So if I hit it
smooth on the cube, simply not gonna do anything
is going to keep it with a flat shading just because the angles are higher than 30%, I could change the
angle that I want. I usually work with
4544 sometimes, which I think are easy enough for shading, for smooth shading. But that's how you can
basically say that anything that is higher than this angle will not
be smooth it out, but anything lower than
that can be smooth it. So that's the first concept that I want you to understand.
24. Timeline: The second concept
that I want you to understand that we haven't
covered is the timeline. I have shown you where
the timeline is, but I haven't really
explained to you how to animate
things in Blender. Although we won't really
cover animation in this course because it's
not the purpose of it. I will show you just the
basics of how you can move objects in your 3D scene. I'm actually going to bring this window up just
so I can see better. This is going to be my timeline. In the timeline we
will be able to see some numbers right above. These numbers represent
the frames per seconds. Not the frames per second, but the frames that we're using. So remember that each second is usually made of 24 frames. Sometimes it can
be 30 or even 60, but Blender by default
uses 24 frames per second. So every 24 frames is going to represent
1 second in time. So that's why this
is our timeline. Right now we have 2250 frames. And I'm actually going
to start at frame one. So I'm going to place my
timeline on frame one. And this is where I'm going
to start my animation. This is going to be
my starting point. So to animate things, I will just select the object. Remember that any object
in Blender is animatable. It doesn't have to be a mesh. It can be a light, it
can be a camera, right? Can be anything you want to animate things to
create a keyframe. We will press I. When I press I on my keyboard, remember that he has to
be first on object mode. It cannot be on edit mode, because if I'm on Edit mode, I will probably do an inset. But if I'm on, on object mode, this is where I can
create a keyframe. So I press I and when I heat a, you're going to see
these menu right here. So you will see
there are a bunch of things that we will
be able to animate. Mostly are going to be
just the transformations, the usual transformations
like the location, the scaling, and the rotation. So you will have the
ability to choose what properties you want
to keyframe right here. Just for the purpose
of this video, I'm going to hit all
of them which are location, rotation, and scale. So this is the option
I'm going to be using. These is going to be
my starting point. Now, I will move my
timeline a little bit. Let's say to a 100
frames or maybe, maybe less, maybe 70 frames. And now I'm going to do some
transformations to my cube. So let's say I want to move
it maybe to this position. I want to scale it down. And I want to rotate it. So I just made a whole
transformations on my cube. But I haven't actually changed the things yet because I
haven't added a new keyframe. In order to keep this position in these
rotation and scaling, you need to add a new keyframe. So I'm gonna hit I again. And I'm gonna do the same
location, rotation and scale. When I do that, now I have a
new keyframe on my timeline. If I go from the beginning, you will see that if I hit play, my cube is going to move. It's gonna do the
rotation, the scaling, and the change of position. So you can start
doing more keyframes. Let's say if I bring in a 120 and I'm going to
move it around here, scale it up and then rotate
it a little bit more. I'm just doing randomly changes. And now I'm going
to heat Eigen to location, rotation and scale. And now if I, if I go back to the beginning and I hit play, it's gonna go to one side. And then he's gonna
go back really fast to the other side. So there are some concept of animations that I
won't really get into, like the timing and how
the frame should be. The keyframes should be decided. Where should I put them? All of that is more complex, but this is basically
how you can do animations on Blender. Just by heating I, you can, you can decide what property you want to
transform and change. And then it's going to do
the animation for you by pressing I in,
choosing that option. So that is basically
the animation. Now we're ready to start
off with our project.
25. Toy train: Locomotive: Alright, so now that we have covered most of the
Blender basics, we are ready to start
working with our project. In this case, we will be
building a toy train. You will be able to create
these model by using mostly primitive shapes and applying a little
bit of the modeling tools we've already seen. So let's get into it.
The first thing we gotta do is that we got to delete the objects that we don't
need in our scene right now. I'm going to select the
camera and the light, and I'm going to hit delete. So I don't have those on
lysine with these cube. I'm going to start building
the locomotive of my train. So this is going to work for our base where
everything will be located. So I'm going to
click on my cube. And I like to work with the orthographic
views just to have a better understanding of the
measurements of my model. So here I will just go into the side view
by pressing three. And here I want to scale my cube in the y-axis
just so it's more flat. So I'm going to hit S and Y
to scale it in the y-axis. And a cool thing that
you can also do here, remember, is that you can Till blunder how much
you want it to scale. So right now, I might hit
three to get the exact number. So I'm just going to hit
Enter and now I have my cube in its wider
on the y-axis. Now I want it to be
thinner as well. So I can also do it from here,
from the transformations. And I want it to
be exactly half. So I'm going to put
0.5 in the c-axis, just so it's going
to be thinner. That's going to mainly
be my base of the train. Now let's build the cylinder, which is iconic for trains. So I'm just going to
add a new object. And I'm going to
select the cylinder. One thing that you've got
to keep in mind here. Remember that you
will always have this menu popup down here. And you can choose how
many vertices you want, you want, and you can
change the radius to death. And there's one thing that
I believe it's important, and it's the cup
field types are right now this is an NGO and
what that means is that the caps of my
cylinder have 32 vertices. Remember that we don't
like working with that. We prefer to have faces
of four vertices only. So we can change this option to something
that says triangle fan. So you can change it to
not have caps at all. Having an angle, which
is the option that we have right now, or
having triangle. So I'm gonna show you
exactly how this looks. I'm going to rotate these in the y-axis just so you can see a little bit what I'm referring
to right now, these 0s. And then going, and if
you go into edit mode, you will see that these phase
has exactly 32 vertices. That is something that I
personally don't like to have. So I'm just going
to delete that. I'm going to add a new cylinder, and instead I'm going to
choose the triangle fan. And you will see what these has. Again, want to rotate it in the y-axis so that you can see. Now you see that he has
divided my cab into triangles. So having tries is not as
bad as having an guns. That's something that I
personally like to have. So now, instead of having
one phase of 32 vertices, we will have 32 triangles. So this creates more geometry. But I think it's more
correct to work like that. Once again, I'm just
going to delete this and I'm going to add
the right cylinder. Again. I'm going to keep it with a triangle fan and
I want to rotate it so it faces forward
instead of facing upwards. So what can I do? I can just rotate
it in the x-axis. I'm going to rotate
it 90 degrees. And now I have my
cylinder facing the way supposed to here. I can just move this up
wherever I think it's okay. And I'm going to also
scale this in the y-axis. Might keep it at maybe 1.9. I think it's okay. Let's see how this is looking. I'm going to this a
little bit to the back. Just a tiny bit. So it's not right at
the edge of my base. I think this is
looking quite okay. I might want the cabin to be
maybe a little bit wider. The base, I'm sorry,
a little bit wider. So I'm going to maybe
put it at 1.2 or so. It's a little bit
wider than that. And that's it. We have our cabin and sorry, we have the locomotive
and we have the base. So the first thing we gotta do, because we're going
to start adding more and more objects that
we should rename this. This one right here. I'm going to call it
locomotive cylinder. Remember, I like to keep, Do not put spaces but
instead putting underscores. If I want to rename my things, here is going to
be the locomotive. This is going to be the base. Just so I keep track
of all of my objects. Now I'm going to add the main
copying of the locomotive. So I'm going to add a new cube. I'm going to bring it up here. I think the measurement
is quite a ride. Maybe. Maybe we can make it
a little bit wider. Let's see if I put this at 1.1. Yeah, let's do that in this, just move it here. Actually, I'm going to
keep this at the front. So it's right, three points. So my measurement
of both things is gonna be three,
just like my base. Now, these I wanted
to scale it up just because it needs to be taller. So I'm going to scale
it in the c-axis. Something like, let's see. Let's put it at 1.7. And now
I'm going to put it upward. So I'm going to press G
and C just to drag it up. And let's leave it
somewhere around there. So we have the basic
shape of our train. The last thing I
want to do before we continue Is that I want to
change the shape of my base. I don't like that. It's
completely flat at the front. Usually they have a
diagonal at the front. So to do that, we need to change the topology and the
geometry inside edit mode. I'm going to hit Tab
to go into edit mode. And I'm actually going to
select the edges up here. So I can select the edge that is going to be
moved to the front. So I'm gonna select
this edge down here. Again, I'm going to go
to the side view and I'm going to move it to the front. I'm going to press G and Y. And now I can move it a
little bit like that. So now I changed a little
bit of how the shape is looking without affecting
the geometry much. In lastly, we need
to rename this. So this is gonna
be the locomotive. This is gonna be the main cabin.
26. Toy train: Locomotive pieces: So before we continue
making up more things, we actually need
to save our file. This is very important. So I'm gonna go under File, Save or Save As I referred to. Click on Save as. And this is going
to be called train. And I'm going to
call it version one, just so I can keep track of all of the progress
that I'm doing. I really recommend that
you create versions. So the next time you save, you probably want to
save a version two. So just if you want to go
back to a certain point, you have the access to, I'm just going to say
train version one, save as, and I have
saved my file. Alright, so let's continue
working with our locomotive. So I'm going to create the
roof of my main cabin. To do that, I'm gonna go to the side view by pressing three. And I'm actually
going to duplicate this object right here just
because I want to remain, to keep the position
remains the same. So now what I'm gonna
do is I'm going to duplicate it by
pressing Shift D, and I'm going to move it upward. So without moving my mouse yet, I'm going to press
Z to move it up. So I'm going to move it up
Somewhere around there. And now I'm actually
going to scale it down so it's a way thinner
than what it is right now. So I'm going to press S and
going to press Z again. Just so I can make it thinner
somewhere around there. I think that's quite alright. Now I want it to be wider. In order to do that,
I'm actually going to scale it proportionally. So I'm just going to press
S and I'm going to scale it up somewhere around there. I think that's quite alright. And I'm going to move it
down cypress G and Z again just so I can bring it down just on the top
of my main cabin. Now I actually want to make these part at the front
a little bit larger. So I'm going to scale AT the
y-axis a little bit more. So x and y somewhere
around there. And now I'm going to
move it to the front. And now I have a roof that
it's longer on the front. So now that we have
that, let's rename it. So this is going to be the roof. And now let's
create the steamer. I don't know if that's
the right name, but the thing that's goes up here where the
theme is released. So we're going to add
a cone to do that. So let's select the cone. And without moving either
doing anything to it yet, we're gonna do some changes on the menu that we
have on our left. If you don't have it opened up, you might have it like this. So you can just make it bigger
with the row on the left. Here, we're going to
change a couple of things. So the first one is that we're
going to change the cap, should be a triangle
fan as well, just like we did
with the cylinder. So we don't have that phase
with so many vertices. Now let's change the
dimensions of it. So right now, our bottom cap has one meter wide and
the tub has none. It's in zeros. So that basically means
heats up perfect cone. Actually want to
have some sort of flat surface on the top. So I'm going to make this
one bigger maybe at 0.2. I think that's quite alright. But for the bottom, I actually want it to
be less, less wide. So let's put this on maybe 0.7. I think that's okay. Maybe
a little bit less 0.65. Okay, I think that's
quite alright. Now we gotta inverted. So to do that, we're
going to rotate it in the y-axis a 180 degrees, just so it's facing
the other way. Now with that done, I can select it and
I'm going to bring it upwards just so it's
somewhere around here. I'm actually going
to scale it down. I think he's way too big. I actually want to
keep it around these high so I can just put it here where I want it and then I
can move it to it to a friend just so I know he has the
same height as my main cabin. Now actually want to create
another part on the top that goes flat to the, to the top. So to do that, I'm actually going to go
into edit mode because I'm actually going to change
it from the cone itself. So I'm gonna go into edit mode, and I got to select the faces
that are right at the top. So to do that, I'm
actually going to do something that we haven't
really talked about, which is the X-ray mode. Remember that we had different
render modes up here, but we didn't talk to the one
that was right to the left, which is this one right here. This is called the X-ray mode. And basically here I can
see the things that are on the back or that might not be visible to me at the moment. So I'm going to press there. And you will see that everything looks transparent right now. And that will allow me to select the faces that
I actually need. So first I'm going to
select the faces up here. Just isolate faces and edges. And now you will see
that we have a couple of points that are right in
the middle of each face. So that means that
I can actually just drag and select the ones
that are on the top. Just because I'm not selecting the faces that are
on the middle. And that's how I select the top. Now I'm going to
disable the X-ray mode just because I don't
need it anymore. I know that I have my top faces selected and now I'm
going to do an extrusion. Remember, how do you extrude? You can do it with the tools on the left or we can press E. I'm gonna do that. I'm just going to press E and it's going to extrude upwards. So somewhere around,
maybe that's too thick. So something like that. Um, and just because I might want it to be
a little bit higher, I can actually, I'm actually going to select
these faces right here. So again, I'm going to select
the X-ray, X-ray mode. I'm going to select all of these and I'm going to
bring them to the top, G and C to change the position. Somewhere around that. I think that's quite alright. Now that's disabled
the X-ray mode again. Now I have the steamer
that goes up here. I think that looks
quite alright. We basically have
the main shape done. We are missing our wheels. But one thing that
I want to do before we finish this lesson is that we actually need to do this
moving of our objects. So right now I can
see all of the phases that are making up my
cylinder and a cone, and it doesn't look
quite alright. So remember, how
did we change that? We just right-click on the
object and say Shade Smooth. So I'm going to select
Shade Smooth for both. But as you can
see, we again have those dark spots
that we don't like. So remember that to do that, we go up here on the properties panel
under the green triangle. And then we select normals and we're going
to do and now to smooth. So basically now the edges
are going to remain sharp. But the phases that
are making the curve, they're gonna be smooth. And the same for the cone
I'm going to select on that. Go to Normals, out is smooth and now I have a better
shape right there. So that's it. Then the next lesson,
let's do the wheels.
27. Toy train: Wheels: Alright, so let's finish the locomotive by
making the whales. And maybe I want
to add a thing on the front of my cylinder. So let's first add the, the thing that I want to add
right here in the front. Actually want to
duplicate this cylinder. I'm going to press Shift and I'm going to move
it to the front. So I just press Y to
bring it to the front. Now from there I just
want to scale it down and make it way flatter. So to do that, Just
press S and Y. I can flatten it out
Somewhere around there. And now I'm going
to bring this to the back just so it stays right in the
middle of my cylinder. And that's just like a tiny
thing that I wanted to add. Now let's do the wheels for the wheels is going
to be the same. I'm going to add a new
cylinder right here. I actually wanted to face to
the right or to the sites. So I go to the front
view just like I did by pressing one in here, I'm going to change the
rotation of my cylinder, so it's going to
be in the y-axis. I'm going to rotate
it 90 degrees. And now we're
displacing the size. Now from here, I
want to scale these down and I want to
make it flat as well. So I press S and X just to make it flat,
something like that. I'm going to move
it to the side. So G and X to bring
it to the side. And now let's go to the
side view and see if that measurement is okay. I think it's quite alright. Can make it a little bit
larger, just a tiny bit. Now I'm going to bring
it to where I wanted to place it somewhere around here. Let's see, in the front, it needs to be really
close to my to my base. I'm going to move
it a little bit more just so it's
barely touching it. And now these, I also want to smooth it out before
I duplicate it. So let's do that. The outers move
on to Properties. And I'm going to say
Shade Smooth just so the app orders are
smooth it out. Now let's duplicate this because I want to
have three wheels. So let's duplicate this shape. The, Now let's move
it to the back. Press Y, and I'm going to put
it somewhere around here. Now. I want to make the
next we'll way bigger. So I'm going to
duplicate this again, move it to the side. And here I actually
want to scale it up somewhere like that. And just because these is
not touching the floor, this is like our invisible
floor right here. You can see the grid to
kinda see where you want to. We want the floor to be. So I'm going to bring it
to the top a little bit, just hire a little bit higher. And I think that's
quite alright. So now I have that large wheel. Okay, so now we
want to duplicate this just because we have we want to have it on the
other side as well. So I'm just going to
go to the front view. I'm going to select the
objects that are my wheels. So the three of them in
now I'm going to press Shift D and I'm going to
move them to the side. So somewhere around there. I think that's quite alright. So now I also have my wheels. Okay, I think the
locomotive is mostly done. On the next lesson,
we're going to build one wagon and that's
gonna be our train. That's going to be all of it. So I'll see you then.
28. Toy train: Wagon: Remember that we need to rename all of our optics right
now we have a bunch of cylinders and I don't
really know which one each. So we need to change that. We need to go and rename all of our objects that we just
created for the wheels. This is actually going
to be a locomotive. I'm going to say We'll one. And for all of
them and I'm going to keep the same naming. So let's do these
ones should be wheel to naturally this is going
to be on the right side. So I'm gonna say, I'm gonna put an R at the end. Just so I know that
this is the ones, these are the ones that
are on the right side. Let's do the third
one is going to be wheel three and R for, right. Now for the others, we're
going to do exactly the same. But he's got to be on the left. I'm sorry. This one right here on the left, and then the last one as well. So underscore L and I forgot
to change the numbers. So yeah, we had a mistake here. This is going to be wheel two. And on the left,
there we have it. We have left and right, left
and right, left and right. Now for the top, I'm going to actually name it. I don't know cylinder front. I don't know how to
name these things, but as long as you
know what they are, That's the important thing. Now let's build the
vegan food for dividing. We're going to go into the side view and we're going to create
first the base as well. So let's just add a new cube. I'm going to move
it to the back. And this is going to be, this is going to measure
your 0.5 on the height. Remember that we did
that for the first one. And we can just do it
as big as we want. I'm just going to do
something like that. It doesn't have to be huge. We get a little bit to the back. Now I want to duplicate
these as well. So first, remember
that I mentioned. So they need to be, so this
is actually 1 too wide, so these should be 1.2 as well. I'm going to do that. Now that we have that list, just duplicate the cube, so I have the vegan, so let's just press shift D, move it to the top. I'm going to scale it here. Somewhere around. There. Actually needs to be smaller
than the locomotive. I'm going to place
it right on the top. And this doesn't
need to be that big, so he's gonna be just one. So he's like ride on
the top of the base. And that's about it. Let's just, the vacuum is
going to be really simple. That's mainly it. Maybe I want to scale
it a little bit less on the y-axis just so the base
is popping up a little bit. I think that's okay
for debugging. Now let's add a roof to it. So I'm going to duplicate
this object once again, bring it to the top. And here I'm going
to scale it down. So it's way thinner. I want it to be similar to these roof right here so I
can actually measure it. Hold it a bit, it's
a little bit tinier, so let's just scale it up
somewhere around there. And now let's bring
it right at the top. Let's scale it in the
y-axis a little bit. And also on the x-axis as an X among the
top view right now. It's a little bit wider
than the Bagging itself. So that's mainly it. Now let's add the wheels. First. Let's rename all of our objects. So this is gonna
be our wagon base. This is gonna be wagon and I'm just going
to call it cabin. Is that okay? Yep. And then the roof so wagon roof. There we go. So now that we have this, this is almost done. We only need more. We'll duplicate the ones
that we had at the front. I'm going to duplicate
this right here. I'm actually going to duplicate
both at the same time. Just wait Cesar for me too. I don't have to
duplicate it once again. So I'm just going
to press shift D, move them to the back
somewhere around here. I think that's quite alright. Let's rename those. So this is not a, not
gonna be locomotive, But this is gonna be back
and we'll one on the right. And then the other one
is going to be again, wagon wheel, one on the left. So let's just rename
those like that. And now again, let's
select both of them. And I'm going to
duplicate it once more just to make
the second wheel so Shift T, G and Y. And somewhere around
there, That's okay. And let's rename those as well. This is gonna be well too. So let's keep those like that. And then the other one
will be, will chew. Okay, We're almost done. And I think that we have the
main shape of our train. There are a couple of
things that we are missing and we're gonna
be done with those. So I actually want to have
some sort of Windows. So we're going to do a window to the side here and some
windows on our vegan as well. So to do that, remember
that we have seen some tools that will allow us to manipulate the geometry inside. So the first thing we're
gonna do is gonna be the the main cabin. We're gonna go into edit mode. And I'm actually going
to select both phases, the phases that are on
the side with shift. Remember that we
select we shift. And now I'm gonna
go to a side view again and I'm going
to do an inset. So remember that
to do an insert, we press I and I'm
going to scale it down. So we create some sort
of inset right here. I'm going to focus on how
wide I want it to be. The window should be
somewhere around there. Now I'm going to click. And because I have both
faces selected, selected, I can now do some
transformations to those phases. First thing that I'm
going to do is I want to bring them up. So I'm going to press G
and Z to bring them up. And I want it to be a
little bit less tall, so I'm going to scale
them in the z-axis again. So I'm going to press S and z to make it somewhere
like more squared, so something like that. And I can actually bring it a
little bit more to the top. I have some sort of
window right there. Now with those faces created, I can actually make a whole. So to do that, I'm going
to select this face. And I'm going to
do an extrusion, so just press E and I'm
going to bring it in. It doesn't matter how much. And I'm gonna do the same
for the other window. Select it risky, and I'm
going to bring it in. So now I've made some sort
of window in my cabin. We're going to do the
same for debugging. So because I want to add
more windows than just one, doing an inset won't
really do the job. So here we're going to
use the loop cut tool. So I'm gonna go into edit mode. And To Do loop cuts. Remember that we can
press Control R. And that way, if I go
near one of the edges, I'm going to see that
yellow line up here. I actually want to have
more than one cut. So if I just curl up, I can create as many
Lipchitz as I want. I want to have three windows. So I think by having
these amounts of edges will do because I will have three
spaces right there. So I click and now I'm going to hit right-click just so
they are in the center, so click and then right-click and they will be placed
right in the middle. Now, lastly, we're gonna do the ones that are gonna
be across my vegan, so I can actually have windows. So I'm going to create
two more loop, gets. One up here. So I just clicked and
select it and move it so I can choose where I
want to look good to be. Let's do a second one around
there. And that's about it. Now, let's create the
extrusions that we need. So I'm going to
select the faces. So gotta go up here
and select faces. You're going to select
these three right here. And I'm going to do
an extrusion inside. And now let's do the
same on the other side, Let's select these three will
create an extrusion inside. So now I have some sort
of windows on my bag. And lastly, we're going
to need something to connect these two pieces. So let's just add one last cube, going to make it really small. And maybe I want it to
be something like that. More weight in the y-axis. Maybe that should be
a little bit flatter. So let's just scale
it in the z-axis. And a little bit,
something like that. We're going to need
it to be huge. And that's gonna be
the piece that is connecting both of my things. So we're done with our
first model in Blender. Now in the next lesson, I just wanted to add some materials, so we gave some
color to our train. Your model is done. Remember that we need
to rename everything, just makes sure that everything
is renamed as it should. And that's about it. This is our first model.
29. Toy train: Materials: Alright guys, so now that
we have our model ready, we can start adding
materials to it. So it looks colorful and it looks prettier than
what we have right now. Remember that to add
individualized materials, you have to go up here. Right now we are on
the solid mode option. We have to go into
the materials option, which is this one right here. And right now you will see
that our train looks white. It just because he has the base material
blender has by default. So we're going to start
adding color to our train. And to do that, we have
to create new materials. Because these cube was
the original one that we had the lender
brought by default. The one that is the base. If I go to the materials tab
on the properties panel, which is going to be
this icon right here, the one that is a red sphere. If I click on that,
I will see that it already has a material
that it's called material. These e's only applied
on this cube right now. If I change it, you
will see that it will only affect that cube. And that's because that's the
default cube that we had. So I want to keep the
base just like a wooden, like a soft wood color under the materials go to
the base color in here, you'll be able to change the
material however you want, the color of our material. And you can also
change the levels of my hue and the brightness
of our colors. So I want to go
somewhere around here. Like a light brown,
somewhere like that. I think that's okay. I also want to apply
it to my other base, which is the one on the back. Because I want to add
the same material. I can just look into this list. If I go to this
list on the left, you will see that now I have
a material called material, which was the default one. So if I select that one, that material is going to be
applied to my base as well. I also want to apply
for the connector, so I'm just going to
select the same material. Now I'll rename this. And I'm just going to call
it like a light brown. I know that's that color. Now let's start adding
new materials to our other objects in the
other parts of the train. So for the cylinder, I think I want to go
with a reddish color. So I'm going to
create a new material because if I select this one, I will just have the
same brown color that I have on my base. And I want to have
a different color. So I'm going to create
a new color by pressing this button right
here that says new. I can add a new color and I
can change the color itself. So I'm gonna go with a red, pinkish red,
something like that. I think that's, that
looks quite alright. And I'm just going
to call these red. Now, if I wanted to change
the color, for example, of the wooden like brown color, I could I could just change it and it would immediately change all of the pieces that have
that material assigned. So I'm going to
keep it like that. I actually want to
change a little bit to something like
anything like that. I don't know if
something like that, maybe that's that looks
a little bit better. Alright, So now let's start
adding more materials. So let's create a new
material for the steamer. So I'm going to create
a new material. This time I want to
do something like yellow and I can
change the color. So now you might be wondering, what are all of these
properties that are down here? Because if you can see, we're only changing
the base color, but there are so many
different properties that we can manipulate
on our materials. This is way more complex that I intend to teach you right now, just because there
are so many things you would need to understand. For now, we're only
going to focus on changing the color
of our materials, the rest of the properties. We're going to leave
them as they are, so don't worry about those yet. I just want to create colors, different colors for my train. So now that I created
that yellow color, I might want to apply that same color to
this piece right here. So I'm just going to select the same yellow material and assign it to the
bees right here. And let's continue
for the main cabin. Let's create a new material. Let's see, maybe
something bluish. Oops. Let's see something like that. I think I like that color. And then for the roof, let's create a new, oh, I
forgot to rename these. So this is gonna
be allied a blue. Then for this one I want
to have a dark blue color. So let's create a new material. Actually want to go towards
like the turquoise side, but don't want to make it dark. Let's see. Maybe that's too dark. I think that's quite alright. This is gonna be my dark blue. Then I think we
have enough colors. We have four colors and I don't think we should
add more to that. So I'm just going to assign the materials that
we already have to the rest of the
pieces for the wagon. I might do the dark
blue for the roof. I could use the pink or yellow. Let's let's use the red one. Now for the wheels, Let's just do it randomly. So maybe light blue
here, dark blue here. Maybe I could add
some yellow in here. And then let's with
the red and then the light blue. Let's see. And we're gonna do the
same on the other side. So we're going to
choose the light blue, then goes to dark blue, then the yellow than the red. And lastly, a light blue again. That's it. So that's how you
create and you add materials to any
object in general, there are more
things to materials. That's a whole other world. There are so many things you
could learn about materials, but these are the basics. You know how to add materials to any
object on your scene, how to reuse them, how to change them,
how to rename them. And it's pretty basic, so
we have a train right now. You could also visualize how VCs looking in with
different lighting. So remember that if I have the
material selected up here, and if I click on this arrow, I will have these sphere. We'd like an image in this. This is called an HDRI. We won't get into this, but you could click on it and
you could change it. So basically this will
change the lighting so I can see how my material is reacting to different
types of lighting. So if I change it to this, the materials are going to
look a little bit brighter. If I put it with like a night scene was going to look like this and you can see how your materials are behaving
with different lighting. But for now, I'm only going
to keep it with the full one, which is the third sphere. And this is going
to be my materials.
30. Toy train: Lighting: The train is basically done, the model is ready. We have added materials to it. And there's not
really anything else that we could add to
our train for now. But if we want to
take an image out, if we want to render this out, we need to follow
some extra steps in order to get a final
image of final result. Because right now the
model is inside Blender, but if I want to
show these outside, maybe get an image of it. I wouldn't be able to do it
unless I do a render of it. So the first thing I wanna do that I want to name
these collection train. Just so I know that inside this collection is
going to be all of the meshes that are making up my train and I won't
really touch that. I'm going to leave it as it is. But now I need to add
some extra optics in order to get
these final image. So if I go to the
render view up here, remember that we're
in the material view. But if I go on the
render option, you will notice that
it looks very dark, almost as if it was
like very flat. There's not really
any deaf to it. So the reason why is because arsine doesn't have currently any light and we need to add light in order to
see our object. Now, what's
illuminating my train is under the Environment tab. Remember that is
these were red world. That's the Environment tab. Like the world properties. Right now, what's illuminating lysine is the background
color, which is gray. If I change this, this is going to
affect how it looks. But before we actually do a render or decide what
type of render to do, we got to choose
the render engine. So if I go to the first step, actually the second tab, which is like this
camera right here, you will see that the
render engine that I have at the moment
is called EV. These render engine is
actually a real-time renderer, which means that everything
that I do will be rendered at the exact
moment as I do the change. But I actually want to
change this for now. There is another
option called cycles. And what this does is that
it calculates the render. More times like the
bouncing lights. There's a whole thing inside rendering, which
I won't get into. But if you can see it changes, if I bring it back to EV, look, it looks very different than if I put it with
tackles, with cycles. It looks more as the real life as actually
real life works. If you have a GPU by any change, you can change it
here right now, I'm working with the CPO. I can change it to the GPU. And if you have a good GPU, you probably will be much
faster than if you do it with a CPU unless you have a
really good computer. But actually, what we're working
with doesn't really need much because it's very basic
and we don't need many. Like a great computer
in order to get this, so don't worry about that. So now that we have that, we need to start
adding some lights. So I'm gonna go back into the actual until the solid mode. So now I see just like a gray model and I'm
going to add a light. So the light that
I'm going to add, I'm going to press Shift a
and I'm gonna go to light, and I'm going to
select the sunlight. This is gonna be at direct
like basically will eliminate everything
that's around. It acts as the sun. So basically, if you
think about the sun, it illuminates anything without having a range of
where the light goes, it will eliminate everything. So we're going to
choose the sun. There are other types
of lights bark. This is the one that
we're gonna be using. And I'm actually going to move it somewhere where I can see it. It doesn't really
affect what it is. What it's going to
affect is the rotation. So right now, if I look at the shadows of
my object right here, are gonna be directly
to the floor. And it's gonna be like the
light is coming right from above from the top of my train. But I'm actually going to
rotate this a little bit in the front view to the side, just so I get a nice
shadow to the side. And then also if I go
into the side view, I'm going to rotate this into
the bag just a tiny bit. Just so it's coming
from a 45-degree angle. If you see it from the front, this is almost 45-degree. So actually I might change this a little
bit, just about there. So now that I have a light, and if I go into
the render view, you will see that now I
get some nice shadows and that it looks much
better than what I had. Should actually rotate
this a little bit more just so that I get
some nice looking shadows. Now, the next step that we need to do is that I
actually like to use the environment right here
as part of my lighting. So right now I have these
gray color and that's the look that I'm having like
a like some gray shadows. If I bring this up. I'd like to keep it very high. And I'm actually going
to change the color to a bluish color. And the string is going to be a little bit less, maybe 0.8. And then the light, I'm gonna change this
to be a little bit. So I'm gonna go under the
properties of my light, which is this light
bulb right here. I'm going to change the color
to something more warm. Not too much you. So I have a good contrast of the environment that gives me some cool tones and
the light is going to bring me some warm tones. And just like that,
I already have a good lighting for my training. Doesn't need much than this. The only thing is
that if you want to change the environment,
you can do so. There's one way I can
keep it like it is, and just keep these white
background, which is alright. But I could do two more things. One is that I don't want
to have that background. So I'm going to go to the World Environment and I'm going to change the
ray visibility. And I'm going to disable the camera option just
so that I don't see it. So I still have
the lighting from the background from
that environment, but I'm not gonna
be able to see it. That's the first thing
that we're gonna do in. Then we're going
to add a four just because right now the
seas casting shadows, but I'm not able to see them because I
don't have a floor, so I would need to create one. I'm gonna go back
to my solid view on the side view and I'm
going to add a plane. So I'm gonna go to Mesh and
I'm going to add a plane. When I do that, you will see these lines right here and
that's going to be my plane. So I'm just going
to scale this up. And I'm going to
scale it more and I'm going to move it right
where I need it. So I will be putting it
right under my wheels. So now I have this, this is my plane. If I look into the render view, you will see that
now I'm casting some shadows onto my floor, which is quite alright,
especially down here. I will see that I have
some shadows going on. And you could probably look it up from here
and you will see the shadow or you can
just see it from here and the shadow is
going to be there. So that's about it. That's all the things
you need to do. Now the last thing
we need that it's not adding any more elements
except for a camera. So right now we're
able to see the train and we're able to
see everything just because we have the viewport. But when I want to
render this out, I won't really have a camera. In the next video, I'm going to show you exactly how to put a camera and how to move it around in order to
get the right view. And just the framing that
you'd want for your picture. And we're also going to see how to maybe expand this floor. Maybe put a wall
behind so we can have a better background
for our train. So I'll see you guys then.
31. Toy train: Camera: Okay guys, so now we're going
to start adding the camera. So we do have an option
of rendering this out. I forgot to change the
position of my lied and the plane because I
don't want them to have to be in the collection. Coltrane, I want to have a different collection
and keep my optics there. So I'm actually going
to create a new collection and I'm
going to name these extra just because I
won't have many lights, were many cameras or
anything like that. So I'm just going to keep all of the other objects under
the extra collection. So now I can select both
the plane and the sun, which are my light
and the floor. And I'm going to move them
down to the extra collection. I just move them and now
they're under these collection. I'm going to collapse
the train collection. I'm going to rename the plane as a floor in the center. I'm
going to keep it like that. I know that's my light. Now let's add a camera. So I'm going to press
Shift day and I'm gonna go into camera down here. So I'm not able
to see right now, but it's right in the center. So I'm actually going to go into the solid mode just because the render mode takes up a lot of memory
from my computer. It's better for me
to work like this. I know I have my
camera selected. I'm just going to
move with, with g. And you will see it right here. This is where my camera is. How do I see what's
inside my camera? Because right now I only see an object right
there floating. But I don't really know what
the camera is looking at. The shortcut to see what's inside the camera,
it's going to be 0. If I press 0 on my numpad, I will be able to go
inside my camera and I will be able to see what
the camera is looking at. So that's very important. Now, how do I move this around? Well, there are two options. The first one is going to be by just having another window. So I'm actually going
to add a new window. Remember that you can create
as many windows as you wish. So I'm going to add a
new window right here. And this is where I'm going
to look at the camera. But here I'm gonna go
outside the camera, writing the perspective view. And I will be able to move
this with a transformation. So I'm just going to bring
the transformation handles. And I can move this and I can see how my camera is,
where it's looking at. So I'm just going to
maybe move this down. Now if I want to rotate it, I can do so a little bit. And then again, I'm going
to move this to the ride, maybe push it a little
bit to the bag. There are so many ways you can manipulate these camera around just to get a nice framing. So that is one option
of framing your camera. Now, the other option that we have is that we can actually manipulate and
position our camera from within the camera. So there's a shortcut for it, which is Shift, the accent
grave key on your keyboard. I don't have access to that key. And you might find
it difficult to find because it's not a very
common key to use. So what I like to
do is I like to change the shortcut
for my camera. If I go to Edit under Preferences and I
go to the key map. Down here you will
see the chemo option. You will see all of
these showing up. You will usually be like this. So here if you go under 3D view, on their 3D view, again, 3D view global, you
will be able to change the manipulation
for your camera. So I'm going to look
for something called, Let's go down very quickly. It's called the view
navigation, walk fly. So I like to change
my key to shift f. So how do you change that? It's very easy. You will
probably be collapsed like this. You just hit on the
key right here. So you will see all of the
shortcuts are here and you can actually change any
shortcut that you wish. But right now I'm
going to change the view navigation walk fly. I'm going to click
on the Shift F, and it's going to ask me to
do a command of my keywords. So I'm going to press Shift F just because there
was the previous, the previous circuit that we use the blender on
previous versions. So I got used to it and I
like to work with Shift F. And that way I just changed the the shortcut to be able to manipulate my my
keyboard and my camera. So now that I have that, if I click on my camera
and I press Shift F, I will be able to move my mouse. If I move it, it's going
to move my camera. So I'm basically doing like
we do in the viewport. And there are some ways
that you can change the position because with the
mouse you can only rotate, as you can see on your right. I'm not really changing the
position of the camera. I'm only rotating it. So how do I change the position? Well, if you're a gamer, if you've ever played games, it's pretty much how you move
around with your keyboard. You're going to use the WQ a is the E part
of your keyboard, which is on your top left. But if you're not
familiar with games, don't worry, I'll
explain it to you. So basically, you have the first six letters on your keyboard or going
to be q WEA is the, if you have an English keyboard and you will be able to move
around with these keys. So basically, if I press Q, I'm going to go down. If I press E, I'm gonna go up. Now, if I press a, I'm gonna go to the left. If I press V, I'm going
to go to the right. And if I press W, I'm going to go in. And if I press S, I'm going to zoom out. So those are the keys
that you have available to frame your camera. I know this might be a little complicated if you prefer
to do the other method, eat so right by, you know, you can do it as well
with your keyboard. So I'm gonna go maybe a
little bit farther away. I'm going to go
down a little bit. Maybe that's the
framing that I want. I think that's quite alright. So I'm gonna, when
you're ready and you are happy with your framing, you just click in, the camera is going
to stay there. So those are the two options. You can do it with a two views or you can do
it inside your camera. Now that I have my framing, I'm actually going to close this window right here and
I'm gonna stay on my camera. And the one thing that
I wanna do is I want to rotate this plane a little bit so that it faces like perpendicular to my camera. So I'm going to rotate this
Somewhere around that. So you see the floor, the horizon is right
behind my camera. Now with that, I want
to add more geometry on light plane to create
some sort of wall. So to do that, I'm going
to go into edit mode. I'm going to select
the edge at the end. So that's gonna be the edge
I'm going to be selecting. And basically from here, these are the cases
where you can do an extrusion out of an edge instead of draining out of a face with these edge selected, I'm going to press E
to make an extrusion. And I'm going to bring some
sort of wool going up. So that's the thing
that I'm gonna do. And lastly, because
I don't want to have these sharp edge at the end, I'm going to select the
edge and I'm doing, I'm going to do available to it. Remember that we've
covered bevel already. So I'm going to press
Control V to create a bevel. And I'm going to make it probably with more
edges, something like that. So it has a curvier
end to my wall. And I like that. I actually
want to smooth this out. So I'm going to right-click
and say Shade Smooth. And that way I have some sort of infinite background.
I'm in here. I can also add any
material that's, let's see how this is looking. If I go under the Render View, you will see that now I have some sort of
infinite background. If I want to change the color, I can add a new material
to it because this is just an object like the ones
that we had on the train. So I can create a new material
called these background. I can change the color
however I wanted. So this is going to change. This is also affecting
the lighting on my train. If you don't want
these to happen, you could go on
your object panel, on your object tab, which is the orange square. If you go to Viewport Display, I actually know VC ability. You will be able to say that it's only visible
for the camera. But I don't want any
of the other options. So I'm going to disable
the volume scattering, the transmission
glossy diffused and even the shadow
because I don't want it to cast any shadow. And then it's only going to
be visible for my camera. That way it won't affect
the lighting of my train. So that way you can change
the material however you want it with a color that
you wish to have. And that's basically it. Once you're done with it, we're gonna go into
the rendering part. So let's look into that.
32. Toy train: Render and final image: Alright, so the last
part of our course is going to be rendering these out. So now that we have
already seen ready to go, the last thing we need to
do is to render our image. So how do we do that? The first thing is
that we need to choose the right renderer that
we'd already done. So under the Render properties, which is these camera icon, you can change to have a
weight cycles or with EV. If you do it with
EV is gonna be way much faster than if
we do it with cycles. If you prefer to do it with EV, it's not going to
affect anything or materials are going
to remain the same so you don't have
to worry about that. It's going to be much quicker, but the result might
be less realistic. In a way. I know we haven't really
gone deep into materials. So this still looks
very 3D CG made. But you can choose to work with cycles or
with EB. It's up to you. I will choose cycles just
because I want to get that right shadowing in
the floor and all of that, that only cycles can get. So now that we
have the selected, we're gonna do
change our sampling. So the sampling is how many times the
computer is going to process each part of my 3D view port and
place it into an image. So right now, our viewport has
a 1024 samples at maximum. And the render,
it's actually 4096, which I think is way too high for the image that
we have right here. We don't need that many samples. I'm going to lower these two, maybe 500, which I
still think it's a lot. But we're gonna
keep it like that. If you want to have less to make it quicker,
you can do so. But I think anything above 500 for these cases not
really do anything. It's not gonna do much. So we won't really
tell the difference. That's it. We're going to
need to change the sampling. So I'm going to keep it at 500. And the other thing
that we need to do that we're going to go
under the printer, right here, the printer icon, which are the output properties. So here we're going to be able
to change the resolution. And right now we
have it at ten ADP, which means he's
1920 pixels wide and 10,080 pixels in the height. So if you want to change this, you can remember that
the proportion and the aspect ratio will
change right now, where using us 16 by nine ratio, which is the standard one. So I suggest you didn't
change the ratio, but if you want to make
these bigger or smaller, you can change the amount
of pixels per image. You can also change
the percentage. If you want to make
you the health, it's going to keep
the aspect ratio, but the dimensions
are gonna be smaller. I'm going to keep it
at a 100 and I think this resolution is okay for us. So I'm going to
leave it as it is. The last thing is that you
can change the output word. This is going to be located
so you can change and put it in a specific folder
of your choice. Then you can also
change the file format. Right now we're using PNGs, but you can export these as
a JPEG or at BNP or target, other different options
available for us. I think that a PNG
for now it's okay. A PNG or JPEG is going to
work okay for our case. And having that done, we're ready to render. So once we have
everything settled, we're gonna go on the top
menu under the Render tab. And we're going to
see the first option says rendered image, the shirt good is going to be F2 if you wanna do it
with your keyboard. But you can also find
it under domain you. Because this is not animated. We're only going to
export an image. But if you had an animation, you could do it with
Render Animation and it would explode frame-by-frame. Right now we only
need the first one which is rendered image. So when I click on that, I will see that my
image starts rendering. Now, if you look with detail, you will see that we see some
sort of noise going around. And that's why we
need more samples. Because right now if you see
my sampling, it's at 22. So every time my computer
process the image, it's going to start
reducing these type of noise that it's usually made. Ended up peers because of
shadowing or lights or the materials that are
so many factors that might affect and
create more noise. But for now I'm going to
just keep it like that. I'm going to wait until
these goes up to 500. And that's when I know that my render is going
to be complete. Alright, so now that
our render is done, I know it because it's
gone already to 500. Me tells me how much you
took that basically now, I have these image available, so what can I do with it? Well, basically I can go to
Image and I could save it. Or I could just copied
or create a new image. There are so many
things I can do from the render edit editor, but I'm just going to save
it and that's about it. This is going to
be my final train. You can name it however you
wish. And that's about it. You save the image and
you're good to go. So that's it, guys. This is the end of the course. I hope you've really learned a lot that you understand
the basics of Blender. Now, you're able
to start creating your own work with
these powerful so far. I'm so proud of you for
reaching this point. I'm sure that you
will keep on moving forward by learning new
things along the way. I know learning 3D might not
be easy or quick process. But the important
thing is that you keep your enthusiasm for getting to know more and more each time, even if it is with small steps. And also remember to
enjoy the journey, which is the most
important factor. I'll see you guys.
 Monica Trochez-Hayes, CG Artist