Transcripts
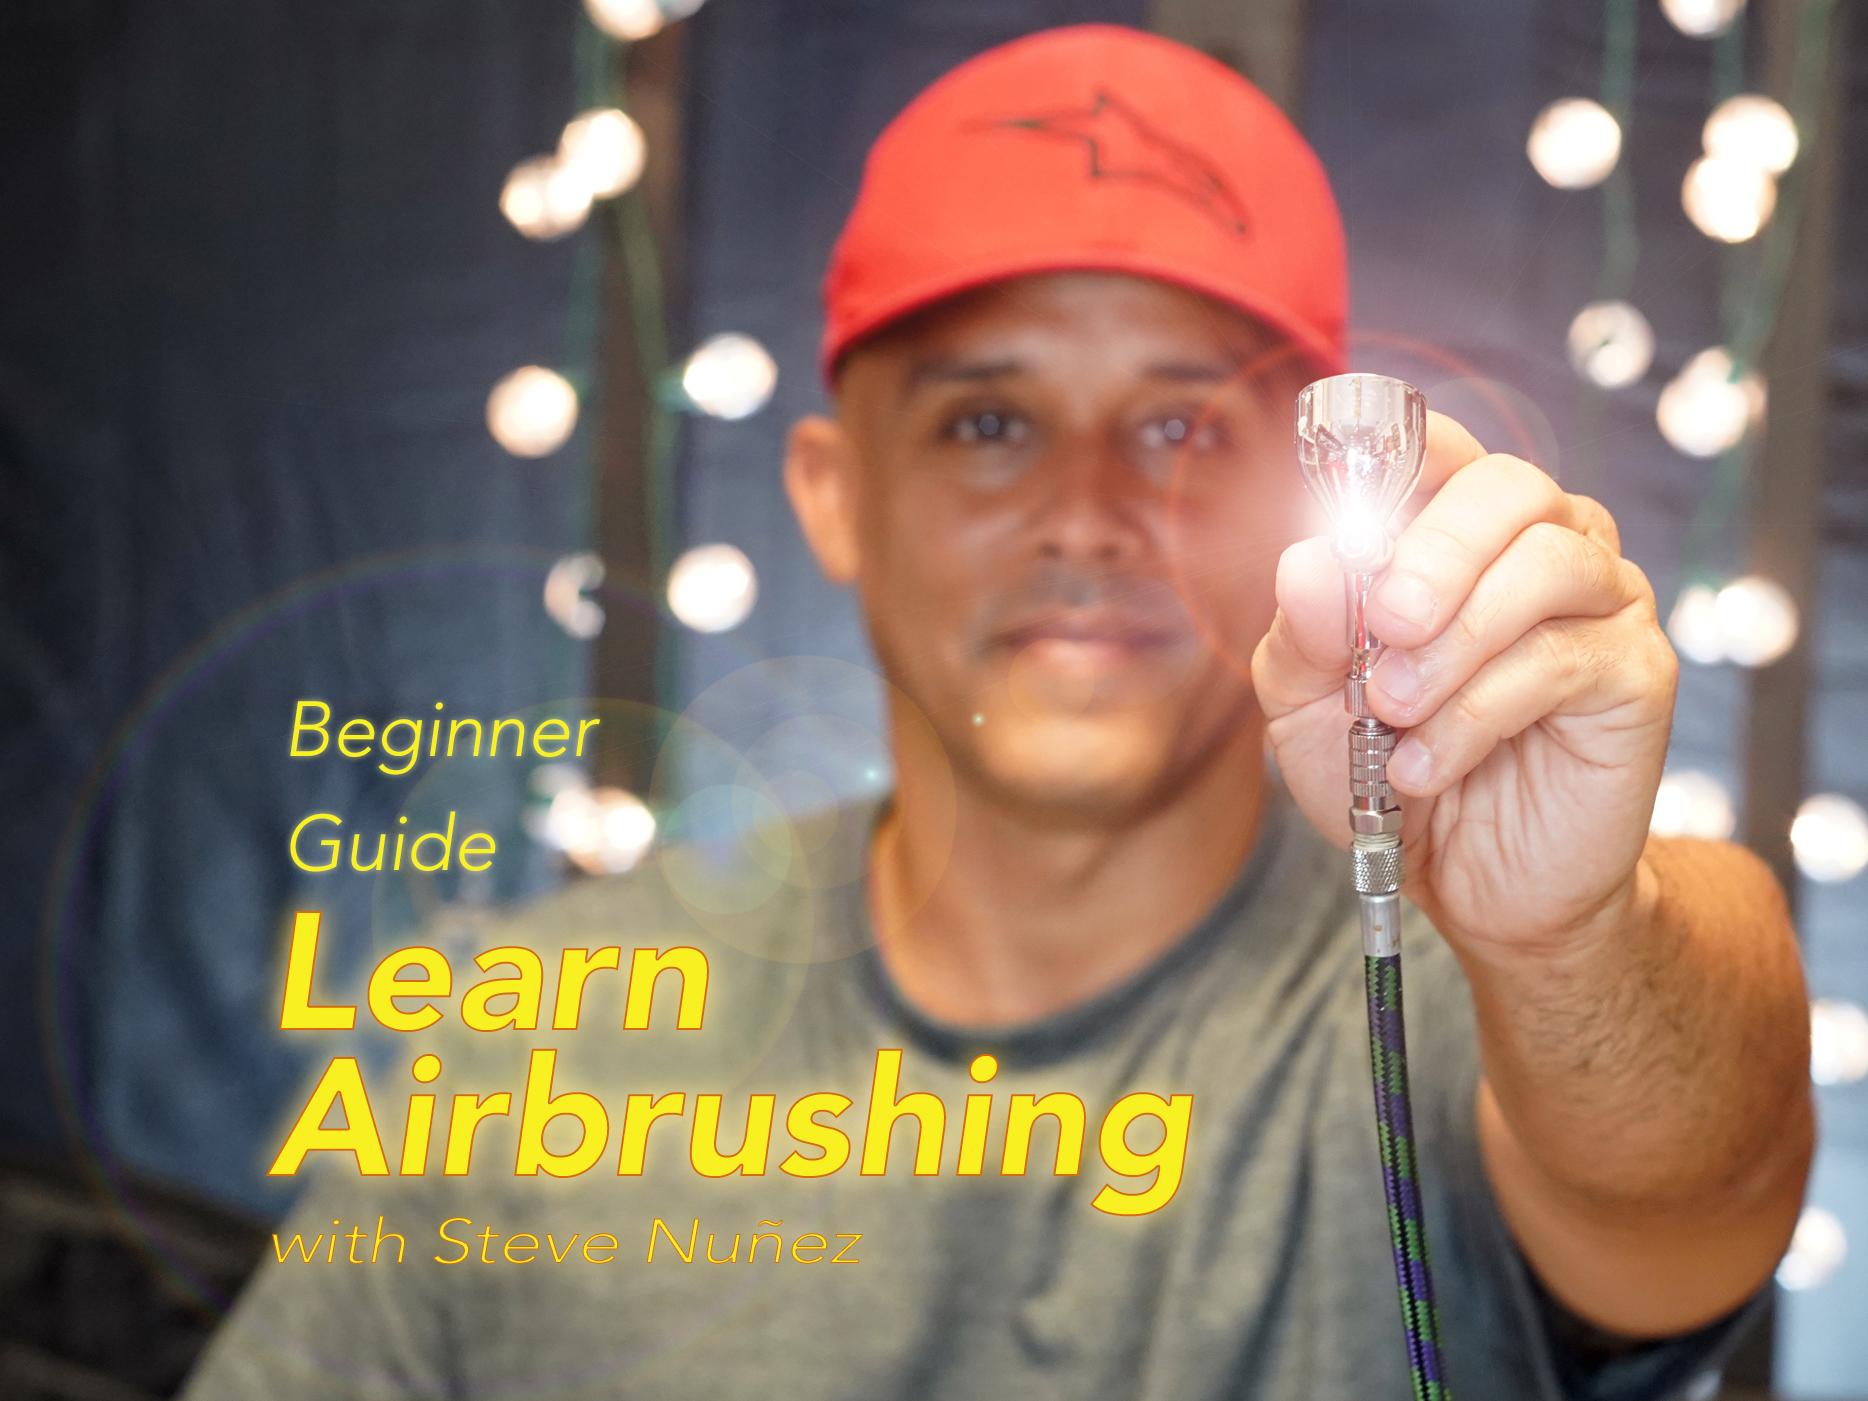
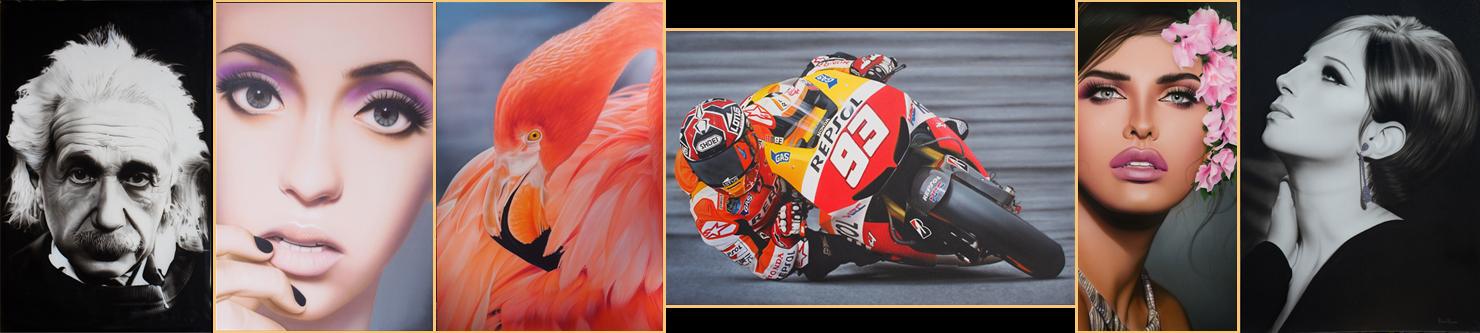
1. Intro Trailer: this is an airbrush. And when you learn how to use one, you can create all works like this. - Hopefully that video slideshow will encourage you to take up airbrushing. And maybe your exposure to air brushing in the past has been limited to what you've seen at car shows or festivals. Well, carnivals where you see someone airbrushing a T shirt and you thought that sprays like a spray can, but only a little finer. Well, while that's true and airbrush is also capable of very fine detail work. My name is Steve Nunez, and I've been a professional airbrush artist for over 30 years. I've been posting videos to YouTube for quite some time, and my video views of surpassed 2.7 million. And by far the number One question I get asked is, How do you learn to airbrush and do you teach airbrushing? Well, thanks to school show, we now have a platform where I could teach you how to air before all the techniques that I use. If you're thinking you're not an artist and you don't know how to draw on, you can't pee. I will show you techniques and how to get our reference image onto the surface is that we want to paint without needing to know how to draw. Now, having said that, I highly encourage you to learn how to draw. It's a matter of learning some proportions and some human anatomy, and within one year, your drawing skills can go through the roof. But if you can't rule now and you're not an artist, but you're interested in airbrushing, you're in the right place. This is where you want to be. There you're gonna learn airbrushing. So what are we going to cover in this class in this class? We're gonna cover just the basics. We're gonna cover the airbrushed to buy the piece that you want to get and the compressive that you're gonna get. Now, the surface we paint on is up to you. If you have cardboard or cannabis panels or anything that you may have at home, you can always practice with that and then eventually will move on to canvas panels as the actual panels that will paint artwork on. So if you wonder how much can you learn just by watching, you could learn quite a bit. In fact, when I first started airbrushing many years ago. I held an airbrush just the way you would see in a photograph from these show, like an airbrush advertising where you're holding it like this. It wasn't until I saw another airborne artist holding it with two hands, and so how steady he was able to hold it. I realized I was holding it wrong and he was holding it for accuracy and for greater control. From that point on, I started holding in Airbus with two hands, and I see that other airbrush artist do it that way as well. Had I not seen him do that, I probably would have been holding my airbrush a one hand for quite some time until I would have realized that it's the wrong way. And I'm not achieving the results that I want to achieve now. It's not to say you can't hold an airbrush or what hand in spray. I still do that, but when you're doing fine detail work, two hands is basically what what I suggest you use. So learning by watching is a fantastic way to pick up a technique you don't actually have to be present. You just gotta watch and observe. Apply your own style toe What you're seeing so airbrushing is something that you can learn . It's a skill. It's not a talent. The talent part comes from how you use it, how you spread the paint that you have when you mix your transparent and opaque Spain's. When you put your flavor into your art, that's your talent. That's what you put into it. And that part I can't teach. That's up to you. So I'm really excited that you've decided to join this class and you're gonna check out Introduction to Airbrushing and I can't wait to see what you make. You'll need an airbrush paint, a compressor and canvas panels. That's it. Get ready to create or work like this. Fan. Motorcycle tanks, photo realism. Motor sports are custom projects, pop art, classic style mural or while life are stylized, our upcoming lessons include Click on the Next lesson to begin
2. Selecting your Airbrush: welcome to selecting your airbrush. So this is the exciting part. Right now you're thinking, OK, when I pick up in Air Bush, which one do I get? So basically before even begin, there are two types of airbrush is that you probably run across. There's a single action in which you press down and it's spray paint at a fixed amount really can't adjusted on the fly. There's usually a neural, the adjuster that you can spin and then that will adjust how much paint comes out. We don't really want those single action air bushes. They're not used in the fine arts community, not very much, because they're limited in what they can do. There's a much better option, which is the double action airbrush, which is what you see here. So the reason why you're seeing two of them is that basically all airbrush is the heart of them is the needle and nozzle combination, and there's a needle inside and a nozzle, and the way that works is as you press down, that's the first action air is gonna come out, and as you pull back, that's your second action. That's when the pain comes out so you can vary that in control the with of paint that you want to come out And this is why they're called double action. Airbrush is you put the pain inside the reservoir, you press down for air and you're pulled back and then you spray on your surface and depending on how close or far your detailed is varied. So the reason why I'm showing two of them is that these are the two types that you basically run across. And by this, I mean, if you've been to a fair carnival and you've seen someone airbrushed T shirt, they tend to use textile paints, which or fabric paint, which is very thick, and they need a lot of pressure to go through the airbrush. And this is a seif and feed. So this is the type of air burst they would use, and by this they would put the pain in this jar. They have, um, you know, large jars in this different colors, and they put the pain inside here and they press down and pull back. Just like the other airport issue with These are is there designed for thick paints and designed for medium sized details. These are typically sold as a 0.35 up usually point for something like that. And it's good for murals and cake decorating and areas where extreme precision of airbrushing isn't needed. But it is a good air burst 1/2 because there are certain times when you don't want to use your finer airbrush and you want to spray a large area. And this kind of a bush really is the best that you can use. But for most of our fine quality airbrushing, you won't need something like this, and you don't need to hold this amount of pain. You're gonna need something like this with the small reservoir in the top. You put your pain in here, and this is what you're gonna use now. The reason why I recommend this is that these are typically sold as a 0.35. This one specifically is, and I wanna Neil. And for the price, it's probably one of the best ones you can get because it's inexpensive. They typically less than $70 all you need is the air brush and a hose, and they might even be sold with the holes together in a bundle. So we confined that I recommended. This will be capable of producing probably 90% of the airbrushing that you'd want to dio. I used these type of air brushes. This does, I would say, 90% of war off what I typically do. So the reason why I have this is because there are going to be times when you want to spray large amounts of pain and spread faster and with a wider opening. So these are versatile. But if you're gonna buy one airbrush and you want to get one for the class, this is the one I recommend. Now there's one thing to be to be aware of. This one is called the I Wanna Neo C n, and it has this color cup. Now you may run across other air brushes that have a much smaller one, and I'll show you an example of one. And that's what this, if you notice it's a lot smaller than the color cup, is very small. That's discover versus this company. This is meant for very fine detail ing and isn't really meant for general airbrush spring. This is like for eyelashes and doing really light shading around the mouth of light wrinkles and, you know, just really fine line work. It's a fantastic airbrush. And if you get serious about your airbrushing, you probably end up buying one of these because these are unsurpassed. You're really good. But they're not for just general airbrushing. And I used this maybe 10% of the time, if that. Because as you get better with one of these general ones, you could find that you can get really fine lines. You could basically sign a check one of these if you really wanted a practice and get that fine. So this is capable of 90% of the work, and this would be the other, maybe 5% and maybe this the other 5%. So in selecting, I recommend get something of this style. The needle in Oslo should be a 0.32 point 35 tops, and with that, you'll be able to do everything that we're gonna do in our art lessons. And that's it. That's selecting your first airbrush
3. Selecting Paint: selecting the paint part. So this part is usually pretty exciting because usually people have painted home, and they're wondering if they could use that to, to airbrush. And for the most part, you can. But there are some drawbacks when you're doing it artistically. So I'm gonna talk about some of the pain here and what you may have at home. So I'll start with these artists quality paints. You may have seen these kind of paints that very popular artists used to paint canvas. They do paintings pretty much everyone has seen these. They're available at stores and craft stores. And if you're an artist and you're interested in airbrushing, there's a good chance that you have this kind of pain. Now this goes by the name of two acrylics. That's the type of paint. This is acrylics, and they come in different grades. They come an artist grade student grades, and if you're wondering, can you airbrush acrylic paint? You can, but there's a slight drawback, which I'll talk about so with with these tube paints that the big issue is that they're actually designed to be applied with a brush, and because of that, they're not grind it down very fine. So that needle and nozzle that I told you guys about as far as the point to 0.0.3 point four millimeter the particles in this P it's gonna have a hard time getting through there. So if you're wondering what I wonder if I mix this with enough water, can I get it through? The problem is, you can, but the pigments are still whatever size that they are, so they do make a medium for its called airbrush medium. And here's one example by Golden and other companies. Make it to you. Use this with these paints. It works really well with the container versions because those already in fluid form and that actually works really well with goals. But it actually will work with this, and it allow you to spread. But screaming come out somewhat grainy. You'll never get that super fine line because it's just the chemistry of the pain in the physical properties. Chronic pain, technically is a type of plastic. It's a polymer, and those particles have to flow through the air. Bush and it has a hard time so you can use this, but it's you're not gonna get there really fine lines. So I'll explain why you might want to use airbrush specific pain instead of paint like this . But if you have it, you can use it and sort of mix it with what you have. So I haven't talked about that. Let me jump to something that you guys may have seen. So this is a typical craft, Pete that you might find at a megastore. Discount craft stores on this, and it says Acrylic peak. So you wondering? Well, if this is acrylic paint, can I still use it? And can I use this medium? You actually can. But this is even green here because this this sort of like an old purpose paint. And the companies that make don't grind this down very far. It's meant to be applied with a brush, but it is permanent. They normally make this so that you could rush on a piece of fabric or would friended shirt . So this is very doable, strong stuff, but it's not made for airbrushing. And because of that, the particles in here quite large, but you could mix it in a later class. I'll explain how we can use this stuff very effectively. It just allow your artistic dollars to go further because you can actually buy some of this stuff and use it with your fine art. And I'll explain that in a future video. So being that this looks like this, this is actual air birth pains. And now, if you notice it's called Spectra Tek that any time you see a paint that has like Texan it usually that means it's textile its textile base, and that's what it was designed for. But if you think about it, one of the grounds we use the most canvas and canvas is a fabric. It's a textile. So Badger makes this particular Brandon. It's called Spectra text, and this works really, really well. If you're able to get this at your local store, order it. This stuff works really well. I have a complete assortment of it, and I find myself using its phrase very fine. There are other types of airbrush paints that you can also use, so if you like acrylics like these to the critics, they actually make them in jars, and these are actually going that extra fine. And this is called Dr Ph Martin's spectral I'd acrylic please call the private collection and it's a liquid acrylic. It is made for airbrushing. You can airbrush this. There are other brands. This is F W. They also say you can airbrush it, and I even think they even have a picture of an air burst right there. You could see that or not, but there's a picture of an oven airbrush so these are designed for airbrushing. If you could find some of this stuff is great, but I'm gonna tell you about my favorite kind of pains. And there's a company called Create X and this is the company and they make a few different lines of pain, and I really like their products. Its they're my favorite for water based feet, and that's what all this is. This is painted toward a based. We're not talking enamels of your things that are solvent based and having border these air nontoxic paint. This is what I recommend for your artwork. So why do I like these will create checks, for one thing is they have an incredible line, very vibrant. They give you quite a bit of pink for the money that they have large jars and smaller ones . Their selection is very good, and they're grind it down specifically for airbrush use. They also have another line called Wicked Color. What's nice about this particular line, also made by Queen Sex, is this is a multi surface pain and can be used on motorcycles and on plastic or metal. I'm pretty much ah, lot of surfaces, so this is a great way to use water based paints and techniques onto all their surfaces besides canvas. And you can buy an assortment set like See this small assortment said. Create six makes these illustration called us. These are capable of very fine lines, and this is probably my favorite of all their pain, my favorite to get a very detailed work. So I highly recommend these. If you have created takes, knew you, I would definitely recommend checking things out and the other kind of paint that you might want across. It's not really a paint, but it's an ink, and it's Bombay, India ink, and they have other inks. This is this opportunity by Dr pH Margins, the same company that makes the acrylic. This has been around for quite some time, these colors a super vibrant, but technically, this is not a P. This is an ink, sort of like in a shellac resin, so it has very unique properties. I like to use this in conjunction with the critics. Like to intensify or to use to get ultra fine line because it's not really a paint. There's no paint particles. It's more like a dye and relax. It's very iniquity, So this has its place and airbrushing. So now that I've showed you all these paint, you might be wondering, Well, which one do I go for? So basically, in a nutshell, you want to go for any of these that are formulated for airbrushing. And the reason why is like I said earlier, that means the pain has been grinded down super fine, and it'll pass through your airbrush without clogging. They still will clog a little bit, but it takes a long time to clog up, and it's easy to clean up, and it reduces something called tip dry, which means that the paint will dry in the tip of the airbrush, and I'm gonna show you examples of this. The end you might ask, You know what do you recommend? Well, if it was up to me, I know that this video could be watched in many countries and some paints are available. Some places and harder to find in other places. Decent brand off widely available paint that's airbrush specific is going to be fine for our class. So if you have create X, I know this is very popular in America. I don't know about other countries, but a lot of the airport authority in America use this. They make these other ones as well. But this doctor Ph Morris, this is pretty much available worldwide. Rio March still carries these. Have you have access to this? Then? Get this. This is great stuff. You'll have no regrets now. The one thing I can say is that with the creates X, their parents are eliminated. So filing they specialize in making air birth pain. It is possible to Pete the finest lines with this pain. And this is why I use it with these. You also can, but you have to reduce them quite a bit. And when you over reduce the pain, it loses its its opaqueness. It get very transparent and you don't want to lose opacity when you're dealing with an opaque pain. Now you're dealing with a transparent pain, which is a paint that you can sort of see through. Then that's not a problem. But when you want your pain, your pain to stay opaque, then that's where the issue runs in. So that was a quick recap on these pretty much you can use other kinds of acrylic paint, especially if you want to mix it with airbrush medium. This is an amazing substance. It definitely works as it's advertised, but it does not allow you to get those hair lines. If you want that, you gotta go with the air burst specific paint. So I'm gonna show you demonstrations of what each one sprays like, and then you make your own conclusions.
4. Selecting your Compressor: Theo Word. Air Bush is comprised of two words. Air and Rush and since is a brush that paints with air. We need a source of that air into the air compressor. As his name implies, an air compressor is simply a machine that compresses air into a chamber. For the most part, compresses folded. Two categories. Tank and tankless each have different characteristics. Impress points. It attracted various users because of the popularity of whom make up airbrushing. Many people are familiar with small, tankless compressors that produce usable low pressure and pulsing sound when in operation. While these compresses can be used for airbrushing, I don't recommend them as they lack a tank. For steady, smooth airflow. However, small quick projects thes tankless compresses are perfectly adequate. The tank air compresses are far more desirable as they produced a steady flow of consistent air pressure, airbrushing benefits from most air compresses, fill a tank to a certain pressure and shut off until the tank pressure drops and the compressive would simply refill the tank, ensuring the artist has a steady supply of pulse free air ready when needed. It is for this reason I recommend purchasing a tank air compressor. To complicate the choices. There are a few varieties of tanks compressors off, which include oil and oil. This the oil is compresses, four more common and less expensive due to its simple manufacturing. They are compresses that air usually somewhat noisy and run hotter due to internal friction of the diaphragm pump. Thes pump tank air compresses are commonly found in garages and shops with quiet sound is not a priority. Oil compresses have the benefit of bathing the pump oil, thus reducing sound and friction and beach a long life and durability at the cost of light maintenance and hire purchase cost. Professional airbrush artist often choose oil compresses as they are nearly silent and have 20 or more year life spans. Despite their higher costs, biggest drawback toe oil comprises is the need for moisture trap that features an oil separator to ensure the air supply doesn't contain oil, which could spoil the artwork. Such moisture traps and oil separators are usually including with the compressors and require cleaning. Every so often, most tank air compressors have to pressure gauges on them one decades, the pressure inside the tank and the other is usually on the exit side, where you can turn a knob to regulate the pressure measured in bar or PSC exiting the regulator forever Shoes. Most artists spray from 20 to 30 PSC, with T shirt artists going as high as 60 PSC To spray the thicker textile paint, stay calm and use to use to compressing. You simply connect your air bushels to the compressor, then turn on the air compressor and turn the air regulated to a pressure of about 25 p. S I and adjust to suit your taste. You could then vary the pressure as desired. How he recommend purchasing a tank air compressor as it will ensure a steady supply of pulse free air. The choice of oil or list is up to you, but the less expensive diaphragm tanked. Compresses are perfectly adequate for most airbrush artists. Air compresses can also be used around the home and garage to fill tires and sports balls and can be used for other film needs. You may find the compress a welcome purchase for uses other than airbrushing. As a word of caution, you may run across cans of compressed air that air sold to power airbrush is I recommend against purchasing these as they supply a small amount of air and will become expensive to use over short time frame, making them not cost effective. My recommendations for compressor or one that includes the tank put air that is no less than one pits of a horse power and is quiet in operation. You can often find these compressors for less than $100.
5. Surfaces Prep: Hey, so we're getting closer to actually painting. So before we paint, obviously we need a surface to paint on. So what surface to our recommend. So I'm sure that you familiar with canvas, and if you're not, a lot of artists paint on it. It's usually on a stretch two piece of wood, something like this. This is the back of canvas, and this is normally the part that you see, like in a gallery or museum, and it's basically just canvas fabric that's been stretched on on a stretcher strip, and it's painted like this. Now I recommend we paint Kim's, but not like this not stretched. And I'll tell you why. Well, for one, they're pricier, and they're meant for finished artwork so you can get that same surface that canvas service . But you can get it in a board, which is a lot less expensive, and it's usually made for students a student grade, and you can use it to practice your techniques because it behaves exactly like stretch canvas would. And these boards are like this. This is one, and it's called a canvas panel, and I recommend it. All. It is is the same exact fabric cameras, but it's mounted on a rigid board, and it's been glued, impressed, and it's flat. It's not a thick piece, and these are very inexpensive. Literally. This isn't maybe 50 cents, if that, and you could buy like, a pack of five of them for, like, $3 or something, so they're very inexpensive. The only thing you really need to do to get him ready is you need to sand them down and smooth them and to practice. You actually don't need to do that. If you're just practicing strokes and and playing around with it, then you could just average bear on it. And this is just some scratch stuff that you do now. The reason why these are good to use it because literally you can practice, and then you can paint white over and sand it down, and then you're back to this again so literally. A cameras panel is a very good surface to practice on, because it will behave just like finished canvas. Not alternatively, you can spray on anything, anything that will accept pain you could spray on. So if you just let's say you got a new air birth or you're testing out a new pain and you just wanna play with a little while. Then you don't need a campus panel. Just spring it on us on a piece off a spare car board practice, and I did that for many years. I took every piece of cardboard I could find and sprayed on it once years. Once you feel like you're getting ready and you're about to start painting artwork, and then that's when it's time to practice on these canvas panels. Not to prepare a cameras panel is very simple. You just take a panel. You place it on a table, you lightly sand it with some sandpaper, a sanding block beers, a type that I use. It almost looks like a little break. You could buy these at any hardware store, and they last quite a long time and get a fairly rough grip on just stand over the surface . When you smooth it down, you're taking some of the great away from it, and then you put white paint. Usually we use Jessel and Jessa is meant to prime canvas, and it will seal it and it's usually white, and I want to give you that nice surface. It will be non shiny like this, and you can pain on it. And you can do that over and over and over and use the same piece and practice multiple times on it. So and then, when you're finally ready to actually paint your art piece, you could give it one final standing. Give it another coat of white Jess. Oh, and you can paint right on that. So that's why I recommend campus panels over other panels of They're inexpensive. And the behavior would be just as you would expect when you're ready to work on your finished piece. But if you're just practicing, scribbling and kind of getting used to your airbrush and paint, then there's no reason to use cameras panels. You can use whatever scrap you have around. You're gonna find a little bit of a hard time doing it on paper, because once the paper gets wet, it buckles. But there's nothing to stop you from using paper if you just want to scribble and test and practice when your real practice begins, I definitely recommend practice on a canvas panel. They just need a light sanding and a code of Jessel and you're done with it. So that's it. This video Super. Sure. Just get ready with your canvas panels, and then we can get on to the next portion, which is actually painting our project.
6. Non-Artist Draw Methods: wake up to an interesting part of these lessons, and that is the no drawer technique. How doe I draw my image onto the surface without knowing how to draw, you wondering, Can that be done? I want to airbrush. I want to paint, but I don't know how to draw. Well, the answer is, yes, you can. There are a lot of techniques a lot of artists are using today, and it's techniques that don't require them to draw. So let me just tell you a few you may know of some of these. Maybe you don't. Maybe you know, all of them. Maybe you know none of them. So let's start by saying this. If you watched the movie in any movie theater, which I'm sure most of you have, they project that image onto the silver screen, basically view to freeze that image and drove over. You'd have a great drawing off whatever they were projecting. So if you had a portrait that they were projecting on a screen and you were to draw it and they would shut off the projected, you'd have a nice drawn image. While home cinema projectors are very popular today, you could use those same projectors for your art projects. A lot of them except S D cards. You could put on SD card in the slot and it'll project an image right onto your canvas. Here's a blank cameras and I'm gonna show you how that works. Now they're different. Project is on the market and there's one particular company called Autograph. I have no association with them, but they make the best are projected that I've seen. They make digital ones and the older analog will pay projectors. They tend to be a little bit more price because they are geared for artists and they have certain modes and the projectors that would benefit artists. But if you don't have the money to buy an Arctic craft projector, then you could buy a standard cinema projected that you use at home. And in case you haven't noticed, those prices have dropped. Incredibly, you could now pick up inexpensive projector at about $70 they range, you know, into the thousands if you get a four k laser, one that focuses, but you don't need anything like that. I just suggest anything that's 800 by 4 80 pixels or better. Something in that size would be great for your art needs. Now they make small people size ones actually have one here, and these smaller ones are actually really good. They could be purchased. They could be purchased for around $100 or so. Some of them are 23 $400 they have SD card slot. You put the SD card there, and it'll project your image onto your on your canvas or whatever you're painting. Another art technique that you might find very interesting is the old technique called greeting and greeting is All you do is you take a photograph whatever you want to paint or draw, and you put a simple grid onto it. You can do with a pencil, and now that you have it divided, you can take that same proportion and draw that same grid onto your surface of are paying this canvas. I could make a tick tack toe sort of great here and then use that same great just copy the reference marks. It's a very good way of dividing it in giving you reference points, and it makes it much easier to draw now, a complex drawings and complex references. It's still a bit tough because you have to find it in between points. But for portrait or basic animals, greeting works really well. It also works very well if you want to scale your image up paint on the side of a building and doing outside mural or something, because then your unlimited in the scale that you could do and using a grid is a very effective way off, drawing without really needing to know how to draw. Another technique that artists use is a printer. So you say, Well, you're not printing on your surface. What you're really doing is you're taking your printer and you print the size that you want to paint. So say this is 16 by 20. You print a 16 by 20 print, and then you could simply trace behind it. You rub graphite behind your print, put it on taking office. It doesn't move, and they just draw that in tight and pull it off and then you're gonna see a pencil drawing on. You don't need to know how to draw, because basically, your reference is going to be. It's going to stay on on your surface, and then you condemn pain. It alternatively, if you didn't want to rub the back off the print with graphite, because that gets a little bit messy because of all the graphite they sell. Transfer paper is just a sheet of paper that's infused with different color graphite that yellow and green and black and full, different colors. And you would put the sheet there, then put the print or break and just trace over and leave a beautiful clean image on some of it could be robbed off. You gonna race it off? You're gonna make it lighter. So that's another very popular technique that people use today. Another very popular technique is sort of an offshoot on the print idea. So what you can do is some airbrush artists print in the size they want to paint, and what they do is they cut out certain areas off that print, and when they put it down to scram when they spray, it leaves the mark behind off the air. So think of it if you're if you're doing like a giant Pepsi logo and you cut out No, the Ian Pepsi and you put it on the surface. Well, if you cut it out, you sprayed it. You leave that E behind even if you took the paper all. So what? What artists tend to do is they make multiple copies, identical copies, and then they'll spray out quite a few areas of it. And it'll leave like almost like registration marks so that you can puzzle it back together . It's a good way off doing that. Especially wrong. Complex curves like If you're going around a tank that's a very effective way are projected , wouldn't work as well, because projectors can't go around curved surfaces. So that's another technique that you can use. I heard she don't use that one too much because it's very tedious. It requires a tremendous amount of mechanical like you have to put it down and tape it, make sure stuff doesn't move, and then have you have to line your stuff up. Really, precisely. But it is effective and it does work. And if you're that type of methodical, very precise person than that technique would probably work really well for you. What I suggested you try all these techniques if you can, and see which works the best for you. I think most artists tend to go with their projected because they're very affordable. There you can battery power them. So, basically, anyway, you go. You can project your image that you want. Sounds even working for WiFi so that you can pick an image on your phone, send it to your projector and you don't even need the card anymore. There's quite a few different techniques we can use to get our image on our surface without needing to know how to draw. So I highly encourage you to check out those autograph projectors. They have a nice series of projectors, and if those just won't do in their outside your budget, then look at one of the less expensive cinema ones that you could use at home and then also show you the grid technique. And I will show you simple masking off printing. Things are the size that you want, so I'm gonna go through each one of those techniques and you pick the one that works best for you. Hopefully, this has provided some insight as to the techniques that artists are using. I take images drawn onto surfaces without needing to know how to draw. Hopefully, this has sparked some interest in you. And you have been thinking about art you might want to create. I'd like to encourage you to follow the class lessons that I post so that you can follow along in our projects. We're gonna cover a lot of areas of airbrushing and different styles. We're gonna do a portrait to motor sports, art, wildlife, art and other styles of airbrushing. And in those projects will detail the exact methods I use to create the artwork. And you can follow along and completed yourself. So I can't wait to see what you guys do with your airbrush.
7. First Practice: So these practice lessons are gonna help to improve your free hand airbrushing. And by FREEHAND I mean, you're not gonna need masking or tape objects to get straight lines. And I think it's important to develop your free hand airbrushing when you begin, because it's always easier to adopt masking techniques to get your image the way you want it. Rather than learn that way from the very beginning, think of it as learning to drive a stick shift car. If you could drive a stick shift car, then you could drive an automatic car. But if you only do it on the automatic car, you won't be able to drive a stick shift car. So by learning freehand, it allow you to be able to create shapes and blends. Without that we're needing frisk, it's or masks. So I think it's really important that we learn free hand that you practice that. And then, of course, if you decide in the future that you like the masking technique where you mask out certain areas to get very fine edges, that that's perfectly OK. There are a lot of artists to do that and achieve very good results and I do it occasionally, but I try to avoid it because there's a certain stiffness and I don't want to rely on using a mask. And then when you get into fine art and you paint on canvas, it's even less necessary because you could simply hand picked an area street or sharp edge . All these lessons will be free hand lessons. They'll be easy to do. They'll increase your free hand abilities. And I think from that point forward will be up to you whether you want to decide to continue freehand airbrushing or get into masking and masking techniques. So I hope you enjoy these lessons. They can get tedious after a little while, so they're not so much fun. But it will help develop your free hand airbrushing. And it's really important that you master all these little nuances before you want to actually create a piece of bark. So I hope you enjoy the lessons and you follow them through. All right, so welcome to your first practice. So by now, hopefully you've been playing with your airbrush. If you haven't highly suggest that you put pain in it and it to about the consistency of milk. Set your compress it about 25 p. S. I and practice on scrap pieces of paper or cardboard. Anything that you can find just spray. Just squiggle with it. Write your name trying to get really close to the surface without touching it and just continuously spray practice, paint anything. The ideas for you to get familiar with your airbrush and the way it sprays and so that you could build a sort of predictability with it. Once you have a comfortable feel and you know what pressing down feels like and pulling back on what it's gonna produce, then you could move on to your first practices, which will increase your your painting ability. So by now, if you've played with your airbrush, you already have some degree of familiarity with it and some degree of predictability of how it's gonna spread. So what I suggest you do is you get a scrap piece of paper, take a pencil and just lightly drew and, like a squiggly line, something like this, right, and then maybe make lines across like this. Now, why would I do that? The reason is, I want you to build accuracy. So what I want you to do is anywhere where the lines have crossed. So in this case, it would be any of these intersections. I want you to spray adopt. Just spray a small dot so that you can build your accuracy. Now, the first time you do this, your doctor may be off center, and that's perfectly OK. In time, your doctor will gain accuracy, and that's what this first practices about. And I'll go along and do it with you. So you want to get kind of close to the surface. Don't spray really far back, almost touching it, - and your results should look something like this. Don't worry. If they're not complete, accurate and you've missed some points, that's the whole point of the exercise is to try to build your accuracy. But the idea is to get all your dots on the intersections, and this would increase your accuracy. Practiced this several times. Don't worry if it if you miss, it's OK. You're gonna get accuracy as you continue to practice, and if you want, you could vary the size of the dots. In my case, I did. I'm very small, but you could do them large and I'll show you what this looks like not to add double value to what you're doing. I want you to spray on the same dots again, but just make them larger. This when you get a second pass at it, not be larger, but you'll get your game control this way. - So this is what my exercise looks like. Your should be somewhat similar. You just want to make the dots a little bit bigger. And I hope you get a second shot at passing over it and practicing accuracy. Practice this over and over until you feel that your accuracy has gotten much better. - Okay , so I've done the exercise about two or three times and I went over the dots, so they're a little larger now. So now you should have something like this. If you haven't gotten into this point in your dripping or the dots are off center, then you may have a bias where you aim and shoots a little to the writer to left. Just keep on practicing. You want to eliminate any bias or tendencies to paint off target, so keep on practicing, so you get all your target exactly on the intersections. This will improve your accuracy quite a bit. And the reason why I did a swirl line is just so that it would be random. I don't want to put him in a grid, even though it already looks somewhat like great. But it becomes a little bit more unpredictable when you do it like this. You don't want to build a Muslim memory when you're doing it. What, you want to build it wherever your intersection is, that's where you're gonna place a dock. So after you've done this and you've completed this, that maybe you might want to go over these swirls and just airbrush a line, that's a little harder, But we'll just try it Not because I'm right handed. I won't start with the airbrush this way because I'm gonna block my view So you always want to airbrush where you can see what you're gonna paint. So I'm gonna start this way so that I can see the line as I airbrush I can see the line that I've drawn If I try to do it, do it this way I'm gonna obscure what's behind it. So always keep that in mind when you're painting. Always make sure that you're at eye level or below because you don't want to Airbus up. You know, you kind of want a bush where you can see and sort of like in this range so airbrush, you know, if you left hander than aerbin or to the right and if you're right handed air burst towards the left. So that's what my finished work looks like. Us should be somewhat similar if you squiggle the bit. Don't worry about it. This is your first attempt at it. Practice this over and over until you feel that you could do it without a problem. And then when you when you feel that you can do this, then you can go across into the lines going across. But a really cool thing to do and it'll increase your control because you're gonna have to vary how much you pull back is to go over the lines and wherever it curves. Meat that area thicker, almost like a snake. But you're gonna variant, that'll that'll increase your control and it'll plays into freehand airbrushing. So I'm gonna do that now and show you an example of what I mean. I'm gonna take this section and do it for you, so I would go spray here and then start to spray it. Why? So what I'm doing is I'm just building a color on the curve on Lee. You can do the same on this side. What I'm doing is I'm pulling back when I get told to tips because that's the area that's gonna be the biggest. Now, The reason why you want to do that, you'll increase your ability to pull back while you're spring. And that's not natural to you because you haven't used an airbrush. So you want to be able to move and pull back and sort of released. So as, um, spring, I'm pulling back when I get to this point, and then I'm releasing so that it looks like it's a one line that's been made thick as it reaches the top in time. You'll be able to do this in one stroke without having to do this, but this is good practice now. Now you could take your lower levels into the same thing. Your practice should be similar to this. You could vary and add your own challenges, but to start and have it be like, this is a great way to start and practice your free hand airbrushing. All right, so this is gonna be a basic exercise, and this particular technique they were going to do is called a rat stroke or they call it a dagger stroke. And it's important to learn this because this is gonna be the basis of a lot of your free hand airbrushing. And all that is is doing a line that tapers. And you need to be able to control that because a lot of your free hand airbrushing is gonna require you to do that in certain parts of your heart. So I'll show you now demonstrate what this looks like. So you're doing is varying the line thickness from the top to the bottom. You could do it from the top. I mean, from the bottom, going off or left to right. Practice this in different ways. What you want to do is you want to make sure you start fat and you end up skinny. You want to do that and control it. Do it as often as you can. Make sure that you can do this on command. Do that often practice it so that any time that you need to be able to make a tapered line , you'll be able to do it and you can make them larger. You can make him any size you want. Let's see here a little trip. Practice that as often as you can. Once you're able to do this basically at will, then you can move on to the other parts of the practice. So what we're gonna practice here is a variation on the dagger stroke, and we're just gonna curve them and do, like, almost looks like they should look like quotations. And the reason is you want to be able to create lines, but do them in a curve, not just in a straight line, and you want to be able to taper them because that will come up quite a bit in your free hand airbrushing. And the idea is that you want to start with it being sort of large and get down to Ah, a sharper point. If you could do that at will, that would help you quite a bit when you're free handing and you have to do certain curves going around ears and noses. This basic step it controlled is really important. You could also curve them and squiggle them just to get more control. Your variance practices till you could do it on command when you can do it easily and it's not a struggle for you continue to practice this. This is gonna be the foundation for a lot of your future airbrushing. What we're gonna do here is we're gonna practice very small gradations in other words, like blend. But we're going to use one color without blending multiple colors. And the idea here is to get your free hand airbrushing to the point where you could make simple blends and I'm gonna show you. Think of it as an empty cup that this is what I want you to do. So take in the area, draw a line with your airbrush like this, and then draw like a cup like this. Now it sounds simple, right, But this is what I want you to do with this. Make a small blend, filling that cup and then make sure that the blend goes to nothing, for this is what I This is what I'd like you to do. So what What's happening here is that it starts with intense color, and as it fades, it basically goes to no color. And this is gonna be important. Your airbrushing, a lot of your airbrushing is gonna be based on the ability to do this. So practice this at all. Various angles don't get used to it. Only going up or right or left, do it in old sorts of manners. So I'm gonna do some more like this, - and this is what I want you to continue to practice, draw a line and then faded. It should almost look like it's a meteor, and you shouldn't see any specific lines. You should see a small, even blend. You could make the larger if you want. I just tend to make them small, because when you can do the really small, your precision, of course, increases. But if you want to start off making larger ones, you can do that. Continue to do this in old directions until you feel very comfortable doing it now to keep it doing. This is start with this line and then gradually faded out. But move away from your surface. So when you first start the line. You're gonna be close to the surface and you're gonna sort of draw very light cup. Right. Then you you'll fill it in and you're gonna move back. You could see that. I'm moving away from the surface and I'm continuously spraying going like this. I'm not going like this. I'm continuously keeping the air down and letting it fade away. It should fade to nothing as you just gradually disappear. Continue doing this to you Feel very proficient at doing this. This will absolutely be the basis for a lot of your airbrushing, This fundamental principle. So I have a little variation on exercise there you've already been doing on. What I want to do in this case is I'm gonna draw a random shape and I'm just gonna fade. The reason is I want you to get used to the idea of shading and let me show you what I mean by this. So I'm gonna draw a random, random shape, and the idea is just to shade inside it and get used to that feeling. And what I'm trying to establish is I'm doing a random shape and this sort of just doing a very light fade out. You shouldn't see any specific lines other than the outline you did. And the reason that you want to do this is this. This will get you accustomed to irregular shapes. These are things that will happen while you're painting. In real life, you're gonna have You might be painting a turtle or a portrait, and there's an irregular shape and you want to be able to shade in any direction. So practice making up anything like that and continue to shade. Get used to this. This is gonna be an integral part of your airbrush. So as you could see, I have, ah, nice shape. And then I have a very light blend out. The idea is just to get my shading to be progressive, keep on practicing things like this. This will help you in your future with your shading and your portrait and in other airbrush areas. Congratulations on finishing the video and doing your first set of airbrush practices. As you might know, this is not the end. By now, you probably have a bunch of sheets of paper and scraps that look something like this and this is not the ending of course, you're going to continue to practice and build up your confidence and your ability to airborne freehand. So where you gonna go from here is now with these basic lessons that you've learned you'll be able to take on creating an a piece of bark, and we're gonna start with a portrait. So if you click the next button that says what we've learned, I think you might be surprised on what you might be able to create next.
8. What you've Learned: way. Learned what we've learned quite a bit. You've by now selected your airbrush paint. You're going to use the compressor that you're gonna use, and you probably picked out surfaces that you want to pay down, whether it's canvas panels or illustration words over scrap cardboard. So the only thing left now is just to practice and sprayed. Continues me. Don't give up, keep on trying and keep on practicing. If you've been practicing the exercise in the video, you have the skills it takes to try your first painting like this. Let's deconstruct this painting to see if you have the skills to create a portrait. Aren't these the doctor practiced to build accuracy? Florentines curve. Brach broke. Three practiced, and this is our airbrushed freehand and curved dagger strokes inside and outside the I. There are small daggers, strokes everywhere in this. Remember those variable tapered minds I told you to practice. This is why I have skills and techniques needed to try your first airbrush painting. This is just the beginning, will learn a whole lot more during our painting session. So now that we've completed this lesson, Siri's and you've learned quite a bit. I have some final words for you. I'd like to encourage you to continue to practice. You've just touched the surface of what's possible with an air birth. There are so many more techniques that we can explore and I'll be posting them in the lessons. So I encourage you to follow lessons along. We're gonna cover multiple disciplines of airbrushing from airbrushing. Portrait's and motor sports are toe while life and other genres. So this is just the beginning. And I'm excited that you've decided to join us on this airbrush odyssey, and I can't wait to see what you create with your airbrush, so join us in our classes.
 Steve Nunez, Professional Airbrush Artist