Transcripts
1. Introduction: Butterflies are fun
and simple to animate, but they can also add a lot of life and depth to any scene. In this class, I'll show
you how to use a number of different techniques to create believable butterfly
flight within blender. Hello, I'm John Knolls. Having worked in animation
studios for many years, I've had the
opportunity to bring a wide range of different
characters to life, each of which come with
their own challenges. Whilst all of those character
performances were built upon a solid understanding
of animation principles, having access to a range of different techniques
can really make the difference to either enhance or accelerate your
animation process. In this class, I'll be sharing some of those
techniques with you. First, you'll learn
how to construct a simple butterfly flap cycle
using keyframe animation. From there, you'll explore
different techniques, including puppeteering, the
use of curve modifiers, and path animation in
order to transform your simple cycle into a believable,
fluttering butterfly. This class is designed
to be easy to follow for anyone that's
new to animation. But if you're completely
new to blender, then I'll suggest
starting out with my blender essentials
class first, which will teach you
everything that you need to know to get started. By the end of this class, you'll have learned a set
of techniques, which can not only be used
to animate butterflies, but also apply to a wide
range of other projects. So if you're ready,
let's get started.
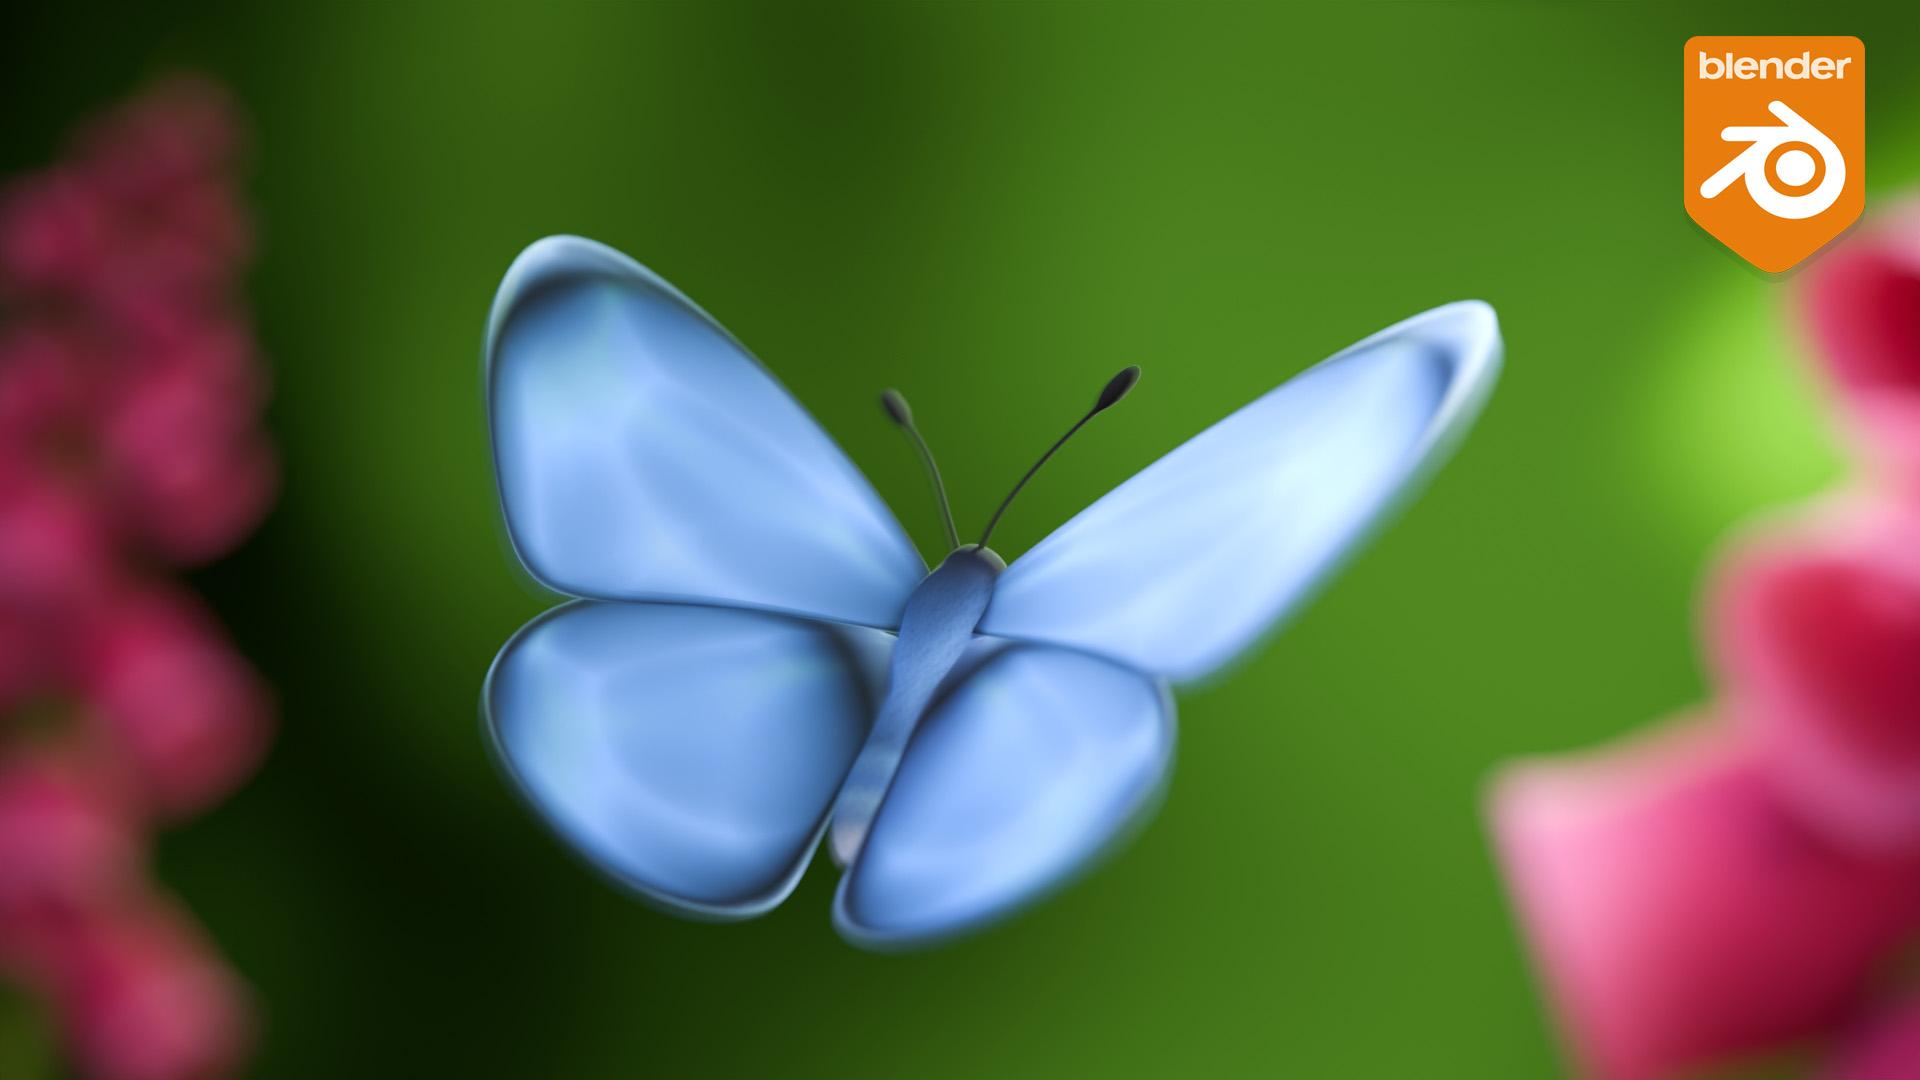
2. Class Overview: Hello, and welcome to the class. Butterflies can add a lot of visual interest to any scene. But at first, they can
appear tricky to animate. And if you fail to add
the necessary amount of detail to the animation, the final result can end
up looking artificial. This class breaks down the task of animating butterflies into simple steps whilst exploring a range of different
animation techniques. We'll start out by using
keyframe animation to construct the flapping cycle which will form the core
of our animation. This is where keyframe
animation shines, since it provides us with
the maximum level of control with the
flap cycle complete, we'll then make use of
different techniques to both move our butterfly throughout our scene and add an additional level of
complexity to the motion. It's this complex
erratic movement, which really helps to make the butterfly motion believable. Each of these techniques offers a different balance between
speed, ease of use, and control, and this is
something which we'll cover in more detail as we
progress through the lessons. Since this class is
focused on teaching animation techniques rather than the other elements of
a three D production, I've provided a startup file to make it as easy as
possible to get going. The startup file can
be downloaded from the Class Projects
and Resources page and includes both
the butterfly g, which we'll make use of during the lessons and a lighting
setup so that you can easily achieve
nicely rendered results without needing to do
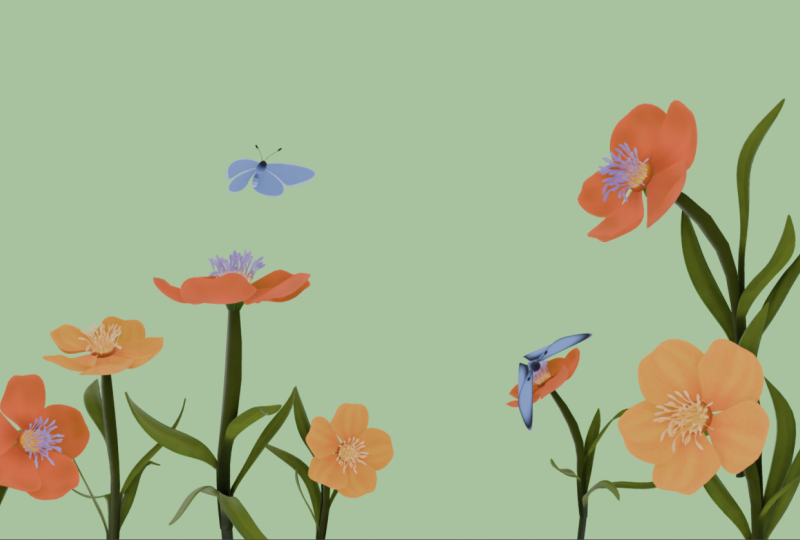
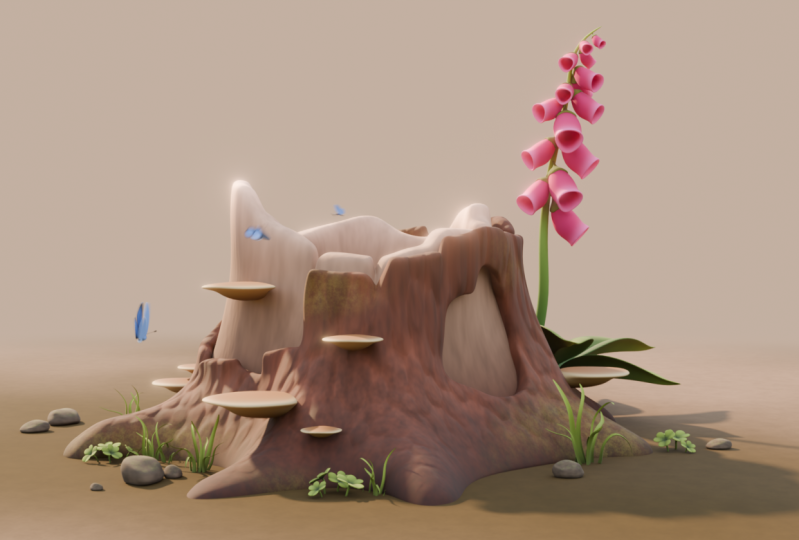
any additional work. For your class project, I'd love to see how you make use of your butterfly animation to add visual interest and depth to
a scene of your choosing. This could be anything
from a simple background to a more elaborate scene.
The choice is yours. Once you're finished,
upload your work to the project gallery for feedback and to share with the other students in the class. Also, if you have any
questions along the way, feel free to add them to the
class discussion section. Now, if you're ready, let's
jump into the first lesson.
3. Scene Setup: When teaching in Blender, I try to ensure
that my preferences are kept as close to
default as possible. This makes it easier for
people to follow along. When animating, however, it is useful to change a
couple of the preferences. So if we head up to the edit
menu and into preferences, and then head to
the animation tab, we'll be making extensive
use of auto keying. And whenever we do that,
I always like to ensure that this only insert available
option is checked on. This prevents us
from accidentally setting keyframes on things
that we don't intend to. The other option that I
like to change is this only show selected
Furve keyframes option, and this is something
that I check on. This changes the display of
the graph editor and helps to prevent
accidentally selecting things that you don't intend to. So I can now close
down my preferences. Now, the other thing
that you'll notice is that I display all of my keyboard shortcuts in the
bottom right of the screen. I try to make
everything as clear as possible within the lessons. You'll be able to see
exactly what shortcuts I'm using in the bottom
corner of the screen. So the next thing to do is to open up the provided
resource file. So if you navigate to
wherever you've saved that, we can simply select the
file and click Open. And before I do anything else, I want to save a new
version of this file. So I'll go up to Save As, and I'm just going to save
this in a different folder and I'm going to rename it to
butterfly Animation 01. This ensures that our original
butterfly file is safe, and we can always return
to it if we need to. So with all of that set
up, in the next lesson, we can go ahead
and start to work on the butterfly
wing flap cycle.
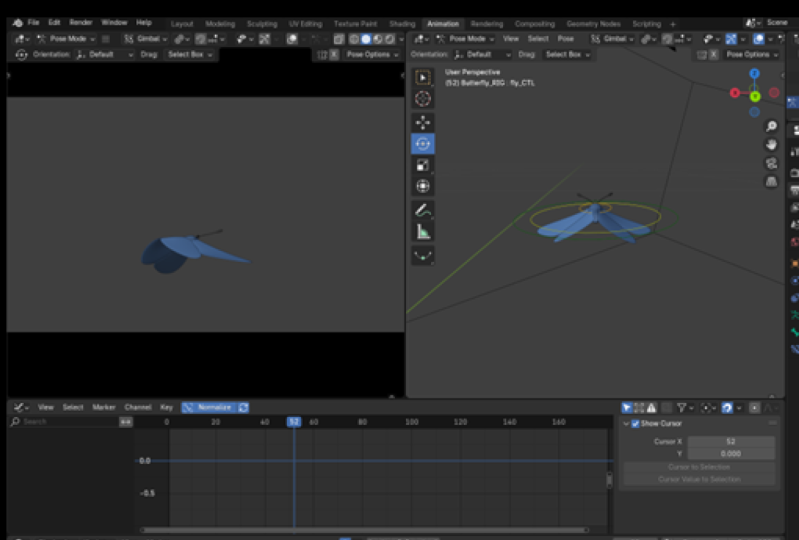
4. Keyframe Animation: Wings: So in this lesson, we
are going to create the flapping cycle for
the butterfly's wings. So to do that, I'm first going to select the
butterfly rig here, and we're in object mode at the moment here in
the layout tab. But if I flip over into
the animation tab, by default, it should
switch us into pose mode. If it hasn't done that, you can always switch the mode here. And in pose mode, we can now select the individual
controls of our rig. I like to work here in
the right hand view port, and in the left hand view port, here we have our camera view. So at the moment, it's a little bit difficult to
see the butterfly, so I'm just going to move in on the
butterfly a little bit. So if I just enable my gizmos
here, click on this toggle, and when the padlock is locked, it allows us to move around
within the camera view. So I'm just going
to move to a point where we can see our
butterfly nicely there. So I'm using solid view at the moment, but if you wish to, then you can hold down
the Zi key and switch to material preview or
to the rendered view. And this has already
been set up for you with a flat
colored background. For now, though,
I'm just going to head back into solid view, which will keep
performance at its best. So I mentioned earlier
that we're going to make a boto key and we can enable that down
at the bottom here. But because of the preference
that we set earlier, when we move an object around, it won't automatically
set a keyframe until we already have a keyframe
on that particular control. So I'm just going to undo that. So the first thing
I want to do is just hit A to select everything, and then I to insert a keyframe. So you can see that we now have our first keyframe down
here in the dope sheet. And if I roll over
the left here, you can either use
these little arrows to reveal the rest
of the information, or if you have a numpad, you can use the plus
and minus keys on the numpad to open and
close this section. Now, initially, since I only want to be
working on the wings, I don't need to see all
of the other controls. So if we head over to
the properties panel and to the data tab here, we can see the bone collections, and if I drag this
down a little bit. I've already set up a number of different collections here. So we can disable the abdomen
and the main controls, and that would just
leave us with the wings and the wing
deformation controls. Having done that, we
can now hit A to select everything and it will only
select our wing controls. We can see this down
here in the dope sheet where we only have our
wing controls selected. I'm now going to
start out by just selecting these
main wing controls. What I want to do is rotate these up for the first keyframe. Now when I'm animating, I like to make use of
the gizmo for rotation. So you can either hit the
Tiki to access the gizmos here or you can hold
down shift and space, and that will bring
up this menu here, and then you can use that
select the rotation Gizmo. So I'm just going to
rotate this wing on the z axis until
it's fairly high, and then I'm going to do
the same on the other side. These don't need to
be exactly the same, but I'm going to get them to roughly the same
sort of angle. I'm then going to go in and select some of these additional
deformation controls. And then I'm just going
to bend the wings up so that we have a slightly
more natural shape to them. We don't want them to feel
stiff and artificial. And I'm just moving
around and being careful to make
sure that the wings aren't cutting
through one another. Just always rotating around, checking things from
different angles and adjusting things
where necessary. Now, because we had auto key enabled and we set
our initial keyframe, everything that we've been
doing here has been saved. And if we hit the key, we should be able
to see that because everything here is
shown in yellow, which shows that it
has a keyframe on it. So I'm happy enough with how
this first pose is looking. So I'm going to hit A once again select all of my controls. And then down in the dope sheet, I'm going to hit A again to make sure that my full
keyframe is selected. And then what I'm going to do is just zoom in a little bit, and then I'm going to
duplicate this keyframe. So I'm going to hit
Shift D to duplicate it, and then pull it all the
way over to frame six. Now I'm going to move
forward to frame three. And then what I want to do is to create a pose where
the wings are down. So again, I'm going to select that first control in the chain, and I'm going to rotate
the wings right down. And I'm going to leave
the bend in the wings because I think that should work fairly well for this
position as well. So again, I'm going to hit
A to select everything, and then I to set another key because not all of those controls
were manipulated, so then not everything
had a keyframe set on it. Okay. So we already have a
bit of a flapping cycle, but it doesn't
look very natural. So what I want to do is
to move to frame two here and select these controls and then move them
down a bit further. So as we move between
the keyframes, we go most of the way down
and then finish moving down. So we're adjusting our spacing here so that we're easing
into the bottom position. And then I'm also going to bend these controls
back further, and this will show some
drag in the wings. Using the rear
wings here as well. So as we go down, we're pushing against
the air here, and then as we get to the
bottom, they start to recover. And then we're going to
start moving upwards. At the moment, we
have these two frames here in the middle,
frames four and five, which are auto generated by the computer before we
come up to frame six. So again, I just want to go
to frame five and just move these up so that we're a little bit closer to
our top position here. Just moving backwards
and forwards, just to check how we're doing. That gives us a
middle position here. That's fairly even. So I'm just going to
move that slightly back in the opposite direction. So then on frame four, as we're on our way back up, I want these wings to bend in the opposite direction so that they're dragging on
the way back up. Just bending all of
those down a little bit. And where things are cutting
through a little bit, just go ahead and rotating on the other axes or make use of some of
these other controls. And I'm not worried about things cutting through the
abdomen at the moment. We'll go ahead and adjust
that a little bit later. Okay, so I'm going to hit
A, select everything, and I, once again, to insert a keyframe. Just going to go back and
do the same on freedom to hit I just to make sure that everything is
keyed just to ensure that nothing can move from
its current position. So we're starting to drag the
wings as we come up here. And then as we approach the top, they'll start dragging
a little bit behind. Can pull that a
little bit further. Same with the rear set of wings there. That should be fine. A select everything and I
once again to insert a key. Now you can see as
we scrub through, drag the wings behind as we come up again, once
again, they drag. That's looking pretty good. Alright, so we have
our first flap cycle. The next thing that
I want to do, again, is just hit A once again to select all of
my wind controls. And butterflies are known
for their erratic movements. So what we don't want
to do is just create a cycle that loops in a
way that looks mechanical. So now that we have this cycle, that loops from start to finish, what I'm going to do is just
select the whole thing, and we can just hit A
to select everything. And I'm going to hit Shift D to duplicate and just
bring this across. And what I need to
do is make sure that my first and last
keyframes overlap. Like so so we go up into that top position
and straight back down and up into that
top position again. So frame 11, frame six, and frame one should all be
identical at this point. But what I'm going to
do now is just create some variation in this
second part of the cycle. So I can go to
this frame six now and just adjust it a little bit, and what I'm actually going to do is just push these wings a little bit higher and maybe tweak them a
little bit more there. And then on frame seven, maybe you don't pull
them down quite so far. So I can bring these back up a bit and reduce the
drag a little bit. And we're just trying
to create a bit of variation here so that
with this fast cycle, it doesn't appear that we have just the same frames
repeating over and over. So frame eight I'm pulling
up a little bit as well, and pull frame seven
back even further. So we've got a point
there at frame six, but on frame eight, we don't go down as far. Which means on frame nine, I want to again
pull this up a bit. And again, I'm just going
to reduce this drag a bit. And I'll leave frames
ten and 11 as they are. And what we can do
now is I'm just going to set my end frame
to frame ten. So one short of our
full cycle because the next frame we just loop
back to the start there, and then we can just play this back and see what we've got. And before you do that, just under the playback
settings here, just going to change
the sync from play every frame
to frame dropping. This ensures that the speed that this will playback
will look correct, even if you're using
a slower computer. And then we can just
hit the space bar, see how this is looking. So that flap is working
fairly well for now. I'm just going to
stop that. But what we're really missing is
some movement on the body. So that's what we're going
to add in the next lesson.
5. Keyframe Animation: Body: So our wing flapping is
looking pretty good, but we need to add a
little bit of movement on the body to make things
feel a bit more natural. So the first thing I'm
going to do is turn off our wing controls and re
enable the main controls. And that gives us access to
this thorax control here. So we already have a
keyframe there on frame one. So what I'm going to
do is move to frame six and set another keyframe
there just by hitting high. Then what we can do is
move to frame three, and our wings will have gone
down to the bottom by there. And what I want to do is just push the body up a little bit. So I'm going to hit G
and Y to move this up. So moving the torso
up a little bit, and I'm going to rotate it on the x axis a little bit, too. That's moving up and down. I'm going to duplicate
that frame three, select it and hit Shift D
and drop it on frame eight, and we'll do the
same with frame six. Just duplicate it and
drop it on frame 11. Now, as before, I want to introduce a little
bit of variation into this so that as we go
down on frame six, maybe we can go down
a little bit further. I'm going to hit G and Y to
move this down a little bit further and maybe we'll add a little bit of X
rotation in there too. And then maybe frame eight. We maybe don't go quite as high there and just tweak my
rotation a little bit, too. And we're just trying to avoid
this repeating too much. So we can now press space
bar to play this back. And you can see that we now have some movement on our body. All hit space again
to stop that. And I want to adjust the
abdomen a little bit. So I'm just going to disable my main controls and re
enable the abdomen controls. I'm going to select both
of those controls there, and then I'm going to change my transform pivot point
to individual origins. That means as I rotate
these controls, they should both
rotate together. Now, I'm just going to undo that and make sure
I'm on frame one there and rotate that down out of the way of
the wings a little bit. And we can just scrub through
and see how we're doing. So we're still clipping on
a couple of the frames, frame nine and frame four. So I just need to
look at what's going on with the wings
on those frames. So I need to turn
my wing controls back on and my abdomen off. So let's have a look
at frame four here. Let's bring that control up and this other one down a
little bit. That's better. And frame nine was the other
place that we had an issue. So I'll do the same thing there. Just lift that up a little bit, and that should
work fairly well. Let's just play that back again. There we are. And that forms the basis of
our flapping cycle. But at the moment,
this is only looping because we've changed our
endpoint here to frame ten. If I increase this
to 96 frames or just 4 seconds and press
play, everything will stop. So we need to loop
things properly. So I'm going to hit A to select all of my win controls here, and we could duplicate
these keyframes along the entire timeline, but that wouldn't be a very
efficient way of working. So what we can do
instead is hold down control and hit tab to move
into the graph editor. Now over the graph editor, I'm just going to hit the home key to
frame everything up. I'm going to hit A
over the channels here on the left to
select everything. A here in the viewport, and then home should frame
up all of my key frames. Now, what I want to do is just drag across all of
the curves here, and you should see
here at the side, things have changed
and we now have this modified tab available. If individual keyframes are
selected, we don't see that, so we need to ensure that the curves themselves
are selected. So drag across all
of the curves, and then we get the
modifier tab available. So now under this
add modifier menu, we can go ahead and add
in a cycles modifier. And you can see, as we zoom
out that our curves continue. Even though we only
have keyframes in the first 11 frames, the cycle continues
on beyond that point. So now if we press play, our wing flap cycles nicely, but our body stops moving
after the first few frames. So we need to do the same
thing with the body itself. So I'm going to disable
the wing controls and reenable the main controls, so I can get again at
this thorax control. And now here in
the graph editor, you'll see that we can't
select our curves. This is because of the
preference that we set earlier. If I open up the preferences again and I disable this only
show selected keyframes, you can see that we can
see all of our curves and our keyframes and we can
select any of them like this. The problem is, if we want to
select specific keyframes, it's very easy to accidentally select something that is
on a different curve. So the reason for enabling this option here in
the preferences, even though it
means that we can't easily select our curves here, is that if we head over to our channel box on the
left hand side here, any curve that we now select
here will become enabled. So now if I try to
select keys here, I can only select a
key on the curve that I have enabled over on the
left in the channel box. If I do want to
select everything, I just roll my mouse over
to the left hand side here and hit A to select
all of those channels. And now, once
again, I can select anything over here
within the graph editor. Which way you choose
to work is up to you. I personally prefer to
work this way because it enables me to isolate an
individual curve easily. It simply means that you need to remember to select
everything over here on the left hand side
if you want to be able to get all of
the curves together. So we can select our curves
here and once again, add our cycles modifier. So now if I press space to play, our full cycle moves properly throughout
the entire timeline. So with that done, we can
just save our file there. Then in the next lesson, we can start to move
our butterfly around within the scene to create something that looks a
bit more believable.
6. Puppeteering: Butterflies are known for
their erratic movement. And one way of creating that is with a technique known
as puppeteering. So the first thing I want to do is within my camera view is just move out a little bit and rotate around
my butterfly here. And this just gives us a little extra space to work with it. And what we want to do is to create an erratic path
across the screen here. And to do this, I'm first going to select this
fly control here. And then I'm going to
hold down control and hit tab just to jump us back
here into the dope sheet. You can see that
we have a keyframe here already on our frame one. So to puppeteer this, what we're going
to do is make use of the auto key
framing function. So first of all, I'm going
to make my camera view a little bit bigger just to give us some space
to work within. And I'll also disable
my gizmos here. If I hold down the G key, then I can roughly move our butterfly around and define
a path for it to follow. But obviously, none of
this will be saved. If I release my mouse, all that I'm doing is changing that first key frame. So
I'm going to undo that. But there's a way to make
use of our auto keying. And if we actually play back our scene and move the butterfly
around in the same way, then it will record
its position. Now, the easiest way
to do this is to first extend our
timeline a little bit. So I'm going to change
this up to 250 frames. And with auto key enabled, if we press space and
then press the G key, you'll see that
we're starting to record the position
of our butterfly, and we can move it around
the scene in an erratic way. And when we're happy,
just click and release. And then you can
see that this is producing exactly the sort of movement that we
were looking for. So I'll just press
space to stop that. And we now have a
basic flight path. But because I didn't start
moving the mouse straightaway, what I want to do is to just trim out the
first few frames, everything before
about frame 29. So if I move to frame 29 and I press the left
square brackets key, you'll see it selects everything before
the current frame. And if I press the right
square bracket key, it selects everything
after this frame. So I'll just hit the
left bracket key again, and then I can delete
those keyframes. Then if again, I press the
right square brackets key, it would select
everything, and I can drag that back to frame one. So our animation now starts
from the first frame again. And then we can move
through to round frame 146, and we can set that
as our final frame. And then we can play
this back again. And we now have a
nice flight path moving straight
across the screen. But we can now make
this look even more interesting just by rotating our camera around a little bit so that our butterfly flies
off into the distance, and we make better use of
the depth within the scene. And then having done that, I can just adjust my
endpoint a little bit. Looks like things stop
moving around frame 150. So I'm going to select
everything after frame 150 and delete it. And we'll make that
our final frame. So I'm just going to
push my camera in a little bit and rotate around a little bit
further just so that our butterflies starting in the bottom corner and moving
off and up to the right. Reframe this slightly up. And you can obviously
adjust this however works with
whatever you've created. So I'm fairly happy with
how that's looking. So I'll just press space
to play that back. And then we have
quite an erratic and fairly believable path
for our butterfly. So this technique can
work really well for motion that just needs to
work on a single plane. But if we move
around, you can see that a butterfly moves in
just a single direction only, and it doesn't move
left or right at all. It has a very straight path. It's not moving left or right or round in
a circle at all. So this is definitely a
useful technique to know, but it does have
its limitations. So what we'll do is
save our scene there, and then in the next lesson, we can explore a
different technique, which will allow us to
achieve a similar result, but with a bit more flexibility.
7. Curve Modifiers: In this lesson,
what we're going to do is roughly define
the path that we'd like our butterfly to follow
and then make use of Blenders curve modifiers to add some extra detail
to the animation. So the first thing I want to do with this fly
control selected, I'm going to roll over
the dope sheet here, hit A to select everything, and delete all of
those keyframes. I'm also going to
reset the position of our fly control here by
holding down Alt and pressing G. So the
first thing that I want to do is just hit I to devine my first keyframe
here on frame one. And then what I can
do is move all the way down to frame 150 there, hold down G, and then move our butterfly all the way up to the top right as we had before. And then maybe I actually
want to move this back off in space a little
bit, increase the depth. So we can move it in both of the viewports until we're getting something that
we're happy with. So we now have a basic path defined between
point A and point B, but it's very linear
at the moment. And by default, we'll
also have an ease in and an ease out at
the ends of this motion. So I'm just going
to hit Control tab to go into my graph editor. Then we'll hit A to select everything and hit our home
key to frame it all up. So you can see here within
the graph editor that we have an ease at the start and the end of each
of these curves. So what I'm going to do is hit A to select all of my keys, and then we can hit the V key, and I'm going to change all of these to use a vector handle. This forces the handles to
point to the neighboring keys and creates a linear curve which generates a
constant speed. What I can now do is start to break up this
path a little bit. I can pick a point partway along and I can start to move my
butterfly around a little bit. I can use the G key and then just move it down a
little bit on this frame. Let's just move a
little bit further along and maybe I want to
move it up quite high here. Let's go a bit further and
drop it down a little bit. I'm not sure I like it staying
down at the start here, so I'm just going to move it
back up again a little bit. And we're obviously just
trying to create something here that feels a
little bit random. Now, if we play this
back, at the moment, the end result is
still quite robotic, so we still want to create a
bit more variety in there. I'm just going to have a look
at this from the top view. And we've got a little bit of a strange path going on here. We want to create a
balance between having something that's very erratic, but also creating
an interesting path for our butterfly to follow. And we can start to adjust
some of these keyframes. So I'm just going to switch
back to the dope sheet. So I'm just going to scrub through to see
what's going on. We're moving forward
quite straight here. So I'm just going to
adjust this a little. Make sure we're on the
right keyframe here. Again, just looking at the
flow of the motion here. I think I'll move that across
a little bit here as well. So we have a basic
path defined there, and that will do us
as a starting point because what we want to do now is to start breaking things up by making use of the
curve modifiers. So I'm going to switch
back to the graph editor. So what I'm going to do is just to select my location
curves here, the X Y and Z locations. And then I'm going to drag
select across all of these. And then within
the modifiers tab, I'm going to add in
a noise modifier. And you can see
straightaway that this has made a big
difference to those curves. Now, the default
values are probably going to be a bit
too erratic for us. And if I play this
back, you can see that our butterfly is
jumping all over the place. But it has introduced
some randomness for us. So we just need to go in and adjust these values
a little bit. So what I'm going to do is just select this z curve
here to start with. And the modifier has a number
of different values here. Now I'm using Blender 4.4 here, which features a new
version of this modifier. So if you're using an
older version of Blender, then your settings will be
slightly different here. You can actually get back to the same settings as
previous versions of blender just by enabling
this legacy noise option. So these are the same
parameters that you would see in older
versions of blender. If you are making use of an
older version of blender, then you'll just have to adjust the scale and strength settings until you get something
that works well for you. I'm going to disable
the setting and make use of the newer version
of the noise modifier. So the first thing
that I'm going to do is to expand the scale here. You'll be able to
achieve similar results in older versions of blender. Your values will just
be different to mine. I'm also going to dial down the strength here quite
a bit on the axis. I'm now going to do
a similar thing with the other two axes just to give us a better
starting point. I'll dial down the strength a bit and expand the scale out. This will just give us a
better base to start from. So our Z axis is controlling
our forward motion here. So I actually don't want this
to be too extreme at all. So I'm going to adjust
my strength just so that I get a little bit of
variation in the line here, but I'm not causing
our butterfly to move backwards
and forwards at all. If I go ahead and
increase this strength, you can see that
our butterfly is, in fact, moving
forwards and backwards, which is obviously something
we don't really want, so I'm going to dial
that right the way down until we've just got a
little bit of variation here. If we move on to our Y curve, that's controlling our up and down movement on our butterfly. So what we've got there is actually looking fairly
good at the moment. So I'm just scrubbing
through this slowly, looking at it frame
by frame just to see that we're getting
a reasonable amount of random motion in there. And then moving on to our curve, that's going to control our side to side movement
of our butterfly. So again, we've already got a bit of random movement here. I'm just going to play with
my strength value a bit. So this is giving us a lot
more side to side motion. Now we can increase our scale. I'm just going to dial this up. So we're getting a lot
of side to side motion, but it's not too frequent. So then we can just press play and see what that has given us. So you can see from our rather robotic motion
that we had before, we now have something that
feels a lot more natural. And the benefit of making
use of this technique with the curve modifiers
is that we still have full control over
our original curves. So at any point, I can go in and start to
adjust these curves. I can select points on them, start to move them up and down. If, for example, I want
to adjust the height of the butterfly at any point,
I can easily do that. And we also still have
the ability to adjust any of our modifiers for the
finer detailed animation. So this technique gives us a lot of versatility
because we can more precisely control the path of our butterfly with the
keyframes that we're setting, and then we can draw
on the strength of the noise modifier
to add in a lot of that random motion that makes the butterfly flight
feel more believable. So I'm happy with how
that's now looking. But if we want to create
a more complex path for the butterfly to follow, there's actually an
easier way to do it than setting
individual key frames. And that's something
that we'll explore in the next lesson.
Don't forget to say.
8. Path Animation: In the last lesson, we
created a number of keyframes to define
how our butterfly would move throughout the
scene and then made use of curve modifiers to create
a more erratic motion. But if you want to create
a more complex path for the butterfly to follow, there's a different
way to achieve it. So what I want to
do is once again, select my fly control here. And I'm going to select these
three location curves here, and I'm going to remove the noise modifier
from each of them. Now I'm going to head back
into the dope hut, hit A, select all of my
keyframes here on the fly control, and
then delete them. Now we should be back
to a point where we just have our basic flap cycle. The next thing I'm going
to do is just jump into the top view here and
then hit the key, just hide that side panel. And what I want to do is to draw out a path for our
butterfly to follow. Just going to hit the W key just to hide our gizmos there. And to do this, we don't
want to be within pose mode. So I'm just going
to hit Control and tab to head back into
object mode here. I'm going to hit Shift A
and add in a Bezier curve. Now, by default, this is going to be a lot larger
than our butterfly. I'm going to hit tab
to go into Edit mode, A select all of vertices
and X to delete them. I can then zoom in
a little bit more, and I'm going to hit the T
key to open up our tool bar. And what we want here
is this draw tool. And this will enable
us to draw a curve. And since our butterfly
is facing down here, what I'm going to do
is just start out drawing from roughly
where our butterfly is, and I'm going to
draw out a spiral. There we are. So if
I rotate around, you can see that we have
our flat spiral here. And what I now want to do
is to adjust this shape. So I'm going to go back to my selection tool and just select the vertices
right here in the center. And now I want to turn
on proportional editing, which you can do up
at the top here. At the moment, I have
here a value of ten, and if I hit the GK
and start to move, you can see that
we're going to start moving this central
portion here. Now, if you've got a scroll
wheel on your mouse, what you can do is
just scroll the wheel to just the area of effect here or you can head back up to the top and just manually
type in a number. So I'm just going to increase
this to 20 centimeters, which should be about right. I'm going to hit G s. And I'm going to move these
points down a little bit. And you can see that this is creating this more
interesting spiral effect. And if we want to,
we can just always move a few of the
other points around. I want to create something that still looks like a spiral, but it's also a
little bit wonky. So I think I'm happy
enough with that. Then I'm going to
move everything up. So I'm going to select
all of the points, then hit G and Z. What I'm going to do disable my proportional editing there, then hit G and Z
and move everything up until it's sitting just
above the origin there. And this is the path that we're going to want our
butterfly to follow. So I'm going to hit Tab to
head back into object mode. And the next thing
we need to do is to attach our butterfly
to this path. So to do that, I'm first going to select
the butterfly rake here and hit control tab to
head back into Pose mode. And in this case, what I'm
going to do is make use of this global control to
attach to the path. This means that we'll still have access to this fly control, which will allow us to make any additional adjustments
that we wish to. So with the global
control selected, I'm going to head over to
my bone constraints tab. And under bone constraints, we can select follow path. Now we need to pick a
target object here so I can select the eyedropper and just click on my path there. And you may have noticed
that our butterfly has jumped slightly forward
to the end of the path. So within our constraint here, I want to enable this
follow path option. And this will force the
butterfly to orient itself to the path correctly
as it moves along. The other thing I want to
do is I'm going to leave my axis as my up axis, but I'm going to change my
forward axis to negative Y. And it looks as though it's facing in the wrong
direction at the moment, but we'll see what
it looks like once we're properly moving
it along the path. Now there are a couple
of different ways that we can add some
animation to this, and you can see
here that we have this animate path button. So the first thing that
we can do is just click on that and see what
results it gives us. So if I click on that button and then start to scrub
through the timeline, you can see, indeed,
that our butterfly is starting to move
along the path. And because we enabled
that negative Y option, it does look as though
the butterfly is indeed facing in the
correct direction. If I were to change
this back to Y, then you would see
that the butterfly is now flying backwards. So I'm just going to
move out a little bit. And now you can see,
as we scrub through, it will move all the way along
this path up to the top. And it's reaching
the top of the path here at around frame 100. So what we now need to
do is head back into object mode and
select our pathhae. Then under the data
tab for the path, we have this path
animation section. And if we roll this down,
you can see that we have this number of frames and
this evaluation time. You'll see as I
scrub through here that the evaluation
time changes, and this animation
is what was created by clicking on that animate
path button earlier. And we can adjust how
fast our butterfly is traveling just by adjusting
the number of frames here. So if I wanted to, I could
expand this out to 150 frames. Which means it would
now take 150 frames to reach the end
of the path here. Or I could reduce it down
to maybe just 50 frames, and then our butterfly
would travel a lot faster. So what I'd like to
do is make full use of our 150 frames here. But the problem is that
this evaluation time here is not something that
we can now directly control. If we jump into the
graph editor by holding down control and hitting
tab over the dope sheet, you'll see that we
have this curve here for the evaluation time. But this is a curve which has been generated
automatically. So what we can do instead
is just right click on evaluation time and
click Clear key frames. And you can see that that's removed that curve completely. And now, if we scrub through, our butterfly just stays put. So instead, what
I'm going to do is just jump back to
my first frame, which you can do by holding down shift and pressing
the left arrow key. And then under this
evaluation time, I'm going to set
that back to one, and then we can click this
little dot to the side of it, and that will set a keyframe. We can then move to the end
of our timeline to frame 150. And then in evaluation time, we can again type in 150, and that's automatically
being keyframe for us. And now within the graph editor, you can see that we have a
curve we are able to control. So if we want to, we can
start this out more slowly. And then if I adjust
this handle here, we can have the butterfly speed up as it reaches the
top of the curve. And this just gives us
a lot more control to adjust the speed
of the butterfly as it moves
throughout our scene. So the next thing
that I want to do is just to make sure
that we can see all of this within our camera view
port over here on the left. So to achieve that,
I'm just going to enable my overlays over here and then just frame up that curve within
our camera view. And I think what
I'm going to do is just maybe start
the butterfly just out of the bottom of the screen here and then have it
come up and through. So we can just disable that, and then we can play things back and see what we're getting. So that's looking pretty
good at the moment. But if we have a closer
look at the butterfly, though, you can see that the
butterfly is upside down. And as we scrub through, you can see that
that seems to be the case for much
of the animation. Now, there are a number of
ways of dealing with this, but the easiest is if we
go back into pose mode, just by hitting control tab, we can then select
our fly control, and I'm just going to go back to my first frame and
frame up my butterfly. And now, what I want to
do is just to rotate this fly control by 180
degrees around our head axis. And then as we scrub through, we should then see that the butterfly is now
the right way up. Now, the way that curves work, if we first select the
curve by going back into object mode and select that curve and then hit tab
to go back into edit mode, then any one of
these vertices here, we can actually
start to twist them. So with the butterfly here
quite close to this vertice, and with this tool here, we can actually
rotate this vertice. That allows us to control the
angle that our butterfly is flying at as it moves through
that part of the curve. So if we wish to, we can head down to some of these other vertices and maybe just the angle that
the butterfly is flying at. And we can do this at any particular point that we choose. But I think I'm fairly happy
with how that's looking, so we can just head back
into object mode there. And let's make the
camera a bit bigger, and just hit play and
see what we end up with. Mm. I'm just going to just
that camera a little bit. So I'm happy with that. This is how you
can go in and add a slightly more controlled
path for your butterfly. And if you wish to, there's still the option to
go in and make use of those noise modifiers to add some erratic motion
over the top of this. I'm fairly happy with
how that's looking. So I'm just going
to hit Save. And
9. Final Thoughts: In the previous lessons, we've seen how puppeteering,
curve modifiers, and path animation can all be used in conjunction
with keyframe animation. These techniques are obviously useful when animating
butterflies, but they also have a wide
range of other applications. Puppeteering is great
for simple motion, whilst anything which needs
to be moved in a precise way throughout a scene can be
animated along a path. Noise modifiers,
when used subtly, can add random complexity
to any animation. If you've been
following long and have created your own
butterfly animation, don't forget to share it in
the class project gallery. So I'd really love
to see your work. If you've enjoyed the class, then do also consider
leaving a review. Not only does it help other
students know what to expect, but each review also
helps me to know if the classes I'm making are
having a positive impact. Finally, you may want to
check out my profile page, where you'll be able to
find my other classes and learn a bit more about me. If you'd like to, you
can also follow me to be notified of every new
class that I publish. Thank you so much for
joining me in this class. I really hope that
you've enjoyed it, and I've also taken
away some new skills which you can apply to
projects of your own. Thanks again, and I hope
to see you again soon. M
 John Knowles, Animation Director