Transcripts
1. Introduction: Seeing your own characters coming to life through animation is a magical experience
which I never get tired of. This class will teach you the essential three d
character animation skills you need to get started. Hello. My name is John Knolls. I'm a character animator
and animation director, and I've been lucky
enough to work in children's television
for the last 15 years. This third class of mine
into the Ocean series, we're going to be covering character rigging and animation. Wis this class is
designed to build upon the previous
classes in the series, it also functions as
a standalone class. If you'd simply like to learn about character
rigging or animation, you're free to
follow along using the provided models
as a starting point. If however, you've already taken the earlier classes
in the series, you'll be able to apply
everything that I demonstrate to bring your
own character model to life. In this class, I'll first demonstrate how to
build a character rig. These are all of the
essential controls that you need to be able to
animate a character. We'll then go on to
analyze how a fish swims, using that information to help create this simple
looping cycle. Finally, I'll show you
how to make use of that cycle as an element
within a longer animation, which truly brings your
character to life. This is a beginner level class, using the 33d software
application blender. If you need to
blender, I'd recommend starting out with my
Blender essentials class, which you'll teach you
everything you need to know before continuing
with this series. Character animation is a
complex skill to master. I'll be covering
everything required to bring your fish characters
to life in this class. But if you'd like to dive
deeper into the subject, my character animation
fundamentals class is also worth
checking out. By the end of this class,
you'll have all the skills necessary to both rig and animate simple
characters of your own. So if you're ready
to start bringing your own characters to
life, let's get started.
2. Class Overview: Hello, and welcome to the class. This class is split
into two sections. Initially, we're
going to be taking our character model through
a process known as rigging. This is where we add
all of the controls necessary to bring it
to life in animation. Was any individual object
can be animated in Blender. In order to create
flexibility within a model, we need to add what is
known as an armature. This is formed from a
collection of bones which together create the underlying
skeleton of our character. Once a character
rig is complete, we move on into animation. This is the front
part which we've been building up to
throughout this series. It's here that we'll
really start to bring our character to life. We'll start out by analyzing
the motion of a fish, which we'll then be
able to apply as we create this cycle
of a fish swimming. Once we've got that sorted, we'll then make use of that cycle within a longer
piece of animation. If you don't already
have your own character models to work with, you can download
the provided model from the class
resources section. Character rigging can
be a technical process. I'll be keeping
things simple and straightforward as possible
during this class, but if you do find
yourself struggling, I've included a rigged version
of the character model. You'll be able to make use of to either analyze its structure or if you want to
jump ahead past the rigging section into
the animation section, then you can make use
of my rig to do so. For your class
project, I'd love to see your final
character animation. Once you've finished, be
sure to upload your work to the class project gallery for feedback and to share
with the other students. Also, if you'd like
feedback along the way, feel free to upload
work in progress, or ask questions on
the discussions page. If you're ready, let's get
started with the first lesson.
3. Class Updates: Blender is a powerful and rapidly developing
piece of software. Typically, there are
three main updates of the application each year, coming with new features and
performance improvements. This is fantastic for those
of us using the software, but it can be problematic
when searching for training. Rapid updates mean
that training can quickly become out of
date and hard to follow. To provide you with the
confidence to follow my classes, I will always check
new releases of the software and update my
classes where necessary. When Blender version
four was released in November 2023 introduced
several updates which do have a slight
impact on this class. Whilst the modifications
are minor, I've included lessons later
in the class to cover each of these changes and ensure that the training is as
clear as possible. If you do find
yourself struggling to follow the class
for any reason, please do leave a question in the class discussion section and I'll aim to respond as
quickly as possible. If you're ready, let's jump
into the first lesson.
4. Rigging: Scene Setup: The same file that I have
open here is one which you can download from the
Class Resources Section. However, if you've already
modeled your own fish, then feel free to start with
your own scene file instead. Before we get started, I'd first like to
rename this scene file. I'm just going to go to Save As, and I'm going to
change this name to Rabbit Fish Rig Version
1, and Save As. Next before I actually
start on the rigging, I'd like to tidy up a few
things in the same file. At the moment, we've got
Material Preview on. Before I hold down the Z key and switch this to Solid Shading, you'll see that we can
no longer see our fish, and the reason for that is that this volume object that we have is not transparent
in solid view. To work around that, what we're going to
do is head over to the Properties Panel
and we can open up the Object Properties, attempt to View Port Display. If I scroll down, we have this Option Display as Textured, and we can change that to Wire, and now we'll be able to
see through the object. While we're actually
working on our rigging, we don't actually
need to see all of these lights and
other elements. For now, I'm actually
going to disable this environment collection
in the Outliner. One thing that was nice
about the Material Preview is that we could
actually see all of the textures on our fish. Now if I head up to the top
right of the Viewport here, you can see next to these different
Viewport Shading Modes, we've got this Drop Down. Whilst we're in the
solid shaded mode, we can go onto this color
section and change to Texture, and that will
enable our textures simply within this viewport. We can do the same over here
in the Camera View as well. Next thing I'd like to do
is reset the rotation of this fish because
we don't want to build the rig for it
with it skewed off axis. You can do that simply by making sure that your fish
body is selected, and then hitting "Alt R"
to reset the rotations, and you can see that's
returned to zero. I'm now just going to hit
the Number 3 key or my Numpad to jump me into the
right orthographic view. We don't actually need to see
our Reference now either. So I'm going to disable
that collection as well, and I'm going to click on the "Fish Collection"
that we have here. Let's just rename that
actually to Rabbit Fish. I don't really need
to see my camera here in the right view either. So let's turn off its
viewport visibility here. I'm also going to rollover
this viewport and hit "Alt Z" to enable X-Ray Mode. I'm just going to save my
scene and will be ready, start adding our rig
in the next lesson.
5. Rigging: Main Body: A character rig is a
collection of controls used to manipulate a
character for animation. Within Blender, a rig is
formed from a collection of bones contained within what's
called an armature object. It starts out, and just
double-check that you have your rabbit fish
collection selected. That ensures that when we
add the armature object, it will be created
within this collection. We're then just going
to hit Shift A, and then we can go
down to Armature. When we do that, you'll see a single
bone has been created. We now need to hit the Tab
key to enter edit mode. Now we can start manipulating our bones and adding
additional ones. For now, what I'm
going to do is leave this bone exactly where it is. I'm going to select it
and hit F2 to rename. I'm going to call this Root. This will be the master control
which lets us move around the entire rig and reposition
in the scene if necessary. I'm now going to hit Shift A. Once we're in edit
mode for an armature, that will actually
add in a new bone, and it's created it over the
top of that original one. If we just click to select, you can see up at the
top here that we've selected a bone called bone, so it's not a root object, which means we can
now hit J and we can move this bone and
reposition it within our scene. What I would like to do
is just move it over to the side slightly and down
a little bit as well. What I'm looking to do is place it somewhere around here, so it's in line with
this central line that runs through between
the nose and the tail. Now, with the bone selected, I'm going to hit F2 and we'll
rename this one, Torso. Now, there are three
parts to the button. We've got the main bone
itself and we also have this head and tail control. We can use those to manipulate the bone and resize
it here in edit mode. But if I select this
head part of the bone, I can then hit the E key, and that will extrude
a new bone from it. I'm just going to then hold down my middle mouse to constrain
that movement to the y-axis. I'm going to drag that out and drop it partway
along the head here. Then hit E again, and that lets me
extrude another bone, which I'll bring out to
the tip of the nose. Again, select these
bones and rename them. Rename this one to head. This one we can call nose. I now want to go back. I'm just going to
zoom in a little bit so we can see more clearly. Again, select the head
of this torso bone here. You can see it's the slightly
larger circle of the two. I'm going to hit E to extrude, middle mouse to constrain
it to my y-axis. I'm actually going to drag
that all the way down to the root of the tail and click. Now, what I'd like
to do is actually split this so that we have more than one bone in this chain coming back along the
back of the body. I'm just going to
select this bone. If we right-click, we have the option
to sub-divide. That will split it
evenly in half. If you go down to the bottom
of the viewport here, you'll see this
little pop-up here, and that tells us that we
have just a single cut. I can increase that number to two cuts and that will give me three bones running down
the back of the body here. You can see because
we excluded them from this bone which would
rename to torso, we now have a bone
named torso 1, torso 3 and torso 2. It's not very logical naming. I'm just going to select
them in turn, hit F2, and I'm going to rename
these to just to torso_1, 2 and 3 in order down the chain. The next thing I'd like to do is define some bones for the tail. In this case, I'm not going to extrude them from the
end of this chain here because I'd like to
add two separate chains, one for the top and one for
the bottom of the tail. That would just give us a
little bit more flexibility within the tail when
we're animating. Instead, I'm just going to hit Shift A to create a new bone. I'm going to select that
bone and hit G to move it. Just double-check
up at the top here that you're moving
the correct button. I'm going to drop it around about here in the upper
part of that tail. I'm going to select
the end of that tail and then just hit G, and rotate it down
and into place. I'm now going to
select the bone, hit Shift D to duplicate it, lets move it down to
the bottom of the tail and grab the end of that and
move it down into place. I'd also like to increase the number of subdivisions here, so I'm just going to
right-click on each of these bones and hit Subdivide. I'll select the lower one, right-click and
subdivide as well. Once again, I want to rename
these so that we're not left with a whole load of bones
which are undefined. I'm just going to hit
F2, and we'll call this, Tail. Tail_Up_1, Tail_Up_2. I'm now going to hit Shift
A to create another bone, which we're going to move
over and we're going to use for this dorsal fin
up at the top here. I'm just going to move the top-left bone
down and into place. Somewhere around
there, that's good. Then before we subdivided that, I'm actually just going to select the bone
and hit Shift D to duplicate it because
we're going to need another one down at the
bottom here as well. We can then once again
select each of these bones and sub-divide it so that we've got a bit
more flexibility. Let's rename them dorsal 1 and 2. This fin down at the bottom is actually known
as the anal fin. We call that Anal 1 and Anal 2. Don't forget to save.
6. Rigging: Fins: Now so far we've defined all of the main bones that run along the center
line of our fish. But we're also going
to need controls for both our pectoral
and pelvic fins. To add that again, I'm going to start out
just in my side view here and I'm going to hit Shift
A to add a new bone. Add that bone and move it over to where my
pectoral fin starts. Now what we can do is just
move into our 3D view. I'm just going to hit
G and I'm going to slide this out along the x-axis, just roughly in line with the ridge of this short
part of the fin here. I'm going to grab the tip
of this bone here and just hit G to move it
down and into place. You have to keep
moving around in the 3D view to make
sure that we've got things aligned as we need. You can keep going in and
tweaking each part of the bone to make sure that
they're in the right place. Now, I'm trying to get this as close as possible to where I want the rest of the chain
to extend from here. That's looking fairly
good. We can move the whole bone obviously
by selecting it there. The other thing that you'll
find as you start to move bones around within
the 3D view like this, sometimes the orientation of that bone is not exactly
as you'd like it. We can control that with
this roll attribute here. I can pull up back a bit so it's a bit better aligned
with the rest of my mesh. Once you're happy with that, just select the end
of that bone there, and we once again, we're
going to extrude this out. I'm going to hit E, and
I'm going to pull this out and try to drop it roughly
around the tip of my fin here. Once again, it's worth
moving around in your 3D view just to check that things are lined up
as they should be. Again, select that
bone and check that the roll value
is correct here. I'm going to take this
right back somewhere round here so it feels as if it's
actually aligned to my fin. Once you're happy with the
placement of your bone, we can sub-divide it to give us better control over
the vein in animation. Again, I'm going to right-click, Subdivide and increase my
number of cuts to two. This once again,
double-checking everything is in a correct place there. Now I want to rename
these bones again. I'm going to select this one at the root of the
chain and hit F2. Then I'm going to rename
this to pectoral_1. I'm just going to copy that, and then rename each of
the others in the chain. There we are. For now we're just going to work on the fins on the one
side of the body, and you'll see why and as well. Now I'm going to move
to the pelvic fin. Again, I'm just
going to jump into my side view and will
add another bone. I shall move down again
roughly into place before we go into the 3D
view to fine-tune that. The first thing I'm going to do is define this initial bone. Always moving around, check it from all angles and make
sure it's working correctly. I'm just going adjust
that roll slightly. That should be fine. Select
the end of the bone here. You can see I'm aligning my viewport roughly to the same angle as this fin
before I extrude the bone out. That just means I won't
have to move things quite so much once
the bone is created. It's more or less
in the right place, but you can see the roll
of this is not so great. That's just that. It's a bit better. Once again with this,
I think I'm going to subdivide it to give
me a bit more control. I just right-click
and subdivide. One subdivision is
sufficient here. Let's rename our
bones, so hit F2. Call that pelvic_1, 2, that's 3. Now the reason we were only
working on the fins on the one side is that
we can mirror them over to the other
side of the rig. But before we do that, we need to ensure that Blender knows that these
are controls that need to be mirrored which means
we need to define them as being either left or right
controls within our rig. Now to do that, if we have a look at the
pectoral fin first, you'll see I named each of these bones without defining whether it was a left or right. If I select all
of those bones in the chain and we head up
to this Armature menu, we have an option here
under the Names menu, to Auto Name left/right. If I click on that, you
can see up at the top here it's added a.l at the end. In this case, we
actually want this to be named as the right
bone rather than left, so we can do that again
up in the Armature menu. If we head back down to
that Names menu here, we've got Flip Names. If I click on that, you can see that our names
have been changed.R. We can just click through
those and you can see each of them has that.R
suffix at the moment. We'll do the same
down at the bottom here and select all of those
bones for the pelvic fin. The Armature menu, Names, Auto Name, and then again, we have to go in and we
need to flip those names. Should have renamed each
of those correctly. That done, we can
select all of the bones here for our pectoral fin. If we go up to Armature, we have this Symmetrize option. When we click on that, it's now generated a chain
on the other side. Each of these bones on
the other side has been named to match the bones we first created
on the right side. We can now go ahead and do the same down at the bottom
here with our pelvic fin. I select all of those bones. Armature, Symmetrize, and it's dropped everything into the right place with the
right names here as well. [NOISE]
7. Rigging: Parenting: Now that we've
defined all of the bones for our character, we need to ensure that they're connected together
in the right way. Now to check out how things
are moving at the moment, we can move out of edit
mode and into pose mode. You can do that up at the
top here, or alternatively, if you hit Control Tab, you'll get up this pie menu and you can select it
from there instead. In pose mode for first
select this route bone, and then just
translate that around, you see that nothing follows it. We actually want the entire rig to follow along with
that route bone. Same guys, if I select this two side bone,
nothing follows. Let's see if I rotate
this head bone my nose follows along. Now if I select this bone at the root of this
chain and rotate it, these two bones are connected
as well as because we extruded each of
these bones from one another or subdivided
the chains, so you'll see the same works for each of our fins as well. So I'll just hit the
tab key that's going to take me back into
edit mode here. Now we want to start
connecting things together. So I'd like this torso bone to control both of these two main change
through the body here. I'm going to select
this head bone, and then I'm going to shift
select my torso bone. I'm going to hit control
pate parent and I'm going to select make parent keep offset. That shows the bones word
pop to a different location. I'm going to do the same here, I'm going to select torso 1, shifts left torso, control pate and keep offset. Inside my torso bone now, and shifts my route again, hit control P, and keep offset. This way when we move the root, it will then move
this torso bone, which will in turn move
these two chains with it. So we now need to work out where we're going to connect
each of the fins. It start at the back here. What I'd like to do
is connect each of these chains at the back here that are
controlling these fins, to this bone at the end
of this torso chain. That ensures wherever
this ends up as we're rotating
the body around, these other bones
will follow with it. So again in turn, I
can just select each of the root bones of
these fin chains, shift select the button
I'd like to parent it to and hit Control
P, keep offset. You can see each time I do it, it creates this dotted line
which shows the relationship. So I'm just going to
go through each of these other chains
and connect them up. Now, looking my
pectoral fins here, if I select the first
bone in the chain here, you can see that it's fairly well aligned
with that head bone, so wherever the head bone turns, I'm going to want
this to follow along. I'm going to select the first bone in the
chain here again, shift select that head bone, Control P to parent
and keep offset, I'll do the same on
the other side too. Now when we're looking at
pelvic fins down here, we've got a decision to make. You can see they align
fairly well with the center point between a
head and a torso chains. In this case, I think
what I'm going to do is connect it to
the torso chain. As the fish is
swimming, I'm expecting this to be moving around
more than the head, and having these
fins follow along with the back of the
body would make sense. Again, the first bone in the
chain shifts left torso 1, and Control P keep offset, the same on the other side, and that should be
everything connected. Once again to test, we're going to hit Control tab, and going to pose mode. Now if I select this route control and translate it around, you'll see my entire
rig follows with it. I can select this torso control, and again that moves
everything below it, but leaving route control, which is exactly
what I would like. If I select my head
bone and rotate it, it's moving those
pectoral fins with it. If I select the ridge of this torso chain
here and rotate it, again, it's moving
all of those fins at the back along with
the pelvic fins below. So it looks as
though everything's connected as we would like. I'm just going to hit Control Tab and that's
going to take me back out in this case
into object mode, and I'm going to go up
and rename my armature. So call this rabbit fish rig. Let's save our scene.
8. Rigging: Gizmos: So far all of our
character controls share the same bone
object's shape. Sometimes it can
get a bit confusing when all of these bones are layered over the
top of one another, particularly with a
complicated character. Also, if I disable the X-ray
mode here by hitting Alt Z, you can see sometimes it
can be difficult to select our armature when it's hidden
within the character mesh. Now, what we can
do within blender, is change the display of any of these bones to use a
different object instead. If I hit Control Tab
to go into pose mode, I'm just going to enable
X-Ray mode here as well. You'll see if I select
this route bone here and I go up to
the properties editor, if we go down to
the bone properties here, under viewport display, you'll see that we
have the option to add a custom shape and add a
custom object to define that. For now, I'm going to hit Control Tab to go back
into Object mode, deselect everything,
and I'm going to hit "Shift A" to add a new object. I'm going to add a mesh circle. We can actually just hit
"S" to scale that down, just a bit larger than our fish here. That should do for now. Because we have this
scale value on here, I'm going to hit "Control A" and apply the scale to reset
those values to one. I'm also going to go over into the Outliner. I'm
going to hit "F2". Let's rename this
to control object. Then with the objects selected, I'm going hit "M" and add a new collection which
we're going to call gizmos. That's moved our control object into this separate collection. Now, I'm just going to click
on my "Rabbitfish Rig" to select that and hit
"Control Tab" again. With my root bone here selected, I'm going to head over to this bone properties
tab and the custom object. If we click in
there, you can see all of the objects in our scene and I can go down and
pick this control object. Now what you'll notice, is it's swapped out our bone display and it's replaced it
with this circle here. But obviously its orientation is different to that which
we created originally. Now we've got a couple of
different options here. We can actually manipulate the transforms of our
custom object here. I could go ahead and I
could add some rotation in, rotating in this case
around the x-axis. But instead of that,
what I'm going to do, is I'm going to
hit "Control tab" to go back to object mode, and I'm going to select
this control object and hit "Tab" to
enter edit mode. Hit "A" to select all of
the points here and then I'm going to rotate them 90
degrees around the x-axis. You can do that just by
hitting off rotate x to define the x-axis and then 90
and hit "Enter" to confirm. Once we've done that, if I
hit "Tab" again to exit out, you should see that our gizmo is now rotated in
this orientation, but we have our root bone with this custom display object, which is now oriented
as we'd like it. To make things less confusing, we can now hide our
control object just by disabling this gizmos
collection completely. If I go in and select this, now you see that I'm selecting the whole of my character rig, which is far easier
than trying to select individual bones which
are hidden by the mesh. If I hit "Control Tab", that takes me into the rig. I can still manipulate this custom object
further if I choose to. For example, I could scale
this down on the x-axis, so it better matches the shape
and size of my fish here. Now I hit "Control Tab", and that will take
us back out into object mode. Let's
save our scene.
9. Rigging: Weight Painting - Intro: Now that our rig is complete, we're ready to actually
connect the mesh of our character to the
underlying controls. Before we do that, I just like
to version of my scene 4. Now Blender has a number of different ways in which we can connect the mesh to
the underlying rig. One which can be quite handy sometimes is to connect
with automatic weights. If I select the fish and then I shift select
my character rig, I can hit "Control P" to parent. But in this case, what
I want to do under this Armature Deform section is pick with automatic weights. Now, that will automatically
assign an influence from each of the bones to
the points on the mesh. Unfortunately, that's
not necessarily what we want in the
case of this character. Because we have these fins as separate objects,
we have bones here, which really we only want
for controlling these fins. Remember what you'll
find if we select the rig and hit "Control Tab" also I can select, for example, the nose
and rotate that. You'll see it's doing
the right thing. If I select one of these fins, for example, and I
start to rotate that, it's moving around
the side of the face, which we don't want
to happen at all. You'll also find
that we're probably getting the same effect
down at the bottom here. In fact, we're
getting all sorts of strange movement towards
the back here as well. Instead, what we want to
do is manually assign the weights to certain
bones within this rig. To do that, I'm going
to hit "Control Tab" to exit auto pose mode. What we want to do is remove the influence that
we've just added here. There are two things that we
need to do to achieve that. If I select the mesh itself
and go to the modifies tab, you'll see we have
this armature modifier which has been added in here. We can simply click "Remove
Modifier" to remove that. Now, if I select my
rig and hit "Control Tab," you'll see if I start to rotate any
of these bones, it's no longer influencing
my mesh, which is great. But there's something
else that we need to do. I'll get back into object
mode and select my mesh. You'll see if we go down to this Object Data Properties tab, we have these vertex groups
that have been created. This is how the relationship
between the bones and the specific points
on the mesh is defined. What we want to do is hit
this little arrow drop-down here and click "Delete All Groups" to remove
those vertex groups. That way we won't have
any conflict between the weights that were auto-generated and the new ones that we're
going to create now. Once again, if we select just our fish body object and shift select our
rabbit fish rig, we can hit "Control
P" to parent. But this time instead of
hitting Automatic Weights, we just want to select
Armature Deform. If we do that, and
I, once again, just select my mesh, you see we don't have any
vertex groups created here. But if I go into
the modifies tab, we do have this armature object, which is creating the
relationship between this mesh and the
rabbit fish rig. Now, what we need to do is go in and assign the weights that will control the points and connect them to the bones within a rig. To do that, first, select the rig object and then shift select
the body mesh. Important to do
that in this order, because we're now going to be editing the weights on our body, but we also want to
have this rig selected. Having done that, we can now
enter Weight Paint mode. Again. You can do that with this option up at the top here, or hit "Control Tab"
and you'll see that we now have weight paint as an
option within this menu. I'm going to click
on that. Now what you should see if you selected those two objects in the
correct order is that our fish is here with
a solid color on it. But we also have the option
to view each of these bones. If we hold down control and
click on any of these bones, you'll be able to select them. That's how we'll
select the bones and paint an influence
for each of them. But to make life a little
bit simpler, first of all, what we're going to do is Control click on this
first nose bone, and then Shift click on each of the other bones along the torso. We can then also shift click on each of these bones
for the fins and the tail. If you accidentally select something like that route there, just shift click
again to remove it. We're not selecting either our pectoral
or pelvic friends, and we're also not selecting either a root bone or
this main torso bone. With those bones selected, what we can now do is go
up to our weight menu here and click Assign
automatic from bones. This will give an
automatic assignment, but just from those bones
that we have selected, that will make our life
just a little bit easier. You can see whichever
the last bone is that you have selected, you'll see the influence
from that bone. We can now control
click on any one of these bones to see the
area of influence. You'll see as you click through, anything that's red has a full influence and that fades off through yellow
and green into blue, blue being zero influence
from that bone. The other benefit of working
in weight paint mode, having first selected
our character rig, means that we can
actually rotate each of these bones to see the
influence on our mesh. You can see at the
moment it's actually squashing some things right up at the top of the mesh there that we really don't want. If I right click, I can cancel that rotation and I can go and check out
each of the other bones. If I select this
one and rotate it, you can see that
we're really got this problem right at the
very top of our head there, where these points
are being crushed up. If I rotate this
bone here, again, you can see things are not doing exactly what we want up
at the top there at all. What we can do is
start painting in a little bit of
influence ourselves. To do that, you can see this circle that we
have around our cursor, that's the area
that we're going to be painting an influence. Up at the top, you can see
these different values. We have our weight and
each of our points on our mesh will have an influence
between zero and one, one being fully
affected by the bone, zero having no influence at all. Our radius simply controls
the size of our brush. If you have a pressure-sensitive
graphics tablet, you can click on this icon here, which will enable
pressure sensitivity to affect the radius
of your brush. Then Strength allows
us to dial in how much influence we're
painting on gradually. For example, with a strength
of one and a weight of one, anywhere I click on
the mesh will get 100 percent influence for
that particular bone. For example, if I
start clicking here, you can see these red marks here show that I'm getting
100 percent influence. I'm just going to
undo that for now. If for example, I dial this
strength right the way down, maybe to 20 percent, as I paint, I'm going to be gradually increasing the strength
up to this value of one. Again, if you have
a graphics tablet, we can enable pressure
sensitivity here. At the moment I can
see with this bone selected that most of my influence is very
localized here. Really, I would like to paint
some influence throughout the whole of the fish's
body up at the top here. What I'm going to do with
this strength set relatively low is just start painting
in along the body here. If you hold down the F key, that will interactively
allow you to adjust the radius
of your brush here. I can make it a bit wider
and start painting. You can see that
as I paint across the mesh and gradually
adding influence. You can adjust the
strength value if you wish to make it a little
bit higher, for example. One thing that I should note though is that
whilst I said that each of the points can have an influence between
zero and one, to a particular bone. Is possible to end
up with a situation where some points don't have a full influence to any bone and therefore will be left behind when the rest of the rig moves. Other points can end
up with an influence of greater than one in total
between different bones. Both of these situations can
create a problem for us. In order to get around that, there's a function
called normalize, which will take each of those
points and ensure that even if its influence is
connected to multiple bones, the influence will only
add up to one in total. What we can do is actually
head up to the Weights menu. First of all, let's
hit "Normalize All." That should ensure that each of those points is averaged out. Then under our painting
settings here, if I hold down the middle mouse, so I can slide this along. You'll see we have an
option at the end here. We have auto normalize. So it's worth
checking that on to make sure that we're
not painting in a way which will negatively
impact the final result.
10. Rigging: Weight Painting - Body: I'll go in and start painting a bit more
influence in here. I'm going to paint down through the rig as well, down
to the bottom here. Just keep moving around in
the 3D view if you're finding some areas are hard
to paint onto. Maybe the angle that you're
approaching the mesh from. We are going to now control select the
next bone in the reg. Again, I'm going to
do a similar thing. Paintings influence
up to the top here. You'll notice as I'm painting on the one side is currently
mirrored to the other side. That's because we
actually still have our mirror modifier on. Now if I select that nose bone, obviously we have a lot of
influence up at the top here, which we don't really want. What we can actually
do is paint in a weight of 0 in this case, I can tell that right down to 0. I can start painting in
here and you can see that we get this
darker blue instead. Anytime again, you can
just hit R to rotate each of those bones to see the influence
that he's having. Control click to select a
bone, an artery rotate. You can see that we've
now got a slightly smoother fall off
on the top here. It's not perfect
yet, but we will refine that further as we go. Again, I'm going to
select this bone. Take my weight backup to one, and start painting in some
influence for this bone here. Now in this case, we do
want the influence to be associated a little
bit more in this area. Let's rotate to see
how we're doing. Because we obviously
want to be able to control these fins
independently, but we don't want that fin to be pulling up
on this area too much. I'm going to control
click on that bone. Just painting a bit
more influence up to the top and down to the
bottom here as well. I'm overlapping the
ends of those fin slightly a bit more
controlled by this bone. Again, there's
just select one of those bones and rotate it
to see what's happening. Again, I feel that squashing the rest of the body
down a bit too much, we can actually
select a weight of 0 and paint that in over here
because you can see it was affecting some of this body when it really
shouldn't be a tool. We only want the influence
to affect the fin. Let's try down at the bottom here we've got the
same problem here. Painting weight of 0
down at the bottom. Still got a bit too
much but Bolger up at the top that I want
to get rid of. Reduce the influence on the top. I'm going to paint in a
bit more influence here. Let's change that back to 1. I leave that for now because we've got a
couple of things that we can do to help out with
these problems around here. Let's just have a
look at this tail. Again, we don't really
want that bone to be influencing the area
outside away from the tail. Let's select a weight
of 0 and paint that in. If you need to just have to reduce the size
of that brush, we can remove all of the
influence from the upper fin. I don't look at what's going
down at the bottom here. As we rotate this, you can see our influence
is constrained to a tail. Once again hit one
on the weight. Just paint in a little
bit more influence at the bottom of this fin here. Now, up at the top here, particularly you can see this area is looking
a little bit messy and when I
rotate this bone, we're getting this area
crushing up a little bit. There are two things
that we need to do. One thing at the moment, our armature is being
evaluated in the wrong place. Really want to move that up above our subdivision modifier. If I slide that up
and into place. Now as we rotate, you can see that the end
result is far smoother. You'll notice that as
we move throughout the rig and if the areas
that we're squashing up, particularly this area
up at the top here. You can see our
deformation is now far smoother than it was before. That's because a deformation
is being applied, and then our subdivision is being applied at
the top of that. The other thing that
we can do to try and help with these problem areas, such as the mesh
crushing up just here, is we can apply smoothing
to our results. I'm going to select each of these two bones at
the root of the fins. Also this bone that we have here at the back of the torso. Then under weights, I'm just going to
head down to smooth. You can see that
softened this influence. If I rotate this bone here, you can see that that defamation is a little bit better now. I think what I'm going to do
is just drop this strength down to 0.1, and just see if I can paint in a little bit more influence
from this bone just here, so that we're getting a
better fall off along here. See how that looks for rotate. Just add in little bit
up at the top here. That's looking a
little bit better. Bear in mind is while we're
not going to be moving this fin to drastic angles. As long as it's working well, when we rotate it at
small amount that should be sufficient [NOISE] for any of these
individual bones. I can just go in
and click "Smooth." That should help average
out those weights. We're taking just a little
bit of time moving around. Just move around your rig, and checkout the deformation
from all angles. Make sure that it's
working as you expect. Well, it can also do, if I "Control" click this bone and "Shift" click the
other ones in the chain. I go up to my Transform
Pivot options here and make sure that I have individual
origins selected. I can now hit
rotate and I'll get this distributed rotation along
the length of that chain, which is really useful
for testing how this fish is going to
look as it swimming. I think those weights are
looking pretty good now. We've got everything set
up for the main body, and we can move on to the
fins in the next lesson. Let me just hit
"Control S" to save.
11. Rigging: Weight Painting - Fins: We're now ready to move
on to the pectoral fins. I'm just going to
hit "Control tab" to exit out of
weight paint mode, and into object mode, and I'm going to select
this pectoral fin. Once again, we want to
shift select our armature, and hit "Control P" to
parent with armature deform. With that done,
deselect everything because we need to select
things in the correct order. Let's select our armature first, and then shift select
our pectoral fin. We can now hit "Control tab", and select "Weight paint mode". Now, before we go any further, I'm going to grab this
armature modifier, and again move it up above my subdivision modifier
to make sure that we have a smooth end result. I'm going to control click
first bone in that chain, and then shift click
all of the others. We'll go out to
the Weights menu, and click "Assign
Automatic from Bones." Now if I control click
each of these bones, we can test out the influence. That looks like it's
doing what we want. Again, let's shift select those other bones in the chain, and I can rotate them with
that distributed row. That looks like it's
doing what we want. I'm just going to undo that, and that should be all we
need to do for that fin , so control tab. Let's go back into object mode, and we can do the same
over on the other side. Select the fin shift, select our rig, "Control P", armature deform. Then select our rig. Shifts select our mesh, control tab to enter
weight paint mode, select that first bone, and shift select each of
the others in the chain. Weights, assign
Automatic from Bones. Again, let's just
do a quick test by selecting these three
bones in the chain, and rotating them. That is fine. Again, Let's move
the armature object up above the sub division. That gives us a smoother result, and control tab back
into object mode. Let's repeat the same process for these pelvic fins
down at the bottom here. First, let's select the fin, shift select our rig
"Control P" armature deform. Rig, shift select our mesh control tab
into weight paint mode, select all of our bones, Assign Automatic from Bones. Quick test again, and you can see again here, just how badly
that is deforming. But if we move our armature
up above our sub division, and rotate, we get a much smoother fall off there,
which is what we were after. Control tab out again. Do the same on the other side, and select things in
the correct order to get back into
weight paint mode. Select order of bones, and one final time, Assign Automatic from Bones. Let's reorder our modifiers, and check out the result. Here we are. Back
into object mode, and our character weights
are all correctly applied. Now, let's save our scene.
12. Rigging: Parenting the Eyes: Now whites are all applied. If we select our
character rig and hit Control tab to enter pose mode. As we start to rotate
controls around, you'll start to see that
we've got a problem here with the eyes, the way that they're
slipping over the mesh. You'll notice that if we
grab this torso control, if I rotate that, then the eyes are slipping and sliding all
over the surface. To avoid that, what we need
to do is make sure that the eye is actually parented
to one of these bones. To do that whilst we
were imposed mode, select this head bone, and then exit out
of pose mode back into object mode by
hitting Control tab. What we can now do is
select this eye white here, and then we're going to
parent it to that bone. To do that with the
objects selected, let's shift select
our armature and hit Control P. But this time instead of using
armature deform, we're going to
pick bone and it's important that we
select our bone first so that blender knows which bone is we're
trying to connect to. That's why we pick
that head bone when we were in pose mode. If you do that and
we hit Control tab, you should see now if I start
to rotate this bone around, our eyes stays
locked to our head. When we rotate the head
bone, the same is true. We will still get
some stretching occur if the movement around
the eye is too great. But for the most part,
this should work nicely. Again, let's just make
sure that we've got that head bone selected
in a pose mode, control tab back
out to object mode. We can do the same for the
eye on the other side. You select the eye shifts, let our rig Control P to parent, and this time select bone. Again, Control tab in and check out that that
is working correctly. Looks as though it is.
Let's head back into object mode and save our scene.
13. Rigging: Rotation Orders - Intro: Before we complete our rig, there's one last thing that
we need to talk about, and that's rotation modes
and rotation orders. In order to explain that
a little bit better, what I'm going to
do is first uncheck my Rabbitfish collection and I'm going to hit "Shift
A" to add in a cube. Just going to frame that up. By default within Blender
when a new object is created, you can see we have our X, Y, and Z rotation axis. Below that you can see what is called the rotation mode here. In this case, X, Y, Z Euler. I can rotate this object
around the X-axis, or the Y-axis, or the Z-axis. As I'm rotating individually
around the axis, I'm getting a very
predictable result here. If I enable this rotation
gizmo at the side here, and I actually change
from local mode here into what's
called gimbal mode, that will better show us what these rotation
orders are doing. What you'll notice,
if I rotate around the Y-axis and I rotate
this to around 90 degrees, you can see now my X-axis and my Z-axis have actually
aligned with one another. At this point, if I
rotate around my X-axis, I get the same result as if
I rotate around my Z-axis. In fact, there's
no way for me to rotate around this one axis without manipulating
multiple axes all at once. I can do that here
and you see that all of these values are
changing to get the end result. This is a circumstance
known as gimbal lock. If I just reset this rotation, what you'll notice
is rotating around the Y-axis has that result
of lining up these axes. If I rotate around
the X-axis here, it appears that these axes
haven't moved at all. All of a sudden, if I
rotate around my Z-axis, that's still aligned to
my global coordinates. If I undo that, I start
out by rotating my Z-axis, you'll see that's rotated all axes and they're still
matching up with the cube. The reason for this is we have an order in which these
rotations are calculated, and that actually works backward through
the sequence here. It's essentially a hierarchy
where the Z rotation works first and the
Z-axis axis will move both the Y-axis
and the X-axis with it. The next one in the sequence working backward is the Y-axis, so as I rotate that, that would actually carry
the X-axis with it without having any influence
on the Z-axis. Finally, if I rotate the X-axis, that has no effect on either of the two that are higher
up the hierarchy. That's important to understand because if I reset
this rotation, we can change this order. Instead of evaluating X, Y, Z, we can have a
different order. If for example, we know
we are regularly going to be rotating around
the Y-axis here, we don't want to end
up in a position where these two axes quickly overlap. We can change this order so
that Y is not in the middle. Whichever axis is in
the middle of these three is the one that will end up creating this
gimbal lock situation. For example, if I
change this X, Y, Z-order so that instead, we have Y at the end
of the chain, so X, Z, Y, that means when I
rotate around the Y-axis, both of my other axes
will be carried along. That means wherever I
rotate this Y-axis too, I still have full access to
both my Z and my X-axis. Obviously, because my
Z-axis is in the middle, rotating now around my Z-axis will ultimately lead to
a gimbal lock situation. With the Euler rotation mode, there's no way to avoid that. One of these axes will ultimately get you into
this gimbal lock situation. Within animation, that can
start to create problems, so it's worth
taking some time to set up the correct
rotation orders at the start so that we minimize the likelihood
of hitting gimbal lock. Whilst there are ways around it, it just makes life a bit more
complicated in animation. Now there is one
other rotation mode that you need to be aware of. If I reset the rotation here, we can see we have
this quaternion mode and that gives us an extra
rotation value in here, we have W, X, Y, and Z. Now, instead of having
what we're used to, which is degrees of
rotation from zero round to 360, instead, as I rotate around the Z-axis, you can see as we get
up to 180 degrees, we're closing on a
value of one here. You'll also notice that the W value is changing all
the time as I'm rotating. Once I get past 180 degrees, you'll see that my Z value is now actually
decreasing back down to zero and again my W value
is changing all the time. The same is true if I rotate it around any of the other axes. This mode is designed so that
we never hit gimbal lock. You'll see, even though
I'm in gimbal mode here, whichever axis I use
to rotate around, I still have full access to all three axes and they're aligned
perfectly to my object. This is great because obviously you never have
that problem where we're hitting gimbal lock
but within animation, these values become very
hard to understand because every rotation is a combination
of multiple values. When we're manipulating
animation curves, it becomes almost impossible to get the result
that we're after. As a result, for animation
within our rigs, it's better to stick with the Euler rotation methods
even with their limitations. With all that said,
let's hit "X" to delete our cube and re-enable
our Rabbitfish_Rig. I'm just going to hit
"Home" to frame that up. In the next lesson,
what we'll do is set the rotation orders on our fish so that they're
useful for animation.
14. Rigging: Rotation Orders - Setup: So, if we first select our
Rig and hit ''Control'' tab, what you'll notice is
that any of the bones we select actually have this Quaternion rotation
mode by default. Now as I've explained, it's actually going
to be better to work with one of the
Euler rotation modes. For now, what I would like
to do is switch all of these to the default XYZ
Euler rotation mode. Now if you select, for
example, two bones here, you might think that
if you then go and change this to XYZ Euler, that would change for both of these selected
bones, but actually, it's only changing for
the last bone selected. If I go ahead and
select this bone here, you can see it's still
set to Quaternion. But there is a way around that. If we first hit A to select
all of the bones in our Rig, if we hold down the
''Alt'' key and then go and change
this to XYZ Euler, still with ''Alt'' selected. If we click on any
of these bones now, you'll see the XYZ Euler is now the selected Rotation mode and that works for any
value within Blender. If you have multiple
bones selected, and you want to enter a value
here for multiple bones, just make sure you have
the ''Alt key'' held down before you make the change. Now with everything
in Euler mode, what we now need to do is
make a decision on which of the actual rotation orders we want for each of the
bones in our chains. So, to do that, let's
just select one of these bones and with Gimbal mode selected
up at the top here, let's enable our rotation
gives way ahead, so that we can see
exactly what's going on. Now in the case of these
head bones and torso bones, most of our rotation as the fish is swimming is going to
happen on the z-axis. As we're moving that
tail from side to side. So that's going to be our
primary axis of rotation. As a result, really we want that to be the final
one in our chain. And that's exactly
what we've got with the XYZ Rotation order. You can see as I
rotate this bone, both of the other axes
are coming with it. After that, obviously, if we rotate on the y-axis, we're going to be bringing our x-axis down
towards this z-axis. But on the whole, that's not going to cause us
a major problem. So, we will still have
access to both our X and our Y Rotations regardless of
where we rotate our z-axis. Actually this XYZ rotation order should work just fine
for these bones. And if we check our torso
bones at the back here, you can see that's
exactly the same. The z-axis is the
one that we want. Obviously the same will follow through with our tail bones as well and these fins at
the top and the bottom. Again, XYZ, should
work just fine for us. What we do need to
look at though, is this main torsal bone. This is the one that's
going to control the direction that
our fish is swimming. Since we're generally
going to rotate it to point in
different directions, you can see here we quickly
closing on Gimbal lock. Once we rotate 90 degrees, we'll no longer
be able to easily rotate around from side to side. That's because this bone has a different orientation
to these bones. So, in this case, we're
rotating around the z-axis, but here would be
rotating around the Y. That means we need to change
our rotation order so that the Y is at the end
of this sequence. Now we could pick
either XZY or ZXY. I'm going to pick ZXY. That means that as we
rotate around the y-axis, all of our other axes are aligned and if we rotate
around the z-axis, we still have our x-axis that
we can rotate on as well. We rotate on X top down or z-axis is actually going to be aligned to our
fish correctly. So that all seems to
work pretty well. Let's just reset these
rotations and as a result, I think we're also
probably going to want that same ZXY rotation order
for our route bone here. So let's change that now. Next thing we need to do is
look at our pectoral fins. Now this route bone here of
the chain is the one that I'm generally going to use to rotate this fin
around up and down. So I'm going to be using
this Y rotation quite a bit. I'm also likely to
rotate this in Z, but not so much on the x-axis. As a result, let's check
out the ZXY rotation order. If I rotate on the y-axis, you can see I still have direct access to both
of these other axis. If I rotate around Z, I am however, losing my y-axis. What we want is our Y to be at the other
end of the chain. So let's instead try YZX here, if I rotate my z-axis, you can see I still have
access to my Y wherever I am. Whilst that is closing
us on Gimbal lock, we're unlikely to want the
x-axis rotation at that point. So, I think that will
work well for us. I'm just going to change
that on the other side as well, to YZX. Now looking at this fin here, it's likely that as
I'm bending this fin, I'm going to be rotating it
along the x-axis primarily. I may also want to
twist it on the y-axis. Now, whilst I can do both of those things at the moment
that further I rotate that X, you can see that my axes
are being left behind, I'd like that X value to be the final one in our
rotation orders. So it's actually
evaluated first. So, I'm going to try switching
this to ZYX instead. Now if I rotate on the x-axis, you can see that my other axes are still aligned correctly. I can rotate around Z, I can rotate around Y and that should give
me the control I need. You can see that
I've only changed this one value here, ZYX. So let's go ahead and
change these others in the chain also to ZYX. So, again you can see that X rotation is giving
us exactly what we want. Let's just select all three
bones on the other side. And again with the
''Alt'' key held down , let's pick ZYX. Just double-check
if that's being applied to all of these bones. Let's have a look down
at the bottom here. Once again, we primarily wanting to rotate around
this y-axis here. And possibly also around the x-axis and having
that y-axis stay aligned. It's the same sort of
thing that we were wanting to do up
at the top here. What you'll notice
is our z-axis is now aligned differently to
this one up at the top. So, in this case, I think YXZ is probably what we're going
to want to work with. So as we rotate in Y we still have access
to the other axes. If I rotate in X, I still have my y-axis
correctly aligned. Figuring out some of these
rotation orders can be tricky sometimes and even
if you leave everything, the default XYZ it's
still fine to work with. Just in extreme cases, you might find yourself hitting the Gimbal lock situation
a bit more often, but there are ways of working
around that in animation. Finally, let's check
out this chain. I think on the whole,
I'm going to be rotating on Z and on X here and I think we could get away
with just leaving that with the XYZ
rotation orders. Let's just make sure
that we've mirrored this over to the other side. So we had YXZ selected, so let's do the same
on this side as well. Here we are, and that should be
our rotation orders all set up correctly. So, just going to hit back to object mode and save my scene.
15. Rigging: Scene Cleanup: The final thing
that we want to do is little bit of tidy up. Because what we want
to do is set up the scene scene in
such a way that we can then load elements of it into a fresh scene file
to work on the animation. So, in order to do that, I just want to clean up some of the naming here in the outliner. First of all, this collection, let's just hit "F2" and rename that camera so it's
clear what that's for. I'm going to turn my environment collection
back on again. I can just collapse
that up for now. Then my rabbit fish itself, I'm going to select "The Mesh". At the moment, the subdivision
level is set to two. That's fine, but I
think we're going to get a cleaner result
if I actually increase that up to three
subdivision levels. You can see it's actually
given us already a smoother outline
to our character. It'll certainly help
with the definition once we're actually animating
the character. If you're seeing it
gets a little bit heavy when you're working
in animation, you can always head over to
the scene properties tab. Then if you scroll down, we have the simplify option. Under that, if we
enable it we can set a maximum viewport
subdivision level which will override the
subdivision levels on the mesh. By doing that, we can work in animation with a lower
subdivision level, but just disable this result whenever we need to
see the full res mesh. We can also have a
different subdivision level for viewport and render use. For now, I'm just
going to disable that. I think everything should
now be ready to go. I'm just going to save my
scene for one last time.
16. Rigging: Eye Controls: Also, I had said that we've done with rig for the character, it would actually
be nice to add in some control objects that we can use to
manipulate the eyes. With the setup that
we've gone for is possible to select the
geometry of the eye, and actually animate
it directly. However, for animation,
it would actually be simpler to have a control
that's built-in to the rig. In order to add that, let's just once again disable our
environment for a minute. Jumped into the side view. I'm going to hit Z, and select my armature, and hit Tab to enter edit mode, I'm going to hit Shift A to add a bone and then select it, I move it over roughly into the position of
the pupil of our eye. Then I'm going to set it up that bone and
translate it down. We can now, select her
bone and I'm going to jump into my front view, and translate it across sets
just inside the eye there, are now F2 and
rename that to eye. I can shift select
this head bone, and then hit Control P to
make parent and keep offset. Now, I'm just getting
to head up to the armature menu
with my eye selected, go down to names, auto
name, left and right. Once again, it's given it a left suffix and we want
to change that, right. Let's go down to
names and flip names. At which point we
can then go into armature and pick symmetrized. We now have a bone on each
side to control our eye. It's going to hit Tab to exit edit mode and let's
actually hit Control tab, go into pose mode
and I'm going to select the bone
just on this side, and hit Control
Tab to go back to object mode or I want
to select my pupil. One quick tip, if you have multiple objects over the top
of one another like this, and you find you
clicking on something and selecting the wrong thing. If you hold down the Alt
key before you click, you get this little
menu up here and then you can pick
the correct object that you want from that menu. With my pupil selected, I'm going to Shift
select my armature, hit Control P to parent, and then we want to
parent it to the bone. I'll do the same again
on the other side. I need to work to again
go back into pose mode, select the bone that I want to connect this other eye to, then we can go back into
object mode, Select our pupil. Again let's just use that
holding down Alt and clicking to bring up this
little menu, set my pupil. Then shift select
my armature control P and parent to burn. Alt Z to get out of x-ray mode. Now, if I go into my pose mode, see we have these bones
here which should follow along with our head
correctly as we rotate. If I select one of these
bones and move it around, it will move my pupil with it. What I'm noticing here is
that we're actually revealing a small hole in the eye white
there, which we don't want. In order to fix that, we're going to do is
just go back into object mode we'll set
the white in my eye. Then we're going to
get to the modifies tab and then I'm just going to increase this offset value slightly on my shrink
wrap modifier. I'm going to increase
that to 0.06, and let's see if
that's done the job. Let's move that
bone around and you can see that hole
has disappeared. We just need to get
back to object mode and do that on the
other side as well. Select this all white, and change that to
0.06 [BACKGROUND]. There we are. I'm now going to re-enable my
environment collection, as we had before, and
we can save our scene.
17. Animation: Analysing Reference: Before we start to
animate anything new, it can be really useful to study reference footage
in order to fully understand the movement of the particular species that
we're going to be animating. Analyzing reference
footage helps us to avoid any preconceived notions about how a particular species moves. In the case of a fish, we can obviously assume that
it's going to be moving its tail and its
fins as it swims, but how exactly does it do that? Now the more reference
footage that you study, the more you'll
realize that this varies from species to species. As we watch this footage of the Foxface rabbitfish that
I recorded in an aquarium, you'll notice that as
it's moving its tail, there's quite a lot of
movement along its body. If you look at its head,
you'll notice that its movements counter the movement of the
rest of the body. As the fish slows down, we get less movement
throughout the body. Then as it wants
to accelerate off, you'll see these
faster tail movements, which help to propel
it through the water. One thing that's
really useful to analyze are the movements
of the pectoral fins. It's quite common to see
animation of fish where the pectoral fins
have been used as arms to propel the fish
through the water, but that's not
actually the case. Pectoral fins instead are generally held up by
the side of the body, and then are pushed down and
forwards through the water. This actually helps
to create lift at the front of the fish and can be used to both help the fish to rise and fall
throughout the water. But also, by adjusting the amount of lift on
each side of the body, they can be used to
help with turning. Also, by pushing
those fins forwards, it can help with deceleration. You can see quite well on the turn here how
the fish is actually making use of those fins
to help control the turn. By analyzing different footage, we can see how the fish is using those fins both to control its speed and to control its orientation
within the water, either turning left and
right, rising and falling. It's also worth noting
how the dorsal and anal fins are used as
the fish is swimming. What you'll notice is, as
the tail move side to side, the dorsal and anal
fins generally move along with the rest of the body from side to side as well. Even if you don't have
access to footage of the particular species that you're going to be animating, it can be useful to analyze footage of other fish instead. But it's worth noting that not all species move in
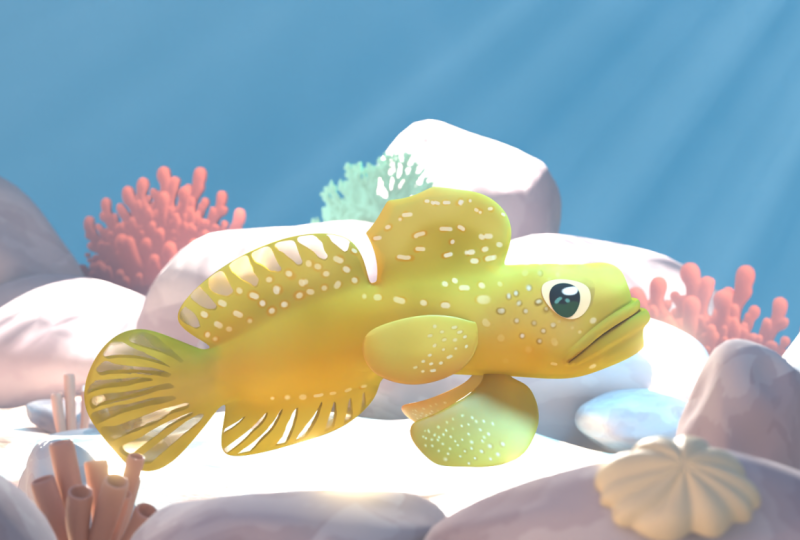
exactly the same way. You'll notice here
that this yellow tang swimming around at
the moment makes very little use of its
tail when compared with the Foxface rabbitfish that
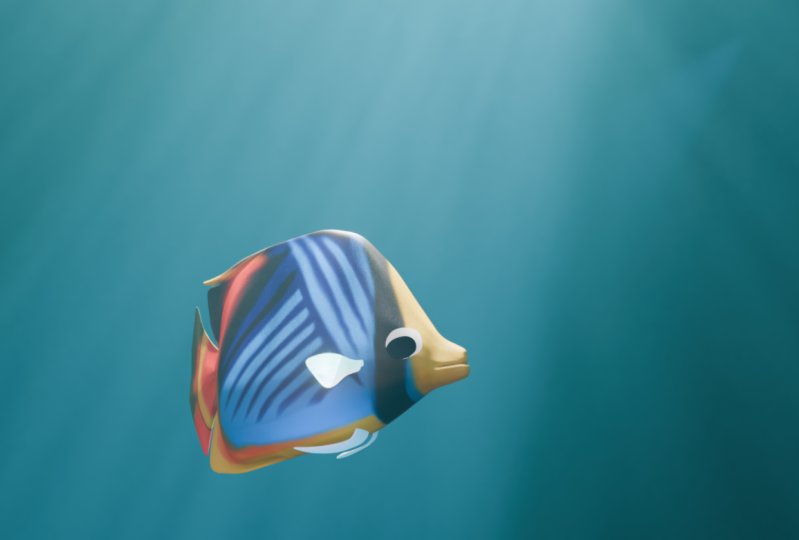
we were studying earlier. Also, if we take a look
at this blue tang here, as it moves towards the bottom, it makes a lot of use
of its pectoral fins, both to keep itself from
hitting the bottom and to change direction and
to rise back up again. The other thing that
you'll notice as the blue tang is swimming away, is it makes very little use
of its tail once again. This is actually something that the animators working in Finding Nemo realized when they were using the blue tang's
reference for Dory. Initially they created
animation which closely matched the
movements of the real fish, but when the animation
was played back, it appeared strange
and unbelievable. In the case of Dory's animation, what the animators
actually did was to introduce far more
tail movement. They would be natural
in real life. It actually created a far
more believable result. It's an important reminder
that in character animation, what we're trying to do is
to create something that's believable rather
than realistic. We can actually caricature motion to create something which feels more true to life than if we were to
copy it exactly. What's useful though
to take away, are things like the way that the pectoral fins are
used to create lift, rather than using them to swim through the
water for propulsion, since that propulsion
is mainly coming from the movement of
the body in the tail. I think we're now ready to
move on and put some of these principles into
action in the next lesson.
18. Class Update: Library Overrides: In the following lesson, I demonstrate how to link
a character rig into a seam file and apply what is known as a library override. In Blender version four, the location of this
menu option has changed. Previously we would select the object menu relations
and make library override. In Blender four, we still
use the object menu, but instead head down to library override and
then select Make. The other thing to be aware
of is we no longer have to reconfirm this option as we did in previous
versions of Blender.
19. Animation: Scene Setup: If you've already worked with rigging section in the class, then everything should be
prepared and ready to go. If however you've skipped
ahead and you'd just like to get stuck into the animation
side of this class, then you can go
ahead and download this file from the class
resources section. Whereas we could now
go ahead and select our fish character rig and go ahead and animate
it within this scene. A better way of working
is actually to create a new scene file and link
this character rig into it. That means that we
can keep making new scene files and we'll
always have our character that we can bring in to
work with rather than just creating our animation within
the original scene file. It also means that any
changes that we make to the rig will be propagated throughout all of those scenes. In order to do that,
I'm just going to hit Control N to
create a new scene file. I'll just pick general here. I'm going to go ahead and
select both my cube and my light and hit
X to delete them. I'm now going to go to the
File menu and choose link. If you navigate to the
folder where you've saved your rabbit fish rig, we can select that
file and click link. We'll then be presented
with a list of the contents within
that scene same file. We want to open this
collections folder. Now you can see each
of the collections that we created within
our scene file. By naming them correctly, makes it far easier to actually find what
we're looking for. In this case, obviously, we want to link in the
rabbitfish and there it is. The other thing that
I'm going to do is link in my environment. Again, I'm going
to go up to File, link and click on the
environment collection. Let's bring that in too. For now, I'm just
going to disable the visibility of
our environment so it doesn't get in the way. I'm going to select
my rabbitfish. Because we've linked
this rabbitfish in, we don't initially have
access to the character rig. If I was to hit
Control tab here, you'll see we only have
object mode available. That's because as we've
seen in the outliner, all we have is this one
link to the separate file. In order to get around that, with our fish selected, we can go up to the Object menu, down to relations, and click Make library override. Make sure you also click
this confirmation box. Once we do that, you'll see that we now
have access to our rig. If I open this up
within the outliner, you'll see that
we can see all of the contents of our
rabbitfish rig. Now that we've created
our library override, I'm just going to jump over into the animation tab where we are going to be
generally working. You can see our
camera at the moment is looking at the
back of the fish. I'm just going to roll over this camera viewport and
get to the View Options. Turn on camera to view. Again to get rid of that. Now I can use my regular
navigation controls to move the camera around somewhere off to the side
of the fish here. You can see as I'm moving
around within this viewport it's moving my camera
within 3D space there. I'm also going to
enable my textures by clicking on this little drop-down
and turning on texture. We'll do that for
both viewports. The other thing I'm going to do is for now I'm just going to
enable my environment again. If I turn on the rendered view
within my camera viewport, you'll see that we
brought across all of the lights that we generated
within the other scene file. But you'll notice that
the shadows are harsher here than they were when we
originally set up a file. That's because if we go over
to the world properties, these properties
are stored within the specific scene file. We've lost our HDRI
that we originally had plugged into
our environment. I'm going to set that
back up again now. Before I do that, I also want to change the display of
this camera viewport. I'm just going to click on my
camera up in the outliner. First of all, I need to
switch to object mode. I'm just going to
hit Control Tab. Again, select my camera. If we go down to the
camera properties here. We have a look at
viewport display. I'm going to increase
this passport two value up to one so that we have black outside of the area that will
ultimately be rendered. That makes it far clearer what we're ultimately
going to see. We can now go back over to our world properties
under color here. Just going to click on
this little color dot and we can add an
environment texture. I'm then going to click open, navigate to my blender
install directory. Here if I go into the
data files folder, we can find studio lights world. Then we can select one
of these EXR files. In my case, I'm going
to set this sunset EXR and open image. That's now corrected the
lighting on the fish. But we need to get rid of this image in the
background here. In order to do that, I'm
just going to jump over into the shading viewport and I'm going to change the
display down here to world. I'm now going to hit Shift
A and click on Search. I'm going to load in a mixed RGB node which I'm going to drop just on top
of this connection here. I'm now going to hit Shift
A once more and search for light path node
and drop that in. What we're going to do is use this camera ray output here and we're going to drop
that into the mixed factor. This will allow us to mix
between our HDRI image, which will be used for the
lighting within the scene. But the background
will simply take on whatever we have in
this color input here. For now, I'm actually
just going to put in a dark blue
color in here. I'm just going to
zero here to change my camera view and change to my rendered view
to see how that looks. Now you can see that we've lost this texture in the
background here, and we just have this
color here instead. You can adjust that
to your liking. I'm going to jump back now
into the animation tab. I'm going to switch
back to Solid View. For now, we don't need
to see the render. I'm going to turn
off my environment, so it's not getting in the way. Finally, we need to
save this scene file. I'm just going to come
in here and change it to rabbitfish animation one. We should not be ready to start animating in the next lesson.
20. Animation: Setting Preferences: Now, before we get
started on animation, it's worth checking
some of our preferences to make sure that they're set up in a way that will make our
lives as easy as possible. As we work, we're going to
be making use of "Auto" key. But before we enable that, I just wanted to
go up to edit and preferences to check
the way that's set up. If we go into the
"Animation" tab here, you'll see under this
auto key framing section, I'm going to check the "Only
Insert Available" option and close down my preferences. This means that when we have auto key enabled, and
we can do that now, when we start to move
controls around, they won't
automatically get keys unless we've already set
a key on them first. This prevents us
from accidentally animating things that we
don't want to be animated. Now, the other thing
that we need to do to help with our Auto key is, if we go into this keying
menu down at the bottom here, we can change our
active keying set. If I click in that, we have a number of different
options available to us. In this case, since all of
the controls that we'll be animating will either require
location or rotation keys, I'm going to pick that
location rotation option. This means that whenever we set a key on something or we set it on the location and
rotation controls only. The other thing I'm
going to do is go to my playback menu down at the
bottom left here as well. If we click on that, we have this "Sync" option which
says play every frame. That's worth changing that
to frame dropping instead. This was left to
play every frame, as you're playing
back your animation, blender will favor showing you every single frame rather than playing it
back in real time. That can really mess
with your perception of how fast that
particular movement is. Instead, by selecting
frame dropping, this means that the speed of the movement that we
see on screen will be accurate even if blend is unable to show every
single frame to us. As we start working, you'll see that we actually end up with a representation
of the frame rate up in the top left here. Now, to help with
that performance, what we're also going
to do is head over to the render properties tab and we're going to enable
the "Simplify" option. If I turn that checkbox
on and drop it down, we can drop this max
subdivision level down. For the moment, I
think I'm going to leave that set to one, gives us a smooth enough
representation of our character without it being too heavy when
we're animating, and you can adjust this up
and down as you choose, depending on the performance
of your computer. With that all done,
we should be ready to start animating in
the next lesson.
21. Animation: Swim Cycle - Body: We're going to start
out by creating a simple fish swimming cycle. To do that, first let your character rig and hit "Control tab" to
enter pose mode. Then Alt Z will
enable X-ray view and allow us to see
all of our controls. To start with, what I'd
like to do is just work with these central
controls in the body. We can worry about the
animation of the fins later on. I'm actually going
to hit "Seven" to go into top view here. Because we're going to be
moving the tails side-to-side. This will be the easiest way of saying exactly what we're doing. I'm going to start out by
creating an initial pose. First of all, what
I'd like to do, is just like these three bones along the length
of the tail here. Then what I'm going
to do is headed to my transform options
up at the top here. I'm going to change my Transform
Orientation to Gimbal, and I'm going to change my transform pivot point
to individual origins. This means that as we rotate, these bones will get distributed rotation along
the length of the chain. To start with, I'm just
going to hit "R" to rotate. I'm going to rotate this
off to one side of it. Now I can select the two
bones in this head chain, and I'm going to rotate them in the opposite direction,
a small amount. Something like that should do. The other thing I
wanted to do is select all of these bones for
the tail and the fins. De-select that bone now. I'm just going to move around and check that I've got
everything selected here. I'm going to rotate
them as well. For now, I'm not
going to concern yourself with the other fins. What I'm going to do here
is just hit "A" to select everything and "I"
to insert a key. Now you can see down
in the dope sheet, we've dropped the keyframe
onto all of our controls. Now going to move along
the timeline to frame 24, which is one second. It's worth actually
just double-checking, and your output
properties that you are working at frame rate of
24 frames per second. That shows that things
are kept consistent. Here in frame 24, I'm just
going to hit "I" again to insert a key for
all of the controls. You can see because we changed our keying option down at the bottom here in our
active keying set, whose location and rotation, you can see that we've
just dropped in. Key-frames have a location and rotation only, not for scale. Next thing that I'm going
to do is I'm just going to click on this
first keyframe here. Click at the top of
the summary track, and that selects
everything below it. I'm going to hit "Control C". I'm going to move
to frame 13 here. What I'm going to do is
click "Shift Control V", and that will allow us to
paste these keyframes in, but paste a mirrored
version of them. That's really useful
feature within blender allowing to mirror
pose very easily. Now if I just change
my N frame here to 23, which is one French short
of our final pose here. That will mean that, as we play back, our animation
should loop correctly. Reason for that is,
once we get to 23, we will circle back to frame 1, which would be the
same as frame 24, meaning that that cycle
should playback smoothly. If I press ''Space'', we can see what we've got here. We've got this basic movement, from side to side. Up here in the top
left of our viewport, we can see the
playback frame rate. At the moment that's
hovering around 25 frames per second. It's trying to maintain
at 24 frames per second. If this value is red here, it shows that we're
dropping frames. If it's white, then shows it's
playing back every frame. What I can do here is to jump back into my
render properties, go down to simplify by actually increase this subdivision
level 23 and play it back. You'll see here
our frame rate is only displaying around 12
frames per second here. Even though the speed
is playing back, is actually still 24
frames per second. Let's drop that back down to one so we get a smooth playback. Once we have a basic fish
swimming motion here. It's currently not
very convincing. What we need to do is actually create a bit of drag
through the body here. The motion will
start at the root of detail and it will gradually
propagate down the tail, so we get a little bit of an overlapping motion at
the back of the tail. In order to do that, what we first need to do is with all of our
control selected, we're going to head over
into the graph editor. You can do that by rolling over the dope sheet and
hitting ''Control tab''. Just going to hit ''Home''
to frame this up. I'll just zoom back a
little bit so that we can see exactly what's
happening here. Again, with all of our
controls selected, I'm just going to hit
"A" over the viewport here to select all
of our curves here. If we hit "Shift E" over
the graph editor here, we can change our
keyframe extrapolation. The moment it's set to constant, which is why we have
these straight curves before and after a reaction. If I hit "Shift E", I can change that
to make cyclic. You can see now our
motion continues before and after the area that
we've actually key framed. What that allows us to do now is to select individual bones. I'm going to select this one in the middle of the tail here, and we can offset
these curves slightly. What I'm going to do is,
with all of these selected, I'm just going to hit "G", and with my middle
mouse held down, I can constrain that motion
so it's only moving along one axis and I want to move this just two frames
to the right hand. This means that the
action is happening two frames after
the bone above it. Then select the next bone
down the chain here. In this case, we'll
do the same thing, select everything and G
middle mouse to constrain it. In this case we're going
to move it four frames. Then we can select
these other bones here. Let's select each of these
root bones of these chains. Select everything. Let's
move them six frames along. Finally, we'll slip the
loss bones at each of those chains and will move those eight frames
along the timeline. Now if I just hit back to
my top view and hit Play, you'll see that we
have this formal or natural-looking movement
on the tail here. In this case the tail
and these fins are really dragging behind
the rest of the body. We can also try just to get even more
flexibility in here. I'm just going to select the
top two tail bones here. With all of these
curves selected, I'm going to hit "G"
and I'm going to move that back one frame. We have an offset between the upper and lower
parts of the tail. Now I'm going to select
the lower part and I'm going to move all
of those on one frame. Lets see what we get there. You can see now that
these two parts of the tail are offset
from each other, so we're getting a little bit
more flexibility in there. The other thing I'm
going to do is select this anal fin and I'm
going to actually move those on a frame
as well so they're offset from the fin at the top. We can now do the same thing
at the front of the fish. We're going to select
this nose bone here and just move those
curves on two frames. Now, if we look at
this from the top, at the moment, the center of our fish is staying very still. What I would like to do
is get a little bit of sideways movement
in here as well. In order to do that, we're just going to select this
torso bone here. I'm going to go to
my first frame, I'm going to hit "G"
and "X" and just move it slightly
along the x-axis. Just going to hit "Control
tab" over my graph editor. I can select that
first key frame, just for the torso here. I'm going to hit "Shift
D" and I'm going to move it and drop it on
top of frame 24. Then I'm going to select
that first key again, hit "Control C" and
again go onto frame 13, "Shift Control V" to
mirror that frame. You can now see that
as we play this back, we have some movement across the x-axis here on the
main part of the body. I think that might be
slightly too much, so I'm going to hit "Control Tab" to go back into
my graph editor. I'm going to hit ''Home''
to frame all of this up. Now I can just drag
over my X curve here, which is my X translation curve. I'm going to scale this down. What I'm actually going to
do is hit "S" to scale. That would scale everything together, which is
not what we want. I want to constrain that to the y-axis here in
the graph editor. I can just hit "Y", and that will now allow me to
scale it vertically. We can pick an
arbitrary number here, or I can just type
in note point five, that will scale it by 1/2
of its original value. Let's play that back
and see how it looks. I think that's actually
not quite enough now. I'm going to again hit "S", "Y", and let's try 1.5 and
see what that gives us. I think that's a
nice compromise, then get to save your scene.
22. Animation: Swim Cycle - Fins: Now that our main body
animation has been worked out, I want to take a
look at these fins because at the moment they're
feeling rather unnatural, stuck onto the side
of the fish here. What I'm going to do is just
head back to frame 1 here, and start out by selecting
this first bone in the chain. On frame 1 here, I'm just going to
hit R to rotate, and lets just move it back in alongside the body a little bit. I'm going to hit
Control Tab over the graph editor to head
back to my dope sheet, select that key frame, hit Shift D, and drop
it again over frame 24. Now as we move to frame 13, I'm just going to rotate
this bone slightly forwards. You can see that we now
have a basic movement of our fin in line
with the body here. What I think I'm also
going to do now is select these three
bones in the chain, and I'm actually going
to rotate them slightly out on this first frame,
only quite subtly. Once again, I'm just going
to select this first frame, hit Shift D, and overwrite
that final frame. This frame in the middle, let's just rotate things
slightly back, and in the opposite direction. Let's play it back to
see what we've got. Once again, this looks
stiff and robotic. What we need to do is
loosen things up slightly. What we're going to
do is once again hit Control Tab to go into
our graph editor, home to frame this up and
zoom out a little bit. Again, I want to delay the
animation on these bones, so I'm going to select the
first one in the chain, hit A to select everything. Once again, hitting G and holding down my
middle mouse button, we've got two frames
down the timeline. We'll do the same for the
following bones and A, G, and we've got four frames, and select the final bone
and we've got six frames. Let's play back and
see what we've got. I'm actually going to
take this final one, and I'm going to move
that a couple more frames so we're getting even
more drag at the tip there. I think that's working
fairly well now. Now that we have one of our
fins working correctly, I want to copy that animation
over to the other side. We can start out with this bone at the root of the chain here. What I'm going to do in
the graph editor here is just hit A to
select everything. Control C, select the
bone on the other side, and hit Control V. We can now select the
next bone in our chain. In this case, we're
working from frame 3, so I'm going to go there,
A to select everything, Control C. I'm going
to select this bone, and what I actually
you want to do is just select all of
these key frames. Let's just hit G to move
them also to frame 3, and then hit Control V to
paste in our new key frames. Do the same on these
other bones in the chain. This starts at frame 5,
A to select everything, Control C. Let's move all of these key
frames to frame 5, and hit Control V to paste. We'll do this for
the final bone in our chain as well from frame 9. Copy those frames, move these key frames to frame
9 and Control V to paste. Now if we play this back, you'll see that both
fins are coming in at the same time and going out. Coming in, going out. Now this motion might not be exactly what you're expecting. At the moment, it looks like these bones here are
mirroring one another, but the bones at the top
of the chain are not, and we can see why that is. If we select these two bones at the top of the chain here, I'm going to hit
the T key to open up our tools and bring up
our rotation gizmo here. Now if we're in Gimbal
mode, what you'll see, if I rotate this in Z, two bones are both rotating
in the same direction here. If I select these two bones here and the next
bones in the chain, and I rotate them here on X, you can see they're actually
mirroring one another. This is down to
the rotation that these bones had when we
initially set up the rig. It's something that
we need to work around here in animation. For now, I'm going to leave
this top bone as it is, I'm just going to hit the W key to go back to selection mode, and T to get rid of those tools. I'm going to select these lower three bones in this chain here. At the moment, these key
frames startup from frame 3. I'm actually going to
move them halfway through the cycles so they
start at frame 15. I can do that just by hitting G, middle mouse to constrain, and I'm going to move that along the timeline to frame 15. It looks like I've
missed a curve there, so I'm just going to
hit Control Z to undo, hit A to select everything, and once again hit G and move
that back on the timeline. Now as we play things back, you can see that our two fins are properly opposing
one another. I also want to do something with the pelvic fins down
at the bottom here. You can see as we're
playing back there, they're moving in
and out of the body, so we want to counter that. I'm going to select this
first bone in the chain here. I think what I'm actually
going to do is select both of these bones at the top of
the chain here on frame 1, try a front view, it
might look a bit better. On this first frame, I'm
just going to hit G and X. First of all, I need to
change to global orientation. G and X, and I'm going to move them slightly across on the
x-axis on that frame 1. Let's just move around. You can afford to do that
little bit more, G, X. Let me move that across. It balances it up a bit better. We move to frame 13. Again, hit G and X. Let's move them back. Once again, we're
fairly evenly balanced. Now my dope sheet. Once again, I'm just going
to copy this first frame, Shift D, drop it my last. Now as we play back, we no longer have the fins cutting into the
body as they were. What we can do though is
select these two bones, and then I'm once again going
to head into my top view. What I'm going to do is make sure I'm in
gimbal mode here, so with my individual origins, I'm going to rotate them in
slightly here on frame 1. Frame 13 we can rotate
it slightly out. Again, duplicate frame
1 over frame 24. Again, let's jump into
the graph editor. Let's let this first bone
in the chain, A to select, Control C, bring it
on the other side, Control V, and do the same
for these bones here. What's going on
here? At the moment, it's not getting
the effect that we expect because once again, we need to select
these two bones, A, and I'm just going to shift that down the timeline to frame 13. Now we should have these fins
moving from side to side. Once more, I'm just going to
offset this key slightly, so I'm going to select
that end one in the chain, hit G. I'm going move
that two frames, do the same with this one. Do this to add a
little bit of flex to those bones. There we are. If you ever want to see your animation here without
the bones over the top of it, you can just go up to the
top here and click on this overlays icon and that
will turn all of that off. Then you can move
around your view port and see your fish swimming. You can turn those overlays
back on, and save my scene.
23. Animation: Swim Cycle - Clean Up: Something that's
important to be aware of. Is it the method that we've chosen to animate
this fish where we've actually been offsetting curves along the timeline
in the graph editor. I only really holds up
whilst we're making use of this continuous cycle. If I select all of my bones and go to the graph editor here, you can see that this cycle continues into infinity
in either direction. If for example, I was to hit, "Shift E" and clear
this cyclic modifier. You see now the
different body parts start moving at different times. If I were to extend
my timeline back out, we will end up with
different body parts finishing at different
points in time as well. This makes it very difficult
to reuse this cycle as an element within a
more complex animation. As a result, what I'd like to do is create curves that start at Frame 1 and end at Frame 24 but we'll still
maintain our cycle. To do that, I'm just going to change this end
frame back to Frame 23 and we're going to work
through control by control. If I select this Torso control and just hit the Home key
to frame everything up. You can see at the
moment, all of our keyframes are in
the correct place. It'd essentially be true
if we select either of the first two bones
in these chains. If we select this nose
bone, for example, it starting two frames later and continuing to frames
later down the timeline. For now I'm just going to eight select everything
because I wanted to re-enable that cyclic modifier [NOISE] A in the graph editor, "Shift E" and make
cyclic once more. If I now select that nose bone. What we want to do is to add
a keyframe here at Frame 1, one at Frame 24, and we want to remove this
key frame, this Frame 26. If however, I simply add in
a keyframe here on Frame 1. [NOISE] I can do that
over the graph editor by hitting "I," selecting
all channels here. You can see that this is
currently breaking our cycle, and it's actually changed our handles at the other
end of the curve here. I hit "Control Z" that
will pop back into place. What's best to do
is actually, first, let's change that to
Frame 24 is our N frame, we head to Frame 24. [NOISE] I'm going to hit
"I," all channels here. You can see I've now introduced
this extra keyframe here, but left the orientation of
our final keyframe the same, which is kept our curved
shape exactly the same. What can now do is
hit "I" again select everything and go
back to Frame 1. Hit "I," "All channels"
to insert that keyframe. Now I can remove that
final keyframe just by selecting all of those keys and then you can hit the "Delete
key" to remove them. Our curve now should match
what we had previously. If we were to remove this cycle modifier
since our first frame, our last frame are
exactly the same, we can still loop this
animation correctly. I'm not going to work
through the other bones and do the same thing. I'm going to select this
"middle torso bone" here. Again, I'm going to go to "Frame 24," "I," "All channels." We can now do the same
on "Frame 1," [NOISE] "I," "All channels," and then just select [NOISE]
"Frame 26" and hit "Delete." Moving down the chain here, you can see that we're
now offset even further. I'm going to go
again to Frame 24 still "I," "All channels," [NOISE] same to Frame 1
and to the S final case. I'm just going to
move now through all the bones here and repeat
the same [MUSIC] process. Now, in the case of
these two bones, because we've offset
these curves so far, we actually have two sets of keyframes are passed our cycle. We're going to have to handle
that slightly differently. [NOISE] In this case, our Frame 25 should be
the same as our Frame 2. What I can actually
do is go to "Frame 2" hit "I" to insert a key. Now when I delete Frame 35, we're back to our
cycle as it should be. I can now go to
"Frame 24," hit "I" to insert a key here
and one on Frame 1, delete my Frame 25 and now I
cycle continuous correctly. We'll do the same for this
frontal bone in the chain. Again, Frame 27 is
repeated here at Frame 4. Let's hit "I," "All channels" and delete
that final keyframe. Then once again,
we're back to being able to set a
keyframe on Frame 24, one on Frame 1 and remove that final frame to ensure that our cycle
continues correctly. Now we can just hit "A" to
select all of our bones. If I hit "Control Tab" to
go back to the dope sheet. That will allow us to see if
we have everything complete. We still got the
petrol fence to do. I just go back here "control tab" to each of these in turn. [MUSIC] Once again, on this far side, we need to treat
things differently. Again, I'm going to
go and set a key on Frame 4 because it's
the same as his Frame 27. Then delete this keyframe and then repeat our
standard process. [MUSIC] Once again, if I select all of my controls and head
into the dope sheet, we can now see from the summary track,
hit the "Home key." Everything is between
Frames 1 and 24. As we move down, we'll see that our keyframes are distributed around within this, but everything is keyed
on Frames 1 and 24. That will make our
lives an awful lot easier in the future. If we now hit back
to the graph editor. I'm just going to hit
"Eight," select everything, and then "Shift E" [NOISE] and clear this cyclic modifier. Now without that modifier enabled I'll change
my N frame to 23, we should still be able to
press play and cyclists within the view-port without anything stopping or starting
where it shouldn't. That will looks correct. [NOISE] We'll save our scene and then move on to the next
stage in the next lesson.
24. Animation: NLA - Overview: Now that we have a properly
looping animation cycle, we're ready to start doing some more interesting
things with it. To do that, we're going
to make use of something within Blender called the
non-linear animation editor. But before we jump into that, I need to explain a
few things about how animation is organized
within Blender. So far, we've been working with both the graph editor
and the dope sheet. If I select my character here and head over into
the dope sheet, you can see up at the top here, once we can change our viewport type here to
dope sheet or graph editor, within the dope sheet, we also have this
additional drop-down. That lets us move to something
called the action editor. Here we can see
our same keyframes that we had in the dope sheet, but we have some extra
features within here. All animation within Blender is stored within what
is called an action. Its a container that all
keyframes are held within. You can see the name of the current action
up at the top here. We can rename that
action if we want to. So I'm just going to
call that SwimCycle. Now to better explain how
actions work within blender, I'm going to actually
first hide my rabbit fish, and let's add a
cube to our scene. You'll see here in
the action editor, currently there is no
action enabled at all. What I'm going to do is
just hit ''Eye'' with this cube selected to
drop in a keyframe, and it automatically
creates this cube action, which is the container for
all of our animation curves. If we actually take
a look at our cube here in the outliner, you can see here
under animation, we have our cube action here. What I can do now
is move to font 23, and I'm just going to translate
this along the y-axis. Because we have
auto key enabled, we now have some
animation in here. From the action editor
we can still hit ''Control tab''
to jump over into the graph editor and see the curves that are
controlling this motion. What I'm going to
do is just rename this action from cube
action to Y_Move. Then I'm actually going to
hit this little cross icon, which will actually remove this action from
our cube object. You can see that's disappeared. There are no longer any curves and our animation
has being removed. But it's not currently been
deleted from the scene. If we click on this
little drop down here, you can see we have our
Y_Move and we also have a SwimCycle action
in here as well. If I select this Y_Move again, it draws back onto my cube, and once again, my
cube is moving. For now I'm going to
get rid of this action. I'm going to hit ''I '' to
set a key again on this cube. Now, I'm going to move
to the end frame, and I'm going to
translate this up. In this case, let's
rename this to Z_Move. We now have our action that's moving the cube up and down. I can swap this
out to my Y_Move, and that will again swap
to the other animation. What's important to note is that the action that's currently connected to this cube will
be saved with the same file. But anything in here that
has a zero next to it, that means it's not connected to any object at the moment. That means that when
Blender restarts, that action will be removed
from the scene completely. In order to prevent that, what we can do is add
what's called a fake user. With this Y_Move selected, if I just click this
shield icon here, I guess this is would take that's added this
so-called fake user. I can then remove
it from my cube, and you'll see in
this drop-down, it has this little F next to it. That means it will
be saved within Blender when we
restart the scene, even if it's not
connected to an object, I'm going to do the same
here with my Z_Move. I just click that shield icon, and then I can remove
it if I choose to. For now I'm going to
re-enable my Y_Move. What I'm going to do
is I'm actually going to add in a new editor here. I'm just going to right-click
on this boundary here. I'm going to add another
horizontal split. Let's move this up a little bit so we can see
what we're doing. Down at the bottom
here, I'm going to change this viewport, I'm going to change it to this non-linear
animation editor. You can see here we
have our Y_Move action, which is the current
action up at the top here. Next to it we have
this little icon, that allows us to take this animation that
we have here within the action editor and place
it as what's called a strip down here in the
non-linear animation editor. We can do the same
using this push down button up here
in the action editor. If I click that, you'll see again our animation has been removed from the action editor. But we now have
this stripped down here on this non-linear
animation track, and it also says that we have no action currently
loaded onto our cube. But, if I move my timeline, you can see we now have a Y_Move action still
controlling our cube. But if you look up here, it shows no keyframes currently
on the selected object. That's because nothing has been loaded in here to
the action editor. Now the non-linear animation
editor allows us to treat our animation in
a similar way to editing video within
a video editor. The animation at the moment is contained within this container, which is called a strip. I can move this
along the timeline. Now you see that our
animation starts later on. There are other things
that we can do with this, which we'll explore a bit later, such as scaling this
strip to enable us to speed up and slow down
a piece of animation. For now, what I would
like to do though, is up here in the action
editor I'm going to add my Z_Move back in as
an action on the cube. You can see we now have
keyframes on the cube again, and if I head into my
graph editor again, we have our Z curve
affecting our cube. Now the moment we
just have our Z translation affecting the cube. We've lost this Y movement, even though it's displayed
here as a track. The reason for that is if we go down into our nonlinear
animation editor, each of these layers is placed
one on top of the other. Initially they
obscure one another. So whatever the top track is will block out everything
that's underneath it. But we can change
the way that works. If I click on this
Z_Move and hit the N key over the
non-linear animation editor, you can see we have
this blending mode. If you're familiar with
things like Photoshop, it's a very similar concept, so at the moment, this top track is completely replacing everything
underneath it, its blocking it out
as if it's not there. But we can change this
from replace to combine. At that point, as I
scrub the timeline, you can see that we both have our cube moving in Z and then Y. The Z movement is coming
from these keyframes here. But the Y movement is coming
from this non-linear track. Now that we have our
Z_Move here as an action, we can once again push this down to the nonlinear
animation editor. You can see it's added in an additional track here
with our Z_Move on. Having done that because
we'd already changed our Z_Move to combine. That means as we
move our timeline, we have these two
strips here combined. Now, we'll dive
into more of what the non-linear
animation editor can do later as we're starting
to work with our fish. But that gives a good
basic overview of how animation is stored within Blender and what
we can do with it. One thing to note is
that even once animation has been moved down to
this non-linear editor, we can still always return it back onto this cube
if we want to. We still have our
animation actions here available to load back in. I can always select a track down here and hit
''X'' to delete it. We're now back to nothing in the non-linear editor and just our Y_Move that's
controlling our cube. But I think that gives us
enough background to work with. I'm going to just hit
''X'' to remove my cube. We can re-enable
our rabbit fish. Then we'll be ready
start working with non-linear animation
editor in the next lesson.
25. Animation: NLA - Time & Influence: If we re-select our fish
character rig here, you can see we already have our action loaded
in our swim circle. Here in the Action Editor. We can now hit
"Push down" to move it down into the
nonlinear editor. For now, I'm going to
extend my timeline out to 240 frames, which is 10 seconds. I'm just going to
re-frame things here, so that we can see
everything nicely. Now, over on the right here, we have these various options which can be toggled
on with the NK. If we go down to strip here, we have options that relate to this current strip
that we have selected, which contains our
SwimCycle action. Now, what's worth noting is that this strip has
been called SwimCycle, but we can actually
rename it to anything. It actually contains
an action clip which contains our
SwimCycle action. Just so happens that it's being
given the same name here. For clarity, I can just rename
this to SwimCycleStrip, so that differentiates it
from our SwimCycle action. Over here, we can also rename
our tracks if we want to, so just by
double-clicking on that, I can rename that to SwimCycle, or in this case maybe
SwimCycleTrack. This is really just for
organizational purposes. Now if I scrub
through my timeline, you'll see that our fish is swimming once we're
over this strip, but once we go beyond
it our SwimCycle stops and our fish stays in the final
position that it reached. If I just hit "Control Tab"
to go back into pose mode. You'll see that if I select
any of these bones here, they don't actually have
any animation on them. This green color here shows
that the values have been overridden with the
library override, but not that we have
actual animation on here. Because the animation
itself is stored within this separate action. If we'd rather the fish returns
to its default position, once we've gone
beyond the boundaries of a particular action strip, we can change that
value over here, so under the strip
properties here, we have this
extrapolation option which is currently set to hold. That will hold the
final position. If we change that to nothing, you'll see that the
fish is returning to its default position. You can see as well here in the non-linear editor
that the color that we had beyond this
strip has disappeared. Now, there are other
things that we can do with this SwimCycleStrip here. Just going to
increase the size of my editor a little bit here so that you can save it better
at the moment, these frames, start and end values correspond to the start and end values of the position of this
strip on the timeline. We can edit these
if we choose to, but that will also manipulate
the length of this strip. Instead, a better way of working is if we move down under
the action clip itself, we have this repeat option. You can actually increase
that repeat, say for example, 23, and you see it's dropped in three versions
of the cycle here. As we scrub through,
you'll see our cycle continues smoothly all the
way through to the end there, and we're currently
popping back to our default position because we changed our extrapolation
value up here to nothing. Now, that pop, in animation is going to
be quite distracting. It's probably better just
to leave this on hold. I'm going to move this
strip back to frame 1. I'm going to go down to
the bottom here and I'm going to increase
this repeat value. For now, I'm going to
go ahead and increase this repeat value up to 20, which take it way beyond the extent of our
current frame range. You'll see why and also while. At the moment, as
prescribed through our fish swims with full duration
of the timeline. But as you have noticed
when we were studying our reference
footage, originally, a fish very rarely swims at the same exact
pace all the time. A fish will obviously
speed up and slow down and change the
intensity of its movements. What we can actually do is
we can animate those values. Let me see over here in the
strip options that we have this animated influence
and animated strip time. I'll roll these things down. Our animated influence
will allow us to change how much of
the animation we're blending in or out
over the top of the other tracks
or over the top of the default values in this case. If I turn this on, by default, we have this influence of 0, which means nothing
is happening at all. We also have a keyframe
already set here on frame 0 that's shown by the yellow color and this
little diamond icon next to it. If, for example, I
move forward for 1 second and change
it's influence up to 1, you can see it's automatically
added in a keyframe here, and you can see here over
the top of the strip, we have this curve here, which indicates that we're
increasing our influence. If I play this back, you'll see that we gradually
start to increase the speed of our animation from nothing
up to full intensity. This allows us to play with
this intensity over time, as we speed up and slow
down our animation. It might be that we want to stay fully intense for a while, and maybe I'll go along here from 94 and
key that influence. Then move a few frames on the timeline and let's
drop this influence down say maybe around 0.5, perhaps a little bit lower even. Before we then once
again ramp up to full intensity again.
For short time. Let me just click this
again at full intensity, and then we'll drop
it right the way down to it's very
low-intensity towards the end. I'm just going to disable my overlays here
and play this back. You can see the effect that
it has full intensity. We slowed down a little bit. We increase our speed
again and again, taper it off towards the end. Some reason that's not
tapering at the end. I'm just going to go back in
and make sure that keyframe is set at a low value here. That's how we affect the
influence of a clip. We can also change
the speed of it. Just did that we work with
the animated strip time. I'm just going to roll that down and enable the
animated strip time. This value here
directly controls which frame we're displaying
throughout the timeline. If I set this on my
first frame to one, and then go to my
end frame here from 240 and set that to 240, this will actually
keep the same speed throughout the animation. The only thing is, you'll
notice if we go, for example, to frame 80, that's showing
a strip time of 62. The reason for that is we have an animation curve
attached to this, which is not linear. If I get back to
my graph editor, you'll see we can now see our strip time and
our influence, and they're defined
by curves here. My strip time is
this green curve. If I select that and
hit the "VK," I can change this to have
vector handles which will point at each
other and give us essentially a linear path. Now you can see
here on frame 80, we are displaying frame 80 of this animation
strip and that will continue right the way through
wherever frame we're on, we will get the same frame here. That way, once we play it back, you should expect to see this animation
cycling throughout the rest of the timeline. But for some reason it's not. The reason for that
is that we need to enable this cyclic
strip time option. Once we do that, our
animation will cycle correctly along with
this strip time. Once we do that,
you can see that our animation is cycling
again once more, and we still have our animated influence
effecting the animation. Now that we have this
animated strip time set up, you can adjust
this curve to also adjust the speed
of our animation. For example, our influence increases over the
first 24 frames. We probably want our speed to increase over that time as well. To do that, we can set a
key in here and we can actually just dial that
back a little bit. We'll start off slower. Might increase our
speed at this point. We're getting faster. We can then set
another keyframe here. As our influence decreases, we can slower our animation
down a bit as well. Maybe a bit further still here. Then as our influence
increases again, we probably want to
speed our animation up. You can see the curve that
we're creating here with our slowdowns as the curve flattens and then we're
accelerating again, here as we get a bit steeper. And because we increase
the number of cycles here, we don't need to
end on frame 240. We can actually hit
"G" and move this up, so we can increase our
speed quite a bit, perhaps through this section. Then have the speed turning
off towards the end here. Let's just play this back and see what we've
ended up with. You can see here that we're
both varying the speed of our animation and
the intensity of it, simply by adjusting
these curves here. But our fish animation still isn't looking fully convincing. There are some more things
that we can do to affect that, which we'll look at
in the next lesson.
26. Class Update: Shortcut Changes: In the following lesson,
I show two ways of duplicating strips in the
non linear animation editor. Visually, both methods
appear the same. But depending on
the shortcut that you used to duplicate
these strips, you'll either create a new
action or a linked action. I explain the differences
further during the lesson, but the important
thing to be aware of is that in Blender four, these shortcuts were
reversed previously. Shift D created a
duplicate strip old created a linked duplicate. In Blender four, the
Shift D shortcut will now create a link
duplicate by default. Since this is the behavior
you're most likely to want, the change to the
shortcut makes sense. If you do need a non link
duplicate for any reason, you can now do this with
the old shortcut instead.
27. Animation: NLA - Pectoral Fins: Now that we've completed
our basic animation cycle, I'd like to go in
and start adding some extra elements which
will help to break up the cycle and help to make the animation feel a
little bit more realistic. Now we've already added
some subtle movement on the pectoral fins, but what I'd like to do
is go in and animate some larger moves that the fish uses in order to gain
lift as swimming. Before we do that, what I'm
going to do is head down to the nonlinear
animation editor and disable a swim cycle track. That means that we won't have any animation on
the fish which will distract from the
animation that we're going to add to
these pectoral fins. If I just scrub
through the timeline, you can see that nothing
is moving at the moment. We're now going to re-enable our overlays so that we can
see all of our controls, and we'll select this first
bone in the fin chain. I'm going to hit I in
order to set a key here on Frame 1 and then I'll do
the same on Frame 20, so I and set a key. Now here in the Graph Editor, what I'm going to do is disable visibility
of the influence and strip time and then hit the "Home" key so that
we frame everything up. We're now going to
go back to around Frame 8 and up here
in the Viewport, I'm going to hit T to enable my tools and enable
the rotation gizmo. Now, I'll just make it slightly easier to work with this
fin as we're animating. Now I'm going to
rotate it forwards on the x-axis and rotate it
down a bit, insert as well. If you remember
from the reference, the fish actually
pushes its fin forwards and down in order
to gain that lift. We can hit the
"Home" key again in this Graph Editor so that we
can better see our curves. As we scrub through, you can see that we're moving
forwards and backwards, but we're moving
forwards and backwards along exactly the same path. I want to break that
up a little bit. Around here, Frame 12, I'm just going to drop it down further on the z-axis here. Now as we scrub forwards, the thing goes
forwards and down, and then it drops a
little bit as it's returning back into
place by Frame 20. Now we're going to move on and select the other two
bones in the chain and then select the
two of those together. If we just double-check
here in individual origins, that will mean that we
can rotate these together and get distributed
role along this chain. I'm actually going to
start animating these just maybe here on Frame 2. I'm going to hit I
to insert a key and then scrub along a couple of
frames after maybe Frame 23. I'm going to hit I and
insert another keyframe. I'm now going to
scrub through it. As we're moving forward, I want to start dragging
this part of the fin behind, so you maybe around
here at Frame 6 and rotate these two bones
back along the x-axis. I'm also going to drag them a little bit at the
bottom as well, so I'm going to rotate
in the y-axis too. As we scrub forwards that
fin is bending backwards. Maybe just a little bit more and then as the fin
is coming backwards here, we're going to do the opposite. Here around Frame 14 we're
going to rotate that in x back in the other direction
and again on the y-axis, we're going to drag the
bottom part of the fin, so we're pulling that back in the other
direction as well. That should give
us a nice bit of overlap then on that fin. I think that's gone a bit
too far though on Frame 14, so I'm going to pull
that back a little bit. We can play that back
and see how that feels. I can look at it from
different angles as well, and that looks as though
it should do the job. What we also want to do is copy this over onto the other side. I'm going to select
this first bone in the chain and go back
to Frame 1 here. Just maybe out slightly
in my Graph Editor so that we can see everything. Hit 8 select and
Control C to copy. I'll go over to the other side. Again, I want to hit I to set a keyframe here on
Frame 1 to start with, and then we can hit Control V to paste those curves into place. Now if I scrub this forwards, what you'll see is whilst our x-axis is doing
what we want, our z-axis is mirrored. What we need to do is
select our Z curve here. Then if we right-click, we can bring up this
mirror option here. What we want to do is mirror these values here up
over the zero value. We can actually hit Control
M here instead to bring up that menu and then we want to mirror By Values
Over Zero Value. If we click that, it should be perfectly
mirrored to the other side. We now need to
copy the animation from our other two bones here. If I select those two bones here together, go to Frame 2, hit A and Control C. Go over to the other side and select those two bones and hit I
to insert a key on Frame 2. Then we can go into the
Graph Editor and hit Control V. Now once again, we're going to have issues
with the mirroring. You can see again, our
x-axis is working fine, but our y-axis is not doing what we want and it's actually working in the
opposite direction here. Again, if we just select
those white curves, we can hit Control M and again, mirror By Values Over Zero
Value and then we'll flip those curves and now everything should be
dragging correctly. Now that we have
those fins animated, if I hit Control Tab, I can return back to
my Action Editor. If I just hit A over the Viewport that will
select all of my controls. You can see the only controls
that have animation on at the moment are those
pectoral fin controls. We can rename this action to pectoral fins and
then we can hit this "Pushdown"
button to drop it down into the Non-linear
Animation Editor. Once again, all of our
animation has been removed from our controls
up here in the Viewport, but if we scrub through, you can see that we have
that animation down there in the Non-linear
Animation Editor. Now that we have this
animation track down here, go ahead and rename
the track if we like just by
double-clicking on it. We can re-enable our
Swim Cycle track. Now if we hit "Play", we see our pectoral
fins animated at the start here over the
top of our Swim Cycle. If we want to, we can
add in more instances of this pectoral fin action along the timeline throughout
our animation. If we select this
pectoral fin strip, we can hit Shift D to duplicate it and drop it somewhere
else in the timeline. There we have two instances of our pectoral fin animation. The only problem with
doing it in this way, if I select that first strip and head down to the
bottom over here, you can see that the
action that's been dropped in is Pectoral Fins, but if we select the second one, the action is actually
Pectoral Fins 001. That's because if we duplicate
one of these strips, we're also duplicating
the action behind it. What this means is we're
going to end up with far more actions here
than we necessarily want. If we want to go back and adjust our pectoral fin animation, we would have to adjust
it every single instance. That's not going to
be very useful to us. Instead, I'm going to hit
Control Z to undo this, so now you can see we only have the one instance of our
pectoral fin action. Now with our pectoral
fin strip selected, instead of hitting Shift D, we can hit Alt D. That appears to have done
exactly the same thing. But with this strip selected, we click on it and go
down to the bottom here, you'll see that the
action is actually still that same original
Pectoral Fins action and we haven't created
a duplicate in here. That way if we ever want to go back and adjust the animation, it will update for each instance that we
have on this timeline. Again, I can with this
selected hit Alt D and you'll notice it
always drops it in on a new track up above, but we can drop it back
down onto the track that our other pectoral
fin instances are on. We can go ahead and drop
several of these in throughout the timeline with a bit of variety in terms of
where they're placed. Now if we, once again, disable our overlays
up here and I can hit the W key to return to Selection Mode and T to
get rid of our tools. If I play this back, you'll see we now have our swim cycle, but we have these
extra moves from the pectoral fins
laid in over the top. Now, I'm just going to shuffle these slightly
because we don't really want one of these in
this section here where the rest of the animation
is slowed right down. It'll look strange to have
this pectoral fin moving at the same time and
what I'm actually going to do with
that strip selected, I'm just going to hit
the X key to remove it. Again, let's see how that works as we play
the animation back. You can see as I
move around that the pectoral fins are
working on both sides here. Let's save our scene.
28. Animation: NLA - Breaking it Up: One thing that you might
recall from when we were analyzing the
reference footage, is that the pectoral
fins of the fish are not always used
exactly the same time. Sometimes the fish will
favor the fin on the left or the right in order
to help with turning. At the moment, we've
combined the animation for both of the pectoral fins
into a single action. What we can do is split
that up into two actions, one for the left and one for
the right side of the fish. In order to do that, once again, I'm going to go down to the
non-linear animation editor, and I'm going to disable
these tracks here. Once again, as we
scrub through there is no animation on the fish. I'm now going to go up
to my action editor, and I'm going to add the
pectoral fins animation back onto the fish here. Let's enable our overlays. We can see all of
our controls here. What I'd like to do is create a duplicate of this
pectoral fins action. We can do that simply by
clicking on this number 5 here. The number 5 simply refers
to the number of places within blender that that
action is currently in use. You can see that it's used down here in the non-linear
animation editor, as well as up here. If we click on
that, you see we've created an entirely new
action here with a new name. I'm going to do is rename
this, to Pectoral_L, and then we'll pick our original pectoral
fins action and rename this one to pectoral
underscore R. In this case, what we can do is select all of these bones on
the left side of the fish. If I just drag across this summary tract
to make sure that everything's selected in here. I can hit the X key, and hit Delete Keyframes. Now as we scrub through, only the fin on the right side
of the fish will animate. If we now switch back
to pectoral left. We can do the same
on the other side. Set all of the
right-hand side bones with everything selected here, we can hit X and
Delete keyframes. Now it'll just be the
left-hand side that animates. What I'm now going to
do is go back down, into the non-linear
animation editor. I'm going to re-enable
my tracks here, but I'm actually
going to select all of these existing
pectoral fin strips, and just hit X to remove those. Now the Pectoral_L
action selected, we can push down, to drop that down into the
non-linear animation editor. I'm just going to drag that down onto this PectoralFinsTrack. Let's rename this to
Pectoral_L_Track. Now go back into
our action editor, and select the Pectoral_Right, and we'll do the same
and push that down. We can again rename that
track just for organization. Now if we play this back, you'll see once again, we have both of the
fins animating. Once again, we can hit
Alt D to duplicate these and drop them in
where we would like them. Do that for both the
left and the right, if I just offset these slightly, just by a frame or
two from each other. What you'll see as
we play it back, is we end up with a slightly
more natural result, with the two sides
offset from each other. The other thing that's
very noticeable as you play this back, is that the fish is very still
from the side view here. It doesn't move up or down
throughout the water. A simple way to fix that, I'll just go back to frame 1, is I can select this
main torso control here. If I just hit eye
here on frame 1. Let's get onto our frame
240, and hit eye again, and we can go somewhere
around the middle, and just translate this
up a bit on the y-axis. This way if we play it back, we'll have this
subtle rise and fall, on the main body
of the fish here. It makes the whole animation
slightly more believable. If we want to, we
can even translate this slightly along the y-axis, and see how that
looks as we play. Slight rise and a little bit of a fall back
on the camera there. Makes it look slightly more believable than the fish
is swimming underwater. Now this works okay
from the side here, but we can do a lot more, in order to break this up and make a far more
believable animation. I will start working on
that in the next lesson.
29. Animation: Path Setup: The next thing that
I'd like to do is get our fish swimming
through our environment. But before we start with that, I'm just going to version
up our seam file. Just head up to File, Save As, we're going to hit
the plus icon to increase in version
number and hit Save As. Now I'd like to
do is to actually create a path for
our fish to follow. But before we do that, we added some animation to
this torso control here. I just hit the Home key here
over the action editor, we can make sure that all of these keyframes are selected. Just hit the X key
and delete keyframes. You can see up here that
all of our animation has been removed from
that torso control. Next thing that I'm going
to do is just roll over this viewport and hit
seven on the numpad. We can move into top view here. I'm just going to zoom
out a little bit. Because we're going
to create our path here for the fish to follow. To do that, and we have to first make sure that we're
back in object mode. I'm going to hit Control
tab and then hit Shift A, and we're going to go
down to curve and path. When we click on that, you
can see this NurbsPath is been generated
here in the outliner. Now, zoom back in just for a moment so you can see
what we've got here. If I hit the Tab key
to go into edit mode, you can see this path here has got five points
on at the moment. We can just grab those
and move them around. Because this is
just a NurbsPath, what we're actually
doing is moving this set of points and then it creates a smooth
curve between those points. If I zoom out a
little bit to do is just start to move these
points around here. Now, I do want the fish to
swim in an up to camera here. If our curve is not long enough, what we can do is just hit the E key to extrude
with a point selected at the end of the curve to extend that out further. Go ahead and hit again
and bring this out, move back out again and I'm good to you again straight this right back off and
over here somewhere. Then I don't want that
fish to swim up to camera, but then swim often passed. In order to see what
we've got here, we're going to want to actually connect our fish
to this path here. I'm just going to hit Tab to
get back into object mode. For now, I'm going to
drop down here into the non-linear animation editor. I'm going to disable all of these tracks that have
animation on them. Next thing I want
to do is select the rabbit fish rig and hit Control Tab
to go into pose mode. Just to make sure
that we've got this bone here selected,
this torso control. That's the one that
we're going to then attach to this path. With that bone selected, I can go down into the
Property Panel and to the Bone Constraint properties and under at Bone Constraint, we can add a follow
path constraint. We need to add a
target object here. If we just click in here, you can see are
NurbsPath is available. If I set that, our fish pops
off to the end of the path. Now if I scrub
through my timeline, you can see at the moment that
the fish is not animated. In order to make the fish
follow the path properly, what we need to do is
to exit pose mode, hit Control tab, and
select our NurbsPath. Here in the Properties Panel, you can go down to the
object data properties here where it says
Path Animation, have this evaluation
time attribute. Now if I just set
a keyframe here on Frame 1 with a value of zero, then I moved through to the
end of my timeline from 240, then increase this
evaluation time to 100. That will take the fish through
to the end of the path. Now if we scrub through, you'll see that the fish
is following this path. But it's not turning
to follow the path. In order to fix that,
what we want to do is go back into the constraint
that we set up. I'm going to once again select the rig Control tab and go to the Bone
Constraint properties. We have this option
here, Follow Curve. If I check that on,
you can see that our fish is now facing
along the curve. As I scrub through the timeline, it should follow along nicely. You can see when we look
upper our camera viewport, it starts off in the distance, swims towards us, turns, and then swims out
of frame nicely. What I'd like to
do is start with a fish just out of shot. Go back into my top view here. Once again, just going to
return to object mode, select my curve and hit
Tab to go into edit mode. I'm just going to select
this point here and just move it back and out
of frame a little bit. That way our fish will
start out of shot, come in, turn nicely, and then
head out of frame. But at the moment, if you
look in the camera view, everything is happening
flat to the camera. We can make this look far more
interesting, more dynamic. To achieve that, what
I want to do is start moving some of these
points up and down. We can start with this
point at the back here, and let's just move it up on
the Z-axis to start with. That way our fish will
come down and into frame. I'm going to stop there just a little bit lower than that. These two points here, again, I can push
them up a little bit. Then I think as it's
getting close to camera, drop this point down slightly. Then I'd like it
to rise up quite a bit as it's leaving frame. We can screw up through our timeline to get a feel
for how it's working. Now what you'll notice is now that we've moved
these points up and down, our fish is starting
to lean to one side. We can actually control
the way in which it tilts and leans as it's going through the animation
by selecting each of these points and adjusting
this tilt value here. For example, as it comes
towards this corner here I might want it to actually lean
in a little bit more. We can select this
tilt value and we can actually adjust the
angle of the fish here. Maybe as it's coming in, I like it to actually be
bank slightly the other way, leans through this
curve, straightens up. We've already got a nice
little bit of tilt here. Perhaps push that a
little bit further as it's coming around the corner. I wanted to straighten up
a lot more at this point. Just that slightly, it's going up nice and straight. You can play with
these values as much as you'd like to get the
look that you prefer. Little bit of banking through the corners just gives us a bit more belief
ability there.
30. Animation: Adjusting the Speed: Now if I play this back, you'll see that our fish
starts out quite slowly. We then have a fairly
constant speed coming through here, and then it actually eases
to a stop at the end here. The reason for that, if I just hit the "Tab" key again to get back
to object mode, let me go to our object
data properties. This evaluation time, we added in a key-frame at
the start and the end here. Now if I roll over
this action editor and hit "Control Tab", we can go to our graph editor
and see what's happening. Here you can see our evaluation time and we're easing at the start and
at the end of this curve, what I can do to start with, I need to select everything. If I hit the "V" key, we can change that to vector, which means our
handles point to one another and now we have a
linear speed throughout. But this is going quite slowly and I want to get some variety into the speed of our fish
as it follows longest path. We can introduce some
extra key-frames here and adjust the speed to speed up and slow down as the fish is following
along this path. I think what I'm going
to do initially, I'm going to have the fish
come in a lot faster. Let me just grab this handle
and push it up a bit. When it gets to this
corner, however, I want it to really
slow down quite a bit. I'm just going to hit "I" here and just hit
"Selected Channels". That will introduce another
key frame here on the curve. Just move this down a bit, give us a bit more space to work with on the graph editor. If I select just
this handle here, I can flatten this
section out a little bit. The fish will be going more
slowly through this section here than it is through
this section at the start. I then want the
fish to accelerate up before slowing again
through this corner here. I'm just going to hit "I" again and add in a key frame here. Now what I can do is actually if I just select this
key, hit the "G" key, and I can move that sideways, that means I'm going to
get to this point sooner. I'm speeding up this
section in between. Then we can flatten out these handles a
little bit so that we slow down as we go
around the corner. I think I'm going
to keep it quite slow through this section here. I'm just going to
go to around here and hit "I",
"Selected Channels". This position that we've
got here is the point where I want the
fish to then start accelerating and zooming off. I'm going to do it to
delay this key frame. I'm just going to again hit "G" and move this
along the timeline. Just around 190,
something like that. I'm going to select my handles here and adjust them so we've got a flatter
section through here. The fish will go nice and slowly and then we'll start
to accelerate often out. I can actually take this final key-frame that was set to 100 and I
can just move that up. You can see a fish just moved beyond the end of
the curve here. We can get a nice
acceleration off. I can move that up quite a bit. Let's just play this back
and see what we've got now. We've got some nice
slow sections, but we need a faster move
through the middle here. I can do that by
adjusting my curves a little bit hold this slower
for longer and speed it up. I think I can also pull this point back a
little bit as well. Just aim to get
here a lot sooner. Get rid of this kink
in the curves now. We should have a nice quick move there through this corner. Perhaps a little bit too
slowly at the moment. Let's tweak that
curve a bit there. I didn't want it to actually stop through this section here. What we might do is actually just to get to around
here a little bit sooner. Again, I didn't add
an extra key frame. Let's just drag this across. Turns a little bit too quick. It also can take a little
bit of time to work with these curves and get the exact field that
you're looking for. Getting some of that
variety in the timing, the speed that the
fish moves in at, say, it's not constant
all the way through, but it speeds up
and it slows down. It accelerates out
rapidly at the end. All of that variation
adds to the feeling of life in the character and
feeling of believability, as well as the overall
appeal of the scene. It's worth spending
that little bit of time getting used to
the graph editor, adjusting those
points and handles until you're comfortable
and you can get the right right of motion. I really want this to accelerate off quite a bit at the end here. I'm just going to get
nice big change there. I can take a little
bit of tweaking and adjusting these curves to get something that
you're happy with, just try again and
see what we've got. Just going to introduce
another keyframe here. I really want to slow down
that turn a little bit, pull these points back. We're going to this
point at the start of the turn, quite quickly. See see the steeper the curve,
the faster we're going, get to the start of the turn, and then we're
getting round quite slowly between these
two key frames. Then into the slow section here, just drifting past the camera and then accelerating
off and out. I want to just adjust
this slightly again, flattening out this
and this slightly ramping into this
acceleration off. But then I really want to speed it off at the end
of that as well. Sorry again, I'm just going
to take this final position. I didn't move it
right the way up. Again really nice fast move. We can just single
friends through this to see with the left and
right arrow keys. See how fast we're
moving at any one point in time. Back again. I think that should work
fairly well for us. Then we can move ahead in
the next lesson to start layering everything back
in over the top of this.
31. Animation: Varying the Cycle: With a path setup, we're now ready to add in our animation cycle
over the top of it. I'm just going to bring up our non-linear
animation editor again. Initially I'm just going to
enable this swim cycle track. If we play that back, you'll see that our fish is now swimming nicely over the
top of our path animation. The problem is, because
we've already animated the influence in the speed
of this swim cycle strip. The moment the slower parts
of our path animation, the fish is swimming
quite quickly, and when it should be swimming quickly, it currently isn't. We need to go back into
this swim cycle strip and edit those influence and
strip time parameters. I'm just going to
select my rig here, which should bring
up the graph editor, and we can enable our influence and strip
time curves here. For now, I'm just going
to work on the influence, and I can just hit the "Home" key to
frame all of that up. At the moment our
fish is swimming in, but we have zero influence at the start so we
have no animation and we build it up to this
first key frame here. I'm just going to
take that key frame and just move it up. What we want is the full influence when
we have quick moves. For example, this here, we're going to want our full influence
in the middle hand, just going to grab this
key frame and just move it along the
timeline to around here, and back here, as we're
getting more slowly, we don't need nearly
as much influence. Only I select to channels and add in an
extra key frame here. Then I'm just going to move
that down so that we have less influence as we're
going through this corner. Then as we're accelerating off, we have a lot more influence. I want to bring this key
frame up here as well. But then again
through the corner, we want to be backing off on the amount of
influence that we have. Same all the way through this section until we're
ready to accelerate off here. Again, I'm just going to hit "I" o channels and
add a key frame here. Then I'm just going to
select this key frame back here and drop that
right the way down. We will want some movement
through this section. The fish still seems alive. I think we can delay that key
frame a little bit as well. It's going fairly
slowly and then it will start to accelerate off. Doesn't really matter since
the fish is out of shop, but we can up our influence
at the end there as well. Just going to light this
key frame a little bit. We want to get up to
full influence before it leaves because it will start to push itself forward
to accelerate out. Just going to drop this
down a little bit here, don't need the full influence. That is just gently moving in. Now I want to get to my strip time and have
look at that one. Just hit the "Home"
key to frame that up. Now this, if you remember, is influencing how far
along these cycles we are. How quickly we're moving
through the actual cycle. Again, we shouldn't be starting
out from nothing here. I can actually just increase these little bits
and we're getting a faster movement through here. Doesn't want to be too fast, I'm going to save that for [inaudible] in gentle movement. As the fish is coming in, you want to really slow
things down into this corner. Again, flattening out the curve, before we get a quick
acceleration at this point. Just going to move this
back a little bit. We start that acceleration for the fish is moving quickly. I want to keep it going
for a little bit longer. Through that section, I'm going to slow
everything down. We still want to keep it moving. Then we want to speed up
through this last section here. I want that to be
going a lot faster, I know it's ramp
up in intensity. It starts to head out and it's going a bit too fast
do as it hits that corner. These and drop them down a bit. I do want a little
bit more speed through this section here. I think we're ramping up just a little bit too soon. That's combination of the
speed and the intensity, I want to save that for that real acceleration
at the end there. That's a little bit better, that's perhaps going too fast. Bring that back a
little. I want to again, look at my influence now, we've adjusted that speed. I just hit the "Home"
key to frame that up. Do that slightly further. I'm going to start
ramping up into it. Maybe not hit full
influence just yet. I'm going to load the influence a bit here so we're not moving
quite so much. We have a gentle movement
coming down through there, before we get to the
faster movements as we're accelerating
out of the corners. There's always a bit of back
and forth with these things. Since both the strip time and the influence have
both linked together, and they always have
to work well with the existing path animation. I'm going to lift this one
slightly quicker at the start. Then we're gradually slowing
down a bit more again. We're getting that
bit of variety. I think that works a bit better. That should do us there. We'll save that and
then in the next lesson we can start adding the
pectoral fins back in again.
32. Animation: Pectoral Fins: The next thing that I'd
like to do is to add our animation back onto
our pectoral fins. So to do that, obviously, we can re-enable
these two tracks down in the non-linear
animation editor. Then as we're stripping through, you can see we have our pectoral
fins moving once again. We don't want to just drop
them in arbitrary locations, we want to use them when
it makes sense to do so. So initially, what I'm
going to do is actually delete all of these
except for the first two. I just select them and hit "X". I'm going to select these
first two and drag them a little bit later in
the timeline so that our fish has actually come into shot before it uses
its pectoral fins. I indicate them slightly offset from one
another here as well. The other thing
that I'd like to do which we didn't do when we first added them is to
change this blending mode. At the moment it's
set to replace, and I'd like to change
that to combine. In the case of these fins, it will probably make
just a subtle difference. But at the moment with replace, is replacing all of
the animation on the fins with the new
animation within this clip. We did add some
subtle animation onto the fins within our swim cycle and we want to blend
the two together. Changing this from replace to
combine will do just that. So now we have the pectoral fins being used as the
fish first comes in, and then as it's
coming to slow down, I like to use them again here. So we can select our
strips there and again, hit "Alt D" to duplicate them, and move them into place. So that will help our
fish to slow down. As it's turning, what I like to do is make use of this right-hand
pectoral fin again, hit "Alt D" to
duplicate that strip, and drop it into place because the fish can make use of that fin to help
it with the turn. It's going to bring that
strip back a little bit. Because the fish is
slowing down as well, it's going to start
dropping a bit. So it makes sense
to then once again, use those pectoral fins
straight afterwards to just give it a little bit of lift so it comes down
and into this corner. Again, in this case, we use
that left-hand pectoral fin. Again, let's duplicate that, drop that down its place, just handle this turn. That's probably a bit too much. What we're actually
going to do is delay that and delay this
left-hand one. That way is just making use
of that to finish that turn there just by offsetting our
right and our left slightly. Having these two
fins offset from one another once again, it creates a more
believable motion there through that turn. Because we're going
quite slowly, we can duplicate
that right-hand one, drop that in here. So we're just adding just that extra little movement there before we then
start to accelerate off. One last one in here as
the fish is leaving, see if we can just
bring that back. So it's using those fins for lift as it's starting
to accelerate off and out. Let's play that back
and see what we've got. We can maybe drop this so that
overlapping a little bit, and that will help us
there on that exit. Makes it feel a bit more believable that we're
starting to use them to push the
fish up and out. The other thing I feel
is the movement of the fins here is quite rapid, at the start here, and it
could be a bit slower. What we can actually do is select any of these strips here. If we scroll down, we can adjust this
playback speed. If I change this
from one up to two, you see it extended
this strip out so we'll get a much
slower movement there on our pectoral fin. I just shuffle that
back slightly and we can do the same here on
the right-hand side, change the playback
speed again here to two, then we'll see how that looks. Again, we're getting a
little bit of variety in the speed of how we're
making use of these fins. What I might actually
do is these ones here, I'm just going to
extend them slightly. So maybe we'll just
up this to 1.25, maybe shuffle them
back just a couple of frames, and see how that looks. That way we've got
a slower movement on the fins followed by a slightly faster one as
the fish starts to exit. That one might use speed
that up even more. So you can try
bringing that back to maybe 0.75, the same here. You can see we get a
quick movement and then a faster one there before we exit. I'd like to just pull us back a little bit further so it's really dragging
behind as we exit. I might bring these
back slightly as well. I had to change
these back to one, I think they're getting
a little bit too fast. Change them to one and just
bring them back slightly. It's looking good. So I'm
going to save my scene now, and then we'll add a little bit more detail
in the next lesson.
33. Animation: Eyes: One thing that really
adds to the believability of any character are its eyes. What I'd like to do in
this lesson is to add some eye movement so it appears that the fish
is looking around and it gives some more
believability to the scene. In order to do that, we're going to first select
our fish rig and hit "Control Tab" so we can
go into pause mode. We added these bones in
here to control the eyes. Now you'll see that we have our strip time and
influence curves here and I can just disable them so that they're
not going to get in the way. What I'm going to
do is just add in a couple of eye movements here
as the fish is coming in, up close to the camera. I think initially when
you set a key frame here, a frame 110, and I'm just going
to do it on this one side that's facing us. I'm just going to hit "I"
to insert key frame there. I think we can actually
delay that a little bit. I'm just going to hit
"Control Tab" to flip back to the drag sheet and
just drag that back. I think may be okay for frame
113 and then frame 115. I'm just going to
hit "G" and move this eye so it's looking
back over to the right here. It just has this
little eye movement over a couple of frames, looking where it's going. We'll key that again, frame 119. I will just hit "I" once more then I'm going to select that first
key frame that we had and I'm going to hit
"Shift D" to duplicate it and we'll move it
down the timeline here. Again, we're having it moving back to the front as we're
starting into a turn. I can probably delay
both of those again, just ever so slightly, which I just jump and can move
them along the timeline so it's just starting to
look forward as it turns. Then as it turns
around the corner, we are going to start
working on the other side. I switch to the other
eye here just like that, I am going to hit "I" to insert
a key here at frame 145. We've got an eye movement here that's looking more
towards the camera. I just delay that
again just slightly. As I'm positioning these eyes, I'm positioning them so that the pupils are overlapping
the edge of the eye. If we have them
towards the center of the eye without white
all the way around, it doesn't look quite
as appealing as if we have it clipping into the
edge of the eye there. I am just going to set
another key frame. Once again, duplicate
that first key, "Shift D", and bring them. The fish starts to look
forward just as it's about to accelerate off and out. Do like that up to there.
Let's see what we've got. As we're quite fast
through this section, I'm going to adjust this slightly so that we
can read it a bit more. I'm just going to grab those keys and move
them back a little bit so the fish goes to the
side a little bit sooner. I had to delay that
eye that's looking forwards a bit as well. That feels a bit better. It tends to look at us and then it looks forward just as it's deciding to accelerate
off and out. Very well, save our scene.
34. Animation: Final Adjustments: Our animation is now
almost complete, but I just wanted to
see if we can add in a few extra subtle
details to add one more layer of
believability to it. To start with, I'm going to
slip the character's head. As the fish is coming
in around this corner, the head feels a little
bit stiff to me. I think we can just add in a little extra subtle movement to give it a little
bit more life. What I'm going to do is
just come around here and hit "I" to insert
a key frame there. Then through this turn, I'm just going to stop
rotating it slightly, so I'm just going to hit
"R" twice and that gives me this ability to
freely rotate upon. We're leaning into that
turn a little bit more. Around here, I'm
just going to pull even further round so that I'm really
twisting into it. Before straightening
up, I'm just going to slip that first key, Shift D, drop that in. I can pull it out a
little bit further along. I think I want that to be
quite so straight there, so I'm just going to again rotate that around a little bit. It's getting some subtle twist
and lift in the head here. I can now scrap that first frame and bring that back to here, so we're straightening
up a little bit. I think that's getting on there a little
bit too far away. I'm just going to drop a key
frame there and hold it and then just rotate slightly
off to the side. Bring that back a little so
the head is starting to turn. I just laid that move. Then we start to turn to
look where we're going. Then again, I'm just going
to straighten this up again, and here, so we're going out. That little movement
there is a bit too harsh. I think I'm just going
to select this key frame here X and delete it. That twist is quite
abrupt there as well, so let's see if we
can soften that a bit. Lay this one as well. I'm just going to rotate that down a little bit
further so we're getting a little dip and a rise up
into place around that corner. I think we can lift
that slightly as well. I can divide that by
a couple of frames. That's a bit more natural now. The other thing I'd like to take a look at are these pelvic
fins down at the bottom here. As with pectoral fins, these can be used
to help the fish to adjust its position in the water to speed
up and slow down. I think I'd actually
just like to get some extra movement in breaking them up so
they don't feel like they're just stuck to the
bottom of the fish here. I think what they're
doing is fine all the way through this early
part of the animation, but as we come into this turn here and we're
slowing right down, I think we're going to make
use of them to indicate some breaking before we then drop them back into place
as we accelerate out. I'm going to select all of those bones on the pelvic
fins to start with. I want to keep them as they are right through to
around frame 120. I'm just going to hit
"I" to set a key on them there and I know I want them back into
place around frame 190. Again, I'm just going
hit "I" and set a key, but as we're turning here, I want to start moving them out and making use of
them for some breaking. I'll just hit period
key to frame that up. I think we can pull
this out to the side a little bit and
drag that behind up on this round so it's starting
to fly them out. Come out to the side
and then this as well, getting just a little bit
of overlapping there. Then start moving them back
into place a little bit here. I want to bring this rear
one up a little bit sooner, so hold down a
little bit longer. I think we can tuck these back in just a
little bit sooner. Select all of this and bring
it back a bit on this frame 190 and bring right away back to the 170 and see how that looks. There we are. We're
just throwing them out a little bit as we come
around that corner. We might even bring
these key frames back, so we bring them out
a little bit sooner. See how that looks. Brings them back. Making sure they drag nicely. I think what I'd like to do is, again, just select all of them. I really want to tuck them
in as we're exiting out, so I'm going to
split a key there. I think I'm going to just fly them out slightly
at this point. Then really tuck them back
here as we're exiting out. Pull them in nice and
close to the body. There we go. Then pull them in
a little faster [inaudible] grab this
and move it back a bit. There we go. Pull
that in sooner. I think this rear fin is just coming down a
little bit too far. I'm not liking
through that turn. I'm also going to
delay that a couple of frames just to make sure that the two
fins are nicely offset from one another. I think that should do it
for now. Save our scene.
35. Rendering: With our animation now complete, we can start to set up
our team for rendering. I'm going to be making
use of the cycles render engine to get the
maximum possible quality. But I'll also show
exactly how to set up the EV render
engine as well. So the first thing that
I want to do is just roll over my camera
view here, hold on ad, and I can enable
the rendered view, and then also going to re
enable my environment here. Now, under the render settings, first of all, for the
EV render engine, just going to disable the
temporal reprojection, which can just
sometimes introduce some artifacts while we're
working and changing settings. You going to enable retracing
here and disable simplify. Now I'm going to switch over
to the cycles render engine, changes from CPU to GPU compute, enable de noising
the viewport and reduce the samples down to 100. Then for the render, I'm
going to go with 200 samples, which hopefully
should be sufficient. Under the light path setting. I'm also going to increase
the volume balances to one. Finally, I'm just
going to check under the color management
section that we're making use of the AGX
view transform here. Now you can see here
that obviously, we don't have the same light
beam here in cycles that we had while we were working
with EV. Now that's fine. That's just down to
some light settings, which we'll change later on. For now, I'm going to
switch back to EV, because there are a couple of other things that I
want to change first. If I just move back along the timeline to when
the fish is coming in. You can see at the
moment, whilst it's quite small enough
in the distance, it's still very much in focus. Now, to aid the
believability here, I'd rather have the fish out
of focus when it's off in the distance and coming into focus as it gets
closer to the camera. To do that, we're
going to change the camera's depth
of field settings. So first of all,
I'm just going to switch back into object mode, hit control tab and
select my camera. Now if we go into the
camera settings here, we have a section
for depth of field. I'm just going to check that on. And What we can do here is we can set a
manual focus distance, which as we slide
that in and out, will change whether our fish
here is in focus or not. Or we can pick to
focus on an object. What I'm actually
going to do, I'm just going to drop an empty
here into the sea. I'm going to hit shift A, go down to empty and plane axes. I'm going to hit F two,
and I'll rename this. As camera target. Now if I reselect
my camera here, I can just click
in this focus on object and select camera target. This means that wherever I move this object within the scene, that is where the camera
will be focusing. Since it's currently
at the origin, which is where the fish swims through when it's
close to camera, that works perfectly for us. If I move to where the fish
is just entering the scene. At the moment, it's still not
particularly out of focus. So if I select the camera here, under the depth of
field settings, we have this F stop setting. If you're familiar with
real world cameras a tool, you'll know that
this is a setting which controls the aperture, which in turn can control the depth of field that
we have within the scene. Since we're dealing with
quite small objects here, I'm going to have to reduce
this F stop down quite a bit. We'll try F one. We can go a bit further
there, maybe not 0.8. Now our fish should be out of focus until it gets really
up close to the camera. So that should work
for us nicely. The other thing
that you'll notice as I scrub through the scene here is that our light
beam doesn't animate. Now, That's down to the texture that we have here
on this lighting cookie. We'll see if I try to
select that cookie, I'm simply selecting
this entire environment object because it's something that we've linked
into the scene. What we actually need
to do is to go back to the original scene that this was linked from and
change it in there. What I'm going to do is just
save my scene file here. Then I'm going to open
up rabbit fish rig to. So now I'm going to select this cookie object and head
over to my shading tap. So with this selected, if I go to the materials
view and scroll down, the moment I render method
here is set to dithered, which means that
if I zoom in here, we get this quite noisy result. If I change that to blended, it'll actually get a
far smoother result, which will make it easier to
see what we're doing here. So what I want to do
is to actually animate this W value here over time, so that will create
a rippling effect. To do that, I'm going to first make sure that I'm on frame one. You can see the
frame count up here. If you're not on frame one, you can just hold down the
shift key and the left arrow, and that will jump you
back to frame one there. So then I'm going to
roll over this W value, which is currently set to zero, hit the i key to insert
a key frame there. Then I'm going to jump to the
final frame on my timeline. So I'd down shift and
press the right arrow key, and that should jump me to
the final frame in my scene. So in this case, 250. And then I'm going to
increase this value a bit. So I can hold down
the shift key. That will allow me to move
in smaller increments. I'm just going to increase
That's just a little bit. We'll go for
something like 0.06, and then I'm going to hit
I again to insert a key. Now, I'm just going to make
sure this Voronoi texture here is selected. Is the white
highlights around it, and I'm going to jump
into the animation tab. Then here in the dope sheet, press Control and tab so that we can see
our graph editor. A to select everything, and the home key to
frame it all up. We can see at the moment that we have this easing on the curve, and that's not what we want. I'm just going to hit the T key and change this curve to linear. The other thing that
I want to do here, just in case we are
just this range of our scene file at all, I'm just going to
hold down shift, a press E, and change this curve to have a
linear extrapolation. That means that we
will extend following the same path both before and after the key
frames that we've set. Now if I just switched
to rendered view here, as we scrub through
the timeline, you can see that we are
animating our light beam there. Now, that will work for EV where we need to make use of
this lighting cookie here. But we also have a
similar setup on the other lights
that we're going to make use of for cycles. So in this case, I'm going to select
my light beam here. Again, head over to
the shading tab, and let's just frame that up. Once again, here on frame one, I want to set a key here
for this W value at zero and holding down shift and pressing
the right arrow key to jump to the end
of the timeline. Again, I'm going to
put a value here. Now, I know that
this is going to need to be significantly higher here on the light than it was on the
lighting cookie. I'm actually going to just set a value manually here of uh 0.6, ten times more than we set
on the actual cookie itself, and I'm going to e to set a key. Again, I'll set that
Voronoi texture, head into the animation tab. A, just to make sure we've
got everything selected, T, and set that to
linear, and again, shift E, and choose
linear extrapolation. Finally, we want to
do the same thing here on the wide beam. We'll head back into
the shading tab, to have ni texture, Shift left to go to frame one, I insert a key, shift right to get
to the final frame, the same value of 0.6, and insert a key, back to the animation tab. I insect everything, T, changes to linear, shift, and linear interpolation.
Once again. To see this effect, obviously, we need to be using cycles. So I'm just going to switch my render engine
here over to cycles. And this is where again, we can see that that light
beam effect is not visible. So to solve that, if I just
select my light beam here, under the light settings, I'm going to
increase this value. Now, if you intend to render
your scene out with EV, leave this exactly as it is, but for cycles, we want to increase this
power significantly. So up to about 15,000. What's there gives us
a nice light beam. And also, if you're
rendering a cycles, you'll want to turn
off this cookie both within the viewport
and within the render. So now, as we scrub
through here, It's hard to see obviously with the noise here
in the render, but you can just
about make out that that light beam
is moving nicely. With that done, I'm going
to save the scene here, and then we can reopen our
last animation scene file. Once we do that, if
we suscbe through, Should be able to see that
things are animating here. Now, despite us changing the settings there for
our lighting cookie, it's still visible here
within their seam farm. What we're going
to need to do with our environment selected
under the object menu, head down to library
override and make. That way we can now
select this cookie here, and then I just press the period key, we
can frame it up here. You can see it is
disabled for renders. It's just visible
here in the viewport, so I can check that off. So then it's going to head
to the render settings here. I'm going to switch this
back over to cycles. And enable the rendered view. So now we can clearly see
our light beams here. Now, as one last touch, I'd like to introduce a bit of blooming around the strong
highlights within our scene. This is something that the EV render engine used
to support natively, but as of Blender 4.2, the effect needs to
be applied within the compositing tab for
both EV and cycles renders. So to do that, what we need
to do is, first of all, just pick a frame to use
as a starting point here, and we need to render
a single frame. So you can just hit F 12, and that will render a
single frame for us. Once you render is complete, we can head over into
the compositing tab and click on this
Ue nodes checkbox. Now, I'm not going
to go into the way the compositor works
in depth here at all, but I'm just going
to show how we can add this glare effect. First of all, to be able to see what we're doing here
in the compositor, we need to add a viewer node, so we can just hit Shift
A and s for viewer. And if we drop that in there. We can then take the output of our image and drop it
here into the viewer tab, and we'll obviously show our image here in
the background. Then if you press the V key, will allow us to
zoom out that image. V will allow us to
zoom back in again. If you hold down the k key and use the middle mouse button, we can pan that around equally just holding the
middle mouse button, allows us to pan around
within the compositor itself. Now the next thing
I'm going to do is shift A and add in what's called a glande I'm going to
drop that in here. At the moment, it's just fitting between our renduler
and our view output. We need to make sure
that this is also connected to our
composite output here so that our final image will be saved with the
effect of this glare node. Now obviously, the effect here is quite over the
top at the moment. We're going to change
this from streaks here, and we can either select this
bloom setting, or fog low. I generally prefer the effect
to this fog low effect. So I'm going to use
that, and I'm just going to increase this
threshold value. So it's not quite so strong. Usually somewhere around eight seems to work quite well for me. You can see around
these white areas when we've got
strong highlights, which is getting this
bloom effect here, which works quite nicely.
So with that done. Before we render
out the final C, we just need to check
our output settings. For that, I'm going to go
over to output settings, who in the properties panel. Our frame rate of 24 frames
per second is correct. Frame start and end of
one and 240 is correct, and we just need to set up
our output folder here. So I'm just going
to click there. Go to our folder that we've
been saving our files in, and I'm going to create a new
folder here called Render. And within that folder. I want to call this
Rabbit fish animation, and just put an
underscore afterwards, then Blender will
add the frame number after that underscore. I can accept that. Then we can save this out
as a PNG sequence. By saving individual images
rather than a movie file, that means that if
anything goes wrong, if it crashes part way
through the render, we can simply resume
from where it left off. Then at the end, we'll compile everything together
into a movie file. We don't need it to be
set to RGB A, though, which includes an Alpha
channel because we don't have any
transparency in our image. I'll just change that
to be an RGB image. With all that done,
we can just save our scene and then head up to render and render animation.
36. Export: Once your render is complete, you can go ahead and close
down the render window, and then to view your animation, to render, and view animation. That will open up
the native player, which will allow you to
view your animation. Obviously at the moment,
everything is still saved out as an image sequence. You can of course take
that image sequence into any video editing software, but equally, you can
combine those images together to form a movie
file here within Blender. That's what we're
going to do next. If you head up to
the top where we have this little plus icon, we can go down to video editing and add in a video
editing workspace. Now, here down at the bottom. I'm just going to hold down the Shift key and
press the left arrow, just to jump us
back to frame one, and then we're going to add
in our image sequence here. Do that, just hit
Shift A to add, go down to image sequence, and open our render folder. Here to select our first frame and scroll down to the bottom. Holding down shift. We can click our last frame
to select everything, and he add image strip. C now see that we can scrub through our animation here within the video
editing workspace. Now what we need to do is to render this out as a movie file. To do that, we're going
to come up to the top here where we can find
our output settings, and we can leave
the same directory as we saved our
image files into. But instead of saving with
this PNG file format, we're going to change
that to FF Peg video. We then go down into
this encoding section. We're going to change the
container type to an Peg four, and leave the video
codec set at h264 there. There's output quality. I'm just going to rise up
from the medium quality, and you can pick either high quality or
perpetually lossless, which is what I'm
going to go for here. Once that's all set,
all that remains is to go up to render and once
again, hit render animation. When that's complete,
once again, you can close down
your render window. Then if you open
up a file browser and the location that you
saved your files out, you should see that we now
have this MP four saved, and you can just open that within any native video player. I just going to close
that down again, and don't forget to save.
37. Final Thoughts: Thank you so much for
joining me in this class. Really hope that you've enjoyed learning about
character rigging and animation and following
along as I share my process. If you've been following
along with the class, either using my character
design or one of your own, I love to see your
final animation. If you're happy to
share, then please do upload it to the class
project gallery. I really look forward to seeing all of the class projects. I can't wait to see
what you've created. Character animation is a
complex skill to master. But if this class has interested you in digging deeper
into the subject, my character animation
fundamentals class will let you do just that. It takes an in depth look
at the principles of animation for applying them to a series of
different projects. Finally, you may want to check out my profile page where you'll be able to find my other classes and learn a bit more about me. If you'd like to, you
can also follow me to be notified of every new
class that I publish. If you've been
following along with the full series of inter
the Ocean classes, you should now have all
of the skills necessary. Take your own simple
character designs all the way through to a finished
three D character animation. I hope that you now
feel both confident and inspired to start using those skills to create
projects of your own. Thanks again for
taking this class. I look forward to seeing
you again soon. Oh.
 John Knowles, Animation Director