Transcripts
1. CHAPTER 1 Intro: Hey, guys, my name
is Frank Dorov and welcome to this video. Now, this video is slightly different than you're
used to, probably. In this video, I'm going
to show you some of my images and how we created it. We took some video
during the photo shoots. So, in other words,
these are photos that we literally shot during workshops
or during photo shoots. And, of course, we
also have some videos to explain lighting setups. But most of all,
this is going to be a video about workflow
and about how you can succeed in getting great images without putting too much effort or budget in it. Isn't that what we all
want? So enjoy the video. And if you have any questions, you can always reach out to us and ask your
questions. Let's start.
2. CHAPTER 2 Gear: Now, before we go into
the photo shoots, there's one thing that
I have to make clear, and this is one of the
things that always comes back when I teach workshops
or when I post images online. And that's about gear. Now, we all know that gear
is awesome, right? There is an expression called guess, gear
acquisition syndrome. But that's not really
a problem unless you're married and
your wife finds out what everything
costs, of course. The gas syndrome is
not a real problem, as long as you know
why you buy new gear. If you buy new gear to be
inspired, that's awesome. I have that with Vintage
guitars and tube BAMs. But if you buy gear
because you are covering up things that you can't do
or think that you can't do, that's where you have a problem. That's why before we
go into the studio, I want to make one
thing very clear. Of course, I'm shooting
with the Sony A seven R five and a great
G master lens. So yeah, my gear is great. But I can also take exactly the same pictures
with my iPhone. And stroke wise, of course, you can use bronze color. You can use Pro
Photo. You can use Ellen grom or Hansel.
A great brands. But the last two years, I've been shooting
with Gekoto and that's actually are much more
affordable brand. And in all honesty, my images
didn't become any worse. The reason I
actually switched to a hybrid strop is for
the very simple reason. We are doing a lot of
photography on location, and I just got tired of, well, carrying around very heavy gear and very expensive
gear when I can also use stropes that
I can just fit into my bag and shoot 400, 450 images on full
power with one battery. So it's all about
horses for courses, but also the quality
of your gear is, of course, really
important for durability. It's important for
your light shaping. But don't let anybody tell you that because you don't use
a very expensive camera, you can't take great pictures. You can do it with
literally everything. A light bulb, look at these images or a chandelier.
Look at these images. You can literally use everything you want
for your photography. So don't let gear hold you back. But if you love to buy
new gear, be my guest. Okay, let's go into the studio.
3. CHAPTER 3 Tethering: Okay, now, of course, we're
going to talk about lighting. We're going to
talk about how you approach your model and a
little bit about styling, of course, because that's one of the most important things. In a photo shoot,
you have to make sure that you have
something cool to look at. But there are some
things that are really important
in your workflow. Now, in this next chapter, we're going to talk
about tethering. Now, you might wonder,
what is tetering well, you know that when we
switched over to digital, one of the biggest
improvements was that we now don't need
poloids anymore. Now, I'm not from the age
where we used poloids. And that meant that
when you shot film, you didn't have any feedback. So you shot film. You needed a light
meter, of course. And the first thing you shot was a poloid to check if
your images were okay. Now, in all honesty, a poloid
isn't the same as film. So it was more like
well, it came close. Of course, the switch
to digital was awesome because now you
can take a picture. And on the back of your camera, you can literally see
what you're doing if your composition is right,
if your lighting is right. And that's actually
almost the image that you will get in the end, of course, without
your retouching. So, now that we see all our images on the back
of our camera, are we done? Not really, because when
you do a photo shoot, isn't it really irritating when people constantly look
over your shoulder, ask you like, Hey, how does this image look and
I see the image? Yeah, that doesn't really
work. So we need a way to get those images straight out of the camera onto a big screen. And that can be a TV,
a laptop, or an iPad. And that's actually
what we call tethering, connecting our camera to a display or a device that
will show your images. Now the cool thing is, as
soon as you take that image, the image will appear
on that big screen. Now, this is a huge
improvement in your workflow. It doesn't only show you if you shut your
images the right way, but it also shows
your client how the images will look in
the end. Let me rewind it. You just said that the images
were raw when they came in. Yes. But in some instances, like for example, with
Lightroom or Capture One, you can actually
tell the computer that every time when
an image comes in, you want it to run a
certain well, preset. And now when your client wants to see a black and white image, you can literally shoot
it in black and white. So your client can see the images straight
when they come in. And they can also,
of course, say, like, Hey, I really
like this image. Let's give it five stars. So it's a huge improvement
in your workflow. But what do you need? Well, in the studio, it's pretty easy. You can use your laptop, you can use Windows
machine or a Macbook. But on location, well, that becomes a little bit
more tricky because a laptop, of course, is always
well, vulnerable. Let's just look at my laptop.
We have a big screen. We have a keyboard. We
have all these ports. We have a track pad, and
we have to make sure that it stays really nice
and clean, right? Because if there's a
little bit of dust on your keyboard and
you close the cover, yeah, my own screen is
the witness of that. You can literally just damage
your screen if there's a lot of dust or sand
on your keyboard. Now, this is something that
you don't want on location. Plus, you want to move
around very quickly. So a more modern solution
is actually using an iPad. Now, in my case, I'm
using the iPad Pro 12.9. And in the past, with the iPad, you had
a lot of problems. It was only possible
to shoot wireless, and I'm not a big fan
of shooting wireless. Most of the times it works, and then you arrive
on the location, and somehow it just doesn't work or you're at a trade show, and it's very busy with Wi Fi, and the image don't come in. So you don't want it.
Nowadays on the iPad, we have several solutions. I myself use Cas cable, which is a one time buy. I believe it's 65 euros
on the app store, or you can do a subscription. But you also have capture one, which is a subscription, which is not my personal
favorite thing to do. So my personal advice
is use Cas cable. Now, the biggest
change for me is when the iPad started to
support wired tethering. Now, again, I'm not
a fan of wireless. I want it wired. But how do you connect it
to your camera? Well, first thing I have to explain to
you guys is there is a huge difference between normal USB cables and cables
dedicated for tethering. Now, my personal
choice is IQ wires, and I have it here on my camera. Now, the most important thing is that you protect your camera. Now, there's always people
walking around at the set, so you want to make
sure that it can't hit the side of your camera because that will break your port. Now, in this case, we're
using a connector here. We're using the flap
of the port over here, and we have a smaller
connector which actually goes straight into the port here and is very well protected. Now on the bottom
part, we also have to make sure that it's
tight and connected. So in this case, we're
using a slider system. You just connect this and you
just take the slider out, which is very, very easy. And you just click it
in like this again. So this is a very nice solution for on location
or on the studio. But what if somebody
stands on your cable? Well, that's why we
use a cable release. So, in other words, you
don't damage your cable. Length wise, in our studio, I'm using 15 meters
in one piece. I don't want any
connections in between. And the cool thing
about IQ wires, they deliver five,
ten and 15 meters. So it's always something well, that you can fit
in your workflow. But how do you get your
images onto your iPad? Well, with a newer iPad, you, of course, already have
a USBC connection, and this is where you
connect the cables straight into the iPad
when you're on location. But in the studio
or on a trade show, you also want to connect
an external monitor, and maybe you want
to charge your iPad while you're shooting
or giving your demos. And this is why we're
using so called dogs. Now, this is a very
simple dog from Anchor, and it just uses
one USBC connector, and now I have two USBC
port, an HDMI port. I have a network port
and a card reader, of course, and some USB A ports. Now, with those
dogs and dongles, you have to be a
little bit careful when you go online on Amazon or AliExpress or wherever you want to buy it or at
your camera store, make sure that you buy a
dongo that has the option to charge your iPad and
also has a data connector. So, in other words,
two USBC connectors, one for data and one
for charging your iPad. And in my opinion, HDMI
is also very important. Now some of those dogs
will work flawlessly. Some of those dogs won't. This is something that you
have to do by trial and error. I spend about three
or four dogs before I found one that actually works all the time,
and that's the anchor. And well, your mileage may vary. It also depends a little bit on your iPad and the
camera you're using, but just test it out
and make sure that you can send it back
within 30 days. On the laptop, by the way,
everything is no problem at all because you already
have the ports on that laptop. Now that we set up tethering, let's talk a little bit
about color management and calibrating your monitor.
4. CHAPTER 4 Calibrations: Okay, the final part
of the boring stuff. Now, we already
discussed tethering. Let's talk a little bit about
getting your colors right. And I immediately have to
say one thing about this. This is just between you and me. This doesn't take
away your creativity. This doesn't kill
your creativity. And for certainly, it doesn't
slow down your workflow. What I'm going to tell you now, if you don't do it already, will change your
workflow forever, and it will be much better. So let's take a little
bit of a sidestep. Let's talk about color. Now, I'm not going to dive
very deep into color, but let's just give you the color triangle,
as you can see here. Now, we have red,
green, and blue, and in the middle, we have the so called
black body curve. Now, you might recognize
this red, green, and blue. Those are indeed
the primary colors. Now, when you calibrate
your monitor, and this is the part that
you really have to do. Let's talk about that
a little bit later. You are choosing a white point, and that means that well, there is a certain point
on that black body curve. It's actually a little bit
of the black body curve that we agreed upon to
be a neutral white. And in all honesty, it
isn't neutral white. It's just a little
bit reddish white. Now that we know
that coordinate, this means that we can now use a so called calibrator for you monitor to create
a neutral white. Now, normally, when you
calibrate your monitor, it will go from black to
white in several steps. That's called the gray scaling, but that's only for the whites. Now, how about the color? You probably already know in
Photoshop or Lightroom or whatever raw convert
to your work that you see certain color
spaces like for example, SRGB Adobe RGB,
and pro photo RGB. Well, the gray scaling or neutral white in most of those color spaces
will look the same, and that's supposed to be, right, because we want
to have neutral white. Where it does differ and differ a lot is the
coordinates for your colors, your red, green, and blue. In your SRGB color space, you have a small color space. That means that all
your colors will fit nicely in that color space. You can use JPEC eight
bits, no problem at all. Now as soon as you
go to Adobe RGB, that's a bigger color space. And now with JPEC eight bits, it becomes a little
bit more difficult, but it's still pretty doable. Now, when you go to Photo RGB, that's a really big color space. And this is also a
color space that you can't store in JPEG anymore. You need TIV 16 bits. Now, I'll nest, my workflow mostly is editing
in TIF 16 bits and then storing in JPEG Adobe RGB for the final results for
the very simple reason, hard drive space is limited, and TIFs are very, very big, and JPEGs are
a little bit smaller. And when I have my final result,
I don't have to go back. So we talked a little bit about those colors and the
different color spaces. Now, for every color space, the coordinates for
each color is fixed, and those are three coordinates. We have an X, a Y, and a big Y U, saturation
and luminance. Now, you probably notice
from your printer CMIK. Hey, wait a minute, CMIK? Yes. Next to our primary
colors, red, green, and blue, we also have
secondary colors, sion magenta, and yellow. Now, when you
print, you probably already saw that you print not with RGB but with CMIK.
Now, what's that K? A lot of people think that
the K is actually black, and that's because
in the printer, it's actually used as black. But it's not really black.
The K stands for K, and that means the brightness. Now, remember, X, Y, and the big Y, saturation
and luminance. Now, this means that when
you shoot your images and you want 100% accurate colors, you need, of course,
something of a reference to make
a calibration for. So we calibrate our monitor
with a color analyzer, but we also need to
make sure that we calibrate our camera
because every sensor, well, gets the pictures
just slightly different. So we have to make
sure that that also fits in that profile. Now, this is where
we use a very, very handy tool called
a color checker. Now, this is a so called
duo color checker. This is for video. So this part is for video,
setting your blacks, setting your medium, and setting your whites, and
of course, your colors. And when you open it
up on the other side, you now have one for photography
with your white balance, and of course, your
squares for your colors. But if you don't do any
video, you can, of course, also get away with the normal full photography where
you have this one, where I only use actually
the bottom part, and I do white balancing
on the gray squares. I never use that part. If you want a little bit more well, green your landscapes
or a little bit more red in your portraits,
they have that option. But for me, I want it neutral,
so I always use that one. And we open it up
on the other side. You have two ways to
do your white balance. Now, in all honesty, I mostly use the duo because, of course, we also do video, and the
duo is very handy for that. Now, with a color checker,
you might wonder like, Hey, if I have the color checker, everything is set up correctly, right? Yes and no. Now, you remember that I told you that there are three
coordinates, the X, the Y, and the large Y, or in other words, the luminans. And that's why you always see me using this tool when
I'm shooting a photo. And this is called
a light meter. Now the light meter is
incredibly important. It might be the most
important thing because the light meter
determines your exposure. Now, the light meter
isn't there to make sure that you don't over
expose your images. The light meter, they
also do, of course. The light meter is
mostly there also to make sure that you
expose correctly. And when you expose correctly and you use the color checker, all your images
will look perfect. And that's also where
the problem comes. Do you want your images
to look perfect? In most cases, I don't want
my images to look perfect. I want my images to
give a certain mood, a certain look to my photos. And that means that I always change my images. I
always use preset. So why should I use
a color checker? Why should I use a light meter? When later on in
Photoshop or Lightroom, I change everything
and use presets, and the colors look
totally different. Well, that's the trick. When you create a preset, you are creating a lot of
different actions that are, well, literally
executed on one image. If that image isn't
100% correct, let's say your color
is slightly off, your color temperature
is slightly off, your exposure is slightly off, then that preset will give you a totally different
result than on an image where everything
is exposed correctly. And that's why when you
want to use presets, it's vital to use a light
meter and a color checker. The images that come in
will look very boring. They will look all exactly
the same, very sterile. But it also means that if your client wants
perfect colors, you can just do your
adjustments with your contrast. You can do your sharpening. You can create a
vignette or crop or do the skin retouching and deliver those images
to your client, and you will have perfect color. But if you want to run preset, well, that's the trick. If you use the light meter
in the color checker, every time you run that preset, the result will be
exactly the same. So, in essence, it will speed
up your workflow a lot, but it will also
make it possible to shoot the same look images
under tungsten light, fluorescent light, and
outside in the sun. But I think we
talked a lot about theory and about all
the boring stuff. Let's just go into the studio
and let's see what we can do with some proper lighting
setups and our models.
5. CHAPTER 5 Working with models: Okay, guys, just in between. And this is one
of the parts that a lot of photographers
struggle with. Now, I teach a lot of workshops. I haven't been doing
it for a long time. And one of the things
that always strikes me is how photographers
treat their models. A lot of photographers
don't even talk to them models.
They take the camera. They take some images,
they look at the back, and sometimes they get
a really nasty face, like, Ooh, I don't
like this image. And then they shoot
again. What kind of idea do you think
this gives your model? Now, to have a
proper photo shoot and to make sure that you get
the images that you want, your model has to be at ease. And do remember, just like you, your mother loves compliments. So don't just say to your model, this looks like crap.
This doesn't look right. Oh, my, this pose is terrible. No, always be positive. If you don't like a shot
or you don't like a pose, you just say, that's great. Let's try something else. And when you really
like something, well, you will probably
hear it in your voice. And the thing is, don't
over tire your model. One of the tricks that I always
use is shoot some images, let's say ten or 20 images
just to loosen the model up. And from there, I'm just going
to select my best image. So let's say I take an
image and I really like it. That's the one. Then I
take another five shots. If in those five shots, there's one that's better,
I take another five shots. And if in those images, there's one that's better,
I take another five shots. You get the idea,
right? But as soon as I take five shots and I don't
get an image that's better, that's the moment where I stop. And the reason is very simple. Your model doesn't need
ten shots from one setup. So he needs only one or two. Three quarters, portrait, full body or whatever you
want to do, of course. And the way that
you work when you keep the energy level
high is that one, you can do more sets a day, but two, you keep the
energy level high. So your model is
totally pumped up. So sees the images,
and after 5 minutes, well, go into makeup and change. Wow, I'm already done? Yes, you're already done. Do you like the
images? I love them. Okay, next set. And that way, you keep the energy
level very high. The biggest problem
in a photo shoot is when the energy level goes down, or if there's no
proper communication between you and your model. And the communication starts
already with the email. Make sure that when you plan your photoshoot,
you have a mood board. In other words, you
know what your client wants or you model, and you know exactly how
to set up your lighting. This means that there's
no stress for you, and that also means there's
no stress for the model. Now as soon as the
model comes in, don't start shooting right away. Sit her down, give her
something to drink, make sure that her favorite
music is playing in the studio, and just relax. A photoshoot is 90%
relaxing, 10% working. Well, that's how it
should be for the model. For you as a photographer,
it's 110% working to make sure that it looks
like you're 90% relaxing, because the more
relaxed you are, the better the photoshoot is. So, that's a little bit in between about working
with your models. Let's continue with
our photo shoots.
6. CHAPTER 6 Different softboxes Horses for courses: Okay, now, this setup might
be one of my favorite setups. And, hey, I'm Dutch,
right? Rembrandt. Now, the Rembrandt lighting
is really interesting. Now, when you start
out with photography, one of the things that may or may not be the
first things that you try is actually the
Rembrandt lighting. The reason is very simple. You get a great high
contrast image, and it just looks
absolutely beautiful. The trick about Rembrandt lighting is to
make sure that you get that really nice
triangle over the nose. And how do you achieve that? Well, the light has to
come from the back. So it has to just wrap around
your model a little bit. So one side will be really dark and one side will
be really bright. Now, the main problem
with the light setup like this
is because you're placing your softbox behind your model aimed a
little bit forward, that means that there's no
light hitting your backdrop. Now, in some cases, you don't want light hitting
your backdrop. You like that really
nice dark backdrop. Maybe you like it black. But in some cases, you do
want light on the backdrop. One of the many
solutions is, of course, to use a separate light
source on your backdrop. For example, a snoot
or a reflector, maybe add some color
on your backdrop. But what if you don't
have enough soft boxes for that and you still want
to light your backdrop? This is why we are
using for this setup, the so called Lantern softbox. Now, the difference between
a normal softbox and a lantern is, well,
clearly visible. A normal sof boox just emits
the light from the front. You can use a grid, of course, to narrow that light beam. But a lantern doesn't only
emit the light from the front, but it also emits the
light from the side. You could say it's
a little bit like an omnidirectional light source, except it doesn't emit the light to the back but hey, we
don't need that right. Now, the big advantage
is that I can still light my model
with the sof box. And in this case,
actually the side of the light because that's
nice soft quality. The main light just spills
over, so we don't need that. And because we have a
translucent material, also on the side of the sof box, it will also light the backdrop. Now, with the first image
that we're going to take, we're not going to use the
strip light on the right side. And we're going to show you how that translates back
into the photoshoot. And as you can see,
without that strip light, yeah, it does look
a little bit dark. So we want to add something
extra on that side. Now, the strip light we're using from the back of our
model aimed forward. The reason for this is
actually pretty simple. We don't want two
light sources from each side because then we lose that contrast in our image. What we want is a little
bit of an accent. I always call it
a kiss of light. We just wanted to wrap around the jaw line of the model or in this case, the
clothing of the model. So we're going to turn
on the strip light, and we're going to make
some images with that. Now as you can see with
the strip light with way more definition in that
shadowy side of our model. Now, the lantern lights the backdrop and it
lights the model. The thing that the
lantern doesn't do is give any direction on the
light of our backdrop. In other words, it just lights the backdrop,
and of course, you have your light
fall off on the back, but it just lights the
backdrop in a very even way. So that's why, of course,
for the next setup, we're going to change the
lantern for a normal self boox. You might say normal self box. Yes, a medium sized
saf boox with a grid. And let's see what an impact
that has on our backdrop. Okay, we changed the lantern for a medium sized
soabox with a grid. Now, the grid makes sure that I focus my light only on my model. And that means that
with a setup like this, there's no light
hitting your backdrop. You're going to see
that in a second. So choosing the right modifier for your shoot is
incredibly important. For example, if you
look at the lantern, you already know it's great for, for example, newborn
photography, product photography or
fashion photography where you want your
light on your model, but you also want to
fill in the shadows. Like, for example, if you
have a big elaborate set, the lantern is great to use a few stops under
your main light to just light up the set. There will be a
chapter when we're actually going to
show you this, too. But for now, we change the lantern for a medium
sized sof boox with a grid. Now, the grid already
channels the light a lot, but also with a normal softbox, you don't have that translucent
material on the side. So that means that with a
setup like this for Rembrandt, there's no light hitting
the backdrop at all. If that's what you like,
this is the perfect setup. For me, the backdrop is
a little bit too dark, but we're going to
solve that with our strip light in a moment. So first, let's take a shot
with only the softbox. Now as you can see, that's
pretty dark on our backdrop. Now, let's say that
we want to open up the shadows just a little
bit on the other side. And remember, that's where
we use the strip light. So by using the strip light, we are opening up that
side just a little bit, as you can see in these images. But what if you also want a little bit more
light on our backdrop? This is where you
can actually use the grid to its
maximum potential. Now, if you look at the
strip light with the grid, you can actually see that
it's a rectangular shape. So that means it isn't very
white, but it's very tall. So you can light the
model from top to bottom without having
any spills on the side. But what if, like in this case, we only want portraits
or three quarters? You don't need the full
length of that strip light. So that also means
that if you want a little bit of light
on your backdrop, you can use the grid
and the strip light to literally just aim
your light perfectly. We're going to switch
the strip light over from vertical to
slightly horizontal, light our model and our backdrop with only one light source. It's going to be
totally different from the lantern, but
that's the cool thing. You can do both in
your photo studio, and you have a lot of different
options for lighting, depending on what
your client wants. Now as you can see
the strip light is a very important part
in this photoshoot. The main light, of course, you can use omnidirectional
to also light the backdrop, but that strip light
you can use not on your backdrop or by slightly tilting it to
also light your backdrop. That's why probably
the strip light, including the grid is one of my favorite modifiers
for accent lighting, but also for main lighting, if you really want to draw
the attention to your model.
7. CHAPTER 8 Working with gels and getting white light: Okay, guys, now, as
mentioned in the intro, color consists of three colors
for our primary colors, red, green, and blue. Now, those are the
colors that you will also find in Photoshop
in your channels, your red, green,
and blue channels. This is also the color
that is used by, for example, projectors
and monitors. Now, the colors itself
interact with each other. So that means if
you combine red, green, and blue, you get white. This is how the whole gray
balance works, right? You mix red, green, and blue to create white. But what happens if you
use color with gels? Now, let me show you an image. As you can see here,
the sky is magenta, but the model looks natural. How the heck did we do this? Well, we're actually using
a very, very simple trick. By using a green
gel on our strokes, we're actually shooting our
model like Kermit frogs. It's totally green. But by selecting that green
as a new white point, we're actually lowering
all the other colors. So, for example, the white
in the sky towards magenta. Very simple. You just lower it. You can also do this
with blue, for example, to create nice yellow
use, for example, in a hotel, when you want
nice golden light coming in. But what if we don't do it with one color, but we
do it with all three. So when we combine red, green, and blue, you
should have white. And this is what this
setup is all about. We're having one stroke on
our left with a red gel. We have one stroke on our
right with a blue gel. Now, those two combined don't give you a
natural looking image. They just give you a blue and
red image, which is okay. But on this strope I'm using a snoot and behind the
snoot there's a green gel. So that means that
I'm shooting with the three primary colors,
red, green, and blue. That also means that where
those colors interact, they will start to
mix with each other. And that's why the snoot is on the face slightly higher
than the other colors. Now, green is already a
very, very strong color. We see green 66%, 22% red, and 11% blue. So you have to be careful
when mixing this. Don't use a light
meter for this. Just do it by eye. You can use a light
meter, but it's just way easier to create it by eye because sometimes you don't want the perfect mix. You want a little bit more
creative looks in your images. And it's actually exactly
what we're doing here. So I'm not using a light meter. I first set up red,
then I set up blue, and then we're adding this one. So let me first show you how it looks with only red and blue. Now as you can see,
it's interesting, but it's red and blue, right? We don't see a model. Now, only turn on the green
and watch this. Now as you can see, now the
image comes way more to life. And green for me personally, isn't a color that I would use as an accent or that I would use as a main color for
the very simple reason. We have several different
connections with colors. For example, if we think
about red and blue, we always have emotions
with red and blue. For example, blue is distant called the future uncertainty. But, for example,
red is hate, love. Hey, those two are already
interesting, right? Hate and love both
together in one color, but also danger, warmth. Red and blue are what we
call the emotional colors. Green, I don't have any connection with
green, to be honest. So green is more a color that doesn't give
me any emotion. So in my photography, I don't use green a lot. However, if I want to
manipulate colors, then green becomes very vital because in the color triangle, green is actually on
top of the triangle. So that means, as soon as
you start using green, you really start
noticing attention because you can't get around around green. You will see it. So by using green in this
setup, I'm, of course, creating green
light, but I'm also creating little sparks
of white light. And that's with tree
strokes, At Gelt. Isn't that awesome to play with? Think about all
the possibilities you have when you
start mixing this in shadows on your subject
or as we do here, to create a certain
mood in your images. So let's start
shooting and let's create some cool shots
with three colors, which actually creates
white light in the middle.
8. CHAPTER 7 Medium Softbox with grid and accent: Hey, guys, let's take a
look at this image of Kiara. Isn't it beautiful? Now, don't you just love that soft blue light from the side, just giving her a little
bit of an accent? Well, actually, this
lighting setup has a trick. What I'm going to
explain to you guys now. Now, it's my main light source. I'm using a medium sized
softbox with a grid. In this case, we're using it slightly in front of our model, so we're also hitting
the backdrop, so we don't need a
letern for this. In this case, we can literally just aim that light straight on our model and also light the backdrop just a little bit. But I didn't want to use a normal white light from
the side to give an accent. I wanted to give a little bit of an extra tint to the color. Now, in the past, with
my old stroke system, I could, of course, use gels. But most of the time I was limited for using
gels on reflectors. And that mostly
meant that, well, I got a really harsh
quality of light. If I want to use gels on a soffbox there was
only one option. Just gel the whole
soffbx because inside, I couldn't place any gels
due to the modeling light, and, of course, the flesh tube emitting way too much heat. Now, with our new
system, the gecotos, we're now using hybrid
stropes and that has a big advantage because when
I look at my hybrid strope, I now have glass in the front, and this means that I can
now use, for example, our magnetic system from Rogue with a blue gel
and just place it in front of my strope and now as you can
see in this setup, I'm using an adapter. On my stand, the strope is
mounted inside that adapter, and on the adapter,
I can now use any bones mounted
softbox or modifier. So that means that I can now tint every single
modifier I want. So I'm not limited anymore to that harsh quality of light. I can now use big soft boxes and tint them from the inside, which gives you a much more
beautiful quality of light. And if you still want that harsh quality of light
for, for example, lens flares, that's, of course, when you use an open reflector. Or just no softbox at all. So let's take a look
at the final result of this image and
later on in the video. I'm also going to show you what you can do with soft boxes, color, and how to combine them all for
something really cool. But let's start
simple by just adding a very soft quality of light on the side on our model Kiara.
9. CHAPTER 9 Putting it all together: Hey, guys, so what happens when everything comes
together and you are really starting to think not about just your
image with one light, but you're actually starting
to think in layers. Now, thinking in layers may sound a little
bit complicated, but bear with me, it isn't. It's actually pretty simple. So let's take, for example, this image from Nadine. Yeah. Well, it looks
very complicated, and in essence, it is
pretty complicated, but let me just walk
you through it. Now, this was shot during
our fashion event, and as you can see here, we
started out with two chairs, and from there, Nadine actually, together with the
attendees, build up a complete set with
a lot of dresses. Now, the idea was to create a Phoenix rising out from the ashes and
with a lot of fire. Now, of course, we don't
want any fire in our studio, and I really don't want
to use it in Photoshop, although, Okay, let me show you very quickly what we
did with one image AI. It's not something that
I'm really proud of, but, hey, we just
did it for fun. So let's just continue
to the rest of our set. Now, as soon as our
ANDs build the set, there's a few things that you
have to take into account. The first thing,
of course, is from which angle am I going to shoot? If I'm shooting too low, I don't see all
the beautiful work that they put into this
big dress and set. When I shoot from too high, I may not get that hero pose. So I have to make
sure that I find a position to shoot
from a nice angle. And I think in the
end, we ended up slightly under your
normal viewing angle. This is also because
Nadine, of course, is pretty high up in this setup. Now, of course, Phoenix,
so that meant fire. Well, what color is best to
get fire the red, of course. So I immediately knew that this setup we wanted to do
something with red lights. But when we talk about Phoenix, we also want smoke, of course. So we already knew that we
wanted to use smoke machines. And what is the best
combination to get fire by red smoke
and lens flares? Yeah. So set everything like that up and then make sure that your model jumps out. So how is the light
setup set up? Well, of course, our
first light that we have to make sure is
our main light source. And in this case, that's
a little bit tricky. Because I want to make
sure that the whole set is lit and I see all the
detail in the dresses, I have to make sure that I use one light source that's a
little bit omnidirectional, but doesn't have enough power
to also light our model. In other words, it's the
shadow sliders in light room. And we have the perfect soffbx for this, and
that's the lantern. Now the lantern is a sort of omnidirectional
light source. It differs from a
softbox because it doesn't just emit the light
straight from the front, but it also emit
lights from the side. And in this case, that's awesome because as you can
see in the video, I'm aiming it slightly
away from Nadine. Nadine is still hit, of course, by the omnidirectional
light source, but most of the light
is actually aimed towards the front of
the set with the dress because I know all the other
light sources will come from the back because we
want to make sure that our smoke shows
up and then smoke, of course, we have
to light from the back cause if you light
it from the front, it just gives you, well, a miss bank, and we don't
want that, of course. So by opening up the shadows, I already got an image where
I can see all the detail. The model was way
underexposed, of course. Now, for our red, I'm using a very, very bright red on
the right side of the image with no
other soft boxes. So that means just
the gel straight on our GT 400 from Gigoto. And that means that that one will give me a harsh
quality of light. It's not aimed
straight at our model, but actually straight
at my camera. The reason for this
is very simple. If you look at light sources, they all behave
approximately the same. The center of the light will be very bright but also very harsh. The more you go to the
sides of the light, the output will lower, but the quality of
light will be softer. So this is why with
hard light sources and especially with gels, we aim the hot spot of
the light exactly into my lens so we get
all that quality of light straight into the lens, all that power to
create the lens flare, and the sides of the
light will just give a kiss of light to my
model as an accent light. Now, on the other
side, we wanted something a little
bit more softer. So on that side, I'm
using a gecotostrope with a red gel from rogue
and a strip light. So we're using the gel
behind the strip light, creating a beautiful
soft quality of red. Now, the lantern, of course, already shows me all the
detail in the dress. The only thing that I
was struggling with is how to get your
model jump out. Now, a lot of people
will go like, Hey, you can do that
in Photoshop, right? Yeah, you can do a lot
of stuff in Photoshop. Don't get me wrong,
but you don't want to do everything
in Photoshop. It's much more satisfying
than do it on the set. And also, it just looks way better if you
do it on the set. So what is the trick
in this setup? If you want to make sure
that your model jumps out, you make sure that there's
light on your model, right, exactly in the
spot where you want it. Now, if we shot this whole image without that extra light source that I'm going to introduce
to you in a second, it looks very dull. There's not enough
light on our model. Now, I don't want light
on the whole of my model. I only want it on the
face of the model, maybe a little bit on the chest. And that's why we need a
light source that can be focused really, really accurate. That light source,
ladies and gentlemen, is, of course, a snoot. Now, the snoot is a
light source that's often disregarded as
it's way too harsh. It is too small, and a lot of people don't use it except maybe for
product photography. But for model photography, it creates a beautiful way
to just give an accent to your model's face or any
other part of the body that you want accentuated.
So how does it work? Now, in this case, I'm
using a Gekota GT 200. Now, the reason I'm using
this one is actually double. Now, when you look at
the strope on the front, it's a rectangular strope. Now, when we look at the GT 250, that's a round strope. Now, you might wonder like, Hey, why are you talking about
rectangular and round? What's the difference
between those two? The difference is very simple. When we use a snoot
in this case, I'm using the rogue
collapsible snoot the thing is that if you want a
round image on your model, so you want round light, you use a diffusion panel
in the back of the snoot. And this is also,
of course, included in the box of a snoot like this. But if you take the
diffusion panel out and you place it on a
rectangular strope, you're actually getting a
rectangular light source. This is awesome because now when I have a rectangular
light source, I don't have to worry about
the roundness of that stroke. In other words, I don't
have to aim it up to make sure that only the face is lit and not too
much of the chest. By using it as a
rectangular light source, I can now literally just aim my light perfectly on my model. Another big advantage of a collapsible snoot is that
you can literally go white, a little bit less white, a
little bit lesser white, and, of course, a
very, very narrow. And I believe in this case,
we ended up in setting two to make sure that our
model was properly lit. Now, in the end, the only
thing you have to do is make sure that everything
is balanced nicely. Now, you can do this
with a light meter or you can just do it by eye. And I have to be totally
honest with you guys. I love using a light meter
to get everything perfect. But in this case,
it's just a matter of making sure that
everything looks great. So that means that my main
light source, in other words, the snoot I did meter
with a light meter, but everything else,
we're shooting tetered. I'm just looking at my screen. Do I like this detail
a lot, yes or no? Do I like this color there? Do I like the lens flare? Yes or no? That's actually how you build up
a set like this. So when you do a
portrait, of course, everything is the light
meter and the color checker, and you keep it as
perfect as possible. But when you do a shot like
this, that's more creative. You have to make
sure, of course, that the face of the
model is perfectly lit, and then you just
build everything up the way that you see it. I sometimes call this
cooking with light. Sometimes you need
a little bit more and sometimes you need
a little bit less. That's the fun part about
photography, right? You start with a
black canvas and you can just build it
to everything you want. Okay, let's take a look at
a close up of this shot. There you go. And, of course, well, let's zoom
out a little bit. And then when you add a little bit of extra special
effects in bore as affix, and the only thing I
actually added here was a vignette and a
slight reflection. So we call that a
particle simulator, you can see in the image. We didn't change it a lot from the original, but as
you can see here, adding those small elements will really make
an image jump out. And if it's already
great in camera, you only need a little bit later in Photoshop to
make it really from zero to hero or from o to Wow. A
10. CHAPTER 10 Final: I almost finished my drink, and that means that I also
almost finished this video. Now, I hope you understand that taking photos of models is way more than just
a pretty girl in front of a camera
or in other words, in front of a great backdrop. Photographing models is about communication with your model. It's about making sure that
the styling is correct, making sure that you find the proper backdrop with
the styling that you want. Or in other words, what kind of mood do you want to
present to your viewer. Sometimes you need images
that are 100% perfect. This is where you
use, for example, a color checker
and a light meter. For example, for
a CEO or portrait or maybe some clothing that
you want to sell online, you have to make sure that
the colors are 100% perfect. But sometimes you
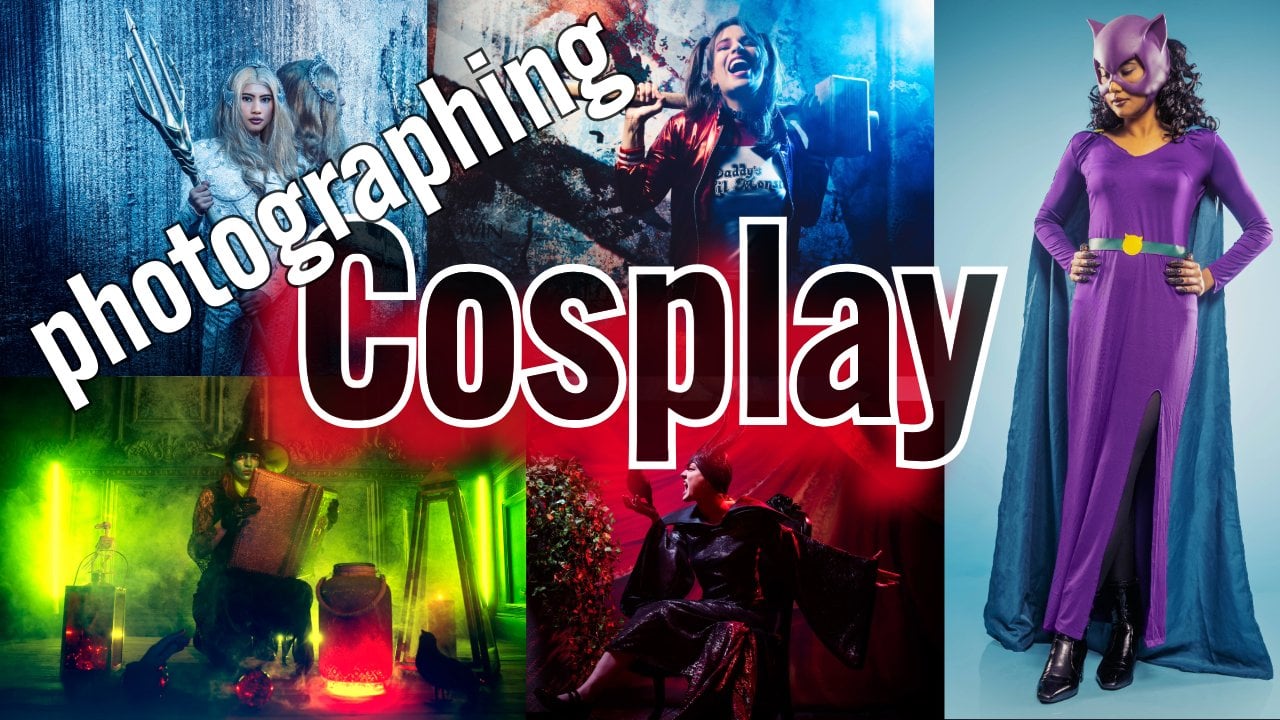
also want a lot more. Think about shooting a cos play. Well, you don't need
it perfect, right? You want some funky
effect. You want fire. You want smoke. You want colors. You want lens flares. You want everything
that's not realistic. This is the power
of photography. We as photographers
are storytellers. We frame literally pieces of history that never
come back again. But we can also create
different moods. We can create
different atmospheres, and we can create totally
different worlds, especially now with
artificial intelligence. So you as a photographer, you can play along
with your lighting, with your backdrops
and your models, but always remember that
there are no limitations. The only limitation is what you think you can do with
the gear that you use. And trust me, even with your smartphone and just
a small light source, you can create beautiful images. I hope you enjoyed this video and all the
information I shared. If you have any
questions, feel free to reach out via
social media to us. We always try to respond
within 24 hours. Thank you, how very
much and keep shooting and stay creative like yes.
 Frank Doorhof, Learning with Frank