Transcripts
1. INTRO: Ink and wash or ink and
watercolor is just an art sketch with ink and finish off with watercolor wash or vice versa. If you are going to pin first, make sure you are using
a waterproof ink. Hello, I'm Zen, and
today we are going to pin first and finish
off with ink sketching. This is a fun class and it
is suitable for beginners. All you need to have
is a black pen, watercolor paper, and a
basic set of watercolors. Here are three pens
that you can use, fountain pen, fine liner, and a ball point pen. You will get to see
what we need to use in the video on
tools and materials. In the class lessons, you will learn how
to pen loosely and finish off with loose
sketching with your pen. At the end of the lessons, you are encouraged to
do a class project. You can do the same one that you have learned
from this class, or you can totally do your own illustration based
on what you have learned. Here are some samples
that I have done earlier. I usually get my reference
photo from Pintras. This bare cup is featured in the bonus video at
the end of the class. Here is the
illustration that you will be learning in this class.
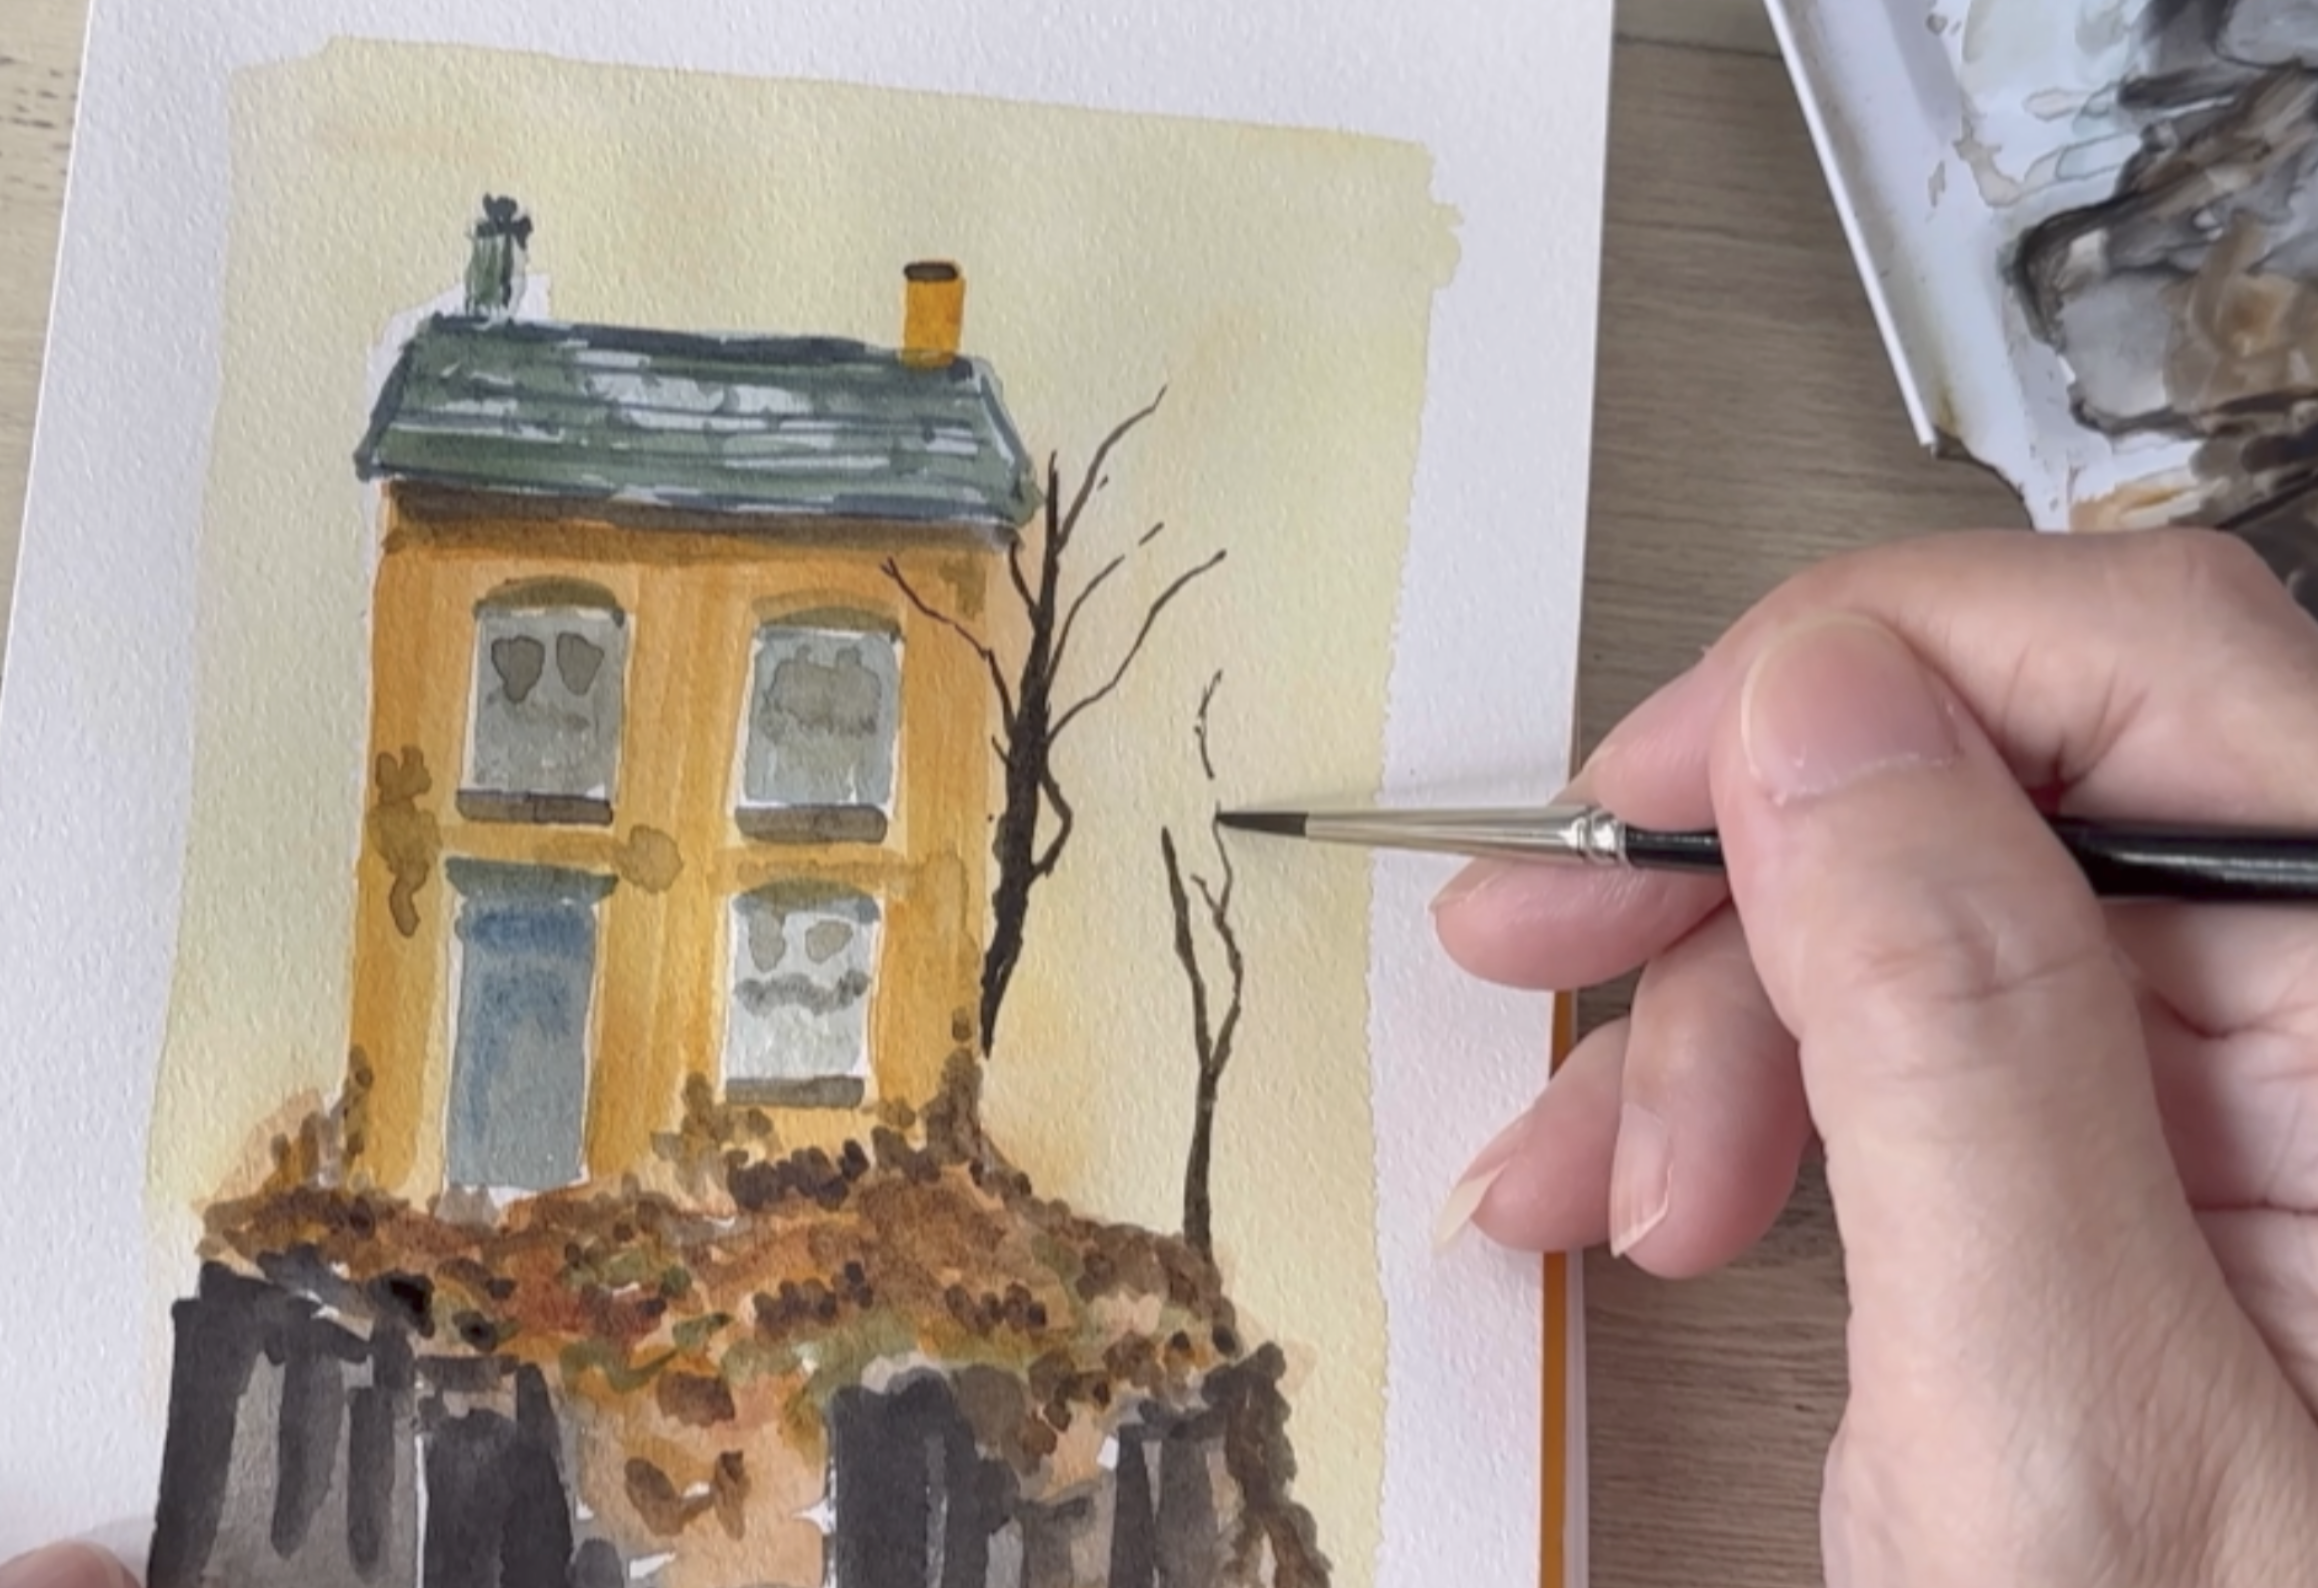
2. CLASS PROJECT: In the class lessons, you will learn how to pan this abandoned
house loosely with watercolor and finish off with a rough sketch
using a black pen. After completing the class, you are encouraged to
do a class project. You can choose to do
the same as Mine, or you can totally
do your own picture, as long as it's based on what you have learned
in the class lessons. Here are a few
samples that I have done using ink and wash Concept. Once your project is done, please do share it with
fellow students by uploading it in the project gallery page below this video. This way we can all
learn from each other. I will start the class
by first showing you what you need to
use in the next video.
3. TOOLS & MATERIALS: Let's look at paper. Use watercolor
paper or any paper that is thick enough
for watercolor usage. This watercolor paper is from Fabriano that is 100% cotton. Next one is from Canson and is 100% cells watercolor paper. Last one here will be the one that I'm going to
use for this class. It's the cheapest of the first
two I have shown just now, 18 sheets for only $1.50. Even though the thickness
is like 140 to 160 GSM, it can hold water. Is ban, a Japanese company known for producing high quality paper. Next, a jar for water. A reg or kitchen tower. A set of water color
with basic colors. I have chosen these
colors to make this set, which I use on a regular basis. Here is the color that I painted from all the
colors in this box. One color I would add into
this set will be lemon yellow. I will be using
these four brushes. A flat brush. To
small round brush. I'm using quite a small brush because my painting
is quite small. You can use a size if you
are painting a bigger one. This is a fine Chinese
calligraphy brush which is excellent for lines. A normal ball point
pen with black ink. White jelly roll pen
for high lights. Or you can just use a
white colored pencil. That's all for the
supplies you need. Lastly, here is
the picture we're going to pen in
the class lesson.
4. LETS PAINT: I'm painting free hand, but you can do a rough
pencil sketch if you like. Using a very light
shed of indigo, I'm painting the rooftop
first with the flat brush. Flat brush is perfect
for painting buildings and houses or anything
with the flat surface. My number one tip,
you don't have to paint exactly the same
as the reference. Now I'm adding a hint of green. Adding the little chimney. Not to worry if you don't
have the same colors as I do. Just use whatever you
have in your set. Here you can add a
little brown like burn umber to make the roof
looks old and run down. Adding a little more green
like most growing on the roof. It looks a little light
now, but it's okay. Later, you can add more layers
after each layer is dry. For the sac of this class, I'm using ranges in the ph, but like I said, you can use
whatever color you have. As you can see here, that a flat brush makes it
easier to pin straight line. Use the tip of your brush to pen the horizontal space between the top and the bottom windows. For the rocks below the house, this pan with a downward
stroke using dark colors. I'm using a mix of brown,
black, and indigo. You can also mix in
some greens or violet. The idea is to
get. Remember that you don't have to pan
a perfect picture. As ter, we are going to
sketch with a pan at the end. I'm using Burn Ciena for
the dead grass here. This photo looks like
it's in the autumn, where the grass is all brown
and the sky is gloomy. Notice that I pend with
horizontal movement of my brush. Later when dry, we can add
darker colors for textures. See how the orange color dries. So now I'm going to
paint another layer. Just remember, you have
to wait for each layer to dry completely before
adding the second layer. O Just before the pan is dry, I'm adding a darker orange
just below the roof, so that it will
spread downwards. To get this darker color, I just add red to my orange. You can dap some of the
darker orange downwards. As for the gloomy sky, I just use raw umber. But please remember to wait
till your house is dry. Look at mine, the
color is spreading outwards because I didn't wait
for it to dry completely. Now I will wait for the
painting to dry completely. Painting is completely dry now, and I pant in the
other chimney which I mixed just now with
the small round brush. As for the windows, I use or
you can use any dark color. You can mix indigo with green. Oh. Dap in some ducks for shadows. Use the same duck
shed for the door. Now I'm adding in
the structures that are above the door
and the windows. There's a little curve
on top of the windows. While the door and
windows are drying, let's give the roof
some textures. Still using the same mix
of indigo and grain, let's pan in some textures
for the roof top. Don't pan straight lines, but instead it jagged
to show that the roof is and coming off at some parts. Add in some solid
sheds too for shadows. Paint some shadows under
the roof with dark colors. I mix mine with burnt
umber and indigo. Do the same under
each window too. With darker brown, pin the grass with a
scribbling motion. Just throw in any colors that are the same color spectrum. Don't have to be specific. The M is to give this part of the grass land some texture. You can also add in some lighter brown and
some brighter brown too. Same to the rocks. Here, I
just add a little black to my browns to darken certain
parts of the rocks. H. Paint a mixture of green and
brown onto your grass area. Now it's time to leave it to dry and we'll see how it goes. Back to the house, I'm
painting another layer as it's getting lighter and almost blends
with the background. M. Now I'm going to
let the painting completely and will
continue in the next video.
5. DETAILS: Painting is completely
dry now and it's time for some
final touch ups. Adding some more ducks
on the grass area to make the ground
looks more uneven. By doing so, it also gives step and textures on the ground. Now use your smallest brush that you have to
pan the tree trunk. The trees might look a
little too complicated, but you don't have to follow exactly the s in the picture. Try to pan lightly with the tip of the brush
for the branches. When you are panting lightly without pressing the brush down, you can actually
pan quite thinly. Pan the bigger branches
at this moment and later, we will come back to
pan the smaller ones. Here I'm painting the dead
climbers on the wall. These are dead vines that
is growing on the wall. Using the same d colors to
paint the window frames. Using burn umber, I pen the
outer part of the walls. Oh Just look around and
see whichever parts of your bending needs because yours might be
different from mine. A For the fine and small branches, I'm using this fine
Chinese calligraphy brush. You can also use a rigger
brush if you have one, or you can even just use a fine pen if you don't
have any such brushes. Hh Then just simply scribble in some curve lines
all over the wall at random. With that, we are
done for this stage, and next we will sketch with
our pen in the next lesson.
6. INK & HIGHLIGHTS: Final part of this glass
is inking and high lights. You can use any pen
with black ink. I normally use a fountain
pen or a fine liner. But recently I love
using a ballpoint pen. This pen can glide smoothly as you sketch,
especially curves. Don't draw with super
straight lines, but instead try with jagged
lines or even broken lines. As usual, you don't have
to draw too perfect, just an illustration of
the reference photo. Oh, Watch how I sketch in the window frames. I don't follow what
is in the photo, but rather how it would fit
with the size of my window. Then I added a little on each square frame to show there are shadows and
reflections on the glass. Here I'm just enhancing
the cracks on the wall. As for the grass area here, just scribble in with
or c lines randomly. As for the rocks, just sketch in some
vertical lines. Now it's time for high lights. You can use a white gel pen
or white colored pencil. Sometimes I just use in
as shown in the insert. Finally, it's done. Don't forget to sign
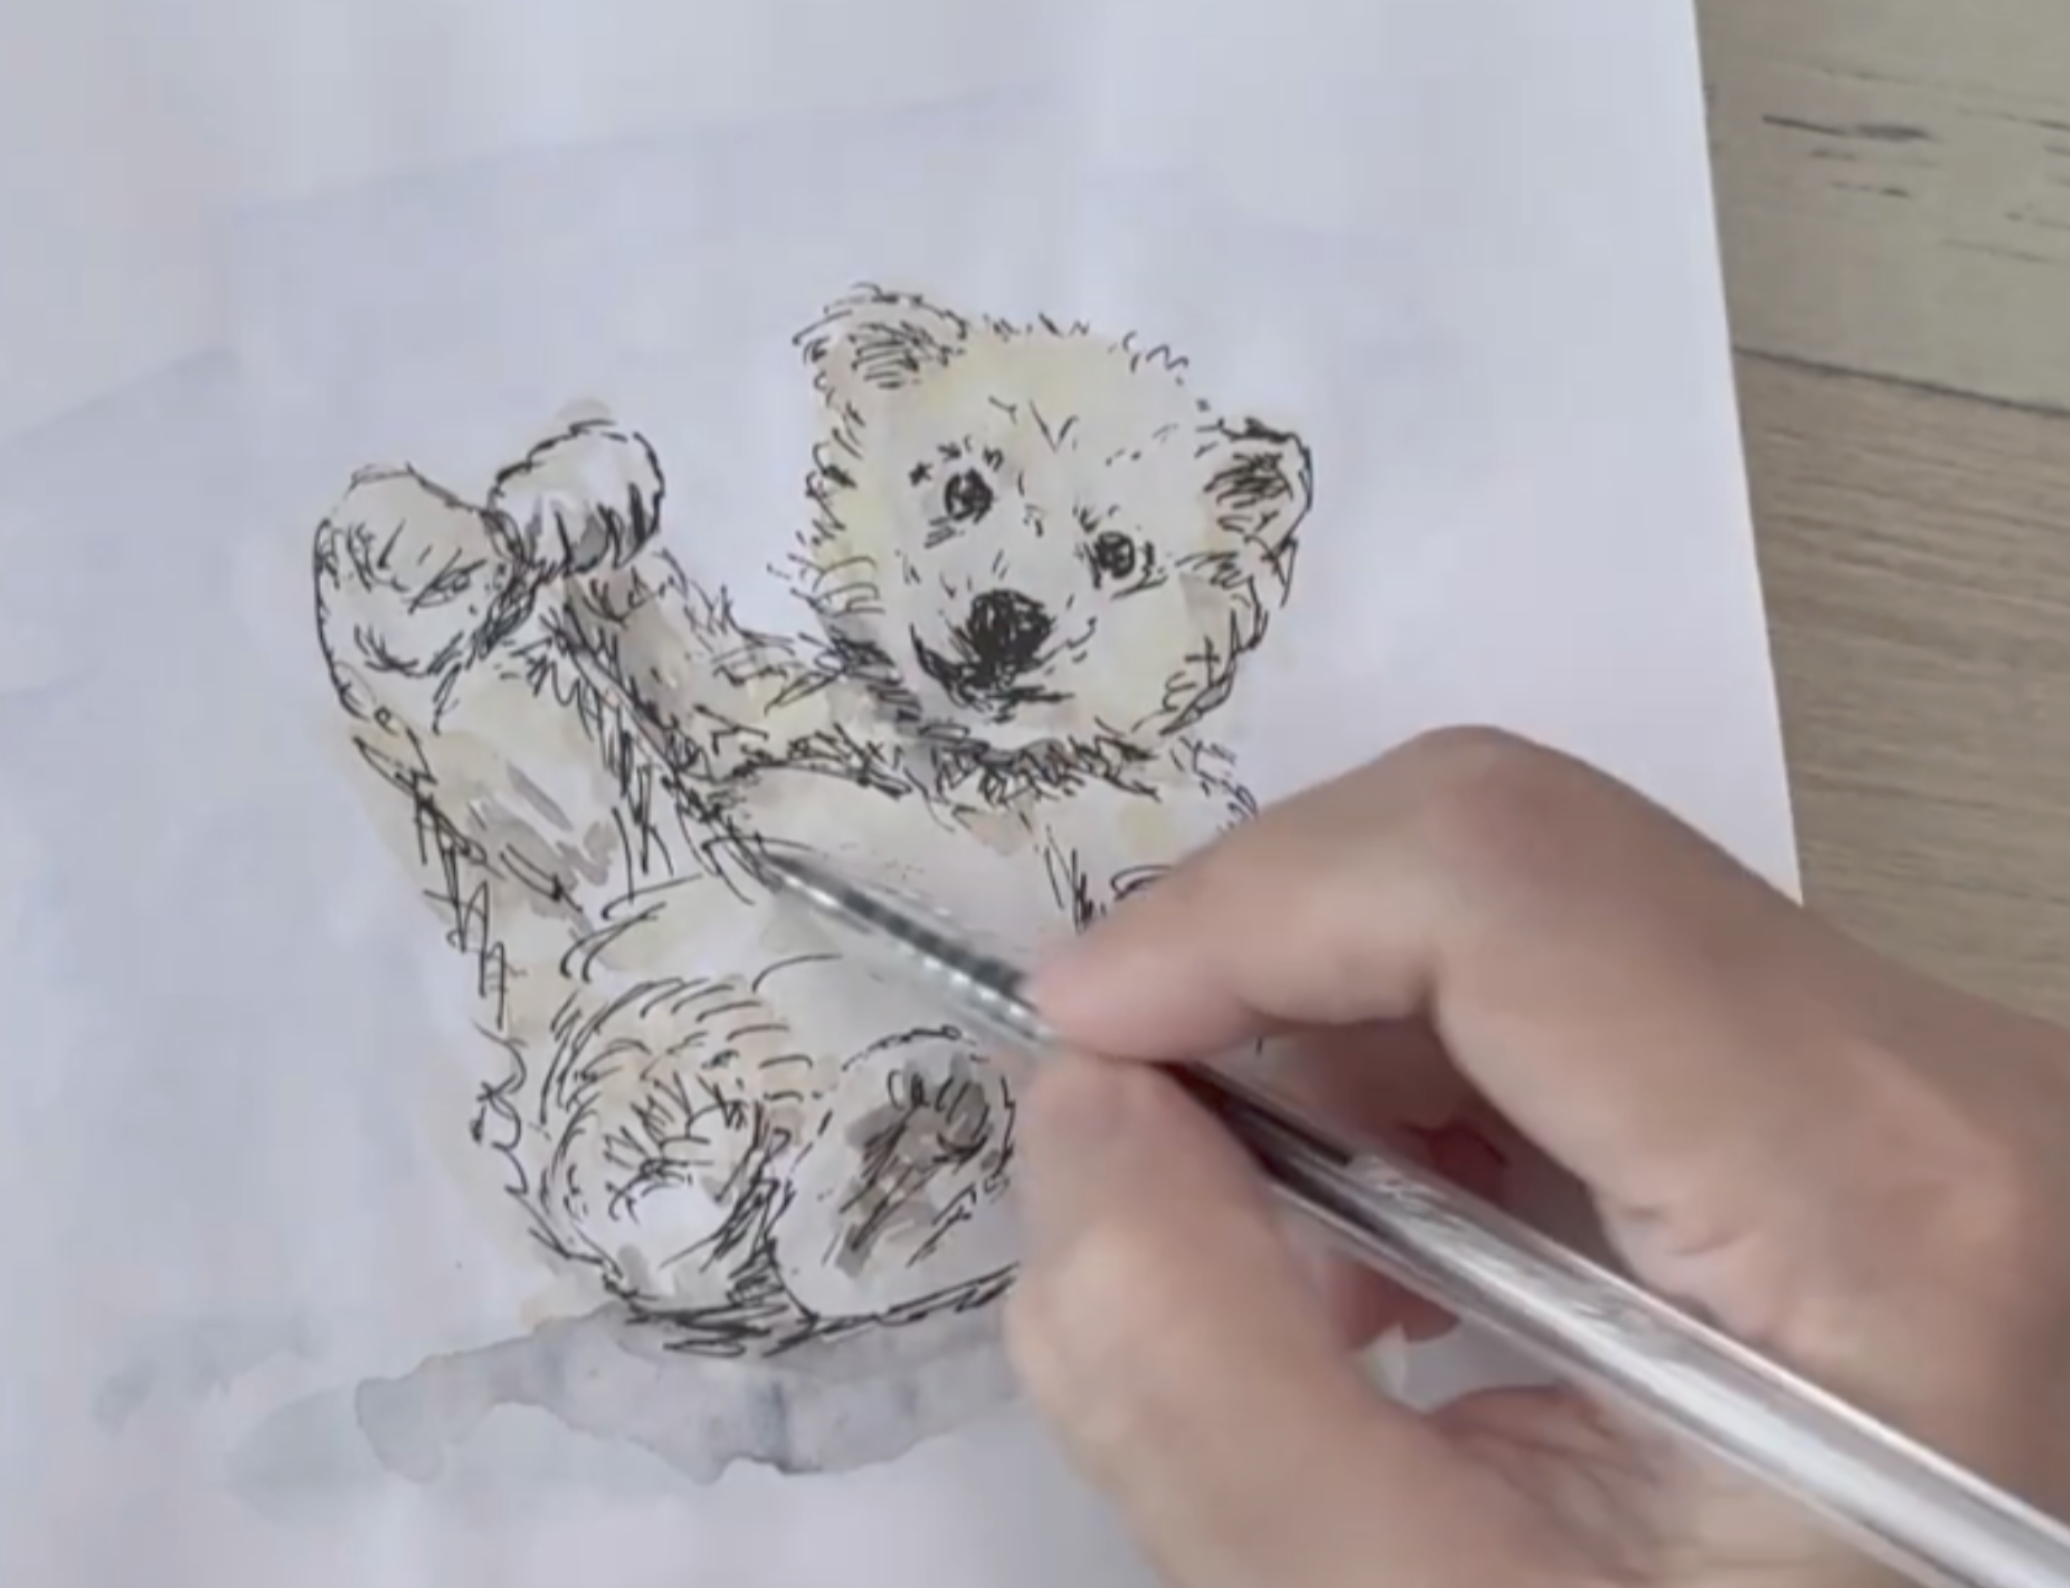
your name on your art. I will show you a
bonus video next on how I paint a
bear using the same.
7. BONUS VIDEO: Here's a bonus video
for your inspiration. So sit back, relax, and watch till the end. Ignore the wrinkling
of the paper because here I'm using quite
a very thin paper, but it withstand water. My advice please e a proper when you started. Oh. O Oh Done now, you can watch more examples
in my YouTube channel. The link is in my profile. Next, I will do a
of what we have learned so far in
all the lessons. H
8. FINAL THOUGHTS: L et's recap on what you have
learned from this glass. First, painting loosely with water color using a flat brush, achieving straight
surface with it. Then layering to achieve that. Also, how to paint textures. Which brush to use for
fine lines or objects? Then how to sketch
with your pen, especially with a
ball point pen? Also, how to sketch shadows
and reflections on glass. Lastly, what to use
for highlights. And now it's time for
your class project. Do remember to share
your class project in the project gallery
page below this video. This way we can all
learn from each other. These are a few of my in
and Wah illustrations that I have done previously. You can watch the
whole demo process over in my YouTube channel. The link is in my profile page. Thank you so much
for taking my class, and I will see you
in my next one.
 Zainab Mohamad Ali, Artist and animal lover