Transcripts
1. Introduction: Hey, do you know where
is your next prime? Don't worry if you
don't this class, we are going to create
an animation of a hot air balloon
flying over a city, and we are going to
illustrate it in procreate and animated
in procreate dreams. Procreate is an
incredible program. I bet you know it. It is ruling the Illustration
industry for years now. They just recently
created an animation app that is just as user
friendly as Procreate is. And the two programs work
together just like magic. Hey, I'm the art mother, an artist, an online educator, and I have taught over 80,000 students worldwide with
my online classes. My students say that
my superpower is making complicated arts
topics easy for beginners, and I think that is true. This class, though, is, I think, for confidence beginners
or those who have more experience or courage or working knowledge
in procreate. The class is divided
into two main parts. In the first part, we
are going to illustrate a beautiful cityscape
with a hot air balloon. And then in the second part, we are going to animate
it and create the effect that the hot air balloon
is flying over the city. I'm providing you everything. So apart from the
video guidance, you will get resources
like brushes, my sketches, and my
original files that you can animate if you would just join me in the
animation part. Okay, so are you
ready to join me in this Procreate and
procreate dreams journey? If yes, see you
inside the class.
2. About The Class: Okay. Welcome to the class. I'm so happy to have you here. In this video, I'm going to talk to you about
the class structure, the class resources,
and the class project. The class is divided
into two main parts. In the first part, we are
going to only illustrate. We are going to
create the elements. And in the second
part, we are going to animate your elements that
you have illustrated. But if you would love to only
learn the animation part, I'm giving you in the resources, every element that I'm illustrating so that
you can just learn the specific movements and effect in procreate dreams
that we are aiming for. You can animate my elements. But I recommend you to join us for the
illustration part as well. It will be super amazing. We are going to create
this beautiful cityscape. I have chosen Istanbul
to illustrate. But you can choose whatever you city with the
beautiful buildings, and you can just, you know, take a trip without
leaving your house. Uh, you can just, you know, let your imagination go
and play with colors, and we are going to play away colors of the sky and
the time of the day. And I think this
illustration process is kind of one of
my favorites that I've done in the last eight
years that I'm doing this. So it will be worth it. We are also going to
illustrate a hot air balloon and you will have artistic
freedom to customize things, and I will include
a little character in the hot air balloon, but you don't need
to include anyone. You can just have the hot
air balloon as you wish. And in the animation part, we are going to work with a very beginner
friendly techniques. We are not going to overcomplicate
the animation part. This effect of this animation
can be reached very easily. But I'm going to talk about this in more detail
in the next video. Now let's just talk about
the class resources. With the class, you will get a brush set that is the simple brush set of
my signature brush set, but those six brushes are just enough to
illustrate anything. You will get that, you will get a color palette that I'm using
during the illustration. But again, you are free
to use your own colors. You will get my
sketch, if you would love to follow me step by step, and if you are a very beginner, it would be great if you would
just simplify it all and more advanced students can
let their creativity Boom. And yeah, I think
in this project, you can really be creative
and create incredible stuff. And then you will
get my elements for animation and you will
get my original files. My procreate file for
reference and my Procreate dreams file also for reference
so that you can see, how does it look like my file? The class project,
the class project is to create the illustration and the animation of
a hot air balloon floating over a cityscape. If you just decide
to illustrate, please in the class project, just include your illustration. But if you decide
to animate as well, include your animation
in the class project. And you can do that by
uploading your video to a video service and share the link there
or embed your video, or you can convert
your video to a Jif that can be put as an image
into your class project. I'm going to talk about that later when we are finished
with the animation. So I think that's all. I wanted to remind you to keep your eye on the
discussion board below. Maybe some people are asking questions that
might be relevant for you. Keep your eye on
the class projects to get inspiration from others and check out my social media and don't forget to leave a review for
the class at the end. Okay? I think that's all. Okay, let's just get started.
3. Let's Start: Alright, so let's
just get started. In this video, I would
love to talk to you about how this
artwork is built up and what will we need to think about in order to
have the animation. Okay? So as you can see, the dimension is basically
a screen size canvas. It is a bit higher
resolution this time because this was a big print that I did. But we don't need that
for the animation thing. So we will use a simple
screen sized canvas, and we will have three elements
illustrated separately. So we will have the sky, okay? We will have the hot air
balloon and the cityscape. And actually, I don't really want to illustrate them
on separate canvases. It will be good if we
will have this dimension, okay, because we can
then rearrange them. Let me just show you
how will that look like in an animation
for social media. So we will have the social
media a dimension, basically. And yeah, maybe if
I put it like this. Yeah, if I put it like this, you can see it better. Okay. So like this, you
can see it better. So you can see the
cid scape itself is, like, moving from this
side to that side. Like this, creating the illusion that the hot air
balloon is flying, and as we are playing
with the size, it creates the illusion that it is moving in space as well. There will be free movements that we are going to animate. We're going to animate the cityscape moving. We
are going to animate. If you are looking closely, the background is
moving very slowly, and that creates more
realistic effect. That will be the second one and the third is going
to be the movement of the hot air balloon in space. Okay? So this is what we are going to create
in the animation part. But let's just go back to
the illustration part. Okay, so this was all about
the structure of the class. See you in the next
one where we are going to talk about inspiration.
4. Inspiration : Alright, so in this video, we are going to talk about what you need to
look for and what inspirations or what
you need to think about before you
start illustrating. Okay? And this is
the time I love to give a shout out to the
illustrator Corey Egbert, whose beautiful
illustration is basically recreated in the space
that you are looking at, and that basically
inspired this whole class. Let's start with the cityscape. That will be the
most important part. I think that will give, you know, character to this
animation and illustration. So this is my hometown. There are very
recognizable buildings of my hometown put together, not in a realistic way, basically, but if someone who knows my town
and looks at it, will immediately know
that this is this town. So if you want to
illustrate your town, look for these, you know, characteristic buildings,
photos of them, and, you know, just spend time getting resources from which
you can, like, work. You can choose a famous town, and this is what
I'm going to do. I always wanted to go to
Istanbul. I've never been there. Actually, the hot air
balloons are very, you know, characteristic
of Turkey. So I thought it will be so amazing to illustrate a
cityscape of Istanbul. So what I'm going to do is to
spent time on the Internet. I'm going to go through Google to see what the most
characteristic buildings are. I will write some
keywords into Pinterest, and that should include
cityscape and silhouette. And you will find graphics, mostly vector graphics
of most cities, maybe your town has it as well. Most of the times towns like, do these kind of cityscapes for promotional materials
for tourism for different, you know, cities. And you might see, like, stylized versions
of these cityscapes. So you don't need to
stylize them and stuff, but you can get, you know, ideas for buildings
that might be famous and or very characteristic
for the cityscape. You might find perspectives, you know, that are already done, so you don't need
to invent things, but also do not copy. I need to emphasize that. Do not 100% copy something, use it as a resource, okay? So, see the buildings and yeah, placements and perspectives
and stuff like that. Okay, so that's
about the cityscape. The second thing
that you need to think about is the
time of the day. Which will basically influence the color palette that you
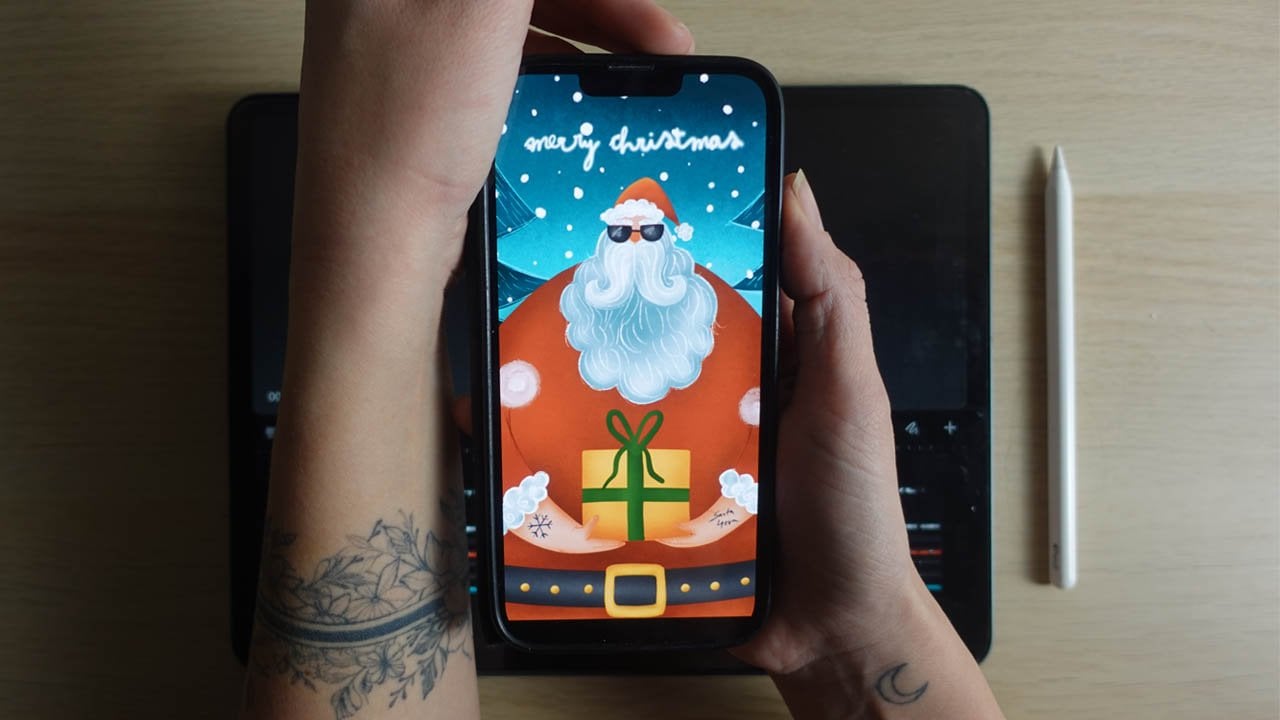
will have in your piece. So this is a nighttime
illustration. So it influenced the colors
I have on the buildings, the sky that I have
actually, you know, the stars and the moon here. I think I will choose
sunset now because I love how colorful that can
make buildings and the sky. So I will have, like, oranges and purples and stuff like that. So I will again, use the keywords in my
research sunset colors, and I will specifically
look for ways these colors reflect from buildings and maybe water
and stuff like that. So that will be my point. And the last one is
the hot air balloon. Now, as you can see, this is a little guy here
with a school bag and a toy. This image was actually created for my son
leaving the kindergarten, and they, you know, had
their photos all around, and it is it is on the wall of the
kindergarten he went to. So you can just think
about Anything. It can be a dog in
the hot air balloon. It can be a person.
There can be no one, ok? It can be an empty
hot air balloon. You don't need to
do any extra stuff. Can you see this school bag? It was so much fun. I had so much fun making
this illustration. Okay, and you can look for
real hot air balloons, how they are built up, what
colors they are using. What shape do they have? Well, I found these
Turkish hot air balloons have differently
shaped, you know. So spend some time also
thinking about and, you know, just researching. I would say spend at least
30 minutes and you can create a mood map for yourself, and then we are going to
move on and basically start sketching
out a our artwork. Okay, so, see you in the
sketching part, and now, like, spend the time researching for your project. See
you in the next video.
5. Sketching Part 1.: Okay. Okay, welcome back. So I have just
finished my research, and I found these beautiful
twix on Pinterest. And what I've done basically
was thinking about the color palette mainly
and the way I'm going to, you know, illustrate Istanbul. And what I found is that I really love the
simplicity of this one. So there are three layers of
buildings, actually, four. But maybe I will go for simple free layers of
silhouettes of buildings, and it doesn't even have
like shading, you know, but it has these windows, and it looks pretty amazing. So I will try
something like this, so that is very it
has these palm trees. I love those. And the building
that is very recognizable. Also, the bridge is
very recognizable. So these are the
ways that I'm going to do this landscape
or cityscape. What I also thought of is the
colors of these buildings. I really love those,
and as it is sunset, it will have an
orange kind of sky. So I will need a
contrastive color for the hot air balloon so that
it is, you know, contrastive. And if you look back
to the original, I had it like in reverse. This was a warm color and
the background was cool, and now I'm going to do
it in total opposite. And also, yeah, I think I will keep the shape of
the hot air balloon, the way I like to do that. I don't like this shape. I don't even understand why
it has that one, but there are blue,
hot air balloons here, and that's why I
chose this image. So what I did, I just
grabbed some colors here, from the images,
and now I'm just going to create a
color palette for it. So I'm here in the palette. I will create a new palette, and I will just pick and place the colors I picked
from these images. Cool. I will choose even more colors while
I'm working to make, you know, the shading and stuff. But now, let's just close this, go to gallery and create a screen sized canvas and basically spend
time on sketching. The first thing we
will need to do is to go choose black and
sketching pencil you can use from the drawing set, but
sketching sketching. Yeah, brush set,
the six B pencil. I love that one. We will
need some composition. We are going to use the rule of thirds to create a composition. Of this image, it
will help us a lot. Well, the rule of darts is that if you divide the canvas of any dimension to free even parts vertically and free
even parts horizonally, you will get some
crossing points and as that will help you to
guide your, you know, pencil. So you can do this just
really approximately. I will just draw these two lines and I can see that
it is not very even, but I can just, you know, put them kind of kind
of here, like this. Yep. Not not perfect. Okay, and be like this. If you don't have eye for it. You can use the Canvas guide. Let me show you in a second
how you can do that. If you go to Canvas, drawing guide, turn that
on Edit Drawing Guide, and you can play
with the grid size and you can have free free even parts, but you will need
to play with it. We are going to have the city
escape in the lower third, up here, we are going to
have our hot air balloon. So I will just lower
the opacity of this very much
really really very, very lightly to
see approximately to know where to start drawing, I will just create
another layer and start drawing this
cscape basically. I will start with
different buildings, and as it will be
just like silhouette, I will kind improvise Okay, so this is
not really perfect, but it will be okay. I will just place it lower
so that I have space to include these famous
buildings in the background. These are totally
random buildings, and I kind of, you know, used inspiration
from those graphics that I found online about, you know, these
are random houses, and I customized
them a little bit. Uh, I don't really know how
the houses in Istanbul. Like you know, the regular
ones, how do they look like? I only know the
Eastern European ones. I will do little
adjustments to the shapes, and then we can Okay. So I'm finished with
the customizing of this level of buildings. And now I'm going for the second layer of
the buildings behind. And I will need that big big building that
is very famous of Istanbul. I will need to look
for, you know, a reference for that and I will just put it in front of me. And it will basically
be on a hill. It is on a hill. It is a giant. I will just erase, okay? This is just for, um, reference. So it is the building here. I can make it then
smaller, you know, to fit so that we have actually the hotel
balloon and focus. Mosque. This is the blue mosque, and I'm using some, you know, images that I
can observe and stylize. So there are these stuff. These ones. This is what
I'm trying to do here. So it is a patience
game, you know? Your artwork is always as
detailed as patient you are. It is not about talent, okay? Some people can do very
detailed artworks. Some people can't
am the cant person. I don't have a how to put this? Not just patience,
the attention spam. And if I don't have,
like, success right away, I can get very much
discouraged in any process. So, I test this, you know. So what was I saying? I need that, you know,
um, instant feedback. Okay. Looks kind of better, but these stuff
are not very good. I really want to go here
and see this place. Maybe it is very good
that I've chosen this. This is my
manifestation process. I will draw my new
next destination. Okay, this is going
to be a silhoutt. I don't need to overdo this. But, what I've done here was a very big
very rough sketch, and I need to correct it because usually it is just
not how it looks like. With my, you know, very
quick observations. So tough. I'm going to make this
quicker for myself. I'm going to go to the
freehand selection tool, select these two towers, free finger swipe,
and duplicate. And then I think I will
just place it like this here and erase from behind. Yeah. Perspective wise, because these two towers are in the front and these
are in the back, okay? So this is why I didn't flip. And I'll just put all these to the same layer and
it will be okay. So now let's play with the
placement a little bit because I think that
yeah, it can be here. So let's just add the bridge. So I will just make this bridge probably a bit smaller. Should be Ah let me see. Okay, so there is land, as well, the other side. So I will just place
something like this here. I'll make it smaller. I'm just trying to figure out, if it will be seen, you know,
behind these buildings. I don't really want to cover it. Maybe I will make this a bit higher like this so that
it actually fits there. Yeah, something like
that. Like this. I think a very subtle, you know, background layer, very lightly behind this bridge. Could be fun. Yeah, because the bridge
is going to be kind of discolor and something
behind it would look good. So let me just add
some more sketches. And I will actually lower the opacity of this
bridge so that it's not that dominant. So I will create another layer, maybe behind it and just
draw something there. Okay. Something like this. It came out pretty complicated. I didn't want to
overcomplicate it this much, but okay, whatever.
6. Sketching Part 2.: All right. And I will
create another layer and basically draw the
hot air balloon. I will start with a circle. I will hold down, it did and
create and make it a circle. I will make it a bit smaller. Let me again see.
So as you can see, these lines follow kind
of this rounded shape, the circle that is getting
thinner at the end. Imagine that you have
this line here and try to I'll add two lines here. Like this, maybe. Kind of like this and then
it flolows like down. Okay. And this is just a guideline.
I will just adjust it. Okay, I don't want
to overdo this. And I'll be illustrating, it will make more sense. What I want to add is
when I illustrated that hot air balloon was, you know, having these dots
kind of in the middle. So here, here, here, here, here. Here. Oh, here and here. And Dever, you know, connect it like this. And there is this. You can just invent your
hot air balloon machine. I had this little stuff here to which it
connects, like this. You can make it as
easy as you want or as complicated as you want. Like this. We can just turn around the whole
air water balloon, you know, so that it has this
little movement forward. Let me just spend a little
time on illustrating myself there on a new layer so that
I can erase whatever I want. Okay, so I have added
myself to this little card, and I will just make it bigger so that I
can fit in there. Okay. And I will overly make the I think I will
make it a bit smaller, but as in the animation,
it will move. We are going to scale
it up and make it smaller to make it crisp and, you know, um high resolution. I will keep my image
of it like this. And now I will just add some
more details on a new level, and I don't really
want to animate birds, so I will leave that out. But if I would keep this
as an illustration, or maybe I will try
to animate a bird. Let's keep that as a bonus. Okay, I will just have free little birds
around this part. And we will see if we can animate these
little simple ones. That will be the
bonus animation part. So it will be sunset. I can have the sun
dem right here and some clouds, you know, to have So something on the sky to move
as if it were stars. If you are drawing stars, you can totally keep
them and draw them. Okay. So let's just summarize this sketch because it is a
pretty complicated sketch, but it will look
amazing, I promise. We have three layers
of cityscape. We have the main buildings. We can make this
smaller later as well. So as you can see, I didn't keep the lower third part
with this design. But this will allow
me to scale and, you know, have it
more in detail. And then I can just
make it smaller. And when we are,
you know, playing with the movement
of the ctscape, we can just make it smaller.
So we can play with that. This is why I'm keeping it
approximately like this. Also, we have the illustration or the sketch of the
hot air balloon. You can add extras
like flags and stuff. I will maybe add I don't know. There will be lights down here, maybe. I don't know. I will add that when I'm illustrating some
extras. We'll see. So we have the sketch, and
we are going to move on to start illustrating the Sid scape itself. So, see you there.
7. Illustrating The Cityscape 1.: Alright, so let's just
start illustrating. I'm super excited. So we have all these sketches on separate layers,
and you know what? I'm just going to group them. We don't really know if we
were going to them separately. So I will just group them. I will duplicate,
and I will flatten, so there is one sketch and I will just hide
the group, okay? So I'm doing this frequently because I really love to keep my stuff together because you never know when you need it. I don't think we
will need it, but I just wanted to show you how I backup my work while I'm
working on bigger projects. So I will lower the
opacity of this sketch, and I will create
another layer below this sketch and choose
darkest purple. From my brush set, I'm going to choose
the clean shaper and any opaque brush that you can create solid shapes with will work.
There are plenty. Maybe you have purchased some or you want to choose one that
comes with the procreate. That's totally fine. So what I'm going
to do now is to just fill in the shape of this front piece,
basically, front Scape. And I want it to be crisp. So if I see that my brush is too textured or
something happened, there are no crisp edges, I'm going back and
forth with the eraser. H. Okay, so I think the
first layer is all right. I'm not going to
go for perfection, so if something is not
symmetrical, let it be, and let's move on to the next
video where I'm going to work on the second layer
of the set escape. See you there. So forth.
8. Illustrating The Cityscape 2.: Okay. Let's move on and I
will choose this light pink. I will play a little
bit with shading later, but I now want a bit of a
contrast between this part and, you know, the layer behind. So I'm going to
create a new layer behind this layer and I'm going to just
fill in this part. Okay. And let's just move
on to the third layer. It already looks incredible. I will create
another layer behind and choose this light orange. I will maybe go a bit lighter. Maybe. Let's see. Yeah. Let's just
start with that. Oh, okay. I will just turn
off the sketch and find the parts where I might
missing, you know, pixels. For example, here, this is,
like, pretty undefined. But I know what it looks like. Oh, my God, I think
it is beautiful. And let's just add
in the next video, some shading and the
windows. So see you there. To.
9. Illustrating The Cityscape 3.: All right, so it is
already looking good. Let's just move on to
the background and then add some textures and
shading to the front. So as we are as I am, actually, creating a sunset, I will create a new layer and not just simply change the background color. But I will choose a new layer
and fill it with color. At first, I will just place
this yellow color here, and I will choose the shader
brush from the brush set. And this orange color, I will make it big and I
will go from this dark. I will make it even bigger. I will create a smooth gradation I'm going from light
yellow to a darker orange, don't worry, I will get
back with the yellow. I just need to have a little
texture because you can see, as I put this darker
orange onto that yellow, I got this wonderful
beautiful texture. Actually, I will choose another very saturated
orange here. This one, I will just
place it here and go through with that. Oh, wow. This color is so rich, it varies really this darker orange with this
yellowish color. I will go back with the yellow
a bit in this top part. Oh, wow, this looks beautiful. I will adjust it a
bit. Very lightly. You can just play with it, I will create another layer
and choose the clean shaper, and I will actually
turn on the catch. I will draw now the sum. I will make the brush smaller. I will draw a circle, hold down, click this menu that pops up editing
and make it a circle. I will fill it with color and
it leaves out some pixels. I will just fill it in. Cool. I will I think I
will make it a bit higher. Okay. And I will add
the clouds as well. You don't necessarily need to
add texture to everything, but I'll follow this
layer and I can help it. I will choose this orange. I will just add to
these clouds a bit. Also the sun can maybe have a bit of a texture or color Ooh. I missed some pixels here. I will just correct that I will try to add a bit of a texture to these
layers as well. I will go to the front layer. I will alpha lock all three maybe with this lighter
gray, not gray purple, I will make the brush
a bit bigger and I will add a bit of a texture to it and it will add a bit of a color
and these gradients and it will just look good. I will go to this part and this maybe the
exact same purple. And it can have
shading like this. And at the back, I will go
with this exact same one. And to be honest, yeah, I'm making it a
bit darker so that it kind of pops, you know. And down here, this is water. So I think it should have
a bit of a reflection of the sun maybe and maybe
this orange even. Yeah. And I will play with this orange stuff also
at the middle layer. So maybe adding you know, as if bit of a
reflection of the sun. But maybe that's a bit too much. So I will just make it
lighter. Maybe here. Like this. Yeah, it looks cool, but I don't want to overdo it. So maybe, like, a bit
burnt feeling of it. And at the front. I think just a little bit
of lightness where the sun might hit these
buildings could make it, you know, a bit interesting. Yeah, I love it. It has some mystical mystical
feelings to it. And now I will
create another layer and chooses orange and
with the clean shaper, I will at the windows. I don't like the brush. Smaller. Okay. I think this
looks amazing. I will just turn off the sketch to see what we have created, and I think this is gorgeous. What do you say? It
has such a mood. I love it. So I
will try something. I will duplicate this
layer of these windows, and I will go and gauche
and blur the second layer, right? Shines a bit. And oh, my God. I'm in love with
this illustration. Alright, I think with it
an absolutely amazing job. And now let's just move on to the next video where we are going to illustrate
the hot air balloon.
10. Illustrating The Hot Air Balloon: Okay. So this is so exciting. Let's just move on to
the hot air balloon, and I will create another layer. And we talked about having this hot air balloon
with cold colors. I'm not sure, though, yet, but we can change
the colors anytime. So let's just go with
what we've decided. So I will choose this dark blue, the clean shaper brush, and I will just fill
in the balloon. I will just take a
chance to show you how I fix shapes like this. So as you can see,
this part looks pretty nice but this one is off. So what I'm going to do is to click the freehand
selection button, and I will go to the top
in the middle of this one, you select one half of
the hot air balloon. I will prepping or swipe and duplicate and then flip horizonal now I
will just place it. I will put it like this. I will make it fit this side. Okay. And I will go below
and erase this part. You will see what I'm
talking about in a second. I will just okay. That's much. Approximately, like this. Okay. I will select this top part and
adjust it a bit more. Like this, I will
adjust this top. Yes. Now it has the same curve as a
dsp. Can you see that? Can you see? I think it looks great. I will merge these
two layers together to have one hot air balloon. I can see some uneven stuff. I will just lower the
opacity of the sketch even more and just play around. You can also use this
symmetry tool for this. Yeah, let's just do that.
I will go to actions, Canvas, drawing guide,
edit drawing guide, and I will add symmetry. And I will place this dot to the top part of the
hot air balloon. Yeah, it was the middle. And this Okay. And this bottom part. Can I? How can I Okay. I will place this dot down
here and I will adjust it like this so that
it is in a symmetry. I hit done and if I draw, it goes both ways. Okay? Okay. I think it looks good. Let's
remove the drawing guide. I will actually duplicate this sketch and select invert so that I can see
these lines better, and I will create another layer above the hot air balloon and I will make it
a clipping mask. I will hit and hit clipping mask and I will
choose this lighter blue, keep the clean shaper, and I will add these lines here. O. I think it looks pretty nice and let's just add some
textures to it as well. What I'm going to do is to
outlook both of these layers, and I will just try something. I will make these lines
darker or this one lighter. Let me just see if that works. I will just select this dark
color and fill layer and select this color
and fill layer. No. I looked better this way. We always need to try things. I will select this layer. I will choose the shader
brush, the lighter blue, and I will just go through the hole with a
bit of shading in the edges in the
middle to this one, I will put a darker one. So I will make it a bit
smaller at these parts. I will at the bottom, add a bit of shading like this so that it has highlight
going through the hole. I can do that as well by
creating another layer, still keeping it as a clipping mask and choose
an even lighter blue, keep the shader brush and
just go over the top. And we will get this
wonderful color blast. Maybe I will get back from it. If you want to get back from it, go to the eraser and choose the shade
a brush and just simply get back from
that highlight a bit. If you think it is too much. But I think it looked
better that way. Yeah, it is cool. All right. I'm going
to try something. I will select these free. I will group them,
and I will duplicate. The top part, I will just flatten and go to adjustments
huge saturation brightness. This way, I can
try out versions, so I can go this dark purple. Oh, the pink one looks great. Or oh, wow. Okay. I'm not sure I want
to keep it in the blue one. I love this red one as
well and this dark pink. I will just turn it on and off. Like, this creates
nice contrast, but now I think that this analogous color palette
would just work better. So I keep it on you, okay? I'm going to go
with this pink one because it is like, Wow. I love pink color, and I love how it works. It just works, okay,
with this orange. But if you want contrast, can you see how these cool
colors, like, pop, right? So, make your choices. You can change it anytime. I will keep these two here so I can just anytime
just simply change it. Now, let's work on this thing. I will create another
layer and a choose brown and I will choose
the clean shaper, and I will just at first draw
this part and this crate. Okay, I need a richer
brown for this. Okay. What layer I'm on? It is a normal layer.
Why is this, okay. I will turn off the light sketch because that
distorted color. And I will do Oh yeah. Maybe a bit darker. Yeah, this will work. Okay, I will put this color to this color palette
so that you have it. Okay. And it just true. I have a signature bubble
thing that I love to do, so I will just create
another layer and I will actually
use black for it. I will just place these bubbles here. Okay. I will alpha lock my bubbles. I will choose, um,
yeah, light gray. And the shader, I will
make it very small, and I will just add
some reflections. This is my bubble
thing. I love to do it. Yeah. I think I will go
actually even lighter. Yeah, like that. I love it. I love it. Yeah. This is coming to see you know, that
this is my work. If you see these
bubbles anywhere, that was basically drawn by me. Okay, I will choose
this dark brown again, and I use to clean shaper and I will go
back to the layer of the crate and basically
connect these bubbles. These are the ones that hold
everything together. Okay. If you want to have nice arcs, you can just hold down the
arc that you have drawn. I try to not make
these ropes to dig. Oh, okay, we have it. I think it looks amazing. You can just play around. I think I will just place random light thing going around. Here, let me just try it. I will create another layer
and do something like this. Yeah, it looks good
with lights on it. I will create another layer, choose yellow, and I will
go to the lumins brushes. I will choose the
light pen and I will just add little lights. Onto the hot air balloon. Oh, God, this looks
so good. Oh, my God. I love it. I love it. Okay. And I almost forgot. We need to add some
shading to the crate, as well, and I will need
to adjust the shape of it. I think. Yep. That's right. I will alpha
lock this layer, yes. And I will choose
a lighter brown. And I will choose the shader
brush, the shader brush. And I will add a little bit
of this blue blue light brown to these ropes as if they weren't even
a bit illuminated. It has texture. It
has a bit of color. Yeah, so cool. And also this great
low, just like this. I love. What's this texture? Oh, okay, that's the sketch. Actually. Yeah, I
turned off the sketch. And now I will choose a light brown color and
a sketching pencil, and I will just draw a little
bit even lighter brown. I will just draw these
things, you know, through the ropes so that you can see that they are ropes. There's a little bit of detail that doesn't really matter much, but I love to add them. And this part is wood, so I will just add a
little bit of this kind of wooden hand drawn texture onto it like this and
also here as well. Just very lightly. Scribbles of texture. I still don't like the
shape of this grate. Let me adjust a little bit. Okay. Looks super cool.
What do you say, Oh, my God, I didn't
really expect that it will look like this good. Like, this is very
good. I'm so sorry. I'm, you know, this excited. This is what you need, you know, to be
excited about stuff. Okay, let's get back
to the character. And one more thing
that I just discovered that this grate is
not in a good angle. Let me just fix that. But not that part was okay, but not lower parts. Okay. Again, the perfectionism. Okay, this doesn't look
good, right, like that. I need to be more
precise with my cuts. Let me see. Okay. It needs
to be in the best angle. It will be like this. As you
know, when it is flying, it is more like a
little bit behind at this kind of angle. Let's turn on the sketch, and let's create a character
in the next video.
11. Illustrating The Character: All right, so let's
just start working on the character in this video. I will create another layer and choose a color for
the skin at first. And I have a nice skin
color that I usually use, and I will just okay, I will just place it there
so that you have it. I will choose the clean
shaper and fill in the head. Okay. I will create another
layer for the hair, and what color her hair will be. Let's just go with
this dark brown, and then we are going to
add some color to it. So it is on a new layer, and let's just add it. At this part, I
will create a layer behind to make it darker. I will just alpha lock it, choose the shader, and
add with this orange. I love this combination
because it adds like this light brown color a
little bit gingery hair. Just really lightly, I will just add a bit of
a highlight with this light orange here and maybe used a sketching
pencil and just Oops. That's very light. So
probably with this color, just a little bit lighter. I will just add lines like this. Okay. I will choose a
color for the t shirt. I will go with this dark purple, so I will create another
layer and just draw it in with the clean shaper. No, she will wear black. Yeah, she will wear black. I will need to figure
out this hand. So she will have
her hand like this. Like, she's looking, you know. She has her hair hair. I don't need to go into too much detail because
this is going to be small, so it is not, very important. And if you don't want to mess around with
something like this, you can just keep it
as you wish, okay? So you don't even need to
I don't like the hint. The proportions are not good. So this is her hint. She will have it
till this. Oops. It's black. So like, yeah. So this arm, she has like this, and this is going like this. And I will choose this skin
color and just draw her hand. Here. I will create another layer
and choose the slight one. Joos the sketching pencil, and I don't know. Oh. Okay. Let's create
another layer for the face. I think we are going to
go with this very dark brown and just add two giant eyes and
some eyebrows. Oops, and the mouth,
and a little nose. I will create another layer, choose a bit more golden color. I have this color here. I will just place it here
and throw the glasses. What do you say? I
think it's all right. I will alpha lock these glasses. I will choose this lighter
yellow, the shader. I will make it very small and
I will add some highlights, but a little bit lighter yellow. Like this. Less yellow. More white, probably. No, more yellow. Yeah. This will make
it a bit more golden. I will add a bit of a
shading to her face. Let's go back.
Alpha. I will choose a bit darker color
and bit more red. Hit the shader. I will
make it a bit bigger Oops. Yeah. It's smaller. I will make it smaller
to below the neck, maybe below the
hairline. Like this. I will go through
the face a bit to add texture, even the hints. I will choose the
sketching pencil. I will create another layer
and need a very thin pencil. I will just draw the fingers. Here's a watch, let's say. And like here as well. This just very like noted. How is. That's how we Hindus. You cannot see the
other, you know, finger. I need a line here with a bit darker color,
maybe like this. She has her watch here. I will need a lighter gray to kind of add the line
here how her hand is. Okay? I will erase from this part how
her hair is Yep. Wow. It looks good. I will turn off the sketch and
adjust it even more a bit. I think I need some inclusion. So on top, I will choose the drop shadow brush
and completely black. Make it small, and I
will add some shadow. So for example, behind
or below the hand. I will make it thinner
and I will add a bit of a shadow
below the glasses. I will try to make it like
this, below the nose, like this below the neck, here, maybe to the hair. I'll make it bit bigger. Shadow below the hair. Yeah. Below the
create part here, B to the bottom to her hair. Yep. I will need
some shadow here. I will make it smaller and
add a bit of shadow here. Maybe a bigger shadow. Now, here for these lines, they are having their momentum. And maybe below like this. Don't worry, I will
gauchenblur it in a second, so it will be not that harsh. So I will go to
adjustments gauchenblur in just a bit gauchonblurriy. I feel this girl is a bit maybe she needs
eyelashes. Let's see. I go with this catching pencil
with a weather thin brush. Yeah. She's so cute. And let's see her hair if we
can do something with that. Use saturation brightness. She can have a bit of a
pink hair. Oh, my God. This purple hair, purple
hair, brown, blue. I love. I love it. I love that you can
play around with so many, you know, possibilities. Yeah, it can be very
bright pink hair. Oh. Oh, my God. She has a very bright pink hair. What do you say?
Should should she be normal or she should
have, like, pink hair? I don't know. Okay.
Now I'm not sure. I love that she has this, uh, actually white hair now. I loved the the brown as well. And I loved the pink. So I'm not sure where
I'm going with this. But let's keep the
pink for the sake of the pinkness of this artwork. Okay, so I think this
illustration is kind of finished. Play around with the hair color, play around with all the colors. It is so freaking fun. So see you in the next
video where we are going to animate this movie.
12. Intro To Procreate Dreams: Okay. So if you haven't opened
Procreate dreams yet, in this video, I'm
going to explain to you how this application
works, right? So you open the application, you have the gallery. It is very similar to the project gallery that
you have in Procreate. So here you can hit the
plus sign and select different canvases or files. Now I will show you this one so that you see how a
working file looks like. So at the top part,
you have the screen. You have the canvas, and it is active
outside of it as well. And actually Procreate
Dreams remembers your step. So as you can see, I
just opened it and hit the undo gesture that
is similar to the one. Like the gestures are similar
to the undo, you know, in procreate, and as you can
see, remembers the steps. So that's what's different from procreate,
because in procreate, when you exit the canvas, it forgets everything
you've done, so you cannot undo things. Now, so this is
the canvas thing. I will just show
you that you can move around the objects. Outside of it, as well. And where you have the
cityscape, where is it? Where is the cityscape? Here is the city scape. It makes sense to have
it active outside of it because this
is a bigger image than the screen.
Can you see that? And if I move it around, I can just, you know, it will not be seen
outside of the canvas, but I can bring in, for example, a longer cityscape and create the illusion that
this hot air balloon is just flying over it. Okay? So it is really useful to change your thinking
from just the canvas. It is just as if you
were just, you know, looking into the a whole and everything is happening
outside of that, as well. So with procreate dreams, you just need to change how you look at things and active
things and passive things. All right. So we have
the cityscape there. Now, at the lower part, you have the timeline
and some tools. You can zoom in and
out from the timeline. Can you see that you
have the seconds here? You can just set the
length of this animation. So it can be, I don't know
how long, I guess, lot. But this is just 10 seconds. And if I am right, we default, it opens up files at 30 seconds. So let me just show you
how to set the link. At this menu, if you
click these oops, yeah, you get back
to the gallery. If you click the
name, so the dream, you get into the settings part where you have
the properties. You can set the
frame per second. You can set the duration. You can start the pixels. You can you know
that you made it. And these are animation
technique settings. So there's the stage timeline. So you can do a one shot. You can do a loop and
a ping pong animation. We are keeping it at
one shot at this one. So there are so many
things you can, you know, here is the history. There are recovery
points you can set, you can export. So
here is the menu. Then in the timeline, so let me first show
you you have kind of similar as you have in the
Procreate, you have layers. You are importing
layers of outwex. We know flattened images so that we don't
have layers within. You can group things together
and move them around. This is a very simple animation.
We have a background. We have a cityscape. We
have something moving on the sky and a main object,
the hot air balloon. But in complicated, more
complicated animations, there might be layers
that are grouped together and different motions are
applied to different layers. But this is a
beginner thing, okay? So as you can see, so
these are the layers. You have a checkbox, you can
just turn them on and off. And as you can see, we
have here this thing. And this is the key
frame or motion track, motion track it's called. This is where it
collects information about the movement that you are applying to
different layers. So when you click that, you got different, options. You can move this Trackhat
from one layer to another. When you have a track
or layer selected, what you click on is going
to be applied to that layer. If I just click it, this is the action button. You can add different moves. There's moving scale,
warp, distort, and you can add the filter, and you can add it
so you can split. We are not going to do that now. And you can I will
just show you in the main animation
part how we can apply the different
motions to these layers. But this is one way
to add, key frames. These motion tracks
collect data, basically. There are several ways
you can add motion. For example, there is another one that I
wear very much like. It is the record or
the perform button. The first one is display
button where you can just select the
animation, just play it. And you can see,
another thing that is, I think it is very
annoying is that it only shows the part of the
timeline if you hit play that is shown
on the display. But this animation
is so much longer. Yeah, I get it. This can be very useful when you are working on a big animation, you are just working
on a part of emotion. What is happening. But sometimes it is annoying. Whatever. So keep
that in mind as well. So this is the play button, and it plays you the whole. This is the record button. If you place this track
hat, for example, to the background and I
hit this record button. If I'm moving around the
background, can you see that? It is running. It is running. These Layers are doing what they are supposed to do
based on the motion track, and it is just recorded the
movement that I've just done. This is very useful
because you don't need to, you know, redraw every
little movement. You can just really grab an object and record how
you are moving it around. The downside of it is that you need to have a
steady hand sometimes, but it is a really fun
way to animate things. Then you have timeline
edit mode where you can, you know, select layers with
this very nice non thing. If you go through these layers, again, it's di selecting them. This is how you can group. So I just select the two. I just hold down and I can
just group these layers. Then we have a drawing mode. This brings out a similar
place that Procreate is, but it is way more limited. You have brushes, you
have smudge tool, erase tool, you have layers, and you have colors. Let me just hit done,
and I will just create a new track and
show you something. So I will just hit
this plus sign and you can import things and
you can add new track, for example, where
you can just draw. I will place the Traka
to the beginning, hit this drawing mode and slide the lower part up and it will bring
out a flip book. This means that, as we said, we have 24 frames per second. For every second
of this animation, we have 24 pages. That gives us 240 pages that
we can draw, animation in. If we decide to draw something, I will choose the light
pen, for example, and I will have a bird
here and it will just and go like this and I can just play with it. Can you see that? Okay. We can just move it
around, et cetera. And when I hit done, these individual frames will
show up in my timeline, and it's a very small part because it's just five drawings. But we can do very, very
fun things with those. Okay, this should be
enough for you to understand the basics and
to be able to move forward. Let's get to animating. Okay. Okay.
13. Preparing The File: All right. In this video, we are going to
connect layer so that they are easier to transfer
into procreate dreams. So we need to do some stuff
within this artwork at first. So what I love to do is to group certain elements
and then flatten them. So I will need three
different elements for the animation. And I just realized that I will start with the background and
it will be separate. But these clouds will be
moving just a little bit, but the sun will be at the same place because
it is further. So at this layer, I'm going to select the layer where I have the
clouds and the sun, select the sun, free finger
swipe and cut and paste. I will place it
onto a new layer, and I will actually I will
just duplicate this so that I have the sun for later
if it makes sense, and I will put it over the background
color and merge down. Now I have only the
background with the sun to have one
simple layer active, you will just go to this checkbox here and
just hold it down. And every other layer
will be deselected, and you will have only
that layer there. There are two ways to transfer layers into procreate dreams. The first one is that you
hit the range button, hit Share, select the
format, for example, JPAG and you just save amature camera
roll and then just input it into Procreate dreams. But you can also just drag and drop layers into
the application. And I will show you in a
minute how that works. But at first, let's
go and again, hold down any reactivate the layers that we selected
or turned on before. And I have the cloud. That will be a second layer
that I will be transferring. When it comes to the cityscape, we are going to
go begin our way. So we are going to move the
whole cityscape throughout the animation to give
the effect that it is, like, you know, floating. If you want to dig deeper into the more advanced
animation things, you can do these
different layers of cityscape at different speed. You can play with that, but I think that would be a
bit complicated for now. Let's just go with
the beginner way. I will just select
all cityscape layers. I will group them.
I will duplicate, and I will flatten. Now I have the city scape. Now let's go for the
whole hot air balloon. I will just select
everything, the hair, the hot air balloon,
the glasses, the shading that I have on all these details and I'm
going to again group, duplicate, I will turn off this group and I
will just flatten. Something happen. Okay. If I grew up like this, yeah. Okay. Okay. I will duplicate this
group and turn off the lower one and just flatten and I
will just turn off this one. I'll just count again. We have the hot air balloon, we have the cityscape, we have the clouds, and we have the background. These are four
layers that we are going to transfer into
procreate dreams. Let's just open
Procreate dreams. I will just open the application and let's just
create a new file, I will hit the plus button
here and you can choose different versions
and we are going to illustrate or animate
for social media. I will choose this one
and I will choose Empty. Bang, I have the
social media one. Okay, I'm going to at first
bring in the background, Let me just show you
how you can do that. You can either hit the plus
sign and choose from photos. And it will bring it
back or you can go to Procreate Hold down the layer of the background and drop it here. I'm going to make it fit
the canvas with the hate. I'm placing it right
here, just like that. I want my son to be at
this part of the canvas. We are not going to pretty
much move the background, so the sun will be steady. This is going to be a
ten second Animation. M timeline is already
set to 10 seconds. Let me show you how
you can do that. So if you go to that dream, here you can set the duration. If you click there, you
can set any duration. It can be, I don't know,
a 15 second animation, a 32nd animation, a minute
animation, et cetera. It is set to ten. The 24 means frames per second. 24 is a very good rate. The movement will
be very smooth. If you set it lower,
the movement, it means how many, you know, images you have within 1 second. The less you have the more like this robotic or how to say
it, the movement will be. Okay. So now we have the background. Let's go to the Cescape. So I will just hold down and keep your eye
on the timeline, you know, do not put it where you have the
background, but above. As you can see, this is not
filling the whole timeline. There are several ways
you can make it happen. You can just place this clip to the beginning
of the timeline, hit it, hold down, and hit fill duration. I will fill the whole timeline. Now, I will select it
and make it bigger. Oops. And I will place
it kind of here. As it will move from one side to another.
I don't like that. I will make it a bit smaller. Yeah, I will make it smaller. Maybe even smaller. The reason I'm doing this is because the sun is not going to move
in the background. It will be really, really
weird if, you know, it would move that much and it doesn't
have that much speed. I mean, the hot air balloon doesn't have that much
speed if that makes sense. Okay. So make the
cityscape smaller, and I will just place it here, and I will adjust the
background a bit, so I will make it bigger a little bit and
place the sun a bit lower like there
or even smaller. So that this yellow part doesn't look through behind the scene. Just import the clouds. I will just import the clouds between the
background and the cityscape. And again, I will
just hold down, place it to the
beginning of the track, hold down and hit
field duration. So here are the hoops. The clouds, I will
make them. Down here. And the last one is
the hot air balloon. I will again hold down the layer and drop it to the
timeline to the top. Okay. I will make it bigger and place it kind of into
the middle of everything. Okay. I will again, yeah, feel the duration. So I place it at the
beginning of the timeline, hold down and hit feel duration. Now in the next video, we are going to animate
at first the cityscape. So see you there.
14. Animating The Cityscape : Okay. All right.
So for this part, I rotated my iPad
so that you can see this part better
because it's very small when it is in a
landscape position. Basically, the
tools are the same, so I can just, you know, select an object. I will actually make
it a bit like this. Okay. And let's just
animate the cityscape. Okay. So this is its
initial position. I will maybe place it
a bit more like this. If I go to the track, I will make it bigger
so that you can see. I'm at the layer
of the cityscape. I place this track to the
beginning, or click on it. I will hit move movement scale, and it plays a key frame here. This means that it
remembers the position, the initial position of
this image on the timeline. When I go to the end, and I will just place this
image to the other end. Yeah. I move the trace. Can you see that? It is moving. Let's play it. It is very slowly. Okay, it is getting quick. It is because it automatically
has this easing curve, so it starts very slowly
and it gets very quick. To set the easing, you just hold down
this track and it opens up the set all easing menu where you can choose how
this movement will go. It is going to be linear. It is going to ease in ease
out or ease in and out, and we are going
to choose linear. So when I'm playing it, it is the movement is
very, you know, equal. And what I need to say that I don't like that
the sun is there. Or how to put this? I want to put it here so
that end position, it is not behind, it
is not moving there, so it is not making any sense. I will just select
the background. Yep. And I will just put the sun somewhere here. I think we need a smaller sun. What I'm going to do
is that I'm going to delete this layer, go back to Procreate. I will. Can you
remember that I placed the sun outside of the
background, right? So, um, I don't even
need to do that. I will go back and put it back, and I just need the
color of the background, and it will be the same, okay? I will need a sun, and I
have a sun individually, so I will just select
that layer and go back and place it
above the background. So I will now just have a sun
and it will be down here. And now it doesn't
look that bad. Okay. Cool. I need to feel the duration
for the sun as well. Okay. Select then feel duration. Maybe make it a bit bigger. Okay. I will cut off this end. I don't like it. I can
maybe put it higher. Sun like this. Okay, fine. I think the sit
escape looks great. Let me show you the
movement like this. Yeah. The reason I'm not, you know, re recording this part is
that I want to show you that sometimes it is
just a guessing game. How will it look like, you know, and how you can redo things. And I don't want to give you the impression that
I know everything, but I know that always have the possibility
to correct things. Let's just do a recap
on what we have done, we imported the cityscape, placed it to an
initial position, put a keyframe there, placed it to the end
of the timeline, put a key framed in, set the easing to
a linear movement, and we change the sun
so that it is not awkward that it is that big and it is moving
behind the city. Okay? So that's
what we have done, and in the next video,
we are going to play with the clouds. All right, see you there.
15. Animating The Clouds: All right, so in this video, we are going to play
with these clouds. So I will make them a
bit smaller and place it just about the
cityscape, okay? And now I will choose or place this motion track
to the beginning, and I will place the
beginning of this track. I will place it a bit higher. Okay. And what I'm
going to do is just a little bit play
with the movement of them. We are going to record, and it's going to be
a free hand movement, so you will need to
keep your hand still. So the recording
animation technique is, if you have already done any
of my Procreate classes, is that you hit
the record button when the track head is at the beginning or from where you want that movement, basically. And you just go along
with the animation and, you know, move around the
object and record it. We're already at the end. Okay. I'll just play it. So these clouds are moving,
but I don't like it. I will delete this moving. I will actually place the
traced to the beginning, place I don't want to
record. I'm so sorry. The trackat is at the beginning. I will place the cloud to this part so that it is a little bit outside of the frame, maybe a bit above the hole. Now I'm hitting the record, and I will very slowly move them slower than
the cit scape, okay What? Okay. It is fine, I think. You can just play around. The main thing is that
it has to move slower, but the movement should be noticeable that
yeah it is happening. I think from this part
it is looking good. I will probably cut the whole animation from this part to this
part till this. Okay, let's just
give it another go. I will maybe not I will
turn off the record button. So I will maybe not
place it outside, but that much, but maybe here. I place the tracer to the
beginning, hit the record, and very slowly move it around. Yeah, it looks good.
Okay, I love it. Okay, I will turn off
the record button. Alright we'll stop the play hat. See you in the next video. We're going to animate
the hot air balloon.
16. Animating The Hot Air Balloon: So let's do this. I will select the
hot air balloon, and we are going to
record now scaling. Okay. So we are going to
layer a bit of a movement. We are not going to go into too much detail in the movement. This is one thing
that we are going to do a little bit, you know, being very close not
this close, but, you know, closer, further
away a bit closer. This will add depth
into the animation. So I will put the initial
position like this. I will put the track head here. I will hit the
record and I'm not going to move around
the image just making it smaller
and then bigger. Splay. Wow. So cool. I love it. Can you see that not much of a movement has to happen
at the same time. So it will bring the image alive even if there's just a little bit of movement.
But I will do it again. I'm always doing several
rounds of the movements. So I will hit the record and try to be continuous
with the movement. And Okay. Amazing. Now we are going to
layer the movement. What I want is to, you know, I can record again
and it will just record the other
movement that I'm making and still having this going getting
smaller and bigger. So I will place it to the
beginning of the track head, and I will and now I don't
have the record turned on, so I will just show
you what I mean. I will just make this small movement in
the air so it's not just, you know, getting
smaller and bigger, but there is a bit of movement. So I will just hold down
the object and make very small circles
with my Apple pencil. Okay? So here's the initial position. I will hit the record
button and hold my breath. Very small circles.
Let's play it. Can you see it as more organic? So it is not just like
getting smaller and bigger, but there is some
kind of movement. Yeah. Alright, so I think we are
finished with our animation. I think it looks super amazing, and I can't wait to
see what you create. So just move on to
the next video to show you how you can plot your artwork to
the project gallery, and then let's just
wrap it all up.
17. Bonus Video: I All right, so this is going
to be a bonus part, okay? So do you remember
that we talked about those birds that were flying
about the blue mosque? I think we should try to draw
them or it, give it a try. So I'm going to
create a new track, place the play had, approximately where it ends the blue mosque and
hit the drawing mode. I'm at this new track. And I will just
choose this thing, well, we have the
flipbook thing. I will get closer, and let me just show you
how to draw a bird, okay? It's just a very simple one. I will choose this color, and I will choose a procreate pencil from
the sketching brushes, and there will be three
stages for this bird. This is a very simple bird, and let me just show you, okay? So this is when
its wings are up. This is where its wings are in the middle position
and when it is down. And if you want it to fly, you will go this position this position,
disposition, and back. Pm pm pm bom, bom. Let me show you. So add this one. This will be very small, okay? Uh, let it have the
first position. I will make the
pencil bit thinner. The middle position. Ooh. Then the middle
position again. Then the middle position again. Let's make it fly around, okay? So Mm. Let's turn it around.
Middle position. Middle position, down position. Oops. Middle position. Upward position,
middle position down. Oops. Oops. Okay. Let's plate. Can you see? Yeah. So this is the movement
that I'm going to do. I think with one bird, but you can do several ones. I will just now spend
time to continue with this one bird to fly till
the end of the animation. It will take me a lot of time because it is
200 drawings or what. So just watch me doing it. Oh I really love how this bird moves, but it is still outside
of the active zone, so I will just sit down. Okay, I need to
select the object and just place it like this. Oh, it looks fun. Cool. Let's continue. Let's play. The whole. Flies out. Yeah, it is enough. I don't want to continue. This one little effect
is really nice. And you can just do more
of these little birds, and it's just a very
small detail there. He just, you know,
disappears somewhere. Cool. Okay, so I hope that
you like these techniques. I think it is very
beginner friendly. So let's just wrap it
up in the final ido. Poo.
18. Export Your Video: Okay, so I have rearranged some layers because I love the clouds for some
reason. Whatever. So we have it back. What I wanted to
say is that I think this is super fun and
super big and friendly. We work with four
different elements and added a five bonus one, and I think it looks
super amazing. And I can't wait to see what
you create for this class. And I hope that you will flood the project gallery with
your amazing artworks. So let's just do a little recap what we
have done in this class. So in the first one, we have
illustrated a cityscape, a hot air balloon and
a nice background. We transferred four layers from Procreate to
Procreate dreams. We have transferred the
cityscape, the background, sky, the clouds and the
hot air balloon and then how we animated it. We animated the
ctscape by adding keyframe to the beginning and the end and with
a linear movement, it is just moving
through the screen. We recorded a very slow motion to the clouds with
their recording button. We layered motion to
the hot air balloon by making it smaller and bigger and then adding
a little bit of, you know, this wiggling effect so that it is more natural. And those are the free basically animated
things that we have added. And the fourth one was the
hand drawn little Birdie. That is just a bonus
if you wish to add to your illustration
or animation. Alright, I think it was super fun and it
looks super cool. And let me just show you how to export this little animation. So if I go to Dream 13
or the name of the file, I can hit the share and I
will export it as a video, and it is exporting. And if I want to create a
Jeff that I recommend if you are sharing your artwork in the Skillshare class project, let me then show
you how to do that. So at first, just save
video. Okay, cancel. So hit Save video Allow it
is just going to be there. So it is a ten second animation showing up in my gallery that I can share
on social media. I will just choose a little
music and just share it. I think it looks beautiful, and let me just play it again. Oh, yeah. It is so cool. And this bird is so much
fun in the background. I think it looks amazing. Yeah, very moody, very nice. Alright. So now you have this file that you can share
on social media immediately. I love to create a
Jif from my artwork. So what I'm going
to do is to go to Adobe Express because you cannot create a Jif from
Brocre Dreams yet, and he's Adobe Express. And I think I will work
from my phone then. So I will just, you know, transfer the file to
my phone. I'll drop. Yeah, the animation looks good
here as well on my phone. I will just go to Adobe Express. In the search bar,
I will just write Jif and it is convert to Jif. I will just upload the video. It is loading the media. I will choose the high quality one and it is uploading there. And it is already ready. I will just download. Okay, so I save to camera roll? It is also okay if you
upload your video to a video screwing site and share the link so that I can
check what you have done, and the best would be
if you would share it on social media
and tag me there. I think that's the easiest way for me to see what
you've created, and you can just share
the link of the post into the project as
well. All right. So this was the class. I hope that you like it. So in the final video where
we are going to wrap it all.
19. Final Thoughts: I'm super happy for you. Okay, so you finished the class, and now you have a
beautiful illustration and a beautiful animation
of your own, right? I hope that you enjoy the class. I definitely did. And I'm so much looking forward to see your artworks
in the project gallery. So please don't forget to apload your class project
and finish it. If you are finished only with the illustration,
just put it there. I really want to see
your city escapes. Also, don't forget to follow me on social media to stay up to date and here on
Skillshare as well. Hit that button. And please leave a
review for the class. It is really important to me to know what you think about it and for others to know if
it is a great fit for them. It was such a pleasure
to have you here, and I hope to see
you my other classes as well. Happy creating.
 The Artmother, Professional Art Teacher and Artist