Transcripts
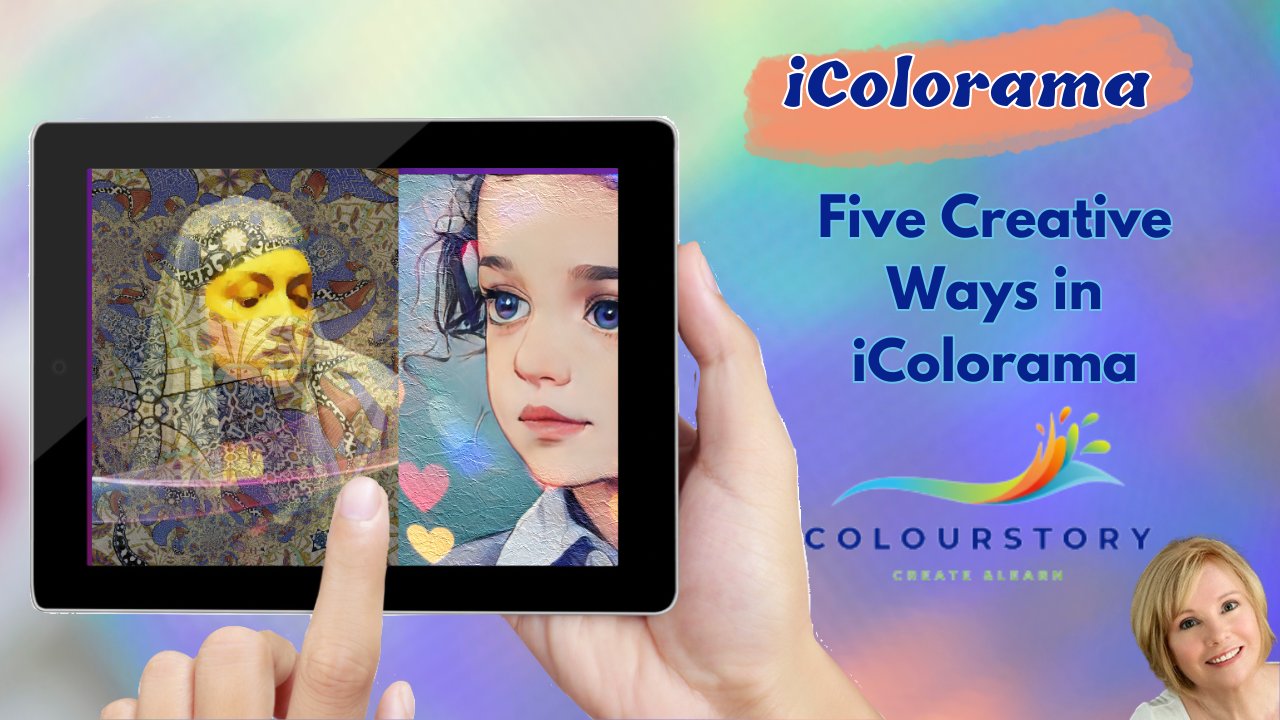
1. IColorama Class Three Intro: Welcome to Eichler
armor class three. In this class, I will
show you how to use five painting techniques to transform your
favorite pictures. This is the third in the
eye color ARM A-series. Close one shows
you the basics of eye color armor and
some techniques. I encourage you to take this class if you are new
to the eye color arm or AP. Class two shows more ways
you can use Eichler armor. The app is a marvelous addition
to your artists arsenal. Please tap the Follow
button at the top so I can let you know when further
classes are available. Now, without further ado, we'll begin lesson one.
2. Impasto Painting from Photograph: Welcome to Lesson one. There's a number of
reasons or procreate or digital artists may want to
turn a photo into a painting. Some may love
creating characters that don't want to spend too
much time on the background. Others find a fabulous picture that would make an excellent
concept environment. Or a photographer
isn't an artist, but would like to have one of their photos on the
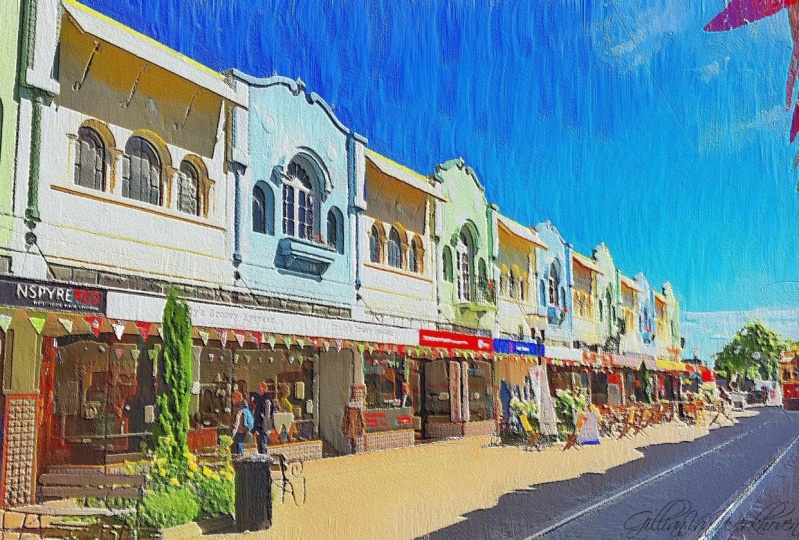
wall as a painting. In this lesson,
we're going to turn this street photo into
this impasto painting. Let's get started. First of all, open
up Eichler armor. Take the picture icon on the
top left-hand corner image from library and bring
in the streets image. Now first of all, we're going to crop the picture
because as you can see, it has quite a rough
edge around there. Go into form and press Crop. Then we're going to press
three and just moves the corners in to get
rid of that rough edge. And we're going to press the Save button and
save the picture. Now we're going to adjust the
color to give more depth. So they'll go into
adjust tone lab. We're going to go to the window, the bottom right-hand corner. And tap number six. That gives the picture
more depth and more color. So go up to the adjust
button and save. Now we're going
to go into style. And painterly, the window in the bottom
right-hand corner. And we're going to
choose the preset to. This is to give some
white in the picture to enable us to smudge
the colors together. You can see it's far too much. So we're going to go into
opacity and turn it down to 25. That's much better. Tap the adjustment
button to save. Now we're going to
choose our brush. Or before that, we're going
to actually go to the save to camera roll the top right-hand
corner, press Save. So we've made some adjustments
and we've actually saved this picture
to our camera roll. Now we're going to go
into brush rebound. And in the window in the
bottom right-hand corner, we're going to choose loss. Then go to the Brush icon,
number to selection. And then you can choose
any brush you like. But for me, I quite like. Number 421. Jessica, tap the brush again. Go into the Settings icon
with the color bury. The limits. We're going to move
the limits up to 50%. Then we're going to go into the vibrance icon at the
top there, little sun. And we're going to put
the vibrance at 40%. Tap the settings again. Now we're going to choose this blank square at the bottom, which will give us
our background. Now we need to import
the picture with the adjustments that we saved a few minutes
ago and apply. That puts the picture. On top of the background. Now we're going to work upon
this picture with the brush. I'm not going to make you watch me go over
the entire picture. As we go along, I'll show you the relevant
information that you need. Now to start off with, we're going to reduce
the brush size. And let's make the picture in a bit so we'll
press the zoom. There's a picture down a bit, press Zoom again to
fix the position. Then we're just
going to start here on the right-hand side. Just move the Apple pencil like a brush to
mix up the colors. Make sure that you overlap
to get the less even effect. Now I'm going to show you how
to do the smaller details. So we're going to press Zoom. And we're just going to
do this window here. So press Zoom again
to fix the picture. Small brush size. And you'll notice
that if you go up, it tends to spread the color
that you're working on. And when you put
the stroke down, it tends to pull the
color from the top. So you'll find that
small strokes. Or even just a tab will give you the
control that you need. Press Zoom again,
moves, picture. Assume again to fix in place. And you can see here
that the war went over the window
that's easily fixed. So experiment with
your Apple pencil to see which direction
is the best way to go. Now I'm going to carry on and I'll be back again
with you shortly. Remember to keep adjusting your brush and to go in the
direction of the picture. Within pasta, You just giving an impression of the features. They don't need to be exact
or to recognize a ball. Just an impression. Them to experiment with your Apple pencil in the
directions and lifting. And sometimes just tapping. Adjust the size. The broad areas, go larger
and adjust the size. Small areas. Remember to tap the Zoom to move about and make
the picture bigger. Topics again to set
it in position. Now let's say I put a
big line down there. I didn't want it. At the top left. You can press Undo and
the line will disappear. So at any point you can
undo only one step. That can be useful. The brush quite small here. Remember, moving the pen up, spreads the color that
you're working on. And moving it down tends to
drag the color from the top. As the picture
gets further away. You can be less precise
in your brushstrokes. Go in the direction
of the roads. When you see something
like this iron railing, you don't need to
do too much to it. I'm just tap around it. You don't need to smudge absolutely everything
on the picture. So you see the
iron railing here, I'm just tapping around this
so it doesn't look too real. Now I'm going to show you
how to get rid of the car. So we're going to press Zoom. Assume again. And you see this car here. We really don't want that. Simply pull down the paint until the car disappears there. And we'll do the same
with this car here. Keep the brush going down, lift up, and go down. Pulling the the brown
color from the top. No cars. I think we're nearly there. So just look on the
overall picture, see if there's any
adjustments you need to make. I can see I've forgotten
to do the sky. I will fix that. I've Lizzie the blue
of the sky over the black drain pipe
to remove that. Any features that you don't
want to show on there? Just smudge them
over to remove them. Okay. I think that's pretty
much the picture done. So now we're going to
save the adjustment. And then we're going to go
back into tone and enhance. Tap the window in the
bottom right-hand corner. And we're going to
choose number 16. That gives us a
nice bright color. But we're going to
turn the contrast down to that 66 there. And now we're going to go
into texture and paper. Tap the window in
the bottom right. And I like number
11 for this one, I'm going to put the
intensity up and the size down a little. There. I think that's the batch right there we have
our finished picture. So unsaved the adjustment. Save to camera roll. Now let's just go
into the history. And we can see the
original picture. The first set of adjustments,
adding the white and the texture on top. So that's it for this lesson. You can try all sorts
of photographs. I'm landscapes,
cityscapes, water escapes, and see what wonderful
pictures you can make. Now, we're going to
move on to lesson two.
3. Edged Brush Painting Technique: Welcome to lesson two. In this lesson, we're
going to learn how to use the edge brush
painting technique. You can see from the picture
that this is a little bit unusual and quite a nice
technique to use for a change. So let's get started. Open up by color armor, press the picture icon
and import your image. I've provided this image in resources for you to download
or you can use your own. We're going to go
into brush and edged. Going to go into
the settings and turn the edge
control right down. Next we're going to go
into the brush icon. And you can use any
brush you like. But for this edge effects, I've chosen an ink brush. Its way down. Scroll right down until you see some lines going across there. That one with the dash
going across there. And that is the first one
which we're going to choose. Press the brush icon again. Now press the blank square because we're going to
apply a background. Go into choosing
your background. I'm going to choose a texture which I will provide you
with and then apply. Now we're going to
turn the opacity down because that's much too match. Probably down to about $0.30. No, I think we need a
slightly, Let's say 45. I turn the size of
the brush right down. Then we're going to top. Might be up a little bit more. Mailing the picture size. By tapping with this brush. It gives you a
nice edge texture. Just a little bit different. Slightly mixes the texture
in with the background. I think we need the
opacity a little bit. Now. I think we'll turn the
opacity writer to guess. A better look. You can see the texture of
the brush much clearer now. And it looks less
like a photograph. You can put the brushed
over all of the painting or you can leave some
of the edges clear. Showing just the background
that we've added. Say, tapping gives you
the right texture. If we do a line, it doesn't. So we can undo that line. I'll just show you that
again, aligned undo. That's why I suggest that
you use the tapping method. We will go completely over this. So what I'm going
to do now is press Zoom and bring the picture
in so I can reach the edges. Press Zoom again to
fix the position. I can finish. Tapping grand. This is quite an
unusual technique. And it gives you a
painting that looks a little bit different
from the norm. I think that's all
are tapping down. So now we're going to
save to adjustments. Then we're going to go
into town and enhance. Tap the window in the
bottom right-hand corner. Look at the different colors. Enhancements you can get. I particularly like number nine. So I'm going to go with that. Play with the contrast, play with the gamma, like gamma. And I'm happy with that. So I'm going to save
that adjustment. Now I'm going to go into
effects and sharpen. I'm going to turn
the radius right down because it's a
little bit too sharp. Right down to 20,
say the adjustment. And then we're going to go
into texture and paper. Like we've done before. We're going to put a paper
texture on this picture. So go through your textures
and see which one. Like number 11 is quite good. Let's put the intensity up, but the size down. Let's try some more. I think I prefer 17. Size up again slightly. Yes, I'm I'm happy with that. So now we're going to
say two adjustments. Now let's just look
at the history. This is the picture
we started off with. Then we tapped over
with the edge brush. Then we enhance the picture. And finally put a paper
texture on there. Try this technique
with one of your own or use the picture provided. Now we're going to tap in the top right-hand corner and save our image
to the camera. Roll. All done, and now we'll
move on to lesson three.
4. Sketch and Watercolour Technique: Welcome to lesson three. In this lesson, we're going
to learn how to make a sketch from a photograph and apply
a watercolor technique. I hope you enjoy this. Let's go open up
eye color armor. Tap the picture icon and
bringing your original image is the one I've
provided here and resources taken from Pixabay. So it's quite legal
for you to use it or use one of your own. Now go to style and edges. Tap the window at the bottom. We're going to
choose number one, but we're going to reduce the
opacity down to about 75. Now we're not going
to apply this, we're going to just save it
directly to our camera roll. Now staying in style. Move along and find water. Set the texture to 0, intensity to 0, the
opacity to about 70%. Now apply. Now going to brush and rebound. Set the limits to about eight. The brush size than a little. Go into the brush. And we're going to choose number five on the
list, watercolor. And go right down to the
bottom and choose number 41. No brush. Roughly. I think Bill just
moves the size up a little bit partially roughly to
show the picture underneath. And don't go right to the edge. Lift your pen every
now and again. Just gives us more random look. Rough effects. You get near to the edge, just tap. Now I'm just going to go round
and just talk a bit more around the edge to give
a nice rough feel to it. Then that's done. So we're going to press Apply. Now I press style. Go along the sub menu
and press water. Tap the window in the
bottom right-hand corner and choose number six. Now press Apply again. Now we're going to go
into adjust and tone lab. I'm going to use the
precess number one. Now, apply that. Now going to turn lab, again. We're going to
choose number three, going to apply that change. Now we're going to
facts and choose blend. In the bottom right-hand corner, choose a picture icon. And bringing the sketch
that you previously saved. Now select the window
and choose multiply. I'm going to apply that. Now we're going to put
a texture on this. So we're going to
texture and paper and choose a nice watercolor
paper type texture. And the sixth is quite nice. Quite like that one. I think we'll go with Number 15, in this case, going
to move the size down to about 60% intensity. Now we're going to save the adjustment and the
picture is finished. So we're going to save
to the camera roll. Just have a recap and
look at the history. This is the picture
we began with. The changes we made. Just looking at
this picture again, I can see there's some sketch at the side
that we don't really want. So I'm going to go into
presets and choose a border. Press the window in the bottom. Let's choose a border. That's a good border and
that's solves our problem. This sketch showing
up at the edge. So now we're going to save the adjustment and
save the completed picture. The camera roll. You can try this on landscapes. Cityscape, looked through
photographs and find one that would make a good
ink sketch and watercolor. Thank you for watching
this lesson. Have fun.
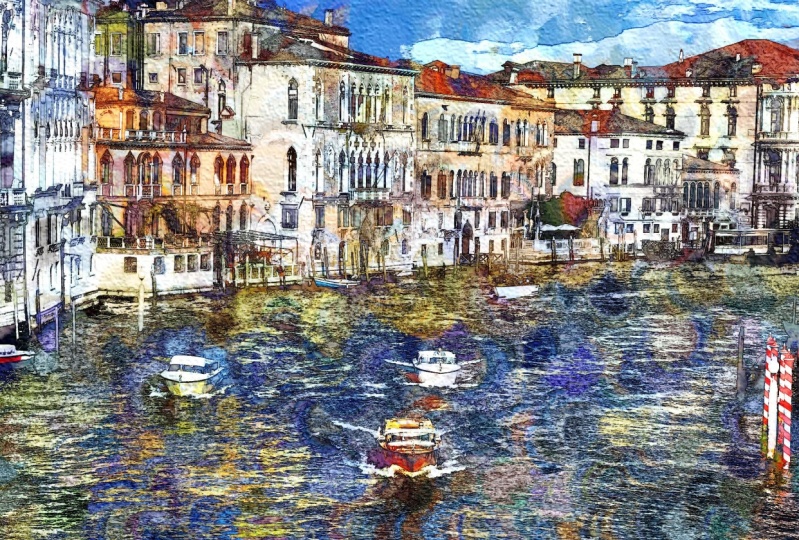
5. Bristle Brush Painting Technique: Welcome to lesson four. In this lesson,
we're going to learn about the bristle
brush technique. This technique really
defined some brush marks. And to define them even further, we're going to use
the race technique. So let's get started. Open up Eichler armor. Tap the picture icon. Import your image. This image is from Venice. You can use this
image provided in the resources or use
one of your own. Go to adjust. Tone lab. Tap the window in the
bottom right-hand corner, and choose number two. As you can see, this really
brightens up the image. Those are the top
right-hand corner and press the
adjustment save button. Now we're going
to go into brush. I'm bristle. As you can see, the picture
is underneath the Canvas. So we can see a little
bit of what we're doing. We're going to lower the
opacity a little bit. Then we're going to go
into brush and way down, we're going to find
a grunge brush. And then we're going
to choose number 11. Tap the window,
and we're going to choose number two
in the presets. Right? Let's start painting. You can adjust the size depending on where
you're painting. And as you can see, even though I go
over the building, I call a rama, knows where the boundaries
are of the picture. And this will help us
because we want to adjust the direction
of our brushstrokes. Go in a little bit. Press Zoom. Press Zoom again to set the position
low the brush strokes. And I'm going to go in a different direction
on this roof. A different direction on
the side of the room. A different direction
on the walls. Roof again, you can definitely see
the bristle brush marks. Remember to keep adjusting
the size of your brush. For larger areas. Reduce the brush size. The smaller areas. With the ground here we're
going to change direction. The wall of the house. Paint upwards. Reduce the brush size a little. You can see the
define brush marks brings the painting to life. I'm going to press the zoom. I'm bringing the picture
in a bit so I can see what I'm doing. And reach the bottom half of
the picture, pressing again. To set the position. Again, you can see that he can see the picture underneath. Keep lifting your pen to
make a new brush stroke. Just keeps that definition. Change direction for the
boats and the water. You see it's quite
a quick process. The garnished go to the top right-hand corner and
press adjustment to save. Now we're going to go
into effects and race. To give them a picture
even more definition. We're going to choose,
raise number one. Reduce the opacity just
a little bit there. Top right-hand corner, press
the adjustment and saying, now we're going to
finish off by putting a texture on our picture. Press texture. Paper. Press the window in
the bottom right-hand corner, and choose a texture
that pleases you. I ended up with number 23. So I'm going to save
that adjustment. There's our picture finished. If we go into the history, we can see the original picture. Bryce and a little bit painted. The rays technique
and the texture. That's all done. So we can go to the
top right-hand corner and save to the camera roll. That's it for the
bristle brush technique. Look through your
photographs and find pictures that you think would work well with
this technique. And that's the end
of lesson four. Let's go on to the final lesson. Number five.
6. Artist Brush Technique: Welcome to lesson five. In this lesson, we will use
the artists brush technique. Plus we'll make
some adjustments in the painterly effect and change the tone of
the photograph. So let's begin. Open up Eichler armor. Press the picture icon in
the top left-hand corner, and bringing your image
from the library. We're going to work
on this picture of a lady with beautiful roses. We're going to change
it quite a bit. So first of all, we're going to go into
form and crop to, crop the picture down like that. So press the
adjustment button in the top right hand
corner to save the crop. Now we're going
to go into brush. And artist. As you can see, the canvas
now covers the picture. So we'll go to the opacity in the bottom left-hand
corner and reduce it slightly so we can see the
picture we're working on. Now we're going to
go into the brush. And we're going to
choose Artists, which is the second one down. And we're going to choose
number 15, which is Brassica. Tap the brush icon again
to remove the brush. Now we're going to reduce
the size quite a bit. And this time, instead of using the Apple Pencil as a brush, we're going to tap with it. We're going to go
all over and makes more taps and try to keep the pressure of the
taps roughly the same. So we get an even
talked effects. Squatter, a quick effect to do. When you've done
the fine features. We can increase the
brush size a little bit to make it a bit quicker. To cover the rest
of the picture. You can of course, choose a different brush
to get a different effect. I encourage you to go through the brush menu and
try different ones. But for this picture, I think the seeker
brush works quite well. Going to increase the
size a little bit more. As we get to the more outlying
parts of the picture. Now we need to reach the
bottom of the photograph. So we're going to press, Zoom. Moves a photograph in. Press Zoom again to set the
position and continue to tap. Nearly finished. Make the brush smaller
again and just tap any places that
you've missed. You don't need to get rid of every part of the white canvas. There. That's finished. So now we're going to tap the adjustment button in the top right-hand corner
to save our picture. Next, we're going to go into style and look along
to Lucy painterly. Now we're going to tap the window in the bottom
right-hand corner. We're going to choose paints. Save two adjustments. Now we're going to go into town and light the
way along the menu. We're going to find beauty. Tap the window in the
bottom right-hand corner. And choose number three. We are going for a
more muted look. You can save that adjustment. Now we're going to
go into texture, right the way back. And choose paper. So you can choose any
texture you like. But this time, I've
chosen number 15, I'm going to increase the
intensity a little bit, but make the size go down. That's much better
with a smaller size. Then we're going to
tap Save adjustment. And that's our picture done. As you can see, it was
a very quick process. So use the picture in the resources or
choose one of your own. And that's the end of
a painting techniques. Thank you for joining my class. And I'll see you
in the next one.
7. IColorama Class Three Wrap Up: Thank you for joining me in my latest Eichler armor class. I hope you've enjoyed making some new artwork out
of your photographs. Please upload your projects so everyone can see
your amazing work. Please tap the Follow
button so I can let you know when further
classes are available. If you could take the
time to review my class, it would be very
much appreciated. Thank you again, and I
hope you've enjoyed it. We'd like to see my
other creative work. Please visit my website,
Color Story.com. I started my creative journey
writing books and audios, as you can see here. Then I returned to
my first love art and created all kinds of art. Finally, I have 20
years of mind, body, and spirit articles to help my readers navigate
our complex world. I think you'll find it
very interesting to visit my website, color story.com.
 Christine Sherborne, Artist and Author