Transcripts
1. Introduction: What's happening,
folks, and welcome back to another IPC I, pink creatures class
here on Skillshare.com. And thank you all for leaving reviews and feedbacks
in comments. Because today's class is addressing a little bit
of the common said. And I'm going to take you
through my drawing process. And the first video
in this class will be just the basics
of drawing dragons. But I specialized in drawing
taught suits and tattoos are from the Yochai
family and Yochai basically roughly in English
means strange spirit. And they basically are
folklore creatures from Japan, characters and creatures
from Japan in them highly inspired
Ukiyo-e and Pokemon and did human in Studio
Ghibli and a lot of entertainment franchises out of the East in from the
lovely country of Japan, which is my heritage. And so the difference
between dragons and taught Sue, basically, dragons are from Western
mythology and have wings and elementally
major the fire over in Yochai and each
inland tattoos are water serpents and so they represent mythologically
inside of our stills in folklore wise, to support us from not
submitting our humanity to any darkness or any
machine or mechanics. We will be drawing tattoos, although they look like
Eastern dragons a lot. They have a lot of similarities to drag it in there
creature features. Like I said, the first video. What I'll be concentrating on is just the basis of the exercises. I will go through all the
drawing terms and drawing possibilities and
different choices. And ultimately it's up to you
to get your drawing skills, the basic drawing skills
of drawing shapes and the fundamentals which I like to call the cool
rules because I was worked with younger students
and drawing. And I teach them the fundamentals
and so they can have a much pleasurable
time drawing and continue drawing because
I always like to say, in what I call art ventures, everything you do in a class
or anything that improves your drawing or painting or your creation or
crafting skills, you should be successful. So I call them art
ventures, so be successful. So you'll keep returning
and do a lot of repetition, which allows you to get better, find your own style
and have a much more enjoying the experience
drawing and painting. The first video I will
go through drawing of the basics of drawing a top Sue and how I do it and there's
many ways to do it. So I will just show you
the basic construction, how I do it and
talk to you about every technique and tip I can and have you
draw along with me. And then the second,
third video, I'm gonna show you
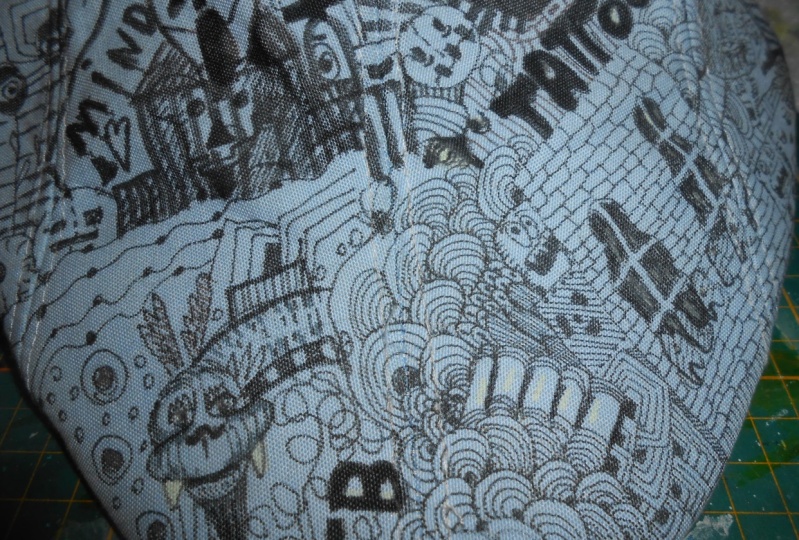
this hat and how I actually applied
drawing straight with ink and draw my tattoos or must be will know
them as dragons, but they are taught sues TAT SU. I'll see you over
in the next video. We're get out a ballpoint pen or some basic inking
drawing tool. And let's go through the basics.
I'll see you over there.
2. Drawing Lesson - Drawing Dragons - Tatsus: Like I said in the intro, this is the drawing lessons. So I loved to use a big stick or any
type of ballpoint pen. Big sticks are just so wonderful my
favorite drawing tool, and I always like to use a big stick or a ballpoint
pen is drawn not a pencil because I believe pencil is a whole nother realm of drawn in it's almost
like painting to me. And when you use
a ballpoint pen, you can basically draw and you can't say I can
erase and all that. And it's not about shaping, it's about really just drawing. What I suggest right
here to start off is, is parallel lines. Parallel lines are exactly
what I'm doing right here. And I'm putting angles to them. I'm drawing the shapes that
make up a Dragos head. And we're basically
going to concentrate on the Dragos head or the dragon's head or
the tattoos head today. So basically what I want you to do is do what I'm
doing right now. Do a whole bunch of
parallel lines and use a lot of angles and curves and just practice getting the lines looking like you
want to so they're parallel. Don't have to be
completely exact, but have to get at a point
where you liked them. The third drawing I
did on his example of how to do a horn by
just putting dots. And that's another exercise. Just put a bunch
of random dots and then draw parallel
lines to the dots. You just connecting the dots and always try to use
your whole arm, not just your wrist and draw. The last thing I just drew were how I do a lot of
tattoo or horns. Because tattoo horns
are modeled after a deer or fauna. Fonts. And basically, you have to design your own way of
doing your own horned, your own way of doing. I just did some
fins right there. I'm doing a fin again right here because tattoos
or water surface. So they have a lot of features, what I call creature features. Aquatic creatures. Right near my left
hand right now, my pointing finger right there
is what's called the sale. So it looks like a fin too, so you can see how everything is a parallel line
and it's curved. Mainly what I want you
to do right here is do as many parallel lines as
you can and curve them. Right here I'm showing how
you do an inner scale belly, see which once again
is parallel lines. The next thing to do is
practice doing basic shapes. So this is like a circle, right? Is for more of an oval. And this is the basis
construction kit to doing tattoo or drag
go from a front view. So the view you see me. Now I'm showing you the basic shapes that
make a side view. And there's all different
types of dragons and taught sue the
draw all different shapes and I think the
most challenging one. And if you give me feedback, I'll do of course on this about really exploring
the Find the way you draw these creatures. Right over my shoulder here, move over a little bit
so you can see it. You can see the major component is just a small
little oval circle, not a perfect circle. Then it has a snout
which is precis. You can see all the
parallel lines again. So a lot of the basics
of drawing Dragos and tattoos are parallel lines. And so I'm here, I'm taking that shape. I'm using the crosshair method, pretty much invented
by Walt Disney Company to really find the
placement of your eyes. But once again, I
think a lot of it is your creativity and the
only fundamentals that I really encouraged to
practice and hone down our parallel lines and
curves and angles. I'm showing you how I
take that little shape right there and I start
adding the Creature Features. And you can see how I'm applying all the parallel lines and
the shapes are drawn before because I have those basically those
taught Sue horns that are somewhat modeled
after a deer are fond. Of course, there's ears. And then you see me
add it a little bit of the cheeks, the cheekbones, and then there's the
snout in the front, which a lot of times
you can go you can put your eyes down so you have
tier two eyes down, right? And then this line right here, right here is how
you form the snout so you can come right
from this I line up here, come around the eye
and then do the snout. You can see on there
how I did that right? Right the eyeline
and then the snout, then the cheeks
above the eyeline. Then the key is
the parallel lines are attached to the
top of the head. They're not like our next
which are attached down here, their top to the bottom
of the behind the head. So you can see how the parallel, parallel line is so important. And once again, there's the beard because a lot of them will have a
mustache or beard. Then the main features
do you have to basically concentrated
on figuring out how you draw are the nodes. You can do a nose that is
around nose like mine. And that's mainly what
a lot of tattoos have. Dragons have a lot
of lizard nose. And so you see I just
did slits and then I do a parallel line on top of the
slits to define the nose. Here's how I'm showing
you on the side view, how you start adding
a lot of the angles. And once again, it's just
parallel lines again. So practice your parallel lines and your confidence in them. Then your angles, right? So you can add on the horns, you see I added extra
point sharpness, right? And then once again, the
basic triangle square and a circle and ovals and
ovals are probably the most powerful and
drawing creatures. I'm using my little triangles
to do the teeth down there. And of course I'm not doing lots and I'm putting
in a sale, right. So I showed you how
I drew it right above practicing drawn sale. Now it's right there.
And once again it's on a parallel line and an angle. That's the basis of it. Now I'm going to turn
the page and I'm going to show you the symbol
of the front view. Once again, draw
yourself an oval. This is why I like
ballpoint pen because it really much acts
like a pencil. I can do what are called
suggestion lines. There's my parallel line connecting to the
back of the head, which will give it its neck. I'm doing a little
bit of a crosshair to show you I am so experienced, I don't need to do that. I more shaped my
style and my flavor, my drag on my taught soup. And then they're right there. I'm using that technique
right between the eye. After you get the eyes laid
down, you lay it right there, you see, you can go back
in the video and watch it. And that's where I basically drag down and then
I do the snout. And so it has the snout. Then I'm doing more
of a traditional ones are more like a human nose
for the zoo and a lot of them have nostrils
on their nose and big ball on the top, not necessarily just two slits, kind of like a lizard. Tattoos take a lot of
things from camels, dogs, and probably hippos are
rhinos, Western dragons. They take things more from
lizards and reptilians, and they also take things from big animals like
elephants are giraffes. That snout is kinda
like a draft, but a lot of it is like a lizard where tattoos
definitely bring in more of the other
type creatures. And now I'm doing a side view. And there's that
parallel line again and just a small little ovals,
almost circular shape. And then there's the
snout, long snout. And this is more
drawing a tattoo more and traditional dragons
because dragon's head, that big snout and a, I bought all a lot of my
tattoos a lot after dogs. So they have more of a
dog snout than a beak, like almost a flamingo are almost like I was
saying, reptilians. Then the center line on
the side view is pretty much I drew it right there. It is pretty much the one side of the oval, right
down the center. And then you keep everything. You don't show too much of the other side
and the other eye, you can hint it a little bit, but it's very in perspective. And then a key to pay attention here is that cheek
line I just put in. And then one thing that sometimes I don't
follow very much, and I, when I start to
render and paint my Otsu, it'll come out kind
of funky if I don't remember that lot of times, but the bottom lip
is just their chin to so they don't
really have like lips like us and then a chin. And so it's always on the
very bottom, those things. It also designed that way to give my character's emotions
so you can make them smile. There's my sale again, and I'm doing a little
bit of scales because the water creatures
definitely requests below. I will do some more courses that goes through
civic gland doing scales and bodies of these creatures and
other creature features. But basically that's
the basis of it. And at the basis is
parallel drawings. So go out and do your
parallel drawing. I will upload a bunch of
these for the class project, just the sketches so you can
see how rough I started out. And let's head over to the next video where
we're going to show you all this in process
and repeat a lot of this stuff and show you
where I'm applying it. Drawing on a much more difficult
surface as snapback hat. So I'll see you over there.
3. Drawing with Ink onto Hat Demo: Welcome back to the drawing
demonstration portion. We just went through
the video lesson and hopefully you guys
got your ball points out instead of drawing and have
a grass more of how to construct your
drag, your tattoo. And doing a lot of that. I constantly am always
working in my sketchbook, not specifically for to do
the hat or to draw tattoos, but always experiment and find, like I said in the last video, I think the biggest
challenge for you as an artists or creators to
figure out how you draw them. You can take things from
other animals and that's what a lot of mythical
creatures are all about. Like if you can see right here, I'm doing that side angle
version like I was showing you, but doing more of my style
and making it a tattoo. So you can see before I added the neck and some of the
other features right there. Basically it looked like a wolf. And using wolf ears too, I didn't go into the ears
and the drawing process. But yeah. Just to give you a little background
on the surface here it's a snapback hat. Use the chart to get the ones
that have a Canvas texture. But I'm gonna fully paint this. So I did what's called JSON. Json is a medium that is I think it's a lot like
just white acrylic paint. It has a polymer
based plastic base. It's basically a
primer that you put on any surface that
you want it to be a little bit smoother and
for the acrylics to stick because I will use
acrylics to paint this. I will use some pigment inks, will basically do this. It's kind of a messy process. I don't really always share the videos because
it's kind of boring. Just to learn how to just
take this white paste, which is like I said, a lot like a type
of acrylic primer. And then you just put one codon and then I usually
use a hairdryer and I dry it off and then put another codon
and then dry it off with a hair brush and use I go
three coats to get it. It's still kind of
rough smirk surface because when you do it on a canvas or a woodblock or something that
you're going to paint on, usually smooths it out, so gives you an acrylic base. And acrylic loves to stick to
acrylics. Work really well. Then after I've done
is all dry and then ballpoint pen seems
to work very good. When I first started drawing
and painting on hats. Tried to figure out a way
I could erase it so I can really draw and
kind of failed at that. And so just took it as an
opportunity to really drag in and kind of get to
my roots of a lot of street art where
you got to just do it. You can't erase and
you can't all do that. Here I'm doing the front
view and I'm doing the classic taught Sue and
the version I like to do, which is very much
modeled after camel and the dog and those
types of animals. And I did the side view of the parallel lines
of the neck again. And you can see how
I did the snout, put the nose right there and employed those
deer like horns. And you can see, the more I'm clear about where are those
parallel lines going, how I construct the taut suit. Then I can put more
features in and start adding more details and bringing them
alive as a character. So it has its own
personal personality. And I didn't show arms, which like I said, if I get some requests, I'll go into more
construction of a whole Otsu tattoos
or water serpents. So they really don't
need the wings. And I'm willing to do stuff like that because I
do sometimes draws Dragons with wings and that's
a whole design process. So definitely you requested below if you'd like to see that. As I keep going on, you can see the basic
construction methods I employed and they're all
pretty much in place, which are the parallel lines attaching the body and the
neck to the back of the head. Not like a bottom of
the head like ours. I employed didn't employ
the lizard type of slips from the nose because this is my style and I always
put them more taut. So who knows this? If you look at a lot of Japanese tattoos and
Eastern dragons, which are basically in Japanese, are called RHIO or basically the main ones I loved to draw once again
are the tattoos, which are the water serpents. I left this in the
video because. I'm showing you of how I use the basic construction
and a lot of it I don't construct like I
was showing you in the drawing area because
I've been doing it so much and I'm really familiar
with how to just draw now and have a dragon or a tattoo character
come out of me. And this one right
here I'm showing you because it is
where you start adding all the Creature Features
and make it original to your story or your type
of drag or tattoo. And this one I loved
doing musical ones and so I'm employing right
now if you can see it, I put headphones on him. I also made him my
famous piano teeth. I love doing. All right, that makes
them more mechanical. And then I'm making his
horns out of his head. Be horns instead of animal horns are actually
musical trumpets. And then I put where I usually put the gemstone
or the third eye. And in my story they're
called the storage stones. I put a musical note. I just wanted to show you. After you get the
basic instruction, you can draw kinds of
fantastical things. And a lot of that, once again, is just going on an image search engine and pulling up a whole bunch
of guitars are horns. And once again, the basics are
parallel lines and angles, and proportions
and perspectives. That's all you got to think of. Now I'm just drawing some
environmental stuff. I decided to do these kind
of orbs floating around. I love making my
Dragos and my tattoos, all horror and
holding magical orbs. Here's another example
of doing a drag, but adding all kinds of features
to make it a character. So I put a snapback
hat on this tattoo and flip flipped his
litter and then have his horns coming through
and made it like one of the classic gnome creatures
where I don't even show his eyes and he's got his head all the way
down above his eyes. This last one then I'm filling
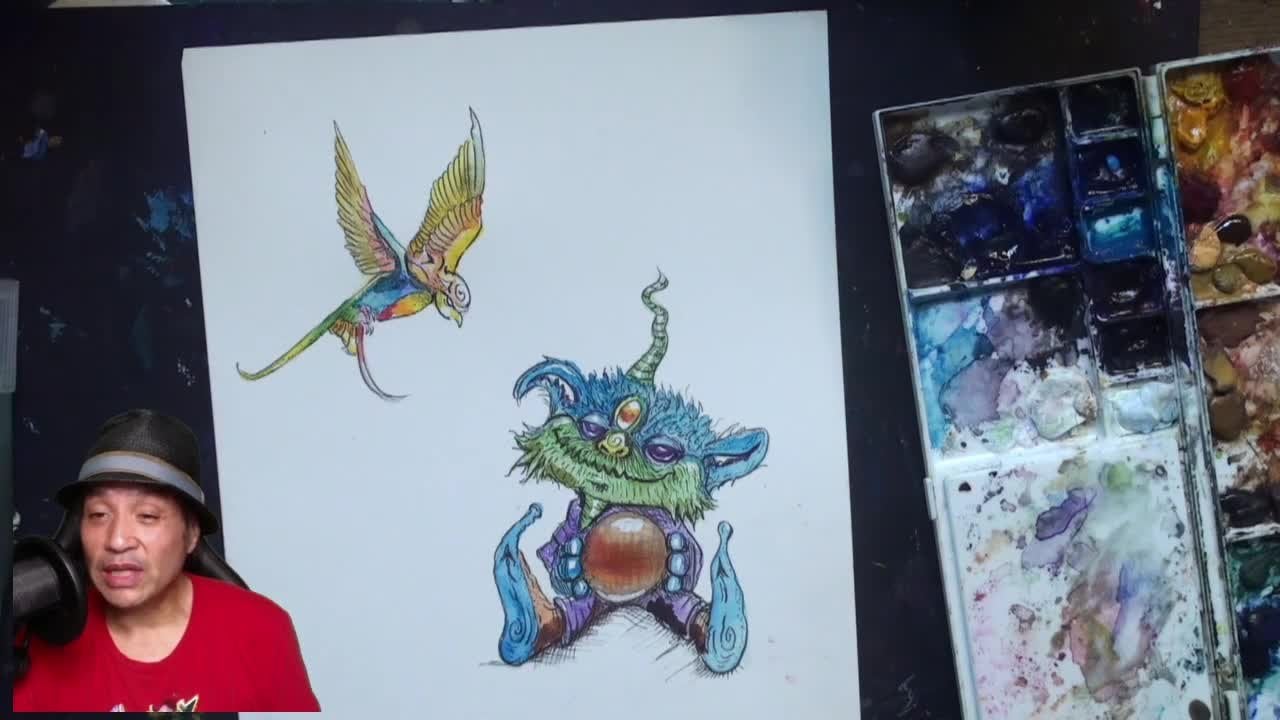
up on the back is actually one of my original characters that is in one of my stories. So just wanted to show you how you can construct your own
tattoos or drag or dragging, and then give its
own personality and really pay attention
to the features. And then you can
redraw them again and again and
employment his story and this creature is
called hue more humor. And he's a real fun tattoo
and reasonably drew them on a huge panel and
just painted them in a loosely sketch pain and it was really
happy with them. So I rendered him and
drew them all out. And here he is again. What you do to keep it on what's called on
model is just always remember she's features in where the placement of all what
type of horns he has, how many spikes hat on it where his story stone is placed. His demeanor, his cheeks, one of his big things is huge
cheeks because he's funny. And you can see I
just once again, I basically employ the very basic drawing
techniques of parallel lines. How to construct that snout, the different kinds of
nodes I'm going to use. Then since I model a lot
of my tattoo after dogs, they have a split mouth
just like a dog or a cat. That wouldn't be specifically
employed in a dragon. But that's something
I decided to do. A lot of times. A lot of the features
that I choose will also be employed to
show form and contour. And so I usually like a
lot of times to put mask, just like dogs have markings around their eyes
are a little masks. I use a lot of those
lines to show the farm. Because what's
important when you show a tattoo or dragging from
the front view is he really show that it has a
snout because as humans we don't have really that
big old muzzle, that snout. We have these little
receding lines that show our mouth is round, but like a dog or
drag or a tattoo. You got to show that it has around snout in
front of his mouth. So a lot of times I'll
use a lot of markings are lines to basically show that form and I'll make
them in that form. So now I'm just
showing what I do. I sketch all that originated
with a ballpoint pen. Now I'm using my zebra. It's not like a lot of
those other ballpoint. Zebra is actually a
drawing manga, anime pen. Basically it has a
synthetic brush tip, which means it doesn't
have the individual hairs, but it has a synthetic
plastic brushes that I can flick and bend. And so it gives
affects like a brush. And I'm just going back
now and putting in the refined lines and still leave a lot of
suggestion lines in there. But I know I'm headed
toward the acrylic. So any of the lines
I get in the way, the clarity of the image
or the illustration. I will use the acrylics too, opaque legal over it. But right now you can see how I really got this character going, the musical tattoo
with his headphones and dilute them in and
after the ballpoint, I've figured out all the form what is shaping
the illustration. So definitely with
the zebra analysis, just bringing the zebra back into basically sharpen
all the details and bringing out
the illustration. I also will do the first pass to basically get the
drawing so it's punching and it's fully there. It's illustrated. The second pass, I will go
back and start darkening the lines which brings out
the tattoo or the character, the creature, even war. At this point, I'm working in what's called
composition mode. I'm not just concentrated
on one of the to2. I'm bouncing all over
the hat to kind of just see the competition
composition come forward. Now the competition of the comp, composition come forward. It's a lot like painting now, looking at the overall
composition of the hat and how it appeals. I have this on speed
paint and actually because I like to really
enjoy the process. So you do the inking process and the best part where you
started into define the actual lines
and not just you suggestions and sketchiness and get the drawing ready to
be colored with acrylics. This last video is really short. I just threw it in
because I started the coloring process
and I did in ink. Just going to talk a little
bit about why I'm doing this certain things
because I did not fully color in it yet. But definitely this is the
really exciting part of the process is when you've had you gone from the basics
of your construction, parallel lines in
your basic shapes and angles and your perspective,
and your proportions. And you have your
fantastical tattoos on your drawing surface, on your canvas, or
in this case a hat. So it gets the area exciting. And I'm basically just
setting it all up now to paint more values and shadows I can punch in right now to define
what's going on. And so a lot of it doesn't
get lost when I'm painting. And getting all acrylic. I call it critically. When acrylics gets too mushy and you don't do it in sessions. I will see you over
in third video. It's a short one. You got your drawn and
definitely go back to the first video and this
video and get your style down and employed those
basics I showed you to get your tattoos sale and
free in this world. So I'll see you over in
the last video piece.
4. Slight Coloring on Hat: Welcome back to the final video. And this one is just
slightly short. And I'm finishing
off once again, really a lot of the values. So I'm really
concentrated on polices where the illustration
could get lost. Like a lot of times, fingers, hands, what are
called the whips. I didn't really show you in the drawing process how to
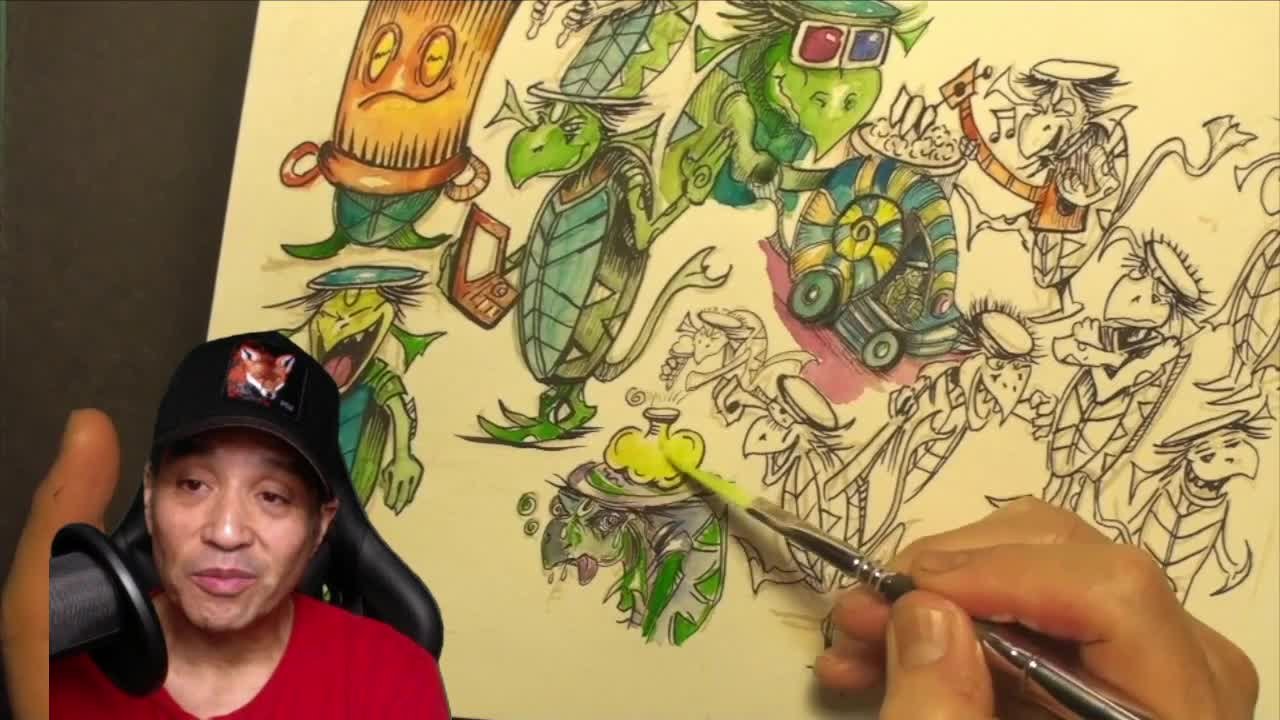
do whips on the top Sue. But that's a major creature
feature of the tattoo. I'm looking at it and
I got my ink already. I loved these Escher brush pens, colored brush pens,
they have pigment ink, which means the
ink will not fade. And it's just a quick way of like start to render where I'm gonna put a lot
of the color and of course, I'm calling right now to put
a lot of form and the orbs. And so you can see what color with kind of contour
lines and shading, which gives them form
and so they look 3D. Now, I thought I'd also start to work on little bit
the part that I know from my experience
sometimes will get lost new illustration, like I was saying, because
either illustrations getting too crowded and I
didn't leave enough space, or just really fine details that you got to
pay attention to. Make sure you preserve
enough for the highlight and everything in there so you can articulate the
viewer current, articulate what's going on. Especially in
fantastical drawings. Because fantastical you're
always pushing the limit, especially my
drawings right here. This is neither a weapon or an actual
paintbrush or a pen. It's some type of magical or
Harry Potter one paintbrush. So just got to make sure it articulates so people can
be confused what it is, but they can open their wonder
and their imagination in the storyworld and curiosity
and figure out what it is. Then showing right here
with this purple brush pen. How easy it is to use watercolor techniques
and save a lot of the highlights on these
headphones in rendering really quick and look really powerful. Punch and pop, pop. I think I switched
to another color just to start the
coloring process. But a lot of what I'm
doing right now is really starting thinking about when I do enter the coloring process, what types of color
theorem gonna apply. So the figures pop out
of the background and the background
gives a good stage for the characters
and the creatures. Have a yellow right now. And so I'm experimenting
a little bit with color theory and what
could be yellow and red and the background
will be blue, so I have enough contrast, so the hat really pots. I of course always
love rendering the orbs and the shiny things. Part of this is doing
my art venture. And once again, I
define art venture of anything that I take you through in my classes
on Skillshare, I want you to have
a good time and I want you to be successful. And that's why I tried
to keep them really basic and tried to make them to step-by-step because it is drawn in painting
from your imagination. And at the ultimate
level of Gettier, to love Imam, you have to love
doing it and do it often. Get frustrated, too much. Fine mediums that really fit the subject
you want to draw. And then take it
to the next level. But always have fun. Always feel you
accomplish something. And thank you all
for watching this. My drawing process and of
course leave any more comments and I will address them
at home my classes down. Thank you all for farm. You come along for the journey. Makes sure you tell others
and you share this. Go deep into my catalog
and I will keep continue, come back here and
bring you more and more of the
Skillshare classes. Thank you Skillshare
for all you do. And most of all, thank you the
incredible community here. And I'll see you soon. Thanks again for
taking the class.
 Ipaintcreatures . poet painter illustrator and storyteller, drawing and painting from the poetic imagination