Transcripts
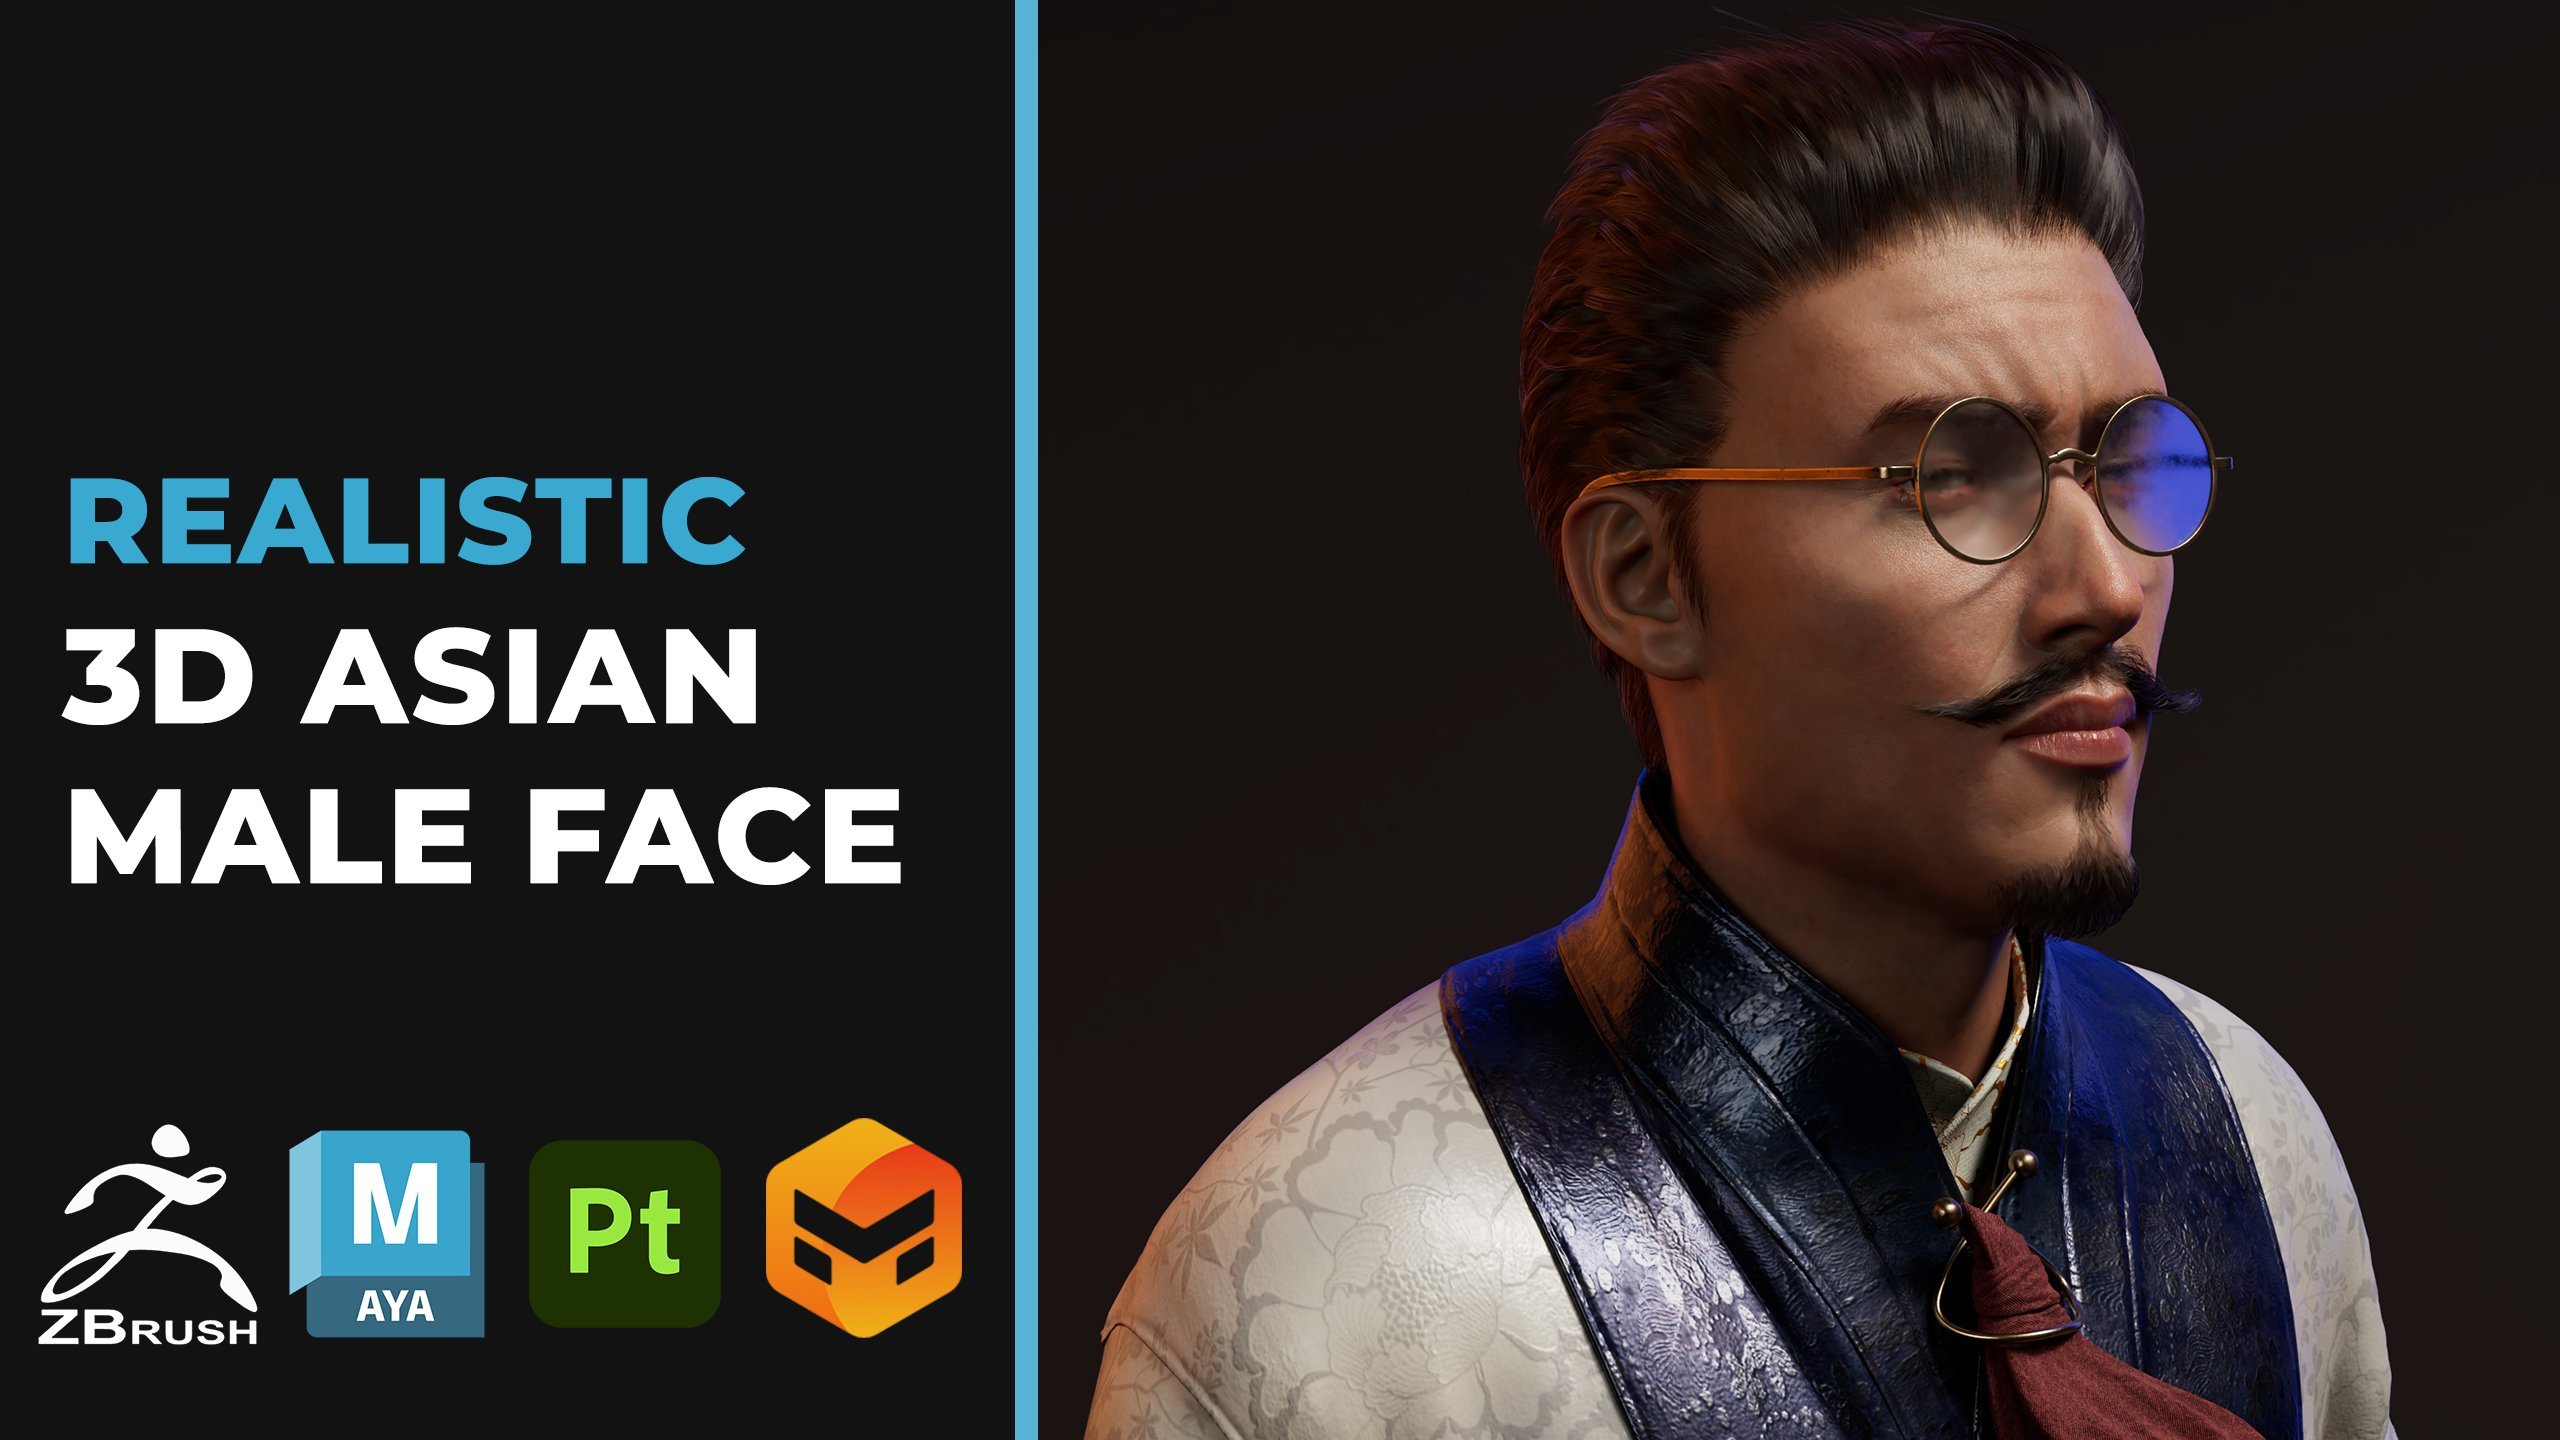
1. SKILLSHARE AFRICAN WARRIOR PROMO VID: Ever wondered how realistic
VFX game characters are made. My name is Kelechi Tango John, and I have been a three D character artist for
about seven years. I have worked for TV shows, movie agencies, and three
D animation studios. Currently, I'm working as a freelancer character
artist and a TD tutor. You'll be able to create realistic cred African male
warrior character design utilizing industry standard
tools like Orthodex Maya, Maxon Zbrush, Marvelous
Designer, homosetTubag, Adobe sbtanpinter, NexGen hair, and also rendering
in Arnold render. By the end of this tutorial, you will build the confidence
you need to create your own realistic believable
looking character. Well, now, what would you
learn in this tutorial? Pro creation in Maya, ven rapping in Maya. Sculpting male
anatomy in Zbrush, baking maps in Zbrush, garment creation in Marvelous
Designer, texturing skin, fabric, metal, and leather, realistic air creation
in XGen formya and look development in Arnold Formya.
What is this course for? I have designed this course for intermediate level
to expert level. Want to model eye
catching looking, production ready
male characters, but they struggle to get it because they don't
find a tutorial, which is step by step, no
fast forward, no skip. I'm coming from a
production artist who is doing this for years. Because it's also for
artists who want to speed up their workflow and learn
industry proven techniques. If you want to model
realistic characters using util or utilizing industry standard softwares
like Orthodex Maya, Maxon Zbrush,
Marvelous Designer, mosetTb and adopt Softan spina. Join me now and take your
skills to the next level. Don't forget that investing in yourself will pay for
the rest of your life. Hope to see you in this course.
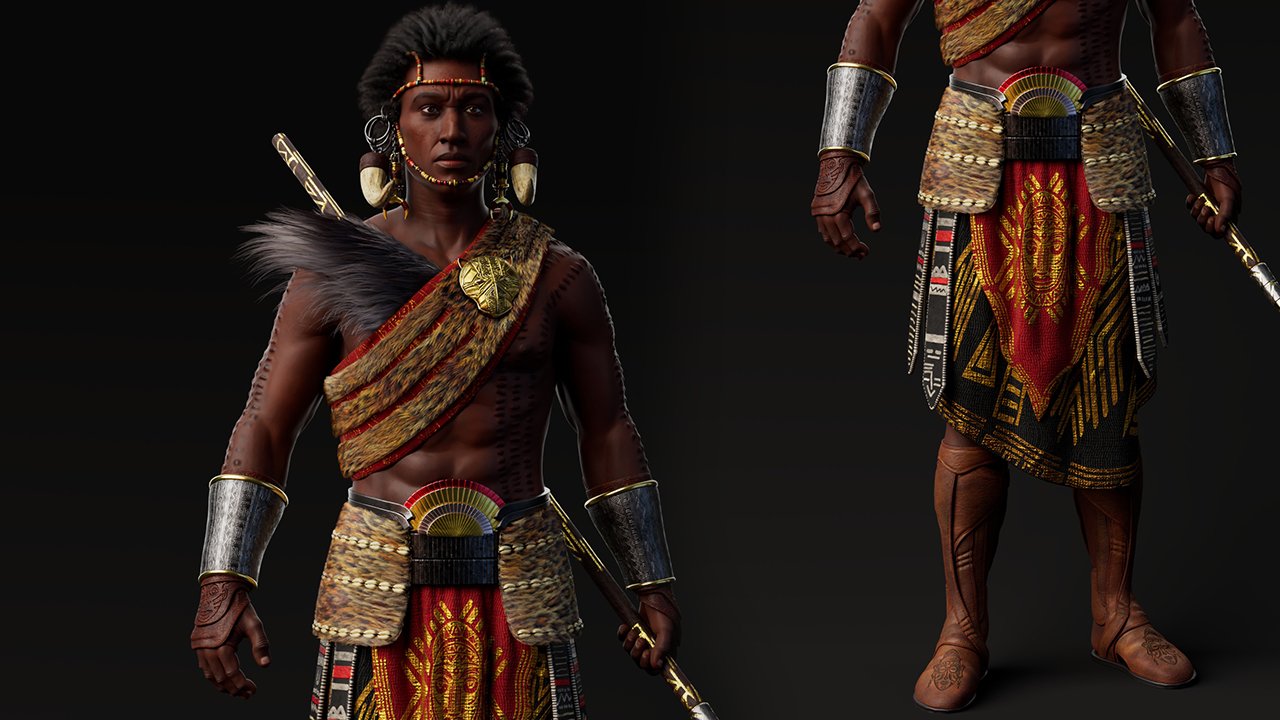
2. 01 Gathering References: Hey, guys. So in this tutorial, we're going to be
working on creating this African warrior
character in here. So this male warrior
character in here. So we're gonna be doing
this from start to finish. But we're going to
be starting for the main character,
for the body, we're going to be starting
with a base mesh, and for the most part, every other thing is going
to be created from scratch, except for the base mesh, we're going to be using which is just going to be the body
and then the eyes in there. So yeah, so now
before I kind of, I'm just going to show you guys my own thought process before starting any character
design work. Usually the first step would be definitely definitely to gather more references as
possible because we can't just work with just
this reference in here even though this
is kind of good enough, but we still need more realistic references to
actually kind of help. That's why I have
two boards in here. So one reference board contains
references for anatomy, but for the head, the hi, the body in general, actually, body in general, so so I already saved out some screenshot
that we're going to be using kind of create
and get the body to look anatomically correct
as much as possible. Yeah, and then aside from
that, that's just by the side. I also have, like,
another board. Let me increase this
board a bit more. So for this particular board, I have reference that kind
of relates to the head, just ply the face
we're going to be using as a reference
to scope this. As much as this is good enough, we still need something
that's a bit more definitive in terms of real
world proportions in there, and what better way to
do that than to use an actual human head to better get better to get a better illustration
of that anatomically, so for that, I have
this character in here. This is I think Dancing
Idris, I believe. That should be his name.
So this is dam scene. He has a face that
resonates more with a character reference facing it. That's why I'm
using him instead. I look some
similarities in there, maybe not entirely, but at least something close
enough to actually work. Maybe just maybe the character artist or the concept artist actually uses face as a reference kind of
grid concept, maybe. But anyway, that
just by the side, so let's keep that in mind. The idea is to look
for something quite close to the reference, so you can actually
disputed concept product, so you can actually
scope something as realistic as possible using
real world references. So aside from that, also, too, we also have some parts and
pieces going on in here, too, like for example,
a good example is for Glast beyond the head. A good example is
beating around the head. So looking at the building
now, you might think, Okay, maybe they actually
metal buildings, but actually, they're not. They're actually just
marble building in here. So I have also another
reference that kind of helps. I think the reference are
not exactly it though, but yeah, it gives a good idea as to
what they actually are. So this is similar kind of
kind of building around this. But in size or yes, in actual size of the building and ship also
they are quite different. You can see some bit longer, you can see some a bit shorter. Okay? So longer, some shorter. So we're going to kind of create variations in there by creating
longer and shorter bits. So let's see. Yeah, this is an
interesting one. I kind of give this an idea, especially on this lower part. I can see some because the
sizes of B is quite different. Solar and cylindrical shape, some more like some
more polygonal shape. So we're going to be using
that as reference, yeah. So that's just to
give you an idea as to the loading references
needed for your scope. So aside from that, also, too, I sparkler one is
completely different. So it's a completely
different one. This we're going to be creating some say metallic because
it actually looks metallic, more like good actually, we're going to create
here also some building. We're actually going to
use some of the raffle. I is a very good one in here. It's a very, very good one for the building across the face. See different sizes and
coloring in there also too. That's one thing
to keep in mind. Then this we can
obviously see almost like kind of jaguar kind of face with some interesting patterns
going across them, which are going to
create also, too. Then we have another
reference for the feathered. But for me personally, this actually looks like a if I'm pronouncing
that correctly, do, but a skunk or a skunk
animal, that kind of stinks, that kind of stinks
a load produces some gas subtan scales of
preys around that thing. I'm going to using that
as a reference for this. In one actually using that, but it gives us a good idea that's okay maybe they actually use iskunk skin for this
with all the hairs in here. That's one aspect
to that also too. I'm basically just trying to
break down the concept for you guys understand
my thought process before going to search
for references online. And also on this also, I think we can also create
a variation by creating some paint across his face
also to actually help. I go to give him a
bit more character, like another variant of
him also. Moving on. So we have some
animal skin in here. So for that, I also add some animal skin
that kind of helps. So this will actually
help in getting proper for detainea and also texture painting details
also too in there. So by painting the textures, maybe you can actually
use textos online, but that is completely anyway
we actually work actually. You can actually pen
this in or we can use textual references
that we import in. This reference board is not
my final reference board also too because
while we continue sculpting and working
on this download some model additional
reference is bring in but I'm going to be providing
this fight for you guys to actually all your
files to actually use project files for this
character in here, so just to get there, just to get you guys
in knowledge of that. So I'm asking we're
going to be using this also two references
for this to kind of get the four s in
here because in here, we currently see the four
in here, so that's fine. Then this might look like a
meta piece, but it's not. It's actually cowry sine. So let's see if I have,
I believe I should have a cow co reference in here. So yeah, so this is an example of how a cowry should
should look like. So basically, around
this spar these are kind of coales going
across the entire meal. Basically, you need to use objects that relates more
to the African culture. That's basically the idea for guarding reference for this. Also moving on, so you can
see some scarring in here. So wens in and
create or download some scar references also too that we can actually
use kind of get this as accurate as
we possibly can, too. So all the references
in here are kind of selected individually for to kind of get better realistic
representation of what we have on this
concept in here. Now for this, I couldn't really find maybe I need to do some more searches
for this, though. I was thinking to do some
more searches for this to kind of find
exactly what this is. So you can have a reword reference that
kind of represents that you can actually use to kind of scope
this improperly. Then for despair, let me
get this to the side. For the pay, we already know
this is like a meta piece, and this is a wooden
piece so that shouldn't be too difficult to know. So yeah, okay, all that
sins in for the arm now, in here, the concept artist
kind of just created something that looks just
generic like a flat surface. In here, we just lines going
across it, but in reality, using reword references for
this, they actually tubes, actually individual
tubes or kind of elox tube, most likely, yes, definitely an elox tube around this or just normal rounded
tubes going across. So you can see more or less
like biding going across these deary spheres or tubes, actually, or should we call it should should we call it donut tubes going across
this all the way? So we're going to
be using this also to kind of layer all of this on top so that give it
the more realistic look. Then we have a we have a
leather band going across this, leather bond, and a
leather glove also. So the concept
artist kind of added some additional or bond
looking detail in here. Like for example, this leather glove in here that's
not entirely complete. Then for the fit, we definitely need to grab some
reference for this also, too to help yeah, but
for the most part, for the most part
for the most part, we have good reference
in here to begin with. So that's just Matos process for downloading
references in here. We're also going to get
some other references also to kind of use for this. So as we move on, we'll keep adding
more references to our collection
and to our body, so just to get this
looking more realistic. All right? So I'll see you guys in next lesson
where we jump into my begin to prepare our mesh for put into Zbrush.
Bye for now.
3. 02 Importing Base Meshes to Zbrush: Okay, welcome bad guys. So now we are in
Maya trying to prep our base mesh to spot to Zbrush. Okay? So now, there are a few things to kind of
keep in mind in here. So on those things, one, the UVs and to see if the base mesh is good enough to kind of work with.
So let's do that. Let's do that real quick, but
let me just show you guys. So if you go to your
workspace, send this to UV. So I have a pack of base
mesh I usually use. So this I've used before. So we already have UVs laid out now zero to
one space in here, which is precisely what I want. Just to keep you
guys in perspective, this is a it's like a base mesh you
got in from meta human. So that's why the name in
here is Meta human base mesh. So just to keep that in mind, and I took the liberty of
arranging all of my UVs in zero to one space cause I'm not going to be
working with you Dems. I don't want this to be
zero to one space in here, so yeah, moving on, so one other important
thing to keep in mind before exporting this is
to let me close this out, set this workspace to
modeling standard. All right. So set it back
to modeling standard. And then one other thing I like to do is to check
our camera setup. But before we do that, let's just just show you guys
the topology for this. Let's use a more darker
material by type history. This is a more darker
shade of material, so you can see the topology
for this bit properly. For the most part, we have
good topology around this. I mean, come on. Obviously, this is
from meta humans, so I believe the topology should be good enough
for character designs. So that's why I'm using
this. So for that all good. So yeah, all good for that. So the next thing
would be to kind of check our camera in here. So we just kind of set this to a more realistic
camera. Setting. So once we're sculpting
this in kind of using the realistic word
reference and rendering this, everything should be matching the camera across each platform, we're going to be using,
for Zbrush and Softanpnter. So let's start by
matching the camera and we are using
reword skill for this. So let's go over to a
perspective camera and I'm going to set this focal length
to 85 millimeter length. Zero on 85 millimeter
length for this. So this is like the camera setup I usually like using
for the most part, for most of my
characters, actually. So this should be just fine. So with that setup now, so let me just show you
guys one of that to the eye so I'm going to use
my own eye mesh for this. So I'm just going to
let me get this done, and I'm going to
explain a few of. There's not much
explanation in here. But let's start by isolating hiding this control edge to hide the miniscus
and the iris. So this is not just the
outer shell of the eye. Let me solo this. This is just basically the outer edge shell of
the eye in here. Then I'll hide that. Then we have let
me put this down. So let me work sequentially. Let me explain
sequentially in here. And then we have the
iris so the iris is, that's just the iris, with
some pattern in here. I already have premade
textures for this. We're going to just
use and then texture out a brown eye instead
of stan spinter. I have the normal
map that comes with this and displacement
map also too. That's going to where gets good realistic eyes out of this. I'm going to get that set
this up too, very important. Then we have the
miniscus in here. The miniscus is basically
the set that underneath the eye I think I can find let me shift H to
bring this back out. Let me show you guys a reference for this
that should help. If you look at your eye, you
notice that there's like a water line underneath
your underneath your eye. So obviously the
eye is a bit wet. So once the eye your
eyes supposed to be wet most of the time
because when you have dry eyes begin to
have bloory vision. So your eyes is usually wet. And that's when you
close your eyelid, kind of creates
another extra level of coating of
wetness around that. So the wetness kind of
settles just below the eye. The wetness begins to
settle just below the eye. So there's a miniscus
in here that actually illustrates the
wetness underneath the eye. Was it going to eventually
kind of come back in there and then modify
that a bit properly, but just to get you guys to understand
why that is in there. So yeah, that's fine. So I'm going to make
sure you save your file. Make sure you save your
file to correct directory. I already have my
file already saved. So the next thing I'm
going to do now is to export this out individually. But before I do that, I'm going to export all
of this and then save in project files for you
guys to actually work with. Okay, so I'm selecting
all of this, and I'm just going to export
selection. Spot selection. Okay, paste this in the correct fold the
way it should be. So any, I'm just going
to create a new folder, projects project pise so I just want to open this and
then save this as an FBX and just name this to base meshes. All right. That's fine. But
now to export to Zbrush, you need to export them
out as individual bits. So let's start with this. Let's start with this
in here and then let's go to modify
freeze transformation. Okay, no transformation
in there. Yeah, I think, that's fine. Okay, do that. So this should be
where it should be, is fine, select this. I'll go over to File
export selection. So I'm going to
create a new folder. I'm going to name this
folder Z Import. Z inputs. Any file I'm going to be
important for Maya to Zbrush, is going to be in this folder.
So let's open this up. I want you to change
this from FBX to OBJ. I'm going to rename this two. Let me just name this to
Idris Idris Yeah, it is body. It is body, it should be fine. And I also need to kind of rename it also in here, not yet. Is to be spot back into
Maya we're going to rename. So this at default, I'll go over to the eyes do
outer eye spot selection. So this is going to be
outer eye or this cochlea, it showed whichever
word you prefer to use. So let me just name
it outer eye. Saved. Let's go to the Iris,
export this out. So this is the Iris.
Okay, exports. Then let's go to the miniscus. I'm just going to
copy the name for this and export that as an OBG I'm just going
to paste the name in there then export selection. All right, that's fine. So
we don't exports in now, we need to put all of
this in one single group, so I'm not going to drag
this I and drop this inside of this group and
rename this to base mesh. All right? That's
fine. Save this again. So now let's open up Zbrush and then import our mesh in there. Okay, so inside of Zbrush,
let's close Lightbox. And then, let's open
Lightbox, actually. I always like to start
with the default project. Let's click on this
default project. Open this up, and
then we can now import meshes on top of this. So with this police
past selected and go to Imports, let's imports. Let me first past
my directory in here because T wants to use
the same directory for this. So it should be imports, copy these five parts. Press the five parts in here. Let's start with the body. I body. Then let's go append. Because to apply or to
bring in meshes in here, we need to actually
use the append. So let's do the append in here. So fair, select
fair. Select this. Okay? It should be fine. Then I'll go over and
then click on Imports. Then let's do the Iris. Let's done append
again. The police fair. Okay, Imports, let's
do the miniscus. Append sphere, you can actually use any
of those shape in there. It doesn't have to
be police are so. Olan select this spare
Imports out eye. All right, so not as in there. So one thing we like to do
before ending this chapter, I would like to show you guys the camera setup
new to using here. So like I said
before, let's kind of march the camera setup
across each platform. So you can get something close
to what we already have. So let me say this this way, I'll go over to documents. No, not document on the draw, Sed this to 85
millimeter length. Draw. The one that I like to do is to
adjust the crow factor, so you can actually properly
match that of Maya. So to do that, I'm just going to come
in here and set this to four. Four usually works. So we need to test this out. So to test this out, let me
change my interface. Okay? Leis bling material,
set this to the side. Okay? Come in close on the head. So it's the head going to
use kind of measure this. So then I'll go back to Maya. Let's go to our front view, outside the front
view around here. Let's collar this. So we
have this just completely visible in our view around
here, get this closer. Then I'll go back to Zbrush. Space bar, take
down the draw size. Let's can see through, and we'll try to match our head with that with one
inside of Maya, so you can see how we kind of accurately match accurately
matching both camera, kind of a bit more precisely. So I I should, let me just show you guys
should do feed this through. You can see very soft
transition across this is not too
aggressive actually so. You can see it for
the most part, kind of matching of magic camera, at least, quite
closely, quite closely. So that's just how you
kind of test to know if you're matching the camera
a bit more accurately. So yeah, with that
out of the way, we'll just move on
to the next lesson. So the next lesson, there are a few things I would like you guys to kind of understand in my thought
process of sculpting before kind of go in and then start doing proper
sculpting details in here using the references
we already have, so I'll see you guys in the
next lesson bye for now.
4. 03 Directional Sculpting In Zbrush: Okay, welcome, bad guys. So in the previous tutor, we kind of imported our
character into zebrush. Okay, let me temporarily
hide the minuscles for now. All right? So now, imported this to z brush. So just before I start
sculpting on this, I would like to just kind of run through some of
the brushes I use and then some should we call it subtle understanding you should have at the
back of your mind, why sculpting on here that
would actually help by a lot. So we kind of get quite
similar results in here. So even though we
don't get precise results in here, at least, you kind of be getting
something similar and something good enough
also to work with. There's actually nothing too
fancy just to show you guys some transitional flow and directional flow why
sculpting on your model. So I'm going to go to
the cylinder in here. Let's just open a new canvas
in here and I'm going to bring in a rather
upend sphere. Okay? And I'm going to hide
this cylinder for now. Let's see delete this Can
let's work with Joseph Fine, then I'll go to my
sub too and I'm going to subdivide this some more. Yeah, I think 2 million
should be just fine for this. So let's go over. So if you want to kind of
bring out this layout in here, you just need to go all the
way here. Let's go back. So just load next
interface layout. So I always like default, so I'm kind of
familiar with default. I'm not used to customizing
my entire workspace though customizing
your entire workpace actually helps kind
of work a bit faster, but I'm quite comfortable
with the default. So let's continue so
let me set this to the front view using this
Gizmo and E plane in here, kind of know where
my front view is. I'm going to click on this
stream dynamic and I'll set this to them standard brush. I'll go to my clay brush. So I'm going to increase
my broush size, space bar, increase this. Alternatively, you can hit on the keyboard and
increase the brow size. So I'm going to create something
like, so let's do one. Let's do another one in here. Let's do another one in here. So let's do one that comes
across this way, right? So basically, basically, what I'm trying
to explain to you here, is kind of transitional and directional scoptin
flow in here. So what I'm going
to do is to go over to my smooth so down shift
to go to your smooth brush. Let's take down the intensity. So usually let's let me
let's do another one, yeah, another one, yeah. Okay. So usually for beginners, if they want kind of scopes
or smooth things in here, or maybe when you
create lumps of additional flesh
across their model depending on the kind of
model you're working on. They tend to just do, let's say just smoothing
things out, for example, they tend to just let me
increase this a bit more. They tend to just
smooth random relax. So at least for the most part, you want to avoid smoothing in this direction like so.
You want to avoid that. Why? Because soot
in this direction doesn't really
Smoothing randomly doesn't really give you that
soft flow around your mesh. Let me do this and
do this smooth. Let's go to lower
subdivision level Shift D. You go to lower
subdivision level, and let's repeat that again. So you can see I'm
smoothing this randomly. And I noticed in here,
if you come in here, you notice on this part, this part is more smooter
than this part in here. So on this part you can see
some edge detail in here. If I use my max
brush on this part, you can see some
edge detail in here. But on this part, you
can't see this edge detail anymore in here because we
were smoothing randomly. So you won't go to avoid
smoothing in that fashion. So if you aren't going
to be very conscious of smoothing any
particular direction, depending on the Look
you're going for. Let's say, for example,
now it's going to have soft edge here and another
soft edge around here. Basically, what I'm going to
do is to hold down shift, and I'm just going to smooth
in that direction instead, smooth in this
direction instead. So I know precisely what I have the mental picture in my head of what or how I want
this to look like. So just to smooth
out full length a particular distinctive
directionality to it. So in here, I was
going horizontal. Then in here, I'll
be like, Okay, let's say, I want to kind of get some soft edge around this part. I won't just go and
then smooth randomly, so that will just be where
you can see we are now having some lumps across
this which in some cases, you might actually need
smoothing randomly, do that. So you want to kind of smooth with directionality in mind. So I'm going to smooth
this vertically instead, I'm going to get a better flow around this because
I'm following the direction of how that
surface actually is. So getting a nice blend in here. You can also smooth
this some more. So that just one thing
to keep in mind. Also, grating. Let's go back to the
cteniclybo brush. Grating additional lumps of flesh or additional
flesh in here. You also want to be mindful of the directionality
of it also, too. Let's say, for example, let's drag this all the way
down and clear this out. Let's say you want to
create some nose in here. I'm going to increase
this. I'm going to start by let's know
symmetry for this. Let's say we're creating a nose, we know the nose has a
particular directionality to it. Let's say we're
creating this for now and then I will just
leave this part up a little. Then I would like to create something that goes
across horizontally. Nod that back to
declare or brush, and I'll just go
across this way. Go across this way. Just for example, this is
not a precise nose though, but just give guy an idea. So if let's say I define
this nose structure a bit more and make it feel
more like nose in here. Now, what I'm going
to do is that I'm not going to just
smooth randomly, just go in and then just do
something rough like this. You don't avoid that
because now you can see irregularities and
irregularities and then bumps across the surface. Avoid that because you notice why creating
this lump of flesh, I was creating that
with directionality in mind. Let me do this. If I'm also smoothing this, I need to smooth this with also directionality
in mind also. If I come down here and I'm just going to do a blend smooth, keeping directionality in mind, or do this horizontally. With precision in mind, so now you can see
now we get better, smooth out rounded surface instead to work with
instead of just smoothing randomly or creating or creating additional lumps of flesh
in a chaotic manner. So that's one thing to kind
of keep in mind because while I'm working on can
delete this now, Let's go back to
the original five. While I'm working on this,
each particular region or surface has a particular
directionality to it in form of a shape, C shape, rectangular shape, moving round A shape also too so you want to keep that
in mind and then make sure you get your hand flowing
in that same direction. For example, now the
deltoid deltoid in here, you can notice in here that the directionality is flowing. Let me select that to
select that sub to. Directonality is going to
flow in down this way, slanted down this way. So gives me an idea
that if I'm to add if I want to add
additional flesh to this, I'm going to respect the
detoid shape and then create something that flows in that same direction that
flows in that same direction. Then when I'm smoothing that, I'll smooth that also
in the same direction also to just to get something that flows in that direction. That is just something to
actually keep in mind. Very, very, very
important, very important. So I figured I should
get that out of the way, so you guys will get
an understanding as to how I kind
of move my brush with directionality
in mind to get a more clean surface because even though we might
be doing the same thing, it's important to kind of
flow in the same direction, so we get quite similar results. All right, so because this is one of the issues I kind of
face while starting out, creating characters
and sculpting on surfaces because I kind
of get lumps everywhere. I keep wondering. Where are
those lumps coming from? I'm doing exactly what the Gyorizing but I keep getting
lumps across my surface. It was because I
was not doing it in the actual directionality
of that particular region. So yeah, that's so
in the next lesson, we're going to start proper
and then start using anti anatomical
references and then start adding some more more structure. So this are character that's going to get this to look just like a reference image. So I'll see you guys in the
next lesson. Bye for now.
5. 04 Torso height In Zbrush: Hello, welcome, but guys. So in the previous
lesson we kind of worked on and we talked on also kind of showing you guys how to kind of sculpt directional flows and smooth in
directionally, also, too. So now we're going to jump
right into the sculpt proper. So usually for me, I like to at least for a full
body character like this. I always like to start by creating the entire proportions
for the body first. Once I get the proportions for the body as accurately as I can, then I can now work on the head. So that's precisely what we're
going to do in here also. So let's get right into it. I will select the base body, so this is Idri's body. Also, make sure your
file is also saved. I've saved this as Idri's body, just to let you guys know
that I saved up already. I'm going to select Idri's body. So I would like to increase the subdivision
level all the way to the S subdivision level I would possibly need
for this character. So when I'm adding
layers in here, I don't need to up this
subdivision level anymore. Let's do that. I'll
go over to geometry. Then I'll keep subdividing this. After subdividing
this, I'm going to test it out to be sure
if it's enough for us to work with and
complete this Control D, control D to add more
subdivision levels to this. So I'm going to go something roughly around one
more should be fine. One more should be fine
actually for this. So 55 million should
be fine for this. So I've used this before
and 55 million was a good number to
kind of use for this to add all the necessary
details I need for this. So let's test this out. So usually, I like
to test this out with using some simple Alpha on the face just to be sure if the resolution is enough to
work with for the phase. So that's what I'm
going to do now. I'll go over and
select standout brush. Then on the light box, I'll go over to Alpha. Then I have a texture XYZ, 175 Alpha in here to
us, XYZ, 175 Alpha. I'll also pull this up.
I think I can just use. Let me try two on here. Okay. And I'll just get close. Then it should be on drug rec I'll just draw this out here. Okay. Then I'll get close to see if it's kind of ding the
detail properly, it is. So it's ding this detail properly fashion
increase the intensity, and I do this around there. So I'll just check the closed of if it owes the detail a bit
more, yes it does. So I will do that. I do that also. Okay. Set this back to dots. Set this back to one,
then we should be fine. So now I sub I can go in and then create
layers for this now. So let's go over to layers. Scroll down, and then I'll
add click on this plus sign. And I'm going to name
the body primary forms. Let's use all caps for
this. There is no caps for this body primary forms. Okay. So now we've added
that in there. I would go to the lowest
subdivision level. So I would need to then
put this the side. This should be here,
and this should be. Okay? I'm going to open up
my geometry because I'm going to be dialing
back and forth between each subdivision
level in here. I'll do that. So I'm going to go to the lowest
subdivision level. I'll drag this all the way to the lowest subdivision level for this. All right. So one thing I like
to do is to inflate, especially when it has
a bigger body parts. So I would like to inflate the arms more so let's
hold control side. Hold on control,
select Mark's lasso. She pull up here actually. I think Opia should
be fine. All right. Then around here should be fine. Okay. So that should
be fine. Then I would. What I'm going to do
right now is just to mark out the arm. So let's make your
symmetry t down the seas. So let's mark the arm around. Let's check the back.
Mark this part also. Undo that. I don't want
to mark that part. Let's do this from Let's turn this on the side and mark this that in. Alright?
This is fine. This will work
just fine. I think the brightness for my skin
tone is just way too bright. Let's dig this down
a little bit more, so it's not too bright. I'm glad it should be fine.
And I will invert this. I would blow out the mask all
down control and then tap on the surface to blow
out the edge of the mass. And I'll go down to deformation that
deformation, get this in. I'm going to do an inflate. So let's go towards
the positive. I can see obviously this
is way too extreme. We just need just a
very tiny amount, actually. Still too extreme. Okay. Let's see. Let's see if this is fine. No, this is just way too much. So I'm going to type in
actual values in there. Let's do a value of one. There's the value
of one in there. Okay, one seems like a good one. At least most especially for the fingers because
the fingers we had in here was way too slim.
So it was way too slim. So I think this should be
fine. I should be fine. Just check in the arm again. Let's do a little bit more,
but this time around, I'm going to max out the wrist with the
fingers, blow this out. Then let's inflate this again. I'll use the value of one again. Right, so this is
just going to add an overall mass to the arm,
just a little bit more. That should be fine and I'm
going to clear that out. We should have a bit
bigger arms in here, but we need to also
compensate for it also for the body type.
We'll do that also. But before that, let
me check my character. This my character has a
bit more height to him, let me reduce this slightly
taller in height so I would select This part
mark this part out. Okay, go to gizmo,
invert the max, drag this just very little
should be just fine, very, very little should
be just fine, very little. Like, so because it's little adjust meant to make
for the length of this, you're adding extra
inches to this, so you want to be
careful with that. So I'm kind of giving him
a slightly longer torso in here, slightly longer torso. Then I'm going to
max this part out. Tonal symmetry for this. Okay, blow this out a bit
more invert the mats. Okay, and add a littlest
a little bit more also. Just a little bit more
like so should be fine. So it shouldn't
look too extreme. From a distance, so kind
be able to tell if that, Okay, this guy is actually
a tall character, so should be having a slightly longer torso and
then longer legs to him. So we're going to kind
of get that also, too for the um let's get
that also too for the arm. The arm might be slightly thick, but we'll make it work. Let's max this part out, blow the mark the max. Let's get this in
here on the keyboard, rotate this to get this
on the same orientation. Then I'm just going to
move this forward a little bit more like
so, should be fine. No, that was a bit much. And that was slightly
slightly old. So let's see if I
rotate this down. Let's do that instead.
Mark this part. I blow the marks. Over the mask, go back to our Gizmo, old drag this Gizmo around here, do that. All those put the
gizmo around there, set the orientation we
facing this way. Come on. W this here Then I'm just going to rotate
this down slightly. I'm just trying to see if
this is going to work, if the length for
this is actually just at the center of the thigh. Which for the most part, it is. I'm just going to pull this
back to the way it was before and clear this out. So we can continue
on from there.
6. 05 Deltoid And Biceps Sculpt In Zbrush: I Okay, welcome bag, guys. So welcome bag, guys. So in the previous lesson, we worked on extending
this character a bit more, the toeso and then the leg
just to get him look a bit taller in height. So we're going to do
a little bit more, and then just carry
on with that. So I would like to
inflate the I like to inflate the thighs a bit more and inflate the calf
also a bit more. So we also have the ankles
and then the toes also. So we need to inflate
that some muscle. To do that still
on the max lasso, let's select max lasso. Then yes I'm going to
grab all of these parts. I think we can grab
play this out again. Let me grab. Let's grab
this part instead. No. All these parts. Okay? I think we can
grab this part also. Let's grab this part also. Blow the max, invert the max. So basically to
invert the mouth, just down control and then
tap outside on your screen. Then I'll go to the formation. So for this, I'm
going to start by looking at the toes
because I don't want to overextend or over
inflate the toes. So let's go into
the toes inflates. Let's start with
the value of one. Let us find the tools
seems fine now. Those are fine, I'm going to exclude the tools
by maxing it out. Add the max around that part. Blow the max. Okay? Then let's inflate this even more.
There's a value of two. I think a value of
two is a good one. Yeah, value of two
is a good one. Okay. So add some at
least some more thickness to defeat. That's fine. So kind of helps This
kind of helps us work a bit faster in without having to add some flesh
over the entire outin. Tough we're still going to add some more flesh with declare bio brush on the entire
outing, but for now, we have overall proportions with some gradual transition in
between the That's fine. So let's do for the toes
excluding the arms. Okay. I also like to
exclude the neck, also. Let's exclude the
neck out of this. Exclude a bit more of
the neck. Don't do that. Let's do this from
this angle instead. Okay? Then we can add
that back in around here. Okay. Inverting max. Blood this out some
more. Let me do that. I think I'm missing something. Let's exclude this some more. Yeah, this is fine.
Inverting max. Blood this out a
little bit more. The lets done in flits. Okay? Yes, this
is actually fine. This will actually work just
fine. Let's clear this out. Okay. Yeah, so now we kind of added some
more thickness to him. So if we begin to build
on top of this now, we should be in the
right spot because we've added the right amount of
moresomas on top of this. So I'm going to reduce
the smooth intensity, take this down,
and then begin to smooth this part out.
Okay? That's fine. Usually, I like to start
with the so adding some more additional
fleshiness on top of the especially where
we need them to be. So let's go down to ply group. Go down to poly
group and then let's do Shift F. Let's do
poly group with UV. Poly group U should be fine. So down control
shift, select this. Put down control
shift, select this. Put down control shift and
drag selection outside the canvas to get just
this part visible. Okay. I think we can
let's mark this, bring everything back out in vote the mark, blow the mark. I would like to
exclude the ties, exclude this, exclude this also. Let's just get this visible lex. Then I would like to
start with the detoid. I'm going to start with
the detoid in here and get some more
structure in here. Let's do this from the side.
Let's this from the side. We already we already
have the right mass in terms of the overall
proportion for them. So just to add some
fleshiness on top of that. So let's go on
subdivision level higher, drag this down, drag this down. Let me make sure the subdivision
level is shining here. Also you can see the
active point in here, so we know what we
are working on. Okay, enclosed. Let's go and include this
one subivision level higher. So just D on the keyboard to include this one
subltion level higher. Okay. So yeah, now we need to look at realistic anatomical
references in here, so if I go over to, I believe have an
CO chair in here, maybe I should extend
this out a bit more, make it slightly bigger
than it is right now. Okay? So if you look at, let's look for something
that is on, this is work. If you look at this in here, you can see the directional
flow to this coming down, just going downwards instead and connects around these parts. So it kind of connects
around this part in here. So this is not
actually accurate, but you want to keep account also of the actual apples or
character, very important. Keep an account to the actual
apples or re character. This is also another one we can also can also use in here. But if you notice very well, you notice that the deto kind
of folds into the bicept. So that is what we
also have in here for the realistic reference
we're working with in here. Let me just get that
This is it in here. So you can see I kind of fools
into that parts in here, so basically, I'm basically
trying to show you guys the anthemical
accuracy of that. And the more we
kind of blog this in, we will know, Okay, yes, we are doing this as accurately as we need to get it to be so. But using this mi reference, that's a good example, though. Let's blow this out. Let's go back to the Clay Buda brush. Clear Bu Du brush now
will begin to respect the directionality
of it and then just add some more
flesh in there. Okay. For this in. If you notice the
direction I'm using for, this is the directionality I'm using for this is
this directionality in. Yeah. Should show
you guys in here. Okay, so you can see the
fiber details in here. You can see how you can
see how the fiber details kind of folds into
the endpoints. You kind of teasing down here. So that basically what I'm
trying to do also too. Trying to follow the
same directionality. Like I explained initially
that why blocking this in? You want to kind of do this
with directionality in mind. Direct directionality in mind, which is what you
need to kind of get this to look
absolutely right. So yes, keeping that in mind. So let me change
this string dynamic to my dam standard brush. And then I'm going to carve a little bit more depth
around here. Like so. Yes, I'm going to
smooth this down, smooth this down some more. Then we come in here and smooth this down with a low intensity, increase the bros size, smooth this down, smoothes down. So you should you don't want to completely smooth
everything though, but something like this, you should still
have those fbight those fiber details in there, so it should be fine. We're doing this symmetrically, so we can work a bit faster
in here. That's fine. Okay, so moving on moving on. Let's go back to our main
reference. Reference in here. Let's see some interesting
shapes in here school. So let me make sure I create some more
depth around this part so. Let's see some you can
see depth around here. Close to the clad starts
from the clavicalbon, so all the way down
under the armpitel. We need to introduce that also in every de standard brush. Okay? Blend smooth that down. Smooth that down some more. But the depth is in
here a bit small, I'm going to get
that depth in there. Okay. That's fine. We also have a depth just around here with this mass in
here, we have a depth. I'll smooth this down. I don't need to be too obvious,
but still in there. So we're basically
trying to work between getting something soft
and also sharp in here. So another depth in your also. A depth in her also. Okay. Smooth that down. So you just about making
so two changes in there, and then you get really good realistic
result going on in there. So yeah, moving on. Moving on, said this right. So in this bicept bisptin
and just at the tricep also, too, there are some
secondary shapes in there that we need to
keep into account too. Let me show you guys another
reference that should help. Show you guys because I always want to kind
of show you guys a reword anatomical
reference that should be in there before before blocking it in
because it's important to kind of see what is happening
in there before actually adding firstly adding
those structures in there. So in here. So we then it gets in close. So you can see the biceps
with this purple and you can see the triceps as this
yellow at the back in here, so we have a trap piece in here just between
the tricep and the bicep so that
extra piece in here is what we need to kind
of mark out in here now, so to mark that in let me take down this intensity of
mydaM standard brush. Let's kind of get a
marking for that in here, so just going to use the
Dame standard brush, and then we can have the
shape of that in here, so it should be around here. Should be around no, that's way too thick. So somewhere around here. Kind of flows, kind of flows
all the way around here, so so it's always good to kind of use your deme standard
brush, kind of mark that out. So once we are fleshing that in, we're going to
fleshing that in with the right anatomical
reference detail in there. So it's also what we kind of have in here. But
mine is a bit too. I would say mine is a bit too, may be too thick for now. So let's get something
more or less, like, so, something like
that should be fine. So it goes all the
way all the way to all the way to the back
to the price septin, so let's blend smooth this down. So even though we
kind of add that in, we don't want it to be too
I don't want it to be too obvious and then distract my entire distract
the entire shape of this structure in here, so it's just to add that to the dam standards,
blend smooth that down, then go to another move to another model structure and then get that in a bit
more accurately. So I'll go back to let's go back to the echo
chair we have in here. Let's go back to the Echo chair, and then we compare
that to the trapezsmzu. Tricep rather about to tricep so this is
another example in here. Let's look for a side view. So this is a good,
this is a good one. It's a good side view in here. So this piece just kind of
marked in here is what we have is what we have in between the bicep and the
tricep in here. This depth we have in here, so that's basically that. So now let's go
back to let's go to the tricep now and then add some more defining
shape in there for the tricep. I would
like to do this. I like to use this echo this
echo chain, should be fine. Fine in here, so you
can go to the back and then add the detail in here. Okay? So this spotlight
reference kind of shows us a split different between the
front and the back. So we have kind of
added detail for at least for the front part of
the det need to go about the Tricepnum then reintroduce
that detail in here, introduce more detail
for the triceptu. It is also kind
of separated out. You can see separation
in the center part. You can see separation
in the center part. Even though we try to
add this mass in here, we also kind of add
that separation in the slightly just to make it
feel a lot more interesting. We also need to kind of extend or increase a little
bit of the mass of the deltoid in
here also, too. So let's go to the
deltoid and then just add a little bit of additional
lumpine then smooth this down. Smooth this down some more. Like so, should be fine, okay? Then let me blow
this out a bit more. Let's read the seal on
the clay B do brush. Let's add some detail
for the triceps. But before we do that, let's get where the shape should be. Let me get this
out. Get this out. It ends somewhere around here. I do that ends somewhere
around here. Then all the way. So basically using the
dens standard brush to block that in, get the depth in here. Okay. Then we have
another one that kind of cuts through the mid
in here, like so. So once you go to blog
this in this way, it becomes a lot
more easier to kind of know how to flesh that out, following the
directionality of it kind of digs in a bit more. So you can go to the
clay buildup brush now and then begin to add a bit more flesh in here
directionality in mind. So you need to do this with
directionality in mind. Flesh this in. Okay? So making sure respecting
the directionality for it. Okay? A nos we add that in, we can now do some smooth, some blend smooth do that. Let me just add a little
bit more around there, then smooth this down.
Smooth this down. Seven though we kind of added this now using
this echo chair, we still need to kind of go
to a reward reference and then that figure out how that should be based on
the realistic reference. So let's look for.
So for him now, it's not too obvious, actually. It's not too obvious
because it's not that masculine,
if you should see. No, no alive, you see. But it's kind of add
some kind of smooth. You still need to
have kind of smooth transition around there though, we don't kind of completely
hide it, though. You still wants to be
in there, but with some smooth smoothed out
transition around those parts. Let me add a bit
more around here. Smooth that down.
Okay? All right. So once we go to break this out, we still need to kind of
make sure that we have some breakup in there based on more mass structure
around those parts. Now for this part, kind of there's a bit more fleshiness
around these parts. So we can also add that too, just to smooth things
out some more in there. Okay? I think this
is interesting, you can actually work with, add some more flesh,
smooth this down. Okay? No, do that. That isn't looking right.
That's not looking right. Okay? All right, that's fine. So let's compare this to so I'm basically using different
references in here. Let's kind of get this to
look right as much as we can. Okay? So we can also
use the move brush also to go to lower
subdivision level to lower subdivision
level and then use move brush and then lift up the mass a bit more on this
part if you need to Okay. All right, a little
bit more down here. All right? Let's come
to the side view. Let's extend this out
a little bit more. Okay? So just small
minor additional detail, fleshing out and then using them standard carve out
where it needs to be. You should be getting, actually
good result out of that. And ask precisely what we want. Since our main
references like this, I won't say precisely, but at least this
body mass structure in years is good enough for us to actually work with ins
main as our main piece. So I would like to extend
this out a little bit more. So once we're looking at this
from this recorder view, you should have these parts on the Trist slightly elevated,
which is what I want. We also come down on
this let me fix this, extend this out a
little bit more. If you getting
something like this, which will work just fine. Yeah, it will work just fine. Alright, so moving on, I would like to calculate
this parts out. Yes. Yes. I think this
should actually work. Except maybe maybe a
little more depth in here, but using the depth
standard brush, kind of carve some parts in. So let's just see already have the depth in here based
on shadow information, now you can see the
depth in there. So maybe let's accentuate
it a bit more. I'm just going to go in
and smooth this down. Okay. Undo that, undo that. Let me do this again,
goes all the undo that. Like so. And I'll
smooth this down. It should just be dabs
quite faint D quite faint, should be fine. All right. Yeah, I think this is fine. We add something here, do that kind of food in here. Get this smoothed out. She just resting the like sha of shadow depth information in
here, that should be fine. Alright, so I think
this is fine for now. So let's go to the let's go over to the pictorialis major moss, which is the chess moss in here. Now for chess moss
we need to add more or add additional
mass in there, but keeping in mind the
directionality of it also too. A also keep in mind
that the lower part, let me get the lower part of this chess moss
extends out a bit more in regards to this chess
moss the upper part. Keeping that in mind, I'm
going to do that base. I'm going to ask some more
fledge based on that. Let me show you
guys the echo chain here so you can actually
be on the same page and we will not
start we're doing in here. It is a good one. So the most on the lower
parts kind of is a bit more. I can kind of folds into the detoid in between the detoid and the bicep
so keep that in mind, I'll go to my Clay buildo brush. Let's start with the
Clay buildo brush. Okay. Let's start with the dams. Let's start with
Move brush instead and go to the lower
subdivision level. So with this now, we can
just move things a bit more gently before
adding more flesh to it. So let's get this up
a bit higher, okay? All right, this is
working just fine. So look at this
from the side view. Then we compare. Let's get
this on this view also. Yes, is a good view on this
view, we can now move. Since a bit more around here, we can get this mask out. We can get this mask
out. All right. Then we can use the
Dame standard brush and create some
more tighter dead. But we need to connect
this to D toy. So let's extend this down, get something around
here. Yeah, awesome. Awesome. That's
working just fine. So we know it's kind of
tightening to the detod so we can push this a little bit
more depth around here. Yeah, that's fine. So now we can increase the
subdivision level by just one subdivision level
here. Okay, that's fine. So now we can see what
we have in here now. We have a bit small mouth.
We're also going to flesh this out some more though
we declare the door brush. But for now, I think this
is working just fine. So I'll see you guys in
the next lesson will carry on and keep working
on this by for now.
7. 06 Back Muscles Sculpt In Zbrush: Okay, welcome back, guys. So in the previous lesson, we kind of worked most
particularly on the Deltoid, the biceps, and also
on the tricep, okay? So in this lesson, we're
going to work on the vectoralis major and some
other parts of the model. So let's jump right
into it, so moving on. So our main reference
is this piece in here, but I don't really like
how the chest muscle or the pictorialis
major is right now. So I'm going to be using a different reference
for that, I think. Yeah, this one is actually okay, but it does not have
that chess mass in here that we
can actually use. But from this angle, we can see something
quite similar in here, based on what I was kind of explained in the
previous lesson. It's a deep cut
in the middle and this lower part is a
bit thicker in form, or has more muscle
mass compared to the part closer to
the clavical so. With that in mind,
let's continue on. So I'll go to the
lover subdution level. I would like to get
the clavicarbon a bit more of your seen there. So with the dam standard brush, I'm just going to add a
bit more depth in there, then smooth that down. So it's not bio
it's not too sharp, but just enough in there to know that we actually
have something in there, and let's create some depth, bit more depth in these parts. Smooth that down. Awesome.
So I think this should work. So actually work let's
get this undo that, get some depth down here
instead, smooth that down. Alright, so two changes that makes all the major
difference in there. But the clav carbon actually
extends all the way. So undo that. Let's create some depth in here. Alright? Yeah, that
should be fine. So to continue on, I'm going to cut a deep
separation in here. So if you're wondering what
this separation in here is, let me show you
guys think we can use I guess we can use not this. Let's just look for
the Eco che in here. Let me see if I can
find it on this piece. It's not really on this piece. I believe it should be
let's look for something. Yeah, it's here also, but
it's not too obvious, but it's quite important
kind of note that in actually because the lower part extends more than
the higher part. But you can definitely
see the separation coming from this
fiber uso fibers in here that cuts into
cost into the deltoid. So let's add that in. So keeping in mind
directionality also directonality is basically
like everything in here, so let me increase the bro size. I'm going to add
this separation in here, something like so. So it's going to
be like a depth, then we will smooth
out this depth. I'm not going to smooth it down all the way
to the end though. I still want to keep some on the on the center of the rib cage on the center
of the rip in here. So want to keep something in
here. So it should be fine. Should still be slightly
obvious based on shadow depth information around
those parto. That's fine. But in here, I
would like to know, why do I have this,
remove this, okay? So just underneath the all
its breast of the meal. I would like to add some more
depth around these spots. So should capture a little
more depth around that part. I can now use the
Clay Bu Da brush now and build some more mass. Let's build some more additional
mass structure in here, but keeping in mind
the directionality, so it should be flowing
around somewhere like so. I won't completely hiding the nipple detail around
those spots. Let me do that. I don't want to hide
the nipple detail. I don't want to hide
the nipple details. So let me start by going
to my lab Buda brush. And then make sure my Nippo
detail is not washed out. So let me go to one
subdivision level higher, and I'm going to kind of accentuate the Nippo
detail in there a bit more. So I know it's
actually in there. So I don't completely
wash that out. So let's go back to the
lower subdivision level. With a lower
subdivision level with the clay build up
brush instead now. So keeping in mind the
directionality of it's very, very, very, very,
very, very important. So I'm going to
add mass based on the directionality of this
fiber detail in here, okay? All right. All right. Let's go on sub
dibution level higher. Go on subution level higher. Let's go to lower
subdivision level. Then I'm going to add this in. This fiber should flow. Then we blend, smooth this
down. Smooth this down. Okay? Yeah, I think should should be
more or less fine for what we need it for
smooth this down some more. Alright, actually going to go in there and work a
bit more in there, but for now, I think
this should be fine. Add some more mass in
her smooon this down. Okay. Let's see what we get. Check this from the side view. Okay. Yes, they should be fine. So let's go back and look at
the reference in a bit more. Okay? So a deep separation in between the bacterial
is more souvenir. So let's get undo that.
I'm using the wrong brush. Let's use them standard brush, carve a bit more
depth in the center. Kind of separates them out a
little bit more. Let's see. Let's go on solution
level higher. Lets see if we do that
accurately enough. If we didn't do this
accurately enough, then we to redo that. So let's look at this
from a distance. Yeah, let's move this down. Okay, get some soft
transition on those parts. Then I need to add a
bit more depth in here. Smooth that down, should
not be too obvious, but just enough enough in there should be
fine. Let me do this. I don't want I introduce the
bro size actually before doing that smooth it down. Okay? Right. Yeah, this
will work just fine. So let me smooth this down, smooth this down. All right. We can introduce, actually we can actually
introduce because why? Just like a fiber fiber it
we just discussed earlier. I kind of falls into
the dt in there so. For him, we can see a major
one from this part here, so we can introduce
that in there. So basically something
that goes in this way, then we can just smooth this
down, smooth them down. Move them down some more. There's quite a lot of
them going on in there. Let's move this down. Don't want this to
be too obvious. So, so then for the
center part of this, you need to create something
that looks pretty much. Like, so just like those
connectors for the fibers. Basically those fiber
connectors are kind of which origin points
from the center of this Victorious moss in a
pictoralis mousse rather. So most of those get
some the fits in there. We're still going to
come back to that when we're working
asymmetrically in there, but for now, let's just get something at least in there for now. So
that should be fine. I kind of like the way
this guy's neck is, so I would like to use some of this use this as my main reference for the
neck muscle around here. So let's go to the lower
subdivision level. Let's go to lower subdivision
level for this and then use the Dame
standard brush. Still on the Dame
standard brush. You can create a bit
more depth in here. Is it too deep, feels
like it's too deep, use the brush size. Okay, so we're still working symmetrically in
here, so that's fine. Sin add something weird
up. Okay, moving on. So we need to add a bit more
depth around these parts. We create depth in here. No, do that. Should
be a bit wider. Okay. So for this, I'll go to the clay
build up Boclay brush, create some depth in here. Symmetry working accurately. I think something
doesn't feel right. Something slightly doesn't
feel right on the neck. Okay, yeah, it's fine.
It's fine. So it's fine. So with a clear brush, or
with the standout brush, I'd like to add some
more depth in you, increase the intensity of the brush, increase
the brush size. Okay. Yeah, that should be fine. Add depth in here. Okay. Smooth this down. Shouldn't be too
obvious in there. I think mine is kind of
spread out way too much. Let's get this a bit closer. Do this reduce the brush size, get this a bit closer. Okay. Get some more depth in
here, smooth this down. Okay. No, that is
not looking right. Yeah, this is fine. Smooth
this down. All right. Yeah. For the shoulder
also in here, I think for the most
part, this is fine. But we need to definitely
add some more. There should be some
depth around this part. So do that sib size. Add some more depth around here. But it's a bit too deep now, so we're going to
smooth this out. That's why we're
kind of working with the lower subdivision level so once we smooth, we should get
something interesting enough to work with
around that part. Get some more depth,
smooth this down. Okay? Yeah, that should be fine. That should be fine.
Smooth down a bit more. Let's look at this. This is fine. So one other
thing I would like to do would be to give this guy a small
slightly longer neck to him. Let's give this guy longer neck. Let's bring everything back out. Okay. I'm just going
to mark out from the lower part to the neck
around there should be fine. Blow the mark by holding control and
tapping on the surface. It the mark, blow
this out a bit more. Okay? Ton of symmetry. Let's center this. Let's drag this down a little bit more so
it should be fine. Just should be fine. Bley this out. Then let's go to the neck,
turn on symmetry. I'm just going to move No, with the move brush, let's
move this in a bit more. Let's zoom out. It
looks a bit off. Let's extend this back out. All right, so we can
move this undo that. Move this down slightly. Yeah, yeah, that's
fine. That's fine. So one of work on the face, it should just kind of
make a lot more sense with all of this together
as a single piece of. But I think we need
to smooth this down to smooth this
down a bit more. Yes. This is fine. This we can work with in here. But here has a bit more depth
around the clavicarbon. So let's create a bit more
depth for the clavic carbon. So I'm using the
standard brush now. Holding out creates a bit
more depth. Blend smooth. Extend this out some more. I don't do too much, though, so smooth this down. All right. Yeah, this should just
about work just fine. Let's do a bit more depth
in her, smooth that down. So go to a higher
subdivision level. Let's see how all
of these blends together as one single piece. So once you add some
detail in there, you always want to
go and increase the subdivision level one
step so you can actually see how all of the details are coming in
together as one single piece, so I think this should be fine? Though, se one sing though. So let's go to lower
sublution level. I need to push this
clav carbon out down a bit more more brush down
a little bit more, okay? Done a little bit
small. All right. That should be fine.
That's fine. That's fine. So this is how we kind of
block this out in here. I think we can work with this. Yeah, we can
work with this. Now, let's go back to the
back part of, do we need to, let's continue working a
little bit more in front and maybe's conclude on
them a little bit more so. Let's look at this reference
for the most part, there's not so much
happening in here. I think the structure
we have in here has already grown
enough to work with except we have some
breakup in this. Let's use the echo
chit kind of add that in Let's look for
something better. I think, this is
fine. This is fine. Let's do this from the
same from the same angle. The same angle should be fine. So basically,
something like this. So we have a moss
that is around here. So we can accentuate that
that we can accentuate. We can just go and red them
standard brush, create that. Okay. That actually falls
into the middle part. We have one here. We also
have another one in here. So I'm just basically trying
to bring them out some more. Get this in here
around that one around here, smooth them down. Okay? Let's look for something
with a better better view. Let's see I think this one, this is good, is
actually a good one. Yeah, it is a good one in
here. See, this is a good one. We can at least see
structure a bit better. So we know that this let's
foods from the same angle. The basement is actually
quite nice because it kind of blocks out the shape
a bit more rush. At least, it was
actually in there. So me the dam standard brush
continue on around here. We can get this in all. So basically just adding some separations
in there based on the reference we have in here just to define it a bit more. All right. Yeah,
this should be fine. We're going to build slightly
a little bit more on that, but it should be fine. I'm going to blend smooth. Some of these lens are not too obvious but still in there, so just blend smooth down. Smooth this down.
Okay? All right. That should be fine. Yeah,
that should be fine. That should be fine
that we can work with. Alright, so I think we can
just leave this for now. Since circle back to
that when we start adding some rational
directional, muss structure in it's going to get those fibers
a bit more ticker. So we'll circle back
to that later on. Let's go back to the back.
Let's go to the back. So let's work on the I think
I need to smooth this down. Let's work on the tri Pasios
moussu in a go to the back. So let's work in the trapezsmsu
and then the tires major, and then the
latissimus dorsu also. So what's that thems
going on at the back, but once gonna get this
major structure in there, it should be fine.
I should be fine. Usually, I like to
kind of start by adding some more mass too. Most especially the rhomboid. So the rhomboid needs to have a bit more height mass in there. And the rhomboid is what we
have. Let me max this out. It is what we have
around here. Mass. It's kind of must
structure that kind of folds into the detoid also. But there are actually
two layers to that. There are actually
two layers to that. So we have one at the top, then we have another one that
falls in in this pattern. Now, this base mesh radia kind of gives us an idea
of where they are already. We are going to build on top
of that, and that'll be all. So let's start by using
the Dame standard brush to get the shape of that a
bit more obvious in there. We have one piece in here, we have another piece in here. Okay? And I'm going to go in and then elevate
the spine some more, get some more depth
in the spine. Then we have the
trapezomcle also. Let's see, use a bet. Let's use, no, this should
be actually focused in here. So, yes, it's a good
one. It's a good one. So you can see how elongated the trapezs muscle is more like a more less like a triangle. You can see it looks more
or less like a triangle, so it differs from
bodies to body, though. The shape of that
actually, the major shape under underlining
the muscle structure underlying dt is still the same, but with the reference
with some references, might look slightly different. So in there, the traps moss is not that sharp or not
too obvious there, so And this is like the reference we're
actually kind of using, but we need to kind
of blog that in structurally before making it look more or less
like a reference. So that's what
we're going to do. So let's use the
Dame standard brush on this inner also that
connects down here. Okay? This mousele let me show you guys
this moss in here. So this mussle just
below the trapezus mostly the tracho lumber fascia. So it's just muscle just below the tribess
muscle in here. So it's what we have
this strangular shape in here that goes all
the way to the butt. So this shape in here,
so that's for that. I need to kind of get
that shape in there, using them standard
brush to line it up. So I'm using them standard
brush just to max or create a more ovo shape for them by kind of separating them with them standard brush. So when we're kind
of blocking that in we block that in a
bitt bit more accuracy. So we have this
structure in here, Okay. You also have a muscle
that goes all the way to the back of the neck is
around here around here. Then it crangulates
around here also, too. Let me show you guys
a typical example for that with the echo chain here because I this kind of
show you guys where that is. So we know what we are doing, so you can see this large mouse of the
trapezo moslein here. So we already have that
structure in here. Now, I think you have blocked out the structures in there, so you cannot begin to
start filling them up. So let's start filling them up, I would like to start
with the Rhomboi. So let's do the rum booi first. Let's add some more
flesh in here. Keeping in mind there it directionality of
it very important. So from the side vieulk kind of pop out a little
bit more like so. Then let's fill up
the trapezmre so. Fully tropes small zoo. Okay? Kind of feeds or kind of blocks in
all the year, right. Then we will do also. Get these parts a bit
more around, right? Yeah, that should
be fine. Then let's separate the bot some more. Is it going to come
down to the bot us in a bit let's just flesh, all the structure in a face. There's a bit more light around these parts compared
to the other parts. Let's begin to smooth
things out now. So I'm still on the soft smooth. Excuse me, small intensity for my smooth brush,
very small intensity. Smooth this down, okay? Yeah, that's fine.
Smooth this down. Okay. Smooth this down. Then we still also have like still also have
let's see if we can. There's no libit for this,
though, but it's a struct. Let's echo chess structure
that goes all the way from a dam standard brush. It comes all the way
around here, like so. So that structure is
somewhere around there. But it's not too
obvious, so blocking that in and then we
smooth that down. So it's not too sharp. It's not supposed to be it's not supposed to be
that sharp in there, smooth that down, right? So let's go on subdivision level higher just before we do, with the dam standard brush, am going to create
a depth in here, smooth that down. This down. With the clay B do brush, let's get a smooth transition around here. Smooth that down. Okay. Then let's increase
the subdivision level, so you can at least can actually see what we
have done in here. Yeah, also, you can see how we can block the
structure in here now. Structure N is not
properly blocked in a bit more accurately. Let's get this in here, smooth this down. Okay? I can use the DM standard brush and create some
more depth in here. Should be a bit
more depth in here, smooth this down.
Smooth this down. Shouldn't be this sharp,
smooth this down some more. Alright. So you
can say we kind of gotten good structure
in there already, which is precisely what we want. So in the next lesson, we're
going to carry on and then continue working on
this, right? By for now.
8. 07 Abs And Thigh Sculpt In Zbrush: Alright. Welcome back, guys. So in the previous lesson,
we worked on the back piece. So we're going to carry on and then keep
working on this piece. So let's carry on. So still on this and would
like to you can see some elevation on the sides, which we also have on
our character in here, but it's not obvious
yet on our scope. So let's introduce that. So I would like to shift S or shift F to bring out the
control to remove that. I did a screenshot by mistake. So yes, this is fine. So I would like to Control Shift click on this. Max this out. Invert the max,
blow out the marks, blo mark or more. I'll go to my MOV brush. Asymmetry is turned on. I like to extend this. No, I'm not a move brush, yes. Let's let move brush. On
the lower solution level, let's extend this out a
little bit more. Okay? So you look at this
from the side. Yeah, it doesn't look accurate
enough from the side, so you want to make sure
this is working accurately, let's extend this out first, then extend this
out to join that. So this should be fine now. You just need to pull out
the small su structure. Let's get this in. So it's basically this
model structure in here. We need to extend. So I'm going to inflate that out a little bit
more, smooth this down. Okay. So from the side now, it should look a bit too much, a bit too much, a bit
too much on this side. So let's move this
with the move brush. Move this back in
a little bit more. Yeah, right, This looks and
feels a lot better now. Okay? All right. Yeah,
it will be fine, but there are a few things you need to do in here, though. Let me undo that. Mark this path out again. Okay, both have different UVs. So let's drag out a selection after in control and shift to
invert this selection out. Max this out, inverted
marks, blood mark. Okay? So for the front now, we just get some of the
module structure in here and get them as
accurate as we need to be. Yeah, this is a
good one. You can see major separation
around here. So it's more like a dead more
module structure just below the ditoid pectoralis
major, and then the biceps. Still on the lower
part of the waist or rather the waist top part
of the waist rather. So let's block that in. So if I should show you guys another reference also so
you guys can actually see, so we're both on the same page, you can see I kind of cut in there it cuts in the
round out parts. We have a Okay. Let's see. Let's find the Okay, there's no specific
name for that, though. The labels in her doesn't
give him the specific name. Anyways, kind of nowhere, it's a bit more of your senior, okay senior so it
is the lattice, mouse dose still almost the one that kind of comes from the
bab with a separation to. So you want to understand that. Even though there's
a major name, it's kind of separated. The more structure in there
is still slightly separated, so Let's kind of get the structure in there a bit
more Dem standard brush. Let's create the separation. You put this to the side. Kind of cuts all the
way around here. I cuts all the way on this part. So yes, there fine. There's actually fine. So we
can actually build less IDs. We can actually build
structures based on the separation of
those added in here now. So you can use the clay Bo
brush and fill that part up. So more fill this
part up some more. All right. Bring the back
out. Then we can smooth. Come blend smooth just to get
everything blend it down. But still in there,
though. You don't completely blend
smooth that down. I still want them don't still
want them to be in there. Right, so moving on. We can add in here. Let's see. So, yes, we can work
on the apps now, we can work on the herbs now. Let's work on the on the herbs, get the herbs in the structures
for the herbs in there. So moving on, let's see if we need to the
mass is already in there. Mass structure. Let
me put this aside. The mass structure
is already in there. Let's use this instead. So we can see the major mass in there a bit more accurretly. Okay. I see. So now let's get
the let's get the oblique sculpted in a
bit more accurately. But in mind, keeping in mind, we still have a word reference
to actually work with, so let's just block out with
the dam standard brush. I don't name knows them
standard brushing. Let's just use the clay Do brush does build
on top of that, so it from the side view. So let's get some
more fleshiness for the oblique smooth this down. So basically just adding
it's more or less like model structure
that kind of folds or tighten itself
around the rib cage. So that's basically that. So let's get this in also and we just blend smooth. The
blend smooth for that. So you just in the then we can use the Dame
standard brush and get this ship in here, get this for the lower herbs, gi down here, smooth
this down, right? Then the herbs goes
all the way to the vectorial is
major mostly in here, so basically, we're supposed to have another additional
herb around here. It's more smaller ship of herb in. Let's
separate that out. Then separate this out, get separated out,
get separated out. Then we have the we have
our bellybutton us. Let me get the depth
in bellybutton. Okay? So, so now let's go back and look
at our main reference. Let's look at our
main reference. So we use our main
reference kind of get better structures in there. So already use deep standard, kind of blog this
in like we did. So every last we need
to do here just to flesh things out a little
bit more. Get this. So okay. Can create a bit more depth
in here, a bit more depth. I don't want the depth
to be too much, though. That's I kind of
doing a bit fence because for a few persons
rather for beginners, they have an issue of making
things too deep around this part around this part, between the obliqteen the
obliques around here, and then the regular b structure you have
around this part. So Now this line around here tends to be a bit
too deep for some people. So I want to kind of avoid
adding too much depth in there because it kind of breaks
the structure too much, and I don't want that kind of drinks a lot more
precision to it, so drinks a lot more precision. But this part, we need
to get a bit deeper. We can get deeper. That's fine. So we can use the clay
buildup brush now. Maybe when the clay
brush, actually, clay brush is actually still a good one to actually
use for this. So we're just going to add
some more mass in here. Okay. See, undo that. N this to be around here. Or something around here. This part should
be the way it is. You don't need to add
too much heights on this lower part of the album,
just blow the belly button. You need to keep it slightly flat as it is,
something like so. Just a little
separation in here. We're doing this on a
lower subdivision level, so once we increase
the subdivision level, we should begin to see some of the structure a bit more deeper Let's go on
subltion level higher. I don't want to smooth yet now, so I'm going on
subltion level higher just to see how they look like before before I start
smoothing things out, too. Yeah, this is actually fine. This is actually fine.
So we can smooth here. Smooth here slightly. Cause I already on
the blockout in here. We did them standard
with the clay brush. So you can use the DM
standard brush now. I'll go to lower subution level. I go to lower subution in here, and we can create some
more depth around here. But we want to avoid
straight lines, though. Avoid straight lines
as much as we can. So you should be
slanted down this way. Yeah, slanted down,
it should be fine. Right? Then we get some
structures in here. Right? So we're actually working
symmetrically in here, so we're not ready to
we're not ready to kind of break symmetry in here yet, so what's gonna keep
it quite symmetrical. Brick symmetry, begin to
add some variation in terms of Musm are in here. So let's see. Let me
hide this for now. Let's hide this for now. I want to just
visualize this only. Let's view this from the
similar camera angle that we having it on
our main reference. C, get this to the side. Same camera angle should help us get this where it needs to be. I'm going to use
my move brush now. Extend this out a
little bit more. Extend this out a little bit
more right out some more. The top part, this front part
should be out a little bit more out a little bit more. Okay? Let's see extend this
out a little bit more. Just sort of minor changes
in there should help a lot. Then we can now go
back to the clay brush, not declare buildup. Just the clay brush alone. I'm going to add a
bit more ams in here, smooth this down. Okay. All right. Yeah,
this should be fine. Adding a little
bit more to them. All right. Okay. Then
we can now begin to use this main reference now and do some more breakup
in here clap a brush, adding some more
lumps across this. So lumps. In here.
Okay, there's one in here that kind of goes
all the way here. There's a bit thick
around here, right? One here, sort of. It's almost like I'm not
the one doing anything, but you should be able to
see the difference in here. You can see difference in here. So you want to be a bit slight or soft handed
around those parts. Okay. Let us do them
standard brush. Just do some slightly bit
more depth around here. Alright soft, but
still in there. Alright, this is fine. This will work just fine. This we can work within here. Let me everything back out. Look at this from a distance. We can see this is working. This is good enough, right? So we can also with
the clay brush. Let's feel this parts. It shouldn't be too
tight in years. We can add a bit more flesh
in here. Smooth that down. Okay. Yeah, that's fine. That's fine. That work just fine that we can
definitely work with. I can see some
discrepancies in here. I'm going to smooth this
down. Smooth that down. Okay. Right, add some more sums around here. Smooth that down. Just smooth in and clearing
things out a little bit more. Let's go to the back. Let's
see his back some more. So for this guy, he's a bit more depth
around these parts. So we can use the
build up brush and build some depth around these parts around
close to the trips, trips just more so in
here around that part. So still on the rum booi. He has a more wider
robos to him. So we can just implement
that smoother down. Rumbo rather. So
that'll be fine. We can use the dam
standard brush to sent that a bit more.
Smooth this down. So we should get some more No, let me won't do that.
I don't think we need. I don't think we need so
much in here. Let's do. Just on this part,
you'll be fine. Smooth that down. Smooth
this down. All right. Okay, say this work just
fine. Smooth this down. Okay. So yeah, I think we can do a little bit more
now for the botches. Let's do a little bit
more for the boti. So I'm gonna using
the echo chain here. Let's use the echo chain. Yes. It's echo che in here. Usually, I like to start with separate separation down here. Separation we have in here, so just get this down, smooth that down, then
get a Dimp in here. Get the dimpo in here.
Yeah, that's fine. Though, this part is not
gonna be visible though, so we don't necessarily
need to spend so much time making this undo that. That would be too deep. Making this as too accurate
so let's move this down. Okay? Yeah, I think for the
most part, you should work. They should work
for the most part. Yes, we're already moving. We're ready kind of walking quite fast in
here, which is cool. Fast quite fast in here. So I'm just checking this
just to be sure if I need to do something else in
or I can just move on. I can move on to something
else to lower part of move to legs rather. Okay. Yeah, we can move to legs. Come move to legs.
So this is fine. Okay, so moving down to
the leg, get this down. So for the ties now, a lot of structures happening
in here for the tie. The structures happening
in her for the tie, but we're going to simplify
it as much as possible thought going to simplify it. We still have leverage, kind of simplify this
as much as we want. I'm not going to be
talking about all of what we have in here, though. There's so much
labeling in here. I don't want to
confuse you guys with that. So now for the tie. So one thing we need
to kind of keep in mind actually start with is the sactuios band. We have that goes across from the goes across
from the waistline, all the way all the
way towards the nail, actually, all the way
towards the nail, just lower part of the nail. So to do that, you need to use the
deem stand out brush. Dem stands out brush does a very good job to
separate that out. So this is depth
we have in here. So depth even goes all
the way back around here. Like, so once we kind
of create this band, it makes things a lot
more easier for us. So after putting this band
in here now, we can see. We cannot clearly see
the abductos largus which is this moss
piece in here. So we have separated
that separate that, separated that out. So we have that in here now. But usually, it's
kind of like piece a three piece system in here. So let me use you can
use this in here. Can use this in here. So we can just now begin to do some additional
separations in here also, too so we add another
moss structure that comes in here around here. The leg is not going
to be visible, though, but we still want to get
these structures in there. Okay? So on kind of block
this in and then with smooth, it all kind of makes sense. Everything kind of
makes better sense. So I'm basically just using them standard brush now to just kind of separate this out a bit more. We have Okay. Okay. Yes. Yes, we can do
can carry on with this. Let me hide. Can we just, this is a lot better. Come on. I need to go down here and hod display leston on double
sided for this double sided, hide this control sheets, drag intellon to reveal just this leg and the
torso or the waist. So let's go up to the side here. So once you kind of add
your model structure, you want going to be sure of where they kind of
connect themselves to. So connecting more
just to make sure everything works as accurate as you should is
quite important. So let's use this instead. I think, okay, it should
be this angle instead. So once we kind of adding
these structures in there, they kind of form
themselves automatically. So we have another
module structure in here. It's moon that down. Don't necessarily need
to add that, though, but let's just add that for the sake of adding
something in there, window is not going
to be visible. It's got login on India, though, but the most Indians kind of keep in accounts is let me
go back to the echo change. This echo chi kind of
separate them out. It's a bit has a
more larger piece. You just to start by
adding a separation around kind of flows
in this direction. So blocking this out is actually important because I'm
going to use that to kind of start feeling things in there a
bit more accurately. So folds folds in here
around these parts. So we still up the model
structure that falls all the way to that falls all
the way, like so. Then we go to the
curve and go to the curve add this
separation and yeah. There's not so much going
on for the curve though. Then let's add this
Control Shift click. Control click,
Conti click, click. Let's bring everything back
out so you can see this. Okay. Then we get a depth in a concrete
de with them standard, create that depth
in here kind of elevates the ankle a bit more something like
so should be fine. They should work just fine. And let's come to the front. So now for the front
now, just still on the curve still on the
curve on the front view. We basically just
need to kind of continue this on,
create a depth here. We have it on the other side? Let's use the front
view for this. There's quite much
going on in the do but it's not too complicated, actually, so let's add this bone structure
in here for the leg. So let's add this tibia bone. So to do that, I like to use
the clay brush and then just do something that comes
down comes down this way. Undo that comes down this way. And I'm just going
to smooth that down, so it should be fine. So it becomes a bit more obvious from that angle. That's fine. Then with them standard brush, we can get this in here, smooth this down,
smooth this down. Okay? There's a
depth in here too. Smooth this down. Smooth
this down. All right. So now we can go to
the clay Bio brush. Clay brush, we can start building some more
Tar forms in here, flowing the same muscle
structure directionality for it. Okay? I'm not doing so
much in here, though. I'm just kind of adding some
extra layers should be fine. Extra layers of this
should be fine. We don't need to do
so much in there. Okay? Get a bit of
the ankle in here. Of the new in here let's get the nil in
here, a bit more obvious. Then we can just blend smooth Blend smooths,
all of these down. Smooth this down, feel
this part up so much, not be too obvious in there, and we can smooth this down. Smooth this down,
smooth this down. Okay. Let's smooth this down down let's go to the
higher subdivition level. Let's see what we have. So what we have should be actually
good enough to actually work with so you can
see how we kind of get the sort detail in here. That still makes a lot of
sense in here, that's fine. Okay? This we can
definitely work with. I think we need, I need to
add a separation in here. So we deem standard brush
with a separation in here. This caves in here. This coves down here. And I'll smooth that down also. I shouldn't be too obvious,
so too sharp in there. Smooth this down also. Alright,
so with the clay brush, I can fill this up some more. Smooth this down. Okay? Add this add a bit more in,
smooth this down. Just to make sure it's kind of a bit obvious around
the side view. Slight this down, smooth this
down. Alright, that's fine. I think for the most
part of your leg, that should be fine. So moving on, move on to the next thing and the
next lesson. By for now.
9. 08 Feet Sculpt In Zbrush: Okay, we come back, guys. So in the previous
lesson, we worked on the legs and the back. So we're going to carry on
and then this time around, we're going to be
working on the fits, there's not so much to
do on defeat actually, but let's just get
something descent in there. So let's go to the lower
subdivision level in here. I will just go to the
lowest subdivision level subdivision level one. And then let's look for
a reference for the fit. So I have a very good example for the fit in here that we can just use and then block
out most of the shape, and then we should be
actually pretty much there. So let's do that. So ready. We sculpting is already on
symmetry, so that's fine. Usually what I like to do
would be to start with the D wearing on the
Dem standard brush, reduce the brush size. I would like to isolate it. Let's just work
specifically on the fit. Let's do the other way
Control shift, tap, tap, tap, tap, drag selection sat
on down control shift. Same the selection,
and then we should have this piece like
social to work with. That's fine. Then working
symmetrically also. Then I will just increase
the broad size some more. Then I will coat
right through this. You can see a depth
around the side. So I'm just going to coat right through that all the way back. Increase the broad
size some more. So she cut all the way this
way, that should be fine. You know, I need to
smooth that down. Shouldn't be too intense, something soft around those
parts should be fine. We have another sepreion around the egg.
Smooth that down. Okay? There's a bit more depth
around the smooth this down. All right. We can also carve in some
more depth close to the toes, spread this big toe in here, something like
that should be fine. Then we can now begin to add some knuckle detail
on top of this. Just before we do that, we need to kind of
separate this out. Kind of separate do
some lines across the toes in here just to get this depth
around there also. You just moles
just to accentuate the nucleus and the bone
in between those parts. I'm going to show you guys
an example so you guys can actually see this with a better see this on a
better view instead. So basically, let me look for something that should
better illustrate. Um, we can really find something quite
distinctive in use, but the general idea is
still the same though. I think we can use
the ECOT actually, so we can use this
ECoch instead. Let's look for something
close to the fit. Now, it's not even that detailed not enough to actually see
what can block in there. So we're just going to go
back and then stick to what we already have around here. So we can just
continue using that. So now I block that in. So just to begin to add
the standard brush. Let's begin to block out
the knuckles for this. Use the brush some more. Let's get something a bit
higher around the egg. Then we can start locking out some of the knuckle piece with the standard brush,
elevate the parts, elevate the parts, getting a bit of height for the
knuckles in a Okay, use the brush size, repeat the same in here, the
same in here also. So we begin to get some
height around those parts, which is precisely what we want. And I'll use the clay Bo brush with something a bit
higher around here, something slightly a bit
higher as well to high. Take down the intensity with something
higher, here, here, here, also, also, here, also. Okay. Yeah, that should be fine. Then we can also continue building some structures
here as well, pulling the same pattern
all the way down, more or less flowing
straight line all the way to the toes, right? Yeah, I think this
should be fine. We can sent you it down
here here or and do that. That's looking a bit odd. Okay, that should be
fine. And there's one more nose we also
need to do is to use the dem standard
brush and create eight depths on the side
with depth on the side. Let me show you guys
why I'm creating that because it's
a bit more obvious on with the instead
on the fingers, a bit more obvious
for the fingers. It's almost something
similar also for the feet. So I think I should
have one reference in here that should, yes. Something like this, we can
see in between each knuckle. You can see in
between each knuckle, we can see a depth in here, like the flesh kind of
pushing in between itself, kind of compressing
itself towards the bone, kind of more attracted
to the bone. Let me look for a better example that should give us an idea. Okay, so regions where we
have the nuc in there is a bit kind of put out a little
bit more on the side. Can see it on the side, can
see this on the side also. I think I have one more
reference that should. Yes, it is a better one, yes. Yes. So something like this. So we just kind of push
the skin towards the bone. So that's basically what
I'm doing on the fifth. It's still the same idea that kind of works on
the fifth also, too. So I'm just going to
push this inward, put my gizmo drug selection
around here instead. Maybe let's go on
Subutionl higher instead. Let's go on subduction
level higher. Then all of sculpting India should begin to
make better sense. So you can see them now, you can see the now the India is now kind of showing
up a bit properly India. So now, with them
standard brush, I'm just going to dig
in in here or so. Go to the Gizmo,
grab all of this, and that it's no one grabbing it as much as
I would like it to. Anyways, I think we can just still do that
in there regardless. So this should help zoom in. This should help sell the
character a bit more. I think I should use the
standard brush instead. Something like so, do
this on this side also. Oath and just dig
in a little bit, a little bit in her, little
bit in here as well. Same as around the. The down is a bit
olds a bit old. Let's kind of accentuate
the knuckles first. Then we get dept ear. Then we get that dept ear, smooth this down so more Look, I think that should be fine. I think we did this
symmetrically, so that should be fine. Smooon this down some more. Okay. So now let's kind
of work on the fingers. But for this meat to increase
the fingernails rather, but for this meat to increase we need to increase the
subdivision level for this first. Okay? I think I would like
to undo that standard brush. Go on subdivision level lower. I would like to create
some more depth in here. Like, so smooth this down. Okay? Let's increase the
subdivision level for this. Increase subduion
level one more. With the dam standard brush now, we can go in and then carve
this out even better. Let's go on subdution
level higher. I think I might need to
increase my brow size also. Increase my brow size also. Alright. Okay. Yeah, I think that should
be fine. Get this no. We don't want that deep
a bit deeper around the. Alright, so I can do now and then let's increase
the brush size. So more increase
intensity, a bit more. No. S to take this down. So use the standard brush now. No, it's not give me the
desired result I'm going for. Yeah, I may need to make
some corrections in here, but let's just continue with
them standard brush and then keep adding some
more depths to this. Okay. Make it a
bit more obvious. We are doing this
symmetrically, so it should be working on
the other side also, too, which is precisely
what we want. Okay? Yeah, would you be fine? Smooon this down a bit more. I think I'll go over to stroke, Lazy mouse, take this
down, increase the radius. Yeah, this is precisely
what I'm looking for. But it's not looking
good enough. Let's use the standard
brush instead, take down lazy mouse
lazy mouse radius. No. Now, intensity is
way too high I take down the intensity for this, do that. Take down the intensity. This focus shift, I think I need to adjust this some more. Yes. No, it's actually
good on this part, but on the other
part, not too much, so I'll need to, like,
so should be fine. No, it should be around like so. It's not looking too good
yet, but that's fine. We're going to use
the pinch brush and then fix that up properly. Let's just get it to
where it needs to be first. Almost done. Spoon this out. I think we need to increase
the brush size slightly for this Okay. Here as well. Then we
can use the pinch brush, BPI and we can
just tighten this. It's no tightening it properly. Okay? It's better now. I
just tighten it a bit more. Smooth this out,
tighten it some more. Okay. The smooth
tighten the smooth. I think I need to increase my
smooth intensity some more. All right smooth this out. Smooth this out. Yes, for me, this stand that
looks a lot better now. That actually looks
a lot better. So I think for the most part, I think we are kind of
done with this one. We don't necessarily need to do too much around that parts. Don't necessarily
need to do too much. So maybe looking at this now. Maybe, I don't think I need
to extend the fit anymore. I don't want to extend the
fit. I don't look a bit old. Should look a bit old. So let's go to lower
subdivision level for this, increase the browse
size as going to smooth this part a bit slightly. So let's get some
blending in her right. Yeah, the knuckles also let's do something for the ankles. I keep saying knuckles.
Ankles rather, so let's do something
for the ankle. Let's do something a bit more
interesting for the ankle. Let's go to lower
subdivision level. Okay. Then with the
standard brush, you can start by adding
the depth in the smooth. Then elevating this
a little bit more depth elevate some more Okay? Let's go to higher
subdivision level. Let's see what we get from this. Eventually, we're
going to come back and then break symmetry
for this bots. Let's just leave this
as it is for now. It should be fine
as it is for now. It's not overally detail,
just the right amount before we break
symmetry in there. All right, so I'll see you guys in next lesson. Bye for now.
10. 09 Fingers Sculpt In Zbrush: Come back, guys. So in previous lesson, we worked on the fits. So this lesson, we're
going to working on the hand and the
fingers in here, so let's get right into into that and then create something
interesting in the right. But I would like to
isolate it first. We already have some
interesting details in here, so I'd like
to isolate this. I also like to let me just make sure this
geometry is opened up so we know which
solution level we're in. Take this down. Shift F. Right, so yes. This is fine. Let's see which parts
we need for this. Okay. Control Shift
click on this. Control Shift click,
Control Shift click. Control Shift click,
click Control Shift drag is selonOst inverts. We can do solo.
Let's solo this out. Shift F. And I'm going
to rotate it this way, get enclosed on this part. Let's make sure we have
symmetry turned on. Asymmetry is turned on.
That's precisly what we want. So ready have a
reference in here we can use for this reference. But we're still
going to use kind of similar steps similar steps to creating the fit and kind of implement
that also in here. But for the most part,
this base mesh already has most of the some
of the features, we need to kind of get something interesting in here without having to do so
rather too much work. But at the same time, we're also going to put a lot of effort in here with a bit of precision to get
this look just right without having to do this
over and over again. So really, the first thing I
like to do is I sent youate the inward parts just in between the
knuckles around here. Wever you use deformation, kind of get thickness
for the finger, so that helped a lot for getting correct
proportions in here. Let me send this
to them standard. So with them standard
activated now, I'm just going to adding
some more depth around here. It's important we
have depths in there. So we're just going to do this
for every finger in here. Okay? That's fine. Okay. That helps sell the
mesh a bit more. Someone sublution
level two for this. Subltion level two
should be just fine for this. All right. So can create some kind of food food in around the edges that's why I'm kind of creating these depth in here. It can also look at you and
then you see the depth and food that comes adding this crease in between
them, so that's fine. We intensify this on this side, intensify this down on
this side, comes down. Same here. A we have another
one that comes this way. Let's go to the finger thumb. Okay. Come on. Keep rotating this
to the other side. Do this around your soap. Yeah, that should be fine.
That should be fine. One other thing I
like to do is to lift this part of this knuckle, lit it up a little bit more. Let's use the move brush and get this out a little bit more. Alright? Yeah, that
should be fine. That should be fine.
Leave the speed elevate this up a bit more. Okay? That's fine. So here also, too, if
I act show you guys, I think the previous lesson actually showed you guys that, let's go in between. So in between each finger nail or the inch fingers, rather, we get some line
up depth in here where the nerves where we don't have so
much nerves in here, so something in between
here around there. So nerves kind of covering up the skeletal structures
of the in there. So we kind of get depth
in between there. Similarly also in years, so we can see all of
these just wrapping and creating depth in
between all of this. So I'm going to be
creating that in year, so that is what we need to
kind of create in here. So I'll go to lower subdivision
level subduion level one. So she did go to lower
subdivision level, they will them standard brush. I was going to create
let's see where this is. There's a depth around
here, down here. I think my brush
intensity is a bit much. Let's take down the intensity of the standard brush and
repeat this again. Like, so but we
want to be careful, though, we want to kind
of make them kind of fold underneath the wrist. So we need to make sure they
kind of fold on down in the wrist smoother less
intense depth in there. Like if you go to a higher
subdivision level now, you begin to see you
depth a bit more, but not too intense, but just quite shallow in there. So what's you going
to soften this out? Let's take down the
smooth intensity, surround the value
of intensity of 12 and let's soften
the lower parts, soften this out a
little bit more. Okay? Let's go back to
the reference here. I always like to
use this reference for blocking out my arm, which is very detailed, quite detailed, quite detailed reference that
actually helps give us a good idea as to getting this looking as accurately
as we possibly can. So I'm going to shring
this now or better still, let's go to lower
subdivision level. Let's go to a lower lower
subluti level, should be fine. Then I can I can either use the standard brush or the standard bro but let me use the standard brush
instead for this. Trying to shrink this
knuckles in here, so trying to shrink
this down some more. So basically just trying to shrink this in
because when we inflated this part
became too inflated, so I would like to shrink
that in a little bit more. I'm using this standard br
to shrink the edge in some more smoo this down,
shrink this in. And that's basically
holding out and then making this feel
a lot more trangulted. That's basically what I'm
doing, trying to make this feel strangulated,
smooth this part out. Okay. Then we blend smooth. Smooth, smooth this down. All right. For
this, not so much. I'm gonna leave that as it is. Alright? So now, what we're
going to do next will be to add additional or knuckles
to the fingers in here. So let's go to higher
subdivision level. I think to make better sense, doing this on the higher
subdivision level. I'm going to use the still
on the same standard brush. I think I can increase
the brush size a little bit more then elevate this some more elevate this a
bitmre down here also, elevate this, elevate this. Elevate this in here, as well, as well, also. So from a distance, I'm begin to see a bit more
obvious sin there. Precisely what you
want to do. A few of them a few of them
are a bit too high. So let's just reduce
the bro size. Do a slides, Blend
smooth for them. Try for those that's not
looking too good. Okay. Yeah, I think it should be fine. Let's not neglect
this out thumb. This one should be around here. All right. Yeah, all
the way down here. Smooth this down a
little bit more. We have around your so. Okay? All right, Bn smooth that
down a little bit more. Check this out from a distance. Yeah, that is fine. That's fine. So now we
need to kind of get some slimming of this
edge is in here. I kind of feel like the flesh is a bit tight around the bone on the on the sides
of the fingers. So that's basically I
does the same way we did for the toes. I want to do the same
thing here also. So I can use a standout brush
to do that in here too. So I can just go in here. So this is going to
make the fingers feel a lot more squarish,
almost squarish. We should give it better to give it better
structure to it. So that would give it a lot
better structure in the All right? So you
can kind of almost like making sure
still kind of see the tightness of a little bit of the structure of the bone
picking out a little bit more. So I like a general
idea for this. So it's not so much
in here, though, but it's actually in the
actual zoom in let me show you guys, you can
see how we get, like a planar
change around here, like, more or less like a triangular planar
shape around there. So it's been caused by
trying to make the fingers kind of taper or kind of shrink
itself towards the bone. So what I'm trying
to recreate in here, so smooth that down. So it's all about looking at the shadow depth in there
even though it's quite faint. Over time, you get used to actually seeing those
shadow depths in there, and then you can
actually see once you can see the shadow depth, you begin to observe
planar changes a lot more a lot more easily. Then you can be sure of how to create that in a more
soft and subtle way. So it just takes a little bit
of a little bit of training your observation
skills to be able to see CDT that an average
individual wouldn't actually see. They will actually
see it visually, but to be able to interpret
that art as what it is like the extra or rather
additional special features we have as artists to be able to read forms a
bit more properly. And then being able to
not just reading them, but being able to actually
interpret them in our sculpt or in our art, whichever art medium
you're actually use. So I'm just going to smooth
this down, smooth this down. Okay. Get this in here
also. Smooth this down. In year is not so much, but I think there's
one year actually, so we smooth this down. There's obviously
one around here. This is not kind of tightening
these towards the bundle, but it's another additional there's a depth in here
actually, so don't do that. Ood out a depth in here that
I need to actually get in. It looks more or less like, so from this angle,
here, that's fine. Because it process
a little bit more. Ood out, dig in,
smoothes down. Okay? So if you look at
this now, you can be able to see planar
changes around this that makes better sense now.
Precisely what we want. Not too obvious, not too sharp, but still in there
to kind of sell out our work a bit more. Make our work look a
lot more realistic. So in here also, too, they undo that, like, a little bit of depth
around these parts, not too obvious, also, too, but still in there. So this help kind of break
up the surface a bit more. I was going to smooth this down. This is not too obvious,
but just roughly in there, use the clay By doo brush, build on top of that. The smooth that down,
smooth those down. Smooth those down.
Right. Yeah, that's fine. Don't do that. I don't want to erase the
depth we have in there. Okay. Smooth this down. Alright, interesting. So we have interesting
details in here already. So now let's go to
the fingernails. Let's go over to the fingernails and get details in there. So for this one,
we're going to need to increase the
subdivision level too. Very high amounts. Higher amounts will be fine. Let's do one step.
Then for this, I'll need the dem
standard brush. Get closed, reduce this down. Let's try one on her.
Let's see what we get. Yeah, I think this should
be fine as a base. Let's say good base. Right? Yeah, that's fine. What you going to use
the paint brush, though, let's just carve out the shep in the right? Yeah, that's fine. With the mesh, the base
mesh already gives us an idea of where this
should actually be so. That's basically just following that guide that's giving us and then creating this in the Okay. Yeah, then we just
mean just one more. There's this major thumb now. On that do that
sky straight off. Okay. Get this in in in a sold out, get this out. I'm holding out now for the
dam standard brush just to elevate the tip
of the fingernail. So it doesn't feel too soft. It's supposed to have something something
sharp around there, something that's a bit that's more like a sharper edge to it. So those holding out to the
same dame standard brush. And I'm creating that in
her Okay one more one more. It doesn't need to be perfect, so we don't need to make it look extremely
perfect in there. So let's use this
pinch brush BPI, and we can start tightening this part up,
tighten these parts. So it feels like an
actual actual flesh folding on this edge, folding in on those edge. Okay? Here, so you do a bit more around
here, tighten this out. So it actually looks very
good for me distance. It looks a lot better
for me distance. Tighten this part up. Alright. Okay. I don't know
if I did for the thumb. I I indicated this
for the thumb? Yeah, yeah, yeah, I have,
so this is the thumb. So yeah, this is fine. So if you look at this
no form distance, it feels a lot more pronounced like actual finger
nails in there, which is precisely what
we want to do in there. So let's bring
everything back out. Okay. Then go to lower
subdivision level. There's something we
need to do on the wrist. I need to get some crispy
some foolds around the wrist. We have, this is a good one. I do some creas food
around the wrist, but we need to first make sure
we create a cut in there, just indicates like flesh
folding in those parts. So I'm just going to
start by doing something like this to begin with. All right, around that part. Then let's go on
subdivision level higher. Let's go on subdivision
level higher for this. Okay. Yes, yes. This is fine. Put the coat also
around the edge, food around there
around the soap. That should be fine. Then we need placed, I'm going to show you guys
a reference for that so we better understand what
we're doing in there. We can just find it in here. Okay. So it's basically in here. Yes. So it's like a depth
around these parts. There's a depth
around this part, so. We need to implement that also. So let me show you guys
realistic reference. You can see this bone in
here where it sticks out. Now that bone that part
ler bone in there, I use my echo chair in here, we should be able to
see obvious there. It's not obvious there though. It's not too sin here, but it's actually in there
and there is a dead that comes with it tapers
around those part too. Give us an idea
that the flesh be sticking or pushing itself
towards that part some more. Let's go to lower
subdivision level instead with a standard brush. I'm not going to out
and create a dense air, like so tapers in around,
tapers also around. Reduce the size, the
pass in year and. Then I'm going to
smooth this down, get a smooth out transition
around those parts. So that increases the
subdivision level now, if you increase the
subdivision level now, you should be able to
see faint pieces of dart in here that actually helps
sell this out a bit more. Maybe this is
actually too intense, increase the bro size,
the blend smooth. Okay, the blend smoons. Then I'm going to
elevate this more Elevate this bone
a bit more so it's slightly more obvious
and smoothes down. Alright, so awesome. Yeah, this we can work with. I can smooth this out. Extend this out a
little bit more. Smooth this out. Etend this out some more. Smooth this out. Lettend out some more,
smooth this out. Okay. Mood this down. Yeah, I think that
should be fine. As at least for this as far
as the unstructured good, I think we did a pretty
good job in there. Pretty good job in there. So while we are approaching the region partway we need to kind of break
symmetry eventually. So manage to break symmetry
in here eventually. Okay. I would like to
accentuate this some more. Smooth this down
around the parts. Smooth this down again. Smooth this down
around. Alright. Let's see if that looks good. No, it looks messed up. That looks messed up. Let's do something
a bit more accuracy to it. Smooth this down. Okay? Smooth that down.
Yeah, that's fine. That we can work with. All right. Let's feel this part. Undo that, undo that. Undo that. I'm supposed to
break in symmetry doing this by breaking
symmetry, though, but I just no, no, no, undo that. Smooth this down. Okay? Not really. Doesn't
look too good. I think what was there
before was actually better. If we want to refine
this, we can use realistic references to
refine this letter room, but I think this should
be just fine for now. So yeah, so in next lesson, we start breaking
symmetry in here just to get this to look asymmetrical and
more interesting. Okay? So we'll do that in
next lesson. Bye for now.
11. 10 Torso Asmmetry Sculpt In Zbrush: O Okay. Welcome back, guys. In the previous
lesson, we worked on the fingers and the end. So in this lesson, I would like to break
symmetry in here. But just before I do that,
I would like to make some proportional changes based on different
reference just to add a little more interest to ali bit more interest to
our character in here, so most especially on the toe, so I'm going to be using this reference though
we already have most of the shape
we need in there, but we can still kind of
push this a little bit more. Let's push this a little bit more and get some more
interest out of this. So let me start by, I'd like to start by
increasing the boat a bit more side of
the boat a bit more, just slightly a little bit more. Okay. Wide on this side, right? Yeah, that should be fine.
That should be fine for now. Okay. Then I would
like to increase the kind of give me more
broader should undo that. Kind of give me more
broader shoulder. So let's come to the side. Let's lift the shoulder
up a little bit more because I kind of
added more us mask the entire the arm
and some molar part, but not so much on the shoulder, so let's give this guy more
broader shoulder to him. Okay. So you should work. Do that. Let's do smooth blend this down
some more, right? I think this we can work with. Then we need to add a bit more
depth around these parts, nond that depth
around the a little bit more smooth that down. Okay. Yeah, that should work. That should work.
Right, so let's add some more Musso mass
for his chest region. So we need to add a bit
more mussom mask for this. Let's use the clay Build brush, or maybe even the move brush, actually it should be just fine. We can use the Maklaso and
just mark out and do that. Let's max out the chest region. Okay? Inviting max, blow
this out a bit more. So let's add some more to it. With more brush, let's
elevate this up a bit more. Okay. Yeah, it shouldn't looking like kind of breasted
both, that's fine. We just need to extend this down a bit more
around these parts. All right. Leave the parts up some more. Look at this from
the top view. Okay. Move this down on this view, extend the parts out
down out a bit more. Okay. Up a little bit.
Let's lay this out. Let's see if this is
kind of marching. I think that's way too much. That's actually way too much, so we can bring this
down a little bit more. Okay Let's see. Yes, I think this
we can work with. Let's see. Yeah, we can work with this. Yes, we can work with. We
can work with this in here. I need to leave this
on the upper part, just leave this up
a little bit small. Okay, it's a bit more rights. That should compensate
for it. Moving on. Moving on in here, so I think, let's look at the arm for this. So as much as we can,
we need to kind of add some interest
to it just to make it feel a lot more feel a
lot more realistic in here. So let's go for the arm, increase the subdivision level. Let's use this arm as a reference guide and create
some more interest to it. Use them standard brush. Okay. All right. Look at this in here. We can do similar also in here. Smooth that down. Okay. Let's flesh
this out some more. Smooth that down,
smooth this down. So it kind of not be too
aggressive in there, but just enough
to sell this out. So I'm not doing anything new. I've already talked
about this already. So I'm just basically
accentuating on top of what we've
already blocked in previously, smooth this down. Okay. Yeah, interesting. That should give us an interesting
result out of this. Okay. Smooth this down. Smooth this down. All right. So for the tricept, I think we need to do a little
bit more work in there. So use the clay brush, clay brush rather and
flesh this part out some more out some more Smooth down. Okay. Smooth down. Smooth down on these parts. A bit
more around the. Okay. I'm going got into
the part where I need to brick symmetry
in here though. I use the move brush. Move, let's clay with do brush. Fill this part up a little
bit more. Smooth this down. Allr. Yeah, much better. Yeah, so let's do
Let's do Let's see. Okay? This guy has a
longer neck to him. Take this down. Let's see. We don't need to completely one to
one marge this though, without kind of using this
as a reference guide, kind of get some
interesting structures implemented on our scoped. Let's look at this
from this side view. Yeah, we have something interesting going
on in you already, maybe just accentuate it a little bit more on these parts. Okay? I think we need to grab
grab this also. All right. We can grab as well.
Smooth that down. Okay. Get some depths
on this on the oblique. Get some more depths on
this oblique in here. All right. That's fine. Smooth that
down a little bit more. Okay. Let's add some more
fleshiness on these parts. Smooth this down. Okay. Yeah,
that's fine. That's fine. It's actually an interesting reference to use
to kind of create some more interesting
shapes and forming here. I think it's kind of eye
time, we break symmetry. I think it's eye time,
we break symmetry. So let's bring
everything back out. I'm going to increase
the subdivision level. Create the submission
level to the highest, go to the highest subvit level. Then we're going to create a new layer and then ring
it out to asymmetry. So in there, we start breaking the breaking up the
shape a bit more. Get some asymmetrical
structures around those parts. Let's go to layers layers, put the new layer in here and I'm going to rename
this to body asymmetry. Come on. Okay. I like to use all caps in here. Let's use all caps in here. By Smoky. Alright, Enter to apply that. So anyway, I can turn
off my symmetry. But as you can
see, with this now we get actually good
results out of this. It's actually good results to actually keep though,
if you need to. This we can actually keep, but for the most part, we need to break this up
a little bit more or some more just to make it look a
lot more interesting in here, so we can create some
more interest to it with this breaking symmetry. So let's do that. Let's do that, so we
can go back in here. Let me introduce
some more breakup. So let's go to a lower
subdivision level. Go to a lower subdivision level. Increase the subdivision
level one step. Let me show you guys
geometry so you can actually see what you
are doing in here. Okay? So take this down, red
them standard brush. You can start doing
some additional breakup in a asymmetrical Okay. All right. Sort of break up here and there, using this reference as a guide. Smooth that down,
use the clay brush, elevate this out a little
bit more. Smooth that down. Okay. Use them standard at
a cat in smooth down. Okay. Now, once we smooth all of this down and increase the
subdivision level, it begins to make
better sense in there. All right. Okay. Okay. Smooth this down. Should
be faint in there. All right. Okay. All right. So I'm not doing
anything fancy in here, just being on top of what we already have
in here already. Then I'll smooth this
down, smooth them down. Let's go on subdivision level, highlighting what
we get in here. If this is looking good or we need to completely erase them. So let's do some erase. So I don't want them to
be too sharp in there, just enough to kind
of break the surface. Just enough to break
the surface to be fine. Okay? Use the bro
size a bit more. Okay, smooth this down. Let's go to lower
subdivision level. Now we can accentuate
this a bit more. All right. Okay. All right. Smooth that down, smooth this down. Yeah, this would work. Okay. Let's do for
the opposite side. So basically breaking
this up in here, so it doesn't look absolutely
symmetrical on both sides. So this is how we kind
of break this up. Okay? Let's get this belly box
in accentuated in there. All right, smooth this down. Okay. Well deviate this
some more smooth this down. Yeah, interesting.
So these moles like the form parts
where you just go in and manually break the
ship and break the foam. Smooth this down because
for the most part, we do not want this
to look symmetrical. If it looks too
symmetrical, it feels like we don't get that
interest in there. There's not too much
interest in there. We just look too generic. So trying to break
the uniformity of this by making it
look not generic. Okay? Yeah, this should be fine. Smooth this down,
smooth this down. Smooth this down. All right. Yeah, this is interesting.
Smooth this down. So let's go to higher
subibution level. Let's see what we get on a
higher subdivision level. So should get a breakup
in the structure in here, which is precisely
what we want in here. So now I can use the clay buildup brush and build a little more mass
in here, smooth this down. Okay. Smooth this down. So this will add
an extra level of fleshiness to it just to break up the entire structure of the herbs in here,
smooth this down. Now for this, you can
actually kind of add some a little randomization to the smoothing for this actually. Postifrin is certain sort
flow in here, so too. That is going to help a lot, kind of break the surface, make it a lot more interesting. So you won't be having
something that is too smooth in here. Okay. Smooth this down. All right. Yeah, that's
fine. That's fine. Give them standard brush. Creates depth in here. Okay? All right. Yeah,
this should be fine. You should work just fine.
This should be fine. So let's go over to the chest region and continue creating some
more interest to this. Let's use the clay brush. Create a bit more depth
around the smoothes down. Increase the son's
intensity, and do that. I shouldn't be doing this
on this subdivision level. It kind of breaks this
entire shape too much. I want to do this on a softer on a lower subdivision
level so we get more blended transition across around those parts, actually. So let me use the standard
brush instead holding out, create a bit more depth in
here, smooth that down. Okay? Using the standard brush rudder to create some breakup
on these parts. Then we smooth them down take
down the smooth intensity. Let's smooth this part
down, smooth them down. Okay? Use the standard brush. Let's use this same
reference for this, so we get something more
interesting in here. Create a bit more depth. Okay. Bit more depths on these parts. All right. So this helps with surface
breakup, smooth this down. Okay. Smooth this down. All right. Smooth this down. All right. Yes, getting interesting looking
shapes in here now. Okay. Smooth this down. Smooth this down. Alright. A lot more interest, and then we should be good. Smooth this down.
Okay. Interesting. On this part also, we can accentuate this depth
of this mouse smoothes down. All right. Yeah,
that would work. Here, we need some separation, breakup in here, smoothes down. Okay, her Laxo should be fine. Similarly, also around
the air smooth this down. Okay. Smooth this down. Yeah, interesting. Interesting. Let's get
to the back parts. Let's accentuate this gap so more get this a little
more intense. Smooth down. Okay? Smooth down. I don't know if you
need to kind of Let's Let's do something
in here, actually. Let's something for
the for your thighs. Let's not leave that part empty. So let's do something
for the for the ties. So that's going to accentuate or build up on top of what
we already had before. So that's basically
what we're going to do. I'm not doing
anything completely and absolutely new in here, already have the structure,
so I'm just going over them, smooth this down. Okay. Smooth this down. Alright. They accentuate
this a little bit more on one side over
the other parts. Okay, that's fine. We need to get
this, a bit deeper. Let's get this
deeper around here. Smooth. Let's get something deeper around here
also. Smooth this down. Then I'll do something
for the back. I'll get one part, a bit
higher than the other parts. Alright. Smooth down.
But for the center part, you definitely need to get a bit more depth around the air. Okay. Smooth down. All right.
Smooon this down. Smooth this down. Smooth this down. Smooth down. Now, we'll get one part, a bit higher than
the other part, so let's still using. We're still using this
standard brush, though. Using this standard brush. Smooth down, smooth down. Just breaking the general
surface of this hell lot more. Let's use another reference to another reference
that kind of helps. Yeah, it is a good one.
You should actually help. Actually help
around these parts. Use the clay build up brush. Bit more form in a
bit more form in a smooth down, smooth down. Actually even help break the
back part a little bit more. Use them standard brush. We can create something
in here, smooth it down, use the clay build up brush, B something around the, smooth that down as well. So this is just going to sort to break up changes
here here and there. So this is what we
actually need to actually sell the structure
of this as being realistic, smoothes down, reduce
my brush size. The process gets
a bit more shape around here. Smoothes down. The add a whole lot
more great depth in here, smoothes down. So all of this adding a lot surface breakup detail in here. Both in in formation and then in surface
detail also, too. Modes down. Okay. All
right, smooth this down. Get this smoothed down. Okay. Smooth this down. On this part, also, let's do something
like soap, smooth this down. All right. So you should be a
bit o, this is fine. The back ne actually fine. Need to do the same
for the arm, though. The arm also needs that
same attention of love. So let's use the bros size and then do breakup
that kind of follows the same directionality
of how the muscle is being noted or tied together and then being visible through our
skin as one single piece. Let's move this down. And be symmetry to
off it helps by lots. Let's get a bit out. Let's get elbows in here. Okay. Then in next lesson, we're going to carry
on with this doing the same thing over and
across the entire surface. I'll see you guys in next
lesson. Bye for now.
12. 11 Arm Asmmetry Sculpt In Zbrush: Cumber guys are still on this. In previous lesson, we started working on asymmetrical
structures of the body. And then after doing
that, I noticed an issue. So I don't know. I don't know, honestly, but
this finger got messed up, but we're kind of adding details to asymmetry details to the body, I would
like to fix that. Let me show you guys
how to fix that. We can use the move bros
to actually fix that. So now, it's actually on
this particular layer. So if I turn off this layer, we should lose all the
asymmetrical detail we've added in here,
but that's fine. So once we do that, I
would like to go down to move targets,
store move targets. I'll stop this as
the moth targets. Go to layers, turn on this
body asymmetry layer. So it's visible now
then let's records. Let's start recording. See
recording is tight now. So it'd be M. Let's
use the mouth brush, select the move brush. I'd like to move this back
to the original shape, so you can just use this to move this back to the
original shape or to to the stored move target we had Okay, no symmetry for this. That's fine. We don't want
symmetry for this, obviously. So let's just get the shape
back to the original. And since we're not
adding any details on the fingers yet, so
that will be cool. So let's get all of this
back all of this back. Okay. Yeah, that's fine. So that's how we kind of easily fix that. So with this done now, I believe I can go into more
of targets and do deletes. So we should be, I should be back to normal
now. So go back to move. Yeah, so we're back to normal, so we can continue continue on with
this and then keep breaking up the surface
detail we have in here. Isn't our reference. Okay, so let's see if we can find something interesting
for the arm. Thus to break up the
surface dt in here. Let's use this instead. Yeah, I think we
can still use this. But basically, what using
the clay be brush now, it's asymmetry in here. So doing this asymmetrically, let's go to lower
subdivision level. So this on lower
subdivition level instead, let's set this around. So we can actually see which
subdiviution level we are in Okay. Take this down. Let's go to lower
subdivision level. All right. T subdivision
level should be fine. So you can use the
clay bio brush now, and then just continue adding
surface breakups to this. I'll take down my
smooth intensity, and I'll just smooth this down. Smooth this down. This would kind of break up the surface tension a bit more. I mean I think we have got to soup to let's turn of
this paint icon in here. So you can see this sound great. This is fine. So basically, I'm
just building on top what we already have before. Nothing too fancy. Take down this smooth intensity
again, smooth this down. Okay? No, let's rotate this
to the other side. So I'm just going to flow the
same directionality for it, so flowing the same
directionality for it. And I'll smooth this
down. Smooth this down. Okay. So that would add additional surface breakup to it. That's exactly what I need. Flowing the same
directionality downwards, this way, downwards this way. Then smooth this down.
Smooth this down. So this is adding additional
surface breakup to this. Smooth this down. All right, smooth this down.
Look at this one. Distance that's
actually looking good. This is actually looking good. This we can work with, no doubt. Okay. Moving on. Let's add one around
here. Smooth down. Smooth down. Okay.
Smooth this down. That should help with
break up even more. Use them standard brush, add some more depth
here, smooth this down. Physically, build up brush, build some more structure
around the air. Smooth down. Okay? So yeah, this
is how we kind of gently separate out and break the surface
out some more. Go on around. Smooth down. Okay. All
right. Interesting. Around here as well. Okay. Smooth down. Okay. Smooth down a bit more. Let's dig this in, smooth out. Okay. Yeah, like so
smooth this down. Smooth this down. Smooth
this down, feel the edge. Alright, smooth this down. Get a bit more around here. Smooth this down. So it's just going to build the same repetitive
process across this. Zoom out. Smooth
this down. Okay. Then we come down here, flow the same directionality. Smooths the edges,
smooth this also. Yeah that's fine.
Okay. All right. Just a little bit
around a year or so here as well.
Then smooth down. So this is going to add
another addition layer, like I said before. Additional layer of breakup in the Actually increase
intensity a bit small. So we do a bit more. The stone is going to blend
with the skin a bit small. So it's not too sharp, but still in there to cut some cool shadow detail
around those parts. Okay, I think we need
to smooth a bit more. More in the same directionality. Okay. Yeah, that's fine. That we can
definitely work with. So we'll do for the other
parts of the also. Let's see. Let's do a breakup around here. He also flowing the
same directionality of the muscle fiber
structure in there. Very, very important. You kind of do that with the
same directionality, very, very important.
Very important. Smooth. So from a distance, you
can see breakup in there, which is still what
we need in here. Let's do some more
breakup around the air. He also smooth. Smoothes down. Smooth smooth around you also. Get close so. Yeah, just sort of
repetitive process across this to make
this look more alive. Smooth down, smooth down. Because we're trying
to avoid getting a surface that is
completely smooth. Because human skin and human
surface is not too smooth. Most especially for guys
that are slightly muscular. So we want to add that no, want to add that fib
breakup detail in there to help sell
this a bit more. I'll do a bit more around here. Then connect this around here. Okay. Smooth. So I'm basically smoothing
the edges instead. So the edge I'm more concerned
about with the smoothing. Okay? Put the same
directionality for this. Okay. Smooth down. Though, for the
most part, most of the details are not going
to be visible bots. It's always good to kind of
add this in there regardless. It's always good to
actually add them in there. Smooth down. So it's great some
fiber break up in here, just like we anticipated and just the right
amounts we need. Okay. Smooth down. Getting up close, smooth down. Okay. Smooth the edge, get a good blend in between. I would like to carve
in some more depth. No, undo that. It's not supposed to
be straight line. Carve bit depth
in here, like so. Alright, it should
be fine. Okay. We can go back to
clear bit or brush. Okay. Yeah, like
this smooth down. Smooth down. Yes,
this should work. Let's do some sentina the
blend smooth this down. Yeah, that would
definitely break things up a whole lot more with some shadow
depths in there. Alright. Smooth down. Then standard brush, create
any indention in smooth down. Okay? Go back to clay Build brush or build something that
cuts across this way, this way and smooth this down. Alright, bring
everything back out. Okay. Yeah, this parts
a bit disjointed. So let's fill that part up. Smooth down. Okay. Yeah, interesting. Now for the this, not too sure, though, but let's just do something in there. Let's just do
something in there. So once we are looking at
this on this gray scale, we should have at
least a good amount of uniform breakup
look in there. It'll smooth this down. Okay? Okay. Smooth this down. Right? I'll use this
damn standard brush. I'm going to add a cut
in a in a smooth down. Okay? Alright. Yeah. Just
simulate something, I look more, more or less, more like a knee cap in there. All, Saving out. Okay. Moving on. Smooth that out. Go back to the
clay bed or brush. Add some clearing on the part, do the last piece. Okay? Okay. Smooth out. Smooth out some more, smooth out some more. Alright. Yeah, that should work. Yeah, interesting. That gives a more interesting result to it. Do the same around here. Okay. Smooth. Smooth this by lots
around here also. Similarly here also. Okay. All right. Yeah. Yeah, we need
to do some break up. Smooth this down.
Smooth this down. Okay? For the back, we need to actually some interesting detail
in here also, too. Get this in here. Okay. All right.
Smooth this down. Okay. Smooth down,
smooth down. Right. Yeah, I think we need some, not necessarily for
under part, though, those parts is going
to be covered up by shoe in the shoe in the, so I don't think I
necessarily need to add so much any detail
in there actually. Smooth down. Okay? Smooth down. Sort to break up that makes cool interesting detail
in here, Smoll down. Okay? Okay. Yeah, that was a mistake, Dub We can keep that we
can keep that mistake. Don't do that. Let's
dig in instead. Let's dig in instead. Then smooth. Smooth that down. Do some digging, digging
around these parts. Okay, then we smooth. So the surface detail
gets broken up even more with some planar changes in there which we
can definitely keep. That makes the
character who lot more interesting at least
on this part of in adding the surface
break in there. Alright. Let's do
for the Bpiece also. I don't want to neglet the
bapiece because it still needs to have at least
some detail in there also. Smooth. Okay. Right. Smooth. Smooth this out. Smooth this out. So more some more also on
these parts. All right. I won't do too much
in here because it's not gonna be visible
on a fire render, so let's smooth this
out a lot more. Okay. Let's add some more dimple on this side
compared to the other side. So one parts, you'll have a
lot more dimple. Smooths out. Smooth. Okay? Let me dig in on
this part instead. Let's down the brush
size, digging smooth out. Just to add variation in
there, nothing too fancy. Okay. Smooth this down,
smooth this down, adding some more
breakups in here. Alright. Okay. I think I need to
fill this part out. I think I went
overboard in here. Let's fill this
part out. Sm down. Yeah, this is fine.
This should be fine. Let's do for the broad
shoulder in here. Smooth smooth this out. Them stand out brush, create
some more depth in here. Smooth this down. Let's create some fiber details
on these parts. Smooth down. I don't want
to neglet this part, so breaking that up is some
more fiber mostul detail underneath the skin but
smoothing this down to create effect in the Smooth this down. Okay. All right. Smoothes down. So with this now we kind of created variation
around that parts. Since we need Adam's apple in here smooth down on the edge. Alright go to the opposite side, dig in a dig in a smooth. Okay. Surface breakup is looking fine. H. Right, smooth out a little bit more around
the smooth out. Okay. No wrong place, smooth this out. Zoom out a bit more, get up in close, Blend smooth. Okay. Yeah, as I would kind
of go back and forth, breaking up the surface, making it look a lot more interesting in here,
smooth this down. Yeah, I think as
far as this goes, I think we did a very
good job in here. We'll come to the actual let's
come to fingers in here. Okay. Smooth. Smooth.
Okay. Smooth out. Smooth this out, smooth
out. Smooth out. I need to have a variation surface breakup on the fingers. Very important. So smooth out. Get this in, smooth out. Okay? Smutn shouldn't look
too symmetrical. That's the general idea. I shouldn't look
too symmetrical. Okay. Et's get closed, smooth out. Okay, smooth out. Smooth out. Alright, I think we can we can
move on to the other part. Let me smooth this
down. Smooth this down. Smooth this down. Smooth down. Okay. Let's go to and do that. Okay. Smooth down. I'm basically focusing on smoothing
down the edges of this. So the edges of this based on how I created them initially, smooth this down around here. Let's get close on these parts. Smooth out. Smooth out, get some more depth in here. Okay. Smooth out. Smooth down. Well, that's fine.
I think for the
13. 12 Nipple Sculpt In Zbrush: Should should work just
fine, for the most part. Let's do something
around the air. Come on. Smooth smooth. Smooth. Let's do more around the smooth. Yeah, use a some
details in here. Shouldn't neglate smooth. Okay? Sm down. That one looks old, so I won't do that. That one looks old. I won't do that. So it's
looking slightly old. Reduce my brow size. Okay. Smooth out. Yeah, so get in
close. So it should be fine. Okay. I just want to add
some ris in here. Just need to add
some ris in there. Okay. Get in closes. The smooth that
down. Smooth down. Add some more depths in across, smooth out by lots. Okay. Yeah, that's fine. That's fine. I think
for the most part, this is quite nice. We can definitely work
with them standard brush. Get something around here, smooth down just to add a
little more interest to it. Okay. Yeah, that's
fine. That's fine. So now, let's create some
detail for the Nipus in here. So let's start with doing this symmetrical let's turn
on symmetry in here. So asymmetry turn on. Undo that clear brush. Now, we need to go to the
higher subdivision level, so you can reduce the
bit more accuracy to it. Okay? Smooth down, get in close. Smooth down some more, reduce the bro size. Let's go to much higher
subdivision level. So I should be showing you guys the geometrie so you can at least see subdivision
level I'm actually in. Very important. So let's drag this down the higher
subdivision level now. Okay, it should be fine. So let's use the DM
standard brush now, and then just carve out and
you put structure in here. Zoom out. Let's
see where we get. Okay. I think we can use the
move brush and go to lower subdivision level
and move this back into cut the t is
a bit undo that. I think the t is a bit much. The for this is a bit much. So let's get this
back down a bit more. And let's go to higher
subdivision level. Let's see what we get. So I'm just going to increase this to the highest subdivision level. Okay. All right. I is the highest
subdivision level for this. Let's do agent smooth. Okay. Let's see. Yeah, this would work.
This would work. This we can
definitely work with. Okay. Turn asymmetry with
the dam standard rush. Feel like I undo that undo that. I feel like I should have a bit more depth around this parts. Let's go to lower subdivision
level to do this. Let's go to lower
subdivision level. Okay. Smooth down. Smooth down a bit small with the clay brush or add a lump around there,
smooth this down. Okay. Yeah, that's fine. That should be fine.
That should be fine. Smooth this down also. Okay. Smooth down. Use
the standard brush. Let's say we elongate this. No, nope, nope, nope. Signal is looking a bit off.
Yeah, this should be fine. We don't need to do too
much. This should be fine. I should work just
fine. All right, so, so let's move on. And then in the next lesson, I think I need to smooth
this down a bit more. A bit more. I don't want
to be too aggressive in there. Yeah, that's fine. So next lesson, we're going
to move on to something else. Okay? So I'll see you guys
in next lesson. Bye for now.
14. 13 Facial Primary Forms In Zbrush: Okay. Welcome bad guys. So in the previous
lesson, we worked on the asymmetrical
structure and filling up of details around the mesh, and then we created the Nippo. So in this lesson,
we're going to start or rather continue on on top of this character design by working on the head. So I would like to go to the higher subdivision level
and then create a new layer. And this layer will just be
specifically for the head. I'm going to be using
this character in here. This is the character
design character head, I'm going to be
using for ASCOps. So with the subdivision
level active, let's go to layers. Let's
create a new layer. So I'm going to
create a new layer. This layer is going to be
named as Ed primary forms. So let me just give it a moment. Okay, is there now. So on caps. So head primary forms. Okay. That should be fine. That should be fine.
I'm going to zoom out. Let me check if
there's any issue on this again on the end again. On the fingers, just
should be sure there's no issue in there,
so that's fine. No issues in there so far. So now we're going
to isolate the head. So Shift F to go to poly group, then Shift click on the
head. So we can select this. We can just work on just
the loon let's go to the lower subdivision level. Let's go to the lowest
subdivision level for this piece. So let me make sure the geometry is open
in here so you can see the subdivision
level I'm in. So, good. So this is the subdivision
level I'm supposed to be in Shift F. All right, so bet anything in here, I'd like to look at the I
always like kind of get the silhouette of
the head in here. So let me just get
it straight on. So we can see let me see. I think I should be able
to let's use this inset. So based on the structures
of the head in here, you can see sharp
line around the jaw. You can also see a more obvious molar bone
structure in here, just beneath the lead cheek, and then we have the
Nasibar foods in here, but Nasib in here. But originally the
slow should be a bit ungod especially on the jaw around there
and around here. Then we have the chin
bits not too broad, though, not too broad, but more or less for like an average male structural face, but he has a wider lip. So the up lip is gradually
a bit higher in here. So you can see, actually
higher in here. Then obviously, it's
an African face, so it should have wider
nose risk to him. So these are all
the structures, I'm going to be looking at before blocking that right
into my model. So let's start with the jaw line and then get that in first, and then we can work
on other parts, right? So the move brush is our
major friend in here, so the move brush is
our main major friend. I don't know met in here. So I would like to start
with the Mark card grey. So the mark card gray is mostly I think for just
starting part actually, it's actually good kind of
use this kind of start out. So I would like to Let's do
find a reference that looking sideways so we can get a bit more accuracy on
the jaw line in there. Let's look for a
good side reference. Yeah, this is a good one. So
we can use this actually. This we can use and try and get the jaw looking as
accurate as we need it to be. So'm going to move
this undo that. I don't need to affect
too much of the, so I think this is the Mx lasso. Let's use the max lasso I'm
going to max out these parts. V the maxblow this a bit more. Use the brush size.
Move this back up, move this down. Okay? Come on, increase the bros size, then move this down
a little bit more. Like, so not too much though, you want to be careful
you move that, so I think this should be
fine and a little bit more. Then around there, we can push this can push this
up a little bit more up a little bit more, just to get a better
transition around there. I think that should be fine. Okay. Let's clear that out. Then we need to flatten this. Let me smooth this out first. We need to get the cheeks
pinched in some more. So let's let's pinch
this part in a bit more. But there's a part la region
to it and just go to push. Well, let's just
start by pushing this in a little bit more, okay? So the idea is just to
do sort changes to this. All right. Get this
in a bit more. Okay. Now, let's look at this
from the silhouettes. I think, yes, yes. I'm getting something in here. I'll come down around. Come on. No, below the cheek bone and
just move this in. So more. It looks like I'm
not moving anything, but I'm actually moving
something in there, so I think this should be fine. And I think this should
be back this way. I'll do some smooth. Okay. Okay, that's fine. Let's look
at this from a distance. Let's see if we're getting
the shape in there. There's still a lot of
work to do here, though, but I think we are getting the shape that we
want out of this. Let's go back to the
soda referencing here. So it has more of a has
more of a box like fist. So that we're trying to
that's what we're trying to recreate in here this box. I keep moving this. I
should just use the airs instead to just skill
the brush instead. That would be a lot better. Okay. So I'm going to adjust the temporal edge of the face just before
the temporal line. Let's push this in. Let's get this temporal parts
bone structure in. Okay? A bit more, a bit more. All right. Yeah,
that seems fine. That seems fine. Let's
push this in some more. Yeah, this we can work with. The nose is not in there
yet, but that's fine. So the lower part of the lip, we need to extend that out
also a little bit more. To do that, I can
use the come on. The center is I going to control and drag a selection
here. Like so. I'll give you a
different polygroup Control W to give a
separate polygroup. Then it W on the keyboard
to go back to the Gizmo, select the Gizmo, Shift
F, invite the max. Okay, invite the max
again, blow this out. I would like to bring this part of the lip
down a little bit more. Okay? Because it has
a bigger lip to him. And this, let's get this
up also a bit higher. Okay? All right, like so. Yes, I think this should work. Yeah, this should
work. So what we need to do now would be undo that. Let's bring back the max. Let's get this down
some more, okay? Invite the max. Lift this up a bit more, clear the marks,
increase the bro size. So we're not going for aute
likeness in here, though, but just something good
enough should be fine. Extend the lips out a little
bit more on the side. Okay? Okay, that's fine. There's still a lot of work we need to do in here, though, but piece by piece, we're going to capture
the essence of this character a little
bit more on our scope. Moving on. Let's see,
let's do for the nose. Let's get the fructure of the nose in there as
accurately as we can. We're just going to
widen this on this side. A get a African nose in there. Okay, and come to the side. We need to push this
down some more, okay? Obviously, it's not
a male vocal male, so it's not supposed to have
more pointing nose in there. So let's look for ano side
reference that should help. Okay? Let's look at this Look
at it from similar angle. Let's see if there's something else we need to push in here. Okay. Yeah, I think this is
in the right place. It's in the right place. So I'll use this damn
standard brush now. Let's carve indentation in
here, let's move that down. Okay. Yeah, that should be fine. That should be fine. Zoom out. Let's see again. Okay. So now let's use this anatomy
reference in here. I think we can look at
this from the side. This is anatomical
reference now to begin to compare this with our original reference and then get some more structure
going on in there. So now, this molar,
the molar in here, so the molar is just this bone
you have around this part. So using the an actual
core structure in here, you should find it I think I have this co structure
in here somewhere. Okay, use should
have one in here. I think I do have one. Glad just use this echo chain here to illustrate that skele. So the molar bone is just
this bone you have in here, so for him, it's not entirely
protruding out, though. But just to give you guys an
idea that's actually there, we also have this piece or
this part around the jaw, this flesh in, then there
should be a depth around there. Then the naso label
should be around here. So all of these are those
structures that we face that we keep account of before locking that in on our
scope because that would actually make our head
look a lot more realistic, a lot more realistic,
like a real human head, so all those
structures we need to actually account
for on our scope, so let's get that in, but still keeping these our
main reference in mind. So let me just get
this down around this way, move this out. So with this in here now. So with label food in here
for him is not very obvious. So let's smooth this
down a bit more. You don't have to look
like he's too hood, so tune that down. Let's see. Then we can start
carving the structure here. We can use the Dame
standard brush. The Dame standard brush now, I can carve out where
the shape should be around the should be fine. Okay? That's fine. Then the molar we
need to accentuate, we need to accentuate
a bit more. That we need to
accentuate a bit more. Well, let's start by
using the clay brush. I think the clay brush
would do a good job. Before that, just before that. Just around close
to the net label, we need to create a
depth around the air, little depth around
the smooth that out. Okay. Then smooth this out also. No completely though, don't
completely smooth them out. Just want something to want something to
actually be there. Want something there that should kind of help to help
us know that Okay, we kind of maked out the region. Then we kind of kind of
fill that parts out a bit. So I was saying here, let
me look for something that's more of a profile view. I need something that is more
like a profile view to him. So it feels like his face is kind of coming out more
because look at this, looking at this now from
the side and I feel like I need to kind of bring
the face out to be a bitmre. So I'm going to
max out this John. Like, so blow out the
marks, invite the marks, blur out the marks
a bit more, okay? I think somewhere around
there should be fine. Then let's use ton of symmetry
center front center, this. Let's get his face out a bit
more, rotate it this way. Bring this forward a bit more. Okay? O a bit more then some more.
Let's see what we have. Let's see. I think I
push this way too much. I want something that's not
too aggressive in there. Let me turn on symmetry. Let me use the move
brush instead, see if we can capture the essence of this a bit
more with the move brush. Okay. All right. Now, that's a bit much.
Let's push this back in. Okay. Clear this out. Let's
see this from the side. Yeah, I think this
should be fine. Here this we can work with.
This we can work with. All right, so yeah, moving on. So we have that in place now. We have that in place now. We can leave that that
we can actually keep. Let's look for
another reference of the side view also too that we can use,
this is also a good one. Okay. Let's try using this and get
this similar apples also. Get this similar apples. Move this way. G
symmetries don't on. Okay. Maybe there's
way too much, get this down this
way. All right? Still only move brush, I would
move this out a bit more. Okay? Get this in some
more, get this out. Push this back in some
more. All right, okay? Yeah, there's still a lot of
work to do in here, though, but I'm just trying to get the general proportions in the fast before doing any
major work in here. Okay, yeah, let's leave
this as it is for now. Then we'll work on
something else. So let's go let's go to the brow and get the
temporal line in there. So you can use this
standard brush. We use the standard brush. Let's get the temporal line in. Let me use the
edge polish first. Let's use the he
polish and then polish this edge in a bit
more smoother down. Okay, smooth this out. So with this now, we can get the temporal line in there for free by using
the He polish brush. Then I'll go back to
the standard brush. This front front fronts colline is the
forehead, actually. So I'm just going to create mood out and create a
depth around the air. Smooth that out. Let me take down my smooth
intensity, smooth this out. Okay? Out a bit more. Right. Then I'm going to
use them standard brush, cap out a depth around the air. Probably that's way
too much, you see, but I think that
should be just fine. Smooth that out also. I think that's way too much. I think we need
something a bit thinner. N something a bit thinner
around that part. Let's get this
around the instead. Okay. Smooth out. Smooth out. Swan this part out again. We use the clay builder brush. Let's build some additional
structure around here. No, undo that. Undo
that, undo that. This is the standard
brush instead. Okay. But structure, and
smooth that out. Okay? No, that seems a bit smot That seems a bit
sm Let's do that. Do that. Back in here,
smooth this out. Okay? Yeah, so let's
look at another one. Let's see this from
the side view. Okay. Fair enough. I think I need to bring this chin down some
more down a bit more. Okay? Up, some more. All right. Maybe
that's way too much. Maybe take this up a
little bit more. Okay. So there's a lot of structure around the face or
the head that kind of makes a character look
a lot more human like. So there's still a lot of work we need to
do in here, though, we're kind of getting
it in piece by piece. So it's still going to take a
little while to kind of get the proportions and the structure completely
right in here, but we're getting something, definitely getting
something in here. So let's just continue
in that same fashion, fashion and then keep
working on this to get the face to look not
entirely like him, but something good
enough in here. With that in mind, I would
like to create another depth, carve this in, smooth out, smooth this out a bit more. Okay? No, no, no, that's
a bit too deep. So that's a bit too deep.
Undo that undo that. Okay? Let's get some more
shape for this temporal line. I mean, the more line here, let's get the small live bits slightly exaggerated in here. So let's get this
slightly exaggerated. And I'll smooth this down. Smooth down, okay? Here something like
so, right? All right. Yeah, this is fine. So
back to the move brush. Move brush, I can still move
this in some more Alright. Okay. Let's see. So it's all about using shadow information and then try to capture the essence of your
character a bit more. I think I made the
nose a bit too big, so I'm going to reduce this on this part
a little bit more. Okay? All right, so
it should be fine. Smooth this part out. Okay. Smooth this part down.
Let's use the DM standard. I'll create a shape in here. Because the same shape we also have et show you guys
the shape also in here. Same shape also have around the lip around the
lower part of the lip, so I need to kind
of get that in. Also looking at this
also from the side, the forehead, I think we need a bit more
depth also in there. Still the standard brush. No, that's way too deep. That's actually way
too deep. Okay. Smooth out. I feel this
is even way too much. I feel that's bit too modular. Let's see. Let's see. I think I think we
are the right amount, so we can use the
clay brush now, and undo that, undo that, undo that, undo that also. Let's smooth this part out, increase the brush
size a bit more. Here, smooth out.
Yeah, this is fine. So in the next
lesson, we're going to carry on and then
keep working on this.
15. 14 Facial Refinement In Zbrush: Welcome back guys.
So previous lesson, we started working on the head. So in this lesson,
we're going to carry on and then keep
working on the head. So let's continue on instead
this to the standard brush. Yes, so Control Shift click
on Condo shift click, Condo Shift click, Condo
shift click, click. Then we can invert this.
So still on the face. I noticed something a bit of on let's see, I
think this reference. As much as this reference is actually good to work with at least for some other
parts of the face, it wasn't as accurate as it
should be based on the fact that more or less the camera
lens is for this far out. So the zoom into the face and then zoom into the
face with that. I'm not entirely sure which focal lens is used for this to actually
zoom into the face, but created a more
wide face to him. But this particular this part
lar reference in here kind of gives us a better idea as to the proportions of
his head in here. So I'm going to continue
on with this instead. So there are a few things
we need to adjust in here. So let's go back
to the move brush. So I'll go to the nose. So coron need to met the nose. So I'm going to extend this
part out a little bit more. That should be extended
out some more. Maybe that's way too much, okay? Then this will move undo that. Okay, let's get close. Reduce the broad size. I'll extend this in some more. Let's start by extending
this up a bit more. Then I'm going to push
this inward this way. Okay. So if he's very, like if he's very mot like
his own nose in here, so let me smooth undo that. Take down this moon's intensity. Still on the move brush. Okay, smooth this down. Okay. I think I need to fill
it up a bit more. Let's use the clay
buildup brush, fill that part out, smooth out. Pretty much like
so. Fill this part, undo that. Undo that. Fill this part out some
more smooth out. Okay. I think most likely this tip of his nose should poke
out a bit more. Let's use this move brush. Move this out some more, increase the brush size. Get this in a bit more. Yeah, something
pretty much like so. I was going to smooth it out. Let's use the clay brush. Feel the parts out. Alright? Yeah, I think, this is
a good place actually. Then move this okay,
back to the more brush. I'll move this reduce
the brush size. Move this in a bit more. Okay. Yeah, that's
fine. Alright. So I think that should be fine. For now, we'll move
on to let's move on to another piece. Let's see. We need to look for a side
reference for this though. Let's look for a side
reference for him. Okay? Yes, it is a good one. Let's turn to that side. Let's see how we
can make this work, the clay build up brush. I was going to fill this part up a bit more and
smooth that down. Okay? So let's go back to
let's go back to this. On this polar reference, it has a more longer facial
structure to him. So we're going to try to replicate replicate
that in here. So back to the more brush still on the lower
subdivision level, increase the brush
size a bit more. When I once I kind of
noticed in years that he has a shorter hair to him. So an ear in here is quite long. But before we fix that, let's get this pushed
ins a little bit more. Okay. Then I'm going to shrink
the size of the year. I'm going to leave this
part up a bit more. Yeah, pretty much like
so it should be fine. Then also for the lip, the side of the leap in
here is actually too much, go to the gizmo control, click on this poly group. So the lower lip kind of
made its way too big. So let's get this
back up, get close. Just push this back
up a bit more. Okay. Yeah, that's fine. Then I'm going to raise
this up a little bit more. All right. Yeah,
that should be fine. That should be fine. Let's
do something for the hi. Let's get something
for the high. Let me just declare
do brush and build something on here a little
bit more. Smooth that down. Okay. Yeah, that's
fine. That's fine. Still a lot of corrections we
need to do in here though, but I think we are getting
what we need in here. I would smooth this out. We that in previous lesson,
so let's smooth this out. Let's get that a
bit softer also. Then I would like to shrink
the size of his jaw. A little bit more Let's look
for a good angle for this. Let's do this from around
here should be fine. Poduce the bra size. C back to remove brush. Move this a bit
small, way. Okay. Let's make it slightly angled. Let me smooth this
down, smooth this down. Here I think like
so should be fine. Let's kind of visualize it
from similar angle, also. Let's see, there's something
else you need to do in here. Here there is. I think
we can with more brush, we can push this back in a bit more around the
air in a bit more. Okay. Yes, I think we are
getting something in here. And I think I can move this up the jaw up a little bit more. Okay? Up a little bit
more. Up a bit more. I think I should be using
this smooth bros. Is instead instead of using space, but that kind of
messies little for me. So let's look at this from
the same similar angle also. So looking at it from
the same camera angle, then make corrections
based on that. So this part, I'll
need to lift up some more condo
that wrong angle. I see. Come on. I think I need to move this
get in a little bit close, move this up here instead. Okay. Up a bit
more. Up some more. Let's look at this from
the same camera angle. Let's see. So I think I need to increase
intensity for this. Okay, that's too intense,
reduce that down. Let's look at this
from this angle instead up a little bit more. I think that's a
bit too extreme, get that back down a little. Yeah, something pretty much
like so should be fine. Let's look at it from the
same camera angle also. Yes Okay. Let me reduce the
size of his lip. Undo that. Do this
from this angle, undo that. Reduce the bros size. Okay. Yeah, something like,
so it should be fine. Reduce the size of his neck a little bit more smooth down. Yeah, I think we can
let's see Let's see. Yeah, I think the leap, I would like to make that a little bit put out some more. Let's get this
forward a bit more. Okay. Yeah, that should be fine. See if there's something
else we can do for the job before we move on. Okay. Let's see. Let's
jump to the high. Let's jump to the high. So I'm going to use the max lasso. I'm going to max. The brown used to be a bit higher
than weight is right now, so let's max the spats
around the edge be fine. Blow this some
more remove brush, increase the brush size. A bit more okay so
it should be fine. Then we're going
to leave this up. I'd like to get
that a bit higher. I think that's
actually way too high. Let's get let's get
it down a bit more. Yes. Somewhere around
there should be fine. That should be fine. Okay. I want to use them
standard brush, create some depth around
here, smooth that down. But I think this jaw just knife doesn't feel right to me yet. This jaw doesn't feel
right to me yet. Jaw doesn't feel right yet. I want to mark this part
out, load this down. Lo let's go a bit extreme. Let's go a bit extreme. Let's see. Let's
see what we get. Nope, nope. That is quite odd. That looks quite odd. I think we need to
kind of ned this based on the most soft to transition. Most soft transition. Let's look at our
anatomical reference. Let's see what we
can get in here. Okay. Crease the brush side some more push this
down a little bit more. Okay. So I'm basically trying to capture a more longer
fiscal structure to him. So that's basically what
I'm trying to do in here. This face long enough.
Let's clear the marks. I think this we can
work with except we do something like max
out this region, blow the mark, inverte the max, blow it out a bit more. In this, get this down slightly. Okay. Yeah, I think it should be fine.
You should be fine. Yes, this we can work with. I think I would like to extend the brow up a little bit more. Just a tiny amounts so should be fine. Yeah,
that should be fine. Up a bit more. Okay.
Smooth this out. Yeah, let's do a
little bit more. We can do a little
bit more work on the, this part, this nasa
bell looks a bit off. Let's get it down some more. Yeah, like that
should be fine. Okay? Yeah, so now we can begin to add some more interest to this. But for a male character, I think we need to have a little bit more sharper ang here. You know, do that.
Sharper angle should be pushed this way, okay? Get it more sharper
going in there. Not too sharp though,
but something just to create a good illustration
around those parts, okay? Yeah, that should be fine. So let's create the so let's
make the eye bag in here. Then we're going to
create the lead chick. The eye bag is what we have around here.
That's the eyebg. Then the lead chick is what
we have on these parts. It's more like two
layers in there, let me show you guys a
good example in here. If you come in Zoom
can see the eye bag, then the lead check in there, Let start by creating creating use them
standard brush grating. Separation in between, so
let's separate this out. Go in here. Okay. Like so. Then we'll have another
one that comes across. No that's a bit too much comes across around these
parts. All right. Then I'll smooth
that out because it's not supposed to be
this obvious in here, so let's blend smooth that down. But we should still kind of sit underneath that based on
so soft shadow in there. So here, that should be fine. Smooth out a bit
more around here. Okay. I want to use
the move brush. Extend this down a bit more. Smooth that down. All right. So just a faint example
of something in there. So back to the dem
standard brush. Let's create some more depth
on the brow, smooth it down. Okay. So this is are we kind of start creating
and blocking now the structure of the
O face a bit more. Keep adding these
structures piece by piece. It begins to make a
lot of sense in here. Now, I also want to kind
of use your reference also based on the reference you have kind of create some
more shape in there. Marks part out,
invite the marks, blow it out, use the move brush, move this up a bit more. Okay? Okay, that's fine. I think for the nasulbel we need to create a bit
more depth in here. So just around the nasolabel, need to create a bit
more depth around here. That's a bit too deep. Let's
take down the intensity. Let's do something
light in there. Okay? Just to separate that out from the nasolabl
and the molar in there. Then smooth that down,
smooth this down. Okay. So all of this will begin
to make better sense where we add reflectivity to it. Let me get this at an
angle from the top. I'm going to use the Clay
Build brush get close. I would like to build
undo that undo that. Let me use my inflate
brush instead. So BIN. So I'm going to use my
inflate brush instead to inflate this molar
bone some more. So inflate the molar
bone a bit more. This one has a small smooth
transition undo that. Is a bigger brush. And Okay. We use the brush size, then smooth that down. Is soft smooth. Okay. That soft smooth in there. Still on the inflate brush. I would like to
inflate this place. We use the brush
size, get close, do that. That's a
bit too extreme. Let's just de clay
Bow brush instead. Build a shape around here. Here like so, then smooth
that down. Zoom out. Okay? So once you add those
ships in there, you also want to kind of
check if it looks right. You also need to kind of
check if it looks right. If not, we're just
going to remove it. So I just want to check if that feels or it looks
right in there. I think for the most part
that should be fine. Go to the standard brush
them standard brush rather. It's actually good in
there, but it kind of creates it's like a Let's see if we can
find it. It's in there it's in here already. So it's a shape where the
structure of the nose kind of the bone in ja kind of books out and then
creates like a dent. So the n should be around. Let me show you guys in here. So is this ship in her
separation in there. That what we're trying
to recreate also on our scopes separation in there, but using our main
reference as a guide, you can see the same
to also in there. So use them standard brush. Think let's smooth
this out also. Do I need to smooth that out? Yes. Yes, that's fine. So I'm going to create the
ship in there undo that. Undo that. Okay. I think, so should be fine. The brows size. Then
smooth soft smooth. It should be just
india should be fine. Yeah, there's a depth
also around this part. So let's create increase in
dense a little bit small, a little bit more depth around. No, no, that doesn't look right. That wasn't looking
right at all. So let's do that again. Okay, around here. Okay. Then we smooth that down, use a smaller brush
size. Smooth that down. Okay. Zoom out. Yes, that's fine. Let's look at this from
the same similar go. No, around the Nasul be, we have a folding here. It's like a folding here, so let's use them
standard brush and then carve out a shape around here. No, do that. I should kind of connect to the
Nasibe folding here, so something around here. So block that in with
a then standard brush, then smooth that
out, smooth out. Smooth out also. Then I'll use the
clay Buda brush and then build a shape
around that part. Smooth that down,
smooth down the edge. Yeah, something like
that should be fine. If you do create this shader
information in there, that we can
definitely work with. Okay. Let's say there's
something else we can do. So basically building
this bit by bit, which is what we
actually need to do. I think I need to
smooth looking at this. Let's smooth this out some more. Use the standard brush. But something, smooth down. Okay. Should be a
bit obvious for now. Should be a bit obvious
for now. That's fine. Use the move brush. Extend this out a little bit
more smooth down. Okay. Let's go to our blink material. She begin to kind of see
some of these structures, a bit more in here now. Okay? Now, de this
depth we have in here, I need to kind of fill that
up. Let's fill this up. Let's fill this up. All right. Smooth that down. Okay.
Yeah, that's fine. Just check in to see if there's something else
you need to add in here. W obviously, the obvious les. Most especially around this jaw. You need to do pretty
broad side to, like, a fill it in here,
then smooth that down. Okay. We feel it also around,
smooth that down. All right. Okay.
Yeah, that's fine. So, yeah, we continue to keep working on this in the
next lesson, also. So I'll see you guys in
next lesson. Bye for now.
16. 15 Facial Secondary Forms In Zbrush: H right well comb guys stick on the fragment
of this head. There's still quite a lot of smaller tiny facial structures around around the head that if you don't capture the
essence of downtnoscopes, you might not get something
looking realistic enough. On that note, let's just
continue working on this. I see some features from
this reference in here. Another idea is that
once you get stock, you can't really find another additional reference
to actually use or another feature block in, change your reference and then if you have something
to work with with a better reference different reference from a
different angle from a different time and different
lighting also to begin to expose some of the facial
structures that you kind of miss in your previous sculpting. So keep that in mind. So I can see some features. Yeah, I can elevate, like, smooth this down. Okay. Let's see what we get. That's slightly
odd, slightly odd. So I'm going to
use the move brush and then move this down
a little bit more. Yeah, so it should be fine. Okay. Also, you can see this part is on the nose
is kind of thinned out. Nosy is kind of thinned out, so let's smooth that out and get something a bit
softer for the noses. Let's get something a bit
softer. Here, that's fine. Then the general proportion of the general proportion
for the nose, I like to do some more
corrections to that. So let me just show you guys,
let me use this instead. Let's look for a
nose structure in here that we can use to better illustrate
what we need to do. Believe I should
have one in here. Okay, so this is a good
reference for this. So I wonder even oh this
is like an African nows, the structure in the t needs
to kind of show a bit more. So to do that, we can use the DM standard brush to kind of elevate that
a little bit more. Yeah, more or less like so. Then I'm going to smooth
that down a little bit. Just to get an angle in there because we need to
get an angle in there. Then we have something
that goes across down here that cuts
across this part. Okay? No, do that. You need
to do this properly with properly from around
down here, should be fine. Okay? There should be fine. Then smooth that down. So you should the shader
information in there help help us in there,
just flow kind no. There's something actually
in there. Let's see. Let's see what else
we can block in here. Yes, we can go and
create an indentation. Yeah, that is fine. Elevate
this a little bit more. Okay. Let's actually see his
nose from the side view. Because I feel like the nose in here is a bit kind of too flat, flattened out way too much. So let's see, so we need to kind of elevate
this up a little bit more. Actually, on these parts, the mid range part needs to
be elevated a bit more, okay? Around your house,
a little bit small. Yeah, something like
that should be fine. I can see based on the
shadowing in here, it gets closed, gets enclosed. Okay. Let's get it similar
to the angle we have. We can see Let me
get in closing here. You can see a separation
around the molar region. So we can also get that in. We can get that in. Let's see. Yeah, I can also
see a planar change around a planar change
around this part also. So that I can easily
do with edge polish. You can just polish
this edge slightly, just something soft,
smooth that out. It's a bit too sharp. Mine
is a bit too sharp in there, so I'll need to undo that. I see the same he polish
but reduce intensity. Let's get a planar
change around here. Okay, and I'll smooth
that out. Here, like so. Smoothing that out
would be fine. So just a soft planar chin, smooth this out also
around the air. So that soft planar chin
should actually help. So this is how we start breaking
up this head a bit more. So now we can see this.
Let's get this at an angle. Let me soften this out
a little bit more. We can see this separation
around the molar. Is also on bring this out
around the ears fine a good. Reference for that, but in here, let me use this instead. It's not obvious in here. I think it should be,
it's more obvious around. It's more or less
like this line we have more or less like this
separation we have in here. So we need to kind of
create that around here. It's also what we have
on the reference. We just decide. Let's
get this around here. It's also what we have kind of separating this
part out some more. We need to introduce that
also too in our scopes. So this is having various reference image of the same person from
different camera angles and different light setup
actually helps by a lot to get some good interesting detail
around that part. Let's create a separation there. But we need to smooth it out. Before smooth it out, let's. Let's I think I think my
browse size is way too big, so let's use the bro
size a bit more. Let's get some thin
thin around that part. Okay. I do one step. We need to do this just once
on the same line naturally. So then we can smooth. We can smooth, but we should we still get that
shadow information should actually help us know that there's something
still in there, so I'm basically using my
shadow there to my advantage. So let's go on subduction level higher
let's see what we get. Let's go and stop the iron so we can see what we
get out of this. I need a bit of time
to kind of jump to, okay? It's in there now. Let's see if we get that in. It's not too obvious in there, so we can use the same dame standard brush can repeat that
again and do that. Okay, then smooth out. Okay. She should just be barely in there, but
still in there too. Stay in there on kind
of look at it from a different angle where
we have more light in. So yeah, that's fine. So I'll blend smooth
this down again. I like to tighten it to
use BPI pinch brush, tighten it a little bit more, tighten it to a more. Okay. So we get something
tight in there, but see catching the right
amount of shadowing in there, so it's still very
much in there. So let's go to the
lower subdivision level and keep working on this. Let's see if there's
something else you need to do in here based on
this camera angle. See, most of the shape are
blocking in clay brush, move this to the side,
move this down here. I would like to create
something in here, then smooth that down. Zoom out. Let's see, smooth that
out some more, right. I think that should be fine. Okay, I'm going to
use he polish now. I'm going to polish the
corners of the nose. Basically trying to create
a play ner change in there. So trying to create a
play n changing there, that should be fine. Let's see. Let's go towards the
forehead, a bit more. Let's go towards the forehead
a bit more and create some more interesting
shape on these parts. This is west that's west
lowest obvion level. Let's use the dam
standard brush, increase the brush size. Okay. Okay. Let's see. It's a separation around
the frontal skull. So I would like to implement something similar to
that around that part. You can see this part is
slightly also elevated. But let's start by creating the dense ear first,
create the dense ear, use the brush size,
smooth that out, smooth that out, a bit small. Okay. I should still
be there but faints. Then we can use the clay brush and increase the brush size and create a lump on the part. And smooth that lump
out a bit more. Okay, get close zebra size, zebro size, smooth out
that lump some more Ar. Okay. Then still on
the same clay brush. I can see a shape that
comes across this way. Zebra size, elevate this part some more Okay.
Smooth that down. I down my smooth intensities, smooth this down,
smooth this down. Alright. Think that's
a bit too elevated, get it smooth around that part. Use the dam standard brush, create a dense in
here, zoom out. Okay. Zoom out a bit more,
increase the brush size. Let's get more dense in
here, then smooth out. Okay. Use the clear
build up brush, fill the spot up some
more smooth that down. Smooth down, smooth down, zoom out, gets enclosed,
smoothes down. Also, Alright. So should be quite
barely fenced in there. So you should see
it when we look at this from similar angle. Looking at this from this
similar angle now I see I need to let's use the
standard brush instead. Put out, dig in here,
smooth that out. Smooth out some more. Yeah, that should be fine. That
should be fine. Then go to this dam standard
brush undo standard brush, create a depth in here. Yeah, let's give him some
more character to him. So that's fine. Let's find
out we can work with. No necessarily bare food. I think I need to
get that a little more should be a bit more
obvious in there actually. So redeem standard brush. Okay. Yeah, that's fine. Yeah, that's perfect.
We definitely needed that all the while. So smooth it slow up or down. I'm going to use the
pinch brush now, use the pinch brush and
tighten it a bit more. Okay? Tighten it a
bit more soft smooth. Smooth, again, all right, that should be fine that
we can work with in there. Let's see, look not this from the same similar
angle. Let's see. Yeah, we also need a
separation around the lip, around the top part of the lip, create some dent in her let's look at
this, mood this down. I shouldn't be too
obvious in here but just to get a shape in
there. We need to do that. That's fine. Then let's
go over to the lip. Wedcee the bro size,
use the bro size. Let's increase the bro size. Let's get this leap in
here some more Okay. Let's get a ship for
that lip. Undo that. Let's just essen it upon what
we already have in there, right? Then undo that. There's a depth around
the edge. Like so. Yeah, that's fine. Gets close. There's a depth also undo that. Let's start by elevating
the lip like, so, right? Then we can reduce the bro size. Then there's a depth
around this undo that. There's a depth around this part all the way in all
the way down here. A. Yeah, yeah, something
like that should be fine. So it just kind of captures
something in there. So so I kind of adding these minor secondary
details in here. I begin mode is beginning
to become more alive. Yes, it's becoming more alive. So now let's go over to the eye. I think we need to make some
more corrections to the eye. So I need a bit
more ebb in here. But I have a better
reference for that. There's another reference
we are adding here that kind of yeah, this spot long angle kind
of elevates it a bit more. So we're going to use
before doubtless, the directional Sizo the
angle for the eye, actually. Need something. You
need to kind of get the angle of the eye a
bit more accurately. So let's see let's kind of
compare. Let's compare. Let's look for something
that's more front on. I kind of facing a
bit more front on. Now, it has an
expression in there do, but if you use this and
then just line this up, let's line do
something straight. Okay? So if we do that for
our scops, I'm not sure. I'm not sure when
you writes, please. We still need to make some
additional corrections to it. So let's do that. So with the move
brush, the move brush gets close, put it to the side. I think all I need to do
is to use the move brush, and then on the lowest of the
vision level, that's fine. Remove brush, increase the
brush size a bit more. I'm just going to elevate
this up a little bit more. Yeah, so it should be fine. Then bend this down a little
bit more, just a little. Okay. Yeah, that's fine. So now we can the eye is a bit the lower part of the eyelid is a bit is down way too much. You kind of shrink that need to string that a
little bit more. But before we do that,
before we do that, before we do that, I think, let's go back to, you know,
this reference. Okay. I think I believe
this reference. Let's get something just
below for the eyebag. Let's mark so this lower
part of the eyelid, blow it out invert marks. Then we can let's do
them standard brush, blow this out some more, get this at an angle. Let's look visualize it
from a similar angle to the reference we're
using. All right. So I'm just going to make
this a bit more obvious. But I think mine
is way too high. It needs to be a bit
tighter. Use my bro size. Play on the same
damn standard, bro. Use my bros size. I think
there should be a good place. I think that is a good place. Get this in here. Zoom out. Let's see what we
get. All right. Here, this should be
fine. I should be fine. Let's use the clay brush and add a little bit more flesh in here then smooth that down. Smooth that down. More or less, I'm trying kind of
create some kind of tired high to him in here. So trying to create some
more tired high to him. Go back to the move brush. Use the brush side
I think I need to move this up some more. You should kind of connect them standard brush gets close. Should kind of connect
all the way here. Like so. Like so
smooth this down. All right. Zoom out,
play the max out. All right. Let's look at this from the
same similar angle. Let's see, smooth this out. Okay. Yeah, I think we can actually, we
can work within her. So now let's max out the lower part of the
eye again of the eyelid, lower part, blow this
out invade the mark. Move brush, I'd like to
get it up a bit small. Let's look at let's look at it without too much of
an expression in there. Something like that should
be fine. Let's get this eye closed a bit more
because I don't think I don't think my eye is
actually in the right spot, so with more brush, get this up. Alright, get this
up. Up some more. Okay. I think the thickness for the lower part of the eye is slightly too much so
Let's smooth that out. Reuse my bro size, increase intensity of the bros. Let's smooth it out some more should not be
too aggressive, something like so
should be fine. Okay. Let's see. Here, I think we're
actually in a good place. Actually in a good place.
Yeah, that's fine. So you can see on now
on your top eyelid, you can see this creasing here should be a bit
closer down here, so we need to push
that a bit closer, so let's max out this
part, blow the marks. Okay, no no undo this. We do one step. Let's just repaint
this again, actually. So I'm not going
to go around here. Down. Okay. I'm going to max out this
part also. Blow the mat. Then with the move brush
still on the move brush, we can, I think we need to do a bit more
maxing in there. On do that. Let's add a bit more
maxing on these parts. Okay. Blow this twice. Then we can now easily
push this down. So a bit closer because
for our main reference, this is a bit closer.
It's down a bit more. Undo that, I don't think I
did this accurately enough. Okay, so let me increase
the bro size a bit more. Get this down. Get this down. Down a bit more down a bit more. Yes. Yes, I think around
there should be fine. Yes, down around there is fine. Around there is actually fine. So the dam standard brush, I can create another gap
in here for the brow. Something faint, not too sharp or too obvious in
there, something faint. Then blend smooth that out. So you need to do up
some shadowing in there. So it's the shadowing we need actually for that part,
so that should be fine. So now for this jaw,
I think I need to make a bit more
adjustment for the jaw. Okay? Yes, we can add, for the job, we just
need to create. I can just use the clay brush or the standard brush instead. I'm just going to do,
and I'll put it dense in a separation in here should
be fine. Smooth that out. So there should be
a slight shift in planar changes and just
smooth it out a bit more. Yeah, so it should
be fine. All right. So we'll continue on the
next lesson by for now. I think there's one more
thing I would like to do. There's one more thing
I would like to do. Just to add a bit
more interest to it. I'm just going to separate
this out, so this down. So just to add a bit more bit more additional
feature to him. Okay, with the clay
buildup brush, we can build something
smoother down. All right. Fell this part
up, smooth that out. Okay. Here, I come
in around here. That's coming around
there from the top view. I'll use my move brush
now coming around here. With move brush, I can move, increase the brush size
at the brush size. Let me just push this in a little bit more, a
little bit more. Here. That should be fine. That should be fine. Okay?
That we can work with in here. Alright, so I'm going to carry on in the
next lesson and then keep doing some
more work on this. Sin I can let's
use inflate brush. Inflate brush, come to the eye, inflate this a little
bit more and do that. Let's do something soft. Smooth that down. Alright, so continue on the next
lesson. Bye for now.
17. 16 Ear Forms In Zbrush: Okay, we come but, guys,
the previous lesson, started adding some minute
facial secondary form details into our head or the fish. So we're going to
carry on with that? And then this lesson
we're just going to scope something for the year. So at least for the base mesh, already almo the
structure for the, but we're just going to add something in there regardless. But looking at this
reference, nice, it's something just below in between the lower part of
the lip and then the chain. So I like to block that in. I'm just going to use
the clay brush instead. I think this should be Let me increase the Bus
size a little bit small. Is going to undo that
something around undo that, something around here,
use the bro size, and then I'll just the smooth. Smooth again. That should be fine. Yeah, something around
there should be fine. So we're going to add let's
add something in here. You can see on this
smaller album in here. The small depth around here. So let's see if we can
introduce that with the clay brush, dig in. Okay. Then we smooth brush
smooth it out. Okay, that should I think
that's actually too deep. I think I made mine too deep. Mine's actually too deep. Okay. All right, smooth
it out a little bit more. Then come to the side,
reduce the brush size. Let's see you want to
reduce the intensity of the brush and then just dig in a little bit more,
then smooth that out. Yeah, so from the
side, you should be getting something
interesting in there. Yeah, this work, smooth
it out a bit more. Then I'll go to the
theme standard brush. Increase the brush
size. So let's add wrinkle slight
wrinkle tiles and I need the neck around here. No do that. Do something
around the, or. Okay. Now, do the last one.
Do the last one. Let's go on subduction
level higher for this. Subduction level higher. And then we will do that again. Okay? On do that. That's not
looking accurate enough, so let's mount it out. Let's do another one. Yes. Come on. Okay, don't do that. Let's use the math
cap gray instead. Okay. Undo that. N to be Okay, that's fine. Yeah, that's fine. Uh I don't know. Maybe maybe we can keep this. Let's just smooth this
out. Shouldn't be too obvious in there.
Let's smooth this out. Alright. Smoo that out.
Yeah, that's fine. That's fine. Moons out. Alright, now let's
go to the Let's use this character in her
to create for the year. Yeah, this is a good one.
It's a good angle in her. So let's go to the lower
subdivision level. With a lower solution level, I'm going to using
the move brush, Starp using the move brush and
move this up a bit higher, bring this out some
more up a bit higher. I don't think we
need to do so much in a dense standard brush, create a dent in more
depth in depth in a year or so that elevate
this out some more Okay, create some depth around there, right. Depth undo that. Reduce the brush size. Dig this in in some more, use the clay brush. Accentuate these
parts a bit more. Put the standard brush. Okay? W digging in
a Okay. The smooth. There's not so much
in here, actually. So put or dig in
here, smooth out. I think for the most part, they should for the most
part, they should be fine. Okay. So let's go on subdivision level higher. Let's see what it gets. Yeah, yeah, I noticed
there's something else also need to do. So I think where did I see
that? Where did I see that? Not in a Not in the Okay, I think for this actually. So on the brow, let's go on subdivision
level lower. So I would like to use this. Let's go to the stroke first. On the lazy mouse, let's take down this lazy step. Create Oh, whoa, that's
way too intense, reduce the brush the
intensity of the brush, hold out, dig in the
air, smooth out. Most likely, let's use the
clay buildup brush and then build some more depth
on these parts. Smooth down. Let's
see what we get. That's slightly too extreme. So kind of blend
smoothes down some more. Smooth this down. Let's see. Smooth this down some more. Okay. I think this should work. Just the same standard brush. Let's see if we can
elevate this smooth out. Yeah, I think this
should be fine. Let's look at it from an angle. This work just fine. Let's
blend, smooth this down. Okay. Smooth down. Yeah, this is fine. Let's
visualize everything. Let's see what we get. Okay. Now, this
would actually work. This would actually work.
Yeah, this is fine. This is fine
actually. Let's go on subution level
higher. Let's see. Next lesson, we're
going to start breaking the shaping
here by sculpting asymmetrically for the face
and then start breaking up the surface of the
face a bit more. An asymmetrical fashion. But I think all of this should work just fine for
what we need it for. We already in a good
place for the head, so we just to keep working on this breaking up
symmetry on the phase. I don't know how feature
we can add in here, we can do that also. But I think at this point, we're already in a good place. I say detailing
here, we can add. So let me undo this. Let's go back to where we
have the isolated. So let's add a bit more depths. Just where the structure of the nose is starting
from on the skull. I think we can use
the clay brush. I'll just fill this part up some more then blend
smooth that down. Okay? Use the them standard brush. I'll create a separation there. Here, so should be
fine. Smooth that down. Yeah, that's fine. That's fine. That's we can
definitely work with. Smooth down a bit more. So I'm just basically
trying to see if there's any other
feature. We can. Let's look at other
references in here. I see if I can milk this as
much as possible before we start breaking
symmetry on the face. Okay. Now let's actually look at realistic three
discan data instead. Let's look at three discan data. Let's look for something
that is similar to the face, and then we use that
scan data to add some more refinement details
on our scuptThis a good one. This is a good one
in here. Let's see. Let's see if there's
something we're missing that we can
introduce on the scoped. Let's look at the side view. Okay. Just look outside view. Alright. Well, I think
we're in a good place. It maybe just a matter of
training years kind of pick out details that you
can add on your record. But for the most part,
I can't really see any major detail in here I can pick from this scan data that should
actually help. Most of the structures, we
kind of did a good job getting blocking that in as much as we could. Let me use
something else. Let's use, I don't
actually have it here. I don't actually have it
here, but that's fine. Let's look for see if we can
find something in here from the main refresh in itself
that we can introduce. Yeah, most likely,
the depth around the brow region and then get into more fleshiness
on the nes labor food. I think that are good examples. Okay. So let's re them standard brush, sensate this a bit more. Don't do that as a as a bit off. Okay? Maybe make it a
bit more thicker, then move this out, move the side on the forehead. This is the separation in here, make it a bit more obvious. Undo that. A little
more time around there. Okay. Smooth that down. Tap smooth that down. Yes, I think we in a good place. Yeah, I think when you're
actually in a good place, there's something else
we can always add. Just a matter of taking a rest. Rest your eyes and then probably when you
come back to this, you should find
something else to add. At least for the most part,
the general proportion of the shape is
actually in there, and we can I think we can
actually move on with this. So yeah, I'll see you guys
in next lesson. Bye for now.
18. 17 Strong Facial forms In Zbrush: Okay, welcome but guys. In previous lesson, we're trying to refine a bit of
the shape on the face. So in this lesson, I
would like to kind of push the design a bit further by making him slightly by getting
him more stronger. More stronger character
face in here. Okay? So I have a reference
in here I can use. So I think it's got a
reference in here I can use, so I'm going to use
this reference kind of push the design a bit further by making it feel
a lot giving him more stronger
characteristics to his face. So to do that, let's go to the highest
subdivision level. So I'm going to create
a new layer for this. So I would have two variation. This is actually
completely fine to use if you want to actually
keep this, that's fine, but I'd like to push the iving forward and create a more
stronger feature for him. So just so we have something
that looks more cooler in terms of more interesting
character characteristics, so character fats to him. Okay. So to do that, let's bring everything back out. To conclusi and tap out,
everything back out, and then we're going to create a new layer to have these
strong feature forms in there. So this is actually very fine.
It's actually very fine. We can keep this, but let's
push this a bit further. Let's ph a bit folder. So I'll go to layers. I think we have Okay. Just decide. So I'm going to
create a new layer in here. It's kind of
creating new layers. Let's just give the
same moment to create. Yeah, let's fine
click Okay on that. Then it's going to pop
out a new layer for us. So for this layer, I'm
going to give it a name. Let me name this to
frongFas that should work. All right? That should work. Then I'm going to isolate
the phase again, so D Shift D, go to the lowest abibtion level. Control shift, click, click, click, click, click, click. Old and Control Shift and
invite the selection. Let's put this to the
side and we get in close. So this is the lowest
abribution level for this, go back to the move brush. So one of the strong facial
structures around the face is close to the
nauseolabel, and the molar, we have a bit more
depth in there, we have a bit more depth
in there so you need to push that in some
more around here, we put this in some more. Yes, so interesting. That should give him a more interesting facial form to him. Then we're also going
to think we have this to decide decide. We need to push this down here should go in
a bit more also. In some more, right? So, that feels a bit old. On to do some gradual
transitional process to this. So what I did
before was just way too strong, so let's do that. Do that again. Needs to be carefully put
in the right spot. So here around there
should be fine. Okay. Here, this we can work with. So for the molar, I'm going to push this in a
bit more smooth this out, push this in some more. Okay? Yeah, that's fine. Yeah, that's fine. So we're kind of pushing it more kind of creating some more stronger
facial relevance to him. That should actually
help buy lots. So that should be fine. Then we can use the Dam standard brush. Use them standard brush, carve a bit more shape in here, a bit more depth in there. Yeah, that's fine. I'll take
down this smooth brush, blend this down a bit more. Okay? This is not too sharp in there, but
see in there actually. What's he going to go back to
kind of break sit in here, we're going to go back and then smooth that out some more, putting some more interesting
variations out of that. But this is fine
for now. Kind of getting getting more stronger
facial structure to him, which we definitely keep. So let's come up around here, W move brush, use
move brush in here. Dak down the bros size. I'll push this in some more. This in some more like so. Okay. Yeah, that should be fine. Then we'll send you this molar
bone in malar bone here. Let's get something
sin out around the e. Let's get this thin out. Okay. I'll smooth this down. Smooth this at the
air. I'm basically smoothing this at the edge. So yeah, that should
be fine. Okay. Would break symmetry here
and then do a little more. I'll now surface
breakup in here, but it should be fine for now. Okay? Then I'll push
this in move brush. Move brush. Take
down the brush size, push this in some more. Okay? Yeah, that's fine. So basically trying to create some stronger facial forms in here as much as
I can find them. So we have another
one around here. I'm going to hold down. Let's use the standard brush. Hold out, dig in
here, smooth out. Okay. Smooth out undo that
smooth out, right? Okay. Yeah, that's fine. Yeah, there's quite
a lot opening around around the forehead,
on the brow. There's quite a lot of
bit lapening in there. But we'll come back
to that. We'll come back to that, let's
just keep working. Let's work a little
bit more on the chin. So I'm going to use
them standard brush instead this time. Let's see. Okay, no, let's use the
clay brush instead. I think the clay
brush should be fine. I'll build something here. I comes down, smoother down. Okay. Yeah, that's fine. That's fine. We use the standard brush now. Pull out, dig in a bit
more, smooth that down. Okay. Yeah, that should help us create some more
stronger forms in there. Okay? Smooth down. Yes, interesting. Yes.
And a strong form in here that should help. Let's see. Add a bit more undo that undo that.creeze the brush
a little bit more. I think I went overboard in there actually, but that's fine. We can always use
the smooth brush and then smooth this down. Okay. Smooth that down
some more. All right. Yeah, I feel this is a lot more interesting compared
to what we had before. We have more stronger
structural forms to him. So once we be stimmt,
you should have a lot more interesting
result going on in here. So yeah, that's fine. This we can definitely keep. Let's go over to let's see. Yeah, this is fine. This is
already something in here already. Smooth this out. All right. Yes,
this we can keep, go back to the Dam
standard brush. Okay? H. All right, this should be fine.
Smooth out. Okay? Yeah, that's fine. So we have
more stronger faces to him. More stronger fires to him. Yes. So now let's
go to the forehead. There's a lot of detail going on on the forehead in there, so lot of wrinkle
and full detail in there that I would also like to
implement in my sculpts. So I think we can do this with the standard brush,
really brush size. Okay? There's
another one in here, here also, elevate this
part out some more. Okay? Actually creates a lot
more interest to it. Ton of symmetry for this
actually then do a shape in the center, smoother down. Okay? I think at this point now, it'll be easier for us to it's much easier for us
to brick symmetry and then continue doing some
work on this, okay? Wood dig in a shape in your air, smooth this down. Okay. Alright. Yeah, this is fine.
This is fine. This is definitely fine. It's a more stronger
facial structure to him. I believe I can merge two
layers together now because this I would like to definitely keep. I'll definitely keep. So didn't do too much, though. We just kind of accentuated
some forms a little bit more just to give him giving a lot more character
to his face. Right? So, um, this is still be an African
face, African nose. I like to extend the
nose a little bit more. So let's use the more
Botnel asymmetry, extend the nose a little
bit more around you also. Let's see, I think
this might be too big. Let's undo that. Undo that. Maybe only extend it at this part alone.
Yeah, that's fine. And I want to lift up the
expression a bit small. Let's lift up the expression. I was going to lift this
expression up a little bit more. Like around it should be fine. Okay. Now, let's go back to gizmo. Mark this part out.
Invite the marks, blow this out some more. Okay? With the move brush. With the move brush, let's close this down a little bit more. Okay. The max. Close this around here. Okay. Yeah, that's fine. This is fine. This we can definitely
work within here. Yeah, this is fine. So now let's see for the eye, something I need to do
for the eye actually. So for the top part
of the eyelid, top part of the eyelid, max out these parts. Blow it out with the move brush. Let's get in close, increase the brush size. With the move brush, let's
bring this close yeah, I think, se should be fine. Clear the marks. Alright.
Yeah, that's fine. This is fine. This is fine. We can work with in here, go back to the Dam
standard brush. Let's quit separation here. Due to separation,
that should be fine. Okay? Alright. Okay, so I think we can now comfortably break
symmetry in here. But before we do that,
before we do that, let's go to the higher
subdivision level. Let go high subdivision level. I believe I can merge
these two layers eight primary forms
I can merge them. I believe I can
merge them together. Let's go down Control Shift and tap out to bring the
entire body back out. Yeah, this definitely
feels a lot better. I definitely feels a lot better
than what we had before. I have a much stronger
facial structure to him that should
actually help. Lots, this is fine. Okay. So let me just sent you with this more rhythm standard brush. Okay? Let's carve this in. All right. That should be fine. We use the standard brush, add some more thickness
on these parts. Okay. Smooth that out. Smooth out. All right. Yeah, I think that's
fine. That's fine. That we can keep.
Okay. Moving on. Let's do, let's go to the
highest subibuton level. So going back to the highest
subibution level for it. Then we can merge
some layers together. I believe we can merge
some layers together. It's long I mese
layers together, cannot get them in
one single layer, but I think I have merged
layers before now, so let's turn of the recording for this
to of the recording. Of the recording, starting off. Okay. Then we have let's
select this Ed primary form. Eight primary forms, yes, I think, let's see, it should be merged down, is it? I should we are men
merged down awesome. So let's just merge this down. So you don't want to merge
down to the layerizedblud, which is precisely what we want, so I cannot merge that now
into one single layer, so that's precisely
what we want. So we can that we would keep. So now the head kind of matches a more stronger body from now. So the head matches it
a bit more accurately. So that's fine. That's fine. So the next layer,
we're going to work on next is to now actually
break symmetry here. So we'll do that in the
next lesson. Bye for now.
19. 18 Facial Asymmetry forms In Zbrush: Okay. Welcome back, guys. In the previous lesson, we made this character a much stronger
feature structure to him. So now we're going
to start breaking symmetry and then
move on from there. I'm going to tur on
the recording for this primary forms.
Let me turn this off. So you can get this
dark sheded version. And then we would also need to create a new layer for this. This layer is going to
be facial asymmetry. Let's create a new
layer for this and name that facial asymmetry. Name these two caps
in your facial SM. All right? That should be fine. That should be
fine. But I notice something for the eye lid. Sin the eye is a
bit widen the d. So let's go down to
lower subdivision level. Select all of these
via the selection. Go to the move brush, increase the brush size. Let's max. I don't think we need to max. We
don't need to max, though. Let's see if we can just
capture that without having to let's move this
in, and do that. I think we can do this
from this angle instead. Okay. Let's see what we get.
Now probably not. Just getting a bit closer. Come from an angle
move this way. Okay. Okay. That should be fine. Okay. Let's see. Yeah, I think that
should be fine. Yeah, this should be fine.
Th should work just fine. Let's do this tail doct in here. Let me reduce the brush size, increase the subdivision level and then we'll do
something in there. Let's do something in
there. You can use the clay brush and then just put additional
form in there. Undo that that was not
done accurately enough. Undo that again, undo that
again, okay? Let's see. I think this is actually
fine the way it is though. Let's just reduce the
brows size a bit more. Okay. Zoom out. So now breaking
symmetry in here, obviously, we're going to
turn off the symmetry ine. Let's go to lower
subdivision level. Go to lower solution level. I'd like to decrease
on your forehead. I would like to
get that in a bit more. So this is
actually two los. Let's go on solution level
higher dem standard brush. Pretty brush size.
Get in more depth, more depth around here also. Okay? The depth should fat
underneath these parts. Okay. Similarly with
similarly also this. Okay. But now we need to
generally move the fam, because it's kind of frowning, so with the move brush, you need to move the fam. Let's don asymmetry
for this, actually. Let's move the form
With the move brush. Let's move the brow
down a bit more. Almost like it's
kind of frowning, sort of a bit tighter, okay? Yeah, yeah, that's fine. That's fine. So ton
of asymmetry now. Let's continue on and break
up the shape some more. So I'll go to lower
solution level for this. Then I would use
the standard brush. I'm going to hot
dig in here. Okay? That's a bit to be. Let's
use the brush size. So let's dig in here. So more smooth that out. Okay? Them standard brush, carve
this down, smooth out. I'm not sure if that's looking
good, still looking good. But that should definitely
help break the foam, though. So certainly help break the fam. I think we can keep that
we can definitely keep. Okay? Yeah, else What else
can we break in here? We can use the dam
standard brush, create a gap in line in
there, smooth that down. All right. Yeah, that's fine. Can create shape in
here, smooth this down. Okay. I actually
breaking this up now. Breaking this up now
the way we need it to be create a dense in
here also, smooth down. Okay? So st sto change
this nice way up, break up the entire
surface a bit more, get this shape in
here, smooth down. Okay. I tight in this part. No, undo that. Create
depth in, mood this out. Okay. Out out, push this out, Moot this out a bit more. Okay. Here that's fine. Create a denton in
her, smooth out. All right. That's
fine. That would help. He I brick symmetry
in here actually. So let's use the, I think the inflate brush
would be better one. Inflate. Let's inflate
one side of the nose. Let's inflate this
side, smooth it down. So smooth down,
okay. Alright, yes. Let's do a bit more around here. Inflate that out,
smooth down. All right. Smooth down a bit more. Okay. Yeah, that should help. That should help.
Flatten this part out, yes, that should be fine. Okay. Moving on. Let's see, yes, we can create, can accentuate. No. Let's go one solution level
higher for this actually. I think we can go one
solution level higher. We can make this line
in a bit more obvious. Don't do that. We just
need just one step. Yes, we can keep this
let smooth this out. So you should be faint in the las fine that can still work. Smooth this out a bit
more on the lower parts. Okay? Yeah, let's tighten it out.
Let's use the pinch brush. Pinch, pinch, pinch brush,
increase the brush size. Let's tighten it a bit small. So it's not too
broad, get us fine. Yeah, let's go to lower
subdivision level. To lower subdivision level. Get us lower subdivision level. Let's go to the move brush. Increase the move brush. Size. Let's bring this closer. Okay? Okay. Then we can get this higher
than the other opposite side. That helps with the
breakup also too. You can tell the nose a
little bit more this way. Okay. Yeah, that would also break
up the surfacing here also that helps reduce
the brush size, smooth this out a bit more. Get some softer edge
around those parts. Nasal Bel food.
Let's get one part, a bit thicker on the other side, what can we use in here? Let me max it out actually. Let's do a xing. Let's do a proper xing. No. Let's do this
this way instead. Mark this part out. Also, I undo that. Invit marks, blow out.
Blow out some more. Come on invite the mark,
blow out some more. Let's use the standard brush. Let's see if this
actually works. But basically trying to add
a thickness around here. Okay? Smooth that out. Yeah, that's fine. That's fine. That would actually
work, smooth this down. Okay? We them standard brush, creates a bit more
depth. Clear the marks. So one p be having a bit more
depth on the other side, which is precisely what I want. But that doesn't mean we still had additional thickness
to this though. So standard brush. Okay. Alas fine. Smooth out, smooths out. Okay. I think I need to undo this. Let's Let's mark this out
a lot more precisely. Below the marks
with a move brush. Undo that. Let's
get this, no, no. Get this folded in a
bit tighter. Let's see. I think from this angle
looks a bit rather odd. Let's use the pinch
brush and then tighten it more tighten it
more then smooth. Okay. Smooth this edge. Alright, that should be fine. Right. Smooth out some more. Smooth out some more. Okay. Let's make this top
part of the leap a bit more of your no, not dots. So we them standard,
but you just dig in. OO, tonal asymmetry, we can
elevate this out a bit more. Yeah, that's fine. That's
fine. That would work. So we need a crease
in here. Let's go on subduction level higher. One subduction level higher. Let's get increase in
your tono symmetry. Get a rise in here,
push this in. Okay? In some more. Okay, gets a rise in here, line in here, gets
up close. Okay. Yeah, that's fine. What else can we do here to
break symmetry? Yeah, so the eyes should
not be as operators. This one eye should be bit
higher than the other part, but most especially
for the lower eyelid, for the lower eyelid, we need to pull one down and leave
one at the same size. So let's do for the eyelid
on the left hand side. So I'm not going to max
at the lower parts. Via the mouse, let's go to
lower subdivision level. Go to lower subdivision level. Okay, then blow
this out some more. We use the move
brush and then just pull this down up down
a little bit more. So if it's like one eyes one of the eye is more
open on the other side, so actually quitate under
additional level of variation in yes, that should work. So you can also create Let me let's say some indentations. Also, that should help. So let's just use this create some four had almost like some four
head wrinkle in here. Let's go on sublution level high. Let's see how that looks. It's almost like I didn't
do anything in there, but I actually did, so we're just going to go in
and break this up some more. Okay? All right.
This should be fine. Let's use the pinch brush, tighten this pinch brush, paint brush, let's tighten
some of these a bit small. Okay, then the tap smooth
around that parts. Alright? I'd like to add some
scarring on this part here. Let's do them standard brush, take down the brush size. Let's do some
scarring around here. So it shouldn't be too sharp.
I want to soften this out. So that actually does
kind of break up the uniformity of
the facil, too. Let's do one around
here, so this out. So she kind of add
another extra level of break up on the surface
in here, so let's see. Let's see what we can
still in here to use. Okay? Yes, we can do I can do. Let's take this to lower
subdivision level. You can use the Dame
standard brush. Dame standard brush. Dame standard brush. Let's do a carving in
here. Am I doing that? Yes, I am. Well, I think that seems rather too
far. That seems too far. Let's getting
closer around here. Okay, smooth that down. So just sort in the bots. As a lot of difference in here, smooth that down a
little bit more. Okay. So yeah, that's
pretty much how you can break this up to make this look a lot
more interesting. You can use the move brush also. Take down the brush size. Do a pinch in a gentle
pinch in there, so it should be slightly
different from the other side. That would also help too. Okay. Let's get into the side. Let's say we push this
in a little bit more, so we get slide. No, I think that's way too
much. That's way too much. Let's do something
elsewhere instead. I already have this indention
unit, so that's fine. Yes, yes, yes, yes, yes, yes, yes. Okay. Okay, let's get let's
do them standard brush. Undo that. Let me dig in
a bit more undo that. Introduce a bit more
precision to it smooths out. So one side should be a bit more deeper than
the other side. So this would also help. We can do a dense in,
smooth this out also. Okay. Yeah, that's fine. Yeah, so we'll break, creating shapes in between
as we can find them. Depth in a smooth it out. Okay? All right. This is quite interesting. Getting interesting
ships in here. Let's see, this is fine. I think, even if we don't
plan to do too much, we have good detail in here. Let me use the clay BD
brush, smaller brush size. Take down the brush size. I'll get close. Let's create some
surface detail in here. I'm just going to go over
this, then smooth this out. So let's actually create an extra level of surface
breakup around those parts. Okay? We can do the same
also around here. Okay. Then smooth that down. I'll create on that
surface, break up in there. Let's go to higher
subbtion level actually. So on a higher subbtion level, we can do this bit more. It's a bit more
accuracy in here. Okay? Let's say I flesh
this part out like so and I do it smooth, so you should have no, no, no, no, that
doesn't look right. I think the clay build up
there is a bit too intense. Let's do something quite subtle. You shouldn't do it on
the nose, actually. Shouldn't do it on the nose. We can smooth this out, okay? We can put dig in in a bit more. Dig in a bit more
smooth this out. Okay. Smooth this out. Smooth out. Okay.
Yeah, that's fine. Here, we can do a
few more in here. We can build the smooth out. Okay, smooth out some more
a bit more on the edges, that should help also
smooth out some more. The S, smooth out some more. I think we need to smooth
out a bit more also. So I just want it to be faint in those
parts. That'll be fine. Okay. Let's getting close
to the dam standard brush. Create a dent in
another one around her, a bit longer one.
Smooth those down. Okay. Alright, that's
be fine. Okay. Yeah, I think for the
most part this should actually work just fine
for what you need it for. Because let's do a
render shift arrow. Let's see, this is fine. Yeah, this is fine. We
get two shadows in there. It's more stronger facial
structure also two in there. So should all of the
should work just fine. All of the should
work just fine. Okay, Smooth this down. Alright. Okay. Let's add wrinkle details. I'm going to reduce
the bras size, increase the subdivision
level actually for this. Let's add rank details
around the eye. They always like
to do this Let's turn I always like
to do this one over the skin polity,
but let's just add. Let's start by adding do that. Let's start by adding
one there first. Let's add something there
to begin with and do that. Okay? All right. Yeah,
that should help. Let's do one around here. Okay? Let's do one
around here also. Yeah, so it should be fine. Okay. Yeah, this is
good. This is good. Okay, let's do wrinkles
around the neck. Canton asymmetry for this. Okay. All right. Undo that, undo that again. Okay, I think we have weird for mi ton asymmetry,
smooth this out. Okay? All right. Can do another one around here. Okay. Let's see. We can smooth them out. Let's do some randomized
smoothing for them. Okay. Yeah, that's fine. That's fine. Bring everything back out. Okay, so I think at this point, we can easily and safely skimp on top of
this and then we'll continue building up some
other structures to this. So I'll see you guys in the
next lesson. Bye for now.
20. 19 Surface Noise In Zbrush: All right. Welcome back, guys. So in the previous
lesson, we kind of worked asymmetrically on the facials
of our character in here. So in this lesson, we're going to start adding skim detail into our character and then work our
way up from there. So let's do that. But usually, first,
I always do like a break a breakup of this
surface in here using the noise inside of using
noise inside of Zbrush. So I'm looking at
this. I'm trying to see if I something
I need to fix. I'm looking at this brow. I feel like I should
thin that out some more, so let me set this
to them standard. And then just use the pinch brush BPI
come in to the head. Let's bring this down. And I just tight undo that. Brose is way too big. So I'm going to undo
that and then I'm going to douse my bros size and
then repeat that again. Okay. Yeah, yeah, yeah. That's much better.
That's much better. That should work just fine. Let's do the same
around here also. Okay? That's fine.
Okay. Let's do a little bit more around there. Alright, so yeah,
we can move on now. So I'll go over to layers. Yeah, let's make sure on
the layer ablution level for this cause I need to
create a new layer in here. ED again to go to
the ublbution level. So now can see a
layers in here now. I would create a new layer. Look okay? Yeah, that's fine,
so I'm gonna rename this layer to noise surface. No surface. All right, break up. That's fine. Let's go
down to surface surface, and I'll open up
the noise modifier. Let's get enclosed so we can see where we
get out of this. Okay, so I'm going to be doing some variations of this though. So there's going to be a
few variation of this, but let's check this round. Let's see if there's any
stretching anywhere. Let's say this to UV,
it's messed up on UV. Let's set it back to three D. I kind of like this, though, so I'm going to be
using this like Bsinsurface dit in here, but not this yet. I'm going to I'm going to increase the let's
see, strength is fine. Let's increase the noise skill. Increasing noise scale,
a little bit more. Trying to see if value that
should really work for this. Yeah. This seems like a
good one. I'll click Okay. The only thing I need to do
in here would be to go to the lower subdivision level and go to lower
subdivision level. So that was going to, I think subdivision level
three seems fine. Yeah, that seems fine. So let's go back to our noise surface. Let's modify this a little
bit more. So clic con edit. Okay. I'm going to take
down the strengths. I don't want this to
be too aggressive on the skin. This is looking fine. Let's see if we can do some
adjustments with this. Is there any major change to it? Is those are interesting ones of create patches across the skin, but this
is not what I need. Let's just put this
back to the average already have had there before and adjust the scale a bit more, increase the scale some more. Okay? More bigger scale should be fine for this. All right. Though it's kind of eating up
most of these tight edges. That's fine. That's fine. I think we can
click Okay on this. It's looking rather odd
messing since up by lots. I'll take down, let's
leave smooth for now. Let's leave smooth
for now. Let's see. Let's go back in there.
Let's see how we can fix this crack on the edge, Two, take down the strengths. Okay? All right. Click Okay. So this is just going to
break up the surface or more. So let's apply this
now to our mesh, so I will just click on. I think I can keep this smooth. Let's start by keeping
this mood first. But let me take down the
smoothens intensity. Let's put this down to three. Then let's do apply to
mesh to apply to mesh. I'll give the moments, okay? So it's been applied
in here now. This actually helps to
break up the surface and then smoothing down based on the subdivision level
we're actually in, which is precisely what we want. But for the moment, is a bit too intense, should say, it's slightly
too intense. That's fine. We can always go back to
the Subdivision level then we take down the
intensity for it, go to the Subdivision level. One more step to go to
absorption level now. So it's actually still in there, breaking up the uniformity
of the surface, which is what I want, but
it's likely to intense. We can go back to layers. We can turn off recording. Turn off recording in here. Then we can take
down the intensity. Let's say this to
a value of 0.6. It's enter on that. So you're going to soften out
that little in here. So I had been softened out, but it's still in there though. Why? Because if you
turn this off and on, you should see you see a
good difference in here. B on go to say I just
breaks up the surface. I have some more texture breaku
variation on the surface. But I still feel like I need to take this down a little
bit more though. But let's look at
this from a distance because the idea is we're going to be view this
at least from a distance. Let's see at least
from a distance, so we can tune this
down a little bit more. So let's do a varie of 0.4. Let's do 0.4, let's see. I don't want it to
be too intense. At 0.4, then let's turn it off and on. Let's
see what we get. Turn it off. Okay, turn it back on. Let's
see where we get. Yeah, I think, this
is a good place. We can actually
keep this. I think we have this as a
good place now. I just make the surface
look quite uneven, which is what we want
it to look like. That's fine. So let's put a new layer now,
create another layer. Crit another layer for this. So on this layer, I want
to name this layer too. Let's name this layer to
noise, noise, pause. Okay. Yeah, that's fine. So yes,
you guessed it right. What's it going to go back
to our surface noise? What's our surface noise? Let's add noise, edits. So for this pler one, I'm going to tighten the skin
pause a bit more. I be a bit tighter. Let's see let's increase intensity a
little bit more too intense. All right. Let's
tighten this some more. One is quite tight
on the surface. Let me zoom out. Let's
see what we get. I still feels too noisy, so I need to take down
the skill some more. I want something that is
actually quite tight. Something that almost simulates some kind of skin pore in there. Let's increase the strength, increase the
strength, some more. Okay. Zoom out. Then let's see
what we get out of this. Now, I still need to take
down the scale some more. Make it quite
smaller, quite small. Okay. Yeah, this is small.
It should be small enough. It should be small enough. Yeah, this is fine.
So let's increase the strength some more. A little bit more
should be fine. Because I'm increasing
this higher so that when we apply
this to the mesh, now we can now tune it down. We now tune it down some more. I think, let me reduce the skill even more, a little bit more. A little bit more. Yes, like so. Let's zoom out and check
the body out again. Okay? Let's see. Let's look at
this from a distance. Yes, for me distance, this
actually work just fine. So we're going to need to increase the
skill a little bit more. I mean, the strength for
this a little bit more. That ten may increase
its strength. I kind of have you need to kind of tune down the
intensity of I mean, you kind of tune down the skill. But I think what is this let's apply apply apply let's see. I'm guessing I'm managing to
take this for me distance, actually, it actually looks
fine for me distance. I think we can work with this, but we need more
strength for this. Need a bit more
strength for this. So I'm going to
put these two more more of an aggressive
side to it. Then we take down
take down smooth. Then let's do apply to mesh. So apply this to the mesh. Let's give this a moment.
I should run through. Oh. Is it done? It's done. Okay, it's done. So now we can always
do what we did before by tuning down Oh, oh, oh, I'm supposed to
exclude the lips, undo that. Undo that. And let's
exclude the lips. That's this detail on
the lip, actually. I don't want it on the lip
around some part of the eye. So let's go back to
before we apply this. Then we use the mark
pen with cemetary turned on, increase
the blood size. Let's max out the lip. You don't want this to
be affecting the lip. So cling this out from the lip. Okay? All right. So you can see how this is being cleaned off now because
I wouldn't want this to applied on this
region of the lip, so let's clean it up some more. I think I'll do a little
bit more also on the eye. But this skill for
this skill for this, I think I still need to work on this scale for this
a little bit more. So let's remove some more
of this on the eye here, also on the eyelids. There's a light stroke in here
actually, so that's fine. I think I need to adjust
this scale some more, make it even tighter, click okay. Okay Let's see. Yes, I think we go
Let's do for the ear. Let's clean some part of the
S. And control the maxing. S max out some part of the. It's not too
aggressive on the air. Don't just to the side,
do a bit more around. You also. Okay. Yeah, yes, yes,
one more thing here. Yes. The fingers, definitely, we need to remove
this from the finger. We don't want this
to be applied to the fingers to the finger nails most particularly and
on the palm also. So we need to kind
of clean that off. So we need to do
this gets in close. Okay. Then let's start
maxing this out. Mark this out. We're working asymmetry in here,
so that's fine. Okay. Get enclosed.
Mark this out also. Okay, clean this off.
Okay, that's fine. Let's Come on. Let's move to the
next next piece. Clean this off. All right. Yeah, I think that's fine. Let's move to the
next finger nail and then clean this off
from this fingernail. Yeah, this is fine. That's fine. Let's move to the
next fingernail. Let's clean this up
even more around the edge around the edge. Just trying to make
this careful though. You want to make this as
neat as you possibly can. Okay? Yeah, that's fine. I'm
do it symmetrically. Okay. Okay. Now, let's
do for the palm. Let's see, there's
something else. Now for the palm for this, we need to kind of find a
better camera and go for this. And we're still working
symmetrically, that's fine, so we can do this as
quickly as we can, increase the brush size, hold down control,
and clean this. But I wouldn't like to go
too intense on you, though. I would still like to have some surface texture in
there actually. Let's just go a
bit light handed, so we don't completely
erase the entire out. Okay? Light feed. Light feed also. There seems like maintenance
is quite strong. But that's fine. That's
completely fine. Come to the edge. Okay? I think you might need to hide a few of these
parts though. Might need to hide
a few of this. A few of these two kind of get better better cameraunf
getting this right. I'm just going to completely hide completely hide the fits. Okay, Cro Shift click again. I think mind to go to
lower subdivision level first so we can
work a bit faster. Higher subdivision
level might begin to slow down bit too much. Let's just side this. Then we can hide the
we can hide this also. Yes, we can hide this also. Hide this also hide this
also this here and this. Okay, that's fine. Then let's low this so up to the lone then we can go to the higher
ablution level for it. Yes, we can go to a higher
sublution level, actually, so Let's go on
sublution level higher. Then we can continue painting in the now,
something feels odd? Did I lose my maxing et? I think I lost my maxin
so let's do that. I need to bring the maxin back. Let's go back, bring
everything back out and then get a maxin. She get the Maxine now. Come on. Oh, Seems like
that's just the end. Seems like we be able to
get the marks in back. So we'll just have
to do this again. But that's fine. Let's
just do this again. Look for the other. We're
going to select the other out, then invert the selection. Then draw let's do
this out again. So take down the bro size. You can just do this here now, so we can just clear it out. Get in slightly closer. Okay. All right, rotate this. I do symmetrically I'd like to any symmetrically,
that's fine. Okay. Move on. Okay. Well, that's fine. Okay, move on to the
next fingernail. Okay. Now let's
go into the palm. Grizz your bro size. Let's move a bit faster. Okay. Go around there. So Okay. Grizzy bro size. Okay. Go a little bit on the edge around your all should be fine. Okay. Get this closes up. Let's do for the
front part first. Okay. Then let's go to the
edge. Let's go to the edge. I think that edge that edge
should be fine, actually. That ghould be fine.
That should be fine. Because we're you going to pull this very low intensity
from the layer. So we can just get this
fitted on the edge. So it's just going
to blend blend pretty much down with
the skin itself. Especially when we
kind of add actual Scan the actual scan
to the skimp alpha. We're going to apply
on this later on. So let's just get this
cleaned out, some more. Okay? Clean this out some more. F to the side, clean
this out even more. We also need to
do for the fifth. We need to do for
the fifth also. Clean this off. Okay. Come on. Undo that
last step I did, getting close, clean
off some more rights. So now let's go for the fifth.
Let's go for the fifth. So I'm going to
invite the selection. Let's get everything back out. Hopefully, I still have my
marks in there as I do. Let's come to the fifth. I
shouldn't take too long. Get into the toenails. We're still working symmetrically
in here so we can hold down control and clean off. Okay? This shouldn't take too much time to
create, clean off. Working with this
symmetrically, that's fine. Let's do a bit more, get a
bit more accuracy to it. Okay? Yeah, we need to do for
the under part of the fits. You can just increase
the broad size for this. Then we go around symmetry tone down just to help us move a lot
faster in here. Okay? That is fine. All
right? That's fine. So now we can go to go back to the highest subdivision level. And we can now apply this to the mesh on the
higher subdivision level. So we all of the details on the highest
subdivision level. So we get better refinements
better visual refinements on the surface noise in here. So now let's apply this to mesh so I'm not
clicking on apply. Then we now going in
and then zoom down the, you can see right
off the battery just kind of smoothing things
out a little bit small. But that's fine. Let's zoom out. Let's get in close. Let's get close. Even closer I'm basically trying to look at it
also specifically. Then check the face also, too. The face is fine. Okay. Yeah, this is fine. So
now we can now go back to layers and then we
can tune this down. So I'm not renaming this.
I'm not renaming this. Let's turn off recording, and then take down the
intensity for heat. So, let's do a value of 0.5
value of 0.5 should be fine. 0.5. Okay. Let's see
what that gives us. Yeah, it's perfect. So this will work just fine
for what we need it for. Okay? So come on. So in the next lesson,
we're going to work on applying actual
chimps Alpine here. It's much more realism to it, but this should be fine
for now as a good bis. All right, I'll see you
guys in the next lesson. Bye for now.
21. 20 Surface Skin Pores In Zbrush: Okay, come back, guys.
In the previous lesson, we kind of added or use the surface noise to
add surface skim pole, and breakup details to asked. So I'm going to working
our way up from there. Adding actual skim pos. But looking at
this, I feel like I should tune this down
a little bit more so. Let's do a value of 0.3. Get something lower than this. Okay? I think this
is a good one. Let's compare, let's check
around. This is fine. So now I'm going to I'm
going to hide this. Let's hide this for
now because now we need to apply actual skim polls now
to the entire surface. Like actual scans Aha
to the texture in here. So let's go back
to surface noise. Okay, no, let's create
a new layer first. Let's create a new layer first. Then I'm going to name this to Flip Ops. Let's
use caps for this. Skin. Come on. Not
using no cups. Ops. Skin, pause flip. Because I'm using a flip normal skin pause Alpha
for this actually, so let's go surfaces
noise, edits. Then before turn on, UV, let's apply,
let's bring this in. So go down to Alpha
on and off off and on and off, select that. I'm going to go to the directory where I have that installed. So let's go down
to that directory. Should be rows Alpha Philip, skin table, that's the one. Then is this for
02, select that. Select that. So she would have
something a bit of that we need to
adjust settings for. So first of all, this
is way too intense. Let's take this down.
Let's turn on UV. Turn on UV. Let's see. Let's take down this mix. We don't need to mix
with the base noise. We don't want don't
just to mix with the base noise let's
start increasing. Oh, sorry, that's the
wrong skill to increase. We need to increase
the Alpha scale because we're using
Alpha as in here now, let's get this smaller get
this a bit more intense. So now we're getting
something in here now. Okay? We need enough
tights in this some more. Should be quite tight in there. Though want to keep in mind also too that you
want to kind of check this all around the model because based on
the UVs for this, depending on the textile
density you have on the mesh, it's going to kind of create some weird some weird variation on the stretching on some part. You might need to redo
this a couple of times on various regions to just
get it to look right, so I'm going to start
I'm going to start with doing this for the head. I'm going to start with this for the head then we work our way down and make all
of this look good. So let's tying this
up a little bit more. Let's increase the strength. So it's a bit stronger, something a bit stronger so you can see it a bit more
clearly in there. Zoom out. Yeah, it needs
to be tighter than this. So let's take down the ha
take this down instead. Down downwe too much. Okay. This seems one time I release release this just
something else happens. Zero, 44. Okay. 0.0 044. Seems
like a good one. Let going to check again. Okay. Yeah, this is
actually tight enough. Let's look at this
from distance, we can see that this is
actually tight enough. Getting close. Maybe
a little too tight, but I think we can
actually work with this too tight, but
we can work with it. Now let's check the
other parts of the body. Let's see. Now, it looks
too tightly around here. A mine to we tweak the
tilien a bit more. From this partner, we can see separation in terms
of scale for that, so that's one thing to
actually keep in mind. But let's check for
the rest of the body. Let's see. Okay? I think
for the rest of the bodies, actually, I would call it
I would say too tight. Yeah, probably maybe just the that's the right
amount, actually, so I check this before applying this to the
merge to be sure, okay. This is how we like
this to be finally. But I think for the most
part for the most part, the only issue we're having is around the clavicarbon regions. Let's check the
herbs. Let's check the herbs and let's see if this is tight enough
around there. It is, I think it looks
good on the herbs. But the issue we have
is around around here. Though it might not really
be major issue, though. Why? Because for me diste, can't really see that much, but I would still
like to I would still very much like to get everything blended out a bit
more accurately. Let me check the back,
so it goes all the way to the back, okay? To this you can work with
the we need to do is to tighten this increase
the strength of it. Es increase strength.
Let's make it are a bit more obvious. Should be a bit more obvious. I'll just do a little
tweaking for the scale. So instead of 0.004, let's do 0.005 instead. So that has to scale out the
pause a little bit more. Just a little more
should be fine. Okay. Let's click Okay in here. All right, no, I
need to go back in the increase the skill. So more a bit more skill, a little bit more
aggressive in there. Yeah, I think this is
aggressive enough. Okay? I think for the lower
part, that seems fine. Yeah, it seems fine
for the lower part. It's just the chess region that is just looking a bit old. Let's do a fix for
that and then we would reapply that on just the chess
regions looking a bit old. Let's get this closer
again. I understand. I kind of feels a lot. It bit it's tight on because the scale welding for this is quite small. But that's fine. That's
completely fine. Let's see, you can see the
region where we have issues. Just go to figure out
where that stops and then max that part out. Okay? I see where it is. So now I can use the Max lasso. So I want to use the Max lasso get this around here,
symmetry turned on. We're just going to marks out these parts. Like so. I think, so it should be
fine. Mark that part out. So we should not have anything applying on those path now, which is precisely, that's
precisely what we want. Then now we can exclude the skin pads from the
fingers, just like we before. Let's isolate these fingers
and then the palm also. Okay? Come on. Taking too much time
is kind of flow. I think I need to go to
lower subution level, so we can actually do we can actually do
this a bit quickly. Okay. Let's go to lower
subdivision level. Since we have not fully
applied this on here yet, so let's go to lower
subdivition level and then isolate them so we can
work on them specifically. Okay, let's do that now on the
lower sublution level now, so we should be working a
little bit faster in here. Grab this out. Grab
this out also. I think we can look for defeat. Let's grab this part out
also. Then invert this. So it's nice to applied
to the mesh in itself, so we should still
be seeing we should still be seeing the actual schemes in there
eventhough on the lower one, the lower ablution level. Want ablution level higher. So once we are
painting our marks, our mark will be a little bit more accurate,
cually on the edge. So, undo, undo that. Let's use the mark spin. Okay? Now, let's raise this. I need to also raise
it for the Oh, come on, undo that. Clear that out here as well. Okay, move on to the next one. Let's try and reduce
as quickly as we can. Move this to the
side, clear this out as well. Mark this out. Okay? Mark out. All right. I think this is the thumb now. Gets close. Okay? Mark
this out. That's fine. We're still working
with symmetry on here, so that's what we need. Let's go in, increase
the bro size, do a lot more
maxing out in here. Okay? I think I'm okay. Yeah, that's fine for the edge, but I need to be a lot
more careful in there. Okay? Muss around here, increase
the browe size a bit more. You do bigger shapes
in here for the pum. Okay? The reduce the brow size. Mug this out. Okay. That's fine. Mark this out. Okay. Max out here also. Alright. That's fine. Around
here as well. Okay. Yeah, I think, yeah,
that's fine. This is fine. This we can
definitely work with. Let's go to the Let's see. Let's do a little bit
more around here. Okay. Around as well. Let's go to the
fits. Let's start from the under part of the fits, increase the brow size. Mark main part for us
us will just be for the toenails and then the lips and then to around the eye, and then we should be
good around as well. Okay? Now let's go to the fingers. Right. Erase this here as well. Yeah, well, also, also, clean this up a bit more. Okay, fill it out some more. Yeah, I think we should be fine. Let me get this back out. It this. Let's get
this for the lip. We think it's going
to blow out the edge do but let's do for the lip. Getting close. Come on. Let me just mark this out and invert
the marks instead. So we have this. So basically, repeat
the same to also, too. For the lip, just
marks out the lip. Don't read for the lip. Okay? Because we're going to kind of specifically create alphas or
drag it alpha for the lip. So I don't necessarily
need this lip to have this aggressive
skin podytail in there because there
are no actual skin actual tiny skin
podytail on the lip, so we want to kind of make this as realistic
as we possibly can. So let's just clean this off. Okay. On the nose, I'll do
a little breakup, soft break up around this, just to make it slightly uneven. Make it slightly uneven around
here also in inward also. Then for the eye, I'll do something lights around the eye. I still want this day I'll do, but not as aggressive
as it is right now. So I'm going to do something light on those
parts, getting close. Light also. Okay? All
right, a bit more. Do and bring no, do that. I think, that's fine. That should be fine.
Now, I like to reduce the intensity
for the year, also. I don't want this between
things on the year. So let's increase the brush size and do some maxing around it. Okay? So you have something soft in there
shouldn't be this strong. So we have symmetry ton
down, so that's fine. Because I can see how
aggressivity is in this part, and then we are getting some
stretching in the right? Okay, this should be fine. Around the Zoom out. So now let's bring
everything back out. Let's bring everything back out. Let's make the entire
body divisible again. Then we would blow the edge, blow this edge a bit more. So we have soft out transitions
around those parts, so get more soft out
transition, blow a bit more. So now we can now apply
this to the mesh. But let's make sure you're in the highest oblivion level
before applying this. So let's go to the highest
subdivision level. Then we can now apply this
directly on the mesh on sublon level higher,
almost done. Okay. So now we can
now click on Apply. So let's get close for the face. Let's make sure you
turn off smooth. No melon, just to kind
of smooth it out, then we can now apply
this in the mesh. Let's give you a moments
and it should load up. So it hasn't applied now, since it's been already
applied to a surface. I think this is actually
good. This is actually good. This we can work with. So
we would clear the marks. So yeah, this part we
don't have anything. Yeah, that's fine. We'll
bring that back in. But for now, I think
this should be fine. So let's go in to about layers. Let's turn off recording for this and then create a new layer and then apply the same thing on this part of the chairs where this stream
was a bit off there. So let's turn this off. Turn that off for now, then create a new layer. Okay? I'm going to
give this a name out, because I'm going to merge this down with this simple detail. So let's go back
to surfaces noise. So you should apply the same
one that was there before. But this time around,
we would let's do so I'm going to
ignore the upper parts. I'm just need to work specifically on this part
but before I do that, I would like to I'd like to
max that part out again. So let's just do no, no. Nope. Let's do the Max lasso instead. Max lasso. Get this
in the middle. Then we can grab those parts. All the way, should
be fine. Okay. Then we invite the max so we really want this
applied on this part. So we can actually refine this a little
bit more actually. We can find this a
little bit more. Let's go to Max pen. Increase the browse size. Let's continue the
maxing on these parts. We should be fine. Okay. Yeah, I'll ignore
the back parts. Yes. Okay. Let's max out
this part as well. Okay. No, undo that. Undo that. Undo that. Let's do something
light handed instead. Light handed should be fine. Okay. Let's see. Let's go back to edit. Then the idea for this would be to increase the scale by a lot, just to march the
order, to march the order scale for the body. So let's just decrease
this a little bit more. Let's getting a bit closer. Let's see this que
we have for this. I think this que
should actually work. This que would work just fine. Let's increase the intensity
a little bit more. Click Okay. So
yeah, this is fine. Then we can click
on Apply to Mesh. So apply to mesh now. You mean to actually
apply to the mesh. It doesn't apply to the
mesh. Let's get in close. Let's see what we get. So it's just one issue there, though. Let's undo that. To make
this a bit more intense. Let's undo that. Need to go back in and then make
this more intense. So let's increase the
strength for this a bit more. Okay, a little bit more. Something stronger, click, okay. Let's apply it to mesh again. Okay? This is definitely going
to soften out but should kind of give us similar
to the skin pots and your regions of the Is it done? Motr calculated. Okay, still working on it. Almost done. Okay,
it's done now. I think should be
fine naturally. We can actually work
with this. So now I can zoom out, clear the max. Then let's go back in two layers and then turn on
the original one we did. Let's see how all
of this kind of blends in as one single piece. I think should turn it on. Should be on now. Yes. Okay? Oh, I can see an
issue around here. On the lower part,
there's a gap in there. There's a gap in there. There's also a gap around here, so we need to go back. We need a little bit more than
we need a little bit more. Kind of spread this
out a little bit more, just to compensate
for this empty part so Let's undo this do it again. Let's undo this again. Oh, we're at the end.
We're actually at the end. So I think we need to redo that just so we
can get more of it, so we need to
actually redo that. I'm going to delete this
to actually do that? Because I kind of lost
the marks for it. We've lost the marks for it. I said with Viconos yes. I think better still we can
increase this bro size. We can max out. Come on. Is the max Dentin. We max Denton. No, do that. So I'm not going to use
the max last actually, use the Mx last and max out grab more than we
need actually, like so. Let's do a bit small
around there as well. Okay? There coming
close to the neck, I'll grab this also. Okay? Let's grab this as well. And I'm going to blow the
edge a little bit more. Now with the edge blow out now, I'm just going to undo that. Invert. Come on, do that.
Start to invert that. Then let's go back to
the ubution level. Then I'm just going to apply
the surface noise again. Let's apply the
surface noise again. Noise. Intensity
is already there. Intensity is already
what we need, s can apply to mesh. S's there and applied, then we can clear this and
then go back and then turn on the other skin pow
so this is fine. I think we can actually This
we can actually work with. You can turn on the
other noise pause. Then all of this together. Now, getting a good
blend and we can play in between in between each one and then figure out the rest intensity to use to
kind of get all of these blended out quite
nicely on top of themselves. So I think they should be
fine we can work with. So yeah, so I'll see you guys in the next
lesson. Bye for now.
22. 21 XYZ Skin Pores In Zbrush: Okay, Walcob guys, so
in the previous lesson, we kind of use the
surface noise to add different types of noise specially the flip
normal skin pause, tib alpha in here. So now we have the seniors just a matter of blending all of this as one single piece. So I'd like to start by
merging the skin pause, flip with the lower one down
here. So let's do merge. So let's do merge down. So it should be
taking up the name from the layer that's
actually above it. So I believe that is
what should happen. Cause I'm merging down. So it's kind of taking this
time to merge down. Let's give this a moment. Okay, so it's merged down now. So we have all of that now's
one single layer in there. So we cannot tune this down. Let's tone this
down. The intensity, let's do a value of 0.6
there's a value of 0.6. So those strengths cannot
get a pad blend between all the skim or surface
detail we've added in there. So most especially on the face, my main kind of area
of focus is the face. So once I get something
done for the face, the rest of the body
should kind of be at similar visual quality also. I think it should be fine
for the face actually. So, this will definitely
work for the face. Let's check the body. Yes. Yes. This is really good. Let's go a bit lower,
check the arm. I think as far as details go
for this, this is also fine. It doesn't need to
be too intense. Maybe maybe you can crank the intensity a little
bit small actually. So let's crank the intensity of the skin pause a
little bit small. Let's do a value of 0.8 instead. Let's go to value of 0.8. Let's see. Okay. So
once you get here, this is a good blend.
This is a good blend. I think this we can keep. So this is what we
would definitely use, except otherwise
because kind of use the texturing XYZ phase
alpha to kind of get some skin directional skin
pole detail going on in here. But for now, it
is actually fine. We can definitely
work with this. So let's carry on. So I'm going to
create a new layer. This layer, I'm
going to be working with the texturing XYZ, five ski poles, texturing
XYZ Alpha for it. So let's create a new layer.
Let's create a new layer. So before creating
new layer, actually, let's Let's idle this
surface noise noise pore and then this skin pause. Let's id of darts. Okay? We're actually this clean. We need the clean
surface to actually use the texturing XYZ one
round 75 Alpha for it. So it's important to get
a clean scheme for this. So yeah, I will go over the high solution
layer that's what we want or create a
new layer in here. Let's create a new
layer in here and then, let's create a new
layer in here. Let's just that's
already in there. So I'm going to rename this
so cups, should be all caps. For car texturing. Oh, no. Let's just do XYZ instead. Let's do XY Z purse. That's more shorter
way to name that, so yes, let's get enclosed. Let's see, everything's
working correctly. Think good place. Yes, we are. So now I can actually
isolate the head now, so I need to isolate the head. Head needs to be isolated, so let's go to a lower subdiviton
level and isolate this. So we should be
able to work faster on the lower sublution level. Again, Control Shift click. Okay. It that, I think, yes, this is fine. This is precisely all we need. So now after we apply this in, let's go to the highest
subdivision level. So remember, initially when
we starting the project, we kind of tested the
texturing XYZ scheme for p. So it was good enough
to work with on the face. So now you need to Okay. Let's go on subduction
level higher. I believe you should
still have yes, you still have one more. We still have another
one another piece. Let's go all the way.
Let's go all the way. So for this, we have
this at 24 million, well, this is actually
a lot, but that's fine. We can definitely work
with this in here. This is what we need.
Let's go into our, let's make sure you
understand that brush. Let's go to light box. Let's go over to Alpha. Then I'm looking for
the 175 skin Alpha XYZ, 175 skin, open that up. I want to be using the
let's use the 2001, double click on that.
Local conducts. Let me just do a
brief explanation on how to actually use this. I think we should have it
here and drag this out. Basically, for each face basically for each
region of the face, you should have a corresponding
number for that region. This is the face flattened out. For just the top
part of the brow, we have this value
number four in here. This region, this
part is going to be number four. Open this up. It's going to be number four. I'm going to be using
that to start with. Let's double click on that. Double click on is in
here now, standard brush, say this to drag rec
let's go and modify the Alpha to go to modify
and then the come on. Let's go back in the outfit should be radio
outfield to be ten. Mid value, we can
do 50 for that. So that mid value will help us avoid us extruding
out the mesh. So we want this outfit to be applied on the surface without
extruding out the mesh. So I'm going to turn off,
do I need to turn off? No. Let's leave
symmetry on for now. For the most part, symmetry is actually
going to be turned on. It's going to be on. Let
me reduce the brow size. And I'm going to drag
something around. But minus is a bit too broad. But one thing to
be very conscious about is the directionality
of the skin pause. Very important.
Directionality of the skin pause is quite
important. So I won't do that. Let's do it again. Increase intensity
a little bit more, I get close around. Okay. Here I think around
this should be fine. That should actually be fine. Let's get close. Let's see, you can
see we're getting very good skin por
detail in there. And that's going to continue on the value next number we
can use for this is two. So let's go I think
let me make sure. I knew something was
off, so let's do that. The mid value I applied in
there did not actually apply. So let's go back into because my mesh of extruded out.
Let's say this to 50. Say that to 50, then we
can drag this out again. Let's do this front facing. Can drag this out around
that's a bit too broad. That's a bit too broad.
I'm going to take down the intensity
a little bit more. Let's do one with direction
tive pointing downwards, so it should be fine. Let's get closed. Let's see, rotate this to the side. Yeah, I think that is fine
that we can work with. Let's zoom out. Okay? Now, let's go and use the value of two. Yeah, but before that,
I think we still need one more around here also. We need one around here. Turn off symmetry. Let's
turn back symmetry. The drag this out around here as well with
directionality in mind. Because we look at
this mic zoom in here, you'll notice based on this directionality skin flowing in this direction downwards. That's why I scoped also
we have something similar. We also have something
similar in here. That's general idea for that. You want to do that with some directional flow
it's very important. Directional flow for
it is quite important. Just to get it to look right
Let's go to the value two. Let's go back to light
box. Let's use two. So double click on
that. Double click on S. Then it two should
be just above the brow, somewhere around
there, I believe. Do that, we're supposed to Set the values for that. Let
me increase this bit more. No, that's way too much. Let's get this to around 30. Alpha radio fed should
be around ten mid value. I'll do 50 for this. Okay? So we can now
drag this out now. So with directionality
in mind, very important. So you get the directionality as accurately as
you possibly can. Think it should be flowing
in this direction. I also feel, this is
actually way too intense. Actually way too intense. Let's take this down to 25 inch. 20 cs, that's fine.
C should be fine. I would like to shrink
this some more. Okay? Move this out this way. Yeah, this is a good
angle for this. Let me zoom this out so you can actually see the region of
da a bit more accurately. Then drag this out This is good. It's a good intensity for it. Rotates this way,
kind of straight on. Yeah, so it should be
fine. Auto symmetry. I'll repeat the same thing
on the center parts, but making sure the making sure the directionality
actually matches that properly. That's fine. I can also use the same can also use
the same in here. So we can just go also in here with the
same directionality. This way, yes, that
should be fine. I'll continue that also around. Directionality should be
in the same direction. So. Let's go on
down the eyebrow. I'll flow the same
directionality also in here. That's fine. This
we can work with. Okay? Do asymmetry, do
the same to nos around. We flowing in this
direction like so, that's fine. Moving on. I can actually use
this quite a lot, so just feel undo that. I just going to make
sure we turn on symmetry. Let's
turn on asymmetry. Now, for night seem
like it kind of looks a lot kind of
too busy actually, but once we blend this with the old once you blend the d alpha, we should begin to see something interesting coming out of this. Okay? Let's see do we
need to use three? Yeah, let's use three
for the top part now. Let's go in and use three. Come on. Okay, selected now. Let's go in and adjust
the Alpha settings. Ten is should should be fine. 50. Around 45 to 50
is actually fine. Let's drag this out. Here,
it is actually fine. But a little more intensity. So let's crank intensity
a little bit more. Let's get something a
little more intense. Okay, here, this is fine. Do another one also to flow the same
directionality to it. That should be fine. Think I can continue this on actually. You can just continue using this around the forehead with
the directionality in mind. S here also. Okay? Let's see, yes, we are getting
the directionality. I don't connect a lot of time, so I have a good idea for
the directionality for it. But we need to feel
this part a bit more. Go down on that
part looking empty. Okay, that's fine
around here also. This part looter has a very
good directionality to it. So I do that need to do
this a bit more accurately. Yeah, so let's get closed. Let's see, that's
fine. That's fine. You can continue this on keeping the same directionality
also in mind. Okay. Let's get this way
flowing downwards. This way, I slanted
'lluld be fine. Yeah, also, should be fine. We take it this way.
We'll take this this way. This way around there
also. Let's calm down. Let's see which other
values numbers we can use to continue on the working. So we're doing a very
good job in here. So let's let's carry on. Let's carry on. Okay, yes, I think we can
before we use ten, let's fill this
part up a little. Okay. Yeah, that's fine. So now we can let's
use let's use nine. I think we're actually
supposed to use nine. No, that's fine. That's fine. I think we're actually supposed
to use nine here instead. Let's use nine. On doo that. Let's
use nine instead. Okay. So back in to light
box, let's use nine. Okay. Let's go and set this up. It's just the same
repetitive process actually. Once can understand where
the flow should be, the process becomes quite
repetitive. So let's come in. Let's see how the directinity
of that is getting close. Okay. Yeah, that is fine. Also as well. Okay? I think we can use this across
all these parts. I would actually work. Okay?
Yeah. Yeah, that's fine. We do symmetrically, so it should be affecting
the other side, too, which is precisely
what we want. Okay? Yeah, we can get in
close also around here. Let's zoom in, fill this
part up also. All right. So we're going to be using
eight for this part, then seven for the eye. So let's start with eight. Let's start with eight. Okay, let's do a little fill up around the. Okay? That's fine. Let's go over to I won't be using 77 has a bit
of weird artifact around it, so I'm going to
avoid using that. We can use the opposite side. The oppose side is a is
a lot better, so 24. So let's move to 24, 24. Okay. Then let's adjust this. Adjust radar ten mid value, 50, Alright, so now this one
gets a little bit tricky. So we just need to make sure we do this as accurately as we can. Usually, I like to
max out these parts. So those parts doesn't
become affected by it. Then low blow the edge
a little bit more, so we get kind of soft
out transition around it at the edge. So, right? So now let's drag this in here let's get the
directionality in here first. Then I'm going to drag this out. It's going to bleed this way
without but that's fine. No, no, the direction is wrong. Let's do it from the
opposite side instead. Let's do it from the parts where we kind of using
the numbers from. Okay? Yes, yes, pretty much, pretty much around
here, should be fine. Extend it out a little bit more. Yeah. I think this should work. Yeah, this would actually work. This we can Keep though intense
for now, but that's fine. Intense for now,
but that's fine, because we're still
going to e's clear this. We're still going to take
down the intensity of the entire outing and get
the proper blend to it. So moving on, let's
let's now go to height. Let's use eight for this now. It already created some details here that we can actually keep. That is also fine. That's
fine. That's fine. I think I can continue
I can just continue on with using nine. Let's just use eight instead. Let's use eight
instead. Let's use eight instead. Come on. It's applied now. Then
let's go over to Alpha, S value to ten, mean value to 50. Drag this out, pull
this out this way. I believe that the
same directionality for it, so that should be fine. But I feel like I'm not
looking at intensity, though. If intensity is right one or is way too intense.
I think it's right one. That's actually fine. We
can actually work with that that we can work
with. Yeah, that's fine. Uh down here, let's see, we can use ten. Let's use ten and then just
feel the lower part down. Okay. But I think this butler
should work around here. I should work around
less getting close so we can see the
directionality for it. Let's see undo that intensity I think density for
that part is a bit small. Let's take this down lower. Okay? Yeah, I think that's fine. Let's continue on down here. Okay? This we can work with. Let's do around
here, that's fine. Okay. Yeah that
we can work with. Let's use the value ten for this now. Let's
use ten for this. Maybe we won nine. But
let's just do ten. Let's do ten instead.
Let's do ten. So 1010. Okay. Applied. Let's go and modify the setup
in the radio fit, ten, mid value, 50. So it's just going to
that's just going to flow down around these parts, okay? Okay, around here. I think this you can
actually use across this. I don't think I
actually anyone need to do anything else again.
I can just repeat this. I can definitely
just repeat this around these parts. Okay. So this would actually
work just fine. Okay? Get this way flowing
in this direction. This direction also. Let's get close. Okay. Do this with
directonality in mind. Let's get a good camera
angle just on Oh, come on. Zoom this out. Okay? We can do something here, flow the same
directionality for it. Okay, here as well. Make this this directionality
should be fine this way. Okay. Let's frame out. Let's frame out.
Okay. Get close. Let's look at this
from the under parts and then fill the parts up. I think directionality is very
important extend this out, rotate it out this way. Yes, so should be fine. Okay, around there. Make sure afro the
same directionality. I won't go all the
way down though, but I think around this part should help us to have
some textures in there. Treat it this way. All right. Get this down here also. We can actually
stop around here. Stopping around there
should be fine. Okay, that we can do. Yeah, this should be fine. Let's get close. Pull this down. Let's do some fill
up around here. That should be fine.
Now your nose. For your nose, you can just
use the same Alpha three. We can use Alpha three for this. Let's go in here and
use Alpha three. Then we just extend
this out this way. Let me get close. Can you see it
properly, that's fine. Extend this out some more. Okay, that's
directionality we need. Okay, as well. All right. Yeah, that's fine.
Here, as well. Then let's do for the
ton of symmetry and do for the center. Okay? This will as well. Yeah, this we can
definitely work with. Ton of symmetry, let's
just fill this part of something in here as
well. Yeah, that's fine. We should be good, okay? So in next lesson, we'll
let's go and then start blending all of this down and see what we get out of this. I'll see you guys in next
lesson. Bye for now.
23. 22 Knuckles Details In Zbrush: All right, so welcome but, guys. So let's see, we kind
of use the textion XYZ, 175 Alpha on the face. So what I see some
things we need to do around the body
like adding wrinkles and then using the same using some one particular ideally, one particular Textion XYZ map kind of create a modtil for the. Let's do that. So let's go to the highest
subdivision level. Let's go to the i
Subution level. Okay, select them
standard brush rather. Go back to the highest
subdivision level again. Okay. I've not done that before. On the highest
subdiviption level, now we need to open
up layers in here. Then, you have textion XYZ selected in the XYZ
pus selected in there. That's fine. So yeah, I'm going to I'm kind
of thinking in between. Can I just apply the nuface? Let's apply this napace
let's go over to Light box. I have a particular
It's in a XYZ. Okay. Yeah, so I have this
and XYZ and skin. So basically, the
Alpha for that is from this female face 200 and
I'm using this Alpha three. So basically, I'm using the Alpha teres because
the Alpha Outer is what we have to go over to go over to the pace the Alpha three is what we have there's paler straightforward
pattern to it, so that will kind
of use on the top part so I'm going
to be using that also on the arm. So on the arm and on the
arm also. So let's do that. I would symmetry asymmetry
is turned on, that's fine. Let's go back in
there and select it. Select it, drag rec. Let's adjust the Alpha
setting in here. So modify radio outfit to
be at ten, mid value 45. Okay, that's fine. Two years now, we
can now use that on the arm and on the end. So let's, this should be fine. Let's start dragging this out. Directionality should be
flowing in this direction, so I lo. Let's get close. Let's see what we have. Yeah, that's fine.
That's perfect. Then we'll continue on. Flow the same
directionality for it. So, rotate this to the side. Let me smooth this out. I'm not sure where this is
coming from, though. Smooth that out some more. Okay. Yeah, that should be fine. Then we'll just
carry on with this. Around the is fine, also. Around the fine.
That'll work just fine. Here also make sure we're kind of fueling the
directional flow for it. Very important down here
as well, rotate this. We're still obviously going
to blend all of this back down and find the
right balance for it. But for now, let's just keep
creating this around Okay. That is fine. That blends
where to the side. Okay. Let's go up a little higher
around there as well, rotate it this way. Okay? Good. Why do we have
these shapes in here? Let me go to lower subdivision
level and smooth this out. Not sure why that is, though. Smooth that out. Okay? Let's go back to the
higher subdivision level. So you want to be
very careful, though, so you don't get shapes your lumps in some where
you don't need them to be. Okay? So let's carry on.
Around here, as well. Let's do something small, here. Okay. We're doing this symmetrically, which is precisely
what we need to do. Okay. Yeah, well, rotate seats. We'll just go up a
little bit higher, and then we should be done with that around here one
more on the side. Okay? Well. Then let's come in to the backside because we
need something around. Definitely need
something around here. And you can see, we didn't
turn on Breakfast max. That's why we're having
some of the details bleeding around here,
but that's fine. It's not too far off from what we actually
need to be actually in there. Do one more around
there, as well. Okay. All right. And I'm going to
go over to brush, I believe then automaxin then
Bfix Maxine, turn that on. All right, so let's before
we do for the palm, we need a few more
on the fingers. For these fingers. Okay, let's just use the same
intensity for it. Same intensity should should
work just fine. Okay. Directionality
should be the same, so you should be mindful of that the same flowing
horizontally. Okay. Rotate this, get one
also around here. I can see that we've even
added knuckles in here. Knuckles are fine here, so we need to add
that also in here. But I think we'll
do that when we are adding rinkle detail on
the wrinkle details, so that should be fine. Okay. Rotate it this way. No, do that. You can see it's kind of
bleeding towards the fingernail. I don't want this bleeding
towards the fingernail, so I won't do that. I won't do the last one. We did. Let's do this a
bit more carefully without it bleeding
into the fingernails. Okay? That's fine. Yeah,
also Alright, that's fine. Come in close up around
here, repeat the same thing. Yeah, that's fine. That's fine. Yeah, as we
can definitely work with. Okay. Yes, this we can work with. Now, let's do for the perm.
Let's do for the palm. I'll I'll take down the
intensity to begin with. Then I'll out. I'll do
something that digs in instead. You're just going to
create some prints pattern in the Come on. Now, you don't need to be too, it can be a bit loose in here by not being too precise with
the directionality for it. But let's make sure
the directionality for it is not awkward. So I'm just going to feel
I'm just using that just feel this part up so it
doesn't feel too empty. Okay. So something in there
should be fine. Holding to do this. You got to give us an inverse of what we were doing before
without holding the out. All right. So it's not too strong in there, something light around
there should be fine. Okay. Almost done. It's not too aggressive. We're going a bit light
handed around these parts. We're not trying to do something too aggressive in there,
going light handed. Light handed should be fine. Okay. Still we do that as we're adding wrinkle
detail, obviously. So let's just continue on this. Alright, I think
it should be fine. I think now I can create a new I can create a new layer and then add
my nucle Alphas in there. So let's create a new layer. On this art layer,
we'll be adding my knuckles alpha on this. So yeah, we can do that. Let's go over light box, Alpha. Knuckles, knuckles, knuckles, knuckles, knuckles, knuckles. We don't use our fingerprints. Could have used those
bots nah. Come on. Where's my knuckles Alpha in here, knuckles alpha.Fund it. So just ignore this question no. W was going to be
using most of this. Let's start with the pinking. So let's double click on this. Okay. Another thing we need
to do we need to tune this? Yes, we do radio fit ten, mid value, 50, then we increase intensity
a little bit small. Let's go to the pinking here. Then we're going
to drag this out. Here, like soap should be
fine. Around here also. That one is a bit old,
so I was a bit old. Let's get in close. Maybe we don't do that. Let's do something a bit more
aggressive in there. Let's go a bit more
aggressive 31. Okay. Yep. We do the in something lights. And let's go over and
then change this up. Yes. Okay. We are
the middle finger, then we should be using this. Okay, 01, pinky then we
should be using this. Double click on
that. Okay, let's go over set this to ten. Set this to 50.
Then we come over. Yeah, yeah, that's precisely
what we want. Do that. Let's do that again. Let's do that again.
Something a bit more broader for those knuckle
region, should be fine. Okay? I think I can go but
let me take down the intensity and use the same alpha in here
with a lower intensity. That's fine. Increase intensity again. Then let's go and use the
one for the middle finger. This for the middle finger,
let's go and adjust the Have you actually I don't think you've
applied that middle finger. Yes, it's in here now. So let's change this ten. Mid value should be 50. Then we'll go over.
Yeah, that's fine. Reduce the intensity and
do something in here. Yeah, we can repeat
the same thing. No, undo that. Undo that. Let's do that again with
a higher intensity. Okay? No. No, not as we tense. As way too intense,
take it down a bit more and drag
this out again. I'm going to rotate it. So it feels slightly different, then we take down the intensity. Let's do something like
around there. Should be fine. I can just repeat the same thing here also increase intensity. Let's use the same
one around here. That feels like it's in the
wrong place. Let's see. Do that. Let's do it again. Yeah, I think repeat this. Nope, no. I think you need
something broader for it. You should do something
a bit broader for it. Sometime going to repeat that, find a good angle actually for this, that
from around there. That should spread abroad. Nah, no, we're not
getting it right enough. And I believe is the camera angle we're actually
using for this. So I think at this
point, this is fine. That we can
definitely work with. So if I add knuckles to this, which we can definitely keep. Well, right now, I'd
like to do to go to the Dame standard brush and then add some more wrinkle
breakup detail around there. Yeah. So just basically adding additional
wrinkle breakablty. So that's basically
what I'm going to do just to make it feel a lot
more lot more interesting. Eventhough for the most
part, we're not going to be doing close up of this, but it still helps kind
of add them in there. It helps to add them in there. Okay? We're doing this
symmetrically, so that's fine. We can get them symmetrical. It's completely fine. Okay, we need also additional
ones around here also. Okay. Carry on. All right. We also need to do the
same for the pump also. We need to do the
same for Come on. Since I'm moving out my camera angle so
let's repeat that. Yes, then we can do the
same also around the. Undo that download is
a bit dd. Undo that. Okay? Yeah, this is what we
definitely need to do. Okay here also around the just below the thumb. Add some more around the ear. This part needs quite
a lot actually. So that should break things up a little bit more around there. Yeah, that would work just fine. Yeah, that's fine.
That's fine. Okay? That we can definitely use. I think I can just
carry on with this. We can have all of this in
this same layer actually. I'm supposed to rename that. So let's just carry
on and then continue with the additional adding
wrinkles on top of this. I'm also going to add
let me kind of turn off the tection XYZ layer first. Let's turn that off. And you're
also going to add evens. So yes, let's first of all, rename this and then
turn it back on. So let's name this
to Nok NoksRinKs. Yeah, that's fine. That
will work just fine. So let's just carry
on. I'm going to turn off symmetry
for this now. Then, oh, yeah, we
need to record. Lets go and turn on the recording
for this code in there. Okay? Awesome. Won't do that. Let's just a smaller
brow size for it. Smaller brow size for it. I shouldn't be that
aggressive in there. Okay? So basically, I'm looking
for regions where we have folds and depths in there, and I'm just going to add
wrinkles around those parts. I also, I also need
details in here. But that's fine. We can use. Let me just be be on the keyboard standard
browre coming here, let's use and Alpha, we can drag this here actually. So I'm going to turn
on symmetry because new something for Elbows. So increase in tense
to a little bit more. So it should be
slightly more tense, drag it out, like
so, that's fine. I allow this save out. We also need to do the same
not too for the kneel. We can still use
the same alpha for the knees also, that
will work just fine. So let's go back to the nil. Let's go to the nail and repeat the same reuse the
same Alpha in there. Okay. I same horizontal
directionality to it. Okay, that's fine. That works just fine. Yeah,
that works just fine. So you can go back to the
dem standard brush and let's continue wrinkle
detail across this. Okay? Take down the bros size. Imagine the symmetrically,
I think I am total of symmetry for it, okay? Yeah, that's fine. Most of the most of these
details are not going to be receivables. It helps to actually
have them in there. It helps to have them in there. It helps break up the
surface a little bit more, make the surface a
lot more interesting. Though we're still going to be having garments covering
most of these bots. At helps this detail on there. We use the brush
size a bit more. Okay. All right.
Okay, that's fine. Yeah, we need quite I would say a lot for
the herbs, though. So I'm just going to
take down the bros size. Taking down the bros size. No, that was a bit old. Undo that. Undo that was
a mistake. Undo that. Okay. So I'm basically looking
for regions where we have folds and
creases around there. So then I'm just going to add this almost like leathery wrinkle detail
around those parts. Was when we add sub
what's that called again? Subsurface scattering on this is going to break up
the surface even more. It's going to kind of soften out most of this wrinkle detail, so it's okay that we're kind
of adding a little bit of pressure in there
and making them a bit more obvious.
That's completely fine. Okay. All right. I think this find
more around here. This part is not
going to be visible, but let's add
something in there. Okay. All right. Let me zoom out. Let's
see what we get. For the face, we need special wrinkle details for
the face, though. To do that to do those wrinkles, I'll need to actually
have the other layers visible skin players, visible. Get the perfect
blend I need for it, and then I'll start adding can now easily start adding
wrinkle details in there. Okay? Alright. Move this side. Okay. Out. I'm only going
to do this for the front side
because the back side is not going to be that visible. Maybe it does the little
around here though, especially at this side at the back at the
center of his back. We need some wrinkle
around those parts. Come up a bit higher around
here should have some crease. Okay? Right. Yeah, that's
fine. That's fine. Let's see on some
wrinkle detail, fin wrinkle detail
around there also. Yeah, I think we
can live with this. Yeah, I think this we
can actually work with. So in next lesson,
we're going to get the perfed blend and
then we're going to start adding more wrinkles
around these parts, okay? Well, I think, there's a lot
to actually do on the face. A lot of wrinkle on the face. So the next lesson, we're
going to carry on and then continue adding more
rink around the face. So I'll see you guys in
next lesson. Bye for now.
24. 23 Lip Details In Zbrush: Cucumber, guys. So in
the previous lesson, we kind of worked on adding knuckles detail wrinkle detail around some parts of the body. So in this lesson,
we're going to add more wrinkle or wrinkle
details on the face. So let's get right to it. So I'm going to turn on other layers and then
find the perfect blend for the skin pulse and noise pause detail have
been adding on this. And then after doing that, you can now go back
into the knuckles and wrinkles and then add
wrinkle detail for the face. So for detection XYZ, I would like to tune this down. Let me start by tuning this
down a little bit more. So let's do a value of 0.6. Let's tone that down
to begin with, 0.6. Yeah, I think that Come on. It's taking some time.
Okay, it's in here now. Okay? We need to do some
blend between these, though. So now let's go back to Alright, then let's go and then turn on the skip dative layers in here. All right, turn the soft nose in and then turn on
the noise surface. So we can see a blend of all of this together as
one single piece. Okay. Now you might
see quite noisy. So lily just find the right
blend for all of this. So just to find the right blend, most especially on the let's
see getting close.'s see. I think most of the noisiness coming from
the tectron XYZ, but layer in this. Let's tune this down a
bit lets the value of 0.4 and intensity of 0.4,
let's see what we get. Okay? We're getting something
interesting in here already. So if you turn that off, we'll see some
difference in there. Let's turn that off
and turn it back on. Okay? I think I need to crank
up the flipnomals pause. Let's crank that up. Let's
use the value of one. Let's see what we get. Let's
use the value of one for it. Okay. Yeah, yeah, this is
actually much better. We have better
detailing in here. Yeah, this is fine.
This is just fine. This we can work with. So now we cannot begin to add our
wrinkle detail on top of this, so we able to see it a
lot more better in here. And we know the right intensity
to actually use for this. So let's go back and record the knuckles and
wrinkle, turn that on. Then still on the same
dam standard brush. But the lower
intensity this time, we can now go in and then
that adding more wrinkle, tiny wrinkle detail across this. Okay. Here, something like that. Let's go over to the other side. So I'm doing this
asymmetrically. Asymmetrically, which is
precisely what you need to do. Okay? Add wrinkle
just underneath the nose also as well around
there should be fine. Yeah, that's fine. Now we have we are using now the intensity for
it and knowing that also blocking this
in we can at least see it a bit more obvious. That's precisely what you need
to do. Yeah, that's fine. I'll come around the
word, all around here. Yeah well. Come underneath this. You need a bit more
around the chin. That's fine. Yeah, you need asymmetry
for this actually. We do that. Do that. Let's do it again. Okay? Some smaller ones
that comes across this. Alright. Yeah, I'm pretty much like
so it should be fine. Yeah, that should be fine. So carrying on. Tn symmetry for this. Add some wrinkle detail
across here also. Okay. Moving on, let's go over to
the eye, bring this down. Now for this one,
it should be fine. Yes, this is fine. Right. Let's zoom out. Let's do for the other
side as well. Okay. Around the edge of the eye. You need something
also in there. Alright. Yeah, that's fine. That should work just
fine. Let's come in around there as well. Get enclosed, find a
good angle for it. Yeah, like so now, this photo, this crest
on the forehead, we need something
in there as well. Okay? Let's get our camera
down. All right. Same also around here
should be cracks in here food in her
around here as well. Okay? Yeah, we need something
for the forehead, actually. So let's create some
variation in here. I think, no nothing that's
way too thick. Undo that. Oh, we can actually,
that's fine. Reduce the bros size. Okay? Just a little break around
there should be fine. That should be fine. I think we're basic there's somewhere else
need to add this. Just checking to see if we add
a little bit around there. Okay? Yeah, I think
we're in a good place, but definitely in a good place, really add on regions
where we needed to be. I don't think Let's
just check the back. Let's see. Yeah, you'll need
wrinkles around the air. Move to the other side.
Around the as well. Okay. Yeah, that's
fine. Zoom out. We can just for the fun of it. Let's add some around here. All right. Oh, we
need to do for this. We didn't do for the
other side of the. Let's do some more depth in
here around here as well. Okay? Create a lit around here. Yeah, that's fine.
That is fine. Okay. This we can work with. Let
me use the standard brush. I think we need
some depth in here, ton of a ton of, let's use the clay
brush instead Os, create a dense in here. Okay? All right. Here, that should be
fine. Doesn't need to be too intense, that's fine. I think also while
we are in here, we can just create some alphas or work
on the lip instead. We'll create a new layer and this delayer is going to
be for the lip detail. So let's create a new
layer with a new layer, and this would be for the lip. So come down, let's rename this. Let's name this lips
for this lip details. The tails, right? So I'm not going to do too
much in your Y because I have there's an Alpha that we
can actually use for this. So let's go to standard brush, light box, go back out. On the flip skin, we have yes, we have lip
Alphas in here. So we have the We have a leap bottom lip top. Let's start with the leap bottom going to double click on that. Selected let's adjust
the values for this. Radio field ten, mid value, 50. So Autonosymmetry for this
asymmetry for this actually. Let's zoom in zone in. Drag this down. Okay.
Unless drag Oh, I'm holding the wrong ki. I'm supposed to I'm not
supposed to hold out for that gets in a bit close. We can go to Gizmo Max this out. Come on. So I'm basically trying to max
this I think better still, let's go to lower subltion
level to begin with. So we get better
precision on this. So down control, select this, blow the mark, blow the marks, more or right, that is fine. Let's go back to the
highS subdivision level. Then we can freely
draw this out. High subibtion level
for this up a bit more. One last subdivision
level to go higher. Yeah, we're in there now.
So let's drag this out. Okay. Out of more, that is fine, that we can
definitely work with. Let's do one more. Okay? Yeah, I think we
can work with this. This we can
definitely work with. And I'm going to
reduce the intensity for it, reduce intensity. And I'm just going to add some smaller ones
on the lower parts. That should help break up
that surface some more, ton of symmetry for this. Okay? And I'm going to
smooth these parts. Basically trying to add
some variation to it. Okay? Smooth this part out. Invert the max. Let's go back in a
unless you the laptop. No, no, no. Just before we use the laptop. Just before we use the laptop. Let's use the same
increase intensity. Let's use the same one
for the midpoints. I shouldn't be too big, though. Undo that actually. Let's do specimetyturn
on simmer return on I think around, no, no, no, that is
not going to work. Let me turn off
symmetry for this actually turn off
symmetry and let's do I need to use
something else for that. I need to see something
except if we turn on symmetry and then
we do one year, then we do another one here. Nah that's a bit too noisy.
That's a bit too noisy. Well, I have another. I have another we can actually use
another we can actually use. But let's first use this
lip top first so lip Okay. Selected now, adjust the
Alpha set up in 1050. Okay? Is it at 50. Let me make sure it's at 50. Yes, I at 50? Okay? So we will do this
from the side. I think I need to
rotate this Okay. That's a bit too extreme. Let's see. That's definitely
a bit too extreme. I also like to take down the intensity of it
down a little bit more. Let's find a camera
and go around there. Let's go from the lower parts. Okay? Write this out
a little bit more. Let's see. Now, it's
not going to work. It's too wide. It's
actually too wide. Let's repeat this again. Okay, let's rotate
this actually. Probably my rotation is
not accurate enough. Okay. Yes. Yes, this we can work with. This we can work with. So I'm going to use another Alpha now. I have specific lip
Alpha in a zit. Lip lip Alpha, open that up. A few ones in here. So let's go over to main No. Let's go to transitions instead. Transition, laptop, lip,
let's let's use this instead. Do click conduct.
Go over to Alpha. Let's set this up, ten, mid value, 50. Okay. We can drag this around. You need a little more
intensity for this. So let's increase intensity. Still not intense enough. As California is
not intense enough. Yeah, much better now. Okay? Like, so All right. But I'm going to kind
of take this down, take down then if it down
a little bit more though. But just for the most part, this would
be fine to begin with. I would turn up symmetry. Then let's begin to
smooth some of this out. It's a bit too
intense. Smooth out. Okay? Then we use the dam standard brush
with them standard brush, starts adding my own cats in
the add more coats in there. No undo that. I think my
brush size is way too big. Take down my brush size. Okay? That's fine. Let me zoom
out, clear the marks, then add some coats some deep cuts across
that across the lip. I'm still going to
go over this with the inflate brush
just to inflate some part to create unevenness on the height
information of this. Okay. So let's use inflate B I N. Let's zoom out a
little bit more. Okay, rotate this weight, and I'm going to inflate
some of the detail. Get some detail inflated, reduce the brush size
a little bit more create eight variations
with this, rotate upwards. Okay. Increase intensity
a little bit more. So you're just going to
reduce the bro size, create some inflations
here and there. Okay. Rotate this down. Increase your brush size
a little bit small. Let me find it good, okay. This number should be fine. Alright. Let's zoom out.
Let's see what we get. Look at this from a distance. I think we need to actually
blend or take down the intensity for this down some more just to get a
perfect blend for it. So let's take it down. So I'm going to turn off
the recording layer. Let's turn that off. So where are you
coming to a close of all the details you need to add to this character as
far as skiing detail goes. As far as king detail goes, I think this is actually
in a good place. Okay, so let's take down
the intensity for it. Take down the intensity. Let's use saving up, let me give you some
moment to save. Okay, so let's take down
the intensity for this. One. Nope. That is so at the extreme
on negative value. Let's use the value of 0.7. Zero point sensing positive. We don't push you towards
negative. So 0.7. Yeah, I think 0.7
seems like a good one. Zoom out a little bit more. Let's see. We can see
take this down fine. Let's take it down
a little bit small. Let's use 0.5. 0.5. Let's see
what 0.5 gives us. Okay. Yeah, I think,
this is fine. Yeah, this is fine, actually. This we can work with. So
just to round this up, we can try and create
some Let me go back and record the
wrinkles detail in here. Let's add some kind of pimps
or imperfection on the face. A little bit more. A little more should be fine. Also, I'm going to be
using the flip noomal. I think flip normala some
imperfection in here. So we have holes that we should have, we
have spots in here. So let's start with this.
Double click on this. Okay. So let's go in and
we're going to drag this take down the intensity
for this crazy brush size. Oh, we definitely
need to come back in a less off increase
the mid value rather, increase the mid value and create some breakup on his face. Okay? Take down the intensity, kind of create variations
in a sometimes smaller, bigger shapes and you increase intensity
a little bit more. All right. Take down
the intensity. Okay. Let's come down at some
more around the egg. Okay. Take down the intensity. Okay, this should help should help break the
surface a little bit more. Take down the intensity. Okay. Let's do something for the nose. Alright. I think around the parts where pimp
poo is supposed to be, that's where I'm
drawing this out, so that should be fine. Okay? One more round
here, something bigger. Okay? Take down the intensity, try and create some larger
ones in around these parts. It might not be too obvious, but you should just be in there. O, do some that kind of
digs into the flesh, increase intensity,
at, do something that digs into the flesh. Okay. Yeah, that should be fine. Do some that digs in digs
in your house as well. So let's turn this turn on the recording and let's
get a blend for it. Let's get the blend
for it. So I'm just going to use something
small Let's a blend of 0.8. That's going to
affect the rink also, too, but that's fine. That's fine. So let's use
0.8. Let's see what we get. Okay? So this is 0.8. 0.8 is
actually a good value for it. It's not too intense, just in there. Alright, so that's fine. So this is like I believe we're
done we're done with yes. I believe we are done with
everything that has to do with the scheme for detail
in imperfection. So next lesson is just
going to be about the other assets on
our concept reference. So thank you guys
for watching now. I'll see you guys in next
lesson. Bye for now.
25. 24 Scar Details In Zbrush: Welcome, bad guys. So
in the previous lesson, we kind of finalized on
the details of the face. Now we need to do one more
thing to wrap this up. So there are some
scarrings in between here, so you can see some scars
we have on the body, so we need to kind of
replicate that on our sculpt. So that's what we're
going to do. So I have some references
here already, so these are some references. Can see how unique they are not completely the
same shape across. So we're going to go free and on that to
create all of those. But before we do that, I would like to map
out where I want them to be before creating that. So I think the best brochure actually is for this would
be the inflet brush. Well, let's start by
creating or I'll go to the highest subdivision
level and then we'll create a new layer
to accommodate that. So on the highest subdiviution
level now come down here. Let's create a new layer. And this layers going
to be called scars. Yeah, we're going to
name this layer scars. Let's go over, rename
these two scars. I like to use caps,
so is all caps, these scars Okay,
that should be fine. Alright, so now, I need to map out where I
need this to be first, then I cannot start creating
those scars in there. So I'm going to use the
Let's believe the mark spin. Mark spin should be
fine. I will increase the intense bro size. Let's see what we have
in here. Bro sizing. Let's use this
dynamic bro sizing here so we can actually have better sizing
for the bros size. So with this num that's
going to mark out, so this is going to
be the first where the first scar should be in. Move this this way. Okay. That's fine. So the
second one should just come just beside it. Okay. Then the third
one should be beside that also to around
here should be fine. Okay. So now we need to
turn on symmetry for this. Turn on symmetry for this now. Let's turn on symmetry for this. Then I think let's see
where this actually stops. So we can, no, do something else, undo that. Do that. Do something
else. Sometimes undo that. Okay, so let me get a good angle for this symmetry
is done, that's fine. Get in a bit close, reduce the bro size, hold down control, and I'll drag this out this way,
connect to the first one. Okay. Then let's go
over the second one. No, undo that. I'm not doing
that accurately enough. That is not accurate enough. Get closed. Okay. Right, doing this better now. All the way here should be fine. Then we can do the last one. So I'm just trying to max
out where I need this to be. In here, it should be fine. Here that's fine. So
symmetry turned on for that. So I'm going to do I need to do trying
to see if I need to do on the other side, I'm not sure we don't really
have anything in there. So I think stopping at
this part sh be fine. So let me turn off
symmetry, actually. Then I'm going to do all the way all the way here,
should be fine. Okay. So now what I'm going
to do is to invert the max, so I'm just going
to invert the max. So now I know precisely where I need to add or read
these cars in here. So let's look for reference
for it. Let's see. Okay. Let's see, they're quite
tightly close to each other. Okay. Yeah, I think
we can do this. Let's look for another
reference in here. Okay? Yeah. Okay. Let's see. Yeah, it's a longer. I think we need to create
something longer actually, so we're creating
something longer. See spacing between them. All right? Okay. Yeah, so now we can
start creating this. Let's start from the lower
parts, then work our way up. Let's let's put these two dots. Let's say this this 401. Let's try and create
this in here let's. Let me increase
intensity of the brush. I'm trying to
standard brush first. Let's see if that give
us good results in here. Okay? Almost. Almost, I
think we need to turn off lazy mouse for this No, it's kind of cool,
though, but it's kind of having some broad edge. I don't want this broad edge. Getting broad edge, using. I don't want that broad
edge. Let's see if we can let's something
a bit sharper. Let's try this on. Yeah, this
looks like a better one. This actually looks
like a better one, but we need to increase the
intensity of the brush. Yes. Perfect. This will
work just fine. Okay. I try to see the intensity
is way too high for this. I think intensity
is way too high. Let's take that
down. Let me reduce the intensity and then
we'll do that again. Let's do 23. Here, I think
we can work with this. This we can work with.
Okay? I don't do that. Don't do that unless increase the brush size
a little bit more. Come on. Increase the bre size, zoom out. Take down the browse size. Then we can no, no, no, no, I was way too high. Reduce the browse size. Try this again. Still not
the right browse size yet. Reduce the browse size again. Yes. I think this
should be fine. So now we can do this
now across the surface. Going to leave gaps in between. Undo that. Undo that. I think pressure on adding to it is
not accurate enough, so I'm not creating gaps
in between, though. Okay. Let's just from the
opposite side instead. Let's see. I think this we can
definitely work with. Let's go over what
I created before. We're not looking right, you
can just go over them again. Yes, this is actually working. Now, we don't need to be precise with the sizing for all of them, so we just need to create something in the Yes, this should be fine. Okay? Moving on. Okay. Well, since you kind
of go over them, though, you need
to go over them. So let's go over
them and then make them a bit sharper like
we did previously. So this would would add
additional detail into it. Okay. Change the camera angle. Okay. Yeah, so it should be fine. I think at this point, we can I think we can turn no,
no, let me not turn. Let me just do this
full on asymmetrically. That will give us
better results. Okay. Then go over it again. All right. Come over to the other side. I'm going to do one strip first, and then before we
move to the next one. So that makes better sense. Alright. Let me go over the
entire them first, then I'll come back
into them piece by piece and accentuate
them a little bit more. Okay. Alright, now, let's
go over them again. You can add if you
want in between, also. Okay? Yes, this is working just fine. Maybe we won't reduce
the brows size a little bit more, create
something sharp. Okay. Yeah, this is working just fine. We can introduce new
ones also in between. Right. Yeah, that would work. This would work. So I'll
move on to the next side. Next strip in here. Okay. Getting a bit faint. Come on, undo that. That wasn't look I isn't looking
good enough. Is not looking good enough. Okay. I'll skip the Nippo. I don't want any detail
on the nipple parts. Alright. Let's come over and then I'll send you with them some more. Okay. Yes. It doesn't need to be perfect. That's just genders
just a general idea. It doesn't need to be perfect. We just need something in there. Imperfection is even what
we are going for here. All right? Come to a better camera angle. Okay. H. Having issues with
my pain pressure. It's feeding itself out on the air not
precisely what I want. I think we need to find once you find a
good angle for this, your pain or draw withdraw or the pain pressure begins to work a lot better. So just a matter of finding
a good direction or good camera angle
for it over this. All right. That's fine. Get in close. I think we are doing just fine. Get in close. I think the closer we
are, the better we can get that detail in. I was thinking to
go over thinking to go over them a
little bit more dog. But for now, I think
we're in a good place. Okay. So now let's go over it. Reduce the bros size.
Go over it again. Okay. All right. Gets close. Undo that. It's not
in the right place. Yes, much better now. Okay. Yeah, that should be fine. One more. One more on
the right hand side. Okay. Increase your brush
size a bit more. Find a good angle again repeat this increase the brush size. Maybe will increase
intensity a little bit more. Okay. Yeah, this is working just fine. Alright, let me go
over them again. Go over them again. So we get something
sharp at the tip. Like I said, initially, imperfection is our
best friend right now. So you don't need to be too extremely careful
in here, just go free. Just go free and in
there because it's so This is like handmd
so it's not supposed to look very symmetric and the sizing and shape of everything is not
supposed to be the same. So you can just really go free and in there.
That's completely fine. Okay. All right. Let's rotate the camera angle. Get in close. Yeah, pretty much. Like so. All right. Almost done. Then we'll
go over it one more. Eleanor, now let's go over it. Let's centuate a
little bit more. Okay? Yes, interesting. Yeah, I was looking interesting. Then we just meant to do
on the opposite side, the left hand side,
and then we should be more or less done. Okay. All right. Yeah, awesome. Awesome. So it's
kind of a good thing kind of mapped out
where it needs to be, and then we let's go over that. So now let's do for
the opposite side. Oppose side. Let's
see if we can do this as quickly as we can. Okay? Go over. Let me use the browter
just a little bit more. Okay? Yeah, we can let's
move a lot faster in here. Yes, all the way,
should be fine. All we also screw the same thing
across, get in close. Okay? Get a good angle so our
brush can work a lot better. So now let's go before
we go te, actually. Let's just go te use the
brush size and go over it. So we get it looking better
than it is right now. Get in close and go over them, creating sharp sharp
edge or sharp tip to it. Okay. Then we have just
one more shape. Alright, I want one more strip to go, and then we
should be fine. Okay. Alright. Now, let's do Llaves. Okay. So the last three, let's go over that and just repeat repeat
the same scene in here. Look for this at a
better angle so we can reduce a bit
more accurately. Increase my brow size
a little bit more. Undo that, reduce
the brows size. Okay? Almost done. Let's come to the front side and do this from the front side. Getting close. So now let's just go it. So we just go over it to
create sharp tip on it. Okay. Come over down here to the side. Right. Almost done. Okay. All right. Just a few more, and then
we're good. That's fine. So now let's remove
the maxing in there, and then we should have awesome. Should have this
detailing in there, which is precisely
what we want, right? So I think this finalize it, so we can move on
to something else. I'll see you guys in next
lesson. Bye for now.
26. 25 Miniscus Adjustment In Zbrush: Welcome guys. In the
previous lesson, we worked on
creating these cars, we also lay that on a layer. So that is actually on a layer. So if we need to
actually if there's a need, let's see, yes. So if there's a need
for us to actually reduce the intensity of this, we can always do
that by going over to going out to our layers and then
tone of the recording. T of the recording, then we can dial the layer down
as we would need to. So maybe I'm not
going to dial this down just a little bit more, just a little, not too much. Maybe around the
value of 0.8 to 0.9. I think values around
that part would be fine. So let's do that. Let's go over, and
put in a value. Let's do zero point. Let's 0.7 first, I see. So 0.7, let's get
out of this. Okay. And then I think we have, this seems fine. It's not too hot. It kind of creates
weird deformations around the polygons
on this region. I think this is mesoma. I
think they should be fine. I would like to go over to
soup to remove this paint too. But the paint is actually
making it too bright. Okay. Yeah, I think it should be fine. It should be fine. So now
I'm going to exports. Let me get close
actually and kind of see there's something else I need to do on this scheme
detail around this. Okay, I think for the most part, this is working just
fine. I work just fine. So let's go to oh, yeah, one thing we
need to do actually, the miniscus Muscle is like tail line under
the lower eyelid. Just behind the lower eyelid. You need to kind of fix that. So I'm going to select it and
then it have to go into it. I will need to make
corrections to it. Let's make corrections for it. So I'll use the move brush. The move brush selected. Let's do let's start
from this region. I'm just going to lift this up. Let me max out some region. Let me max out some
of this region out. Let me select the
main body first and then go to lower
subdivision level. So you can actually work
a bit faster in here. So let's go to lower
subdivision level for it. Okay? Yeah, that should be
fine. That should be fine. So let's go back and select
the select the minusc now. And then we can let's do transparency so I can
actually see and I'm going to use the rectangular
marks to mark that part out. Let me solo this coming close. I'm going to mark
this part also. Okay. Wood and control tab to
blow the edge of the mark. Then to off transparency. Let's move this to
the other side. Let's work on the
left hand side first. Ton of transparency. Okay. I'm going to use
the inflate brush. Going to inflate this
a little bit more. Then we can start lifting
this up some more. Okay? Smoo this down. Leave the end up, smooth down, smooth this down, leave
this up a little bit. Okay? I think this
should be fine. Let's look at this
from another angle. Yeah, I think somewhere
around there should be fine. Let me push this down
a little bit more. I shouldn't be too
obvious in there, though. Before we do one
on the top, let's move let me move this
zoom out a little bit. Zoom out again, invite
the max, then go back in. I'm just going to
lift all of this up. It shouldn't be too visible
around here actually. So just move it up. Look for an angle under an
angle underneath this. Okay? All right. Smooth that down.
Smooth down some more. Okay, load this out some
more, smooth this down. Okay. I'm just going to
lift it out just a little. Okay. I think around
there should be fine. Smooth out some more. Smooth out some more.
Smooth out some more. Yeah, that should be fine. Okay. Let's look for the
other side. It the max. Invert the mark again.
Let me push this up. Okay. It the max. Let's get uploading
asymmetry done that's fine. Let's use the inflate
brush, inflate. Let's inflate this part. Let's make it a lot more
visible in here, smooth it out. I think I need to get in close.
Let's get in close first. Let's get in close.
Transparency. Move brush. Okay. Ton of transparency rotates this. Okay. Sm down do that, actually. Getting close getting
quite close to this. Okay. Or maybe better
still, better still, we can do. Let me
frame out first. We can do Mirror weld instead. Glad Max, get in in there again. Okay? Okay, maybe not. Maybe not. Let's
just pull this up. Let's just pull this up instead. Transparency. Mark this out. So low this, blow the mark. It's getting close. Okay. Take down the smooth intensity, smooth this part a bit more. Okay. I'll leave this part
up some more smooth out, leave this up up a bit more. Let's bring everything back
out. Let's don't have solo. T of transparency. You should be able to
see it now in here. Okay. I think we can use
the inflates now. We use the bro size. I'll just inflate
this end, right? Let's rotate this
down some more. Then do some gent moth
around here as well. Okay. Then let's invert
the max for the top parts. Let me just bring
this out slightly. So smooth out a bit
more out a bit more. Then the gentle smooth. Okay. I think I need to
push this up, do that. Move brush, move this
up a little bit small. Am dh should be fine.
Clear the marks. Yes, this we can
definitely work with. Okay? So that's fine.
Now let's spot this out. Let's spot out our mesh. Let's spot this out.
We're done with this. So let's start with the start with the miniscus since
already in there. Just going to export
this, but I'll first go to preferences. Import and Export
exports smooth group, Tn off group and then Tono
off smooth normal rather. Son off Smooth normal. Then let's export this out. So that have subdivision level for this miniscus,
so that's fine. So let's export this out. I export this to a new folder called Z
Export, so open that. I've already exploded
out the body, but I'm going to
replace this actually. So let's export the miniscus. Then come down and
then select the body. You need to export the body at the lower subdivision level. I think I'll prefer
to export this out at I believe it should be
subdivision level two. I ask this sublision
level one actually. I like to export this out at this subdivision,
subdivision level one. Let's just do
export.Eport this out. We exporting this
to Z export food. So Idris body, let's replace that since we have made a lot of corrections in there. It us fine. This
we can work with. Okay. Yeah, we can
work with this. So then we'll go
over to let's see. Here, the next piece less. For the iris, we
don't need to expose the irises because the
iris is already in place. We didn't touch that.
We didn't touch. We did not also touch
the outer eyes. I'm just going to
leave those two. So we touched the body
and the minuscule, so we're exposing those two out. Okay, yes. Yes, that's we can
work with. Okay. Yeah, that's fine. So now
that we've exported that out. I'm going to let me just
do a quick save for this. Let me save my file,
then we will save this. Then we import them into
Maya and then just okay? So they to create
the accessories. I'm going to create a
separate Zbrush project kind of create
these accessories. This fire is already
a three gig. I don't want to wait to put
much pressure on this fire, and then we start getting some lags on this fire while working with some other
assets on the same file. So we're going to create
a new Zbrush fire to create to create this
asset we have in here, so that's pretty much
what we're going to do. So yeah, let me just go. Let's go to Maya and
bring in what we have exported out and let's see how all of that is
playing out in here. So I would think I'll need
to steal the I. Yeah, I'll steal the I to control D, Shift P, send this down, select the hide dt. I'm going to delete this miniscus because we're going to be importing
new ones in there. Okay. I'm going to select
it. I'm going to give this a blink material. So let's just give it a, there's a blink material
in here already. Let's give it that. And then let's start importing what
we have exported out. So let's go to our
folder in here, Z exports and the
less S imports. The body and the minutes
goes into this Maya file. Let's give this a moment. Okay? Now we are in. So this is it. This
part love you? Is this view looked, okay? Is a perspective view. It's almost like it's almost
like we can't even see the very, very faint in here. The scars we had in
here it's quite faint. That's fine. That's fine. We can use always use the displacement map to drive this letter when we want to
do the look development. So use a displacement
map to drive that. But for the most part, I think this came
in quite nicely. Okay? All of this is
where it should be. All right. Awesome.
Awesome. So I'm going to save this file again. And I'm going to close
the previous five, we have the original
five for this and then create a new Zbrush file. Start working on
the assets in here. So let's go back to ZBrush and let's close
this and open a new file. Okay, so this is a
different Zbrush file now. So I want to start with
this default project. I'm not going to
double click on that. So that should open up
in here. That's fine. Then we're going
to set the camera just like we did for
the original documents. So let's go to draw 85 this Crow factor should be I think I use can't even remember the value I use but
I think four should be fine. It don't really matter
that much, though, because we already have
already on mean sculpting, so I think something
kind of fits this. So the camera will by no
means affect the topology or the already made
scope just going to affect the camera
but not manipulate or by any means a detail scoped. Let's just go and
then import the body. I put the body on the
import the outer eye. That's pretty much what
we need to import. This pot line doesn't have any subdivision level in
there, that's fine. I'm just going to
duplicate this actually. Then the one at the top, I'm going to replace
that with the body. So let's go over to Zports. We're going to bringing in
the updated body version that we exported from
the previous file. So open this up. Okay. So actually there though you can see it
but it's actually there, so you can see how
small this spare is. But that's fine. We can,
this is what we have. All of this came well. Yeah, this is all
of what we need actually going to be using
this kind of create. I'm going to be using
this to kind of create some other so molder
mesh is out of this. So yes, that's why I actually needed this because already has the proportion we
needed to kind of continue working with it and create another set
for it also too. So with that in place, we would go and then
duplicate this again. Select the top one, imports. Let's import the outer eye. I was going to go back to the import because we
have the outer eye. So let's import that in,
and then we are good. Yeah, yeah, we are good in year. So the next lesson, we're going to continue on by working on the
bidding for him. So we're going to
create the beds first, create the bids building
around his face a year or so. We can do one year and mirror
this to the other side. Yes, we can also do this. I think you can actually do and mirror to the other side too. I think that would
definitely work. Then we can make or maybe we
can do everything by hand. But with some mirroring now, we're in between just to
make things a lot faster. So it's building down here
and beading around here. Was it going to connect them
all the way to the back? Everything should
work just fine, and then we're going to go
back to Maya and create this. It's a very interesting bid or. Should we call it
yelling, actually, because it's not on
the year actually. It's not hanging on
the, like a year ring. It's actually
hanging on this bid. On this building, you
have another extra piece that comes out that's kind
of hanging around that part. So all of that, we're going to start
working on the next lesson. So I'll see you guys in the
next lesson, bye for now.
27. 26 Head Piping In Zbrush: Alright, so welcome back guys. So in the previous lesson, we kind of set up this new file to work and create most of
our sets in here, okay? So now let's jump right into it. So I'm going to go out
and select the mesh. Then Shift F Shift F to
go to our poly group. Let's come down to polygroups
auto groups with UVs. Yeah, that's fine. So I
want to make a duplication. I won't start by creating
this beading on his forehead, so that is what we're
going to create. So I'm going to divide this. Let's get at least
something sma in there. Okay. Then I'm going
to duplicate it. And let's select this. Let me move this up,
actually, move this up. Okay, select this newly created
this newly created body and then tone of the original. Let's work with
this newly created. And I'm going to go back in and then go back to lower
subdivision level and then delete the higher
subdivision level and put this down your all right, let me get close to the beading. Then Shift F, Come
tro Shift click, and I'm going to
do a delete ding. Let's do deleted the modified
topology, delete ding. All right. So the idea
in here now would be to create a poly
group that lines across where this
building should be around the horizontally and around the vertical all the way
to the back of the head. So there are a few
ways of doing that, but I'm going to be using the
let me get this to decide. I'm going to be using
the let me move to the side slice cove instead for this hold control and shift. Then you should bring
out this panel for you then select slice Cove. Slice Cove is selected now. So just to kind of figure out where this should
actually be in. And I believe, come
on, clear that out. Control Shift click.
Okay? I believe around here should
be fine. Okay? Yeah, I think this is
actually in a good place. Yeah, in a good
place. That's one. Then Control Shift
click on this. So, asymmetry is don't on. So we need to go from this is from the top
is that frame this in. Come on. I just keeps napping. Anyways, let me just
zoom this common. Yeah, it kind of
happens. I don't really know why that
happens, though. Yes, so we can do tap out. Tap out again to get the curve. Let's do this from around here. Yes, around here,
it should be fine. Do a slice. Oh, it's
not even working. This doesn't work symmetrical. But that's fine.
But I think it's supposed to be more
on the temporal line, so I think let me
do this from this. You know, here, instead, let's find a good angle
around there, so low this. Okay? Do this tap, tap out again. Then I'll move this around here. Okay? Yeah, I think I think,
yeah, there should be fine. We can work with it
around that spiece. Okay. Let's do for the opposite side. Now I can easily just mirror
this to the other side, but I like to do this
free end instead. Let's do this free end instead. I think we can make better
sin doing it free instead. Okay, I think we can move this to the side around
there should be fine. Yeah, perfect, too. The next thing for us
to do now is to create pipes that goes around where we kind of separated
out poly groups for this. So let's do that. I can do Let's see. Let's start with
this. I don't know. I don't really know
if I can do this. Let me make sure that
who side is turned on. Let me see if I
can hide this and then create the
loop around there. So to create that loop, we need to go over to B, C, for the curve brush. Now, let's look for
this curve pipes or curve tube bacal
actually two in here, but I think any of them
should should be fine. Okay, we have curve
multiple tubes. Let's let's use these
curve tubes instead. So yeah, so let's go over
to stroke and then over to, I believe, C function. Then we need to Oh, we have polygroups in here. It's actually a good one.
We have polygroups in here. Let me turn this
off. Let's leave polygroups alone,
bring this back on. So let's use this want
to make sure there are no polygroups inside of
this kind of cut out. So let's do frames, frame
polygroups Perfect. Yeah, this is precisely
what we want. So now, we're just going
to find the right. Oh, I think, let's increase the brow
size a little bit small. So the brows size now that
will determine the size of the tubes we're
trying to create. Okay? So let me reduce this brow
size down a little bit small. Crease the draw size, yes. Then you'll step in. We kind of creating to
undo that ton of symmetry. Let's do this again. Yeah, actually this
is actually fine. We can definitely use this. Yeah, yeah, this we
can definitely use because it's kind of slim
enough for us to actually use. Give us an idea of where we should kind of put
our beading in there. Though we still
need this though. But I think this should be fine. Yeah, that's fine. That's fine. Let's go back to move brush. Okay? Yeah, this is fine. Let's go back to
srope the lit, okay? Then let's split this
out. Let's spit this out. So go down or up
to soap to split. I'm going to do split
on marked points. Turn off so low. So out and select
these tubes now. So we have this at 42
k which is quite much. So let's load this. But we definitely have what
we need in her now already. But I think I would I
would like to I would definitely like to reduce the
Popolo count is quite high. It's quite high. So
let's duplicate for it. I would like to rename this. I would let me start renaming things where we move along in her Okay, let's name this two. Ed Oh. Oh. We need to create one more. We need to create one more. Let's just name
these two Ed pipes. Okay. We still have one more. We still have one
more around here, so I think we can let's do that. Let's do that. So I will go and turn off this late or slow turn off so loud, select this piece
again, Shift F. Let's kind of connect this. Let me sold this actually. Let's see this comes
across this way, that we can do control shift let's find the region for that. Tapings taps, undo that. We need to solute this out
first. I should be solute out. Drag selection, tap, tap, tap, tap out, tap out again, tap out again, all the way up. Yeah, this is fine. Bring everything back out. I think I can repeat this again. Let me put this again.
I'm going to delete this. Let's repeat this again. So we have everything
where it needs to be. Then we can go back into
ShrokFrame B c tube, the sizing for this yes, size for this brush is fine. Let's do this again. So now we have all of this where
we need them to be. Yeah, actually, precisely precisely where we
need them to be. So this is precisely also
what we want to shave F. Then go back to move brush. Then we can do splits
on marks points. Then we can go back to throke, delete curve, ton of
isolates. Yes, much better. So, yes, we have a senior now. So let's go and then
rename this So Pipes. Alright. That's fine. Yeah. This is fine. So
now we can add this head. Let's add this eyeball also. Oh, no, no, let's
bring it back on, I would like to see
this in a while because once I start adding
the bit on top of this, I would like to know
if it's kind of penetrating or touching the skin with too much and then make
adjustment based on that. But before we do that, let's low these pipes out, duplicate. Let me drag this
duplicate up Okay. Then go down to this
piece down here, which is still the
same ad pipes. I I would like to reduce the plc way too
high. It's way too high. Now, let's go down to Z
remerchaZRmara in shift F. This is quite dense. Okay, let's see if we can actually reconstruct
this subdivision. Okay, we cannot. So now
let's come down here. So we have this 59,000 policons. Let's see if we
can use it to ten, so let's say this to ten. Target Polycount to ten.
Adaptive, that's fine. Keep groups dictct edge. Yeah, so let's take
this down to ten. So let's run this. Give us a moment. Let's see what we get. Yeah, introduce that
to instead of ten, it's not even
taking into account the target picant for this. You said it's
setting this to 28. Let's come in and see.
So let's go off of this, so let's do half.
Zero mash again. Let's go out of this. Okay, I think we can
still half this out also. Come on. Half and then just increases
actually increasing this. Actually increasing this. Let
me take down this smoons. Let's do half again. Come on, supposed to go halfway. But it's not going halfway. It's not even respecting
the values in here. Let me take this down
to around five instead. Let's do five. Let's do five. Let's down all. Select mesh again. Okay. Run this again. He's not respecting this at all. Take this even down
further this again. Okay? Now we have
this at 15 k. Yeah, I think we can live
with this at 15 k. This we can
live without 15 k. Okay. But we need to make some
corrections to this, though. So control ships Move brush. Let's do an auto group.
Holy group. Auto group. Okay. We can do move topology. So B, move topology. See, move topology in here, so increase the brush size. So only once I only need to kind of move this down
here a bit more, so it should still be in here. Yeah, that should be fine.
Let's look for other regions too that's kind of
extended out way too much. Close this in here.
Close this in here, move this a bit further. Let's this back. That's fine. Wait wait a minute. Where's the other piece?
The up is no longer there. Almost like almost like it completely littered
the other piece. So let's go back. Let's go back bring
that back out. Okay. So back in
here. All right. Here's back in here,
we'll stay out this as 15 k which you can work with. So let's do this again. Also group. Okay, then bring this
back down for some more. That is fine. Okay. Yeah, that's fine. Yeah, this should work just fine naturally.
This work just fine. So I think we can
start can start. Can now start creating
the beading for this. But I would like to
inflate it out a bit more so it's not sticking
too much on the skin. So let's do let's
see if we can use the inflate and then
under deformation. Oh, the size here. Let's
do size instead. Whoa. Whoa, do that. I just all over the place. Let's do inflate instead. Okay. Just a little
feel it should be fine. All right. I think in this part, I'm going to use my move brush. Don't on dynamic,
reduce the bro size. Okay? Don't asymmetry, reduce
the bro size a bit more. I would just like to leave this out of the skin a
little bit more. Just a little bit
more. So it's not sticking too much on the skin. A little gap should be fine. Around there as well. Okay, out a little bit more. No, that's bit too
much, get close. Okay. Get this at an angle, leave this up some more
out some more Okay. Yeah, that's fine.
Let's do down here as well out a bit more.
Yeah, that's fine. That will definitely
work. So now we can now go in and begin to go in and easily begin to add or creating
this bit piece in there. So, we can do this
on top of this. So, I think we can work
with symmetry here. Let's. Yes. Okay, that's fine. Let's
work with symmetry for now. So BI so the beading for this, I can see spherical
shapes and I can also see I can also see
cylindrical shapes in there. Let's start with the come on, spherical shape in here first. So I would like
to use let's see. Um, we can use. Let's start with an insert. Let's start with
police fair first. Let's start with police fair. So we can do a police fair
around here to begin with. Okay, I think that
should be fine. Then let's move this up
where it needs to be. So in here actually,
I was going to be doing mostly Munir working here. So it's mostly
Munn Walking here. Reduce this a little bit more. Okay, we have a piece down Okay. Yes. So I'll go back to the MO brush. I would like to work
with just one instead. Let's turn off. Let's turn off or
Control Shift click. Turn off symmetry for now. Okay. I'll mark this out. Control Dub toge
separate poly group. Bring everything back out,
Control Shift, click on that. Control shift drag selection. I need to go back to my
Control Control Shift, go to select selection rectangle or select Shift drag
selection out in that. Then let's do deleting. Let's do Deleting, Deleted
delete modified topology, delete Eden. That's fine. I'm going to select Control
Shift click on this. I'm going to do split
Eding Split ding. Let's work with just
this piece alone. Let me get this in place. Okay. Sent out this. And I would like to scratch this down this way. Shift F. Then let's get close. Yeah, this shape
is actually fine. If I move this here,
let's see what we get. Yeah, the size for
that is actually fine. But once we need to do this too, we still need to move out
pipes out a bit more, so it should typically
be around here. So our piping should
come out a bit more. Our piping should come
out a whole lot more. So we still need to go
back like this piping, clad max, tonal asymmetry. We still need to move this
piping out some more. All the way here should be fine. Okay? I think we actually need to do a lot more work pulling
all of this out also. Okay? No, undo that. My brow size
is way too big for that now. Up a bit out, outward, a bit more. Okay? Say for the back piece
around there should be fine. Stand this out some more. Yeah, I think that should
be in a good place for now. So we can continue
working on this. Okay, so now we have
one piece in here now. Let's go and select this. Let's go back to our IMM brush
and create another piece. I would like to move this
forward a little bit more. So I go back to the first
one let's use this in, Tinder should be fine. Sinder no extrude. Select this drug that's in here. Okay? Let's get this
properly oriented. Yeah, this should work
just fine. Shift F. Well, I think I I will need
to also make some corrections using the using the let's see. Isn't a Zi moodlar
brush actually. So let's go to move Brush. BZ M. Yeah, Let's skip
that. So Shift F. You need to add loops in here. Undo that. She Come on, undo that, go to the edge. Should be a loopF a opa also. There's the loop. And
also so this out. Let's put a loop
also around here, here, also, as well. Let me do one across
and also undo that. Undo that. Yes, one also
in here, that's fine. So I'm doing is because when
I kind of smooth things out, I don't want to kind
of collapse on itself. So if we should do it smooth, you can see it kind of
owes the shape a bit more. Shift F. Okay. That's fine. Yeah, that work just
fine. So we can now go back of slope, bring
everything back out. Let me center, rotate this way. I think it should be longer than it is right now. This
is a bit longer. Zoom out some more, rotate this let's get this
way it should be, put this in here, do rotation, move this out, scale
this down some more. All right. Move this forward. Rotate. Let's get this we're going to do mostly and manual working here. So most of what we're going
to do here is going to be manual working here just to
get this to be in place. Move this forward in here, rotate a bit more, rotate a bit more, invert the selection, get
this here, rotate some more. Yeah, that's fine. That's
fine. Invite mats. Inverted mats, go back
to the previous piece, leave this up some more Okay. Get close, Shift F, rotate. Let's see where this is or a bit more, so
it should be fine. Okay. Yeah, that should be fine. That will work just fine
for what you need it for. Alright, so we're just
basically going to start. Just continue on with
the same process, blocking this piece by piece. Okay? So I'll see you guys in next lesson as we carry
on with this bye for now.
28. 27 Head Center Left Beading In Zbrush: Alright, welcome, but guys. So in the previous lesson, we worked on creating this
piping for the head, and then we started adding
this bearded piece to it. So what was going to carry
on with that, right? So let's move on with that. Mm. Yes, we have created this piece. We
created this piece. So let's let's actually now use another reference
that kind of help. Okay? We can see variations in here. I think
it's a good one. It's a good definitely good one. We can see various
shape building in here that we can use. So let's carry on with that and let's continue
working with this in here. So this one has more
rounded shape to it. So we can use another
type of IMM for this. Can definitely use
another type of IMM, we can even use this same one, but it's slight
modification to it. Before that, let's
go back in here Shift F control and bring our degrees mood
and control tap on this. Let's say this
proper orientation, hold control, drag it out. Okay, out this way
down the sway, drag it out again.
Oh, undo that. Let's get this back
in here first. Okay? Bing this closer, all dots, cate that out. So what I was going
to basically just keep repeating the
same thing all over. Rotate is a little bit more, and I'll scale this
down a little bit more. Let's also get variation
in skill, too. Variation in skill
should actually help also. That's fine. That's fine. Zoom out, get an angle in here. Okay. That's fine. Then let's go be IMM for this. Let us I think it
should be a caps uline. This is what I'm
looking for. So let's extend this caps
out around here. Okay? Snap this
out, center this. Let's get this in place. Okay. Hold shift. Let's snap this direction, get a good angle to it, then move this in place. Nope. Okay. It's quite dark on
this side, though. Let's rotate this,
go back to move, go back to our gizmo. Get in asymmetry to do for this. You need to make sure
symmetry is done. Okay, symmetry is off because we do not want symmetry on here. Then let's get this
rotated in, move this in. Scale this down. Maybe
not down too much. Around this sash be fine. You know, scratch
this down naturally. Finally create some of
this piece in here. Scratch this down a little
bit small, that's fine. Move this in place, F to frame into it, rotate. Let's see if this is
in the right place, rotate it this way,
get that's fine. This we can
definitely work with. Get a rotation basically just checking this on all
angles just to be sure, I have this in the
accurately as it should be. Okay, scale it out a little
bit more. All right. Yeah, that is completely fine. Then I'm going to control, extend this out this way, and I'm going to extend it out
a little bit more like so. Okay, I'm going to deduplicate
do that before duplicate, let's go in and make sure
it's in the right place. Yes, it's in the right
place. That's fine. Then I'll rotate my camera, move this out a little bit more Wood
control, extend this out. Squash this in, like, soap, a bit more, take down the size, move this close up. Okay? Yeah, that should be fine. Move this in rotates, move this in. Okay? Get down, get this
down some more. Alright. Yeah, yeah, that's a good one. That is a good one. Um, now we can do let me select down control
and select this piece. Okay, now we need to do an
auto group for everything. There's an auto group
for everything. Let's clear the mark. There's an auto group. We're basically going to start repeating most of
what we have in here, what going to do so. Yes, auto group auto group auto group Bully group auto group. Yes. Give more
control, select this. Okay, old, center this, change orientation, Old
control, get this out. Move this out. Now
we're going to rotate and let's
get this in place. No, rotate. So it's basically a
very careful process. Just a very careful process. Get it in there. It's a lot of manual
work actually, but we're still going to
make this a lot faster. We're just going to
do one side and then mirror it to the other
side. That's basically it. Okay. Scale this down some more, move this around the Epp. All right. Move this out. Okay? That should be fine. Yeah, that's a good place. This we can
definitely work with. Shift F. So I think
I can just Okay, let's down control and move
this to the other side. Okay? I think I can repeat
the same sequence now. I think I can actually
repeat the same sequence. So to repeat the same sequence, I would let me get this out, got my Gizmo O down control, tap out invag max,
go to the Gizmo. Okay. Then I would all I need to do in
your now is just to down control
and drag this out. Do that actually. Wow control, move this with gizmo instead. Okay. Rotate, at this week. Now we need to do a lot of manual work in
here. That's fine. That's completely fine. But this will actually help us spit
things up a little bit more. Let's center this
in here, rotate. Let's try and see if we can
leverage on this while still. All of these are still together, and then just try as much
as possible to kind of get them on the pipe
and get this down. Yeah, I think when a good place, move this out a little bit more around there,
it should be fine. Then, come on. Let's kind of knock this
off the right camera angle. Let's get this back to
the correct camera angle. Okay, we still need to move
this out a little bit more. Right. A little bit in. Yeah, that's fine.
Yeah, this is fine. Then we can do Shift F.
Let's do Auto group. So now we can now
individually move them and arrange them,
set them up in place. I think it starts
going A wire around. Yeah, this piece. Oder Control or rather select EW
on your keyboard, go to your Gizmo order
Control, select this. Let's kind of get this in place. Move this in front. Older control, move
to the next piece, rotate this this way. Get this in, move to the
next one, rotate this way. Let's transcenter
this rotate this way, move inwards, inwards. So more. Get this out this way. It's just a careful process. Move this back
where it should be. Let's see, I think they
should go up a bit higher. Let's leave this
up a bit higher. Yes move on to the next
one Control select this. Move this in place, rotate. In rotates, center this again. Yes, rotate. Rotate this around there.
That should be fine. Control. Select
Lemate the marks. I like to select these two all
at once, select these two. Okay. Undo that,
invert the marks. Then we move them. You can
move this all at once. Let's center it Orient, get this in here rotate this
way, move this forward. Okay, rotate in get
this inward, inward. Alright. I think
this should work. We should work just fine
up a little bit more. Yes, yes, I think
we're getting this. This should be fine. Let's check this around
here just to be shock. Maybe scale it out
a little bit more. All right. Let us
clear this out. Yeah, that's fine. So now we're kind of moving a
bit faster in here, so we can I think we can also duplicate this
same thing or maybe add, let's break this up
a little bit more by adding adding a little bit
of variation in here also. So I would I would hold
down control, select this. All right, select this. Extend this out more. Extend it out more. One more. But for this,
I will scale this out. It should be bigger
than the rest. Okay. Then get this out this way. Okay, that should be fine. Just to break this up
just a little bit more. Then we can do, let's do let me select hold down Control,
select this piece. I would extend it out back out
a little bit more, rotate. I can also even create a new
formation in here. Come on. We create a new create a new formation of
building in here also. Rotate this. Get
this out, rotate. Now, the only issue we
might have in here is we can't just scale this properly anymore because the orientation
is now completely off. Orientation is completely off, so we're just going to start maintaining what we
have in here and then just repeat do we have? Yes, just repeat some
of this in here. Just repeat the shapes
we already have, just duplicate them and then get them where
they should be. I think this should be fine. Because, let me show you maybe just maybe it might
actually work. Maybe if you do a lot
of carefulness in here, a lot careful in here,
we can get this to work, so. Let's extend this out. Okay? I'm trying to I will
try to undo that. Yes, this would be fine. Rotate it this way. Okay? Let's see if
we can squash this. Squashing, but it's not
squashing accurately. No squashing accurately enough, so that we need to fix. Let me just get this see see if we can do this a
bit more accurately. This is close enough. No, see how it's messed
up on this region. So it's gonna be a
difficult one trying to trying to get
this to look right. Come on. Okay. Let's see. I'll rotate this all this week. Nope, it's still not
working accurately enough. We don't necessarily
need to do this though. I think maybe we
can work with this. You can actually work with this. Yeah, this you can work with. Let's go back in here. Get this close up. I'm going to zoom out. I'm going to steal I'm
going to steal this, hold down Control,
extend it out. Let's zoom in. Let's zoom in. It's actually
eating in here now, so we need to get
this out up out. Okay. Getting close. Move this out, rotate. This way, rotates this way. Okay. I think this should
be fine where it is. And I'm going to scale it out. All right, duplicate. I'm basically trying to create
a new formation in here, a new formation of
building in here, then then I'll be able to duplicate that entire
entire new formation and then use to create another
loop of sequencing All right. Rotate this this week. You'll do uplicate of this. Move this down I can
shring this down, move this closer, do another duplicate of this
shrunk version of it. That's fine. Then we can go and steal I think we can steal this. We can steal this. But I think the numbers are way too much for
it, but that's fine. We delete the numbers in here
because it's way too many. Get it out. Okay? Came orientation. Come on. All right. Gets enclosed. Yeah, we need to do a lot
of modifications in here, but let's start by
doing an auto group. Select this. Let's see, I think the three
should select this also. Let's do delete Eating. Let's delete ding. All right. Then I think did
we say this already in place? So Control click click, invert the max Mark this out, bring everything back
out. Oh, come on. All right, that's fine. Rotate
it in place, move this in. You're almost done creating a new formation for this.
Move this this way. Oh, I think we should have
left that in there, though. Yeah, that's fine. We
can select where is it. Rotate this. I would like to still I like to
steal this though, but I think this skill, okay,
we can use this instead. Let's use this instead.
Let's steal this instead. And I'm not going to down
control, move this out. Move this out some more, get this forward, and set this in here.
That should be fine. Okay. Let's center this,
go back to the Gizmo. And let's just do
proper orientation in here just to get it to look right.
Yeah, this is fine. So now we've created
a new sequence of formation in that we can now duplicate across.
I clear this out. I think we started let's see let's see where that
actually ended. I ended. I ended around here, so we can duplicate
the sequence. Now, I'm just going
to grab all of this. Grab this entire
sequence. Come on. Do we have let's go
over to Max lasso, select all of this, Control W and Control
Shift click on this. Invert this, this one
single poly group, mark it out, bring everything
back out, invert the mark, then we can safely move this
out as a new formation. Let's move this out
of the way here. It's going to be a new
formation out, up some more. And yes, we still have a lot have a lot of
corrections to do in there get this in. I think around there
should be fine. Then we can do an auto group. There's an auto group
auto group auto group auto group auto group in here. Now we can slate them
individually and then start moving them and
arranging them in place. And control, select
this first piece. Let's get close up in the and then we start making
proper modifications in. Let's see get this forward
a bit more. All right. I think around there
should be fine. Let's go to the next piece. Okay. Next piece. All right. Let's zoom out. I think we can leave, let's
go to the next piece. Let's leave a little bit
of gap in between there, so you can actually
see the piping. Inside of that,
but this will get out around there should be fine. Around there
should be fine. But downwards, rotates. We're trying to
make this confirm conform to the piping we have around that
part, very important. So select this also, get this in place, rotate our camera,
get this closer. Okay. That's fine. Select the next piece.
Get enclosed. Okay. Forward, around there
should be fine. Around there should be fine. Rotate this this way. Move the camera out a bit more. Let's get in bring this forward a little bit more then down some
more, select this. Let's see where that is. Move this down closer. Let's move this out.
Forward, select this, move this forward. Rotate this. Let's center the
orientation for it. Extend it pre side
a little bit small. Forward, go to the next piece. Okay. Let's see. I think well, let
me just continue on manual instead
center this rotates, rotates up a bit more. Let us fine. Control
select this. Okay, move this in place. Rotate, move this backward actually gets in the Let's see. I think that should
be fine. Come on. Then come on. Select this last piece, get our camera up a bit more. CentzG this in place,
rotates. Okay? Let me rotate this
this way as well. Get this in. I think
this should be fine. Get this out some
more. So that's fine. All right, so let's zoom out. Let's see what we have.
Zoom in close, Shift F. All right. So we're
kind of getting this now accurately across
the entire piece, which is precisely what we
want, precisely what we want. So now we cannot continue moving this around and then fill up this mini part and then we will mirror
it to the other side. So we'll do that in the
next lesson. Bye for now.
29. 28 Head Center Right Beading In Zbrush: Okay, but, guys, still on this piece, still
on the beading. Still need to make some more some more kind of filling some of this piping
around there, so **** F, I would
like to select. Let's see how far out
I can select this. I think we can just select. Let's grab a selection and go all the way think all the
way around should be fine. Okay? I want to make some
modifications there though because selection here
is not that precise. Control Shift click on this. Zoom out. Clay any maxing
in there. Con do that. Clay any maxing in
there. Oh, come on. Come on. Llamce more efficient. Want you shift
click, shift click. Zoom out, get close, do a max last max
out these parts. Okay. Bring everything back
out invert the max, then I can mirror this
to the other side, rotate, hold it and then
snap the orientation for it and then hold and control
and drag this out this way. Rotate this, get enclosed, rotate this down again. I think I grab more than what I needed, though,
but that's fine. Let's just going to modify and
delete what we don't need? I think maybe this
is right amount, it should be the right amount. Let's get this
closely as we can. Let's center it rotate. Get this closely close in here. Just trying to get this
as close as we can. Get this closer. Okay? Move this in. Let me just mark
this around here instead. At the starting points instead. The starting point
should be fine. Then we can move this up.
Yeah, it should be fine. Then we don't auto group again. No, don't do that. Let me move this closer
closer closer swell, okay? The leis on Auto Group now. Then we can now go
in and then begin to perfectly merge
this as possible. Wood on control, select this
piece, move this in place. Yeah, quite a lot of
moving individual piece, individual bit bearded
piece in place. Not anything too
complicated or extreme. So basically just moving
this piece by piece. Yeah, not a form process, but necessary actually
necessary process. So let's move to the next one. Move to next one. Get
this closer Okay. Yeah, that's fine. That's right where it is. Okay, move to the next one. It's quite dark in here. Move to the next piece. Closer. Come on, remember moving
it that way, though. Getting close, let's see, it's quite quite dark in here. Let's do Shift F. So you can actually see this
a bit better in here. Rotate this way,
hold down Control, select this piece,
rotate this way. Yeah, yeah, that's fine.
Move to the next piece. Move this backward. Come on. Let's get it Okay. I think it's in the right spots. Roughly in the right,
it's in right spot. Let's go to the next piece. The camera angle
begins to get a bit funky around these parts. Okay? That should be fine. Move this along, select this. Let's look at this
from the top side. Yeah, that's fine. Move
to the next piece. Move this backward. Rotate
it so more backward. All right. Zoom out. Come on. So in this part, you should be fighting with the camera angle
actually on this part, start fighting the camera angle, trying to get the camera rights. Okay? Yeah, that's pretty
much fine. That's fine. Yeah, I think there
should be okay. Okay. Yeah, still some corrections
to be made, obviously. But I think we're on the
right track, move this in, go to the next piece. Orient center this. Move this in place. In a bit more. That's fine. Move to the next piece. We rein center the orientation for it. Rotate it this way. Come on. Go back in there. 'Cause
it's a little bit far out. Let's say this back in. Go to the next piece. On center this
orient this rotates. Yeah, I think that
should be fine. Around there should work
just fine. All right. Next piece, hold out
center orient in place. Change the camera
angle for this. Bend this inward, orient
this this way, that's fine. Okay. Zoom out. I think let's grab more
than what we need actually. Yes, forward. Okay. Then I'll clear the
max. Let me grab more Let me grab the end points, so transparency let's grab
all of this and do that. Let me grab this again with
a bit more precision to it. All right. So, invert the mats, orient and, and
sent this back to the center points, orient this. Do a rotation, get this in. We see to do manual working. At the very least
get this roughly around where we need them to be. Forward some more down here. Okay, well, that'll be fine. Then we can start selecting
them as individual piece now. Okay. Out orient center this. Alright, orient this this way. Rotate this, go to
the next piece. Go to the last piece actually, and then let's move
this backwards. So more center orients. Move this down. In her rotates in some more rotates,
center orients. In here should be fine. Yes, under part should be fine. All right. So the next thing now we
need to do is just to I think center part
is around here. Let's just extend or
duplicate this a bit more. Let's do around here, move this in place, duplicate, scale this out, duplicate making sure I'm doing this
as accurately as I can. All right. Move this out more. Just eyeballing the
center part rotates. Move this out some more. Eyeballing the center.
I think should be fine. If you raise the
there should be fine. Let me calculate this out. This is a good is
actually a good place. This we can
definitely work with. I would select this and I'll
move this out this way, shring this down some more Shing this down even more. A bit more this way. Trying to avoid the center part. When I mirror this to the side, it shouldn't be too
much of an issue or any weird merging around
those parts move this in. Okay. Go out of gizmo. Oh, I think I need to move
this forward a little bit more clear this out. Okay, let's go out
of transparency. **** F. We a good place so
I'm going to transparency. So I'm going to duplicate the duplicate of
this soup to first, it's going to be like our
original piece that we're going to use to start
filling up the parts, these parts, also
around here, too. So it's going to be
our original piece or more or less a template piece to kind
fill up the other parts. Fill up the part a
bit more accurately. Yeah, that's fine.
So let's move on. I'm going to duplicate. W is this is DTs. Let me rename this
to BdinRamenam this to BDI. Come on. Yes, let's just lim
this to Ed bid instead. Eden center bid. Come on. I'm not spelling
this accurately. Center bid. B bids. That's fine. That's fine. Then do
duplicates of that. Let's temporarily
hide the duplicate. Let's work with. Add one of these as a duplicate
and then let's work with this that's
visible to Ros, and then we'll go
over and then do a urral before I do a mirror, I would like to slightly inflate this make it slightly bigger
than it is right now. Slightly bigger than
it is right now. Nope, cannot fill up
too much of the gap. Yeah, that should be fine. Probably a little
bit more. Okay. That's fine. Interceptions, we have interceptions in
there, but that's fine. It's not going to
be a major issue because we still have
gaps in between them, so this should be fine. I just need a little
bit more skill on them, it should be fine. Then we can total Plc for
this 12,000, that's fine. Can we use as a base mesh? Then we can mirror this to the other side and make some
other adjustments to it. So go to geometry mirror weld so obviously would have
a missing piece in here, which is what we
want, so we don't get models merged
together inaccurately. So I can just easily
fix that suit. Let's see how we can
use to fix that. Yeah, we cannot sweet this
in here for the center. So let's shift F. Let's do
an auto group in auto group. And I can still I
can steal this. Get this out, spit it
out a little bit more. There's just something quite
bigger for the center part. So it kind of feels a lot
more unique in there. You also have a bit of a unique
piece in the center part. So we're getting a
unique piece in here. Okay. Yeah, that is fine. Let's get this out a bit more. Just kind of sticking on the
skin a bit skus the scale. Scaling things from your
kind of moving your camera, navigating on the
top, you kind of messes things up a little bit. But I think
they should be fine. It should be fun around
there. Shift. Play the marks from this in. Yeah, that's fine. That makes a lot
of sense in there. Then if we subdivide
this control dig, you can see how this is
all smoothed out and we have gaps in between,
which is also what we want. You can also use the
move topological brush. In case, for example, now we have a shape in here
that is too close to itself. We can move that can
move that out slightly. Move that out slightly. Yeah, awesome, this
will work just fine. So we have the phase
building in here now. And it's the same size we're
going to be using across the entire across
the entire mesh. So yes, this is fine. This will definitely this
will definitely keep in here. So I'll see you guys
in the next lesson, we will start using this
to affect the kind of work on the piping across the
entire head. So by for now.
30. 29 Head Top Beading In Zbrush: Okay. Welcome back, guys.
Previous lesson kind of finalized on Well, at least I thought
I finalized on this centered bidding boards. We still have kind of
fix up the back piece. So it shouldn't be too
much of an issue actually, we can just use think I can use let's shift F. Make sure auto group for
everything is turned on. Then I can just use
this piece is going to select this down control. Oh, I have subdivision
levels in there. Let's delete the
subdivision level in there, so go down delete Aire. Let's do this again. Maybe use just this
instead should be fine. Then d control, extend
that out as a duplicates. Then rots. Oh, do that, then rotates, center orients, get this where it needs to be. Getting up close,
rotates, rotates. Orient this again, scale out
a little bit more rotates. Alright I think it
should be fine. A little bit more
rotation forward, a bit more rotate this way. Yeah, I think we can
leave this as it is. Yeah, that should be
fine. That should be fine around there. That
should be fine around there. Lady max. Alright, that's fine. Then let's go back to let's
go back to this piece. Let's do a duplicate
for it, hide this. Then we need to lift this up and it's going to be
a lot more trickier in here though to get this oriented and then begin to manually fix them where they need
to be piece by piece. Let's first start by getting it roughly where it needs to be. Rotate upward. This way down around here should be fine.
Yes, a lot of work. A lot of work is going to
go in here piece by piece. But the good part is, have
a gap in here though. Okay. But the good part is that ready beads in here
that we can actually use. So just to do the manual process of getting them in place
that I just left out. I think around just should
be fine to begin with. Around should be
fine to begin with, so let's start moving this
individually piece by piece to Shift F. So it's
going to be a lot of work. Let's make sure we
have auto group turned on for each auto group. Right, so give more and
control select this piece, and then we can start moving
it in place as it should be. Let's do one around here. Rotate. Do that cents
orient, rotates this way. Okay. Let's go to
the next piece. Create gap in between. Let's create gaps in
between for it because I'm still going to inflate
it a little bit small, so let's make sure
we are creating gaps in between to accommodate the inflation, we're
going to add on it. I a bit more rotate this in some more
areas should be fine. Move on to the next piece. Orients. Okay? That
is fine. Next piece. We're going to keep filling this up and orienting and
then once we are done, we can mirror it
to the other side. Move this this way.
Move to the next piece. In here, should be fine. I think I need to turn on
transparency so we can actually move a lot
faster in here. Come on. Center is actually
center on the mesh, move this forward, orient this, move this Come on. Move this this way. Next piece, get this in place, create
a bit more gap in between. Okay. I can see just meant
in the center orient. Right? Yeah, that seems
just about right. Next piece. Okay.
In a nice piece, move this in place. That's fine. I'm getting not of gaps in there, but that's fine. We just need to get all of
these where they need to be. Already have them
laid out for us, just to arrange
them accordingly. It's not in the right place. We need to center
orients, move this out. This way, Orient. That's fine. Around
there should be fine. Come on. Around there Come on. Around there should
work just fine. Yes. Next piece. There is
actually quite boring. Actually quite boring. Come on. Actually quite boring process, but we just need
to get it right. Once we get it right, keeps just jumping
somewhere else. I don't know I keep
jumping somewhere else. Okay. I think this I
need to move this way. Let's sit down some more.
Around that should be fine. Move the next piece. Orient
this this way, at this in. Center, orient this this way. Move this outward,
rotates this way. So those things can get
this to be moved in proper alignments with the trade in India or with
the pipe in India. I think this should be fine. All right. Next piece. Get close, get to center, move this out some
more down here. Yeah, I think around
this p should be fine. Next piece. Center orients Okay. Se creating gaps in
between for when we inflate Just checking this
out here, that'll be fine. That's fine it right, place's in the right, please
move to the next one. Get close up a bit more center. Yeah, I think
around there should be fine. Move this forward. Next piece. Let me center this get
this way I feel it should be up a bit more around
the ingredients, more up a little bit
more a, that's fine. Next piece, Maybe you can
grab a lot more than this, so let's grab a lot more. Control ships click. No, clear the mask. Control ships click. Slet all of this invite the selection. Max this out, bring everything
back out, invite the max. Then with the Gizmo, we can just move a lot more to come on. Just move things a
whole lot faster. Move this in here outward. You need to make minor
corrections to the dough box. I think around there
should be fine. Just the last piece is
not in the right place, so we can just easily set
this in the right place now out a little bit more. Yeah, that should be fine. It a bit more space in between them. Then we can clear the
marks and go in and then keep moving them individually. I think we are kind
of gone far, though. Seems like we're just almost as if we're stuck in one place, but we're making
significant progress on this repetitive but
necessary process. Okay. I think should be,
this should be fine. Th should be fine around there.
Here should be just fine. Next piece. Okay. Center orient rotates it in place. Yeah, I think, yeah,
it should be fine. That's fine with rotate,
move this forward. Select the next piece. At least
select two of this piece. Go out of gizmo, select to do that. Okay. So something
is off in there. Let's do an auto group again. Whoa. This part is actually in a mess. We have a messed up piece in there, and we need to fix that. This piece is
actually messed up. Can we is there a way to just isolate isolate? Okay. Alright. We can do let's
do split actually, split iden, then
go back in here. So this small piece
that we don't need, we can now fully delete it. Not sure where that
actually came from, though. So let's continue on. Select this, move this way
it needs to be. Rotates. Upward, get a better
angle like this. I think should be, this should be, this is fine with it.
That's fine with it. Next piece. Center gizmo its rotates. Move this inward. Rotates. Inward. That's fine. That should be fine with it is. Rotates. Look for the next
piece. Let's actually copy. Let's actually grab more.
Come on, play this out. Go out of gris mole.
Let's grab more of this. Sense orientation, move
this out some more rotates. I think we're at
the midpoints now. Yes, we're at the midpoints. Yes, almost done. Met this. I mean transparency
tone on the ghost. Okay. Yeah, let me turn of
these goes actually. Let's see, yeah,
this will be fine. Then move all of this in place. You just get a close
approximation for that, then we can start making modifications to
this individual. Let's do individual
adjustments now. Move this in. All right. In. Select the next piece. Around here should
be fine. Okay. Let's go to the last piece
and grit some gap in between. But we're still going
to gently inflate this, so we need to kind
of get accurate gaps in there, move this in. Center orients out a bit more. Lot this. Yeah, that's fine. Still more piece to grab. Let us grab, go
out of this gizmo. Let us grab some more. Think all the way around
here should be fine. Ivting mark. Let's max it out, bring everything back
out, invite the mark. Grab this down. Try and get the
orientation in place. Okay? This way this way in the down Orient down rotate. Yeah, I think it should be fine. Create some gap in between here. So now we can go individually
create the marks. Let's go individually and then move them in where it should be. Yeah, that's fine.
Create some gap. Next piece. Center the orientation for it. Okay, that's fine. Next piece. Sensor orients. Okay. Back some more. You need a
lot more gap in between them. So let me start by doing
it from this part instead, create gap in between. Right, Orients Let us
move to the next piece. Center orients. Get this down around the air. Okay, move this in forward. Next piece. Move
this in by lots. Orient. We have gaps in
between. That's fine. We need the gaps in between
for when we cannot inflate. Next piece. Move this way it needs
to be operate too much. Rotates. I think
that should be fine. Next piece. Alright. Bill gap in between,
orient this. Bring this down some more. Next piece. Sent out the orientation. Let's get aligned to the
piping in here, right? Select the next piece. Get it. Undo that, get it properly where the
piping should be down some more do a little bit of
orientation in here. Move to the next piece. Yeah, I think this is
the last piece before we duplicate more piece and then get them aligned towards
the piping down here. Okay. In a bit small, I
think that's fine. Around there should be fine. Okay. Almost done. We can grab. Let's grab some more. The marks. Let's grab Let's even
grab all of this. W marks last 22, let's grab all of
this. I at the marks. Let's just get them
where they should be. Okay. I would say it close, it's nothing we should be
move this way. All right. Move this down some more. I think they should be fine. Clear the marks, then we
can now go individually in there and move it accordingly, where it's supposed to be
Center orientation for it. Rotate. Move this out this way. Right Next piece. Center pivot, get
this in here, right? Next piece. I think that sits quite
nicely in here. Next piece. Get this down. Yeah, that should be fine. Move this in so more next piece. Okay, up a bit more. Scale this out a little
bit more. Right? Next piece, rotate a yeah, I think pretty much like
sushi almost almost down some more around the
edge should be fine. And this is the final piece. Should be the final
piece in a rotate. Scale out some more. Get this in where it
should be up some more. That's fine. Clear the marks. And ever that you
can just delete don't need them anymore. So we can control click all
of these out and delete them. Right. So you can also do
a delete ding for them. So let's delete ding. So und geometry,
modified topology, the delete ding. Right? Is perfect where it should be. Then I would like to inflate. Let's mirror this to
the other side first. Don't know transparency. Whoa. Whoa. It's not in the right
place, that's fine. We can just move the
piping in there actually. So we can move the
piping in there. So let's select this
piping instead. Control S click on this, Max this out invert the max, use a move brush. Move brush instead and
move it in towards, undo that, undo that. Via the mouse. Don't
have symmetry for this. We do not want
symmetry for this. And they would
manually push this in where I believe it should be. Okay. Get in up
close. All right. I think, Okay, it's not in
right place here. Get this in. I also as well, smooth that out. Rotate this We'll take you
almost done, move this in. Move this in, move
this in. Okay. Here around there
should be fine. So around there should be fine. Clear this out. Let's go
and select this piece. Then we're going to
do a little inflate in here and then
we should be good. So let's just inflate
this a little bit more. Well, alright, something
like that should be fine. Okay? That's fine. So we can definitely we can
definitely work with. We've done the other
part, so just mean this final path towards the jaw line, and then
we should be done. Then move to something
else, right? So I'll see you guys in
next lesson. Bye for now.
31. 30 Left Jaw Beading In Zbrush: Okay, we come but guys. So in the previous lesson, we kind of worked on creating the beading for the
top part of the head. So this to worry,
we're going to work on creating the beading along the molar all the way
to the jaw and to the chin. So we already have
a pipe in there. So I would like to adjust the
pipe in a little bit small. So I'm going to use
the move brush, going to eliminate the
angle we have in here, M it a bit more
slender in there. Adjust a little bit small,
like so should be fine. Okay. We up a little bit more around there.
All right. That's fine. So basically, we're going to be repeating we're going to be repeating the building
we're at the top. This is where we're
going to also repeat along this line. Okay? So yes, let's see if we can
kind of steal one of these. Think we can actually steal one of these and then we use that. Also, in this order, the other side, it
feels a lot more. It feels there's no variation in there in terms of the shapes. I'm going to adjust
that a little bit more. Okay. Just make slight variations
in there, Shift F. Okay? Is there an issue? Oh, I
see something in here. Let me move this back
to where it was before. Select this, push this in. Okay. It us fine. So back in here, let's break the uniformity
of this a little bit more. Let's make sure gizmo is on. Ton of symmetry for this. Ton of symmetry hold
control, select this piece. Let's move this. It's an angle. Let's move this this way. Select this piece, rotate
a little bit more, select this piece,
rotate some more. I just to break the uniformity
of it, it doesn't look. So it looks slightly different
from the opposite side. Okay. Come on. Come on. Undo that. I need to get oh, great, undo, undo that. Let's rotate this
a little bit more. Move this this way, select this. I need to zoom out
a little bit more. Hold down control
and select this. Okay. So basically, I'm
just adjusting this for what is going to be
visible on the front view. So that is basically what
I'm adjusting in here. So piece is going to be
visible on the front view, I'm just going to adjust
them a little bit. All right. Okay. Rotate
this way, rotate this way. Rotate, rotate this also. Oh, my goodness. Complete mess on the other side. I need to undo, undo this mess completely. Let's start by. I should have done
the auto group first. Yes, so have done the
auto group first. So it shouldn't affect
the other piece now let's make quick
corrections to this. So we shouldn't get anything affecting on the
opposite side now. So my bad should have
done that earlier. Okay? So just to make
minor fixes in here, and then we should be good. Okay? Down this way
forward some more rotate. Scale that out a little
rotates, move down. Okay. I just need to
flip this this way. You shouldn't get this affect
on the opposite side now. So everything should be
working a lot better now. Okay. All right. Move this down. Rotate this a little. Yeah, I think it should be fine. We don't need to do too more. Just fewer variations in
there should be fine. Okay. Let's do this, do that. Rotate this. Let's do rotation this way also. Okay. Yeah, so the adjustments
should be fine. This adjustment should be fine. Then let's go back
to our sub two. I believe this piece will
duplicate that again. Okay. Let's get it out. It's around there.
Well, this one looks like we need to make
a lot of adjustments, too. But that's fine, let's route
it it this way to begin with and kind of roughly get
this where it should be. Then we can start making
corrections based on that. Okay? Down some more
it down this way, push this out some more. Alright, I think
we can work with this this we can work with. Though it's quite
in sense though, but that's fine. That's fine. So let's get in and start
making corrections. Let's do transparency. Okay. Turn on got also for this. Let's turn off ghosts.
Transparency should be fine. Shift F. Let's go and do
poly group in a poly group. Okay. Go to Gizmo, select start, go back
to the original. The first one actually,
then move this in. Okay. I'll rotate this this way. Okay, off putting on the side. Rotate, get this in, down some more around
there should be fine. Let's go to the next piece. Okay? Center this
rotates, get this down. So it's just the same repetitive process for this also too. The same repetitive
process across this also. Okay. I think this should be fine
where it is. Next piece. Move this in where
I feel it should be hold or to center this, rotate it this way, rotate
this way, move this in. So you spend a little bit
of time in here actually to get all of this
to look right. Get this down a bit more. I still want to be
creating space in between, so in case I want
to inflate them, I shouldn't have any
issues inflating them. All right, let's go
to the next piece. Okay? Move this in here,
in a bit more. Okay. Let's center. Come on. Let's orient this. Move this in. Up a bit more at close
that should be fine. Next piece, move this in place. Down here should be fine. Rotate center this
orient this in place. Up a bit more around
there should be fine. A bit close that should be fine. I think we good next piece, Down. Put snap the two center organs. Okay. I I some more, get this a bit closer. I think when a good place, it that's fine, let's
go to the next piece. Put all center it on the mesh, center gizmo on the mesh. Then some more up around there. Around
there should be fine. Orient this. Get this down. Up a
bit more orient this. Who orients this. Up
a little bit more. Select the next piece,
move this down. Oh, I then make adjustment. You always want to check
this around just to make sure it's actually
where it needs to be. I think that's fine.
Move to the next piece. So the camera angle begins
to make it look like the camera becomes a
little bit more deceptive. So you want to always kind
of check around to be sure you're putting this
in the right place. Because as you move this around, it might get a bit deceptive in terms of camera angle for it. So you want to always move around to kind of check if
it's in the right place. Okay. All right, that's fine.
Next piece, Okay. Drag this down, get
close around here, center, move this in here. Right now in the right place, move this in, get this right. Okay. Up a bit ire. Move this this way. That's fine. Next piece. Okay. Move a camera angle down in where it should be
bring this down forward. Move this in forward. You see, still off
get this in here. Now we're in the right place, move this down some more. Okay. Nice piece. Tens Okay, bring this down here. Zoom in rein this
a little bit more. Guard this up a little
bit more, rotate this. Yeah, I think this is fine. Come on. I think that's where should,
is where it should be. Create a bit more
space down here. Next piece around still off. You said this way I feel it
should be, move this down. Check this from another
angle just to be sure this is working correctly. Wants. I think that's fine. Okay.
Next piece, put center this. All right. Of, get
this in close. Rotate, rotate, send this down. B this closure off your axis almost there
push this in here. Wine this a little bit more. That's fine. We still have
quite a long way to go, but we're making good
progress in here. Next piece, Okay. Center orients move
in, orients, move up. Okay. Let's go out
transparency. Let's see. This is most of this actually
intercepting with the skin. Most of these are
intercepting with the skin. So we're still needs to
make corrections in there. Let me just move this
out some more frame out. Okay? We still need to make
some corrections in regards to some of these
are pushing into the skin. Oh, okay, it's just the spot lap is pushing into the
skin way too much. So what was going to
lift that up some more. Move this up also some more. Let me select the strip
instead, the pipe instead. Symmetry tunnel symmetry
for this actually. Then we need to lift
it up some more. Tunnel symmetry now.
Okay. Get close. Lift this up some more. Okay. Let's look at
this from this angle, leave this up also some
more out a bit more. Increase intensity of the brush. So you can move
things a bit quickly. Okay? Let's see. Look at it from
the opposite side instead. Extend undo this,
reduce the brush size. Extend this out a little bit
more out a little bit more. I think it should
be fine for now. Let's go back to this piece. So no transparency. Come in close. Okay.
Select this piece. Move in, move this in. Ans, get this up. Ens up Okay, up a
little bit more. I think need to shrink this pipe and shrink it a little bit more than the
way it is right now. Get this up even higher. That's fine. Move
to the next piece. Let's get this way I
feel it should be. O to get this in
the center here. Move out, rotate,
it this way. Up. Get a good orientation to this. I think that's
the right place. Move to the next piece. I think we can select
Multiple this time. Can we select
multiple this time? Let's transelect
Multiple this time? Okay. Invite selection,
mark it out, bring everything back out,
invite the max, and move in. Don't need to get
this close enough, and then we make individual
adjustments to it. All right? Okay. This be fine.
Let's select this. Orient orient this, create
a bit more space in there. Okay, let's move
to the next piece. Okay. Now, we're being to get most of these two clues to the mesh, and it's becoming a little
bit more distracting. Kind of get Come on. To get this to look right, so
we need to make adjustments to the rest of the bids and kind of create a bit more
gaping between them. Ideally, just pushing
you down should be fine. Don't say this way it should be. Okay? Clear the max. Okay. Control shot click. W have another weird
piece in here. Okay? Select mark all of these. Ct together a separate
poly group, exclude that. Okay. Let's invert
all the selection. Then we can move
them out or actually down move them down out this
way, that should be fine. Invert the selection,
bring everything back out. Now, this piece that we
don't actually need, you need to remove that. Let's say delete ding
now, delete ding Okay, we're good. Give more, select this, and
then we can keep moving moving them in place. Get closed down or snap
this to the center. Okay? Down some more. A bit closer orients
around there. Next piece. Okay. Get close. Center this. Let's bring
this closer. Orient this. Move this in. I think
we're in a good place. Closer. Right. Select
the next piece. Move this in. Okay. Orients orients center
this Orient this this way. That is fine. Next piece. Move this in place. Center this. Okay, drag this out. Rotates, move this out. Orient this, move this down. Orien move this out. Next piece, get this in place. Get this back in
place. Center this. OrienG this in place. Extend it out a little bit more. Just sclean it out a little
bit more. All right. Oriens next piece. We're just around
the leap region now. I think I believe we're more
than halfway done with this. We don't fine this on
this Spot Love chapter, this spot Lepisode, you can just finish it up in
the next episode. So it's just a matter
of doing this manually and getting them
where it should be. Spots getting a
bit darker. Okay. I think that should
be fine where it is. Next piece down where it
should be. Still no there yet. Okay? Down down some more. Okay, we're there now. That's fine. Next piece. Okay? Center this on the mesh. Closer. Get this down. Okay, down a bit more
OriensOensR in some more. Okay, up a bit more. That us fine. Next piece. Center this around rotates. Center this on the mesh, orients up a bit higher. I think the should be fine. Let's go to the next piece. Drag this in where
roughly should be center this.Oientient some more in
the head should be fine. So the next lesson, we're
going to carry on and then continue
fixing all of this. We're almost done. I see
you guys in next lesson. Bye for now.
32. 31 Right Jaw Beading In Zbrush: Okay, come back, guys. So in the previous
lesson, we kind of worked on rather we were still working on the left hand side of the
job to create our bidding. So yeah, we're still on that. So let's just continue on and then continue
to make this work. Get enclosed. Come on. Oder control. Okay.
Yeah, that's a bit odd. Let's clear the max first, hold down Control and
select this. Oh, yeah. It's not hold actually.
So remember we added gave all of this on the lower part
one single poly group, so we need to split
that a auto group. So Control click now, it
should work just fine. So back in the extend this
out a little bit more, get this in where it should be. Okay, up a bit higher center this rotates a bit more, okay? That should be fine. Create
a bit more space in there. Move to the next piece,
get this in here. I'm also going to
be checking this now while I'm doing
this just to be sure I don't go more
than the midpoint, so we can mirror this to
the other opposite side. Okay. Yeah, that's fine. Next piece. Get in, let's get in a bit more. I think I need to make
this part a bit tighter. I'm going to select this turn on symmetry for it
symmetry turned on. Symmetry is turned on now, increase the browse
a little bit more. Increase the browss some more. I'd like to bring this a bit closer a bit tighter around the spots.
That should be fine. Go back in the Okay. Go back to Gizmo,
select the next piece. Move it closer. Okay. Create a bit more
space, rotate this. Let's get in the let's see what we have around there
should be fine. Select this piece,
rotate it this way. This way, that should be fine. Okay? Next piece on do that. Basically I down control and
I made a duplicate of that. I don't want to
duplicate of that. All right. Okay. Move this out some more. Create a bit more space, rotate this in a bit more. Move this a bit more. Okay, let's center this. Yeah, that should be fine. In some more Orient
this up a bit more. That's fine. Do the next piece, move this in here. Okay, I think we're getting
very close to the center. I think we just need one more. One more should be fine. Okay, let's get this in. Rotates, scale this out. Okay. All right. Let's just
duplicate the same one. Orient it this way,
squash it down some more, create another piece. Wient this rotates. Okay. Get this out. Let's see. I think, it
should be fine where it is. Maybe move this out some
more with more brush. Okay. Um, yeah, that should
be the center part. It's close to the center
part. So this work. Okay? So let's exclude all of this. I don't need any
of this anymore. Max all of this out, give one single poly
group, select ds. Then where is the
delete den Delete Eden. Yeah, this should be
just about writes. Then we can mirror this
to the other side. Let's mirror this go over. We're still in the
modified topology, let's mirror and weld. Okay. So for the midpoint, I can still let's see. I think. Let's see
what work best for. I think can still can still use what we did
for the top parts. You can still do
that also around there. That should also work. Let's just look for something close to it that
should work. Shift F. Let's do pool group. Autogroup all of this. Then let's find this is
one year. We can use this. Okay? Center pivot on
that down control, grab that out, or orient. Let's kind of snap this two. Orient it this way. Orient this way, scale it out, rotate it this way. Then let's get close. Let's see, maybe the scale is actually way too much,
take down the scale. Okay. Orient it this way, orient this this way. I'm going to squash it
down a little bit more. Like say this here, squash this down some more. Move this, put another
copy of it around, squash this down a
little bit more. I think these two
should be fine. All right, Clare the marks, if F ton of transparency. Okay. Just make the other parts. Before we make symmetric
asymmetrical changes on this let's first inflate,
it's a little bit more. Let's get this inflated. Sticker than it is right
now than it is right now. I think this should be fine. We should be fine. Let's make that symmetrical change here. Going to select this variant. Let's do transparency
so we can move inside by moving
inside of the mesh. We can navigate without
any distractions. Okay? Select this orient this way, move this down a
little bit more, down some more, get some
variation in there, select this, rotate this way. Rotates this way,
rotates this way, rotates this way,
so should be fine. Just trying to break symmetry
here. Get this down. Okay. Rotate this
way, down some more. Rotates this way,
rotates this way, get this back in, rotates. Okay. Get this back down,
up, some more. Let's move this in some more, rotate this way, rotate down. Yeah, I think we are
doing a great job in here by making this not look too symmetrical from
the opposite side. Okay. Yeah, this should
help. This should help. This should be just fine. Awesome. This will work just fine. Except we need to there's something else you need
to do in here actually. I feel the building
kind of continues on and I know this
piece in here. So I would like to create a building that goes
like in form of a loop. Let's create a building that
goes in form of a loop. Okay. I don't want something we're not supposed to use
something that there's too many pieces to be fewer
piece should be fine. So let's just create we can
create something in here. Let's just use the B I. We can use a cylinder. Can just drag out Let's do this from the
opposite side instead. Let it from the
opposite side instead. Let's see where we can
grab this out from. Okay? Oh, this one feels like
sitting too much on you. Okay, that's fine.
I want to make adjustment to that later on. Just trying to figure out
where to please this. Trying to figure out
where to please this. I think we can do
something around here. Turn off symmetry. Okay, let's oring this a bit
properly. Shring this down. Get this out, rotate
it this way. Okay? I think I'll shrink this in some more shrink
this in some more. At least want something
quite thin, a bit more. Okay, a bit more. Let me extend this
out some more fits. Then creep shrinking this. Shrink this again.
Shrink this again. Yeah, something around
there should be fine. Okay. Undo that. Let's scale
this out some more, create some thickness for it. Center a vote on this. Okay. Let's get
the flat this way. Yeah, I think this should be
fine. The should be fine. I feel like it's
creating buildings. It feels like a kind of
building in there actually. So Let's stick with that. Let's stick with creating
buildings in the All right, so or better still, we can do let me flat this out. We can do like kind of in kind of chain going from down
because it's like a metapis, so I would like it to be
held by a metapis also, too. Yes, I think that will
make better sense. So let's inflate this
a bit out a bit more. Then I would polish undo that. Polish is way too extreme. Let's add a dot on that polish. OG too extreme. Do that. How do we polish it
without going to extreme line? Let's do a value. Let's the value of 0.2. Now, wait to tin. Well, let's inflate
this, let's see. Pretty much the same thing.
Pretty much the same thing. Let's do inflate
balloon instead. Not too much.
Control D, do that. Oh, yeah, we need to split this up actually.
Spit on max points. Let's get it separated out. Control D. Okay?
Yeah, this work. So basically, what we're
going to do is like, create like kind of chain mill. I need to make this a
bit ticker deformations. I flat this out a
bit more. Some more. Yeah, this is fine.
I'm going to oh, yeah, we have a subution
levels in there. Delete lower. Okay. So we'll create something
interesting in here. I'm going to rotate
this 45 degrees, bring another one out, rotate this back 45 degrees,
clear this out. Old control drags this out. Create a duplicates. Okay? Yeah, this is fine. Create another duplicates. Yes. Yes. T should
work just fine. Let's do another duplicate. Let's do another
duplicate, another one. Okay? Clear everything out. Then we would scale this down. Scale all of these down.
Let's get them in. I'll just move this. Yes,
that should be fine. Then move this closer. I'll need to hook this around and move this do that first. Let's get it duplicate so we
can work with duplicating. So duplicate this Okay, Let's move this close up first. Let's move this way
it needs to be. Okay. So I'm just basically
trying to average this out, see where it should start from. Okay. Let me get this out. Let's move this in. I think we need a few more. We definitely need a few more. Shift F. Let's do
auto groups in here. Auto Group. Okay, select this like this. Its out, invert the max. Hold down control drag
another one down here, drag another one down here. I think this should be fine. Shift F. Okay. Yeah, I think this
lens should be fine. This lens should be fine. So
we just need to hoop this around C up, instead. Okay. We can rotate it this
way in some more, scale this out some
more, bring this down. Yeah, I think around there
should be just fine. Then I'm going to drag
this all the way up here, up some more, and tilt
this out this way. No, that's a bit extreme. That's actually too extreme. Ice if we do something
else instead, I think we can put
this around here. Yes. Hmm. Well, we can hook
this year instead. Need to find a good place
to get this hooked in. Think up a bit
higher around here. Rotate this in. You definitely need another
piece that we use to hold this all together.
Getting close first. I think, somewhere around
there should be fine actually. Just rotate this a bit more. Okay? Select this piece, rotate this in some more
This should be holding it. Scale it out some more. Then I'm going to deflate it. Shrink it down some more. Okay. Yeah. Somewhere around
there should be fine. Okay. Ind the marks. Get this in her out some more. Let's get closed. Let's see in some
more invded marks. I'm going to scale this
out a little bit more. Okay? Around here. Nope, up a bit higher
up a bit higher. Okay. It the max, bring this out down some more around
there should be fine. Yes. Around should be fine. We can now tilt this
this way a bit more. Yeah, I think it should be fine. Should be fine. Maybe maybe we actually
have too many numbers here. We have too many
actually around here. So we can reduce this.
We can reduce this. So let's clear the max Shift F. Oops. Let's do auto group again. Poly group auto
poly group again. Auto pull your group auto group. Okay. I think we
need to delete a few more, let's let's delete. Just trying to eyeball this just see how many, I need
to delete from this. We can do one, two, three. Yeah, these three
should be fine. Then we can do delete den. Delete ding for this. Okay, then we can mirror this to the other side. So mirror. Okay. It should be fine. So then we can now
create this piece and then hang it around this,
and then we should be good. Alright, so yeah, we'll do
that in the next lesson. I think I need to undo that. I feel like I need to I need
to tilt this invert the max. I need to tilt this way a bit more so it feels
more straight on. Around here also as well on something that feels
a lot more straight on. Here that is fine. Here, then we can mirror this to
the opposite side. Here, that's fine.
So that's fine. You can work with this. So in your next lesson, we're going to start
creating this. I think it would be best
to create it inside of Maya and bring this in here. I would have to take it inside
of Zbrush but this pla pot la piece in here feels
like something that would much easier to create inside
of Maya, at least for me. So that is what I
am going to do. So I'll see you guys in
next lesson, bye for now.
33. 32 Ear Ornament In Maya: Come back, guys. So in
the previous lesson, we kind of finalize
on the building. So in this tutorial,
we're going to create this piece in here. So let's do that. So I'll go to my front view. Come over to the front view, hit right leak and hold. Let's do interactive
creation. **** right leak. And I'm going to create
a where is the pipe. So I'm going to create
a pipe instead. So I'm going to drag this pipe. I think somewhere around
this side should be fine. Let's add some t to it. The inward part, let's see
how thick this should be, probably somewhere around
there should be fine. Let's framing so that. Okay. I'm going to
go to phase mode. I will select let me select this phase and I need
to select a bit more. Let me do this from the lower
part all the way up and do this again. Oh, no. Do this properly
around here. Yes. I do deletes. I think the gap year
should be fine. Okay, let's just delete
this piece also. We delete all of
this. On shifts. Let's let me coming close. I think I need to
be closed a bit. Select all of these deletes. Do the same for
the opposite side. Select all of these
deletes. That's fine. Let's come to a
perspective view. Let's frame into it. No, this
is actually way too long. Squash this down some more. Let's say somewhere around
here should be fine. You can always go
back and modify that later on if you need to. I think this should be squash this down a little bit small. Size, this size should be fine. Let's see. The other
size should be fine. Now we'll continue we're
going to fill this space up. Conducts doubly conducts
heat right a fill. That's fine. That's
precisly what we want. It's good to our more ti coats. I'm going to add your coats
in the center, hold down, control and shift get
something in the center. Okay. Similarly also around there so get something
in the center, 50%. Okay, that's fine. Let's
go over to a front view, I would like to go to vertex, select all these vats. Okay. I'm going
to scale it down. Scale it down somewhere
around should be fine. I'll do the same thing
for the opposite side, scale this down around
should be fine. I think it should, okay, yes. Yeah, this is actually fine. This we can work with. Then what I need to do would be, let's see let's see Okay. Unless done two smooth for this, let's see what we
get done Oto smooth. Okay, I'm getting
something interesting. But we need to kind create a gradual transition in between because this part
is just way too broad. So we need to do
that on both side. I can just delete half of this. Let's delete half of this. Let's work on one side, and then we're going to
move it to the other side. So let's go edge more, double click on this
edge, squage this down. Squirt this down,
squash down a little. So we should get better
transition across this. Okay? A bit more, a
little bit small. That's fine. Okay. So now we can
mirror this together. Let's go to polymodlling,
select this. Let's do a mirror. Turn
of the quad geometry. Whereas on the opposite side. Let's bring this closer frame
into it hold on control, so you can move this
gradually and kind of get a good shape in something like
that should be fine. Yeah, this would
definitely work. This we can work
with in the Okay. So now I'm going to I
need to create let me close and by type each drone. Is going to create a shape
that comes out in here. So let's select all of this. Let's go over to maybe probably we should
do verte. Let these verts. Can I bevo these arts? Yes, Bevo these vat. Increase the width some
more that's way too much. I think somewhere around
think somewhere around here should be fine. Okay. Select this. And let's
sphericize this. Come on. That's a mess. Let's go to phase
most like this phase. Come on. Why is it folding
itself in that way? I'm not sure why it's folding
itself in that way, though. Go back to selection phase. Let me make sure we are
on modeling standard. Just to make sure I'm
doing this correctly. Okay, so let's do
another extrude instead. Extrude. But this time around, we extrude inward. Let's extrude inward. Then, oh, oh, I was using
the wrong all the wire. That was the wrong one.
So spherical not smooth. Sphericaliz. Yes, yes. Okay, circularize rather. I'm supposed to be using
the circularize instead. So this is correct. Where's it again? Yeah, these correct one we actually use. Okay. Then we're going to
add divisions to this. Let's see radar offsets, string this in some more. Okay. Let me do this. Let's start this
with this instead. Let's start it with
this undo that. Let me scale it out a
little bit more first, scale it do undo, undo. Select this scale out some
more, a bit more like so. Then do an extrude. Let's get something
smaller in there. Okay? Like so then we
can sphericalize that normal let's increase
the divisions for this and then ad of
let's get this in. Okay? I think we can this we
should be able to work with. Maybe the subdivision
subdivision level is a bit more. Okay, I think one
should be fine. Let's put one in there. Let's do one instead. Okay? Who's down. Let's leave this up. Get this up around
there should be fine. Okay. Let's see, maybe
up with too much. Okay. And I'm going to
select this vert SECs verte, ladies verts. Get this down some more. Okay? Set these verts. These arts down a
little bit more. Just trying to ease the
tension around those parts. Okay. Yeah, I think
this should be fine. Yes, this we can work with. So now I can select
this phase now. I don another extrude. Let's get something
smaller in there. Here, like so. Then I
can extrude this up. So EJ go on the keyboard. So let's extrude this up. Flatten this. Okay. Yeah,
I think this should work. Extrude this out a
little bit more. I try to figure out how far out I need to extrude
this, though. Show this out some more. Okay. Yeah, that should be fine. All right, I would like
to go to art come on. Let's go back to vertex, leds vert, lets verts. I'm going to use the
lesson on the constraint. Let's do surface constraint
IG on the keyboard. Let's bring this
close around here. Okay. I would like to go
over to more tie codes. I'll add a code that
goes across this way. It ends out to apply another code that
comes down this way. Code this way. Another
code this way. All right. I think
this should be fine. Because we have quads in here, we have quads in here also. So I believe that should
work. Let's see if we can connect this to this. So we have one, two,
three, four, that's fine. Let's connect this in here also. Connect this to this point or the vertex in there.
Similarly, also. Then we add a loop around here. All right now let's don't auto smooth for this let's
see what we get. Auto smooth yeah, you know, the top part, we've
seen this kind of add another edge loop
also around here. So let's do more tie cuts. Add an edge loop around here. Add one around the middle
points here and should be fine. Okay. I think I'll need to delete going to get a flat surface covering
that part out, so we don't actually need
this so we can better still, let's just do let's
do an extrude. Let's do an extrude.
Inset instead. Okay? Add divisions here. E John on the keyboard to repeat the last use to get this down. Let's do divisions also here. Then we can eat deletes. So we should smooth
this out now, we should be getting
something like so. Okay. Yeah, something pretty much like
this should be fine. Okay. Except maybe we want to
extend this out some more. I would like to extend the
entire outing out a bit more. I'll need to make some
modifications to this vertex, select these arts,
select these arts. These arts this art also. Then with the scale two, can scale that out some more, create a bit more
space in between. Okay. I think I should should have done this earlier,
but that's fine. Get this back out. So I have
enough space in here now. Let me go over to the top view. Let me get this out
of the way first. Let's get this out of the way. Let's get this in here.
Okay. Then verteg selects all of these
arts. Select it again. Undo that. Let's tone off. Let's turn this off.
Let's turn this off. Scale it out, some more. See this in here, we
can move this out. Let's do surface constraint,
get this down here. So let this get this here. I think I feel I have
messed some things up on the lower
parts. That's fine. Not so much. We can just move this back
where it needs to be. Turn this off. Let's move
this back back where it needs to be around
there should be fine. Yeah, certainly we definitely have issues in here,
but that's fine. We can fix that by
just lifting it but fix that by lifting it up. I'm just going to select all
of these verts. Select this. Think I can select
centerpiece center verts. Good so I'll translate to let's just lift this
back up some more. I did not select a butler piece. Let's select this inclusive. Let's do this from
the front view so we can get better angular. Okay. Yeah, this seems fine. This we can work with. So it's slightly bigger
than it was before. Then on the keyboard,
you can smooth this out. It's fine to this
imperfection around here. This will actually
help. This imperfection around here should
actually help. So that's fine. Okay. Yeah, this we can work with. So we need to kind
of go in and then start adding some of
things on top of this. Okay. Maybe I feel like
I should shrink this shrink this a
little bit more. I feel like it's way
too way too big. So let's scale this
back in some more. Okay. Let's give this in. All right. I can just trying to
make sure this is imperfect in a sort of way. Because it's like
a metal. It's like a handmade metal piece, so you kind of look
imperfect in a way. Okay. This down. No, do that. It doesn't
go all the way there, so this should be fine. Let's see what we
get out of this. If you do a smooth. Yeah, that's fine. This is fine. This we can work with.
All right, so save this. So now we can start creating
this additional layer. We can't leave this
instead of Zebra. It's going to be a lot faster doing this
instead of zero but. Anyway, since we're
already in here, let's just try and
finalize this in here. So I'll go to the top
view top view instead. The view. Then let's create a cylinder. No, create a pipe instead. A pipe instead should
be better for this. So I'm going to
create a pipe that goes is a bit wider in shape, something around here
at heights. Come on. This is. Let's
hold down control, and then let's do this
a bit gently this way. If we extend this out a little bit more around there,
it should be fine. Okay? So, this should be
down, I believe, yes. So let's get this up, have to frame into it. Op. Up. Let's add let's increase
the height for it. Let's add a bit more thickness
so you know, t instead. That's way too much. I
think this should be fine. Okay? Get closed. Let me squash this
down a little bit. Do that actually, because
I don't mess this so. Let's say this to
eight, or maybe not. We can also increase to the amount we actually
need for this. Let's increase to the
amount we actually need. Okay? And the little model we're going to do is
just to bevo the edge. Let's just get this to the
value we actually need. All right. So this
should be fine. We think to create another
extra piece, though. But I would like to take
this down a bit more, let's do a value of
four for the heights. Okay. Then I can duplicate this. I think I need to get this
down around the first. Let's get this done around the e. I'm going to duplicate
this, get this up here. That's fine. Then let's go
in and create a cylinder. We need a cylinder
in here now so shift right like old cylinder. Okay. This should
be slightly wider. Almost around there
should be fine. Add some to it. Okay? So it's down here. Let's get this up. F one
to F to frame into it. Okay. Let's see. Okay. Just trying to figure
out the height for you might need to kind of scale this out
a little bit more, but I think for now, it
should be finally just get most of the shape in there. I would like to
select these three, scale it out some more. Okay. All right. Then I need to
kind of scale this in kind of touch
this shaping here. So let's go over to the piping.
I believe the thickness. Come on, thickness is
just moving way too fast. This is moving way too fast. Probably use actual numbers
in the Let's do 0.8 instead. Okay? Let's do 0.01. Let's do 0.05 instead. I think 0.05 should be fine. I'm going to delete this,
duplicate this, get this up. All right? Yeah, that's fine. That's fine. So we need to extend
out some more. But let's kind of get this
a bit more rounded in here. So we just kind of do
any subdividing in here. That's going to be with
the edge. Let's see. Okay. I don't I don't think
we need this top piece. I don't think we
need the top piece, so we can select. Let's select the top piece
and then delete that. Frame into it. Do the same for
both side, though. Let's select
everything, then select this midpoint, then do delete. Okay? This should be fine. We need to kind of extend
the lens a little bit more. So I'm going to
extend this lens up more up a bit more around
there should be fine. Yeah, around there seems fine. Round there seems fine.
That would actually work. Yeah, that will work just
fine. That works just fine. Then I'm going to
duplicate this again, Control dig, get this
covering the top parts. Yeah, that's fine. Squash it down a little bit small. Okay. Yeah, that seems fine.
Then I can select. I think I can select
the same one again, Control D to duplicate it. Get this up, squash it down. Okay. Move this way. Move it this way,
increase the heights. Okay? Squash it down some
more. Move this out. All right. I think this will
this will work just fine. Yeah, this we can work with.
Yeah, I think that's fine. I think I need to make it scale
it out a little bit more. Put this back in. Okay? I think this should work just fine. Get this back in around
there should be fine. So now in the next lesson,
we're just going to, I think this we need to
scale out some more. Should be a bit wider. Up a bit more around there. Yeah, that's fine.
So the next lesson, we're just going to
carry on and then keep working on this and making
corrections, right? So I'll see you guys in
next lesson. Bye for now.
34. 33 Ear Ornament Arrangement In Maya: Okay, Cucumber, guys,
in the previous lesson, we kind of started with creating the Bs for this
year ornament bis, so I'm going to carry on and
then keep working on it. There's see some
work to do on it. Should be fine. So moving on let's get
this to look, right? I think we need we
have one here already. So I think we need to
duplicate this again. Set this around there,
then scale this in some more around
there should be fine. So the reference is not as clear as it should
be, but that's fine. We'll try and make this look interesting as much as we can. So moving on, you
can see a shape that comes across this way
all the way down here. So, we can recreate that. So let's do that. Let's do that. So I would go over. I think we can do this
with the cove brush. You can use the cove brush. So let's just get
this to the side. And we will do create a cove shape that comes
all the way down, and then we just
blog this in here. So yes, let's go over
to our cove Okay. Let's use this instead. This Epi curve. So the shape goes this way, this way, way all the way
down, it should be fine. Okay? Yeah, I think
this should be fine. Then go back to our
selection to select this, go back to polymodlling. Let's do a sweep mesh for it. Now, the scale for
this is way too much. Let's adjust the scale
profile, let's take this down. Okay. Let's go to it's kind of far out where
it's supposed to be though. It's far out. Let's
select these two. Centi volts, and let's move
them in place. Come on. Move this in place, select it. Right. Let's just leave
that one where it is because it's not moving
accurately in place. So this is where
we want it to be. Let's go back to the sweep. Let's make modifications to
this precision, optimize. Precision. Yeah, this should
be fine. Yeah, I think we can definitely
work with this. Well, no, should
we optimize this. Let's optimize this actually. Let's leave this optimized. Okay? The curve in there, we
need to adjust that. Let's adjust the curve
to select the curve. Control vertex, let this
verte move this down. Okay? That's fine. Yeah, I think this
is actually fine. This we can work with in here. Okay. Yeah, that's fine. I think for the most part, this will work just
fine. Let's go in. This will work fine,
for the most part. Select the lower do that, select the lower points here. Vertex, let this lower points, move this in some more. Kind of create shape in here. Move this around there. I think around there seems just right. Yeah, that seems fine.
That seems fine. This we can definitely
work within here. Okay. Yes, we can use this. I'm going to select this now, and I'm going to do a type t, it should be his on shape now. That's fine. It should
be his own shape now. Okay. And I'm still
can select this again. I think, yes I'm going
to duplicate it. I'll bring this closer. I'm just going to rotate it
this way, rotate this way. Rotates this way,
rotates, rotates. I would like to sort
of modifying this. Let's just create
a new one instead. Let's create a new one instead just to work a
little bit faster. So I'm going to go over to the same curve EP Curve, right? I'm just going to create a
shape that comes in from here. Okay. Around here. A all the way, should be fine.
Okay? Select this. Now, Let's Let's make sure we cannot bring this closer.
Should be closer. I shouldn't be far
out. Center upevot. Let's bring this close before we start adding any sweep to it. Okay. Let me put this around
there to begin with. Then let's sweep,
take down the size. But that's a bit odd. It's
a bit dd on that part. Undo that, undo that. Let's leave this back at
the original position, then do the sweep again. Take down the scale. Now, it's pretty
much the same thing. It's pretty much the same
thing. There's no difference. So let's still
bring that closer. We got to modify
that actually and then fix the tu is
having in there. But let's get this in place
first and let's do the sweep. Okay? Let's reduce
the side scale for this. Take this down. Create a bit more
precision to it. Okay, the precision
actually fix that optimize. Okay? But the scale for
this is still too big. We need to go back and
reduce the scale some more. I think, yeah, this size
seems just about right. Size seems just about right. I think we can let's do taper. Can we taper the
start same points. But at the end, the endpoints rather less taper the endpoints. A little bit more
like so, right? Yeah, that's fine. So we can
this we can definitely keep. Let's play this by
type history on that. And I'm just going to
drop in a spare in there. But first, let's move this
in place so center pivots. Get this in down some more down some more
around there should be fine. Okay. I would like to
rotate this this way. On do that, let's rotate
this a bit more greatly. Move this this way
in some more, right. Yeah, I think this
should be fine. Then we can create this fat creating his fare we're going to create a box and then
subdivide that box. That's pretty much what
we're going to do. Let's create a cube. Let's turn off interactive
creation let's create a cube, primo that cube. Let's add divisions to this. Where is my modeling two kids. Let's do smooth. Let's increase. Let's
do a value of four. Yeah, four seems like
a good one. Is it too. Let's see if you are getting
rounded edges to this, we're getting rounded edges
to this, should be fine. I'm trying to create
something that I won't need to start subdividing
again inside of Zbrush, so this should be fine. Let's get this way.
It needs to be. Okay? Scale is way too much though.
Let's scale this down. Frame into it, get
up, scale this down. Okay, and get it
where it should be. Let's see if we can take down the smooth intensity for this. We're at four, let's do three. Here, three, three is
actually fine. Three is fine. Three is fine for this.
Don't need to go to extreme. Get this down. So more
around here should be fine. Okay, I'm going to
select this use scale to scale squash this
down some more, move this back in, up, select move this in place, up. Alright. Yeah, that's fine. That should be fine. Let's see there's there's something else. There's other things we need
to actually doing here also. For one, look at this
from the opposite side, I can see this
cylinders in there. So we need to get that in also. I think we can duplicate this. We can still use
this, so I'm going to this one feels a lot
more rounded though. Feeds a lot more rounded.
So I'm going to use a torus instead.
Let's save this. Let me a torus instead. So we can turn on
interactive creation mode. Um, Should be fine. Let's go over to the toe view, read something like so. Okay. All right. I think of make
some modifications to this. This, let's get this up. Framing to it. Yeah, I mean to make a lot of modifications
to this actually. So let's go over to, you know, this attribute editor. Tis, Nope. Okay. Um, I think this is exactly fine. We need to kind of
scale this down. So how do we duplicate of this, get this up, select this. No, undo, undo that. Undo that. Undo that. Let's make sure we add more
subdivision level to this. Create all the way up. I think this is smooth enough
for us to work with. This we can work with, so
we can now do duplicates, get this Where's duplicates
is duplicating here. This is the original. Then we need to work with
duplicates instead. Let's get duplicate down
because duplicate does not have those attributes
those attributes anymore for us to modify. Scale this down. Let's
scale this down. Yeah, I think this is about
the right size for it. Get this in. Let's go
to the front view. I think I'm going to
do another duplicate. Let's put this to the side. Then this, I would
say it this way down. Control D, get this up. Then we can do Shift D, Shift D. Let's delete this. Select this. Shift D. Get this up. I'm going to rotate your order opposite
direction instead now. Okay. Let's get in there. I'm going to scale
it in some more. We use more bring it out on
the opposite side, like so. Okay? That's fine. Then she Control D rather get this down. Get this down around here. Then D, Shift D. Yeah,
around there should be fine. Then I'm going to
select these three. I will scale it out a little
bit a little bit more. We need to make modification
of this instead of Zbrush. But I think for the most part,
this should be just fine. Yeah, this will be just fine. This will work just fine. Okay? So I think for the most
part we've done most of the I've done most
of the work we need to do in her let's see if there's anything
else we're supposed to do. And we can just get that in. But for the most part, this
is where it should be. Let me move this out of the way. Okay. I'm going to
select this now. Let me select all
of this and then put them in a group
and then rename that. So I'm going to group this
control G to group this. Let me just name this to
Bs or L's black ornament. I'm going to do
duplicate for it. Let's get these duplicates. Up. Okay. Then I'm going to select
this 83 on the keyboard, and then we need to, obviously, we need to get these subdivision levels
in there into the mesh, not just as an auto smo
so mesh to preview. Channel box. Let's do a
value of one instead. I don't want to go to extreme. Let's see, Polycount
is quite low. Plecans are 880. So, I think we need to
do this double instead. Let's do two instead. T is three K. The k
for this piece. Ah. Oh, still, we're not done yet, actually.
We're not done yet. This some other piece
we need to create in here. We're not done yet. Yes, let's go back in here. Let's go back in here. All right. Then I can use this. Reason why we have duplicate of that to duplicate this again, get this around here, rotate. Move it in place.
Skill it out this way. Get this in, out some more
lift this up around here. Let's see, also,
that should be fine. I would like to scale it
out a little bit more. Let's get a bit more
thickness to it. Yeah, that's fine. That's fine. Then Shift D. Okay. Let's change orientation
for this control shift. Let's do no, just
control actually. Clear that out. Come on. Undo that, undo that. Okay? I believe No, this mode center this. Yes, so control shift. Then let's do objects mode. Control D. Okay. Okay. Shift D, Shift D, move this
in. All right. I think we need to kind
of scale this down. Look, I think we can
make arrangements on this inside of
Zbrush instead. We don't inflate that inside of Zbrush just to get
something tick out of it. But I think this should we
should be Shift D again. Come on. I think we lost that. Bring this in.
Yeah, that's fine. That's fine that we can
work with. Alright? I think we need to mirror
to the other side also. So I'm going to
select all of this. Combine it, combine them as
one single piece, combine. Then let's do a
mirror. Turn this off. Let's mirror this on the
opposite direction. Come on. Where is it? Is there already. So let's just undo that. Come on. I've lost my
Let's go to the mirror. I've lost the tab in this. Let's go to channel
linear and then offset of set of set of sets. Come on. Where's the offsets?
Undo that, undo that. Get in closes. Let's
mirror this again. Oop, nothing's on the underside. So let's mirror this again. Turn this off. Then
adjust the offsets. Let's get enclosed hold down Control and then let's
get this in here. Let's see, that's fine. That's fine that we can
actually work with. I can delete this for now. Delete this for now. Let's get this new
piece into that group. Delete by type history. Let all of this actually
delete by type. No. I don't think
I need to do that. Let me just sleet in here. Save this. Okay. So yeah, let's
continue on. Let's see what else can we do? Oh, yeah, yeah, we can move on. We can move on with this. Except you need to, except
you need to add Bevo to this, this actual Ns Bevo.
This needs Bvl. But just before I create
Bevel for it, exclude this. I need to have a
duplicate of it also. We can just select this two and then drag them into that group, delete this,
duplicate this again. Let's get this up. Then I'm going to bevel
some of the edges of this. Like this, we need
to bevel the edge. I'm going to select
this. I would select this and this and this Let's isolate this to
control one to isolate this. I just need to bear
with the edge. That's basically what
I'm going to do. I just need to bear
with the edge. Let's combine all of this as one single piece,
select all of this, combine, by type et, send out back into the group. Okay. And let's Bevel
all of these edges. From underneath this,
select this edge. I selected the inner
edge for this, not yet. Let that edge, select this edge. Okay. Select the
edge, this edge, this edge, this edge all gets
enclosed, select this edge. Sleds edge, sleds edge. Now, let's do Bvl
for this Bvulo. Let's see. This counts for this. Oh, I missed one part.
On do that. On do that. Sad this edge also.
You do bevul again. Add segments to this. Let's do five segments. Come on. Please don't crash. Okay, I think this is
a bit too extreme. Let's just say this
to a value of six. I think six should
be fine. Let's see. I think six should
actually be fine in here. Yeah, six is fine.
I want to go to extreme in there. Save this. Let's go out of isolate. Yeah, we need to do
one in here also. So I can just select this also. Let's do a bevul. Yeah this is fine. Let's
add segments in there. Si seems like a good
number. Yeah, that's fine. Yeah, this will work just fine. Save this. Okay? So I'm going to select I feel like I feel like this part
here, I think is way too wide. I think let's select all of
this at the top, select this. Oh, come on. Come on. What do we have
to piece in here? What do we have
to piece in here? Okay. Now, this is a bit
this is a bit confusing. Let's see. Okay, this is all of select this.
This is down here. Okay. Then I'm not entirely sure what all
of this is, though. Oh, for the opposite side, we need to let's do
Shift P, send this down. Send this down, then this
should be in here instead. Let's drag this
in the All right. So I'll select this select. Oh, also merge this
together actually. Let's merge this into one piece. So combine them. Did
by type history, send them back into this group, right? Yeah, that's fine. So we can select
this, select this, select this let everything
at the top, select this. Can we move this down now? Yes, we can. So I'm just moving this down
a little bit small. Around there should be
fine. So I'll save this. So now just to
select the group in itself and move this
where it should be. Okay. Think around there.
I think I also need to kind of scale
this out some more. Should, that's way too big. I think somewhere around
this size should be fine. A little bit more. Like
so it should be fine. Then bring this down
because going to hook this up some more. Let me scale this down a little bit more. That's fine, right? So in next lesson, we're
going to export this out to Zbrush and then get
them where it should be. So see you guys in next
lesson. Bye for now.
35. 34 Ear Ornament Set Up In Zbrush: Hecuba, guys, so we're still
on this year ornament piece. So before we export
it to Zbrush, I would like to make some
modifications to this. So I'm noticing
that this shaping her for mine is actually
way too big, so. I would like to reduce that. So I'll go over to vertex. Can we do this in here? Let's go to our front view instead. Okay, front view should be fine. Let's actually
isolate it do that. Let's actually isolate it. Right. So I would like to select select all these
vat up here first. Get all the vat first. I'm going to select
the vat around here. Okay. Then I would like to
scale it down some more. Okay? Get this back up. Okay. Let's see where we get. Let's see if we
can still make it even smaller than
it is right now. Let's shing this down some more, it this up a bit higher. Let's think I think this
side should be fine. Scale this in some more, squash this down this way. In some more up a bit. Okay. Yeah, I think we
can work with this. Let's go out of isolates. Let's see what we have. Yes. Yes, this is actually fine.
This is actually fine. This we can work with. They we just need to make some more
modifications to this. Let's go to edge,
bring this edge down. Leave this up, pret a bit
more spacing between them. Do that. Maybe we can delete
that actually delete that. Okay? Yeah, this will be fine. Yeah, this should be fine. This we can work with.
Select this, select this. Move this down some more. Move it down a little
bit more. Okay. Yeah, that's fine.
Okay. I'll select this. Let's just push
them back in place. Select all these arts. Why do we have
duplicates in there? It's just one that we
can delete delete that. Select all of this
and delete those. Select all of this. And let's get this.
Come on, do that. Let's get this in place. Squash it down. Okay? Up a bit higher need to
squath this down some more. Move this to the
side. All right. Squash this down even more. Okay. Let's move this up a bit higher around
there should be fine. Yeah, that seems fine.
That seems fine. Okay? Let's let him select all of
this at the top, select this. Bring this down some more. Alright, so I can select this now I can mirror
it to the other side. Tone of these codes. Get this in place,
frame into it, control, move this around
here should be fine. Okay. So now we need to
convert this into actual meg, but I would like to
duplicate this again. Let's get another duplicator. Let's put this around here. Select this. Let's go over to modified topology,
Smooth review. Okay? I think I'll leave this article. If I take this down, it's
going to put the sets to one. You can see some it's give me the desired
result I'm going for. So let's do a bit more. A bit more idea should be fine. Save this, select, select it. Let me drag this all the way up. Okay. Let's go over to UVs for some of the delete
the UVs we have in there. Let me scale this out
a little bit more. Any UVs we have in here? I was going to delete that
delete any UVs we have in. Okay? Yes. Yes, we can delete
the UVs in there. Let's select all of this and
then go over to UV editing. Go to UV Editing and then we
would go to our UV editor, Shell, select all of this and delete them. We
don't need them. Don't need them for now. Or he going to create
our own later on? Or let's just work on
getting all of the ship and meshes we need in
there before doing anything UV later on before
we go into texturing. Yeah, it's fine. This is fine. This we can work with. Yes, I would select it. Okay. Then we can export
this out as an OBJ. So let's export this out
where we need it to be. It should be in here. So on inside of the Z imports, copy these five parts, place the five parts in here. So spotting as an OBJ OBGEpot. Let's name the two ornament. Ornament. Okay, that's fine. So let us go into Zbrush and import this in and then set it up
where it needs to be. So let's go over
to sub to append. Say let's fair.
Where's the spare. Okay? Spare should be all
the way down down here. Okay? It's all the way down. Then let's do an input. Let's get this out
from the Z inputs. Select I mean, so let's
select that Okay. Is this upside down? Whoa. So this is
actually upside down. So this is an issue with inputs. And here's an issue with
inputs, preferences. Sometimes those at is
a bit weird. Inputs. Um, What should should
we flip this now? Let's do a flip X instead
and import this again. Simple this again. Come on. Where is it now actually?
It's kind of seeing this upside down it's kind
of important upside down. Okay, so kind of fix
the issue in here. So the issue was that
it was important. The importation
setting is a bit off. So on the preference, you just turn on flip X and Flip Y and then import that back in again,
and then you should be fine. I've experienced an
issue like this before, so I knew that was how
to actually fix it. So let's carry on. Let's go select this
oren center pivots. Were the minutes.
Where is my chain. Turn on this chain.
Thought I lost that. Then let's get it
where it should be. Now, I still need to make some modifications
to this though. So let's try and get this chain piece so
let's move this up. Let's kind of measure where
it needs to be first. Since she be down. Should
be down some more. Yeah, I think we're
in a good place with this move this way, rotate it this way. Okay. Then get this in. Yeah, I think that should
be fine. Yeah, that's fine. That's fine. So now we just need to duplicate
it to the other side. So let's do a mirror
to the other side. Let's mirror this to
the opposite side. Tone down, always covers
bad geometry mirror weld. Awesome. Awesome. But now I still make some additional
adjustments to this. There are a few things I would
still like to do in here. Let me undo that actually. Just before I mirror
this to the side. Let me undo that so we can make the modifications first
and corrections first for this Shift F. Let's
go to move topology. Move topology for
this, move topology, move topology, yes,
increase the blow size. Move this out, move this
out, move this out. Okay. Shift F. That's fine. Let's see what else we can do. Yeah, that's fine on the
other opposite side. Okay? Yes. Now all of this, I will need to inflate
this actually. I need to inflate this S
marks out invting mark. I will do inflate, Shift F, get close. Let's do inflate. Now deformation inflates
make this a bit ticker. Yeah, pretty much like
so it should be fine. This we can definitely work with extend this out some
more out some more, get this inward, in some more. Okay? Why getting this weird pinching? Okay. Get this close
close close close. Do the same on the opposite
side, get this close. Okay? Those gentle smooth just
to fix those pinching we have from the move
topology brush. Smooth fix those
pinching smooths out. Okay, right that's fine. Get in clear this out. I feel like I should still
do something in here, just to create some
variation across this Let's create some
variation across this. Maybe we should
mirror out first, prob probably mirror
this out first. Yes, I think we're
in a good place. Yes, mirror this Let's mirror this to the
opposite side first, then Astra and brick symmetry in the little bit more. Okay. Yes. So Mirror mirror
to the opposite side. Yeah, that's fine. Okay. Yeah, that's fine.
So now we can I begin to break
uniformity in here. Let's break uniformity in here. Get this in. Okay? I will pull this up some more, extend this out some more, Moon out, mood this
out, moon this out. Okay? Just trying to break
uniformity of it, so it looks a bit
different from one side to the opposite side.
Yeah, that's fine. Then I can duplicate Symmetry turned off,
yes, that's fine. Shift F. Let's do an
auto group also in here. Auto group. Okay.
So I'm going to select select this
piece, clear this out. Old down control,
select. Come on. Old down Control,
select, come out. This is the piece,
that's the piece I need. Rotate this. Rotate,
scale this out. Then hold down Control. Let's do duplicate of
this, scale this down. Let's turn this out this way. Okay. Yeah, I think it
should be fine there. Should be fine there. Let's just move
this out some more, increase the scale,
move this this way, scale this down some more. O down control, duplicate
it to the opposite side. Bring this forward. All right. So just to create more
variation in here. All right. Then I would
clear this out again. We can order an auto group
also in here, select this. Clear this out, not selecting this properly.
Select this instead. Come on. Seller
control, sell great. Select this up come on. It's becoming a
lot more difficult kind of selecting in here. Maybe. Let's see. Let's see if we can
get this right now. Take down the bro size. Why can't I just
select things in here? What is going on? Move brush. Okay, that works. Come on. Ah, that's a pain. That's a real pain.
Anyways, I think I'm just going to do this from your
opposite side instead. This is the piece
I need to select. Come on. Yeah, this one. Undo that hold down
control, extend this down. Scale this down. Okay?
Around here should be fine. It shouldn't go down completely, but I need to rotate
this actually because we only be
with the top parts. We didn't be with
the lower parts, so it should be around there. The part should be more
visible underneath this and duplicate this
to the opposite side. Get this down. It just break the
symmetrical nature of this, it feels a lot more unique way, lot more unique in a way, create some more
differences around. Yeah, this is fine.
This is fine. This we can work with in here. We can keep this. Yeah, this is fine. So
I want to save this. So in the next lesson, we'll just move on
to something else. I don't think there's
anything else we need to do for this piece, at least for now,
except otherwise. Okay? Yes. So the next piece we're
going to be working on would be start creating this trap. This pat las feel more like obviously
animal hair in here. So it feels like a
kind of skunk animal. Not entirely sure
what pl animal. This is white long as in here. So we're going to create
a piece for this and then create a piece for pat la, this brown piece in here at the back feels more like
it's more or less like there's a particular kind of material in Africa
etarly in Nigeria to be precise from Eurobarab's called Buba it's more like a
kind of thick fabric. You cannot create any
more traditional now with kind of thick fabric to it, so I feel what this
actually looks like. So I'm going to be using that kind of create there's
nothing too special about it. Basically, it's going
to be a thicker fabric material with this. I want to add this brown, look for a brown or even create our warm brown fabric
texture for it. Okay? So that's
fine. So moving on, so we'll do that
next lesson now. So you guys in next
lesson, buy for now.
36. 35 Ear Ornament Detailing In Zbrush: Right, so welcome back guys. So I would like to make
a little adjustment to this because now I
do econotosmooth. Anatosmooth for this Control D, kind of see some of
the shape kind of gets strung down and do that. So I would like to fix
those regions for it. So let's go over to display
properties double sided. Okay? Let's start with this. Funny enough, keep
selecting something else. Not sure why I do, but slightly frustrating that I
selecting something else. So it's just this big
white cylinder twist that we're trying to
make adjustments to. Okay. Let's start with
kidding me right now. This is just off putting. There's something
I'm doing wrong. Okay. Not sure what
this is, though. So probably restart
this setup and then this file and
see that continues. So I've restarted now.
Let's see if this would work a bit better
now. Symmetry is t off. So, this shift Okay. Get in quite close. Pretty
much the same thing. So go down to Gizmo, select this piece inverts. Still not selecting the
piece we want you to select. See selecting something else. Well, that is a bit frustrating. That's quite
frustrating, though, just set up my screen properly. Let see. It's kind of
jumping elsewhere. It's kind of jumping elsewhere. Let's do the inverse.
Let's just clear this out. Okay? Then I would
go over to just B. So for this inset, I would
like to undo that Okay. Let's do multiple instead. So let's see if we can do
multiple edge loops. Yes. So, come on. I think somewhere around
there should be fine. Something like that
should be fine. Let's go and do this
for the other side. Just need to be on an edge
and do that getting close. Okay. Letting something pretty much like so should be fine.
Yeah, that's fine. Now, let's do the same
for this piece also. Okay? That's fine.
Same here also. That is fine. Let's go
to the opposite side. And do the same also around
do that gets in closes. Okay. That's fine. This why I'm doing
this is because I feel like I will undo that. I feel like I will
still go in there and then add some beaten
up surface look to it. Let's do two year to year. Okay. We do a few more around there. Like so it should be fine. Because if you can
subdivide this now, it's going to hold. It's going to hold nicely. Okay. Let's do two. I think that should be fine. Get up in closing.
You can do two. Okay. Yeah, I think
that should be fine. Yeah, that should be fine, also. Let's do this for
the opposite side. Bring everything back out. Get in closed. I think this should be fine. I think just one
should be fine there. All right, so shift. So if we should subdivide
this now, we should hold. I've subdivided this. We
go to our geometry now. This has been subdivided, and it olds up quite nicely. Let's subdivide this a bit more, then we try out some metal
bitten up look to it. So I'm going to subdivide
some more. Let's do one more. Okay, 15 could be fine. Then we go to the trim dynamic. Let's get close. We can beat this up, get close. Yeah, split them out like this. So won't do that, don't do that. I need to put it in
a layer actually. It's supposed to be in a layer. Let's set this up in a layer. Most of this piece in here
mostly metal mostly metal. So on do one last step, okay? Then we can pull this
up in a separate layer, put it in a separate layer. Okay? That's fine. So we have this new layer now, let's name this all caps metal bits All
right, that's fine. So we can use either the tran dynamic or the
edge polish for this. So anyone will work just fine. Is going to use this
and then beat this up. Basically just tapping
on the surface. Basically just staping
on the surface to create that beat up look to it. Okay. So just to tap
across the surface, it will just help create a lot more uniqueness
to our sing here. So let's just create
that as much as we can. So I'm doing this
asymmetrically. So it feel a lot better. D asymmetrically. Okay. That I want this to
look too symmetrical. So that's why I'm
doing asymmetrically Once I'm done with
this left side, I'll move to the
right hand side. So it should create a lot
more uniqueness to it. And that's like a general
idea for doing it this way. Okay. All right. And I'm
using a small bros, not using something
to be cause I want the details to be quite small
in there, not too obvious. All right. Let's move
to the opposite side. Okay? Yeah, that's fine. A cross also around here. It might take a little
while, but it's fine. It's good to kind of add
this detail in there. Because when we add the
metal piece in here, it's going to cause some nice looking reflections in here with all this
betting up detail. Because it also needs to kind of feel like something
that was made by hand, that is not made by
industrial machines. So since this is made by hand, you should have some
irregularities when it comes to the stuff is not being
completely and entirely smooth. You still have some kind
of breakup in here. Also, this will also kind of add some measure of
agent to its too. To add some measure
of agent seeds. Okay, let's do for
the back side. Just beat this up
some more right. I'm not going for
something too intense. I don't wantth intense. I'm just going light and across this when you cannot come closer you should be able
to now see it a bit more. But for me distance,
it shouldn't be too obvious. And that's
precisely what I want. For me distance I still want to maintain that smooth
rounded surface to it. No. Okay. Oops. Since I snot off
all bits for this. Get this clothes up, go back into the mesh
I'm working with. Okay. Then continue
beading this up. Beat this up, get in close. You want to kind of pay
particular attention to the edges because it's just a little chip
off on the edges that will kind of make it look
more even more interesting. So kind of being a little
bit particular on the edges. Okay? Go around, beat up, create that beat up, look also around here. It doesn't look completely perfect because we're trying to introduce
imperfection in here. That's why we're adding
this beat up, look to it. Okay. Rotate. Continue creating that
beat up, look to it. Writes if you were to
add dense to this, you can easily add those
crutches and dense inside of Substance Painter that would
work just fine in there. You don't necessarily
need to do it in here, but if you want to do that in here, that's
completely fine. You can still have the
creative freedom to make this make this mesh on by doing some interesting more
interesting details in here. Okay. Go up, break this up some more rotate
this to the side, get some more bits
up around there. Okay? Let's go up a bit higher, get this also bit up. Okay. All right. So from a distance, it's
looking slightly smooth. But close up, we see those interesting
beat up look to it. All right. Here, as well, I'm doing this as fast as I can. Okay. In here as
well. All right. Yeah, I think this
is a good place. Okay, we miss these parts. Are there as well. Okay. Yeah, I think, as far as this
goes, this should be fine. You can see that
surface beating up, look to it. That's fine. Let's move to the next piece. Move to the next piece and
introduce those beat up, look to it, get this
more in a camera view. Let's start beading
this in place. Put this out of the wake. Stuck Okay, interesting. Smart this in. No, when I graduate to move
this to the back side. So want to deal with
this a little bit more. Okay. Start this on the side. All right. Move to
the other spice. Get this beating up. All right. Oh Oh. So you just kind of tap. You're not kind of going as if you're
smoothing things out. You're just basically
tapping on your tablets, just to create the look. So there's no particular fashion to do this part pattern
or way to do this, just to tap on the surface, and then you should have
something in there already. Okay? So we're switching this to
the side now back side. Right, up in here should add some more
brick up around here. But you want to be careful
though, you don't want to kind of go too
aggressive on it. If you start doing that,
you begin to undo that. You begin to have issues when you try to do
your baking on it, so you want to avoid that you want to go
a bit soft handed, but just like go
medium range across this not being too aggressive
or too sharp on it. Light handed should be fine. Okay. Around here as well. Okay. Same here. And that is why we kind of added
those edge loops. So we have enough topology
to kind of undo that. Enough topology is
kind of break this up and then get some smashed
beaten up look to it. Okay? So this is a decent amount of subdivision level
we added to this to kind of capture the
look we're going for. Yes, it fine. Break this apart. Now we can slowly turn this around
and then going up and down, breaking this apart, adding
more beating up look to it. Okay? You can go under this
setting with notes. We ignore this part. Let's add something around
under part also. Okay. Around here up here also. So it's nothing too fancy extremely difficult
in here, too fancy in here. It's just the same repetitive tapping across the surface in
here, and then we're good. Okay, we ignore these
parts, build this up. Okay? All right, up around there, is a bit more depth. Up, up. That's the wrong one. Kind of move towards the wrong piece. This is the piece you're
supposed to be on. Get enclosed, let's
smash break this apart. All right. Rotate this tap to create
imperfections in there. Okay, up here as
well. Smart this in. Careful though so you don't move towards the one
you're afraid you done. Okay. Alright. Oops, who, who. Okay, this is it.
Still on its Okay. Around on the edge, rotate its the opposite side. Okay. Beat this surface up. This part has been ignored. Let's add details detail, beating up, look in here. Okay. Right, rotates. Go around this, as well, because all of these are
mostly metaps we have across. Right. Okay. Yeah, as well. Okay. I think it should be
almost done almost done. I think around there,
we'll just add a little bit around here. Okay. I think we can really
see the surface of this a bit properly
here. This is fine. Let's do something
for the top side. And I think for the most part,
this should be just fine. I think this is fine. We did a pretty good job
breaking these apart. Okay? Y. Yes, let's do a bit
more around here. A little bit extreme
around here. Yeah, that's fine. That's fine. This we can work with. Let's
bring everything back out. Yes, this is fine. This is fine. This chain piece. I, I think I would like
to leave that with. I don't want to do
too much in there. There's any breakup we need
to do, we can do that. We can do that inside inside
of Substance Painter. So we have something a
bit more interesting with smoother surface and a bit
more built up surface in here. Okay. Yeah, this is fine. So the
next piece I'm going to be working on will be going down below around
the chest region. We start with this fed
out or rather five, four piece in here
before moving on to the soduPice that comes like
a strap across his chest. So I'll see you guys in the
next lesson. Bye for now.
37. 36 Fur Shoulder Strap In Zbrush: Come back, guys. So in
the previous lesson, we worked on this here
on a man's piece. Okay? So in this lesson, we're going to moving on and
working on another piece. So I'm going to working
on this animal hair, skin fall in here. So this kind of create the
piece that comes across it. So to do that, I would
let's go back up here. Come on the way, first of all, let's make sure for this piece, we go to rest of
the vision level just so we can work a
bit faster in here. So and then we'll go all the way I will turn this
off, turn this back on. I'll do duplicate of this. I'll shoot this down
all down shifts and select this down arrow to shoot this down the last
piece last sub down here. Now we're going to create the
loop that goes across it. We have this subdivided already. I think you can
work with this, I'm going to delete lower on this. Let me zoom out a
little bit more. Okay. Let's solo this out. The idea would be
to create the strap across it to shift F, Control W, give this
one single poly group. Just to figure out
how to do this now, I think I can are a few
ways to do this though. Let me just do the ordinary way of just painting where I want my maxing to be let's start with the max
last to begin with. I'm going to max that region
where I want this to be. I do. Across like so. I supposed ton of
symmetry in here. Play this out, ton off
symmetry, do this again. A, I think so should be fine. Around here seems fine. This you can work with in here. Okay. So let's give this a Poly group Control W to give
this APL group. Then I'm going to
come over here. I'm going to turn on
the lasers duplicates. You can afford duplicate.
Let's not duplicate that. Let's just turn this.
This is already on, bring everything back
out. This is already on. But it's not selected. This
is what's selected down here. So Control Shift click on this. Control Shift click again, so invert that. Okay. So this is what we're going
to be working with in here. So the next thing to do would be to isolate and then let's go over and then do
polish by group, polish by group,
polished by group. Then we also need to
do a delete ding. Let's do delete ding modified
topology, delete ding. Okay. That should be
fine. Then we'll go back to our deformation. Go back to deformation. Let's do let's turn off these dots. Then polish this a bit more. Let's get something
straight out of this. I don't need to be
completely straight on those screts a little
warp on the edge. Let's make sure double sided
double sided is turned on. Okay? So I'll come over around
there, use the move brush. T ton of dynamic. Move this out some more. I'm just going to
create a bit more drag around the shoulder parts
around there should be fine. Okay? Here, here also. Then we'll go back
to deformation. Polished by group, polished
by group a few times. That should be fine. Okay. Let's bring
everything back out. Yes, it's going to be hidden
in here, but that's fine. Is completely fine. So what we need to do now
is to make sure. Let me extend. Let me lift
this up a little bit small. Let's get this out
a little bit small. Around here should be fine. Yeah, so, swell. Okay. Yeah, swell. Yeah, that's fine. Get this up around here
also. Yeah, as well. Okay. So what we want to do
next to duplicate this piece. Let's isolate it out first. Then we're going to do
duplicate for this piece, so duplicate, hide this. Then we would zero match
this. Let's match it. Let's get good
topology out of this. I'm also going to help this in the sense of creating some
cats in between just to tell the zer masher how to zero match this and
move this to the side. Slice cove. I'll do a cat here. Okay. I'll do a e. I'll
do a cat here also. Select this I do a cut here also, bring everything back out. This is going to help
Zero Maher know how to ate topology across this. So with this in place now, go over to zero Maher. Let's turn off adaptive for now. The adaptive tone this down some more tour
on keep groups, dtect edge, reduce
the smooth groups. So let's start with
five K for now. So I'm going to out
and select zero Maher. Okay. So you see here, it's kind of
respecting where we kind of added poly groups across this. It's kind of respecting that and creating a straightforward. I think I need to do
one and do that need to do one cotia Let's do cotial that should help drive that a bit model and
that courtier as well. Okay? Yeah, that should
be fine. Then let z mash all zero march this. Yeah, I can see it's
kind of giving t this zero masher zero mare based on the way we have
added these codes in here. So kind of a better
topology across this. This just a way kind of help. Zero masher gets proper topology across your mesh.
So I'm going to go. Let's go out of this. Let's go F again. So
we have this at one K. Let's turn of R. Let's
use SAM. Z merge this. Zemarge this again. No, undo that. It's great. It's not give me the
results I want actually. So let's con trough W to give
this one single poly group. Then merge this
again. Yeah, perfect. So now we have bet out
topology across this Okay. Maybe undo that same zero mash. I'd like to clean undo that. I'd like to clean this
part up some more. So let's do another quote
across this zero mash, okay? Give everything one single
poly group, then zero mash. It looks like we can do away
with that, but that's fine. It's not going to major it's
not really a major issue. We can always we can still work with it as it is
right now, so that's fine. Let's bring everything back out. So since this is going
to be heating on this, we call it tiger skin or
low pad skin around here. So that's fine. We
can just leave this. We don't really need to
do too much around here. Can leave it as it is, actually. We need to create that piece where our falls are going to be
generated out from. That's fine. That's fine. As long as this is
what we have in here, we are completely fine. Now with this in
here, we need to add some thickness to this. Let's add thickness to this. So let's come in close. Let's come in close closer. I'm going to be using the dynamic subdivision
level in here. Let's turn on dynamic. But there are a few corrections we
need to make in there. The first correction would be to take down smooth.
That's fine. Let's increase
thickness for this. Increase thickness a bit more. Still not thick enough.
Increase some more. We need to increase
even a bit more, okay? I think a little bit
more should be fine. There is a little bit more. I think around should be fine. Shift F. Let's say the
poly group for this. Let's put one segment in here. One segment around
should be fine. Then we can turn on the smooth. Let's do smooth one step. Okay, now, undo that. Then we just use a normal regular smooth
for this instead. Um, Okay, that's weird. Undo that. I think we can
work with this as it is. So let's apply supply this. So we have this total plico of two k, which is actually fine. Heaf. So now let's
subdivide this. Yes, this is precisely
what I want. So if we subdivide this
now, it should be getting smoother edge to it,
which is what I want. But, what is this? There's an issue around there. Undo that, undo that again. Turn this off. Go back in there. There is an issue around there. It is an issue on the edge here. So we need to usually tend to have an extra
piece around here. So let's move that piece. To do that. We just need to do poly group a group Control
Shift, click on this. I don't think it's still the group normal control
shift, click on this. I believe it's gone now. Let's come in close. Okay. Let's do it delete ding.
Let's do delete ding. Now, usually, delete won't work until you have a mese
that's actually hidden. So let's delete ding. So it's actually
working. Now I've done that actually deleted
something in there. Because if you do
this again to tell us the function requires mesh
you partially hidden. And the first time I
clicked that did not show us that information. So I believe I believe what we fixed
in is actually working. Let me just check again, so I'm going to divide this. Okay, we see an issue here. There's an issue in here. Okay, let's check the
other side as well. Okay? Let's see if you move this down, check in to be sure and do that. Set this down, set this down. Let's do a tiny amount of
polish smoothing in here. So let's do the polish by
group, smooth this out. Okay? Is there any other issue around here that we
need to be mindful of? Okay. That's fine. So let's
go back to Zoom out, bring everything back out. Okay. That's fine. So we would now go back
to geometry, dynamics, sub div donn this back on, still memorizing our
previous setup in there, which is fine except for
the segments in here. Wet have any segments in there. So let me add one segment. We need one segment,
at least one segment there and apply. Then let's isolate this We
still have, I understand. It's basically creating multiple basically creating multiple
edges around that part. We have multiple edges
around these parts. But it's not going to be
a major issue actually. It's not really going to
be a major issue per se. We still we can just ignore
that and keep working. It's not really major issue. Let's see if we can delete that. If we can delete that then we'll just leave that as it is. It's not going to make or
break our machine here. Let's be M. Okay. So let's delete some edge. Let's delete some
edge out of this. Let me undo this actually. Let's delete the edge before
we add thickness to it. Let's look for let's
find the edge in here. So we do delete delete,
delete, delete, delete. I want to delete edge in here, so single polynom Okay. Come on. Let's get close. After volution levels in
there, let's delete ayer. Do that. I'm not trying to insert a loop. I'm trying to delete instead. Okay. So you completely
delete that edge. I think we can do that instead. Let's completely delete that
edge. Yes, this is fine. We let that edge. So
it should be fine now. Completely lit the edge loop. Okay. Let's see if we can
extrude an edge loop also. So let's go over to extrude, extrude, extrude,
extrude, extrude. Extrude. Edge. Okay. Edge loop. No, no, no, on the
entire outin Okay. No. So let me just show
you guys what to do. So beyond the edge, let's
find a good angle for. This is just beyond the edge. Then select mesh border. So we want to extrude
out the mesh border. So I'm just going to select this and we can extrude
this border like so a little bit more around
here should be fine. Let's go out of solo. So yeah, this is fine. Then
back to move brush. Okay. So now we can repeat we can
repeat the dynamic again. I believe we shouldn't be
facing the issue anymore. So if we should solo this, we shouldn't be facing
the issue anymore, so you can see how we get
clean edge out of this now. So we're good in
here, so that's fine. That's fine. This we can
definitely work with. Okay. So one segment, again, go out of solo mode, then apply Shift F, reduce to the side,
subdivide this. So should be getting this
piece here now is fine. For the most part, this is what we This is what we
created out of this. So I'm going to
use the move brush and move this out some more
move this out a bit more. I would like to even
inflate this also. Let's go to the formations. Let's done inflate, inflate
again. This is fine. This is what I want. Just put another Xtra level of thickness around it so that I can push
it back on the surface. Yes, this would work just fine. So this work just fine
for what we need it for. All right. Check this
around. Yeah, that is fine. Okay. I rename I need to rename this. I need
to rename this. I'm going to rename
this to SKO and skunk Skunk for shoulder. Or maybe just four
shoulder should be fine. Four shoulder should be fine. Four shoulder or
four strap shoulder. Yeah, that's fine. F four strap fulderFour strap shoulder, it
should be fine. Yes, that we can work with. So the next things to do be to create I believe
this AsTs for now. I goings create this piece also. Then after our dome starts creating some measure
of detail for it, okay? Right, so let's carry on. I would just let me leave this.
Let me hide this for now. Side this for now,
select this piece, the body itself,
duplicate it again, make a duplicate
of it, duplicates, shoot this duplicate down. So low this. Now, let's create Let's create this
red piece just behind it. Shift F, control W for this. I would like to
subdivide, delete lower. I think a better way
to do this would be would be to use
the slice cove. I think we're already on the slight c of
the control shift then tap tap out again. Okay, you can do a slice
across this. Okay. I think it should be I think it should be
slightly higher. So let's do this
again. Tn of symmetry. Tap oats, tap out
again. Tap out again. Let's see across
here should be fine. Yes, that's perfect.
So that we can keep. Let's do the next one. Okay? It's around
the clavica though. We have it around the clavica. So let's extend this
out some more sos. Oats? No, no, no, I think
we need to kind of spread this out a little
bit more. Undo that. Hats, oats. Undo that, undo that.
Let's do this again. No, this is not the right place. Undo that. Come on. Should be somewhere from
somewhere around here. Tap outs, tap outs. Tap outs. I think around
here, should be fine. No, but we didn't do
this accurately enough. So I need to do this again. Just need to find the
right way for this. Ah, it needs to be it
needs to be perfect. It needs to be perfect. Alright, I think we can hold space but move
this out some more. I think around here
should be fine. Okay. Well, this piece feels
just about right. There's any need to
extend this out. We can always extend it
out by moving it manually. So this is fine. So the
next thing would be to isolate it Control Shift
click. Let's isolate this. Let's do a delete den. So geometry. Geometry, modified
topology, deletes ding. Let's make sure Dub side is
done on display double side. All right, so we
can work with this. So go over to the formation. T of these dots,
polish by group, polish, polish a bit more. All right. This
seems feels right. Okay. Then let's bring
everything back out. I would like to extend
this with more brush, extend this down some more, extend this down some more. Okay? All right. This should go up a bit more. Let's get it out. All right. Look for an angle,
get this out as well. Around there also
out some more Okay. I see. I need to push this I need to push this
closer around here. This should be covering
most of these parts. You still have control
over this say move this closer around here. As well. All right. Let's polish this
again, polish this again. Yes. Yes, this seems
just about right. Move this out some
more polish again. Yeah, that's fine. That's
fine. So this is fine. So in the next
lesson, we're going to go in there and then start refining it and do some topology for it using the Z remsher. So I'll see you guys in the
next lesson. Bye for now.
38. 37 Cross Chest Strap In Zbrush: Okay. Welcome, but guys. So previous lesson,
we kind of worked on the four shoulder strap. So in this lesson, we're
going to continue on and then try to refine this to get
this to look a lot better. So now we have this piece in. We're going to
duplicate this piece. Yes, let's duplicate this piece, so duplicate, hide this. Okay. Let's bring
Everything back out. Let's see if it's
in the right place. Yes, it is. Yes, let's see if we need to pull
it out a bit more. I think it should be
fine around here. Let me just move this up a bit more up a bit higher
should be fine. Okay? At some more. Right. Just need to make
sure everything looks right. Yeah, I think around
there should be fine. Yeah, so we can slow this out. Let's do a new polish it. Polish again. Okay. Yeah, we need to fix this. All
right. That's fine. Then we can start slicing
or dicing this up. So let's start from down here. This is just to help.
Okay, we have slashing. This is just to help Zemsha. Le a bit small. Just
the same way we did for the four shoulder strap. Slice this in. Cut also
around here. Okay. Let's go to the other piece. Do a cut around here, here also. And here. Okay. Yeah, just be fine. Now, let's zero march this. So just go over to geometry, zero march Tn of adaptive,
bring this down. Keep groups, detect,
take down the smooth, and let's run this Okay. Undo that, actually. I'm going to go to
a lower number. Let's do one instead. Let's do one instead.
Let's run this. Okay. Now, nope. Let's do this from five, then walk our way
down instead. Five. Zero mesh. Let's go off
zero mesh of zero mesh. We have some issues
around some parts. Undo one step control
doubly to give this one single poly
group, then zero mesh. Feels a whole lot better.
It's definitely better. We can work with this. Th is clean enough for
us to work with. Okay, so let's go out of isolate and let's bring
this up a bit more, leave this up some more, leave this out out out a bit more around here
also, out a little bit. Let's do for the back also, leave this out some
more OO. Okay. Yeah, this should be
fine. But next thing you need to do is to add
thickness for this one. I believe we should
still remember the if you still remember the thickness we had with
the dynamic sub divina, let's apply this
did not remember. It seems like each
butler sub too. It only works for
individual stop tools. I've not done in any stop
to yet, so increase this. Okay? Increase this some
more, a little bit more. Alright. Okay. I think we can
work with this. Let's see. Yes, we can work with this. But before et'stur
this off for now, let's do under deformation. Let's polish this a little. Yeah, that seems like a bit
too extreme, but that's fine. Kind of get sharp
rounded edge to it now. So then we can use
the move brush, lift this up some more, a little bit more,
a little bit more out on the side here as well. Go to the back, lift
this up some more. Let's go back to
dynamic sub div. Okay? So you should pull
everything out, which is fine. Except we need to make a
little correction around here, pull this out some more. Okay. Let's get close. I think I need to make this even slightly thicker than
it is right now, so let's increase
this some more. Okay. Let's do one subdivO
segment in there and apply. All right. Shift F. So
we should subdivide this this is what we
should be getting. Then I'll just go in and
then do a little inflate. Before we do inflate
let's push this down some more and
down some more. Get this out around here also. Now we can do inflate. Let's inflate this. Let's go over to maybe not. Let's just use the
polish do that. Polish group is going to
polish everything now. Let's do inflates Okay. Yeah, that should should be
fine. Let's check this out. Probably feels too thick,
though, that's fine. Shift F. We can give this
one single polygroup now. Let's see shift F.
Let's do a relax. Okay? Yeah, this
is fine. Alright. Then we can push some
of this back down. Pulls out a little. There's the polish, right? Yeah, I think this
polish helps quite well. So I think we can work with
this pull this in in Okay, let's get some of this in. I'm not looking at
the edge. I feel like the probably the edge
is way too thick. Feel like the edge
is way too thick. Can we do? Let me solo this. Just trying to shrink this
down a little bit more. Shrink it down a
little bit more. Yes, I think this
is fine. This is fine now. This we can work with. We can work with this instead. This is fine. Okay? Yes, This we can work with. Let's bring back the
other shoulder strap. Let's turn it on. Then we need to push the
shoulder strap back in. But let's leave this up first. Let the shoulder strap
and push this in. I also around there
should be fine. Yeah, around there
should be fine. Yeah, this should
be fine. So yeah, we're making good
progress in here. And I'm going to
rename this now. Let's rename this. Let's name this instead to name
should we give this now. Cross NoOps. Let's do house. Let's name this to cross
shoulder. No, cross chest. Cross chests, strap.
Yeah, that's fine. That's fine. This
you can work with. Okay. Yeah, this will work
just fine. Yeah, this is fine. Okay, B piece. You need
to fix this back piece, lift it up, select this, push this down instead. Okay, out a little bit more, getting close out some
more out some more, select this, push this
in, smooth it out. Lift it out some more. I think that's
fine. That is fine. So in the next lesson,
what goods going and then create this next piece. I'm creating this
next piece where this low pad skin we're
going to be creating next. So I'll see you guys in the
next lesson, bye for now.
39. 38 Leopard Chest Strap In Zbrush: Okay, welcome, guys. Previous listing, we
worked on creating this cross chest strap. So now let's create the loop pad skin
that comes across it. So let me just move
this up a little bit more round there
should be fine. Let's set this here instead. Okay? So just to create the low pad
skin that goes across it. So I need to select this piece, and then I'm going to
I'm basically going to create or duplicate it and then extract this
version out of it. Shift F. Let's go over to
geometry or sub two first, and then let's duplicate it. Less isolate, then
we go back and then, under geometry, let's do delete lower heat F to see the
polygroups for this. Now we only need this
top polygroup in here. The only top polygroup we need. Or maybe let's undo
that actually. I think this lower
version would actually help this lower version of silly hole because we have good topology flown around it, so we can leverage on that also. So let's take this down to
the lowest ablution level. Let's do delete higher
Control shift. Click on this. Then we do delete ding. Under modified topology,
let's do delete ding. Alright, so that
should be fine. Okay. So basically, we need to think I'll start by
deleting these edge loops. Let's deleting Let's
delete these edge loops, and then we can work with
loop starting from this part. So B Z need to be on deletes. So edge loop completes. Okay? No, L complete do that. Let's do this again.
Let's go over it. Delete no single poly group. Let's do. Let's see. There's a lot of
settings in here. Let's do poly loop. Okay? No, no, need to find
a good angle for it. It gets a bit tricky
on that part, finding the right angle for it. All right, I think
this should be fine. So now we have this
first strap piece because it feels more
like let me get close. Feels more like two
strap piece in there. We have this strap that
continues on this way, then we have this and then this. Okay. So now let's I
think I'm just going to continue with the Z modulo
so you can get something a bit neat and accurate in here. I'm trying to figure out
where this line should be. So let's bring
everything back out. Let's figure out where
that line should be. Okay. Let me zoom out and find the
region where that should be. I'm looking at this,
looking at this piece now. It needs to be pushed
up a bit higher. I need to push it
up a bit higher, so dynamic brush, move this out. Okay? Move this up a bit more. Get this down, reduce
the brush size. Okay? Up a bit more
around the shaped F, that should be pushed down. That's fine. Around
there should be fine. Let's go back to this piece, BZ. Okay? Let's see. So should be around this region. So now what we can do in here would be once we kind of figure out
where this needs to be, most likely, let's say starting point from around
here should be fine. I'm going to space
let's go to Q mesh. Then the Q mesh for
this we do poly loop. So let's do a loop undo that. Let's do this across. Okay. Undo that. Let
me do this again. Let's do from around here. Yeah, that's fine.
Yes, I need this. Then we will Let me just check this out
all the way to the back. We'll do something
for the back also. Let's say we stop that somewhere around there also hold out
and then just go across this. Here that's fine. That
can definitely work. Now the next we need to
do would be to hold down. Let's go back to move brush, Control Shift click on this. Then let's do Auto Group. Auto Group, auto
group, poly group. Then we'll do an
Ato group, okay? So I'm basically trying
to leverage more on the z modular brushing
here so I can show you guys another
out technique to kind of get the
same thing in. Because I feel this to give us a lot more neater result
without having to do Z rems and then try and polish it and then just try to do a bit more
refinement on it. So right after the battery fish you use this should
first of all, we should have the
mesh in place. We need to kind of
use move brushing to push them and kind of align them on the surface a
bit more accurately. With this, we can just
get that immediately. So that's precisely what
I want to do in here. So moving on, bring this out. Okay? Now, let's get
a loop around this. Let's do, we're supposed to be on Let me get
close on the face. Select the pace.
Let's do poly group. We can undo that. Come on, undo that.
Solo this out. Undo that. Just get a bit
tricky just to get it to work. Come on. Okay. Oh, great. Nope. You just kind of
fusing it's okay. Come on. Yeah, that's
a bit difficult. I think I'm doing something wrong in here. Let's
figure it out. So let's bring
everything back out, and then still on the
poly loop poly group, I'm going to go into the edge. Then tap control or rather down control, and
then we should have this. Okay? It's also affecting
the back side too. Okay. Let's see if there's any
extra piece in there. I also need to grab this. Undo that. Undo that. It gets a bit tricky kind of finding the right
angle for this. Okay. So this is underway to do this. Let me just undo this
and repeat this again. So once you find the
right edge for it, just go tap in then oto or the tap out kind of change the undo that let
me do this again. Tap out. Just kind of change the
poly group colors for it. That's fine. We
can't hide this yet. We need to do this also in here. Top change the poly group color. I'm trying to capture
this trap here. I think this should be fine. Yes, it should be fine. We can we can definitely
work with this. Except if we
subdivide this again, they will get another
extra eight out of it. Or better still we
can do because I feel like it needs
to be slightly bigger than it is right now. Let's get another extra
piece an extra to this. So I think we do let's go to
the edge and add Come on. I'd like to add an
edge loop instead. So in inserts. Come
on, undo this. What are we using
single loop instead? Let's do single loop instead
around the midpoint. Then go back to space face rather space bo let's
do Qsh still on Qs, still on poly loop, that's fine. Then tap out kind of
change the for that. Yeah, this should be fine.
So this is the first. This is the first piece we need. So grabbing all of this piece with this piece on the side, then we can, I think, then we can do this
other piece now. So you can just do so. Then we can do so also, and
then we should be fine. So let's do that. So the gap in between will be this gap, this gap, then one, two, then I believe
one, two, yes. So we leave this
gap No, undo that. Come on. Now is going to
find that strpos. Okay? No, undo that. Undo that, find a
good angle for this. That's just the tricky
part about working with Zimlin you need to find
the right angle for it. That's fine. We have this. This on your one should come
naturally because let's see, we have one gap
here and one, two. We need to select this actually. We need to select this actually. Let's start by
creating an insert around trying to figure out the gap you should
have in between these. Maybe somewhere around
should be fine. Not too much gap, per se. Oh, this plan is
a little thinner. So we can do this
from here, actually. So tap out undo that. Undo that. Okay. Is this where
it needs to be undo that. No. Undo that, undo that.
Find a good angle. No, undo that. Undo that. Yes, we're actually using the right but is not capturing that look
for us, undo that. Great. Come on now. Okay, I think it has worked now. No,
it does not work. Undo that. We also have loops here that
we don't even need. But that's fine. We're going
to delete that undo that. Let's even do this again. Okay. Undo that. Come on. Undo that. Okay, I think I'm just going
to ignore that for now, because we do have a
separation in between, so let's now grab all the
piece we need for this. Let's start with, let's start with grabbing
Control Shift. Click, click and click. Okay. I think we need to
grab this also. Let grab this also
invert all of this. So we have let me see if there's any
thickness in here because sometimes you can kind of get an extruded an extruded
piece that I see. So this is an extruded piece that we don't actually
need in here. So we can easily
fix that by just doing a tiny amount
of let's see, a tiny amount of from
this deformation, let's let's do a tiny
amount of relax. A tiny amount of relax
should actually fix that. But we have all these
issues here that we don't actually need. But it's fine. We just need to let's
just add this again. Let's do a very tiny amount. Let's do 0.5 instead. Okay. That's fine. Let me do all of this and bring everything back out there let's do this for
the entire acting. There's any part that any
part that needs that 0.2? What is this sorry this
function requires a Okay, like I'm missing something in here, bring everything back out. Relax 0.3. Yeah, that's fine. So you just to get everything smoothed out. Then we should be fine in here. Okay? So control
selects this and this inverting max Yeah, this should be fine.
This should be fine. I don't think we need to
do any odd outs in here. I think this should
work just fine. Let's give the same
polygroup control W to give the same polygroup, okay? Aditi inionize that we need to delete this loop
we have in here. This extra loop, we
don't need them. So let's be on delete. Edge Loop complete, that's fine. Then we'll just go on this
edge, delete that edge. Es space bu go to
allow the sieve. Es space bu go to insert. Let's add another edge loop
here to compensate for it. Okay? That is fine. We think it's some loops going to hold this
edge properly, but I think for now,
it should be fine. I should be fine. I'm
going to do a split ding. Let's do split ding. So go down to split. Right. Before we do split ding, let's do a tiny bit of
polish for this, do that. So this is just going to do polish crips edge and do that. This just going a wire. Maybe we should just move
this manually instead, just to get this a
little bit better. Okay? That's fine. That's fine. Then we can do a split soup
to split ding. That's fine. So let's go down to the maze
that we kind of splitted, and then grab the other
parts out of this so yeah, the other part is, let's see, um, let's go back to move brush. Trying to see the gap. I think I've forgotten the
gap we in here. We have this extra piece
taking out, then we are okay. Then we have this piece,
then we have this piece. I've seen it now Control. Let's just do the inverse. Let's delete what we don't need. This also solo, bring
everything back out. Then there's an
auto group because I need this piece
I need this piece so There's auto
group auto group. Okay. It the selection. Let's give the same poly group. So now we have a bit more
separation around this. So we have the gap in
between, then we need this. So I'm going to exclude this, and I'm going to exclude. Come on, excludes grabbing
more than what I need. Let's do the inverse. Let's
grab this auto group. So we grab this. Then
we grab this and this. Then inverse. Select this. Then we need the intes. This is what we actually need. This is definitely
what we actually need. I'm still going to
extend this out a little bit more though, but this
is what we actually need. Let's do another split.
There's another split. Soup to split it in again. Let's bring everything back out. So what we need is we can never merge them. We
can merge them together. We need this. We need this. I'm going to shoot this down all downshifts shoot this down. Okay. We need this and let's
see what is this? Okay, we need this. So let
me just put this up here. And let's merge them together. So let's go down to merge.
We do a merge down. Click Okay. Yes, This is more or less
precisely what we need. Okay. Uh, it's looking
like I I need to extend this out a
little oh. Let's see. I think I grab I
might have grabbed the wrong piece.
But that's fine. It's not something
that we can't fix. Something we can
still fix in here. So Okay I think
that's actually fine, It's a lot of gap in here, though, that we need to move in. But it's completely fine.
It's completely fine. So let's do Let's now. We can bring back this
cross chess piece. So it's exactly where it
needs to be, which is fine, exactly where it needs
to be, but we might need to extend some things
out a little bit more. Okay, let me just isolate it. Yes, I think this would work. This would work just fine. So let's start by extending this piece out a
little bit more. I think this needs
to be separated out. Let's do an auto
group. Auto group. Oh. It's kind of merging
everything back together. I need to get this
splitted out actually. This needs to be splitted out. It needs to be the only
separate piece actually before merging them together
as one single piece, so let's go back to split Eden I'm going to extend I'd like to extend
this edge out a little bit, a little bit more,
a little bit more. Okay. So B Z M. Let's do Extrude. Okay, extrude mesh border. Maybe let's extrude edge pull, let's do Edge loop instead. Let's see what that
gives us. No, no. That's just one single
piece. Mesh border. Can we select two at the
same time we cannot. So let's extend this out out
a little bit more. Okay. Okay. Yeah. That seems fine. That seems fine. I think this
would actually work. Okay. Let's bring this back out.
Let me zoom out. Let's see. Yes, it's much better now
slightly slightly thicker. Okay? I think we have this
extra piece in here. I'm trying to make sure I
don't get confused in here, so I think this, this is
not the piece we need. It should be this
piece actually. This is the piece we need.
Okay, so Control W for this. This needs to get in
one single poly loop. I'm checking this again. Let's do. Can we visualize all of this all at once?
Because I can see. Let me. Basically, let's hide, let's hide this stay much
better than less hide. Let's add this
also, much better. So you can actually see
this in a bit properly so. I would like to be ZM. I would like to extrude this
edge also a little bit. So let's extend
this out some more. Okay. Let's see. Undo that. Let's do an
auto group instead. Let's do atorop I don't want to extend this
part, this one out. This one is already fine. The size of that
is already fine. So let's go and
do an auto group. Can I isolate this
and do this alone? Now, I can't do this alone. It's going to extend that out. We would I think we
would let me make sure. Let me pull this up,
actually put this up. I would need to
split this apart. Let's just split it in. So now we can extend this
out alone we separate piece. Yeah, perfect. That
will work just fine. Oh, that select this piece. Let's solo this. We just extend this out. Just a tiny bit should be fine. Okay. Let's see. I think this should be fine. Yeah, yeah, this should be fine. All right. So now we can go back and then merge
these two together. So let's merge them together. So let's just do merge down. Merge down, merge down,
merge down. Okay? This is fine. So yeah, it's very ab in place now. So just to kind of
give them sickness. So we'll do that next
lesson, bye for now.
40. 39 Leopard Chest Topology In Zbrush: Welcome, but guys. So
in the previous lesson, we kind of extracted out this low perches
strap out of this. So I'm going to continue on by making modifications to it. Seeing like this, my piece
is kind of touching it. So I'd like to make
more modifications to it by just lifting this
up a little bit more. So let's just get this up a bit higher around
here should be fine. Okay. Because we're going to
be adding sickness to this, so we don't want
the thickness to be touching it in there, so I think this should be fine. Yes. Okay. Now, let's start adding individual
thickness to all of this. Let's add individual
thickness to this. I'm just looking at this now. I solo, I let this
past solo this. Try and see if I can delete this if I need to delete edge loops in here
but this would be fine. I think this age loop
here, we need to delete especially this one
around here, so ZM. Delete edge look complete should be fine. So
let's delete this. We can delete this also. Okay? That is fine.
This we can work with. I think we can
delete this as well. It just make the topology
a little bit neater. Nothing too fancy,
just trying to make the topology
slightly neater. Let's just do let's insert one directly in the middle
around here. Yes, fine. Right, so yes, this
we can work with. Let me add an edge loop. Do we need to add
an edge loop here. Probably not. Probably not. Now, let's extrude this out. Before we extrude, actually, I would like to get a
duplicate from this. Let's do a duplicate. Let's hide this. Okay. I'll
drag this up, duplicates up. Let's add thickness for this. So let's go over to geometry. Dynamic sub div on its own. Oh, it's already memorizing. Okay, because we kind of extracted this out from
the cross chess piece, so it's kind of memorizing the previous dynamic or thickness we added in
there, which is cool. But we to make it this thick, that was the main question now. So go out of isolates. Let's bring the other piece
back on cross chess piece. It should be visible. Okay. Um, Okay. Let
me select that. Where's that actually? Okay? Back in. Like, there's an extra
piece here. I'm not sure. I feel like it's an
extra piece in there. Okay, we're fine. We're
fine, actually. We're fine. So let's see I thickness
right for this or not. Feels like it's right
for it, though. So let's do a test. Let's do a test. I'm going to Let's add
let's go over to geometry. Do you have segments
in there already? Okay, we have segments
in here already, so this is actually two. Bring this back out. Let's find the right amount for this. Okay. All right. We still need to push this
out manually, though. But let's make this
slightly thicker. I think this should
be the right amount. It's a good amount. Then let's apply this and subdivide it. Let's see what we get. This seems fine.
Except we need to, I think we need to make it even more thicker than
this right now. Undo that let's make
this more thicker. Okay, apply this,
subdivide, right? Or maybe we don't do
this, make it less ticker that previous method
built before by inflating it, so subdivide, then we can
just do an inflate for it. Deformation, let's do
an inflate for it. Okay, that's fine. Then let's polish this
a little undo that. Let's do relax instead. Okay. So it's kind of holding
up the edge way too much. I don't want to kind of
hold this edge too tightly. It's holding this
edge way too tightly. If we do it polish, let's see. Polish is slightly too
extreme.'s undo again. Let's make sure we on completely remove Let's completely
remove the segments in there. Okay. Take this down, delete higher, apply,
subdivide this, yes. Yes, I'm trying to get a
smoother edge to it actually, so we can go in and
then deformation, inflate inflate some more. All right. Yes, this should
be fine. This should work. This should work just fine. Let's go back to lower
subdivision level for this. Yes, this is fine. This is fine, except for
the fact that we might need to move this out a
little bit more. Come with it out
a little bit more just to make it a bit sticker. So dynamic brush.
Take this down. So we can just do some
manual movements in here just to get it
a little bit wider. That's fine. It's not
going to be a major issue. Are you going to
govern this with heads four heads over time. So let's just get something
that is slightly wider. I want to be careful,
though, you don't want to mess things up. You want to be as careful
as you can be on this. Okay. And make sure you
get this average out with the same
lens across right? Extend this out
also around here. Now, once we add more
subtion level to this, smooth most of the jagged
edge we have in there. Extend this on the
lower part also. This work being quite careful when make sure we
get this properly aligned. Okay. That should be fine. Move out here as well. Move this down down also
around here as well. So it just takes a little bit of time just to get
these to look right. Pretty more what
I'm trying to do, just trying to make
this look right. Okay. Yeah, I think we
can live with this. Now if we should increase
the subdivision level. I should kind of straighten
some things out. Yeah, that's fine. This is fine. Now let's go to the next piece. Let's go to the
next piece. Okay? Let's go and isolated Shift F. All right. I'm getting an
extended edge to this. That's fine. I don't matter.
We're going to move this in. Let's just do a tiny bit
of on our deformations. Let's let's polgis turn on the dot first so it
doesn't go too extreme. This should be fine.
This is actually fine. We're going to be pushing
all of this inside the first wrap this
should work just fine. Go out of isolates
with the move brush, move this in Okay. Then down in some more, let's do this for
the back piece. So we just get this in. Yeah, that should be fine.
That should be fine. Now let's go in and
then let's duplicate it to get the
backup, duplicates. Yes, then we drag this
all the way hide that. Okay? So now we can
add thickness for this geometry dynamic is memorizing the previous setup
we did, which is awesome. So yeah, this should
be fine. Let's go in. We need to remove
these segments, apply, subdivide, go back in
the Shift F. Okay? So we need to kind of push these ins and do that.
Is there a max in there? Okay? Now we can reduce the bro size, get in there, reduce
the subdivision level. I feel like I'm seeing
an issue in there. So okay something else is
actually visible in there. I think we can shift F. Let's select. This should
be hidden. Hide that. Oh, I've been working on I've been working on something
else since that. Let's find this. No. No. This is it. This is
what I'm working on. I need to bring this down, move this up, select
this, make this visible. Yeah, it should be
fine now. So now we can move this shift F. Let's move this in. Something seems off with
the move brush in here. Rotates. Undo that. Let's increase
the brush size around here, move this in some more
should be kind of flat in. Okay? Yeah, around
there should be fine. Around there should be fine. I feel like I I need to extend this out a
little bit more. So let's isolate. I think I can use the
max lasso for this. That's going to
max out this edge. Okay? Mark out this edge as well, blow the marks invert the mark. Can we even use the
gizmow for this? Can we use the gizmow for this? Just extend it out a little
bit more, yes, we can. So with the gizmow
extending it out so more make it slightly thicker. Alright. Yeah, that's fine. That's fine. I think we can
do this for the piece also. But in this case, I'm going
to mark the lower parts out. Okay? Mark this part A invert
the marks below the edge. Let's bring back the gizmw. Kind of center this roughly
where it needs to be. Let's use this and
extend this out more. Okay? I think this
should be fine. Yeah, this will work just fine. So we can do inflate now. Let's inflate this
a little bit more. Okay. Yeah, that's fine. This will work just fine. We got something in
here to work with. Oh, yeah, we need to push
this in on the back side. Forgot to do that. Stay
on the move brush. We can just move this inwards. He did to go to the
highest subdivision level and then we should
be good in here. Yeah, this is fine.
This is fine. We can definitely
work with this. This we can
definitely work with. So we are all of this now correctly in the right place
where they need to be. Okay. So now I think it is
probably high time we merge these two
as one single piece. Let me move this down some more. And in, let's get this in down some more. Okay? That's fine. Let's do the same for the
Bay fine where it is. Alright. Okay, a little
bit of gap in between. Yes, so now, now we can think before we move on
before we move on to creating this piece
in here we can now starts doing some corrections
on some of this piece. So I would like to I'd like to merge
some shapes together. Some shapes needs
to merge together. For example, I
will need to merge this piece with this piece.
Let's start with that, so. But before we do that, let's go over take this to
lowest sublbtion level, delete ayer, select the lowest subduction
level, delete are as well. Then let's combine
them together. So she was old and she
don't send this down. She'll be all the way
down. Select this also too and send it
all the way down. That's fine, then
we can select this. We can select this and then
we would do a merge down. Let's do a merge down.
Now we have this now as one single piece,
which is what we want. Then we can do a duplicate
for it, create a backup. Let delete this first. Let's rename this actually. Let's rename this to Lu part. Let's do a cups for this. Liu Come on. So Lu pad spelling that wrong. Lo pad, chest strap.
Okay? That's fine. Then we can do duplicate for it and we can hide
this duplicate, drag this up.
Alright, that's fine. So we need to kind
of merge the or some other piece
also too together, and then we should be good. So let me select this, go to a lower subdivision level. Lower subdivision level
for this, delete ayer. Select this also, lower
solution level, delete are. Then we can send the
downhOwnshit, send this down. Down, select this piece, send this down as well. Turn this off. Then we can select this and we can do a meas down also, so merge down. So I have these two measures
one single piece now. Then we can just do
a duplicate for it, then send these duplicates up, hide that and then
we should be good. So now we can now work on
them as individual piece. Okay? So I'll see you
guys in net less work on them as individual
pieces. Bye for now.
41. 40 Cross Chest Detailing In Zbrush: Ocen baar guys, in
previous lesson, we worked on creating thickness for this
low pard chest trap, and then we kind of merge some of the shapes down together. So, oh, I see
interpenetration in here. So let's try and fix that. We can easily just fix that by moving this up a little bit more and moving
some things down so much. Let me start by selecting
this and moving this down. Move this down instead.
Okay? That should be fine. Smooth this up and do that. Smooth intensity
is way too high. It is down, smooth this
a little bit more. Yeah, and then should
be fine. Yeah, that should be fine. So we
can work with that. So now I would like
to move to this. There's a few things I
would like to do in here. It's not extremely
obvious in scope, but I would like to get that in. That kind of create a little bit more
detailing on the edges of this, cross piece. So let's do that. So selected now. I'll go over and take
down the bro size. I would like to
start by Ilating it. Then we need to kind of
subdivide this to a good amount of good amount of
resolution to work with. Not too crazy, though,
but just a good amount. So maybe somewhere around
3 million should be fine. So let's just subdivide this. Okay, subdivide, subdivide. I'm kind of looking at
these values in here. Okay? Let's do one more. Yeah, I think around
4 million should be maybe maybe 4 million
might even be too extreme, but we'll find out. We'll find out. So let's go
into the Dam standard brush. If it is too extreme,
I cannot take this down to 1 million and
then we should be good. So yes. So basically, we're basically
splitting I believe we're basically splitting this to 2 million 2 million
here, 2 million here. So it's the valuations
actually fine, so we don't need
to take this down again, so this should
be actually fine. Let me set this to
them standard brush. Okay? And then let's do
an auto grouping here. So let's go to lower
subdivision level and do an auto group auto group, polygroups auto
group, that's fine. This work just fine. So
let's check this again. Then we can go to diet
subdivision level Shift F. Go to diet subdivision
level for this, then reduce the browse size. Then basically, I'd
like to just cut in through S, get this piece out. So you just kind of slice
what I'll do with depth in here and just see. Okay? Yeah, that depth should be fine. That should be fine.
That we can work with. Then we come in close up. Getting close up around here. Then let's go to the
lower subdivision level. So let's start this on a lower
subdivision level instead, so we can reduce the bro size even more and start creating a depth cuts on the edge Okay. Let's start with is on
lower subdivision level. Then we're going to crank
up the subdivision do that? Is it going to crank
up the subdivision do that? That's
not looking right. So crank up the
subdivision level and then do a little bit
more work on that also? Let's just get something that
goes across on the edge. Okay? Just creating a depth
pass around the edge. It did dam standard brush. So this actually
add a little bit of surfacing detail to it so
doesn't look just too flat. So trying to avoid undo
that doesn't looking right. We trying to avoid this
surface looking too flats. Want to add at least a little extra level of
detailing in there. So it feels a lot
more interesting. And then we're just
going to undo that. We're just going to
refine that as we move along and do that. As in the wrong place. Okay. Undo that angle is a undo that. Angle is a bit wrong in there. So you just about looking
for the right camera angle to implement this
detailing in here. So basically, kind of creating a depth pathway is we want
to add thing in between, we can always add
that on the edge. There's not so much topology around these parts,
but that's fine, because these parts are
actually buried into the mesh. Undo that. Look for a better angle
for this gets close. Okay. All right. Yeah, I think we can continue
this get in even close. It wasn't a damn
dynamic brush for this. So the closer you are to it, the smaller your brush kind
of gets in case you might be wondering why it feels like the brush side
is kind of shrinking, kind of shrinking on itself. That's basically
what happens sing the dynamic of
Okay, that's fine. Get in even close. Call this in. So let's go to a higher subution level.
Let's see what we have. Now this is what we've created, which, for the most
part, should be fine. So let's go on sollution
level higher again, and then we're
going to redo that. It's going to get a
bit more reducib size. It gets a bit more sharper line, bit more sharper line, a bit more depth line
in between that. Okay. So I'm just going
to do this across using the rather folding the part of what we
created previously. Get closes. Okay. Then
we just move this down. That wasn't looking
straight enough, so it's to get this
looking straight enough. So I think that should be
a little bit better now. Okay. Getting close. All right. So basically, for this, once you kind of do
some lighting in here, the depth begins to add an extra level of
contrast to your mesh, which is precisely what we want. And that's why we're
kind of creating this additional level
of depth pass to it. Okay. Moving up. I'm still going to break
this up a little bit more do that get close. Okay. Zoom out a
little bit more. I think, okay, one more's done. We just do one more
pass around here should be fine. Yeah, that's fine. So kind of create an extra level of interesting detail to this. I'm still going to kind
of cut this one mode, I feel like I need to
cut this one more. Let's kind of visualize
this out first. Let's see what we get. Okay. So you can see how
right off the bat, we have an interesting
level of detail in there. I need to make some
corrections in here because this kind of pushing
in way too much. So with the move bro
selected, let's get this up. So Oh. That should be fine actually
because kind of I know we we invited the other
piece. That's fine. Let's just still get this up
slightly a little bit more. It's not completely
buried into the flesh. That look a bit old
buried into the flesh. So yes, it's an extra
level of detail. So this we can work with. I'm just going to break this
level of detail even more. So let's solo this. Solo this. Even break
this even more. Probably be adding this on a parler layer, but that's fine. I'm not really doing
too much in here, so not necessarily need to
even add this on a layer. Adding this on a
layer will increase the file size, and I
want to avoid that. So let's go to a higher
subdivision level. Okay. So on the higher
subdivision level, do that. We can now begin
to even do that, not this dm standard brush can begin to add
interesting cuts to the interesting cuts
around the surface. Just give it extra another extra level of
detailing in there. So this should make it look
a lot more interesting. Okay. We can do something across, so I see that for
an African pattern, they kind of have
they kind of have some kind of V shaped
looking shape in there. So let me undo this first. I
think we come back to that. Let's just first add
lines across this. Okay? And then we
also undo that. We also have the what's
it called again? Yes. So, we also have
backup for this, in case anything goes
wrong you can always use a backup mesh for eight spots. I think for the most part,
this should be just fine. Let me getting close
again. Just trying to add. You don't need to be
too precise as to how the spacing between
each line should be, because by just playing
along with just adding simple and a little bit more
interesting detail to it. So there's no guide at all, there's no pressure as to
it needs to be perfect because our
assumption in here is that this was all of
this is handmade, so we want to kind of
maintain the idea that, okay, since this is all handmade, we can be a little bit loose
on the sculpts in here. That's basically what
I'm trying to do. So I'm just going a
bit loose in here, not concerned about precision
around these parts. So precision wna is not
my main focus right now, just to get something that looks interesting and looks a
bit more hand crafted. So all this line in here should
add that interest to it. Is like a general idea for a addition now detailing across. So she feel a lot more handmade than using
machine parts to kind of create all of this so it's basically repeated repetitive
process across this, basically adding lines across, basically adding lines across. Okay. And in substance painter, we're going to kind of do some
paint overs on those line. So she also kind of add another extra level of detailing
for us too that we can work with maybe take down the intensity of the
brush a little bit more. So it's not too deep, but just enough for it to
bake without any issues. Alright. We still
have a long way to go I think we're
losing angle in. Let's get up close and keep casing or creating these
separations in between rotates. What are you doing this
for the part that's going to be visible
on our camera? So that is completely fine
that's precisely what we want. Right? Move this house. Most of these parts are not
really going to be having this hair detailing in there
or for detailing in there, so still like them to look in more like
in natural estates. Almost like some kind of
leathery skin around them, like a black leathery
skin around these parts. Fred the back in. Okay. They're moving on. Almost done with this. So this part is not much not so much surface
resolution in there. But actually, we
still have enough. We still have enough
detail we need. This part is going
to be buried in. These parts are actually
buried into the second piece. Okay? Yeah, that's fine. So for me distance,
I can see how we get some interesting
looking details to this. Is precisely what I'm going for. Okay. So we should bring
everything back out. You get a little bit of
interest to it, which is fine. So for the other
piece now, let's bring back the other piece. To this one, I'm going
to be adding the solos. Nodding too much in here,
actually, not too much. Noting too much, but
we would like to add let me go to lower
subdivision level. I would like to add
some little measure of what should we call it like let's say fabric
detail in there. So to do that, it
just kind of creates a court directly in the middle. And do that. Don't do that. Let's increase the subdivision
increase intensity, increase sub dilution
level some more. So I'm basically going to
add a coat on the edge. So this coat you
kind of simulates more or less like a sem line. This coat is
simulating seam line. On do that getting close. You need to be quite
close to this. Okay? On do that I was a bit off. I was a bit off.
Let's getting close. A Okay. We use the brows side a
little bit more and continue. We're going to bring
this across the surface. Do that. I wasn't looking
right. Get in close. All right. Most of lit things
we're adding in here, something that even
if we don't like, you can just smooth it out,
and then we should be fine. But let's just add it
in here just to create some seam stitching in there. All right? Get in close. Okay. Look for another
angle to this. Might also need to tighten
this up some more. All right, rotate
our camera angle. Let's undo that. Get in close. Let's come in from
the top instead. I think from this
angle coming in from the top is a lot
more easier for me. I'm not going to carry
on the same fashion. Okay. Around so undo that. I need to get close. Lo a
good angle for this, do that. Make sure we connect it. So We directionality
for you works? Can I just use that. So I'm just doing this now from the original directionality I
was using before, top to bottom, where
the bottom to top. I don't really know how far how extended out
this is, though. I'm guessing I'm
close to the end. I best guess that I'm already
getting close to the end. Okay. Yes. Close this up. So that should create
another extra level of detailing on the edge. So that's just for
one side. We need to do for the
opposite side also, too, right? So the same repetitive
process also across this. Let's see if we can be
a bit faster in here. Let's look at wider
gaps in between. Okay. Get this a
bit more deeper. All right. Let me increase your brow side
a little bit more. A bit more space so
we can see a lot more and then just go
straight line across that. You don't need to be
extremely precise. Maybe getting the
perfect line for it. Like I said before she still
needs to feel handmade, un crafted, but she used
that correct term instead. She still feel
handcrafted do that. Okay? I think I missed
the mark in there, so let's get a better
angle to this. Alright. Up, like so, create a bit more space. Now, let's come all
the way from the top, all the way down instead. Though that it
feels like it's the depth is no longer
there anymore. Let me increase the
intensity of the brush. Let's make sure we
have that depth in. Maybe because it means a
lower subdivision level. Probably why we don't have
enough depth on the edge. But the major
reason why we don't have enough depth on the edge is because there's not enough
edge loops to hold that. What we have in here
is actually fine. So at least for the most part,
this will work just fine. This work just fine for
what we need it for. Okay. Let's go and do that. It's not looking right. I save and then we'll go back in there, get in closes and move
this to the side. Okay? I believe almost getting
to the end of this. Yes, we are. That
should be fine. Then we can now begin to introduce can begin to introduce what should
we call it now? Let's call it full
details to this. But we need to be
a bit more precise we're adding the full details. We don't want to
go to extreme and then put this where we
don't need them to be, we can use the standard brush. Then just lower
subdivision level. You can just create
patterns like this to break up the
surface some more. Get intensity a little bit more. Smooth edge was not
looking completely right. Undo that's getting close. All right. So not
too much, though. Just undo that, undo
that getting close. Just enough give an
illusion of, okay, this is some measure
of fabric in there. All right? Create some depth,
smooth these out, smooth out some of
the edge looking a bit odd looking to smooth
some of the edge out. Okay, then we can use
them standard brush now. Kind of accentuate the lower
subution level, actually. Try and accentuate some of these folds.'s a bit more depth close to where we kind
of added the fold detail. On do that, get close. On do that. Okay? That's fine. So like I said before,
not don't go too extreme. Something light ended,
should be fine. Alright? On do that get close. Increase the blow size
a little bit more. Create a bit more depth in here, or surround the air
on the edge as well. On do that. That's a bit
old. On do that again. This is the edge we
need. Smooth edge. Okay? Smooth this out. Let's bring everything back out.
Let's see what we get. Okay, so it's not too well. Let's increase the subton level. Increase subution level again. So you can see we
need to still make some corrections
in a few places. Going to standard brush. E them standard brush instead. Okay? Und that smooth this
out, do that actually. That was way too deep. Okay? So this is going to add extra
level of detail to this just to create some more
shadow depth in between. But we still need to kind
of move and pull and put something back down because I feel like they're kind of
popping out way too much. So with the move brush now, we can begin to make adjustment. Let's go to a lower subdon
level atually for this. Let's make sure only
this is visible. Then push down, push down, compensate for it,
push down. Okay? Because this part is going
to be like actual fabric. We're not adding any new
four detail to this. There won't be any
four detail to this, so it's just going to be
just normal fabric detail. Increase subdivision level. Let's see if there's any part
that's going to poking out. Create subdivision level again. Okay? I think we
can live with this. Okay, can see a little
correction in here. Let's push this down some more. Yeah, this is fine.
This work just fine. So let's see we're going to carry on with
this. By for now.
42. 41 Metal Mask In Zbrush: Alright, welcome but guys. So in previous lesson,
we kind of finalized on this red inner piece in here. Okay? So let's see. I think there's a few correction
we need to do in there. Lk open this out a
little bit more. Go to a lower subdivision level. But in this lesson,
we're going to be making this piece around here. So that is what we are
going to be making. Get this up and out
some more. That's fine. Now to do that, we need to
go down this sphere in here. Think we need let's skillet
out a bit bit more. Okay. Then I will duplicate it actually let's
duplicate it, duplicates. So it's actually a
police fare box. It's not the type of
police fair I need. So it's key on the keyboard
to go to draw mode, Shift F, to go to polly frame. If we should solo this
out and zoom into it. As much as this
is a police fair, it's kind of having
some weird jag edge. Topology is now flaming
quite nice let, so I'm going to use something
completely different. Let me hide the
original phone now. Okay, what I'm going to do
is to replace this with a basic low police fare here. So let's go to our
IMM brush, BIOh, B. Let's select the
first one in there. So what I'm selecting
this police fare. Then we'll come
over to geometry, modify topology, and then
we'll do mesh from brush. Select that. So automatically convert that our police fire is not good enough to something that is at least good enough
for us to work with. Let's turn off isolates. So it's quite tiny in there, so we need to kind scale
this out some more. Roughly around the age
find ton of symmetry, lift this up forward. That's something I would
like to do. I would like to move this
to a new canvas. Let's move to a new canvas so we can also work
on this alone. To do that, what we need
to do would be, let's see. So to do that, we would just
go over to a sub to copy it. Then let's select this
cylinder in here, then paste that sub in here. Okay. Yeah, that's fine. That's
precisely what we want. I'm going to duplicate
the police spare, add these two, right? Then we'll go over to Max Polly. Yes, Max last Rader son. We can select all of this
do that legacy again. Control W for that. Now, we need only half of this, so I'm just going to
select this half instead. Let's center this in our screen, and then we go down to modified
topology, delete Eden. Then we come down to display
properties, double sided. Perfect. So this is what we need, but we need to make some
modifications to it. For one, we need to
flatten this out. Let's flatten this down
a little bit more. Not completely floured though. I think somewhere around
this spot, you'll be fine. T on symmetry for this. Then we're going to
subdivide this, right? Just want subdivision for now. Then the next we go craft
this shape in here. That's basically what
we're going to do next with move brush in place, increase the brush
a little bit more. I get this out some more, right. Little bit more,
reduce the bros size. Then I'm going to pinch
this in some more, pinch this in some more and scale this out a
little bit more. I need to make some
sharp points in here. Then at an angle, move this out some more. Okay. Up a bit higher up a bit higher. All right. So see a bit of correction
to make in here. For example, we can reduce the bro size
a little bit more. We can get a sharp angle
around there as well. Okay. Almost there. I'll
pull this out. Pre the browse size,
pull this out some more, put something sharp around here. Going to create something
sharp also around here. Okay. Yeah, I think it
should be fine. Shift F. Yes, this we can
definitely work with. This we can work with. Yes. So the next thing we need
to do would be let's see. Shift F. I would like to extrude this
edge out a little bit more. So B Z, M, go on the edge. Let's do this let's
move this to the side. We can see our tab
menu a bit more. So side moves this way. Come on. We're on the edge. Oh, do that. We're supposed to kind of let's dig it lower for this first. Di lower for that. Oh, I mean, it's ngi
so space bar rather. Space bar so let's extrude. Merge border is fine. Extrude this down. On do that, let's get this
around this nature. So we can extrude this
out instead. Okay? And it let me get this give
this a separate poly Okay. Now, let's give you a separate
polygroup Let's give this a separately Q poly loop
polygroup here, that's fine. Okay? This is fine. This we can work with. We can extrude this out a little bit more around the
should be fine. Shift F. Let's see what we gets. Whoa, we have a broken
up edge for this, which is quite odd. Let's go back to
extrude instead. Let's do the extrude instead. Let's do Poly edge
loop, poly loop. Edge loop, poly loop
should be fine. It keeps subtracting this
piece. Don't know why. That piece keeps getting
subtracted out of this. Undo that Okay. Yeah, that's fine. We can always do this
directly in there without having to create
a new p loop for it. So creating some thickness
for this do that, let's do a little bit
more thickness for it a little bit more
extrudes out some more. So it feels more obvious
in there. All right. So now what we need to do would be to add edge
loops across this. So let's add edge loops. Oh, come on. We'll do that. So let's add edge
loops for this. In sets, add one
edge loop around, so well. Yeah, middle points
around there as well. Okay? Around there, all. Then we'll do for the middle. That's fine. Then it's gonna o sharp edge is a
little bit small. Let's owe the sharp
edges some more. Okay? On do that. On do that. Okay, this old, that's fine. We can always, I think
I'll do that instead. I would delete this kind of separate the
piece out actually. I'll separate the
piece out actually. That would work a lot better. So we have this as
a separate edge. So we don't need
to kind of create edges edge loops that
we don't actually need. Then when we are
done, we can merge them as transing good piece. So what I'm going to do
would be go to move brush, Control Shift click
on this piece. Then we do a split.
Let's do split. Let's do Okay. Well, looking at this knife, I feel like I won't really
matter that much, why? Because we still gonna
urge extra loop around there that will steal
the entire shape. So let's just do this
in here instead. Let's just do this in here
instead and keep all of this. By gets close. No, Okay, this edge, hold this edge. Let's come down here.
Let's see hold that d is the edge you
need to hold in here. This is the edge
you need to hold. Okay. Undo that. Undo that gets close. All right. That's fine. Everything symmetrically,
yes, we are, also, as well. Undo that. Okay. Now do we need to do
for the middle points. Yeah, not really. I think this should be fine the way it is. So if we should subdivide
this now, subdivide this. And yes, we have a few
issues to actually deal with here a few issues to
actually deal with so do that. I think we need to separate
this out actually. So let's separate this out. I think the issue is coming from this extra piece we have here, which we don't necessarily need since we also need to
kind of cover that up. But that's fine. That's fine. We
can still keep it. So let's go over and then do Look over splits splits Eden. Okay. Go out and move brush, select. I let this actually. And I would like to completely
delete of this edge. I don't think I need
this edge anymore, so let's completely
delete that BZ Come on. B ZM. Okay? Undo that. I need to um plyoopPoly group yes.
That's what I need to do. Do we have something Undo that? Let's do something else. Let's do delete instead. Get this out of the way.
Let's do delete instead. So do delete delete. So basically, I would like
to delete this instead, so delete pllly loop. Okay? Okay, that seems
to work just fine. Let's check around just
to be sure, though. All right. Yeah, I
think that is fine. Go back out of isolates. Now if we subdivide this, we should get a little bit more some shrinking around
the that's fine. We can use the move brochure and then just move it in place. Turn on dynamic, ton
of dynamic rudder. So we can just move
this back down. I Okay, do that
actually do that. Let's just straight off add
loops that should hold it. But add the loop in
there's going to create some one key
feelings also too. So yeah, yes, I think the
bestter approach for this would be would be to extrude
out an edge for it. Let's go back in there. Let's extrude edge for
it, that should hold it. Okay? So I'll go over and then be the M Qu mesh. But let's do Extrude instead, mesh boda Undo that? Is it even working. Undo
that. Something seems wrong. Let's try and fine and fix that. On the edge, extrude
mesh, border. Yes, much better. Undo
that. Let's do this form. War this down instead. We want to push
this down instead. Undo that's pretty much like so. Okay? Now, let's go out of isolate. Let's subdivide this again. So, this odds up
a lot better now. Is odds up a lot better. Undo that, let's
go back in there. You need to add Ed loops now. Undo that Oh, come on. You need to add E
loops for this now. So inserts, let's
do a year also. Okay. That's fine. So we should
subdivide this again. It's not pushing out
shrinking in way too much. Now we can use the move
brush. Turn off dynamic. You can use the move
brush now and then manually move those points
in place. Symmetry on. Let's move this in, get close, move this in. Move this in. Also around I've done that
already on the opposite side. Come up around
there, move this in. Okay, I think you
should be fine. Select this piece, subdivide
this also. Shift F. So yeah, this is fine. This is actually fine. This
we can work with. You can work with this
in here. Let's see. Yeah, I think we
can work with this. Let me just check
this from the side. Let's use the blink material. Let's check this again, subdivide this some more. Let's see here, I think
this should be fine. This should be fine actually. Okay, except for I do
someone little ten ino this, let's go to lower
subdivision level. Then I would just pull
out this front part. Let's use the Clayby dog brush instead the Clayby dog brush. I like to fill up these parts. Undo that, undo that, undo that. Take a smaller brush size. Try to get a bit of depth
in the middle parts. Gentle bit of depth in here.
Oh, that's a bit small. Smooth this down. Probably should use the
move brush instead. I think the move brush should
do a better job for this. Come to the front side, smooth this down
with the move brush. Okay. Just get this part
bulge out a little bit more. Okay. Go to higher
subsivion level. Bulge this out a little
bit more. Smooth down. Okay. Smooth this down.
Yeah, that's fine. This is fine. This
will work just fine. If I need to make any
modifications to this, we can always do that. No issues. Okay? Filling this part
out a little bit more. Okay? P part out. That is fine. Yeah, you can work with this. Now I'm going to create
some UVs for this. I'm going to create
some UVs for this and then extract this out. I would rather save the UVs out as a JPEG and then we can now create this detail instead
of Adobe Illustrator. So let's do that. But I would like to I think
this is at one k already. We can keep this at one k.
Let's duplicate for it. Duplicate for it. Then let's do delete higher, delete lower. Okay. So Shift F. So all we need to do
in here would be just to is basically to just go to Zip login under Z
Z VmasterRaa Under Vmaster, let's go to work on Clone. So this is what we have.
Then we'll just do a single poly group on wrap. Okay. Then go back to ZM Zlogin. Let's do flatten UV. So it's going to
show us a zero to one space in here,
flatten the UV. To symmetry. Let's
go to our gizmo. Let's rotate this this way. Let's get somewhat perfect. Let's get somewhat perfect. In here, Shing
this in some more. Okay. Put this in here, you can see how flat and straight this is, which is precisly what we want. So let's just
compare this again. Let's rotate this this way. I'm trying to use the line in the center to kind of
get something quite straightforward in
the center line this work just fine. So
this is in the center. Yeah, this is fine. So the
next thing you need to do would be go out
of this Gizmo. Let's go to zip
login on flatting. Then I'm going to copy this UV, copy, then let's go back to This our original piece, and then we paste
the UV in there. Since the noob division level, the pasting UV is not
going to be an issue. Let's do paste UV. Let's confirm the
UV has been pasted. If you come down here to UV, we can do more UV. So this now is now mof you
can see clearly that yes, we have the UVs copied
in there accurately. So on Muff UV, then hardware
extract this out as a map or as a texture
map. That's quite easy. So what we're going
to do is to go over to where it is poly paint. Then let's do poly
paint from poly groups. So select that. So you're going to
fill up this mesh with the poly group color. So which is a blue.
So we have that. Then we need to kind
of convert this. I think we can let's go over
to texture map creates. So let's do new. Let's do New from poly paints. Wind of derive a
texture map from this poly painted
mesh we did now with the poly paint
set up in here. So let's click on New
from poly paints. So it's in here now. So
let's do clone texture. So see clone texture apply
this as a texture around here. So let's send this out or
save this out instead. So I would like to save
this Let's do fork instead. Fok instead, they do
over texture map, let's do new from
pulley paint again. Then let's do Crone
texture again. Then go to texture. This
is the most recent one. You can see a Fok
resolution 4,009 60. Height 4,009 60, then
we'll do a flip. Let's do flip V because
it's actually flipped. Yeah that's rue. Actually looks at
things upside down. So this might be an issue. Why? Because you
need to go back. Let's go back to this piece, flatten it out again. Because this brought
these things upside down. So let me put it this way. Turn off symmetry center, we need to rotate the
opposite direction this way. Then we need to go in
back here on flatting, copy UV, copy UV, go back to this piece, go down to textures. Let's turn that off for now, go back to the sub
to go to Zip login. Then we paste this in there. Let's do past UV. Let's start by doing
Delete UV first. So we'll just make
sure everything is clean without any issues. So delete UV, Zip login, past UV, under the for it
says to fork again, more fv. Yeah, it should be upside
down. That's what we want. Then go back to poly paints. Let's do poly paint from
polygroups. Select that again. Maybe let's even do
a different color. Let's do a different
color for this. Then do polypaint
from polygroups. Then under texture, we can
do new from poly paints, then clone texture, then
go over to texture, then we can do flip V. You're going to flip
this the correct way I want it to be now. Then we can now export this
out as a texture file. Can I spot this out? Let's just give this PNG format. Let's just name these two. Let's do caps. Let's do
MAX UV, save this out. Okay? So saved out now. Let me also save
this my documents so everything saved
out accurately. Then now let's go and view. Let's go and view that.
So it should be in here. Let me just set this here. So we have the mats in here now. So we do we can basically
do whatever we want in here now and create
this shape in here instead of Illustrator. So
what we're going to do next. See you guys in next lesson. Bye for now.
43. 42 Metal Mask Alpha In Illustrator: Welcome but guys. So in
the previous lesson, we created the U Vs for this max piece in
here, this meta max piece. In Illustrator, we're
going to be creating the patterns and then
putting the patterns back into Zbrush and then extract out some of this
detailed pattern in here. So let's do that. So I'm going to
create a new file. For this file, to give the file the same texture resolution of that particular texture file. So kind of similar
kind on that one, but nothing too different
from what we had before. Was he going to make
adjustment to that eventually? Okay, so I would select it. So the detector resolution
for it is 449-61-4906. So let's come in here and then adjust that to
merge that also too. So 496 copy that. Piece this also in here. I think that's pretty much fine. Let's just click on Create and give this a moment to
create it in here now. So let's drag and drop
the texture file in here. So you've noticed
that it's not even really matching.
It's not matching. So we need to kind of
extend this M to shift out, kind of get this to match
as closely as we can. Okay. Right, that's fine. Okay. Though are preferable
way kind of gets this even more
accurate would be to bring the UVs back to bring the UVs back to let's
say Marmoset Toolbag then we can bake out a UV island for it just to get this
a bit more accurate. I think that's better because now we're having this
edge bleeding out. And even though we kind
of shrink this we shrink the UVs instead of side of Zbrush not entirely sure
if this is going to be matching completely
where our UV mesh is in zero to one space. So I think for us to be a little bit more
accurate with this, we can just make a UV island
instead of Mooset two back. So let's do that instead, get a bit more accuracy on the actual size of the UV
is in zero to one space. So to do that, we need to
kind of export this out. Let's say spot this mesh out. Let's go over to preferences. Preferences, important
exports, under exports. Don't off Tunnel Smooth normal. I'm not going to
export this as an OBJ. So I'll just come down to Z exports and just
rename this to Max. Okay. Save that. Then we can open up Homoset to Bginia and then we can
just big UV Ilan for this. So Momo sets Momo set four. Alright, so we just need to
import this marks in here. So let's go over to before
that way we exported that in. Let's see. Max, drag and kind of exported this out
to the texture file also. So let's just import
the mark in here. Okay? So basically, what we're going to do is to
duplicate this. Then we go to bake
new bike and just drag this to the high drag this duplicate to the low, and
then we should be fine. Let's go back to
baking property. Specify what we want
to big this into. You can big this out here. Let's do a PNG instead. Let's do two bag. I just name this to Max Max.
Yeah, that should be fine. See if that it's going to rename that based on the texture
map will be out for it. So for the padn use none, don't want any padn for this. Okay. Then let's see all of
this is set up properly. Let's go over to configure. So for the configure in here, we just need to
bake out UV island. So let's turn off material ID. So we just need to be
out UV island for this. That's all we need to bake. Turn off UV island. Turn off normal. Yes is fine. Let's make sure you're
baking a Fok resolution. So let's find
resolution in yours. To set this to
FokiRsolution in here. And then we are
good silicon bake so it's done it's done baking, let's go back to that folder. We should be able to see we should be able to see
it in here now. Okay? It's still, I can see an issue in here because
it's still not shrunk down. It kind of still kind of in the same occupying the
same space in here, which we don't really want so. We need to put
another extra step by bringing it into Maya and then make this a bit more
make it a bit more accurate, so Let's import
the marks in here. Extra necessary step
just to get this as accurate as
possible because we're also going to be importing
this into Z brush and I want it to be directly on the UV. And it's important
to kind of get it as accurate as possible and in the right
zero to one space. So Z exports, let's
bring this in here. Okay? So this is the shape. Then we'll go to were already
on UV Editor already. So let's open UV
editor, UV shell. So it comes with
texture, obviously, we don't want that
texture in here, so we go over and
then delete this. Okay. So it's deleted now, so it's not going to
be applied anymore. Then we can select it, and
then we just shing this down. Let's go over to arrange layout. Let's do layouts in here. Shing this down around
this search would be fine. Get this roughly around
the center part of this. Maybe scale it out a
little bit more to compare more of zero to one
space. Here, this is fine. This will work just fine. Then I'm going to
export this back out. I'll save this. Save this file. I'm not to export this
back out and then replace replace it in here, go to Z exports, replace. This pot aler mesh now we are
going to be bringing into, I think it's supposed to
actually update because Marmoset Toolbag actually
updates the mesh. Actually updates the mesh. I believe this should have
updated. Let's test it out. We test it out, but I strongly
believe it has updated. Let's go back in here and then delete delete or put this
in a different folder. Let's put this in a
different folder. Let me just leave this up. Let's drag this into, let me just delete this instead. Be already has a name. Then let's bag this again, already have VL and in the
already fk is already set. Let's do a big again. Now let's go back to the
folder and let's see, perfect. I can see it now, is now
accurately centered, just the way we want it to be. Now we can actually
import this now to Illustrator and we get
this working a bit more. I can work on it
now, let's do that. I'm going to I don't
need this anymore. I'm going to close this. We don't want to save
this. We're not saving it so close all we can
delete this too. But one thing we need to
do is that in Zbrush, you need to update update the file actually,
just update it. So I'm going to turn this off. Okay. Then off right. Gondaply paints. Okay. Let's make sure everything is all
set up off, right. Then go back to our
soap to turn this off. Let's now replace that. So Imports, we can now easily replace
that she can capture the new the new UVs
now should be captured in here without any issues
because if we export this out, if you export this out,
getting the same UV. Once export this out so this is completely fine.
This we can work with. Okay? So, let's move on. So let's go back to
Illustrator, update. Let's update this. Okay,
let's replace this. No, this is texture
file is this. Let's replace this with
this. Yeah, perfect. Come on. Sin I've lost Okay. So this is what
we actually need. Let me just move this
way a little bit more, extend it out a little bit more. This is perfect now.
Now we can now begin to start adding our
detail on top of this. I'll go over to layers
and let's lock this layer first so we don't accidentally
move it in any way. They will come over. So our main reference and then start creating the
shapes in your son. Let's start with the
rectangle shape. Let's get this rectangle
shape directly on the center. Trying to figure out the
length for this though. How wide do I want this to be? Okay, that's fine. Then
we'll bring out our rulers. Let's bring our rulers for this. Let's bring the rulers, set this back to white.
Turn of the stroke. Let's visualize rulers in I believe should
be control arrow. Then let's get a line
and kind of center this. Okay? Yeah, much better. Okay. Then we can select our shape and move it
a little bit more. Let's move this up some more. That's fine with the arrow too. That's fine. I feel like I should extend this
out a little bit more. Okay. Yeah, that's fine. Then we can just
carry on with this. We see the other shapes and they just kind of block out
the major shape because they actually actually a
lot of shapes in here. So let's go see another Y shape that
comes across this way. To do that, I will just use
the pencil and I'll draw something out around here, so it's end to apply that put it to stroke and then let's
increase the stroke for it. So we do 40, I think
we need a bit more. 60. Yeah, 60 seems
like a good one. Now for this, would you need
to work on one side and then we can mirror this
side to the opposite side. So that is pretty much what
we are going to be doing. Okay, so now we
have the shape now. Let's create another
shape in there just gets those
separations in. Okay? I see another ship that
comes in across Sea down. So back to the Penzu
back to the pen too, we would let's see the ship comes across from
around let's see, around trying to be a bit
careful here around down year. Then all the way down down ships and create
this ship down here, Enter to apply that Okay. Then we have another
ship also in here. Sounds actually
quite interesting. So it's kind of ungod this
way. Then all the way. Then all the way around here, enter to apply that. So we have space in here another we can create additional ships. Okay. So this shape should
be from here all the way. That's fine. Enter
to apply that. We have another shape
that comes in here, but doesn't touch this
white shape also. So put that in there. But it needs to be thicker. So this battle is
actually thicker, so let's get it thicker. Let's do 80 instead.
Okay? That's fine. I think I'm going to rotate it and move this down some more. Okay. Extend it out
a little bit more. Yeah, should be fine. I think this I need to rotate also as well.
Okay, that's fine. Yeah, so moving on, you can see, let's just create a shipwrek
I feel the eye should be. So we're going to be
using an ellipse in here, so basically just kind of block out where I feel
the eye should be. Sed this to fill, then
move this upward. Okay. Down here should be fine. Right, let's squash this
a little bit more. Right. Extend it out some more Yeah, I think around J should be fine. Around seems fine. Then I'm
going to come uplose here. Let's use the direct
select to select this. Come on, select these points. We can actually move
the points here because we need to convert
this into a field. So let's convert this
into a field to expand. Click Okay. So now we can
get the points in here now. So can sleate these points and we can move this
up a little bit more. Move this out,
select these points, move this up a bit higher. Okay. Select up a bit higher should all the way around here,
should be fine. Okay? That seems fine. Alright, that seems fine. Just trying to break the uniformity of It
a little bit more. Let me leave this
up, rotate. Okay? That is fine. We also
have a ship in here. We have like I believe a
triangular shape in here. Let's flip this. Then
rotate it this way. Yeah, that should be fine.
So just kind of slowly build up slowly build up the
shape you need for this. I think I'll bring this
down a little bit small. Okay. Cutting down some
more, that should be fine. Then we go back into our strop. You can see ship around here. Ship around here. Let's try
and create that fis more, let's like a
triangular shape also. Let's see how far as
far out as in here. Okay? We can create
a shape here, go all the way here, and then create some kind of
curve around these parts. Yes, it's like, so it should be fine. That will work just fine. Okay. So moving on we go in
and flip this to stroke. There's a shape
that comes in here all the way that shifts. Oh, when it takes two instead,
let's go back to pin two. Okay. I think from here, how do we close? Let's see. Oh, spot own is
actually interesting, so we come down here. Then we do let's scroll down kind kind of guessing a little bit
tricky but we make it work. Okay. Rotate this,
flip this rudder. Then we go down all the way. Okay, I think it
comes all the way to these points all the
way to these points. Let's see, uh, around
here should be fine. Okay? We can go all the way. I think we can go
all the way out. Close this. But I need
to say this to whites. It should be on full white. Click Okay. Then We can set these two
and bring this closer, increase thickness for
this, let's do CT. Yeah, it should obviously
be more, but that's fine. We'll fix that. There's still a lot of fix we can
also do in here. Yeah, so now we can convert to make sure this is stick enough
first to begin with. Make sure that stick enough,
right amount of thickness. This is the right
amount of thickness, then we can go in
to objects, expand. Okay. Then we go to direction
select, direct select. We would select
this and do that. I want to select
these points here. Around, so when I would
select these points, we can get this in
around here as well. Select these points as well. That's fine. I will
work just fine. Okay. So moving on, moving on. Going to kind of clip all
of this out in Photoshop, but that's fine, just carry on. Then we see another point, another edge that goes in here. So rotate this pen to. You can see an edge around here. Can just say this in here, its enth apply that. But we need to increase the
thickness for it, select it. Use thickness of Let's
do thickness of 60. But we need to make
modifications to it. So let's convert this to
rather I expand this. Click Okay. Then come in close, select need to select these
points, extend this out. Extend this out some more. Okay. Maybe that's way too much. I can see smaller ship in here. Let's shing this down some more, shing this down some more. A bit more. That's fine. Go back to penhip
additional ship in here. So that's going to capture the essence of
this ship in here, old way here, and
the way down here. Flip this, go back to select. Select the shape again. Let's do 60. No, 60 is way too mot. Let's do 40 instead. You're boosting to we need to
make modifications to this. So we can do
modifications to this by expanding the selects. It's supposed to be
like a span in here. Spans supposed to
be around here, but it's not, let's just
go over and expand this. Click Okay. Okay. Then
we would shing the top. Let's get this a bit
smaller undo that. Select the points, shing
this down some more. Let's do something like so. Okay, select these points. Do that, select these points, extend out, select these points. Move this down. Okay.
That should be fine. Select these points. Let's do something a bit
more interesting. Let's push this this way. Okay. Select these points around here should be
fine, a bit closer. Maybe too much.
Just bit too much. Let's do around. Around
here should be fine. Okay? So control zero to zoom out. So we're going to continue
the next lesson and then keep blocking all
of the details for this. I'll see you guys in the
next lesson. Bye for now.
44. 43 Metal Mask Alpha In Photoshop: Welcome bad guys, so
we're still on kind of creating the parts and
inside of Illustrator. So let's just let's just carry on and then keep working
on that. Come on. Okay. So we have done this, we think we need
something on here. But before I do that,
let's fill up this piece. I feel we need to fill
up this piece just to compensate for what we
have not really done in here. I'm looking at
this, now I feel I need to make some
adjustments in here. For one, I'll select this and
bring this down some more. Okay. That should be fine. Then I'll go over and then
add points at ankle points. Add the points in here. Sled out points. Can just move
this around here like so. Okay. I should be fine. Then I'll go back in. I'm going to kind of make this feel a lot
more like my own, but then some
modifications to it. So by doing, you can start by adding a
modify shape in here, something that goes
across all the way. Okay? Around there should be
fine. It's enter to apply that then I'll go back
to direct select, select these points, and
move it in this way. Okay? That's fine. Let's fill up the gap
we have around here. I would like to
let's just create another straightforward
shape in here first. Enter to apply that. Okay? Then let's create
some thickness for it. Let's sisti All right. The sister should be fine.
Then go back to pin two. There are a few things we need
to do here to begin with. Okay, so I'm going to tap, tap, tap around here. Okay. Go around here. Flip this to fill. Okay. I think on the last
step, do the last step. Let's go far out a bit
more. Set this to fill. Okay? All the way out,
this should be fine. And go back to the origin
points and close that up. That's fine. That
works just fine. As in the ship in here
in the ship in here. So we can still use
the same brush. We can just do something like so Okay. Close this up.
Yeah, that's fine. We can work with this.
So let's go downwards. Let's fill up these parts. So the same pen to. For the most part, the pen to
do most of the work for us. I think we need to select these points and
then get this out, create some Oh, do that. That should be where
it is actually, so leave that as it is. Let's start creating
shapes in here. You can see triangular
shape in here. Okay. Let's do creat a bit
more gap. Close this up. All right. Now, this one actually
looks interesting here, so we're still going to
use the same pencil. We will do a shape around Let me move this
fill. Move this fill. We'll do something
like so Okay, do that. Let's get this done some more. Yeah, it should be fine.
It should be fine. Enter, move to. Then let's select it again. Add a bit more thickness to it. Okay, push this forward some
more. That should be fine. Then I'm going to create
a shape inside of this. Not a few shape precisely.
Let's not create a few shape. Let's just do another
shape like this inward. Okay. But this time around, I'm going to take down the
stroke thickness for it. Let's say this to 40. Alright? Maybe 40 is
actually a bit too small. Let's do 50 instead. Let's do 50. That's fine. Okay. Then we would create No, let's just use the same pencil. Pen do we enter to apply
that do that actually. Let's go a little bit higher. Okay. I think we can continue on. Going to clip all of
this out at the edge. Let's just do something. Undo that. Undo that. Let's get this down here. Okay? Around here, all the
way down here should be fine. Enter to apply that.
Yeah, that's fine. Okay. So kind of feel. Okay, we something in here, something
needs to be in here. Let's zoom out a
little bit small. Okay. I need to move this
forward some more. Let's go into select two. Let's move these points
forward a bit more, make it slightly ticker. Let's make it slightly
thicker than it is right now. Let's do seven instead. Let's move this forward. Yes, I think we're getting something
interesting in here already. Guess we can work
with this. Okay. Let me select these points, move this out some
more undo that. Get this where it should be
down here. Okay? That's fine. Okay, so back to de pensu. But to dependsu, I think
there's a shape around there. We can easily create that. Let's just steal this old oats. Bring this down here,
squash it some more. Squash it this way. Yeah, I think should be
fine should be fine where it is for some more Okay. Let's see. I think I think
that should be fine. So back to the pens. You can start creating shapes. Undo that. Let's
go further down. Okay. Do that. Let's go all the way. Then, then swap that. Okay? I'll eat enter
to apply that. Then let's make sure we have some thickness
going in for it. So 40. Let's do 60 instead. Yeah I think this
is fine. Let's just squash this down a
little bit more. You can actually see the tip, bring this out a bit
more, else is fine. Yeah, this will work just fine. We go back to the pen to. We can just create a
shape inside of it, Enter to apply that with
another shape inside of this. Do that, let's
move forward a bit more. You should be fine. Enter to apply that. Let's do a shape in here
enter to apply that. Then for this, we can
do a fill undo that. For this now, we can do a fill. Let's do filling the air. Close this up, flip this. Here, that is fine. Okay. So let's same
on the lower part, go back in there to depend and then let's create sink
the shape goes in this way. Flip this. It's
enter to apply it. You need to add some
thickness to it. Let's do sisti Okay. That's fine. Hot duplicates it, rotates it. Let's do sets. Set it where I feel it should be around there,
get another copy. Another copy do that
does get another copy. Get another copy. Let me
move this distance this way. Okay? You should be fine. We can do a fill in here. Let's say this to feel can just create a
triangular shape and do that pen to Let's just
create a triangle in here. Collar this gap, that's fine. And let's go up and then
finalize on this top piece. A little bit difference, some
difference in here, though. But there are more
intricate details inside of it, actually. So for this, I think
eventually, eventually, you might need to kind of use some Zbrush bro kind of art cuts in between
in between you, too. Okay. So let's do that. Let's create the shape we
need to have in there first. So the shape comes in
all the way across, I believe, around here. Okay, then up up
around up around here, then it goes up a bit up a bit higher all the way this
way, then colla ups this. But we need to make
modifications to this. Let's go to select. Let's
select this points. Okay? A little bit more.
That should be fine. So let's create a shape that comes in around all
the way down here instead. So we can do sipenc Okay? Let's do feel instead. Let's do feel instead. Okay. Oh, I see an interesting
shape in there actually. Let's come around her. Do that. Let's come
around here instead. Then we can do a ship this way
all the way up down shift. Then close this up. It ends out to apply it. All right? That's fine.
Also have a ship around. I think I would like to extend this out some more actually. Let's extend this out this way. I think that's a bit much
just a little should be fine. It should be fine. Go in
Let's start from here. How do we do we. More or less like a
triangle shape in here. Okay? And to apply that. Yes, I think this
should be fine. We can create shapes
in here if we need to. But I think this
one we need to get it closer closer this way. There should be gaps in between. Extend this out some more. Yeah, that's fine.
Then let's go back to the pencil. Say this to Stroup. We can do something
of this nature. It's apply, then we go
back into Zadi on Stroup. Move brush, select it again. Let's add some
thickness to this. Let's do 40. Yeah, 40
seems like a good one. 40 seems like a good one. Then we need to go
in and begin to add some some separations
in between. So additional ships
in between, actually. So let's do that. So back to the same pen too. We can just kind of follow
the same pattern we have in Pena to apply that. Okay. To apply that. Can do a small one around here. Okay, we need to make
modifications to it. Select this point, move
this down some more. Yeah, this is fine. This is fine. This This
will work just fine. Except we need some cuts
in between these, though. Um we can do. Let's say we select
this for now, let's flip this and
give it this instead. Lift it up some more. Then we can go inside
of it and then just manually create an
interesting pattern india. Actually, a very tight
pattern India should be fine. Okay? I think all they should be fine. Okay? Kind of like how this kind
of poking out on the y bot, it's going to be
an issue in zebra, so let's squege that back in or better still
we can shrink this. We can shrink this. I
shrink it way too much. Let's do a value of 30 instead. Okay? Squche this down. Okay. I think this would work. This would work. Is there any kind of make any
adjustments to this? We can always go in and then. What easily do that? Except me, yes, yes, we can do that. So we can flip this now
to the opposite side. This we can flip to
the opposite side. I'm going to select all of these this way,
put them in a group. Then rightly condemn
Let's do reflect on the transform transform,
let's do reflect. Reflect with its copy. Okay? Then we just down shapes, move the copy to
the opposite side. Okay? Get it even closer. Okay. Yeah, this should be fine. This we can work with in here. Except for, I think we
can work with this. So we need to kind of import
this into Photoshop now. So let's open a photoshop. All we need to do
now is to import our texture file in there. So it's a texture island drag and drop this inside Photoshop. And then we would get
something working in no time. So, yes, this is fine. Let's unlock that, get
that from the view. Let's go back to Illustrator. Then we'll grab all of this. Okay, grab all of
this, Control C, and go back to Photoshop, Controg V. Then we want to pase a smart objects,
that's fine. Come on, okay, Zanie now. We just need to accurately
position this way. It needs to be enter, apply that, move
this up a bit more. I think we also need to kind
of think drag this down, So should be fine. Okay, up a bit more
around there, as well. Becomes just get this perfect
where it needs to be, but I think it fine. Eat enter to apply this. Then we go into the lower layer. We can do a let's do
magic grab. Come on. No, This is not the
magic magic wand, grab this red color in go back and turn
on the vector shape, then we'll do a Control J to
get a duplicate out of it. So now we can see this now
directly inside of the mesh, which is precisely what we want. So for this now,
we're going to add convert this to a
smart object and then we let's d the lower parts, create a new layer,
get this down, flip, get it to full black. Then it going to blow the
edge a little bit more, egg needs to be blowed
out some more just to get sound some smoothness
on the edge. So let's do gosh and blow. Okay? If it does we too much, let's tune this down some more. Click Okay. I'm going
to come in close. Let's see if this is
the right amount. I think this is
fine. This is fine. Doesn't need to be too extreme. I'm going to save this
out. Let's save this out. So this is going to
save this out as a PNG. Save it as a PNG. Then we're going to
import this back into Z brush and then get this
extruded out or inflated out. So PNG, let's do PNG instead. PNG. Let's do let's
name this to meta Max. Or else name this
Alpha Max instead. So that should be
fine. Click Okay. The next step would be to
come, okay, save this. Next step will be to come
into Zbrush and then import that in and then get this
extruded extruded out. There are actually a few
ways to do this though. Actually a few ways to do this. So we can we do this
in a more precise way. So just to do this as precise as we
possibly can for this. So Okay, so Zbrush now, but before before
I can get this in, there's still a few things I would like to do in here though. There are a few things
I would like to do. Like, for example, it's to create a more
earpiece out of this. Then we're going to
merde of this down and then work on it a bit more so. I'll see you guys in next
lesson, bye for now.
45. 44 Metal Mask Ear In zbrush: Okay, welcome back, guys. So in previous lesson, we
kind of finalized on creating the pattern for this meta mark, so I'm not seeing here that we have a ear piece
that comes out of it, so I would like to I would
like to get that in place. Let's create something that should capture the air in there. I'm thinking I can do. Let's just create it
from scratch actually. Let's use. Let's come over. Let's use this pols fare. So we just do one side and then we'll flip it
to the other side. So to do that, let me get this out first.
All you need half of this. I don't need the entire outing, so let's grab half of this Control W to give
the separate pool group. Then we'll do it
delete ding but let's duplicate of this mesh. Okay? Then let's delete Eden. So under geometry, modified
topology, deletes dent, then I'll need to squash it down down completely actually. So let's center this, make it completely flat. Okay? That's fine. So just to use the
move brush now and then let's get something that looks somewhat
like a year in there. So we would just
pull up, come on. Move brush. Let's pull this up. Okay. That's fine. Do that. Let's get this lower part a bit flattened out
a little bit small. Get enclosed. I think this should be fine. Get this way. Okay? Let's do Let's don on double
sided for this double side. I think this should be
fine. Let me just make sure we kind of shing
this in some more. Let's make the top part to be sharper. Yeah, it
should be fine. Then I'm going to add. I'm going to add, so I'm
going to kind of put a a loop actually around the middle point just
to hold that sip a bit more. I smooth this out now, I should be getting
something like this. Okay This is actually fine. You can actually work
with this though. This is actually fine. So let's do I have subdivided this. Let's keep the subdivision
level we have in here. Let's keep this.
So delete lower. Yes, delete lower, okay? Yeah, that should be fine. It's not net we need to do to
add some thickness to this. Let's add thickness to this. So I'll go over to
dynamic sub div. Okay. Turn off, take down the smooth, increase the thickness for
this a little bit more. Okay. Then we can use our gizmre
and do that not yet. So let's apply this out first. Let's apply the supply. Then we can do a bit of work kind of
scale this out some more. Scale it out a little bit more. Okay, that's fine. So we need to kind of fix
through the outer edge. So let's do B Okay. I think that should be fine. I just need to
extrude out the edge, so B, Z M. Let's skip this. So we need to be
on the edge loop. Let's do extrude
and let's extrude. Poly loop poly group. That's what we need to extrude. I'm just going to
extrude this out more. Some around there
should be fine. A little bit small. Okay. I
think this should be fine. So I would like to push this in. So let's go over to let's
make sure on the face mode, and let's do polygroup
island instead, so flat polygroup, so
it should be the one. So I'm just going to let's use
let's just push this down. Not too extreme. I
think somewhere around here around there
should be fine. So let's add some insert on
the edge around here also. Outwardly, also to here as well. Let's do one in the middle. He should be fine. Let's go
through the back piece also. Let's do one here and here. Okay, I think this we
can actually work with, can definitely work with this. Yes. So you just now kind of set this kind of pull
this where it needs to be. So let's just turn
off symmetry for now. Shift F, scale this down. Scale that down, move
this all the way, skil it up some more. Rotate it this way, a little bit more that back
in all the way to the back. I think around there
should be fine. Yes, around there seems fine. So that's kind of mirror
to the other side now. So mirror to the opposite side. Now, I'd like to merge this down with the edge lobes
edge in here. So let's make sure
we send this down, shift, select that down. So this, I'm going
to merge it down. We have sublution let's take down the subution
level we have in the delete ier then
let's merge down. So do a merge down. Click Okay. So ship he. So this is now completely merged down
to as one single piece. And I'm going to scale
it out a bit more, pull it back in, like, so Okay. Yeah, this should be fine. Yeah, this should be
fine. Shift F. Yeah, we can definitely
work with this. Let's do auto group also
actually in your son Auto group auto group, select this group for
the selection and then scale this out even
more. Bring this back down. Yeah. Yeah, that's pretty
much it's pretty much fine. It should be fine the way it is. This I can work within here, then I'm going to make a
duplicate a duplicate of it, drag this duplicate
up, select this piece, make a duplicate of it also. Then that then I'm going
to merge this down. Let's they merge
down. Let's measure of this down one single. That's one single piece, so they merge down
again, merge down. Okay. So all of these nice
now one single piece, which is fine. This
is what we need. So now we can now
subdivide this as much as we want to get the extra, needs to be subdivided
quite a lot. In not too extreme, though. I think 3 million
should be fine. Let's see. Let me and control. Shift select this
piece. Let's see, we have 1 million for this. I think we need one more. Let's do one more.
Subdivide one more. Okay. So this now should hold. You can see gaps in between
here and we need to fill up. So let's go to lower
subdivision level. It the mark, invert the max. Then with the move brush, the move brush selected,
turn off dynamic. Then we just need to get close, take down your brush size. Okay. Just basically trying
to cover up any gap we find in between these rights. Yes, I think should be
they should be fine. Hope a little bit more.
Yeah, that should be fine. This we can work with now, okay? So next lesson,
we're going to go in and then bring
in the Alpha we created and then kind of extrude the Alpha
out of this source. See you guys in next
lesson. Bye for now.
46. 45 Metal Mask Inflation In zbrush: Okay. Welcome back, guys. So in previous lesson, we kind of created the earpiece. So now let's input it in. I've already saved it out on
Photoshop as a texture file. So let's import this in, so I would just
select Let's do okay. So I go to the highest
subivison level. So let's create a layer
for this actually. Let's go to the highest
sublution level. Then let's go over to layers. So layers. Then we'll create a
new layer in here. Okay. That's fine. Then we
want to name this layer too. Let's name these two. Let's
use all caps instead. So how far. Come on. Let's do how far max. Okay? That's fine. So then we'll
go over to let's come down to Oh, just
one thing though. I'd like to make sure I'd like to make sure our UVs
are still in place actually. Can I move this
This action layers. We have layers in there, so
I'd like to let's delete this layer for now just to test if our UVs are still in place. So more UV. I should I actually
be doing this on lower subdivision
level, actually. Anyways, should it should
show us what we need. Okay? That's fine. Okay, then let's exit this
more UV. Alright. Okay, so now let's go back to the we're still on
the subdivision level, then we can create
a layer in here. Then we can rename the layer. So Alpha Max then we'll go down to texture map, Shift F. So new texture. Let's import the
texturing in instead. So Import. Let's import the Alpha. I believe this is the Alpha max. Okay? So you can see how
we kind of get this directly on the mesh. Yes, this is actually fine. This is actually fine. Though we have a few gaps
in here, but that's fine. For these gaps in here, we can create something unique
around those spots. That will still work just fine.
We can leave it as it is. That will create another
tr level of detail for us. But for the most part,
I think I think this is actually fine. Yeah,
it is actually fine. Now the next thing we
need to do will be to extrude this out. Let's extrude this
out to do that, we need to go over to maxing then we'll do
max by where it says, Let's do max by color. We do other marks by color, we do max by intensity. Is it done already? Let's confirm if it's
there already now. So we'll go over to Text
shore and we'll turn it off. So it's there now, so we can see clearly what
you kind of created now is in that texture file into an
actual Zbrush max in here. So with this now, we can now do an extrude. Let me just make sure
everything else is excluded. Okay, this part is maxed out. That's fine. Okay? That's fine. So let's go over to deformation. Next we want to do in here
will be to inflate this lets. Let's do inflate. Okay. Let's see, but you want
to be careful though. You don't want to do not
want to push just too much, and then you begin to have weird deformations on the edges. Almost like something
like this now. So I'm going to undo this. Let me just blow out
the mark just once. So tap on the surface to blow out the marks
a little bit more. Let's even try the
inflate balloon. Let's see what the inflated
balloon actually does. This might be too extreme. But I just wait and then give
this a moment to load up. It doesn't actually
do much, though, so I'm just going to go back
and stick with my inflates. Okay. Maybe we should inflate
this a little bit more. Or maybe not. Just
checking just to see. Checking just to see if
I need to inflate this a little bit more than
what we have right here. Okay? I think as far as this go, this might actually be just fine. Maybe let's say we do
instead of inflate, let's come to our Gizmo and then put things
out a little bit more. Okay? Yeah, I think it should be fine. So if I should
clear out the mark, we should be getting
something like this. Yeah, this is actually fine. This would all do just fine. But it's going to make probably a little
modification to it, though, or maybe not, but I think it should
work just fine, actually. Okay, so this we can work with. But we need to make
some let's say, a little modifications
in a few places. So let me undo this and
bring back the mark. Then I would invert the max. So I turn on symmetry for
this asymmetry is turned on. Let's go to the I think
we can use the brush. Let's just use them
standard brush. Let's just use the
fourth brushes in here. So Dam standard brush. We also have deco
brush Deco brush, won't do much, not really. It's not what I'm
going for in here. So Dam standard
should be just fine. Basically, I'm just going to let me increase the brush
size a little bit small. Turn off dynamic. Let's turn off dynamic in here. Take down the brush size. Then I can just add
cuts in this way, same here and do that. Anyone that is a bit
straight on this, then I'm going to do
something like so, something like so here as well. Okay. Yeah, I think that's fine. Just to add a little
variation to it. Do that. Let's do something
that goes ig zag this way. Yeah, that's fine. We'll do the same thing
also around here. Let's do something that flows this way
instead around here. Alright. Yeah, awesome. Seeing
that work just fine. So we can before
we clear the max, I'd like to do some details
for this year piece. So undo that. Let's do okay, undo
that again. Undo that. Let's use Lazy Mouse senior
to get something straight. So increase Lazy mouse radius. Okay. Yeah, that's
a good starts. Reduce the intensity
of the brush. Then we can no that let's
do sharp lines. Undo that. Okay. Okay. I think around
there should be fine. Let's do the same
also around here. I think this should be fine. You don't necessarily need
to go to extreme in there. I think something like
this should be fine. I can tighten it so let's do
PI to use the pinch brush. Do that. Let's do it with a bit
more precision so it. Tighten all the edges a
little bit more all right. Yeah, that's fine.
Yes, this is fine. This we can work with so we
can clear the marks now. So we should be getting
something like this. Awesome. So now into just to move this back to the other
canvas. So let's do that. So to do that, we
can we can just copy this entire sub too cause every single piece
there is in one sub too, so let's just copy this copy
this, then we'll go over. Feel like I should
kind of add a ship in I feel like I should
add the shipping year or better still, better still. Instead the shipping year, we can inflate what we
already have in here. So let's go to a
lower subution level. Go to lower subdution level, then we do let's inflate BN. Then we'll just inflate this this way, Let's see. Inflate this a little bit more. Yeah, I think this
should be fine. Yeah, this will work just fine. Then we can go back to the
subdivision level again. So now holding holding up quite nicely, which
is what we need. Then let's copy the sub
two, copy the sub two. Let's go to our original CTA or I believe in okay in here. Then I can let's hide this.
We don't need this anymore. Let's paste that sub to in here. So on the same sub menu, we can just do paste. Okay? Yeah, let's paste it in now. Then just to move this
where it needs to be. Let's go to lower selected. Let's go to lower
subdivision level. And move this way.
We need it to. Squash this down. Turn off symmetry for this.
Move this forward. I think we to kind of
make this even thicker. This edge piece a bit
ticker, but we'll see. Yeah, let's actually
make that ticker first. So let's do Control
Shift click on this. And then we'll just extend all of this out a
little bit more. So more should be fine. Okay. Shift F. Then we can easily move
this where it needs to be. The scale just to be
sure if the scale is no bigger than what needs
to be move this in. I think this scale
for this is too big, reduce this down a
little bit more. Move this in place. Should be up around
here should be fine. Scale this down a
little bit more. Move the this way. I think the I created
for this might be too might be too
high, but we'll see, let's just rotate this
rotate it this way, push this down, rotate, push down some more. Okay? Yes. Rotate this way. This way, it should be fine.
Push this down some more. All right. Just kind of get the
right balance for this, rotate this in, pull
this out some more. Right. Yeah, I think around there
should be just fine. Then let's go to the
highest abbation level. Okay? Yeah, I think that
should be fine. Based on the reference image, it's all straight on because
this is like two D. So it's kind of perfect this in three D. It looks slightly different. Definitely looks
slightly different. So let me just
rotate it this way, see if we can rotate
this way a bit more. Okay, that's fine. That
will work just fine. This will work just fine. So the next we need
to now will be to add more like create an
indentation in here. It's kind of create
a pocket piece. Then we're going to have a
bit go in there and across. So let's do that. Come in and then
select this mesh. So now we can subdivide this n bit more and create
a layer for it. So let's subdivide
some more Okay. I feel like I should
make this even higher, so let's go to lower subdision
level to begin with. With the more bro selected, we can extend this out some more up a little bit more, okay? Then subdivide let's
subdivide some more, maybe up to 1 million
should be fine. Okay, and 2 million
should be fine. Okay? Yeah, we can
definitely work with this. I'm going to create a
layer for this actually. So it's also to keep the hi bits organized, create a
new layer for it. And I'm going to name
these two bid parts. Alright, so but
let's first start by creating the pocket piece
that needs to be in there, so with them standard brush. Us the brush size. So I believe we should be
somewhere around. Let's do somewhere around. Oh, B size, reduce the
brow size actually. Let's do something
across this way. Okay. Let me solo this. Since we
have everything here now, we can go in there and do
a little bit more work. All right. Undo that, cre little
bit more depth. Undo that kind of straight off. That's fine. Then we can do Let's pinch this in f. So B
look for the pinch brush, pinch brush, increase the brush
slightly little bit more. Okay. Yeah, like so, and I'm
going to inflate the edge. Let's try using this standard
brush to inflate the edge. Yeah, I think something more or less like so should be fine. Let's zoom out on the edge, do that a few times. Ppeat this part a bit
more, smooth this down. I think it should
be fine. Let's go to lower subdivision level. So you need to kind
of create a part where this building
should be in. So we just need to
bid in for this so we can use the standard brush
actually to do that. So one year around there, undo that one around this edge. Then we'll just carry this continue this on all
the way to the back. I think all the way,
should be fine. Let's do, all the way. But we still kind of create this same pocket piece also This pocket scoped
at the back as well. So let's go to the highest
subdivision level. I'll do that around here. So let's start with the
dam standard brush. Basically just going to repeat what we did for the front parts. So let's do bit be on the
keyboard, pinch this. Let rent out a little bit more, use this standard brush, create an edge for it. Yeah, that should
be fine. Let's go to lower subdivision level. I still on the same
standard brush. O out. O out and dig in, Old out and dig in
all the way here. Okay. So this is
where the building should actually be resting in. Let me create a little bit
more depth in there. Okay? That's fine. Let's
go to a little bit of an IR subdivision
level for it. Yeah, that's fine. So just to kind of create
star ratings fares or kind of draw out a curve, and then the curve
should be should be having an IM of this
office of a police fair, then we can also
wrap this around it. So that's pretty much what
we're going to do for this. But to do that, we need to go, let's bring everything
back out, actually. So I will go back to my sub too. This fair we created. That's fair we
created. I don't have any subdivision level in there. I'm going to use this as
a base to draw our IMM. Let me reduce string this down. Put this inside of the body. Click Okay. Yeah, that's fine. So
it's still selected, which is what we
want, it's visible. Then let's go to
our IMM brush to be Yes, I am ambrose. Let's do police fair. Police fair selected now, could go over to
stroke C curve mode. Okay? We need to make some correction system
adjustment to this but for now, let's leave this at the default and then
let's reduce the bros. Let draw out where we want
this to be applied on. Let's start by dragging out
the selection around here. Okay. It's actually working except. It's not following the
it's not following the shape a bit more. I draw this a bit better and then also reduce the brow size. So it might get a little
tricky here though. So let's just Okay. I think this is slightly it's kind of pushing in,
which I don't really like. Let's see if we can do
this from this angle. Still still not
flowing accurately. Still not flowing as
accurately as I would want it to undo that. Let's do some things
that's a bit faster. So it's quite faster
but I will give you add a little more time to
was trying to get it right. So let's just select this piece. Then we duplicate. You have a duplicate
of it already? Let's see, I think we have
we have a duplicate of it. Yes, we have a duplicate. So let's isolate
these duplicates. Awesome, good thing
we have duplicates. Then let's duplicate
these duplicates also. Yes. Then I'm going to Control
Shift click on this piece. Then let's do delete ding. Modified topology,
delete ding. Okay? The next thing we need to do
is to add a cut around this. So let's look for a good
angle for this and add. It's going to be a
tricky one thou. So I'm going to use
the slice cove for it. So let's do slice cove. Slice cove. Get this frame, zoom
out a little bit more. He around there should be fine. Then we can slice this way. Here, there's one.This
that be fine. Clear this out. There's another one around here. Get this in view. Yeah, so bring
everything back out. I think I need to code this
part delete all of this, bring everything back out. Okay. Let's do an auto group also
in a Holly group auto group. Oh, come on. I think I need to
mark this instead, let's mark this instead. Control doubly to get
a separate polygroup. Then let's do delete Eden. So delete Eden.
So with this now, we can go over to stroke. We will do cough function, I believe, poly group. So frame group. So let's go back
to the IMM brush. Okay. Let's see if
this would work now. Yes, this is working just fine. This is precisely what
we actually need to do. I'm trying to figure out the
sizing for this is fine, no. We need to make this
share a bit smaller. Do that, let's make this spare
a little bit bigger. Okay? I think this is fine.
Is will work just fine. I work just fine. So let's go into the stroke and delete cuve and
then we should be fine. So the next lesson we want to carry on and then
arrange this cup.
47. 46 Fur Strap Beading In zbrush: Okay, welcome, but, guys.
So in the previous lesson, we kind of finalized
on the meta max, and they were trying to
create this beading that goes into the low pad skin for. So we created this in
the previous lesson. We're just going to
kind of set this up and then the way should be good. So let's do that. Let's set this up properly. I'm just going to Control
Shift click, click, click. Then let's split this out. So let's split ding. Okay? This is the beading. I'm going to hide this. Okay, let's bring
everything back out and I'll select
the beading instead. Let's go to the move brush. There are still a lot of corrections you
need to make in here, but I think at least we have most of the
piece we need for this, what's more important. You just make
modifications and start adjusting this is
the way we want it to be. So this is fine. This is on the
opposite side is fine, so we're just going
to delete say. Yes. So let's do an auto group. Let's start by doing
an auto group for it. Okay. Then I'll try and move
this closer to the fk piece. Let's get this down
a little bit small. Okay? We'll still
make adjustments and then get everything
where it needs to be try and closely
push this down. Okay. Shift F. Let's see. But the beds are quite smaller,
though, quite smaller. But that's fine. I
think we can let's see, we can actually shring
this down if we need to. If we need to, we
can shing this down. I'm just trying to see if
the sizing for this is fine. Shift F again, let's
do transparency. I'm going to start by moving the parts that we don't need. Let's use the max last so
we can work a bit faster. Max lasso, I'm going to max out all the way here. Let's go so first. Control W, give it a single poly group, Control Shift click. Then let's do delete Eden. Let's go over to
geometry delete Eden. Then we can get
close Control click. C sheets click, delete Eden. He that's fine. Then let's
bring everything back out. Let's turn of this transparency. Yes. Okay, now let's
string this down. Let's string down the bits. Or maybe if you push it in towards the four
makes better sense. Let me just center this. Say shrink this down
a little bit more, kind of try to bury it
inside of the four. Okay. Shift F. I think this is fine. The building for this
is actually fine. I don't need to kind of
create SSS for this though. The bidding for this
is actually fine. Let's work on the back and
then fix this at the back, so shifts F. So the
same mark last two, I just going to
max out this part, Control W, grato
single polygroup Control Shift
click, delete Eden. Control Shift
click, shift click, delete Eden as well. Okay. Shift F. Yeah, I think, yes. I
think this should be fine. So those things kind
of start making individual movement
and corrections to it. Let me start. Let
me start by doing a little inflate or
deflate instead, but we're using the
inflate brush to do it. Let's just showing this down a little bit more to begin with. Okay, now we can start doing
individual movement to this, going to select this move
this back a little bit more. Go to the next piece. Move the back so
more get in close. So I think this mostly. This is what we're going
to be doing actually, just to get them in place. Go back to the first
one we selected. Move it in place. Okay? I just going to try and be
a bit more precise on this. Let me actually move them
quite close out to themselves. Move them quite close. I can do that. I don't add any rope rope bits
in between them. Though, ideally,
there's supposed to be like a rope
piece inside of that, but rope is not
actually visible, so we just need to get
this close enough. Then if we need to kind of
multiply or or duplicate, then we can easily do that. Since we are still on the Gizmo, we can do that easily
without any issues. To then move this
down some more. Okay? Move this in around
the should be fine. Old control, get the
duplicate out of this. Okay? Get this close. Move this closer, right. Get a duplicate out of this. Move the next piece,
move this out, bring this closer closer, make a duplicate out of it. Move this back some more. Select this, move this
closer, move this closer. Select move this back actually, then make it duplicate for
it. That's much better. Select this piece,
move this closer, move our camera
around, moves closer. I don't think we take too
much time to do this though. I see something I
need to fix in. Let me select old and and
select this piece in general. Let's use the move brush. Leave this up some more. Let's go back old and
select this piece again. Okay, let me just select
this all down control, make a duplicate of it. Okay, rotates. Get this down. Okay? Select the back piece, move this closer, move this
closer. Move a camera. Oh, we already done,
safe? We haven't done? We haven't done.
So let's just move this all the way around down
here, it should be fine. Alright, let's go to the
opposite side. Move this down. I think we need to do a
little bit more working here by moving it down some more. So it's kind of buried
into the surface, actually, so I just
bury this down. Bury this down. We see bringing it closer to
themselves, though. It's important to bring
them closer to themselves. Seleg this bury down. Okay? We need to push this
back. Then bury this down. Okay. How control, make
a duplicate out of this. Move this out, rotate this out, and push this down instead. So this one is supposed
to bered down even more. So let's find a good
angle for this, bear this down some more. Select this bring this
closer, Bry down. Move these out. Move the close make it
duplicate out of it. Let's zoom in so
that duplicates, move this camera around. Get a good angle on
it, move this forward. Around should be
fine. Let's move our camera out a
bit, select this, get this closer,
get this closer, move a camera, make a
duplicate out of this. Okay? Select this,
move this closer. I think it should go
up a little bit more. Let's leave this up some more. It's buried down way too much. Same also as this. Okay? Move
our camera out a bit more Get a good angle on this. When this closer, make a
duplicate out of this. I just want of mesh together. So we need to separate them
out a little bit more. Let's just get a space in here. Then we can space this
out, space this out. Space out a little
bit more. Okay? Get a rotation around there. I think we need to
leave this up more up some more up a
little bit more. Okay. Move this out. And all of this is buried
down way too much. Let's create spacing
in between them. Bing this closer, leave
this up a bit more. Move our camera, move
this up some more, bring discloser, duplicate it. Select this, create some
spacing in between, move out our camera, leave this up some more, leave this up some more,
bring this closer, bring this closer,
lift up some more, move out our camera. Almost done already. Let me just make it
duplicate out of this. Select this. Select this. Let me lift this up some more. Let me move this in in this way, create a bit more space in between them for this
to kind of rest in. Let me lift it up a
little bit higher. All right, so let's
help to frame out, then frame back, close up. Let's select this, bring
this closer up a bit more. Yeah, I think this is
actually in a good place. When we move brush
now, we can now manually move some of this
up a little bit more. Okay? So you still have control
over it, which is fine. It's good to still have
control over this. Then I'm going to shrink
it down a little bit small let's use inflates and
shrink this down some more. Okay? Maybe that's
a bit too much. Let's get this sink around. This sizing should be fine. Okay. I think I went too
much way too much. Let's fred this out
a little bit more. Okay. Then we can go in and begin to bring some things
a bit closer. Let's done auto group clear
this out let's do auto group. So under poly group auto group, then we can keep making adjustments to a little more
adjustment to it actually. Just moving them a bit closer. Kind of shrunk this down, so we need to go back and then make additional corrections to it. Because I'm trying to make
sure it's not too big. I'm trying to avoid getting
something too big for it, so modifications and
corrections to it are in order. Move this closer,
move this closer. Move closer, get a
good angle like this. Move this closer, leave
this up some more. Win this closer, make
a duplicate of this. Shing this down some
more, bend this in. Okay. Yeah, I think that
should be that should be fine. So it's still fine to still have little a little variation
in the sizing for it and bring the
clothes to themselves. But they should definitely
be touching each other. General idea is
just to make them touch each other a
little bit more. Okay. I'll make it duplicating here. Move this out. Make this touch each other. That means we is gonna make additional create some additional
phase in here actually. But I think we're doing
just fine, moving this in. I just need to create you just need to create
an adult sphere here, we'll just do that. I think I'm going
to make this butler bidding here feel a lot more unique by adding some
kind of texture, pel, making it more like a textured, like watercolor
texture, peels in here. That will make better sense
Llue actually blue texture, peels in here should just fine. Something a bit more reflective. Yeah, that's fine. Let's go to the opposite side and then
fix this up also as well. Get in close. Move
this closer closer. Move this this way. We
can duplicate out of it. Fill up that gap, get in close. Touching this is
touching. Most of these are touching around here. Let me move this even closer. Okay. Maybe skill
this out some more. Make she look slightly
not too spherical. Bing this close. Extend
it out a little bit more. Okay. Move this out. Let's do from continuing
here actually, select this being disclosed. Close. Okay. I mean in this part might need to kind of
create additions, getting close, rotate this, select, move this up, up a little bit more, move our camera and go out
some more, being disclosed. Duplicate of this. Let's move up higher
rotates a camera view. Bring this closer this way. Move a camera view up. Move this closer,
move this closer. Move this closer. Alright, I think
it should be fine. Yeah, I think we can
definitely work with this. This will work just fine. Clear this out. C.
Actually I'm moving off. So we can just rotate
this to this way. So kind of it's not
bending somewhere else, so let's move this in, rotate
it out a little bit more. All right, T trying
to get this a little bit as perfect as
it needs to be. With the move brush,
I can move this in some more. Yeah, awesome. Awesome. This will
work just fine. I feel like I should
I need to extend this even kind of make this little bit bigger
than it is right now, so Let's just go for it. I just go for it, move this up. Okay? Should be a bit
more obvious in there. Alright. I think that
should work just fine. This will work just fine.
What you need it for. Okay. Yeah, let's see if
there's something else you need to do in here.
I don't think so. Okay. Yeah, this is fine. But yeah, there's one now
I'd like to add in here. I'd like to have
some kind of like to add some kind of
piece around here. Put some kind of piece around his face in
front of his face. I don't have the
reference for it. Let me see if I have reference
for it here actually. I perhaps I have something for it, Oh, not really. We don't really have
anyone in here, but we're going to
create it actually, just to give it to push the detail for this even
a little bit further. It make a lot of sense to add that just to push it
a little bit further. So we'll do that next
lesson. Bye for now.
48. 47 Horn Rings In Zbrush: Okay, welcome but guys. So now I have the reference I need for this
actually a few references, but this is one I'm
going to be working with so let me just show you
guys the references first. So I'm basically trying to
create this own piece in here. Is the on piece. So I would, these are
references we need, but I'm going to be sticking something closer to this
particular one in here, but with a few modifications
to it actually. So I'm making a few
modifications to it, so let's get into it. To do that, we would need to I've kind of first thing is to figure out where
to kind of hang this. So looking at this now, I feel like I can I feel like I can hang this
somewhere around here. Or somewhere around
the year, actually, somewhere in here should be
fine. India should be fine. So we need to pull out
out a little bit more, then I think we have gaping we have a live gaping there that we can
actually utilize, okay. There's going to fold or
rather fold down around. This part should be fine. Maybe even come down here. So let's get to it.
Let's get to it. So I would go back and
sell it that police fair. Let's go up a bit higher
select this police fare. The one we kind of buried
into the body actually. Is buried into the body. So what I need to do is to create another
cylinder for this. So let's go over to I think we can actually
steal one of these though. We can steal one of these
if we need to. Let's see. Subdivision level in
there Okay, no, we don't. I believe we can
steal one of these. So let's frame into it. Let's start by doing a
duplicate hits. No, not yet. So let's just go in
hold down Control and select this so down control
and then move this out. Then let's solo this out. Okay? I collate the max. I'm going
to max out this piece. Max out also Control W to give them the same
poly group, select this. Then let's control
shift and select it, and then let's do splits Eden. Split ding. Then let's go and
bring everything back out. But I would like to
delete this Control W, Control Shift click,
Control Shift click again. Let's delete ding because
I need to work on the left hand side and we move right to the
right hand side. Let's bring everything
back out again, Shift F. This is a piece
we need to work with. So let's scale this
out, center, scale out. Undo this symmetry turned on. Let me isolate this again. Okay. Scale this out. Out a bit more. We
out of solo mode. But we need to deflate this. Let's defleate this. So let's go over to
deformations and then deflate it actually. Let's deflate it more more some more Come on. This
might take a while. Almost there. Come on. Okay? Yeah, this should be fine. Probably not so let's just shing this down first.
Let's shing this down. Oh, I think I went
overboard, but that's fine. We can get it we want
it to be later on. Let's just get this, put it where it needs to be and then find a good angle for it. So it should be something
rotated this way, scale out some more we need to make a lot of
modifications to this. Let's pull this out, rotate this way, come in close, rotate this way, get in closed, move this in here up
a little bit more. Let's go and select
this bit piece. I need to move it out actually. This symmetry turn on. Let's just create a little gap in between there for
this to actually rest. Create a little bit gap. All right, go back and
select this, move this in. Hey, I think that
should be fine. Let me move this down some more. Okay? Move this up. All right. I think I need to
rotate it even more. This part needs to actually
be in here actually. This needs to be in here.
Let's bend this this way. Yes, I think we're getting
something out of this now. Move it out some more. Yes, yes, it should be fine. It should be fine except
when you need to let's see. Let me just check
the sizing for it. I think I need to inflate this a little bit more, make
it slightly thicker. Maya maybe way too tick. Let's reduce this
a little bit more. Yeah, that's fine. Go back and select move this out some more. And let's go and select
the threading for it. Move the threading back in. Yes, yes. Yes, this I can
definitely work with. So now we need to
kind of select this. Then we control drag this out. We need a few more
now.Tring this down. I think this sago be fine.
We're going to rotate this. Come on. We just need to kind of make
good corrections in here, and then we should be fine, rotate it this way, move this in up a
little bit more. So we need a series
of these around this. Okay. Um, Okay. Yes. Let me rotate it
this way, actually. Rotate this way. Okay? Shrink it down a
little bit more, move this up, bring
this up a bit more. Rotate this way. It's actually a lot of a lot of rotation in here
just to get it in place a little bit more. Okay. Down here, now let's duplicate this down
control, extend this out. Up some more. Duplicate,
rotate this way. Just to create slight
variations in there. Control, drag this out, move this forward, bring
this out some more. Okay? Yeah, that is fine. That is fine that
we can work with. Let's rotate it this way. Okay. Then we'll drag this out. Put down control, drag that out, scale it out some more. Yeah, scale it out
some more. Okay. Let's shrink this down
a little bit more. Just a little should be fine. Okay. Then we would rotate this. I think we need to shrink
it down a little bit more. Should be slightly slimmer. So should be fine.
Bring this in. I should all of this should
go in inside this ring. So let's rotate this. I think my scale is way to
be let's scale this down. Move this out, up some more. So just a matter of finding
the right angle for it. Okay. Uh, I think there should be
semi rotate it this way, push this back in. Okay? So as much as I
was trying to get this right I would
want to kind of intercept with some
other machine there. So I think around
there seems fine. We would need to scale, deflect this down a
little bit more. Okay? Pull down control,
pull another one out. Okay. Rotate it this way. Get this up a bit higher. Yeah I think around
that should be fine. Okay. I think at this point now, we need to do poly group
for this actually. So we can make sure all of
this is working just fine. So under poly group, let's auto group,
auto group in here, go back to gizmo, con
control select this. Then move this out this
way, rotate this way, move this out some more, old
and control drag this out, scale this out a
little bit more. Just to get variation
on this scale, rotate it out, undo that. Let's cent reents
rotate this way. **** tf, let's get this
at a different view. Let's see if this is
working correctly without intercepting and breaking up without machine
here. Move this out. This way out some more. Yeah, that's fine. I think
we can work with this. Okay. I also need to inflate
this a little bit more. Let me just create a
slight variation in terms of their thickness. So let me scale this
out a bit more. Okay. I think I need to make this
rest a little bit more, so let me select all of this. Do this. Oh, come on. I'm supposed to kind of set
remove this last slice cove and then set this to select
rec int the mark out. Invert the mark get in the Okay. Trying to clear
something slightly similar to what we have here. Let's rotate. I
rotate it this way. Yes, it's the right
rotation for this actually. Then move this back in. But we need to make
modifications to this now. Okay? Select this,
move this two in, select this, move this in. Yeah, that's fine. That is fine. I work just fine for
what's needed for. Okay. Shift F. Just check in. Just checking to
see, clear this out. Compare this to the yes. It's actually bogo actually
comes out a bit more. I think I would like
to make these rings. Come on. Let's do an
auto group in here. Another auto group
should be fine. Auto group. I'll select this marks them out, inverting max Inflate this
out a little bit more. Deformation, inflates
that's fine. That's fine. Let me see. I think it's not
completely similar. It's not completely rounded,
so I think I can break this can break this a little bit more, but
it isn't a move brush. Let's use the move brush now and then break this up
a little bit more. Okay? So it's not
completely rounded. No completely rounded. So
this will work just fine. So the net piece
you need to create now will be this on piece now. But just before we
create the own piece, I'm going to invert that. I think we need to push
this back in some more. Let's use the no. Let's hold down
Control, select this. This is what we need
to push back in. So I'm going to
push that back in. Yeah, that's fine. That's fine. Move this up a little bit more. Alright. I think we're
in a good place. I think I will need to select
let's select Control Shift. Click, and invite
selection, Max this out. Invite max, center it. Why not? Oder Control,
get this out. Would this shring this down some more to add the same
interesting shape to it. Clear this out. But I want to
make some variations to it. So back to ply
group. Auto group. Okay. Come on. Go down
control and select this, rotate it this way,
bring this up, select the next one, up some more, rotate it this
way, move this forward. So it doesn't look the
same as one at the top. Okay? But the max center bring
this out a little bit more. Okay. Scale it out some more. Yeah, that should be fine.
Yeah, that should be fine. So the next thing
you just to create the on that comes all
the way around here. I think I will do that
in a different canvas. Let's do that in a
different canvas. But before we do that, let's mirror this to the
opposite side. So under geometry, modified
topology, mirror ld. Okay? Yeah, I think
this should be fine. Just looking at the
silhouette now. Basically just eyeballing
the silhouettes. Okay. From this
silhouetting year, we have something similar, right? Similar,
similar silhouettes. Yeah, I think this is fine. This is fine. Is fine. We need to change direction 94 this is a little bit
small, but that's fine. We do that. Let's
won't do that now, actually. Let's do that now. Okay, so I'm just going to
let's select all of this. Select this also in v max. Oh, I think Let me go all
the way to end again. I'm going to symmetry
ton off so Ton off I'm lec of this Control
W a separate poly group. Control Shields click max out,
bring everything back out, invert the max. Let's center it. Basically just to just
rotate it a little bit more, make it slightly different
from the other side. That's basically what I'm doing. Trying to make it look different
from the opposite side. Okay? Yeah, I think this
should be fine. Probe a little bit more. Yeah, that's fine. Hey,
that is actually fine. I think I would like
to do something similar on this side also, too. Just going to rotate. There's good or sent it
on the opposite side, rotate a little bit
more up some more. Yeah, it should be good. Yeah, this has a better
there's a better angle to it. This we can
definitely work with. Just to break uniformity
with your feet, we can do an auto
group in a shift F. Auto Group. Okay, I'm going to let's bring everything back
out, Control Shift click. Control Shift click,
Control Shift click. I max this out, bring
everything back out, invading max, pull down control, and duplicate it to
the opposite side. I would like to rotate
it all the way this way, then bring this in there. I just get variation
in just to get so it doesn't look completely symmetrical on opposites
on both sides. So I should actually help. Should actually help.
So you can see a little bit different in here
now, which is actually fine. So yes, as far as this goes,
this is actually fine. So we just need to kind of
create the on here now, and then we should be good. So I think we can do
that next lesson. Let's do that in next lesson, just to keep things a
bit more organized. Okay? So I'll see you guys
in next lesson. Bye for now.
49. 48 Horn Base In zbrush: We come about guys. Previous lesson kind of created this ring piece
where we're going to be putting in on mesh in there. Let's create your on that
kind of fits into this. I'd like to create you
on a different canvas. So let's go over to believe
this max Canvas in her Okay. Let's go over this. I think I can delete this now. I don't need this
anymore, actually. So I can delete this
just to save up on just to save up on room space or five
size also in here. So deleting that we would I think I'm just
going to do an append, append append append,
append, append. No, not an appendix
stage should be fine. But we can just
duplicate this actually. Let's duplicate this instead. Then let's create
a police fare to B and then police
fair selected Oh, these caps these caps looks
like a good one, though. These caps will actually
work just fine. Do have good topology in there. I doubt that. That
was the issue. I doubt if it has good
topology around there, and I need something
that has good topology. So let's just stick with
the police fare for now. I'll modify the police fare to get what we want out of this. So yes, let's do let's
go over to geometry. Let's do mesh for brush. Great. It's kind of it's down. It's down way too much. So this comp comparison size
for its way way too small. Way too small. Got smooth brush. Center this scale scale
this out by lots. Oh, undo that. Undo that. So you want to be careful,
though. Scale this out. Yeah, around this
size should be fine. Okay? So I'm basically trying to use something that
has good topology around it. But at the same time, I
would still like to try, you know, B C. Let's use the curve Curve
tubes, cove to instead. Let's draw out a
cover around there. Let me just see. Try to see if this cover has
good topology around it. Now, there's not good topology. You can see triangles
around there. I don't want triangles actually, so I wouldn't do that. Do that, go back to move. So this is the best
one to still use. I'm going to duplicate
this police spare. Hi this. Let's work
with the one down here. So what I need to do now would
be to grab the top parts, grab the top parts, Control W. A separate poly group.
Control Shift click on this. Control Shift click again. Dubsr is ready tonne, so we'll go over to
geometry. No, mistake. Delete agent rather,
deletes agent. The next step would be next step would be to grab,
clear this out. Let's shift. Let's grab. These top
parts invert the max. Then extend, oh, no, no, blow this max. Come on. Do that. It's going to be a tricky
one. Not tricky per se, but I think we need I don't add too more subdivision
level actually for this. It's better. Is what we need. I'm just going to extend
this out to the length I need that should perfectly
create a own piece like so. Let's do it from this
angle instead. Okay. Yeah, this should be fine. This length should
actually be fine. Okay, then clear this out. We can do a's a small polish. There's a small polish. So
let's go over to deformation. Deformation. Look, that
shins way too much. Nah. So let's do polish
by feature. Nope. I still not working. Relax.
Nope. Polish crip edge. Nah, definitely not. Actual Polige actually works, but I think before we
use the actual polish, let's let's let's add some more segments
around across this so BZ et's skip this. Let's do an inset multiple
loop, zoom this out. There's quite a lot to be fine. Around this should be fine. This will work just fine. So we have 360 polygons
now, which is fine. Then Control W for this, we can now do the polish now. Yes, I think polish
should work just fine now. Polish again. It's kind of
creating some bulge, bulgy look at the end. I don't want that
so Control W again. Let's do polish by group. No do that, do that again. Before we move on, I
would like to let me duplicate this for
now. G to duplicate. I always do you
get to duplicate. Yes, then we subdivide
this Control W, subdivide this one more, then I can delete lower. Yeah, this would be fine. This will work just fine. Then what we need to do
is to go to A gizmo. Then on the setting of a
gizmo, let's do bench. So select this tip. Then let's scale this down. Squash this down
first just to get the point look to it. So more. So you should get
the point look now. Yeah, this is fine. So you can work with. Then let's add some more resolution to it. Let's do three for now. Okay. Let's go to the side
view. Is our side view. A side view. I'm going to
move this up this way. If you guys get
the idea already, so so this is just basically
I would create on for this. It's a lot more accuracy to it. I think this
should be fine. I don't need this to be
too extreme, though. I think this should work just
fine for what's needed for. We can go in and add
more resolution to this and then bend this over
a little bit more, if this up some more back in
some more down some more. I think this should be fine. Okay, so shift F
and let's accept this geometry accepts Awesome. So this will just fine
for what we needed for. This we can definitely use. Okay, so now we have
our own piece now. So the next thing
you need to do would be to cover this up, actually, let's cover this up. So I'm still going to using the same is our sphere here
duplicate this spare. Okay. I just lift this up, gives up some more.
Let's go back to this. I think we need to make
some corrections to this. Tonal asymmetry for
it, ton of dynamic. Tonal dynamic in there. I need to lift this up
some more this up some more a bit more. Okay. I think this should be fine. Yes, it should be fine.
Then we'll go back to this. For this, we're going
to repeat the same. So let's just max out
these lower parts. ControlW, we can Control Shift click,
Control Shift click. Let's delete Eden. Delete ding, delete ding, delete ding, that's fine. Then let's max out this out. Let's max out these
parts and add the max. Put this out some more, squash it in some more. Here this is fine. Control W. Do that, Control W again. Okay? So we can dot's let's add B. Let's add loops across this.
Here, that should be fine. Control Shift. Control Shift click
Shift click Control W, do that one single polygroup. Then let's go over to deformations and then
polish by group. Little polybgroup
should be fine. Basically this is going
to be a cap for it. It's going to be a cap for it. Click blow max ton asymmetry, center this orient,
squash this down some more around that should be fine. Play this out. This
needs to cover this up, get this in, orient
a little bit more. Get this in, squash
this down. Okay. I think we need to
subdivide this actually. So let's subdivide. Okay,
before we subdivide, let's give you some thickness. Let's add some
thickness to this. Yeah, I think that
covers the cap. Yeah, that covers
it quite nicely. So let's add some
thickness to this. So we can do Let's do Shift F, BZ, no, maybe not. Let's push this back. Let's just do let's
just normal regular thickness from setopin so we can actually measure how
much we need for this. Dynamic stop div dynamic
takedown the smooth, increase the thickness for this. Need a bit more. I think we need a
bit more than this. Let's do one point. Great. Going to type, click and combines that so. Let's do two. I feel like we need a
bit more than this? Let's do three instead. Okay. Doesn't get thicker
on this. Shift F. Control Let's see. Control Shift click,
click, click. Oh, wait 10 minutes. Let me go in naturally and see Stickness is for everything. Yes. Stickness for
everything, actually. Let's go to a poly group. Let's do group by normus. Yes, it should be fine. Condo ship click, click, click. Nah still not working
the way I want it to. Let's go back and I have not
really applied this yet. Can we still Can we still get increase the
number? Let's do five. I can't even increase
more than five. Okay. I think we need to use
another approach instead, let me turn this off BZ. Let's do extrude instead. All polygons. All right. Yes, it
should be fine. Stickness should be fine,
actually. So let's add. Come on. I think two
should be fine there. Go back to move brush, bring everything back out. So we need to kind
of scale this down now and make it fit. So let me move to an angle. Scale this in. N to fit. Control W or control this kind of add more
subdivision level to this. Skill it out some more. Okay. Ton of dynamic, reduce
the brows size. Just need to make
modifications in a few places, and then we should be
good. Bring this closer. Just make this kind of,
let me move this out. I, I need to hide this
marks. It's just in my face. I don't need to be my face, so let's hide that undo
this move this aside. Symmetry tonal asymmetry
for this. Extend this out. Asymmetry ton doo now, we can rightfully push this in. But it needs to
touch the Come on. It needs to touch the unsurface, so just need to push it back in. This is going to be like, some kind of leather
piece for it. So let's just make sure. I was thinking making
this metal instead, but we already have
metal for the rings, so let's just make this a bit more of a
leather piece for it. Okay? Taps moons. Right. I think this
should be fine. So you can merge these two
together as one single piece. Let's merge this together
as one single piece. So let's do we merge. Before we do we merge down. Let me do duplicate of this. Okay. Let me send the
downshift, send this down. So this is this. We need
to duplicate of this also. Let's do duplicate of this. I'd not so ablution level
in there screw down. It's an At ablution
level in here, so we can take this down. No, actually, let's delete
lower instead, right? So delete lower
instead, then we go and then select this on and
then we merge down. Let's do a merge down,
merge merge down. Okay? That is awesome. Okay? We can still modify this v once. That's
completely fine. Let's go over to Pol group. Let's do an auto
group. That's fine. Okay.
50. 49 Horn Surface Details In zbrush: Okay, welcome back, guys. So on the previous lesson, we
created the base for this. So let's now bring it
into our main canvas and then set that up and then start doing some
sculpted details on it. So I'll go to Stop two. I'm going to click on Copy. Let's go over here. And we'll paste this in here. So let's do paste. Okay. Well, that is quite large.
It looks really weird. So let's just get
this scale back to how we supposed to be. Scale this down, get this up. Move this ton of
symmetry for this, push it this way, scale
it down some more. Okay, out a little bit
more, drag this up. Okay. We just need to plug this where it needs to
be then move this this way, rotates this way,
rotates this way. Yeah, I think that's
right orientation for it. Then let's move this I think
all the way to the back, should be fine. No, no. I think it should be up to
the front a little bit more. Move this forward, rotates. And basically just looking
for a good angle to kind of set this in. I think rotate this again, pull down it's intercepting
with our piece. I don't want to interstate
with the earpiece. I think I will leave
this up around there. I think around there
should be fine. Let's see around here, rotate it this way,
bring this forward. That basically create the engine that should
be on top of it. I think we can do well, yes, we can still we
can steal one of these. So let's let's go
in the Shift F. Control Shift
Control Shift click. Let's on auto grouping
here, Auto Group. Poly group, poly
group, lygroPlyGroup, Auto Group. Okay, that's fine. Control shift. Bring everything
back out. Control shift. Click on this. Okay? Oh down control drug. Hold down control, drag Oh. Sometimes it's often you let's
figure out what that is. It apen sub visually
every in day. So why is it not
working? Come on. Something seems oddly wrong. Clear this out. Okay. Let me bring everything back out first. I think what we
should do first would be to create a copy
out of it first. So let's go down con tres. This will work just
fine. Create a copy. Then we can do let's do splits. Let's do split on marks points. Splits on marks points. That's fine. So we can
go in and select seats. Sent our orientation on this, bring this in here try get seats where it needs to be in her increase the
size a bit more. Okay? Even more. Lift it up, kind of dig this
in here should be fine. Get this down so more around
there should be fine. Okay. I think I might need to I think I might need to drag
this out a little bit more. I think we can do, I
think one should be fine. Yeah, one should be fine for this think around there
should be fine. Shift F. Alright. Let me move this out a bit more. Yes. So let's just
merge this down. Let's merge this down. So shift select this shoot this down. Say with this one piece. A shifts, shoot this down. Then we can merge these two down together as
one single piece. So let's merge down. Okay? So shifts he now this
antine one single piece, is fine. Get this here. I'll just need to orient
it where I like it to be Shift F rotates. Okay. I think this would
actually work. This would actually work
except if let me just see. I want to try this put this down first. Let's say around here. We get this done around
there, how would it affect the entire mesh or
back where it should be. Let me scale it out
a little bit more. I'm just trying to
find the right scale and the right
positioning for it. This is a bit too extreme. Let me leave this up.
Let's say we have this one's going to figure out the right
position to fix this day, we're going to live that day. At the moment, I'm
trying to figure out the best position to
get this fitted in. Okay. Protect it this way, no.
Intercepting with that. I think the previous place where it is actually a
better place bots. The scale for this
is way too much, let's tune down the scale. Get this this way. Okay? But forward, it needs to go a bit forward
forward a little bit more. I think somewhere around
there let me extend this out. I don't want to completely
cover the piece at the back, so let's extend this
out a little bit more. Rotates this way, out more. I rotate it out this
way, a little bit more. I think should be
just about right. F is just about right. Okay. Rotates this way. Yeah, I think around
there should be fine. Then we can mirror this
to the opposite side, so let's mirror
this to the side. Geometry, modified topology,
Modified topology, we will do I'm just
looking at this side. I don't know I think I feel
like I should leave this up a little bit more.
Let's de duplicates. Let's de duplicates. How
do you duplicate for now? Let's work with this.
If I pull this up here, how does it look like up here? Rotate this back in. Let's say we get this this way. Take down the scale. Okay. Yeah, I think actually, for me, most prefer this
looks like something that should work except
we need to bend this. Might need to kind of
bend this down some more. Bend down some more. Okay. I think I personally prefer it around
this place because I can I can still see more
of this ring detail. So I don't want to
use this kind of this kind of completely
cover it up. So that's what I'm trying to
avoid because I would like the details to be obvious in there not
completely covered up. Okay? So now, it just
left to us to kind of log this in where it needs to be so we can do
Control, select this. I think for this one, just a matter of
rotating it on see we have this e somewhere
where it needs to be. Okay. Maybe lift it up a
little bit more up some more. Rotate it, bring this in here, rotate some more,
rotate this way. Yes. I think this part lava interlocks with
that perfectly. Yes, I think this is fine. Yeah, this is fine
because when we side view, we get
something like so. So I think at this point now,
we can make it even bigger. So we undo that invert the max. You can scale this out
a little bit more. Okay? Yes, we can rotate
this down some more. So for my angle light, is
this actually lose cool? With move brush, compensate
for it down here? Yes, I think this is fine. This is fine where it is. We can work with
this around here. You look at it from
this angle and then we do a test render for this. Let's do Shift.
Let's render this. Let's see some shader
information coming from this. Yes, this is fine. This is fine. You can work with
so now we can now begin to add some
details to it now. Now let's mirror it
to the opposite side. So we clear the max mirror. Yeah, so we see all the details that needs to be
in here a bit more accurately. Undo that first. Do that. I would
like to Max is out. It Undo that invert the max. I would like to till this I'd like to til
this a little bit more. Oh, I think if I t this
to be too extreme, yes, to be too extreme. Just leave that as
it is. Let's just mirror this to the
opposite side. Yeah, so at this point we
can start texturing this or adding some surface detail to this. So let's solo this. The first thing I'd
like to do would be to subdivide this, let's subdivide this no
first to begin with. 1.1 0.6. Let's do one more. Yeah, 6 million should be fine. Yeah, 6 million should
be just fine for this. Alright, so let's go to
the dam standard brush. Iolate this out. Let's
work with this for now. Okay. So we're just
going to add undo that. Let's go to lower subdivision
level to do this. On the stroke, lazy
mouse, eggs down. Okay? Maybe before we undo that, let's use the He polish brush and make some planar
changes to this, go to lower subdivision level. So I'm not going to make
planar changes to this first. Okay. Yeah, we're not doing asymmetry. We're doing asymmetrically,
which is fine. So let's work asymmetrically
in here first. Okay. Increase the brow
size a little bit more. Let's do this with a bit
more aggression to it. We use the browse
size gets close. Reduce the brush size. Get spines. Let's move
on to the opposite side. So this is just
going to break up the surface a lot
more before using the dam standout brush to add sharp straight
cats in between. Okay? From the top, you actually acts really weird way when you're
kind of navigating this. So try to avoid
being on the top. Yeah, I think they
should be fine. Then we can go back to
the dam standard brush, use the brush size and do that. Intensity is way too much. Use the brush size even more. I think we are getting
dotted lines in here. I don't want to do
these dotted lines. We can smooth that out. Let's go back in here, turn this off. Okay? Street lines across. I don't personally,
I don't do too much. I don't do too much,
if you should be fine. Because I still
like this kind of maintenan smoothness around it. Okay? Yeah, this should be fine. There's something we can do to make it even more interesting. But we do that in a
bit before we do that, let's do something else. Let just first
carry on with this. But that requires us to use, epotlar Alpha to
break up the shape. Let me increase subdivision
level one more. Okay? Go under this. Let's
do under here also. Okay, smooth that down. I should be fine. Let's
go to standard brush. On the alpha, we'll change
up change up the alpha.
51. 50 Horn Leather Details In zbrush: Okay, we come about, guys. In the previous lesson,
we kind of created some surface breakup for this
mesh. Sally for the horn. So we're going to break
this up even more by using DL surfacing detail in here.
Let me smooth this out. Okay? So I'm going to them
standard bro selected, or rather standard bro selected.
We'll go to the Alpha. We're going to change this up
to let's use this instead. What this basically does is that with this now if we
drag a selection, we have this interesting surface
detail coming out of it. So let's just go
do that actually. Take this down a bit more. I don't need to be too
aggressive in there. Let's see Okay. So this will just add another additional level
of surface breakup to it. Actually, an
interesting level of surface breakup that
would actually help, especially in the
texturing process. Most of these details
are going to be popping out quite nicely. Okay. Let's go to the other piece. And then just drag out
the detailing in there. Let's use the mask
cap gray instead. Symmetries don't offer. I want
to do this asymmetrically. Increase intense a
little bit more. Go I think that's way too
intense, let's undo that. Undo that. We use intensity. Okay? Yeah, that should be fine. Yeah, definitely this we
can definitely work with. All right. We're more around here. Okay? Yeah, I think
this is fine. This is definitely fine.
This we can work with. Okay. So let's invert
the selection. Then let's kind of make
this piece feel a lot more feel a lot
more leather like. So I'm going to use the
Dame standard brush. Let's start by going to
lower subution level. Let's start with at least
with the H Poly brush. Increase sublution level,
increase subluton level again. Let's start by doing some surface irregularities
around this first. Okay? Use the bro size, go to
lower subdivision level. All right. Go at the top also. Let me clear this out. Let's
select just this alone. Use the brush size. Let's Let's take down
this moon's intensity. Let's moon some
of the edges out. So this is just going
to another extra level of surfacing in here.
Let's smooth this out. Is it going to drag out Alphas in here, let
out fas in here. But for now, let's just get
this feeling quite irregular, increase intensity a
bit more. Go over it. Smooth out. Okay. Yeah, it should be fine. Let's
go to the opposite side. Don't do that.
Let's go to lower, we're already on the
lower subdivision level. Okay? All right. Gets closed. Let's make sure we don't
neglect the top parts. Let's get something
for the top parts. Okay. Then we can start
smoothing things out now. Reduce the smooth intensity. Okay? Smoos out. Smooths out. Get up close. Okay. Smoos out. Yeah, I think this
should be fine. Yeah, you should work just fine. Then we can use the dam
standard brush now. Undo that dam standard brush. Let's go to higher
subdivision level. Reduced intensity bra size
increase intensity a bit more. I'm just adding
coats around this. Okay. Et's do a bit more
around here also. I think for the most part,
this should be fine. Let me make sure okay, let's turn on lazy
mouse, smooth this out. Oh, that's a bit too deep. Dus the brush size. Okay. Smooth out.
Smooth this out. Seems like our smooth
intensity is not high enough. Let's increase smooth intensity. Okay. I entirely sure where this
is coming out from, though. Okay, coming up from
the previous one we kind of sculpting details on. So back to them down that brush. Okay. Let's be too extreme. Reduce the bro size.
Let's move this out. Smooth this out also as well. Let's bring everything back out. I think this should be fine. Don't need to go to
extreme in here. I think this should
work just fine. Then coming close with
them standard brush, we can smooth this out. I'll asymmetry for
this standard brush. Set this back in here. I'm just going to elevate this
part. It's getting close. Oh, undo that. Undo that. Let's make sure this is the
only thing that's selected. Then the max, then gets close. Okay, then we can do this
now with a bit more ease. Basically trying to
elevate this edge. Let me increase
intensity a bit more. Increase the brush
size even more. Increase intensity
a little bit more. Okay. Reduce intensity. Okay. I think what you need
to asymmetry do that as bro size we to be
less coming close. Okay, with them standard, let's elevate this up also
with them standard brush, we can do a carving in there. Ton up symmetry for this. Go to the opposite side. Add a bit more got
around here, undo that. I think this should be
fine. This should work just fine so we can bring
everything back out. And we should be having
something like this, that should work just fine. All right, so the next lesson, we'll go and then create. I think there's
some glove for it, and then the meta piece
for the arm also. So we have a meta piece for this metal ring
along the arm. Then we have this lead
out glove also for him. We're going to create that
also in the next lesson. I'll see you guys in
next lesson by for now. I
52. 51 Hand Glove In zbrush: Welcome back guys. In
the previous lesson, we finalized on the horn piece. Okay. So in this lesson, we're going to be working on, I see there's a bit up
modification we need to do. But after the modification, we're going to be working
on the gloves for the hand. So I would like to solo
this and fix this. I can see this penetration
we're having in here, so I would like to fix that. Let's go to lower
subvison level. Okay. Let's max this out via the max. Then I'll just pull this up, make sure symmetry is done off. Give me the move brush. Get this out. Okay. Then we're going to check around
this just to be sure. I think for the most part, this should be fine. Okay? Yeah, for the most part, this should work just fine. Bring everything back out. Clear the marks, frame in. Okay. Let's see. I would like to tighten
some of this a bit more. So let's isolate it again, do solo, use the
paint brush for this. Tighten this out a bit more. Okay. Back to the pinch brush. Alright, I think
this should be fine. Do that that's way too extreme. Okay, so let's work on
the gloves for this, bring everything back out. So let me just zoom in a
bit more so we can see better representation
of the hand glove in here let's be on
this position first. So there's quite a lot
lot going on in here, but typically the
leather gluve should go inside of where
this metal armor is, but we're not going to do
that because there will be too many polygons that
we don't actually need, and that's not going to be
visible on a final render, so we're just going to
kind of optimize that by just having or blocking out
what is going to be visible. Let me get close let's that let's start the
creation process for this, so I can see a few
layers in here, can see firstly, secondly standard third
layer around there. I think secondly Tanjos. I can pretty much
easily create that with by just using
them standard brush. Okay? So let's carry on with this. So I'm going to select
this body mesh. I'll make a duplicate of it. I'll shoot these down all down shifts and shoot this down. So we only need Oh, we need to hide the
one that's at the top. Let's hide this. So we need to work on the duplicate now, which is all the way down. Shift F. Okay. So I'm going to grab. I think most of what
we need would be let's just grab
this and do that. In the selection. This is the only piece we need because once we are
done with this, we cror we can mirror it
to the opposite side. That's pretty much
what I'm going to do. So yeah, let's
carry on with this. So Control W, give this
one single polygroup. Then I'll go over to geometry, modified topology, delete Eden. That's fine. I think I need to sub subdivis increase the subdivision level. Okay, they do delete lower. This is going to be
the base where we can max out and extract out
measures we need for this. Alright, so I'll start by maxing out or moving
out this major piece. I think we have an
piso so to at the top. I think we can
grab most of that. Let me just zoom out
a little bit more. So can properly visualize this. So in this instance, I think, let's see if we can use the max last one and grab
what we actually need. It's going to be tricky though, but let's see, let's
grab all the here. Okay. Yeah. Yeah, I was afraid
going to kind of max out these parts that we
don't actually need. Okay. Um, I think we can now manually
make some corrections. Let me slow this out
first. Getting close. So I'm going to use
the pen to mark pen. And I'll start erasing and do that control and O. I'll start erasing parts
that I don't need. Okay? Then let's go up to Tink brush automaxinTurn
on backface maxing. Why? Because once I'm
erasing this party, I don't want to affect
the one in front, so that's a general
idea for that. So I can continue
cleaning this up. Okay. Let's see. I think all the way
should be fine. Let's see. Let's clean
this part also a bit more. I think I would like
to get the same similar or maybe
this should be fine. You can actually
leave this like this, though Ies look like it's going to mess things
up for us on this side. Because in the reference,
we don't really have the side view for it, so I think this should work. I can just clean to undo that. Reduce my brow size, I can just clean
this air just to make it feel a lot more ungod. Yes, I think for the most part, this should work just fine. Yeah, this work just
fine. Let's grab. Let's see if I need to grab
something a bit higher. Yes, let's grab
something a bit higher. Let's do Mac sla so. Okay. Let's get
this steet like so. Let's add the sweet. Yeah, that's fine. Just a
little bit more so Shift F. And I'm going to do I also of
duplicate this piece too. I'll need to
duplicate this piece. So let's duplicate
again, add this, go back in here, Control W to give this one
single polygraup. Okay. Yeah, a lot of undo dots. A lot of interest to this
last fine, Cro W again. Control Shift click
to isolate this. Then we need to kind of
go to deformation and then do a polish for
this tone of these dots. Polish just a little bit
more to get something sharp. Okay. Let me show Wu side of this
so let's turn on D side. Let me max out these top parts blow the
marks, inviting mark. Let's get this kind
of flattened out. Undo that. It's not
flattening it out very much. But that's fine. I
want to subdivide. I'm using kind of I want to make sure
this is smoothed out. Is because once I
z matched this, I don't want it to
look a bit messed up, so let's just see if we can still fix this yes,
that should be fine. Clear this out. Yeah,
I think this is fine. For a base, this
should work just fine. So let's go in and
then delete Eden. Delete ding, then
let's Z rematch this. So before Z remage this, I kind of add some poly
group to this just to tell Let me use my slice
of just to tell Z masher where I want my
edge float kind of be on. So let's get this properly
positioned this way. Then we'll do a slice around. Hi darts. Okay. Let's do one also around. Also around here. Okay? I think this should be
fine. I should be fine. Three should be fine. So
now we can zero marge this. But before zero marge this
let's duplicate for this also, just to have another
additional backup for this. So now we can easily
zero march this now. Let's go over to
geometry, zero marcher. Turn off adaptive, keep grooves, detect edge, take this down. Let's set this to two. Then zero mash. Okay, doing a really pretty good job kind of
matching this for us. And kind of taking
up the flow of the poly groups we added in here, which is
precisely what we want. So let's do I mean, we have a four k. Let's do
half of this. Let's do half. Two k, let's do half
again. Here, one k thing. Whoops, undo that. Ok is messing this
part I think two is. Let's run this again,
actually. Let's see. A, don't do that. Hold Os, select that again. So yes, he's holding
it properly now. So holding out and then tapping on Z match actually helps. I don't know these signs
behind that though, but sometimes when you hold
out and you tap on Z mash, you get a better result.
So this will be fine. We have a one K. One
k is completely fine. We can Control W for this. So we have good proper
flow around this, which is what we want. Okay? So let's go out of isolates. Let's bring back the main body. Let's bring back the
main body. Okay? So now we need to push things up or rather out a bit more. Let's get things out some more I will still make
some modifications to it. Let's start by lifting
it up a little bit more. Aeqenotickness for this, do
that, reduce the bros size. Let's just first get all
of this out some more. Up and out. Okay. Especially this edge needs
to be out a little bit more. Shouldn't collapsing
too much on the skin. Seduce the brush size, do that. Get close, leave this out. Leave this out also. This out. I'm just
being careful, though. I don't want to lift it up up or rather out way too
much than we need to. Get this out. Okay.
Out also as well. Let me rotate it this way. Okay. Out also around here, out also Zebra cycles
get in a bit close. Get in close out. Get in close. Yeah, I think we're pretty
much almost done with this. Okay. All right. A, so, yeah, I
think this is fine. So yeah, we got something pretty good in here, which
is precisely what we want. So now we can add I think we can easily
add thickness to this. Let's add thickness for this. So I'll just go
over to come over, let's do dynamic sub div. Okay? Take down the smooth, increase thickness
all the way up. Okay. Way too thick.
Way too thick. Let's find a good
value for this shift F. You can see this a bit more, a little bit more
should be fine. Yes, I think around
there should be fine. Then let's add
segments in between. Okay. Let's apply
this subdivide. Let's see what we get when
we subdivide, perfect. Here is perfect.
Should work just fine. Should work just fine. Do that. Let's go in and then
max out another piece. We still have another
piece in there. So just to get this
to look right, let's get that piece in. So we'll go over to this
for now. Scroll down. I think Christi have a
copy of this, isolate it. Let's duplicates it. Get duplicate for this. Oh. Let's see. Let's start with
the one at the top. Let's start with one at the top. So I think for this, we need to draw it
by hand, actually. So let's go over
to the marks pen. Weduce the bros size. Getting close, then we can manually paint
where this needs to be. Let's do all the here. Okay? All right. Then this goes and then let's reduce the
broad size to begin with. Collapses in the air. We have a band going across
this around the. So let's connect that band. Okay? All right. I'm just checking
just to be sure everything's working correctly. I think we need to make some
more modifications to this. Make this even ticker. Let's even do it
a multi car band. Oh, this actually
looks interesting. Let's do around the as well. Okay. Yeah, that's fine. That's fine. Except you need
to get an angle to this. So let's erase let's erase this down here,
get something sharp. All right. Then erase also around here,
get an angle to it. Get an angle to this. I think I need to add a little
bit more around here. Clean this part out,
get an angle to this. Yeah, this would be fine. So Shift F, Control W to get
out one single poly group. This is fine. Just need to check if there are
no gaps in between. Checking to see if there
are no gaps in between, this should work just fine
so we can Cth click on this. Then let's polish this
some more polish this. One of the dots, polish
this a bit more. Okay. Then with the move
brush, we need to make a little
adjustments in here. Come on. You need to make a little adjustments
down here. Oh great. This down. I think this is fine. Make sure double sided is turned on to display
properties double side. Yeah, it's pretty much fine. So let's do delete ding. So down modified
topology, delete ding. Yes, that's fine. Okay? So it's just the same reptive
process actually for this. So let's start slicing
these things up in here. So let's do one across here, so also one across here. Undo that undo that. Let's get something
quite straight on. Kind of fighting with
my view right now. Trying to make sure this
is properly centered. Let's do that slice
up around here. Do that moving the
wrong key slice up around here as well. Yeah I think this
should be fine. Let's go in and then let's make a duplicate of this,
like we always do. Duplicate I duplicate. Then there's the
zero match for this. Geometry match ton of adaptive. Is I'm turning off adaptive
because I want the squared, the space, the size
of the squard to kind of be proportional
to the others. So it's supposed to
have taken them, okay? I think let's leave smooth on. Let's say this to two. Let's merge this let's
see what we gets. Let's do F check around. This is actually looking
good. Z marge this again? Oh, I see initial
at the top parts. There's an issue around
There's an issue around here. Undo that again. There's an issue around here, so I'm going to max out
these points invert the max. I'm going to actually
polish this quite well. Polish this very well. Just to eliminate any I think we have another edge in there. Let's see if we can
actually get that out. It's something we
want to keep in mind, just to make sure everything's
working correctly, so not sure if that's not sure if that
actually works, actually works. Undo, undo. To make sure this doesn't
give me any issues. Mark this inverting max, smooth this out again. Deformation, polish. Okay. Then polish by group,
clear that out. Let's remerge this again. Yeah, I think that works. All right. Let's go
off of this again. Yeah, this is fine. So
we're having this at 900 roughly 900
polkons. This is fine. So contro W for this. This will work
absolutely just fine. Let's go thickness for this. Maybe just before
we are thickness, let's make sure we lift this up. It's going to buried in. So let's get it out. Shouldn't be buried
in should be out. So we're going to do a lot of work pushing this out actually. Or maybe do that. Let's
do an inflate instead. Inflate should actually
help us pull all of this out. Okay. Fantastic. This actually did a very pretty good job
for lifting this out. Okay? Maybe it is out way too
much too, but that's fine. Now we can now make our own
manual corrections in there, so let's push this down because if we're
extruding this is going to be extruding out and not in. So let's get this
closed down a bit more. Okay? Yeah, that's pretty much fine. So let's go a
thickness for this. So let's go to dynamics
of the dynamic, take down the smooth, increase the thickness for this. Way too thick. Take
this down some more. I think somewhere around
seems just about right. Let's add a segment to this. Then apply if we subdivide this should be
getting this, which is fine. Then we move brush,
take this down. With the move brush, we can
move this down a bit more. Okay. Yes. Awesome.
This is fine. Let me get this down some more around there
should be just fine. Yeah, that's fine. So
we can move on also can create an ke creating same repetitive process
for the entire out. So I think we're actually
in a good place, yes. So let's carry on with this. So we're going to carry on
with the next lesson instead. So I'll see you guys in the
next lesson. Bye for now.
53. 52 Hand Glove Band In Zbrush: Welcome back guys. In previous lesson,
we worked on creating this or rather we're still working on creating
the glove piece. Let's continue on
with that there's still some more
work to do on it. Let's go back to the arm
piece, duplicate it. Isolate, clear this out. We need one that comes
across Okay, we need one. Mia comes across in
here all the way in. So I think let's see if we
can grab this with undo that. Clear this out. Let's use
the max lasso instead. Try and see if I
can grab this with the Mx lasso a bit
more accurately. Okay. Close enough. Close enough. But a few modifications though. For one, we don't really need. We need to let's make
modifications to this. Let's do the marks pend that, clean this out to begin
with, clean this out. Yes, on this part
is way too thick on this part so let's level
this down a bit more. Okay. Let's see, clear this out also. Undo that actually. I think we can add to it. Yes. I think this will
work just fine. This will work just fine. Let's do a delete ding. Let's sharpen this.
Let's sharpen this. I'm going to do and tap on the surface to
sharpen this and do that. Or control O to kind
of sharpen this. Sharpen this some
more, that's fine. Then we can me a duplicate
of this already Shift f12w, get a separate poly group
control shift click. Let's go in and then
turn on D sided. Okay. Now, let's polish this. Let's go in and turn off the dots. Polish this a little bit more. Let's do a few more times. Try to eliminate any edge that will give us
issues in here. So kind of polishing
that's a little bit more. Okay. Yeah, I think this
should be let's come in here. Let's see. Yeah, this
might be an issue. Problematic parts, in
valdblod the marks. Polish this a bit a bit more. Let's do polish first. Nope. As a bit old. Polish grips edge, polish. Yeah, that's fine.
Now let's do delete eating because it's still
attached to the full hum. Let's detach that
by deletes eating. Yeah, this should
be fine. The slice this up until this way wants zero meshed polygons
to be flowing on. Let's find a good
angle for this. Control shift and we
slice it this way. Do that find a good
angle for this. Okay. Yeah, this is much better. This we can work
with. Then we'll go and slash slice this in, slice this all around here. I think this might. I think this should be fine. Let's
see how this works first. I'm skeptical though,
because we have too many polygroups now. I'm hoping it does not affect our topological
flow around this. Let's do duplicate for
this duplicate hide this. Let's go over to the geometry. Zero mesa, to this
off, wrack this down. Okay. Let's say this
to two, 20 mash. Awesome. Actually
did a very good job maintaining this
polygroup across this. But we need
to take this down. Let's do 00 mash again. We have this at nine
red, this is fine. Just checking around just to be sure everything's
working just fine. For the most part,
it is awesome. Control W, you give this
one single polygroup Okay. Yeah, this is fine.
This is fine. So let's go out of isolates.
This is what we need. Let's let's bring back the entire body so
we can actually see. Maybe not the entire body. Let's just bring out the
duplicated harm piece. I think this one,
let's turn this on. Let's see. So I will need to inflate this
out a little bit more. Let's done inflate s on inflates
instead of deformation, inflates, inflates,
inflates, Allright? That's fine. I use
move brush now and then manually move
things out some more out some more yeah, I
think this should be fine. Also, I'll go back in here. I need to leave this up a bit more because this band
that is kind of wrapping into the d is supposed to supposed to be supposed
to have thickness in there, and then this gap is supposed
to have a little bit of higher gap in here to accommodate for the
thickness would add for it. So I'm just going to
pull this up some more I think this
should be fine. So let's go back to the band, and let's reduce the bros size and let's add thickness to it. So dynamic up div, on its own, take
down the smooth. Let's increase the
thickness, a bit more. Oh, oh, that's way
too much. Let's see. Shift F. This seems
like a good one. Let's add segment, one
segment, that's way too much. Two should be fine. I think this should be fine. Let's apply this subdivide.
Let's see what we get. Well undo that. It needs to
be a third thicker than this. Okay, I think they
should be fine. Apply, subdivide. Yeah, this is fine. This
thickness will work just fine. Increase the bro size, reduce the subdivision level, and let's move push
these things back in some more Awesome. This is fine. I work just fine. We're moving this a lot
faster in here now. We still have one more band. There's this band around this, I think I can still be
band from this instead. Let's do a duplicate for it. Let's duplicate. Solo this out, Shift F. Then let's grab Control Shift. Click. Let's delete's
delete Eden. Geometry, modified topology,
deletes Eden, that's fine. We need to grab the bond. Grab the bond. So I think a
much easier way to grab this. Grab this bond would be to see we can grab the
bond all the way here. So let's do BZ.
Let's get a loop. So Q mesh, pull the
loop, pull the group. I think that's what we need. No. No. Come on. Do that. Delete ding. I
deleted ing already. So why are we having
issues in here? Come on. I still don't know why this
is pulling out, though. Everything seems to be fine. That's just my issue. That's just my issue with this sometimes a bit
acts a bit weird. On the right so I've
done this before, so dontly show why this is we're getting
extrude out of this. Undo that. Come on. Well, I think I'm just going to use the approach for this. Let's deletes instead. Delete. For the
deletes zoom out. I think I'm going
to delete this. Let's delete a loop
across this and do that. Yes, this is fine.
Let's do this instead, then I'll do an auto group. Holy group auto
group, AutoGroup. Go back to a move
shift control shift. And then I'm going to
do it deletes agents. This is the piece we need. Let's bring everything back out. So I'm just going
to scale this out, so I think the more preferable
way to do this would be to let's Can we use scale to? Let's just done
inflates instead. I think that would be
a lot more better. So let's go to
deformation, deformation. Inflates Inflats inflates. Oh, you have this on
the opposite side. Ah, I don't didn't mend you have this on your
opposite side, actually. That's fine. That's fine.
That's completely fine. That's completely fine. Let's just inflate this
some more inflates. I think this size
should be fine. Undo this last one. I
think this is fine. Then we're going to
use the move brush and then and move this up slightly. Yeah, I think around
there should be fine. Like this, I feel like I should maybe drag this up some more. Maybe I should add
a bit more eye to it and do that actually. Let's use the Max
so instead, Max so. Mv at the marks, blow this out. Move this up a bit
more, undo that. Undo that. Come on. Undo that. Blow the edge, drag this
up a little bit more. Clear this out. Okay? I think it should
be fine. At some more less add
thickness to this one. Let's do some
thickness. For this. I let's go and then
under geometry, dynamic subdit this on. So it automatically memorize what we had before
because we kind of extracted that out of
one of the previous piece. I think the thickness for
this is way too much. Let's take down the
thickness down some more. IT around J should be fine. Heft F, apply
subdivide undo that. Undo that. Let's add some more thickness to
this apply, subdivide. Yeah, this is fine. Undo that. This will work just fine. Except we need to bring
this in some more. Let's get this more
closer to the skin. Getting close. Bend this in some more in some more just to be at least
close to the wrist. Kind of tape out this
close to your wrist. I think around there
should be fine. Let's move to the
side, move this in. In some more around
there should be fine. Alright. Still had no idea we're having duplicates
in here though. So let me I would like to I'd like to delete
these duplicates in here. Maybe not yet. Not yet. Silo let's just finalize
on this before we merge everything down
as one single piece and then we mirror to
the opposite side. Now we need to go
up a bit higher, bound around there as well. We just need to figure
out where that is. I think I see it now.
Let's select this. Let's duplicate of this. Do it duplicate? Fine. Yes. Yeah, it is fine. I'm
just looking at the loop. There are very interesting
loops going across this. But I think instead of using the Z modular broach that kind of gives me strength to
get a loop around this. I think I will just do
what we did before by just maxing out maxing out
regions where we need. Let me isolate this, clear this max out. Oh yes, let's just figure
out where this should be. Then we can let's see. Uh, yes. Let's do a max lasso. We can do a max lasso for this. So it's somewhere
around here, like so. Okay, I think definitely
somewhere around there. Somewhere around
there should be fine. Let's see. I'd like to
raise some of this. No, I won't do that. I'll
leave that in there, actually. Let me leave that in there.
Let me that in there. So this will actually
work out fine. So Shift F, control, no. Let me save this. So Control W to give that a separate
polygroup control shift click. Ships click again. Let's do let's delete
in first before we start smoothing things
out with deformation. So, let's go over
to deformation, polished by group,
polished by group, polished by group,
polished by group, polished by group, a bit more. Let's make sure
Dub sided is t on. Double sided is turn on. Okay. I think I need to make some adjustment down here
with the move brush, pull it down some
more deformation again, polished by group. Alright. Now, let's add
some cuts to this, so let's slice this down here, slice this down here as well. Okay. Yeah, it should help. So let's go to
Zima ZmchGeometry, ZmchTn of adaptive takes down. Keep group, keep groups, detect edge, targets
plicon, let's do two. Z masch. Let's check to see if there are any
issues around this. For the most part, no
issues. That's awesome. Then let's go do half of this. Check this issue. You see an issue around there. There's an issue around there. Don't do that. Let's get close. That's why it's important
to check this properly. I won't do this. Let me
Mark this out first, invert the marks,
blow the marks. Let's polish this do that. Polish this quite well,
it should be fine. Clay the marks. Let's go back.
Let me allow to save out. I would like to
make a duplicate of this also too,
like we always do. We as to fall back to
select the duplicate IDs. Now we will clean all of this up in a later video, actually. So, Bole just keep creating
the piece we need. So geometry, let's
Turn off for now, set this to 20 mesh. Then we can do, zero
mesh. Z mesh again. Z mesh once more. 500 seems fine.
Let's check a lot. Check this out. This is fine. Control W to give this
one single poly group. Let's go in and then make
this arm piece visible. It's completely hidden,
so that's fine. Let's do inflate
to bring it out. So inflates, inflate,
inflate, inflate, inflate. No, this deformation
inflates inflates. Just keep doing this until
we get something out. I think should be fine. Then we can smooth brush
and then just manually put things up and out
a little bit small. All right, out around
there also as well. Get close. Alright, that's fine. This should work just fine. Let's go and add
thickness for this. So let's add thickness. So dynamic sub dive
take down the smooth. Add thickness to this. Go close, increase thickness
a little bit more, a little bit more than add segment to this,
apply, subdivide. Yeah, I think this
does just about right. Take this down. So kind of
grab the next piece now. So I'll select this m and then
let's the duplicate of it, duplicate, hide this, go in
the heaped F, play this out. So now we just need to grab
the portion we need for this. I think this portion like
soap, all the way to the back. Oh, I think, no, no, rights
not in the right place. Clear this out. I
think it should be somewhere around undo that. Let's come down a bit closer. Yes, I think somewhere
around there should be fine. Go out of solo. Let's see. I think around there
should be fine, but it needs to be a
lot slimmer than this. So we need to make
modifications to it. Isolate that. Let's Okay. Oh, no. Ah, okay. I think I accidentally
hit something. Let's just just close up
and then open this up again. So we got our fight back. What I needed to do was to
erase some of this dynamic. Is a bit slimmer than
what we have here. So go down control and then all do that, we
use the bros size. So we just need to just
clean some of this out some more Okay. That's fine. So no, Shift F, Control W. Give this one single polygroup
which is what we need. Then Control Shift select. Then let's delete ding. Delete ding. Let's go over to
deformations and then polish this a bit more. Make sure W steroid
is turned on. Okay, a few corrections
I need to do in here. So with the move brush, with the move brush,
I'll move this down. Move this down down
as well. Down. Okay. Then back to deformation. Let's polish this some more. Okay, it should be fine. I
should work just fine. Okay. So now, those things kind
of separate them out. Oh, I need to bring
out my slice cough. Let's create poly
groups for this, one, one, as well. Yeah, as well. That's fine. Then we can
subdiv then we can merge this. So let's first de duplicate
Let's de duplicate of this. So duplicate, this. Oh, it's about this
one we actually need. So in the next lesson, we're
going to carry on and then make some more
modifications to this. I case, I'll see you guys in
next lesson. Bye for now.
54. 53 Base Hand Glove In Zbrush: Talking about guys. We're
still working on this piece. I think on this
now chapter we can actually round things up a little bit more and then
move on to something else. Okay? Or rather move on to
adding surface detail on it. So we've already
kind of separated this outline two
different pol groups, so it's now up to us to kind of give what kind of zero mag this and get better
topology out of this. So the same repetitive
process actually detect edge keep groups, and let's start with two, then zero march check this
around just to be sure. Okay, we see an
issue around there. It's an issue around here, so I need to mark this part out, invert the marks blow. Let's do a polish polish by groups again on those
parts a little bit more. Okay, clear out the mark let's zero match this
again. So zero match. Let's go off. I feel
there's an issue here. Strongly feel like
there's an issue. If I should mag this out again. Let's do Polish Polish. Yes, I knew it there's
an issue there. So we need to undo this I would go in and then grab all
of this around here. Undo that invert the marks, blood out. Let's do polish. Undo that polish by clips edge. Then do polish, polish again. Let's see. Now, let's go in and then zero march this again. So geometries zero
mash don't do that. Turn on this. Let's say this
to two, then zero mash. We're still having that issue
in there for some reason. You having that issue in there. Let me just grab this
grab all do this. Let's use the max
last one instead. Grab all of this,
add these to it. Invert the mark blow this out, and I'm going to polish by
group, polish by group. Then go back to geometry. Let's make sure that
this same issue is not repeating on other parts. Let's make sure repeating
on other parts. We see one also around
here. Repeated around here. Invert the max polish this there is quite a lot
happening here actually. I see also if there's something happening
around here also as well. Polish by group, letting out. Let's do a general polish by
group for the entire outing, so it can expose regions
where we have the echelon. Okay? Then we can do let's do Zi
mesh. Okay, that's fine. Zepino's fix the issue for us. That's cool. So now let's
go out of this Z mesh. Let's do Z mash again, 431 pool counts, which is fine. Control W. Give this
one single poly group. Okay? Now, let's
polish this a little. Okay, bring everything back out. Let's make sure the
body is visible. The arm is actually visible, so. Let's go to our sub too, make the arm visible. Then let's inflate. Polygroups deformation is
rather, let's inflate this. Okay? One more should be fine. Then we can manually
move things. Let's polish this again, rather inflate this again. On the move brush, we can move things
out some more, move out some more. Let's see how this is. I think we need to pull this in around some
more, get this in. Then generally leave this up a bit a third more out some more. Up in coming close. All right, less
thickness for this, let's go over to let's
go over to geometry. Dynamic sub dynamic
take down the smooth, increase the thickness for it. **** F. Let's see if this thickness
should be enough. Yeah, this thickness
is actually fine. Thickness is fine. Let's
do segment two, apply. Then still on the move brush, we can move things in, reduce the brush size
a little bit more, push things in all the
way on the other side. Push in push in some more Okay. That's fine. Yeah, this will work just fine. So there's one we need to do, so I need to get close. I can see this on this band, there's a bit of an elevation. So I need to get the
elevation in there. And for that, I will
need to extrude. There's a piece, I will need to extrude out actually for it. So it might get a little
tricky here because I need to start selecting some part of this so let's
solo this out first. Okay? Control Shift click. So we would need I think
all the way, let's see. Okay, we can do this loop. So Bus hopefully
we get this right, but I'm not going to use a more friendly
approach for this, so we can can do this
a bit more correctly. So let's see first, we can do the friendly
approach would be just to mesh single pul figure out where
that should be first again. We can do, we can do
from around here, so I'm just going to do. Okay. And then just grab all of this. Think of the way
here should be fine. Then put all and drag through. This one is a bit more easier, so I don't run run
into issues, do that. Okay? All the way up, all the way up, stop here, okay? Then I'll surround y. Undo that here as well. Then let's do Control shift. Click on this. Let's bring
everything back out first. Control shift, click Move
brush, Control Shift, click on. Oh. Great. Get a
bit tricky here. I'm just trying to
select the whites. Yes. This is fine. I we need to go back to
Slice let's slice cove. Skip, keep the neurontinm
select this select wreck. Involve this. Okay. Control shafts click. Control ships undo that
control shafts click. Control W. Come on. Move this aside Control W to give you a separate
Pulley group. Okay. Control Shift click
Control Shift click. Control Shift click, do that. Okay. Do an auto grouping
here. Let's see. Control Shift click. Yes. Yeah, that's fine. So now, let's do an
auto group in here. So auto group, photo group. Yeah, this is precisely what
I want Control Shift click. Control Shift click. Invert this Control W. Yes. Condo that Control W again. Give it a completely
different color for it. This is precisely what I want, so I just need to extrude I just need to extrude this out. So we can easily do that
we can quite easily do that with less than extrude. So extrude instead. We want to extrude
a flat island. FlatulFlat island,
flat flat island. Poly group island instead. So poly group island
instead is what we need. So we just come in and inflate this
out a little bit more. So around should be fine. Okay? This we can work with heat F. I don't think I
necessarily need to add loops across this Y because
if you have subdivided, let's go to geometry
to subdivide this. So you should be getting
something like this, which is pretty much the
look I'm going for actually, something like this
should be fine. So let's bring
everything back out. Except is undo that undo that I think I made it way
too high, it's way too high. Let me get this up a little. I shouldn't be too high. Then Control **** click on it. I'll squash it. Undo that. Let me center it, squash Undo that symmetry
todo for this. Let me orient this. Try to orient this
the way it should be. Turn of symmetry now. Squash this this way. Squash this this way. I think symmetry was turned on. That's why we're having issues. Bring this up a little
bit more back out. Okay? Squash this in some more. Okay. Bring this down some more. All right, clear this
out, Control D. Okay. I think I think we went a
little bit too extreme. But I think this
is actually fine. We also need to kind of add an edge loop somewhere
around there should be fine. Control D. So those helps shape a little bit
more and do that again, let's add an edge loop
around here and here. Control D, Okay. Let's bring everything back out. Let's see what we get. Yeah, this is pretty much fine. Undo that ship theft. Yeah, I think this
is fine. This we can definitely work within here. So back to the move brush, out all dots like this piece, a move brush, increase the size, take down the size. And we also need to move this up just to compensate for it. Okay. Yeah, that's
fine. Clear this out. Yeah, this is fine. This will work just fine for
what we need it for. Yes, I think in a good place, select this, get this
down down as well. Down. Okay? That's fine. So the next step would be
to merge all of these down. So we need to merge all of
them down a single piece. So that's what we
need to do next. So let me go in select let's start with
the lowest lowest one. Make sure that no
delete her shifts, select to send this down. Go to the next piece. Make sure that no sub divition
level in there. Okay, there isn't any sub
dilution level in there. Old shifts, send this down. Okay, so we can
select this two now, we can merge it
down, meagre down. Select this. Make sure there
are no subdivision levels in the delete On shift. Send it down. Select this. Is there any subdivision
level in there there's none Oder shift, send it down. Okay? So we have this
and this and this so we can merge of these
downw measure down. Awesome. Select this. Check if there's any
subdivision level in there, delete ayer Od shift,
send this down. Okay, select this. Check if there are no
subdivision level in there. That's fine. Send it down. Wow shift, send it down. Then we can select the top one, me down, mese down. Awesome. Then the other
piece is a bit messed. All of this is messed up.
So we need to fix that. We just do mirror and weld. So geometry, modified
topology, mirror weld. Awesome. So let's go
and then hide this arm. We don't return anymore,
so let's hide that. Let's go in and turn
on the main body. Okay? The arm is still visible, so we need to make
sure it's hidden. Okay. Is this selected actually. That's why IT visible. Let's select this instead. Ship F, this is fine. So now we have this piece in
here now exactly the way we want it to be and where
we want it to be also. So now we can subdivide this control D. So with
this subdivided now, we get this in here,
which is fine. So we also need
to go in and then make some modifications
to it and then add some leather
material to it. And, most likely, I think we can do that I'd like to add
some pattern in there, but we can easily do that
instead of substance painter. Okay? So this is fine. I'll
see you guys in the next. Let's talk. We need to make
some modifications to this. Let's start by doing
an auto group. Auto group. Then
Control Shift click. Zoom out, turn on symmetry,
symmetry turn on. G turn on symmetry now, gets in close, gets close. Then pull this out. All right. I think we're fine. Okay. So now we
just to get this. I see issue around
the opposite side. I need to move the other side, I can see some of
the spoken out. Okay? It the max. Get in close. I think we need to do
both side independently. Okay? Control Shift
click. Get in close. Pull out out. We can push this back in
closer to the skin. Okay, goes out to the skin. Yeah, well, because it needs
to be touching the skin. So let's just get this wrapping
tightly around the skin. Freeze boss a little
bit more. Okay. Yeah, this should be fine. Let's do for the opposite side. Control Shift click,
invert the marks, and then let's push this in. Okay, that's fine. Yeah, this is fine. So this
we can work with in here. So in the next lesson, we'll start doing some surfacing
detail on top of it. I'll see you guys in the
next lesson. Bye for now.
55. 54 Ear Metal Loops Details In Zbrush: Right. Welcome back, guys. So
in previous lesson, we kind of finalized on creating this glove bond piece, okay? But I see some few things
I would like to do. For one, Oh, let's see. Internal symmetry for this. I would like to push this back in some more.
Okay? That's fine. Okay. What I would like
to do would be to add some beating up metal
look for this year loops. Let me go up a bit more. Select these loops, so
load them, frame into it. This year loops in particular, so I would like to give them
some beating up metal look. So let's subdivide
this a bit more. So to do that, I would like
to subdivide this some more let's do one more. Then I'm going to create a
layer for it, so great layer. And I would like to do this
symmetrically, I believe. Yes. Let's do this
symmetrically. So ton of symmetry for this. Think you're in the same place. Yes. Okay? So I'll use the H polish bros. Let me
state this to them standard. Then H polish. I'll take down the intensity. Okay. Just brows it
a little bit more. And I'm just going to tap across this just to break up
the look some more. Okay? Or across this also. So I'm just using this just to break up the surface or more. Now, it's fine to do this completely symmetrical,
that's fine. But at the same time I don't
want this to be too extreme, so that's why I'm using
the low intensity for it. Alright. Get close. This is going to make it
look a lot more interesting. So you shouldn't be
getting a surface that's too flat and too clean. A little a little breakup
should help these by lots. Okay. So we need to go across most of the surface actually to
get this to look right. Let's do this from
the side view. Okay. Move up some more. So it should also be affecting the other side instead of doing
this symmetrically, which is precisely what we want. Okay. Move this up
a little bit more. No, we don't want to
go to extreme, though. Just on the surface
should be fine. So we're just supposed to go over the surface, and
then we should be good. Okay, so moving our camera
angle different area, so we can actually
see this a lot more properly and then
add surface details. Okay. Go over this
angle, get close. Okay. Yeah, this should help. I also as well. Okay, up some more around
these parts. Okay. I think we can brick symmetry now and go to the other side. Get close. Here interesting. We're getting something interesting
on these other parts. There's the gentus moons on regions where was
a bit too extreme. Okay. Make sure we symmetlytn off. Yes, ultimately turned off. Smooth this down. So
extreme, smooth this down. Smooth down, smooth down. Okay. All right. Then let's start doing the
breakup also around the air. Okay. This part is a bit
off. Let's smooth this down. All right. Go to the next piece. Get an angle to eat. Okay. This we need to
smooth out some more. A bit a bit too extreme. Beat this up a bit more. Gets closed around el
so should be fine. Okay, undo that take
down the brrse size. Okay. Here, that's fine,
also, as well. Okay. Put it to the side, increase the bro side a little bit more. Also. Let's look for these
smaller rings. Reduce the bros size. Dg that beating up. Look also to this, change the orientation for
the camera angle. Okay. Go to the one at the top. Be slightly gentle with this. Hs around here. Okay, here, hos as
well. Here, as well. Okay. Routt. Okay, let's do also a inward part a little bit more. I think this should be fine. Yeah, this we can work with. Let's bring everything back out. Even looking at this
now still kind of contemplating if I need to
bring this on down some more. Taking if I need to bring
this on down some more. You know what? Let's do a duplicate
of the horn and try and bring it down and
we probably push it back. Let's see the result that
gives off. So let's select it. Come over here Okay.
So form this in here. I'm going to the
duplicate this again. I'm not entirely sure where
I would like this to be, but let's just make
a few corrections. Let's sent out the orientation. Let's say we bring it
all the way to the back, do this tunnel symmetry. Move this all the way here. I think this is actually more preferable
place to have this. Tono symmetry, se let all
of this invert the max. Let's get this properly angled. We move this back some more. So it hangs on these der rings. Shift F. Escalate the mark. Let's do an auto group for this. Auto group, select this. Well, we can't just
move that in because we have actually scopted
details in there for that. I think there should be fine
actually. Play the max. Okay. But this we need to
make some corrections. Let me frame into it. The symmetry is
off. Think I need to mark all of this in the max, bring our selection in here. I move this this way. Okay? Maybe we should
hang it up here instead. Yeah, that makes better sense. So it doesn't feel like they
are both in the same place. So we can hang this around here. Yeah, I think around
there should be fine. Maybe we should
bring it down some more down some more around
there should be fine. Yes. Rotate it this way, some more, lift this up, get close. Bring this forward
down some more. Let's get in a closer
viewing there. Yeah, that's fine. Let's see. I think this makes
better sense, actually. So you can actually see
this loop some more. So it's not completely
eating with this on. So I think this we
can definitely work with. Okay? So this is fine. So in the next lesson, we're going to work on this bond piece instead
a little bit more. So I'll see you guys in
next lesson, bye for now.
56. 55 Hand Glove Surface Details In Zbrush: Oh Alright, so
welcome back, guys. So the previous lesson, we kind of adjusted
the head horn. So now we can work on the
unstrap leather piece. Okay? So let's do
some work in there. So I'll go over to I'll
select it to begin with. So I'll go over to sub two. I'm going to subdivide
this a bit more. Let's get something. I think
2 million should be fine. Let's test that out by
I think we need a bit more. Let's test this out first. So let's go over
to standard brush. Light box. Let's go to Alpha. Okay, let's use Let's look for a leather alpha
in here that we can use. Okay, we have tib
then flip skin. Let's go over to Flip skin. So we should find something
leather like that we can use in here. Okay? So we have the sun
damage too neck. Then we have the skin. I think skin seems we can
see leather risk in here, so Leader risk, we can use this. Let's double click on that. Let's just test
this out in here. I'll go over to stroke, set this to drag wreck I'm
just going to drag this around here just to see if we have enough
resolution holding this. We do not do that, so we need to subdivide this
one more. Okay, that's fine. 11 million should be fine. Then let's say this
back to default, okay? What we need to do is to start, let me solo this out start
by creating edges around this loop edges around this
what I want to start with. To do that, let's
use underbrush. Look for sm brush in here. I look for a sm brush. It's no less trying to
create seem on the edges, so we need a seam
brush for this. We can use this on this. Let's look for a good sim
brush we can use for this. Okay. Well, let me just
use this instead. No. We need something
that has some kind of not threading
in there actually. So let's try this on.
Let's see what we get. Yes, this is interesting. This we can definitely
use do that. So we need to create
layers for this. So let's create a layer and
name this layer to SIMs. Let's do all caps for this. Okay. Shift F. Yes, that's fine. Let's
make sure we're doing this symmetrically. Symmetry turn on. So I'm going to take
down the intensity of the brush and let's do
the second Control shift, click on this.
Let's isolate this. Is is isolating just one part. Let's fine Control
shift, click on this. Go to the lower
subdivision level, get enclosed on
the opposite side. Invert this. Shift F, let's give you the
same polygroup. That's fine. Let's
do the same also around here here also. Symmetry Tondon already. Tonal symmetry,
inverted selection, give you the same polygroup. Okay. I want to
shift click on this. Here as well, inte, give you the same polygroup. It this same polygroup Okay. This also inverts
same poly group. I think we should
be good now so we can control Shift Click on this. Symmetry turn on Shift F. Let's go to the IS
subdivision level for this. Is the IS subdivision
level for it. Okay. I think I need to
smooth this part out. It's looking a bit odd. So I'm just going to do a
gentle smooth around there. But that part is still
going to be covered up, so I don't really matter. I'm not doing that
so we can avoid any weird baking we
have in the later on, unless you increase the
ablation level. Okay. Shift F. All right. That should be fine. Now, let's add s across this, so I'm going to start from around let's go to the highest
subdivision level. Although that's increase
intensity a little bit more. Yeah, that's fine. Okay. This will work just fine. Feel like it's way too deep
actually way too deep, so. Take this down a bit
more. Do this again. Yeah, this should be fine. So we're just going to
go over around the edge. Okay. So we need to be on the
edge for this. Undo that. I don't think it's
straight enough. Let's come from around the. Okay? That seems that
seems a lot better. That seems a lot better. No. Get this in a Okay. Undo that. N something that flows
quite nicely across that. Undo that undo that. Undo it needs to be as perfect
as we can get it to be. Okay, that's fine. Then we can continue on Okay. You need to go over
crossing a Right. Undo that actually.
Undo that again. Okay. Undo that. Zoom out. I'm just trying to
make sure I do this as accurately as I possibly can. Okay. I need this to be on the edge. Come over on these parts. Undo that right. Yeah, that's fine.
This we can work with. We do also the same around here. Undo that, increase the blows
a little bit more like so. Undo that. Let's do this again. Rotates. Undo that. Undo that. It needs to be as clean as we
can get it out to be. Undo that undo that. Reduce the brush size. Undo that, reduce
the brush size. Okay. I think that's way too deep. Let's go a bit light handed. Os, that's a lot better. Increase the bra size
a little bit more. Okay, I think that
should be fine. Then we need to do
one on top of this. Around. Let's continue this on. Okay. Like so change the
angle of view. Okay? Here, that's fine. Then
we can cut this across. Continue across this. Okay? Then we can get this
all the way down around here as
well. That's fine. Yeah, this will work just fine. This we can
definitely work with. Also the asymmetrical
that's fine. I also on the opposite
side. Yeah, that's fine. So let's bring
everything back out. Let's go to the next piece. Let's do this piece instead. Okay. Go across Okay. Down here, change
the angular view, do that increasing broad size. Go across this. Continue it on. All right. Follow the same pattern across. Well, let's just continue on
from this around the. Okay? Undo that. Okay. Increase the bro surge
a little bit more. All right. We can just continue this on here and then just connect this. Yeah, that's fine. Bring your thing back out. Select this piece. Okay. Let's start from the back. Undo that, increase the
bright siidee some more. Undo that feels like we're
losing a lot of undo that. Something somewhat like so. Rotate this different
angle of view. Undo that B side is
way too big undo that. We use the bro side some more rotates Okay. Change this angle of view. Undo that. Increase
broad size some more. Okay. Find a way to connect this. Here, no, no, that doesn't
look right. Do this again. That doesn't look right. Let's
come undo that, undo that. Actually. Let's do this
from here instead. Okay? Undo that. That's a lot better. Then we can do one that comes across move our camera view, undo that move this along. Let me come in from
around the duzebr size. All right. Yeah, that's fine.
That should be fine. Okay, that we can do for this. Both of them is selected. We
just go and cut this across. Okay. Don't know why I just shrinks itself when we come
to a different edge. When we go to the bag,
it kind of shrinks its Anyways, undo that. Connect that up, let's do
also for the top parts. Okay. Rotate. Get this across. Brows just massively
increases on the edge. Undo this way too deep. Okay? That is way too deep. Just get this facing us
around here like so. Okay. Undo that. Yeah, so
it should be fine. Bring everything back out.
Let's go to the next parts. Okay. Yeah, I think it's around there. There should be fine.
Okay, isolates. Reduce the brows size. All right. Increase
the brows size. Increase the bro size. Rotates. Okay, increase the
brow size some more. Undo that, let's
repeat that again. We use the bro size. Undo that. We use the bro size. All right. That is
fine. Undo that. Continue this on. Let's come across this. Undo that that's way too thick. We use the brow size. All right. Then we'll just convert this up. Bring everything back out. Let's do the final piece. Undo, use the brow
size. Undo that. Reduce the bre size. Undo that. Undo that again. Okay. All right, continue this on. Change our camera orientation, increase the bro size. All right, come to this angle,
increase the brow size. Nds messing with my
view use the bro size. Okay. Let's confirm this direction
and then connect it. That's fine. Almost done. We can connect this. Undo
that brow size way too big. Okay. Yeah, that's fine. So we're
done with this actually. So just need to kind of add the leather texture on top of this, and then
we should be fine. So let's create a
new layer for this. So I'm just going to name
this layer layer to leather. Okay. And I need to
hide, maybe not. Yeah, definitely. You need to hide the first layer
we added in there. Then go back to standard brush. Let's use the leader, drag rack. Let's do under the
Alpha, modify mid value. Let's say this to 50 radio feed. Okay, let me give you
some moment to save up. Let's go back India and
continue modification. Radio fed should be at ten. Okay? Obviously we're too intense, so let's reduce the intensity. Okay? So I'm trying to get this with a particular
directionality to it. Here, as well. We're doing
it symmetrical that's fine. At this point, it's fine
to do this symmetrical. It's completely fine because even though we're
doing symmetrically, when we're texturing
the detectior will be broken up some more. Right, rotate this. Okay. Here, this should be fine. Let's get something
for the edge. Okay, that's fine. Bring
everything back out. Let's select another piece. Go kind of work on top
of it, that's fine. So we don't need to do
too much work in there. We just need to fill up
parts where we don't have this laid out texture
alpha in there. Okay. And I'm doing this with a
certain directionality in mind, so it should work
quite nicely in here. Smooth this down some more. Okay? Fill up the back
parts. All right. Let's go and do the next piece. Let's do this instead. Okay? Yes, this is fine. Move
on to the next piece. All of this sort
detail is going to make a lot of sense
later on when we start texturing it because the Cature map Aquatmp is
going to be derived from this. So this is fine. Let's just do something for the top also. The top part doesn't look feel neglected or at the edge,
it doesn't feel neglected. So let's fill up these parts. Okay? All right. Here, that's fine. Move
on to the next piece. So it's just the same pte
process, nothing too fancy. So I'm just going to
fill all the parts up. Okay, we've increased
intensity a little bit more. So it's a bit more a
little bit more obvious. Okay? Yeah, this should be fine. All right. Let's go to the
next piece. Select this. Come on. Control ship select, select, drag this leather alpha on it. Okay? Move to the side. Okay, same thing I'm going
to do for the strap. But I think we're in a good
list for this already now. Just adding something
for the top. Okay? This is fine. Alright, add one more year around
here, fill more the gaps. Select this now as
the final piece. Okay. All right. Yeah, I think it should be fine. Let's add something
for the edge. So the edge doesn't
feel neglected. All right. Let's do s for
the under part of the edge. Okay. Yeah, this should work just fine, so
this we can work with. I'll see you guys in the
next lesson bye for now.
57. 56 Arm Rings In Zbrush: Welcome back, guys. So in the previous
lesson, we worked on adding leader to
this hand glove. So in this lesson, let's
work on grab this. Let's work on creating
or are you adding the cylindrical
cylindrical piece to this. That's what we're
going to be doing there. It looks very much like if
you use actual reference, it looks pretty much like this, so this is what
we're going to in as a guide to block that in. So to do that, let me make sure. Selecting this now, let me go to lower subdivision level so we can work a bit
faster in here. Then I would use let's go to SubT this ferry
having a tiny ferry, police ferry having that's
buried inside of the mesh. I love the one buried
inside the mesh. I believe this is one
buried inside the mesh. That's the one. So we're
going to use that. Then let's hide
the body for now. Let's use that. Let's use the
arm that we extracted out. Let's use this instead. We selected, come on. Uh, I think I did
not turn it on. It's supposed to be turned
on, so yeah, that's fine. So, let's let's go over to B, we're going to be
using the cylinder. I'm going to drag a cylinder
around here to begin with. Okay. Then to move. Let's set the
orientation for this. Okay? Let's facing
this way. That's fine. Let's start by shrinking it down to the size
we need it to be. Okay? Then I'm going
to do an inflate. Let's inflate this quite thin. So we're going to go towards a negative
value for this, actually. So I'm pushing this
towards a negative value. Also shrink this down. Okay. So more Come on. Oh, I think I completely
messed this up. I sont shrink in the wrong
place, Itend this out again, then shrink this in again, okay? All right. Get
this front facing. Do this again. I need
to do a bit more. Yeah, I think around
this should be fine. Then I'm going to squage this
in a little bit more again. Then subdivide, do that. Oh, supposed to spit
this out first. If I was subdivide this,
let's spit this out so split on mark
points, select this. Control O, now, that
is not looking good. That is not looking good
enough, that's fine. We can easily fix that.
We can easily fix that. So let's go to deformation, inflate this, inflate some more, inflect some more, Control D. Okay? Let me isolate this. Then I'm going to undo that. Squash this down this way. Yeah, yeah, that's a lot better. Let's inflate balloon instead. Inflate balloon,
inflate balloon, flat balloon a little bit more. Yeah, I think it should
be just about right. But we subdivide this again, start getting something
a lot smoother. Do that. Then let's go over
delete delete lower? Let's go to Sub to
send this down. Duplicate for it. The first
one, lets the one down. Then let's go to geometry, delete lower, bring
everything back out. So just to manually position the position it where
this weight needs to be, so let's get this
out, move this in. Rotate this up and down shifts. Rotate this rotates, get it in, down, squash this down. Now we're going to
do a lot of working here just to get
this to look right. I'm going to rotate it this way. Okay. Down some more
rotates, rotates. Okay. Get this out this way, scale this out some
more. Get this down. Let's see. I'm not checking around just to
make sure this is fine. But this can only be done a
bit more accurately by hand. So I'm just trying to get the orientation properly before
I start duplicating this. I think they should they should they should
more or less be fine. Okay, let's move
this out this way. Okay, then we can control
and drag this out. Okay. They need to
be quite close to themselves, quite
close to themselves. They should be definitely
touching themselves for one. Okay, move this up. Scale it down some
more, move this up. Okay, scale it down
a little bit more. Okay. Scale down a little
bit more. Drag this up. Okay. Scale down, up, scale scale down. Okay. Oh, I see an issue here, do that. Undo that. We definitely need to be moving
this undo that actually. I think I need to be
checking the opposite side, the other side also
to not just one side. Hold down control, get this out. Okay? Scale this in. Bring it down. Get this up. A new copy for this.
Let's undo that. Move this in, squash
it down some more. Okay? I think I need to select all of this and rotate a
little bit more this way. Yes. Yeah, I think that is fine. Yeah, that's fine.
So let's carry on. So Shift F, let's go down
and then do an auto group. Auto Group. Okay. Control Shift click on this
max this out invert the max. So down Control, get the
next piece up, Shift F. Okay. Move this back in. Scale this down, drag this down. Yes, I think this is
working just fine. Yeah, this is working just fine. Scale it out a little bit more. Okay. Move the next one up. This means to scale out some more because the arm starts getting thicker
around these parts. Scale it out a little bit more. No, undo that scale. Undo the scale
instead. Get this up. Scale this out some
more, move this back in. In this way. All right. Make a duplicate of this. Move this back in. In some more get this
touching this around here. Do that actually. S to be as neat as as we
possibly can get this to be. The scale this up
and that duplicates. Skill it out a little bit more. Skill it out a little bit more. Scale out some more. Push this in. Undo this, undo this push this in. Okay, then get a
copy out of this up. Okay. This we need to
scale out. Move this in. I think this should be fine. Get other copy up. Scale this up some more. So I'm basically checking this around just to make
sure all of this is working correctly.
Get under copy. Scale this out a bit more. Okay. Scale this out some more. Undo that old Control
drag this out. Okay? Yeah, that's fine.
Let's get this out. Make under we don't need
to go all the way up. You need to kind one more. If you still see what
we have in here. So let me clear this out. I feel like we need to make some
adjustments to this. For one, let's do an auto
grouping Control Shift click, select these three, the marks, max them out v the max and
scale them in some more. Okay. Something pretty much like so. Then select this piece. I need to push the
clothes out of the skin. Come on. Come on. S, increase brush size. With the move brush, let's move this in in all. Okay? Just trying to make
adjustments to the sem fits. Okay. Let's go back and select this. All right. Then shift F Control
D. Let's done inflate. I'm going to inflate
all of this, actually. Most of them should
be touching itself. Except note. Let's just grab all of the
marks this inviding marks, invert this inarti,
scale this down, bring this down even closer. Undo that. That seems a bit off. This way should
be fine. Rotates. Basically trying to get this
as neat as we possibly can. Then this we need to make some adjustments
to drag this down out. Okay. Scale it out
some more right? Bring this in here. Go back and select this, grab this out in. Okay. Go back in here,
clear everything out. Feel like I can rotate
this a little bit more, then push this back in. Just trying as much
as possible to get this as neat as possible. Okay. Select this.
Bring this down. Let's do a copy for
this. Bring this down. Let's do a cop we have,
what's it called? We have subdivision
levels to this. So let's ignore that let's
just drag all of these down. Drag all of this down. Okay. Now, we definitely
need to make a copy. So let's go back to
our subdivision level, go down, delete hier. Then I can duplicate this. So down control, get
a copy out of this. All right. Seems to make quite some
corrections in here. Like this, for example, the center move this this way, squash it down some more. Okay. That should be fine. Elongate
it a little bit more. Okay, let's go to undo that. I'm trying not to lose I'm trying not to lose the
directionality of the Gizmo. Let's put this down. You can grab these two. Invert the mark, select this, invert this, drag this down. Squash it down some more. Okay? Clear this out,
grab all of this. Bring them down some
more, scale it down. Okay? Oh, I can sanise on the
opposite side, but that's fine. Oh, then give you some
moment to save out. So basically, I think maybe
I won't use the move brush. Move. Maybe not. Let's just scale it
out a little bit more. Okay. I think this should be fine. Go back in here,
use the move brush, move this in undo
that get close, move this in some
more, get this out. Here, I think it should be fine. Select this, clear
the marks, subdivide. Okay. Yeah, this should should be fine. This will
work just fine. Maybe we need we need one more. Let's look at the main reference and try and compare that. Let's see if I need
one more for this. Okay? I think this should be fine. This should be fine. I'm trying to follow something that's a
lot more realistic. Now what is on the concept because even though we
have this in there, we need to use something that is is quite realistic in there. So it's important we still
use something realistic. All right subdivide this Yeah, this is fine. Then we can duplicate this
to the opposite side. So do that first. I do this smooth then let's mirror this to
the opposite side. Let's just mirror this
to the opposite side. So mirror weld. Okay. Then we can subdivide this. Let's go over and
turn over this. For now, let's bring
out the main body. Okay? Yeah, this should be fine. Okay. Yeah, we can definitely work
with this, so that's fine. So the next lesson was going
to go in and then start working on the Sanders
for this character. So work on the Sanders and then after working with
Sanders and we think we can now safely go over to Marvelo Designer and then
create this sketch for him. And continue with your piece, so I'll see you guys in
next lesson. Bye for now.
58. 57 Arm Rings Variation In Zbrush: Okay, welcome but guys. So in the previous
lesson, we worked on this metal and piece
or armor instead. So I would like to make another
variation of this soon. The variation I would like
to make in here would be something quite close to what
we have in here already. So let's do that. But I would like to keep things a little
bit organized for now just so I can
know where they are. So let's find this in here. Okay. So this is ten years.
I'm going to name these two. Let's use all caps for this. Rings. Okay, that's fine. So I'm going to temporarily
hide this for now, let's go to the I
belies the hum. Let's isolate this,
clear the marks, make a duplicate of it, get enclosed, and I'm going to grab I'm not going to grab grab grab the
piece I need for this. Okay? I will just do let's just
get this at an angle, shift F. Let's make sure we're using this slice
cove. All right? I would like to slice this
as perfectly as I can. So let's go slice
this around here. Then slice this also around. Let's come down around here. Okay. You can see how slice is
not completely perfect. Do that, do that. Okay. Let me do this from this angle instead. Let's do something straight on. I think we can work
with this with a few modifications,
should be fine. Control shift click. Let's go and turn on Double
sided for this. Okay. Here, that's fine. Go to modify topology,
delete Eden. Okay. I think this is fine. Under the formations,
let's go and then polish this make this a bit
straight on the edge. I think we need to do a
lot more on the top edge also because we might be
having issues around here, so let's just mark this out
invert the marks, blow. Let's do polish nod that. Polish this by lots, get something straight
going on in there. Okay? I think, we need to make
some modifications. Let's use the move brush. Ton of dynamic, use this. This is not completely straight, so let's get this undo
that looking straight, reduce the brush size again. Okay. I'll max out these parts, invite the mark below the edge. Let's go to our gizmo. Orient this gizmo. So the Gizmo is not
properly oriented. It's going to be an issue to actually straighten
this out accurately. So let's just try and see if there's
something we can do in it, get this to be straight. No, it's not going
to be straights. It's not going to be straight. I think we can see straight
things out later on. Let's just undo that. Let's do polish by group again. Okay? Urets zero marge
Before we zero marge, let's make a duplicate
of this duplicates. Okay. Let's go out so. Let's see. Oh, I think I actually made this longer than it needs to be. Yeah, I need to make
corrections to that. So it's actually longer
than it needs to be, so let's come in here. Let's do transparency. Okay. I think I can code this. Let's this better still. Let's do B CM Skip this. Let's delete a loop for this. Let's delete a loop
and we should be fine. So I can let's figure out which loop
we can delete for this. I think somewhere around somewhere around
there should be fine. So let's make sure one
deletes deletes delete, delete PulyopPuly Loop, okay? Undo that undo that. Okay, that's fine.
That seems fine. Okay, I think around
J should be fine. Just basically checking
just to be sure. Just to be sure if I'm doing
this on the write angle. That's fine. Let's
go to Tran dynamic. Let me change this
to them standard. Let's do an auto group in here. Poly group, AutoGroup
control shift click. This is what we need. Then
geometry deletes Eden. Yeah, that's fine. Tn of
transparency, solo this out. Okay. And I need to mark the top parts and then smooth this by using the
polish by groups. We go to the formations
and then just do polished by
groups a few times. Okay? With the move brush, let's
move this down some more. But we're better precision when we're working
with something lower clear this
out, polish again. Now, let's zero mash this. Geometry, zero marcher,
ton of adaptive, take down the adaptive size. Keep groups detect edge. Let's say this to two. The topology around is already
following paler patterns. I think that would also by itself help to create
something that flows in the same quad flow around this so this is looking fine. Let's go half of this. Okay? So we're at almost two
k. Let's do half again. I think 900 should
be fine for this. Let's test this out to be sure if there are no
weird edges to it. So let's just polish, undo that. There are no weird edges
for this should be fine. Okay. Here, I think
this we can work with. Let's bring everything back out. So I will need to inflate this. This needs to be inflated. So let's go over and inflate
keep inflating this. Okay? Inflate some more. Flit a bit more.
Okay. Almost there. A bit more, a little bit more. I think around here
seems like a good one. I'm noticing also down here that we kind of pushed it down
way too much, I guess. So we're still going to make
modifications to that also. Or probably actually
in the right spot, maybe this we need to
actually move down instead. Let's just keep flatting
this out so more I Okay. I think we just need to move it up or we can just delete
what we don't actually need. Let's do transparency. BM we can do from
around this loop. Okay? That's fine. Then let's do
auto group also in here. Let's go back to move Brush. Let's Auto group Auto Group. Control sheet click on this. Let's do delete Eden. Geometry deletes Eden. Just checking this around
again just to be sure. Undo that first, undo that. Okay, I think it just this. You need to delete
undo that. Undo that. Move on step forward again. Find a good angle for this, do that. Do that. Okay, that's fine. I think
this is what we actually need. Okay? So we can do
delete ding now, so modified topology, modified
topology, delete ding. Oh, that's fine. So move brush. Ton of transparency. Ton of this dynamic. Let's see what we are Okay. I think this would
actually work. And pull this out some more. Let's just do genera
inflate instead. Let's done a general inflate to deformation, inflates,
that's fine. So now let's go in and add
thickness for this song under geometry dynamic
sub div turn it on, take down the smooth, increase
the thickness for this. Oh, we have this
mirror to your side. Which is not really what
I want, but that's fine. Let's just leave it for now. So add more thickness to this. Okay. Shift F. Let's see, thickness
for this we added. If this is fine, or we need to work on it a little bit more. Okay. I think this
thickness is actually fine. So let's do one segments,
apply, subdivide. Okay. I think this is
fine. This is fine. We're going to move
this up some more Okay. I think pretty much around
here seems fine. Get enclosed. Okay, extend this out some more. Dig this down, delete higher. Yeah, I think this
will work just fine. So but we need to
kind of add rings. We might need to add
rings on the lower parts. I need to add a ring to fold
this a little bit more or we can just create or we
can just create our own. But I think it's much better
if we add rings in there, so we can just go in and
then still come down. Let me shoot this down instead. We can steal one of these rings. Let me just duplicate for it. The duplicates Okay. So lo this shift. Let's go over this, take this down, delete higher. Control Shift click. Control Shift click on this
need to invert everything. So let's go back and select La. Great, do that. Let's auto group in there
first because this part Lao mesh these two mesh on top
are the same poly groups. So let's invert that, Autogroup Clear this
out Control Shift. Undo that. Control
Let's do select. Control Shift click,
Control Shift click. Invite selection. Come on. What are we having two in here? Auto group again,
Control Shift click. Yeah, much better. Then we can do deletes Eden. Let's do delete Eden, modify topology, deletes Eden. I go out of ILD or solo. Then we can properly position
this where we need this to be control shift click
on this to begin with. So this just needs
to be on the edge. It needs to be on the edge. Okay? Shring this down some more. Shring this down some more. Alright. Let's use mart
cap, gray instead. Now we see where we need to
make some corrections on, rotate this, scale this out. Just need to get this as perfect as we can
possibly get this to be. Okay. No completely there yet. But the other thing
we need to do now will be to select this. And with the move brush,
we can just force it in. I should just to make sure
it's lining up inside of it, so we can force this back in. Okay? Yeah, that's fine. Get this in. In as well. Yes, I think around
there should be fine. Let's do for the top piece now, bring everything back out. Let's do for this piece. Orient, lift this up, scale out some more. Orient it this way. As once you get it to
match in your other parts, we can now make modifications to it. So let me move this out. Go back and select
the wider piece, and then we can
properly align this in. Okay? Yeah, I think
this should be fine. Yeah, we can work with this. So now let's mirror this to the opposite side. Bring
everything back out. Let's do a mirror. Then we need to merge it down. So let me send this down first. Okay? Then let's
do a merge down. Let's make sure
that no subdivision levels on this.
Okay, that's fine. Then let's merge down. So merge down. Okay? So we have these two now merge down as
one single piece. Then we can subdivide this Okay. Yeah, I think a lot
This is a lot better. This we can
definitely work with. That's fine. It's fine. We can
work with this. So now the next
lesson, we're just going to let me save this up. Next lesson, we'll
start working on the Sanders for it for him. So we'll do that in the
next lesson, bye for now.
59. 58 Foot Front Cover In Zbrush: We come about, guys.
So in previous lesson, we made a difference
and amo vibration. So this is where we get. So today, we're going to
be working on or rather, in this lesson, we're
going to be working on creating the Sanders for him. So let's do that. I'm going to select
this Base mesh. I will do a duplicate of it. I think I have to let
me delete this one. I don't need this anymore,
so let me delete this. Okay. So duplicate
of this high dis, I would shoot this down Shift F. So I don't need to
grab. I just need to grab just this top part. So let's use let's use max
in two and just max out. Think all the way, something out the
way, should be fine. Now selects selects or demark the right hand
side. Control W. To give this a
separate poly group and then control shift, click on this to isolate it. This is all we need for this, so we can use this actually create the standards for this. We don't really have something based on the referencing here. Referencing here, squares is for the most part, good enough, but there's quite a
lot you need to do in here to make it
work because it's not quite definitive, so we need to improvise on it. Carry on. I would go over and then let's
do delete Edding. So let's go over to deformation.
No, not deformation. Geometry, delete ding vertices, we have sublbution levels in. Let's take down let's increase
sublution level actually. Delete lower and then
delete Eden. That's fine. To work just fine.
So now is now to begin to select and max out
regions we need for this one. I'm going to start with the Bs. Start with the Bse the core vsue for this. I'll start with that. So let's go in Shift
F. So in here, I want to be Let's
uses this way. Let's use the max lasso. So Max lasso is our friend
in here, so max lasso. I'm going to max out yeah, it gets a lot trickier
tricky here actually. But no worries.
We'll make it work. We definitely make it work. So I want to start by
maxing. Let's max out. This thing, should be fine. Yes, somewhere around
there, somewhere around there should
be just fine. Then we go on down defeats. Let's solo this. Yes. So now let's go and
use the Max Max pen, and this selects underpas. The select this
select, select, right? Oh, it's affecting the tops. I don't want this to
affect the top. Do that. Let's make sure do
side is underbrush, automaxin automaxin
automaxin automaxin back fix maxin, okay? I shouldn't be affecting
the back face of this, which for us, based on the
perspective you're looking at, this should be the front of
the fit I think around there, let's mark this part also marks the parts,
mark these parts. I was thinking to break
this up some more ou. But for now, ship F, Let's the duplicate
of this duplicates this Control W. Okay. Undo that. I think there
are better ways to do this. A a preferable way to do this. Oh, it needs to be on this since need to
be on the top one. So select the top one. Top one, we have the undo history for it. So let me send this down again. So we have the undo
history, undo this. Shift F, Control W. That's fine. Then we would isolate
it completely. Let's see. I'm just
checking this again, undo this bring everything back. I'm just checking to see if I think I think I
need to grab more. I need to max more of this. I undo that. Let's do the max last, so I need to max a little
bit more and a little bit more to hold this properly Control W,
country shaped click. Let's do it deletes Eden. Geometry deletes
Eden. Double sided. Double sided for this.
Okay. Close hole. Okay. That's fine. Now let's go over to deformation and polish
just a little bit more to kind of erase this
jag edge were having here. So let's do polish by group. Turn of the dots. Polished by group.
Yeah, that's fine. So yes, we're getting
something in here. So the next thing we
need to do now would be, I think it would be to create
or rather slice the apart. So slide to slice apart. So using a different brush to do to slice apart
so control shift. Let's do the where's it again. Trim trim co fam cove and we'll just do around here. Yeah, should, this will work just fine. So
this is what we need. So yes, so we go back and
then go out of isolates. Okay. Let's bring back the
duplicate of the fit we had. Let's make the
duplicate visible. Then we need to start
moving sins in a bit more, so I would like to can I smooth this out
to begin with yes we can? So let's smooth this
out. Okay? C to folate, then we start pulling this out. We need to pull this out.
It's a bit weird do that. So let's dynamige this first. Let's dynamage this Control W
and let's dyna mesh for it. So we get better
topology to work with. Not the best topology, actually, but something good
enough to work with. So let's go to dyna mesh. All this at 1:20. Let's
see what that gives us. So we want to look at the
pulicunt for this dynamesh. No, that's way too dense. Undo that that's way too dense, we need to take down
the resolution value. Let's do a value of ten. So it is a value
of eight is fine. I think eight works just fine. So let's go out of folates. Then pull this out. It's pulling out in
a very strange way. Dynamze this again. Those drag a selection out. Those dragging marks
out, I would dynamsh it, so let me move this a bit drastically first to invite the
mark below the edge, bring everything back out, use our gizmo and pull this out. Okay. Center this put
this out some more, clear the mark, smooth this
down, smooth this down. So it's just now a
matter of trying to make this fits a
bit more accurately. Reduce the browse size, Dynamize this again,
smooth this down. Same time we have weird topology around this, wed pinching. We're going to dynamih it
and then we should fine. Dynamo smooths out. Let's get this out. Get all of this out as well. Okay? Pull out,
smooth this down. Pull this out as well. Put this down. Okay. Go to the side, pull this out, smooth this down,
pull out some more. So yes, this is just the part we need to do some extra work just to get
it to look right. The main part, we can just use the same method we use
for the handglove. So it just needs
to have something clean enough to work with first. Okay? Let me use the intensity
of this move brush out. Yes, I think around
there should be fine. So we need to make this look a lot better. So let
me smooth this in. It needs to feel a lot more like actual an
actual shoe cover. So that's fine. We can go over clay brush and then we build a shape
around the edge. Something somewhat like so. The smooth this down. Smooth this down. I'm just trying to
get an angle to it, trying to get a
flat angle to it. Smooth down. Smooth down. Yes. I think this will definitely
work smooth this down. Okay. Let me make sure this is what
we need smooth this down. Okay. Add a little bit more to fill this part up the smooth down. Alright. Smooth down.
Check this again. I'll use the edge
polish and then just polish this edge do
the bit too extreme. Polish it, smoothes down. Okay. Smooth this down,
smooth this down. Smooth down. Smooth down. Okay. I think we have this
where we need it to be. Okay? I'll do transparency. Let's just see the fit inside of this and see if we can make
more modifications to it. So we can with a move brush. I'll just push this clue. I'll push this Come on. Is not pushing in
ton of transparency. Something feels off. My moving brush is no longer
working. That's stringe. He's working on this side. Why is not working on this side? For goodness, why
is not pushing in? Something seems oddly wrong. Let me go back in and then
turn off Bface Maxine. Yes, he's working nothing. These work from the
backface Maxine. So I'm just trying to push
this in some more Okay. Here, that is fine. Okay,
polish this smooth out. Alright. So now we can now easily cut out the part
we need for this shift F. So I would just let's start by doing it
duplicate for this Because might just
need this duplicates. Okay? Yeah, that's fine. Then we need to grab this
portion now out of this. Let's see. Okay? So I'm going to start
by doing a slice cove. Let's do a slice cove instead. I still like to maintain
the polygroups in there without flattening the mesh out. So let's do a street
cut down here first. Okay? Yes, sin need to make
it a bit more accurate, so I need to push
this down some more. Let's use the move brush and pull this down a
little bit more. Okay. Then do slide go again around think around all
the way, should be fine. Let's see. Yeah, that's fine. That's perfect. Actually. We
can actually work with this. Then I'm going to Control
Shift select this. So now we can see how we get at least a ship now going on for us, which
we actually need. Then we can now continue on and then slice of parser
we don't need. The tap on the oats and I'll just do something
around here. Okay? Yeah, that's fine. We needed an good sweet. Okay. This we can work with Control shift control shifts,
click on this. Control shift, click on this. That's awesome. This is fine. Then we
need to kind of cut out. We can see this opening in here, so we need to cut
out the opening. That depends now if you need to cut out the opening on one side, or me the coat on both sides. I would like to make the
coat on just one side alone. So to do that, I will
just go, let's solo this. I think I think for, let's just do it in here. So we can either use
the max instead. We can use the max or
we can use the slice. Let's do the slice instead. Okay. Somewhere around here, double tap on the Os to
get a sharp angle to it, get this slanted
down double tap, get this down here. Okay. Awesome. So it's
affecting the opposite side. I think, which I don't. Okay, let's see. I think
we might Let's see. We have a reference
for that side, so I'm trying to figure out
if I need to keep this notes. Trying to figure out if I
need to actually keep this. Um, it's a tough actually tough. Actually a tough
decision. You know what? Let's just exclude
it on both side. Let's exclude it on both sides. You should be getting something
like this, which is fine. Okay, so this we can
definitely work with. So now I can go in
and do delete Eden. So geometry, modified topology,
delete Eden. Awesome. Seems like this is precisely
what we need, actually. This is precisely all we need. So what we need to do now
is to zero match this. Oh, we do Can we undo? Let's make a duplicate of this first before we delete Eden. Another backup, very
important. Okay. So control his click. This is all we need
precisely what we need. Then we can do
delete ding on this. Geometry deletes den. Then we can slice
this up so we get good topology around this
when we use zero masher, so let's add the coats here. I'll do another coats here. Okay. Then I'll do another
coats, as well. I think this should be fine. Okay, let's do one more. Let's do one more
coats around, as well. Okay. Yeah, this should be fine. So now let's zero merge this, so we'll go over to zero
Maser ton of adaptive, keep groups, detect
edge, take this down. Then let's set our
target polygons to two. Then So supposed to
mean two polygons, but sometimes doesn't really
flow that.Flow the numbers, you apply, you apply
in there, that's fine. Let's just zero marge this
and let's see what we get. Okay. Awesome. So we get
something quite good. Let's see, yes, so
let's go half of this. Let's do half of this. Woo. So the half of this completely reduces or squashes down the resolution we
have in there already. You know what? Let me control W, and then let's do half. Let's see what that gives us. H, let's see. We have Low Apo leucon, which is good, which
is what we want, except for the fact that it's kind of smoothing things
out way too mooch do that. Let's take down the smooth. We don't want the
smooth in there. So z match. Perfect. So this
worked just fine. So the smooth groups that was actually smoothing
things out way too much so I think for this,
it worked just fine. Okay, so for the first part of shoes of our shoes
is actually done. But we need to add
we need to add. We need to hold the
GB tightly so it doesn't fall apart when we do or not we kind of
smooth things out. So to do that busy, Okay, let's do one year, one also around her, one around year also.
Yeah, that should be fine. You can do one year, as well. That's fine. That's fine. The edge literally goes a
crossbars, it shouldn't matter. I shouldn't be too much
of an issue, actually. We can definitely
work with this. Or if we want also to weaken we don't necessarily
we need to add this extra edge loop if we feel like we don't
actually need them. Because once we add
thickness to that, it might still hold up properly. So let's just do that
instance. Let's do this. Let's on do. Let's test
this with thickness first. But before we test
with thickness, we're about to move brush. Let's go out of solo. Now all of this we
need to push down. We need to bring this down.
So let's just use our gizmo, extend this out, a bit
more pull this down. Okay, down should be fine. Ton of dynamic. Then do need to make fear
adjustments to this. So let me extend this out. Pull this out, pull
out also around here. Okay. Yeah, that is fine. Now let's add thickness to
this. Let's see what we get. So let's go over to dynamic. Okay. Take this down. Add thickness to this. Now
this is way too thick, so let's reduce that. Let's get something good
enough to work with. I think somewhere around
there should be fine. Let's add segments to this. So I'm adding two segments, which is let's increase
the value to three, but that would only add
two segments to this, so I think this is what we need. So if we choose apply this now and then subdivide,
so it's fine. We don't really need it to
add that extra head loop, so it actually holds
up quite nicely, which is precisely what we want. So let's take down
the intensity, the subdivision level
we added in there. Feel like I should
move this pull this down some more Okay. Down some more, just
flatten it down some more. Okay. Increase the brush size. Crease the brow size some more. Let's get this down towards
the skins a bit more. Put this down.
Okay. Lift this up. All right. Yeah, I think
this is a good place. Let's use the He polish and
then that's be too extreme. Take down the intensity, then let's just do something around there to
flatten this out. We still want to keep that slide on evenness on the surface, though, still want to keep that. Yes, this will work just fine. This will work just fine. Alright, so we can move on
to the next piece for this. I'll see you guys in the
next lesson. Bye for now.
60. 59 Foot Pad Cover In Zbrush: Okay, welcome about guys. So in the previous
lesson, we worked on creating this
front cover piece. So we're going to carry on and then continue
working on this, so. In this lesson, I'd like to make the sole piece
for this song. Let's do that. So to do that, actually a
few ways to do this, though. There are a few ways
to do this. So anyway, we still works long we get the desired result
we're going for. Okay. So yes, so I'll go over to let me let me first move
this down some more, okay? So let's use a flat plane. Let's use a plane instead. So I think a plane
will be just fine. So let's do delete a for this. Okay. Then go under this. All right. We can definitely easily
extract it from this and the movie.
Let's do that instead. Let's extract the soul
from this food base. So let's solo this. Okay? Play the max. Let's draw
out a new max in here. For this, I'm going to
be using the Max pen. So I'm just going
to create a kind of grab all of this down here. Okay? Yeah, this should be fine. Let's grab a little bit more. Okay. That's fine. I'm going
to duplicate the fifth, let's duplicate
for it, hide this. Let's work with this
selected already. Shift F, Control W to do
that, complete W again. Give it a more obviousl
in there. That's fine. Control Shift click. Then let's do it deletes Eden. Let's do deleteden
Mfatpology deletes ding. Make sure Wu side is done on display double side. All right. Then I'm going to use the deformation polish
polish by group, polished by group again, then that center
this squash it down. It should be completely
flat, absolutely flat. W something absolutely
flat, that's what we need. Yes, this is flat.
This we can work with. So you can see already have
almost base for the soul, but we need to make some
few corrections to it. For example, we need to push this forward a bit more Okay, pull this forward some
more polished by group. I'll need to squash
it down again. It should be completely flat. Like, so let's go
out of solo mode. Don't have this dynamic solo. Okay. Then I'm going
to bring it down. Let's turn on the fits. Let's turn on these
fits. I'll bring this down this way. Okay? So you can see we
still need to make some corrections to this. So with the move brush, I'm going to move this out
and fill up these gaps. Okay? I should extend out
even more, a little bit more. Okay? Extend this out. But you don't want to overdo this because there is this part, there needs to be a
cove around this part. So we still need to
maintain that cove there. I'm just going to
extend this out. Extend out. I think this
should work just fine. Let's rotate it this way. Then squash it down again. Center this scratch down
completely, sqratch down again. Should be completely
completely flat. I think this is flat. This is flat enough. Okay. Yeah, I think
this should be fine. Maybe just rotate it this way
and bend this in some more. Yeah, it should be fine
because I still need to I need to bend this in. I need to bend this in. So maybe we should do this
even now. Let's bend this in. Okay. Bend this in also. Defeat in there in some
more in all around here. Okay. Get this at a different
angle, bring this down. Okay? Yes. For this in, that's fine. Yeah, that's fine. This
will work just fine. So now we can let's move so, move this up a little bit more. Somewhere around
there should be fine. Okay, let's make a
duplicate of it. Let me solo this out. I'll make a duplicate of this, let me move this out
a little bit more. I would like to pinch
this in some more. Okay. Let's make a
duplicate of this. I'm going to duplicate
it, hide this. Then you need to do
zero match for it. 40 march, let's polish
by group again. Then we can zero march this. Let's go over to
geometry, zero march. I will take down the groups. I don't want to
smooth the groups, so I'll take that down, take this down, ton of
adaptive, set this to two. Then let's slice
this apart so we get so we kind of tell
Zi mash how we want our word flow to be so it should be flowing
in this direction. So, it should be fine.
So let's zer mash this OO and click on Zimsh. Okay? Also, getting
something quite clean. Let's do half of this.
Let's go half again. Okay, we have this at 400. Let's do one more. Let's
see what we get. Yes. I think this is way better Wave greater
control over this. This we can use, and it's all in Quarles which is
precisely what we want. So let's go out of the isolate or the solo mode and check this again to be sure if it's working correctly. I believe it is Se move
this in some more. Oh, I think way too much. I'd like to get this
forward a little bit more. Yes, like, so it should be fine. Go and select this,
extend it out some more. Okay? Yes, I think somewhere
around should be fine, a little bit more forward. Okay. Just checking to be sure if everything's
working correctly before I do anything
else. Yes, this is fine. Then let's flatten
this down again, squash it down again, Control W to give this one
single polygroup. Now thickness. Less
thickness for this one. Let's just go over to
dynamic sub div, dynamic, take down the smons
increase the thickness. This thickness seems
like it would work. Okay. Maybe take it down
a little bit more? No. I think somewhere around
here. Ship let's see. Okay. Yeah, I think this would work. But there's no now I like to do our Control shift.
Let's apply this first. Let's do two segments,
two segments for this. So let's drag this
segment three. I should have to loop cut across this so then we can apply it. Then Control Shift
click on this. I'll use the Max lasso, I'll grab all of this. Okay, Control W, get out a
separate Poly group. Okay? That's fine. So what I'm going to do now will be to bring
everything back out, control shift click on this. Then BCM, like to
inflate this in. Let's bring everything
back out actually. I think we can inflate this in. So let's do insets. Let's do flat island. You know, do that. We need to do poly group island instead. Okay. Let's see how much
of this we actually need. I think somewhere around
here should be fine. That's fine. Then
Control Shift click, Max this out in the Max
with the gizmo do centers. Then we'll pull this out. Just a little, not
too much, though. Okay, square this
down some more. Okay, Shift F. Let's
move this up some more. Let's see. Trying to
figure out if Ily need this Itly need this or not. But we generally need to scale
this up a little bit more. No, I don't think I need this. I don't think I need this.
Let's completely undo that. Bring everything back out, scale this out some more. Okay. Shift F. Let's see, Control D. Here, this is fine. This This will work just fine
for what we need it for. So do that. So now we can select this again
with the move brush, ton of dynamic, reduce
the brush size. Then we can push this in. Let's get this in.
I also as well. Pging out here. Let's fill that up by dragging this out. Okay. I think this should be fine. Push this in some more
more in some more. I think this should be just about right. Let me select this. Maybe we can move this
out a little bit more also to compensate for it. Out some more. You just want to be slightly genuine
by pulling this out. I think this should be fine. Yeah, this will work just fine. This will work just fine
for what we need it for. We can do something in here. So mark this lower part out. Then we can orient. We can do something like so bring this down
a little bit small. Just get a little bit
of slant in there. A little bit of slantedness in here should be
fine, I believe. And let's move this
up a bit higher. Yes, maybe too
much. Do some more. Okay? Yes, this should be fine. This would work just fine. Yes, this is the first step to second step to completing
this entire outing. So this is fine. So
let me save my file. Then we will continue
working on this. So let's see the last
piece we need to work on. So looking at this now, I see I see one piece in here. So this one that comes across
this way all the way up. Okay? Yes, we can do that. I need to make sure the two of these are visible, actually. So let's select this. Do we have a duplicate? Let's get a duplicate
out of this. Duplicate this again,
hide the top one. Isolate everything. Isolate let's just
visualize this alone. So let's start by
I think for this, I would like to kind of
unpaint this manually, introduce some manual
un painting in here. So I know it. Come on. Let's Let's go and change
this to marks pen, increase the bros size. Okay? So we have something
around here, no doubt. To begin with, then it comes across this way
all the way this way. Okay? Yeah, well. On the opposite side also, well. Okay. Then we see it's going upward. Let's see how far out this goes. Okay? We can say undo that, reduce the broad side
a little bit more. Okay, like so, this would work. We can let's grab
all these parts, get a shape around
here, like so. This is fine. Let's get the same
around here. Okay? All right. Now, let's sharpen this. So I'm not going to
s and tap on Oh, supposed to erase
the lower part, so let's erase the lower part. We can just go down
underneath it, increase the brush size, raise it out completely. Okay? All right. I erase what we had in
here, so that's fine. We can withdraw that again. Okay? Well, that's fine. All right. So yes, something pretty remote
like this should work. We can probably erase
this a little bit more. Okay. So let's go in and
sharpen this some more **** type
Control W for this. Yeah, this is fine, so Control, Shift click Control Shift
click inside of this instead. So let's do turn on
double sided for this. Display double side. Yeah, this would
actually work. Okay. Well, we'll make some
modifications to it later on, but let's just refine
this some more. So polish by group. Ton of the dots, polish
by group some more. Okay? Yes, I think this is this
will work just about right. Okay? Like to get this treating out some more
P by group. It is fine. So now let's add or let's
duplicate this and zero M so. Let's go and do a
duplicate of this. Let's delete this phase. Delete duplicate we
just made, select this. On shape, send this down. Make a duplicate now, hide
the duplicated piece, select the one that is down,
and let's die this up. So topology flows
in a certain way. Okay? Yes, we can do
around there also. Yeah, this should be
just about right. Yes, this we can work
with. So now let's go and then geometry, Z Z masher ton adaptive, take down the adaptive size. Okay? We can reduce this.
Yeah, let's reduce this. Let's set the value to two, then out and zero mash. Oh, do that. Forgot
to delete in. So delete d in first let's
do and do this again. Okay. I think do that we need this news a lot more.
I need some more help. So select this we can
do a slice like so. Then dot zero mash, F zero mesh. Okay, undo that.
We have an issue around we have an
issue around here. We have an issue around here. Let's go in. Let me
dice it this way. Let's Okay, save the tone of this, let's say this back to
two. Zero mash again. Let's do Zero mash. Um, no, I don't think
I'm liking this though. Undo all of this. Undo this. We have this in here, let's
make sure we do delete ding. I want topology that is kind
of clean, so delete ding. I want good clean
topology across this. Let's do this like this instead. Let's see what we get.
Let's turn this off, say this to two. Zero mash. Yeah, this feels a
whole lot better. This a lot better. Let's
do, zero march this again. So we have this now at 900. P counts at 900. Onto W, let's just do
same Zero mash, okay? That should mix do
that's zero mash. Okay, same zero
mash again. Okay. Yeah, I believe this feels a whole lot better
actually. We can work with this. Let's do. Let's see
what that gives us. Not just making
its way too slim. I think this should be fine. Yeah, it should be fine. This
will work just fine. Okay. So now we just need to go and
bring everything back out. Let's turn on the leg. So we can make modifications to this. We have a lot of modification. We need to make
to this actually. With the move brush, let me
start by moving this up. Thi should actually
cover most of this. Okay? Pull out bring this down. Pull out down some more. I might need to march this again, actually.
But that's fine. Let me push this out. Let's just get it out where
we want it to be first. Okay. I see a lot of mistake
actually made in here, so but that's fine.
We can correct that. This needs to push
forward even more. It should be sitting
just around here. Okay? So now let's get this
closer on the skin. Not the skin, actually, but
this padin we add in here. Should be quite close to
it, even touching it. We're still going to
extrude this out though, but let's just make sure
we get this quite close. Should be quite close. Get a good angle like this. Maybe not entirely touching it, but at least it should
be on it this way. Okay, let's extend
this part out. Okay? Yeah, I see it in a good place. This is fine. So now let's
let's polygi little bit more. So deformation,
turn on the dots. Polygslitt just to make the as kind of spread out
evenly across this. Okay, out down some more. Okay? Yeah, that's fine. So in next lesson we're
going to call Caron and then keep working on this
and get this to look right. I'll see you guys in the
next lesson. Bye for now.
61. 60 Foot Heel Pad In Zbrush: I. Okay, welcome back guys. In the previous lesson, we
created this padding piece. So we're going to continue. There's still a lot to
do in here actually, so let's continue on
and keep refining this. I would like to make
the leg visible linear, so I can make modifications
based on that. So for example, we need to
pull this out some more. I'm just going to pull this out. Okay? Here as well. Pull this out. Okay, up around
around there also as well. Here, I think this is fine. This has to be just about right. Then I think now we can
safely add thickness to this. Car thickness to this, I would
like to add a bit of cove in here so it doesn't it
doesn't feel boring kind of. Let's add some push up
cove in there and get this kind of flatten back
into this piece below it. Yeah, I think ya should be fine. Ya should be fine. So let's see if there's something
else we can do in here. Okay, I would like to create some more cove
around here as well. Okay. Do some more
cover around here. I'll do some more
cover around here, pull this out, drag this
to the back some more. Okay? Yeah, this should be fine. Then I need to do a little bit of polish in
there, clean to clean, stretch out the
surface squar in here, so it gets evenly distributed. Um, yes. Okay, now let's add
some sickness to this, so I would I would do, let's get this out. Let's just go back in here
and then do an extrude. So, yes, I think we can
add some let me move this out some more,
get that cove in. Okay? So at this point now we
can add thickness to this. So let's go back to
dynamic sub D. Okay? Then we take down smooth
increase thickness. Well, now this is way too
Take it down some more. Get enclosed, let's
increase a little bit more. I need to at least
a good amount. A good amount should be maybe
this is maybe too much. Take it down a little
a little. Okay? Think we are at a
good place for this. Let me move this in. Okay. Let's add segments to this. Let's do two. But we're going to set this
to three in here. So Shift F, so you can
actually set Okay. Here are three now, that's fine. Shift F. Let's apply,
subdivide this. Subdivide this is what we should be getting
which is fine. So undo the subdivision
level added to it. And then let's see. Let's start moving
since it's a bit closer it a bit
closer to the skin. Okay. Out some more. Then this sound needs to
bring down even closer. All of this now we
can bring closer. So she'll be just resting on the first part piece
we added in here, so move this in out some more. See if you should
subdivide this now, should get something on top of it this way,
which is fine. She's precisely what I want. Put this down some
more. This is fine. So let's take this down, delete. All right, so this is fine.
Let's create the next piece. So we created this
in word piece. We need to create it out to create it under outward piece. So the output piece is
going to be is going to be this piece goes
all the way inside. Okay. Yes, that makes sense. So let's do that. Select this. I'm going to isolate it for now, reduce the bro size. Let's duplicate of it. So duplicate. Okay, let it duplicates. So just to figure out
where it needs to be now, and then we should be good. So it should be
somewhere around. I think we can do
use the brows size. Make sure we marks
pen, we marks pen. Just need to do this as
accurately as we possibly can. Okay. This way, we can
reduce the browse size now, drag this all the
way in the air. I think this should be fine. Then we can collapse
this around the air, fill these parts up. Pretty more somewhere
around the and she's clean this a bit more. Okay. I think around here
should be fine. Maybe add a little
bit more. Okay. Yes. Around here also
control shift out. I do that Control O
dab to sharpen this. Let's go out of solo.
Let's see what we have. Okay. Yeah, this should be fine. Yes, this should work just fine. Just checking just to be sure where this needs to be, I think. I'm supposed to go to
extend this out some more, but let's extend
this out some more. This is supposed to be
extended out a little bit more so with the move brush, I'll lift it up some more. Okay. Yeah, that should be fine. Pop a little bit more around
there should be fine. Go back and select this. Okay? Yes. Yes. Just checking
just to be sure if I'm doing this correctly and then we can
extract this out. Okay, we need to make
some modifications here. We need to draw it out all
the way here, for example, and then push this in, reduce the bros size. Okay? Wo sharpen this out
some more.O through out, sharpen this more, okay? Yeah, this should be
fine. So let's solo this. Let me check this out
again to be sure if I'm doing this correctly, yes, I am. This is fine. So Shift f, Control W,
Control Shift click. Control Shift click. Okay. Then we would start by
doing a deletes Eden. Modified topology, deletes Eden. And let's go, and then we defer deformations polished by
group, polish some more. Okay. Make sure double seed
is on double side. Okay, while I'm here, let me just make sure the food itself double sd is torn on. I keep doing this
everything good time, I really duplicate out of it. So let's make sure double
salt is turned on. She send this down, D
duplicate of it, I duplicates. I think we should be fine. Let's go in and then polish
this polish this even more. Polish by group. I can ignore this. Let's
do an auto group for this. I shouldn't be a major issue. Autogroup should work just fine. Then let's do deletes
Eden, deletes Eden. Okay? So now we can
Z remerge this. Let's remerge this.
But let's first get, we already have even flow
around this already. So let's remerge this first. Let's see if it's
going to mess up our age flow for
this. I believe not. But let's just test this out
of adaptive, take this down, keep groups, take this down, set this to two, Z remerge. You see an issue,
there's an issue here. There's an issue there. Marks are out, invite the marks. No, let's even let's just do
it for everything instead. So polish by group. So you see issues around okay. You see one issue up here, one around here,
one around here. So I think if you
subdivide this n you should if you zero marge this should work
outs and zer march. Okay, then let's go F. Checking your numbers
in here, 800. See, we have this at 800. I think 800 should
work just fine. I'm Learning to get this.
Let's do A again. Let's see. More space in here, though. But we have wow
topology across this. So let's just do same Ah. Um, let's see. Let's do F. I think
we can work with this like this actually
causes not too much of a It's not too much of an
issue actually around there. So maybe we won't
do this. Then do same then run this again. Okay? Then do. Run this again. It's pretty much the give
know the same thing. Pretty much the give
know the same thing. Yeah, that's fine.
I work with this. Tisho be fine. It shouldn't
be too much of an issue. Okay. So now let's do some
other work on this. Let's make sure we
review the previous one, the main leg in there, and we can make
modifications based on that. Okay? I'm going to this
needs to be forward, this needs to come out
especially on these parts. This needs to come
out on these parts. So I'm going to get
it out this way. It should completely
be on top of it. Yes, it should be on top of it. So let's get this out
out also around here. But the parts will be inward. I should be inward. So something
pretty much like this. Get this out also as well. Okay. I think we can make
this work. Select this, pull this out around it to
accommodate for this piece. Okay. Put this out. Okay. That is fine. Pull this out also. I
think this is fine. The less artickness to this. So let's go over to geometry, dynamic subdivTurn this
on, take this down. Okay? Increase the thickness. Let's come close. Let's see how much
thickness we need for this, a little bit more
should be fine. Okay. I think you should be fine. Let me pull you towards
the skin some more. Shift F. Shift F again. Let's do three segments in here, then apply, then
subdivide. Okay. I think thickness
is way too much. Thickness is way too much. Let's take down the
thickness some more. I think somewhere around
here should be fine. Apply this again, subdivide. Okay? Yes, this is fine. Spartl is fine. Wood this
out, delete air Okay. Pull this in some
more O, some more. Okay, let me make the
move quite close. Okay. Put this in some more. Yeah, this will work just
fine. I work just fine. So we can continue continue on also with this would like to push this in some more glad this in some more because this part
is going to be covered up, so we don't want it to be put
footing out way too much. Let's get this in
a little bit more, especially around these parts. Get this closer to the
skin out some more. Okay? That's fine. I work just fine.
So the next lesson, we can create
another of the pits. But before we end
this lesson, let's create I see a piece around her. Let's create that soon.
I'm just going to select this and I'll do
duplicate for it again. Let's duplicate, hide this solo clear the
marks underneath it. For this one, I can
actually use the max lasso. It can move a lot faster or
faster with the max lasso. Let's bring everything back out. We can do this while
this is still on here, so so it's more or less like, Oh, I think I need
to do this again. Let's grab all of this. It goes in here also. Okay? Yeah, pretty much, pretty
much something like this. Maybe we should erase
these parts. Okay? Maybe not. We should actually, I think this should
actually be fine. This will work just
fine naturally. Let see, we need to kind
of grab a bit more. Let's use the max pen instead
and then pin in some more. Can solute this
now. Pin some more. We can erase a little
of this around there. You can erase a little of
this around there as well. Okay? You should
be like so Okay. Like so. Okay, it
should be fine. Control O, tap in the Control W Control Shift click unless the deletes Eden. So delete ding, modified
topology, deletes Eden. Then we can polish this. Let's just polish this some
more, tone of the dots. Polish this even more. Get something clean out of this. Polish a bit more. Then down, move this up, polish a little
bit. That's fine. Then we can do a duplicate of this, let us send
this down first. A she send this down, make it duplicate, hide this. Let's bring everything back
out. Let's see what we get. Isolate Alright, then let's
let's do zero match for this. So zero match Don adaptive. Take down smooth, take down the adaptive size,
set the value to two. Then let's zero match this. Let's go. Okay.
Let's do A one more. Yes, I think this should work
just fine. Let's do same. Let's do same. Okay. Yeah, it's work just fine. So let's bring
everything back out. Let's turn on the top fits. So let's go up and then make
sure that it is visible. Select the fits, clear the
marks, select this again. With the move brush,
we can move this out. Okay? Move, out, move this
out also as well. Okay? Move this out on
the opposite side. Okay. Move out around
there as well, right. Then we need to add
thickness to this. So let's do add some
thickness to this, go over to geometry so deep. Take down the smoons.
Let's increase the thickness for this or more. It undo that. Move the wrong button. So let's solo this. Let's
see what we get. Let's do three in here. We did for that's way too much. Three should be fine. Apply,
Shift F, subdivide, Okay. Yeah, I think this is fine. Take down the subdivision
level, delete higher. Then we can do some more
working here by pushing it in, which is in in some more
in around here also. Okay? Yeah, this one should
actually should be buried in. You need to buy it
in bury this in o? Yes, I think this
should be fine. I think I need to move this
in some more, get this out. Okay? Yeah, I think
this should be fine. Yeah, it should be
fun around here. So let's subdivide this
lesson where we get. Okay? In some more
in some more, okay. Take this down, delete
again. I think this is fine. So in the next lesson, we can
continue on and then keep creating the other piece kind of food, all of these together. So I'll see you guys in
next lesson. Bye for now.
62. 61 Foot Strap Pad In Zbrush: But guys. So in the
previous lesson, we kind of worked
on this EU strap, but we're still working on
the entire Sanders in itself. So let's carry on with that. So the next piece I would
like to create in here would be this piece that comes
all the way down here. So the same piece,
the same piece also wraps all the way to the back and sees something
somewhat like this here. I also wraps around
the back part. Okay? So let's create that. I'm going to select this. Clay any marks we have in there. Let's duplicate of
it, duplicate it. Select Okay, duplicates, okay? The old she send this down. So now, just to
use the mark spin. We're on the mark spin to just max out where we
need this to be. So let's start from the Let's start from
this side instead. So we should have let's see, should be coming on top of this. So we can do grizzy
brow size again. We can do some frizzy bros
size, hold down Control. Okay. On do that, reduce
the bro size again. Okay? On doo that, I think
we need to subdivide this fits, Dt lower. So we have better defined better defined marks in in here. Okay. Around here. All right. Now let's isolate it, then this should wrap do
that reducing brush size. So this should wrap
across do that. I need to get this
down some more. Okay. Then like so. Let's see how far it should be. I think somewhere around
there should be fine. Okay. Yeah, like
this to begin with. Then let's get this triangle
shape in Maxine parts. Maxine what part very well. Just make sure there's
no openings in between. Okay. Then we'll make sure
we go across this, so let's make sure
we go let's see. So this should go
all the way in here. Okay? All the way in here. Here, so, go out of isolates. Let's move this further in. Think all should be fine. And let's see what
we get to. So we're having something of this nature. So this will definitely
work just fine. I'm just checking just to see if I can refine
this a little bit more. Let's get this a
bit more refined. Okay. I think this should
be just fine. Maybe we should add a little
thickness around here. All right? Yeah, I think this will work. So let's go back out of solo and let's see
what we have in here. Yes, we can definitely
make this work. This we can make
work, no doubt. Okay. Yes, I think it to work.
So now let's go back. Let's go out of
isolate, Shift F, Control W, give that a separate poly group,
Control Shift click. Then let's do a delete Eden. So geometry modified
topology, delete Eden. I'm sure you guys
might wondering why I can't just
have this sauce, kind of create my own
customized UI for this. I don't know. I always prefer working
with the defaultyY Just prefer working with defaulty don't like messing around
with my interface. But if you like to mess
around with your interface and then create shots code
that's completely fine. But I always stick
with the default. So that's in mind, and then let's go back to
right let's go to deformation. It's the same repetitive pattern we've been doing all along. So Marks out the shape, refine the edge,
and then z mash it. So that's basically it. Let me just check this again
it is working just fine. Okay? I believe this
should be fine. This we can work with Let's
police a little bit more. I'm going to do
duplicate of this. So under sub two, let's duplicate, hide
the one at the top. Let's work with
the one down here. Then it's time for
us to zero maage it. Looking at the edge
flow for this, I think we might not
necessarily need to add additional polygroups
to this because it's just going to take keep
in mind the flow of the polygons already having
of our quartz in here and then zer mash it so
let's z mash it. Let's see what we get.
So go to geometry, Z remaher for adaptive
keep groups, detect edge. Take this down. I don't think we need any
smoothing for this. So let's set this to two. Okay. Take this down, take
adaptive size down. Yes, then let's zero mash. Okay. Now, it's kind of creating some gaps in here that we don't necessarily need. Let's see pulley counts
we have in there. Okay? This might be an issue around
here because it's creating gap that we don't use. Let's slice these
parts up first. Let's just slice the parts
and then Zimach this again. Slightly better,
slightly better. Control W. This one single
pool group. Let's do. Okay. I think this is not
completely not that bad, but I think this
will actually work. This will actually work. Even though there
are space spacing in here once we subdivide this, it kind of make up for the
spacing we have in here. I believe we're in a good place except if we want to kind
of add our own segments. Additional cutter cross
deserts completely fine. Probably we should. Okay, this is fine. This is fine. We should
come up with this one. Now, let's go out of isolate, and then we need to pull this out to pull this out and make sure it's
where it needs to be. So with the move brush,
let's even go over to Let's go over and
then turn on the leg. Let's turn on the leg for this. So let's make it visible. Okay. Then I would manually before manually moving this around, let's do inflate. Let's do an inflator
and get this out. Okay? All right. Somewhere around
there seems fine. Then we can manually
move this out now. Okay? Out out here as well. All right. Making
good progress on this also around the air
out as well around the air. But we need to make
sure this goes in. Let's reduce the
bro size and then come close get this in. Okay. Pull this down some more, push this in, get this
out a little bit more. Okay, I think that
should be fine. Let's look at this
now. I think, yes, we're making this
is actually good. Yeah, this one should actually wrap itself in. That's
completely fine. Let me select this and move this out some more to
accommodate for it. Okay? Yes, this would work. Maybe pull this down
some more, okay? Yes, this is fine. This is fine. This would work. I would say I think I
might need to create another strap that goes in here. Yes, so we need to create another strap that
goes in there. But at least for the most
part, I think this is fine. Checking this again.
So now, this is fine. Let's now add
thickness for this. Let's add thickness for
this move this way. Okay. So let's go over to geometry. Dynamics of the tonal dynamic, take down the smooth, increase
the thickness, some more. Okay. Do a little
bit more thickness. Shift F, let's see, add
two segments to this. All right. Let's apply this, subdivide,
let's see what we get. Okay. Yeah, this is actually
fine. I think this would actually work. I think this we can
definitely work with undo this, undo it again. Let me try this with
just two segments. Instead, let's see
what that gives us. Okay, Itting two
segments is fine. Setting this segment
out too is fine. Yes. Yeah, this work. So now let's go and take down the subdivision
level, delete higher. I'll just move
this in some more. Put this back closer. Okay? Then this should
be down. Get in close. To that off. Let's
move this closer. Push this in closer down in some more Okay.
Yeah, that's fine. You need to push
this closer also. Same here also
bring this closer. So you just making
a few adjustments in here and then
we should be fine. Yeah, this will work.
This will work just fine. Okay. So yes, let's move
on to another piece. We've kind of done with most of the pieces in here actually. But I think we need just like
we have this select this. I think we need
one around there. I also need to kind of
create I feel like I actually create another one
at the back parts, yes. So iso we need now and also the wraps
around there. That's fine. So let's start by creating one that wraps
around at the top. So yes, select hold OT
and select the leg again, and then we duplicate it. Hold on shift send this down. Okay. Let's add the original, and then you can just do this in here let me clear any marks
we have in there. Shift F. I think I can just
slice out the portion we need for this actually so
let's do around the A. And around here as well. Okay, it should be fine.
Control Shift click. So load this, this is fine. Let's do delete Eden, delete Ding modified topology, deletes Eden deletes Eden. I'm not checking if I'm not mistakenly do mirror and weld, let's polish this, go to
deformation polished by a group. So let's just polish
this a few times, okay? Getting close, pole some more. All right. And then let's
go on that geometry, Zero masher. Turn of adaptive. Detect k groups, take down
the smooth on adaptive size. Let's say these 22
out and zero mash. I feel like there might be
some issues around this, so let's check by using the
deformation polish by group. Okay, so far, we don't have any issues on the edge,
so that's awesome. That's great. So let's move on. Let's carry on with this
by I think we give more, I would like to squash
this down some more. Okay? Okay, that's fine. Then
let's do half of this. Let's go half 00 mash again. So we have this at 500
oligonsgia which is fine. This wraps around
this perfectly, so we can then go back and
make sure the leg is visible. So let's go and make sure the
leg is visible. Turn it on. Then let's do inflates
to get it out, deformation, inflates,
inflates, inflates, Inflate a bit more. Inflate again,
inflate this again. I think this will
be fine. So let's make show this is
the front view. I would like to more or less
pinch this down some more. Finish this down some more. Then let's do polish by group. This would be fine. Okay.
Go out of isolates. Now, this one might be more
thicker than the rest, so. Let's go over to
geometry, dynamic subdiv, turn on dynamic sub div, take down the smooth, increase
the thickness a bit more. Okay. I think it should be fine. Yeah, I think we also need
to scale this up some more. A little bit thicker
than it is right now. Okay? And then I'll leave this up some more up around here
should be fine. So now, I think we need a
lot more thickness for this. Okay? Maybe that's actually
way too thick actually way too thick Okay. As I feel like I don't need
to add more thickness. I don't need to add segment to this actual supply subdivide. So you should have something
smooth around the head, so do the subdivision level. Okay. And now we can be polish this a little
bit more subdivide. Okay. Okay. So now we need to start
pushing all of this back in. Most of this need
to push back in. So let me select this. Let me select this first.
Skill it out some more. Okay? All right. And subdivide undo that
subdivision level first. Let's do polish is way
polish is way too extreme. Let's turn on the
dot for the polish. Stick to extreme. I would
like to just smooth this out. Let's do relax, relax
value is way too more so. Let's go into the polish
and then use value of values instead to
zero. Let to 0.03. That's even way too much. I think I'm not going
to leave this way and we kind of subdivide,
so that's fine. When we subdivide, it's fine, but let's push all
of these back in. So first of all, I would like to merge them down together so. Let's merge all of this. As we saying pie
then it becomes a lot more easier for us
to kind of push them in. Okay? So let me select this. I think this should
be down some more. Okay? Just the stop part
should be going in. We just a bit higher. Okay? Let's start. Let's
do it manually first. Let's do it manually, so we have a little bit
more control over it. So push this in,
select this piece. Push that in. Okay? Down
some more. Select this. Pull the top part in,
select this again. This needs to go
in some more Okay. Select the next piece,
go in some more, use the brows size. Okay? You can select this and
then pull out instead. Pull it out instead
for it. Alright. Select this piece, I think
we need to get this down. Increase the broad size so more pull this down a bit more. Well out. W out. Okay. Yeah, this is fine. Yeah, this feels a lot better. Those see some corrections
they made in your bots. For the most part, I think
this is a lot better. And I need to move
this way, okay? All right. But it is obviously
way too thick. So we can let's do
Control Shift click, Max this inverting max. This even inverting inverted
the max. It the max. Let me sold this Shift F.
Control Shift click. Okay. Or better still, we
can inflate instead. So rather just deflate
this instead. Okay? I think this would
be a lot better than sink this into the mesh. Let's sink this into
the mesh a bit tighter. Okay? Once we add subdivision
levels to this, it will look a lot better. Okay? Yeah, that is fine. Yeah, I think we can work with move this down
some more right. Okay. I don't think we
can make this work. This work just fine.
Bring this closer. Okay. So now I think we just need to okay there's a piece we
need to get in here. There's a piece you
need to get in here. So let's see if
we can grab that. Let's do a maxing for that and then we should do that in
the next lesson instead. Let's do that the
next lesson and then fill out some other parts and
then we should be good. I'll see you guys in the
next lesson. Bye for now.
63. 62 Foot Sandal In Zbrush: O Talking about guys. In previous lesson, we
kind of created this cross sided strap and then this
olden edge on top of this. So this lesson, what was going
to carry on and then keep adding more adding some
more pieces to this. So let's do that. Let's start by adding a piece in here that goes all the
way up and then I'm going to and then I'm going
to finalize this adin that piece that comes across all the way to the
back around these parts. So let's do that. I'm going to select the
old and select the leg, move any new maxing
we have in there. Okay. Then let's
duplicate the fit again, send it down. Okay? Then I isolate it actually, I think I can let me just mark out where
I feel this should be. So let's just mark this
part all the way down. I think that's basically. Let's do it from this
side view instead. Set's make better sense from this side view instead
around here all the way up. Okay? This should be fine. Also maxima Shift F, Control W. Give this one poly group
control shift click. Okay. Then let's
do a delete ding. Modified topology, delete ding. All right, then polish this deformation
polished by group. Polished by lots.
Okay, that's fine. This is fine, then we can stretch it out
a little bit more. Let's just do some minus stretching here like
this will be fine. Okay. Then let's duplicate of this. So I'm going to duplicate
this just to have a backup, as my usual habit already is. So geometry, let's make sure we hides eating already
done that already. So geometry, Zero masher, keep groups, take down the
smooth, done adaptive, take down adaptive size, set this value to two, os and then zero remerg this. Yeah, that's quite a lot. Okay. Let's go off zero mash
Zm Z mash one last time. As now 300, 300 is fine. Doesn't need to be too
extreme, 300 should be fine. Now let's go out of isolate. I think it's right where
it needs to be actually. We can now just easily
extrude this so. Let's go over to solo this out. Let's go dynamic,
turn on demand, dynamic takedown smooth,
increase the thickness for this, add a bit more, get close, a bit more, a little bit more, go out of isolate,
let's see what we get. Okay. I think for this
part, we need to bring the pull this
out a little bit more. Sync around there should be
fine. This should be fine. Then we can just let's
do two for the segments. Apply divide that
F, let's see the. This is fine and do that
and let's push this in. Select this, pull this out a little bit more to
accommodate for it. Pull this in, in, select this. We can bring this out
more, select this. Let's create some more spacing between it to accommodate for it and do that increase bro size. Okay, pull this out. Let me get this to the side. So just trying to be a little bit more careful in here just to get
this to look right. Maybe smooth this down some
more. That should help. A little bit of gap in here, select this and we can
pull this out some more. Yeah, pretty much around
there should be fine. Yeah, this we need
to sink back in. So let's sing that back in. Okay? I think I will need to
degenerate out of this. We need to move in some more. Yeah, pretty much like
so close that gap. Okay? Yes. And I'll leave this part up. You need to kind of see more of the thickness on the side. Thickness should not
be completely eaten. Yes, pretty much so
it should be fine. So now we can finalize this by creating one fine
beside the back. So this piece here,
I'm looking at this, so this piece
should come all the and kind of you can allow it
to fill up this part also, too, fill up these parts. Fill up slightly this
part also as well. Yeah, that's what
we're going to do. So let's select this fit again. The duplicate. The
duplicate, send it down. Okay? Then we can start
makin' our senior, so let's use the max last. I think the mark last should
do a better job for us. So mark last so I'll
come up all the way. Yeah. Okay. Then slim this down all the
way down here and this way. Yes, this is perfect. This will work just fine.
This will work just fine. Let's see. I think we need to add we need to kind of fill
up this part a bit more. But this part is filled
out a little bit more, so we can fill
this part up also. Maybe probably because we
have this piece in here. I'm trying to see if I need to duplicate this piece here and
then get to around there. Yes, let's do that instead. That will make better sense, so I'm just going to
hold and control, drag it to the opposite
side, rotates orients. Okay, move this in,
rotates, undo that. There's no rotates in it. Bring this in here this in here, rotate this again,
rotate this way. How it's coming out
around this place. We can actually keep that. That would add another extra
bit of interest to it, extra bit of interest to it. Let's just move this undo
that rotate it this way. Okay. I think at this point, we
can use our move brush now to fill up the gaps. So we can move this up. Okay? Around Js should be fine. We can push this in. Okay? Yeah it is already
taking a shape and then feeling
sinking in in between. So that is fine. Let me push this back down. But that's down way to
Let me select this. Push this in, down some
more, select this. Okay? Bury this in some more. By this in some more way too
thick on this on this edge. So we might need to bring
this down even closer. Let's just do a mark
last one instead. For this, let's just max out this portion at the mark
blow the edge a bit more, then we can safely
just push this in. Put in there, that
thickness is fine. Pull down some more. Shouldn't be that thick. Let's take down the thickness
some more.Ge enclosed Okay. We use the thickness
for this some more. Just trying to take down the
thicknesses, not too thick. Invert the max,
leave this part up, clear the max,
leave this part up, up, some more, select this. Let's get this out
a little bit more. It's a little bit
more so we can see more of the thickness
picking out through this. Okay? At some more right. Select this. Come in close. Yeah, awesome. I think
this should be fine. Yes, it should be
fine. This also looks quite
interesting also, too. We also adding some
additional interest to this. So let's go back to this. That's not the one.
Let's add that. Let's go down select this. Yes, this is the one
we add the maxing on, so you should have something
pretty mode like this now. So we can kind of clean
this up a little bit more by adding Undo that. Let's go to Max pen. Okay. Yeah, we can do something
pretty much like so. Yes. Awesome. I think
this should be fine. I try see if I need to add. If I need to add
something around here, maybe bring this down and
extend this in here maybe. But I will make this
part way too busy. Select this. I need to
move this in some more. Okay. Yeah, this is fine. Let's go back and select this. Try and figure if I need to
have something here or not. For the most part, my mind is telling me, No, don't do it. Don't do it. As much want
to have details in here. You don't make
details way too busy. You want to avoid making
details that are just too busy. Making the entire merge too busy. I think this
should be fine. Shift F, solo this. I think we need to let's extend this out
some more as well. Go out to isolate
and that is fine. Control W for that.
Control Shift click. Let's do delete ding. Go down Let's delete ding for this modified
topology, delete ding. Then deformations,
polish polish, polish, polish tone of the dots, polish some more, get something
even cleaner out of this. Yes, I think this
should be fine. Lets poly juice a little bit
more. It should be fine. Less they duplicate of this, so duplicate this, and the
duplicate but for this, we need to add poly
groups to this, so this is going to help greatly direct
topology for this. So you get better
directionality for it. Okay? Yeah, it should be fine.
So now let's merge this. So let me save my five first. I haven't saved in a while. So down to geometry, Z marcher. You've same pedity process actually take down
the smooth groups, take down the adaptive size, set the value to two. Hold out, and then
let's z mach this. Awesome. This is the first one we did in here it's
atuly quite nice. Let's test this out to be sure, we don't have any weird
edge topology on this. Polish this. Let's see. You see, we have
edge issues in here. We have some edge
issues in here. So let me polish this again. So I suppose more of this Okay. Now, let's go back
into geometry. Let's zero merge this again. That's fixes. Let's
go off zero march. Sondra is actually fine.
Hundred will work just fine. At we go lower. Let's see. Oh as much as I would like
to keep this way too low. It's actually way too low. Probably we can keep this though. You know
what? You know what? Let's keep it. Let's
keep it. Let's keep it. So I want to go out of isolates. Control W this one
separate poly group. Okay. Then we need to move
this out where it needs to be. So let's go back and
turn on the leg. Let's make the leg
visible again. Ts on the leg. Okay,
make it visible. Alright, so do an inflate
inflates inflates. Okay. Inflats again. Now let's use a move brush and get this out a
little bit more. Okay. Pull most of these out. Okay. Out some more. But not outweigh too
much because some of this needs to still
be buried inside. Let's do inflate again,
inflates inflates, inflates. Okay? Move these out. We've moving things
out in here. Okay. We Move this back down. Move this back in. So at this point
now, we can safely add safely kind of
thickness to this. Let me move this in. I think we actually needed more
subdivision level for this. So let me subdivide this once. So we have this a 1,000. 1,000 seems like. I think I might
need to go back and then use the CSN
red we had before. 600 was actually a good
one, if I should say. So let's do that. Let's
do this by do this. Let's get Sison red back in. Let's get the SiSunRd Okay. Can we get sundred? Yes, we have one
more step forward. One step forward? No. Yeah, Cisnre. We
have Cundrad now, so I think this is the one
I'm going to work with. It becomes a lot easier just to inflate and then we move
brush, move things properly. Control W. Okay? Should have better control
over this inflated some more. All right. Then we can easily
move something out some more out some more. Then we still need to
move some things back in. Let's start moving most
especially the edges back in. Mostly moving the edges back in that in in also around there. Move this down down as well. Move this down inward, inward, inward as well, inward. Get this inward. You need to reduce
the bro size and then push this in by lots. Okay. Similarly,
also to this path, get this down down some
more inward, inward. Let's see. Come in close get
this down down also as well. Get this down. Down.
Okay. Get up close, push this in, reduce
the bros size. Okay. We'll do this in let's eat tiny bit
of polish for this. I'll just straighten out
the edges a bit more. Okay. Get this in. Yeah, I think that's fine. Let's Let's add
thickness to this now. I think before we do that, let me move this up slightly. Slightly. That's fine. Then geometry, dynamic sub div, turn on the dynamic subdiv, take down the smooth, increase
the thickness for this. Let's come to the head. Let's
see where we get hit F. I think this thickness
should be just about right. Now, we just need to
pull this out some more. Okay? Get this back down. So now we have at least lots
better control in here. Pull this out. Just a little more corrections there and then we
should be good. So down some more up a little
more up a little more. Pull this down. Use the
bro size, push it down. Yes, I think, I think
when a good place, let's fix the lower parts. Put this in, pull this in, and some more reduce the
bro size, get up close. Then let's get this out, select this, pull
it out some more, pull this out also as well. Okay? As as well. Go back to this
piece, get this out. Okay, I think we can get close, bring this closer closer. Way too much out. Yes, this should be fine. Just checking just
to be sure all of this is fine before moving on. Let's apply segment for this, let's do two segments, apply, subdivide let's
see how it gets. Yeah, this is fine. Except
we need I like to pull this up a bit more higher
than out some more. Yes, I think this is fine. Okay. This is fine. Do you have an api.
Something doesn't feel right. Shift F. Oh. Oh, I was wondering
like, what's that actually? Because it feels like enveloping
around this entire skin, that's fine. That's
just the fit. So get this out some more. Okay, so at this point now, we can start merging all of
this now as one single piece. I think we have something
interesting here to work with so we need to start
sending all of these down. So let's start with this.
Go to sub to old shift, send this down, select
this, send this down. Okay. Pull this down. This for the back piece. Let's start measuring
all of this down since this is what
is visible now. So let's measure
all of this down. Measure down right. Select this hold and shift, send this down. Select this. Making sure that are no
subdivision level in there. It's very important
to make sure they are no subdivision
level in there. War them at their
most basic form. Is the most basic form. You always want to check
send this down. Okay? No subdivision level in here unless merged down, merge down. Okay? Shift F. So we
need to select this. An subdivision level
in there's none. Awesome. So let's
send this down, O down shift, send this down. A sub dibutionnodn shift to send this down.
What about this? Any subdivision level there's no order shift to
send this down. Select this and then
merge down merge down. I believe we have this now. So Shift F, let's
see all of this as one single piece. This
is actually fine. This we can
definitely work with. So let's subdivide this now. Oh, before we subdivide, let's make sure we do
a mirror and weld, geometry mirror weld, so
mop topology mirror weld. Okay. This is what we have, let's
make sure we turn on. Let's turn off this leg for now. Turn off this leg. Let's go in and make sure the
entire body is visible. Let's make the
entire body visible. Okay. This is actually fine. Then we can now subdivide this. So let's subdivide so
this is subdivided, now, this is where we get,
which will work just fine. This is actually fine
this we can work with. So if you can do a test, let's do Bling material instead. So we're actually
going to make some should we say modifications
or adjustment to this. But for the most part,
this is working just fine. This will work just fine.
So let's get in close, and let's do Shift. Okay. Yeah, this is fine. So let's kind of add some
details and patterns to this. I should look a lot more better, so let's go down to the
lower sublution level, okay? So that we're doing
the next lesson. So thank you guys
for watching now. See you guys in next
lesson. Bye for now.
64. 63 Foot Sandal Folds In Zbrush: Welcome back guys. In previous lesson, we kind of merge all of this
piece together. So in this lesson, we start kind of doing some sculpted surfacing
detail on top of it. So let's get right to it. So to begin with,
we're going to need to subdivide this
a little bit more. Let's increase the
subdivision level for this, I'm just going to divide this. Let's divide one more. 8 million should be fine. B going to test that out. So let's go to standard brush. Let me check if I still have my Alpha and have the
alpha in here anymore. We need to test this out, though, for the most part,
8 million is actually fine. We don't need to go
to extreme with this. Let's just go to
Alpha and let's grab some let's grab some lead Alpha that we can
use for this song. I'll go over to let's see
what is winning year. Oh. Okay. We don't need wood
for this, so we need. Let's use the flip
skin pack in here. So I'm going to open that. And we have a few
leather textures in here that we can use. So it's all under leathery skin. Let's open this up. And
let's just test this out. Didn't test for this, so let's see if this
will actually hold. So it's on the
keyboard to go over to symmetry mode
and drag this out, get enclosed or undo that increase intensity
a little bit more. It's not really holding up. It's not holding up accurately. But it's not supposed to be a
major issue, actually, why? Because if you crank this
up now all the way up. I I crank this up again, it's just going to
be too many policons to work with 34
million polygons. It's definitely holding it's most likely hold our details in here. Let's go in and see. It's still not holding
our details properly, so I think the most
preferable way to go about this would
be undo that again, would be most likely
to let slow this out. Most likely to do the
leathering detail inside of Subtanpna. This is why we can't go extremely crazy years because we have too many parts in here, so it's just best to
just do this inside of sbtnpnter instead and
then optimizing here. Okay, so let's carry on. So what we're basically
going to do now would be just to do some fold
details around here, and then add some seam
lines across this. Sandra is going to
create a new layer. Before we create a
new layer for this, actually, I'm supposed to
make a duplicate of this. Let's see rename
this to Sanders. Okay. So name this to sounds. I'll make a duplicate of it. Okay. Then on these duplicates, I'll go to geometry, take all
of this down, delete ayer. Well you want this
in its basiest form. So is this duplicate we made
now that we're going to be working with so
Let's go over to, before we create
layers for this. Let's add some fod to
this, bring this out. Let me see if I can find
a reference for this. Nothing too specific actually, just to create fold. The idea is to create
folds in here because I believe while he is
working with this, this region here,
she gets folded in. Shift F. Let's go to
lower subdivision level. Then let's do Auto Group. I don't group ply
groups on the edges, so let's do Auto group. Symmetry turned on for this
year symmetry is turned on. All right. Control Shift click
Control Shift click, It this hoops, do that. Bring everything back out. Control Shift, let's turn
on, select rectangle. Control shift, click,
control shift click, invert this selection.
This is what we want. Let's go to higher subdivision
level Shift F. Okay. Yes, so we can let
me turn this off to take it back to our
for one drug wreck. So for this, others kind
of create foods in here, reduce the intensity
of the brush. Okay. Something like so. This will as well. Should food in here as well. This is working on both sides. Then we can turn
of symmetry now. Then let's go on
subdivision level higher. You should have
this food in here, which is precisely what I want. It comes with them
standard brush and then create some more
depth across this. Okay. Around your as well. Okay? That should be fun.
Let's go to the opposite side. Create indentation
around here as well. Swell. Here as well. Okay? I think this
should work just fine. I should work just fine. So let's bring
everything back out. I just to create an extra
level of food in your Okay, I'll smooth this down. Put this in some more here
as well. Smooth down. Okay? So this food
should work just fine. This food should work just fine. Let's do something light, yes, smooth that down. Okay? Standard brush. Add one, yes, smooth that down
a little bit more. Just create variation
around those parts. Yeah, that's fine. This is fine. So let's go on
subdivision level higher. Okay, and I'll use
the pinch brush, BPI. And I'll tighten this
tighten this also as well, tighten around here also. Go to the opposite side, tighten this edge. Okay. Yeah, that's fine. Moving on. So I would like to use my Dame standard brush and
create some coats across here. Actually faint but not wvable, something just something
faint around there. So let's select
this via selection, the dame standard brush. Go to the lower
subdivision level do that, reduce the Brosset
a little bit more. Okay. Undo that. Turn on symmetry.
Need symmetry for this. Okay? This is just going
to make it look somewhat like it's inflated
on the lower parts. Inflatable or probably
the right word to use would be deflated. Do that again. This is
going to be quite light. Let's go also up here
do that gets close. You do this around here instead. He also as well. Up around here. Go up around here as well. I'm not looking at study SIM. Study SIM connect this in, continue doing this across. That feels odd This way instead. All the way down here and up up around there,
connect this down. Now, this is fine. Now if you increase the
subdivision level, if you're getting
something faint like this, which is precisely what I want, it just adds another extra
level of detailing to it, subtle level of
detailing sold to it. Pre precisely what I'm
going for in here. Okay, that's fine. So I think we can go. Let's do this across
the entire model first, go to the lower subdivision
level, go out of this. Let's go to the next piece. Go out next piece, invite the selection and repeat
the same to you as well. All we move this
across all the way up It might take a lot
of time to do this because we have actually a lot of quite a lot of pads in here. So this might take a while to
complete, but that's fine. It's important we
get it in because these a really cool level
of detail on the mesh. At least on the lower
subdivision level, so we have something that kind of creates some
shadow depth around it. Okay. Go across, then
start going down. Let's use math cap for this. I can see this a bit properly. I don't want too much
highlights affecting my view. Alright. Keep going
down down as well. Look for a good angle for this. Continue this on. Do
this, continue this on. Okay. Go around up also. Okay, I think we're not
doing properly on this edge. Let's do this from
this angle instead you get better at there to do
it from the opposite angle. Okay? Come across. Let's do this from the top view. Okay. Almost done. Oh, that doesn't look right.
Let me do this again. Well, awesome. That looks fine. So it's on both sides precisely what we want.
I work just fine.
65. 64 Sandal Surface Details In Zbrush: H so welcome back, guys. So in the previous
lesson, we started adding some seam tap into this. Not really sim taping, though, but just a little bit of
taping around the edge. Give it a lot more make
it a lot more unique. So if you increase the
subdivision level, should be getting something
like so, which is fine, maybe we should take down the intensity and then repeat this around just to
make it a bit more intense. Okay. Just making it
slightly more intense. Alright. Okay. Okay, that's fine. So go out, do something else. Let's look for another piece. Let's do for this piece. Control Shift click
Control Shift click, invert selection. Okay. Probably increase the
intensity a little bit more. Then get close. We can do this around there. Okay. Yes. So we just
carry on with this. Probably doing this
down here instead. Let's go from the top
all the way down. Let's do from around here. Okay? Well, undo that. That
seems rather odd. So it's fine if you even though you don't
get it correctly, you can always redo that
until it feels right. It's completely fine to redo it until it looks right, okay? Go let's do from this side. I'm kind of doing this in a way. It's much easier
for at least for my brain and for
my hand movement, kind of do this as
accurately as I can. You can do it from whichever
direction you deem fit. That's completely fine. So
long you have similar effects, so that's completely fine. However you want to do it. Okay, connect this, right. So what needs to be
symmetry Ton doom, which is precisely what we want. So we carry on Okay. Condo that feels like a mess. Okay. We're not doing
anything too fancy. We're just trying, we're just
trying to get this around. Okay. As well, also. All right. I'll undo this do this again, undo it get up close. You should probably come
from this direction instead. Connect that. Okay. Almost done. At least with
this piece. Undo that. Okay. Connect that all the way. That's fine. Let's go on
subduction level high. Let's see what we have.
Yes, it will work. I think I need to
repeat this again on this region. It
doesn't looking right. All right. No undo that. Mound we're not straight enough, so Let make sure I'm using
straight hands for this. Undo that. Do this again. All right. That's fine.
Then everything back out. A Okay? That is fine. Get enclosed. Let's see. Maybe go over this again. All right. He us fine. Let's go to under piece. Let's do this instead. Opposite side, invert
the selection. Okay. Can we reduce on
solution level? Yes, we can. An tho that is rather
odd. All right. I have a strong cleaner.
I'm doing something wrong. Sublon level, let's go lower. Let's just lower because
I don't want this to be too aggressive or too sharp. I can be light
handed on the edge. Okay. All right. Come down across down
your opposite side. Okay? All right,
move this this way. Get this at a good angle, continue this on undo that. Continue this on around here. Okay? Move this all the
way to the opposite side. Undo that doesn't look right. Let's do this again.
Still not looking right. Still not looking right. Get all close. Okay. I think that's
a lot better now. Duce the brow size. Duce the brows size. Okay. That seems rather
too aggressive. Alright? Okay. Yeah, that seems fine. Let it out. Let's
do something else. Let's do the inward parts now. I think, this no
doubt, select it. I think it should be
this also as well. Yes, that's it. And let's do
the same thing here as well. Getting a bit close. Okay. Yeah, that seems
fine. Continue on. Okay. Undo that. Let's do that again. Alright. Go over across this. Let me repeat this part again. I feel like I didn't do
that properly, that's fine. Come across this way. Okay. Then we can
go down. All right. Undo that actually. That
doesn't seem right. Okay? I think this should be
fine. This should be fine. Let's go on to observon level higher and repeat this
around here because there was we don't have no
topology within that parts a bit more, repeating that again. A little bit more intense
around these lower parts. All right. Let's make this a little
bit more intense. Okay. Yeah, this should be fine. Yeah, we can work with this. That's fine. Let's
select another piece. Let's do this inward piece. No, that's the wrong one. Should be the one on
the opposite side. Yes. Fantastic. Something
feels wrong here. I think I have way too many way too many
Shift F, let's see. Something doesn't look
right across this. Okay, we have, select this. Then on the opposite side, select Undo that Undo,
invite select better. This is what we
need. Just wanted to be sure if I'm doing
this correctly or not. Okay, go to lower subdivision
level, get close. Okay. Undo that. Continue on on the edge. Okay. All right. All right. Continue on. Continue on, do we? Okay, smooth this down some
more. Repeat that again. There should be fine. Let's go on subduction level
higher for this. Let's even go to the
higher subdution level. Let's see what we
have done so far. Okay? Yes. This will need to repeat again. We need to repeat this again. We might still need to kind of repeat this using
something a bit stronger. Using the more stronger brush. Let's go to lower
ablbution level, using more stronger
intensity to get this to look and feel a lot better. Okay? Alright. Okay. That is fine. Let's do this and
this getting close. And then just carve
these depth in there. Okay. Go up, continue this on. Yeah, that's fine. I think we have two more piece to
go and then we're done. Let's do this. And this
invite the selection. Okay. Undo that. Let's do this again. Undo that. Let's go to lower
subdivision level for this. Okay? I think I kind of
strayed off on the end, so let me smooth this
out and draw it again. Undo that. Okay. All right. Here, that is fine. Do that.O it again all the
way to the bottom edge. Undo that. Let's do this again. All right, clear this out. Let's do the final piece. Okay. Oh, undo that. It's
supposed to get both sides. Alright. Con do that. I don't think
I'm moving accurately enough. Let me do this from the
opposite direction instead. I think mans are more stable
from the opposite direction. Okay. Let me do this this way. All right, connect
it all the way here. Condo that get close. Okay. A here, well, undo that. Mans are not moving
accurately enough. On do that also. Let's come in from this direction instead. Okay. Let's finalize this
also at the back side. On do that, this should be fine. Let's bring everything back out. So for this we're getting
something like so. So let's increase the
creaslution level for this also. Okay. I think this should
work just about right. Bring everything back out. I should work just about right. Don't need to go too
extreme. You just need to create that
softness on the edge. And sometimes pent
would texture of this. We're going to have all of
this, making a lot of sense. So I'll use the same
dam standard brush. I can now make some of
this a little bit sharper. I can do some variations and make some of
this a bit sharper. Okay, I think we
have an issue here. Okay, on this side instead so. Let's go to lower
subdivision level. Okay. I would like to
move this with move bro, ton of symmetry, move this back in some
more. That's fine. Okay. I would like to create some fer details on
this piece also. Let's go opposite side
via the selection. Turn off symmetry for this, reduce the bro size, right? Then let's create
additional increase the subdution level for this. Let's do this one more higher
reduce one subution level. Okay. Don't know symmetry now. Okay? Like, so a dam standard brush, cutting separations in here,
and we should be fine. I'll do the same
also across this, go to standard brush, create additional foods to this. Okay? Let's do here as well. Them standard brush, carve this in, bring
everything back out. Yeah, so this is fine. You get
interesting foods in here. So let's go to higher
subdivision level. Reduce the browse size by lots. So I would use the
browse size quite more. We'll use the browse
size a bit more. Something like symmetry on. There's ton of
symmetry for this. Okay. So Indiana can just add start adding additional food
wrinkles on top of this. Add food wrinkles in where
we have those foods in here, introduce wrinkles
around those parts. It kind of give it a
lot more realism to it, just like the general idea. So trying to add a little
bit of realism to it. Same as well, okay? In here or here as well. Let me just do for
what is visible. Okay. All right. I think that should be fine. Let's go to the opposite side. Okay. The wedding to
symmetry turned on. Yes, we wear, that's
completely fine. So we can come in here now, begin to add a more
personalized wrinkle detail on this Alright I think that's fine. This we can definitely
work with in here. Okay? Let's see if there's something else we can do to make it even
more interesting, increase the brush size. Turn on symmetry. Make this a bit sharper. I'll just make a few
parts a bit sharper. Okay that's way too extreme. Let me take down the
brush intensity. Okay? All right. Just creating another extra
level of depth to this. Symmetry turned on for this
year's symmetry is turned on. Okay? Seem across this undo that. Read that again.
Okay, around here. Undo that. Undo that. Get this straight on. Okay. All right. Undo that. All of this to see you still add extra
level of detail into it, which will give it more
of an interesting look. Okay. Indo that. Okay. All the way at the back also. All right. Repeat the same around here. Make this more intense
adtnsity to this. Okay. Yeah, this is fine.
Let's come into this. Since we need a
bit more for this. Okay. Undo that was kind of messing since up with two more
thing that should be fine. Yeah, this is fine. Let's do for this. Okay? All right. So we're going to add some interesting pattern
looking detail across this. Oh, it's amat we need to add. There's a shape that
comes across this. So if you look at
our main reference, you can see the cuts in between here. So we can introduce that. Let me just max it out. Select the other piece. It the selection, max it out, bring everything back
out, invert the max, increase the brush intensity. I think you should be
having it around, like so. Okay? Yeah, that
looks interesting. That gives more of an
interesting look to it. Yeah, we also need to do
something on this piece. Let's max it out. Okay.
Okay. Invite the selection. Go to the highest
subdivision level. This one should come
across this way. Undo that. To do this straight
on. Also around there. A undo that. Also undo that. Undo that needs to be
straight undo that. Let's get this as straight
as we possibly can. Yeah, this is fine. Okay. Then we'll use the pinch brush. Let's use the pinch pinch
brush and tighten this some more tighten this
tighten this also, tighten this around
there as well. Okay? All right. Yeah, it should be fine.
This will just create an extra level of detail
in that work just fine. Okay. Let's do the same coat. Before we can ad the same coat. Let's do the same
coat all around here. Okay, so let's go to
lower subdivision level. I'll select this. I think
bring everything back out. Let me know what I'm selecting. Okay. Let's go to the highest
subdivision level for this. Read them standard brrush. We can do let me max this
out, invert the max. We can do the same
thing across here. Here, that's fine. So this is fine. T will work just fine. So we'll continue on the
next lesson. Bye for now. Or we can do also around here. Let's do for this this as
well. Invite selection. Let's do something that cuts
across these undo that. Undo that this
way, and this way. A, that looks weird. No need. So continue the next
lesson. Bye for now.
66. 65 Skirt Pattern In Marvelous Designer: You're welcome guys. Previous lesson we kind
finalized on this food sandal. So this lesson, I would like to create then bring this out. I would like to create
the garments in here. So this sclyskt waist wrapper. Let's call it skates
instead. Let's create that. I already have the base we've already sported
this out already. So we're going to using
that same biz match. So let me close up Zbrush. And then make sure you save this, make sure you save this. So inside of Marvelo Designer, we're going to be
importing in base mash. So let's go to File file. Let's do Avatar Imports imports. So let's use the Ad feature, add and then add Avata in here. Let's now select the
Avatar we need for it. Let's go to Z exports. So I'm using the ZRS body too. That's like the updated
version for it. So all of this seems fine. CM, that's fine. Okay. I think we are good
in here. I'll click Okay. S's loading up down here, let me give you a moment to load So now we have a
base machine here. Let me create a bit
more space in here. I think showing
this in some more. I'm going to select the base chw I'd like to change the color
for this is way too dark. Let's go to color and then use something bit more
obvious to see. Maybe we select
our color instead. I think somewhere around
there should be fine. Okay. Then let's add some
more reflection to it, make it a bit more reflective. Okay, that is fine. Yeah, this will work just fine
for what you need it for. Yes, we imported ported
this accurately. Okay? So ignore the UV issues we have in here kind of weird
biking shadows in here. So we need debasement, the
body just to work with. So let's go to our two D view. It's our two D pattern view
or the pattern window. So now let's start
creating this GDP. So I'm going to start by
creating a rectangle. So this rectangle that we're going to be using
or converting into simulated mesh for a
character in here. So let's do that. Let's create something. So let's start with
something close to the kel, let's around the
edge should be fine. Okay. We can use this
to begin with. Yes. I'm going to extend
this a little bit more, extend it some more
B I like to extend this more than the length of the wist to simulate
this together, we should be getting we should be getting wrinkle details
going across this, which is precisely what I want. That's fine. I'm going
to select this now. Let's get a duplicate
out of this. Okay, so Control C, Control V phase this here. Okay? All right. I'm
going to select it. I'd like to start
by flipping it. So let's do flip horizontal. So the reason why we're flipping horizontal is because this
is the backface for this. I don't want the
backface to be visible. So since we're going to look at this if you're looking
at this from the back, you want to visualize what
is going to be visible. The front face,
not the back face. So I believe that makes sense. So let me just move
this in place. Okay, move this out this way. All right. I think this
will work just fine. Yeah, this will work just fine
for what you need it for. Okay. Now the next
thing we need to do now is to kind of create a band. Wind creates a bond. The band will be wrapping around wrapping
around the waist. So that's the bond you need
to create in here now. So that bands wrapping
around the waist, so we need to create
a band for this. Let's just go back to rectangle and then create a short band. Let's do something like sew around here
should be fine, okay? Okay. Maybe extend it
a little bit more. So let's go to our it pattern to select this and down sheets, extend it out a little
bit more. That's fine. Then we need to duplicate this, select this Control C, Control V, select it. Put this around where. Come on. Let's put this where
we have a back skirt piece. So now let's move it, you know, let me move this down first. Let this move this up. Move this back up. Okay. Then we need to do the
same thing also to flip horizontal send this
back, send this back. Okay. Around here
should be fine. Let's get it closer. Let's
get this closer to the body. Let's actually use
arrangements points for this. Let's see if arrangement
points will help let's go over to the three D view
or three d window. Then build up your mask on this. Should we call it
human eye Continue, and click on Show
Arrangement point. This will help us just map this around the body a little
bit more accurately. So I'm going to select this
arrangement points here, select this shape, and I'll select this arrangement
point also around here. Okay? I see now that I will need to extend
this to some more, so let's stretch it
out a little bit more. So once kind of
bond this together, I should hold up
tightly in there. So I'll select it, move
this closer around here, select this, move this closer, do that click out. Move this closer, okay? I think we might need to extend it a little
bit more also. Let's extend this out
a little bit more. That seems fine. What
you need to do that, you need to make some
modifications to it though. Let me show select the
arrangement point again, select this, select the
arrangements point again. Then select it and then move it closer around
there. Select this. Move this closer. Yeah, that's fine.
That works just fine. Next thing I'd like
to do is to select. Let's select this. We'll use the same arrangement
point also as well. Select the arrangement points. Then we need to move it down because it's up way too much. Around should be fine. Select this. Let's use
these arrangements. Let's go down instead. Let's go down instead again. Around should be fine. Select it. Move it down. Okay. Yeah, around there
should be fine. But a little more
gap in between. Yeah, this is fine. Yeah,
that work just fine. So now let's go out of
this arrangement points. Or for now, I'm going to
select this and select this and I would like to freeze
them. Let's freeze them. Freeze, freeze, freeze, freeze. Son I'm freezing them is
because when I simulate, it's not going to be simulated. So just remain in the same
position where it is. I like to move it out a little bit more because I would like to simulate this piece first before simulating
this. Let's do that. I'll make sure. Let me make sure I
turn this fast first. Let's say this to fast DPU. When we're finalizing this, we're going to be using
the complete instead. We're going to using the normal. Oh do that, I accidentally
simulated this. So now let's stitch
this together. Let's start sewing
things together in your so we can either
say it from the two D V, cans from the three D view. So it's a lot more based on
the view we have in here, it's a lot easier
if you sew this if we saw this to the so
this in the three D view. Let's do that so I
will go to the sewing. Let's do segment two. So I'll sows to this, come to the opposite side. So the segment, so these
segments, that's fine. Go back to move, I
select and move. Then let's simulate this. So it's space about
to simulate this. I'll stop the simulation. I will undo that. Now, I
need to shing this down, down even more because
I want it to be quite tight. I should be quite tight. Let's shring this
down run simulation again. Yeah, that's fine. Let's shing this down a
little bit more as well. Simulate this again. Okay? I think around there
should be fine. Yes, around there is fine. So the next thing I'm going
to do now would be to, I believe, okay, let's
not freeze this yet. So let's freeze this too. So activate undo that. Let's use freeze fast instead of activate because most of the activate is going
to simulate it. So now let's start stitching things
together in here also. So I think it's much
easier to stitch this on a three D window because I can do this with
a bit more precision to it. So let's go over to
so so segment so. Then I'm going to
select the segment and stitch this to this.
Okay? That's fine. Then I'll know. Okay.
Then stitch this to this? Oh, undo that. Something
seems oddly wrong in here. Something seems oddly
wrong. Stage this. Okay? Go back to move, go back to segment so. Stage this this, go back
to select and move, go back to segment so again. Okay. I'm just making sure I
don't make any mistake here. So that's why I'm just
going back to select. Go back to select
again. All right. Then go back to segment C, Stig this to this. Okay. Awesome. So this is precisely what we want checking this around just to be sure. Then let's simulate this. All right. Awesome.
You can see how now we get some wrinkles
around here around this, so we can extend it out again. Let me select these two, shring them down a little bit more. Around the simulation again. Okay? Yeah, that's fine.
Stop the simulation. There's one thing
I'd like to do, select all of this pattern. There's something
we need to adjust in This artines collusion, let's say this down to zero. Now, if I simulate this I won't really see any
major difference? Because we're simulating
with first GP. You see a lot more I see a
lot more difference When we do this complete
simulation for it instead, using our CPU. I think it should be
fine where it is, but I like to select these two. I would like to move
it up a little bit more and simulate this again. Okay. Let's pull this out. Because I want this to be
quite tight around here. So I'm just moving this
up a little bit more. Get this wrap around
the skin some more. Yeah, that's fine. That's fine. So now we need to make some
modifications to this. Now, let me select the two, and I can freeze them. Now, select this to extend
them out a little bit more. Run the simulation again. Reason is because I would like as much wrinkle detail
as I can get for this. Let's get more wrinkle
detail out of this. Stretch this out, fix some of the weird issues we
get out of it. Okay. Yeah, that's fine. That's fine. Okay. Stop the simulation. Now, let's make sure we
have all these on quads. Let's make sure
they all in Qard. So let's go and
visualize the mesh. So I visualizing the mesh now,
we have this all in Qard. So if you don't have
these all in quarts, let me show you the
setting to actually use. So let me go back to
monochrome surface. All you need to do is to go to settings, I believe,
preferences. Then let's see if you can
still remember where this is. Okay, go to three D, by default usually on triangle. We just send it to quards. Once you do that, it's
going to ask you to close and reopen the file again. Then just do that and
then it should be fine. But in case it's still not
updating it on your mesh, all you need to do is select
the mesh right click. Then we do quadrangults, and then it's going to
convert any triangle mesh into quartz for you. That's pretty much
what you need to do. Yeah, this is fine. This we can keep the next thing we need to do is to make some
little adjustment to it. For one, I need to add
some slight cove to it. Let's go to Edits
Cvrtue instead. Edit curvature, I'm going to
create a curve around here, a curve also around here. Let me make the cove a
bit slanted this way. Make the curve slant. Undo that, undo that. Let's do edits, cf points. And I'm just going to move
this way here, like so. But now, it's just way too long. It's way too long. So I'm going
to select select let's go to this pattern
instead. Select this. No, undo that. Undo that. I'll need to select all of
this and just undo that. Let's do for both side.
Let's do for both sides. So we can do all at once. Let's move this up some more. Yes. I think around, let's see, up a little
bit more than shifts. Okay? Run the simulation again. Yes. Awesome. So it kind of makes a lot of
difference in here actually. It looks feels it feels
a lot better now. Okay? I think we can
this we can work with, I think I need to
move it up some more. Okay? No, no, that's
a bit too short. Do that. Run the
simulation again. Okay? Maybe we'll move
this up some more. Let's move the upfront
part up a little bit more. Then stretch it out this way. You can say I kind of
pokes out around here more around the simulation. Yes. Yes, this is fine. It
will work just fine. But the next thing
we need to do now is to create it's another wrapping
piece that comes across, so we need to create that piece. So to do that, we would need to create
another rectangle. So let me save this first.
Let's save this out. So I'm saving this
into a new folder, so I'm not going to
name this folder MD. Open up that folder and name
this to Idris garments. Because the character
has a name already, so it's most easier I of use the character's
name for him. Okay? Save now. So now let's create
another rectangle piece. So let's do rectangle. Okay. Now, the length would be approximately let me just use this as a guide
actually. Or maybe not. I think a more preferable way to do this. Let me delete this. Preferable way to actually
do this would be to copy this out Control C, then not symmetry pattern. Let's do symmetry
pattern instead. Not symmetry pattern
pattern so instead. So I think, yes,
this should be fine. It's going to solve
on top of itself, so I'm going to select this. This I'm going to Oh. Do that. We need to
break symmetry on this, remove linking a linked edit. So I'm going to extend this out. So more then I also need to I also need to delete
I also need to kind of delete this COV
we're having here. So let's do that. Edit
CvtureEdit Cvture. Yes, select it
right click on it. Rightly Come on. Let's go back to it
pattern instead. Select it rightly, Cit. Let's do delete all co points. That will straighten things out. Okay? And let's go back
to is transform pattern. Right comite, let's do I think I forgot what I'm
supposed to be doing here. So, I remember. I'm supposed to change
the layer for this. Let's rightly cont. Let's do US supposed to have Supposed to select this. Yes, it's what I'm looking for. Layer down, so go to
your property editor. Let's say this to two. So this is going to be on top. Then I'm going to bring it out. Let's bring it out. End is down first to begin with.
Undo that. No there. Not there. We need to edit
pattern, select this edge. I only need to move
this down instead. This is where we need
to move down, okay? Yeah, that's fine. Then I'm going to select it and
pull it out some more. I would like to be sure if it comes with the swing in there. So let's go over to edit sewing. Does it have any stitches in there? It does not
have any sewing. There's no sewing in there. That's fine. That's
completely fine. I want to stitch
that properly now, to stitch that we can
to sew that and we can use Let let me do
this in here instead. So it might get a
little trick in here, but we'll make it work. Let's do let's go over
to segments sewing. Definitely to sew
these segments. Let me get this go up a bit
more to these segments here. To begin with, that's where
we're going to sew that too. So now, now that's fine. Then I need to sew I
just going to figure out where this is Okay. Let's go to it Edit
screen, select this. I'm trying to figure out
where that is coming here. Maybe move this
out some more and do that actually.
Let's just do this. Let's do this s on the
three diviens Edit sewing. I'll select this edge, and I need to sew it
to the back edge. Let's see. Okay. Yes, that's precisely what we needed to do. I think let's go to edit sewing. Let's see where we saw that too. Okay. Do I feel like something
doesn't feel right here? Where did we sell
this pattern to? Just trying to figure out
where I sold this pattern too. You just need to be
extremely shown here. So edit sewing, select this. Okay? I don't think I
actually sew anything there. Nothing has been sewn.
Nothing has been sewn yet. Nothing has been sewn
yet. So let's try this again. This
is the back piece. A Okay. Move this out. Okay. Let's just move it out. Let's just move it out trying
to avoid moving it to. A have to move it out now. So I can get better
apprecision to it now. So I'll go back to sewing this pattern
segment sewing a rather. Select this. I'll
stitch it to this. So now in two D window, we know where we are
stitching that too. So across then I'll select this. Okay, I think we are good now. Something feels a bit old.
Let's run the simulation. Let's see where we get
some parts teaching. Oh. It's kind of pulling
itself out. That's fine. That's precisely what we want. Okay? These are kind of
fighting themselves in years. Let's just stretch
them out some more. Create a bit of gap in there, so don't fight themself
with too much. Okay? Alright, I'll stop
the simulation. Now, I see some things I
would like to do in here. I would like to,
let's pull this out. Okay? Stop the simulation. What I definitely
like to do would be extend this down some more, extend this down a bit more. Then run this simulation again. Okay? Yeah, it's pretty much pretty much like
this should be fine. And I think I will need to
make some corrections to this. But actually in a good place, this is working just
fine we want it to. So we'll continue on the
next lesson, bye for now.
67. 66 Skirt Refinement In Marvelous Designer: A Okay, welcome, but guys. So in the previous lesson, we started creating a pattern
for this skate piece. So I'm just going
to continue on and then keep refining this until
we get our desired results. Now there are a few correctons
I'd like to make in her. For one, I would like
to this point in her, I like to bring it down some
more because it's kind of up way too much around
this part so for him, kind of poking out some more, and I'll make corrections
to this also. So let's start doing that. So this pattern, I'll
select these points, lay these points, and let's
move them down some more. Okay. Down a little
bit more. Okay. Then I think I will select this. Let me move this down. This
is kind of blocking our view. Edit pattern. Select this. I'll need to move
this up a little bit more. Okay? Same also around here, move this up some more. Okay? Run this simulation again. All right. Move this down. Yes, I think we can select
this point again now, select this point, move it down maybe quite much this time. Okay, that's way too
much. That's bit too much up a little bit more. I just want it to be slightly
visible the backside. Should be slightly
visible the back side, we still need to make
some corrections to Okay, no, that's actually
fine where it is. Move this up some more run
this simulation again. Awesome. That's
fine where it is. Stop the simulation. Then
now let's go to this piece. I would like to make
this a bit more. It looks too sharp.
F way too sharp. So let's start by moving
this up to begin with. No, B down where it's supposed
to be do that back down. Then add a curve to this, so let's do Edit curvature. Let's add a curve,
little curve to it. From the simulation again. Okay? Now, obviously
it's way too long. We'll start making
modifications to this. Let's this pattern, select these points and move this
point up a little bit more. Okay? I see this point needs
to go up some more. This point needs to go up
quite a lot, actually. So d shifts pull this up. Okay, up a bit more. Okay. Run this simulation again. Okay. Let's see. Let's make sure this is
working correctly as it needs to bring this down. All right? Maybe that's actually
up way too much. Let's bring this down
a little bit more. You just to find the
perfect balance for this simulate this again. Let's check where
we get in here. Okay, I think it needs to be
done even a little bit more. On she bring this
down some more. Okay, pretty much around there. And I would also use this
move this point up some more. Alright. I think this is fine. Let's check this again. Run this simulation again. I'm having this weird
but kind of bulging out. Stretch this down. Okay, let's unfreeze this. Let's
unfreeze them. Turn off simulation for now, let's do okay, transform
patterns, select these two, and then activate
activate select them, and then let's do solidify. So let's run this
simulation again. Okay. Undo that, undo that. Undo that. Okay. Activate. So let this let's do
strengthen instead. Run the simulation again. It just keeps falling off. I
don't want this to fall off. Undo that. What can we
do to actually make this a bit more solid
so let's shrink it in some more from
the simulation. Let me move this up,
up again, up again. Okay, stop the
simulation. All right. So now for this let's freeze
I like to freeze this snack. I think I have this
where it needs to be. This is where it
needs to be already, so I can select these two, and then let's freeze them. Let's just work
specifically on this alone. Okay. So now what art
now I like to do. Let me stop this. Let's see. Oh now I like to
do is that I would like to instead of stitching
it all the way to the end, let's do something around. Let's stitch it somewhere
around here instead so. To do that, let's go over
to did in Edit sewing. So select. Can we
move these points? Is there a way we
can move? Do that. We can actually move it though. So we have these two pattern
should be this year. This is the one we need. Let's
see if we can move this. Yes, we can also. So
let's just move this. Let's see where
we have this now, then move this some more, move this all the
way here instead. Then run the simulation again. Should create a bit more gap. Has shifted, is precisely
what we want to. I think I was thinking to
shift this a little bit more. Let's shift this some more, go back to edit so
move this by lots. Okay? Run the simulation again. Okay. I think I might have
gone overboard, so I think I went a little
overboard, but that's fine. I think we can snap
this around here. Yes. Yeah, around
there should be fine. So let's just move
this around there. Run the simulation again. Okay. Then we can
stretch it out. So now we get a bit
more food in there. We have some more food in there. But I think now the entire
looking at this knife, feel like, Oh, this front
is actually way too high. It's down way too much, so let's on freeze them. Just a matter of going
back and forth and then getting the desired shape for it or the desired
length for it. Ring this back up. Okay. Yes. Let's see, let's see, the simulation again. Okay. All right. Let's see what we get
out of this. Okay. I think these points, I need to move this
down a little bit more. I think this both side actually. So let's go this pattern, select these points,
select these points, bring them down slightly. Run this simulation.
Then activate them. Activate Okay? Yes. Okay. Undo that. I will need to freeze
the two again. So let's freeze them again. So freezer select this activates
ground simulation again. Okay. Let's see. I already activated this
already, so activates. Okay. Let's just make sure we
have this as accurately as we possibly can undo that
from the simulation again. Let's look at this from
this angle because it's pretty much around this
angle the camera is on. All right. Get enclosed. Let's see how far
down around here. Let's shift it forward
a little bit more. Let's shift it a little
bit more. Don't mind me. I'd like to get this as
precise as I possibly can as precise as
I possibly can. So let's move this
forward a little bit more from the simulation again. Yes, this is perfect. It's perfect where it is. Stop the simulation. I think
now we can let's finalize on this edge to finalize
a bit more on this edge. So let's do edits, select this. I'll just move this
in some more guide this bits, more
or less this way. Let's see what we get.
Okay. Interesting. Yes. Yes, a lot better. A lot better, actually. I don't understand why this part
least feels a bit bogos. Let me select it, move it out. And kind of check in there to be sure if
we're having any issues. I can see this part
looks a bit bogus. No, no, no, why don't. Run the simulation
again, pull it down. Go down. Yeah, this is fine. This is fine. Stop the
simulation, save this. So now we need to kind
of increase the Oh, yes, we need more
piece, one more piece. This piece, red piece in here. Let's get that red piece out. So I can just do Okay. Yes. So let's just
create a new shape. So let's do rectangle. I'll create it should be
roughly around the same length. Same width as this actually, roughly around the same
width. Okay? It's down. You need to lift this up.
Let's get this up. Okay. I think this is way too broad. Cancel this way
wide, way too wide. So let's shrink it a little bit begin with a
little bit to begin with. Okay, then we have this
point in here. Okay. How do we make this work? We can do. Let's see
what we can do in here. Okay. I can do something like, let's say we add edits
or rather add points. Let's add points around there. Okay. Then let's go
to Edits pattern, select these points,
move this out. Something like so should be
fine. Yeah, that's fine. Then we need to kind of
stitche this together now. So let's stage this
where it needs to be. Let me go in and check first. So I'm going to stitch it
to this piece instead. So move this let move
this this way instead. And I'll change the
layer for this let's say this to three, so it
should be on top. So we shouldn't have too much of a simulation
issue around there. So now let's still
this together. So I'm going to go to sew, and then let's do free and sewing instead,
free and sewing. So let's do all the
way from year to year. Okay? Then we'll
come to this piece. We do something smaller. Okay. Let's from around
all the way to the end. Okay. I think somewhere
around there should be fine. All right. So now let's eat space bar and then simulate this
let's see what we get. Okay? Yeah, one thing is
certain is way too long. It's way too long. So
stop the simulation. So that simulation, and
then let's select it, shrink it down some more. No, I don't want
to shrink it down, so let's reduce the
height for this. The height is way too much. Let's see, okay? Shrink more Okay. Run the simulation. Okay. Pull this out, stop
the simulation. So there are a few things
you need to do in here. So let's start making
modifications to it. For one, let's extend this
down some more to begin with. And I'll go to its pattern, select this, select
this, move this closer. Okay, select this
move this closer. Okay. Run the simulation. Okay. I see we need to
this point out the. We need to push this down by a lot to stop the simulation. This needs to come
down quite more. Okay? We're getting
something in here now. All right. Let's see. I think we need to
make some corrections for this sewing now. So let's go over to
the edit sewing. I'd like to select the color for this will be
DCs that's the color for it? What's the color
for that sewing. Let me see if this file. Okay. I just need to move it. You just need to let's see, this is 24 ". Okay. Okay, let's just move
this move this a little bit more round
the simulation again. So you should shrink
or rather move itself. Let me stop this simulation. I would like to freeze this. Let's freeze this round
the simulation again. Okay. Yes, around
here should be fine. Let's see checking
this out again, just to be sure everything
working correctly. Okay? I think for the most
part, it should be fine. If there's any correction
we need to make, we can easily do that
instead of Zbrush. But I think should I see this length goes
up all the way up, so we can do. Let's select this edits pattern, select this, move this up a
little bit more around the. Yes, that makes a lot of
sense. Run this again. Okay. I think this is fine. Maybe we can just select this and then shing
this in a little bit more a little bit more
run the simulation again. Okay, pull this
out, pull this out. Stop the simulation, right? Then coming here, I would
like to freeze that freeze. Also on strengthen, select this select that and then
freeze and strengthen, select this and freeze this,
let's activate instead. Save. Oh, still some corrections
to be made actually. So let's just select all of
this and do freeze ones. The length for this is
those down with too much, so let's get it
where it should be. Okay, so I'm just going to
go back to this pattern and let's let's grab all of
this and move undo that. Undo that. Better still let's down
here instead up this way. Just about right. I will
select these points, move this up as well in some
more round the simulation. Okay, stop the simulation. That's fine. So now
what we need to do next would be to give this
a more higher resolution. So let's make this resolution
a lot more higher. So I'm going to go back
to transform patterns, let the entire pattern activate. Then one thing I'd like
to do for sure would be is it, let's see. Okay, let's see. I think
painting, pin, pin, pin, pin. Yes, this is. So pin box, I like to come in here and pin
the top parts, pin the. I don't want the top
parts moving too much. Let's pin that. So now we kind let's go back to move select move If
you simulate this now, the top part should just kind
of hold itself properly. Okay? That's fine. Then let me select
all of this pattern. Then change the particle
distance to ten. Let's use the particle
distance of ten instead. Enter to apply that. So it's applying itself to it. Now let give the moments. Taking this time to
apply. Is there now. We need to simulate this. The simulate might take
a little bit of time to actually simulate
depending on your PC specs. I might take a little
time to simulate. But I just allows run through. You can see how we get something a lot
more realistic now. We have more realistic
folds around this simulating a lot
more accurately also too. It is precisely what we want. Let me put this down some
more, stop the simulation. Now, to get a lot more
definition to this now, what we need to do to
simulate this with simulate this victim with
our CPU simulation with our RAM but
before we do that, let's let's clear out
this pin parts in here. Down control and drag
a selection across that to go out of it
and go back to move. Simulation let's
do norm defaults. Then if you simulate this now, you get something a
lot accurate in here, a lot more accurate in here. Give you some moment
to actually rest. Give you a moment
to actually rest. Yes. So we get a lot more food wrinkles across this now because
we're doing this with a lot more res into it. Okay, I think it should be
fine. It should be fine. So I can stop this now. I don't anything weird
happening in here. So this is fine. So I'll
start the simulation now. So this is going to
be like a final. This is like a final
simulated piece. So this is a final
simulated piece. Everything working accurately. So the next lesson will
just be save this. So the next lesson
will just be all about going to be all about creating topology
for this piece. So we'll do that in the
next lesson. Bye for now.
68. 67 Retopolog In Marvelous Designer: Welcome back guys. So
this butler lesson is going to be about creating topology topology for son here because topology
we have in here is not something let's
say proud of. There's nothing I
will be proud of to actually use for
production in here. So we just kind of change
this up and then use something that is more friendly. So this is what we're
going to be doing here. So let's create clean
topology out of this. To do that, all you need to
do is to come over here. So you come over and then select this and we do the parched
topology instead one. The patch topology actually makes things a lot
faster in here, so I like to set this to ten. Set it to ten. Now to use this, we
need to do this too. Let's go for the
strapping here, tap, tap. Basically, we're
taping on four sides. Tap here and then go back
to the origin points, okay? Then click Create. So tomaicali we should have polygons created
for this already now. So that's pretty much how fast you can kind of
create topology for this. Let's go to another piece. Tap, tap, tap the points, go all the way up, then go
back to the origin points. It usually works best for rectangular or
squarish patterns. So we actually keep
that also in mind. So this one gets
a little tricky, but we still kind of
keep in mind that we don't need to tap four times,
and then we should be good. Let's go tap in here. Tap here, go all the way down, tap there, all the
way up here, tap. Let's go back to the
origin points and tap. Okay, click on Create. Fantastic. We have another mesh in here now, which is fine. Let's go to the next piece. Parch topology. Let's go in and tap, come all the way down tap, all the way tap, tap, back to the origin
points, click on Create. I liked how I just like how this actually makes the topology
process a whole lot faster, most especially especially for squares or rectangular surfaces. So let's carry on, so tap in here, tap in year. This one goes all the way tap, tap, back to the origin
points, click on Create. Awesome. Let's go
to the final piece. Now for this one, this one
looked a bit ticky bots. I figured out a way
to make this work, so let's do tap here, tap here, then tap. Okay, we have one, two, up here, then we go all the
way to the origin points. No, no, definitely, no,
that's not looking good. Let's redo that again. Okay? All right. Let's do, but it doesn't
continue all the way down here, so that's like a
disadvantage for us kind of. So we just need to
find a way to actually make this actually
make this work. So let me do a I'll go all the way
here the origin points. Yes, this is actually
a lot better, but I think we can push this even further
and make it a lot better. So I won't do that. Let's
go again, tap in here. I'll go all the way
down around here, here, and then the
origin points, yes, is fine. I cal concrete. So now all we need to do now
is to begin to manipulate this and get this to
look a lot better. So let's go to topology. So the di topology, I'll start moving since
out some more. Let's see. Can we move all of this?
Let's do create first. Let's create taping
tap all in a click. That's fine or taping
taps around here. Okay? So we're basically
creating topology in here now. F. So this is like a
tricky one in here, so we need to make sure
we get the rights. Okay? Right Okay. Same also around here
around here as well. Yeah, as well, okay? So I'll go back to
ditpologyG closed. I think I can move
this all the way. Maybe that's way too much. C do that pull
that way too much. Let me select a few of these actually let's select
all of this do. Now, I just get a little
tick in here just to select the edge properly. Now, this part out
is actually limited, so we just need to make do
with what we have in here. Do that. Okay? We can move this. We can move this,
it's not even moving. Let's move this
this way instead. Let's do this this
way. Move this down. Okay? Move this down some more, not go too extreme though. Move this down, move this down. Okay. Bring this closer. Bring this down a
little bit more. Okay. I'll push this year. I'll bring this year.
I'll bring this Come on, undo that. Pull this year. Oh, great. Getting close. Move this down here. This I can move all the way down here. Move this down
here, grid do that. Move this close, move this here, move this down here, then move this all the way here. Yes. Yeah, it's a lot better just
to fill up that lower parts. Then we can move this
this way, move this way. This way. Here, also
this way. Here swell. Close need to put push
this towards the edge. Once you get this on the
edge, you should be fine. Let's look for the
opposite side also. Move this in here. Okay, move this here. Here swell, here, also. Okay. Yeah, that's fine. Yeah, move this also. Undo that. You just need
to move the points alone. Move these points this way. Yeah, that's fine. It is fine. This week This we can work
with India, I believe. Let me make sure move this
points up grates Undo that. I like to move the
points up some more. No. Great, undo that.
Bring this closer. Okay, so at this point now
we can add more radius, can add more subdivision
level to this. So let's go over
to Great topology. Then right click and
we'll just do remesh. Can we just do remesh for this? Okay. So let's do remesh. No, I supposed to
subdivide this actually. I like to subdivide
this instead Edipology. Let's subdivide, this is
what I want to make sure you are on ditpology
then right click, then do or division. So select that. Before
we select that, let me save this first. Save this. Okay? Then we
can safely do all division. That's going to subdivide this topologize version
we just did in here. So A all subdivision. Should should have more
polygons across this, which is kind of
precisely what we want. Okay? Now, I want to
be careful though, because sometimes you
might have points intercepting themselves
but you want to completely want to completely, completely avoid that actually, so that you want to avoid. I think you might need to
do some movements in here. Especially on the sits, the gels at or the spacing between each squares is
quite broad for this. So might need to make
some modifications to it. So let me undo that first. Let's make a modification in Fas before we add
that divisions in. Let's just try and average
things out here so more. Okay. Move this closer. I'm just trying to
average in between the spacing for
each quad in here. Move this down down
down also as well. Move this in. Move
this in here, okay? Just trying to
average this in here. Nothing too extreme
in here for now. Okay. All right. Okay. Yeah, I think on an average,
that should be fine. On average, should that
should work just fine. Okay? Now, we can still push
this more if we need to. We can push this more
if we need to by adding segments in between, but that's just going to
take a lot of time actually. So I don't think I
would want to do that. So let's just add division
not current pattern. Add all division. Okay? This might even be This
might even be too small. Let's say we can crank this
up again if we need to do. But I'm trying to see if I
need to actually do this. Just checking just
to be sure if I need to actually crank
this up even more. Maybe one more. Let's do
one more so click out. Let's run this again. Okay, now it's
becoming quite dense. But on this dense version now, we should be able
to have this old all the details a
bit more correctly. Now, to test us, if it's
actually working correctly, we need to extra this out as an actual mesh now.
So let's do that. So I'm going to right
click and let's do remesh all duplicates
and give the moments. So it's not going to destroy what we
already have in here. This topology just made in here. It's going to keep an
editable version for us, but then it's not create
nodal duplicates of fi, so we can still go back
and forth in case we want to make modifications corrections
or corrections to it. So let's let us see what
we have out of this. Let's give you a
moments almost done. The reason why it's
taking a little bit of time that depends on your PC ram also as
your PC specification, and also greatly dependent on the amount of topology
you have on your mesh. So that's just something
to actually keep in mind. So I'm hoping we will not be
having any issues in here because I try to be as much
as careful as I possibly can. The only issue you might have
in here is if two vertices, two vertices are kind of
too close to themselves. So that's the only
part you have issue, but I think I think
we are good in here. Okay. Let's go back to move. Let's go back to this pattern and we can move the
duplicate out, I believe. Yes. This duplicated piece now
is the topologize version. I think I should
even pull this up. Let me pull this up instead. This topologized version on
top. Let's check that out. I'm going to select all of this, the original version and
then let's hide them. Hide the pattern. This is the version now
that we did topology for. So what we are seeing here
is the topologiz version. And you can see how it's kind of holding quite a lot of the details in here, which
is precisely what we want. So let's check that out.
So we'll go to mesh. Let's select mesh. No, no, let's just do wireframe instead. Let's do wireframe instead. Okay, can we get Wireframe here? Okay, every on surface, yes. You can see how we get. You can see the clean
UVs we having here now. Really clean UVs. And then also is holding up
the detail quite nicely. Yeah, so that's fine. So this
is pretty much all we need. Then we need to extract this
kind of export this out now. Let me go back and then set this to monochrome surface, okay? So I would save this. And I'm going to select save. Let me give you a moment. Okay? So select the
topologize version. Let's go to file.
Let's do exports. Export OBD selected. Okay. Then let's export this into MDifis.
Let's name this. Let's just name to skets. Let's do a caps in here. Okay. Save this. Now we need to import
this single object. We don't want this
multiple objects, single object and
well that is fine. Unified UV coordinate
is fine also as well. All of this is actually
okay, just click Okay. But there's one thing I notice that usually happens when we spot out of Marvelo designer, most especially on the newer version for
this butler version, to the best of my knowledge, is that once we
import it into Maya, it gets a bit offset. It gets kind of offsetted. So let me show you guys
what I mean by that. So if you should
report this in now, let's go over to Document file. Document file, MD, skirts, drag and drop this in
here, as you can see. It gets offsetted
one way or another. I have no idea why. But it's
not really major issue, let's just give this
an existing material Let's just give it
you write material, let's do blink instead. Dark in this bling material. Dark needs some more, okay? So we need to do is just to just move it in
place. That's all. Moving it in place, we just do the trick so center pivots. We just move this
forward a little. If there's any act we
need to do in here, we can quite easily make the
correction inside of Zbrush, move this out some more. Okay, this is fine. Any correction we do. Any correction we can
do inside of Zbrush. Let me see if I
move this up, maybe fix, it's not fixing it. Okay. So another thing
we need to do would be to add thickness to it
because for the most part, I think this is
working just fine. Let me see if this
date duplicates. Rename these two skirts, is not taking the name for
it, so let's rename that. Okay. Then let's isolate
it Control one to isolate. So total poly count for this
around nine k which is fine. N is actually fine. So if you should do an
autos mood for this, let's say we go in and do we have some issues in
here, but that's fine. We can fix that in zebra. So if you do an
autos mood for this, you should be getting
they wrinkle details across the entire piece.This
also precisely what we want. So let's go out of that. That's fine. Save this. Okay, so in the next lesson, we're just going
to add thickness to it with add thickness to it, and then we can quite
easily export this back into Zbrush and then start doing some
additional work on it, okay? Yeah, there's some pinching
that has to happen when I export this or create
topology, but that's fine. There's some pinching in
so let's try and fix that. I believe it is this,
let's just undo that. Let's go over to Series
to modeling standard. Then let's just
constrain surface slide. Okay. No, undo that. Let's let the vertex
instead. So that's fine. So you should find some of these issues on where we have more pulley
counts in there. So let's just check
around and then make sure if we found one, we see any of that,
we can just quite easily slide them back
in where it needs to be. Okay. Now for this, I need to reduce
the polyco for it. I can reduce the polycon for it because we have SS in here
that we don't actually need. So let's reduce that. So I'm just skipping one,
moving to the next one, skipping one, moving
to the next one. Okay. Just so we save more on all the counts in here
and do that wrong one. Because for the most part, this band is not
going to be visible, so why keep so much topology
for you to control deletes? That is fine. So it's
a lot lighter now. Let's do the same
also around here. Okay. Almost done. So however way you can to
reduce the plicon for this without destroying the details on the surface, that's
completely fine. You should definitely
do it and just reduce. So I'm just letting
that and then I'll control back space, so control, delete delete
both the edges and the vertices. Okay,
this is fine. I'll save this. So I've reduced
it now to around eight k, total poly count of eight
k now. That's fine. So to kind of make this visible in case your
ears is not visible, just go to display Edge up display and turn
on ply counts. So that's all you need
to do. That's fine. So next lesson we thickness
and exports to Zbrush. Okay? So I'll see you guys in the next lesson, buy for now.
69. 68 Skirt Prepping In Maya: Okay, welcome bad guys. So in the previous lesson, we imported skirt
into Maya and then let's let's create extrude some of this out and then
get this into Zerush. Okay? So let's do that. I'm just checking to be
sure if everything is working correctly
before moving on. Get to do an autism. Let's see. I think we are good in here. Okay. So now let's add
some thickness to this, we already have edges
around this already. So if we done of those
smooths not kind of smoothing out the same line and then making it too obvious. It's still holding up quite nicely because we have enough topology to kind
of hold this properly, so that's also a bonus for
us so that we can keep. Okay. Now let's add
thickness for this. So let's just do extrude. Okay? Get enclosed. Undo that. Let's use the Locals it tends to
give better results. Okay. I see somewhere around
there should be fine. Let's see, let's check
the hem for this. Probably a little bit more. Add. Let's see, let's
do one segment instead. Okay? Click out. Let's don't Autos mount on this.
Here's don't X. Okay? Let's see
what we get. Okay. Oh, you can see now
we're kind of getting the similar edges now
kind of revealing itself with to moto.
We need to undo that. I kind of like I like the thickness we have
in here though. Thickness we have in
here work just fine. So let's eat one, let's
undo that thickness. And then let's try
fix the edges. So we don't have this
undo that again. So we don't have
once we kind of add the extrude to this
or thickness to this, we don't have it pulling out way too much
on the same lines. So to fix that, we just need to let
me turn this off. We just need to add segments, additional loop cuts
on the edges of this. So I just need to figure
out where those seams are and then add extra
edge loop to them. So let's go edge loop. Hold down sheet rightly, can. Let's do more tie cats instead. So how do I close here
around here as well. Come down. Let's add
a tight one year, another tight one year, okay? Let's go to the opposite side. Okay. Then add one, as well. Okay. Then we'll add
one here as well. We also need another
one that goes across on the horizontal axis. So to do that, let's
come close instead. So it should be around here, here also as well. Okay. Undo that, let me
just do this again. Okay? Around there
should be fine. Undo that. I think I'm not
doing it in the right place. I need to make sure I'm doing
this in the right place. Okay. Yes, around there
should be fine. Okay. Yes. We do the same for
the lower part also. Let's do one at the
lower parts here, here, also as well. Okay? We need to isolate. Let's make sure we go
to selection tool. Let's go to phase. Let click on this
phase isolate this. Okay? We need to add one
across at the top part. So let's add one
more techds Okay. I'll add one. Okay, that's fine. We don't need to add anyone
on the vertical axis, so we don't need
any one for that because we're just going to
completely smooth this out. So let's go out of isolates. Object mode, go out
of isolate, okay? Save this isolate this again just to be sure
everything's working correctly. Add that duplicate again. Let's add this control
H to add darts. So you can add
thickness to this now. LokaZOd control, create
some more thickness for it. Okay. Let's look at the M. Let's add one division in there. Okay? Click out. Let's E three on the
keyboard, all those smoons. Let's see what it gets. Okay. I'm not sure what this
piece is in here, though. Do we have I think we
have Oh, yeah, yes. Oh, yes, yes. There's something
we kind of skipped. We skipped something in here. Definitely skip
something in here. Completely forgot
we have another extra piece, so in there. So we can do double click
on it and slow this out. Then we can add cuts across. We just need to add one
year, and we should be good. So one day should be fine. Yeah, we don't need to add
around Okay, we need to add. We need to add one on this
part because go to stitch this with the
pattern at the back. Let's make sure we
have checking this from an angle just to be sure if I'm doing this correctly. We already have a
segment india already. We already have a
segment india already. So let's go back to Object mode. Still on face mode. Let's go back to Object
mode instead something. I cannot click. Come on. Put selection two. Play this out object mode. Isolate this. I would need to let me go
down here instead. This is the piece I need
to isolate face mode, select double click on this. Es isolate this more ti codes. We already have a cord in
there already. That's fine. Okay, we have one already. Yeah, this is one we're missing. This is one we did not add,
so let's add that in there. Okay. Awesome. Let's go
back to selection two. Okay? Object mode.
Save this file. I think we can safely
fit on the keyboard now, so do one of those moons. Okay? So I think we pretty much have
what we need in here now. This should work just fine. This would work just fine. We just need to
make modifications and corrections to this,
and then we are good. Okay. Let's see. Yes awesome. It's one
on the keyboard again. We have a total poly count
of 19, which is fine. Save this against. Now let's export this out, select this. Before we export,
let's make sure any UVs we have in there, we
completely delete that. Make sure any UVs we have
in here. Let's even see. Maybe we can even keep this.
Since we extract this out, let's see if it's going to
create duplicate for us with good UVs in there. That's the layout. Okay. Well, surprisingly, it kind
of kept it's kind of keeping all keeping the UV quite
clean here, which is fine. We can definitely might. We can definitely keep the side, I guess. Let's see. I think for the most part,
this is actually quite clean, and we can keep it actually. So let me select
all of this again. If you do an unfold, it's going to change some
of this a little bit more. Let's start with an unfold. Let's see because oh, yes, it's completely messed up, so we can't keep this.
We cannot keep this. It's a complete mess. So let's delete this for now. We don't actually need
this for now. We're going to create our own UVs later on. Create better US later on. So plain F Rader, let's go over to
export selection. Export an OBJ file. So we going to export
this to Ziputs. So Ziputs. Let's just name
these two skates. Okay. All right. That's fine. Now, let's import
this into Zbrush. We won't even need to do any extra or extreme
detailing in there. For the most part,
the wrinkle detail we have in there rush
is really looking good. Okay? So let's go and export this import
this into Zbrush. Let's open up Zbrush five for this. Let's get this in here. So to do that, let's decide, let's do an append
so append spare. There's a spare space down here. So select that spare. It's quite small in right down there. So let's go in and
then do an imports. Let's go to the imports skates. Okay. Awesome. So we have
this now neatly brought in. All good. This is
what we want. Okay? So we need to kind of
make some corrections to this obviously, but
for the most part, I think we kind of did a good job getting
this in, which is fine. All right. So now let's make
some modifications to it. So go to geometry. Let's see if we can
reconstruct this. We can't reconstruct
that, that's fine. What else can we do in here? Yes. So I'm going to solo
this out to begin with. Make sure do side is turned on. Display do side, Shift F, Let's make sure we assign
different poly groups to this so we can properly and most easily select them
whenever we want. Okay, Shift F. Shift F. Then let's go and then add more subdivision
level to this. Before our subdivision levels to this actually let's do one. Let's do one subdivision level. Let's check this
out again to make sure nothing is broken in here. Just making sure we don't have any broken mesh across this. Because the next
step would be to move the seams closer
to themselves. So it's important to move the
seams closer to themselves. Okay, so let me
subdivide this again. One more. I think one more
should be fine. All right. Now, let's start making
corrections and adjustment to this Let's go to lower subdivision let me
move this to the side. Subdivision Level two is a
good one kind of move this in. So let's use the move
brush, Control Shift click. No. Let's select your Gizmo and click W or any of the
Gizmo navigation tools. So hold down Control
and select this. Then we can use the move
brush now and begin to move things in place, move this down. Let's move this in place. That's pretty much
all we need to do, just to connect this, bring them even closer.
Bring them closer. O W again, Control select
this and move this together, bring them quite close. Okay? Then we'll go
to the next piece. I think we would do Control Shift click
Control Shift click, Control Shift click. On Control Shift and rag out
to invert the selection. Then we can Control click on this to move them
close together. Let's move that same
close up closer. Okay, just a little
bit of work just to get them close to
where they need to be. So it's not really
complicated work. It's just to fit them back in. Okay. All right. I think I went
overboard in here. I think the idea would be
to push them in instead, bring them forward
and push them in. Okay? Loser. Okay. Yeah,
so it should be fine. Let's go to more lower
subdivision level for this. So we can move this a bit
more slightly faster. Okay. I feels a lot chaotic
around this part, but let's just try as much as possible to get
them quite close. Invite the max, bring the
other side closer also. Okay, pull this out forward. That's a bit much. Okay.
Pull that back down. So just to be as careful as
you possibly can with this. Okay? I think this should
be just about right. Don't need to go to extreme. It should be just
about right. Okay? Let's go to the opposite side and fix that p also as well.
Let's start from the top. Okay, bring this closer. This part is actually doing its best to kind
of keep the shape. So let's work for us actually. So let's just keep
moving this in. Up, some more, okay, down some more down, down. Okay? Move this
up, move this in. Okay. All right. Up as well. Reduce this down get close. Yeah, I think that's perfect. Let's go on solution level high. Let's check how well
we have done this. We need to move this
down some more. Just a little bit of
refinement should be fine. Okay, that's fine.
Go out of this. Wing everything back out. I think we need to
do for this side. Cd that actually. Ow Control click. Candles push this closer and then we should
be fine with that. Okay? Let's see bring this down. Select this. I would like to bring all of
these up some more. Let them touch a bit more. Because I feel like there's way too much gap around that around those parts up a bit higher. Okay? Yeah, that's fine. You can actually talk
that in if you need to, but I think around there
should be fine. Clay that out. We can do. Okay, that's fine. Now let's
move on to another piece. Let's start with this. Keep
forgetting let's do that. Let's old control,
tap on this instead. Is a lot better. Okay? No, I think we
actually need to hide this. Let's start by
hiding this let's. Let's first fix what
we have in here first. So Shift F. This is where we
need to fix to begin with. So control, select this piece. And then, you know, let me select this piece first. I'll talk this into
the band instead. I'll talk this into
the band first just to create a bit more space
for the piece in front to wrap itself in a lot more without having to
see the back piece. Let's wrap this in
back some more. Push this back some
more and drag it up. So drag this up, drag this up, push in, drag this up, push in, up as well, push this in, drag this
up, and push it in. Yeah, it's pretty motor
like, so it should be fine. Okay? So now this now
is in the please. So let's select undo that W
O down Control, select this. Okay. I'll need to
push this in also as well up and in up in. Okay? Kind of tuck
this back in also. Tuck in this a little bit more
in some more in some more. Tuck this in some more. Put this up, tuck this in. In some more, tuck
this in. Okay. I let's go oh, can see
some corrections in here. I'll pull this out
some more, okay? Just shift F. We need to fix this
seam in here also. So get this close to the SM. Get this closer
to them closer to the SIMndo that, get close. Okay. Let's get close. Up undo that. Let's find
a good angle for this. Here is a better angle. We can just move this up closer. Okay, here, that seems fine. Here, that's fine.
Clear this out. Shift F, let's put down
control, select this. Need to tug this back
in a little bit more. Tug this in some more, use the bro size, Tug
this in some more. Okay? In some more. Here is fine. Okay? Clear
the mark, select this. Talk this in some more.
Okay, that's fine. Let's bring everything back out. So yes, this should be fine. And I'm going to
select this now. I think the best option
would be to select this and pull this out, pull it out. We should be covering should be covering this what
should we want to call it? It's not even a leather piece. I actually see a fabric piece, you should be covering this
fabric piece in front. Okay. Pull it out,
out some more. Okay, we use the broad size. Let's get into the edge, shift F. Okay, pull it out. Okay, pull this out as well. Okay? Yeah, I think
this is fine. I think we're in a good place now, it will work just fine. We put this down some more, led this out. Yeah, awesome. This will work just fine. So shift F there you see
if there's any correction, there's some correction
we need to make in here. So select this. I need to generally pull
this out a little bit more because it feels like some of the parts are kind of buried in at the back, so we need to elevate this
up so more shifted F. Yes, elevate this out more out a
bit more around here as well. Okay? I think this should
be just about right. Okay. Here, this is fine. Then I'm going to
deduplicate for this. Let's de duplicate for the
skirts, the duplicate this. Let's work with just this
alone because I would like to make do some
drastic move to this. Okay? So I'm going to just let's go to lower subdivision
level actually for it. And I'll just move
this in do that. That out some more, okay? So I'm basically just trying to break this up a little bit more. Just make it look
a lot more unique. Similar to the reference
we have sort of Okay. All right. I think I need to
generally move this up a little bit more, okay? All right, get enclosed
pull this out. Okay? We can buy, bring this closer, pull it out some more. I don't want to go too extreme. So I don't want to lose
the fidelity of this mesh. So let's go a bit
geno in her Okay. I think something like
this should be fine. Okay. Yeah, it should be fine. It doesn't need to be exactly what we are when you reference. I think I do that, let me
just move this closer. Okay? Yeah, this is fine.
We can work with this. So next lesson, what else
going to carry on and then do something else. If there's anything we actually need to do
in here, though. So I'll see you guys
in next lesson. Bye for now. Okay. Let me just check this show. There's no penetration
through some of this. I think this is fine.
Yeah, this is fine.
70. 69 Waist Band In Zbrush: Okay, what about guys. In the previous lesson,
we kind of brought in a garment and then we did
a little bit of work on it. Okay? So in this lesson, we're going to carry on
and then see what we can do on the garment or just
leave this as it is, and then create some model piece for our character in here. So let's see. Let's go back to, we're still selecting
the selecting the skate. Sktti selected in here. So let's see, let me
subdivide this one more. I don't want to go
too extreme on it. I think this should
be just about right. Let's go to the lowest
subdivision level. Go down control, select this this, increase
subdivision level. I go to my standard brush. I would like to out and just
create a little bit of depth here a little bit of
depth around there also. Adding an extra
level of detail into this increase subdivision level. So it's there, but quite
faint, which is what we want. We don't want something
to undo that. We don't want
something too extreme. Something faint in there.
She works just fine. Okay. So I'm just accentuating some of
the forms some more. I didn't do that. That
was way too deep. Go a bit light handed. Just making it feel a lot
a lot more better adding some little detail to it, and then fixed regions
where Ns fixing also. So back to the standard brush. Elevate this at bit
more, elevate some more. Okay. Yeah, that's fine. The back part. I don't need
to do too much working. I think this should
be fine where it is, except we might need to smooth this out a
little bit small. That was a bit too tight.
Okay? That's fine. Alright. Yeah, this will work just fine. Play this out. Select this. I think I might need to do
some smoothing in here. Just a little bit of
smoten in here just to get it not too folded this way. Just get this slightly
smoted so it should be fine. Okay. I think that should
be pretty much it. You don't need to
do too much in here already have a dessert, look, we're going for a des
already in the sep, we need to do
something specific, but for the most part,
it should be fine. So the next piece I
would like to create would be this leather or not leather ban actually
animals can bun around it. So let's create that. So how do we go
about doing that? I'm going to use I think based on the shape already have
in here, the closer shape. The closer shape to it
is like a cylinder, let's use a cylinder for it. So to do that, we need
to use an IMM for it. So let's go over to, I think we have a
cylinder also too in the append, we have one here, so Cylinder select that.
Select it in here. It's quite small down here. It's a very tiny piece,
so let's scale it out. Okay. Move that up. Scale it down, move this up, get this roughly around
the center of the body. Okay, I think somewhere around there should be
fine to begin with. Let's squash this down. Scratch this down to roughly
around the length for it. Squath this down. Okay, up a little bit more up
higher around the. Okay, that should be fine. Then shift F. Yes, so let's do an auto group. But Es tamaran will
do group binomals. So let's go over to polygroups. Let's do group binomals. So the top partial have
his own separate polygroup and the bottom partial have his own separate
polygroup also as well. So then we're going to let me to list this
first. Solo this out. Control Shift click
Control ship click. Make sure Wo Saly
is turned on. Okay. Control Shift click as well. Then let's do it deletes Eden. So geometry, modified topology, delete Eden We need to reduce the pool canon
for this less reconstruct. Let's reconstruct one
more reconstruct. I think this is the lowest it
can go. Yeah, that's fine. This is fine. This we can
work with so I think we can do before we do
deletes the duplicates. Let's have a backup piece. Okay. Then delete ire, I would like to This
is the center parts. Let me max out. Let me see. Now, it's just to figure out
how far back out this goes. Looking at this,
I don't think it goes completely all
around the wist. I think you still have we still have some space
in between them. So we still need
to kind of account for those space in between them. So most likely, I'm going to
use let's use the max lasso. I'm going to max out this, let me make sure
symmetry is done. Let's don on symmetry for this. So I'm going to max
out these parts, Control W. Okay? Let me
see if I'm in the front. We use the front
view. On do that. Let's do this from
the front instead. Let's this part, Control W. I do that, clear
the marks again. Let's do this a bit
more accurately. Control W for this. I'll do the same
also around here, Control W. So these two
now should be excluded. Let's just grab Control
Shift click and grab this. I think it should be
something somewhat like this. If we need to make
corrections to this, we can, but let's just
see where we get. Okay. I thinking let's
see, let's check the back. Let's see. I think something
around there should be fine. Doesn't need to go all
the way to the end. Okay, so let's delete
ding so delete ding. Then we need to squash this
down back to proportion. Let's do something
somewhere around there, up a little bit more up some more around
there should be fine. Okay. Then now we need to use let's subdivide this
and then delete lower. Okay. Yes. This is just about.
This is just about right. Is Ds any need to pull them in together again,
we can easily do that. But for now, I think this
should work do that. I think I would like
to I might need to extrude this out
a little bit more. Before we do that, let's add. Let's add a cat around.
When we do all smooth. It's not going to completely shrink everything down too much. Let's do BZ. Okay. Then we add a cat here, a loop coat going across
this all on this edge. Okay? So if we divide this now, you should kind of
hold all the edge a little bit more than before. Yeah, something pretty much
like it should be fine. Okay? So let's do delete lower. Then we can do Can we
reconstruct this again? Yes, we can. I'm not basically checking
to be sure if this is working just fine
before I move on. Let's do it. Let's increase
this again, delete lower. So let's go to gizmo, let's use the bend curve.
So bend curve for this. So I need to change
the orientation of this my bend curve. So let's change the axis for it. I believe, this is
the axis we need. So let's push this
up to the green. Then I'm going to add some resolution
one resolution in the middle. So I'll select this. Let's squash this down this way. Select this, expand this out. Okay? Undo that. Let's se two instead. Let's do two instead.
Select this. Selected, let's just
scale this out this way. I think it feels a lot
better this way now. Expand it out a little bit more. I can see now that
we generally need to kind of pull
this even closer. But that's fine. I think we're making significant
progress in here. We just need to make
fewer corrections, and then we should be good. I'll select this, bring
this in some more Okay. Let's see. Okay, I think you
should be fine. Now, accept let's accept this. Accept. Okay? And I'm going to reconstruct, make it lower, use a move brush already on
the move brush, T of dynamic. Tn on symmetry for it. Shift F. So I would like to just
visualize just the torso alone. So let's go back into Is there I think we
have slight do that. I think we have a
slight problem in here Okay. Let me solo this out. Let me see whether
there's this piece. We need to hide this.
Don't need this anymore. So let's hide that. Okay? Select the main body.
Let's do an auto group. Poly group auto group. Auto group PTV instead. Control Shift Control
shift, click this also. In v the selection. Yeah, this is fine.
This is what we need. Let's go back to
this. Shouldn't be too much of a
distraction in there. I would just to oh, I see the government seems to make
some corrections to this. Let me see this let me
hi hide this for now. Hide this for now. I did not notice we have some
corrections to do in this. Let's just do that
with the move brush. Move the closer out to the body. There's nothing too complicated. We just need to move this closes out to the body, and
then we should be good. Okay. Closer right. This way. In most of the aim of this or this bond is not
going to be visible, so let's at least just
make sure we have in the right in the right place
move this in some more. Okay? I think that should
be just about right. That should be just
about right for this. Make sure there are no
interceptions in between these. Okay? I see we need to make
some corrections in here, move this in some more. Okay? All right. Clear that out. Yeah, we're fine.
Let's go back down and then try and bring this closer. Should be up even more. Okay. Use the bro size. Bring the undo that. It's beginning to get a lot trickier in here,
but that's fine. We'll make it work,
so I'm going to mark out the top part, invite the marks, blow the
marks a little bit more. Scale this in some more Okay. Et me clear this
out again. Let me do this again from
the side view. Oh, we need to move
this up first. Let's move this up, up as well. It just takes a
little bit of moving and pushing things in just
to get it to look right. So we're doing
this as accurately as we possibly can so just a few more times, and
then we should be good. Okay? You should
be up a little bit higher up a bit higher. Okay? Bring this closer. I think let's go to a higher
subbtion level now just so we have more polygons
to work with to better get good precision on this I think I'm moving it too far too
close to themselves, so create some gap in between. Okay? What is it going to
polish this down? Was it going to polish
this down to get some rounded more
rounded surface to it? Let's do our best to push
this in as closely as we can. Okay. Check this again. Right. I'm going to max
out lower parts. Scale this in. Okay? Right. Invite the max. Bring this out, pull
this out, some more. Okay? I think I need to move this even closer into the skin
should be fine for now. Then let's go and
then polish this. Let's polish this. So go over and then get
this polished out. So deformation polished by
group, polished by group. Keep doing some more polish. Okay. Let's do I'm
trying to avoid this. I still want to maintain
the sharp edge. So let me see if I can. Let's max out this
part to begin with. Mark out this part also as well. Blow the marks, then turn off
these dots can polish this. Okay? Okay. Yes, I think I just need to do some movements
in here also as well. Use the move brush, elevate
this out some more. Now, I need to create
some gap where this piece should be where this stylist
man piece should be. I need to create some
gap for that as well. Let's make sure Doble set
is turned on for this. Double set is already turned on. Yes, that's fine.
Okay. So let's move. I think we should be able
to do this perfectly if we max in the max,
blow the mark. We move this closer. Okay? A bit closer. All right. Yes, we're making
significant progress in here blow the marks or
more ton of symmetry, ton of symmetry,
and then we elevate this clear the mark elevate
this out a little bit more. Okay? Here as well. All right. Just checking this around just to see what we get out of this. I think the front part, we
need to push this front part. This front part is kind
of even the back part also expanded out way too
much, you need to get them in. So let's bring these
lower parts closer. Let's start by maxing it. Okay? With the move brush,
kind of bend them in. Okay. Come to the
fronts, bend them in. Okay. Yes. Come in closes. Bend them in. All right. Come in on these parts. Let's bend this down some more. Okay, elevate this
out a bit more. Then let's polish again. Polish by a group. Okay,
that's way too extreme. Let's turn on the dots. If you cannot do things that
get a bit more gradually. All right, let's check
this here. That's fine. Back also too. That's fine. Think a good place,
clear the marks. I think you can turn
off symmetry for now. Extend this out.
Extend this out. So more out. Okay? T on the waist,
was way too close. Get this out, some
more out also as well. Get into an angle,
move this out. Okay? I think this should
be just about right. Polish this a little
bit more. Pull out. Okay, now let's add
thickness to this. I think when you write last now, let's add thickness to it. Let me figure out if the
length for this is fine. Let's figure out the length if we have the right
length for it. Tn asymmetry, we need to expand this out some more because we're going to having something interesting in there, so let's get a little
bit of gap around there. Okay, I think that should
be just fine. Okay. Compensate for it around
a little bit more. Maybe maybe I did too
much don't do that. I think around here
should be fine. Dre'st need to kind
of pull that out. We would later on.
But this is fine. There's a thickness for it, so I would just go over
to, we need to push. I need to push this up. Should be a bit more pointed. And the gap in between
the gap in between, I think we need to
push this back. We don't completely close
that gap in between fronts. So let's respect the gap we have in there and
push this back in. I think this should be just
about right. All right. So I'm going to do a
duplicate of this. So let's delete lower
the duplicates. Let's artiness this
duplicate piece. So I'll go to dynamic
stop the dynamic. Take this down, take
down the smooth, increase the thickness, add
more thickness to this. Okay? Yes, I think this
should be fine shift F. Let me just see if this
thickness should work just fine or I need to do something
else or need to increase it Let's increase a little bit more then
do two segments in, apply, subdivide, shift
F. Let's see what we get. I think this should
be just right. Okay, so we still
have more control over this to push this
down if we need to. But I think this should be
just fine. Check this around. Yeah, you should work just fine. It should work just fine.
I think I will need to extend it out a little
bit more and do that. Let me just max some
of the top parts. Blow the mark some more. Go to our gizmo, extend this
down a little bit more. Yeah, that's fine.
That works just fine. Don't need to go to
extreme in there. This works just fine. Alright, so we need to move
this in word some more. Okay? Get this out. Yeah, I think this is fine. This is fine. We
can work with this, push this back some more. Okay. Yeah, that's fine. This is fine. This
will work just fine. So we can continue working on
this and then create this. You can see a
metapis at the top. We can quite easily create that by making
a duplicate of this and then extra
extract this edge, and then we can get out
get this metapis out. We'll do that in
the next lesson. I'll see you guys in next
lesson, bye for now.
71. 70 Waist Band Edge In Zbrush: Okay, come, but guys. So
in the previous lesson, we worked on this waist band. So we're going to continue
on with this and then keep making modifications
to it as we go. So let's continue on. So I'm going I want to make this metal band at the top part. So let's carry on. Let's do that next. To do that, well I would just go and duplicate this piece, so duplicates it. Okay. Then I will hide Let's
start hiding the duplicates. Let's start hiding
this duplicate first. But this is
the main piece. We're going to need that?
Let's even rename it to waste. Let's use all caps for this. Bnd. All right? We name this all, we don't
need to name this for now. Let me just pull this up, select this, this, select
this is what we need. Solo Shift F. Delete a new topology we have
in delete rather. This should be fine.
Control Shift click, Control Shift click,
Control Shift click. Okay, delete Eden, delete Eden, right? This is what we need. Okay, so I'm going to max out symetonalsymmetry for
this symmetry turned on. So I'm going to max
out this Control W. Okay? I think I just need
to grab one more. Let's grab this Control W again. Okay? So basically, all I need for this now is
just the top parts. The control shift click. This is all I need. Then I'm
going to do delete Eden. Okay. Yeah, this is fine. Let's go out of solo mode. Let's top back the
main waistband piece. Let's see where we get. Yes, I think we can, I think
you can work with this. Or do you want to grab this top? Let's grab let's grab
all of this Control W. Control Shift click. Don't know that deletes ding. Delete ding. Yes. And
with the move brush now, we'll just move
this out slightly, move this out slightly. All right. And I also can create
some thickness for it. So let's create
thickness for this. So we can do let's just use the under geometry let's turn
everything back on first. Make sure this is visible, okay? Then let's do, I think I
need to move this back in. All right? Then let's
go to geometry. Dynamic sub
diiveTnwton, take down the Smokey's already
taking down. Oh, and it's already memorizing the previous thickness
we added for it. So this is where we
need to begin with the zoom out, Ship F. Okay. But we need to get this even thicker than
it is right now. So let's increase the thickness. Let's see. I think we might we might need a little bit more. We need
a little bit more. Can we adjust the values
in the value of one? Yes, we can. Shift F. Let's see. Okay, I think we
can lift this up. Turn of symmetry trans
orient and centers. We can move this up a bit higher somewhere around
here should be fine. Okay. Undo that up a little bit more. All right. Maybe way too high,
let's bring this down some more. Yeah, that's fine. This we can work
with two segments, two segment, two segments. We need to segment for this. I think let's do three
segments instead. Let's do three segments
instead, apply, subdivide Okay, Shift F. Let's see, I think this should
be just about right. We can pull this up some more. Okay? Then let's take this down, delete ire down control, make another duplicate of this. Pull this out some
more up this way. Maybe up a little bit.
Let's do up a little bit, let's see if we can make
modifications to this. You can see this thinned out
edge on the lower parts. We have a lit thinned out edge. Doble let's see without double salt is turned on turned on. Okay. Let's see. I'd like to polish just
a little bit more. You can see this edge here. Let's poking out.
I don't need that. So let's go over to the formation polished by
group. I still not fixing it. Let's do polish script edge. Polish script edge. No issuing its way to motor ship F. Let's figure out
where that issue is. Probably should
we can't even use Control shaped click Okay. Shiptv trying to resolve any
issue you might have here. This is the issue
we're having in here. So mark this out, inve
the max, Ivar the max. Okay. Let's do Polish instead, Polish, Polish, Polish,
Polish, polish, polish. I think something's
actually wrong in there. Something's definitely wrong in that part. Clear the mark. Bring everything back out.
Let's grab this instead. That's one Control shaped
click. Control shaped, click. Yes, it is just strip This strip is actually
the main issue. Okay? This strip is
actually the main issue. So I'm going to mark this out, bring everything back
out, invert the max. Then I can polish this, polish this some more. Okay. Polished by group,
polished by group. No, no, this would definitely
mess things up for me. I don't want anything that
will look a bit weird. Let me use the smooth instead. Or is this even a piece
we actually need? That's another question
to be asked Ship E, Control shaped, click on
it, Control shaped click. Do we actually need
that piece? Okay. I think, okay,
this shoe might be coming from, it's the
piece we actually need. It's supposed to be
in here. But the way it's folded in is
just the issue. We folded in is just the issue. So let's just continue
smoothing smoothing it out, and then we should be
good. Clear this out. Control click, click.
This is what we need. Mark this out, bring everything
back out, invert the max. Let's do Polish Crips edge. I can say it's kind of
thinned out this way, which is not precisely
what we want. Let's polish by future. It's completely messing
things up for us, so I think we might need to
undo all of this by lots. Let's go back to
the original form. Let's go back to the
original form. Okay? I think we'll start by doing
manual extrude instead. I say manual extrude instead
would make a lot of sense. Let me move this click, okay? Because you want to try and
avoid having issues on there. Transmitter as possible to have issues on there because
it's just going to mess up your mess up when you try to take shade instead of so tan spinter. So I'm
trying to avoid that. Let's bring everything back out. So I think a more preferable
option for this would be to use Bs and extrude
manually instead. So let's go over to the
surface and then let's do extrude or polygons. Yes. It's a lot more It's
a lot more neater. Let's go out of
isolates from this out. Yes, this is perfect. So we have something
cleaner now with this. You can see we have a lot
more cleaner topology around this and cleaner surface
around this also as well. Okay. So now we need to just
add edge loops to this, and then we should be good. One other thing
I'd like to do be to go over to poly group. Let's do group by normal. Okay? Yes, this is fine. Then I'm going
tool Polish group. So polish group, so it should hold it should hold up the
edge a little bit more. Let's undo this for now. Control Shift click. Okay? Con through.
Click on this. IV the selection.
Let's add this to it. Invite the selection,
Max this out. Ivdimx Iv max, Shift F. Yeah,
this is what we need now. We can polish this.
Let's do Polish group. Polish group, polish
group, Polish group. Trying to get it
somewhat flatter. Okay. Let's go out of isolates. Let's see what we
get. Clear the marks. Oh, no, no, he's messing
things up in there, so don't do that. Okay. Bring everything back out. I think what we
need to do just to add if you subdivide
this, do that. That's fine. Let's just
add loop codes to this. So let's add one loop code here, add one in the middle.
Add one around here. Okay, add one that holds
this edge together. We need to do this with
symmetry turned on. Let's do this with symmetric
turned on. Do that. Okay, one year one
around here as well. All right. Let's add one around
here as well. Okay? Let's see what
we get Shift F. Subdivide perfect.
This is perfect now. It's a whole lot better. So Control Z. Now we can make
a duplicate out of this. Let's grab a duplicate
out of this. Move brush. Go to Agizmonsymmetry, center AgizmoOn Control and
drag a duplicate out of this. Okay. Bring it down a
little bit more. All right. I think they should be
fine. We just need to use our move brushing and then
move things in place. Let's just move some
things in place, and then we should undo
that tunnel symmetry. Okay. Yeah, I think
they should be fine. Yes, let's go to the front. We put the same around there. Come in close. Okay? Yeah, I think they should be
fine. Invite the max. Let's pull, push
this down some more. Yeah, that's fine. Yes,
that we can work with. Yes, this is fine. We
can work with this. Okay. So I have done
is for the lower part, but it will not make
any sense if I do the same thing for the
lower part because we have this we placed
on the lower part. So we're going to start, let's create let's create
the cow piece now. So that's the next thing
you're supposed to create. So to do that, it's not so much of an issue
to create that week. We use we just use two police fast and
then we should be good. So let me do you can sly do
that inside another canvass. Let's go to another Canvas. Let's do this in
this canvas in here. Okay. So to do that. Let's go and
BI Police Fair, ply fair. Okay? Select the police fair. Then we come in here under
geometry, we do okay? I think, okay, we need to kind of, we need to do
something first. Let's do make polyme
DD. That's fine. So now geometry
now would go down to Modify topology merge from
brush, okay. That's fine. I'll need to scale
this out because our main body is kind of
scaled out a little bit more, so it should be fine. A bit more, okay? So this is fine. So I'm
going to symmetry to on asymmetry turned on now. So I will just go in and
then squash this up. Okay. Yeah, that's fine. Yeah. This is fine. I'm just going to make
modifications to this. Let's make modifications to it, and then we should be good. Okay? So I'm going to go down control, make a duplicate
out of this, right, invert the max, and then I'll start moving this just
to get that shape in. Okay? Shrink the
lower parts like so. Come to the top part,
also bring this in. All right. I think
it should be fine. I think we need to do mirror and weld Mirror and weld undo that. I think I'm going
to max all of this. Control W, Condoh click, Conduhf click, delete Eden. Better still, I'm
going to duplicate this instead and rotate. Come on. As we have an
issue Control drug. Yes, much better.
Okay, that's strange. Clear the mass. Max this out. Control W. Display double sided, okay? That's fine. Do that. Oh, symmetry issue was from the symmetry,
so ton of symmetry. Ton off symmetry, and then we should be good now
when we rotate this. Alright? I'm going to bring
this closer this way. Okay. Then I'll move this in. Bring this closer,
bring this closer. Okay. Yes. So they should be closer to themselves pretty much
this way, this way. This I'll bring in
some more. All right. I think this should
be just about right, smooth some things out,
some more, clear this out. And I'll make a
duplicate of this. Let's duplicate of
this duplicate. Then I'm going to do
dyna mash it for this. Let's do dyna math for it. So go over dynamos
dynamo, Dynamesh. I think this value is way too high. Resolution
is way too high. Let's do a resolution of ten
to begin with, dynamesh. So at this resolution, we have one oh five, do that. We need to kind of
smooth this out first. Let's make sure we
have a smooth surface to begin with, okay? Still make modifications
to this based on that. Move this in. Move
this in, smooth out. Okay. Create some variation in the Variation shipping
in here. Alright. Create a little bit of gap we push this in,
smooth this out. All right, I'll bring this
in some more smooth out, increase my smooth
intensity, smooth out. Yes, that is fine. Clear this out, delete
lower. Take this down. Let's use the resolution
value of five dyna mesh, 90 k that is fine.
Smooth things out. Okay, smooth out,
smooth out. All right. We're still on the move
brush the move brush, push this down some more. Pull this down some more. Okay. Then some more, squash this in. In some more smooth this down, smooth down, smooth down. Okay, smooth this down. Pull this up some more. Alright, smooth this down. Polish this again,
smooth out, smooth out. Okay. Then we can now zero
match this so smooth out. So let's make a duplicate
of this duplicate Okay. Let's do duplicates. All right. I think ship F. So we have two poly
groups in here. Let's add some additional
codes across this, we want to use the
slice cove instead. Let's do slice cove. One year Oh, where the subdivision that
we don't need so delete her. So add, slice slice here. Shipt This is going
to help a lot. Let's duplicate this one more. This is going to help a lot to create good topology across. Its just the same way we've
been doing it before. Let's go to zero, zero
masher detect edge. Yeah, we can keep
smooth group on, keep groups, detect
edge also take down, take this down ton of adaptive, then set the value
to two and then let zero mas Let's give the moments. We have something in here, bots I'm not really digging
the stretching in here, so let's do same. Let's rematch this again. Okay. Let's zero mash you say again. Don't do that actually kind I like the way issue
we are having around here. Um Okay. Let's go out of this. Let's do a value of five to begin with. Then zero mash. Maybe let's don of adaptive
instead for the old Os. Zero mash. Okay, this looks somewhat de
sense Control W for this. Let's do same Z mash. Yeah, it's a lot better. A whole lot better. Then
we can go half way. Let's go halfway now,
ton of adaptive. Let's go halfway. Okay?
Let's do F again. So it at 800. Let's go F again. 400. Okay. I think 400
seems like a good one. 400 should definitely work. Let me move this up some more. Yeah, 400 would work.
We see I would have, because we need to
duplicate this across, so I think this is a good one. This is a good one
to begin with. It's a good one to
begin with, actually. Then we can do some little bit more work in there by using
the move brush. Okay. Let's start by
separating this and do this. Let's get to pull your groups out of this
first to begin with. Control W. Okay? Mark this out and do that
Shift F. So basically, you need to just do some
minor movements in here Okay. Pretty much like so,
like so, invert the max. Get enclosed in move this out
also pretty much like that. It will make better sense
once we are done with this, Ar, reduce the bro size. I think I increase intensity
for this invert the max, pull this out, pull out, pull this out, out some
more, clear these out. Then if we subdivide
this, we subdivide this, you should be getting
something that looks like so, precisely what we want. So let's move this a
bit more drastically. There's some drastic
movements in here, right? Just to make it slightly
a bit more extreme. Okay? All right. If we subdivide this, subdivide this again, so
we should get to getting something that looks more
like a kary piece now.
72. 71 Cowry Bead To IMM In Zbrush: Okay, come back, guys. So in the previous lesson,
we kind of finalizing creating the cali piece. So let's make some more corrections
and then we're going to convert this into going to convert this
into an IMM brush. So let's do that. So I'm going to use
the DM standard brush. Let's use the DM standard brush. Right to add some more shall we call it called
separations in between these, just to push it a
little bit more. Okay. All right this
way here as well. He also as well.
Smooth the edge. Okay. Smooth the edge. Smooth the edge also as well. Dig this in, smooth this out. Okay. That is fine. Undo that. Okay, so let's go on
subdivision level lower. Let's go to lower
subdivision level. Let's go even lower. I think this is the
actual one I need. Let me see if we can dig
in some more around there. Okay? Dig in some more. Okay. Around here as well. Up here, down here. I actually need the lowest one, so I'm going to
duplicate this again. Then I'm going to delete higher. There's one more now I
like to do also in here. I would like to
create this is fine. I'd like to create a bond like a kind of rope bond
here and Opia also. Let's move this up some
more remove brush, move this up a little bit
more up some more. Okay? So to create that band, we can just go Bag
subdivision level in there. B, I. Okay, let's use
the slender pipe. I'm just going to wrap
something around there. Okay. Let's center this d shift, rotate this, get in the center. Undo that. Center this, pull down shifts, rotate it this way,
scroll down some more. Let's get this out
this way first. Go to move brush. Let's let's separate
this out split, split on marks points, select this, and then
let's shrink it. So let's go to deformation. Okay, let me start by
subdividing this just once. Then delete lower. Okay? Then I can shrink this. So deformation. Let's shing this down,
shring this down. Okay. So this should just about right. I'm going to come close, shrink it down this way. Okay? I'll make a duplicate of this and bring this
down here, hide this. Then I'm going to
move this in here, rotate this, get this in. I should be roughly in here. Put this back in
some more up some more up some more yes, I think that's a good place. Hold down control, duplicate
that out and do that. Duplicate this upward, bring
this in, get this in place. Yes, I think that
should be fine. I can make modifications to it. It doesn't feel
completely rounded. The max. Okay. Bring
this closer. All right. I think they should
be fine. Then we can merge these two
as one single piece. Let's do a merge
down merge down. Shift F, control, something
doesn't feel right. I don't think we have
merged this down yet, okay, merge down. Yes, perfect. So control. Let's just do at group. Let me leave the
stats this actually. So let's Control D. So
subdividing this now, we have a to trplcunt of
five K for these two, which is not I need to make
some corrections to this, so select this move
this back out. Okay? All right? Let's see. I think this
my rope piece will need to most likely go down a little bit more
so Control Shift click. Let's delete IRF to begin with. Control Shift click on this. Let's go and then
split this again, split on max points. Can we reconstruct this? Let's see if we can
reconstruct this Okay. I've not splitted this out yet, so split it in. Yes,
this is what we need. Let's see if we can
reconstruct this. Yes, we can. Yeah, that's
fine. Delete higher. Then let's go and
merge this down again. Let's do a merge down again. Because I like to get
this as low as possible, since we're going
to duplicating this across because we have a
lot to duplicate across, trying to get this at the lowest possible polycunt for it. So we have it. If we clear this out, we
have a total polycunt of Chred subdivide this now,
you should be getting this. Okay. Do that. I'm going to select this max
them out invade the max. Let me subdivide it first. Invite the max, and I'm going to inflate this make it
more thicker than this. So inflate inflate some more. That's fine. Yeah,
that should be fine. Then we can go and
delete higher. The subdivide is still not taking up the
inflate we did for this. So maybe we should inflate it when it's on the lower
subdivision level first. Okay. Is inflates. Control D, much better. This is fine. Okay. Yeah,
this should be fine. I think we kind of
lost the I think we lost the detailing. Lost
the detailing for it. So let's delete Air. Let's try and bring back that detailing. I need to get this detail
undo this smaller blow size. This detailing should be
in the the max. Undo that. This is what we need.
Use the blouse size. Go to the opposite side. Okay. For this also. Move this out some more. All right. Clear this out. If we subdivide. Now we get s of
it's in the bonus. I need to make it a
little bit more extreme. Trying to get this at the
lowest possible polycnt for it. So since we're going to be duplicating it across subdivide, I think this should
be just about right. Okay, so this is fine. So now let's make an IM out of this. Let me save my five first. So to make an IM out of this, I'm just going to, I already have a pound
IMM brush in here, so I'm just going
to add that to it. Let's see brushes,
brushes, brushes. Okay. So I have this in here. So I believe it this
KCIMopen that up. So I would like to
add it to this. So I'll go over to brush. I believe if I scroll down createsate creates
insert mesh brush from active brush from
active mesh rather. There there should be
an append here also. There should be like
an append somewhere. Should be like an
append somewhere. So it's in here now, so
we go over to brush, create ISAT mesh was
going to ask you Axos. Would you like to append to active brush or
create a new brush? You can either
create a new brush if you don't have your own IMM, or you can append if you
already have your own IMM, so I'm just going to do I'm going to do
an append instead. So pressing the key SAT My brush when Nb leads
okay, click okay. So you have added
this in here now, so we need to kind of
test this out now. So to test this out,
let's go over to absorb. So I believe we should have just do append append let's
do a cylinder instead. Cylinder is quite small, so
I'm going to scale it out. Oh, undo that. Cylinder
sleg cylinder in here. Scale this out. Undo that
scale this out some more. Bring this down here,
scale it out some more. Bring this down again, so Shift F. Let's do polish by group. I'm trying to check if my orientation is correct
before moving on. Trying to check my orientation. So if you go over to poly group, group by normal, Control
Shift click on this. Turn on D. Okay, no, we need to turn
on double sided. Glo on double sided so we
can actually it properly. So we can do it as
it deletes Eden. Geometry, modified
topology, deletes den Okay, so now let's go over to stroke, and we will do under crown
under crow function. Ton Polly groove, ton
of crips, Cris edge. Let's leave ally
board so free mesh. So now we need this
IMM brush now, put it now to be wrapped
around the edge. So let's start by
using you brush size, and then we just tap on this. Okay, now that's a
bit that's a bit weird. That's a bit weird. It's not grabbing
the entire mesh. It's not grabbing
the entire mesh. And I think I know why. Yeah, I think I know why. So we
need to do this again. We need to save out. Let's go to a more brush. We need to save this out again. Append this again. So
let's just Control W. Give everything one
single polygroup. That's what we needed to do.
That was a mistake I made. So let's go back in there.
Make sure it's IMM selected. Is there a way to
delete this in here? You should you should be able to delete Delete mesh from Brush. Yes, that deleted it so. We can go back to Brush
and then we do creating SAT mesh append Like Okay. Okay. Let's gome back
down, select this again. We still have a stroke on this, let's select that you can see
how it's working perfectly, precitly way we want it
to work, which is fine. So we have this where
we need it to be. Yeah, this is actually awesome. So now, all we need
to do now is to apply and do that and do. All we need to do nee to apply
to where we need it to be, so go down to throw
the lit curve. So now we have this in place. We can go back to sup No sup to. Let's go back to our main
canvassing here. Okay? Yes. So now we need to kind of
wrap it where it needs to be. I think we still need
to do I need to make some additional corrections
in here, I believe. Yes, I do I do actually.
Let me go back to MO. Move, select this. Let me select this instead. Symmetry turned on yes. And I'll just push this in. Push this in and up, pull this in, push this in. Undo that. I didn't do
that correctly enough. Push this in. Then select this, pull them out, push it out, undo the other way too much. Don't do that. We use
the bro size. Okay. I'm basically trying to create
a depth underneath this. That's going to catch
some good shadowing around those parts,
which is what I need. That's fine. Then we
can select this now. We need to make a duplicate
out of it, so Shift F. Let's make it duplicate
out of this duplicate. Okay. So this out. Control
Shift click. Let's the delete Eden
delete Eden, delete ding. Geometry deletes delete
ding. Okay, that's fine. Alright, so we need
to slice this up now. Let me go back to
our main reference. Let's see. So we have one
slice here, one slice here. Then we'll just put last
one on the bottom parts. Okay? So let's do that. I'm just going to do
a slice cove around. I think somewhere around
here should be fine. Oh, delete hier. Okay. Do a slice
cove around yeah. Okay. That should be undo that. Let's do this again. Do this around here. Nope. Okay. Undo that. Okay, in somewhere around
here should be fine. But it needs to be
quite straight on. Let's see. It doesn't look good
at the back parts. This is where it gets a bit. Should I say tricky?
I need to get this pull the know first.
I need this to be. Nope. Almost there. Almost there. Okay. Double tap. No, no, I don't want that
jagged edge there. Probably should go down
a little bit more. Yes, perfect. This
will work just fine. This is in a good place now. Okay, let's hide this. Let's do for the lower parts. Okay? No, really, not really. Do this again.
Yes, this is fine. I work just fine. It is perfect. Its work just fine. Okay, so what we need to do
now will be to go over to a stroke. Poly group. Yeah, polygroup a mesh boer. No, let's not do the
mesh border for now. Let's just do poly group
first to begin with. That's fine. Then let's go
and introduce that brush in. So let's reduce the
bros size, tap this in. That's way too much.
Reduce our browse size. And do that. Turn off symmetry. Symmetry is messing
things up for us. Okay? I need something a
little bit bigger than this. He's working on the
top parts, well, but on the lower
parts, not so much. Not so much in the lower parts. I think the major
issue would be, I think we need more
resolution to this actually. We need more resolution to this. So let's delete Let's
subdivide this. Subdivide this. Then go in and delete higher. But more subdivision
you have the more you have a smoother curve, and the more you have better, more what you're doing can
be consoled a lot better. So let me smooth
this do and do that. Let's do polish instead. So let's polish this a
little, okay? All right. Let's see if we get
something better now. If not, we'll look
for a solution to it. Tap in, you can see how
we get more fit in there. It's kind of trying to match it a bit more accretly
because we have more subdivisions
to this summation and then keep creating
more smooth alcove to it. Okay? I think I need to increase my browse
size more and do this. Create my bros size a
little bit more taping the Tap in there again. This feels like it feels
like the right amount. Okay, Shift F is completely
messed up on these parts. I'm tirely sure
what I do do that. Delete this. I think it would be safe to mirror to the other
side instead. So, let's delete this. Delete it in. Let's work
on just one side alone. Let's work on just
one side alone. So I'm guessing that what's kind of causing
some issues for us. Smooth grove and smooth
increase this smooth curve. Okay. All right. Let's see. I think right now, I'm going
to focus on the top part for now and do that increase the
brow size a little bit more. Okay, we reduce the bro
size some more. Okay. I think this top
part would be fine. We can just duplicate and
mirror this to the lower part, so we work on from
there instead. Let's see. Is actually way way too tiny. Maybe I should create
something even smaller. Alright something smaller,
but just way too small. I don't want something that
is way too small in there. Increase the broadside so more. I think as far as this goes, this is the proper size for it. Let's go in to the stroke
and delete the stroke. Okay? So we only need the top part
now. This is the top part. This is the only piece we need. So I'm going to isolate this. Then the delete bring
everything back out. Yeah, so now just a matter of making modifications to this and then moving them
where they need to be. Okay? So Shift F, select this, go to a higher
subdivision level, and just arrange this
arrange this a bit more. Select this. Okay? That is my move brush. Picker brush size and
move this up some more. D then some minor fixes to it. Okay? Yeah, this is fine. So the last thing
you need to do is just to keep is to start moving. You need to move I don't need to move them too
close to themselves. I'm not sure I need to move
them too close to themselves. Though I would like to push
it in some more push this in some more in some more
closer to the mesh. I should be on the
surface of the mesh. Okay? Push them towards the surface of the
mesh some more. That's fine. Iduce my bro size. Yes, I think this should be
fine. This should be fine. We just need to
outdo an auto group. Let's auto grouping here. So deformation No, not
deformation, polygroup instead. So poly group, auto group. Okay. So now what we
need to do now would be just quite easily just
to move this in place. We can use the move
topological approach for this. If we come in close, let's say we slow this out, we come in close, we can start moving this
closer to themselves. It's pretty much this way. So it feels like they are kind of intersecting
among themselves, like a band, like one
single bond across them. So something pretty
something pretty much like. So we're going to do this
across the entire out scene, and then we should
be good, okay? So we'll do that in next
lesson. Bye for now.
73. 72 Cowry Waist Beading In Zbrush: Welcome about guys. So
in the previous lesson, we were trying to we kind
of successfully noted the first bands in
here for this calorie. So we're going to carry
on and then continue to do that across this
calorie in here. So extend this out, extend this out this way. Okay? And I'll get this down. Okay. Move this up, move this down, up some more. That should be fine. Let's
move on to the next piece. Extend this out,
extend these out. Move this up, forward. Move this up, move this down. Okay. Get this
down, get this up. Okay. Yeah, it should be fine. Hold this up. I'll get I think it will be much
better if let's see, auto group, just continue
with the auto group instead. Hold on control, select this. Shift F can move this out. Okay? Select this. Move this in, for some more I you can move this
down, use the bro size. Move this down and
up, invert this. Move this down. Okay. Yeah, that should be fine.
Move on to the next one. Select this. Move this forward. Select
this, move this forward. Move this down. Move this up. Invert the max, move the stop. Okay. Next one. So I think these two, this is mostly what we're
going to be doing. So we get these two look right. Okay? But still on the move topological
broach, which is fine. Okay. Invert the max pull
this down some more. Okay. Here, that's
fine. Next piece. I like this. Its out. Bring push down, reduce the
brush size, push this down. This should go up. Okay. You are pretty much like so. Next piece. Select this. Pull out. Put this out. Invite the max Invite the mark, pull this up some more. Bring this down. Okay. Move to the next piece. Put Wu this out in the
max, pull this out. Okay? Use the bro size, get this down. Get this up. No, should be down
instead. Get this down. Okay? Next piece. Inverts. Okay. Put this down, get this up. Move on to the next piece. All right. Pull out inverts. All right. Come in close. Okay. Up here around here as well. Next piece. Pull this out, inverts,
pull these out. Okay? Up forward, inverts. Weh pinch down, pull up. For some more reduce the
brush size it should be down. Just get this down, Okay? Reduce myos intensity,
and do that. I don't get that shrunk down way too much, go
to the next piece. Converts Okay. Reduce the brush size. Get this down instead. Invert this. Get
this down. Okay. Next piece. Alright. Okay. Inverts, get this up. Get this down.
Inverts, put this up. Oh, that's last one. Awesome. So put the next piece. Who out inverts, W out. Okay. Invert this put
this down instead. You go down instead, invert or pull this
up. No undo that. Should go down instead. Okay. Yeah, that's fine. Clear this out. Okay. Go out of solo mode. Yes. Yes, I think they
should be fine. Shift F. All those
hide all of these. I would like to inflate the
groups a little bit more. I'd like to get them
inflate a little bit more. So let me solo this and
keep selecting them. Okay. Then shift max out, bring everything back
out invert the max, go out of isolates, let's do
a little bit of on inflates. So let's go over to deformation. Inflates a little bit more. I think this should
be just about right. Okay. Yeah, that's fine. Yeah, that is fine that we can work with. Okay, then invert the selection. Let's inflate this
out some more. Make them a little bit
ticker, getting close. Let's see what we have. So if we should clear out the mat
now and then control. Do you have any
subdivision levels in there already. Let's check. If we subdivide this, we should be getting
something like so, which for the most
part seems fine. Okay. Yeah, so I think this
is, this is fine. This side should
be fine for what. You can see how it's kind of
pulling out. So undo that I think I shrunk that
up way too much. So let's inflate this a little bit more,
just a little more. Okay? Then invert, inflate this also as
well, compensate for it. All right. Yeah, that's fine. That is fine. This we can
work with we move brush. With the move brush.
I like to move this up a little higher
up a little higher. That's fine. Then let's
make a duplicate of it. Let's make a duplicate of this. Extend this out some more. So down control. Just get
better orientation to it. Okay? Center order
control, pull this out. Okay. Get this out. I think you should it needs to come down a little bit
more pull this out. Okay? I'll rotate this out some more. Pull this out some more, then bring this out
towards some more. Okay? Scale it out some more. Scale it out a little bit more. Stretch this out some more. Who bring this back in. Okay, I think I extended
that out with two more so. Let me string this back down. Take down the ski
a little bit more. Okay. Put this back
in. All right. I think that should
be fine. Then we can use the move brush now and then push them in
towards the surface. Let them rest a bit
more on the surface. Okay, this one is
resting with too much. Let's get that out.
Resting with too much, get this out also.
Bring this in. Okay? Come in close, bring this
down, out some more. Trying to make sure we get this as perfect as we possibly can. Touching you also
touching you also, that's fine. That is fine. We can work with this. I'll
pull this up some more. Okay, do that. Okay. Yeah, it should be fine. Move this closer. Check this on the edge, bring this closer. Here, that's fine. Okay, so now I need one
for the lower parts. So let's pull down control
again, bring this down. Out. Rotate. Okay. Bring this down some more. Should be down
close to the edge. Okay. Put this out, bring this forward some more, pop little bit more. Then we can use the move can use the move brush now let me pull this backwards some more. So with the move brush now, we can do some movement on this. Okay? So I'm using a quite a big brush because I don't want to
deform it way too much. I'm using a very big brush. This helps us move
things a lot faster. Okay. Then let's get close. This is resting way
too much on this. I'm begin to carefully get
this where we need them to be up way too much, get down. Should be resting on
the surface or more. Okay? This will
extend out I will extend a little
bit more this way. Okay? This way, start pulling
things up. Who is up. You can see this needs
to raise down some more. Crease the brush size. You do this for me
this time because I'm missing you brush the
dynamic tuned off. So once you get close, your brows size
begins to shrink. And you don't want
the brush size to shrink too much
because you want to do this wide brush size is
still White's big enough. Okay. All right, this should be fine. Maybe it up a little bit small. Okay, clear the marks. Think I will need
to max all of this. Invert the mark, bring it down a bit more should be roughly around
the middle parts. Okay? All right. Invert the mark, we
just the bro size. Needs to come down
some more close. Okay? Yeah, pretty much, you should
be fine. Clear this out. Then I will just mirror this
to the opposite side now. I think we can need to
make corrections in here. Okay. Roughly around
there should be fine. All right. Let's check in again. Broad side some more leave
this up a little bits. Right, that's fine.
So now we can mirror this to the
opposite side. So this now we can mirror
to the opposite side. So let's mirror this
to the opposite side. We'll just go over
to geometry mirror, and then we should be good. Yes, I think we are
good in a Okay. I see some more work we
need to do in here though. But before we do that, let's
go back to this piece. We need to merge
it to this piece also to let's merge them down. So go down shift. That seems like last seems like last one on the list, okay? Drag this down, go
on go over to it. Okay, one KT piece down do have any
subuption level in there. If we don't, that's fine. So
now we can just do a meas down. So that's fine. So we don't merge down
in here. So shift. So these two pieces will
be one single piece, then we can subdivide it. Okay? Yeah, I think we are good
in here. This is fine. Okay. So now let's subdivide Lone and I feel like I need
to push this down some more. Feel like I need to push
this down even more. Okay. Do some more round
there should be fine. Then we can go back to this. Tn on symmetry for this.
Let's start with the top. Let's start with the top
parts. Invert the max. We can carefully
move this in place. As long as it's a
bigger brow size, that will work just fine. Right? Look at this from a
different angle to see if it's pushed in well enough. Okay? D some more. Alright, that's fine. Okay. Let's go to the lower piece. Clear the marks,
less marks out this. Okay? Invert the marks. Do that zoom out some more because we need to
do this with a very big, big bro size, so we don't
mess things up too much. And even if we do, we can
correct it without having to completely ruin and deform
the calories in there. I think for the most part,
this should work just fine. Let's leave this up some more. Okay. Yeah, that's fine.
Here, I work, that's fine. So do that. Back to this piece, I'm going to
subdivide this a few times. Let's do one more. So what I need to do will be to add to add a cat in between. Just like the cat
through actually, so like adding the cat through, so that's pretty much
what I want to do now. Let's see if we can do
this with transparency. You should be able
to do this. We do this with transparency in here. We can do it with transparency. Okay? All right, rotates. Okay. We're pretty much
like so you solo this lesson we get
will work just fine. We just need to shrink
it a little bit more, but at least we get
something in there now, so that's fine. We're going to refine
that later on, but let's just continue on. Okay. Pull in this way. All the way, should be fine. I think for the lower
parts, I want to live lower maybe should do something with a smaller
brow size instead. Smaller blow size
should be fine. Okay. That's fine. Can solo this. Solo this out. And I'm going to use
the pinch brush. B PI. Let me start
from the top instead. And I'm going to tighten
this quite well. Okay. All right. All they should be fine. Do that get close. Okay. Yeah, I think that
should be fine. So let's turn of transparency,
bring everything back out. So you should not be getting something around there that kind of puts some measure
of depth in there. So it should work just fine. So this is fine. So next lesson, we're going
to do something else. We can bring back
the entire body. Let's make the
entire body visible. Let's see what we get. Okay. Yes. I think there's one
more thing we need to do for for the calvary
building here, we need to add some extra
level of detail to it. The distr level of detail
not seeing too complicated. Let's first subdivide
this quite well. Let's use 4 million for this. Then with the deem
standard brush. I think we can do with
symmetry to down. Yes, we can. So I'm just basically going
to use a smaller brush size. Add smooth, add some more. Just add some more
depth in between. Depth like should be fine. We use the bro size some more. Okay. Smooth this down. I think we might still need
to subdivide the seven more. This is still not smooth enough. We still don't have good
enough smoothness across this, so you need to
divide theven more. So let's divide again. So I think system
should be fine. Your system works just fine. So just to add extra level of titing in there, and then
we should be good. So I'll go around and then do that and then that's
pretty much it. So you guys in the next
lesson, bye for now.
74. 73 Waist Metal Beading In Zbrush: Comba guys, kind of went in
and then made modifications to this core and then
add some tit into it. I think I see something I need
to fix in her to shift F, go to the lower
subdivision level. Okay. Then I think I can
do an auto group on this. Okay. Good Gizmo,
click on this Shift f. I think I can just use
a bigger brush size, and then I can move brush. Can just move this in some more Okay. This should be fine. Yeah, that's fine.
So in this story, I was supposed to work
on creating this metal. I believe it's like
a metal piece that goes across the abdomen. So let's try and create
that clear this out. Okay? Yes, we can do that. I like to move this
forward a little bit more. Okay. So you can see this seems like it's
quite all over the place. I like to move this in. Move this in as well. Okay, that should be fine. Let's see if we have the
same thing also around here. We can move this down. We have one here also.
Move this back down, and then we should
be one last one around here. Okay,
that seems fine. So I'll clear this out,
so I need to create this. So it shouldn't be too
much an issue, though. We can just duplicate
this across. So let's do that. I would like to go over sub two. I'll look for something
that does not have any subdivision
level in there. This, for example, doesn't
have any subdivision level in. And I will just shrink this in I think I actually
can actually use this. We just might be able
to use this actually. So, this should work just fine. This will actually
work just fine. So you can definitely use this. I'm going to deduplicate
for this, okay? Then shing this down some more. I'd like to subdivide. Let me make sure I let's leave it slide
like this for now. One thing we need to do
would be to subdivide this. Let's subdivide one more,
delete lower, right? So I just need to figure
out where this needs to be. Shing this down this way. I think somewhere around
there should be fine. Get this up here, bring this in. Okay. Just about
there should be fine. All right, then we would do, let's extend this out
a little bit more. Then all we can do in here would be, let me solo this out. Let's see, F. Maybe I'll need to subdivide
this even more. So let's subdivide
one more. Dt lower. Okay, then we'll go
over to stroke. Border. Let's do frames border instead. Cut of solo mode. Okay. Yes, it's fine
that we can do B, I come in here, let's use I think we can
use the Q mash instead. Q mesh should work just fine.
Select the Q mesh for this. Okay, go of this, select Qmsh and then what we're going to do
would be, let's see. I think there should there
should still be an IM somewhere else that we
can use that should be perfectly matched with that. Something rectangular. I think there should be
one around here somewhere. Okay, let's see if we can find
something that we can use. Okay. I select this. This. This one seems
somewhat close, but there's a shape in here that it's kind of angled and we don't want something that
is quite ungod. We don't want something
that is ungod. So let's keep checking. If we can't find anything,
then we're just going to use the hums instead. Let's come over here. Let's see if we have something in here that will work
just fine for it. Just checking. Let's see. Okay, sadly, there isn't anything
that we can use in here, so we're just going to
we're just going to stick with working with. So we just stick with
working with them, the Qmsh in here instead. Let's work with
the Qmsh instead. So QMS selected, let's go
over to Oh, it's day already. So we already have
this day already. Let's solo this out, then
we can tap in. Okay. I don't know what it's
supposed to be working. Oh, yeah, yeah,
yeah. It's supposed to on something else,
totally forgot. So curve mode should
be activated. So increase the curve, you know, take down the curve step,
set it back to one. Okay, then let's stop in
the should should work now. So something pretty not this, let's reduce the bro
size a bit more. Okay. I think I'm not sure this is cool, I think
we still need to make. We still need to
modify this some more but if we kind
of start shrinking, this is not going
to give us that desired result we're going for. It's not going to give us the desired result
we're going for but. There's always a way
around this, actually. So I think this should
be fine for now. I'm going to go in
and then I think I'm going to delete. Let
me undo this first. Let's go back to
the cove cove step, dig this down, do this
again, and do that. Yes. Now it's quite tighter. Now we have something
quite tight in here, which is precisely what we want. Okay. Shoot. I think it's way too
tight, actually. That seems way too tight. Let's go back in to the stroke and then increase the step or
more t in there again. Okay? No, no, that
is not looking good. Need to find the right
amount I should work for this I need to frame this again. So there's no right
way to do it. You just kind of try and then you figure out something that will work just fine for this
crizy brush size a bit more. Okay, no, this is
way too tight. Okay. Okay. Close enough. Let's sing that in some more way we did that way too much. Increase this a bit more. Increase this a little bit more. I think have to work.
Might have to do this manually because
it's not giving me the desired result I'm
going for in here. Might just need to do this
manually. That's fine. There's no harm in
that because we need to have greater
control and do that. We need to have greater
control over this. Let's go and turn of the COV. Need to have greater
control over this. The more control we have over the easier it becomes
for us to be able to know how to manipulate
this and then get this right. So let's go back to move. I'm going to do splits
on Mark points. All select this.
Goo out of solo. Oh, that's at the back so
let's bring this forward. Okay? Now, solo this. I like to do a little
bit more work in there. So start by shrinking
it this way, shrinking it this way. Pretty much like so. Okay?
That should be fine. Then let's do BZ. So we need to add a
Lope also as well. LCT also as well. He also. Okay? Yes, I think, do that. Undo that. Undo that. Let me getting close instead. Undo that o around here. Go down and repeat
the same thing on the lower parts here also. Yeah, I think that
should be fine. This will work just fine. Okay. Yeah, we can definitely
work within a. Let's go out of solo
mode, Shift F. Okay. The length for this, I think I need to swing this
down some more, drag this in her
bring this closer. You just need to properly position this way
it needs to be. I'm going to use this cylinder as a guide for it, actually. So let's use the
cylinder as a guide. Let's do transparency. So I'm going to squash this
down a little bit more. Okay. Then I would
rotate it this way, put this in here. I'm going to using
this linda as a guide. Rotate this way, bring
this in some more, push this back like saw rotate. Taste it this way. Let me get this completely
front facing. So should be fine. So let me just swing this
down a bit more we need, like, a lot of this solo this. Trying to make sure if I'm
not messing things up in any way. I think we're good. Then I can just start
duplicating this Okay. Well, maybe we don't
do this actually, then I can convert this
into an IMM brush. I think converting
this into an IM brush will be a lot better, the same way we did
for the calories. So I'm going to
orient it this way. Okay? And I'm going to
have this to my IMM brush. So B, I think I still
have that in here. You can go to brush
and then let's do create in South mesh append. Click Okay. So we
have it in here now. Okay, go back to my move. And then undo this back
to the original position. I'm going to wood
shift and send this down to the bottom parts. Okay. Now, select this
again, isolate it. And let's go over
to not cove mode. Cove function bother. Let's use that brush now. Let's use the brush
that created now. Okay? Then let's see, we can just select this. Yes. Yes. This is way better. This is definitely way better. So let's use increase
the brows size. Increase the bros size so
more tap in there again. Oh, so I think
we're good in her. I believe we are
good in year Okay. Let me undo that. Let's see if we can bring
them even closer. Yes, I think we can let's
do a value of 0.9, okay? There's a value of
0.9. Let's see. Yes. I think this would work. This should work just
fine. To shift F. Then we can extract this out. So let's delete the
curve we have in there, so Cove function deletes. Let's do split on
marks points. Okay? I believe this is it. Go
down shift, send this down. Okay. Go out of isolate
ton of transparency. I think we need to let's zo out a little
bit more. Shift F. So it's just a matter of I think I'll just grab
everything down here instead. I think let's sol this. Let's
grab everything down here. Bring it up. Let's bring
it up. Should be closer. I think somewhere around
there seems fine. We do a slight rotate. Make sure this is centered,
tie little bit small. They're not kind of perfectly they're kind of tilted,
not completely perfectly. So shouldn't be
completely perfect. It's not like that
should be fine. Okay. Then now we don't
need all of this, so we need to kind of delete where we don't
where we don't actually need. So to do that, let
me go back to move. Then we can I think I'm
going to scale this. I like to scale this up
some more Okay. **** F. I think it shouldn't be
too much of an issue. We can just go out
of transparency. We can do, let me move
this in some more. So it's somewhat around. Okay. I think they might need to be. I think we need
to push this out. One of the might need to
push this out slightly. Let's go to lower
Subution level. With the move brush selected, select the move brush for this. What is going on? Shift F. Oh. Okay, let's go. C function
is still let's turn it off. The issue was when
you core function. So let's just pull this out a little bit more coming up close, pull this out some more out
some more around there. Just to create gap, just
to create a gap for it, for it to sit well. Turn on symmetry, pull out
some more compensate for it. So it's just a matter of making additional corrections in there and see everything looks right. So I'm just making
some space for it. Yeah, alright, this
is fine. Then I just kind of deletes
where we don't need. So go back and shift F. I need to do this as
carefully as I possibly can. So let me just do something somewhat like so clear this
out tonal symmetry for this. Let me max out these parts. Let's make a duplicate for it, so I have a backup to return to. That's fine. Selet this. Solo let's max out
Control W for that. Control shields
click Shields click. Okay. There's the
auto group in here. So poroup auto group. Control Shift click
on this here as well. Let's clean this parts out. We can clean this
and clean this. Make this as neat as we possibly can, clean
this out also. Ton of symmetry.
Clean this out also. Clean this. Yeah, it
is clean, clean also. Come in closes here
as well, here, also. I think okay, saving out. Okay? I think I can
clean clean this also. Unless see what we get,
bring everything back out. Oh, you don't even
need that for the back because it only needs to be
on the front, I believe, yes. Is only needs to
be in the front. No, we definitely need
something for the back. Definitely need
something for the back. But no worries.
We'll make it work. We already have a
duplicate. I think you can still use this also. Yes, we can use
that also. A have this front part now all good
where you want it to be. So I think we can
do delete den now. Let's do delete Eden. Come into geometry, delete Eden and marks out all of this. Give this one single poly group. Okay? And I'll come
back, select this. Think I need to move it out some more this I'll move
out a little bit more. Okay. That should
be fine. All right. This needs to look as good as we possibly
can get this to be so. I'm going to select this now. Oder control marks this out. So you're getting
something like this now. So let's try and center
this piece and get this in. So we just need to do a
little more work in there, and then we get this in. So on do that move this in we still have this piece in here that
we don't actually need. I have no idea why that
is still in there. But let's make sure we
completely hide it now. Okay? Move this to the side, move this in, up a bit higher, rotate it this way, rotate this way. Okay? I think this should
be fine around here. We can keep this around here. You should work just fine.
Push it down even closer. Shift F. Select this, move this out some more. Se like this, I think
we can squash it on that and squash
this down some more. Just a little around that
part should be fine. Don't asymmetry, we can lift
this part up some more, push this back in, ok? Yeah, that seems fine. That seems fine. I think for the most part, it
should work just fine. Now if you should
add subduction to this Control D do that,
clear this max out. If you ask submissions
to dinner, you should hold up quite nicely. You should hold up quite nicely in there without
any major issues. That should be problematic
for us, so this is fine. Okay. This we can work with just fine. So there's something
else you need to do it will just be to add this art piece on
the abdomen and then keep working our
way up from there. I come in here. I like to
move. Okay, that's fine. I'd like to move
this back some more, a little bit more, a
little bit more. Okay? Yeah, that's fine.
I'll see you guys in the next lesson. Bye for now.
75. 74 First Abs Plate In Maya: Welcome back, guys. So,
the previous lesson, we kind of finalized on
this metal waistband piece. So in this tutorial, let's work on this
piece on the abdomen. So let's do that. So I would like to go over. Let's go to our front view. Let's screen this
from our front view. Okay, I hit three,
four on the keyboard. You go to wire frame, heat rightly and,
I would like to create do interactive creation. I would like to create a pipe. Is a pipe. So I'm not going to drag out this pipe
somewhere around here. I believe all the
way should be fine. Add some ice to it. Then this is the main part we need to kind of pay more attention to. We still need display
in India, though. Space in India. All the way, like so should be fine, okay? Just something else,
we need to do, nothing else. Come in here. Let's see where
that is buried in, is buried inside of the
body. Let's bring this out. It five on the keyboard, bring out a wire display
or shaded display on. Okay? So now for this, I can see in between this, we can see clearly
depth in between them. There are a lot of
depth in between, I would like to capture
that depth in there. But let me start by pushing
this where it needs to be. Okay, I think
roughly around here. Then let's go over to
attribute the digital. And then we'll make
modifications for this based on what we feel
should be in here. So for one, we need to let's
see, subdivision axis. We need to increase
this by lots. I think all the
way here should be fine. This number
should be fine. We don't want it to be
completely tinier and then we lose we lose that together.
I think this should be fine. Okay? Let's see what
else can we do? This already rounded
enough heights no, we don't need so
much in here though. I don't need anything in
here because I'm going to squash or rather delete one
fish out of this completely. Do we need rounded
cubs for this? Do we need rounded cubs? No, we do not. Take that off. Let's see, I think we can work with this we can work with, but we still need to make we definitely need to make some additional
corrections to this. So I'm going to do duplicate
of this control D this out. Let's work with this instead. Let's work with the
one that does not have the setup in there
anymore, okay? This is one of those nice
setup anymore in there, so let's pull this back.
Let's send this out. Bring this back in here, come to our front
view. Isolate this. So let's find the
midpoint for this. I do see where the midpoint
is for this already. So the midpoint is around here. So this perfect midpoint for it. We're going
to delete this. Select all of this, delete, get enclosed, delete as well. Then I'll go to the top view. West for this. I'll need to delete all of these all of these
faces also as well. So we only need this flatfas. We need just this flatfas and
we should be good in here. So I'm going to select
all these vats in here. I'm going to undo that. Okay, I think we have
morning to kit let's turn of the transform constraints, and I like to scratch this down. Undo that. I think I'm not
doing that accurately enough. Let's squash this down and
I'll bring this down this way. Get this straight on, kind of flat this way. Okay? I think we should be fine. Then I'm going to
scale it out this way. Let's kind of get some
spacing in between. Get some spacing in between. Okay here as well. Do that. Let me see. Let's
check in there. Let's see if there's any
issues in here that I need to fix do you have a point in here? Let me leave this o, we
have a points in there. Okay? There's something in there that we need to get
right on do that. Let's see. Okay. Let me start by
selecting these two edges. Pull them back out first. Okay? At some more.
That's way too much. Add a little bit more.
I'll go to the next one, pull them out here as well. I'm just trying to make
sure I get this right. Select this, pull out this way here as
well. Pull them out. S I can select all of this let me make sure
I'm on the front view, select all of this as well. This is why I'm doing this
is because I don't want to I don't want to add the
details with normal map. I'm trying to avoid adding
this detail with normal map because it's going to kind of facing us
in the camera view. So as much as possible, I would like to get
the detail in geometry instead. Spread this out. Spread this out. Okay? I think you need to select this end. Spread out some more. Create a bit more space in here. Okay? Here as well. Okay, here as well. Okay. Move to the next piece. Spread them out also as well. Select these bits, spread
them out. Same here. Spread them out. Okay, as
well, spread them out. Then select all of those points, select this, they select this. Let's squash them down again. So you should have
something that looks at least a little better
than what we had before. It's better than
what we had before. We squash, do that. The select this end points. You select this end
point as well or vertex, squash them in a
little bit more. So this is going to add another extra level
of interest to it, which is what we're
kind of going for. So something pretty much
like this should be fine. Okay. Let's scratch this down
some more so it's kind of flat on. Yeah, this is fine. This is fine. This we
can work within here. We can decide to get it, before we get that down,
let's select these points. Get all of this down
some more, okay? Yes, this should be fine.
This will work just fine. So, now we can start
making modifications to this. Let me save this first. Then I'm going to make a duplicate of this or Control
D, pull this to the side. Let's work with this. So now
we need to start slicing or adding putting some
additional loops to this. So to begin with, you can see one loop that goes
across at the top. So let's get that in Let me kind of average out and realize
the size here for it. Okay? Center up the votes. Scale this out some more, bring this closer. All right. Yeah, I think somewhere
around here should be fine. Looking at this night, I think we might still need to kind of wrap wrap this kind of
give some kind of act to it. We need to give it
some kind of active, but I think we should be
able to easily do that inside inside of Zbrush so we can do that
instead of Zbrush. Okay, so moving on let's see. Yes, we would need to start adding some
extra edges to this. So let me start by
selecting the top. Let me sled this on all
the way Db click on this. Then I'm going to do an Extrude. Let's do an extrude. Let's do Local Z instead. Okay. Although that's
not what we want. It's on the keyboard. Go to your scale to
scale this out this way. Okay? I'll use translate and then pull this
up a bit higher. Yeah, make it a bit flatter. Make it a bit flat on down here. Okay? I should be fine. If you won't turn on our grid, let's make sure our
grid line is visible, so that should actually help
us even more just to make sure we get all the
edges on the same line. So vertex, let all
these vats around here get this
perfectly on the line. Squash this again.
Okay? That's fine. So we have one loop in here now. That's fine. Let's go into
Edge mode, more tie cuts. Let's look for other loops
you should add in here. Okay? We need to add one. Or better still, to make this
look a lot more cleaner. I believe we can select this. Let me give you some
more darker shade of material so we can see
this a bit properly. Apply this. Let's
use this blink. Okay. Let's isolate this you can see things a
lot properly in here. Okay? So let's select
this edge loop. And I'm going to bevo this
and then let's reduce. We just need a copy for
this to begin with. We need copy to begin with. We're going to adjust
that as we please. Say this here, double clicon. This so let's go over
to surface slide. Scale two. Not that, let's do eight slide
instead instead. Let's do eight slide instead. Okay? We have an extreme edge here that
we don't actually need. Slide this down a bit more
somewhere around here. Oh
76. 75 Full Abs Plate In Maya: Welcome back, guys.
So previous lesson, we started by creating
the phase plt. So the idea for this would
be to creates the best view, more interesting way to do
this would be to create several ***** for this. So you can call
this our pas plit, so I'm going to delete this
extra loop we add in here. And I'm going to go over select this loop and let's detach this. So let's do an extract phase. So extract phase,
that work just fine. So I have one plate,
under plate also. Then these plates, I'll move these plates backward
a little bit more, then select this
start lads end loop, do click on this loop. And I'm going to scale it down. Undo that. Let's turn
off this constraint. Scale it down some
more this way. Just push it in. So we
have different plate then. I'm going to move this down. This needs to come down,
needs to mesh needs to merge or that'll be down somewhere around
here should be fine. Around should be fine. So
now we have two plates, first plates, second plates. Think let me change the
background or B so we can get something that distinguishes
them from each other. Alright, so now that
I have this split, I'm going to select this now. I was thinking to kind of grab
another plate out of this. I think can I reuse this? Trying to see if I can
reuse this so Control D, bring this in front,
scale this down. Okay? I believe we can use that. So I need to do this at
least a bit more accurately. Let me just do this
for my wireframe view. Turn off the grid
back to wireframe, turn off the grid line for now. Okay. Try to average in where it
should be, get this down here. I think I need to squash it down a little
bit more like so. Okay. And now we need to
extrude the edge out. I need to extrude this edge out. Let's done extrude. On the keyboard and then just
scale this out some more. Just a little bit
more should be fine. Got our translates
and then let's get this perfect this way. Okay? So that's fine. Now we
have another plate for this. That will work just fine. Another thing we need
to do is to create I would like to separate let's get another separation
for these plates. Let's see if we can get a
separation from for the plates, we can this might get a little tricky
here, but make it work. Okay. That is going to be like it might be
an issue in there. Let's look for a more, a more preferable way
to this would be to, I have an idea that would
definitely work for this. Yes, that would definitely work. So let's do that. Let's see. Because
we can either just start cutting this in here. What are going to create additional points and vertices
that we don't really need. So I think a more
preferable way to go about this would be to use a sphere. Then we slice that spare half. But to do that, I would
like to use a cube instead. Let's create a cube. Pretty cube in here? Or do we have I think we have something in
here that might work. If I can just, it
should be in here. Sometimes it's kind of
difficult to just find it. It's more or less
like a flat surface. It's okay, it's super ellipse. I believe it should
be super Ellips Okay, let's frame this in here. No, I don't think this is it. I don't think so.
It can be this. Let's see if we can find it Oh, we have something new already, so we still have this duplicate. I think this duplicate
will work just fine. So let's duplicate this
again, bring this out. I will just need to scale
it to the right size. So I'm not going to
scale this down. Scale this down. Yes,
this will work just fine. Get this here, scale it up. So more, okay? Actually enveloping it this way. Yeah, it works just fine. Let me make sure it's
directly on the center. Yes, I think should be fine. This will work just fine. So now basically have the three
shapes we need now. So we have we have
this and we have this. We have one. I think we have
one again in the center. I think we have
this in the center. Okay. Let me get that out. So it's a lot more visible, so This will be the one,
the first one in front. Then we have this, then we have this, then
we have this here. All of this will work
just fine. Okay. So I'm going to start let me start
by selecting these three. Select the select this. I'll make a duplicate. Okay. And then I'll
move this way. Let's even work on this instead. So let's just work on this now. So I'm going to let's start
with the so for this, I'm going to let's start by
adding thickness for it. But thickness, we're going
to be adding for it. It's not going to
be anything that creates something that's
way too dense for us. So I'm going to
select the loop edge. I'm going to select
the entire loop edge and I'll just do an extrude. Extrude EW on the keyboard. I'm not going to extend
this out this way. Yeah, extend this out this
way should work just fine. Maybe a little bit
more, that's fine. Okay. Then let's add Let's
add edge loop to it. So I'm going to add an edge loop to this. So let's
do more tie cuts. Let's add a cat around here and around
here and then also. Okay? I believe should hold
up quite nicely, seems to do something else. Let's isolate this first. Okay? So we need loop cuts around something that will
hold this edge some more. It doesn't completely fall apart when we do an auto
smooth for it. Get close or the out here. We need one here as well. N one here in the middle also. Okay? Yeah, this
will work just fine. So now if we do
autosmot on this, we do autosmot three
on the keyboard, so it should hold
up quite nicely. This kind of precisely
what we want. So aside that also, there's still some other
things you need to do. For one, we need to Okay, I will need to
come in edge mode. I will select this
edge, select this edge. I'll be selecting all
of this edge. Okay? This is where we need to do extra work just to get this to look good and add and add the detail on the
geometry instead of doing them instead of so turns
pinter its normal map, which one close up
won't look too good. So, so then I'm going
to do an extrude. But this time around,
I'm just undo that. I'm supposed to
do Bevel instead. Bevel is the right one to use. So reduce the fraction. Reduce the fraction this way. Say depth this way, I think
00.2 seems like a good one. Yeah, 0.12 should be just fine. The next thing you need
to do now would be to go in and begin to select that depth in there to
select these depth in here. Okay? But better still,
let's do the opposites. Let's select all of this. This is what we're going
to be extruding out. So who do this across? Okay? Undo that. Undo that again. Yeah, just another extra bit of work just to get
it to look right. Once we do this properly, everything should be
working just fine. So we have this now. So now we're just going
to do like an extrude. So we're just going
to extrude this out. Let's go over to extrude
extrude thickness. Get this extruded out some more so the idea has to figure out how much of this we need to extrude out. I think 12 should be fine. But now we need
to add divisions. We need to add divisions to actually hold the edge tighter. Okay? Something like this will even
work even without having to do like autos moons. But if we do auto
smooth in here, we should we should still get something
interesting out of it. But even if we don't
even want to do okay, I think we're
actually need to do the Auto smooth
because of this be wood edge that comes with it, which is what
we actually need. We need that bevood edge. Okay. Yeah, this is fine. So I'll save this. Then let's go to the next piece. So this is just the same thing
we're going to be doing on repeats for every piece. So let's go to the next piece. So it's just a
repetitive process. So let's sololow this. Okay? So let's go and
extrude out the edge. Double on the keyboard,
move this in. So more. I think
this should be fine. Okay. Then let's
add Lots to this. Lo court in the middle
and close to the edge. That, do this again. All right, I think
that should be fine. Yeah, you should work
just fine. Can we do? Can we do? Look, I think for this part to my
daughter need to bevel instead. Might just have
to bevel instead. Okay. Well, let's test this out. Let's on auto smooth. That actually holds up that
actually holds up properly, so I think we are good in there. So now let's make
some modifications to this by selecting. Let's go to edges instead. Select this edge. Select
all of the edge. Okay? So I'm just double clicking
to select all of this edge. Okay. Yeah, I think that
should be fine. Yeah, that will work just fine. Then let's do a bevel. I think this amount of
bevel should be fine. I just add or rather a little bit more
like, so it should be fine. You want to be
careful to say don't create something that's
intercept with themselves. Want try and avoid that. So
I think it should be fine. So now we can face mode. Double click on. Let's do it from
this angle instead. This angle should be fine. Okay? We're just going to
repeat the same thing. I need this detail to
be on the geometry. It's important to get
this written on geometry, so it doesn't feel
blowed out when we do some close up renders for it. So we're just going
to okay I think undo that, undo that. Okay. Almost done. All
right. Last piece. Then on extrude. Then I'm just going to
extrude extrude this out. This is a value of 0.12 or 0.13 0.12 seems
like a good one. Okay. Let's increase that a little bit more then divisions across. So adding three
divisions for this. Okay? Select this,
smooth this out. Yeah, interesting. Should
should be just fine. This all of this would
work just fine. Okay. Multi coat. Let's
see if there's a way we can add coat
across this, can we? So I've added one. Let's see where that goes all the way to. So let's do another auto smooth. Let's see. That doesn't do much. That doesn't actually
do much. So undo that. Okay, smooth this out again. All right. Yeah, I think we
should we should be fine. Auto smntegain then just make sure checking this just to be sure if everything
is working correctly. Okay. Okay, I think this
we can work with. This we can work
with. Let's see. Okay, let me go to edge mode, see if we can click
on this edge. Let's say we don't
want to kind of do all those moves for
this in general, we can just Bevo can
just Bevo this edge. Include some more getting close. Let's see what we have in there. Then add segments in there. Thi should hold up the hedge
a bit more to give it a lot, a bit more some
reflectivity to it. So we won't necessarily need
to subdivide this anymore. So I think this should
work just fine. So we won't need
to subdivide this, so let's go out of solo mode. I think I need to
do it also in here. Let's do it also in here. We're just going to
bevel this edge. Say this edge also. This
edge will just bevel. So let's do a bevel. Come in close,
increase the fraction. So more segments in there. Okay? T a way too many
segments in there. Let's just do seven. Seven should be fine.
Seven should be just fine. We don't need to go too extreme. Okay? Let's see. Seven will work just
fine. That's fine. Okay? So now we are beginning to start this
on top of themselves. Let me see this move
this out a little bit more getting things stacked on top of themselves,
and put this back in. I think this going to
get this out some more. And I think at this
point, I think I should let me see if I can actually duplicate this and then replace it here. The push this back to begin
with, duplicate this. Okay? Oh, it's visible.
It's not visible in, let's go out of so let's Okay. Do we have a duplicate already
made a duplicate of this. So let's scale this down. Yes, we can definitely
work with this. I bring this forward. Okay? Then let's get it down. This way, gets closed
scale it out some more. No, we don't do it that way
that we just mess things up. I think this should be fine. This one is kind of wider. There's a more wider edge to it. Is there a way we can still capture that in
here, if possible? It will definitely take a lot. It will definitely take
some additional work to get that sickness in, but I believe we should
should be able to do it, so we should be able to do it. Let me start Let's see if
we can make this work. So let me start by
shrinking this in first. Around there should be fine. Okay? Then select this again. Let's see if we can
possibly make this work. I'm just going to start
selecting all these vertices. Let's see if we can
possibly make it work by scaling it down. Let's see if scaling it down, we actually do the trick. But my best guess is
that it might not, but let's give it a try that would help us
move a whole lot faster. We should definitely try. Okay. Can do that. We didn't
select that well enough. But we can use I
think we can use the last two selects the
last two select for this. Okay, that makes things a
whole lot faster in here. So now let's use the scale
to and scale this down. I can say I missed
the point here, so control shifts, grab
all of that in there. Yeah, definitely work. So I'll bring this down. Yes, we can definitely
work with this. But I think I need
to do that again. So I'm just basically trying
to have read between. Okay, definitely
let just push this down and bring this
down this way. Yes, we can work with this. I should definitely
work. All right. I think we can steal this
also. Let me push this back. So this will make this
whole lot faster for us. This we can steal as well. Let's bring it out
forward a bit more. Think around there
should be fine. Let me select this.
Bring this out as well. Pull this out. Okay. Maybe not
outweigh too much. Let's just find a good
balance for this. Okay. Yeah, that's fine. Select this Control D. Pull
it out, scale this down. Let's go to our front view and then position this
where we need it to be. Scale this down some more. Okay? Sync around
there should be fine. Pull this back in. Let's put this back in, up a little bit more. We can just set this around
here should be fine. Maybe we can bring
it down some more. As we still have creative
freedom over this. Select this and this, bring this down some more. Okay, select this, bring
this up even higher. Yeah, you should create a
lot more interest to it. So now we have a lot
more interest to this. So I'm going to select
all of this now, combine them, combine
the duplicate of this. I think at this point,
I don't think I necessarily need to bend, we need to get this
out of the way, combine them, get
this out of the way. Let me pull this all
the way to the end. Okay. Select this,
bring this in. Let's make sure we get this properly positioned
in the center. I think around there
should be fine. Okay. Save this Yeah, I think I will
need to scratch this down. I think it's way too thick. Scratch this down this way. We might need to scale
this down as well. Bring the down here. Okay. I think we can
now export this out. Let's export this out now. Let's export this out. So Ziput, let's just name the two b slit. Okay? Then let's bring it into
zebra. Let's just go over. Let's do this as fast as we can. Append the cylinder,
scroll down. Let that cylinder and then
let's import this in. Okay? Zimput, select it. Let's just do both instead. Okay? So right, please. So now we're going to
make corrections to this in the next
lesson. Bye for now.
77. 76 Sheath Leather In Zbrush: Comb, guys, in the
previous lesson, we imported this waste piece
in this waste metal piece. It's no lestra set it
up properly in here. So I would like to make a
duplicate of it to begin with. L make a duplicate of this, I'll hide the duplicate. Then we'll try as
much as possible to merge this the way it
is on the reference. So let's do that. First let's erase piece
in here ton of dynamic. We use the brow size. Okay? I would like to move
this out a little bit more. I need to have some gap in between the use the
brow size again. Okay? I think around
there should be fine. Select this b space. Let's bring this down for now. I try to make sure the spacing we have in there
would work just fine. I think this would
work just fine. Move this back down. Okay. Here, that's fine. Then
go back and select it, hold it out, select it. Up, I'll squash it down
a little bit more. Okay. I think I'll bring it
for a little bit more. I think my skill, I need to take down the skill. No, I think previous
was just fine. We just to push it back in. So let me leave this up some more I believe
somewhere around here. Yeah, somewhere around there
should work just fine. Okay. So now we need to
kind of bend this in place. I'm going to use the
bend curve for this. Let's use, we have bend c, so let's use the
bend curve instead. We have subdivision
level in there. Okay, we do take down
the subdivision level. Delete higher than ben curve. So new right axis, but we need to add
more resolution to it. Let's add more resolution point to it. So let's add just one. Can we do asymmetry turn on. No, we cannot undo
that ton of symmetry. We have to do this as
an individual piece. You want to be careful,
though, because as much as you want
to move this back, you don't want to deform
the shape in any way. Okay. I think around
the should be fine. Get in some more Okay. That should be fine.
Select the other parts. Look for a good angle, push this back in. Okay. I think this should
be just fine. And I'm going to pull this
out forward some more. Let's find a good angle to it. Pull it out a little bit
more, get a curve to it. Alright. Yeah, you
should work just fine. Then we click on Accept, I pull this down.
Then some more. Going to average it around
the edge should be fine. I'm going to extend this
thickness a little bit more, pull this forward some more. Okay? Let's see. I think this is
fine. This should be fine. Up a little bit more. Okay. I'm select this. Move this up as well. Okay. Yes, I think this is fine. This is in the right spot. This is where we need it to be. We can select this again. With the move brush, increase the brush slightly a little bit more and move this
back in some more. Okay? Yeah, that's fine. Yeah, this should work just fine. Th should work just fine. Okay. So now we can
subdivide this, get something cleaner out of it. Yes, so zoom out. Yeah, this is fine.
This is fine. I'm trying to see if I if I will need one
for the back also. Okay, I don't think I need. I necessarily need to have one at the back because the idea that it's like a metapiece
so if it's bending backward, we don't want this
metapiece to begin to create markings on the back. So I think where this is
it should work just fine. I should work just fine.
So, this work just fine. So now let's move on to
creating another piece. Let's create. It's like a
leather piece, actually. So let's create this next. So we'll do this next. So let's jump right into it. I would like to do this
on a separate canvas. Let's do this on a
separate canvas. Let's see, do you have
anything in here, okay? Okay? I would like to
do this here instead. But I would like to
let's copy the body. So we need something kind of gives us a good
idea of skill. So let's page this here. Pase this up to here, okay? Then I'm going to
temporarily hide it. Then this cylinder in here. I think, let's
just do an append. Let's appended sphere, select the sphere,
turn on this body. Scale out this sphere some more. Okay. Let's hide
this, hide this. I'm going to convert
this fat into a Qsh. Let's do that B I primitive Qs. Then we go over and
then under geometry, we do modified topology
mesh from brush. Okay. Move brush. Scale this out, scale this out a little bit
more. Pull this out this way. Let me just t get roughly
the scale of this. Once I'm able to capture the scale of this then
it should be fine. Okay. So ideally, I'm just going to create this two and I'm
going to duplicate it over. Then just create some little
sculpting details on it. Then in Subtanspens,
I'm going to add some more or make it
rather look unique. Make it look unique by adding some color variations in there. Or finally just get
the shape we need. So let me go over I
think squash this down. Trying to figure out the lens. So the lens should
be, is close to the kneel so we need something roughly
around close to the knees. Let's squash this down
a little bit more. So somewhere around
here should be fine. Squash this down as well. Squash down some more. I think this height should be extend this up
a little bit more. Let's see. Somewhere
around here, put this down this way, put this down some
more. This is right. This eye would work
just fine. Okay. Yes, I need to get this
back to the center. Let's get it back
because I would like to work with this
emmet toned on. So let's make sure I'm
back in the center. I think roughly around
Jsould be fine. Yes. So Shift F. Then let
me skill it out first. Then we do group by normals. So PolyroupGro by normals. Let me take down my bro
size, Control Shift click. Yes, we did delete ding. Let's do a duplicate first. I do duplicate, work
on the lower one. Then we do delete ding. So let's do geometry,
modified topology, delete ding, right?
That'll work just fine. Then I'll need to just
center this again, squash this down a bit more roughly around the
size that it should be. Okay? This is fine.
Then come close. Pull this out out some more
out a little bit more. Yeah, I think that
should be fine. Okay. So now next
we to do would be to add more subdivisions
to this and do that. Let's first add extra edge loops to hold up the shape a bit more before adding
subdivisions to this. So I'm going to do
B Z M at a COTS. Yeah. Okay. Add one here as well. You need to add one
around here, as well. Just to hold up the
shape a little bit more. So this should hold up
the shape some more, updo one all the way
down here, okay? So if I should
subdivide this now, you should hold up the shape some more subdivide subdivide, undo that delete lower. And then we can, back
to the more brush. We need to pull this
down some more. Pull down shifts. So just get a straight line on that
why pulling it out. Double sided needs
to be turned on. I don't on double sided for
this undo this actually. There's one more nine d to do before adding geometry on it. So let's go back to Busy. I'm supposed to split
this with an edge here, with another edge here as well. Okay, then create year. So this should hold
up the ship a lot more so we can subdivide now, this hold up the ship a lot. Divide again, then
delete lower. Okay? But at this point,
I think we have too many we have too many
edge in the center part, so we can slightly reduce slightly reduce that Okay. So still on the same
busy Z modular brush. Let's do delete Edge Loop. So I'm just going to
come in down here. We can delete this and
delete this do that. That's actually
odding up something. So let's delete this instead. Okay. I think somewhere around
should be just fine. Yeah, like see should be
fine. Okay, so that's fine. So Shift F. So now let's
go over to move brush. And then we need to kind of see a curve water on this
edge, kind of curves in. So to create that, we need to you need to let me
scale this out some more first out this way. So back to the gizmo. Let's make a duplicate
of this again. Okay? Then let's use
the bend curve. Okay? And let's add more
resolution to this. Then select this. Just scale it in some more. So that should automatically create the shape
we're going for. Let this as well
compensate for it. Scale in some more. Okay. Let's add more
resolution to this. Undo that. Scale this
in a little bit more. Scale in some more. Okay? Undo that movement, scale
this in a little bit more. Yes. Let's reduce the
resolution. Okay? Compensated that. Let's compensate for it
around here instead. Okay, here as well. Out some more yes, I think it should be just right. Let me make sure double
side is tone down. So double side. Yes, this would work just fine. The next we need to do will
be to add thickness to it. Let's add thickness to this. So to do that, you can use the geometry dynamic
sub div tonton take down the smooth and
let's add thickness to it. Way too thick. This seems roughly
like a good amount. Okay? Let's see. Maybe this
we can actually keep. See if we can keep this. I think this should be
fine. This should be fine. This will work just fine
for what we need it for. So we need to add extra. Let's do two instead. So instead there should
be fine instead of three. Okay? So apply so if you
subdivide this, okay? I think this should be fine. Just checking just to be sure if everything's working
correctly as it should. Okay. So now the next thing
we need to do B two, I would like to extrude I would like to
extrude out the edge. Well before I do that, let me squash this down a
little bit more. It's not too thick. Take down the
resolution, delete tire. Okay. Let me solo this now so we don't have
any distractions. The next thing I'd like to
do would be to extrude out this holy group on the
edge. So let's do that. I'll go over to yes, I go over B ZM, outdoor Extrude, Extrude,
let's do polyp poly group. I think let's it's not giving us the desired
results we're going for. So let's do let's look for something
that will work better. Poly group border. Okay? Yeah, this is it. So extrude
this out so more Undo that. I think we need a bit more. Undo that. Make sure
we're on the face. Okay. Let's see if this is too
much or the right amount. Feels like it's
slightly too much, slightly too much.
Let's do this again. Feels way too small. Yes, I think this is
the right amount. This is the right
amount for this. We can definitely
work with this. Okay. So now I would let's see. I think do you have any
issues around here? We have a slight
issue around here. Let me subdivide
this. Let's see. If it's a major issue or not. It's not really a major issue, this should work just fine. Okay? Undo that. Shift F. Most likely like to
push this inward. I like to push this inward. Okay. So if we subdivide this, let's see, we get some
rounded subdivide this again. Okay, I think this
is fine. We have some rounded edge should work
just fine. So undo, undo. Okay? One thing I'd like to do just to make the more interesting would be to bevel this edge. So let's go to the edge. Let's find bevel. So edge completes.
Edge completes. Let's bevel this edge this way. Okay, it a bit more be with
this edge as well. All right? That should be fine. So if
you just divide this now. Yeah, we should be getting
something like this. I think this work
just fine. Can we can definitely work within here. Alright. Yes, this is fine. So
I'm going to go down delete Aya so now we can just copy this and put
this where it needs to be, and then make duplicates of it. So let's go and
copy this sub too. Let's go to original Dsits. I think I think there's
it to go out of solo. Then let's paste this in here. So paste. So we just need to properly position this now
where it needs to be. I think I will need to
make this a bit sticker. So let's extend
this out some more. Okay? Yes, that's fine. I move this in place. Let's get a duplicate
out of this. I'll shoot hide this and I'll shoot this download
and sheet and shoot this down to the bottom of the sub bottom of our sub to set up and then
rotate this this way. Just trying to get this. Okay, I think I need to This needs to be even longer
than it is right now. That's fine. We can
extend this out. Okay? Bend this in. Move this down,
rotates down in okay? In some more rotates outward. Okay. Skip this down. Yeah, I think this
is fine where it is. Pull out some more back down, rotate it this way, back down. Okay. With the move brush,
n of dynamic. With the move brush, we can just push this back in slightly. Alright. Oh, I think I made
it way too long, so let's undo that. Squash it down. You can see how it's kind of
touching the hem. Touching the hem off her skirt, so it should almost look like it's touching
the hem of the skirts. Squash this down some more, pull it down in some more Okay? Get closed out some more. Think I'll need to select this. Oh, I see a lot of gap in here that I
need to make up for. Symmetry turned on for this bring this out some more out
some more out some more. Okay? I think this should
be just about right. I yeah, I think we are good now. Let's make extra duplicates
for this. Select this. Hold control, extend
this one out, rotates, rotates, up
some more, bring it in. Okay, rotate in some more
move this to the side. So more, rotate this way. Get this a little too higher, squash this down some more. Rotate in some more. Yeah, that should be fine.
Yeah, I should work just fine. I like to push this
out a little bit more out this way
should be fine. Yeah, that's fine. That's fine. So we're just going
to continue on the next lesson. Bye for now.
78. 77 Sheath Surface Details In Zbrush: Walk on by guys. So in
the previous lesson, we created this, we call it sheet piece or
sheet leather is in here, so going to carry
on and then make some sculpting details and modifications to
it as we deem fit. So let's carry on. So
I'm going to go over to let's make sure
it's selected. Is the last one down here. So
I'm going to name the two. Let's just name these two.
Let's use all caps for it. Caps for it. Okay? I think this should be I think
L should be after the A. Okay? That should be fine. Then we need to kind of mirror
it to the opposite side. So let's make sure we
get some mirror into the opposite side and
then we make, okay? Yes. Yes, we can
do that later on. So I'm going to I'll start by mirroring into
the other side. And after I done in some
scopeded details on it, we can then adjust
the length for it. That'll be a better
way to go. So let's go over to geometry, the topology mirror weld.
All right. Awesome. So we have this where
it needs to be, okay? I'm just going to push
this down some more. I do that instead because I want this to be
completely symmetrical. So better still, let's come
in and move this up instead. Let's move this up instead. Okay. So more. Yeah,
that should be fine. Alright, let's go back to the sheets and then
solo this out. And then we'll start
doing some work in there. So I would like to
subdivide this to the amount of subdivisions
we need to kind of start getting some
interesting detail in there. But I'm going to test
this out just to be sure. So let's divide, divide, divide. I think up to 1 million
should be fine. Yes. So we have
1.8 million here, which is still good enough
for us to work with actually, because if I go in
and then I use it, this is them standard for this them standard,
and we test this out. Let's see if we just
do a line across. Oh, adding a line across now, I think we don't have enough
resolution to hold this. Let's divide this one more. Okay. I still don't have enough resolution to
actually hold this. So let me make sure
Control W give this entire thing
one single polygrop. Let's go do auto group instead. Let's go to lower
subdivision level. Go to lower subdivision
level for this. I would do if I subdivide this, I want to multiply
this seven by four. I don't think I need high
that high amounts of polygon. But we'll see, let's go
over to Shift F Auto Group. Okay. Use auto group
for this. All right. I think that should
be fine. Let's go to the yes subdivision level. Because I need to be able
to add details in here. I need a detail to
actually look smooth enough for us to work
with and do that. I think I might
just take the risks of subdividing this one more. Let's go. So let's see okay 29. Yes, this is a whole lot. This is a whole lot better now, so we can definitely
work with this. So with this year
in here, I'm going to add let's add a layer to it. Let's create a layer for this. We have all information
sculpting in here on a layer, then turn on symmetry. Right, so now I'm going to start making some let's go
to lower subdivision level. I'm going to start adding
because if you fail zoom in, you can see the edge has some coloring to it,
white coloring to it. So it's going to create a
death that will actually hold those texture detail. So go in and then
add a cat across. So basically just adding
cuts across this like so. I just basically all
we need to do add do that cut across this, and then we should
be mostly fine. So you don't need to
be extremely specific. As to this gap in
between each depth cuts, don't need to be very specific. You can just randomize
it makes some smaller, make some of the gap a
bit wider if you must. There's no definitive
way of doing this, make sure you're adding depth in there. That's pretty much it. Most of these data
are going to be smoothed out later on when we can increase
our subdivision level. So if we increase our
subdivision level once, we should get better transition in the smooth out
surface in there. So let's carry on. Put the
lower subdivision level. Let's do this on lower
subdivision level instead. So we need to do this
on both on both end. So that's why we asymmetry on, so we can do things a
whole lot faster in here. Okay? I think we're missing this part missing the parts. Let's
just smooth this out. Let's just make sure we are doing this without
affecting the other part. Maybe you should even control shift click shift click Hi that. So we don't mess
with high disc also. This is fine. So we can just safely do
what we need to do here now without affecting
the other parts. Et's get close. A bit closer closer. Okay, let's carry on. Take down my brows size. So just like just repetitive
process across this. Okay? I think this angle
should be fine. Because this is going to add another extra level of depth to it to catch nice reflective
details around it. So that's why we're
adding this. It's going to also going to catch good shadow contrast
in there also. So it feels like feels like
might not do much but it's just these little details
that kind of make your model shine out as
being a lot more realistic. Okay. Come across down here as well. All right. This one has not even go
all the way to the end, so let's fix that. Okay. All should be fine. Come down here. I think
I'm going to leave a gap, a wider gap in here. Okay. Continue on. Let's do one
around here. That's fine. Continue on. Get a
good angle to it. Okay. Awesome. I'm going to try to be
as fast as possible, so we can work on all
the details for this. Okay. We still have the second
piece to work on also. Yeah, I think this angle makes us move things
a whole lot faster. Right. I believe we're almost done. As if my perception of
lens is accurate, though. I believe we're almost done. Yes, I think my perception
for lens is spot on. Okay. What do I need to
do on top of this? Let's see. Okay, let's do
something on top also in here. Let's not neglect this part, so I'll go a bit go
a bit ungod on this. Okay? All right.
Yeah, that's fine. This will work just fine. So let's invert that selection. Let's go back to the next piece. Coming up close and just
repeat the same thing. Let's look for a
good angle for this. Okay? So this is supposed to kind of simulate something that
looks more like a leader, a more straighter leader
piece without too much of not too much
leadernquisine, yet, but still
capturing that leather feel to it because I believe it should be
like a leather piece. Okay? Move down. Yeah, I might notice that some
regionals now have enough fully counts to kind
of hold the edge a lot more. That's
completely fine. It's not going to be a d
breaker for us, actually. It's not breakup because
we're not going to be sculpting this or rather
rendering this close up. So from a distance should be a distance render will
be just fine for it without having to worry too
much about close up details. If there's a need to
close up renders to this, then it would make better sense to increase the
subdivision level and then get the details
there quite sharp. But in our case,
it's not completely necessary because we're not really doing extreme
close up shot for it. So we can just be a
little loose in there. I think I'll leave this
gap. Let's do one more. Then I'll leave that gap,
I'll go to the next parts, find a good angle for this and continue adding
cuts down across this. Okay? As well, find a
good angle like so. Okay? Create some more
gaps in between. So we're not trying to
make these gaps in between each line, extremely accurate. So it's completely
fine if you're a bit loose and in
here because we're trying to simulate
something that feels more like handcrafted than this being made by an
industrial masonary Right. I think I believe in 3 minutes, we should be done. Then we can move on
to another detailing. I'm sure some of you guys are probably timing me right now. Probably timing me like
hope this guy does this exactly at 3 minutes or
even less. But no worries. Once you're working in Zbrush, things tends to move
a whole lot faster, even though you're kind
of repeating the Samson, or most especially when
you're repeating the Simpson, things moves a whole lot faster. Okay? So the top parts do go
a bit ungod in here. Alright. One more. Rotate the other way, okay? All right, that's fine. So we're done with that, so let's bring
everything back out. So in here now, I'm just going
to let's go to the front. I'm just going to lay out some obvious detailing in there. Let's kind of uniform
on both side. Then rest we're going to do
inside of Substance Painter. Let's do that. For one, I'm going to take
down to Broad side. Let's go to higher
subdivision level. So I'm going to be doing this on a higher subdivision level. Get this in. I would do a line in here
line around there as well. Okay. Go all the way. All right. Okay. No, this doesn't look
right yet. I will do that. Some of the details
in here mostly. Let me bring this
forward. One more. Okay. Undo the last one. So I'm
trying to figure out if we need to do this in
here or we need to do this inside of Subtan
sprinter instead. So we have a whole lot
of control in there. Yeah, I think it make
better sense to do this inside of Subtanspnter instead, because there we have a
whole lot of control, and the details are
not that strong enough for us to actually make sure
we do it instead of Zbrush. We can easily do this inside of Subtnspnter and would get
good result out of it. So I'm going to be
seeking with creating this extra level of detail
instead of Zbrush instead. Yeah, so I'll solo this. So we can I think at this point, we can now manually make some adjustments to the length
of disorder power part. So let's go to lower
subdivision level that's lower subdivision level. So control shift click, you. Shift F. Auto group. Let's make sure we do
auto grouping here again. So auto group. Control Shift. Oh, symmetry is turned
on let's of symmetry. Control Shift click
Control Shift click. It the selection
max out in the max. Center this in here. Okay. Let's orient, get
the orientation properly, scale this down some more. Leave that up some more. You should definitely
do it Control, select this, rotate it this
way, move this closer. Okay, extend this out. All right. At some
more roots this way. So I'm just trying to create
some variation in here. Clearly this bring
everything back out. Yes, awesome. So I think we are pretty
much done with that. So the next thing we need
to work on will be dispare. So I think this pair would be
the next favorite thing to work on in here get this out. Okay. So I'm just going to
check again just to be sure if all of this is
working correctly or not. See if there's any correction or adjustment I need
to make on this. Then if not, we
can just move on. I think this should be fine. All right, so in
the next lesson, we're going to
work on this pair, and I think it'll be a lot
better if we work on this. If we work on this
pair in Maya instead. So we get some interesting
details out of it. I'll see you guys in the
next lesson, bye for now.
79. 78 Spear Head In Maya: Come about, guys. So the previous lesson, we
finalized on this sheet piece. So just tutor you, I would like to let's work
on creating the spare. So I'm going to do
that instead of Maya. I think it's going
to be a whole lot easier to do instead
of Maya instead. So actually is for me. So let's do that. So let's
go to our Maya file. I would need to
start by creating. Let's go over to the top view. So let's start by creating a Bass cylinder, yes,
secret cylinder. I'm gonna drag a cylinder around here. Create some height for it. Okay? Zoom in. All right. So now I'm going to reduce
the polycon for this. I would like to convert
this into quads because I definitely
need quads for this. So let's go over
to Atwood editor. Then we need to reduce
the polycon for this. So ply cylinder axis, subdution axis, let's do eight. It will work just fine. Let's go to side F to frame
into its face mode. Let all the pace delete it. We need the top face for it. Then I'm going to
delete to edge. I want to delete this edge
on control undo that. Undo that. I think the air you need to
delete would be this, this and this control delete. Oh, my mistake. I think before I delete that, we need to
add something in there. Yes. So we need to go
I was doing the letter before the I was doing something I was
supposed to do later on. So I moved too fast. So let's go in more tie codes. Add some coats, move
this down here. Go, move this year, here as well, get the streets. Okay, then we close this
year to apply that. So now we can go to selection to select these
edges, delete them. Yeah, this is what we need.
So now is now quaded, which is precisely what we want. I'm going to select select
these vertices with scale two. I'm going to scale
this out some more. Okay, select this as well. Scale out. Okay?
Yeah, that's fine. This will work just
fine, so I'm going to make a duplicate
of this Control D. I'll move this down here, okay? So the first thing I'd like
to create is the sparehead. So I would like to
create the sparehad as our first piece. I'm
going to select it now. I'm going to do an extrude
W on the keyboard, extrude this out some more. Let's do this from
the side view, Extrude this out a
little bit more. I think somewhere around
here should be fine. Maybe a little bit more. Okay. Most of these
are going to make adjustment to tumble just
carry on with this first. All right? This would work just fine for
what we need it for. Then let's go to our top view. Okay? So the next now I'd
like to do would be add, let's go to motorcades. I'd like to put instead
putting a coat in there, let's just select the
center one instead, sled the center edge. Okay? And we do let's see. I think I would need to
let me come in close. Let's see how that
looks like in here. Okay, so I'm going to bevo this, reduce the fraction for it. I think somewhere around
there should be fine. Yes, somewhere around
there should be fine. Then I would go over. Let's go over to the
perspective view. Okay. Go to the side view motorycle. I'll add a coat around. Let's do somewhere
around here instead. Alright, so I think
there should be fine. One also around here. Don't do that. Let's do
one around here, as well. These three should
be fine for now. Okay? So now, I would like
to extrude some piece out. I would like to go over to
selection two face mode, select Let me start by
selecting this do that, selecting these
faces in the middle. This is the face I
need to extrude out. So let's do extrude Let's
go to the side view. Let's extrude W extrude out. So this is going to be a
main triangular spare head. Let me get this up a bit
higher this way. Okay. Then I'm going to start making
modifications to this now. So the tip, I'm going to squash the tip down this way, okay? I think I need to extend this out even more. But
we'll do that later on. Let's just make sure we get
the proper sizing for it. I'm basically looking at the
edge now to see if I have the right edge for this Okay. So then I'll go back to my
side view vertex, select. Let me start by selecting
these three vertices first. Move this up, select the
center one, move this out. Okay? Yeah, that is fine. Okay. Then now we need
to start extending out. I think I need to add
some more pods to this. So let's go over to edge mode. She rightly can hold
insert edge loop. Let's go in, say this here. Let's do three. Then add that in there. Okay. Close this. We need
to make it straight. There needs to be straight
straight as well. All right. Then we need to start
expanding them out. I think I would go
over to the edge. Let's select this edge, select this loop edge. But I don't want to
go all the way down, so I'm going to let's
go to the side view. I'm going to stop
it somewhere around here. Stop it around there. Then I'll scale to, I'm going
to scale this out this way. Out this way some more. I think probably that's
way too extreme. Shring this down so
I think that's fine. It should be fine. Okay? Something pretty mode like so. Alright, This we're
going to fix in a bit. But let's just get this out first and see how
this is looking. Okay. Then we need to start making corrections to this now. Let's do this from
this side view. So I'll start by selecting
go to Vartex mode. Select a lot of these
vats, squash this in. Squash this in in some more. You need to do a little
bit more work in here. So select these three, squash this down some more. Okay. So more S
something tiny like so. Get this in place as well. Some more a bit more to compensate for it
in some more Okay. I even the lower part
is a bit smaller, so we still need to keep
shrinking this down a bit more, shrink this down some more. Okay, let's do here as well. Okay, here as well. Yes, let's shing
this in some more. Okay, let's go in and let's visualize. Let's
see what we get. So now we need to make some
modifications on this. Yes, we would need to
modify that a lot more. We even we can even completely
collapse if we need to. Let's do something else
instead I would like to select let me come in close, select all of this,
go to the top view. We have the selected. Oh,
so letting you wrong one. Letting at the wrong place. Supposed to be up here. Okay. And I'm going to let's see we can get the side
side view instead. Let's use the side view instead. So I'm going to deselect this. Let's do for your backside also. I'm going to deselect this. I'm going to
deselect this, okay? Then we need to start
pushing this up. Let's get this up and do that. We need to get this
selected as well. Select this as well.
Move this up. Okay. Scale this in rather
squash this in. No, no. Yes, I think we
make this work actually. So let's go to edge,
select this edge, and move this up. Move this edge up. Okay? Yeah. That's begin to look
a whole lot better now. Okay. Yeah, this would work. Yeah, this will work just fine. Let's see how high
up, need to move. Let's move this up
a little bit tiger. Okay? And I'll go in and then select this edge, select this edge, go to the backside, select
this edge and this edge, squash them in some more. Trying to make sure we
get better transitions around those parts. I
think this should be fine. Select this select
this this as well. Come on, this as well. Move this up a bit higher, squash this in some more
squash this in some more. Okay? Yeah, this should
be roughly fine. So we select this now, still I think I need to add some
thickness to this edge. We need to kind of scale
them out a little bit more. So let's go to the
side, the side, the side view
instead. Isolate it. I need to grab, go to vertex. Let's grab. Let's start
by grabbing all of this. Now this selects these bits. This selects these bits. Okay. Okay, we definitely
need these bits. So select those two. Come into the side. I'm going to deselect
everything down here. Okay, I think we should be fine, and I'm going to scale out
some more. On do that. I think this one. Let's
just scale out first. We'll make modifications to
that by fixing that later on. On do that, you can
select this as well. This also scale
it out some more. Out a little bit more. Yeah, this part is
a bit too extreme. So if we push that
down later on, let me just get this out
this way to begin with. Then I can grab all of
this and all of this. Let me make sure I'm grabbing
it correctly on this axis. Then you can push this back in. Select the top part,
push this back in also. Okay? Yeah, that's fine. So what I'm trying to do is to create enough edge to
this two I can actually add the motoric in here in the center
part all down shifts. Put that in the
center, then I'll just go over to edge more
Dublck on this edge loop. I'll deselect it down here. Okay. And I'm just going to
scale this out on the side. I'll just scale this
out on the side. So that's going to be like
our sharp edge for it. It out a little bit more. Okay? This select it
all the way here. For this part, you need
to push it up some more up a little bit more up a little bit
more like so. Okay? Yeah, I think we're capturing the essence of this quite well. Okay? Yes, I think
this should work. So I'm going to do an auto Smoth Let's see where we get
with Autosm in here. Yeah, so we get an
interesting result out of this Autosmon, which is precisely what we want. But we need to kind of add some you need to add
some more e to it. Yeah, I think I lived. I don't want to mess
this up too much, but we need to add let's see where we can actually
add this instead. So let's let let me make a
duplicate of this first. Let's make a duplicate of this. I think on the side, there's something you
need to do on the side. You decide this side instead. We need to select this, squash this more a bit more a bit more some
more select this, extend it out a bit more. Okay? Yes, I think this is
pretty much fine. But this is fine. Let's just make sure we add. I think we select before we do that, let's
make it duplicate. Let's duplicate this
Control D to duplicate, pull this out this way. Okay? I think now the
overall proportion, we need to take down. Let's reduce this quite well. Roughly around the length, it should be, I think, somewhere around
there should be fine. Okay? This should
work just fine. Okay. Yes, this should be fine. Let me go in to the side view. I'll go to my vertex, select all of these verts. I'd like to shrink
this down some more. Do some shrinking in
here as well. Okay? Grab all of this, move
this up some more. No, I think down down here
where it was before should be fine down here instead. Okay? Yeah, this should be
fine. Yeah, so now let's add before we add that
just before we add. Let's ad that now.
Let's add now instead. So edge click on this edge. Okay? But I'm going to
deselect it around here. We select around there.
I'm going to do a bevlo? I think a bevo should
be fine. Let's see. I think I need to close the gap so more make this quite small, add one segment in the middle. Okay. I think this
should be fine. Should we turn off Chan fa. Let's see if Chan f
actually does anything. Okay. Let's leave
it off instead. Let's leave it
off. Okay? I think this should be roughly
where we need it to be. Yeah, this should
be fine. Click out. Let's subdivide this.
Let's see what we get. Let's see if we have maybe
the edge is way too sharp. It's looking like our
edge is way too sharp. Our edge is actually
way too sharp for this. Let's don't do that. I think we need a little
bit more spacing in there. I think this spacing
should be fine. Let's subdivide
subdivide, let's see. Okay, that's fine.
But we need to add holding edges to
this also as well. So click on this, click on this here as well, here as well. Okay, then we'll go
across and do that, go across here as well. We'll do this for the
opposite side. Okay? We also need to hold this edge because it needs to have those edge needs
to be tight as well. Et's do a bevel. Okay. Let's increase the
fraction for it some more. Then add one segment in. Okay. Yeah, that's fine. Okay, then let's subdivide this. So we have edges now to this, which is precisely what we want. Okay. But we do some little bit
of cleanup in here though. We need to do some
cleanup in here. So let's do that. I'm going
to go to more ti cords. So we have a triangle
here, 11, two, three. I think we can move this down this way and start to apply
that move this down this way. Okay? So we have one, two, three, four, then we have
triangles in here. We can just undo that. Think I need to do this again. I didn't do that correctly
enough, so do that, let's just put this on this edge all the way
down here, Enter. Okay? Then we can do this edge also all the
way down here, Enter. Okay. Then we'll just select the
center edge control deletes. So that's fine. I'm going to
do the same notes or two for the opposite side.
So more tie cuts. All the yeah Okay. All the way down here, right, then select this
A control deletes. That should be fine. Okay. Then on this side, we just do one old way, then we do one old way, here, and start to apply that. Opposite side, do one old way. Okay? One way. Okay. And I'm going to select
these vats and these vats, let's go to constrain,
surface constraint. Scale to scale and do that. Let's move to instead. Okay. I think I did
that way too much. Select this, select this.
Bring this this way. Friends kind of create some
more gap in between them. Frink create some
more gap in between, so think this way. All right. Select this, select this. Move the this way. Okay. Let's do for the
opposite side also as well. No, scale, pull
this down this way. Select this, select
this out this way. This and this out
this way, this. Let's bring this down
instead. All right. Since you like this and this, bring this down instead. Select this as well, bring
them down as well this way. Scale in. Just trying to create something at least with some space in India and
some gaps in between. Move this down. Okay? We can select this and move
this up some more. Okay? So if we
smooth this out now, this is what we
get, which is fine. We can work with
this, but we still need to make some more
modifications to it. So yeah, we'll carry
on the next lesson.
80. 79 Spear Body In Maya: Hey, welcome about, guys.
So the previous lesson, we started working
on the spare head. So we're going to carry
on with that and then keep doing some
modifications to this and then model the rest of the road or Westwood road that kind of holds
this all together. So let's carry on. I'm
going to go over to this edge to the
opposite edge as well, and I'll move this down. So we still have this
constraint on surface, which is fine,
precisely what we want. I'm going to scale this out. Spread that out a little bit
more. Okay, that's fine. All right. Now let's look at the reference a little bit more. I see there still some
corrections we need to do on this object mode, F to frame in Okay. So I'll need to select this face in down control,
select these faces, Extrude W do that less
turn of this constraint, bring this down this way. Need to get it should be
I think it's quite long. All the way here should be fine. Then I'm going to
scale this out, so let's just scale
this out a bit more. Okay? I think so should
be fine. All right. Yeah, I think we have
this in a good place. I think this should
work out just fine. Then, I think I need
to Let's get close. I need to extend this out. Okay. Let's extend this out some more out that way
should be fine. Okay? A smooth, let's see again. Yes, I think we can
work with this. This will work just fine. Okay? We can make this even
more interesting. We can select all this phase. This phase as well,
this phase as well. Do the same on the
opposite side. Okay. And I can scale it out
a little bit more. Maybe that's way too
much on do that. Let's select this down here.
Select this down here. Face mode, select this. Scale this out. Alright. Though you're moving
it. I want to be sure he's kind of fine on
the opposite cycle. This part seems like
he's not looking good. He's not looking good enough. But I think we know to fix that. I kind fix that easily. Let's just pull
this out some more. Then I'm just going to go to
vertex, seleide these verts. Let me fix this this way. Drag selection in here, drag selection in here. Okay, I pull those out. Okay? Select this. Select this, select this. Push that out as well. Select this and this. Let's select this and
this pull them out. Okay? I think this
we can work within here this auto smont again,
we should be getting this. Yeah, I think this is fine. I'm just checking just to
see if I need to sharpen out the edge a little
bit more. Okay? All right. I feel like I should add one more coats in the center
around here and do that. The should be fine.
Then connect this all the way down here, and
start to apply that. Do the same for
the opposite side. Okay? Please don't too smooth. I would like to get this
edge slightly more sharper. Sharpness should be a
bit more obvious to see. I'm going to double
click on this. I'm going to extend it out. I'm going to deselect
all of this down here. I'm going to scale it
out this way slightly. All right. Let's see what
we get for those moons. A lot better. At least we have something a
lot sharper now. That's fine. Then
I'll go over to Okay. I think I can select
this duplicate of this, move this out, select this. Let's done extrude, create
some thickness out of this. Okay. But then we need to
scale it down some more. Need to scale this down. Let me center vote on it, scale down. Come in. Scale this in some more. T should fit right in. Yeah, I think somewhere
around there should be fine. I'll select this. I think I would need to make another duplicate of
this entire piece. So let's legislate
this to Control D, move them out, back up, select this, isolate it. Then I think I can select
select this phase. You need one actually? Will you need to
delete this instead? You need to delete this
instead? Let's delete this. Select the edge. Okay.
Select this edge, slide this edge,
pull it back in. Yeah, that's fine.
You cannot maintain that out shape to it
on the lower parts. Then the blick on this
edge, let's don't extrude. Move this up. Okay? That's fine. Let's add more tycos to this
Addicte addict here as well, here also in here as well, and one in the middle. Okay, that's fine. Let's
let's go to selection two. Select Edge. She
rightly can hold. Start edge loop. Come on. Such a loop. Yes. So what we need, three
of these should be fine. Okay. We still need to add
one around here, here. Let's just do more tyco. Let's add one around here. I'll select it,
straighten it. Undo that. And to squash this
down this way. I'll add another
one around here. Hers well as well. Select this, squash this down. Okay. Select this scale it out. Okay? Yeah, that's fine. Let's go out of isolates. Okay. Select this now. Now, we need to get this as long as
we need this to be. So to do that, I think
we need to select the two, put them in a group. Named as to spare. Let's use all caps for this
spare Okay, that's fine. Then we need to scale start by scaling it down around the roughly around the
length we need for it. Let me compare move this compare this to the
body. Let's see. Okay. Let's just say the
length should be as long as from the nail,
all the way to the heel. So somewhere around
there. I'm just musing from the
nail all the way to the heel to measure this most especially for
the spare head. So that's what I'm kind of
using to measure this now. S create out a little bit more. I think this should be fine. Move this in place,
frame into it. Okay. Let's get in there,
select the group. Select the group.
Move this this way. IT I'm going to rotate
the entire outin. Let's make sure we need
the rotation in there, it should be rotate, rotate. Select all of this. Let's
zero this out first. Okay. Then the Z axis, let's do 90 degree. Okay, 180 should be fine. 180 degree. Okay. So now, I think this spell is roughly let's
look at this again. I think it's roughly around the same height as our
character in here, so we need to get this
wood stick, holding it, select the Look, on the on the head of just select the entire
vertices at the teletp of it, and then we going to use a translate to and then get something
quite high out of this. Something roughly around let's do roughly around
should be fine. Okay? As you going to try and measure that out to see if this is fine, based on the reference
we having here. So let's say we want
to rotate this. Let's save this first. Let's
see where rotating this. Let's see where
rotating this this way. Okay? And then we're
bringing it up. Don't do that. Let's say, it should be around
here forward. Okay. I think it's roughly
I think it's roughly around the length we need for this, that
should be fine. Let's go back in and then
set this back to 180. Okay. Yeah, I think that
should be fine. Let me just pull this down. All right. But one thing we
need to keep account of Ip twice m. I need
to scale this out. Let's scale this entire
thing out first. Let's scale this out
a little bit more. Maybe it's a bit
too much this way. Then I'll need to
obviously reduce this. I'll select all of this.
Scale this down some more. Okay. I'm trying to see if this road is way too I think
this road is around this spearhead
pasa way too slim. The handle is way too slim. I don't want to
analyze that slim. I want something
that is still good enough to handle coming here, I think I need to make
some adjustments in here. I'm going to select all of this. Let me do it all of
these vats, okay? I need to scale
it out some more, so I want to scale it
out this way. Okay. Let's see. I think
this should be fine if we run Autos mount on this. Okay. Maybe scale this
down a little bit more. Some more should be fine.
Let's look at this again. I'll need to pull this up some more a little bit more,
that way should be fine. Okay, select these two, save this again,
make it duplicates, extend it out this way. So in case you wonder, when
I want to sing this file. So we're going to
create a new file, kind of do proper asset topping, we try to create XGen and a for it and then do
look development. In a completely
different file instead. But this file is like a total. So this file is just
the file. You need to kind of create assets. Just roughly create assets
in here. It's like this now. I think if I do an auto smoke
before I do an auto smoke, let's go over to South
Motor Edge Loop. Let's create an
edge loop this way. I think we need a whole
lot more than this. We need a whole lot more. So let's go and it
stats. Let's do ten. Let's do ten instead. Okay. That's fine. Alright. But we still need
to hold this edge. So let's solo this. Come on. Go out of solos, led objects. So I think I would prefer to
do a bevel in here instead. Let's do a bevel
in here instead. So bevel, extend the
fraction out some more Okay, we need to chamfer. I think we need
chamfer in there. Let's increase the
fraction some more. Okay? I think this
should be fine. Let's Atos moons.
Yeah, that's fine. But we need also an ding edge for the bottom part,
so let's go in. But we need to delete we need
to delete this lower face. We don't need that anymore. So let's select
this entire face. Older control, the select this. Oh, make the same mistake again. Let's just do let's just
delete this instead, then we can just extend this in. Let's extrude. No, opposite order
control, extend, extend this in that
divisions across this. Okay. Let's do more thi coat. So do coat around, around. Yeah, well, then yeah, okay, that should hold up. That should hold
up quite nicely. Go out of solo mode. Let's compare and see
what we get out of this. So you can see the
spacing in between these. Let's see if we have the
same spacing here, we don't. So we need to
compensate for that by selecting these edges, and then we bevel
them just to have maybe two extra edges
in between them. Let me clear this out te moding that correctly
enough. Wood shifts. Okay. Yeah, well. Okay. Come down. Yeah, yeah. Yeah, so, well. Let's go wire frame. You have any other
piece there, we don't. Go out to wire frame. Then let's do a Bvul Undo that should be quite averaged
out this way instead. Let's do another one in between, increase the
fraction a bit more, so average all of those out. I think they should be fine.
This will work just fine. Then I can introduce one
year on year as well. Undo that, undo that.
Let's just do one instead. Okay. I think this
should be fine. Save this. I think we can
safely export this out now. Yeah, I think we can
safely export this out. I think they are
all in place now. So I'm going to
select these two. Make another duplicate
out of this. Okay. Undo that undo that. Let's select the group instead. Let's open the group Mure
without any duplicate of that. So let's duplicate
the group instead. Send this out again,
select these two, eat three on the keyboard
to smooth them out. Then go over to modify Smooth
mesh preview to polygons. Oh, it's not select that
yet, select these two. Modify smooth mouth
preview to polygon. Okay, let's use
something lower instead. So I'll go over to
channel, smooth surface. Let's say this to one. Also smooth surface. Set this to one. Okay, we
should be good in here. So I will select this two now. Then let's go over to UV it. I want to delete any
UVs we have in there. We don't want any
UVs in here for now. We're going to
create UVs later on. So delete any UVs
we have in there. Select these two. We can combine them as
one single piece. Save again. I think
this should be fine. Yes. And then we will go over
and then select it again, export this out on
OBJ export selection. So Africa me while Z
imports, this is it. Let's save this a
spare sip selection. Let's import this into
It's important to Zbrush. So it's important
to Zbrush does do an append sub to apend.
Let's do a spare. Let's select that spare. So
do's go all the way down, it should be down at lower
sub to scale this out. And let's import this
into imports Z imports. Spare. All right. Awesome. So we have this panel successfully imported without any issues in here, which is precisely what we want, so this should work just fine. So the next step would
be to start converting or start doing some
surface sculpted detail on eight inside of zebra. So let's just solut
this out first. Let's get it closed up in
here. Let's see where we get. Okay. I think this
should be fine. I don't see any major issues
in here for the most part. So this should work just fine. Alright, so we'll do that in the next
lesson. Bye for now. Okay, before we done, I think we can I usually like to scopes from top to bottom, so I would like to
rotate this dn shifts. Let's rotate it this way. Yes. This is fine. This is fine. So should be
more or less like this. This makes better
presentation sense in here. So something like
this should be fine. Alright, so in the next lesson we'll go in and then do
some surface detail, and then I believe we should be done with all
the modeling for this, and then we can start
preparing and organizing our file for UV and
wrapping, okay? So I'll see you guys in
next lesson. Bye for now.
81. 80 Spear Surface Details In Zbrush: Welcome, but, guys. So in the previous lesson we kind
of imported this into Zbrush. So in this lesson, we start doing some
actual work on it, so let's get started. So I'm going to try
and get this in the center I'm going
to solo this out. Then ton on symmetry for this. You can see now is not
perfectly symmetrical. I can just easily do local asymmetry in here and then we should at least
perfectly symmetrical. At least for as far
asymmetry goes, it should be the symmetry
we should be using for it. But at the same time, I would still like to get
it close to the centers, Leamington off
symmetry for this. Try frame this in here. Okay? So asymmetry, I
think we still need to adjust that a
little bit more, okay? There's no specific reason
why I'm doing this, though. I just want to get it in
the center if possible. Okay. Yes, stink is roughly
the center now. Alright, so now I'm
going to subdivide this. First of all, let's create
a backup piece for it. So we have a backup.
So then I'll go in, then subdivide this by
quite a lot, actually. Subdivide. Let's do one more. Okay. So it's at 40 million now. So I'd like to test this
out to be sure if I have enough resolution to hold
any wood Alpha Alpha, I'm going to be bringing in. Let's go to Alpha. I believe I have a whitewood
Alpha, whitewood Alpha. So we also have wood also in
here if I need to use any of these let's use this white wood. This whiewood tends to give me at least good result
for the most part. So let me double click on this. Let's try this on to do
that, to test this out. So we need to do
drag wreck instead. Okay. I'll come close check if we do that see if is holding up the details quite when I'm increasing
intensity for this. Okay, undo that is not. We're not having that fine
detail we need in there. We're not getting that fine
detail we need in there. So I think let's go to
the lower subdivision. Let's go to lowest
subdivision level, Shift F. Okay. I might need to separate
this out and then subdivide the pull once more, and then before subdividing
it because I would like this to have a lot
more resolution to it. This needs to have a lot
more resolution to it, so let's delete higher. Then I'll go over to
poly group at group. Control Shift click. Control Shift click,
isolate this. Shift F. Let's see what we
get, this is fine. I'm going to let's
go over to sub two and then separate this
out to split, split EN. So you should have to
list out of this now. So this one is at
one K resolution, so I'm just going
to subdivide this. Let's do five K. Maybe more, a little bit more. Let me subdivide this one more. 23 k seems a bit much. Let's start with five k
for now, dilute lower. I'll make a duplicate of
this road, get this up. Then let's merge this down. So do a merge down. I'm going to merge the sparehad merging this spare head down. Go out of so low mode. Make sure I'm doing the
right thing shift E. This is the wrong
one. The wrong one. Okay, this is the one
we need down here. So this is down here. So this we're going
to merge this down. So let's merge down. Okay, so we have this
a total of seven k. Fully count seven K.
Now, let's subdivide this. I'm going to keep
doing this until I get the right resolution that that holds up my
detail quite well. Subdivide it once more. Last 2 million. Now, maybe we should try
different kind of Alpha instead. I think I should still have I should still have
some wood alpha in here that we can use. Let me go over to brush. I should have a
wood Alpha in here. Let's see if we can get that. I think I found the right brush now to kind of test
this out with. Over brushes. So I believe should
be wood and back. Denis is precisely the
one I needed to use, so double click on that. So if I increase
intensity a little bit small and I drag this over mesh, should be getting
better resolution out of this now, so I do that. So this is brush I'm
going to be using. So, I think we're
kind of establish the right amount of
polygons we need for this, so we can continue on so I'll go over to layers and then I'll create a new layer in here. Okay. I'm going to name
this layer to surface. Name this to surface. Surface details. Okay. No spelling that
correctly enough. Let's adjust the spelling
right that's fine. So basically, for this, what I'm going to do go Shift F. I'm just going to isolate
this piece to begin with. Come on, do that. Let's go to lower subdivision
level actually for this. Control Shift click. Okay it's isolated now. I need to go back. Okay. Let's select standard brush, set this in your
Shift F. So for this, I'm going to be using
the He polish, actually. So I'm using the H polish to create randomized
variation in there. Just make it look like
something that is a bit more a bit more handmade. So right, what we're going
to do so to do that, I need to use the
clay Builder brush, and I'll go to higher
subdivision level. Okay? So this we need to do we
need to do this around Okay. I think a more faster
way to do this would be would be to use even
the radar symmetry for it. I think a more faster we
might use radar symmetry. But I don't want to look
too symmetric all around. I think just on symmetry
not working in here. Okay let's front facing, okay? Let me increase the
brie ton of dynamic, and I'll begin to use
the clay Bow brush. I begin to undo that
lower bros size. I'm not going to add
variations across this way. Let me start from
the bottom instead. Then we work our way up Okay. So I'm just going to fill
up the shape this way, come on, create variations of log detail across this Okay? Make sure I'm doing this
as accurately as I can. Let me reduce the intensity
of the brush down some more. It's not too
aggressive because I still want to I still
want to kind of see through the smoothness
of this wood around it. Okay. Fill up the spot as
well. Continue on. So this is just going to kind
of create a bit up betting up wood surface to it is
precisely what we want. Moving up come to the side, put some more variations
across this. Okay? I think I went this should
be this way instead. Rotate and keep
fleshing this out. So after doing this, I'm
going to smooth all of these down just to capture the detail, resurface, break up
detail even more. Maybe for the back anytime I come to the mid
maybe I will just turn off symmetry and then
just do that asymmetrically. Like with the middle
parts now, right? Don't asymmetry for this
and do this asymmetrically. We continue
asymmetrically upwards. So I know all these parts should be asymmetry
asymmetrical. Okay. All the here should
be fine. Front parts. Let's come, use the front. Let's go to the back.
Don't asymmetry and I'll repeat the
same nose around here. Okay. So we're not doing anything too special or too
fancy in here, basically fleshing
all of this out. All right, that's
fine. Then we can turn on symmetry now,
come to the side. We can fill this up. So this should make better sense now. Okay. But if I'm smoothing
this, I'm not going to be smoothing this with
symmetry turned on. I'm going to turn off symmetry
and then smooth this out. That will give us a lot more asymmetrical surface
detail in there. Okay, almost done. All right. That should be
fine. I'll turn off symmetry and I'll start
smoothing things out in here. Okay? Smooth out. I think we need
to use might need to use something a more
stronger smooth for this. I think the stronger
smooth for this. That's fine. Let's just
carry on first with this. Maybe I should just add a bit
more pain pressure to it. But we still have
control over the layer, though, to tune it
down if we need to. So maybe we should
actually leave something a bit more intense, so then use the layer to layer intense kind of get
a blend down instead. Alright? I think. Going around this
moons in this symmetrically. Okay, down as well. Teats Okay. Most of the details we have
in here is going to give us a lot more interest to
our surface texture. Most especially when we starting texturing on inside
of subtnspena, it will begin to look a
whole lot better with all these details in here Okay. So down. Smooth down. Let's go to
lower sub dibtion level. So on the lower
subdivision level, we should be able to get a more stronger smooth effect for this. Okay? But if you go on
subdivition level higher, so the DTs kind of
comes back out also. I is fine. So I'm just going to
carry on with this. Maybe even go to lower
subdivision level. I like how we have this lined up wrinkle detail across this. I believe I can keep
that also to kind of allow it to add more
surface detail to our mesh. So going across and around
this smooth this out. And we still have the
leverage of doing a proper blend to it
with a layer intensity. It makes all the
more interesting and we have a lot
more control over it. That's like the
essence of getting or adding layers to your sculpting. Especially when you kind
of figure out, okay, you want to have some
level of control over it, you just want to add that
into a specific layer just to help just to help you have more control over the
entitin smooth this down. Okay? So let's go on
subdivision level higher. So go one subdivision
level higher. Then we can randomly smooth out smooth out all these
wrinkle detail we have. Which is cool, though I don't completely
erase everything. I would still like
to keep a few. So I'm just smoothing this out randomly just to create a
lot more interest to it. Okay. That's fine. Alright. This should
work just fine. So now I'm going to
invert the selection, let's create details for this. You need to have details
in here as well. For this, I'm going to be using the Tin dynamic it's
like a meta piece, so a tin dynamic would work just fine just to add
a bit up look to it. Basically just going to
tap tap on the surface. So I'm just tapping tapping on the surface, and
then we are good. Okay, we've increased
intensity a bit more. But we don't want to go to
extreme in here though, because we still want to keep this smoothness on
it to some extent. But break up the surface to make it feel a lot
more like leather. So make it feel more like metal. Me like handcrafted metal. Alright. Okay,
Weduse the bros size Come in here, also tap some. Do we have, I've not
done this back parts, so let's do for
these back parts. I think I needed to add a
few around there as well. This part was looking
somewhat empty. Okay. Break this up. Alright. Here as well. Look at this at an
angle so you can see the surface breakup in there. Let me use the,
this will not work. We need the reflectivity to
at least see it a lot more. Yeah, something like so. Okay. Yes, this should
be fine. All right. Come to some of this
edge and break that up a little bit more. Okay. Yeah, I think we should be fine. So this kind of creates
some jab edge to it, which is precisely what we want. A little around some of
these parts should be fine. That creates a lot more
chipped out metal edge to it. Okay? For me, this time, I can start
looking like some kind of chip chipped metal edge, which gives it a lot more
realistic result to it. Okay. Yeah, that's fine. Don't
need to go to extreme, bring everything
back out. All right. I think this we can
work within here. Now we can go and increase to the highest
subdivision level. So let's go to the highest
subdivision level and then we can tune
some of these down. Let's tun down some
of the details. I'm going to go
out of recording. Out of recording, and then
let's tune this down. Let's do a value of 0.8. Okay? So my major area of
focus is the handle. Is the handle to be specific. So I think it's not
doing justice to this, but let's go up to the metapis. Metapis seems fine. I don't want to completely erase the DT met for the metal head. I don't want that, so I think I will need to record this again and then smooth down
even more the wood part. Let's go to lower subdivision
level and then isolate it. Right so late this. Okay? So I think we'll go over to
let's go over to Light box. Then in brushes, we have
the so that brushes, we have let's look
for the smooth brush. We have something
called called smooth strong. So open that up. Let's look for smooth strong. Smooth stronger, double
click on that. Click Okay. Okay. Close this up. Then we would hold down shift. So it's on Smooth strong now. So all down shifts. So this kind of strongly smooths out in the
entire outing. Let me reduce the
intensity a bit more. So let's go to higher
subdivision level. The highest subdivision level even I think higher sublution
level should be fine. Increase intensity
so with this now, we have something we have more stronger smooth
effect on this. Let me go to lower
subdivision level. Smooth even more around here. Smoot more. I think cantonan symmetry for this smooth out some more Okay. I'll just keep
smoothing this by lots. I don't want this to
be way too intense. Though, for the most
part, we're going to be looking at this from a distance, but even though we look
at this from a distance, I don't want the edges to feel like to fill the way
it is right now. I feel like the sculpting
it we in years, a little bit a
little bit too high. Okay. And we have this
little merge down with the merge down with the chipped off metal
or beaten up metal head. So I'm just going to keep
smoothing this down. Okay. Smooth this down.
I also need to go to lower subdivision level
and then smooth down also. I'm starting from a higher subdivision level to begin with. Do some more soon around this. Okay. So down. All right. Smooth out some more. Okay. Let's go to the lower
subdivision level and apply this moon little bit it's more
intense in here actually, so let's keep smoothing
all of these down. Though if you feel like
you want to kind of keep yours though it's
still completely fine out. It's still going to look good
when it texture later on. But I don't mind
to be too obvious. Looking at this from
a distance, nothing. The distance view
seems quite right. Let's go to higher
subdivision level. Okay. Is the higher subdivision level. Let's go on subdivision
level higher again. Yeah, I think this is better. Yeah, this is way better. So let's go to the
lower solution level. Click Okay. Let's bring
everything back out. Awesome. So have
everything back out now. So the next step
would be to start adding a new layer and then start adding
the wood alpha in there. So yeah, so we'll do that. Let's increase the
sublution level. So we'll do that in
the next lesson. I'll see you guys in the
next lesson. Bye for now.
82. 81 Spear Wood Details In Zbrush: Pcumberguys. So in
the previous lesson, we added some interesting
surface detail to our mesh. So in this lesson, we're going to carry on
and then add some wood, some wood details to this, and I think I think this crash, yes, we also need to
add and detail in here. So let's get into it. So I'm going to create
a new layer for this. I'm going to name this layer
to wood metal details. All right. That's fine. So
control shaped click to isolate this piece. Okay. Let's go to lower subdivision
level instead to make it easier for us to isolate
this that's fine. All right. So I'll go
over to Light box. I need to use my wood brush. So I believe we should
be this wood and back. So this is a few once in her
though a few once in year. So let's use this instead. So we increase the intensity
a little bit more, right? Then we come in. Let's go to the highest subdivision
level for this. Make sure you on the
highest subdivision level, then we can start
dragging this on top. I think the orientation
should be upward instead. Let's do an orientation
that is upward. Getting close, pretty much
like this should be fine. So we're going to be doing this across the entire surface. Come close. Let's make sure we're capturing the
essence of this quite well. All right. That is fine. Go up even higher
drag one around here. Make sure the orientation
is just right. So we want this vertical
want our details to be vertical
instead. Continue on. Rotate this in position. No upward instead. Let me make sure I'm
doing this accurately. Yes, I think that should be fine. Yeah, that
should be fine. Move down. Get this in place. Okay. Scale this out. All right. Rotate this to the side to the back even completely
the back completely. Make sure this is right. Okay, that should be fine. Maybe you should just focus
on one aspect for now. You just do downward instead. Or just focus on just one view instead and then once
we're done with one view, just flip it to the other side. Alright. Let me go to the far end. Need to bring this
on the far end so the middle point
doesn't look a bit off I think this is moving on. This is fine. All of this is going to make
better sense when we kind of add details
or kind of start texturing this because
once you big this out, sometimes painter is going
to use all of these details, kind of create a curvature
map that would give us a whole lot more control over adding surface that's in there. That's why we need to
at least add some of these detail in here because
most especially for wood, especially for wood, so we can get something good
enough to work with. Okay. Yeah, this
should be fine. Okay? Is software software
has its own strength to actually push your
work even further. So leveraging or rather using
at least a good amount of softwares or using a
good amount of when it comes to eat out
surface detail Alphas or specific brush Alphas or even using the default
brush Alpha in there just to create different
layers of details in there that your
final round out looks a whole lot more
realistic and better. So most especially when you do when you kind of
do close up shots, your viewers or the audience can actually can actually appreciate more the level of detail you took your time
to actually on the surface, which is like a ten of joy
at least for most artists who tend to, okay, let me give you a close up
render so you can actually appreciate the level of detail added on this on a
tiny micro level. I think I believe
it should be almost done this wood is quite long. Maybe we should increase the
height a little bit more. So we can be a whole
lot faster in here. Okay? This way, okay, we're done on this believe almost
one final one. Right, this way should be fine. Come into the top. We just
do something this way. Something horizontal
will work just fine. Then we can rotate it this way and create the level
of detail we need in there. No. I need to make sure I get the orientation
right and do that. The orientation
needs to be correct for this right that's fine. Reduce this do that nothing
that's accurately enough. It's much easier to get orientation before
you scale it up. Okay? I think we
can scale this up. Here, this way should be fine. Okay. Scale this out some more. It's fine, move up. Scale out this way. That's fine. Okay. Let's add a bit more lens to it. All right, that's fine. So we see some gaps in between
that we need to fill up. So we fill up those gap later
on when we break symmetry. Of now let just continue
symmetrically on this. All right. Let's
fill this gap up. Well, it's important to get
the directionality rights. It's important to get
directionality rights. It makes a whole lot
difference to make your standard from others
to give you that reward, realistic look to it. Okay. That's fine. I go to scale this out even
more, make this even longer. All right. Come in
close. That is fine. Now, even sometimes most of
the details don't do that. Most these details
get washed out. Most especially when you add color surfacing
detail to you too. I can only appreciate the level of sculpted detail
in there when you get a very high resolution renderwa your
audience can actually zoom into dimension and then see the amount of detail
you have added in there. Also, and humand tends to even if even though it's not completely obvious
to us sometimes, but the human eye
and human mind tends to pick up subtle
subtle details, even without having to
come close up in there. So it's when we
actually appreciate the subtle detail or we actually have the observation
skill to actually actually see that minute detail from a distance that will
not tend to come even closer and then take a
more closer look and then see the amount of work that
actually goes in there. I'm kind of filling up
some of these gaps. Filling up some of these gaps
by adding details in there. So I'm doing this
now asymmetrically, so I'm not doing this
symmetrically anymore. So you should make things
a bit more faster in here. Okay. We still have control over how intense we need this to be. That's the fun part.
We still have control over how intense this should be. Okay? Fill that part up. Fill it up in a
more straight line. He also as well. Come down here, here as well. Okay. Fill up this part. We still kind of
fill up. I think we still have gaps
at the back also. I think we have gaps where we need to actually
completely fill. I can skip some gaps to just to add a bit
more interest to it. So some gas you can
just easily skip them. Yeah, as well. Okay? I believe is almost done. Yeah, as well. Okay. Yeah, this should be fine. Let's
go to the back. There see some gaps
we need to fill up. Fill up these gaps. Okay? We can do some that
bigger if we need to. Just to create scale variation for the detailing of the wood. Right? Fill up these parts, let's do smaller ones
in here instead. Okay. Yeah, as well. Okay. Here also. You are pretty much almost done. The basic guy just doing the same process over
and over again. All right, this way,
should be fine. I'll I'll skip this one here,
move on to the next one. Okay. Here, I think we are good
now. T should be fine. Alright, this is fine. So I'll need to Let me go to
lower subdivision level. It the selection. Now for this, based on the reference in here, I would like to add you can
see this detail in here. I I think we can easily
add that instead of Substance Painter without
without any issues. And it will still
look good. So yeah, I think it much easier to add that inside of Substance
Painter instead, too. Now, looking at this,
I feel like I need to stretch it out some more. I feel like I need to extend
the length up some more. Let's go to lower
subution level. Okay, I'm going to max out the mid part invite the max
Come on, blow this out. Okay? Center this orient. Extend this out a
little bit more, scale it out some more. Okay. Clay out.
Bring back the max. Let's bring back the max. Extend this out, add a little
bit more thickness to it. Les to have a little
bit more thickness. Blow the mark go to
lower subdivision level, blow the mark even more, add some more thickness to it. Okay. Then, I believe we
are done with this. Now let's go to the
highest subdivision level and we compare this with
the other machine here. So go out of isolate. We can move this out now because we're pretty much
done with all of this. All the details need to add
in years already there. A dots were supposed to have we can we can quite easily do them in quite easily do that
inside of Substance Painter, but I think this
should work just fine. Oh, did I make a duplicator? Let's see. I think I want to make sure I don't
have a duplicate piece. Okay, SI darts,
yes. This is fine. And move this a bit closer. Okay. Come in close. So I think, based on the
thickness for this rod, you should be able to hold this quite well, so it
should be fine. So we just need to kind
of go into layers and then take down the intensity
of this wood alpha. Let's go out of
recording and then let's take it down
a little bit more. So we can do let's
the value of 0.7. Let's the value of zero. Okay. So it's still too
sharp in there. Let's take this down even more. Let's Let's do 0.5. Okay. Let me just so this out so I can just visualize this
without distractions. Let's cut it from a distance. I think it should be fine.
This will work just fine. This will work just fine. Okay. So next lesson is going
to be about rearranging, arranging setup in here, arranging this file, and then
giving it the proper name, organizing everything and then prepared for Uvion wrapping. I'll see you guys in next
lesson. Bye for now.
83. 82 Organizing Subtools In Zbrush: We come about, guys.
So in previous lesson, we finalized on the spare. Okay? So in this lesson,
we're going to start organizing our entire
file setup in here. Okay, so to do that, this
one thing I'd like to do first would be to make a duplicate of my of
this Zbrush filing year, so I believe this
is the one in here. Every other duplicate,
I'm just going to delete that. I'm
going to delete this. I don't need that
anymore. I think I need this anymore. So
this is the main one. So I'm going to
create a new folder. So in this folder, I'm going
to name this to final files. Okay? So I open up that folder. Then I'm going to save
this file in there. So I'm going to save the filing, so let me just rename this to
final he dress accessories, so I'm going to save this in here now this is saved up now. I'm going to start arranging my sub to India and
get it organized and then rename some
of those so we can prepare them for UV
unwrapping inside of Maya. Right, so let me
start by deleting. I'll go to any previous. There's no previous
canvas in here, while you're working, you
just want canvas in here. That's fine. At some point, Zbrush
kind of crashed, so I had to use the recovery file and receive
that as a new document. So that's why I
might be wondering why I don't have any
other canvassing here, so that's pretty much it. But it's not really
big deal because most of what we need is already in
one single canvassing here. So let's go in and then start arranging
this as much as we can. So basically, what I'm
going to do is that any sub that's kind of visible, I'm going to shoot that down and put that in a new folder, except for this body piece, except for this body piece
and then this outer eye. So I need that already have
that externally already. So okay, so moving down. Spot line is visible, but it's down it should be somewhere. Let's solo this out. Let's see what we get. So we
don't actually need this. I'm going to go out of solo, cue to go back to our drum mode. It on that off. I
would like to create a bit more space
in a can I extend? Okay, I believe I
can extend this out, increase the visibility count
of visible counts in here, so you can see a whole lot
of sub to around here. Okay? So now, let's move
on to the next piece would be this mark piece here. So I'm going to send this down
down shifts, send it down. I'm going to create
a new folder. So it's not not to send it down. I'm going to create
a new folder for it. Create a new food. So this food, I'm going
to rename this as Idris Aces Rs so I know precisely what
is in there. Right. So no, we selected the mark, so that immediately would insert itself inside
of that folder. So which is precisely what
we want. That's fine. So I would, let's just carry on. So go back up. We have quite
a lot of subtools in here. So then we'll go to the
next piece, which is this, go and get in framed in, right? So I'm going to shoot this down. Put this into the
folder, go back up. And then accordingly,
we're just going to arrange them that way. I believe this is another one. Select that. Hold down, shift,
send this down. Okay, that's fine. Then drag that into the folder. Let's look for the next piece. Go all the way up. Okay, I believe this
is the next one, select that, send this down,
put that into the group. I'm going to hide I'm going
to hide the group for now. So anything we have selected and put into the group
will be hiding so we can see what is left. All right, so this
is another one. Send this down, put that into
the group, move back up. So it's basically just a
repetitive process across this. Send this down. Go
all the way up. This is another one.
Send this down. Drag this in. Okay. Another one. Send this down, drag this in. But it shouldn't take us too much time to actually do this because we're basically
repeating the same steps. Send this down, drag in. Okay. Here, I think
that's all the way up. I should be the next one. Send this down, bring
this into the folder. Okay. I think we can also keep things organized in here also, as well. So I'm going to for
this Miscellanos, I'm going to let me drag
this up here first. For every other piece that
we don't necessarily need, I'm going to create a new
folder for that also. Let me just name
this to Miscellanos. All right. Then I'm going to start dragging this in the meshes that we don't actually stuck to that we
don't actually need. There's no visible. I'm
just going to drag that in there just to keep things
a lot more organized. I believe I can still keep
dragging shape in there. Okay? So we need this
because it's visible, let's shoot this down,
put that into the group, collabs this group,
back up Okay. I select this, we need this. Send that down, put
that into our group. No, into the group,
into the group. I don't know why it's n into
the group though Let me open up the group and then send
this in, that's fine. Okay? Keep dragging this
in into the group. Until we get to the next
piece that is visible. I'm still going to actually
delete the entire group, though, because I don't
using it anymore, so let me select this. We
want to be careful, though. You want to really careful
so you don't delete or put what you're not
supposed to put into the folder into that
folders not supposed to be in. So I'm trying to do this
as carefully as I can, so I make sure I select all
the necessary mesh for it. Okay. Let me open up
this folder, I think. Remember, we made two mpiece, so I will need to check because we have two
armpis in there is one. Let's see if we can find the
other duplicate in here. Okay, that's fine. So I'm going to shoot this down, drag this into the folder, move back up. Okay. So put this in get
all of those in. But still checking
and looking for the other ring band for the arm. Put this in in in here, as well. This we need. This is like a sound that's in here.
Let's shoot this down. Drag this in, move
back up. Okay. Bring this in this case we need. Put she send this down. Move back up, drag this
in in her in as well. Now we need this. So I'll send this down,
drag this in here. Alright. We need this also as well. Send this down, bring
that into the folder. Drag this in, drag this in. We need this send this down, bring this into the folder. All right. Put this in here, select this, send this down,
bring it to the folder. All right. I think we need this also. Hold down shift, send this down, bring this
into the folder. Okay. Bring this in in here
should go into the folder. Okay. Close that. Then let's go out of solo mode. But I think I'm looking for I'm looking for a
particular piece. There's a particular
piece I'm looking for. Let's see if we can
find this in here. The collapse this first.
Go in and select this. Yes, this is the one I'm
looking for arm ring. So I'm going to shoot that down, then drag this into this folder. That's fine. Okay. I think I'm going to
save this file again. Let's save this file. All right? Because
still need to kind of merge we still need to
merge some shapes together. But I'm just trying to make sure everything's working
accurately by trying to organize as much as
this as I possibly can. Because once we import
back to once we import to Maya just to get
right into van wrapping. I think this is fine. So let me make all of this visible now. All of what is in the ADRs
assessment is visible. Then check if we have all
of these complete go up, check if all of this is
complete as it should. If you have the right mesh in there and not something else. Okay? So we have most of the
image that we need in here. This is fine. All right. This is fine. Here, as well, this is fine. We
can work with this. Fine, also down here. Let's check here, this is fine because we
have this intercepting, so let me just
hide that for now. Let's hide the arm
rings for now. Let's select something
else actually. That should hide that
because ready maxed out. Turn this back on. Okay? All right, I think all of
this is in a good place. We have all of this
now in a good place, so we can move on
good in here as well. Okay, that's fine. So now
we can safely delete this. I believe we can delete
this now without any issue. So go in the let's
do delete all. Because if you use
delete folder, it's really going to
delete the folder without deleting the content
inside the folder. Let's do delete all
instead. Click Okay. All right. So we have this
all organized now. So if you save this out again, you should have a lesser file. So we have this 2.7 gig now. Replace this. Then if you
check the file again, we should get something a
little lesser because I've deleted a whole lot of polygons that we
don't actually need. I'm just going to
delete all of those. And I will still need to I will still need to import
all of this now. I think we need to import
all of this back into the original file where we kind of sculpting
the main character. So the idea here is to kind
of optimize this file as much as much as we possibly can, so we can heard that
to the other file. Let's go in and then check the file size we
have for this now. Okay, not so much going on in
there, so we have this art. We have this t 2.6
gig Okay, at 2.6 gig. Then the Idris body will
have this at 3.4 gig. We' he going to optimize
that also, too? So why we're in here let's
even drag a copy of it to copy this and go into the final file and
paste this in here. Because we need one of this
also in here as a final file. Please don't copin, so
let me rename this. I can just name
this to final also. This is just ways to kind
of optimize your file, especially when you
don't have enough ram to actually hold all the entire
mesh as one single piece. Creating them creating
them in separate files and then bringing them
back into other files, while deleting the polygons or machines that you
don't actually need or soap that you don't actually need actually helps reduce
the files delite bit more, and then you can bring them into one single file and do whatever adjustments
you want to make in there. These are just optimization
techniques that you might need for projects.
Okay, so moving on. So now that we have all of
these 91 single folder, we can start renaming
them properly. So I'm going to rename this. Instead of just MAX, let's just use let's just use a
different name for it. Let's do Tiger metal max, right? That is fine. Spell
is ready in there. But I think we have
a number in there. I don't want that
number in there, so I'm just going to delete
the number we have in there. Move on to the next
one. So center bids, center bit shift F. That's
definitely not center bit. Those are the add on. So I'm going to rename
this to add on. E on an S. That's fine. Next piece.
Let's sort this out. Let's see. So we can
name this to job bid. We can give name this to Joe bid. That will
work just fine. So let's rename that job bid. Rename bids. Alright, that's fine.
I think I should most likely start hiding them. Anything work on them,
we can just hide it so we can really see the
remaining parts of this. Let me solo this what
is this supposed to be. Okay? This is the year rings.
I think I can merge. Okay. Let me just
check this out again. I'm trying to see what
I can merge with this. Trying to look for another
piece I can merge with sets or we can leave it at its own separate piece so we can capture as much detail
as we possibly can. The idea is to get
as much resolution on this as we possibly can. Let me select this. This
is already zone piece. That one is already zone piece. I think we can let me select
select this 15 solo this, let's see this for the
entire out Awesome. This is for the entire piece. So I believe we can
merge this with this. So let me shoot it down
first. Let me shoot it down. And out of the
folders elect this also two sheets shoot that down. And I believe we can merge those two together. Let's check. Is there any subdivision
level in there? No subdivision level here. Let's go to the next one. Check the subdivision in there, no subdivision level
in there as well. So we can merge these two
together. Let's do a merge. Merge down. Click Okay.
Here, that's fine. So we have this now merge
down as one singopie. So if we should
solo this out now, one singopieTtal of
29 k, which is fine. Then we can drag this
back into the group. Let me drag this all the way. Do we need to drag
it all the way up? Not necessarily, though.
Not necessarily. So let's just rename this. Let's just rename it. Solo this. That's the one. Let's
rename these two. Bead, rope. Okay. Let go to your fronts
and name this to chain chain bedrop That's fine. Chain, bedrop be fine. I would hide that.
Let's go back up. Let's even bring
this up even more. Just make sure our
arrangements is fine. Drag this back up all the way. That's fine. Let's go to the
next piece, so low this out. Okay? All right. I think I'll need to merge. I believe I might need
to merge this with this. So I'd like to merge
those two together. Yeah, we need those to merge together. So let's send it down. So solo this On shift, send this down, okay? Select this, send
this down as well. We can safely put them in the same as one single sub let's check if there's any
sub dibution level here. There's none. Go to
the other piece, check if there's any sub
dibution level there as well. There's none, that's fine. So we're going to merge
these two together as one single piece.
Let's merge down. Click Okay. Ship L, so that merge as
one single piece. Let's rename that two. I think this center
bit should be fine. So I'm going to dig
that figure at the end. I'll drag this way up here. Get that organized. If you select drag this way as well. Then we can hide that. Let's go to the next piece. Okay. So this is the next piece. Let's just rename
this two rings. Rings. Okay, that's fine. Yeah, I think that
should be fine with I darts. So we have the A on. I think the naming for
this is already fine, so we can skip that. Move to the next piece. Okay, Shi F. So this is the bed. So chess called this
Clos means to cross chest beads chest or rather shoulder shoulder
should be fine. Shoulder seems
like a better one. Bad that's fine. I think I did I accidentally
move something? Did I did not. That's fine. So moving on, so I'm
going to hide this, move on to the next piece. This is the Let me visualize
this again from the concept. Yes. This is the low
part chess strap. That's fine. I'm going to remove the numbering at the end. Hide darts, cross chess
strap. That's fine. Let's remove the number
at the end. That's fine. Hide the darts. Idri's body. What is this supposed to be? Let's slow this. Okay, this
is the Let's just name this armstrap leader. Unstrap. So let's name this to strap
or rather and leather strap. You can give it
whichever name you feel is necessary for it,
but I think this is fine. Okay. Let's save this. I think we can continue
on in the next lesson and then just round this
up and begin to export them into I'm going to export them into Maya begin
to do some UVs on it. I'll see you guys in the
next lesson, bye for now.
84. 83 Exporting Subtools In Zbrush: Cucumber, guys. So in
the previous lesson, we're working on organizing
our five setup in here, so we're just going to
continue on from there. So let's do that. So we stopped at the leather
strap, we hide that. Let's go to the next piece. The next piece in
here let's see. Let's go back to the and
strap, turn that back on. Okay, I see we might
need to Let's see. Okay, this should
be just about fine. F see if I need to make any additional corrections to this. Okay. This should be fine. I think I can select this, go back in, make sure
this is visible. Turn on symmetry for it. Asymmetry is turned on. I would like to bring
this even closer. Make this quite tight. So wrap around the end even tightly. As well get this as tight
tight as we possibly can. Okay. Yeah, that's
fine. That is fine. So now let's rename
let's rename this. Let's see. Oh, we have
an issue around here. Let me increase that again. Let's make modifications to
this Shift F. Select this. This little on both side. Okay, that's fine.
Bring this closer. All right. Push this in. Here as well. Go around and then check this.
We can't even solo. Let's solo this out. Make sure we have this
wrapped around it quite well. Okay. I think I need to do that.
There was a mistake there. There's a mistake in there. Clear this out. Let's
do auto group first because you can see it didn't as a separate poly group for it. So let's go into poly
group, AutoGroup Okay. Make sure the two is visible. Control Shift click Control
click also as well. It the mags out invert the max. In the max, Shift F.
Yes, it's fine now. So we can safely move
them into position now. Can just safely bring this in we won't pull them
out a little bit more. Okay? Close. Undo that. That should be fine. Okay. And what you stet so that
should be completely fine. I'm just trying to see if I can just making modifications to this do that, do that. Okay? Extend those out, do that. Stand them out some more. All right. That's
down way too much. Check around, make sure all
of this is working just fine. Okay? That seems fine. Let's bring everything back out. Let us see tone of
this dynamic in there. Let's see what we
get out of this. Okay, clear the marks. Yeah, that's fine. This
will work just fine. Come in close. We can bring this closer closer. Okay.
Yeah, that's fine. So let's go back and
then just rename this. We can safely rename this
now hide this, rename this. Name this arm amo. That's fine. I would like
to sieve this as well. Make sure we have the
sieve That's fine. Moving on. Sander piece already name Sanda
already, so that's fine. Let's just delete the
number at the end. Hide darts. Since it skirts, let's just leave the
number at the end. Okay. Hide that's waistband. Okay, it's supposed
to be waste bed. Supposed to be
named as waste bed, so let's rename
that to waste bed. Oh, actually, waste cowry
build Cai waste bead instead. So it's a bit more
distinctive in naming. Cai waste bead. Yeah, this is the waste band. This is fine. Okay. Does that work just fine. Let's go to the
next piece. Okay? So let's name this Let's
Let's name this to metal, waste band, metal, waste band. That's fine. That's Ab
splits, that is fine. Let's just remove the
nombran at the end. Remove the nombran at the
end, that one should be fine. Okay? We have the sat ****
as well. That's fine. I think for the most part, this should work just fine. Select the sheets, increase
the subdivision level. Let me see if what I scoped
in there is no loss. Okay, what I scripted
in there's no loss. Just in there, which is fine. Alright. I think we have this
properly named now. So all of this has
been properly named, which is fine. I would go back. Let's turn everything back on. Then we can begin to export them out. Can
begin to export them. We want to delete any UVs we have in there and
then export them out. So let's make all
of these visible. Okay, no, I won't do that.
Let's hide them for now. Let's hide them for now. I'm only going to make it
visible after exporting it. So that will make better sense. So let's go and select this. This ring Shipped F. I'm going to delete any
UVs we have in there. So let me move this
all the way first. So we have the total poly count. Let's see if it's on the lowest. Let's make sure
it's on the lowest subdivision level to begin with. So 17 K, let's go
over to UV map, delete any UVs we have in there, then export it out. Yes, so let's export this out. So I'll go over to preferences. Important exports,
exports, tunnel group, tunnel smooth normal.
That should be fine. So want to export this at the subdivision level that is low enough for
us to work with. So 17 k. This is fine. Let's export this out. So I'm going to be exporting
this into the final fs. I'm going to create a new
folder in here lemname this to Z exports. Okay, open up that folder. Save this as an
OBJ which is fine. Save. That's fine. Let's move on to the next piece. I will need to export out the
I think I need to export. You need to spit out the body? Let's see. Let's let's just carry on. I think we already have an
export for this already, so we already have
an export for this, so we need to copy the previous one that already have just export it out
since we're here already. Let's export it out
into this Idris body. It's just the body we
need. The other ones we can grab later on. Grab the other later on
from an external file. This is fine where it is. Let's go down to the next
piece. I'll hide this. Let's make it visible,
let's go to the next piece. Tiger meta Max. Let's go to the lower
subdivision level. I think, let's go up up again. Yeah, 52 k seems to be
holding more of the details. So I'm going to be
exporting this out instead. Going to export let's go
to lower subution level. Let's export this from
the higher one instead. So exporting this at
subdivision level three, let's go over to UV map, delete UV in here. So you have that
freedom to export on many subdivision
level as you please. That's completely
fine. But I would like to export at subdivision
level three instead. So export export this out. Turn its own, move
to the next one. We're exporting
now the spare now. Well to geometry. Let's get this down. The lowest one is seven
k. Let's go higher. Let's export this out at 31 k because I would like
most of the details to still be in there to have more of when
we're texturing this, we have more of the resolution
in the visual wise. So I'm going to export
this out. Put out. So like I said before, you
can always export from any subdivision level
that you deem fit, but I'd like to get this at the highest possible
resolution at the highest possible resolution
in terms of both visual, in terms of mostly, mostly visual quality, actually. Mostly visual quality.
So I'm not too concerned or
extremely careful for the polycont right now though
I'm still working with plicon that is kind of not
too high and not too extreme. That will still give me at least very high fidelity results. But if you're looking
to kind of optimize, you can always export out from a lower subdivision level
that will work just fine. So for this, I didn't
have any I did not have any UVs in there because
we deleted the UVs before we brought
this into Zebras for sculpting let's go to the
next one, Let's go to the on. And then let's go
to our geometry. Let's go lower.
The lowest is CK. Ck should be fine. Let's go on sobs no. Ck should be fine for
this CK work just fine. So let's check UV delete any UVs in there,
export this out. Because we want to
grit our own UVs directly inside of Maya. So we have greater
control over it. Make the visible. Let's go to the job bid. Now for this, we don't have any subdivision level in there, so we need to add
subdivision level in there. Let's solute this subdivide. We need to subdivide this quite we get smooth so we get
smooth edges out of this. Something seems oddly wrong. Coming in close.
Let's do actual size. Yes, better. So I kind of
zoomed in and then it's kind of making the is a bit
more a bit pixelated. So just click on actual size. So you should be able to see the quality a whole lot better now. So I need to undo I think
1 million seems to hold. Okay, I think we need to
subdivide this one more. 4 million seems to hold on the resolution quite
well. So that's fine. So let's go down. I think let's go higher,
no, let's go down. I think this should
be fine. I think the subdivision level
one will be just fine for base tax for the
base machine here. But the only issue you
might have in here is this rectangular spherical shape needs to add a little more a little more
resolution to it, a little more polygons
to it to actually hold to actually hold
the hedge a bit tightly. Let's test this out, though.
Let's test this out. Let's test this out by exporting it at the lowest
subiviion level first. Then if you import it to Maya, then we find out it's not
holding up quite well, we can come back
in here and make modifications to it and
export that out again. Okay. But there are quite a few in here actually. Quite
a few in here. We need to have them
as good quality. So let's go over to UV Map. No UVs in there.
Export this out. Okay? That's fine. Let's
move to the next one. Let's move to the
next piece. Okay? The next piece in here, we need to subdivide the
subdivision levels in the none. So let's subdivide.
Come in close. Okay, we need one more. He, one more work just fine. Let's go to the lowest,
lower should be fine. The lower should
be fine for this. Then we can check if there are any UVs UVs in less exports. So it's still going
to be back and forth. AntN is no working
where we can always go back and then fix that
and export again. Okay. Back to the sub two, I believe, this is the
one we just finished. So let's go to the next one. Okay. Let's see. We have this at 42 k.
We need to subdivide, subdivide again, subdivide
one more, it should be fine. So let's go down to the lowest. And export this out. Let me show, I know you
sing the export out. This is going to be the piece that's going
to take a lot of time doing van wrapping for
because they are quite much. So export that out. Let's move to the next piece. Okay, the next one. We already have divisions in here already. Let's go to the lowest. Come close, I think you
should up quite nicely. A UVs in there, no UVs in
there, export this out. That is fine. This we
can work with in here. Okay. Moving on, let's
go to the next sub two. Okay, this is the
one already it is already on the only lowest
subdivision level, I believe. Yeah, it's already on the
lowest subdivision level UVs, no UVs in there. Exports. Save, that's fine. Let's move on. Come down. There's still quite a whole lot more to export in
here. So let's carry on. Move to the next piece. Okay? I think this one might need to go a little bit export
something a little bit higher. But let's subdivide
this until we get smooth surface out
of this. This is fine. Go down. Export this out. And then you vis
India, let's check. I know you visit
India, that's fine. Exports. That is fine. Moving on to the next
piece. Select this. This we already
have vis on here. Geometry, let's go to
something. This is way too low. I think nine K should be fine. Nine K should work
just fine for this. So let's make sure that
you it's on the exports. Let's move on to the
next piece. Okay. I think this should be fine at 19 at subdivision Level two
will be just fine for this. It's on the exports. All right. Moving on. And later. Get enclosed. Let's see. I think I'll be exporting it at one subdivision level higher. One subdivision level
higher should be fine. Let's check any UVs UVs
in there, that's fine. Okay? Let's export this out, exports. All right. Moving
on to the next one. And I think 15 k should be fine. You can export this out at
15 k. But let's subdivide this quite well so we get smooth enough
surface around this. One more should be fine.
Yeah, that's fine. Go on sub dilution level
higher so export this out, UV map, delete UVs, exports. Okay. That is fine. Still have a few its exports. Sanders come in close. Geometry, let's increase
this all the way up. Okay, we have this at 8 million. I think 8 million should
be fine for this. Okay. Let's go to lower
subdivision level. I think subdivision level
one seems like a good bet, so we can export our
subdivision level one. If we go on subdivision
level higher, it just way too high, subdivision level
one should be fine. So they visit visit the
LSA export this out. Expose this out. All right. Moving on. Skirt
piece, select that. Let's check geometry in here. Do we have this at the highest possible subdivision
level without. Okay, we need to
subdivide this one more. Then we can spot at
subdivision level two. Let's come down instead. Let's see. This subdivision
level one should be fine. Subdivision level one
will work just fine. Then you vis in there, I
know you vis in the exports. No, no, wrong place exports. So it's not the correct folder, so you need to bring this
to the correct folder. So you want to be careful though exporting this to
the correct folder. Okay, Cui coming close. Geometry increases
all the way up. I think we have
this ADIs possible for our details to see
through our details. Let's come down. I
think this should be fine at base one at
subdiption level one. Let's check for UVs in the delete any UV we have
in the export this out. Okay? Yeah, that's
fine. Turn that on. Move on to the next piece. Come in close. Check geometry. I think we already
at the highest possible geometry for this. Let's go on subdivision
level her instead. So we're spot at this
subdivision level, Geometry deletes UV exports. That is fine. So I think this is fine.
So in next lesson, what going to call
carry and then continue exporting and then
bring them into Maya. I'll see you guys in next
lesson. Bye for now.
85. 84 Importing Subtools To Maya: Okay, we come about, guys. So in previous lesson, we're still exporting most of this. We're going to carry
on all soviets. So I'm going to
export export this. I believe I exported this out. Let's just confirm SIS Let's
just replace that again. Let's move on to the next piece. So this metal band
should be the next one. So let me make sure there
are no UVs on there. Okay? **** E. Let's see
what we get out of this. So Deleten UVs we
have in there and then let's go to lower
subdivision level. Subdivision level one
should be just fine. Then I can export this
out to is on exports. Save this. I think we have two more piece, and then we should be good. Next piece, go to lower
subdivision level. Let's check if we
have any UVs in Delet UV we export this out. Okay? Exports. I
think the finale now. Let's spot the final piece. Let's check the
subdivision level we have in there. Let's see. I think the lowest
subdivision level. Let's go on subdivision
level higher. Let's see if we can
use this instead. Or maybe it should be way
too dense for us to use. Let's use something lower.
Seven k should be fine. Let's spot this out. Let's check first if we
have any UVs on there. You know UVs on
there? Spot this out. Save. So now we need to
create a new Maya file. Let me save this five first. We need to create
a new Maya file. With a new Maya
file. Let's first look at the original
file we have in here. I think we can just
easily copy all of this, select this, then
we have the I set. Open up the I set in here, we have all of this in here, you need it to be we
delete all of this. Save. Delete all of this. Weird naming in there, and I can select, I think it is fine, let me just select
and drag this in I'm just rename all of
this to Idris body. Okay, that's fine. I'm going
to do an export for this. Export selection. I'm going to export this to the
final Z final fs. Export this in a let me
look out for this Idris. Let me name this to
body set instead. I know it's the body
on there that will be in there. It's fine. Save that. And we're going
to create a new Maya file. Let's open up a new Maya file and get all of that in there. So we have a new
Maya file in here. So I'm going to create
create Create new Ina. Then we can start importing
our models into this. So let's go to the
file in final files. Z export. Let's start with Idris body set. First, that will be the
first one I'd like to import in dragon drop this inner in now. This is precisely what we want. Okay. No. Okay, this is just
the main body. But we need to
import the set now. I believe I exported out
the body set in here. Let me drag and drop
the body set in here. Okay? So I'm going to delete this one that
comes with the body set. Let's keep this one, we export
it out of Zbrush instead. I think this should be fine. But this is way too dense. This is way too dense. This is where we imported
the densed version. So I think I'll delete this. Let's import the version
that we exported out that we kind of
use as our main base. So let's go over to Z exports. I believe should be
these two Idris bodies. So let's import this in. Yeah, this is a better one. Okay. Then we need to start deleting this weird naming
convention in here. This naming is a bit of in here. Did that weird naming
around those parts. Come to the next
one, delete that. I'm just trying to get this
a bit more organized the IRS deletes delete that
should be fine. Then this is the body itself, deletes This is fine. Save this. So I'm going
to be saving this into that final file also. Let me save this
into the final file. Let's go back. Final file. I'll copy this. I
piece this in here. Pies this in here. Then
I'm going to rename this to final Idris. Okay? That's fine.
So this is fine. So we have this in
here now. So let's import in the order. Let's import in the order
mesh, you need for this. So let me grab everything
that's do with OBJ. Let me select all. Then diselect this body, diselect this body,
select this body set. I think every other thing
is what we actually need. Let's drag and
drop this in here. So you can see how it's
important in. Have you done? I believe you're done. Okay, one piece is missing. One piece is definitely missing. Is that somewhere else. The chess piece is
completely missing in here. Did we export this out? I don't think we
exported that out. Let's go back into
Zbrush and get it out. For a moment I thought we
exported everything out. It seems like we did
not export this. Let's export this out now. 17 k. I think we exported
it into the wrong folder. Let's export this out again. Geometry exports. She Imports Epot this in here, select this as well. Exports. Final file, let's
put this in here. Go back Okay. Yes, I think. Now,
let's bring it in. We want to bring this in now, so low part skin, lo part chestrap and then
cross arm chest strap, let's drag and
drop this in here. All right, so we are good now. I'll save this file. So we pretty much have
everything that we need in here now, Export it incorrectly. Let's go in and check. See if there's any
major issue we need to fix in here. For the most part. Oh, it's arm bound. We did not expose the
second piece for it. Let's make sure we expose
the second piece for it. Let's select this.
Let's export this out. Probably I exported that
into the wrong folder. So let's make sure
we export this the correct folder, armor. Then come back to the
file in the armor. Let's just go back
and open it again. Amo let's drag and drop this in. We should be in here
now, so this arm ring, I do drop these clothes
out to the arm arm. So I know where those two are. Yeah that's fine. This is
fine. Save this again. Let's check if everything
is spotted correctly. That is fine. Okay. All good down here. Oh, we did not export out the
shoe, the Sanders for this. The Sanders are not
in here. Let's go in. I think we're exporting. I
don't know why it did not even export because I feel
we exported that out. So let's select the
Sanders for it. Unless spot this out. Exports the same folder. But it's completely
fine, though. So long we put this importing this in and then we have
no major issue. So that's completely fine. So I think that should complete it. Let's check again.
Sandra's the waistband. Okay? This is fine. All the way, this
is fine as well. So you see any issue
you need to fix in it's not going to be a major issue
to actually fix that. You can easily fix that
back instead of Zbrush. Let's go back to Zbrush
and then fix that. So it's for the on, let's
isolate this come in close. We just need to push
some of these back in. Let's go back into ply group. Let's do group binormal. Group binormal is
not working anymore. Let's turn this dot off. Try this again. Yes,
it is working now. You can see interceptions
in between these now. So this is what we need to
fix. W select this poly group, the blue colored poly group,
increase the brush size. You can use a move brush and
then just move out instead. Move out also around here.
That should be fine. Let's check around to see
if there's any part we need to fix or adjust. We can go to deformation and just inflate this out
a little bit more. Fl it out a little bit more. Let this out, bring
everything back out. Then we can export
this out again. Let's put this out again. Replace. Let's save this file. Okay, saving out now. So we can easily
go back and then bring that back
into our Maya file, and then we should be good. So let's go into our Maya
file. We would delete this. Let me check. Okay. This actually
work quite nicely. So we don't need to do
any other work in there. So let's import this in again. So let's go over to the horn. I think we named
this Ed horn. Okay. Let's add on, so drag
and drop this in again. You can see how easily fix that. So that's fine. Check
this out again. Make sure everything is fined
where we need it to be. I think we are good year.
We'll save this again. So the next we need to do is just to adjust the
naming in here. The naming here is
not good enough. Comes with this Zbrush
pull mesh three D. So let's delete anything that has that Zbrush pulling
mesh three D in there. So at this point now, the
next thing to do would be to begin the UV unwrapping
process for it, then move on to the
baking process for it, and then move on to texturing process and then bring that back into Maya again, arrange that
properly, and then go back to Zbrush and
then do a pose. Do a pose for it
and then bring that pull back into Maya and begin
the development process. But before the
development process, we obviously create
Egg and hair. I just giving you guys a
breakdown of the steps. We still have at least
kind of a long way to go, but I believe I believe now that in the entire process
for this entire course, I think I believe we're already halfway, we're halfway done. We halfway done, which is
actually good progress. I believe you guys are
working on this step by step. Must have gotten to this
stage also too and have made significant
significant progress. Almost done with
this almost done. So in this butler aspect
of this process now, we need to it's a process where you need
to actually go in and then check everything to make sure everything is properly
in the right place. Like you need to actually
go in and then check. Save this again into
going and then check. So let me select
the entire out tin. So the total Poli count
for this is roughly around to taplcunt of roughly
around 505 hundred 500. So for this part latori, please, we need to kind of get this
at the highest possible possible fidelity
render for this. Oh, one piece is missing, so
that's why I need to check. The bids in here are missing. Show that bids are
missing in here. So if we export that out, let's go back in and get
it let's go in and get it. So I'm going to, let's see go on sub
divisional level here. Yeah, I think Sisk
should be fine. Let's make sure that
no V is on there. Then let's export this out. Final exports, cross
shoulder bids. And then let's bring this in. Cross shoulder bids,
drag and drop. Going to come that weird naming in there, so let's delete it. Let's delete those
weird naming in there. All right. Save this again. Let me check one more time to see if everything
is in place. Yes, yes. All right. Okay. Yeah, I think we are good. I believe we are good in here. I don't see anything else you
need to adjust anymore in. I think you should
be fine. So we have successfully
imported everything in. So the next step
would be to begin a UVN wrapping process. So I'll see you guys in the
next lesson, bye for now.
86. 85 UV Unwrapping Asset In Maya: Welcome back, guys. So
in the previous lesson, we imported all the
necessary objects into Maya to start UV
and wrapping process. So I kind of forgot to export
out the leather strap, so I just imported that in.
So we're good in yours. Let's start UV wrapping process. So I'll go over to
modeling our workspace, go to modeling and
select UV editing. So after selecting you editing, let's come in here,
open transform, open creates, cuts on food, then arrange and layout. That's fine. This is mostly
what we need for this. Okay. So but there's one thing I'd
like to show you guys though before we continue on. I'll go to twos I'm
going to modify layout. Let me just show you
guys my setup in here, so we're on the same
page. I'll select this. It should be on UV or it should
be on 43d, pack together, non overlapping, reserve
three D ratio, translates. We don't want to rotate this, I'm going to leave that off. I'll say this to four k. You
said this to fork pixel. You need to make some
corrections to this one. The shell pattern will
be pixel differences or pre L gaps or distance
between each shell. So I'll say this I usually
like to use 20 instead. Then the tile pattern. So this controls the
spat in in between a shell and then the UV
which is zero to one space. So somewhere around there,
the space in between this line and then where UV should kind of be at
close to the border. So let me say this
to ten instead. I'll say that to
ten, so that's fine. So this pretty mode
is setup I'm going to use. Yeah, everything's okay. Okay. Parking resolution, I'll increase that
all the way up. Yes, this is fine. Yeah, I'm going to use this. I can apply, but it's not going to work
yet because you don't have anything to apply it
on. Let me close that. But I believe it's set now. So I'm going to start
creating UVs for this based on the hierarchy
we have on our outliner. So the minuscule
already UVs in here. So UVs inia are
not the greatest, are not the best actually, but it can work just fine, why? Because I was going to be
adding a glass material to it. So the outer eye already
has its own UVs, the eyes already has its own
UVs here as you can see. Then the body a is on UVs. This is fine. This will work just fine for
what we need it for. All good. Then, yes, moving on. Let me just come
in here and check. Oh, we see some minor
issues around here. Yes, we need to fix this. What the sound does,
we need to fix this. Let's go back to Zbrush. Like I said, before
any previous lesson, it's a back and forth process. It's a back and forth process just to get everything
to look right. All right. So let's just
hold contro select this. Coming close we remove brush. Okay, I can see
something around there. Remove brush, move this out. Move this out as
well, out as well, out some more. Okay? I think that should
be fine. Okay. I see this piece also. Come in and pull
this out some more. Okay, pull it out
around here as well. Out around here as
well. Out some more. Let's go back to Maya
and then check this up. Let's see if there's
something else we need to do. Okay, pretty much, that's pretty much fine. Okay, that's fine. Okay, clear this out, let's
export this back out. So exports final f Z
exports, that's fine. Sanders going to replace this. Okay. I'm going to save this again just to make sure we
have everything updated. So by saving, we can
go back to Maya, select the delete it. Import the updated
version of it. So Sander, yes, the Citi. So I'm going to drag and drop. I believe everything
should be fine now. Yes. It's fine now. I'm just going to delete
that weird name at the end. Save this. Okay? I believe
Zbrush is also saved. Saved. All right, all good. So like I said, stay
back and forth. We're going to check, there's
anything we need to fix, can go back and fix that
and then re exports. So moving on, so the
body Iris Rs body, all good Tiger max. So let's start with
the tiger mark Let's start creating
UVs for this. I'm going to solo this
Control one gets cut close. Okay. So for this, we didn't have any thickness
to this. That's fine. We don't any extra gore that
we don't actually need, so let me select. Go to Paso, select
the entire face. We would do let's go over to
create Let's do camera base. Camera base to begin with. The old to heavy shell,
select the shell. Move this this way. We'll
go and unfold this. Since we don't have
any thickness to this, this is just going to
flatten out quite nicely. That's fine. We need to
work on this piece now. Let me isolate it go
in and isolate this. I believe does this
have thickness to it? I don't think so, which is fine. Wh is precisely what we want, don't want something that
has thickness to it. Well, now we need to
add added coat to it. I want to create a
sim code for this or we can just unfold
this directly. I wish let's unfold
it directly, see. Okay, this is fine. Unfolding this directly
work just fine. Then let's orient this. Orient rotate this
more this way. Okay? I would like to
move this out this way. Then this piece, go out of isolates. Let's
select these two. Let the UVs and then go into the three dview
let's isolate it. All right, so let's
create TVs for this. So to create TV for
this, I need to go in b click on this edge. Move to the opposite side, lob click on this edge. That is fine. Yeah, we don't need
to work on your part, let's leave this as it is. Let's go over and click on COTS. So now I have one
piece cut out now, which would work just fine
for what we need it for. Okay? Yeah, that's fine. Then what we're going to do
next would be come down here. I create a coat around here. Let's do this election first. Zoom out, this selection
around here as well. The coats. All right, select these two,
run unfold. Okay. We just lay this out
in a zero to one space so you can see them a lot
more properly in here. All right. This is fine. OriensOiens Orient
this again this week. Select all of this, do orient
then we can do our own fix. Let's rotate it's 90 degrees, rotate 90 degrees to
the right hand side. Let's flip this, flip this
vertical instead, right. That's fine. And let's select everything and put them
in zero to one space, but also clicking on layout. Using moments, laid
out properly in here. So now we need to
check. Let's check if it memorized the setup
we have in there. So yes, it's memorizing
the setup we have in here. If you go in and then look
at it a bit more closely, you can see the spacing in
between space in between this piece like two is
for the shell padding. So the spacing between each
shell is shell padding. So we have 20 pixels there and
the spacing in between the UV line and then
UVSLOl UV tirada, then our UVSel ten pixel, so everything's working
correctly as it should. So that is fine. So let's go in and then check
for new distortion. So UV distortion,
for the most part, is all white, so we are good. It's mostly white, so
we want a good place. Let's do checker
pattern around this. Let's see where we get.G
out of so low mood. Coming close, this is
actually quite neat. So this we can work with
not check a pattern. Go back to object mode. Then I hide let's hide
all of this at the top, going through H. I've
worked on them already. Anything we've
worked on, I'm going to hide it just to keep this a lot more organized so we
know where we are at. Next piece, was band. Let's this out. Let's out. Okay? I think this one comes
with the material to it. One comes with the material. Let's see if we
have any materials. So this is the waist band. Let's say there's any
MTL file that comes with it MTF, so waistbund wristband. I will just double
on the keyboard. There's no MCF file comes
with it, so that's fine. Okay? I would like to go over to Zbrush and then check if I have any texture file I like I feel like the texture
file that comes with it, I don't want that texture file. Let's go to texture Map, there's nothing in UV. There's nothing in here. Okay? Okay. That's fine. All right, so let's turn on of the display
imaging, turn it off. So now let's go into face mode, select the entire face. Let's start with camera Bz. That's fine. This
is not the front. Let's go to the front. Okay. I'm going to phase mood, select this select this phase. Let's isolate just this and then make I do our correction
or working in here. So I'm going to go
over to edge mode. This one shouldn't
be too difficult. You just need one. I'll
look a good angle to this, most likely on the inward parts. So I'm going to select
this, select this, come down over here, select come over to the opposite
side, find where it is. He also select
that. That's fine. That's pretty much all we
need go to the opposite side. The idea is to ide your UVs well is not
going to be that visible. Let's go over here and do that
heres well. Come in close. Resell, up close. I believe you well. Okay, I believe we
are done with that. So let's do cuts. Awesome. That's fine. Go out of isolates. Let's select this
face mode, bici, local cons, isolate for
both Mint for both side. Select, select isolate. Then let's find a coat for this. Let's look for a good place
to project our coats in. I think I found a good place. We can project our coats on the lower parts around
there, like so. Let's see if that goes
around correctly, it does. I'll do the same also
around this edge loop. I'll go in and then check to see if it's in the right place. Let's see if that goes across. Come close. Did that go across. I'm not entirely sure if
that goes across, though. But let's check on these parts. If it doesn't go
across, that's fine. Let's work on that later on. But let's carry on.
Let's go this edge look. I believe this
edge look as well. Okay, let's do cuts. You shall select
these two shell, led the two shell, leave
those up, unfold. Okay? Seems like we have an issue
somewhere. Don't do that. Don't do that. I believe
it's on the opposite side. I think it will be
a whole lot better if we just do separate
single piece, it a single piece, we get better visuals on it. This loop close, come close. Just look as well. Do records. Okay, I believe that is fine. Go out of isolate.
Let's select the top is now so we can get
better visuals on this. Yes. Now I can
actually see where we need to actually
add that loop now. So that is in there. That's fine. Go to
the opposite side. So now we know exactly where
we should add that loop. Come to the edge, add
that loop, the cuts. So I believe now
this would be fine. So let's select these two. Let these two, lift
them up on fold. Yes, much better. T should work just fine. Select this as well.
Done on fold. Okay. Select every single
thing orient. I would like to get
this rotated in the same directionality as with this new directionality
in our TD view. So let's just get this rotated
in that same direction. Rotate this way. We still have this piece on
fold, that's, that's fine. Select this I'll rotate to the right hand side, 90 degrees, left hand side, 90
degrees, left hand side, 90 degrees, right hand
side, 90 degrees. Select the rotates. Select every single thing
in here allege the. Then we check for distortions. So it's laid out properly in here now, which
is what we want. Laid out properly
here. Let's see. Okay. I think I would like
to rotate this this way. Let everything again. Let's do and Itin't take
too long, actually, so' take too long.
We're in there. That is fine. Let's
check for distortions. Let's start check
for UV distortions. We have this pretty much white on most region,
which is what we want. Do checkup pattern for this. Let's turn off this
with distortion. Check pattern. This seems
to be working just fine. Turn that off. Save
this up. Awesome. So let's move on to the
next piece. Hi this. App split. Let's solo this out. This one does not
really This one does not have any
thickness to it, so I believe you can
just do camera biz. Then on food, always
turn that on. Give you a moment. You're just going to flatten things out
and then we should be good. Okay. So this is pretty
much what we have in here. Let's select all of, you know, UV shell, select all of
this UV shell orients. I think we have some
This is also indie. Let's select entire out in
again, let's done on food, including the tiny pieces
we have in the Okay? Everything's all selected.
Almost done. Alright. Not sure where those tiny
pieces are coming from, though, but it won't be a major issue because let's check our
UV distortions in here. So there isn't much
distortion in here. We have a little redness
around the edge, but it's not a deal breaker. We can help it a
little bit more by adding a coat in between to stretch that out.
So let's do that. Let me just come over. Let's do this from three d v
instead of edge mode. Oh, I see where
the issue is now. I hole it was when
we put this into Z. That's why. But it's
still not a D breaker. Let me select all the way. All the way. Okay.
I'll do it cuts. Okay. We can also do the
same nodes around. Now we can see where exactly
it is in our UV editor. We can also code data parts. Can code data part as well. Also select these codes. I think we should have
one on the opposite side, select these codes
here as well codes. Okay. That should be fine. Come also around here. This is going all the
way going all the way. I think you should be this Cats. Let's do on the opposite side. The coats Okay. It's fine. We can select the UV shells. Let this UV shell
do unfold again. I shouldn't take too long. Okay. Then select everything. Let's I'm going to free
up some of this here. Free up some retention in here now. And then we should be good. So we should check this again. I can see how we
kind of release. So retention we have in kind of release now
a little bit more. I notice we didn't cut this
apart. Let's cut this. Let this shell unfold. Let's fold just the shell alone. Okay. Let's see what we get. It's kind of stretching
in a weird way. Stretching in a really
weird way, let's turn up this UV distortion. Let's check this again. Let's make sure
the cut is there. We have our cut there already. So UV shell, let's
unfold this again. Let's see. Let's see if it's
going to be an issue or not. It's kind of folding itself in. Let's check for distortion. Now, there's a lot of
distortion in here. It's definitely an
issue with this. I think the way it
was previously, it should be just
fine because it stretched out quite nicely. It should stretch
out quite nicely. So I'm going to I'm going to leave that as it is because this should
work just fine. Let's turn on the V
distortion and then check mapping in there
DV mapping is fine? If mapping is fine. Select the pull this up again. Okay? That's fine. Save this. So in the next lesson, we're going to move
on to another piece. Move on that piece. So let's check a pattern and hide this bring
everything back out. Save this. So the next piece
we're going to be working on will be the calorie waste bit. We'll do that in the next
lesson. Bye for now.
87. 86 UV Unwrapping Cowry Beads In Maya: Welcome back, guys. So
in the previous lesson, we started working on
the UVs of our models. So we're going to
carry on from there. So this lesson, let's move on to the next Picebook will be to create UVs for
this cay piece. So let's isolate it. We have a lot going
on in here actually, so we're going to
take some time to actually get this right. So let's jump right into it. So I'm going to go
over to Facebook, select the entire face, and let's do camera
bis to begin with. So I'm going to start by
working on the bands in there. So let's start with the bands. So to do the bands we go over the lower parts,
DoubleClick this. Then on the back edge, double cli, we're just going to continue in the same
fashion also across this. Undo that. Let's do instead. Okay, then we'll
do and moving on, continuing the same fashion. Let's do y and y. So I'm just going to
do this tutorial then. It's just going to be
the same repetitive process across the entire model. So let's just spend
at least this tutor are working on
getting the right. Yeah, yeah, let's
do as well. Okay. We're going to move
in a little bit it a little bit faster, just to get this done
a bit faster as well. So that's fine. Moving on. You see the same
repetive process across this around here as well. Move on to the next piece. Let's start from
this and then this, then here and here. Okay. Let's do
across across here, yes well, as well. We still have a few to go. Yeah, well, also. So the idea just
to do one half and then continue on with that. With the same region we're
going to be doing this. We're going to be doing for
the opposite side also. Let me make sure my camera angle is not moving out of common. Move this in place, okay? Cameras are moving. My camera is just
moving way too fast. Alright? I believe this should be fine. No, that's wrong
that's the wrong side. I believe and yeah, okay? Let's do, and yep. That's fine. Come on,
fine, yeah. Okay. That is fine. Moving on to the next piece. Let's do on the edge. Okay, that is there,
yeah, yeah, as well. Okay? Yeah, yeah, yeah, also let's do as well. Okay, almost done. Okay. You can do
for the back piece. Let's do from the back instead. Okay, let's do cuts. That's fine. Now, let's go into the calorie and let's do something
for the calories. I'm going to do it from the back because just somewhat ide. So I believe I can just come into the back around
this way should be fine. We can do Nope. Is going across way to
moto done one darts. Let's look for something
that would work. Now, because we can z image, that's where it's going
across the entire outing. So I think we can the more preferable way
to go about this would be to can we get something
in the middle? Let's see if we can get
something in the middle. Let's find something in the middle and then
go across that. Does this go in the middle? Let's see, do that. I think we might need
to actually isolate it. We need to isolate.
So let's isolate. Let's select all of this and
get it isolated instead. Now to make things a lot
more easier to visualize. Okay. So so this out let's figure this out
together. So let's use. Does this go across? It doesn't go across. Does this go across? This one goes in this way and that no, we're not
going to use that. What about this selects? Okay, we can do as well. Double click in the we can
do a cross also around here. Yes, then yeah, also, this
would be fine. Let's do cuts. Yeah, this should
separate things out. Let's go in and
then unwrap this. Let's see what we
get move this out. Let's do unfold. Yes, perfect. This
will work just fine. So we can continue
the same fashion. Let's continue the same fashion, and then we should be good. Okay? What does this look
like? Undo that. Select, double click. Okay. Let's continue this on. Do this all the way down here. Double click on this. Undo that. That is not
in the right list. Let's make sure we connect this correctly. I think
it should be fine. Let's do cord move on
to the next piece. Does this go around?
It does not. I can select this and try to find the connection
piece all the way here. Okay. You can also use
this too if you want to. We're going to be texturing this unit with Tripena mapping. So where do you visit not entirely relevant
at the moment. Let's do code. Next piece. Let's see if we can go across. Can we go across like soup? We go across like soup. Now, let's just continue the same fashion we're using before. Continue the same fashion as we as in before. That
should be just fine. Okay. Yeah, that's fine. Do cords. Move on
to the next piece. Let's do this from the
back side instead. It's even difference? Let's see. These the front. Have
I called this arterin? I've called artergino? Okay, this is the front. Front side, back side. So moving on Come
enclose, connect this. Connect this. Connect this this way. Double click on this. Records. That's fine. Back parts. No, connect it this way. All right. Double
click here as well. Double click here
as well. Records. Continue in the same
fashion selects. Dubcl con come in here
dobicl condi as well. Do you codes. Dobicl con select, select Dubc con doubl con doct. So I just the same repetitive
process across this. Basically just repeating the
same process around this. Which is fine. It's not
going to make it's not going to break our
texturing process for it, so our texturing process
will still look good. You just need to kind
of call these su parts. Okay. Select this, select this. Double click on this, select,
double click on this. Do cuts. Okay. Same also in closes. Double click on this,
double click on this. Cuts. A few more to go at
least on one side. So we click on this. Okay? Or do we miss that. Okay, connected now. The cords. Okay? Yeah, yeah, well. Double click or we can come
down get in this records. Okay. Double click in here. Okay, in the records. Okay, as well. Double click, yeah,
double click. Maybe we can do multiple let's do multiple
selections instead. Okay, as well. The cords. Let's wrap all of this,
let's see what we gets. I'm just going to go to UVs. We can also object moding
stylus, let object mode. Oh, you need to
do UVs in stylus, visius let all the shell. I'm just going to pull this up to begin with. Then unfold. Okay? Yeah, it is fine. We also need to do a cat
also in the middle. We'd also need to do
a cut in the middle. No, a cut in the middle
around here should be fine. Let's see where that
is. Yes, Edding, that's fine. Lets do cuts there. Then we can fold this again. So we stretch out
quite nicely now. So that's pretty much
what we're going to do. We're just going to add
cats in between those. You can send it to add a cat sd cat in here Let's
the cut in here instead. You cat. Don't do that. That's in the wrong
place. Don't do that. Undo that. Let's the cat first and
get that out of the way. Some more let's
put this up. Okay. I was doing anything wrong,
please, so that's fine. We can just do code.
We should be fine. Cats. Okay. Do it undo that. Cote instead. Okay?
Move this out. Let's get close the
cuts your rack, move the side, get in
the Let's do edge mode. Cuts. So it's quite close that in quite close,
that in here. You need to get them out. Edge mode, locally
conduced edge cuts. No. No worry, spend
some time there and just make sure we get this because we need to
spend a lot of time just to wrap a
whole lot of piece. Actually it's a boring process, boring but necessary process. So it's something that
actually needs to be done. It's something we can
just completely put away. We cannot put this away. We need to get it done. Once you get it
done. Put this out. UV Cats. Okay? Undo that. I think we can
do a cat also for this. Let's move it out first so we don't accidentally break
something in there. Coming close to a coat. Select this, move this down. Do we cuts. Okay? I believe we're almost
slightly almost done. Do cut we cut in the records? Okay, we have to
we have one here. This one is a tricky one. No. This one is the records. Then do cut as well. Okay, I think we can use the
part to grab, move this out. Okay? Records. And we can select all
of these new vies. Then we can do an of fold. There's an of fold in there. Here, we're good now. So
this will work just fine. This for a start to work
just fine for a start. Select all of this. Okay. Select. Select
the two. Let this two. I believe this. No, do that. And this Let's select
this also as well. Move that up, do unfold. We need to few things we
need to correct in here. This, for example,
we need to fix. We did not do this
well, so let's do cuts. Select this unfold.
That should fix it. Okay, we do also for this. This we need to
fix. Or the coats. So just go in and then make sure everything's
working correctly. This also needs a
coat. All right. I believe this should be fine. I'm going to select
all of this and pull this line pull
this here instead. Let's say this up
around here instead. What we on this piece is what we're going to
do for the other piece. Don't be same pt
process across this. Let's go out of isolation mode. Okay, down to the next piece. We can just do UV shell and
select all of this shell. We can isolate this, actually we can only
work on this two now. So the same repetitive process around this will be just fine. You going to repeat the
same fashion in here. So get this in, double click in
here, get a Okay? Let's do, let's go
to the front now. Here down here. Okay? Yes, that's fine. We can go to the back,
one here, one loop here. Around around her, to
the back, one, one year. I think this will be a
lot better. A lot better. Need this way is
a lot better, so, rotate to the back
across here as well. Undo that, undo that. Rotates and year. All right. Around here as well,
rotates the back. Okay? Come in here as well, do one year year or. Okay. Move out. I'll try and do this
as fast as I possibly can. But I'm not going to do
this for the entire. I'm not going to show
the entire full process because it's just the same
repetition across this. I'm just repeating this across
this for the curry model. So I'm not going to use
this tutorial alone to just go through and do this. Then off recording. I'm just going to finish it up. So we don't waste too much
time recording something that is just too repetitive. Okay. So around here as well, to the back. Grab this loop. This loop as well. Okay.
Yeah, the backside. Let's do y and y. Okay. That's fine. Moving on. Then the back, grab this
loop, grab this loop. Okay. Just loop, look
at the back, B also. But those parts are
going to be hidden. Move on to the next parts. I'm holding down sheets
while doing this. So when I coat, I'm
not going to coat simultaneously every
everything kind of every selected edge Yeah, over here, over here, as well, I believe we should still have
a few numbers left. Best guess, let's say, four or five more lefts. Oh, that was on the Oh, that was on the last one.
I guess I was wrong. Okay. Then let's do cut. All right. That is fine. Cut this or do you
want it to be, then we'll go over to UVs. Let's select the shell. Select the necessary
shell for this. So you can actually isolate it and then we have more
space to work with. All right. So that's going to continue the same retive repetitive
process across this. Okay? Come in here, double click
in her double click. Do cords. Okay. Here's
the back parts. No, I think you should be this. In here as well, grab the last piece. The cuts. Okay? Here is the obvious
obviously front side. Come in close. Do click
on this, select this. Come all undo that. Undo that. Okay, I
was on the wrong one, so it should be
all the way here. Select, then double
click on these records. Okay. Let's do one last one
for this tutorial purpose. I well, all the way
down around here, click on this loop records. So I'm not going to
go over and then do the entire cowry piece and then come back
when that is done. I'll see you guys in the
next lesson. Bye for now.
88. 87 Unwrapping Ear Loops Chain In Maya: Come buys. So the
previous lesson, we were working on the
curie models in here. So we did the first rule. So it's just the same
repetitive process across this. I did the other rules, and then lay them out entirely
me zero to one space. So nothing too different
from what we did earlier on. Deleting diff different India
just to select all of them, and then do a layout,
and then we are good. Pretty much the same we're
beading for the part of the UV and wrapping
of the other models. So I just carry on with that. So if you check this
now, the UV distortion, we can see they're all good,
hardly any distortions in here, which is fine. So let's carry on. I'm going to hide this Control
H to hide that. Let's go to the next piece. So low this out, so
let's work on this. So let's do a camera
base to begin with. I'm going to start by working on this chain first
before moving to Europe. So let's do the chain instead. So to do that, just the same
repettive process to do cylindrical shaped
shapes like this. So just to hide let me ID
if it's somewhere around. Let's ID if it's somewhere
around here instead. Then this time around, the loop is going to be in
the center of the mesh. So, so let's move
to the next one. The loop in the center. Come on. Then we'll do
another look down here. You can hide this
look at the top. You can hide this in here. Camera movement is just
moving way too fast. We know this is supposed to be here as well. I
think that is fine. Moving on. We want
to the next piece. Let's do one in the center, loop in the center. Then we can do one
down here. Come on. Just keep moving way too fast, one year, one year. I'll move quite
gently now down here. Get close, Loop here. All right. Look also here, and down
here. That should work. I have a loop here already, then look down here. There's a look in
here on the edge. It's just the same
repetitive pattern as well. Just repeating this also. Come down here
this here, L here. Do the same here as well. Down loop here, do
that. Do that again. Edge loop in the center. Loop here, Glo in the
center. Let's do one. Okay, that's fine. We'll do
a cat. Cord that is fine. Let's go to the opposite side
and repeat the same thing. We'll repeat the same
thing in here as well. Let's go to the back side. Grab this edge loop. Yeah, well, get close
at the back side also. We're going to give
the meta piece. We're also going to using
trapna mapping for this. But at the very least, you still want to
sort of hide the UV. Also very important. You
still want to hide it off the camera view
as much as possible. Close, I think, Okay
then here as well. Come down. As well. Let's go this loop here. Add the loop here as well. Okay? Here also need to hide hide
this in here, as well. Hide this in here. Okay,
that should be fine. Hide our UVM. Hide the UVM, get this loop in the center. Get this loop in the
center, add our seam. The last piece. Let me add the same up here instead.
He that's fine. Do cuts here that's fine. Let's move on now
to another bits. Let's do this instead. Double click on this WFacem
do click on this face Mo. Let's solo this out.
Get them soled out. Let's welcome one, and then
we do the same for the other. So I think we can
do for this one, we can definitely
add the loop anyway. But let's just add it
somewhere underneath this. Okay, Loop across like
so should be fine. Yeah, that's fine.
I'm just going to double click on this to get
that look also in there. Do the same for
the opposite side. Find a loop in the center close. That goes all the way to
the center without wonder. Let's do this loop instead. Then on the edge,
Edge also as well. Then we do coats, that's
fine. I work just fine. Is into the coats for the
back piece for the back part. So let's select this loop. You can select this
loop also as well. The coats go out
of isolates. Okay? Let this from the outliner
once more, go to isolates. I think, let's move
on to the next piece. Let's do this. A far out, select
this how far out. Is this okay? It's here, so let's do the second parts. That's fine. Let's solo this. Solo this out. Let's look for where we can add
a loop code to this. Okay? We can do the code here. Yeah,
this will work just fine. Go across this, and we would
go across this as well. All the way across
you'll be fine. We'll put the same around here. We can do do we grab this loop. Okay. Grab also. Oh, this goes across. This also goes across. It's going to split
this into two. I don't want this to split
into two. So do that. Let's start budging a
quad for the other piece. Select this entire thing. Do cats. Come back. Select the entire thing. Set the entire loop, the cuts. I'll select this edge, go over to my UviN
wrapping or to the editor. That edge I select. I'm going to double click on it. So it's not going
to go across where we already have seam line,
which is what I want. So I'm going to cut this now. Yeah, this should be fine. Okay, select this
again, solo it out. We can now select this. S also at the back. Okay. Yeah, I think we are good. Isolate those two. Okay. Then I'm going to
do a loop across here. Coming to the opposite side, I'll do a loop across
do that, do that. Loop across here as
well. Do it cuts. Select this edge. Let's find where that
is in our UV editor. So you can just select
the entire loop for it. Select the entire loop for it. Do cuts. Move to the opposite side. Let's put the same
thing in here. I'm just going to
look for the loop this edge loop in here,
select this edge loop. I'm just going to
separate that out. We cut, then select an
edge in the middle. Let's find where that
is now to the editor. Well, now I use the editor, which is also kind
of two dview also. The layers X and Y. So cut it out, go
out of isolate, select it again, go back in the Okay, we have done
for this piece, this piece, this
piece, this piece. The final piece would be this to face more dolly on
this pace, isolates. Isolate again just to get this
separated out. Come close. We can do Dubli on this quartz, come over to the opposite side. Close the click on
this edge do cuts. Lets edge cut also. I'd like to code this
down the middle as well. Let's code this down the middle. So the click on
this record also. I'm going to select this edge. Let's find where the edge
is in our UV Editor. Find the edge. I'm going
to select the edge. It's going to be
like an edge loop. Leather edge loop cuts. Go to the opposite side. Look for another edge loop. Okay. Not click on this cords. Alright, so now we
can von unwrapping the entire outtin unfold
the entire outing. I'm saving this out.
Let's go to vicious. Let all of this unfold. Okay, the orients,
there's the letter. But I would like to get all of this long strip of
which is actually do. I'd like to get them in the same should be like in sequence. I'm not worried about
the chain on the, so the E in metal
materials for those spots. This looks we need to get them flowing in
the same directionality. So let's select select them. I select this one. I'm good. I'm going to rotate it this way. That should be fine. What is this supposed
to be? I think something's off in here.
You do this correctly. So let's find out what those are we have not done for this. We have not done for this. I would like to select them and do what we
need to do for it also. So let's select this edge in select this edge,
select this edge. Entire edge will be selected. Here as well, I do codes
slide this edge here. Let's find where that is. Don't click on this. Do
you codes Come across also in here slide the
entire edge loop. Do codes. Do the same
for the opposite side. No the entire edge loop instead. We do a code select an edge. Let's find is double
click on this codes Let's unfold I need to select. We can do this. We can UV shell, select the entire shell, then come into UV Editor
and then do unfold. Okay. That's fine. We do Orient, select it, orient it this way. Select the entire
ten. Let's do it. So we have this all set up. We need to fix this.
Select this to unfold. Okay, I think we need to cut
it up a little bit more. So let's go and
then cut this in. Let's the cut unfold. Don't click on these records. Select these records. Undo that unfold. Oh, really? That was a
completely different piece. Okay, we have this
quote in here. We're supposed to
merge this together. Supposed something doesn't feel right in here, so we
need to fix that. Supposed to have that mesh
together, but that's fine. Let's just unfold this
and then we'll find a way to merge that together
as one single piece. So UV Okay, let's start by
connecting these together. Let's double click on this edge. Let's do so. Then we need to same edge
we select this edge, double click on this edge. Oh, we can do this in ends. There's double
click on that edge. Then we do cuts. Okay, that's fine. I think
we can easily fix that. Then up here, we need to merge
kind of sew this together. So let's select
this come all the way zoom out some
more locally conduct. Let's do so. Okay,
select this unfold. Yeah, that's more like it. Let's see if we don't have
the same repeating issue across this across the other piece. It does fine. So we just need to orient this. Let's get proper oriented. Let's orient here first, then we can rotate. Then we select all of this. Check if everything is in order, then let me make sure. Let me make sure this
orientation for this also. Change orientation for
this Let's get everything moving in the same direction. I'm going to keep
rotating some of this. Select these two rotates, select these two rotates. Rotate this as well.
Select these two rotates. Let's see. I think
it should be fine. So let all of this now. And then let's do layout. Let's give you some moment
and then it should I should. Okay? Awesome. So
we have this in here where we want it to be. This should be just fine. So we can go and check and see if there's any
limit go out of this. We can go in and check
if there's any issue. You need to be mindful
of, I believe not. Let's go and select it again. Check the UV distortion. I don't think there's any
UV distortion in here. All of this should
work just fine. Yeah, this should
work just fine. Save this right on
the next lesson, let's add this on the
next lesson model is going to move on to the earrings and then we get some shape going on
some UVs going on in the I think this we can actually do Se up some
time to kind of do this. Let's do this instead.
See up some time to get this to work and
create UVs for them. So let's go over and then
start with the camera biz. Let's start with
camera Bs in here, go out of this distortion. And it's just the same
repetitive fashion. You've wrapping for this
cylinder, so clicking here. Let's do on the
center center center, here, center, year also. Recapture everything.
Okay, I'm missing one. Center, here as well. Let's do this in a
yeah, yeah, well. Yeah, well. Okay?
That should be fine. And let's go down and then do the same thing
across here also. Okay? Get close. Yeah, that's fine. Let's see. I think we're still missing
something. Let's go in. Okay, one more is left. I have just one more left. So let's get in there and
then do the same also around. Okay, I believe that
should be fine. Let's do codes right? Yeah, we can do codes. I've done that
already. That's fine. Let's move to the side of the and just repeat
the same process. So coming close, make
sure we're on edge mode. Okay. Click on this edge, D
click on this edge, go up a little bit
more, go underneath it. Like so do click on
this edges the front, you like this on the
cycle. That's fine. Let's continue on
or add a looper. Let's the looper, here and here. Then get in there a
loop across this also. Let's check if I'm
missing anything. I think we are miss we
have everything in place? Yes, we have, we have all of that in place.
So let's continue on. So I'm going to carry on. I'm going to look across this here do that do let's
do here instead. Here, as well, here, also, here as well, here, also. Okay. Let's getting close. I think we're almost done, need to make to do the
same also for this. And then we should be good. As now as we're done with
the one at the back also. Let's look. Okay. That's fine. Check this again to be sure
if everything is in place. Yes, it is. Let's go to
the one at the back. This will be like the
final one because this is the last loops of ring. Then we can just do a coat
and then unfold all of them. Check this from a
different camera angle. Let's see grab this. Grab this as well.
Then we'll do CT. Go and select the
entire ta do one fold. Okay, I think we are good. Then we'll do Orient. Then we do Oh, let's make sure they all action. It won't really matter, though, because oh, we missed one. We missed one. Let's
find where that is. Okay. Yeah, this one,
we did not do this for. So let's select the
edge records on food. Okay? Orient. We can start to live as it is. Don't really be an issue. It
won't really be an issue. We can actually work
with this this way. Or we can get all of them in the same orientation
if we need to. So let me select this. Okay, no. This select these three
select this as well. Let's just do Orient, select all of those, and
then we can do layer. Yes, this is probably
better optimized. All of this occupy most
of the zero to one space. So let's check for distortions. For the most part,
no distortions. So this will work just fine. We check a pattern in that
works just fine as well. So yes, so we can move
on to something else. Let's save this, bring everything back out,
then hide those. Then we can work on the next
piece in next tutorial. I'll see you guys in next
tutorial buy for now.
89. 88 Unwrapping Round Head Bead In Maya: We come about, guys. So
in the previous lesson, we worked on the E loops or these rings, if you
should call it that. Let me hide that. So we're going to be working on the next piece, which would be the
Ed center beds. So let's get right into it. I'm going to sold this out.
Let's do it from the side. So let's do camera biz to
get a Bz UVsual in there. Then we'll start working on it. So I'm going to work. I'm going to start working
from the left hand side. Let's start working from
the left hand side. So I'm going to
select this piece. Let's go to the back of fits. Let's go to the back of fits. Come in close. All right. Something like this
should be fine. Okay. So now let's start
by working on this piece. I'm going to go to the edge. I would like to use Let's
use the back edge instead. I'm going to select
this back edge instead because the
idea is to hide the seam line as much as we can. So I'm
going to start with this. I'm going to do cuts. Okay. That is fine. Then I'll
come over here also. We can do I can do something like selecting this entire edge. Selecting this entire edge. Then select this
edge, go all the way. Do you cut also as well. This one looks like the
prefers one we did. What was going to select this edge in the
select this edge also. Do you cut I repeat the
same thing no across this. Okay. So select this edge. D click on this edge
cuts. All right. So this is how that's
going to start or rather create UVs for this
and I'll wrap this. So in this fashion, should
work just fine. Okay? Let's see if we're
doing that correctly, we are can see the edge here. Also do the same thing
around here as well. Select undo that undo that. Let's select a different edge. Let's select Let's get close. Let's select this edge instead. Get close, select this edge. Okay. Here that's the one, slides edge, select that edge. Also go via slides edge. Okay? So we need one that we're going to kind of code
this in the middle. Let's do from here, they all do. Okay? Then from here, do we? I think we need to get
a bit closer in there. We need to get a bit closer. So let's use the I
believe wire frame. Let's get in close. We're
missing just one edge. I believe this edge
that's the edge. I believe that's the
edge you're missing, that's fine. You do cuts. It five on your keyboard to
do wire frame on display. Smooth shader instead. So that's fine. Let's
carry on with this. So I'm finding the
edges that are notes is inside of this
actually. So let's go in. It's buried inside of this. Let's select this edge. Okay? This is also buried
inside this way. I think where we
have it is okay. Then we can select this edge. I need to go in. I believe all the way here should be fine. The cuts. Okay. Then we're going
to carry on with this same way we did
for the previous ones. Move to the next
one up around here. Let's see. I think it's
buried inside of this. Let's go. Let's
find it that's it. Let's do for the
next piece also. The idea will just
be to go around this once we are
done, let's do cut. Okay. I think we can do
around here and select this. How do we then select
this loop the cords? Select this Here well here well. We have the same
also the same shape in here. Let's select it. You should be able
to find it here. The other one is going
to buried inside, so I think this should be here. That's fine. Okay? I think we have one buried in here also.
Let's do select this. Okay? Get in there
get in some more. Let's do this that goes all
the way here should be fine. Then we look into it. Select this records. All right. Let's go in Can we see, you can see the
other piece through this. Let's select this. Okay? That should be fine. Select this edge. I believe
it goes all the way. That's precisely where
it goes all the way to. You can continue on or records. Okay. Let's look at the next one.
Next one is buried in. We can use this
select undo that. Okay, you should be
fine. All right. Let's go in. Okay, we can
select this and select this. Get us finalize the cuts. This one, you guys
already know how we should get this done.
So let's just do that. Okay. Select select
this here as well, here as well. They do cuts. Similarly with similarly,
this also. Don't do that. Select. Oh, you know, we kind of got this
from a police vessel. I police vessel almost
looks like a cube, if you kind of decimate it
to the lowest pol counts. It looks more like a cube. I don't think that's
the right place. That's not the right
one. Okay, go do that. I think it should be
here here, as well. Yeah, that that sits. Okay, we can do here. Let's find a continuous
look for it. Okay. We need to get in there so we can
actually see where we need to end this I believe if I come in should be
here, da should be fine. Records select these
points ore verte. Well, do we select
this all D records. Okay? We can do this. We can do all the undo that. Double click. Okay? Undo that. We didn't do that
correctly, select this. Then double clicking
here. Undo all of this. Let me do undo all of this. Let's repeat this again. So we are sure we're doing
this accurately enough. Okay? Yeah, that is fine. I think we can do select select how do we
grab this. Okay? It's beginning to I
don't want to kind of comp on the right track. I don't want to get this sms
visible on a camera view, so that's why I'm kind of
checking this just to be sure. I'm on the right track. So
let's do a quote for this. You still have a
whole lot more of these models or objects to
create UV unwrapping for. Let's see how fast we
can get this done. The codes quite a
lot of this in here, but I'm sure you guys
already get the idea. I'm sure you guys
already get the idea of how this should
be done already. Because it's more
or less like those repetitive repetition
in here actually. So just put in this around
there should be fine with the codes it Okay, come in here. All right. I believe down here.
Now, at this point, we are trying to fight with trying to fight with the
camera and go in here now. So let's just carry on. At
least we know where we are, so we can just
continue on despite the camera angle not being
the best at the moment. Okay? Select do we
select these records? Okay. An on. Yeah,
that's the one. Okay. Yeah, as well, as well. As well. All right. Okay, as well, also. He also records. Okay? Yeah, also. Select this, continue
the edge flow or edge loop, select this. We can do this, select
this or should be fine. Let's look through this.
Let's see where that is. The cuts. Okay? Can't tell us how much or how many of these we still
need to do though. But I believe we are
doing just fine. We're doing just fine in here. So let's just carry on with the same energy,
continuing this on. Okay, the cuts selects I
think we need to go in, Let's see where that is
following the line, get close. Okay, you should be
fine. The records. Space around the
keyboard. Let's see. Let's see, let's see
where we are out on this, we're still We're still
slightly far away. So around there, so we see to go all the way around
this, that's fine. Let's just keep working on it. Okay. So yes, move on
to the next piece. Grab this. Yeah, well, select this. Select this. Move to the next one, this
here as well here also. Similar Oh, wrong, please. Undo that, undo that undo that. Let's repeat this
again. I undo that. I'm doing this correctly,
should be down here. Okay. Yeah, we got it now. All right. Let's continue this on move this this
way, all the way. All the way should be fine.
Let's look through this. Grab this as well.
Okay. Let's do cuts. I think we can do
Let's do here instead. Okay. As well get in
there wrong place. Here. We can do from around here. Do that select here. Move all the way in. I
think we can select this. Okay? We know where this
is supposed to be, so let's just get it done. You still have all
copies of this. Okay? Here, that's fine. Here, as well, select. We can come all the
way, select this loop, unless the cuts Yeah, good. Moving this as fast as
I can, so continue on. Select this, select this. Yeah, we could have used Z UV master instead
of Zebra bots. That's not to give
us greater control. It's going to create it's going to create sims where
we don't use SIMs to be. And it seems to might be most likely most likely be
visible on a camera view, and we don't want that, so
we want to completely either UV Sims as much as possible. That is why we are
doing it this way instead manually by and kind of have greater control over it and where we
want our sMlines to be. And putting our sMlines where
it's not going to be too visible to our render camera. I'd like general idea for
general idea to keep in mind while creating UVs Okay. This now we need to go in. Okay? We can do around here. We can do, yeah, yeah. How do we select this? Okay. We can select this. We can select here. Do we a select this. We can do a codes Next bis, here, go all the way
to the opposite side. You can do a code That's fine. So let's move on. Select, well, yeah, well. Fine with you. This is also all the way down
here, select those. Okay, we can do move out a little bit more or do
we select this? Okay. Same here. These car
shape are kind of much easier because we already know where they're
supposed to be. So just to double tap on this region
and then we are done. Okay. Select select. Right. Coming close. I believe we should Okay, ready, ready halfway, already
halfway through this, which is good progress for this. This can just do
this here, select. Make sure we know where it is. Okay. Then the cuts. So now we're halfway now. So I can see we're halfway. So we're not going
around all the way to the forehead center, so let's carry on. Put a perspective view. Okay? I believe should be like
the longest one so far. The one that goes from the
all the way to the joy is the longest bid
longest bid in for it. So still have that
piece to deal with. Yeah, yeah. It's going to take a little
bit of time to get this done, but we would get it done. Like I said before, it's like, the boring aspect of
the entire process. So, it's also necessary
for you to have greater control over how you
want to texture the mesh. Okay. All the way there
should be fine. Okay. Even though we don't
finish it here, we can just continue
on the next lesson and keep working on
it. Don't do that. Select? All right. Let's go from around here, here, or so all the
here, here, or so. We can do this. Okay. Come in close.
Let's look through this. Next piece. How do
we see the edge, let's do cuts right. Select this. Let's
get close. Okay. We can do from around here. I believe, that's the one. Okay. Let's do one more.
Let's go around. Records. Okay? Lay this out. Do select or do
code here as well? Moving on. No, here select Dub
click to go the way, select records select this, select this.This as
well, this as well. Okay. Select. One last bit, also around there also, also. Coming close, Slet that loop. Let's go in there and
see where that stops. You can select this. You
can see it now, then. No, come on. Then we can just continue it on all the way here. Okay, select this.
Yeah, well, well. This is the police fair. This one doesn't
take too much time. It's kind of nowhere. You need to add your head loops too. Let's do here, here. Okay? We can do. Let's do cuts, right? Yeah, select this.
Move to the side. Move to the side. Yeah, well. Let's continue this on. I believe they there
should be fine with codes. Okay. Next one. Let's start from
around here, selects. Gow selects. Yeah, yeah, well. So Like I said before, the ones are not
too complicated. We already know where we
need to put our selection. Let's do this. Keep just
keeps jumping way too fast. There's the cuts. Okay. Is it going to
take a moment kind of check where we
are at, though? Let's just carry on this way. Select this records. Okay. Select this. How do we select this edge loop. Records? Let's see
where we are at. Okay? I'm going to go
from go to to view. Let's check where we're at now, okay? You're in here. You can see we're putting it in. We're putting our sim line
in your right place, okay? So let's do Let's do one more. Let's do one more, then we
can continue the next lesson. Records. Okay, so I'll see you guys in next lesson.
Bye for now.
90. 89 Unwrapping Side Head Bead In Maya: A cub guys, so we're still
on this Ed center bit, so we're still
creating UVs for this. So let's carry on with it. Let's go to the next
piece. We're just going to continue with
the same fashion of creating UVs for
this, select this. Maybe select this instead. Okay? Go around double
clicking here, select, select. I need to be careful though, so I don't move
this way too much. This is the loop, select dt. Okay, I'm just checking it just to be sure I'm
on the right track. Yes, I am. Sh is fine. That's
precisely what we want. Select this as well. Move distance, doop click
on this, dot click on this. We already know how this goes. So let's just get this in
Okay, that's the right one. This is the right one as well. Also, select this, select this. That should be ending, select
this ending around here. Move on to the next piece.
Let's find where that ends. End there as well. Move out. Let's try and pick up the piece. Okay? Here also. No, do that. Yeah, yeah, yeah, change this all the way. Let's look into it. Let's find where that
where that piece supposed to be. I believe yeah. Okay, that's the one.
Okay, let's move on. Yeah, yeah, yeah, as well. I may start getting
tricky because of the camera movements in here. But just maintain that steady maintain that steadiness to it, and then you
should be fine. Let's go yeah, select. Double click in select, select. Sild'm molding downhet whilst
I'm doing all of this. Select, select yes
well, select as well. Select Let's make sure we're folding the pattern
accurately enough. Okay, we can select
this move out here. Yeah, well, as well. Okay. Let's find where this is. You can see it already
is around here, here, also, ending
at this point. Do the same. Let's
find this also. Okay. I believe that's the
one go up here, right? So I moved in a whole lot
faster because we still have quite a lot of
models to e and wrap. So let's try as much as
possible to pick up the piece. But I'm sure, at
this point, already, you guys already you
guys already get a general idea as to what
I'm actually doing in here. So it's just the same
repetitive fashion in here. Basically just doing
the same thing because we obviously used the same shape in there and just modified
it a little bit more. Just some shapes
we just modified. So, most of the shapes in here, most of the models in here actually are actually the same. So let me get close,
and make sure I'm selecting the correct one.
So yes, that's correct one. Okay, here, also, Okay, so it's also very
important to keep in mind that it's much easier to UV and wrap on a lower
subdivision level down on a higher subdivision level. So you want to get this slow, aside from just optimizing, it's much easier
to work faster on a low subdivision level down the higher
subdivision level, most especially when
you're creating your UVs. So that's just something
to keep in mind. As were putting this out, I will putting this at a low resolution at
low poly coonsl. I would have control over
where I need to create my UVs. And it kind of
helps Maya also to process loading to process, I think we can I think we can
use another edge instead. Do that, do that. Let's use do that as
well, and do that. I think I will do this also. Okay, we can use another edge. We can use this edge instead. Because we're trying
to hide our SIM line. So it's important
to hide our SIM. So let's use edge that is not
completely obvious to see. Let's go in there. I believe
this should be the one. Nope, that's not the one. Get in close. Again,
this is the one. That's the right one. This
one goes up, so that's fine. We're not doing that,
so let's continue on. Yeah, well, yes, well,
that's the coat now. I've selected quite a lot. Let us out. Move on. Go around there, select this. Let's do no do that
as the wrong one, select this this move
yeah well, yeah as well. We can select this,
select move out the way, select this, select this loop. O police spare, we can select where where is kind of
behind our camera view. So let's get in close. I find that edge. Okay,
I can see it now. So let's select the
edge. That's fine. Select this edge. I believe that's the correct
one it is. Moving on. Let's select this. Select,
move across. Okay. Awesome. We're basically repeating
the same thing so let's just be as fast as we
can be for this. Okay? Select this, move across. Oh, awesome. I think we're done. We're done with
this entire loop. That's awesome. So select that. Select our course and
then we have the cut out. So what we need to do
now would be to create. You can see for the most part,
our UVs are kind of ding. Look at it for the most
part, we have ding UVs, which is fine.
Precisely what we want. So now we need to go across
I need to go across now. Let's see, yes.
We need to go and do the same do pretty
much the same thing, for the top ring. So
that we do that now. Okay. So let's do a diving into that. But this one might be
slightly tricky though because we need to add our UV. So a camera will most likely be looking
at this from the side. So we want to kind of
protest this side by making sure our UV seams are not visible on this
side, on the side view. So for the opposite side, it's going to be the side view. So majorly our UVs
should be around there. So that's like general idea for that. So let's get into it. So most likely on this side view like this,
around the edge be fine. Should be hiding her
seams on this edge. So let's go in. So it should be this as
well from under this. Oh, we can actually
hide. You know, this is like a cube that's
kind of smoothed out, making it look like it's fair. I think maybe I should add. For this first one, I
should add the same underneath here,
hiding underneath. That make better sense if you hide this underneath instead. Let's see. Let's check. Yeah, that makes better sense
to hide this around here. Let's see. I think
this should be fine. I will work just fine. Let's go in here,
go to the side. Let's hide this on the side. Okay. That's fine. Double click and
select this, right? Bully hide this also. We can hide this. We can
hide this around here. Let's use this instead. But this one is slightly
tricky so we want to be intentional about where we
are hiding this same line. Really want to be
very intentional where we're adding
the same line. Okay. That's fine. Get in eye this here. Okay? Side. We can eye this
here so we can go in. Okay. Slet that, select this, continue on and this
all the way here. All right. Moving on, we can
do here instead. Okay? All the should
be fine around here. All right. Though, we're going to be
looking at this from existance, but at the very least, we
still want to hide our UVM. It's important to hide our UVM. Oh, no. Wrong one.
Wrong edge loop. Wrong edge loop. Yes. This is the place we need
to select here, here, also. Yeah, that's fine. Same here. Same here. Find where that is. No,
no, I want to use that. Let's use a different
regional instead. Let's Let's hide this
around here instead. Okay. That's fine. Yeah, as well, select all the go and check this again just to be
sure on the right list. Okay? You always want to
kind of check around just to make sure you're
on your rice place. Okay. Moving on, I'm
just going to check, go out and then just see, make sure I'm doing
this on your rice pot. We as fine. Around the selects, how do we select Okay. We can do all the
way here as well. Sled that loop.
Come close. Select. No, that's the wrong
side. Let's do from this side instead. Okay. That's fine. Yeah, select, move up this way, select sled this
loop select this, go all the way, select,
like this loop. Zoom out a little bit more to
make sure I'm hiding this. Seems like I'm already
srailing off yes, I noticed I'm still
enough already. I'm really still off adding
the sims going to be visible. I don't want that.
I don't want that, so I can easily fix that by just deselecting
a few of this. I'll just select a few of
this down control instead. So putting down control
and deselecting that let's add this somewhere else. Putting down control,
select, Okay? We had that in a
completely wrong place. So we need to do that. That's why you also need to
check around just to be sure. You're not putting your seams where it's going to be visible. So check this again. It's going to be
visible from this side, I need to hide this in here. Okay, I will need to select deselect this down
Control, select that. Select this, select
select, that's fine. Then we zoom out again.
Let's fine you right, please to pull this in. I think around there
should be fine. When I'm putting down shift
now I'm repeating this. Okay. Let's do as well. So it's important
to actually check. You need to check to be sure you are putting this in the
right place. Very important. Go up all the here. Okay. Let me make sure I'm putting this
in the right place. Let me select select
this loop instead. We can do, yeah, yeah, all the way up. Okay, that's fine.
Then we can move on. All right. Yeah, as
well. That's fine. Yeah, yeah, also get in I think this is this is fine. We can continue in this fashion. Let's select all
the way down here. Zoom out a bit let's
see actually if we're actually hiding
this properly as we are. Let's fine there. We're hiding this way it needs to be eating. Let's do instead. Okay. All right. All the way. Moving on, we can this here, here, find the endpoints. All right. Find the endpoints. Enclose also can go all
the way, also. Okay. Yes, no, undo that. Undo that. Yes, should be fine. This select this at
the end, do a loop. You can do a cat now L's
the loop coats Moving on. Okay. Just mount again, Make sure
I'm on your right spots. You can do this side. Okay, that is fine. Move up. Okay. Up. This loop gets in
the Zoom again. Let's see, making sure
I'm on the right place. That's fine. Next piece. Get underneath this, select, select, select, go to the side, find where that is. All right. Continue undo that this way. This way, as well as well, get in underneath it. Make sure you don't
knock your camera off. Just make sure you don't completely knock
your camera off. So you don't begin
to struggle to find or get back in place. All right. Move up. Okay. You are well, select. Move up all the way
should be fine. Yeah, well, as well. Select these edges, select
this edge, select this edge. So the camera angle
is beginning to look like we're about
to get knocked off, but just maintain try as much as possible to maintain
the orientation for it. Up this way, select. Zoom out. Let's see. We're
begin to food into that cove. So let's get close. Change our camera go little bit more so we get
better view on this. Okay. Aswell get in underneath this. There's the codo. Click out. Get in underneath it. Awesome. As well get
it underneath it. We can use this come all the way down around
here, use this. Here, let's come down. Se let's use this. Okay.
Let's use this instead. All the way down undo that. That's the wrong one down here. Select the loop. On do that. I think we went
down way too much. Select, select, select. That's fine. Okay? Next piece. Awesome. That's fine. Next bisc. All right. Moving on. This piece selects, almost done. Almost done with this side. All right, select selects, select selects, select the ring, select go all the way down. Okay. Awesome. Let's do a cuts. Click out. And let's check. Let's see how well
we hit the UVsM. So basically vein this
from this angle this way. I think we did a pretty
good job for this. We a pretty good job for this. I think this should be fine. Let's select this again. So we should be viewing this viewing this
from this side view. So we did as much as possible to hide our same
line, which is fine. Let's go to the next
piece, which is this. I'll save this. So I think we pretty much the same thing
we're doing on this side. We're going to do on
the opposite side. So I think War can just do this off
camera and then we can off record and then we can move on to the next piece,
which is the job bid. So I'll see just continue
on and then yes, at least as far as
this tutorial goes, let's just see we can just continue because
this is going to be the same process,
nothing too fancy. Let me make sure I check
the camera angle for this. We want to hide this
underneath this part like so. So let's go in edge mode. So we're hiding this
somewhere around here. All right. Let me select
this loop instead. He also here as well. That is fine. Move
on to the next one. Select, select all the way up. Okay, we can hide this
down here instead. Okay. Oh, undo that. I think
we missed the mark. We're not doing this
accurately enough. Something was off. Undo that. Okay? Now, we should get
this accurately enough now. Yeah, that's fine. Moving on. Let's look for where
we are our SIM, so we can continue
on from there. Alright, do that. Here, that's fine.
Moving up, well. Let's look for where
that SIM line is. Make sure we continue on
from that same fashion. Okay? Let's do cut so let's
just do one more piece. One more should be fine. Okay, as well, select,
select records. So I'm just going to do this
off record now and then we'll come back when I'm done. So I'll see you guys in the
next lesson. Bye for now.
91. 90 Unwrapping Jaw Bead In Maya: Lomb guys. So we have, I've gone around and then done the
UVs for the opposite parts. So now let's unfold all of this, and then we would arrange
them in zero to one space. So let's start biting on fold. We also need to kind of check for issues also in
if there's any, and then fix those almost done. So it's done on folding,
let's do an orient, okay? Let's do layouts. So let's get moments. Okay,
so this is what we have. So you did a very good job laying out everything
out well for us. And I don't really see
any issue in here so far. Let's check for you with
distortions, click out. For the most part, we're
seeing mostly whites, which is good,
precisely what we want. So this will work just fine
for what we need it for. Yeah, awesome. So this
will work just fine. So let's go out of
this. That is fine. Let's move on to the next piece, we need to hide this. So let's hide this now. The next piece you need to
work on will be the bid. The next one. Save this. Okay. So now let's go over and then start
working on this as well. Let's work on this and then get this right and then
we should be good. So pretty much the same same we need to kind
of hide our same line. So we need to hide the same
line where it's kind of touching on region where it's
kind of touching the jaw or we can hide this at the end. But majorly we're trying to
hide this somewhere around. Let me get close.
Somewhere around here, should work just fine. So let's get right to it. So I'm going to start
with Okay, do that. Let's start with camera Bz. Let's get this front
facing camera Bz. Alright. No, do that let's make sure we have
all of this in view. Let's get all of
this in view camera busy again, that's fine. Get in close. Okay. Then we can
use our edge mode. Let's go to Edge
Mode, click on this, select click on this. Let's make sure I'm hiding
this Nicorette please. Get close. How do you select this? Let's
do around here instead. Okay, surround there
should be fine. Select this. I think we
can do here as well. That is fine. Moving on. Come down. Select.
Let's make sure we are full in that same directionality to it to actually ei the UV SM. So I think here all the way down here should
be fine. As well. Come in close. Okay. All right. That's fine. Select come close. Select this as well
here, here, also. Okay. Let's go down here
all the way down here. Let's see where Sim is. Let make sure we're doing
this in the right place. We can do around here, as well. You can do down on this. That's fine. Let's
check this out again to make sure
on the right place. Yes, we are hiding this quite
well on the right spots. We can do let's do this instead. Okay. Also here also, as well. Move down. Continue on with this. These
are mostly police fare. We can just get them where we know they should
definitely be on. Okay. That should
be fine. Move down. Let's figure out where
we need to line this up. Okay, we can line this up
somewhere around here. Come all the way
down. Go do that. T wrong place do that again. All right, that's
fine. Move down. Okay, well, go
back in the swell. That's fine. Come down. Here. Okay. Move around, do that. Yes, that's correct. Or. Okay. F the same directionality for this to make sure I'm
doing this correctly. Zoom out, we can do this
all the way down here. Zoom out again just to make sure I'm doing this
accurately enough. Okay, yeah, that's fine
when you write spots. Moving on. Okay. All the
way, yeah, that's fine. Yeah, I swear we can
do e all the way down. Yeah, okay. Go around this around again. Okay. Do the same repetition
across this also. All right. Get down here, here,
swell, rotate. Okay. Make sure we're
following that same pattern. Select those, select
those, this as well. So I think we already
get the general idea, so if we continue
in the same way, we should be able to
get good Vs of this. Let's make sure we
get the right there. Yeah. Come down around select. Select this, select this. How do we select that loop? Loop here selects, zoom out
again just to make sure, we're staying the same place. Wording this accurately enough. Okay? Move down
select move down. I think at this point,
may need to do coat now. We have selected quite enough. Select do coats. That's fine so moving down,
continue on with this. Okay. Go down. Let's go and find where the
continuation of that seam is. Go down all the way here. We can select this, move down. Okay, do that. Let let that p. Ready know how to get this in. So let's do that quickly. Same for this. Okay, well. Well, yeah, also, also, as well. Let's figure out where, the
line comes down would be. Okay, we can do all the
way down here, sled loop. Continue on in
that same fashion. Sled that loop. Okay. Sled
that loop, slide this loop. Check this around. We're
in the right place. Moving on. I think that
is eating quite well. So we're going to continue on. Let me go push this to
the back a bit more. Let's push the same line
towards the back some more. Okay. All right. We can do this, or do we let this loop? Okay. I think for this, let's just do at the top, undo that, undo that. Get in at an angle, get this at an angle,
select, repeats Alright. That's fine. Let's go back in and get
proper camera and go to this so we don't get
too side tracked. I think around here
should be fine. Or do we select here
as well, select this. Or do we select? Down select zoom out
again just to be sure. Okay, we're already moving
now to the opposite side. So let's do cuts. For the opposite side, I think I would like to start I'd like to start
from the top part instead and work our way down. Let me start from the top side. Look for you best
place to hide this. To hide our SIM, I think best place to hide our
sim will be around here. So let's go select this. Okay. Most of the backside. Come on. I need to be careful with my camera movement so
I don't get knocked off. Yeah, that's fine. That's fine. Make sure we're froing
the same line for it. All right. Okay? As well. Repetition, repetition
across this also. Go and find the line. Okay, as fine. Select all the way down here, select select, select all
the way down here, selects. Okay. Yeah, as well. Come down all the way,
select this loop. Repeats. Come across. Come across again.
Select come easy. Easy now. Let us find were
back in place. Okay. Alright. Let's find this, all the way down yet. We can do this way. Alright. That is fine. Okay. Same thing also down here. All right, one last
piece at the back. Find the directionality
of this same line. I believe this
should work. Okay. We can do all the way down
here to let this look. Okay. Easy now. Yes. Awesome. I think we
can Let's do a cut after this police phase. Let's do a cut after this
police phase, get them in. You're swell,
rotate to the back. Okay. Yeah, swell, ah, swell. Yeah, well, up here. Okay. That's fine. Yeah, swell, yeah, also. A, also. Yeah, also. That's fine let's records. Almost done, I'll be
a few more to go. Let's find where we have that sim code.
Let's check this again. Yes. We have the same code
sim code in the right place. So let's continue on the
same direction around, select, all the way down
here, select that loop. Let this loop, all the way down. Okay, we can add this all the way down
yes, let that loop. Get a good camera angle to it. Select, come all the way down. Select, go way down. Go the way down, select this. Select this loop, select, go the way down,
select, et undo that. All right, that's
fine. Go across this opposite side. No, no. Get enclosed, find those edges and then double click on
that to select that loop. I need to find where the continuation of
our loop continues on. So all the way down, yes. I believe all the way,
yes, you'll be fine. Can select this, come all the
way down, select this loop. I believe this also also that
is fine that would work. Also as well, this as well. Certainly, select
this entire loop in the same repetitive fashion. All right? That's fine. Let's find where the continuation
goes in on. I believe on this
edge, found it. So we can do, then
we can continue this loop down all the
way, select this loop. Undo that. Sledde sloop selects all the way
down a sledy sloop. Okay, this should be fine. Come all the way down. All the way, there
should be fine. Oh, that's last piece, so we can do it cuts. So we have this now don't wrap. I think I would
like to hide this. I think we're getting
these two close. So I'll select this. I'll select come
enclose this as well. I would select this as well. Then let's do so. Let's create new sin for it. Yeah, I believe.
Here's the place, old, as well, that's fine. Let's do cut in
there. Save this. So now we can we can quite easily just unwrap all of this, select all of this fold. Okay, let's done orient, then let's do layouts. Yeah. Awesome. So we have
this laid out accurately. Oh, let's see this might be
sue Let's find where that is. Seems like we don't have
any loop at the edge. So we need to add a
loop across this, This is why we need to
always check just to be sure we are doing
this correctly enough. Let's do unfold,
Unfold, right? Orients. Let's check also around just to be sure if everything's
working correctly. I think, we don't
have this correct. Yeah, there's no edge
loop across this, so let's find there is, but we did not select
a loop at the bottom, so let's go in the day cords. Select these two unfold. So you want to kind of train your observation skills to be able to know what
is actually missing, if there's an issue somewhere. And that's how I kind of figured out where there are
issues that need to fix. So for the most part, I think
this should be just fine. Let's let all of this again. Let's do layout again, and
then can go on and Awesome. So we have this laid
out now properly. Let's go out of isolate. Then we can hide that and
move on to the next piece, let's save this for now. Save that, control, to hide it. LG next piece to load this out. Now for this particular one, I think we can actually use
the automatic UVs for this. The automatic UV should
is working just fine. Though we have too
many pieces, though, but at the same time,
this should work. The pieces are
just way too much. There are more easier ways
to kind of get this to work. There are much easier
ways to get this to work. No, I think let's see. Can we do at seem? Let's go back to object mode. Is there a way to get this to work a lot better
than it there are no options to actually shift Is there option for this?
Let's see if we can find an option for it
creates automatic. Let's go. Okay, there
are options for it. Let's see how we can if we can adjust this
a little bit more. Great we set, no. Planes. Let's see what happens when we set
a planes to four. Let's do four for this. Apply. Now, even worse, let's
go all the way up. Let's go it. Let's do apply. As much as I'm liking
this Samson not liking, this is not good at all. So I think six is
the best for it. Feels like the best for it. I think at this point, we
don't have any choice, but to do this by hand. We just have to do this by and. Let's start with camera
Bs to begin with. I was trying to avoid this
byan but it gave us no choice. We just have to do this
by on let's go in. Now we can quite easily just
split this in the middle. Let's do an experiment
and try for Wondo. A preferable to do this would
be to select this edge, select this edge,
this edge as well. Then select select this edge
and then select this edge. Select this edge, do that
this edge down here. Let's go out. Slide
this edge down here. Select this edge also around. I pretty much like so. Pretty much like so,
then we do cuts. Then if I should go in and
then select that shell, let's select that shell, move this out this way
and done no food. So we should get in
something like this. So this is a monitor way to actually get good
UVs out of this. So we need to basically do
this for the entire piece. And this will give
us better UV sets. So if we check
distortions for this, you can see there's hardly
any distortion in here. So this is a much
more neater way to actually get UVs out of this. So let's just carry on
and then do that instead. There's pretty much
no other way to do this than to just
do this manually. We just have to
do this manually. Get in underneath this. The only issue we're going
to be having is just moving a camera just to find
the right angle for it. That's just the issue matter, but aside from that,
aside from that, we can use this to get
proper UVs across this Okay, let those edges go all the
way down underneath this. Swell. Come in close. Make sure, have you
selected that already? Oh, that's the wrong one. It
should be this year in here. Maybe I should even start by
selecting the bottom part, let me start by selecting
the bottom part. It's much easier select
the bottom parts and then the top part
from this angle. But the bottom part is where we have a little of an issue
with the camera angle for it. Okay? Yeah, well, select up all the way up. Then let's finalize with
selecting these top parts. Okay. Yeah, that's fine. Yeah, swell. Select, select. Okay. Then what do you select
also? Yeah, that's fine. Unless you cut. That's fine. So in next lesson, I'm going
to carry on with this.
92. 91 Unwrapping Metal Band In Maya: Welcome back guys. So
the previous lesson, we started to create sem lines for this metal waistband
or waste metal piece. So we're going to continue
on and then start rather continue adding
those sem lines and then unfold them. So we already have
seam lines here ready. So I'd like to go down I continue creating
the seams in here. Be it's a lot much
easier to create the same line on the bottom parts before
moving on to the top. So I'm going to go around
and then starts to continue creating that seem on the lower parts before
moving to the top part. So let's do that instead. There are quite a lot, though, so we're going to just
keep selecting those edge, then finalize by going
to the top later on. But I'm sure you guys
already get the idea since I already showed
you guys an example, an example in here with
this piece we created. Let's show you guys the
right way to create new vis for this cold panel
or this meta. The issue might have
is the camera angle just to work on the lower parts. That's the issue method the camera angle just work
on the lower parts. Let me make sure I'm
selecting this edge also. Okay. Let me start letting it to before going to the lower parts. And that will make
the whole lot easier. So I don't forget
the edge right. Let's do edge first. Then
we can go to lower parts. Then we can get them
in here as well. Okay? A move to the next one. Okay. Here us fine. All right, here as well. Okay, here also as well. So basically, I'm just
repeating the same thing. Like I said before,
creating Uvu wrapping is the most boring aspect
of the entire process. Boring, but still necessary. Something you can't
avoid not doing. So you just have to do
it if you're looking for control over your mesh. I think I missed one
party that's it. Come close. I think we're on the right track
so let's carry on. Okay, move on to the
next. All right. Yes, well, I think we are fine we see the top part to deal with but let's just
tackle all of the first. Let's tackle all just
on the lower parts. That should be
fine here as well. In, that's fine. Moving on. Already at the end, that's fine. Now let's go to the top parts. Let's select let's
not forget the edges. I think that's fine.
Let's make sure I come in closer and make sure
that edge is selected, both edges are selected. Now we can go to the top parts and we can finalize
on the top part. Okay. That's fine. Yeah, as well. A. It's much easier to do the
top up because we have nothing blocking
our view in there. So we can just quickly and
quite easily do this Alright. That should be fine. Move out. Okay? Move out some more
around there should be fine. As well, or so. All right. Move this aside. Okay, that's fine.
Move this out. As well. I believe it
should be almost done. You have to make sure you have to make
sure you're selecting the right edge and
not something else. So at some point I need
to get a bit closer, just to be sure you're selecting
your right edge for it. Okay? Am I select I select
the right edge in there? Yes, I did. You also Yeah, well, I think we missed this part. Let's make sure we select
that. Move around. I'm trying to make sure I do this a bit as accurately
as I possibly can, so I won't need to start fixing them when I've
done the Uvu wrapping. So you can see also
that should be fine. Then we can do a cat. That's fine. So we're
done with that. Let's go to the bottom parts. Let's go to the bottom
parts and get this fixed. You have some space
in here it's not going to be it's no major issue. But this part already is hidden. Let's start from the
top first. T let's start from the top
parts. Let's do the top. Let's do the top first.
Okay. It's like the edge. Then we can move to
the bottom part once we are done with this top
part for the lower half. No, I did not do that correctly. Come in close here
as well, here well, here, here, so, move
on to the next parts. In the year or so so boring
but important process. It's highly necessary
we do this just right. So even though you want
to dry and be fast, you still want to be careful
you're doing this correctly. So still pay attention to
making sure you're doing this correctly enough
as you should. Okay. Move to the side.
Move to the side. My best guess is that
I think we are almost done with the top parts. We should be almost done with
the top part, I believe. Maybe if I have to guess maybe like three or four
more should be it. So let's maybe
maybe I'm correct. So let's do this
is the first one. Something fall down. So I'm guessing we have
four more to go. This is two is three. This is four. I'm kind of second guessing myself
right now, I think. I'm wrong. Maybe at
most three more. At most three more
or extra four. Let's do three more. So 104 more instead. So, one, two, three, Oh, I'm I'm completely wrong. Let me zoom it and see.
Oh, okay, okay. Close. Close. Close? I
was really close. I was really close. So just two more to go and
then we are done. At least for the
top part, though, is for the top parts. So now we go down
to the lower parts. I think we still
have one at the back also. We still have
one at the back. I think the one at the
back is quite small. But you guys get
the general idea, so general idea is
just to code this way, we need to code them,
and then we are good. Hmm. Okay. Move out. Oh, do that. Wrong, please, do that again. All right. Nope, wrong, please. I think at this point,
you can just do cat Let's do a cut. We have co cannot
letter the lots. Let's do cuts so we don't lose all the effort we have
taken to do the others. Okay. That is fine. Wrong place. Here should be
fine here as well. Okay, move out out
some more Zum a little bit more. All right. Based guy just repeating
the same thing. Nothing new in here, repeating the same edge
selection. Undo that. We do a lot of carefulness because I don't want to
make mistakes in here. I just want to get
this undo that. Get this done all at once. Miss these parts,
get that selected. Okay. Let me do a guess again. Probably I would get
it right this time. So my best guess is that
we have seven more. So let's start our
counts with this. I should be eight to one. Two, three. Oh, that's already the
end. So let's do cut. So done the ones
on the first half, so I'm going to select U the first half is
the one in front. Let's just do let's do UV shell from here let
all this UV shell. Pull that up and then
let's done on food. So wing so should be fine. Yes, I think we have, this is actually fine,
as we can work with. I think we selected
something else. We may have selected something else. But it's actually fine. It's not really de breaker.
I worked just fine. This will work just fine
for what we need it for. So let's go let's select all of this first.
Let's pull this out. We can select all of this.
We can do orients layer. It doesn't really dicta because I'm going to be
metal metal here for you. Not the mapping in. So we're not too specific
about extremely red uvoids. So this is what we have though. We need to go in and then do some optimization in here for sure to use up
more of the space, but let's not do that yet. Maybe we even should
I think we should. Let's Let's get them
vertical instead. Let's get most of the vertical. Let's get them vertical instead. So orient this out. We can select all
of this down here. The select this, select most of the ones that are moving in
more horizontal fashion. Let's select all of those. That in an horizontal fashion
and then rotate them. So rotate. Now let's select all of this
and let's do layout for it. So now we have something
more or less like this. So if you check UV shell, we see we can at least see
any distortion in there. So this is fine. So we just need to kind of do the same thing for
the other piece. I'm just going to continue
on this same lesson, but when I stop this, whichever piece we stop out, I can go off record
and then finalize on that and then bring them back bring all of them
into the zero to one space and do the same thing we did in here by orienting them properly. And then we should be good. So I think this is the front side. So we need to do
this from the back instead let's do this from
the back to get close. And then we'll continue
on by just selecting all these edges get close, okay? Start selecting all these edges. It's got a lot of work
to do in here, though. Still a boring and then
very important process. Yeah, so let's continue on. Make sure I'm selecting
that edge properly. So I just get to do this just once without having to repeat, don't do that, don't do that. Okay? That should be fine. Okay. Move on. Move on to the next piece. Yeah, that's good. Next piece. Get this undo that. Undo that. I think we missed the mark. Continue this down yet. I think that should be selected just fine now. Yes, it is. Okay. Oh, we forgot this edge. Make sure we get that edge in. Okay. All right. I as well. That's fine. Next side. Okay. Yeah, that should be fine. Oh, see I missed these parts. Let's get that selected also. Okay, that's fine. Let's go down. I think
we can go down now. Well, let's first do a cut
so we don't miss anything. Alright. Let's look for
a good angle for this. Okay? That'll be fine. Move out. Alright. Nope, wrong, please. Move out this way. All right, move out this way. Select the edge in
there, got the edge. Okay, here as well. Oh, I think I made
a mistake here. But it's still not
a deal breaker. We can just continue on the
way we should get this to be. We should be fine.
Okay, here as well. Here. Alright, that's fine. That's fine. Yeah,
I swear, also. Okay? I think we still
have a few more to go. Maybe eight more or
most likely nine. Make sure you're selecting that 90 degree angle selection in there. That's
fine. Moving on. Here, also, here, also. Let me get a better
camera angle in there now so I can do this a
bit more accurately. Okay? Right. Nope, Don't please. Get us fine. Get
us the right one. Get in get in there. Right. Nope, wrong, please. Yeah, I think that's fine.
Now let's do a cuts. That is fine. So now let's
go to the lower half. Let's go to the left and just
finalize on the lower half. Yeah, we're still on this.
We're still on this. But don the top half, so just basically in the
lower lower half. Okay. Move the side. Let's make sure we get
this loop in place. Select that again. All right. I'm sure you guys
already get the idea, so it just reptive process, and then we're pretty
much just doing the same thing over and
over and over again. I'm just going to go off
recording and then just get all of the selected
and get them cut out, get them cut out,
and then we can move to another model in here. So we have the sheet
model as the next one. So I'll see you guys in the
next lesson by for now. Let me just do the cuts in here I mean driven
up lift, okay. Still a lot more. I'll see you guys next
lesson. Bye for now.
93. 92 Unwrapping Skirt And Spear In Maya: Welcome bad guys. So in
the previous lesson, were kind of trying
to create and cut off the edges of
this metal waste band. So I've done the
cut off already, so now I've just laid this
out zero to one space. So we should check
the UV distortion, we're all good in here. It is all good so we
can work with this. If we do check up pattern
in here, all good as well. And we have all of this
aligned vertically across which is also fine.
So we would use this. So moving on, let's look let's create
something else in here. So I would go out of isolates. I would hide this.
Hide that for now. Let's go over and then
select the sheets. Isolate that let's
creat TVs for this. Save this out. All right. Then I'll do let's do an
angle for this camera bis. That's fine. So let's
start with this piece. So the idea, like I
said before will be to hide the same lines. So we need to hide the
same lines for this. So I can just easily
go in and use my edge and select this edge. That edge is fine. Cop in
here, select this edge. Okay. That is also fine. Let's even check our reference to see if there's something. It is actually detailed on
the edge that we can we can keep not really not really. But we can have
greater control over this by doing something
like selecting. Let's go in and select. Let's find that edge.
I'll need to go out of the wire frame for now and just see where
I need to place this edge. Okay? Yeah, we can
use this edge. We can select this
edge here as well. Come down, that's fine. And then we'll do a We
do a cat for that edge. But let's go to
the back as well. Select all of this. Select
this, come in close. Let's see, that's
the edge we need. So this is the edge we
need. So I want to have some control over this when
it comes to texturing needs. So let's do something like this. I'll continue this
on, that's fine. Let's do for the opposite side. Select this edge,
select this edge. Come in close, select this
edge, go all the way down. Select this edge. All right. Here, swell. Seleg
this edge, sees edge. Here, swell. Come on the way
down. Here, that's the one. Then let's go to the backside. So kepeat the salt I have
control when I'm texturing it. Go do that. Undo that. Yeah, this should be fine. It goes around this.
He, that's fine. Okay, so we do a cuts
Yes, this is fine. Okay, so let's go
in and then select the entire UV shell,
do it on fold. Let's orient, select let's lay this out
vertically. Select this. Okay, then we rotate to the right hand side,
select all of this. Let's do a layout, you get. All right. Yeah, this
is properly laid out. We can work with this. If we
go and check distortions, I know there will be
a redness in here, so we can fix that
we can easily fix. We can just go in and then select we can just select cuts. Select all the way, cuts. Okay, select this done on food. That will definitely ease
of the tension in there. So you can see how we kind
of ease of the tension. So let's do the same
thing here also. It's just to ease up any
tension we might have in this region. Okay? Let's go also around
here. Opposite side. Okay? Do you have any do
you see any other piece? I think we are
missing. This one is actually missing.
Let's do a cat first. Let me select this UV shell. Let's figure out
where that is. Okay? Okay, we did not
do for this part. I figured we're
missing something. So let's just select
this edge loop I do cat select it, drag it out. Done unfold. Get closes. Dot click on this.
Double click on this. Records. Select unfold. Select everything again. Let's do unfold. Okay, orients o. You're awesome, so we
should be fine with this. This will work just fine.
Alright, I'll save this. So the rest of the mesh is or the rest of the models is
not the rest of our assets. Whichever word you
prefer to use is not Oh. This part is kind
of touching them. Okay, to matter that mode because it's already
buried inside. He's buried inside another
separate mesh, so that's fine. Okay, so let me
add this for now. So the rest of the asset is not going to be too
difficult to unwrap. Select this, save. Let's isolate this
to isolate this. Let's start by Let's start by doing a
camera piece for this. All right. You should be fine. Then I think I can separate
them by UVsalu out, pull this out pull this down, select this, pull
this up, up as well. So we have then
properly separated, so we can work on them
as individual piece. Let's select this and
let's don't isolate. Okay. The creativit for this
is not complicated at all. We just need one loop
line that goes across. So we go to edge mode. So go behind the fabric and
we can select this edge, go all the way down,
see where that ends. Okay, here, we need to
do a little more work. Okay, we need to select all
of these down and do that. Okay? We have that selection. Let's go to the
opposite side and trace that all the way up, okay? Let's go in and find
where it is here. So we know where it's
supposed to be. Let's go up. Okay. Check this at a
better angle. This is it. Let's see where it ends, and then we continue that off
before separating it out. Okay, we have just
one on one here. That's fine. Then we do cuts, select, it's not
completely cut out yet. We have a missing edge. We have a missing
edge. Found it. The missing edge is in here. Let's do cuts. Yes, we can separate
this out now, select these two fold. Okay? Let's Orient, select this, rotate to the right
hand side, 90 degree. That's fine. This
will work just fine. So let's move on
to the next piece. Let's work with these
two piece at the top. I'm going to slow
this out, get close. We're going to repeat
the same thing now. So it should be this edge. This edge, last final edge loop, and then we should be good. Okay, that edge also as
well. Then we'll do a cut. Awesome. That's fine. Then
let's go over to this piece. Slow that out. This
is the front side. Let's go to the back,
we want to hide our same line. Edge mode. Okay. Come on. Let's zoom in getting close. All right. Undo that. I think I selected
something else. Let's go back to edge
mode. Let this edge loop. Selt this edge. We are good, then we'll do a cut. UV shell, let this two
UV shells and off that. Let's do an Orient Okay. I'll select this rotate
to the left hand side. Select this rotate to the right hand side,
should be fine. Let's go to the next piece. Isolate that. So this is the back side.
This is what we want. This is the front.
This is the back. So we need to visualize
this from the back instead. Let's actually see
where that is. Okay? The the front side. So you need to be
at the back side. So now we can select that edge. Come in close.
That's way too much. This edge. I'm
sure by this time, you already know you guys
already get the idea. Just to select the edges. And then we just cut that
apart and then we are good. Seamans should be
properly hidden. It's not going to be visible on camera camera view.
This is fine. Do we cut UVsal select
this to UVsel unfold. There's one who reentera position this correctly.
This is this. I think we need to rotate
this let's find that. Let's use our edge mode,
select all of this. Okay, at least now we know where that's supposed
to be so now we can know how to
rotate this noun. Let's rotate this to
the left hand side. Put this back on top. Let's go to the next piece. Isolate. This is the front. Let's see where this is.
Okay, this is the front. Go to the back. Then
we select that edge also do that wrong edge. Move to the opposite side. Okay. Go into the opposite side, the lower parts, Se let. I think we are good. I think we have the entire
look now selected. Then what do the coats. For the most part, garments are most like the
mosast to unwrap. You just need to find a good
seam edge and then where it's actually hidden
from the camera and then you can just
coat and then unfold, pretty much pretty much it. On fold orients. Okay? We have one piece
not properly oriented. This is it. We do to
your right hand side. Okay? This is fine. We can work with. We can
definitely work with this. Let's go to the final piece. Okay? This is the back side. Let's go. So the
front of the back, if that actually makes
sense. Actually it does. You're looking at this now
from the front and we need to put our saw it's not
going to be visible. So select the edges. Whole, same whole
repetitive process. Select the edges go
all the way down. Let's find that edge. Seleg this edge. That is fine. I think we are good,
we are good in her. Alright, then we would do a cut. Select the entire outing fold. Okay. Let's do one orients. I think this one is not
properly positioned. Let's rotate its right hand
side, so it should be fine. Select the entire piece. We do a layout. You should be good with the layout in here. Here, that's fine.
Let's come in close. Let's check for
distortions in there. Everything looks whitish, which is precisely
what we want to. There isn't so much
deformation in there. This we can
definitely work with. Just to be on the safe
side, I'm going to select everything in
in and done on food, just to make sure everyone
keep light Okay, that is fine. Go out of UV distortion. Let's check if you
have any flips. If you have any flips
UV. Yeah, all good. If you have any flip,
you should be sharing, like, some kind of
red, I believe. But so far, we are good in here. Let's go back to wireframe. Go out of isolates. We are completely fine here. Let's hide that, save our file. So the next bis to unwrapping
in here is the spare. So let's go to the spare. Let's unwrap this. Center
up a vote on this. Okay. Now, let's do a
camera base to begin with. Camera basic scratchy
hiding. Okay, that's fine. Let's go in and then
let's do UVs, select. Let's start with
the pull or the rod instead. Let's start with this. So I'm going to start
by going over to edge. Here, I think we need to hide
where our SEM should be. And the best way to hide our
SIM would be at the back. So let's go to the back. Let's
go completely to the back. Completely to the back side. Okay. Back side, solo undo that. Let's go to Object
mode, solo this out. Completely on the back
side now, select isolates. So we need to start by
selecting this lower edge. Let's go up a little bit more. Do cuts select this edge. Can we get into the edge here? Let's see if we, we can. I'm not going to flow that
same pattern double click. We do cuts. That's fine. Is to work just fine. Then
we just do UV shell food. That should that
should work perfectly. Without any issues.
I to work just fine. Okay. Let's check
for distortions. S we are good in
your all whites. All whites, that's fine.
Let's go out of that. Save this. Now, let's
work on the spearhead. Let's let the spearhead. Vis let the spearhead
gets close. Now, this one's not
complicated either, so we just need to find
the center edge for it. So let's just find
a center edge. Let's do the center edge. Let's move this back
some more around here, okay? That should be fine. Then we slice the apart. Those slide apart we do
cuts full at the back, yes. Then we do cuts. Okay. Yeah, this should be fine. Then select these two down fold. Okay? Select this. Go to my rotation and
rotate it this way, select these two, let's orient. That is fine. Select
the entire piece. Let's layout. Yeah, this
will work just fine. I should work just
fine. If we want to kind of push this
a little two step further unfold this
again. Yes, that's fine. If you want to push a
little step further, we can select this alliance. Okay? We can pull this
a little further by selecting this and
then just scaling it out a little bit more. But let's see the textile
density that comes with this, so select it, select
the pole gets. So we al textile density
at three points. So I'm going to select let's
do textile density for this. Let's do five. Then click concerts.
That's way too big. Let's do four instead. Concerts. Then we
can pull this out. So you should hold a little
more resolution than the put the side than
the pull the wood pull. It's not going to
be too obvious, but it should see slightly
more resolution there. So this is fine.
Okay? That is fine. We hide, let's hide
that, save this again, and then hide hide
despair. Let's despair. So in the next
lesson, I'm going to move going to move on
to something else. Move on to something else. So move on to the
cross chest strap. So we do that in next
lesson. Bye for now.
94. 93 Unwrapping Chest Strap In Maya: Come back, guys. So in
the previous lesson, we worked on creating UVs for the skate and the skate
sheets and then the spare. So we're going to carry on
from that and then continue working on creating UVs for the rest of the mesh.
So let's do that. So the next piece we need to
work on is the let's see, total pully count of
17 k. That's fine. What we need to work on now
is the cross chess strap. So I'm going to isolate that. Okay, now let's start with the camera Bs Okay, that's fine. So I'm going to go to UVs, select move this to the side. So do one piece at a
time, isolate that. So this one is not
going to be difficult because we're we're going
to be texturing this and then using this coin animal kind of
texturing in here. We can't even use
what is v in here. So let's carry on. I will just go in and
then put it to the side. Let's go to edge mode. Our UVs needs to be buried. Buy our UVs in here. So let's go and then select. Let's find a good place to build the UVs around here
should be fine. So that should go like an
entire loop across this. Just precisely what
we want. Do a cut. Select the entire
out, do an unfold. That's fine. That
will work just fine. Then go to the next UV shell. Isolate that. Okay.
Let's see, yes. I'm just checking
just to see, okay, we have the KSS,
we are good in it. These two should work just
fine without any issues. All right, so let's do that. So I'm going to go over, let's look for a good
place to set UVC. We can set our UV seam around. Okay? That is fine. We'll do a cat. Okay. But then we need to add another cat also that goes
vertically across this. So let's look for a good
place to set this up. It's going to be covered.
Good place to set this up, where it's covered would
be around the shoulder. So around the shoulder, let's do somewhere around,
should be fine. Around there should be fine. Okay, let's at the back
a little bit more. Then we'll do a cut.
Okay. Then I'll go in. I'll select the entire
outin less done on fold. Okay, precisely This is
precisely what we want. Do orients, select
this one orients. Okay? Select select this. Let's rotate it this way, select the entire outin. Okay. Let's do a la. Alright, that is fine. But one thing I would like
to do is that I'd like to give you some
more resolution. You should have some
more resolution because texturing is going to be texturing for this is going to be mostly
black and white. We're going to be
using that to generate a color map for eggs and hair. So I'd like to increase to
increase the size a bit more. Copy some more pixel
density for it. So I'm going to select
this. Let's do it gets. So we have at 3.5. Select this. Let's do it gets. So this. It's almost roughly
around the same 3.5. So I'm going to set
this art five instead. But most of the
texture is not going to be visible
because we're going to be having eggs and hair completely Eggs and hair is going to be completely
covering it for the most part, so we can decide to just give it more resolution in here so it occupies
a bit more space. So let's say this to
five, click on sets. Maybe even more. Scale
this out some more. I think five is a good
one. Put this aside. Okay, this should
work just fine. This will work just fine without any issues in here.
So that's fine. Okay. So let's go out
of isolates. Save this. Select yes. We are good in here. This
will work just fine. This will work just fine. Okay, we see Well, we need to push this
down, obviously. So we do that inside of Zbrush. We do that instead of Zbrush. It's not really a big deal. Not so much of a big deal in there that we can
quite easily fix. Okay? Getting close. All right, so I think
we should do that instead of Zbrush first and
then bring this back in. That will make better sense. Let's open up our
Zbrush five for it. So back in here, let's
go in and then fix that. Select this piece. Let's find where
that actually is on. So Ship F. I believe we
should be able to easily set this way found it
found it get close. Let's use move brush, increase the move brush
a little bit more. Okay, take down the size, get in there and then just
pull that out some more. Yeah, that's pretty much it. Let's check around again. Let's see if we have
this working correctly. Okay? I think we are good
in here. So we need to export this out. Let's see which
subdivision level, we put this in nine K. Okay? That is fine. So I'm noticing that
I did not import or export my ring piece into Zebra, so I need to get
that exported out. I did not export that out, so let's get this exported out. So I'll go to let's make sure
that I know is on there. To the map, I know
if it's on there. Export this at the lowest
subdivision level. I export this out but. It exported into the wrong file. We got that into the wrong file. Let's get this into the
correct file ornaments. That's fine. Let select we need to
fix something first. Go to preferences,
important exports one of these group
turn on smooth. Let's export this out again. Still on the wrong still
on the wrong file. Correct file. Okay. Se
like this. Exports. Final five Z export as the
right one. Okay? That is fine. We need to save this
file as well, okay? And I'm going to close this. Let's leave it on for now. Just in case we need to go in and then make some
modifications, we can do that. I'm going to delete this. Let's go over to Z exports. So let's start with
the ornaments. Let's drag these ornaments, and the part chess
strap, drag in here. Awesome. Yeah, we're good in there
and let's go in and then delete weird
naming at the end. Okay, that is fine.
I'll drag that up. Let's Let's drag this
up. Yes, should be fine. Okay, select this. We have
done UVs for this already. Let me pull this up. Okay? I'll hide that. All right, save this. Now, let's create UVs for
this little pad chess trap. So let's do camera bis first to begin with. Let me
pin this back on. Let me check now if I've
fixed that correctly. Yes, we have, so no issues
there anymore. That's fine. Okay. Now, let's
properly and wrap this. Let's select this
we'd camera bit, which is fine. So let's isolate. Object mode, isolates. Okay? So it shouldn't be too much
of an arsle to create UVs four because we can
create a seam across. Let me put this aside. We can create a
seam on this edge. Okay? So that seam goes
across the entire outing. Which is fine, precisely what
we want to do with coats. Okay. Do the same for this. I put this seam around here. Second seam around here. I believe that goes across also. That goes across the entire in. Yes, it does. SD cuts. Select the entire piece.
Let's done unfold. Okay? We might need. Let's see. We'll see if there's
any distortion in there, then we need to cut
some things out most. Let's do an orient first, Selectoients on the right
hand side or left hand side, rather, select the entire outin. I need to rotate this again. Okay. That should be fine. Most of this is
going to be covered by four detail also, too, so move to the side, select the entire out in. Then we're going to
check. I'm going to check four issues in here
if there's any though. Okay? Let's see. Let's go to UV distorts. Let's see if there's
any weird stretching across this, for the most part. For the most part
should be just fine. Okay, we have most parties
should be just fine. It's not too much of
an issue around this. This is looking good
for the most part. Okay, let's check this as well. I would like to flip this. Do that. Let's lip this on you. Leave this on you as well. Leave this on you as well. Select the entire outin. Okay. Now it's a
bit more organized. We have more kind of occupying more of the
zero to one space in here taking more pixel information to give it a better
texture resolution. So that's fine. Coming close
again, bit of redness there. On the front part a little
bit of redness also. Just maybe, maybe. Let's see. Let's do cuts down the
middle around there. The cuts, select unfold. Okay. Let's check if it up most of the tension
in the redness in there. It does. Okay. That means we
need to keep this as it is. I'm going to lays down orient. I'd like to get
this way instead, select the entire out
in. Let's do layout. Okay. Now, the only issue in here is that we now have lower texture resolution
to paint sweets. We have lower texture
resolution to paint sweet. I feel way before was better. So I'm going to undo that and make some modifications
to it, undo that. Maybe the modification
we can do for this to actually help
out a bit more would be let's do something
like edge mode. No click on this edge. Double click on this edge. Okay. I'm basically trying
to reduce some of the tension in the
cyberc this edge. Let's go out of distortion. You need to reduce
more of re tension. Okay. Then we'll do something here. Let's see. Let's
find where that is. We can reduce some of
the tension in here by selecting do that holding ship selecting all the way here. Then we'll do a cut. So I have
a cut on this region now, then we can unfold this Okay. Let's reente. This you reduce
tension some more. So those going to rotate
rotates this way. Let's check for
distortion again. That basically trying to ease up some of the tension
we have around this. Okay. Let's go over and turn this off. Oh, oh, I see where
the issue is. So we need the cut
across this as well. We need a cut across this. Like, so with the cuts. Let's make sure. Let me go back in the let me stitches
back together. Let's stitches back together. Let's do it so select on fold. Right? I'm still going to leave this part where
I cut out though. That should use up
some more retention. But I would now go over to
edge mode, select this edge. Records this will ease up
retention a whole lot more. Less than fold. All
right, orients. It's not properly oriented. Let's get this this way, select get this this way. There should ease a whole
lot of detention in there. Let's do a layout. Okay. Let's see. So let's
go in and check. We still have small tension, but it's kind of easing out detention some more, which
is precisely what we want. We are easing out
detention even more. I will still need to do
a little bit more work. You can select all the
way down here, the cats. Select all the way down here. I'm trying to get this as
white as I possibly can. Do a cat. Select the
two unfold. Okay? That should ease up a lot more
re tension also in there. Okay. Let's see where we get. Let's see where that is. All right. Yeah, this will
This will work just fine. Except for one issue, though, we're going to be a tail
boo texture for this, so we don't want
the tailbtexture I s to be cutting out
on this part here, so I think I might need to at
least for the front parts. For these front parts, I'll need to stitch
this back together. But for the back part,
I'm going to leave the back part it is just
the use of retention. So let's select this on food. All right. Let it inside
out. Let's do this. Okay? That is fine. Is there a way, let
me see if I can select this and
get this up here? Select the entire out scene,
let's do that. Select this. Trying to see if
I can manipulate how this is to be arranged. See if we can manipulate
this a little bit more. I still going back to the original default,
so that's fine. We can leave this as it is. It should be fine. All
right. This is fine. I'll save this, and
I'm going to hide it. Let's hide this. Let's move on. So now that is let's go to
the ornaments, isolate this. I need to do a lot more
work in here actually. But let's start by
doing camera biz, okay? Save this camera
Bs a good start. Then there's a lot of
separation we need to do in a let's start by separating this
separating this isolates. Okay? Come in close. Why do you know how
this will pan out? So this cylinder shape, cylindrical shape, so we
know how to get this right. Let me go in and see if there's something else inside
of this, okay? Now, we need to kind
of hide hide this. We need to hide where simulant should be
so go all the way to the back, get this closed. Let's simulant at the back. The click on this, let the loop. Okay, come in close, a loop as well. We do a cut. This should work just fine. Go out of isolate. Let's do this from
the UVIDT instead. So select UV,
select, select this. This as well. Slow
them out. All right. This we just need to this
at the back also too. Okay? Get enclosed. Our SM line should
be at the back. Maybe you can aid our SIM line underneath here.
That should be fine. As well. That should be fine. Let's go to the other side. I think I moved
out way too much. S on the back side. Come in close. Come
do a simulin as well. Cuts. Okay. Then this's fair
let's select this fair. Select this fair and then do some UV work in there as well. Slow that out. Okay? So this I'm going to hide this at the lower
at the bottom part, Islegs at the bottom part. Is more like a police fair. Find out where that
ends, as well. Move to the opposite side. Okay? Hope I did not deselect. I feel like I've
deselected, bring it back. Okay? At the bottom part
as well, come in close. As well, here, also, here, also. Okay. Yeah, as well. Yeah, that should work just
fine. Then we'll do a coats. Yeah, pretty much
that should be fine. Go out of isolates. Still some other piece
to get working in, so you sell again, select you, select this, you can select those
three actually. You can select this as well. Select this. Okay. Selecting an a piece that I
don't need to be selected. But that's fine. Is it? Do you have any? Yes, yes, yes. I would like to deselect. Well, anyways, let's just go in. It's doing his best
not to deselect that, so we can just do UVs for that since
it's already in place. Okay. We can select. Let's do U Val instead. Why are you selecting this
one as an additive piece? Okay. Anyway, t just carry
on. Let's just carry on. So for this, we can do
we can just select this. Let's just select
this edge instead. Okay? Select this edge also. This is this is the
back side here. We can do Loop boots here. Okay? Selects selects
Loop across this. Look across this.
Let's get close. Londo that, do that. Lo across this. Look
across here also as well. Go to the opposite side. Loop Loop, get close. Look. Okay? For this, we can do we can just do something
like so it should be fine. Little so it should be fine. Then we do a cut.
Okay, that's fine. Let's do for this piece. We do cut across
that should be fine. Then around there also do cat. So continue on the next lesson where we keep
working on this. I'll see you guys in the
next lesson. Bye for now.
95. 94 Unwrapping Ear Orna In Maya: Welcome back, guys, we're
still on this previous lesson, we finalized on the chest strap, and then we started
working on the ornament. So let's continue on with that. So we're done with
this U visual, we can select Oh, We haven't
actually been there. So I'm going to
select all of this. Let's do all of this. For now, I'm going to select this Okay. Yeah, yeah, that's fine.
That's fine. Move out. Do the same also across
select select Okay. Then we go in and then isolate, so we can work on them
as an individual piece. But still on the back side,
which is where we need to be because we need to hide either UVCMs. Let's go in. Select the loop. We can pretty much add
our same line in here. Then call this across,
cut across across. Okay. So letting this loop vertically, that's fine. Let's do cuts. Okay. Let's move to the opposite side. Let's do the same for
the opposite side. Make sure we're
at the back side. We can select in this
inner ring, okay? Here well this part is going to be d
because it's buried in. Then let's add loop
crot across this. Okay, here well. Here as well. You're also Okay, I
think we have missing a few this seats, that's it. So the cuts it's fine. So in here, this one
gets a little bit tricky, slightly tricky in here. So it make it work. Let's do Okay. So we're going to use
metal material for it. So the metal material is going
to be on tripna mapping, so we can just do something like the coats find
where that is. We can select this find
where that is, get close. The loop codes across that. That is fine. That would
work just fine. Okay. Then I'll go in and
then do a loop, let's select this edge. Let's see. Find where that edge is. It's kind of buried
in between this, but you can clearly see so I'm going to do Double
click conducts. We can select this all the way up to where the same line
starts across that same line. Select this also.
Put select this. Find where that is. Come close. We see it now. Double
click conds. The codes. Okay? Yeah, that will work just fine. That
will work just fine. We also need to kind of connect this a little bit more
so we can do let's do. Okay. Let's see. Yeah, that should be fine.
We need to continue this on all the way all the way across. Yeah, I think we can find
this on the opposite side. We should be able to find the continuation on
the opposite side. Let's do I believe it
should be this one. Yeah, that's the one. Okay, then we can continue on with this. All right. Yeah,
as well, as well. All the way, it should be fine. Then we do cats. Okay, I believe that
should be fine. Yes, I think we
did that properly. So let's go to the
opposite side. Let's go to the
opposite side and then repeat the same thing
we just did in there. So I come in here, let's do a cut around here. Select this edge. Let's find where that is
on the opposite side. This is the one codes we
can select Double click. Double click on this cords. Same for the opposite side. Double click with the cuts. Okay. Now, let's find let's traz
that all the way down. Get enclosed, get
to a side view. I'll select this. Okay, select, select, select All right. I think I know where
that is already then go to the opposite side. We will connect all get us fine. Okay? Connect this
all close this in. Then we do a cut. Get us fine. That is fine, that
will work just fine. Then this is an a
piece we need to work. I think we need to
actually isolate this. We need to isolate this so let me select centi out in first to begin
with, the select this. Come on. Can't I just Let me just make things
a bit more easier for me. So I'm going to
select all of this. Keep moving keeps taking
this piece alongside it. Not sure why though. The
better way to do this would be to face move. It's completely combined
as one single piece. Okay. Let's see. I'm thinking of separating
them out completely. But at the same time, I don't completely
separate them out and then cause
issues for myself. So I'm just going to hide
my same line somewhere, it's still going to be
I believe it's still going to be a metal still
a metal piece, sort of, so we can just quite so easily do something
different in here. We'll just do. Oh, it's kind of measure one
single piece, actually. Surprising. But anyways, let's add our cats, our
similar in here. Let's add our in here, okay? He is fine. I'll do cats Okay. Now, get in close. Get close. Let's even
do wireframe in here. So wireframe you can see this. I believe you can see
this a lot properly. Yeah, it should be fine. As well as well as well. I
believe that should be fine. Let's go back to
wire fremon shaded. Let's go to shaded instead. Oh, I think I need
to select this. We didn't select the right
one, so we can just go in and select it
in here instead. Okay? I think we need one
also in here, high dt. Let's do cuts. That
should be fine. Okay? That will work just fine. Let's do for the opposite side. Missing we're still
missing this. I'm missing this so we want to circle back to that.
Let's just continue on. Hold this all together
as one single piece. We add a simlineUunderneath this double click on
that, let the loop. Okay? Yeah, that's fine. I
believe we can go in. Let's go wire frame.
Let's look through this. Can do yeah, well, well. No, don't do that. Let's go to shaded mode. Unless we have a proper job
in this, let's do cuts. That is fine. We've not even select it on
the opposite side as well. So we need to select it now. Let's select, select, select. Opposite side, select, select, select, isolates. All right. So we can work on this now. Let's start with this instead. How do you cut in your
across this also as well, as well. Then we go in. Select loops inside of this. Select horizontal
loops inside of this. That should be fine.
Am I missing anyone? I think this should
be just fine. Cuts, let's go to
the opposite side. Let's start loops in vertical
loops across this way, way, this way as well. Then we can go in
yeah. All right. Here well, ya well. Gets enclosed. Well. Okay,
then we can do your cuts. That's fine. Doing
this quite well. Everything's working just fine. Let's see. I think
there are there more, more shapes to still
unfolding here. So we have let's do UV shell. We have this, I
believe this as well. I should be the
final piece as well. I believe so isolate. Alright, so let's make sure
we're on the backside. Let's start with this.
I'm just going to let's go in and
see, Is it hollow? Do we have something
in there, we do? We have something
down here as well. So what that's going
to do is straight course across the entire actin. Straight course should be fine. Okay. This one is buried
in, we can do a cat here. We can do a cat here as well. We can do a cat here, get in close. Catie, as well. All right. Move to
the next parts. So the idea is to hide you already know is to
hide out same lines. Dot here, as well. Okay? This should be fine. Get in close. Yeah. Locate, as well. Do. Look coti under vascar
look cotier should be fine. Okay. Oh, do you
have loop codes. I'm not supposed to add. The loop codes
supposed to be instead not y, so let's remove that. Let's move that. I think we do the same
thing in the inner part. We need to move that
also. On control and the endoplcd that should remove it. Stay on the back side. The select the
select, that's fine. Okay, I think what
we needed to do was to do a out inside
of this instead. That's what we should have
done. So let's get close. Okay, as well. Do the same for
the opposite side. Get in close. We
just do this first. Then we can do this as well. That's fine. We do the cats. Okay? That's fine. I think we are pretty modern. Is there anything else
we are missing here? We have sim codes across
the entire out scene. I don't think we're
missing anything else. So let's go to isolates. So on a two editor,
are you adicto? Let's select the entire outset. Let's do fold Let's
give you some moments. I don't take a
little writes fold, and then we come back and then there's corrections to be made in there with us
go in and do that. So it's done folding. So let's done orient
let's do layouts, we can also check if it fits. And it's looking good. Okay, so this is This
is where we get. Not sure where I know
where these tiny pieces are coming from, though. Stiny piece, broken mesh. Let's see, mi some fixing
in here to begin with. This needs fixing. This is fine. This needs fixing. This
needs fixing as well. But a lot of broken up piece, and it's usually mostly comes from usually mostly
comes from zebra. When you're spot from zebra, sometimes you tend to have some weird issues
that comes with it, surprisingly, weird issues
that comes with it. Okay. But let's start fixing. Let's start fixing some of this. I'm going to select this for one and then start fixing this up. So I'm going to do a coat around here instead
to cut that a part. Okay? Select fold. All right. Select this. Let's figure
out where that is. Okay? Et's do we don't have any
quarter cut across that, so let's do quarter across this. Let's do cuts, okay? Sell legs on fold. I think Seleg on fold. Okay. So I want to do
something instead. Let me select any me that has issues and put any UV has
issues and put it to the side. So select this, select
this, select the two. These as well. These are well. So I'm basically selecting UV issues in there I like
to put them to the side. I pull them to the side and then work on them specifically. See check in, there's
anywhere I can find some model issues in there. All these pieces are coming from not sure where these
pieces are coming from. But we want to check. We check. Okay? All right. So let's
put this aside. Let's check in again and see
if there's any place we can find we can find additional
issues that we can resolve. Okay. Let's see, okay. This is one. There's another one in there. Come in close. I'll move
that out of the way. Then this polar one in here now, I would like to put broken piece in there.
I'll select those. Select them, select, select,
select, select also. Okay? I'd like to know where they are. I'd like to know
where they are so I can actually isolate them. You how that one again,
can we find in here? Let's do this three for
now? I see one here also. So issues like this can occur
most especially when it's putting out of Zbrush. I think they should
be fine. Put this to the side for now. Okay? I. Let's see where
those issues are coming from. So the problem from this. Okay, so I'll select them. Let's do camera biz. Okay, what just happened. Okay. Face mode, slid the entire face. The major issues actually from this to let me go
out of isolate. Let's see where they are.
Let's find out where they are. These two, for example, right. I think on the opposite
side also as well. So I'm going to do face mode, Dub click on this pace,
double click on this face. Slide this face also as well. Okay, let's do camera biz and then move that
out of the way. Okay. Move that out
of the way for now. Let's see. Let's get closed. Let's do edge. Slide this edge precisely, and then let's stitch together. It's not even stitching together because the mesh is
completely broken. The mesh itself is
completely broken when we export it out of Zbrush, Okay. Anyways, for this,
we still broken. No matter however
we try to fix this still completely broken.
Still completely broken. Ever we try to fix this. So I don't undo. Now, if we're
texturing this it's really not going to be a
major issue, actually. For texturing this is not
going to be a major issue. I just something that comes
with Zbrush when you export. Let's go in and then
fix this instead. Let's do something that
goes across in the middle. The cuts, select unfold. Let's even find
where that mesh is. Let's isolate it. This mesh we have in here, we need Let me select,
you know, let's go in. The cuts. Select unfold. Still giving us issues. Locally con edge, the
cuts select unfold. Okay? We're getting
somewhere now. The cords select on fold. Get in a double
click on this edge. Let's do this edge instead, the cords on food on food, Okay. Yeah, that pretty
much fixed that. Pretty much fix that.
Let's go to another piece. Okay? For this, we need we
have a cut across, then what is the
major issue in here? Let's do some loop cut
around here to begin with. Sled the entire out unfold. Okay? That's fine.
Select this unfold. Let's find where that piece is. Okay? Pull this out. I think there's more to this that
were not seen properly. Let me do a quote
also in here, no. Get in the Let's look
quote across the records. Slide the entire
out in D on food. Okay? T a selected one of
fold, get in close. Maybe even move it out. We can just move it out instead. Scale this out some more because you seem to
do something in there. I get close. Okay? Don't under loop quotes
across the coats. Unfold. Select this unfold. All right. That is fine. Let's move
on to another piece. The coats unfold this? The coats cut around the coat
this apart, selects unfold. Okay. You need to do a
coat in the center. Select, unfold. Okay? We need to do codes across
here, like so codes. We need to do the same
also for these top parts. Can I select this loop?
Unfortunately, I can slide down. Let's look for something
close to select codes. Slide the entire out, lets fold. Okay, so we're
getting somewhere. So we're just going
to continue on and then finalize this in
the next lesson, right?
96. 95 Unwrapping Armour Horns In Maya: Oc but, guys, so we're still on this year on a men and
still fixing the UVs. So let's carry on with that. Add the cotter coats. Select the fold. Okay? You need to add a cotter cots Unfold. Okay. And that is fine. Moving on. Let's do some slats edge, slats edge. That's fine. Okay. The cuts Select unfold. Okay? Moving on, let's
start with this. Let's do this instead.
The cuts unfold. Select, select this edge, select this edge coming
close, select this edge. Let me select this. Let me select this
edge instead. Okay. Let me do this same
also around there. I think I want to
select this edge. This edge, we would
select this edge. The cuts, slide the
entire UV shells, move them up, Dn unfold. Okay, move to the side. Alright, I think this
should work just fine. Move this to the side. Select just one to the side. Let's our fold on this. Okay. Okay, that should be fine. Let's see if there's
something else you need to correct
or fix in here. So I'll go in and then
check also if there's something in here
we need to fix. Let's see. Okay. All right. Led the entire out
in. Let's do orient. Let's do lay out here. Now, let's check for you vi
distortion see if there is any coming close and
just check across this. Okay. Yeah, that's fine. That's pretty much fine. Let's
move on to something else. Go out of isolates. Okay. So like this, let's
add UV on this. For the most part, we
have UVs on all of this. Oh, I see an issue in here. I see an issue in the Okay. That's not going to
be a major issue. We can quite easily fix that. I think we fix that
and then export this out again. Let's see. I just basically need
to just rotate this. Need to rotate this and
then we should be good. Yes, Let me export this out. Let's export this
out and replace. Export this out. Let's go in and export this
out to the correct file. Copy these five parts. Ps that in a fps
in OBJ OBGEpots. So this ornament. Let's go. Arrange alphabetical
ornaments, exports. Okay. Now I'm going to just update this year ornaments and then make corrections and
then bring this back out. So I'm going to select it. So we're on the lowest
obligation level, which is fine. Okay? So I'm going to
go and do an import. Is there imports testing
for this Imports imports? Okay? I think this
should be fine. We'll just go in and then
imports and replace that. So es Z exports, ornaments. Okay, topology of the
mesh has changed. Yes. Oh, this is
going to be an issue. This is going to
be an issue, why? Because if I should the issue was from the mesh that has
broken up, this is in there. So there's an issue in
there that we need to fix. So to fix that we just
need to Let's use no. Let's see where that is. Okay. I still pretty much the same. Okay, I think the issue was the importation. So
there's an issue. Kind of I notice the mesh
completely disappeared, so we won't be able to import this in because it's
going to be problematic. So I'm going to show
you guys another different way to
actually fix this. Let me just show you guys again. If I try to import
this year ornaments, shows us this weird option in here which we
don't actually need. Weekly C no even if
it clic on, yes, it's still going
to mess things up because it to begin to start stretching out mesh in a weird way and deformation
cause deformations. So even if you use no,
it completely remove it completely remove the mesh and send this down
all the way down yes. Let me use get in, so it becomes quite small. And if noticing here,
we're kind of lost our high resolution
levels in here. So we don't want that, so I'm going to do that, get this back to the
way it was before. So instead, what we're
going to do is that we're going to bake the UVs inside of an external soft to kind of get our
normal map out of it. So we need to import. So it's completely fine.
It's completely fine. Usually, sometimes
you encounter you encounter issues like this,
which is completely fine. But there are always ways
to actually fix that. So let me use the other option of let's import this in again. Use the other option of
clicking on Yes instead. So let's give you some moments. There might be issues
coming up with this. So let's just give you some
moment to run through. So you can see how
it's not even working. Zbrush actually crashed on that. So Zbrush actually crashed. So I think there's no way
to kind of get right. We can only get that
right by baking on an SNR software just to get
extra to normal map for it. So that's one way to
do it, click Okay. So we have opened up
Zbrush opened up Zbrush. All our files are still
in there. So when I go to cut anything India, I'm going to maintain
trasmters possible to maintain the same shape because we're
going to using this and then baking out normal
maps out of it. So trasmters possible
to maintain the shape. Then I'll go back to Maya and then let's work on
a different model. Okay. Let's also
go back in here. I'd like to check something
in here just to see. I'll go to geometry. Let's check UVs UVsone. You
know UVson there. Go back to geometry. Let's go over to
modify topology. Do we need to fix
mesh integrity? Check mesh integrity, contain edges are shared
by two or more polygons. Before we make a duplicate
of that before we do that, let's do a duplicate of this. Okay? Just work
with a duplicate, hide this at the top. That it to make most
difference, though. Don't really make
much difference, but let's just go
in and then do fix. March As Ashland
comes too, okay? We can't fix that
Ts layers in there. Let's go in and
then I'm going to delete this let me
delete this copy. I don't need that copy.
So let's just work with the originalise there.
Okay, that's fine. So back to Maya, hide this. What else are you working on? Let's low this out. Okay, this is what
we're working on. Let's go to the front view. Okay, get in close. So this one shouldn't
take too much time to do. We can just do camera
Bs. Select it. D camera Come on. Object mode, camera Bs right. And let's get in there. So we need to create
a UV inside of this. But I would like to hide. Let's get in the first UV shell, select this and isolate them. Okay. Now it is from this
the front view. So I like to create
si lines for this. So let's do one sim here. Es be at the back across
around here as well. Let's go to the opposite side. Okay. Get close. Okay? Get close here
as well, here also. Then we do cuts. That's fine. That work just fine. So let's go back to the editor
UV, select this. Select this. Isolate
again, get close. So our UVM should be let's do our UV SM
down here instead. Let's do a sim around around
there should be fine. Okay, this should be just fine. Then we'll do a
loop coat in here. Okay. Let's do cats. Let's go to the opposite side. Get close the loop codes
across this this way. The cuts. Let's do UVs, let the entire UV unfold. Okay. I'm supposed
to reent this first. Supposed to reent this first. Let's do orientation. Rotates this way, selects
selects orient this this way, slide the entire out piece. There's a lo. That should be fine. Okay. I think this
will work just fine. So let's check for you with distortions in the G to isolate. Let's check for you
with distortions. For the most let's clear
this out, click out. For the most part, this is mostly whites and mostly whites. This we can work with without
any issues. Move that. Okay, let's add. Now looking at this now, I don't know if I
actually need this. No entirely sure if
I need this anymore. I totally sure if I need this, but maybe just for the sake
of having something in there. Let's even wrap this song. Let's start by doing
a camera base. So this is going to
be rather simple. Going to be rather simple method of even wrapping this song. We'll just go and select
loop across this. Okay? It's pretty much the
same as unwrapping a cylinder, it is
like a cylinder, so I'm sure by now from the examples you have
been working with before, it shouldn't be too difficult to do this and then
do this right. Okay. Almost done with this the armor, the rings on the left hand side. Yeah, that's fine. That's
fine. Then we can do a cuts. It seems like we're missing one. Feel like I missing you
missing anyone in here? Let's go to UVchel select this. Okay, we have that
accounted for. So let's go to the next piece. Okay. Pretty much the same thing. All right. The cut across. Let's do a bit more the
cut across in the get in the Ar get in the Okay. In there, as well. Oh,
that's way too much. Let's go up. Almost done. That's pretty much
it. So do a cut. Then let's go into UV editor, select the entire out
scene, done on fold. Okay. The orient, select this, select all of this. O down control shift, select down contra
shifts add these to it. Then let's orient this this way. Orient Orient. What about lava? Do we even want this?
I like these flats. I think I prefer them flat. I'll prefer them flat, more of an horizontal fashion. So let's select all of
this and let's do layout. Right, awesome. So this
will work just fine. Let's check for distortions.
Yeah, this is fine. This is fine. Okay?
Let's undo that. Delete hide this control
edge to hide that. Let's go to the own. Let's
get something for the. This one shouldn't
be too difficult. Let's start with one side and then work our way to
the opposite side. We can even split we can pretty much split this in
the middle if you need to. Let's start with getting
camera UVs in there. Okay, let's go to UV UV we go to UVdito
select the UV shell. Let this UV shell, sled this UV shell, sled UV shell, isolates. Alright? Should be fine. Then let's go in edge
coats down here as well. The coats. Okay? For this, I think I'll just
go from the lower part. Let's do from here double click. Let's find that old
way down here as well. Freeze that old way down here, freeze that old way
down here as well. Here, here, also. Okay? Then we can do
something like that. That goes all the
way, here, like so. More like a T shaped
edge loop across this. Then we do cuts. Okay? Let's do the same for
the opposite side. I think I believe let's get in close around should be fine. Cuts, select this edge. I think if I'm doing
this correctly, should be all the yeah Awesome. That's accurately here as well. Select Let me get in close. Undo that, select this instead. We can undo that, move to the side, or
undo that undo that. Okay, that's fine. Do cats. All right. Go out
of ice too late. Okay. Then we can select. I think we can use
this as a layer piece. This can be a layer
piece. I think this will work just
fine as a leader piece. Solo this out. You go in. What do you cut in the center
and then we should be good. Getting close. Okay. The cuts, let the
entire out piece, do unfold. This will
work just fine. There's bience Okay. This should be fine,
yes, it should be fine. I think I would like
to select these two. I would like to get
them rotated this way. You can rotate this way,
select the entire piece. Lo torsions if there's any. I believe there should
be known. All right? Okay, we have this
tension inside of this. Nicely figure that out.
You can just get close. Let a loop inside of it. Selet a loop also. Then those the cuts, that should release
the tension some more. Okay, we can select all of
these three, put on fold. Okay, slate the entire piece. Whoa, it's a lot of it's actually a lot of
redness at the top parts. Act lay a lot of
redness at the top. I don't I don't want too
much redness in there, so I think I can let's see what we can
do in there to actually relieve some of this tension. But we can pretty much
just re coat also in there. Let me go out of this. We can actually see we
are adding those codes. We can do coat also around there codes. Let
the entire out in. We can do unfold, select all of these out. Okay. Yeah, it should be fine. Let's check for
any tension again. I'll kind of leave most of those tension in there, so
this will work just fine. Alright, so I'll do
a quick sieve. Okay. But trying to decide, though. It can be a meta piece. It can also be a piece. In here is actually a leather piece. I think I'm liking this, though. I think we can use the
leather piece instead. For to be leather piece, we need to remove the same
line we have in here. Even though the extension there, we can still do away with it. We can kind of still
do away with it, so for it to be later
if it wasn't metal now, then we can ignore that, but I need to stage this together. Nos I need to stitch together. We just ignore the
tension increase in there because the
tension is not there. It's not too strong mesh. It's not strong enough
to ruin our mesh. If we go in there, so
it's not I would say, not too strong to ruin our mesh. Okay. Except if you do something in hereby if that
actually do anything though, we can just do a court in here. If we do a court
in here, let's see if that releases
detention some more. Now, let's think on
the opposite side. No, it doesn't do
much. I don't do that. Do that. Okay? All right. That's fine. Save this. So I would like to keep
it as a later piece, so I'm going to live
with our cities. It's not going to
be a deal breaker. It's still copying a lot of
texture resolution on there, so it's going to work
just fine. Save this. So in the next lesson, we will do something else, move on to the next piece, okay? Let me hide this. So what we have is I won't do I don't want to do I want
to do this last instead. I'll do this last instead. So I'll see you guys in the
next lesson. Bye for now.
97. 96 Unwrapping Sandals And Hand Strap In Maya: Hello. Welcome back, guys. The previous lesson, we
worked on on the add ons, and then in this lesson, let's
work on the leather strap. Okay? So let's jump right in. So select this. Then we'll go over to camera Bz. Let's great basically
V camera Bz. So let's select that.
When we get in close, then we'll start working on
them as an individual piece. So let's start let's
start with this. So for this one,
I'm going to much easier to create the
UVs on the edge. We can do that without
any issues in the box. Let's aided our UVsm
like we always do. So try as much as
possible to add our seam. So let's do our seem
around here instead. I think that place is
quite nice to hide that Semline so do we cut? I'll do the same for the other. For the other arm, let me select this framing to zoom out. Okay. Edge mode. Dot click on this
edge, cut that apart. Let's go to the next piece. This should be let's get close. Let's see where
we can hide this. Around there should be fine. Okay? That should
work just fine. Yeah, that will work just fine. Let's see get in close, get into the edge. Let's see, and I think we can do this
from this view instead would add another one
around here as well. Okay, let's go to the opposite
side and do the same. Alright. Get in close. Okay. Double click on this edge. Go in. Let's this edge
as well with the codes. Okay. I'm going to leave
this like that for now. Okay, we need to
do another codes around something that goes
across this way also. Yes, we we need that. The coats let's do the same
for the opposite side. Get in close. Come on. Have to frame in.
Okay, to do get close. Slide this edge loop,
the cats. All right. Let's get into the next
piece, select this edge. Need the coat there. We also need a cat Let's see. Yeah, that's where we
need the coat to be. I think at this point, you
might need to separate things apart just to see where
things are so do cats there. Okay. Come on. Frame into it. Find this edge, the
cut there as well. Now, let's trust separating things out a little bit more so. I'll separate. Let
me separate this. Find a good angle for this. Let this entire out thin. Okay. Select this entire
out in as well. Isolate. Let's see
what we get from this. Okay. We have sline there,
we have sim line there. Let's go the other parts. Get in here, this is
fine. This is fine. Go out of five sold. Let's select the next piece. You shall select this shell. Okay? I think we
can select it from the opposite side also
as well this shell. Let's solo this out. Okay. So now we can go
in and then make another cut around here. Do cats would need another
coat around here swell Cats. Go to the opposite side. One year one year swell. No, that's wrong, please. Let's put this directly
in the center. If we can. Do cuts that is fine zoom out. This is the next piece
we need to work on. Still on Ed mode. We will do a cat. Let's find a good
angle for this. Here, it should be fine. Then the second call will be at the lower part where is going to be them from a camera view? Do the cats. Let's go
to the opposite side, get the same thing in there. Okay? Turn this
to the back side. Se on edge mode. This edge
let write one here, no. Okay, that's the right
one. That's the right one. Underneath this, the cats
let's go up to the next piece. So just repeat the same thing. Code, let's here. For this, we can select this. This part one goes across. The cats go to the
opposite side. Something seems to be missing. Something seems to be missing. Okay. But that might actually
make sense, though. Okay. For this, we only have one strap in here for the side, we don't really have any
strap, so that's fine. Actually we can
actually keep it like that just to make it feel
slightly more interesting. So let's go back in here, Okay? This is what we need to select, figure out where that is, yes, in from this direction. Okay. Select this edge
as well with the coats. That's fine. So
now I think we'll have this all set up properly
now, select all of this. Okay. I should be fine. Just for the sake of
having variation in there it should be fine. Okay. Yeah, this will
this will work just fine. So we can save this. Okay. So all we need to do
now would be just to select the entire outing. Then we done on fold. Then we do orients, then we'll do as possible
to arrange this based on the directionality of
the models themselves. This, for example, would need to rotate like so. This is fine. This is fine. This, I think, I'll need to lay down. Let's rotate to the
left hand side. Okay. This would
rotate this way. I think I'll select this
to rotate them this way. Select this, rotate this way, rotates this way as well. This way, select,
rotates this way. Here, I think this is
pretty much for and select all of this unless they give them for it to properly arrange itself
necessary to one space. Then let's check for
distortions in there. For the most part, we
having this a white, so this is fine. This is white. This is fine. This
we can work with, select, control H to hide it. Save. Now let's move
to the Sanders. So let's go to
Sanders, get in there. Let's do camera Bz. Now, this one has a
lot of quite a lot, quite a number of
not a lot, though, but quite a number
of parts in here. So we're going to try
as much as possible to separate them out so you
can get better control it. So let's select this. Okay, I'll select
this, slow them out. But creating the UVs for this UV wise is
not going to be that difficult because we need
to select the edge for it. So let's find a good
edge. We can select. I believe this one
should be fine. We'll continue this. Okay, let's see. Look for a very good judge that will not create stretching. I think this should
be the best one. This is the best one,
this one goes across. Let's find the same
one here also. No, let's know the one. This is the one
this goes across. Okay, let's select this. Some goes across quite
nicely. This work just fine. We do cuts, bring
everything back out. I think, let me start
from a good hierarchy. Let's start from the top. Let's start from the
top instead. Okay? Let's isolate this out. Get closed, look for a good
region to add our same line. A seam would be underneath here. Then a more better place to hide this what a
second seam would be. All the way to the
back would not be good because in case
we adding render, so let's hide this to the side. I think this side
should be fine. Just somewhere around here
instead. That should be fine. Let's corresponding
parts here as well. Going this select. I will cut. That is fine. Go
out of isolates. Let's select another let's
select this instead. This as well. Here, I
just to work just fine. Let's isolate this. Okay? Edge mode, find a
very suitable edge for this. This should be fine. Go to the opposite side. They should also be fine. Awesome with the cuts. All right. Yeah,
that's pretty much it. Ready have a cuts
in there already. So moving on. UVsll. Let's do this instead. Yes, that's a good
one. Let's look for the edge because we need
to more or less like hide. I believe this edge
should be fine. This one goes across. The other one goes across this. You need something that goes across and we found
the right one. So let's look for another one. Check this goes around. Yeah, this goes around as well. That is fine. The cats. Okay, next piece. Let's do this instead. Let's do this trap for the hell. Okay. So shouldn't
be too difficult. Around the should be fine. Around should be fine.
The cats got of isolates. UV seal right, what
are we missing? Okay, we have a few. We have to select this. Let's select this as well. So this isolates. Yeah, these two should be fine. Move to the backside edge. You select this edge.
I'll work just fine. Select this edge. I'll
work just fine as well. Okay, select this edge. This edge with the
cuts, it's fine. We got to isolates. Then we have W one
have you not done yet? Okay, we have done for this. We haven't done for Let's go. We share. We haven't
done for this. I believe we have we have
done for that already. What about this? I don't
think we are so select it. Let's isolate. Okay? Same process around this also. Let's use this edge instead. That goes across perfectly. Do the same for
the opposite side to see if I can find the rights. I believe that's
the one. No, no, no, I don't think
I want that one. This one going to create some stretching around you
and I don't want that, so let's use this instead. Use this instead. This
two also goes across, so that's going to
avoid stretching close to the edge.
This should be fine. Cuts. Okay. Go out of isolates. Okay, if we shall select selects now shouldn't
be difficult. We will just grab this edge. This one goes across, just fine. Go to the opposite side. Select, this one goes across
just fine also as well. Okay, with the cuts, save this. Let's bring everything back out. Oh, yeah, I mean
one more, the soul. You need the soul,
select select, okay? For this, should
be fairly simple. We just need to read this look. Here with under opa. Now I need more
control over this, so I'm going to create under opia under opa as well.
So I'm going to do cuts. It's precisely what we want. So I have control to
kind of let or give this mid range parts a completely different
different layer material, most multi layer
material, physically, so I think this
should be just fine. Let's go to isolate. And now we can properly
spread them apart now. Okay. So let's do UV shells,
lay the entire shell. Let's do unfold. Okay, let's do Orient. Let's do layouts dm properly. Just in case we need
to apply all types how far inside of so can spinter
can quite easily do that. Okay, so let's start with this. Let's look for counter. Let's just rotate this
way, rotate this way, select rotates this way, this way, same as this. All right. Let's find where
this is. It's at the back. Need to rotate it this way.
Select the other half. Then you rotate it properly. This is second piece, rotate it properly as well. This is the missing
one. Rotate this. Let me make some adjustments
to this by hand. All right. Rotate this way. Okay? Where is this
supposed to be? All right. This one goes across. Let's find where it
is to edge mode, select the entire edge. Let's find where that is. Okay? These are the top parts. That's the top
parts. Select this. Let's see, I think we need
to rotate it this way. So it's pretty much like so. This rotation should
be just fine. Let's find where this is. Select its counterparts,
rotate in that same direction. No no it's supposed to
be this way instead. That way should be
fine. Move this aside. Okay. Move this down, rotate some more. This
way should be fine. Okay. Rotate this way. Move this out. Move
this out this way. Okay. Here's the menu one.
This is the last one. I will rotate rotates this way. Bring this out here.
Select this piece. Okay. I think this is the opposite
piece also as well. Okay, the orientation
for this is quite where it's supposed to be. Okay, I think we need
to rotate this way. Is the corresponding
piece, rotates this way. Okay, rotate this way. That's oriens All right. Yeah, that should be
fine. This, you need to rotate this way,
rotate this way. Rotate this this way. Corresponding part
rotates this way as well. Rotate this way. All right. These are the back. Me to
set this flat this way. Select this, rotate this way, rotate this this way. Okay? This is fine. All right. Okay, select this. This this way. I think
for the most part, the orientation for most of
these are actually in place. This this is fine. This is fine
corresponding piece. Let's find the
corresponding piece for it. This is it. Do that. Let's rotate this way. Let's
led the entire out in. Just the maintaining
or sing this as much as possible to put in
orientation we have for them. Okay. We'll take
this way a bit more. Where is it supposed to be. Okay, the back side. Alright. I think we're in a good place
to take this way some more. I think for the most part, this should be working just fine. I'm just checking
just to be sure. I'm just trying to
be sure, making sure all of this is in place. Okay. Select all of
this again, do layout. No no no another layout now.
So this is another layout. Let's check for distortions. For the most part,
we have the whites, so this should work just fine. Pol rise should work just fine. Let's do check a
pattern in there. Yeah, we did a pretty
good job just to get the proper flow of pattern
in here, which is just fine. Polrishuld work just fine. Alright, I'll save this. It's important to kind
of try to arrange them in a way that becomes most easier for
you to understand. Most especially when you want to maybe you want to have some kind of pattern
across around this. So in Subtansprinter,
we cannot go and then stamp this directly
on it without any issues. That's why I'm trying to
make sure my orientation are actually accurate enough
for us to work with. So just to keep that in
mind. So let me save this. So the next lesson,
we'll just go in and then going and then
we'll work on ID. So this is the final piece. This is what we're
going to be working on you as our final apiece. So I'll see you guys in the
next lesson, bye for now.
98. 97 Unwrapping Shoulder Beads In Maya: Welcome bad guys. So we are on the final model to UV and wrap, and then we'll start
the baking process. So let's get right into it. So basically what I'm going
to do what I'm going to be doing would be to okay, we have this front view already. Then we'll just go over
and then do camera based. Oh, objects, camera
based. Yes, that's fine. So now we just go underneath
this and begin to create our UVs
underneath all of this. To clear out edge mode, locally on this edge. Let me make sure I'm on
the right list right list. Get closed right here as well. Move down to the next one. So we're pretty much just
doing the same thing, adding this course precisely on this almost flat
squary surface. So basically creating square UVs for this because we kind of
smooth this out from a tube. I'm sure you guys get
the idea already. So we've talked about
that previously. So let's just carry on. So the best place
to actually place this underneath do that as the wrong place to
place this underneath the only these tiny
bids, far car beds. This part is going
to be tucked into the leopard skin strap. So we just need
to put this where these UV sins can be properly
eating for the most part. Which is the most
smarter way to do it. Instead of putting it to where it's going to be
too obvious to see. So, yes. So we're already
getting to the form part. The form part is texturing. At least for me, the
texturing aspect of the entire process is
usually the form part for me. So I'm sure for most of it
is actually the form parts. So we're almost at the form
part because I sincerely just love when everything
just begins to come to life when you begin to
add color texture to it. But keep in mind
that all the details all the details you added
inside of Zbrush resorts, we kind of give
you another trow. Another extra edge kind
of push your texturing, the surface texturing and
the general appeal of the texturing even
further and do that, making it even more
realistic believable. That's if you're going for a
more realistic look to it. And for this story, we're going for a more
realistic look to it. So it's important it's
important that we kind of check all the boxes just to get the results
we're going for. Okay. So moving on. Let's make sure we're
still in the same place. Yes, we're still
in the same place. We're not drilling off
from where we need to be. I think from this angle, it's
a lot much easier just to get the selection from
this angle. All right. Move this along,
well, also, okay. We should be done
with this in no time. At least within the 25
minutes time frame, should I believe we
should be done with it because basically just
repeating the same thing. I'm not entirely sure how many. I think these balls are
actually quite much. All these pairs are
actually quite more. They should be up to, if not, up to 50 or so, or maybe more. But definitely not less. Okay, moving on. We still have the opposite
side also to tackle. And I think we're not too far I think we're not too far off. From this role, we should be getting close to the
end point of this role, I believe, zoom out. Let's see, I mean,
whoa, sit quite more. I say, probably 15 or so, or maybe 20, probably. So just move this along quite faster so we can
do something else. Yeah, I know, right?
Like I said before. Doing this at some
point, it feels like might feel like
you want to slip off because you're basically
just repeating the same thing over and
over and over again. Most especially for models that are similar to themselves. And in this case, it is the phase actually
similar to themselves. So basically repeating
the same thing. But ve though you
repeating the same thing, you want to be careful that
you're doing this accurately. You don't want to do
somewhere else and begin to repeat the entire
process again. To me, I know definitely that my UVs are supposed
to be in this place, so always a place that is
kind of tucked into the mesh. So we just make sure
we get all the UVs. All these parts select
all these edges selected. So they are barely afterwards, don't texturing seam lines
should be barely visible. But even if it's
not barely visible, we still have control over it's based on using substance pens
that kind of control where we want some of these
piece to be and some of the textures to be so
we can completely, if not absolutely undo that. If not, absolutely,
avoid our seam lines being completely
visible. Let's be cut. Okay, let's start from
the opposite side. Let's start from
the opposite side now. Let's continue on. All right. Next piece. On this side, also, I
believe, also move down. That should be it. Great.
So that's fine. Next piece. That's the one. That's
the one we need. That's the one we need. We are by no means
thrilling off. Believe we have
this all locked in. I think at this point, I can actually close
my eyes and do all of this I mean, what do you think?
Definitely not. I think I need better I need
visuals to actually know where to actually know
where to set these edges. Because I'm just being poetic by saying I can do this
with my eyes closed. You and I both know that I can definitely do this
with my eyes closed. I cannot do this with my eyes closed because this
is out, obviously. So as much as we try
to be poetic about it, we cannot do this with our
eyes closed wrong place. We need both our eyes and our
mind locked in visually to know precisely where we need
to add these same lines. If not, we need to go back
down and start fixing it. But at least to some
extent, Maya makes the process at least should
you say a little easier? I mean, in terms
of, let's say you select the wrong edge
for just that piece, we can always select that edge inside of our
two d Editor and then it's F to frame into it and
then do the fix for it. So salon I'm using
Maya also is because Maya is more robust that's more robust way of creating
UVs unlike Zbrush. Cases some cases whereby maybe you're working on
your own personal project, and then you're not too specific about how you want
your UVs to be. You just want
something something, something rough
just to begin with. Then you can most certainly use the Zbrush UV master to
just create basic UVs. Do you still have some level
of control over though, like specifying or painting regions where you don't
want your same lines to be. But the only downside to using UV and UV master and Zbrush to create your UV is that in cases whereby you need precise control over where exactly
you want your UVS to be in terms of putting your UVs on a
particular or specific edge, then there's a
shortcoming there's a shortcoming for
Zbrush using UV Master. But inside of Maya, there's no shortcoming
in terms of that because as we are doing now, as we're doing now, we can specify distinctively where
we want our same line to be. Which gives us a
whole lot of control. And to also to actually fix
issues we might encounter. Okay, I believe I think basically moving
at the first pace. Let's make sure we're
not subtracted. Yes, we're in the right
place. Moving on. The camera angle guess
a little bit tricky on this p so might need
to take a view. Different camera angles so we can actually
continue on with this. Yes, I believe this
should be fine. All right. Let's
do guessing again. Let's do guessing
again for this. Let's see how many wavelets. Let me say we have
up to, let's say 12. So let's start
counting from this. So it should be one. Next piece. Okay. That's the end. It should be two. Next
piece. It should be three. This should be four, okay? Almost. Okay, 45, six, five. Oh, I guess I was wrong. But it's a good thing
I was wrong, actually, because come on, 12,
that's a lot more. That's a lot to cover. But good to like on the final, so let's just wrap this up. So in general, it was like,
I think, six or seven. I think I actually lost
counts. So let's do cuts. Alright. So pretty much hidden. Then go and select the entire
UV shell done on fold. Here just do basic orients
and layout for this. Awesome. So we are done. And let's check just to see
if we missed something. If there are any issues anywhere around here, so
we can just fix that. For the most part, nothing. Let's check there are
tensions around the bots. Nothing too, nothing
too complicated, that would ruin our mesh. I think this should work
pretty much just fine. If you apply, you check
a part and in there. I think this should
be just fine. This work just fine. All
right, so I'll save this. Now, let's bring
everything back out, so we can actually
see the entire outin and see how well we did. So let's don all of this. Let all of this shift edge to
bring everything back out. Also I think there's
one you need to set up in the perspective
camera perspective. Let's set this to
focal length to 85. So we get something
let me clean that. So we get something close to
a realistic camera for this. So yeah, this is
fine. This should work just fine for
what we need it for. Okay? So we select
the entire outin now, and then we do checkup pattern. We come close, we should
be able to see all of these ing checker patterns
in the Let me just get this squash this
down some more. You can see how
the checker parts of flow in neatly across this, which is precisely what we want. We want something
that flows neatly. And for the most part, all
of this flows neatly across. Awesome. Yeah, I think we did
a pretty good job in here. All of this should be just fine. Yes, we can work with this. Okay? Yep. This is fine as well. All right, so we
have this in place now, so I'm going to save this. So next we need to
start there now, begin to export them individually back to the
various Zbrush file. Apart from the body. Apart from the body and the eye
and the minuscule, this ones already
have UVs that are already in we separate
file there already. But for the accessories, we're going to export everything
back out except for this one that this year on Amanda art issues.
So we'll leave that. We're going to bag that
in a separate way, but we're also going to export
back to Zbrush and make normal maps and displacement
map inside of Zbrush. Okay? So I'll see you guys in
the next lesson by for now.
99. 98 Baking Body Maps In Zbrush: Okay. Welcome, but guys. So in the previous
lesson, we finalized on creating the UVs
for the entire ten. So on this level, we're going to start exporting
them out individually and then replacing them with the previous one we
exported out of Zbrush. So they kind of take up the
UVs we created for them. Let's jump right into it. But there are a few
of these I won't need to export out again,
this for example, I don't need to export this
out because we already have we already have good
enough topology in here to work with. And we don't necessarily
need to unbik any other subdivision level
or any any other maps for it. This also, for example, and then remember there will need
to be externally. Okay? So if you zoom out now, you can see this weird black
black shadedness in here. So to remove that I'll
go to your perspective. We'll go to our
Attribute Editor, and I believe it
should be clip plans. Let's say this to one. So that will completely
remove that. It's fine. So let's start
exporting things out now. So I'm not going to export the minus because
I'm not going to export the outer eye because already have those
set out already. I'm not exporting
the eye risk, okay? I'm not exporting the body. The body already has UVs, but I'll start from this
tiger mat meta max. Let's export that out. Less than exportation. So exporting this to
the final Z exports. So let's find the tiger
LGBT tiger meta mats. Export, replace. Waste band. Export this as well. So waste band. You should
be down as the last one. So you want to make sure you're
exporting this on top of the original model. B plates. So b splits should
be this exports. Okay? Cowry waste bid. Exports. Cowry waste bid, cowry waste bid, that's the one. Yes. Okay? Chain roup. Need to export that as well. Y chain Rop, y chain Rop. That's the one exports. All right, ring, rings, export this out as well. Rings. Okay. Edge center
bid. Export selection. He edge center bid as the one, all right. You bids. Your beads, that's the one. All right. That will
work just fine. Okay. Then we have the
metal wastes band. Meta We band, is this? I just replace that
metal with band, metal we band, that's the one. Okay? Shed exports selection, S, that's the one exports. Export skates spot
selection skates. That's the one. Okay. Now,
the spare spot selection spare that's the
one Crosshesstrap. Okay. Cross Chess strap. That's the one exports. Yes. Liu Patchess strap, up Lupa chess strap. All right. Next
one, E ornaments. So we won't be exported this year ornament
because it thus issues when we exported
this out of Zbrush. And importing this back is going to give us extra problem. So let's ignore that, so
armor export selection, momo, that's the one. Yes. Rings. Export
selection. Arm rings. That's the one exports. Head ons. Spot
selection Ed owns. That's the one. Yes. And leather strap
and leader strap. So H and leather strap. Sanders spot selection. That should be down
Sanders. All right. Cross shoulder beds. A spot selection. C, cross shoulder beds. That's the one. Yes. All right. Awesome. So we have
this in place now. So I would like to start my baking from our
min mesh instead. So let's open up the Zbrush
five for that. All right. So back to this Control N.
Let's get this in frame. Okay? So we have this properly laid out
now just the way we want. Then let's go in and then just increase our subdivision
level to the highest again. Let's see all the
details one more time, just to be sure
everything is working correctly as it
should. Click Okay. Okay, so this is the
highest subdivision level for this. We have this good. Everything is working
correctly as we need them too. Yes, everything is fine. This would work just fine. All right. So now let's go to the lowest
subdivision level for this. Okay. So D, let's do Shift D and go to
the lower subdivision level. Then we're going
to be baking this from the lower
subdivision level. So now, how do we
bake out of this? I'm going to show you guys
how to bake out of this. So to do that, we just need to so we are on the lower subdivision
level, which is fine. We'll just go down to UV map, set this to four k resolution because we want to bag this at four K. Then go Let's
start with the normal map. So let's start
baking normal map. So turn down tangents, smooth UV, smooth normal,
and then we should be good. So just click on, we
have the body selected. Then just click on
create normal map. Then give you a
moment to kind of run and create a
normal map for us. So we are done, so
this is this here. So now we need to clone this, let's do clone normal map, go over to texture, flip V
because ZebralVts upside down, so let's flip this vertically. Then exports. I'm going to export this to Z final.
Let's create a new folder. Let's name this to Z. Let's do. So let's do Z maps.
Open that up. Then I'm going to name
this to Z normal. This is going to
be our normal map. I want to save this E PNG file. I prefer to use PNG
file, save this. Save Nonetheless go
in and then check. Let's go in and then
check because we always want to go
in and then check for if there's any
issues with the map. Let me zoom in. I'll zoom in. I'm going to check, most
likely check on the face. Okay. For the most
for the most part, I think this should
be just fine. For the most part, this
should work just fine. If there's any
issue around this, we still need to kind
of test this out. We need to test this out
inside of Subtanpiny later on. And if there's any
issue with this, then we'll find another way to make out the maps
we need butting. For the most part, this
should be just fine. This should be just
fine, for the most part. Okay? Maybe we can do we can bake eat
game map also for it. So let's go and then
bike eat game map. Let's try baking. Let's try
baking Et game map instead. Okay. So I'll go into
texture maps, UV map. Let's back at eight k. I'm going to drag
this all the way up. Let's normal map for eight k. Click on
creates normal map. So now we have eight k
map in here baked out. So Clone let's go
over to texture, Fl V exports this out. I'm just going to put eight k at the end. I know what it is. Eight k. Save this. Yes, save now. Let's
go in and then check. So I'll just open this up. We should be getting more
resolution out of this. So I'm going to go into
the pace and then check. Yeah, this is way, way better. I think baking is a
eight architecture. Eight architecture map
is the best option for this because now we can see more details, quite clearer. Details are way clearer
now compared to, let's see, compared to the normal average
four architecture. Okay, Let's zoom into the face. This is the four ki texture. The architecture is not properly capturing the
details for the face, but the eight texture
does a pretty good job catching all the interesting
details of the face, which is what we
want, so you can see more clear definition of the
skip detail on the face. I'm going to be using the
eight ki texture instead. So now we need to create
a displacement map now. So I think we can try
creating a displacement map. Let's start with four
K to begin with. Then we compare that with eight K. Let's start with eight k, then compare that to four K. So displacement map. So Smooth UV, that's fine. Flip V, that's fine also. I think by default, the spots At system bit which is fine. But if you want to export tat
bit that's also fine also. But I think let's create an Export map. So
I'm going to click on that. Okay, actually knows where we need to want to export this too. So this should be
displacement map. Do DIS PL. At the end, we just put 88k. Spots a T file, which is fine. Then click on save. Then just allow it to exist and then we'll come
back when it is done. So it's actually as if we
want to export our model, we just use no. Okay, so is there already
let's go in and then check? Is there a displacement map, k. So I'll double click on this. You should open up in
Windows photo viewer. Then we can go in. Okay. Let's go into the face. Because the face, we need to
kind of visualize even more. I think this eight texture
will work just fine. This will work just fine
for what we need it for. The file size is 120 MB, which is fine. It's
not too much actually. You can work with this. So yeah, this is what we
basically need to do. For the I and the Iris, we already have
displacement math for that and we already have normal
math for that also, too, that we're going to just use up to speed up the process. So that's fine. So now we're
going to need to open up the we need to open up our
second accessories file. Open up our SSS.
But before we open up our SSS f, there's
something I need to do here. I need to optimize this
file a little bit more. Let's optimize this
file some more, so we need to go to our layers and then let's go
to the IS subdivision level. So on the sub ditiyre going
to merge some layers down. Need to merge some
layers down just to optimize this file
little bit more. So we already have a backup
that we kept some variables, so we can do whatever we
want with this actually, and then we should
be good. Click Okay. I need to see all my
layers in here, right? So let me scroll down. Let me scroll down. Let's see. So we ask us in the leap
detail, nook wrinkle detail. Okay. Let's start by merging the asymmetry with
facial asymmetry. We can start with
that. So I'm going to select it. Sled layer in there. Okay. Is the layer
selected. Let's see. Layer selected is the
body primary forms. And the next one below
is body asymmetry. Then we add Ed primary.
Can I move layers? Let's see if we
can move layers in between press sheet
to page down. Okay. Let's send this
primary up instead. So select it. Then
let's shoot this up. This one only select this
is just like a selector, just move in between.
This is the one we need. This is the one we need prime, I'm going to move this
up. That we moved up now. I'm going to merge this body primary with the Ed primary so. Let's do a merge down. So we have merge down.
We have inverts. So let's do merge down.
So I'm merging the body primary with the Ed
primary merge down. Okay, that have
been merged down as one entire layer, which is fine. Let's look for something we can merge down also let's merge down this noise surface with the
noise pause, select that. Let's do merge down. Let's merge down. Okay? Imagine these two as one single layers
that merge down now. Then we have the flip
normal skin pause with the XYZ skin pose. So I would like to merge. Okay, we have the body asymmetry and the efficient asymmetry. Let's merge these two together. The body asymmetry and
efficial asymmetry. So let's merge down for those. There are some layers
I'm going to keep. I'm going to keep some layers. So let's see, we can
merge this noise. No, we can merge this
skin pose flipped Yes, let's merge this XYZ pause
with let me get close actually on this because we've already established the skin poll detail we need for this already. We've already established that, so we don't need to make
any correction in there. We don't need to make
any correction in there, so this is as sharp
as we want it to be. So I'm going to
merge the let's see, let's see what we
can do in here. What can we merge down? Okay? We have the wrinkle. I can merge the wrinkle
details with the leap details. So those two, I can merge down. So let's merge that down. Okay? So we have
this merge down now. We really optimizing
this as much as we can. Let's see what else we can merge down again.
That should work. Okay. So I would like to keep this flip noomal skim pose
and the XYZ skim pose, I would like to keep them
distinctive to themselves. But I think I can merge this. I believe I can
merge this knocks wrinkle detail with scars. I think I can merge
those two together. So let's do a merge down. Let's do a merge down for
those. Okay, that's fine. So now let's save this file. Let's go to lower sorption
level and then save our file. So save this file. This should drastically
reduce S has 3.6 gig now, this should drastically reduce the entire file size,
which is what we want. That has been saved
and let's go in. So our file 3.6 before is
not completely reducing. Let's go back in maybe to reduce by now, not completely yet. We just only had 400 MB reduced. 400 MB was reduced. Let's see what we can
merge down again. Let's merge this skim pose
Let's merge this skim pose with the No, let's merge the
noise surface with the tecton XYZ
skin pose instead. So let's do you need to go to the highest
observation level to do that. I'm going to bring the OD our accessories file las Z in here. So we need to get this
reduced at least to a few amount of file
size. So surface. No, I think we can merge
the body asymmetry. Let's merge the body asymmetry
with the noise instead. That's a better
way to go. Do they merge down. That is fine. That would work just fine. Okay? I think we need to
collapse, one more also. Let's do I think at this point, we can just merge
these two together. Let's merge these two together. Skin pause flip. We can merge this together. I still want to have
this control over this X zipuse if I need to. I still want some little
measure of control over it. I think I'm going to leave that. Yes, I can leave that, but I think I can merge
the body primarily with the body asymmetry. So let's merge those down. So it's just be just
one layer for those. And then let's save this
again. We have a 3.2. Initially, it was 3.6, so 3.2, let's replace this again. So we have deceived out now. Let's go in and
check our five size. Awesome. So you see we
have reduced our five size all the way down to 2.5
gig, which is fine. So if we're merging the
final accessories with this, we should be getting
roughly a five size that is around I think that
should be 5.2. So that should be 5.2
gig, roughly 5.2 gig. So we still need to
go in and optimize a few of this year also bots. I think at this point, we
have a good file size to work with if we bring back in or you bring in the accessories fires
on top of this fire. Okay? So this is fine. So let's move on. So the next lesson,
we're going to start baking our accessories fires. So we'll do that in the
next lesson. Bye for now.
100. 99 Baking Head Accesssories Maps In Zbrush: B comber, guys, in
the previous lesson, we created or backed out texture maps such as the normal map and
displacement map for the body. So in this lesson, let's start baking for the accessories. To do that, let's open up our file and then we'll
go to the d accessories and let's start
with the ring, yes. So there are a few of
this in here also. So we have the also let's
start with the rings instead, I'm going to we're
going to start work hierarchical
in here instead. So let me solow this
out. Okay. So we have this still spotted out
from the subdivision level, we spotted out out
from, which is fine. If we increase the
subdivision level, I think we need to
increase subdivision level a little bit more. You get something quite
smooth out of this. I think this should be fine. It's coming close. This should be fine. Basically, we don't need
to increase this that much because let's just
subdivide one more instead. I think this should be
fine. I think it's going to take this down eventually because the one we exported out, the base mesh we expted
out is actually fine. We don't really necessarily need to make any normal map for it. But anyways, let's
just go down to lower subdivision level
and then reimport that in. So let's do imports. Okay. Then finalize the exports. So this is the arm
ring. So select that. Put that back in, then
immediately we'll go down to normal
map, UV map face. Let's say this at
folky resolution. The rest of the models are
going to be exporting or baking our maps at
FokiRsolution instead. So yes, so UV map
for resolution. We have vis in there
now, normal map. Okay, create normal map. This shouldn't take too
long. Okay, that's done. Then do clone map. Go over to texture. Let's do flip Vo exports. Export these to Z maps, PNG, Okay, I can
arm rings normal. Let's use all caps for this. Okay, normal. That
should be fine. Save. Right, that's fine. Then
I'll go back in there. I'm going to go to the
Let's go all the way. Let's delete Aya instead, just to keep our file
slightly optimized. Okay? Next piece. So if let's go in and check, let's go in and check
our exported out map. Alright. If you zoom in, it's actually quite smooth
because we don't have any part Lo specific
detail on this, so it's quite smooth.
So that should be fine. Let's go to the next
piece, the tiger max. I'm going to let's go in here. Okay, so spot this out at
subdivision level three, which is 52 k. So let's import
that back in. So imports. Alright. The exports. So this is the tiger meta mats. Let's type in C in tiger
meta marks as the one. Double click on
that, replace it. Then we go down UV map, say this to folk resolution. Ready at folk resolution. Normal map. I think need to export
displacement map for this also. Let's export out numer map. Let's concrete give
this a moment. Want to export this or create your nomal map from
the subdivision level, you export it out as a Bz mash. I think this is fine
clone, texture, flip V exports, Z map. Okay. Put number at the end. That is fine. Save that. Let's go in and then check. All right. D click on
this. Let us check. So we have this
accurately exported out, which is fine,
precisely what we want. I'll close this. I'm going to export a displacement
for this also. So displacement map. Flip V creates Z maps. Let's do the IS PL. That is fine. Save this out. Spot out, give you a moments. No, we don't want to export the base mesh, so we are fine. So let's move on to
the next sub two. Let's go to the spare,
get into the spare. We sputtered this out at 81
k. Let's import that back in. E on the keyboard,
spare, this is it. Select that that you
input correctly. Let's go over to UV. For k resolution. Normal map. Well you need normal
math for this? We don't need to export our
displacement map creates. I shouldn't take too long. Should almost be
done with seats. So it's done exporting now. So let's go and then
do a clone normal map, over to texture Flav exports, ZMP, put normal at the end. Okay, you should probably
won't copy this so we can just keep pasting sieve. Go in there and let's
check. Zoom in. So this is here. This is
what we have in here. So we have this
exported out correctly. So this will work just fine. This is the wood. If you go in, you can see the wood
textures in here, which is also oh, I
think there's an issue. I believe there's an issue. There's a stretching in here. Consider this to
very stretching. There's definitely an issue. Well, let's go in and confirm. Let's go in and confirm. Let's see how we have
this UVs laid out here. Sometimes you might
encounter issues like this. So you v ditto, that's
why it's important you check the stretching is
coming from this piece. This piece is quite stretch out. That piece is stretched out. So usually the way to fix
it is to the way I usually fix it will be just to go back in the delete UV to
start with delete UVs. Then import that in again. Import the spare in again, then just beak immediately. So spare. Then we just go in
and beak immediately. So normal map,
create normal map. If it doesn't work, then, the only option would be to beak Eternal software instead. It's not creating a
map, let's do clone, texture fl v export
this out again. Let me just export
this out this way. Then we need to go in
and then check again. So spare Oh, I exported out the wrong file,
so it should be in here. This is this in here.
Let's check that. Let's check for any
weird stretching. This stretching is still in the we still have
that issue in there. Sadly, just stretching
this out way too much. Maybe we should Let's
work on the UV. So issues this up
sometimes unavoidable. Unavailable. You just have
to go in there and do some more and do some
more work in there. So I'm going to
select this. Let's go over to our UV Dittal. Let's try to fix this. Oh. It's kind of extending out. I can see it extending outside
of your zero to one space, so let's bring that back in. Let's just select it and
then bring this back in unfold that again. Okay. Set this down here. Let's make sure I believe it's because it's crossing outside the line. That's why we are having
issues for it for the beacon. So let's select it. Save. We need to
export this out again. I need to turn off
the checker pat and export this out again.
Export selection. Spare spare spare. That's the one. Yes. Okay. Let's go out, delete this. Go over to Z map, delete this. No, we can just replace. We can easily replace.
Let's go back to Zbrush. Start by going to UV
map, delete UV Imports. Select the spare, go in
the forking resolution. Normal map, create normal map. So exported out. Let's do clone. I strongly believe now that we should have
this working correctly. So I want to export
this to Z map. Let's just save it as spare. Let's check. Okay. Fixed. Awesome. So you see
how that's kind of fixed it. So I was just something we just need to go back
in and then check, and then that's
actually fixed it. No more stretching in there. There's no more stretching
in there, which is fine. So you can actually see
the detail now in there. It's precisely what we want, so we are good. Let me just check this again. Though, to some extent, we are losing some amount
of resolution in, but I think for the most part, this should be just fine. Don't want it to be
too extreme. This will work just fine. So
let me close this. That's fine that
we can work with. So let's move on
to the next piece. Sub to add on. Let's frame into it. All right, go into
imports, so add on. Name is add on. Let's type in H on my keyboard, and then we should find
that quite easily head ons. You want to make sure you're
selecting the correct model. Very important. Go down
let's go over to UV map, set this to four k resolution. Then normal map
creates. Is done. Let's do clone, texture, five, exports, Z maps. All right. I should be fine. Then we'll go over to finalize
Zima where that's fine. Add ons. Do you even
need to add normal? Okay, let's just add
normal at the end. All right, save. Then we need to go in
and then confirm and see if we have this
baked out correctly. So add ons. So we want to check and see if there's
any stretching anywhere. For the most part, we don't have any stretching, that is fine. Awesome. This should
work just fine. Okay. Moving on. Next piece, stop to
we have the jaw bids. Okay, go in, let's
see, geometry. Okay, we have this high enough. So jaw beds. Imports, the exports J Jo
beds. That is the one. UV map, FokiRsolution, go over to normal map,
create normal map. This shouldn't take too long. We should have something good. Clone, texture, Philip
V exports, Z map. Let's add norm. Okay, we already have this copied
out so can space this. All right, so we need to check. We always need to
check, very important. We always need to
check a jaw All right. This is fine. We don't see
any stretching anywhere, so this is fine. Next piece. So we have the ye chin rope. Okay, we have subdivision level in there that should
hold it. Yes, we do. So let's go and import
this in Import. So the name is Ye chin Ye chin. Chin, bead rope. That's the one L click conducts. Scroll up would find UV map, folk resolution, Normal map, another similar
repetitive process across the entire outing. So create noumer map, Clone texture, flip
V exports, ZMP. Abnormal at the end. Pass this. All right go in and check
Ye chin, bead rope. This will work just fine. I don't necessarily see any weird stretching
around this so far. Close this. Next piece. So we
have next piece is the d center bid frame into it. Let's check our geometry. Let's see if we have enough
resolution to hold that. Let's go in and imports imports. So this is named center bid. Z exports, H center bid, this would be the one has the one imported
correctly. All right. Then we'll go over to
UV map for resolution. Normal map. We do it
creates. All right. This should be fine. We clone, go over to texture,
flip Exports. Let's export this to
the correct folder. All right, no, with those
pists that should be fine. Now let's go in and then check. All right, in there now
eight center beads. Let's go in and then check. All of this is working
just fine. Awesome. Yes, this is fine. Close this. Okay, let's move on
to the next piece. So the next piece is the rings. That's the one. Framing
suits, let's check. Okay, we have enough
resolution here because we did some sculpted surface
detail on it. So imports, rings, Z
exports, rings, rings. This is the one selects, Imported without any issues. Awesome. Texture UV
map, folk resolution. Normal map, creates normal
map. Don't take too much time. Clone, texture, flip V exports. Export this to ZMap. Okay. Save this. Let's go in and then check. Go back, open that up again. Yes, it's Indian now, so rings. Rings, open this
up. Let us check. Do we have something in
there? Let me close this? For the most part, we were fine. Most of this is
working correctly. Not so much stretching
around this, which is fine. Close this. Let's do two more,
and then we can end this tutorial here and then continue on the next tutorial. We can move down now. We ignored the egg
ornament for now, ignore the e ornament for now. But one thing we like
to do export it out. Export a higher
resolution for it that we can now be the next soft twist. Let's just wrap this up by
exporting a higher resolution. So the highest
resolution for this is how many million polygons
do we have in here? So subdividing. 50
million is actually fine. 50 million is actually fine. So let's export
this out. Export. So I'm going to
export this here. I'm going to No, this
is the wrong file. Wrong file. I think we
can export this outside. Let's export this outside here. Let us export this here instead. Let's do Let me
name this to I Pul. I Pul Save. So this will take a while. This will take a while. So I'm not going to
explore this out. So in the next
lesson, we're going to be that external software. So I'll see you guys in the
next lesson, bye for now.
101. 100 Baking Maps In Marmoset Toolbag: Welcome but guys.
In previous lesson, we exported out and
did you vis and exported out this IPOly
version of the ornament. I'm going to make the normal
maps inside of Momo set two back I should open up Mamo Set two back in here,
let's import models. I'm going to be importing the low poly and
the IPOly version. E on the keyboard, we
should look for this. This is the ornament low poly. This is the I poly Let's
import the low poly first. All right. So I'm going to put in front low ply. All right. So if you should go in here and just check this out, it looks. That's fine. It's no less hide this less imports in
the high poly version. So this is ornaments high ply. Just one thing, though, I think we should be let's just import this in
won't be too much of an issue. But what I wanted to mention was that when we're exporting
this out from Zbrush, we did not set Smooth UV
and when we did not set, just smooth we didn't
set Smooth UV for it, so importing this in here
would actually work, but it's become we sold out models that we
don't actually. But it's still going
to work. So let's just give this a moment to load up. So it's a fight that's
up to 1.8 gigs, so it might take
just a little moment to be brought into
Marmoset Toolbag. So it put it in successfully. And this is where we get with
all the details in there. Okay, that is fine. So probably say two bags to put all the
broken up parts into a particular folder
or more or less like it's going to kind of merge them into
one particular mesh. So even though we
have a group that shows all the poly
groups in there, it's going to put that
as one single piece, which is precisely what we
need for the most part. So we're going to click on this bread
icon, new Big projects. Then let's drag the
low poly down to low. Then the I pull it
down to I All right. Turn on the low poly,
select the cage. So this cage now don't select the low actually
to see the cage. So this cage, you need to make it a whole lot tighter
than it is right now, so you need to push it
closer to the mesh. I believe we can do
this from this mat offsets Bike output doesn't
exist. Choose parts. Yes. Since that's no kind
of select a part you want to bake and mesh into. So we can do Let's
do PNG instead. PNG, finalize Z map. So this should be
ornaments instead. So yeah, spell out correctly, or mens, normal All right. That's fine. Slow it wants. Okay. It's kind of loading
of taking time up. Okay, that's fine. So let's
go back to the bike group. Select this Bk project now and then let's make some
modifications to it. Alright really specify we
want this to bit out in. Baking is a eight
bits, pading none. We don't want any
pading for this. The resolution we need for
this, need four resolution. Fok resolution should
work just fine. Okay. What else do we
need in here to set up a smooth and put the
smooth all the way to one. So this is for the smooth UV, so let's set the smooth
all the way to one. One should be fine. All right, what else can we do in here? Just checking if
everything's set up correctly. I believe it is. So I think we're
pretty much set. We can bake this and see
what we get out of this. Let me check this
again just to be sure. Need to make sure it's
quite close to it, so we can get proper
bikes out of this. That's fine. Let's run our bake and then we're
going to test this out. So I'm going to click on Bake. It shouldn't take
too long, actually. It shouldn't take too long. Once we have our bike, we
can preview it's done. Let's preview this, so let's go and click to preview this. Let's see. Okay. Now, you need to
actually go around and then check if everything's
working correctly. If you have the big working out correctly without any weird
artifact issues around this. And for the most
part, I think you are pretty much good in here. Let's check for
the opposite side. Yes, we can definitely
work with this. It around. Let's check this
around, come in close. Okay. All right. This is fine. This will This will
work just fine. So now we can go in
on the New win check. Check the map itself. Let's check the map itself. So Z maps unless the name we gave it
was ornament. No mark. I should be in here.
Just one you should do. Mose tuba tends to compress
your de texture files. Tends to compress
the texture files. I don't want it to
be too compressed. But the UV is actually fine. There's no weird issue around
the set is actually fine. What now like to do would be to baker at a higher
texture resolution file. So let's bake at
eight k resolution. So crank this up to eight k, and I'll go in and I'll
delete this delete it. Then let's bake this again. So the preview is actually
applied in a preview is applied in as in here
actually, initial. So we can remove that also, we can cancel that.
Then let's bake again. So now we're baking at
eight K resolution. I shouldn't take too long, so it shouldn't take too long.
It should work just fine. Okay? Ignore the
error message here because it's trying to find the file we just
removed from this, which was already deleted. I think it's taking a little
bit of time because we are baking this at
eight k resolution. So it's taking a little time to actually calculate properly. Right, so it's done.
So let's preview this. Okay, that's been
applied to it already. Let's go and then check
our texture file. So this is it 23
MB, which is fine. So those are better
resolution baking in here, so this is fine. All of this will work just
fine without any issues. All right, so we don't
necessarily need to save this. We don't necessarily
need to save this. So let's just close
this No. All right. So we are done with that. The name in now we
need to adjust a little let's delete
this at the end. All right. This is fine. So I
think we're done with this. So the next lesson, we will
move to the next piece. The next piece would be
recross shoulder beads. Okay, so continue
on the next lesson. I'll see you guys in the
next lesson, bye for now.
102. 101 Baking Body Assets Maps In Zbrush: Mcmbuys. So in the
previous lesson, we kind of fixed some of
the issue we're having with the ye ornaments
mash and then baking that in Momosettb and getting clean biks
out of MomosetTbg. So now in this
lesson, we're going to continue on and then back our models inside of
Zbrush. Let's carry on. So the next to back would
be the cross shoulder bids. So we already know
the methods already, so we're going to
carry on with that. So final five Z expos, shoulder shoulder What is it
called Shoki cross instead? Cross shoulder bed that's
the one, select that. UV map, set this to
fork a resolution, then go to normal map, tangent, smooth UV, smooth norms, then create. That is fine. Click on clone, texture flip export this to
the correct file. I think we still have
the previous past in the normal map, so save this. Then we need to go
in and then check. So cross shoulder B is normal.
Let's go in and check. Make sure there are no
weird stretching in there. So the way stretching
should come with some discoloration from a U value of dark blue
to red to yellow. You won't see black though but within the RGB color spectrum. So for that, I didn't see anyone like that that's any issue, so we're just going to carry on. Next piece in here would
be the low pad chess trap. Okay, low p chess trap. Let's go in parts. Lupa, it actually be
held Lopat chess strap. That's the one. We
go down UV map, set this to foggy resolution
baking, normal map. And then we bake this Alright, so clone, normal map, texture, Philip V exports. We just do paste for
the name. All right. Then we need to check it. Lo that should be this. Open that up. Let's
go and check in. For the most part, no we're
stretching, so we're good. Close that back to sub two. Let's go over to the
cross chest strap. Okay? Scroll down in parts. Cross chest strap. It's on the keyboard. Cross chess strap. That's the one D click on that. UV map, say this to
fork a resolution, normal map, B normal map. Okay, that should be
fine. Clone normal map. Texture, flip V
exports. All right. Let's just paste normal at the
end. All right. Save this. Then we need to check so cross let's find this
Cross Jess trap. We check this and let's see. Yeah, for the most
part, everything seems to be working just fine. Yeah, this is working just
fine for what we need it for. Close this. Alright,
move to the next piece. To the next piece would be the letter strap.
Let's get in there. Let's import's impose why
current mesh is eating. Oh, we have an eating mesh.
Bring everything back out. Now I see an issue.
Now I see an issue. Remember, if you go
back to mesh in here, the eating fire was not, let's go strap in here the ten strap was not visible because
it was eaten before we exported it out,
so that is an issue. But it's not going
to be a major issue, because we can quite
easily fix that. That we can quite easily fix. So basically, what
we're going to do would be go and export that out again. So that
was like my mistake. Did not realize
that out already. Okay? I think we need to do a
little fixing here as well. Okay, select this
with the move brush. So like I said, it's
a back and forth. It's something you need
to go back and forth and kind of fix where
we have issues in, push that in, and then
we should be good. Okay? Let's push this
back in in as well. That should be fine. All right. Clear this out. So we're going to export this out
again. This is our front view. Let's export this out again. Let's do exports. Now, let's set this up first. Let's set this up first. So we go over to preferences. Important exports
exports, ton off group, tunnel smooth normal, exports. So we're not going to replace
what we had before though. Maybe we should export
this outside instead. Let's export this outside
instead. That's fine. Go in there's something
we as do to fix that. Let's make sure we
import this in first. I'm not going to
drag and drop Okay, drag and drop this in
here. Let's isolate that. So the only piece
we need is this, so I'm not going to
grab just this alone. Let's do a duplicate
of this first. I'll grab. Instead
of grabbing that, let's select this sheet
rightly can hold. Let's do separate. Okay,
select this Shift P, send it out of that group. I'm going to select
this to hide them. Okay, bring everything back out. Select this, select the leader. Okay, so it should be fine. Then let's combine them. Recombine, select
lead by type history. Then we need to unwrap
this, double click on this. Let's do camera
Bz, pull this out. All right. Then we
just go to edge mode. Double click on this edge
that goes across the cords, select them on fold. Select orients, select
rotates the left hand side, rotates the right hand side. Okay, select the entire out sin. Then let's do a layout. I should pretty much fix everything we need
to do in here. Once is going to rename
I'm going to name it. Okay? So that's fine. So this is the mode here,
so it should be renamed as What should you name? This alum just grab do
a copy for the name. Okay, place that in
there, drag this up. All right. So we
should be good now. Save this. Saving.
Let's check this. We have this correct
where it needs to be. Then we need to export
this out again. Let's just go to FPOts and
etertrap I believe that's the one final phis Zpots has
a please save this. Okay? So now we can quite easily import this in
now without any issues. So let's import
this again, right? So H and letter strap, click on that, there's an issue. There's definitely an
issue now. Can do that. Okay, Imposing this back in actually created
an issue for us. That actually created an issue. I think we might just have to do all of this from scratch again. We might just have to do all
of this from scratch. Okay. Let's import again. Let's see. But my best guess is
that probably input is probably the issues
from in most likely. Most likely from in. But we'll definitely fix it just to
figure out what we're missing. So I'm going to do
an append first. Let's start with an append. I append is first, et that's fair, bring everything back out. This fa is down here.
Let's do an import. Okay, don't import. Let's import this in. Let's see where
it's been placed. We need to just see where
it is being placed. I need to go down. Is actually
placed in the right place. Yes, it's definitely
placed in the right place. So now if you should
hide this for now, go back into this
and let us wrap. Let's de duplicate for
it. Let's de duplicate. All right, we have
a duplicate now. Let's hide the one on top. Let's work with the duplicates let's replace this imports. Let's replace this. Let's see if it is completely somewhere. Whoa, it's just it's
completely down here. Which doesn't really
make any sense, though. So I think we have two options bag this
inside of MomoseT bag. That's one or export this out, export the model out
again and create UVs for the entire piece again. And then we can successfully
bring this back in and then do our big
without any issue. Okay, so I have another option. I have another option.
We can try too. I have another option we can try still we still have the
other duplicates in here? I think most of this is
not in place already. So let's see, I think with those bigs at of moment set two back instead. Don't need this. This is way too small
and it's not in place. It's just going to be
an ssle trying to get it in place. Okay. So, let's check. Let's see. Let's see. We have the highest
sublution level for This is amniplycunts, 11 million polycunts let
Moplyicons quite much. Let's get in there
and let's see. Or we can just export this out again and then
create our UVs. Okay. I'm going to
record the US again. I'm going to recreate
the UVs again, so let's go to the
lowest oblivion level. So I'll do this off recording because we already
know what to expect. It's pretty much a repetitive
process across this. So let me just go off
recording and then just do that real quick and
then bring this back in. So let me hide this. Okay, well, come but guys. So I've exported
out the new mesh, and then just quickly
created UVs for it. Pretty much the same way we
did for the previous one. Then I'm going to export it out. So let's do an export. Okay, let's replace this
with what was in there. Now, let's just create Let's replace it
with the one that was in there before,
which is this. I exported this out. So export, let's replace that.
Okay, that is fine. And I'll go in select this. Let's select the one
that was there before. This is the one, delete that. Let's bring the new one in. I'm not going to drag that as a copy and drop this in there, it should be placed
in this is it. Save this. Then let's
go back to Zbrush and then I believe importing this in here now should
don't be an issue. Import and leader strap. Perfect. So it works perfectly. So now we can quite
easily just big now. So set this to folky resolution. Normal map, creates Okay, almost done. Shouldn't
take too long. Awesome. Is there ow Let's
do a clone Philip V exports. Let's export this way should be. Well, at least we know
the options to use for baking in case
you run into trouble. Normal select this. Copy, click Okay. Then let's go in and then check. A so this is it leather strap. Yeah, we'll look into it. We see all the details in the correct. I don't see any weird
stretching anywhere, so we are good, so let's
move on to the next piece. I think in this
lesson, we should be done with the rest of it. Let's steam o here
have one, two, three, four, five, six,
seven, eight, nine. Okay, so let's move
to the next one. Let me make sure I turn
this back on armor. Okay, there shouldn't be too
much of an issue in parts. Mo double cl conducts,
you bring this in. Okay, let's go over to geometry. Do you have enough resolution to hold that I believe we do? UV map, fork resolution
nomamp, create the map. So it's done, clone, texture map, flip V exports. We just paste normal at the end. Okay, save this. Let's go in and check normal. So it's quite smooth, so you can really see any major difference
in there. So that's fine. Let's go to the next one. So
the next one is the Sanders. Okay. Let's import them in. S on the keyboard,
Sanders that's the one. Okay. Import t
without any issue. UV map, fk your resolution,
normal map creates. Let's give you a moment. We should get
something interesting. All right. Clonormal
texture, flip V exports. Okay, that should be fine. Let's go in and check. Send down no mouse. Yes, we are good. We have
everything we need in here. It's working just fine,
with no stretching west whatsoever in the
clothes. Next piece. The skirts. Okay, let's
import the skirts in. Skates. That's the one important
without any issue also. Once you don't see anything
happening in terms of scale or orientation
or the image completely disappearing
or no message has to transfer from low Polly
to Poly, then you're good. So UV normal map, UV map rather Set fk
resolution normal map creates Yeah, it's done. It's in there now. Clone,
texture, flip V exports. Okay. He's Z maps. P normal at the end. Save this. Let us go and then
cross check if it's in there correctly,
skate skate normal. Okay. Nowhere
stretching anywhere. This export is bit out
perfectly, so close that. Move on to the next piece. Cowie waste bead. Come in close Imports. That should be C C
Cowie waste bead. I believe that's the
name. Okay. All good. UV map, fork a resolution,
normal map, creates. This a little time. Okay, backed out accurately. Clonomal map, texture,
flip V, exports. We're actually exporting a
whole lot of textures in here. But it's necessary because
we need to get this right. So phase this in, okay, save. Then we need to go back
in and then check. This needs to disappear,
okay? It's going now. So now we can check calorie
waste, bead, normal. Okay. We are fine. I think this is fine. Okay? This should work perfectly fine. Yes, this should work just fine. So I'm going to close this. Let's move on to the next piece. So we have the waste band. Okay? In ports, Let's do this bun. I believe
this is the one that is it. Okay, go to U Vnmal map. If you're kind of
new to this and for the first time,
at this point, the metal should kind of stick into your head because you're basically just repeating
the same thing over and over and over again. So the metal should be fried
into your head already. Which is a good thing naturally, so you actually know what to do. Flip Export texture Z map. Save. Then we go
in and then check. Wait band, Waste band, this is it, open this up. Zoom in and let's check this out if everything's
working correctly, which it is, which is fine. I think I need to delete
this body noomal map. As the fourknma map, working with the eight
Gnomal map instead. Okay, so now we have this
one that I bit problematic. But before we work on
this one I B problem that might give us issues. Let's work on something that
won't give us any issues. So which is these sheets. So Imports S, that's the one UV map. Forky resolution normal map creates. This shouldn't be long. We have that in here now. Flip V exports. Okay. Save this,
we need to check. This is it, open this up. Let's check this in. Let's
see. Yes, we are good. No major issues in there so far. Alright, let's check this one. There might be an issue. I strongly feel there might
be an issue for this. Let's start with this metal
band. We have this in place? Okay, solo this out. All right. In ports. So the name is metal waste band. Metal Waste band.
That's the one. Oh, awesome. It didn't
give us any issues, so we can safely just
do a big for this. Do you have geometry, you have subdiviution
levels in there. Get close. Check
this pretty much. Put the lower subdivision level. Let's subdivide this one more so we get the possible
result out of this. UV map, fork a resolution, normal map, creates, normal map. All right clone,
texture, flip V exports. Et's piece this normal
at the end, save this. So we're good actually in no weird stretching
around here at all. So this is fine. So let's
do for the last piece. So the last piece will
be this splits in pots. Okay. That should be up here. Whoa, issue in here, so we need to skip this, so I'm going to I'm going
to cocel this actually. I'm going to leave
this as it is. We're going to do the baking instead of substance
painter instead. So we do the baking instead
of substance painter instead. So we're going to leave this as it is because for the most part, inside of Maya, we have good resolution
to work with for it. So we actually have good
resolution in there, so this should be just fine. Okay? So see you guys in
next lesson. Bye for now.
103. 102 Assigning Mats In Maya: What come about, guys. So
in the previous lesson, we finalized on baking all the necessary
maps needed for our body and for
the entire asset. So in this lesson, we're going to start
setting up our models and the asset files just
to get this into Saptnspena and then begin
the texturing process. So to do that, we need to give
each individual models in a We need to give each
individual model in a different a
different material, just to kind of separate it out so that Stans
painter can actually understand each one as a single or an
individual texture set. So to do that, basically
you just need to apply different shaders to each model with a distinctive name to it, so let's jump right in. I'm going to start
hierarchically working from the top
all the way down. So I'm going to work
in descending order. So let's select the first one, the minuscus and then
let's isolate this. So let's use the isolate from the top menu
up here or you can just click on Control
one, to isolate that. He to frame that in view, and then we would
select it again. Move this okay. Let's see if you can move this so more space. Then I'm going to make
sure I'm on object mode. So we li and od and
then just go down to assign favorite material. I prefer to use the
Lambat material instead. Let's use the Lambat material. I'm going to copy
the name for this. Then apply that around. Let's do a paste. Let's
do a paste in there. Surprisingly enough, it is
not pasted in anything so let's copy that again, Control C. Go in and see if we can phase
that in it's working now. That's fine. Precisely
what we want. I'm going to give this
a separate color. Let's start with red, then
take down the diffuse. All right? That is fine. Take down diffuse
a little bit more. Okay, that's fine. And I'm going to hide to
Control H to hide dart. Let's go to the next mesh, which is the outer
eye rightly can hold assign favorite
material Lambert. Then I need to copy the
name also in the Control C. Please that in contro V. Let's give it a
separate color as well. So we're just going
to be putting the same thing over
the entire mesh because we need to get them separated by assigning
different material to it. One other thing I would
like to do also would be to select all of them and
put them in a group. Put them in a group. Lets name this group to Ads
Let's use all caps for this. Idris model. That
should be fine. We can do a duplicate
of this if we need to. Let's just do duplicate
of this then hide that duplicate control H that duplicates and let's work
with what we have at the top. Now let's go to the Iris
Isolate that Lambert. Let's copy the name. Go to the Lambert and paste
that same name in there. All right. Maybe actually want to add let's leave it as se Don't need to add down
name at the end. We know what it is already, so select that and then we'll go in and then
take down the diffuse. I think I'm going to leave
this as the default instead, let me just increase the
brightness a little bit more. Hide darts, move on
to the next piece, which is the body, select
it, assign lamb bats. So I'm just going to go and copy the name for it
and paste the name also for the material for the shear and then select a different
color for it as well. Let's use the green. Then
we take down the diffuse. He that work just fine. We can go through H to hide the darts. Next piece, frame that in, assign fabrit material Lambert. Let's copy the name for it. Let's do this by type
history so we can let every other attributes that we don't necessarily don't
necessarily need in there. Let's just paste the name
in, like, so that's fine. Let's assign a different
material to it. Let's use this toquasbl instead. Take down the diffuse.
We can hide that. Let me start by
copying the name. Okay, frame into it. Assign favorite
material Lambert. Paste the name in the All right. Let's use a more darker shade
of, okay? Let's use blue. Blue's already in there,
take down the diffuse. Hide this. Next piece. Okay. I remember the b
does not have we didn't bake any UVs for
that instead of zebra, so I'm going to baking the UVs directly
instide of Scans pena. Just say basic UV
should work just fine without any issues. So that's what
we're going to do, select this, give assign a
favorite material to it, Lambert as well, copy the name, really by type history
in there Pase that in. Let's use a dark
material for it instead. I think this should be fine. Let's like that. Next piece, assign favorite material.
Lambert as well. Let's copy the name. But that three pays
that also for this, let's use a different
color for it. Let's use the I think
that should be pink. No, this is more or less like purp Let's use purple
color instead. Take down the diffuse, d d. Next piece, I think I will need to isolate this
so I can properly select it and then assign favorite
material to it as well, Lambert copy the name. Past the name in there assign a different
material to this. We can use somewhere around let's use somewhere
around pink instead. I think they should be fine. Select it, take
down the diffuse. All right, hide that. Next piece, assign
favorite material. Copy the name. All right.
Place the name in there. Unless assign a
different color to this. Let's go start with the
red and we want to use a more darker
reddish toon for it. It's a darker rediston for
it. It should work just fine. We'll hide it. Next piece. Let's isolate this as well. Favorite material Lambert. Select. You can use
this white, actually. This whi should work just fine. I'm going to copy the name. Paste that in the right, hide this country H to hide it. Get closes assign favorite
material lambert as well. Little bitty history in there, if there's any ts we need to fix in there,
it should be fine. Let's copy the name.
Clear, select it again. Go back in, pase that in there. Let's do the yellow, but a more dark shed. More darker shade to it
should be just fine. Hide that. I'll be a few more to go. Not
too much anymore. I'll be a few more to go. This is selected,
lead bat type ptry, assign favorite
material Lambert. I think I'm most likely going to use a more
darker shed for it. Let's select this,
pace the name in. Use something quite dark. Let's use something like black. Oh, this is way too black. It's way let's add a
little brightness to it. Then we can hide out next piece. So this out. He to frame this in select
it, assign you material. Lambert, copy the name. Little type history on the piece the name in
there, select a color. Let's go to the green.
But more darker shade of green should work just fine. So let's darken this a bit more. Yeah, this should be fine.
Control H to hide that. Let's go to the
skirts. All right. Fabri material Lamberts. Led by type history on
the selects the name in. No, that's the wrong one. So let me just type this in instead. So this will be the skirts. Select or assign a
different material to this. This is a more
darker shade for it. If you don't need
diffuse, this would work. Oon through let's
go to the spear. O assign favorite
material Lamberts. Okay. Make sure I copy
the name, paste that in. Okay, that should
work just fine. Give a different color. Let's use the blue but let's use a more darker tone of blue. Take down diffuse as
well. Hide darts. So this frame into it. Assign favorite
material Lambert. Okay. This is fine. This is by type pastry. Let's copy the name.
Paste the name in. I send different
material to this. Let's use the purpu and then
duck in this even more. Okay, we can leave with this, hide that next piece. Assign new material Lambert, little bit type pastry. Let's copy the name, paste
the name in now for this, we need to select uncle, let's use something in between. In between somewhere around
there should be fine. Can take down the diffuse a
little bit more. All right. High that. Onands get up close, that type history on that. Assign favorite
material Lambert. Let's make sure
we copy the name. Yes. Okay. Go in paste the name. Assign a different
material to this. Let's look for a
different colour. Let's find a colour
that should work. Let's use something
towards orange. Yes, orange should be fine. Take down the diffuse
a little bit more. Hide that undo that. Let's make sure
the name for this is here isn't the correct name. Oh, Lambat. You need to
delete this Lambert 20. Let's delete that.
Yes. This is better. Let's hope we didn't do
the same for the others. Okay, this. Then we hide it. Frame into it. Copy the name. Okay, assign a different
material to it. By type t, paste
the name in there, select it again,
paste the name in. Let's select or give you a
completely different color. Maybe somewhere. It's a more brighter
tone of green instead. Take down the diffuse a little bit more. I think
it should be just fine. We hide that. Next piece, Lamberts by type history. Let's copy the name. All right. Pase the name in Let's
assign a different material. Let me go in between
the green and blue. I find something interesting in there. Something like
that should be fine. Down the diffuse.
You can hide that. Head on favorite
material Lambert. Delete by type three,
copy the name. Past the name in. Select
all of this he's the name. It's taking up the weird
Lambert naming in there. So let's make sure
we delete that. So clear that out. That's fine. I think we still
have a number at the beginning part.
Let's clear that also. Yeah, that's fine. Assign
a separate material to it. I think you should look
fine. Should be just fine. Take down the diffuse, and then would
hide this as well. Two more to go and
then we are done. Frame into the sound
out, select Lambert. Select this. We would apply
a different material to it. Lead by type pastry, let's copy the name. Right. Pase that name in Okay. Now co should be used
for this. Let's fine. A mid range color also for this mid range color
so should be fine. Take down the diffuse. All right, this is
fine. Let's hide this. Final piece. Assign
favorite material, Lambert, little bit type
pastry, copy the name. Pass the name in. Then assign a
different material. Let's see where we can set Let's do between the
blue and then the pink. Darken this even more. Yeah, used to be just fine. So let's save this. We have assigned material to
the entire thing. So let's make
everything visible, and then we can now
begin to specify or group them or export
them out based on group actually for texture
instead of subtanspnter. So in this part, I'm going to select the
minuscule outer eye Iris body. So this part is
what I'm going to texture instead of
subtanpnter to begin with. I'm going to texture
this part in subtanspnter to begin with. Then, I see an issue. I see an issue around here. This will need to fix
instead of Zbrush. Do we have our Zbrush
file opened up? Okay, we do not. That's fine. We want to fix that. It's just a minor fix
we just need to do. Minor fix we need to do,
but before we do that, let's make sure we let me
select this all again. And then I'm going to export
this out as a FBX file. So let's go over to
Export Selection. So basically, I'm exporting out the minuscule outer
Iris and ARs body. So I need to export this
out as an VX file to FBX. So we can export that out to the outer file of
the final files. Okay, so I'm just going to
rename this to Idris body. Yeah, this should be just fine, and I'm going to save this. Okay. Then just to wrap, I'm going to open up
my set five or Z brush and then just fix this
issue we have around there. So basically, I need to just pull that out,
and then we are done. So we're in we just need to get enclosed and select that piece. Get enclosed. We're
going to be using the move brush and then we're
just going to move that. I've done this off
recording, but it's important it's important
that I show you guys because sometimes you
might run into an issue where exporting out of ZBrush might just
mess up your UVs, so you really want to
be careful about that. So let me just pull this up
slightly so should be fine. Maybe a little bit
more. All right. Somewhere around
there should be fine. So, you know, remember
where DV is on here. So if you go to UV Map, where DV is on there. So we just basically
need to export this out on this
subdivision level. Let's confirm the
subdivision level. We need to export this
out from. So select this. We have a 17 k. So to kind of see this adsorb
display in case you're wondering now to see
the Ez up display, go to display, adsorb display, and just turn on ply count, and then you should be good.
Should find that in there. Letting it again, we at 17
K. If you go back to ZBrush, we at 17 k as well. So this is the butler
subdivision level we need to export out from. So go to preferences,
important exports, exports, ton of group, smooth
normal exports. All right, so final phis. So I'm going to put
two at the beginning. So I know it's like a
corrected version of this. So exports. The name is Crosshess strap. I'll select this Zselected
let's hide darts. And let's import the new one. Z exports. So two
cross chess strap, drag and drop this in. So it's not to drag
and drop this in. The first thing
you need to do is to check the UVs for it. So it's important to
check the UVs for it. So let's go over to UV editing. And then let's check if our UVs are in there
without any issues. Yes, we have UVs in there
without any weird stretching. There's an issue. There is definitely
an issue in here now, so we can see did not come
back in accurately enough. So if you compare that with the previous one
that was there before. Let's compare to the previous
one that was there before. See the previous one that
was there before. A good. But the new one we
brought in as an issue. You can see it
have collapsed in. You can see under now you can see overlapping
india precisely. So if we should check
for overlapping UVs, you can see this chino red, giving us a clear indicator that we have an overlapping UV in here so this is something you kind of keep in mind why importing and exporting
because Zbrush might just decide to mess up your decide to mess up your UVs
for some reason. So we might need to
create new UVs for this beak and then bring this back in and assign a
material to it, unfortunately. So that is what we
are going to do. Okay, so we're
basically just going to create new UVs for
newly imported mesh. So I'll see you guys in the next lesson will just do that and then something is in here. I thought we already
have this fixed. Something is also
missing in bids. The biding across this
is actually missing, and we see also
an issue in here. So most of this issue is something we can
just easily fix. If you've been following this
tutorial for a while, now, you should be sure on how to get most of this
fixed and back in. Okay? So let me
just bring back in. I think we did not do that. Let's do shoulder
shoulder strap. If there is a name, if
I'm using name correctly, Okay, cross shoulder beads. W you have this exported out. So let's just bring this in. And I'm going to assign a
separate material to that also. So this one comes with the
accurate UV which is fine. Lambat. Let's just give it a difference, I've already assign
material, let's give it a different color and
then we should be good. We just assign
something blood to it, and then that's pretty much it. And then we'll give
it a separate name. Let's give it a separate name. So we don't give us a separate name and
then we should be good. So we'll fix this in the
next lesson. Bye for now.
104. 103 Fixing Mesh In Maya And Zbrush: We come back, guys. So just something to keep in mind is that even
though you're working on your models and you do
everything right by you, and then you kind of
starting your exports, issues might actually arise, so it has nothing to
do with you doing. So it has nothing to do with you doing the wrong thing. You've
done everything right. It's just issues that
arise from box from the software when you try to import and export and whatnot. So something you need to keep in mind that
you might need to be Mint fixing issues
that actually arises. So just keep in
mind, Dyna need to start fixing issues that arise from some of this so I saw another issue
around here also, which I just corrected now, and then I exported that out. So let's import this back
into to Maya and then see if let me hide this for now and see if that
fixes the issue. So let's go to Z exports. So I name these two as well. So I'm going to drag
and drop this in here. Then kind of check the UVs just to be sure
it's working correctly. So UV editor, let's
go and check the UVs. Se another issue in here. So you can do
everything all good, and then Zbrush can just intentionally decide
to just mess things up. So we need to fix that. So we have a few things we
need to fix. We need to fix. We need to fix this. Is that, that's the
one we need to fix the UVs for this and
then bag that out again. So let's do that. So I'm going to select this, and I'm going to do it
on food. Let's on food. Let's see what that
gives us. I'm trying to see if you're still
memorizing if you're still memorizing UVMs. Let's see if you're still
memorizing our UVMs. So we try to do unfold for this and then it's
completely messed up. So let's undo that. Let's actually start
by isolating it so know how to fix
this separately. So let's go to UVSel. So this butler UV
shell has the issue in the so we need to start cutting things apart and then find a way to
get this fixed. I'm just going to use
camera base to begin with. And then we do the UVs. I think I would like to, maybe we can cut
our UVs, no, no, let's cut UVs from the edge. I think we can do
something different here come all the way
down here instead. Okay let that loop. All right. And I'll do a coat. Then we can do a cat somewhere around de look for the
best way to Oh, yes. Look for the best way just
to get these to look right. Let's do another coat also
around come in close. I think we need one
around here as well. The coats select these
two done fold. All right. Let's do orient and
do that actually. Let's just rotate it this way. Then I'm going to
select these two. I think we need to
select the entire out and let's let the entire
out and let's do layout. And we need to kind of check for distortions if there is any. So let's check for distortions. So UVs I think for
the most part, this will work just fine.
This will work just fine. This we can keep there's ton
of UV distortion in there or save this save our file, and then we're going
to let's go back. Let's fix the other
issue we encountered, which is, we're done
with this already, which is this piece. I believe. Let's see. Now, let's get
the one we put it in. I believe this is the
one we put it in. Let us know the one
undo that. Okay? Let's find that I need
to put this down. Let's put this down
to begin with. This we are fixed
already. This we have. Okay. Yeah, this is the
one without issues, so this is what we need to fix. So I'll need to let me just make sure I
ran this up properly so I don't get confused. This will just fixed. So I'm going to select
this and drag this down. Drag this all the way down. Okay. I'll let that
weird naming at the end, that Zbrush Pulemsh Okay. We have still have
issues in there. I think I need to copy
this name. Pase this in. Oh, we're having an issue. We're having an issue
in here now, why? Because sometimes this
actually happens. Let's go and fix that.
Go over to believe name. Let's find this. So this is from around this. Let's go to General
Editor, namespace editor. I think we should have it
down, it should be this. Let's do delete
merge with roots. That's fine. So now we should have it properly
now. So let's close this. Yeah, the name should
be in there now, so it's working properly now. So let's drag and drop this inside inside our main filing, put this all the way down
around there should be fine. Let's select the next
piece. One that has issues. Cross and bed let's
get the cross bid into our file as well
into our group as well. Okay? You want issues, click out, select this.
This one is good. But we need to hide darts
hide darts, drag this down. Drag this out of the group. Drag this out of the group.
That should be fine. Yeah, then this is the
one we need to fix. Let's drag this into the group. Let me make sure I delete
any extra naming at the end. Did an extra name at the end, drag this into the group. All right, so this is
properly set up now. So let me save this
and we're going to fix the UVs for this, and then we should be good. So I'm going to select I believe that's the
one let's isolate it. Let's see where this is coming from Thish is coming
from this piece. Okay. Let's see how we
can get this to work. Select this. Them out. Then I'll do a camera base. For this I might choose a different approach for the
UV and wrapping for this. So I'm going to select
a loop in the middle. Then look for an edge
to add another loop. I'm going to kind of code this is not
going to be too visible, so for the most part, I think we're going to
be adding, let's see, I think, let's look at our
main reference in here. So this is a cross chest strap. To do so for the most part,
is going to be having a fabric, a fabric material. I'm going to add any
fabric material to this, so I would like to hide
my seam line somewhere, but it's not going to be too
obvious to our camera view. So let's do somewhere around. I think the best part to hide this should be up here instead. Let's hide it up here
instead, somewhere around. Yeah, should be fine.
So I'm going to do a cuts around that part. Select it and let's
do it on food. So let's give you a
moment to unfold. Then we'll have this
setup exported back into Zbrush and then
properly baked. There seems to be an
issue across this. Oh, I did not. I mistakenly did not do a
quote for the inner parts. Let's let that again
and let's do a at. Should work
those fine notes. Let's select this on
unfold. You're awesome. Then let's orient this
orient this a bit more. Okay? That should be fine. Then I'm going to select this. Et's get the textile
density for it. Get around five. Select this. Let's do a textile density of I believe the value
was three point. The previous one was 3.5, I think. Let's do 3.5. Click on sets. Here, 3.5
would work just fine. Get this in, properly
position this. So don't have any of the UV sal extending out
of the zero to one space. It is fine. I work just
fine. Let's save this again. So now we need to import this in again into Zbrush
and then big this out again. So let's go out of isolates. I believe all of this
is working just fine. Let's check for any
distortions in there. This is fine. Go out of that. And then let's
export this out now. Let's start by
selecting this piece. Five exports. That's the lit part chess trap. Let's go over to
finalize Z exports. Send this back to OBJ. UbGUBG UbGEpots Lupa
upahessTrap, that is the one. Export Selection,
replace select this, which is the Cross chest strap. Export Selection. Cross chest strap. Crossed chess. Yeah,
that's the one. So let's export
this out as well. Yes. Let's jump back into before we jump
back into Zbrush, let's make sure we
save this file also. Let's keep everything saved. Yeah, saved now. Then
let's go back to Zbrush. But a Zbrush file, and then it might get
a little trickier, but not too much though.
Let's just go in. So let's start with the
nut selected right now. So we have the low purchase trap selected right now. So
we need to scroll down. Under UV map, you
need to delete UV. Very important. Start by
deleting the UVs in there. Then don't imports, let's imports that back in
low parches strap. So let's just type in
L on the keyboard. Low par chess strap,
that's the one. So it's imported incorrectly, and then let's
quickly do it big. So normal map, UV map first, fork resolution is fine. Normal map, let's create. Okay, Clone, normal
map, texture, flip V exports, Z map. So we need to replace
it to the one that was there before let's use PNG. So let's just replace. So this is the one,
low patches trap, low purchase trap,
Save, replace yes. Then we need to kind of
check the UV for it. So we definitely need to
check the normal map. I was baked out to see if we have everything working correctly
without any issues. So so far, we don't have
any issues in there. I biked out correctly. So one key point to take away from this is that
you always need to check. Once you import export, you always need to check just to make sure the
US are in place. Its highly important to
actually check because that's the only way
you can be sure that yes, everything's
working correctly. Let's go now to the cross
chess trap imports. Z exports Cross chest strap. So this is the one
cross chest strap. We always want to
double check to be sure you're selecting
the right one. So click on open. Oh,
made one mistake. We're supposed to delete
any UVs we have in there. Let's do delete UV in there first and then
import this again. So cross chest strap. Alright. Awesome. So, folky resolution, let's
go to normal map. Create normal map. I
shouldn't take too long. Yeah, it's done.
Clone normal map. Let's go over to texture. Let's do flip V. Exports. Let's go in and replace that
with what was there before. No, that did not replace it.
That did not replace it. Let's go over export this again. Cross chest strap. It's supposed to see mess it popping up saying
ten not to replace. So cross chest strap. Yes, replace. Okay. Then let's
go back in and then check. This is the one
cross chest strap. Double click on this. And then we can check to make sure
everything's looking correctly, yes, it is all good in
there as well. That's fine. So you need to save Zbrush five because we've updated this. This is already updated. So let's make sure we save
so while this is saving, we can go back to
Maya and then assign the correct material
to them again, just to keep things safe. Let's go back in there. So it won't be too
much of an issue, we can click, go to
assign existing material. Then we find the
cross chess strap, cross chest strap that
is the one apply. Select the next one. This one is the low part chess strap. Assign existing material,
look for low patches, strap, apply, that's
pretty much it. I think I can delete this backup and created
deletes, save this up again. Then we can make a duplicate of this particular one because we have man modifications to it, so we need to make a duplicate of this, and then
we should be good. So we have all of this in
here, let's duplicate. Control D to make a
duplicate of this, Control H to hide
that duplicates. Yes, this is fine. Yes, everything's
working just fine. We can work with
this. All right. Save this up again. All right. Awesome. Okay, so I'll see
you guys in next lesson. We'll begin to import this into, we'll begin to import this into Sptanspenan and then begin
our texturing phase. So I'll see you guys in the
next lesson by for now.
105. 104 Baking In Substance Painter: Okay. Welcome back, guys. So in previous lesson, we kind of fixed a
little issue in here. So in this lesson, we're going to start our texturing
process for the entire body. So let's jump right in. So I'll open up Subtan
spinter in here. Open up Subtan spenter then
we need to import our model. But just before I
import the model in, I'll show you guys
the reference I'm going to use for the
texturing process. Let me just expand this out
a little bit more. Okay? So this is going to be our
main reference for picking out the precise colors we need for the entire
texturing process. There will still have
some pre made materials also too that I'm still going to use just
to speed up the process. I'm going to be providing
those materials also as well. But majorly this our main
reference for the texturing. So we're going to
be working very, very closely with this
india for getting the textures as accurate
as we possibly can, okay? So let's jump right in. I put this around. Let me squahe this
down some more. All right. This I'm just
going to hide for now. We don't necessarily
need this for now, so I'm just going to
hide that at the top. All right, squage this down a little bit more,
that should be fine. Now let's bring in a model. Remember we expected out
the body and the eye. Let's cone, put this here. So go to Clicon Select, then I'll need to, I believe, Z finalize this body. I'm going to click on that. So also, we need to import the designated maps for it like a normal map and a few other maps I will need for the entire
texturing process. So let's do that. So I'll go over to
Import Bt maps, click on ARD then this
is the wrong one. Okay, this is the
right one. So ZMap let's look for I believe
we named this Idris, Let's look for I. I think
we named something oyen Z, normal Adris k. Open that up. Then there's still some
other maps I need to import. So let's find this
map clic on hard. So we need some textures for it. Let's import those eye
textures for the iris and for the scaler I have some textures that should work just fine for
what we need it for. So I'm just going to go
over there and grab that. So let's just let
me go to the food. I'm going to be
providing this. I will definitely provide
this texture file for you guys to actually use. I'm going to copy this
Copy the five parts. Base the five parts in here. So what we need is
the Iris normal. Can you use iris normal or iris normal Opung Anyone
will work just fine. Then Iris Base color, Iris Iris roughness, outer
eye Base out eye normal, outie opacity out eye roughness. This is mostly what we need. Ignore the displacement
for now, sus lon open. All right, then we click Okay. I think we have everything
the way it should be now. Resolution two k, that's fine. Pung, that's fine. We're now using UDMs, so we're going to ignore text, use UV Ty workflow. I already have UVs for this, so I'm not doing
any auto unwrapping for this as well, also.
So let's click Okay. Then give you a moment to
actually drop in our scene, then we start working on it. So it's already
in our scene now. So the first thing I would
like to do would be to adjust the camera in here. The camera is not
accurate enough. So let's go over to, I
believe, display settings. Scroll down, focal
lens should be on 85 millimeter
length. Let's do 85. So now we should have something really close to what
we have inside of Zbrush and what we have inside
of Maya instead of Maya. Okay, so we are good. So let's start the
baking process now let's go to our texture set. So on the texture set,
we have the Idris body. Let me delete that three as at the end. Okay? That's fine. After I delete that
two at the end, means deleting num brings
at the end, that's fine. I'll save my file, save my
file in the final files. Let me name this two p for Substance Painter, pidris Body. Okay? That should be
fine. I'll save that. Saving down take
too long because we don't have
anything going on in here for now, that's fine. Save correctly. So now
let's go to the dues body. Let's go to texture sets. Go to dies body texture sets. Then we'll go down
to select normal. So we have the normal line, this should be Z, normal
ds body k, select that. Come in close, so
we have this IN now precisely what we want. Now we need to kind of check
for any issue around this. Now, we need to also
upscale review certain NNA. So let's update this
to Fok resolution. So FokiRsolution, now we
get something really clean. Yeah, this will work just fine. It's capturing most of the
detail as much as it can. We might still need
to bring the same Z normal also on our layer stack on our layer stack in here, just to accentuate
it a bit small and then have some more
control over it. But for the most part, I
think this should be fine. At least to bake with,
this will work just fine. So I'm just checking around. Okay. Awesome. We are really good details in here that we can
definitely work with. Okay? Same good details for the fit as
well. That is fine. That's one thing you need to do. Always check. You need to check. You always need to check. If there's something
you need to fix, then you can go back
and then get it fixed. But for the most part, this
should work just fine. Thi should work just
fine, for the most part. Awesome. Let's go over to you don't need this layer
in here. Let's do that. So let's go back to
the textual set list. Go to Iris, scroll down to normal Iris normal
will select that. If we should isolate this, let's go on isolate
get enclosed, you should see the normal
being affected in there. This normal we have. This number we're going to
use. This is fine. Okay. Let's bring
everything back out. Let me turn off the outer eye. Let's see what we have in there. Yeah, the size of this
will work just fine. The size of the iris will work just fine for this, all right. I work just fine. Moving on. So let's select
the miniscus doesn't need any normal map
because just a normal weight or glass material
should be just fine. Everyone wants a
material, we just fine. So let's go to the outer eye. The outer eyes isolate this. The outer eye needs some normal. So you're going to
select I, select that. You come close. I should see
some details in here now. Okay? This should be fine. Th should work just
fine for needed for. Okay. So if you go back in and
bring everything back out, right, it should be fine. Though there seems to be a
weird issue around here. We can fix that actually
that we can fix. But I'm going to show a pretty neat way to actually fix that without having to destroy
anything in here. But first of all, we need
to be. We need to big. So let's go and big
additional maps needed for Substance Painter to work a bit more accurately
with some model. For it to work accurately
in terms of using on smart materials and marks and all procedural
texture needed to work accurately when you have the necessary marks but
inside of Septan spenter. So let's bug that
in. So I'll go over to texture set settings. Man selected. Anyway, calculate
any new one actually. Anyone will be fine. Just go
and click on big mesh maps. So you should open up at let me crease
some space in here. So you should open up
BC in layout in here. There are a few things
we need to keep in mind. We can make this a
two Q resolution. To Q relation should
be fine for now. Now we need to select the models that is on externalnomal
map to big with fast two. Is body as is on exnonomal map, Iris is on exnonomal map, a for the miniscus
let's hide that. You can hide that in
your turn it off. Then this body selected, turn off the normal, where
do you have normal for this. Turn off normal also, outer eye, turn off normal as well. Okay? That is fine. This we can
definitely work within here. Let's get close. Let's
see what we have. Let's see if there's
any major issue in there for the most
part, there's known. Okay. Then go back to Di's body. Now, let's select go
to Embent seclusion. So let's see for
the self seclusion, I prefer to use Ole
mesh name instead. That seems to give
me better result, at least for the
imbent seclusion. So I'm going to repeat
the same scene also. Yeah. Okay, I already
there already? Is there already? Then we'll
go to the core virtual. For the core virtual,
I want to generate our co virtual from the
normal map instead. SletIs also generate
for number map. It is body generate
for normal map. Awesome. This is
precisely what we want. So now what we need to
do is to come in here. Okay? Is there
ready? We will now do big selected texturing. So let's just click on big
selected textures in here. Then give the same
moment to actually run through and break out all
the necessary mops we need for accurate texturing
inside of Subtanspinter. So he's doing his teenagers
give the same moments. Shouldn't take too long to get this to work
accurately enough. Looking at this knife like we
can even be a fkyRsolution. Maybe just to get the highest possible
quality out of this. But even at that, baking a toy resolution is also
good enough to work with. Okay? So this is fine. This will work just fine. We can definitely
work with this. Okay? So now we need to bake. Let's bake for the minuscule because minuscule doesn't
have any normal in here. Let's turn that on.
Turn on normal folk. Not on for that already. Ovature, we need to generate
this from the mesh itself because we don't
have any normal map to generate cvture from. So that's fine. Then
let's just click on, that's the l one selected. Let's just open the store, let's just do bike
minuscs alone. That's the little
we need to bake in here, so it shouldn't
take too long. Alright, awesome.
So that's done. So let's return to pins mode. Turn to pince mode. So we have everything
baked out correctly now. Except for the minor issue we would have on the outer
eye, which is the scalara. So let's go in and fix that. So to fix that, I would just let me just let me isolate it first so we can actually see what's
going on in there. So this is the issue
we are having in Okay, so to fix that, let's go
back to texture set setting. Move the normal map in
there, go to layers. I'm going to delete this
with a new field layer. And I'm going to drop let's come in here and select
textures for this. So I'm going to type
in outer eye in here. I will drag the normal map. No, we only need turn this off. We don't need normal
channel turned on. I'll drag this in there. Okay, this seems to be
this seems to be inverted. This look seems to be inverted. So this is actually inverted, which is not precisely
what we want. But I think let's
check the normal map. Let's the normal map for this. So let's just scroll in and see the normal map for this. Okay. Oh, I see where
dish is from now. So we can see all
these speckles of should we call it to quas blue detail in here that
we don't necessarily need. So this we can easily
fix instead Photoshop. So let's fix that and
then bring that back in and then we can bake again, then everything should be
all good. So let me close. It's Less Runs
Photoshop for this. This is actually a good example to actually show you guys how to fix minor issues
that might arise. So let me just open up Photoshop in here and
then we get that fixed. So let's just drag and drop this in. Then we can fix that. Unlock this. Let's come close. Let's find where those
issues are recided. Okay, we have one at the top, one at the bottom also too. Get close some more
closer. All right. So we can quite easily just use the spot limb brush
just fix this. Let's find that should be
in a spot healing brush. T of my cubs. Spot healing. Yes, that's the one,
take down a brush size. I'll just drag this around.
All right. That is fine. Get close. Raise
this, get close. Okay. I think I need to
increase my brows size by lots, tap in to fix, fix that her as well. Then let's keep moving
this along. Okay. That's fine. Fix this. Then we can permanently
save this so we can just keep reusing
this side we want. I think this issue came from
the most likely exportation. But like I said
before, sometimes you can do everything right, but the software just decide to Nah I'd like to make your
life a little bit difficult. So in usual cases, it's not entirely your doing just the software
acting like a software, obviously probably some bugs. So I think we are cleaning here. I think the top part is clean. Let's go to lower parts, increase the brush size. Let's just brush stroke
around this, do that. That brotro around this
as well. Let's see. I think we are good in
let's fix around here. Let's come in close. Okay. That is fine.
Due the bro size. We can just tap in
for some of this. Okay? That is fine. Draw a line across
this. That's fine. Yeah, swell, well,
clean this up. Clean, clean, clean. We might also need to
actually bag this again. I just need to be this
again because we have made modifications on the normal map. So we just need to
beg for the outer eye again. And then we
should be good. Let's fix this as well. Here also fixed very well. Let's zoom out. Let's see if there's somewhere
else we missed. Okay, I think we
are pretty good. We have this around here, increase the broad size or more. Okay. That should be fine. Check anywhere else. Can't see anywhere
else. Let's go upward. Let's see if we
find anyone else at the for the most part,
I think this is good. Now, let's save this.
Let's save this. I'm just going to replace
what was there before. Yes, we replace
that. Click Okay. I believe we should
be able to update this now instead
of Subtan spinter. Let's go to Subtan Spinter, right click on this, reload. All right. Let's come over here, drag and drop this in. Let's save that
issue, stereo cause. Okay. Oh, we still
have one on this side. Completely Oh, it's
tissue in India. I think I did not update
accurately enough. That's probably Oh, let's oh, yes, it's from the
ambient seclusion. I figured that's where we needed to kind of
big this out again. So let's go back to big maps. So this time around, we're
only baking for the outer eye. So this is fine curvature
generate from normal map. So only baking the outer eye, so let's bake out I in here. So once we're done
with this, I think you should fix all those issues
we had in her before. Previous issue in
n should be gone. Okay, we turn back
to the pencil mode. Right. Awesome. I
think she still in the should guess my best guess
is that the issue is coming from it's coming
from the embient seclusion. I feel good. It's coming
from the ambient seclusion. Even though we kind of fix
the issue in the normal map, sometimes the ambient seclusion can really be a pain. But
let's just bring it back. It's not going to be a
major issue why because we are not going to let's try
something else instead. Let's go to the
embent seclusion. Let's be just the
ebent seclusion alone. Okay. Let's do
should say always. Let's see if any of these
actually fix it in here. Let's bag this
again. We're really baking the ambient seclusion. The issue still
resides. That's fine. I don't know if they
we're not going to be exporting now the
ambient seclusion, but we need to actually get
this to simulate properly. So this is fine. We
can work with this. This we can work with. Let's say we bring in the dragon
drop normal map in there just to
intensify some more. Okay. At the end of day, we're not going to spot
out the normal map. We're only going to
export out I mean, we're not going to spot
out the meticulon map. So we are good. We cannot leave this off just for
preview purposes. So in next lesson, we're
going to start and then go in and then start our lecturing process
for the character. So I'll see you guys
in the next lesson. Bye for now. Sure to
save leg very important.
 Kelechi John, 3D CHARACTER ARTIST