Transcripts
1. Introduction: Hi, I'm Nadine. Thanks
for joining me today, this little lesson
about brushwork. So it's a really
quick one, but it's about picking the right
brush for the job. So if you've done any
of my other lessons, you'll know that
I'm not a big fan on fussing and lots
and lots of details, but I do like to get the
best of both worlds. So really nice and
loose and quick, but also getting some fine
detail around the focal point. So we're going to be doing
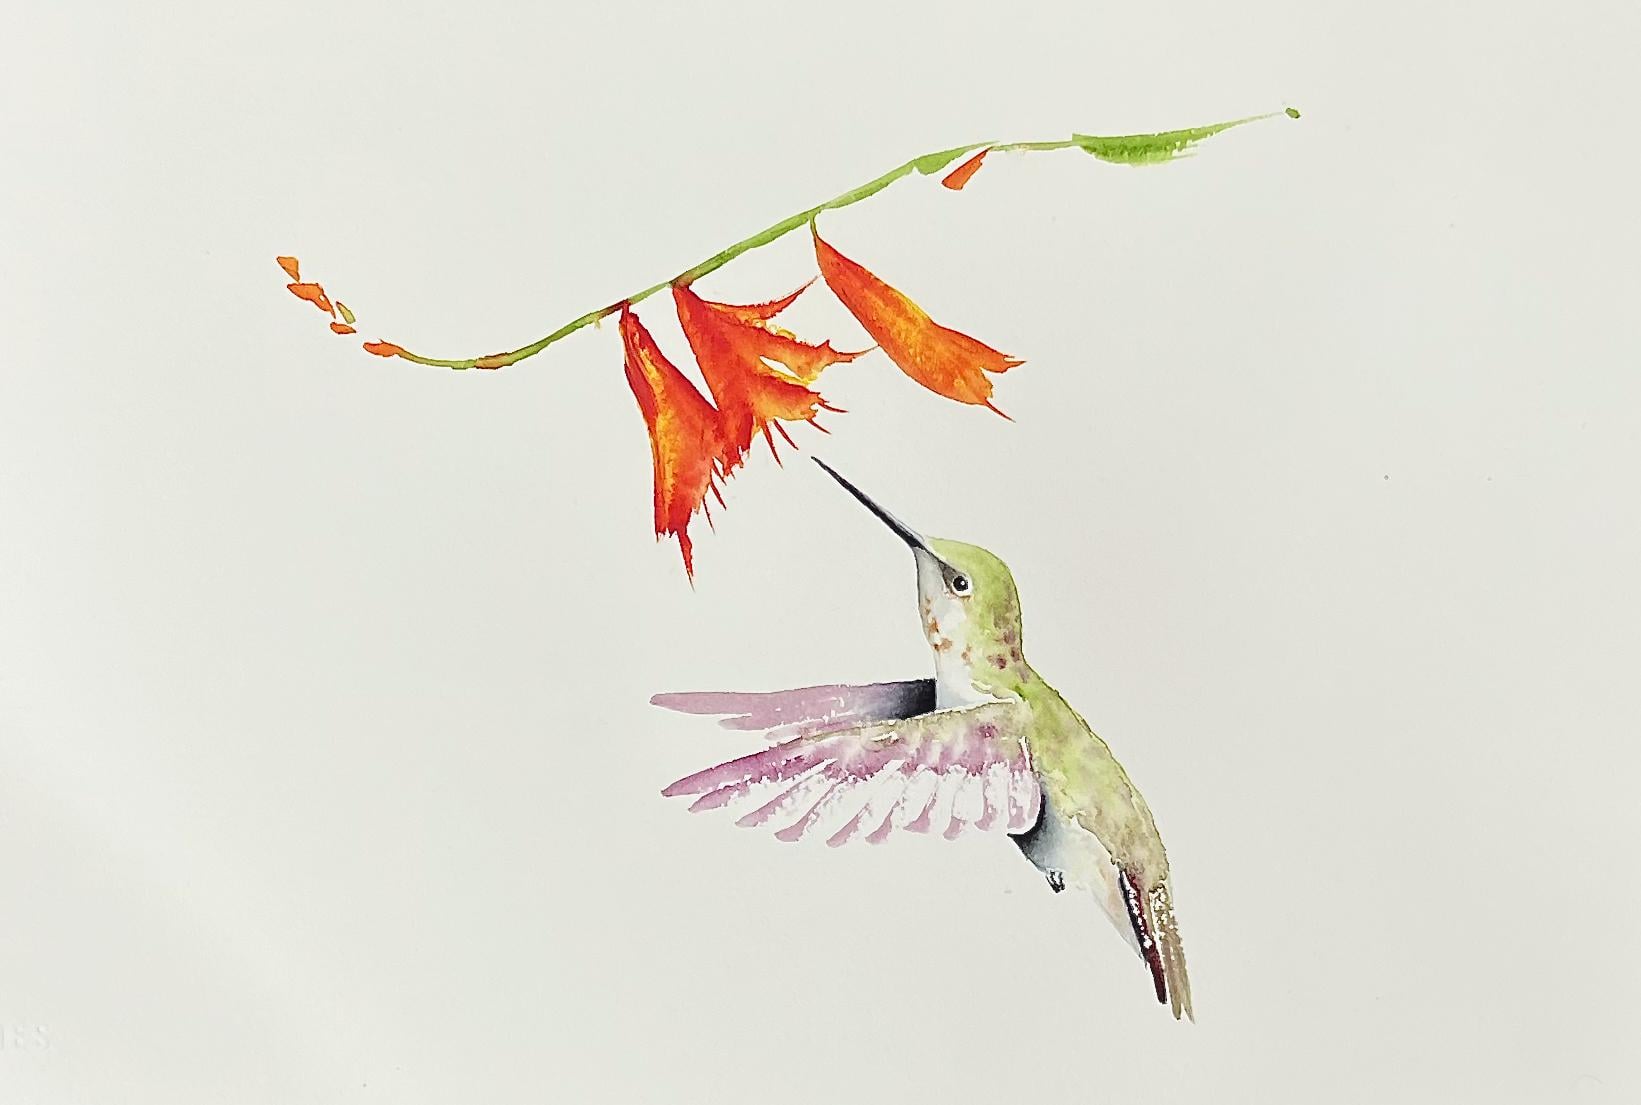
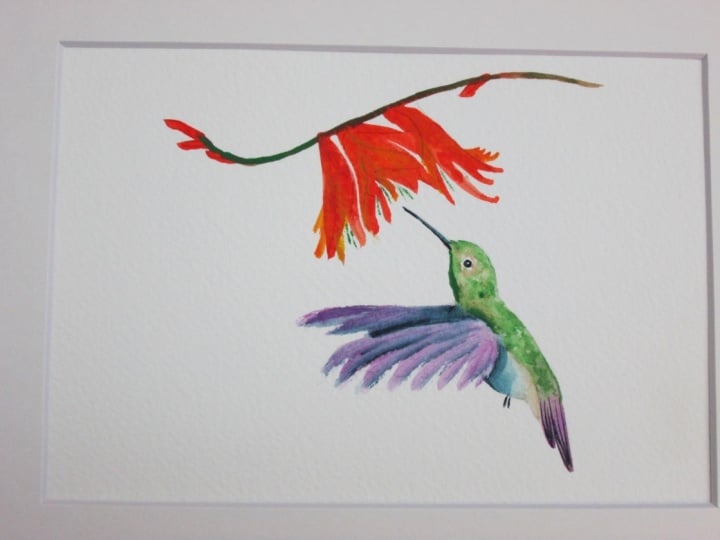
this little humming bird where we've got a spray of flowers that's done in one
hit with a single brush. No thought required,
and then we'll spend a little bit more time on the actual bird itself.
But again, with that, going to move really quickly, and I keep moving around the subject rather than getting stuck too heavily in one spot. And because I want
you to move quickly, I have sent this to
an intermediate, not because it's
hard, but because I want you to move fast. If you're a beginner and
you're all good to go quickly, then by all means, give it a go. We'll go through the reference photo
through the materials, and then step by step through the painting, and
then hopefully, like always, you're happy
with what you got and you can show me what you've
done. So let's get started.
2. Materials: Okay. We'll go through the
materials for this one. So first up the
references on Pixabay, and there's a link for that
under the materials section. I'm painting on 300 gram
arches, cold press paper. I'm on a board, but I've
not got it taped down. I'm using three
brushes for this one. Now, the brushes
you pick for this, this is a brushwork exercise.
It's really important. So this one, I've used this to get the flour
and the branch in. I've picked this because
it's nice and big. It holds a lot of
paint and water, and I can move quickly
through it because I don't want to fuss over this. So important to pick a reasonably
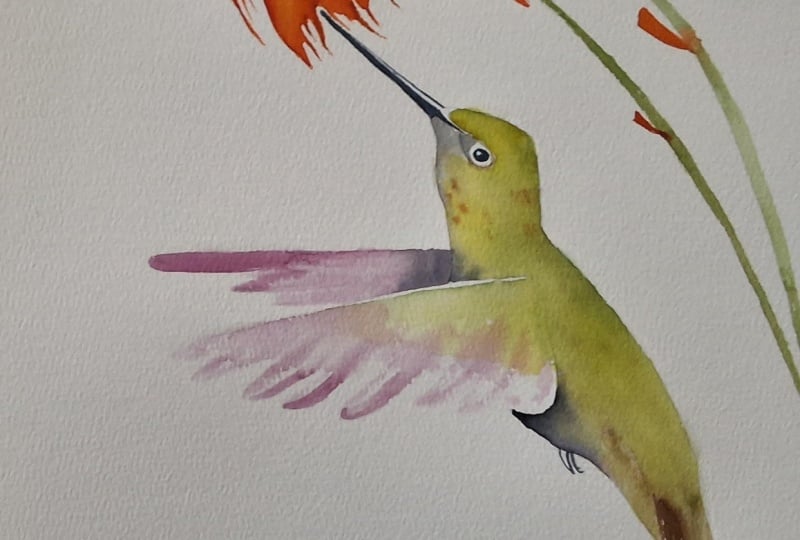
big brush for this bit. The actual bird, I've got two. I've got this little synthetic to get through the
body of the bird and this one I've picked
because it forms a nice shape. These feathers here, that's
the tip of the brush. If I had something round here, I'd get a really blunt end of these on the end
of the wing tips. So I want this nice point and also for the
tail feathers here. This one is because I can't possibly paint that
with this brush. It's got a nice tip, but I'm not steady
enough in my hand, so I'm using this brush. And I would say, when
you do paint this, I didn't say it in the actual
when I was filming it, but this is a tricky
shape to paint. So if you're worried about
your hand being wobbly, lock your wrist when you paint it and pull your whole hand down rather than trying to
paint with your fingers. Just pull your whole hand down, make it a little
bit more steady. Oh, you'll need a pencil and
eraser, just a regular one. And then the paint. So I've got a bunch
of here. Don't worry too much about the colors.
It's not really important. Again, this is about the speed and using the brush
to your advantage. So up here, I've got some
hearty yellow pile sorry, some Hartsy yellow medium and some pile red from Daniel Smith, and the green for no particular
reason is from Holbein. This is sap green. You can use any green you like. The other colors that I've got, I've got full Daniel
Smith today pretty much. I've got some queen violet here, through the wing, some indigo, that's just for the
black of the beak and a couple of these
darker shadows and some transparent brown just for a little bit of patterning
through the bird. Other than that,
you'll need a palette, some tissues, and
a jar of water, we'll get on to the sketch.
3. Sketching Up: Okay, so if we have a look
at the sketch for this one. First up, I'm moving
the bird across a bit. This doesn't really work for me, so I positioned the bird over underneath
this flower here. Now, when you're
sketching this up, really important to
get the shape of the beak right, the
position of the eye. Don't worry about
all the patterning on the body and also
with the flowers. I just want the basic shape. I don't want you
to try and figure out what's happening
with these petals. These are all done in
just single strokes, letting it mix on the page. So just give yourself an idea. Don't get hung up on the detail. If you don't want to
sketch it up yourself, I have included a
template that you can download directly
from the Skillshare site. Other than that,
it's really simple. So keep it loose, keep the drawing minimal,
and let's get painting.
4. Loose Flowers: Alright. We're going to
start with the flowers. And this is put the paint on Don't touch
kind of an exercise, and I want you to pick
reasonable size brush. So I've got my size eight here. I've got some pearl red and hunts the yellow
squeezed out, and I've got a little
bit of sap green here. So the painting isn't
about the flowers, and I want this to
be nice and loose. I want you to have
mixing on the page. So to help me out, I'm going to initially, grab a touch, just make
sure my brush is clean. Grab a touch of
water, and I'm just going to throw a couple
of little bits of water through these
pencil lines. So not everywhere, just
a little bit of water. Then I'm going to
grab put my brush in my yellow, then into my red. And I'm going to come onto
the page and just flip down. So I'm painting a flower,
painting a flower. That one came across. All right. And then I've got these little flicks coming up onto the tip and just
putting a couple of those out. There are also a
couple of little bits of color on the branch. And here, a few little bits. Then I'm going to wash my brush, pick up some sap green. Then I'm going to let's get
my hand out of the way. I'm going to bring
my brush in and let that mix a bit on the page. Make sure these are joined. Up, and that is all I'm going
to do for those flowers. That was really quick. Didn't really look a
lot at the reference, but I just want to
rely on the mixing on the page and letting the
water move the pigment. I didn't mix an
orange in my palate. I picked up a bit of
yellow and a bit of red and went straight on. I'm just looking down to
make sure I don't have any really thick wedges of
paint. I think that's okay. Then I want to not touch that. That's a trick because you want to go in there and fiddle. Don't do that. No fiddling, come out and let that
dry and then we'll start the bit. And
5. Getting the Bird In Quickly: Okay. It's been 5 minutes or so. I'm dry. These are
actually a lot redder than they are in the reference, which
doesn't matter. It's just that I picked
up more piral red than I did Huntsy yellow, but that's kind of the fun of it what you're going to get. So we're dry, we're going
to move on to the bird. Now for this one, I
need two brushes. This tiny one is to
get into the beak, and this one is to get around
the body and do the wings. Now, I want to again paint a little bit
with water when I do this, and I want to have
my colors out ready. So for this one,
I'm going to use. I've got a tiny bit of
transparent brown in here. I've got my sap green, and I've got some queen
violet down here, and I think that's probably
what I'm going to use. I'm going to start by grabbing a little bit
of water and just throwing it around top of
the head around that eye. I'm not going to paint at
the moment in this bit where I want some white over the back. I'm going to keep out of
this little bit for now, into the bottom bit here, a little bit into this wing. All right. Just this
top part of the wing. No heaps of water but
a reasonable amount. Then I'm going to
pick up. I've got a tiny bit of sap green. I'm just going to throw
that into that web page. Coming out across a bit
of my que violet as well. Then I'm going to pick up
a bit of my sat green, bit of my queen violet
now a little less water. I've gone into the
big squeezed out bit. I'm going to come to this
tail and I'm going to paint three brush marks up, tip down up the page, tip down up the page. I want that little mixture I've might be a bit more
of a cat, a bit too much. I've got little dry brush strokes there and
I've come up into the wet because I was dry
here, wet on the back there. All right. Not thinking too much, little bit over into that
pigment into that wing. Washing my brush, just picking up a bit
more of the green. I'm just going to push it
out to that pencil edge. Then I'm going to put my
while this is all drying, I'm going to pop
the wing in here. Now, my room is quite warm, so I'm just going
to throw a little bit more water underneath that. Pigment that I just put on. I'm going to go queen
violet for this. My quin violet here is. This is a bit browner because I've got some transparent brown
in my queen violet. Didn't mean to, so tip down, starting in the tip of the wing, push down, pull up, push
down, pull up, push down. Keep walking it around. Now I've got those gaps
here, but I quite like that. This one I came a little bit
further than I needed to, but I can't fix that now. What I'm going to do
is do the other wing, tip down, it's dry here. And that will help fix
my little mistake there. I actually quite I
didn't mean to go quite that white on the page where I've left all that white paper, but I
actually quite like that. So I'm not going to worry
about that. Now I'm still wet, while I'm still wet,
I'm going to pick up. What am I going to do? Keep moving is what
I'm going to do. I'm going to just
make sure I can see here that I haven't quite
come out to my pencil edge. I'm just going to drag that
water out to my pencil edge. Then I'm going to have
a look at my reference and I picked up some
pigment from the back here. Drag that underneath that wing. I wash my brush, dragging a
little bit of water down. I want to transition. I still want this quite light down here. But I know I've got to put
these tiny little feet in. I'm going to grab
some indigo and just drag three little
strokes up into where I've just popped a little bit of water so I get a
touch of bleeding. Wash my brush. Now I'm going to come I've got a little bit
of a gap around the eye, I'm going to pop a little bit of water just underneath
the chin there. I'm going to grab a little
bit of my transparent brown, I think, and a so
I'm just going to drop a few little spots. Now, with this patterning, I don't want to go overboard. I want to throw a little bit on, but it doesn't need to be really following
the reference in too detail. Then
I'm going to go. I'm going to do Bacone what I'm going to do. Still moving. If your wash on the
back has gotten a bit same same as it's drying, you can just add some board and force and blooms and if there's
not enough color, you can just then touch
a little bit more. In. I can just walk that sap
green round just to get a bit more pigment came
out of my line there. I'll show you how to deal
with that when I'm finished. I'm now going to switch to my little brush and I'm going
to pick up some indigo. I'm going to paint my brush because I need a bit
of water on there, but I don't want it super wet. Then I come and start on
the tip and pull down. Turn it back. I haven't come up yet into the top of the bag, that's okay. I'm going to tease that. I'm just painting with border
there, teasing that down. So I'm getting that kind of shadow underneath
the chin but keeping out not getting too
heavy around this white. So I'm going to bring that to just about where the eye is. Now, I'm going to come back to this little bit on top of
the beak after that's dry. I don't want to get messy
in there at the moment. Alright. Still. Okay. Now, what I'm going to do here before I think about
any more of the colors, I want to put in
my strong darks, some of the strong darks. So first one I'm going
to put in 'cause it releases the light
that's already there. So I'm going to come in and pop. Dark in here. So I'm
going to wet wet down. Sticking with this little brush because this is pretty
fiddly in here. I'll wet down to about
here, damp, not soaking. And this is dry, so I can do
this now. I hope it's dry. Alright. Then I'm
going to get indigo, and I'm going to throw
that into that web page, paint brush my tissue so that I don't have too much pigment, a little bit of control in here. And I'm just putting
in that dark. Now, the reason I wet that
down first is because I want this kind of
soft transition. I don't want a hard line. So I'm just teasing that out. But when I do that, when I'm
kind of softening this edge, it's going to dilute the
pigment that I put in there. So before it dries, I'm just going to chuck a bit more paint in because
I want that really solid. This is really solid.
I need to match. Um, the tone in a few spots. Doesn't
have to be everywhere. The other place I'm
going to do it. I'm going to do it underneath this bit here underneath where the wing comes
in to touch the body. Again, my paint is I'm dry now because it's
warm in my room. This is not still 44
degrees. All right. Now, come wet it down, and then I'm coming and
popping chiseling out that shape. Just throwing that. Darken. I'm washing my brush,
softening the edge. And when I do that, it
disappears and it's a bit tidy. So I want a bit more
movement there. So I just throwing
a bit more pigment in letting it down page. Then the other place I want
to put that indigo, well, other than the eye, I want a little touch and I'm going
to go onto dry paper here. I just want a little touch I didn't do a very
good job of that. I meant to do that
in one stroke. I did it in several. I just want slight dark on that side. I'm going to keep an eye on how these are
going as to whether they're drying off to light. But I'm going to pop this ion. Okay. So we're still
moving really quickly. Where are my closes,
that's about I can see. Right. So although
not being able to see is okay for doing stuff like this because you can
be nice and loose, but really hard to paint
in a little circle. All now, you can. I've just left a little
white highlight. And if you accidentally
paint it in, you can do what I
normally do and just use a little bit of guash. But I think I managed to
leave it in that one.
6. Finishing the Body: So still not I don't have
enough color on there yet, and I still need to
finish this beak. So a couple of things I'm going
to do now. I want to put. The reason I've
left that I've left that little flash of light
on the top of the beak. I'm just going to
use the pigment in the beak to just drag that
I'm painting with water. Just drag that pigment up to give me the little bit of a highlight on
the top of the beak, and we'll probably have
to come and strengthen the bottom. All right. Drag that out to the eye. Okay. And then I
want some more umph. So I don't mind the color, but I need a little
bit more stuff. So I'm going to wet down. I'm just gonna throw a
bit more pigment in, so I've got my sap green. Okay. I'm going to throw a little bit more my quin violet around maybe just in the
back of the neck here. Give it a little bit more form
piece spots maybe through. Back all wet and wet. The first time I did this
to see if I could film it, I put more pigment
on than I wanted to. This time I haven't got enough. So it really varies when
you're painting this loosely, but I need to strengthen up
underneath the chin here. But I think I'm going to do
that. I want it a bit warmer. So I'm going to use
my transparent brown I'm just going to throw
a bit underneath here. Then I'm going to strengthen up. I want more pigment
around the eye. So it was all very fast, but then we want to
spend a little bit of time with this is really our focal point
around the eye here. So I'm going to throw a bit stronger pigment
around the eye. I'm going to pick up
some indigo, I think, and let it be even stronger. And I'm just dragging
that over the eye. So there's a beard of
color coming over the eye. Now, I don't want too
much space around that eye and I'm not staying completely true
to the reference, which is one of the joys of
painting quickly and loosely, you don't have to
putting a bit more dark in the front of the eye. I don't want too much
of a circle of white. My I'm picking up
a bit more brown. Just in the front
that eye there. Now, a couple of
things I want to do. I'm going while this is drying, I'm going to get some water, and I like kind of shadow here, I want a little bit
of that indigo that I put in the wing to just
bleed into the chest. So if I paint with water and
then touch to that indigo, you can see it will just
ever so softly bleed out. So that gives me just that
touch of shadow in there. Then down here, I need
something else down here. So I'm going to do
the same thing. I'm going to paint with water. And I need a bit of that indigo that I did
that line there that can bleed up a little bit to give me the base of the
tail underneath the tail. I'm just softening that's
a bit too hard for me. I'm just softening that
indigo edge a bit. Then you can come out and
let that dry and we'll come back in and just tidy a little bit more around the
face and then we're done. I'll show you how
to deal with the little dibets that
I've done there. Come out of that
and let that dry.
7. A Couple More Details: Okay, it's been a
good 20 minutes since I've walked away from
this, and it's nice and dry. So just a couple of tiny
things to finish off. First up, I want to. I'm going to strengthen again a little bit around that eye. So I'm going to take
going now onto dry paper, I'm going to take
a little bit of my transparent brown and a
little bit of my indigo, and I'm just going to paint around this back off
the light at the front. I just want it a little
bit stronger in there. You might have got it
strong enough initially. I just want a little bit more. I want to darken the
underside of the beak. Again, going on to dry paper. And being very careful,
actually, I might turn it. Whichever way you're preferred, you're most comfortable with, I can't do that
coming from the top, so I'm just going to paint. So slightly more contrast between the top and the
bottom of the beak. Then I feel like two things. There's a dark and
then the purple. I feel like I need a little
bit of purple in here. I jumps out at me a bit. I'm just going to
go onto dry paper, touch a bit of my purple in, wash my brush, and tease that. Into the dry wash. Okay. I think I think I need a little
bit of warmth down here. So we put a little bit
of brown in there. So I'm going to just this
time, I'm going to wet down. I'm just going to
throw a little bit of my transparent brown. Maybe not that much. So I'm just going to throw a
bit of water on top of it. Just need a little bit
of that to talk to that. It's all about balance. Okay. So I think I'm pretty
okay with that, but I did I can't talk and
paint at the same time. I did come out a few places on my wash here.
It doesn't matter. I don't really mind it on the back here because
it's nice and loose, but I do want to tidy up that. And to do that, get
what paper you're on, but I'm just going
to take a glade and I'm just going to
scratch because it's such a tiny um a
little bit of paint. The arches paper I'm on is quite textured and
you can actually get away with just taking
that top layer of paper off. You don't want to go
up on your point. I've got the blade flat, but I can just back that off
a touch and this one here. Now, if you've got a
really staining color or it's a really big bit, you won't be able
to scratch it off. But if it's something
really small like that, usually you can find
you can scrape it. Because if I try to
get that off with a magic sponge or a wet brush, it's such a small area that I would just smear
paint everywhere. Okay. I think that's where
I'm going to leave it.
8. A Final Word: Okay, so now that
we're at the end, what I'm hoping for you is
that that was a quick paint, other than I know we
did some fiddly bits, but things like getting
in this show of flowers and getting
the main shape of the bird, the wing in, I want that to be nice and fast, and I want you to
rely on the shape of the brush and not get hung up on the
detail of the reference. You know, this doesn't
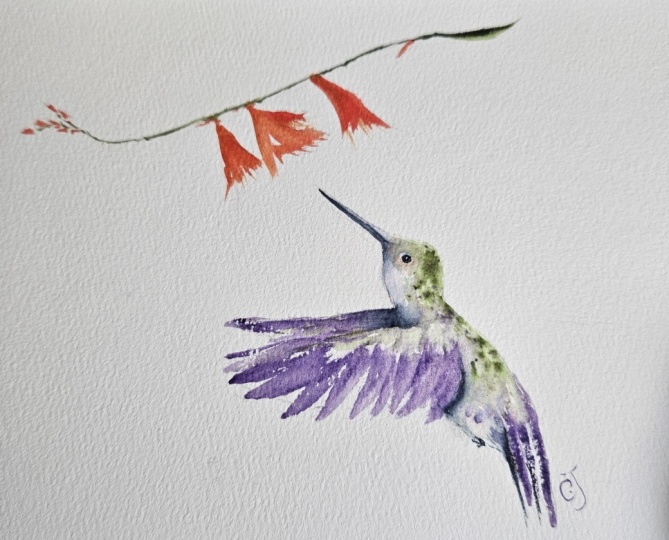
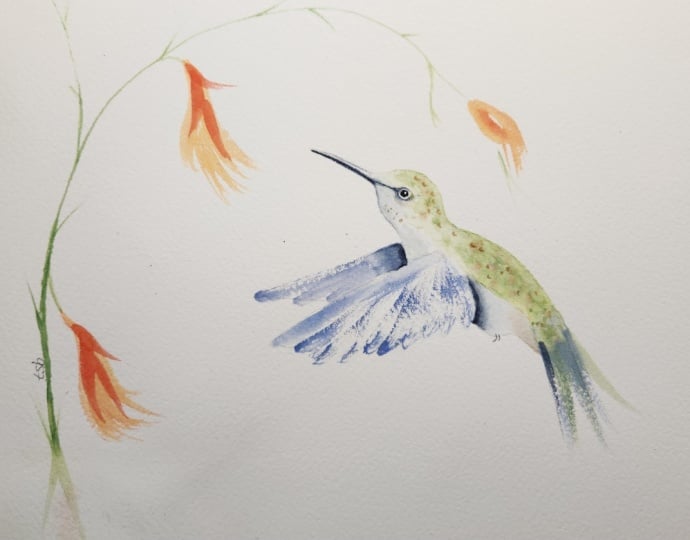
look like the reference, but it looks like a hummingbird, and the flowers
don't necessarily look like the reference
there different color, different shape, but they
still they're flowers. You get the idea. I just
want to get the idea of a subject across and
get you happy with um, letting all
the paint be messy and not trying to sit down
and do all the fine detail. And for me, the bits that
work really well in this are these loose strokes
on the wing and in the tail feather and just a
placement of the couple of shadows that really bring
the bird into form. So if you're happy
with what you've done, take a photo and pop it up on the project section for
me to have a look at, and thanks for joining me.
 Nadine Dudek, Professional Watercolour Artist