Transcripts
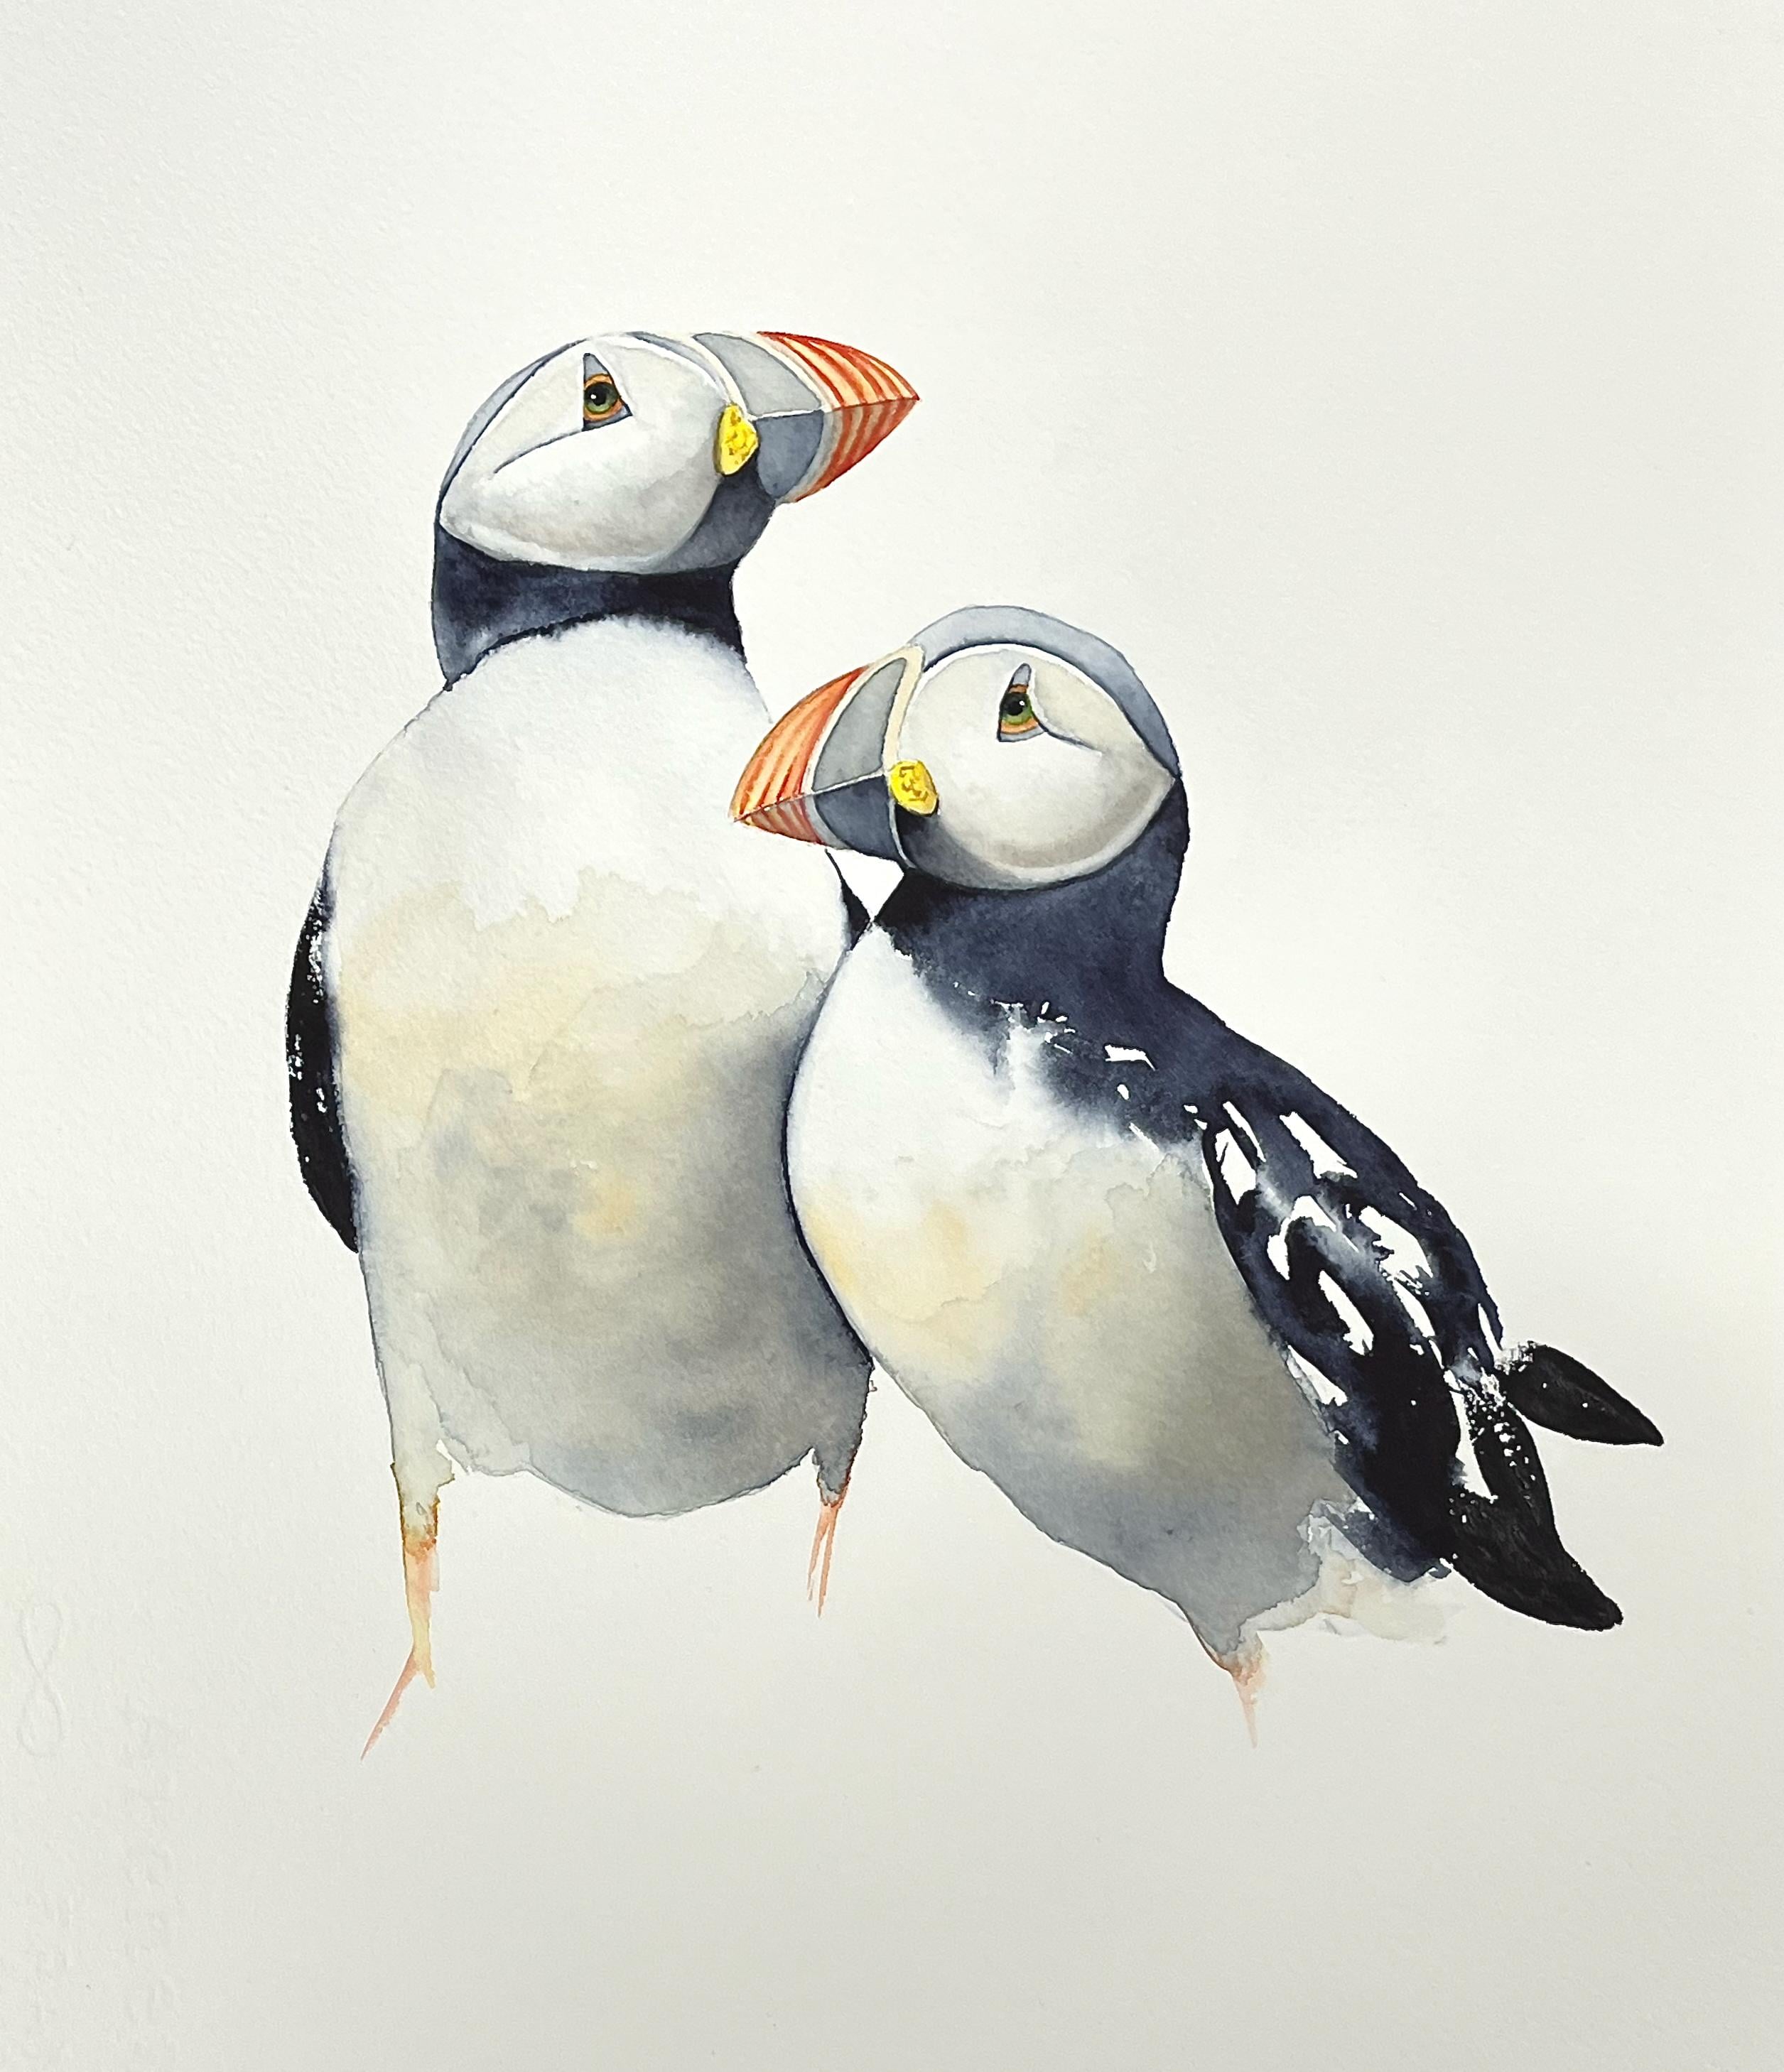
1. Introduction: Hi, I'm Nadine. Thanks for joining me for the lesson today. This is another one where we're combining really loose wet
and wet and fine detail, which really is my
favorite way to paint. So we're going to do
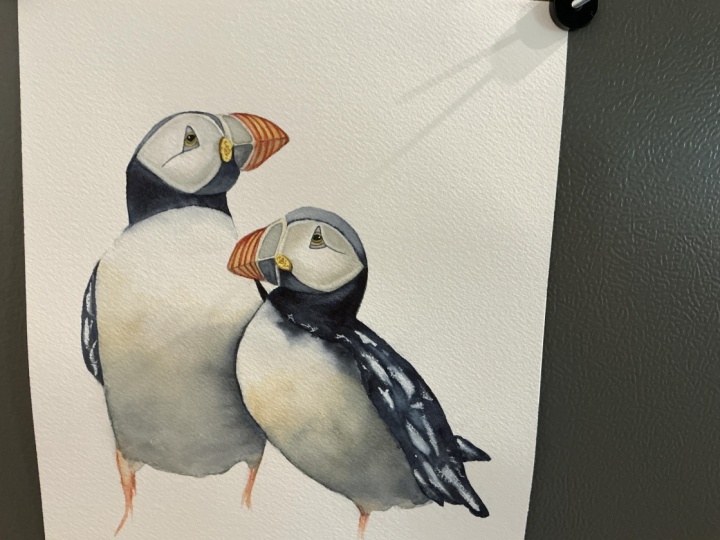
a pair of puffins. And I'm hoping in this one, you get a lot of practice
in blending and wet in wet. We were not afraid to throw down a lot of water on the page, and we will be making
this really, really wet. There's also a lot
of fine detail around the face, the birds. So it is quite a long lesson just because there's a lot
of putting on a layer, letting it dry, putting on
a layer, letting it dry. But in this one, I want
to show you some of the things I do, the details that I pay attention
to that I think really make a big difference
to the final product. So we'll go through the reference photo,
sketch, materials, and then step by step
through the painting, and hopefully by the end of it, you're not quite so worried
about using a lot of water. So let's get started.
2. Materials: Materials for the class today. So first up the reference photo. Now, this is actually two photos that I've
stuck together. I've got the link
for both of these. They're from pixabay under
the material section. I've also given you a template where I've stuck them together, if you would rather use that. For the paper, I'm using 300 gram arches
called press paper, and I'm painting
flat on a board, and I'm not taping it down. You'll need a HB
pencil and an eraser. In terms of paints, I'm using a bunch. So I've got mostly Daniel Smith, not for any particular reason, but I've got some Pyrol red and some Hansa Yellow medium or you could use cad
yellow and cad red. I've got some Indigo
from Daniel Smith. Now, this brand I
think is important because it gives a
really nice dark black. Some of the others
are a bit too blue, so I do tend to favor
Daniel Smith Indigo. Also, I've got some
Transparent Brown Oxide from Daniel Smith
or you could use Burnt Sienna would
work just fine. I've run out of Burnt Sienna, so I'm using this instead. I've got a Winsor and
Newton Yellow Ochre you could use raw sienna. And I've also got just for the eye, you really
don't need this. I've painted the eye green, so I've just used some sap green from holebean only because I got excited and saw it in
the shop and I bought it. So so I have to use it. Any green would be
fine, or you could mix up some yellow and
some French otra. Doesn't really matter.
I've also got a little bit of white gouache that I'm
going to use just for the little highlight in
the back of the eye. In terms of brushes,
I'm using three. I've got two little
ones, so really small. Well, I started with a size two. I lost that and so
this is a size three. Then I've got a size five, so they're just
round synthetics. And then I've got
this really nice big size 12 squirrel mix brush, and that goes a long way, holds a lot of water,
holds a lot of paint. So it's nice if you can have a bigger brush for this as well. Other than that, you'll need
your palette, some tissues. And I would use
for this a couple of jars of water because
we're using a lot of Indigo, you'll get messy really quickly, so I would recommend
two jars for this. So we'll move on to the sketch.
3. Sketching Up: Okay, so here's the sketch. This is a picture that I
put together a sketch from. Now, when I actually was deciding how to put these
together with the two images, I flip them around a
few different ways, and this is how I settled
because I do like to have them, particularly when I've
got in the background, have them overlapping a
little bit rather than having them sitting side
by side with no touching. I don't bother drawing all
the stripes in the beaks. Just give yourself an
indication of where the white is around the
darker black part in here. Don't worry about any of the detail in the feathers.
Keep it really simple. I've actually sketched it
a lot darker than I would normally just so
that you can see it when I'm actually painting it. But in the areas particularly here where it's really white, try and keep your pencil lines a little light.
Really simple sketch. I've given you a template on the Skillshare
site that you can download if you want.
Let's get painting.
4. Starting the Heads: Okay, I'm going to start and do the black top of the head and
into the neck a little bit. Start on this left side bird. Now, I want to keep a little
bit of light on the top. So rather than going
straight in with pigment, I'm going to paint
with water first and then drop a little
bit of pigment in. So I've got a little
brush here, side too. I'm going to grab some water, and I'm just going to wet
down under the neck here. I'm going to stay
out of this bit. It's quite dark in here, but I'm gonna stay out
of there for the time being. So I'm starting you off. This is quite tight so you don't have to stress about
being loose yet. Alright. Just in
that little bit and just a touch the top of the
head. I'm going to grab. I've got some Indigo here. Now, I'm happy for it to
be a little bit darker under on the neck here. So I'm gonna throw
a little bit of paint into that wet page. Move it around a bit. Okay. Now, it will need to go darker, but I would rather stay light initially and
then work up to it. This is a bit that
I need to be light. So I'm going to see if
my page is still wet. No. It's really hot here in
Melbourne at the moment. So my room, my papers
drying really quickly. So the idea was to
have some water there and then let it bleed, but it's dried part too quickly. So I'm just going to pop
a bit more water on. Get that little flash
of black on the top. Pull it over. There's
just a tiny bit of dark, tiny bit of black
just on the top. I missed. I didn't quite get that shape right. So I'm just
washing my brush. I'm just going to pull it down. I haven't painted it for a
while with a Christmas break, so evidently, little bit rusty. Okay, I'm just going to drag
that down a little bit. Now, before that fully dries, I own a take really thick, so toothpaste
consistency Indigo now. I'm just going to drag along the join between the
wet and the dry paper. To get this sort of little
bit of a difference in tone. And then the same, I can tidy
up where I came over here, so I've got really thick paint. And I like I quite like
this little ble because I went wet the page first and then dropped the pigment and I've got these little bleeds
through here. I'm going to see if I
can potentially retain some of these
because I quite like those need to be
much darker in here. But my page is already dried, so I'm going to get
out of that one. And I'm just going
to do the top bit of this next bid same thing because I want some
light on the top. Paint down with water first. Drop a bit of pigment in. Just wanting to retain
that light on the top. Then I'm going to do the same thing where
I'm going to get a really dark pat. I may end up closing in some
of that light. That's fine. But I don't make those
decisions until the end. Just dragging my got
toothpasty consistency paint. Just dragging it through that. That one was easier
than that one's got more space in there. The
moment I quite like that. Again, some of it will
probably need to go darker, but I just want to get that
in initially to break up the fear of looking
at the white page. Then we're going to come in. We're going to be a bit looser now through the wings. I'm going to come
out of that and let that dry for 5 minutes. Well, yeah, I probably need 2 minutes here because
it's really hot, then we'll come back
in and do the wings.
5. Fast and Furious First Wing: Okay, I'm dry now. And this bit is more fun. We're going to start in
this right hand bird, we're going to do the wing. All right. Now what we're
going to do to make it easy, I'm going to again paint
down with water first underneath the neck
here coming up there. Now, I'm going to put a little
bit of water on the wing, but I'm not going to
paint the whole lot. I'm going to put patchy water. Oh, I went outside my
pencil line there. That's going to come
back to bite me, but I can't be bothered
waiting for it to dry. All right. So I've got, can I catch the light there?
Bit of water on there. All right. Got a big brush now, so This will go nice and fast. I'm going to start in
the tip down here. I've got really thick, creamy wedges of paint on my
brush. Got to take a breath. And I'm painting a few strokes in and then coming
into that water. Gonna have to tidy up
that shape a bit there. And letting the pigment. Letting the water move
that pigment around. Okay. Maybe a bit more
coming up into there. Now, it gets tricky
in here because this brush is quite big, so I can't I want
to push right to the edges with that
because I'll make a mess. I'm just looking for that
size two brush that I had a minute ago. You know what? I had that brush and 5 minutes ago, now I
have no idea where it is. I'm just going to take
a different one to tidy up these shapes in here. I'm just coming underneath
tidying that shape up. This I think is a size three. Little brush anyway.
Just a bit more control. Then I this is a tragedy when you
do this because I'll try and get
the paint off that. I've got to wash all
that Indigo off. Oh, all that paint. Okay. I could have used a different paintbrush,
but, you know, right. So what I'm going to do now, I'm going to pop just
a little bit of water down onto this page. And then in a few places, I'm just gonna ever so
slightly touch to a couple of spots just so I get a little bit of
movement of that pigment. So what I'm looking for Is
this sort of thing here. If I touch, if I go
too hard in there, it will all bleed out. I don't want that. I'm going for a little bit more
subtle than that. Now I'm going to switch
back to my small brush, and I'm just going
to paint a bit of water up here trying to
be a bit more controlled. I'm just going to get.
So there, where I touch, that's the sort of
thing I'm after. Right. So now, so that's maybe spreading a bit
further than I want. So to deal with that, I'm going to just chuck on some more water and kind
of let it flood back. The other way. This is one of the reasons to use watercolor. It's this effect that I couldn't get if I was
using acrylic or oils. This is the fun stuff.
I'm just going to touch a little bit more.
Let it do its own. Let it do its own thing. Come. Now, I may have
too many whites here. I may have to close
some of those in, but I don't want to mess
with that at the moment. Something I can see down here, I've got a real smudge
of paint really thick. Lump of paint that
doesn't really matter, but it will dry a
different consistency. You'll be able to see this
lumpy sheen once it's dry, so I'm just going to
lift off some of that, which I can do as long as my brush is drier than the page, I don't want to introduce
more water there. So I need to come out of
that and let that dry. Then we'll do a little bit of a wing on this guy and a little bit of a bleed
through the chest here. Then we'll start to do
a few little details. So come out of that
and let that dry.
6. Second Wing: Okay. I'm drying there now. So what we're going to do
is come into this bird. I want to do two things. I'm
going to get this wing in. For that, I'm going to
use this smaller brush. This is a size five, 'cause I could use
that bigger brush, but I reckon I'll
make it too fat. I'm also going to
use I'm also going to get some bleeds
through the chest here. So I'm going to take
that big brush again. Take a tissue. Now, importantly, I have cleaned my water. I've changed both jars, so I'm nice and
nice and clean now. I'm going to throw
a bit of water on. A chess, just to
make it a bit damp. Ooh. So not heat. Then I'm going to get
that size bib brush. I'm going to grab a bit
of really thick Indigo. I'm going to put my brush
to the page and come up to get that wind shape in. It's a push, push down. Trying to get my hand out
of the way for the camera. I should just set my phone. That was not what
I wanted to do. So I'm going to have to tidy. So normally, I want
that to go in one hit, but I hesitated on
my hand position. So now I'm going to
have to wet my brush. It's not terrible, but it
wasn't what I was aiming to do. All right, so then I'm just
going to drag a bit of water. Three. And just let that led a bit. Now, because I've been
talking and doing that, my page has dried up up here, so I'm just going to chuck
a bit more water in here. And then what I'm
going to do, I'm going to darken with
my smaller brush. I'm to pick up some thick
Indigo, throw it in here. I want to be darker
on this side. I don't want to
introduce too much water with this Indigo. So I'm painting my brush
painting my tissue just to get off that excess water. I'm just teasing that back into this side of the neck so it's
so you can't see the join. Then what I'm going to do
is I'm just going to touch in to that water that I've
just wacked on the chest. Oh, I didn't mean to do that. I meant to paint with water. I just coming in. So like we did here, I just
want some little soft bleeds, but I don't want a
whole black chest. I just want a little
bit of movement. I'm just going to
tease that down to just over the
shape of that big. Chiseling out that shape. Now, if you do that
and nothing happens, you can just get carefully, really toothpasty
consistency paint and just touch it
into that join. If you haven't got enough
pigment there for it to move. Just see that nice soft lead. Less is more here. Don't overdo it because you
can't take it off. Now, when I look at this, I don't kind of
mind what happened there except this little
bit is bothering me, this little chink, and
that little white. So I'm going to before
I let this dry, I'm just going to tidy up here. So my page is pretty
dry there now. So I'm just fixing
that shape there, and then I'm just
going to little divot. I don't know why. It's
funny the things that stick that pull your eye
that you don't like, so I'm just going
to tight it up. You never get as nice a shape
when you have to go and correct what's meant to
be a single brushstroke, but sometimes you have to do. Alright, so really
subtle, not much there. I haven't really done
very much in that, but that's where I need to
come out and let that dry. And then we might start, I think in the face a
little bit in the beak. We'll do some of that before
we move on to the shadowing. Alright, come out
and let that dry.
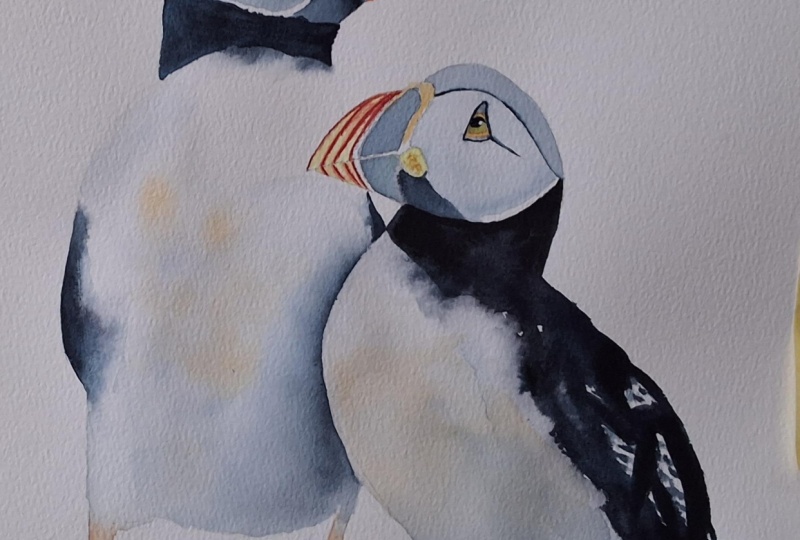
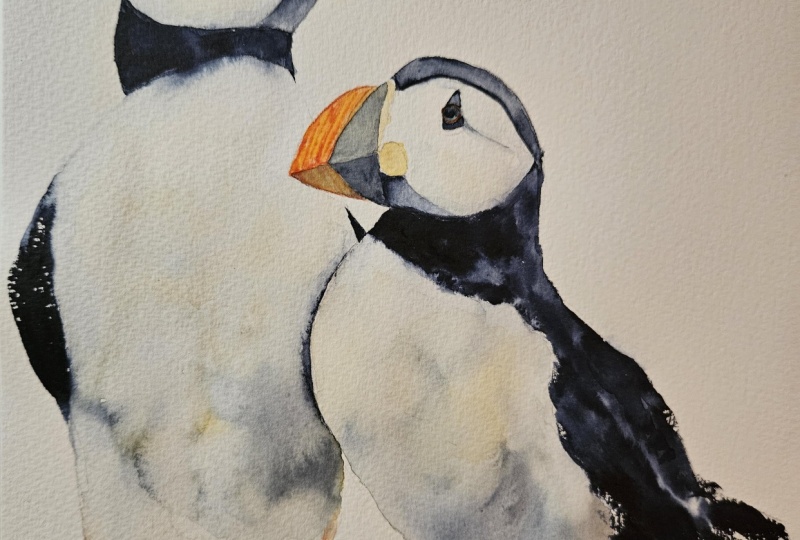
7. Starting the Beaks : Okay, so I'm going to
start now in the beaks. I want to paint the stripes, some of that striping,
but I'm not paying too much attention to the
reference, a little bit, not too much, but I want to
paint it into a wet page, but I want to make
it easy for myself, and so I can kind of
see where I'm going. I'm going to get a
really small bit of wet of milky Yellow Ochre. I'm painting. I've
got my small brush. I'm actually using a size size three because I still can't find where I put the size two. Bottom bit, bit lighter
on the top bit. I'm actually going to keep a bit of dry paper between
the top and the bottom there. I'm not actually joining
those two shapes. Don't want this saturated, damp. Then what I'm going
to do, I've got some Pyrol red enhance
the yellow in here. I'm going to take a
bit of a mix of both. So I want a kind of a red tending towards
orange, really, I guess. I don't want much
moisture on my brush. And then I'm going to
paint into that web page. So stripes and then the
same thing on the top. So coming down, I just need to tidy up this
little bit at the top here. I can't do that looking
from sitting back here. I need to turn the page
to get that he tidy. Now, I actually
got more bleeding down the bottom here
than I did on the top. I'm just going to drag a
bit of a line across so I can see the top and
the bottom of the beak. But I'm not too
worried about that. What I'm going to do is I'm now going to take a little bit
of straight Hansa Yellow. Can I can't find a bit
squeeze out some more. I take a little bit
of my Hansa Yellow, and then I'm just gonna pop
be yellow in between these, and I might see if it's still get it to move a bit with
that in the bottom as well. Mmm. So I pop the handsy yellow one. Then I'm wetting my
brush, drying it, and dragging it through that
yellow because I want to get a little bit of leading
in that top as well. And then just because
on the bottom, my red bled a little bit much, I'm just lifting a little bit of paint to kind of redefine
the stripes in there. Now, there are purples
and things in here. I'm probably not going
to worry about that just for the sake of keeping the lesson pretty
straightforward. But if it appeals to you, you certainly can put that in. Now, I'm just looking up to
see where my beak comes to, I probably should have
come to the edge of where that pale bit is before
the blue starts. It's probably a bit more
tidy than I was intending, but that doesn't matter. I'm going to come out of
that one. I'm going to do the same in the beak down here. So of course, the trick
is when you're doing two is you got to try and
make them look the same. Although these are
two different photos, so the beaks don't
look identical. I'm working with what
I've got in front of me, so I'm going to make them look a little bit closer than
they do in the reference. So Milky Yellow Ochre, top and bottom and keeping
the top and bottom separate. Now, I start with
the bottom stripes just because if it
spreads too far, it's a little less alarming
if it's in the bottom. Okay. And the top strips. Didn't get enough paint, then. So I don't reckon I got
enough red in there. I'm just going to pick
up a bit more red. Try and keep my brush
relatively dry. And then I'm going to
do the same with that yellow just to balance
it up with the top one. I grab a bit of yellow. And then I'm going to manipulate it a little bit by just lifting. Dragging my damp brush through. Okay, I think I probably need to I've got more red
in there than here, but I don't want to fiddle
too much in the moment. I think I'll wait until it's dry before I do too much more. I'm just going to
tidy up the red. I'm just again getting
close to that. A little bit, and
I'm going to just drag a little bit of red paint. In the join there. I might do a bit more there because I
didn't get very much there. I don't want to go
into this bit of the beak yet really until
all of that is dry. I am going to pop a
little bit of paint in the little yellow bit here. Now for that, I'm going to
paint that with Hansa Yellow, and then I'm going to
drop in a little bit of I've got some
transparent brown, or you could use Burnt
Sienna for that. So I'll show you why. I'm going to paint
this yellow bit in. I'm going to do both of them. And I don't want to, there's all that kind of ruffling in it. I don't want to mess. I
don't want to do that. So to get around that, I'm going to take my
transparent brown, and I'm just going to whack
while that paints wet, a few little bits of
transparent brown in there. And let that water
move it around a bit. And that will give
me that interest without having to pay
too much attention. I put a little bit much
on that slide there. Just with some water just
softening that back. I. So I didn't really
think too hard about that. I just whacked in a
little bit of paint. Alright. I'm going to come
out of that and let that dry. We're going to stay
out of the aces and come back into the bodies, then we'll go back
into all the detail. Come out of that and let it dry. I
8. Main Body using Wet in Wet: Okay. We're going to
go loose again now, so we're going to come into the bodies and start
to add a few layers. So I'm going to
grab my be fresh. Make sure it's clean, and I'm going to just
throw a bit of water on. Back over this tummy and chess. Now, I got to keep out of that one's chest.
Chiseling that. We're gonna go a
few layers in here. So don't be too concerned. I'm going a little bit down, a little bit of water inst a leg. So just thrown a bit on. Okay. I'm gonna pick up a
little bit of Yellow Ochre. And I'm going to throw
that into the lower half. Is the tummy there.
Messy. I'm going to pop. I don't want to
paint the leg in, but I'm going to
pop just a touch of orange that wasn't orange. I didn't get enough
red then to just suggest that leg and on
the other side as well. Because the legs are
in the reference, and maybe I'll put
the toe that way a bit tricky when you can't
really see what's going on. It's not what it's
about, so I'm not too bother I'm going to pick
up a little bit Indigo. While that's still wet, I'm
going to throw that in, so nice I want all
this real wet and wet. No overthinking,
just throwing it on. I'm going to do the
same on the other side. But what I want to
do is be careful, you can wait for
this one to dry. But because that's
boring to watch, I'm going to throw
the water on now. I'm just going to
be careful not to touch this tummy into that. Same thing throwing on first up a little
bit of Yellow Ochre I'm going to try and get
some orange this time and suggest maybe
there's a little bit of a leg coming down there. Really messy, pick up some
Indigo, throw that in. Okay. And then I'm, I'm going to put the water I come a
little bit further up. I think I want a bit
more warmth up here, so I'm chucking in a
bit more yellow acre, then throwing in some
water on top of it. So I'm really being rough. Just whacking it on. If you get too high
with the water, you can just grab a
tissue and dab it off. Okay. And then I am
going to need to it is going to end up darker in here. I'm just going to throw
a bit more on this side. And then I reckon I'm probably going to
need to do the same here a bit more Yellow
Ochre up on the chest here. Splashing stuff everywhere. And I'm just going to
sit here and keep an eye on making sure nothing runs
where I don't want it to run. Okay. And so it's totally fine to see all these messy
little bleeds in here. That's fine. That's
what you want. Try not to be too tidy. The other thing to look out for an painting flats clocked
up on my computer. If you start getting
water pooling, I've got my pages buckled, keep an eye on and make sure it doesn't form a funny direction, so you can just move the
paint and water around a bit. So that I don't get a river or really dark pigment in here. This gap will close up later,
so don't worry about that. I don't really like
softening off. I can see a bit of
a hard edge there. We still haven't done
this building in here, but we'll do that
right at the end. Softening it now, I
think I want a bit more, as I'm watching this dry, I feel like I probably
need a bit more Indigo in this one or wet in wet. Just tromming it in
really messy messy messy. Now, if you discover if you say you've got too
much pigment up here, what you can do is
as it's drying, you can drop little bits
of water into it to force blooms and shift
the pigment around. I don't have too much up
there, so I don't need it, but you can cauliflowers
blooms are good for this, so you can just throw more water on and let
it do whatever it wants. I think maybe I'm
going to throw in maybe when I threw
that water on it maybe disappeared my yellow at much throw a bit more because you have to remember
when you're doing this, it's going to dry a whole lot lighter than it
looks at the moment, we can keep adding layers. But sometimes it's
nice to get it a bit stronger initially. I'm starting to
muck, I can feel it. I'm going to come
out of that and I know I've said it
100 times already, but we need to let that dry. A good 10 minutes with this, I want to make sure that's fully done before I come
back into the faces.
9. Face Details: Okay. Now, I apologize in advance that this is
going to be a little bit dull because we've
got to do lots of details now and there's lots of putting on and letting things dry. First up, we're going to pop around the shape
here on the beak, a little bit of
yellow oca because I want to put that on and then
come out and let it dry. To make it easy, I'm
just going to paint the whole thing in
milky Yellow Ochre. So coming on, it
doesn't matter that I'm going into the part that's going to be
kind of bluey black. I'm going to do that on
top one and bottom one. Okay. Then I'm going to
think about the eyes here. Now, they have what I'm going to do to make
it easy for myself, I'm going to paint
What am I going to do? I think I'm going to paint
the little black bit first. So I'm going to
take some Indigo. I'm going to paint
this little kind of curved triangle here. I've gone on to dry paper. But then I want to wash my brush and I want to
pop a little bit of water in it because I want to
force the pigment out to the edges so I get
a nice little effect. Maybe I'll take a
photo of it so you can see And on the bottom here. Same thing. So I'm
painting in that dark, just having a look
at the reference. Okay, and then grabbing
some water and just throwing in so that I get that push to the outside. Okay, so I'm going to do the
same thing with this one. I'm going to paint in that
little shape and then drop in a bit of water
to force the pigment to the edge and the one
down the bottom. Okay. Now, I've been mucking
with that, I'm dry here. So we're going to do
exactly the same thing now with this dark patch, but I want this one to be
lighter than this one. So initially, I'm going to paint really milky Indigo
on the top here. And then I'm going to paint
the bottom one in darker. Now, I'm going to
leave a gap between the top and the bottom ones so that I can paint
them at the same time. If your hand isn't steady
enough to be able to paint them both in without
touching top to bottom, just paint the top
one and then let it dry and then paint
the bottom one. You don't have to do
these at the same time. But now I'm going to
go thicker paint. See the challenges, I
save something like that, and then that means
I have to not touch. Put a bit more water in the one. So I just dropped a bit
more water in there to help me move a bit bit too dry. I think, actually, it's
probably too light. So I'm just gonna give it
one more bit more pigment. It's such a small area,
it doesn't matter if that wasn't quite dry, that's fine. I'll wait and see
how that dries. Now we're going to do the same
thing with the bottom one. Not too much pigment. I'm just going to
soften that back a bit, so I just get a bit more
water and throw that on. I'm really struggling
with this hot room, making everything
dry super quickly. Throwing a bit more water on. Then bottom one. Enjoying that. Again, it's dried too quickly.
I want a bit more pigment. Just going to whack a bit more pigment in
before it fully dries. I'm not worrying too much about this, the light
that's down there. We're going to fill that
in with the shadow, so I'm not getting
too hung up on that. Okay, we'll see how that dries. Now I'm going to
come into the eye. You can see how light initially
that look quite dark. You can see how light
that is gone already. We've got enough dart to
go on the bottom of that, so I'm not going to
worry at the moment, but it does dry pretty light. Now, in the eyes, usually for puffing eyes,
look, you can use. If you want, you can just use
a flat wash of the Indigo. I usually make it a
little bit green. I don't really want
to make you have too many colors in your palette. So you could use. I've got some sap green here that I can mix with a
little bit of Indigo, whatever you've
got, you can use. And just painting a
circle for the eye. And I'm tilting When you're
trying to paint a circle, it's good to tilt the
page up towards you. If you paint it flat, you'll find it hard to make
it look circular. I just dropped a bit more. Order in there, then I'll do
the same with the other one. Okay. So now I want to start with the soft
darks underneath. So I'm going to stay
out of anything that's wet. But I'm going to pop. I'm going to pop a little
bit of water on here. Coming up, I don't
want to really touch. I'm going to try and not touch that bit of the beak
that we just painted. But I'm going to
let that touch into that Indigo that's
down there already. I painted with water first, then touch to the pigment that
was already in the page. Indigo will bleed for days, just use the paint
that's already there to chisel out that shape. Just looking at what's happening under here. I'm
going to bring that. Right there. Then I'm
going to pick up a bit stronger Indigo now
out of my palate. So toothpaste consistency. I'm going to go underneath
that yellow bit and underneath tips not very sharp. In throw a bit of
water in and just let that do its own thing.
Just softening it. It does. I drive I
wash and dry my brush, and I'm just chasing
that edge back down. Okay, I'm going to do the
same thing on this one. So I'm painting with water. Then touching into that Indigo. You don't have to
do that. I just find sometimes it gives you a nicer just a nice soft bleeds. Then if you're going to go
straight on the pigment, then I'm going to pick up
slightly stronger pigment. Come underneath that yellow bit, wash my brush and
just soften that. Okay. Then I'm going to have
a little look at this line. So far, I've picked up
a little bit of Indigo. I'm just going to paint. Really thin line
for both of those. Then I'm going to wash my brush. Dry it off and just
drag my wet brush over that line just to get
it to bleed ever so softly. Okay. Now, I can't do anything more than
that until that dries. And so what I'm gonna do, I'm going to let you
stop for a minute, and then we're going
to come back in and finish off these bodies, then we'll come
back into the face.
10. Building up Depth: Now, we're going to
do some shadowing in here, but before we do that, I'm just going to
pop in the orange around the eye and a pupil, so they can then work on
that while that's drying. So take your little brush, and I just want a ring of
orange around the eye. So again, you probably
have to bring it tilt it up to get that in. We've got a bit more
mucking to go in the eye, so I just want to get
it a bit further along. Then the bottom one. Then I'm just going to paint in a little circle for people. Really hard to see
on the reference, I'm just assuming there's
a around when that's dry, we'll shade in the top so that don't look quite surprised. But for now, just a circle
of straight thick indigo. Start in the center and push out or you'll paint it
bigger than you intend. Yeah, that's close enough. Okay. Now what we're
going to do two things. First, we're going to get
winging that we've missed here. I'm going to get
some water first. I'm just going to paint
a little bit down here. Then I'm going to grab
some really thick indigo and just pop that wing in. The idea of painting at first was to get a little bleeding, but I didn't actually
then touch my wet edge, so I'm just going to wash my brush and just pop a bit more water on and
then come up and just touch. Just so I go a little
bit of bleeding there. All right, so now we need
to chisel out this shape. So again, the shadowing
and shading and the reference I've
got for you isn't right because I've stuck
two pictures together. So I've got to make this up now. I've rubbed off my pencil lines so I can see what's happening. I'm just going to
wet down a page. Make sure your big brush is
handy and clean as well. We're going to need
that in a minute. Then I haven't quite
closed in this gap yet, but now I'm going
to grab my indigo, and I'm going to
come in and tidy up that shape and come in to chisel out the shape of
the chest there. Wash my brush. Tease that up. Be careful here because
if you go too far in, you can't fix it like I've probably
gone a little bit far. There's some tidy up there. Okay. All right. And then I'm going to get water, and you're just going
to help it spread. You just want it to really throwing I'm going to get
my bear brush because it's not spreading enough. So I really want
to flood this now. So I'm painting all
the way to this side because I don't want the pigment to run and
then stop on a hard edge. I want it to spread
this way and fade out. Now, keep an eye on where
you drag your wash to. And I'm going to throw because I don't want the yellow ochre
to completely disappear. I'm going to throw a bit
more yellow ochre in there too. So it's a bit dirty. Now, I will soften that edge
slightly, just not yet, but I now need some of that in here so that
they balance off. So I'm going to wet down. I don't mind I don't mind, see, I've got a couple
of hard edges here. That's fine. There
can be a little bit of messiness in this. So I want to strengthen up. So I'm kind of looking
to match that to this, throwing in a bit more the yellow ochre and
soften off the edge. Okay. And now, so that's
nice and messy in there. I need to at the
moment, these faces don't belong to these bodies. I need to get some of
the same in the face, but I have to be a
little bit more careful. So I'm going to grab a
little bit of water, come around the yellow. I'm in the bottom
of the face here. So staying in the bottom
third of the face, I may actually paint
straight through that. And we're going to add a touch of indigo through
here, soft now. Around there. S grab me a clean tissue. Then a bit of my yellow ochre. On top of that, wet and wet. Okay. Then we're going to come same thing
behind the eye here. I'm painting with water first, and I'm wearing that edge so
I don't get too hard edge. Throwing in a bit more pigment. So all wet and wet. Less is more initially. And probably probably
a little bit in the front here as well. So I'm wetting it down first, coming in with a
little bit of pigment. I'm going to leave
a little flash of white up the top there. And then I need to get some
of that yellow ochre in. Okay. Then I want to soften. I want to keep light
underneath the eye. I'm just going to soften back here I want to keep
light underneath here. So I'm just cleaning my brush, drying it off and just chasing
that back a little bit. But I'm going to come and put a wash of indigo over the
whole bottom of this beak. Really milky indigo into that. Bit where we just were. Now, it's probably
not dark enough, but I want to wait
until I finish the eye before I decide on that. This probably needs to darken. But that now talks a
little more to this. Now I've got to do the same
thing on the other face. So I'm going to wet down bottom quarter third the base come across to the back of the eye over the
front a little bit. I'm aiming to leave light
here underneath the eye. Get my bit of indigo.
Really milky initially. I can add more later if I need it really hard to take off. So that's why I'm keeping it
pretty light at the moment. Okay. And I'm going to come and do
the wash underneath here, so strengthen up that dark, and then the whole
bottom of that beak. I haven't put in
my yellow oka yet. I'll do that in a second. So it doesn't really
matter what order. Do it in. C in a bit of
yellow Oka through there. It's already too light, but that's okay. We'll
do a couple of rounds. All right. Now, what I'm going
to do while that's drying, I'm going to darken off
the top part of the eyes. So I've got some sap
green and some indigo. If you've done any of
my other bird classes before, it's the same
as all of those. I pretty much always do the same thing just
to back off that. Crazy eye look. And
then some of you pay much more attention to
the reference and do a much nicer job than I do. And I love that. I love that. But I'm a lazy painter
and a creature of habit, so I'm just going to keep
doing what I normally do. So top half, wash my brush. And tease that down so that
the only place that I've got light is down in this
bottom part of the eye. So I'm just after a bit of
transition from dark to light. If by teasing it, it
makes it too light, you can just drop a bit of
indigo back into the top. And then I'm going to do
the same thing on this one, but you can see already it
doesn't look quite so wild. Okay, so my sap green
and my indigo top half. And I'm also going to just grab a little touch of the indigo, and I'm just going
to kind of join up. So I've just drawn
an indigo line that's joining up the blue to the orange to the
green to the top, just a line in front just to kind of tie
those all together. And then on the other
one, same thing. Then to finish off the eye, and I would probably
wait until you're sure that it's 100% dry
before you do this, but I want to finish
one thing for you. So I'm just going to
pop a little spot agache just in the back
of each eye there, so that the eye is finished. Now, we need one more layer of strengthening the shadows
and then we'll be done. But I'm going to come
out and let that settle, then we'll come back in
with one more round.
11. Finishing Touches: Okay, what I want
to do now is just strengthen a little bit. So we're going to go over
where we've already been, so I'm nice and dry here. I'm just going to
throw a bit more water down first with my big brush. I'm actually going to add here rather than relying
on the Yellow Ochre. I'm actually going to
take a little bit of my transparent brown
and a bit of my Indigo. You could use bent Sienna. Just to make that dark
a little bit meatier. I'm not sure if that's
the right term, but a bit stronger. All right. So I'm going
to wash my smaller brush and just tea down. Just little bit of
that warmth in there, just to give it a bit of. And again, by doing
it wet into wet, you get these nice soft, not very controlled bleeds,
which is what we're after. And now because I want
that to talk to that, I'm going to get a little bit of the same thing just
down the bottom here. So wetting down Nice and messy, little bit of the brown, a
little bit of the Indigo. I didn't get any Indigo then. Switch to my smaller brush. I'm just switching to
this so that I can get right to the edge of
the washers here, so I don't have too
many different lines. But I don't mind seeing.
You can see where this wash ends and
some of that is right. But you don't want too
much. Soften that. I'm hoping you can see the difference that
the brown makes, but now I need to
do the same thing. I want some of that
through the face now. So we're going to do
exactly what we did before. Wetting down so that we're nice and soft and then
coming in with a mix of the transparent brown and a
mix of the Indigo too much. Actually, I should be what I should be doing
is testing it out on the little scrap piece of
paper that I've got sitting next to me before I
go onto the painting. Do that. Don't just
go straight on. And I'm going to strengthen. I do want a little bit
darker under this bit. Ah, still not quite enough. Just gonna come in.
Just a bit more now. Okay. And what I
can do is there's a little flash of
light around the face. So if I make sure my brush
is drier than my page, while that's still wet, I can just lift
out a touch there, which you could do
when it was dry with a stiff synthetic, but I quite like
the effect of that. Now I'm going to do the
same thing in this side. Okay. Nearly there,
I'm just going to strengthen for both of them. I'm dry here now. I'm
going to go, nearly dry. I'm going to really strengthen just underneath the yellow here. So I've gone on to dryih
paper with my Indigo, washing my brush, drying it off, and just teasing that down. Okay. I'm going to do that
on this one in mint too, but I also want to strengthen the dark under here because I imagine that beak would be casting a bit of
a shadow underneath. So I'm fully dry there,
so I can come down, put that on, soften that out. I'm just washing my
brush and teasing that to sit into the
wash underneath. Then I also think I need that to be a little bit darker and then head
lighter up there. I'm going to take going to dry paper it's that thing where I was saying
at the beginning, spend a lot of time
leaving the light, but then sometimes you want
to close some of it in. So I'm just then
washing my brush. Soften that back,
soften this one in. Practicing. It's practicing,
settling that wash in to the one underneath.
It's a good skill to have. You just have to
be a bit patient. Washing, making
sure I don't have that I'm chasing that line
so that when this dries, I don't have a line where you can see the
wash has stopped. All right. I'm just
going to darken here. Straight on to it's dry now. Just really make
that yellow pop. Okay, I think that's
where I'm going to stop. Oh, actually, that was what
I said I was going to do. I'm just going to run my brush. Just gonna run my
brush along that edge. Damp brush just two. I had a really sharp, bright white there,
which you might like. I just want to soften
it back just a touch. So I'm letting that shadow from that bird just
bleed ever so slightly, so I get a bit of a
softer line there, and I think that's where
I'm going to leave it.
12. A Final Word: So now that we've
reached the end, I'm hoping that the main
takeaway for this class is getting comfortable with
using a lot of water, really, with these wet and
wet areas where you can see that you can throw on a lot of water and a lot of pigment. You can take some time
pushing it around, and it will work out okay. You know, I don't like
having a whole wet page. That freaks me out, but I do like having a lot of water in these smaller areas where it's a little bit
easier to control. So I know some of you
will do a background. I'd love to see what
you do with that. So particularly, you know, you see the puffing
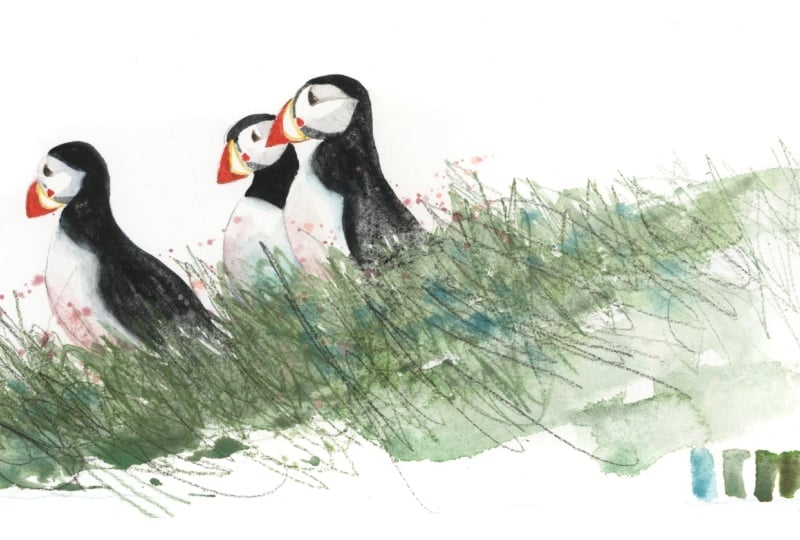
pictures with the little daisies in the
grass in the foreground. So I'll be interested to see
whether anyone tackles that. So if you're happy
with your painting, you can take a
photo and pop it on the project section for
me to have a look at. I always love seeing
what you're doing and happy to answer questions
and give feedback. So thanks for joining me.
 Nadine Dudek, Professional Watercolour Artist