Transcripts
1. Intro: Knowing how to use HTML is an important professional
skill nowadays, not only web developers, but also many professionals
need to create a website. E.g. marketers need to create
rich content newsletters. Those are made using HTML. In Keirsey have been in a
situation where you needed to create something with HTML and there was no
developer available. This course is for you. Throughout this
course, I will talk about the foundations of HTML, how to create textual content
like herders, paragraphs, links to other websites,
lists and tables, how to add images on a webpage, and even how to use some basic CSS in order
to style your website. Of course, this is an
introductory course, so I will not dive
very deep into HTML. By the end, you will have a
solid understanding of it, how to use it, and be
prepared to learn more. I'm a lithium double loss, and this is HTML
for non developers.
2. Foundation: If you want to master
any subject in life, you have to become very good at the basics in order to
build a solid foundation. You cannot solve a math equation if you don't know addition, subtraction, multiplication,
and division, when it comes to
learning a new language, you have to understand
the grammar in order to properly
structure your sentences, only knowing their
vocabulary is not enough. Following this type
of spoken languages, the same principle applies to programming
languages as well. On any website you visit, you will see Heather's
blocks of text, images, input forms, the
placing of those elements. The structure is
defined by using HTML. Html is not a
programming language, instead, it is a
markup language. Html is not the only
markup languages exists, but all the markup languages are used to define the structure
of a text document. There are three different
kinds of markup languages, presentational, proxies,
rural and descriptive. For the purpose of this course, I will focus on how descriptive
markup languages are structured since HTML
belongs in this category, as I said before, grammar is very important in order to properly
structure sentences. Even if I give you the complete
list of HTML vocabulary, it will be useless to you unless you know how to properly
put it together. Every element in markup is
put inside ankle brackets. Additionally, each element
has a start and an end. This is how you start an element and this is how you ended. Of course, for those
elements to make sense, they have to have a
description like this. This format is used
when I want to create a context of stakes in a
group of elements, e.g. this is how I would
write my name. Or if I wanted to create
a group of my full name, I would do it like this. If an element will not enclose text or any other
mark-up element, it is self closed, like this. By the way, all those
elements are called tags. Along with low name. Tags can also have properties which are
called attributes. Attributes are used in order to give more information
about the tug, and they are always placed
inside of the opening tag. The format is usually
in name value pairs. As an example, let's
say you have two pets. Each pet has a name,
age, and color. Looking at these, you can't know if I'm
talking about a canary, bird, cats or dogs. To make it more clear, I need to provide
additional information. Go in attributes. Inside the opening tag. I will create an attribute
with the name animal, and its value will be the type
of bed I'm talking about. Name-value pairs is the
common use of attributes. But sometimes you may
want to state a fact, something that is true. In these cases. Instead of writing
the name value pair, you can just write the name. This will implicitly give the
value through to the value. So going back to my pets, I want to say that
the first one is a bird and the second
one is a mammal. Let's put it all together now. Suppose you're an author
and you're writing a book. Your book has chapters, which have titles
and paragraphs, and also bold text to make
your point come through. If he were to describe
your book using markup, you would start your
document by creating a book. Doug. Books have a
beginning and an end. So you would create a
closing tag as well. Of course, your book
needs to have a title. You also decided that it's
going to be a short story. So you will only
create three chapters. Each chapter needs a title, of course, and obviously
multiple paragraphs. Maybe you even want
to add subtitles. In this paragraph right here. You want to emphasize
your point. So you decide to make
some texts of it boards. After proofreading
it, your book is ready to be published
will not only that, you also now have a good
understanding of how markup languages are structured and you're ready to
start learning HTML.
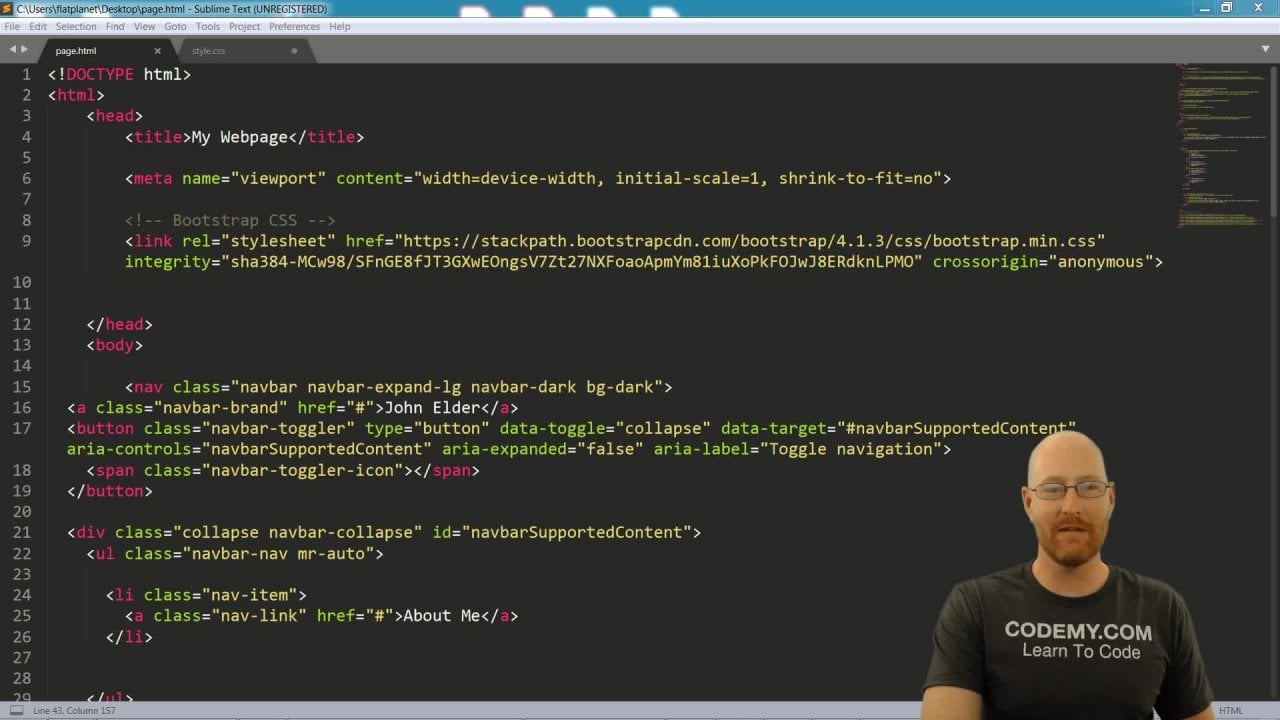
3. HTML document structure: Markup languages define the
structure of the document. Some people refer to structure as the skeleton of
the document in HTML. This is not far from the truth, since all HTML documents have a head and a
body in the head, you put elements that are not visible and describe
the document. Those are called metadata. While in the body, you put all elements
that are visible such as headers, paragraphs,
and images. When creating a mockup document, it is important to define a document structure definition. To do this in HTML, you have to add a DOCTYPE tag on the first
line of the document. Of course, HTML
documents need to have a HTML document extension. Now let's put it all together
with a small example. First, you need to create
a new HTML document. On the first line or the
HTML DOCTYPE declaration. All the content of your document needs to be inside an HTML tag. Then create the head and inside, add a title tag. Next, you need to
create the body tag inside of which you will add
all your visible content, like header, paragraph,
and an image. No matter how complex a website, maybe it always
follows this pattern. To recap, when creating
an HTML document, you need to add the
doctype and the HTML tag, a head and the body, and then your content. With this in mind, you're ready to learn
some basic HTML tags.
4. Headers: From newspapers to
books and magazines. Text is organized and
headers, paragraphs, it, italic text, bold text, lists, and so on. The same principle
applies with HTML. In this lesson, I will
talk about headers. There are six levels
of headers in HTML. The tag for headers is the
letter H and the number 1-6. The number signifies
the size of the title, as well as grouping
the content together. The perspective of an article H1 would be the article title. And the remaining
five are used to organize the structure
of the text. Now let's create an article
about the chunks of the year to make Heather's
more understandable. Starting with the
title of the article, it is an H1 tag. The chunks of a year, years have seasons and months. Those two will be H2 tags. There are four seasons
and 12 months. Smaller herders are needed
here to show the reader that they are still reading
about the seasons or months. For them, the hedge
h3 tag will be used even though you will rarely see Heather's going deeper
than the third level. As mentioned, you can
go up to level six. What is important to
remember is that they need to follow a
consecutive order. Going back to the
previous example, the headers for the seasons
should be h3, not H4, H5. And that is because they belong below the seasons
header, which is H2. Of course, an article can
not only have headers, it also needs to have some text content which you will learn about in
the next lessons.
5. Paragraphs: All bodies of texts are
separated in paragraphs. Html could not be any different. Paragraphs are defined
with the p tag to make them distinguishable
and clearly readable. By default, paragraphs have
some spacing at the bottom. Let's now revisit the previous
example with the chunks of the year before this
isn't and months headers. You would like to add some
introduction decks to let your readers know
what the articles about. Since you're
watching this video, you already know
that to do that, you need to use the p tag. Of course, you can't
leave the article like this and you continue by
adding some more paragraphs. Notice how the paragraphs
have some space between them. In order to make them clear. You're satisfied
with your article. You did a very good job writing. It said Now you
would like to add something more than plain text. You want to emphasize
it, make it bold, and even underline some
key principles to do that. You know that you need to
learn some more HTML tags. And for this reason, you continue on to
the next video.
6. Text formatting: Text formatting is used to differentiate parts of
the text body to make a stronger point shots
formatting is making the text bold,
underlined or Italian. Bold text can be defined in
HTML with two different tags. The first one is the b tag, which makes the text bold, but does not give it
extra importance. The second one is
the strong tag, which along with
making the text bold, it also defines it as important, even though they
visually look the same, the b tag is used to just draw the attention of the reader
to some part of the text. The strong tag is used
to indicate urgency. There are some parts of
the walls were in winter. It's nerves without stopping
for more than three days. You want to draw the reader's
attention to this fact, but not defined
urgency or a warning. To do that, you decide
to use the b tag. You also know that in the summer the weather in some countries
can be extremely hot, which would cause
serious Tom Burns. This is very important for your readers to
know and you want to warn them of the
dangers of sunburns. Knowing your HTML tags, you decided to use
strong for this case. There are also two
ways to define italicized text in HTML. Tags. For this one, I end EM, you should use the
i tag when you want to set off
part of the text, such as referencing
technical terms or idiomatic expressions e, m tags, on the other hand, are used to stress
emphasis on the text. Awesome is very beautiful with a brown and orange
leaves on the streets. But it usually rains
cats and dogs. It's raining cats and dogs
is an idiomatic expression. Hence, you should use the i tag. Spring is so romantic or
flowers are blooming, you should take photos of
the beautiful scenery. In this case, you
want to emphasize that the readers
should take photos. The appropriate
tag to use is EN. Oftentimes, you
may have the need to show some texts
as underlined, even though there is an HTML tag that underlines the text, it is not to be used when underlining is for
styling purposes only. You tag, which indeed
underlines the text is to be used only for
unarticulated annotation. One example of
unarticulated annotation is when you want to point out a
mistake that has been made. Going back to the need
of underlined text, you should use the span
tag and change it styled. I will talk both about
the span tag and how to change styling with
CSS on a later video. There are two tags
to use when you want to quote text in HTML. Which one to use is how you
want the code to look like. You should use the
blockquote tag. When the texts that you
want to quote is quite big, the text is rendered
on a new line, usually with some indentation. The q tag is used
when you want to quote short text in line. Instead of taking a new line, the text will stay
on the same line, usually surrounded
by quotation marks. Here's an example of both tags. The one above is a blockquote, while the second
one is acute tag. Those were the basic and most
used text thugs in HTML. Next, I will talk about lists.
7. Lists: From the ingredients of a
recipe to the days of the week, there are times you would
like to create lists in HTML. There are two kinds
of lists in HTML, and those are ordered
and unordered lists. The difference between the
two is that the first one, ordered lists or numbered. While unordered lists
are bullet lists, you should use ordered
lists when he would like to describe the
steps of a process. Unordered lists are to be used for lists where the meaning wouldn't change if the order
of the items was different. Here's an example of a recipe
to make this more clear. On the left side is the
list of ingredients, while on the right side is the steps to create the recipe. Of course, you cannot
add the mixing the oven before you mix
the ingredients together. To create an ordered list, you need to use the HTML tag. For an unordered list, you should use the
UL tag instead. The tag for the list
items is the same for both ordered and
unordered lists, and it is the LI tag.
8. Links: You can go from one
web page to another by clicking bits of texts that
are blue and underlined. At least this is how
it usually looks like. Hyperlinks are called
anchor us in HTML, and they are created by using the a tag in Angkor needs
a destination to work. And this is given by
using the href attribute. Inside the H ref attribute, you can link to any valid URL, which can be the address
of another web page, a telephone number, and
email, and many more. Create an a tag and the
H ref attribute weight. In order to go to
another website, you have to put the absolute
URL in the attribute. If you don't know if the
destination is an HTTP or HTTPS, you can use a double slash
at the start of the URL. By default, when clicking an anchor tag that links
to another web page. This will load on the
same browser tab. In case you want to open a
new tab for the linked lord, you can use the target
attributes and set it to blank. The HREF tag can take
any form of valid URL. The three most common
units know about, apart from website URLs, our e-mails, telephone
numbers, and media files. Of course, there are many more things you can
do with the anchor tag. One of them that is very
helpful is when you want your visitors to
download something, you can use the download
attribute to tell the browser to treat
the URL as a download. If you leave the download
attribute without a value, the browser will use different criteria in order
to name the downloaded file. On the other hand,
if you want to give a specific name to the file
that needs to be downloaded, you can put it as the value
of the download attribute.
9. Images: Images are necessary to make websites more interesting
and visually appealing. Unlike books, web pages
would be empty and boring if they only had text
to show an image in HTML, you need to use the IMG tag
for the image to be visible, you need to use
the SRC attribute with a valid media
URL as its value. Start by creating
the image tag first. As you can see here, it is a self-closing tag and the SRC attribute and pointed
to a valid image URL. As you can see, the
images shown here. Even though the image
is shown properly, the job here is not yet done. What would happen if there was a network error or the
image cannot load properly, or even if the image
loads properly. What about people who
use screen readers? All the visitors should know what the mixing image is about. For this reason, it is wise
to use the alt attribute, which provides alternative
text to the image. If the image does not load, the text is shown instead, but if the image does load and the visitor is
using a screen reader, they will be able to know about it by its alt description. Make sure to use text that
describes the image properly. Avoid using text such as image. Instead, you could say, fill the flowers to
more useful attributes to use with the image is
the width and height. By using those and adding
a number as their value, you can set the dimensions of
the image on the web page.
10. Tables: You can easily present data in HTML by using the table model. There are various HTML tags
needed to compose a table. Those tags are the table. This is the parent tag in the old table data will be
inside here, the table head. This tag defines the
head of the table, usually the first row
of a table, table body. All the data rows
are enclosed inside the table body tag.
Table further. In case you need an extra
row to show the totals, you can use the table
footer for this table row. This tag defines a table row. It is used both in the
table head and table body. Table header. The table header tag is used
to define a column header. And last, the table data-toggle. This is used to create
columns for the table data. Now let's see all those tags in action by creating
a sample table. First, the table tag is created. I want to have both the head
and embody from the table. So i, and both of
them, moving on. I will define the header
row for the table. To define a row, I need to use a TR tag. To create the columns
inside the table row. I will use the th element. Since I am creating a table header row
with the head ready, I can move on to
create the table body. Once again, I will
use the TR tag to create a table row
asked for the data. This time, I will use the td
tag to create the columns. If I wanted to have a
sum of all budgets, I could create a table footer
right below the T body tag. I will create a t foot
in the other row. This time, I will use both
the th and td elements. I will use th for the header, the footer to read totals are asked for
the sum of the values. I will use the td element. In order to make it
more appropriate. I will add the scope
attribute to the th and set it as a row.
11. Container elements: There are two main
display types in HTML. The first one is bloke, and the second one is inline. A bloke item will take all the horizontal
space available, while an inline item will take only the space
that it needs. As an example, headers and
paragraphs are block elements. When you boot in HTML
element after a paragraph, it will go on the next line. Images, on the other
hand, are inline items. So if you create two
image elements in HTML, they will be shown
next to each other. When you want to prove some
HTML elements together, you need to create a
container element. There are two main
container elements in HTML. Those are the div and span. Dave is a block element, while span is an inline element. Now let's create two
diff containers first. And are the couple of
paragraphs in them. You may not notice
anything different so far since they are
not visible elements. If I add some background
color to them, you can see that they
are indeed distinct. You may use containers
to group HTML elements together and create semantic
parts for your web-page. Valid cases are
creating a header for the menu Filter and
also a container for the website and body span
elements are usually used inside paragraphs to add different styling to a
portion of the text. Going back to text formatting, I did not show you how
to underlying text. If you remember, I mentioned that the correct way
to do it is we use the span tag and
add some styling to it in order to
underline the text. Let's take this paragraph and suppose you want to
underline a portion of it. First, you need to create a
span element around the text. Finally, are the
appropriate style to it, such as change the
color or underline it. I will talk about
amazing styling on the next video.
I'll see you there.
12. Basic styling: The styling in an HTML document, you need to use CSS. Going deep into CSS is beyond
the scope of this course. For now, I will focus on some basic principles
to get you started. There are multiple
ways to implement styling in an HTML document. First, you can add the
style directly into the style attribute
of an HTML tag. This method is not
efficient as it will make your HTML document
difficult to manage. Use inline styles only
when you want to add a few explicit styles
to an element. The good way to go is
to use style sheets. You can define style
sheets in the new file and import them in
your HTML document. Or you can create a style tag
and audio styles in there. Since style sheets
can get too big, it is better to import
them from a CSS file. All you need to do is create a new file with
the extension css. Then after creating your styles imported at the head
of the HTML document, like this, the other way to add the style sheet is to
create a style tag. Create a style HTML tag
at the top of the body, and create your styles
inside the style tag. As I said before, styles can get complicated, so it is better to import them. Styles are defined in
the simple way in CSS. First, you need to
create an identifier. The most common cases are
using the name of a tag, an ID, or a class. After the identifier,
you need to define the blog with
curly brackets. Inside the brackets, you can add your styles with name and value, such as color, colon, red, and then semicolon. To create an ID, you need to use the id attribute
for classes you can use, they're closer to mute. First, let's create two lists. I own the items of the first
list to have the color red. The first step is to add the class to the
list item elements. Then I need to create
the style for the class. To create styles for class, I need to add a period
before the class name. Next, I define the style blog
and add the color style. Styles for ideas are
defined by using the number or hashtag symbol instead of
the period before the name. Going back to the example
with the heading, let's make it blue after
creating the styles, this is how the
website looks like. Another commonly used style is to define the
size of the text. Instead of creating
classes or IDs. This time, I won't make all
paragraphs a little bigger. To apply the style
to all paragraphs, I will use the p tag to
define the style block. To increase the size, I need to use the
font-size property. Let's make it a ten pixels
and see the results. When talking about
the div element. I showed you how
to differentiate them by their background color. Now let's see how the background
color is applied in CSS. Here I have a div with
container as its class. So I will create the
appropriate styling CSS. Inside this time block. I will use the background
color property and set it to orange. Going back to the website, you can see that the
background color changed as it should. Earlier, I told you that if
you want to underline text, you need to use the text
decoration CSS property. Here I have the underlying
class that I prepared. I have sudden the
text-decoration property, two underlined. If I go back to the website, you can see that when
I use the class, that text turns the underlined. All the HTML elements have
a default display value. But you can change that
if we want by using CSS. Let's change the div
from block to inline. As you can see, I have some
texts here that is inline. Notice the red background, it is all this space. The text takes the div, takes the whole space, and you can see it in orange. I will now change
the display property of the div to inline. Going back to the website, you can see the
orange disappeared. In fact, it is still here, but you cannot see because of the red background
of the text. Lets me remove that
and show you again. Those were some basic CSS
properties you can use. Of course, CSS has a lot more to offer and it would take
multiple hours to dive into it. For now. I believe
you're covered.
13. Outro: Congratulations, you've just finished
learning the basics of HTML. You now ready to use your new knowledge in order
to create simple websites. There are multiple
tutorials you can take if you want to dive deeper, now that you have
the building blocks, it will be very easy to learn
and become great at it. If you could please
leave a review as it will help
other learners like you find about the course in case you have any
questions about HTML, feel free to start a discussion thread and I will answer as soon as possible. I'm a failure to stop loss. And I want to thank you for watching my course
to learn HTML.
 Lefteris Psitopoulos, Doing something great everyday