Transcripts
1. HTML 101: An introduction to web development for beginners: Hello and welcome to HTML one-to-one, a beginner's guide to coding. Let's take a look at what's going to be covered in this course. First things first we're going to get a coding program installed. Then we're going to take a look at what HTML is and how to write it. We're going to get lots of hands-on experience. And lastly, we're going to have a little project where we create an HTML webpage. But why should you learn HTML? Honestly, it's the underlying bone structure behind every single website. You cannot view a website without HTML. You need to know HTML and in order to get into other web development. If you want to become a web developer, if you want to just make websites for hobby, you need to know HTML. It's very easy to learn, should only take a few days to really grasp. But most importantly, learning HTML is the first step to learning how to code. Hi, my name's Caleb telling and today I'm going to be your instructor. I'm a senior web developer and premium coding instructor. I've taught over 300 thousand students how to code successfully. And once again, welcome to HTML 101, a beginner's guide to coding. Once you're ready, let's go ahead and get started with that first lesson.
2. What is HTML?: All right, let's take a look at what HTML is. So what is HTML? Html stands for hypertext markup language. It's actually not a programming language. It's called a scripting language, but it's still absolutely vital to web development. And 100% of all websites use HTML. Html is the structure behind every website on the internet is the backbone behind every single website. And then we layer coat on top of HTML. But without HTML, honestly, there is no website and this isn't an opinion, this is just a fact. This is how websites and the Internet work. So the first thing you should learn in web development is HTML. Let's take a look at HTML versus HTML5. You will often see people say, learn HTML5 or HTML5, this or HTML5 that. But HTML5 is actually the last version of HTML and it will just always be called HTML5 and eventually it'll just be called HTML. So there's no HTML six down the road, there's no sixth iteration of HTML. So whenever you see HTML5, you can actually think of HTML5 and HTML as the exact same thing. And that's because they are the exact same thing.
3. Getting setup: Okay, let's take a look at getting setup. First. You're going to need a text editor. I highly suggest VS Code. It's free and it works on all operating systems. So before we do anything, let's make sure we have VS Code installed. And I'm just going to Google this VS Code download and is coded dot Visual Studio.com. And this is the text editing program we're going to be using in this course. Now if you have already written code and you have a different text editor that you prefer, that's ok. But if you've never written code before, let's go ahead and download this program. So for me, in this course, I'm using a Mac. But it doesn't matter if you're using Mac or Linux or Windows, it's going to be the same program, right across all three operating systems. Windows 78 or ten. Make sure you download this one. If you're on Mac, download this one. And if you're on Linux, download one of these two. Once you have VS code downloaded and installed, make sure you can open up your text editor just like this. So yours is going to look a little bit different. Once you open it, yours is going to be a different color, but ultimately it's the exact same program minds, just a different color because I like the accessibility behind it. I like being able to type stuff in here. And it's a fairly easy color for you to read on your screen. So you're just going to look a little bit different in colors, but the general layout is going to be the exact same. So make sure you have VS code downloaded and installed. And once you have that, let's head on over to that next lesson.
4. HTML syntax: Okey-dokey. Let's take a look at HTML syntax. Now the word I'm saying here is syntax. And all that means is the styling which you write something. So English has particular syntax with apostrophes, periods, question marks, commas, things like that. It's like a markup for how we write a language. And writing code is no different. There are certain rules that we have in place. So first things first, let's go ahead and let's look at some HTML syntax. So typically it looks like this. We have some sort of elements. And it opens like this and closes like this. So each one of these is called a tag, this as an opening tag. And this is a closing tag. And it always, always, always, always has a less than sign. Then the word of the element, whichever element is, and there's lots of them. And then a greater than sign. And then to end an element, we do same thing. We open it. And then we say actually this is not an opening element, this is a closing element and we say that with a slash and then the word. And then we close it again with a greater than sign or symbol. Now you may have noticed that I put this on a different line, and that's actually OK. Html doesn't really care about extra white-space, so this does not really matter. All this, all these extra lines between line four and line 11, it doesn't really matter to be honest. We'll talk about that more in depth a little bit later. So this whole thing right here, that is called an element. Now inside of these elements we can have text. So we get, say, some text in here. And what a browser is going to do is then say, Hey, there's a particular element here and it's closing here, and whatever is on the inside, apply these rules to it. So whatever the element rule is, maybe as bold, make this text bold is what is going to do. And we'll talk about bold in the future as well. But right now, also you need to know that element is not actually a real element. We're just going over syntax here. Just so this makes sense. In the next few lessons. The other thing that we can have are these things called attributes. And this actually goes inside of an element. So what I'm going to do is split this onto its own line, and that's okay. It's going to be basically the exact same thing to your browser because again, it doesn't care about this extra space in there. So we have these things called attributes and then it goes attribute name is equal to. And then you can either have two apostrophes like this or two quotation marks like this. And then we can put some value in here, some sort of text. So we can say some text in here. Now we can have multiple attributes. We can have, let's say, a title attribute. And again, you don't need to know what this is, will cover all this in future lessons. Again, we're just going over syntax here, and this is an example of a second attribute. Second attribute. Here, we can have more and more and more, we can actually have unlimited number of attributes. Attributes are just like elements. An element has a rule that your browser is going to read. So if this were to be bold, you browser, it's a boldest text. And just because I write attribute in here does not actually mean it's going to do anything. Now a good example of this, because this is not actually valuable whatsoever, attribute is not a valid attribute in HTML. We could just write title is equal to, and then whatever the title is, and title is actually a proper attribute. And you can have this, uh, most of your HTML elements. Again, we'll talk about that in the future. You don't need to memorize all this either. Because as you write this, as your fingers start to type more and more, you're going to become more familiar with how HTML works and how it looks. So the big takeaway here is, this is your element and you've got an opening tag, and this whole thing is a tag. You've got a closing tag and everything it encompasses is your element. Next we have attributes, like the title attribute. And so it goes, the attribute name is equal to he need that equal sign. Don't add spaces before or after it. Make sure it's altogether. So you've got your attribute is equal to. And then either quotations, apostrophes. Now here's the catch is if it opens with a quotation mark, it needs to end with a quotation mark. Otherwise, if it opens with an apostrophe, it needs to close within an apostrophe. And you can actually see VS code highlighted this for me. He says, everything down here is all the same. And that's called syntax highlighting. But as soon as I replaced that quotation with an apostrophe, because this attribute needs to open and close with the exact same character. This syntax highlighting worked. Now if your syntax highlighting doesn't work right away and you're following as video and you're trying to do what I'm doing. Go down here and this is probably going to say plain text. You can click this and you can type in HTML and just click this one and it will change your syntax highlighting for you. So that's all there is to this particular lesson. You don't need to do anything at this point in time. It's just really important to know that this whole thing is an element. This is an opening tag. This is a closing tag. This is your inner content. And this fella right here is an attribute. Let that sink in for just a moment. Once you're ready, let's head on over to the next lesson where we talk about the base HTML structure of every page.
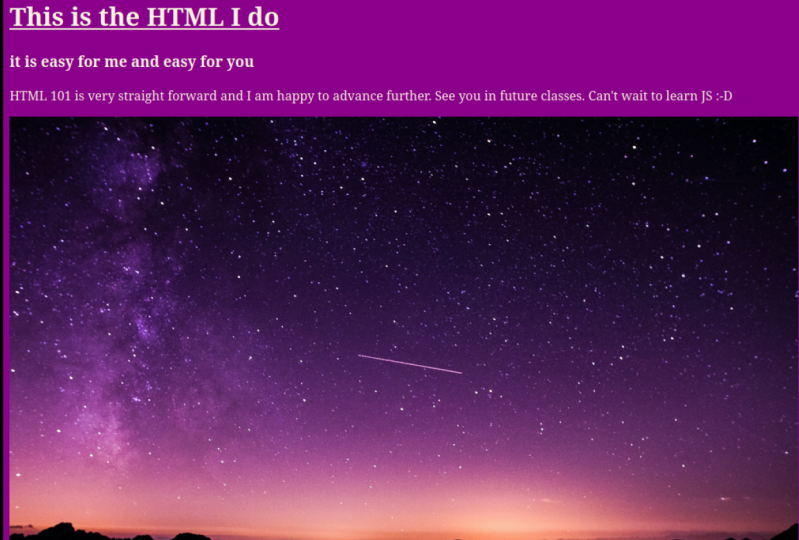
5. The base structure: Okay, let's take a look at the base structure of every single webpage. So I have VS Code open here and I'm just gonna go to File New, that's actually outside of my recording area. So it just Command or Control N or File, New File. And you're going to see this brand new file. You'll let's go ahead and change this from plain text to HTML. And what we can do here is automatically fill. So we have a nice shortcut here, so we don't have to remember this is HTML colon five. And then if you hit tab, it should autocomplete for you using the Emmett abbreviation. You can see that on the right side of my screen here. So let's go ahead and hit Tab. And it does all this stuff for me. Now, I'm gonna go ahead and delete a few things just because we don't need it right now and it might be a little bit confusing. And I'm just gonna change this indenting just so we can look at some nesting and I'll talk about in that, I'll talk about that in just a second. But let's go through this line by line. So line number one, this is the weirdest kind of elements you're going to see. You don't see elements too often starting with an exclamation mark doc type is the only one. So we're saying, hey browser when you when you read this file no, that it's an HTML5 file. It's an HTML file. It's not a PDF, it's not plaintext, is not JavaScript, it's not CSS, it's not an image, It's not a font, it's not some sort of other document. It is an HTML page, so please render it like an HTML page. Next on line two, we have an opening tag called HTML, and this is where all of our HTML actually goes. And then on line nine, we're closing that tags were saying everything in here is going to live inside of this HTML tag and envious code, you can actually click this little arrow and you can collapse it, which is really nice. So if you ever have too much code, you're getting a little overwhelmed. You can always collapse your code. Next we have two main parts to every single page. We have our head. Again, that's an opening head elements, alright, tag rather. And this is a closing head tag. And this whole thing is the head element. And you can actually see that just like HTML. And we have another element in here called title. But this one is nested inside of head and head is nested inside of HTML. And then we have a title element here that just changes the title of the page. So when you go to a web page, such as this one when we downloaded VS code a couple of lessons ago. It changes this title up here for you. That's what the title element does. Now you can have all sorts of things in your head, but you can think of the head element as literally the head on your body. It's your brain. It holds all this extra information. So it's not completely visual, but it does hold extra information. Your body is just like the body that you live in. It is what people are going to see. So if I flip back to this page just as an example, everything in here is part of the body. So everything that's visual, the interactive part of your webpage, that is the body. And we are going to be putting most of our code in there. So let's go ahead and make an example here. And let's just write hello world. And what I'm going to do is save this. So File Save As. And where should I throw this? Throw this on my desktop. I'm gonna call this Hello World dot HTML. I already have one, so let's go ahead and replace that. Now what I can do in my browser, as I get, again, I can go to file, but this time I'm gonna go to Open file. So it's command o or o if you're on Windows, I believe it's gotta desktop. And let's open up hello world. And this is a webpage. Now, if you're following this video, definitely feel free to pause at this point and try to write out the code that I have written in this video. It's not very much code and it's really easy to write with VS Code. Remember HTML colon five and then hit tab. And that will auto-complete all of that for you. And then just write something inside of your body element. So I just wrote hello world, and that showed up as text on my page. If you do that, save your file and then open it in your browser. And you see Hello world. Then hey, congratulations, you have literally just made your first webpage. So my suggestion is give that a shot because this is always really, really good practice and this is really straightforward at this point. So yeah, my suggestion is give this a shot. Once you're happy with your results or maybe you don't want to give this a shot and you want to move on to the next lesson. Either way, let's head on over to that next lesson together and we'll get started talking about the title element.
6. Page titles: Ok. Hello and welcome back. In this lesson, let's go ahead and talk about this fellow right here, the title element. So in the last lesson we created this page called hello world. And I'm just going to delete this. And this is the page that we originally had and it said document up there, right in that tab. So let's go ahead and refresh this and we're gonna see it just as the file name and that matches the file name here. So hello underscore world dot HTML. Hello underscore world dot HTML. Same thing. Not really elegant, not what your users are looking for, not search engine friendly. But we can change that with a title element. And so I'm gonna write title slash title. Let's go ahead and minds set to a Django template. But I want to change this from a Django templates to an HTML file. So let's go ahead here and change this title. Let's say hello from Caleb. And refresh. And you can always refresh with command R or I believe control are. I'm just using Google Chrome by the way, doesn't really matter what browser you're using. But you can just reload the page and it says hello from Caleb and you can change that at any point in time. We could say hello from Earth. And you could do File Save or you can hit control S or command S, i believe it is. Yep, Command S on a Mac, I believe it's Control S on Windows. Just go ahead and save that file. Let's go back here, refresh this page. Hello from Earth. And so that's the title tag. Now, you should only ever have one title tag because it's only really ever used once. Having to title tags, your browser's not going to know which one to use. So just make sure you only have the one title tag. Now the thing about this, this particular element, this title element, it has to live inside of the head element, and that has to live inside of your HTML elements. So now we're getting into nesting. We've got this HTML element, and inside of it we have head title, closing element, and we have body content closing element. And that's all there is to creating a title in a tab up here using HTML nascent easy. Once you feel uncomfortable with that, let's head on over that next lesson and we'll get started with adding some actual content to a page. So it doesn't just say hello world, it's going to say hello world and maybe a title we could write a paragraph, we can have multiple titles, things like that.
7. Paragraphs and headings: Okay, let's take a look at paragraphs and headers. And this is where a page is going to actually start to take a little extra shape here. So it's not just going to say hello world. Now a paragraph, and like a lot of elements in HTML is just a p tag. But because it's an element and it's a pretty standard element, we can do p and then we do slash p. And this is again, this is just our syntax. This is our opening tag or closing tag. And the whole thing together is an element. So p stands for paragraph, but we don't write paragraph, we just write p for paragraph. Here. We can either write some text here or if you want to keep your code nice and clean, we can go ahead and put it on separate lines. So I'm just gonna keep these on separate lines. I think it looks a little cleaner this way. And what I'm going to do is type Lorem, hit tab. And it fills my text area with a bunch of Lorem Ipsum, Latin words. I have no idea what this means, but it's a common thing you're gonna see in web development. So let's go ahead and save. So you can go up to File, Save or command S or Control S on a windows. Let's go back to the page we're creating and hit refresh. And now we have this lorem ipsum text. Now let's go ahead and create a title for this page, a header. So just inside of the body, above the P element, not inside of it, but above it. We're going to write H1. And the nice thing about VS Code is when you write an element, whenever it says Emmett abbreviation, you can just hit tab. So I hit tab and it writes my code for me and then I can write something on the inside. You can say, Welcome to HTML 101. Let's go ahead, save that page. Flip back to our browser and hit refresh. We have this big text in here, HTML, Welcome to HTML 101 and then lorem ipsum in here. Now if this looks smaller on your screen is because I'm actually zoomed in to a 175%. Yours should look something a little more like this. I just made this bigger so it's easier to see on your screen. Now that's not the only size title we can have. We can have H2, H3, H4, H5, H6 elements. So let's go ahead and create an H2 tag. And this could be like a subtitle, a beginners guide to coding. And so you can see I'm getting a little bit faster here, but the syntax stays the same. This is an opening HTML tag, an H2 tag, and this is a closing one. Again, you've got that slash and then the element name, and that just says everything inside of here needs to be an H2 font-size. And everything in the one between the two H1 tags needs to be super-large. And everything between the two paragraph tags is your paragraph just general texts for the most part. So save that. Let's flip back over here and let's see what an H2 looks like. It should be right between these two sections of text. And you can see it's a little bit smaller. What I would like you to do for some hands-on experience right now is create an H1, H2, but then also create an H3, create an H4, H5, H6. And again, all I'm doing here is typing an element name. As soon as Emmett abbreviation comes up, I can hit tab and it creates the H6 element for me. So go ahead and take a look at what H1 through H6 looks like. Add some extra text in here. Lol BBQ. Go ahead and save that. And when you flip over the page and hit refresh, check out the different header sizes. And you might be a little bit surprise when H6 looks like.
8. Whitespace doesn't matter: Whitespace does not matter. Now I mentioned this really early on, but whitespace does not matter. You can see that I actually have an element right here, an H2. Actually this whole thing is an element. And I don't have any spacing or new lines or anything. It's just an H2O opening tag, a bunch of tax and then an H2 closing tag. But with a paragraph, I have the p element here, and then I've actually broken this onto a new line. Added a bunch of extra spaces in here. And then at the very end again, I broke it onto a new line, a bunch of extra spaces. Now your browser does not care how many spaces there are. It's going to try to condense it all down into one space anyways. So as an example, Let's go ahead and add a space just after the word ipsum. Just gonna add a bunch of spaces. Now if we were writing a newspaper article, this would look terrible. It would be two words, a comma, and then all of these different spaces. And those little dots that you see. After I highlight this base that just tells me it's a space that's, that's not actually they're just telling me there's a space. So let's go ahead and save that. Head on over to your browser and let's hit refresh. And we're going to see as soon as I hit refresh, absolutely nothing is going to change. So let's reload this page. I can reload this a 100 times. Nothing looks like it changes. However, if we go if we click somewhere on the page, we can go right-click view page source. And we can see all of our source code and this is exactly what I've written in VS code. And you can see that all the spaces are there. But your browser says, no, you don't need all those spaces. Let's compress that into just one visual space, so whitespace does not matter. Another example here is I could add all these new lines and there's a bunch of new lines. You can actually see there's so many new lines that like I can't even really read the code anymore. And let's go ahead and add some more lorem in here. So Lorem tab and I should have two paragraphs, right? I should have this first paragraph. And I can get rid of this whitespace because it does not matter. I have three new lines and then I have another paragraph. Now, intuitively, you would think it would create two paragraphs for us. It's not going to do that. So if I save this, flip on over to the browser, what you're going to see is these are combined together. And again, it took all of those new lines and squished it into one single space for you. Now if you want multiple paragraphs, but you have to do is you have to close this paragraph element. That's close that paragraph element and this creates it's won its first paragraph. Let's collapse that and let's go up here. And we just have to re-open this. And I'm going to show you what I'm doing here in just a second. And so all I did was I closed that first element up here and I reopened a new one down here. So if we take a look at this together, we have paragraph one, paragraph two. They're not nested. It's not a paragraph inside of a paragraph. It's a paragraph. And then we close it and then a second paragraph and we close that. So let's go ahead and click Save. And now when we refresh our page, we're going to see that this is actually two separate paragraphs, the way we probably wanted it to be in the first place. So the lesson here is whitespace does not matter. If you want to use extra white-space. There are ways to do that, such as wrapping your texts in different paragraphs or different H1 or different h twos. And it's just one more example. Let's, let's go ahead and let's see what happens when I put this is on a new line, right in my H1 just to demonstrate that, that this is not specific just to paragraphs either. So I'm gonna save that. Go over here, hit refresh, and it's not on a new line. And again, that's because our browser does not carry, even though we've written the code that way, our browser does not care that it has this extra white-space. So I'm just gonna go ahead and clean this up. Just delete that extra white-space because I like my code to be nice and tidy. And this is what we're left with. Next up, let's take a look at nesting elements a little bit more. We've actually already been doing it with HTML, head title, body H1, H2, and paragraph. These are nesting, but let's get into some terminology.
9. Nesting HTML elements: Alrighty, let's take a look at nesting some code. So we've actually already been nesting our HTML. And what that means is we have an HTML element. And then inside of that, instead of just regular texts like we see with a paragraph or a heading one, heading two, we have another element and then we can have another element. And this can go on essentially forever. Now what I'm going to do is scroll down my page just below my two paragraphs that I have. And I'm going to create a new element called a div. Or if you want to use the Emmett abbreviation DIV. And then as soon as you see em at abbreviation over here, go ahead and hit the tab letter on your keyboard and it fills it for you. Now a div honestly doesn't mean anything. We'll talk more about divs down the road, but it doesn't do anything like a paragraph is going to separate your text with. For instance, a paragraph is going to separate your text here. It's got like a nice little spacing in there and then it creates another one for you. A div does not really do that. So let's go ahead and say this is a div element. Go ahead and save that, refresh your page. It's going to say this is a div element. And now inside of this element, and this is going to look a little bit weird at first, but we have a div element. And then we can have some text in there. We can have another div in here as well. We can say div. This is a nested element. And we'll close that one off as well. Let's go ahead and refresh this page. And we're going to see it shows up on the line right after it. But this whole thing is wrapped in one div. Now a good way to look at this is right-click on your page. Go to Inspect. And I'm gonna make this a little bit bigger here. Whoops, that was too big. And let's scroll back down and we can hover over the elements in here. And so this is our inspect tool. It is incredibly helpful. You're going to want to use this for pretty much everything front-end related. So HTML, CSS, and JavaScript down the road. But for now let's just stick with HTML. And what we have here is a div. And we can open up this div and we can see that there's some texts and you can see that as I hover over it, it's actually changing what is selected on my page. And then we've got a child element and that's what it's called when it's nested, it's a child element. And that's on its second line. We could actually go one layer deeper as well. So I put this on a new line just to keep code nice and tidy. And I could do one more DIV, or let's experiment. And let's do a paragraph inside of a div. This is a paragraph. Go ahead and save that. Flip on over to my browser and hit refresh here. And you can see as I hover over things, is going to show me what exactly a selected. So I have a div element here, and it's selecting both the nested div and the paragraph. Whereas up here, it's just selecting the one paragraph at a time. You can see that as I flip between them. So here I've got the over-arching, the container element's called div. And then I've got some text and then I've got another div, and then I've got inside of that div, a paragraph there, I've got text here and then I've got a paragraph here. And you can actually see that that paragraph has a bunch of spacing around it, so it sort of bumps your text down a little bit. Now let's take a look at some terminology here. This one here. This is going to be your parent element and this is going to be a child element. So what this typically looks like is you've got some sort of parent element slash parent and then a closing tag like that. And then you've got some sort of child elements and the close that tag there again, it doesn't matter if you have extra white space. You can put that on multiple lines if you wanted to, which I'm actually going to do. And then we can go one layer deeper. We could call this a grand child, grand child element slash grandchild. And this can go on and on and on forever. So we can say create grand child. And he goes on and on and on. Now the terminology is going to change based on what you're talking about. So if I get rid of grandchild and great grandchild, when we're working in here. This is our main element. This was called a child. And if we're talking about the element around it, the one that wraps around it like this, that's called a parent element. Now if we're working on the parent element and we want to talk about an element inside of it. We would call it a child. Now we're, the terminology changes is if we have grandchild element and this is the one we're working on, and this is our main element. Let's say we're talking with a coworker about this particular element. We would just call this the element, whichever one it is, maybe it's a DIV. Child would then become the parent. Parent would then become the grandparent. And so it's relative just like in a family hierarchy. Now none of these are actually real elements. So let's go ahead and delete those. And just for funds, Iz let's go ahead and let's add an h3 element in here, just a little title. And it says, this is an example of element nesting. So I save that file and I'm gonna refresh this. And let's close our inspect to it with this x over here. This is an example of element nesting, and this is all in one element. Now in the next lesson, we're going to see why nesting is actually very, very important because right now this was not very important. We didn't have to nest this at all, but we needed to know how this works in order to get to that next lesson. So in the next lesson, let's take a look at bolding, italicizing, and underlining your text. And then we're going to mix and match all three of them.
10. Bold, italics, and underlines: All right, welcome back from the nesting video. Let's go ahead and actually create something applicable here. So I'm going to just make some space to work just because I like a lot of extra space. And again, whitespace doesn't matter, we know that right? So let's create a new paragraphing here, and let's automatically close that paragraph tag. And in here let's write lower them. Hit tab and we get some Lorem ipsum, just like we've done before. Now if we want to bold some texts, you think it would be the word bold. It's not quite that intuitive, but it's pretty close. We just use the b tag. So we could do B and let's bold the first four letters or words or other. And so I've got a p tag, a paragraph, and nested as a child element is the bold element. And so I save that. And if I go over to Google Chrome and hit refresh, you can actually see that my text here is bold and the rest is not bold. Okay? So this is nesting and this is actually getting into something a little more interesting, a little more useful, little more applicable to actually learning HTML. Next, let's go ahead and let's italicize. So italicized to make something sort of actually this is a good example. Whatever I did there made this italics. So it's sort of kind of handwriting ish, I. Let's go ahead and add an i element to these three words. And so if I refresh the page, which ones do we have here? Copa USD. I'm not even to try to say that, but it's the he's 30 words here. And if I hit refresh, we can see that that has now automatically changed. Lastly, we have Underline and really it's the exact same thing. So you'd think it would be underlined, but it's not. We use sort of shorthand when it comes to HTML. And we just say you, it's the new element. And again, that has an opening and closing tag. All three of these have opening and closing tags. I'm gonna save that, come back here, hit refresh. And we can see this is now underlined. Now where this gets really, really interesting is we can create another paragraph. And Laura, and you see how fastest is getting because I have that tab completion. If I wanted to make this bold, italic and underline. And let's just get rid of this. Do only one line instead of two or three sentences there. Let's just do one sentence. I can say be hit Tab makes bold for me. And then it wants me to put my text in here. Well, that's nice. But what I'm gonna do here is just grab all of that. I'm gonna hit Control X or command exon MAC. That just cuts it into my clipboard and then control V or Command V as in violet to paste. And so when I save, refresh, we're gonna see we now have a bold sentence. Now if we wanted to make this italics as well, it's not BI for bold, italics, it's just b. And then inside of it we say I. So then we can go over here, hit tab to indent that some more. And slash I. One thing to note too is your text might actually scroll way off the screen over here. You can go into your settings and you can change your word wrapping or your text wrapping settings so that it Briggs on automatically on two new lines. So you can see that this whole thing for me is line 27, even though it's spanning multiple lines, that's just so it's not one long line right across the page and I have to scroll left and right. Ok, so I added a paragraph, bold, italics. Let's go ahead and save and refresh. And now this is bold and italicized. So that's working out pretty nicely. Lastly, let's add a new element, and I just move that text up real quick. Go ahead and save that file, refresh. And now we can see it's bold, italic and underline, but there is a rule here. Your inner tag, your innermost tag, has to have an inner most closing tag. So if the last one you have is a u, the first closing tag is a u. If the second element that you have here is an i, the second last one is a slash I, same thing with bold. So we start with bold up here and we close and you can actually see, and this is why I've indented it like this, so that you can see that these match up this way. You always want your elements to match up this way. Funny things can happen if you don't match your opening and closing tags, that's pretty important. So at this point, if you want to go ahead and give this a shot, let's try nesting a paragraph. So create a paragraph element. Then bold your text, italicize your text, underline your text. And it doesn't matter if it's bold, italic or underline or or any other order, it could be italic, underline bold, it could be underlined bold, italic. It doesn't really matter as long as these match up. And then add some text in there. And I want you to make sure that your text is both. They're not both, but all. It should be bold, italic, and underline, and it should be in a paragraph element. Go ahead and give that a shot once you're ready to move on and I'll see you in the next lesson.
11. The div element: Ok. Hello and welcome back. In this lesson, we're going to be talking about a div elements. So what I wanna do here is I have a bunch of code already and I just want to collapse it so it's a little more readable for me because this is getting fairly long. And get rid of that extra white-space just because I like my code being tidy. And if we wanted to, we could collapse just the eye, just the bead, just a paragraph. But in this lesson, let's go ahead and talk about div. Div is a dummy element. And it actually doesn't mean anything. So like we said, P stands for paragraph B stands for bold, I stands for italic. Div is just a divider. And you can actually see that the MDM reference here from VS Code says the div element has no special meaning at all. It represents its children. It can be used with class Lang and title attributes to markup semantics, comment, blah, blah, blah. That stuff's getting a little too advanced for us at the moment. But basically that first line that says the div element has no special meaning at all. That's important. It has no special meaning. Now what we're going to talk about here is a div has no special meaning, this has no special meaning. But let's also take a look at how it works side-by-side. Because in this last lesson, where we did bold, italics and underline, we could use all three of these. And actually a better example is this one where we had a paragraph, but then we had bold and that bold text was beside the regular text. And then we had italics. And that italicized text was right beside the normal text and the underlying text. Same, same thing over and over and over again. And this gets into this concept of block elements versus inline elements. So a div is a block element. And what I mean by that is if I just hit Command C or control C, And then Command V or control V, I just copied that whole line over. And this is a second line. So let's go ahead and save that, refresh our page here. And you can see down here, it just says, this has no special meaning. This is a second line. And if I do this, right-click and inspect, when I hover over the element, you can actually see that that blue line that goes right across the entire page, that is a block element. So even though it's only actually needing the, the space from, this has no special meaning. You can actually see that's taking up the entire line. That's called a block elements. And you're going to see these all the time because it's, it's really good to know. The reason for that is because, for example, if this paragraph up here was not a block element of these two paragraphs would merge together and they wouldn't actually be paragraphs. It'd be one paragraph merged with the second paragraph to make one big one. That's not what we want all the time. And so the nice thing about this paragraph is also a block element is it's going to take up the full width of your screen. It's going to take up as much real estate as it possibly can. So let's go back to our code and let's even try to put these side-by-side in our code. So it's opening one div and closing it, opening another div and closing it. Let's go ahead and save that refresh and we're gonna see that nothing has changed. Nothing has changed, literally nothing has changed. And that's again because these are block elements. So our browser set, okay, you have one element is closing another element it's closing. In the inspect tool. This is exactly what our browser sees. This has been fixed for us, so it's on two different lines. And again, they're both block elements, so they're going to take up as much possible spaces they can separated by the element itself. Now this is a strange concept, but in the next lesson we're going to talk about block elements versus inline elements, and how you can use them sort of together and what the difference is.
12. Block elements vs. inline elements: Okay, let's take a look at block elements versus inline elements. So far we've been working with mostly block elements. Now a block element is if I right-click and inspect, you can see that it takes up the entire width of my page, even though it's actually only using what 30% of the text is actually saying. Allocate the entire width of the page for this particular H2 element, paragraphs or block elements as well. H 3s, H 4-5-6, even the one at the very top of the page. But what isn't is if we go down here, we have this particular paragraph with nested elements. Now the next thing has nothing to do with it. What's important to note is that this B element for bold, it's not taking up the entire width of the entire page. It's actually sitting side-by-side with your regular text. And then we have italics, regular text underline, and then some more regular text now underline, italic and bold. These are called inline elements and all that means is they can exist side-by-side with other elements. Whereas paragraph, you can see that I only have text up until about here. If I hover over this to the right of where I selected that text, it's still taking up that extra space. That's a block elements. Now you do not need to have inline elements inside of a block element. Though typically that is what you're going to end up doing, but there's no rule for that. It's just, this is an inline element. And we could put italics right beside bold, right beside underlying. It doesn't really matter because it's, it's an inline element. So it's going to take up the least amount of space possible versus block elements, like down here. This div is a block element. This div is a block element. And it's going to take up the entire width. Now, a couple use cases is bold, italic, and underline. But also if you wanted a block element, you could use a title I can H1 through H6, and that's going to put your larger text on its own line. And so what's nice about that is we already have a title here. Welcome to HTML 101. We've got a subtitle here using an h2 element. And then we have a couple of paragraphs. These are all block elements and this is what's making our page look nice. Now, if for some reason this bold, We're a block element, and I'm going to show you what this is going to look like. But don't try this. I don't want you to try this because this is breaking out of the scope of HTML, but I'm going to show you what this looks like. Display block. So what I just wrote there, you don't need to try. But I changed it. I hijacked its default behavior to be block instead of inline. And you can see that bold is now on its own line. And this is why inline elements are very important. Because if you have bold on its own line, you'll never actually have the ability to select a particular piece of text in a paragraph and make it bold, underline or metallic. Now there are a lot of different elements out there that are inline and there's a lot of them that are blocked. And so you're going to have to sort of discover these as you move through learning HTML. There's too many elements to that possibly cover, there's probably hundreds of them. But for the most part, you're gonna use a handful of them pretty much every single day. And you need to know the difference between a block element like this one that I hijacked, or an inline element. So that you can actually make your text presentable in a human readable manner. So that's the difference between block elements and in line elements.
13. Linking to other pages: Okay, so the web is made of links to other pages. That's really all it is. Y have one-page here, but what if I wanted to link to Google or what if I wanted to link to another page of my first things? First, let's start off by using the most simple form. Let's just link to Google or Facebook or Instagram or something like that. So in this lesson, we're going to create two different types of links. The first one, and I just flipped over to VS Code here. How the first one is going to be a link just to Google. And this is an absolute link. The second one is going to be a relative link. So a link starts with the a element, and this stands for anchor. It's a hypertext anchor. We can see that over here. Thank you VS Code for filling that informed me. So we have an an anchor tag and this actually uses our first attribute. We haven't used an attribute yet. And that's going to be HREF. And that stands for a hypertext reference. And basically this is how we're going to point to another webpage. Now, it's been a little while. But an attribute is always the attribute name equal. And then either quotations or apostrophes, they have to start and end with the same. It doesn't matter which one you use, but has to start and end with the same. And let's go ahead and close this a tag. And let's say this is a link. And let's see what happens. When I go back here and refresh my page. Looks like a link. But when I click it, it doesn't actually go anywhere. So what I want to do here is HREF is equal to, and I want the full link to any website including the HTTP part that's vital. You need the HTTP every single time you want an absolute link. So let's go ahead and go to Instagram.com. So all I did there was HTTP or HTTPS. Most websites have that s These days, colon slash slash and then the website, so Instagram.com. And actually this slash isn't even necessary. Let's go ahead and save that and refresh. And when I go over here, you can see the link has actually changed to a blue because I haven't clicked it yet. And let's click the link and look at that. It brought me to Instagram. So I'm gonna go back. And maybe I don't want Instagram, maybe I wanted something a little less personal. Let's go to Google. So go ahead, save, refresh. And you can see at the bottom left it says HTTPS, Google.com. Click that. And boom, it brings us to Google. And that's all there is to really adding a link to any page that you have. So again, it's the a element for anchor. The HREF attribute is equal to quotation and then your website URL, that link, and then some text. So we can say this is going to go to Google. And Because that's going on to two lines in my editor, I'm just put this on two different lines. And again, whitespace does not matter. So it doesn't matter that I have all these different spaces in here, and I can still go back to my browser, hit Refresh. And only thing that changes the text, not the extra spacing. And so it changed the text. This is going to go to Google. And it does. Now, that's nice, but what if you want to link to your own webpage? Well, that's a little bit different because You can see up here, there's no HTTPS, this is a file and you could theoretically link to it, but you don't want to, because while I'm on a Mac, so it starts with file, but if you're on Windows, it starts with C. And if you're on Linux, it's just a slash. So it's not going to work for everybody. And we need to make sure that works on every operating system. And the way we get around that is using a relative link. So a relative link looks almost identical to an absolute link or an absolute anchor. And we can do a HREF is equal to, we have our quotations in here. And let's go and say second page dot HTML. Close that opening tag and say This goes to the second page. And we always close. Anytime we have text inside of an element, we always close it with a closing tag. And let's take a look at this. And we can see these links are side-by-side. So we know from the last lesson that these are inline elements because they work side-by-side, which means we can put them inside of a paragraph nicely. And when I click this goes to a second page at the bottom left, you can actually see that it's going to users Caleb, Italian desktop, second page dot HTML, and this actually doesn't exist. So when I click this link, it goes to a 404 page. 404 just means your page doesn't exist as your file was not found, may have been moved or deleted. Emphasis on that, if you're moving files from one folder to another folder, it may be moved or deleted. And basically it's saying that the file doesn't exist. So let's go ahead and make this file exists. I'm gonna close this tab because that's not needed. And let's do this. I'm going to copy this whole page. And I'm gonna go File, Save As. And wherever you have helloworld dot HTML, and let's call this 1 second page dot HTML. Save. And so now we have a second page dot HTML. And I can file open or Command or Control O and open up hello world. And now we have two files side by side. So the second page one, what I'm gonna do is I'm gonna delete pretty much everything inside of the body. So let's go and delete all this stuff. Let's change the title to second page. And let's say an H one. This is the second page. That's all we're going to do. So I saved that. And when I come back here, this now exists at this file location on my computer. And if I hit refresh, it actually works. So if I go back, refresh this just for good housekeeping. If I refresh this and I say this goes to second page, it was 414. It was saying there was a missing file or missing page. Now it's not now it's going to actually load the page for me. Lastly, on our second page, let's go ahead and add one more anchor link back to our Hello World page. And let's say Hello World dot HTML. Now the thing to keep in mind here is this is not an absolute link. It does not start with HTTP, it is not an absolute link. This just says go to this particular file which happens to be in the same folder as second page. So these are side-by-side in the same folder. And it's going to say, oh, look for this particular file. So it's actually linking to another file, not necessarily a webpage. And it gets a little bit into how pages are actually served on a server. Basically because the server is just someone else's computer. But this one could say, Go back to home, save, refresh. Let's go back to home. I'm gonna make that just a touch bigger here. So this is our second page. Go back to home. And we now have two pages that link to each other. And if you give us a shot and you get this to work, that means you have successfully created a network of pages. You don't just have a webpage now, you have a Web site.
14. Opening links in new windows: Okay, let's take a look at opening a link in a new window. So we probably all know that you can control or command click a link and this is going to open up in a new tab. And maybe we don't want that. Maybe we want to force people to, every time they click a link, open in a new tab, which could be the same as right-clicking and open link in new tab. But if we want to force this on someone, we actually have that power. So I'm going to go over to helloworld dot HTML, and for Google every time they go to an external page, because this is an internal page or a relative page, and this is an external website or an absolute link. We can say target is equal to, and this one looks a little weird. There's an underscore there, but Target is equal to blank. And so this is our attribute, is equal to apostrophe underscore blank is the value has to be that underscore blank. And then our closing attribute, quotation mark. Let's go ahead and save that. And let's just refresh this page. And now it doesn't look like anything has changed. But when I click this, I'm not going to command click or control click. I'm not going to right-click and click open link in new tab. I'm just going to click this link and it's going to open in a new tab for me automatically. Just like that, we now have two tabs. And so that's how you open a link in a new tab.
15. Adding images: Alright, let's look at adding an image to our page. So for an image, we actually need an image file and I like to go to this place called Splash.com. And we can just use free, royalty, free images. And I just want any image. It doesn't really matter what the image is, although this one is pretty perfect laptop. That's pretty much what I want. Click and I'm going to download this and I'm going to download the largest one that I want, just so I can really make. It gets a good example of this in just a second while, maybe not too large, that's a pretty big image. Let's download the large one. And now this is going to go into my Downloads folder. And I actually want this to live beside my Hello World and second page, and that's on my desktop. So I need to open up that folder and move it into my desktop. Otherwise, this is not going to work. So if I just copy this file here, go over to my desktop, paste it. And where are you? Right there. Let's call this Caleb's image. It's not actually my image. I didn't take this image. Xps took this image, but I'm going to call it Caleb's image just for the sake of keeping it simple. So let's go back to here and then let's go, let's close out. We don't need that open anymore. And let's go to VS code. And now let's add an image. Now this is interesting because images don't have text, so doesn't need a closing tag and the answer actually is no. So let's go ahead and create an H3 and H4, H3, let's call this images. And to create a new image is the IMG tag. It's not image, it's IMG. Now if I close this, there's actually two ways to close this. So this is a self-closing tag, meaning it does not have slash image. That's not how this one works because there's no text, there's nothing else to display. Instead we're going to use an attribute. And so we can just say there's an image here. And you might actually see a close like this. This is called XHTML is, is an older way of doing things and totally valid still, I write a lot of code this way because I'm a little older school, but it's still completely valid. Or you can just write IMG and you want the source of the image. The SRC for source is equal to Caleb's image dot. Now this is important. You need to know that file extension. And that file extension here was dot JPEG. Jpeg. Now if yours is uppercase dot-dot-dot, GAAP, G like this or like this, make sure it matches. It has to be perfect. So mine was not that mine was dot JPEG. I can go ahead and save this and let's scroll down to where it's supposed to show up. And we're going to see this giant image. And this is actually why I wanted this huge image here. Because this was a really large image. Now, cool, the image showed up, but it's just way too big. Now what we can do is we can add a second attribute. We can say the width is supposed to be, and this is going to be in pixels, let's say 500. Let's go ahead and save that. And what this is going to do is make that image a width of 500. And automatically scale the height for me. So if I right-click and inspect what's cool about this, it says width 500. But you can actually see as I hover over the image, it says the image is 500 by 281 by 0.25. Now if we want it to skew this and I don't know why you would want to, but if you ever wanted to skew an image, you can add a width and a height. And you can say the height is going to be, let's say 200. So this is going to look a little bit off now. You can see it's a little bit squishier. Let's make this pretty extreme and change the height to 100. So now we have 500 by 100. If I hover over it, you can actually see over in my viewport, it says IMG 500 by 100. Now, maybe we don't want to scale an image by its width. Maybe one of us want to scale it by its height. We ever, and there will be times where you want to scale an image by its height or justice with one or the other, not necessarily both. So let's say for whatever reason we're working with a designer and the designer says no, the image has to be a maximum height of 100 pixels. And we say, OK, height is equal to 100. Save. And let's go ahead and refresh. This is now a height of 100 and a width. Whatever that automatically was, is 177.77. And our browser works that out for us. So just as a recap, we could say we have an image element. There is no closing tag because, well, what are we going to close? There's no content to put between two tags. We're using attributes here. The source, the SRC is equal to Caleb's Image.all JPEG. And this could also be a link to a particular image on the web. Web, like HTTP website.com slash Image.all JPEG. It could be something like that. It can use absolute or relative URLs. And so we're using a relative URL. We have a second attribute, width is equal to 503rd. Attribute height is equal to 100. And this makes are really weird-looking image. And this entire thing is the image element. Now there's a lot more we could add, and actually I'm going to add this in here anyways, two things. Let's go ahead because this is getting kinda big. Let's throw this on separate lines just because we can, because white space doesn't matter. And let's add an alt. And alt is going to be the text that shows up when a screen reader is trying to read your image, trying to describe what the image is or if the text or not the text, but if the image breaks what text to show, so show me and let's go ahead and change this to missing dot image. So this is not a file on my computer. This is not going to work. This image is going to break for me. And you can see broken image and it says, Show Me, that's the alt text. And if I just undo that, I'm just changing it back to you. My regular image here. The all text doesn't show up as perfect. We don't want it to show up. We want the image to show up, but just in case the image doesn't show up, we have a fall back. So that's how we add an image. What I would like you to do now is add an image to your page, to your Hello World page. Remember you can get any sort of images you want from an Splash.com and just use any image that you like. It doesn't really matter what the image is.
16. Linking an image to other web page: Okay, welcome back. Hello, hello, hello. In the last video, we created an image. We use the SRC, width, height, and the alt attributes in this video. In this lesson, what we're going to do is make this a link. Because if I go back to my page, I can't click that. It goes nowhere. And we need this actually go somewhere. Well, we don't need to, but maybe we want this to, maybe we want this to go to our second page, dot HTML. So let's go ahead and wrap our image in an anchor. So we say a HR REF is equal to, and I can fill that in in just a second. I'm gonna select that. And all I'm doing is tabbing this in. Just because I M pretty keen on nice tabbing. And then we do slash a. So we have an opening tag and a closing tag, and that means it's going to go around our image. And then for our HREF, let's do second page dot HTML. And that's going to go to our second page dot HTML. And so if I refresh this, it looks like nothing's changed, but I can now actually click it. And you can see at the bottom left there it says second page dot HTML. If I click this, it goes to my page. Go back home, scroll on down. And now we have an image, and that goes to another page. Now all we've really done here is nested in image inside of an anchor tag. And this is why nesting was really important to learn. To begin with. We learned about images, we learned about anchor tags, and now we're just mixing the two together. So what I would like you to do is this exact same thing. Grab an image, whatever image from an Splash.com. Make sure it shows up on your page and then link to another page. You could even just link to google.com if you wanted to, or some other webpage out there. If you don't have a second page already built out, you can link to anywhere on the internet, your Facebook profile, your LinkedIn profile, anything like that.
17. Horizontal rules and line breaks: Already hello. Let's take a look at horizontal rules and line breaks. So first things first, I'm gonna work on one of the paragraphs that we actually have at the very beginning, we created these two paragraphs here. And so I've got a paragraph and a vet, a second paragraph. And let's say I want some sort of line in between them. I have this thing called an HR, a horizontal rule. And because it doesn't take any text inside of it, it does not need a closing tag. Again, this is a self-closing tag just like image. Let's go ahead and save this. And it should show up right in here. And so when I go and refresh, bam, there it is. It shows up right there. And a horizontal rule is a block element. It's going to take up the full width. As you can see. It takes up the full width at all. It is, is a line between your text. So it's really good for separating headers or content or things like that. Now the other thing I wanted to show you was a BR tag. So we have a horizontal rule, but we also have a BR tag. So let's say we wanted to separate this onto its own line, but not its own paragraph, but we wanted it to look like this. So we have a first-line of lorem here and then Odeo Sun Tzu, whatever, whatever is on its own line as well. Okay, so I just save that and VS code is automatically fix that up for me. So if I go back to the page, nothing's changed. And again, that's because in HTML, whitespace is not important. Your browser doesn't care about it. What it does care about is if you want a new line, you can just type BR. And this is simply a line, break BER for break. And if I save and refresh my page, we're going to see that right here is going to be a new line just like that. So this started a new line over here. And now we have a horizontal rule and a line break side-by-side, or I guess not side-by-side, but, you know, in the same lesson, what I would like you to do is give both of those a shot and it's a super easy shouldn't take you more than about 30 seconds, maybe 60 seconds. Creat a horizontal rule and then create a line break inside of a paragraph.
18. HTML comments: Let's take a look at HTML comments. So a comment is basically a piece of code you can write and that's not going to be executed by your browser. And it looks like this. So it's less than sign. You can see that all of our HTML elements look like that. One of those weird times where we actually see an exclamation mark and then a dash and a dash. And then we can put our text here. And then it ends with a dash, dash and then a greater than sign. And so if I save this, and typically so far, it would show up above my welcome to HTML 101 text. But if I go back here, hit refresh. It doesn't show up at all. However, if I right-click View Page Source, there it is. So don't ever put passwords, secrets, credit cards, answers, anything. Don't put anything secret in there because it's not actually secret. It is 100% accessible to all of your users. So this is not a good place to write secrets. What it is good for is explaining what we're doing. So we can say this is a tutorial. And let's maybe break this on two separate lines. This is a tort, so tutorial course on HTML. We are learning HTML from scratch. And so again, I can save that. Come back here, refresh my source code. You can see the source code is actually changed. Go back here, refresh the actual page, and it's not rendered. And this is called an HTML comment. If you say this is an HTML comment. Now what's really cool about this is you can actually comment out existing code as well. So let's go ahead and comment this out. So let's do the opening sign and you can see it turned all of my text Gray all the way down to my page, to the bottom of my page. And let's go over here and close that and you can see the syntax highlighting kicks in again, lets me know that things are working the way I want them to work. Save that. And because I have commented this out, It's still going to show up in the source code. We see it here. It's in the source code. But because it's between an opening and closing comment syntax, let's refresh and we can see that it no longer shows up. The browser says it's a comment and do not executed, do not render it. It's really just a useless piece of text to the browser. It's more useful to humans than it is to computers. And that's an HTML comment. Now you're going to see some of these every now and then. It's not too often you see these, but when you do see him, just know that this is the stuff that's not going to show up when you load your page.
19. Lists: Okay, let's take a look at lists. There are two types of lists. There's an ordered list and an unordered list, and we'll demo Both of these. Now this is interesting because this is one of those elements that requires nesting. And again, it's important to know about nesting here. So I'm gonna throw a title in here called lists. Now, the first one I want to tackle is an ordered list and o L. Now we could say something in here and let's preview this. Scroll down my page and it says something in here, but it doesn't actually know what to do. And it's sort of like a list. But if I wanted to make, make a second bullet point, this just doesn't work. What we can do is say, because this is a list, it needs a list item. And all I'm doing here is saying list-item, opening tag, list-item closing tag. And now we have two elements that are nested inside of our ordered list. So save and refresh. And now it lists for us 123, so on and so on. So on accounts for us. I didn't write one, I didn't write two. That's an ordered list. Now an unordered list, very, very similar, but it's not going to have the counting, it's just going to have bullet points. So I could do UL and then I could do Ally. And this is a list item. Hit tab because I have that Emmett abbreviation. Point number one. Copy that entire line down to the one below it. Point to copy that entire line to the one below it. And I'm just using control c and control v, or Command C and Command V. And that copies my entire line for me. Just go ahead and save that and refresh. And we have bullet points. And so as we progress through HTML, you're getting a little bit more familiar with nesting and opening and closing tags and attributes and things like that, this is going to get a lot easier. And you probably already noticed that if you've gone through all of the, all of the videos up until this point that an ordered list, you already sort of know the syntax. You know that this is a nested element and that there's some text in there and then it has a closing and an opening tag. And then if we want another one, we just have another child element. So you've got a child LI here, child LA here, and the parent OL. And at this point is getting really, really easy for you to learn. An example of that is the unordered list. So an ordered list has the numbering, obviously because it's called an ordered list, but an unordered list doesn't have it. It just has bullet points. But the syntax is almost identical. The only thing we've changed here really is from OL to UL. And so you can see from here on out that learning HTML is just going to get faster and faster and faster. You're already learning all of the basics very, very quickly. So that's how we make a list. If you'd like to pause the video here, go ahead. Hit pause and try this out on your own. Make sure it shows up in your browser when you're nice and ready. Let's head on over to that next lesson.
20. CSS tags: Let's talk about CSS tags. So this one is really interesting. We've only actually dealt with one element inside of our head. But with CSS we can, actually, we put it anywhere, but typically we put it in our head. And this one is a style. This is a style element. And what I'm saying here is CSS in the stands for a cascade and cascading style sheets. There we go. Cascading Style Sheets. And I can comment that out so it doesn't actually show up in the browser. Now what's interesting here is, this does not accept HTML. Isn't that weird? We're writing HTML, but this does not accept HTML. And at this point we're getting into this thing called CSS cascading style sheets, which is a way for us to style our page. What this does take is CSS markdown, markup, css language. And this is very, very different. This does not look like HTML at all, and you do not need to know this for this particular course, but this is a good transition into what you would be learning next. So let's say we wanted to change the entire background color to black, and we want to change all the color, the text color to white. We can do that. We can say body. And you can see that this matches the element. And all we're going to do is an opening curly brace, background, color. And you can see VS Code is very helpful. It's helping me understand what I'm supposed to be writing. Change that to black. And then I can change the font color. And you can actually see that MDM reference shows up, sets the color of an element's text color white. And so this is going to select this element, the body, and everything in it. And it's going to try to apply these rules to it. So if I go back here, hit refresh. Check that out. Our page now has white text with a black background. Now again, this is not something you need to know and honestly I would say don't learn it, but I needed to show you what this is because you're going to see this style elements all over the place. Now what I'm going to do is I'm going to comment this out as well. Refresh my page and bring it back to normal. Now if you wanted to, by all means, give this a shot and feel free to experiment with it. But know that you still have a lot more HTML to learn. You need to learn how to add videos and audio and things like that. And you need to learn those things before we learn CSS, or at least you've showed that that's a lot easier to learn one thing at a time instead of learning to things at a time. But if you wanted to experiment and have some fun with it and by all means, go for it. But this is the style tag, this is your CSS. And once again, No, you don't need to know this. I just wanted to show you this. Just as a heads up, you're gonna see this tag in the wild in other source code that you view like on Google.com for instance, there's gonna be some in their facebook.com probably has some instagram.com and probably haves, has some style elements inside of their HTML. So it's a common thing. And I just wanted to make sure you would be familiar with it. Alright, we're done with CSS. Let's head on over to the next one where we learned basically the same concept, but for JavaScript.
21. Script tags: Hello and welcome to the world of JavaScript. Ok, so there are two things I want to talk about. One is how we add JavaScript's two pages, a couple ways to do that. And the second way, or The second thing I wanted to talk about is do not learn JavaScript right now. It's going to be very tempting. You're going to hear people in Facebook groups and learning groups and LinkedIn groups in other courses. And you need to learn JavaScript. But that's not true. You need to learn HTML before he learned JavaScript. Javascript is used to modify and work with HTML. And if you don't know HTML very well, you're not going to be able to learn JavaScript, so you need HTML first. That said, I'm going to show you how to add some JavaScript in here. So it starts with the script tag. And in here, again, because it's HTML, it doesn't really care about whitespace. However, we do not write HTML in here. We don't, we write JavaScript. We write JavaScript or JS for short. In here. That is what's important. So always remember that I see a lot of people are trying to write like a div inside of their script and it doesn't work in this because anything between the two script tags here, the opening and closing tag your browser thinks is JavaScript and not HTML. And that's important to know because if you've taken my other course about web fundamentals, there are different engines in your browser. You have an engine for rendering HTML and engine for rendering, rendering CSS, and an engine for rendering JavaScript. And it's saying, Hey, use the JavaScript engine for this, not the HTML1. So let's go ahead and create an example here, Hello world. And you do not need to know this right now. But this is JavaScript and all this is going to do is when I load the page, it's going to give me a little pop-up. So when I go back to my page, hit refresh. It says hello world. And then it shows my page. So it's executing the JavaScript and then the HTML. So that's one way. The other way you're going to see this tag being used is script. And what happens if I click this button right there? That's perfect. Is instead of having all of your code in your page, you can have this code in another file, like test JavaScript ab.js. And you don't need that in here. We can get rid of that. And that code can live in another file. And so all we're saying here is use the script tag. So hey, Chrome, Firefox, Safari edge, There's a JavaScript that I want you to rendering here, the source just like an image and scroll back up just like an image. Src source is equal to and then whatever the filename is. Now this is a relative file, a lot like this relative link. So should be in the same folder. Now if this doesn't exist, nothing's going to happen. If this does exist, but there's nothing in there, nothing's going to happen. You actually need some JavaScript to execute. And again, that's not something we need to know right now. But what I'm going to do is boom, comment that out. And that's just an HTML comment. And that makes sure that my browser says, hey, anything between this opening tag and the closing tag or the syntax don't render it. It's allowed to live in there and the source code, but do not actually execute it. And if I go back to Chrome and I refresh the page, that alert goes away. So perfect. Now again, you do not need to know this. The reason why I wanted to show you this is because you're going to see scripts a lot in today's modern web, there's a lot of JavaScript. And again, you need to know HTML in order to know JavaScript very well. But you're going to see a lot of scripts all over the place. And so when you see this, just know that everything in between the opening and closing script tag is actually going to be JavaScript and not HTML or CSS.
22. Sharing code with CodePen: Okey-dokey, let's take a look at one cool thing here. So while you're learning to write code, you're going to want to be able to share your code with people. And it's really, really hard to safely share this kind of code with people. People put their files in zips and then chairman Facebook groups and it looks really spammy and nobody knows if it's actually safe to download. And then if you have a question, your question does get answered. It's just this whole thing that you want to avoid. There is a better way. So what you can do is you can go to CodePen.io. And I wanted to create a new pen. Oh, look at that all sorts of stuff. But I just want to create a regular new pen in here. What this is going to do is give me HTML, CSS, and JavaScript work with. Now at this particular time, if you're taking this course, you probably don't need to know JavaScript, and you probably don't need to know CSS, you probably just need to know HTML. Now in here, you can write anything hello world. And it just takes a second, but it does it eventually rent, it renders for you. Now, the thing is, you do not need your Doctype. You do not need HTML, you do not need body. You don't need those tags. What you do need is everything between the body tag all the way down to the closing body tag right there. So we can now right-click paste. And this isn't necessarily going to show my images because while I'm saying hey, CodePen, look for not second page, but Caleb's Image.all JPEG. And this is where the alt text kicks in. And so it can't find that because it doesn't know. It's a website, it's not on my computer, and so it's looking for Caleb's Image.all JPEG on the server on someone else's computer. They don't have it yet, so that's not going to work. So just a heads up there. But, you know, as you're writing more and more HTML and CSS and JavaScript down the road. You can do all of this in a code pen. Now the nice thing is, you can name this. So hello world. Let's go ahead and save that. And I just created a free CodePen account. By the way, it's completely free. You do not need to pay for CodePen. So please, while you're learning, do not pay for CodePen. You never need to pay for it. And you get this nice little link. And so if I open this up in another tab, I just copied and pasted that link. It shows up. And if I have another tab, paste it in there, it shows up. And what's really nice is it's saving all of your code. And so if you need to share your code in the learning to code Facebook group or in a project section on this platform. Or really you need to share your code with a friend or a developer or a mentor or anyone whatsoever. Even if you just want to show this off to you and your spouse, your friends, your family. You can just send them this link with all the code in it. This is a really, really good way to share your code and it's a safe way to share your code so people don't have to worry about downloading weird zip files or Google Drive or Dropbox or anything like that. It's just simply CodePen and tens of millions, if not hundreds of millions of people are using CodePen. It's completely safe. It's been around for a very long time. It's not going anywhere. This is a good service to use when you need to share your code. So when you're sharing a code, please share your CodePen, link.
23. Finding extra support: Okay, if you need some extra support, I have a massive support group for you. So obviously you can ask questions down below, please do if that's your thing, ask questions down below. But if you want answers right away, like within minutes, sometimes even seconds, you're going to want to join some sort of support group. Now, learning HTML is actually quite easy. It's considered one of the easiest things to learn in web development. But that doesn't mean it's easy for everybody. And so if you need a little extra support, you can go to facebook.com and let's search in here for learning to code. And this group currently has 56,905 members. This is a group that I've created a long time ago. And again, there's 56 thousand members in there. There's at questions being asked all the time, people answering things all the time. For example, high self coders, My name is Dragos. He's got a good question and here a 132 comments. If I keep scrolling down, I mean, I participate in this. I mean, it is my group who here is interested in learning how web requests and web responses where it could 59 comments. Can I posted that 11 hours ago? So there's a lot of discussion in here, but you can ask questions like, how do I make something bold? How do I make something metallic? Why is my code not working? Then share your CodePen link. Please don't show a screenshot. I would highly recommend not showing a screenshot. I would highly recommend not copying and pasting your code into Facebook group. Share it on CodePen or width CodePen rather. So if you need any additional support, Definitely, definitely join the learning to code Facebook group. It's completely free. You don't have to sign up for anything. It's completely free. It's just a nice little value add that I like to give to my students. But again, you know, even though it's optional, you don't have to. But if you would like a little extra support with timely responses, that is a really good place to be.
24. Your final project : Okay, let's take a look at your project. Your project is going to be relatively easy. You don't have to do everything in here and remember, you don't have to memorize everything we've written in this course. You can always just Google it too. So if you're like, oh, I know what an H1 is, but I don't remember exactly how to make a link. That's fine. You can Google it and you type in into Google HTML link tutorial. And you're gonna find hundreds, thousands, maybe even millions of pages that are gonna show you exactly how to add a link. So remember, you don't need to actually remember all of this. All you need to know is how to find the answer. And that's honestly about 50% of any job as a web developer these days is just knowing how to find the answers, not memorizing them, but being able to find the answers. So moving on to the project here, what I would like you to do is I would like you to create a new HTML file. Then I would like you to create a header. So like an H1 sub-header boat, like what you do, what you want to get into anything like that, an image. And then, and lastly, add a link to your Twitter. Twitter, Instagram, Facebook. It doesn't really matter, just make sure you have at least one link. So let's do this. Create a 2.1, and this would be a good time for a nested ordered list, by the way, 2.2. alright, so I just formatted that a little nicer just so that we could all read it together. So create a new HTML file. Make sure you've got a header in there, put your name in there, a sub-header, S sub header, Lake, your title, your work description, favorite hobby or anything like that? Had an image of anything, I would say add an image of yourself. It's totally safe because it's just going to be on your computer. But if you would rather share your project with an image of something else, that's totally okay too. You can always go to an Splash.com and get a free image. Lastly, add a link to either your Twitter, your Instagram or your Facebook, or just add a link to Google or something. The important part here is that you're going to add a link. So go ahead and give that a shot. If you ever get stuck, don't forget, you can reference the other videos or you can continue watching this video and I'll show you exactly how I do it. But I would like you to pause this video here and give this project I shot. Don't forget to share your project and down below on this platform, if this platform offers that kind of feature, otherwise you can always share your progress with the learning to code Facebook group. So pause your video here. I'm going to give us about five seconds and then I'm going to resume playing and I'm going to show you exactly how I do this. Okay, so I'm going to create this project. I'm going to show you exactly how I do it. So first things first New File, and I just did Command N, Or you could go to. File, New File, Save, that's going to save this to my desktop. And I'm gonna call this Caleb layout.html because this is my portfolio page. This is what I wanna do. I need that HTML5 stuff in here. So I don't need the meta. We didn't talk about that. That's a little more advanced and I don't need Lang is equal to English again, that's a little more advanced. We don't need to worry about that. We're gonna change the title to Caleb's page. And what did I need to add in here? I needed to add a header that's 2.1 in this list. So a header H1, I'm gonna put my name in here, Caleb Pauline, H2. I needed a sub-header, so let's put something smaller and you're like an H3 senior developer. And I am a premium coding instructor. That's my role in life. The role I have given myself. 2.3, add an image, okay? So I already know that I have one image in here. It's not an image of me, but it is an image and this is from a previous lesson, so I can do it. Image SRC is equal to Caleb's Image.all JPEG, and that's just in the same folder as this file. All of this lives on my desktop. It's in the same folder. Alt. Caleb, Colleen. And I want to give this a width so it's not huge of, I don't know, like 400. Lastly, I need a paragraph right now and needed a link. But also I'm gonna add a paragraph anyways. I don't really want to write a whole paragraph. I'm going to throw some lorem in here. And then I needed a link to, let's say Twitter. So this link could just be an anchor tag. A HREF is equal to HTTPS, Twitter.com slash. Caleb, tall, lean, and you can also find me on Instagram if that's your jam and is put at Pauline. And that's all there is to it. So I can go back to my browser and I can go File, Open File and open up Caleb dot HTML. That's hope I don't have any typos in there because that's going to be a little bit embarrassing. And boom, there is my HTML page. I've got an H1, I've got an h3 for my subtitle. I've got an image and I have some Lorem text in there. I just sort of threw that in willy-nilly at the last minute there. And a link to my twitter, which brings me right to Twitter. And that's all there is to it. So I went pretty fast there and I did that on purpose so that you'd have to pause and, and you might have to think a little bit harder. I want you to really work at something like this. But when you're done, please share your progress down below. Lastly, thank you so much for taking the time to take this course. I hope you learned something great and fun and new. And if you ever want to check out any of my other courses, just hit the link to my profile on this platform, you can see all of my courses are available here as well, including what to learn next, such as more advanced HTML, CSS, and JavaScript, Python, PHP, a bunch of projects in-between, all sorts of stuff. Lastly, if you like what I'm doing here, if you like my way of teaching, don't forget to follow me on skill share. Thanks again for taking this course and I hope to see you in another one.
 Kalob Taulien, Web Development Teacher