Transcripts
1. Intro: Hello everyone. My name is Katie entity. I'm going to talk about how
to convert a traditionally format a comic into a vertical
scrolling web version, as well as how to take a web comic and prepare
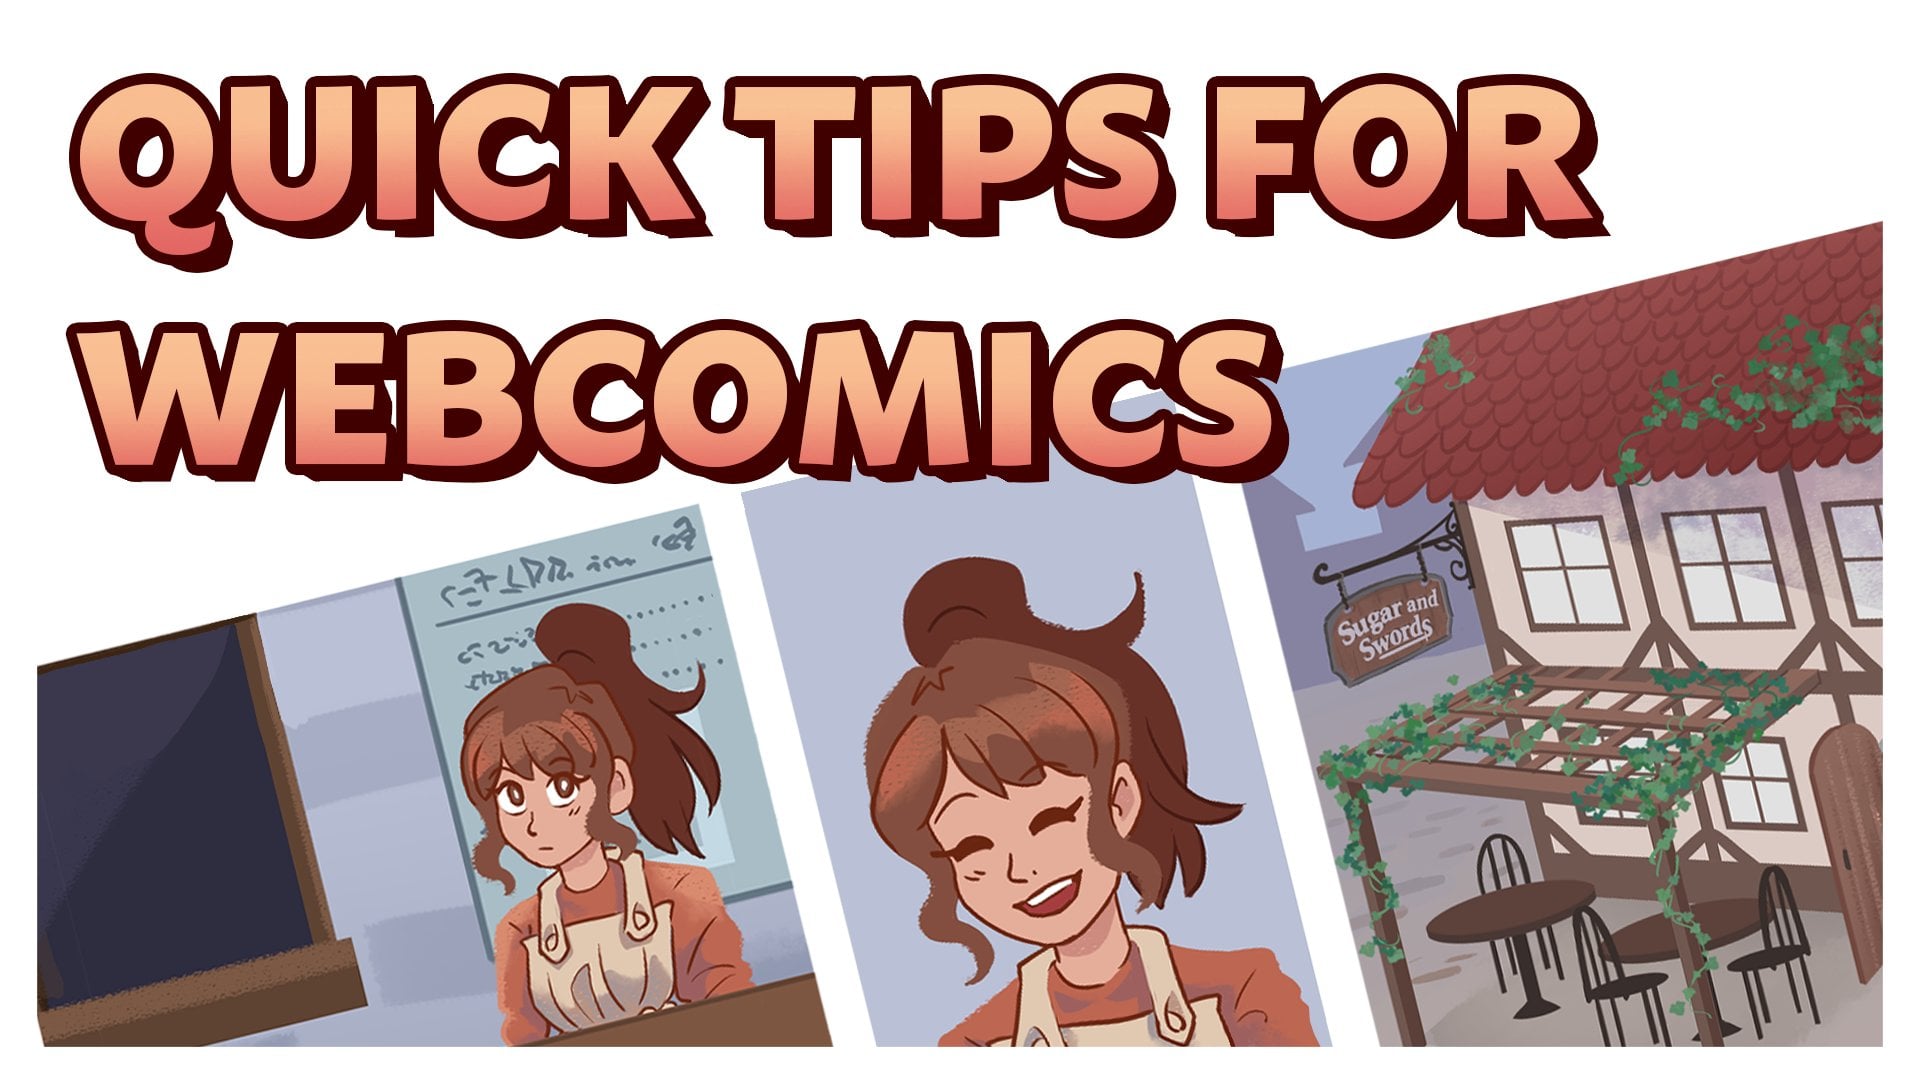
it for print. To quickly define a
traditional comic has multiple panels formatted on a page typically made for
print, a vertical scrolling. What comic is when
there are no pages, the panels are just
stepped onto each other, which allows for an
easy read on phones. The reason you may want to reform at a comic
is to help reach a new audience or give your readers another way
to view your work. Some people prefer the
ease of reading a comic on their phones through apps
like web tunes or typhus. Well, other people
like to collect physical books of
their favorite series. Whatever the reason, I
will show you how to take one format conversion
and convert it to the other. I'll be working mainly
in Adobe Photoshop, but what I will
say can easily be applied to other drawing
programs like Clip Studio, Paint, procreate, and others. Also, if you're curious, the comics that I will
be reformatting are called crystallized
and sugar and sorts, both of which are
comics I created. Also like my last class, I have two parakeets close by. So if you hear them tripping in the background, they
just want to say hi. With introductions done,
let's get started.
2. Preparing print comic for web: The first thing we want
to do is make sure the type and speech bubbles are separated from the artwork. Now, if you'd like to
flatten it all or don't have finished art behind the speech
bubbles, then that's okay. You can still reformat it. I personally just find it
easier to have the option to move the placement of
the texts if need be. What I like to do
is export a PNG of this page but with width and
without the speech bubbles. You can do that by going up to File Export and then
Quick Export as PNG. It's okay if there's a
bit of quality loss, mainly because the web format is only viewed on
phones and screens. So as you can see right here, I have the original document
with all the live text, a PNG with no texts, a PNG with the texts embedded. And because some of
these panels overlap, I may want to separate
them with the web version. So I included what's
behind this panel. Now, since I'm going to focus on having live texts
in the web version, I don't need the PNG
with the texts embedded. So we're just going to
exit that out and focus on the original document
with a live text. And then the PNG
without any text. At this point, we're going
to now make our new canvas. So we're gonna go to File New. And I'm focusing on formatting
for places like lagoons. So we're going to
make the width 800. And we're going to make it
about 10 thousand pixels tall, which does seem a lot. But because of how
small the width is, we can afford to do this. Now, if this does seem
a little bit too big, then you can always
just change it to 5 thousand pixels high. Now for resolution, we
can just keep it at 72 pixels if you're
worried about file size. Personally, I like to
make my resolution 300 just out of habit because I do a lot
of things for print. But honestly this part
is never gonna be printed because we've already
had a printed version. So with that, we're
going to create, now we have this
very long Canvas. So at this point
we're going to make some guides while reading
something on a phone. There's only so many panels that's the reader's
going to see. So to make sure we don't put too many panels in one place, I'm going to make
a rectangle shape which represents
the readers phone. So I'm just gonna
go to my Tools, click on the rectangle,
rectangle tool. I'm just going to
click once somewhere and bring up this window. So the width is going
to be 800 pixels, like your canvas size. And the height. I'm going to make it 1100. This is to show a typical phone. You're free to measure
your own phone or GU other sizes if you want. So from here I'm going to bring this rectangle to the top. Zoom in. Then if you want to
make sure it's right in the middle of this page and should have been going
off to the side. I'm going to press
Control or Command T. And then I'm going to click this little small
bounding box right here. When I click the little square
up in the top left corner, and then just 0 out the
x and y-coordinates. So now I know it's directly in the middle and you don't
have to have this color. I personally like to have no color and then have a bit of stroke to
be able to see it. This little rectangle
right here will show what one reader
can see at a time. So I'm just going to pull
down a guide right there. Then from here,
I'm going to move this and hold shift so
it doesn't move around. And then line it up
with our other guide. Now, if you can't bring
down guys like I just did, it means you need to
have the ruler tool out. So you can either press Control or Command R to
bring it up and away. Or you can go into View. And then Rulers. I'm on a PC, so everything I say is gonna be with control instead of command. And then from here,
I'm going to click and drag from the ruler to
bring down another guide. Then we're just going to
scroll down, hold shift, and move our little
box down some more, and just keep making new guides. And also if you want to see how I just brought
up the hand tool, I'm just holding down the
space bar and then clicking. It doesn't have to be exact. This is just to
show a general view of what the reader
is going to see. Now, from here, you can
either delete the rectangle, but I like to just hide it in case we need to add
more to our Canvas. I also like to add
guides on the sides about 40 pixels in to make sure my type doesn't get
too close to the edge. So with a ruler on the side, I'm just going to drag it out. And to measure about 40, I'm just going to
right-click go to pixels. And then we'll just
zoom in to the 40 mark. And then right here is going
to be around the 760 mark. And then if you're
curious, the way that I'm quickly scrolling out is I'm holding down Alt and
then scrolling on my mouse. So at this point, I don't want
to move my guides anymore. So I'm gonna go into view
and then lock guides. Right now we have a
web ready Canvas. So I'm going to save this as a template version separate from the one we will work with. Just so I don't have to
set up this file again. So I'm going to File Save. And then we'll just
label this web template. And then this window
usually pops up for me. So I just press Okay. I will also include
this blank canvas in the project files in
case you have trouble making your own and just
want to start from this. Now with this template, I will go over it and
then just press Save As. And then I'm going to make, let's say web UP
for Episode one. You can name it
whatever you like. Just make sure that you keep it consistent with any other
future episodes you make. I'm just going to save this. So now our template is separate from the one
that we're going to edit. At this point, we're now ready to actually start formatting.
3. Moving print panels over to web: So now we're going to go to our page that we want
to reform it for me. It's just gonna be
pages 56 for my comic. And then I'm going
to zoom in again, just holding down
Alt and scrolling. And then I'm going to
get the selection tool. And then select my first panel. And I'm going to press
W to bring up the wand. And by holding Alt, we can now subtract the
white from our area. And then press Control C, gonna go over to
our web version, and then press Control or
Command V. Now as you can see, it is a lot bigger
than what is on the page because of the
different Canvas sizes. So I'm going to transform
it by pressing Control T. And then while
holding down Shift, I'm going to scale this down. So remember, right now, this is, this little rectangle area is what someone who's going
to see on their phone. For this panel, I want it to
take up most of the phone. So I'm just going to line
it up with these guides. Now we're going to bring
down the next one, which is these two right here. Again, I'm going to select it, go to the magic wand, hold down Alt, and then
get rid of the white, copy it over and paste it. And then also we're
going to scale it down. This is another panel. I want to take the
whole screen width. So we'll just scale it
down so it fits in. Since there is texts, I'm going to go to my
original art file. Use the Move tool. And then just click on the
speech bubble hold Shift, then click on the text. That way right now I have
both the layer selected. So I'm just going to copy that
with Control or Command C. Go over to my web version
and then paste that in. Now as you can see, it is a lot bigger than the print version. That's because
this file size and resolution is a lot bigger
than our web version. So it thinks will be
pasted in a lot bigger. Now at this moment,
if I were to just transform and shrink it down
by holding down, shift. The stroke width on the speech
bubble got a lot thicker. That's because with shapes, they retained the stroke
width when you transform it. To keep this at
its original size, I'm going to select
both the texts, the texts, and the shape. I'm going to right-click that. And then I'm going to
convert to smart object. This way, not only will be easier to move them
both together. When I transform it
and shrink it down, it retains its same width. Now, if I wanted to edit the text or the
shape of the bubble, I would go into my layers. Right-click, go
to edit contents. And then from here I can
move the type around. Move down a little bit. If I wanted to change the
shape of my speech bubble, I would go to it,
press a to bring up the direction select tool and then move it however I want. That's one of the great
benefits of using the shape tool for
your speech bubbles. So you can always
edit it and change the size without
losing any quality. So from here, if I want us to edit it like this
for some reason, I would just save it, then go back to my web version. And then now the change
is reflected here. Going back-and-forth
between the two, maybe a little challenging. So I'm just going to hold
and drag this tab out. So now I can see both of
them at the same time. Make my changes, save it, and then it will
be updated here. It's going to back up
and do all my changes. And then I can just
exit that out. And now we're good. Now, if you don't use smart
objects or don't want to, or if your speech goals and type is already embedded
into the picture, then what you can always do
is go to your PNG version. Was everything flattened. We can just select it
like we did last time. Go to the magic wand, hold Alt, click in the white, copy that, and paste it here
and just shrink it down. This way is much quicker. However, depending on
how big or small your Texas may look a bit
too small on a phone. As for me, I like to keep my text small in
the print version, but when formatting
for weapon phones, I need to enlarge it to make sure the readability is fine. If you're worried at
all about readability, that what you can do
is export this out, put it on your phone
and then see how easy it is to read each panel. If it's easy for you, then you can just keep going forward. But if it's a little hard
and you'll need to go back into your file and
then enlarge the type. From here, I will repeat
the process of copying and pasting panels over to the vertical scrolling
web version. I like to have one or two
panels and each section, as well as spacing
the panels out more in slower story moments, pushing them closer together in places with a lot of action. When placing them down. You can put them directly in the center or place the
panels off to the side. What I'm trying to
do is make like a back-and-forth flow of words and art to keep the
reader entertained. If you just have all
the panels stacked one on top of the other
directly in the center. It would make your comic
book a little boring. But having some to the side and then variant
with the other side. Just showing you the position would help the
reader stay engaged. With the web version. I like to take all
the speech bubbles and hang them
outside the panels. Since we aren't restricted
to the page anymore, we can play around with
where the words are placed. Also, you can add a different
background color other than the white defaults to also help with creating
an interesting read. If you want to study
the placement of web comics more than I
would recommend finding some of your favorite comics
and looking at how they space out panels and treat
words and texts placement. Another thing to
note on is once you scroll down and you end up
filling up this canvas, you can always press C for the crop tool and then just keep extending it down for
however long you need. I wouldn't recommend making it super long because then
it would take longer to import or export it to whatever site
you're going towards. So I would recommend
making multiple versions. So let's say this is Web
two and episode one a, and then if I need another part, it would be Web two
and episode one B. Just in case your episodes end up being a lot
longer than you thought. So for this class, I'm
going to keep it at these pages so I don't need
this extra bit at the bottom. I'm just going to crop
it and move it up. Just so we have this
area right here.
4. Exporting Web version: So from here, I'm going
to export it out. I'm just going to
go to File Export, Quick Export as PNG, and then just save it
wherever you want. And for web tune specifically, you need to chop up this very long file
into smaller ones. So what I like to use is
the site called crappy. Basically you put in your very
long file and it will chop up all the pieces
for you to make it a lot easier for
formatting for what tunes. So I'm going to go to Browse, click on our Web episode one. And it's going to take a
second to split everything up. And then once it's done, it will be a zipped
file in our downloads. Now for me, it's
split over three because I have a couple
of these already, but it would be split with
nothing else behind it. So here you can
drag it easier to file into whatever
folder you want. And then I'm just
going to extract it. So now I have all
my panels split up, which is perfect for web soon. And we can just go
ahead and delete the zipped file because
we don't need it anymore. In with that, we're
done reformatting a traditional printed comic for the vertical
scrolling web version.
5. Preparing Web for Print: Next, we're going to
look at how to take a vertically scrolling comic
and make it for print. To me, this way is a bit
more time-consuming, but it's still possible. Here we have my comment,
cold sugar and swords. This is just episode 47. I originally did not
intend this for print, but today we're
going to see how it would look like if
I were to print it. To begin with, there
is one important part that could make or break
this reformatting, and that is what resolution
our artwork is in. If we go to image, image size, we can see that
the resolution is 300. If your artwork is
smaller than 300 DPI, which is dots per inch
or just resolution, then your art will look fuzzy or low quality
when you print it. There are ways to upscale it, however, it's not perfect. So the best results for printing a comic mean you have
to have it in 300 DPI. So like the first way, I'm going to make a PNG version of the comic both with
and without the text. However, for this, we
need to keep the quality. So we will go to File,
Export, Export As. And then make sure
to keep this at the highest resolution. You can. Let me just change this a
bit so we can see at all. Like I said, I need to keep
the resolution is high. They can, so make sure the
scaling is that a 100%. For this, we're going to use
just PNG and then export it. And I'm going to make one for high risk, which I already made. And then also when
without our text. Now we have our version
without the text. And then we have
the original file with the original texts that we can still edit if we want to. Since this was
originally made for web, I don't have a set
size for print. The traditional
comic standard size here in the USA is about 6.625 inches by 10.25 inches
with a 1 eighth inch bleed. For this comic, I
want to use a six by nine inch with
a one inch bleed. Simply because I like how it looks is up to you to
determine the size. It could be like
square or rectangular, but remember, we are limited to the panel sizes of
the web version. So I find that the smaller
sizes may be better. I'll explain what
bleed is in a second because right now we are
going to make the new canvas. For this canvas, I want
the size of the book, like I said, to be six by nine. We're also going
to include things such as the bleed
area around that, which is the area that will be trimmed off when the
book is printed. If your panels or colors
touch the end of the page, then you will need to extend
the art towards the bleed. It does mean that part of
your art will be cut off. So be sure to keep
all the important information away from the edges. With the bleed, the canvas
is going to be 6.25 by 9.25. Here we can be good to go, but I personally like
to work in spreads, which is when there are two
pages that are together. This is what the reader will
see when the book is made. So I find this easier just
to see what they see. So document will
be 12.25 inches by 9.25 inches with a 300
resolution or 300 DPI. Dpi stands for, like I
said, dots per inch, but it can also be
read as 300 PPI, which is pixels per inch. So let's create the document. I'm gonna go to File New. I change this to inches. Like I said, the which
is going to be 12, five, then the height
is going to be 9.25. Then the resolution
is going to be 300. For now, we're going to
keep the color mode is RGB, but later we're going
to change it for print. So we have our two pages here, but we can't easily tell
one from the other. So what we're going to do is add some guidelines to add a guideline directly
in the middle. I'm going to go to view new guide and then click
on vertical position. What we're gonna
do is type in 50%. Make sure you don't forget
the little percentage sign. And then that will put a
guide directly in the center. From here, I also want to
see where the bleed will be or the area that will
be shut off when printed. So I will make a
rectangle that is one page size plus the bleed. So I'm going to click on the rectangular tool,
just click anywhere. And then right now
I'm still in pixels, but I can just type
in 6.125 inch. And then this one's
going to be 9.25 inch. And then just press, Okay. Now I'm just going to
quickly turn the color black and then get
rid of the stroke. We don't need that.
This rectangle represents one page size
plus the bleed on the top, left side and bottom. Now, I don't want to just try to place it in the middle of my cell because there could be little white
edges on the side. So to make sure it's
in the correct place, I'm going to press Control
T or just transform it. And then go back up to this
little bounding box area where there's a whole
bunch of squares. And I'm going to click
on the top left square. I'm just going to change
the x and y value to 0. And then now it's positioned
directly on the side. What you can tell lines up
perfectly with our guide. For now, I'm only going
to add in the guides to the left page
because we can just copy and pasted over
to the right side. Now, I'm going to make
another rectangle to show the actual page size. So just click on
this, click anywhere. And we'll just do six
inches by nine inches. And then we're going
to change the color of this to make it easier
to see just a yellow. Now again, I want them to
both line up perfectly. But I want this one to be directly in the center here
so we can see our bleeds. So again, instead of trying
to match it by hand, I'm going to go to my layers. So I'm going to select the
yellow rectangle hold Shift, and select the black rectangle. Then up here, I'm going to click on this little button right here where these two rectangles
are right by the line. So they both aligned
on the right side. And then make sure they
are both centered, which is this one right here. Now as you can see, the
bottom rectangle moved over. So while they are
both still selected, I'm going to press
Control T to transform. And then do the same
thing again where I click the top left box and then
0 out the positions. So now if we zoom in, this little black
area right here, represents our
eighth inch bleed. Wanted to look at inches. Then I'm going to
just right-click our ruler and click on Brushes. If we zoom in, this black area right here represents
our bleach, which is about 0.125
or just 1 eighth. Now, before I move on, I want to find the
gutter of the page, which is found directly in the
middle of these two pages. This is similar to
the bleed except instead of having part of the
page that will be cut off, you've got or maybe
covered up by being too close to the
spine of the book, are going to treat it as an area that won't be shown easily. So again, we're gonna
make a new rectangle. Click on it. And then I'm just going to
make it 0.25 of an inch and then 9.25 and inch tall. Then we're just going to
change the color to gray. Then in order to center it directly between
these two pages, I'm going to transform it. Press Control T up to
the top bounding box, make my y-coordinate 0, and then make the
x-coordinates 6.125. But inch, which will center it directly
in-between these two pages. The last rectangle we need will show where
it is safe to put our texts without the risk of it being cut
off when printing. So I'm gonna go to this
tool again, click off. And I like to make
it five inches by eight and an eighth
or point once you five minutes, just press Enter. And then I'm going
to make this green. And then we'll lighten the
color just a little bit. To align this last one. I want it to be in
the direct center of our black rectangle. So I'm just going to select it, scroll down and then
while holding down control and going to
click on the rectangle. So just the rectangle, the black rectangle integrate
one or both selected. Then going to, again, go up here and centered them. And again they shifted places. So I'm just going
to transform them, go up to the corner and
then 0 out their positions. That was a lot to take in. So let's review. The
black on the top, bottom, and left side shows
the bleed area, which is the area that will
be cut off during printing. The yellow it shows the printed
area and the green shows where it is safe to put any texts and
important information. In the gray shows
the gutter which may be covered up in
the spine of the book. If you've had a hard time
making this, then no worries. I will also include this file in the resources to download. From here. I'm going to move
our grade gutter up. Before I forget, let me just
rename all these layers, make it easier to see. So gray is gutter,
greenest safe area. Is the page. Then black is bleed. Then I'm going to select
everything but the gutter. Put it in a group and we'll
just name it left page. So from here, I'm
just going to drag our Grouped layer
into the new layer, or just the plus right
here at the bottom, which will copy it. I'm going to, first of all
rename this to write page. I'm going to press Control
T to transform it. Right-click and do
flip horizontally. And then now I'm
going to go back up to this little
bounding box area. Click the middle
right box right here, and make the x-coordinate
6.125 of an inch. Then press Okay. Now to make the actual guides, I'm going to select
all of our shapes, which includes the gutter,
right and left pages. Go into View. And then New guides from shape. And then after clicking that we automatically have all
our guides in place. Now, you can either hide or delete all these shapes
that we've made. I personally like to hide them
in case I need them later, as well as lock them just so
I don't ship them around. And also I'm going
to go into view and lock guides just so I don't accidentally move these
guys around as well. So now we're going to save this. And then I'm just going
to save it as six by nine inch print template. With that, we're done
with the documents setup. Like I said earlier, I will include this specific document in the project resources in case you've had problems
setting up yours. With that, we are
now ready to get our panels into the document.
6. Moving Web Panels Over to Print: From here, I'm going to
save a new version of this document just by
going to File Save As. And then we're going to name
it the name of the comic, which for me will be
sugar and swords. And then you're going
to want to put what page number it is. I'm just going to put 12. And then we're going
to press Save. Again, just like changing the
format of a print to web. When changing webs prints, make sure you keep
the same file names, such as if you're
keeping the name and then page when it's due, the next page is of
course going to be the name of the comic
page three dash four. It helps with file management
down the road when you have a lots of
documents that deal with. So for this example,
like I said, I'm going to use episode 47 of my comics,
sugar and swords. I'm going to go over and grab my high res PNG without
any of the text. And then the last version
we're going to select it with, of course, the selection tool. Press W to bring up the wand, hold down Alt, and
then just click in the white areas to we're
only selecting the panel. And then copy and
paste it in here. Then I'm just going to move
this over to the side. Check to see if there's any speech bubbles which
there isn't in that panel, I'm going to go ahead and get
the other panels situated. So now I'm just going to
copy and paste the text. Now, unlike my last comic, I don't use shapes for
these speech bubbles. Basically how I made the
speech bubbles was by going into the layer effects and adding a stroke that way. When I select my speech bubbles, I'm just going to lasso them, copy and then paste them, which you can't see because
they're just white on white. So I'm going to re-add in my
stroke, going into stroke. And of course changing the color to black so we can actually see it making your desired width. I think I will keep
it at five for now. Then now I'm just
going to select my type and paste them over. And then we'll just
move them here for now. I'm going to fix
that in a second, but for now I'm going
to get the rest of my panels can type on the page. So now that all our panels
are on this one page, I decided to leave
this page blank because I'm going to
have this episode, episode 47 on this page. And then on the next going
to start Episode 48, just because my
comic is episodic, so many of these
little short stories don't easily relate
to each other. So there's going to be a
distinction between the two. Now, already, as you can see, if we bring back up our pages, we can see that all these panels are kinda sitting in the gutter
or not in the safe area. So I'm just going to
quickly select them all and fix that. The hard part about this is that not every panel will easily
fit on a comic page. You will have to do a
lot of experimenting to see where the best placement
will be for each panel. I like to keep the text
smaller than the wet version. So this text is going to end up being around seven
or eight points. Which right here is
me. I want to adjust. You can have it
bigger if you want. This is just what I find
looks well printed. It helps to actually
print out the page that you've just made to see
how easy it is to read. You may even need to redraw or cut off some panels to
make it work on a page. Another thing to keep
in mind that you shouldn't scale up these
pictures right now, like I've said, they
were made at 300 DPI, but if I were to seal
them up greatly. If I wanted like a full-page, we can see that up close, it starts to pixelate
and loses quality. This is one of the reasons
why it's harder to format a web comic for print rather
than a print comic for web. Since we are limited to how big the existing panels can be. If you need to, you can
scale it up just a tiny bit. But don't go overboard. You can always, again print out a test version of it and you can judge the quality
of it yourself. So I'm going to go ahead and clean up this
page right here. The thing is, I am
trying to fix well, formatting this comic is the type mainly in the
placement of the panels. Lucky for me, this
episode easily fits on one page and it can be easily
read from left to right. But I've noticed
the type that I'm currently using doesn't match
the other episode fonts. So I'm redoing that as well
as redoing the bubbles because since I'm using a
rasterized layer with a stroke, if I were to try to
scale these up a lot. Right here, the edges of the stroke and
get very pixelated. Because of how I set this up and because I don't use shapes. With this comic, I
ended up redoing all the type and speech
bubbles for this episode. Lucky for me, the type
and speech bubbles are on their own layers so I can still place them
wherever I want. And because of spacing issues, I think I will add a banner at the top which will
show what episode. Because like I
said, this comic is formatted in episodic episodes. Episode like May 7
not quickly relate to Episode eight or Episode nine because they're
all basically one-offs. So I'm trying to create a
distinction for the rear to easily see which panels
go to wish episode. Again, these are the things
that you need to think about when reformatting
a web comic. One format may work and
read easier than another. So it, when reformatting, you may need to
think about changing the style of your comic
a little bit as well. So here it looks
awfully formatted. Something to keep in mind is a space between each panel's. I tried to make
sure they were even between these areas right here. And also wept enough room
for the speech bubbles. Vertical scrolling, web comics. You can put the type in any of the whitespaces
very easily. But for print versions,
as you can see, having to type hang out unnecessarily whitespace
in-between these panels. Now you can make it
work like I did here. But when formatting, it's probably easiest
to make sure that the type stays inside or as close to the
panel as possible. Just so you can create good
whitespace in-between. So I may even want to move
this here if I want to. Just see how this would look. And then play around
with the possibility of maybe moving these two
panels closer together. Again, it's all about
experimenting because you're out how you want to set
up panels and pages, as well as looking at
reference materials from us, some of your favorite comics,
you see how they do it. For the purpose of this class, I'm going to leave it as is. But in the future, if I were
to actually print this, I would experiment more with how I want these
pages to lay out. Then as always, don't
forget to save. Here are some more examples of other episodes reformatted
as a print version. The web version, I had this all one continuously
scrolling down the page. But for here I ended
up getting into its gradient because
the background of the panels in the original
wear colored as well. And I ended up reformatting all the words and
bubbles as well. However, there's some episodes
such as my first one, which I ended up doing
a little differently, which is going to take
some time to reformat. Looking at the original, it's all one singular scrolling
with panel, top of panel. So reformatting niche is teaching a lot more
experimentation. I have this version
where I would have to redraw and extend this panel to the black parts of the edges, as well as adding a type
probably in these white areas. And then I was
experimenting with another version
where I was keeping more of the original
scrolling format by having two
columns right here. The version I will probably
most likely go with is this one after I finished
editing it all out, just because it reads more
like a traditional comic, which is what we're going for. Which is, of course is
one big page right here, which is where some
texts is going to go, as well as a more flowing
motion going back-and-forth. So not every episode you have or every panel
will easily translate. But given the time and
effort, it can work. This page right here, it seems a little busy, but
it is still manageable. I like to have about five
to seven panels per page, but maybe closer to five or six. In of course, as you can see, I need to finish reformatting
it just because this type, bringing back our guides
goes beyond our safe area. And looking at another
episode I make, I varied the panel sizes on the original and
trying to put them here. They are different sizes. So what I may end up doing is either extending this panel
up by drawing more into it, or even just cropping
this panel down. So it matches the other one. It would be easiest just
to add onto this panel. Simply because this
background is quite simple. Then what I would
probably do is just move this text up here
in this whitespace. So at the end of the day, it takes a lot of experimenting. But in telling you will
be able to reformat it. Once you are satisfied
with how it's laid out, now, it is time to
prepare it for print.
7. Preparing and Exporting for Print: I don't know if you've noticed, but this whole time we've been
working in RGB color mode. And for printing, it
needs to be in CMYK, which is just
another color format used for actual ink printing. If you're curious,
the C is cyan, the M is magenta, m, The Y is yellow, and the K stands for black, or like the key color. To not mess with this
original RGB version, what I like to do is save another version
and an underscore. It's not something you have
to do because you still have the original web version is just something
I do out of habit. And then if need be, I would merge any layer
effects that you have, such as if you have
any color modes, such as a multiplier effect or a light-skinned or screen
out to flatten that out because those may
be effective when you change the
color mode to CMYK. So we're going to do is go
to image mode and CMYK. Then I don't want it to flatten and then I'm just going to press OK. And it's going
to take a minute to finish recoloring already. As you can see, this
top row right here, if I go back and forth,
the vibrancy changed, which honestly is to be expected because
the original color that I had wasn't in the crushed colored dynamic
that would be printed. Little confusing. But honestly, if it looks
good to you right here, then you don't
need to change it. But it's a color change is too drastic than we
can always go into the layer and simply re-color
to something we like. But again, if I were
to re-color this, you can see I have this little
caution sign right here. Any of these colors right here would not easily be printed. In order to make sure that
I print the right color, I'm just going to click
on this and it will crop to a color that
will be easier to print. I'm just going to
leave it as this. And then before I move on, something to keep in
mind is if I go to the channels and look at
our color separations, we can look at how each
color by itself, we'll look. You only need to worry
about color separations if you are planning on presenting
with an offset printer. Now there's two types
of printers that are mainly used throughout
printing industry. It's offset and digital. Digital basically
can easily take in RGB document and print it. Whereas an offset printer will actually create
physical plates. Each width colors separated. So like one physical plate
will have only the black, and then another
plate will only have yellow, another magenta, cyan. And then basically it
works like stamps. And it's stamps, each color
onto the paper together. This isn't super
necessary information. You need to print your comic. I just figured I toss it and just in case
you were curious. But going back to the
chance of printing offset, you want your type to
only be a black color. Because if we get rid of, let's say all the layers
but saying and zoom in. There's still science
in our black type. And if we look only at magenta, there's so much into
inner black type. So if we go and highlight this black color
which looks flux us, we can look at the CMYK
color separations, but they're all distributed
between the colors and not 100% black or case. We're going to fix
that right now. So I'm just going to 0 out all these and then make sure K 100. Now looking at the preview, it does look rare, but when printing it
will still look black. And then we're gonna do this
for the rest of the type. Speed up the process. I made
a swatch, a 100% black. So by highlighting this, I can just click on the a 100% black and it
automatically changed it. Have your type 100% black just means that
when you print it, it won't be fuzzy at all. So if we go back to our channels and then
look only at say yellow, our type is gone. But if we look just at the black separation,
It's right there. We also want to do this for the outline of our
bubble if you have it. For me, because all my
bubbles are on one layer. I'm just going to double-click, go onto this joke effect, and then make sure this
color is 100% black. There we go. Another thing to note on is if we are printing
this part right here, we have a lighter
color on black type. Looking at our channels again. If I were to get rid
of the black colors, if we were to use
an offset printer, there's a chance
that there would be a white border around this type. So we're going to do what
is called overprinting, which is making sure that this
black type we'll print on top of this colored rectangle. In programs like Illustrator, there is a checkbox you
would use to do this. But for Photoshop it's
a little different because you don't normally
do this in this program. But a way to get around
it is going to hear type and then going
on to multiply. So that way when we go
to our black type again, if we get rid of the black, there's no white type around it. Again, this is a minor thing
that may be dealt with in PRE press for whatever
specific place you decide to print in. But again, I'd figured
I'd let you know. So at this point
you will continue to reformat your web comic into the print version and
compile them all into one PDF. Now, the way I like to
combine them all into one PDF is by using InDesign. If you don't have InDesign, then you can always
export every page into a PDF and institute
all the PDFs together. To make this Photoshop
document a PDF. We're going to go to File, save as they go down
into Photoshop PDF, which is what I already
did right here. But yes, the way I like to do
this is in InDesign. Here. I have just opened InDesign, so I'm going to create
a new document. And then I'm going
to make sure it is the same size as the
one that we've used. So I'm just gonna
change this to inches. This is going to be six by nine. And then I'm going to
add the bleed in 0.125, which is an eighth of an inch. And then I'm going
to click Create. Give it a second. So as you can see, we have our six by nine inch paper and this red line shows
where the bleed will be. So now we have our
document created. I'm just going to go to pages and then add
some more pages. Making sure the patient
numbers add up to a factor of four means that you have
a top cover right here, which would be the
front of the book. And the last page would be the end cupboard or
back of the book. Some print shops want
you to have their front and back cover on
their own document, while others may not mind having them in the same
document as the pages. This is just something
that you'll need to ask your printer yourself. So I'm just going to open
up my files and then drag and drop the Photoshop
file right into InDesign. And then we're going to
make sure to line it up to our bleed area. Then if we set up
the file correctly, it will match perfectly with
this InDesign document. Then at this point, we will continue to place all our pages inside this InDesign document until our entire
book is complete. And then once that's
done, you of course, would add an a cover
image right here on the front and then a
back cover on the back. Or you can do that
in its own document. And then once you're
all complete, you would go to File Export, and then export as PDF. For print. There are different PDF presets that your printer it May 1. So again, you may
want to talk to them, but if you don't know, then just exporting it as the regular PDF
will work as well. One of the final things
you may want to do to make sure all your type
is in 100 per cent Blache is to go to Window output and then
Separation preview. This will allow us
to turn off and on the color separations to make sure that it's
separated correctly. Now, as you can see, if
I look through here, are black is not separated. Now that I remember, I forgot to save it to reflect in here. So whatever changes we made to our original Photoshop
document will be reflected in our
InDesign document. So if I just go back into my original Photoshop
document, save it. And if we look back
at our InDesign, we can open up the links, double-click this to refresh it. Then now once we look at
our color separations, block is now only
on the black layer, which I forgot to make the
black layer on the title type. So again, this is a good way
to double-check your work to make sure everything
is accounted for. So now it is correctly
separated and the colors. And of course we want to do this to the rest of the pages, save it as a PDF, and then send it off to print.
8. Outro: With that, we are now done reformatting for
both print and web. If you have a whole
series already finished, then at this point you
will continue to repeat those steps to reformat
each page or episode. If you are still making
your comic today, then I would recommend doing
all the reformatting or prep work for printing
as you finish each page. That way, once your
comic is finished, you won't have to spend days at a time working on
the reformatting, which is what I am going
to have to do if I ever want to print a my
sugar and store its comic. Going off of that, if
you are interested at all in the comments
I've showed here, I will provide links below
if you want to read them. The more detailed one
is called crystallized. It's about a girl who gets infected by it,
teleported crystal, and is now forced
to travel to some of the most dangerous
places in her world. The more cartoony comic is
called Sugar and swords. And it's a slice of life about
the daily life of an MPC. Both stories are ones
that I've made in love. So if you're interested
in, please check them out. I hope you all get
some good music on and just have fun
reformatting your comic. It may be tedious at times, but having a comic for different sites and
format could greatly expand the number of readers or how your readers
viewed your comic. That is all I have to
say on this subject. So I hope you guys
have a great day. Bye bye.
 Katie, Illustrator and Graphic Designer