Transcripts
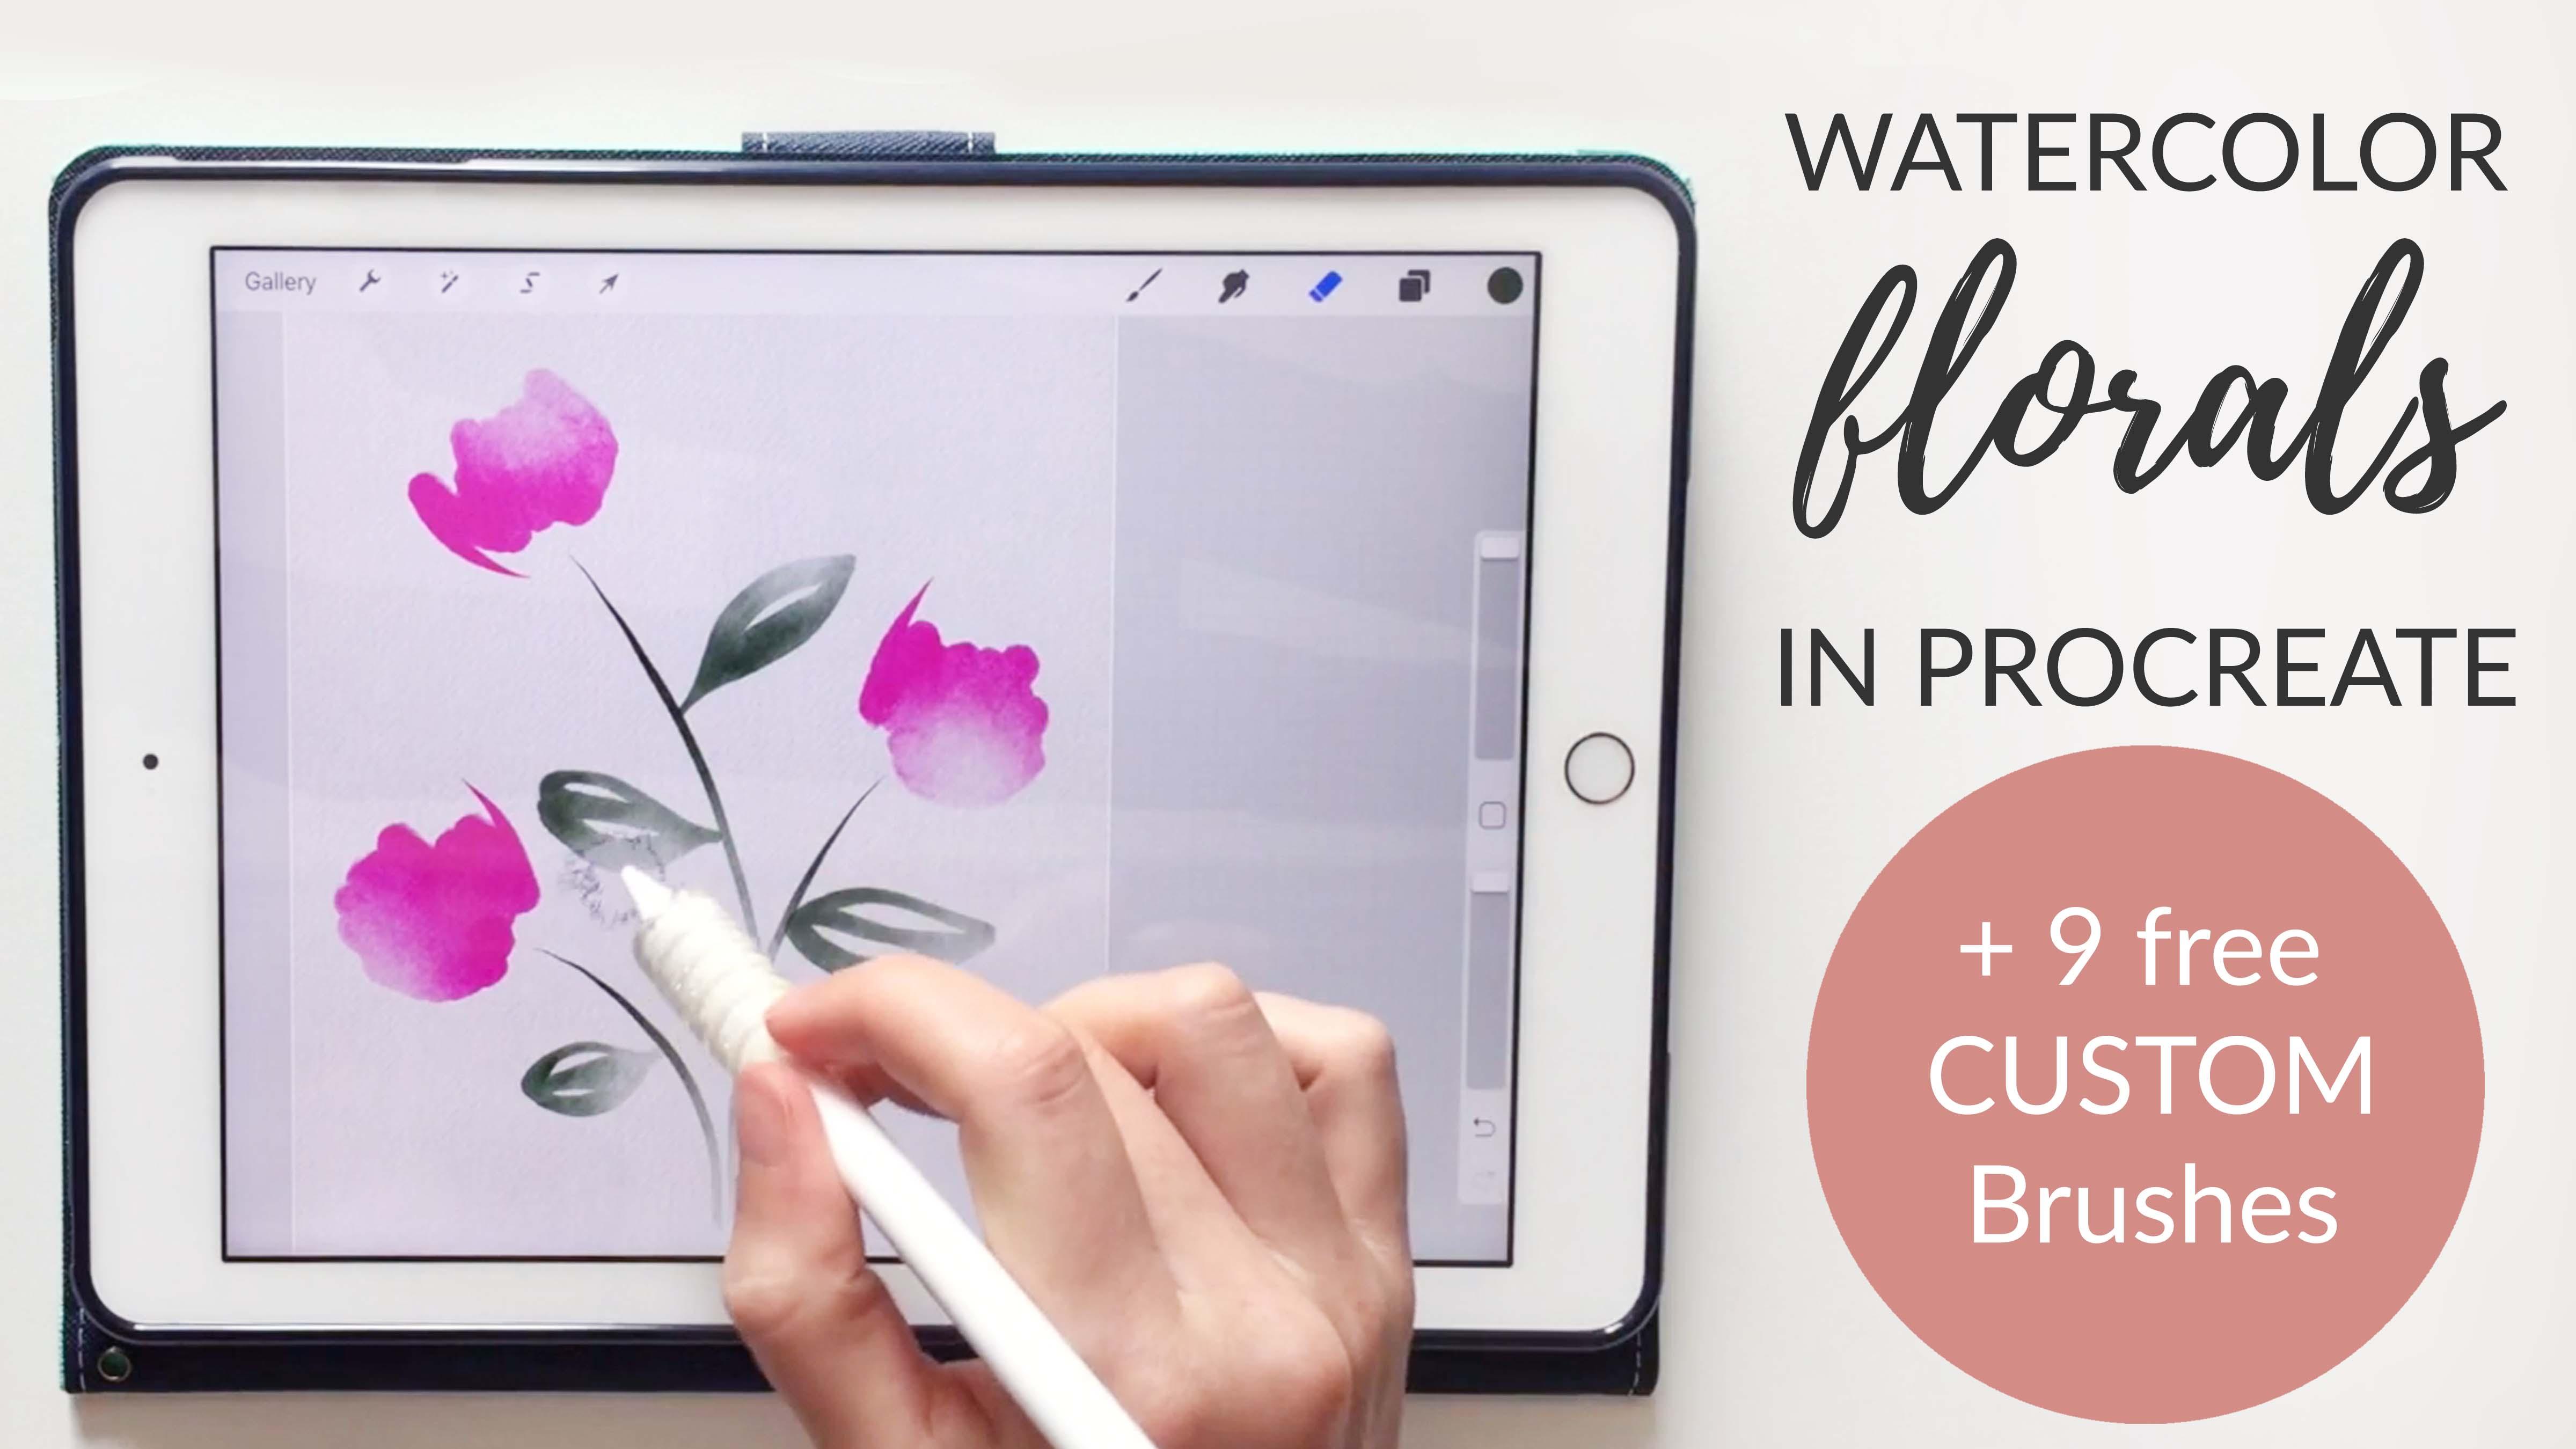
1. Watercolor Florals on Your iPad: Hi everyone. I want to show you how to make beautiful watercolor florals on your iPad. Using the app Procreate, we'll cover watercolor methods like layering, darkening, and masking fluid. I'll show you how to make everything from abstract ink and watercolor paintings to loose modern floral bouquets. I made a watercolor texture paper, and 10 watercolor brushes that are specific for working with florals. I want to share both of these with you as a free download when you take this class. The amazing thing about this process is that you have access to every paint color in the rainbow and you can make changes to your painting throughout your process. So if you want to change the placement or the darkness or the variation, you can do that throughout this whole process. All you need is an iPad and Apple pencil and the app Procreate. Let's get started.
2. Passwords Download + Getting Started: You can find all of the materials that I mentioned in this class in the about section of the class page, and here is the password that you'll need to access that page. Let's get started with our first floral painting, so I want to show you how I set up this document. If you've never used procreate before or you're not confident with your procreate skills, I would recommend going back and watching my first-class. I go through all the basics, I covered the brushes and how to import images, and change sizes and things like that, so if you're a total beginner to procreate, go ahead and watch my beginner class first. This is more of an intermediate level. If I click my "Layer panel" here, you can see I've got three layers. The first layer is the "Paper texture" that I have for you as a free download in the course description, and the second layer is that same piece of paper just rotated one time, so two of the same sheets of paper. The only difference with these is, the first one is set to "Multiply" and the second one is set to "Linear burn". They're both set to about 50 percent opacity, you can leave these at a 100 percent opacity, it just depends on how dark you want your paper background to be. Then I always lock the slide to the left and click "Lock" because I don't want to accidentally paint on those, so you can choose to lock those layers as well, and then I have one other layer that's just a blank layer and I have that set to "Multiply", so that'll be the layer I use for painting, and I'm also going to duplicate that a few times so I can paint on several different layers. The next thing I'll do is go in and lay down an ink drawing so we have something to paint over our watercolors, so I'll start on the bottom layer here, and I'll just grab the "Sketching brush", the "Narendra pencil", and it's all the way up, and I also increase the streamline to about 85 percent. That just makes it a little bit more smooth. I'm just going to draw a few abstract plurals in black here, but you could do this with any color. Now that I have a flower drawing, I'm going to go to my "Layers panel" and get on the next layer. I want to be sure I don't paint on my ink layer. That's really important with this process, and I'll grab a color here. I tend to go with medium colors because the process we're going to use is going to increase the darkness and lightness of different areas. I always choose a medium range color, so not too light, not too dark, and you'll see why I do that in just a second here. I'm going to click my "Floral brushes", and you can use any of these, but I'm going to start here with a "Rough Brush', so this has a blunt edge, so this one has a sharp edge, and that one has a blunt edge. That's the main difference here. I want to get my blunt edge, and have a little bit of roughness in the texture. The important thing here, if you don't want to see the overlapping, is to not pick up your pencil, so we can do it this way, and then we just have one big shape that looks like it was made with a single wet watercolor brush. Then if you see any areas that make it clear that you are painting with the pencil, you can just rub over those, and then release. Now I want to add a little bit of variation to this, so I'm going to duplicate that layer that I just created, and then I'll grab my "Eraser" and my "Cloud brush". This brush is really nice for creating some variation, so there's already a little bit of darkness here and here, so I want to keep that natural darkness. I'm just going to erase a tiny bit with my "Cloud brush" up here. Then I may go down here a little bit. It's totally random, you can do this however you want, so that created a little bit of variation, but I want a little bit more, so I'm going to pinch these two layers so that they merge with each other, and then I'm going to erase a little bit more to create a little more white. You can keep doing that, you can go even lighter if you want. We can duplicate this again if you want to go really dark, and erase a little bit, merge these together, and then erase again, so you can see this is totally your personal preference. However, you want to do this, so we can do it that way, or we can do this in individual paddles, so let me grab my brush again, same color, same brush, and each pedal I'll do separately, and then lift up my pencil each time. Then I'll just do that same process; duplicate, do some erasing. Maybe I'll erase just the tips of these so that it looks like I started in the middle, and then painted out and the pigment was more watery as I got out to the edge of the petals, so that's one option. Then you can see the difference between these two. This one's more of a single blotchy brash, and this one's more of a layered look, so switch just depend on your personal style; which one you like. Let's do one slightly differently here. I'll grab my "Sketching brush" again with black and go back to my original sketching layer. Let's do a really simple flower here. I'm on my sketching layer, I'm going to move to a new layer, and let's move to a blue color for this one. Again, I'm picking a medium tone. Let's use that same brush and just do some big circles on these. For this one, what I want to do is create two different colors within the same circle, so just like if you were using a watercolor brush and you did a wet circle and then added to different pigments to do two different sides of the circle, we can create that same effect here. I created those circles, I want to go ahead and duplicate, and let's make this brush a little bit smaller, go in with our "Cloud brush", and just make a few little changes. I'm trying to keep this really random, so I'm going to different sides of the circles each time. It's a little more than I wanted, so that looks good, so now I want to add in a different color. I'm going to click "Duplicate", and then on this top color here, I'm on my top layer, I'm going to click the "Adjustment tool", "Hue Saturation," and then let's choose a color that would look nice with that blue, so see, I like the purple, so we could choose something similar or contrasting color. Let's go with this blue green. I've got two different color layers here. I'm going to grab my "Cloud brush", and I'm going to make it pretty small so you can really see what I'm doing, and I'm just going to start erasing one side or little areas of each of these. Again, I'm trying to keep it really random going to different sides each time. I don't really like that color anymore, so I'm going to go back to "Hue saturation", and now I can really see what the two colors look like together, and that can help me make a decision about which color I want to go with. I like the two purples together, I also like the subtle pink and purple, so let's stick with that one. We could go even further, we could erase more. We could erase more of the red here to really reveal that blue color. We could also go to our blue layer, and do hue saturation and play around with the color there, so you may find there's a better combination that you would like more. I think I like my original one, so I'm going to click "Reset" and stick with that.
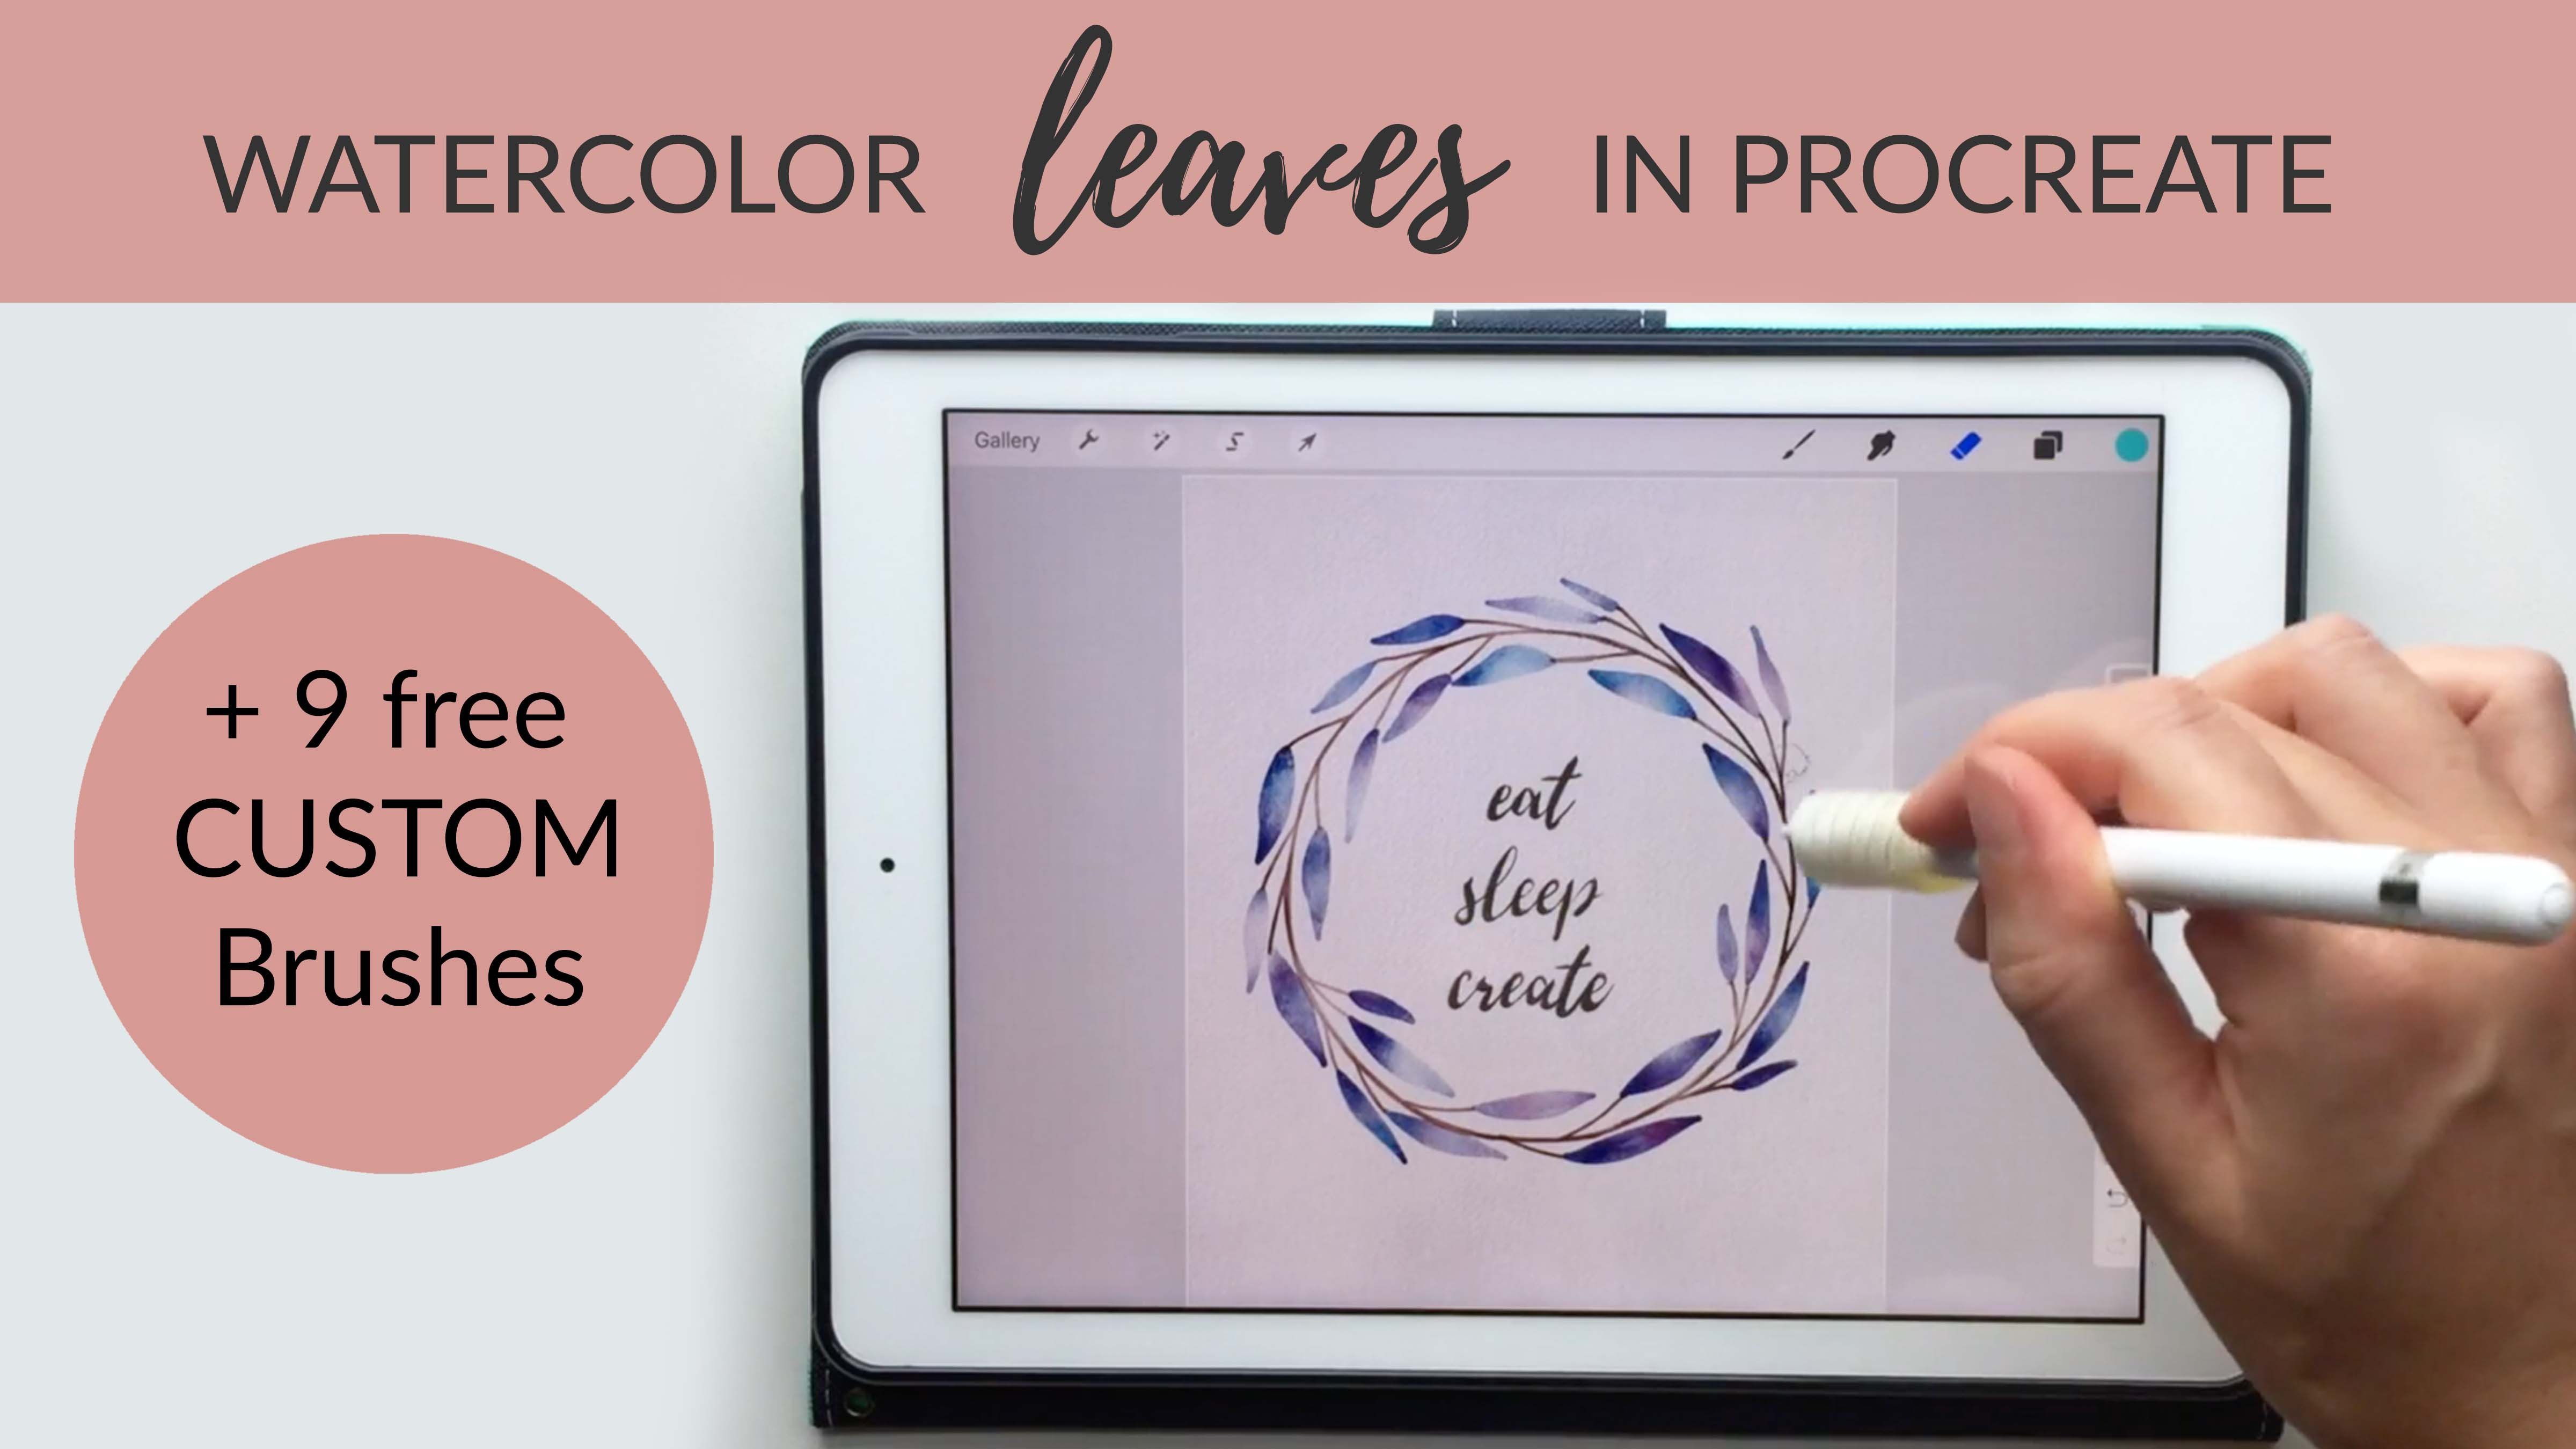
3. Creating Variation: Let's do one more flower here with a lighter color. I'm going to grab my narrow under pencil again, go back to my sketching layer and let's add one more flower down here. For this layer, I'm going to choose a yellow. I'm getting on a brand new layer that doesn't have any paint on it yet and let's grab the controlled edge brush. This one's a little bit different than the one we used before. The one we used before has a really rough edge. It's a lot like a messy watercolor brush so you can really see that watercolor texture on the edge. Whereas this one is going to help you make much more accurate wines and it's a lot easier to control shapes with this. If I was doing like painting a leaf for painting and actual flower will do in one of the future lessons, you'll see I always use this brush for accuracy because it's a lot easier to control than the other brush. Same thing, I'll go in here and duplicate this layer and get a big cloud brush. I think I'll erase the top on this one so that the bottom can hold a big well of ink. Combining these two and erasing again, duplicate again an array. Doing this layering technique is what helps it look more realistic. If we did this all in one shot, it would be clear that we were just using an eraser brush. I'll keep working on this, but I'll speed up the video so you can just see my process but I think you get the general idea was laying down color, layering and erasing the spots that you want to remove. I'm almost finished with this. I don't like how I've got two blues right beside each other so I'm going to go into this newer one and reduce the opacity a little bit and then use my hue saturation changer to find a better color for this. This is the really cool thing about this process, unlike real watercolors, once you've committed to a color, you can't change it anymore. With this process you could play with color for hours and just get the exact color that you want. I'm going to go with a blue teal here. Then if that isn't quite enough, you can go back to that same tool and go even deeper into that same color. I might go a little bit lighter, a little bit darker, and then play with the hue. I wanted to show you a couple of other bouquets that I made so that you can get an idea of the range of options. With this one I mostly did ink and I really just use the watercolor as an accent. Then each watercolor I combined a few different colors, so the green and orange have some yellow and the blue has some yellow in it to make some nice color blending. Then in the next one here, I did just a few flowers and then put some really bold vibrant colors on them. You can make some nice symbol ink drawings and then really bump them up with these bright colors. Then the last one's really simple, I just did four really simple flowers and put some really bright colors in that contrast nicely together.
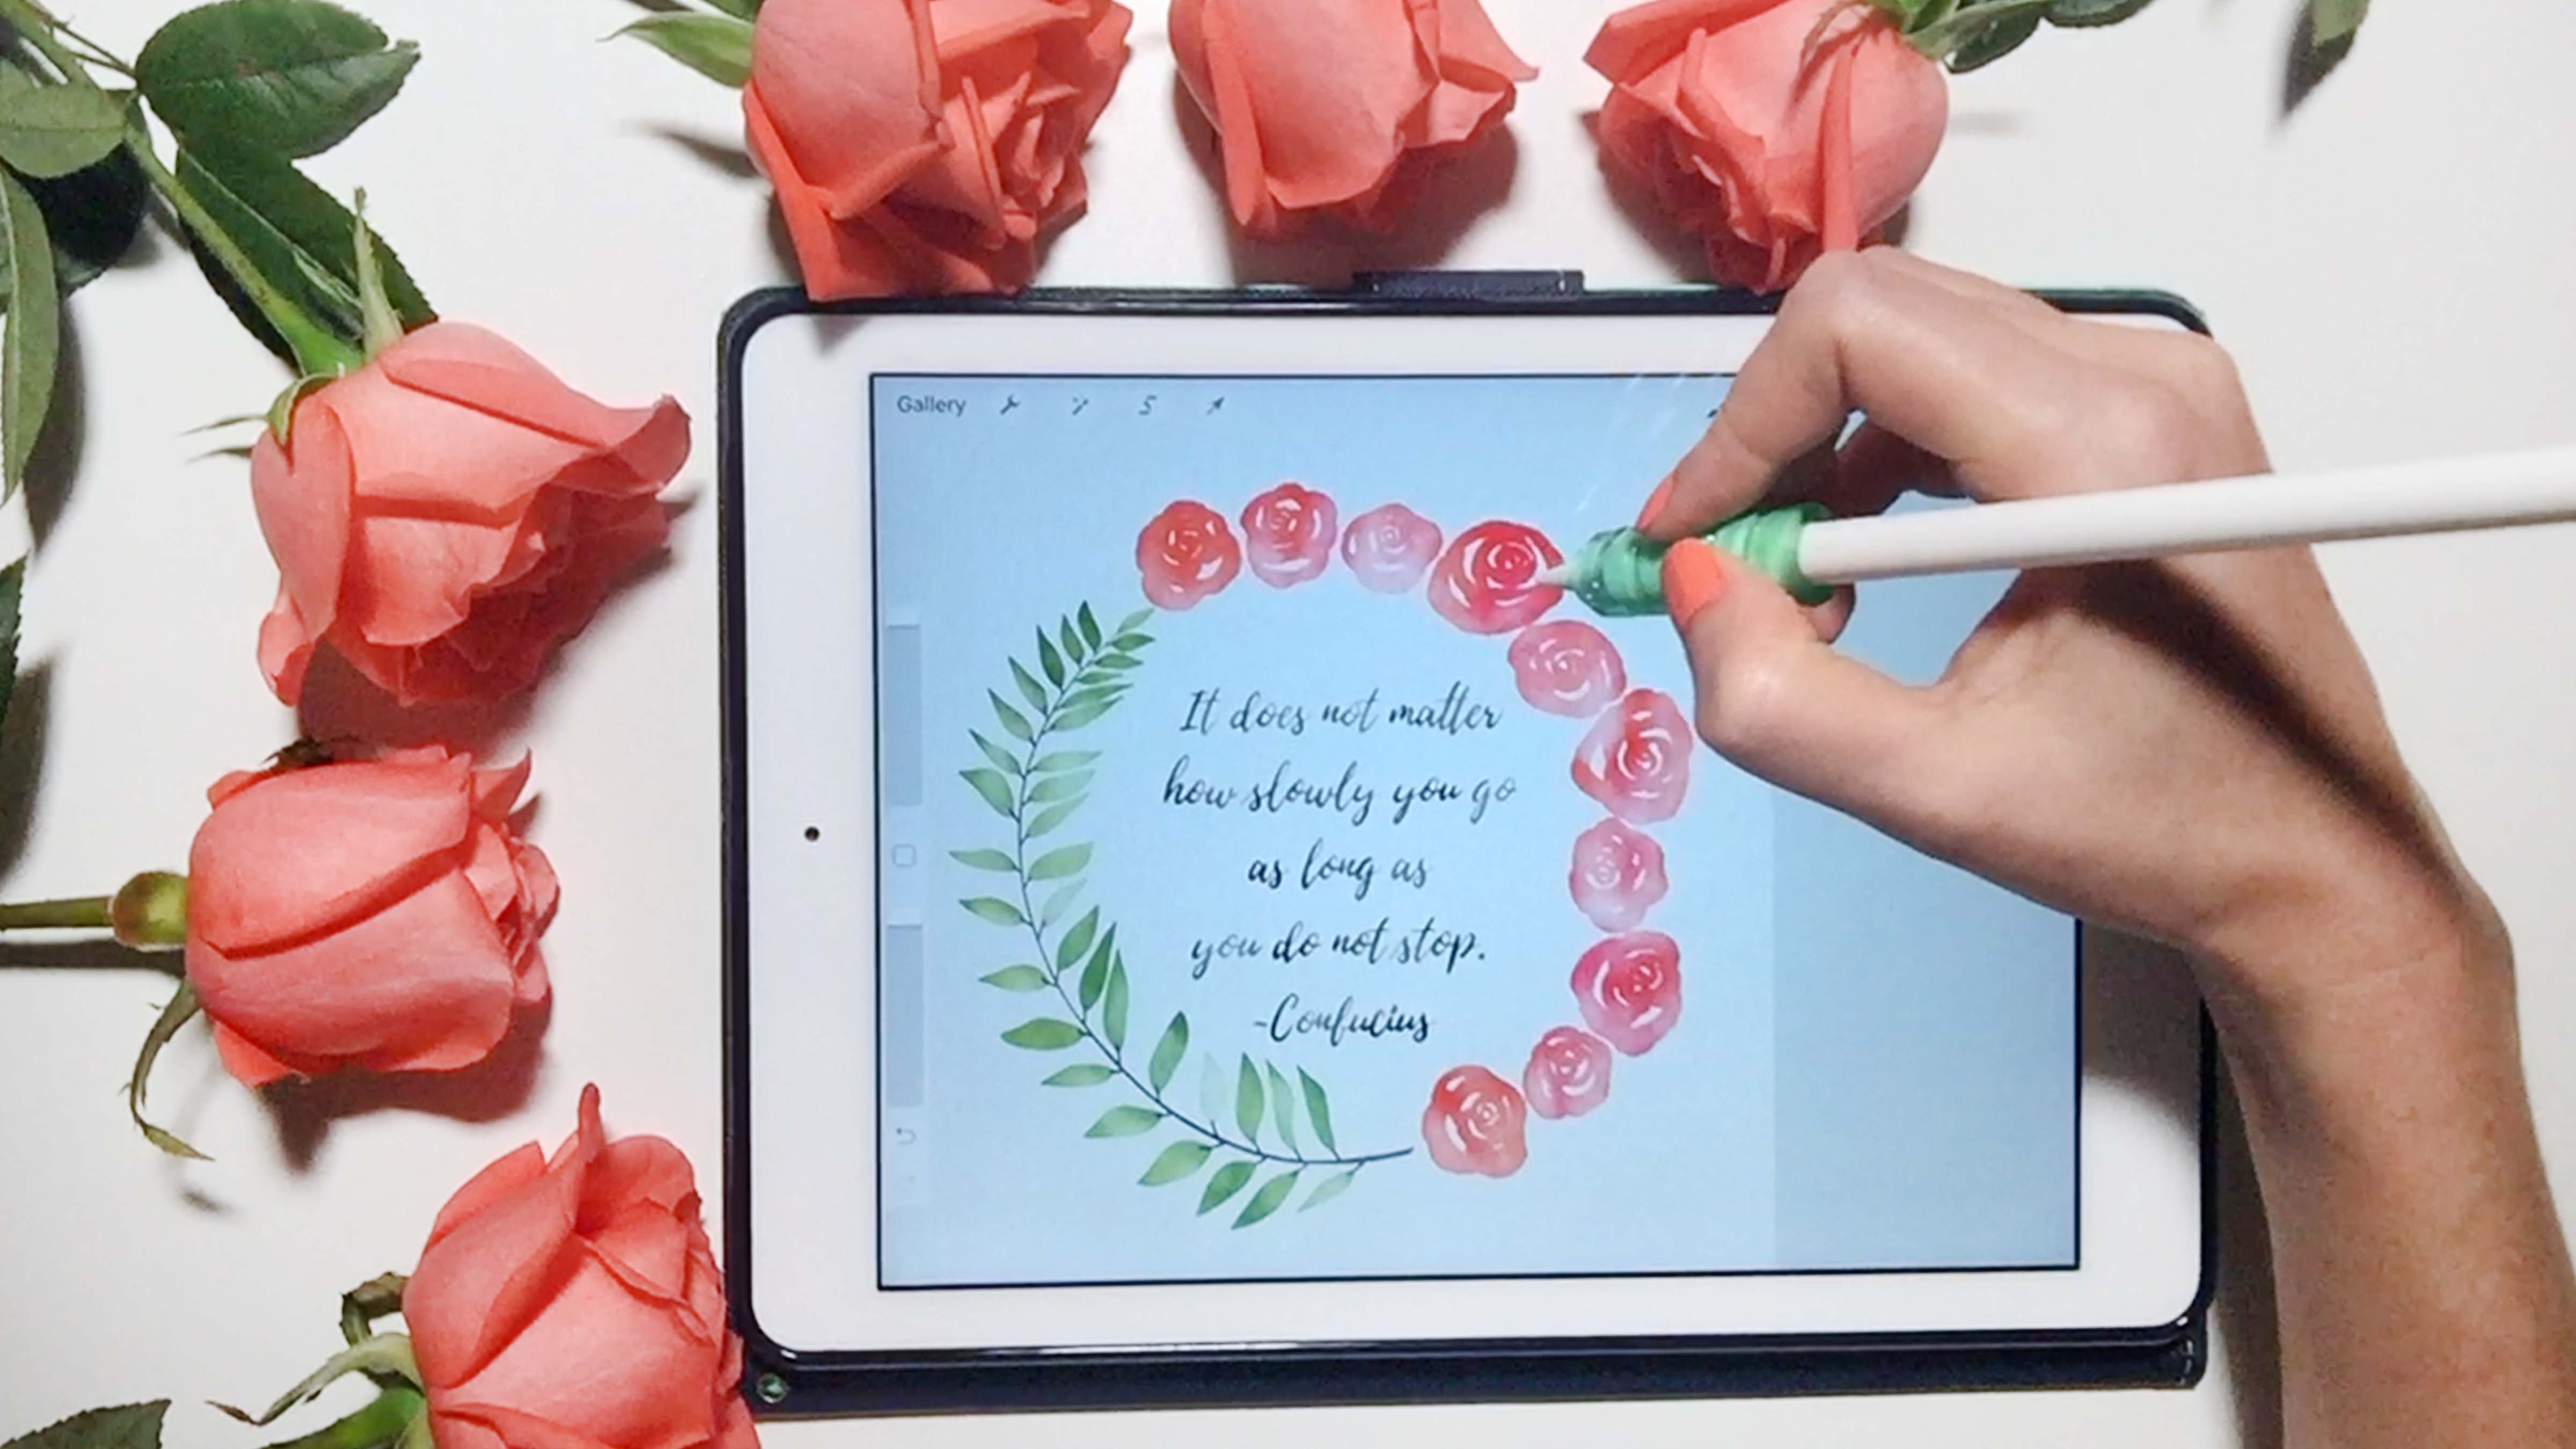
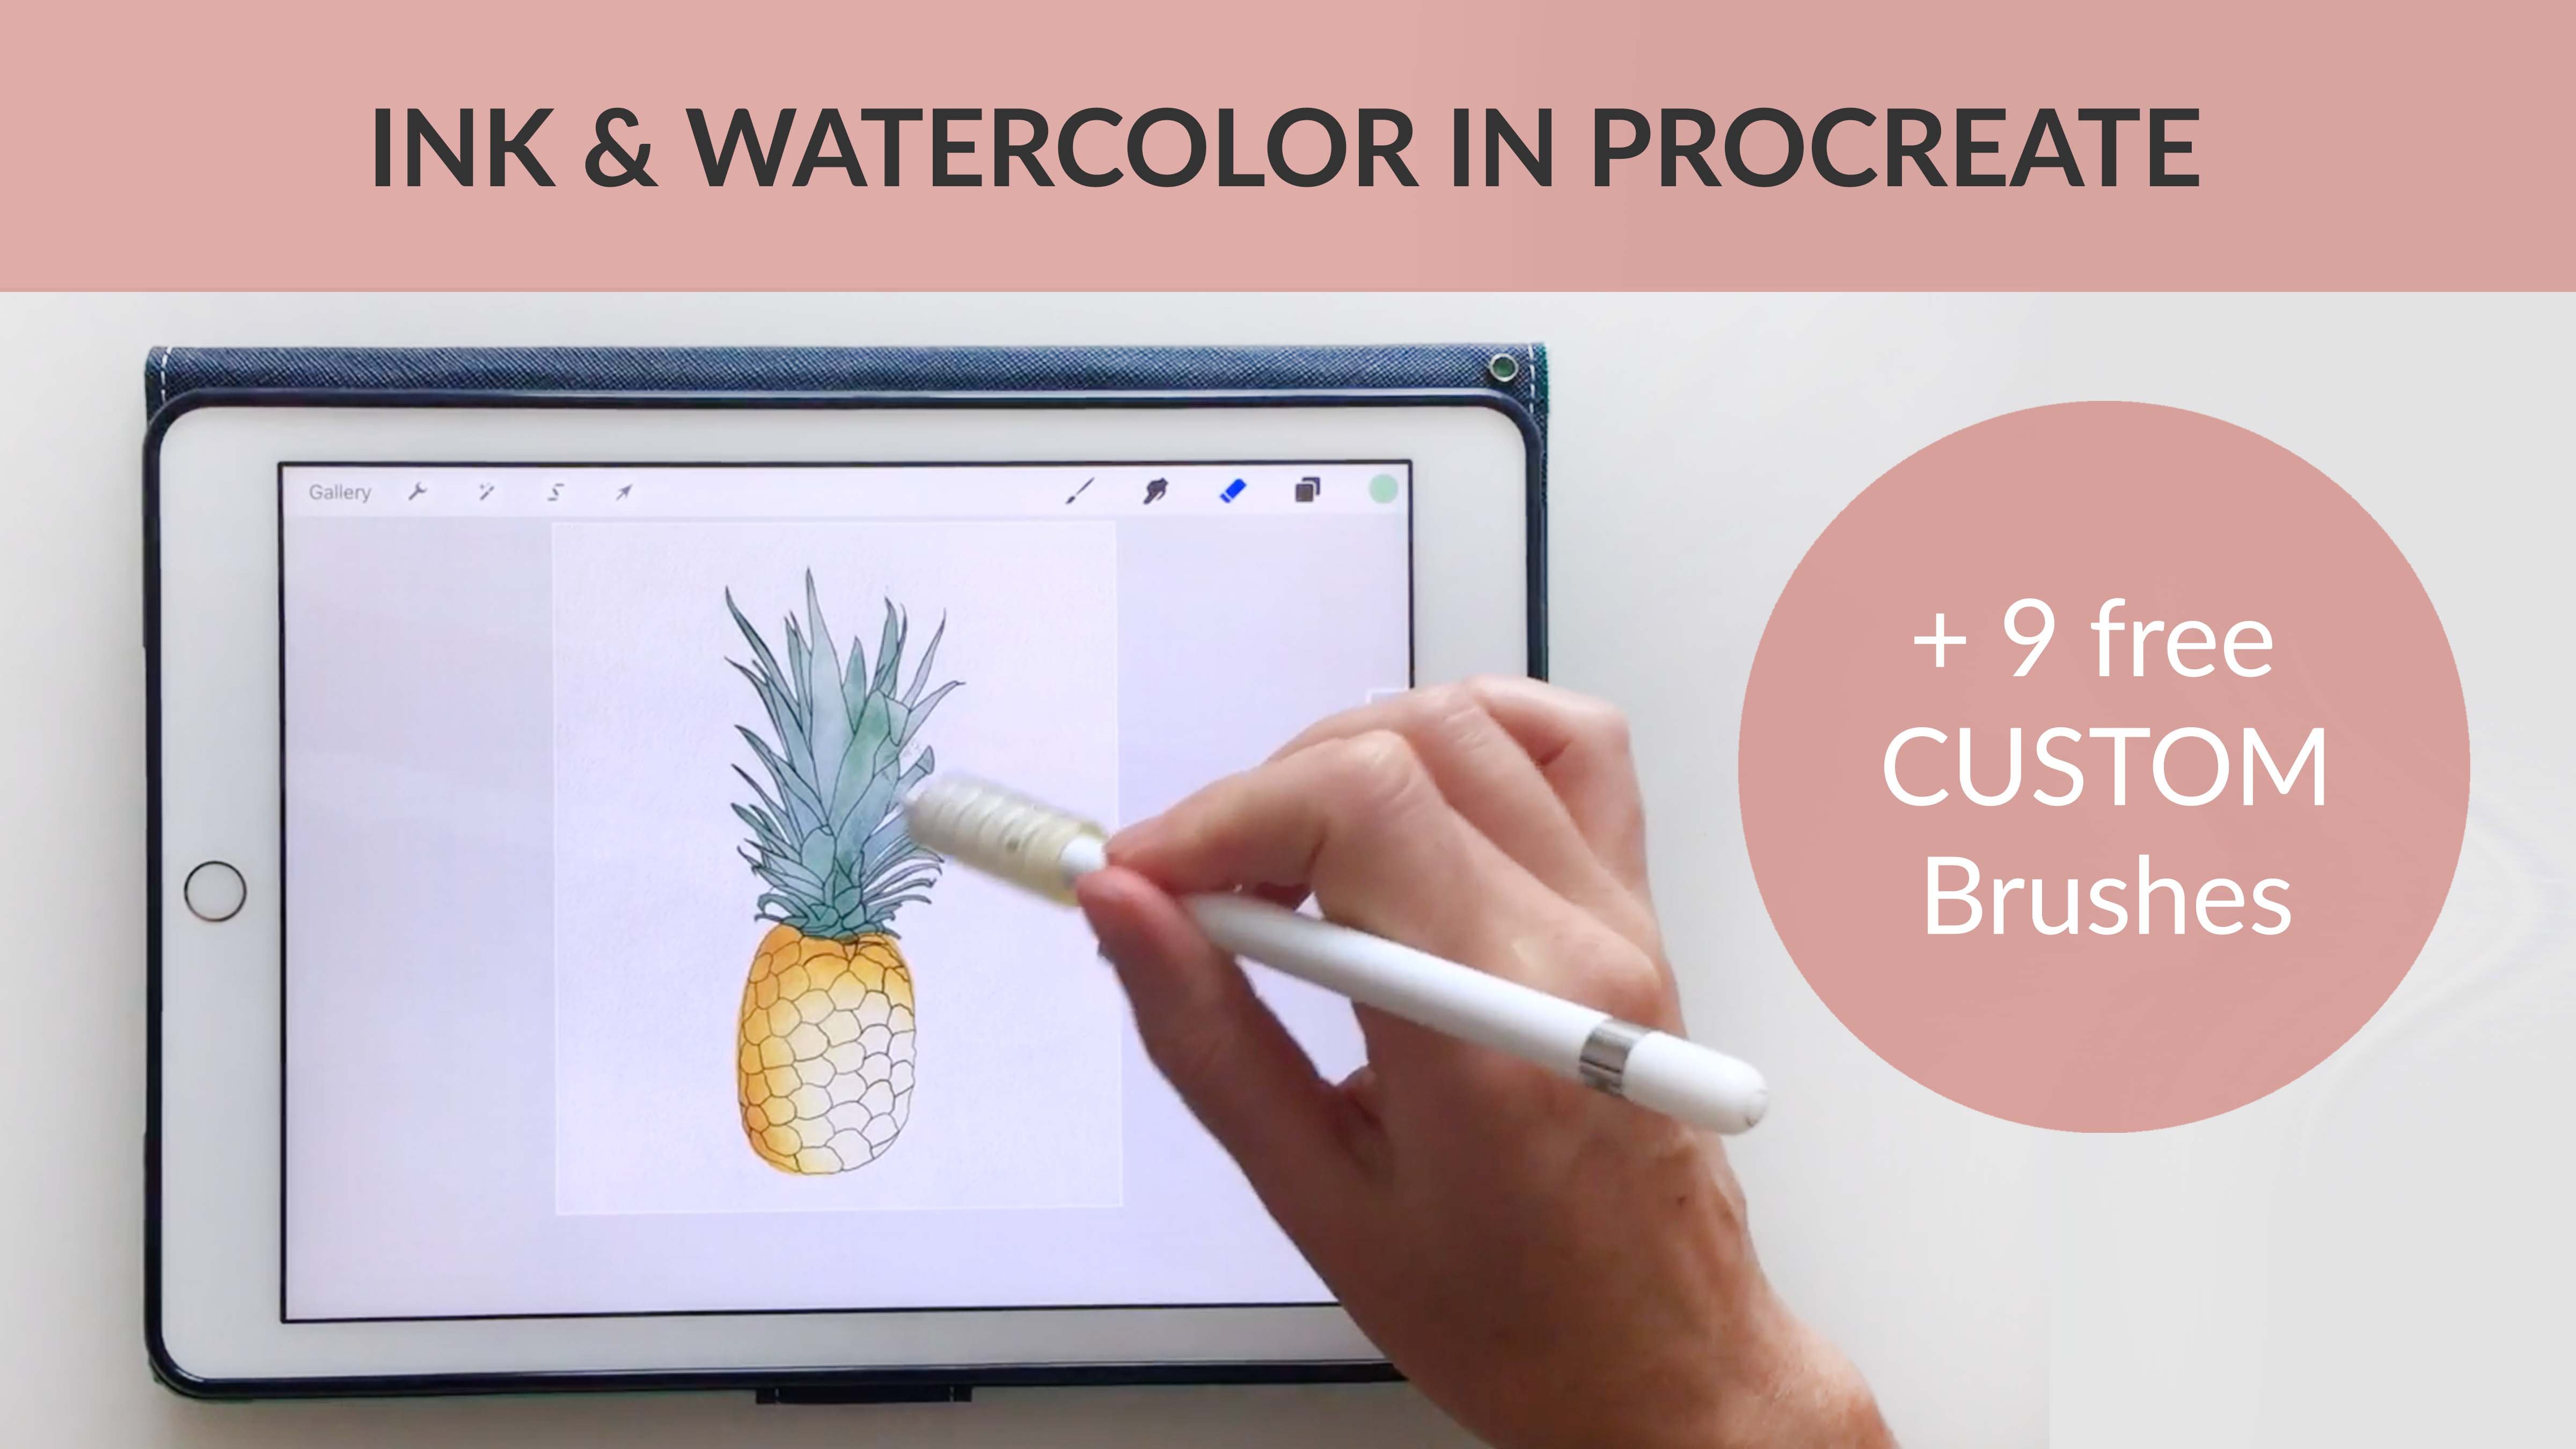
4. Masking Fluid: For this next project, I want to use watercolor and an effect that looks like masking fluid. If you use masking fluid with your watercolors, this is going to be a really great project for you. I'm setting up my document in the exact same way, two watercolor paper layers, one on multiply, one on Linear Burn. Again, I want to be sure I'm painting on these duplicate layers that don't have my paper on them. The first thing I'm going to do, I like to do this from a photo, but you could certainly do this by hand. I got this picture from the website unsplash.com and they have free images that you can use for anything and you don't have to credit anyone, and then they are free for commercial use as well, so I really like that site. I'm just going to put this in the center here, and then I'm going to reduce the opacity a little bit so I can really see what I'm doing and move this layer on top. You can do this with any color, the color I use depends on the painting, whichever one is easy to see. We're going to change the color so it erases our watercolor later, so it really doesn't matter what color you choose here, just choose something that's easy for you to see. I'm going to grab the brush from my set that you can download called masking fluid. This brush makes a really nice wavy, rough brushstroke, so I'm going to get this to a size I like. You can see it has a lot of variation, so if you just barely press, you can do a light line and if you really press hard, you can do a thick line. It's a lot like a brush that you would use for masking fluid. On my blank layer here, and I'm just going to go through and do a simple line drawing, and so I'll speed up my video while I do that. You can see I'm not trying to be very precise here, I'm just trying to get a general drawing and make it look like a brush. You may have noticed, rather than doing a leaf in one whole piece, I do it just like I would do a brushstroke if I had a brush on my hand. So one stroke at a time, even though it would be easier to just do it all in one, it looks a lot more like a brushstroke if you keep everything as one individual line. Now that I have that layer, I can go ahead and start with my watercolor layer. I have a few options here, and I want to do this two different ways. The first one I'll do is painting the rose one color and painting the leaves another color. I'm going to grab a pink and I'll grab my rough edge brush, pretty large, and just go through. Again, I'm not trying to be precise, I'm just doing a general outline of this flower. You could certainly make this more precise and make a really clean, neat piece with the same process, so totally up to you here. Same idea, I'll duplicate this layer and grab my cloud brush for erasing, and I'm keeping this really random. That looks pretty good. Now, for my green layer, I'm going to grab a separate layer, and I want to pick a medium green, and I've got my blunt edge brush. I'm going to go through here, and I'm not trying to be exact because I'm going to use this like masking fluid so I'm going to go through and erase everything that's black right now. I do want to overlap the edge, that we'll be sure that you can really see all of these masking fluid edges. Although, it looks nice in some spots where the paint gets really light, you can see the masking fluid will just flow off the page and that can actually look really nice. I may duplicate this one one more time, I think I want it to be a little darker, and of course we can always change this later. I keep all of my layers separate, so if maybe later I decide I want it to be lighter, I can do that. I may even want to make this one darker as well, so I'll keep those options open. Let's go ahead and erase our black layer. What we need to do is select that layer and then use that on our other layers. For now, I'm going to go ahead and keep my duplicate layers invisible so that I can just erase one layer at a time. Let's select this ink drawing layer and get close. Then I'll click selection tool on the top here and click automatic. That's going to automatically select some things for me here. I'll click on the white and you can see all of the white that's connected will be selected. This isn't connected to this other piece, so that didn't get selected, that's okay, and here oops, get a little closer. Here we go, so that looks good. Some of these little edges didn't get selected. I could fix that by clicking on one of these selected areas and dragging my pencil over to the right and you can see that's adjusting the threshold up here, and the threshold is how much is selected. The more I pull that over, the more it will select. That was a little bit too far. I'm going to stick with that so we get all of our white. If you really want to grab that other black area, just zoom in and click on those little pixels. It looks like our threshold is a little too high, so I'm not going to worry about those little edges, I think when I zoom out they'll be invisible anyway. Now I want to go to my pink layer and grab my eraser, and I'm going to use my cloud brush for this because I don't want to do this really super fast. I don't want to erase everything to be perfectly white. Let's erase my ink layer so we can really see what we're doing here. I think with masking fluid, it doesn't always look perfectly white. I'm not going to go all the way wide, I'm just going to use my cloud brush to mask that out. I'm going to grab my green layer and do the same thing. I'm happy with that, I'm going to stick with that for now. I can always go back and do more if I change my mind. Let's click the selection tool and then you can see what this would look like. This is nice because you can see the paper through the masking fluid. This looks pretty cool and you can leave it like that. We could duplicate this and start making a seamless repeat. I have another class on seamless repeats, this would be a great start for seamless repeat pattern, you could do this with flowers are of course, any other shape. Let's do one other method with the same drawing. I'm going to bring my ink drawing back and make everything else invisible. For this one, I just want to do a pure color background. I can do that with one color or I can combine a few different ones. I'm going to use my heavy bleed brush for this. This makes a nice big brush that allows me to cover large areas at once. I'm going through and this is just like a watercolor wash. If you don't like how this is streaking a little bit, you can always come through with the blend brush with a heavy bleed. Let's make this bigger and blend these so it looks less like streaky watercolor. I'll do a few different layers of the this I'll speed up my video because this can take a little bit of time. Now we've got just a light wash with two different colors a yellow and a blue. I'm going to combine the two layers. I had my yellow and blue on separate layers and maybe duplicate that a couple times if I want it to be a little darker. I might even go through and erase some areas like we normally do to bring out that watercolor feeling. You can make this as light or dark as you want, I may use a third layer, I may not use the third layer just depending on how dark I want this to be. Now I can do my same process, let's combine those three layers and I'm going to click on my black ink layer. Click my selection tool. Zoom in a little bit more, and let's bring down the threshold a little bit cause it looks like it's selecting way too much. Okay, there we go. I brought down the threshold by clicking and dragging down and then just resetting my selection and starting over. Sometimes if you get your selection threshold set too high, it messes up your future selections, but you can always reset that. We could go through and get these little areas or not, It's totally up to you if those little pieces are worth it or not to you. Now I've got that whole black area selected. I'm going to go back to my color layer, let's make this invisible so I can't see it and then I'm just erasing same thing, removing all that white area just like we would with masking fluid. But if you've ever worked with masking fluid, you'll know it's a complete mess and it ruins your brushes, whereas this is easy and quick, so I love this process. That looks good, let's go ahead and remove our selection. There's two different ways to do this same process, a solid color, and then we have that painted layer still under there if we want to use that.
5. Abstract Florals: Let's look at one more way to make some watercolor florals, and again, my Canvas is set up in the same way. I'm going to duplicate these paint layers. I have a few paint layers and two paper layers. I want to start by, go ahead and I'm going to lay down some of my flowers first. You can imagine there's a million different types of flowers that you could paint with this. I'm just going to do some really simple abstract tulip shapes, but you could use any shape here and you could combine multiple flowers too. I'm going to start by just playing around with this brush a little bit. I have the sharp edge, blotchy brush. I'm using this sharp edge because, you can create a nice amount of variation, it looks like maybe there's a little bit of light shining on the flower right there. I tend to use the sharp edge brush when I'm doing abstract flowers. But again, it's totally up to you how you do this. These are just going to be some really simple tulip shapes. Let's do a same process, duplicating this layer. I think I'll make the side that doesn't have the sharp edge of these, the lighter side, so that it looks like my brush started on the sharp edge, and then got wider. I'll combine this, and do a little bit more erasing. You can see I'm trying to make them really varied, that one's really dark, that one's medium, and that one's the lightest. Let's duplicate one more time. You can get these really intense colors, if that's what you're going for. But you could also keep it as a really super light watercolor as well. I'm going to stick with that for now. Let's make a new layer, and grab a green for the stem. I'm going to use my blunt edge, or the sharp edge, for making these stems. You could also use the fine detail brush, it just depends on what stem you want to make. I would recommend just playing around with these brushes for a while, and figuring out which one works best with your personal style. I like that width, I'm going to stick with that and just do a few stems. I'm doing this on a new layer, not on my flower layer. Duplicate that and come in with the eraser. I'm going to do just the bottoms of these, so it looks like I started my brush on the top and then slowly, lost pigment as I went down. You can see how the more you work with these, the more realistic they start to look. The more layering and duplicating you're willing to do, the more you can really create a true watercolor look. This look good, let's go ahead and do some leaves. I'm going to use my blunt edge controlled brush, on this one. It tends to be the easiest to control, in terms of shape, making a pear shape. The not controlled brushes are better for this piece, which has a really rough edge, but if I want to do a leaf that's a little bit more like my stem, I'm going to stick with the control brush. I just realized I'm not on a new layer, grab a new layer first. Let's make this a little bit bigger and we can fill these in all the way, if that's the style you're going for, or we could leave a little shaft of light there, in the middle. I tend to do that, but again, it's just your personal style, whatever you want to do here. Let's leave two on this one. If I see those areas that reveal the brush stroke, I just go in and work on those a little bit before I lift my brush. But, if there's something that bothers you, like that piece there bothers me. I'm going to grab my blending tool and let's get the cloud brush for the blending tool, I'll make it small and just go through here. You can work those little brush marks out. That's better. I'm going to go back to my brush, I've got my green and I'll just add a few more leaves here. Let's just stick with that for now. Duplicate this and erase some of these. Duplicate again and then let's merge all three, do one last pass with the eraser. That looks good for now. Again, let's say you don't like the color of those roses at this point, you can get your Hue/Saturation tool, and go through, and play around with all the options. You may want the pure red bouquet, or blue. Let me reset this, let's say you only want to change one of these flowers, you maybe having two pink, and then you want to change one to a different color. Click your Selection Tool, click Free Hand, and then go through, select that area. Then when you click your Hue/Saturation tool, it's only changing that one flower. I'm going to do this one just a little bit of a different pink, to create some variation. Then we have a little bit more of a varied bouquet. I wanted to show you a few other types of bouquets that you could try out. This one has lavender flowers that are just layered circles, then, another nice pink flower in the middle there, that's really just strips of paint layered over each other. Another option is just to use big dots as a flower. If you're doing something really abstract, just some big circles, with some nice variation, can read as flowers or maybe even buds. This is a really abstract piece and I added some tiny little ink drawing sprigs on top there. You can see, with this last piece that I started with a sketch, that can make it a lot easier to lay out the composition. Then I just layered some different colored leaves and flowers over each other, to create a nice vibrant abstract bouquet. If you liked this class, you may like some of my other classes, where I cover a lot more ways to design and paint on your iPad. Like how to paint gouache in Procreate, using the free downloadable brushes I created. Check those out on my profile, if you want to see more. Also, I share a lot of free downloads on my site. If you want to get more downloads, like the ones you got for this class, check out my website. I would love to see the final project that you create for this class, you could add it as a project here on Skillshare, or you could tag me on Instagram or Facebook. If you have any questions about the process you've learned in this class, please feel free to ask. You can reply to my discussion here on Skillshare, or you can contact me through my website. Thanks so much for watching, and I hope to see you again next time. Bye bye.
 Liz Kohler Brown, artist | designer | teacher | author